Leaderboard
Popular Content
Showing content with the highest reputation on 04/25/2020 in all areas
-

Project: I.S.A.C. by Andy Makin
Colin McNally reacted to Andrew Makin for a topic
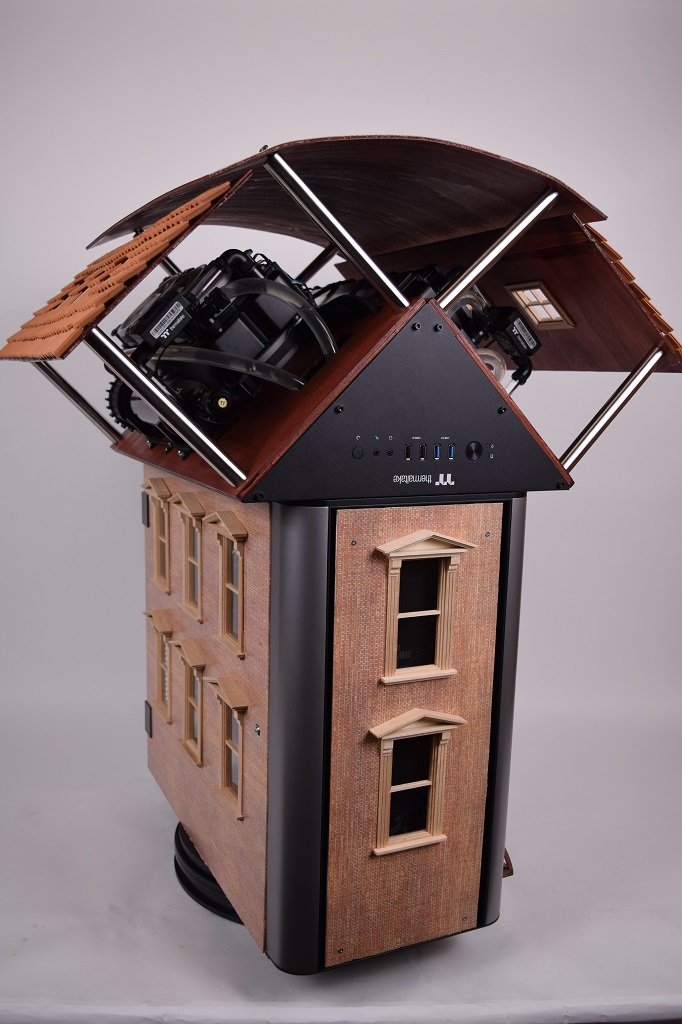
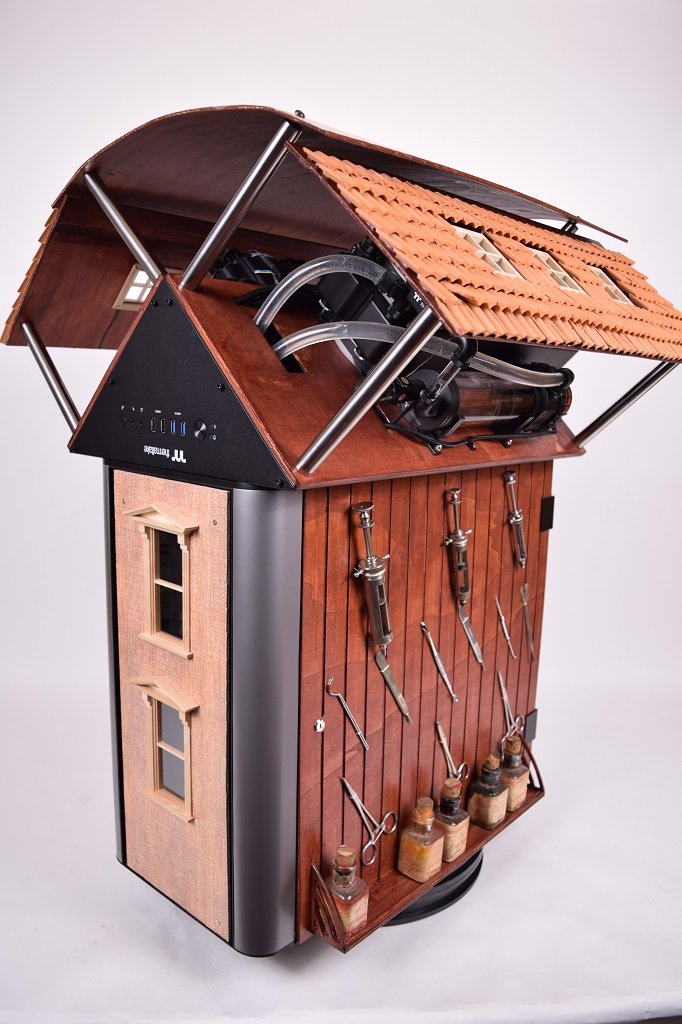
Hi-diddly-hey modderinos! I've not been too well over the last week, fortunately not from you know what, but it has meant there hasn't been an awful lot of progress. I haven't been completely idle though. I've done a few test fittings as the odd part has come in and done some detail plans for some of the things that weren't fully fleshed out. I've also had some more destruction equipment turn up, so toward the end of the week I got back to it. First on the agenda was to continue the "ageing process" and try and blend the side panel into the rest of the case. After I'd finished the side panel I was a little concerned that maybe I should have had the panel on and been doing it in-situ, but I needn't have been. Being a bit of a clumsy oaf and having dropped more than my fair share of computers, I know they can get a bit dented and nicked around the bottom edge. What better way to expedite that than the pointy end of a hammer. I had been using my Dremel with the stand just on the floor. It had fallen over a couple of times and wasn't exactly the ideal orientation for free use of the flexible shaft (quieten down 😉), so I rigged up something a bit more secure that would allow better movement and it helped no end in getting in to it at the right angle (I said quiet in the back! ) I want to try and make sure there are nice little touches here and there, things that may not be immediately obvious or possibly hidden from view, but it's those little flourishes that can make all the difference. In particular I want to try and put in little touches of wear where there would be from actual natural use, not just outright destruction. The little HDD access panel at the back seemed like a prime candidate for just such a thing, where the 2 tabs sit into the case. Taking my trusty 'not for wood any more' chisel, I slowly ground down into the paint and I tried to do it with the same kind of small pivoting motions you'd get from moving the panel about. And not forgetting the panel itself of course. I'm not going to be using the fan filter on the bottom of the case and the tabs that stick out to hold it in place are no longer required. They also kept getting caught on stuff and it got annoying so..... There's also something else missing here. Care to guess what? Can you tell what it is yet? Next up for ruination are the door hinges. First up a little sanding, trying to swing round as the door would and make it look like natural wear. Then I took them out so they could spend a little time with Mr Dremel the Destructor. I used this pointy grinding bit to get in the nook of the screw threads on the first one, which was a bad choice as it left a lot of score lines. I switched over to the abrasive wheels for the other side and the other hinge. Of course when I go to put them back in I drop one of the screws, it bounces once then down through the crack in the floorboards of the shed. 🙄 So I go in search of a replacement, I've got loads of screws from this and that, one is bound to fit. First stop is the screw tin. I didn't find a screw that matched, but it did appear to be the same thread as a motherboard stand-off, so off to my bag of screws to find an M3.5 No luck there either so we turn to the tin of last resorts, where screws go to die, there must be something in here..... Ah. Just whole bunch of junk and tat. 🤨 So armed with the remaining screw and a stand-off I went back to check that was indeed the size. Success! So I ordered some nice shiny nickel plated replacements. Probably for the best anyway, black ones would look a little daft once all those rivets have been removed. But that's for another day..... ..... as is this rather large parcel 😜 That's all for now folks. Will you ever find out what's in the box, or what's happening to the rivets? Stay tuned Crapfans! Same Crap time, same Crap Channel.1 point -

[ENTER HERE] 2020 Thermaltake Rig & Battlestation Showdown! Round 1
Илья Байда reacted to cristianomod for a topic
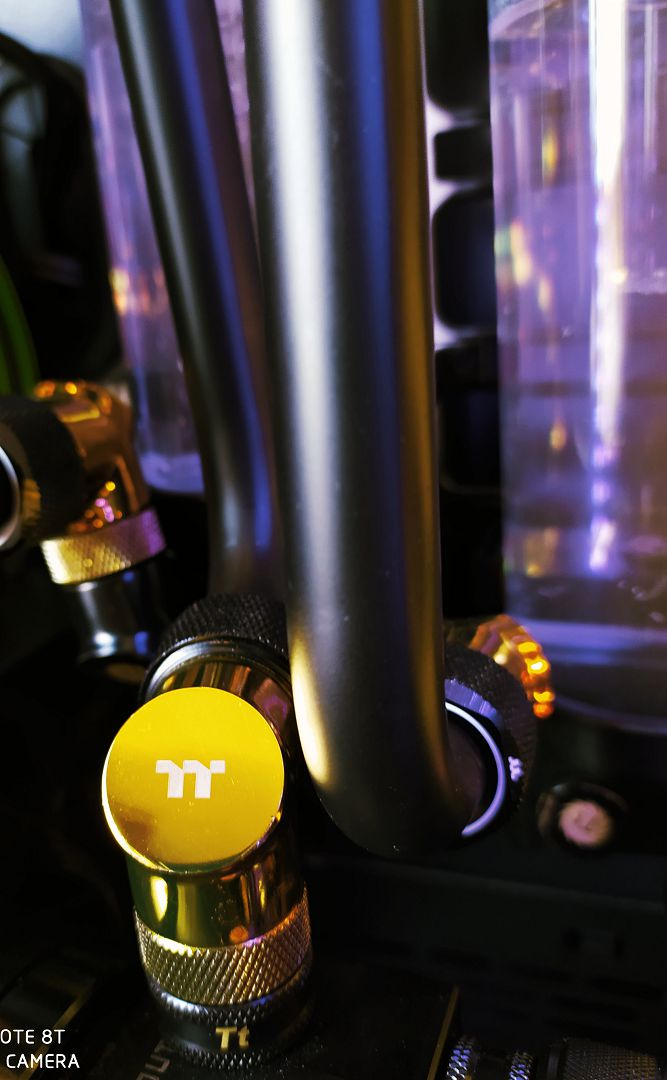
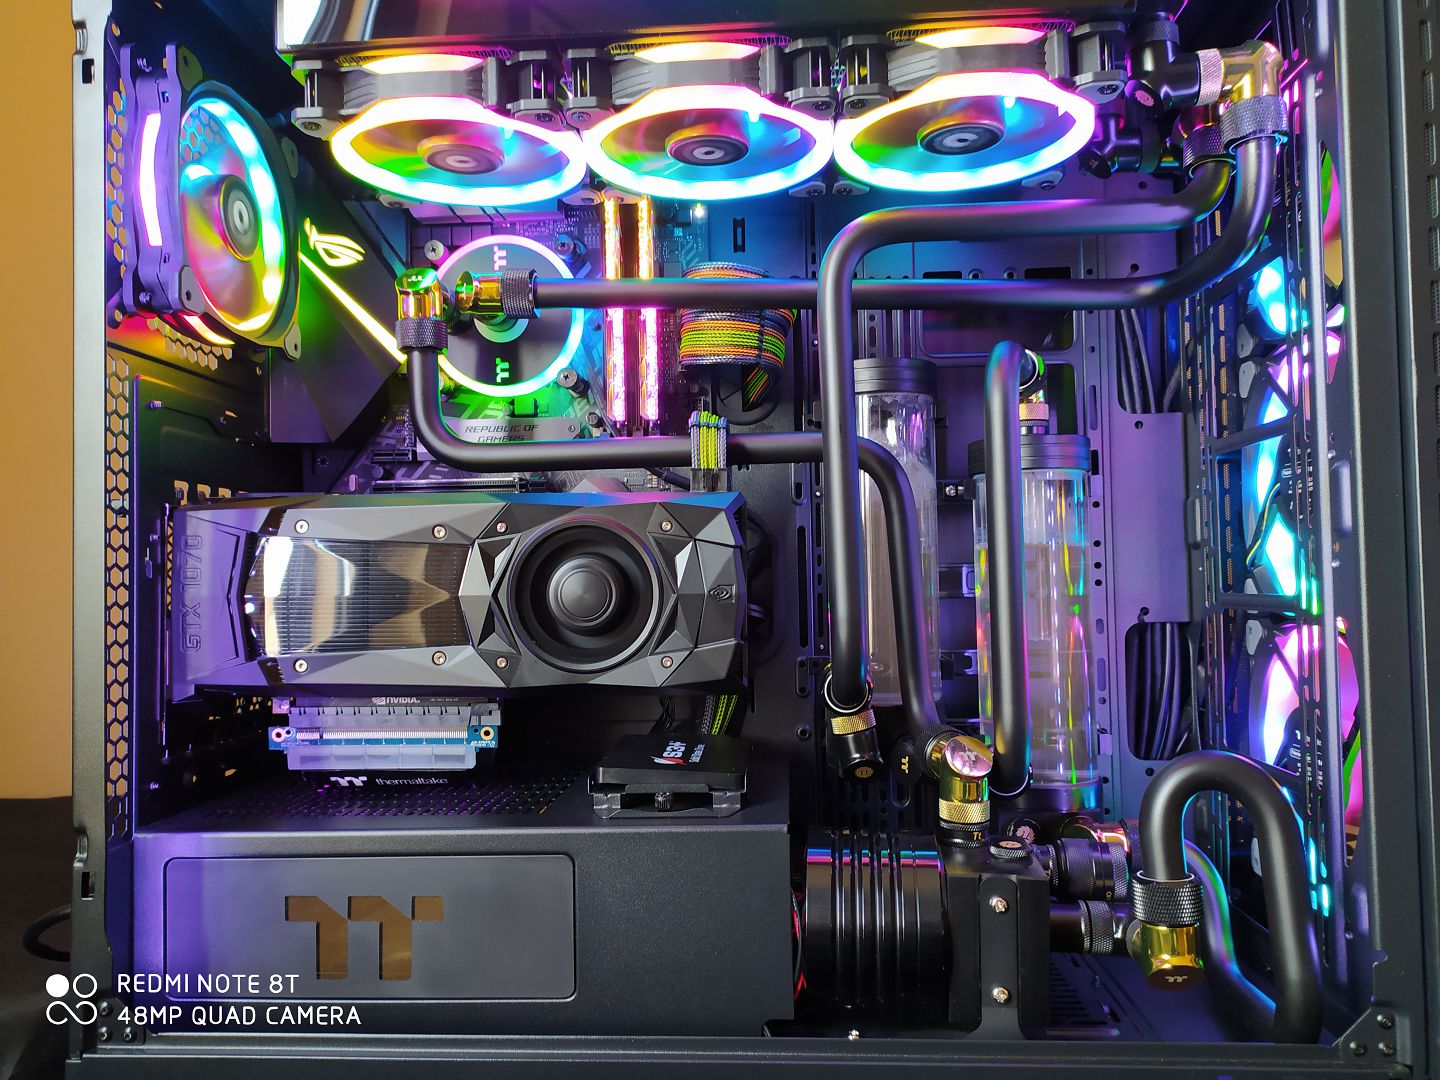
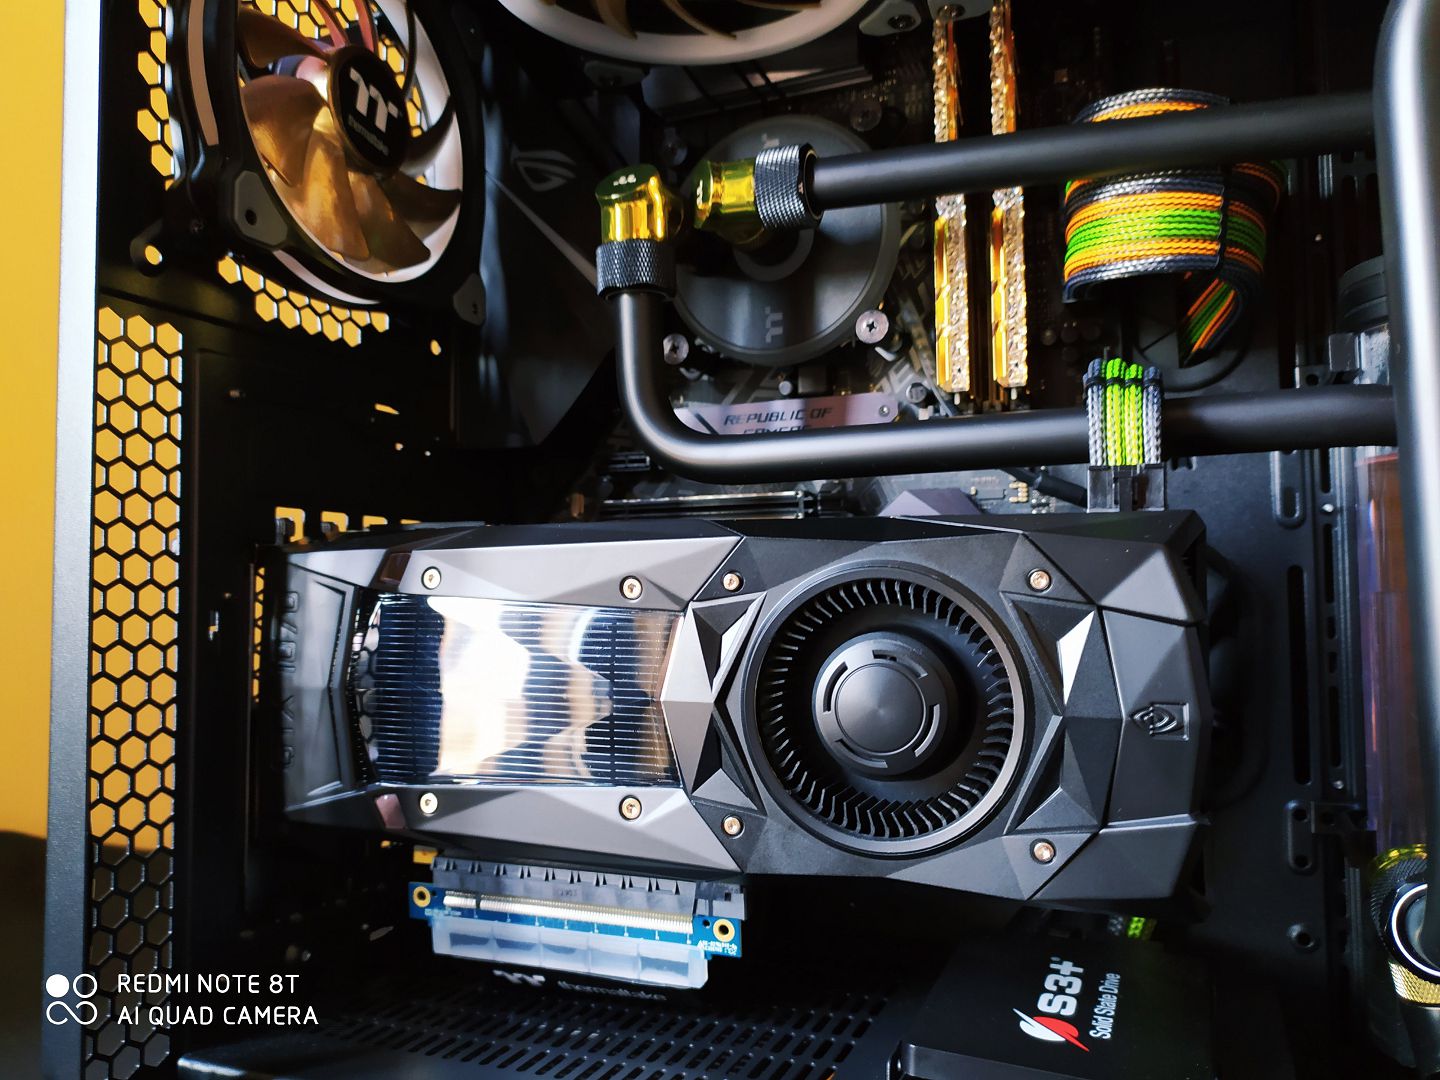
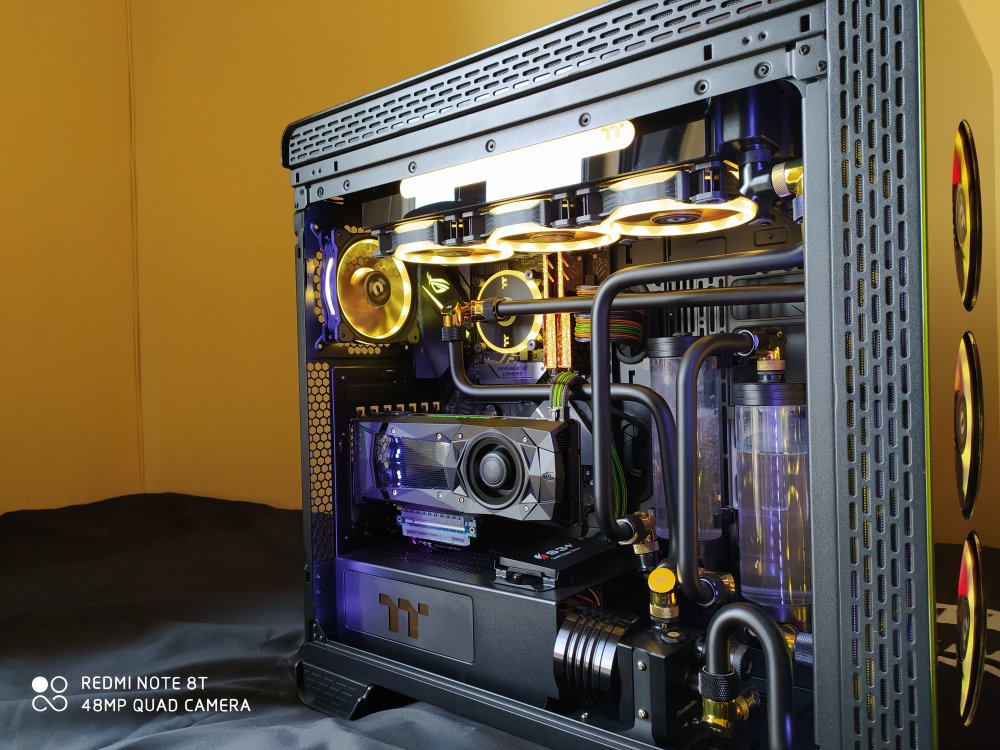
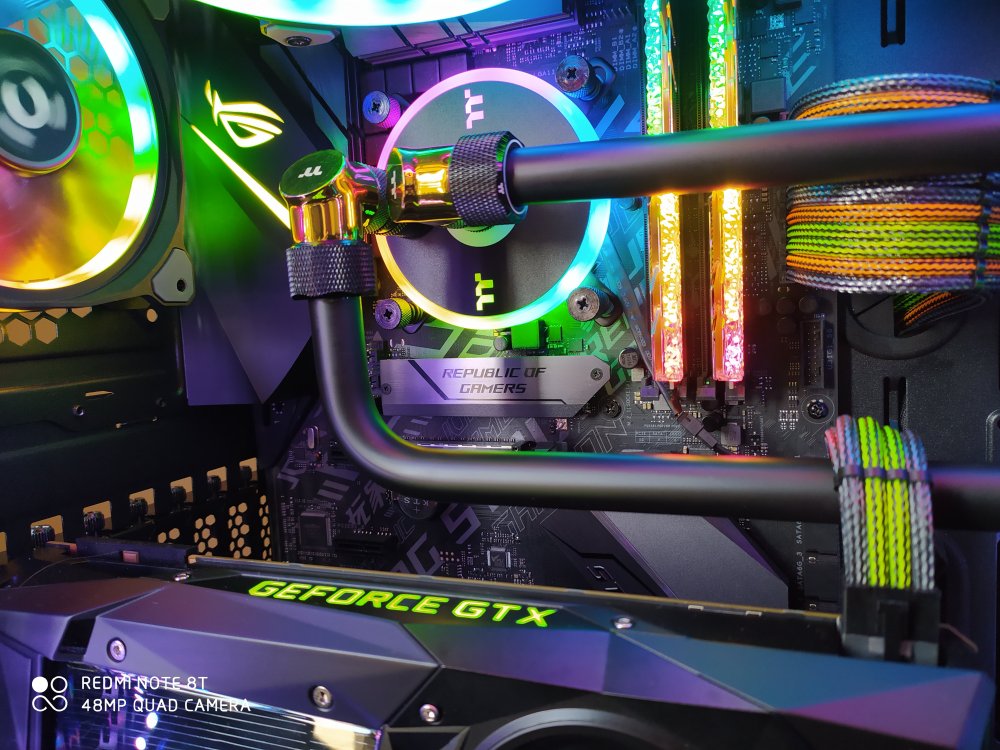
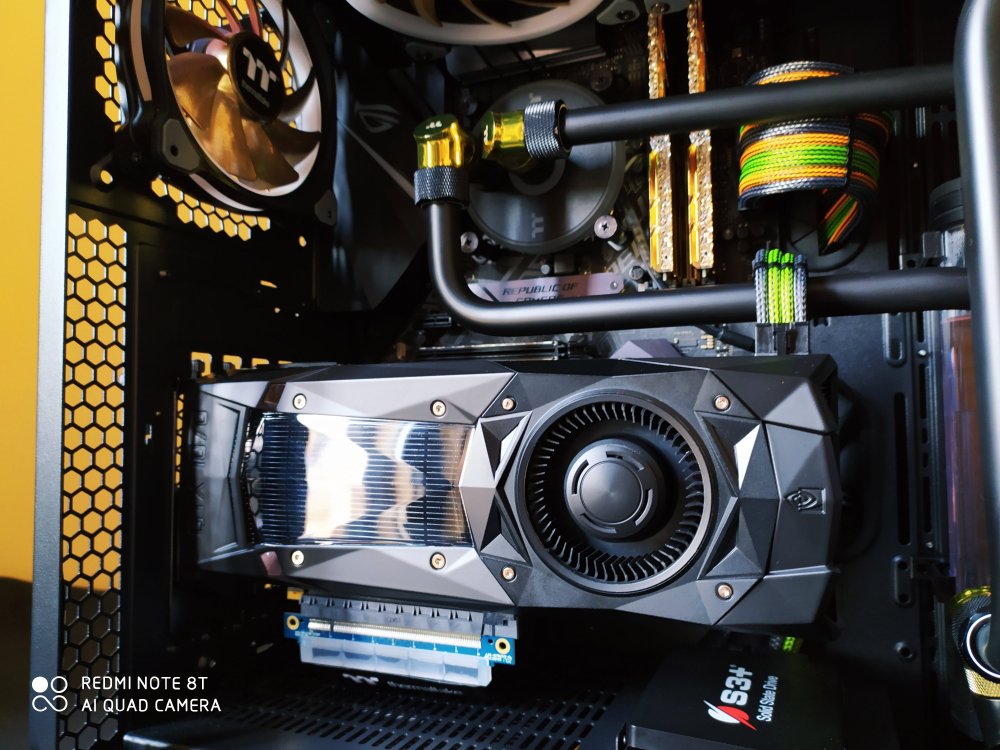
Project Toereon Case TT A700 Full watercooling TT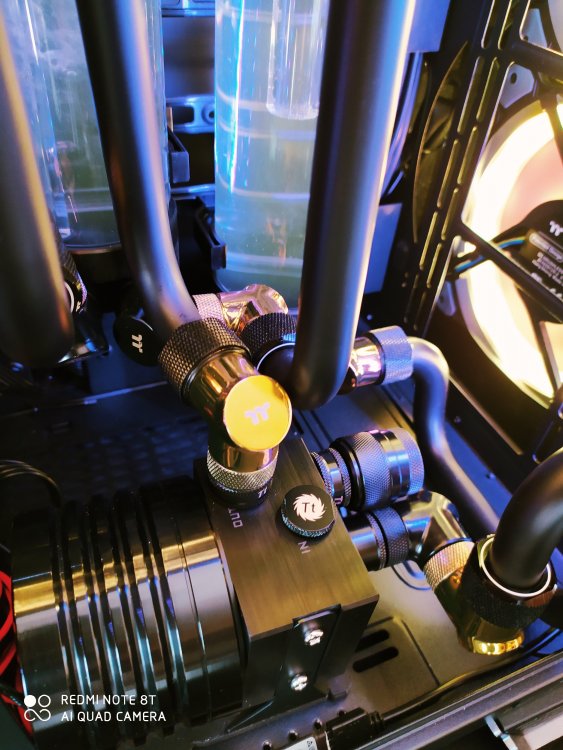

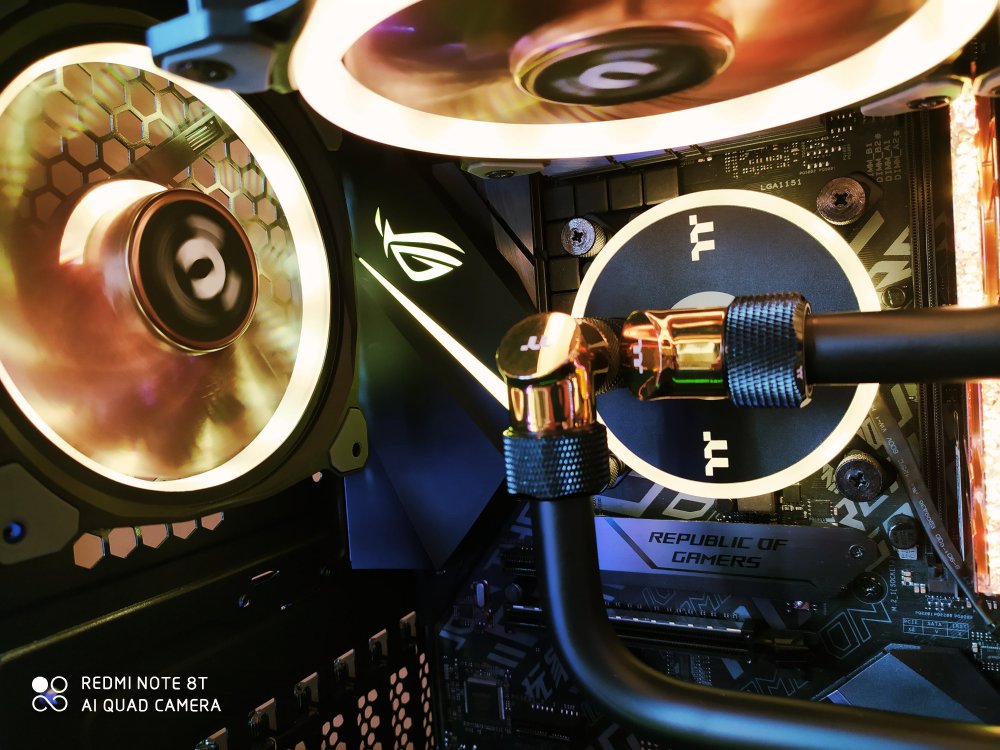

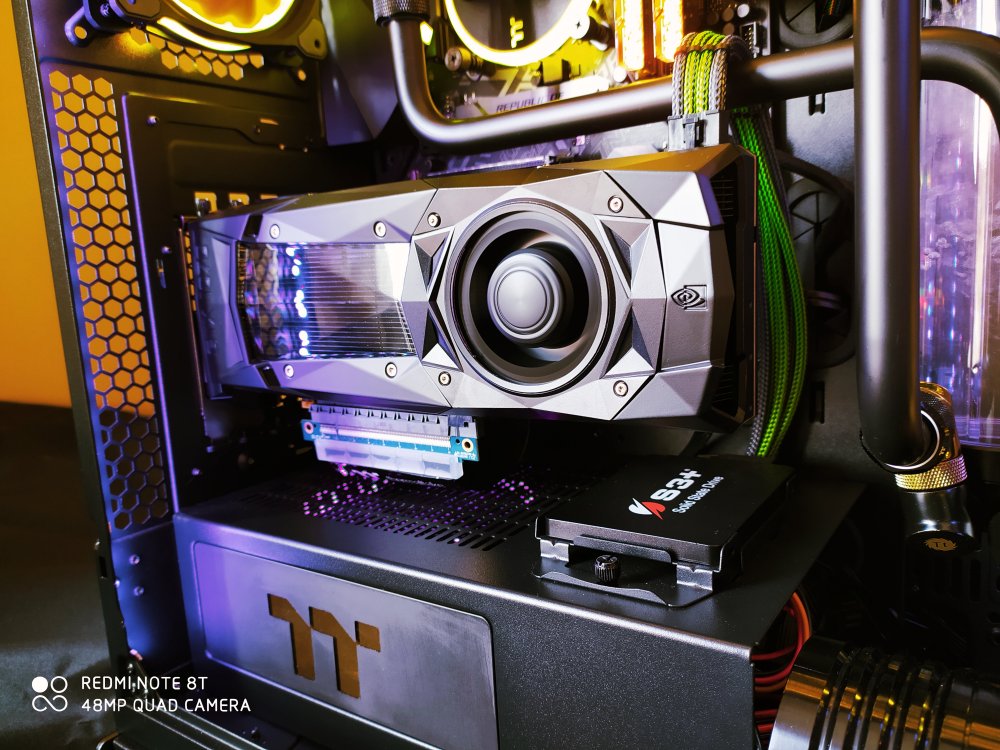
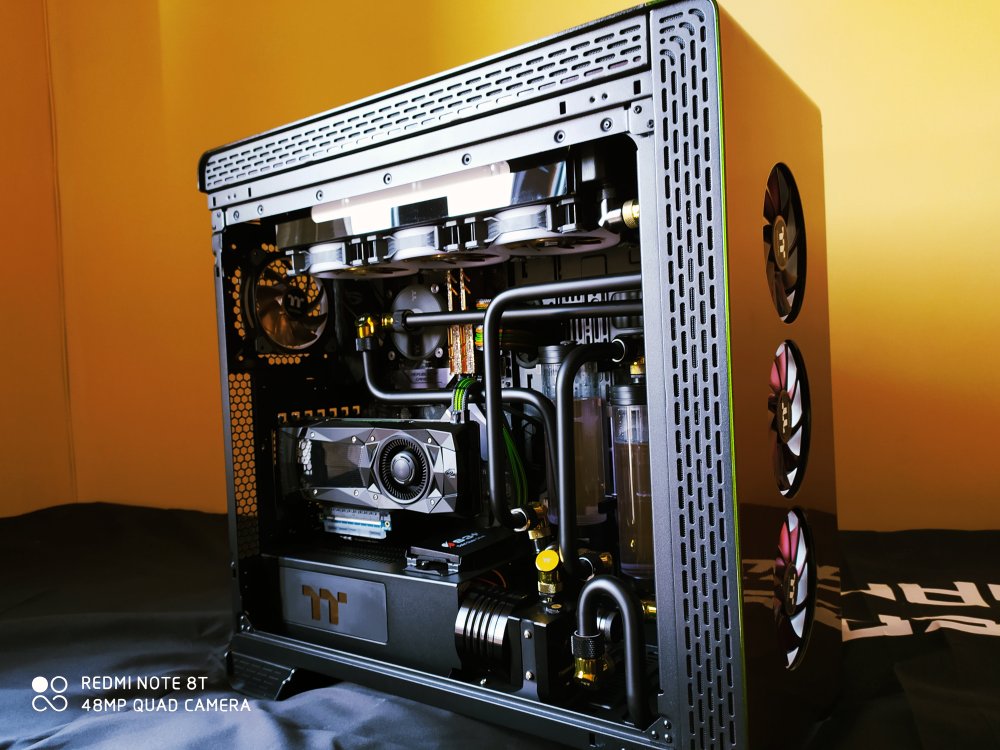
 1 point
 -

[ENTER HERE] 2020 Thermaltake Rig & Battlestation Showdown! Round 1
Илья Байда reacted to MPC Project for a topic
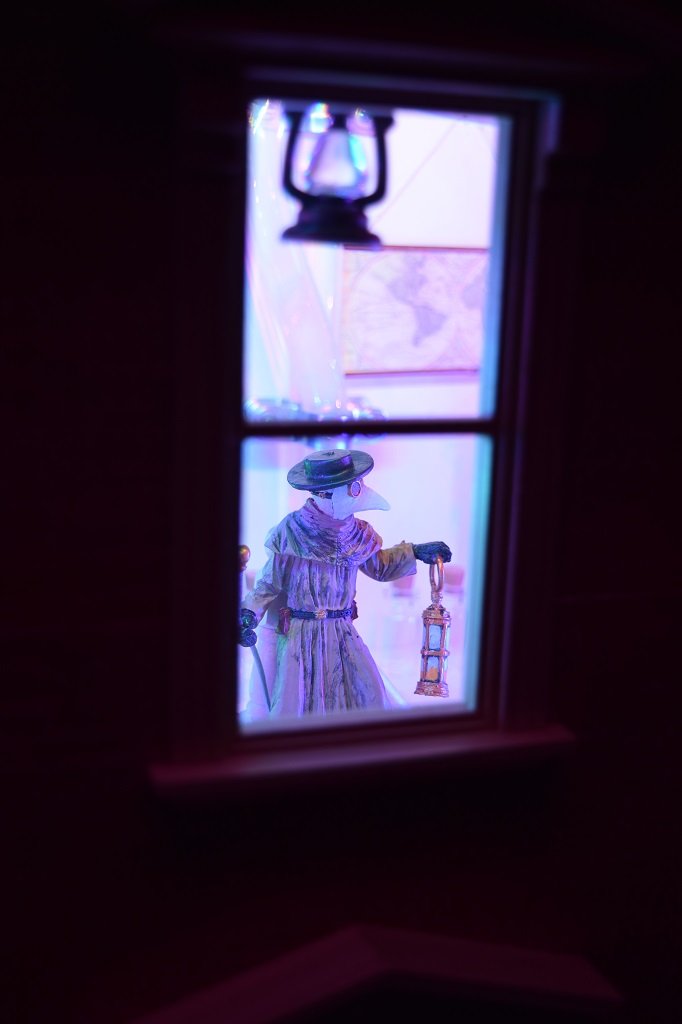
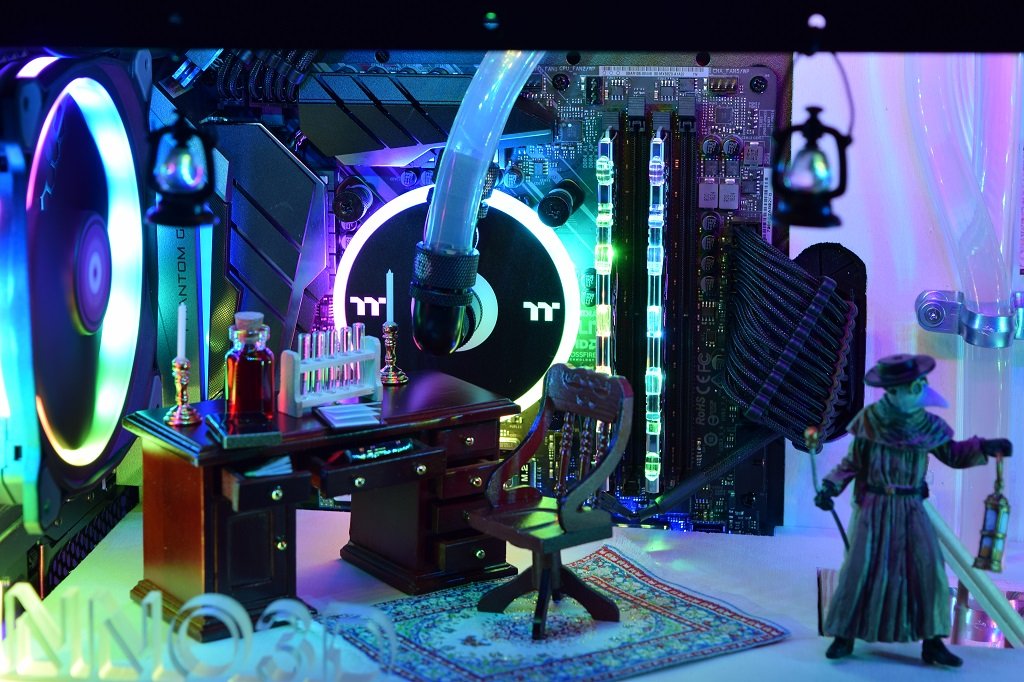
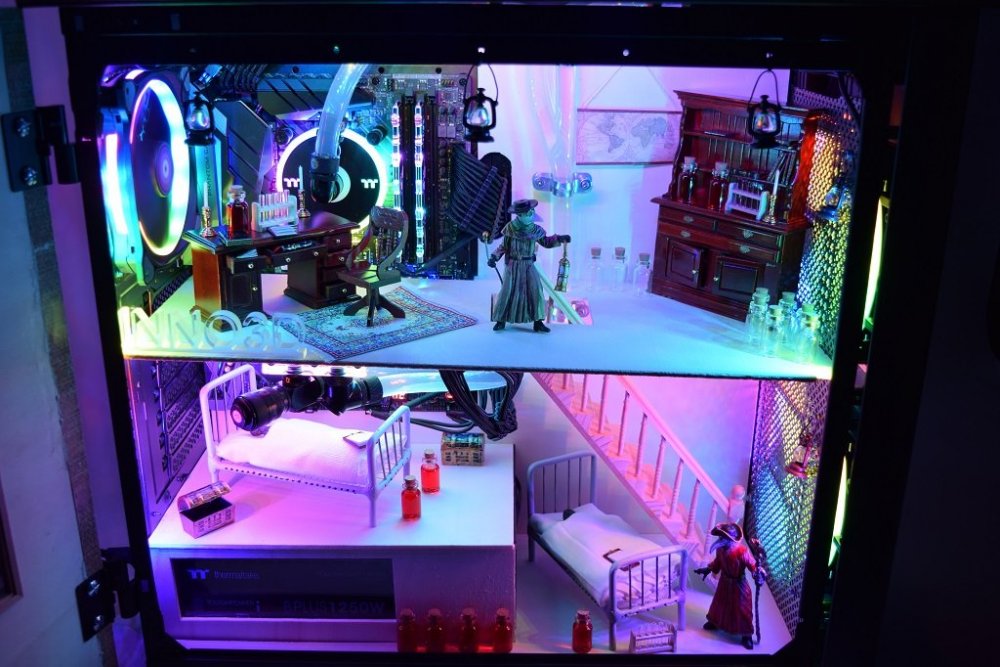
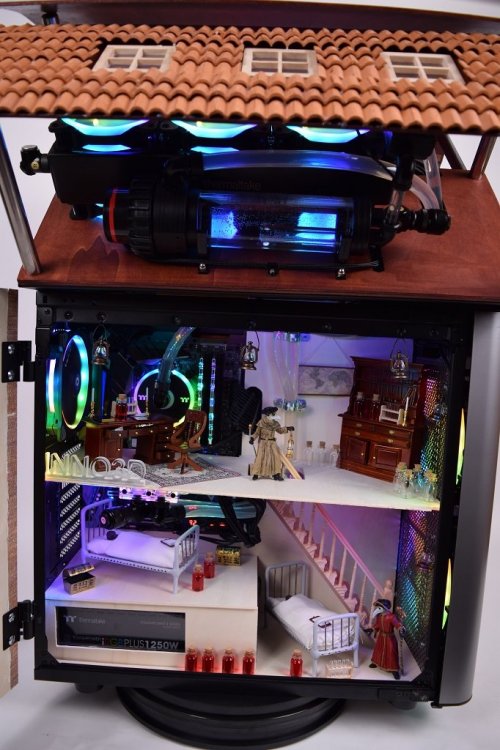
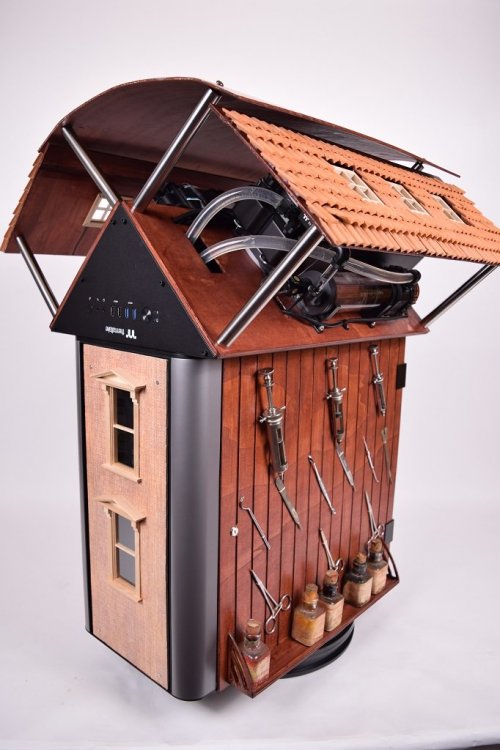
The Plague Doctor by MPC Project Parts used : - Thermaltake Level 20 GT - Thermaltake Core P90 - Thermaltake Toughpower iRGB PLUS 1250W - Thermaltake Riing trio 12 RGB - Thermaltake Custom LCS

 1 point
 -
[ENTER HERE] 2020 Thermaltake Rig & Battlestation Showdown! Round 1
Илья Байда reacted to MPC Project for a topic
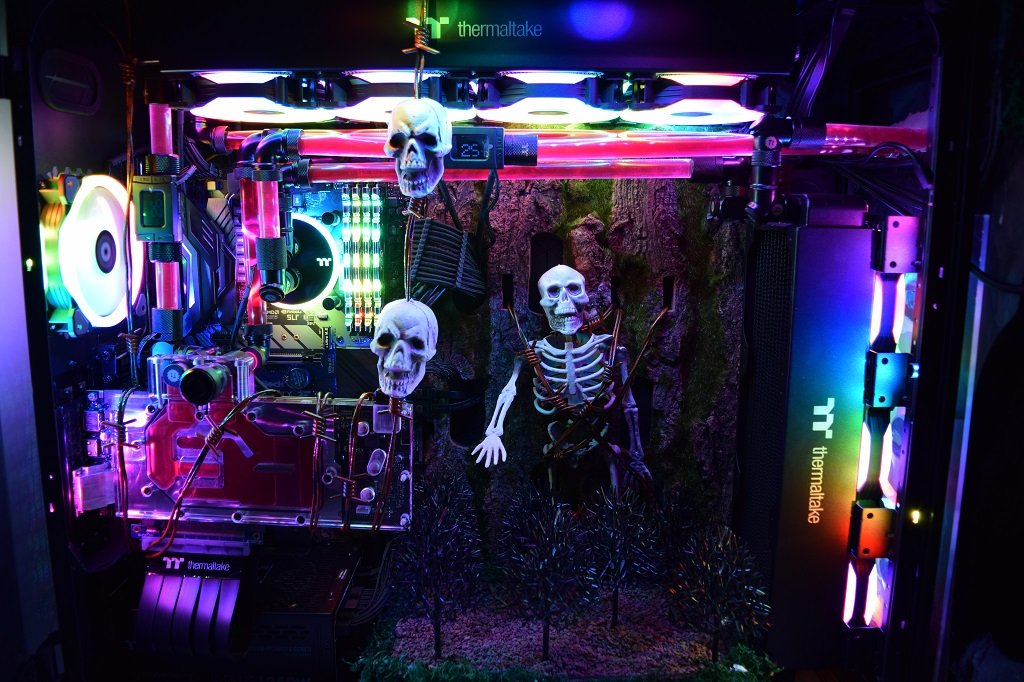
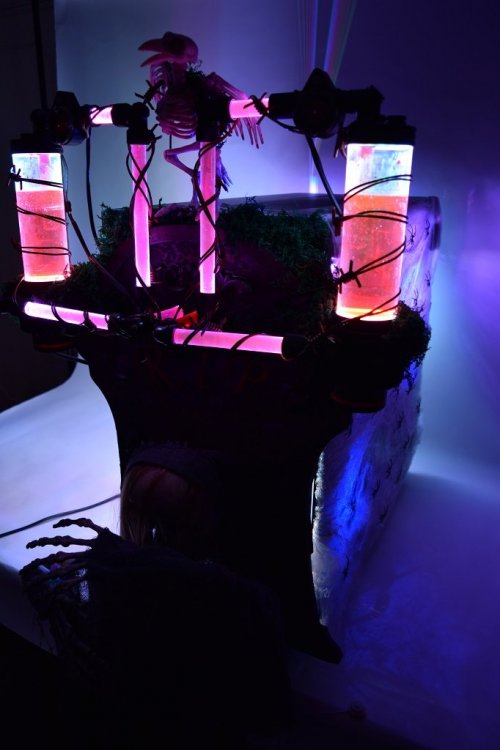
The Tombstone by MPC Project Parts used : - Thermaltake View 91 TG - Thermaltake Toughpower iRGB PLUS 1250W - Thermaltake Riing trio 12 RGB - Thermaltake Custom LCS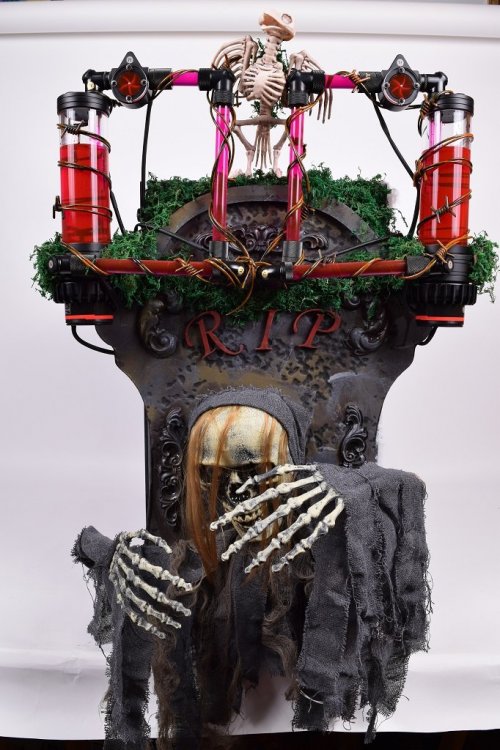

 1 point
 -

[ENTER HERE] 2020 Thermaltake Rig & Battlestation Showdown! Round 1
Илья Байда reacted to kpmodding for a topic
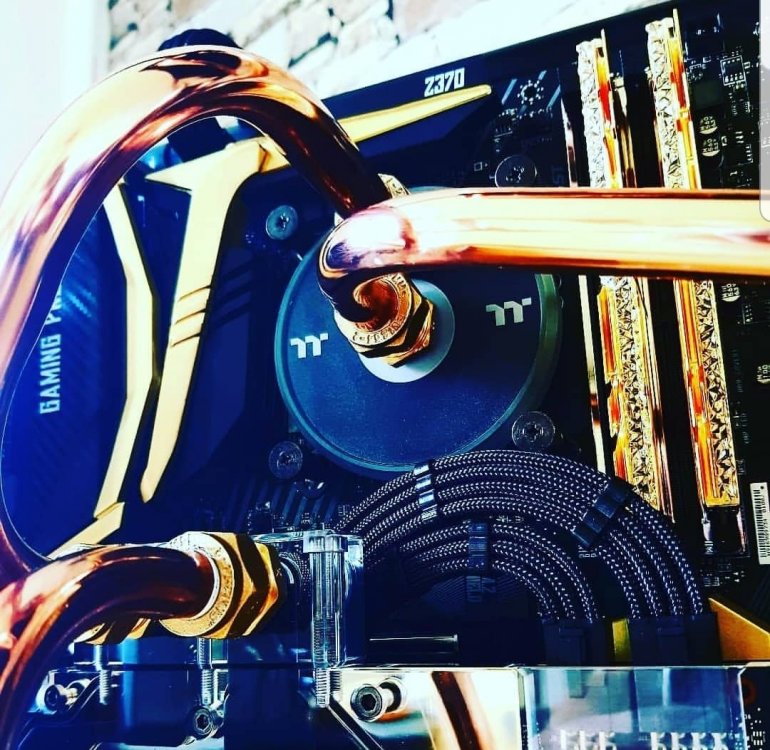
This is my scratch build a done to thermaltake using all copper pipe and fittings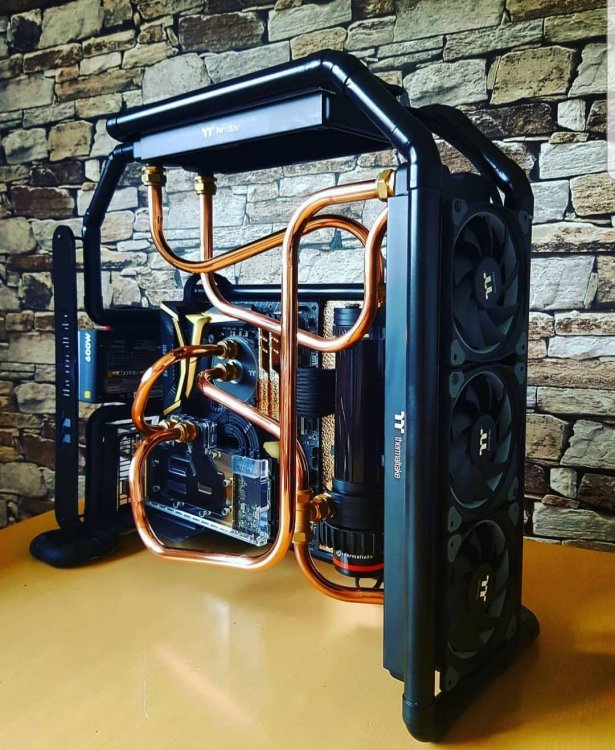

 1 point