Leaderboard

Popular Content
Showing content with the highest reputation on 07/03/2020 in all areas
-
So don't ask me how but i have managed to lose 2 of the large thumbs for the view 71 rgb edition case. my question is any idea where i can get original replacements? or suitable ones. Sorry if this is in the wrong forum1 point
-

Chris Connor - Project SparklePony - #TTUK2020CaseModChallenge
Colin McNally reacted to AcuteJungle66 for a topic
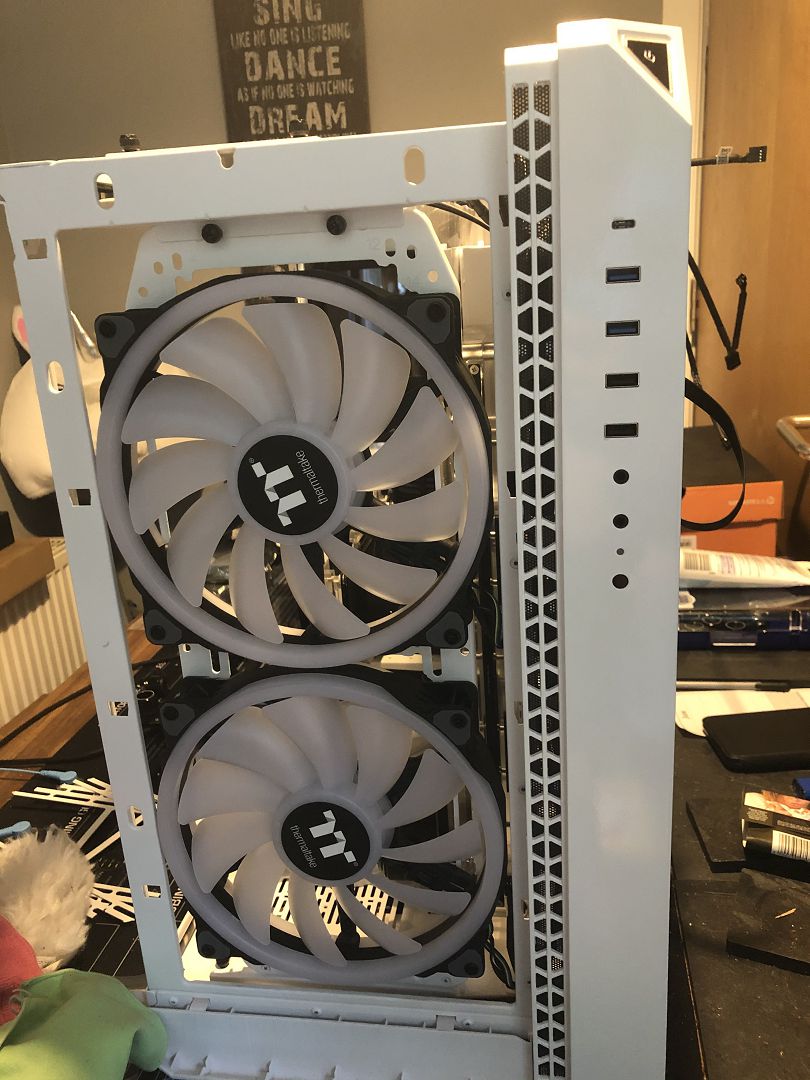
Thanks for the kind words folks, it is much appreciated. 🥰 I went into this whole contest with solely a 'theoretical' understanding of how I could use the acrylic. In my head the plan was to create a cleaner version of the View 51 Snow. Now this isn't to say that the case doesn't already look great stock, as it certainly does; but we all know how factory paint jobs can be, especially when dealing with multiple materials. I'm now getting to the stage where I will start to see whether these ideas actually work or not! So catching up from the last time I checked in, once all those things above had been painted and lacquered, it was time to start putting some pieces back together. First up was the small front panel where the power switch and USB ports etc. reside, as well as getting the 200mm Riing Trios in: I had removed as much of the fan bracket as I was comfortable with, as I still wanted it to successfully hold these monsters in place. Whilst not perfect, it definitely makes things less busy behind the fans. Some other minor things were making the Power Button and Reset Switch black, just to give it a little bit of pop. Another reason for starting to get things like the fans and front panel in was to get started on cable management, as that would eventually be a slight pain. At least at this stage there were barely any cables: It's a shame that the above shot doesn't show how glossy that front panel is, but I suppose that's what happens when you just take candid photos rather than lighting them properly and whatnot. Admittedly when I'm working on a PC I just want to get stuck into it, so pausing to take a pic is something I constantly have to remind myself to do! I then put the thicc boi back in as well as the 3 Riing Quads up top, and it was time to make some new bends: I think this shot gives a better idea of just how white the case is now after the paint job, you can also see a decent bit of reflection on that bottom right corner. After several iterations of different bends, keeping in mind I wanted the area of acrylic on the right to not be covered up by tubing, these are how the final bends turned out: I had considered having the CPU>Distro run travel at a 90 to the right and then straight up, but running it straight this way kept the panel nice and clear for... ...well, stuff 😉 I flushed the system several times with Distilled Water and then ran just the pump for a couple of days to make sure there were no leaks. Everything checked out, so it was then time to drain the system and put in the proper fluid. Whilst the system did look pretty cool with clear coolant, there was really only one choice: I've honestly never used the P1000 coolant before, but I have a decent amount of experience with opaque coolant from other brands. So I'm unfortunately well aware of some the issues that can be encountered. My first build with some really cheap stuff turned quite yucky after a few months, but usually the reputable brands work quite well provided you do the prep work correctly. Next step was to get the system filled and get out all the air bubbles, so ran the pump once again for a good couple of days: I always love how much quieter a pump runs when you use a pre-mixed coolant compared to distilled water, just that slight change in viscosity makes a world of difference. I briefly turned on the system fully, just to make sure everything worked. System was absolutely fine, it just took me a little while to get used to the TT RGB Plus software. But I got there in the end. Before proceeding any further I wanted to get to work on the cables around back. I had all the intentions of making it super-clean back there, but if you recall, the rear panel was going to be modified with a lit Unicorn's Head (still the plan). In order to help facilitate this, as the actual cutout would be clear, I needed a blank canvas back there. So instead I did an alright job of running the cables fairly tidy and then slapped this in there: Now nobody will ever know what sins lurk beneath 😉 I haven't started working on the actual panel that will go there yet, waiting on some dry weather up here as I need to cut some acrylic outside. But once I get that done I can then get it bonded to the panel frame and start working on that. So shouldn't take too long. With the back kinda sorted out for now, it was time to return my attention to the interior of the case: I was pleasantly surprised with how it looks in person so far, the glossy acrylic really shines; which ends up giving a nice combination of reflecting light as well as letting some through. Next on the agenda was to start working on the basement. This is another part of the build that I wasn't sure whether it would give me the effect I wanted or not, so I just very quickly took some off-cuts and slapped them in there to give myself an idea of whether it was going to work or not: The image probably doesn't do the visual effect much justice, but sure enough it is functioning as a lightbox fairly well. So I was very relieved it would work as intended. As of today I've got 3 weeks and 1 day to get the build finished and a video made. So in reality that translates to between 1-2 weeks left, depending how much time I want to leave for filming and the subsequent editing. The outstanding items still to be completed are: Finish off basement and the trim/frame for the side panel Clean up interior and put in 'stuff' Finish fabrication then Prime/Paint/Gloss Front and Top Panels Fabricate and then Prime/Paint/Gloss Rear Panel Glass Etching So I think I should have enough time to get those items done. With that being said though, I will likely only have another 1 or 2 updates this month. Well, before the video goes live at least; as I want some of it to be surprise after all. Anyway, thanks for popping by and make sure to stay safe folks!.thumb.jpg.090cd8ec4eccf81b1a55fad7757154a7.jpg)
.thumb.jpg.39bf24dd4958f9c7602c768d96884653.jpg)
.thumb.jpg.e6bb1ce0eba01ae2dce60a0443addfe6.jpg)
.thumb.jpg.505d8bdac9492cadbdabea0a3bb98de0.jpg)
.thumb.jpg.3c6e26f6f4d49d818ea5ae3a3ea1a68e.jpg)
.thumb.jpg.b6361229d2a13bf7e42e97b8395087c2.jpg)
.thumb.jpg.931d4b2504484371c01bd1abf86f9e6d.jpg)
.thumb.jpg.e5b0758b4ad12fb9335990181ce354f9.jpg)
.thumb.jpg.f42da03ceb2b78965375b4dd1a4973f0.jpg)
 1 point
.jpg.79425de73d9538f630f2e0818a0c5508.jpg)
.jpg.7d5e4bfef6f2db7cd10a00fc59f73e21.jpg)
.jpg.528123cbfafda44ffb4433133bc04b76.jpg)
.jpg.f6b6e8c576fe65c359766703ca7d7fef.jpg)
.jpg.741bba12d5d58b559bd0e4c7cfc1f390.jpg)
.jpg.9c2130054797963b0647453522dc9b99.jpg)
.jpg.86ec753a4c7bdc09be85015948808308.jpg)
.jpg.281dc80aaf374c2bd310483c8ca46e9d.jpg)
.jpg.342dd2c158b6948bcb7c8bbc17903846.jpg)