-
Forum Statistics
7.5k
Total Topics50.6k
Total Posts -
Member Statistics
135,966
Total Members16,800
Most Online


Alan-Lee
-
Posts
181 -
Joined
-
Last visited
-
Days Won
12
Content Type
Profiles
Forums
Downloads
Events
Gallery
Blogs
Posts posted by Alan-Lee
-
-
This pirate theme mod looks amazing!!!
thanks cris
its quite creepy that its actually pretty good. very solid theme for the build. great work!

thanks you ashleybog
AWESOME !!! your the BEST !
well, we will see, but thanks that you think so.
amazing!
thanks flamemaster666
This is not just an ordinary casemod this is art
, thats waht i like hearing themost, i also see my handwrok as art, thankyou barakyp029 for recognising it as such.
Now this is going back why we mod! This is pure passion and art! Never throw the anchor! Move forward!!!!!
i agree with you jos214demi, i love diving into a theme and living it till completion. then the theme will live too. thanks mate
I love the theme and definitely love the handcrafted wooden details...definitely a pirate's treasure!
thanks rochrimir, i am glad it appeals.
am now down in the workshop, the next update is on its way.. i hope with any luck to finish the actual build today, and maybe get some stain on it..
-
Very nice - and hand crafted is admirable. There certainly is a lot of resource out there for things pirate to pull from. Well done
Wow, this is such an amazing build!! The attention to detail and craftsmanship are second-to-none. I can't wait to see the next project update!thanks mate. yes indeed, i love details, and more over i love making every little detail myself.lasered, cnc and 3d printed stuff, whether made myself or ordered from a 3rd party is a nogo for me, its a pity that their is so much of that going on.it doesnt show what one is really capable of, but what one can make a machine do in automation, or let and have a machine do.anyway that seems to be the way things are going and the trend now. while loving and gaping at the result of such automation parts because of their precicion, i cannot say that i could ever value, cherish or admire them or could put the ARTIST stamp on them.all the more reason for me to yet again stress the fact that everything i make is made only by me, without any automatic tools at all. 100% good old hand made man made stuff. soon color is coming, then it will live -
thanks guys, am really trying my best to stay tuned to the theme piracy and prophecy.
with any luck i shoul be finished with the interior and all other trifles by sunday evening or monday latest. monday is a national holiday here so that helps too. that means i should be able to srt getting some color into the equation then.
at the moment, i am living the theme, but then, the theme will live

-

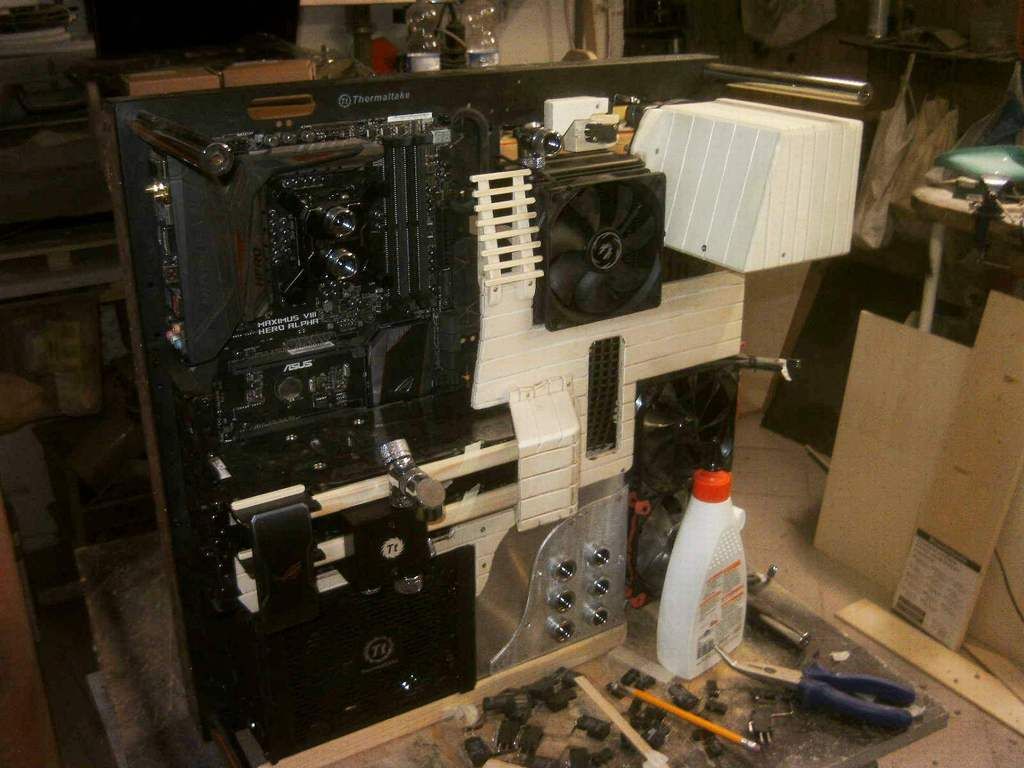
so hi guys, forst thanks to you all for your very motivating comments. here is the result of todays modding session.
i carroed on with the interior and i think it should be finished by sunday evening. its a lot of little thingamadjigs and whatchamacallits in pirate style till its done.
anyway here are the pics.
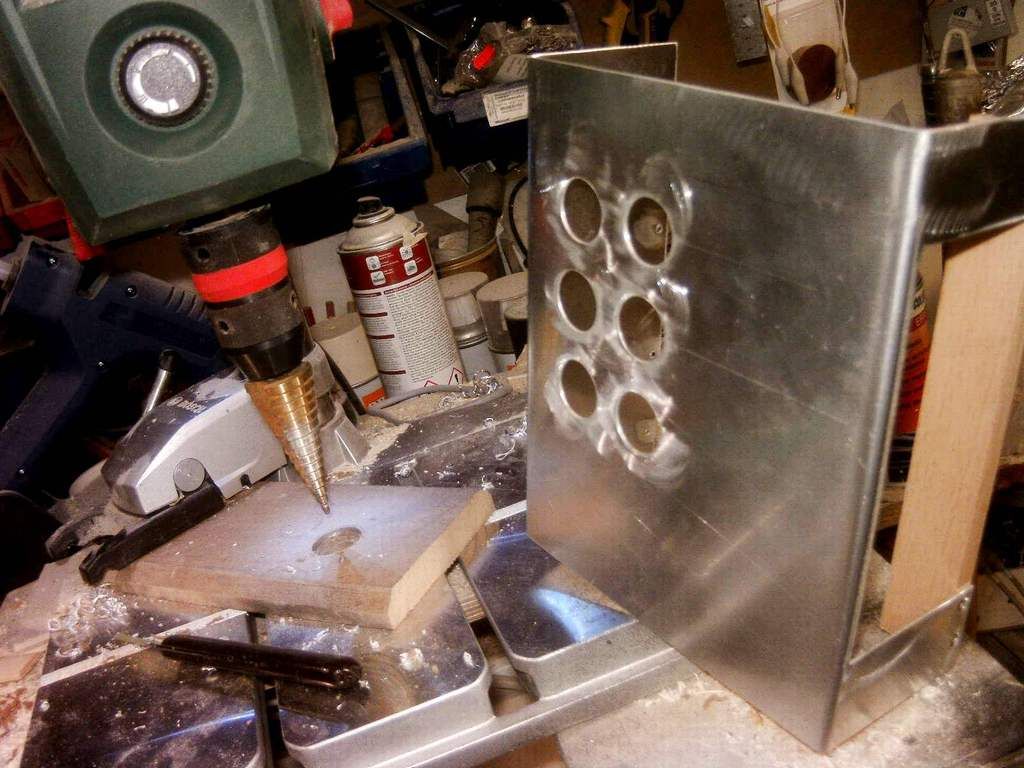
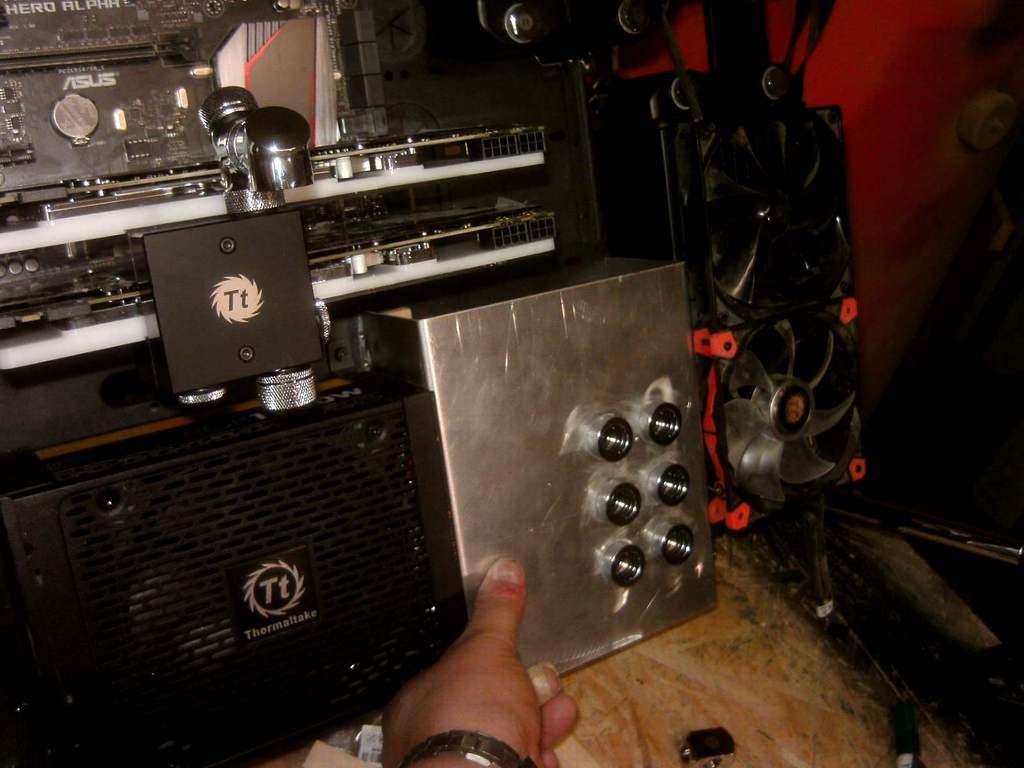
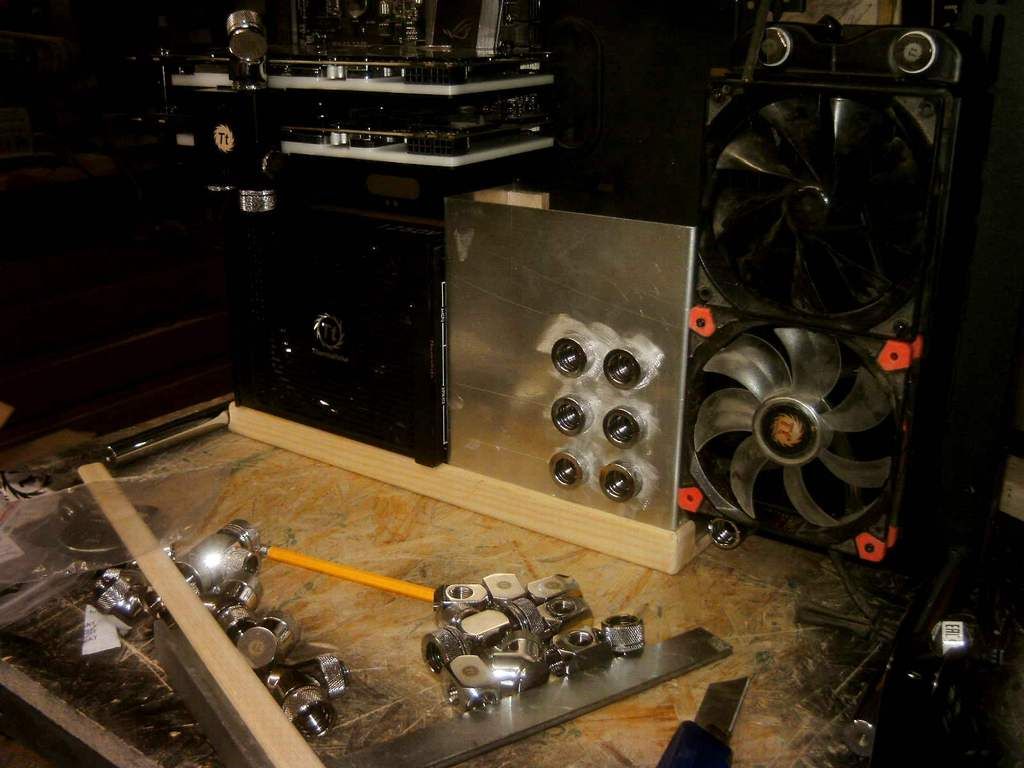
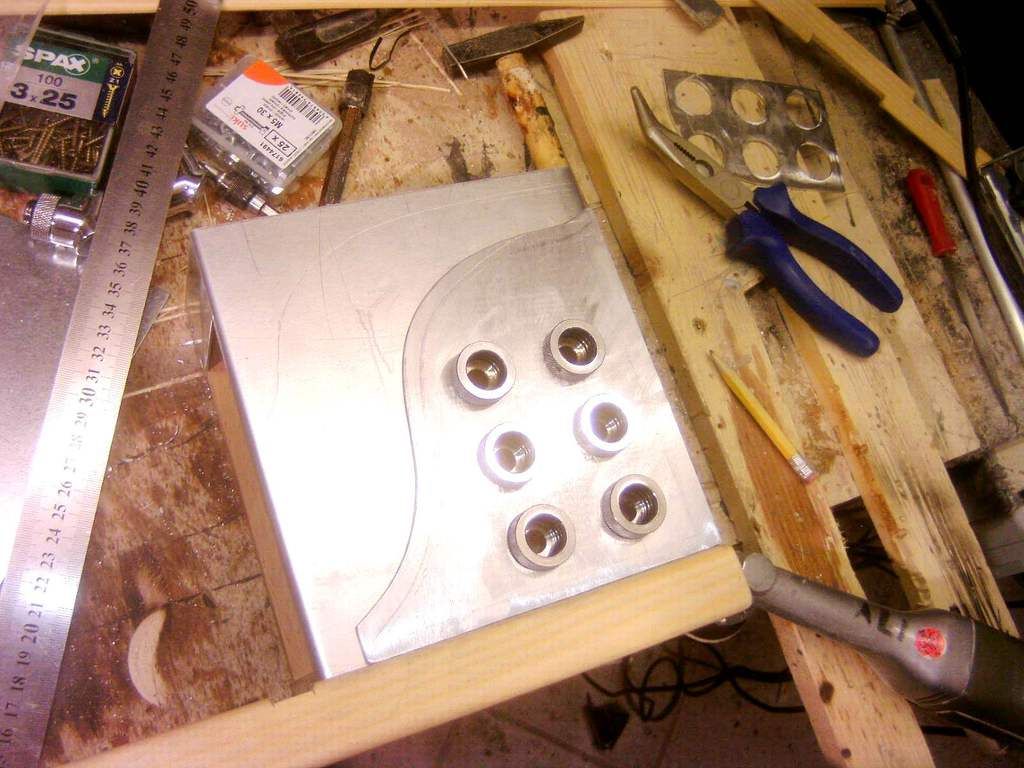
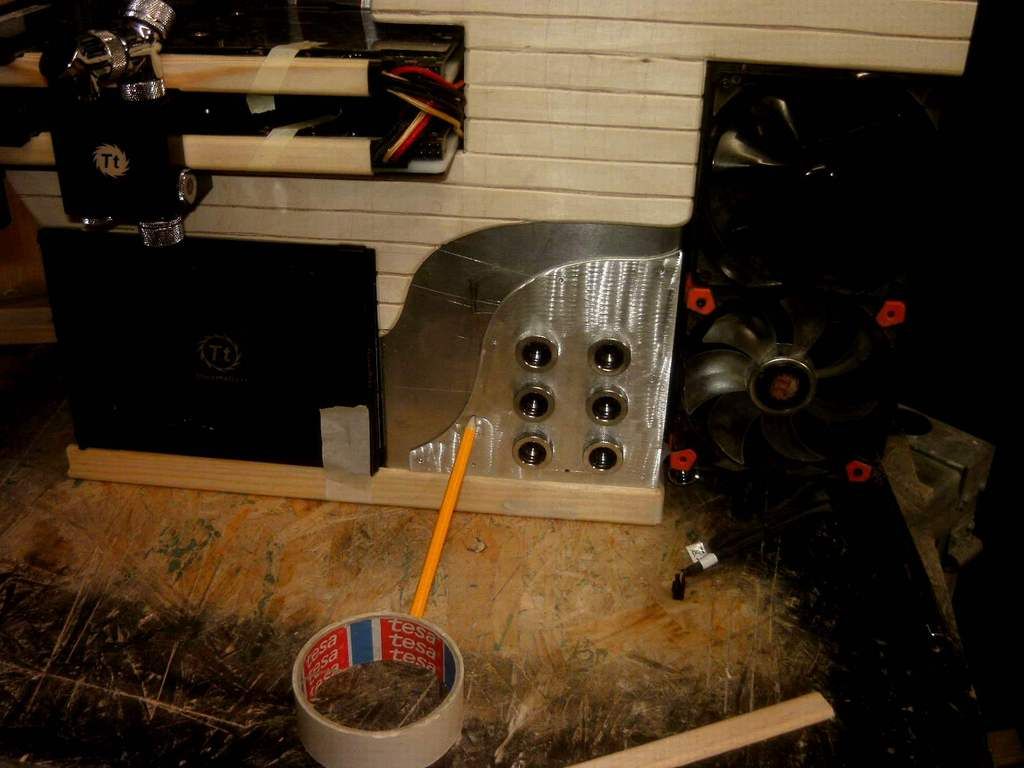
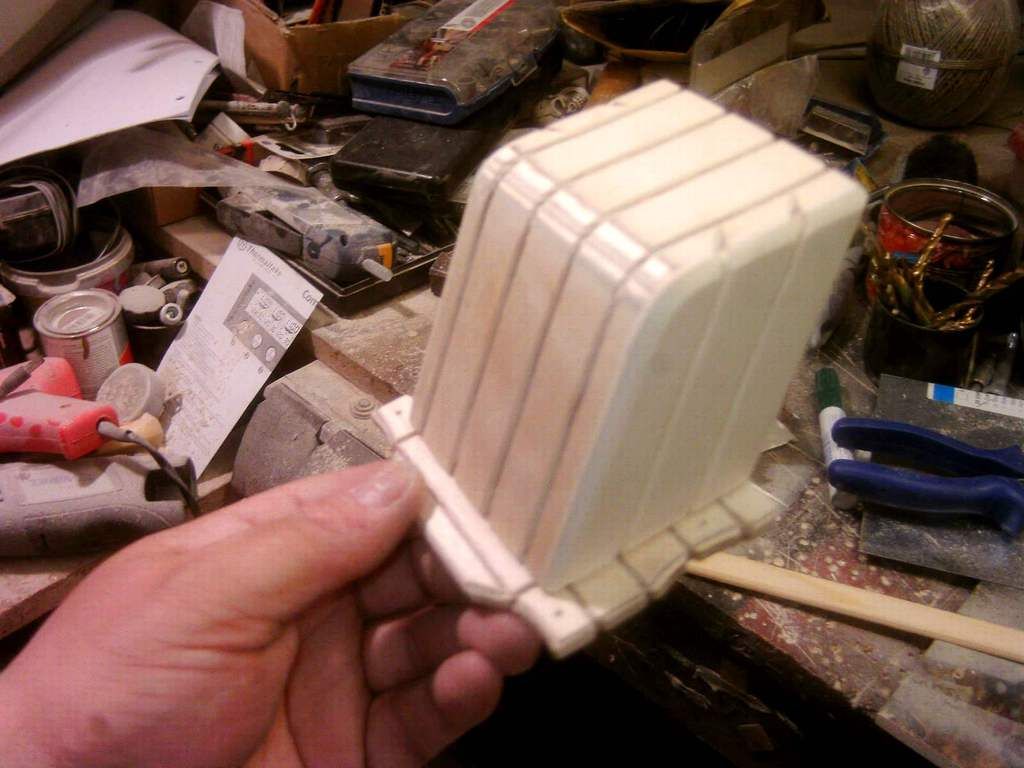
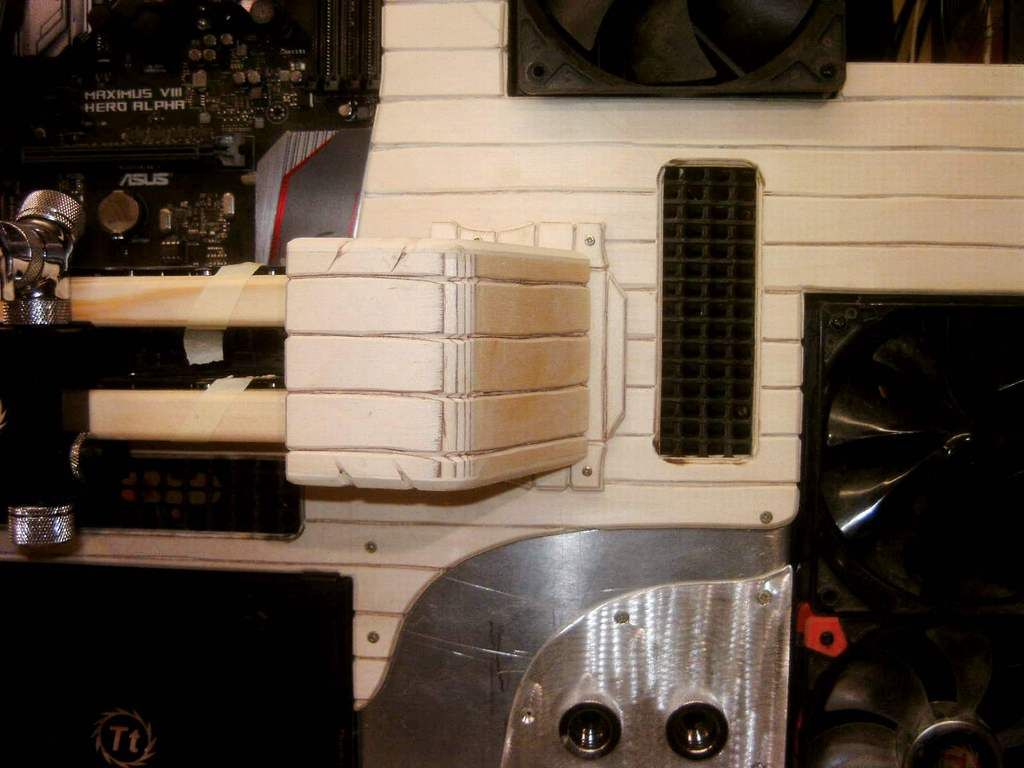
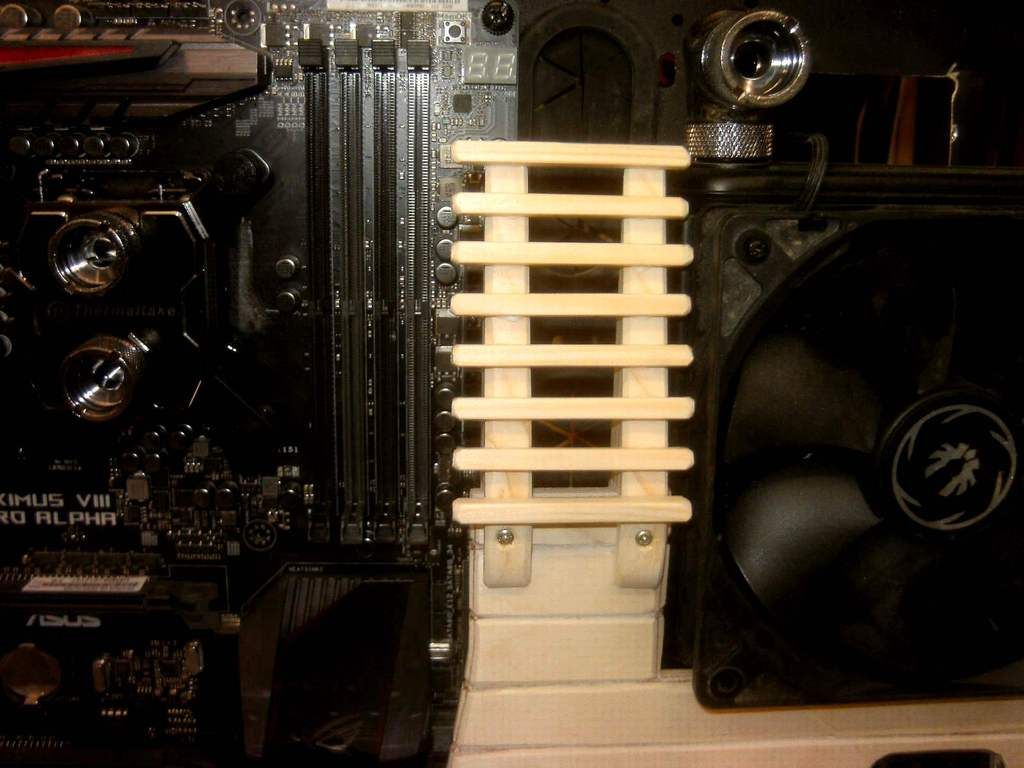
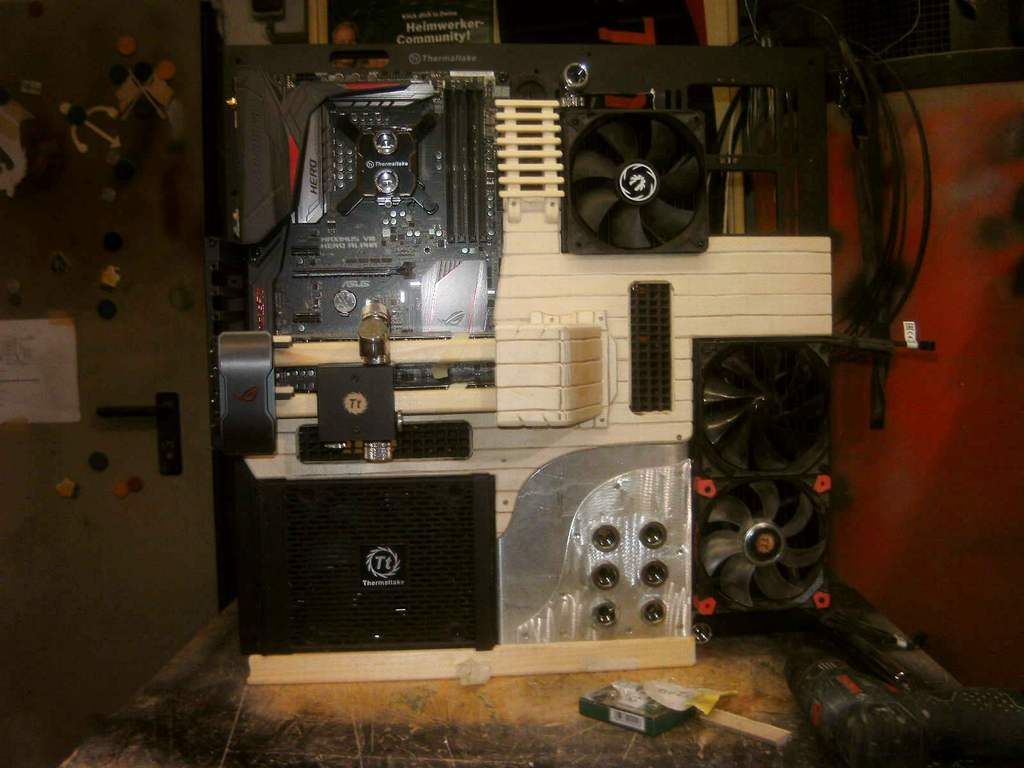
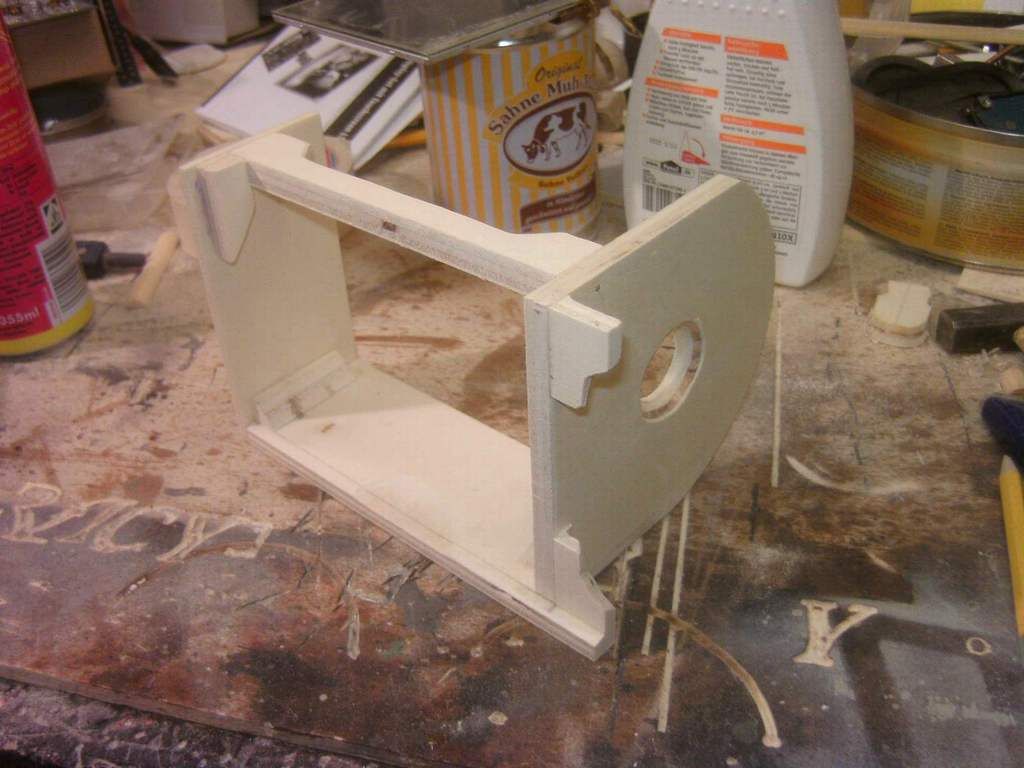
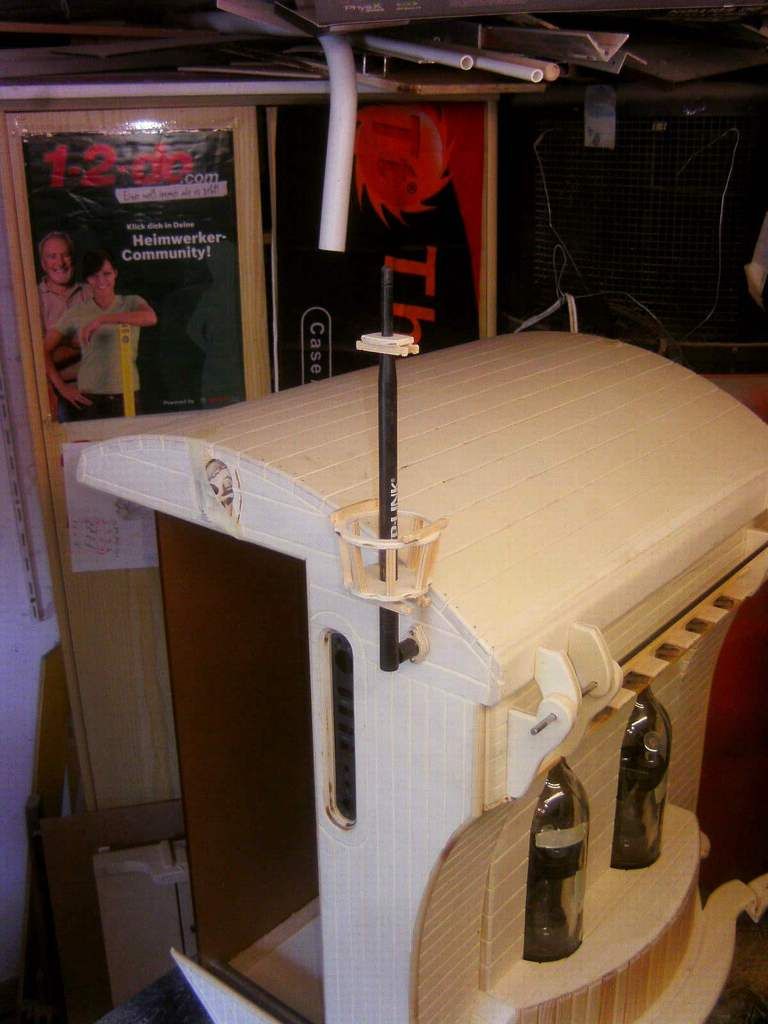
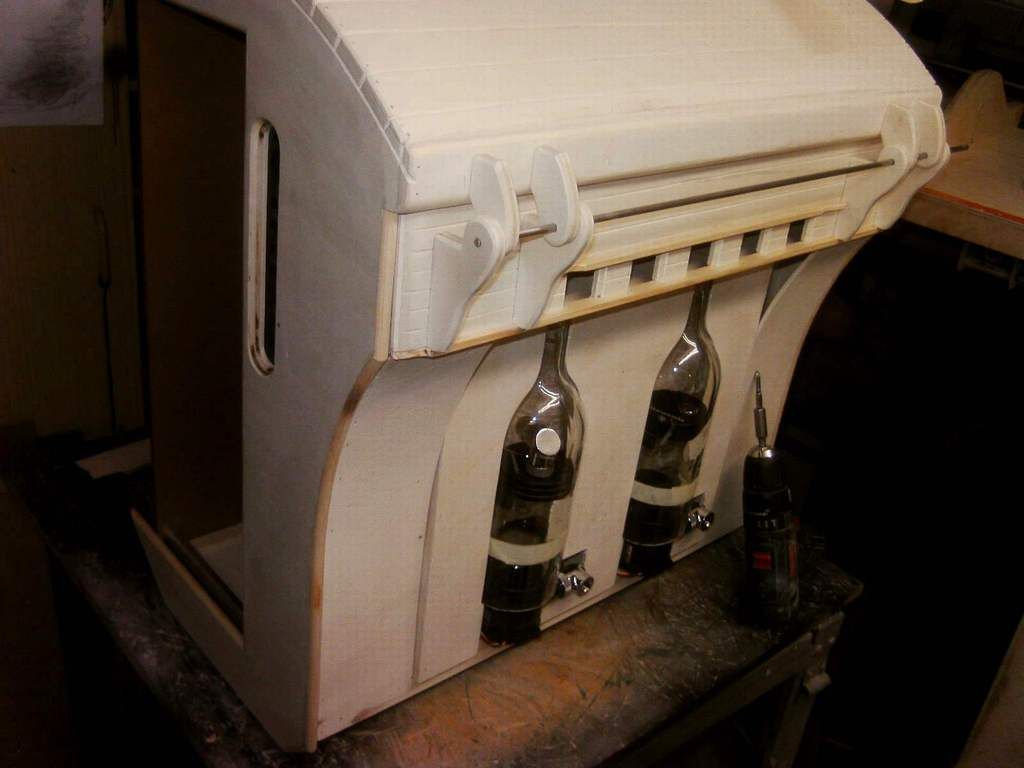
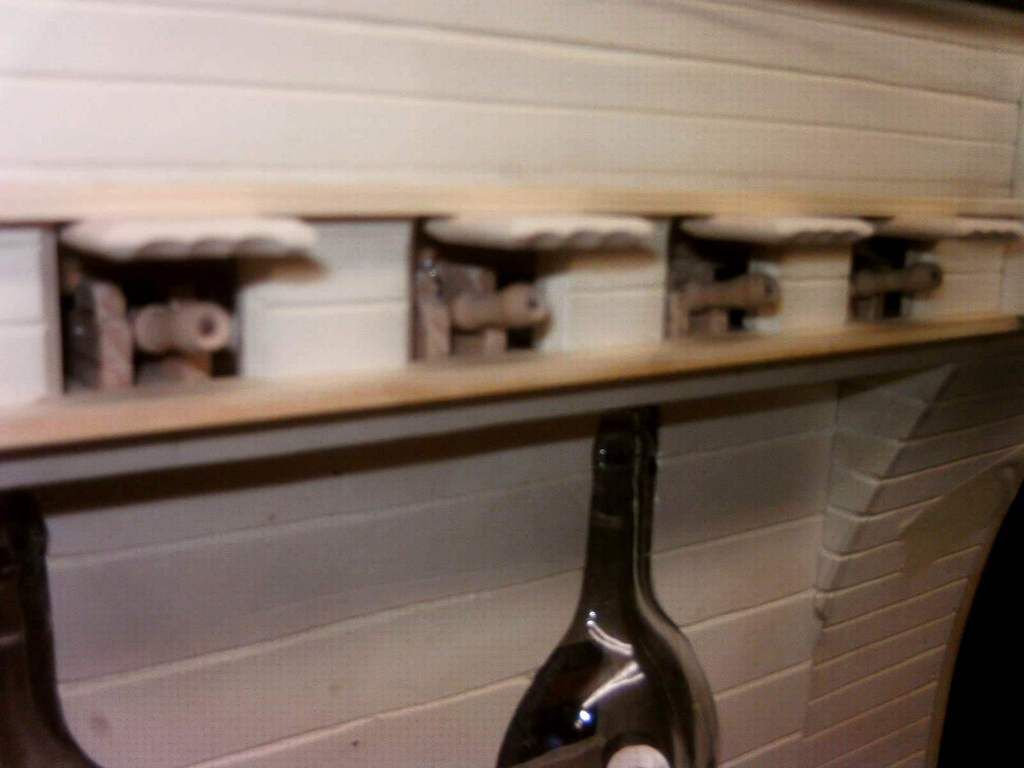
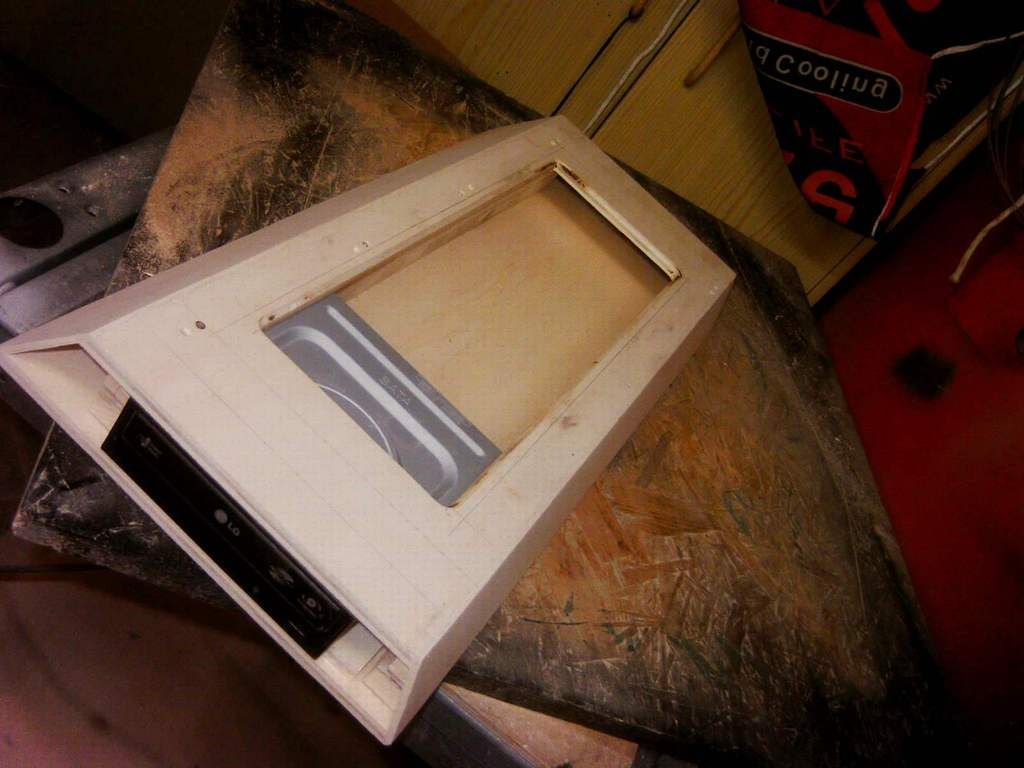
first i made the mid section between the fans and psu. it will hold 6 petg push compressions and will be screwed permannent with the case, it also covers the psu wires too.
yes, even the grafik cards will have certain deck planking too.
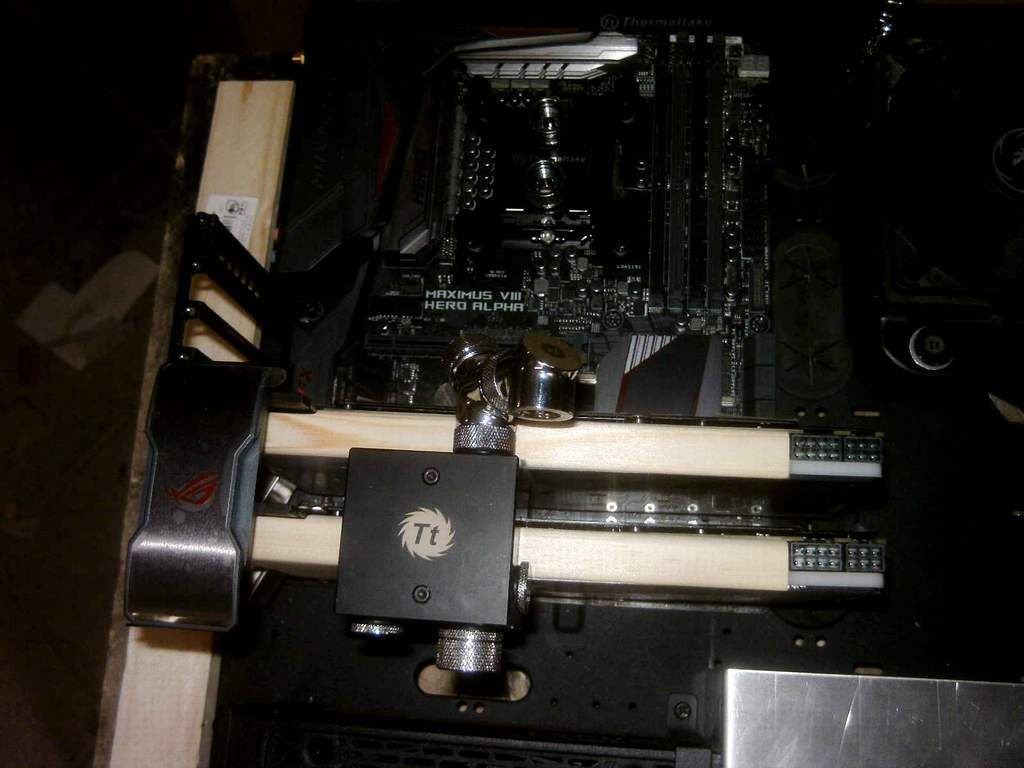
wires dont really fit in well in this theme, so this deck planking cover will hide them.
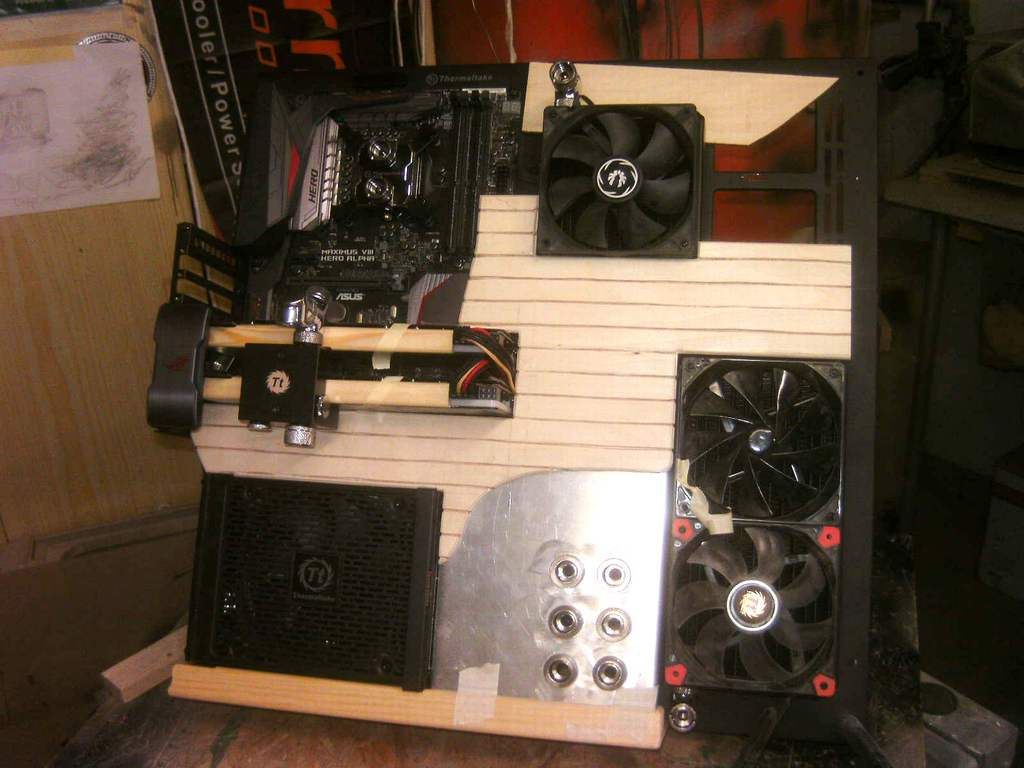
then i thought if the aluminium plate which is holding the 6 petgcompressions is fixed permanently and i want to get behing the connections for some reason on any given day, then i would have to do that from the back, so i changed the plan and made a second plate which is screwed onto the fixed one. this was i can remove the whole block now.
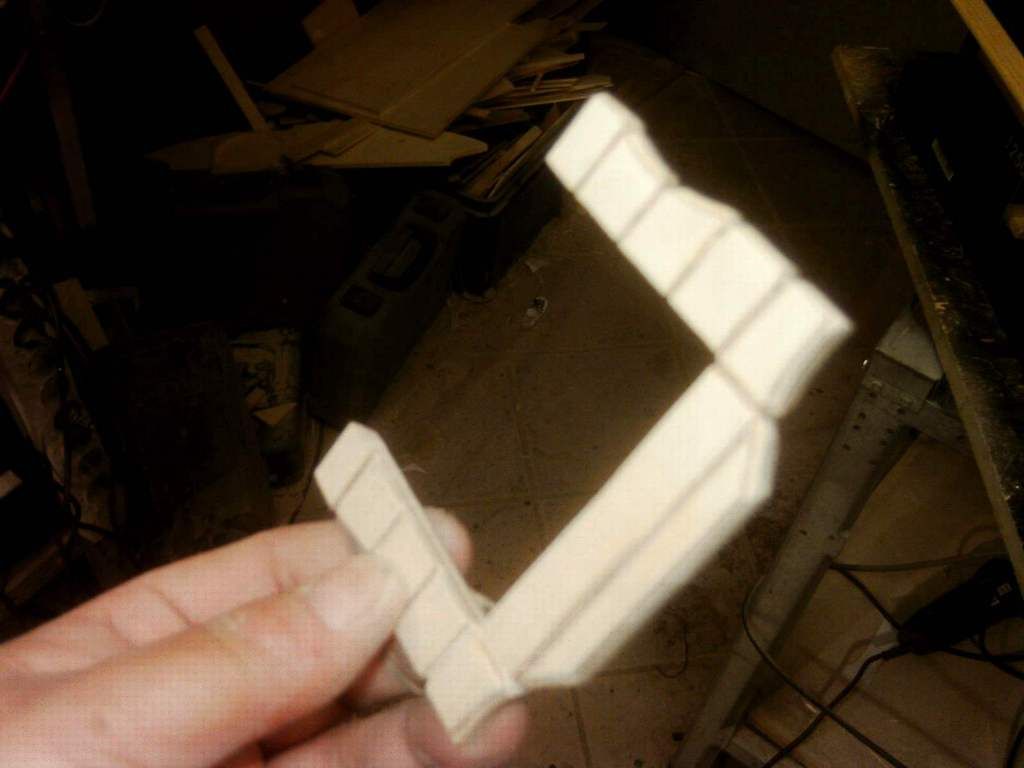
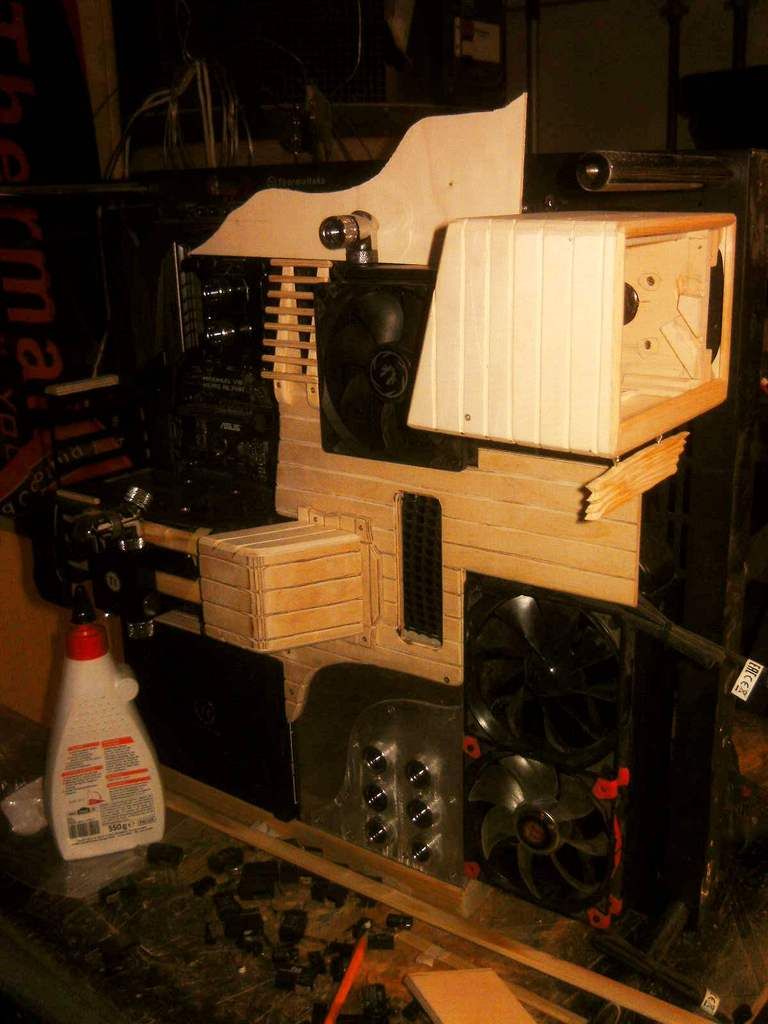
like i said, i dont want wires visible, so i made a stern parapet as cover for the grafik card power supplying cables,
i cut out some windows for better air flow.
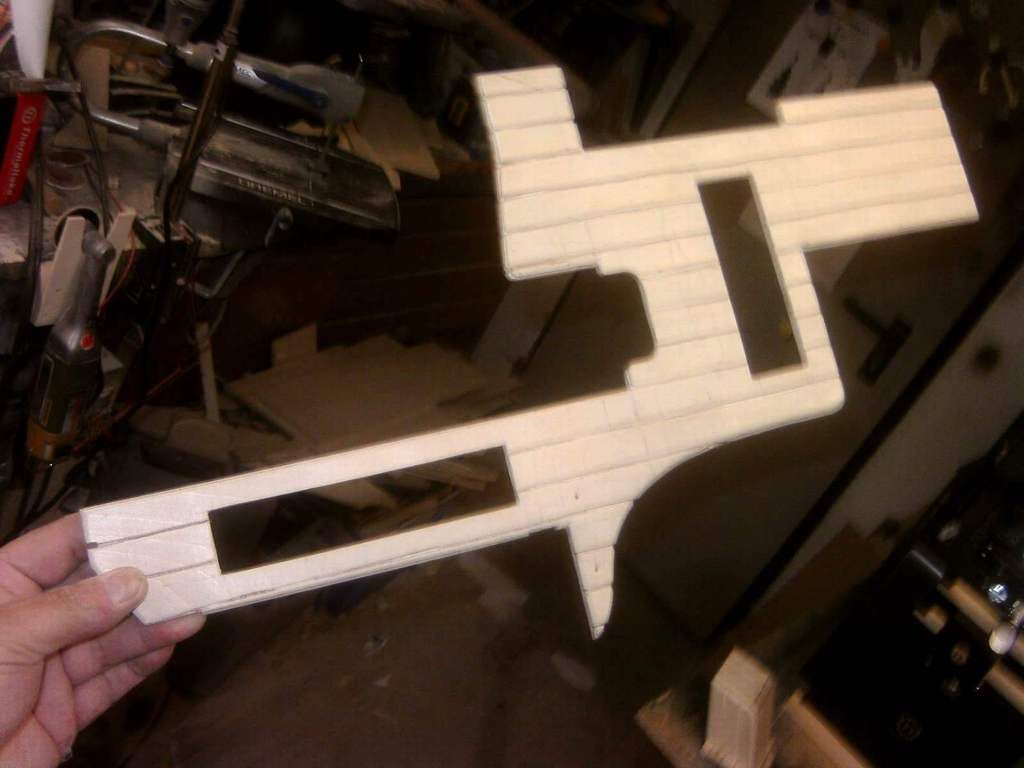
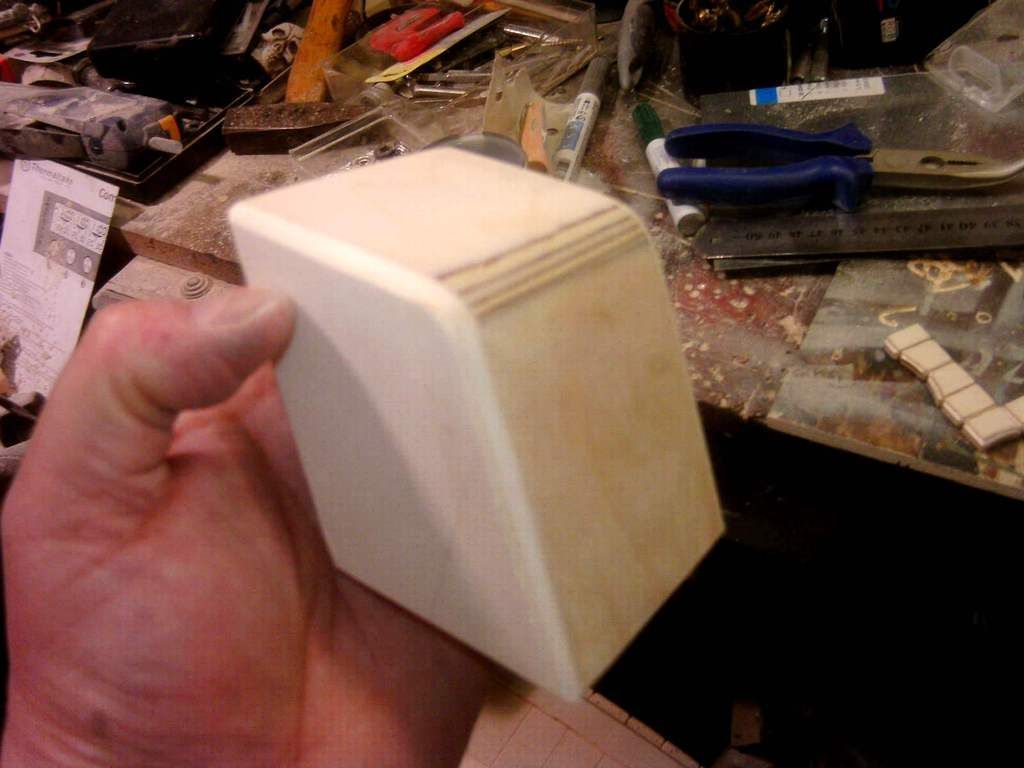
i then made a psu mainboard cord cover which is dismantalabe.

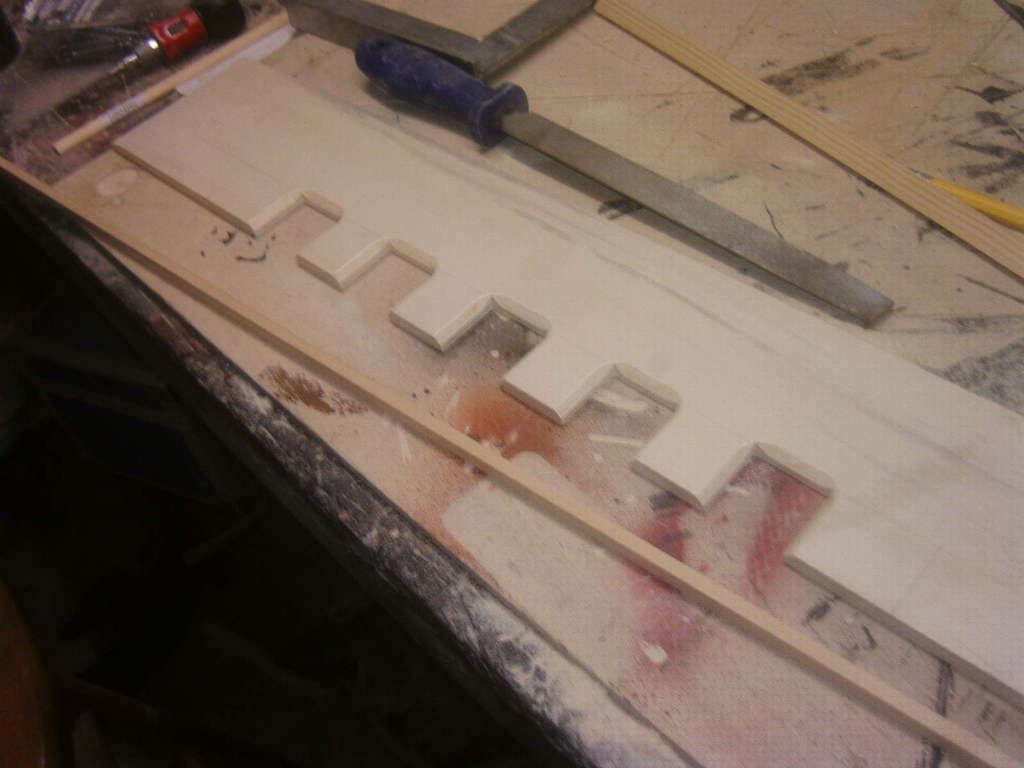
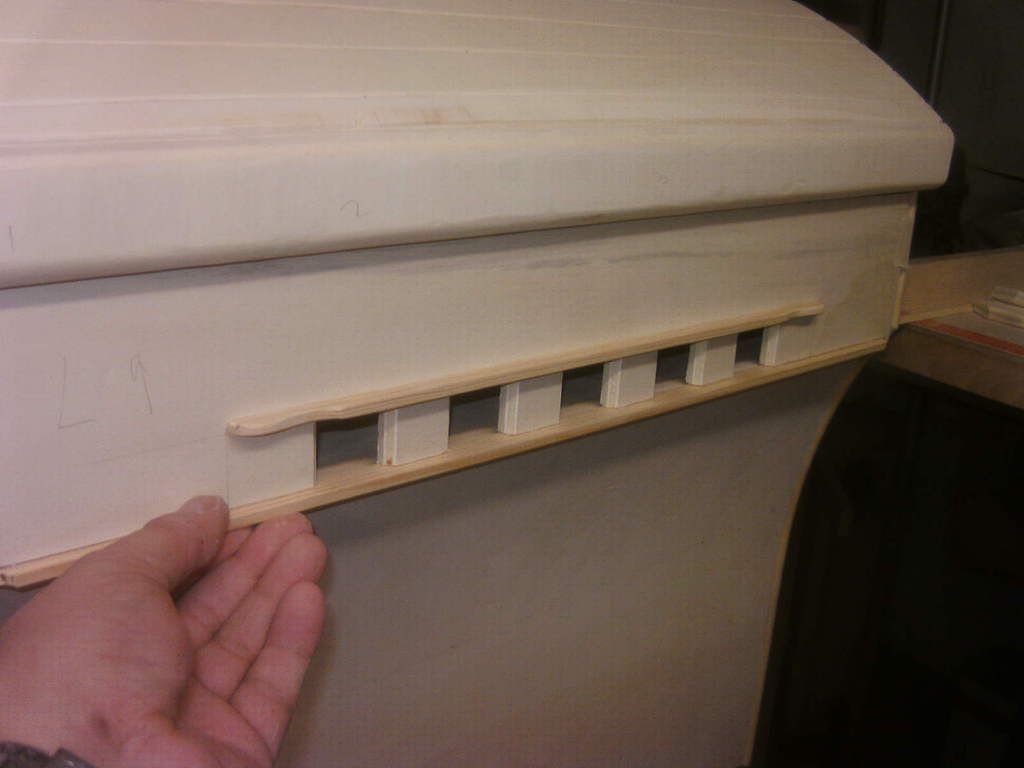
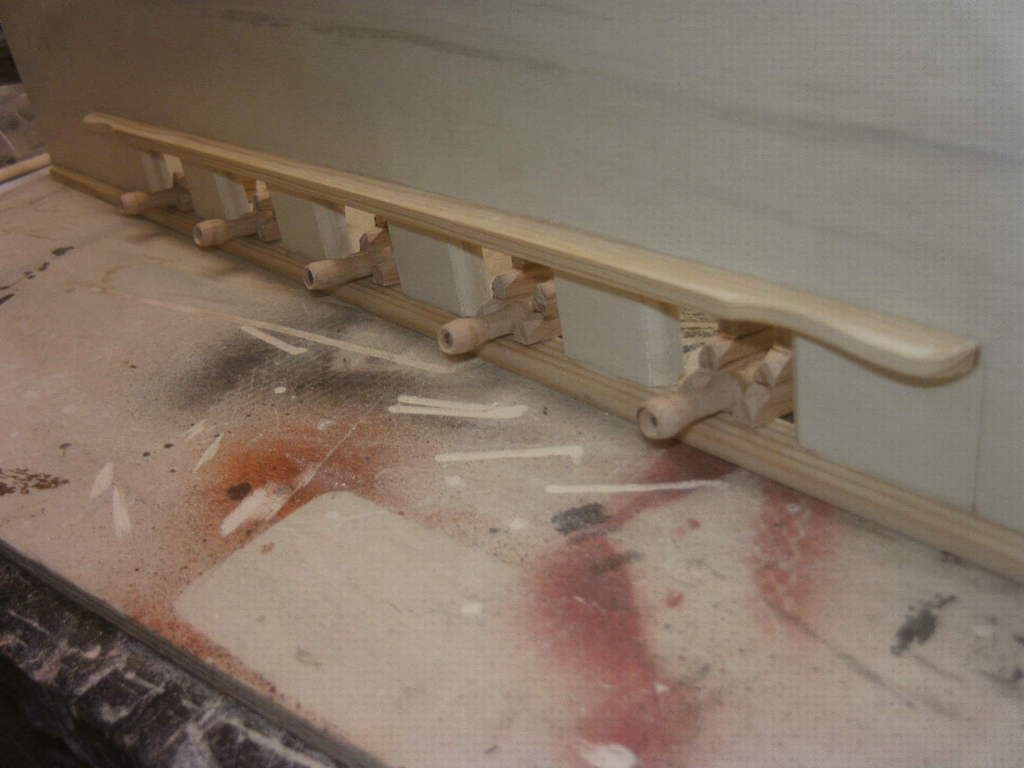
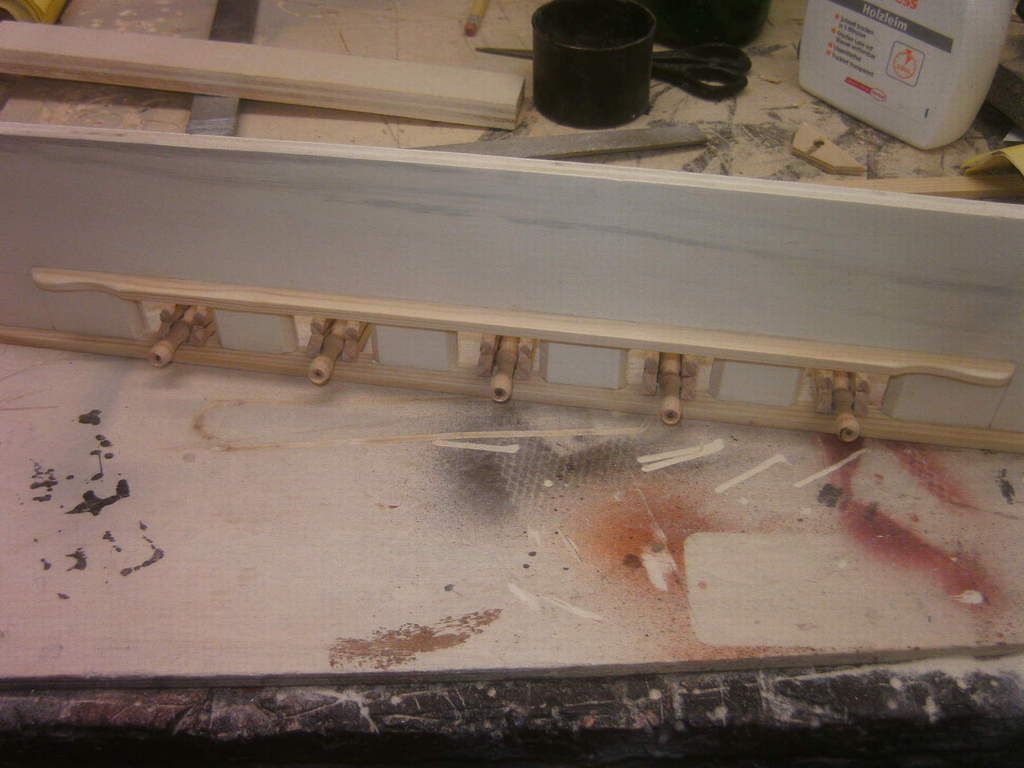
i made a deck ladder looking cover, it is dismountable too.
-
I would literally buy this for thousand bucks. The worth ethic is real with this mod. My gosh every process kills me. I didn't know how you made this case mod possible. I hope you really win this one mate. Good Luck to you! And we all appreciate what you've done. G0D SPEED!
Thanks everyone. Especially to theckingjay. Thanks for your motivative appreciation. I have been watching my fellow modders here and am really subbed by the quality they are all producing. I would like to mention that its pretty intimidating to see the exactness and precision of all that cnc stuff out there, but that it motivates me even more and more to show that 100 % hand crafted can still hold up with them. I would also use cnc's for orders but when it comes to showing my art, then handmade is the name of the game for me, not because its easy, but precisely because its harder and comes straight from the heart.
My heart is my CAD, my mind is my CNC and my hands are my 3d printer. :-)
-
"It's a pirate's life for me" captain Jack Sparrow!!!! This is my favorite build!! Where's the Rhum my friend??
aye aye sir, rum is on the way. as soon as the back is painted and i have finished the interior. am also curious how the bernstein colored golden self made coolant looks like. wont use real rum, i need that to cool my own biological system.

i love your details man!
thansk, i simply love details too.

-
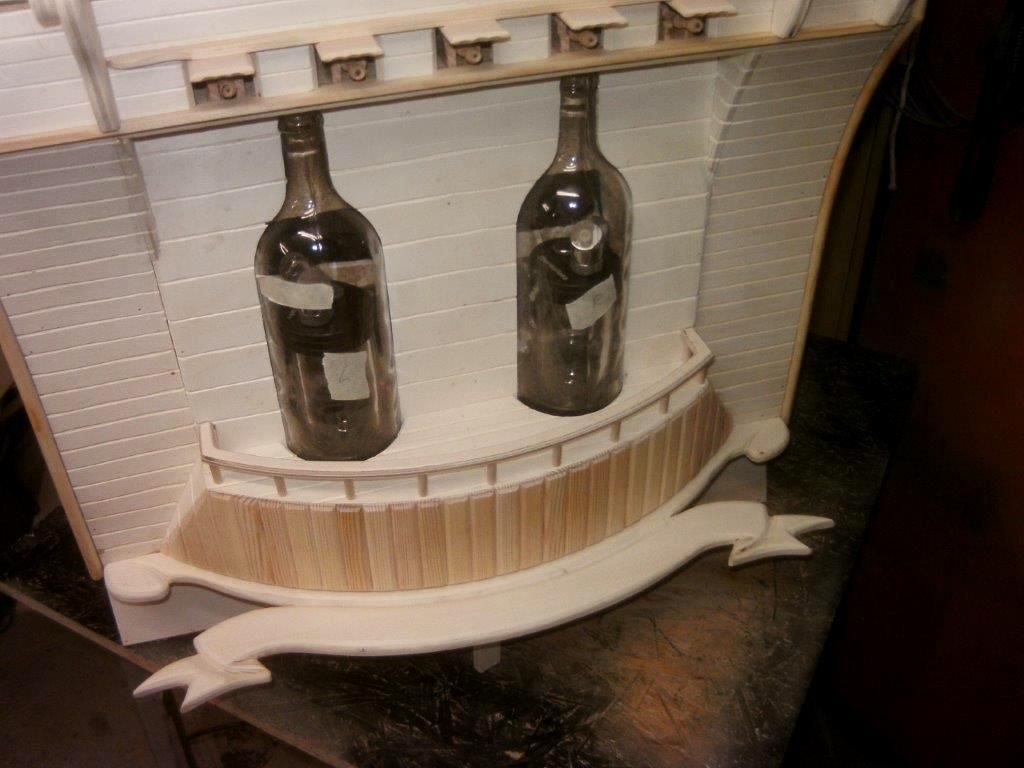
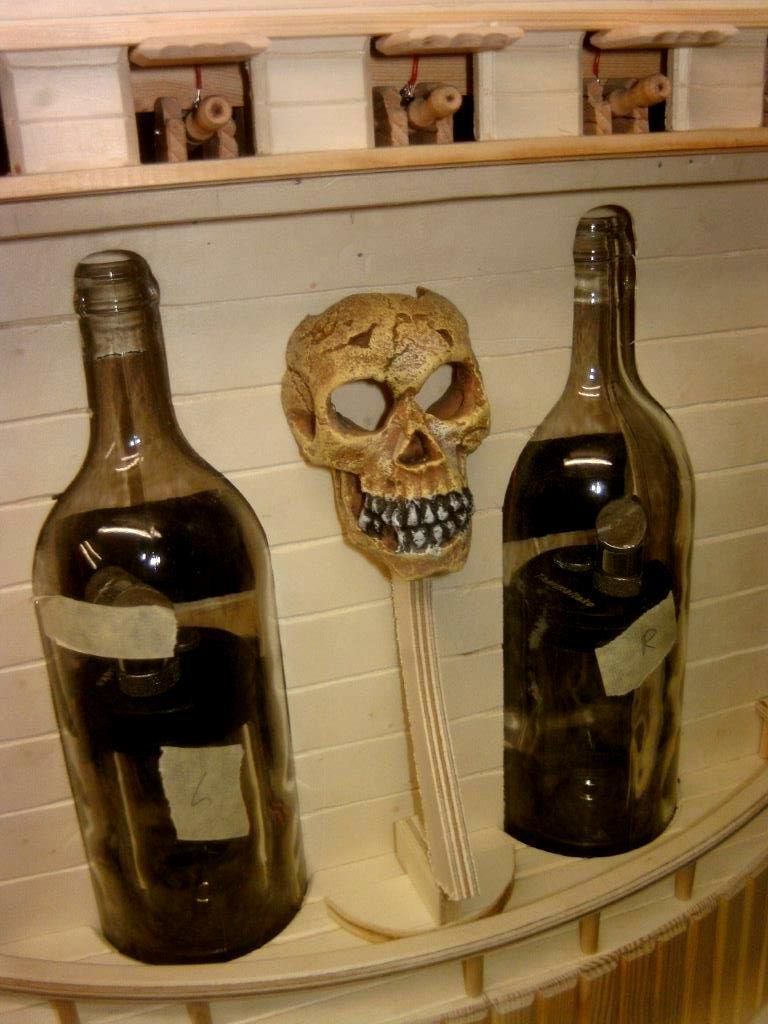
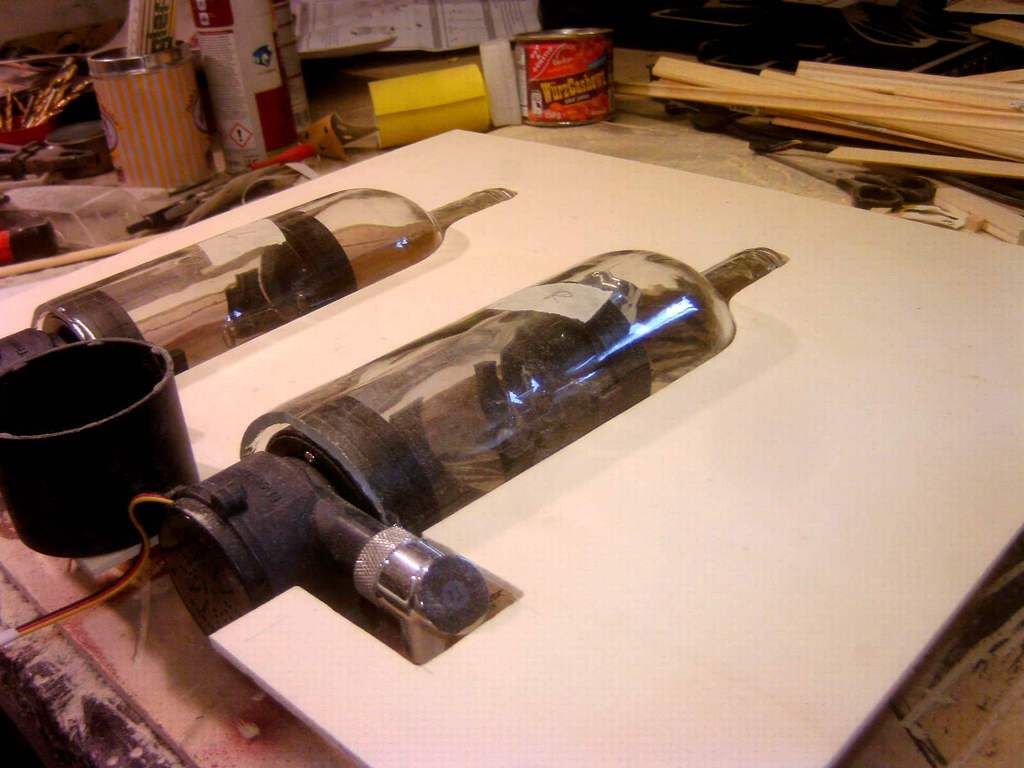
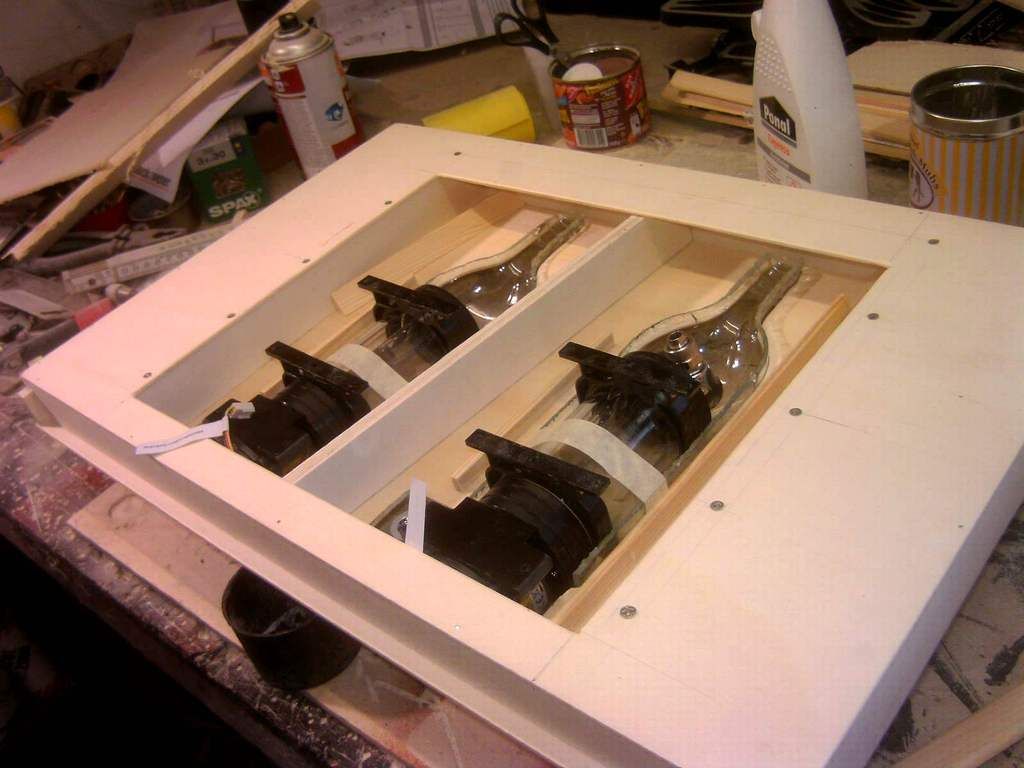
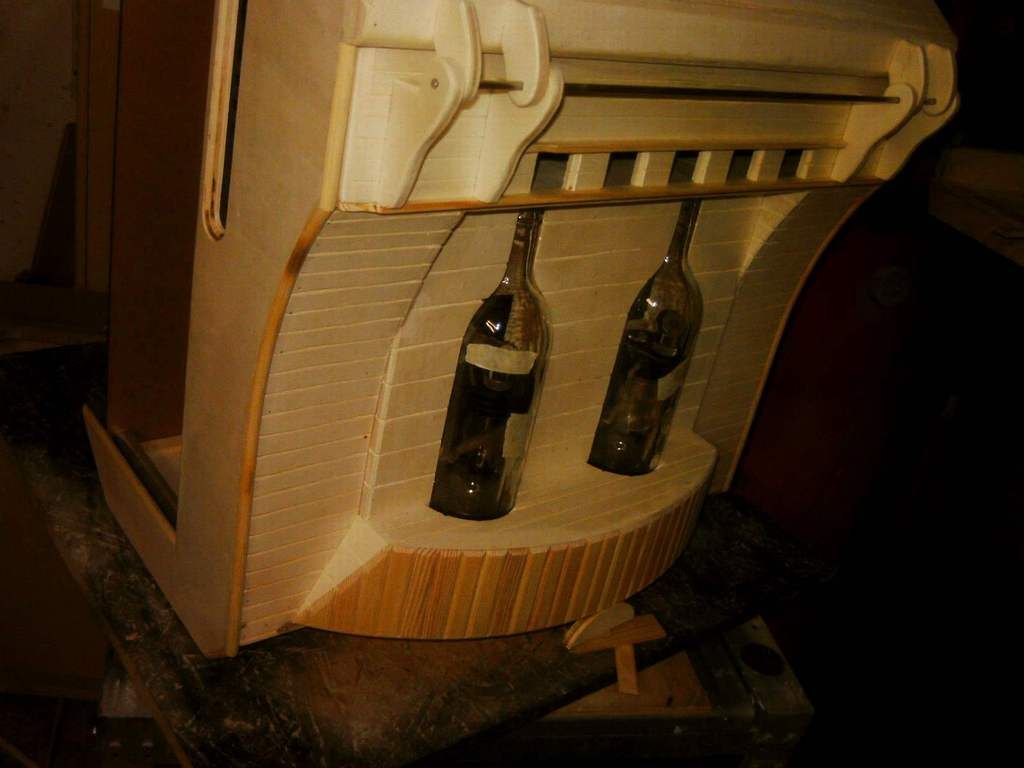
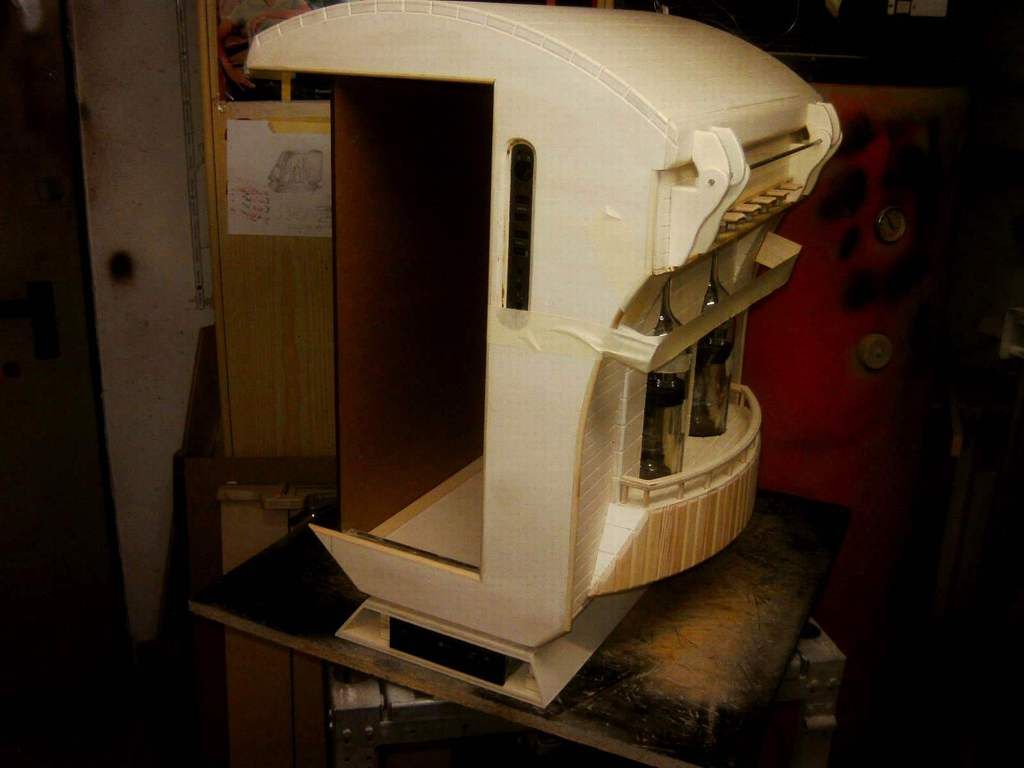
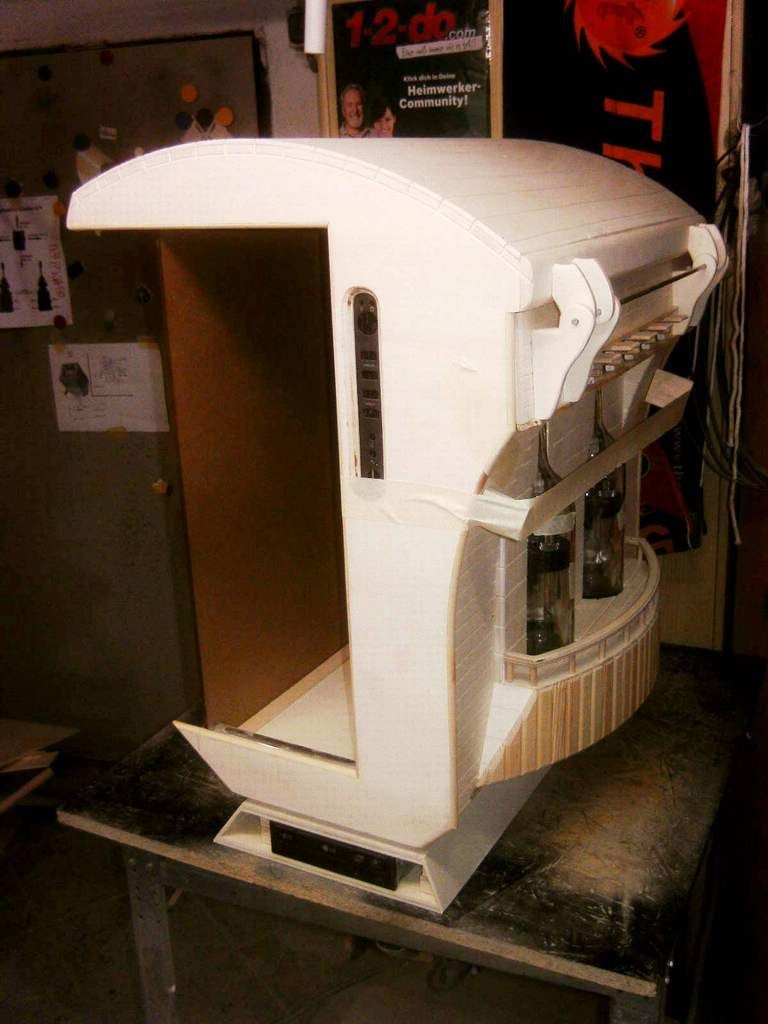
hi guys, thanks for your remarks.
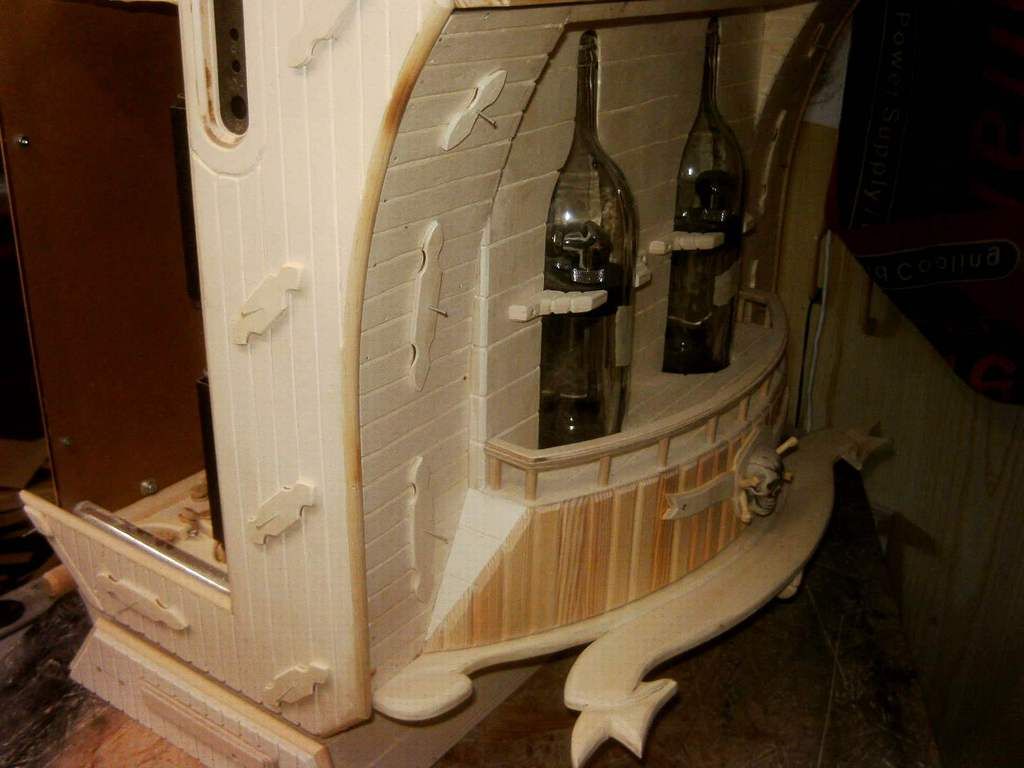
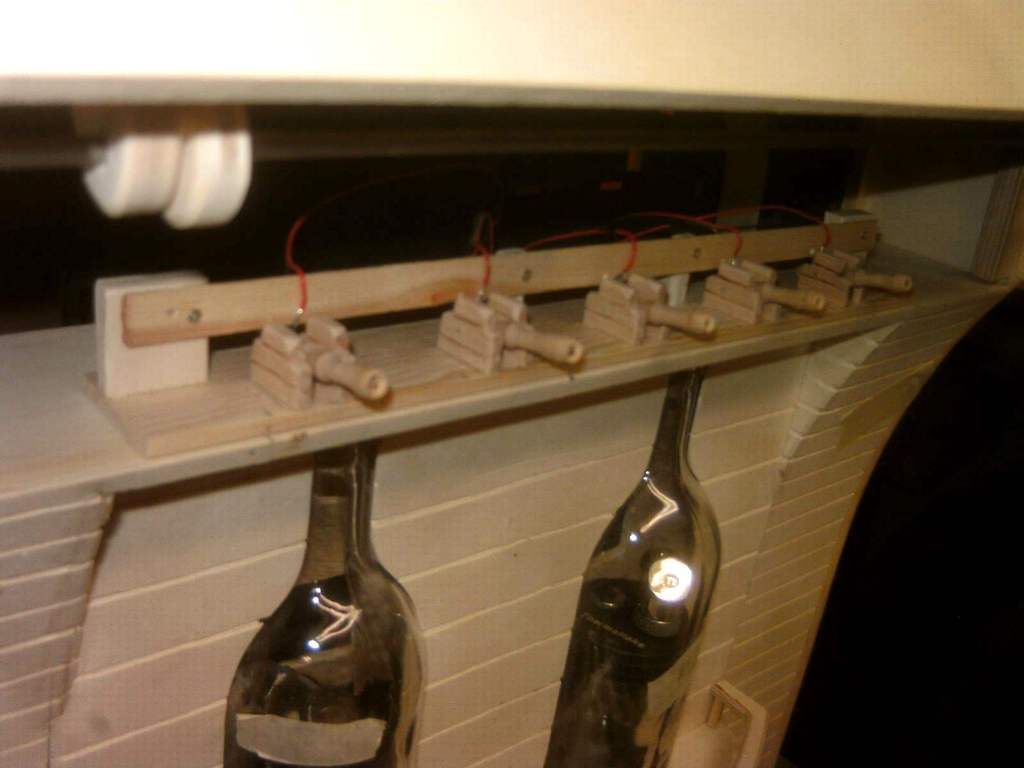
yes indeed the bottles are indeed reservoirs for the coolant.
i have mixed some coolant that resembles the RUM color that used to brewed back then in the day.
yo ho ho and a bottle of RUM, right
at least hollywood tries to tell us that RUM is all any pirate of the carribbean ever used to drink, treasure island too, so its a must.
the bottles will still be decorated like proper rum bottles with stickers ans logos etc.. yet to come.
next update is tonight...
-
oops i forgot this little update before the breakdown, here it is.
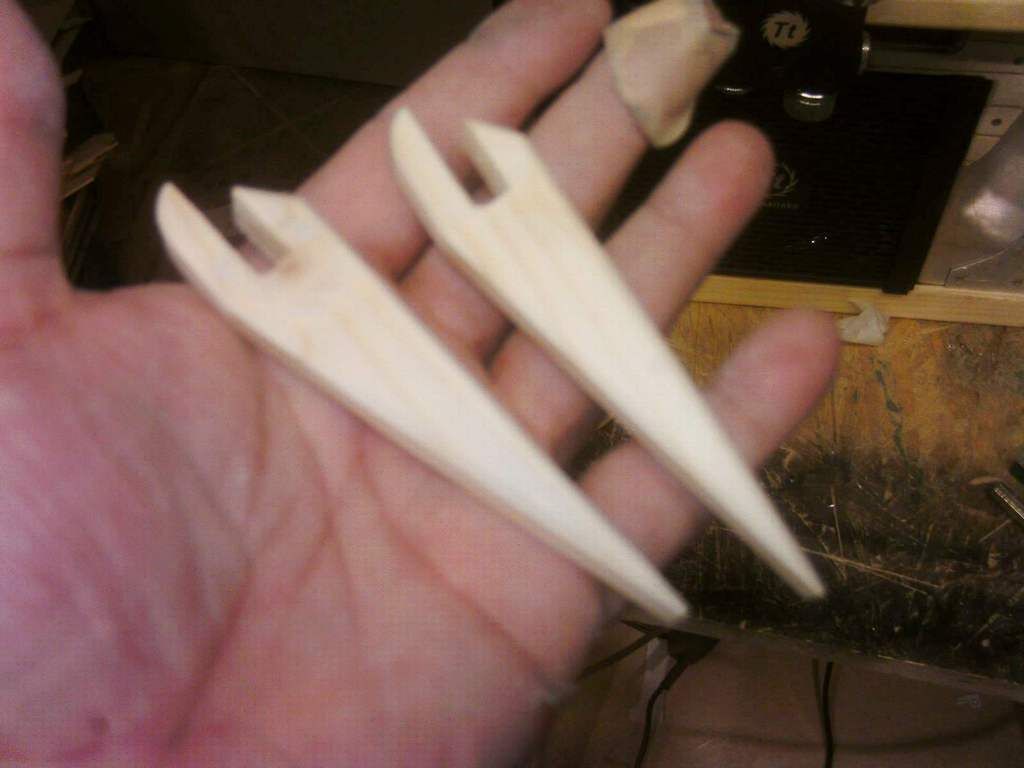
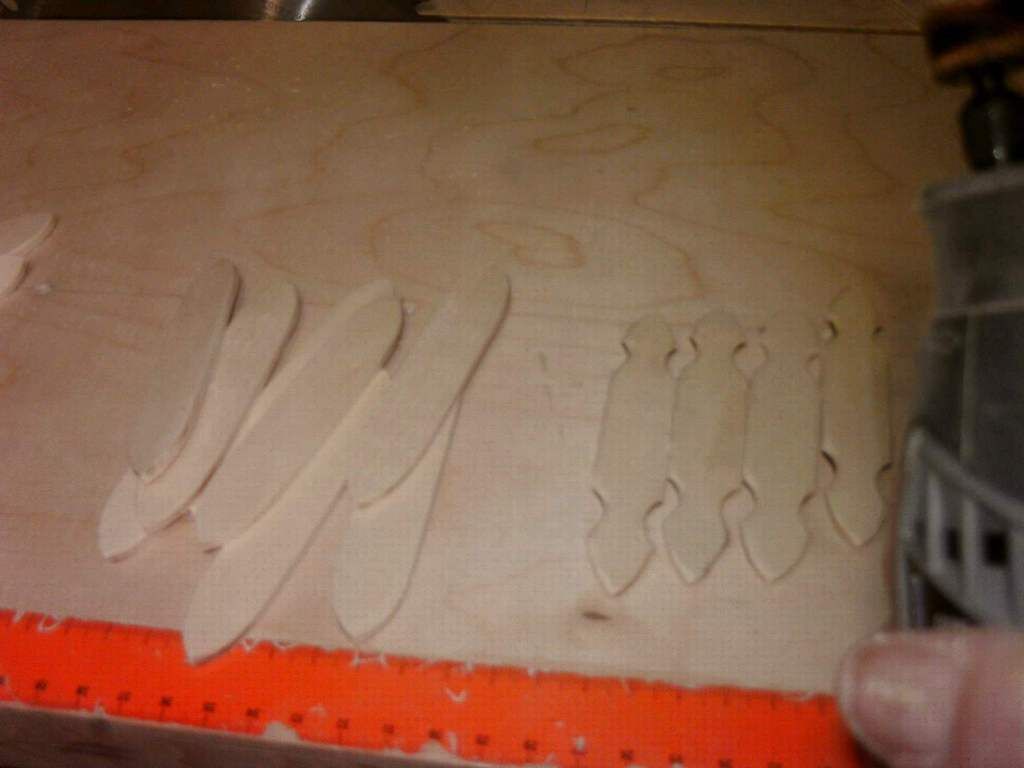
i made some pulleys and winches for the front tackle holders which you will later see wehn its front is mounted.
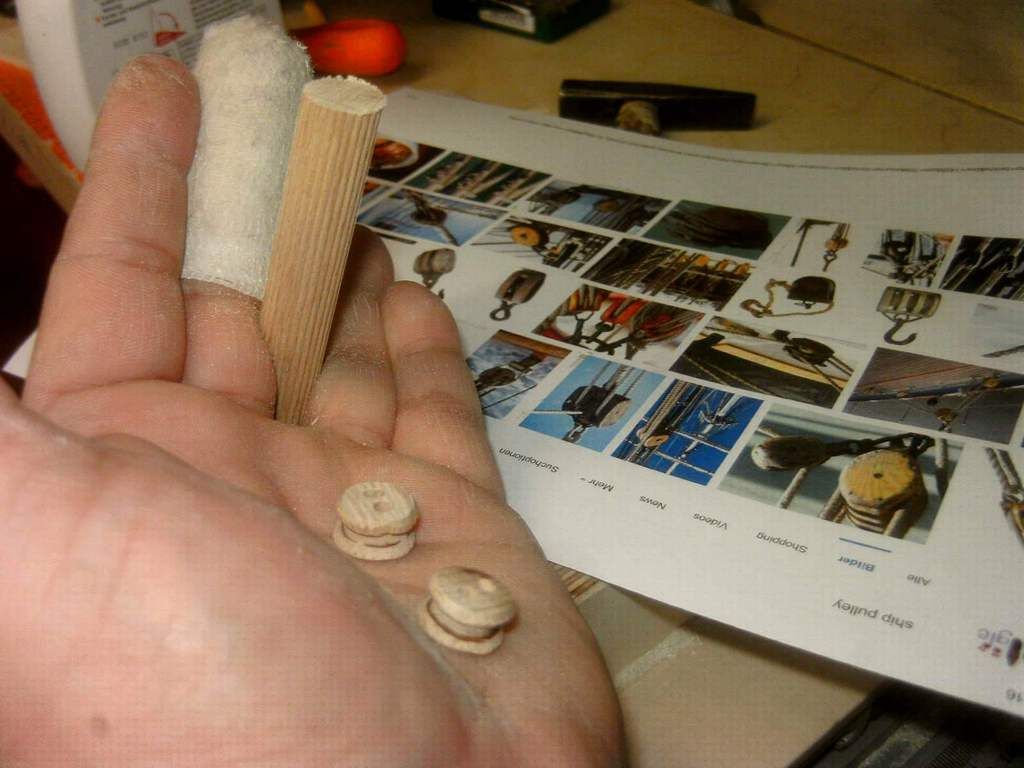
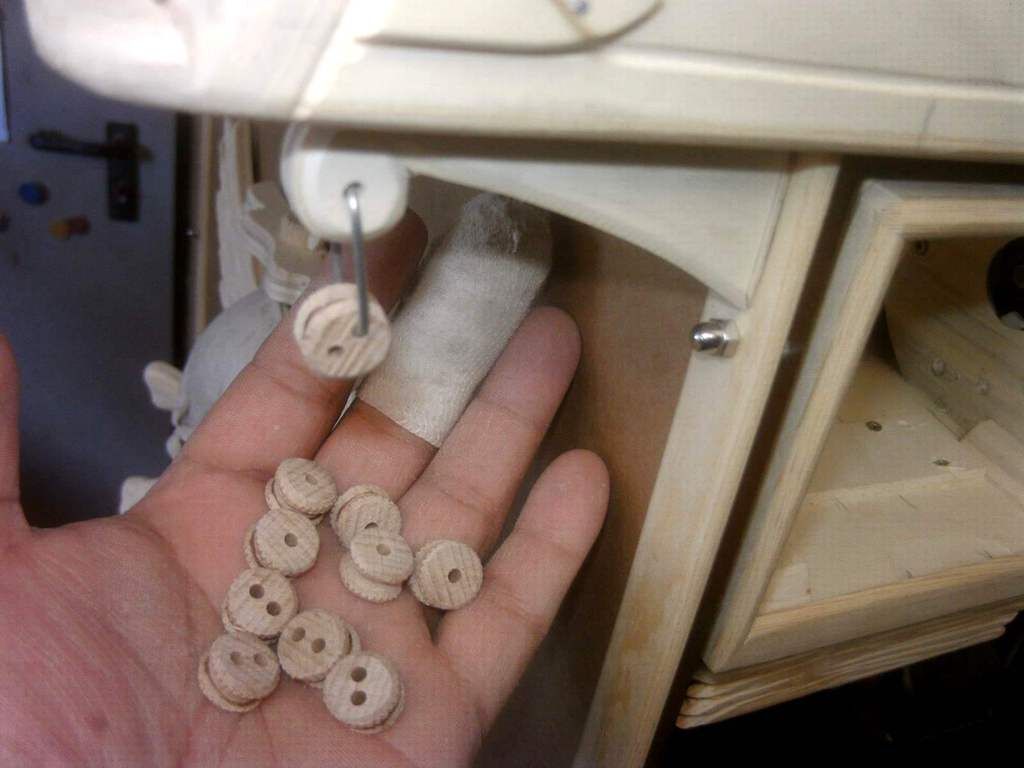
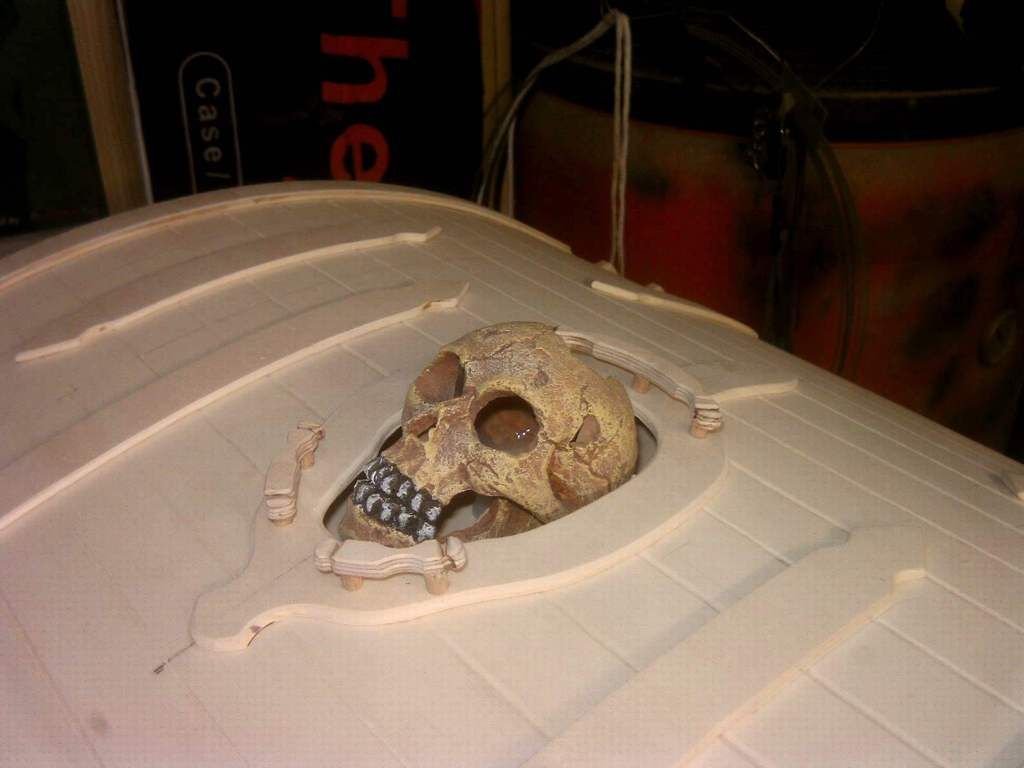
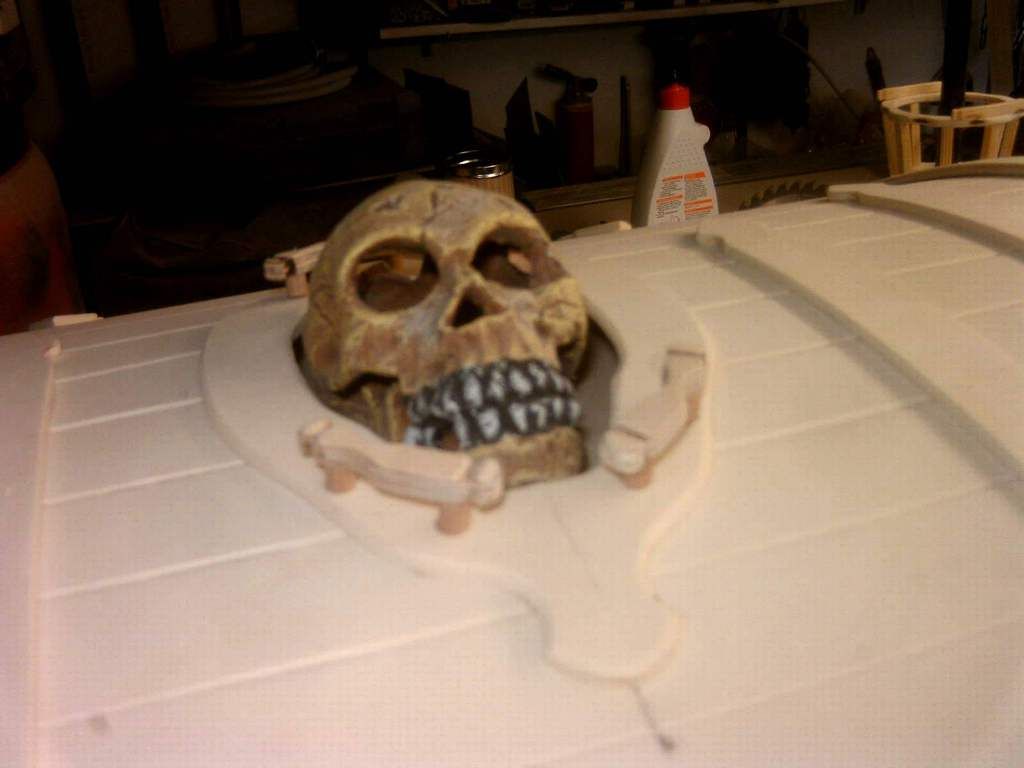
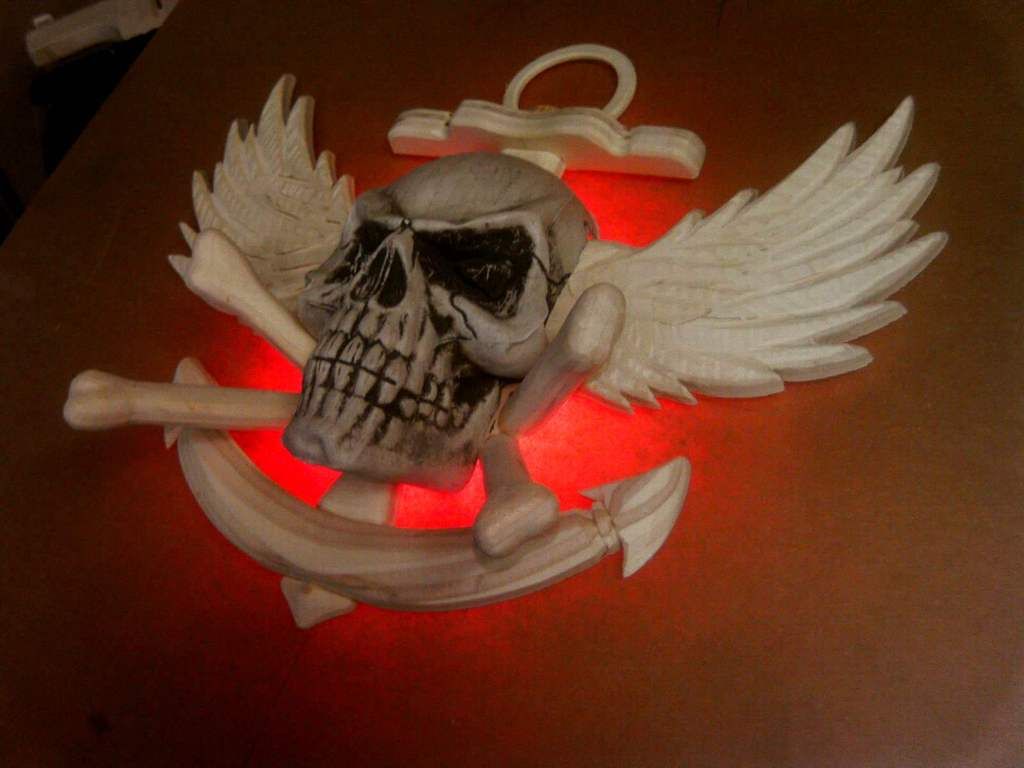
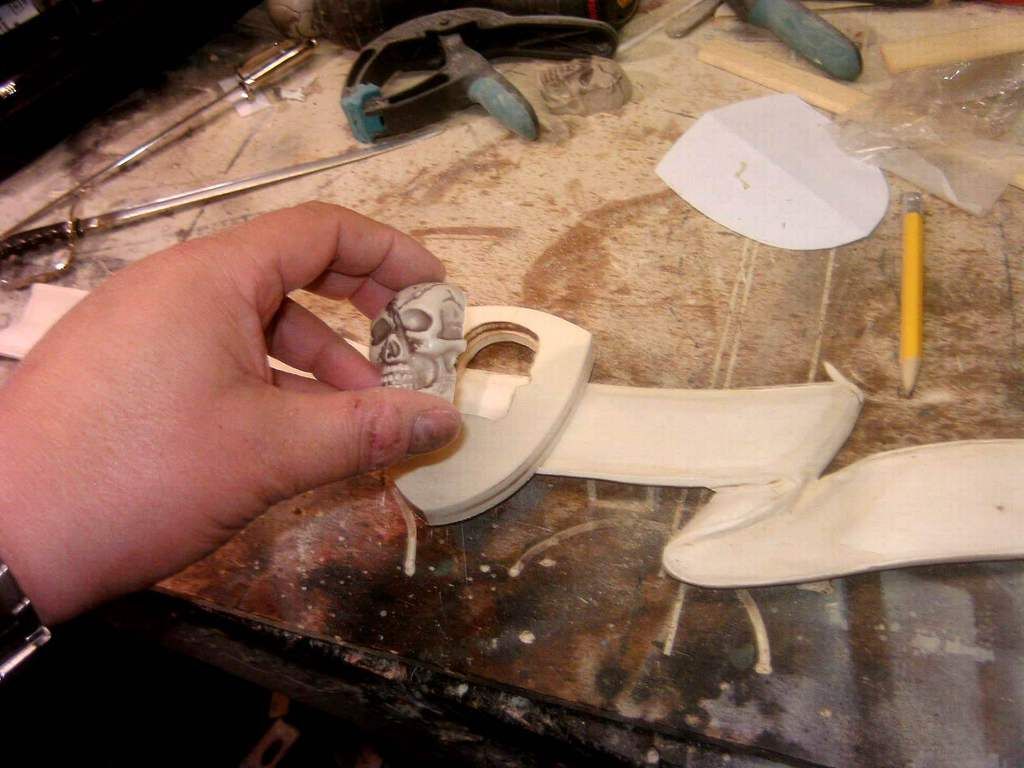
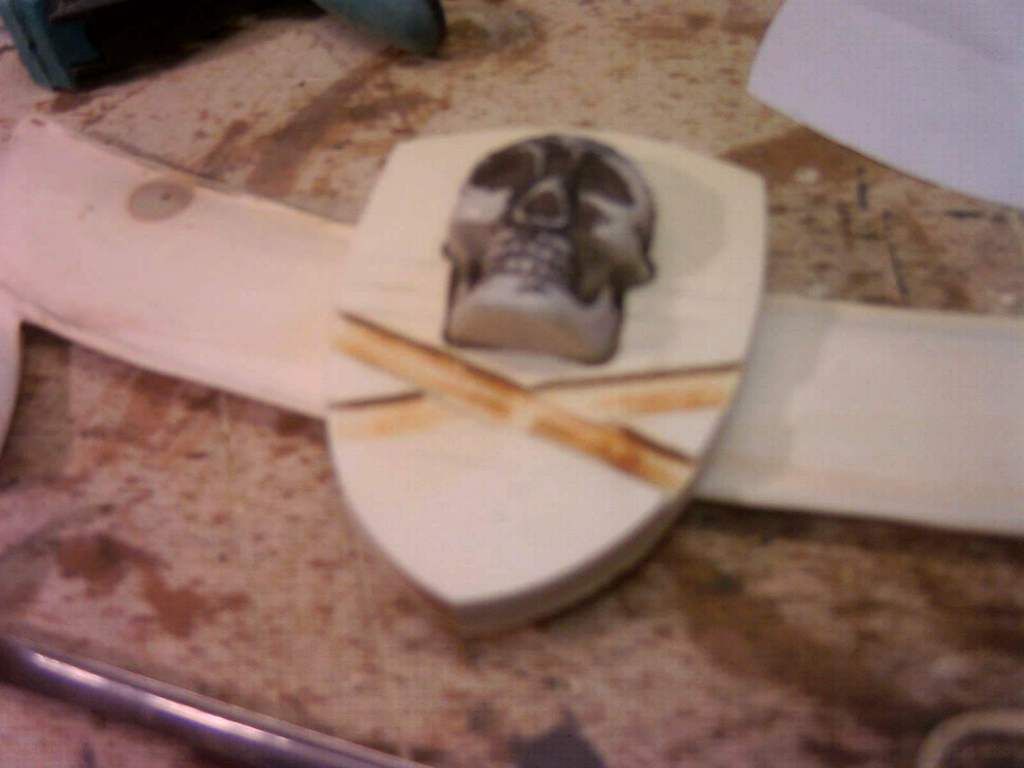
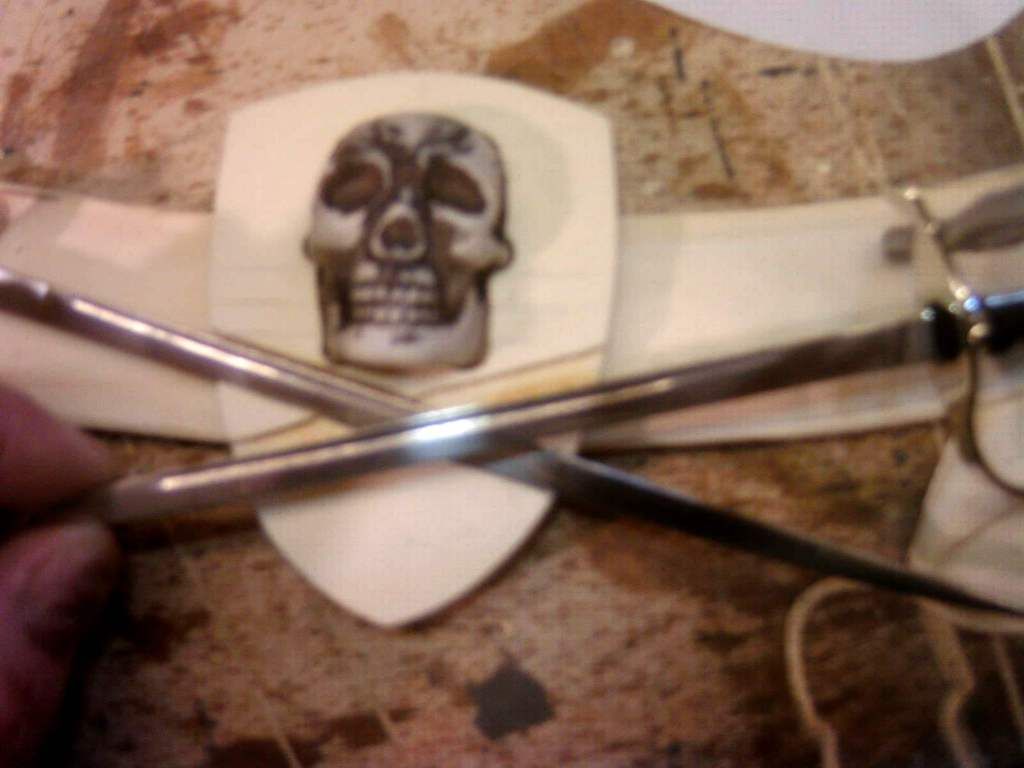
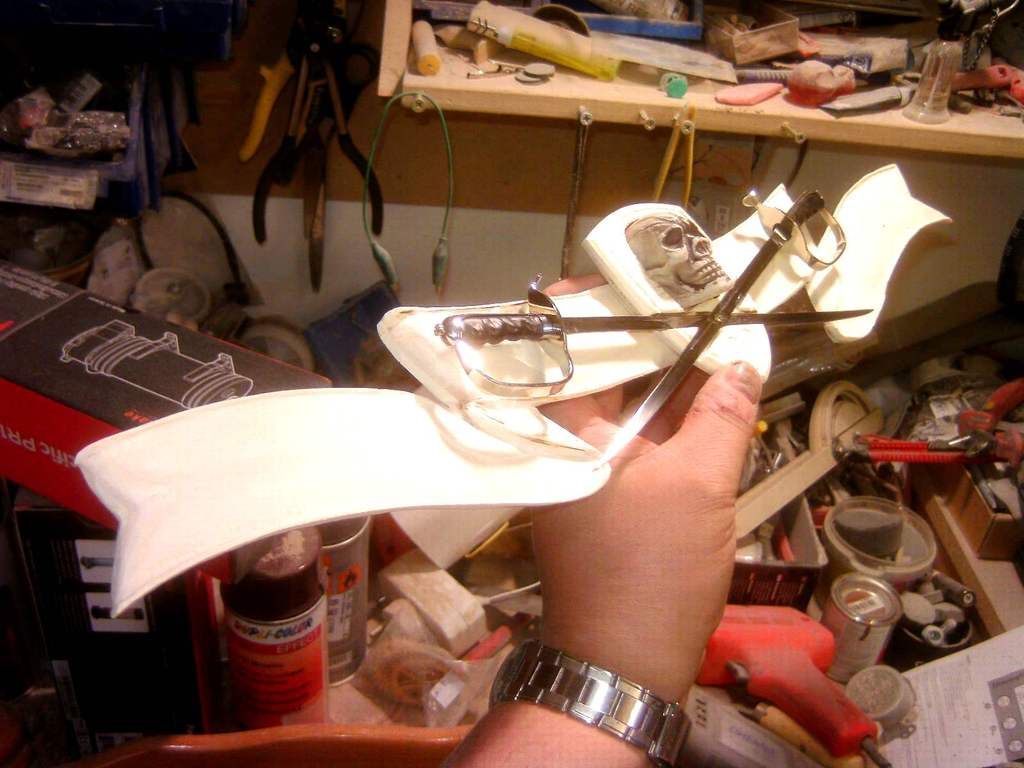
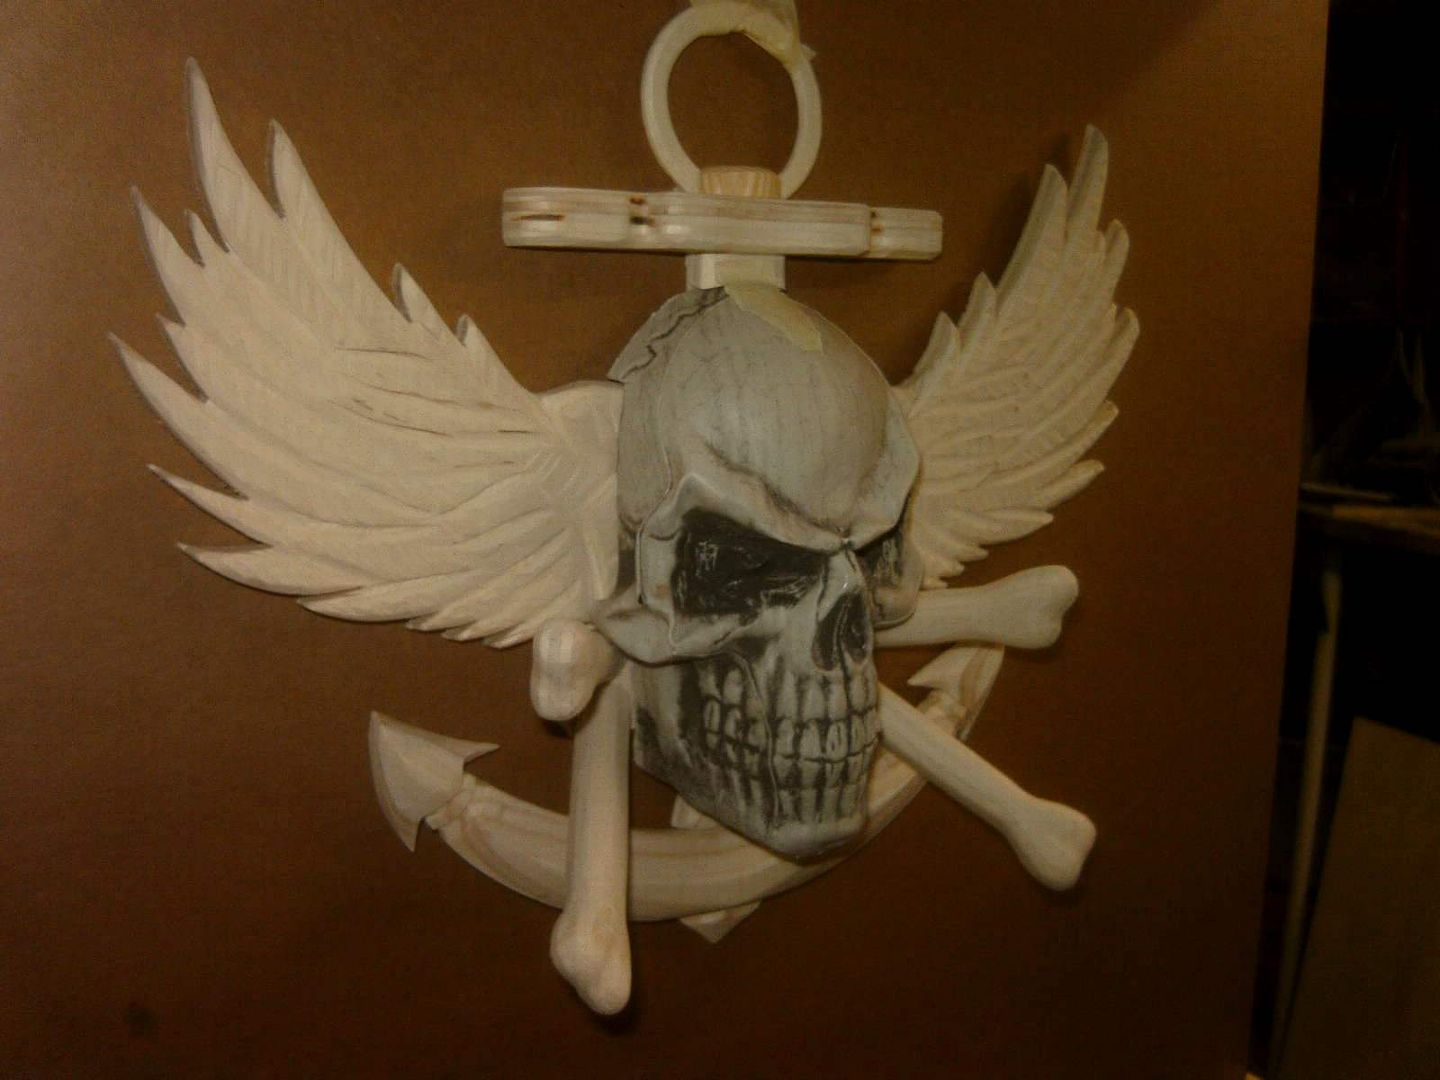
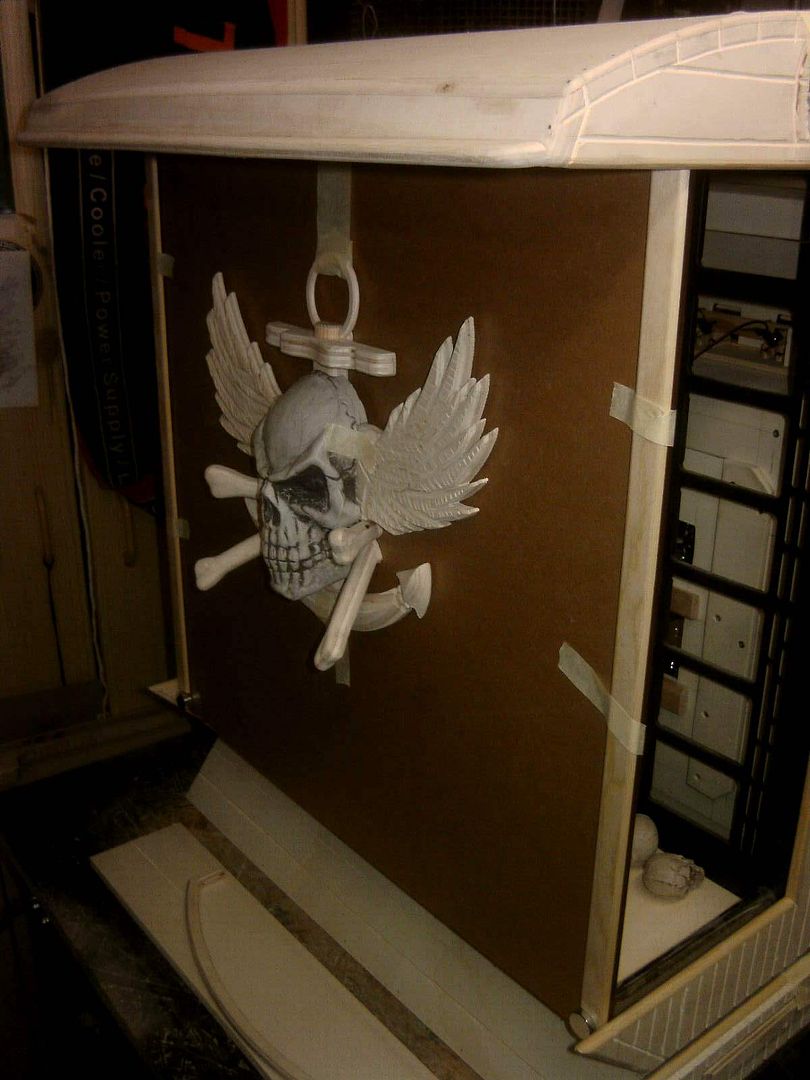
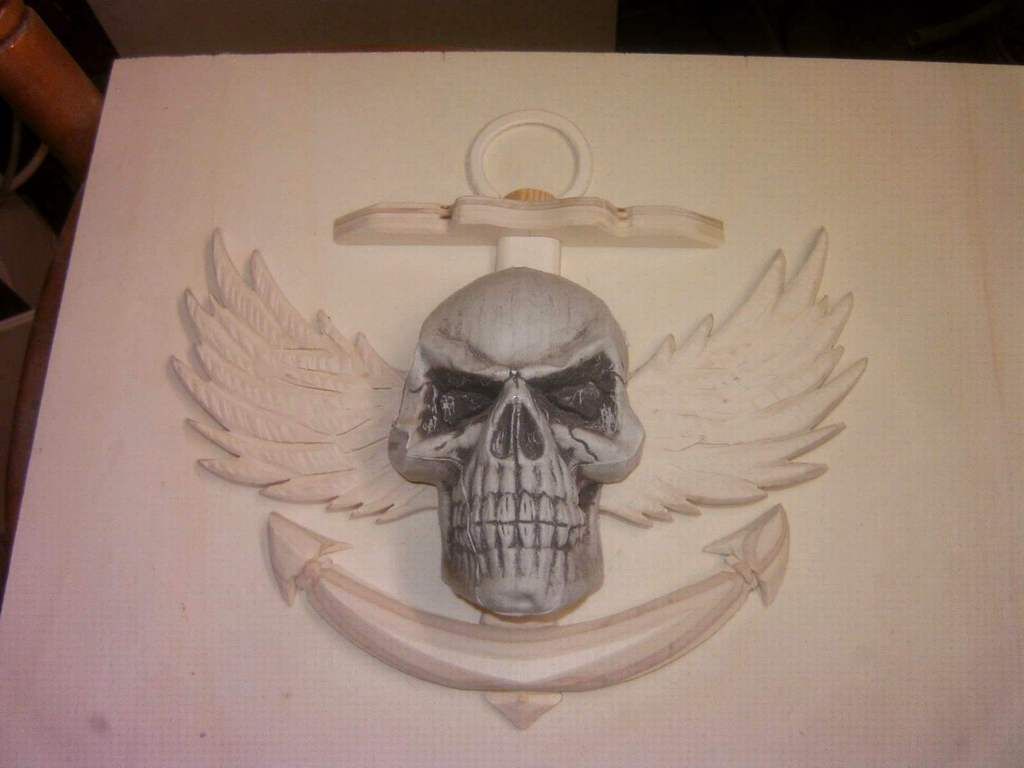
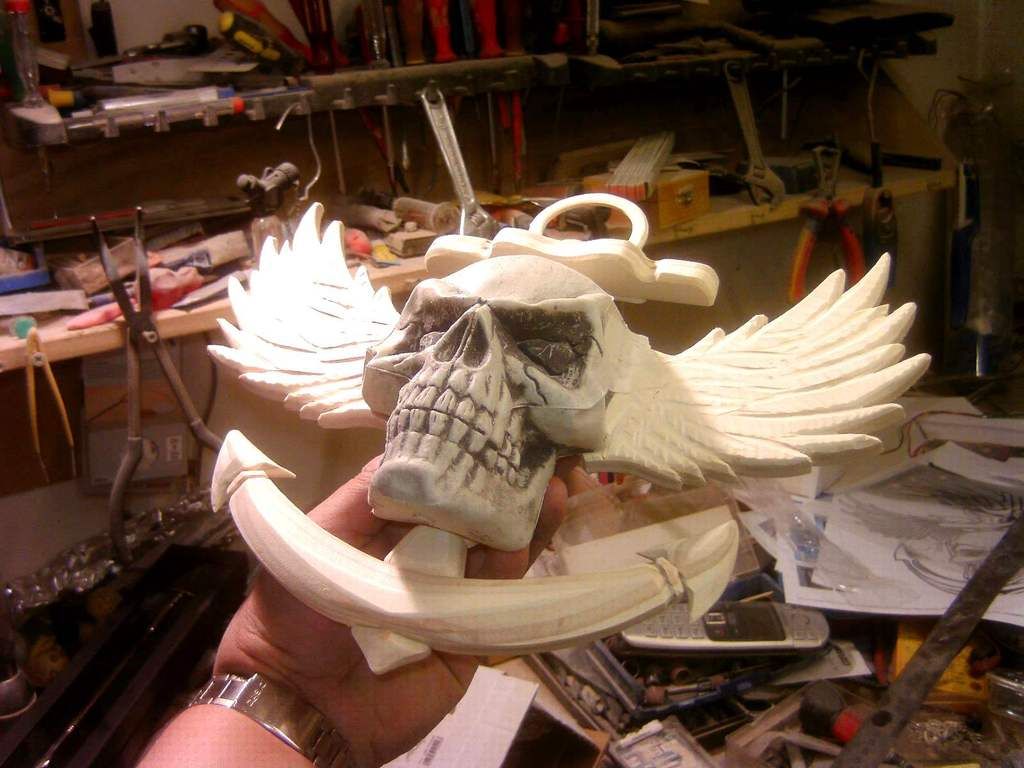
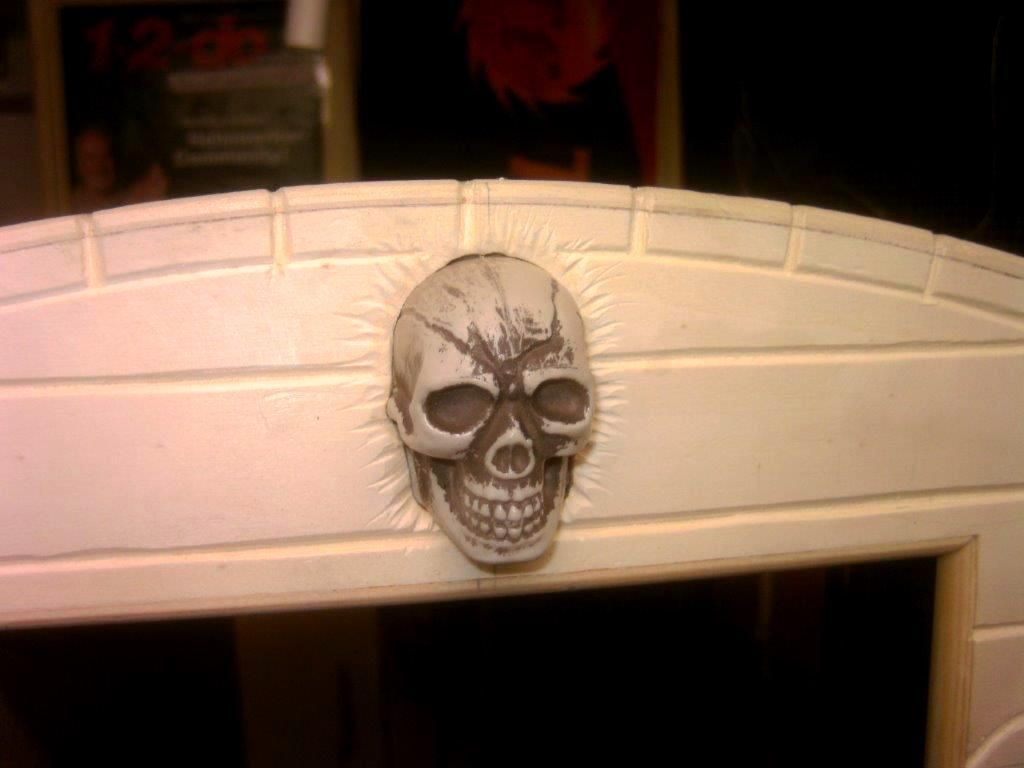
i also made a little badge type of sign for the back with skull n crossbones.

apart from that i also made a banister set for the top skull so that it has soome protection, a bit like a ships banister rail
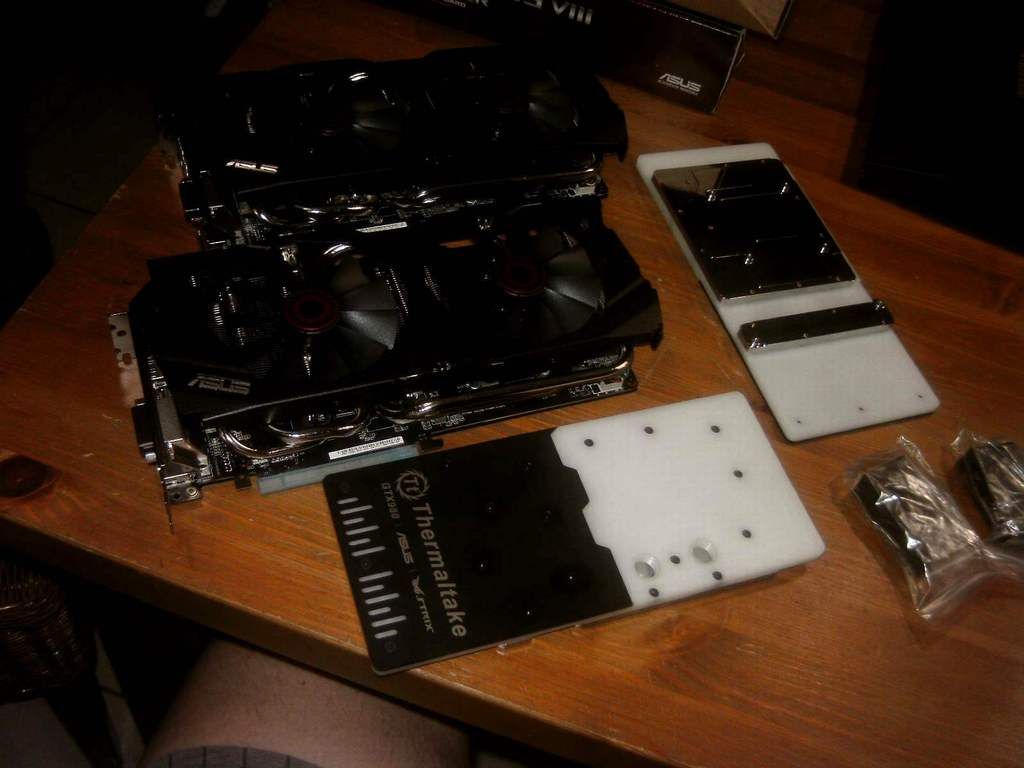
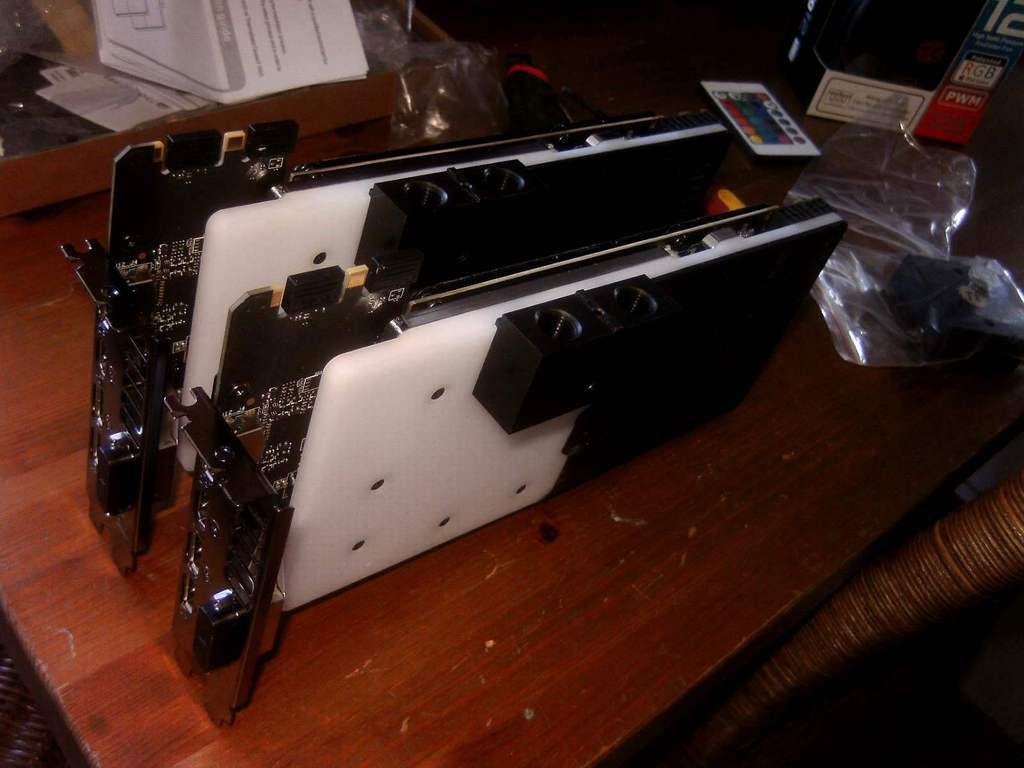
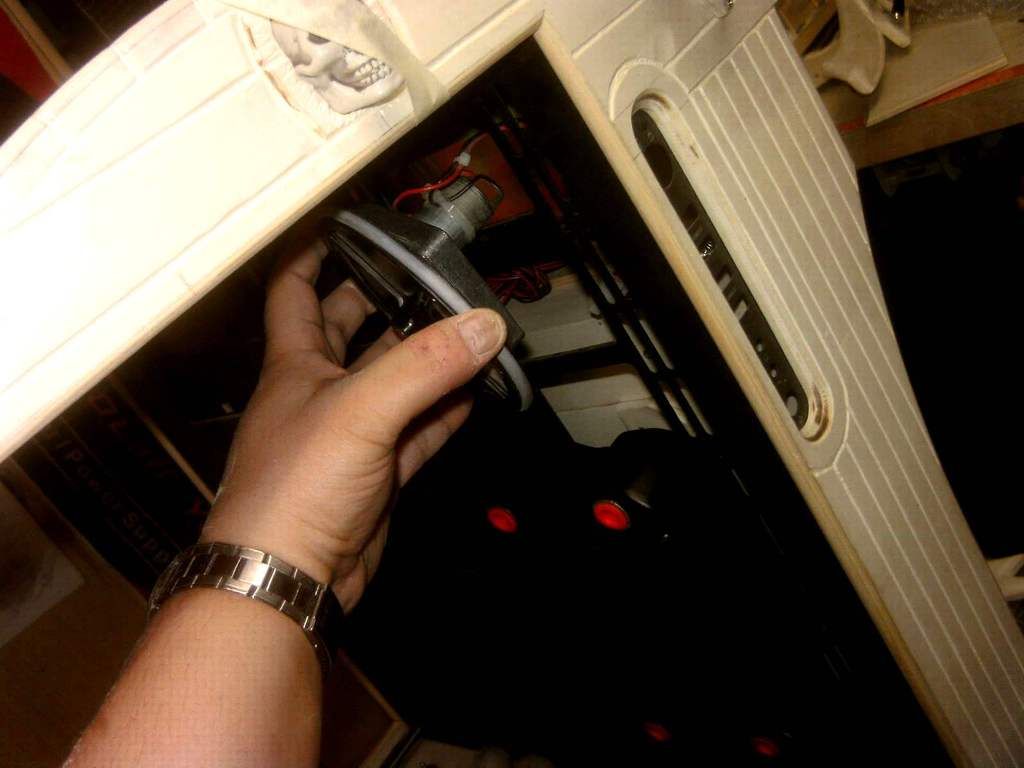
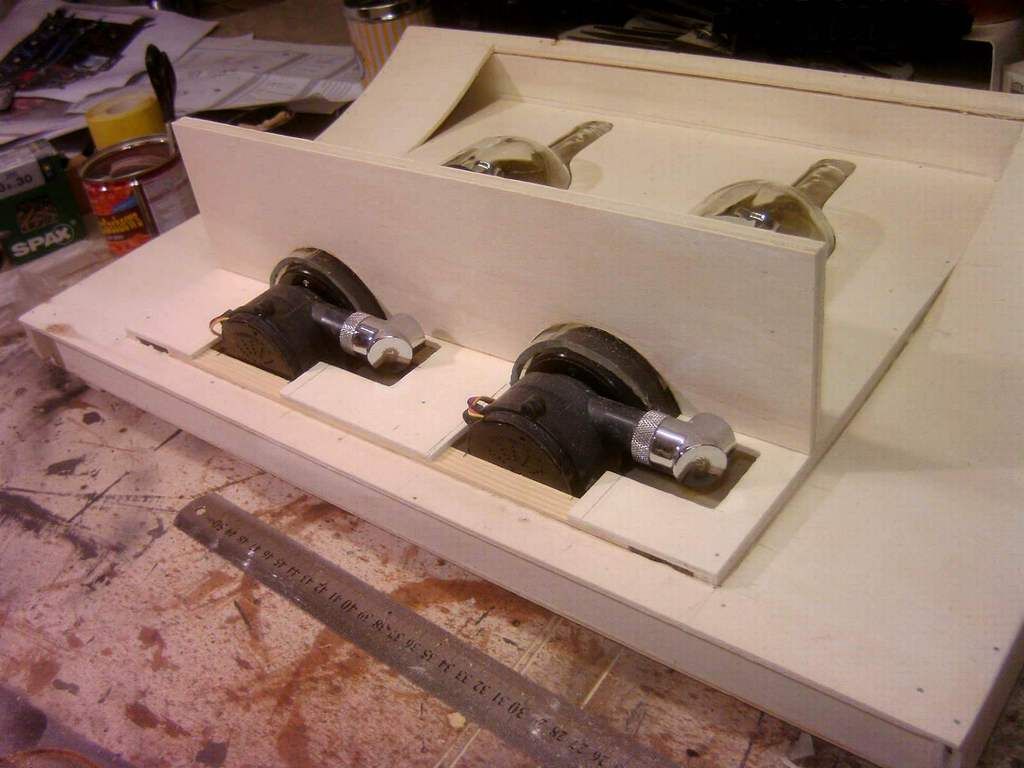
seeing as iwas about to start the interior i dismantled the garfikcard fan system and mounted the water blocks.
-
If you can work easily with wood, you are really an artist. Combined with technology, I may call you "Tecnoartist". Nice work!
thanks nkwoel i appreciate your remarks and like the term tecnoartist.
probably this one..
thanks nostalgia
Beautiful work! You are quite skilled and gifted!
thanks you, i am glad it appelas
Nice build, I love how you incorporated the liquid cooling reservoirs into the glass bottles.
thansk slugbig55, i hope they really look as i wante them too when the rum is in them
Wow!
They say the Devil is in the details and this thing chock-full of them.
I am completely impressed by the vision and use of the varying materials.
Can't wait to see the complete build.
thanks buschyx, yes i certainly love details, always delve into them and try to stay true to the theme. color will liven this one up soon.
-
-
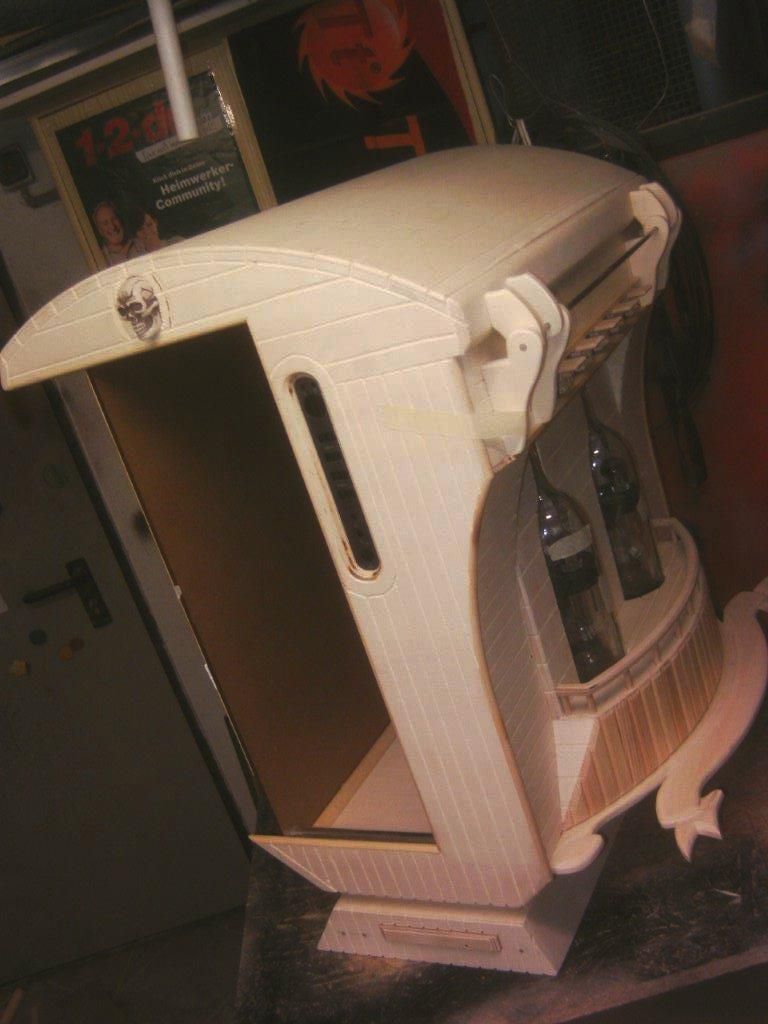
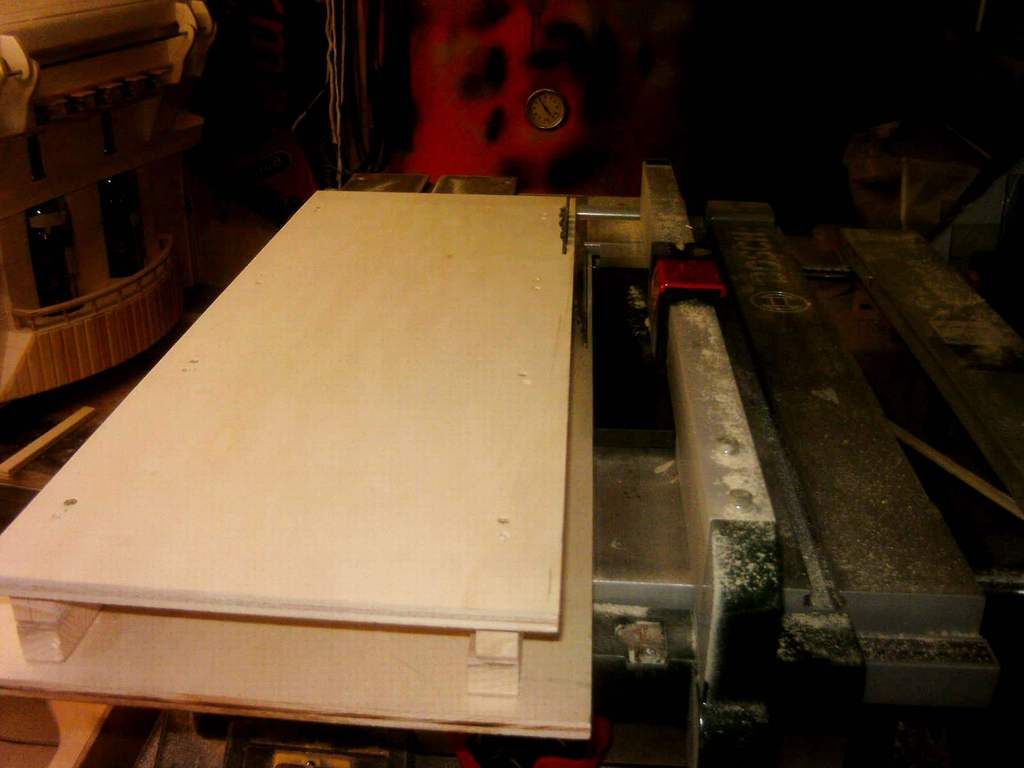
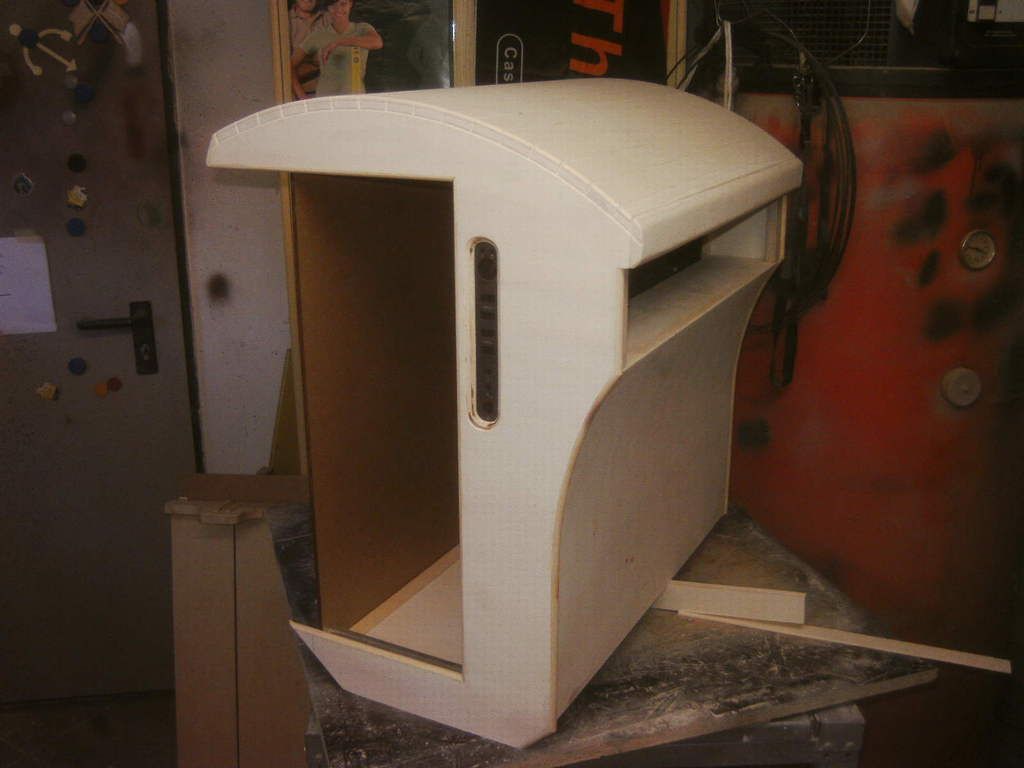
hi guys, i am really looking forward to getting some color on this soon.
am pretty much finished with the exterior and will now start integrating hardware, finding its places etc.. making some parts for the interior.
then its breakdown time.
anyway.
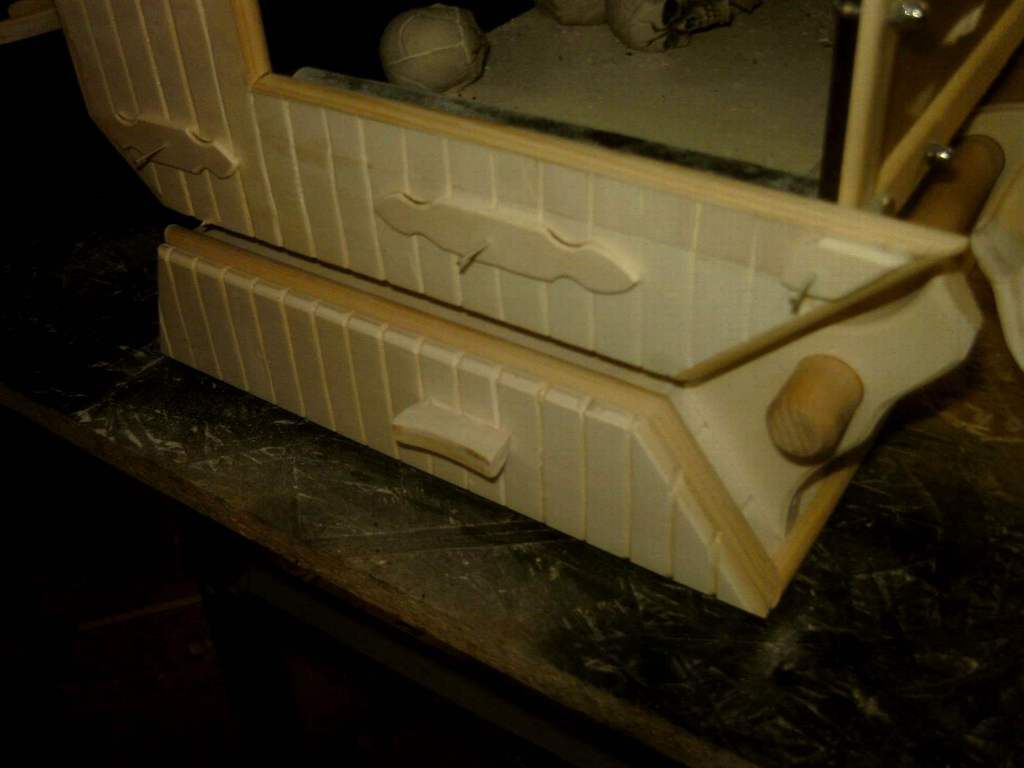
i made a little hanging sign like from old weathered wood for the monitor front.
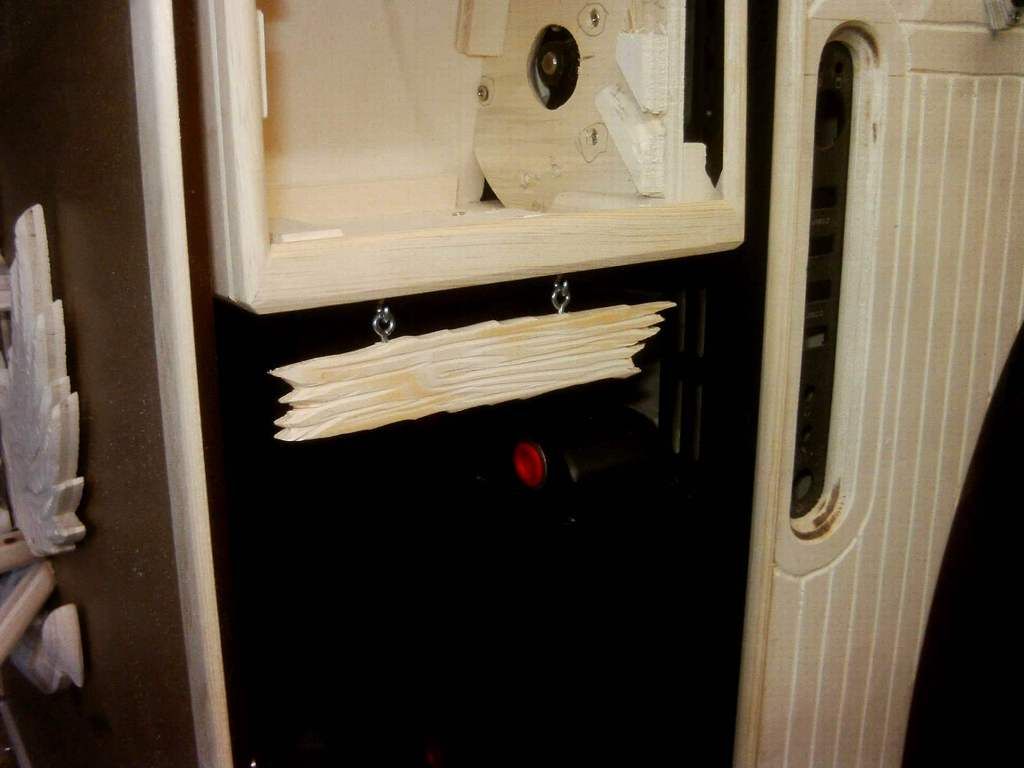
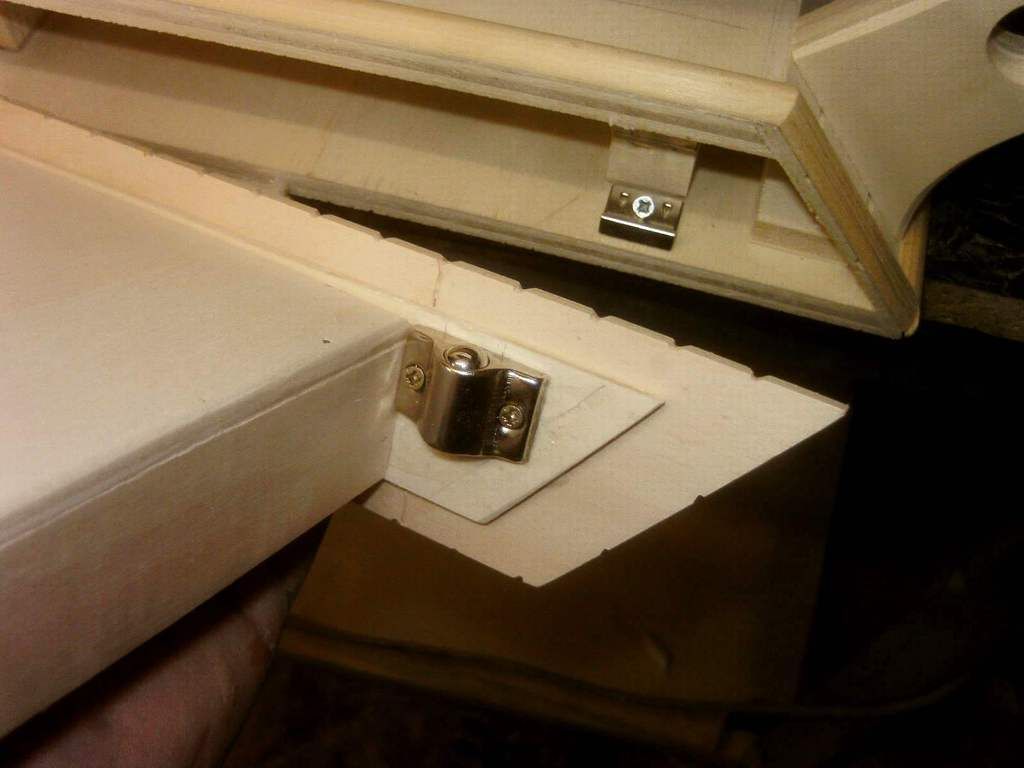
apart from that i started the last fittings, here in wood, later iron of course.
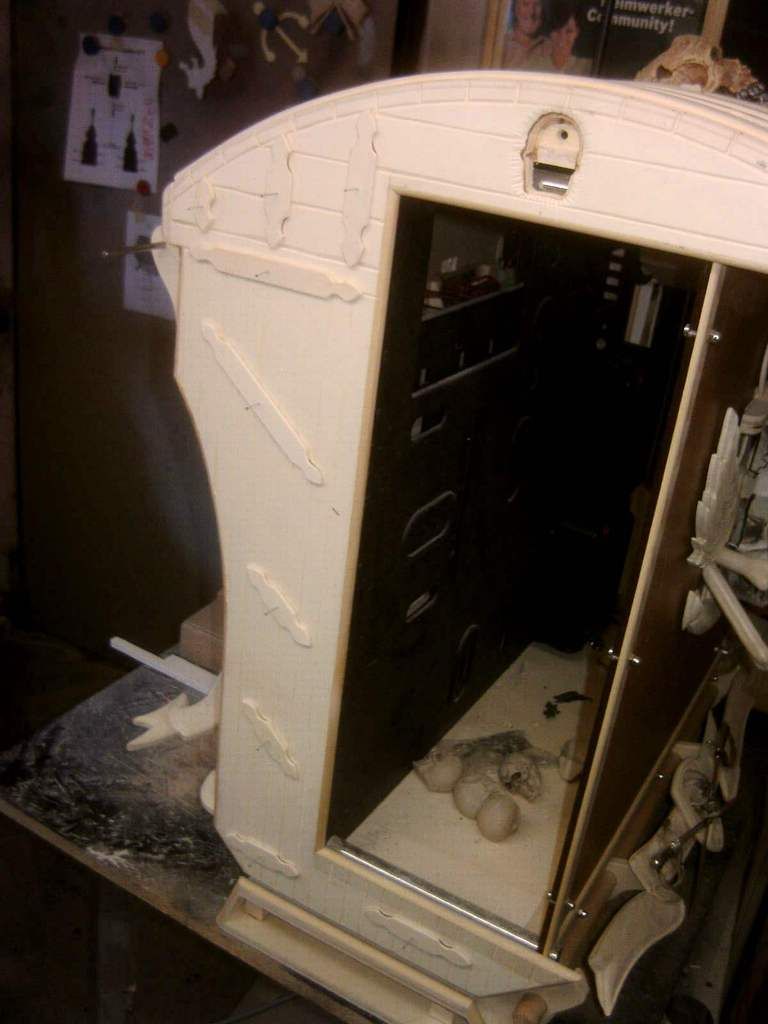
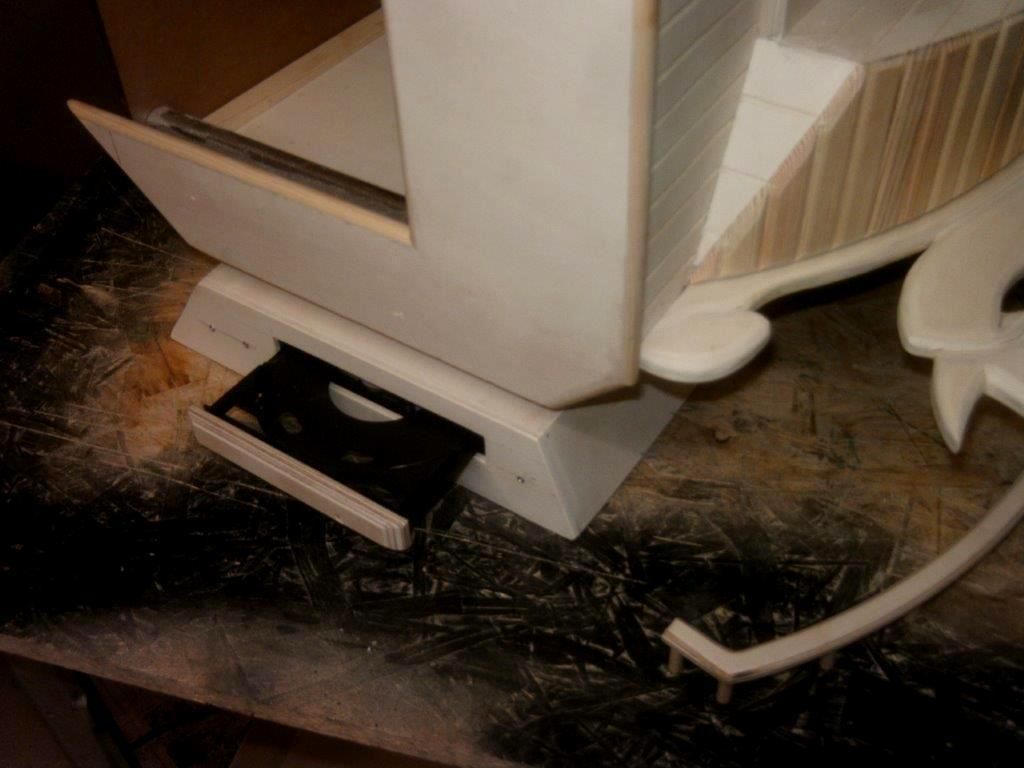
i made the drawer which will contain the keyboard in the base
with a iron ball snap in fitting and handle to keep it in

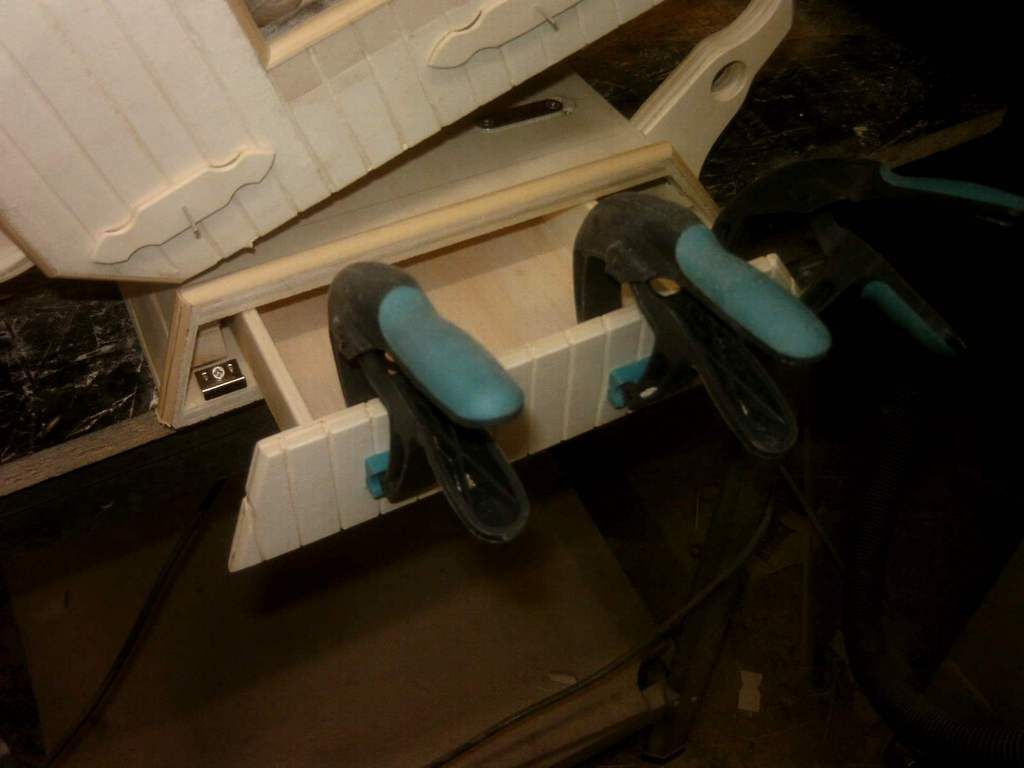

-
hi guys, and here is a little update again
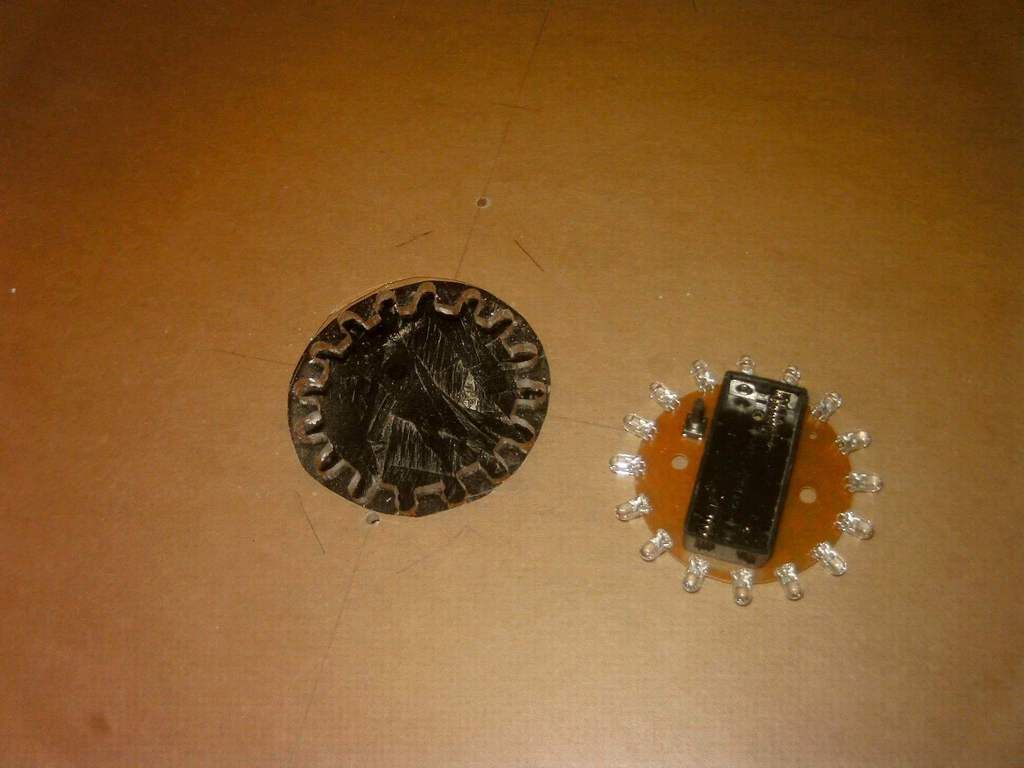
i found this little led ringlet with a few effects too at the local car parts store. seeing as its battery driven and u can hence put it behind the front shield of arms in the plexi windows with out having to run a wire to it, i decided thats gonna be integrated there.
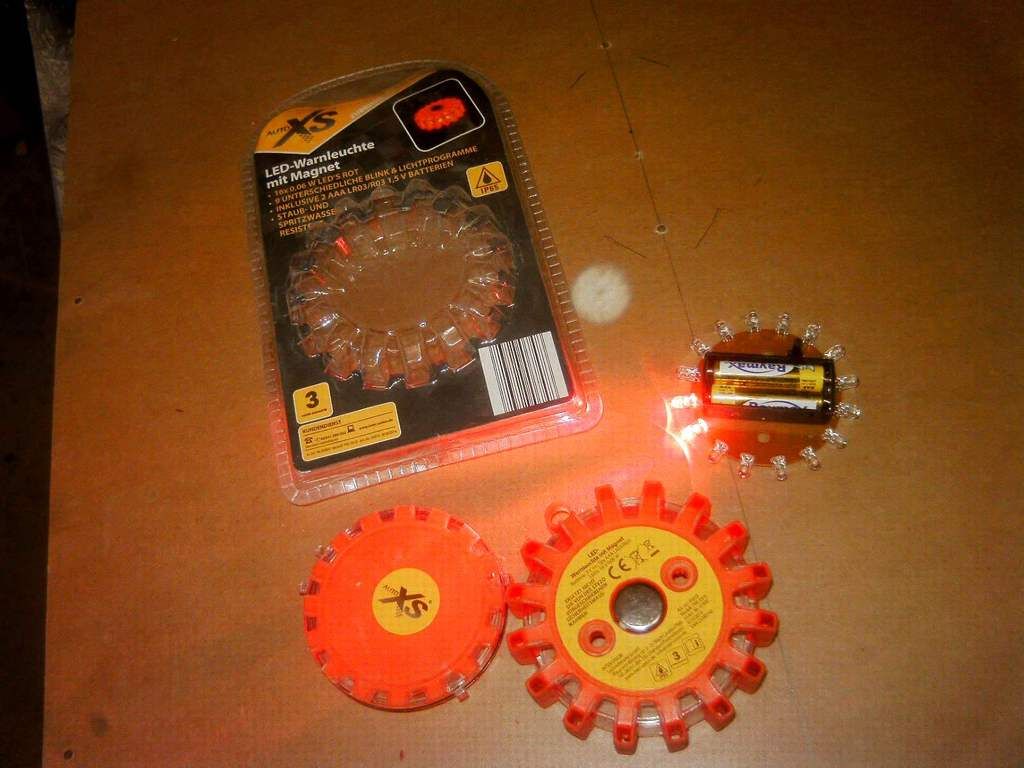
i cut the pattern in the middle of the windows, it will be hidden behind the shield but will difuse the light through the polished sides in every direction.

the protective sticky paper is still on, when its off it will be even better.
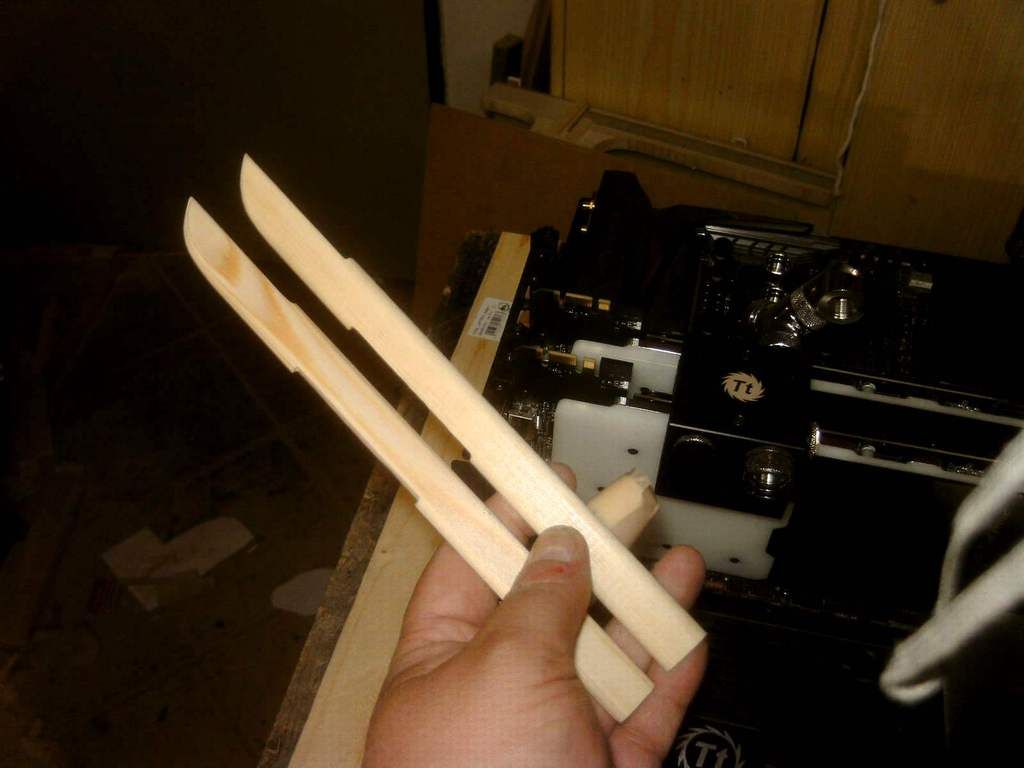
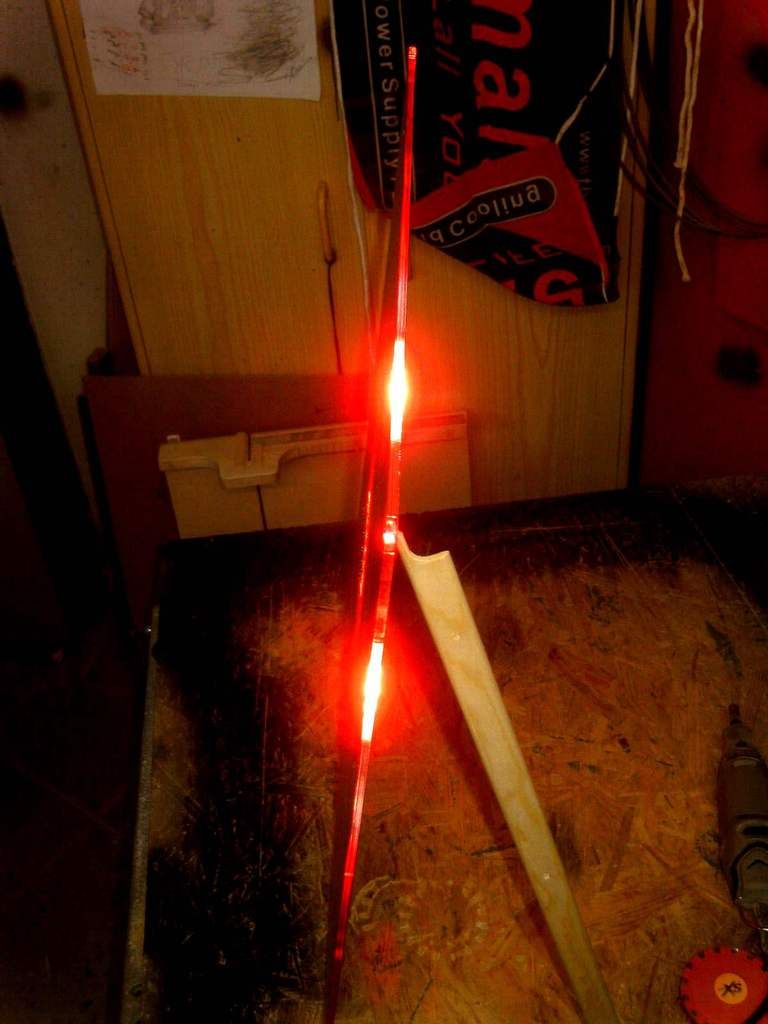
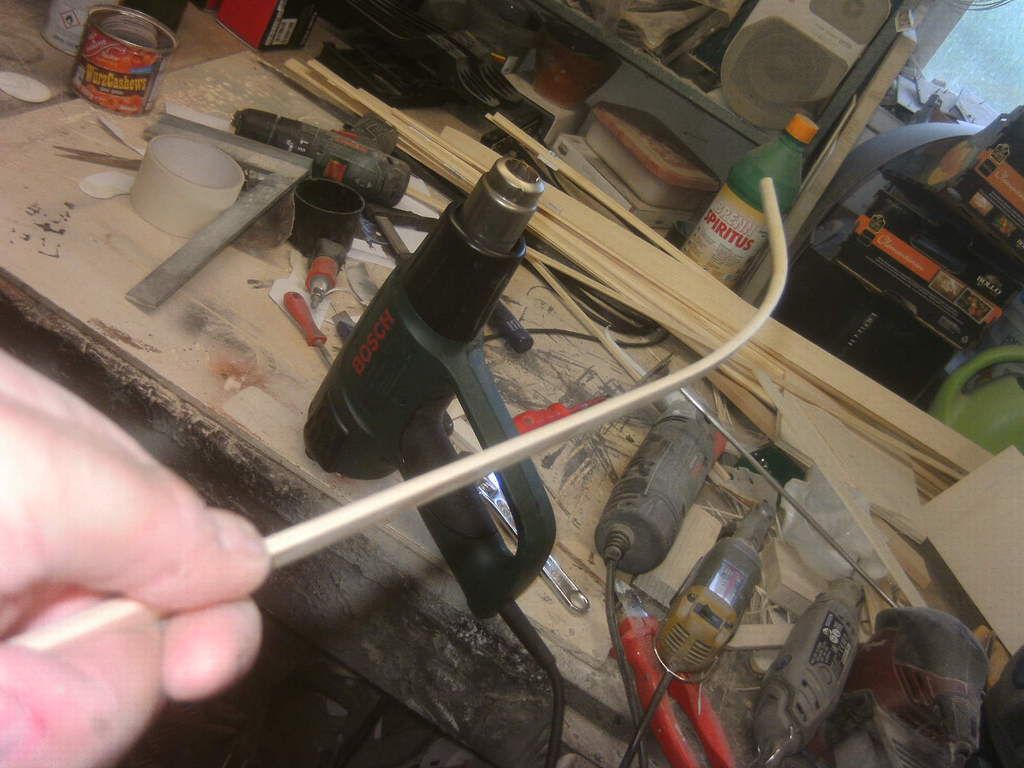
these wooden strips will later in change into iron fittings. wait and see.
-
hi guys, here is yesterdays progress with two little quickie vdeos too.
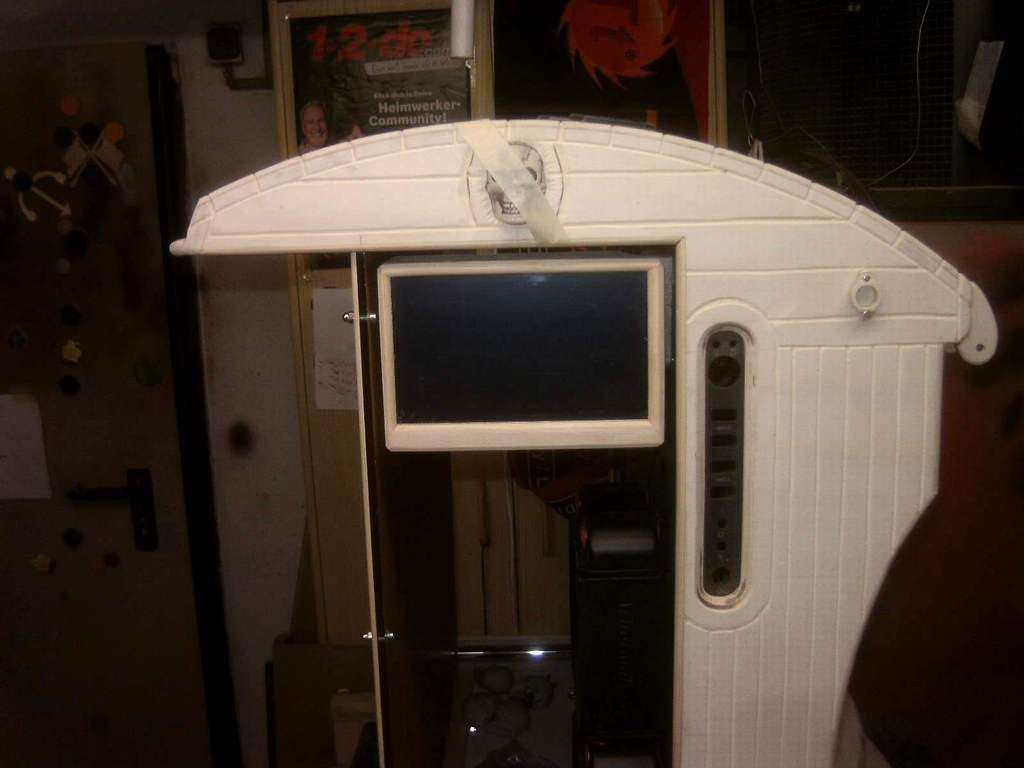
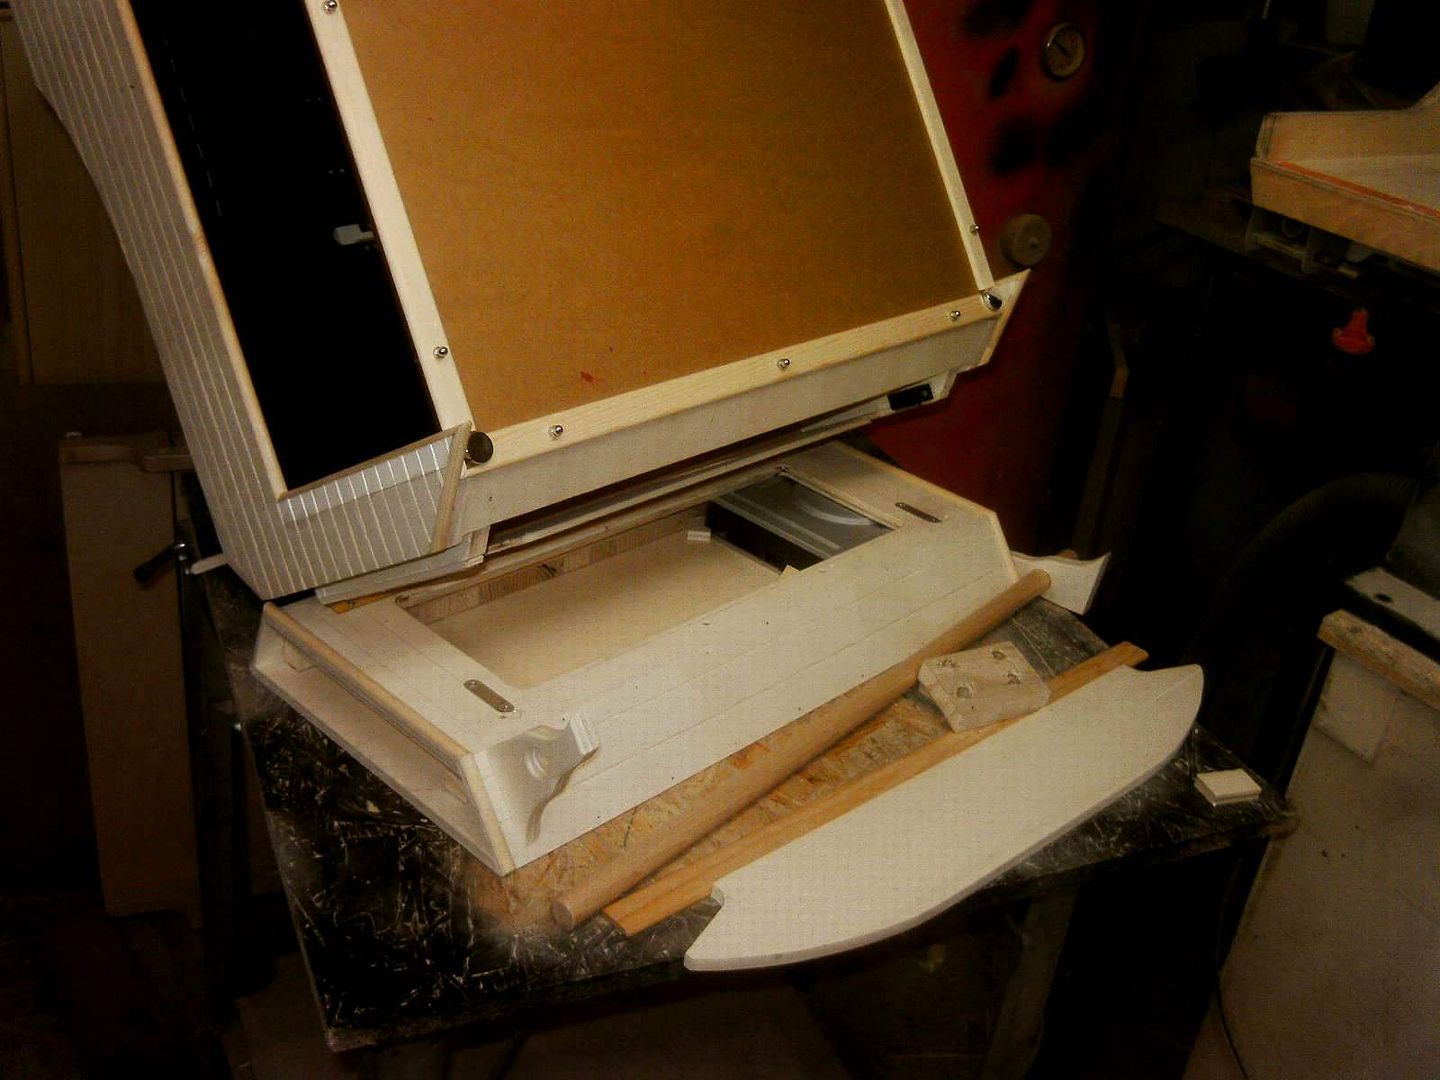
i had some space issues with the swivel in monitor and was tight for space but managed ti integrate it in the end after changing the design and reducing the monitor frame as much as possible. now its mounted and works, not powered yet. the radiators have found the right place too.
i found this 12v motor in ebay, dont really know what it was originally for, but it was cheap and is well transmitted and works at the required speed with 5v too.
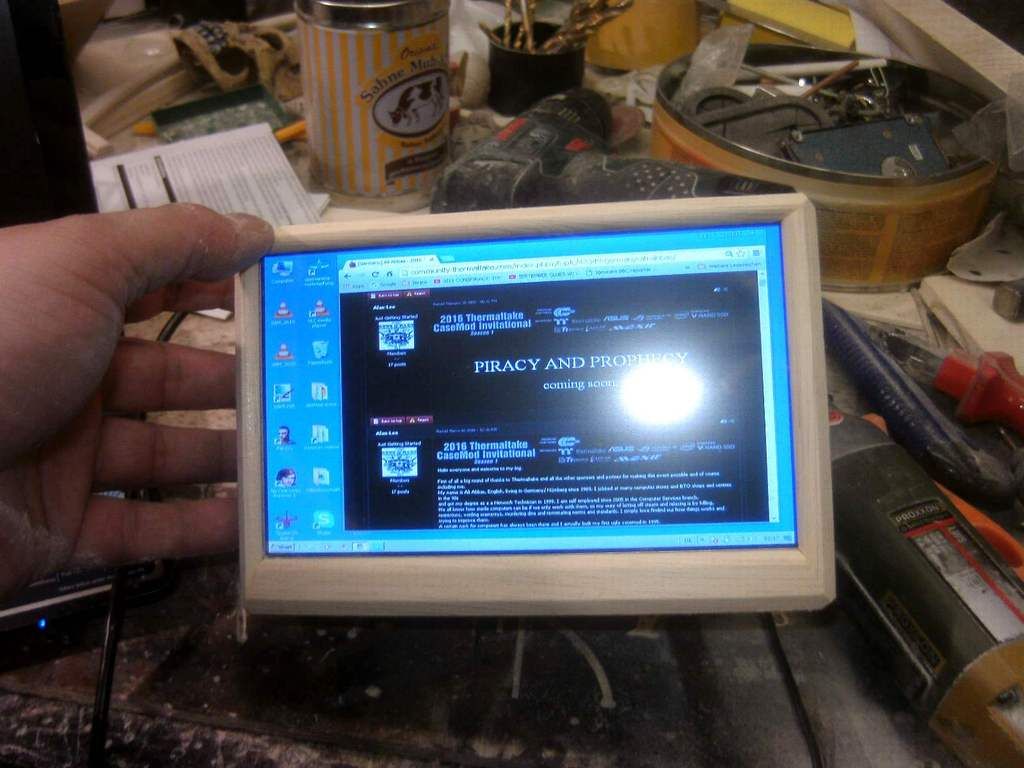
started making the moniotor housing, the 7" monitor is a touch screen and will give me a control over the whole pc even when a regular monitor is not connected. when concealed by swivelling it up, none can then access the pc, even if its running.


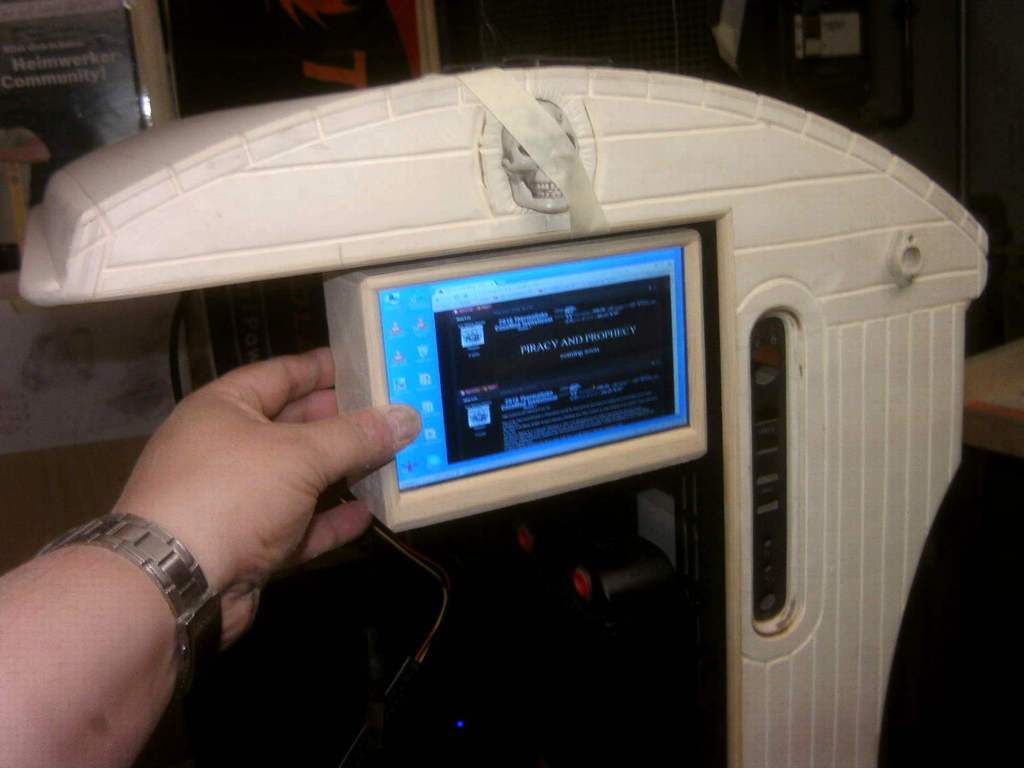
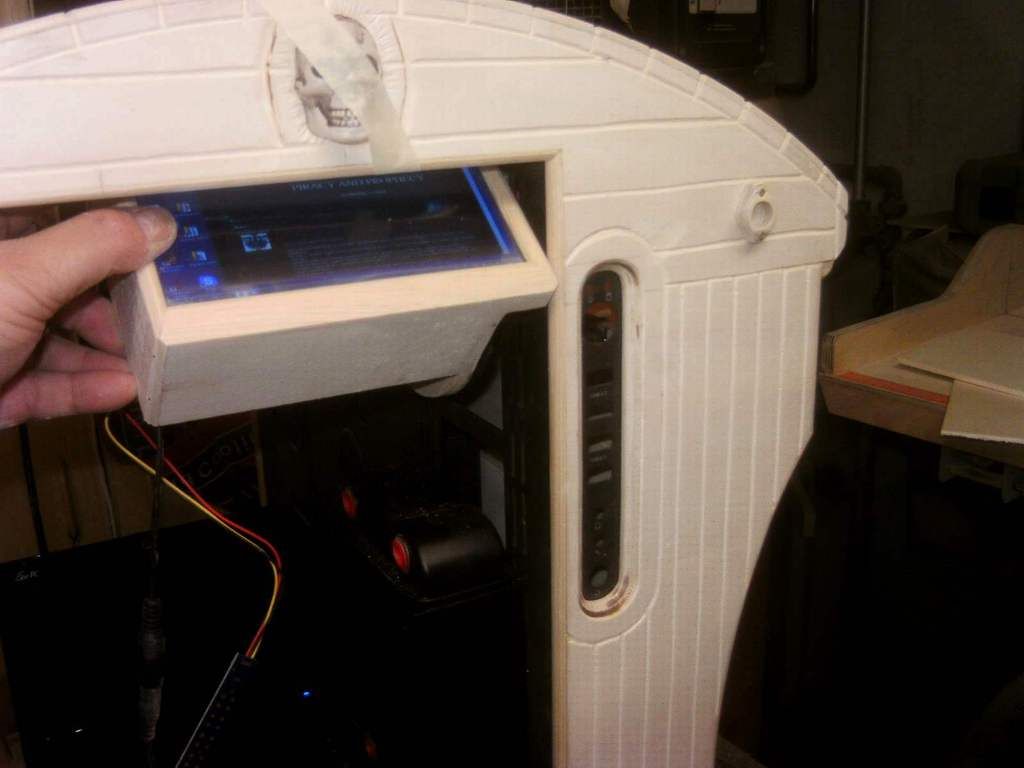
as you can see in the video too, i just barely managed to fit it with approx 2mm of play room left. whew!!!
and here is avideo i made to show that the self made back snap up system works.
-
-
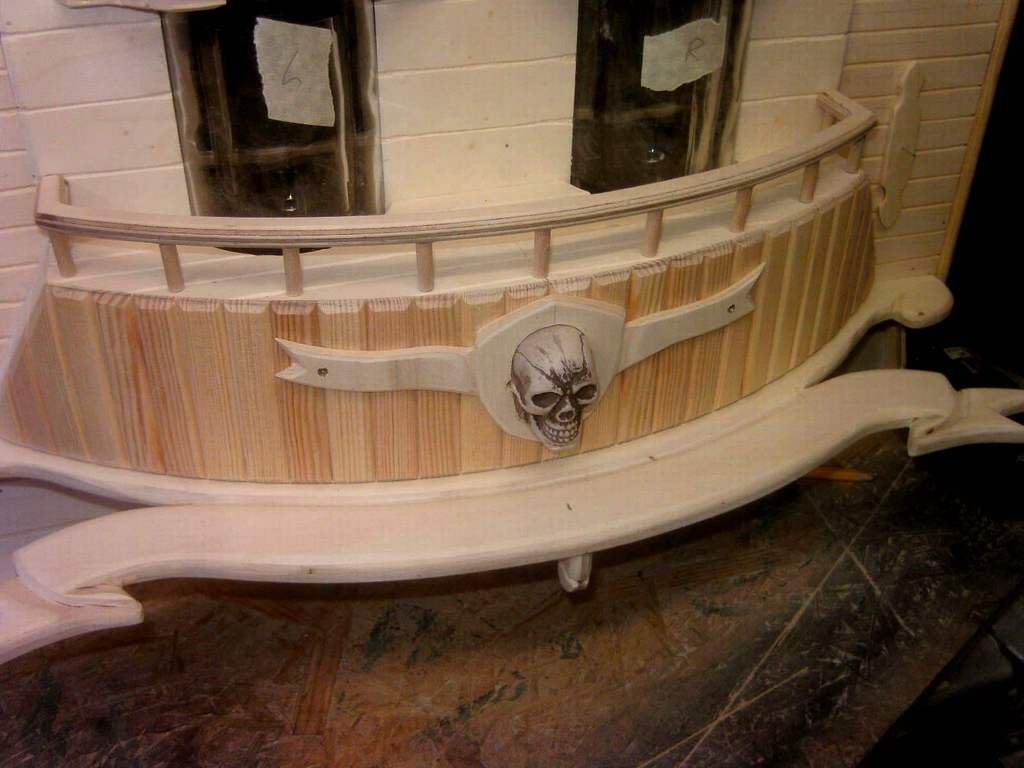
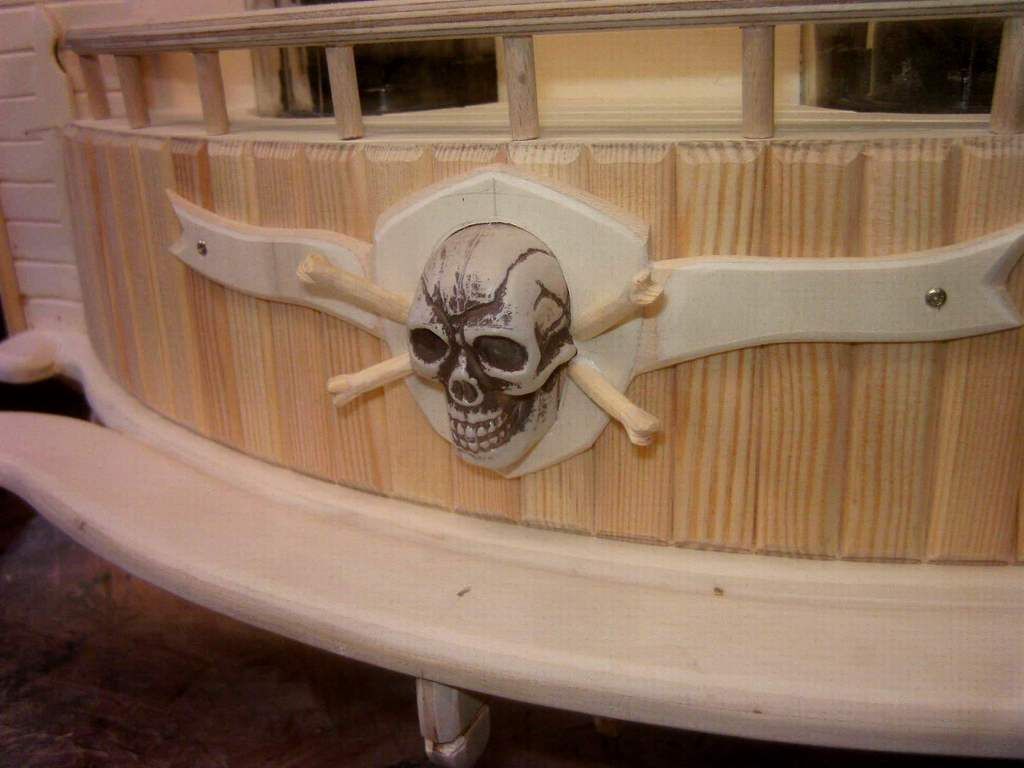
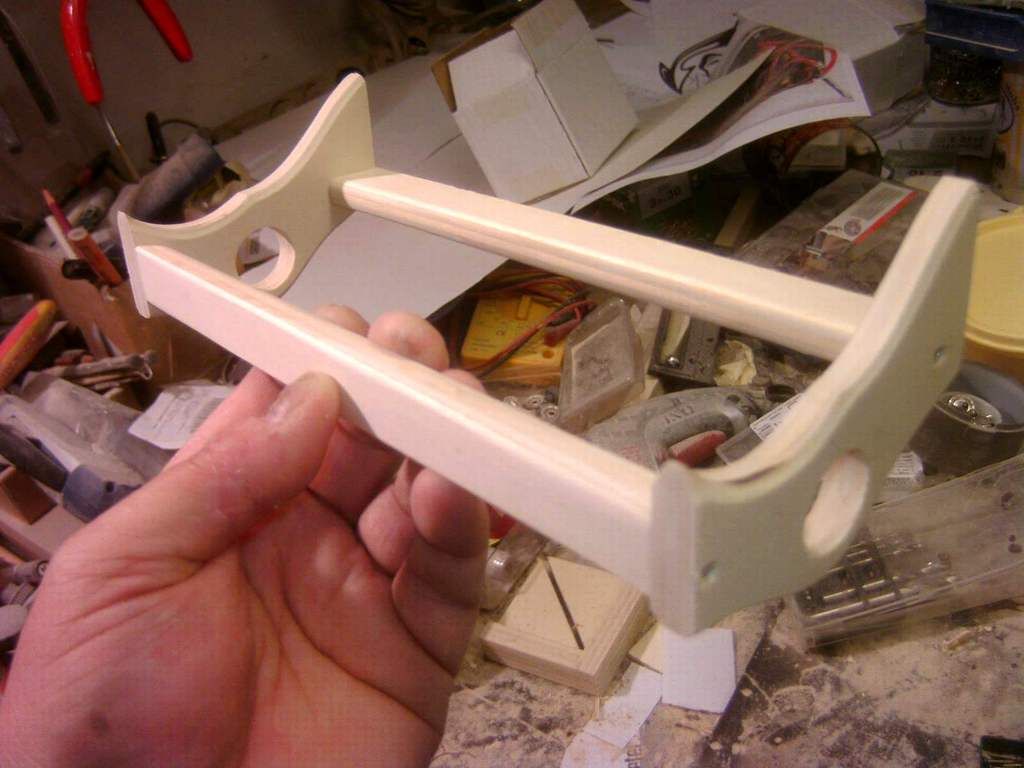
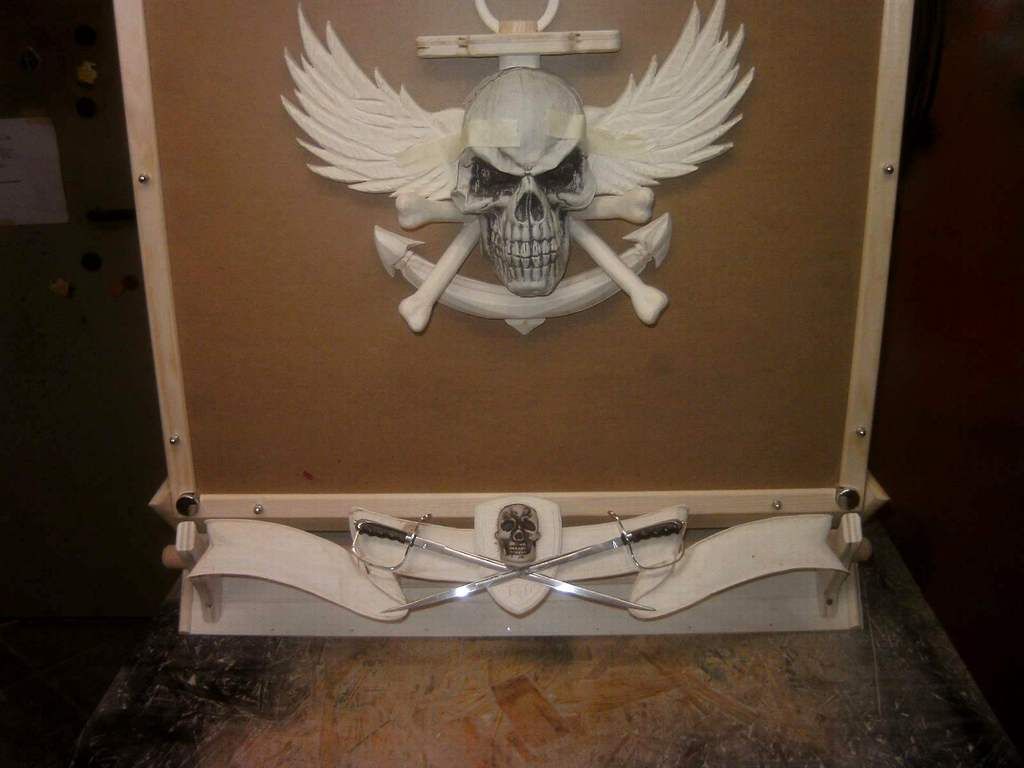
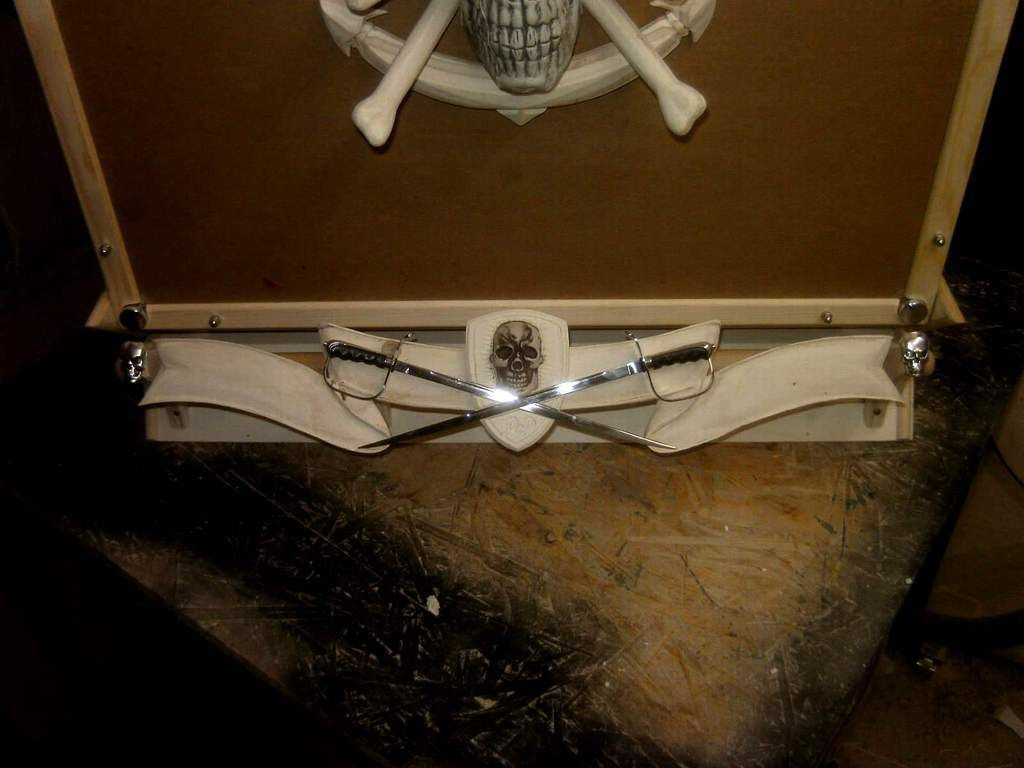
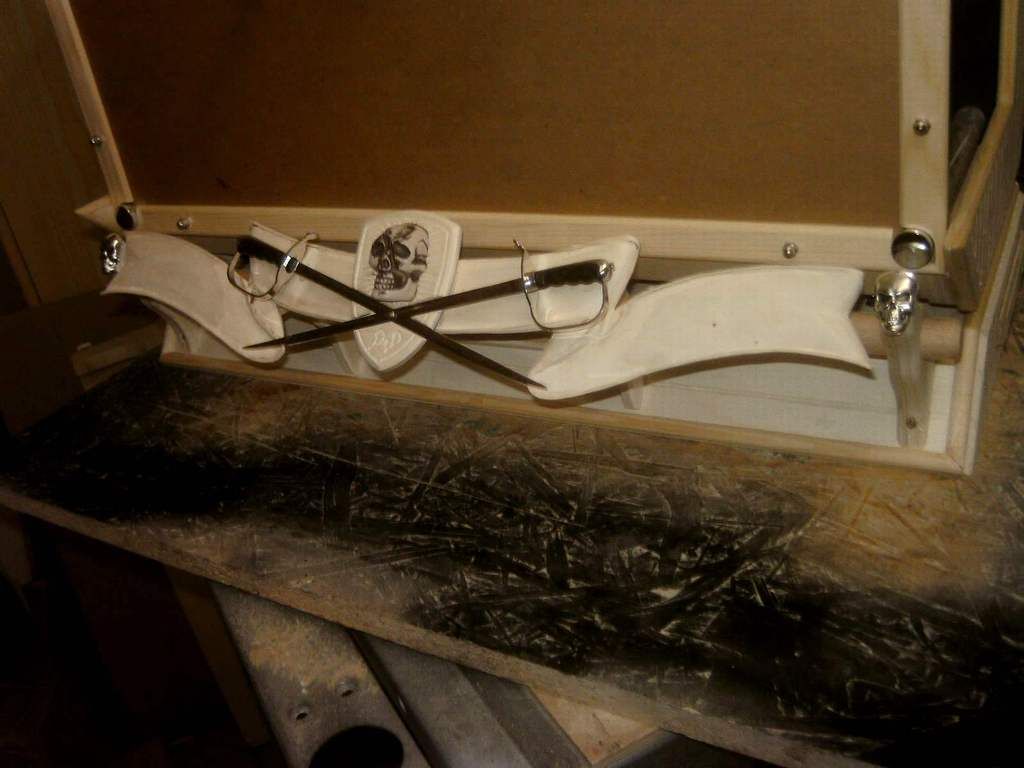
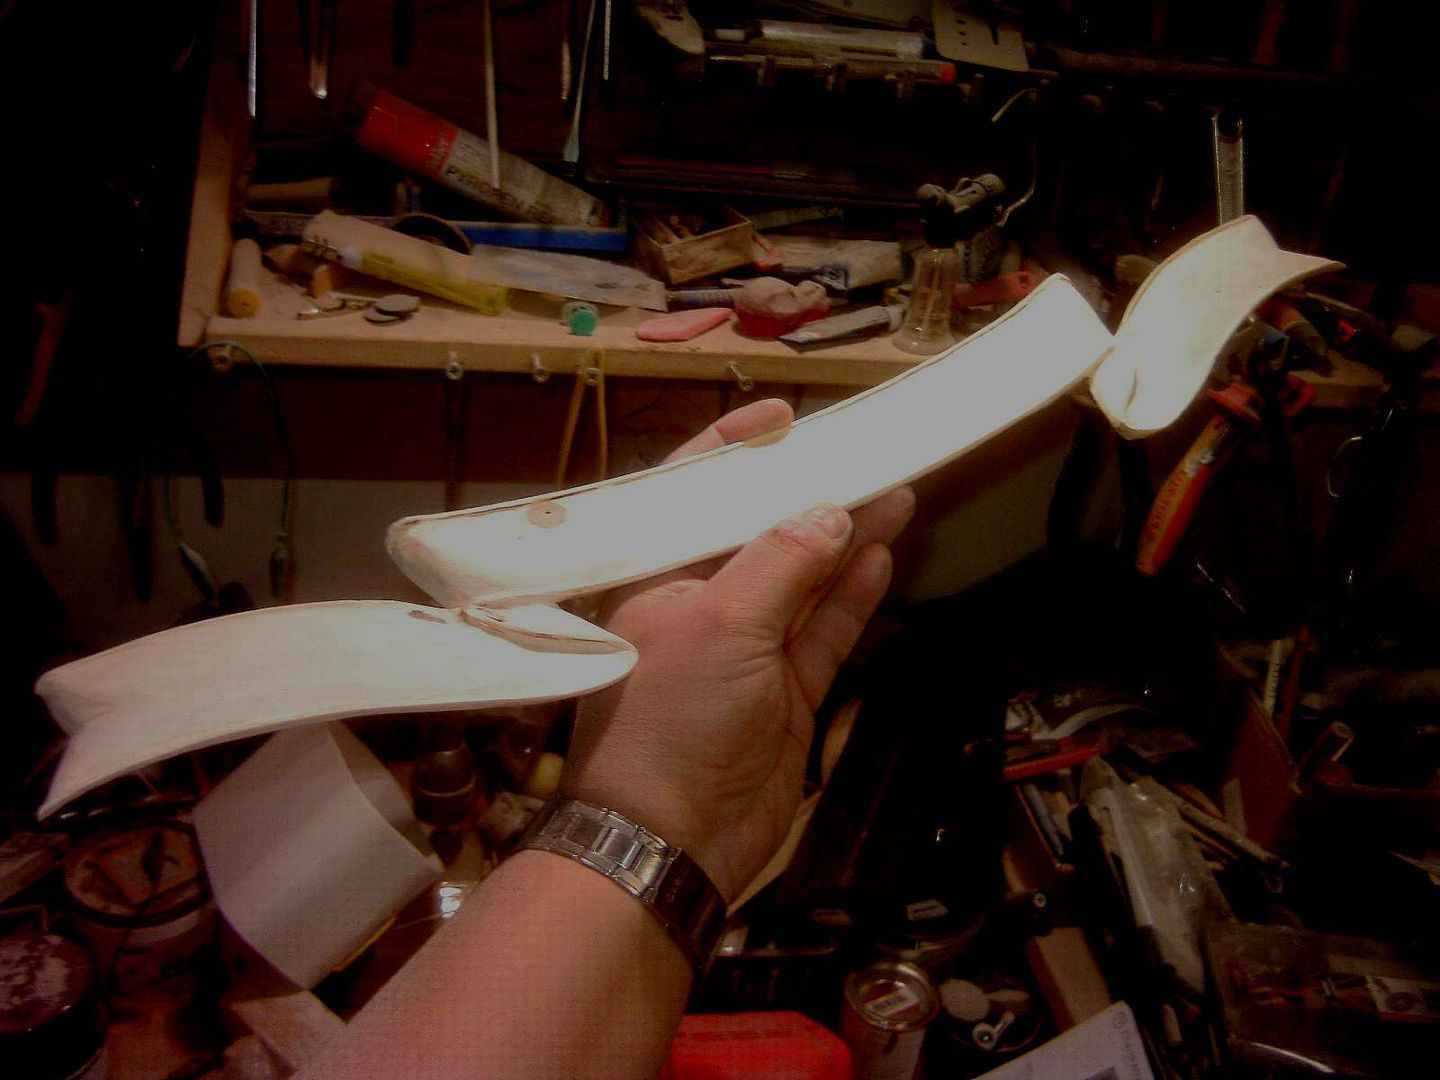
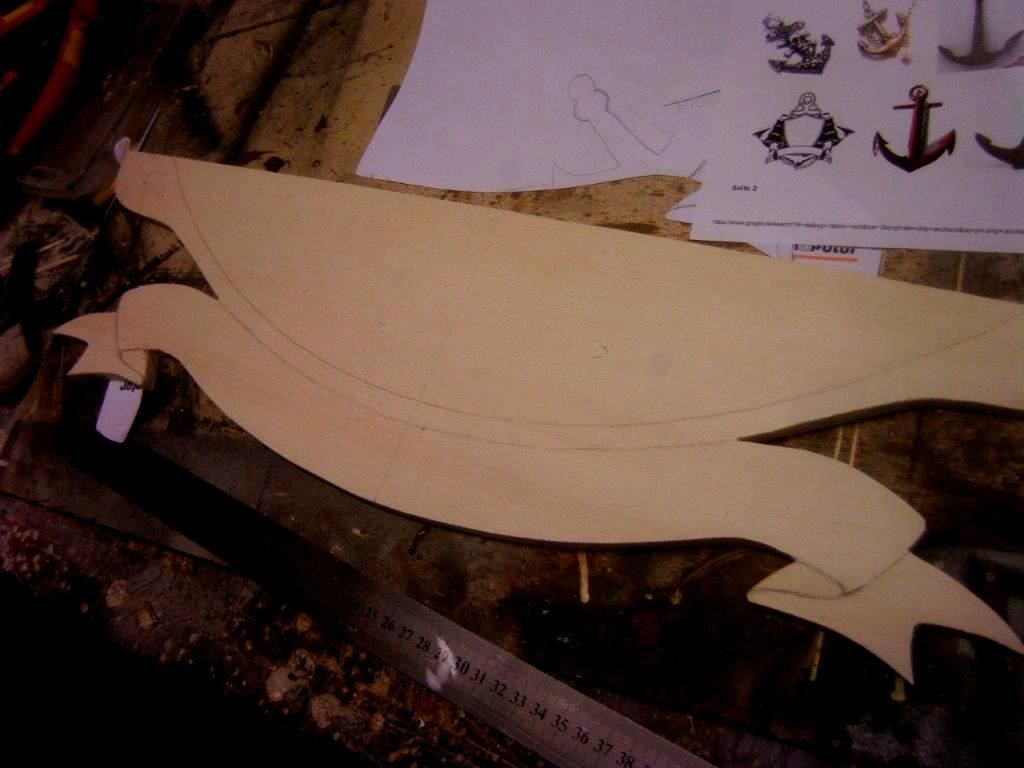
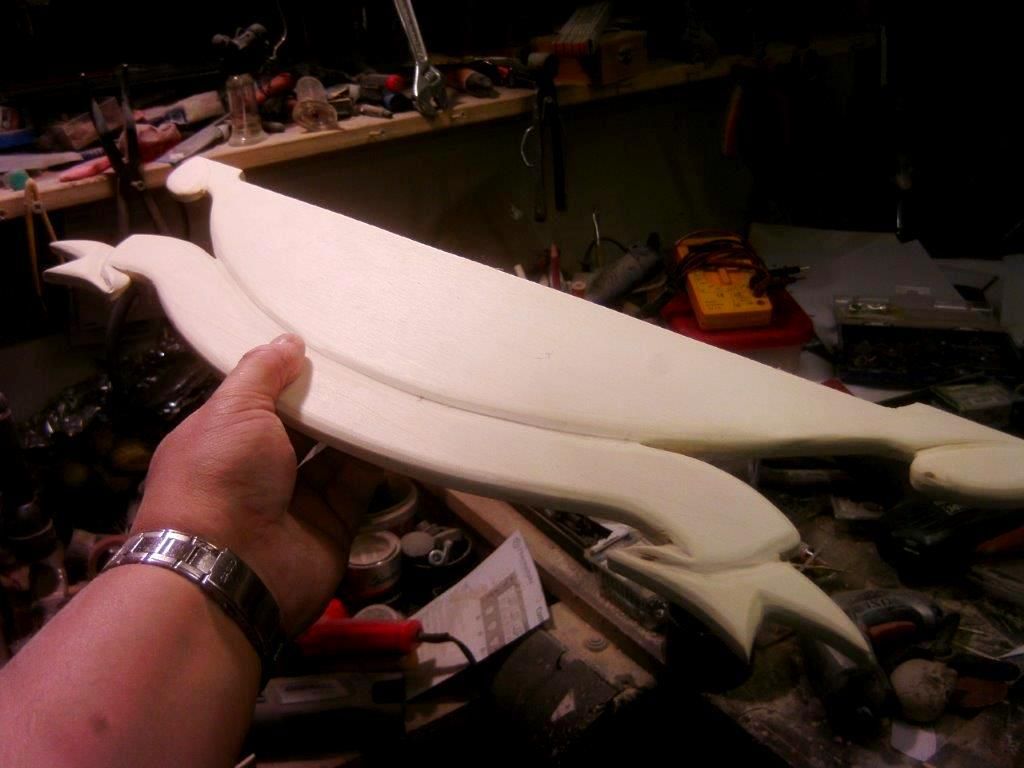
hi guys, tioday i worked on the front banner and desmounting fixture fro transport. i managed to rig a very easily dismountable system.
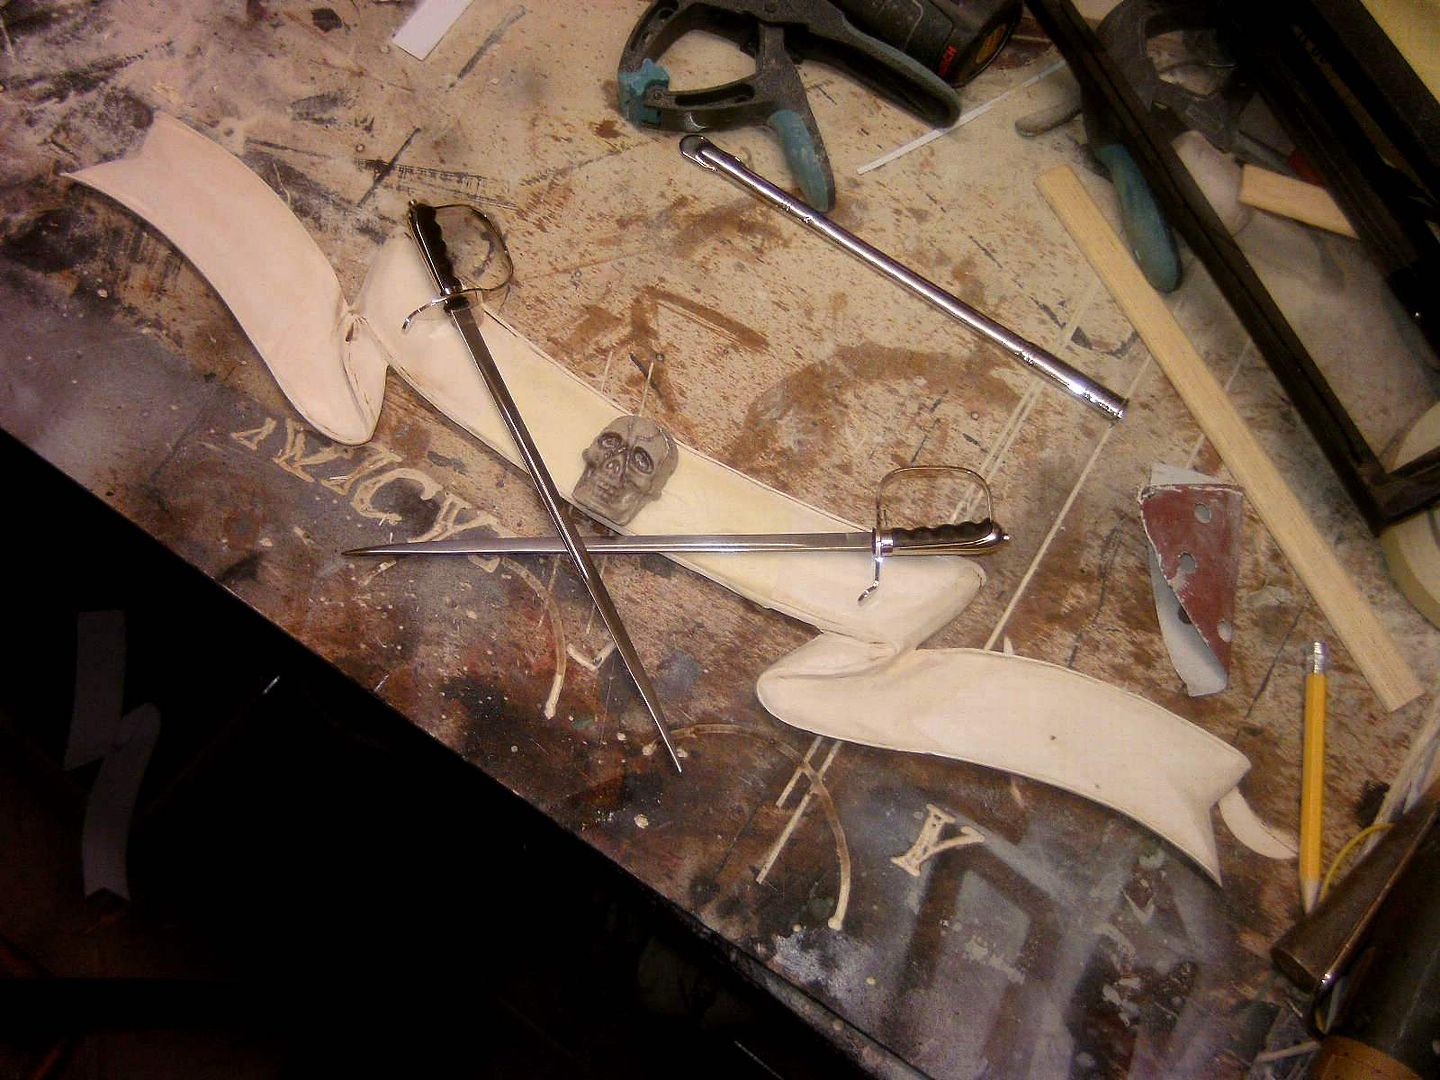
the front cutlasses and shield are also stuck on with a skull on the banner.
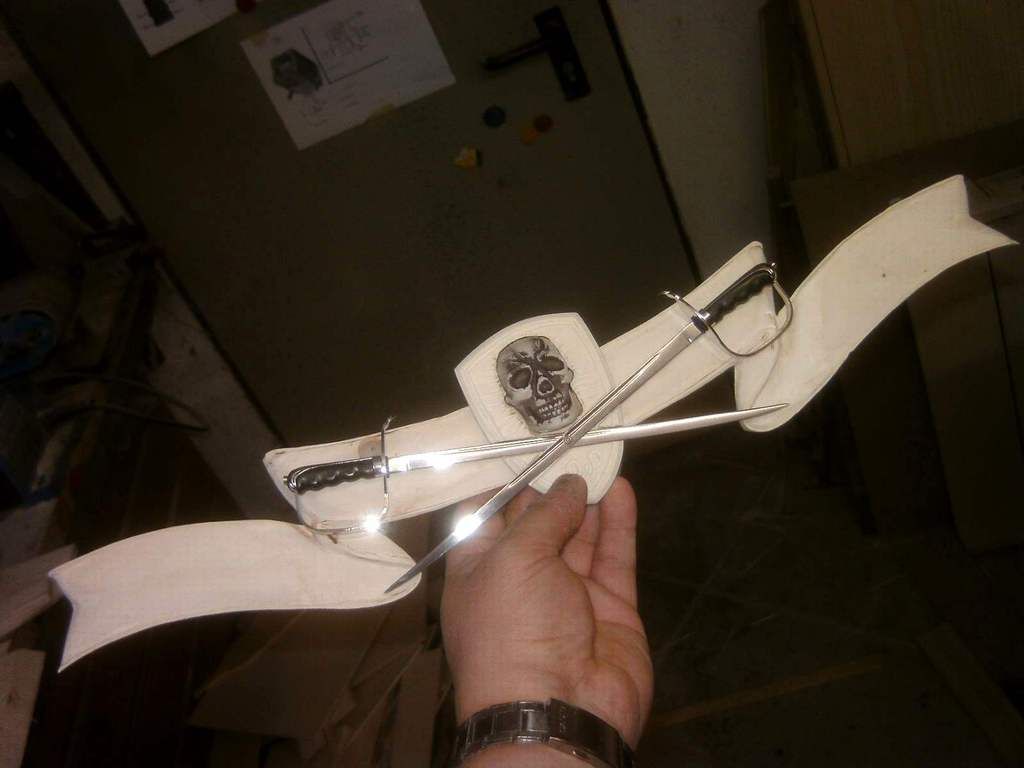
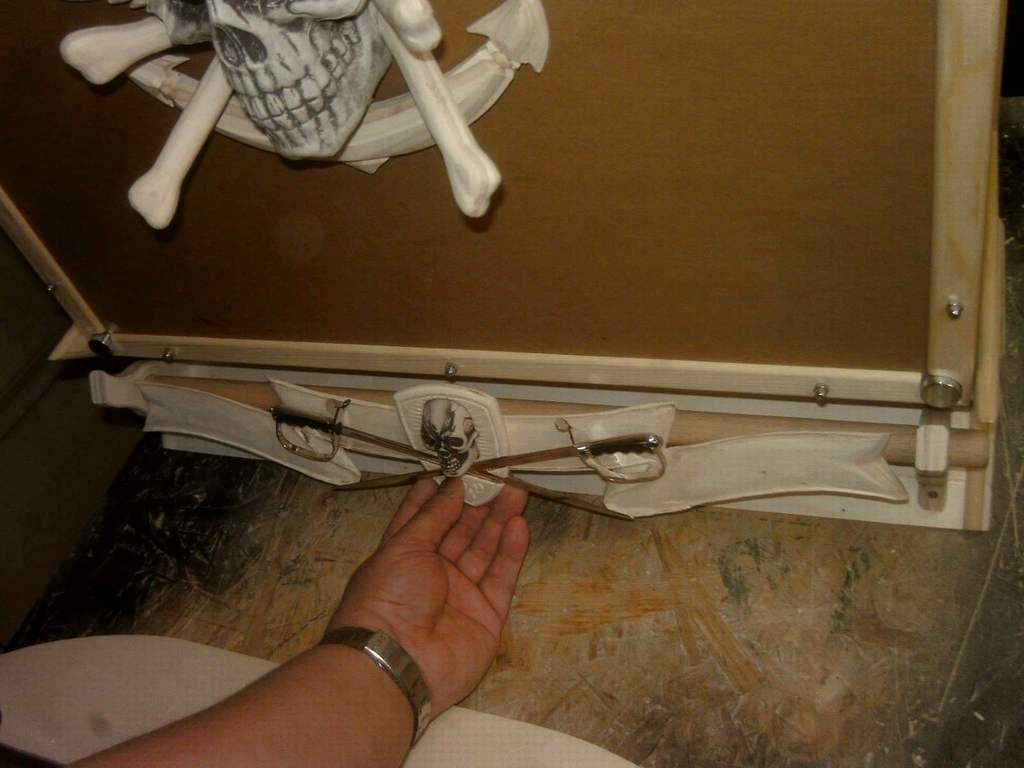
this carriage eneables me to slip off the whole banner by taking the round wooden shaft out for transport safety. it worked out really good.

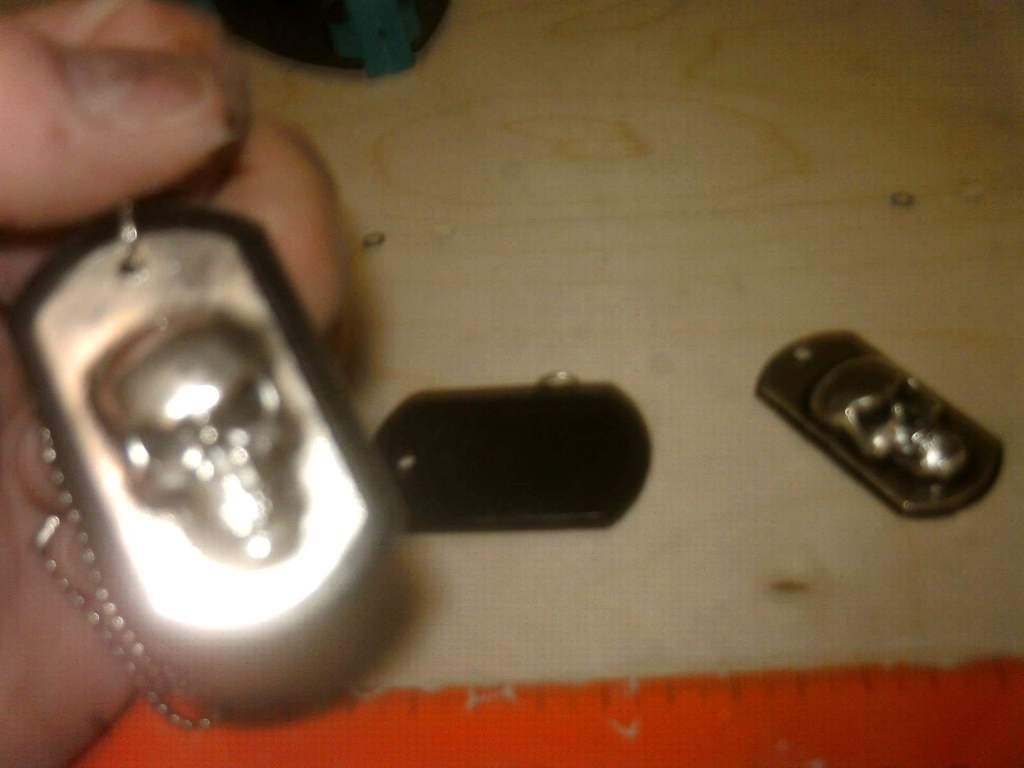
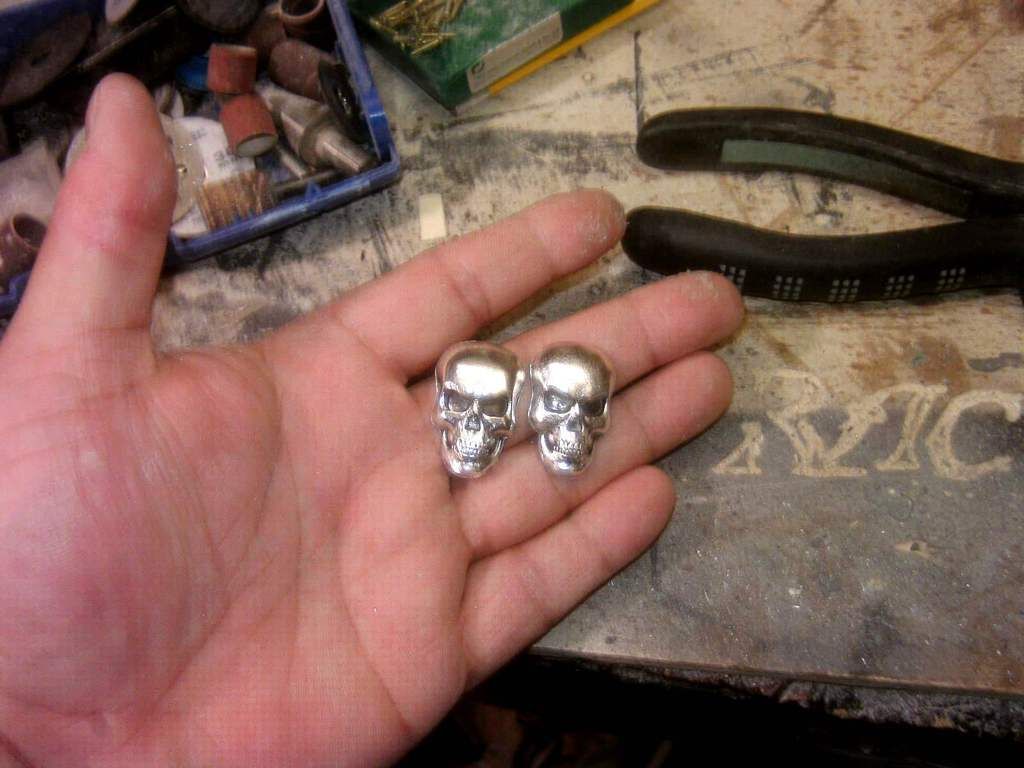
well, believe it or not, these are actually dog tag air fresheners for cars. i had my car at the mechanics today and found these on the shelf.
i dremeled the excess sides away and will use them to deck the pole holder stubs atop.

more tomorrow..
-
hi guys, here is another litle update, soon i will be starting the inside and hardware integration.
for the moment though, i finished the bones on the front shield and started the front banner which will be a clip on for transport.
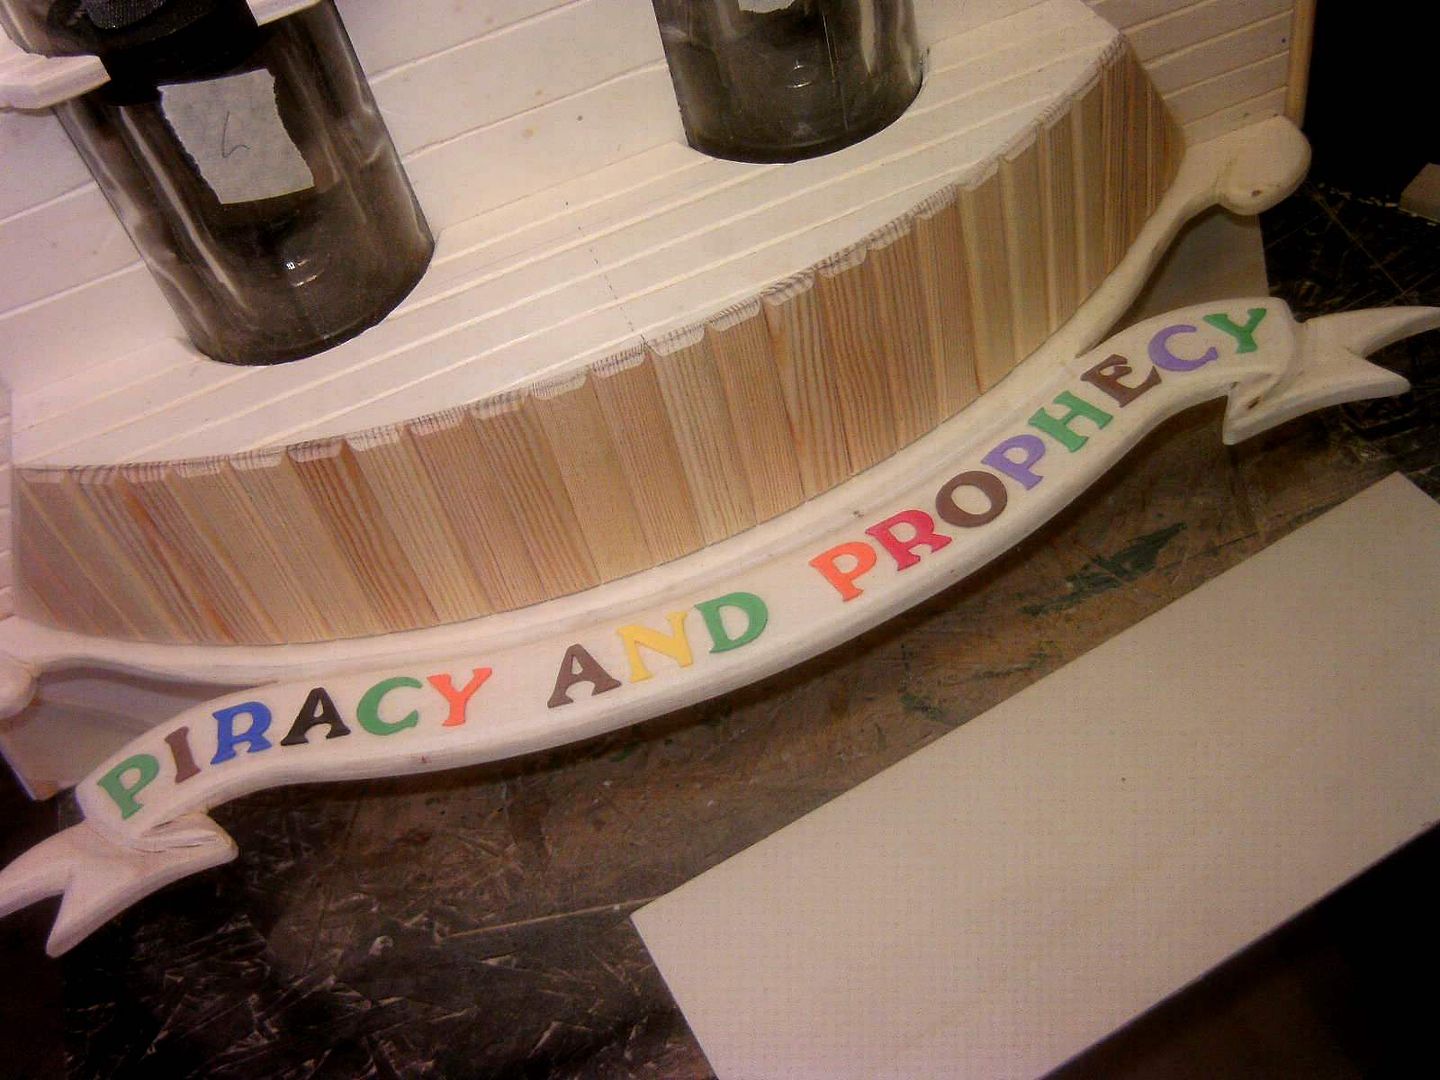
dont worry, the letters will not stay in that multicolor look.
-
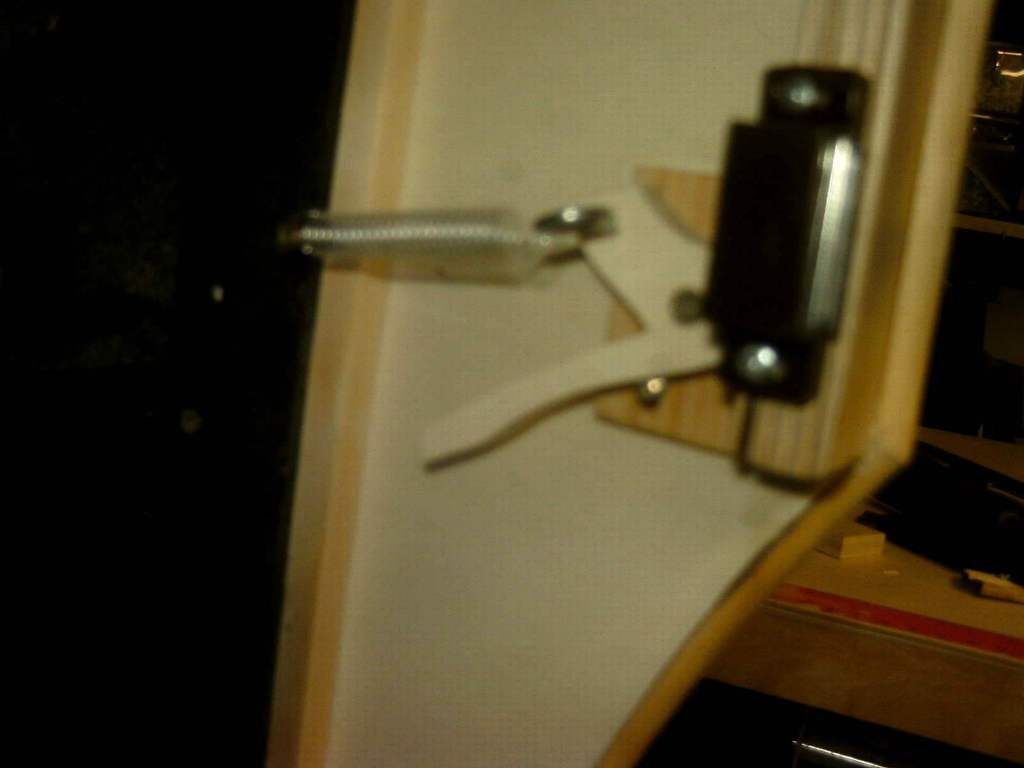
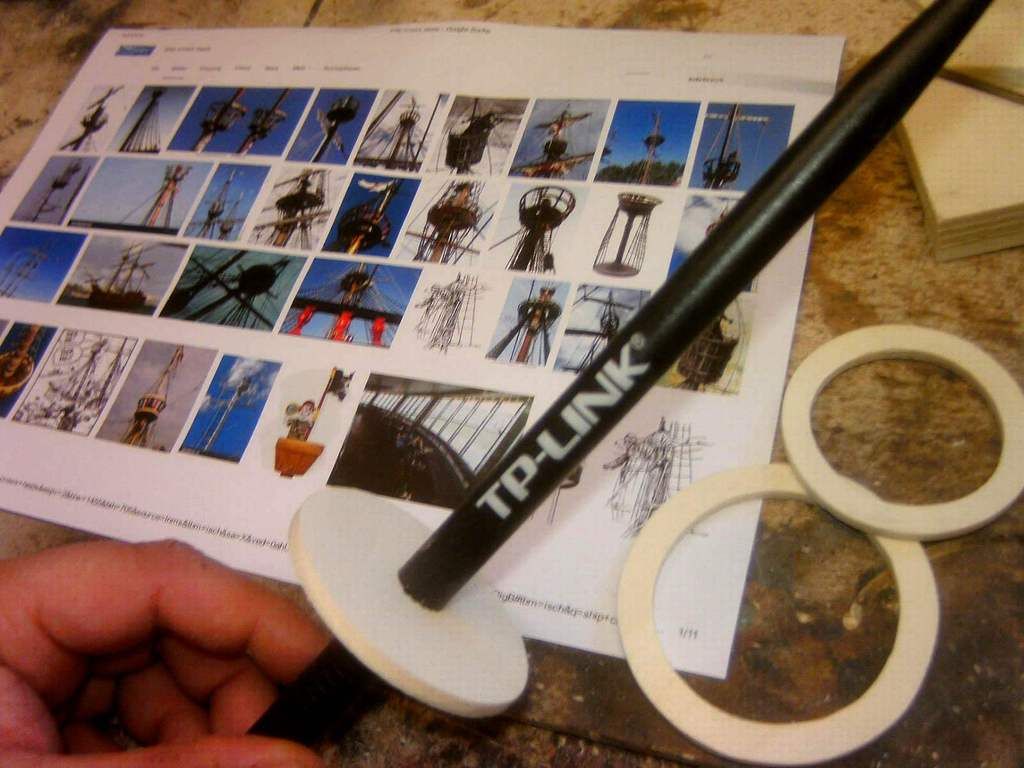
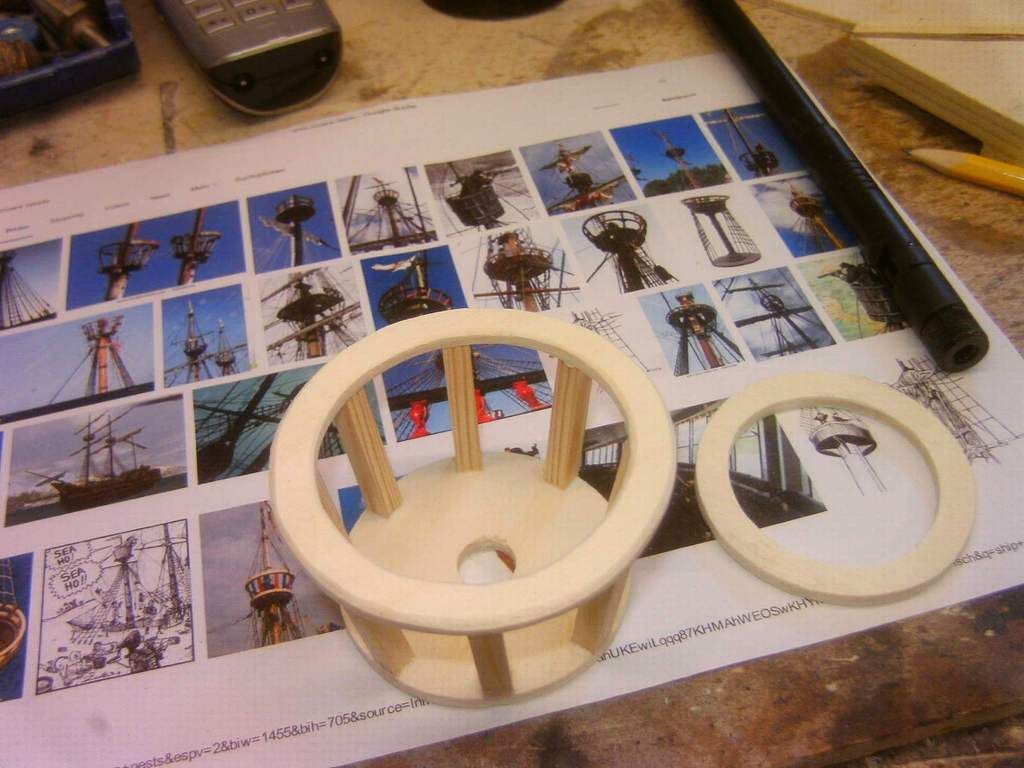
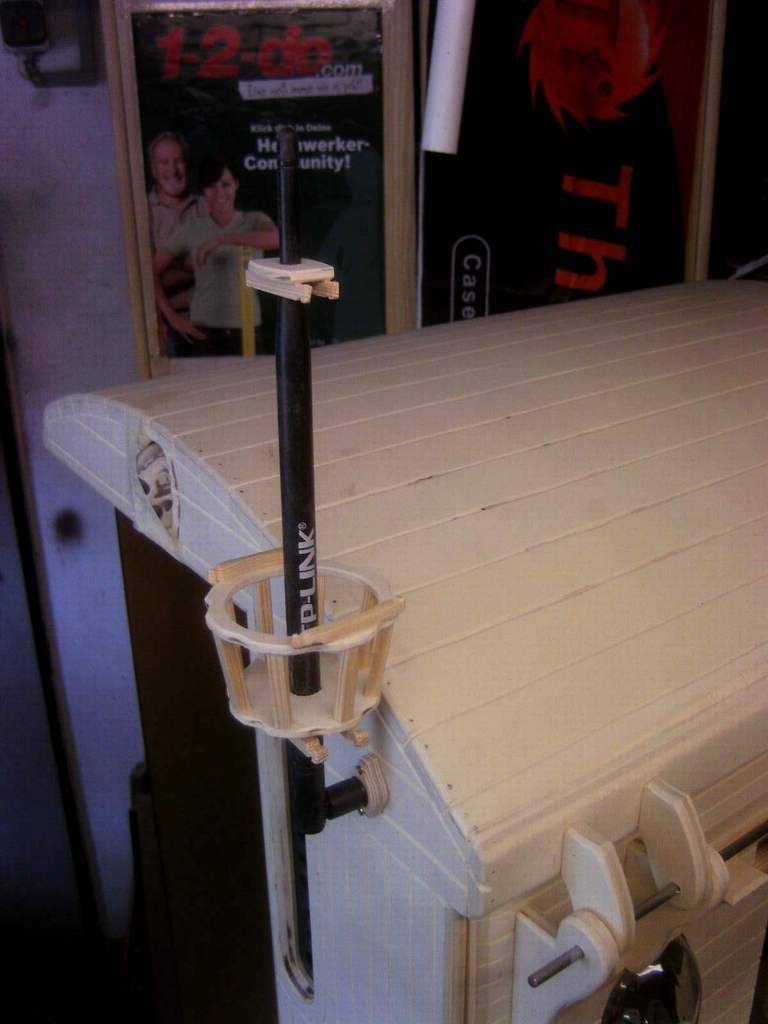
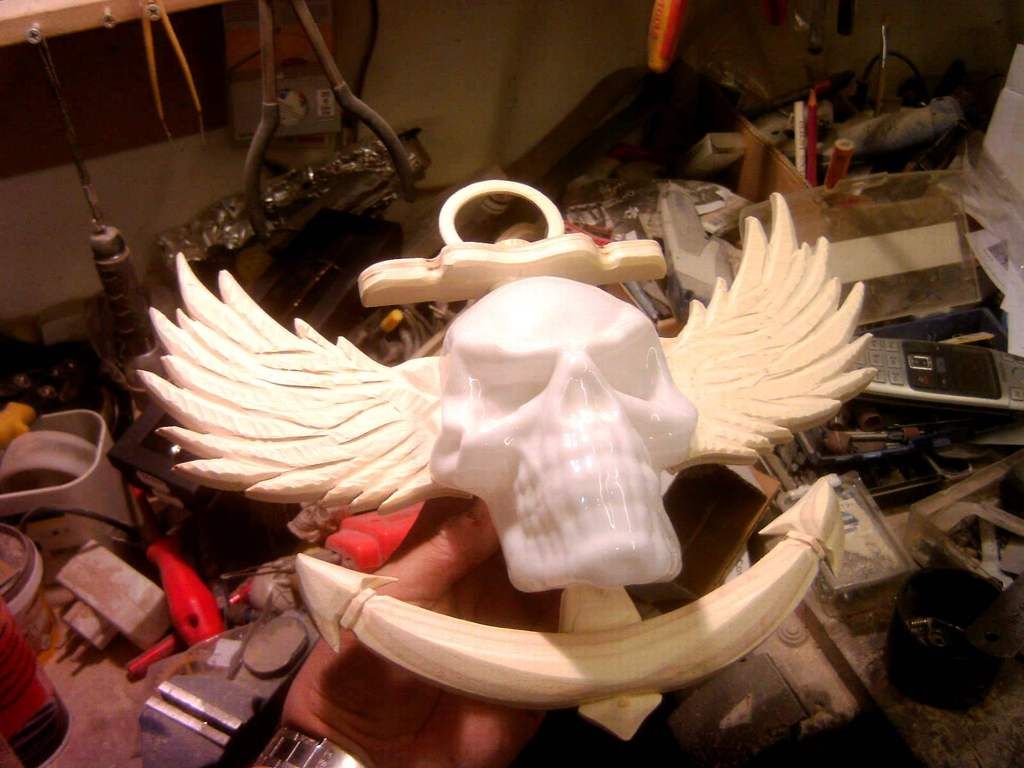
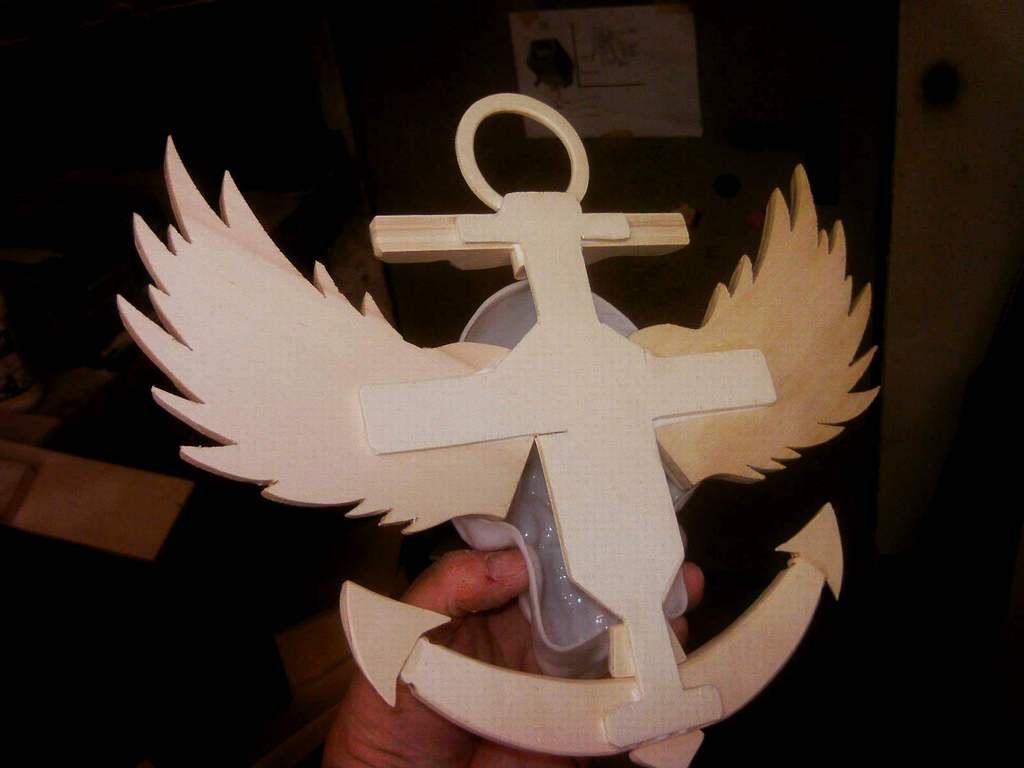
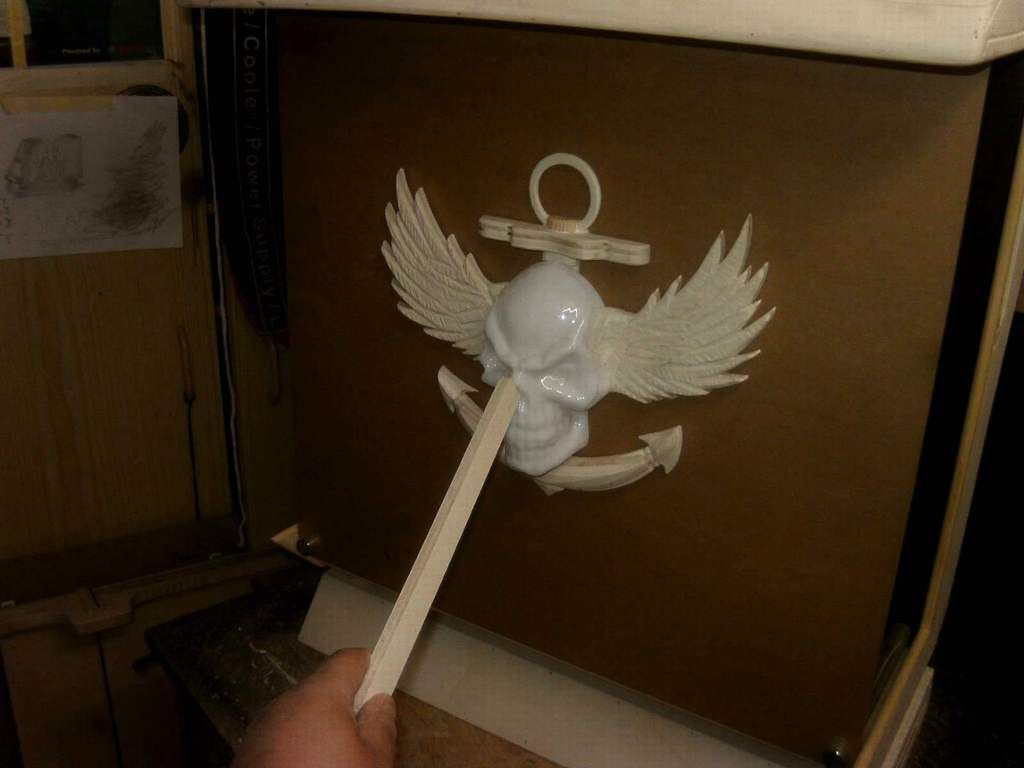
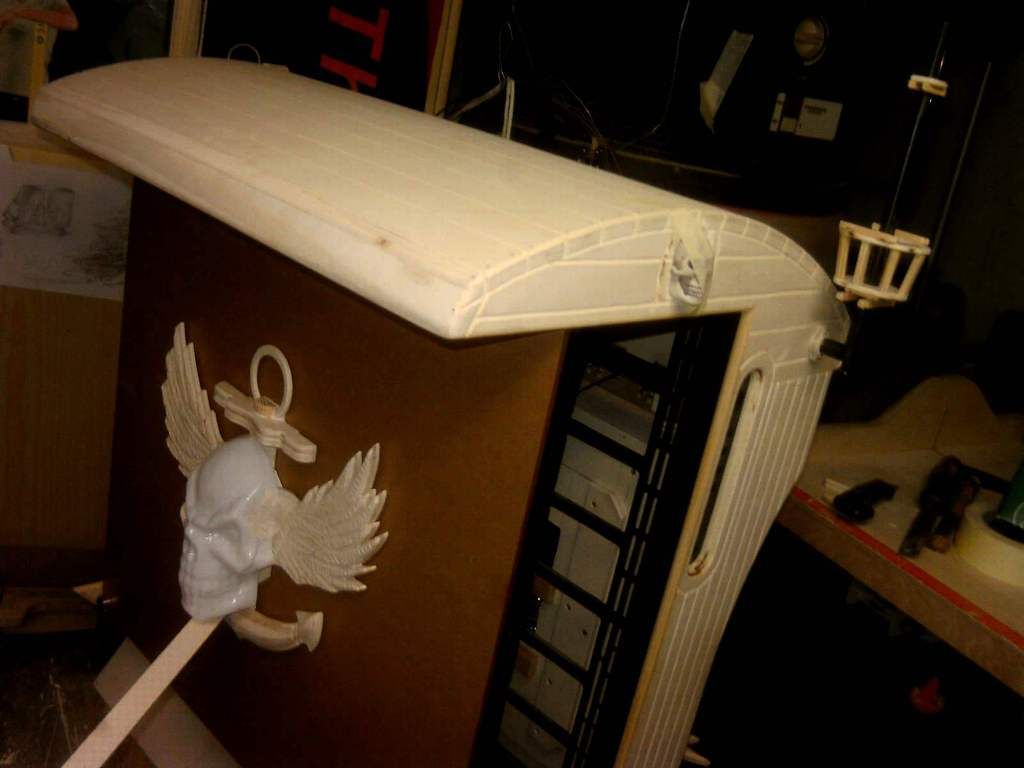
hi guys, here is a little update, i made a snapp to close clasp for the back part, the wirless anteene is almost a mast with crows nest and i also started the front main emblem eye catcher.
more to come..
-
hi guys, and here is the progress of today.
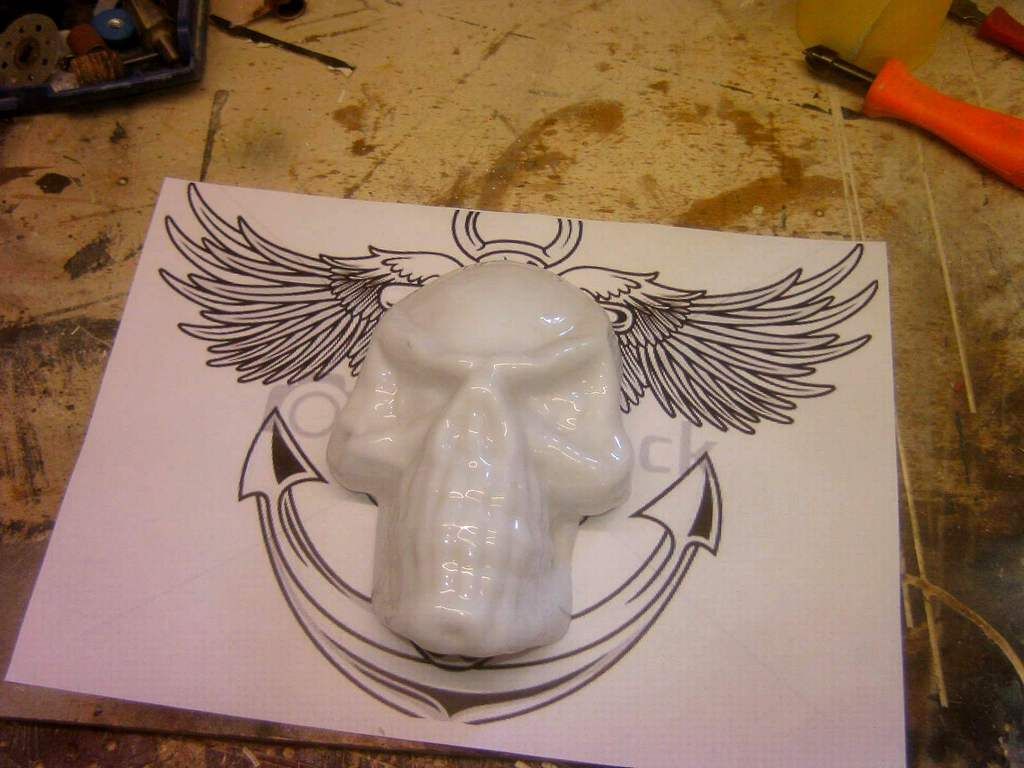
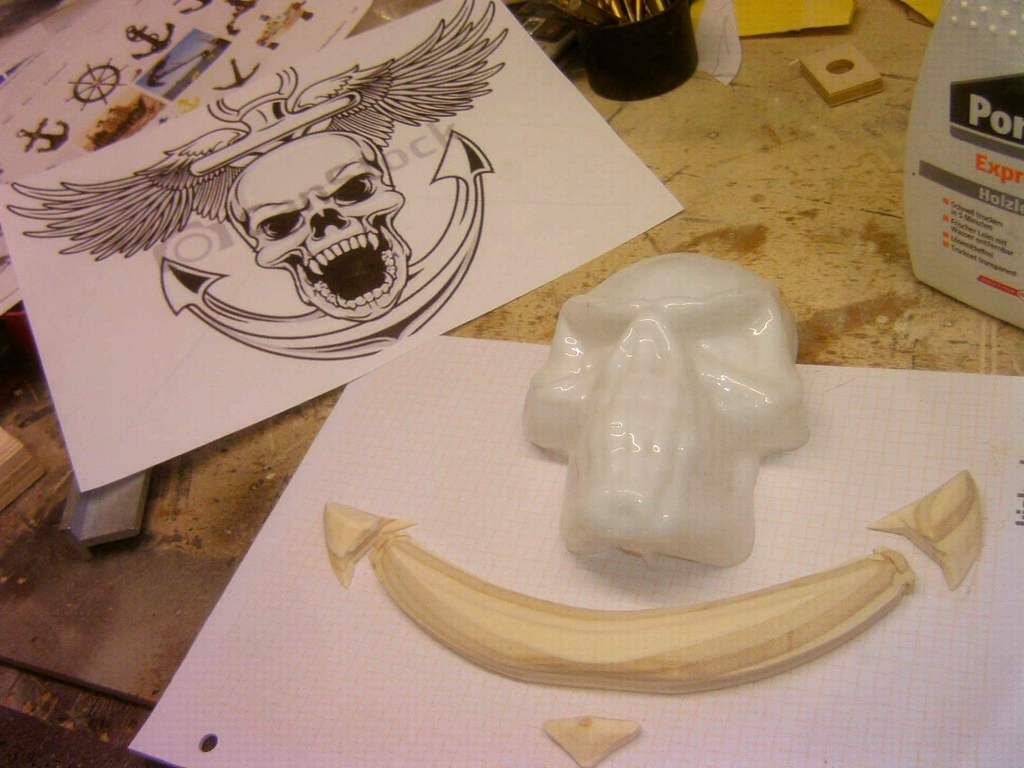
the pirates have the first set in skull. these little skulls were part of a cheap halloween necklace, are of plastic and will be lit up from behind later on.
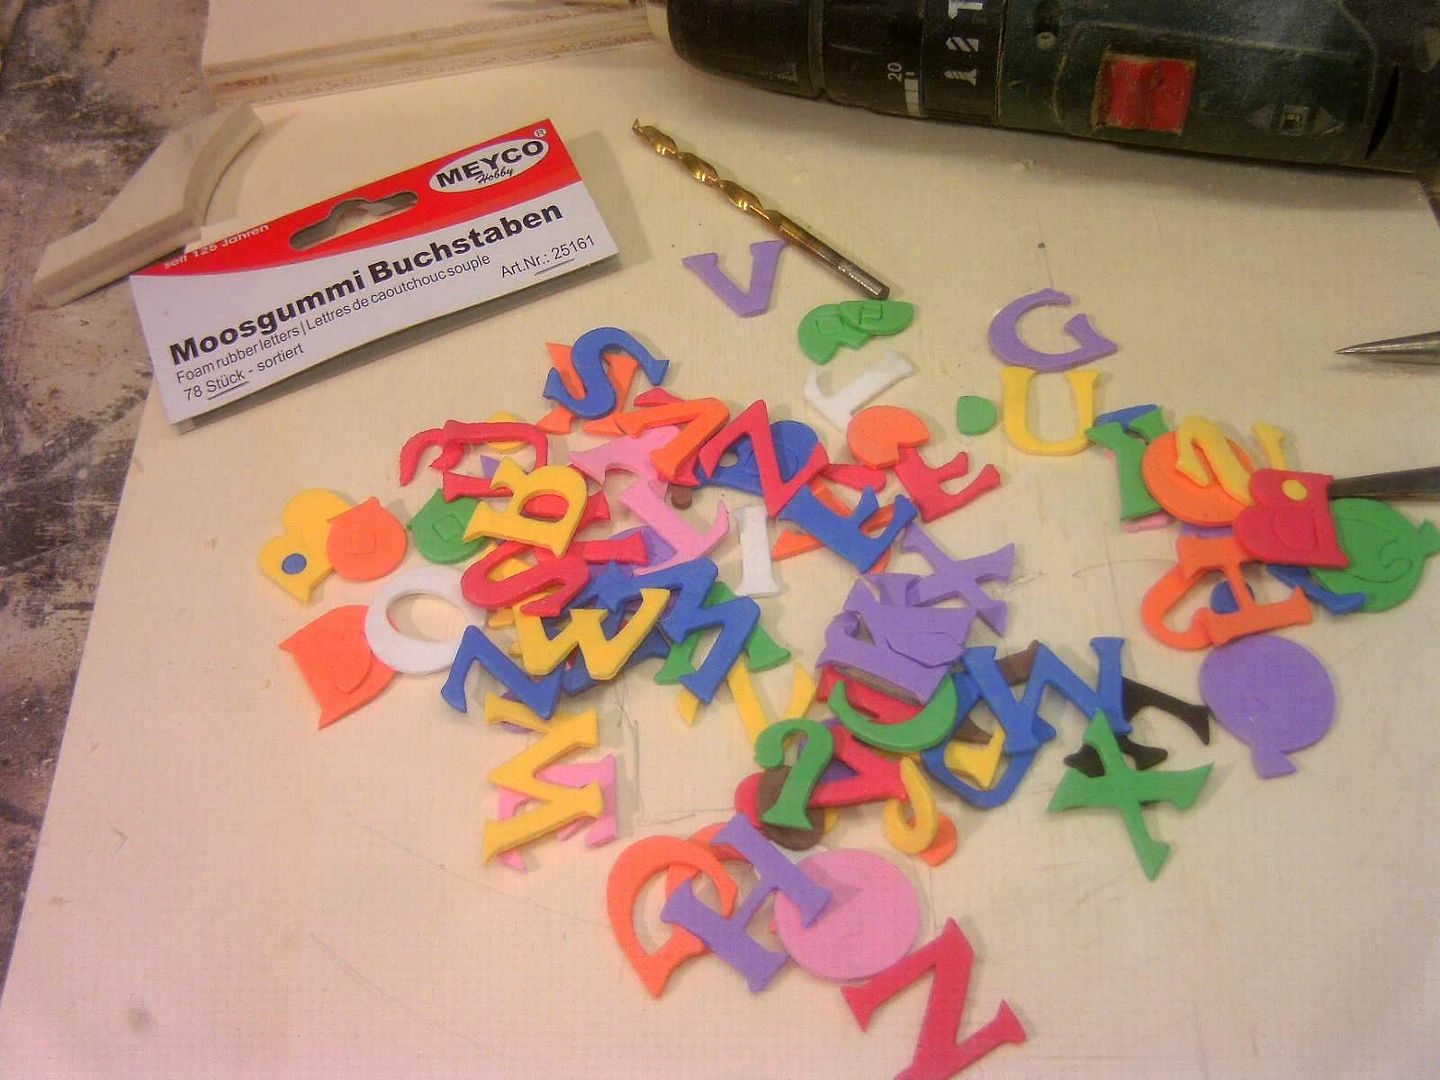
i also made a banner where i will write the PIRACY AND PROPHECY logo later on. i carved it into a 3d form for later staining.
i also finished the cd setting in and drawer cover
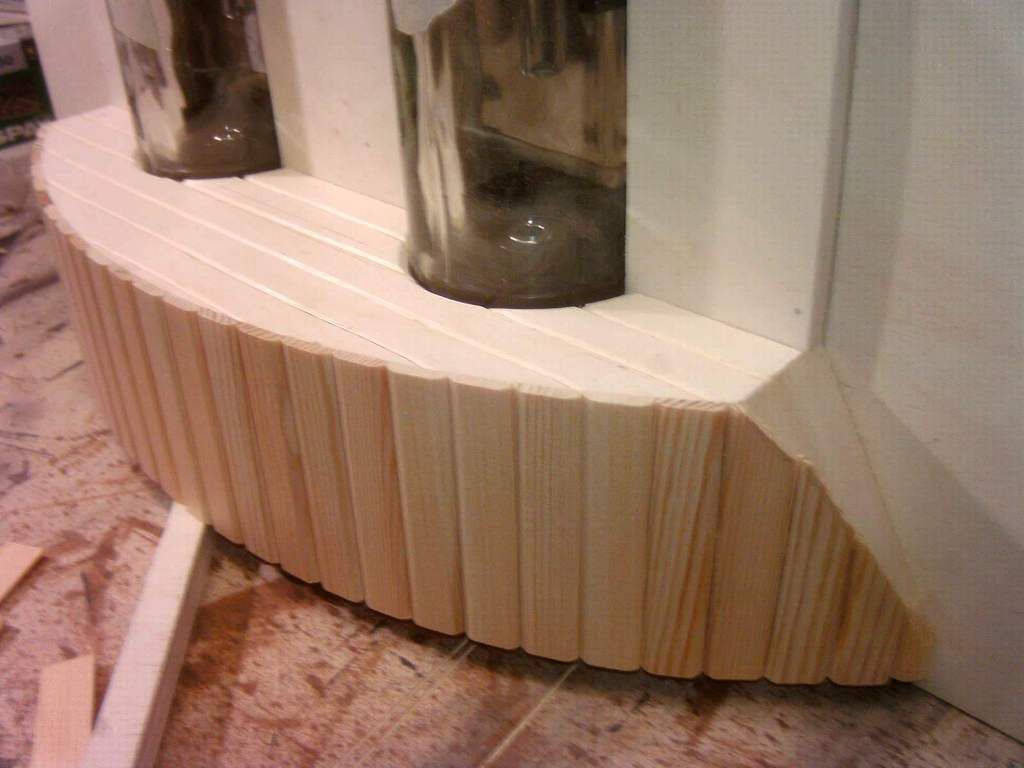
worked some ore planking look into the sides
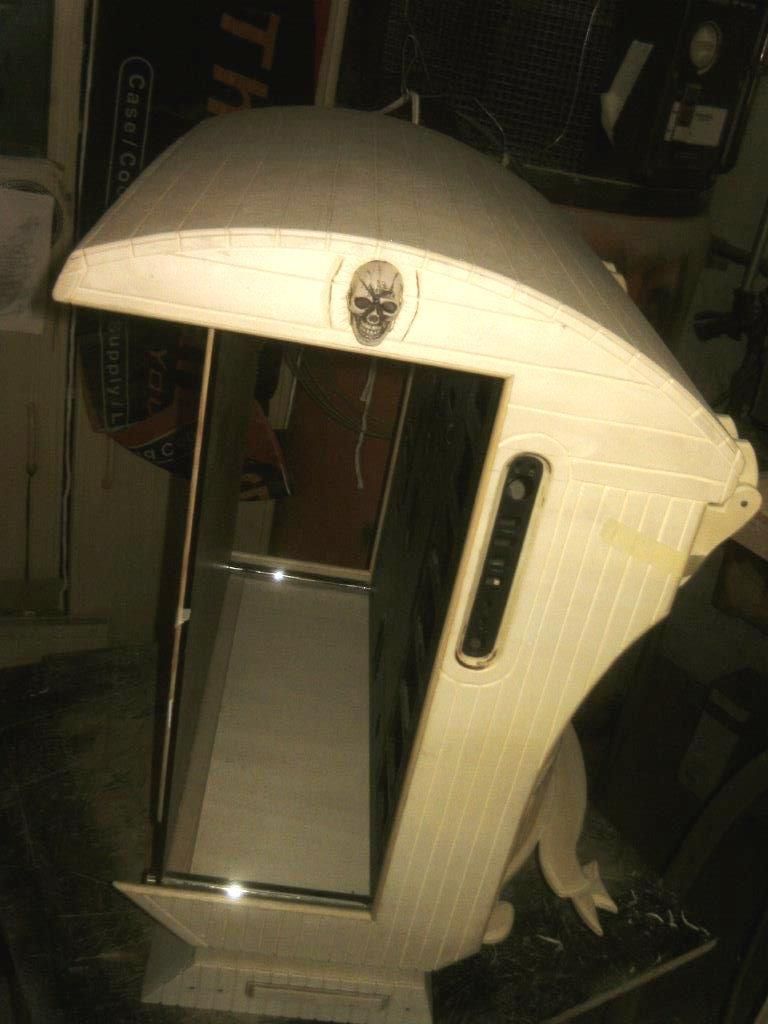
just a test for visuals,,,,,
-
nice job, well matched.
-
Geez, you're working hard..
Love the detail work u put in to it!!
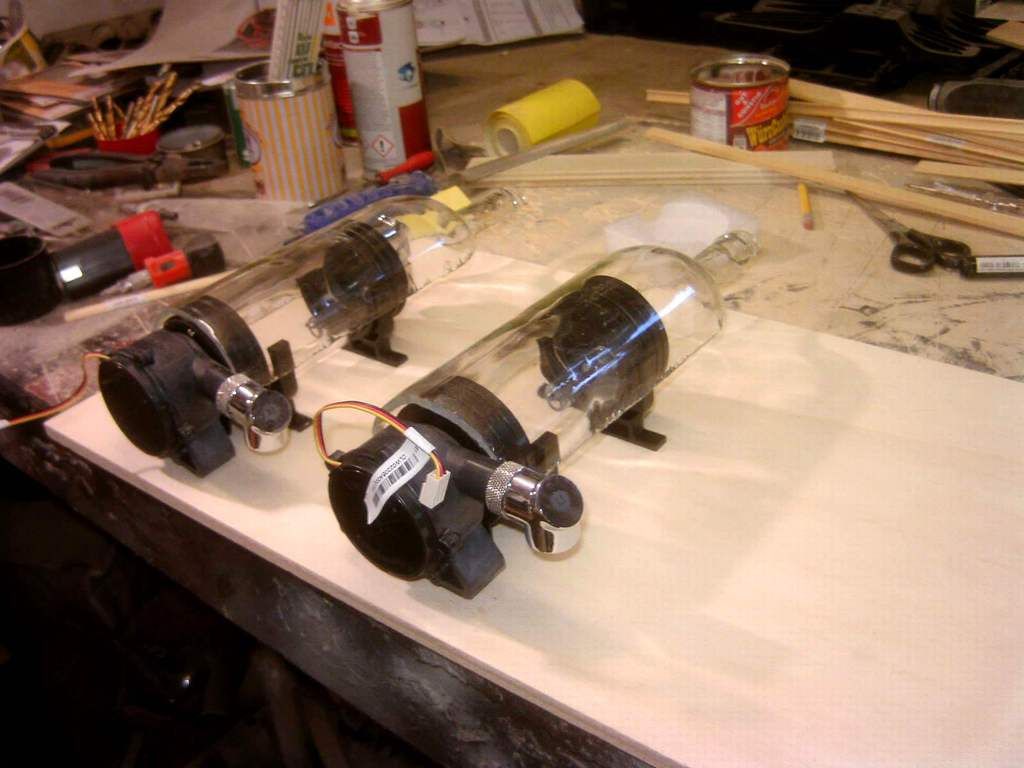
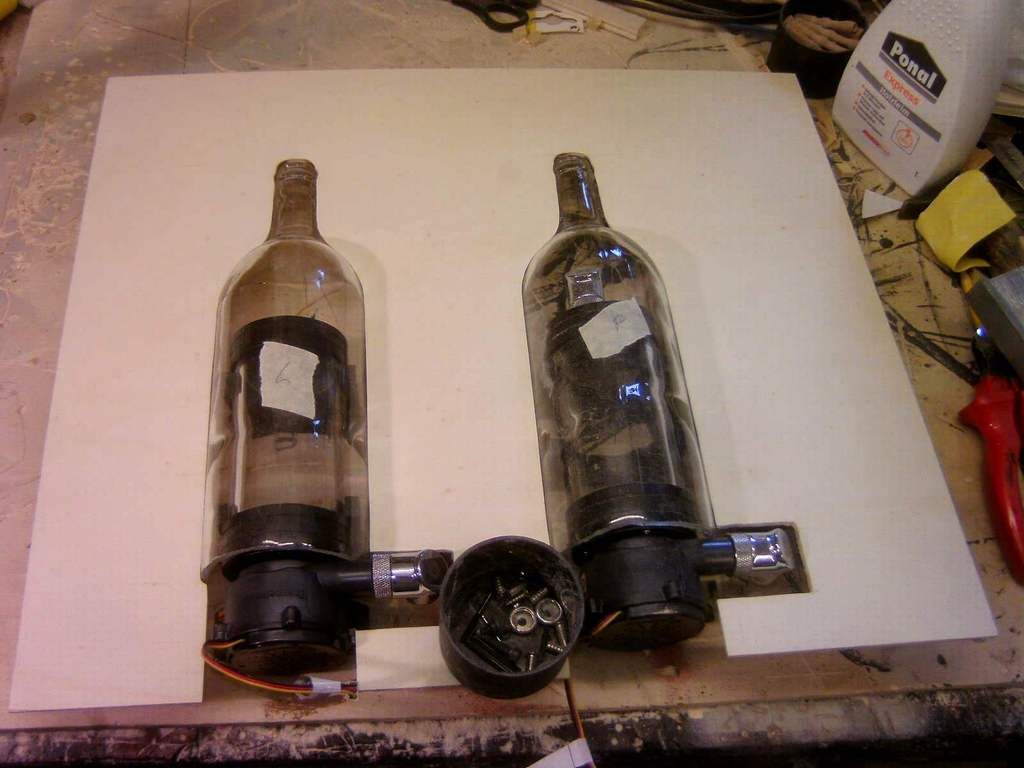
One question tho, any specific reason, besides saving space, for not making the bottles into reservoirs themselves instead of putting a reservoir inside the bottle?
hi allerleidesign, glad you like it. yes i love delving into a theme and swimming in detailed ideas.
yes there is indeed a reason, they are real glass and seeing as it is at least possible that this machine could go to taiwan, as well as for sure to the modding masters in freidrichshafen as well as the german casemod championship at the gamescom cologne, then it will be exhibited in a museum in england too (and many other exhibitions), i just done want to take the risk of some happening, the bottles breaking and bang goes the whole build.
by the way, the bottles will also be decorated with logos, seals and RUM emblems as well as fittings looking like they are being held.
apart from that, the back to front concept is piracy , then prophecy, so i want as less modern hardware from the back moving into more and more when looking towards the front. well thats my plan anyway, but it seems to be working so far.
ps: allerleidesign sounds german based????
-
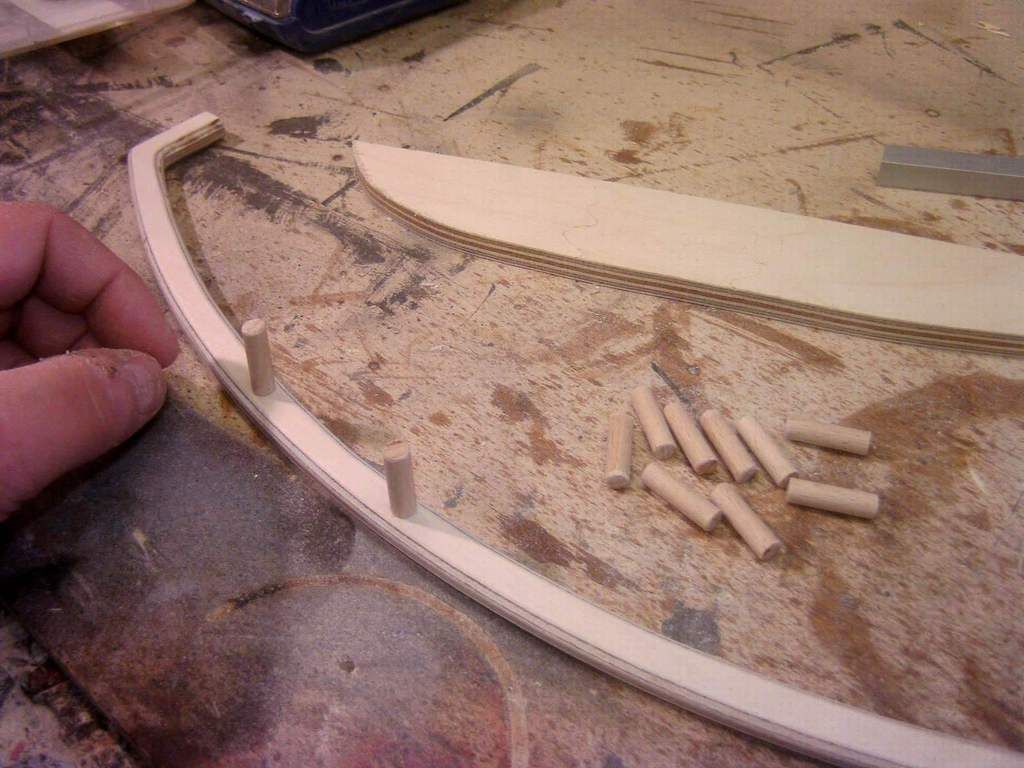
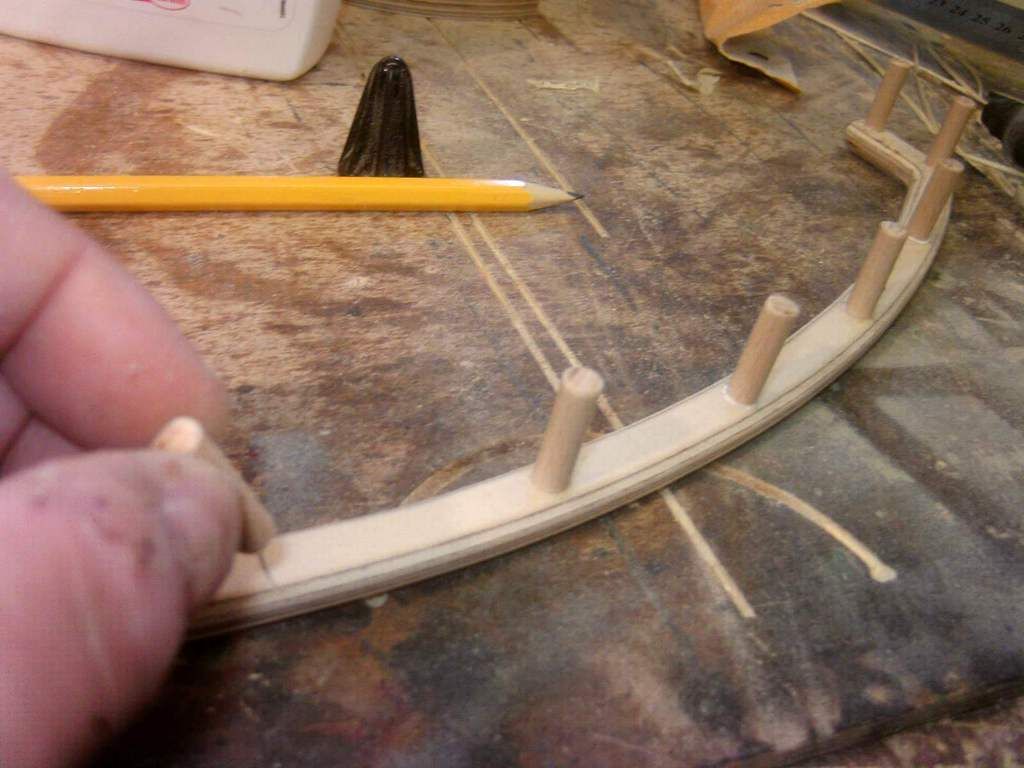
hi guys, here is the progress of todays modding session.
the hinges are stuck n screwed on now
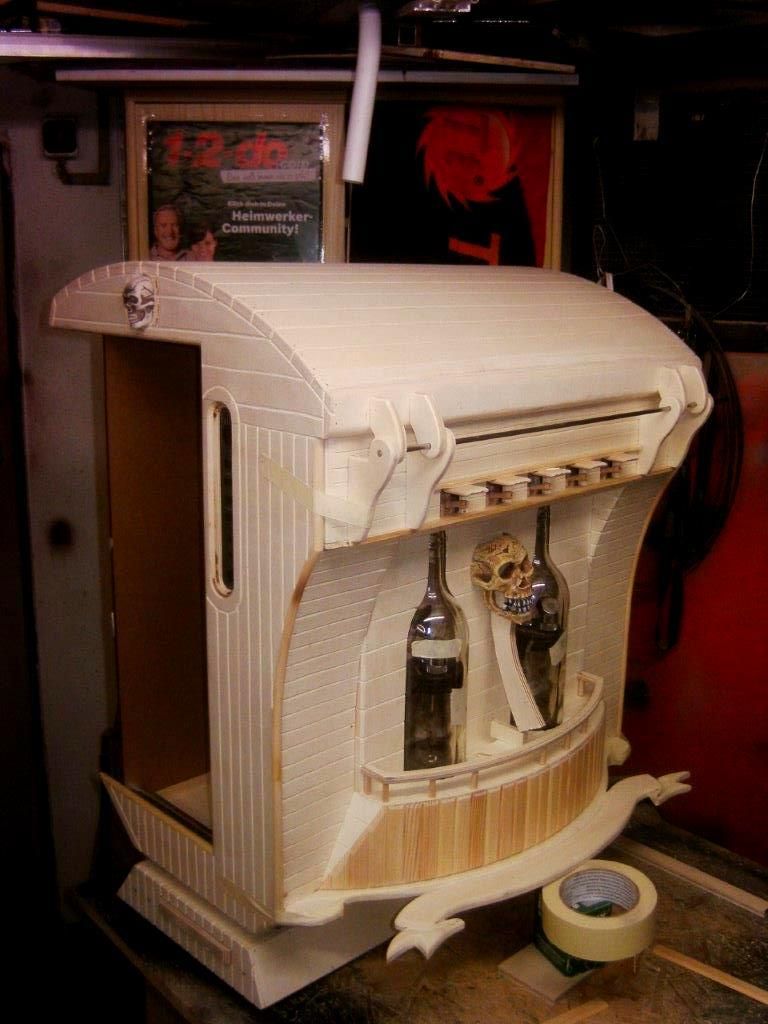
i then started to make the bottöe holder which will clasp the bottles and be dismantleable for maintenance.
just checking for fits.
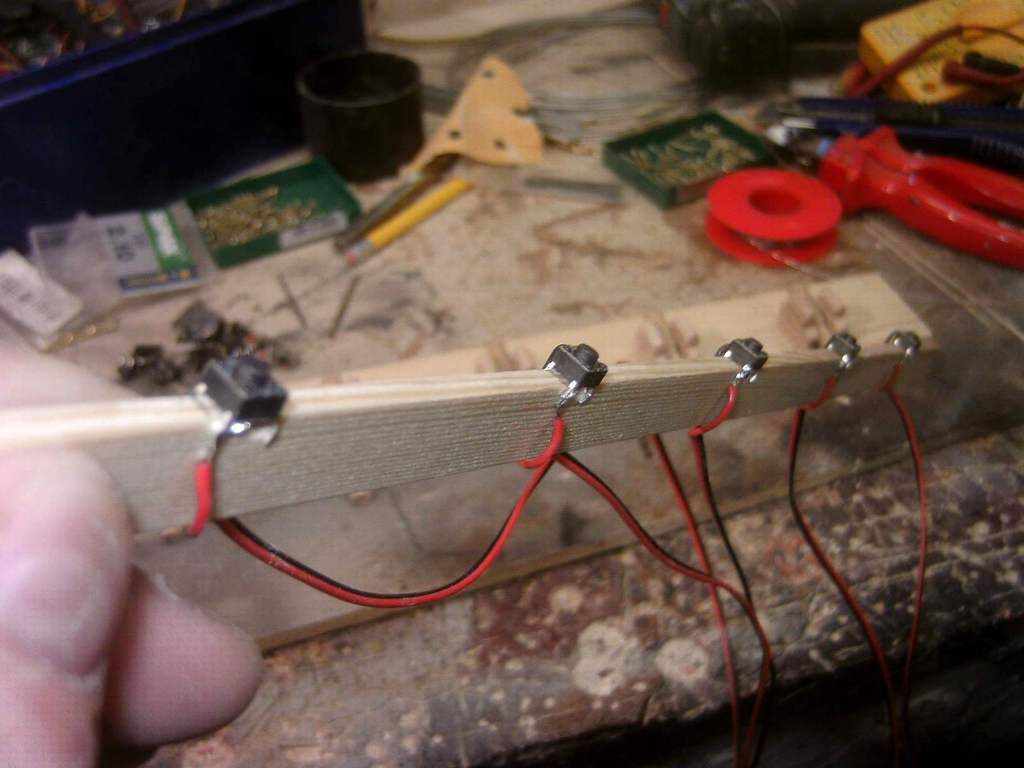
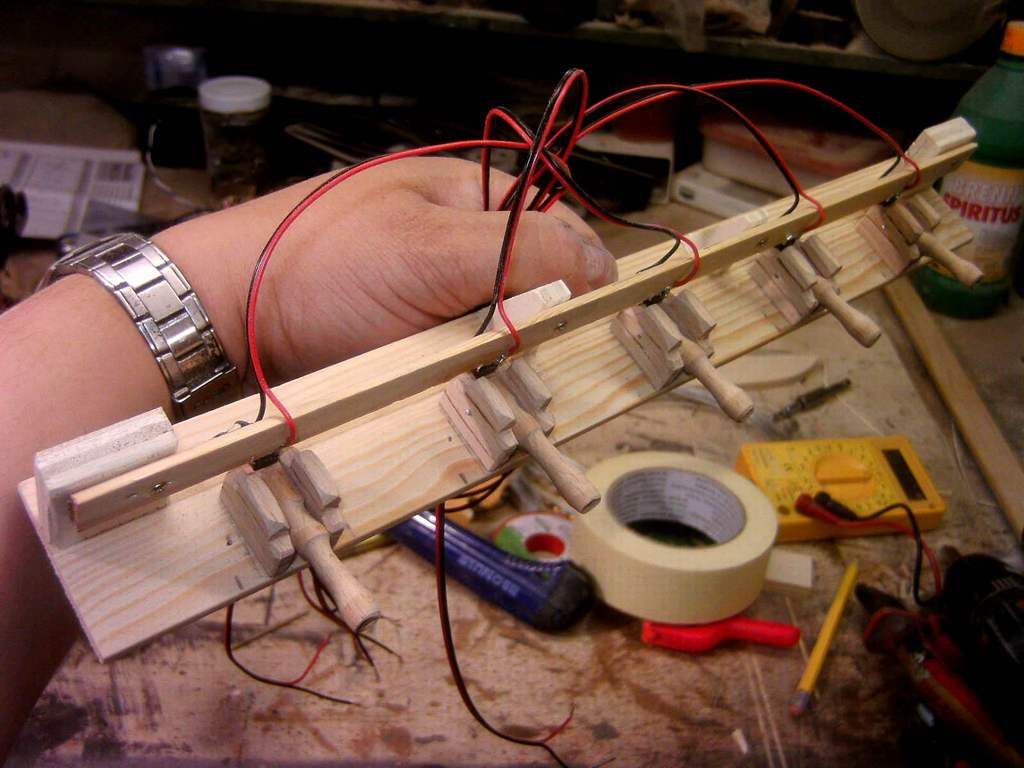
the gunwhale canons will actuaööy be switches for various functions.
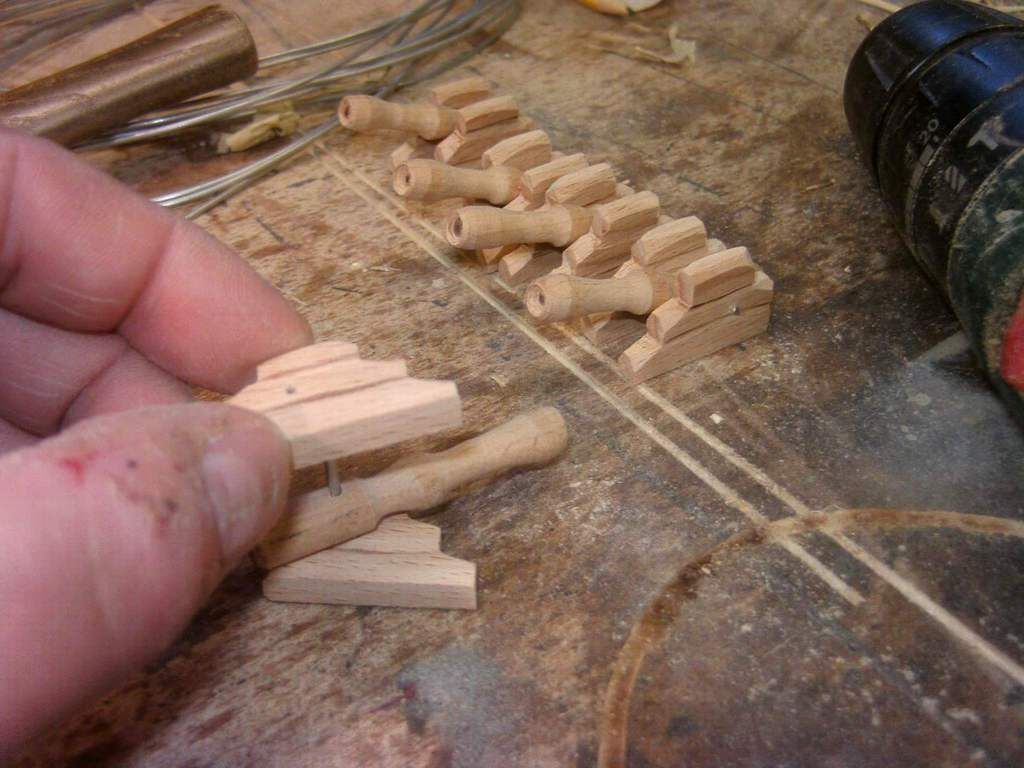

i decided to make a balancing base for the build which will holöd the cd drive.
-
-
I love the woodworking!!! Looking great!
thanks buddy, a lot coming..
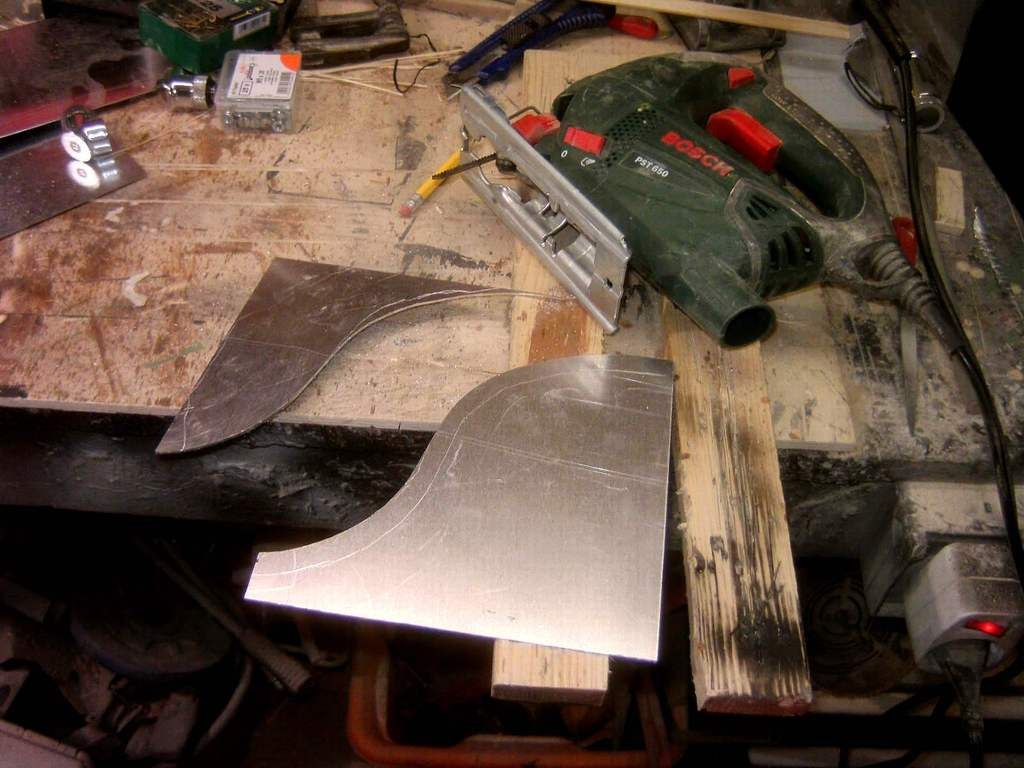
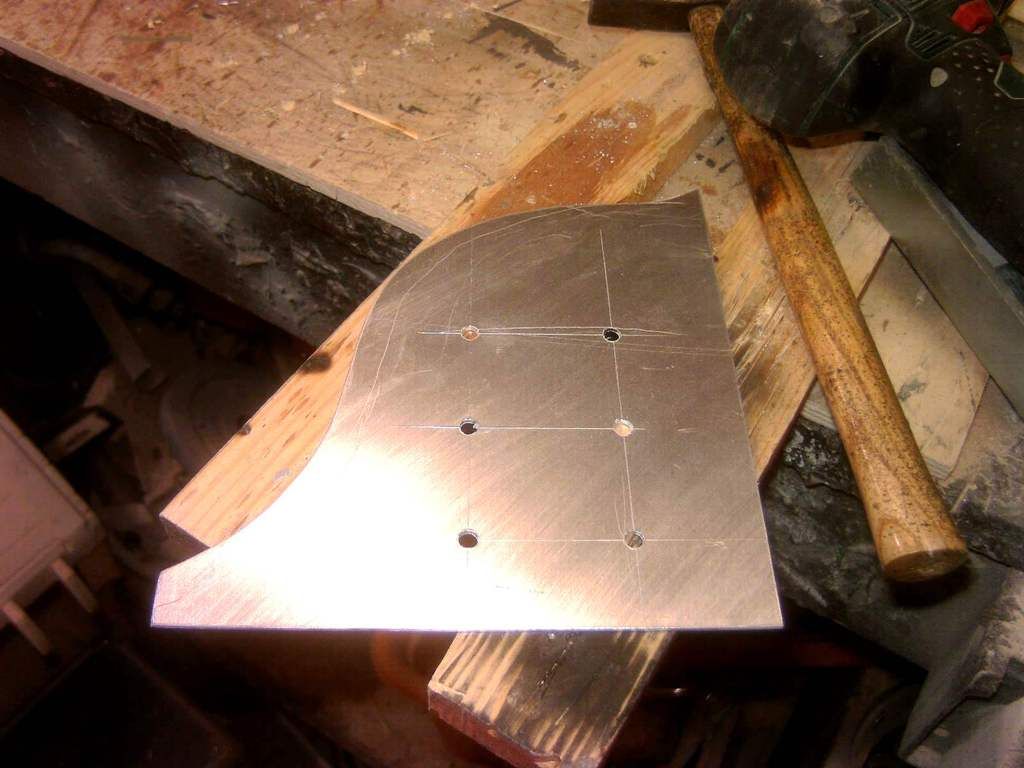
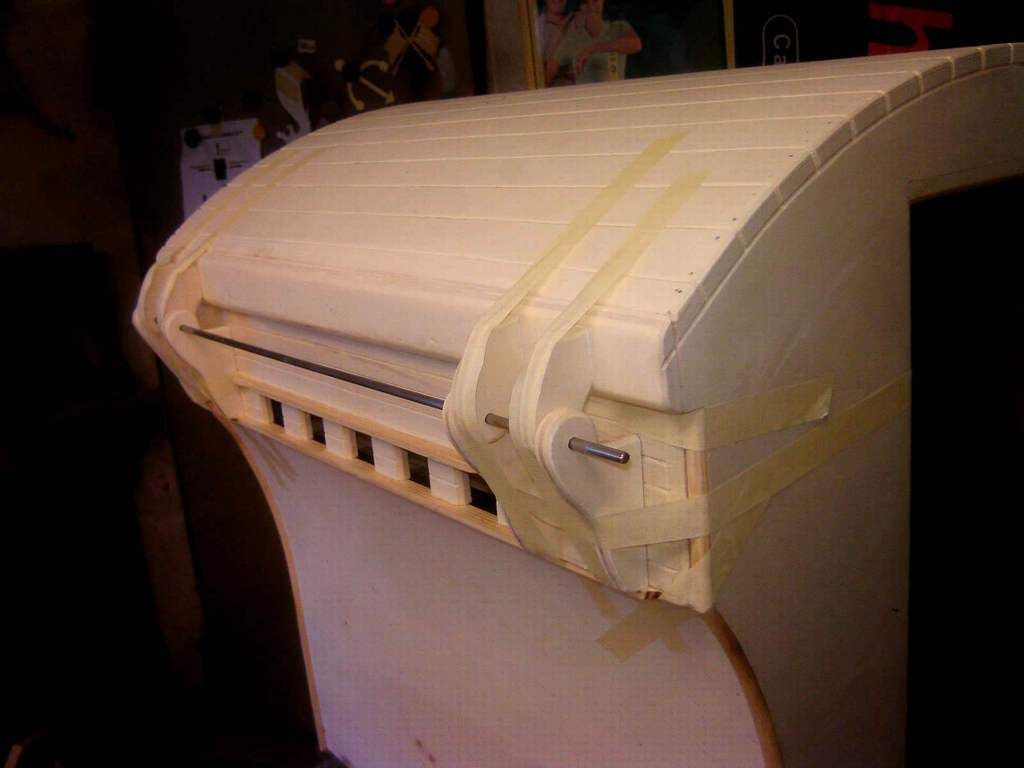
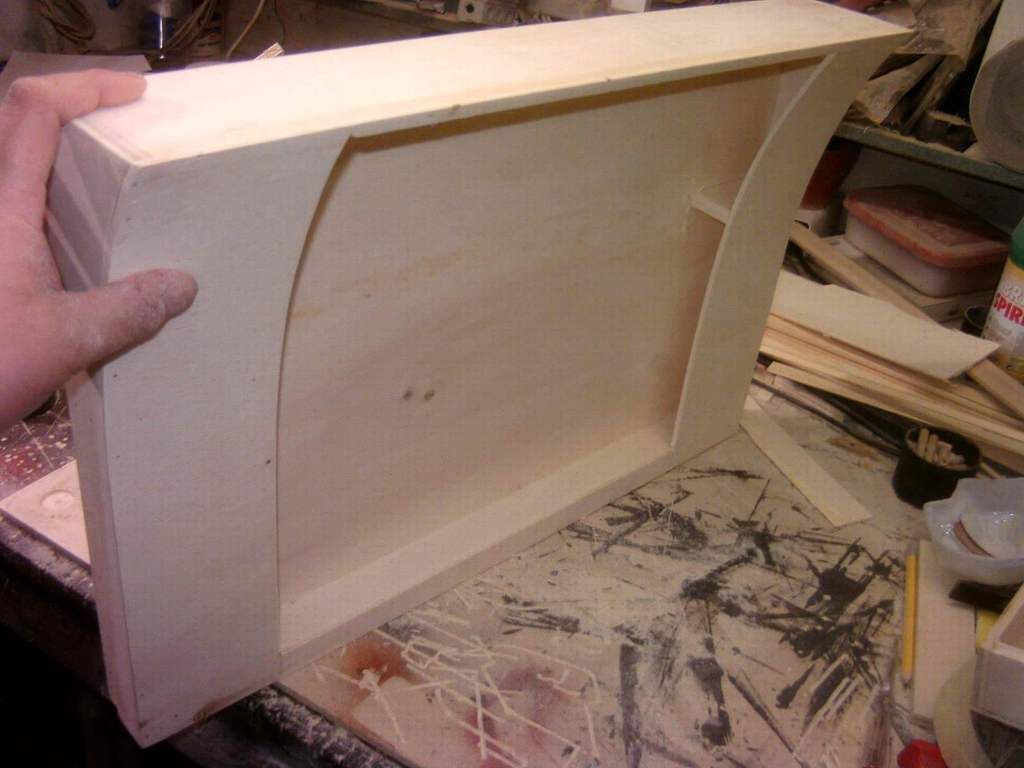
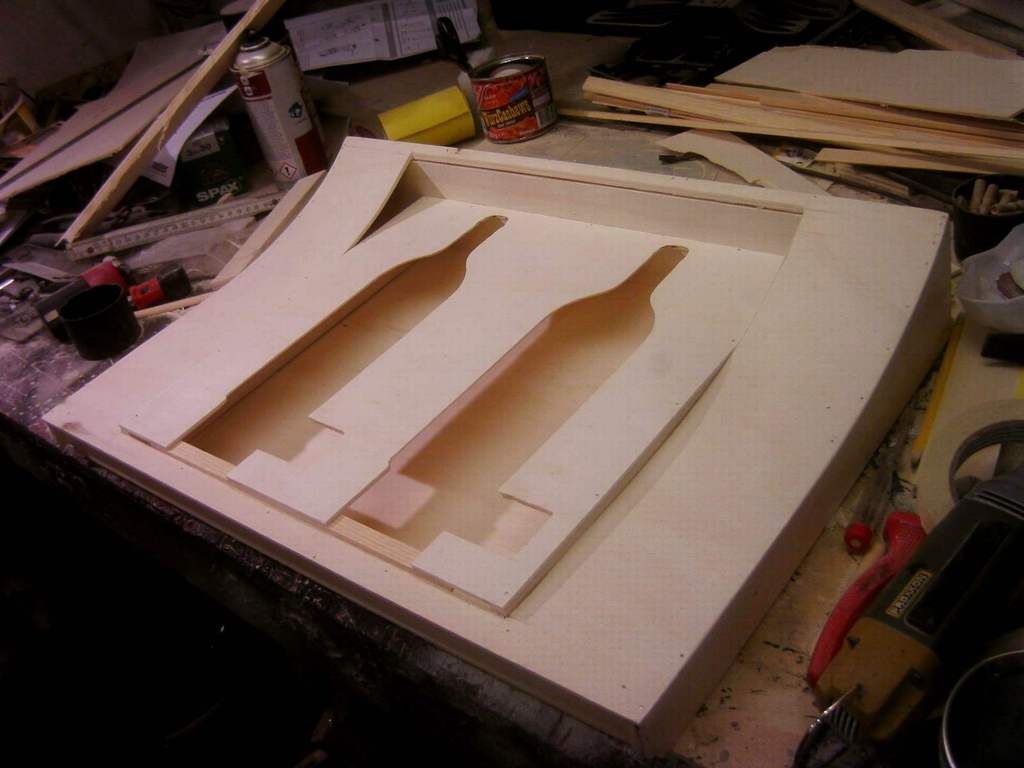
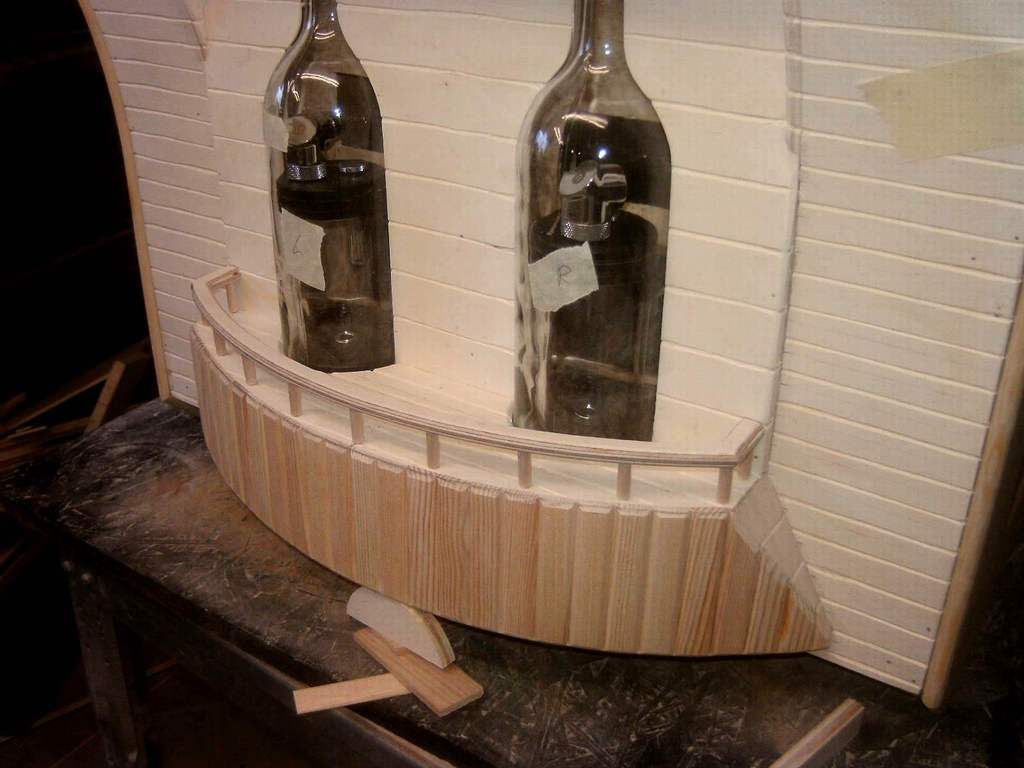
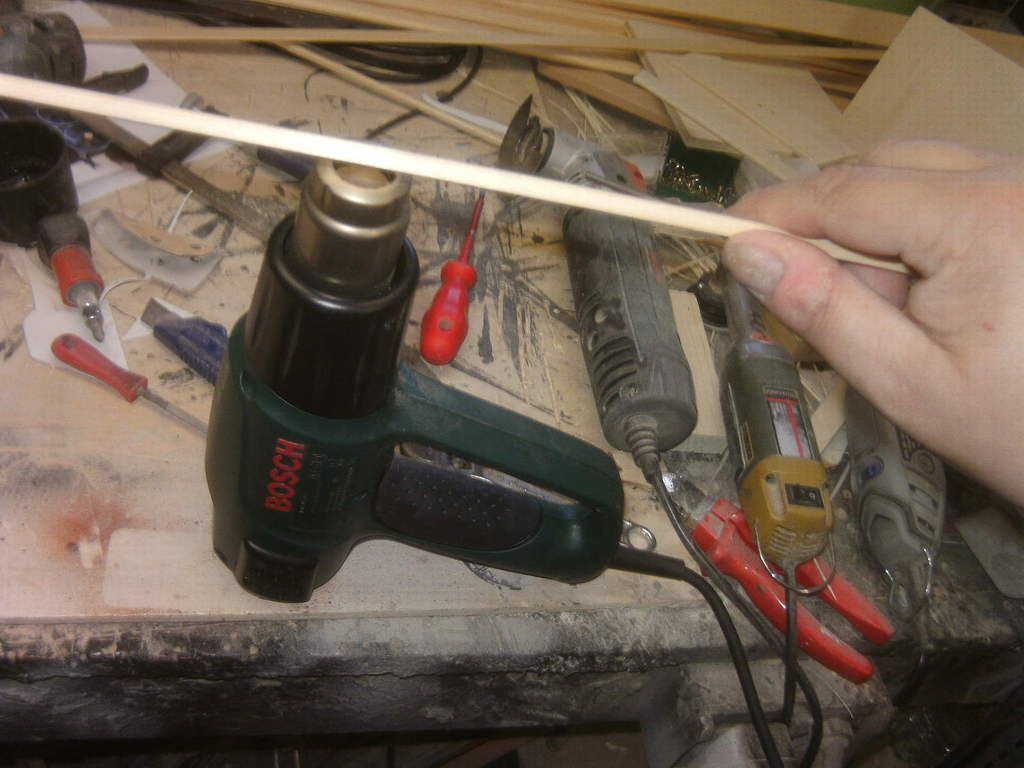
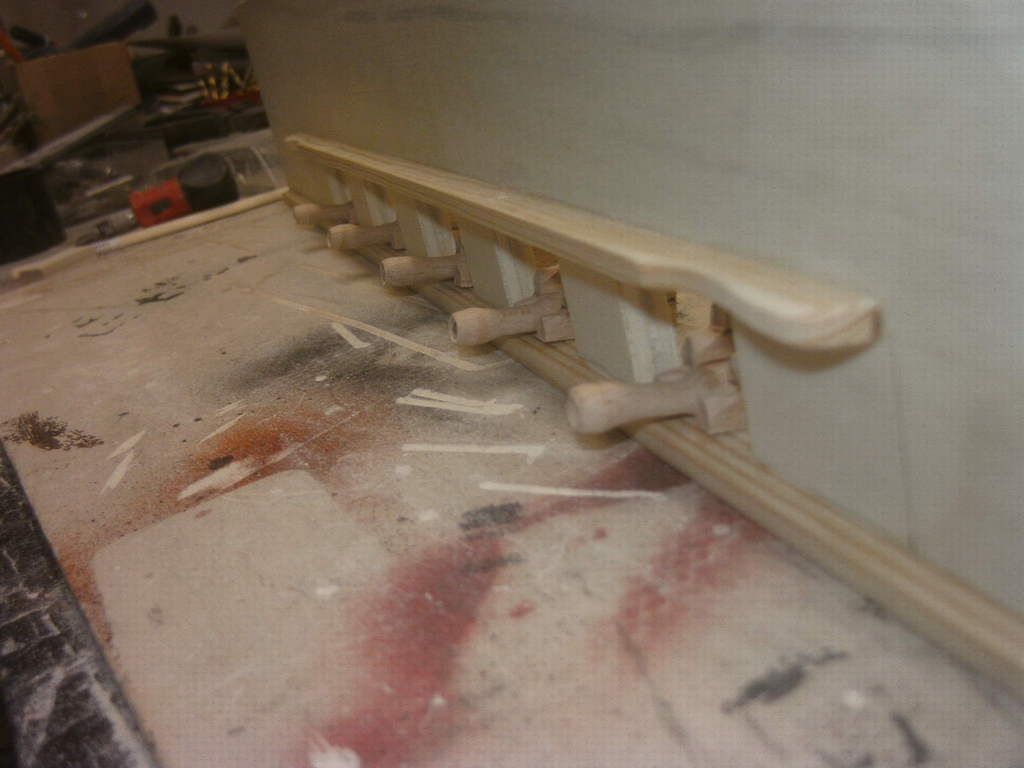
hi guys, here is another update. i worked on the gunwhale today and the rear cover too. the back cover is basically a container, and will be ripped open a bit for the bottles which will sillhouette in between the inner and outer wall.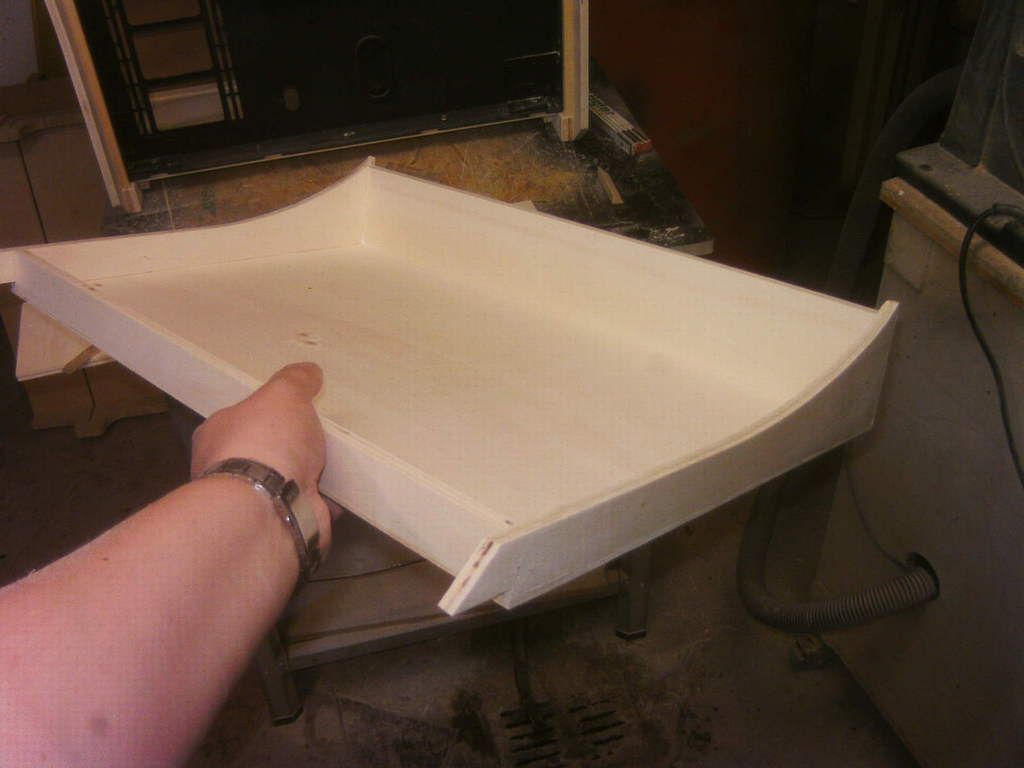
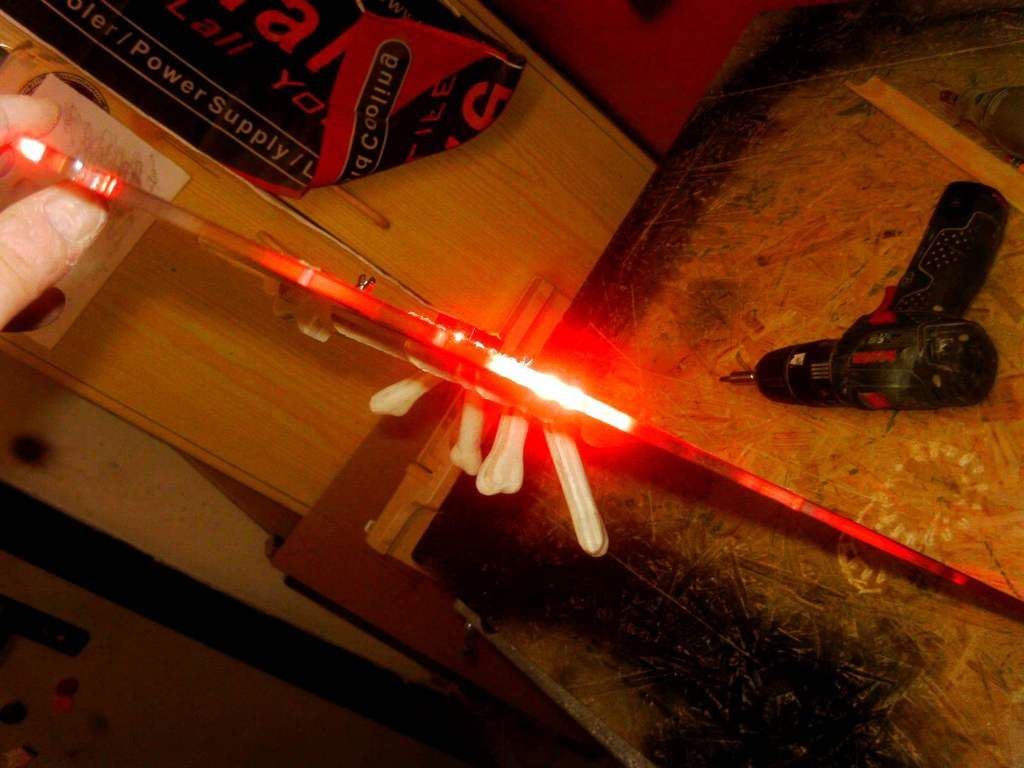
 i had to heat some of the wood strips to get it in the right cirve without snapping
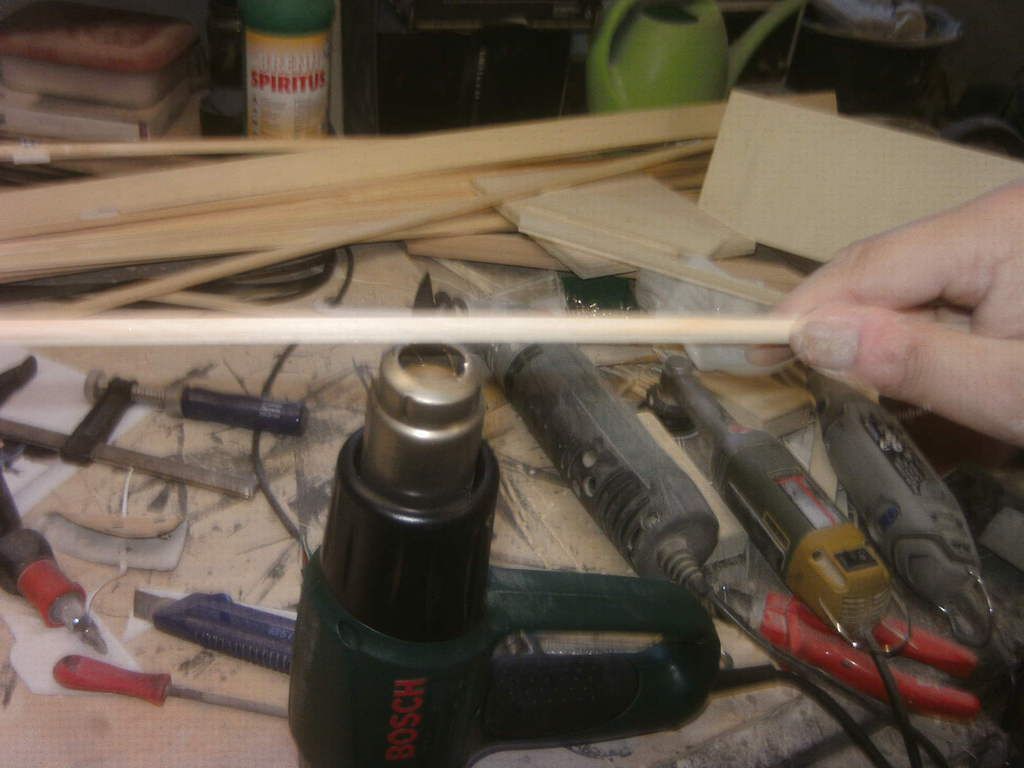

-
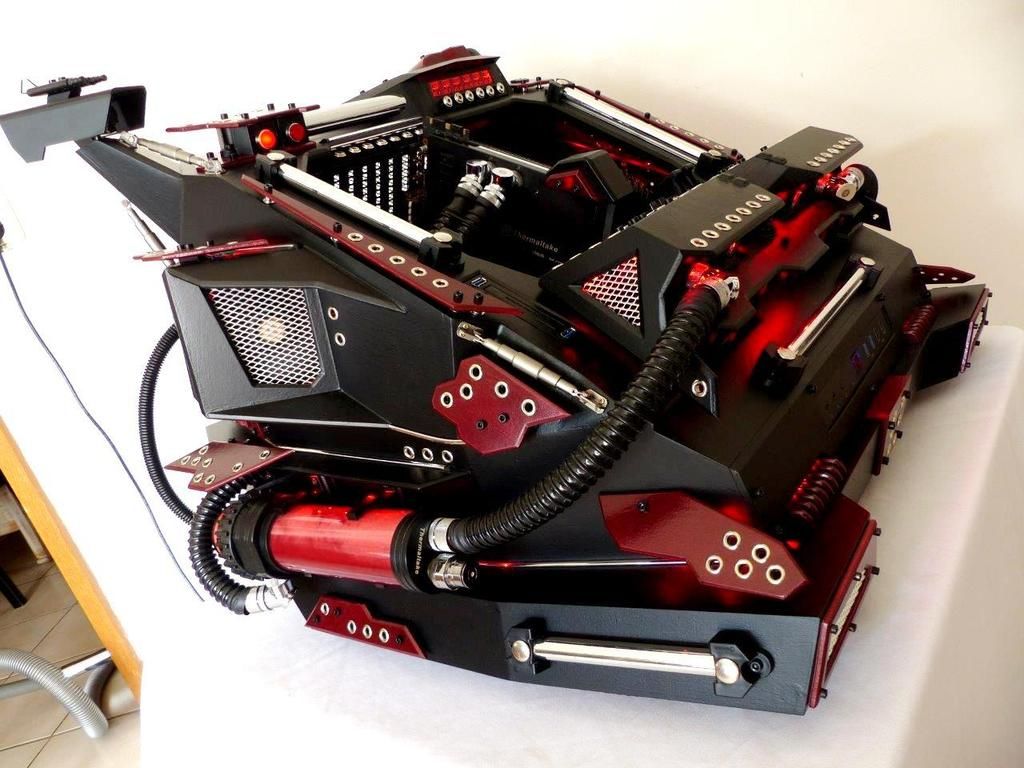
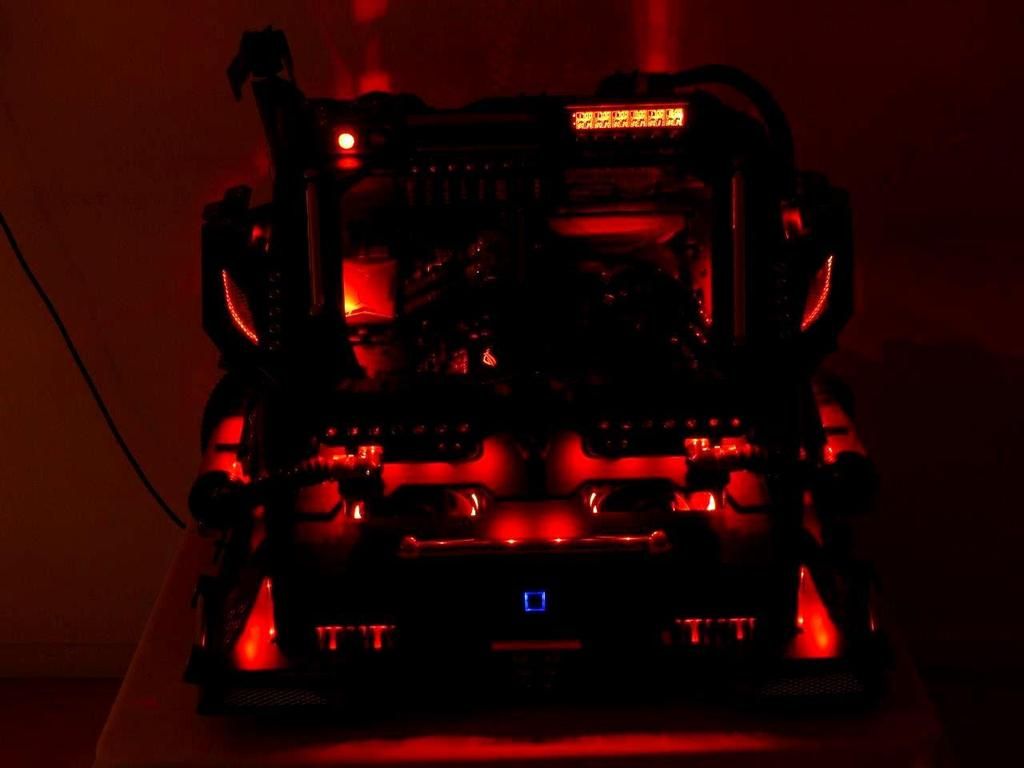
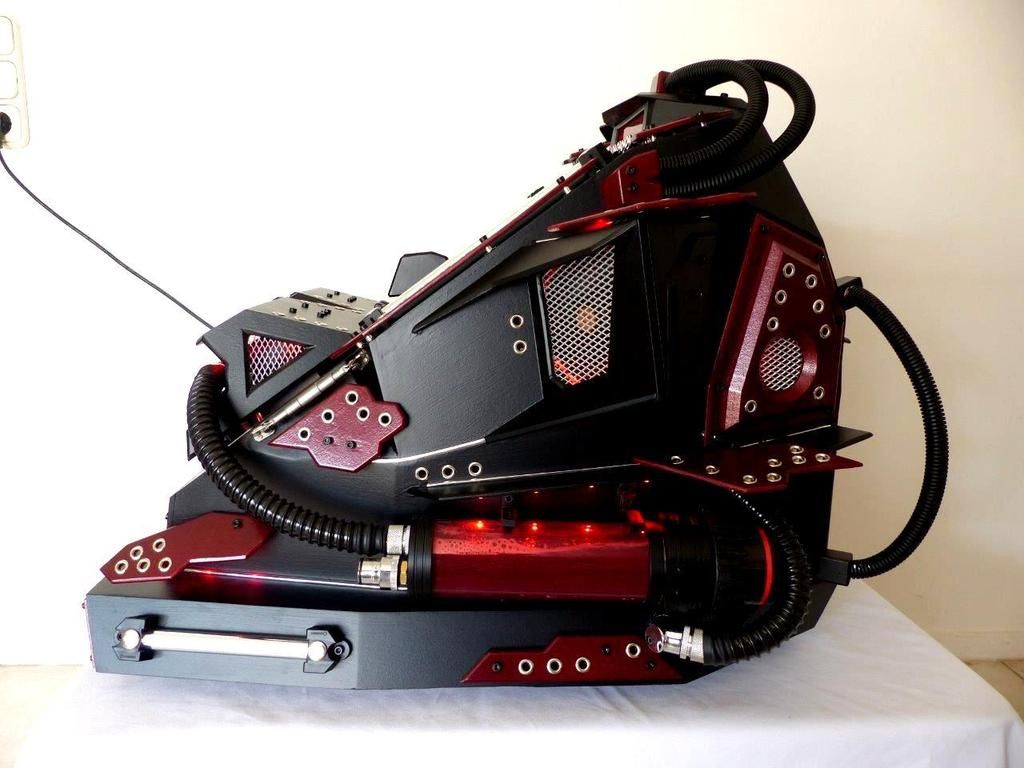
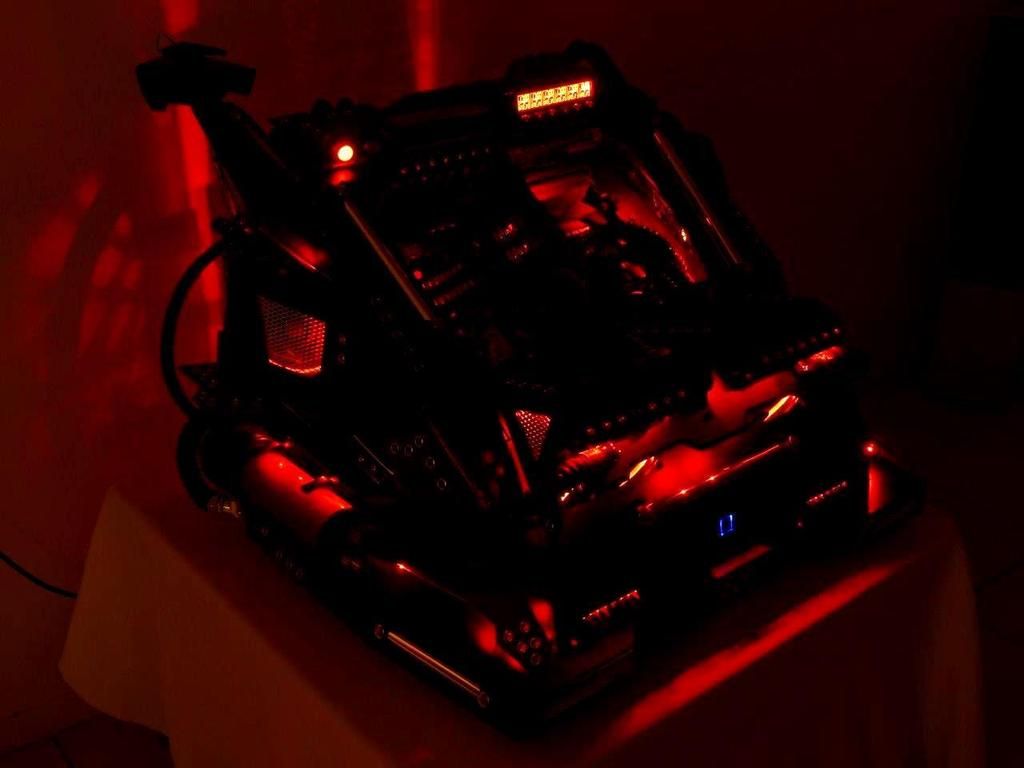
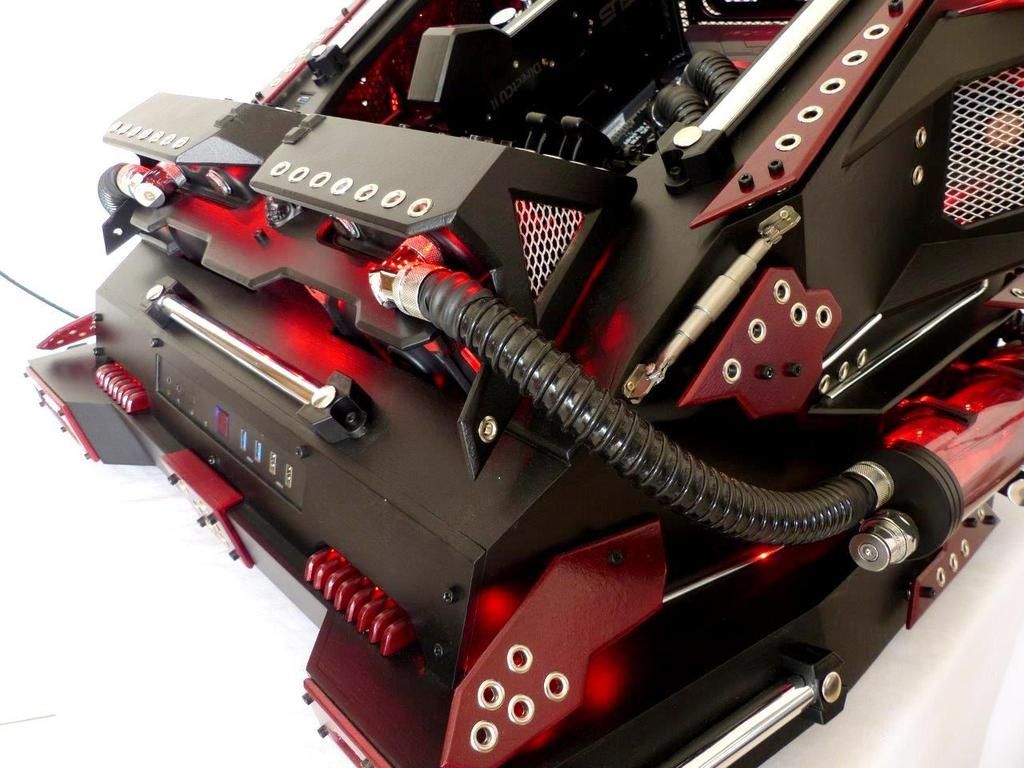
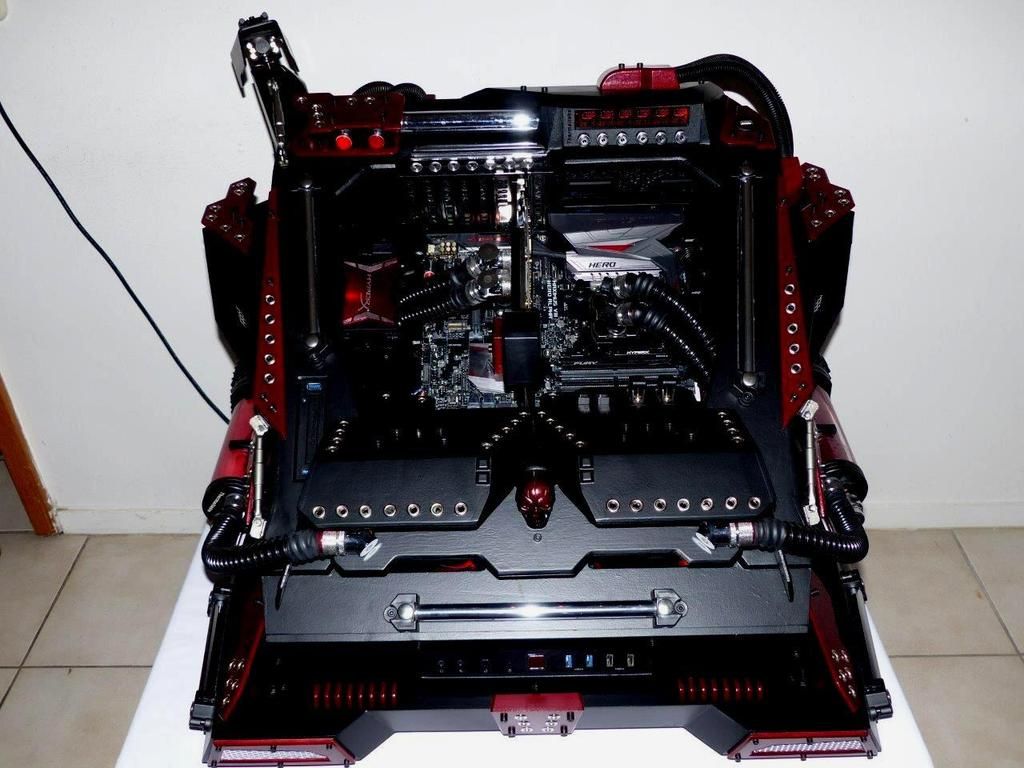
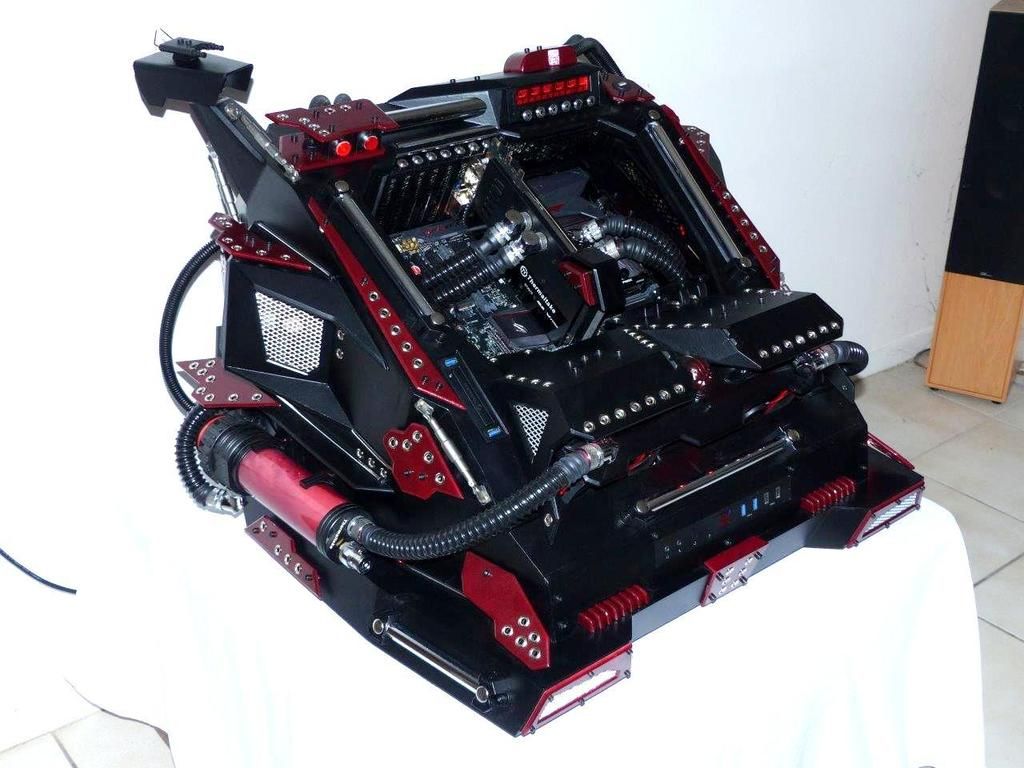
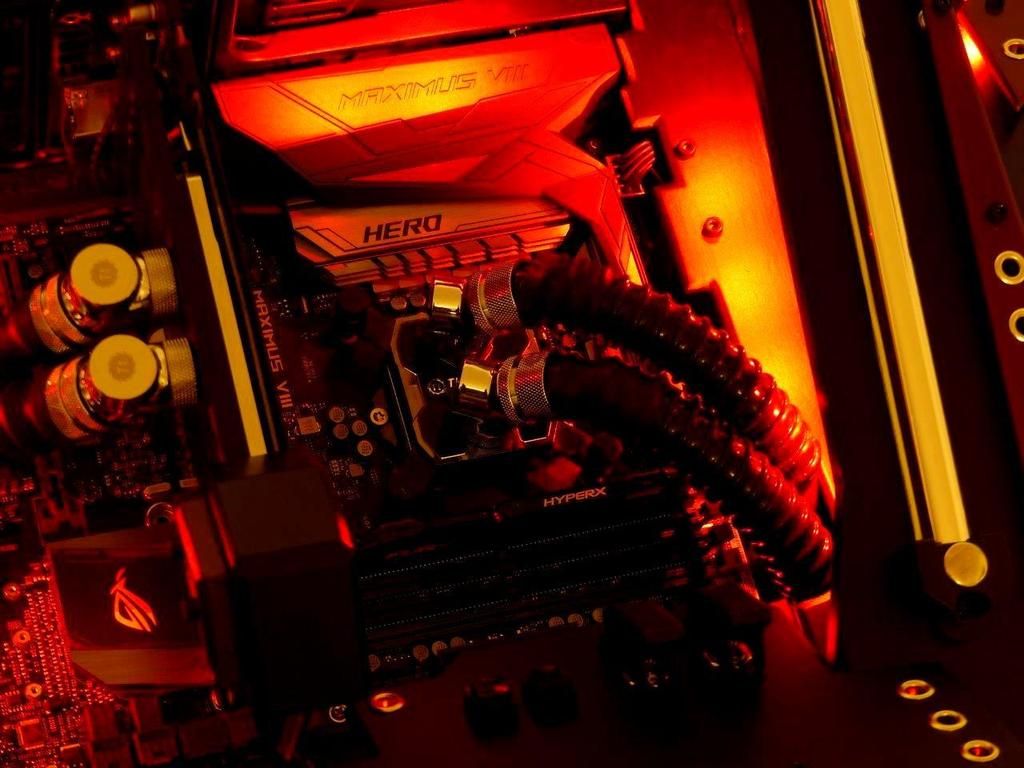
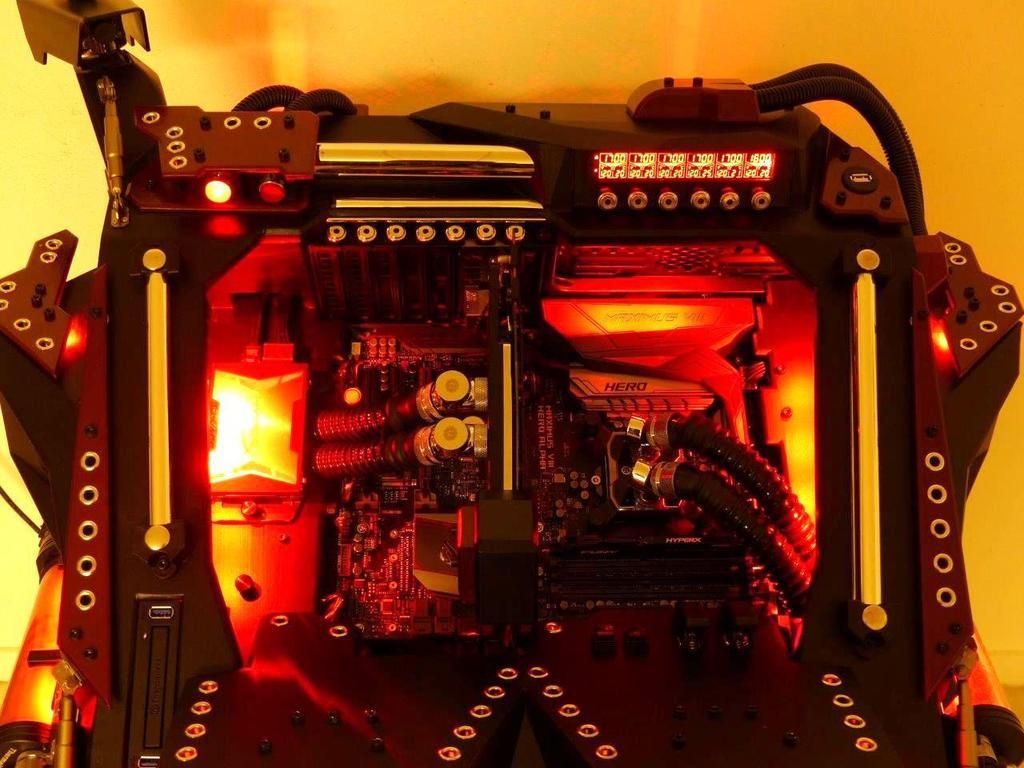
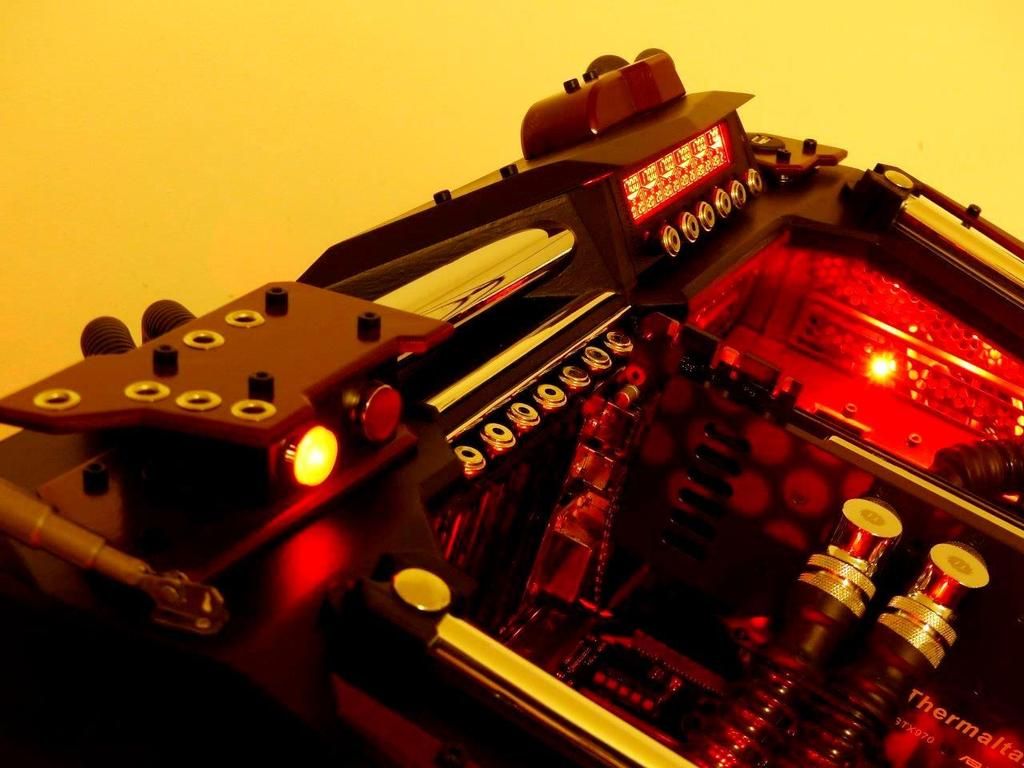
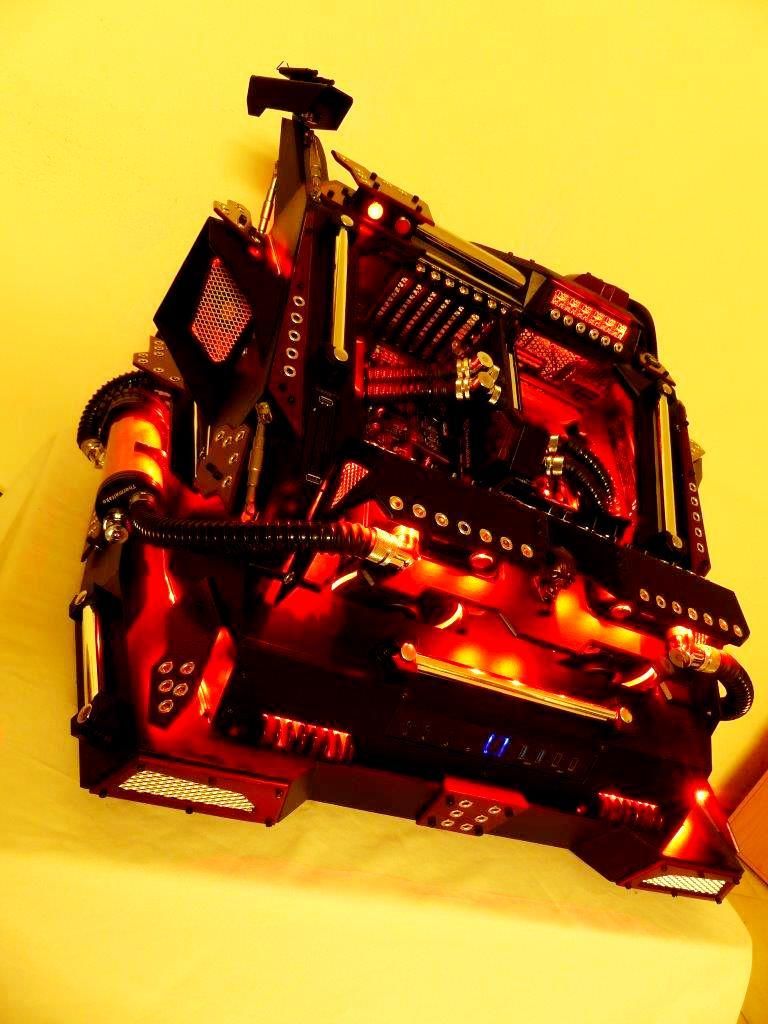
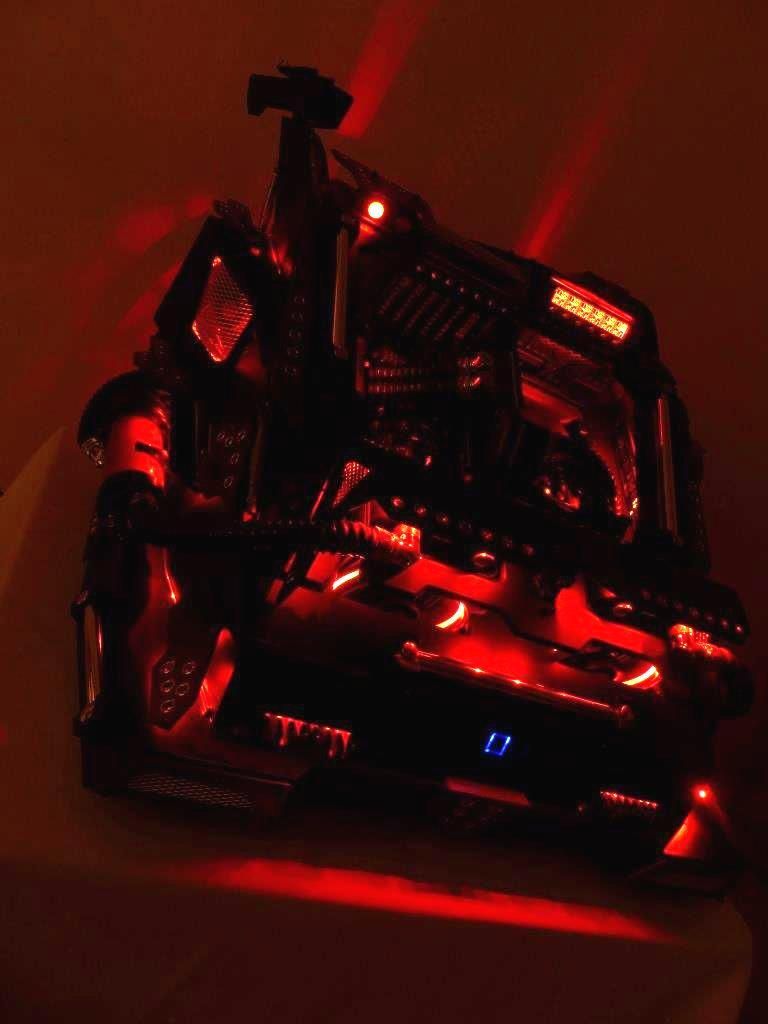
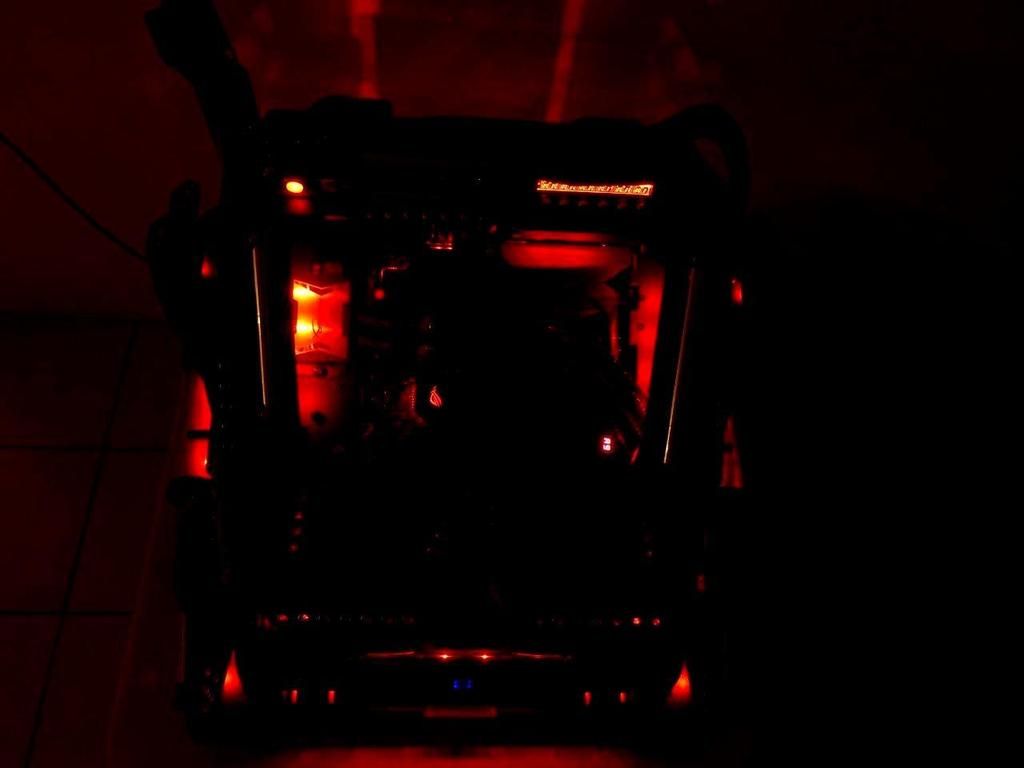
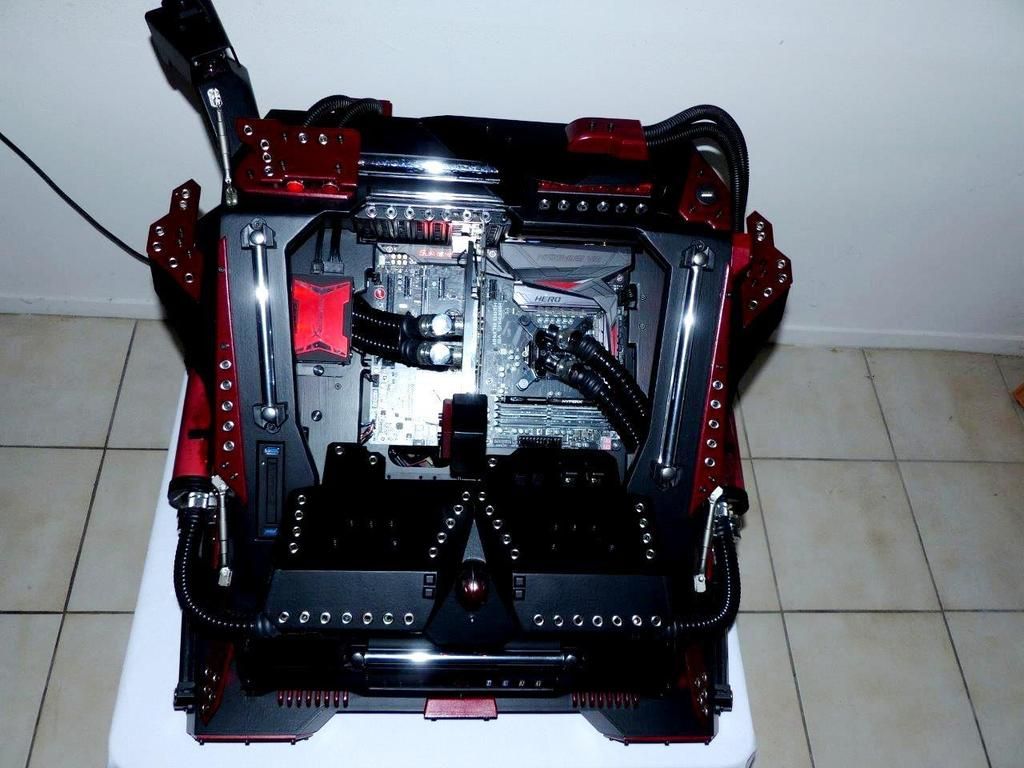
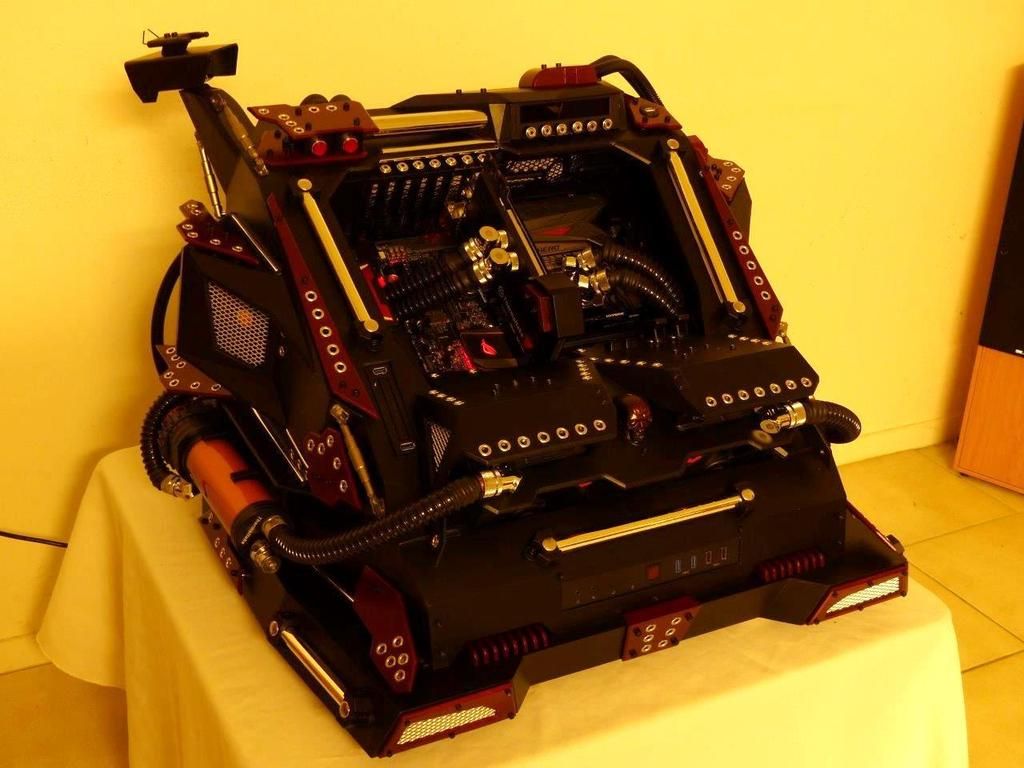
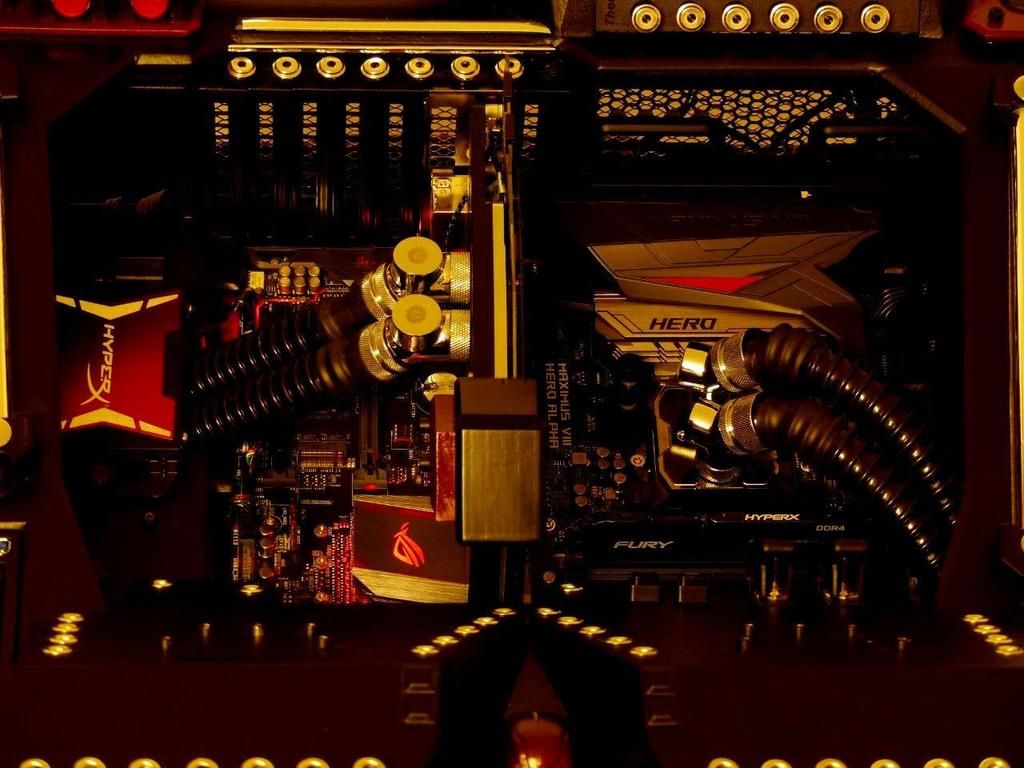
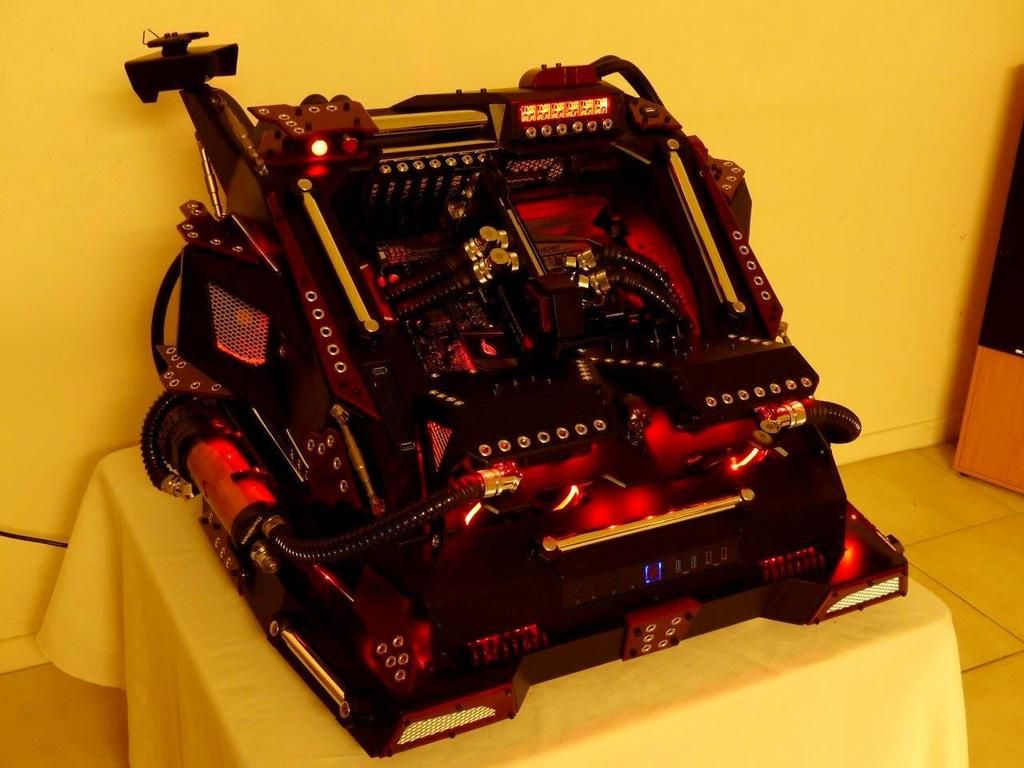
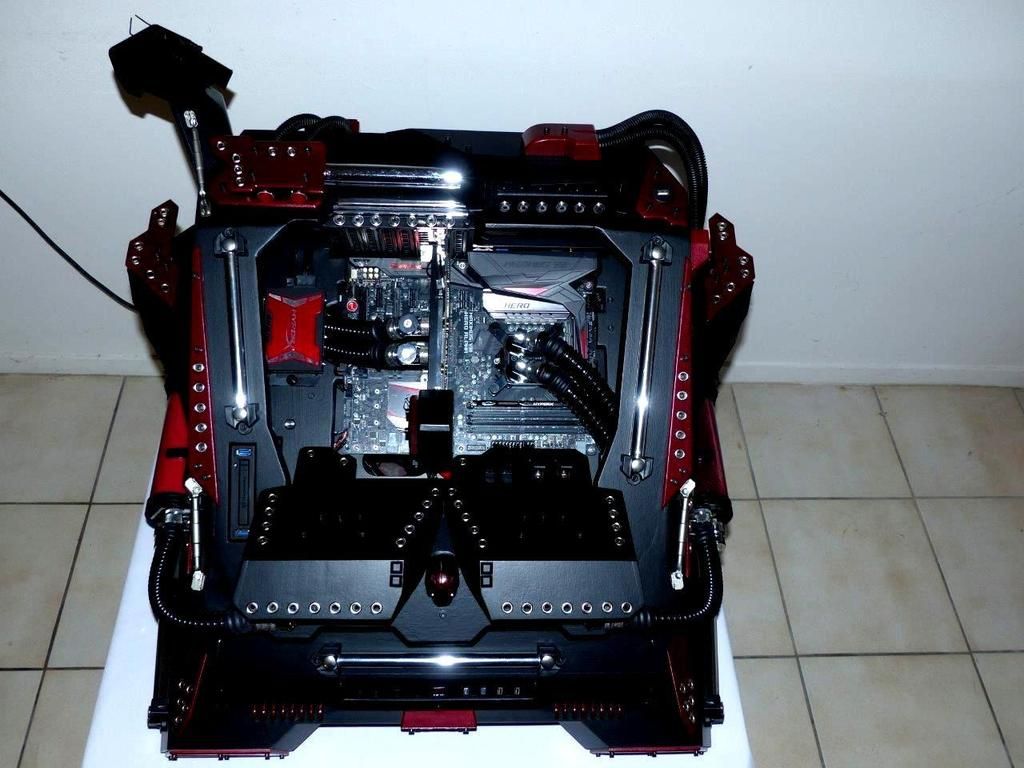
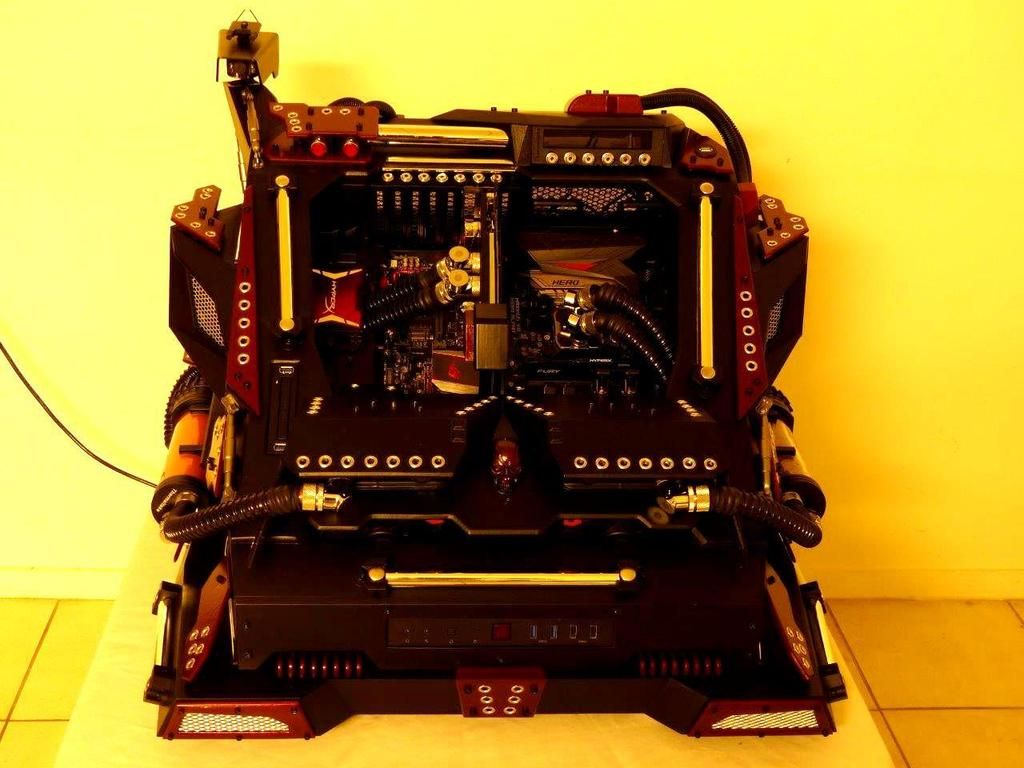
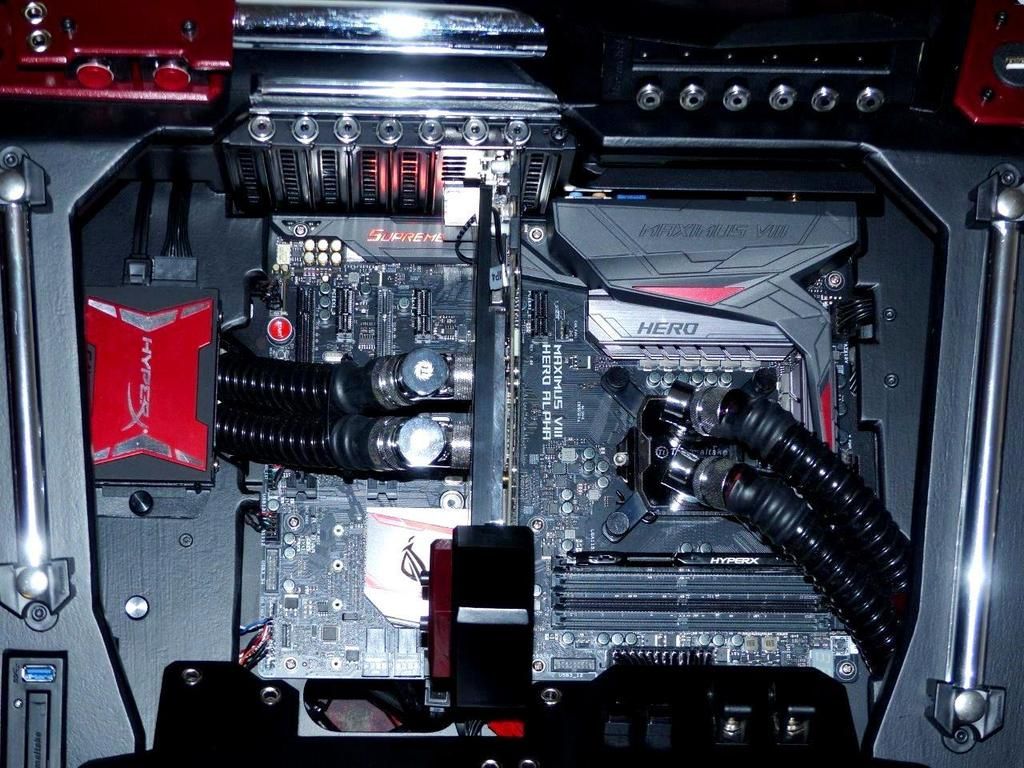
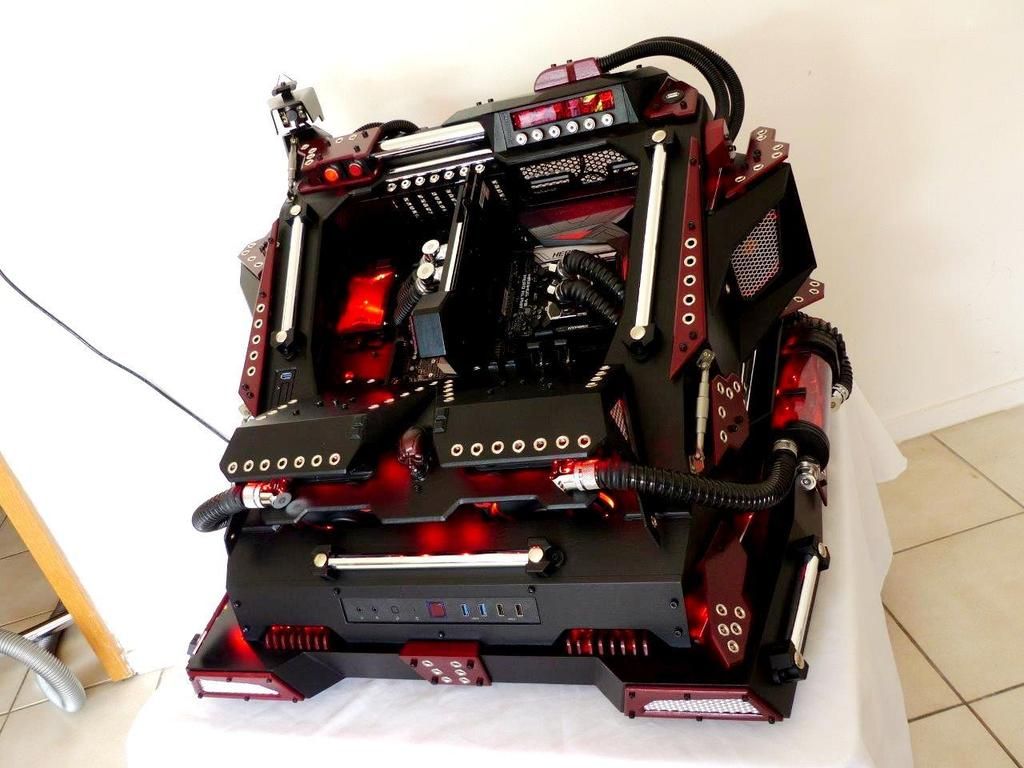
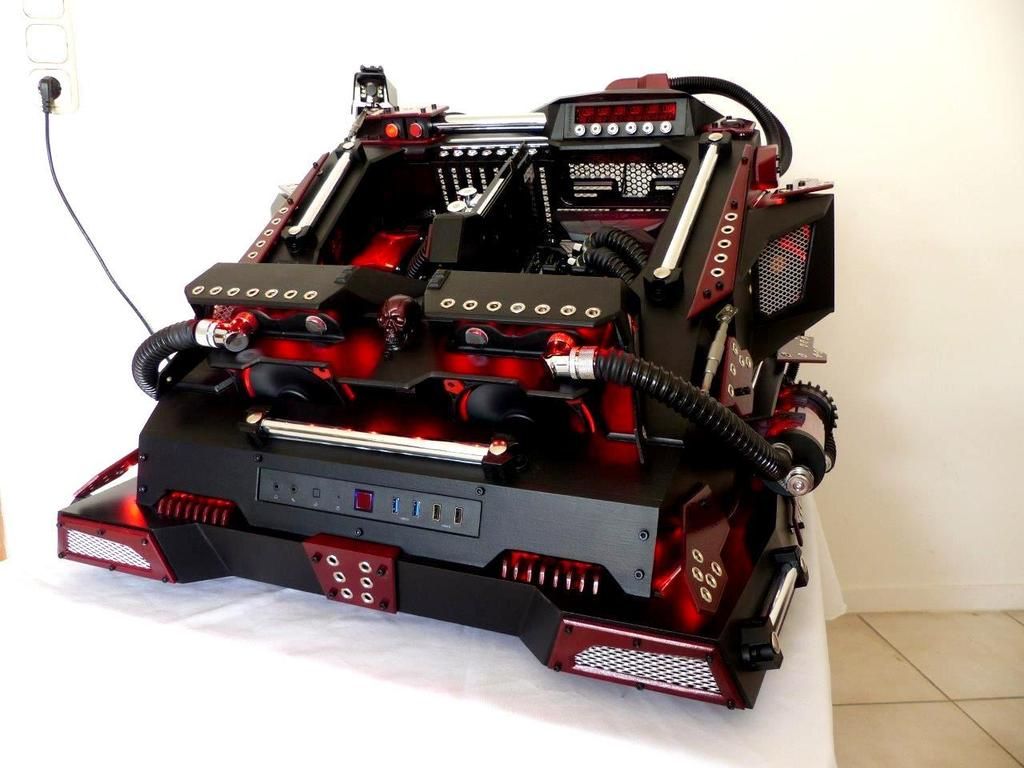
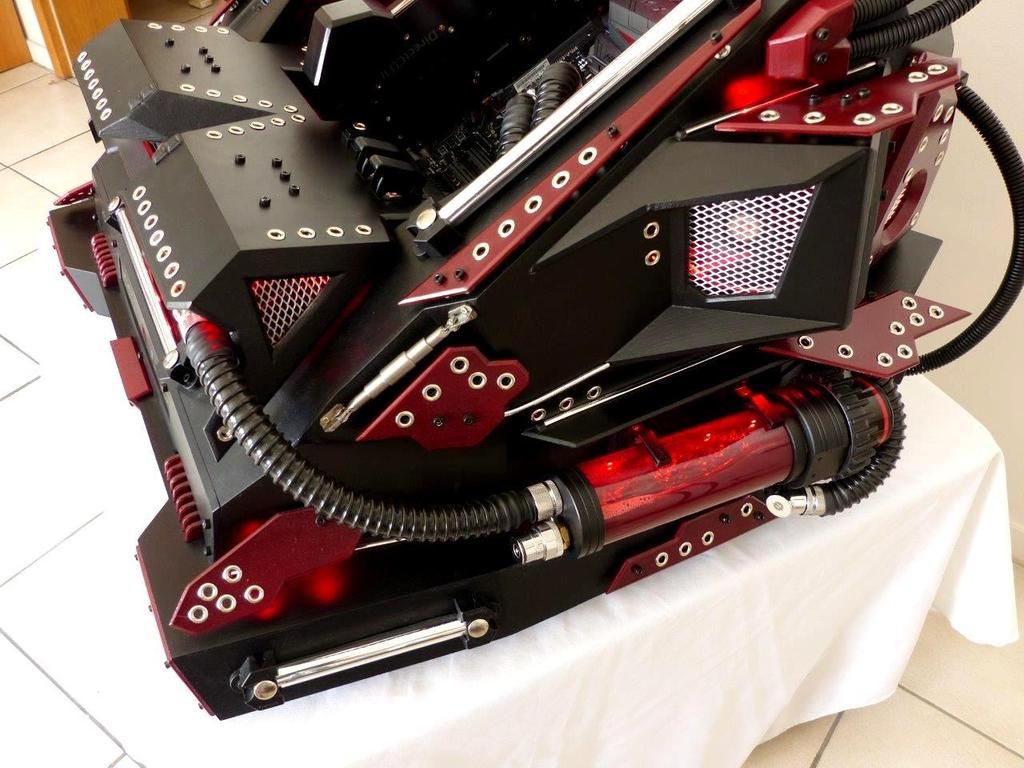
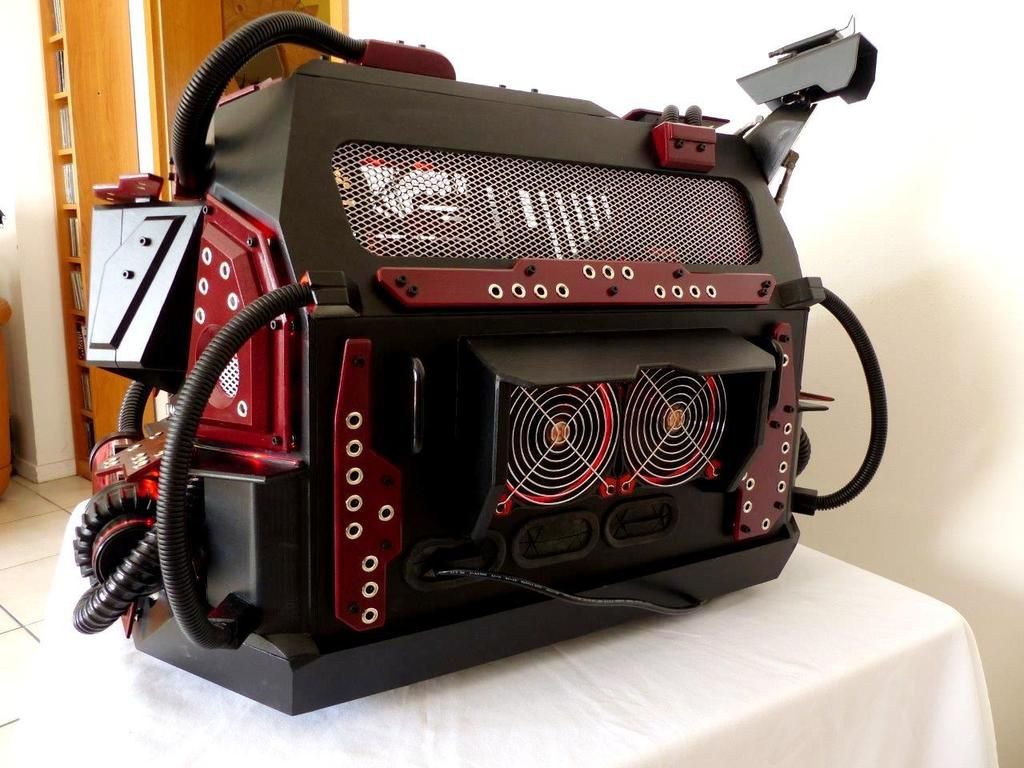
SO Hello everyone, I am never really finished with a project, but I would like to dare saying that for the time being, I am finished with the following project.A big thank you goes out to Scan, Bit-Tech and Thermaltake, as well as all those involved in gettingthis first UK trophy up and running. Thank you for including me and giving me the chance to compete against those 4 top guns here.PODII, THE STRONGHOLD, yes thats the name of this case which should portray strenght and stability.lets put it this way, you could drive around with it in the boot at a 100 miles an hour and this baby wont budge ot tilt or give in to the centrifugal forces. it stands like a cliff against the tides. very sturdy steadfast and rock steady. you cannot just knock it over.I wanted it to be broad shouldered, bulgy and bulky and decided to build it more in the breadth than hight.After sliceing the case diagonally down the middle, I set the bottom half into the POD (which actually means power on demand for me) and built the whole extra caseing around it. I used certain parts of the corex31 case too for the radiator fittings, hdd holder and panels etc..I decided pretty quickly to modify the case unconventionally and stack the two 240er radiators in the case with heads up jutting out like two bumpers with fans and air intkes in the front.by the way the whole case is of course built so that each and every par can be detached, fixed, rebuilt or simply unmounted for maintenance etc..After recieving the Thermaltake chrome parts I decided that chrome was to be omni present every where. The card screws and display knobs are all covered with chrome parts left over from the jean buckle chrome tops which i used togatehr with the modified gardene fittings and chrome pipes for the overall deco set off.I decided to go with matt black and set it off with the shiny reddish dark crimsony type red metalic like on the maninboard and SSD. that made me tinker araound with inking up the ptherwise very poppy red TT coolant to get the same tone for the water, as can be seen in the reservoirs which are placed on both sides like gatlin guns slung low.One thiong was quite certain from the start, that I was going to make the pipes look a little more bulky and strong looking by covering them with this spring spiral tubes form teh local garden warehouse.Seeing as i dont use automation and have to make each and every part in painss taking hand work, it was as usual hard getting both side equally symetrically precise. but I like proving that its possible.Most of the red plates hide inirect leds underneath. I only took red ones and they have an effect module which can control three channels and make em blink, fade, flash and flicker to music as well as in certain preset effects too.Thanks to Thermaltake for sending me extra tubes because i really had more than usual here, i needed 3 packets of flexi tubing to get both loos curled around the case in and out and working the was i want.The rear hatch hold two fans just like the side fans too. the side fans have been mounted in a way i have never seen done before. they are not screwed in, they are just slotted in and click into place diagonally. Hence, they can be slid out and cleaned or replaced too at will by unscrewing 2 screws to take the fan covers off.The rear hatch is magnetically clicked on and has plates with leds as well as 2 hanlde grips to hold it.Up left on the perch is an HD webcam wich can be pitched and yawed to the required angle at will.I even slid in a Thermaltake HDD and USB 3.0 quickdocker into the lower left side for quickly accessing temporaray data. The Hyperbeast SSD in placed at the left of the mainboard.I made the fan holders at the side in such a way that when looking at it while standing in front of it, they look like stern eye brows frowning at you.I integrated the switch and usb and audio panel in the front and the whole front can be unscrewed to open and fix if needed. The front should look a little like a fast car front.All in all, that was just about it, Of course I could go on and on describing how I did what, but now will let some preliminary final pictures tell the tale. Just for the record, its the POD II with an own name called THE STRONGHOLD because I also made a POD 1 which can be seen here too.The first POD was a totally different design and compared to this one a real tiny one. but it had power too. This one casta shadow over it as far as size is concerned though.I hope you all like it.
PODII, THE STRONGHOLD


- Tte Martin, adelinevoc and eqeqeqe
-
 3
3


[Germany] Ali Abbas
in 2016 Thermaltake CaseMOD Invitational Season 1
Posted
thanks mate, glad you like it.
thanks to you too. lets hope the detailed color scheme i have in mind also pays off.
yes guys, now color will slowly lightne things up. dont have much time now to get this finished so its nonstop modding for me now.
here is the first stain in brown, which will more or les be sanded off now.
i also made a ssd quick dock station in pirate ship deck plank style to match the theme.
i will be in the workshop in an hour till open end and try to get as much priming, sanding and repainting donas as possible today.
dont worry, this is not the final color, this is the the weather beaten primer.