-
Forum Statistics
7.9k
Total Topics52.9k
Total Posts -
Member Statistics
136,306
Total Members16,800
Most Online


GorgTech
-
Posts
43 -
Joined
-
Last visited
Content Type
Profiles
Forums
Downloads
Events
Gallery
Blogs
Posts posted by GorgTech
-
-
Here´s another Unboxing as well as some further steps needed for the Water Cooling to progress.
I don´t want to flood the PC in case I have to drain the cooling fluid. This is something I planed right from the beginning.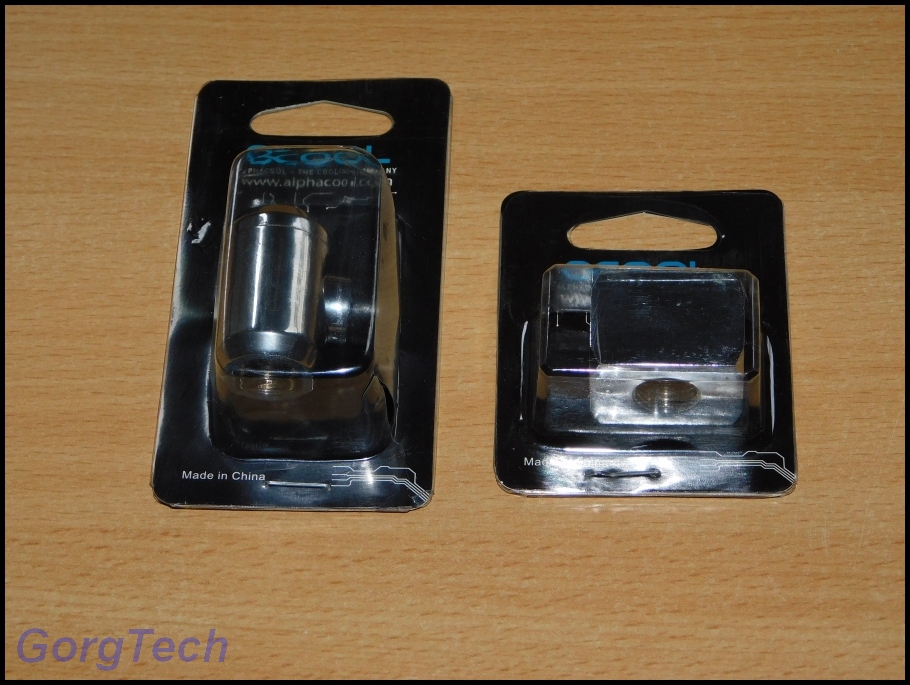
I´ve chosen these important parts: Alphacool connection terminal TEE T-piece round, G1/4 - Chrome and Alphacool Eiszapfen 2-way ball valve G1/4 - Chrome.
Nice, massive and shiny.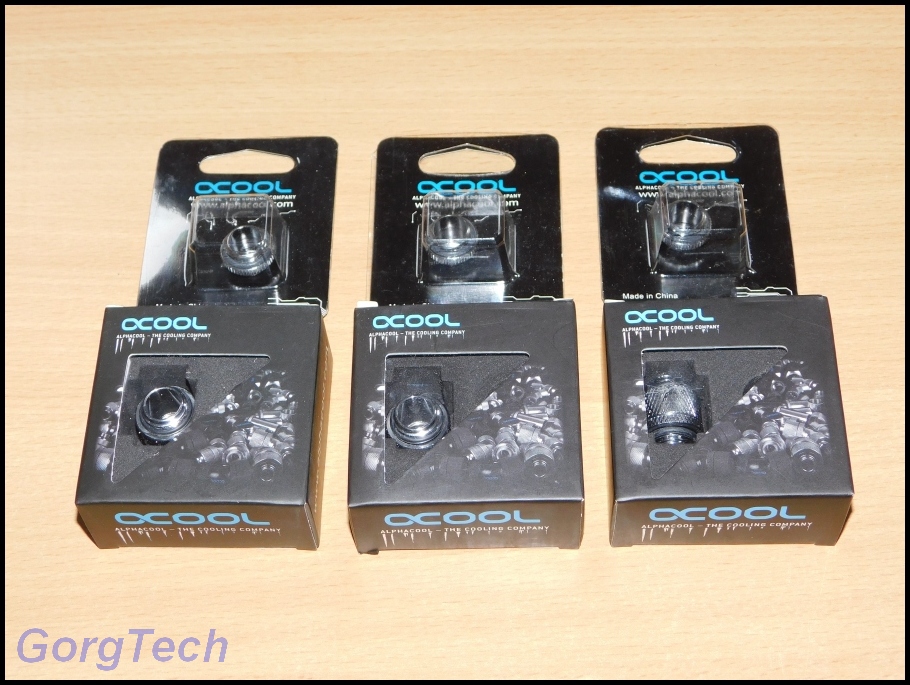
I also needed suitable connection pieces. I´ll use these items:
Alphacool double nipple G1/4 outer thread to G1/4'' outer thread with O-ring - Chrome and Alphacool Eiszapfen double nippel rotatable G1/4 outer thread to G1/4 outer thread - chrome.
Both modells can come in handy.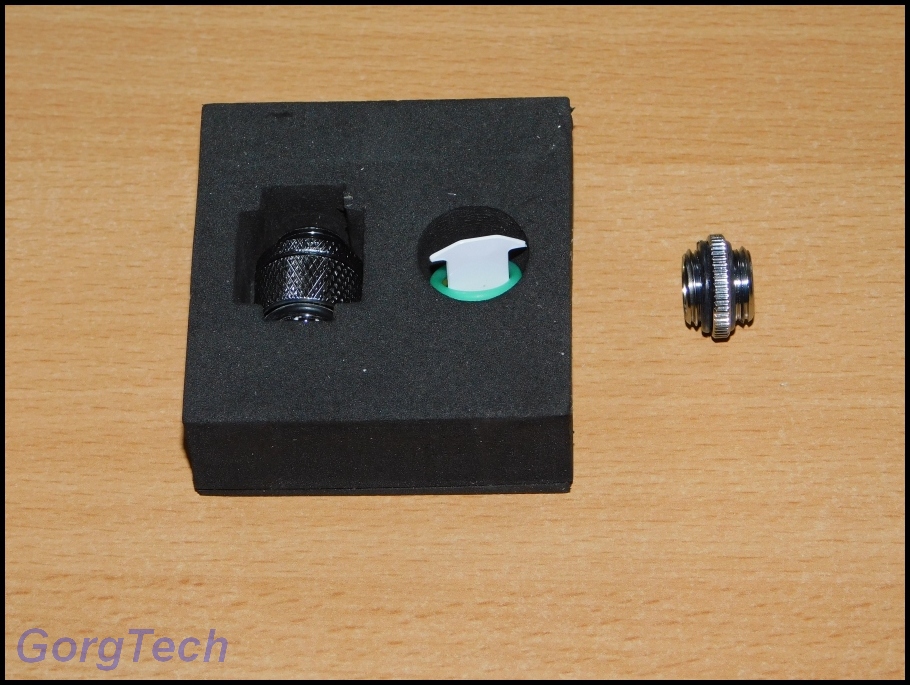
The rotatable nipple also includes some extra gaskets.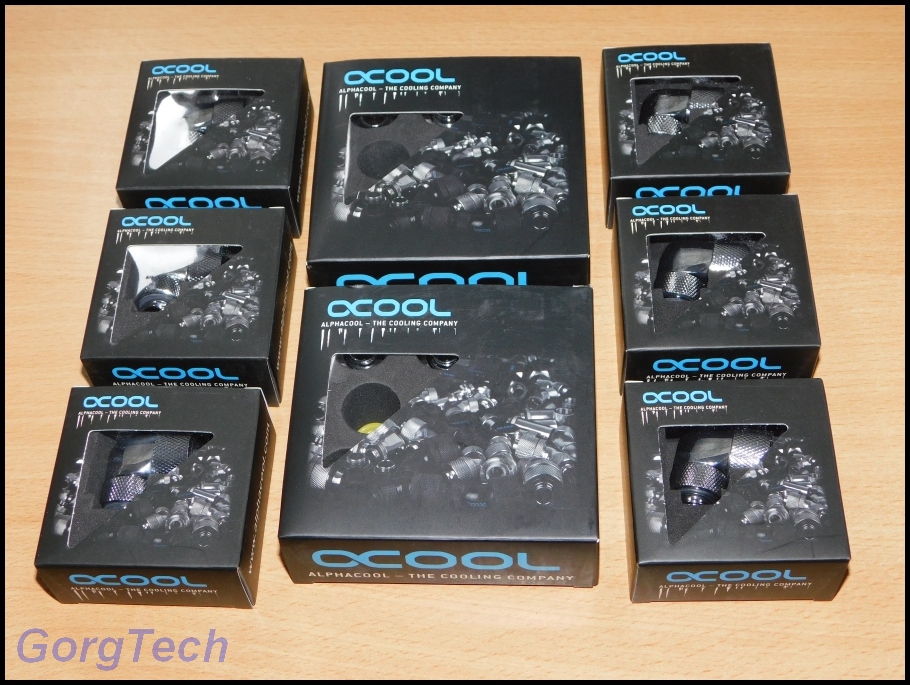
Which fittings should I use? Since all the connecting parts will be visible, I want them to look good and to be of high quality. I´ll use these fittings: Alphacool Eiszapfen 13/10mm compression fitting 90° rotatable G1/4 - Chrome and Alphacool Eiszapfen 13/10mm compression fitting G1/4 - Chrome Sixpack.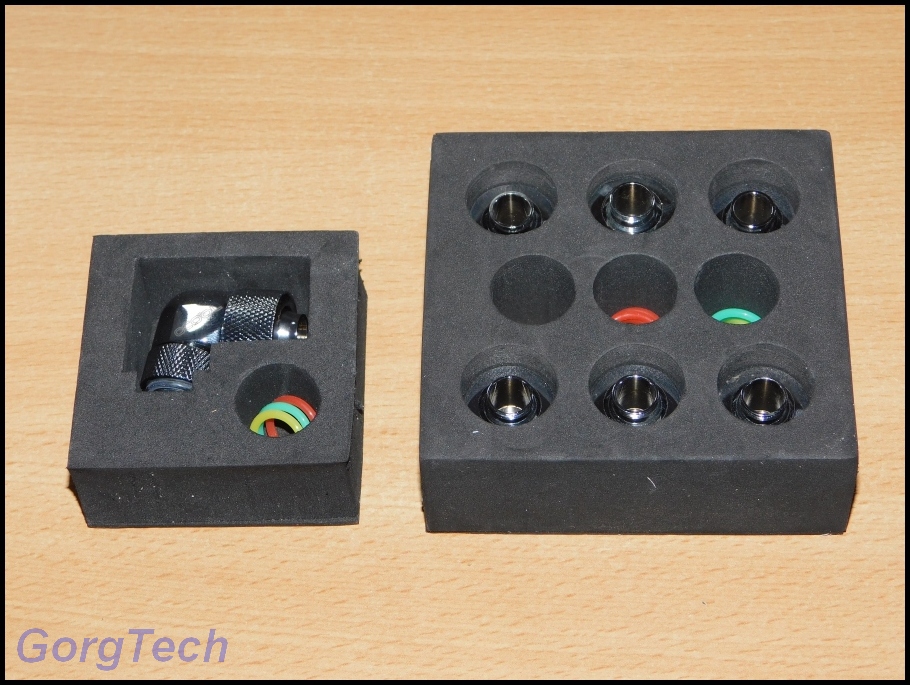
These fittings are well packed and also come with alternative gaskets, in case you want to use them.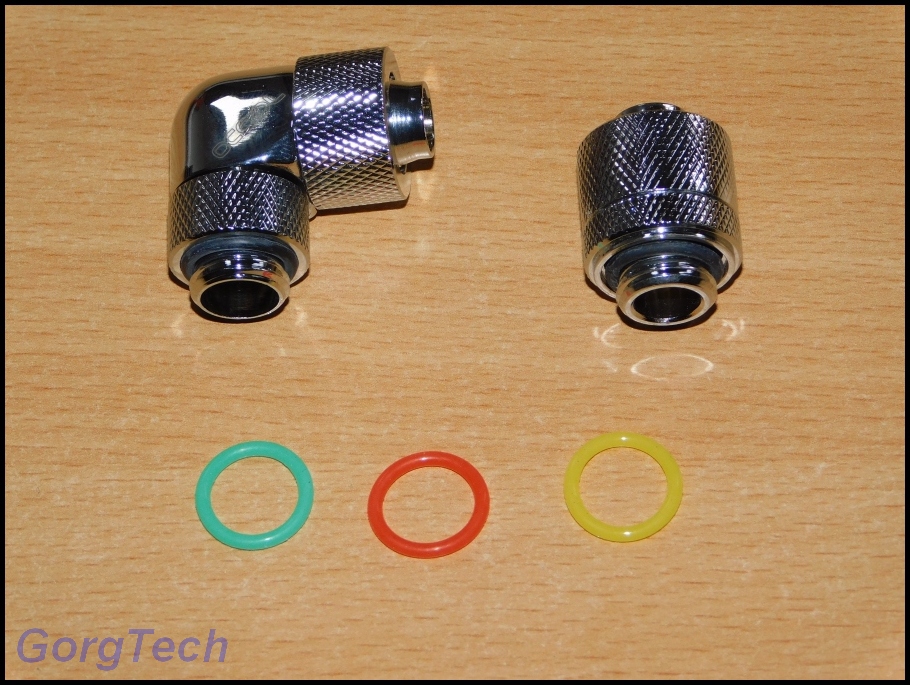
Don´t they look great? I like the massive looks and the shiny Chrome looks. I´m pretty sure that these puppies won´t flood the PC and should be 100% reliable.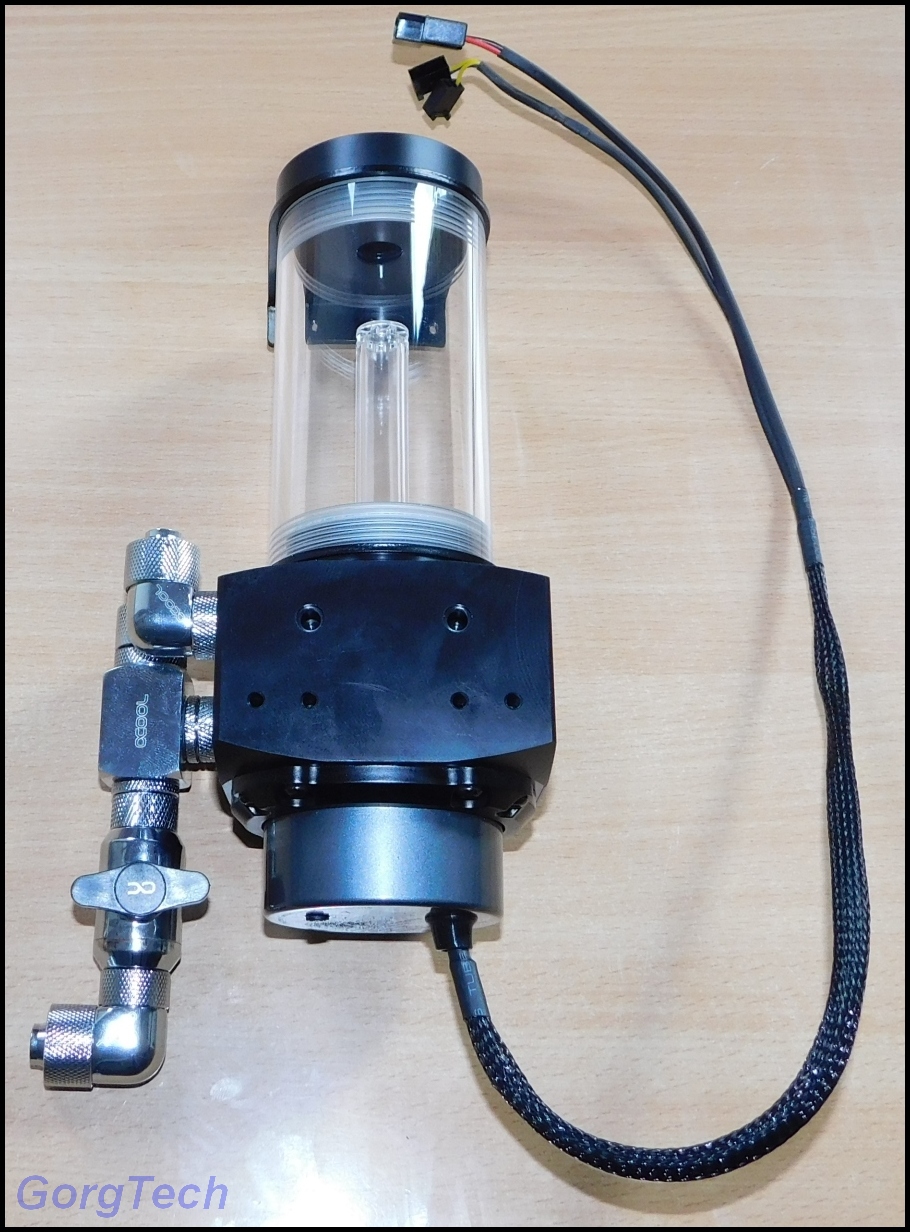
Just used a few of these parts with the reservoir. Not bad, eh?
Let´s have a look at the CPU Cooler. I´ll use the new
Alphacool Eisblock XPX CPU - Intel/AMD - Deep Black.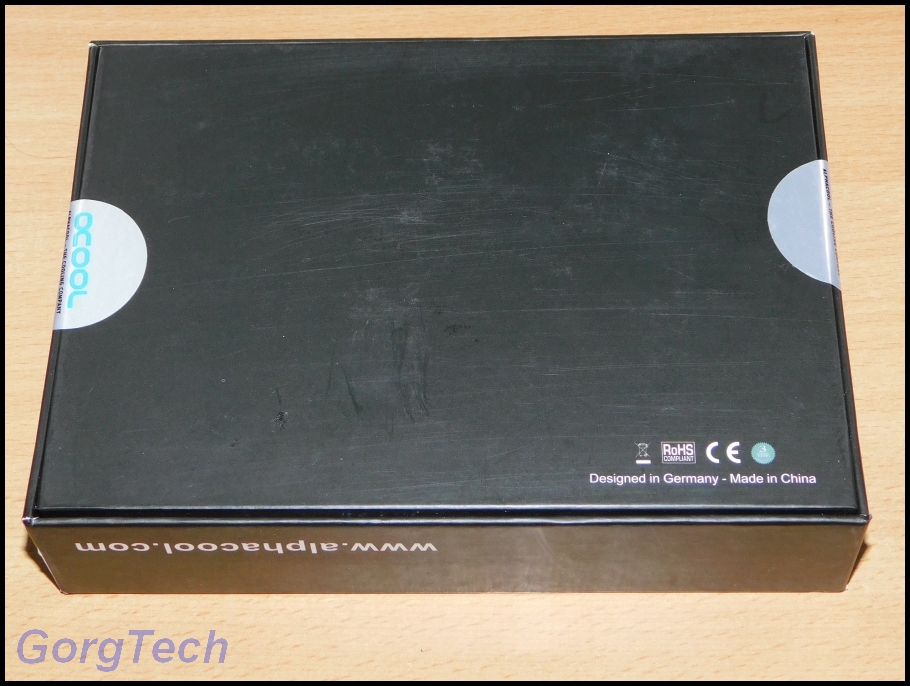
Just cut the sealing...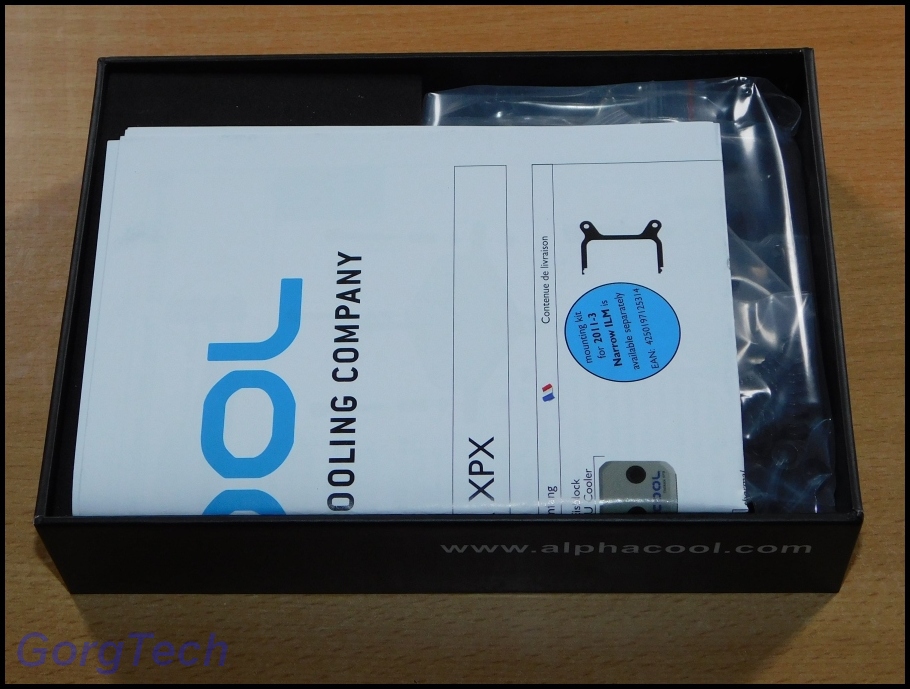
...and have a look at the stuff inside the box.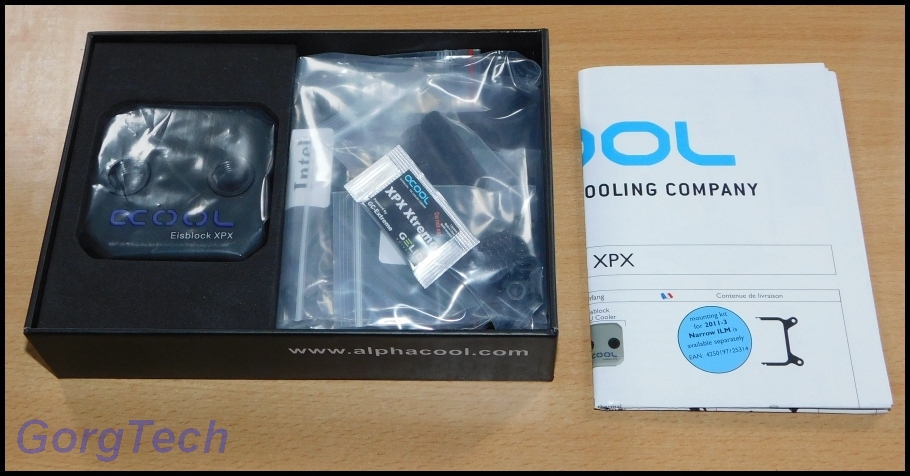
This CPU Cooler is well packed.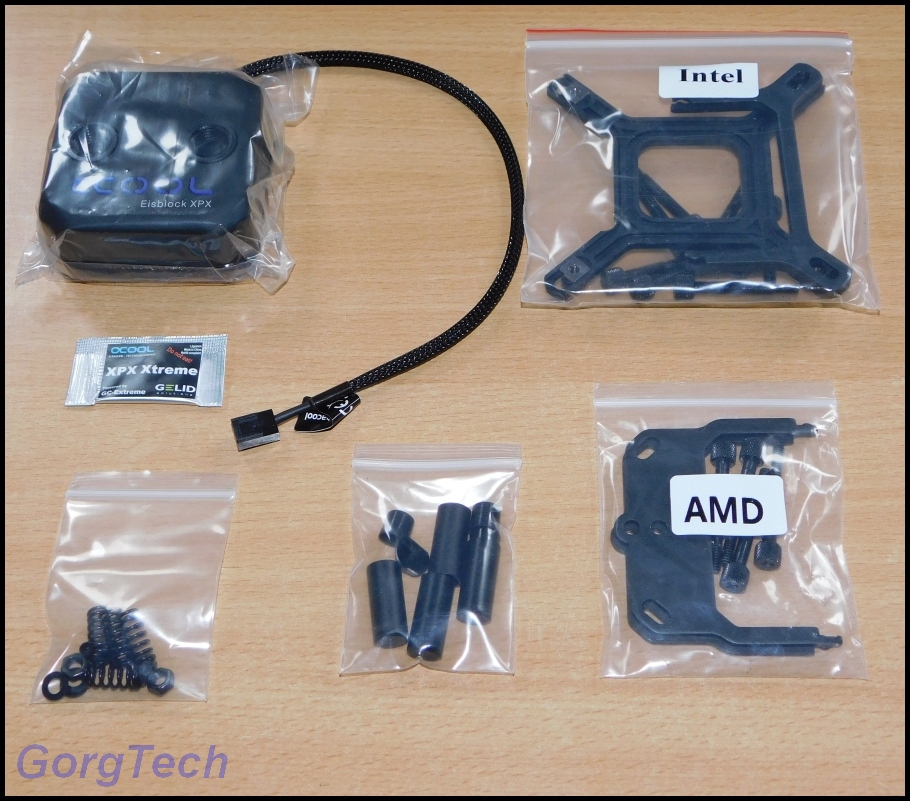
Quite a lot of parts inside. Everything you need for a AMD or INTEL CPU. There´s also some thermal paste inside, just in case you don´t have anything else laying around
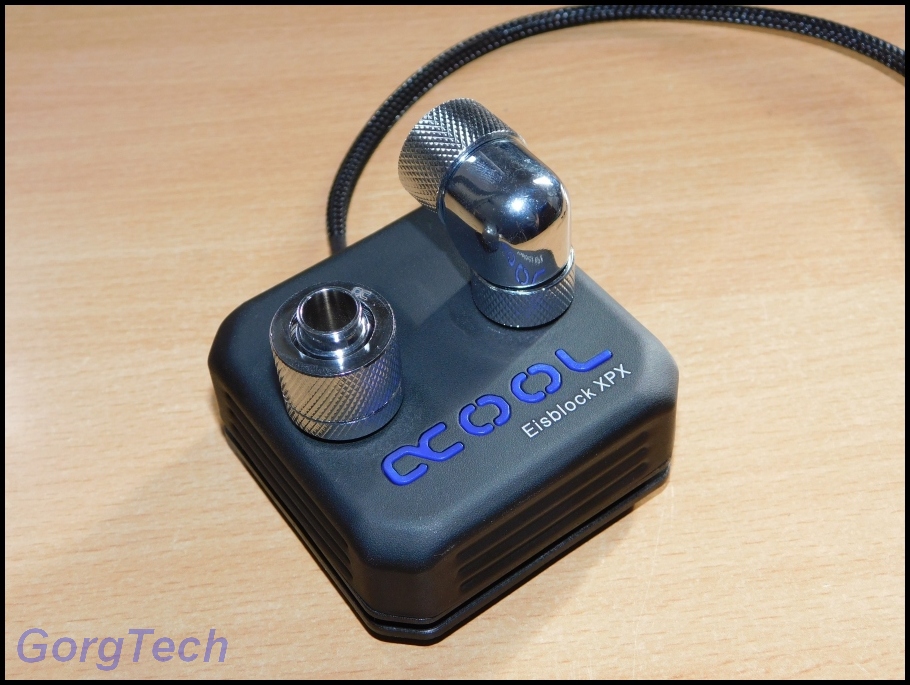
Just use some of the Eiszapfen fittings. Nice contrast between the dark cooler and the chrome parts.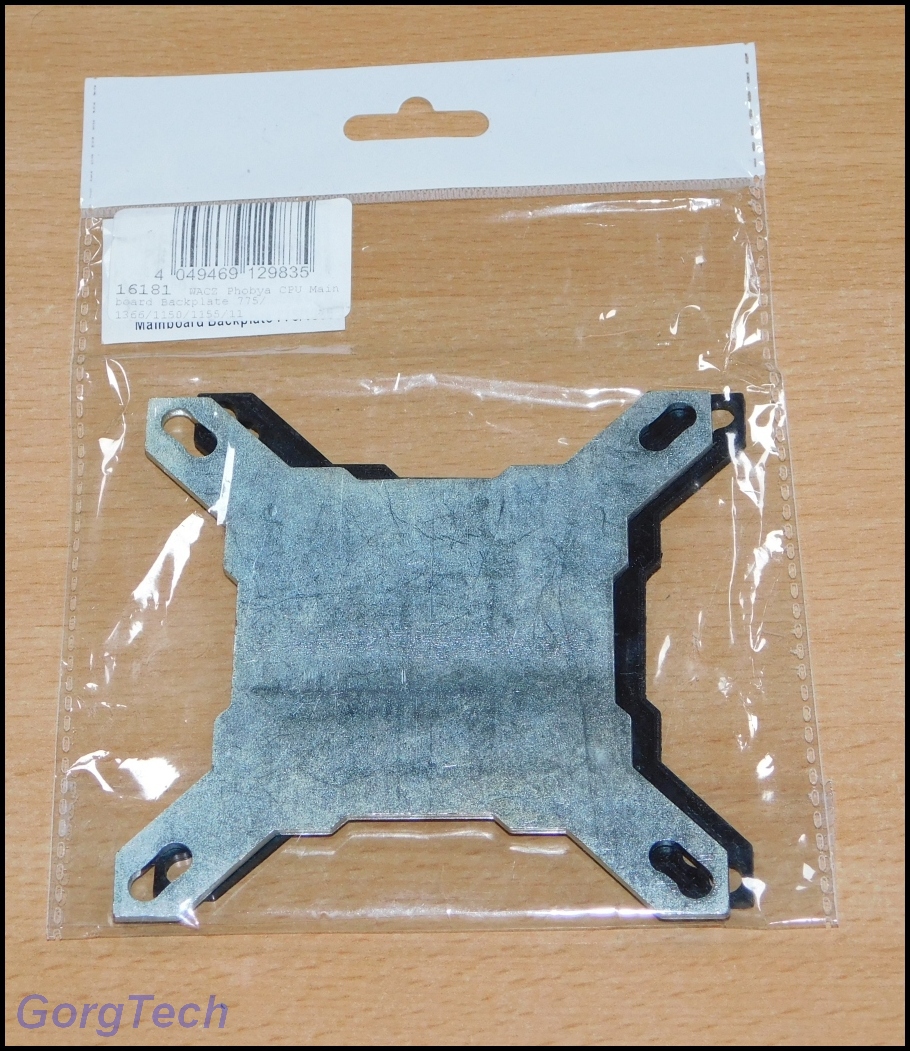
To make sure that everything works out, you need to consider using a backplate too. I´ve chosen this one: Phobya CPU Mainboard Backplate 775/1366/1155/1156/2011.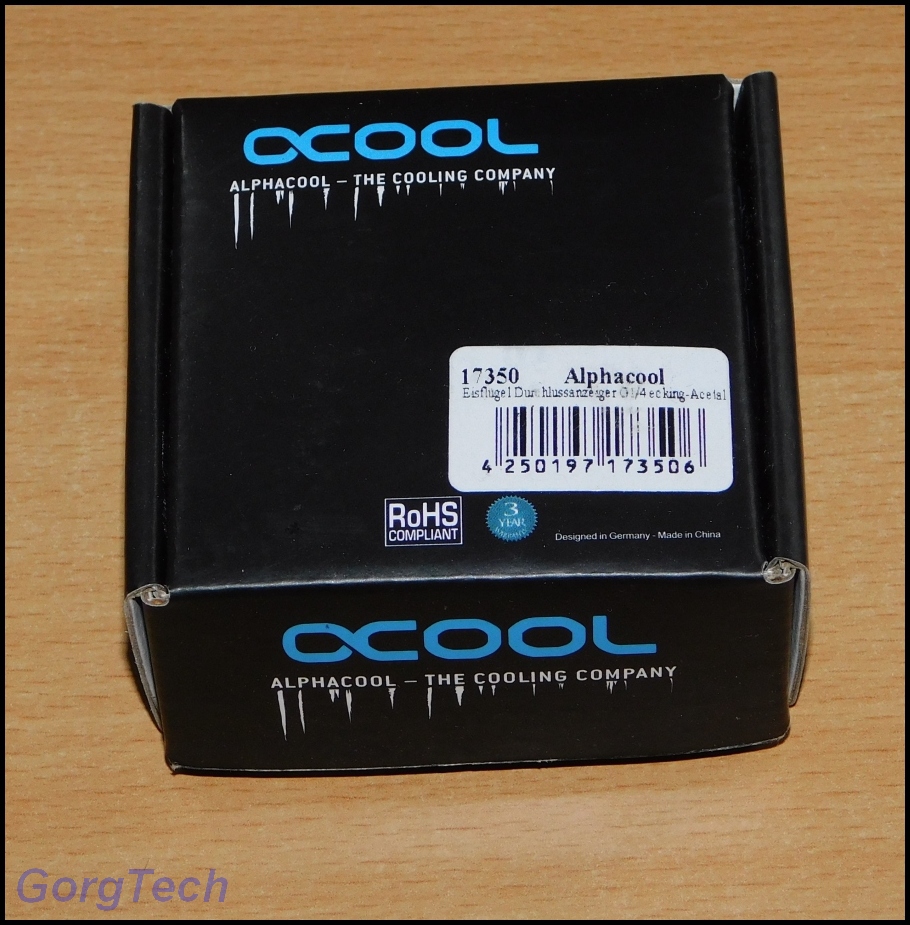
What about a flow indicator in order to see if the pump is actually working? Just use this Alphacool Eisfluegel flow indicator G1/4 square - acetal.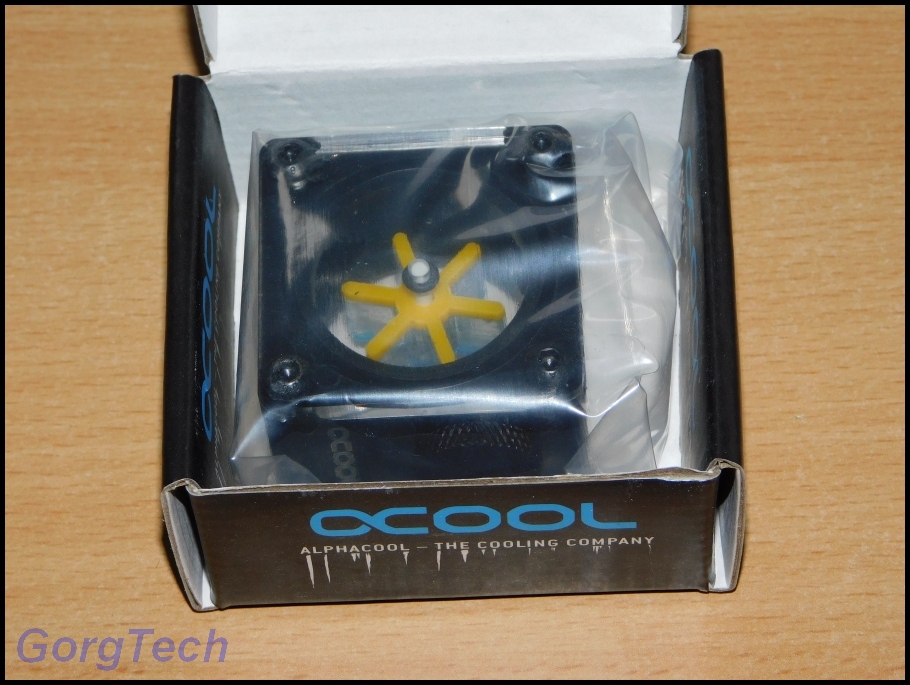
This flow indicator looks great too and is a nice gadget to place somewhere visible in the case.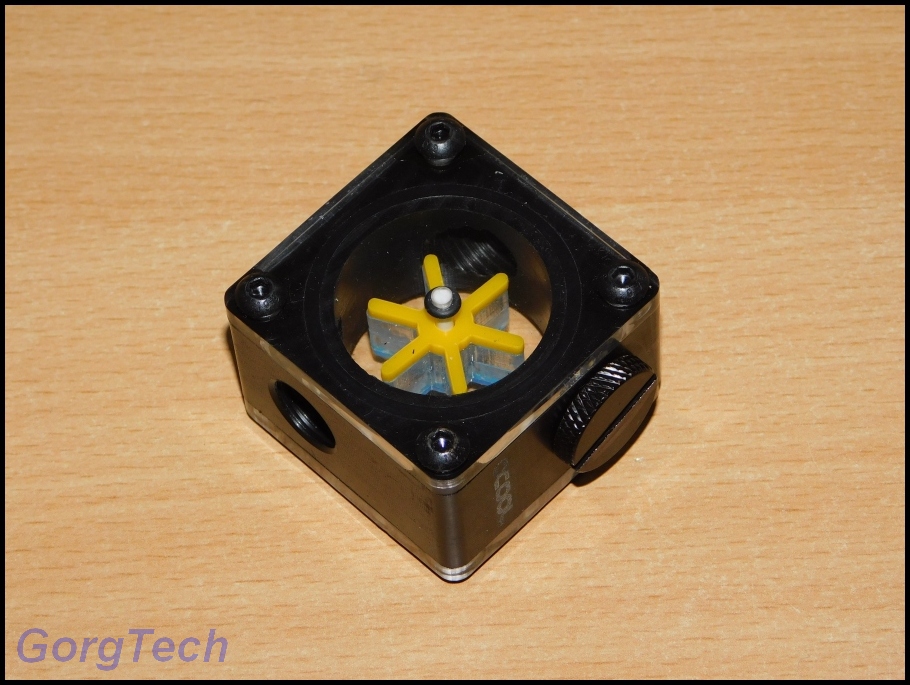
The Fan with six blades has 2 visible colors.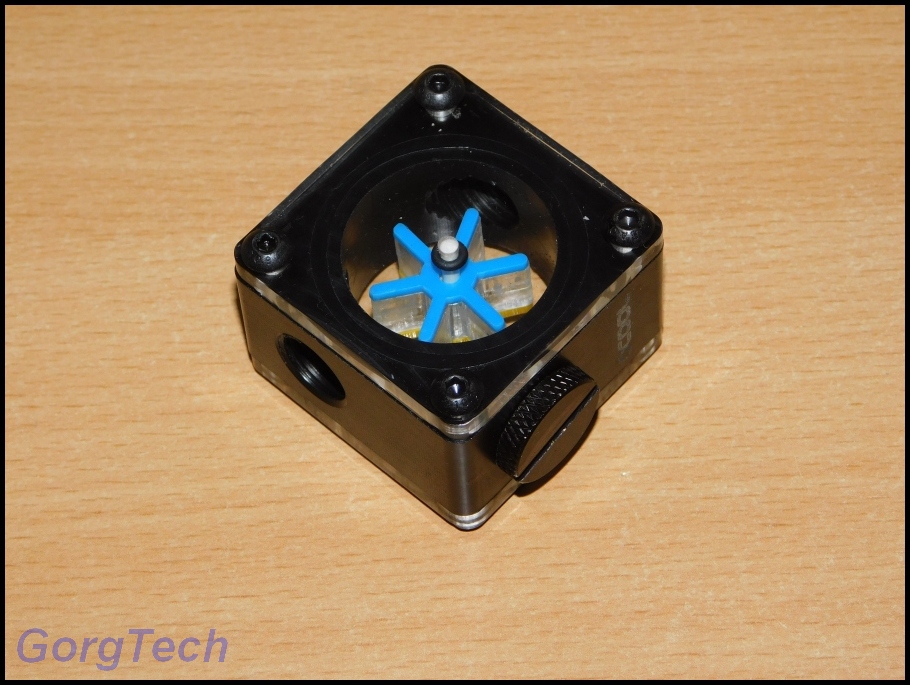
I like blue a lot better. That´s what I´m going to use.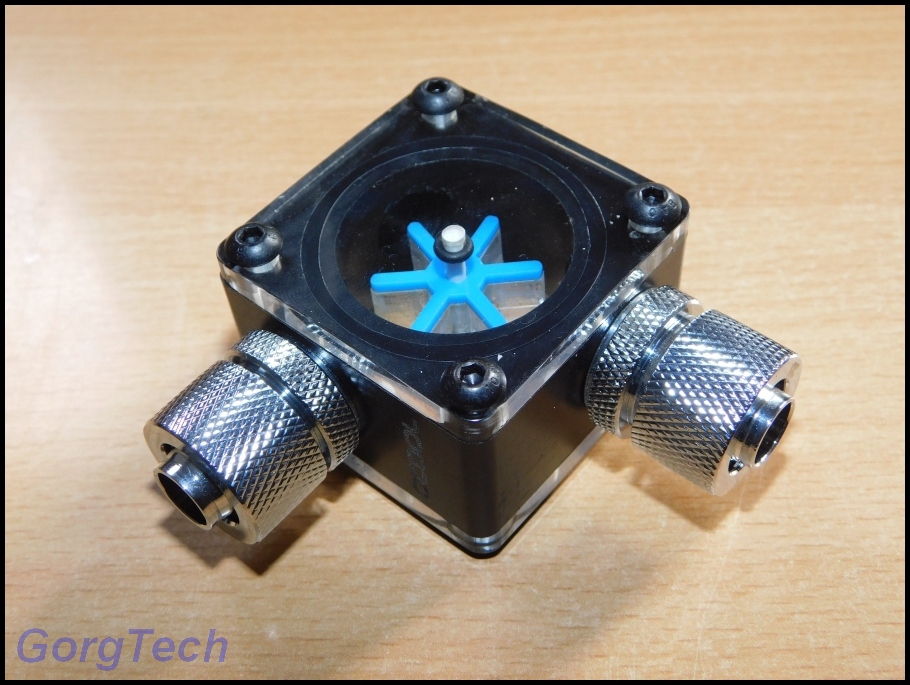
Let´s try some more of the Eiszapfen fittings. Maybe I´ll replace them for other parts later, depending on where I have to connect the flow indicator.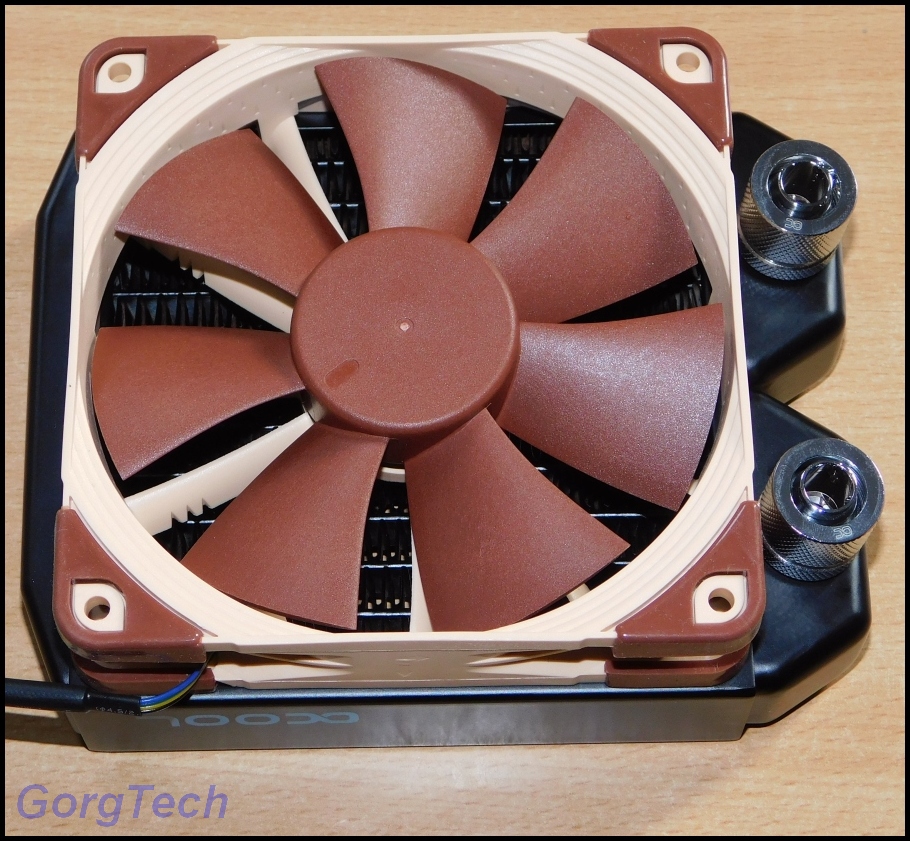
Let the Radiators get some Eiszapfen fittings too. The straight Eiszapfen fit 100% the 120 Radiator.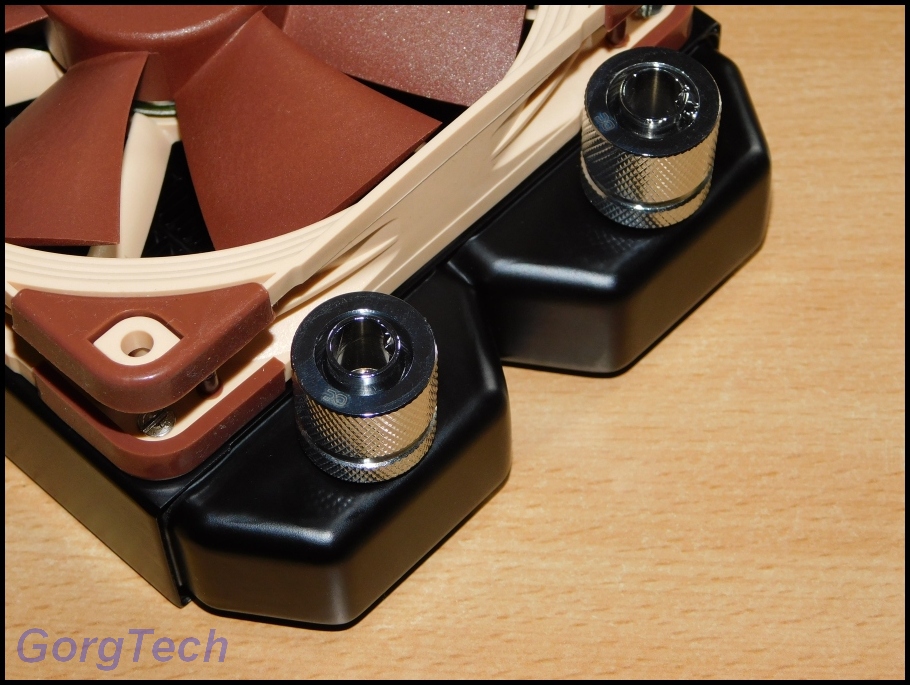
I like the contrast too.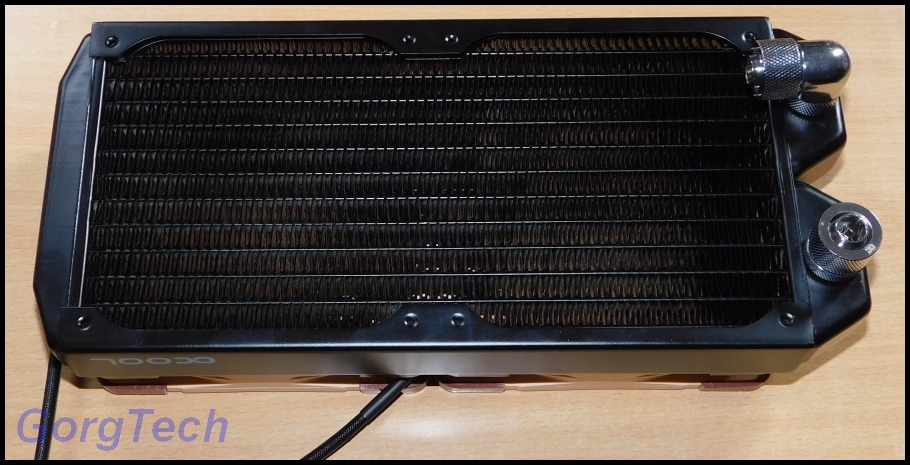
Use some more Eiszapfen fittings with the 240 Radiator.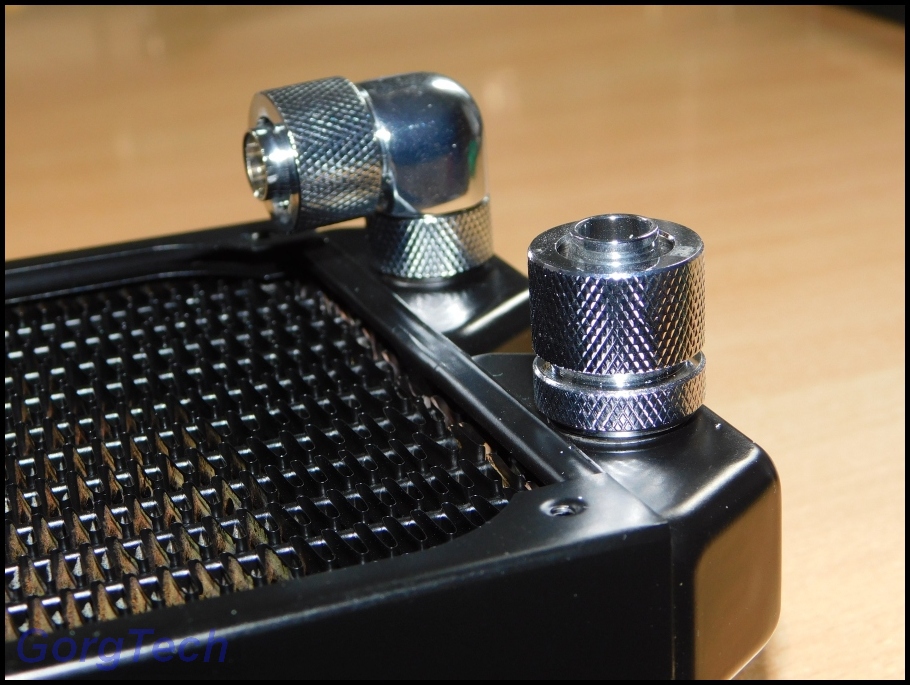
Nice and shiny as well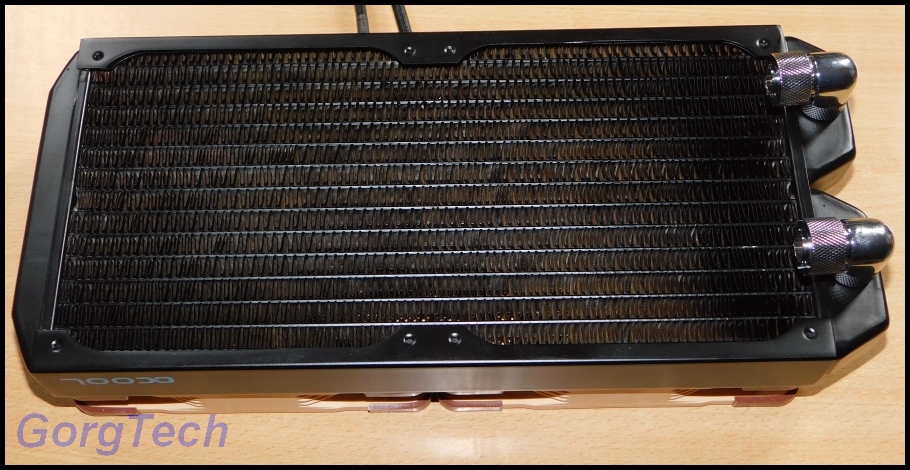
One last time, give the 280 Radiator some love too. I´m going to use 2x 90° angled Eiszapfen fittings in this case.
I really like the looks of these Eiszapfen fittings. I was looking for some industrial looks and I guess that these puppies will help a lot to achieve it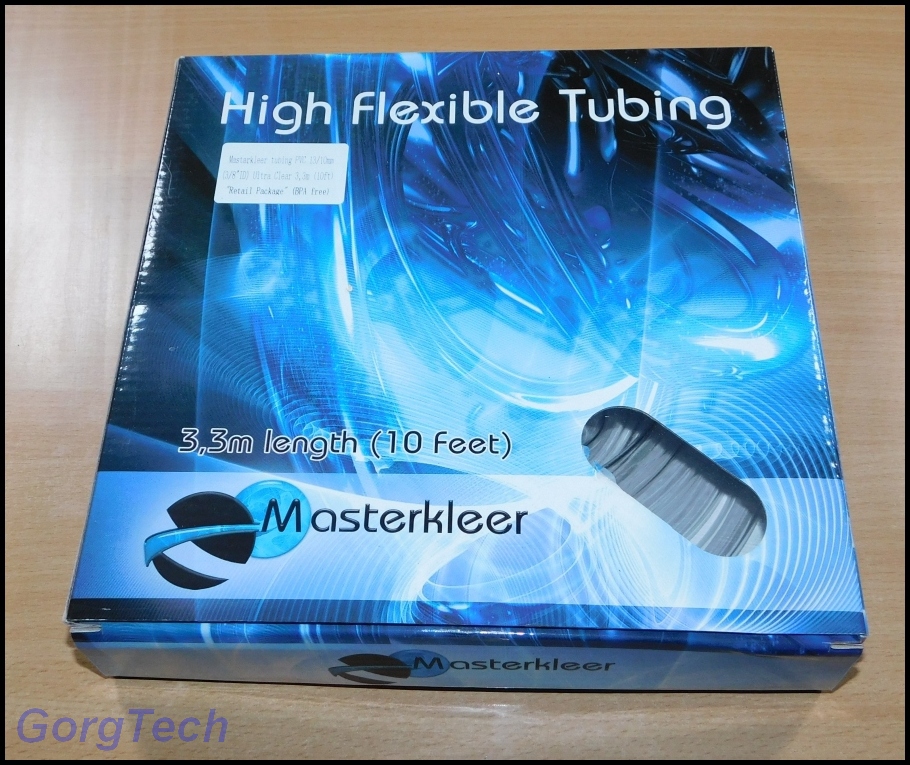
I´m going to use regular tubing this time since hardtubes require extra tools and some experience. Just give this tubing a try: Masterkleer tubing PVC 13/10mm (3/8"ID) Ultra clear 3,3m (10ft) "Retail Package" (BPA free).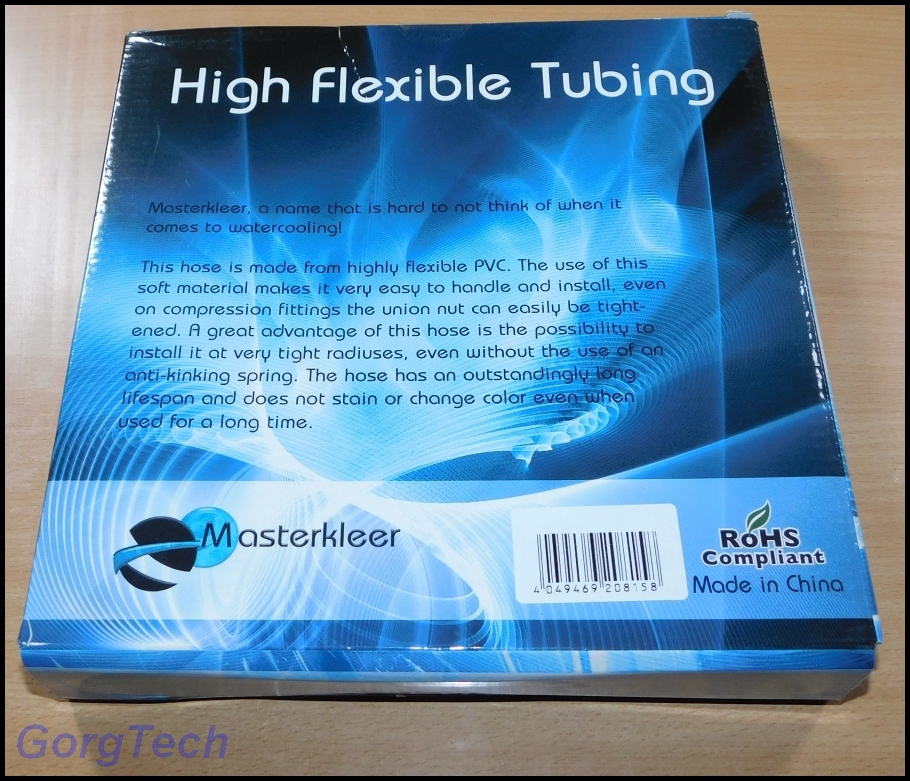
The Specs sound great, hopefully I won´t have any trouble with this tubing.
And the last component to make a Water Cooling complete is the coolant. I think I´ll use the Aquatuning AT-Protect-UV Crystal Blue 1000ml which should look great in combination with UV lightning.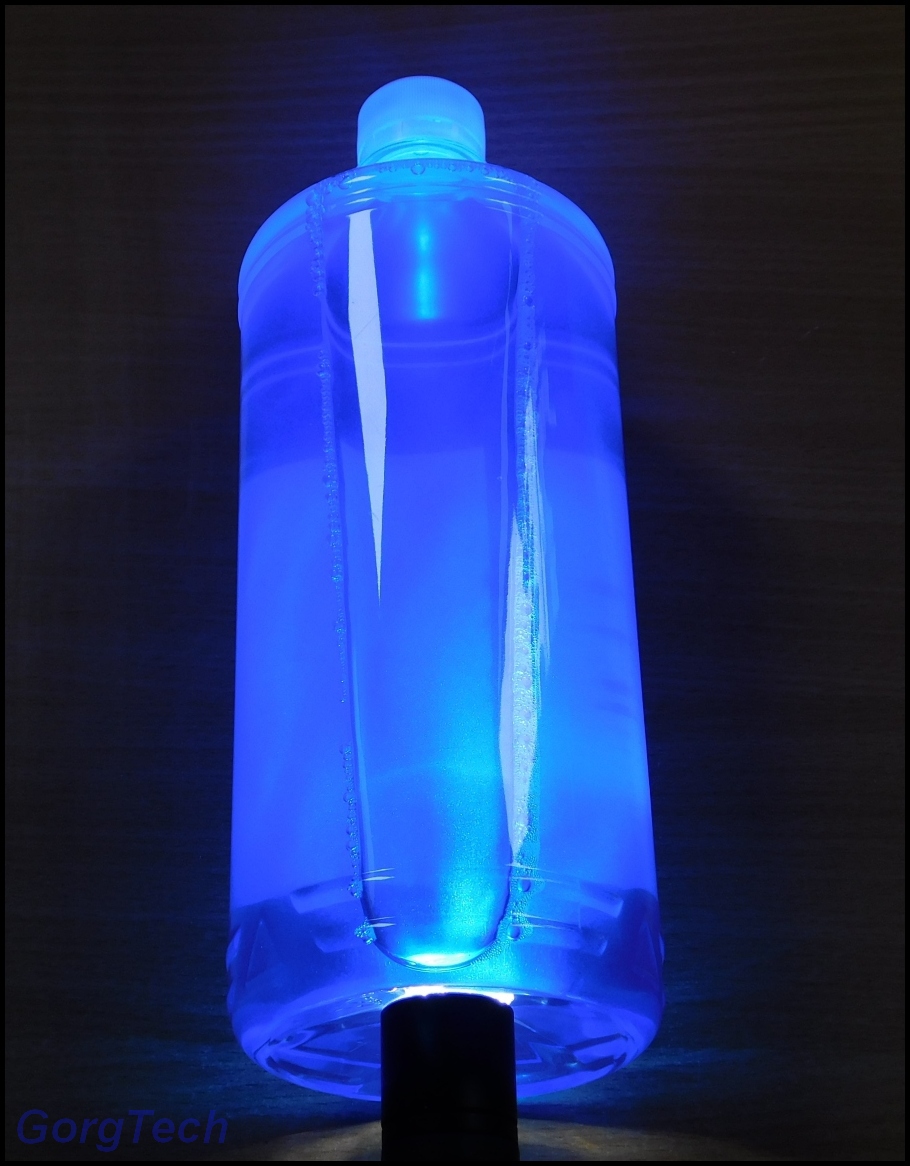
Just have a look if regular lightning from a bright flashlight would work out as well. The white LEDs inside the case should have a similar effect.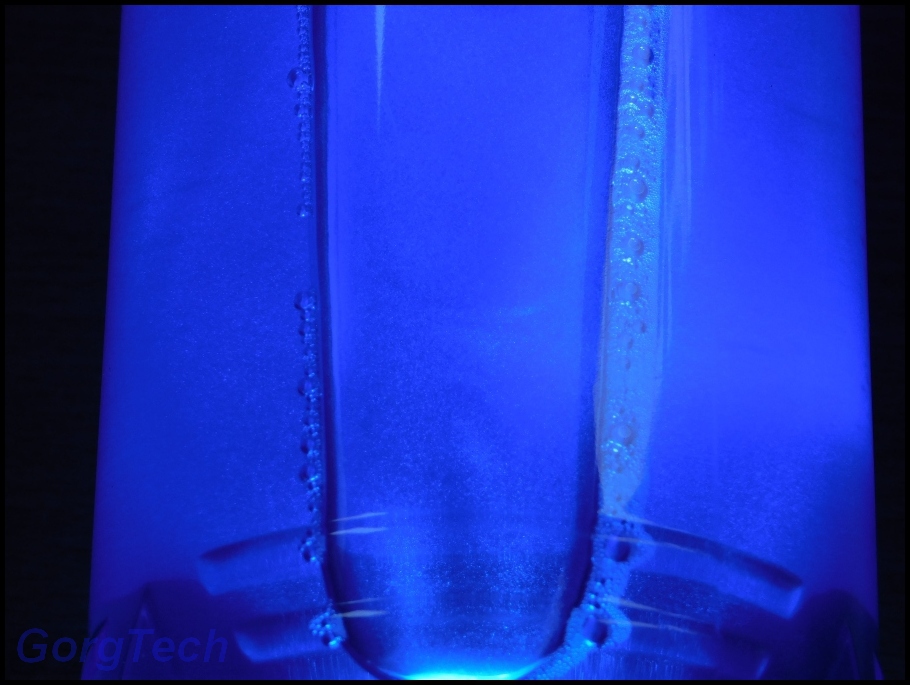
Hmm, if you have a closer look you can see some particles inside the fluid. I sure hope that these won´t mess with the Coolers and attach to the surface over time?
I have to repeat myself at this point. It´s my very first Water Cooling and I expect myself to have to change some stuff or components later since not everything might work out the way I expect it.
Now comes the good news for you, since I guess you hate many pictures, especially Unboxings That was the last Unboxing for now, you know what I have planed for this Project. I will do some more Unboxing when I have new stuff to use with this Project at a later time.
The next update will include some progress you might like
Feel free to leave any comments in case you have questions or suggestions. -
Just a quick Teaser for you. Don´t worry, this time you won´t have to scroll through several pictures, I promise.

Bright enough for your likes?
Who needs loud LED Fans? Not me for sure. Classic Fans without built in LEDs can look awesome too! -
Let´s have a look at what I did last weekend.
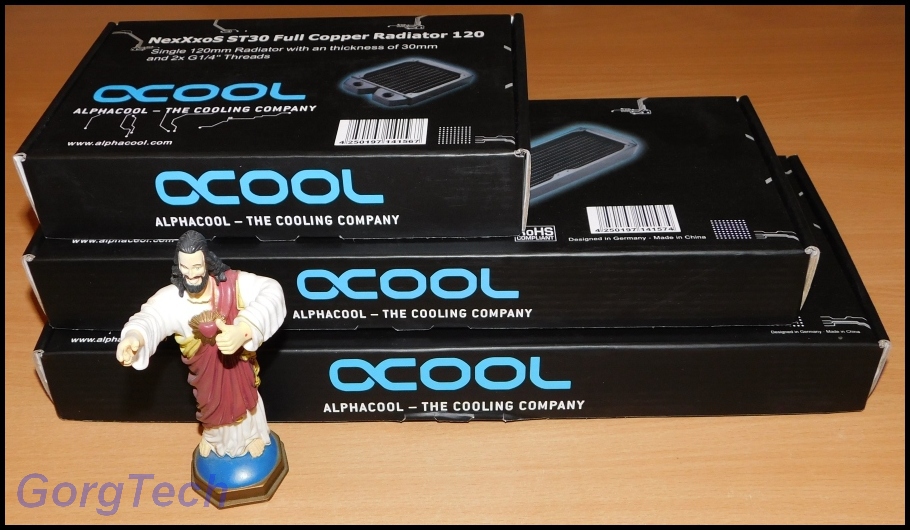
Well, the time has come to check the 3x Radiators.
Having measured the case, I had to choose these Radiators which would fit.
I´m going to use a Alphacool NexXxoS ST30 Full Copper 120mm Radiator, Alphacool NexXxoS ST30 Full Copper 240mm Radiator and Alphacool NexXxoS ST30 Full Copper 280mm Radiator.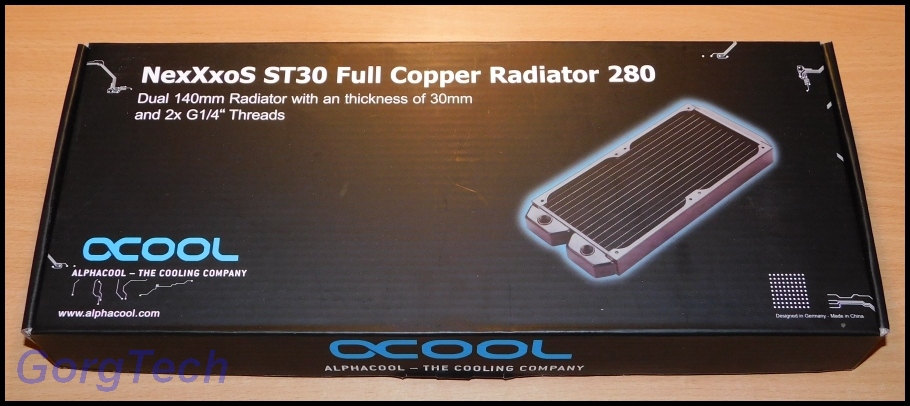
Some more unboxing pleasure. Let´s focus on the packaging and content of this 280 Radiator only since the others are quite similar.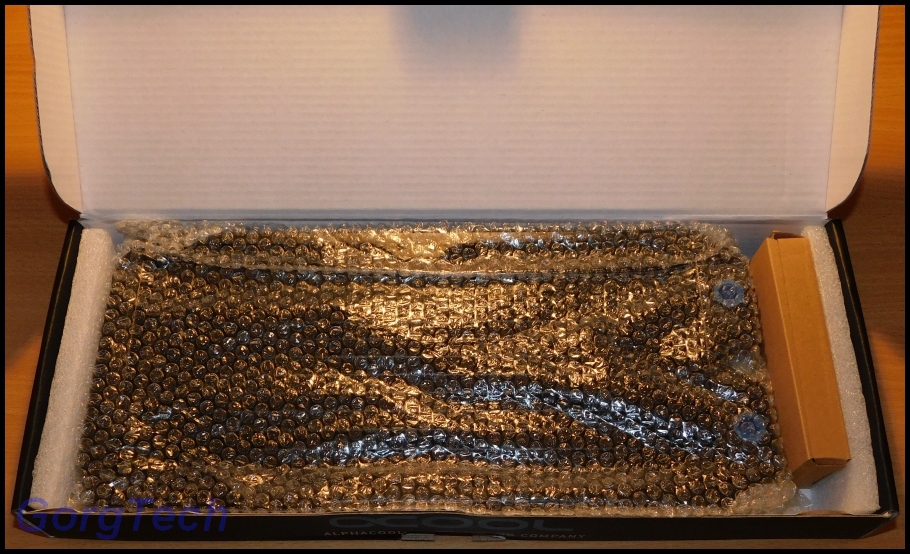
The Radiator is well packed.
M3 screws in different lenghts and a proper tool.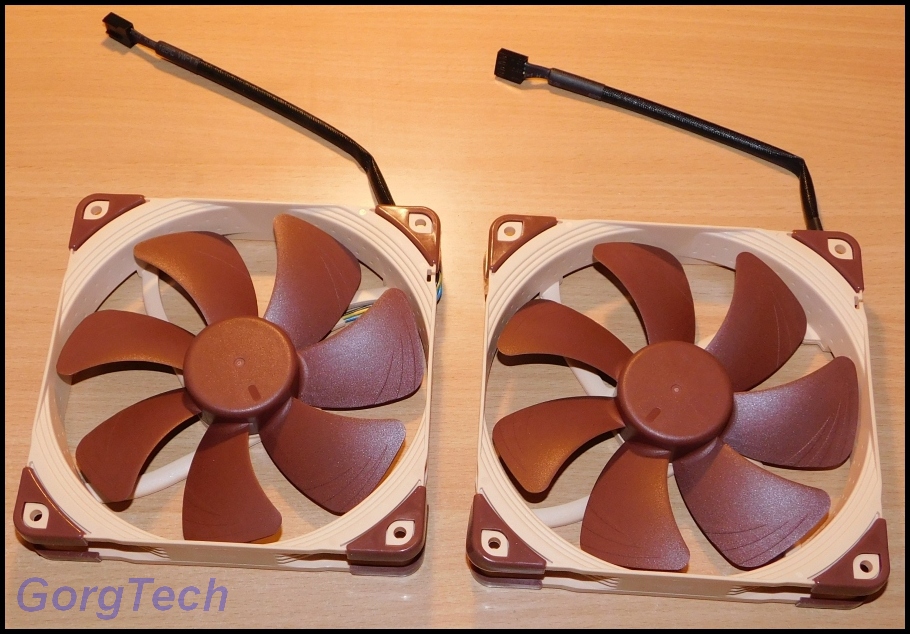
The 2x 140mm Fans for the 280 Radiator.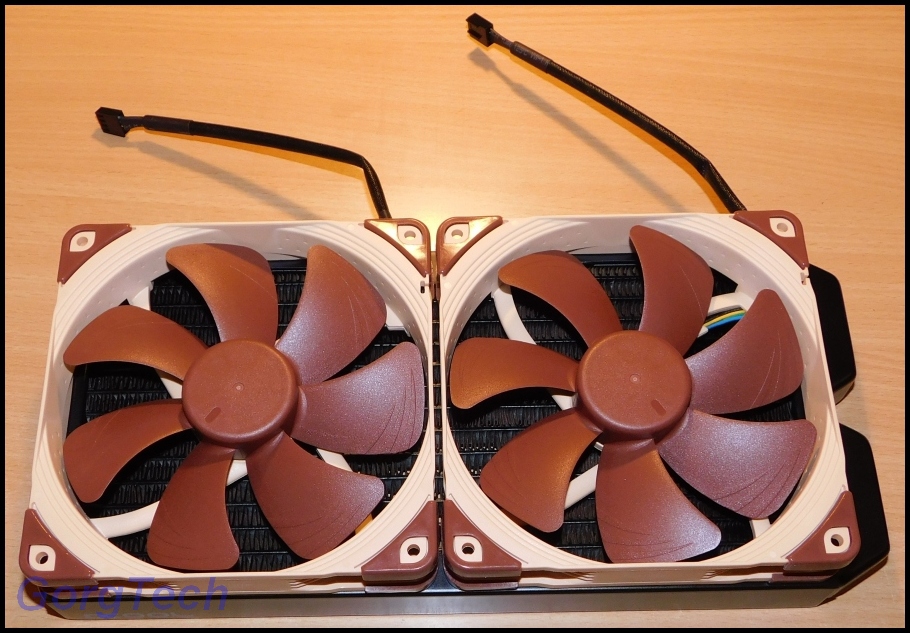
I like this color combination. It´s quite a nice contrast in comparison to boring, black Fans.
I had to find a alternative way of mounting the Fans on the Radiator. Maybe I was too clumsy and didn´t like the idea of mounting the Radiator and the Fans with one screw at the same time.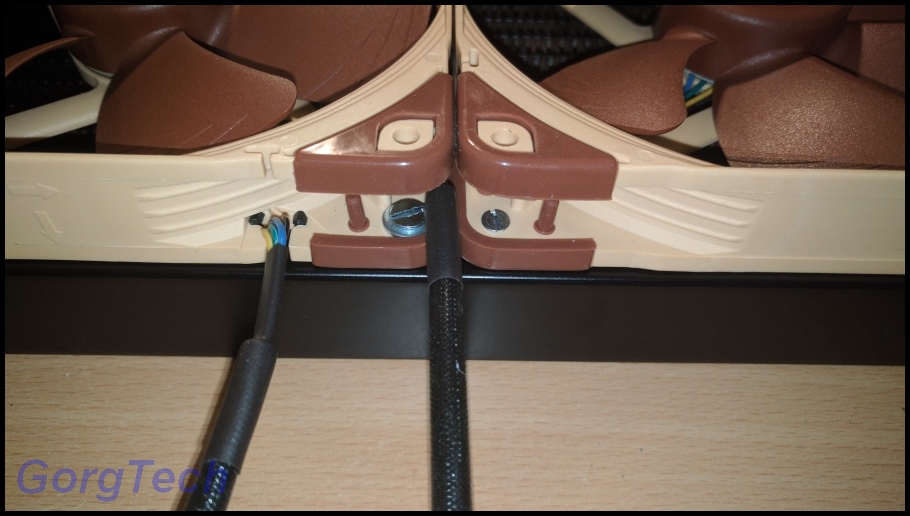
Well, at least I tried and guess what? I used too much force by accident and damaged a M3 thread.
Is this the end? Do I have to replace this Radiator? No, I fixed my error by enlarging the M3 thread and converting it into a M4 thread.
One screw looks different but everybody makes mistakes. At least it works. Once the Radiator is mounted, you won´t see my botched work again
I´ve also mounted the 120mm Fans with short M3 screws on the 240 Radiator.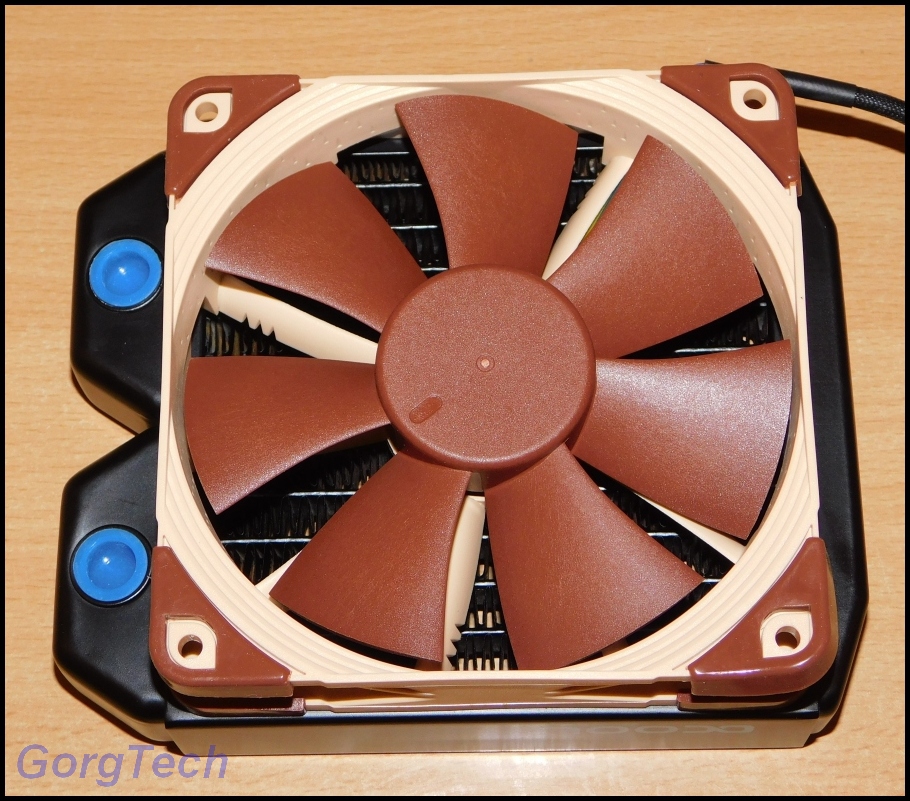
The last 120mm Fan will be used with the 120 Radiator. Well, all other threads are still OK. I guess I learned my lesson to be more gentle next time.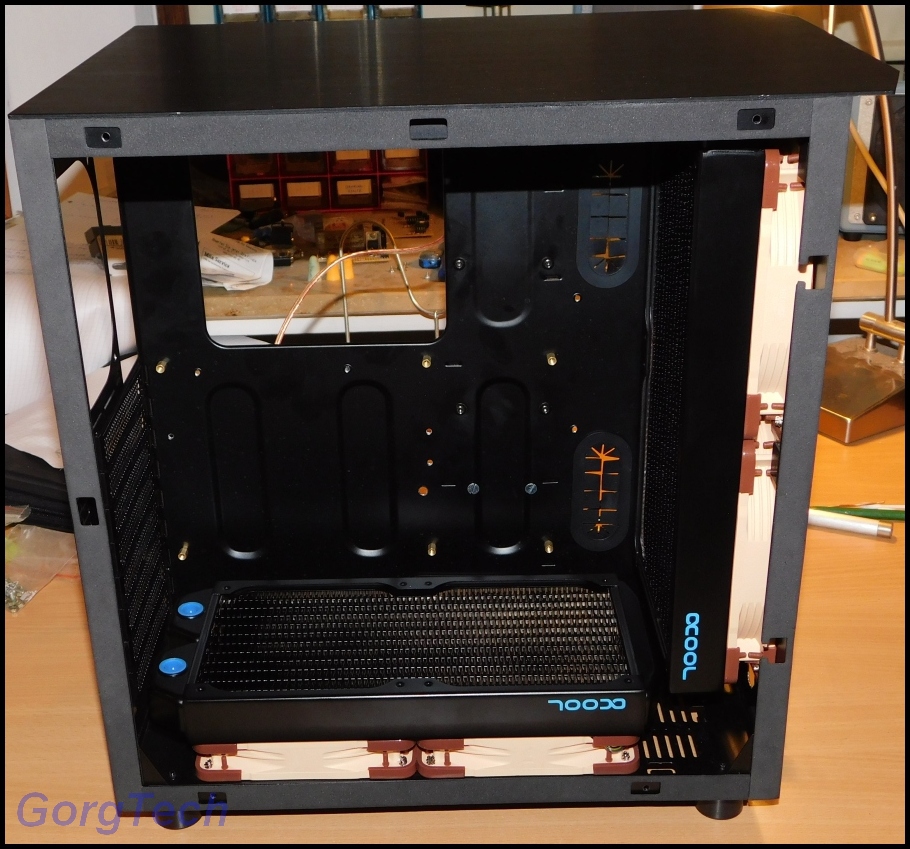
Let´s have a look if 2 Radiators fit. Yep, it´s a tight fit indeed. Other modells wouldn´t have been compatible with this Project.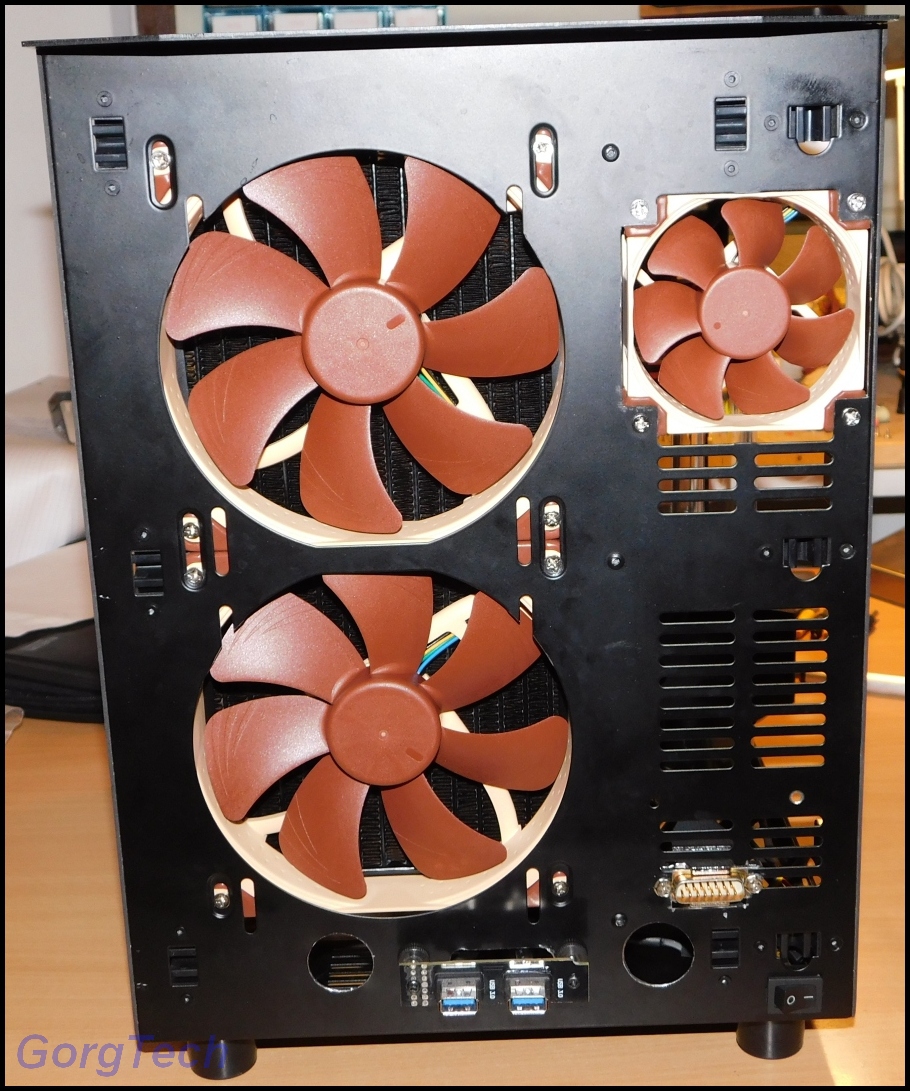
Just use the screws enclosed with the Noctua Fans. These look pretty nice with the dark wall. A truly unusual sight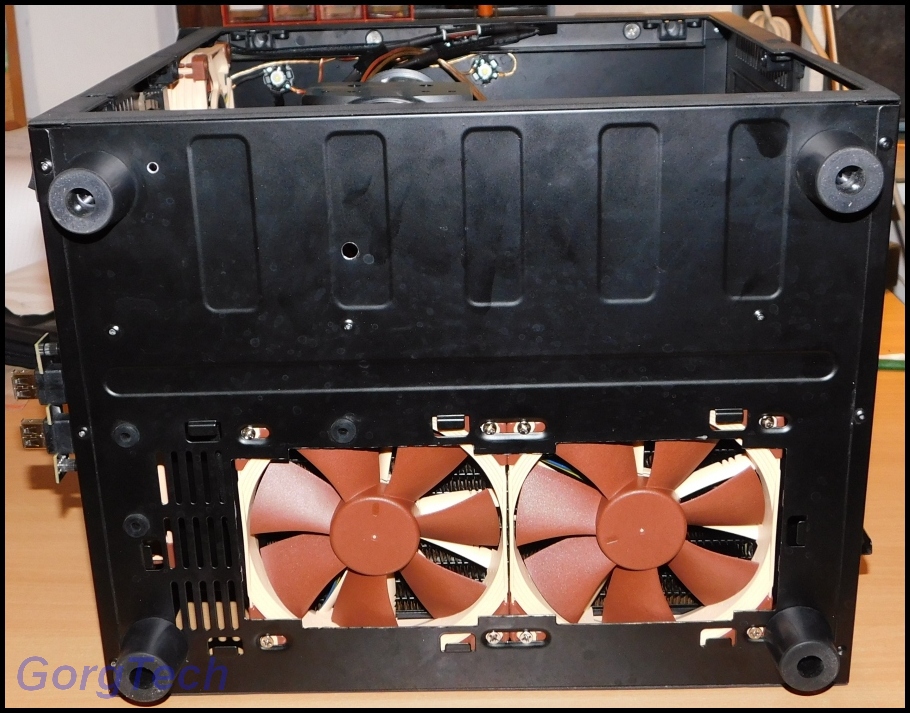
My OCD kicked in again, I changed my mind about the modified bottom. I´m sure I can make this one look even greater.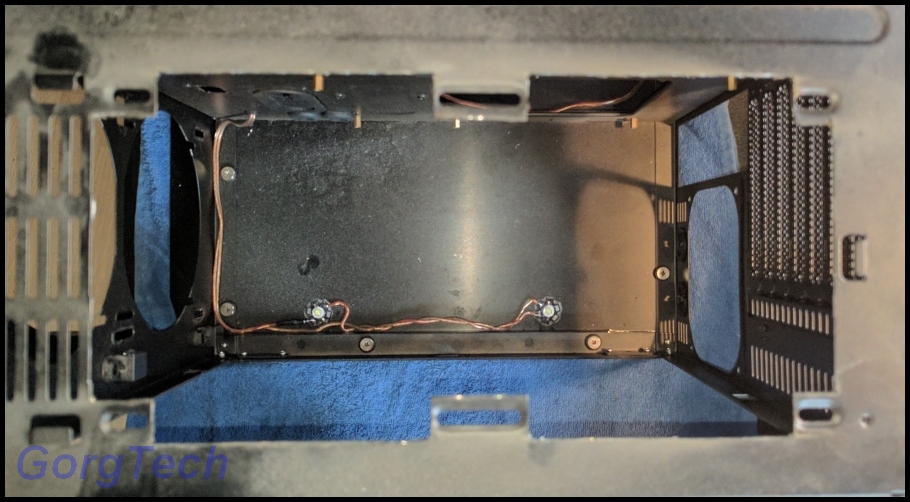
Just use the Dremel Clone again, remove everything which could get really filthy. Well, at least I had another glorious idea
Plenty of air for the 120mm Fans.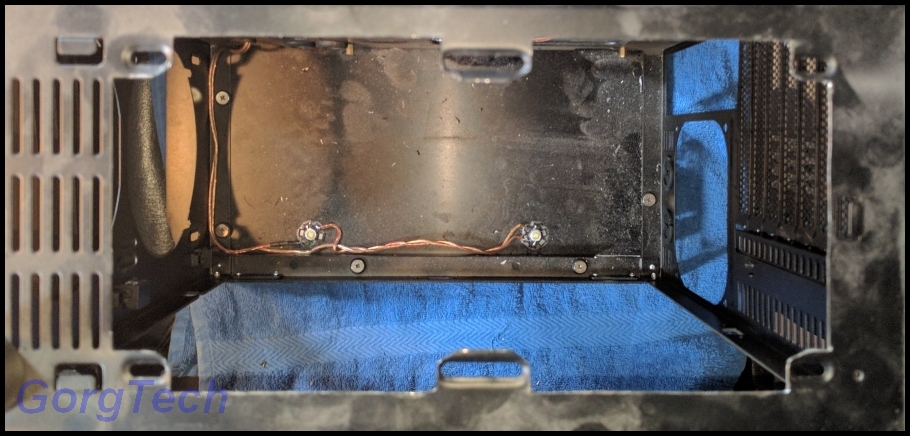
Just make sure to smoothen the edges in order to prevent yourself from drawing blood. This doesn´t look too bad, huh?
The white LED lightning will be great but what about some RGB taste too?
I couldn´t get this idea out of my head again.
The additional lightning will allow you to switch red, green or blue lights on or even use a LED fader which does this for you, including a nice fading effect you know from eg. RGB keyboards.
Do I have to mention that I´m going to build the LED lights and the extra circuits all by myself?
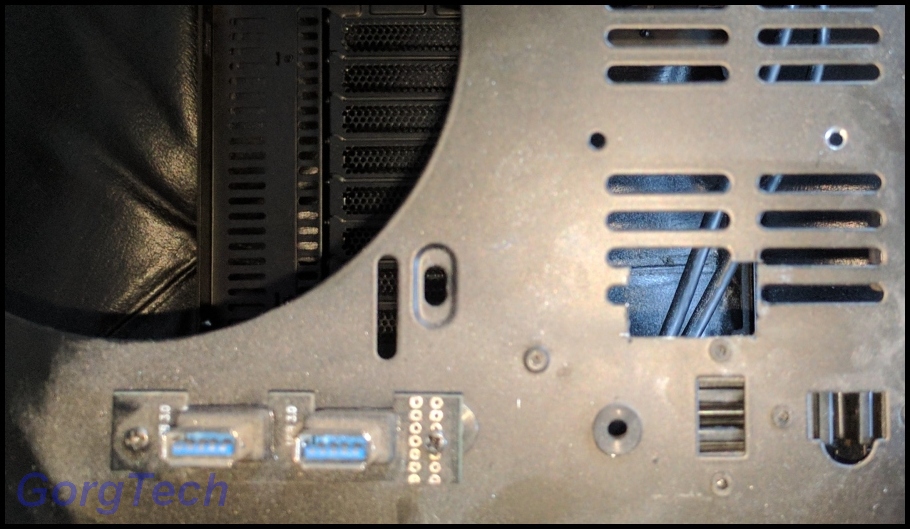
I´m going to need 4x extra switches for my needs but where can I attach them? There´s barely any useful spot left. I had to find a place below the Aluminum front.
Let´s see.
Cut some metal, save some weight.
What about the Aluminum front? I cannot use my connectors since all pins are used. I had to figure something new out.
This mount made of some scrap material could solve my problem.
Where can I attach it? The 280 Radiator is huge and I could only use the space below the top in a area of about 10mm.
Well, that´s it. The wiring will fit through the extra hole I added, right next to the mount.
This mount will make sure that the additional RGB lightning of the front is independent of the Aluminum front, even if you have to remove it.
What´s with the 2 extra holes in the mount? These are reserved for 2 additional cable ties.
What about this piece of Aluminum? Just have a look at the 3 holes and you might figure out, what´s this part for.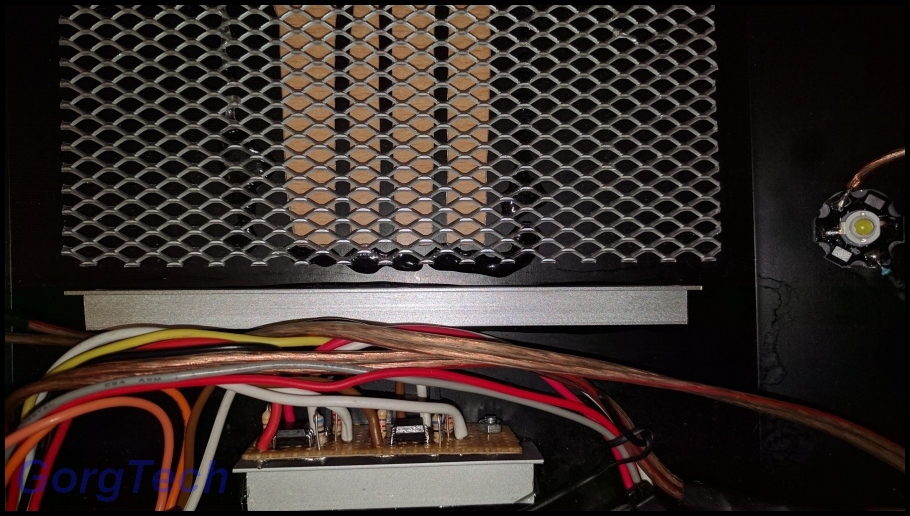
This angle was glued with 2K glue with the Aluminum front. It´s meant to prevent the cables from touching the blade of the lower 140mm Fan. The wires will be tied with cable ties.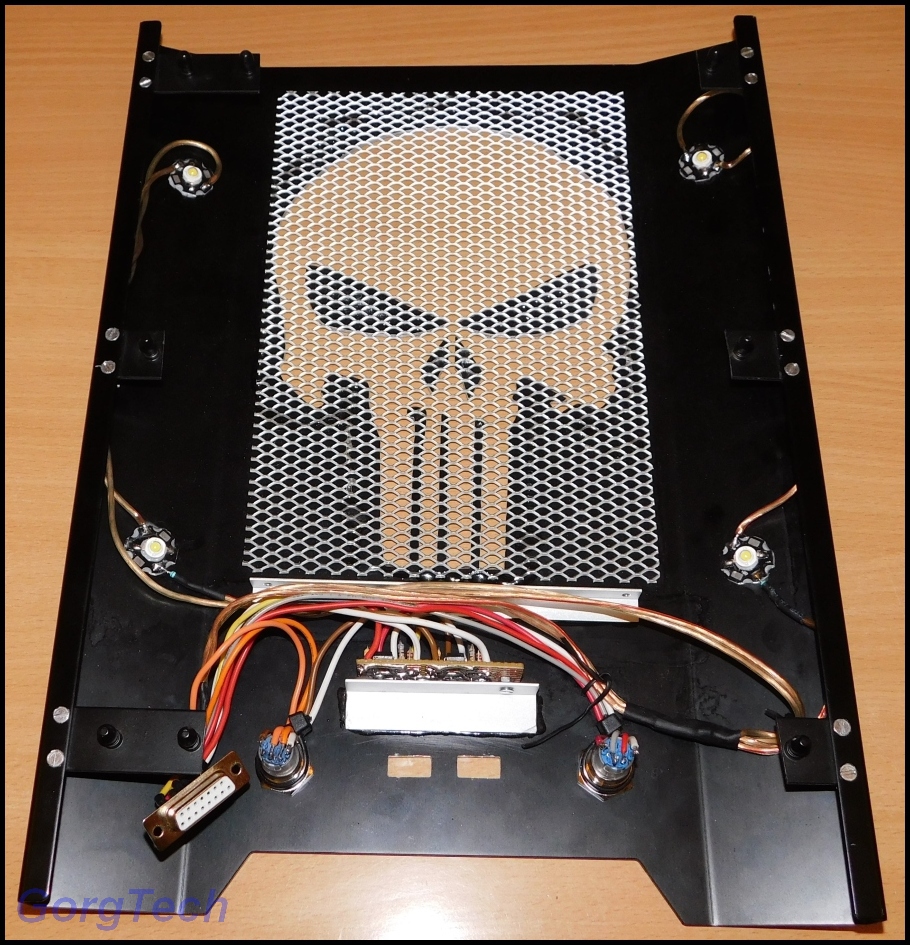
That´s it for now. -
Let´s update this thread a little.

I´ve wired the LEDs in the second chamber of the case.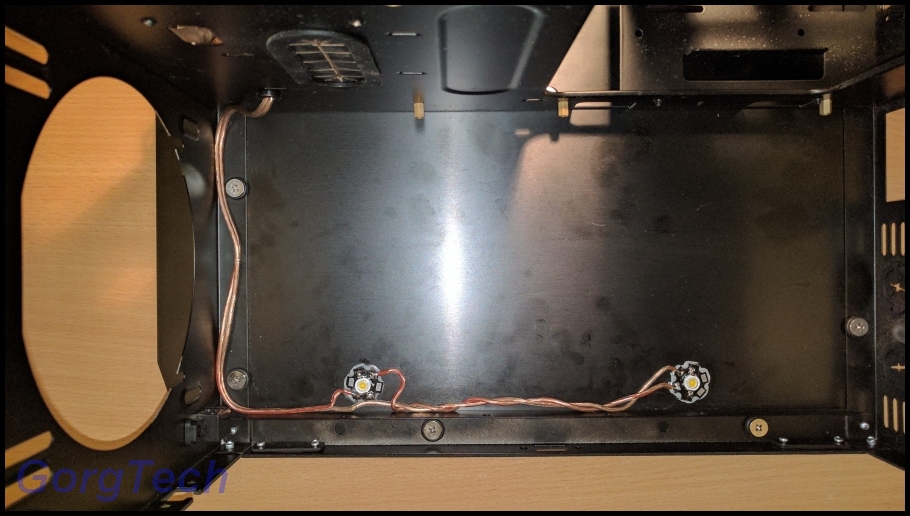
The same goes for the other chamber. Since I don´t want the wires to be visible, I had to drill a hole and use a cable protection.
Not bad, the lightning is very bright but also quite yellowish. I didn´t want to accept it that way.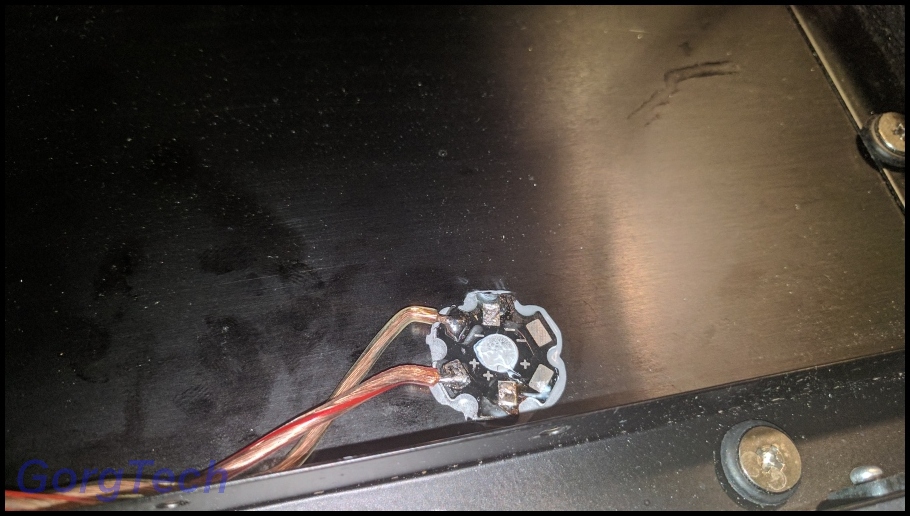
I still had a few other white LEDs left. Let´s redo the same trick I had to perform with the Aluminum front again. The new LEDs also obtained some of the Phobya thermal paste.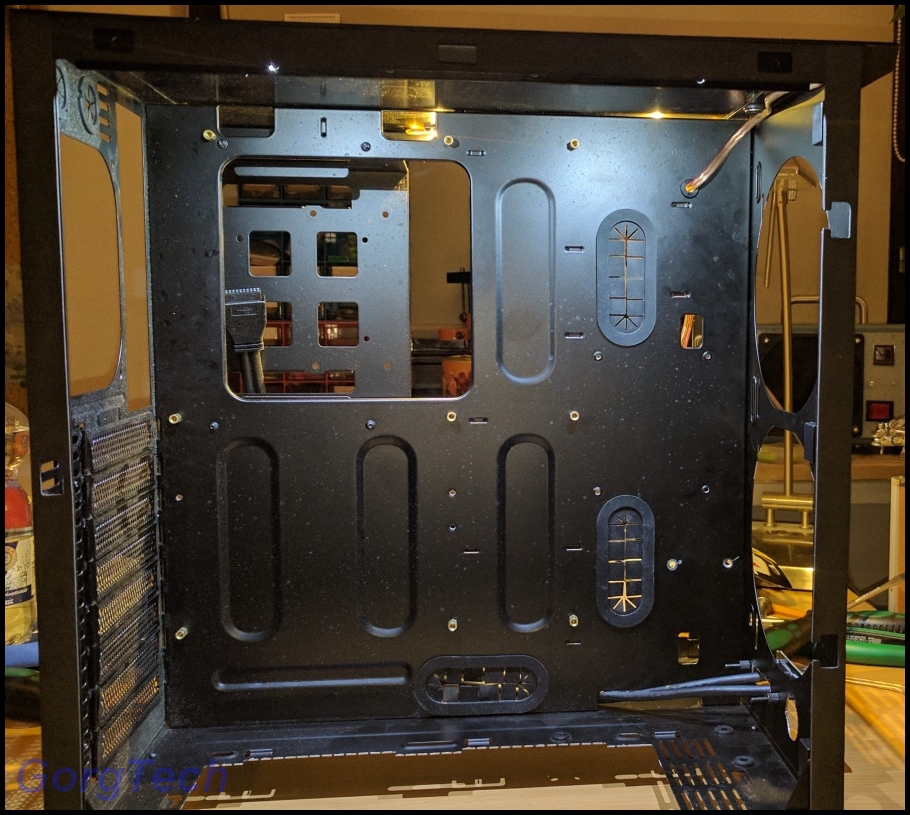
The first chamber looks a lot better. No visible yellowish tint but just compare the other chamber in this picture which hasn´t been modified yet.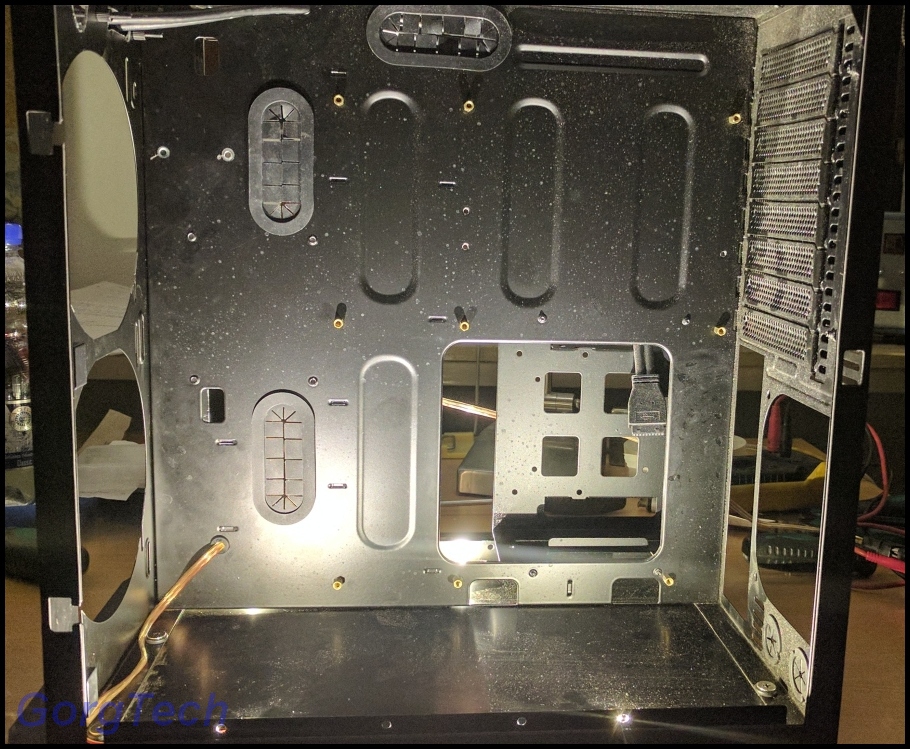
Having replaced the other LEDs too, this one looks decent too. There is barely a yellowish tint visible too, just the way I like it.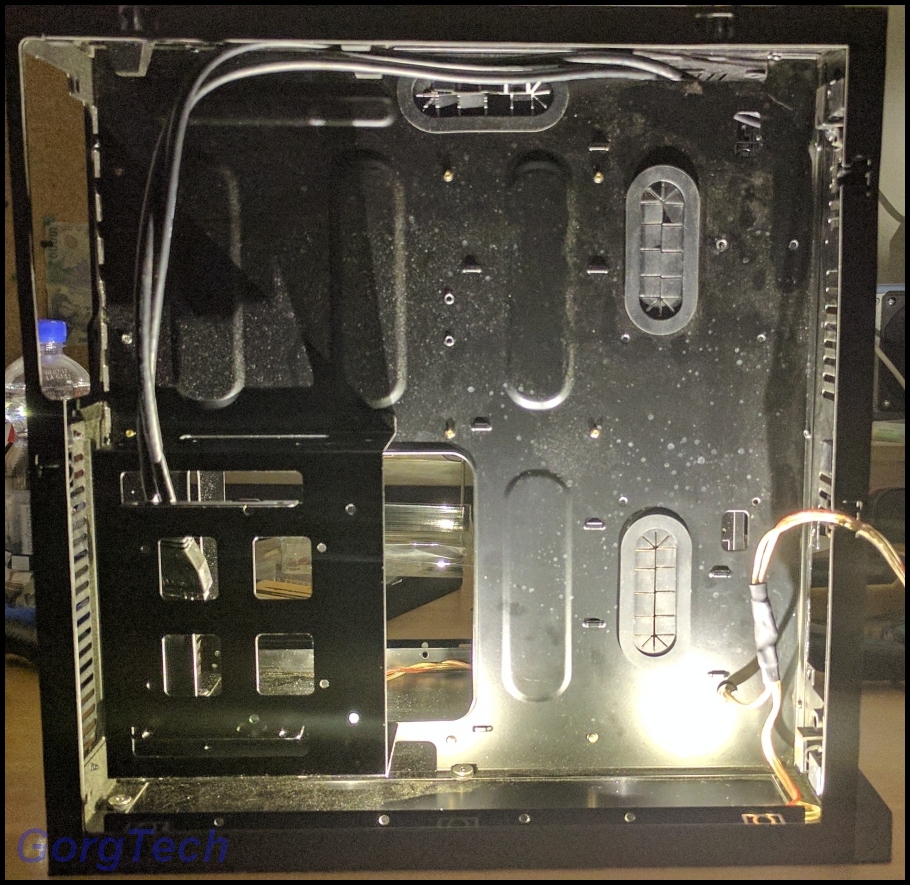
If you have a good eye sight, you might see a slight difference of the lightning in the second chamber. I had to use 2 different white LEDs since this is all I had laying around. However, the color temperature is nearly identical.
Will these LEDs run on full power all the time? No, I´ve set the current to a safe value which should last for a very long time.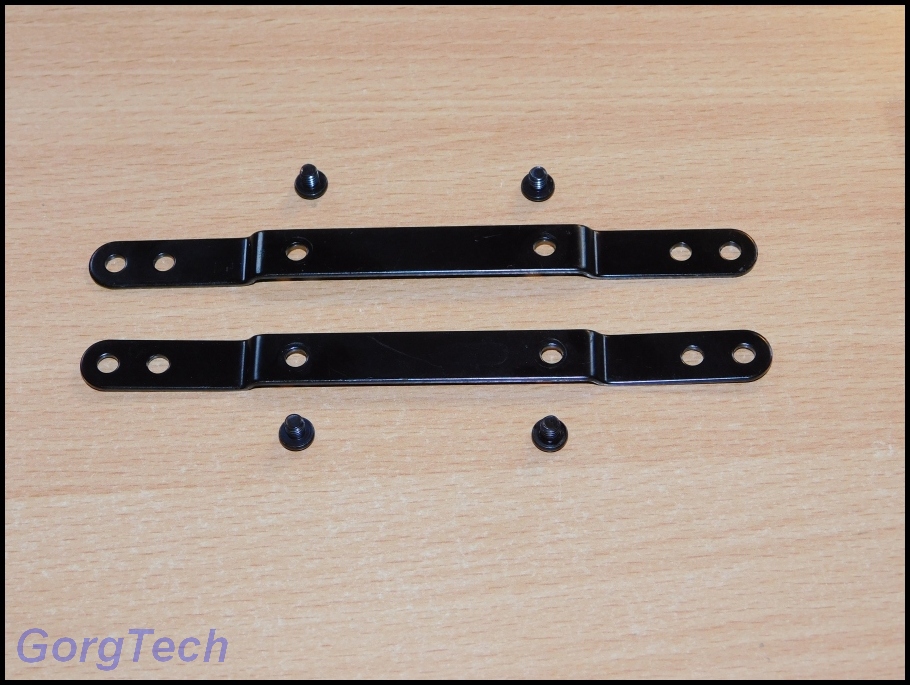
Let´s have another look at the reservoir. I cannot use these brackets and this is why I removed them.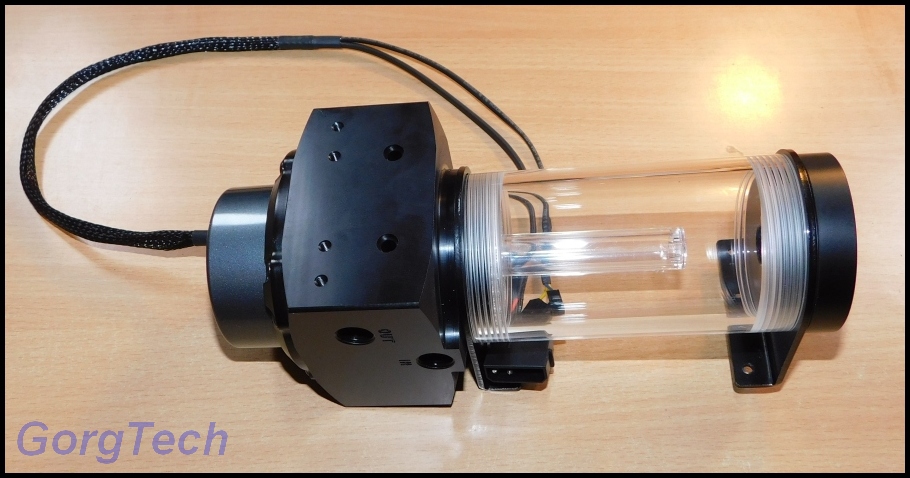
Don´t forget to mount the pump too. Hopefully I used enough pressure to prevent any leaks.
Now here´s the deal. Without being able to use the Alphacool mounting parts, it´s going to be a tough ride to attach the reservoir and the pump in this case. This PC case can handle AIOs without any problems but it´s not "Plug & Play" with the Water Cooling parts I´ve selected for it.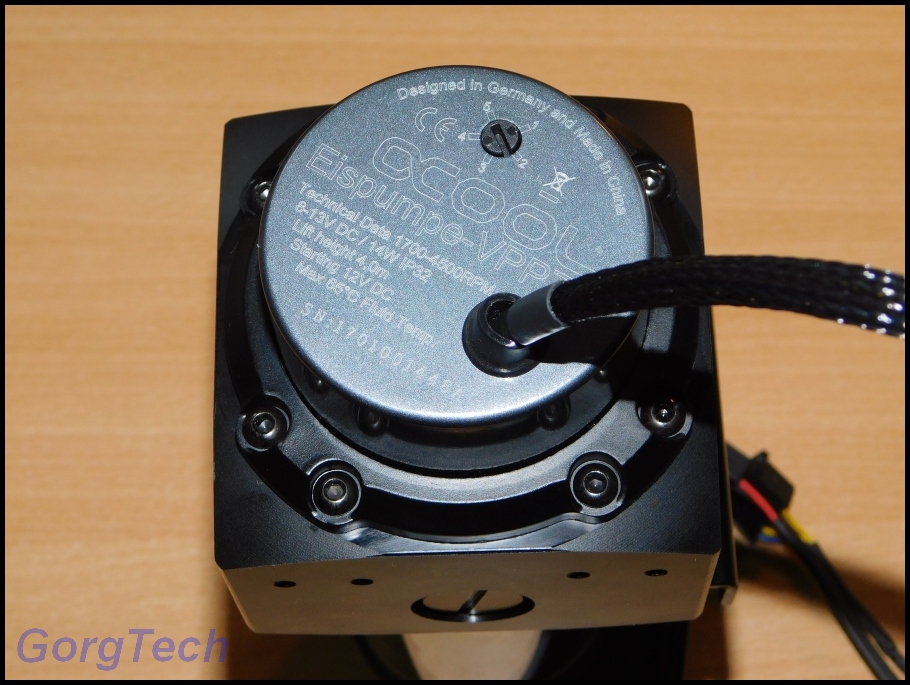
The pump looks great with the dark reservoir.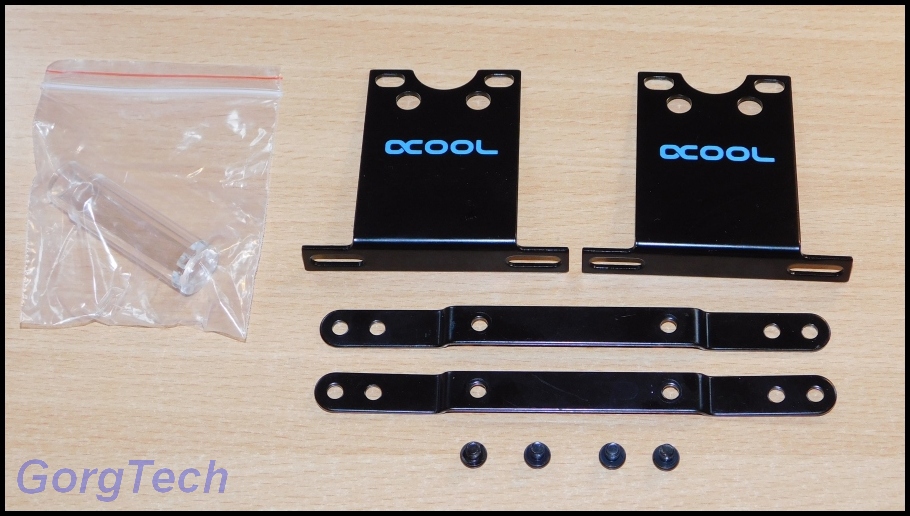
These remaining parts will be stored in the original packaging again.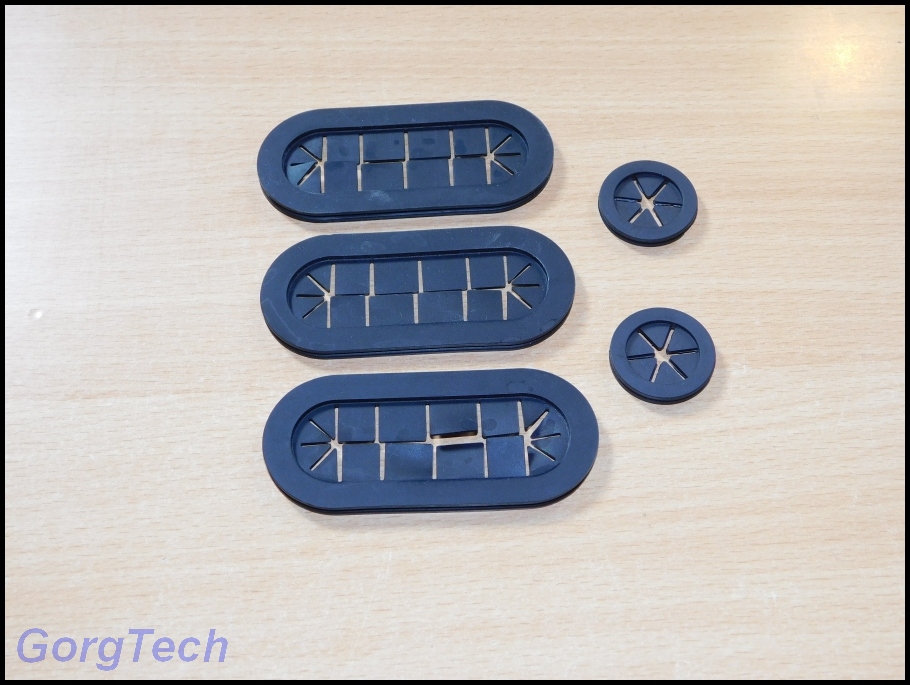
I had to remove these parts and also clean them because the case looked really filthy because of the metall works performed on it.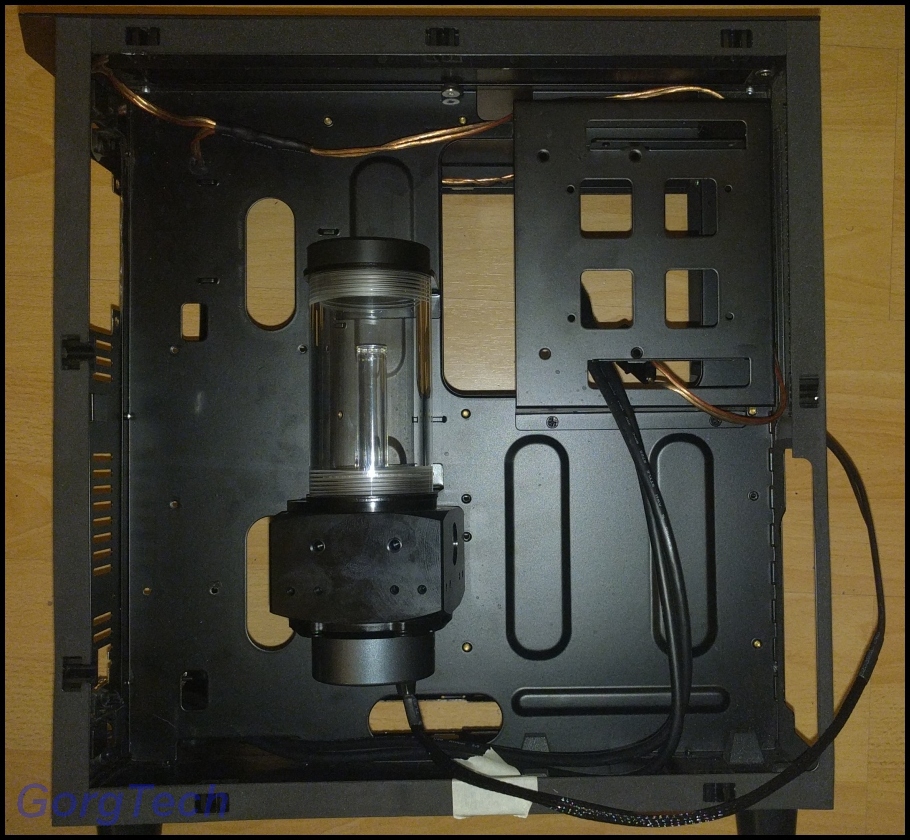
Since this case was too filthy to work on it, I removed every other part like eg. my USB Ports and the front connectors etc. and gave it a shower. Really, this may sound dumb but it got rid of most of the dirt and metall junk.
After a while it was dry enough for me to handle again. Where will I mount the reservoir? Finding the "Sweet Spot" is not that easy like I thought it would be.
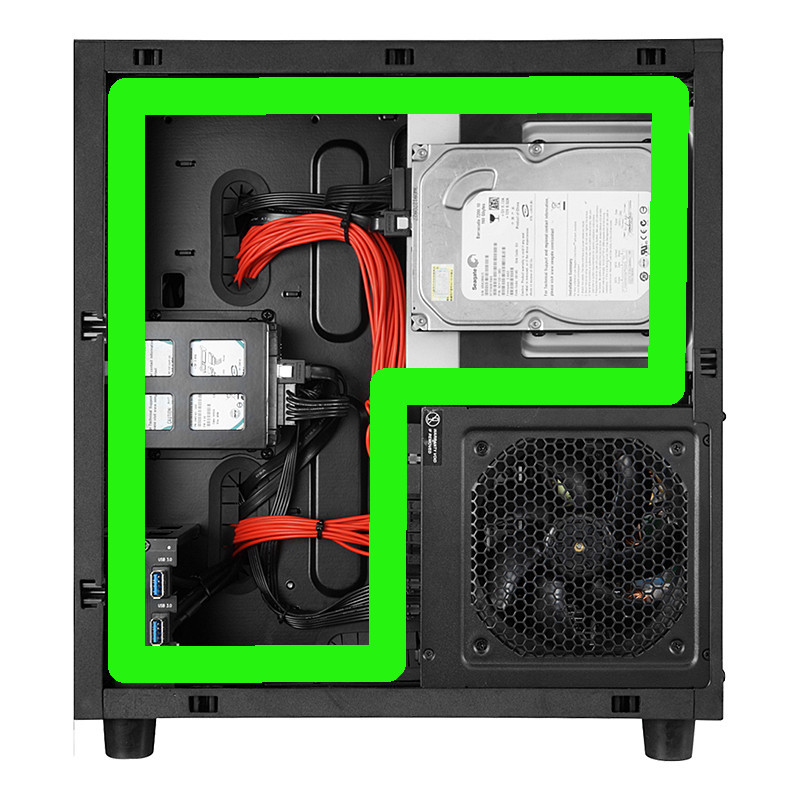
I need a well proportioned distance to the top of the case in order to be able to fill it with cooling fluid later. I also need to make sure that other components still fit in the second chamber.
If I mount the reservoir too far left, I will block the holes for the cables. Move the reservoir too far right, I won´t be able to fit in a power supply.
After a while I figured out a good spot for it.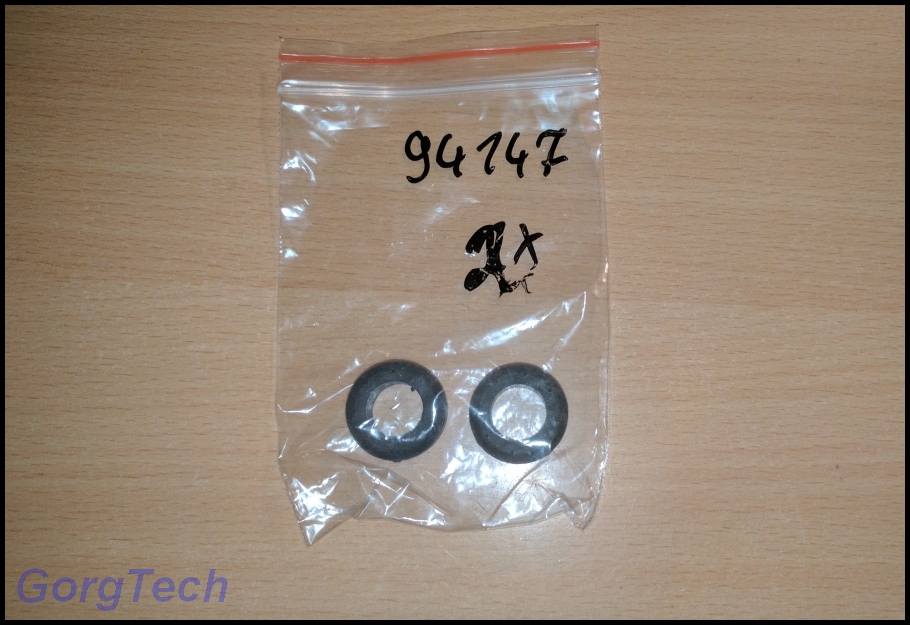
Remember the rubber grommets on my parts list?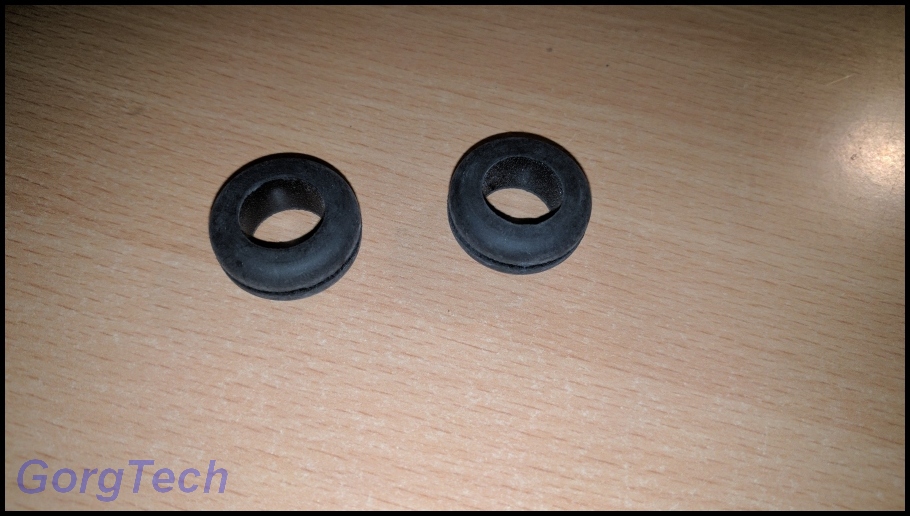
I will use these to protect the tubing.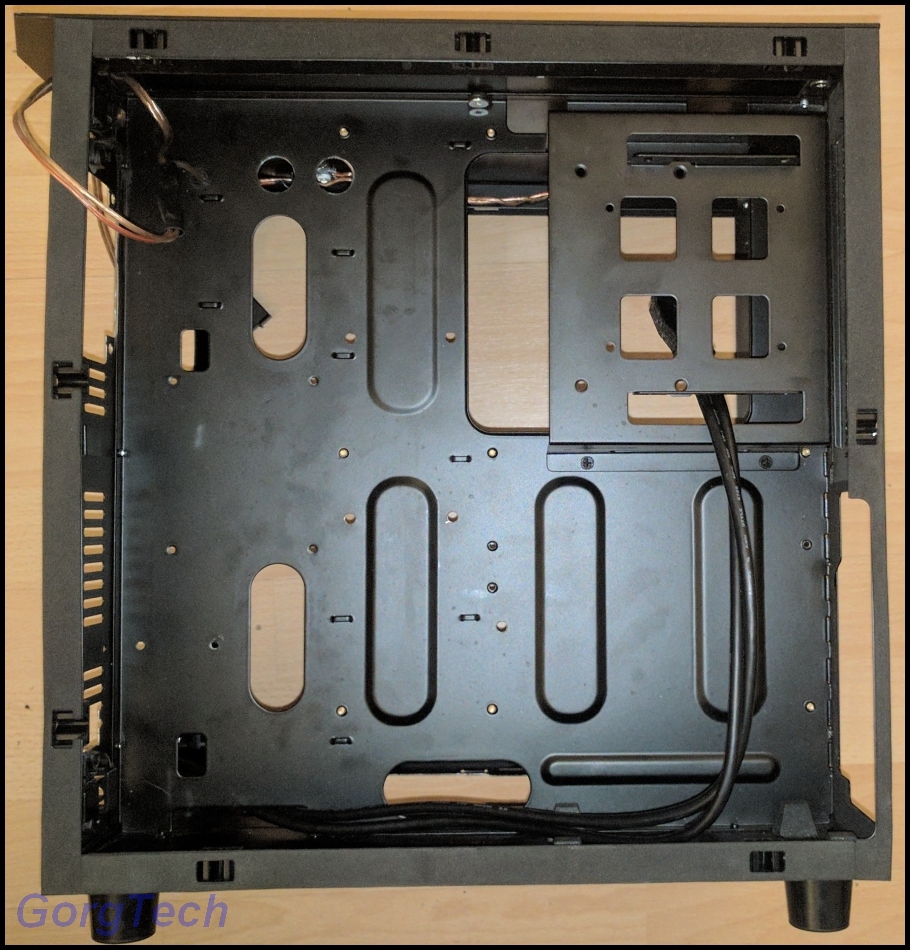
Let´s find a good spot for them. There´s not much space you could chose for these rubber grommets because of the 280 radiator and the 2x 140mm Fans which will block 5,5cm of width. You can´t use thick parts in this area.
The LED wire fits because it uses the slight space available between the radiator and the wall.
I drilled the first holes for the reservoir after having measured the coordinates of the screw holes.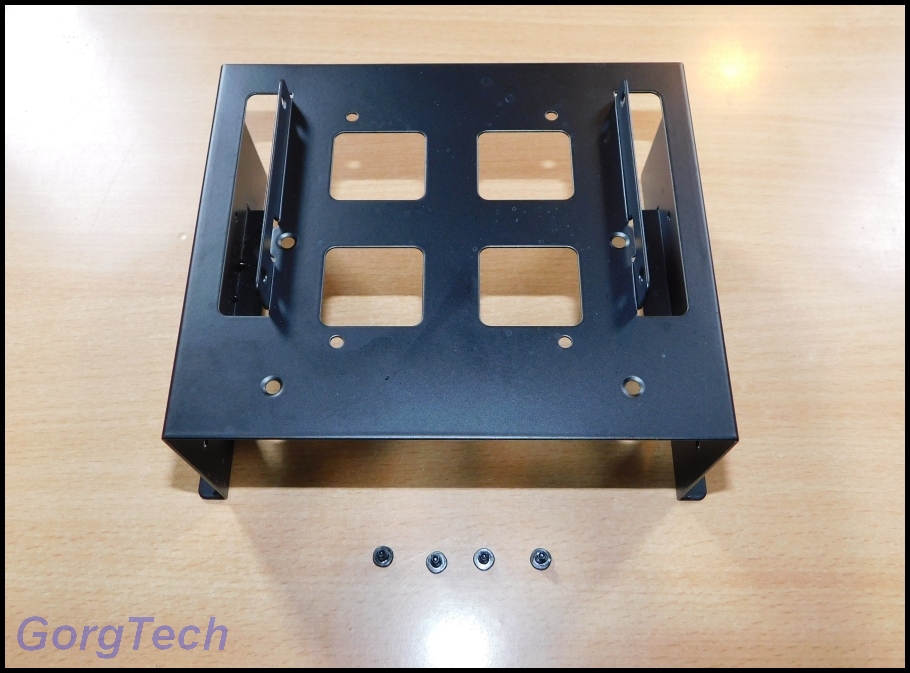
Let´s remove this part too for now.
I don´t have another choice but to attach the reservoir with the wall between the 2 chambers. It may sound less horrible than it is since I also have to bridge a gap between the pump mount and the wall of about 10mm too if I want to avoid any vibrations at all.
Better safe than sorry: Use some sort of rubber material in order to connect the reservoir holders and the pump mount with the wall.
We all know that rubber material can compress if enough force is added. Let´s use some Aluminum parts, old rubber material and a special piece you migh have seen before if you owned the Fan it comes with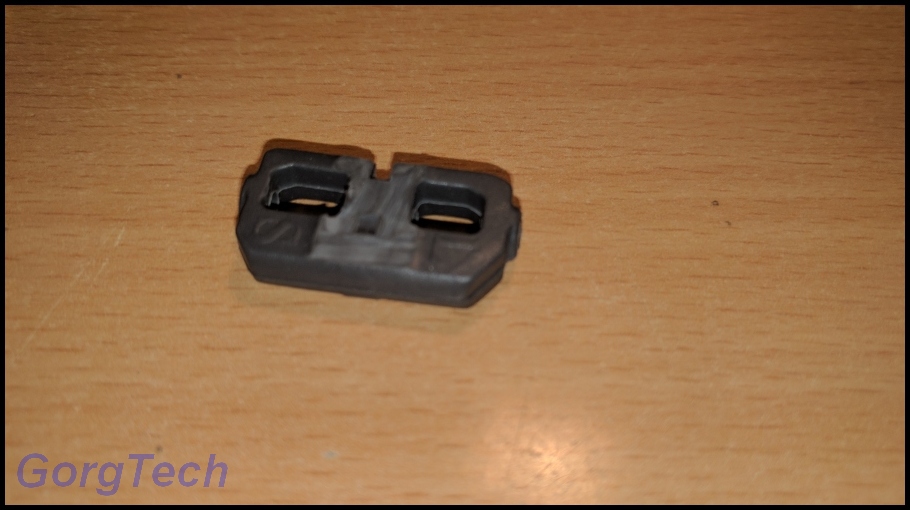
Use a sharp knife and modify 2 sides of this piece.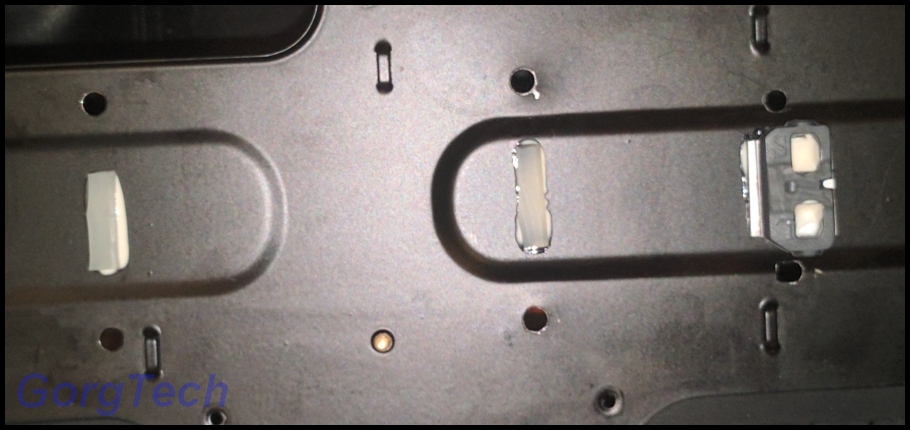
Attach some glue to hold these pieces in place while trying to mount the reservoir.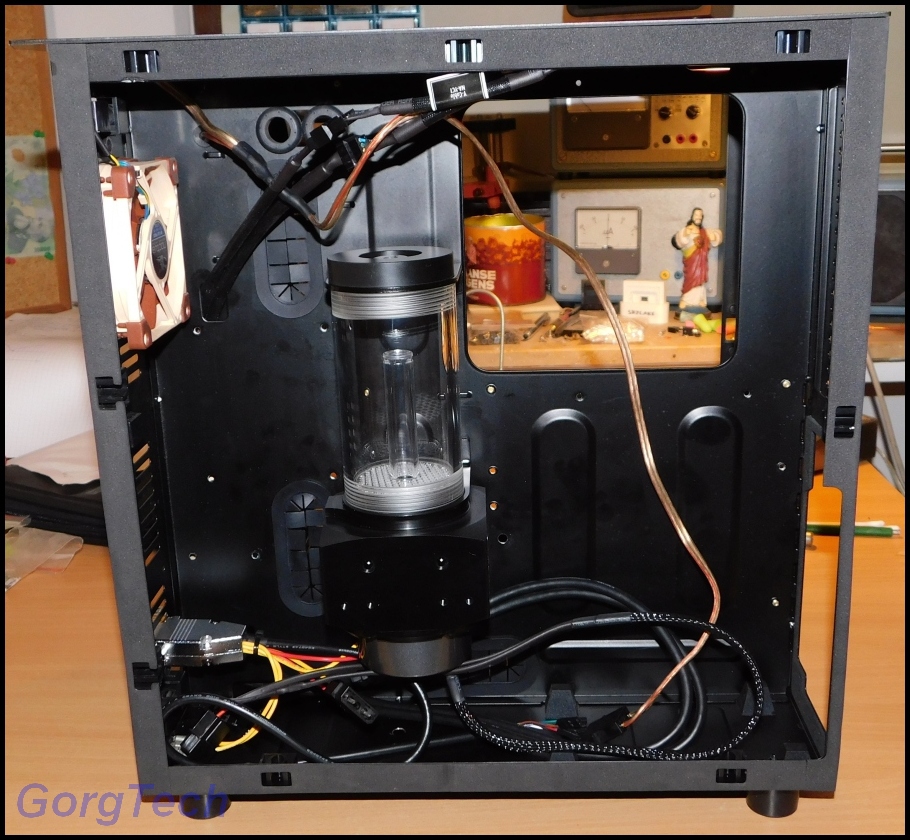
Not bad,eh? But wait, how does it look on the other side?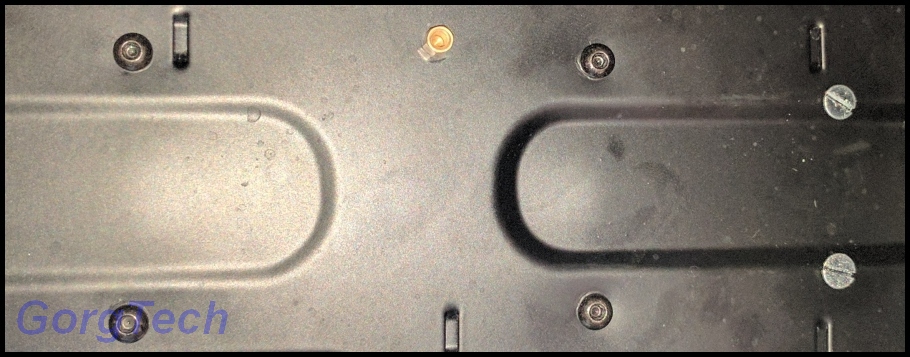
I used 4x of the screws you get with the reservoir. The pump mount is connected with 2 longer M4 screws I had laying around.
The reservoir looks really stiff and I cannot hear any sort of rattling when I try to move it around. I sure hope that the pump won´t transmit any vibrations through the thin wall. There´s only one way to find out but I don´t have the hardware yet I´m going to use in this Project.
Stay tuned for more! -
Before I forget, I´ve also received this great package. I want to thank Noctua for the kind support and for the trust.
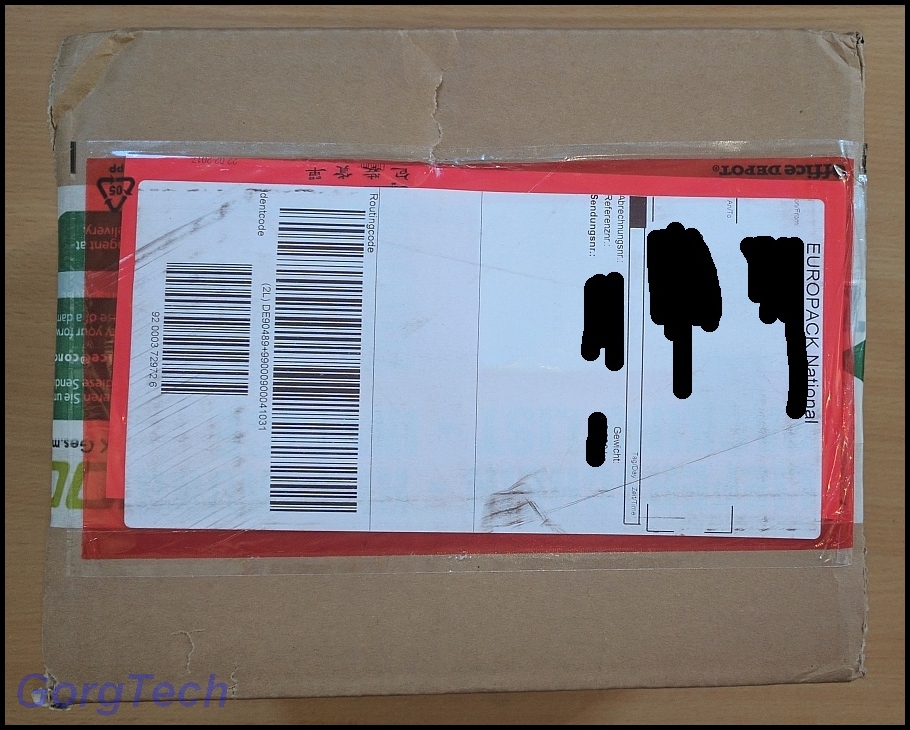
What´s inside?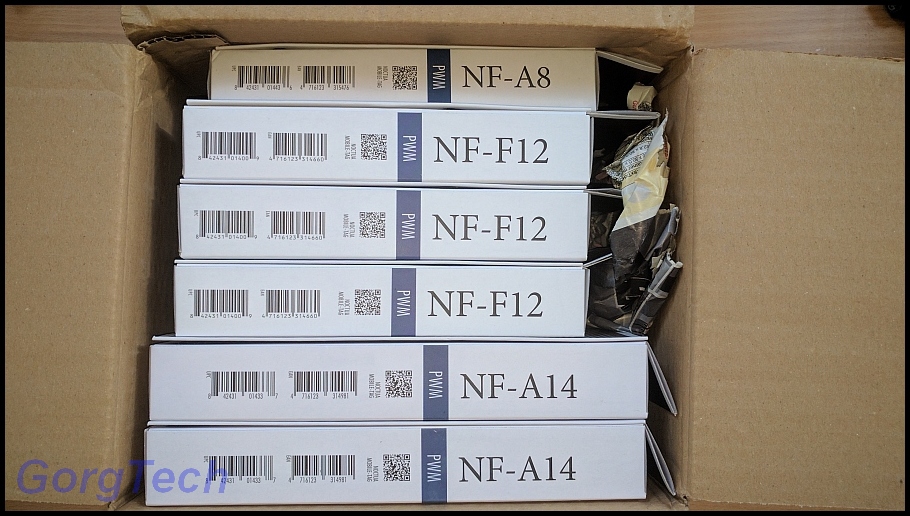
Quite a bunch of Highend Fans which are ideal for this project in order to grab enough fresh air.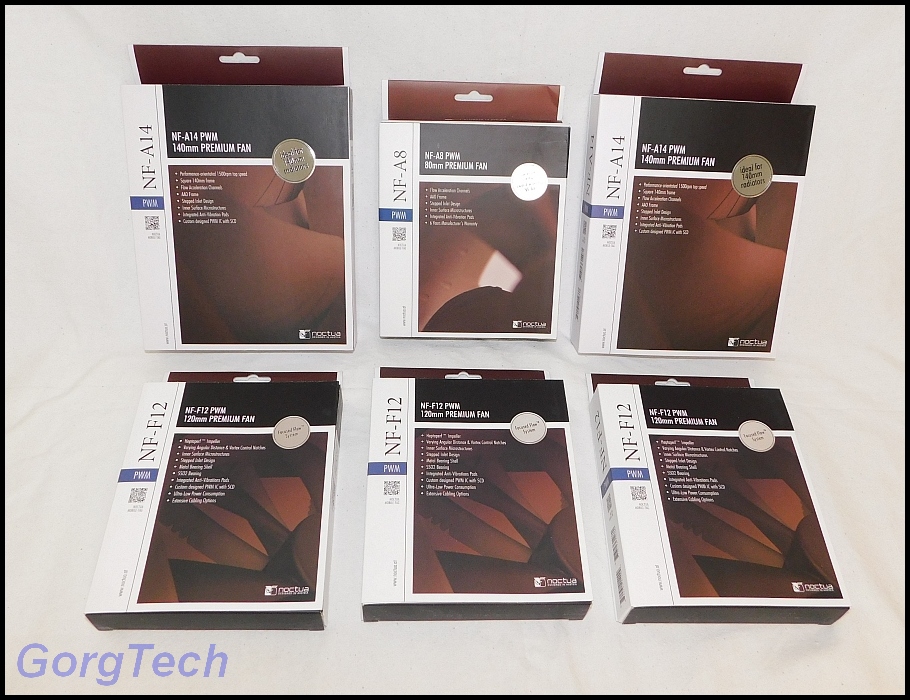
Let´s have a closer look at the Fans: 1x NF-A8 PWM which will be used in the second chamber, 3x NF-F12 PWM and 2x NF-A14 PWM for the radiators.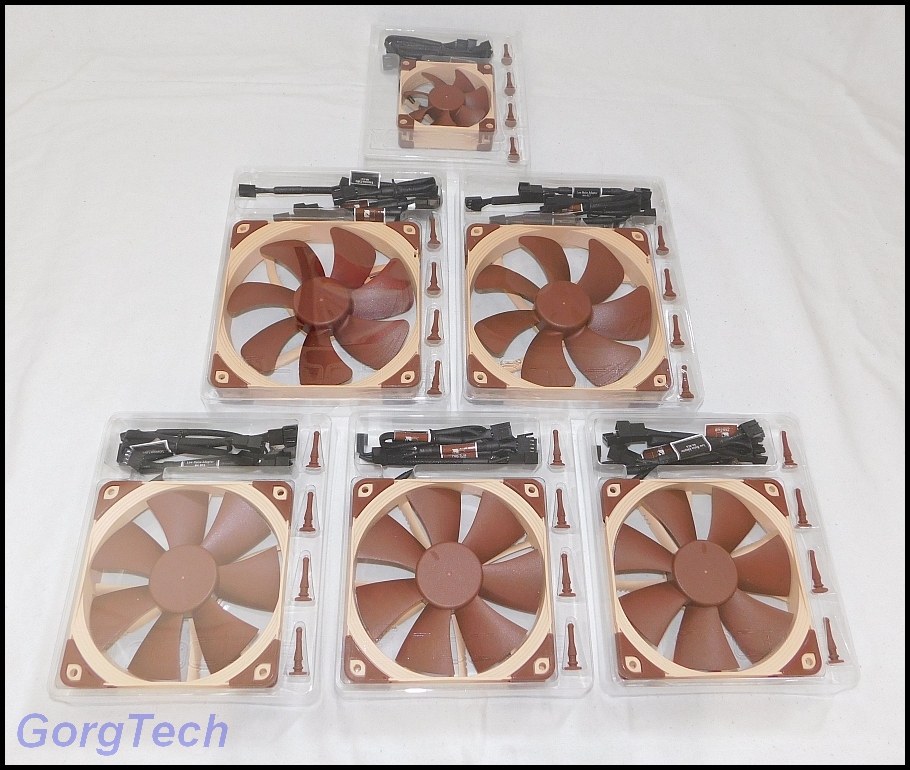
I like this "Fan-Ensemble" which looks interesting enough with the black case and gives a great contrast.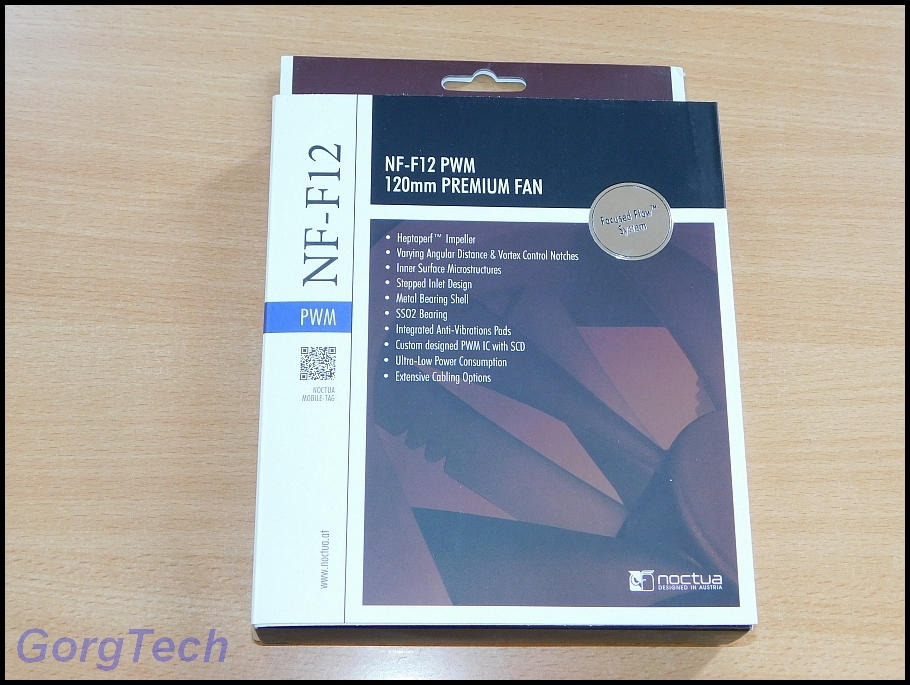
Each Fan has its own packaging which is very detailed. Since the packagings are similar, it´s enough to have a closer look at the one of a NF-F12 PWM as a example.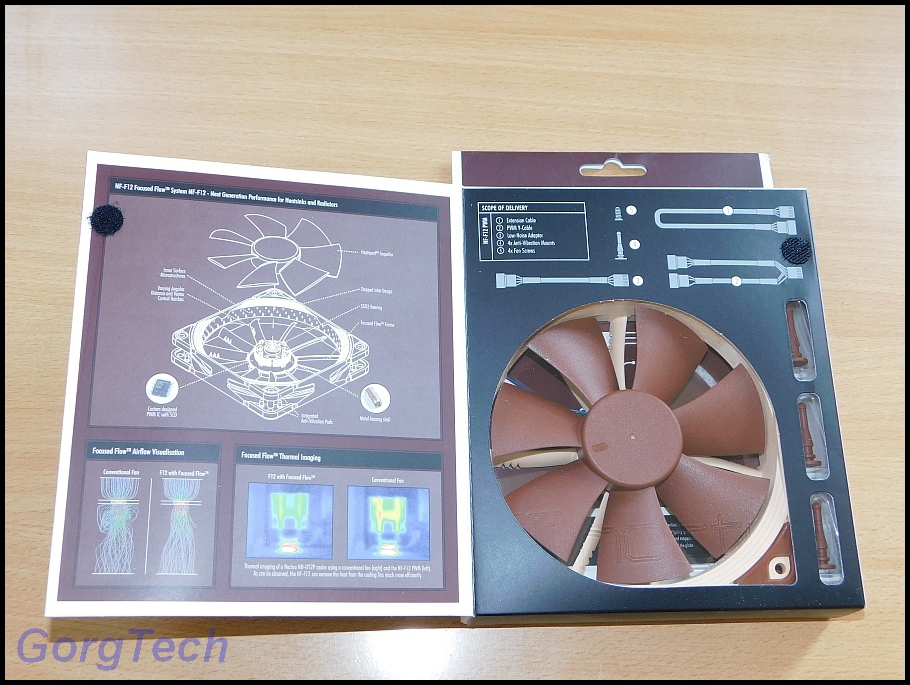
This is the regular version with the standard colours used by Noctua.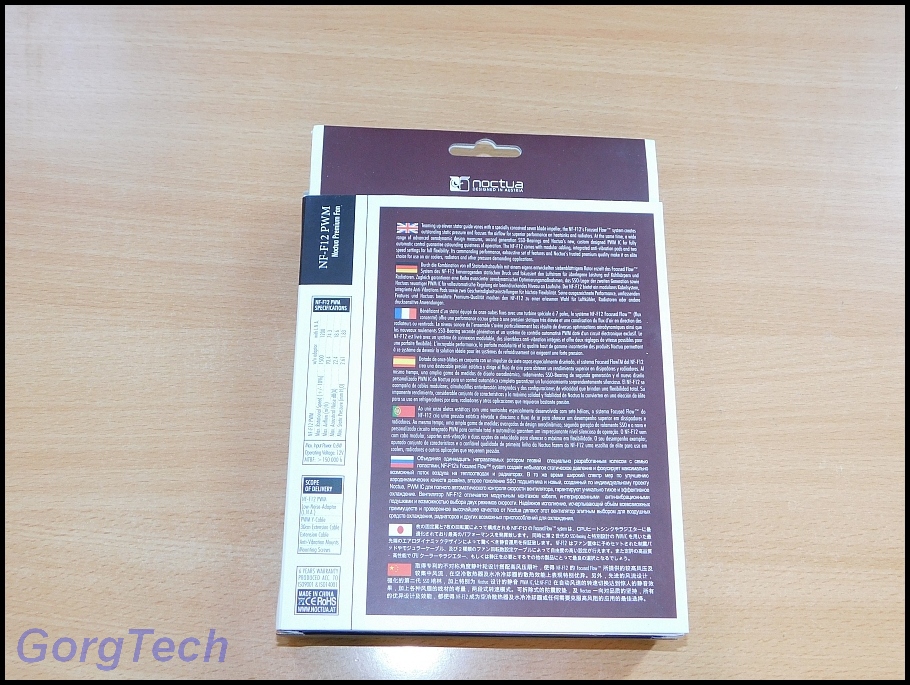
The back of the packaging can also show you more details.
What´s more important than the packaging itself is the technical data of these Fans. These Fans are ideal in order to achieve the best results out of this Water Cooling Project.
The 80mm Fan is optional in the second chamber and is meant to cool down the HDD/SDD attached inside. The Fan grill is nothing special and looks rather ugly.
I don´t like it.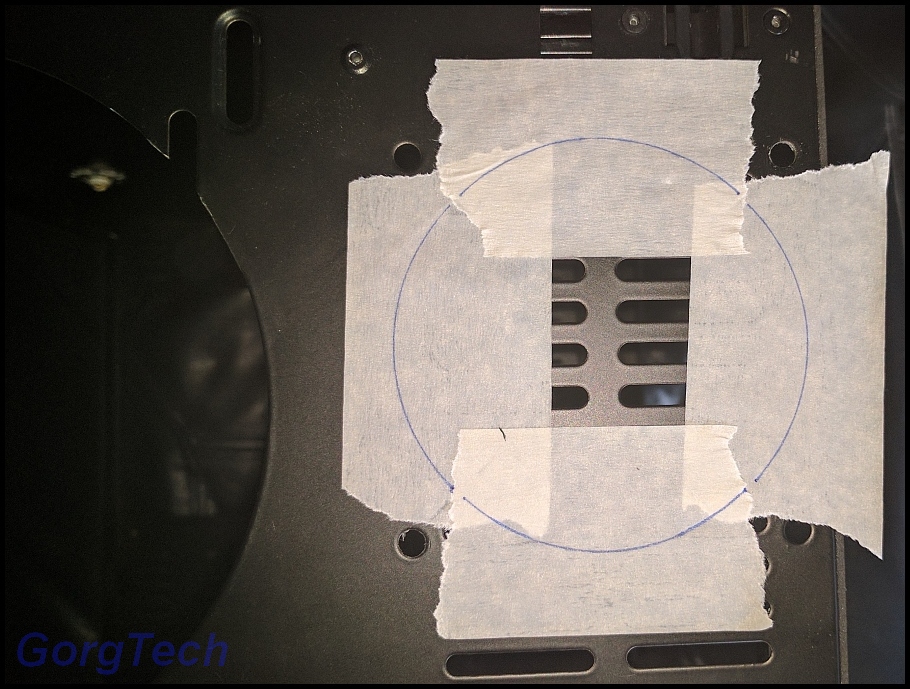
What could I do about it? Let´s try to create something similar like the 140mm holes. It´s not a problem at all to draw something suitable.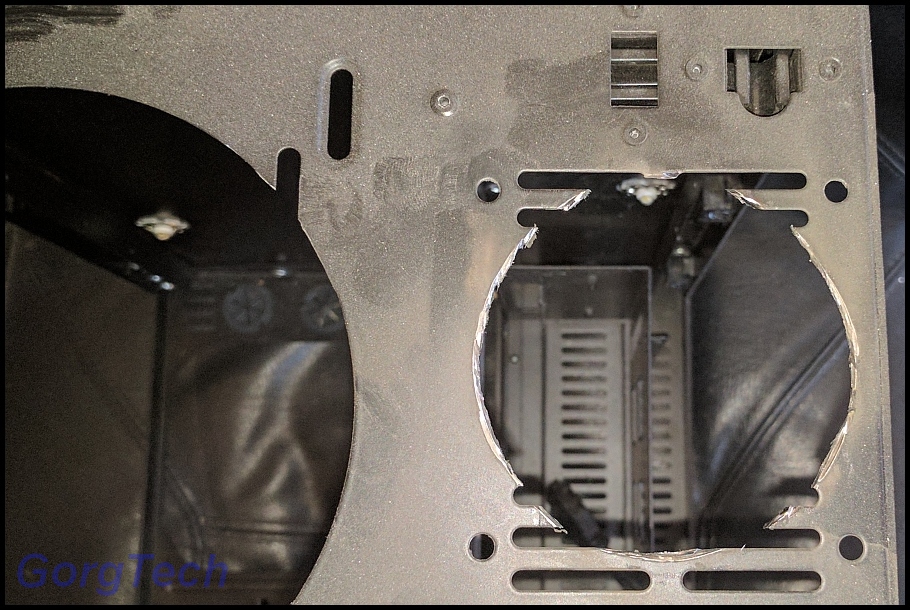
Well, this was fast. The hole is better than the old grill but doesn´t look quite good to be honest.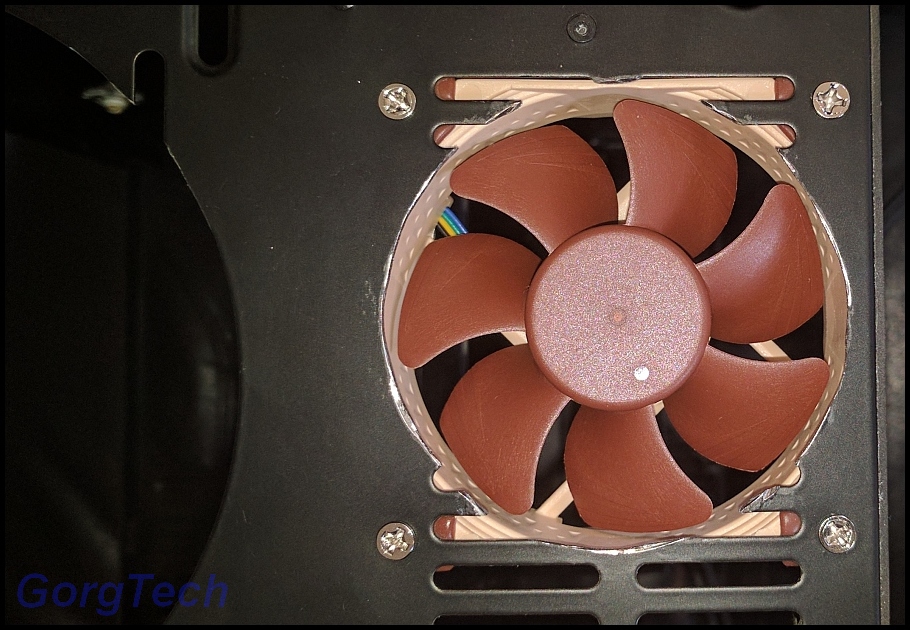
Even if you attach the 80mm Fan, it still looks improvised. Not my cup of tea.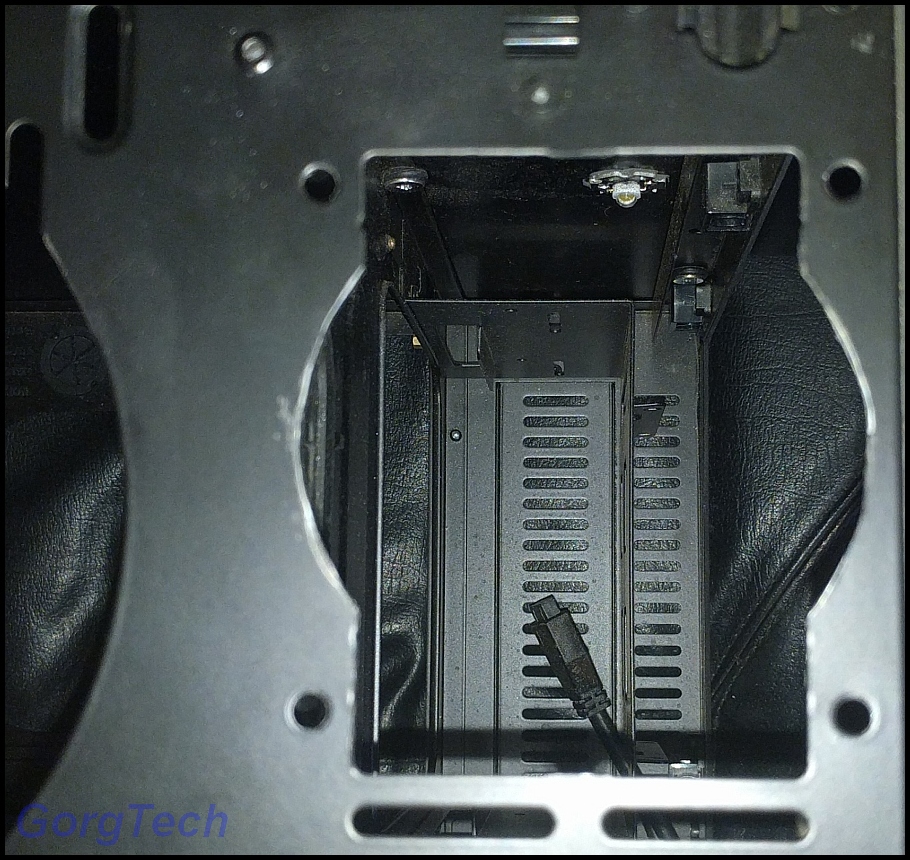
Let´s remove the sharp edges in order to prevent injuries. It´s OK but still not something I´m really happy with.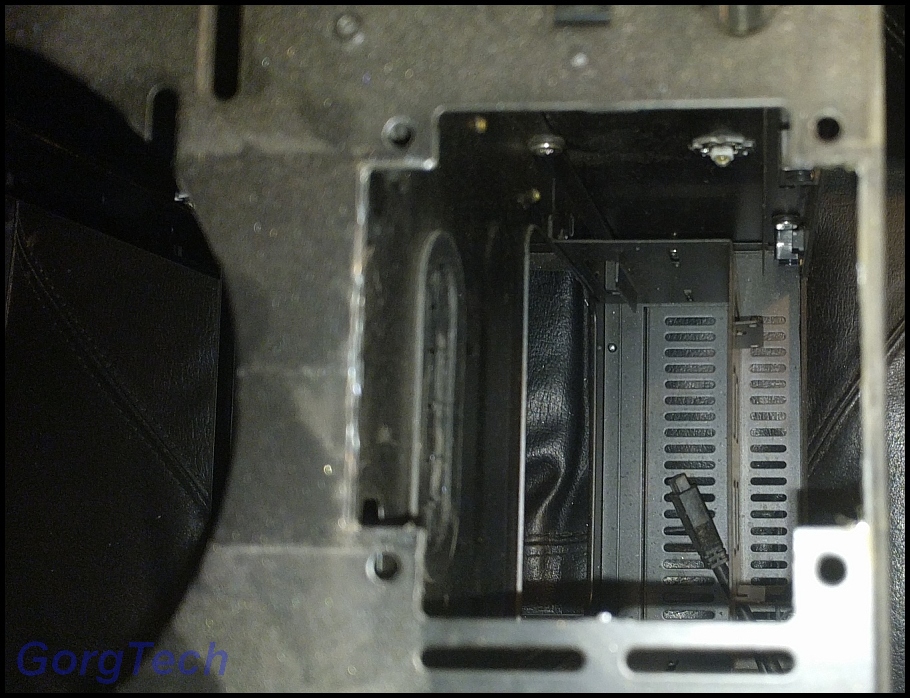
Now that looks a lot better. The new Fan grill doesn´t increase the air resistance. It´s healthy enough not to draw blood like crazy if you attach the Fan and are not careful enough.
I like this kind of shape a lot better. I need to use some sanding paper though before I´m 100% happy with the result. -
The time has come to work on the case lightning
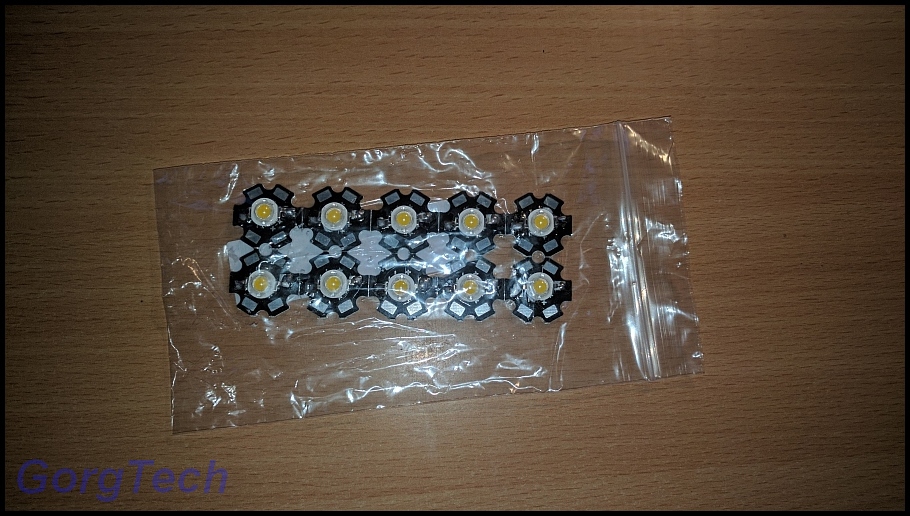
These LEDs are pretty cheap if you order them directly from China. You need to wait a few weeks though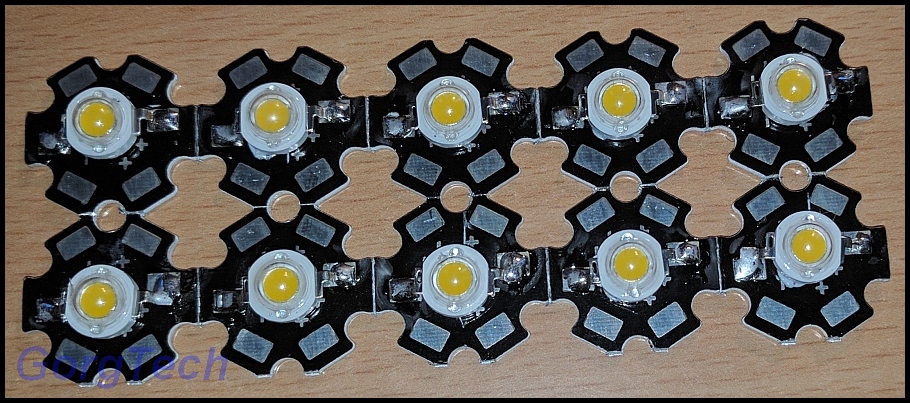
According to the description, these are white 3W LEDs.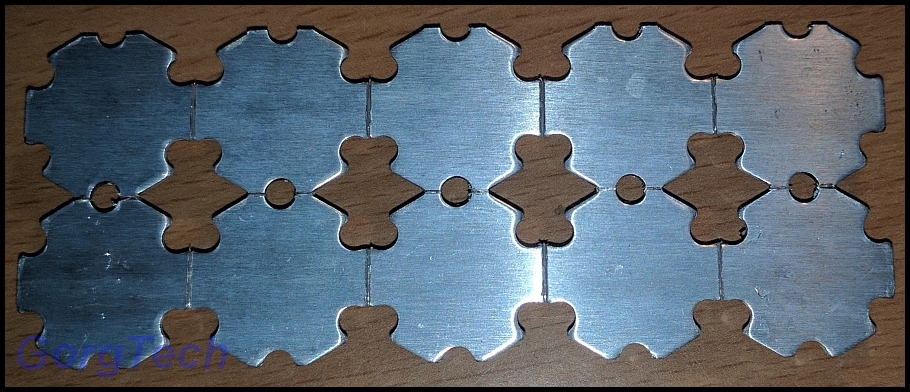
These LEDs are already mounted on some star shaped coolers.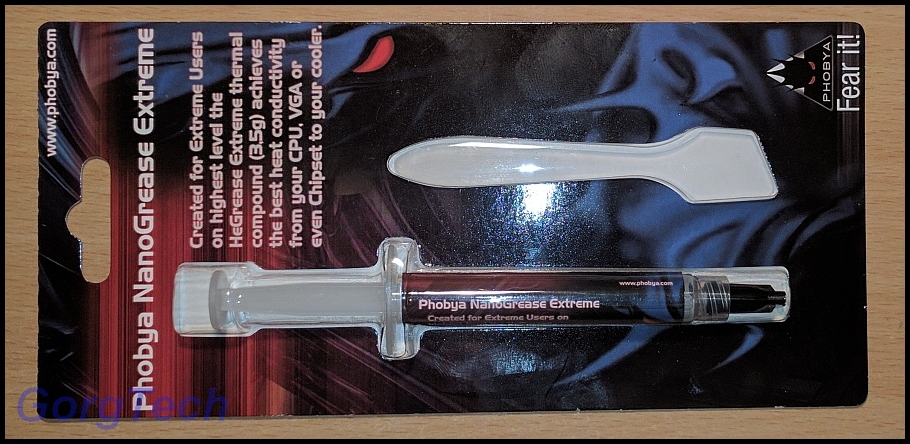
Look at this nice thermal paste. It´s the Phobya NanoGrease Extreme 3.5g. I´ve used this thermal paste in other projects before and achieved great cooling performances with it. This thermal paste also helped to improve the cooling performance of a Google Nexus 5 (2013) and Google Nexus 6P.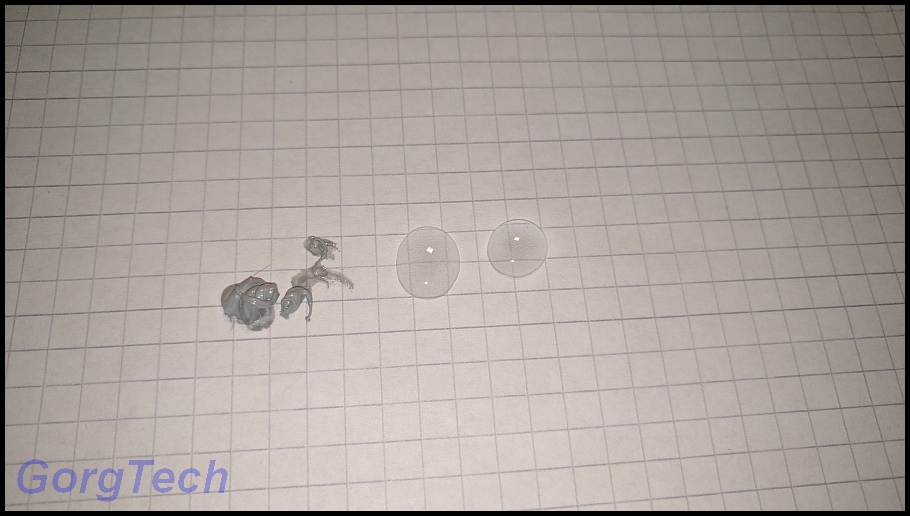
This thermal paste is not only meant to be used with CPUs or GPUs only. It can get along with 2K glue as well.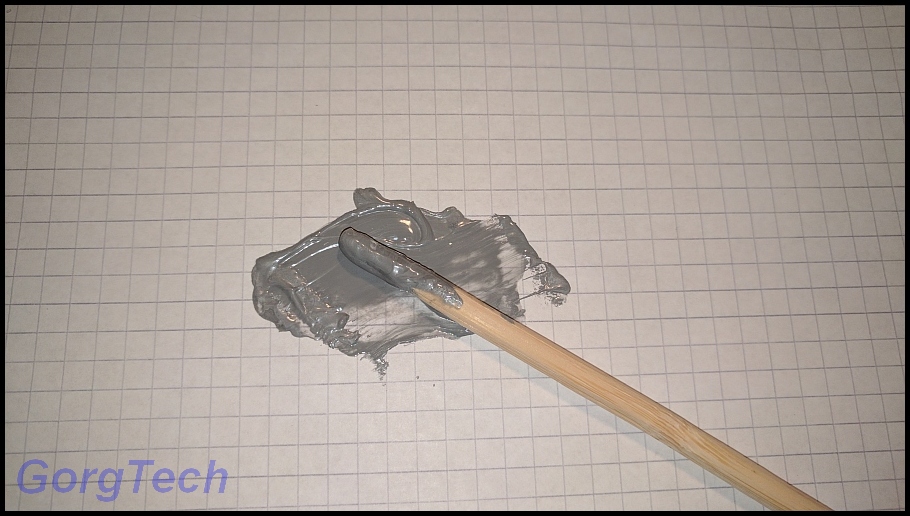
Mix it together and it looks like this. I know that you can buy thermal conductive glue but you can also be inventive if you have to.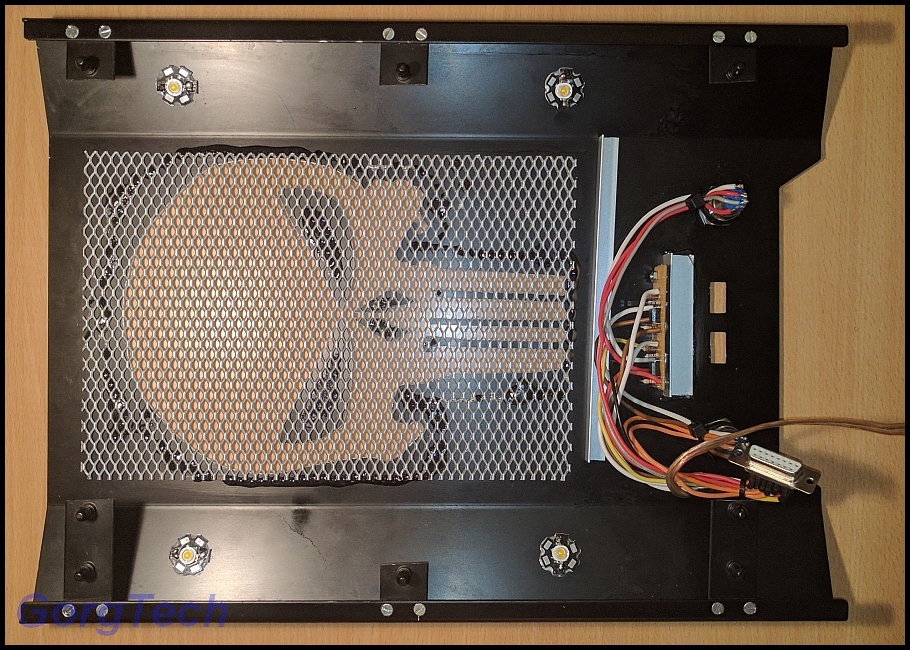
What will I use this stuff for? I cleaned the LED coolers and the back of the Aluminum front with Isopropanol and attached them. The glue is very strong, I have my doubts that I will ever be able to remove these coolers again.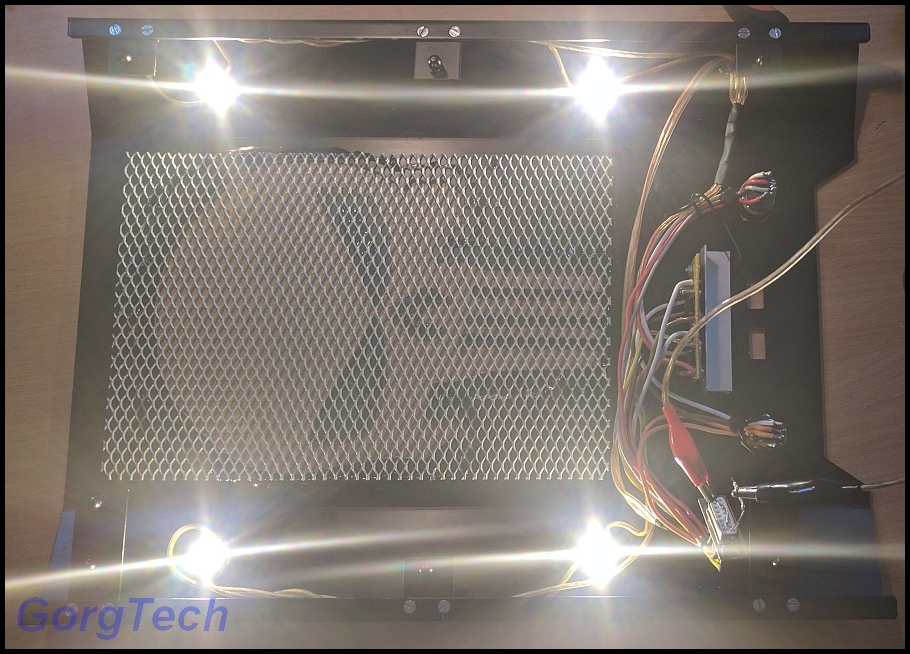
Let´s wire the LEDs up and have a quick check if they are OK.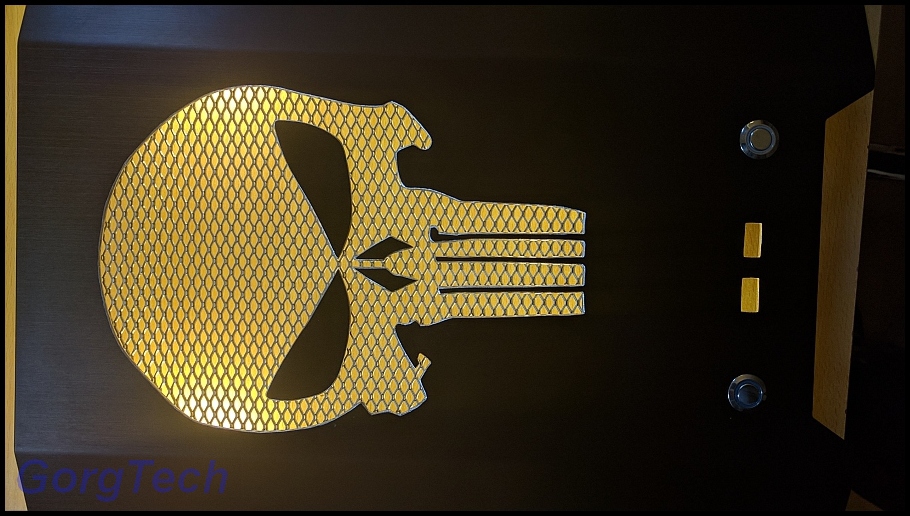
Well, I don´t like the yellowish tint which is really strong. These LEDs have a similar light like some old light bulbs.
I´m not sure if I really like it this way since I wanted a cold white light instead.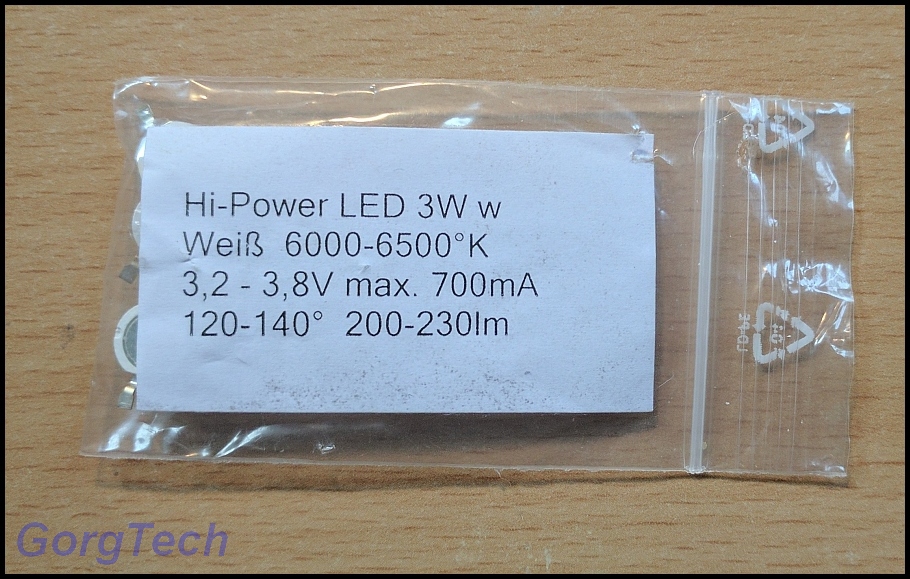
Lucky for me that I had these LEDs laying around.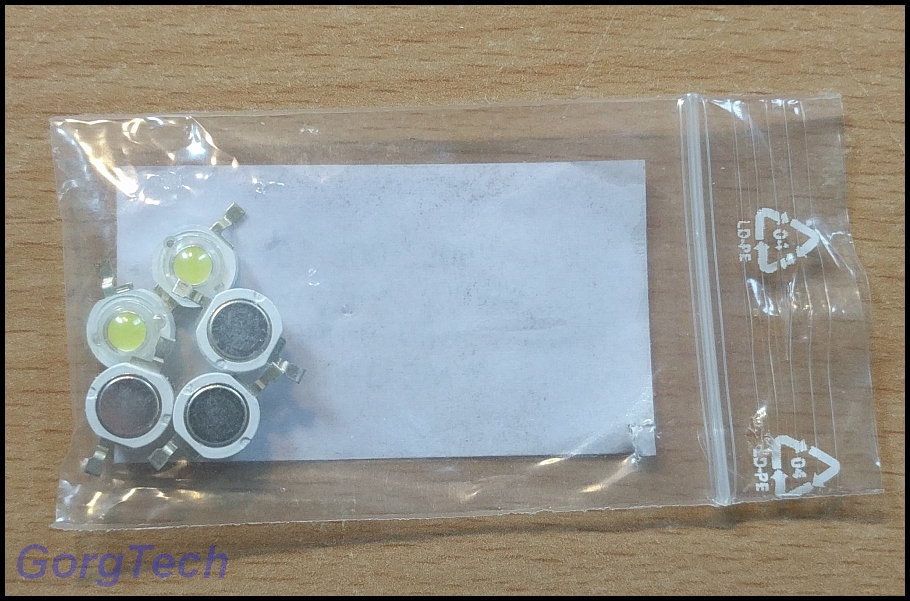
They don´t have a cooler attached to them but this problem can be solved.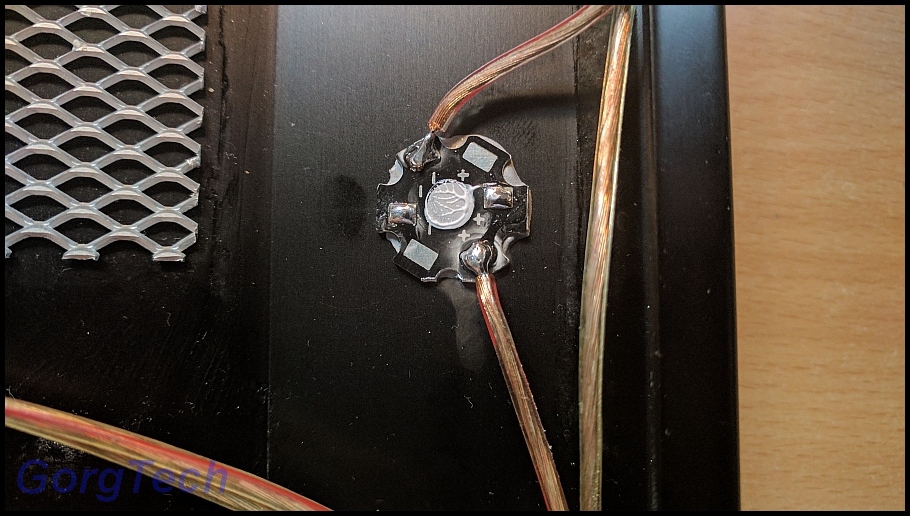
Just remove the other LEDs. It´s nice to see that the manufacturer used some thermal paste too.
I cleaned the coolers, removed the old solder and attached the new LEDs. I used some of the Phobya thermal paste too for best results.
That´s a lot better with barely a yellowish tint visible in comparison to the old LEDs. The Aluminum front acts like a giant cooler for these LEDs which prevents them from overheating.
The case itself will also get some LEDs too. I think that the warm yellowish light won´t look that bad inside.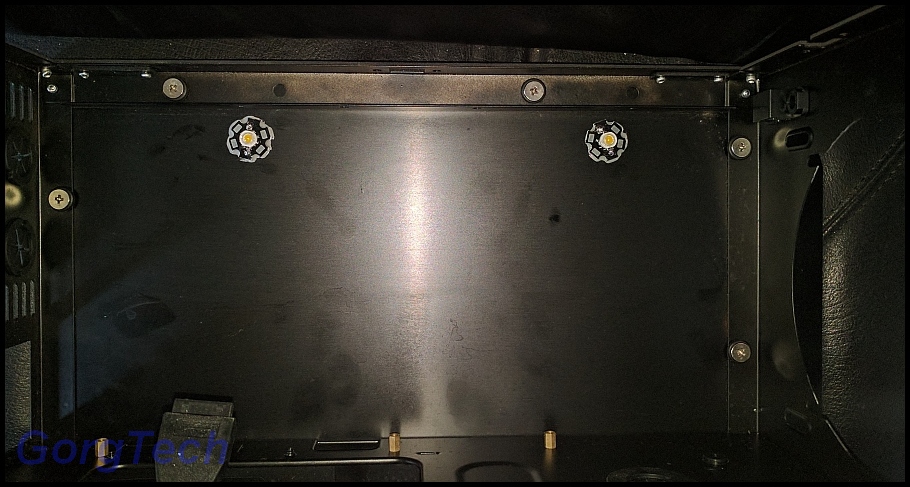
The LEDs are hidden and can´t be seen directly. How will I connect them?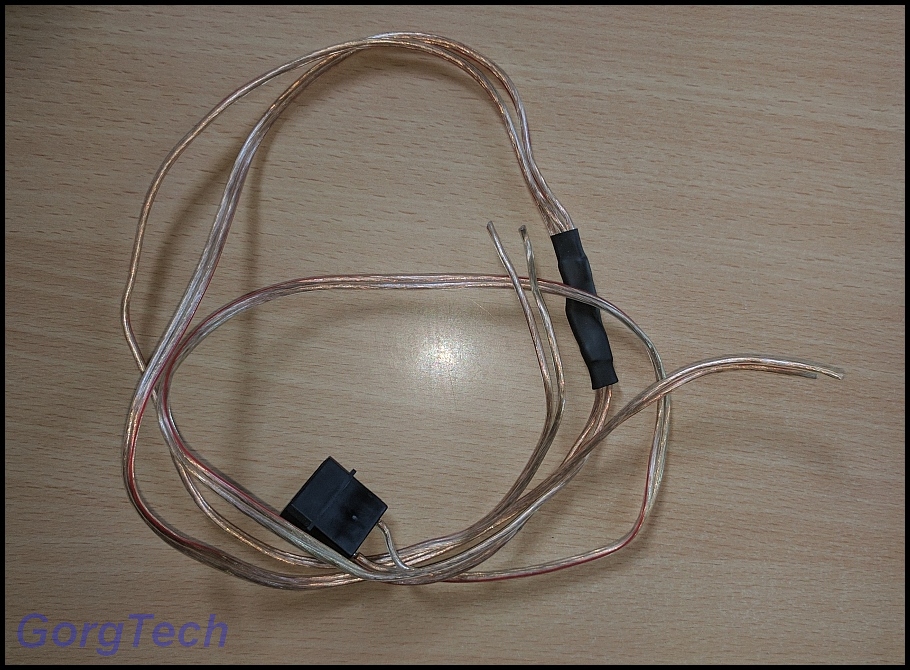
Another recycling of old material. This will work! -
Well, I had a calm weekend this time. Let´s do some Unboxing.
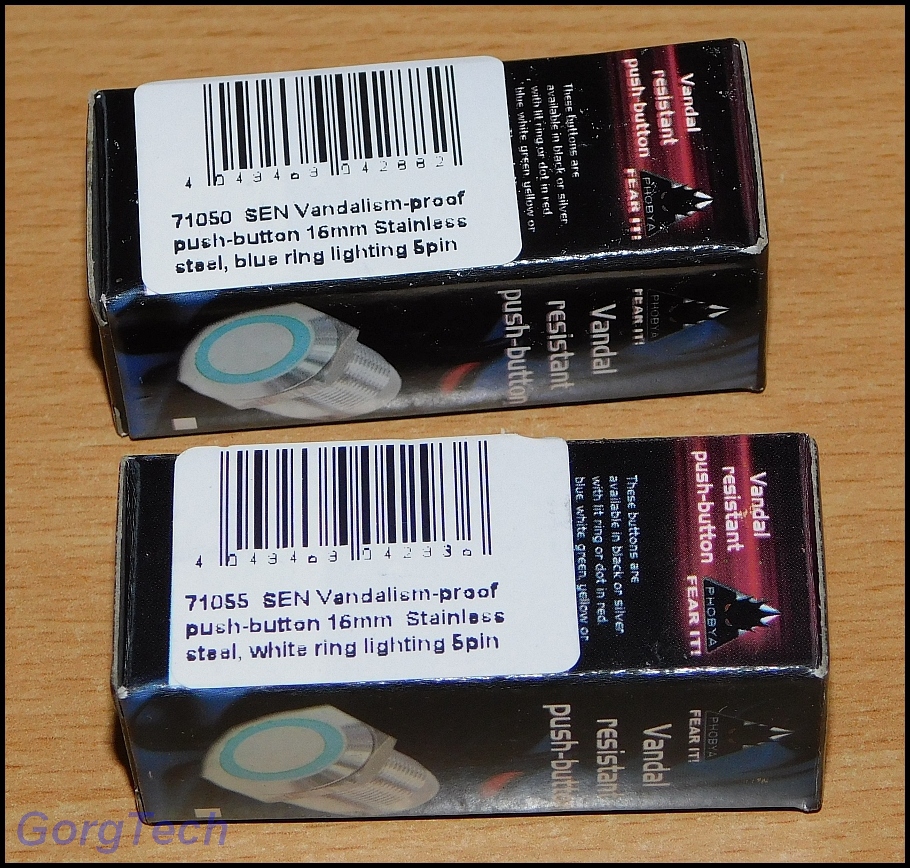
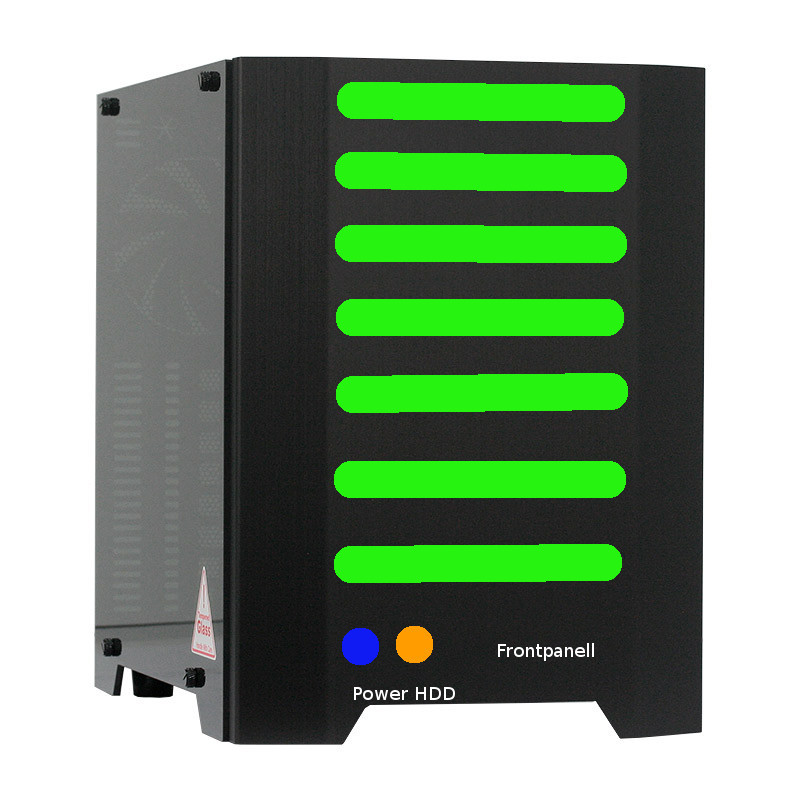
Let´s have a look at the Phobya LED Buttons first. These will fill the holes in the Aluminum front and be used as Power and Reset Buttons. The blue ring will replace the Power LED, the white ring will show the HDD activity.
I´ve chosen these Buttons: Phobya push-button vandalism-proof / bell push 16mm stainless steel, blue ring lighting 5pin and Phobya push-button vandalism-proof / bell push 16mm stainless steel, white ring lighting 5pin.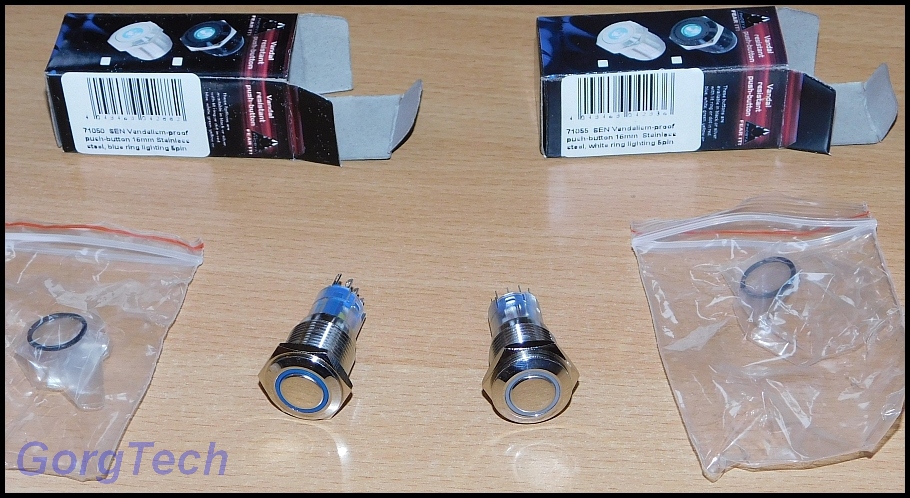
They look nice, don´t they? I wanted the silver version in order to achieve a nice contrast with the dark Aluminum front.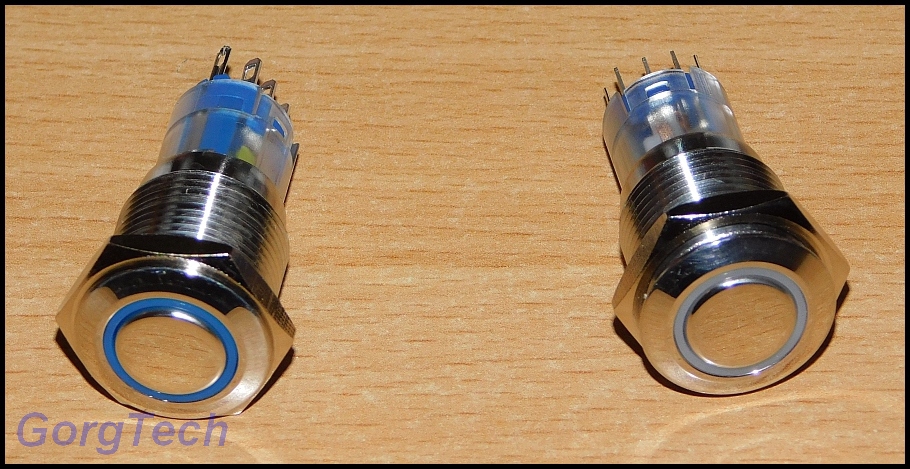
These Buttons are quite long.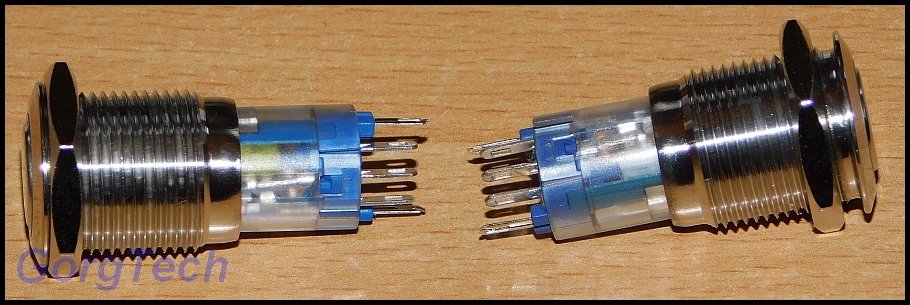
The build quality is awesome.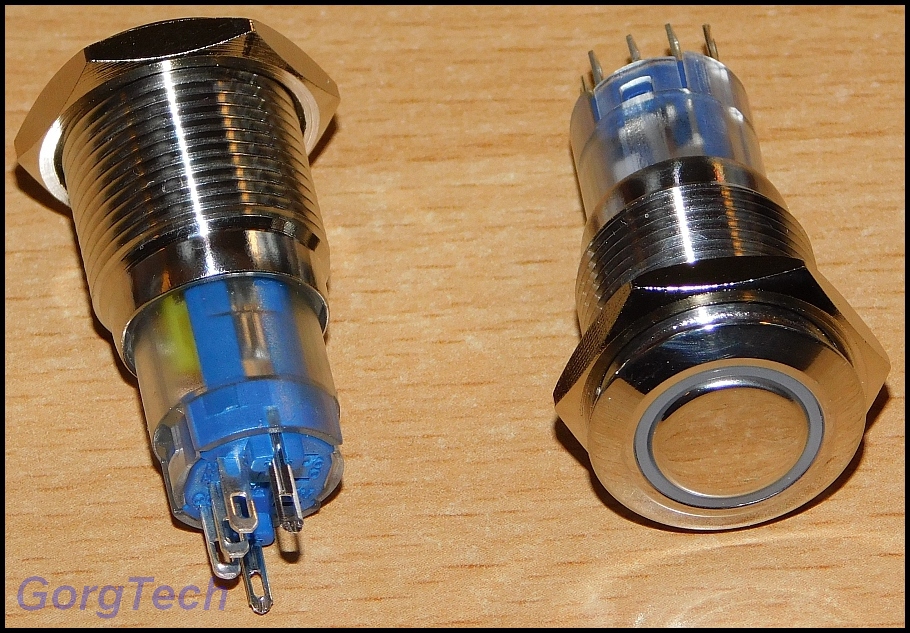
They can be used in order to close or to open circuits.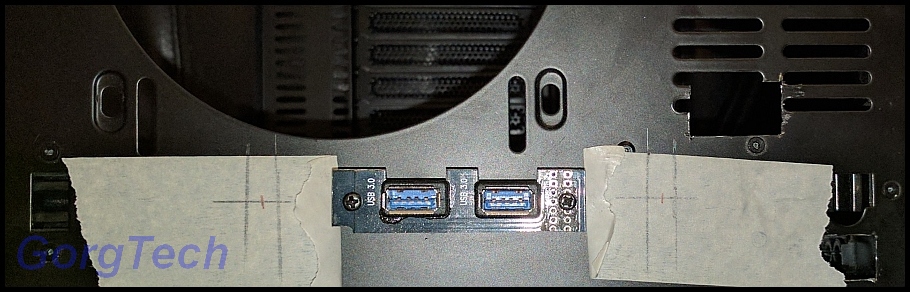
Now here´s the deal. These Buttons are long and I can´t attach the Aluminum front anymore. What can be done against it? You can drill some large holes in order to solve the problem.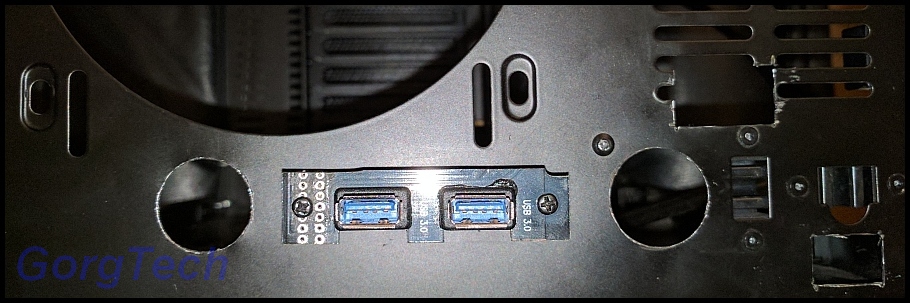
Don´t they look great? These 2 holes have a large diameter for a reason. I don´t want to damage the cables attached to the Buttons when attaching or removing the Aluminum front.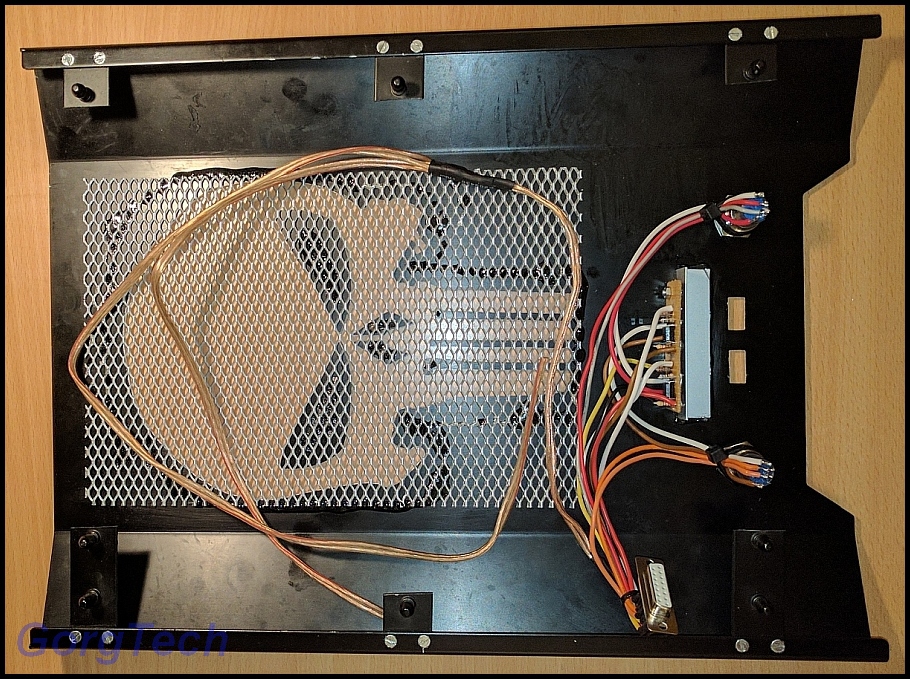
Let´s solder some cables again. This doesn´t look that chaotic anymore, right? The remaining cable will be used for white LEDs.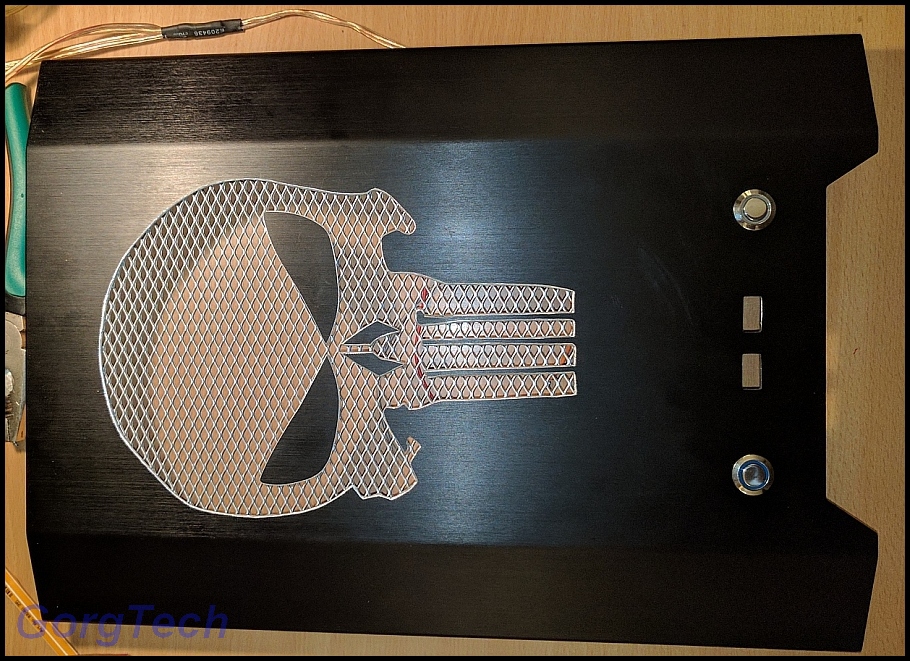
I like the proportions of the Buttons in comparison to the USB ports. These Buttons are available in larger sizes too but I wanted to use the smaller versions. These are not too distracting.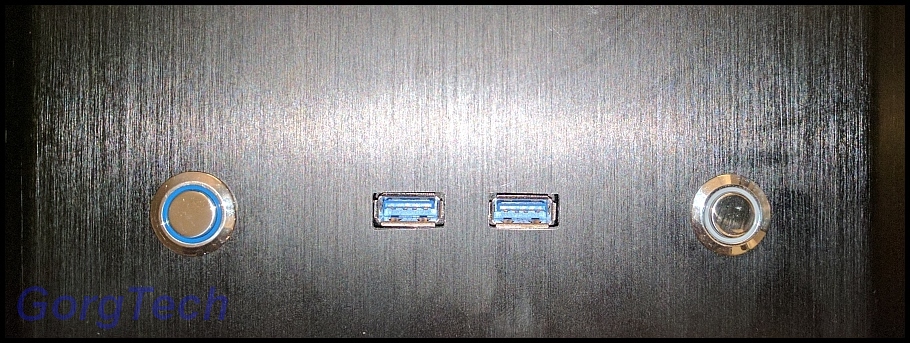
Well, quite a nice contrast?
Let´s have a look at some other stuff too and start with the reservoir.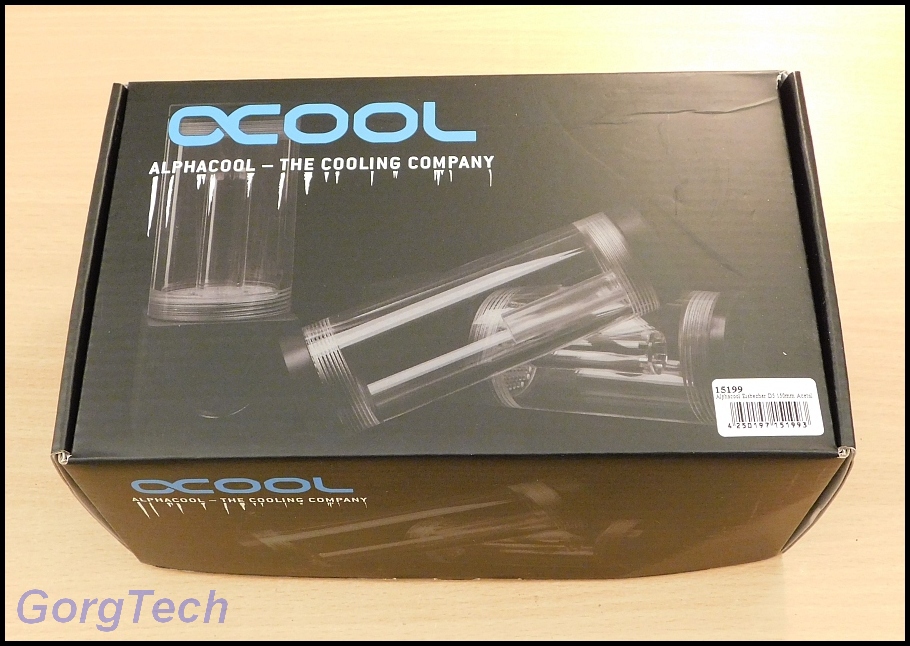
The Alphacool Eisbecher D5 150mm Acetal reservoir is ideal for this case.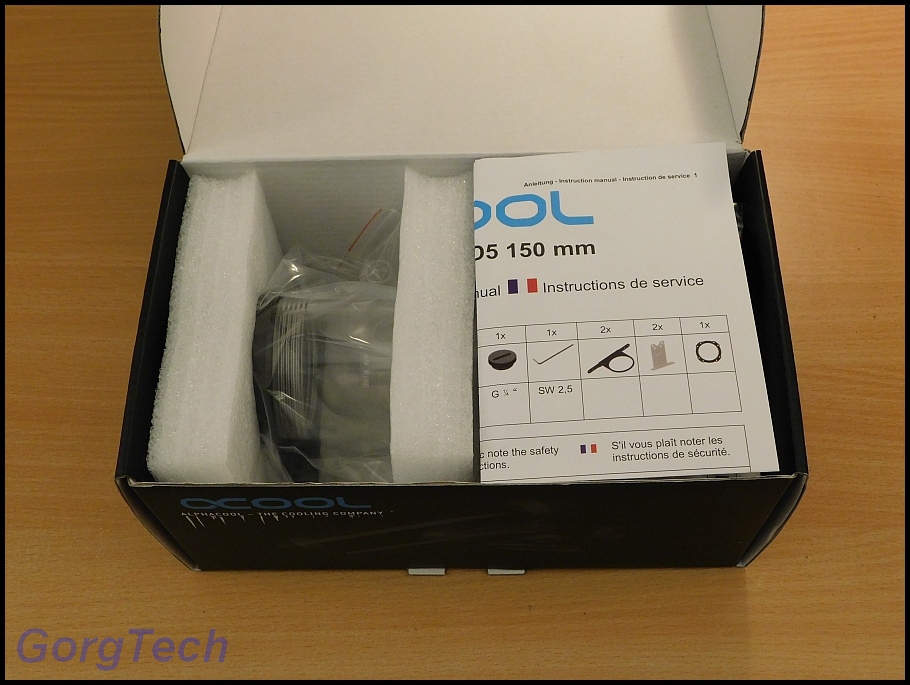
What´s inside the box?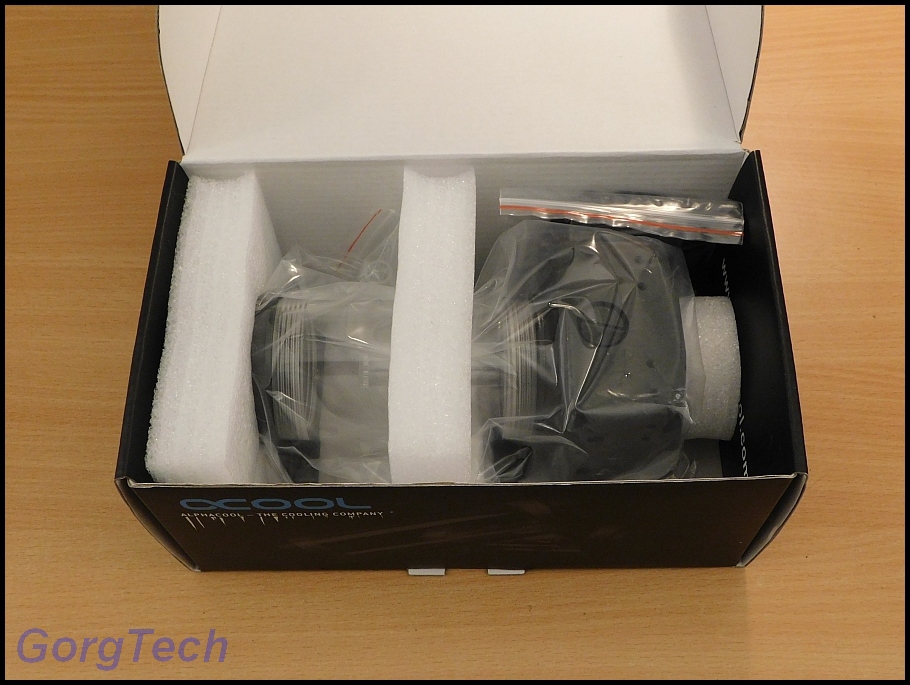
All parts are well packed.
I´ll have a closer look at this reservoir later when I have to find the ideal spot for it. I like the shiny tube though, hopefully it won´t be a fingerprint magnet?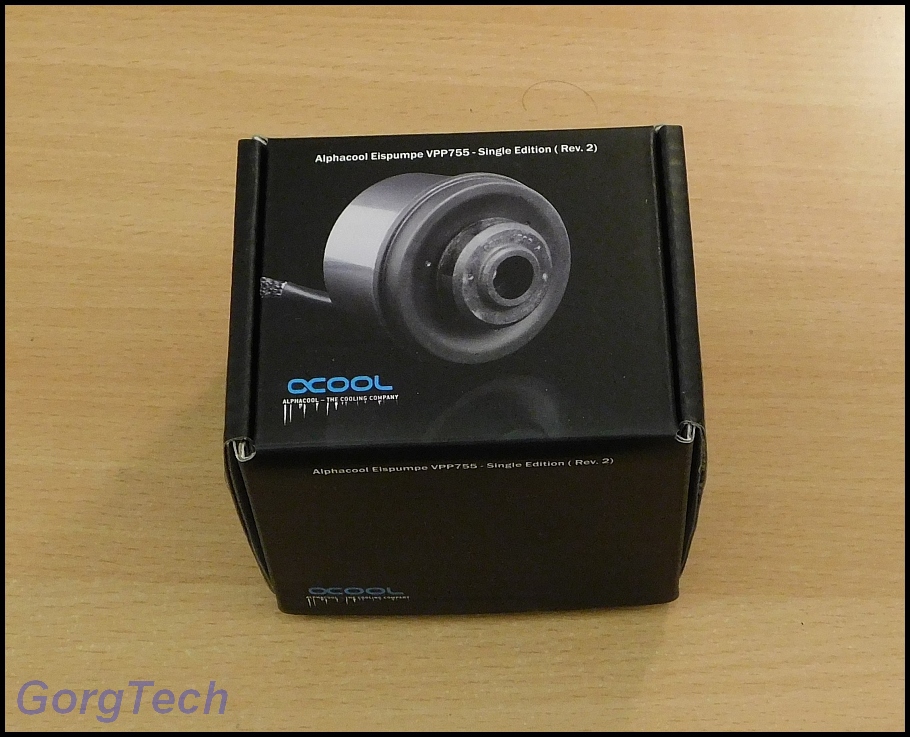
The pump is next. This is the new Alphacool Eispumpe VPP775 - Single Edition (rev.2).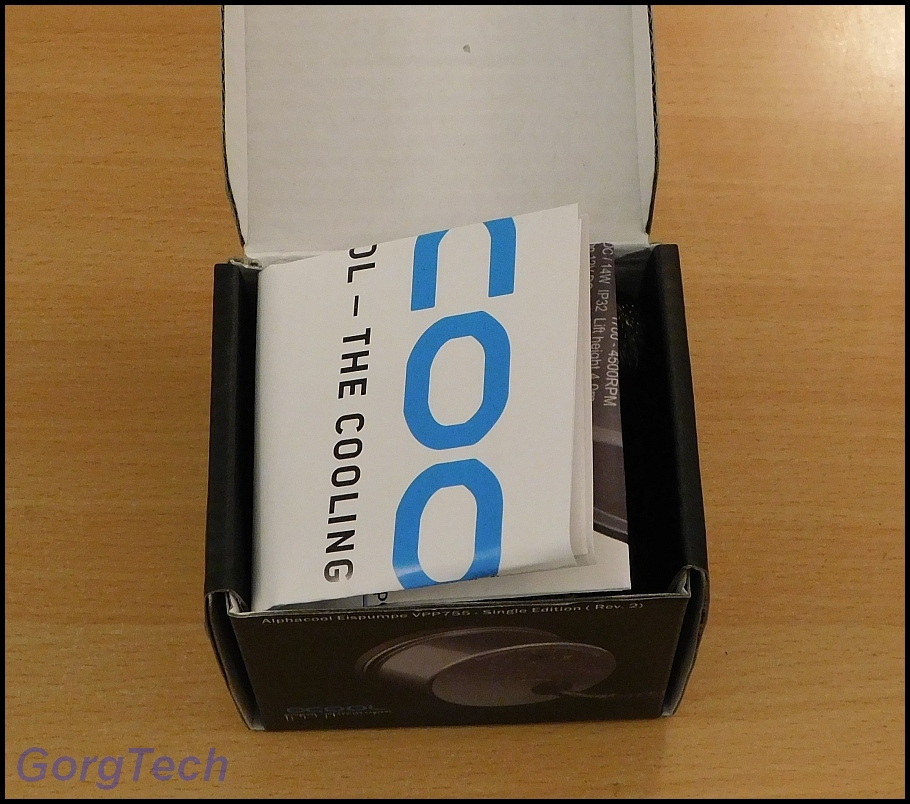
Let´s have a quick peek too.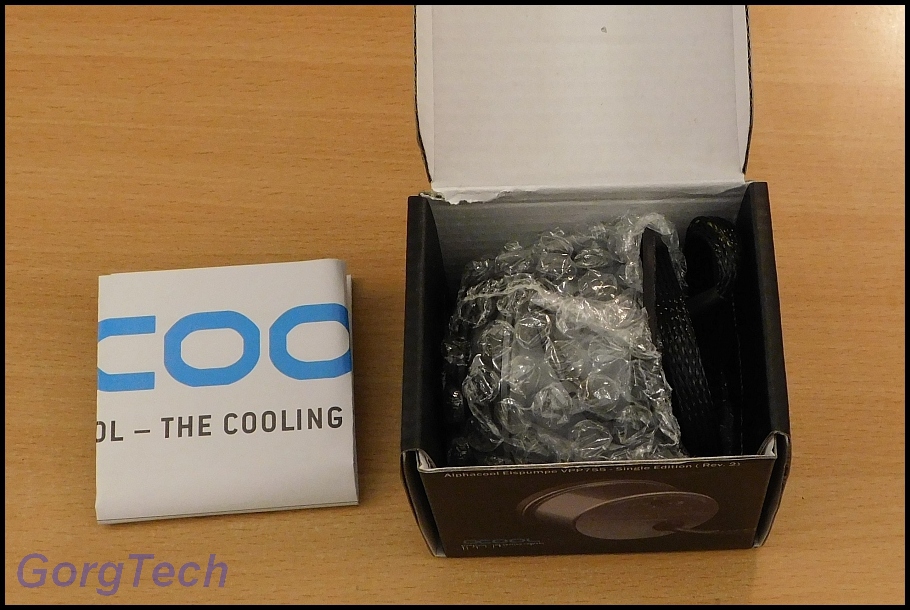
This pump is also well packed.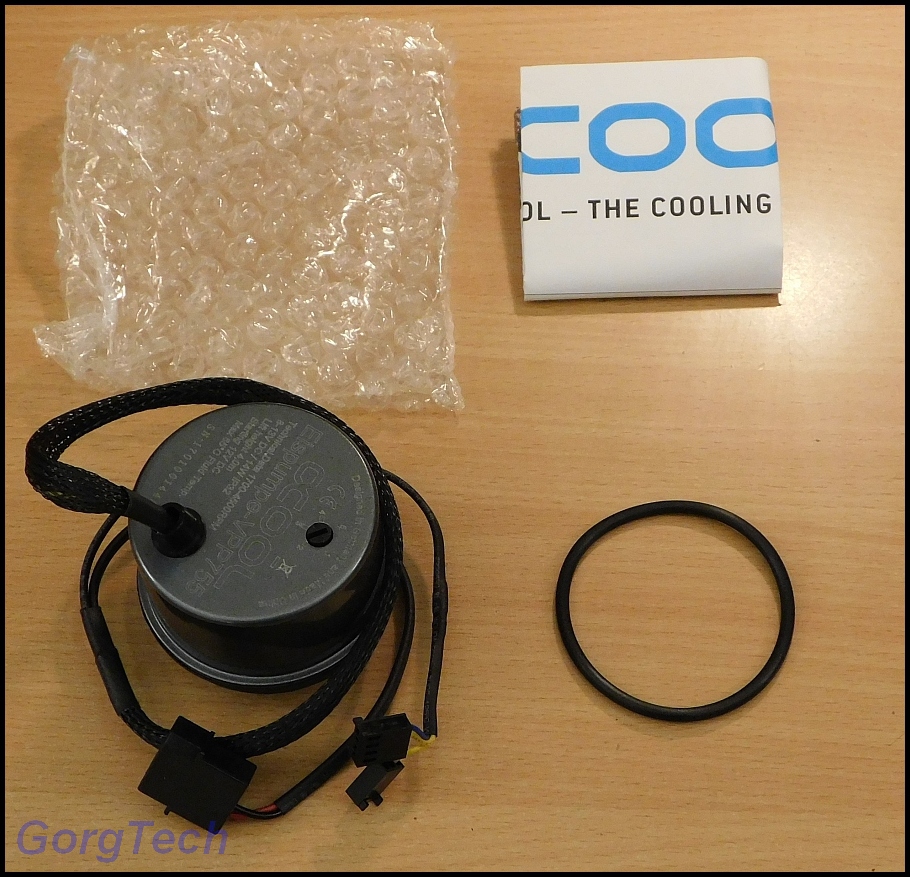
I like the dark metallic color. This pump looks great, all cables are sleeved. It looks really elegant.
You can adjust the power of this pump. I will run it set to the 2. mode which should be enough for my needs.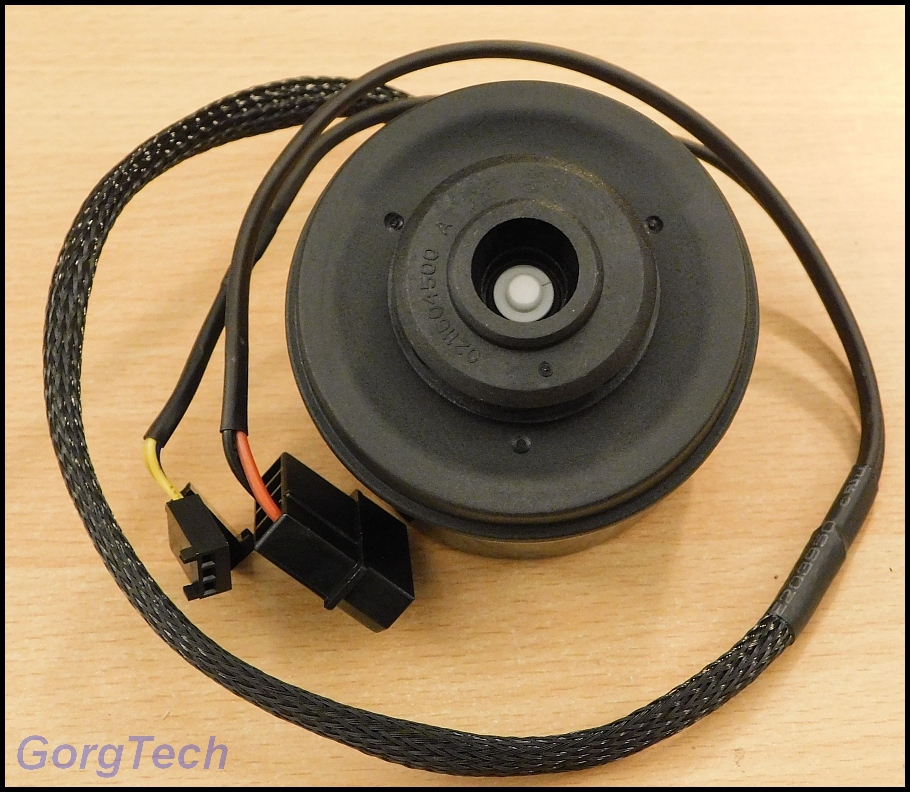
What about the bottom? Nothing too special.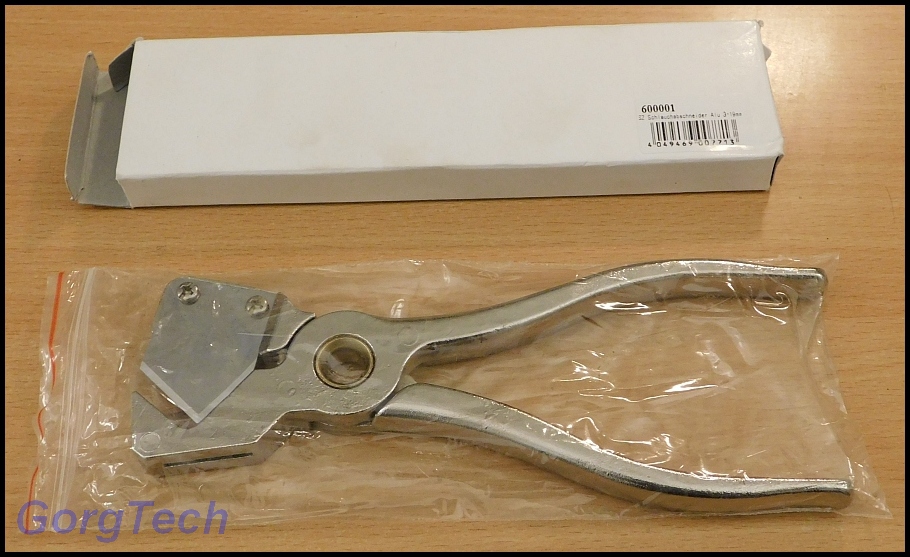
I also got this nice tool. I guess that most guys might already have a hose cutter if they´ve already built water coolings. This is the Hose cutter Aluminum 3-19mm which cuts hoses very clean. I like it since I don´t have to fiddle around with a regular sharp knife.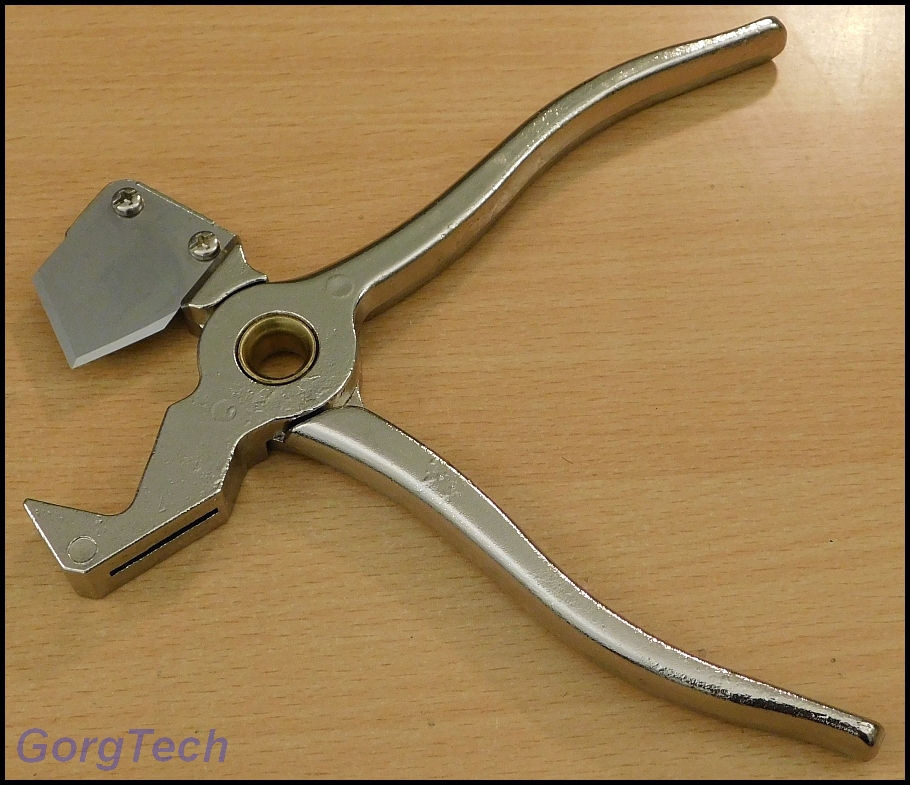
Just be careful not to chop off your finger!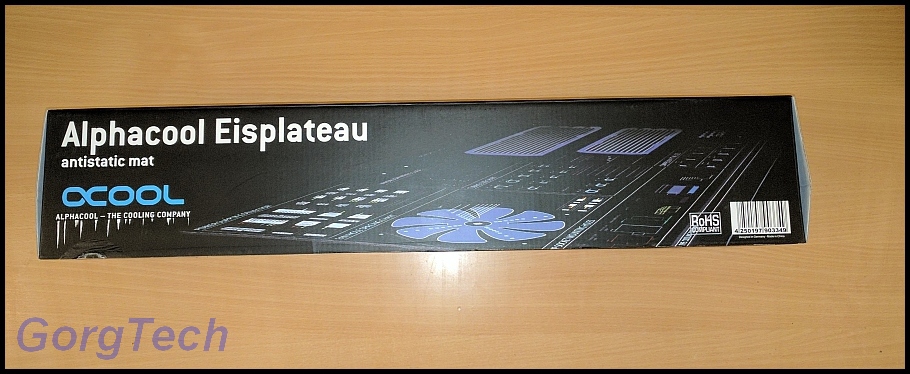
If you work with electronics a lot and handle sensitive devices, it´s a good idea to get a anti-static mat. I got the popular Alphacool Eisplateau Anti-Static work- and mounting mat 120x60cm.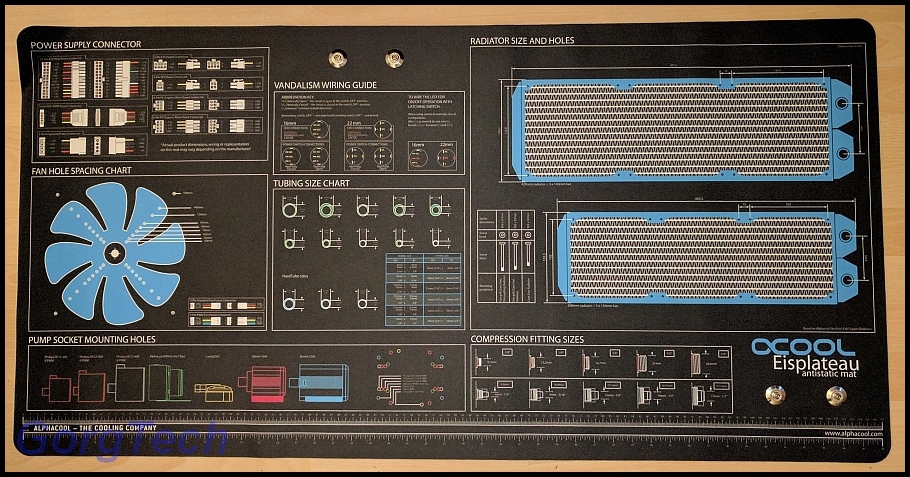
This mat is huge and will easily cover a regular desk. It can be rolled and stored in the box if you don´t need it at the moment. I like the useful information printed on it which could help a lot since you get eg. a description of pin connections, fan sizes and other data you might need when modding PCs.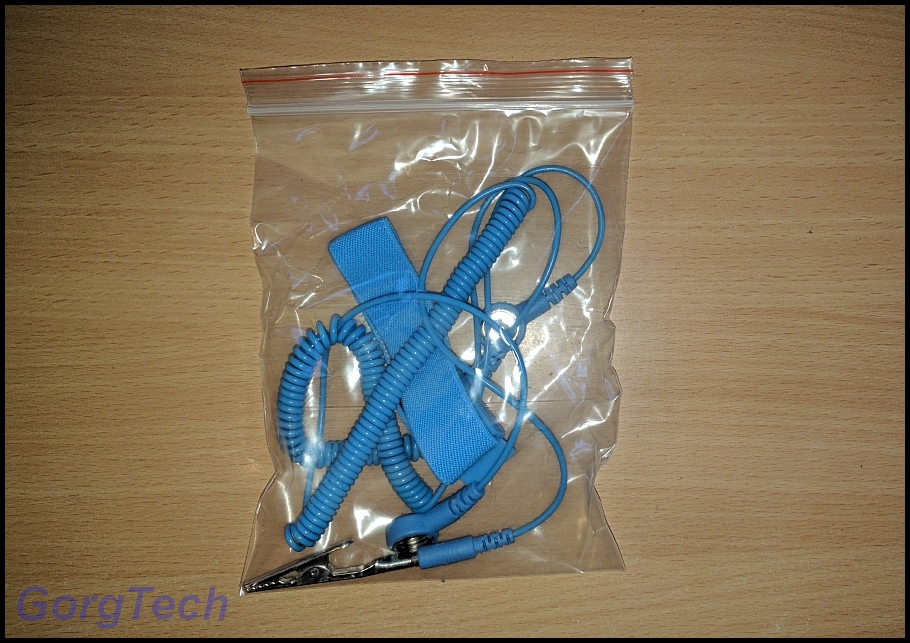
Don´t forget to attach the grounding cables in order to protect sensitive devices from a electrostatic discharge.
I will work on the LED lighting of the case when I get the long awaited LEDs from China -
Here we go again. I guess the Dremel Clone will soon be used again in order to make some adjustments to the case
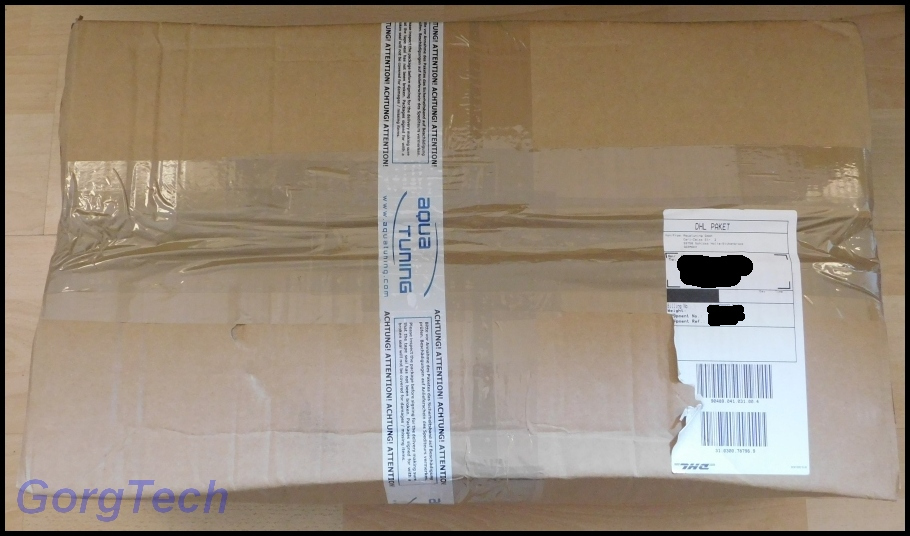
I received this great package today. I want to thank Aquatuning Germany for the kind support and for the trust.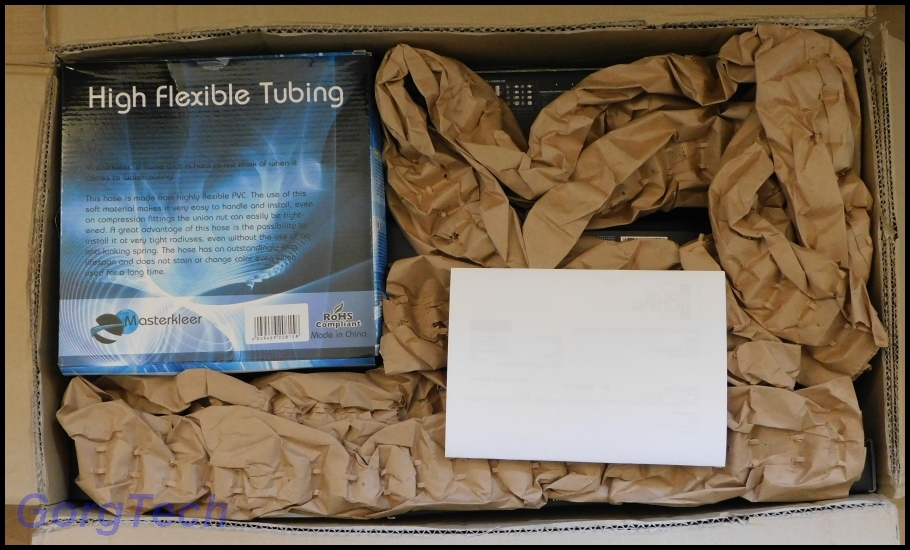
I wonder what´s inside?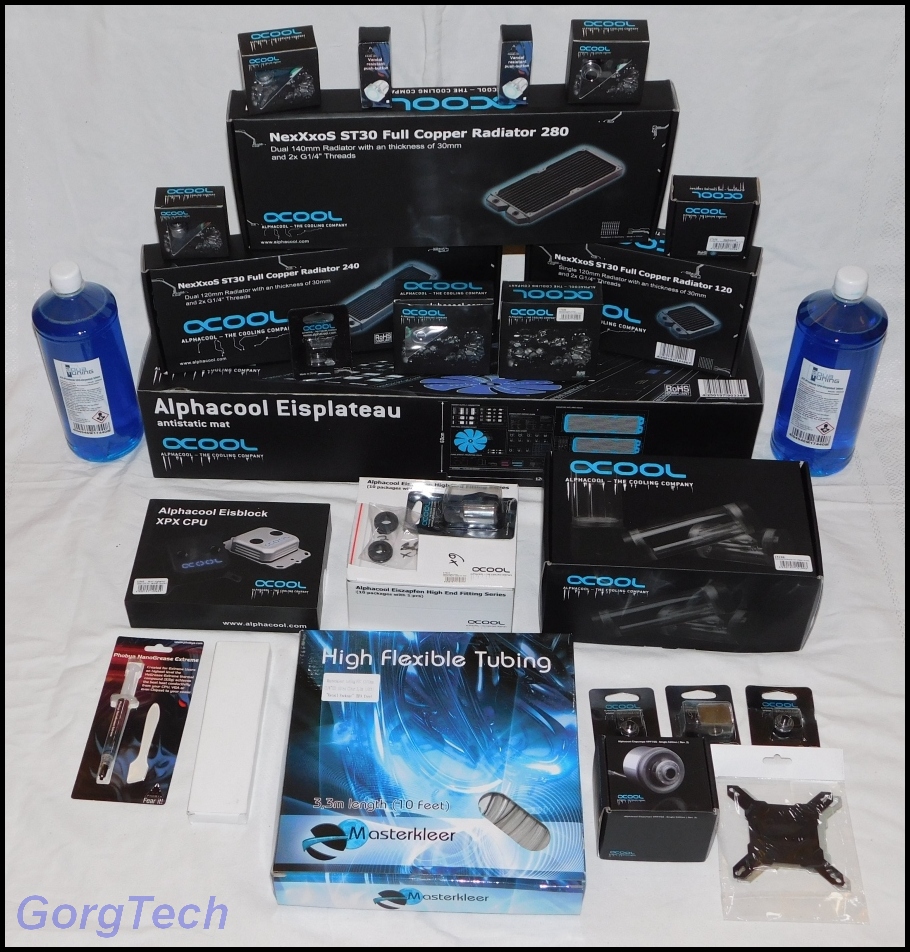
Many Premium Water Cooling parts and some nice tools too I´m sure that this Water Cooling will be awesome, though I have to admit that it´s my very first Water Cooling Projekt.
I might experience some problems but hey, everybody has to start small by jumping into the cold water. "Learning by Doing" is the best recipe if you want to improve your skills.
Are you looking for detailed pictures of all items? Just be patient since I´m going to shoot many detailed pictures later and also create a list -
Ok, some more electronics crafting.
I had to adjust the hole for the socket just a little more.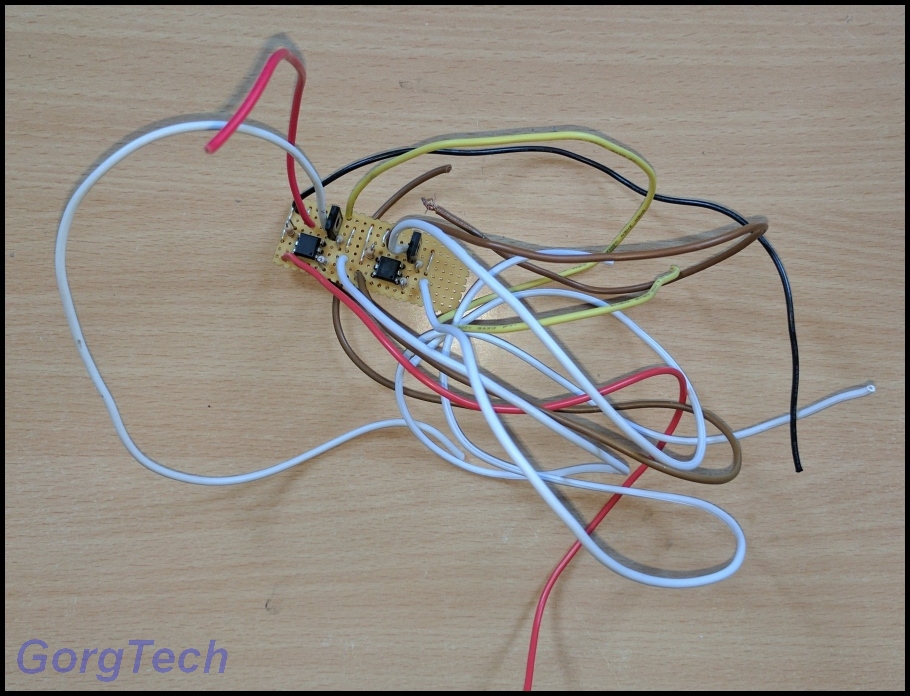
What´s this? I made a little circuit which will be used for the 2x LED Buttons later.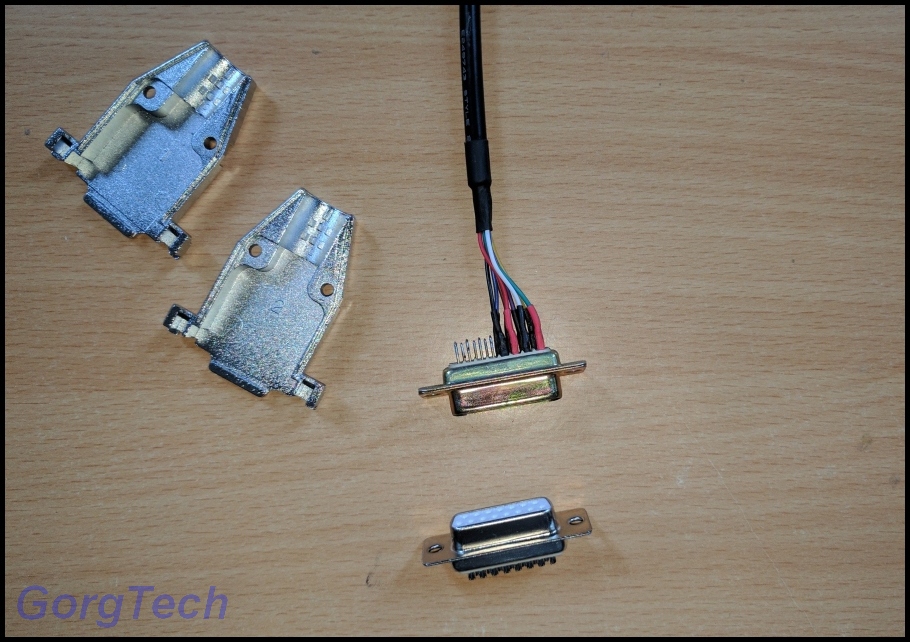
Since soldering stuff is nice, I went on with the socket for the Aluminum front.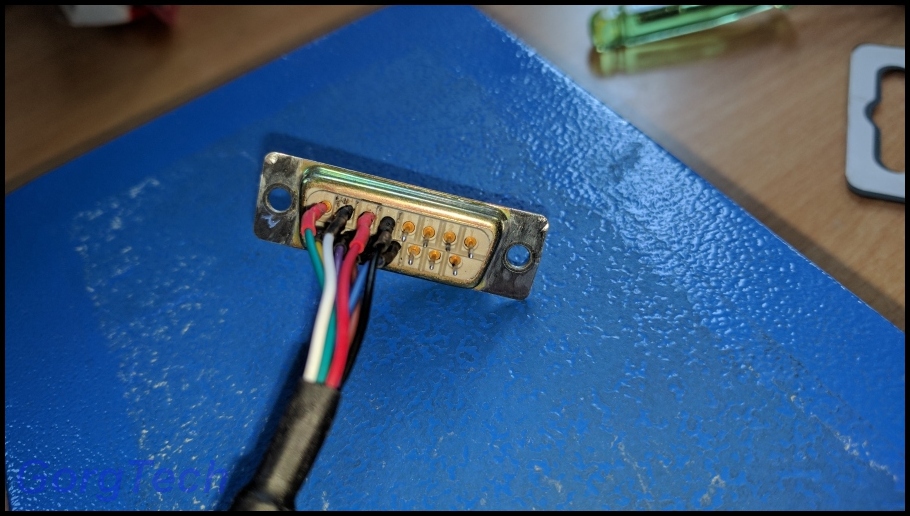
I didn´t like the surface very much and I could not get a idea out of my head. I used a Dremel Clone again in order to grind the surface.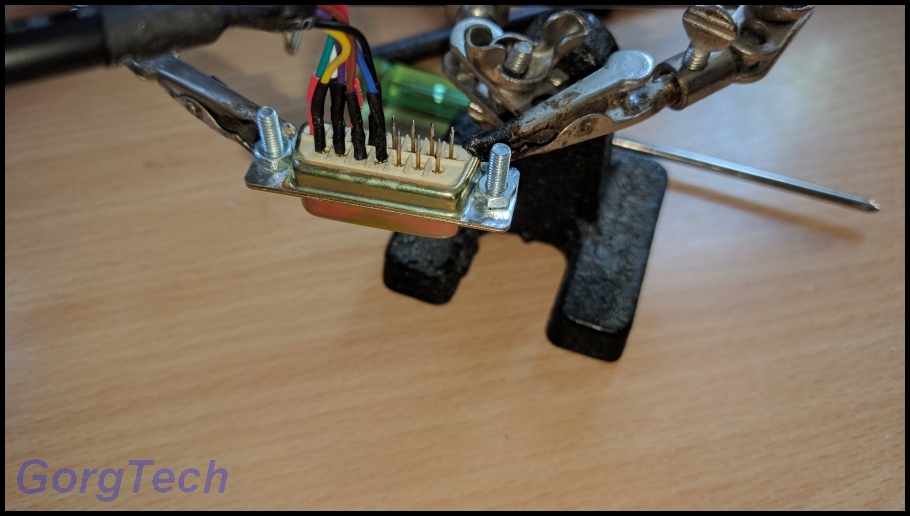
I attached 2x M3 female screws.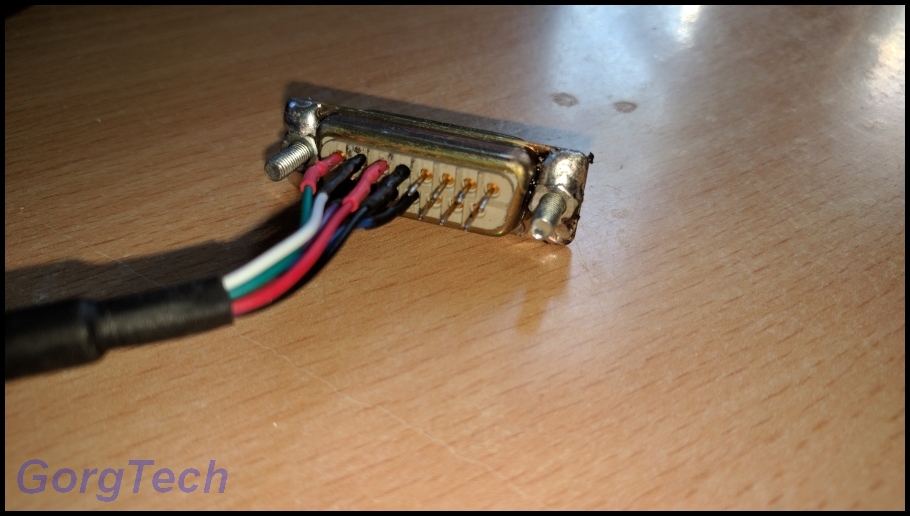
Well, now I soldered them in place and removed the screws again.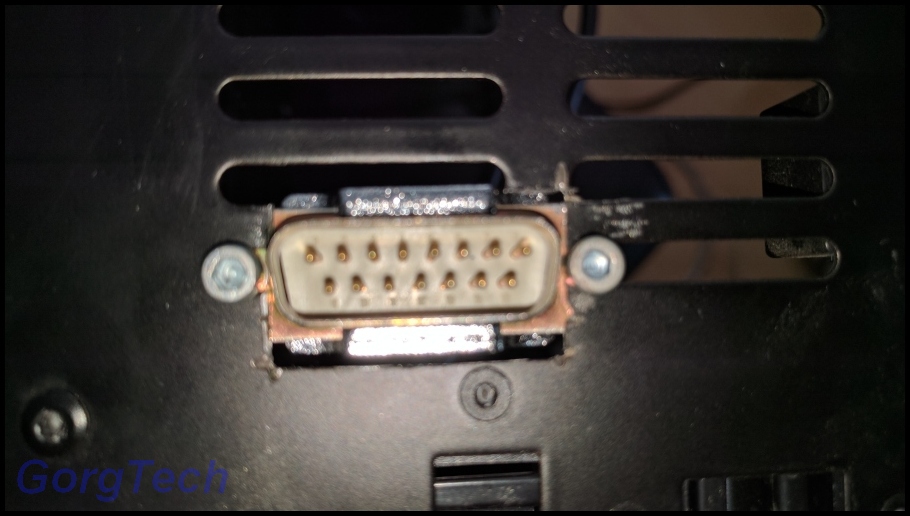
It´s easier for me to remove the socket if I have to, without fiddling around too much and cutting my hands.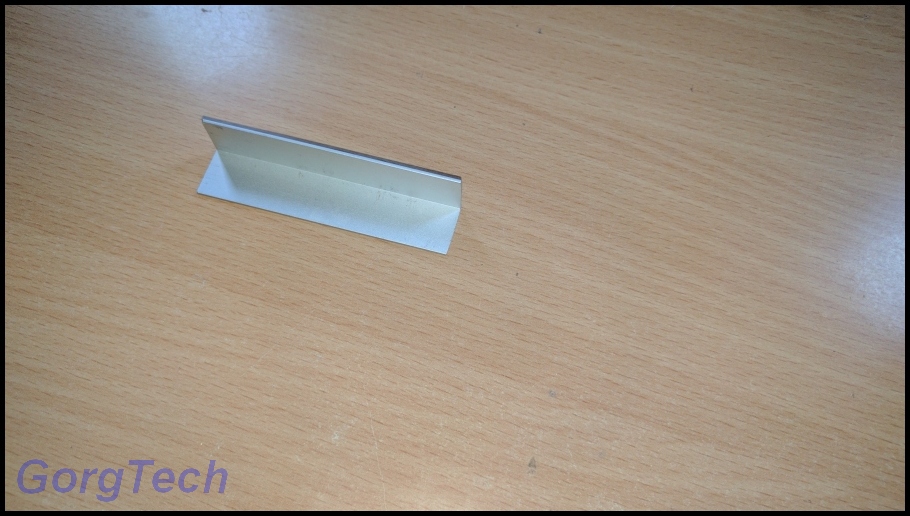
How should I hold the circuit for the LED Buttons in place? This piece of a Aluminum 90° angle seems to be ideal.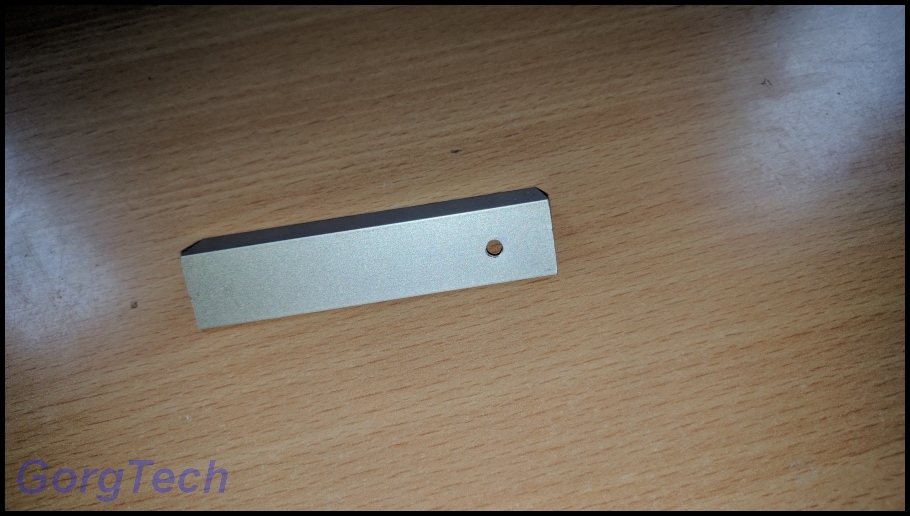
Just drill a hole and grind the surface of one side with some sanding paper and clean it with some rubbing alcohol or similar stuff.
Because it´s so nice, grind the surface of the back of the Aluminum front too and clean it. Attach the piece with some 2K glue. That looks quite sturdy,eh?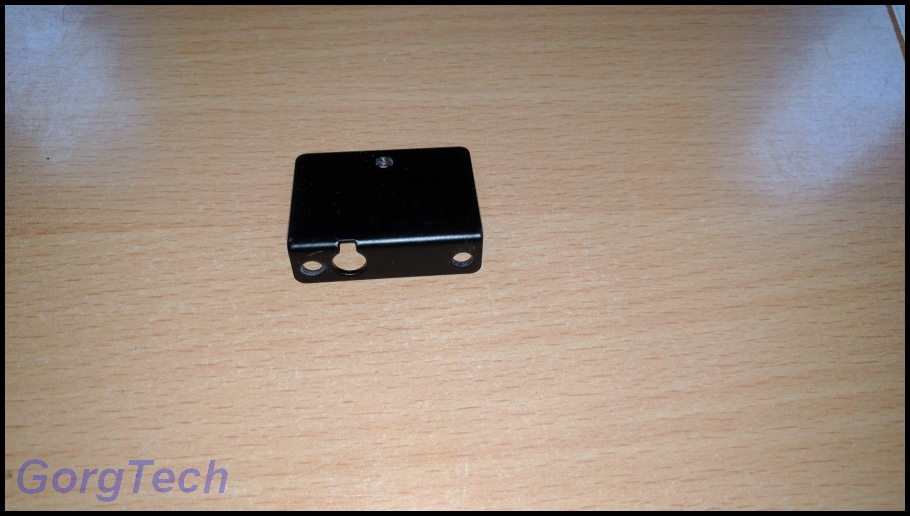
I had to remove this piece out of the case too in order to save some weight. No, to be honest, I won´t need it anymore.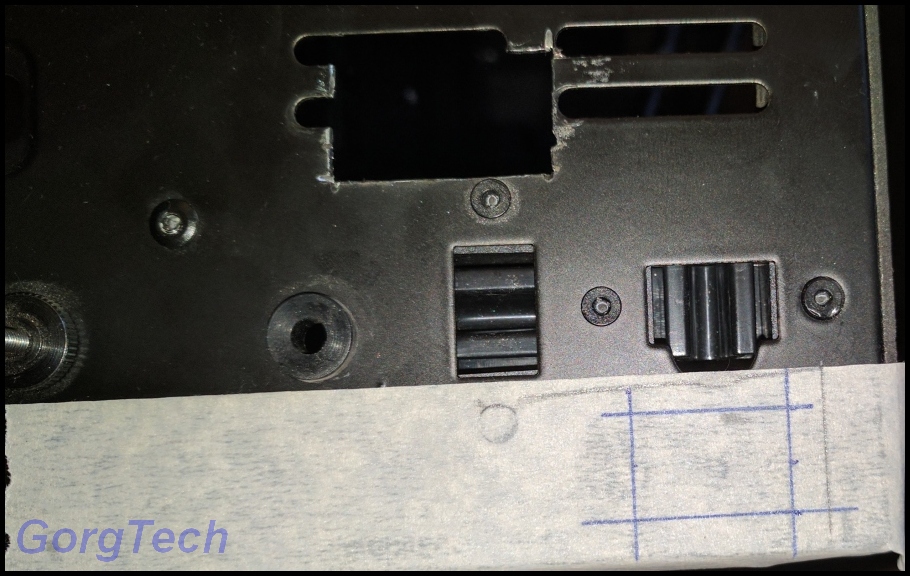
Since I want to turn the LEDs I´m going to use on and off, I need a switch. I dont want the switch to be visible though. I found a ideal position behind the Aluminum front for it.
The switch will be attached there.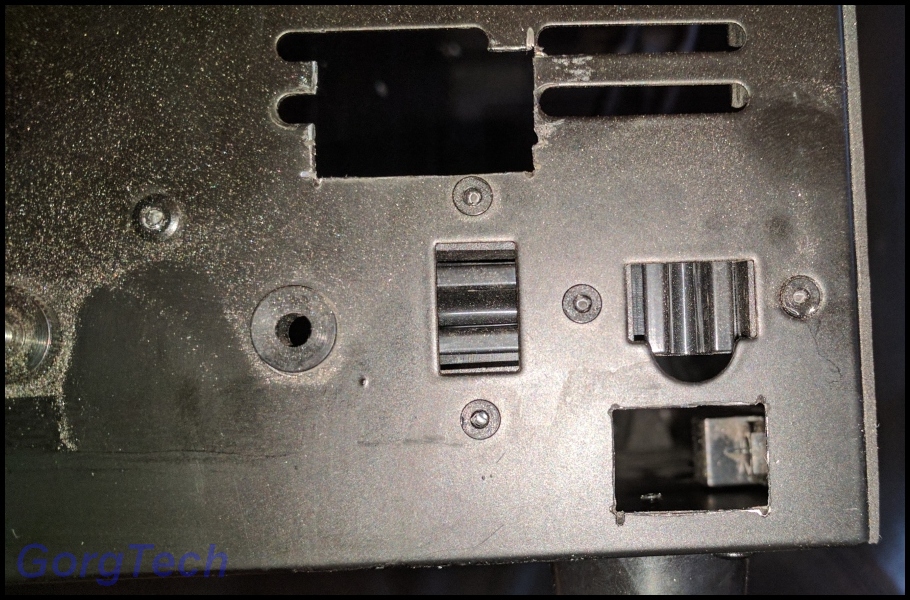
Just use a Dremel Clone again and cut a hole. By the way, did I mention that my Dremel Clone is really horrible?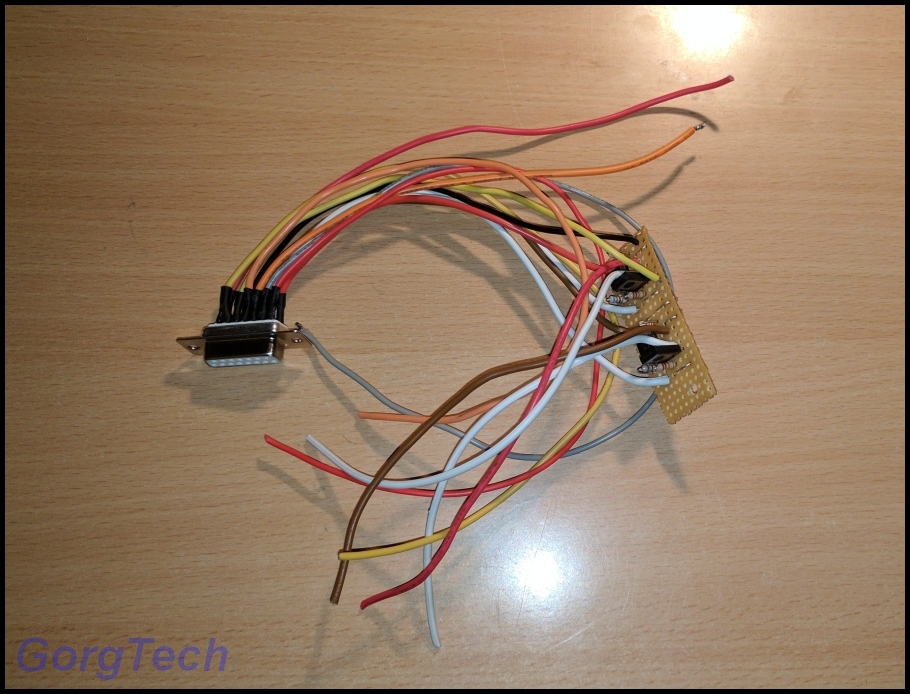
Since I´m still waiting for some parts, more soldering fun ahead in order to save some time later.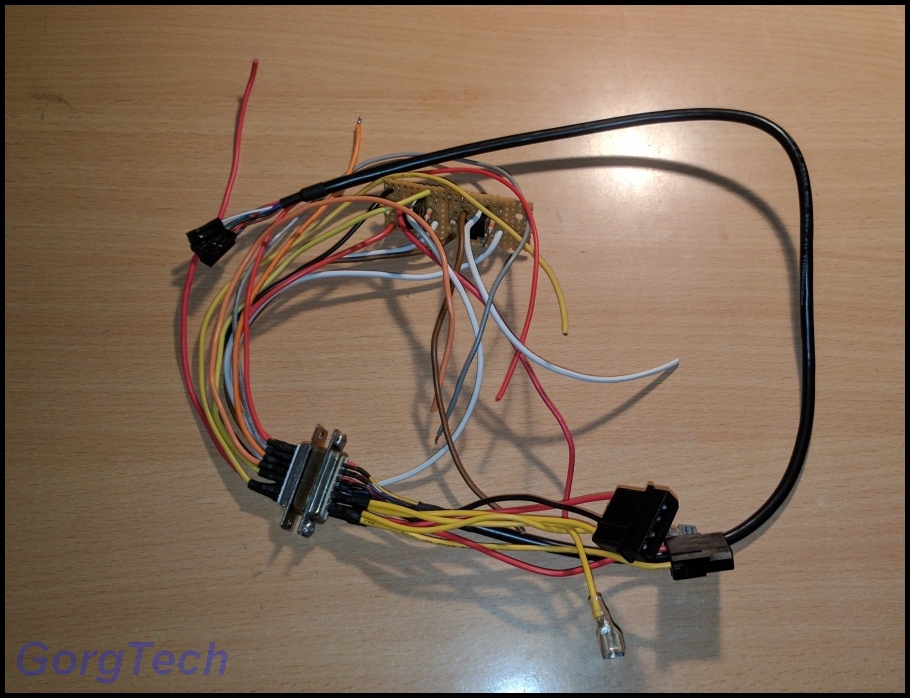
Yummy cable salad and that´s just the beginning.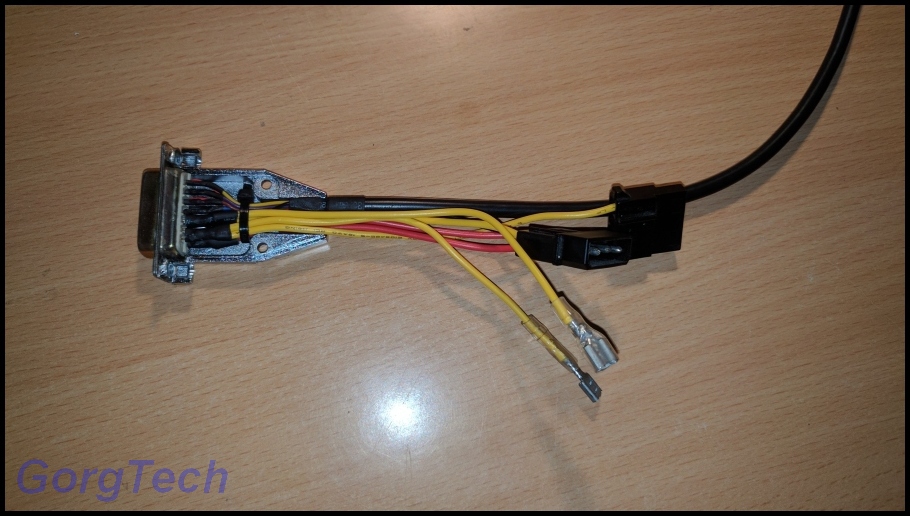
Well, this looks good enough and I guess that the front socket is nearly done. There is not much space left inside.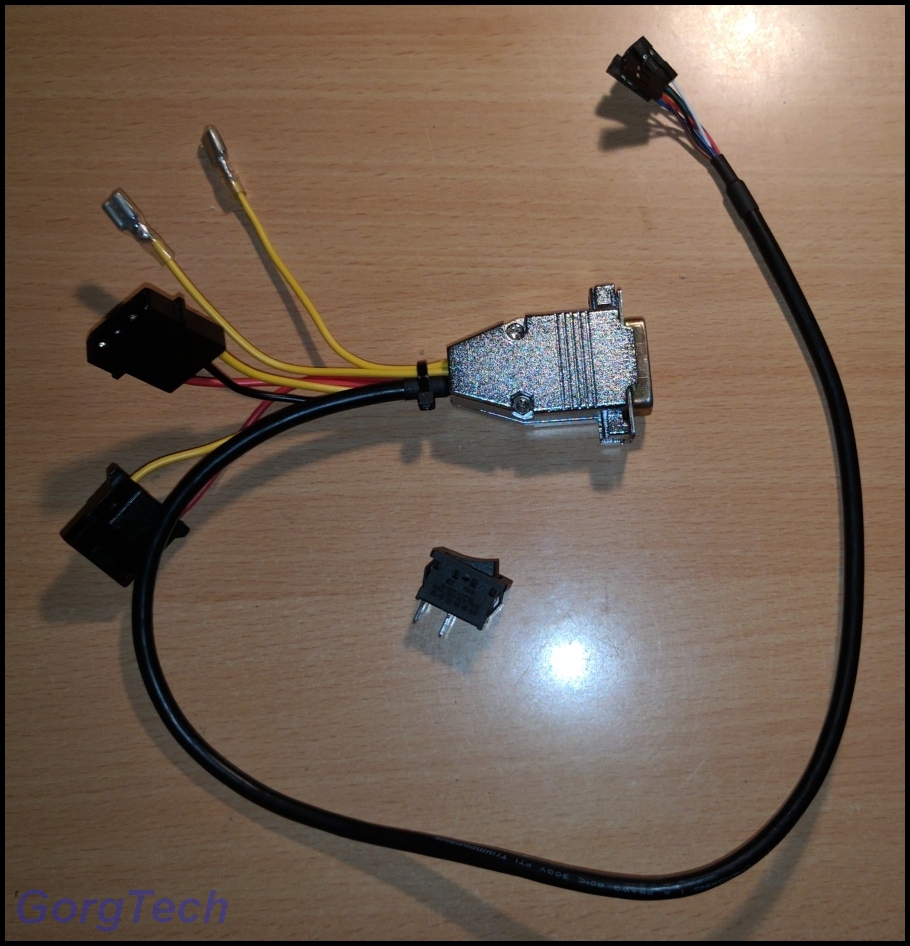
I´m happy with the looks of it. That´s it for now -
The time has come for another update. I´m still waiting for some parts and I´m sorry that I cannot offer a huge update right now.
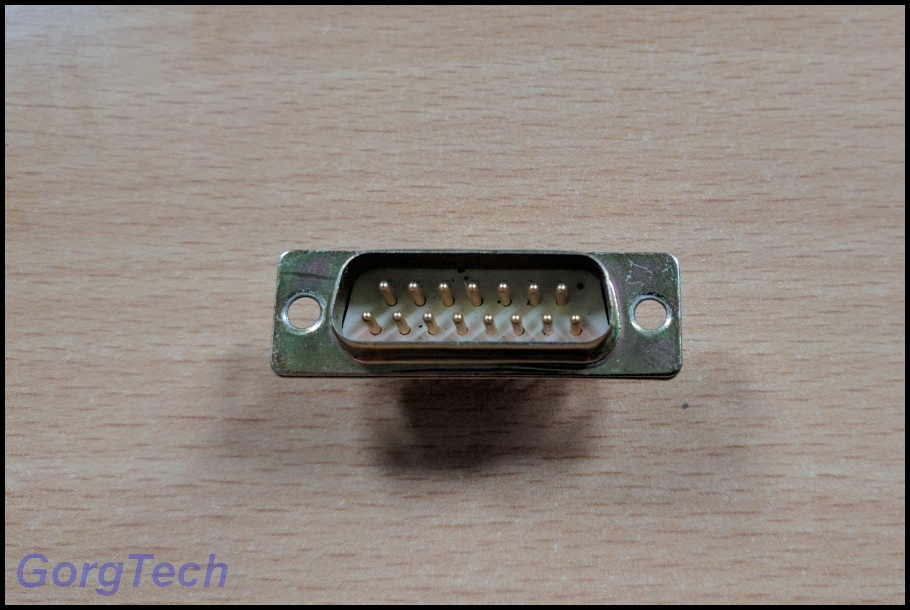
This part looks familiar, eh? What will I use it for? It´s going to connect the electronics planed for the Aluminum Front.
Where will I attach this socket? I think this is a good place for it.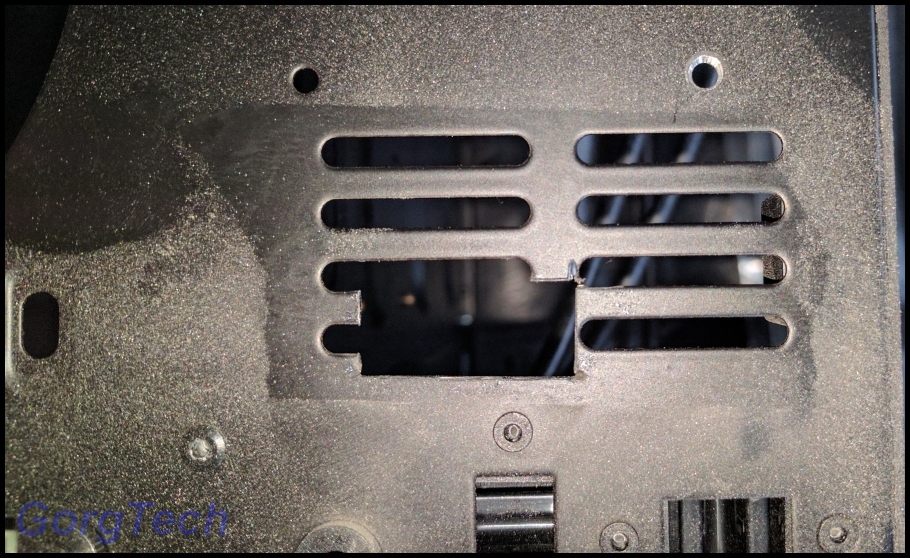
I´ve used a Dremel Clone in order to cut a hole.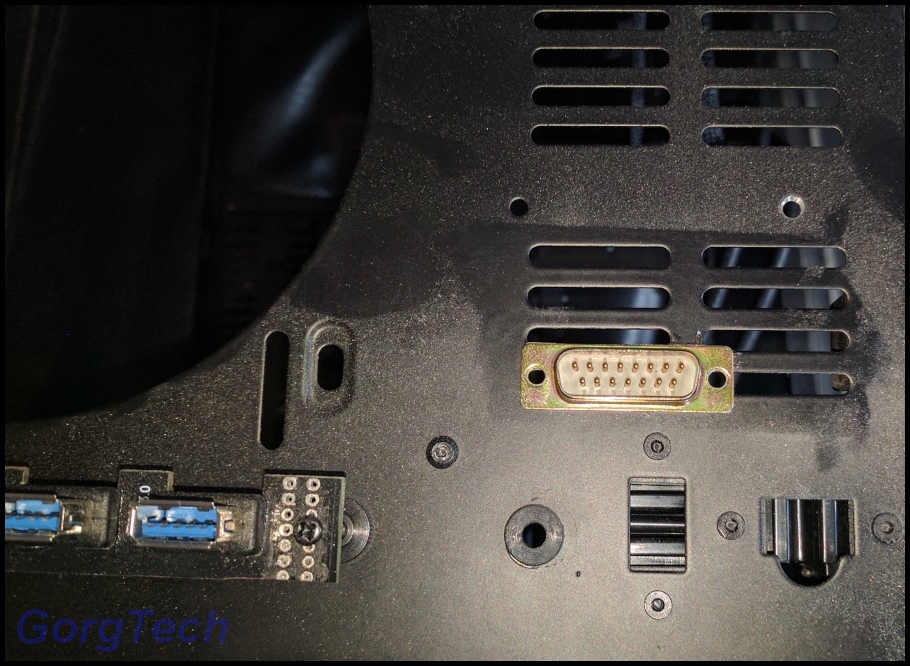
Well, this looks OK to me.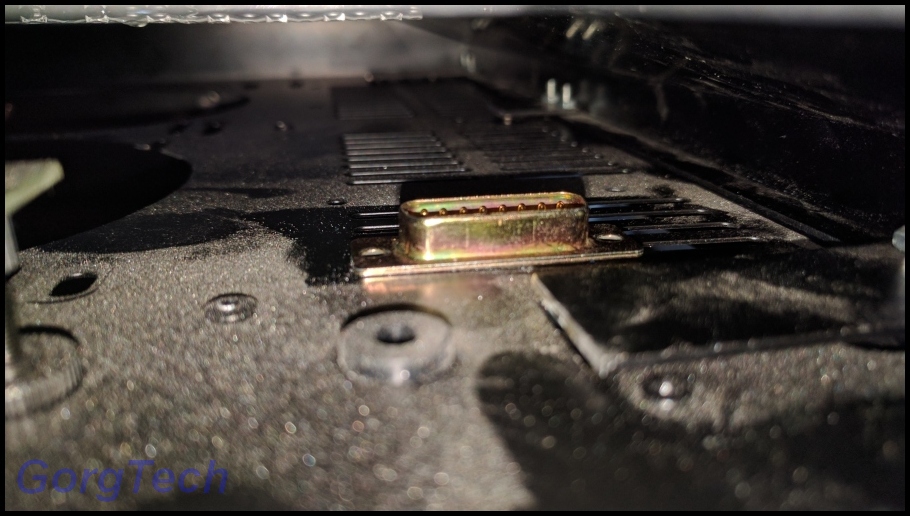
I guess, this doesn´t look bad? There is enough room for me in order to attach the connector and to fix the cables needed.I´ve resized all pictures in case you didn´t notice.
-
I hope that you´re not confused, why I posted 4 Updates in 2 posts? It´s because I had to wait as a new member until each post was verified by a moderator. This can take a while and I wanted all my threads to have the same content as soon as possible
Since I´m waiting for some material, I continued with the Aluminum front.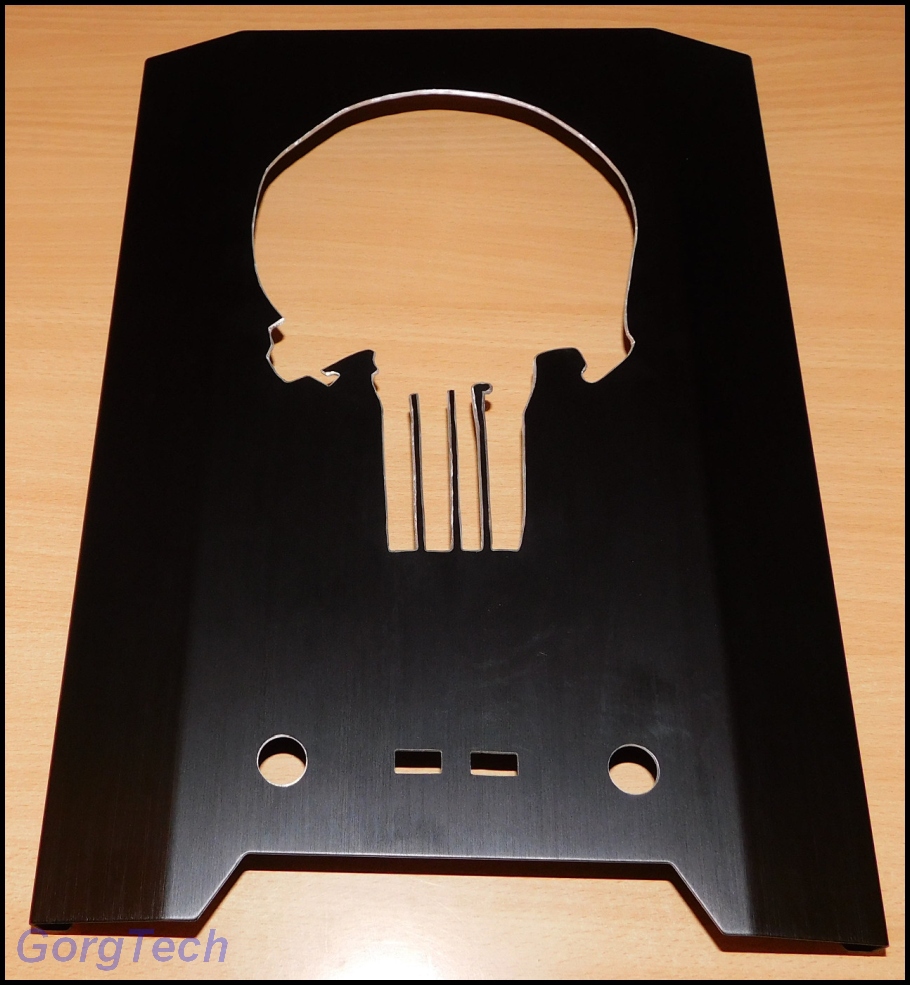
I finished my motive and worked on the edges in order to smoothen them. I also grinded the edges at a 45° angle in order to enhance them.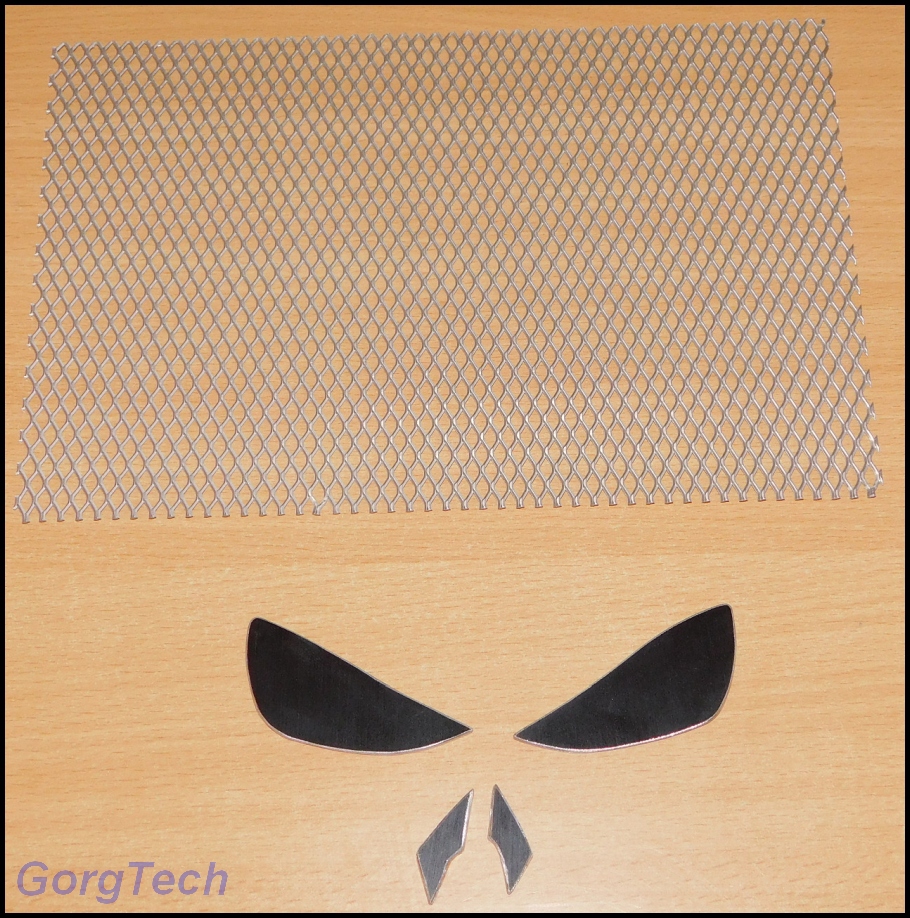
I also worked on the smaller parts since the time has come to close the hole in the Aluminum front.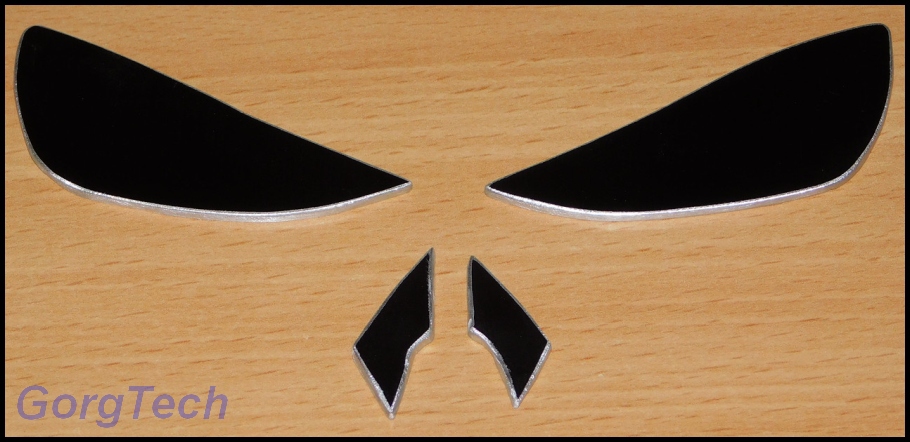
The edges got the same 45° treatment.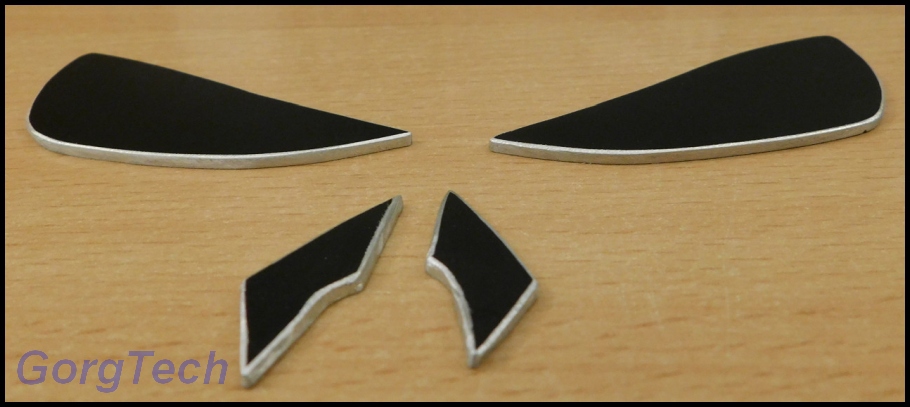
Not so flat and boring anymore, eh?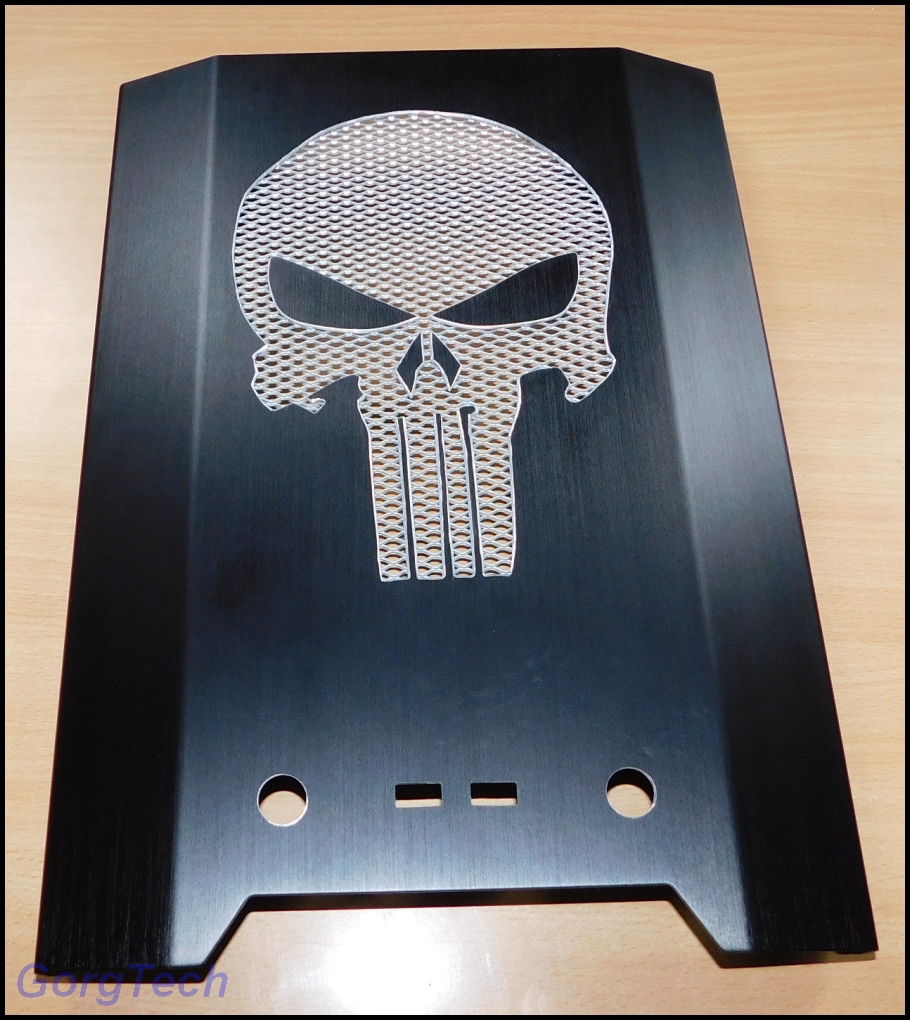
I used some 2K Epoxy Glue in order to stick them together.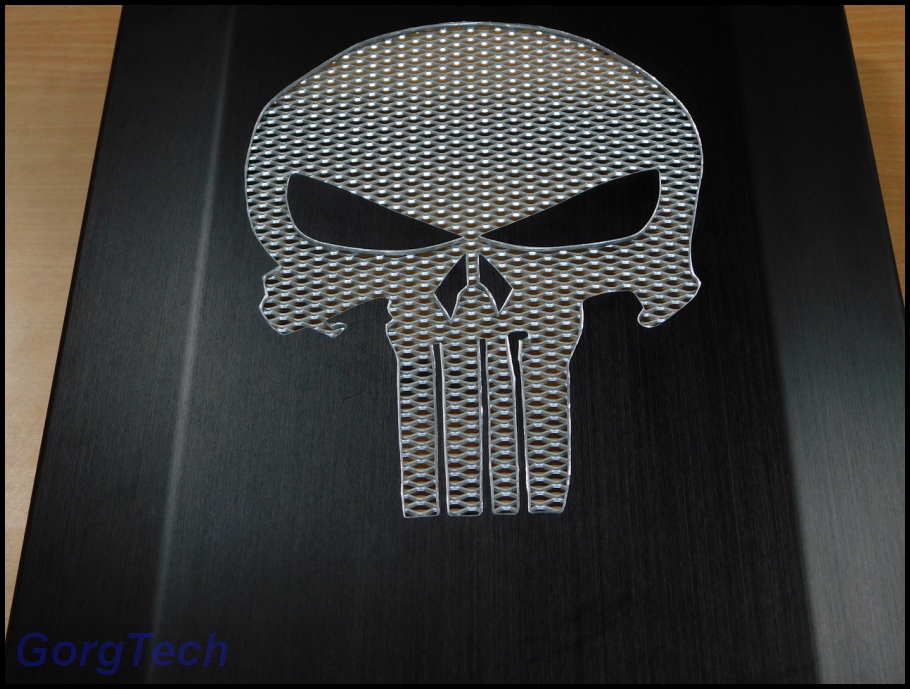
I like this look a lot and the 2x 140 Fans are also happy to get some extra air.
The "Custom Fan Grill" will be illuminated later, I just have to figure out, which color to use and how to attach the LEDs in a sensible way.
I hope that the 2K Epoxy Glue won´t play any tricks on me;)
This is a quick preview, how the case looks by now. Please excuse the chaos in the background. -
3. Update
You can use 2x 120 or 2x 140 Fans behind the Aluminum front. I will use only 2x 140 Fans and this is why I´ve decided to remove the extra 120 mounts.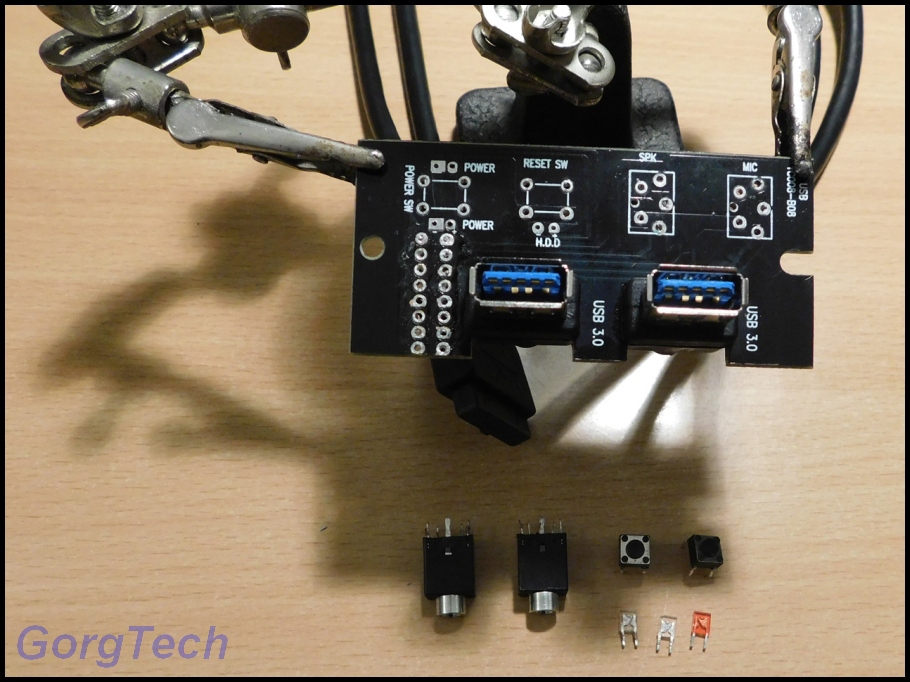
Now let´s have a closer look at the "front panel" PCB. First I had to remove some components since I might use them later.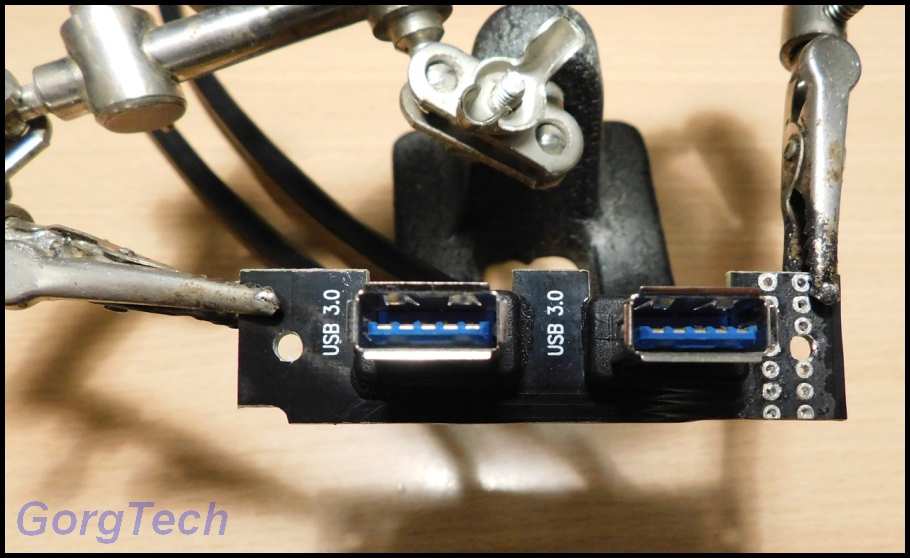
The "clean" PCB received 2 extra M3 holes and was cut with a Dremel Clone.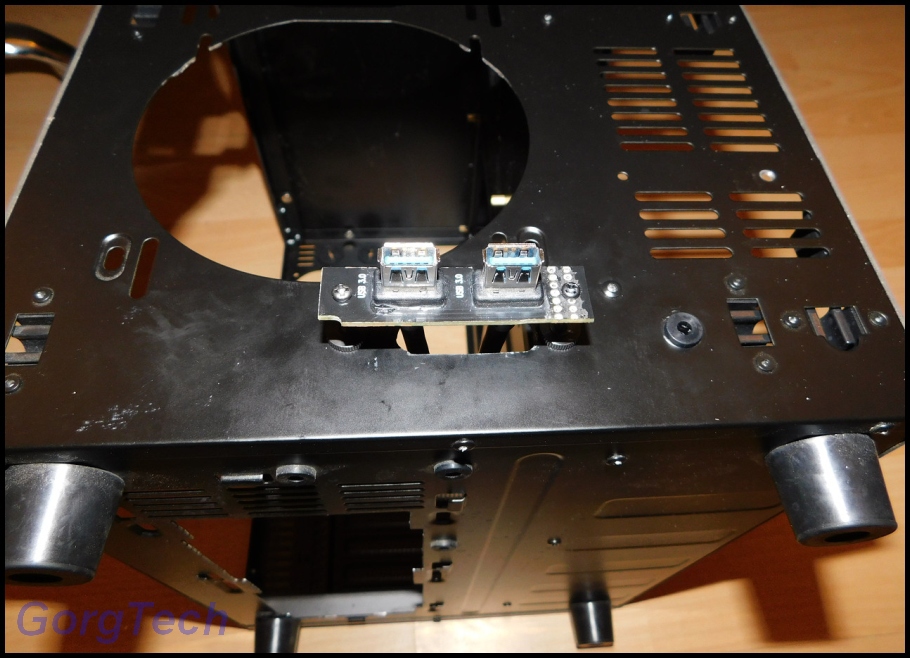
I want the USB ports to be independent of the Aluminum front. This way I can remove the Aluminum front without any problems. I will also connect the Power + LED buttons with extra connectors in order to disconnect them easily if I have to. I´ve prepared a extra hole for the cables.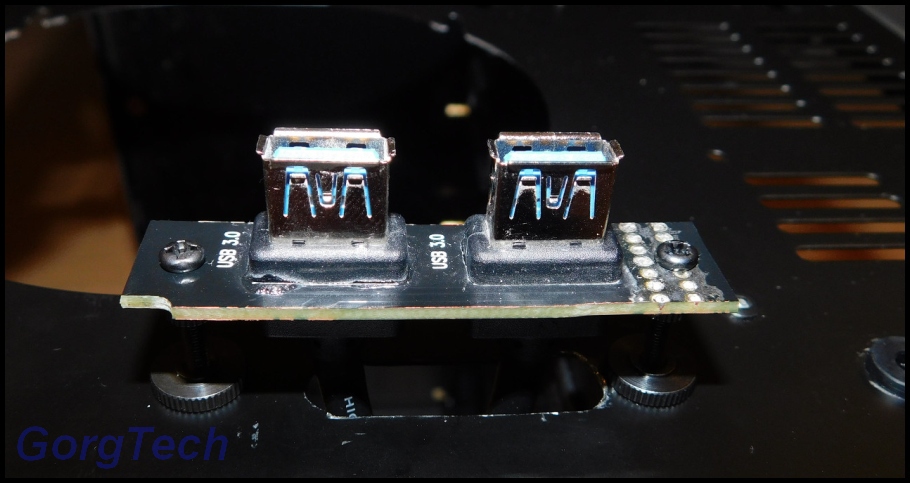
I´ve recycled some screws and bolts from Fans made by Blacknoise, just in case you were wondering why they look familiar to you.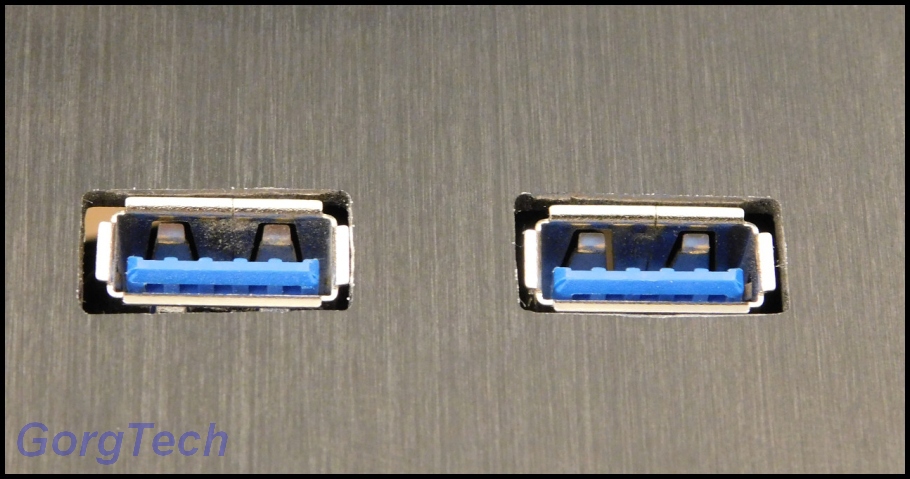
One short test looks good. The USB ports fit nearly 100% in the openings. I´ll adjust them later until I´m 100% satisfied with the results.
I still lack some material, this is why I can only show some smaller modifications at the moment.
4. Update
Ok, the time has come to show a bigger update: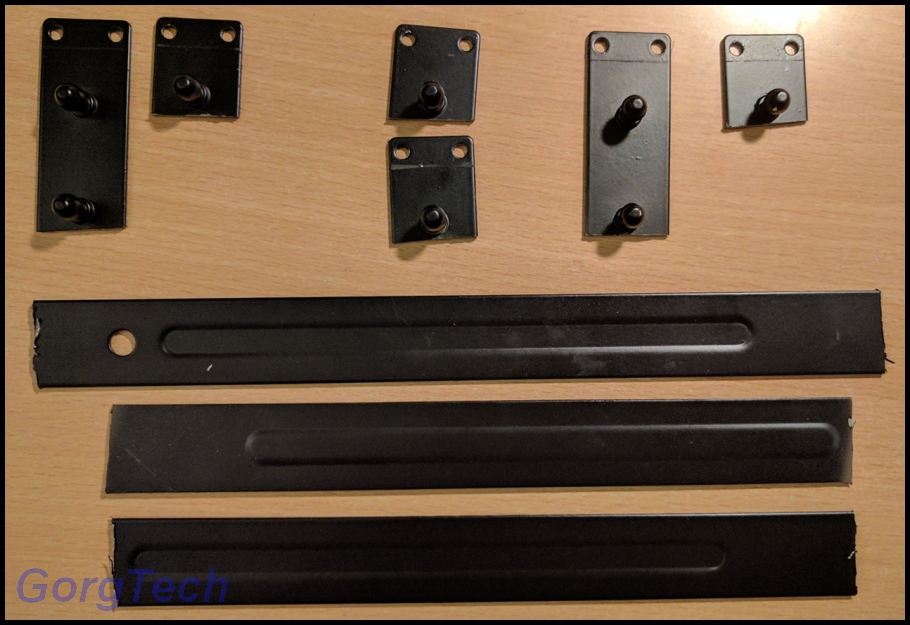
I´ve decided to shorten the crossbars.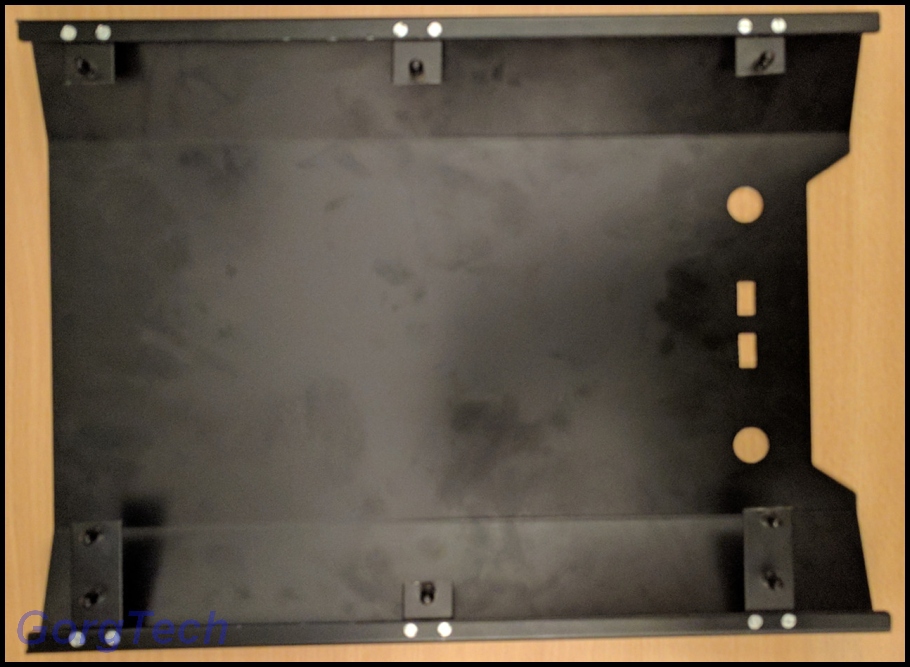
The small parts are sturdy enough. The Aluminum front can be still mounted without any problems.
I want the 2x 140 Fans to get as much air as possible through the Aluminum front. At first I wanted to cut some stripes or a similar, simple motive but I changed my mind. I´ve figured out that I can cut a more complex motive out of the Aluminum front.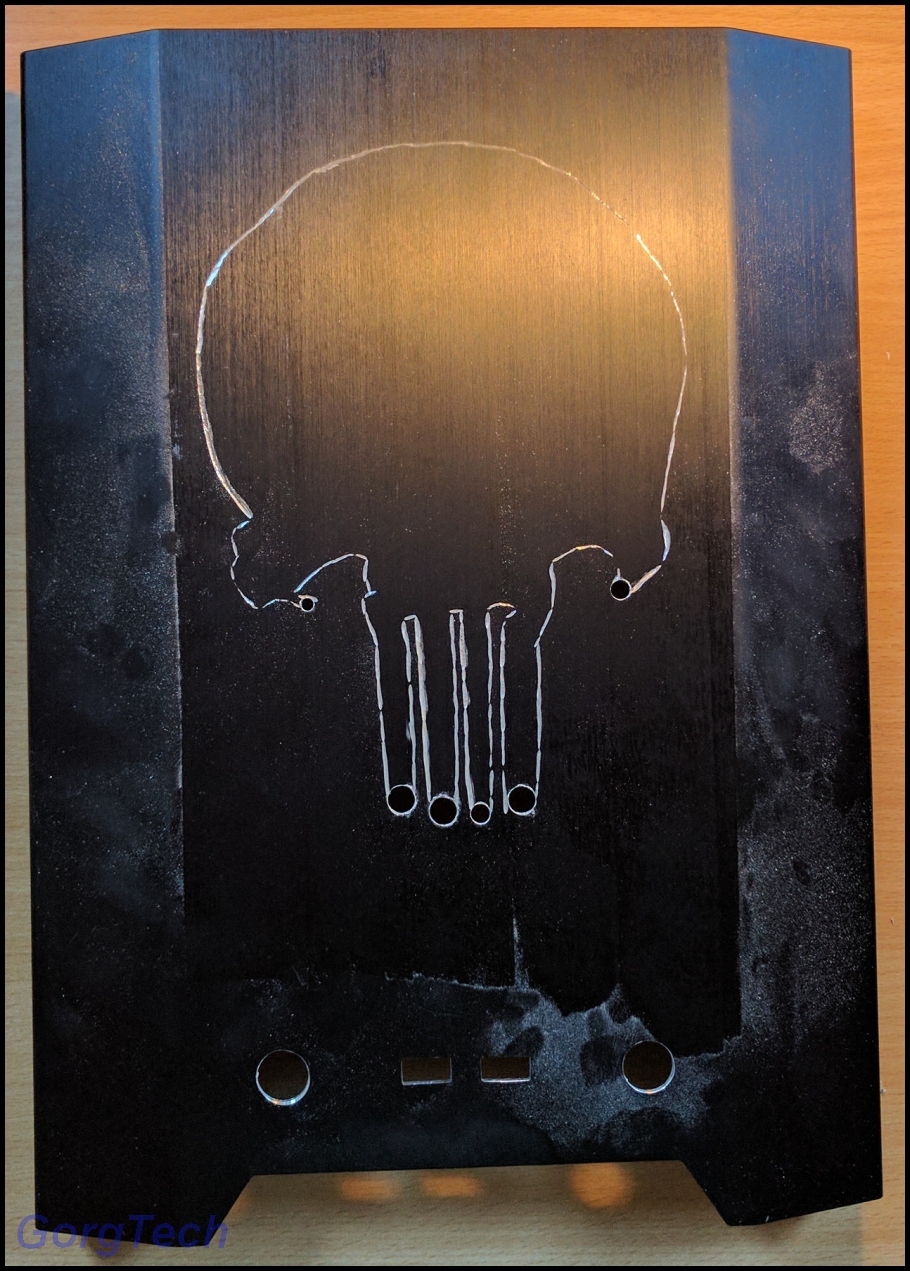
I used a Dremel Clone to scratch the outlines, as clean as possible. The tough part was to remove the inner material, without slipping and scratching the Aluminum front.
I was busy for several hours until I managed to remove the biggest part. This piece had to be as big as possible since I needed to cut further pieces out of it.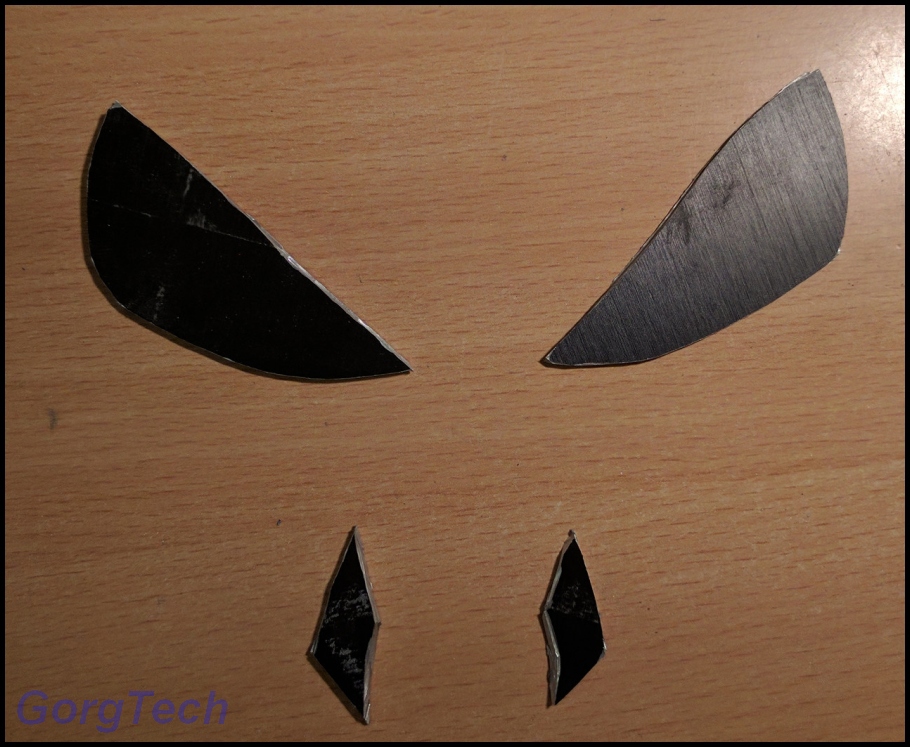
Ok, these pieces don´t look very smooth yet but at least these are somehow useful.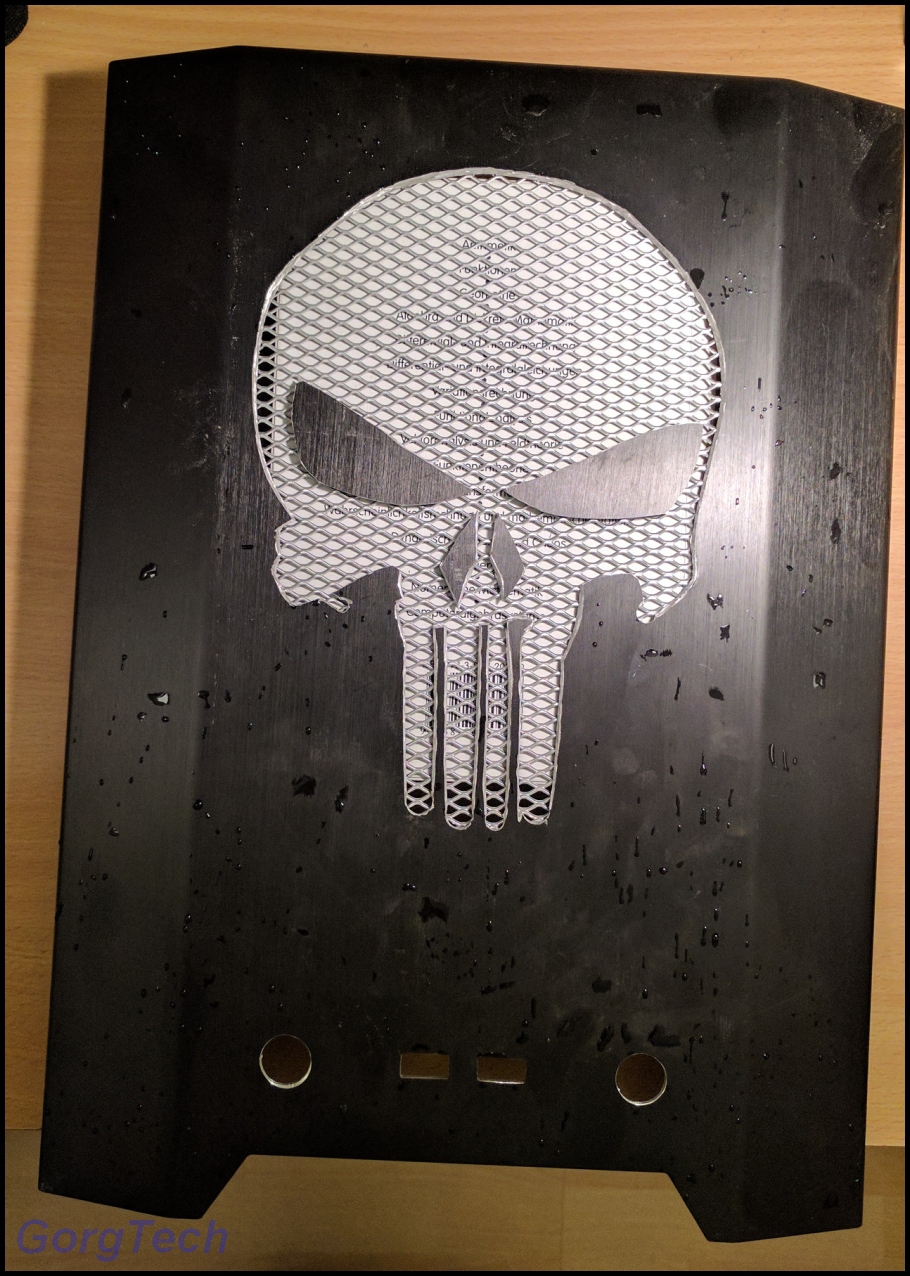
Let´s end the mystery. Maybe someone recognizes the motive?
These parts are not 100% smooth yet and I´ve attached them only temporary. I´ll have to remove the glue from the paper used. The Aluminum wire frame is awesome and will be attached later in order to hold the eyes + nose openings. It´s a nice contrast too and also lets enough air for the 2x 140 Fans through.
I guess that this motive looks great and also matches the Theme intended at the same time. I will "punish" the hardware later since it would be a waste to build a nice Water Cooling and not overclock at all -
Usually I don´t like CNC made stuff because all you need to do, is to connect some industrial made pieces together. Sure, the planing is one thing but where´s the fun, the dirt and the sweat?
But in the end, this project looks awesome.Will you show it in Germany at the DCMM 2017 too?
-
Ok guys, I´ll sumarize my progress
1. Update
Here are some pictures of the stock case: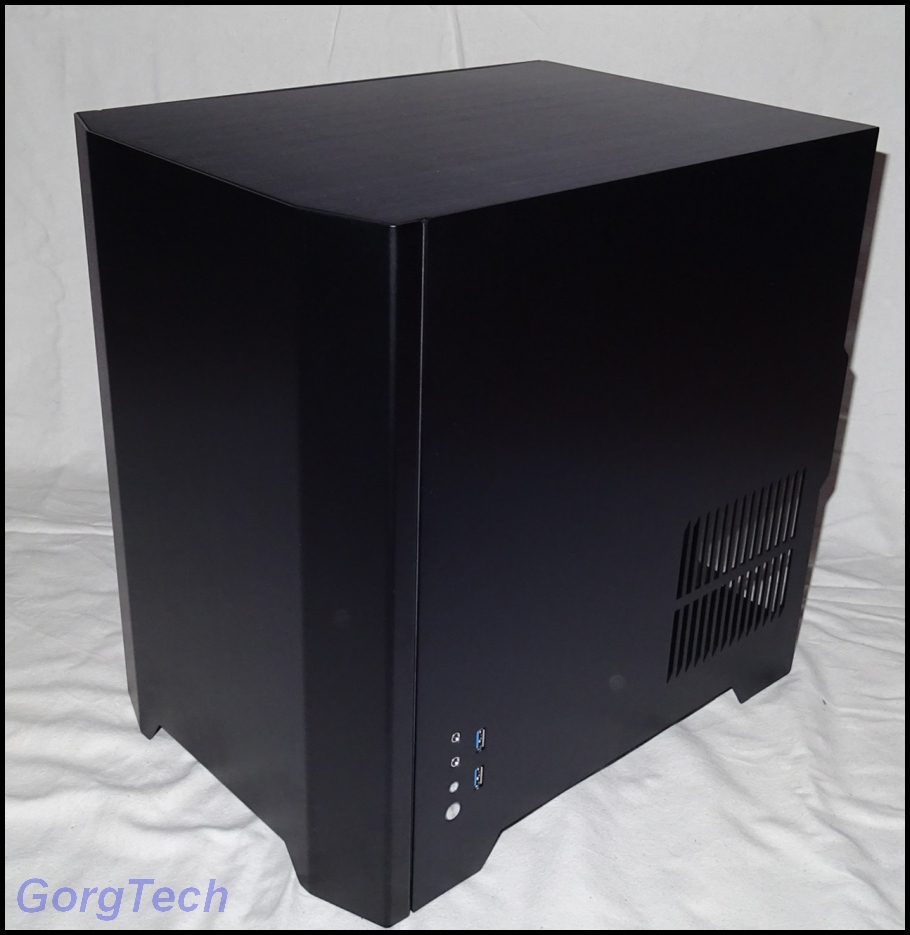

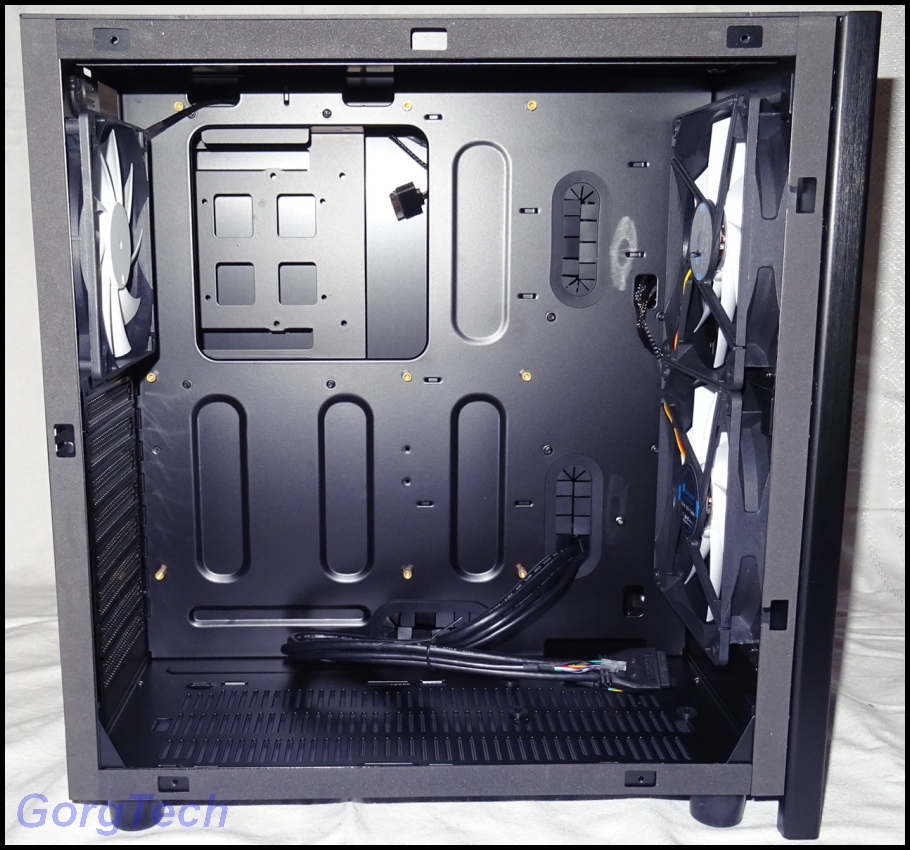

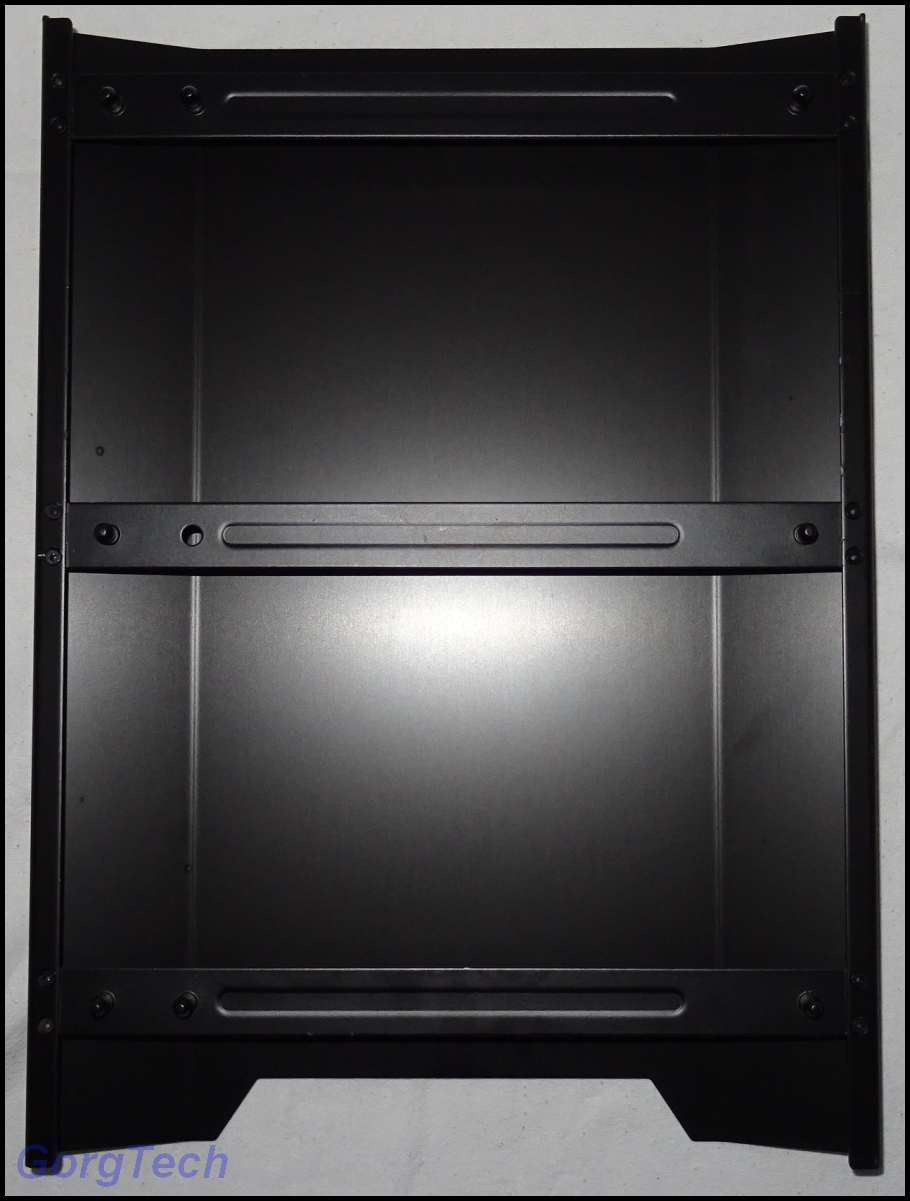
I like the way this case has been designed.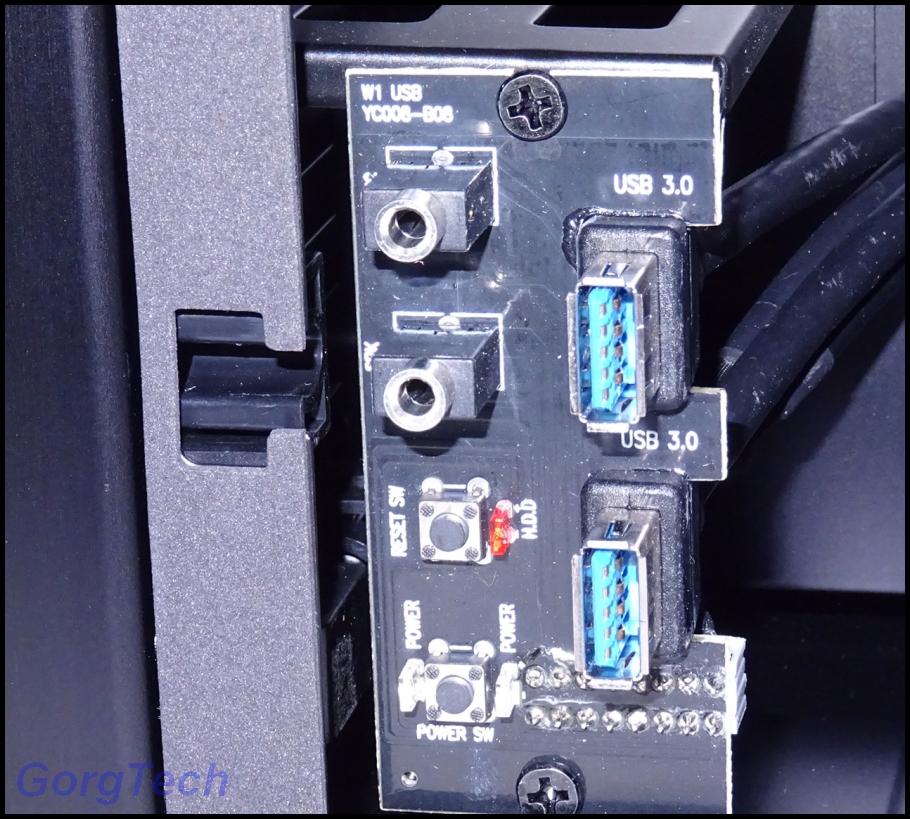
Like I said before, I will move the "front panel" with the additional connections.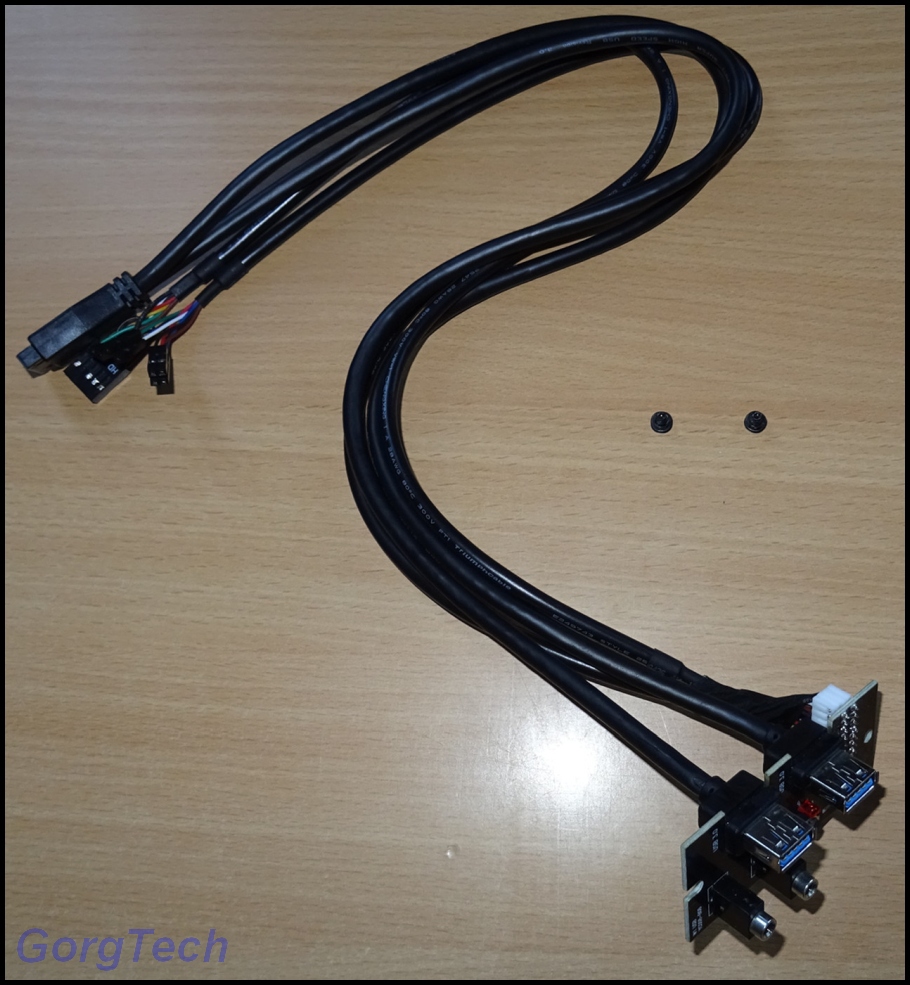
I won´t keep all elements since I don´t need any front audio connectors. To be honest, I never used these. I will keep the USB ports and some of the cables.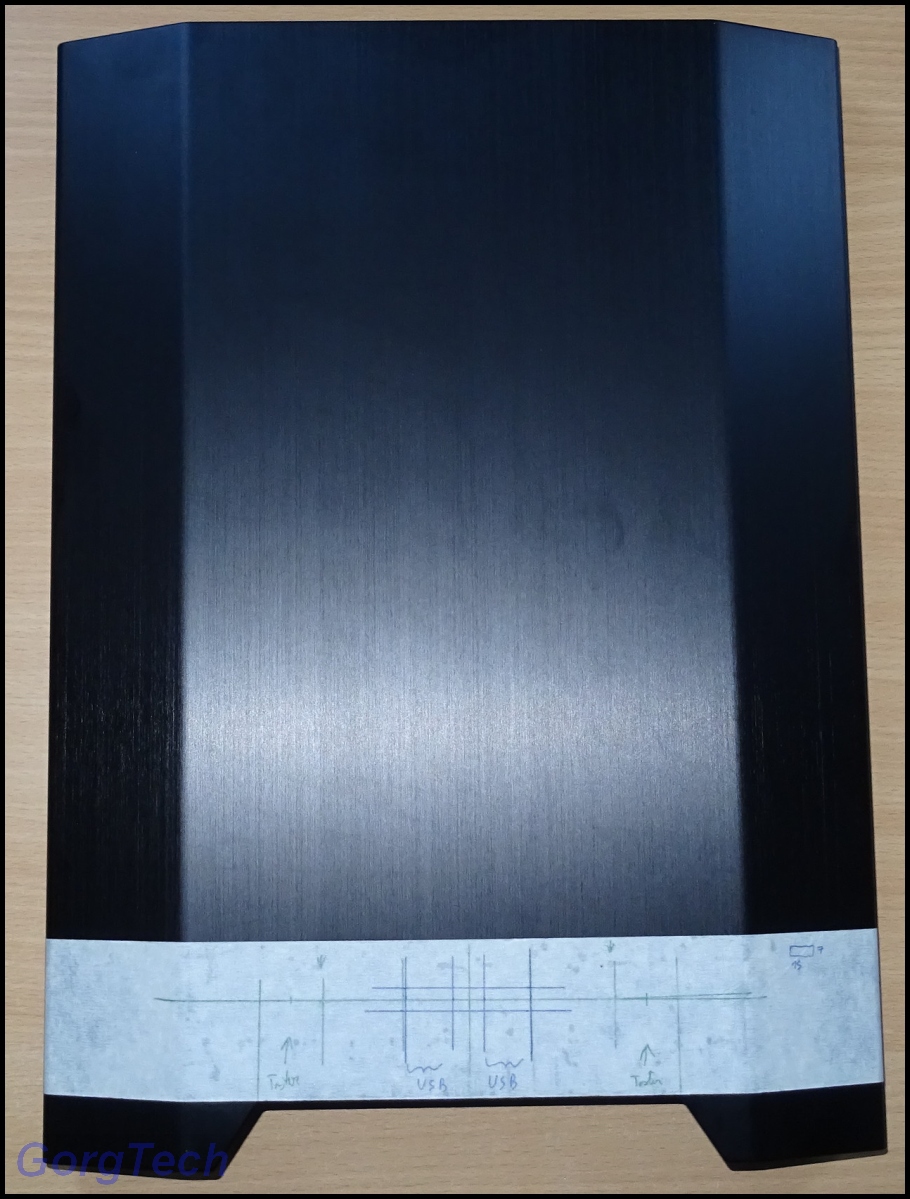
Where should I place the new USB ports and the Power + Reset Button? The lower bottom of the Aluminum front seems to be the perfect spot.
I planed the new position of the USB ports and the Power + Reset Buttons and went on with the first metal works.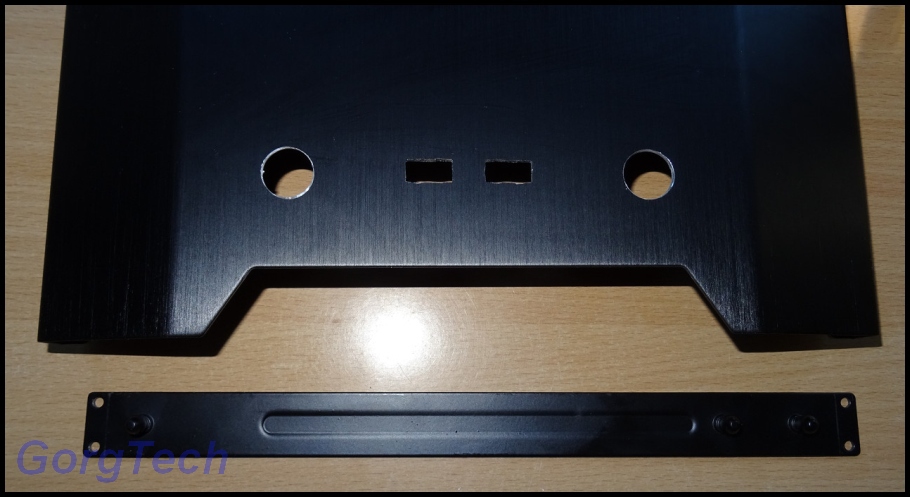
That looks a lot better. I will spend some time though with adjusting the openings.
2. Update
At first I had to remove some parts in order to gain some space for other components.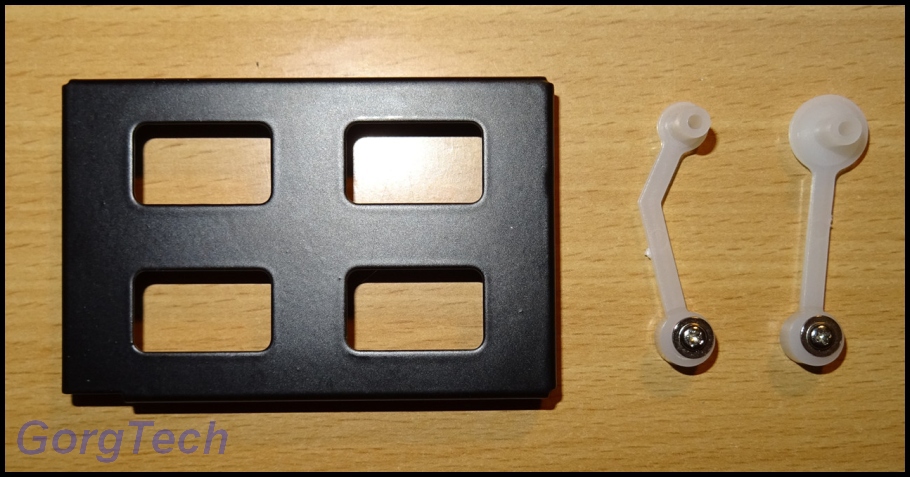
I won´t need the part which holds the "front panel" anymore.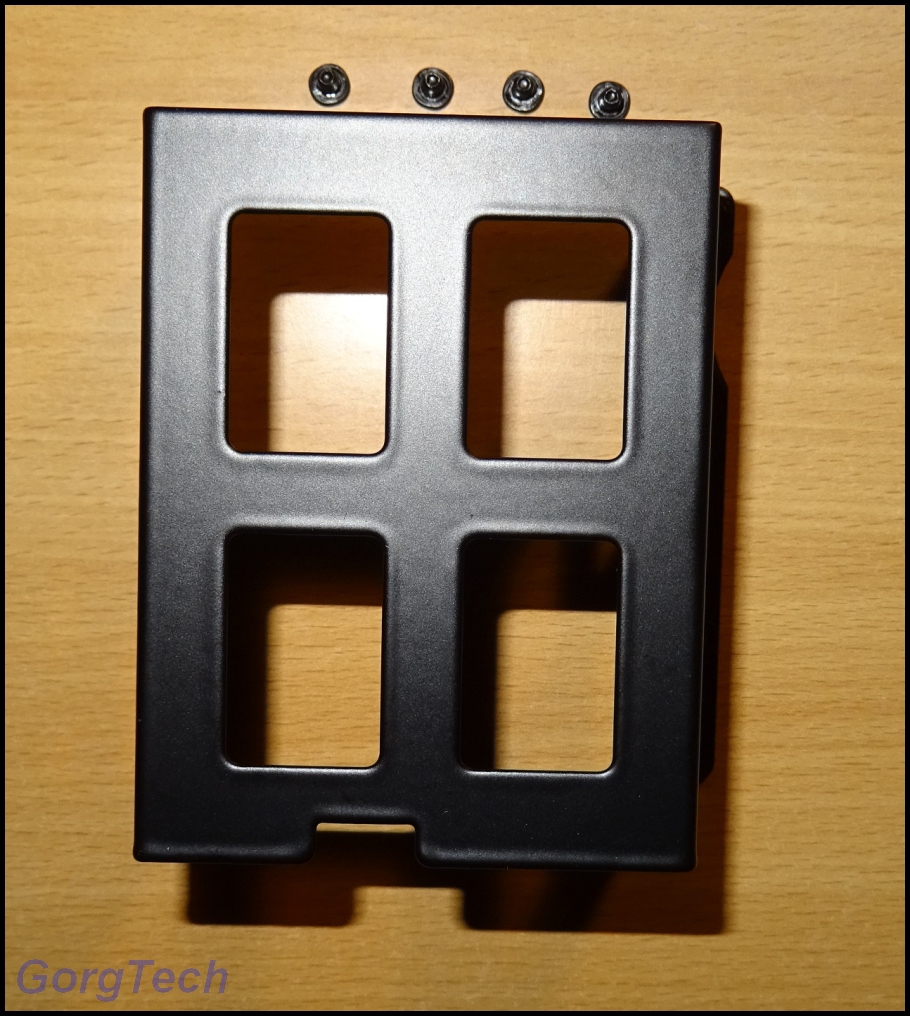
I might also remove the 3x 2,5" HDD/SSD cage permanently.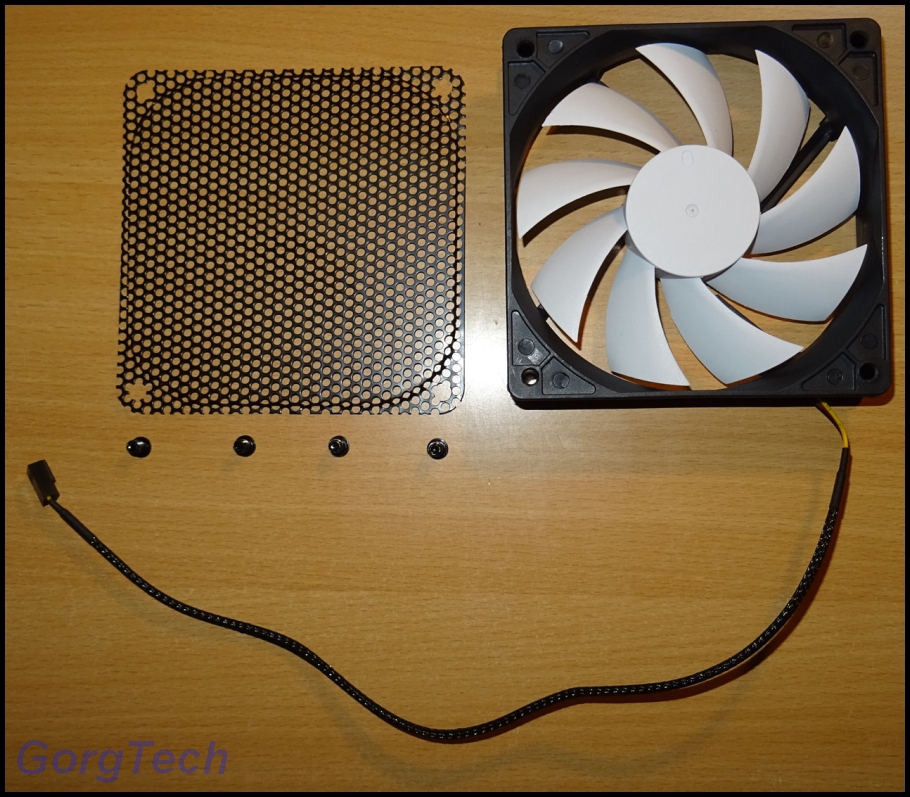
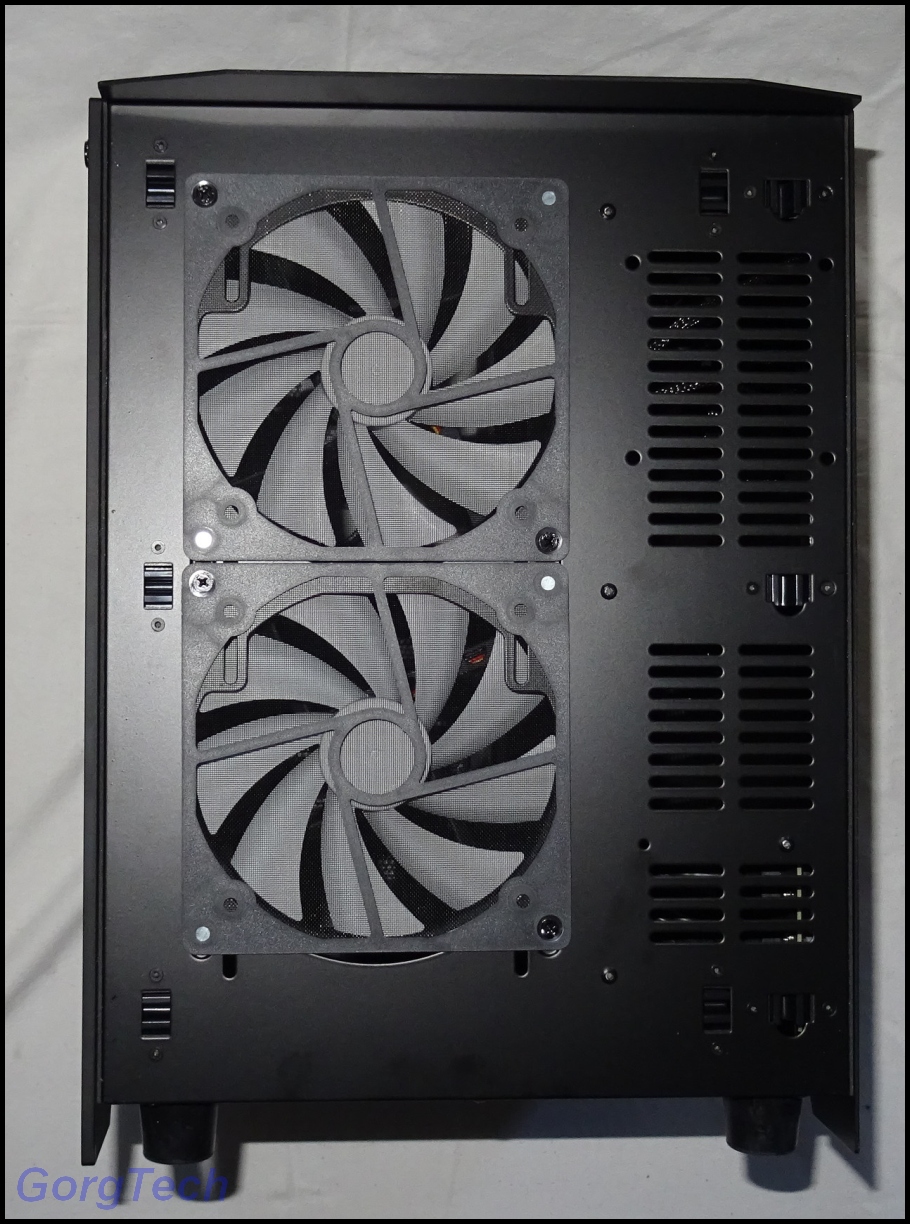
The 120 Fan and its grill have also been removed.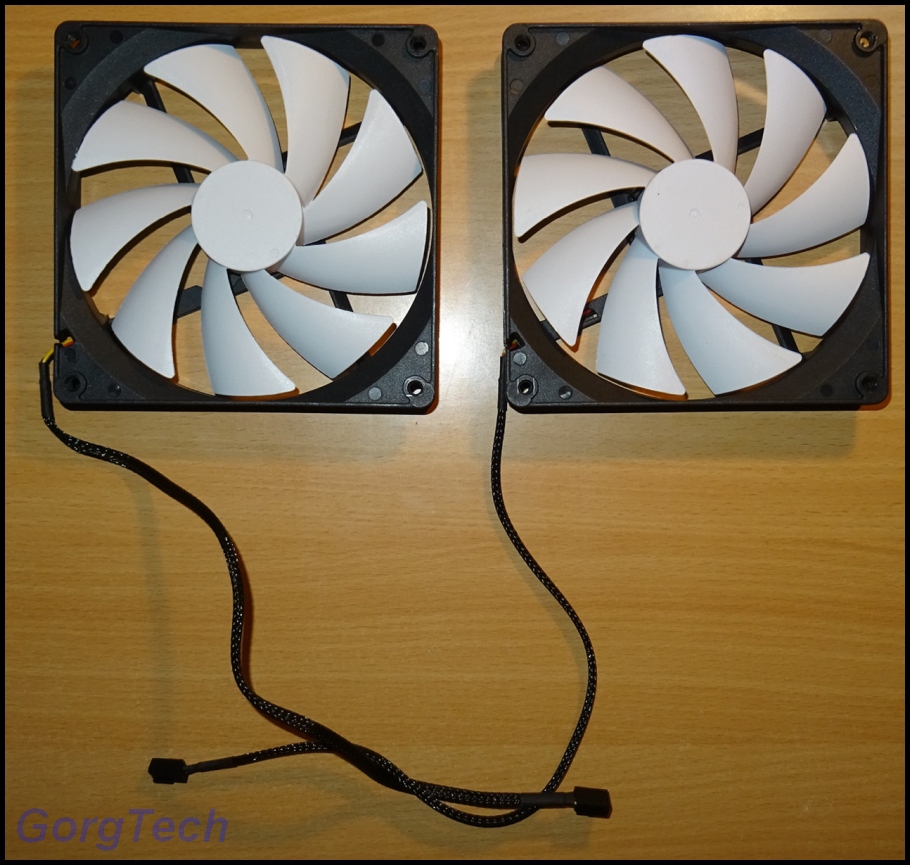
The same goes for the 2x 140 Fans out of the front.
I checked the Fans with my experimental power supply. These fans are decent enough but I don´t like the looks of them too much.
They will be replaced later by highend Fans.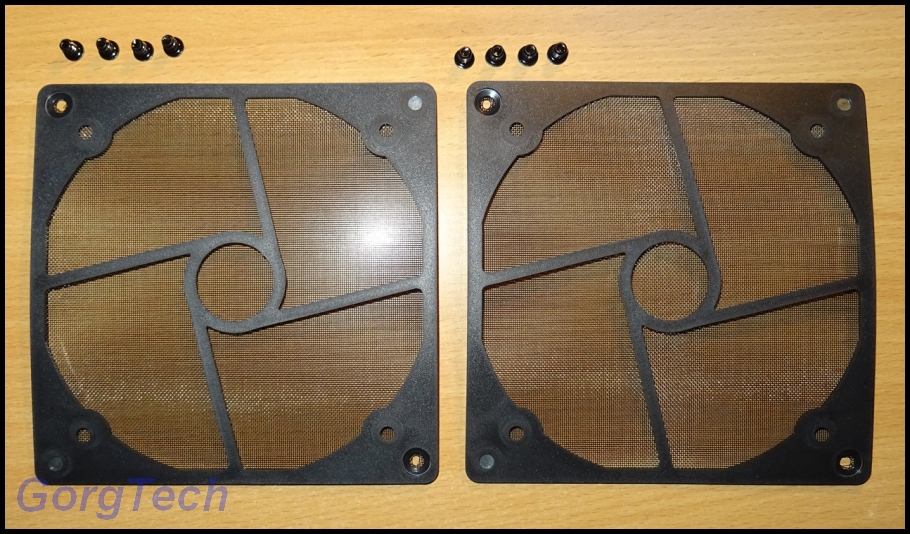
I won´t need these dust filters anymore.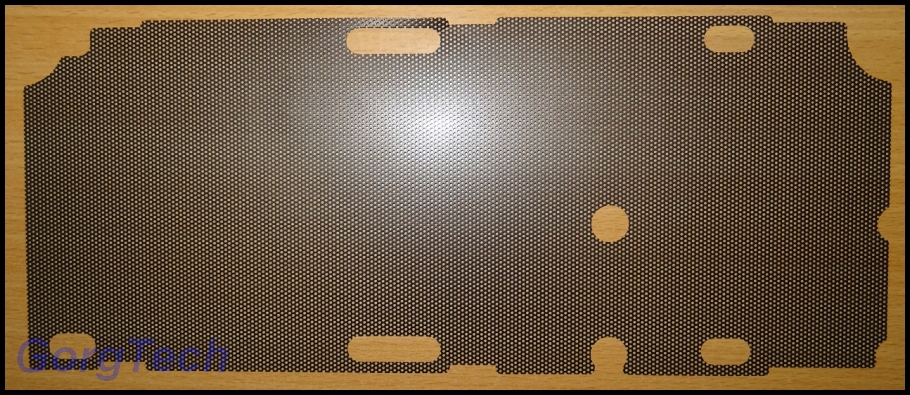
The dust filter which was attached to the bottom of the case will also be removed permanently.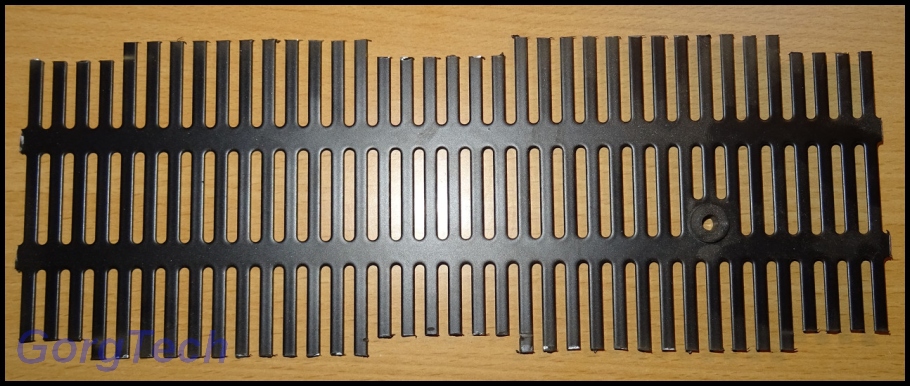
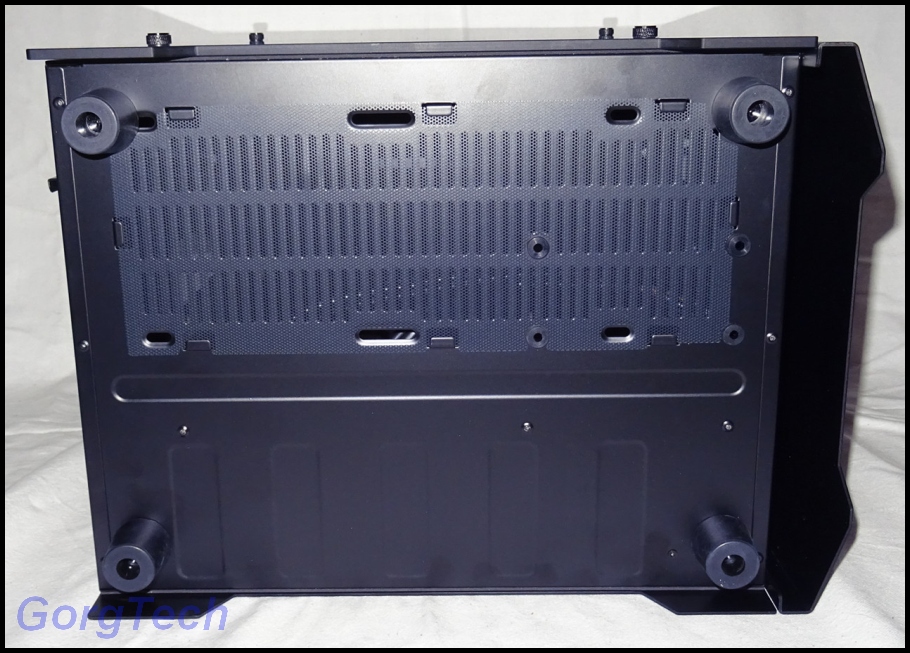
I had to modify the bottom with a Dremel Clone in order to improve the air flow.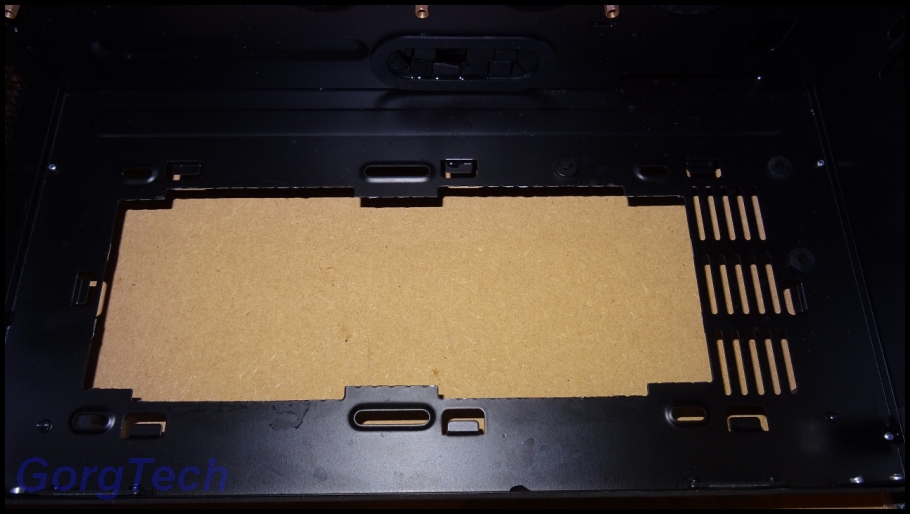
The metal is quite thin but still solid enough to hold a 240 radiator + fitting Fans.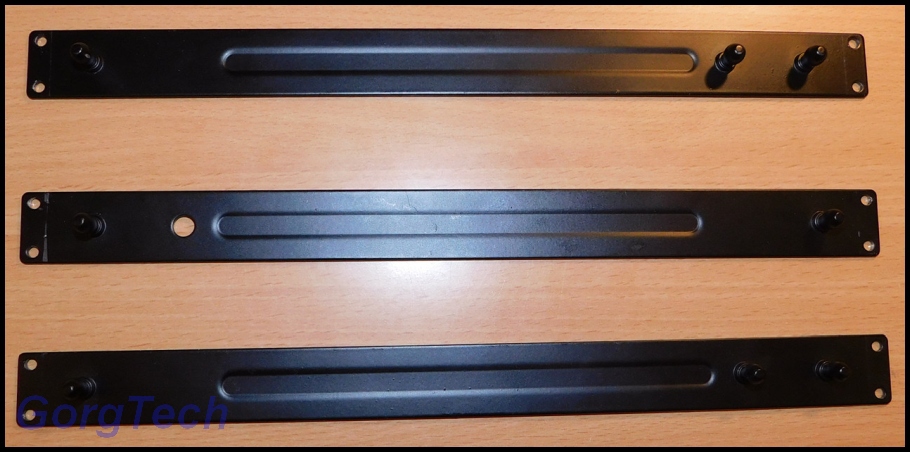
I modified the Aluminum front again and removed these 3x crossbars. I will attach them again later.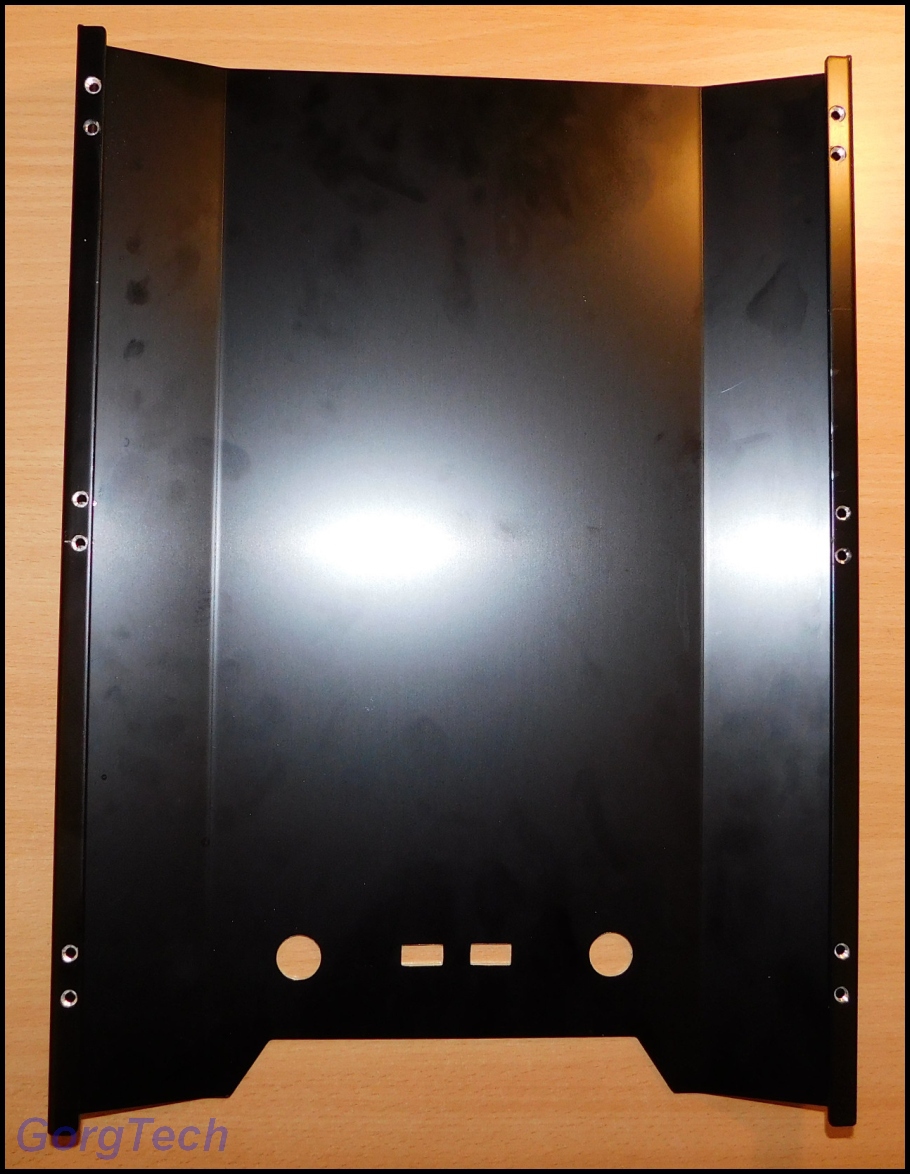
It´s easier for me to add the planed openings for the 2x 140 Fans. I might use a "H2O" inscription instead and glue some Aliminum wire frame.
Here you can see the openings for the new "front panel" again.
Since I´m limited to max. 25 pictures, I will add the other updates in a new post later. -
My vote is for China, though it´s not an easy choice since all other projects are awesome. Yu Han has build a even more insane looking project than Germany.
-
Hello,
I´m the new guy here. Actually I had a account here before, many years ago but I cannot remember the name and maybe it has been deleted due to inactivity.
Some of you may have seen me in other forums too
Since I´m nearly done with my old Project, I guess the time has come to start another one.
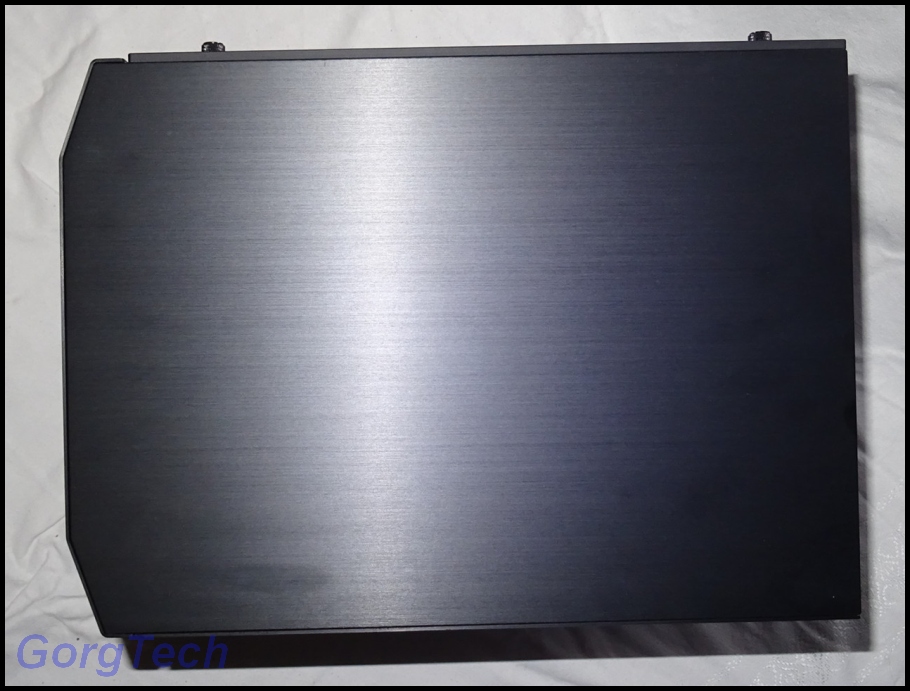
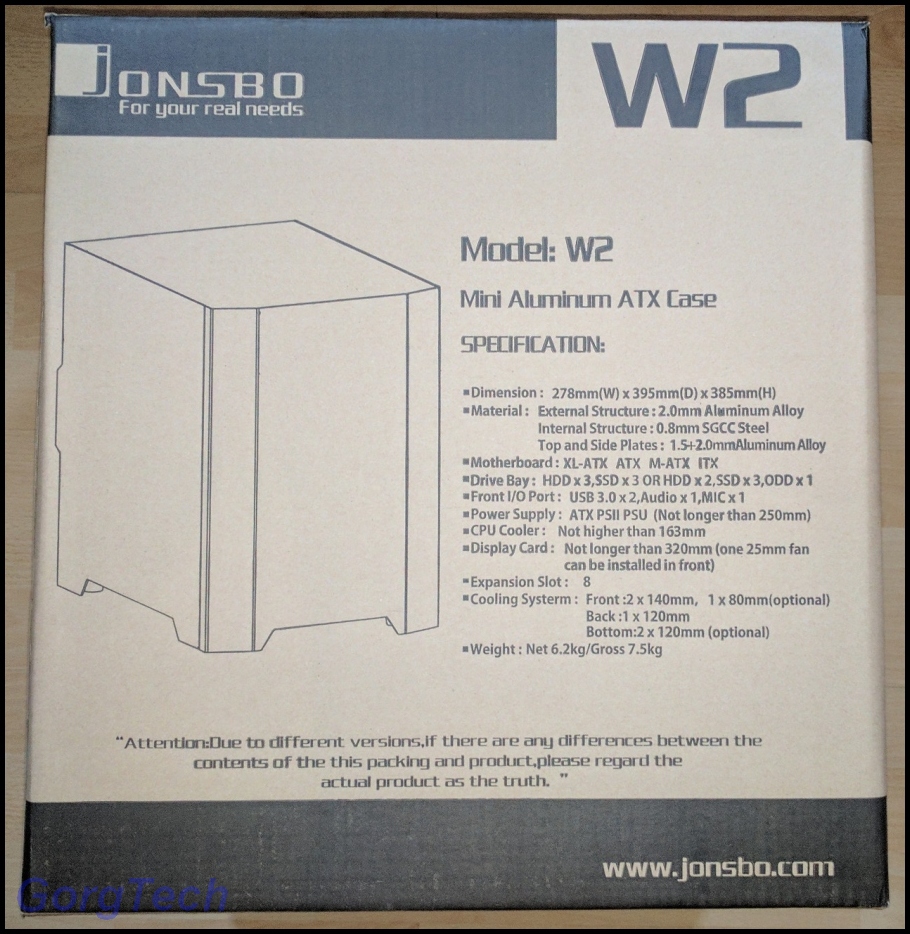
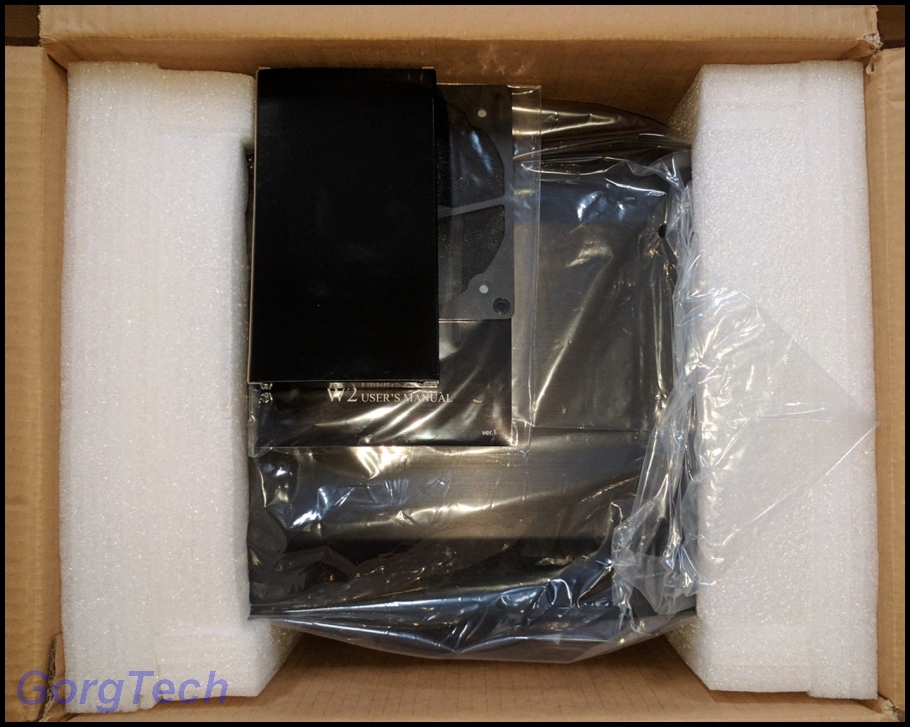
I have chosen a Jonsbo W2 Black Window PC case as a base.
I like this case because it´s quite small, elegant and doesn´t look exaggerated.
I´ve received this large package just in time before Christmas. I want to thank PC-Cooling GmbH for the kind support and for the trust.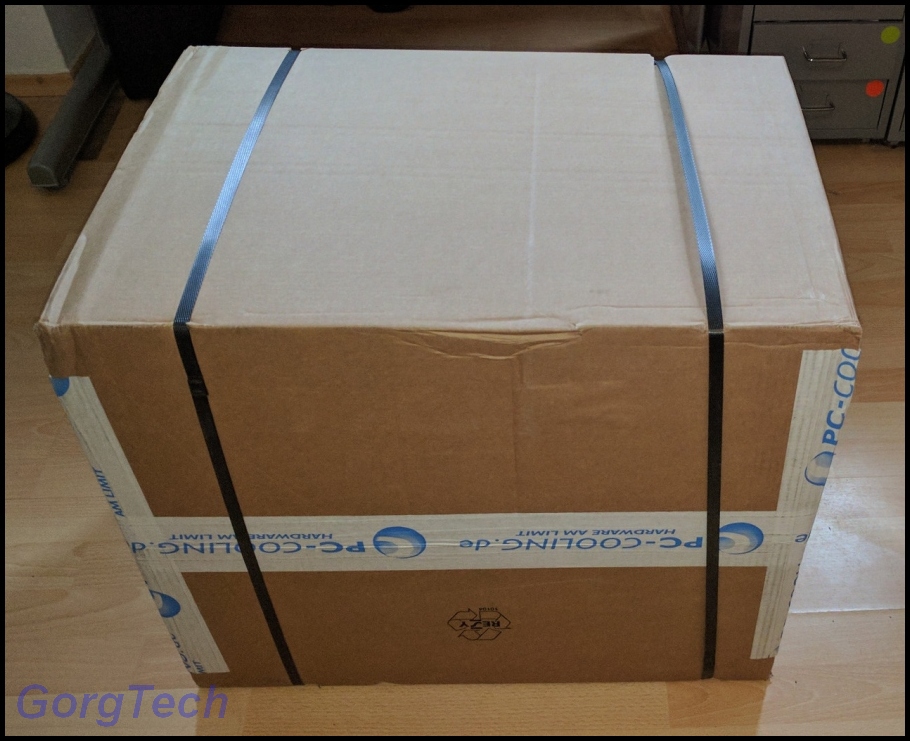

I guess that I´ll enjoy this Project a lot.
Though this case is quite small, it is possible to build a nice Water Cooling inside.
Concept:
This Project should achieve a nice, industrial look and also contain a high quality, custom Water Cooling.
I will adjust the Aluminum front in order to achieve a better air flow. These pictures are just a quick idea and the final result might differ.
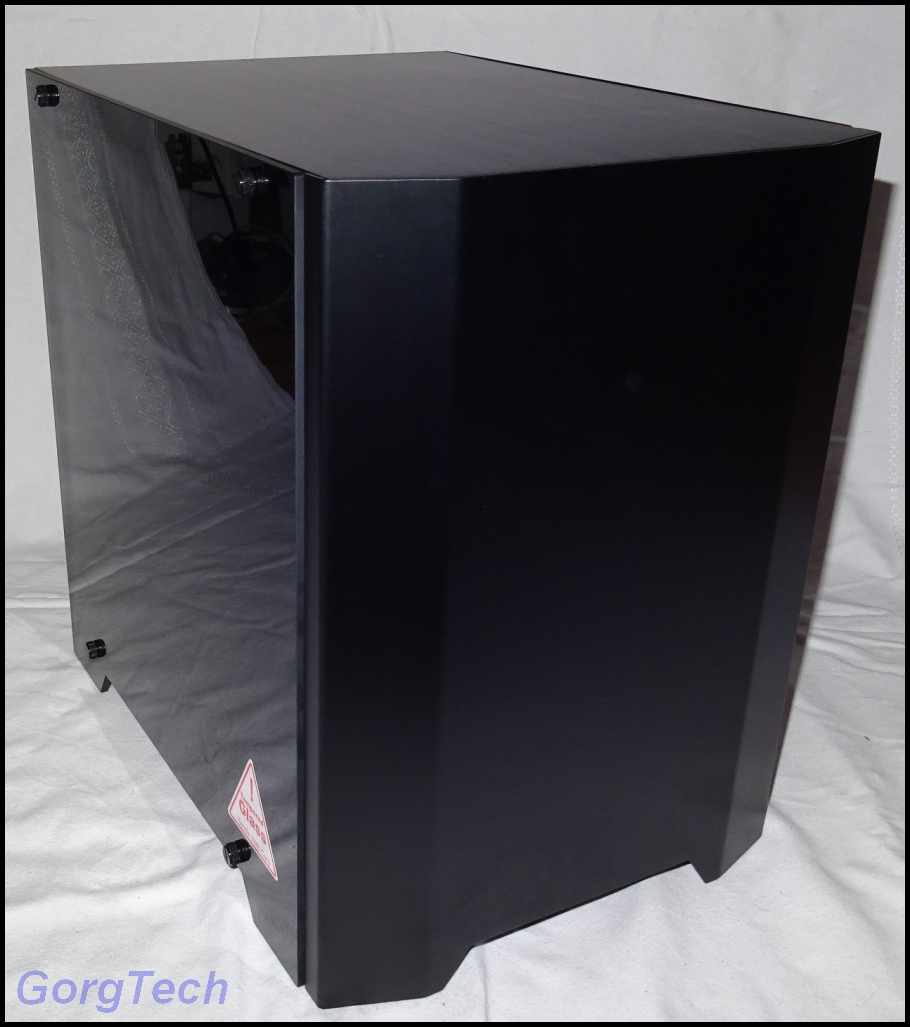
The second panel will also receive a window in order to have a look at all the components inside.
I will remove the "front panel" and build it in the case front instead. I guess this is the best position for a "front panel".
Philosophy:
Every modification is performed through hard work, by hand, without the use of automated processes like eg. Laser, CNC etc.
I try to work as precise as possible and also to document my progress with great care and details.
Whenever it´s possible, I will also develop and build all electrical circuits by myself.
I won´t use prebuild stuff like eg. LED stripes if I´m able to achieve the same results by using my ingenuity.
I would only use this kind of stuff if there isn´t any alternative possible to implement my idea.
Expect everything you could from a guy who has the drive to hold on to his visions.
Social Media:
Don´t miss any Updates about my Projects. Subscribe to my Facebook Page: GorgTech Engineering
PC Hardware Parts:
CPU: Intel Core I7 7700K
Mainboard: Asrock Z270 Taichi
RAM: 16GB GOODRAM IRDM DDR4 RAM
HDD: 240GB GOODRAM Iridium Pro SSD
GPU: AORUS Radeon™ RX580 8G
PSU: Cooler Master V550
Sound: Creative Labs Sound Blaster ZxRWater Cooling Parts:
Alphacool Eisblock XPX CPU - Intel/AMD - polished clear version
Phobya CPU Mainboard Backplate 775/1366/1155/1156/2011
Alphacool Eisfluegel flow indicator G1/4 square - acetal
Alphacool NexXxoS ST30 Full Copper 240mm Radiator
Alphacool NexXxoS ST30 Full Copper 280mm Radiator
Alphacool NexXxoS ST30 Full Copper 120mm Radiator
Alphacool Eiszapfen 2-way ball valve G1/4 - Chrome
Alphacool Eiszapfen double nippel rotatable G1/4 outer thread to G1/4 outer thread - chrome
Alphacool connection terminal TEE T-piece round, G1/4 - chrome
Alphacool double nipple G1/4 outer thread to G1/4'' outer thread with O-ring - Chrome
Alphacool Eiszapfen 13/10mm compression fitting 90° rotatable G1/4 - chrome
Alphacool Eiszapfen 13/10mm compression fitting G1/4 - chrome sixpack
Alphacool Eisbecher D5 150mm Acetal reservoir
Alphacool Eispumpe VPP755 - Single Edition (Rev.2)
Masterkleer tubing PVC 13/10mm (3/8"ID) Ultra clear 3,3m (10ft) "Retail Package" (BPA free)
Aquatuning AT-Protect-UV Crystal Blue 1000ml
Alphacool Eiszapfen L-connector G1/4 inner thread to G1/4 inner thread - Chrome
Alphacool Eiszapfen screw plug G1/4 - deep black
Alphacool HF L-connector G1/4 outer thread rotatable to G1/4 inner thread - Chrome
Alphacool NexXxoS GPX - ATI RX 580 M01 - incl. backplate - Black
Alphacool D-RAM module (for Alphacool D-RAM cooler) - Black
Alphacool D-RAM Cooler X4 Universal - Plexi Black Nickel
Alphacool HF 14 Smart Motion Cooling Plate - Nickel
Sponsors:
PC-Cooling GmbH supports this Project with a high quality PC Case.
Aquatuning GmbH supports this Project with a high quality, custom Water Cooling and some extra items.
Noctua supports this Project with Highend Fans.
Cooler Master supports this Project with a enthusiast Power Supply.
Creative Labs supports this Project with a high end Sound Card.
Asrock supports this Project with a elite Mainboard.
GOODRAM supports this Project with plenty of RAM and a fast SSD.
notebooksbilliger.de supports this Project with a Flagship S.1151 CPU.
Aorus supports this Project with a fast GPU.
-
Same here. Real men don´t use CNCs and only assemble pieces together.

[Worklog][Jonsbo W2 Black Window] The Punisher
in Modding
Posted
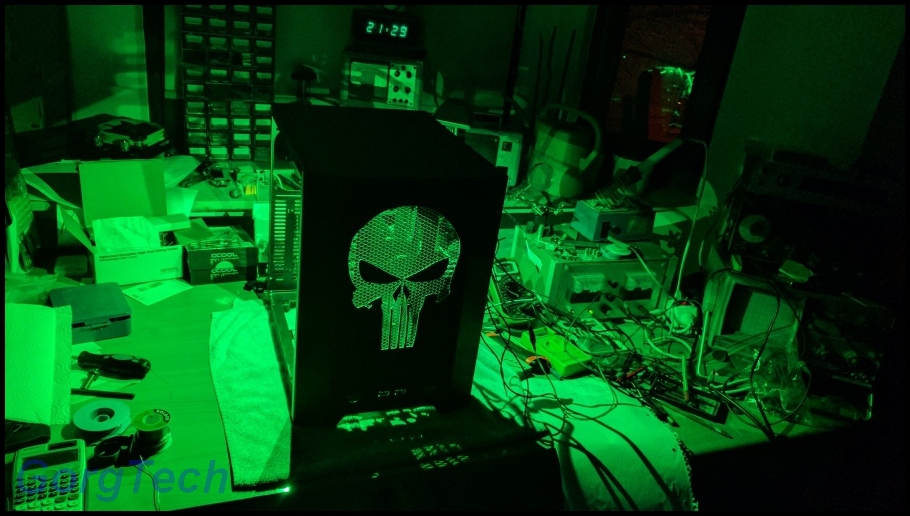
Here´s another Teaser for you, regarding the extra RGB lightning.
Bright enough to enlighten a whole room. Pure evil. Just ignore the chaos in the background.