-
Forum Statistics
7.9k
Total Topics52.9k
Total Posts -
Member Statistics
136,278
Total Members16,800
Most Online


AML Custom PC
-
Posts
42 -
Joined
-
Last visited
-
Days Won
1
Content Type
Profiles
Forums
Downloads
Events
Gallery
Blogs
Posts posted by AML Custom PC
-
-
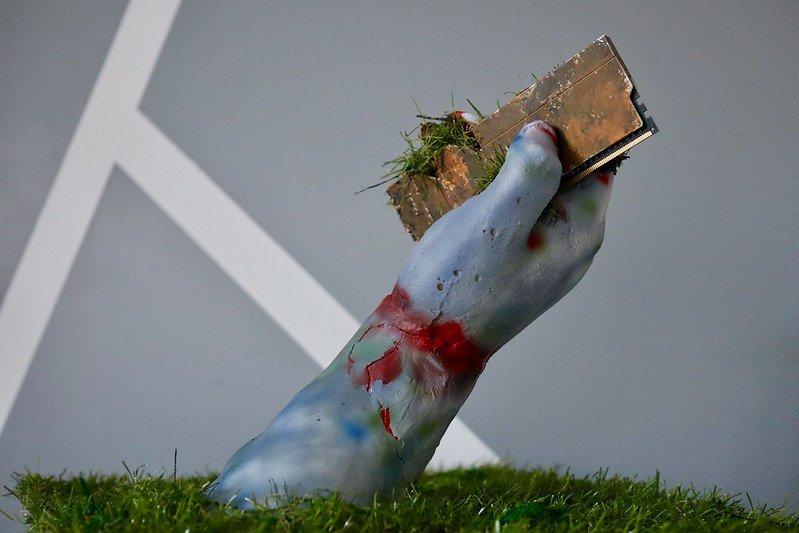
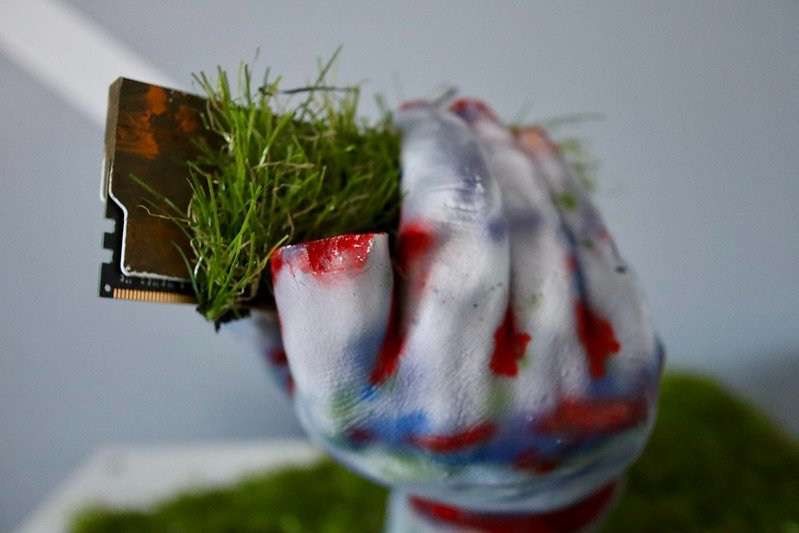
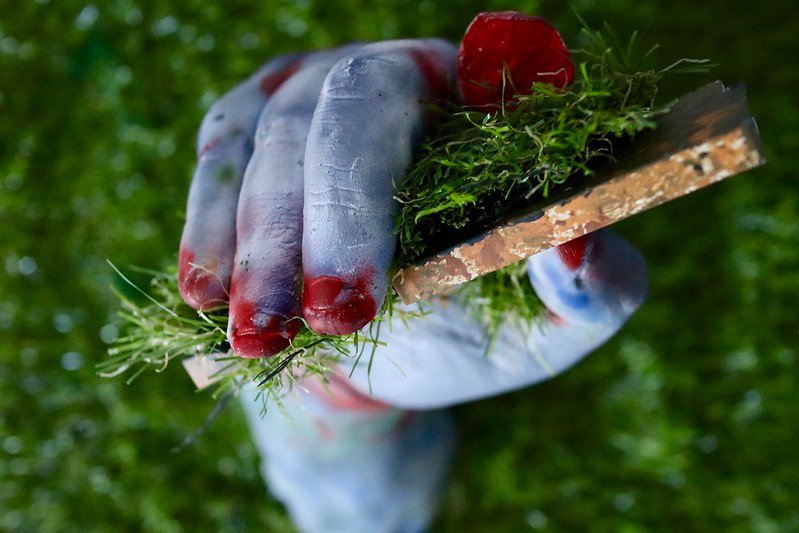
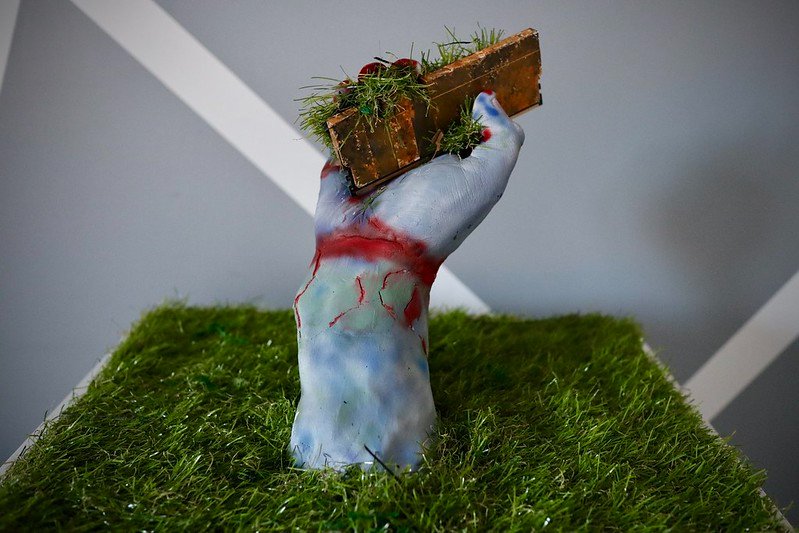
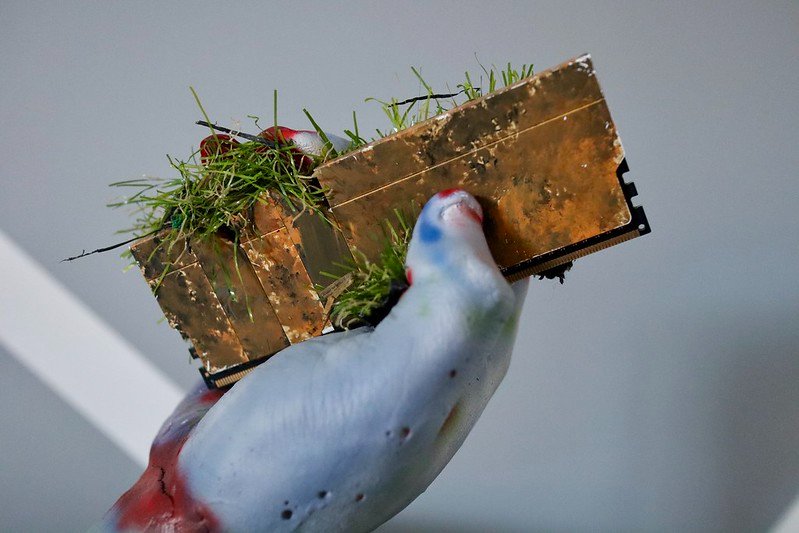
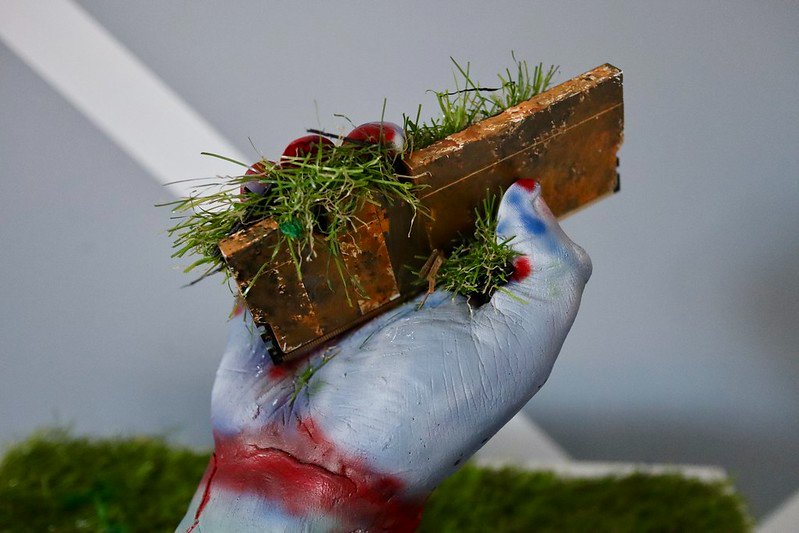
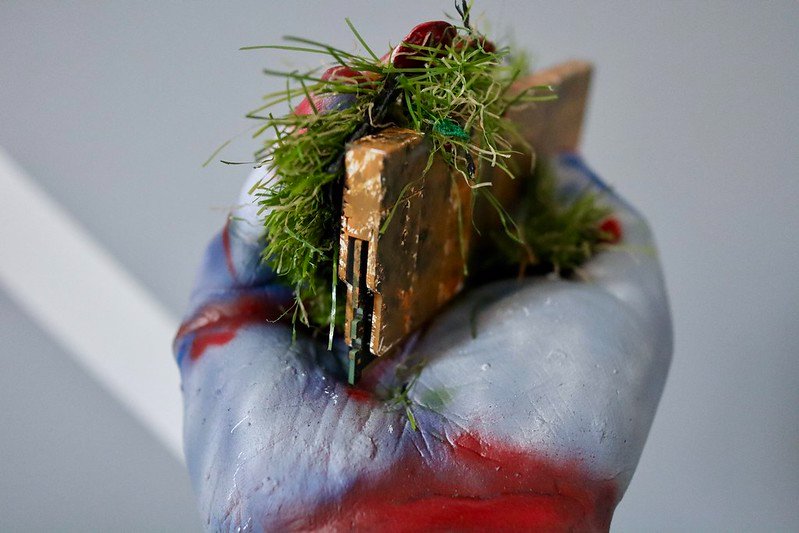
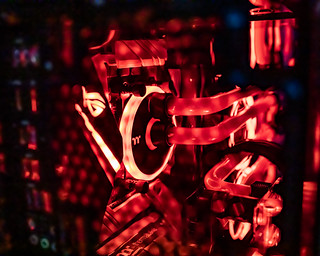
So here are the final photos, hope you like them.

-
So I have added the arm to a 10mm thick acrylic, this will be the base. It will be covered can you guess with what?
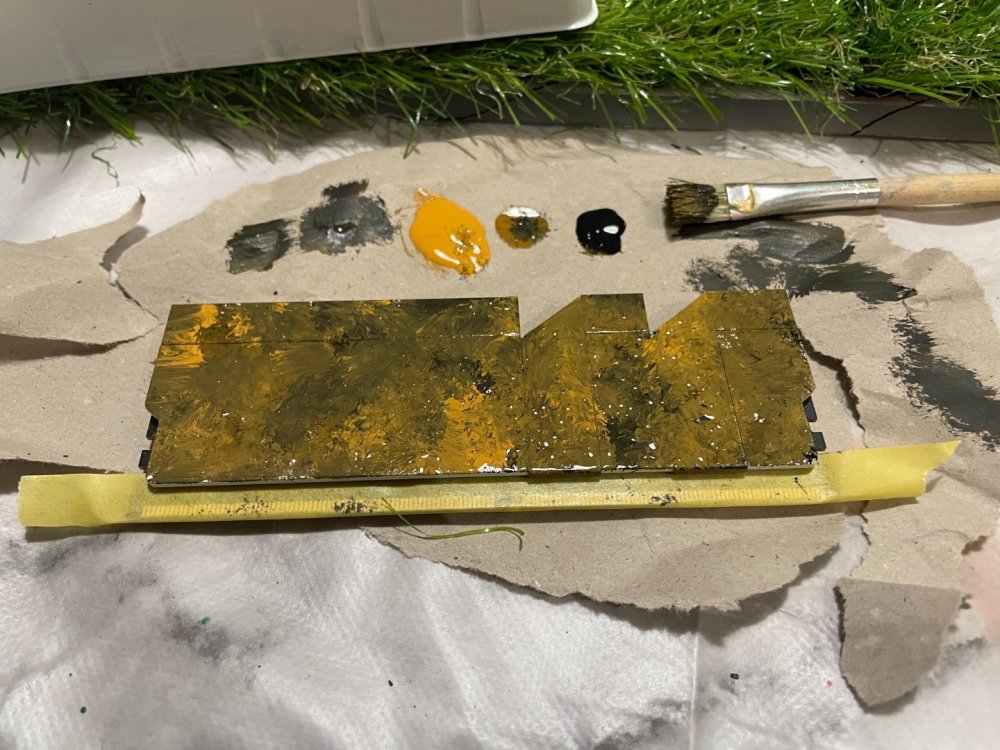
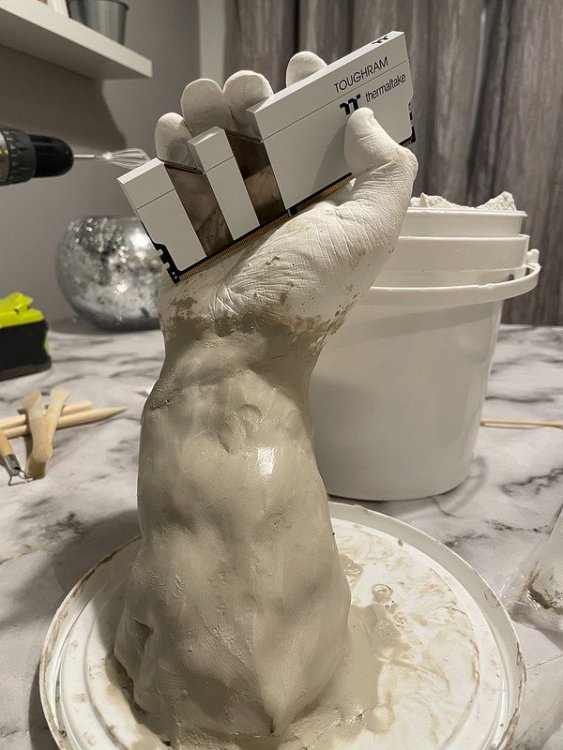
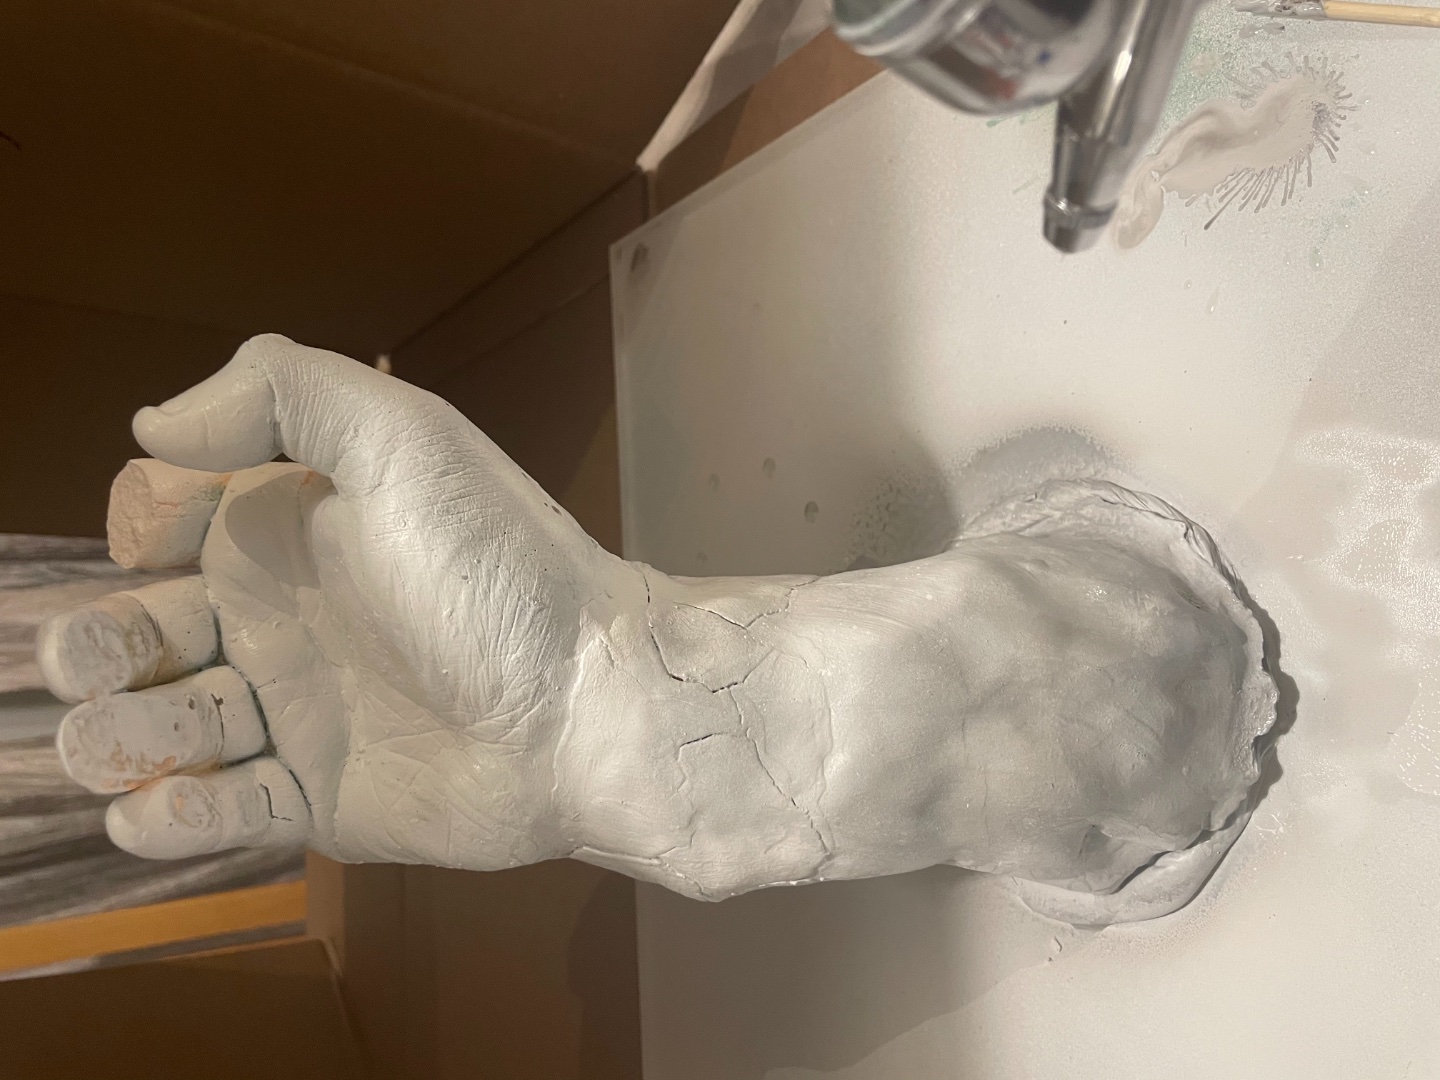
So I started with the ram, I wanted it to look muddy with a bit of rust so it looks old.

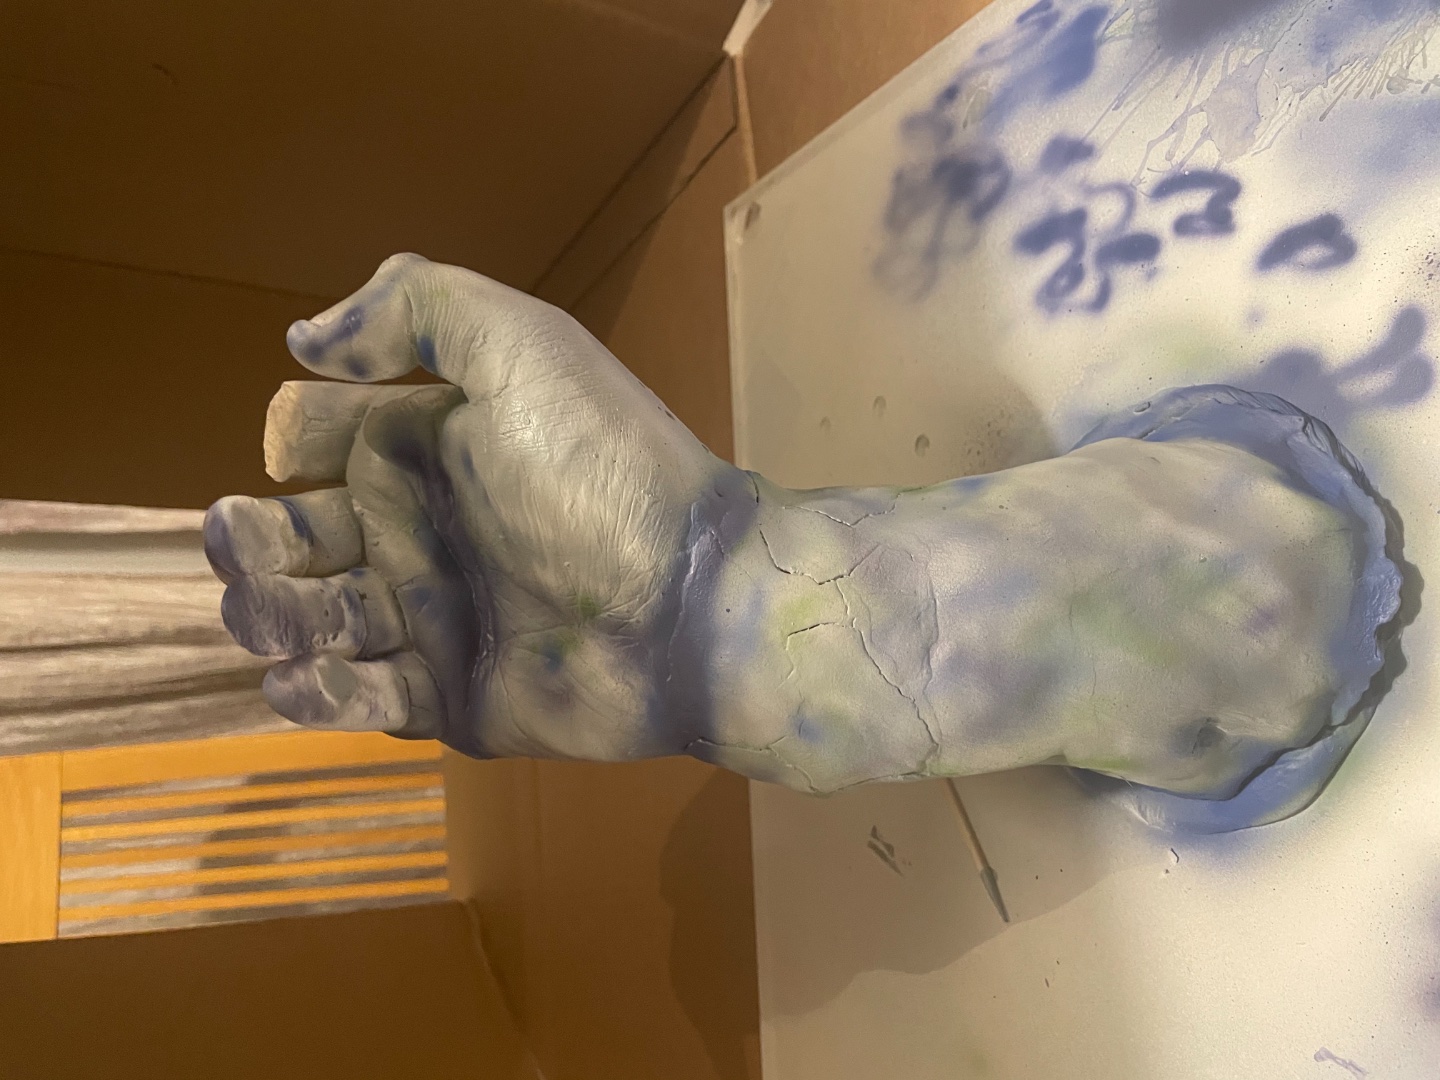
after
it turned out ok, I am happy with this, now need to start layer the paint on the arm.
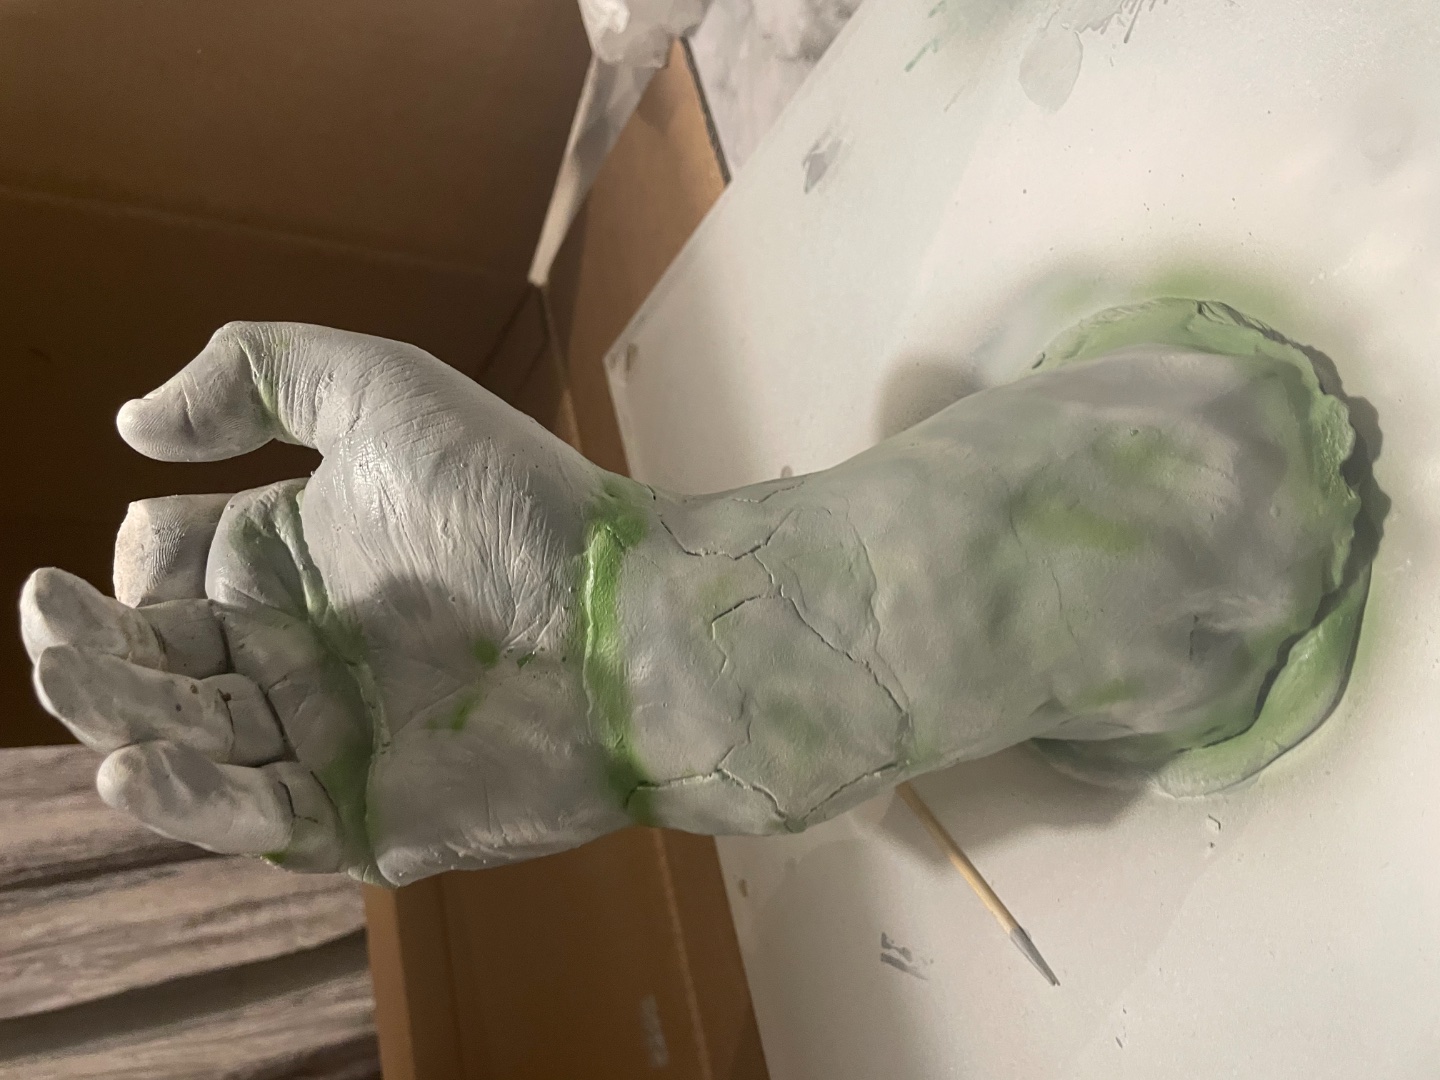
base layer,
next layer

3rd layer

You will have to come back and see the next post for the final photo
-
Looks good buddy.
-
Hey Hope everyone had a good weekend.
Just want to update you all on how the arm went, it turned out great just waiting for it to dry to fix any cracks then I can start to paint it and to the finishing touch, really happy how this is turning out.
-
So I have managed to get all of my materials in, a bit of a nightmare with covid.
So let's just jump straight in, let's start with the hand, I didn’t take many photos as I have video the process, but I have added a few screen grabs.
The main issue I am going to have is keeping my finger space correctly when making the cast. I also need to keep my hand in for 4 minutes.
I started off by mixing the alginate with 1900ml of water, I didn't have a lot of time before the mix went off around two minutes.
![[IMG]](https://live.staticflickr.com/65535/50699828097_ebe6a2be72_z.jpg)
![[IMG]](https://live.staticflickr.com/65535/50699747066_ab3dc01ced_z.jpg)
Once it went pink I needed to get my hand in, I needed to check the spacing for the ram and it went to me hand.
![[IMG]](https://live.staticflickr.com/65535/50698997903_025a2bcf19_z.jpg)
![[IMG]](https://live.staticflickr.com/65535/50698997933_b2d1e7a998_z.jpg)
When the alginate goes white you know it is ready to pull your hand out slowly.
![[IMG]](https://live.staticflickr.com/65535/50698997838_f1aef064d0_z.jpg)
![[IMG]](https://live.staticflickr.com/65535/50698997253_a5a66f7107_z.jpg)
Once you have removed your hand you can start mixing the plaster, I use 450ml water and a bag of plaster, I don't have any photos of this bit, but have video. Once the plaster fills the cast I add some petg tubing as I need this to pull the hand out and for it to attach to the arm I make.
I pulled the full cast out of the bucket and broke the mold open.
![[IMG]](https://live.staticflickr.com/65535/50699731251_e445ce0b12_z.jpg)
![[IMG]](https://live.staticflickr.com/65535/50698982173_db2bde3f53_z.jpg)
I did snap a finger when I removed the cast but it's ok I glue it back on when I paint and sit the ram in for good. It Turned out to be a bit of a blessing.
![[IMG]](https://live.staticflickr.com/65535/50699812372_af822d742b_z.jpg)
![[IMG]](https://live.staticflickr.com/65535/50699731276_82f3f75a3f_z.jpg)
![[IMG]](https://live.staticflickr.com/65535/50699812347_5802728698_z.jpg)
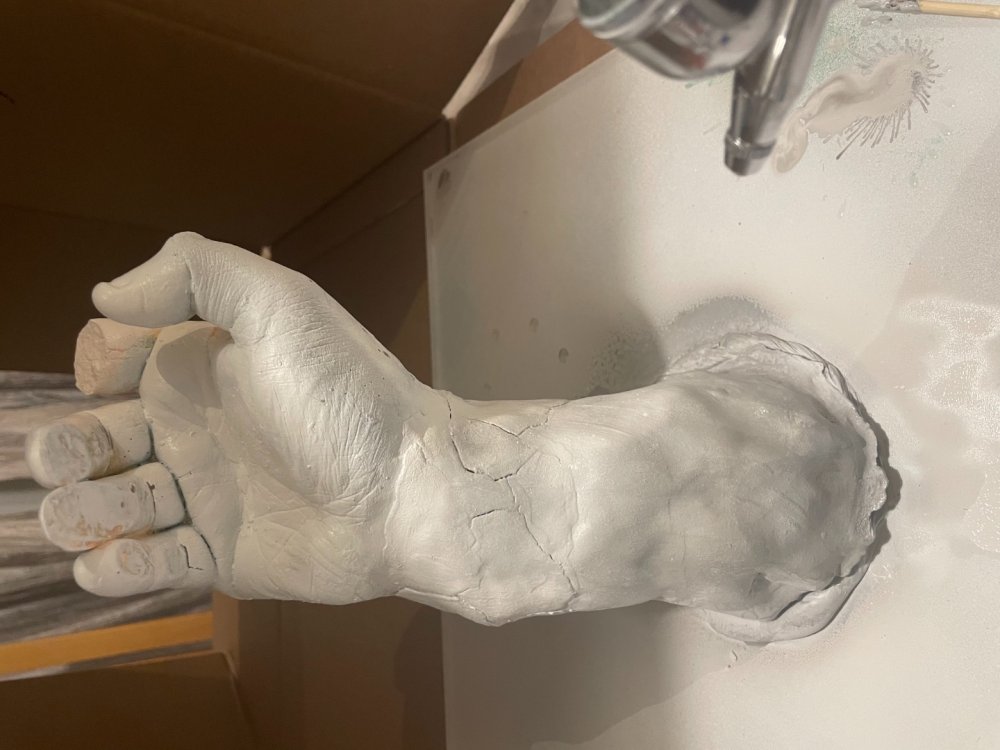
I still have some tidying up to do on the hand but I am really surprised at how much detail the cast made.
You can see what the hand will look like with the ram, next up date will be the arm.
![[IMG]](https://live.staticflickr.com/65535/50699731271_b0e261d28b_z.jpg)
![[IMG]](https://live.staticflickr.com/65535/50699731266_d7b47bc5ac_z.jpg)
-
Hey everyone,
I have come up with my idea, its a little bit different but for the time I have and working around family and my full time job, I think this will be cool.
I have done a quick drawing below,
![[IMG]](https://live.staticflickr.com/65535/50663642983_7bb8f95054_z.jpg)
This hand will have the toughram on show coming out of the ground, I have never worked with clay so this should be fun and I will get to play around with the colours.
I will try my best to keep you all up to date with my process.
-
Hey everyone,
I want to start off by saying a big Thank you to @Thermaltake and Andy for the opportunity, some really great talent involved in this invitational looking forward to seeing what everyone does.
I have an idea of what I want to do, just need to draw up a few design then I can order my paint, then I can show you what I am going to do.
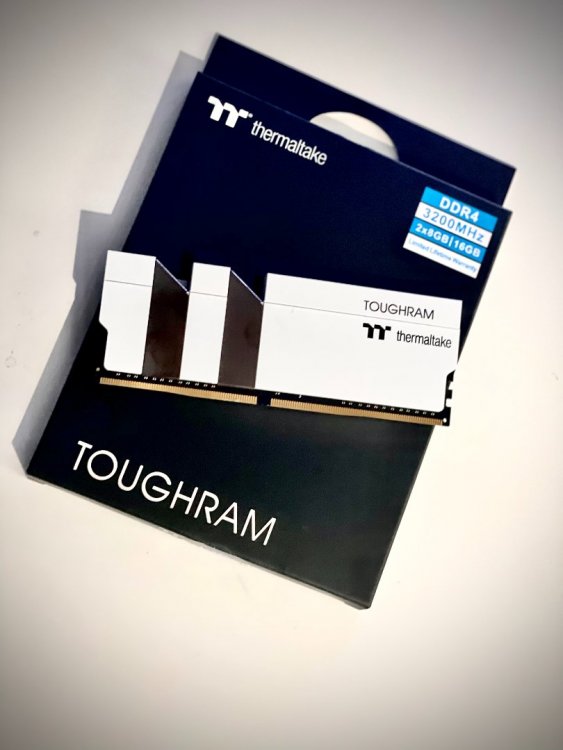
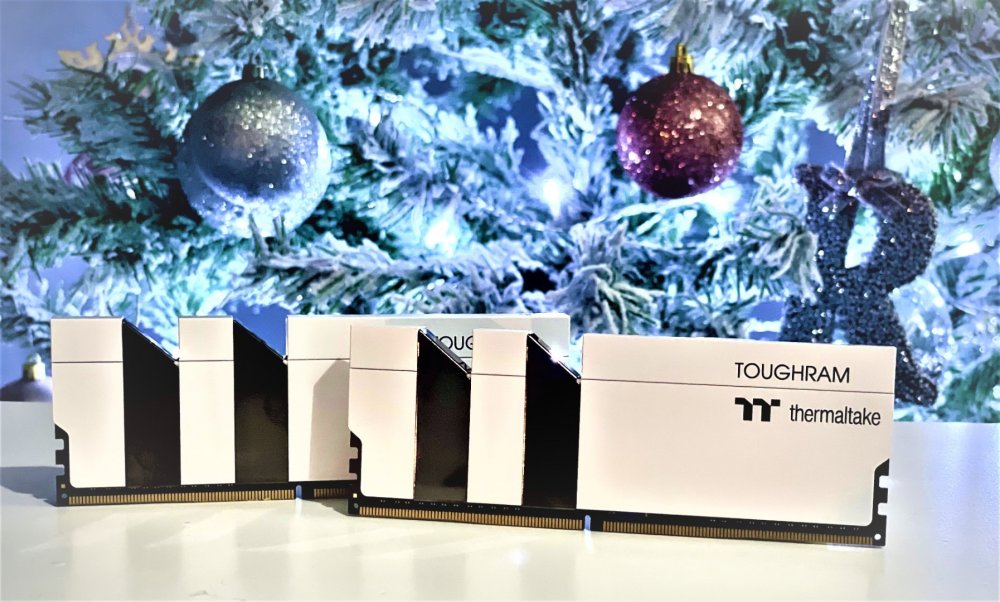
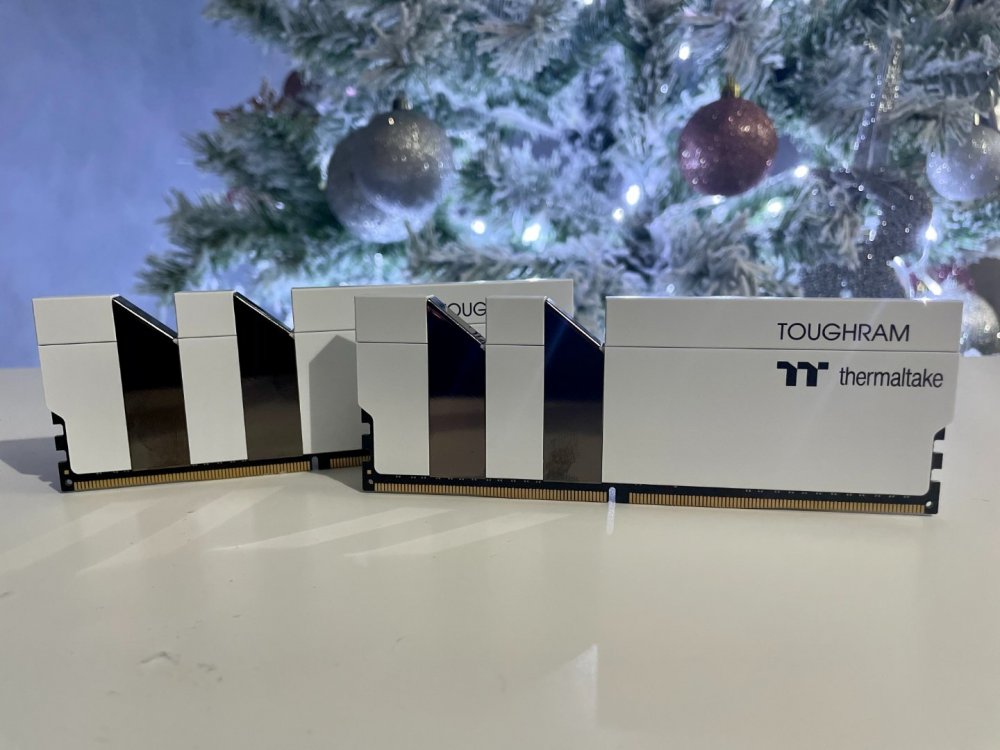
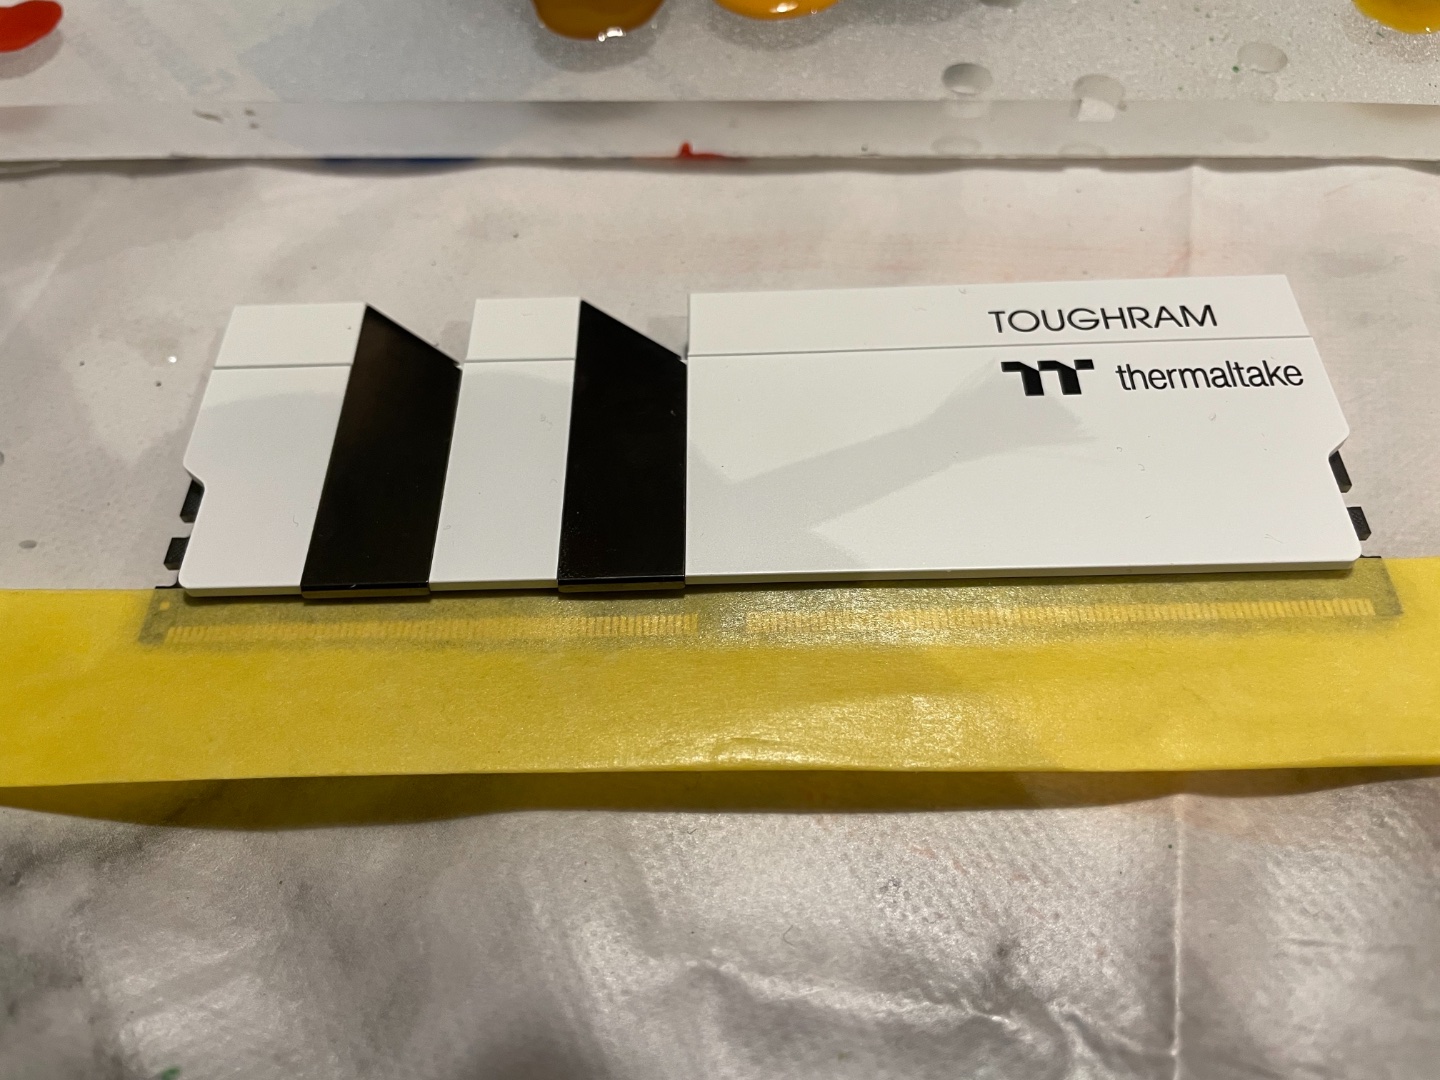
Thermaltake have sent out 32gb toughram for this mod,
-
#Pure
All watercooling, psu and Fans by thermaltake and the case is the A500.
You can check the video out here,
-
Here is #TT20
The case is the thermaltake XT, watercooling, fans and psu all thermaltake.


-
Here is project snow, I used the core ps all watercooling parts, fans and psu from thermaltake.


you can check the video out here,
-
Here is my x71 build, I used the thermaltake fans and the x71 case

-
Look forward to seeing the build logs.
-
Great idea, look forward to seeing the build logs.
-
Great job buddy, well done. Good luck.
-
Great job Ben, well done and good luck.
-
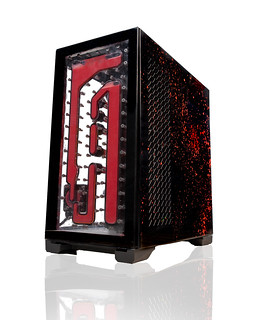
Hey everyone, I am back with a quick build log.Antec asked if I could do a build in their new P120 case and this is my journey.The parts I will be using are,CPU - AMD 2700xGPU - ASUS Dual RTX 2080RAM - 16gb 3200 mhz Thermaltake WaterRam without the waterblockMotherboard - ASUS ROG Strix X470 - FStorage - Adata SX6000 256GB M.2PSU - Antec 650W high current gamer HCGFans - Antec Prizm 120 ARGBAll the water cooling parts were supply by thermaltake and I manufactured a custom distro with integrated ddc pump for this build.This is the case.
-
Hey, not posted in a while, just been really busy.
I have an update and the build is now complete and you can see it on the thermaltake stand at EGX this weekend.
So we left off with the shell of the build and the basic layout of the case,
![[IMG]](https://live.staticflickr.com/65535/48902470246_5332708cb7_z.jpg)
I had my buddy Michael from to the wire to pop over and help with the cables.
![[IMG]](https://live.staticflickr.com/65535/48902673747_2d121b6397_z.jpg)
![[IMG]](https://live.staticflickr.com/65535/48902673422_f3756b4961_z.jpg)
I decided to strip the case and paint it white.
![[IMG]](https://live.staticflickr.com/65535/48901938408_dec410b98e_z.jpg)
I think it turned out great.
Once the case was painted I just need to put everything back in and run the tubes.
![[IMG]](https://live.staticflickr.com/65535/48901948848_71556dcfe3_z.jpg)
![[IMG]](https://live.staticflickr.com/65535/48902681682_8283f4e04a_z.jpg)
![[IMG]](https://live.staticflickr.com/65535/48902478801_6de7a0ebc6_z.jpg)
Now its time to start work on the basement.
![[IMG]](https://live.staticflickr.com/65535/48901940538_bb3ce6ccd8_z.jpg)
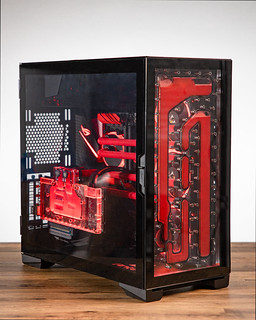
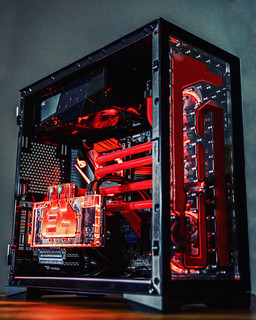
Now the best part the final photos,
![[IMG]](https://live.staticflickr.com/65535/48901947693_672be21a21_z.jpg)
![[IMG]](https://live.staticflickr.com/65535/48902478786_f1721e4930_z.jpg)
U
![[IMG]](https://live.staticflickr.com/65535/48918072886_03cb5e1978_z.jpg)
Hope you all like the build, just want to say a big thank you to thermaltake and MSI for the support. -
Thanks for the opportunity Andy.
-
-
Hi everyone, my name is Richard AKA Aml custom pc,
I want to start off by saying a big thank you to thermaltake for being chosen for the next stage of the thermaltake talent 2019.
I hope you like my ideas, and I just want to say good luck to the other 11 modders and a big thank you again to Thermaltake.
-
-
Your Name: Richard Ord
Modding Brand / Media Name: AML Custom Pc
Facebook Link: https://www.facebook.com/AMLCustomPc/
Youtube Channel Link: https://www.youtube.com/channel/UCtp9oGJA3ZP0giiSjZjKEpQ
Twitter, Instagram, or other social media platforms: https://www.instagram.com/aml_custom_pc/Website: https://www.Amlcustompc.com
Previous projects/build logs:
Project:No Name - https://forums.overclockers.co.uk/threads/custom-build-log-thermaltake-x71-case-with-modding-project-no-name.18771516/
Project:Snow - http://forums.overclockers.co.uk/threads/project-snow.18811808/
#TT20 - https://forums.overclockers.co.uk/threads/thermaltake-uk-modding-trophy-2018-tt20.18833277/
Total fans: 1500 (not including Forum views)
Why do you think you should be the next TT Talent?:
Hi my name is Richard, I am 35 and live in the uk with my wife and two kids. I work full time, so I mod in my free time, I started PC building in 2014 but its only been the last 3 years that I have been pushing my modding, I find this to be a great escape. I think I should be the next TT talent because I feel like I've shown a lot of what I can do in my previous builds and I was always developing my skills. I have shown that I can work to a high standard, I would to be given this opportunity.
Good luck everyone, thanks again to Thermaltake.
-
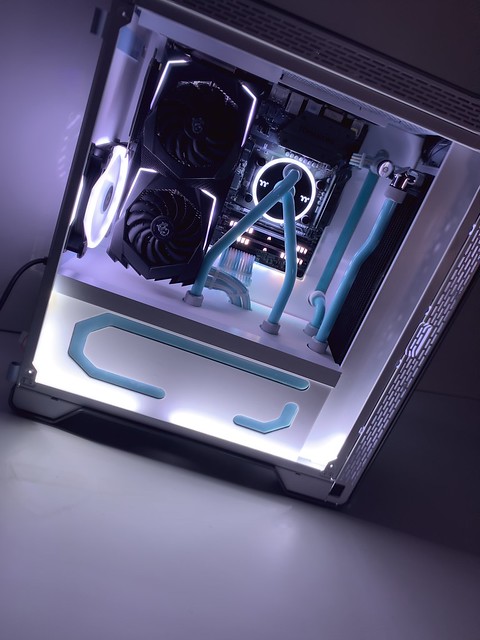
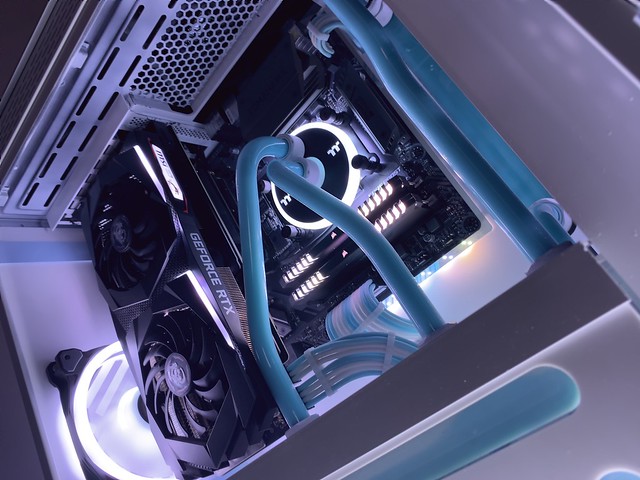
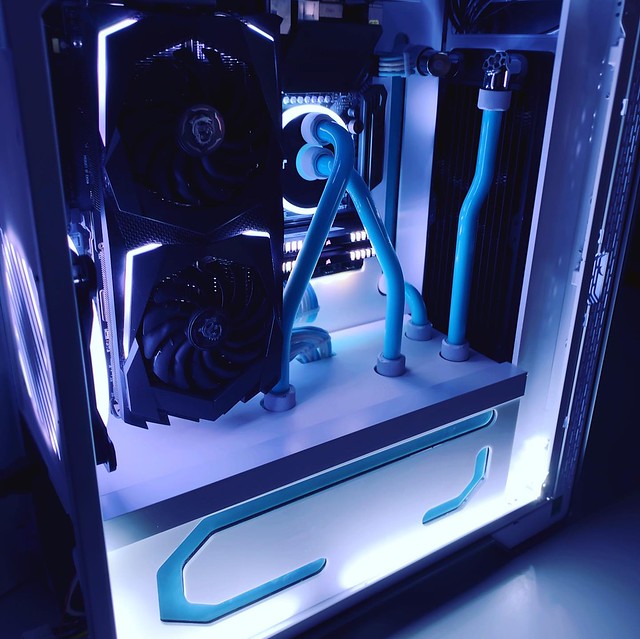
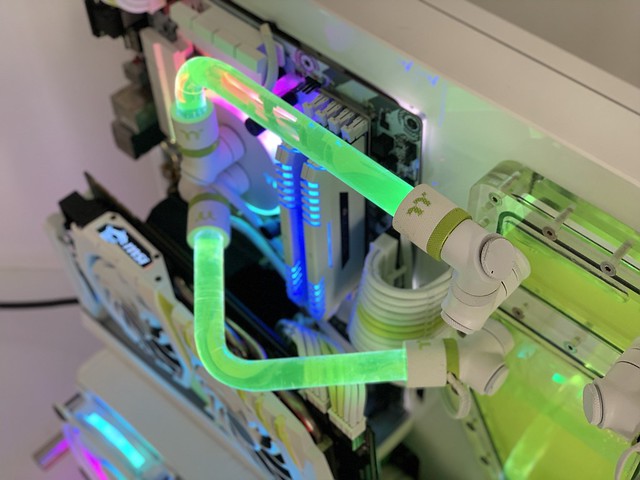
Hey, thanks for checking out my build log for #Pure.
I couldn’t have done this build if it was not for the sponsors, MSI Thermaltake, To the wire sleeving.![[IMG]](https://farm8.staticflickr.com/7901/32516845987_e681144ecd_z.jpg)
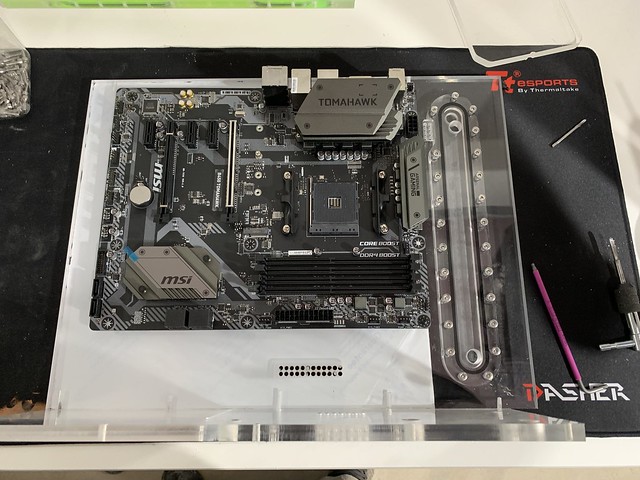
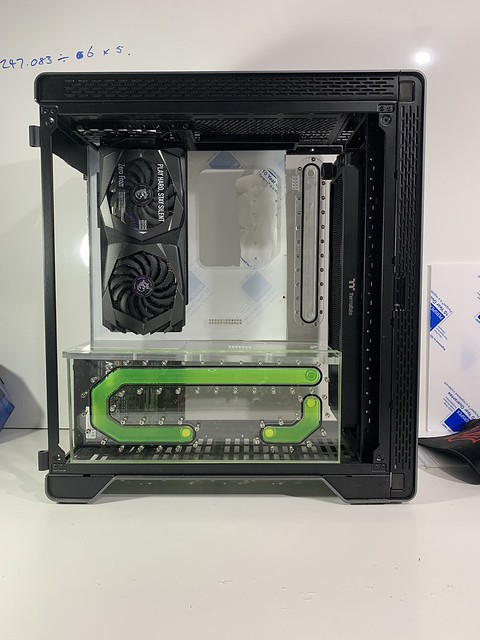
This build will have a white, blue and frosted theme and I want the case to keep its external look and at the centre of the build it will have the Ryzen 2700x.
This is what I want to do,![[IMG]](https://farm8.staticflickr.com/7888/33597092288_29276047ae_z.jpg)
Parts l will be using,
CPU - Ryzen 2700x
Motherboard – MSI B450 tomahawk
Ram – Corsair Vengeance RGB 16gb
Graphics card – MSI Gaming RTX 2070
Storage – Unknown
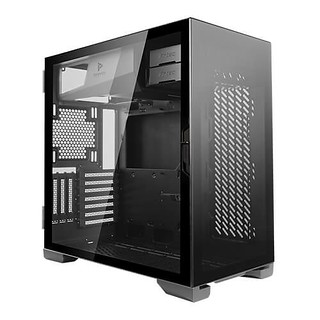
Case – Thermaltake A500
Psu – Thermaltake Toughpower grand RGB 850W
CPU Block – Thermaltake Pacific W5
Rad – Thermaltake Pacific C360
Fittings – Thermaltake C- Pro
Pump – Thermaltake Pacific P1
PCI-E Cable – Thermaltake Premium 3.0 300mm.
I don’t want to keep this build on my bench too long so I have made a design and want to stick to it, I will be re-making all of the internals and we will just be keeping the frame and the external shell.
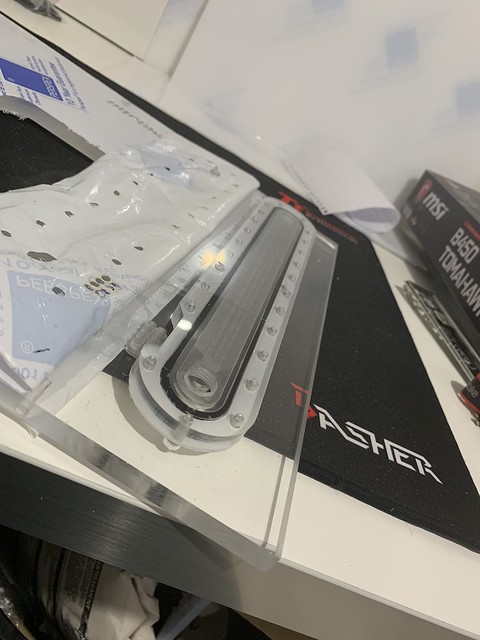
Here are a few photos of the products,![[IMG]](https://farm8.staticflickr.com/7857/47405633612_8c7d02d4e5_z.jpg)
![[IMG]](https://farm8.staticflickr.com/7903/32516846167_87b03525b8_z.jpg)
![[IMG]](https://farm8.staticflickr.com/7926/47405633412_e7fc117b63_z.jpg)
![[IMG]](https://farm8.staticflickr.com/7814/32516845657_763cb8c7c1_z.jpg)
![[IMG]](https://farm8.staticflickr.com/7813/47405633312_3178f019b6_z.jpg)
![[IMG]](https://farm8.staticflickr.com/7809/47458571851_dc626772c4_z.jpg)
![[IMG]](https://farm8.staticflickr.com/7802/32516845467_de9ab63341_z.jpg)
![[IMG]](https://farm8.staticflickr.com/7824/47405633242_eb3a760c48_z.jpg)
![[IMG]](https://farm8.staticflickr.com/7816/32516845367_30bf041114_z.jpg)
![[IMG]](https://farm8.staticflickr.com/7839/47458571791_b6a1e7378a_z.jpg)
![[IMG]](https://farm8.staticflickr.com/7885/32516845307_ef4c1fc517_z.jpg) So this is the case,
So this is the case,
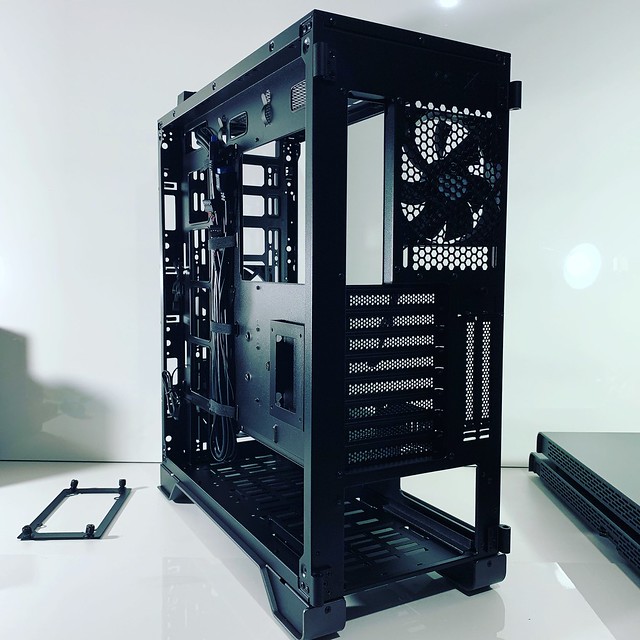 I remove psu cover and motherboard tray.
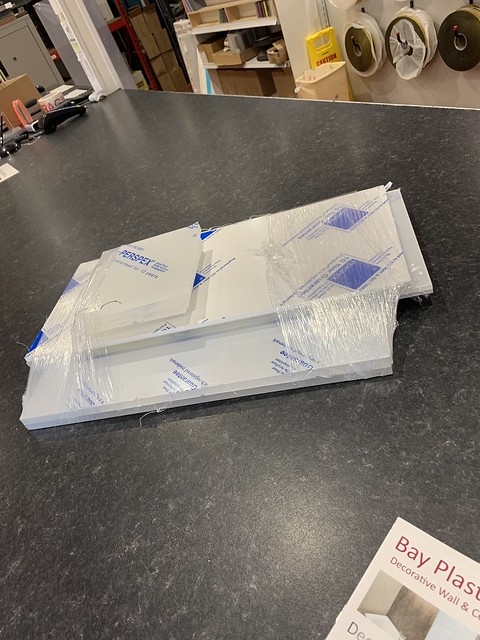
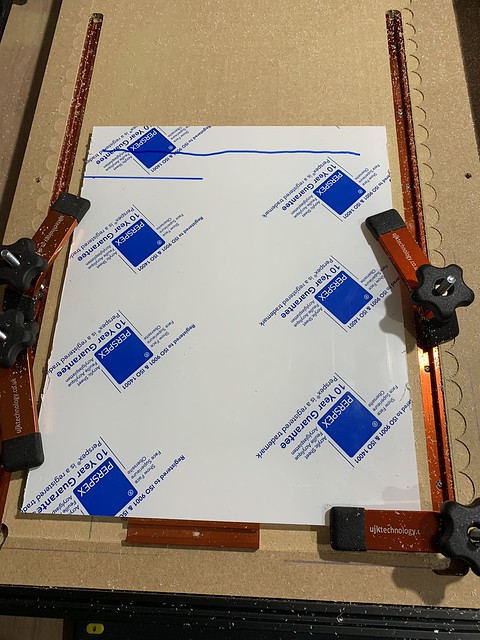
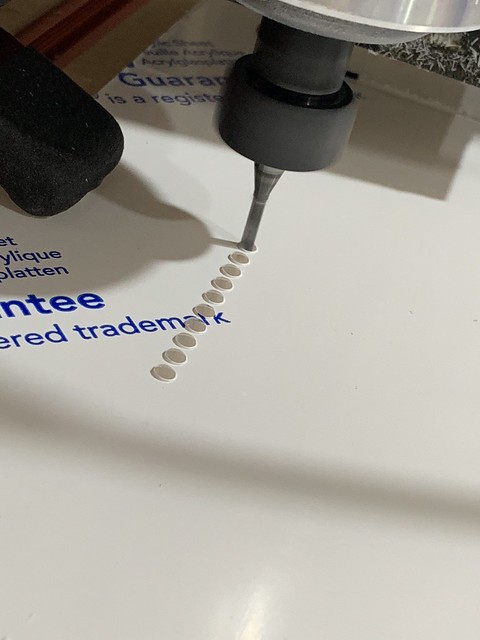
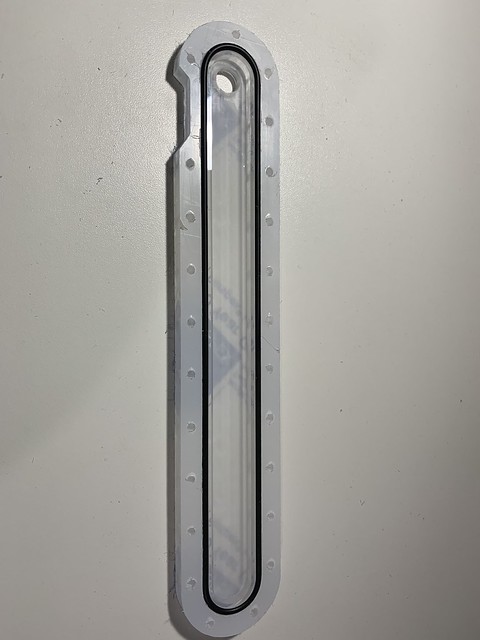
 I made a model out of cardboard to make sure I got the correct sizes for the perplex
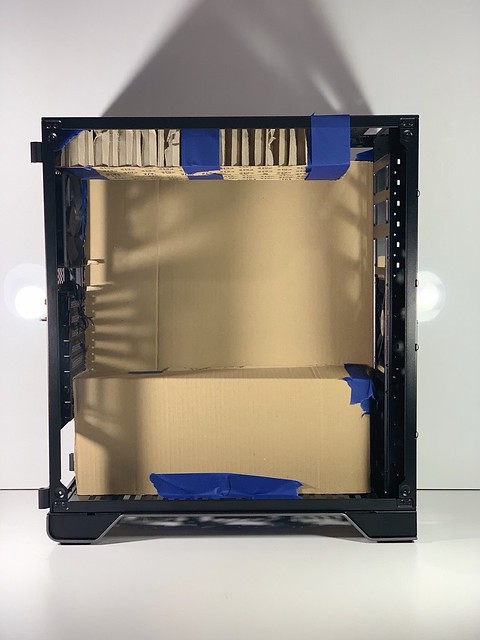 After I did this I removed the IO shield and graphics card supports from the back of the case so I can move this to the top of the case.

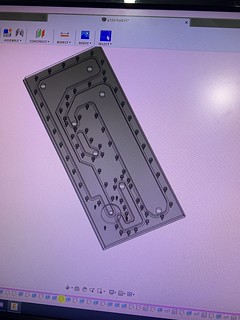
 Once I cut the case up I new I would need to replace the back of the case, I made a quick design on fusion 360 and made a new back panel, this will include displayport and 2 usb 3.0.
 I chopped down an old bracket for the thermaltake p3 to help support the graphics cards so it can hang down in the case.
 This is the point I needed to stop as I needed to pick up the perplex for the next stage of the project.This is where we are up to.
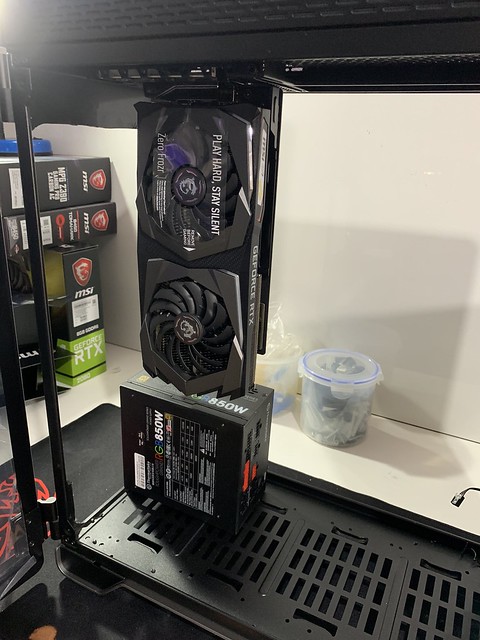
-
![[IMG]](https://farm2.staticflickr.com/1963/30011127177_8cd82a5938_z.jpg)
Right guys, I had to start the Mod again, with me changing the back distro, it meant all my sizes were out.
I started with a simpler design but still has the WOW factor, I think this is just down the the size of the case, I did remove the second loop. I also have to change how I want to mount the panel back to the case, I did want to keep both side panel but I will be removing one of them.![[IMG]](https://farm5.staticflickr.com/4830/32214615898_4d74128c9a_z.jpg)
![[IMG]](https://farm5.staticflickr.com/4804/32214615698_14dd6e4295_z.jpg)
Once I made the new back, and sorted the mount for the top panel and side panel, I was happy to start the internals.
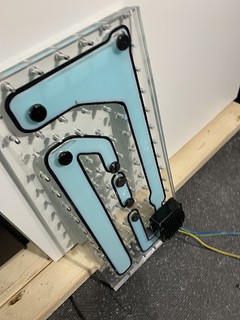
I started in the basement I recut the bottom panel this is 20 mm from the base of the case I have done this to hide the cables going to the 3 control boxes, which will sit behind the screen you should be able to see these from the right hand side and the top of the case.![[IMG]](https://farm5.staticflickr.com/4875/46085869181_567e47cd41_z.jpg)
Once I was happy with this I started with the side panel which will hold the screen, I am using the screen to show celebrate thermaltake product over the last 20 years.![[IMG]](https://farm5.staticflickr.com/4867/46035845702_1127f50674_z.jpg)
You can see I am sticking to the plan I submitted to the competition.
These are the cable combs I will be using.![[IMG]](https://farm5.staticflickr.com/4913/45174192795_d71c6d8b66_z.jpg)
I even made some little brackets to hold the mid plate in place,![[IMG]](https://farm5.staticflickr.com/4904/44269716570_33deff4860_z.jpg)
Once I installed the brackets, I added the mid plate which will hold the motherboard, passthroughs and another custom distro plate. I will be keeping the mid plate clear so you can see straight into the basement.![[IMG]](https://farm5.staticflickr.com/4908/45174193945_b7afee4d30_z.jpg)
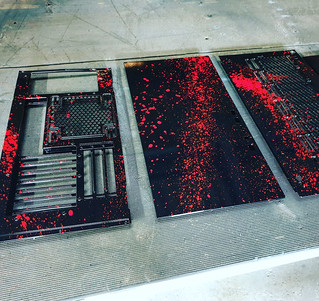
I have added the sponsors logos to the side panel, I got this mod from the modding pages on bit-tech, I have used etching cream to etch the side panel. I tested this on the project no name side panel.
I cut a TT logo out on vinyl, applied the logo and then applied the cream I left it on for around 15 min and then washed it off,
Before,![[IMG]](https://farm5.staticflickr.com/4845/32301368498_efa6ee58be_z.jpg)
After,![[IMG]](https://farm5.staticflickr.com/4896/31233773647_84c4be76a3_z.jpg)
I am very happy how this turned out, I just want it to be seen.
Now it was time to do the side panel,![[IMG]](https://farm5.staticflickr.com/4834/31233772617_53b3681fc7_z.jpg)
![[IMG]](https://farm5.staticflickr.com/4866/46122147592_d3f57c08b8_z.jpg)
You will have to trust me, the panel looks great, you will see this in final photos.
Next I need to add the vinyl to the side panel and paint the screen cover, this didn’t take to long, I cut the logos on my vinyl cutter and applied them to the side panel. I have added these to the top panel which will be painted matt black and I will be painting the reverse side orange.
The screen fits in great.![[IMG]](https://farm5.staticflickr.com/4917/31233962567_f2ef86e9d3_z.jpg)
Apply all sponsors logos![[IMG]](https://farm5.staticflickr.com/4876/45449299254_72cde80ab2_z.jpg)
Test fit![[IMG]](https://farm5.staticflickr.com/4913/31233963067_3b5cda288f_z.jpg)
The panel is all set for paint,
I have also ran my cables from the psu these are now in place and will not be removed, they look great.![[IMG]](https://farm5.staticflickr.com/4842/45449195764_724266442a_z.jpg)
![[IMG]](https://farm5.staticflickr.com/4831/31233786977_ab0c0ba547_z.jpg)
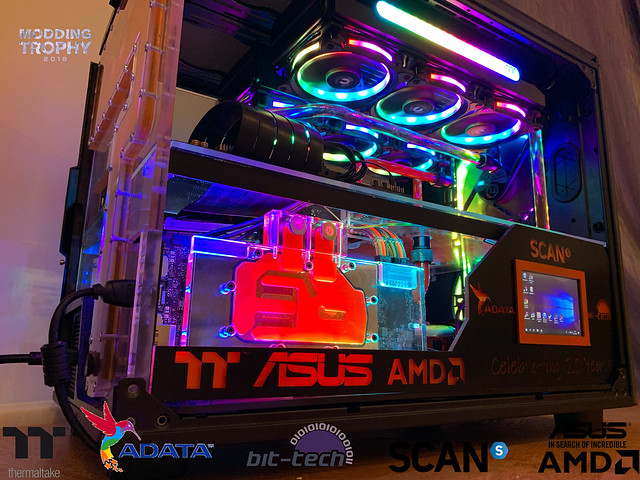
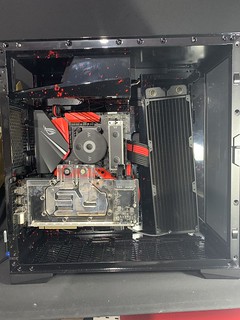
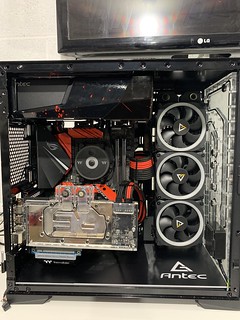
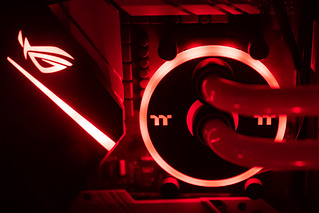
Right guy's I was running out of time, and didn't want to miss the dead line so here is #TT20 hope you like it.![[IMG]](https://farm5.staticflickr.com/4848/45487936904_b35e6309d0_z.jpg)
![[IMG]](https://farm5.staticflickr.com/4850/45487937974_e6303783ae_z.jpg)
![[IMG]](https://farm5.staticflickr.com/4881/32339763228_3470bc0969_z.jpg)
![[IMG]](https://farm5.staticflickr.com/4884/32339762788_03b2c45bd2_z.jpg)
![[IMG]](https://farm5.staticflickr.com/4896/32339762348_e9c4e9959e_z.jpg)
![[IMG]](https://farm5.staticflickr.com/4909/45487937504_afe90d3cd4_z.jpg)
![[IMG]](https://farm5.staticflickr.com/4841/46161283562_65690eb594_z.jpg)
Hope you all like the photos.
Sorry again that I jumped to the finished photos. I need to make sure I completed it on time


[United Kingdom] Richard Ord
in 2020 Thermaltake RAM MOD Invitational Season 1
Posted
Here is my final video.