-
Forum Statistics
7.5k
Total Topics50.6k
Total Posts -
Member Statistics
135,963
Total Members16,800
Most Online

MPC Project
-
Posts
64 -
Joined
-
Last visited
-
Days Won
3
Content Type
Profiles
Forums
Downloads
Events
Gallery
Blogs
Everything posted by MPC Project
-

[Italy] Marco Di Silvestre
MPC Project replied to TT Amanda's topic in 2023 Thermaltake CaseMOD Invitational Season 1
Thank you ! -
[Italy] Marco Di Silvestre
MPC Project replied to TT Amanda's topic in 2023 Thermaltake CaseMOD Invitational Season 1
With the release of the final video of the completed build, I want to thank the Thermaltake team with all my heart. Thank them first of all for inviting me to this competition, for participating with top level modders around the world. Thank them also for their mentality and ideas to always develop something innovative that marries both the concept of gaming and maker. I hope that I have realized a project that is appreciated by all of you. Thank you for all those who have followed the progress of the work ! Thank you, my dear Andy ! Thank you Kenny for creating an important brand with excellent products and congratulations for his 25 years ! Thanks to all the TT team ! Thanks to all the sponsors : Intel, ASRock, INNO3D, Seagate ! -
[Italy] Marco Di Silvestre
MPC Project replied to TT Amanda's topic in 2023 Thermaltake CaseMOD Invitational Season 1
Thanks bro, I just saw yours too and I've always liked the diorama style ones which enrich the internal spaces of the cabinet very well and which also give a very nice look externally ! -
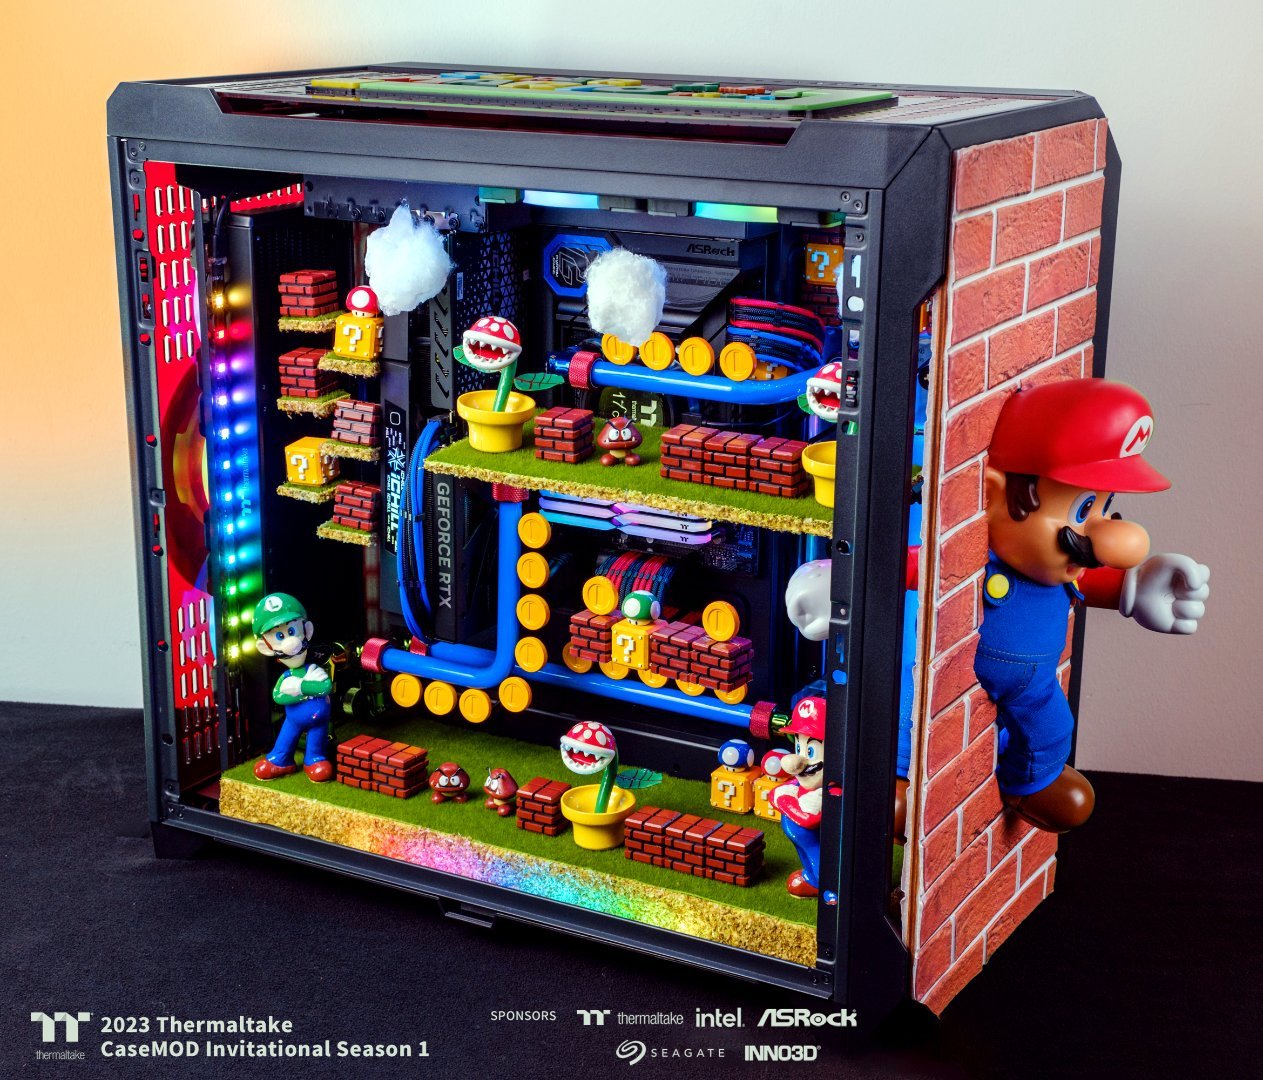
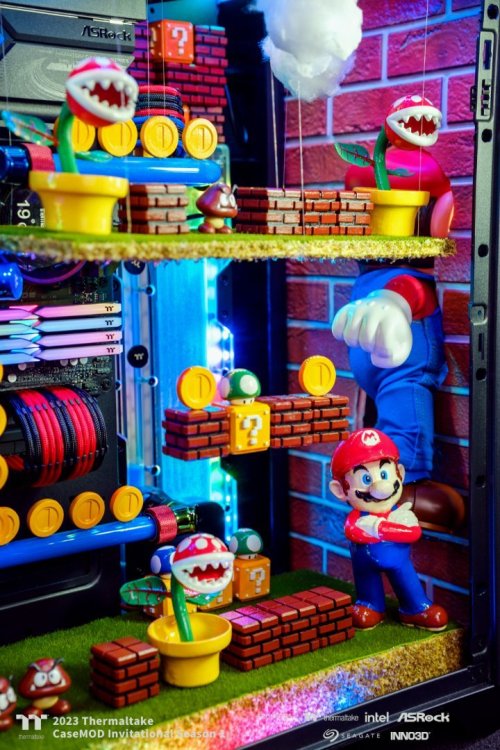
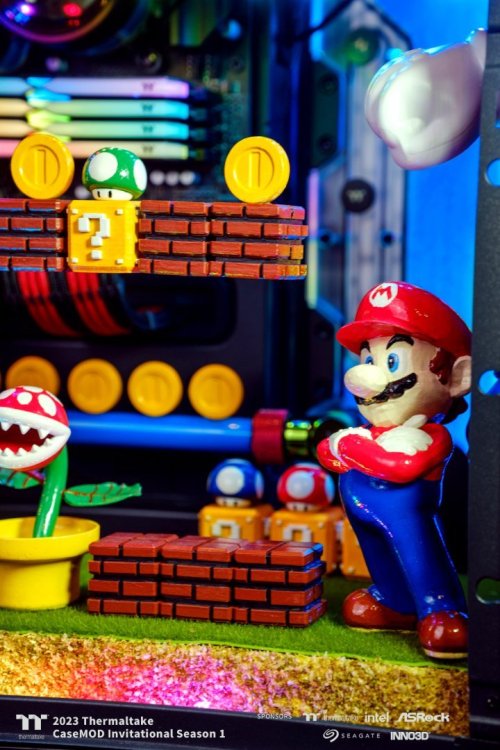
[Italy] Marco Di Silvestre
MPC Project replied to TT Amanda's topic in 2023 Thermaltake CaseMOD Invitational Season 1
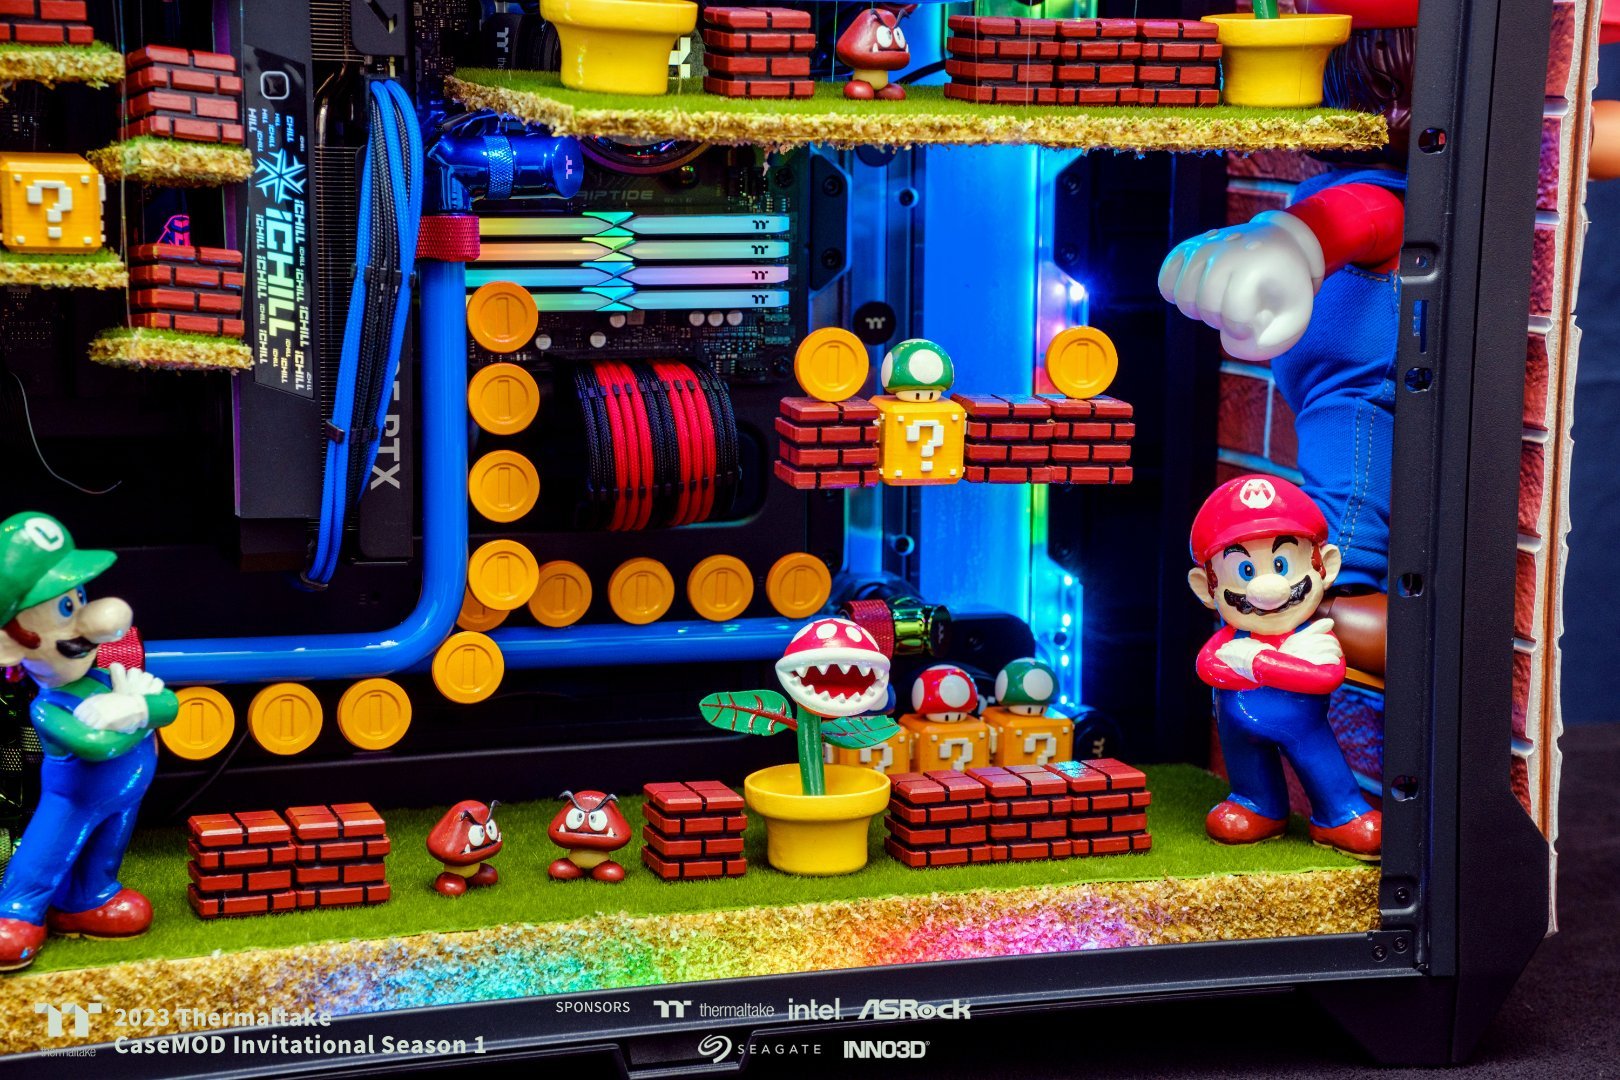
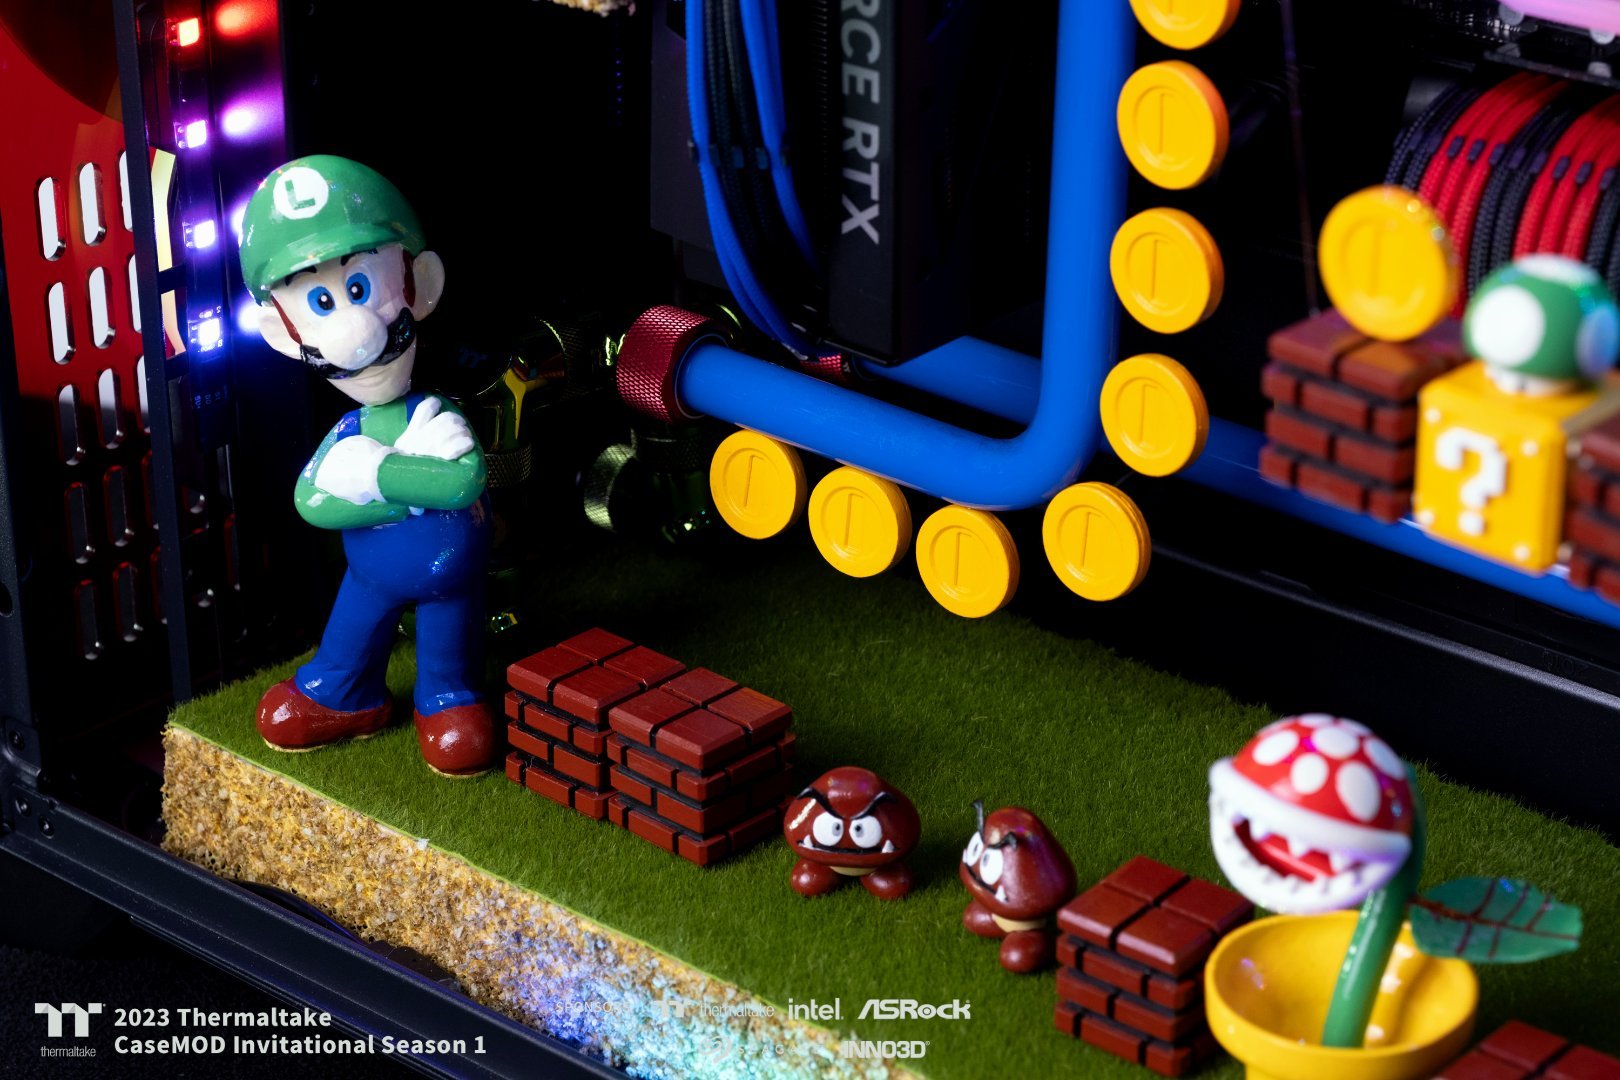
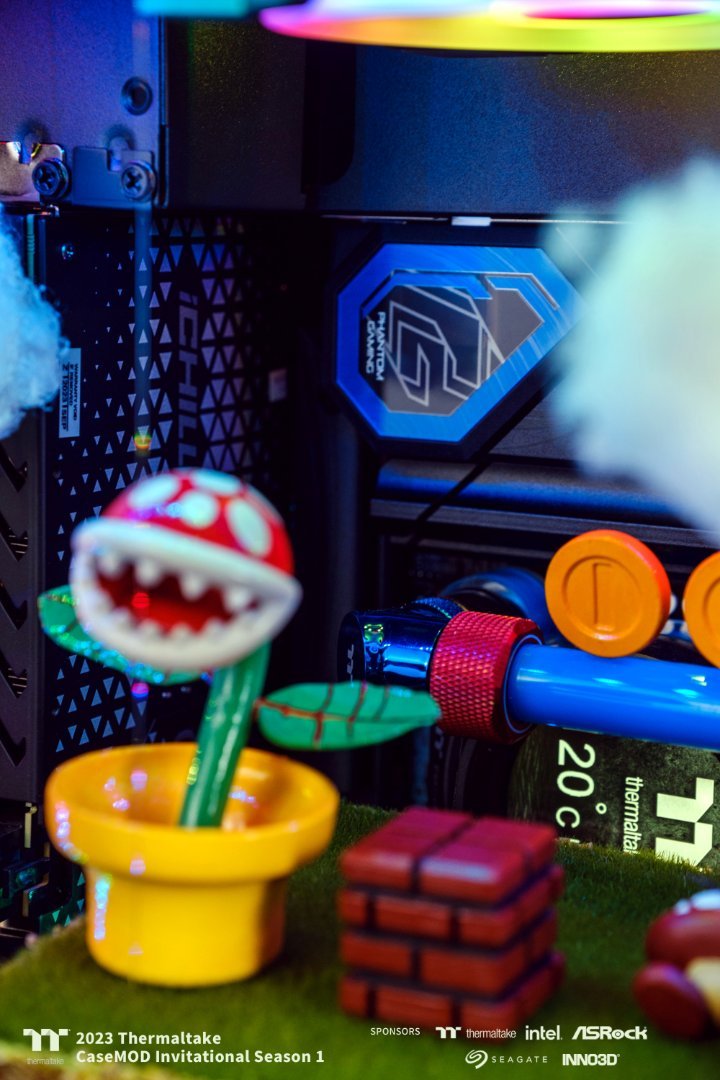
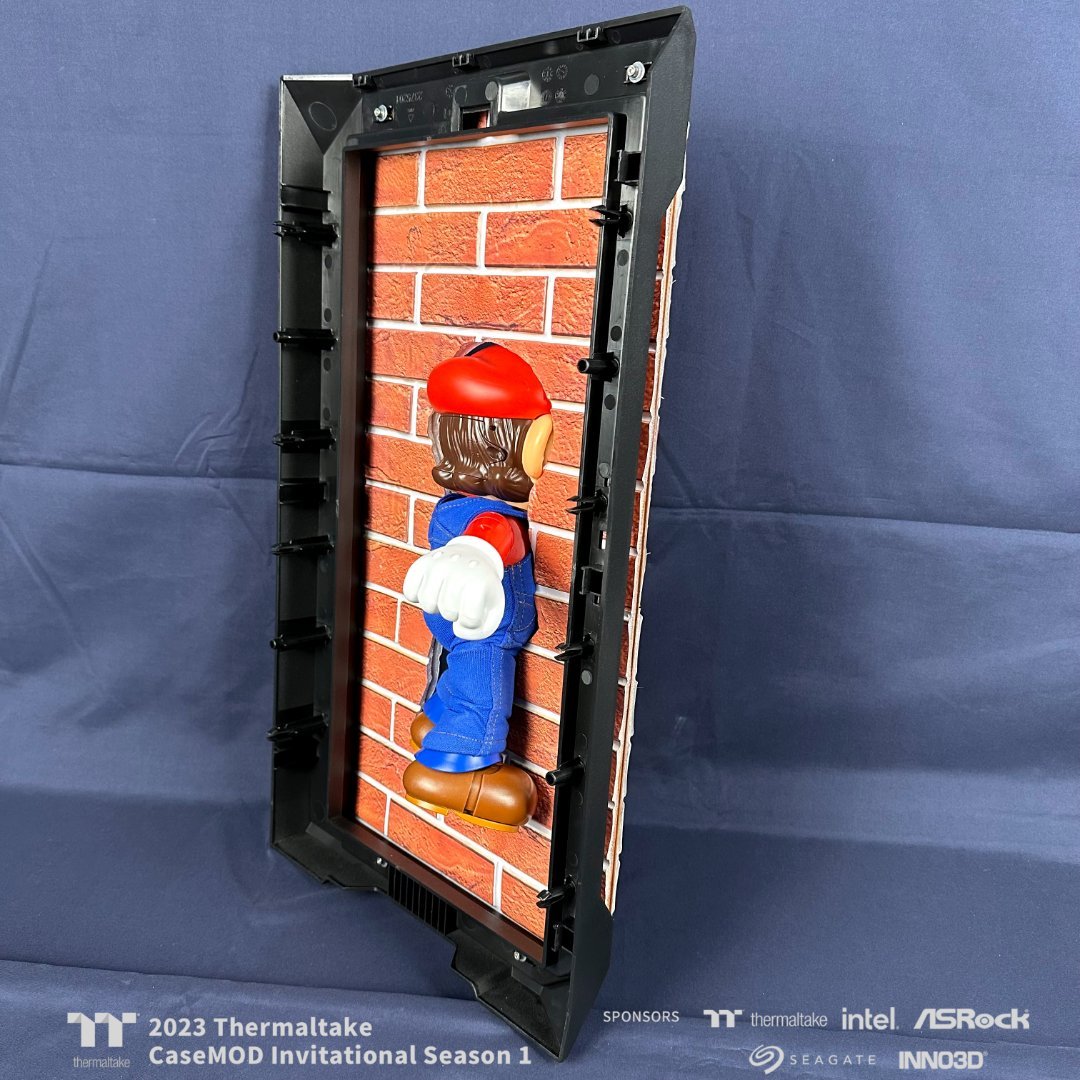
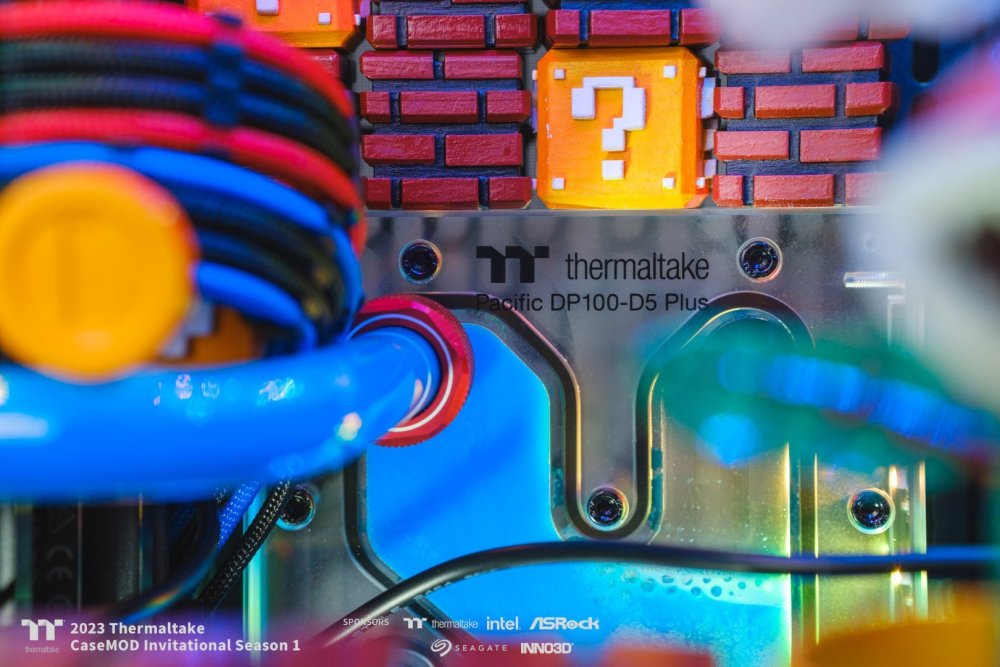
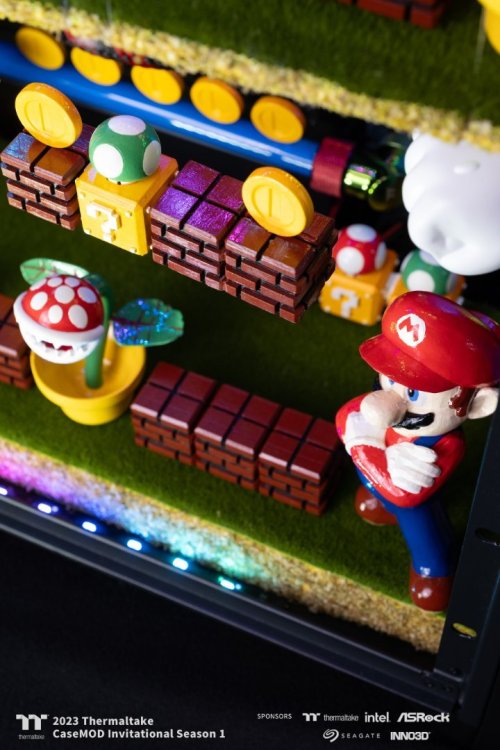
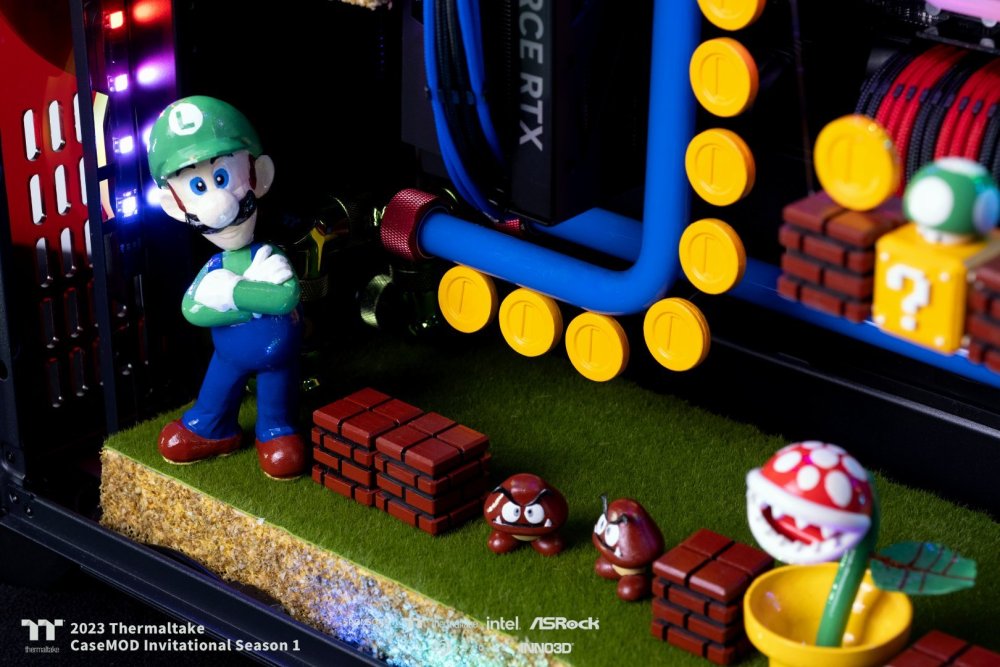
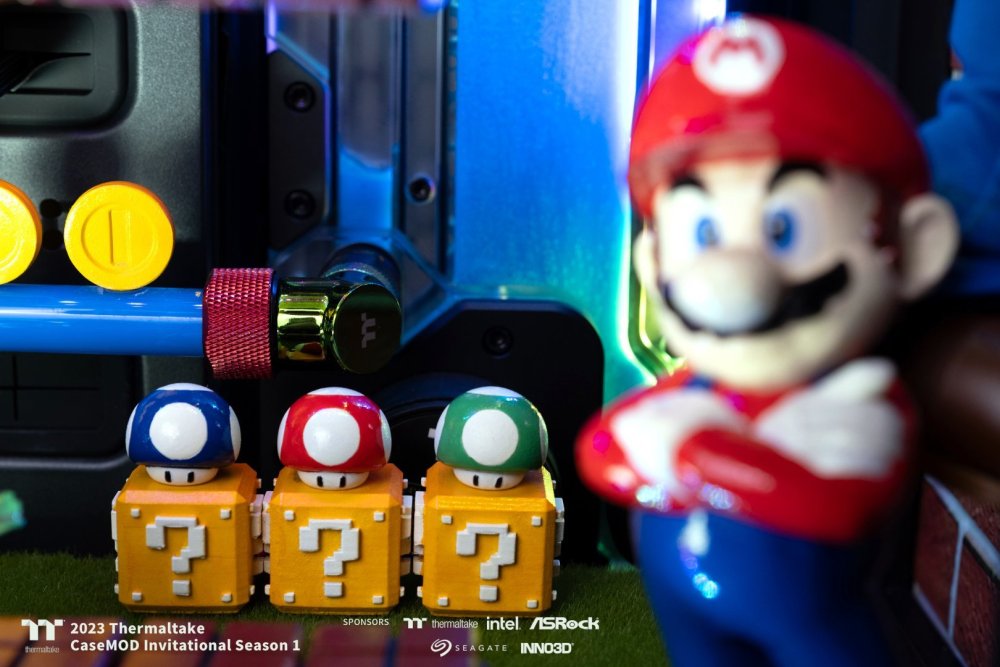
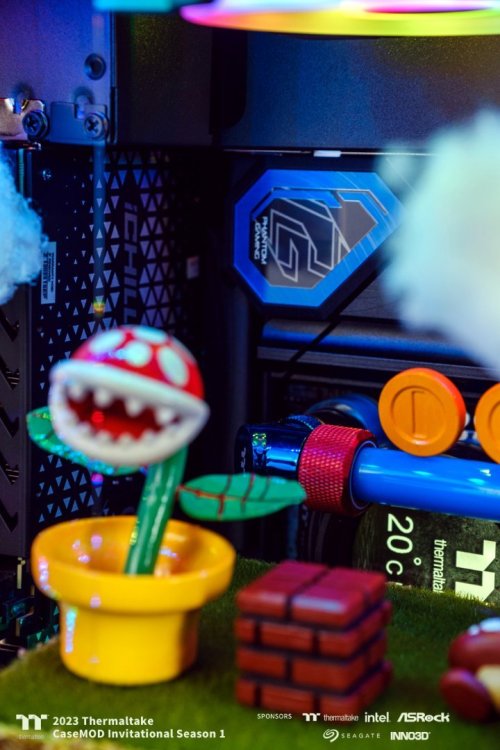
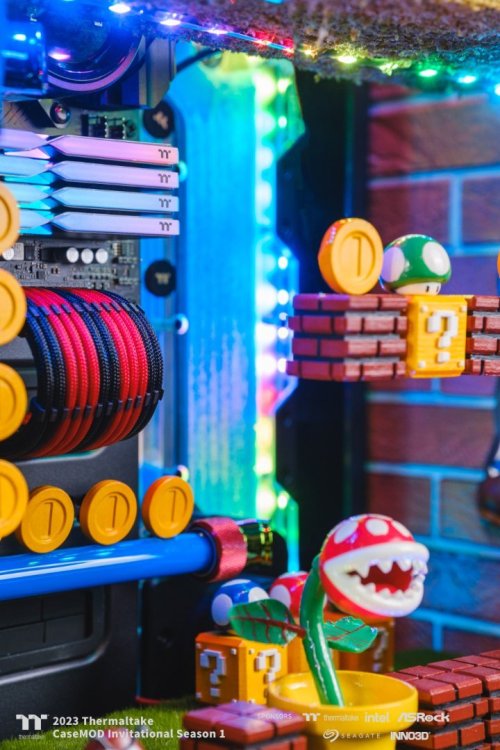
The new home from the inside of Super Mario !


-
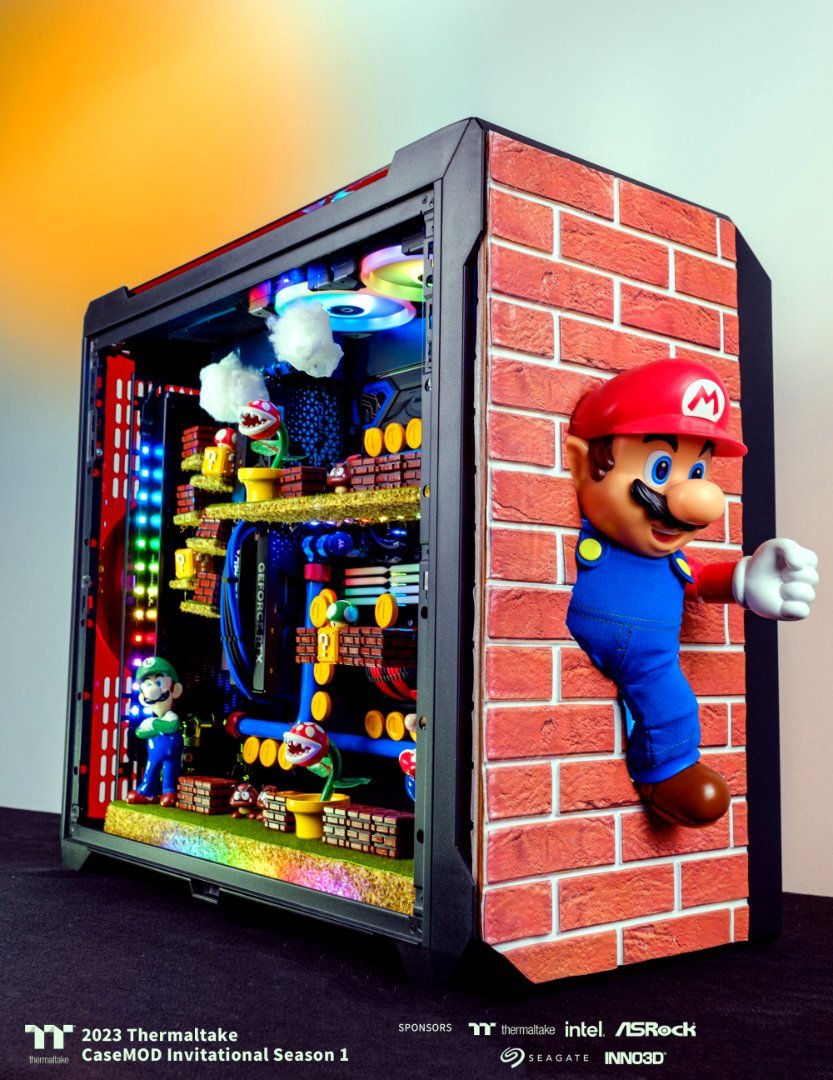
[Italy] Marco Di Silvestre
MPC Project replied to TT Amanda's topic in 2023 Thermaltake CaseMOD Invitational Season 1
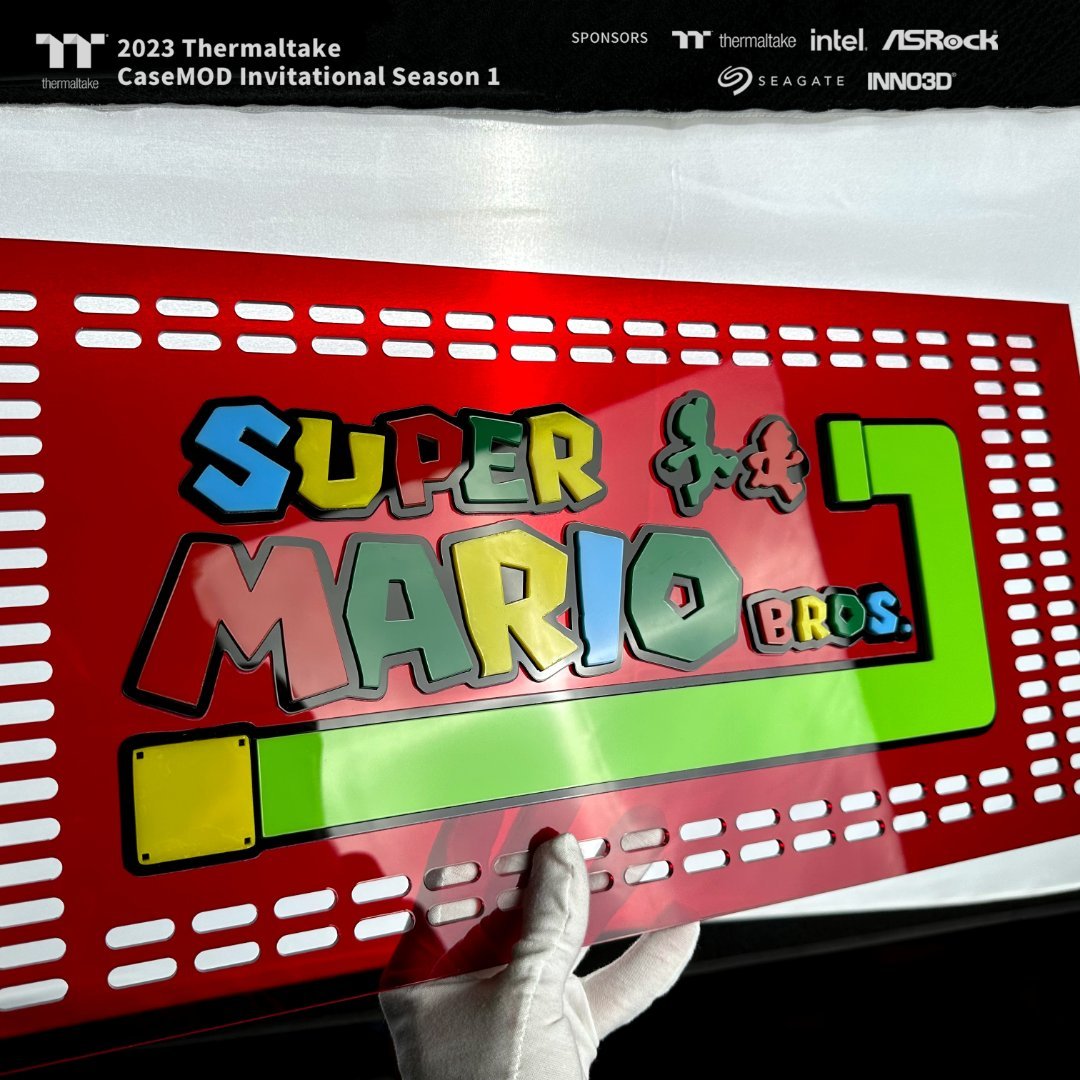
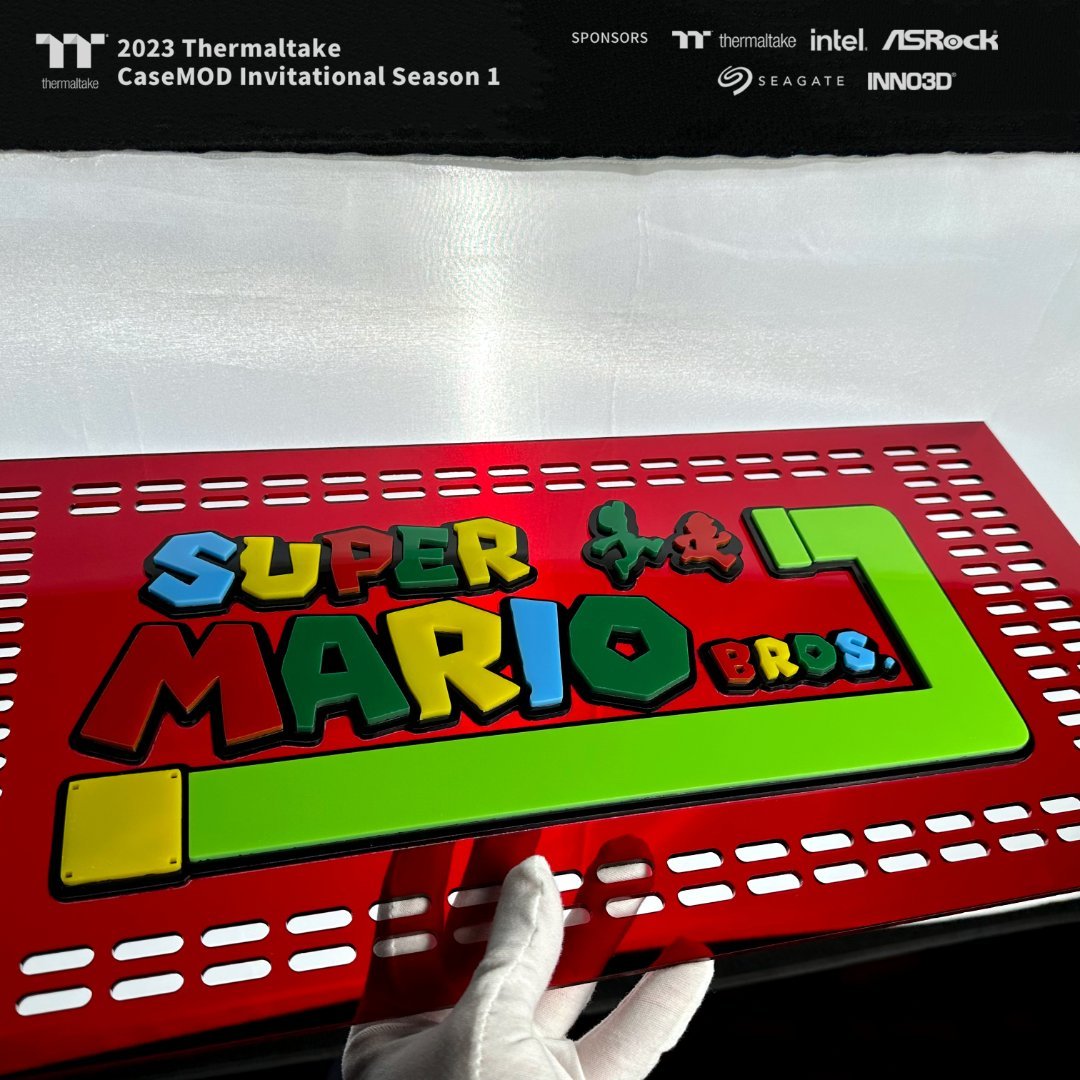
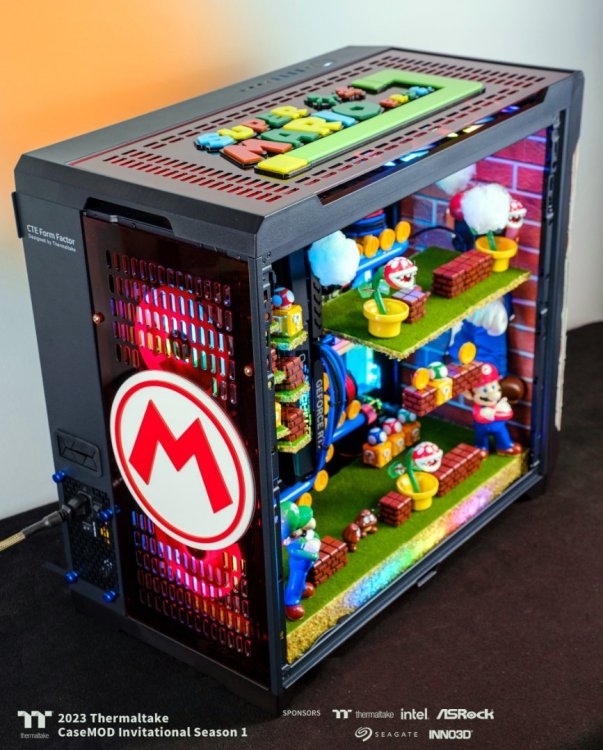
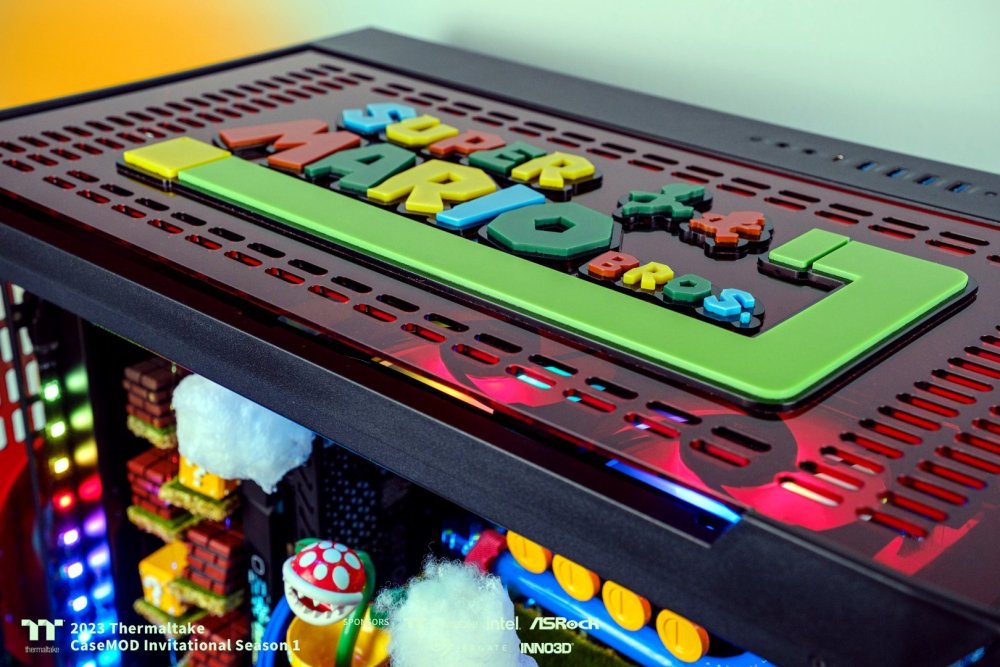
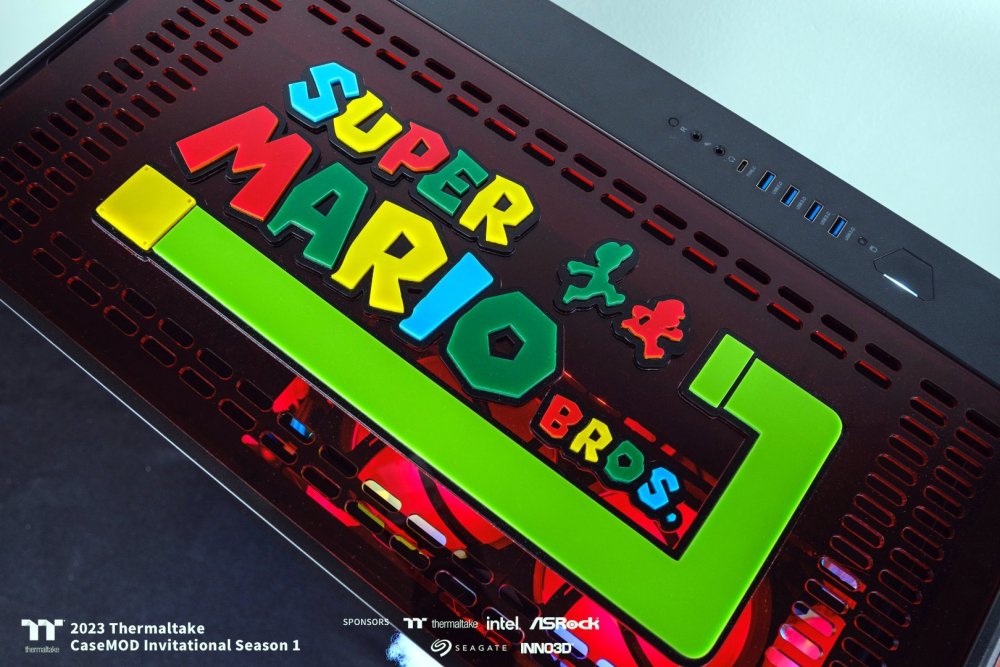
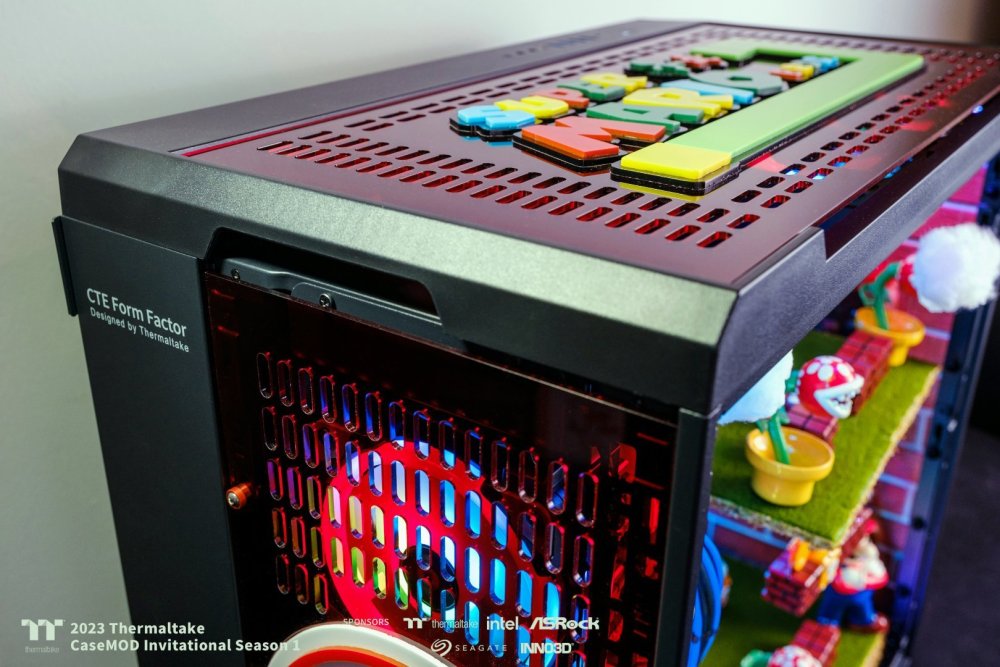
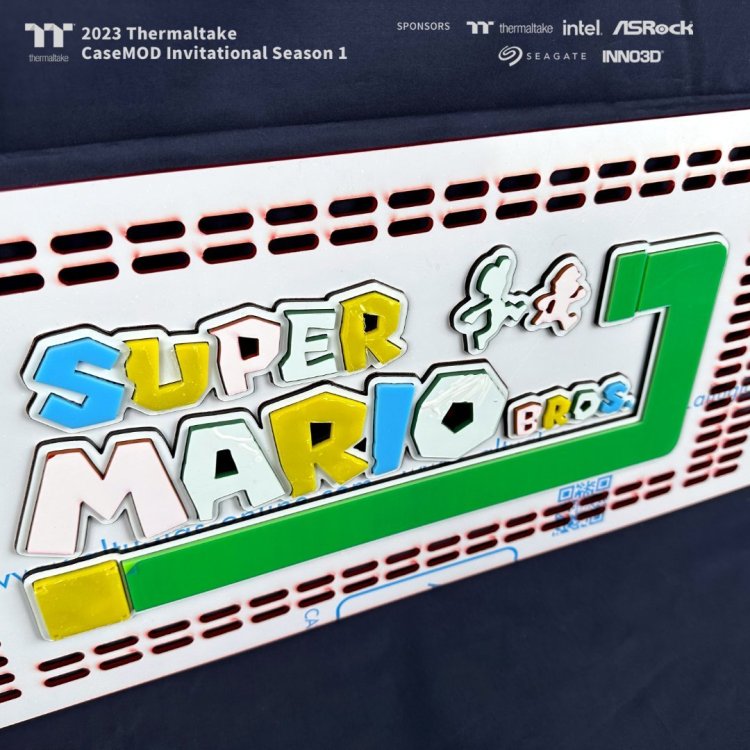
Super Mario Bros is ready for his new adventure ! Photos of the exterior.


-
[Italy] Marco Di Silvestre
MPC Project replied to TT Amanda's topic in 2023 Thermaltake CaseMOD Invitational Season 1
New solid walls for Mario and Luigi !


-
[Italy] Marco Di Silvestre
MPC Project replied to TT Amanda's topic in 2023 Thermaltake CaseMOD Invitational Season 1
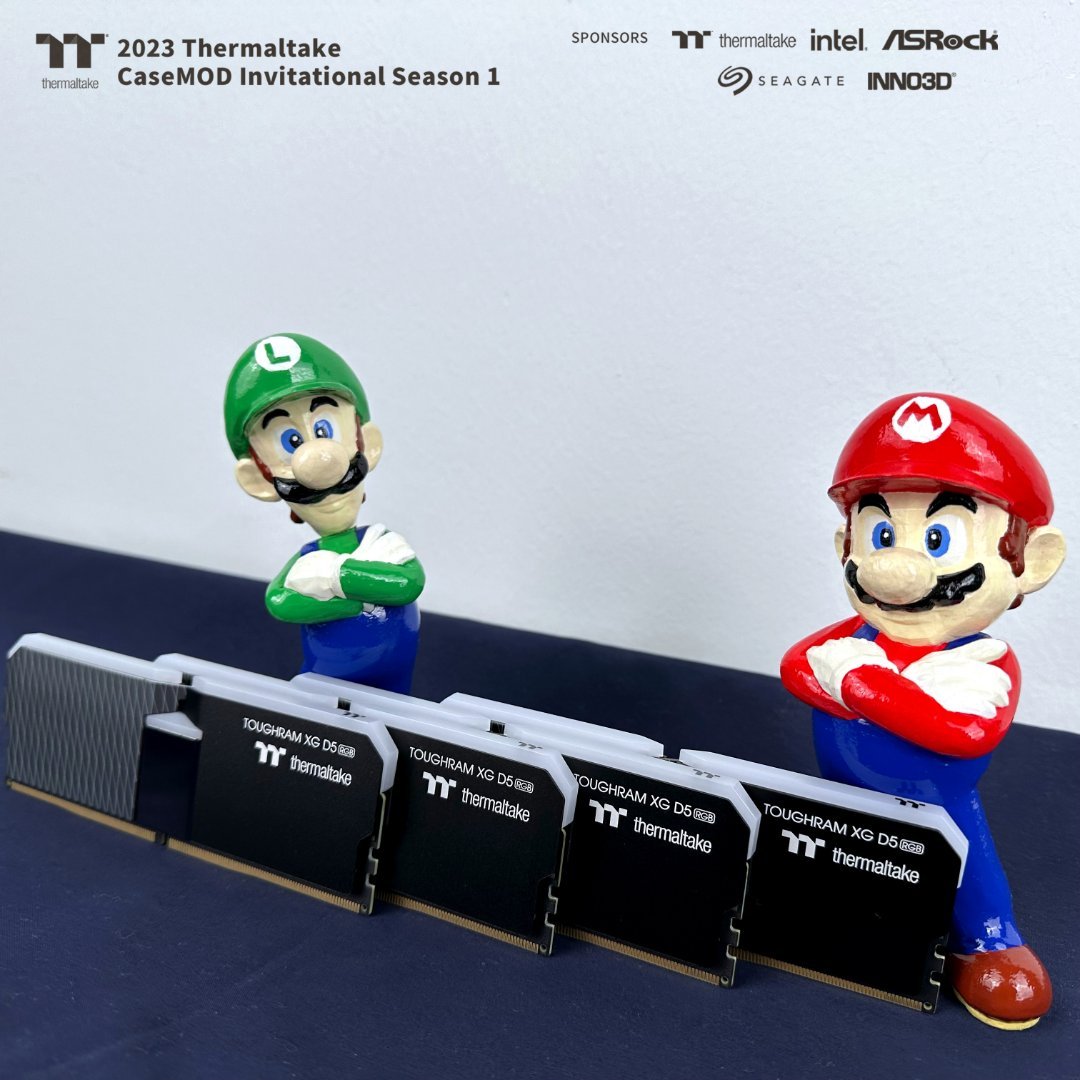
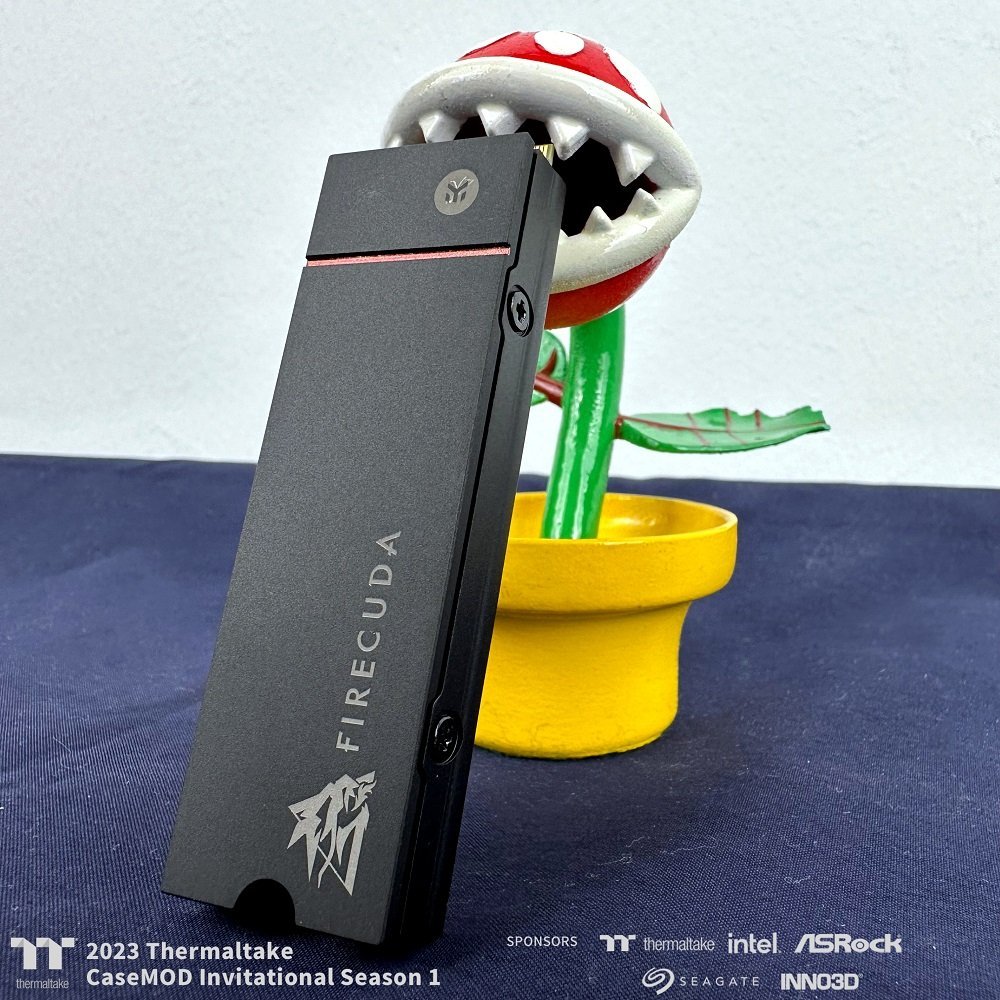
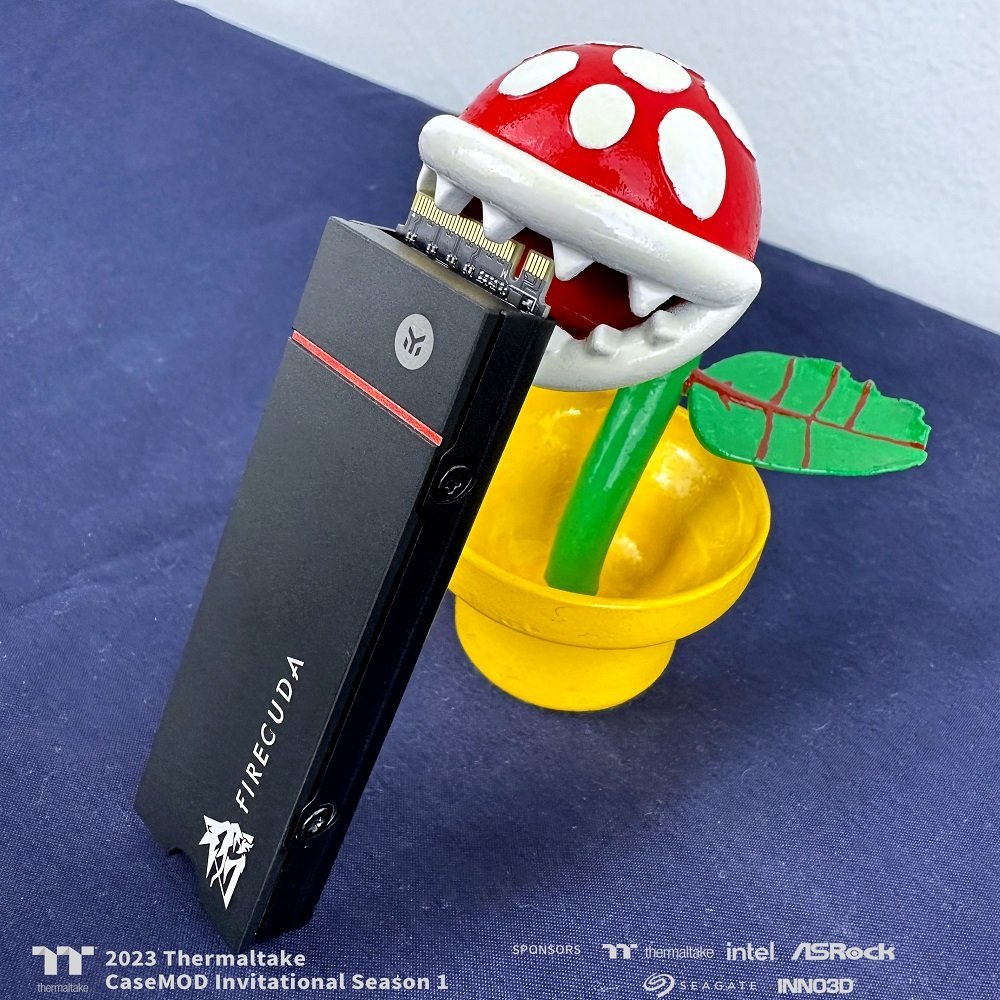
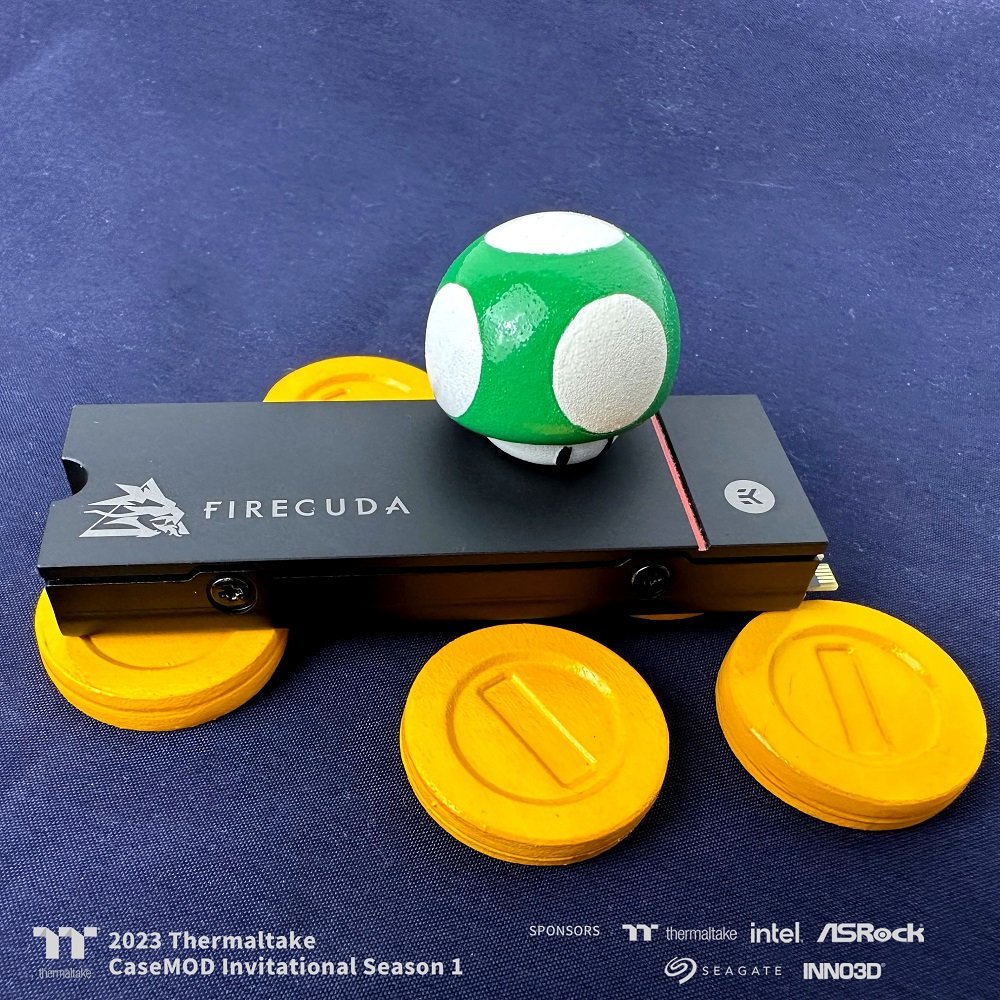
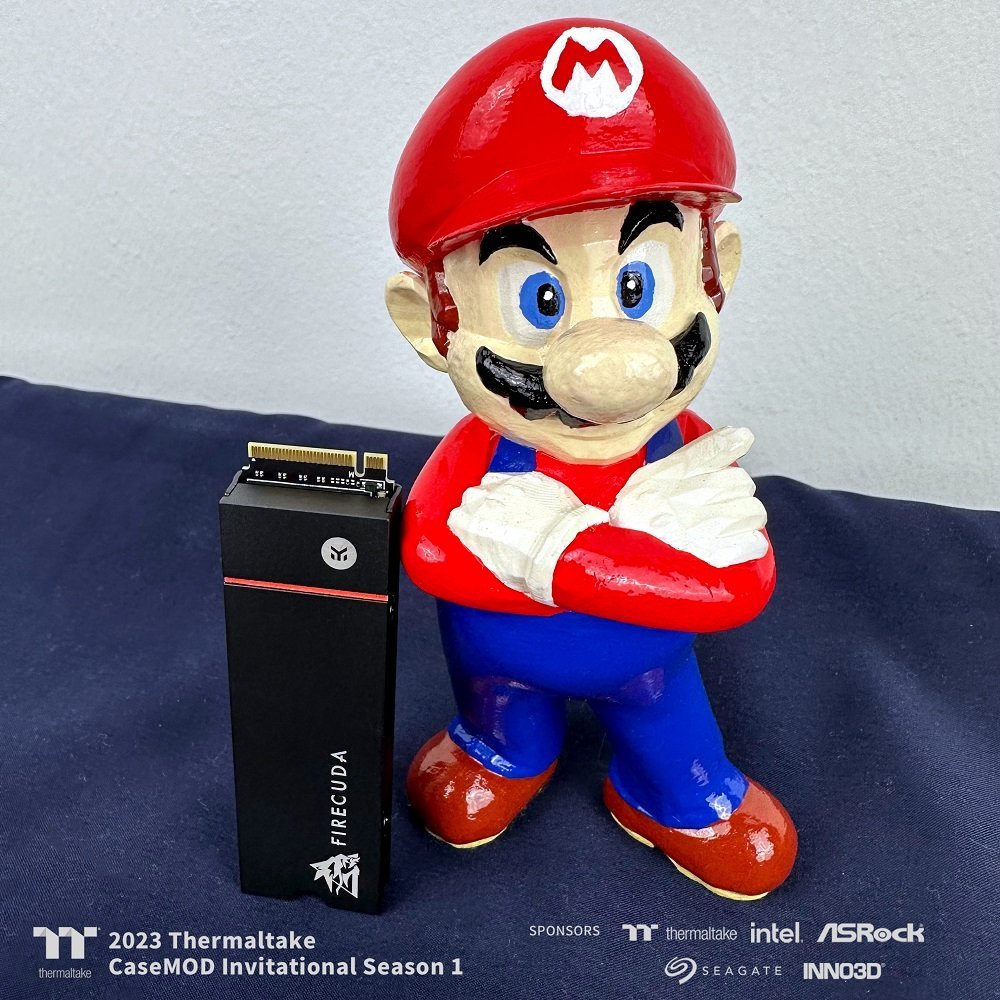
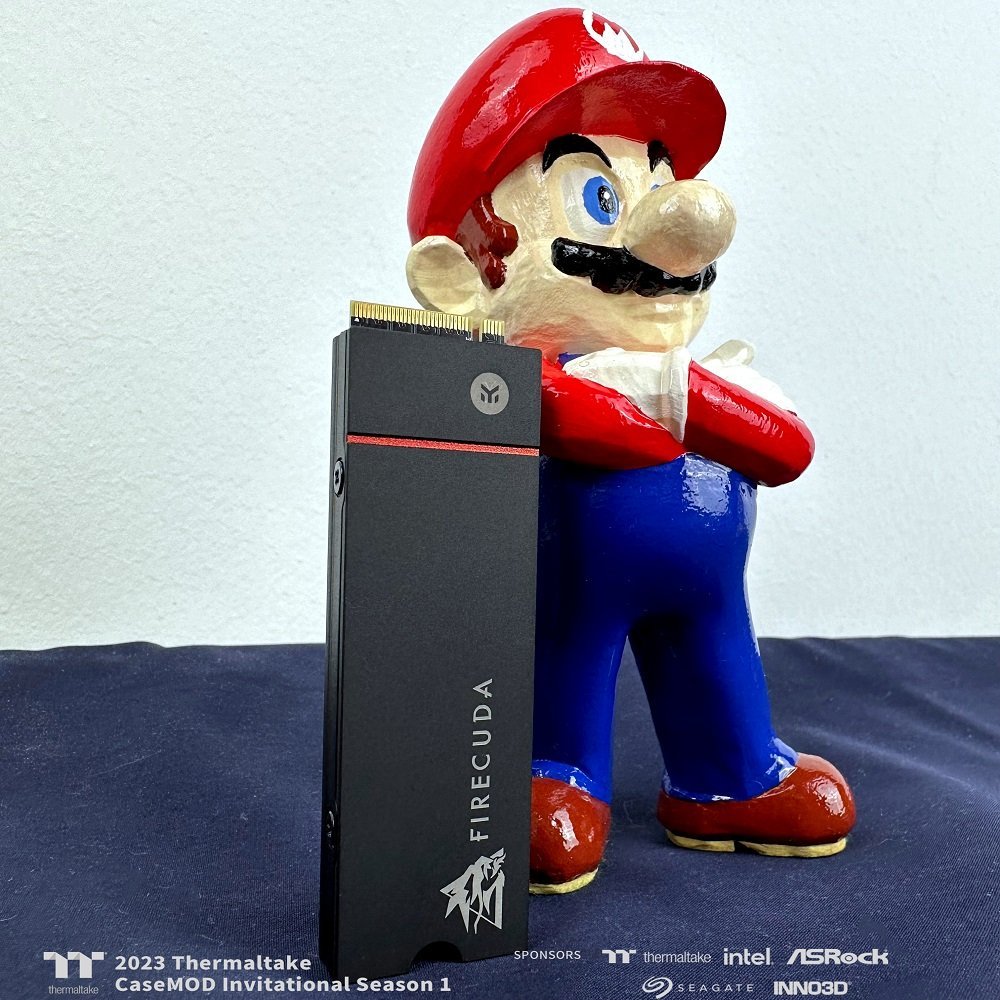
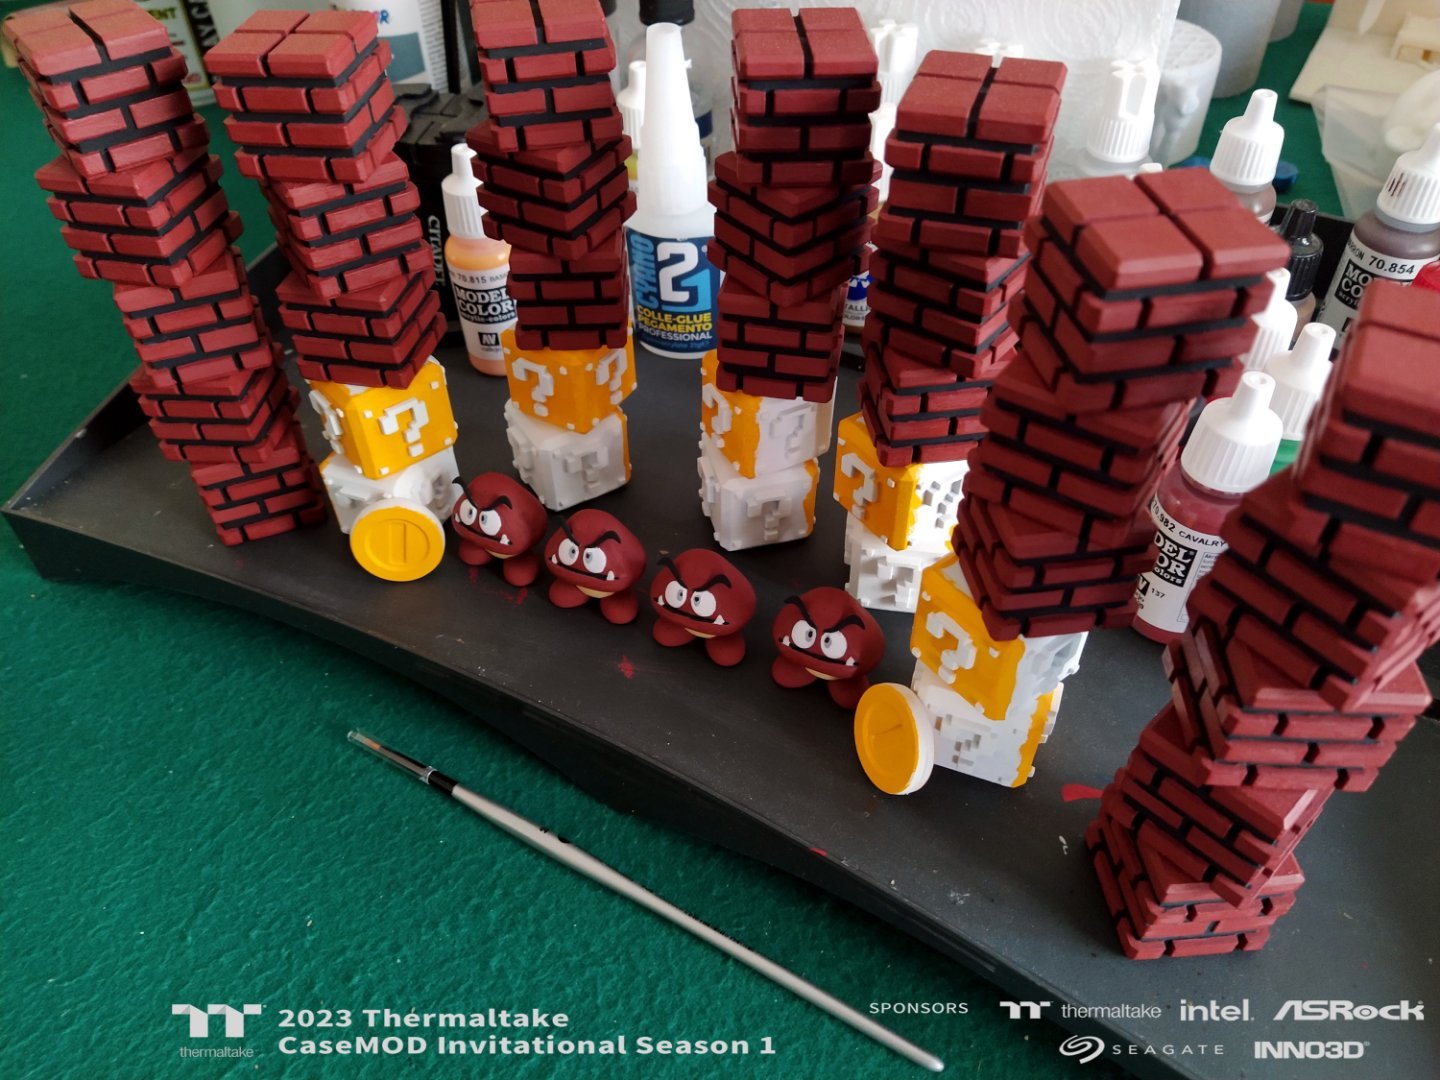
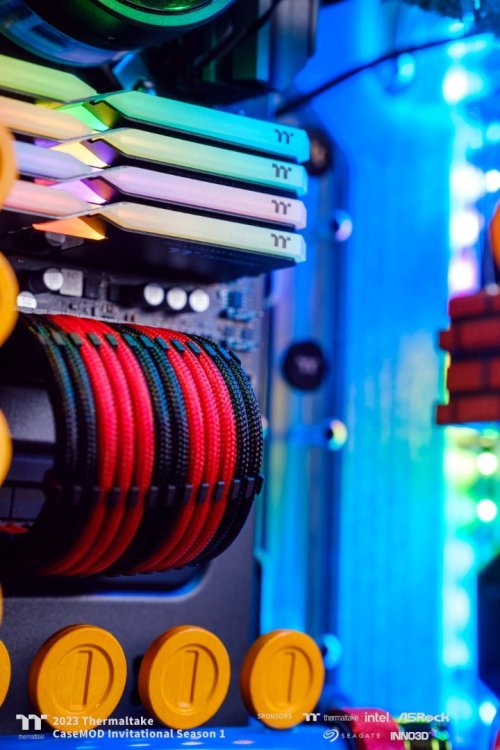
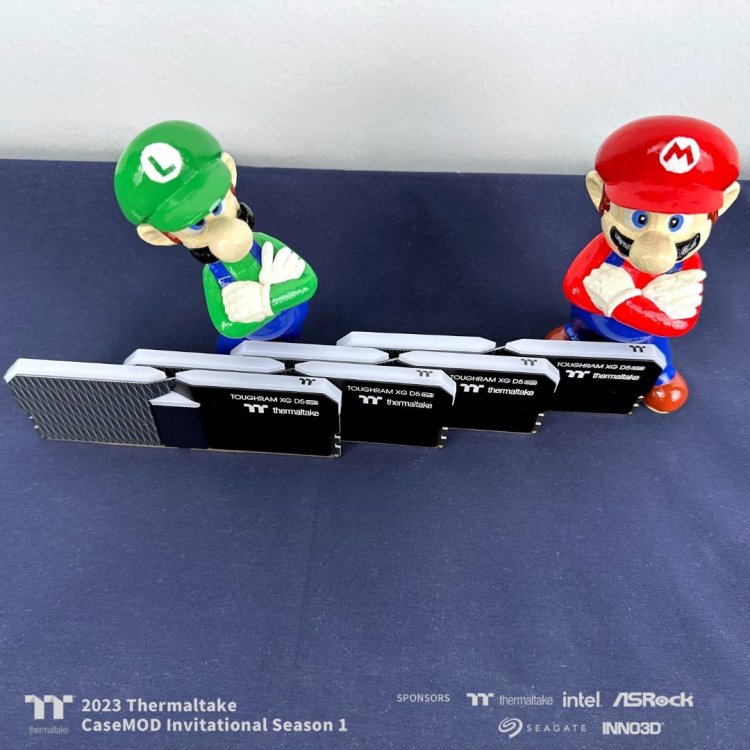
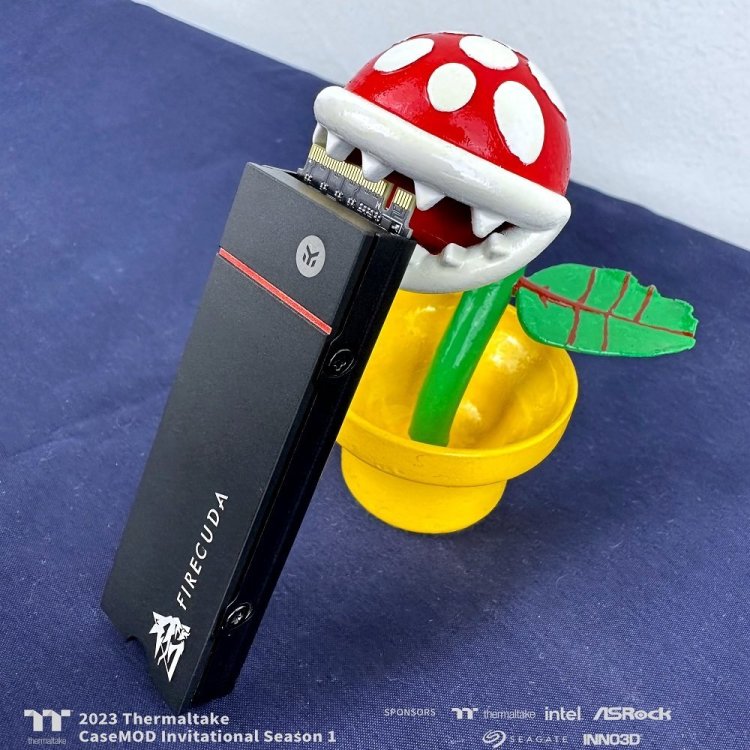
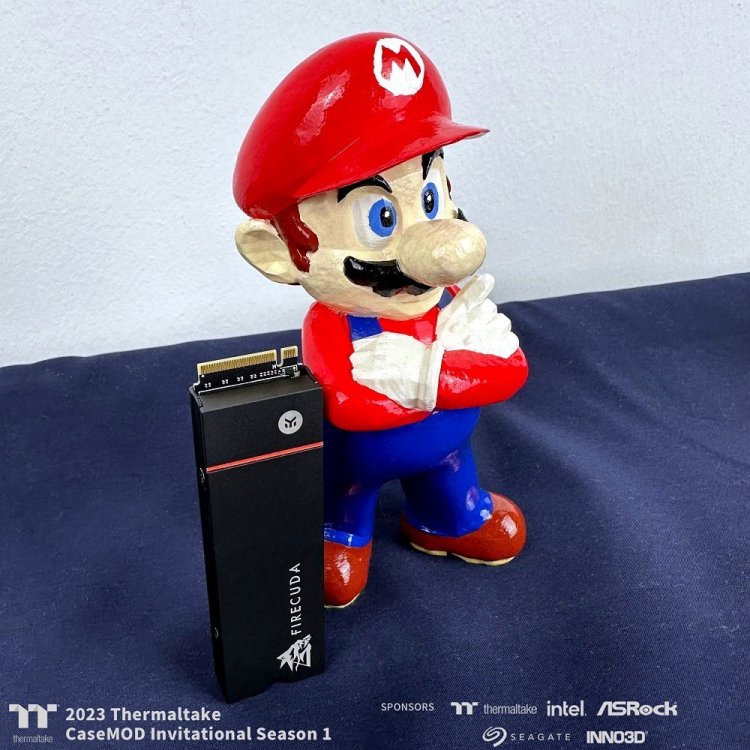
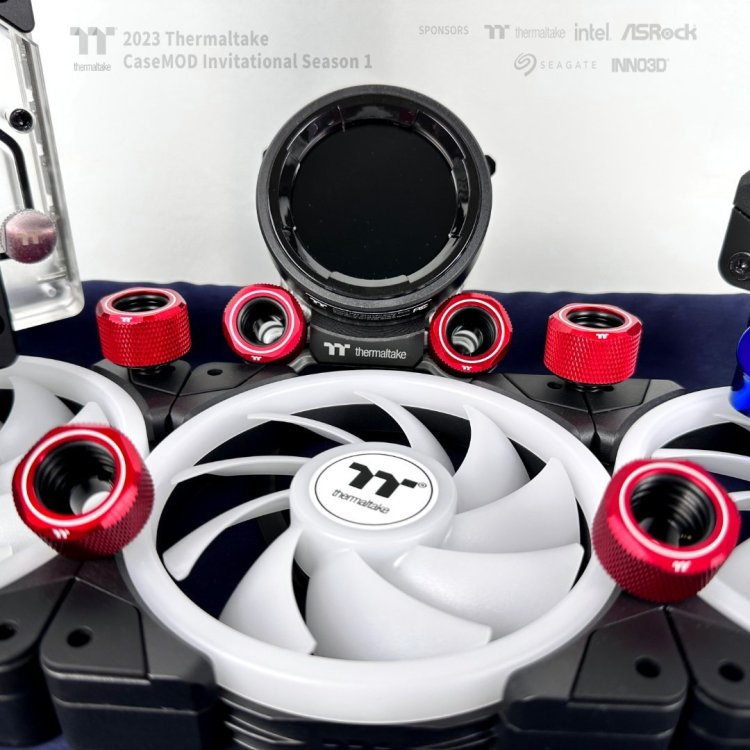
Storage !


-
[Italy] Marco Di Silvestre
MPC Project replied to TT Amanda's topic in 2023 Thermaltake CaseMOD Invitational Season 1
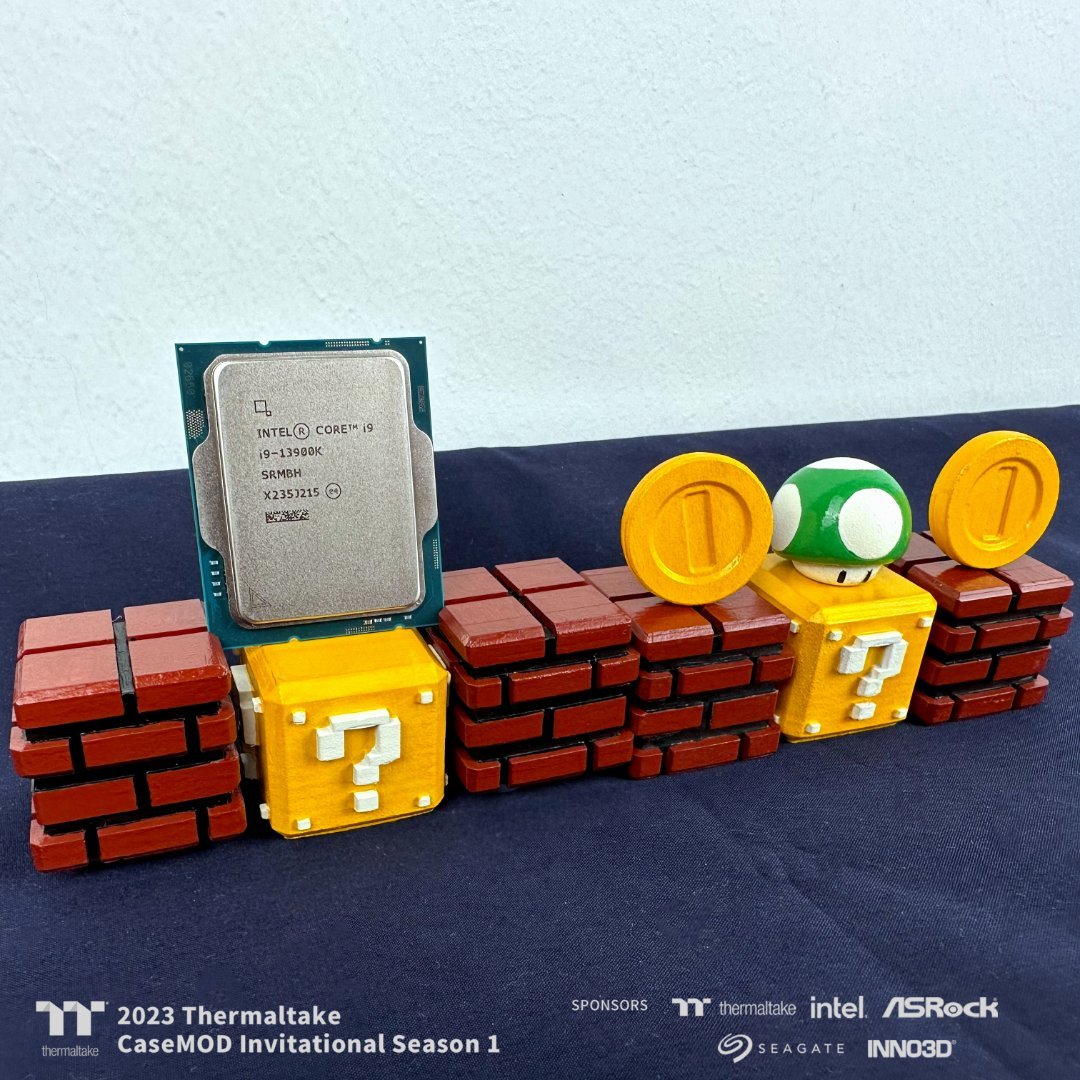
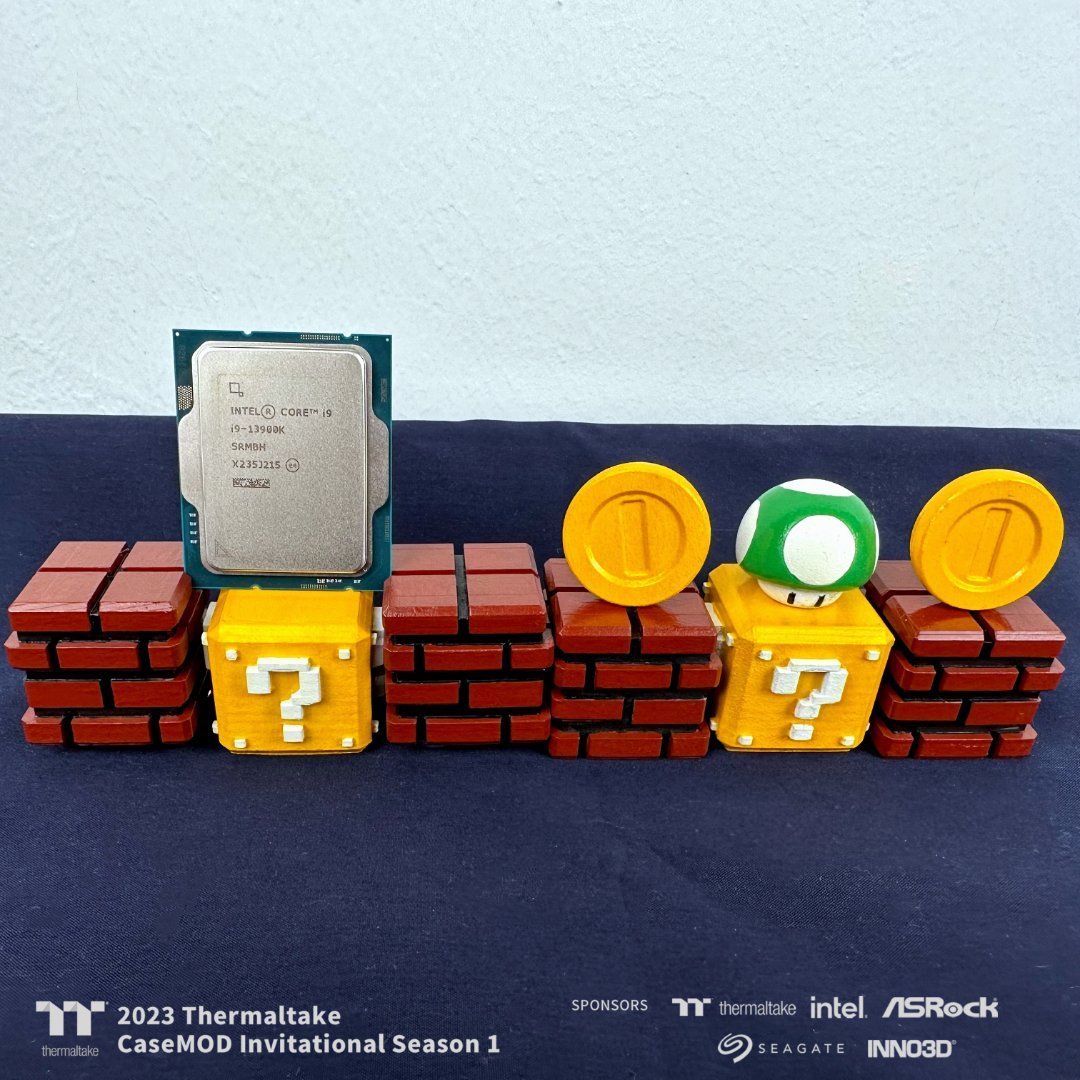
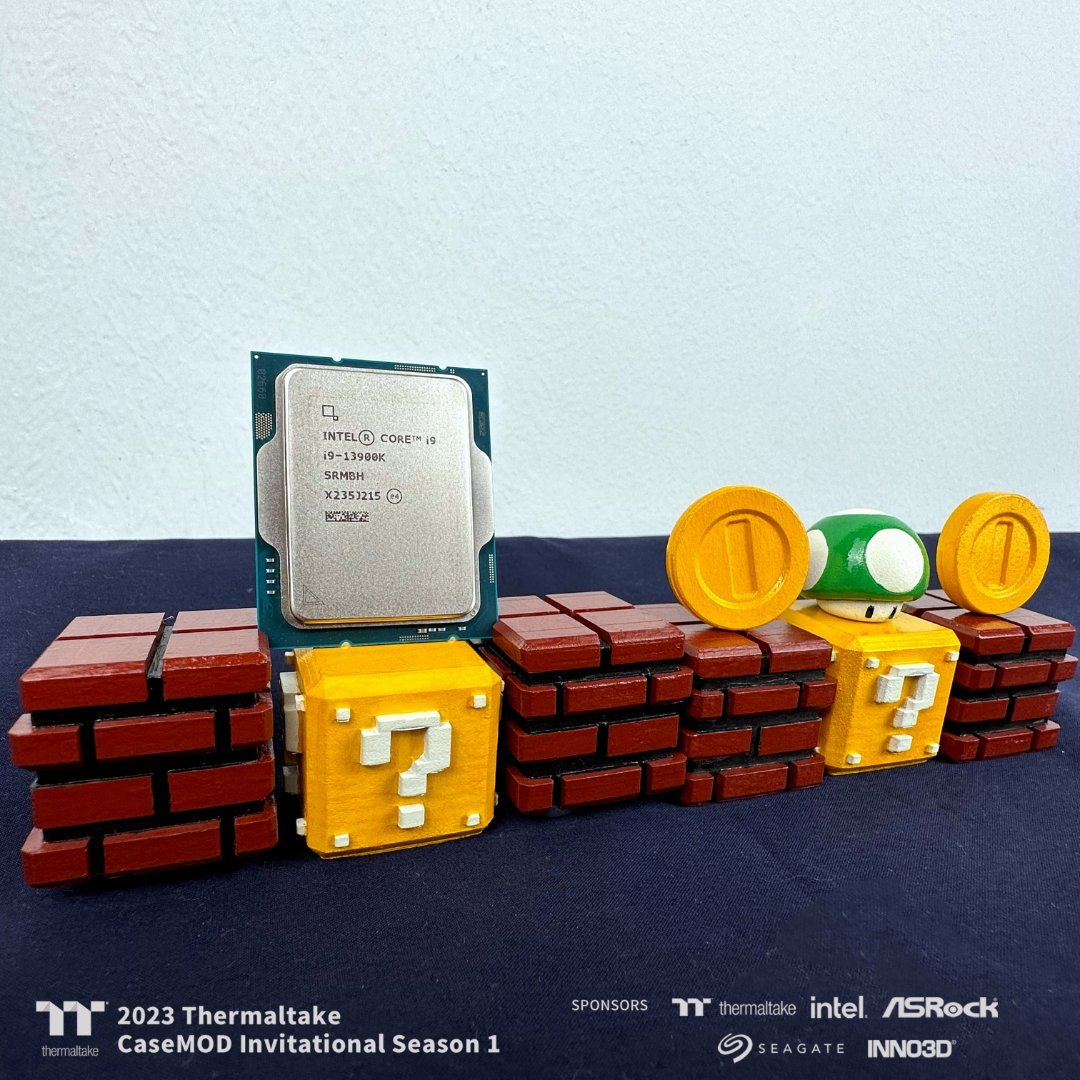
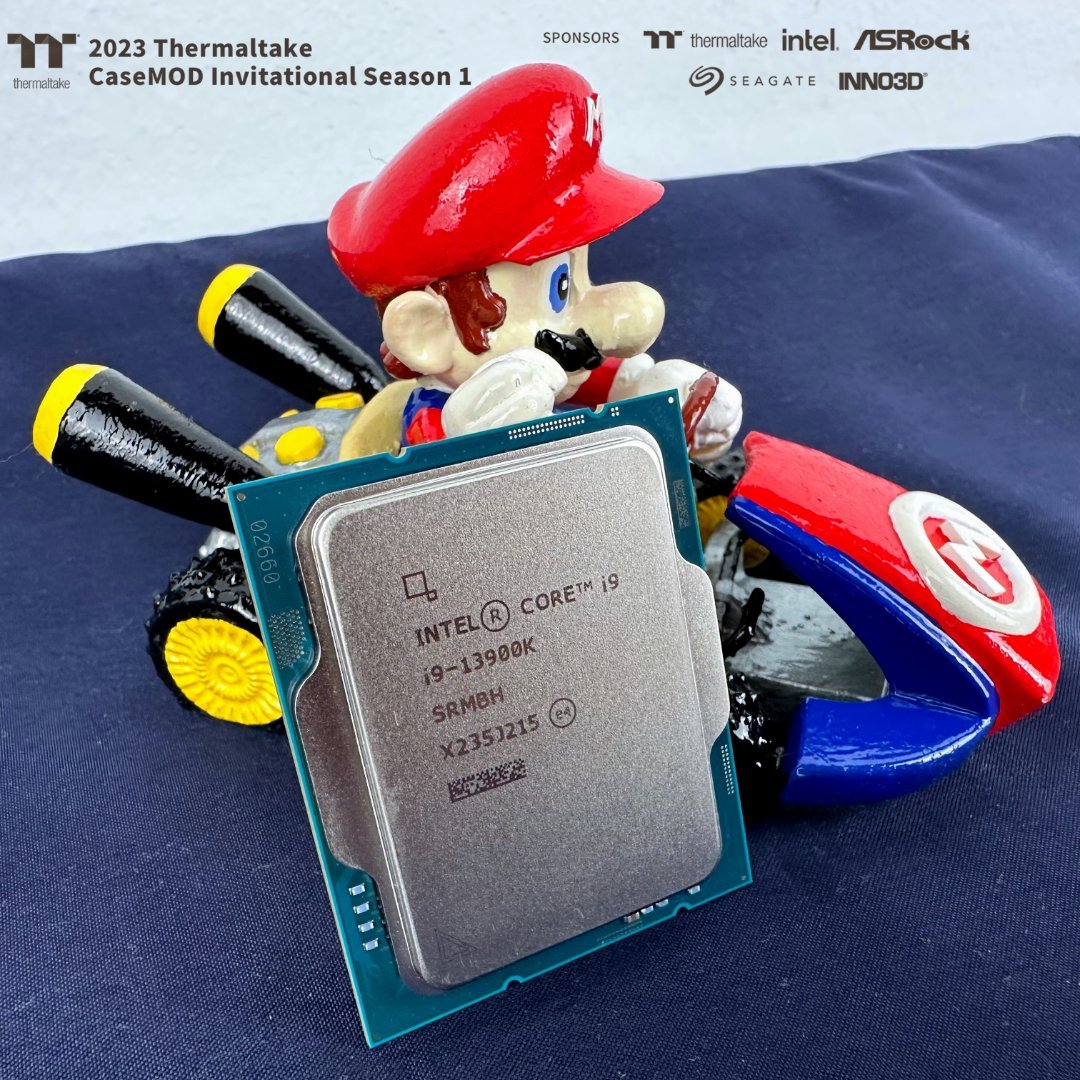
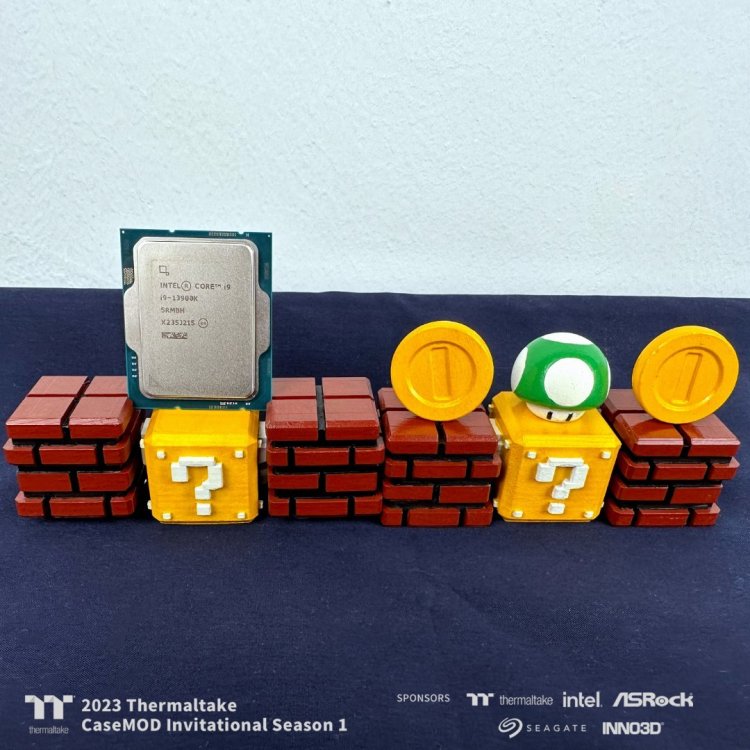
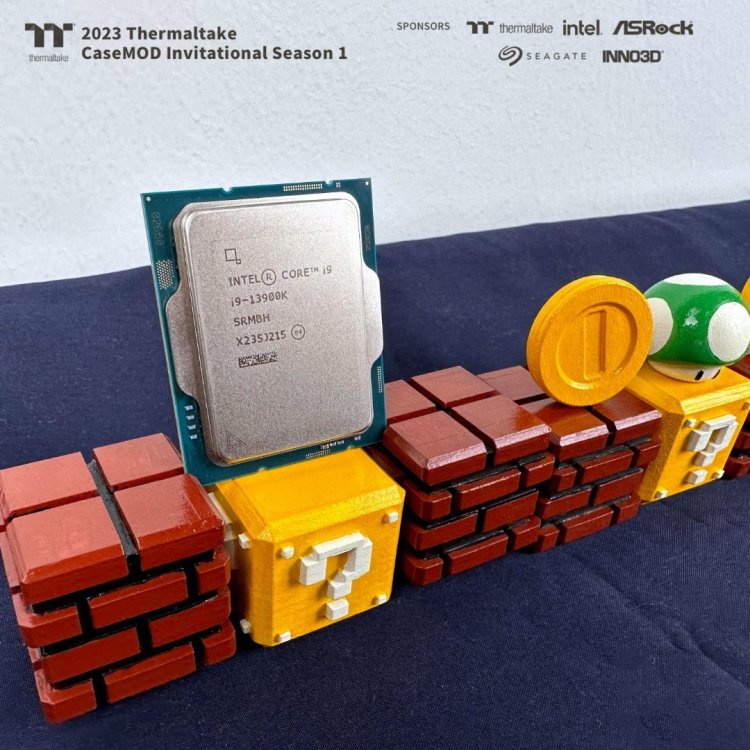
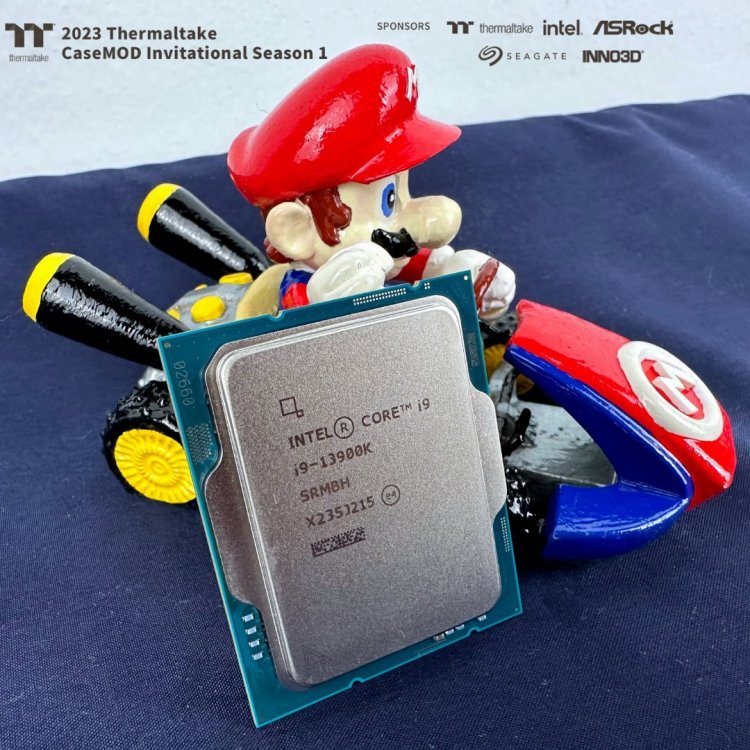
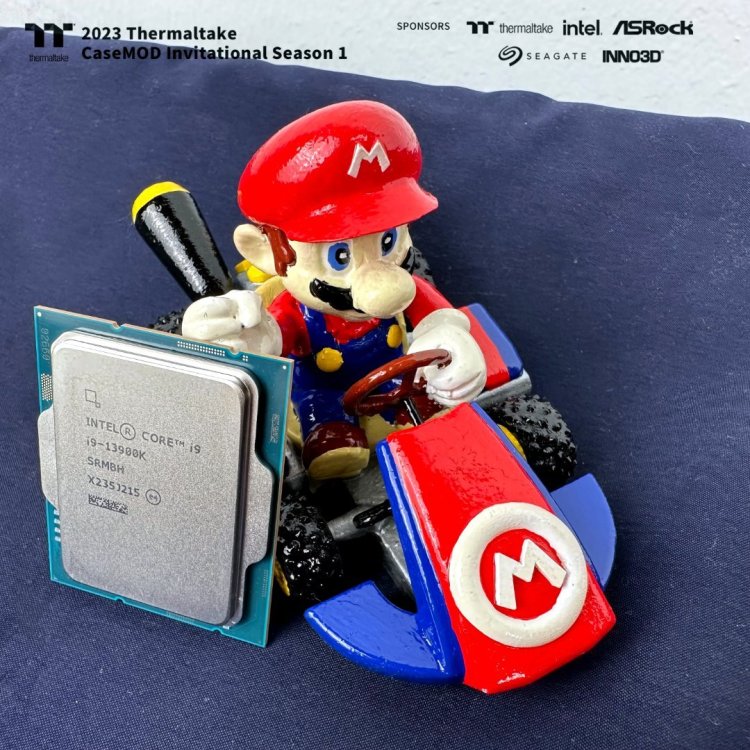
Intel i9-13900K Super Fast !!!

-
[Italy] Marco Di Silvestre
MPC Project replied to TT Amanda's topic in 2023 Thermaltake CaseMOD Invitational Season 1
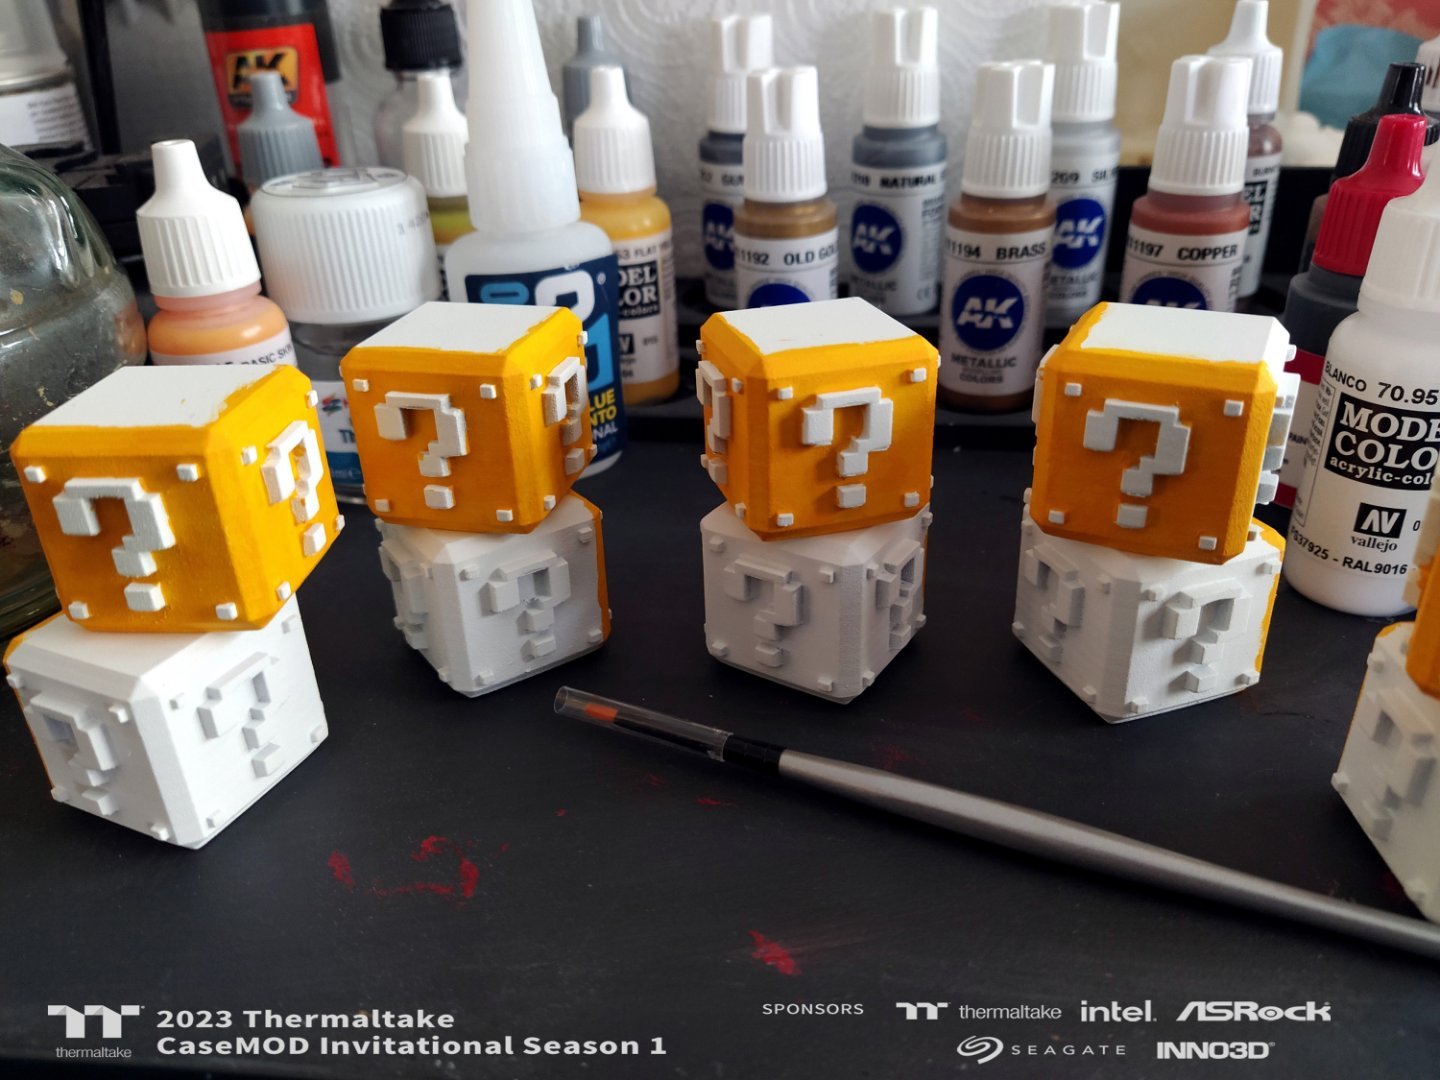
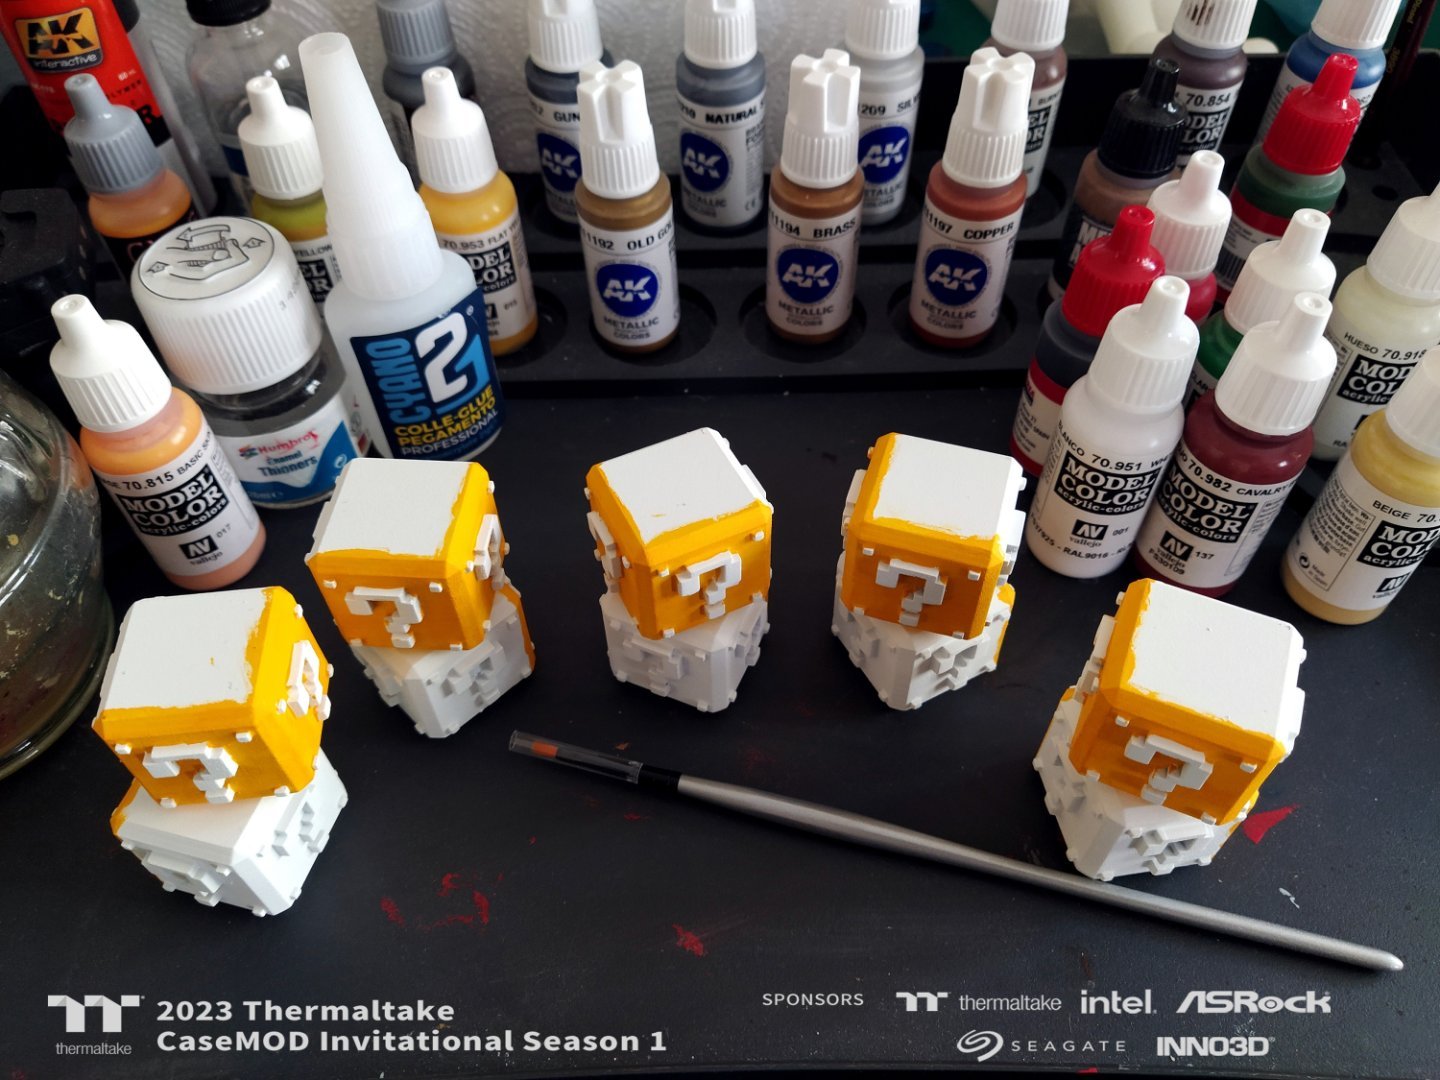
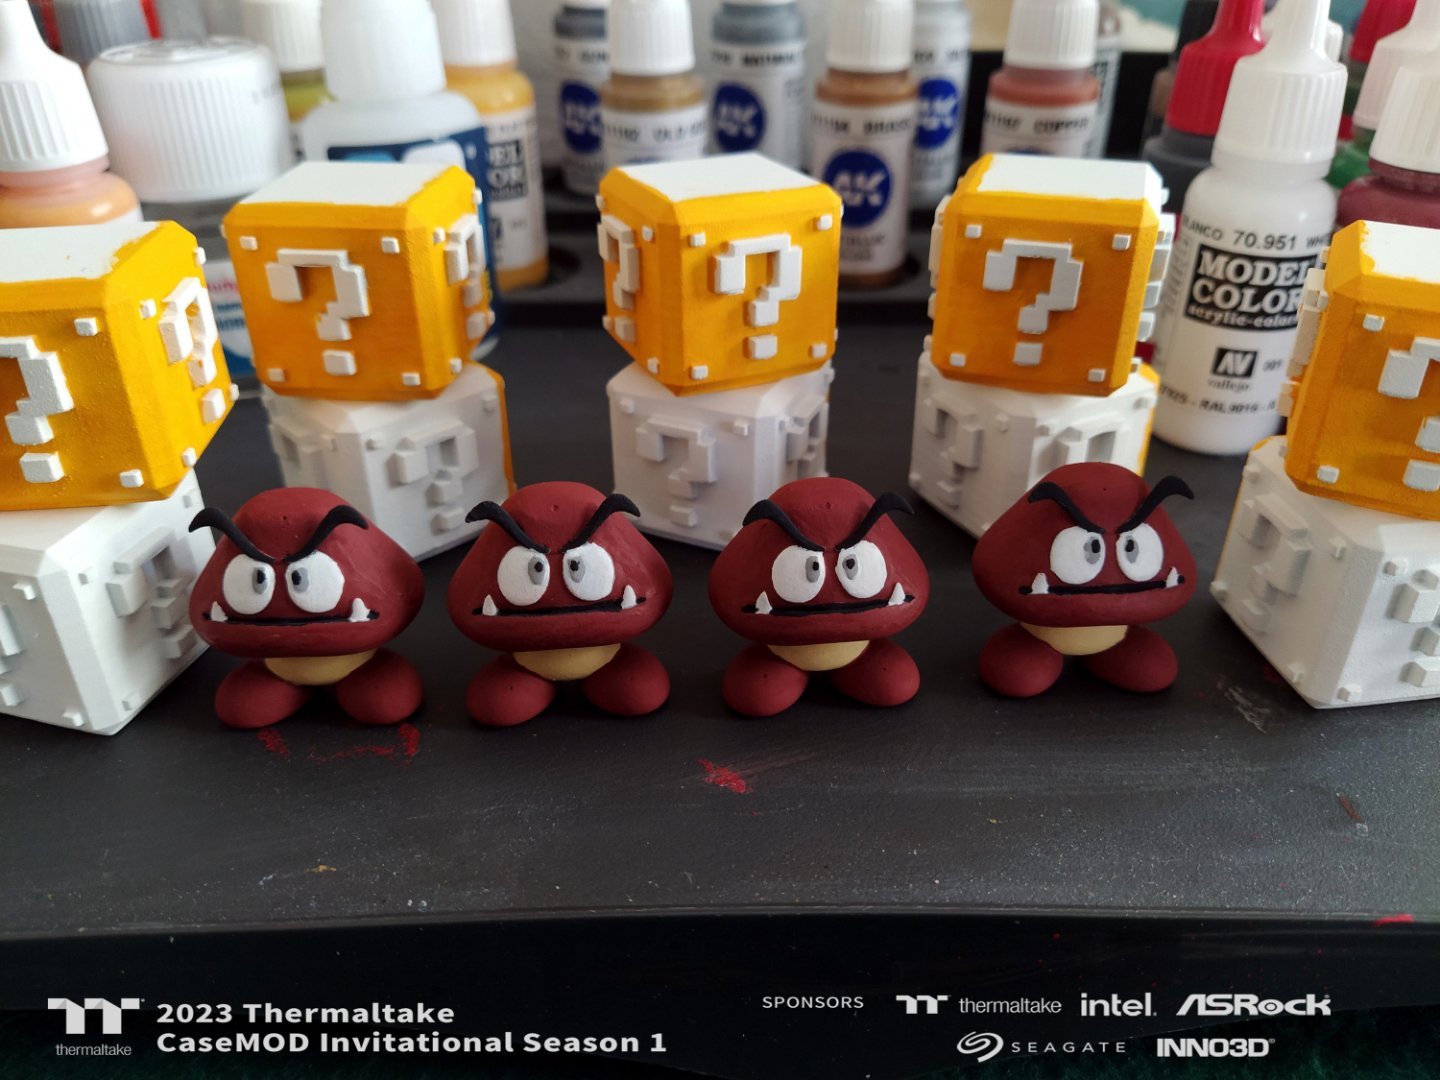
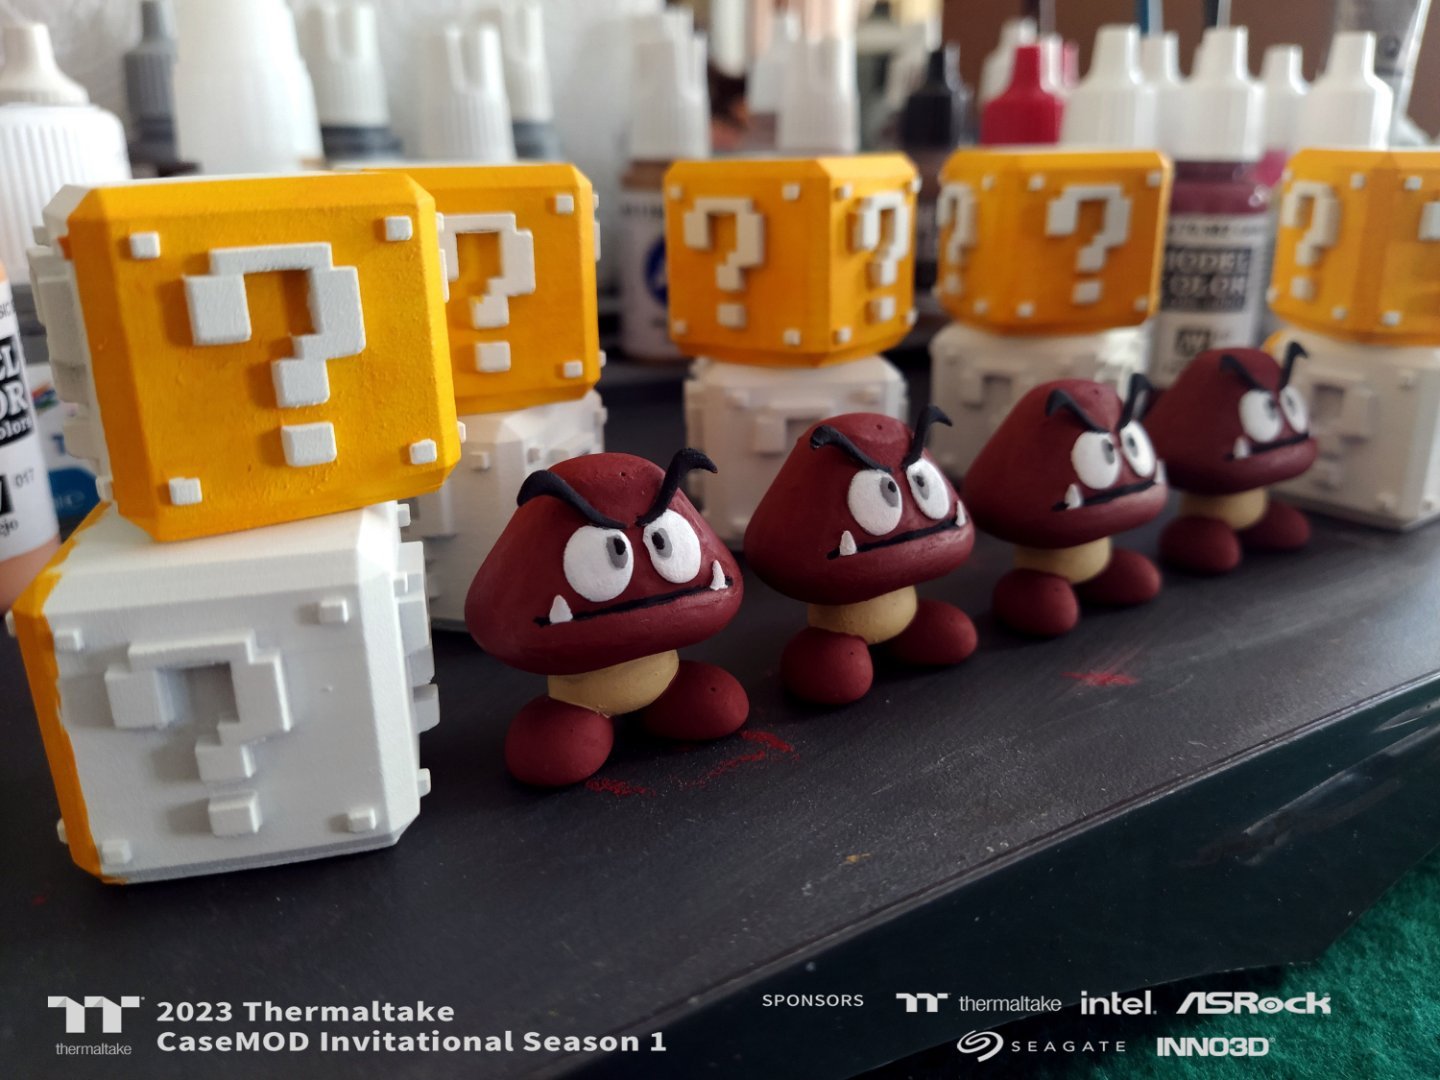
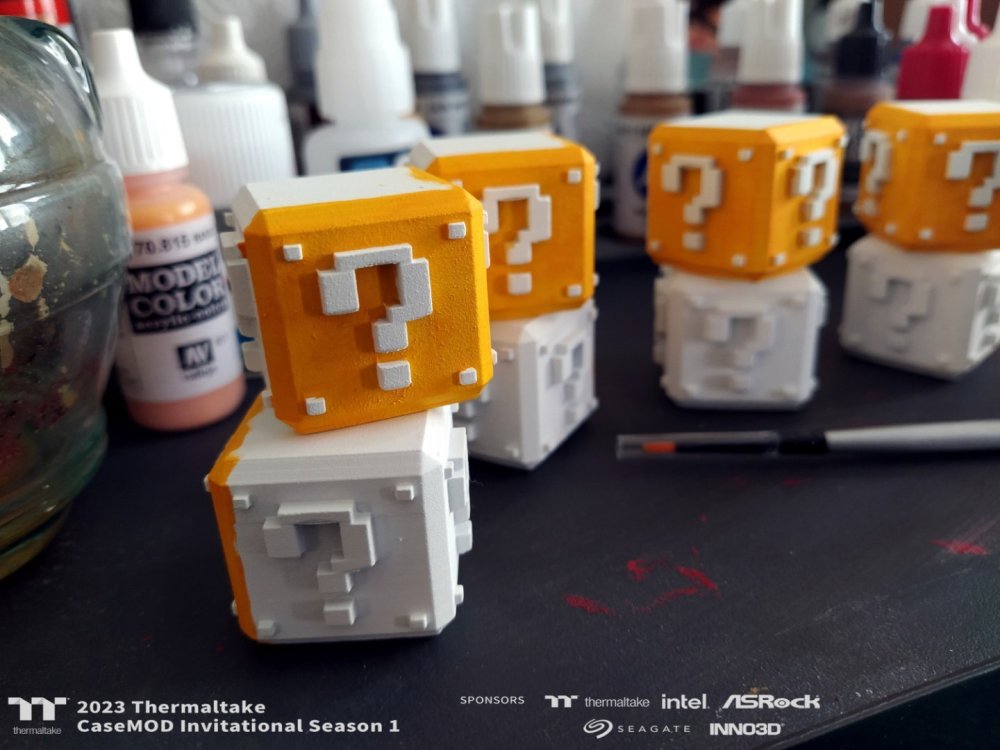
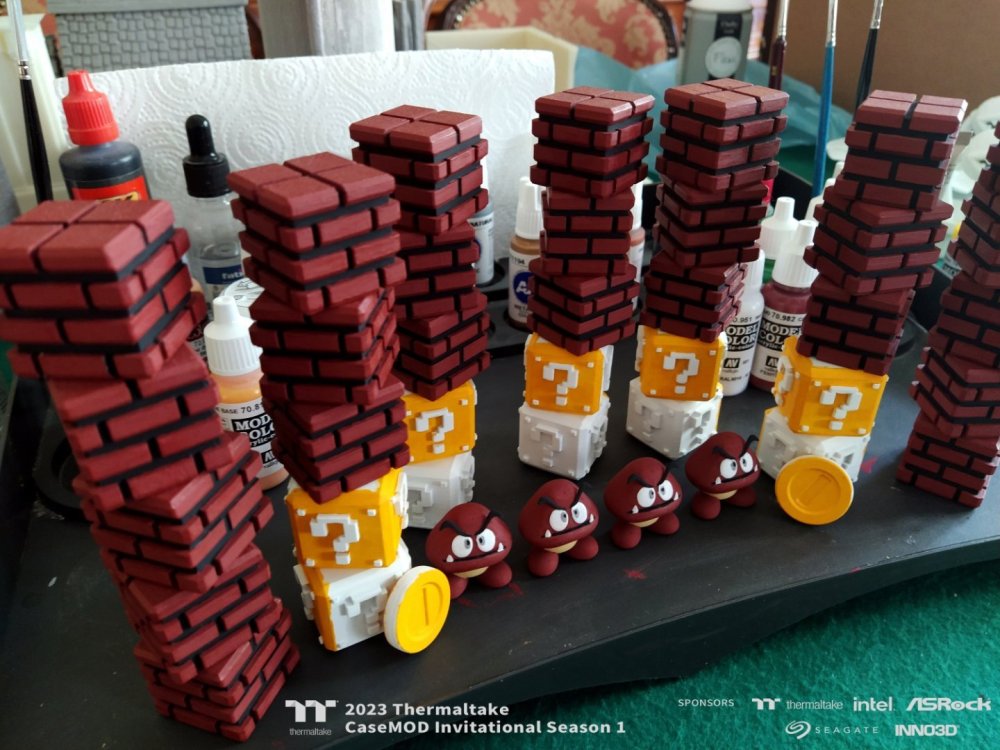
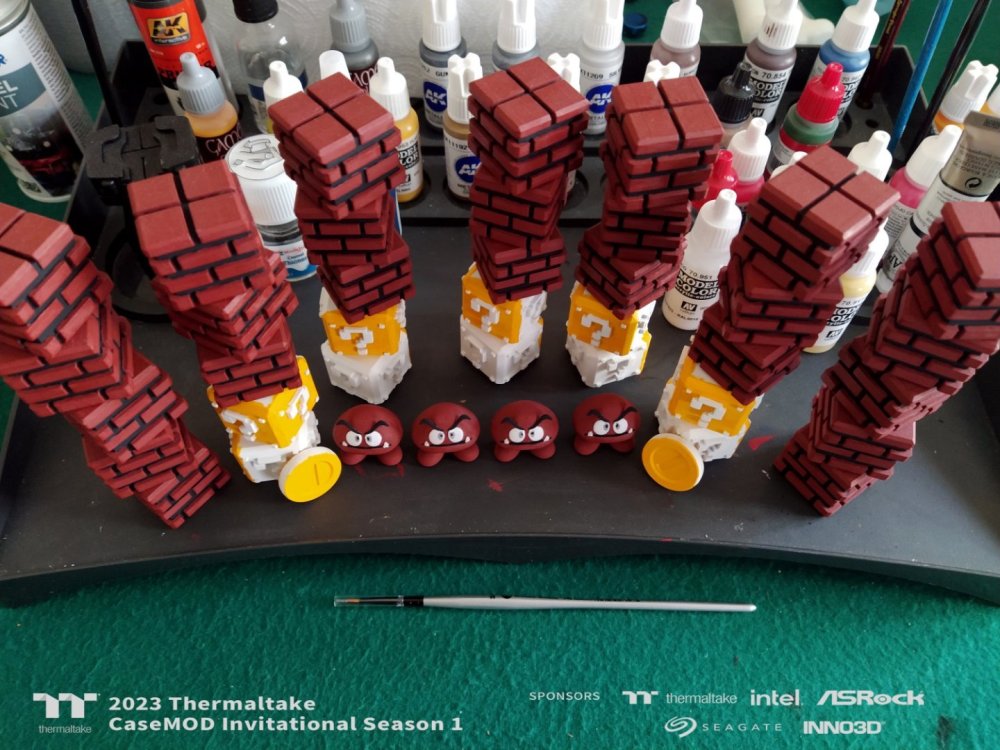
Now begins the painting phase of each individual piece by hand with the brush. This phase of work began immediately after the 3D printing of the various pieces and immediately after receiving the invitation to the competition because it was a very long process.


-
[Italy] Marco Di Silvestre
MPC Project replied to TT Amanda's topic in 2023 Thermaltake CaseMOD Invitational Season 1
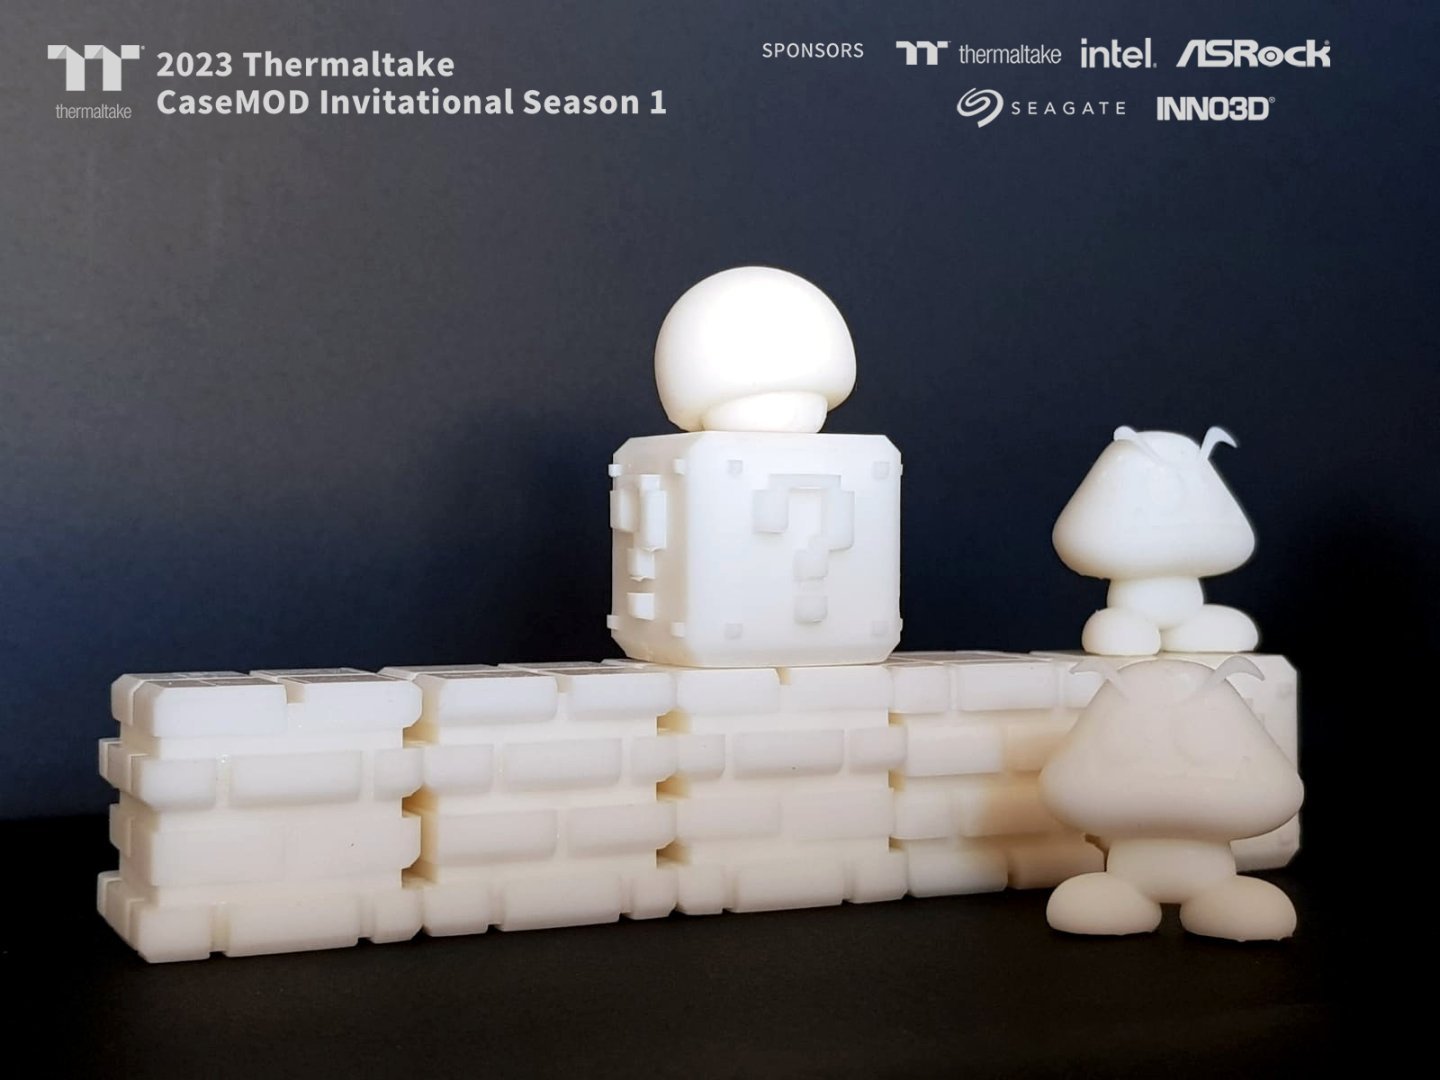
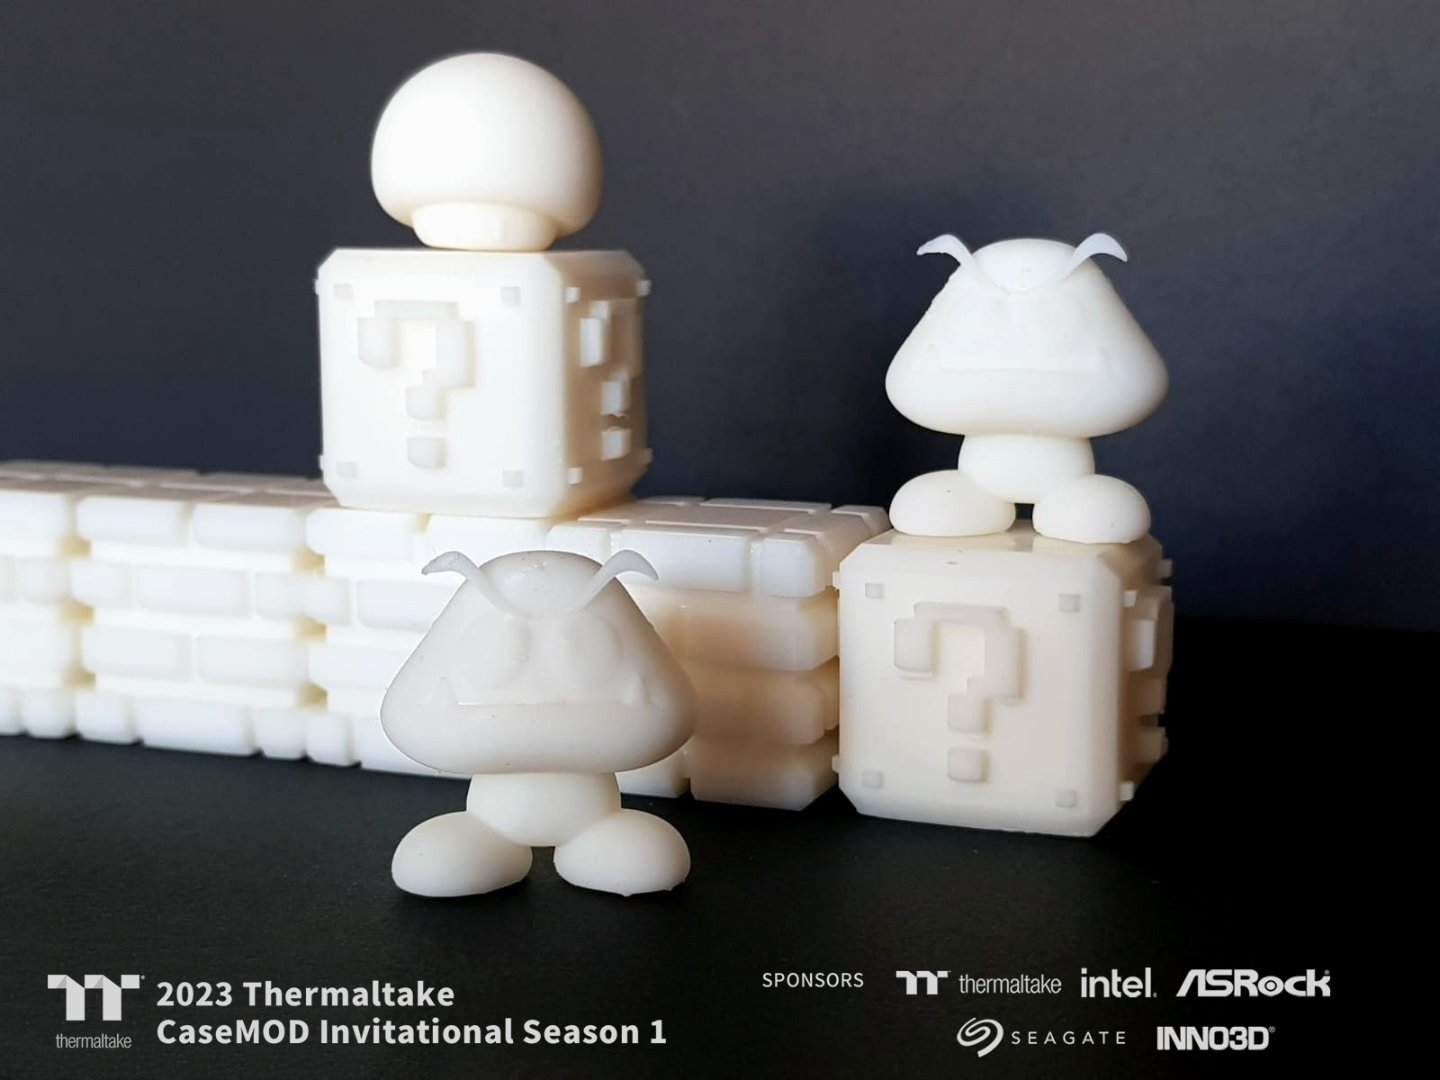
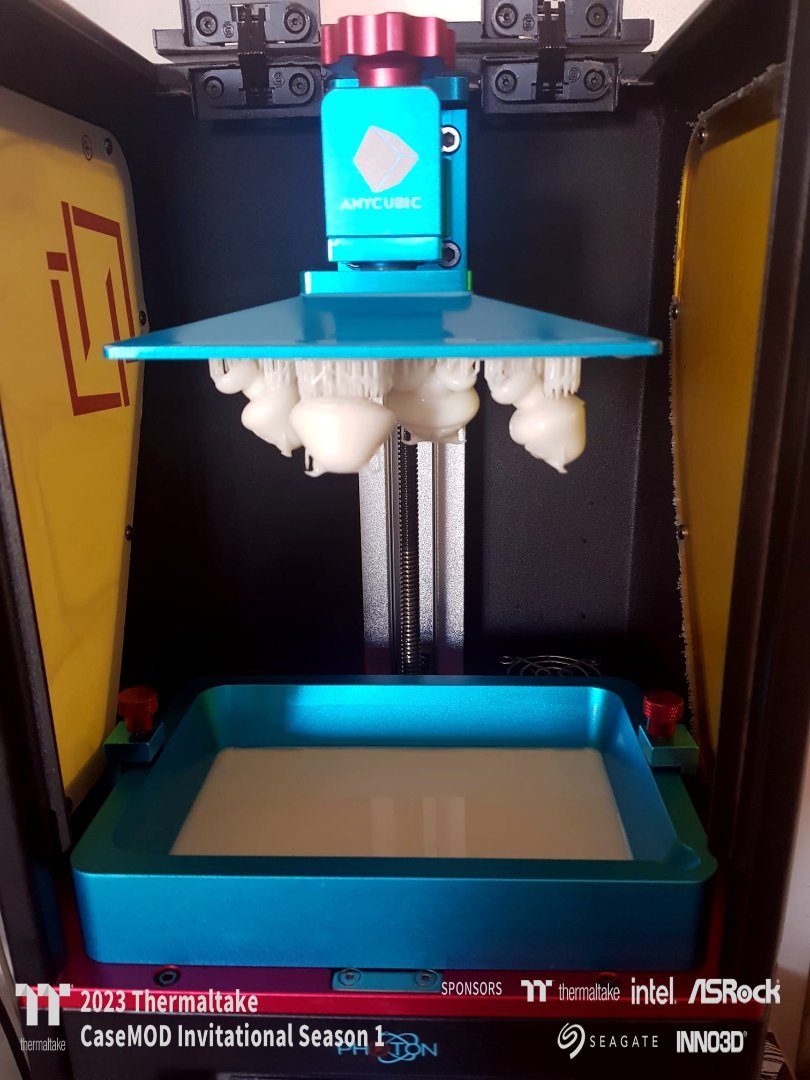
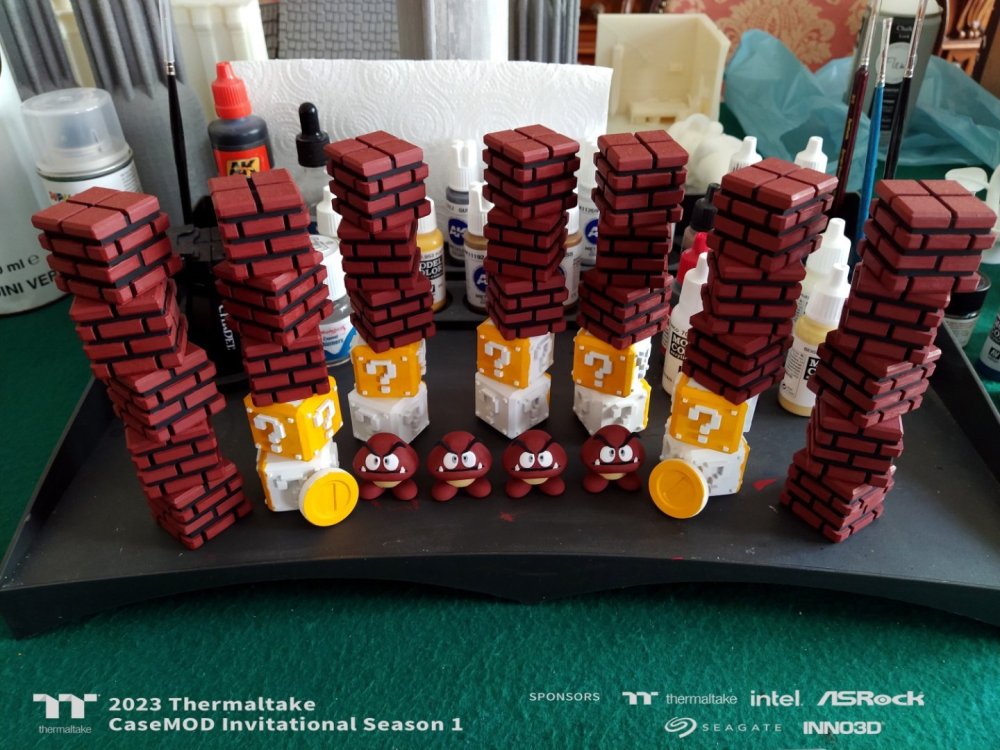
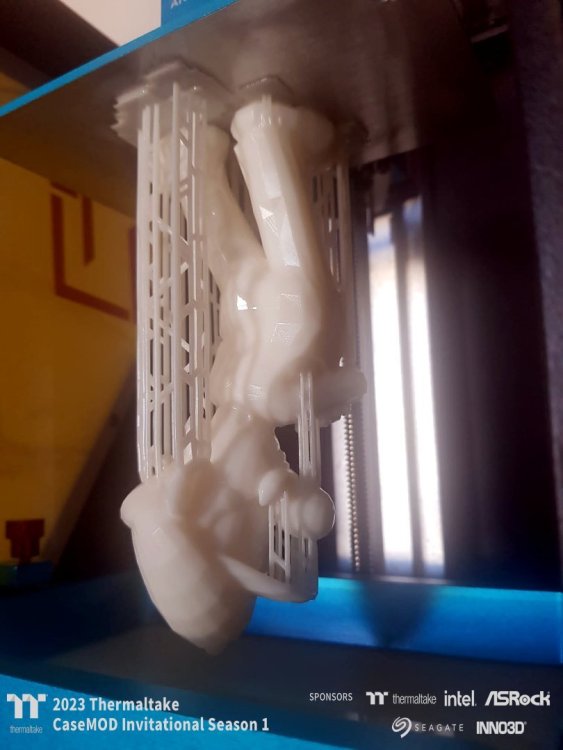
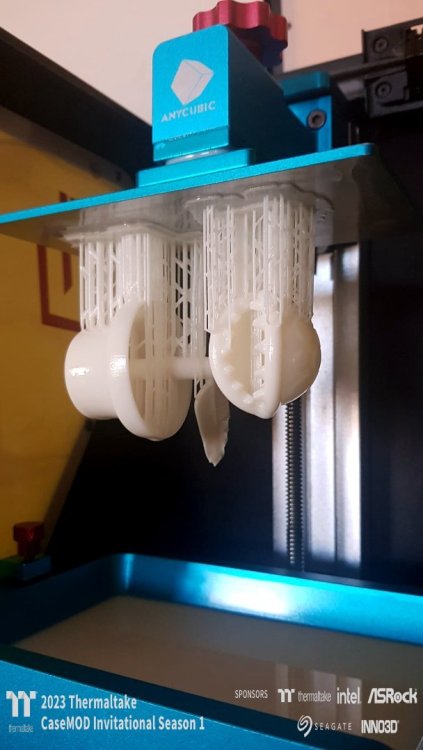
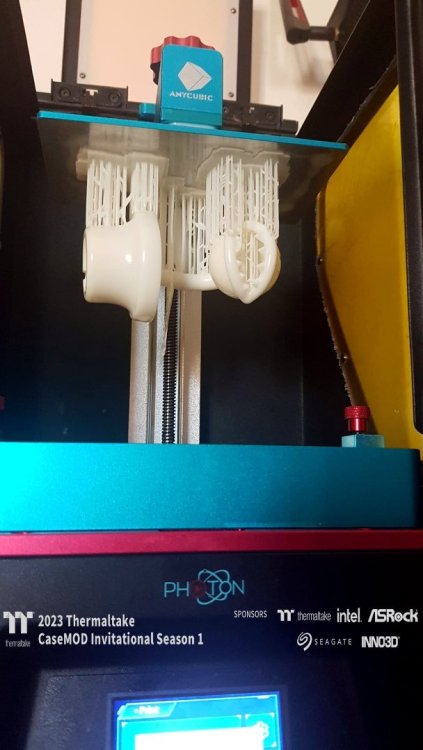
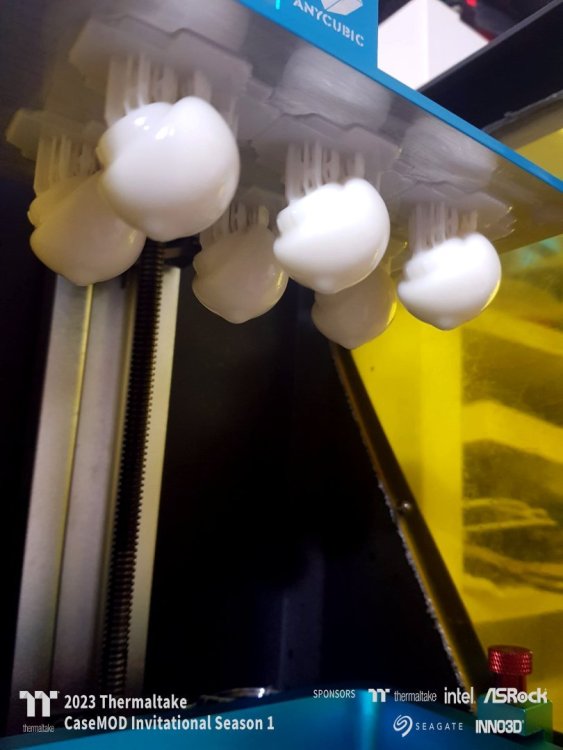
Resin 3D Printing Phase - Part Three We see the resin-printed 3D pieces after drying with UV rays.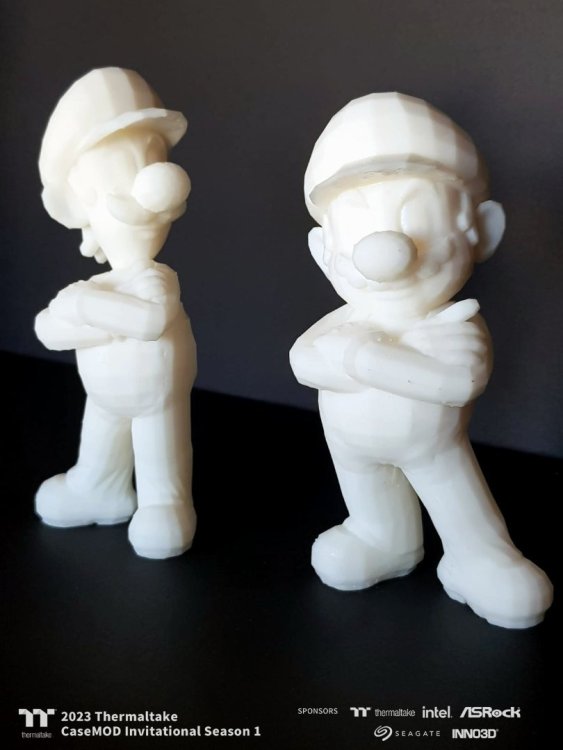
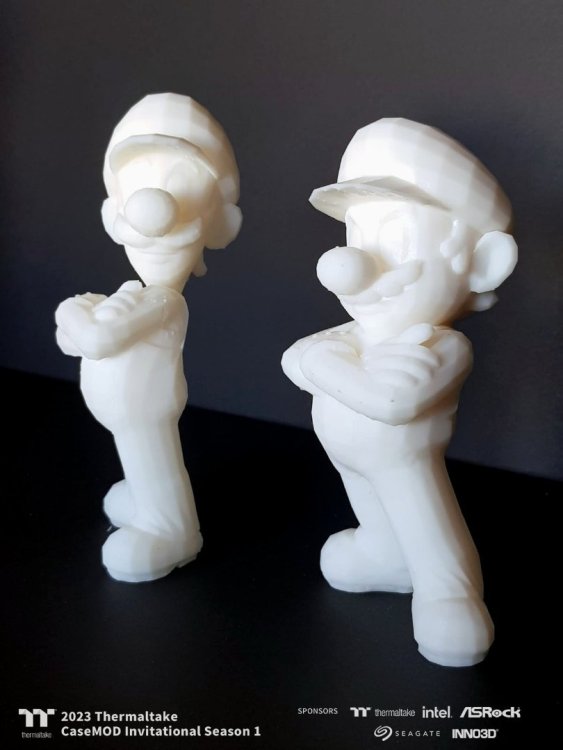


-
[Italy] Marco Di Silvestre
MPC Project replied to TT Amanda's topic in 2023 Thermaltake CaseMOD Invitational Season 1
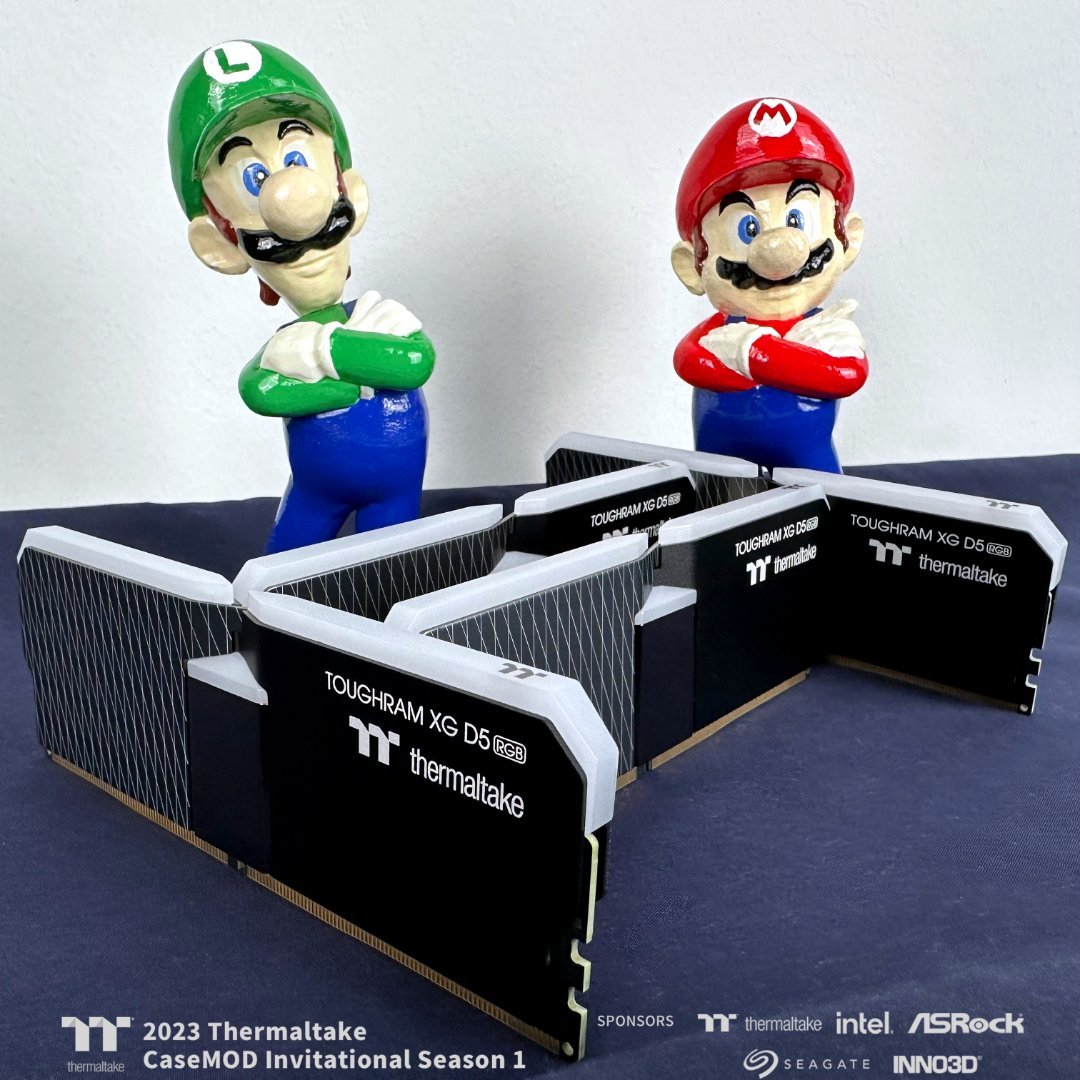
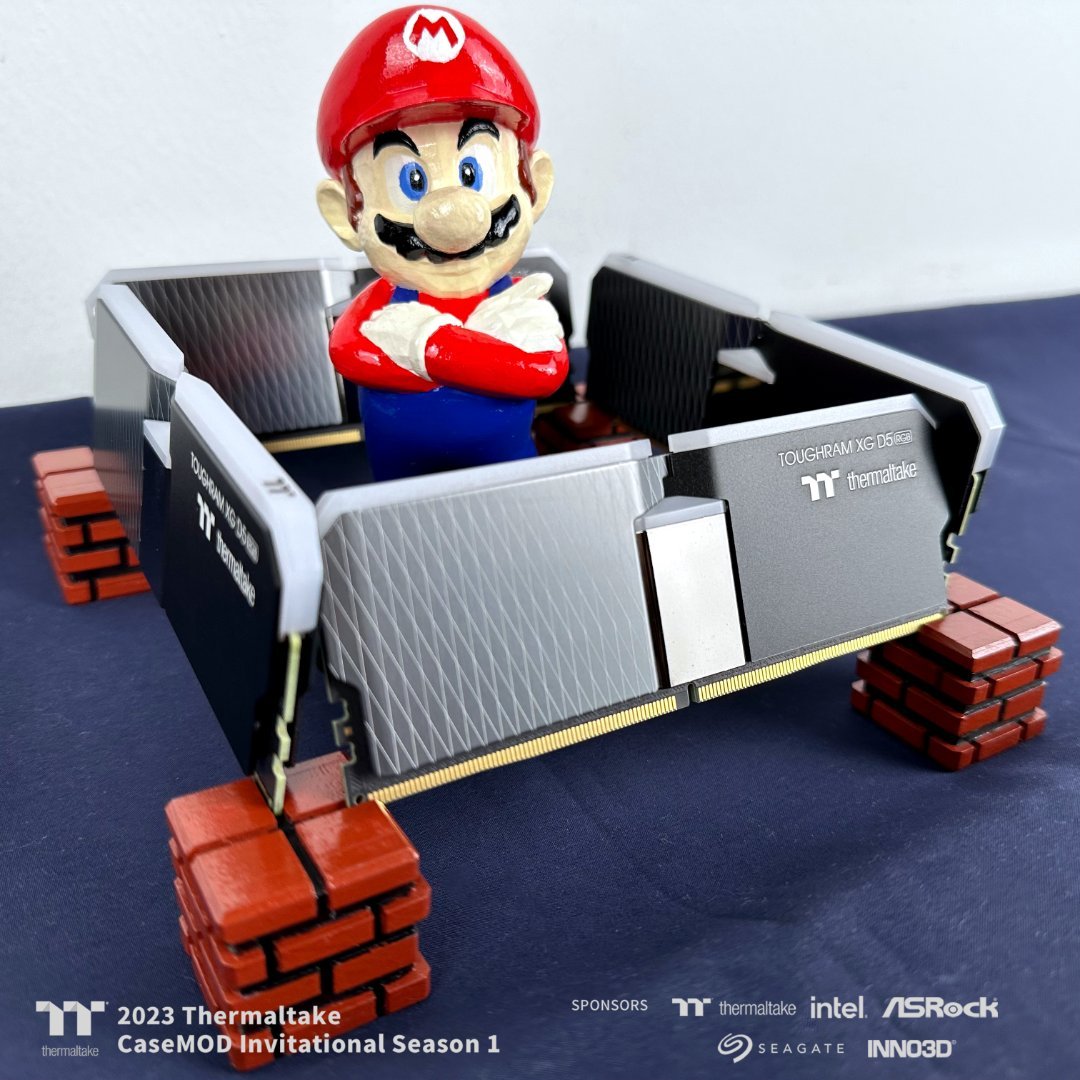
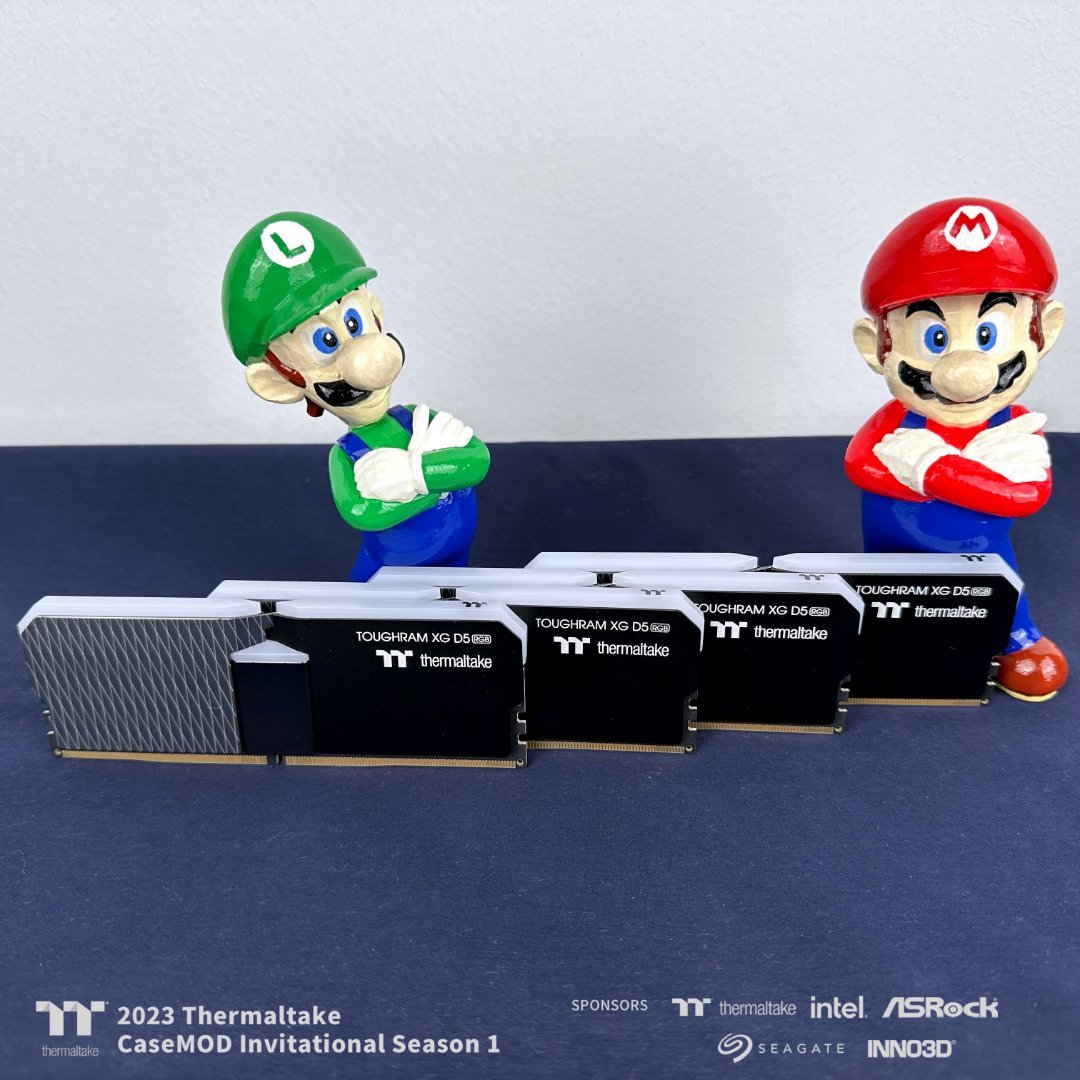
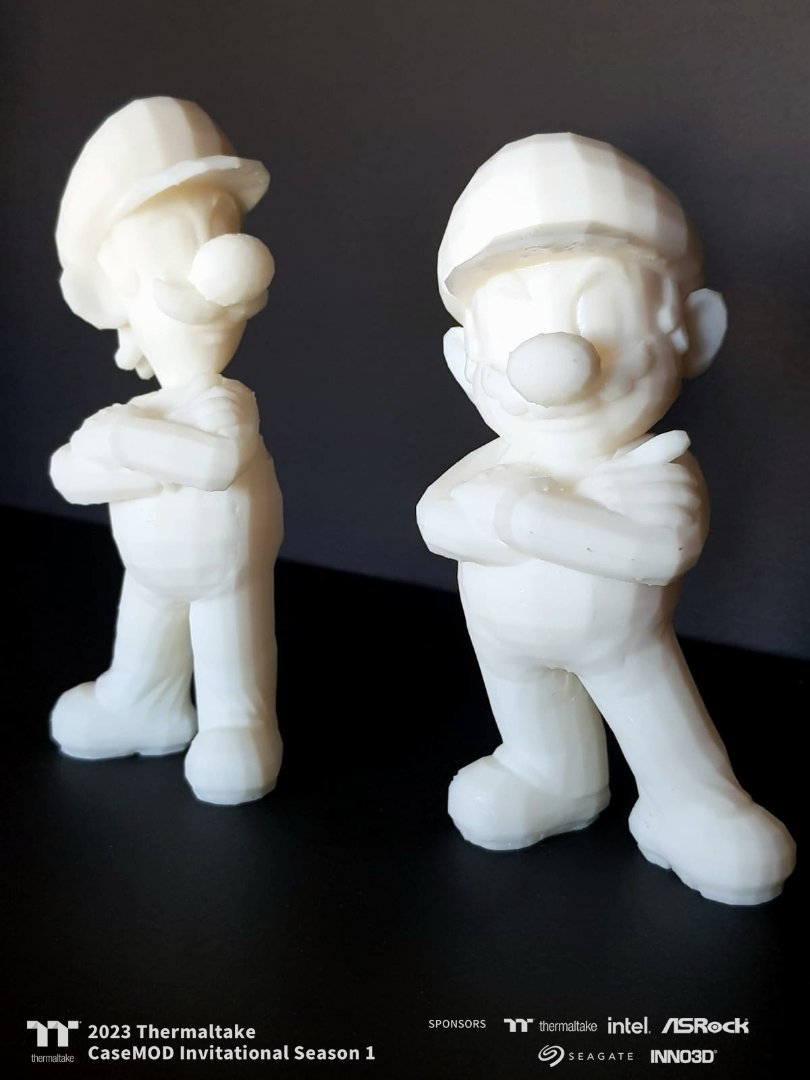
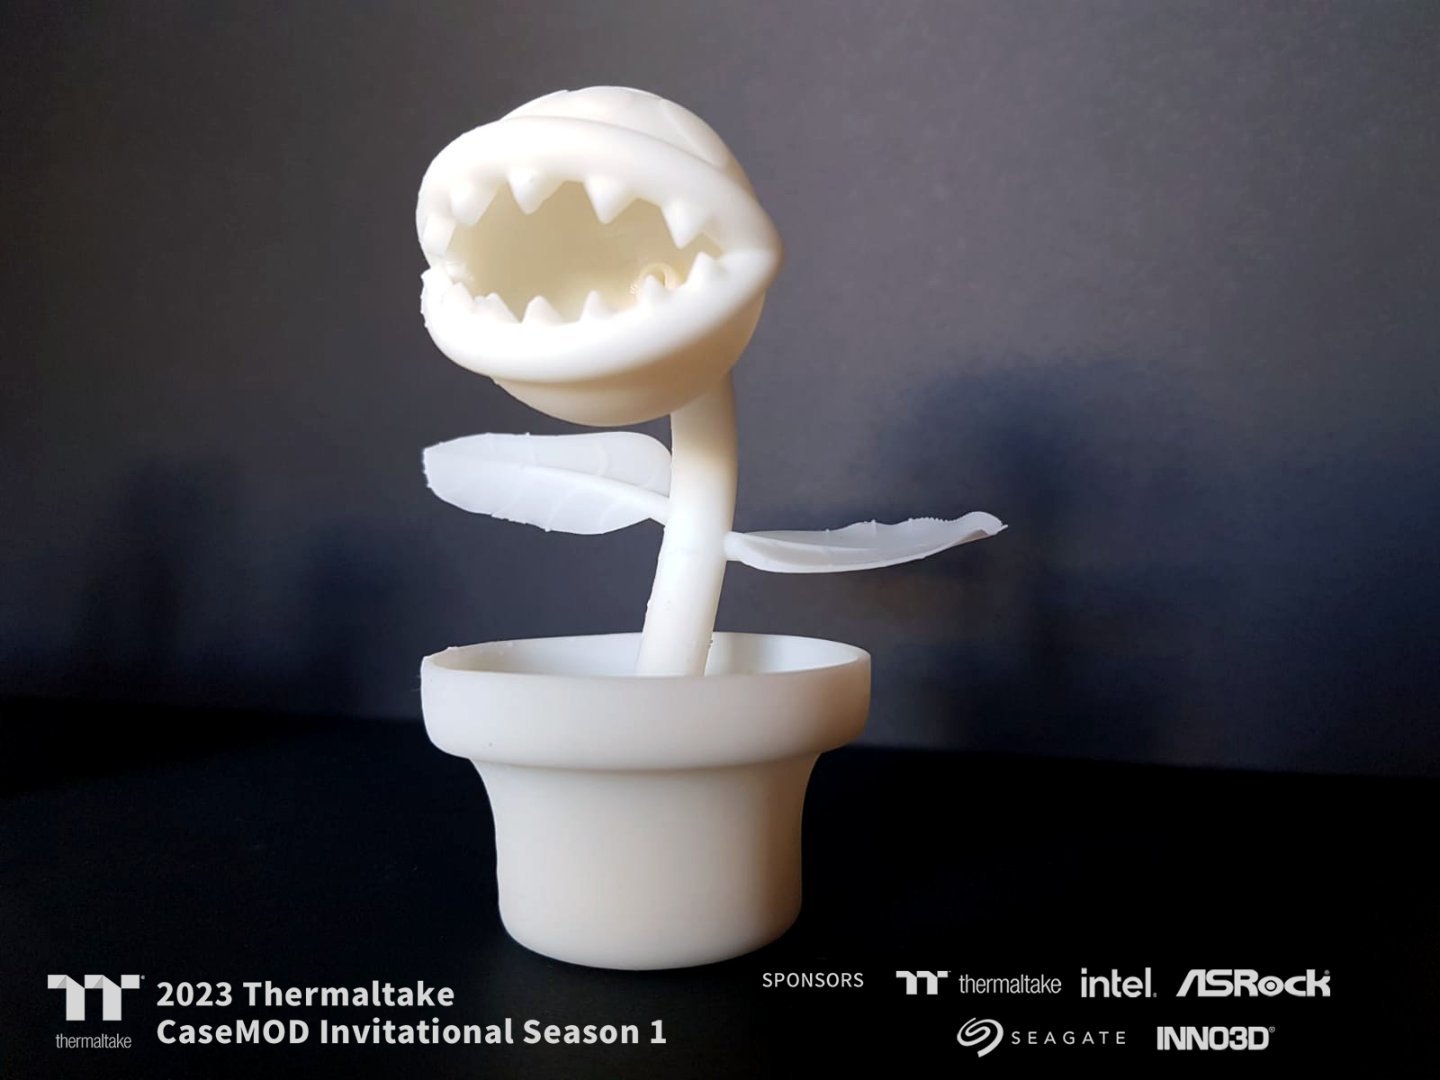
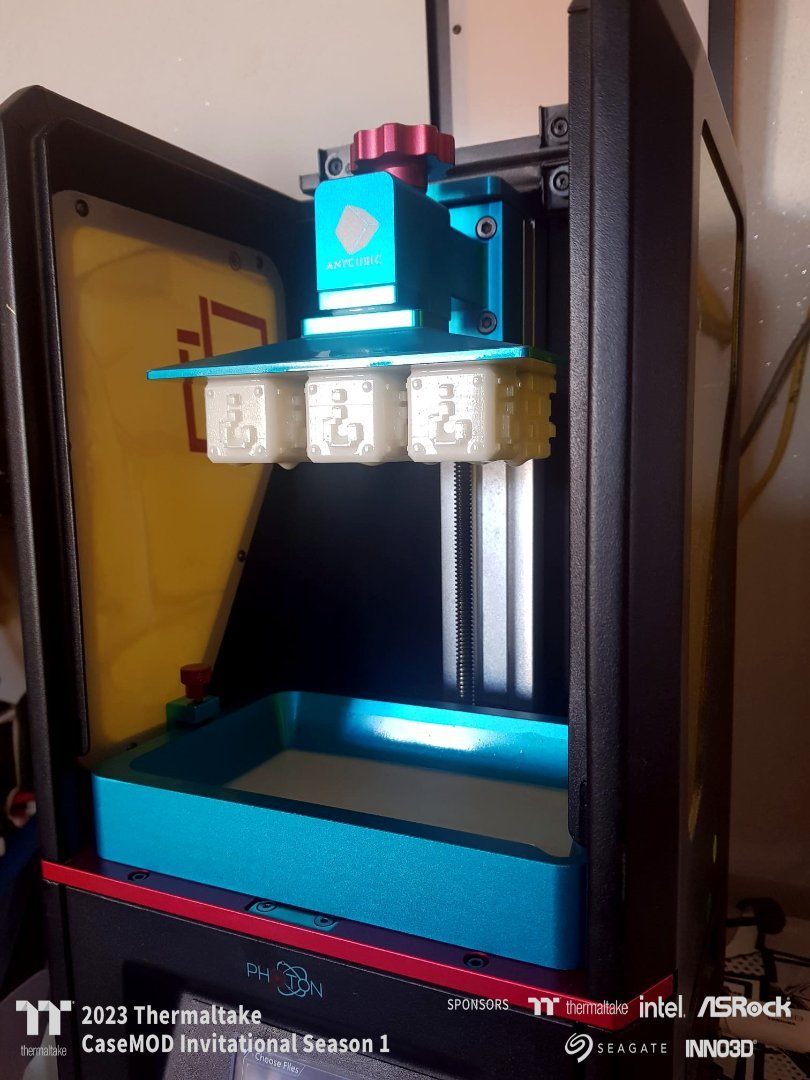
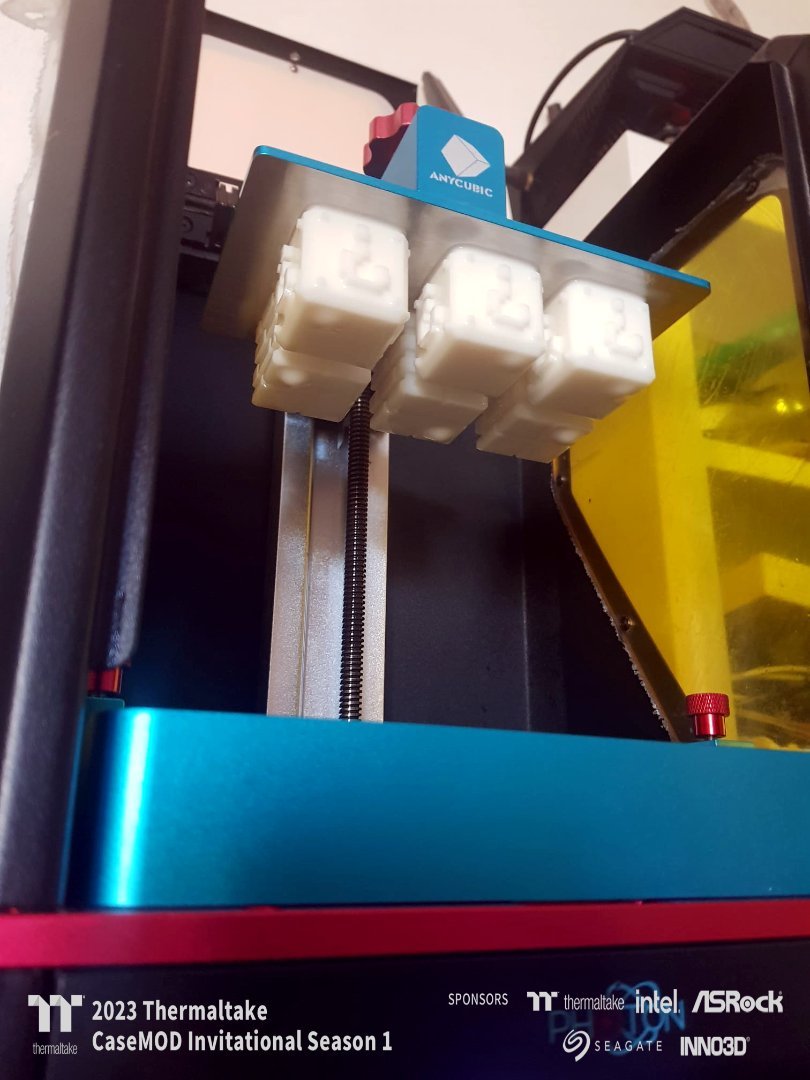
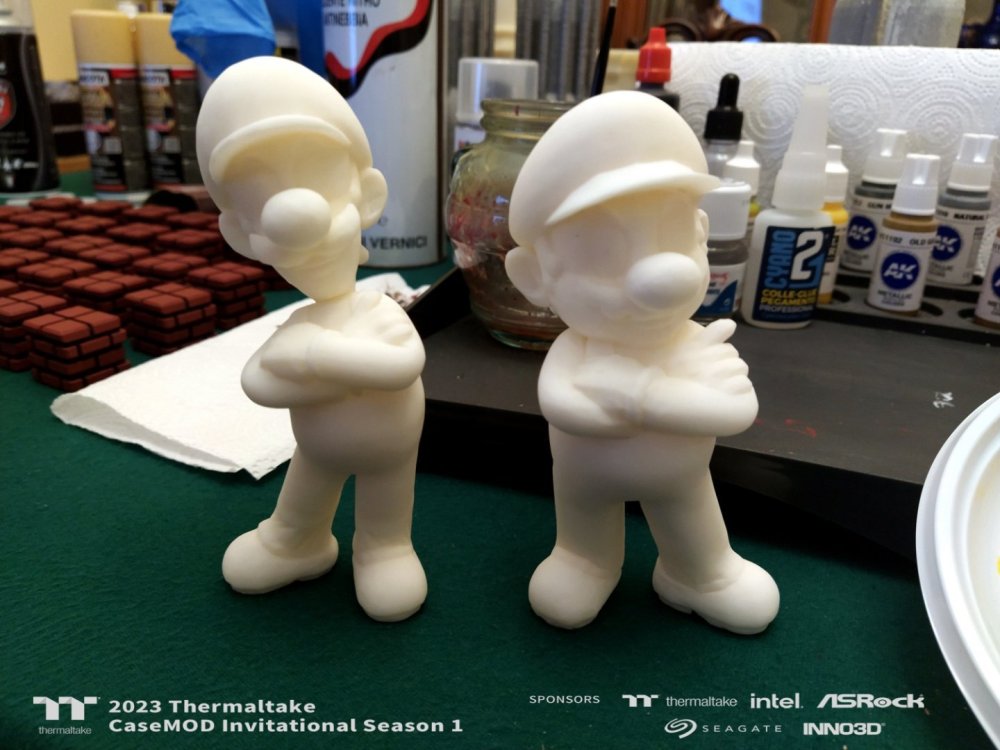
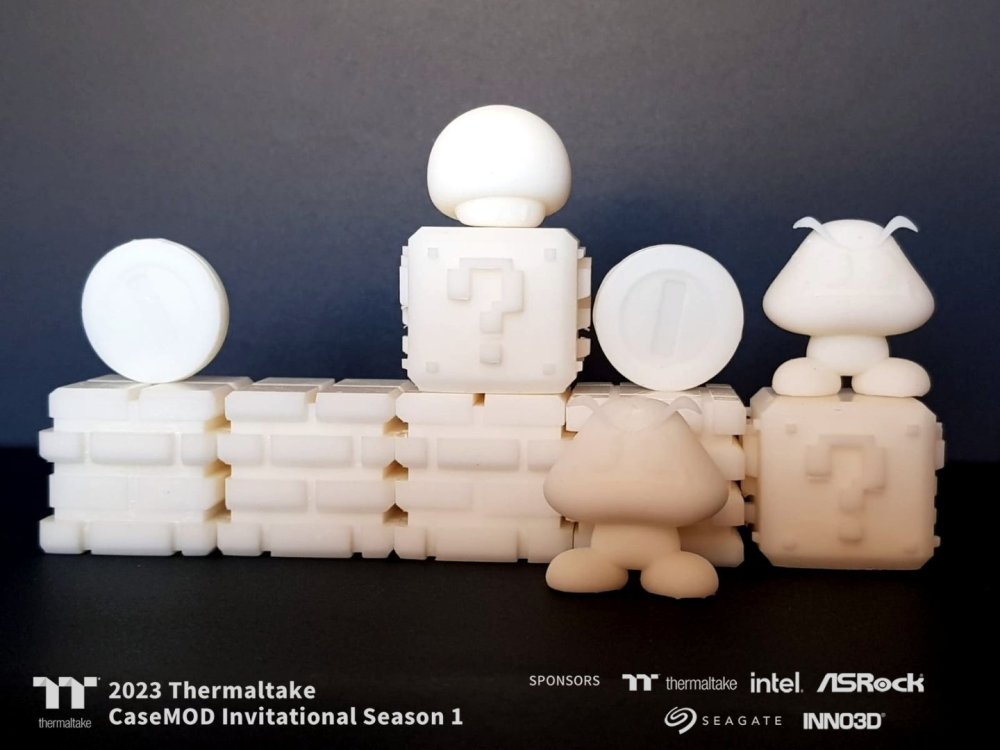
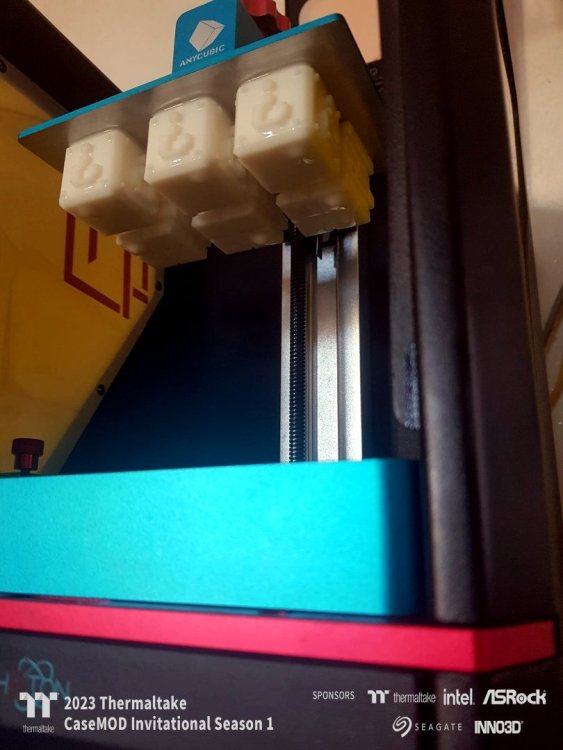
Resin 3D Printing Phase - Part Two This is the 3D printing turn of Mario, Luigi and more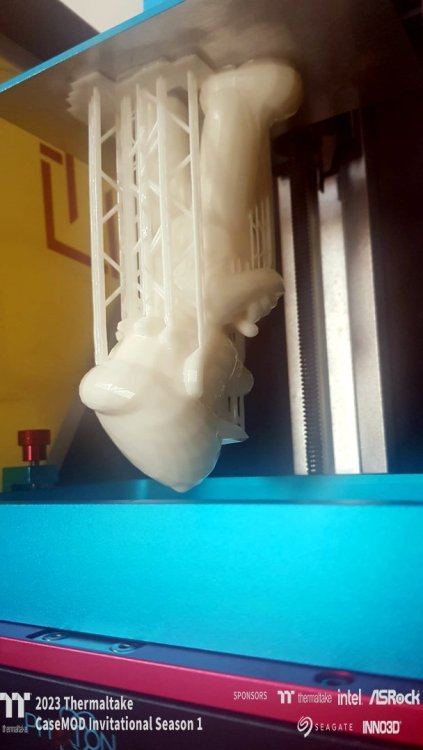
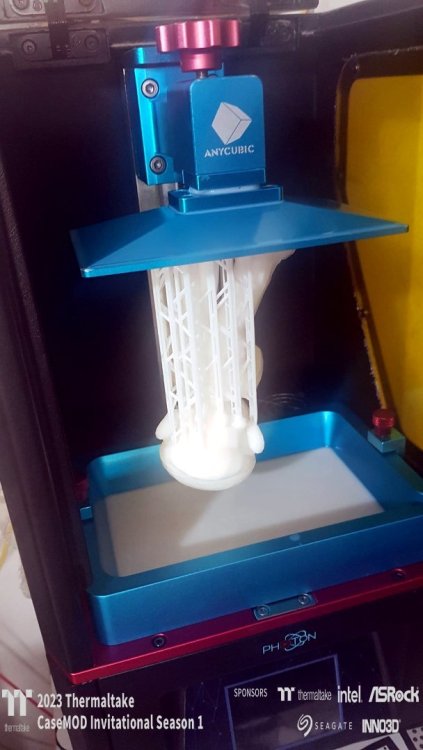


-
[Italy] Marco Di Silvestre
MPC Project replied to TT Amanda's topic in 2023 Thermaltake CaseMOD Invitational Season 1
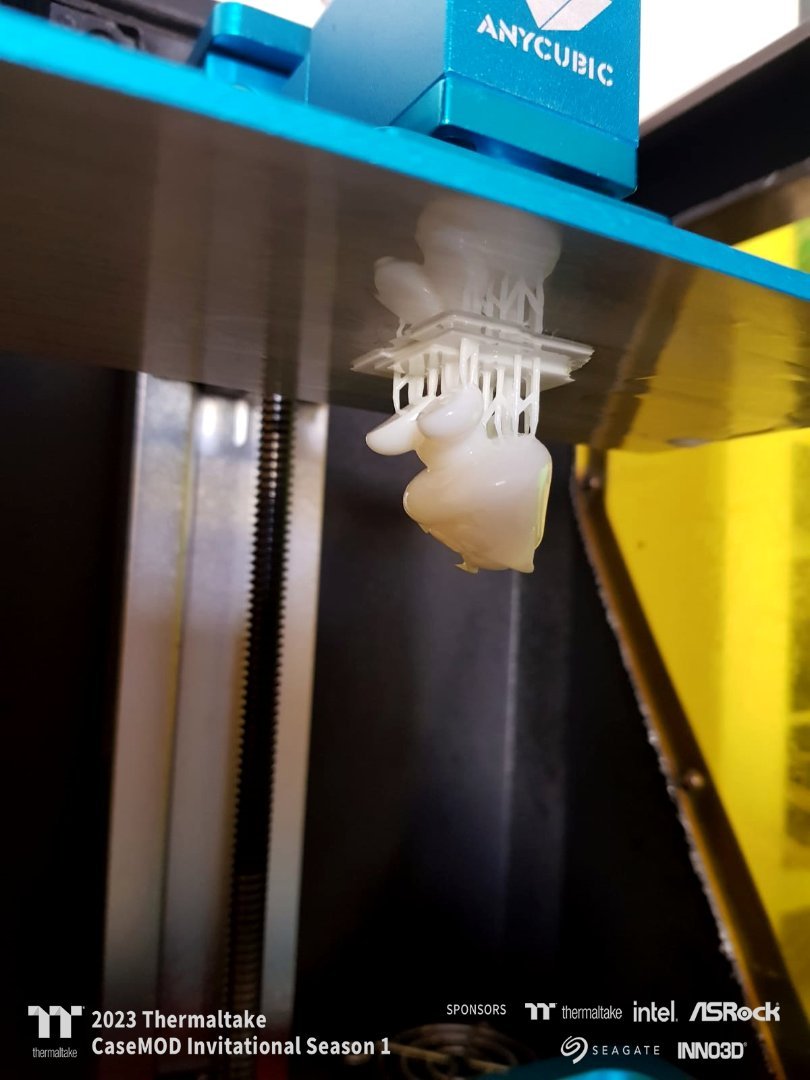
Resin 3D Printing Phase - Part One This manufacturing process with the subsequent hand painting phase began when I received the invitation to this competition even if I am publishing it now.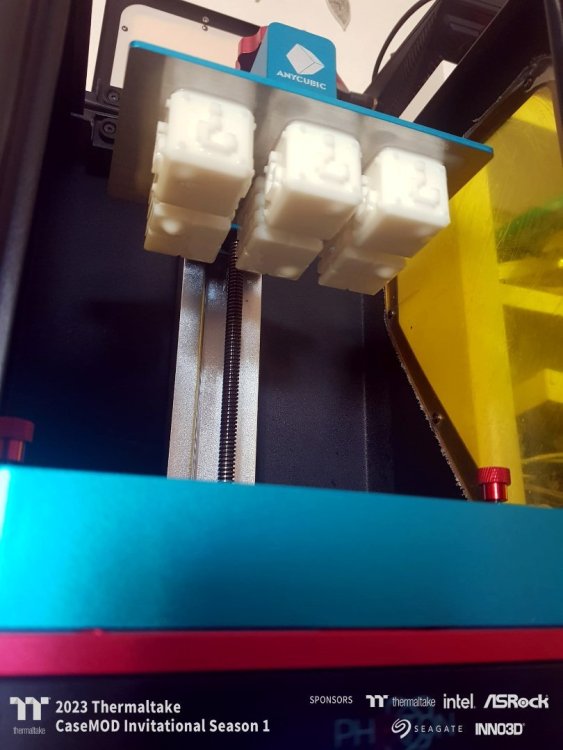
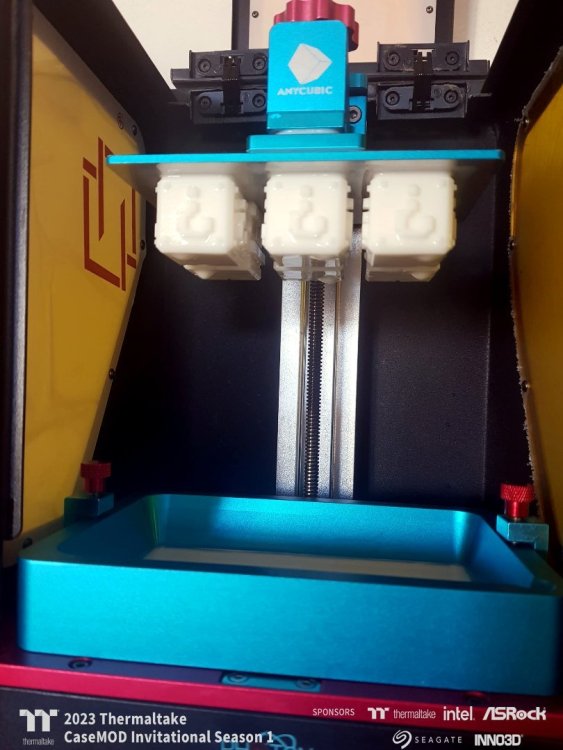


-
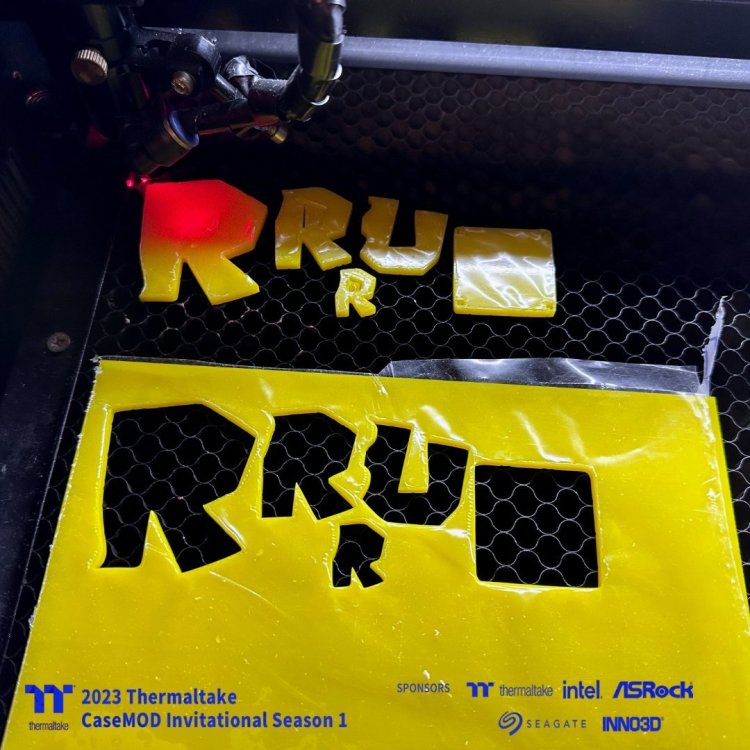
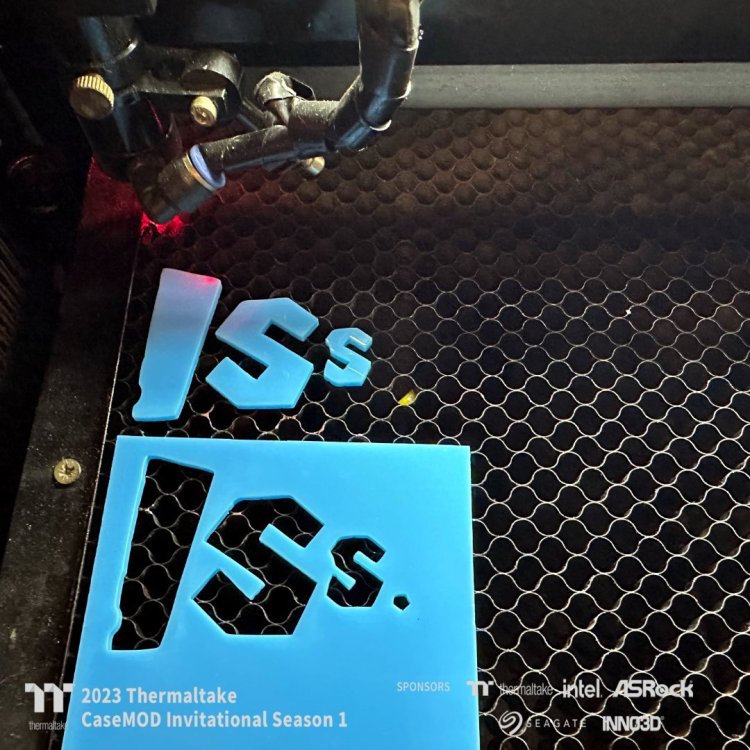
[Italy] Marco Di Silvestre
MPC Project replied to TT Amanda's topic in 2023 Thermaltake CaseMOD Invitational Season 1
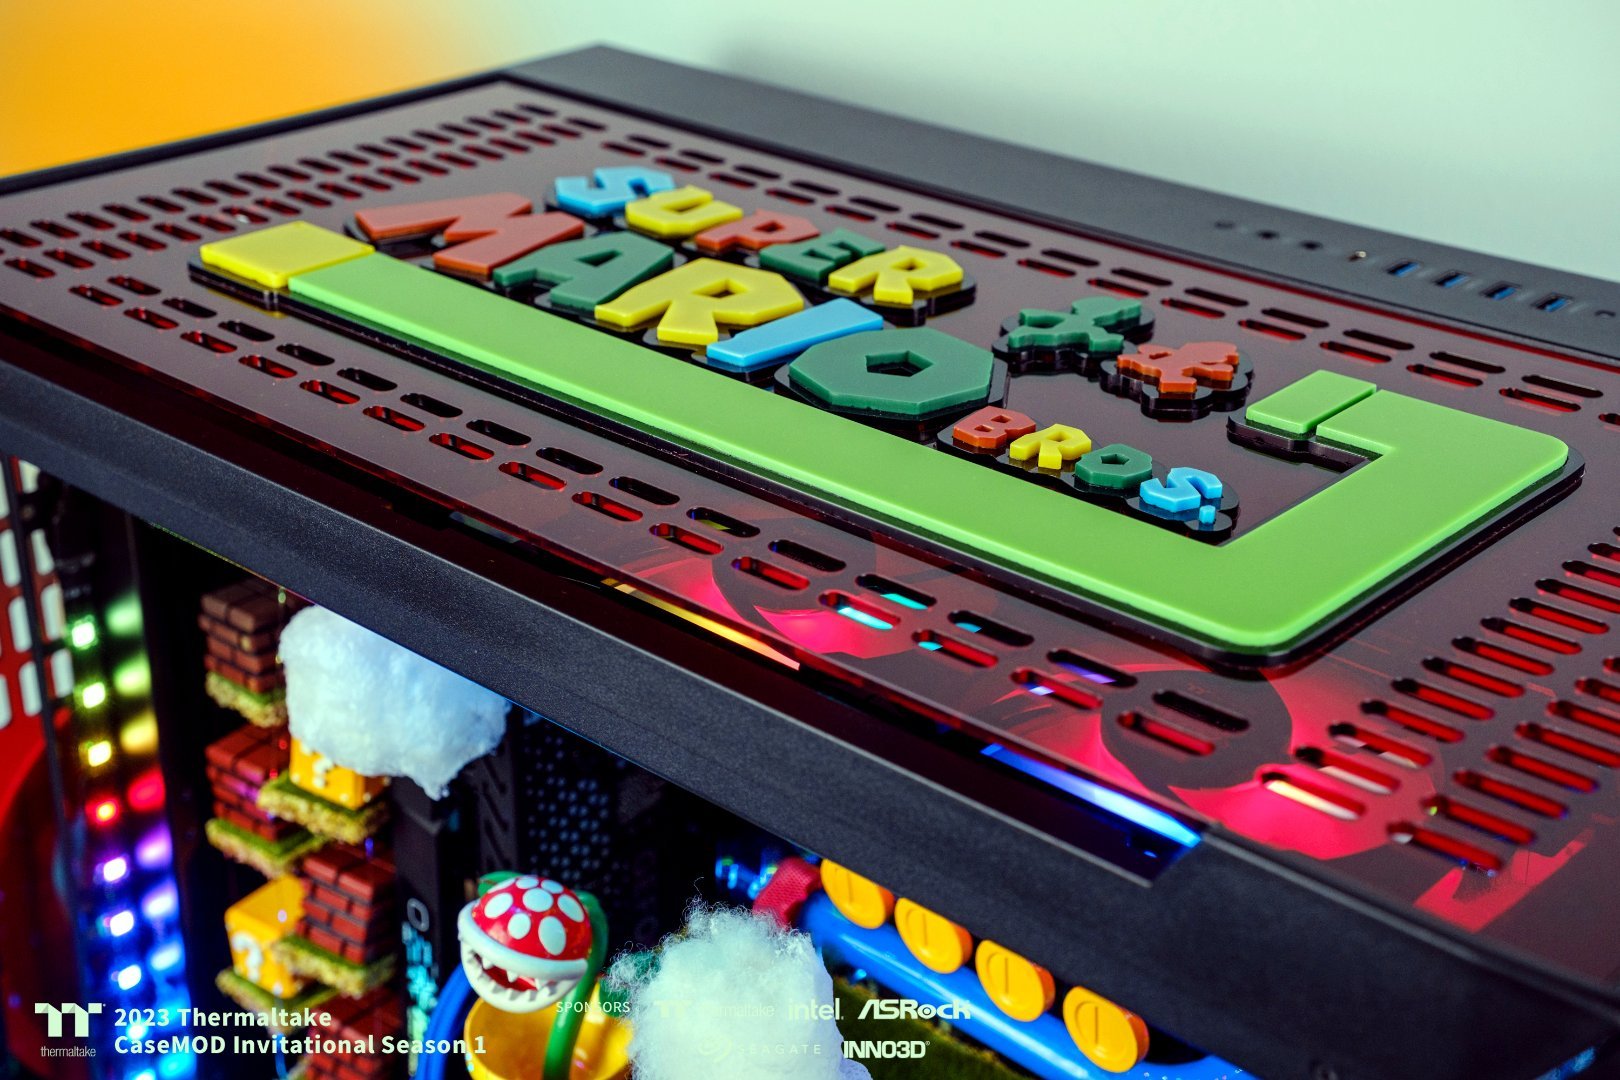
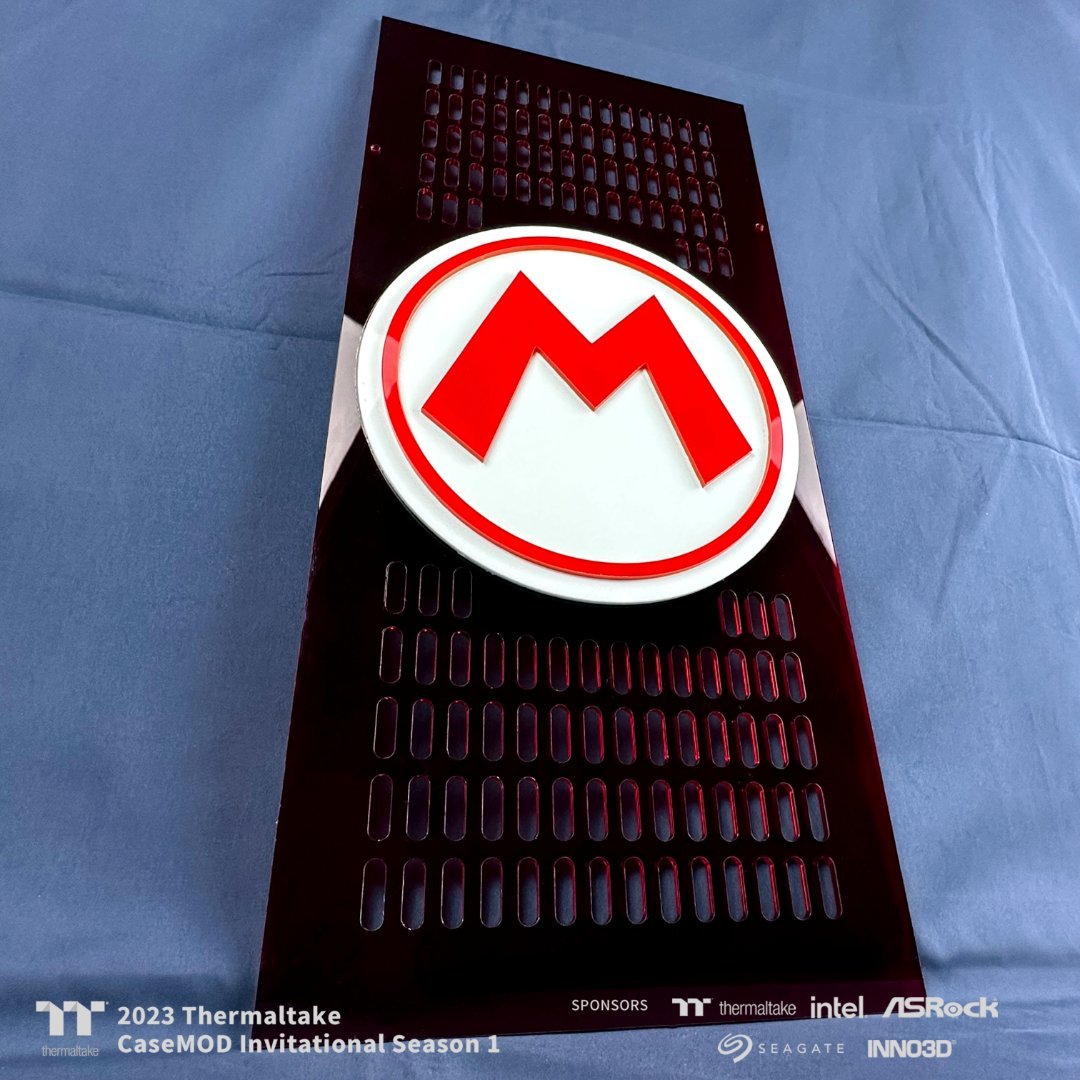
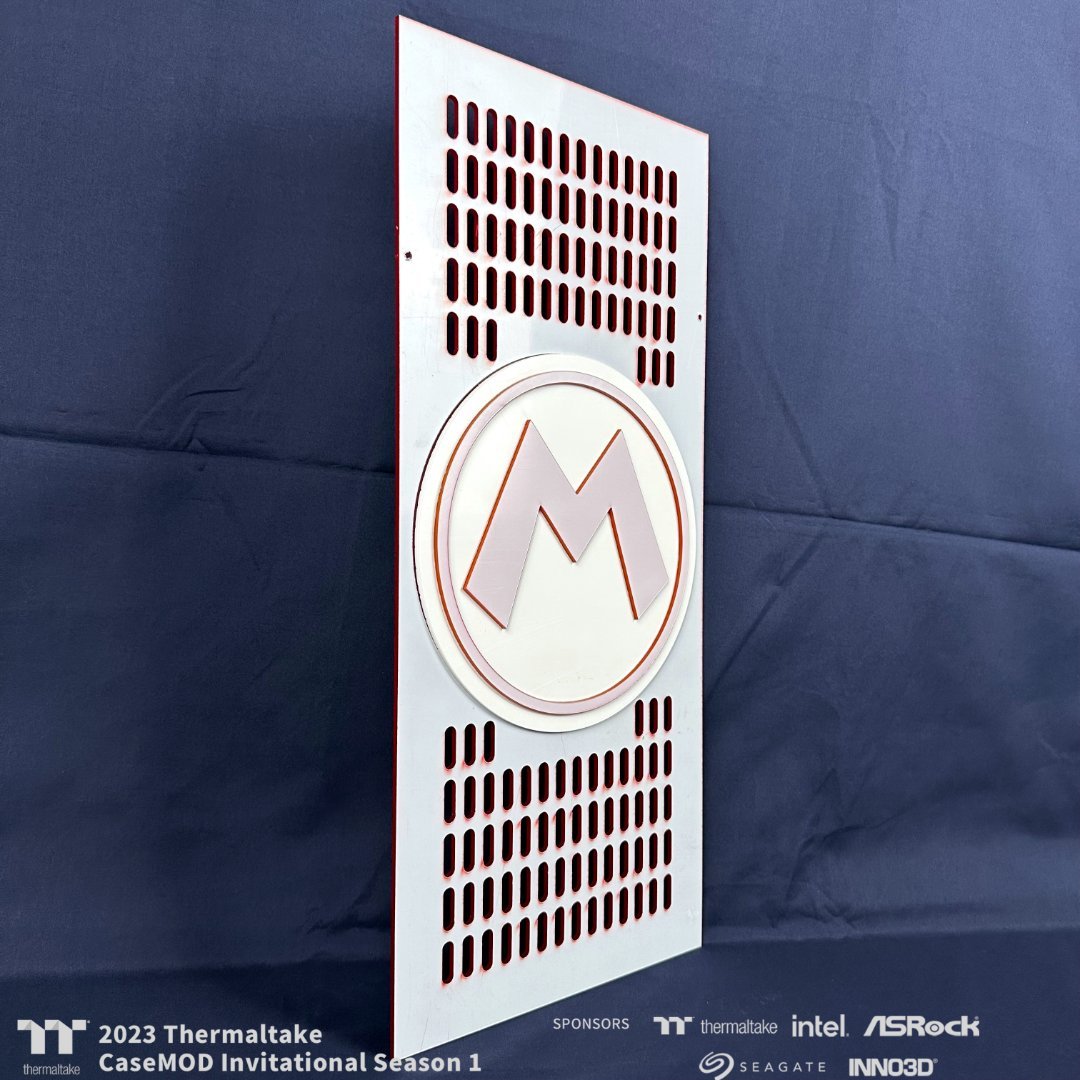
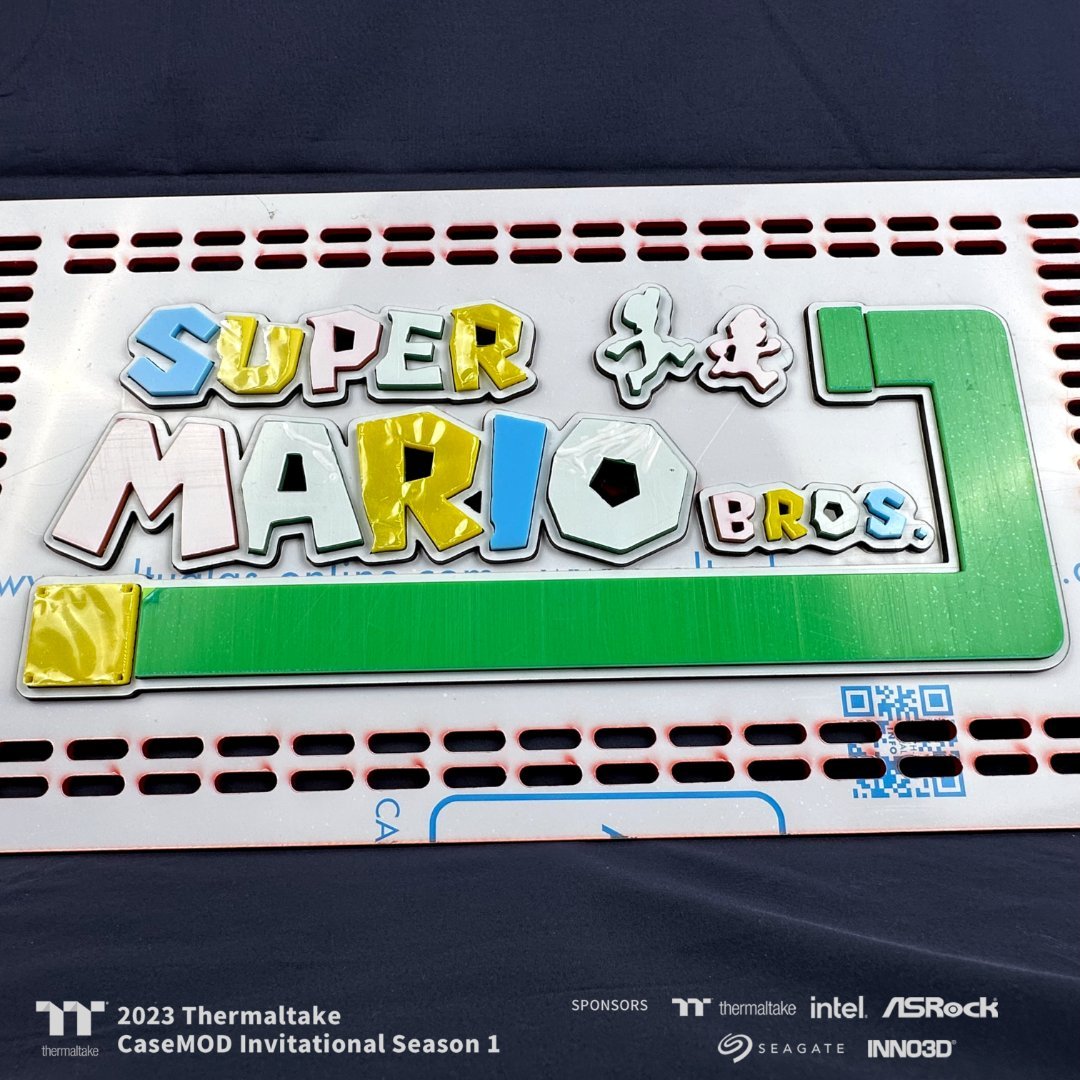
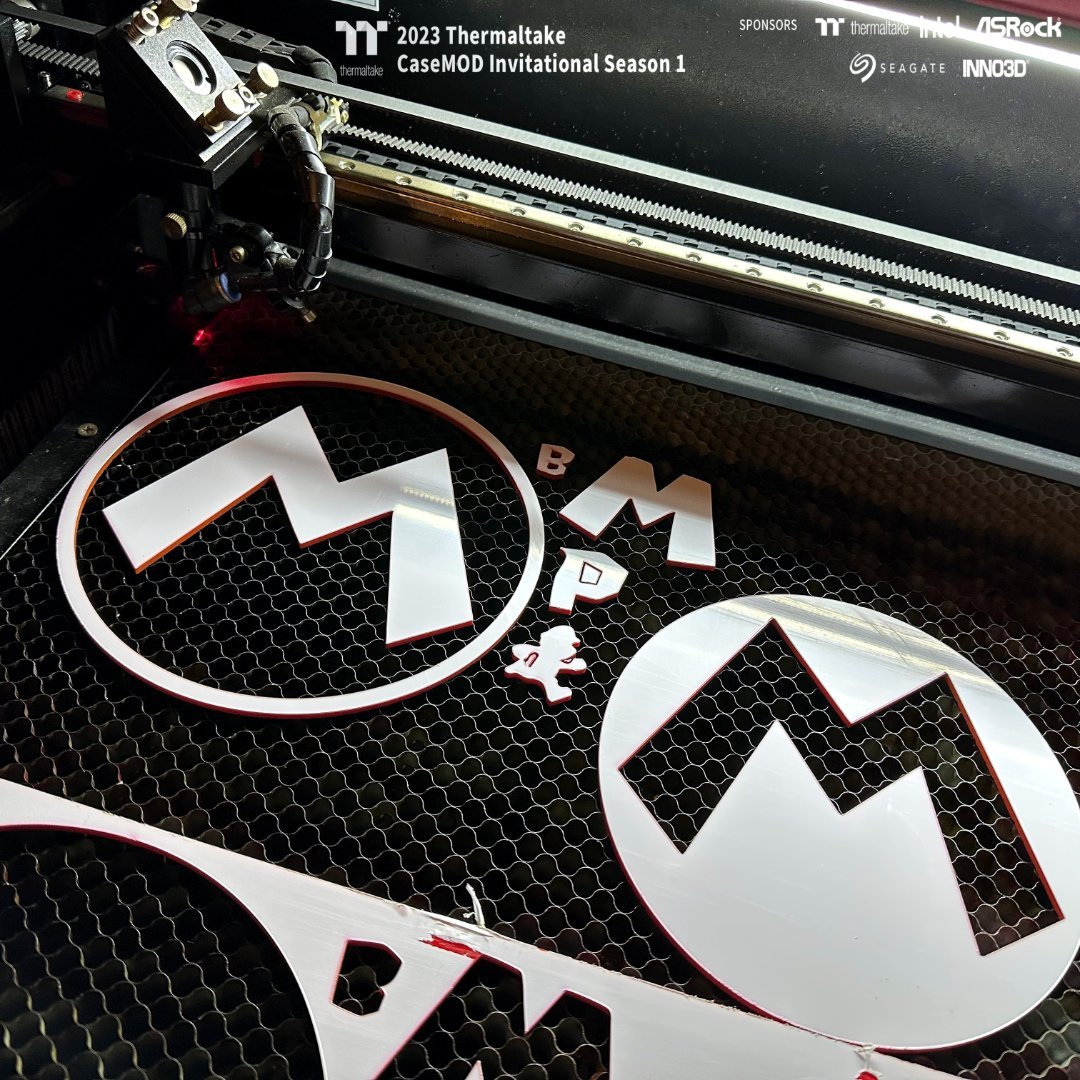
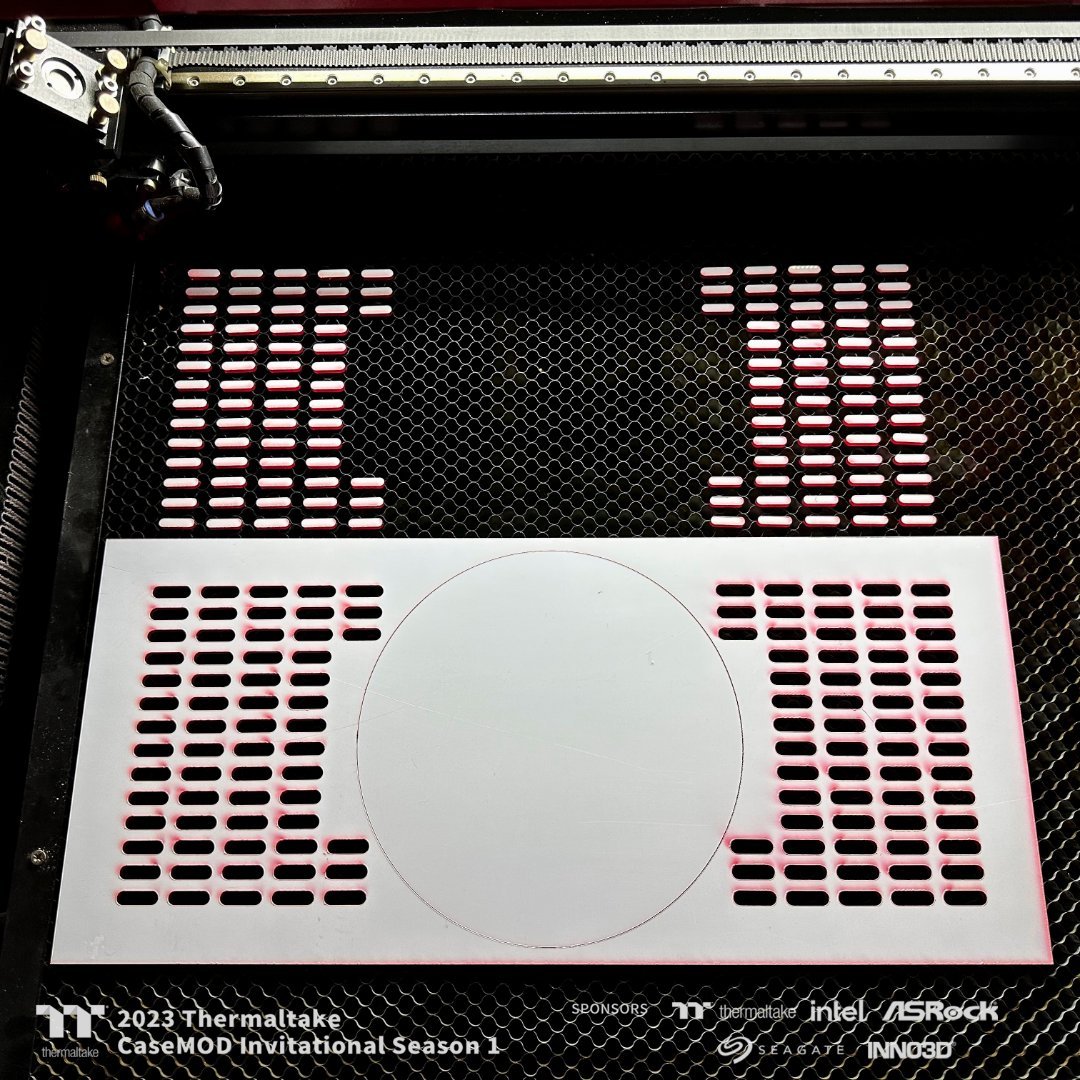
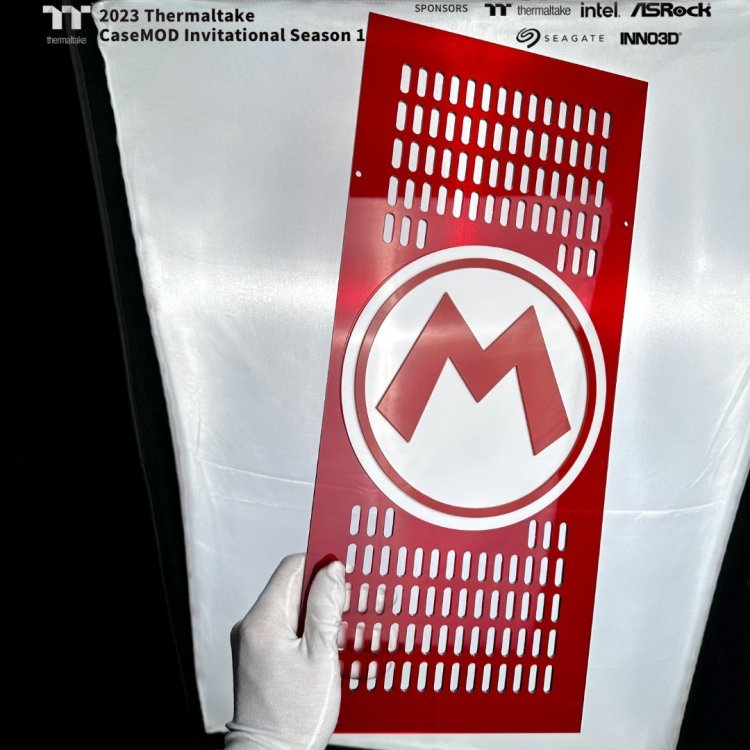
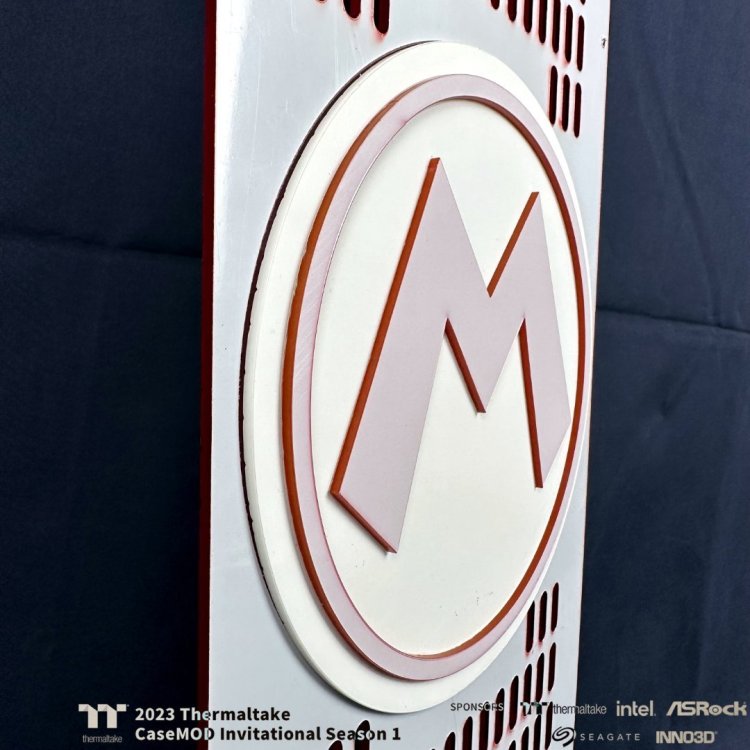
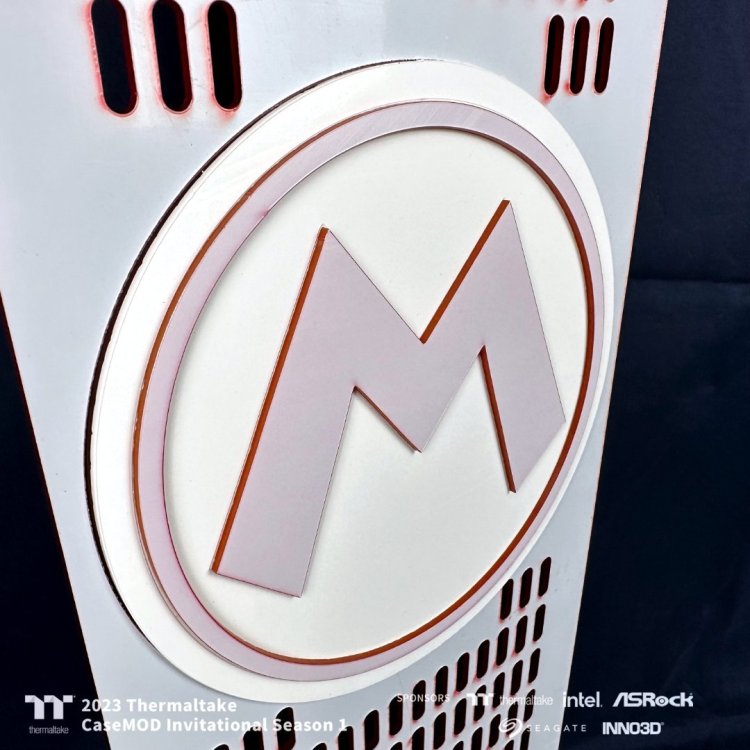
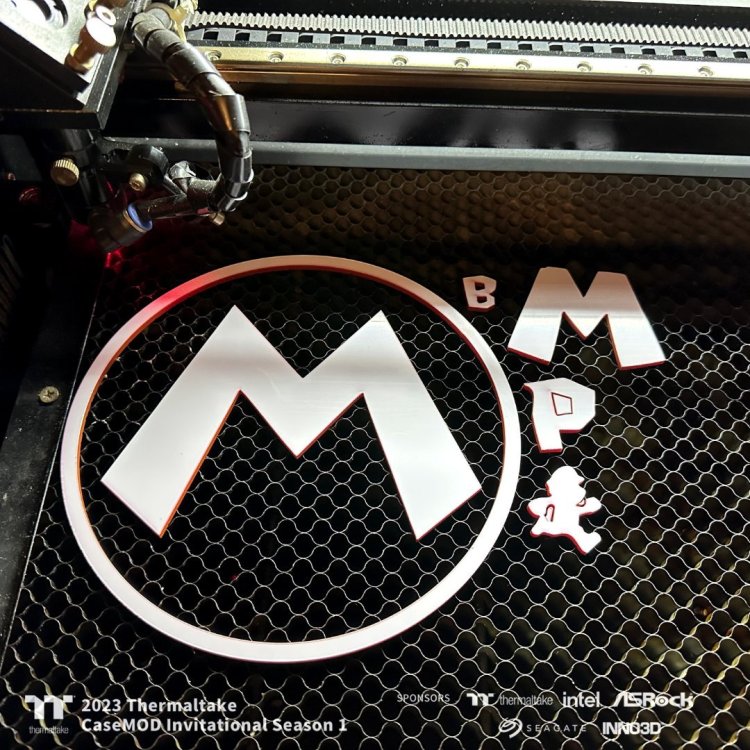
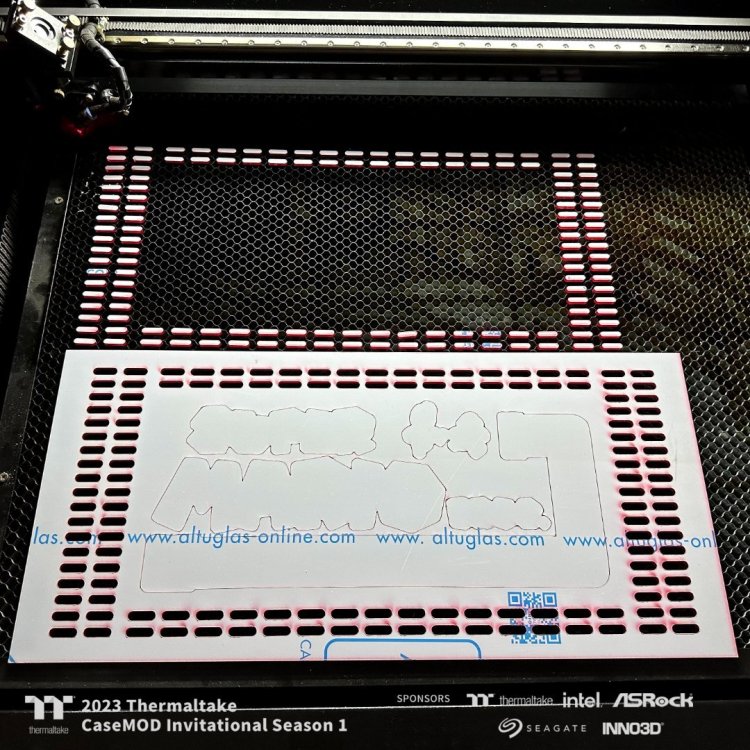
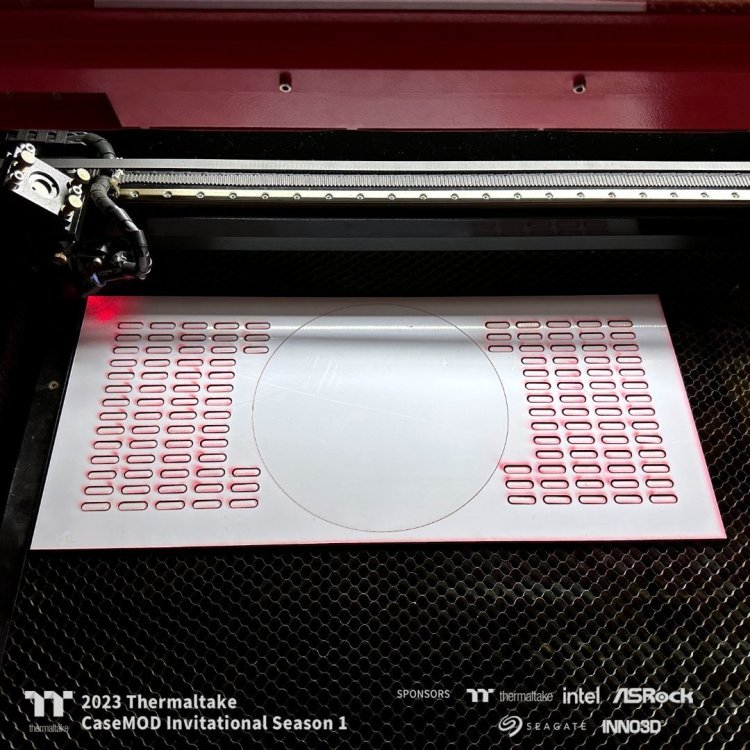
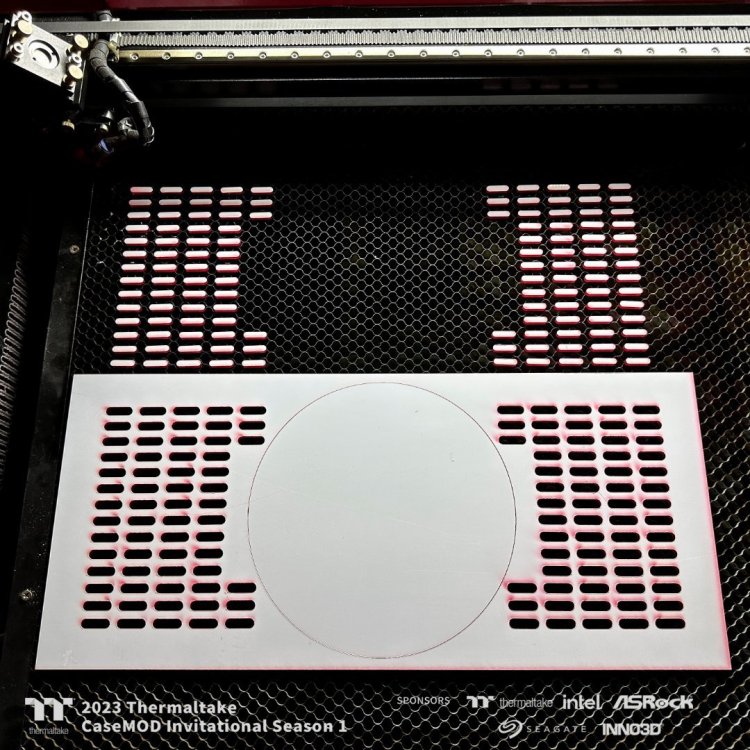
Laser cutting of the top panel and back of the cabinet - Part Four We remove the veils to the top and back panels presenting them in their complete charm !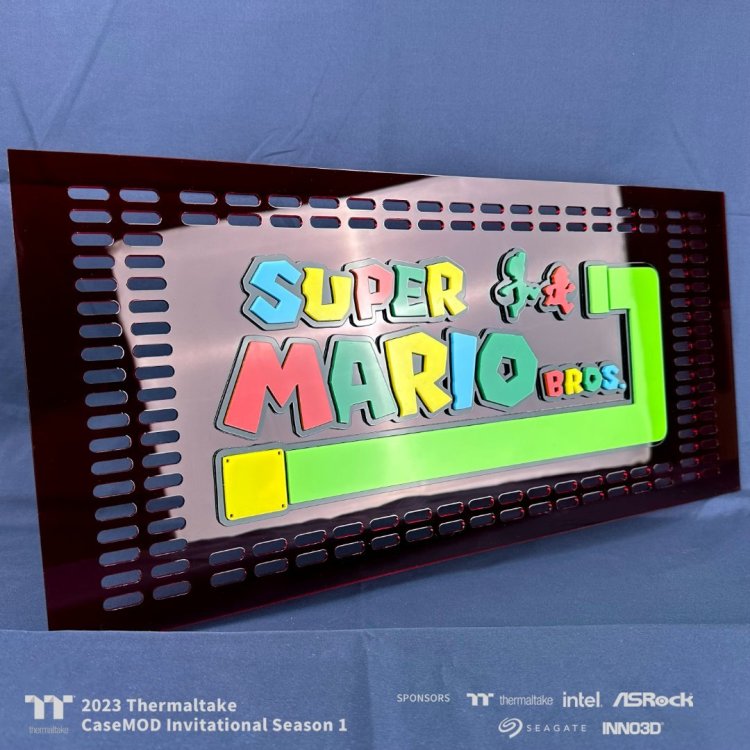
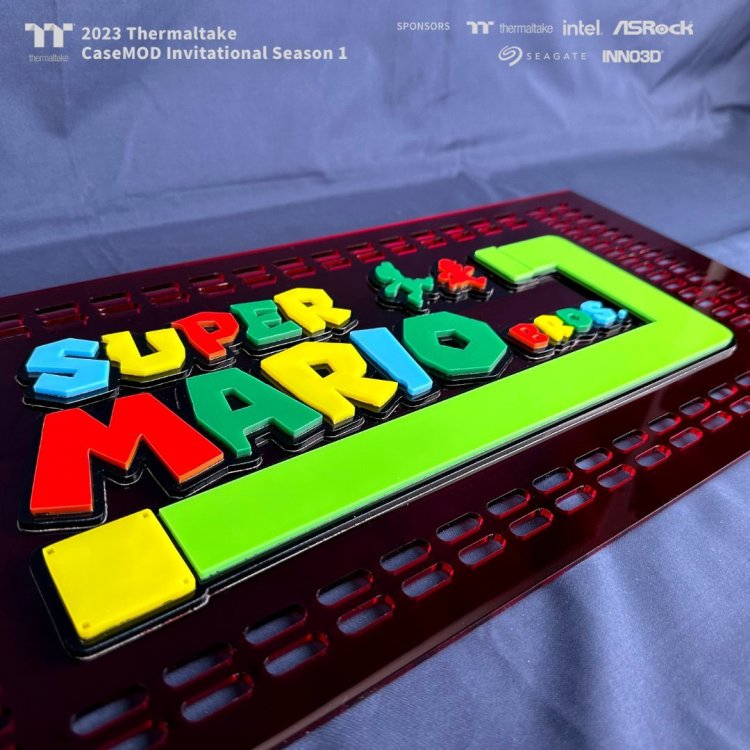

-
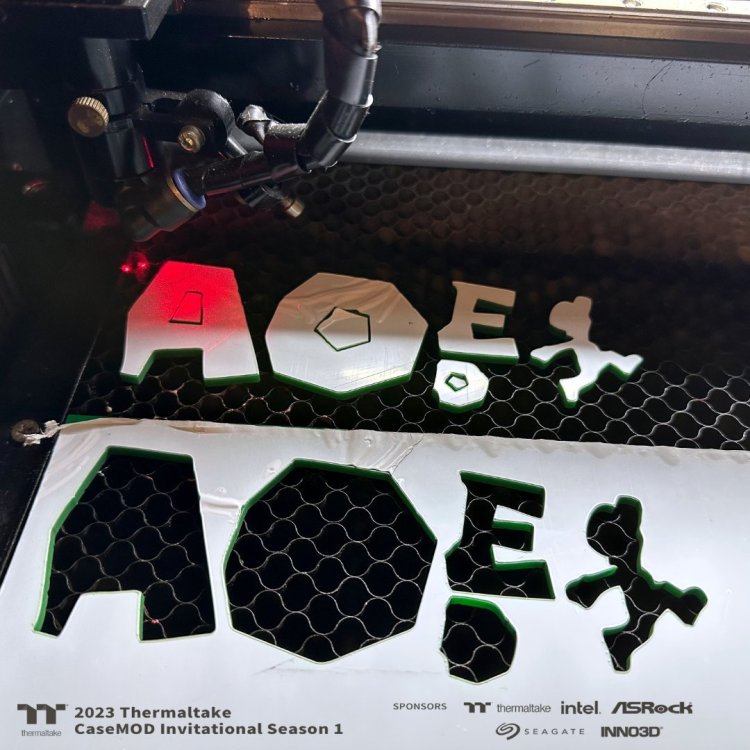
[Italy] Marco Di Silvestre
MPC Project replied to TT Amanda's topic in 2023 Thermaltake CaseMOD Invitational Season 1
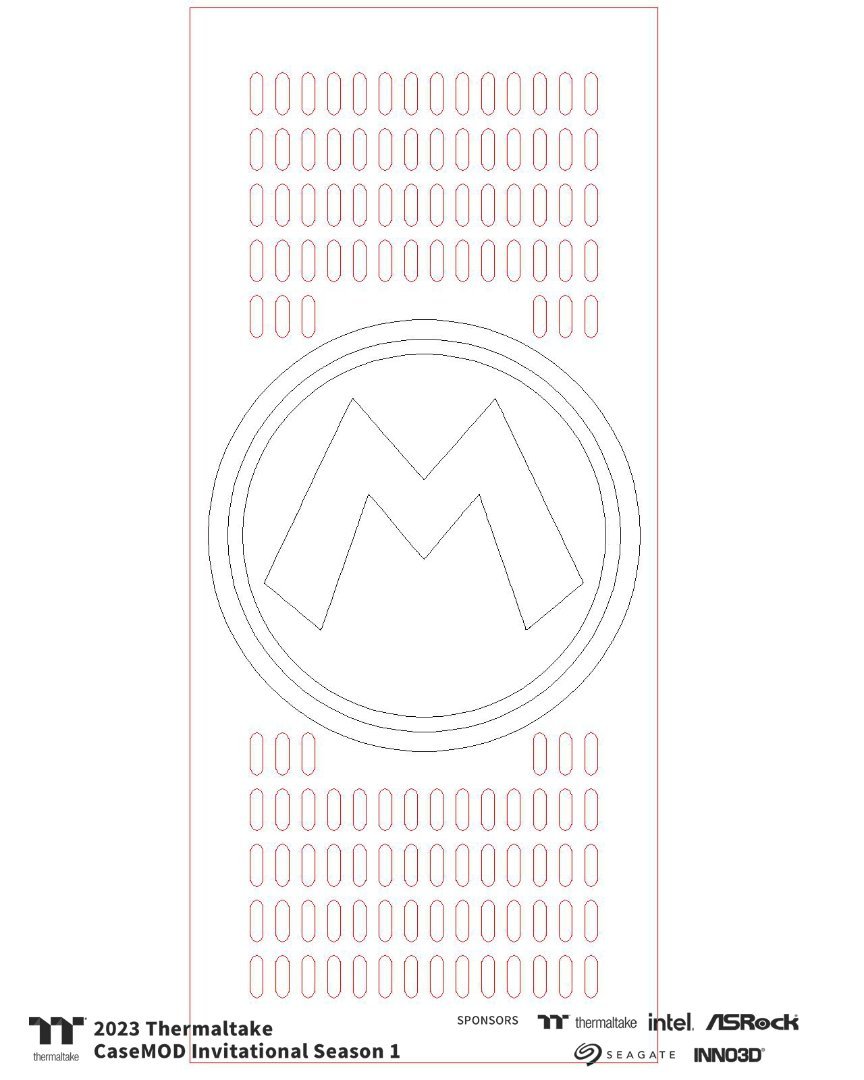
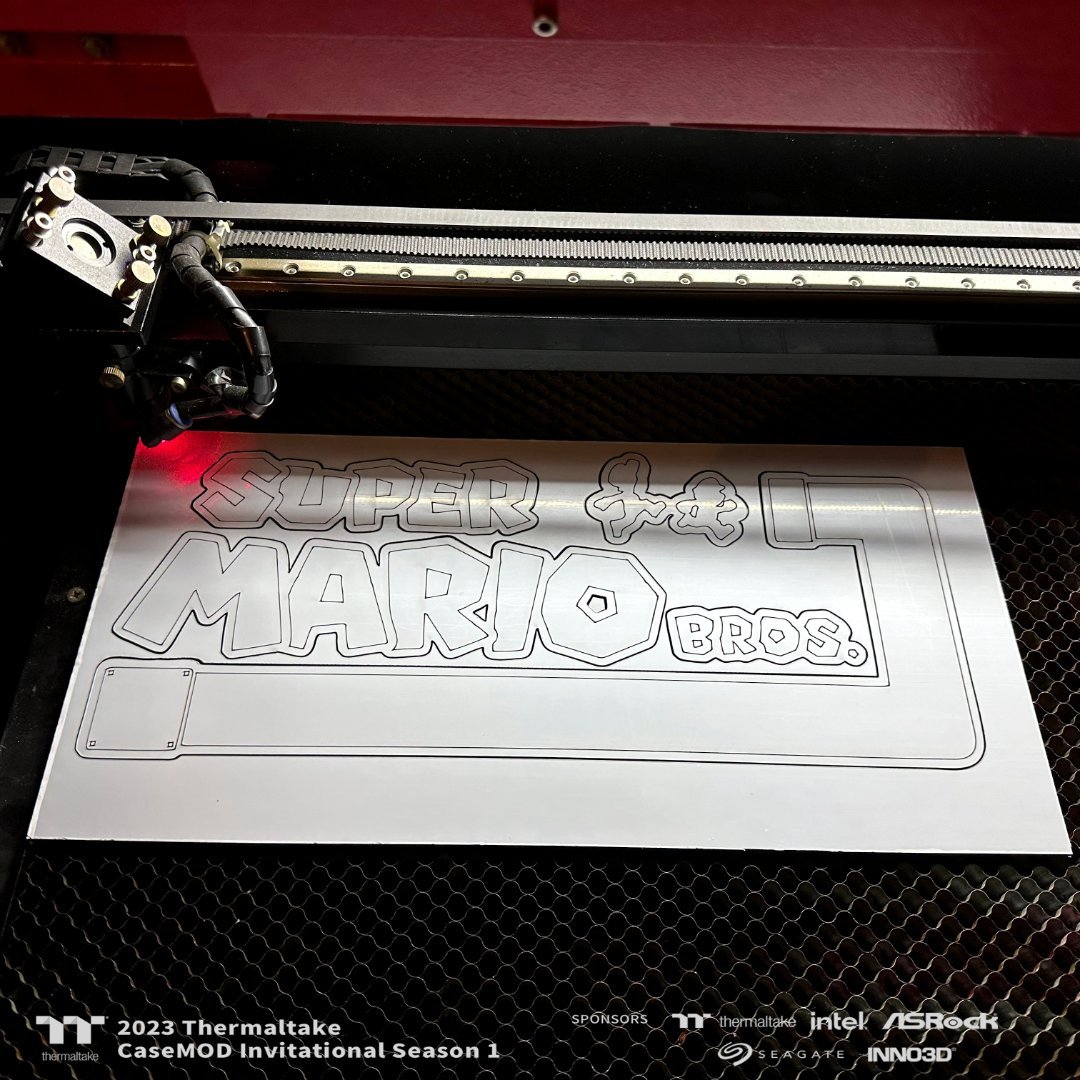
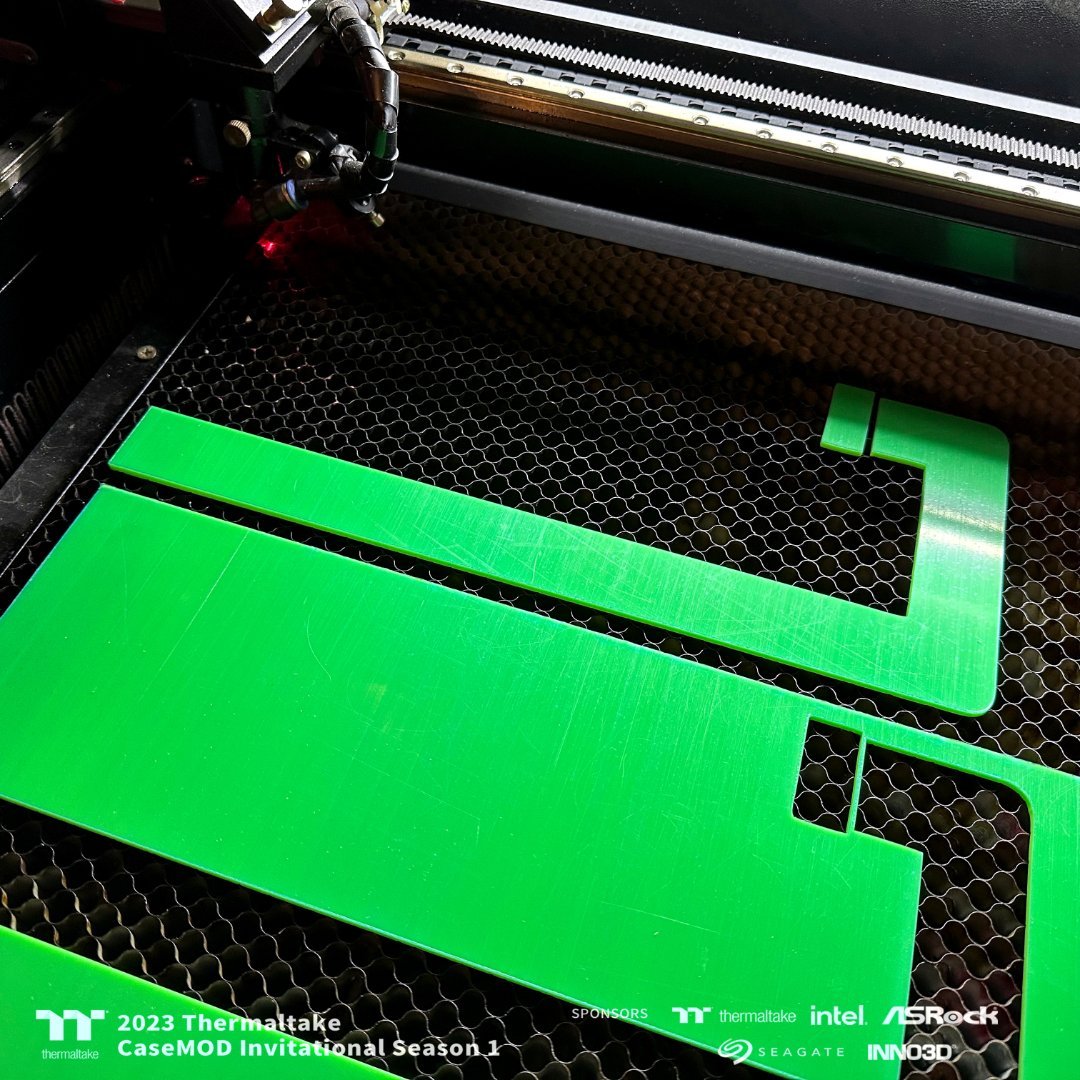
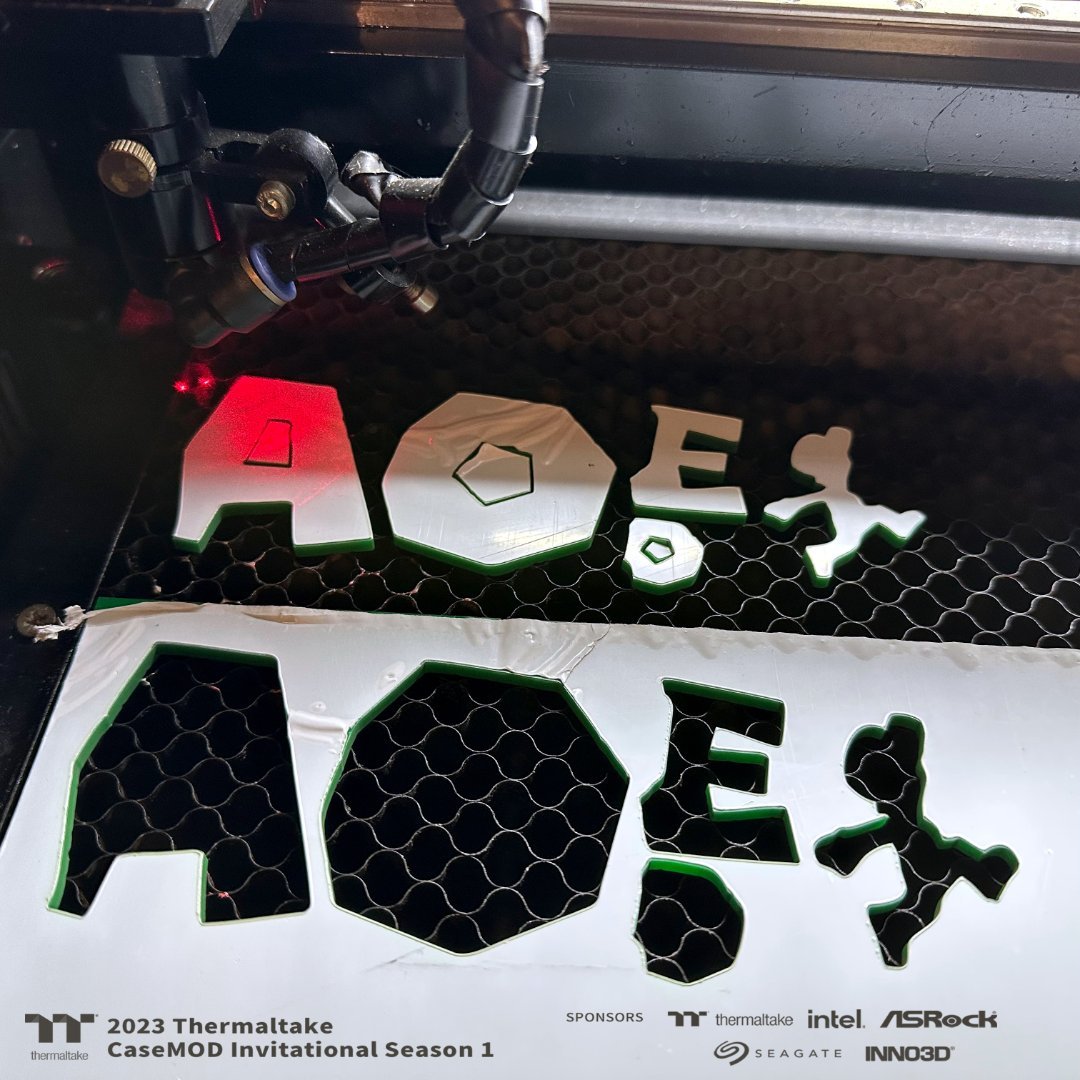
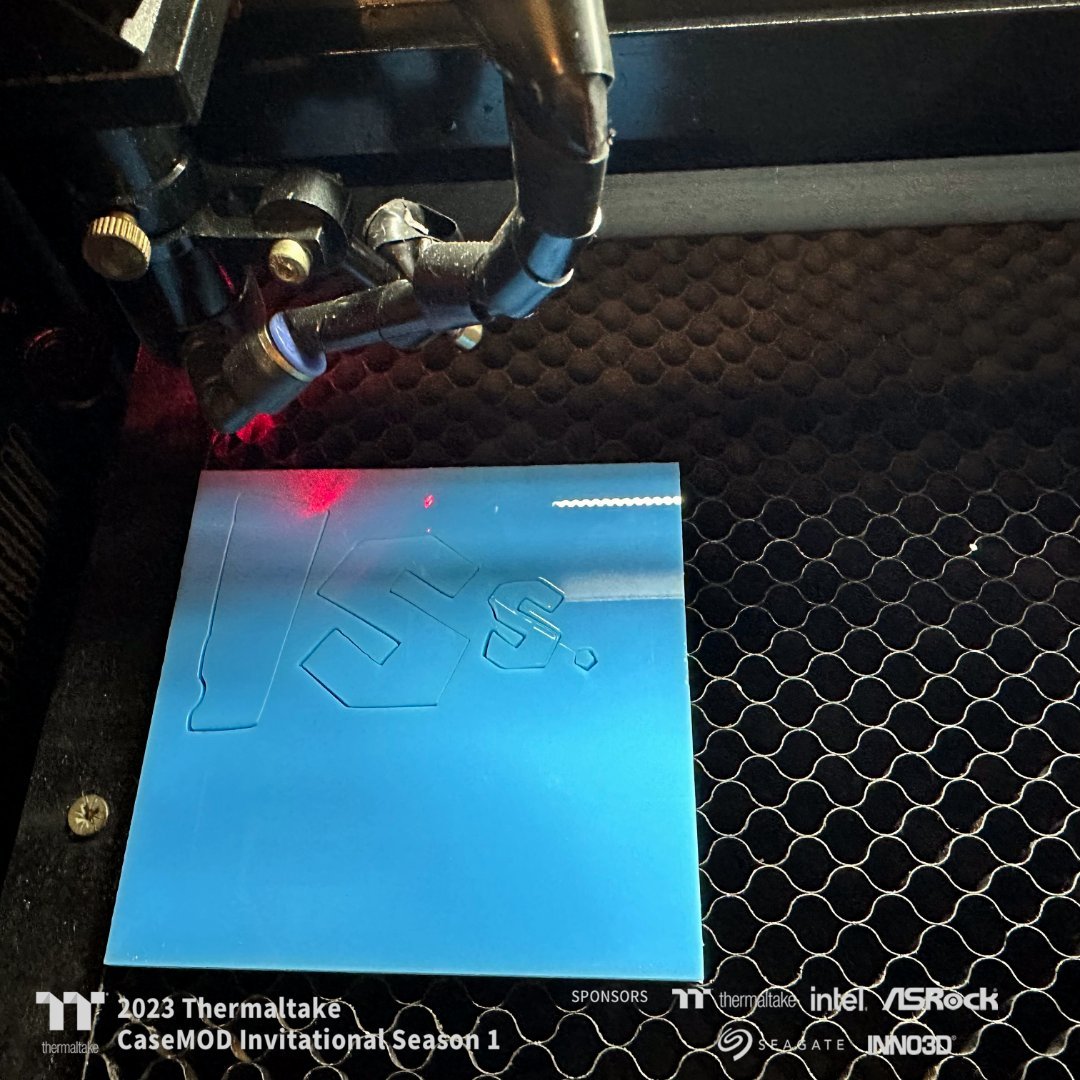
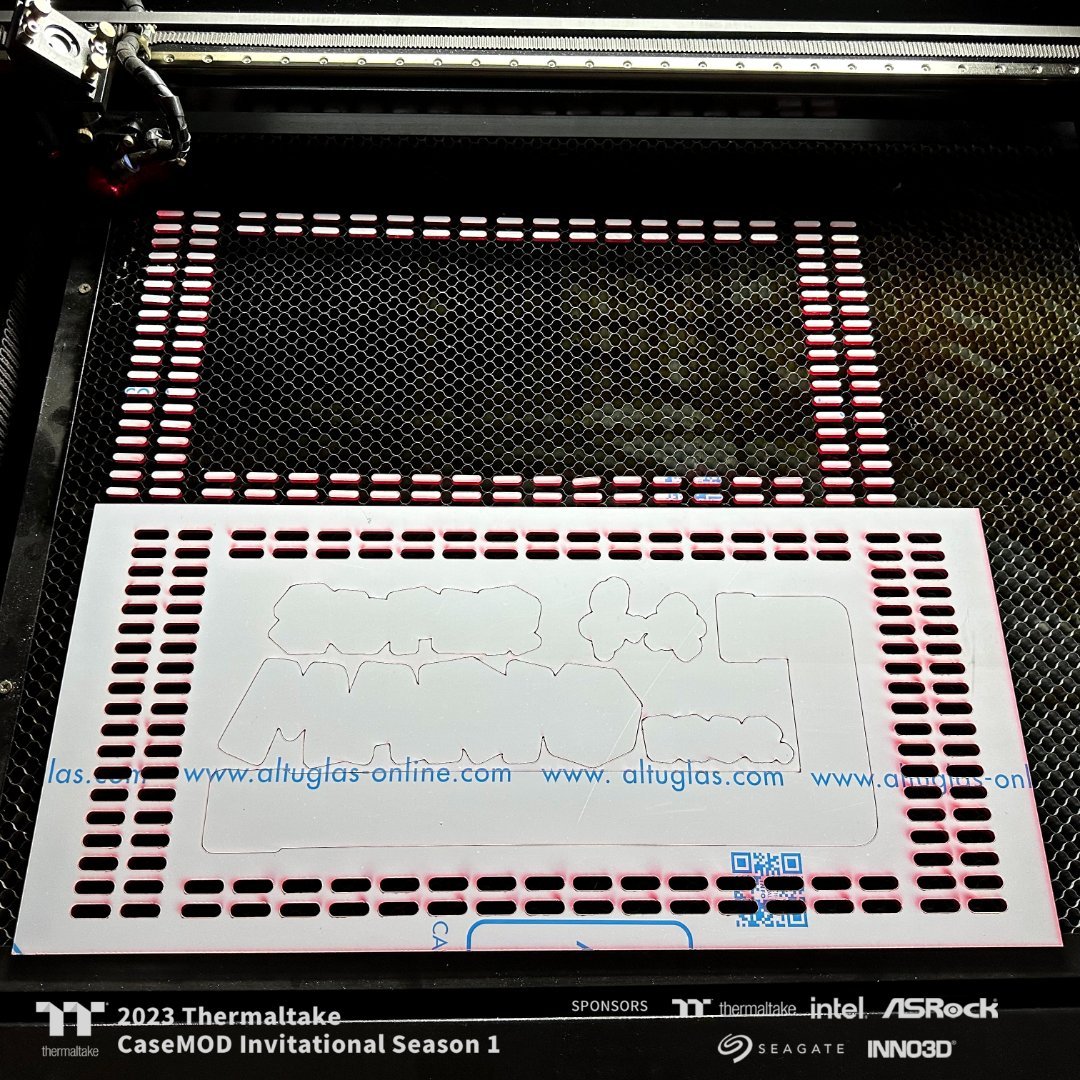
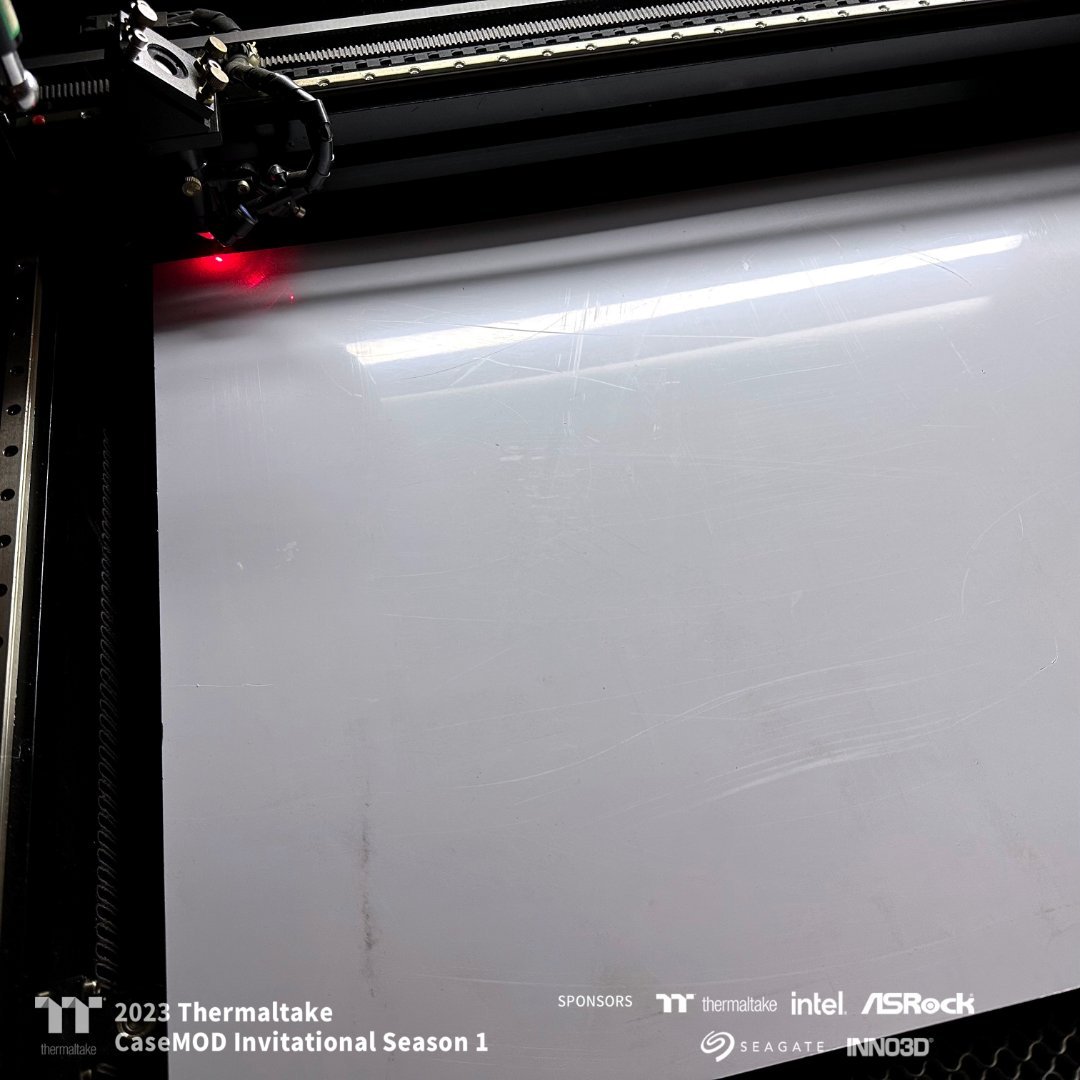
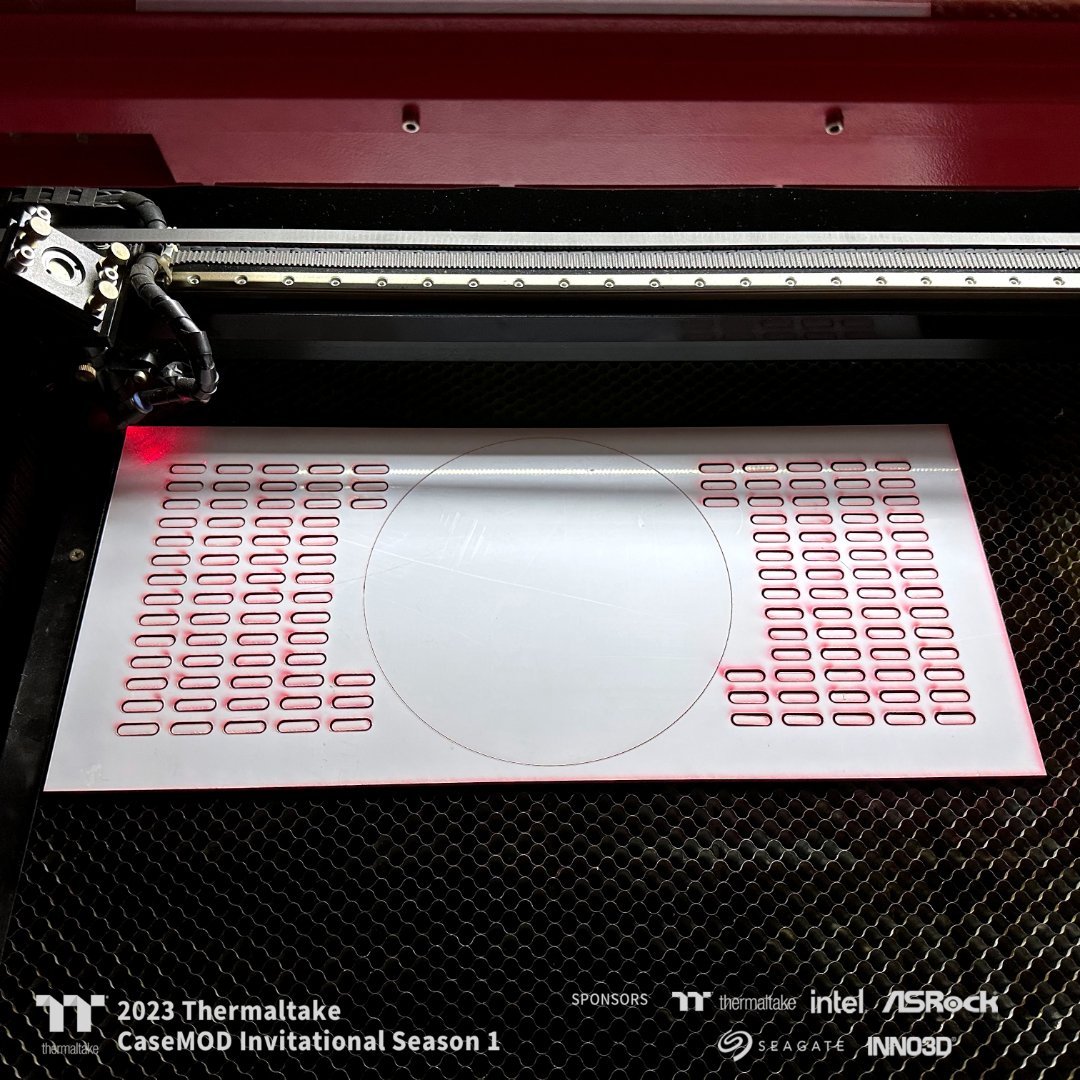
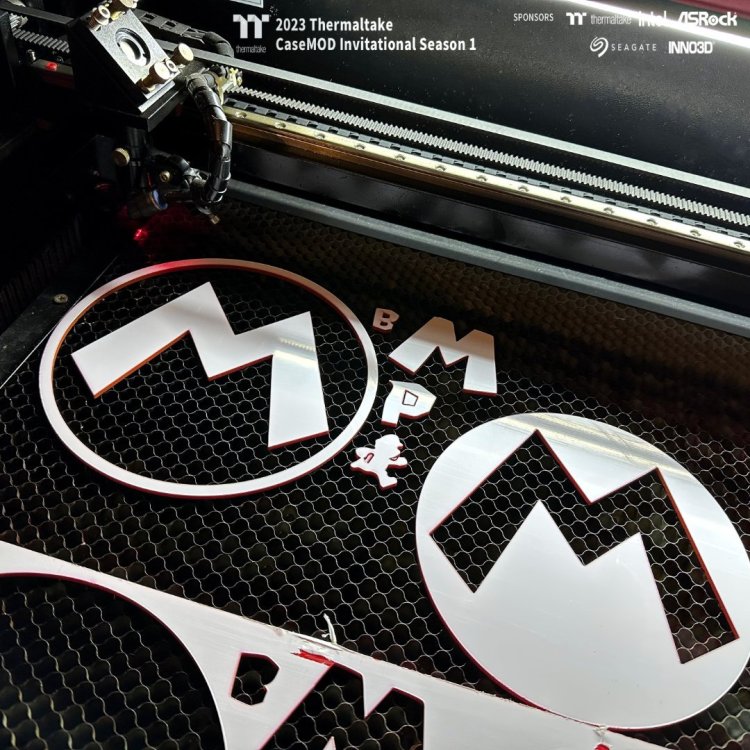
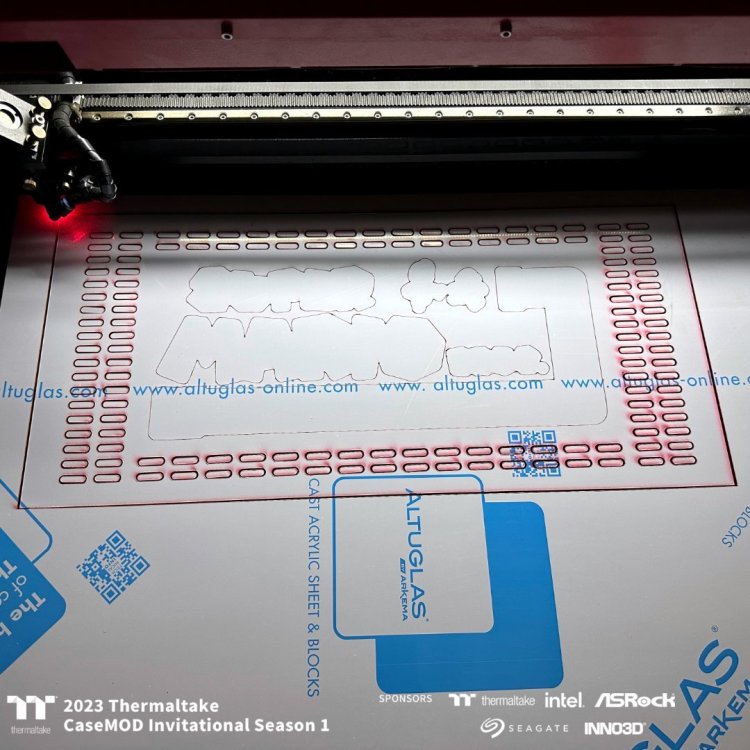
Laser cutting of the top panel and back of the cabinet - Part Three From the initial drawing, I start to place all the various pieces of laser cut colored plexiglass.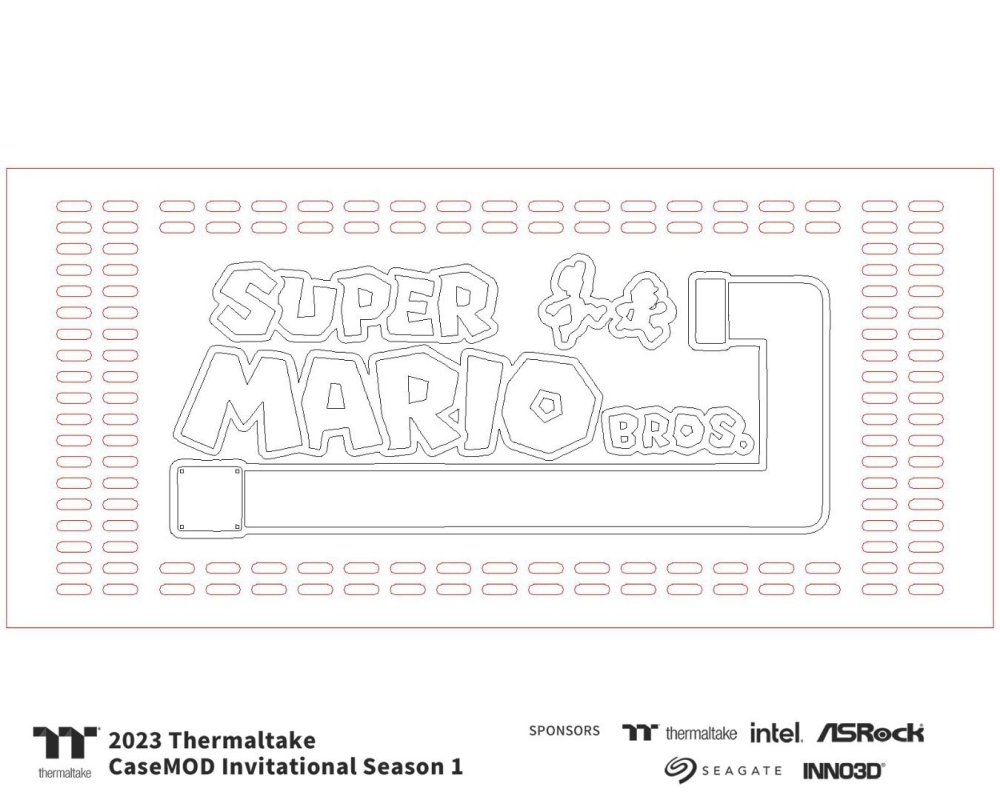


-
[Italy] Marco Di Silvestre
MPC Project replied to TT Amanda's topic in 2023 Thermaltake CaseMOD Invitational Season 1
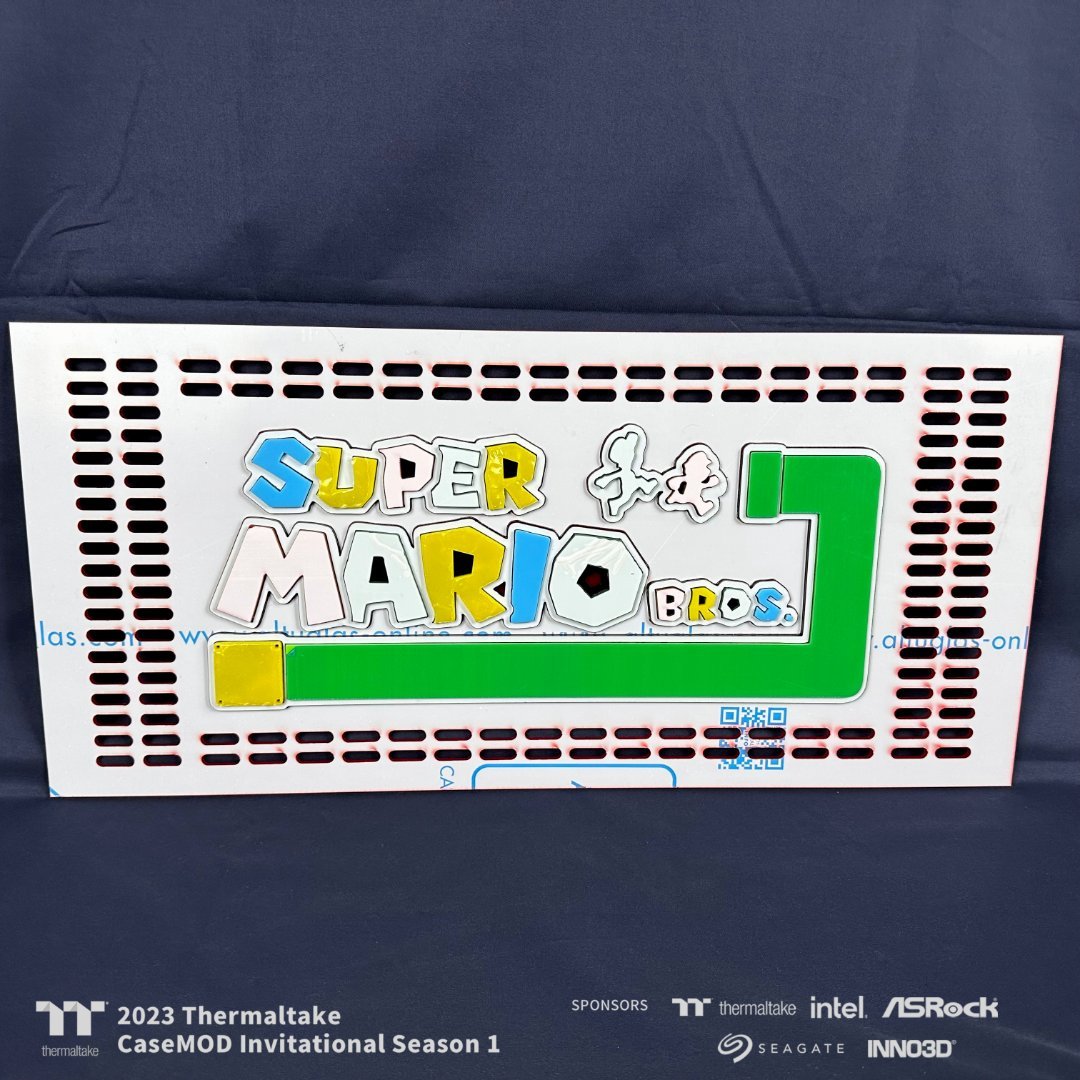
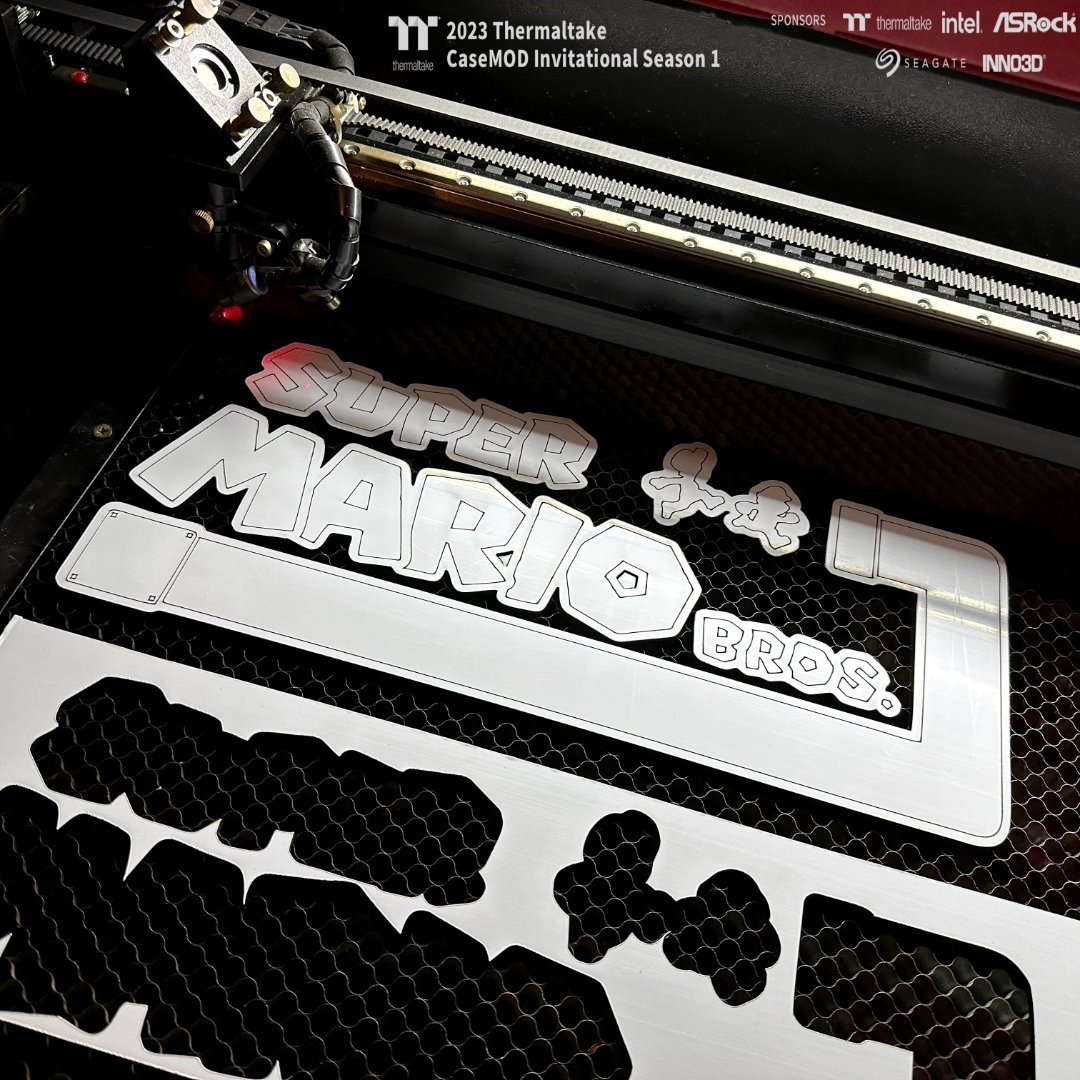
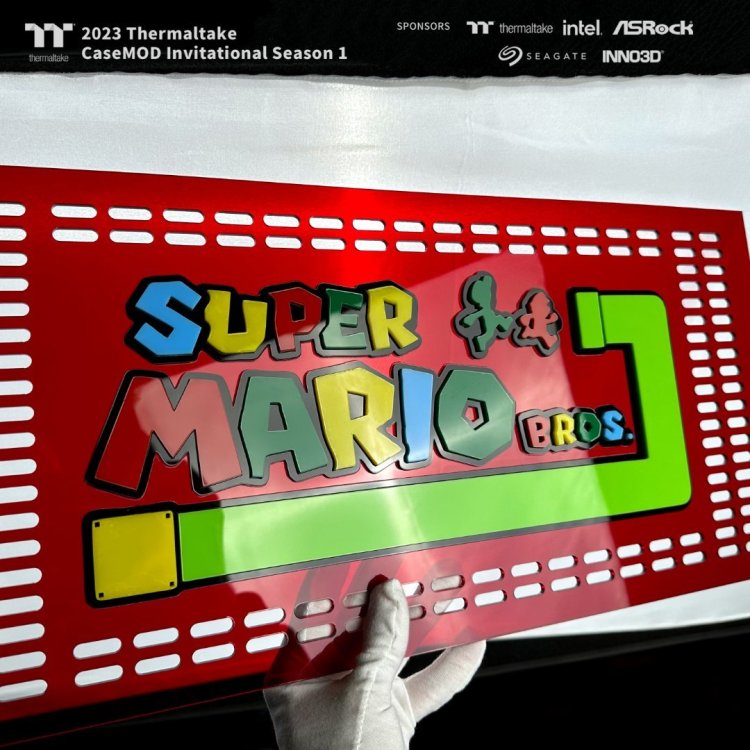
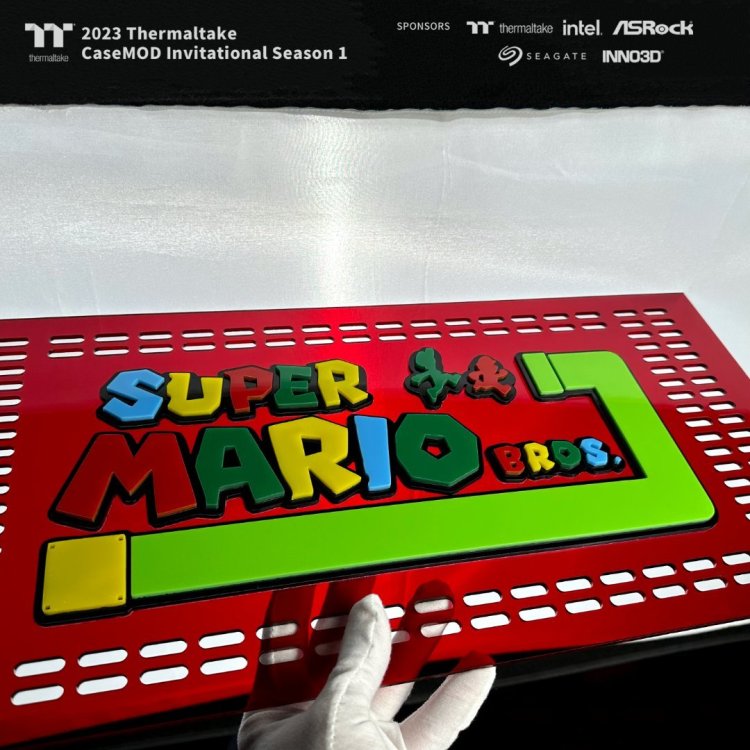
Laser cutting of the top panel and back of the cabinet - Part Two Now we give a bit of liveliness and three-dimensionality to the top and back panels going to work plexiglass panels with different colors typical of Super Mario Bros.
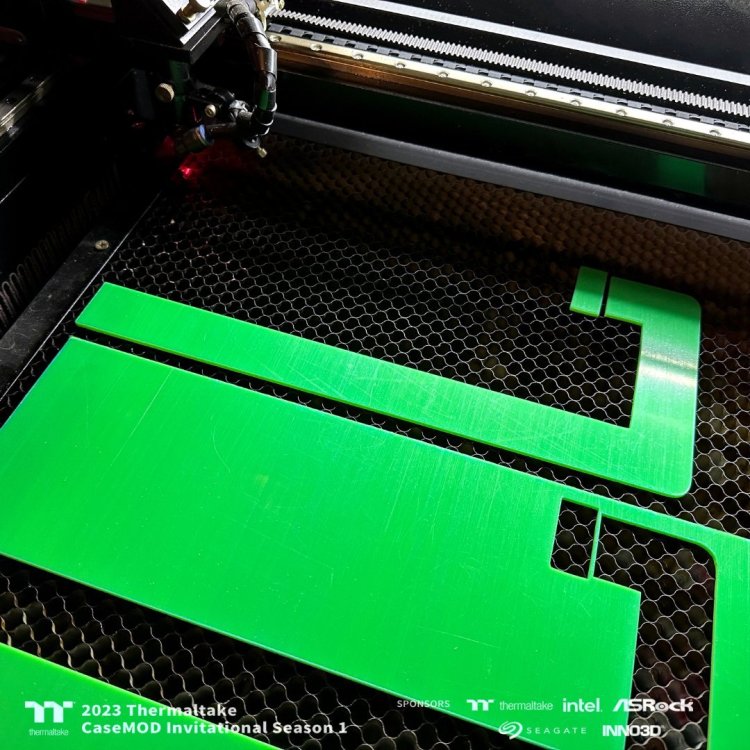

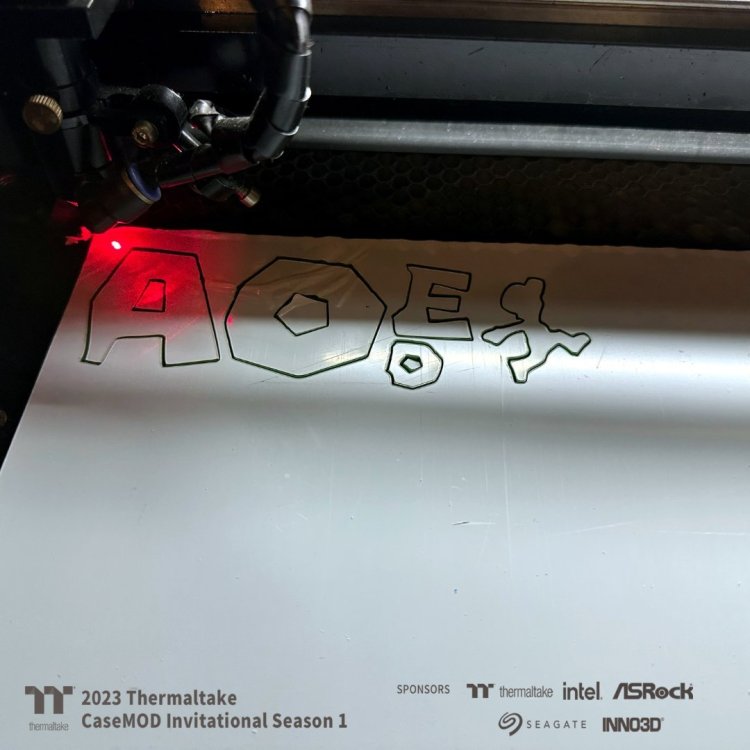


-
[Italy] Marco Di Silvestre
MPC Project replied to TT Amanda's topic in 2023 Thermaltake CaseMOD Invitational Season 1
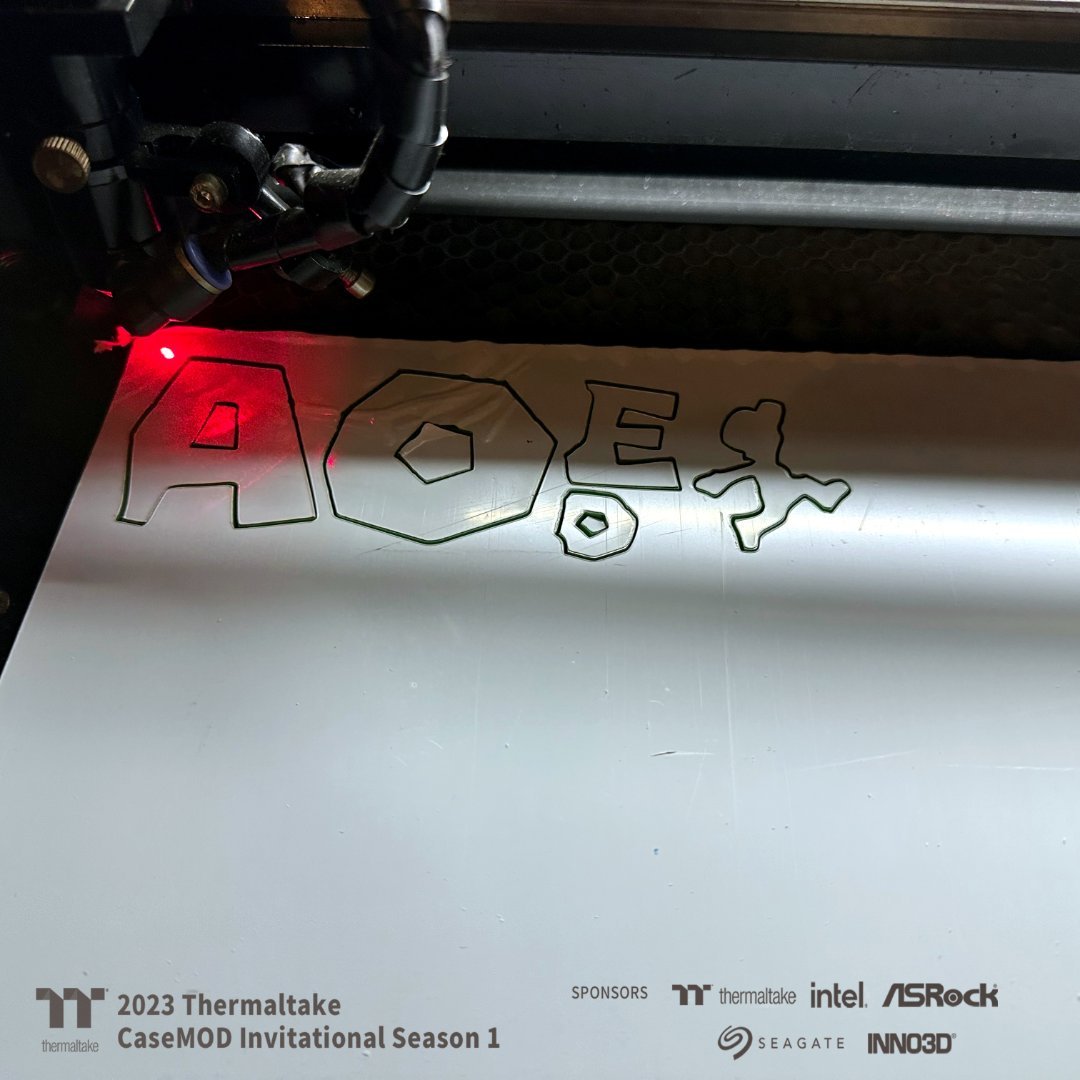
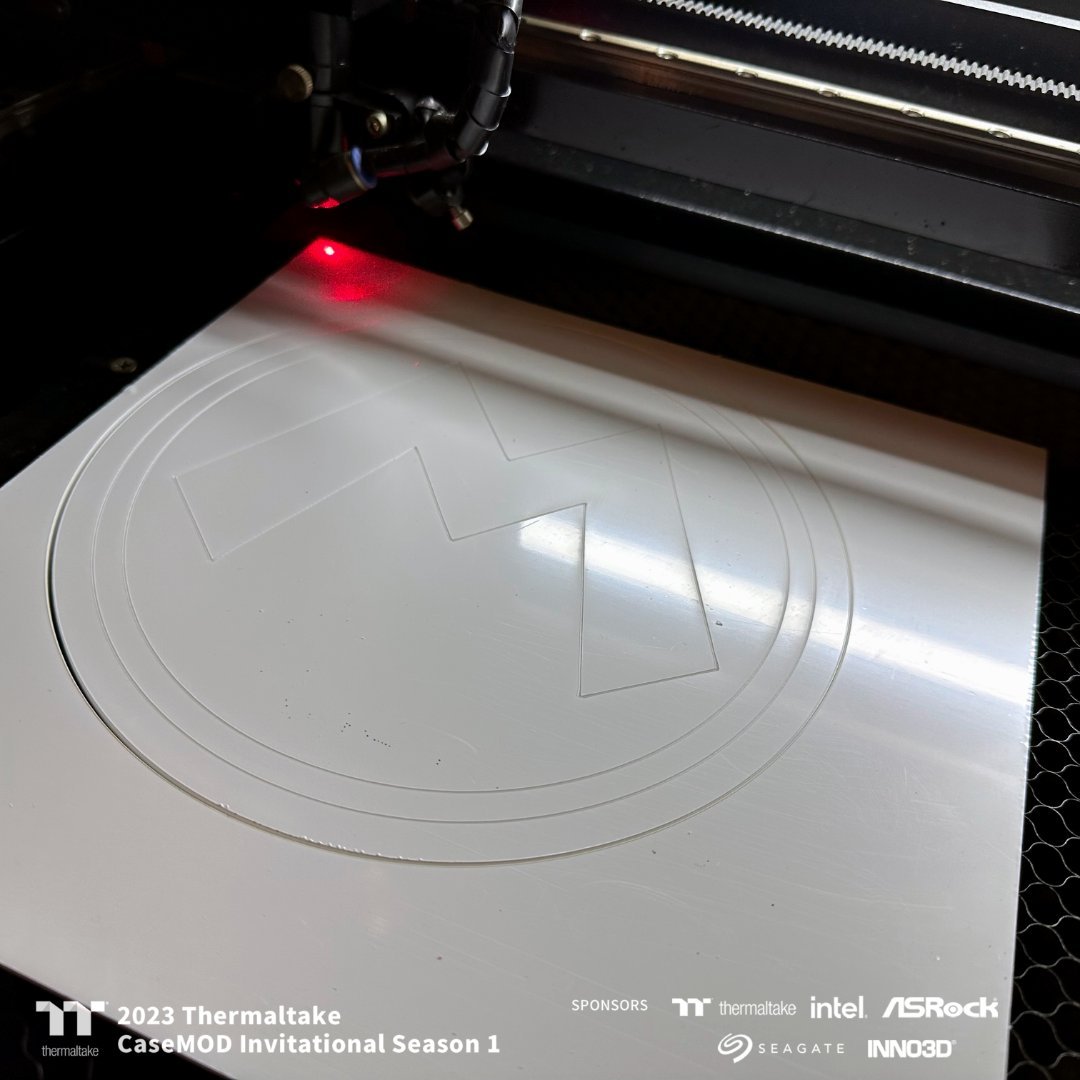
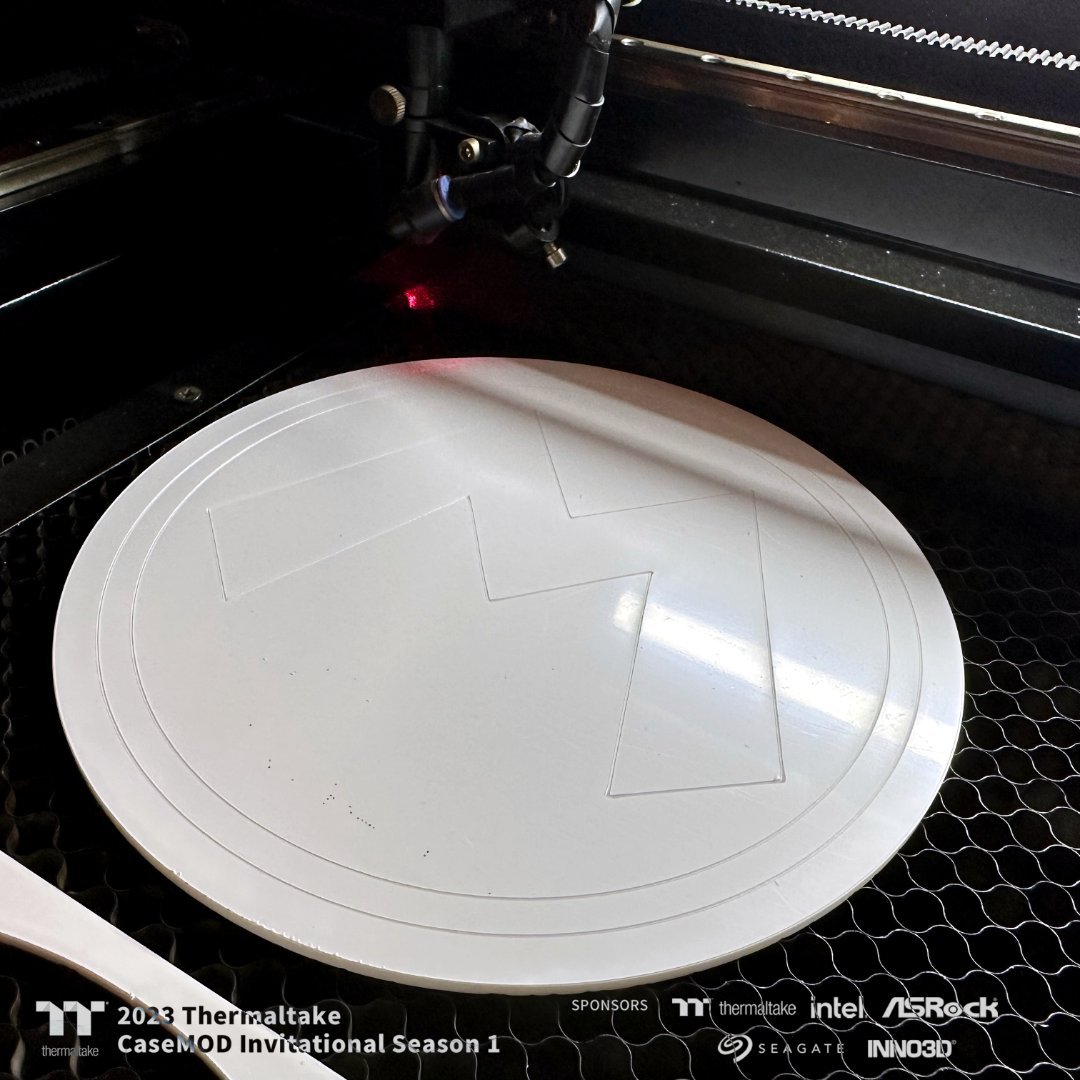
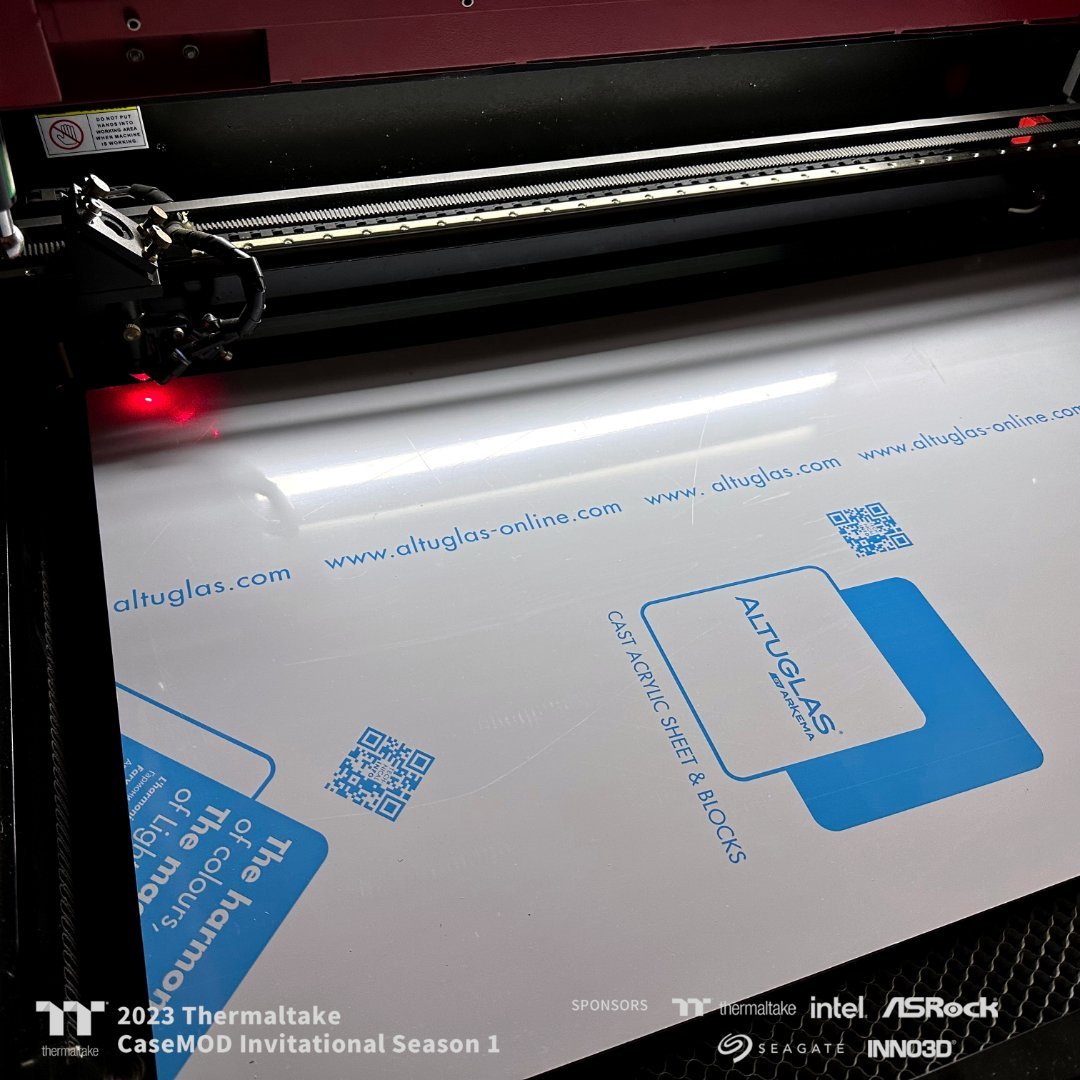
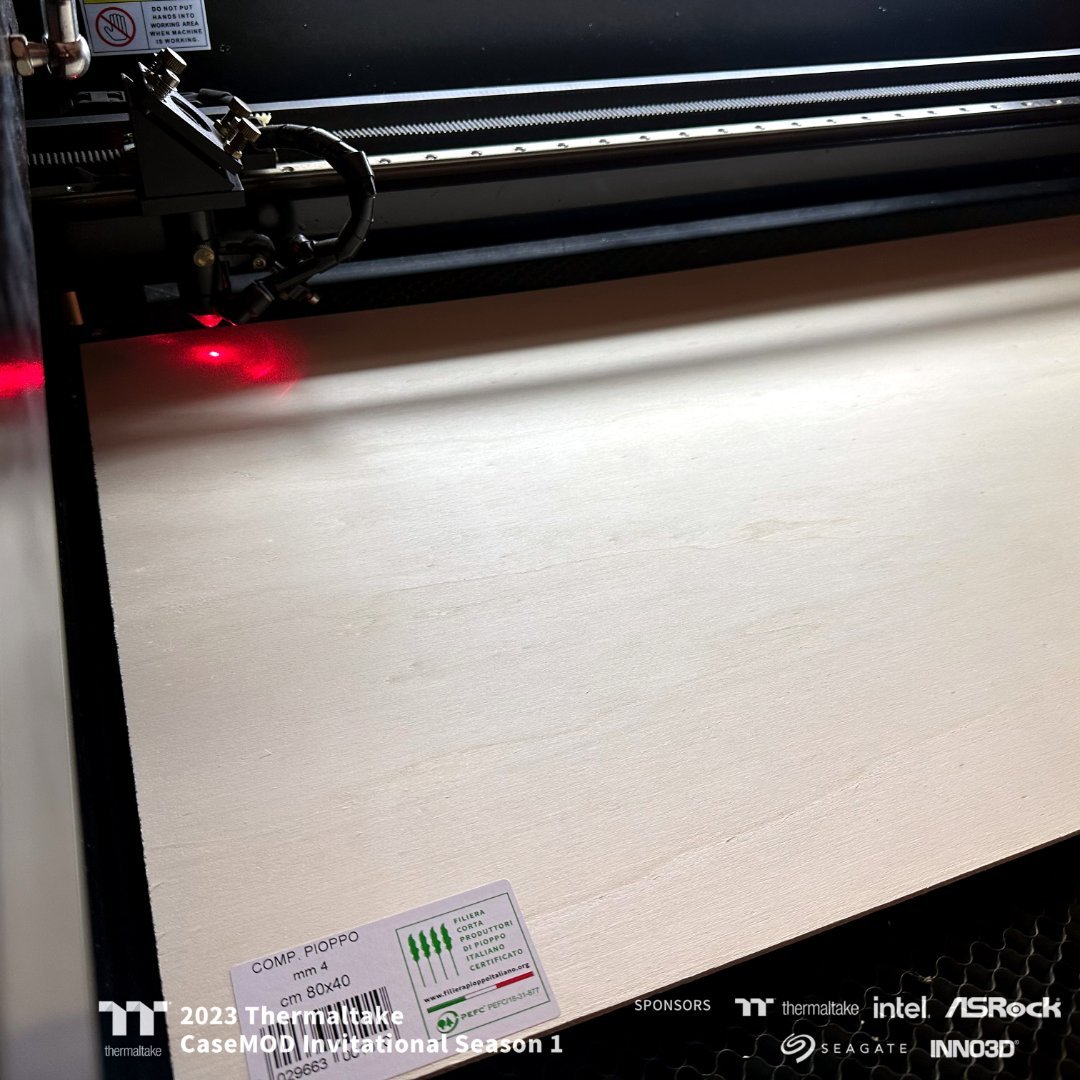
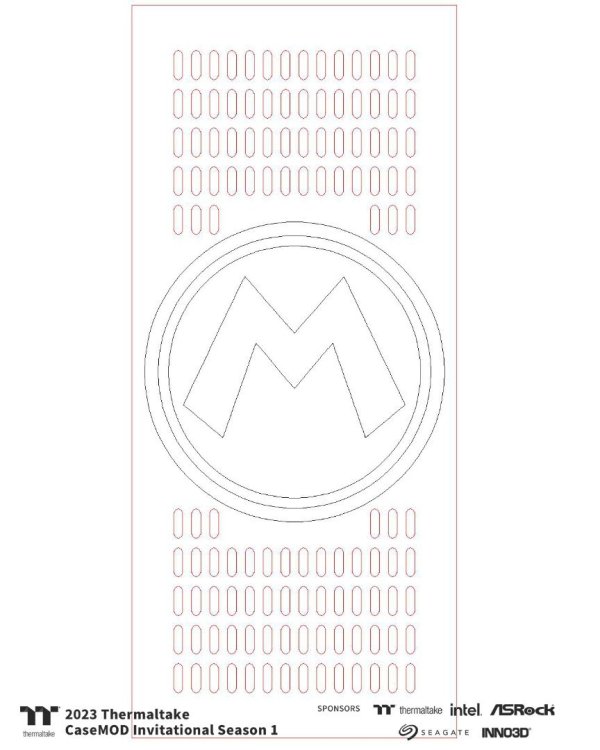
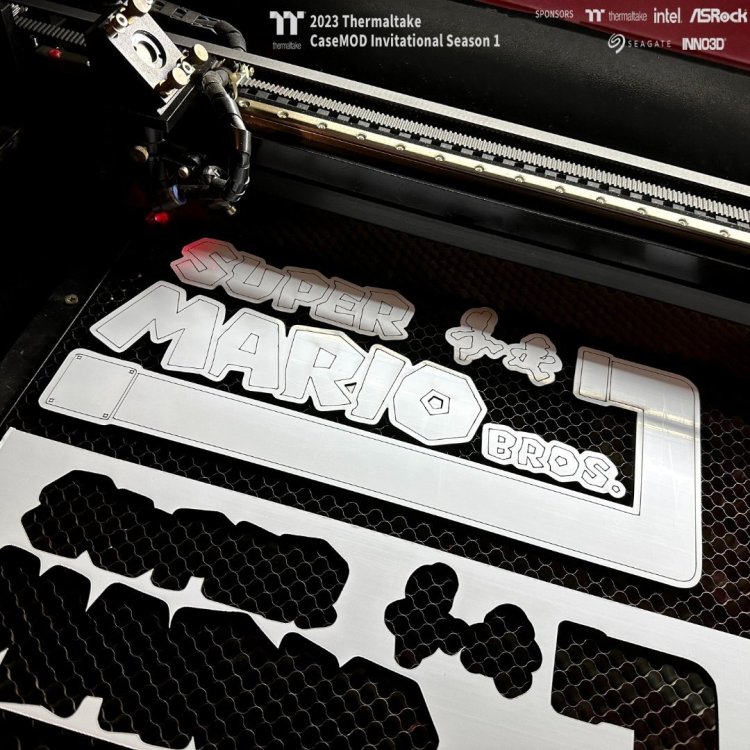
Laser cutting of the top panel and back of the cabinet - Part One

-
[Italy] Marco Di Silvestre
MPC Project replied to TT Amanda's topic in 2023 Thermaltake CaseMOD Invitational Season 1
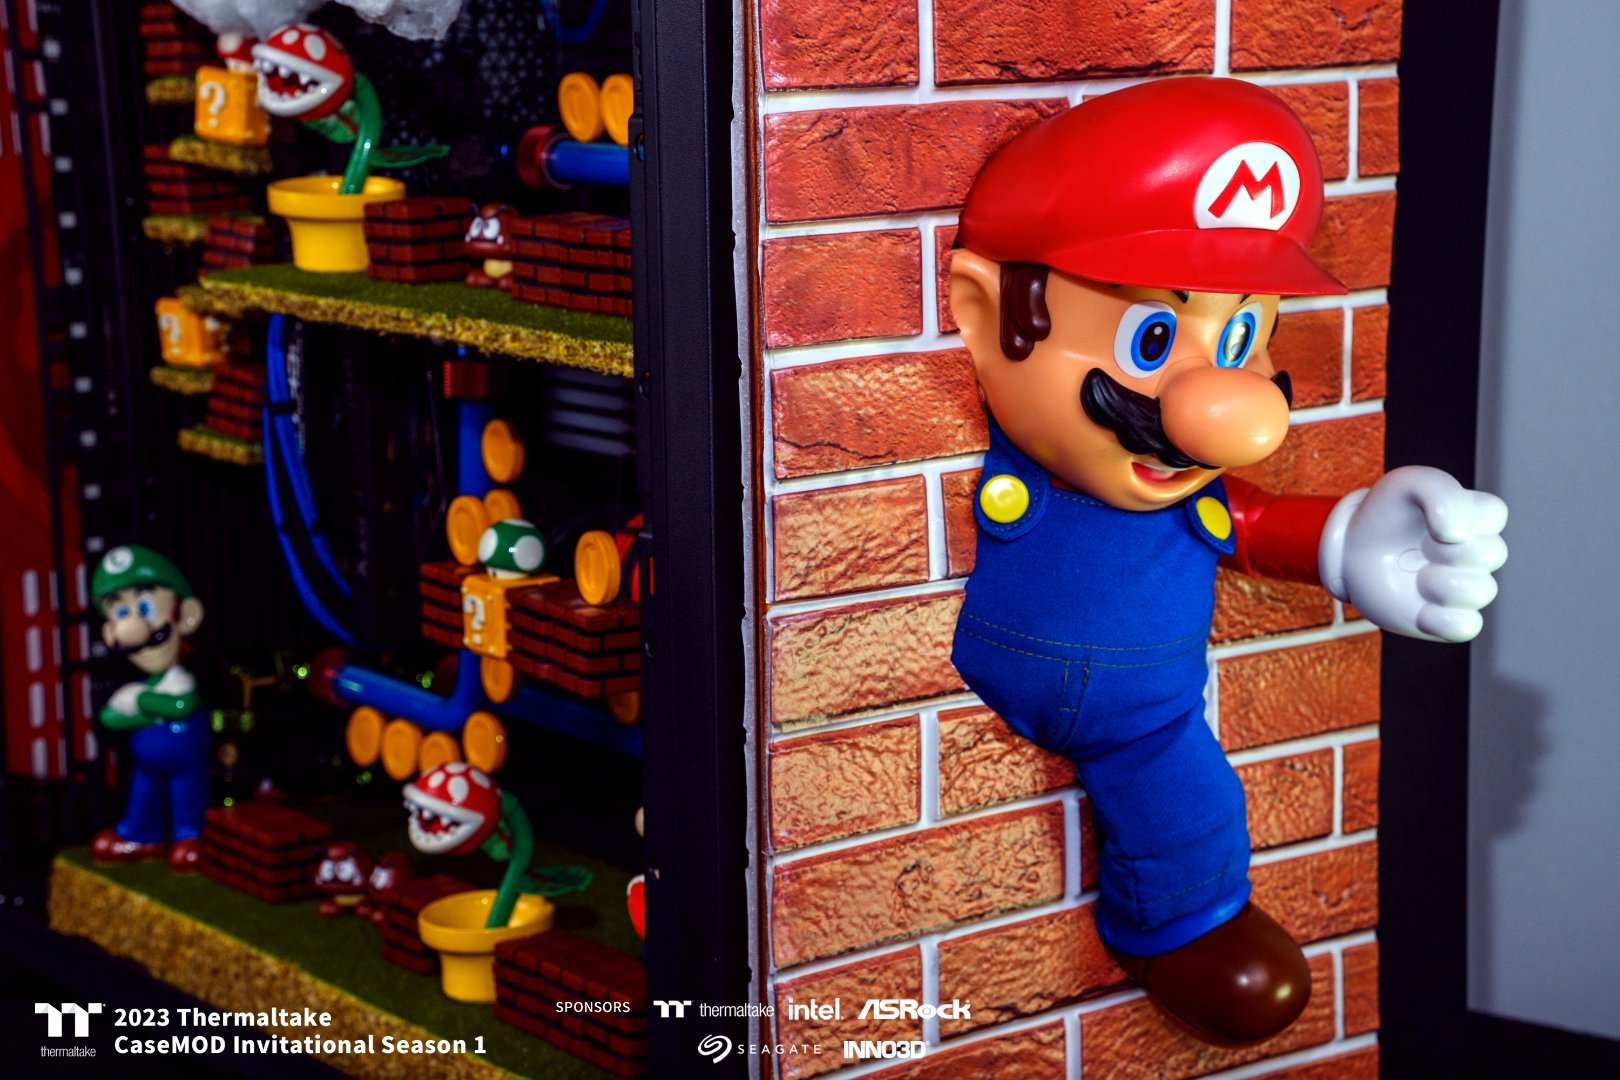
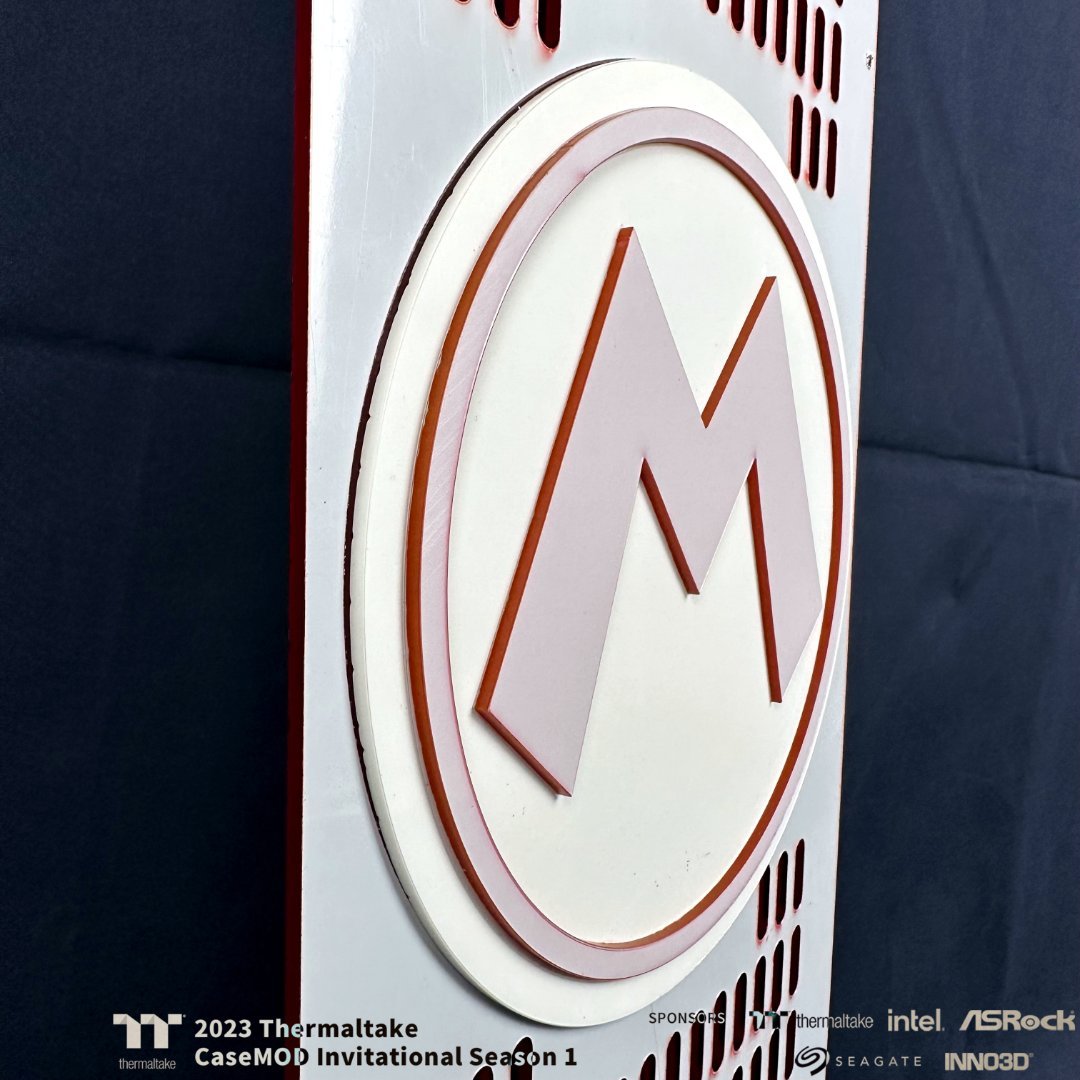
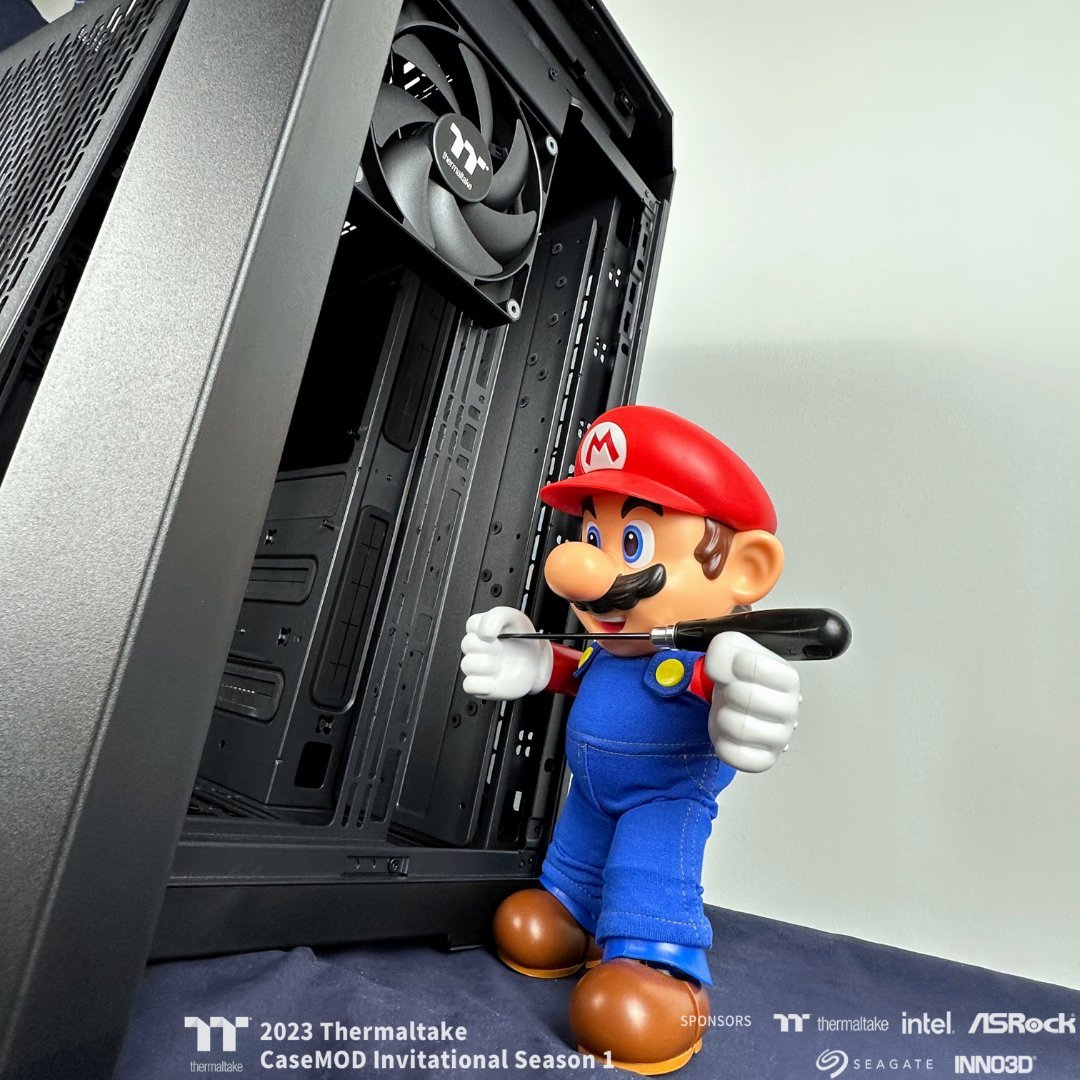
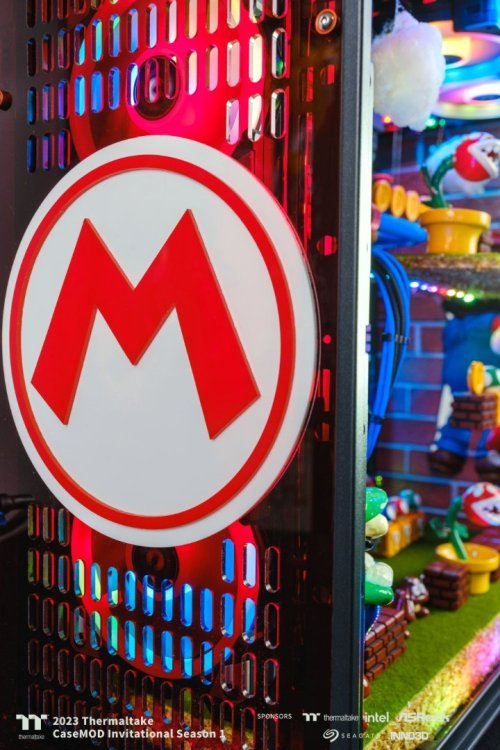
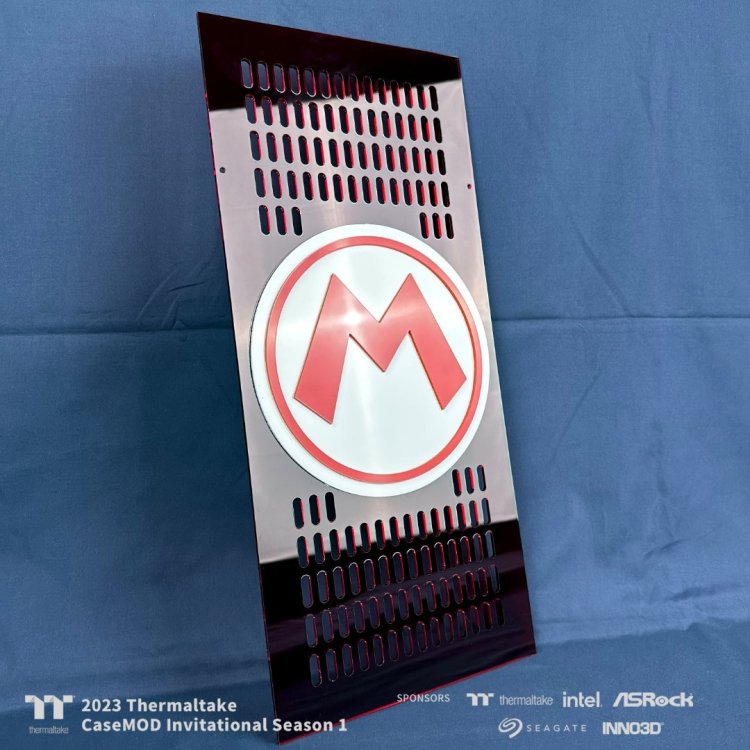
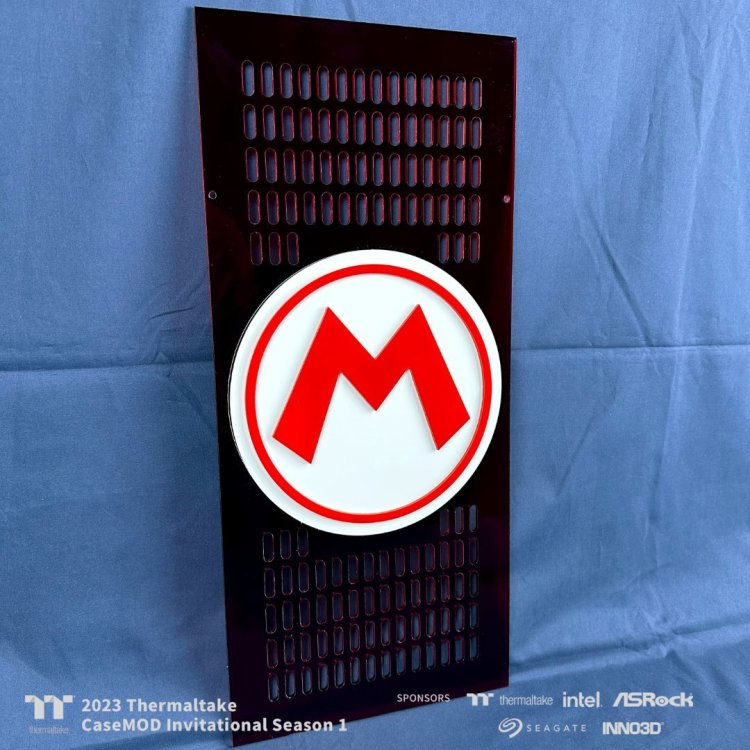
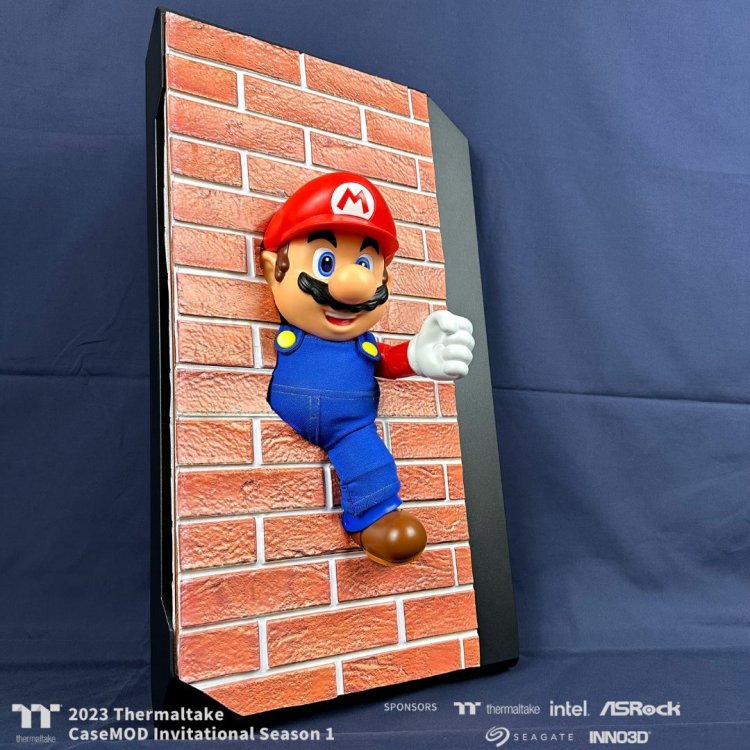
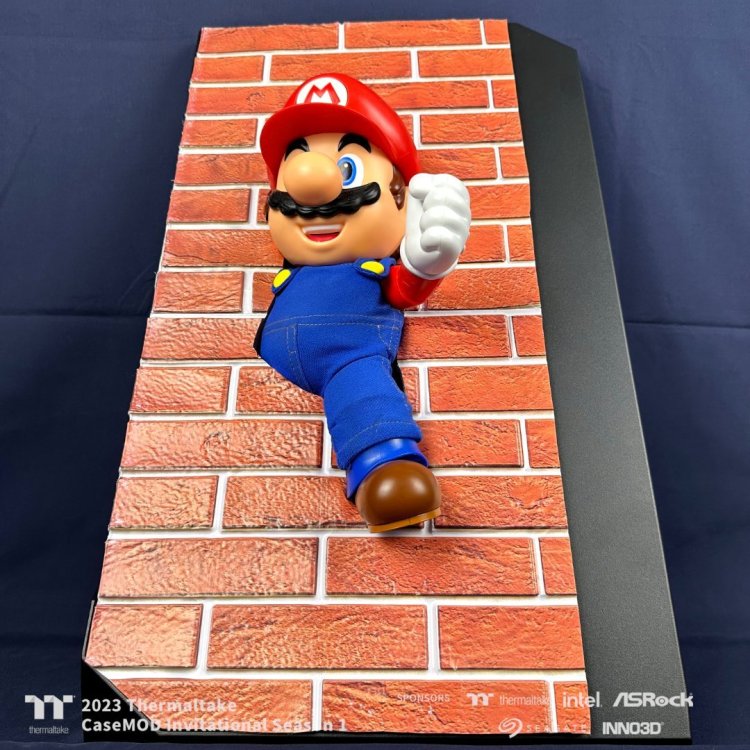
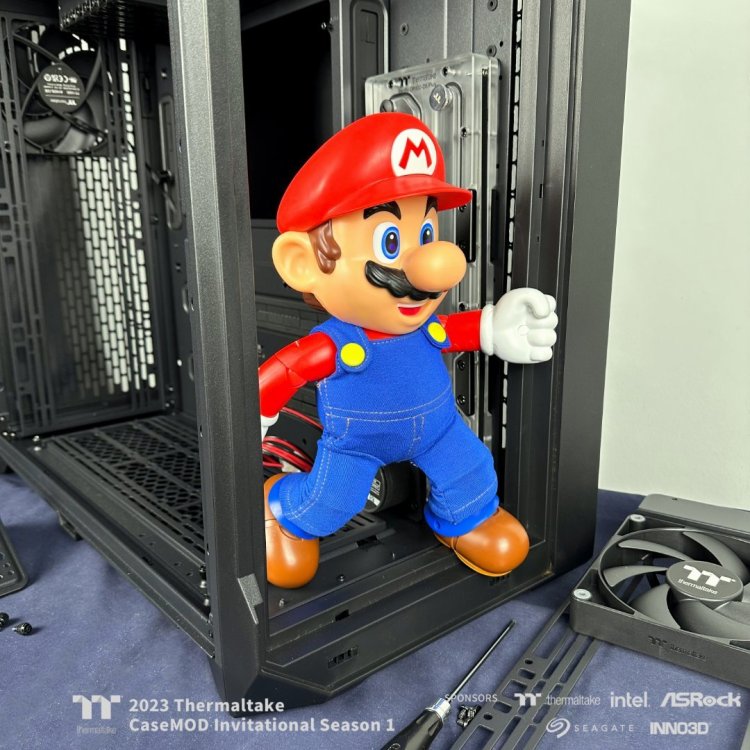
It's official, Mario has took possession of the front of the cabinet and to do so he also managed to break the three-dimensional wall 😱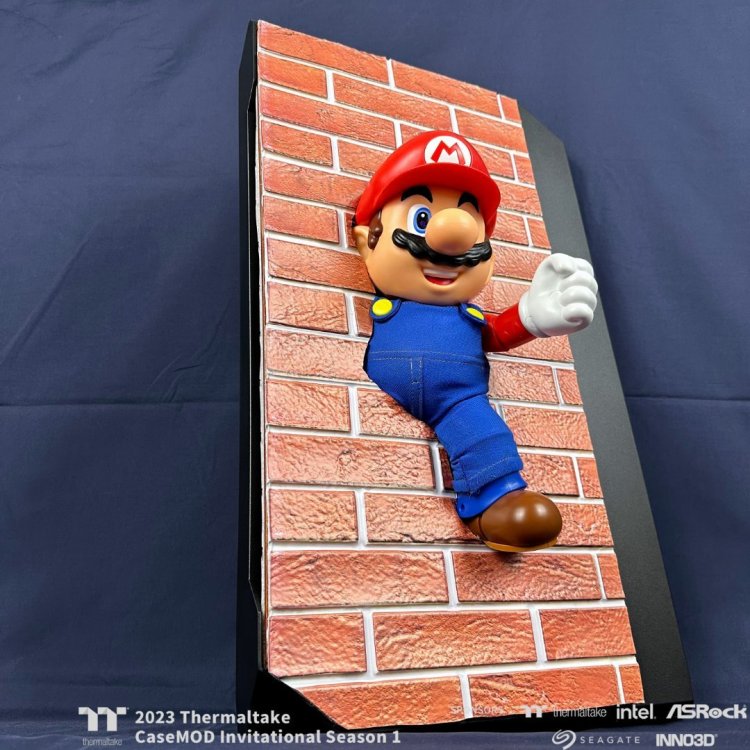


-
[Italy] Marco Di Silvestre
MPC Project replied to TT Amanda's topic in 2023 Thermaltake CaseMOD Invitational Season 1
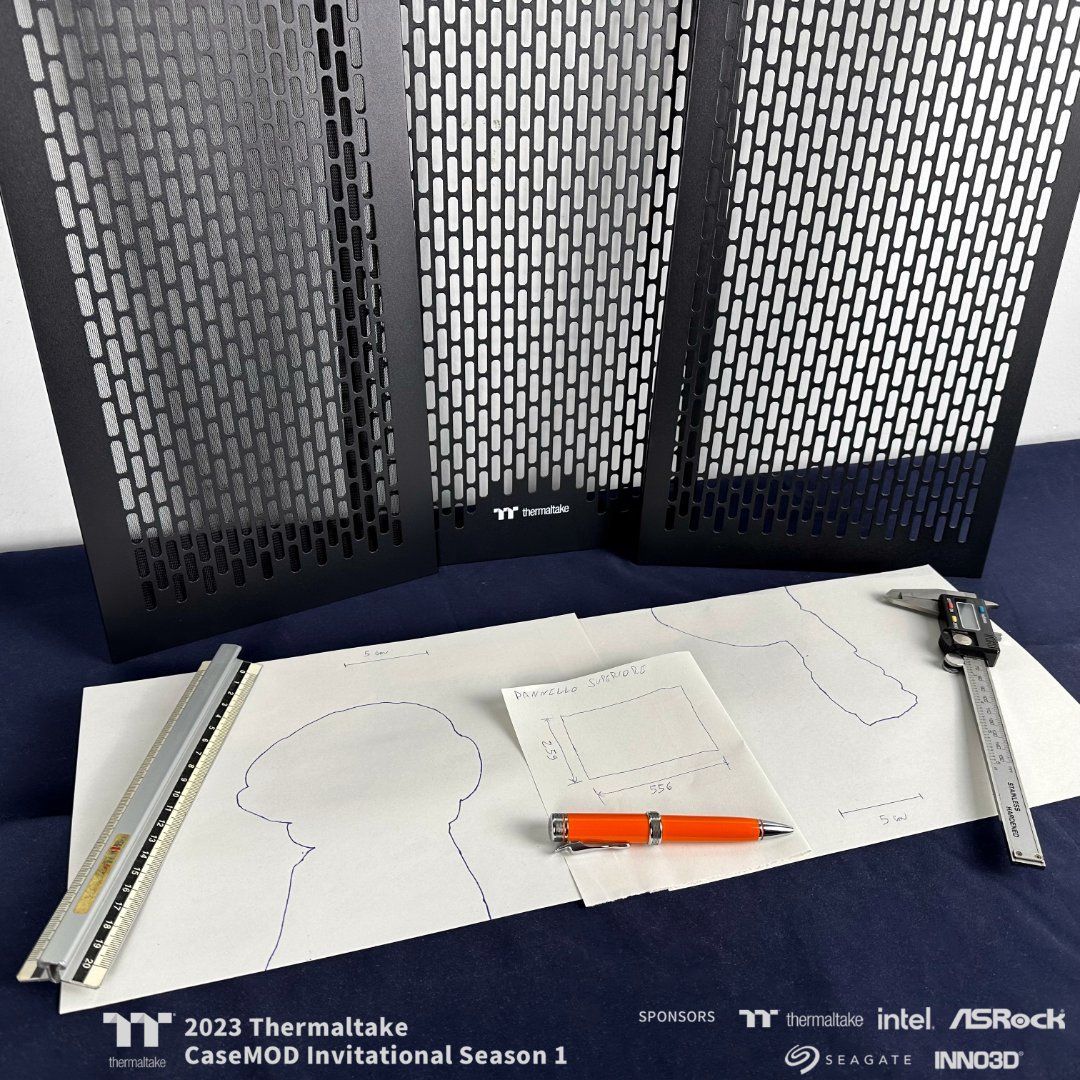
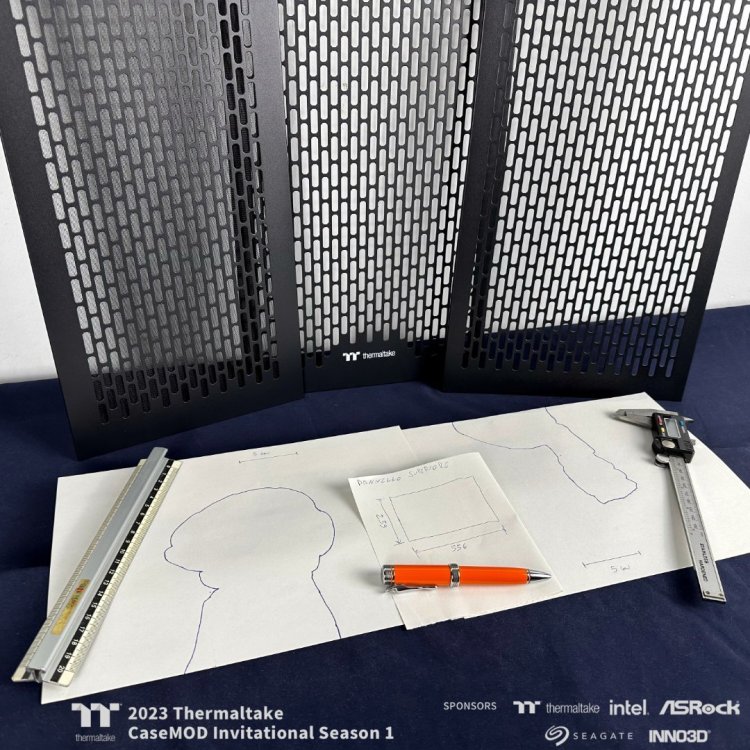
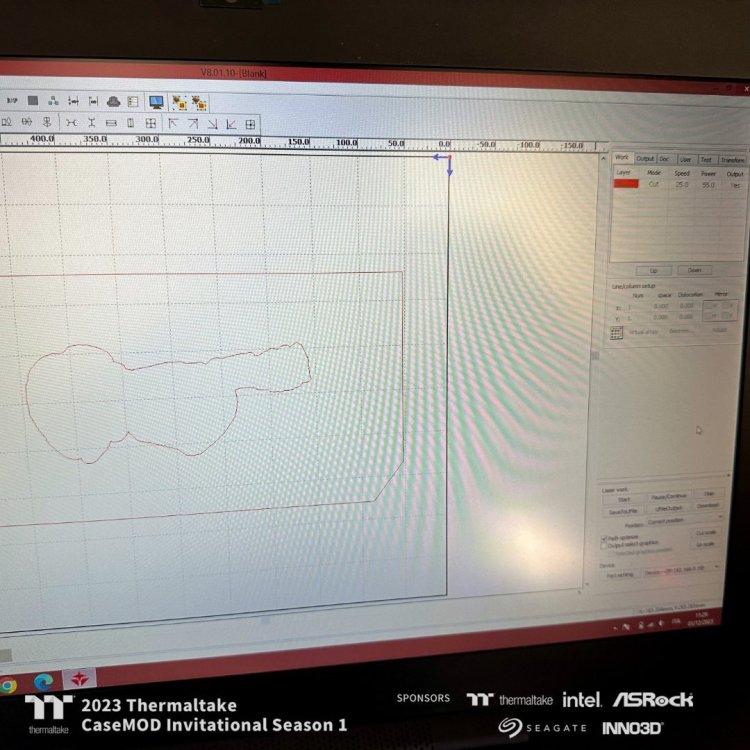
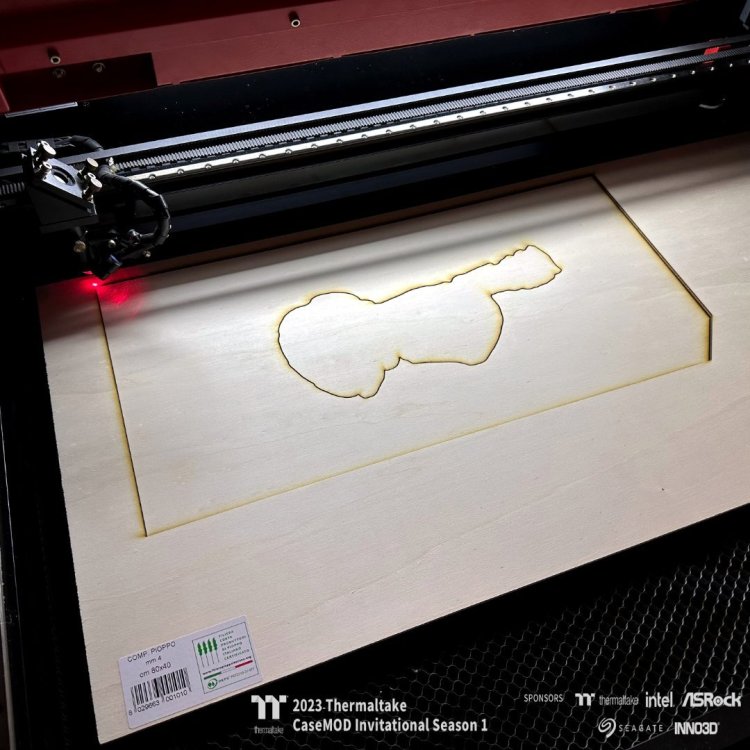
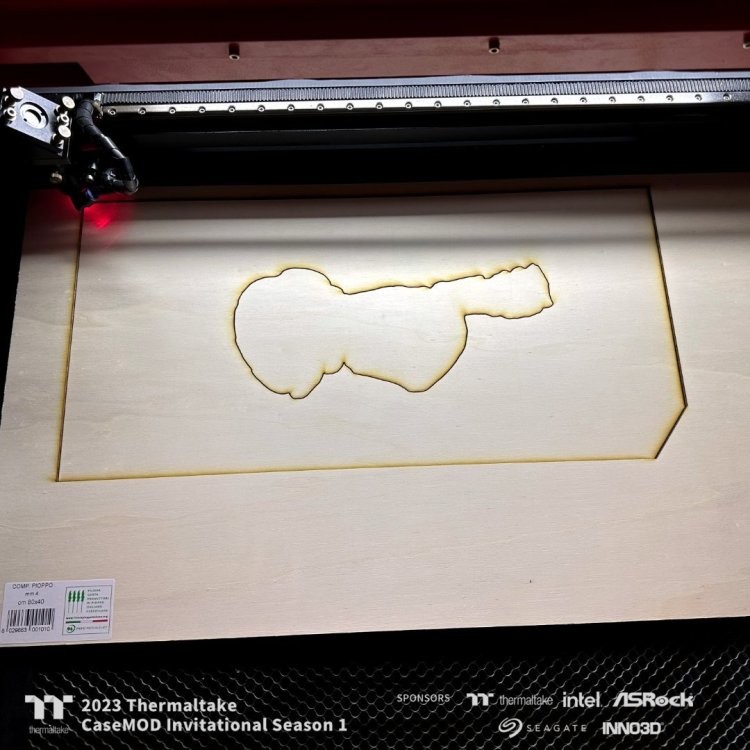
The intruder in my workshop named Mario said he wants the place on the front of the cabinet and that the top and back panel will have to be completely redone. I first start working with the old tools of the trade (pen and paper) and then move on to drawing on software and finally processing on laser cutting ✌️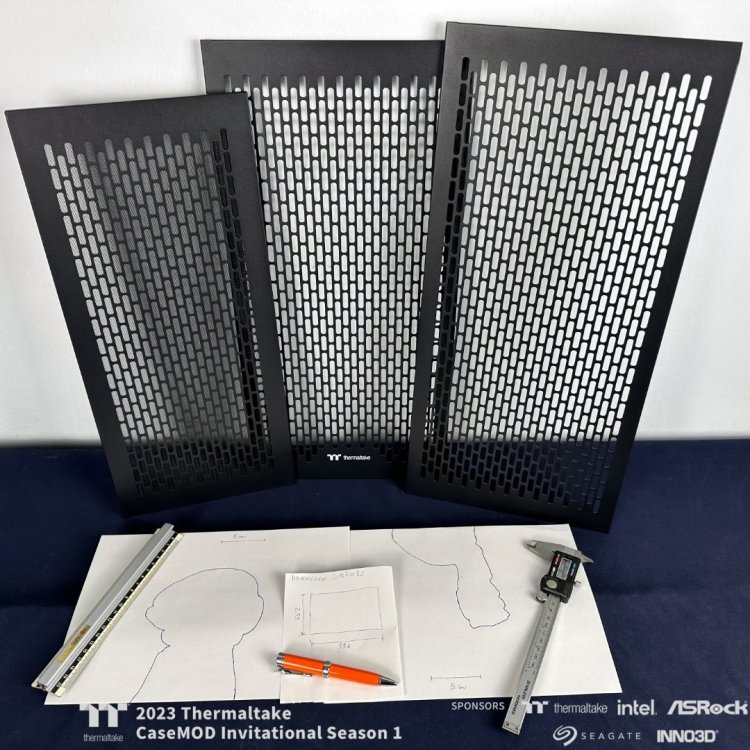

-
[Italy] Marco Di Silvestre
MPC Project replied to TT Amanda's topic in 2023 Thermaltake CaseMOD Invitational Season 1
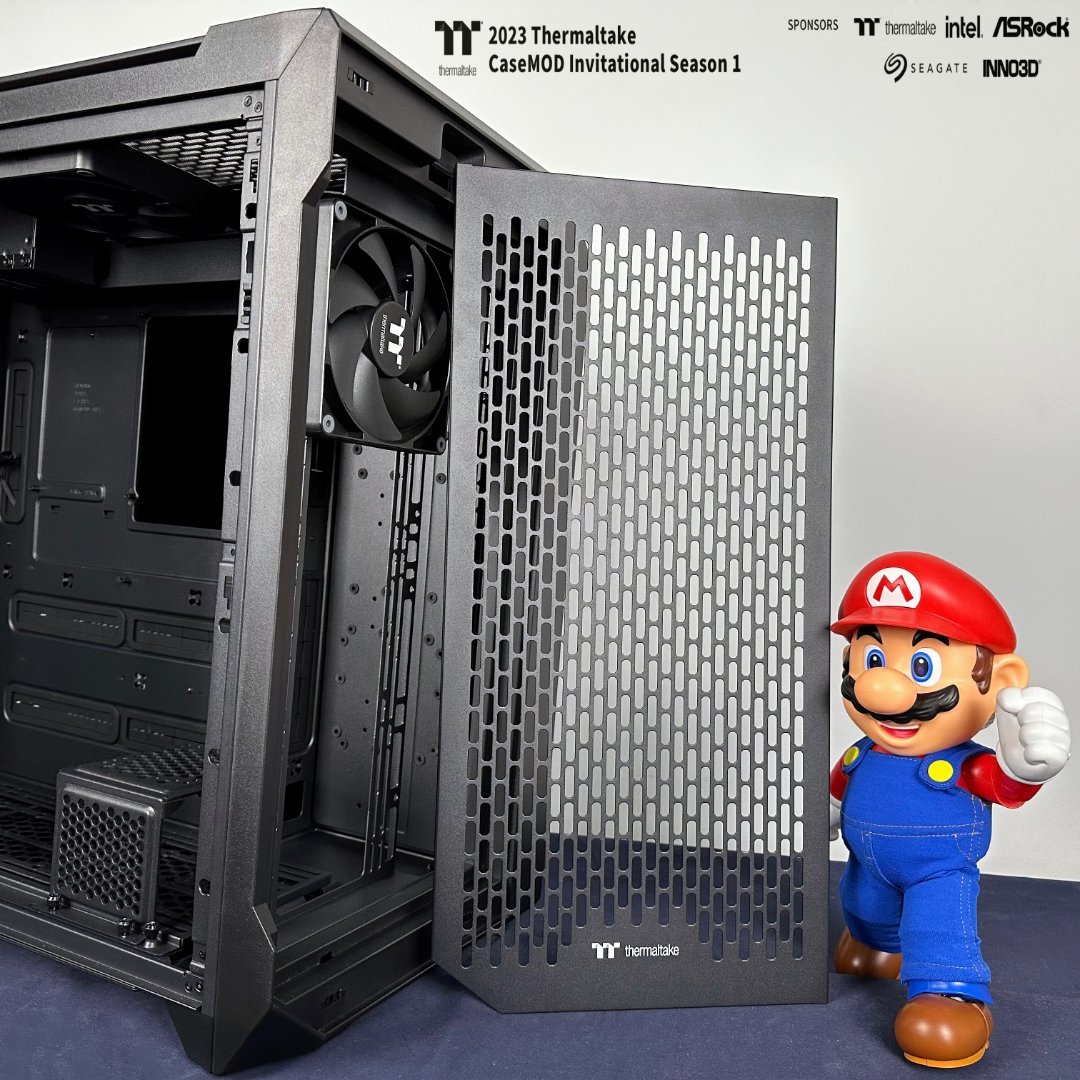
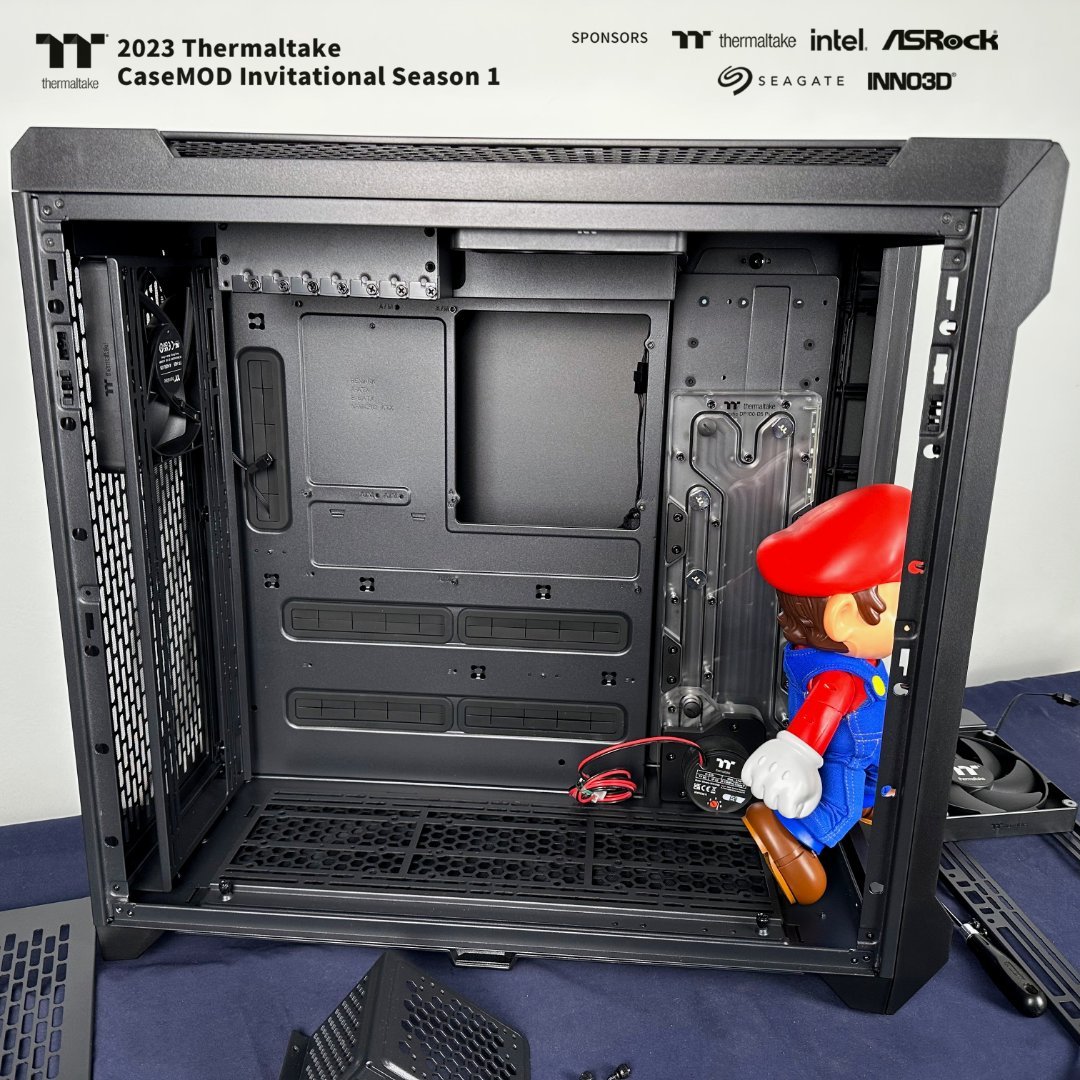
I have an intruder in the lab taking possession of every tool and saying the C750 will be his new home 🤔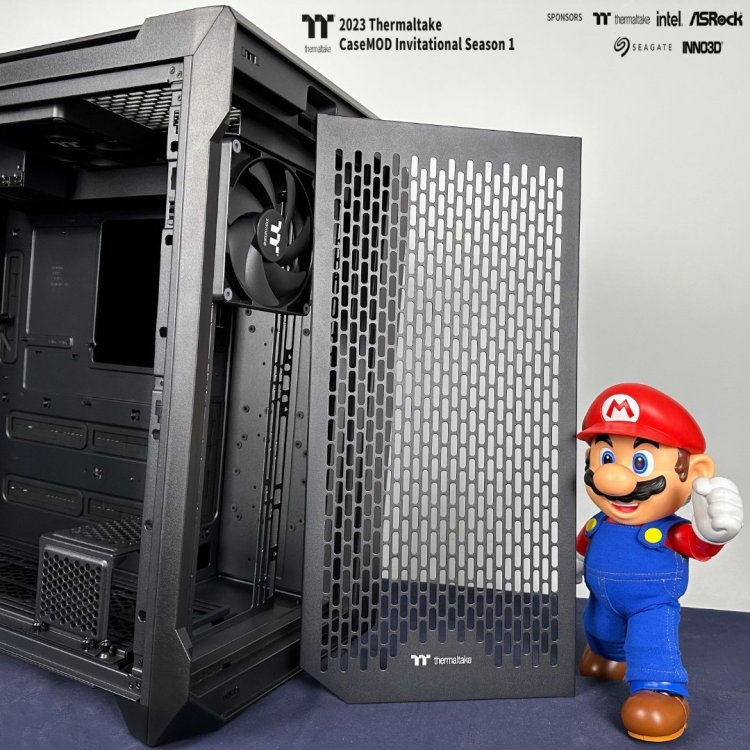


-
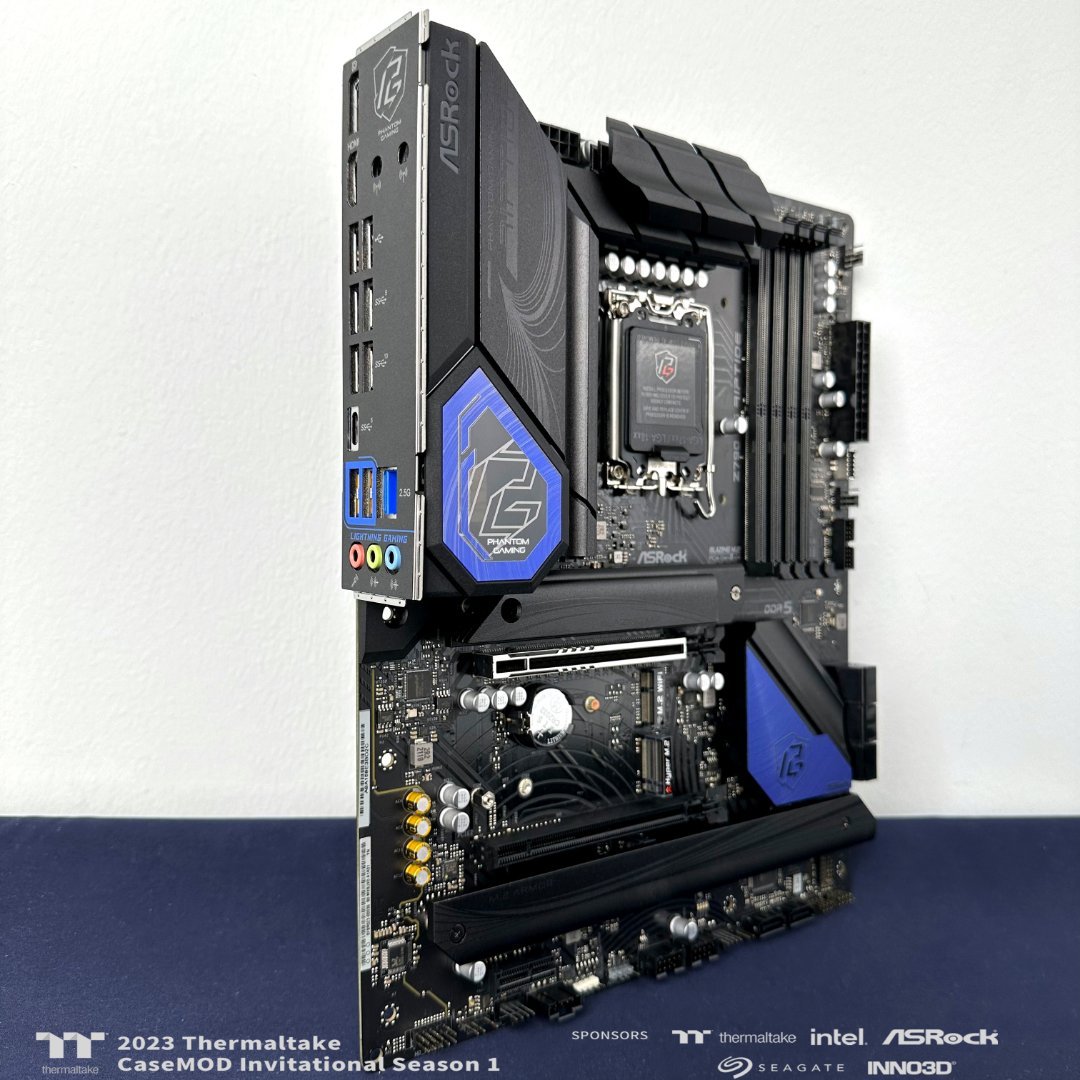
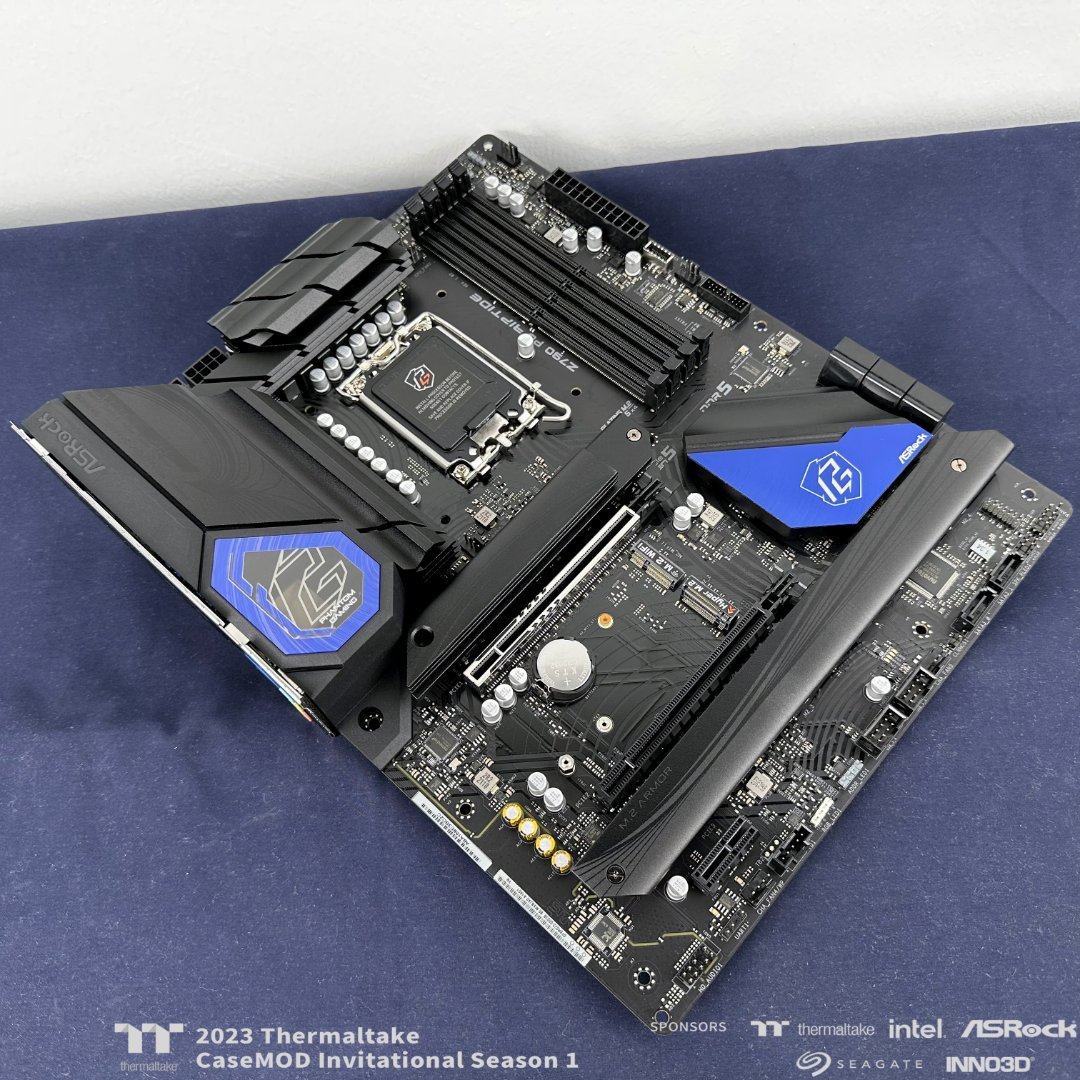
[Italy] Marco Di Silvestre
MPC Project replied to TT Amanda's topic in 2023 Thermaltake CaseMOD Invitational Season 1
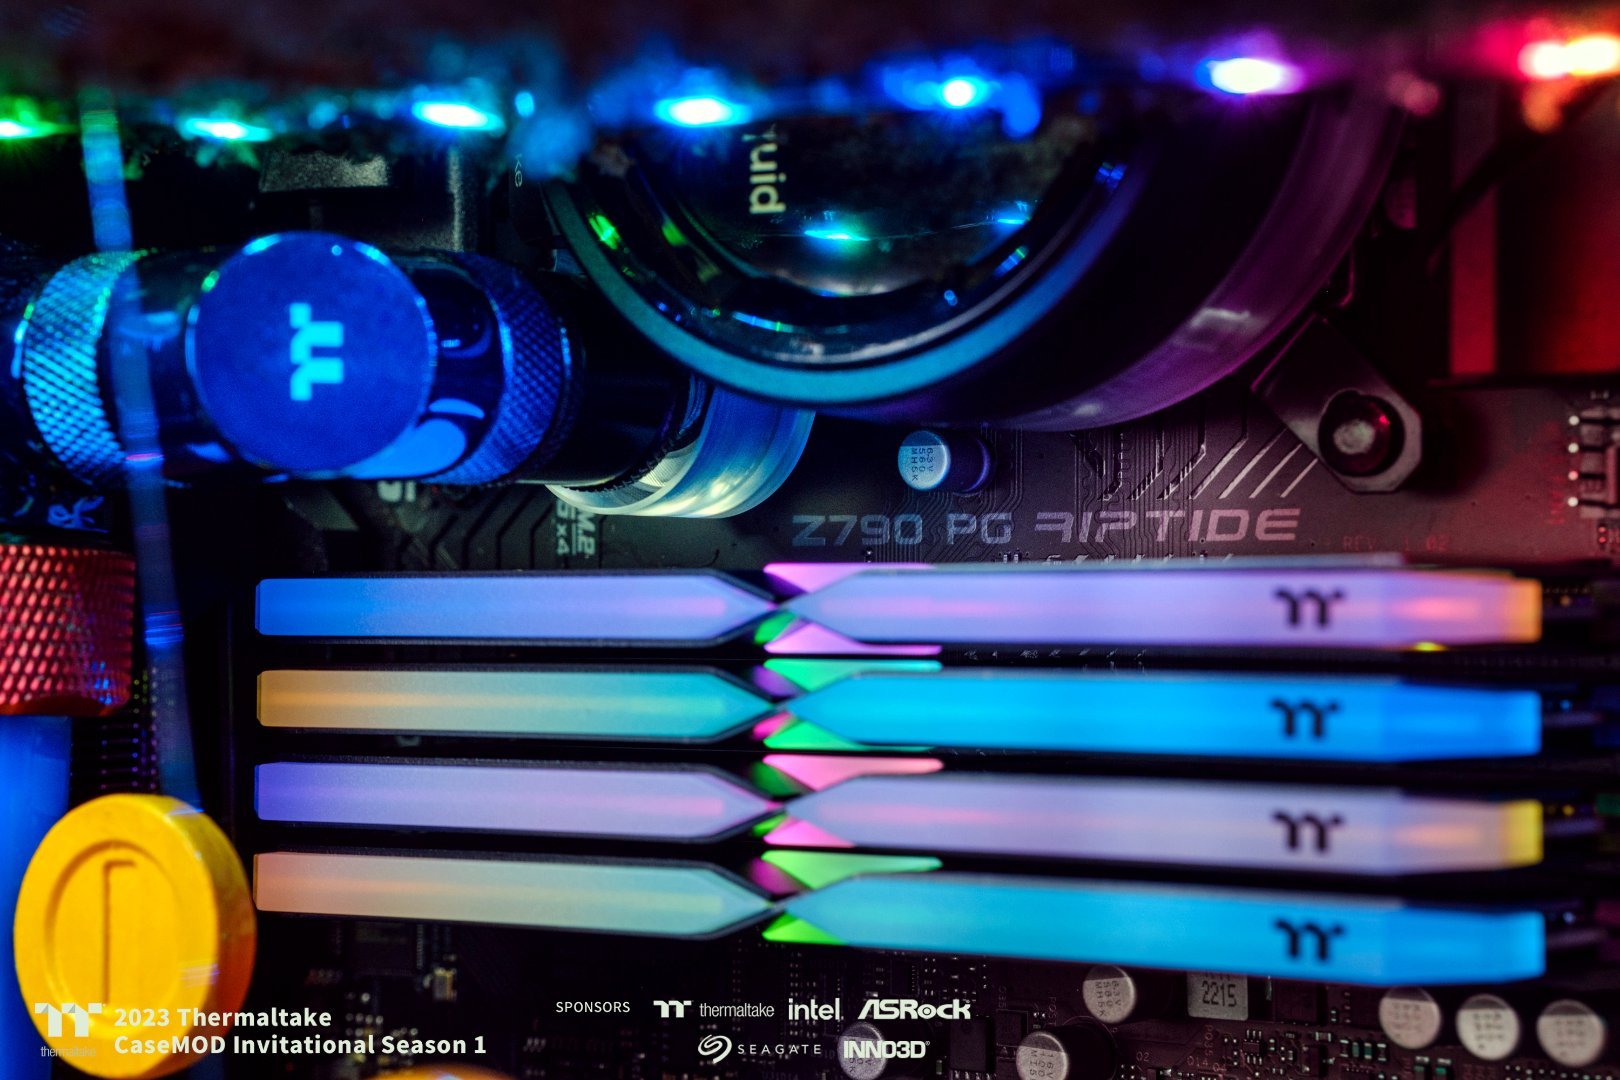
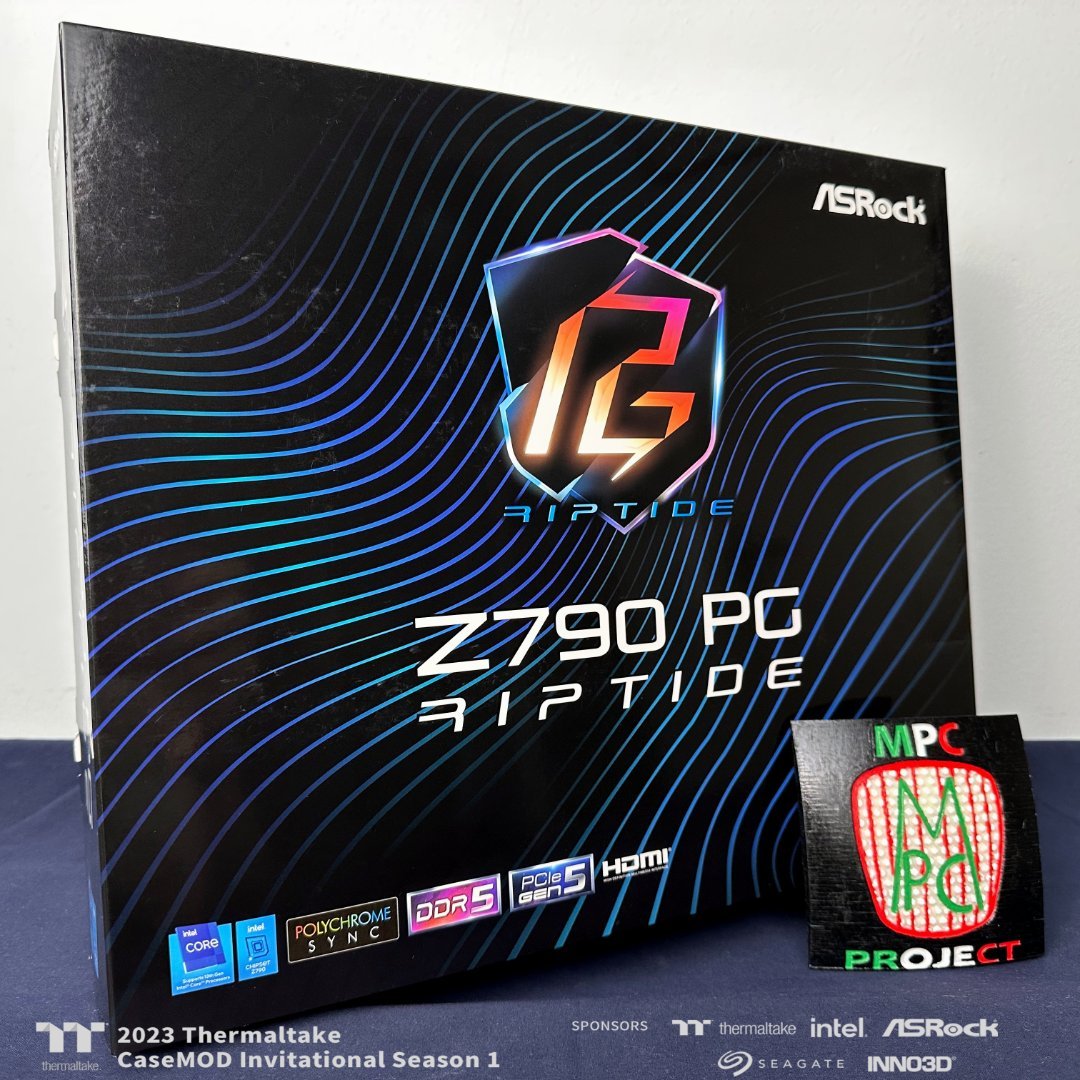
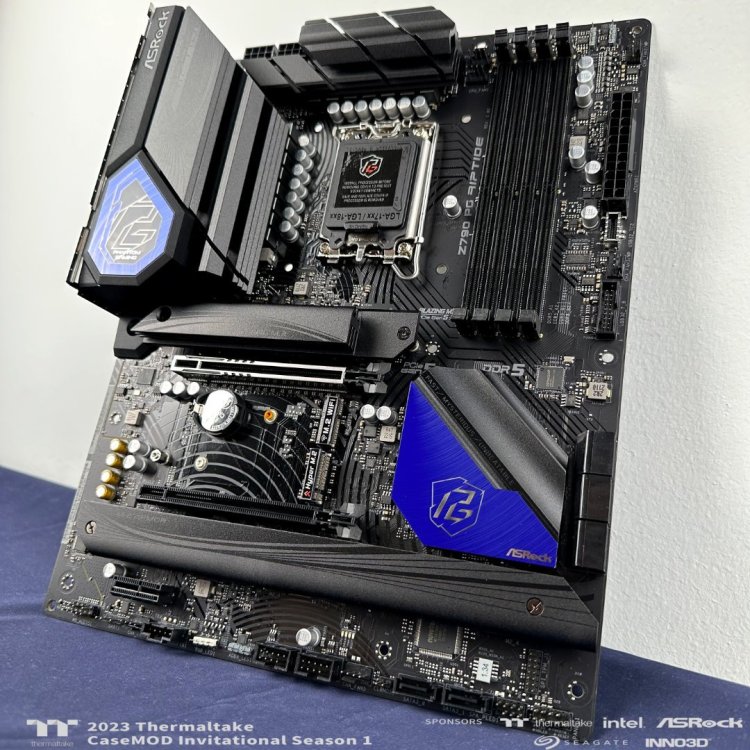
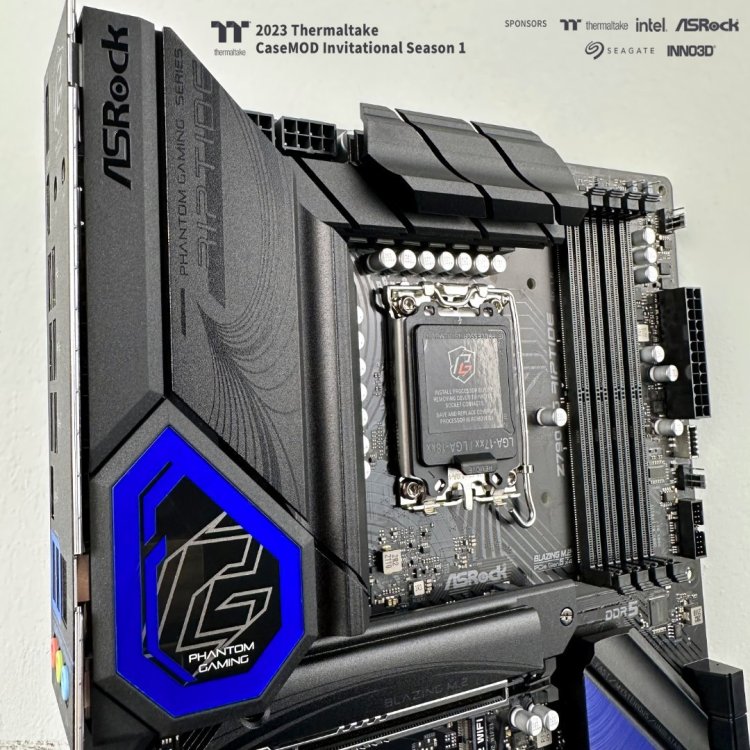
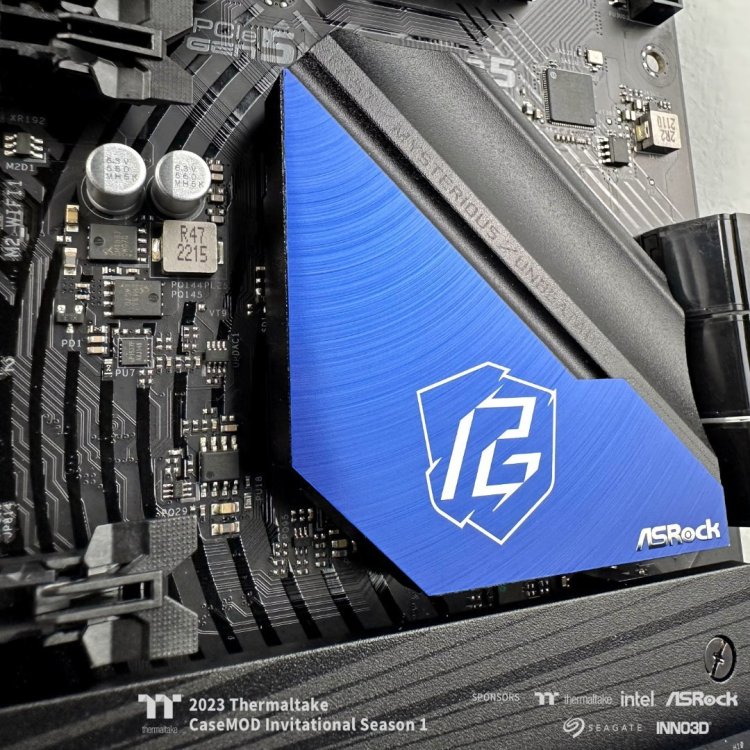
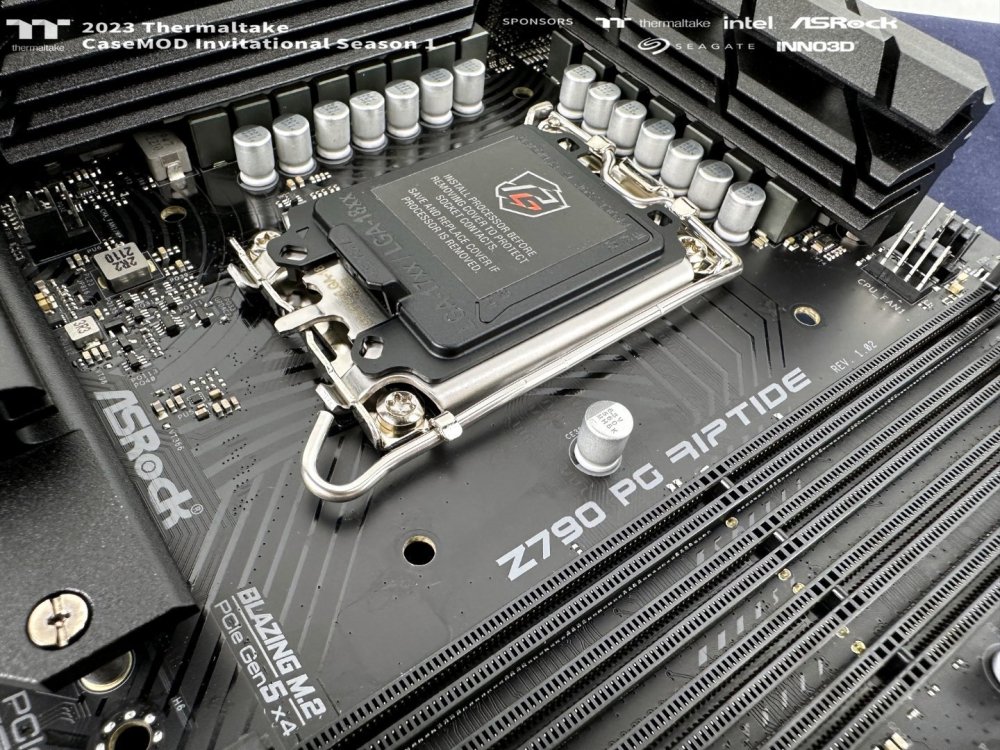
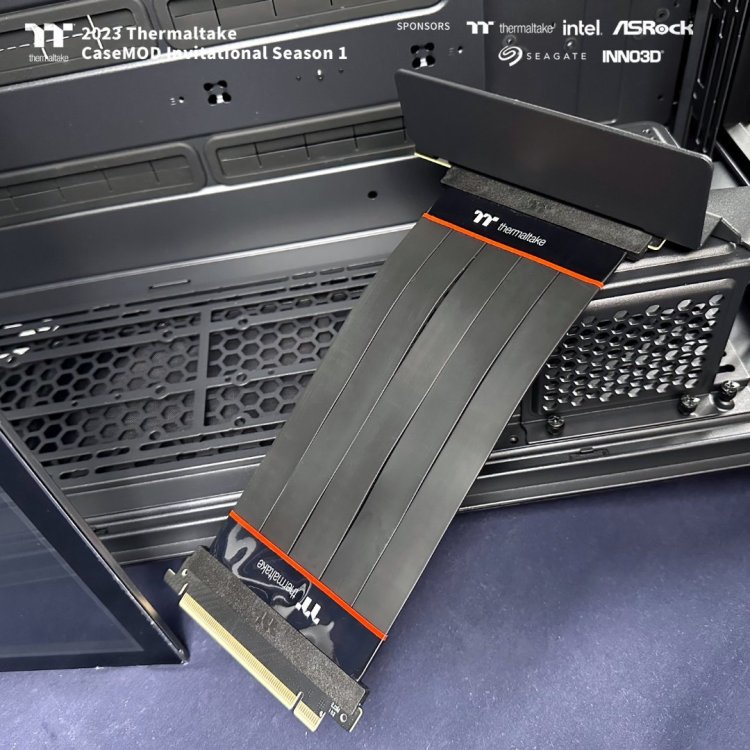
ASRock Z790 PG Riptide present in the project 🥳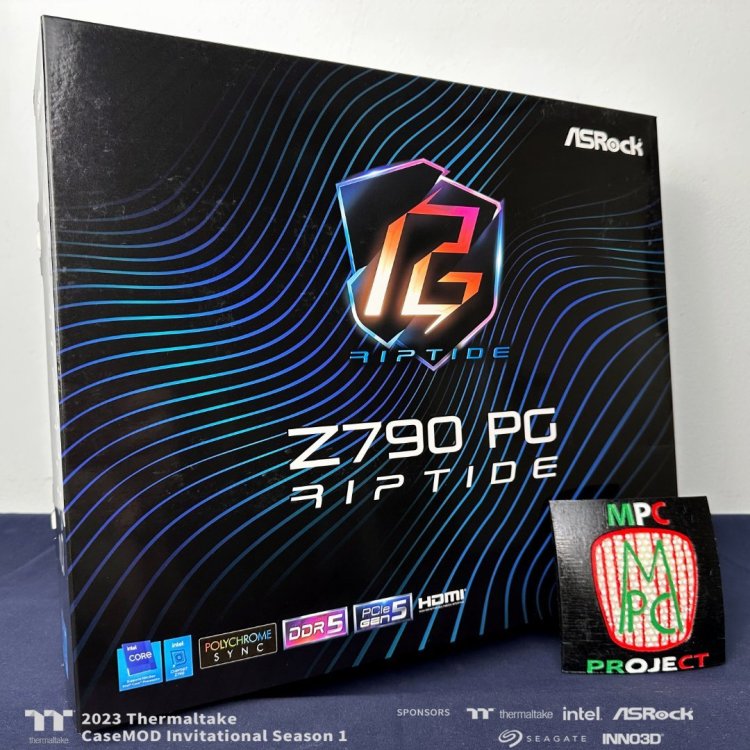


-
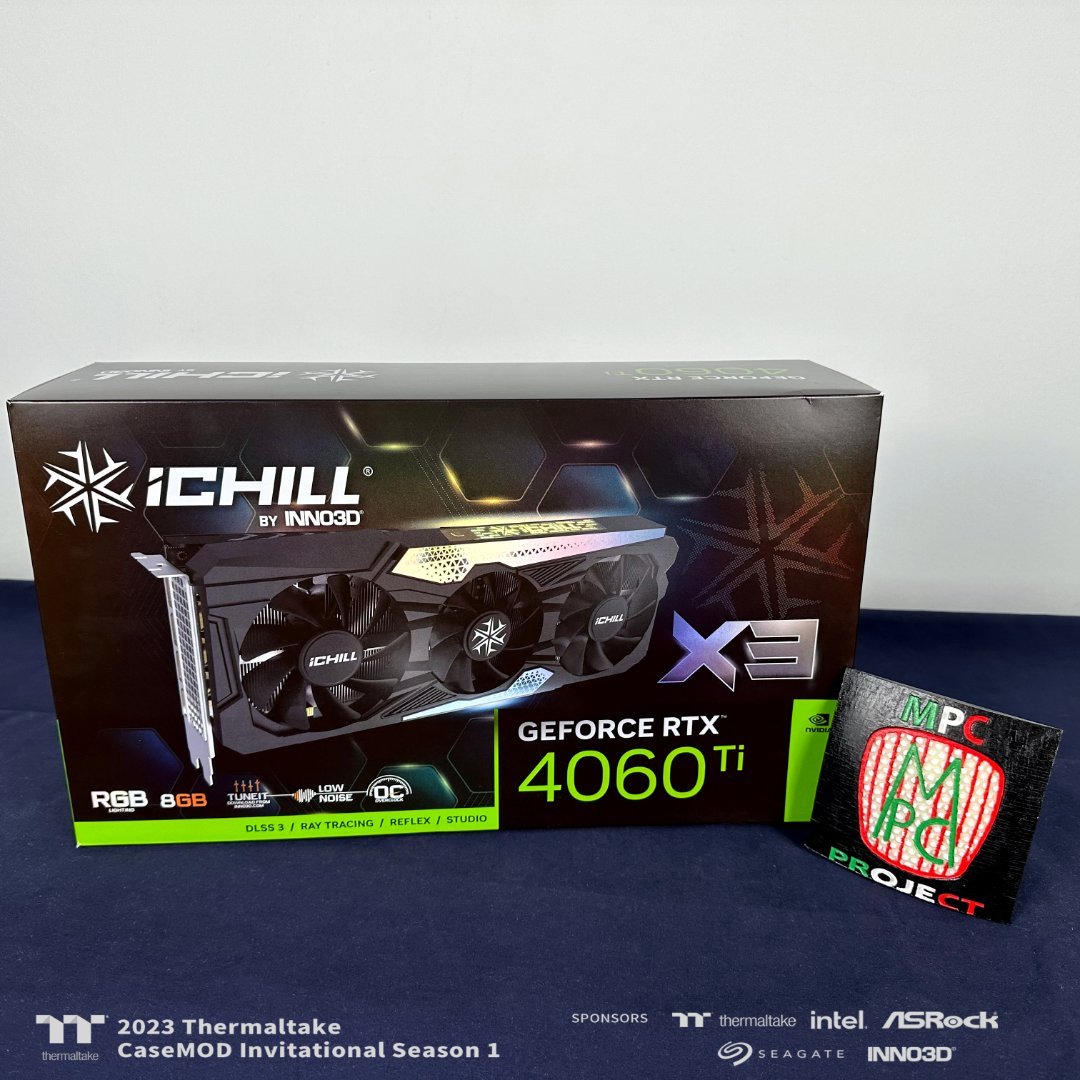
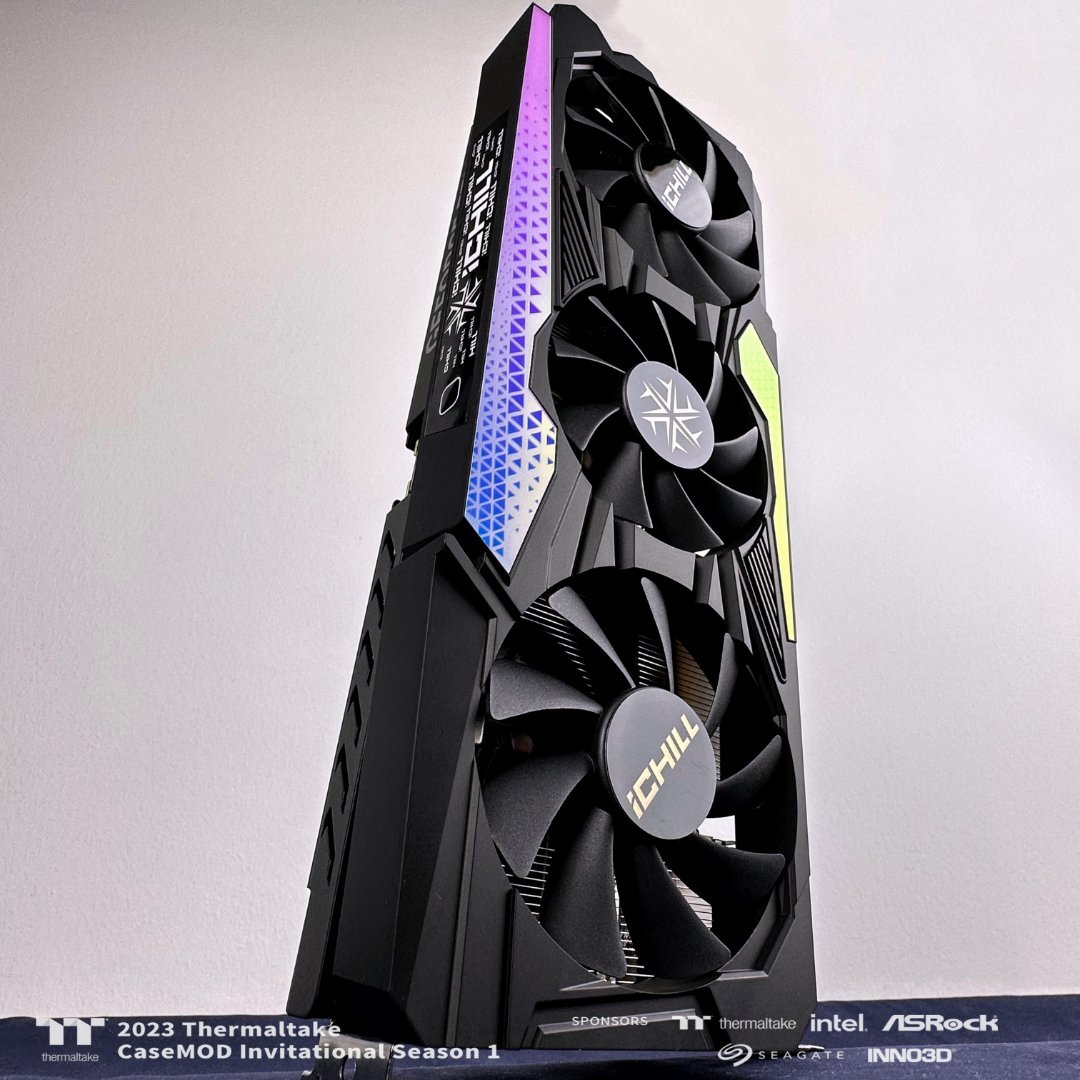
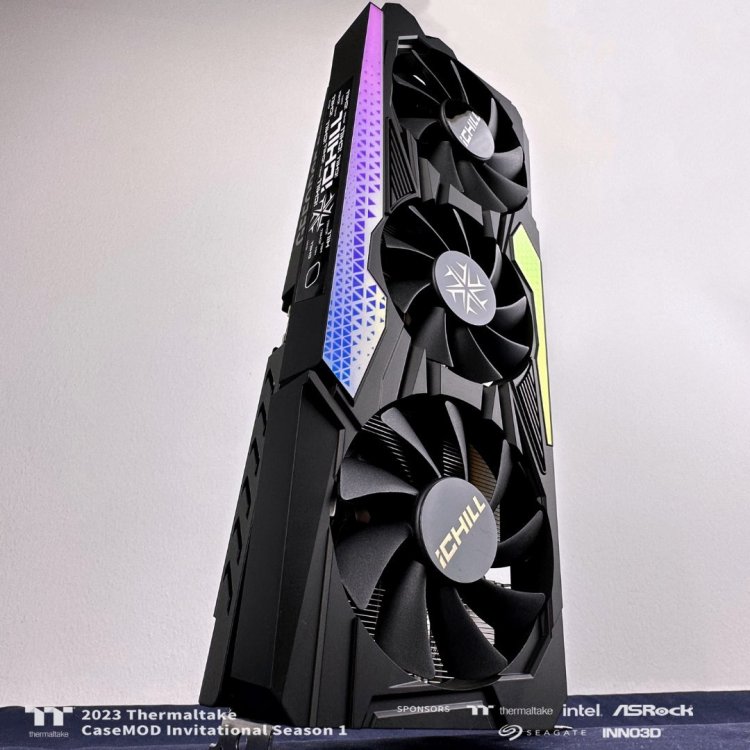
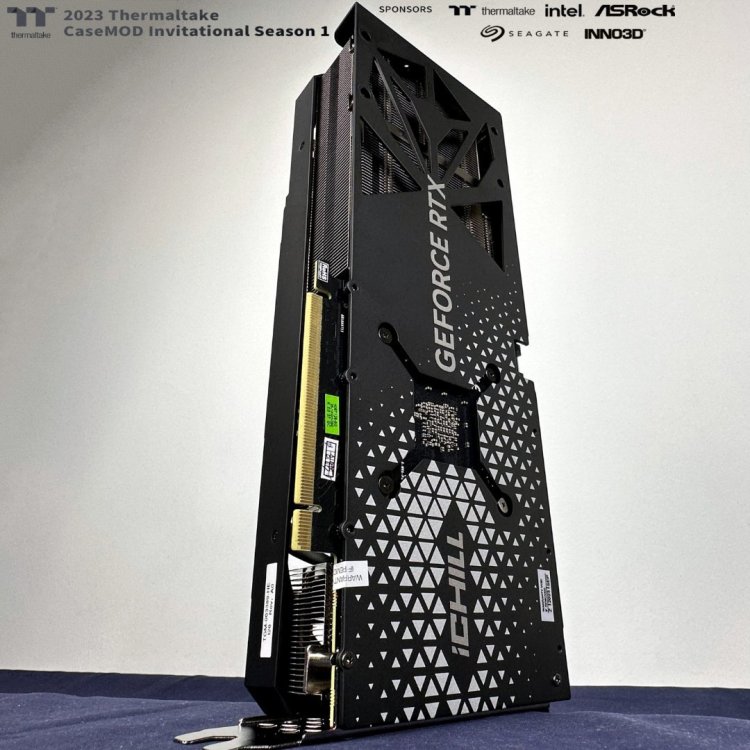
[Italy] Marco Di Silvestre
MPC Project replied to TT Amanda's topic in 2023 Thermaltake CaseMOD Invitational Season 1
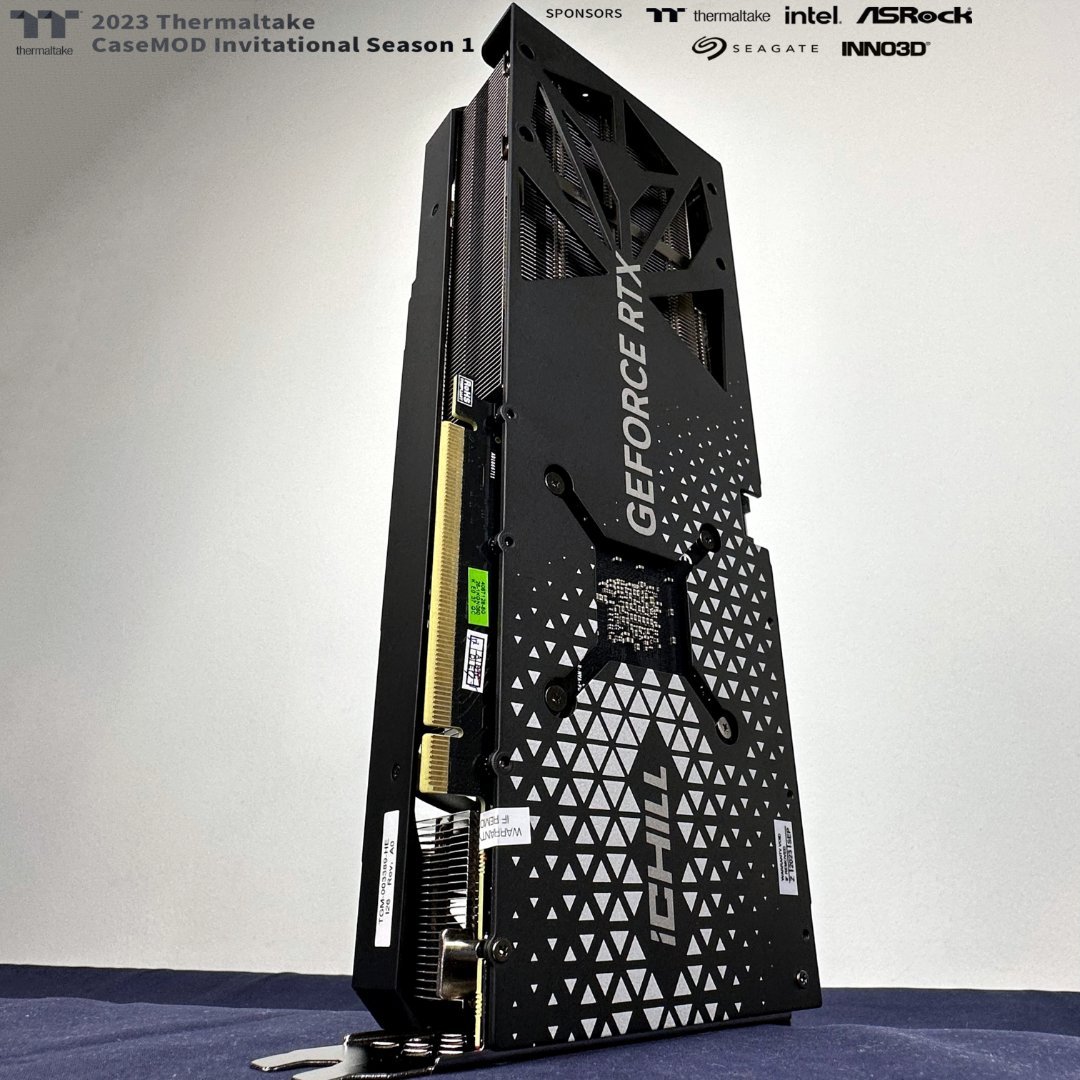
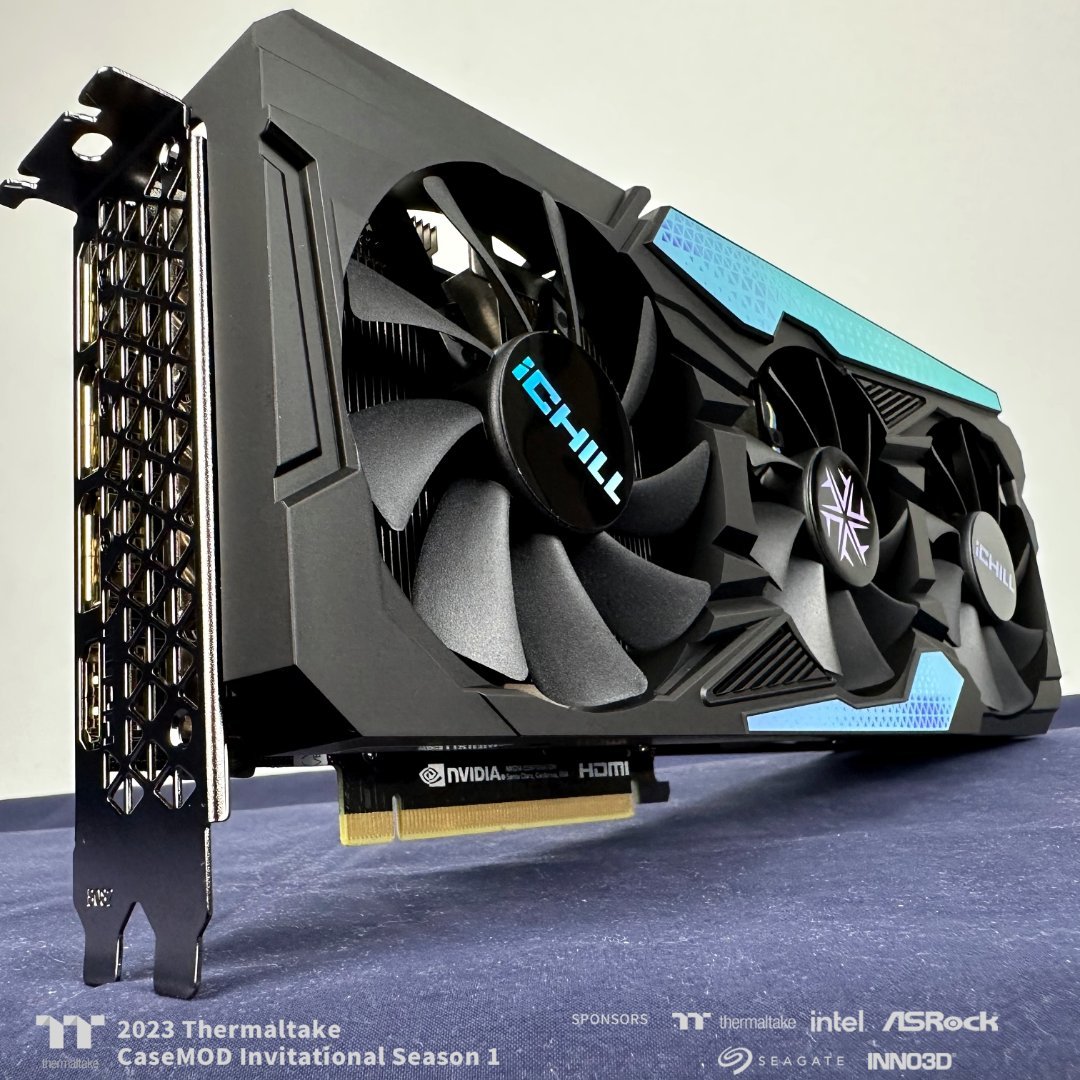
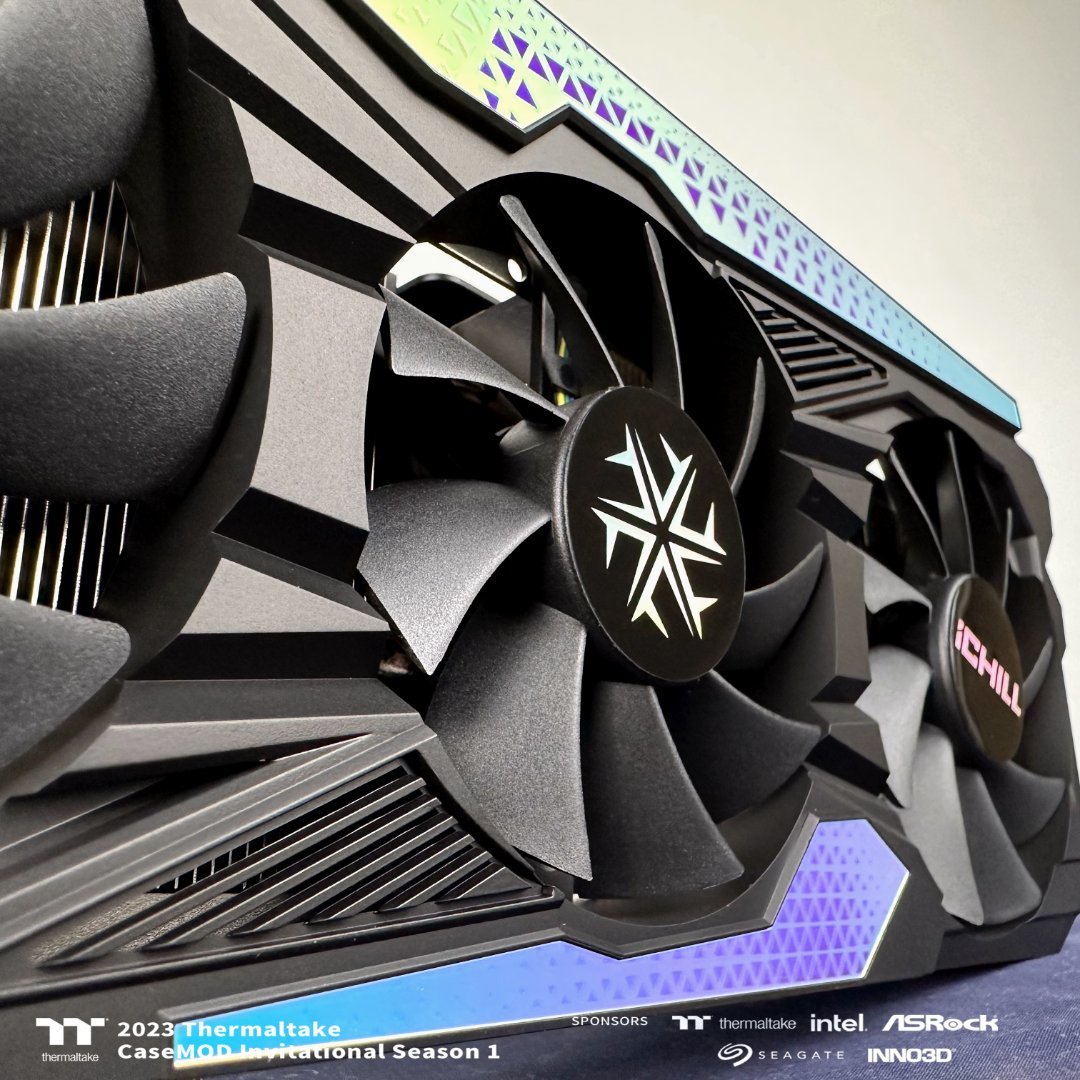
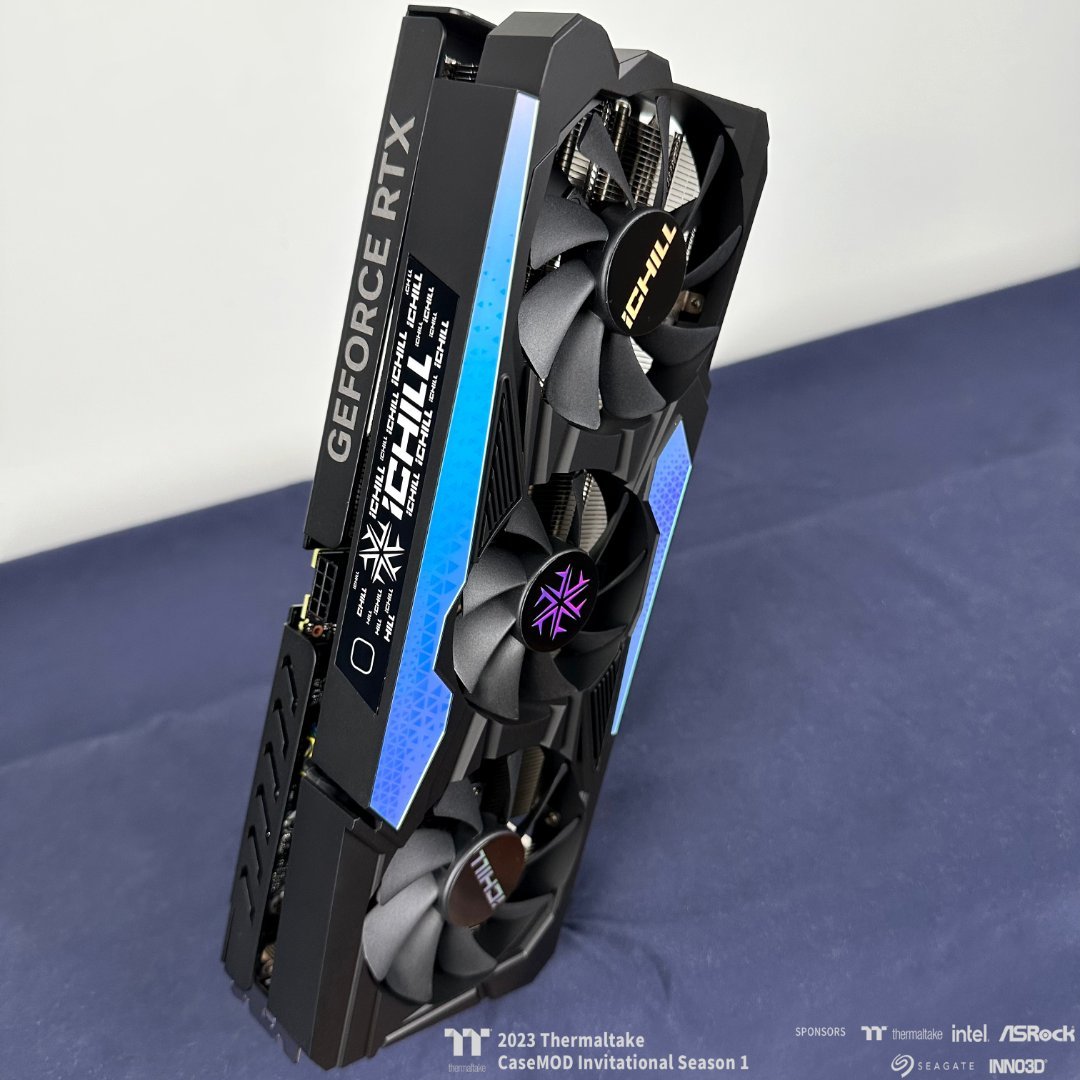
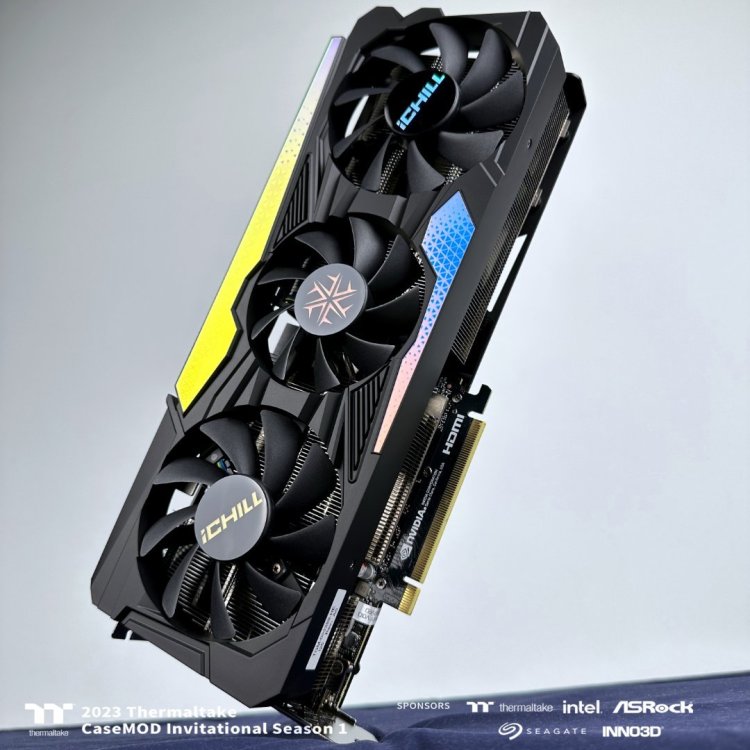
And here is also the beautiful Inno3D iCHILL X3 RTX4060Ti video card 🙂


-
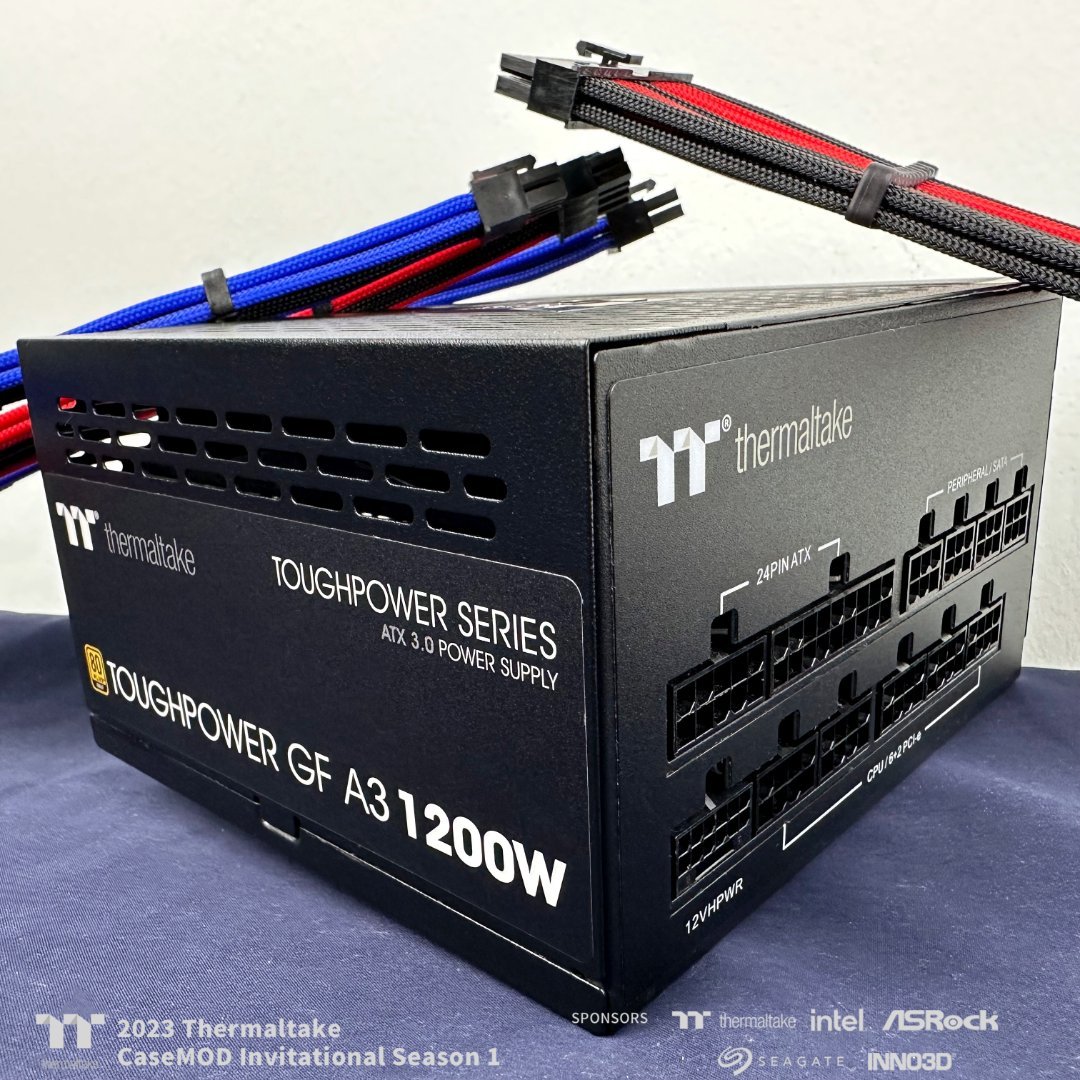
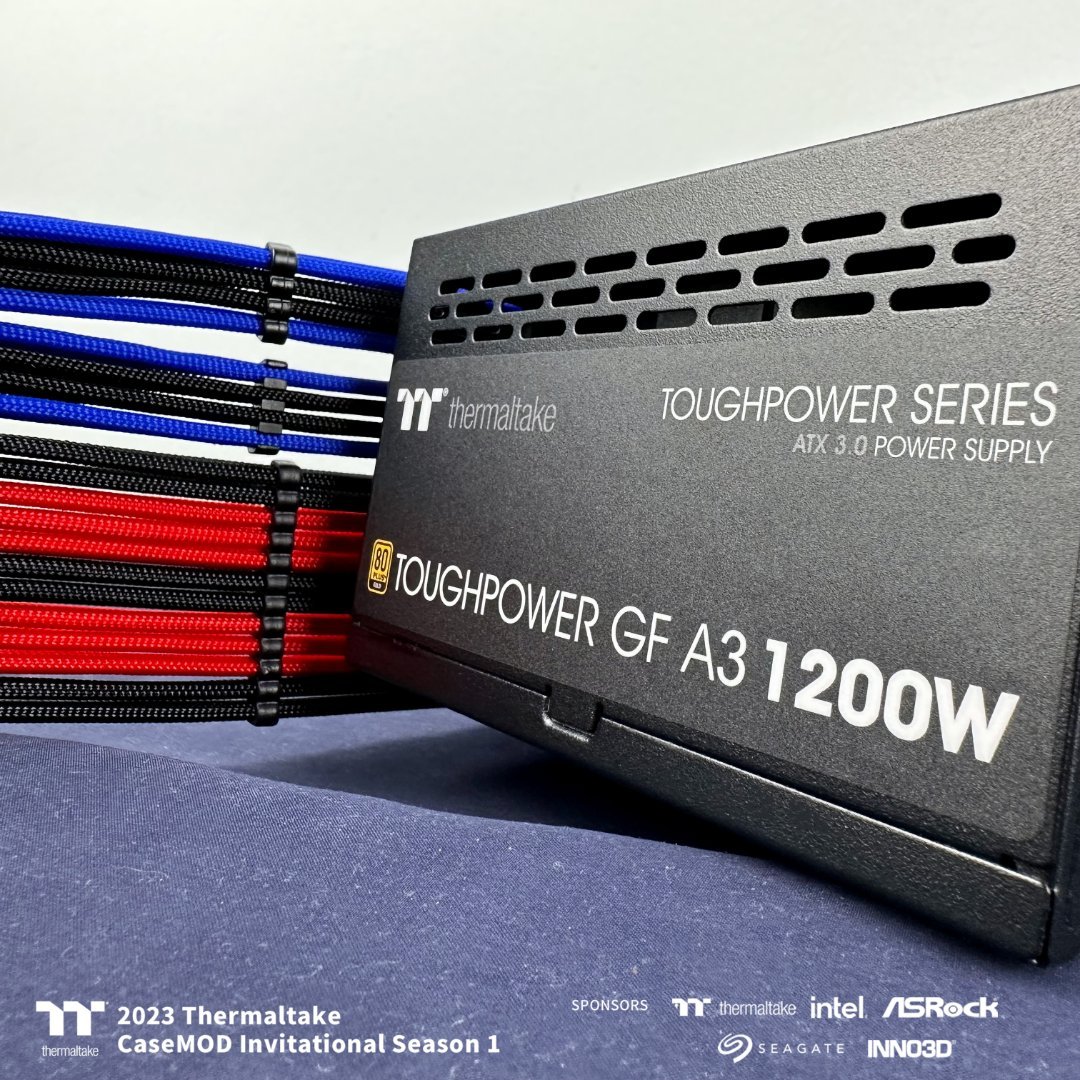
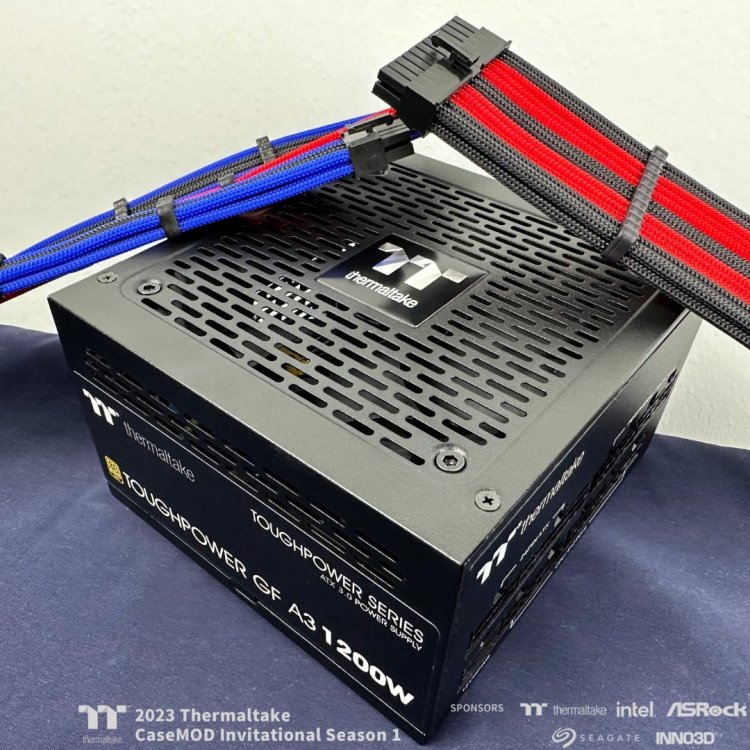
[Italy] Marco Di Silvestre
MPC Project replied to TT Amanda's topic in 2023 Thermaltake CaseMOD Invitational Season 1
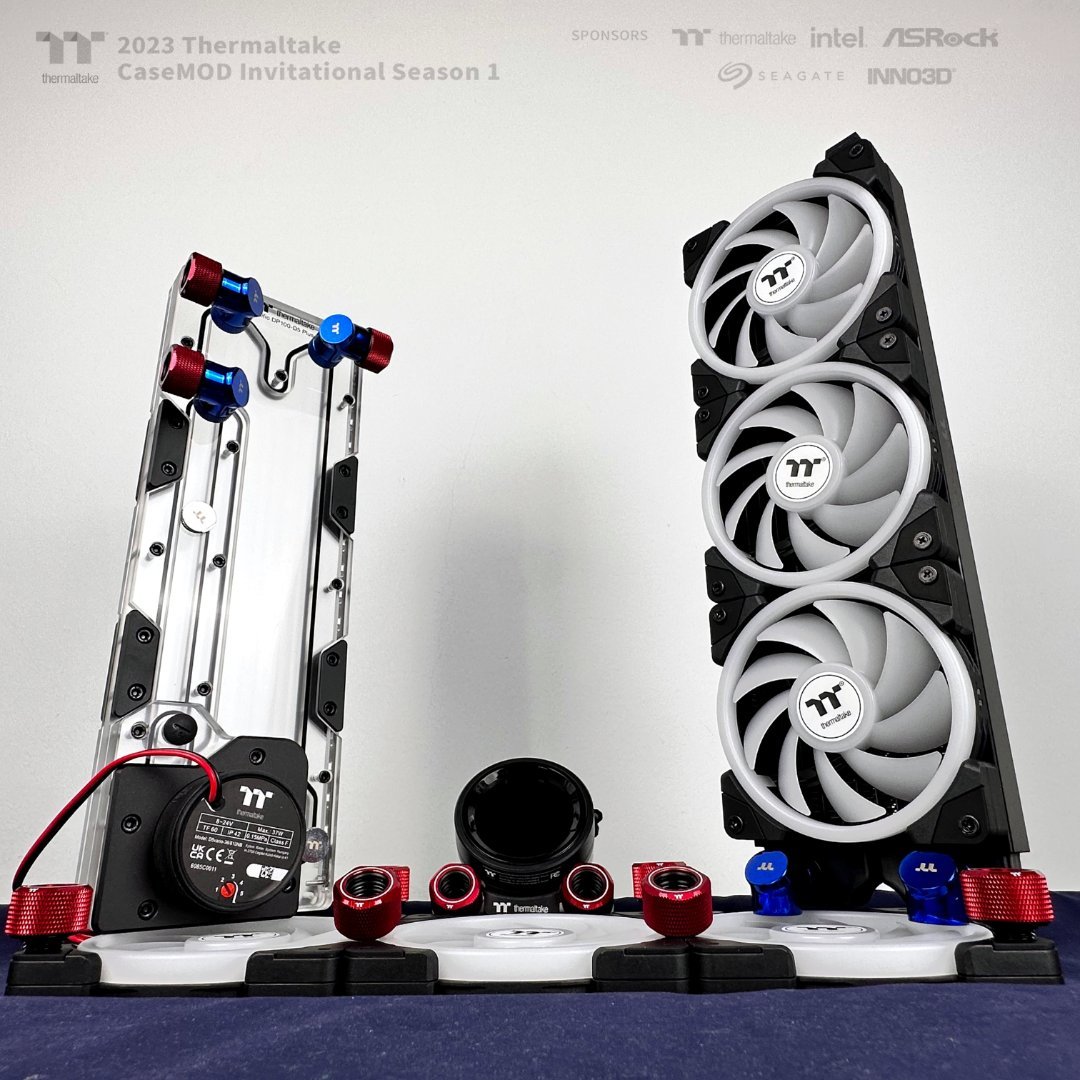
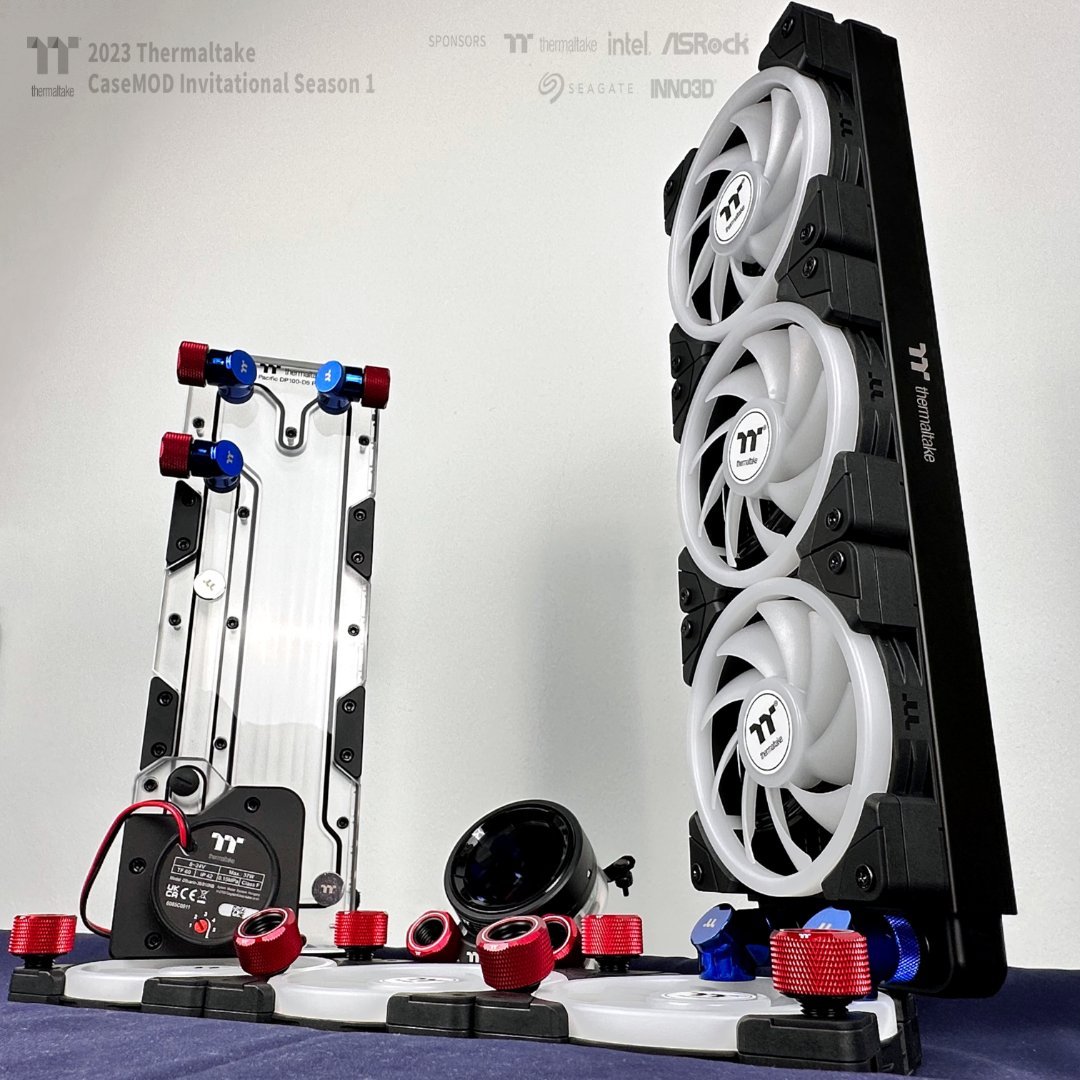
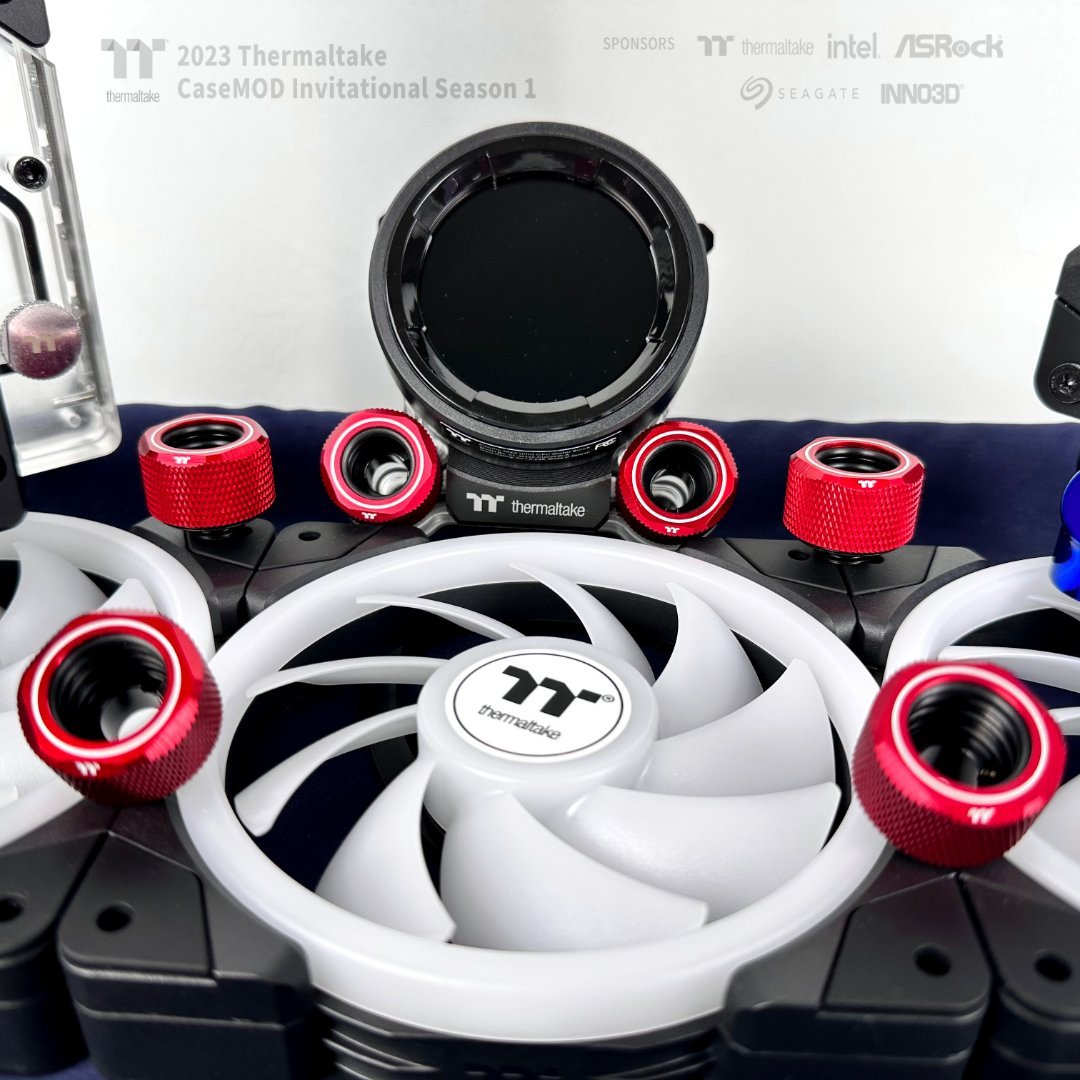
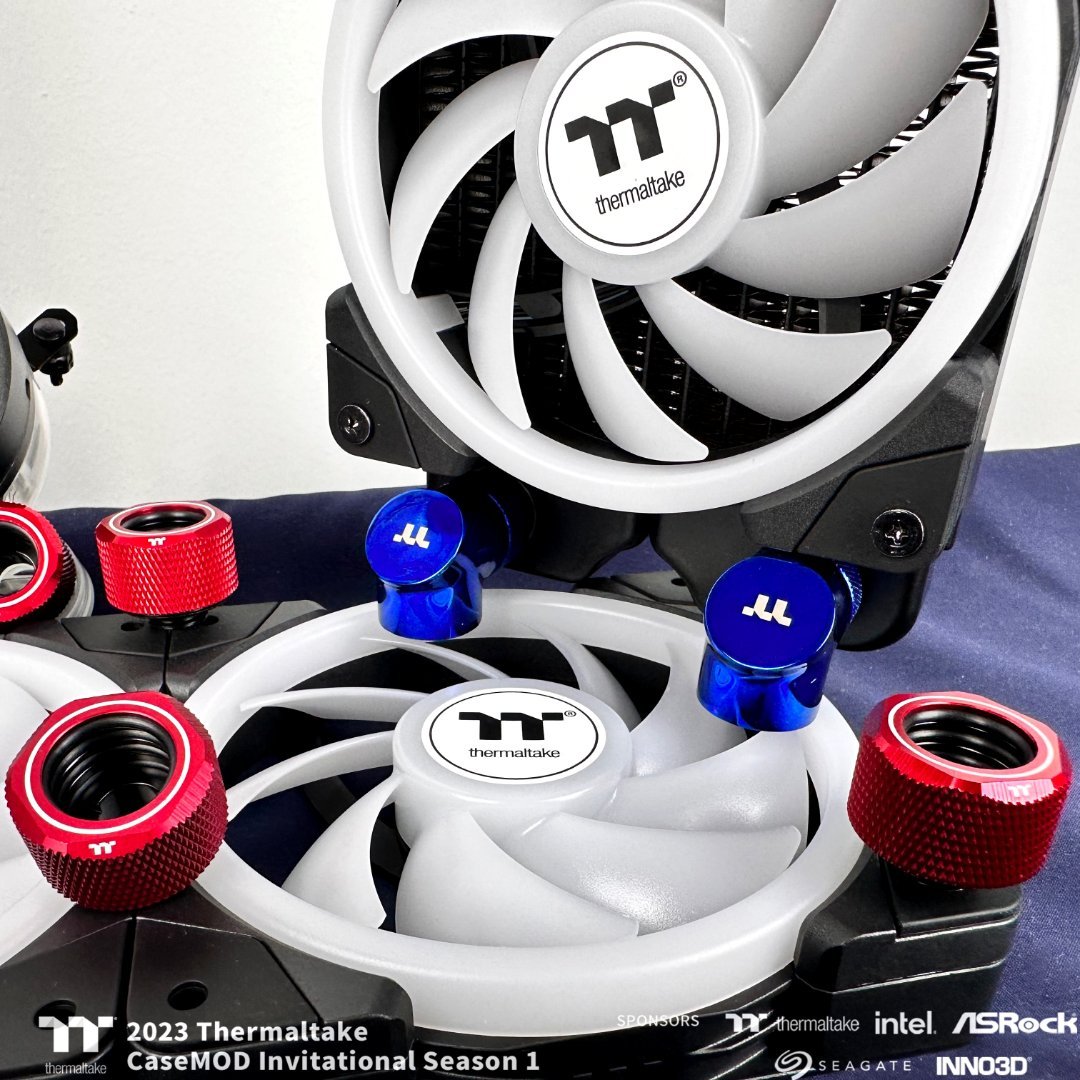
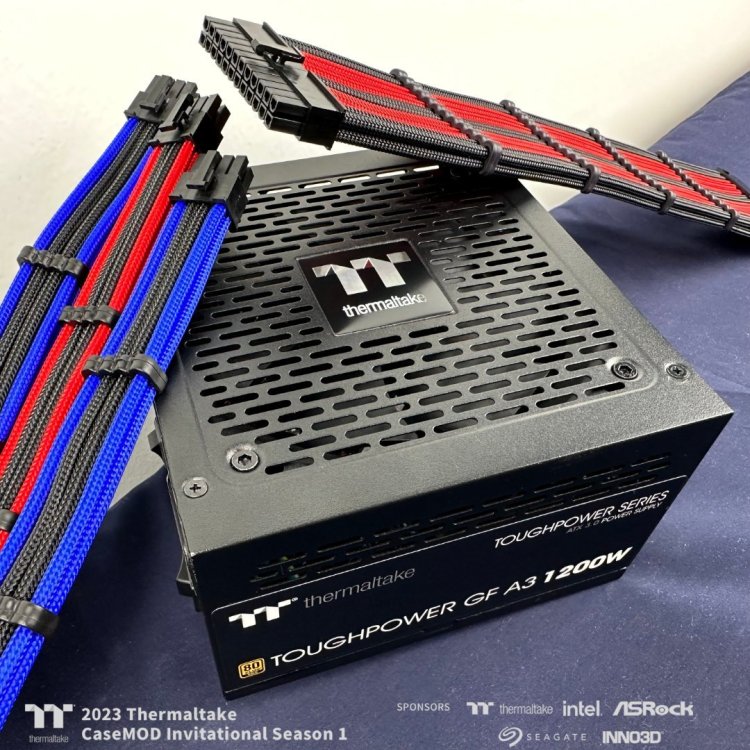
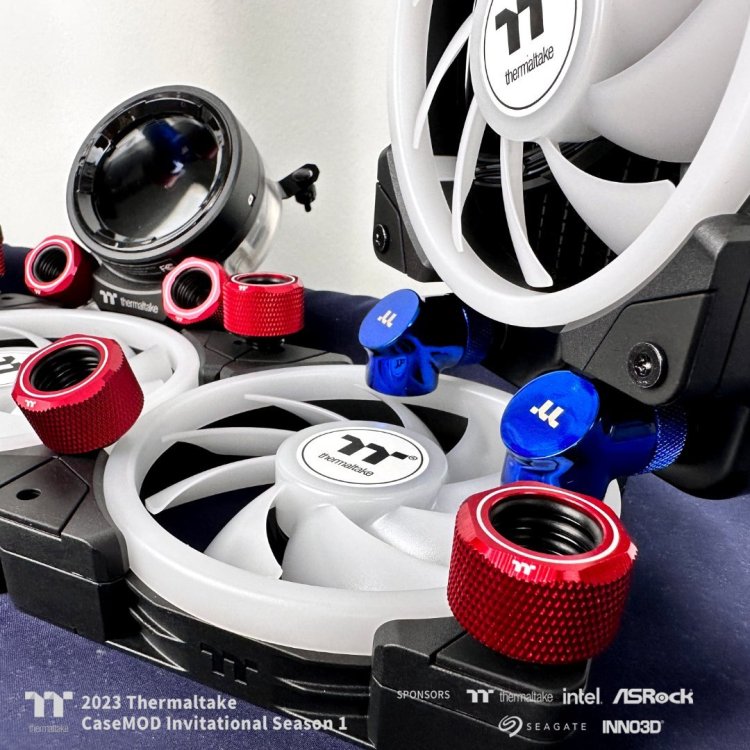
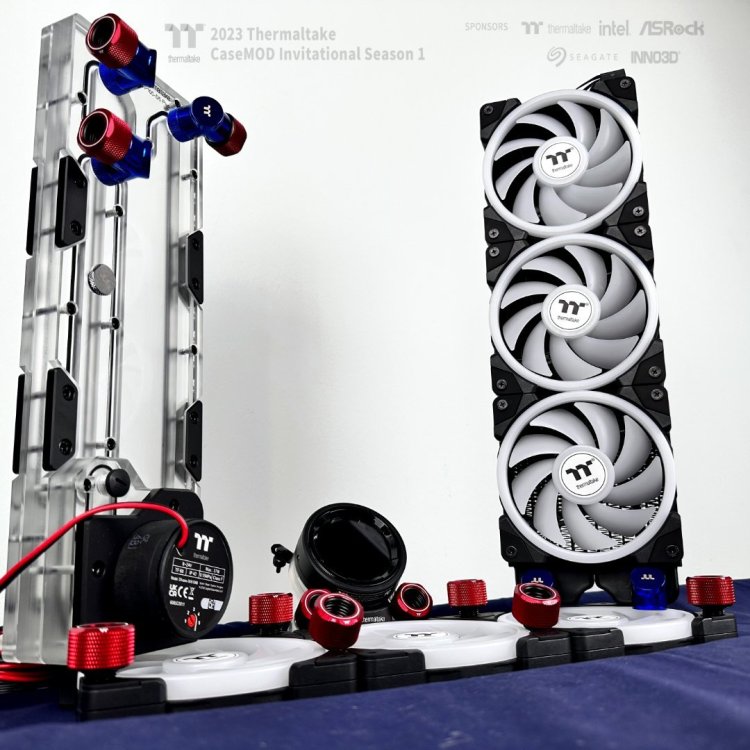
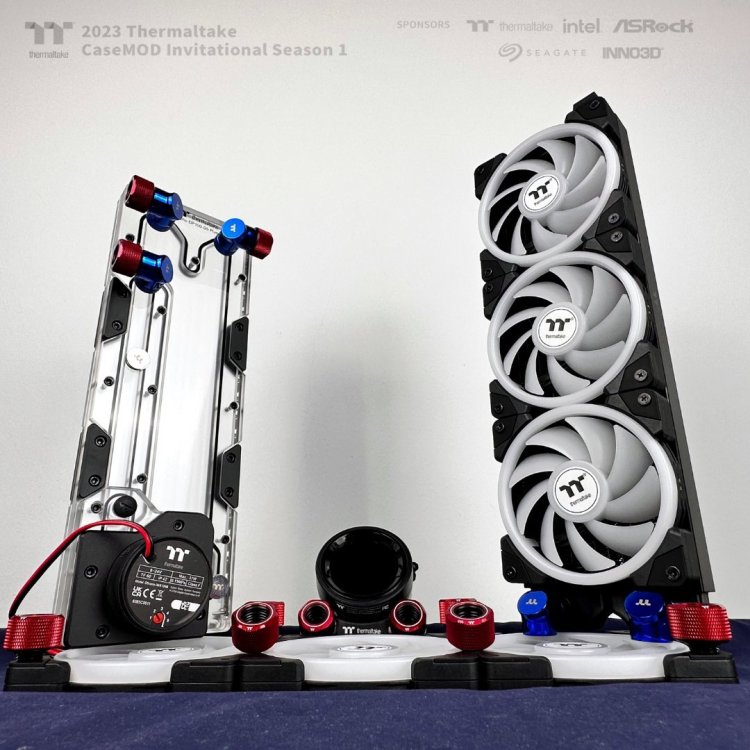
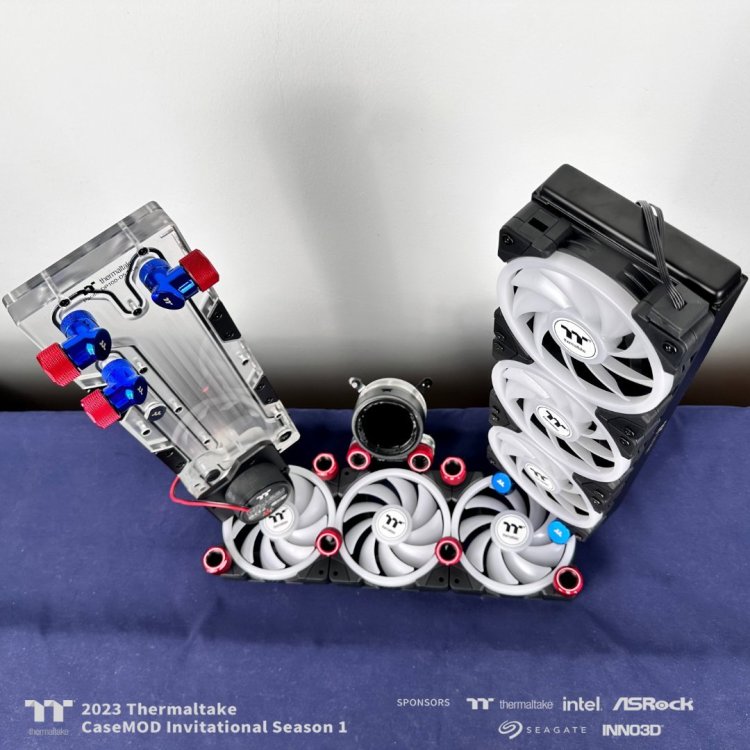
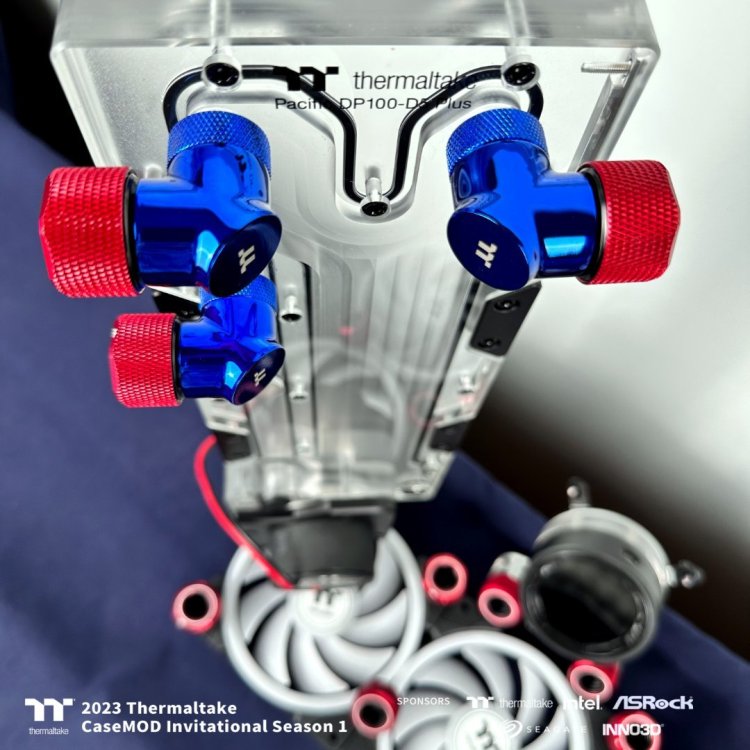
Oh yeah yeah could not miss the brand new Toughpower GF A3 1200W power supply with beautiful sleeve cables, of course always in combination of blue and red color...who knows why 🤔🙃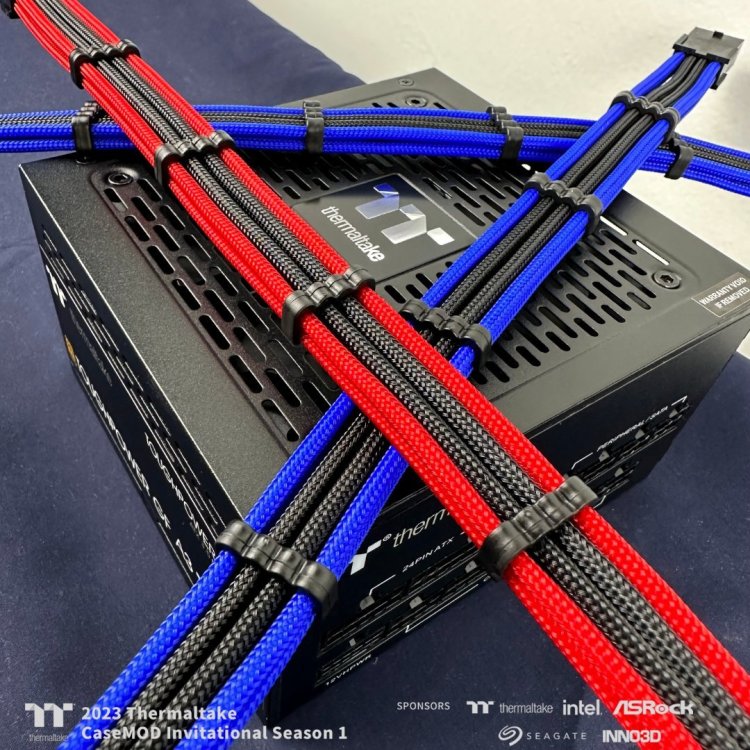


-
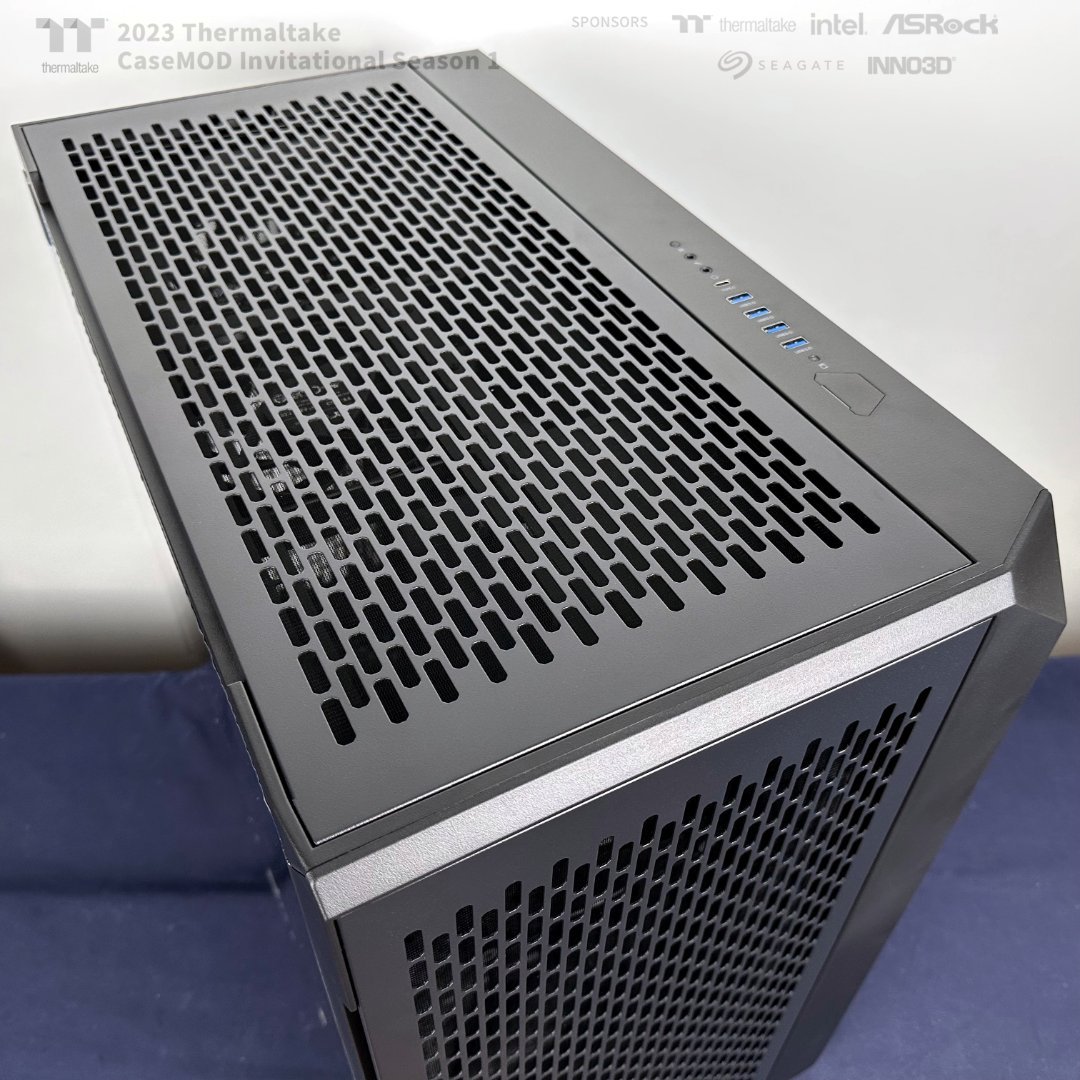
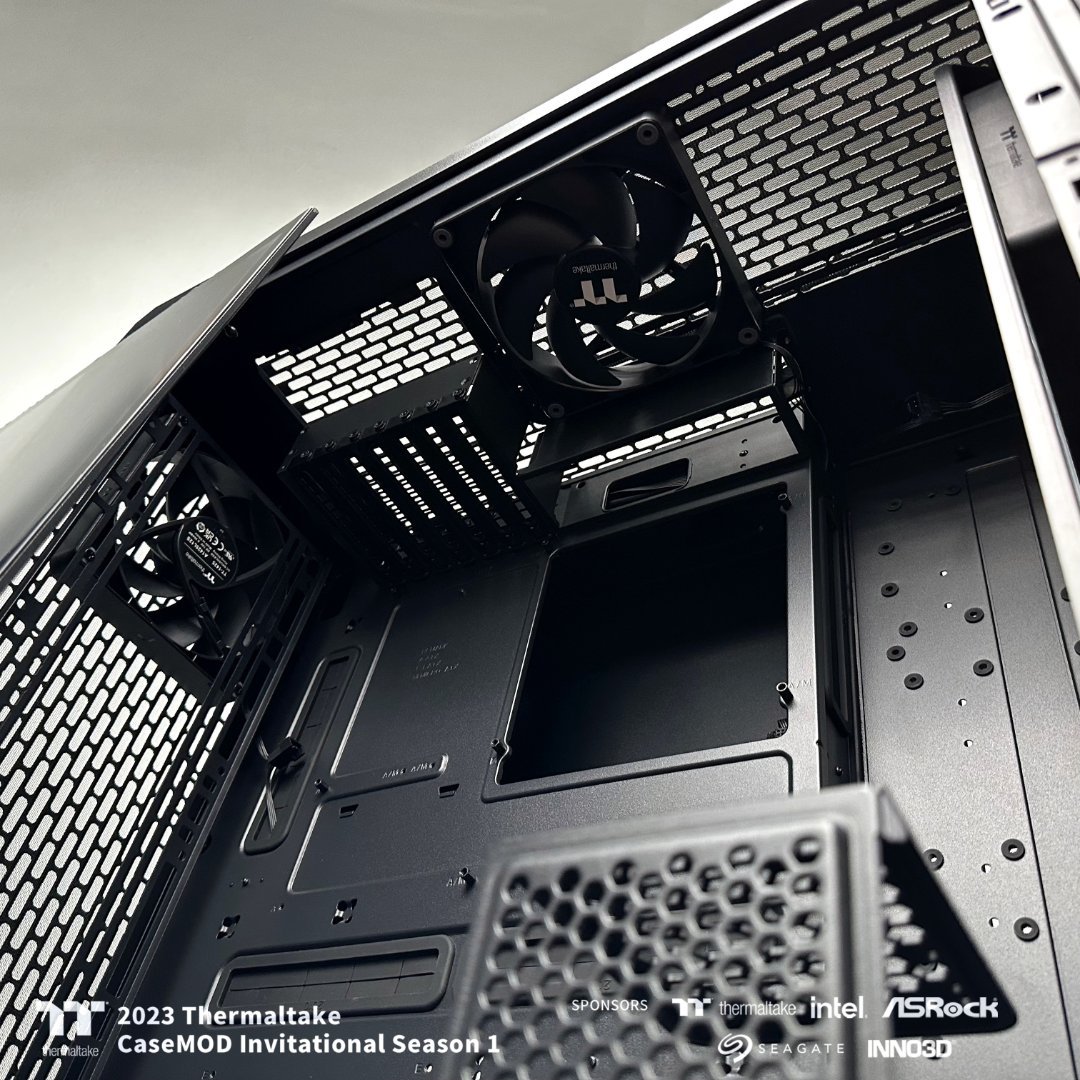
[Italy] Marco Di Silvestre
MPC Project replied to TT Amanda's topic in 2023 Thermaltake CaseMOD Invitational Season 1
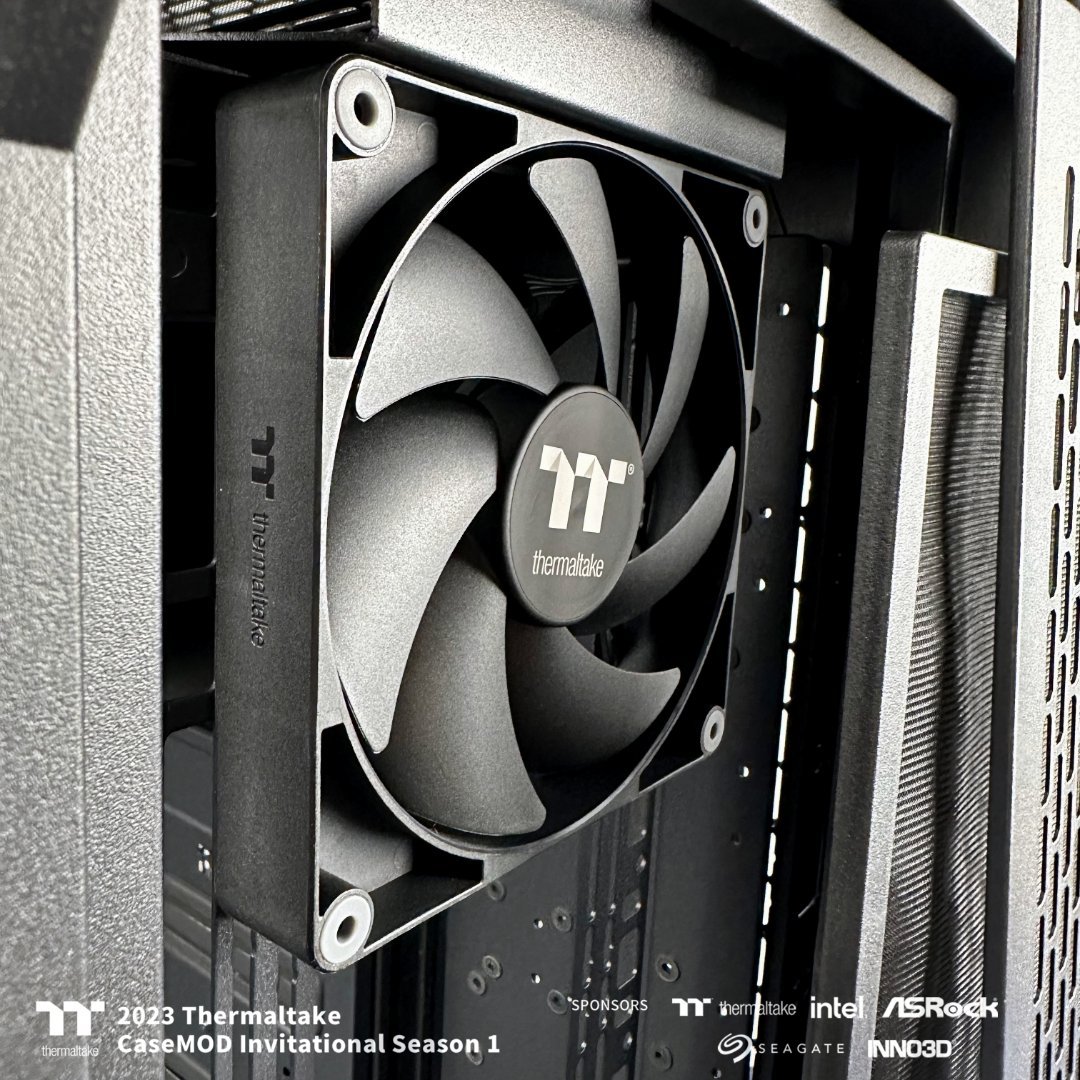
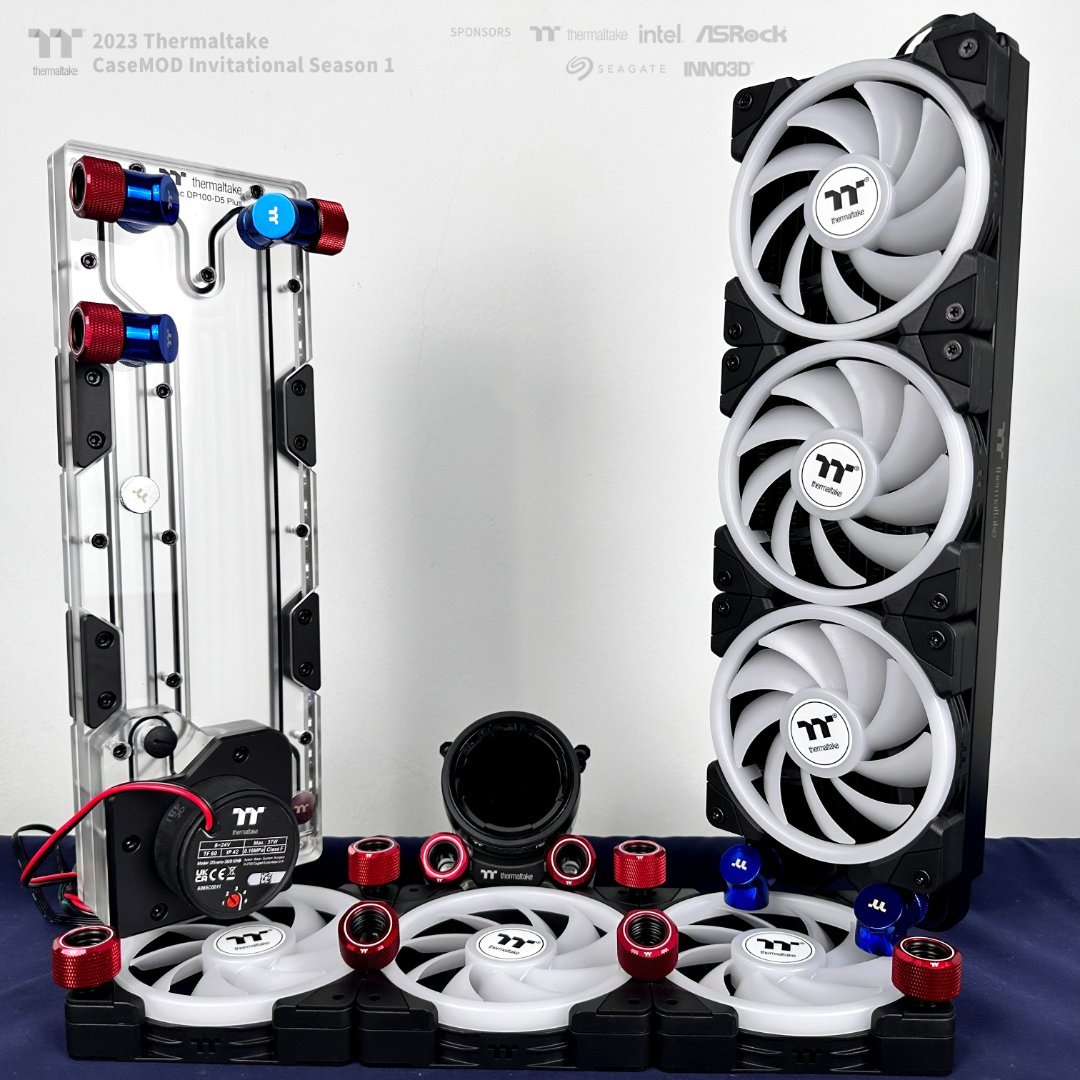
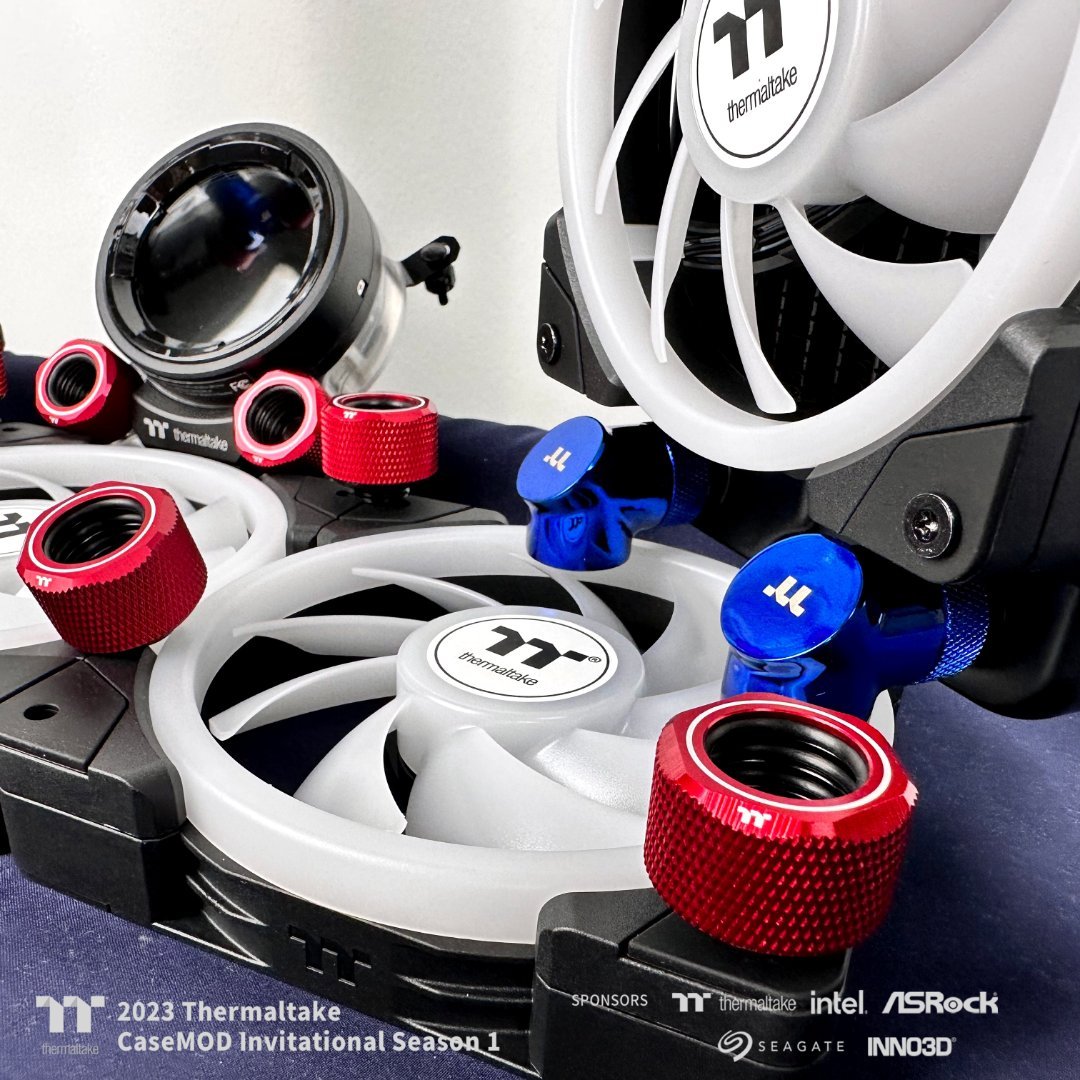
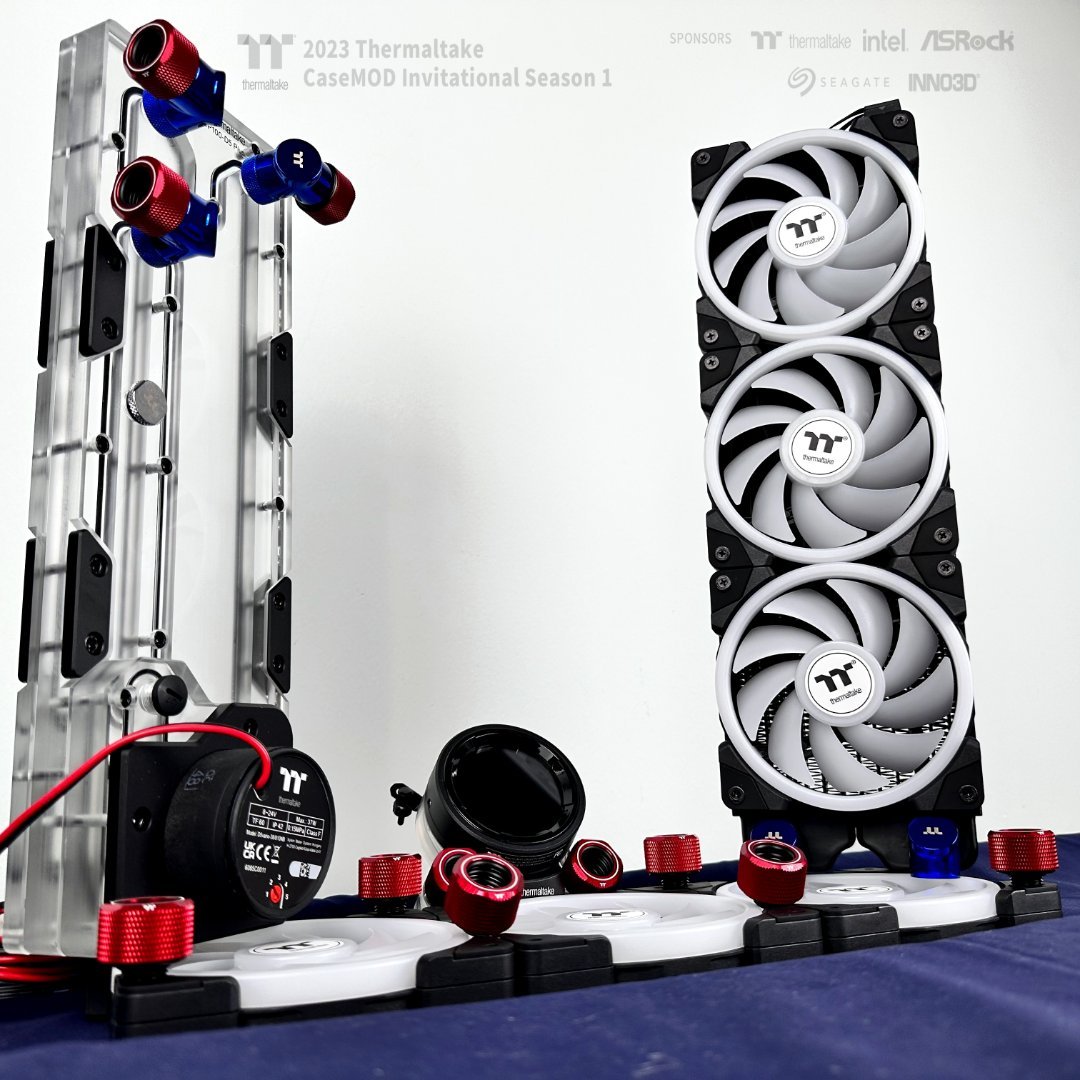
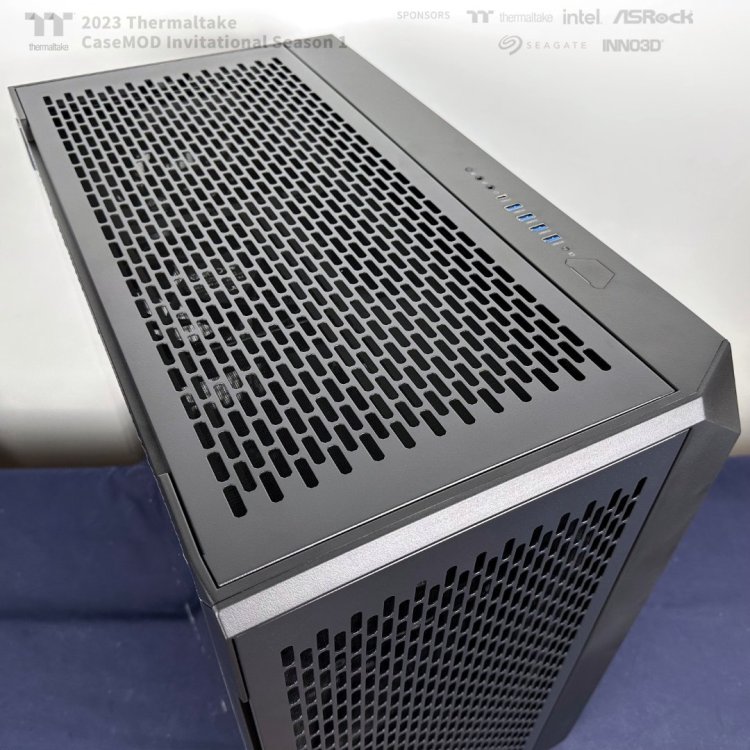
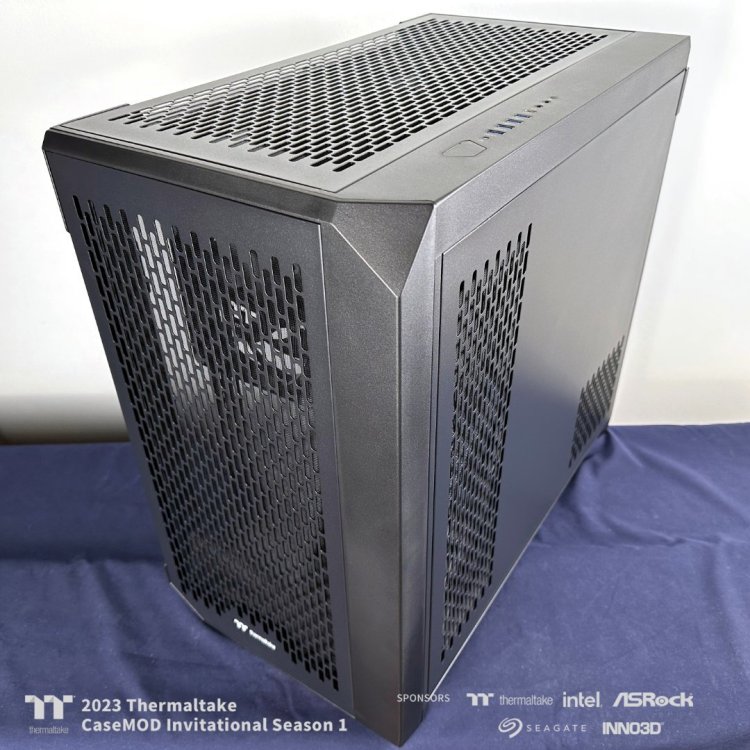
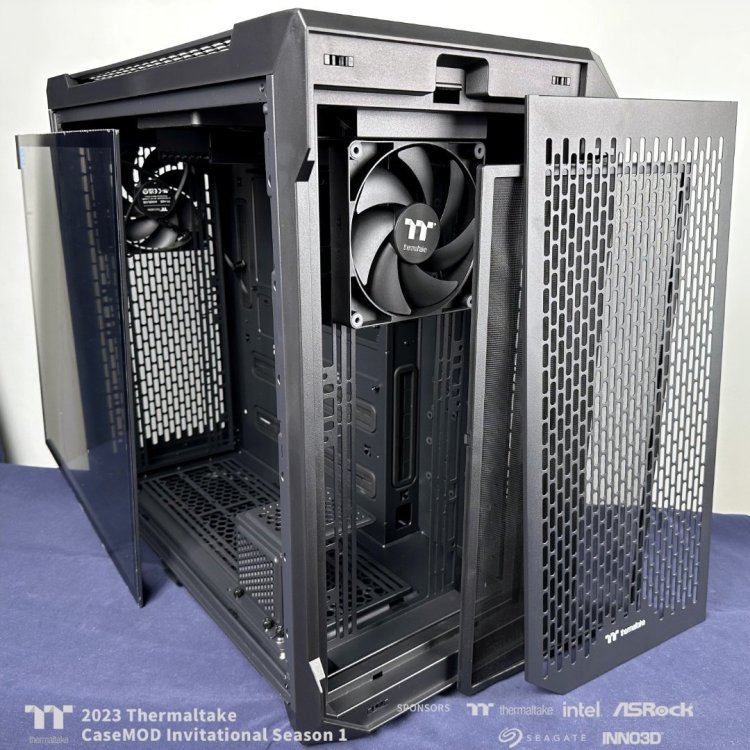
Ok ok, now let's see the fantastic CTE C750 Air Black 😋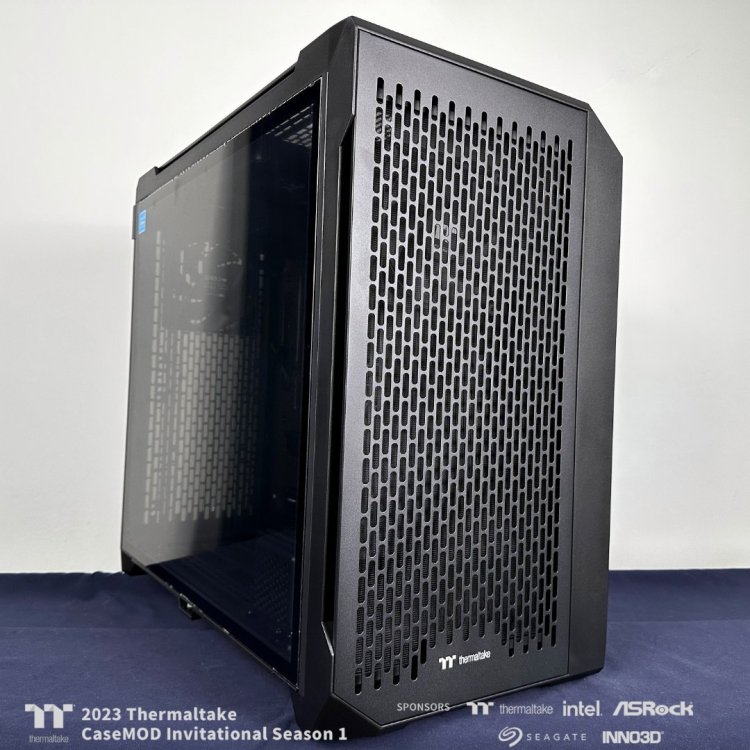


-
[Italy] Marco Di Silvestre
MPC Project replied to TT Amanda's topic in 2023 Thermaltake CaseMOD Invitational Season 1
Hello everyone, are you ready for a new adventure ? Get on the boat with me. Let's go !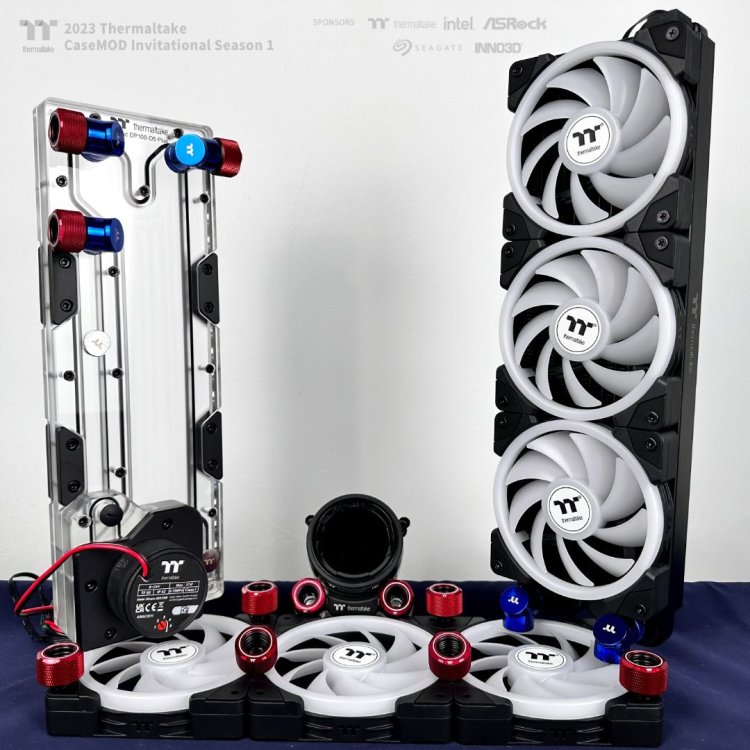


-
Great work from everyone !