-
Forum Statistics
7.6k
Total Topics51k
Total Posts -
Member Statistics
136,025
Total Members16,800
Most Online


Kaleeva
-
Posts
27 -
Joined
-
Last visited
-
Days Won
2
Content Type
Profiles
Forums
Downloads
Events
Gallery
Blogs
Posts posted by Kaleeva
-
-
wow looks really great!
-
-
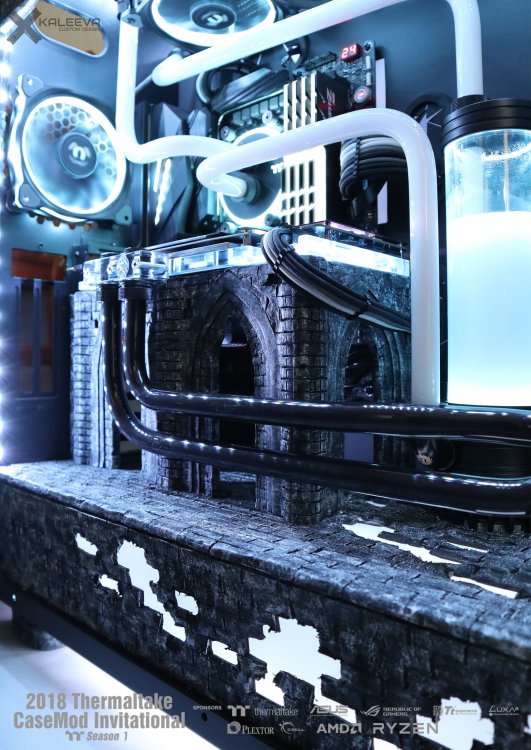
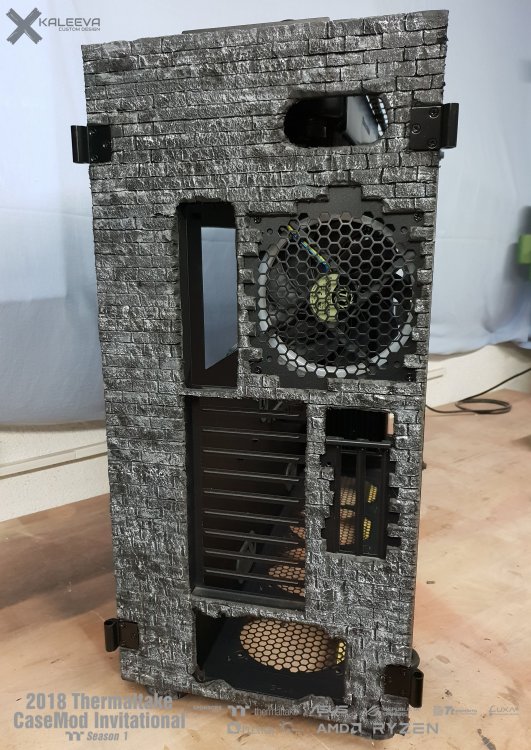
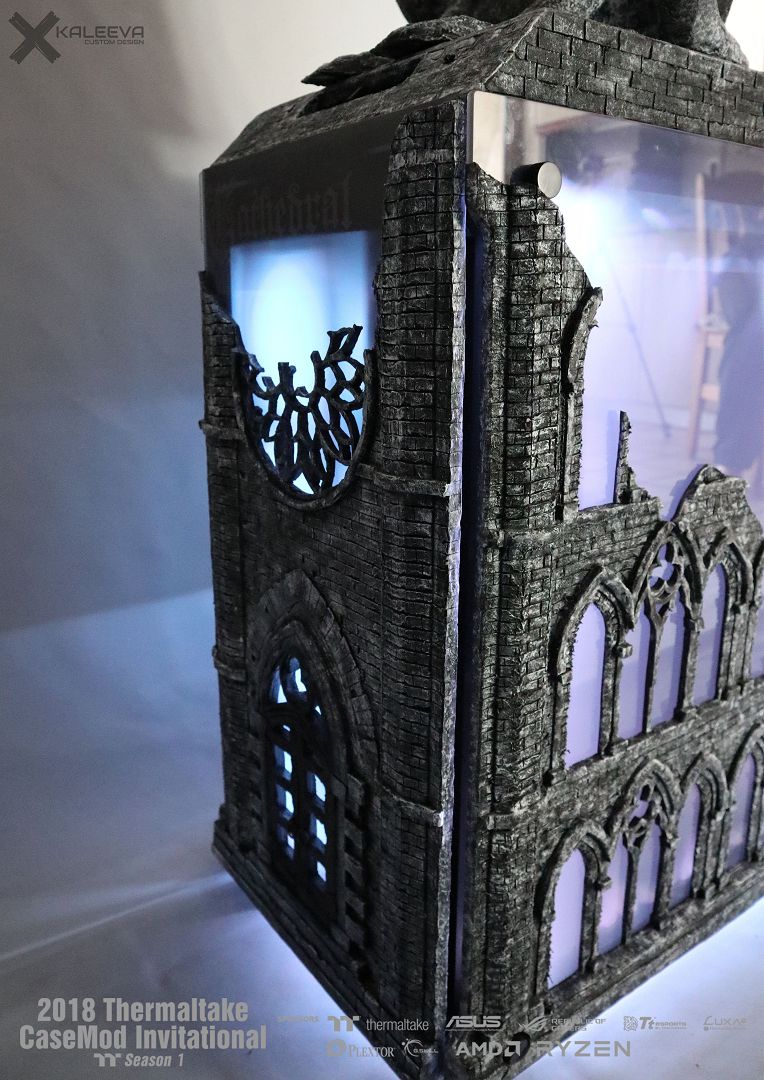
Final pictures

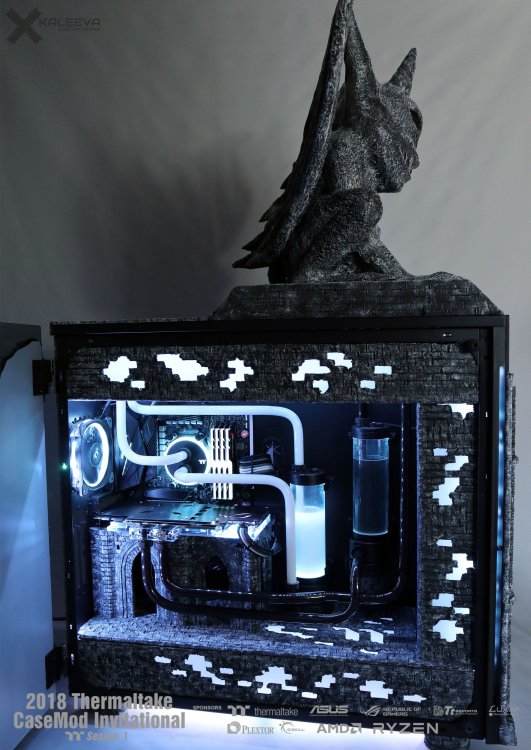


-
Tomorrow there will be the Final Pictures
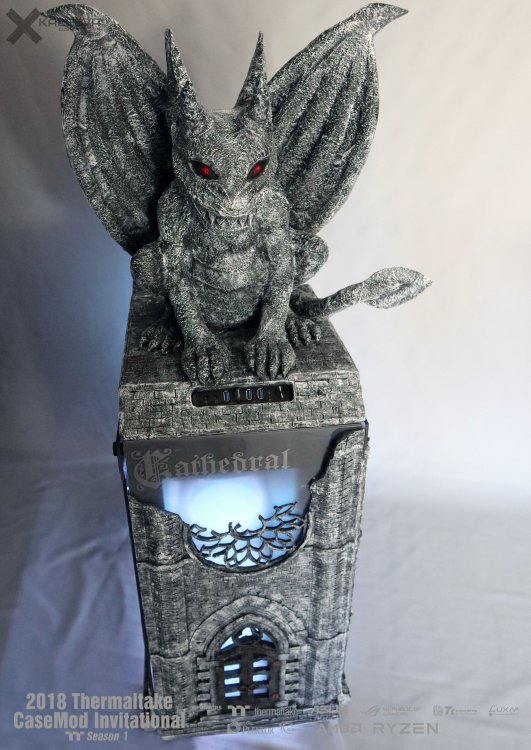
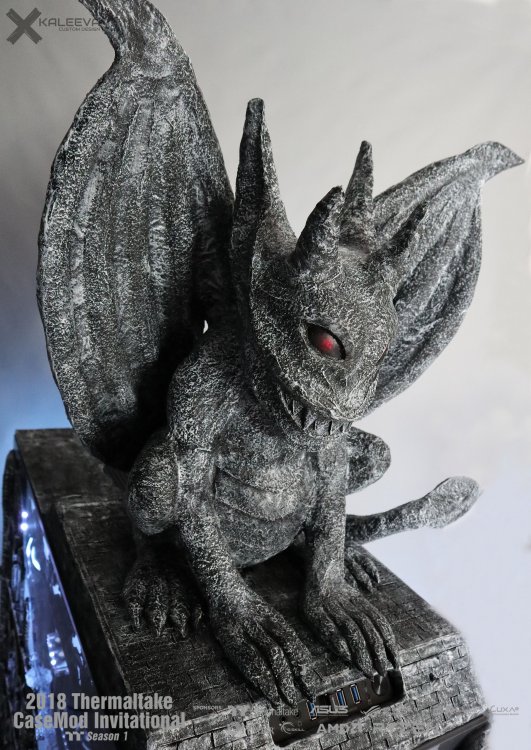
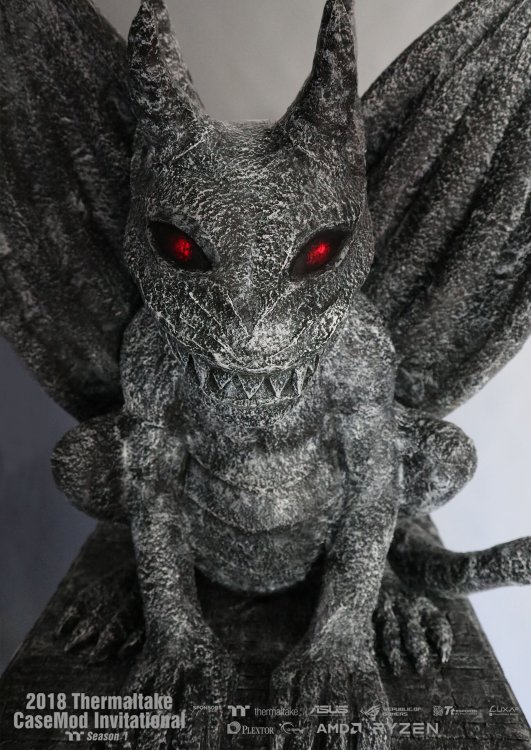
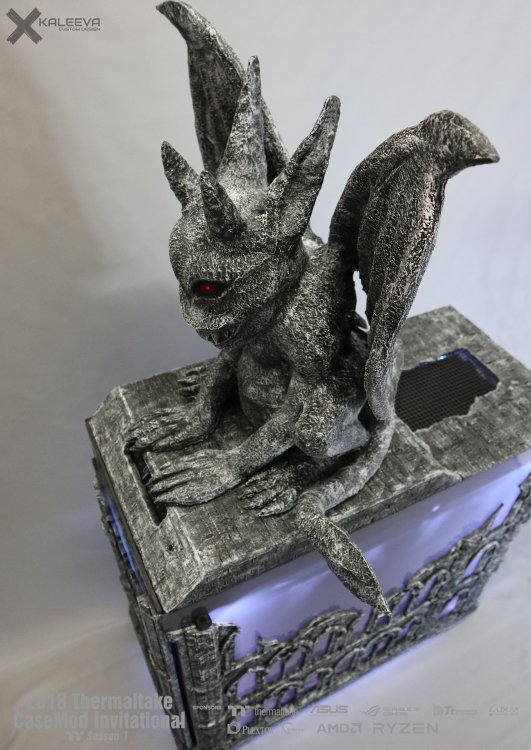
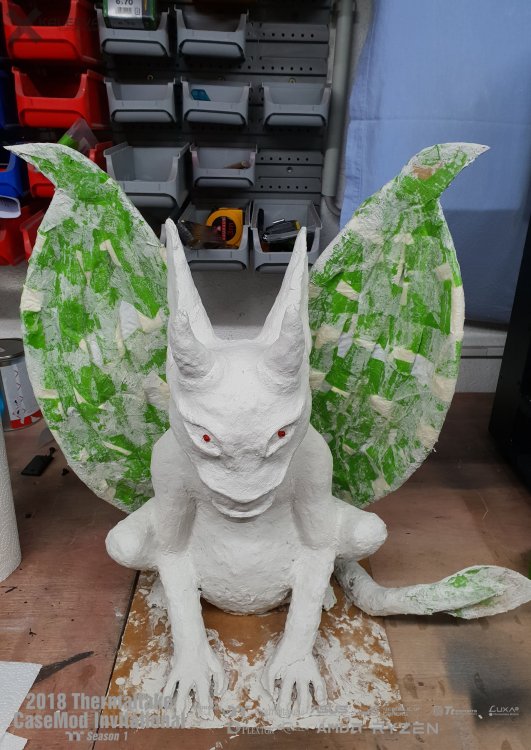
Here the switch for the eyes of the Gargoyle.
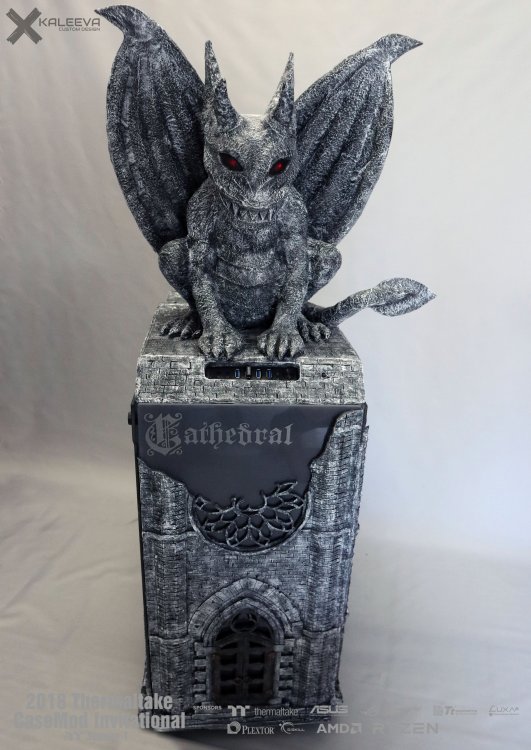
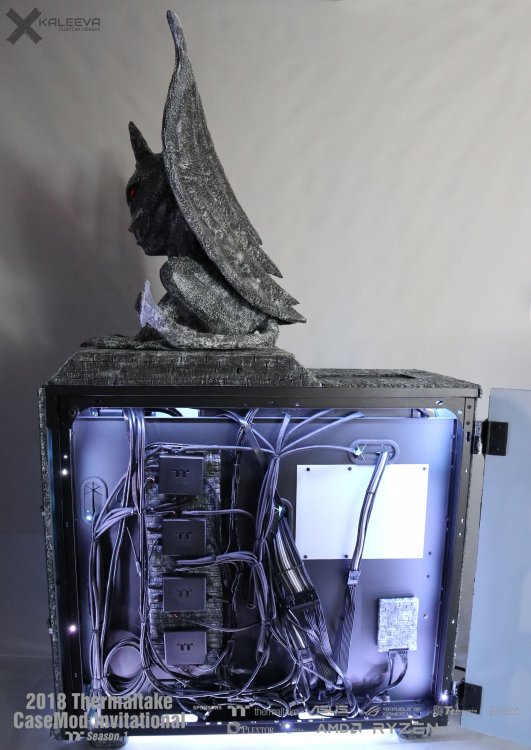
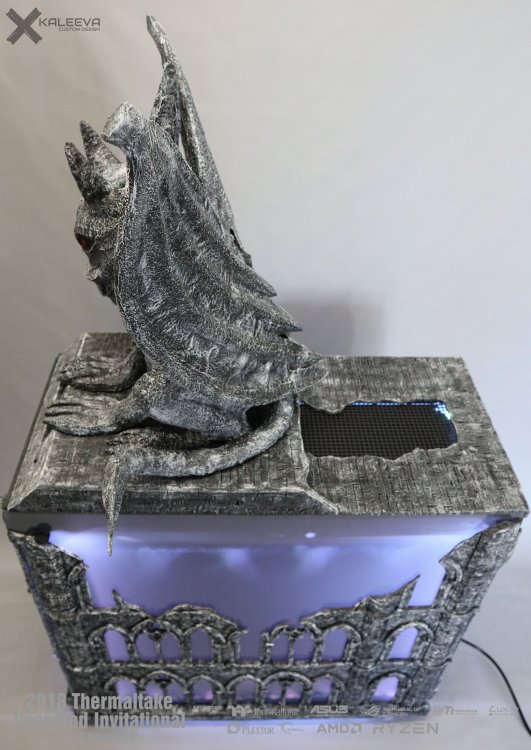
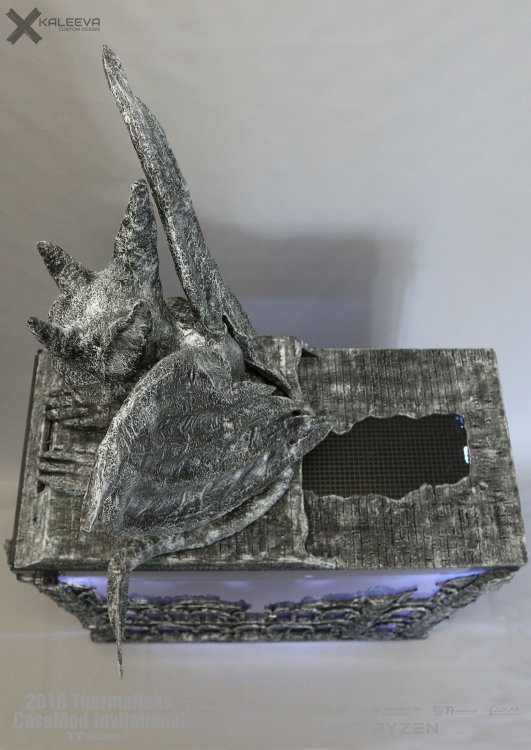
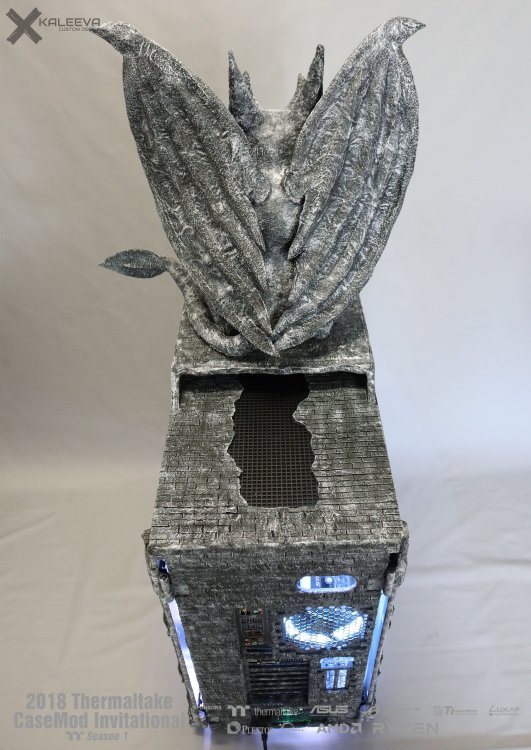
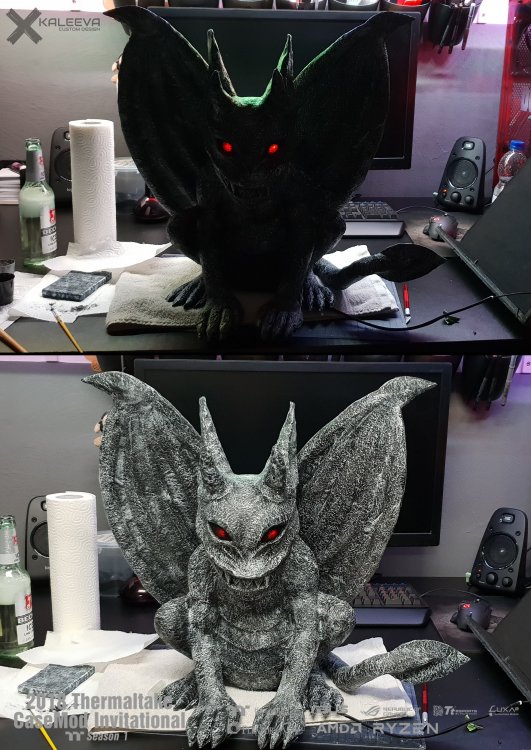
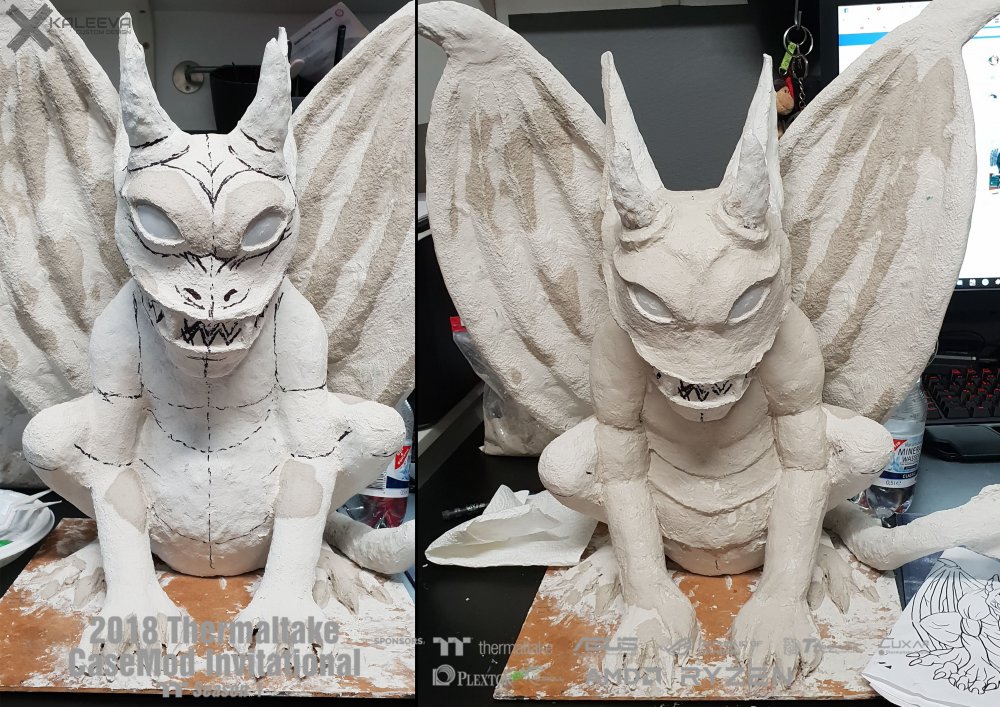
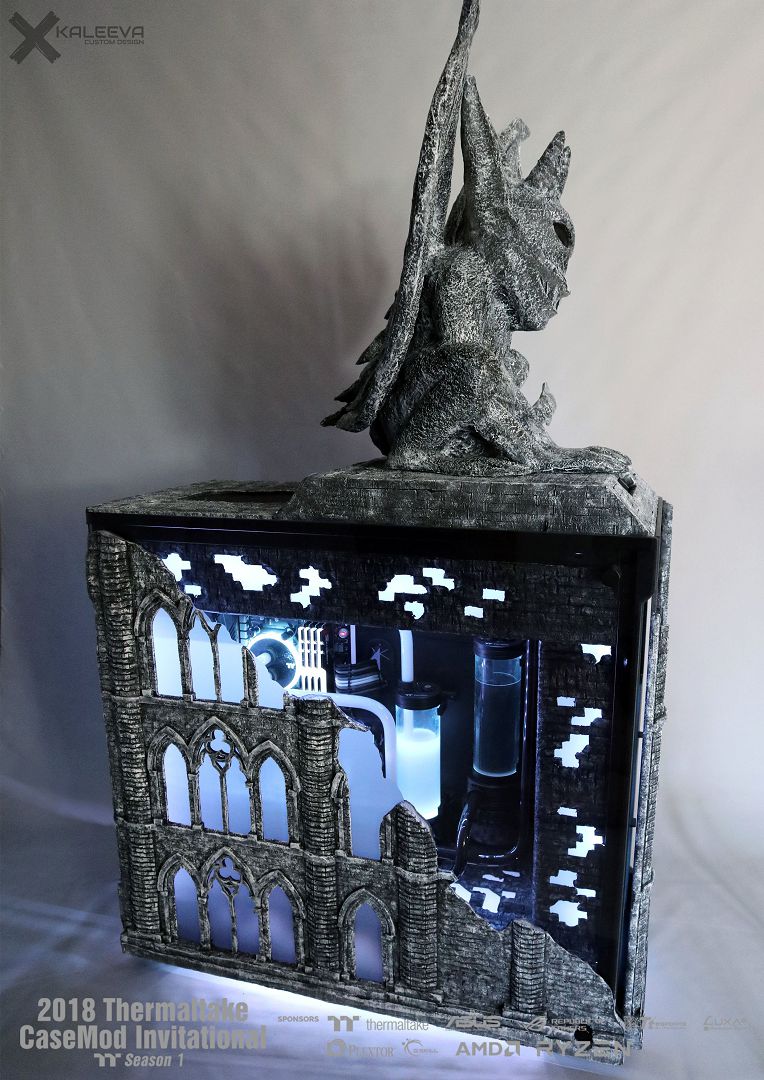
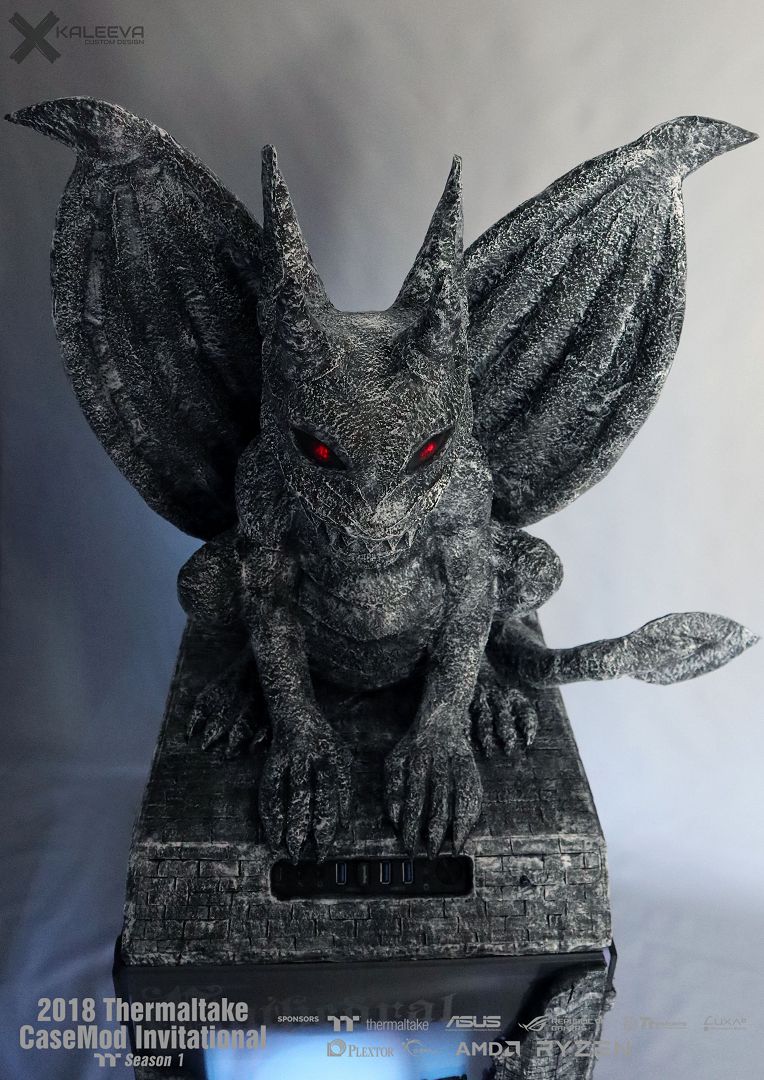
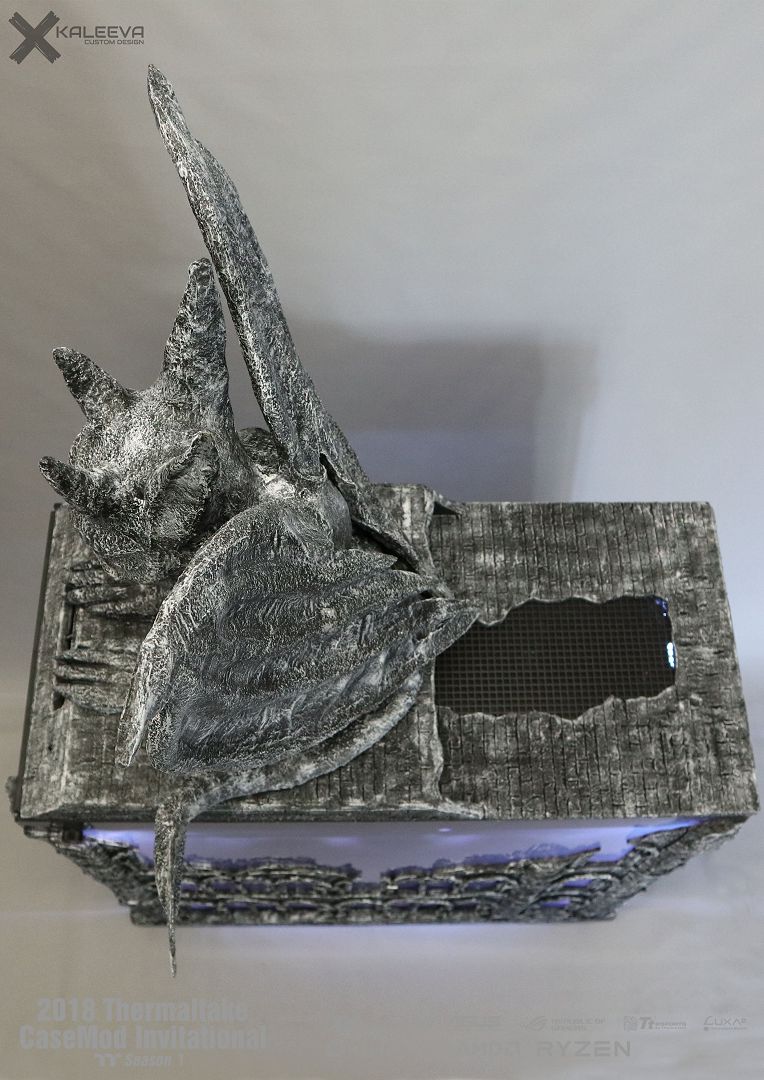
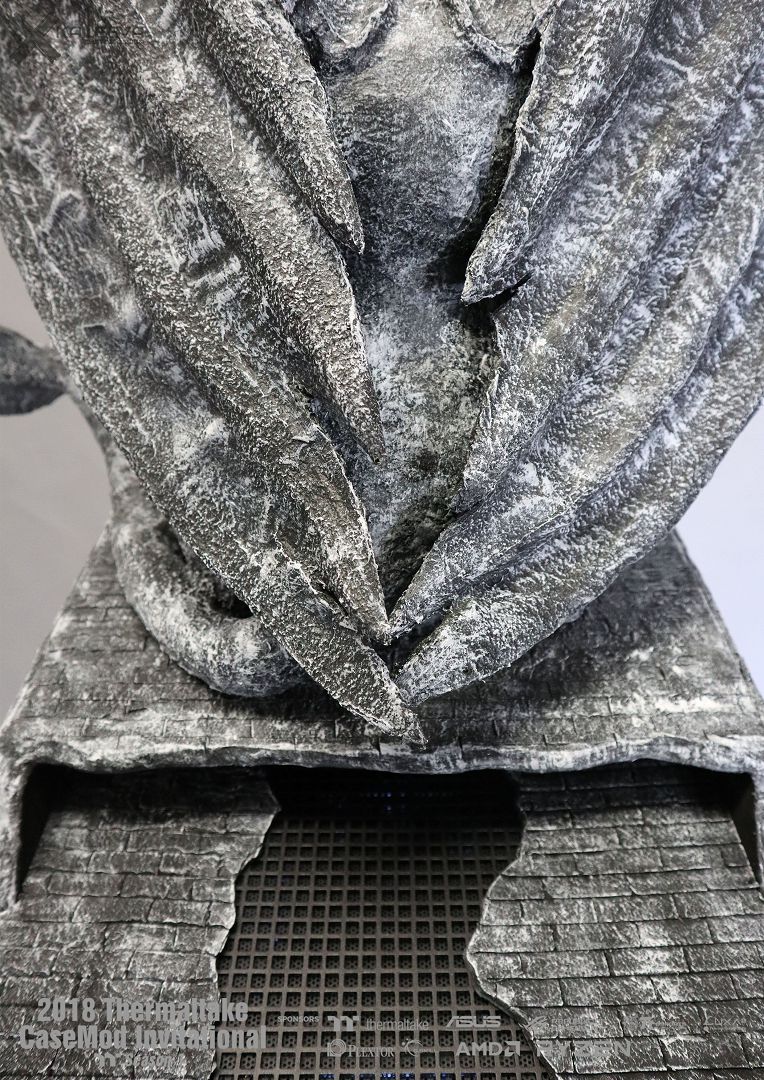
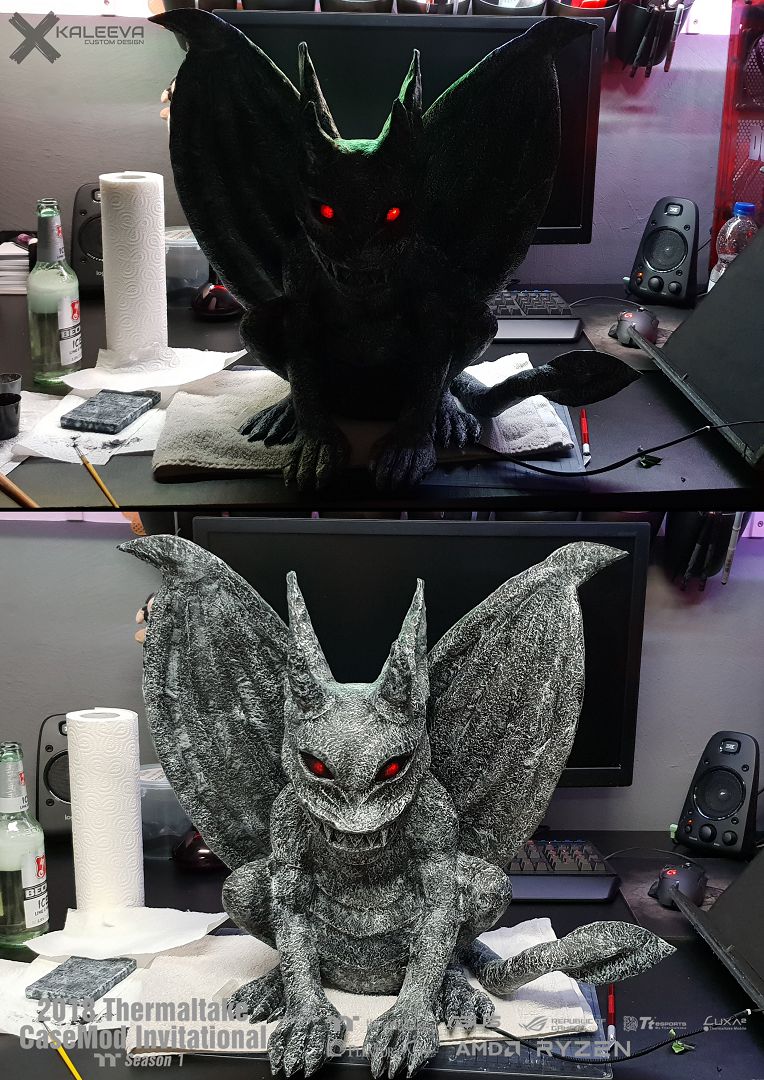
And the finished Gargoyle. Because of the long drying times, I had already considered that it will not be finished in time.
-
There is still a lot to do, but there is an end in sight =)

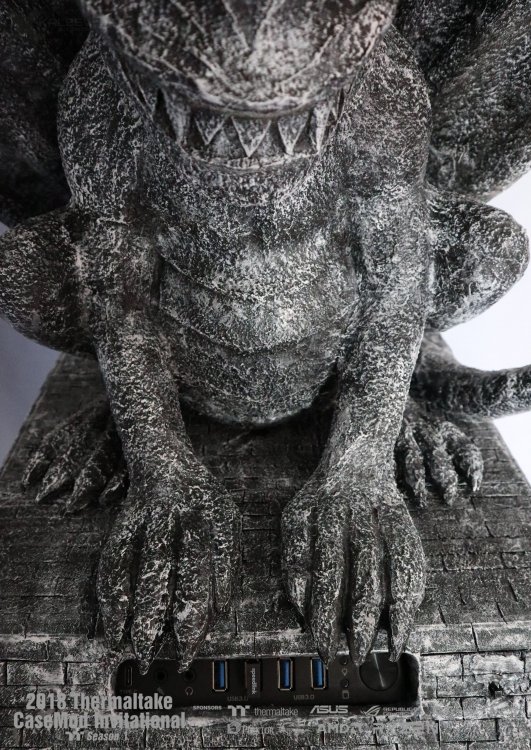
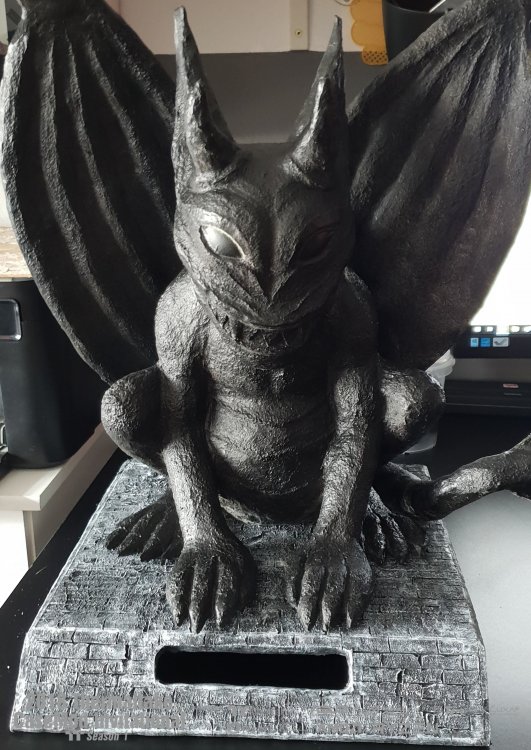
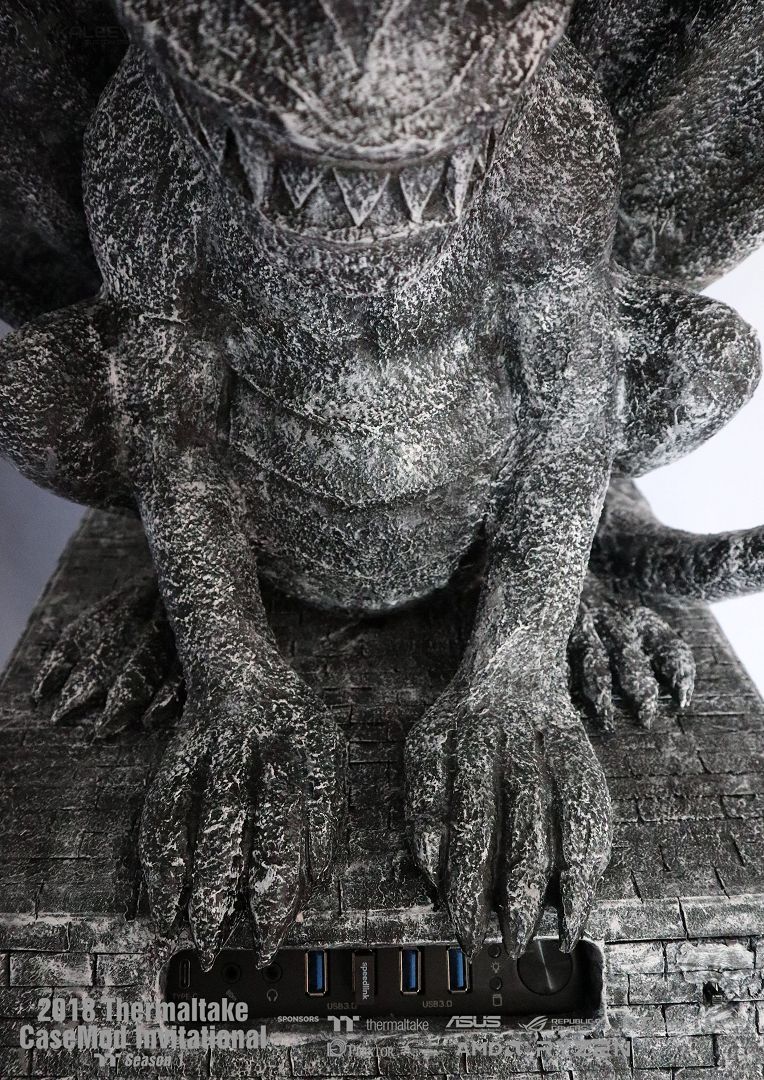
The Gargoyle got metal plates under its feet, so that it can be fixed to the platform with magnets, even if it has enough weight.

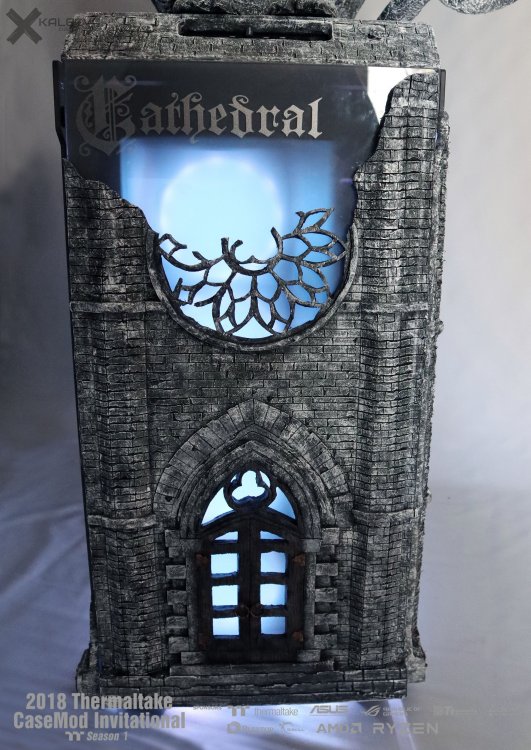
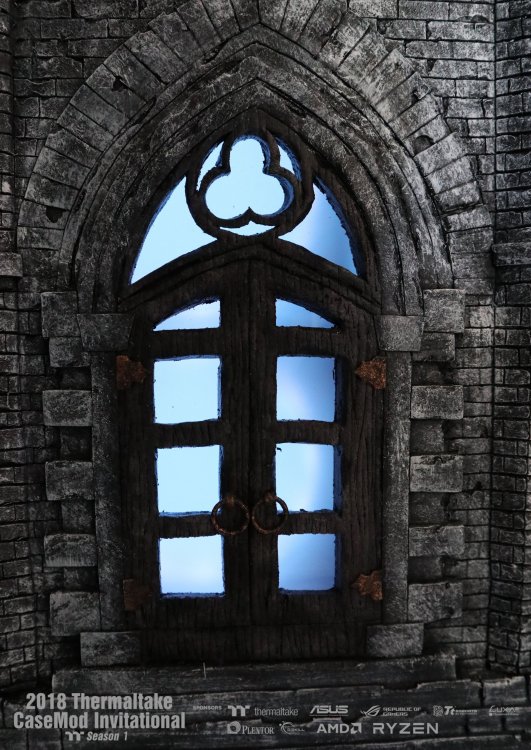
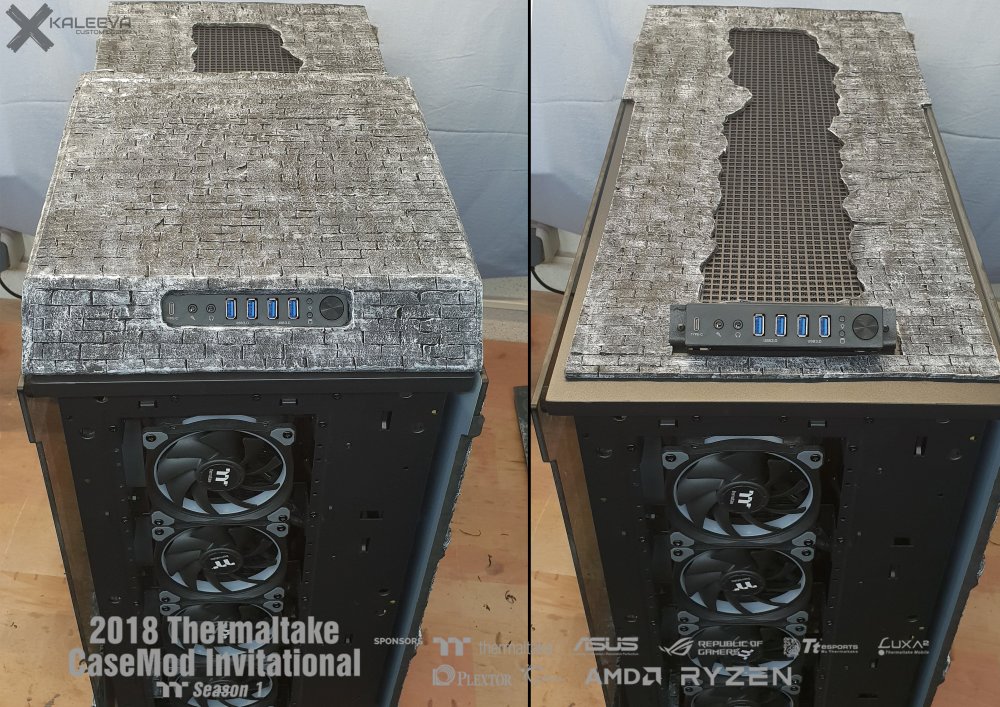
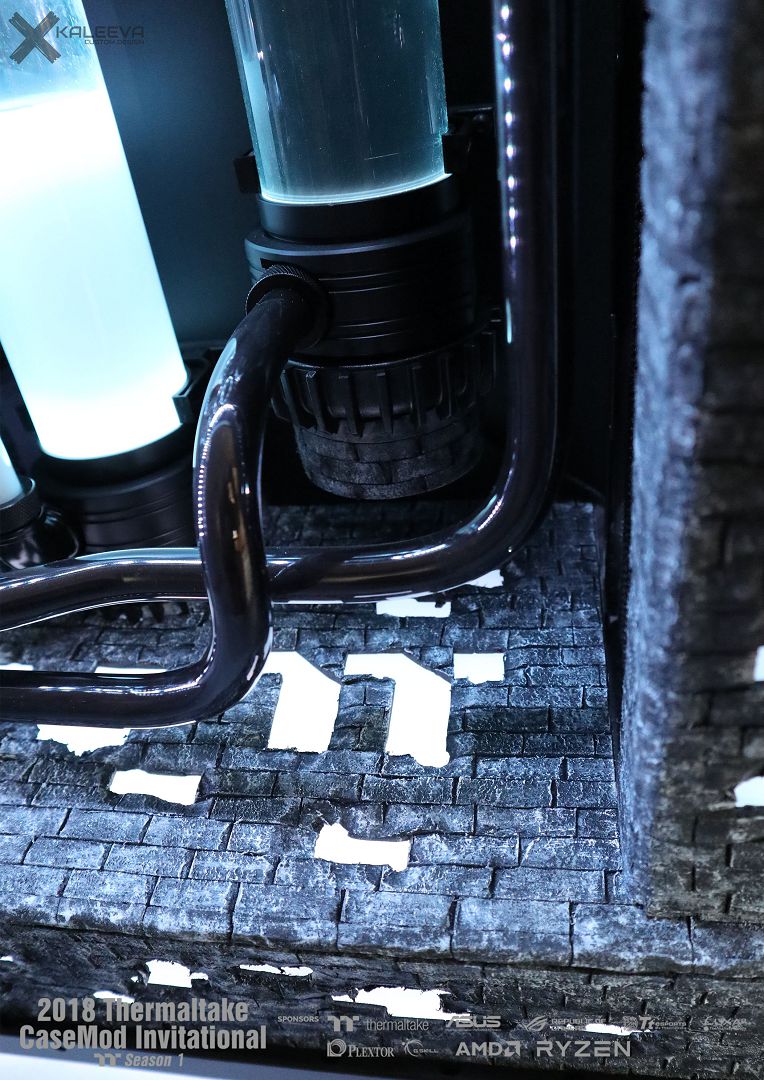
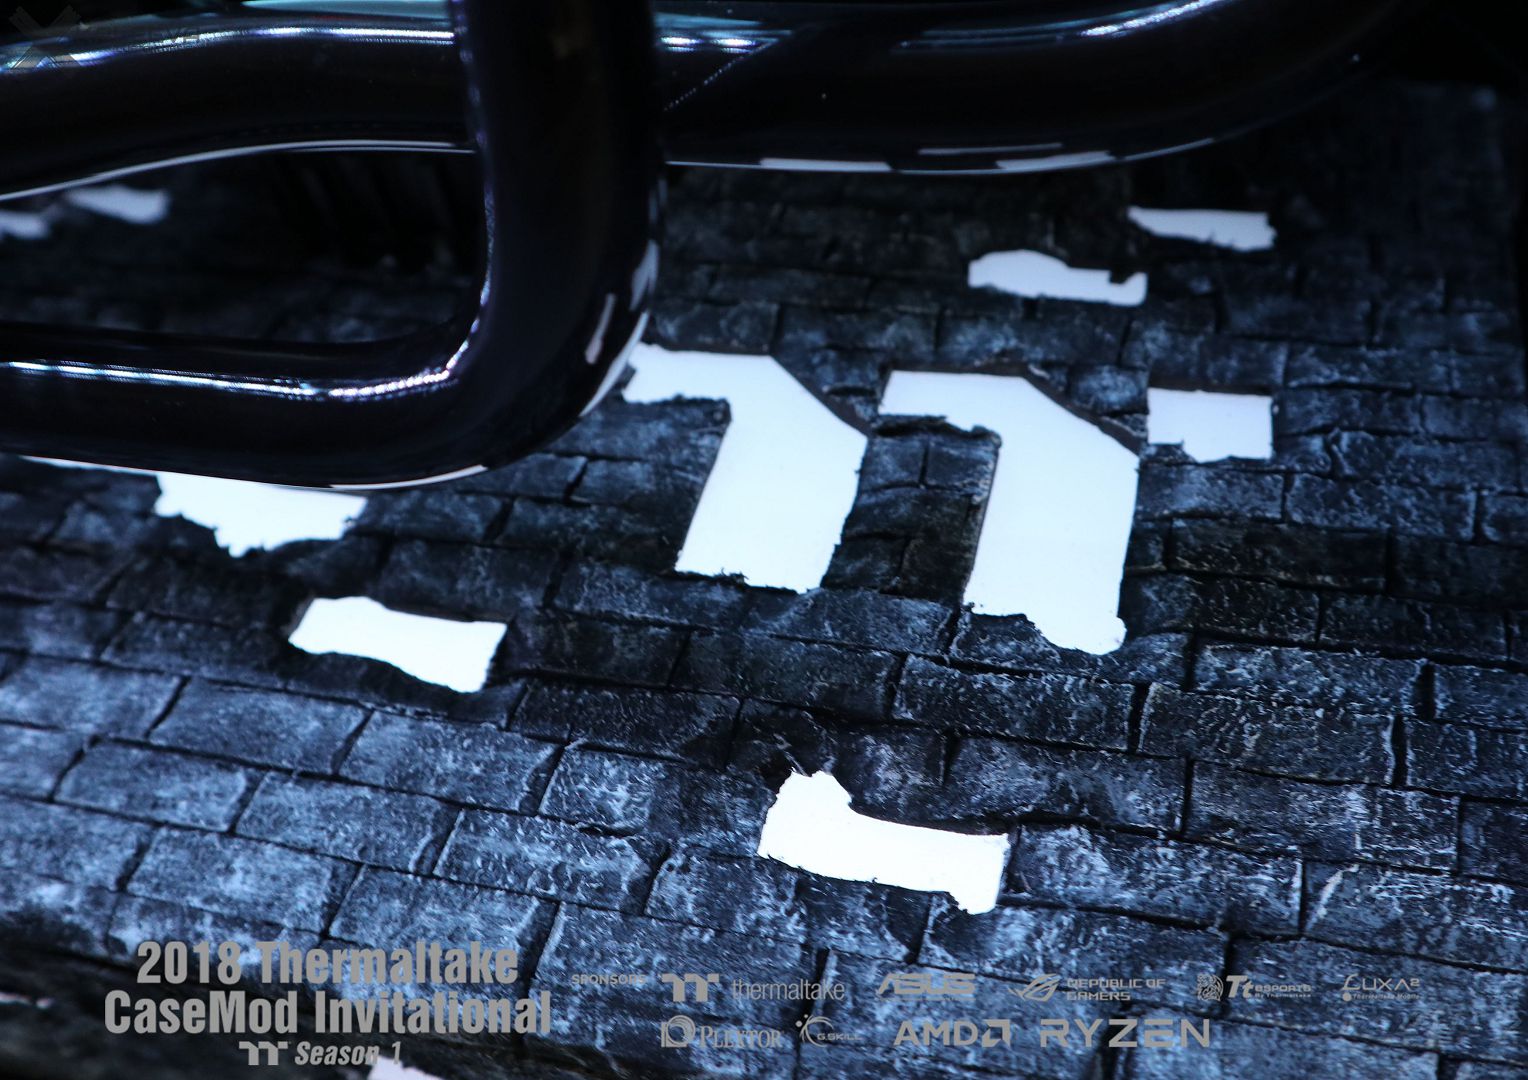
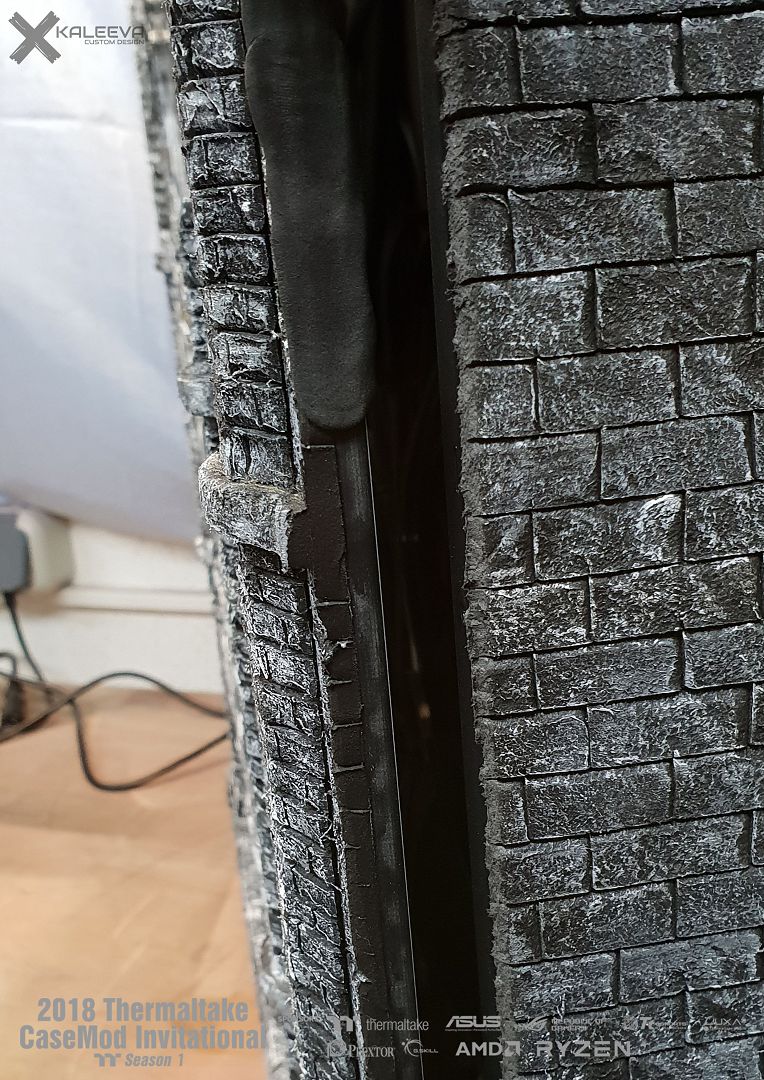
Apart from that I am still doing little things here and there, such as covering the edges of the doors so you can't see the connection from the EVA to the glass.

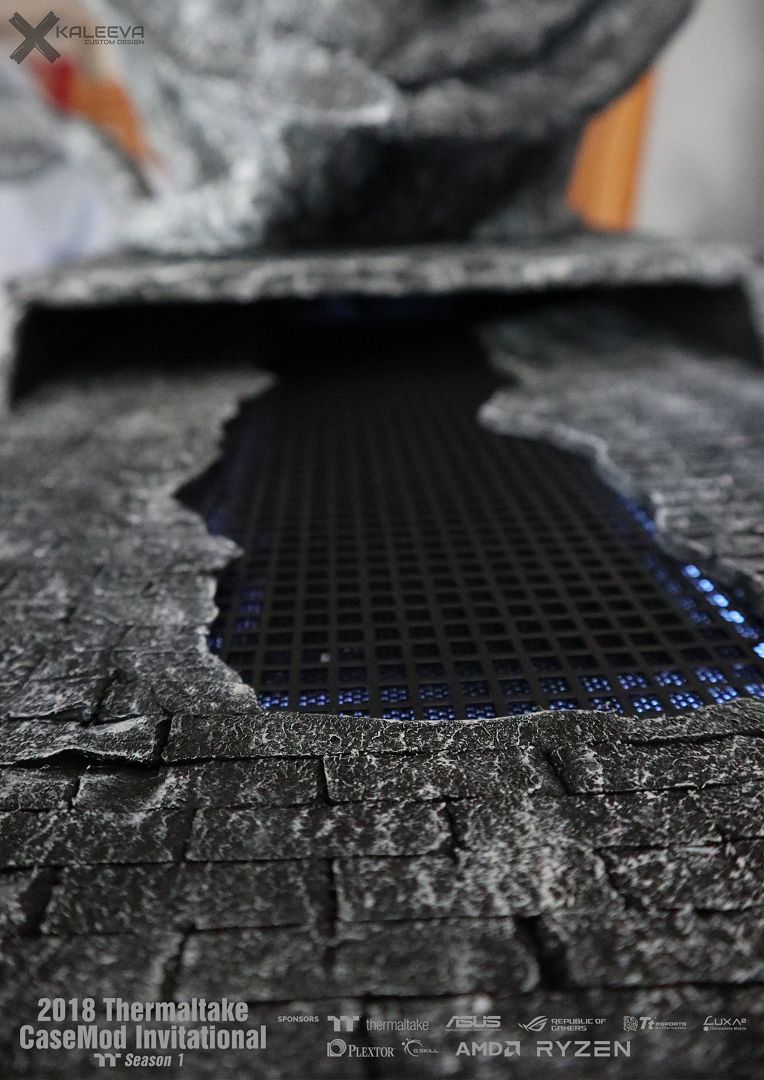
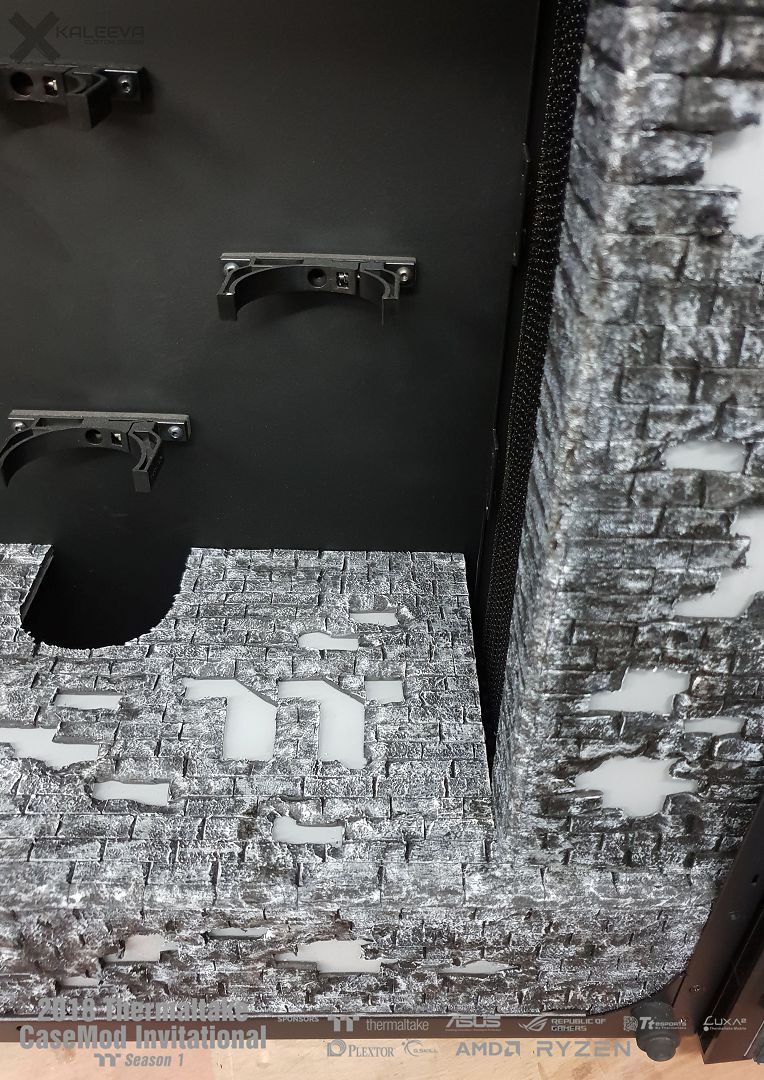
The platform of the Gargoyle remains open at the back to allow good air circulation.

-
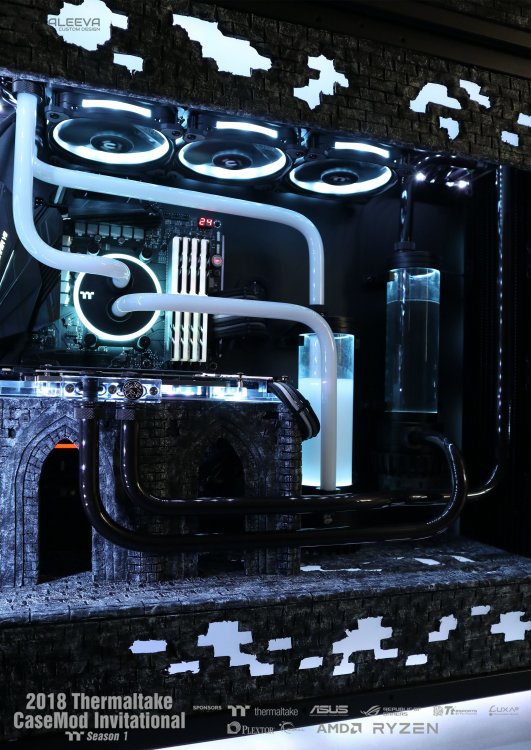
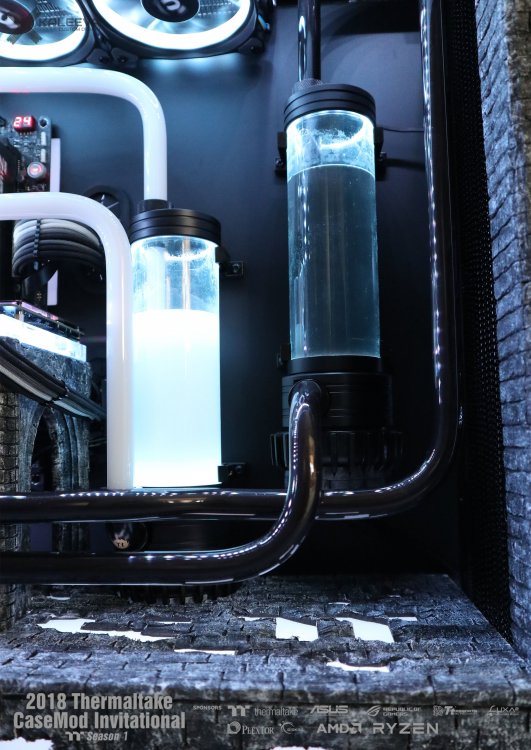
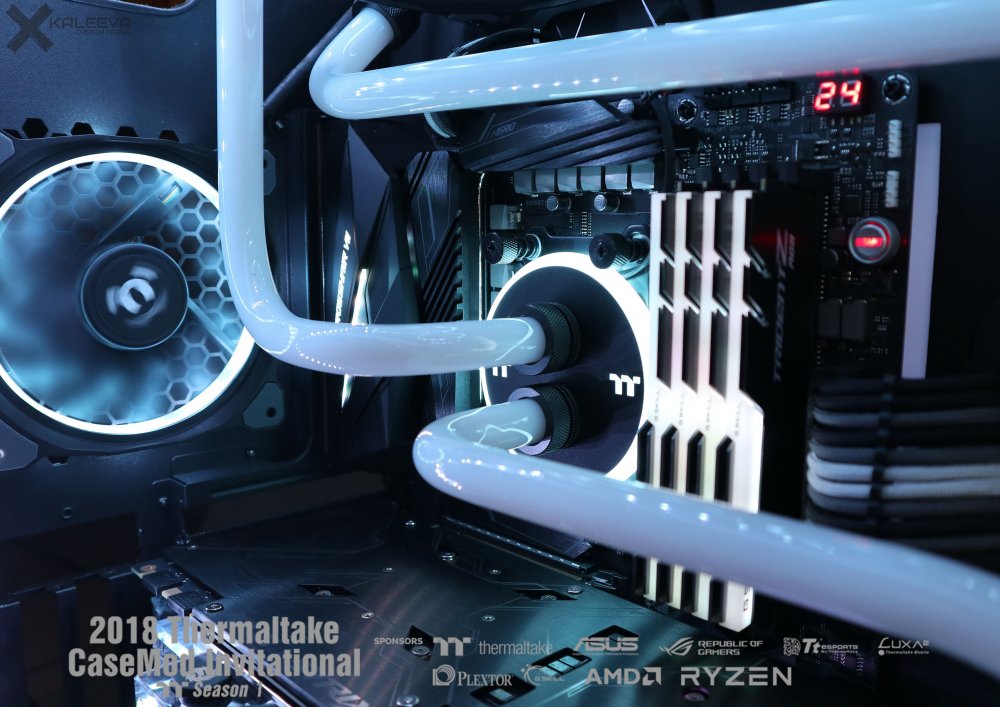
nly one more week and still there is a lot to do.
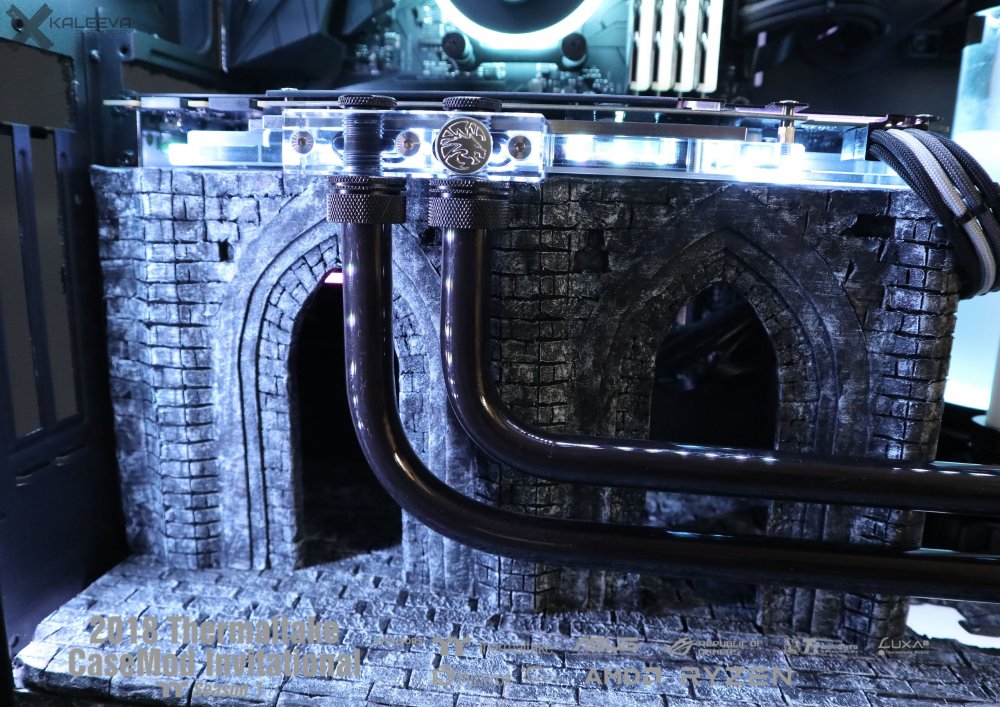
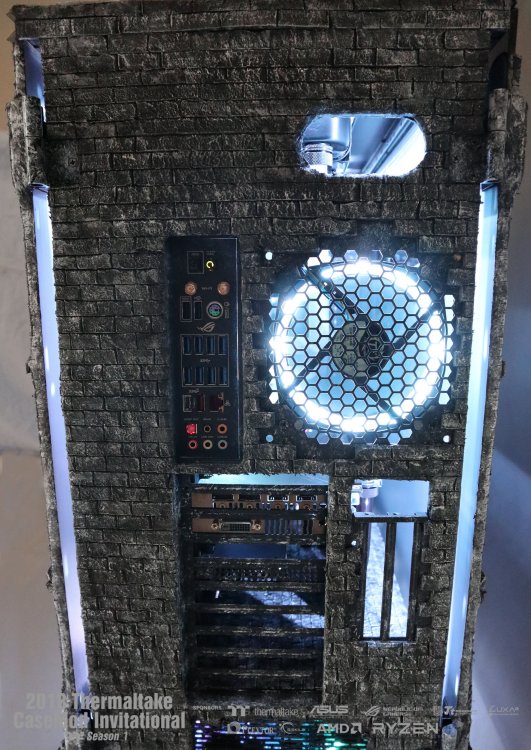
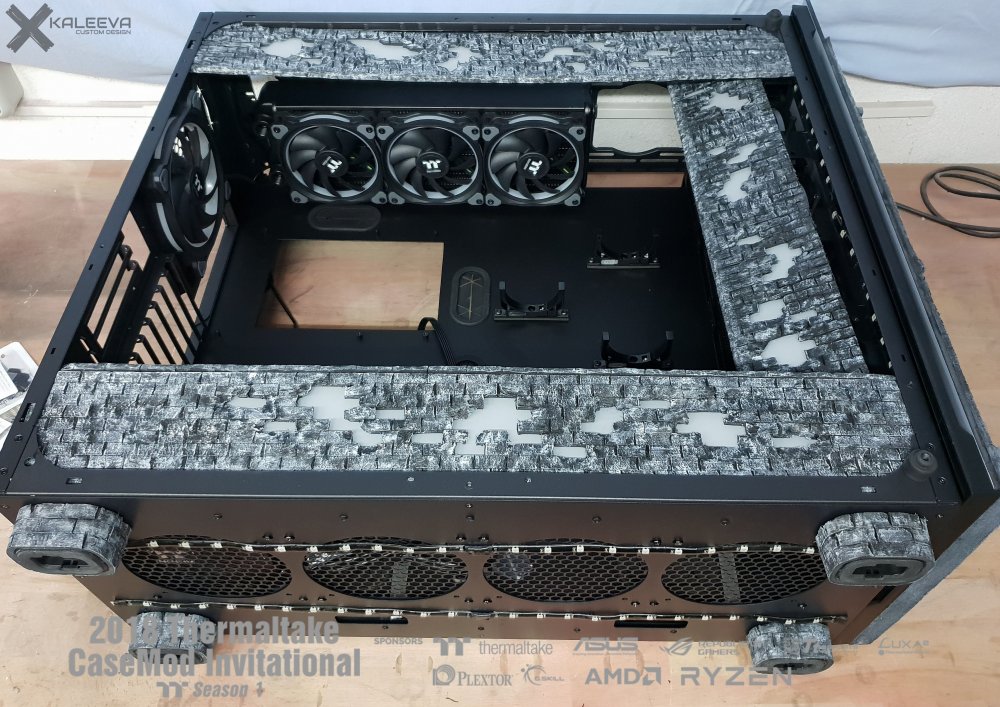
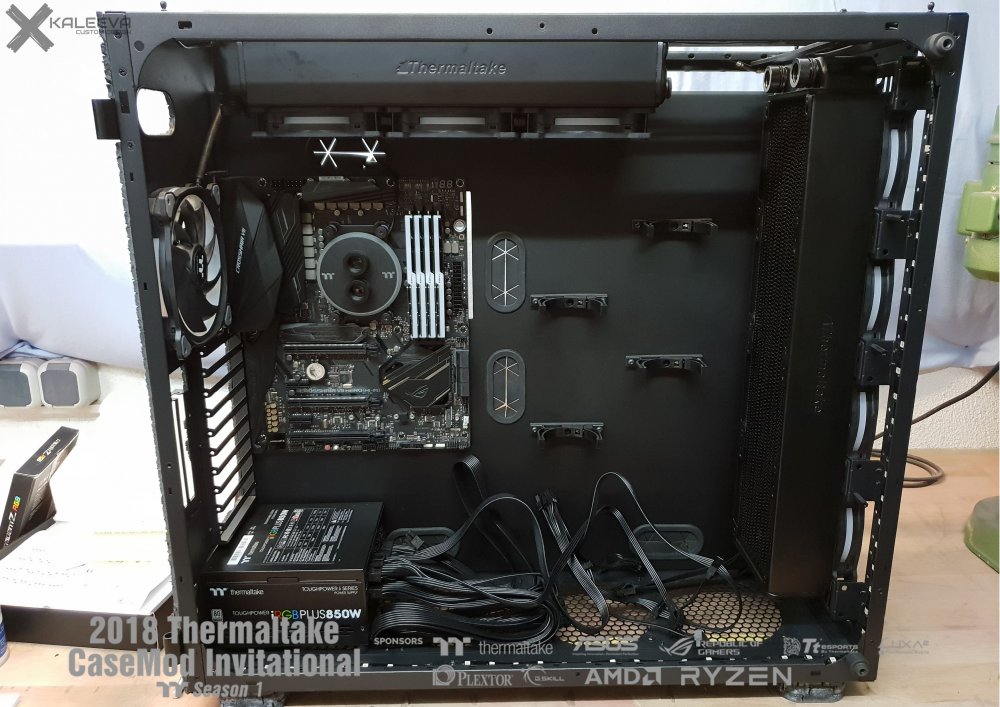
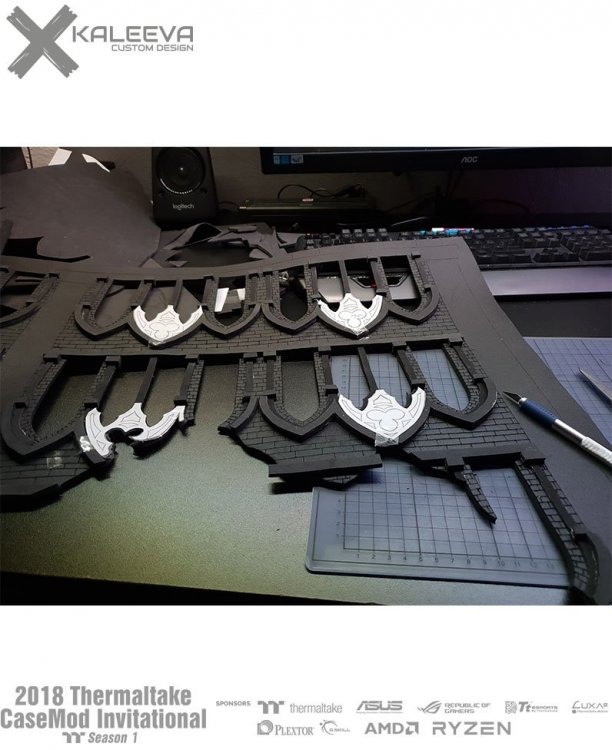
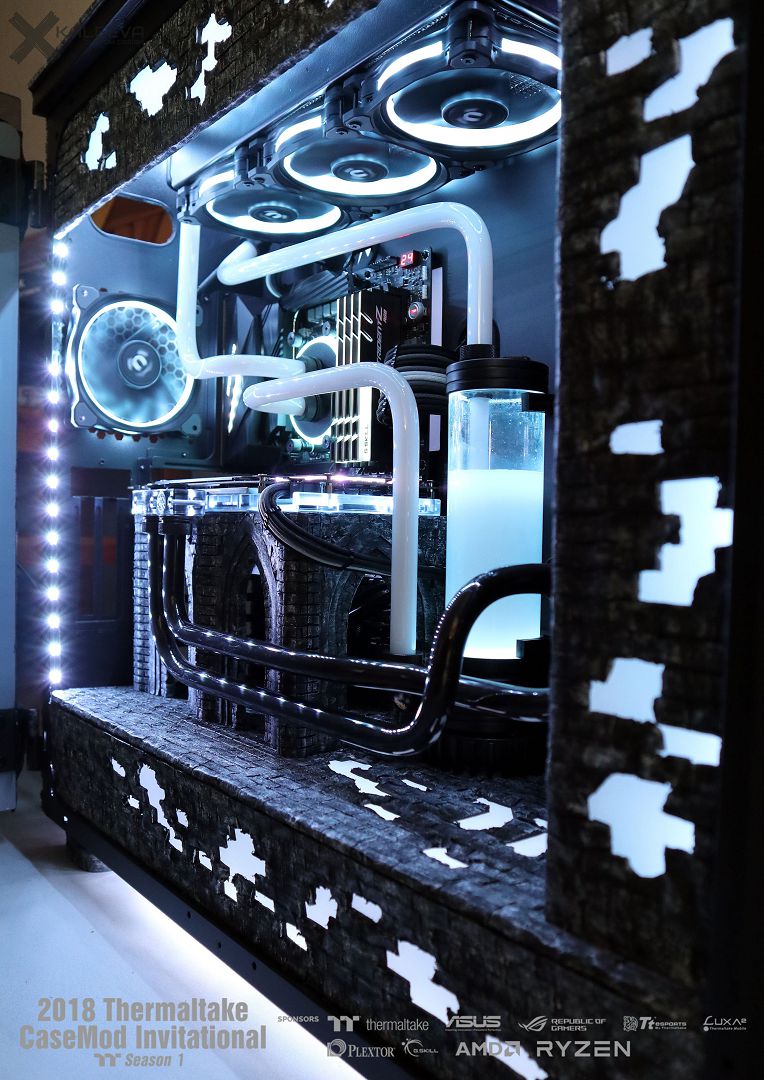
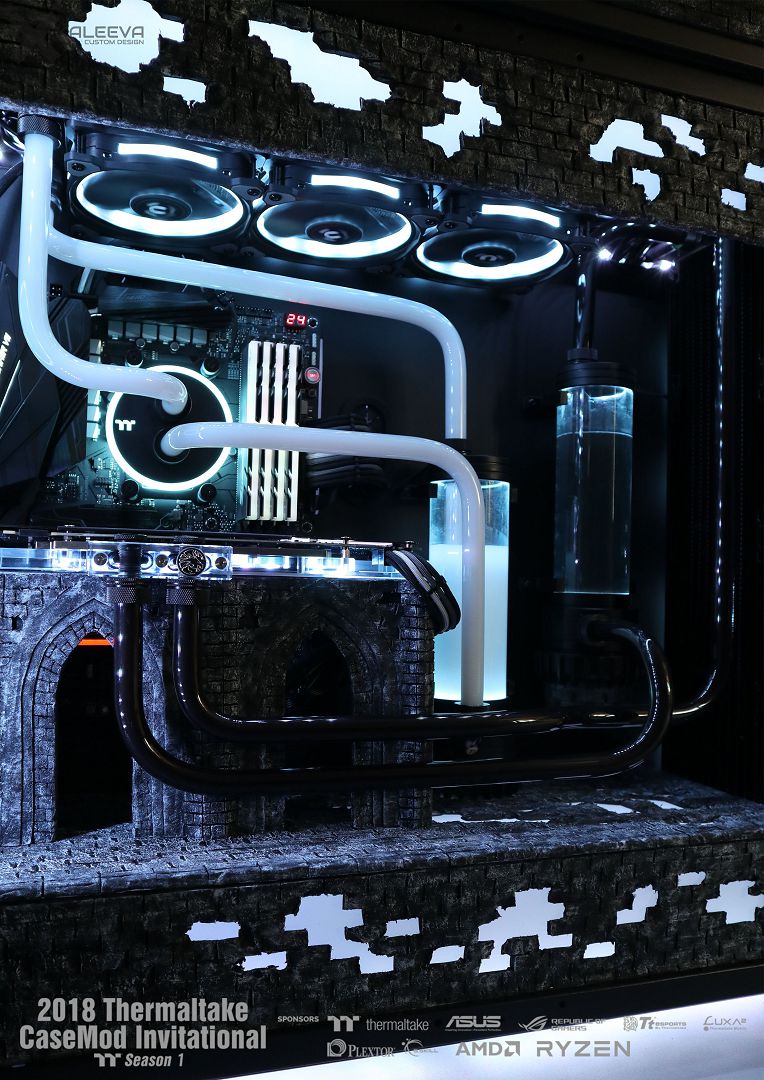
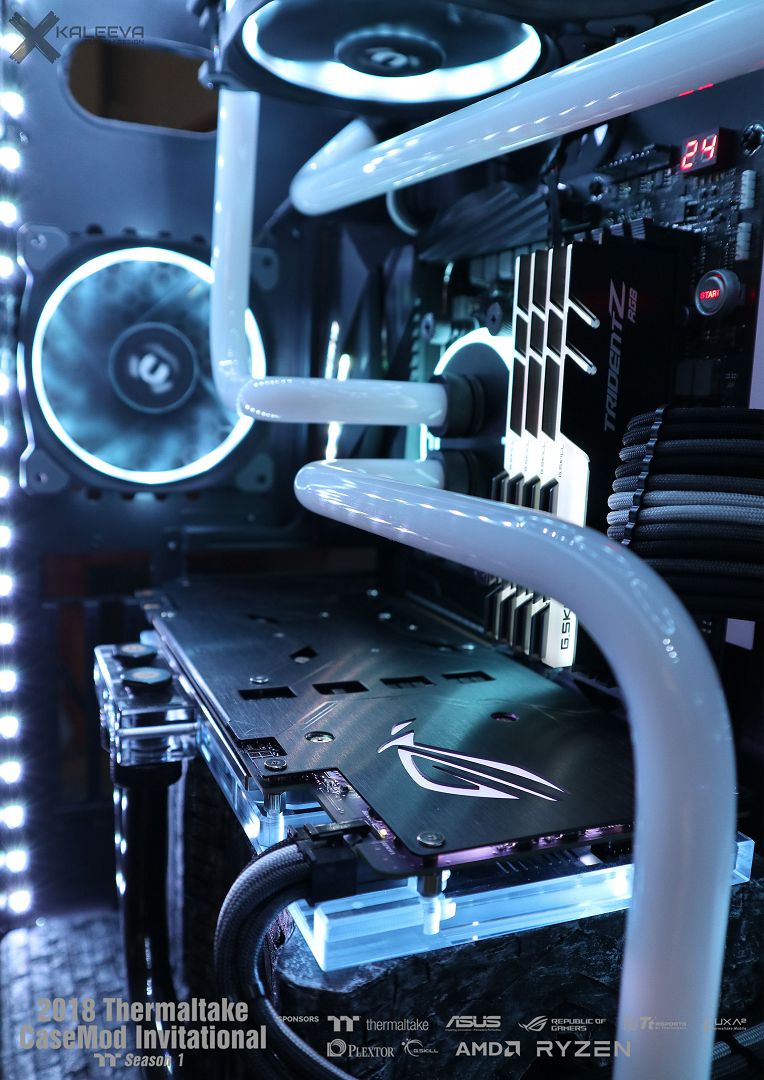
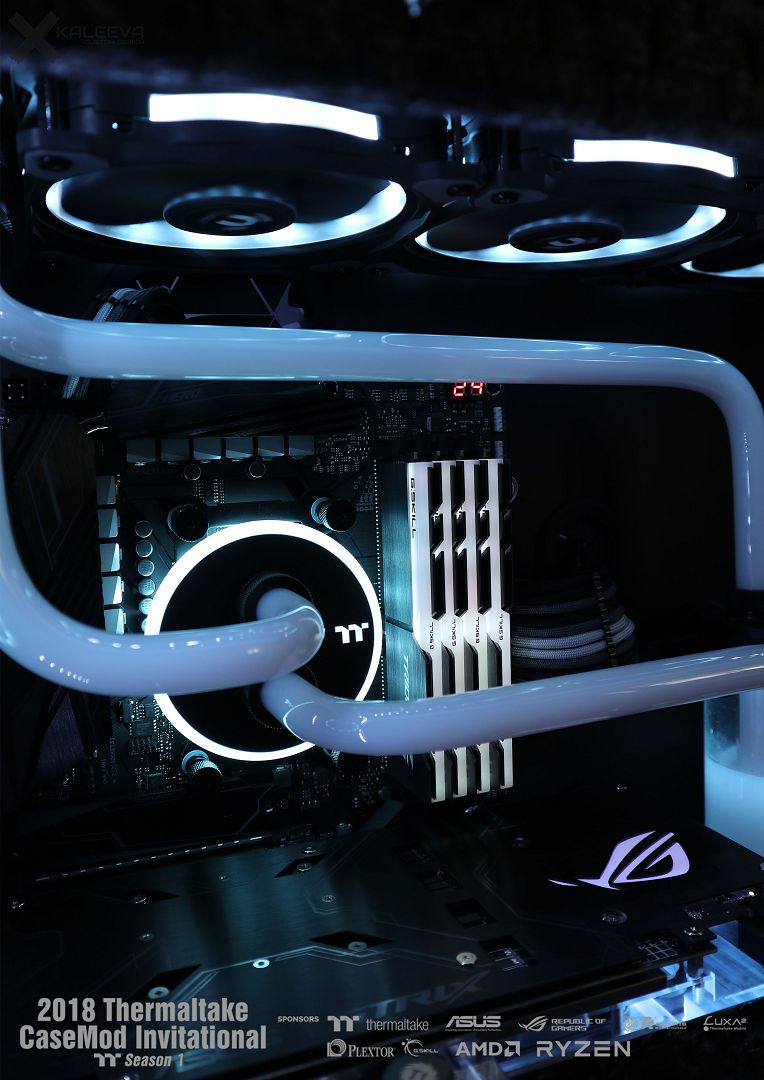
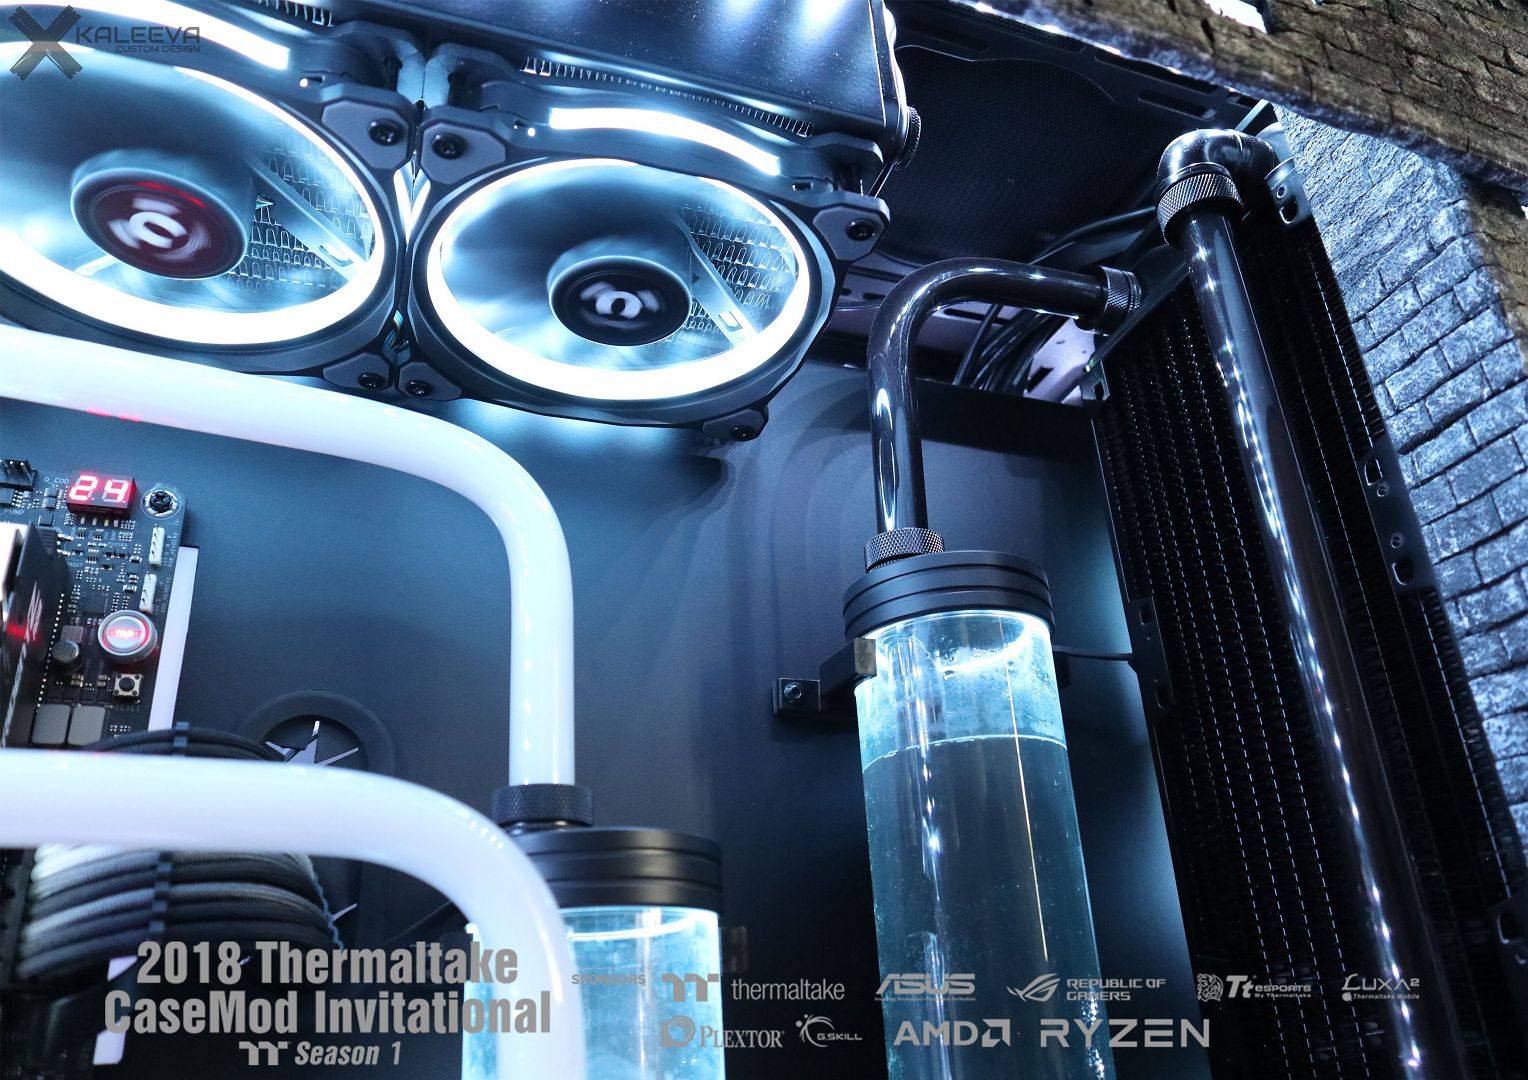
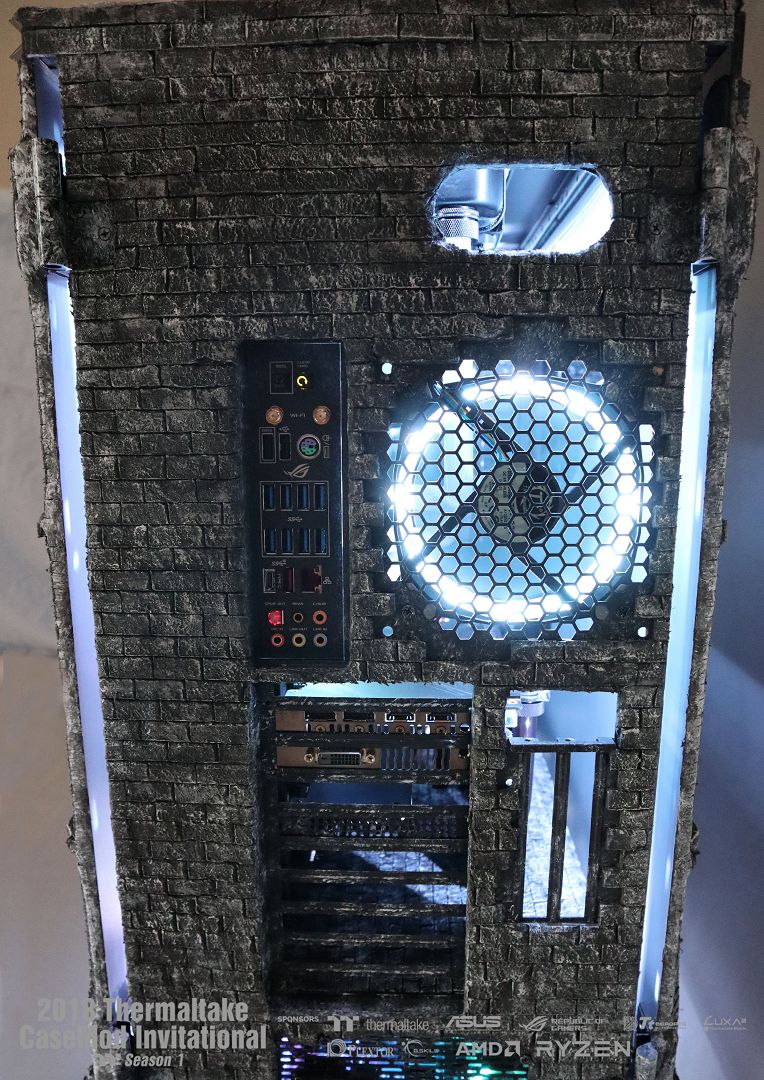
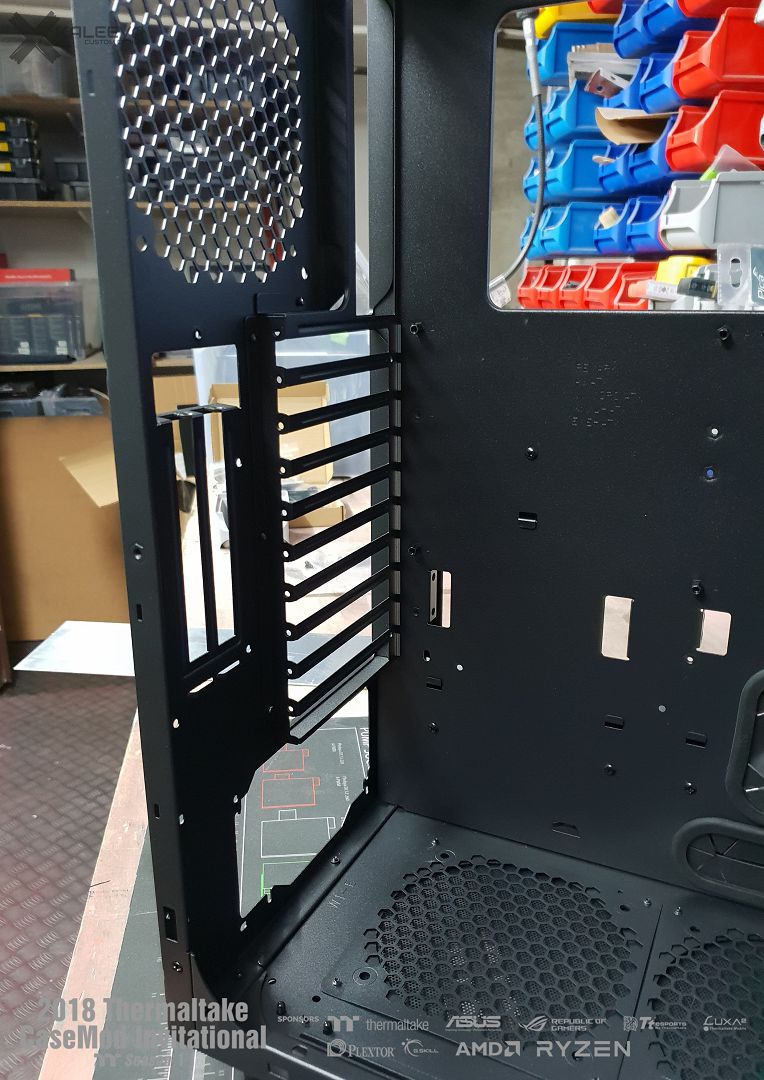
First I finished the GPU mount and installed it.

Then it was the turn of the Hartubes. It cost me some nerves, because it is the first time that I have worked completely without contra-angles. But I think it is quite good for that =)
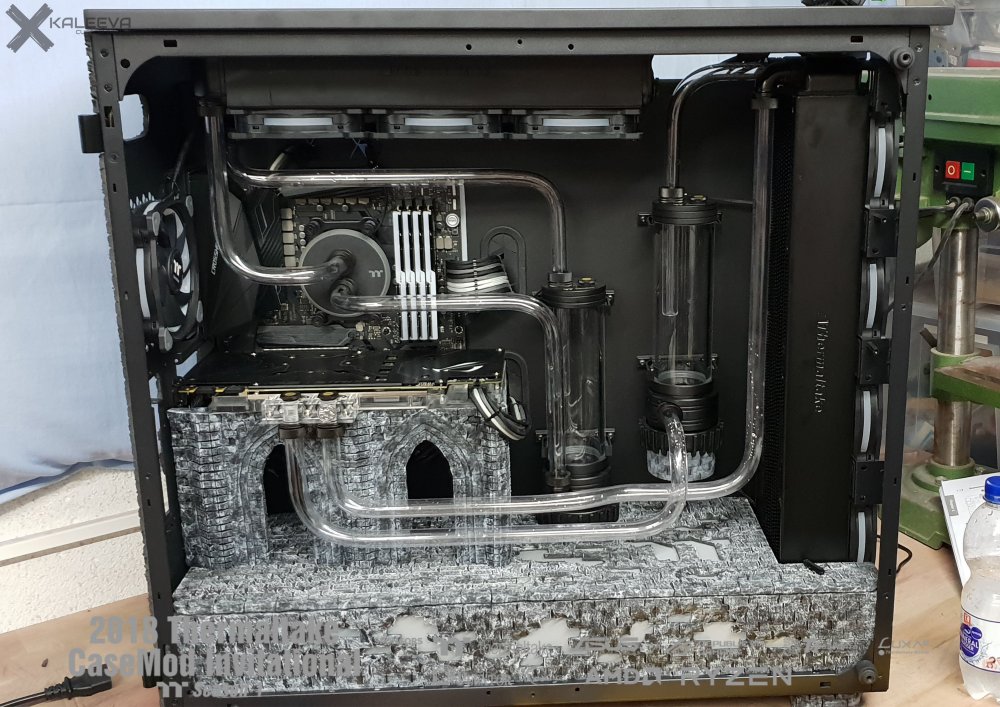
What's still outstanding is finishing the top with the gargoyle on top and the cable management.
Here a short video how it looks like at the moment
-
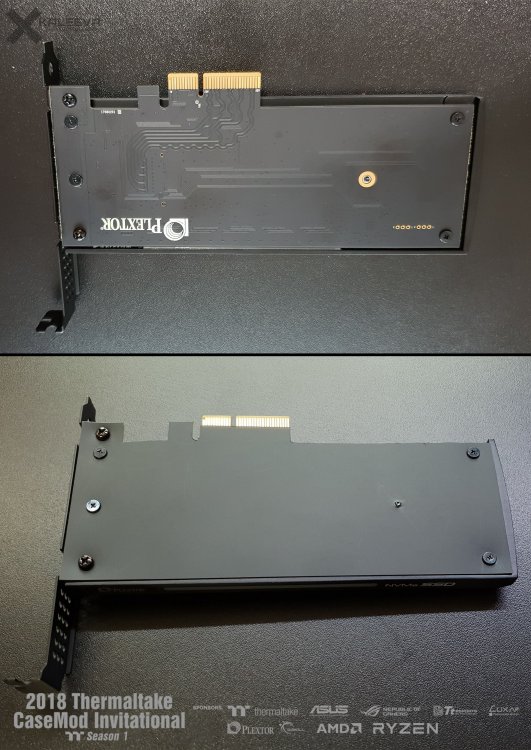
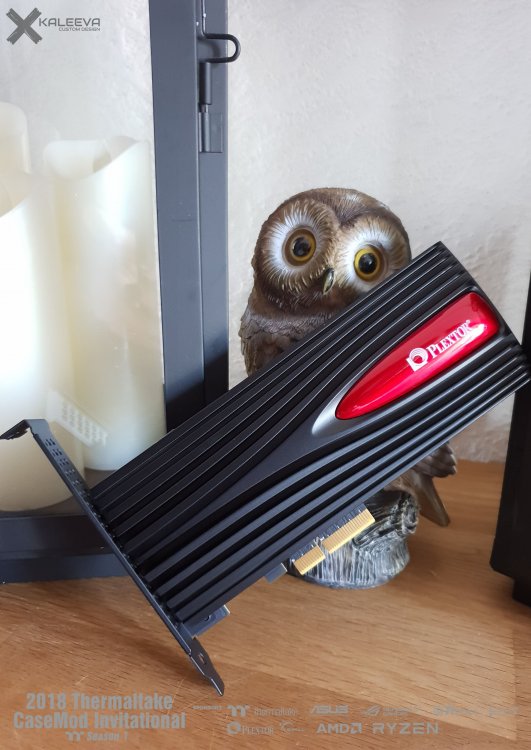
The Plextor SSD has got a hard PVC cover, but you won't see it anymore because of the GPU bracket.
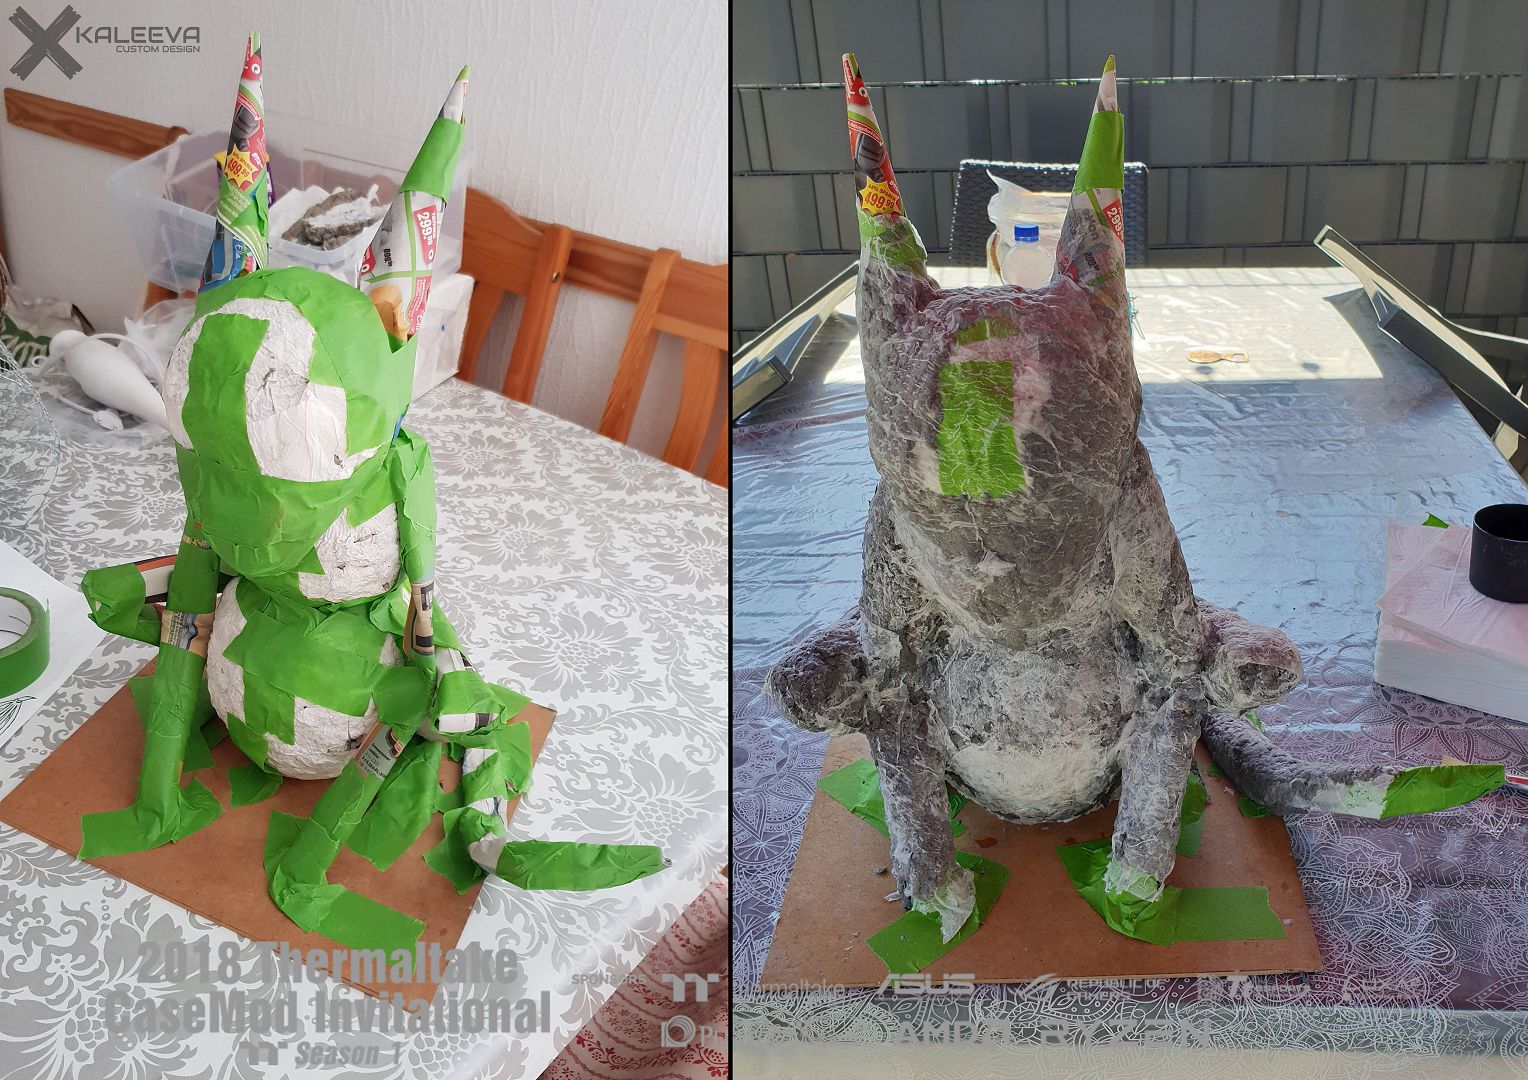
At the Gargoyle it went a bit further. The drying times of the papier-mâché are really long, especially in thicker places.
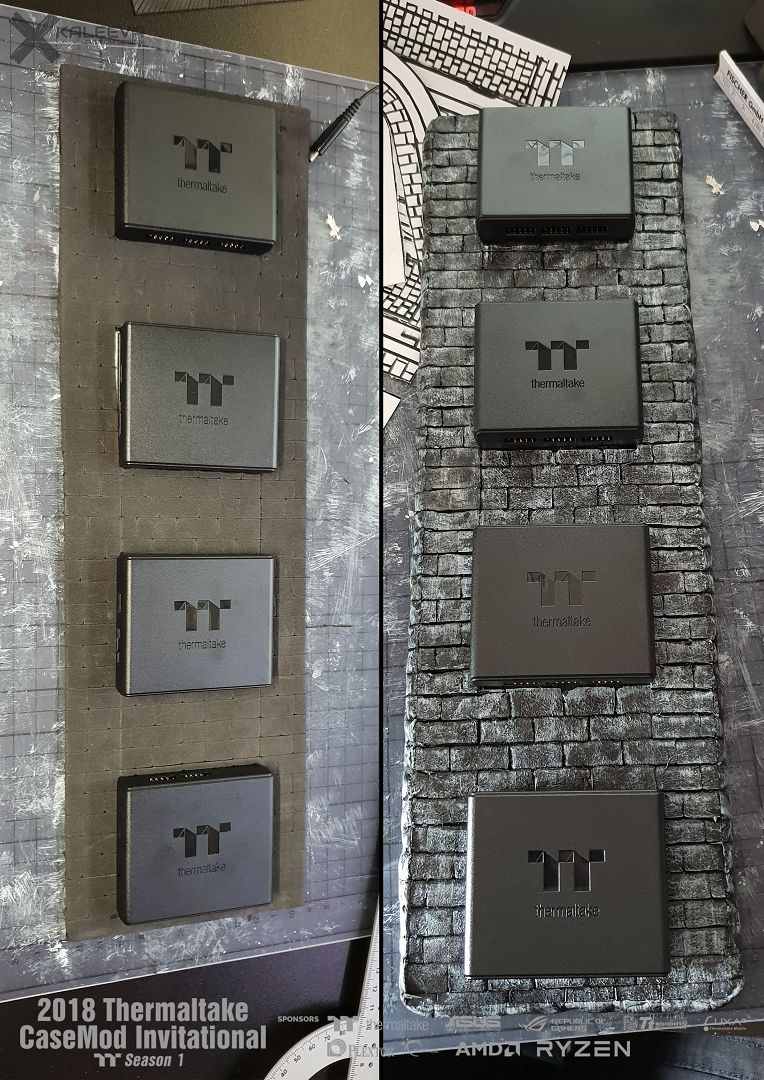
Then I built a bracket for the controller made of sheet steel, EVA foam and magnets on the back.
I'm already working hard on the GPU bracket. The formable EVA also needs 2 days to dry on thicker areas before I can sand it.


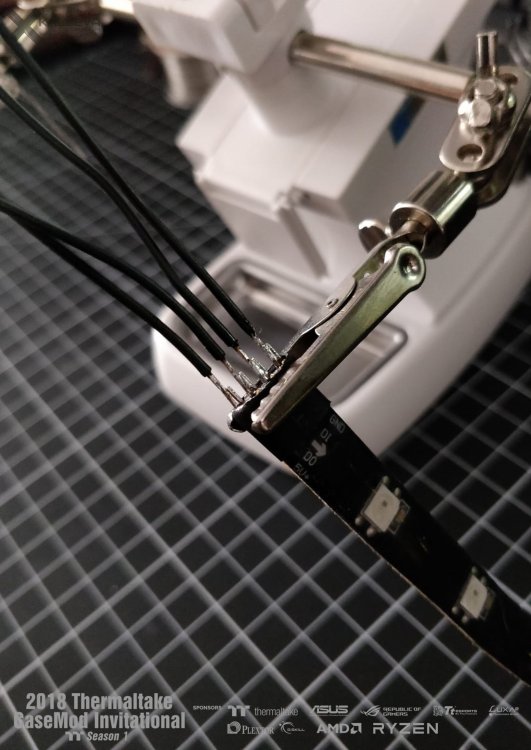
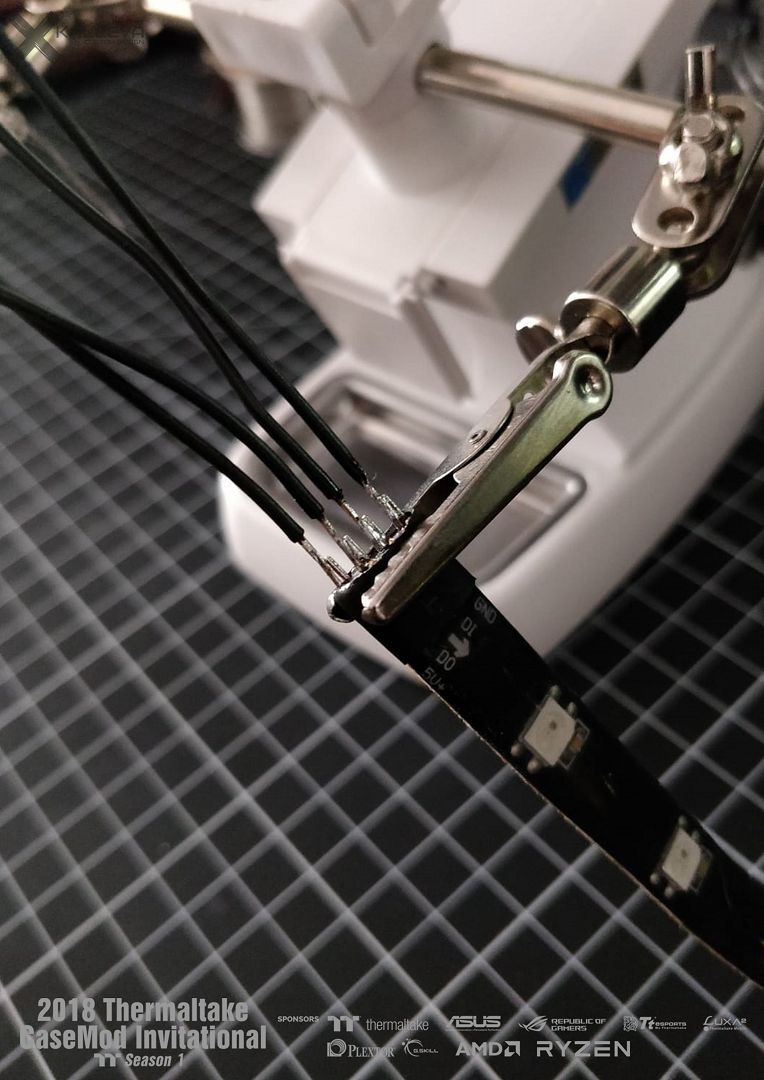
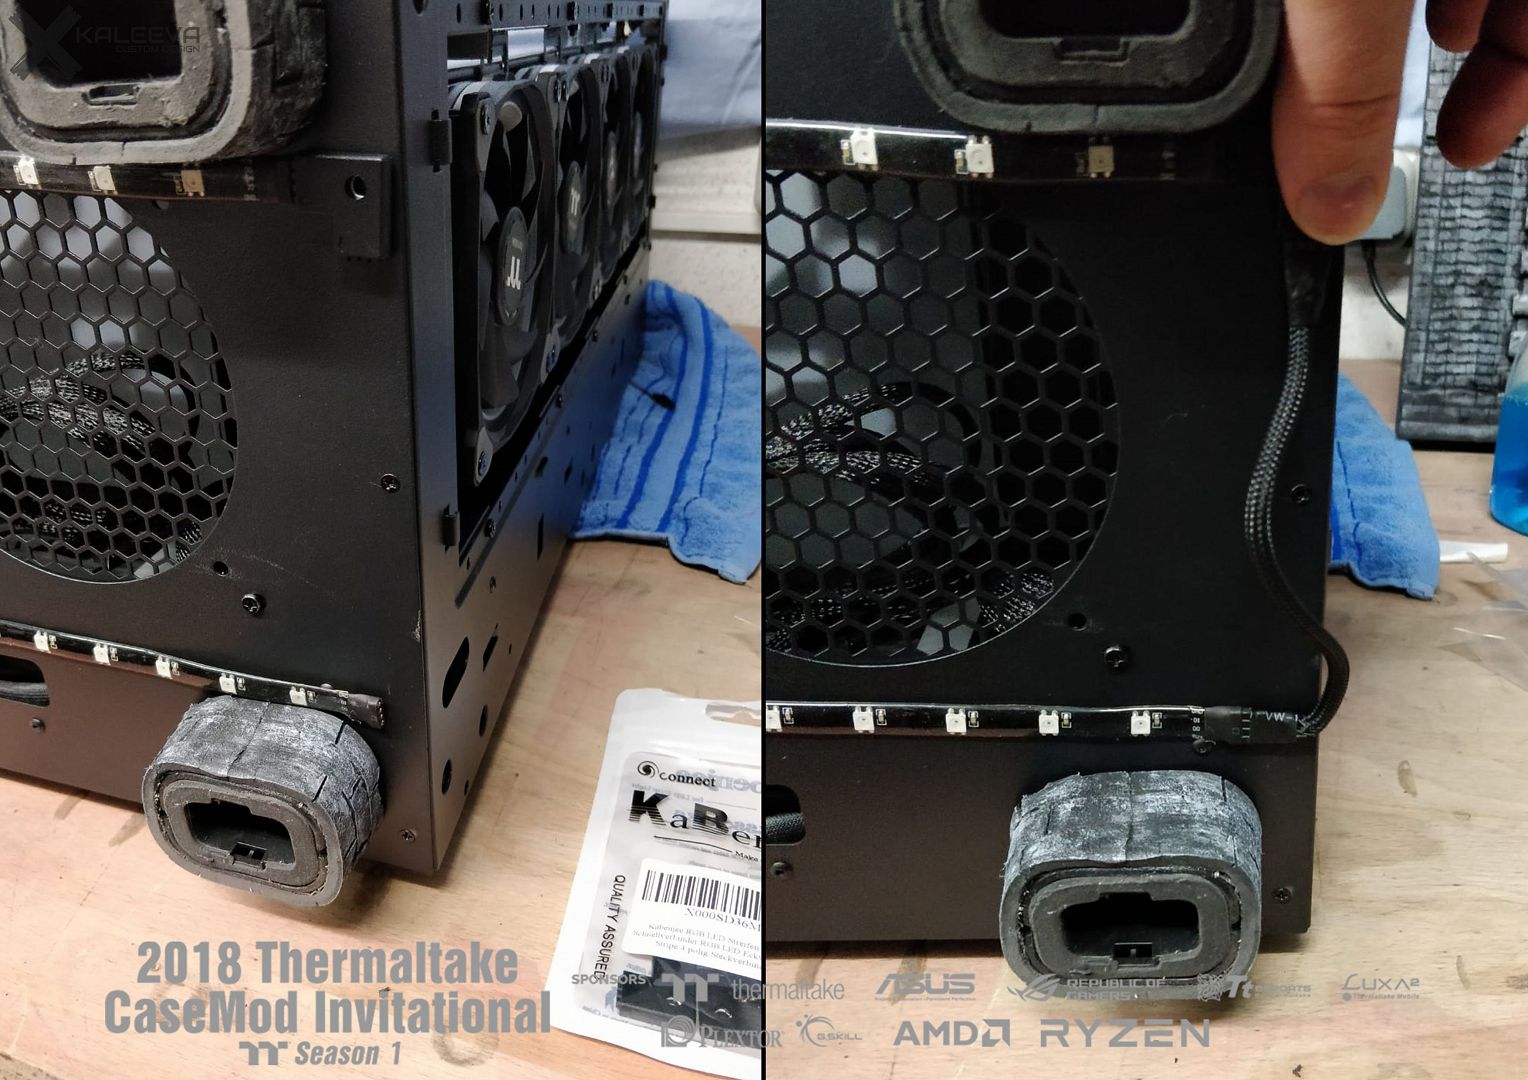
Otherwise I had to solder connections for the LED Stripes on the case bottom.

-
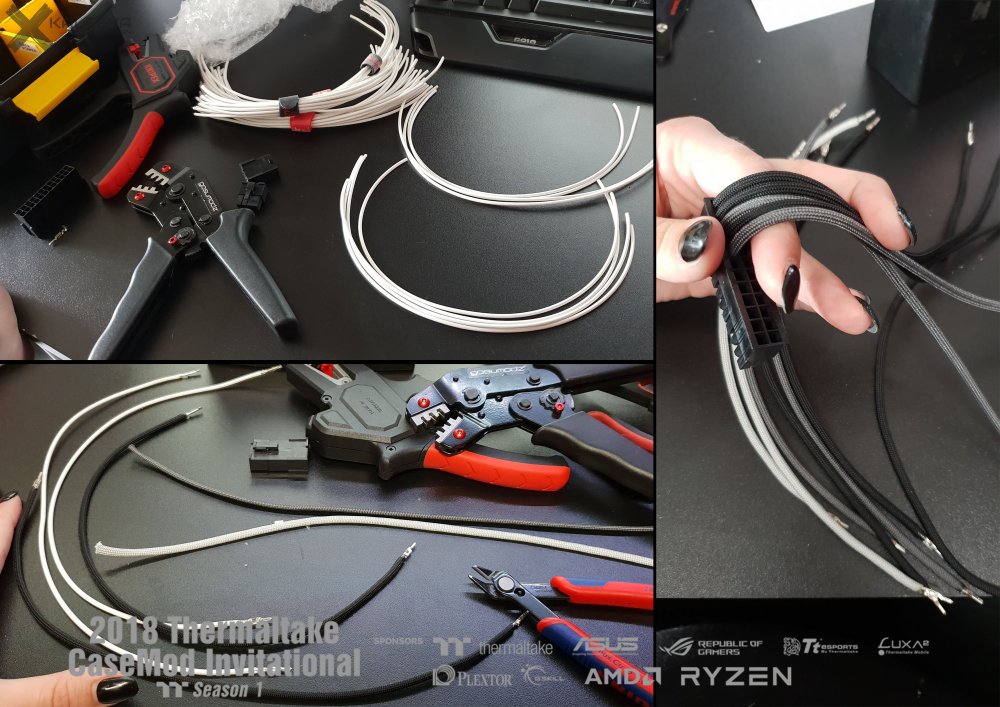
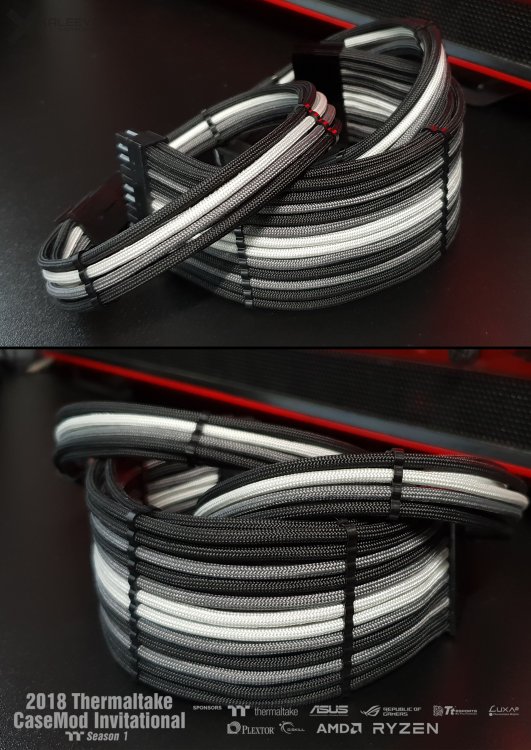
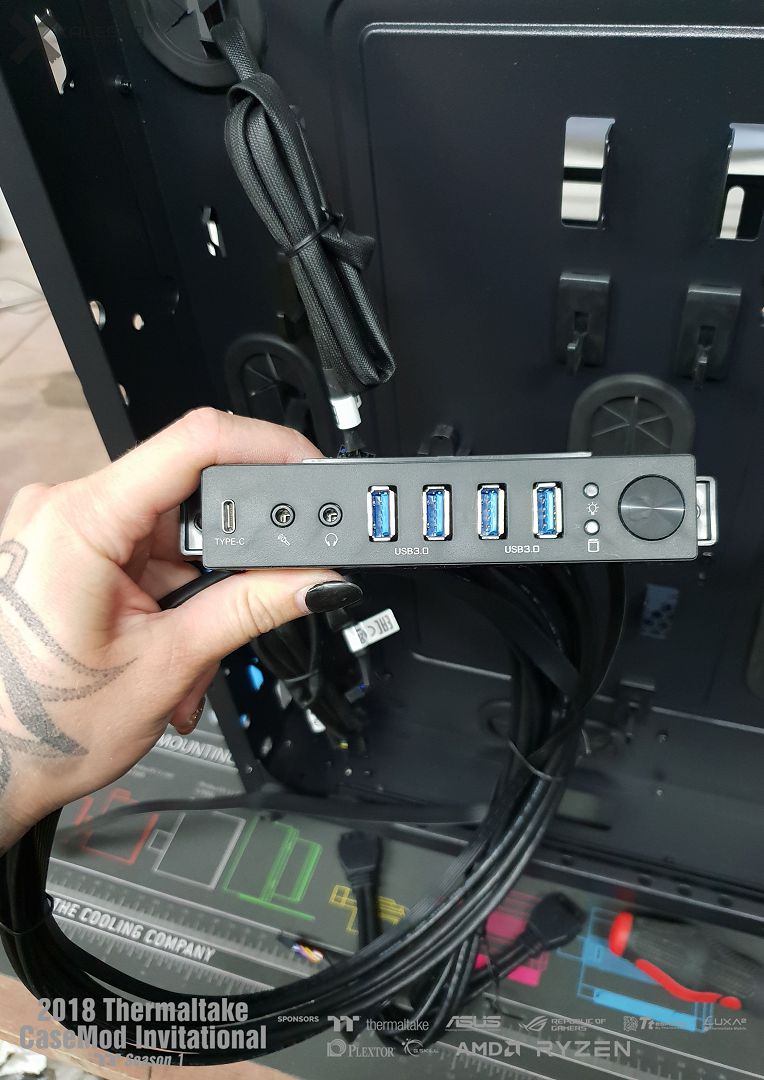
A small update only, but the cable extensions are ready.
If the GPU stays this way or is installed vertically I still have to try.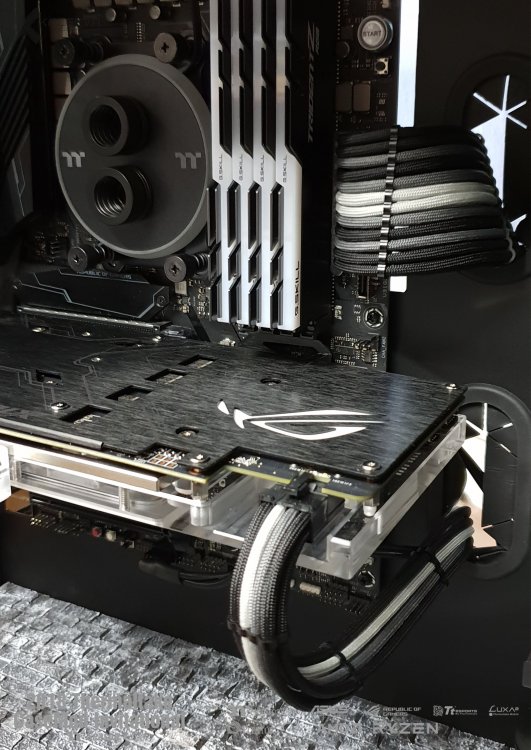
-
looks good.
what material did you use? -
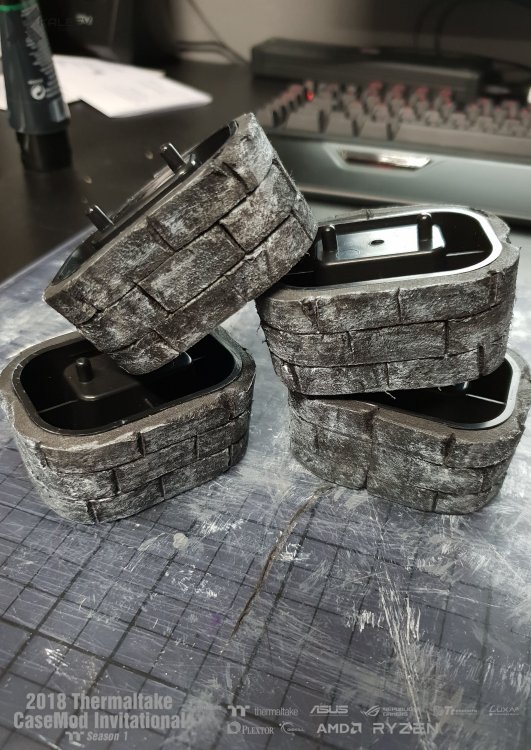
The feet have been finished for a while, here are the pictures.
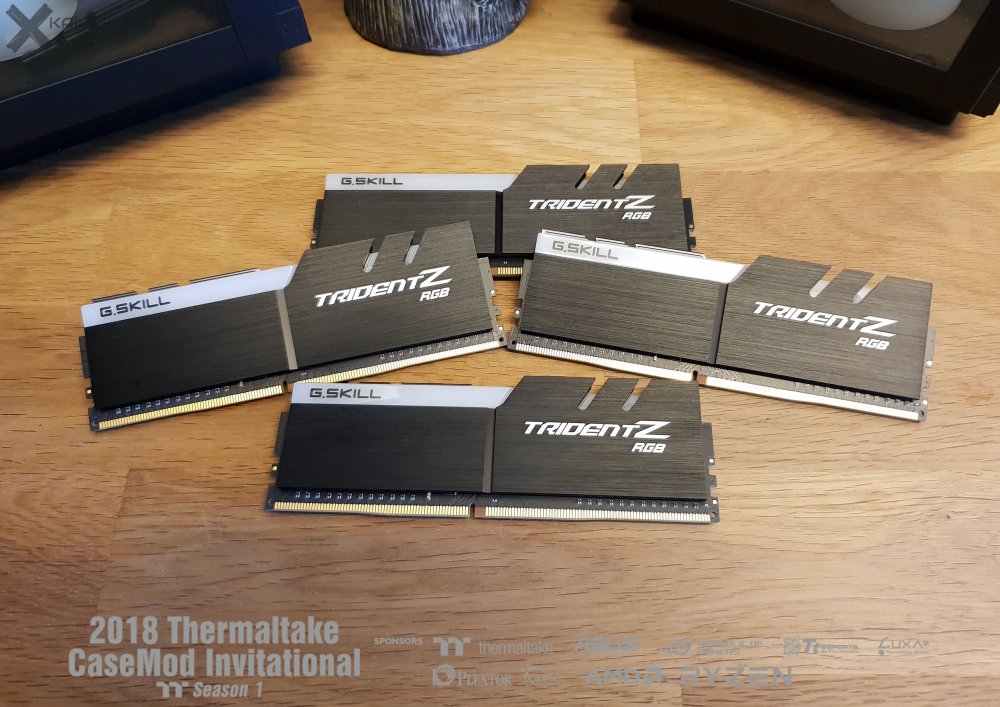
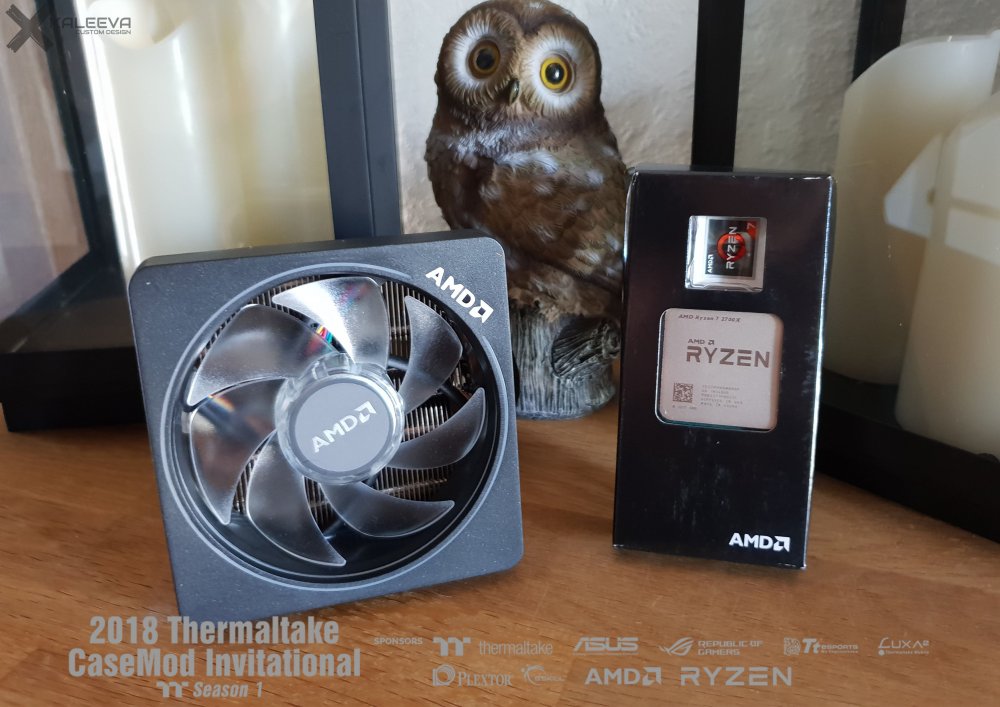
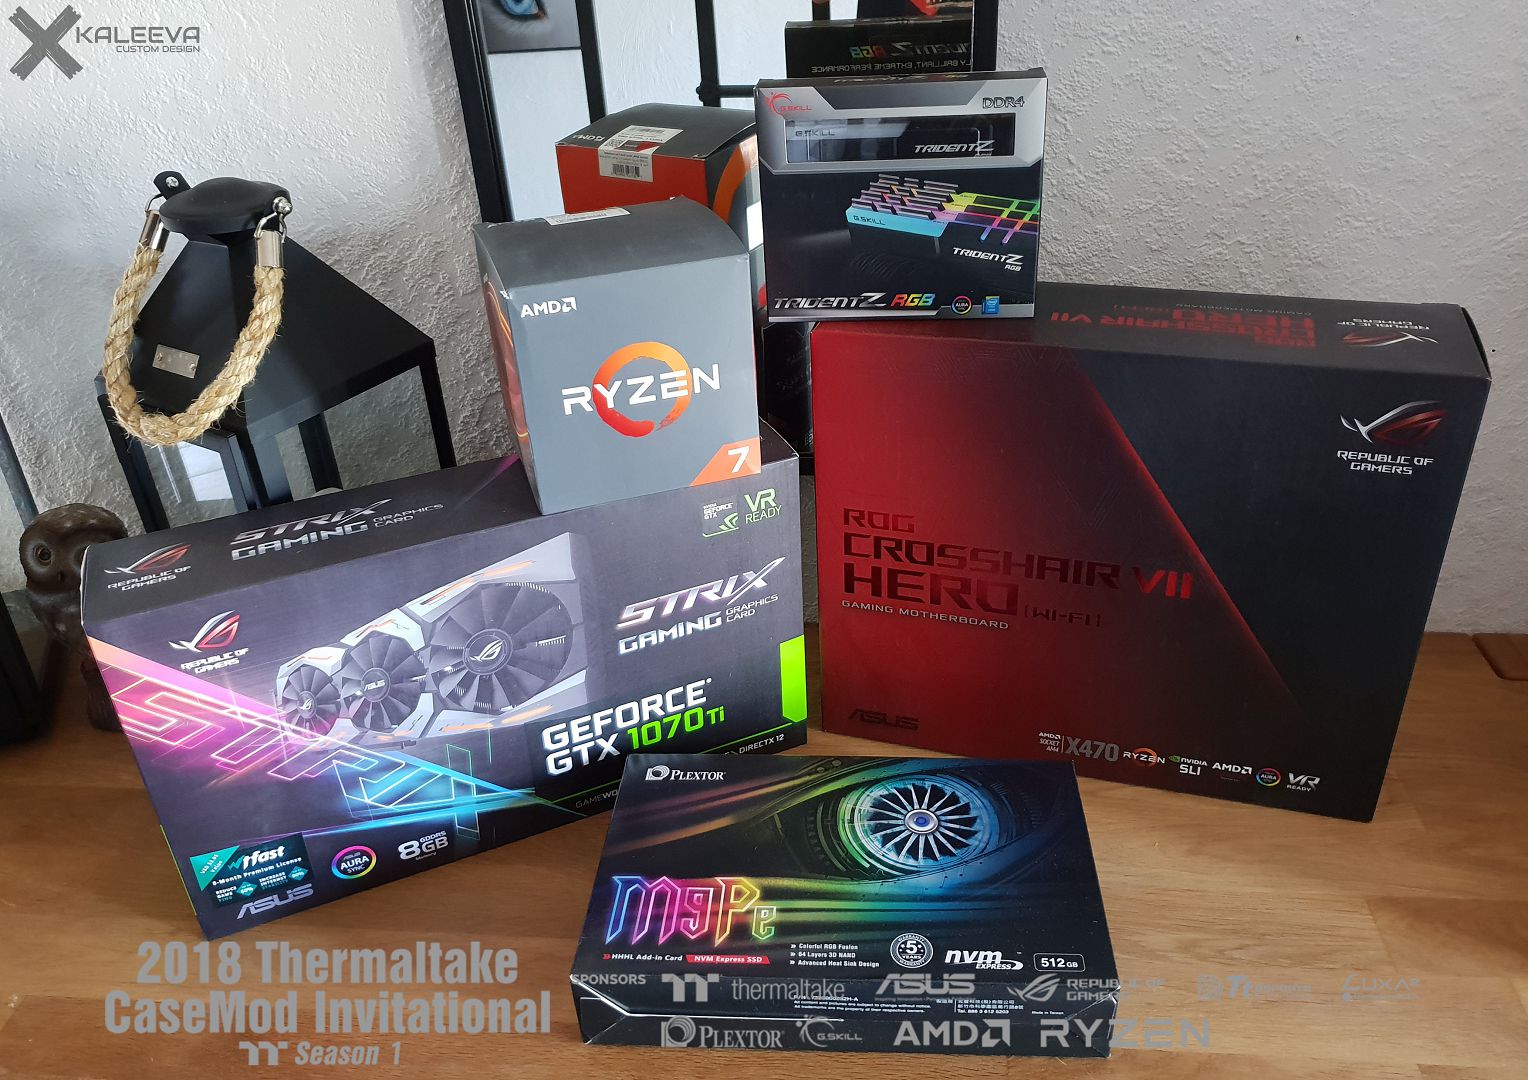
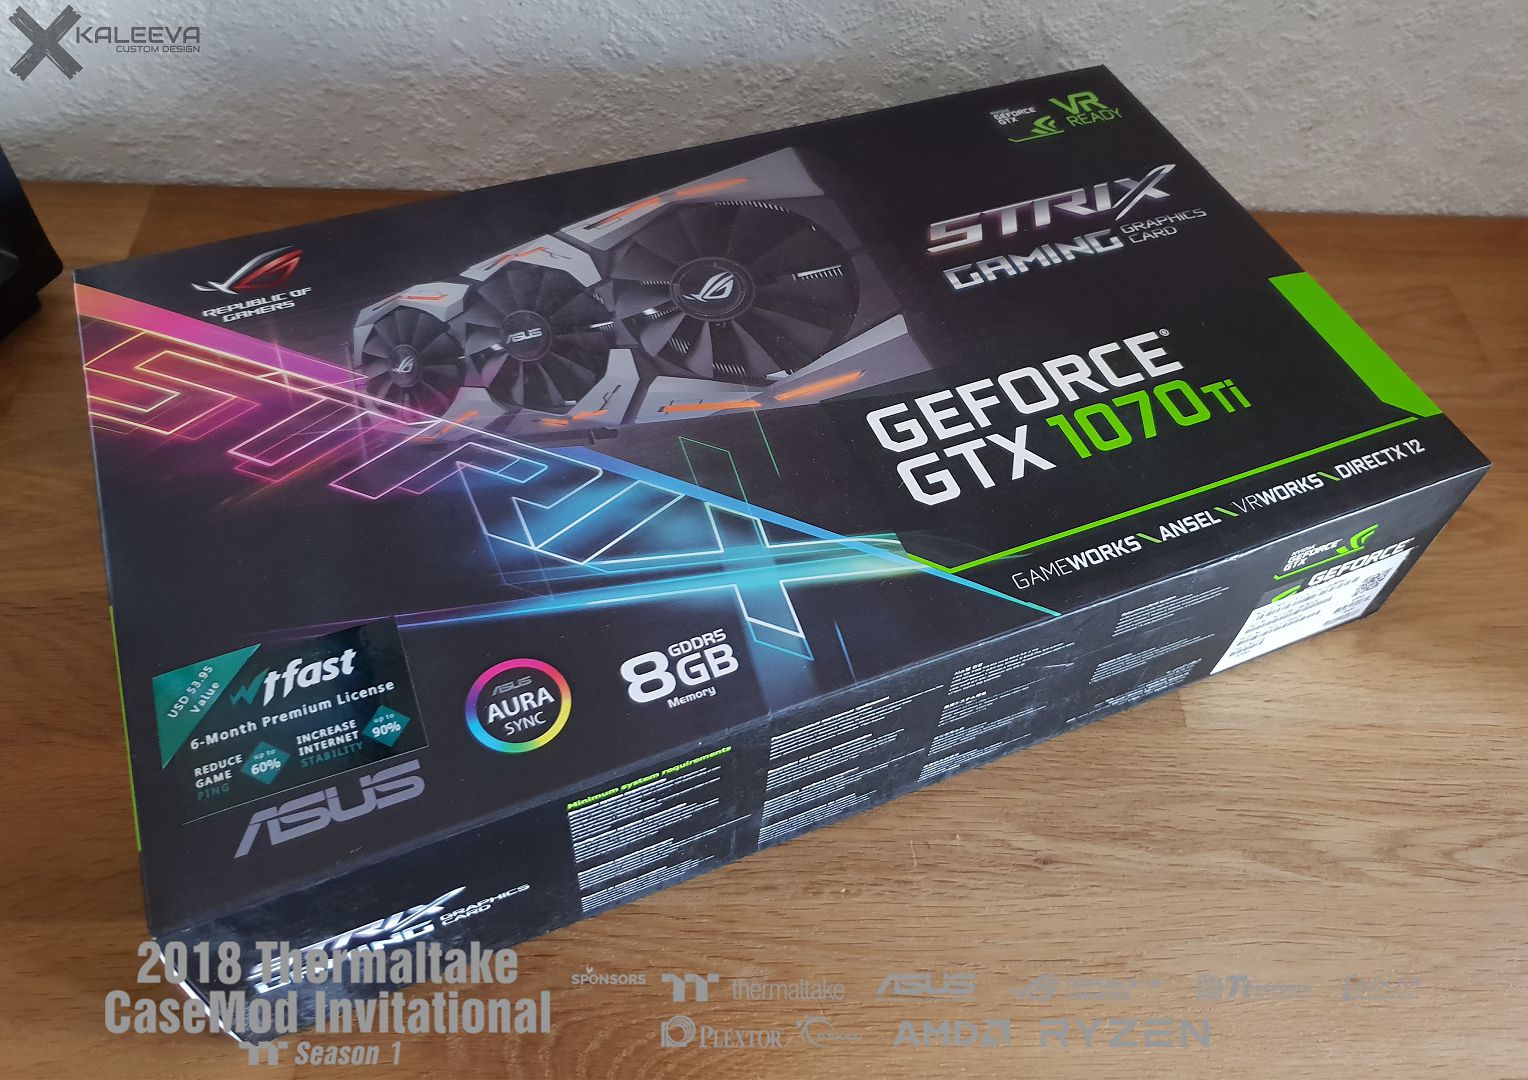
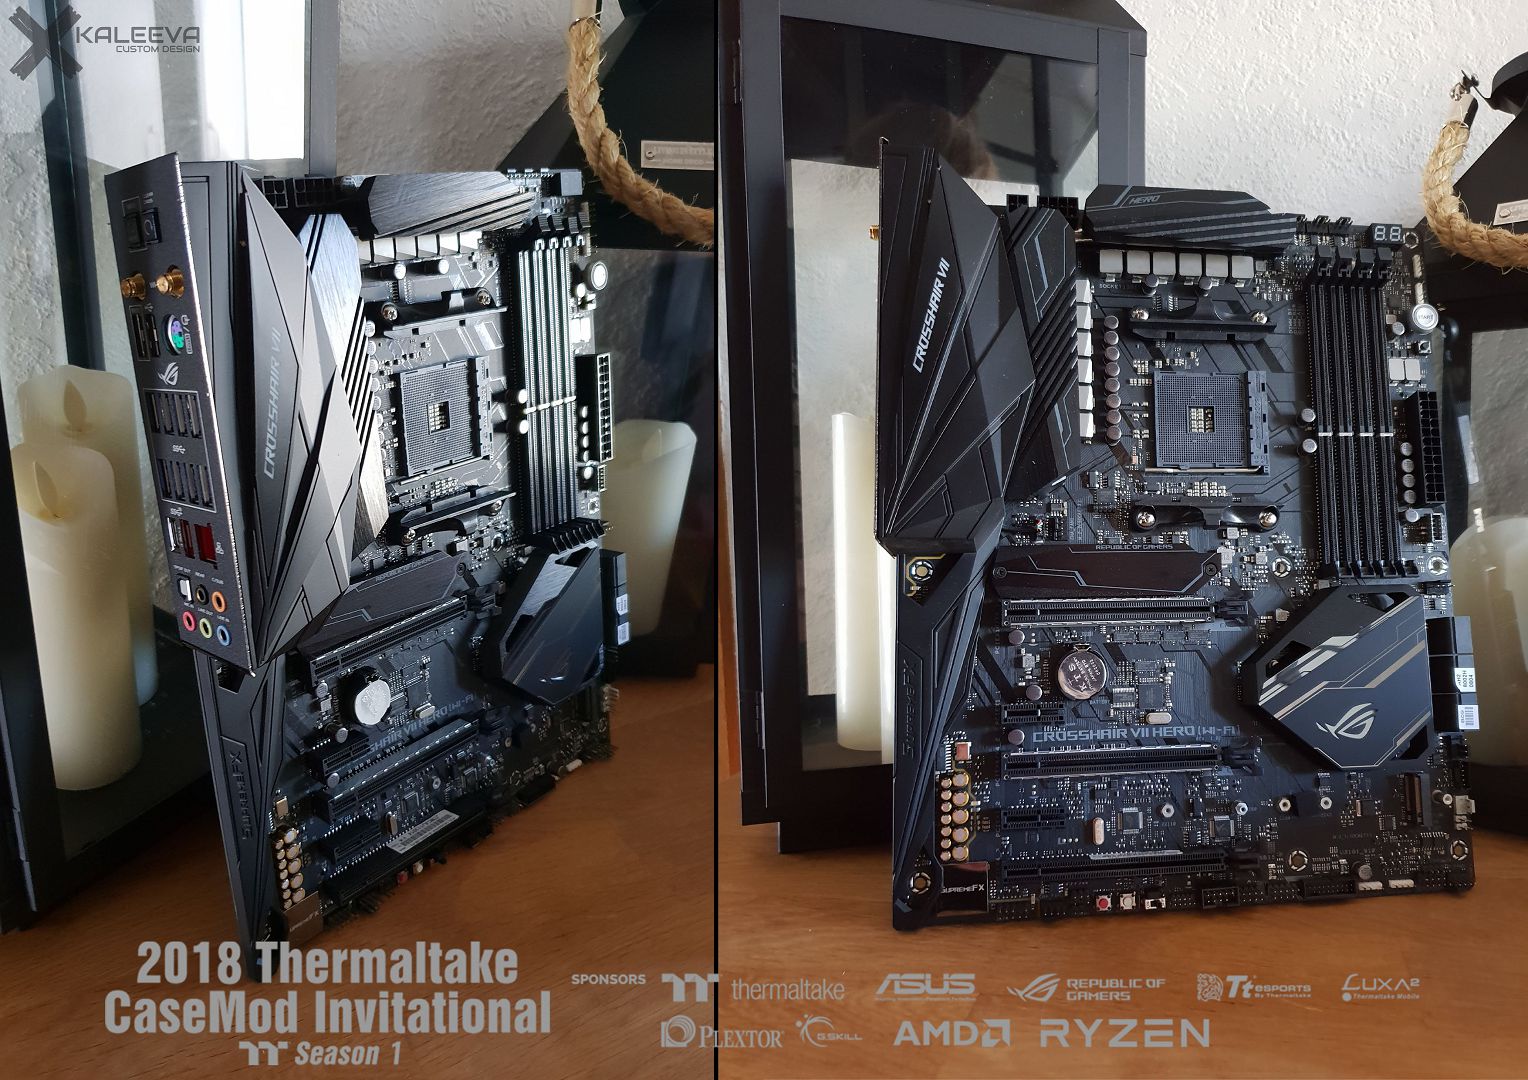
The hardware is finally here.
After waiting to be back from vacation, I could finally get started.
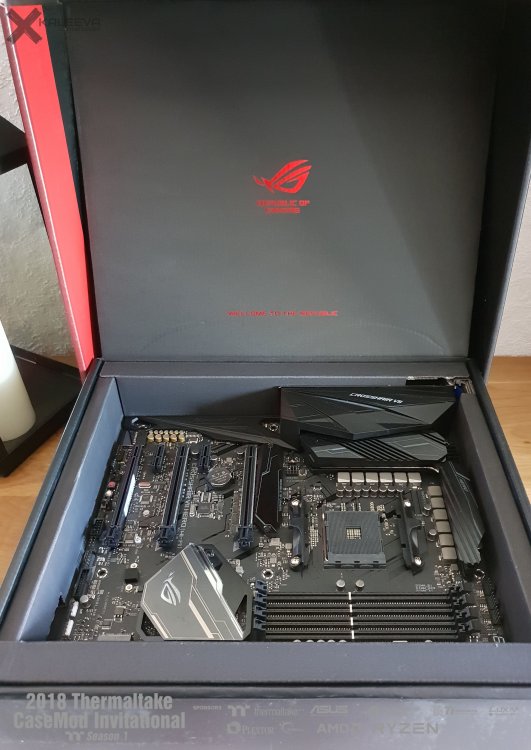

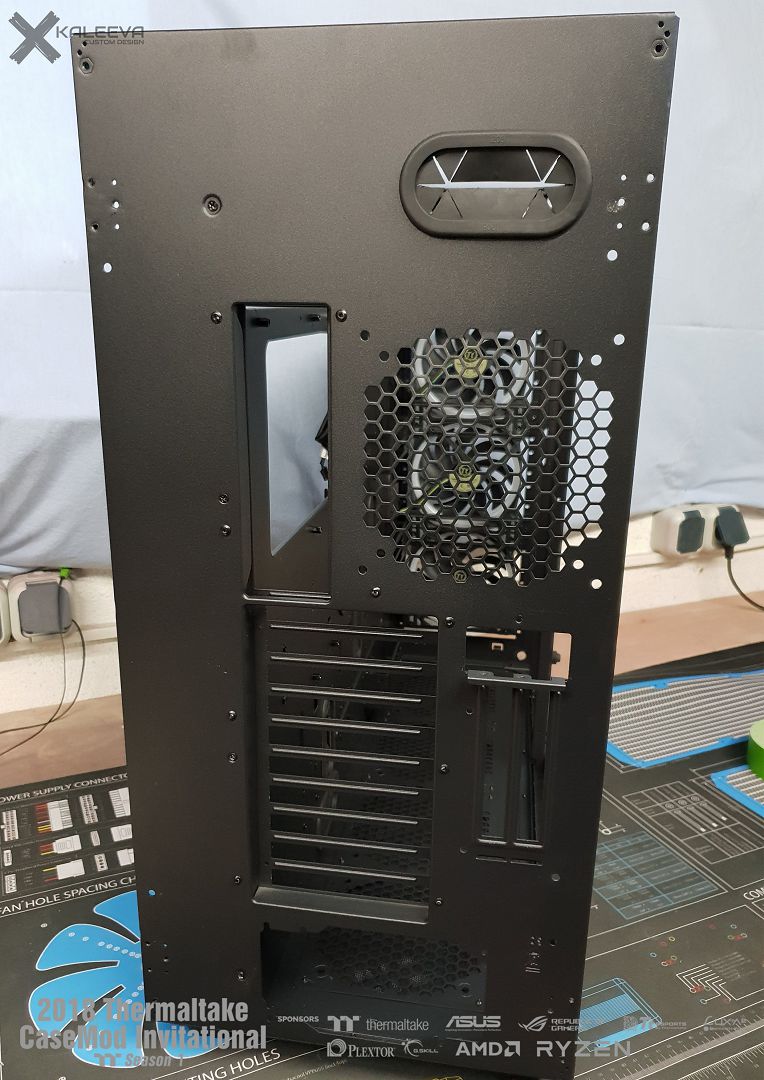
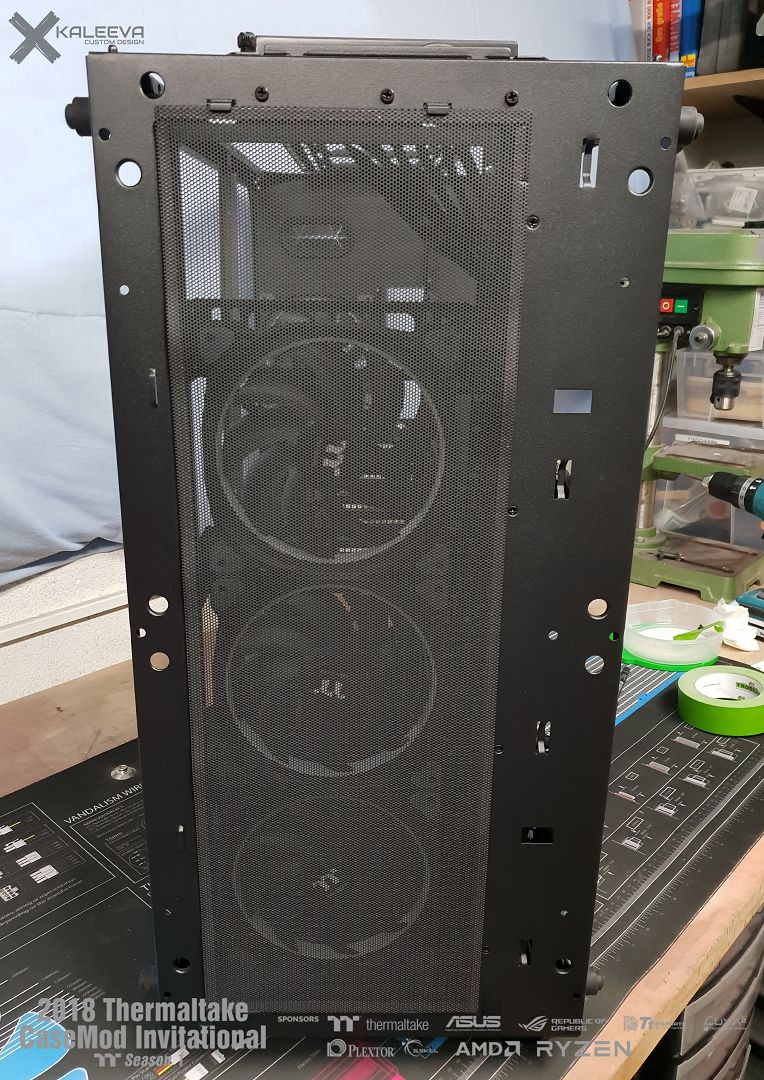
Besides the hardware, I also adapted the back of the case to the theme.
I ordered a water cooler for the GPU, I hope it fits.
The days I will finally sit down at the Cable Extensions, see what color it will be, had ordered several for me to choose from.
-
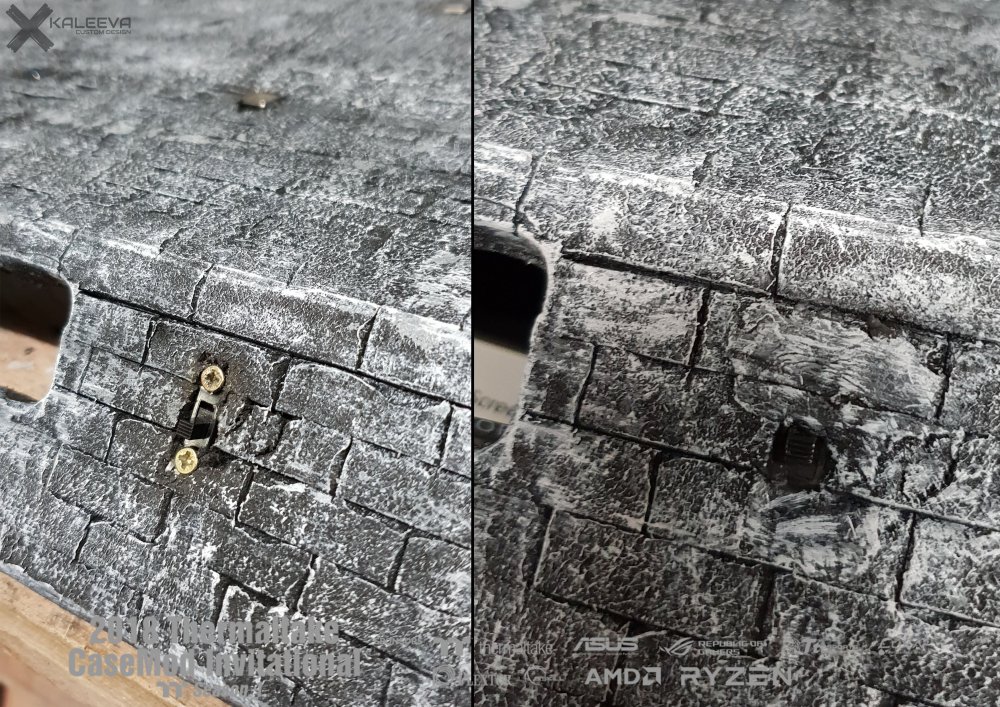
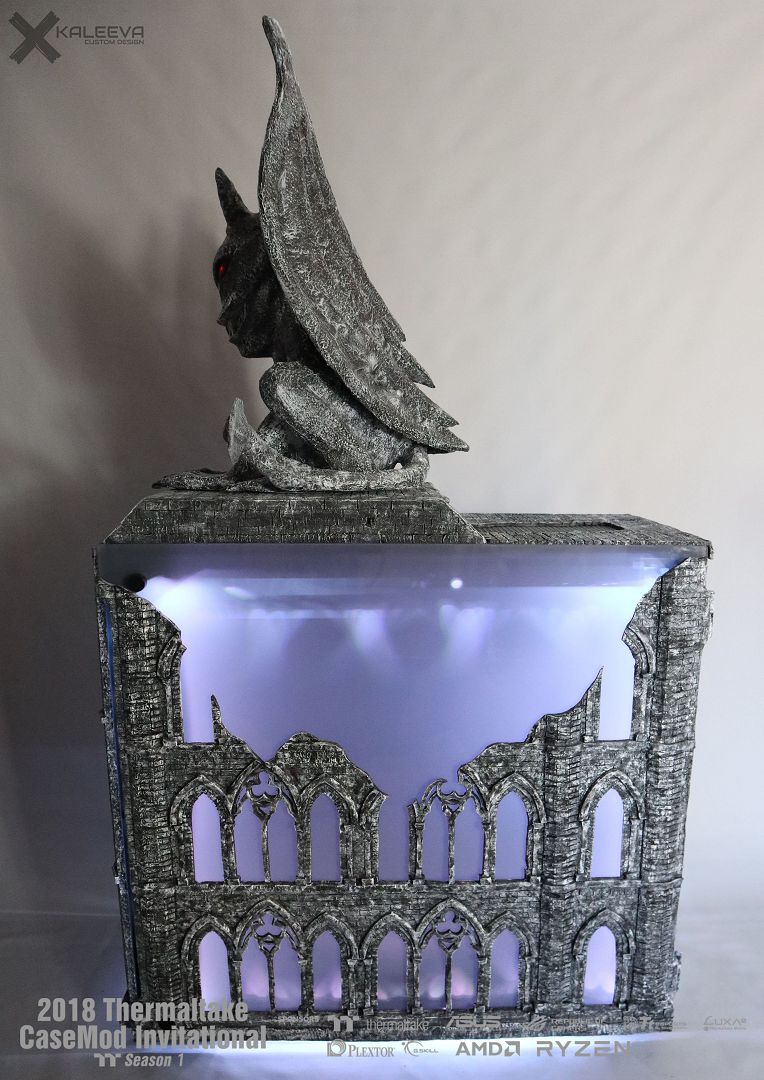
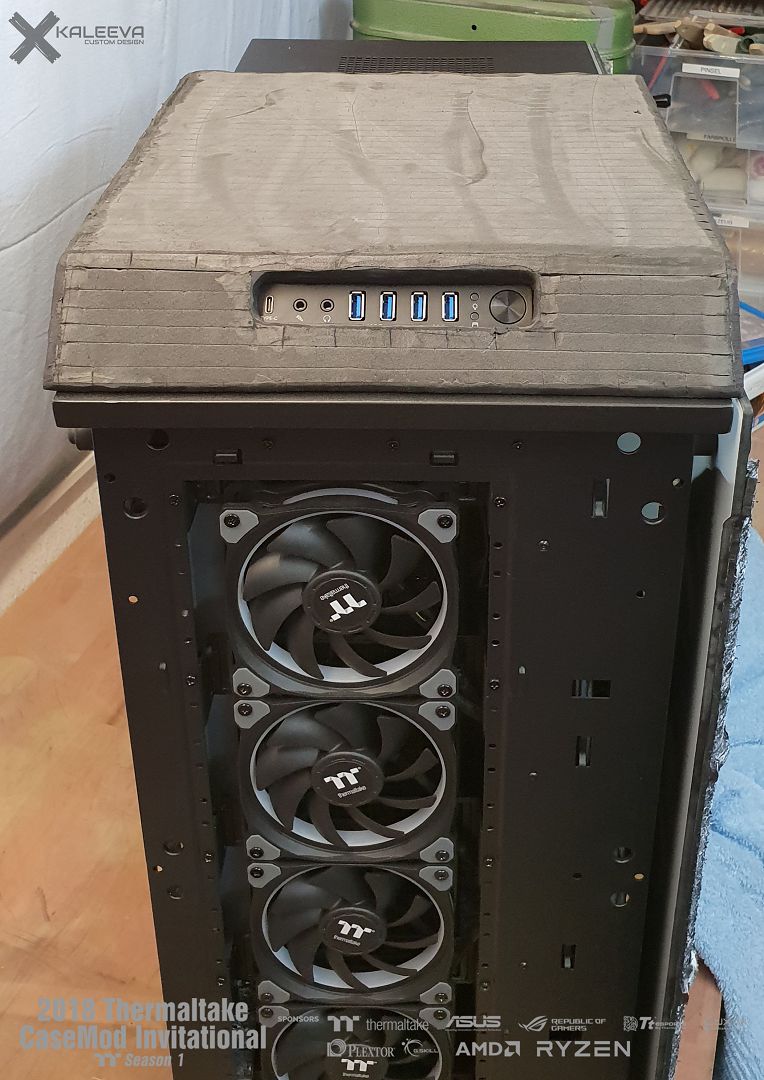
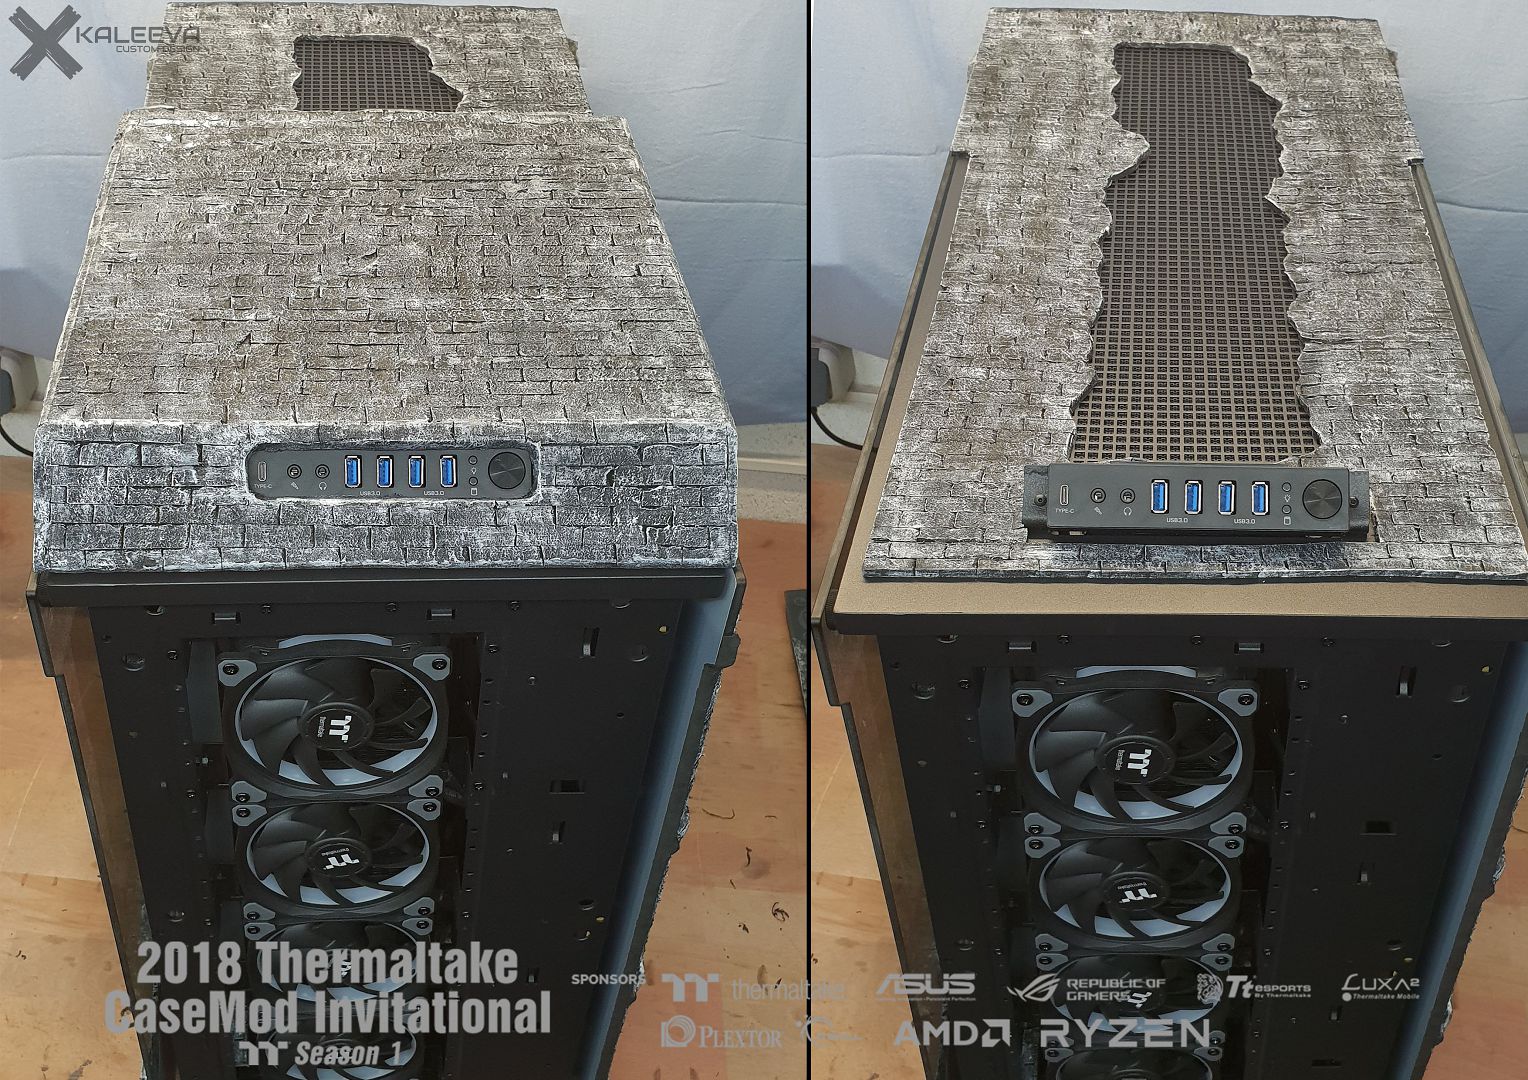
I have to fix the upper cover with magnets, otherwise it would slide on the sides. So that these are not so visible, they have also got a little bit of color.

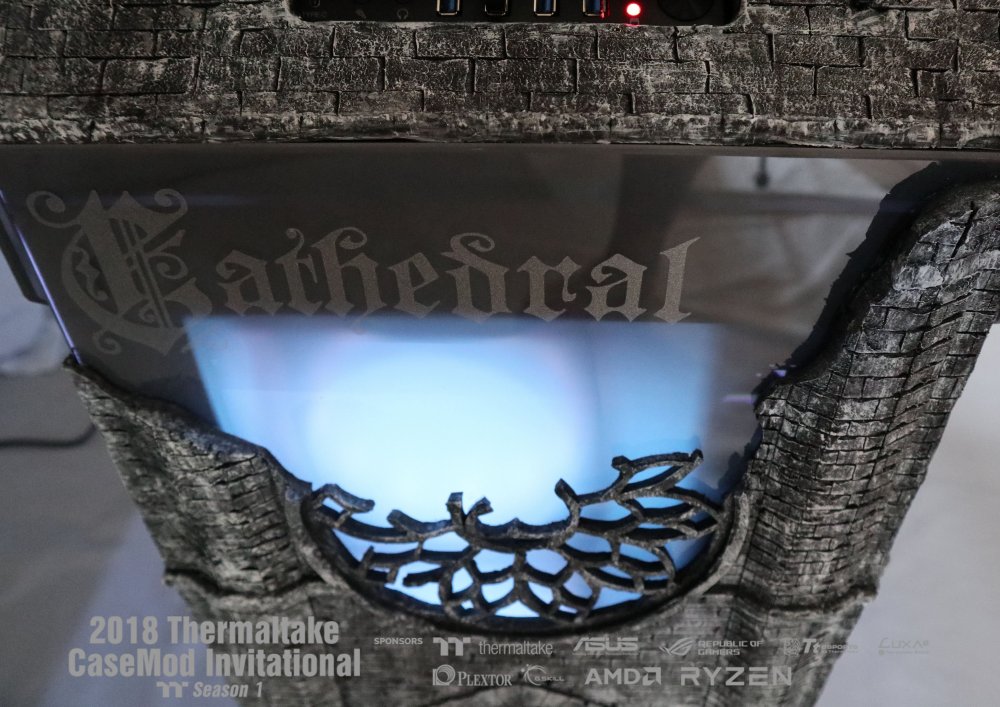
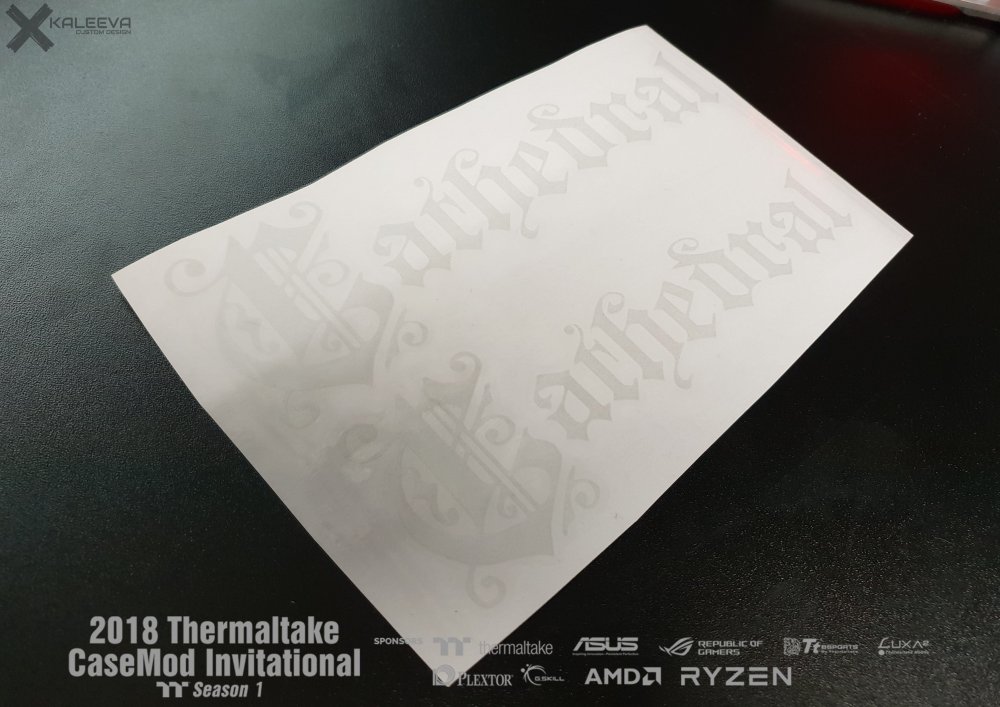
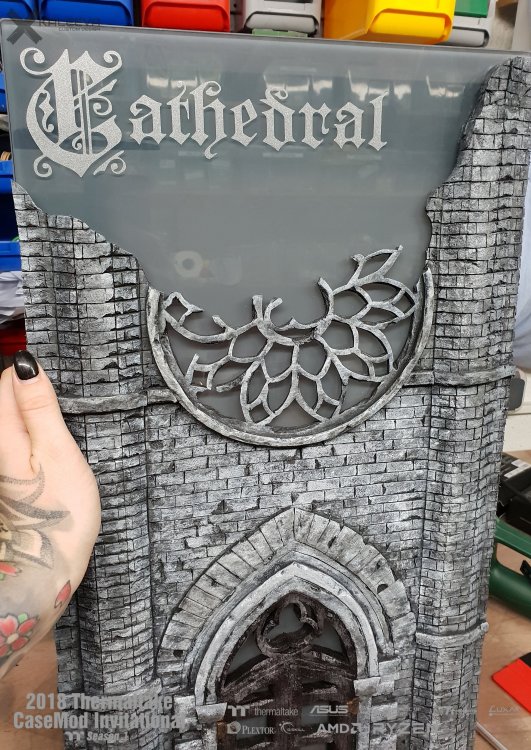
After I finally decided on a project name, there was also the matching lettering.
Then I have changed and optically modified a few details of the PSU cover.
And the days also came my rest of the diffusion foil. I had to order some more, because I dropped a wooden angle on the glued part and then there was a hole in the foil.
A few LED stripes were also came the days, i had not enough
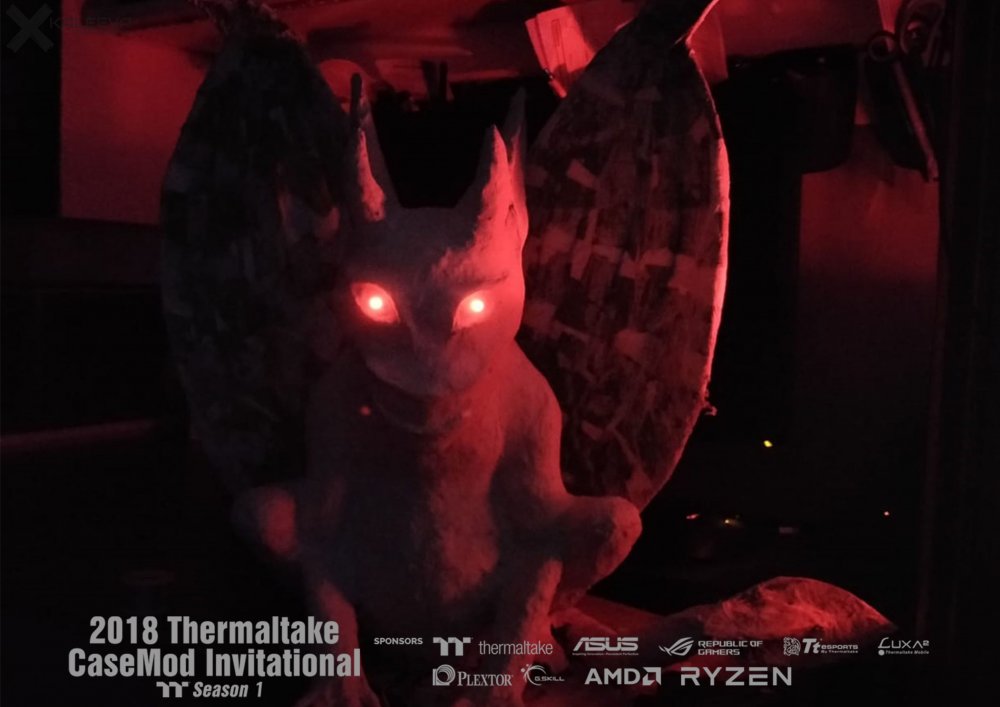
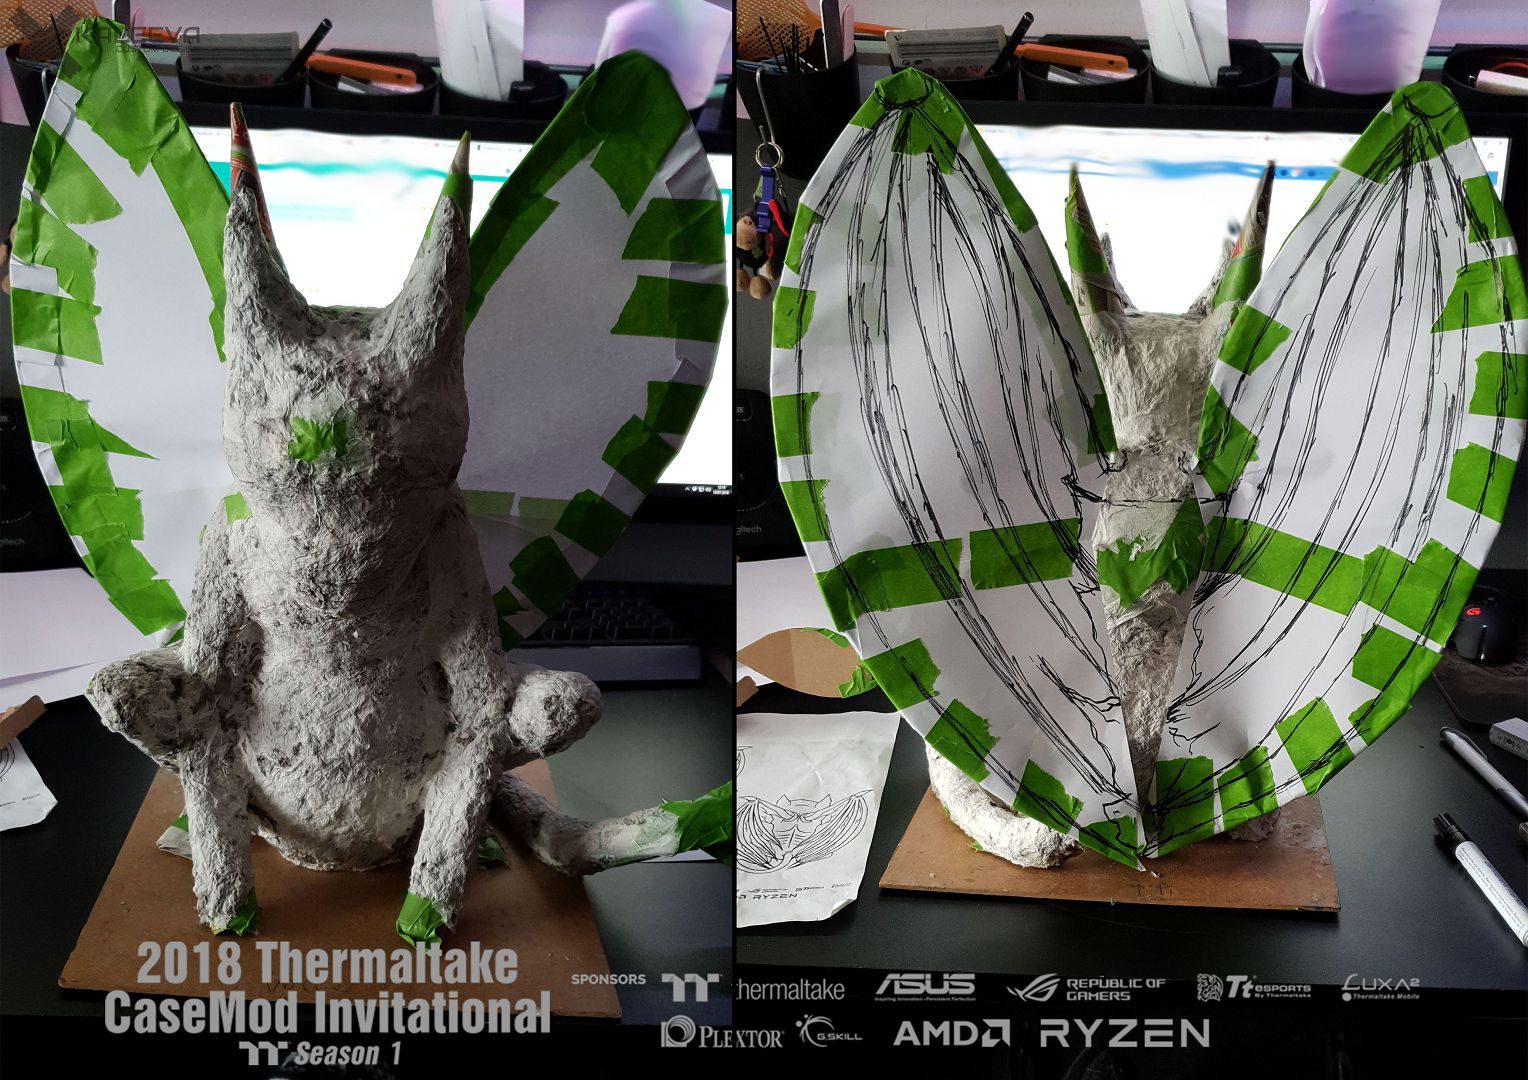
The Gargoyle finally has his eyes, now I just have to model the face properly to make him look pretty evil. But there is still a lot to be done about this.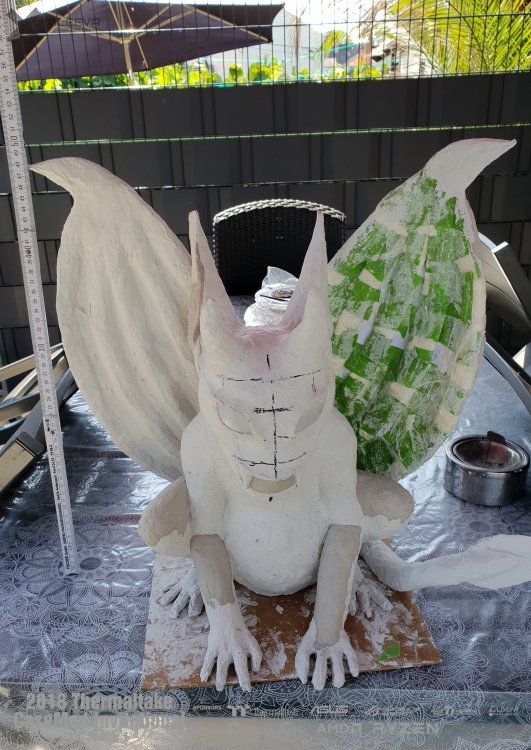
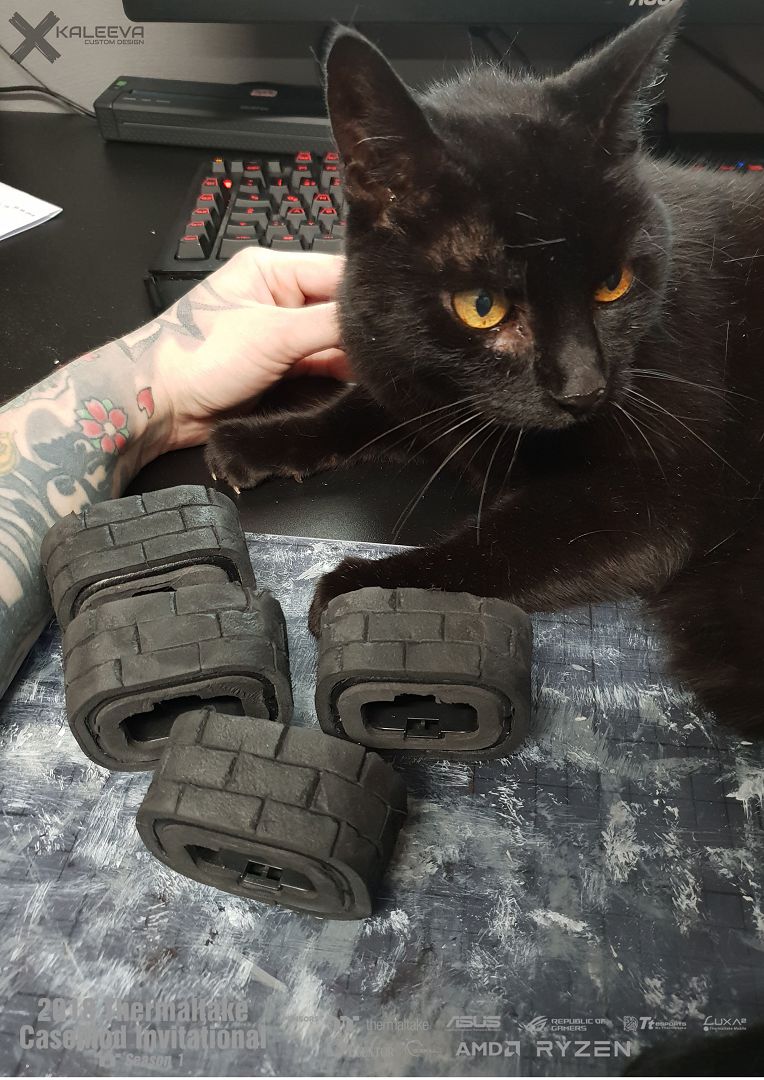
And last but not least, my cat didn't want me to go on modding and wanted to get his belly scratched XD

-
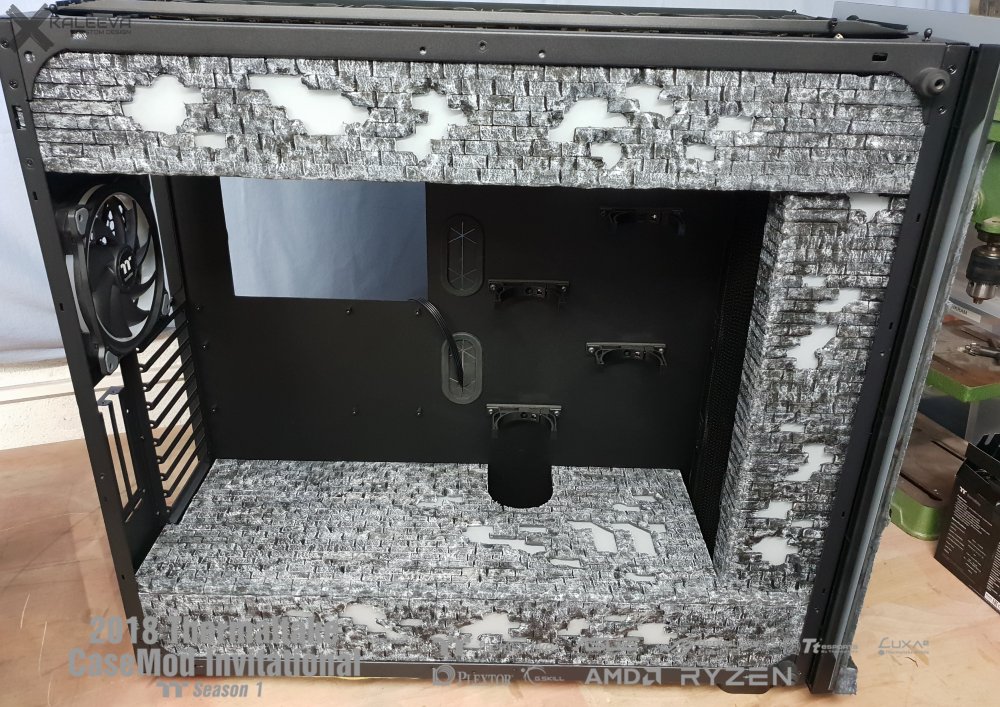
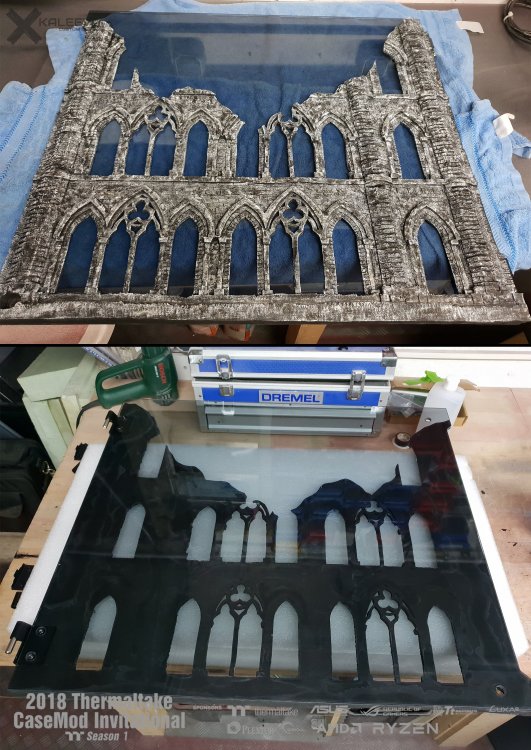
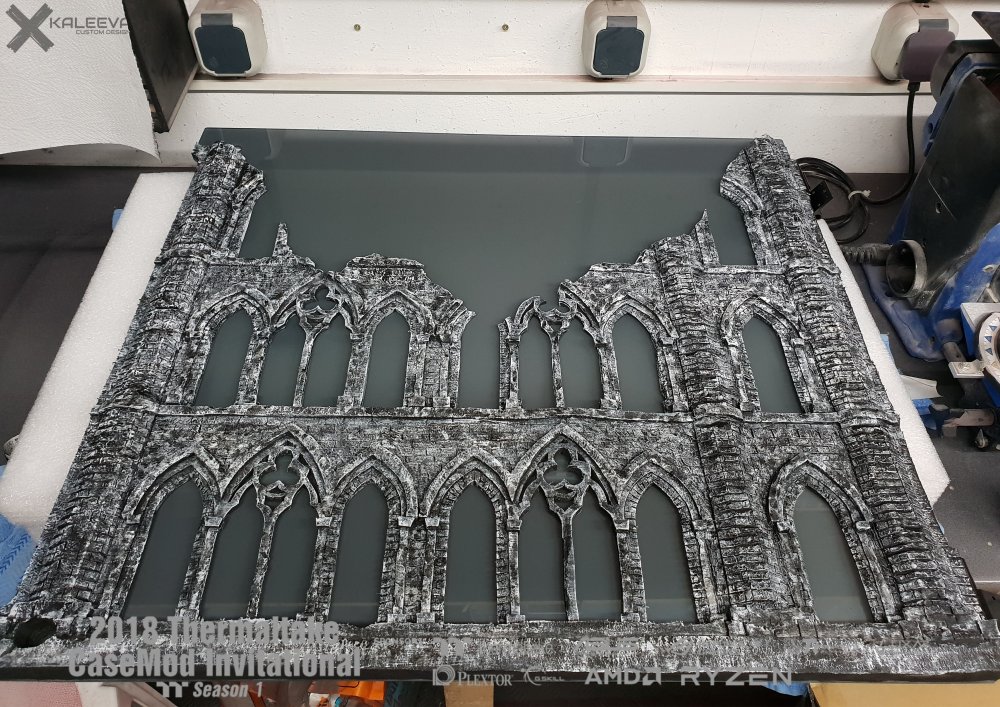
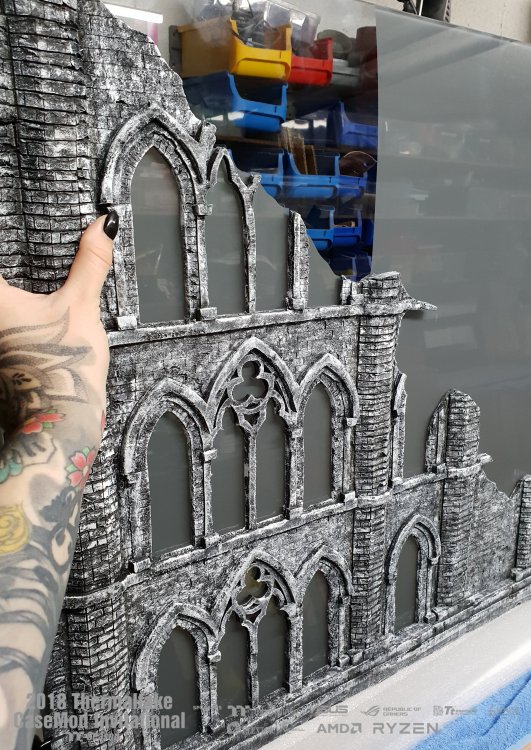
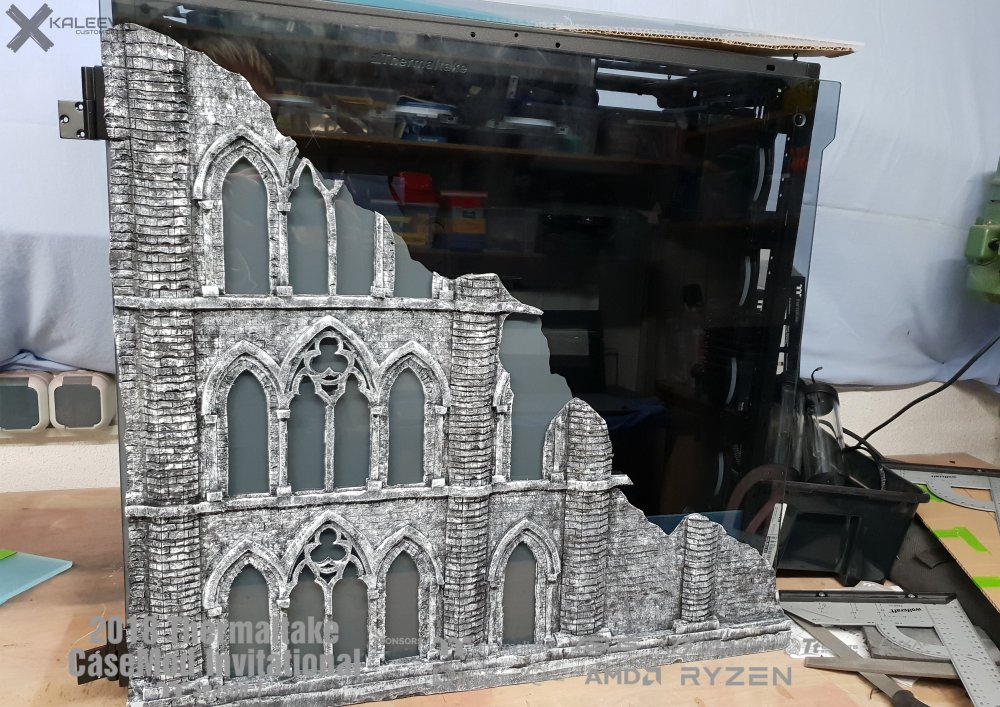
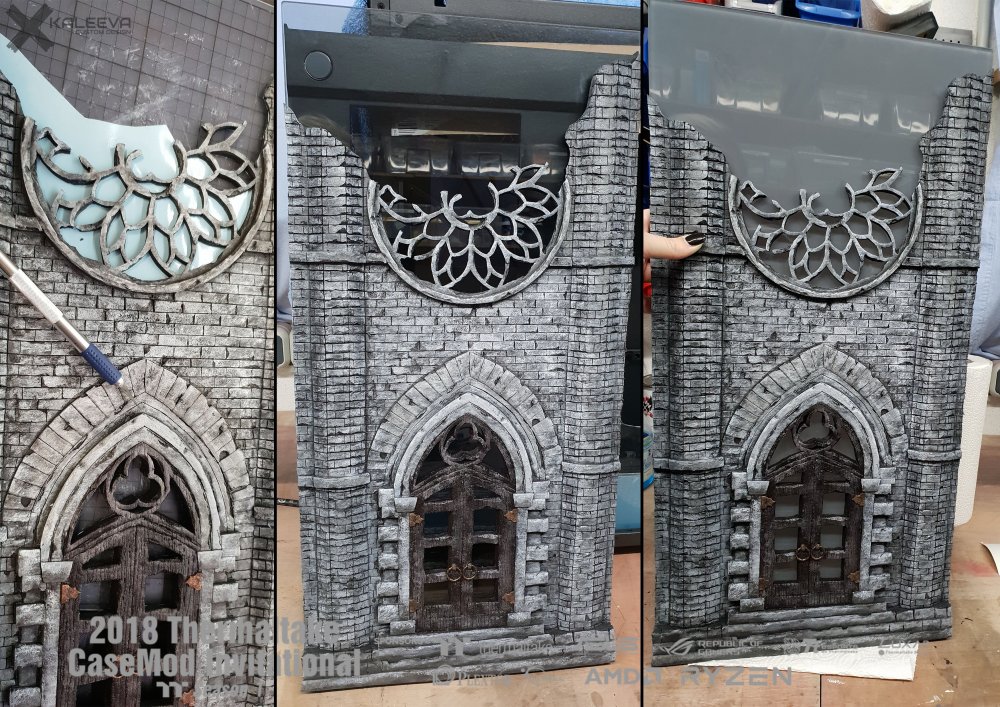
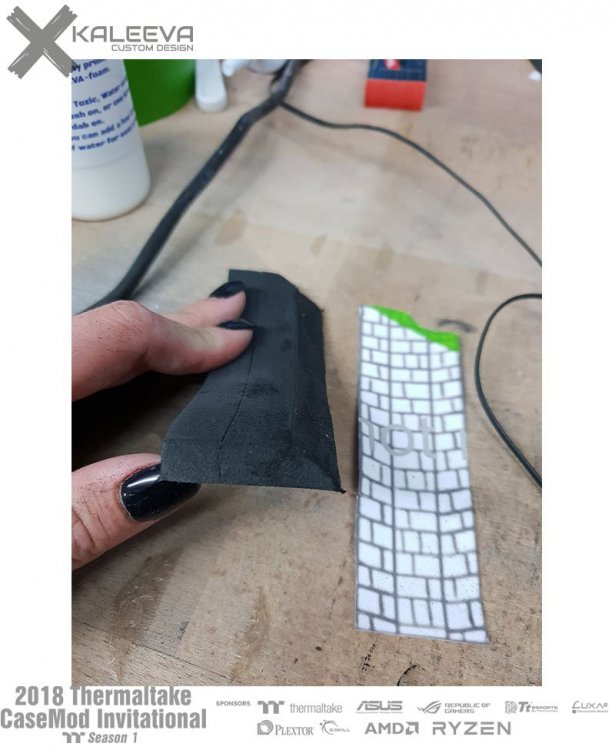
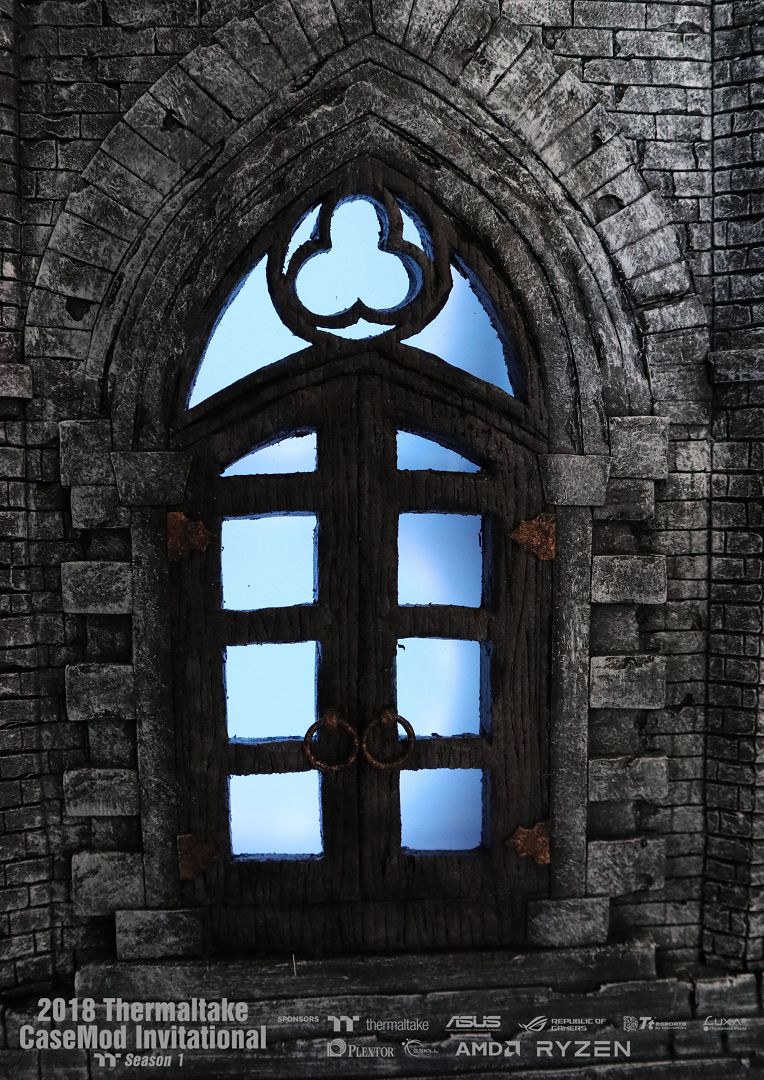
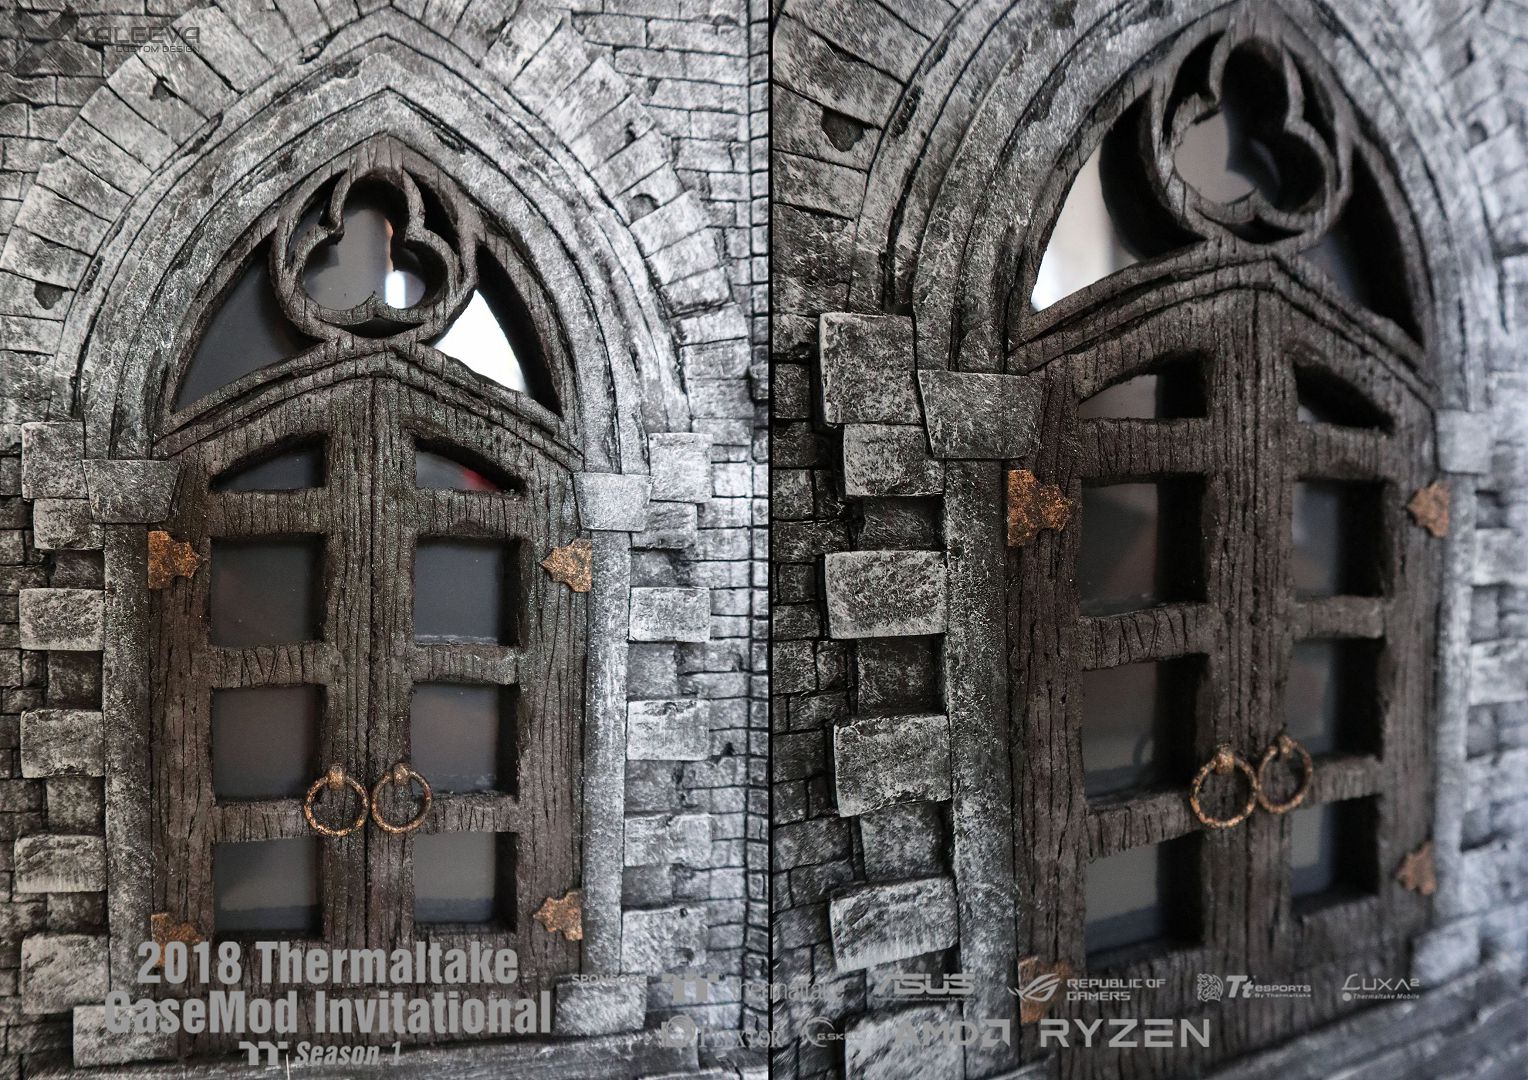
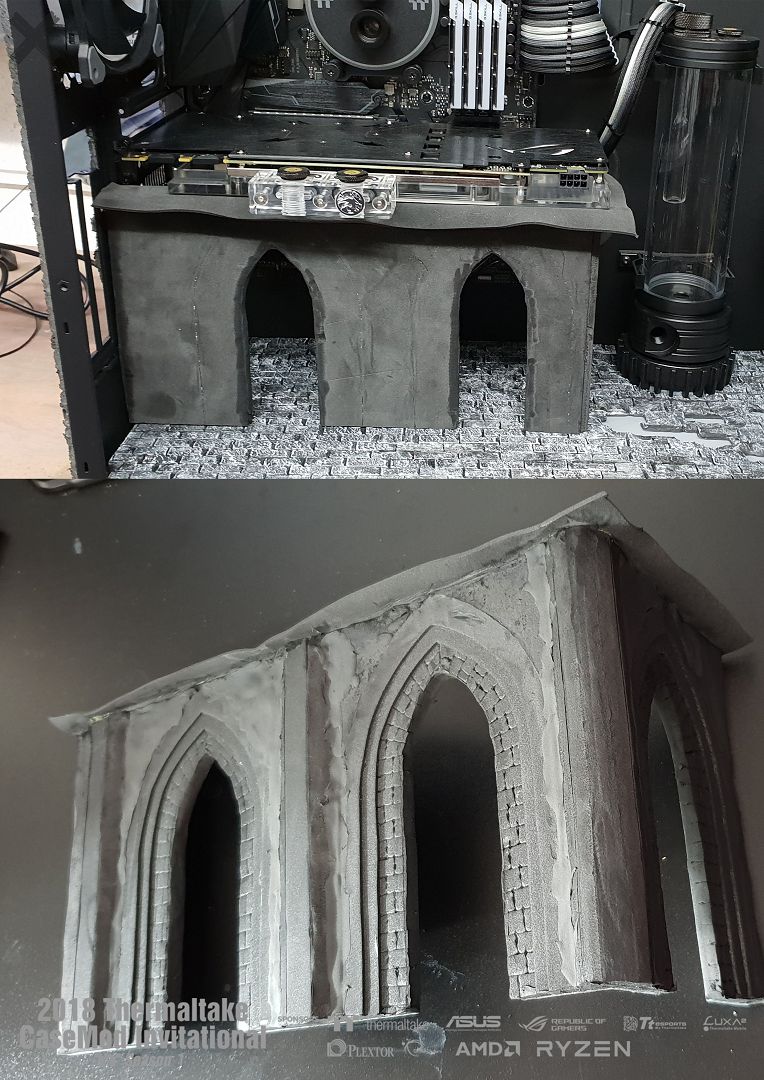
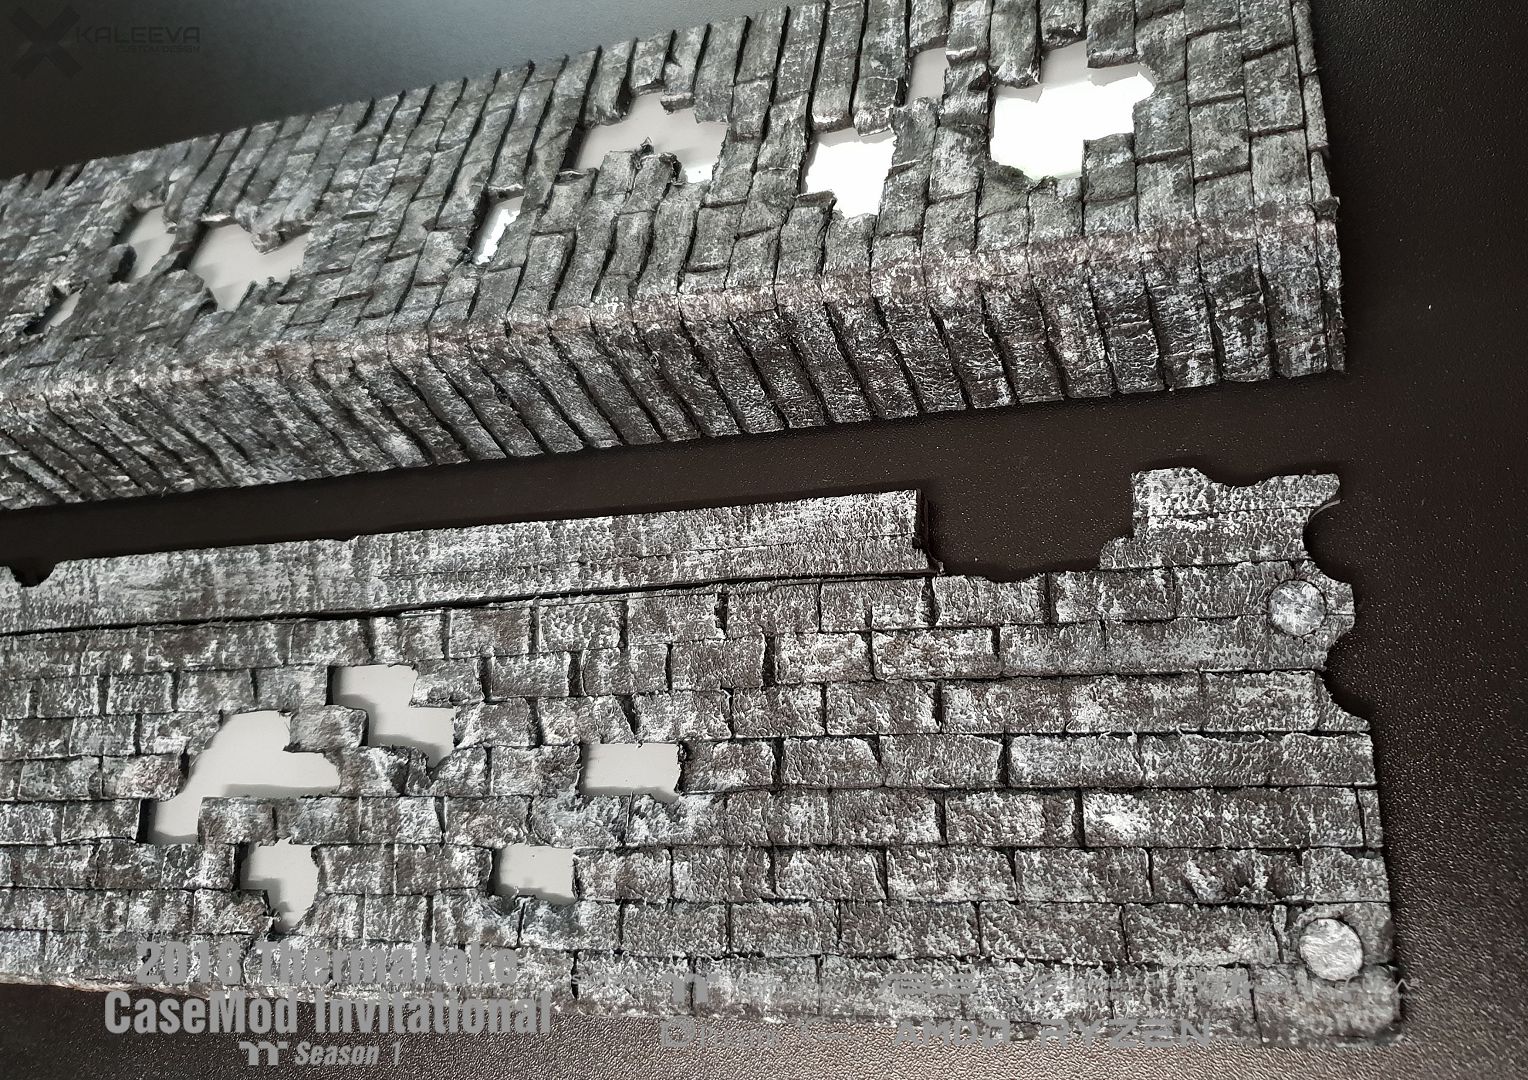
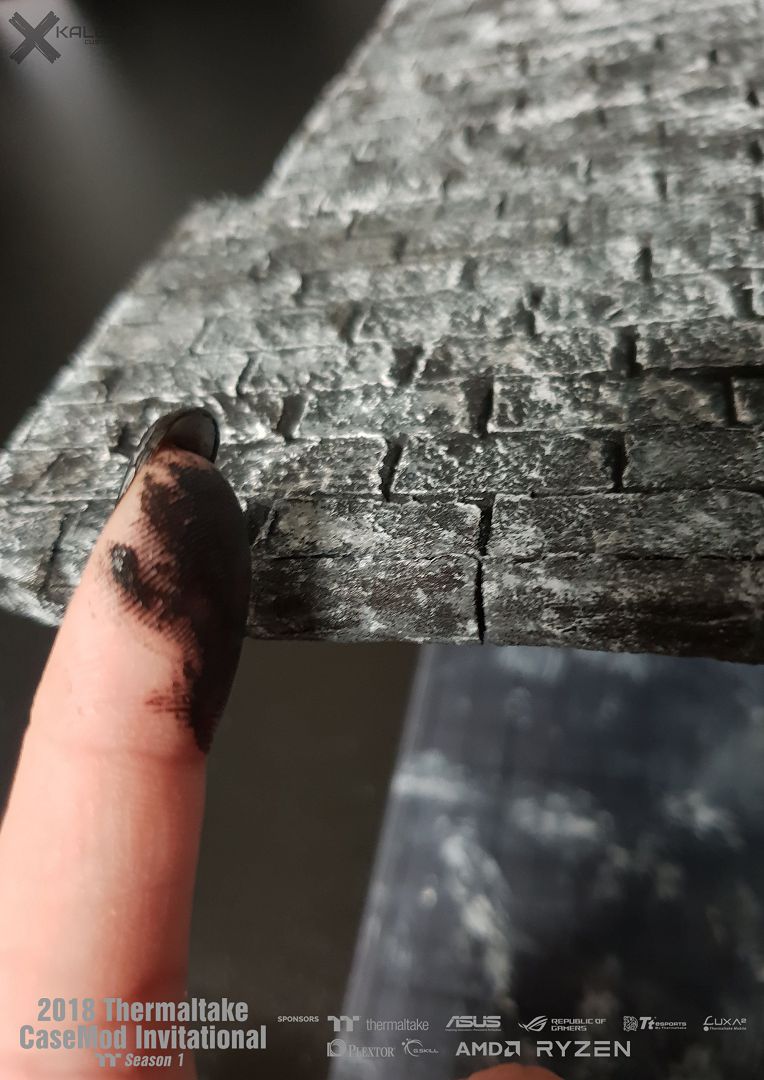
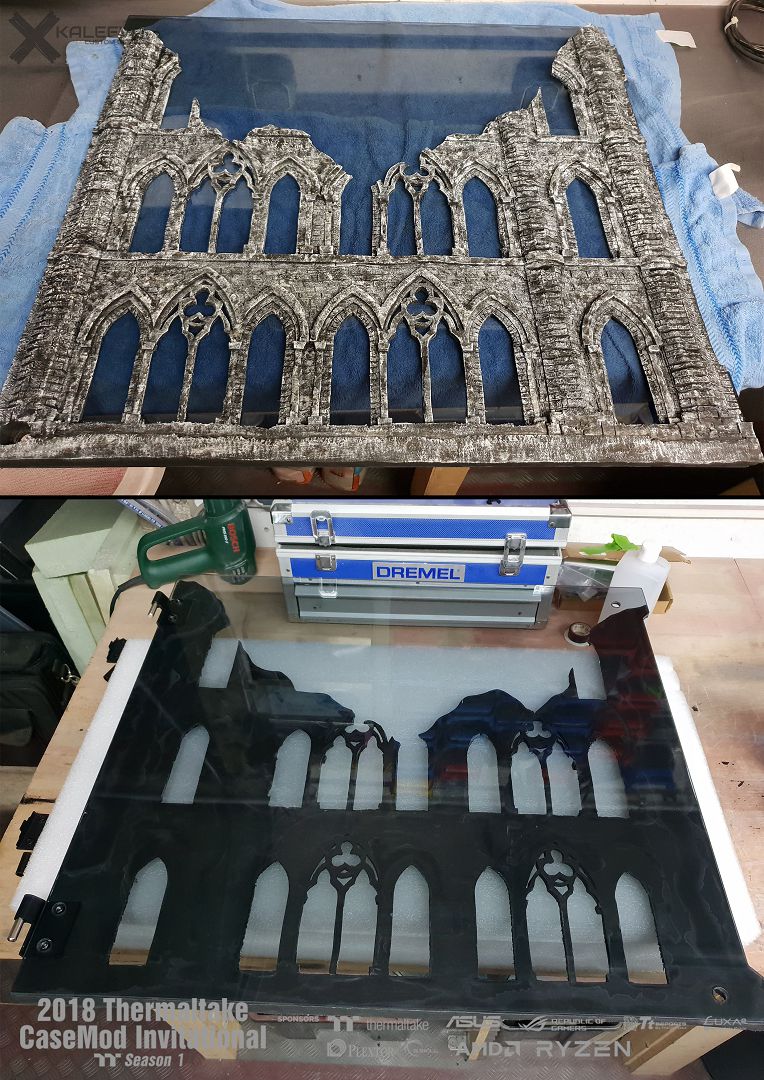
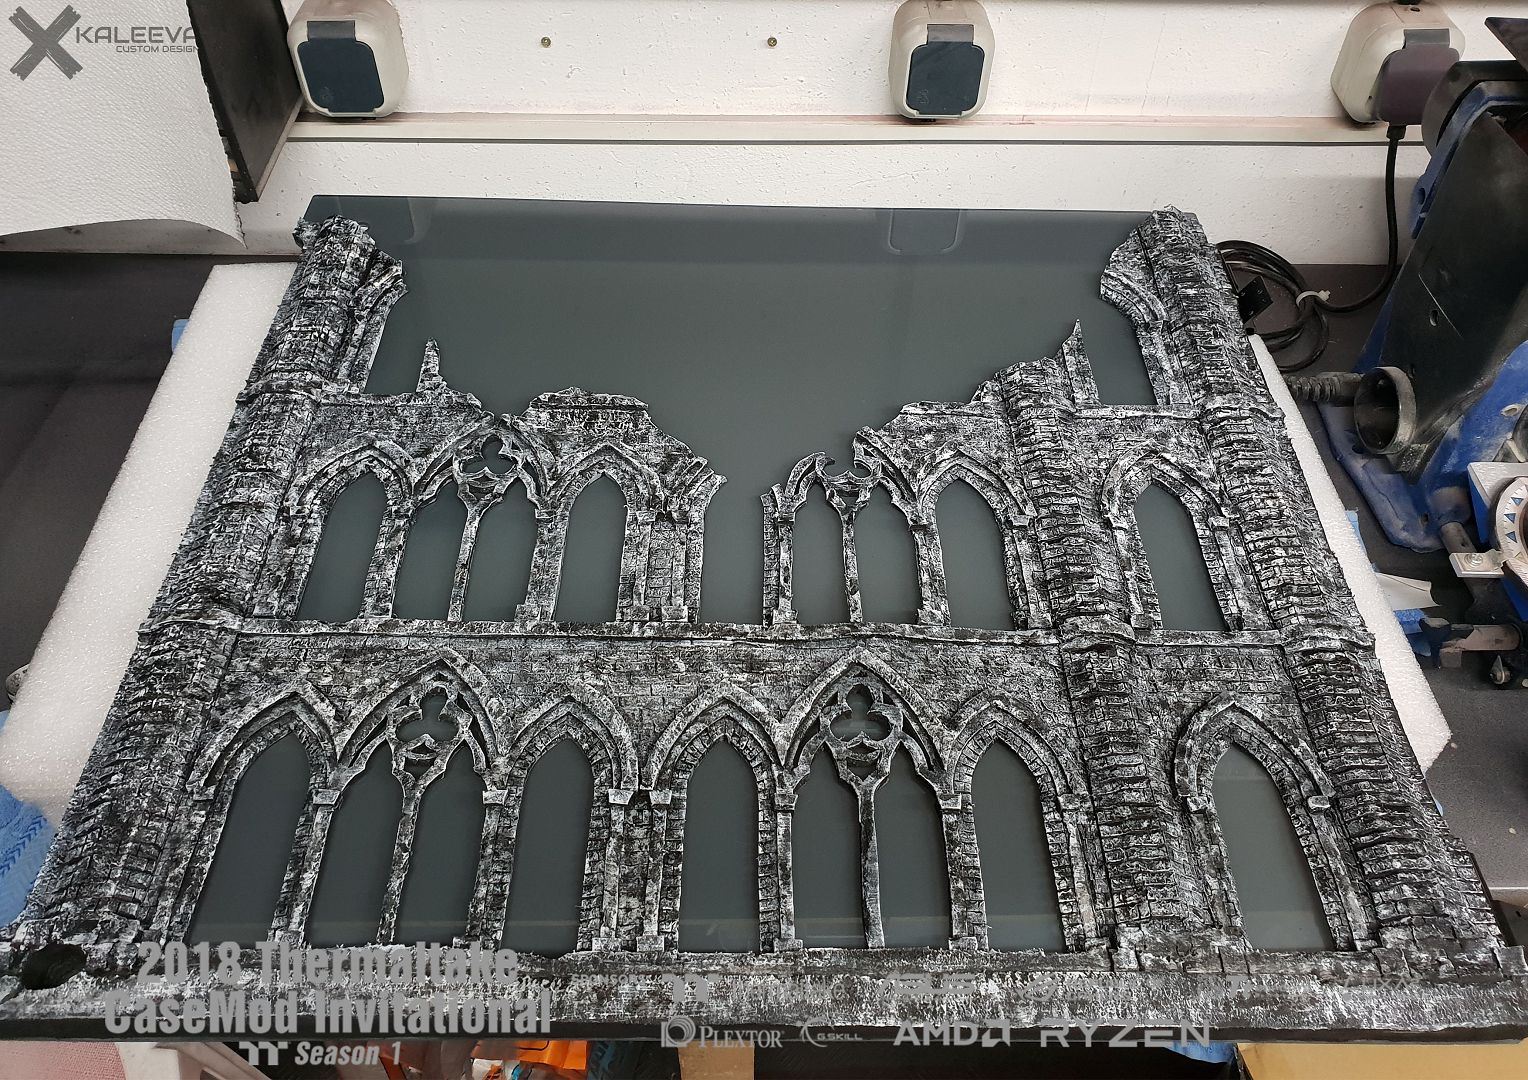
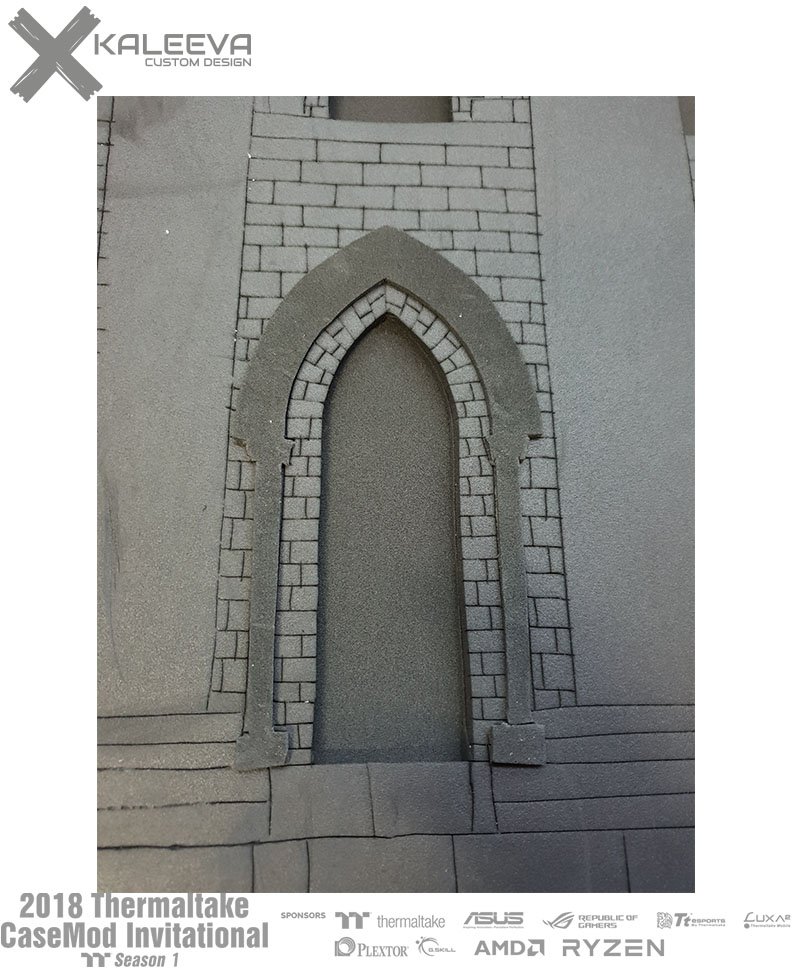
After the first time I got the EVA foam pulled crooked and I could not straighten it anymore (the pattern of the wall was totally crooked), I had to make the upper part and the right part completely new. But as you can see, it worked out

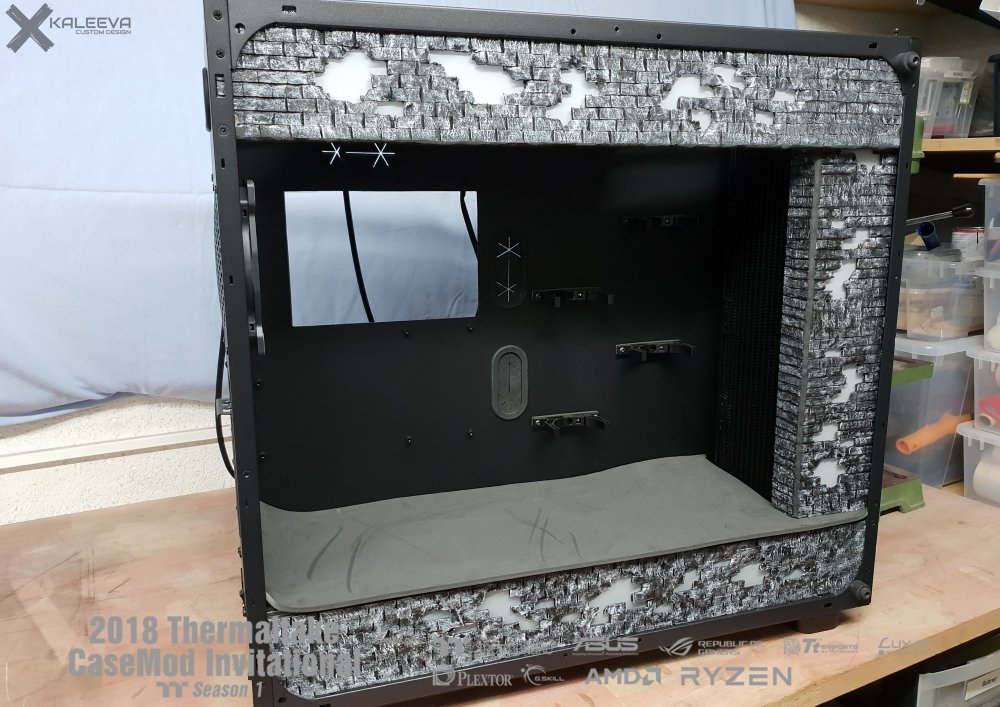
From behind i glued diffusion foil.
At the upper part I used four magnets to prevent it from falling or slipping.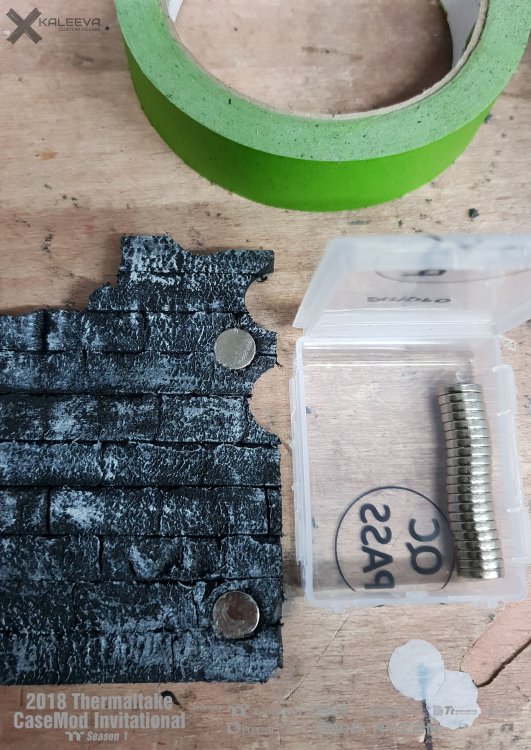
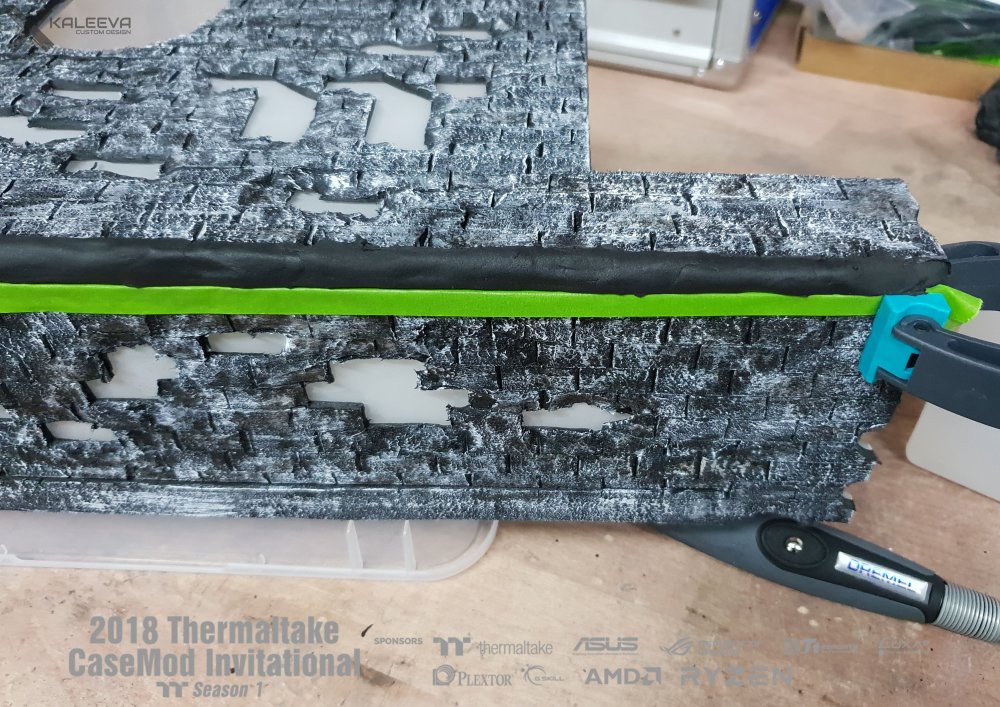
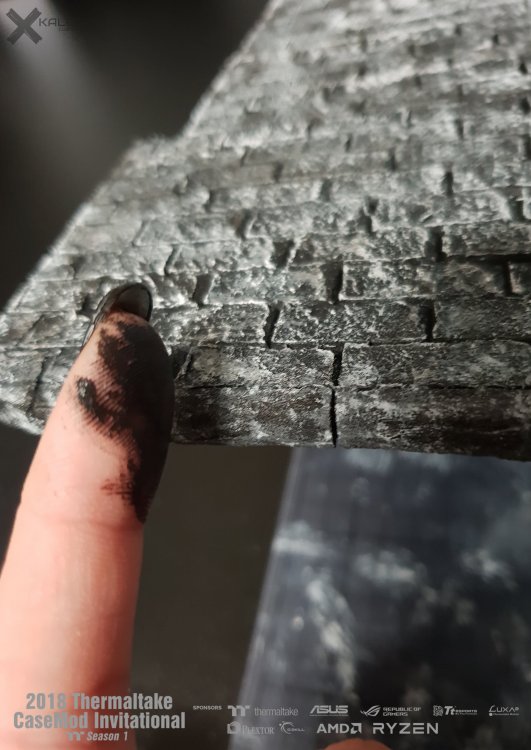
I also work the visible edges with foam clay, after hardening it can be treated like normal eva foam.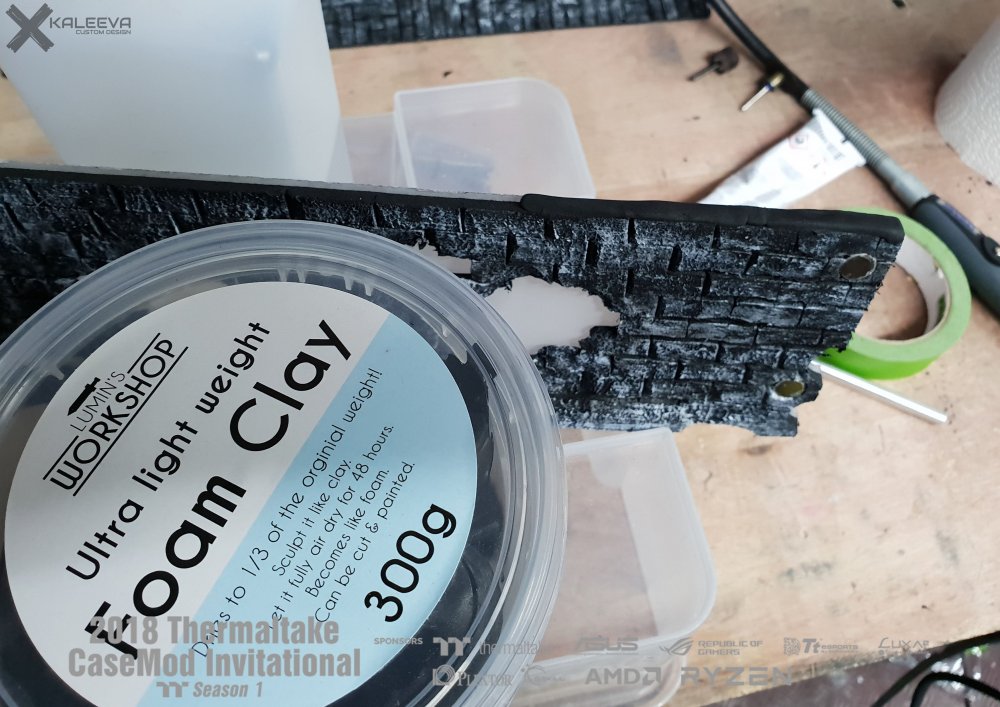
-
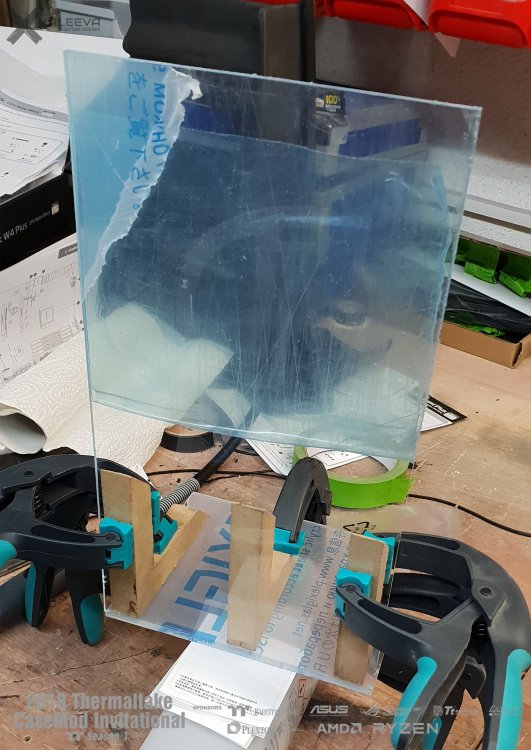
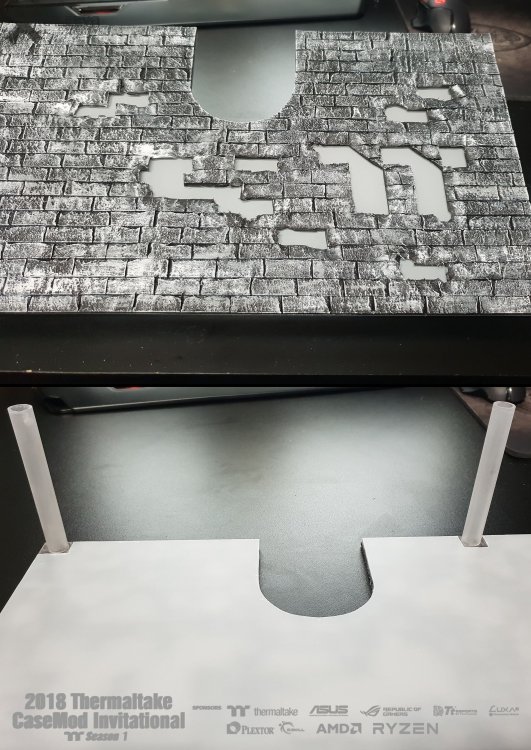
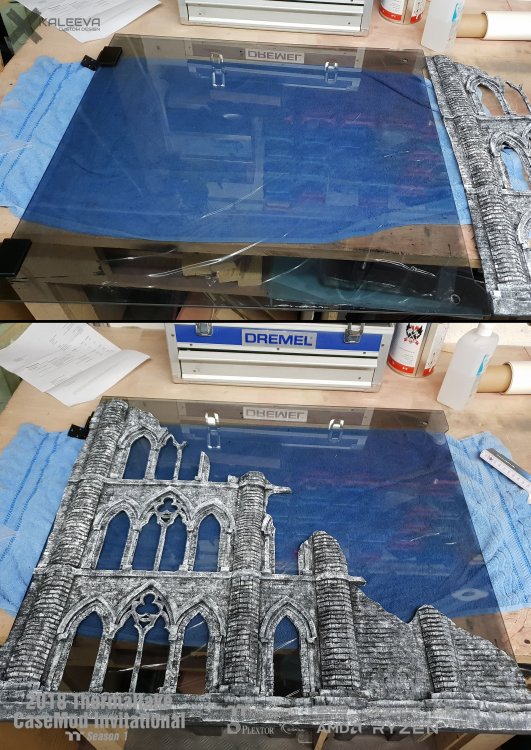
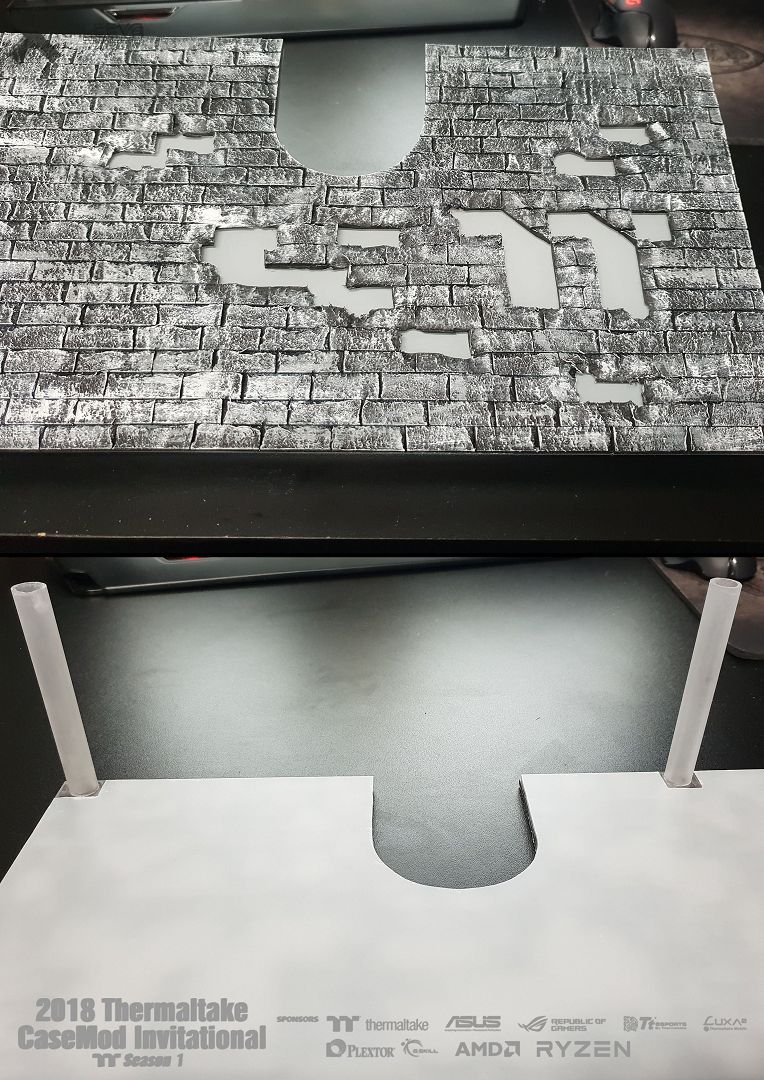
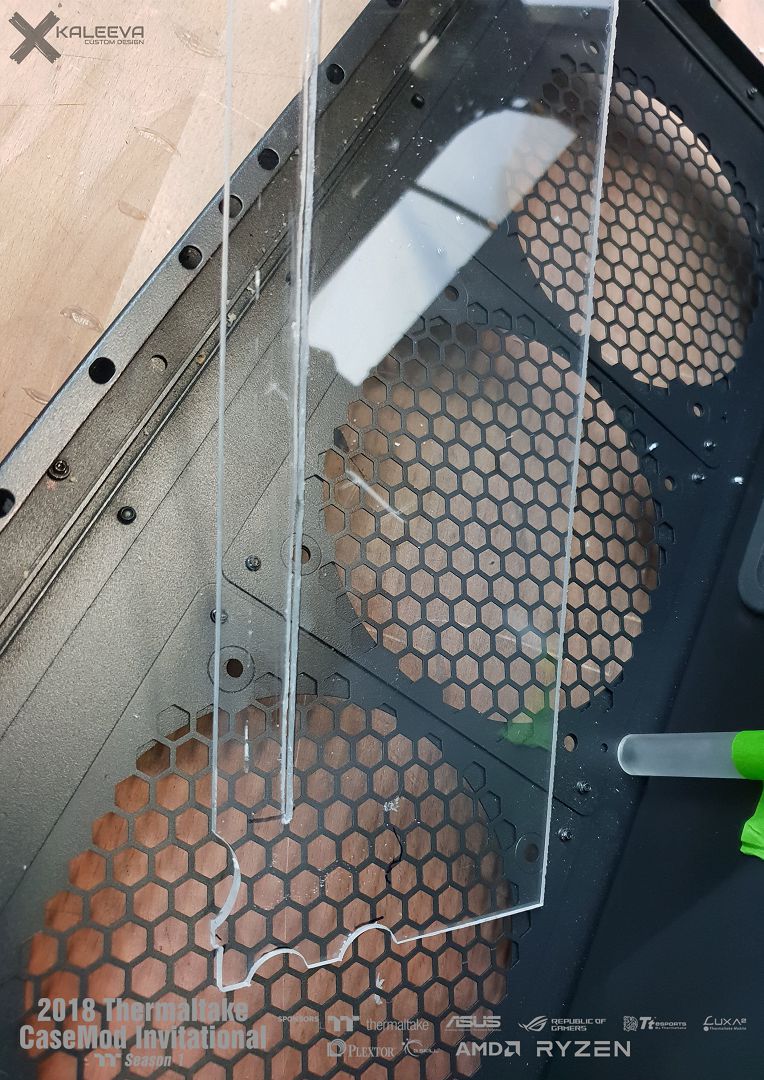
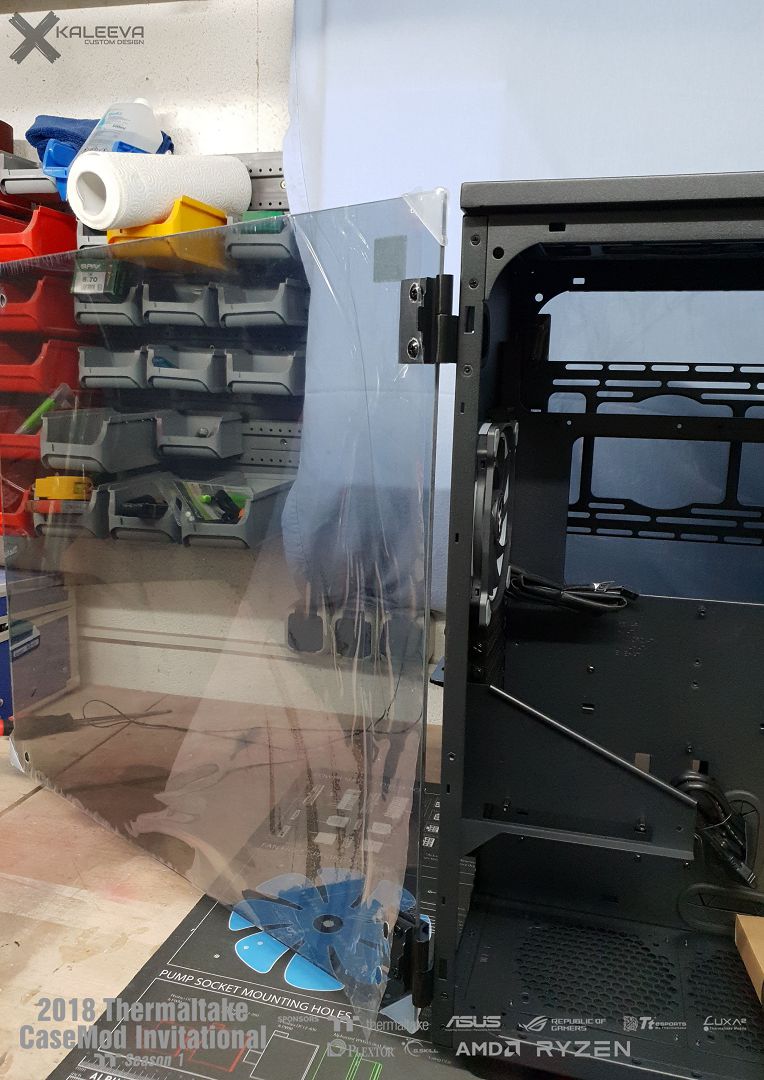
Next was the side window. After I had glued the EVA Foam, I applied diffusion foil from the back and cut it to size.
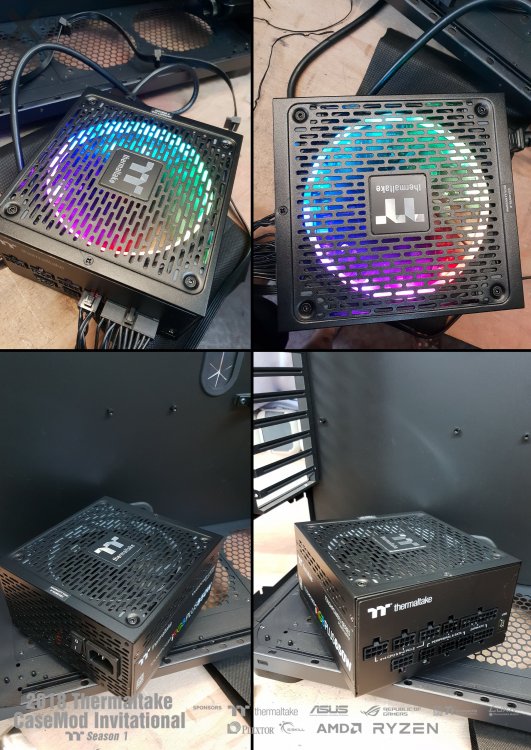
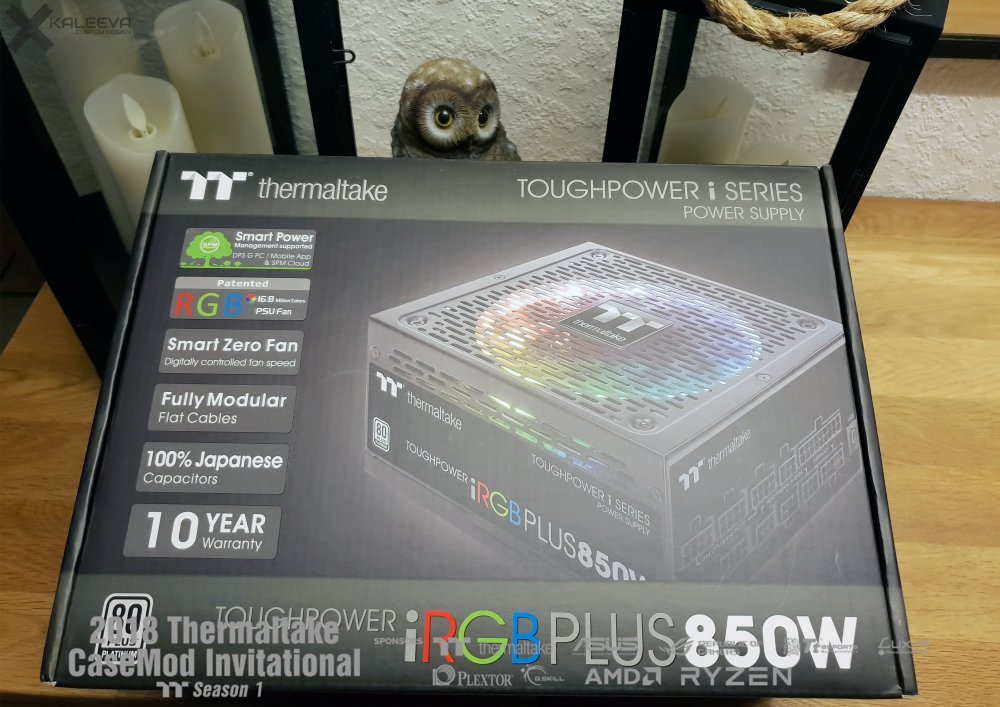
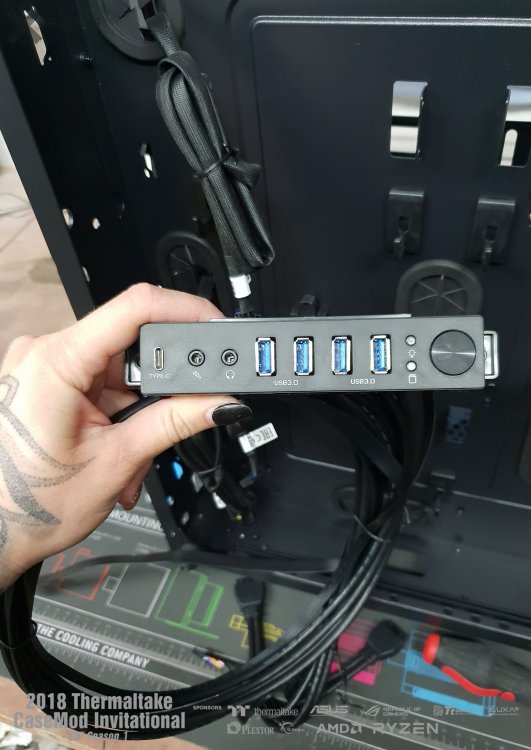
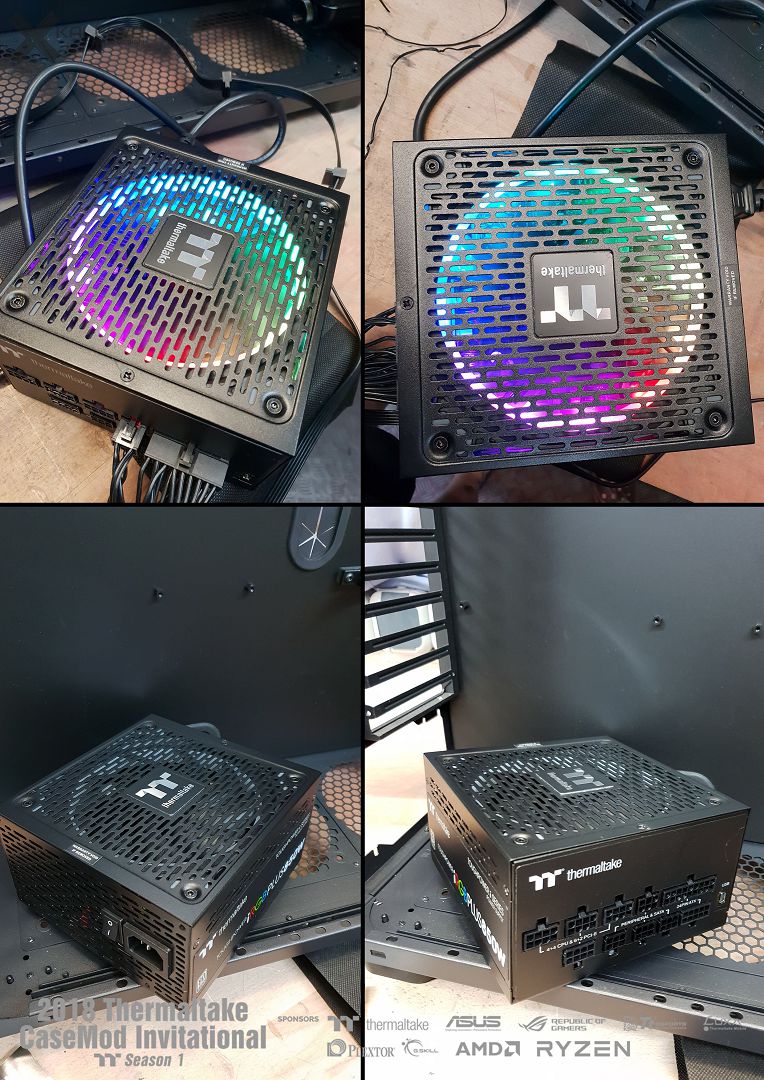
I also had unpacked and connected the power supply once, looks really great with the RGB lighting!
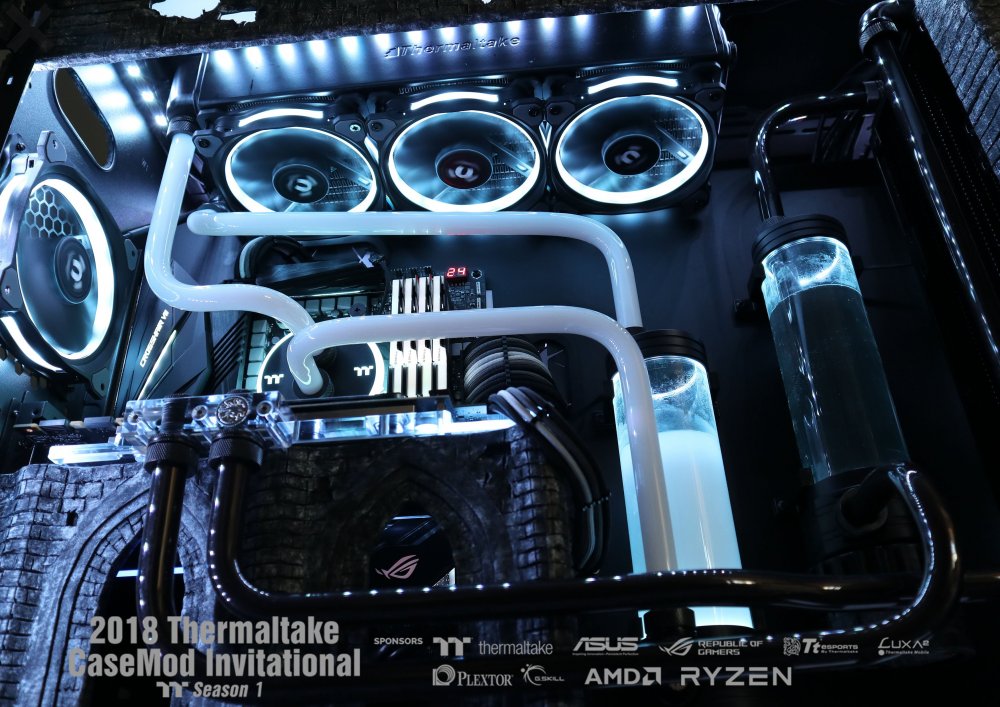
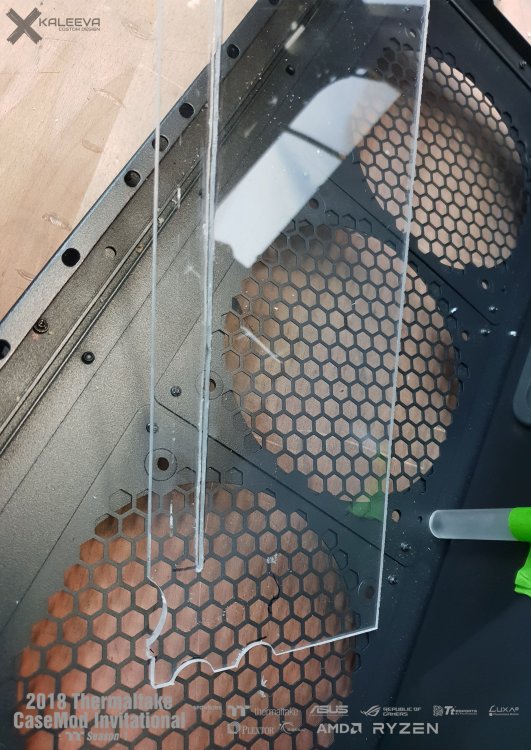
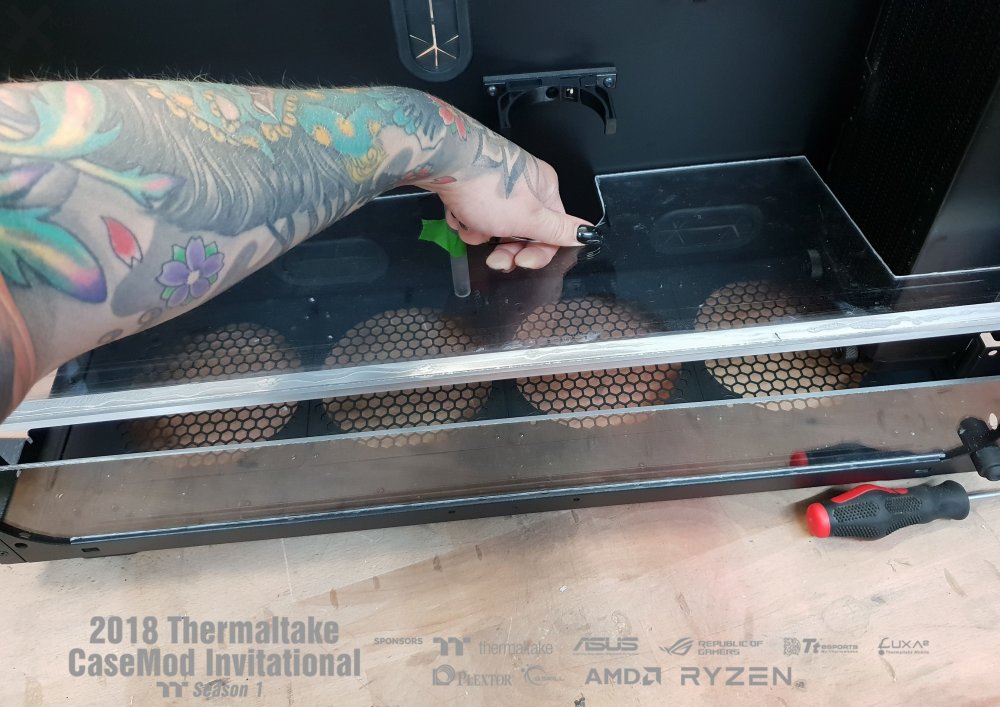
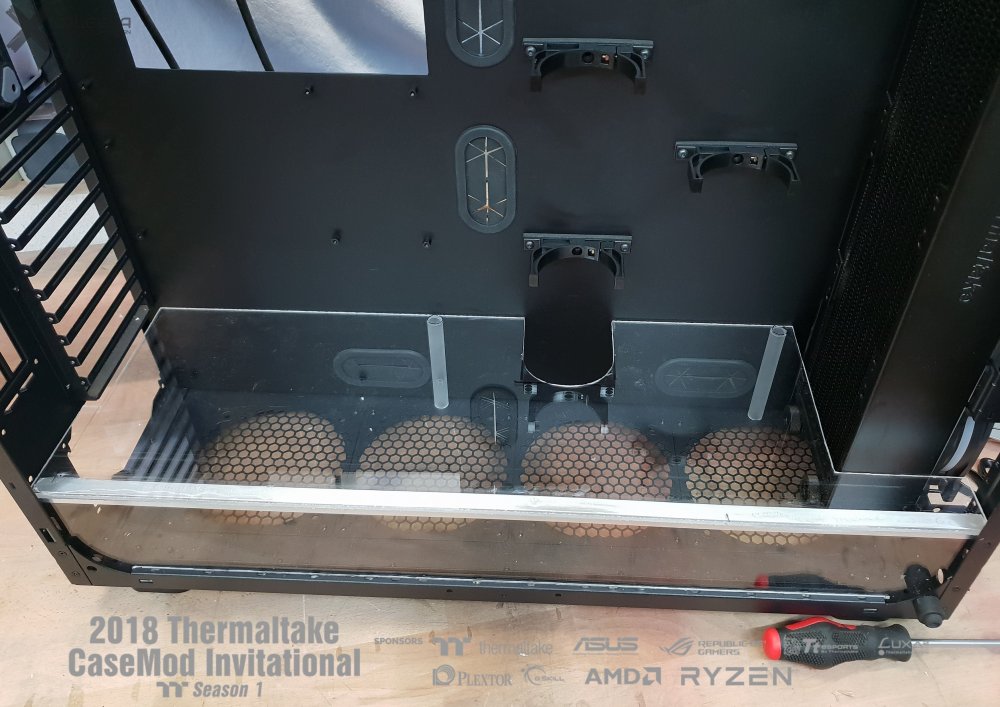
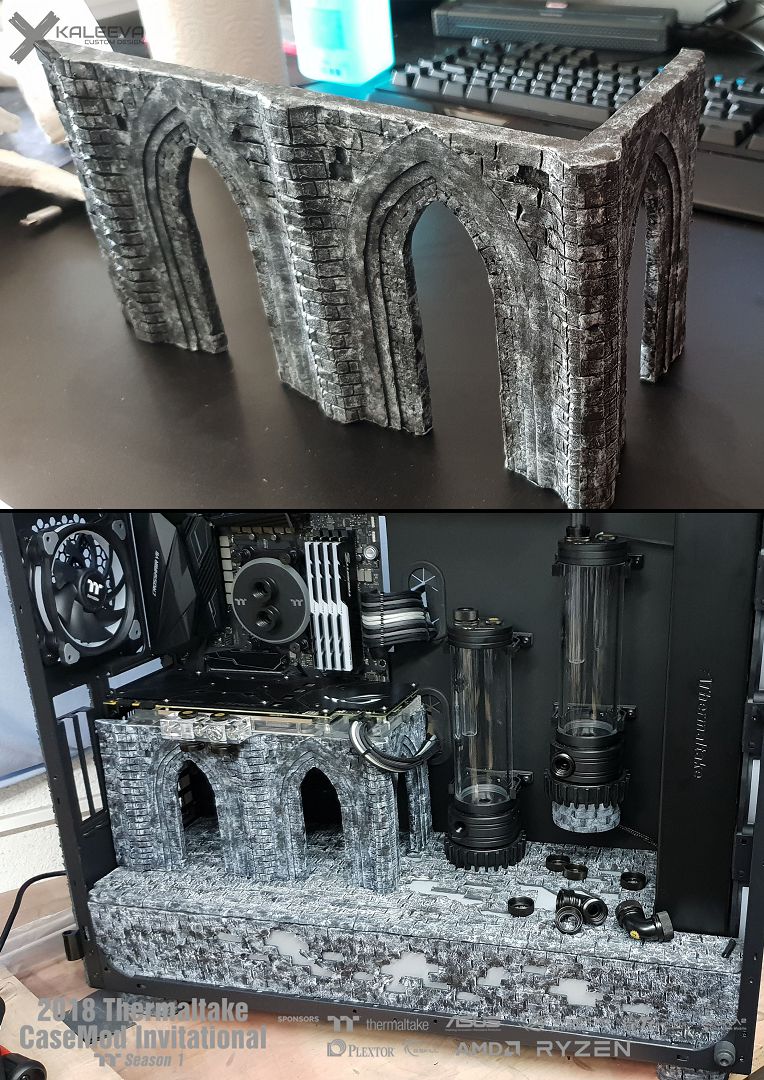
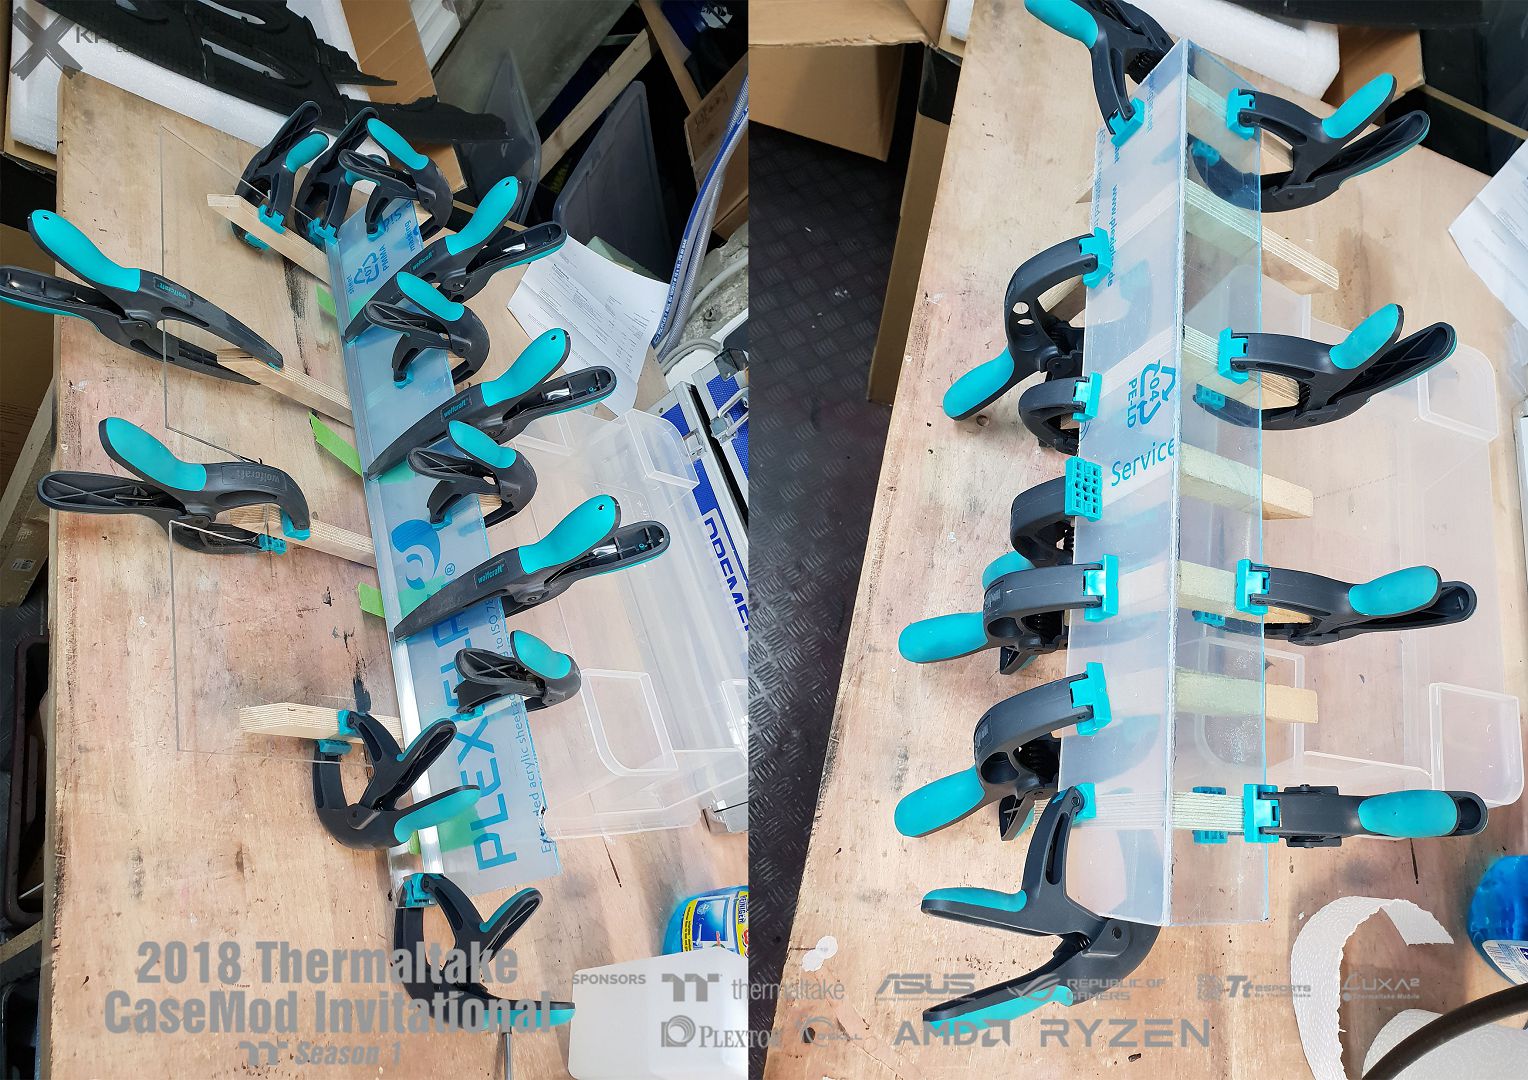
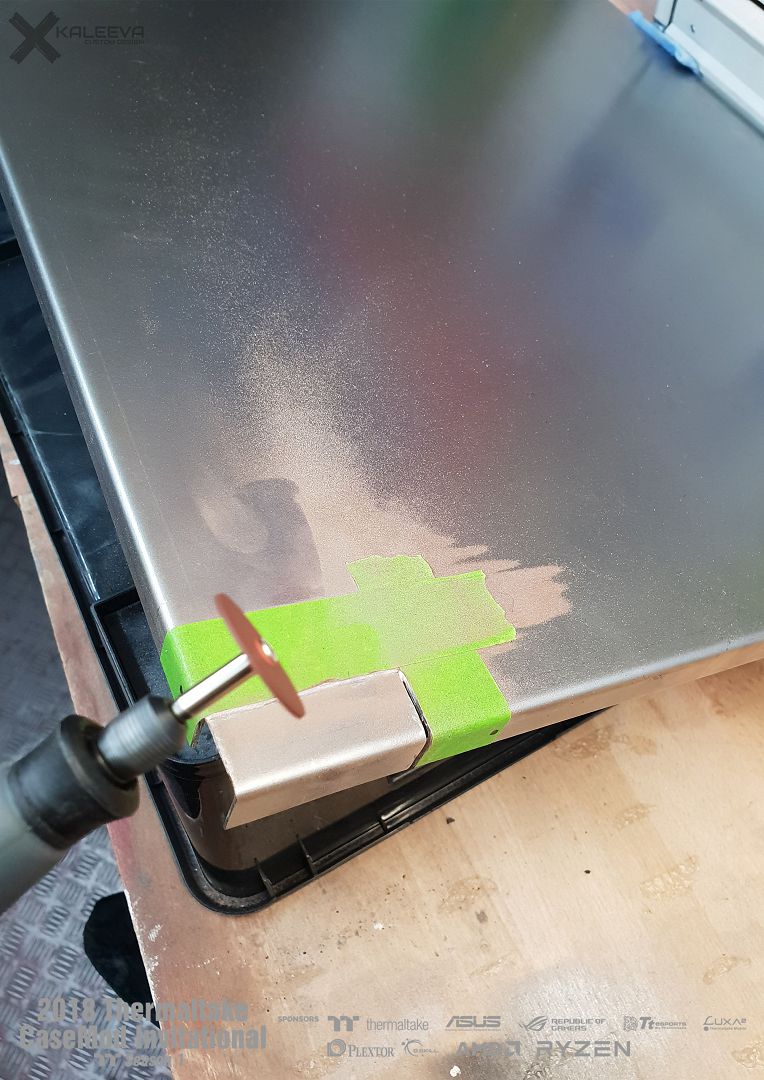
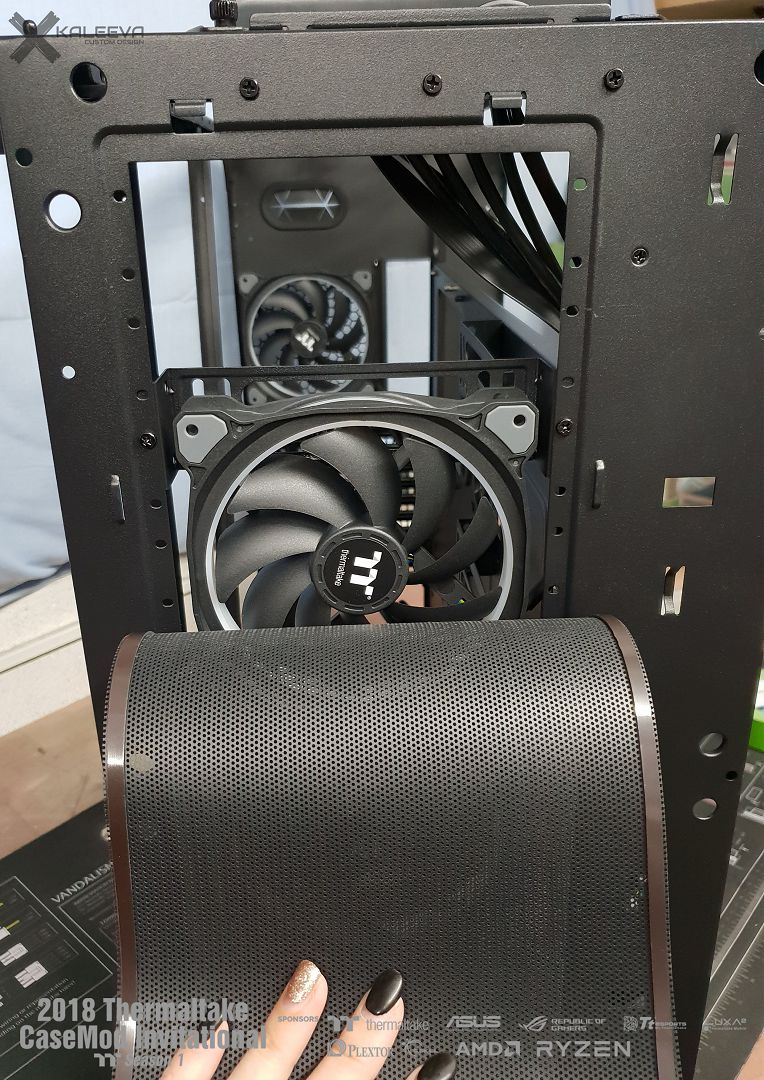
Otherwise I started to cut the PSU cover and some other parts to cover the radiators.
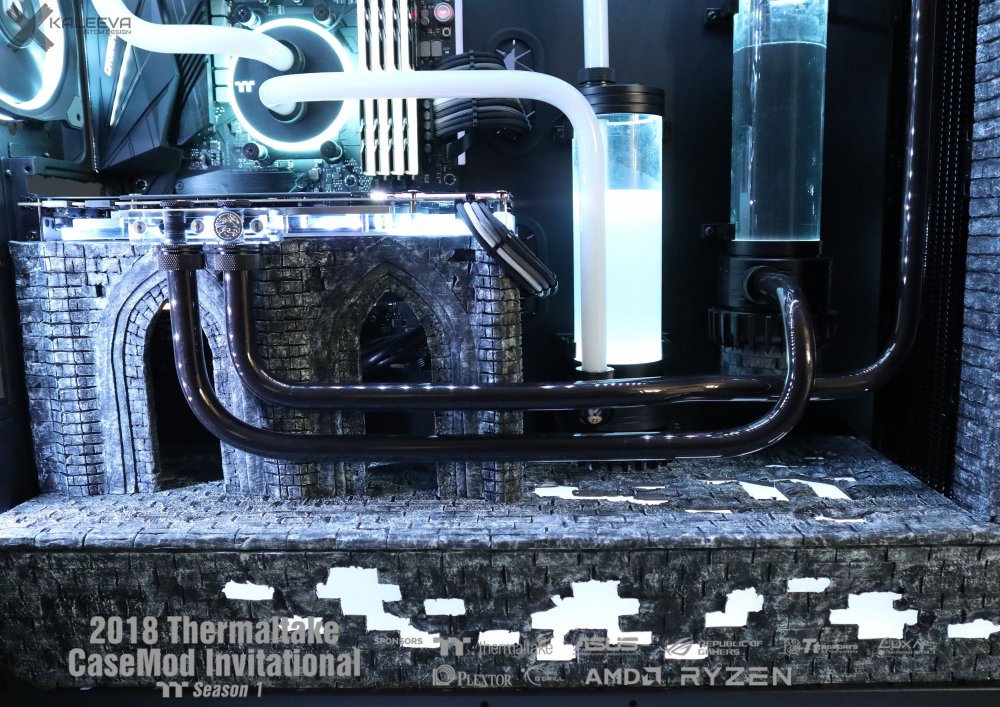
The parts will later be covered from the outside with EVA foam in wall look.For the right distance from Plexi to the radiator I simply used spacers.


-
On 7/21/2018 at 1:43 PM, Terrorheizer said:
Ein Traum !! Hoffe du Gewinnst !!
Vielen dank !
Das wäre echt toll =) -
Something has happened again =)
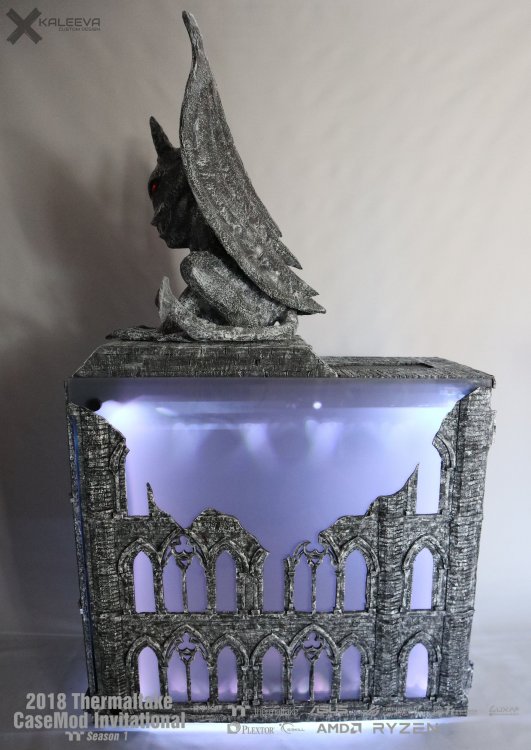
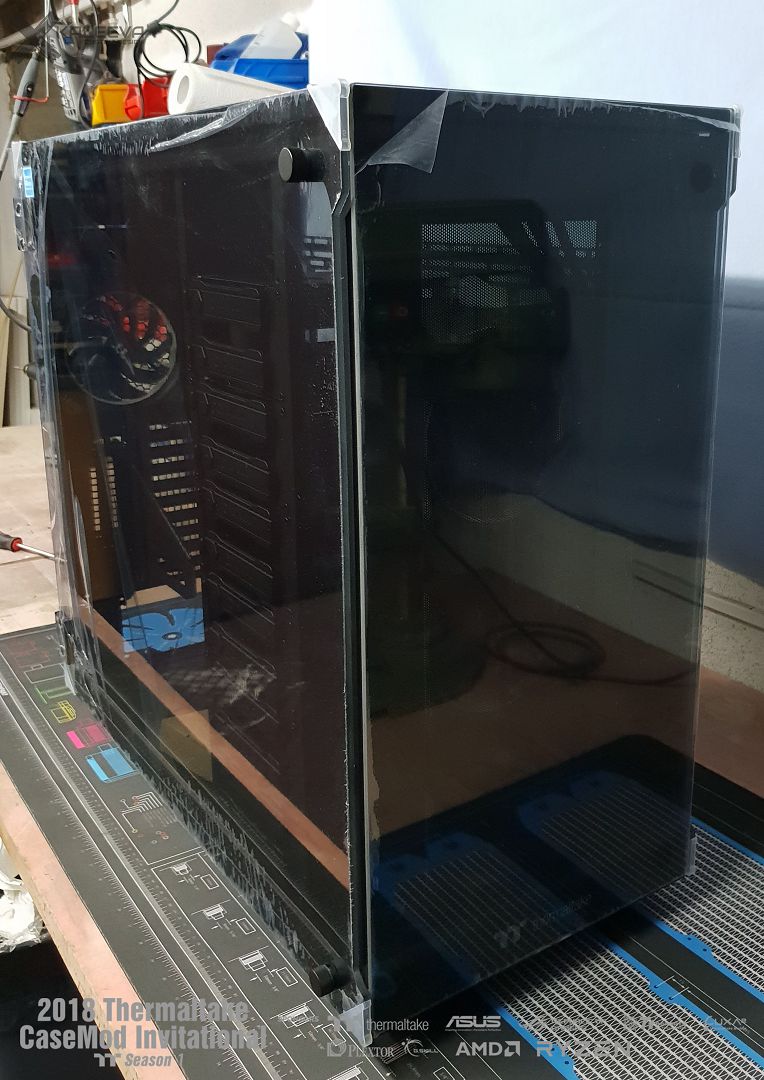
I painted two of the three side panels and glued them to the glass panes with double-sided self-adhesive foil.
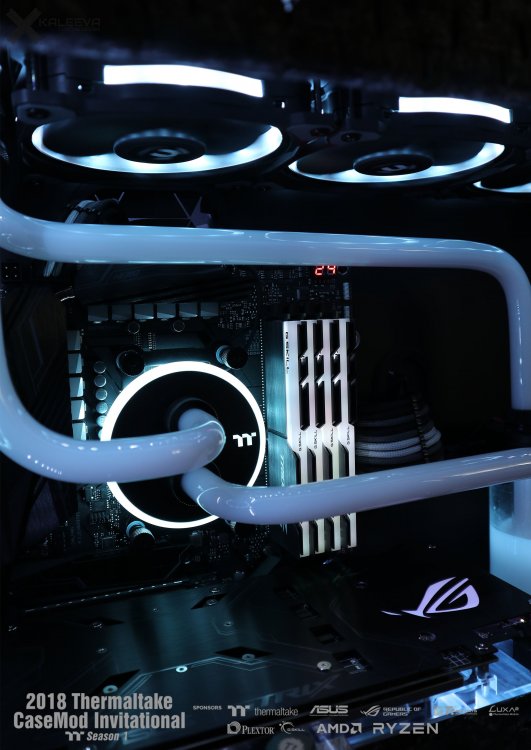
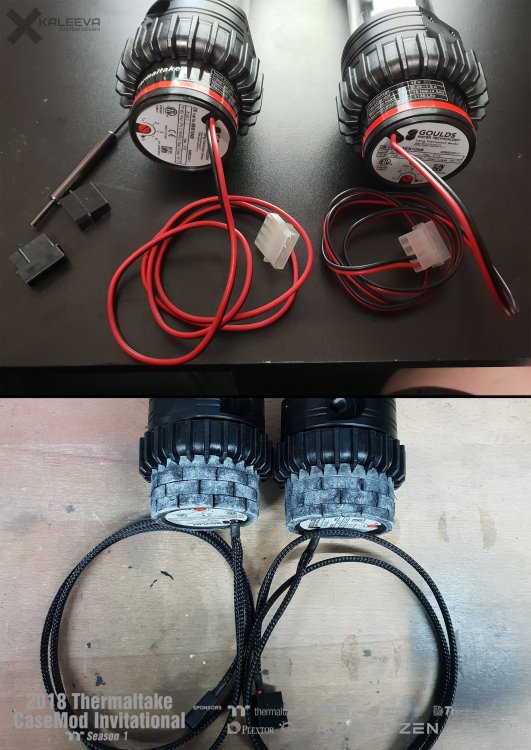
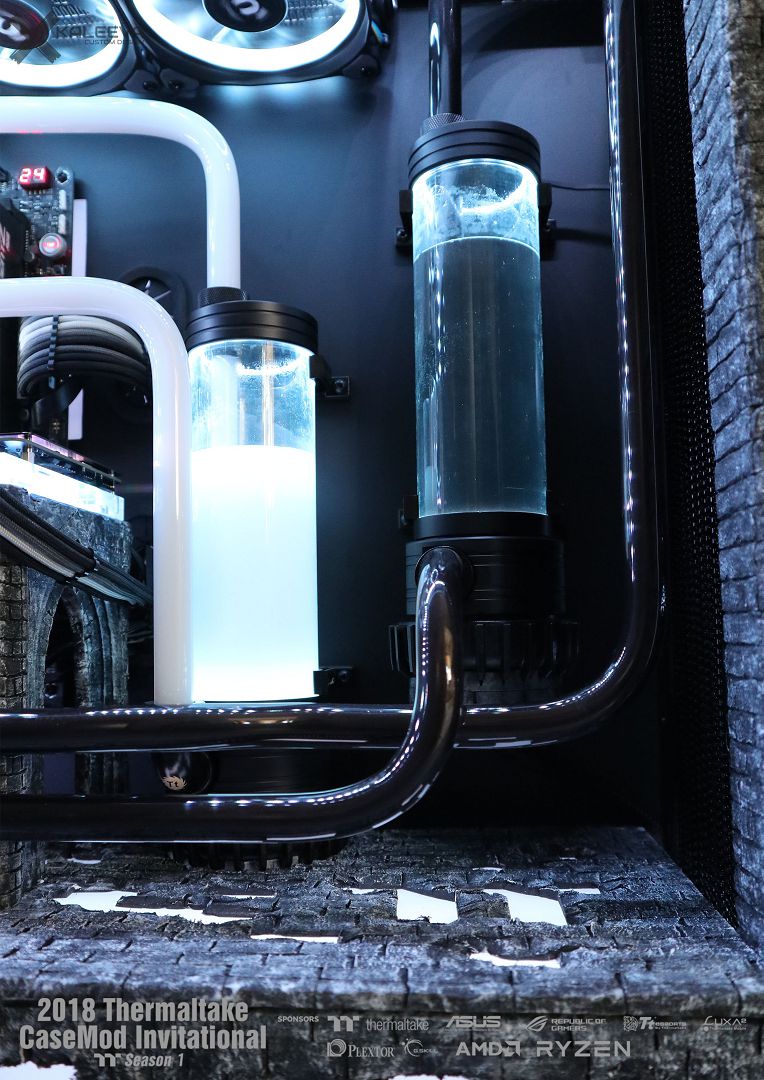
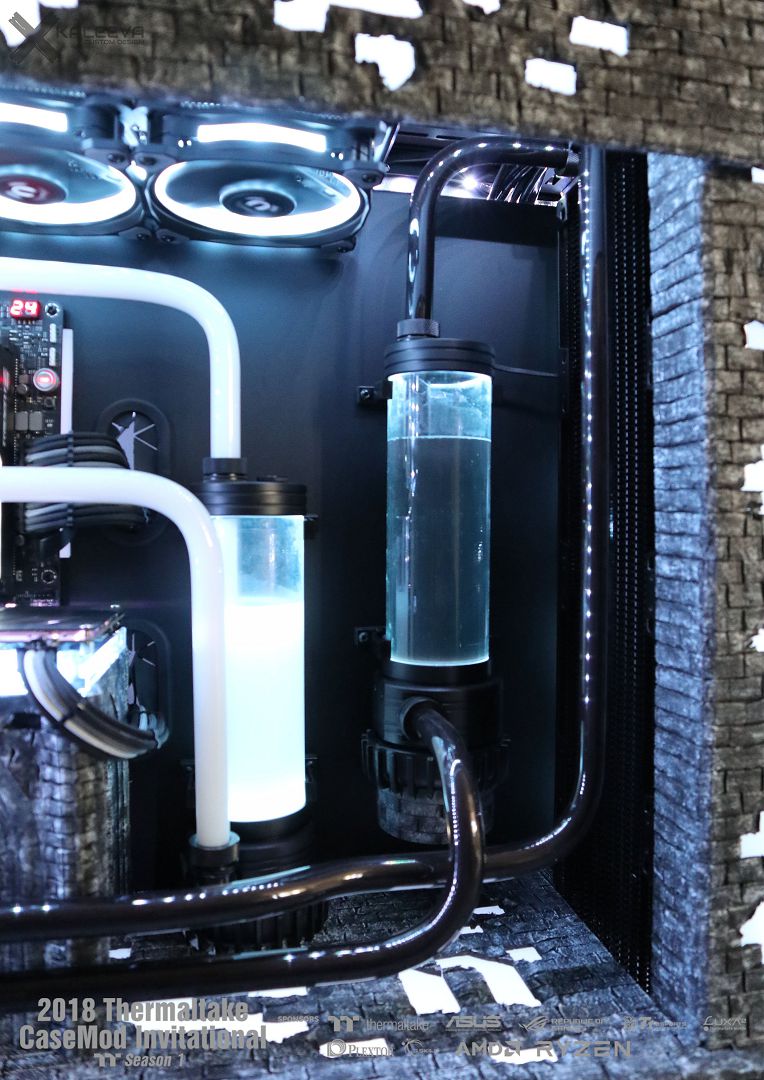
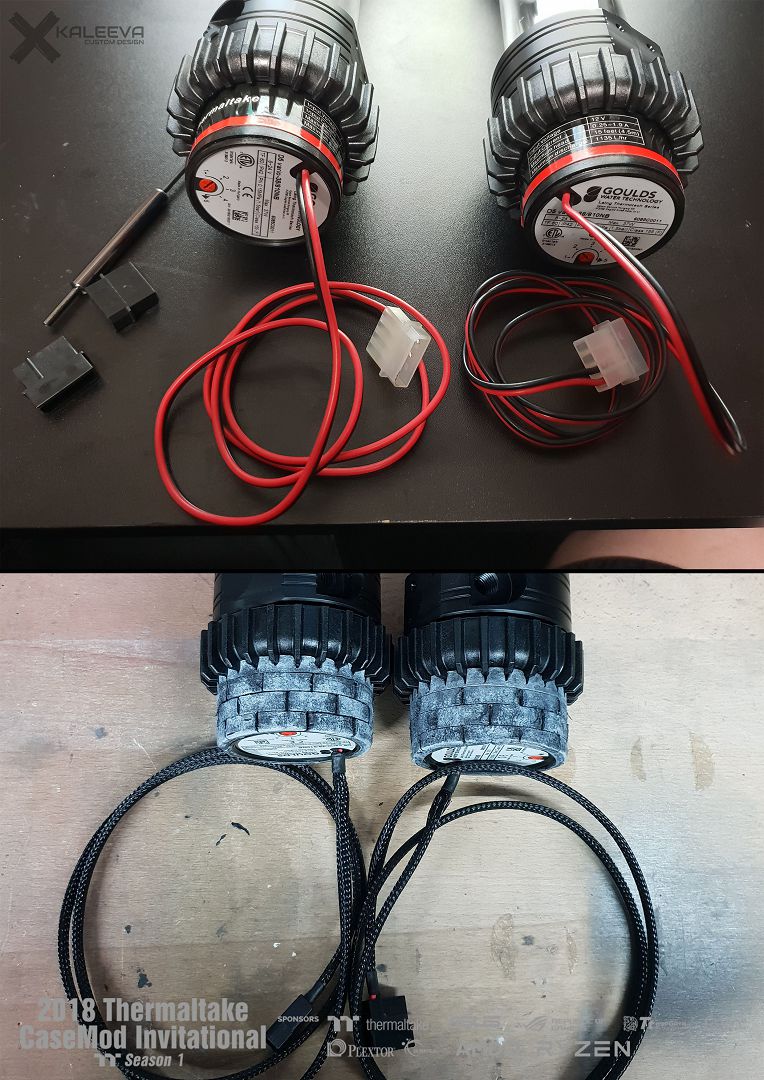
There is also a diffusion foil from the inside so that the light is spread better and the LED dots are not visible.Then I swapped the transparent connectors of the two pumps for black and sleeved the cables in one. So that the whole optical fits better, the pump has also got a stone look with EVA Foam.
The power supply has also arrived today, but has to wait a bit until it is allowed to move into the case
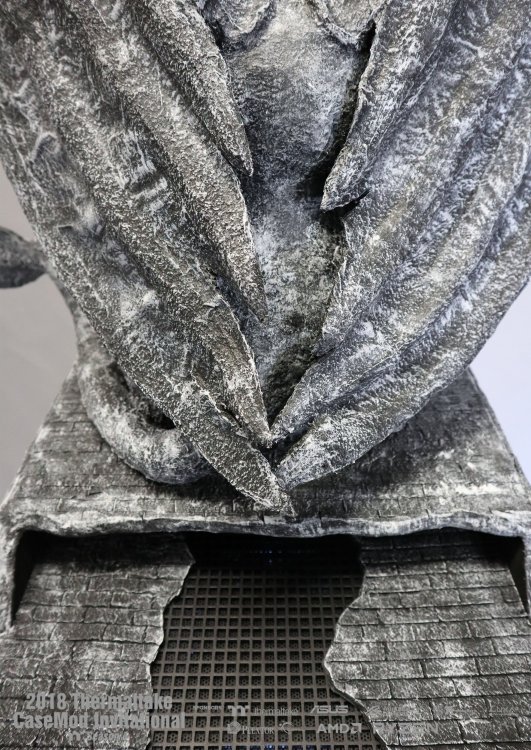
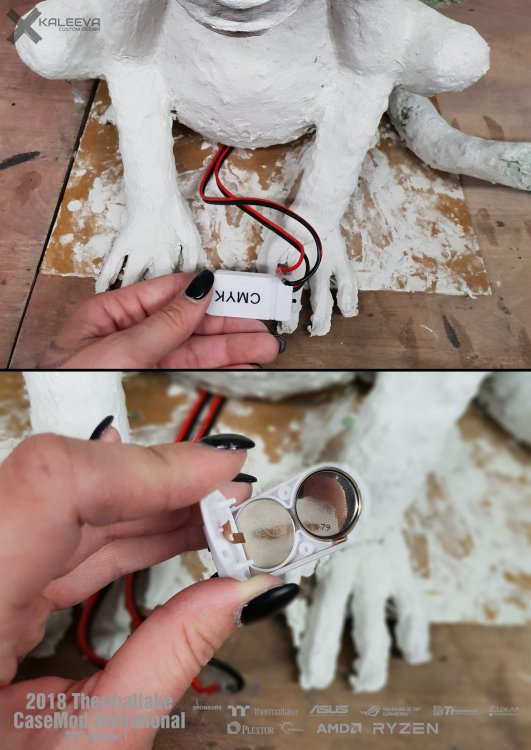
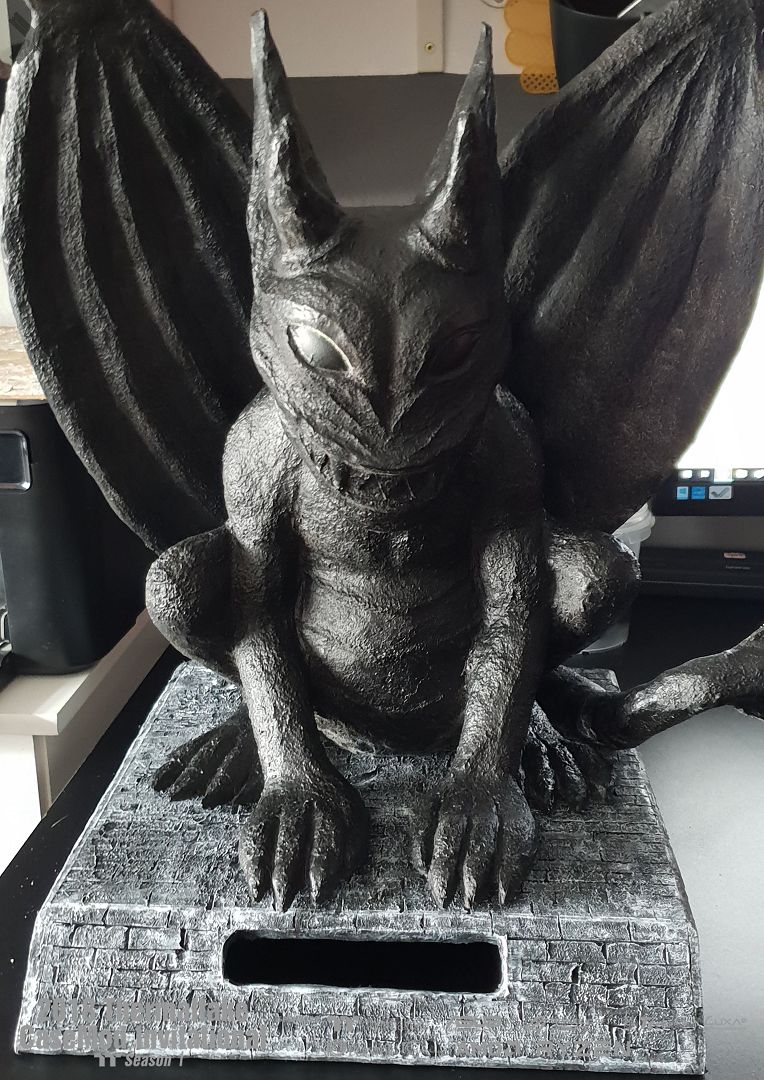
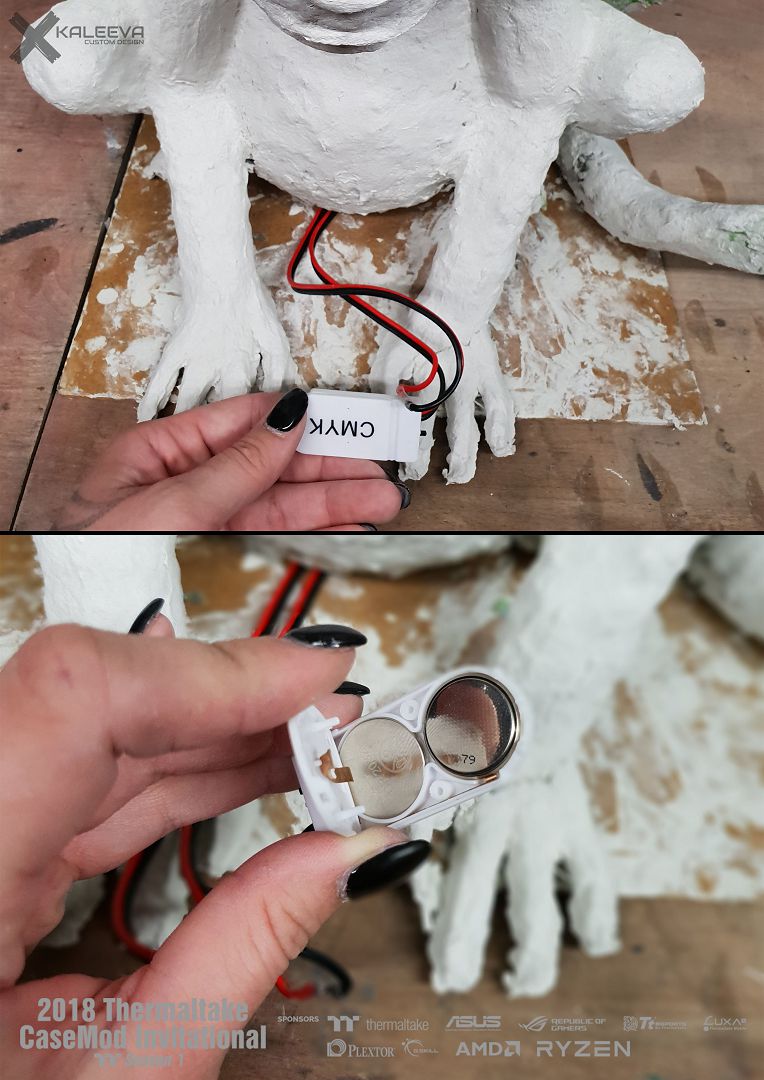
And last but not least the Gargoyle got LED´s into his eyes. The power source is a battery compartment of an old LED light chain.
The eyes are being covered so you don't see the LED´s any more.
-
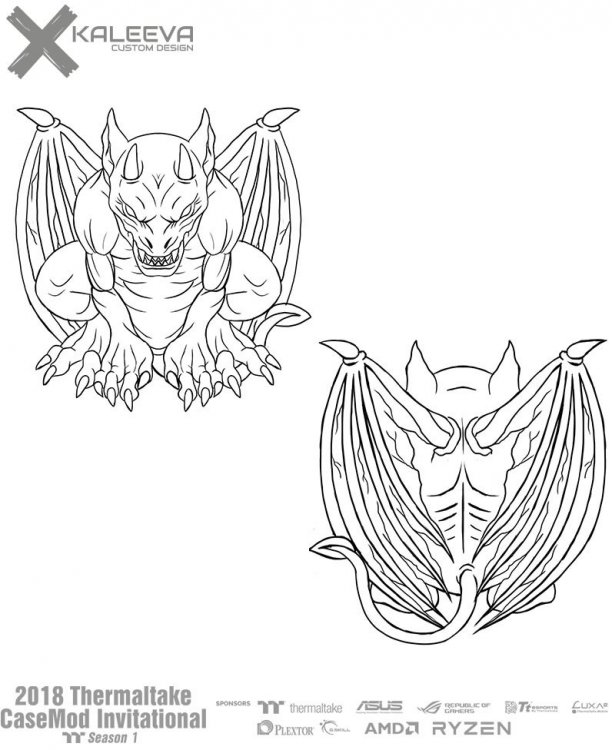
I know the problem with the clay.
Wanted to make a dragon with it for another project. Absolute disaster. That's why I'm using paper mache again. Easy to apply and does not crack during drying. Also a lot cheaper and won't become so extremely heavy at the end =)
But it looks good so far. I wonder what he looks like at the end. -
-
I started building the Gargoyle out of paper mache.
Looks a bit strange so far, but as you can see many details are still missing.
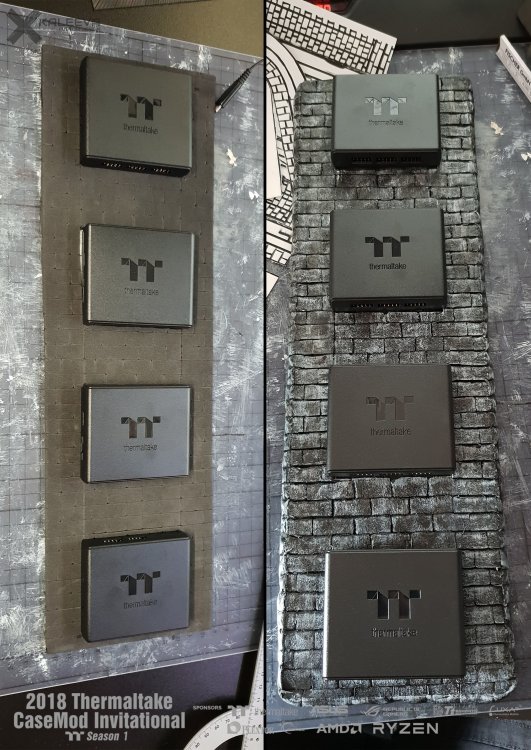
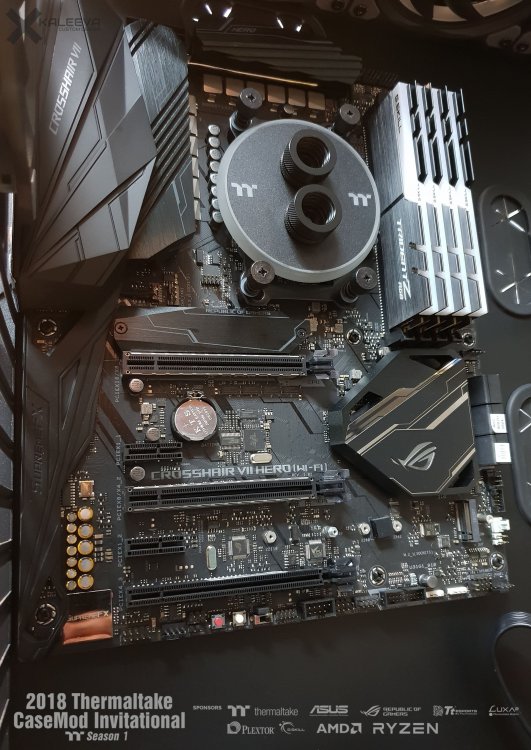
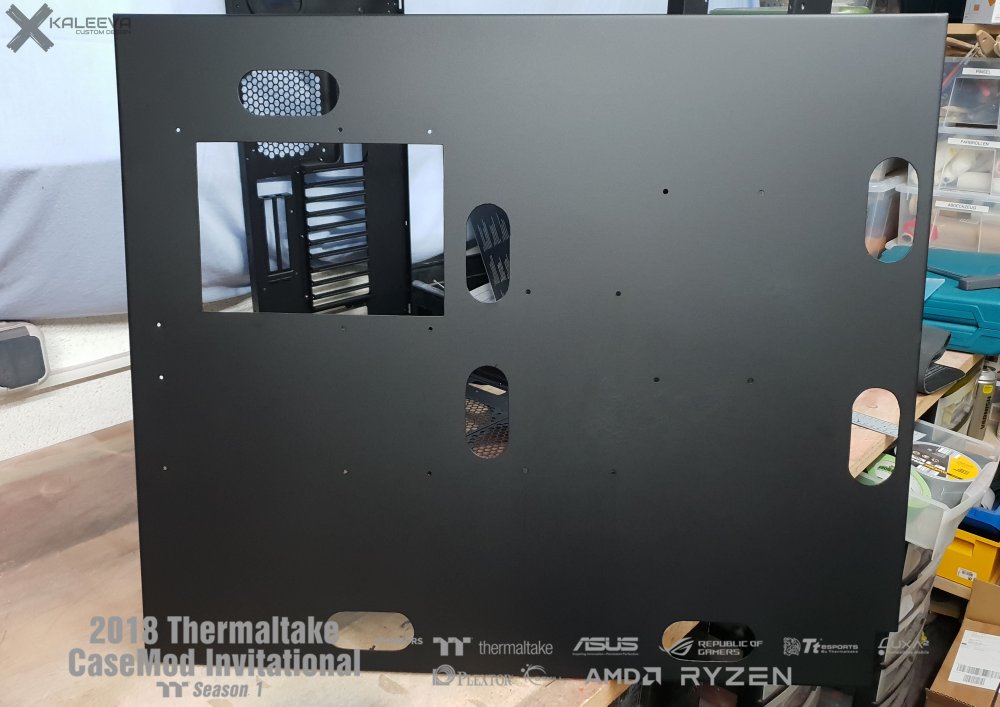
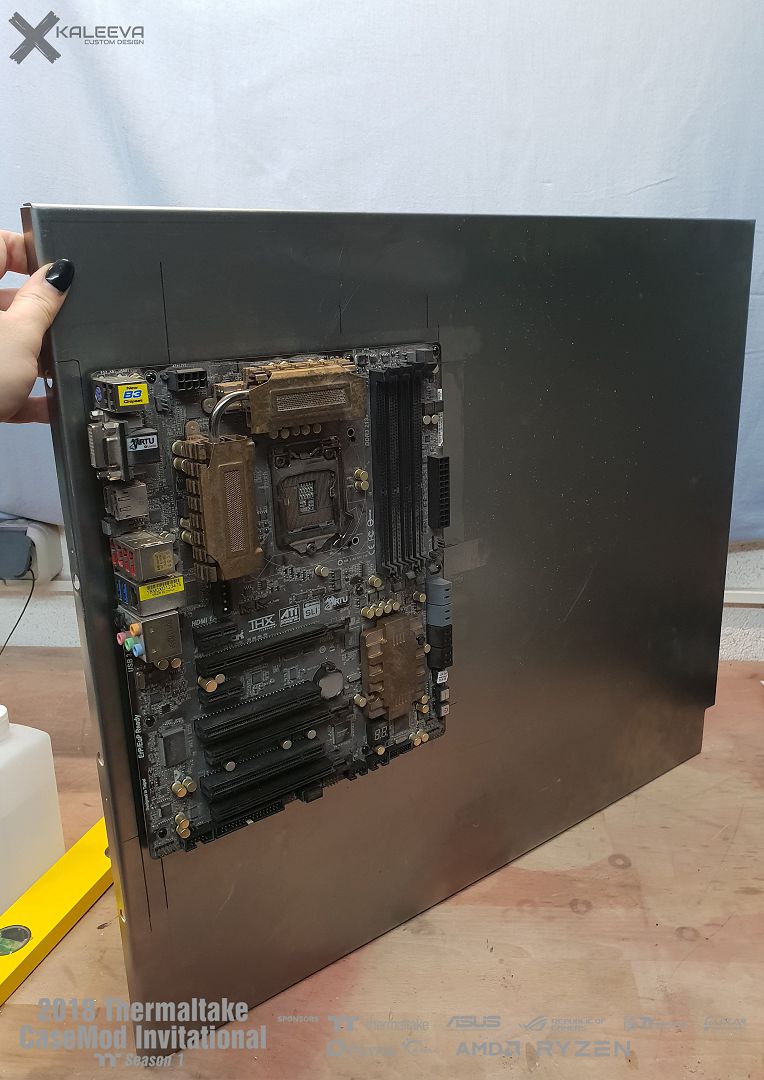
So far I have mixed the papier-mâché out of newspapers and glue myself, but for the details I use finished powder, which is finer and easier to process.The mainboard tray came back from the powder coating and was installed directly =)
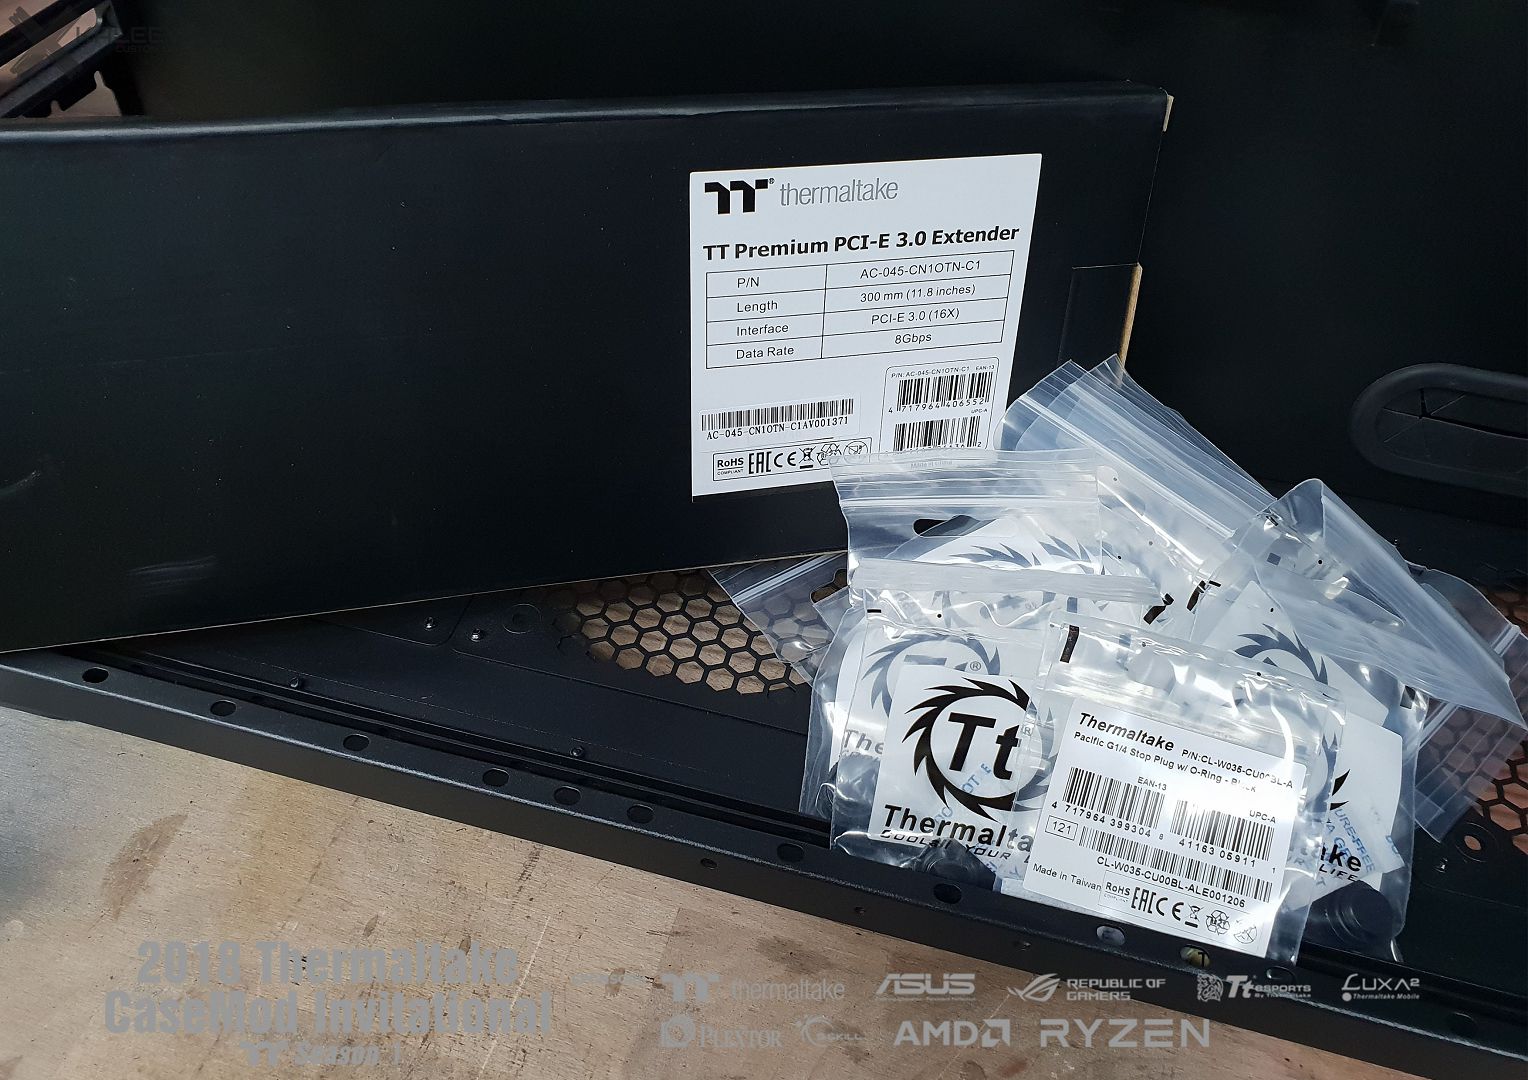
Apart from that, the days came my riser cable and the stop plugs, because I wanted to use black rather than the included chrome.
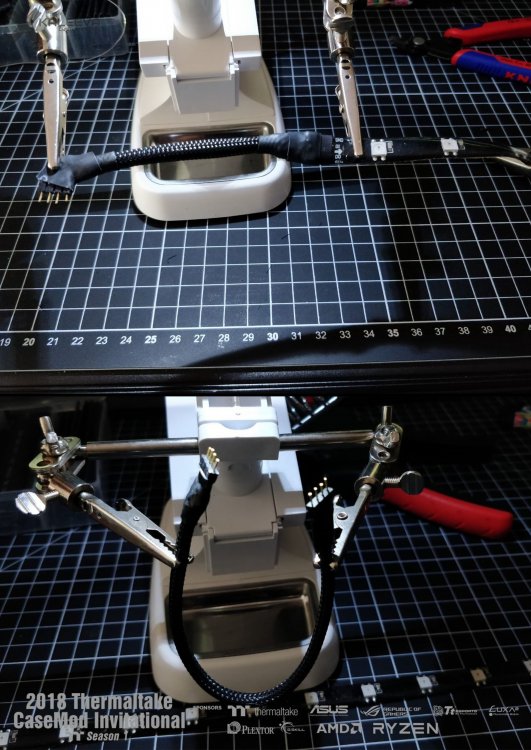
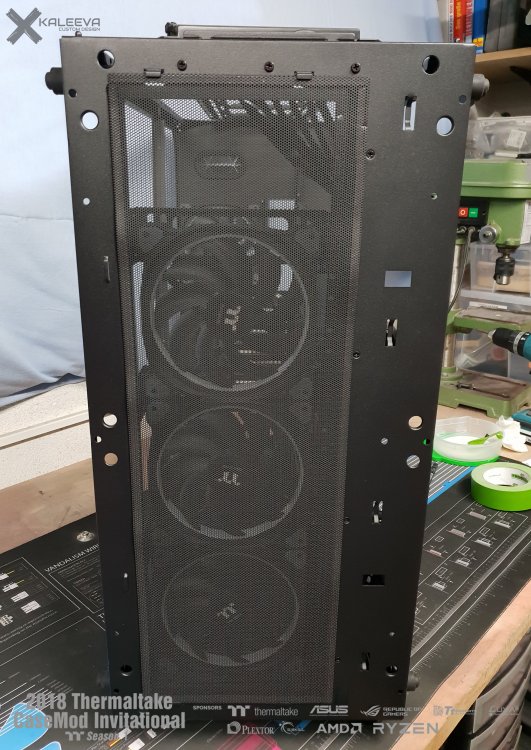
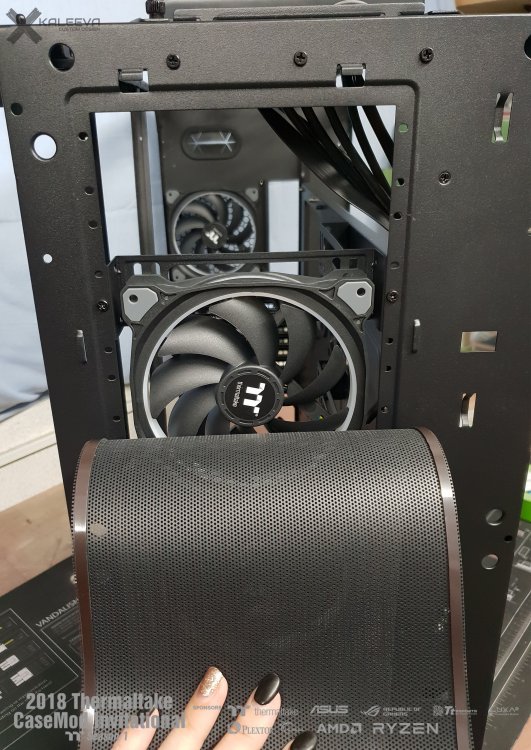
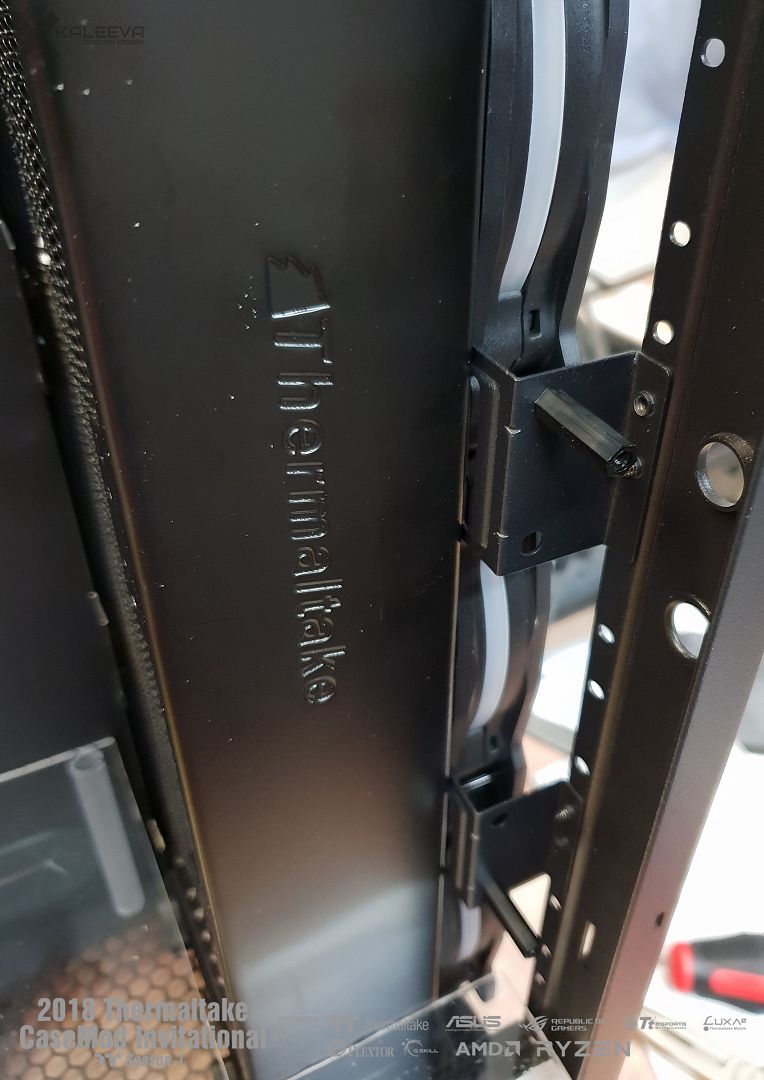
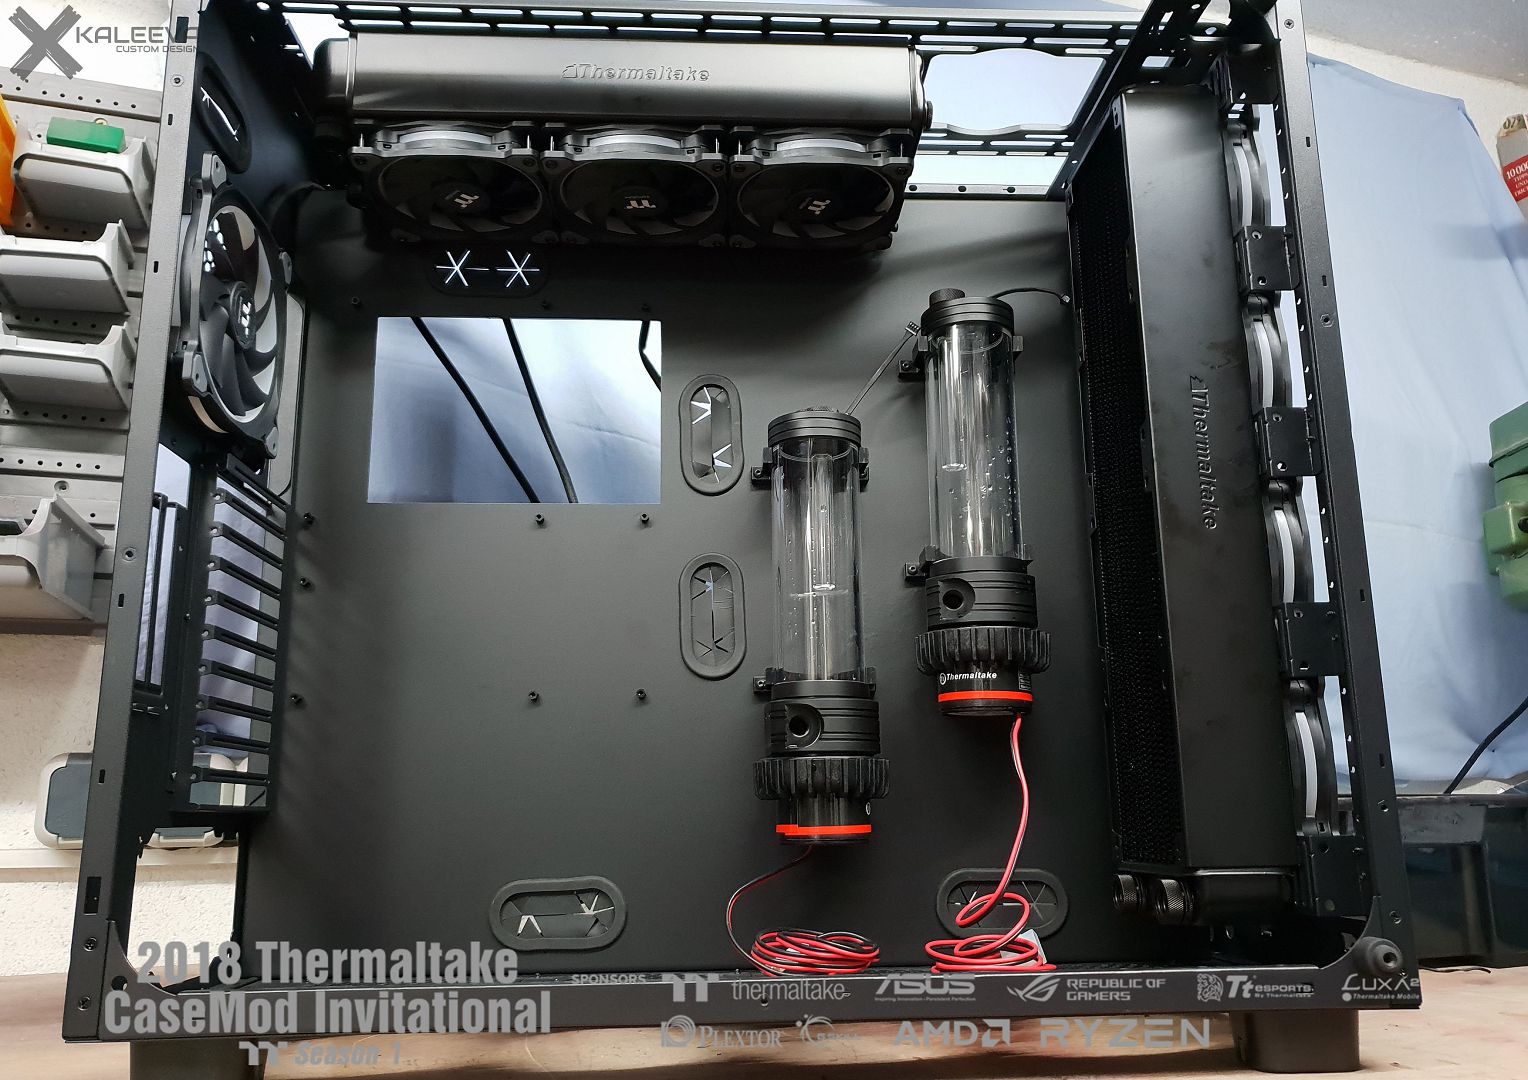
After replacing the stop plugs, I was finally able to install the radiators and fans.I still have to sleev the cables from the pumps and I am still thinking about how I can include the pump a little better in the project.


-
Thank you =)
-
-
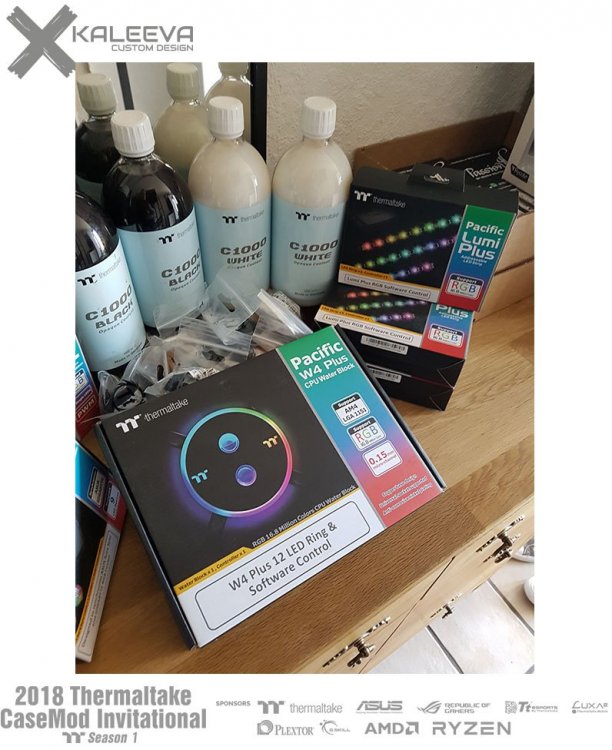
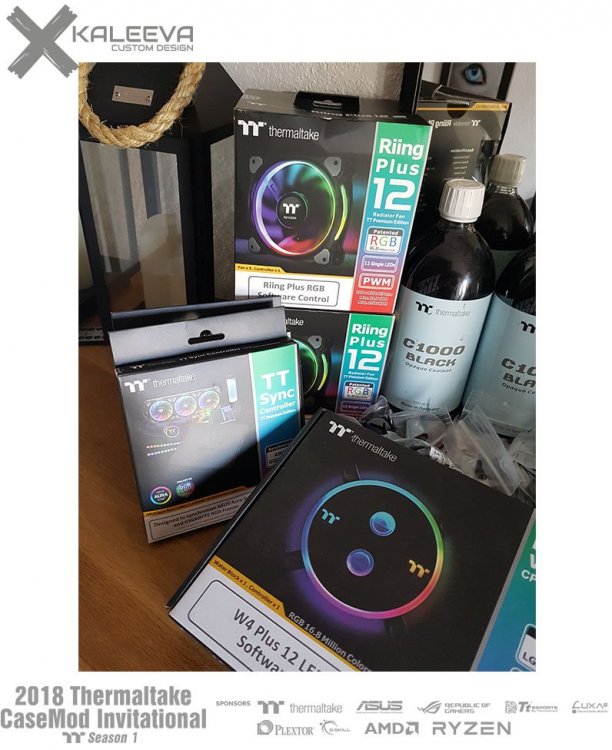
Here are the rest of the things that arrived yesterday.
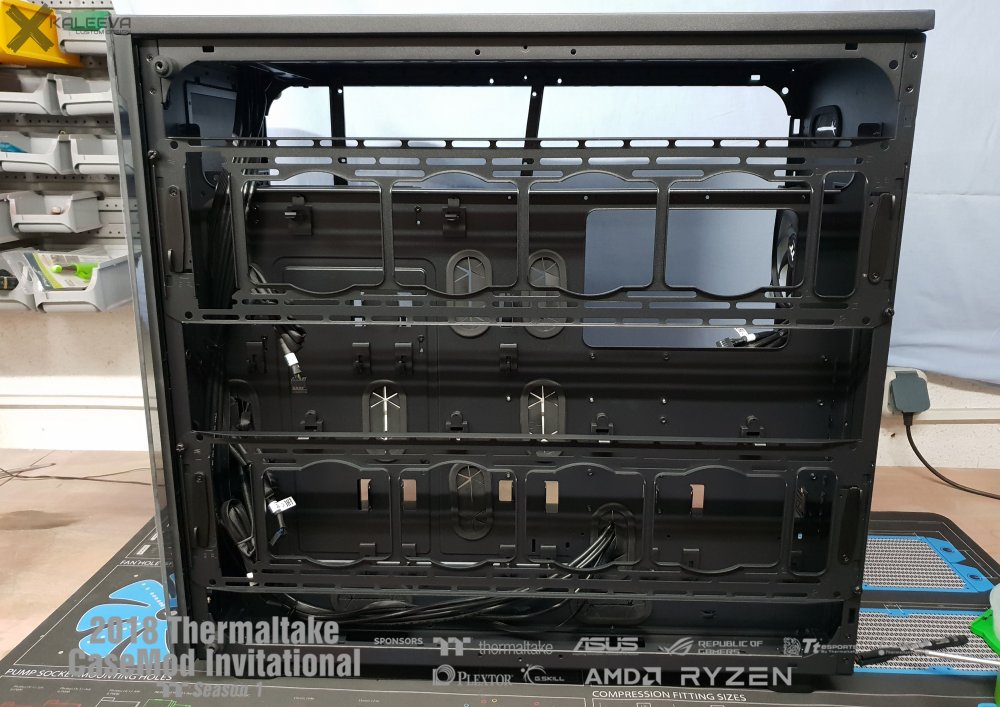
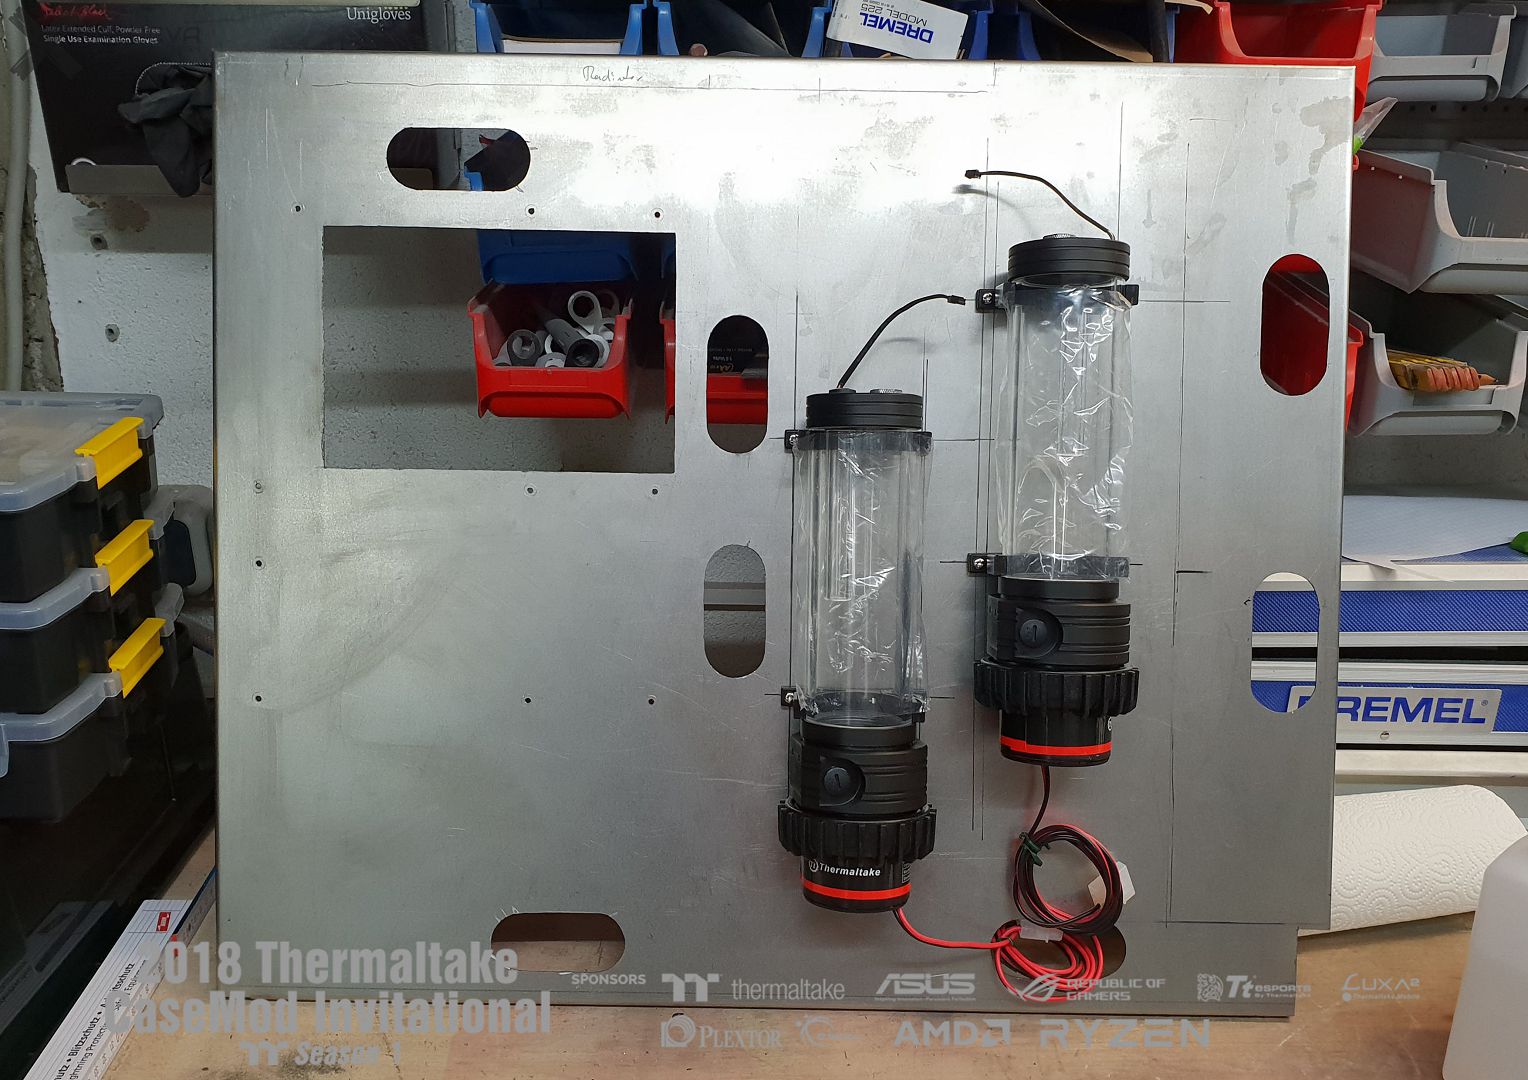
I also started to build a new mainboard tray. I wanted it higher than the original. Also, I can now place the cable glands as it fits best and I also have more space to attach the reservoirs.The mainboard from the picture is one of my old broken ones, which must always hold for such purposes ^^


-
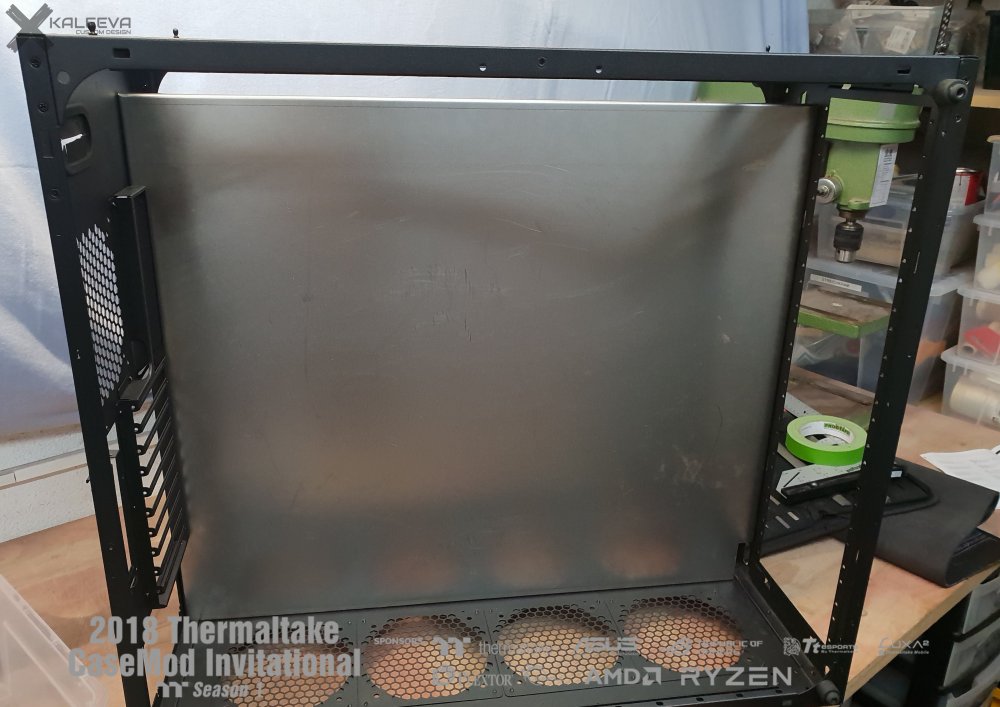
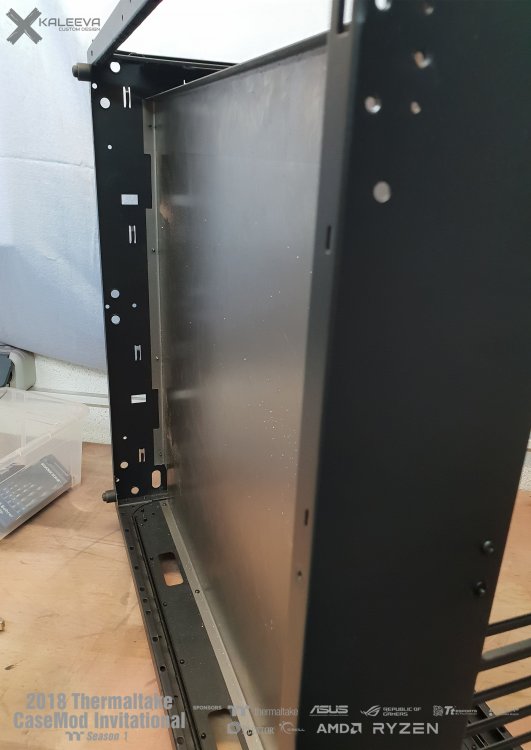
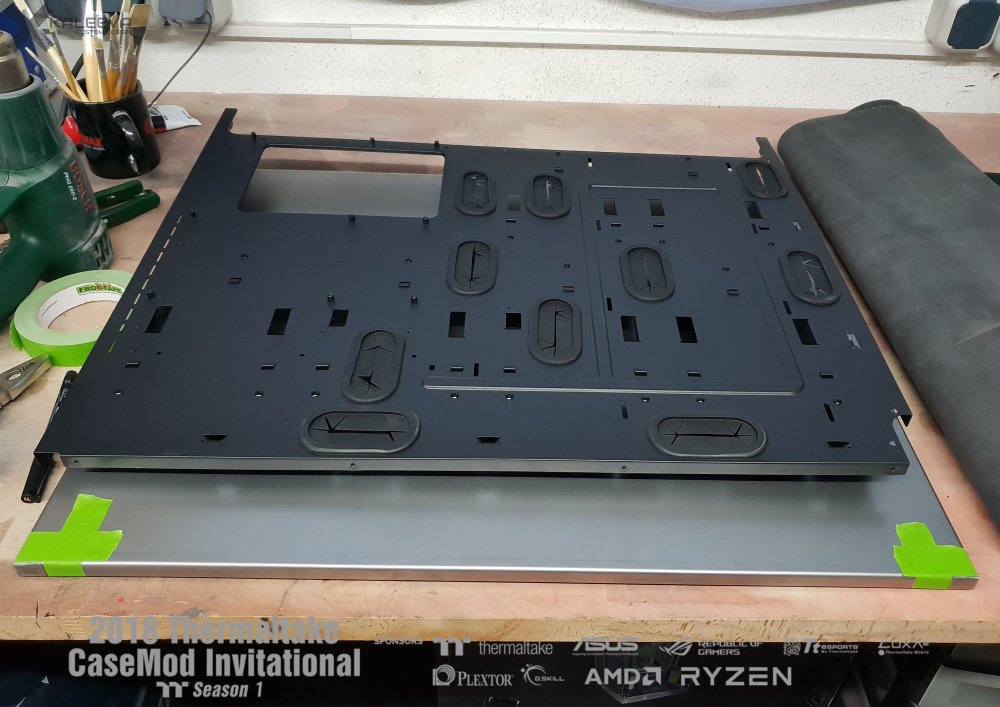
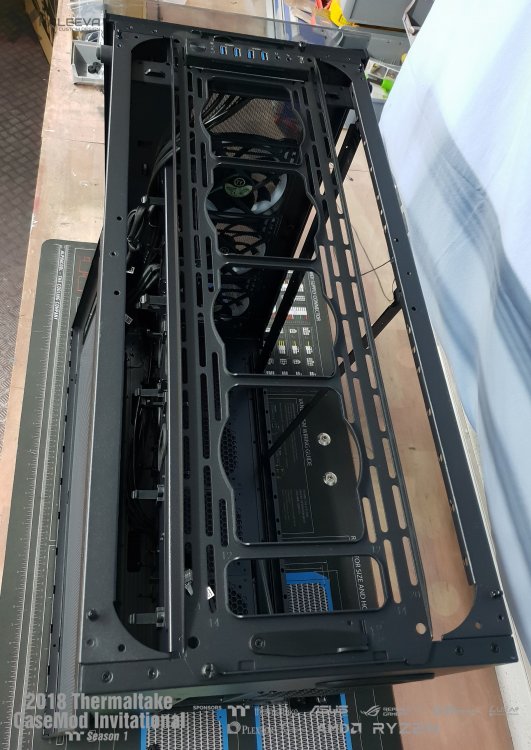
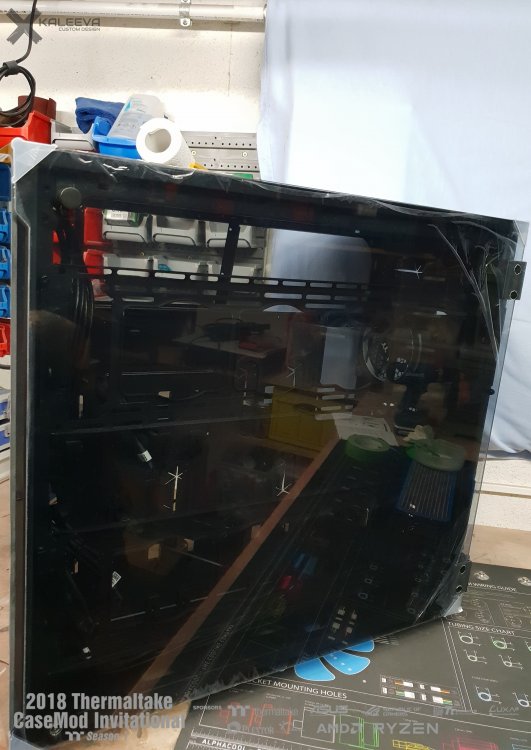
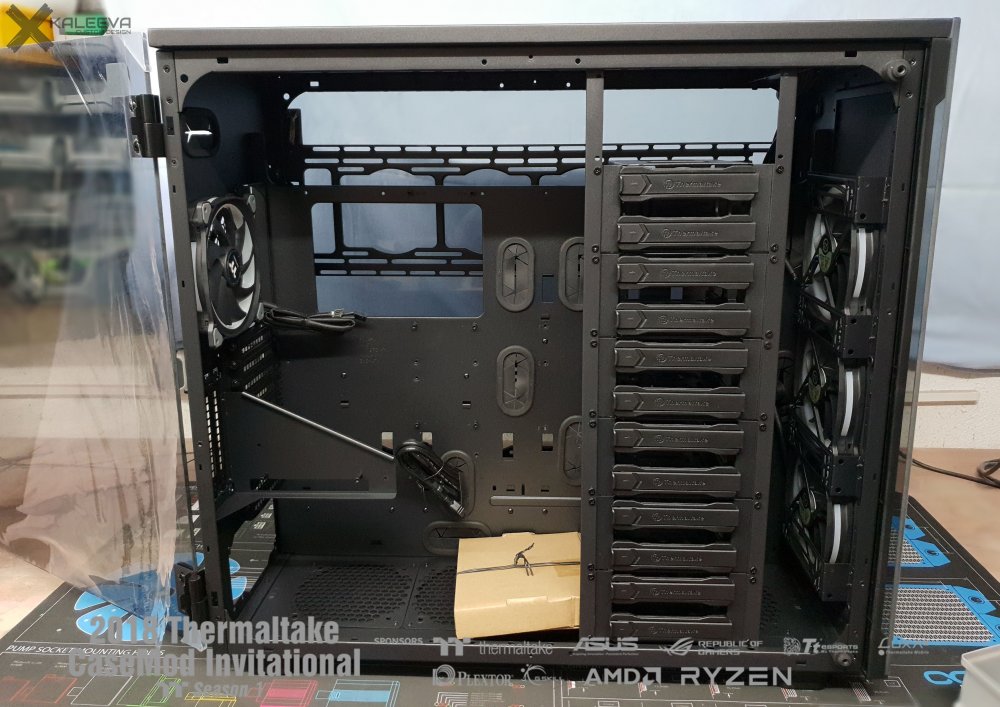
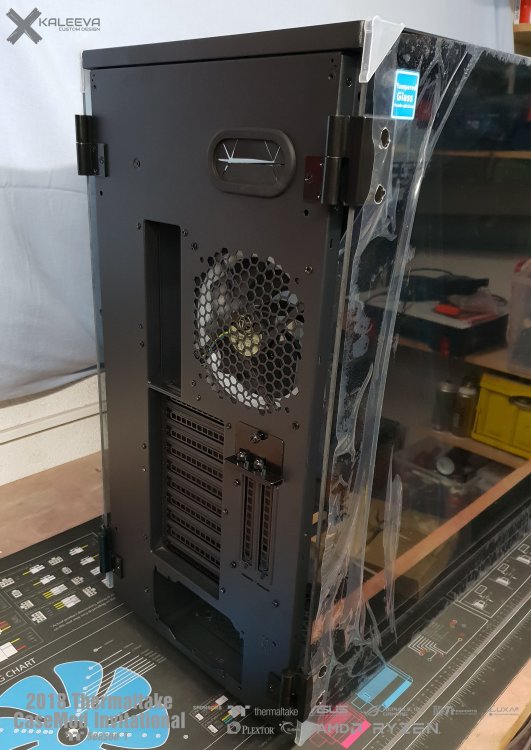
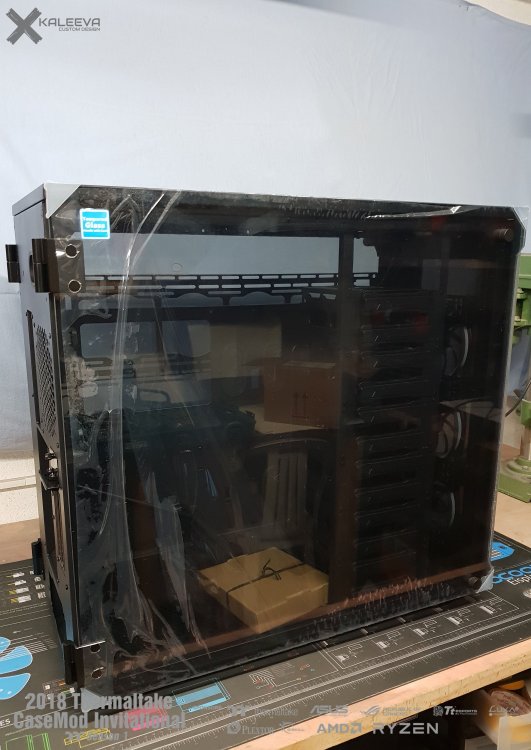
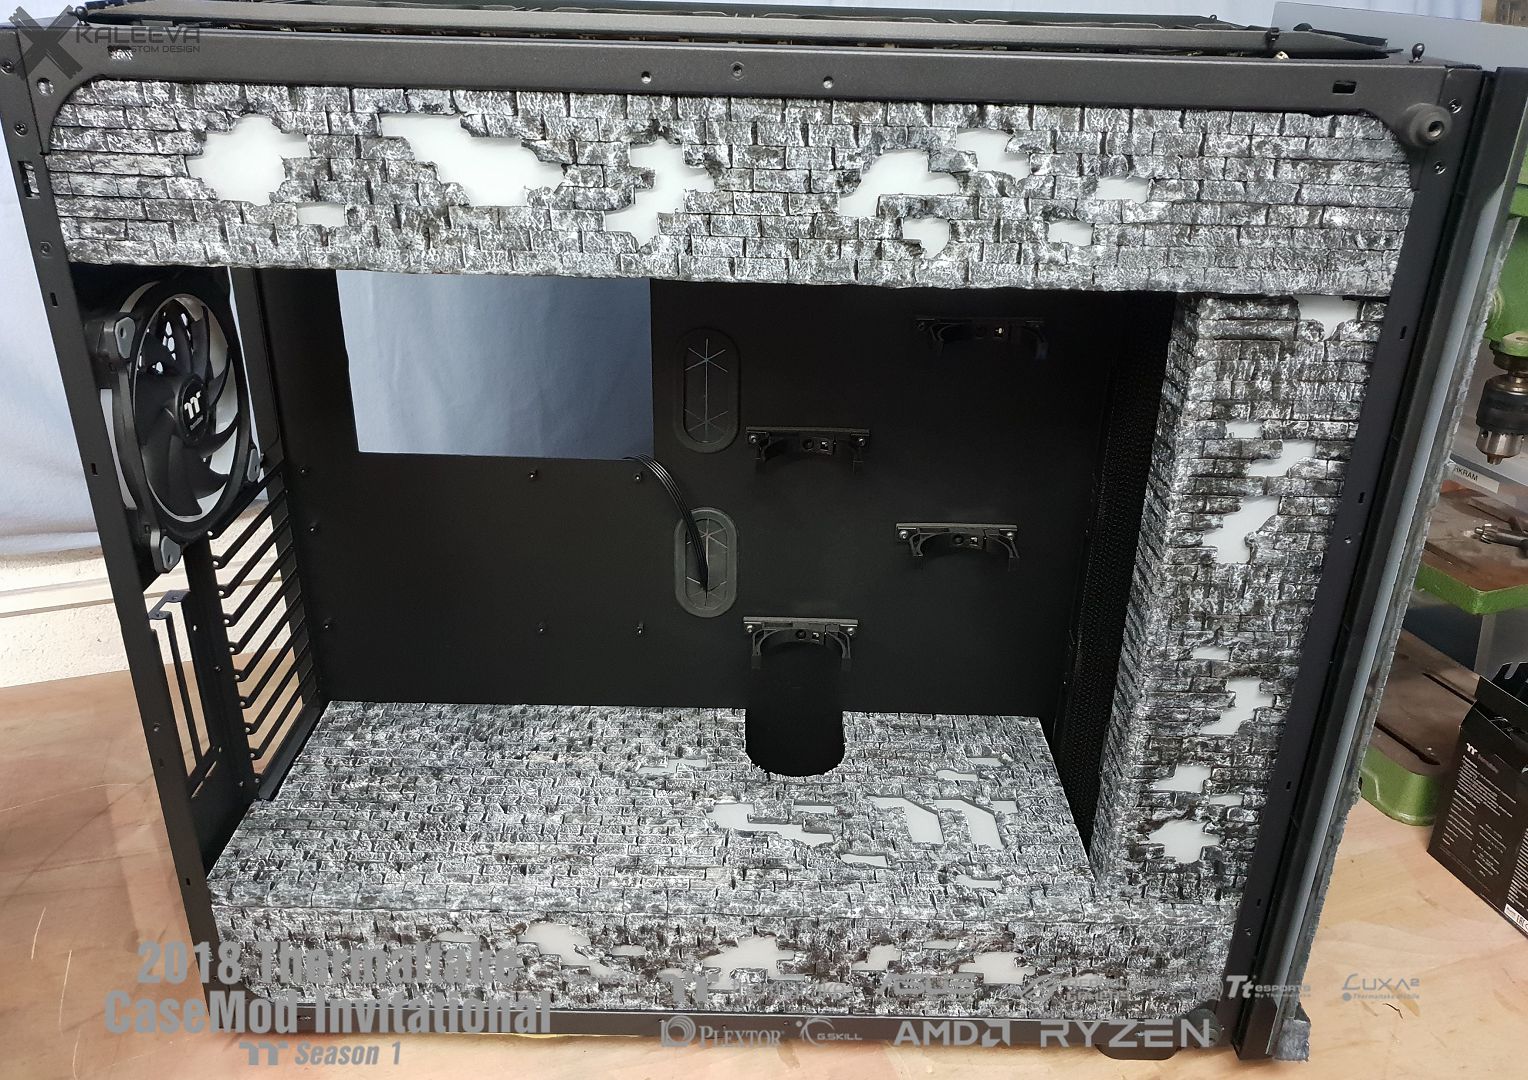
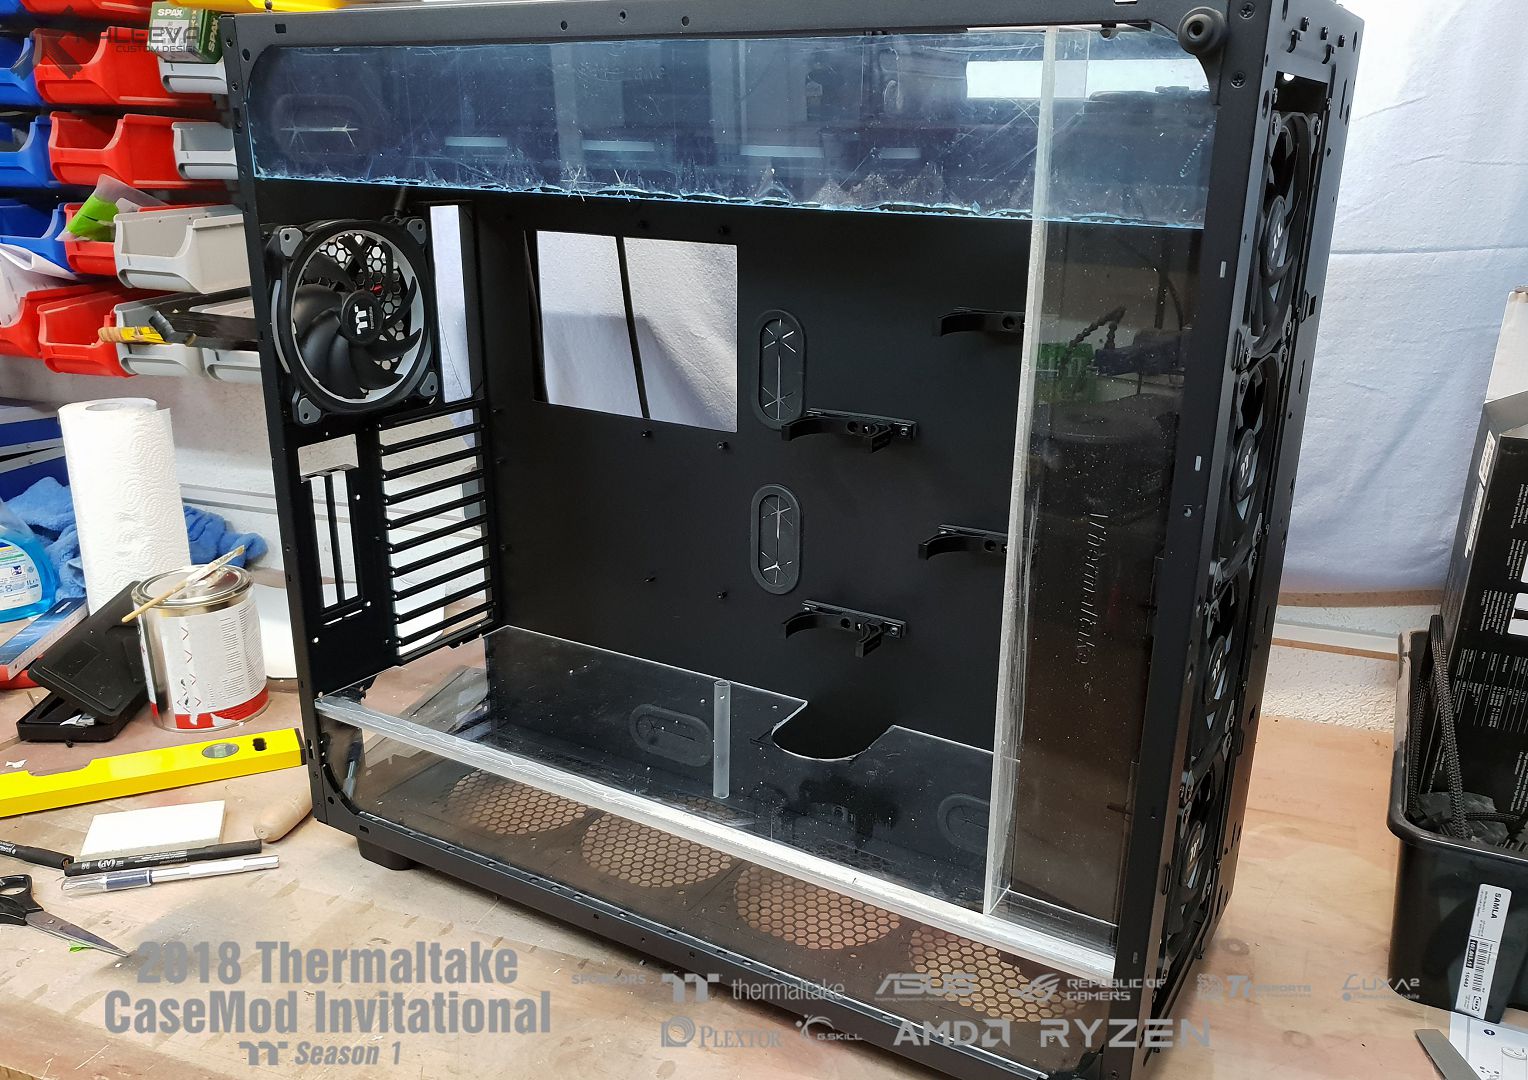
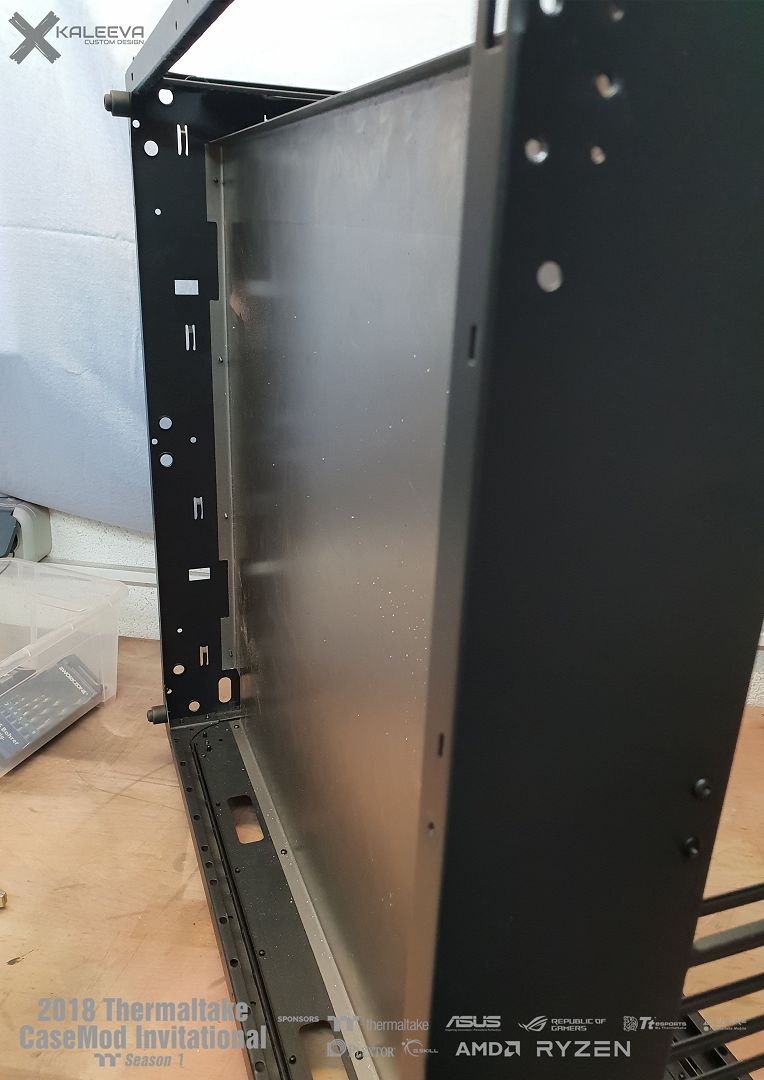
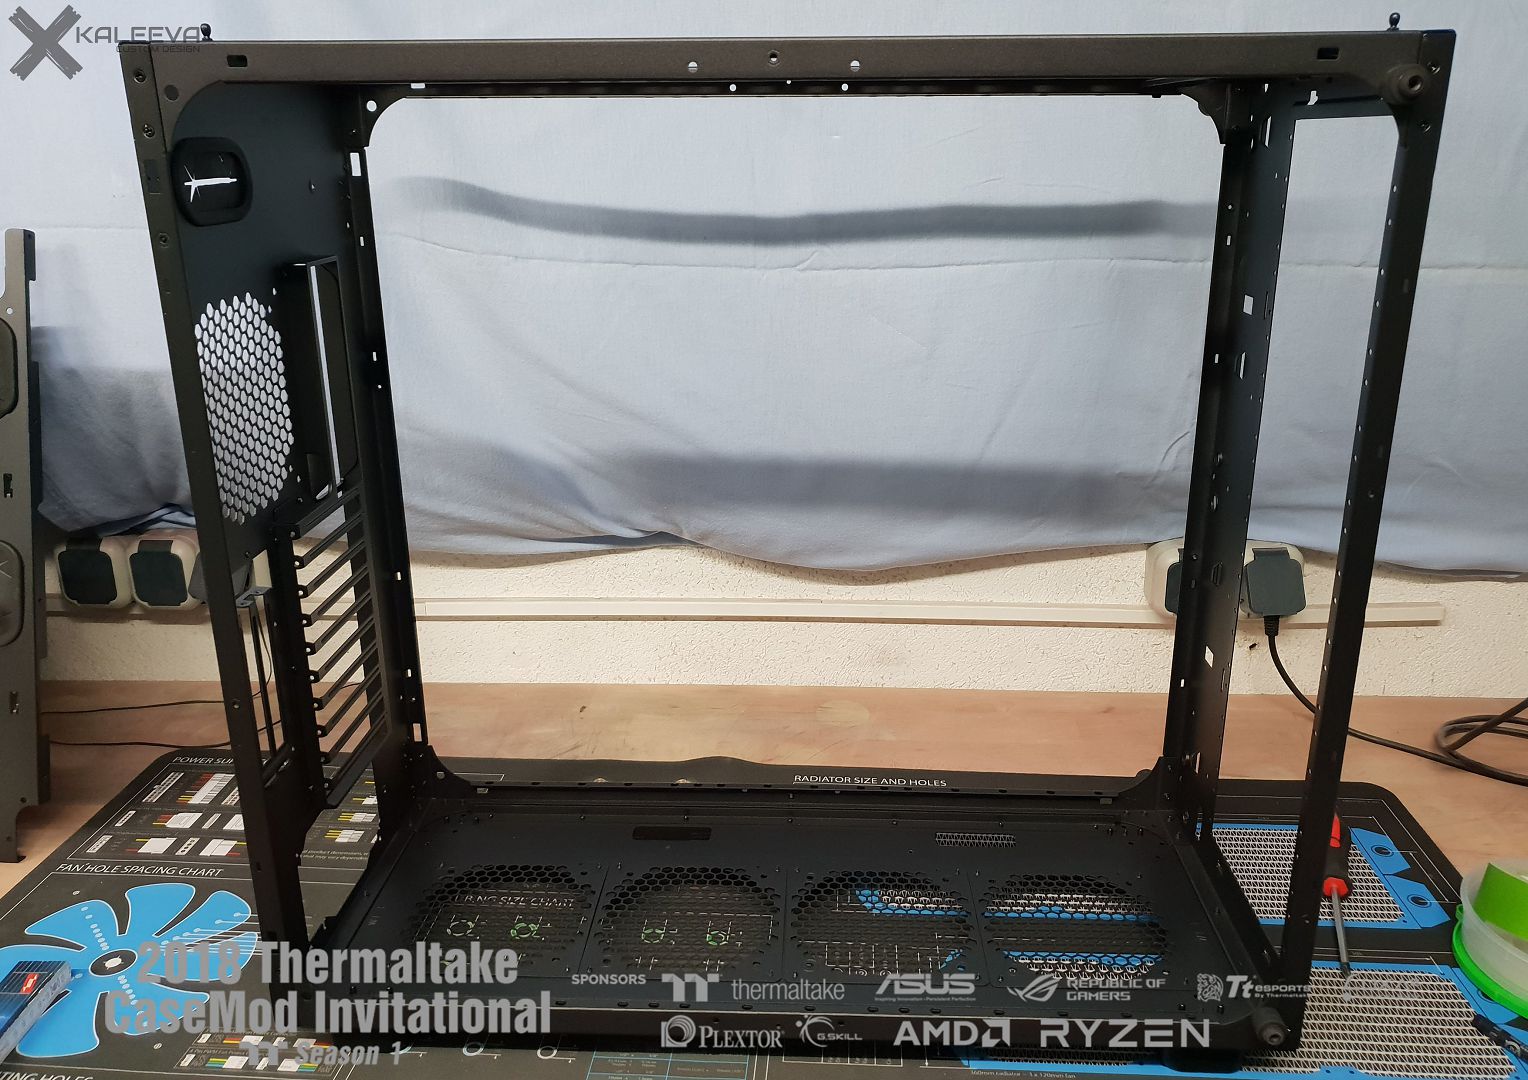
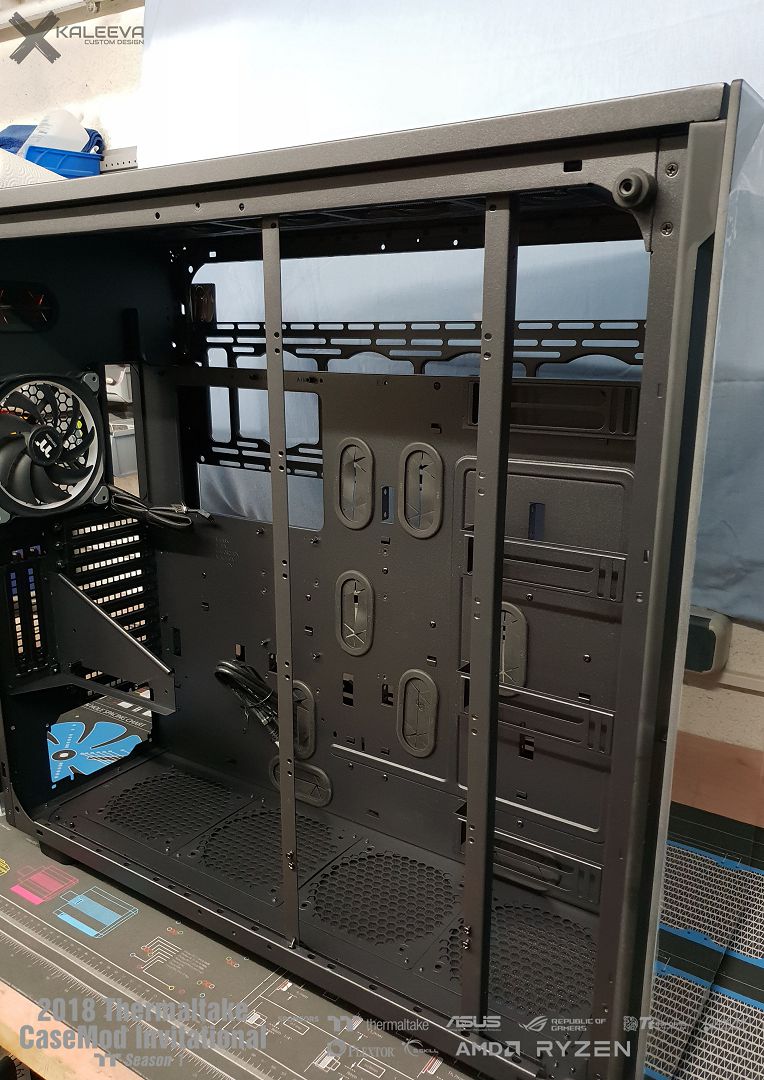
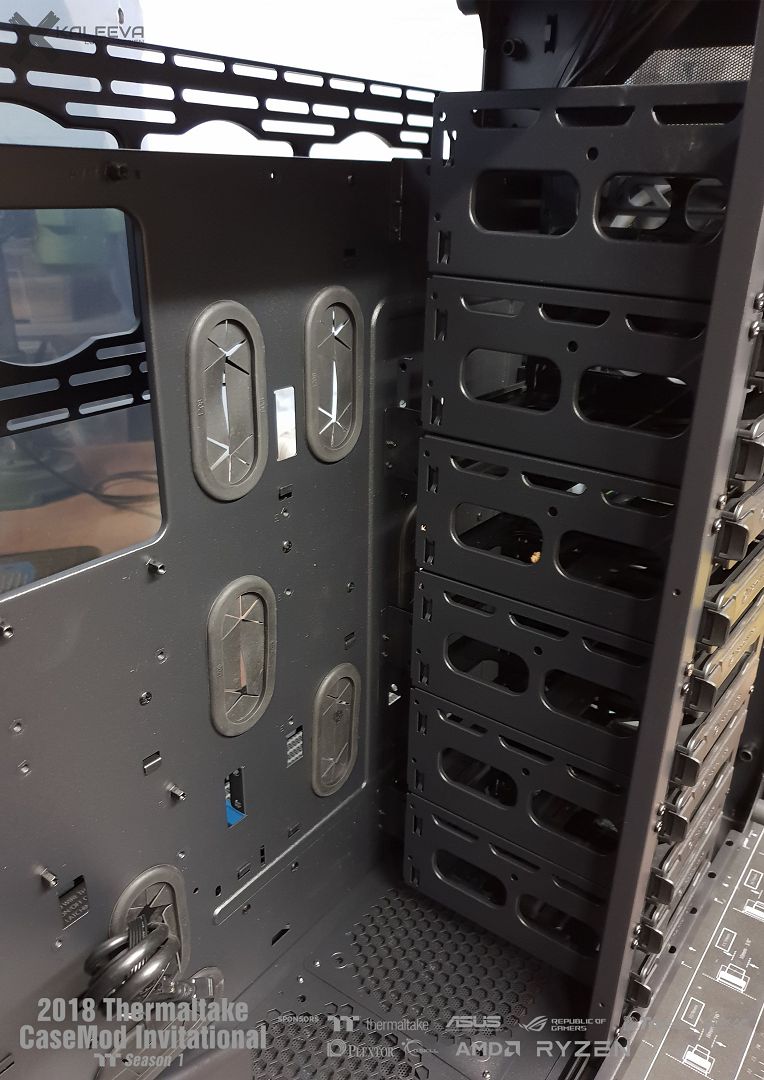
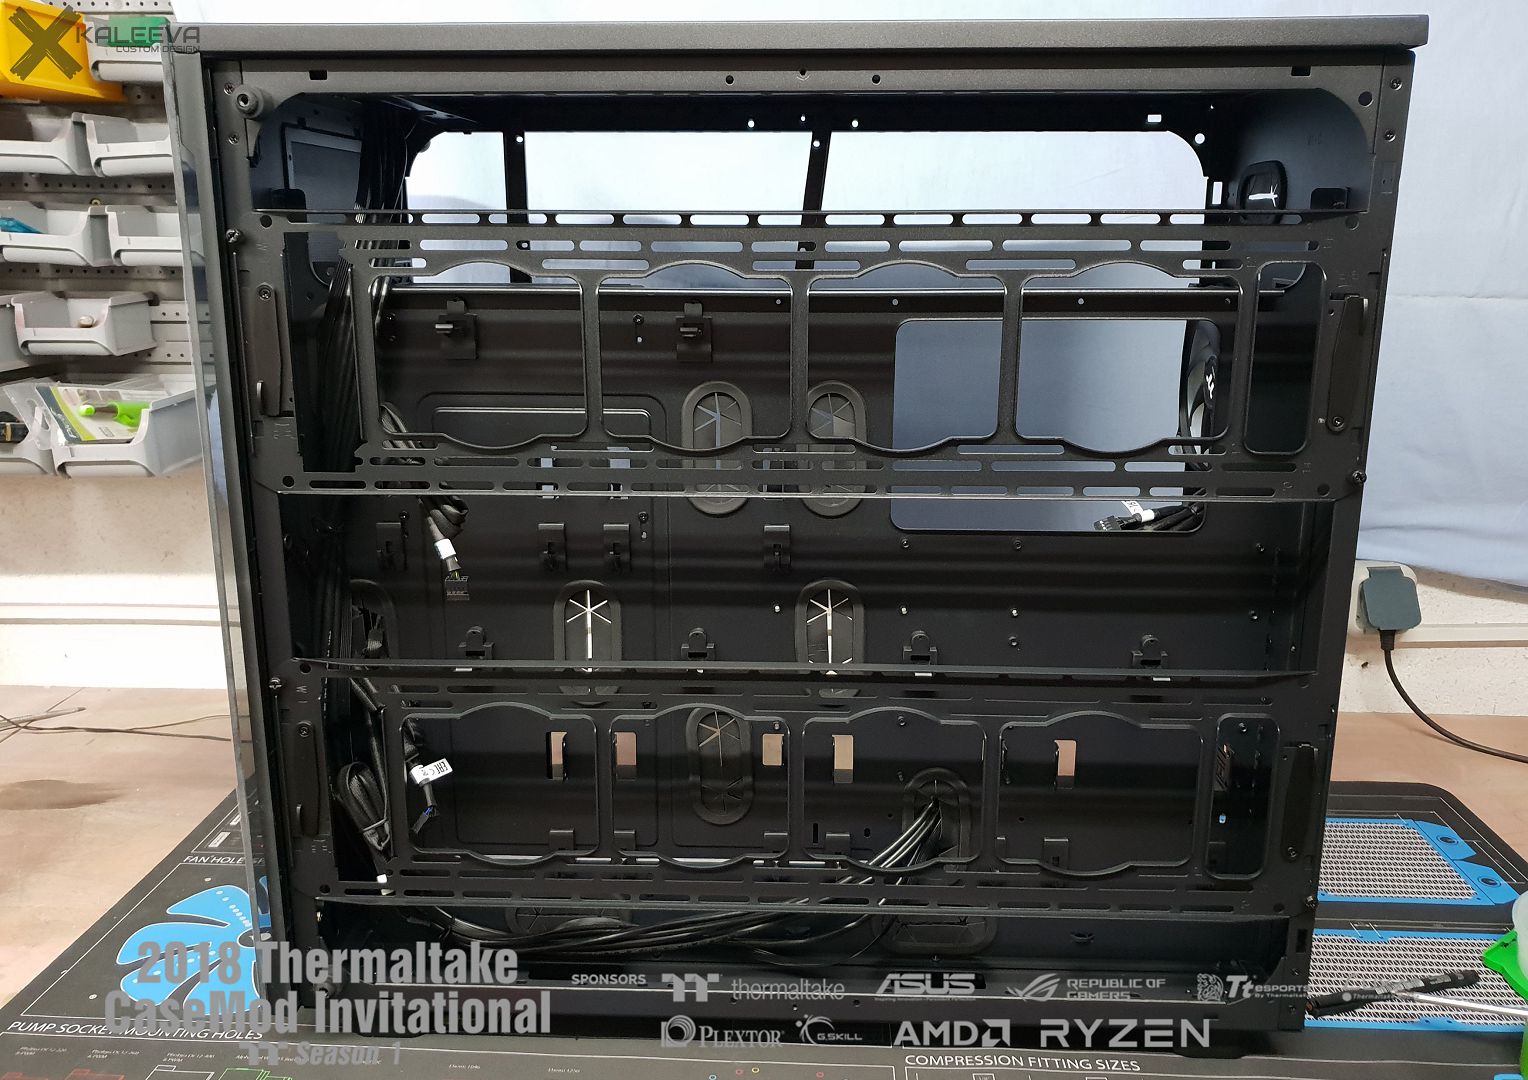
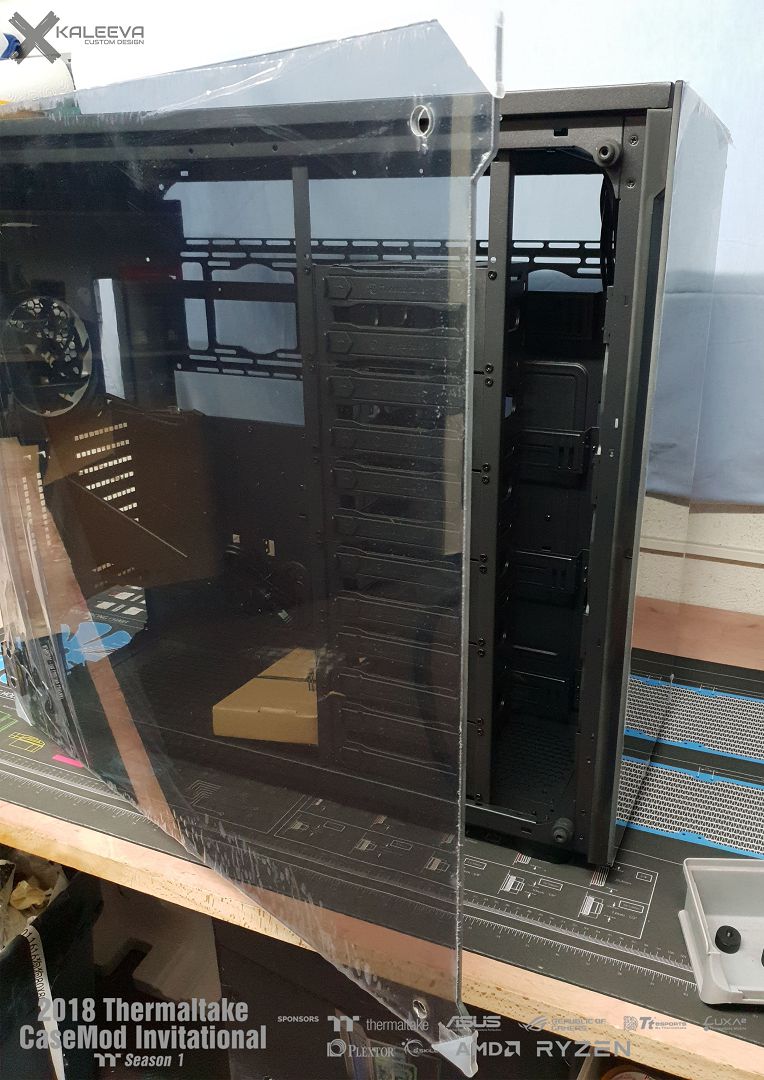
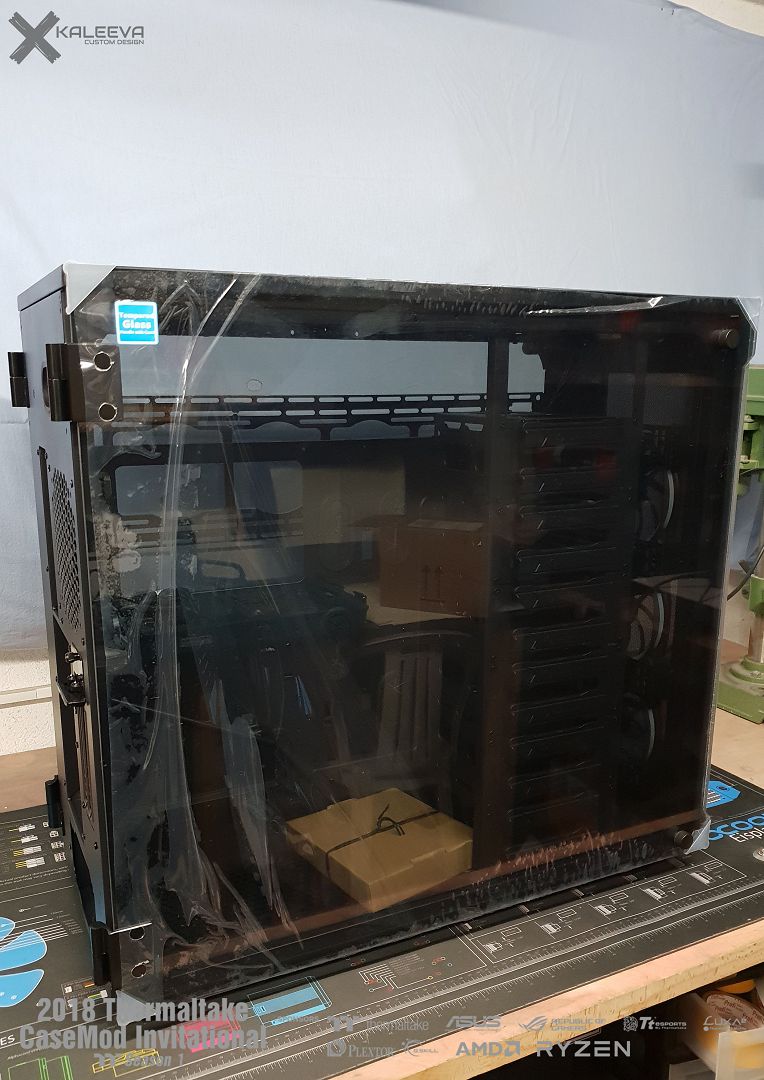
The case came today. I went straight to work and took it all apart. It's really very heavy, but most of the weight is the glass parts.
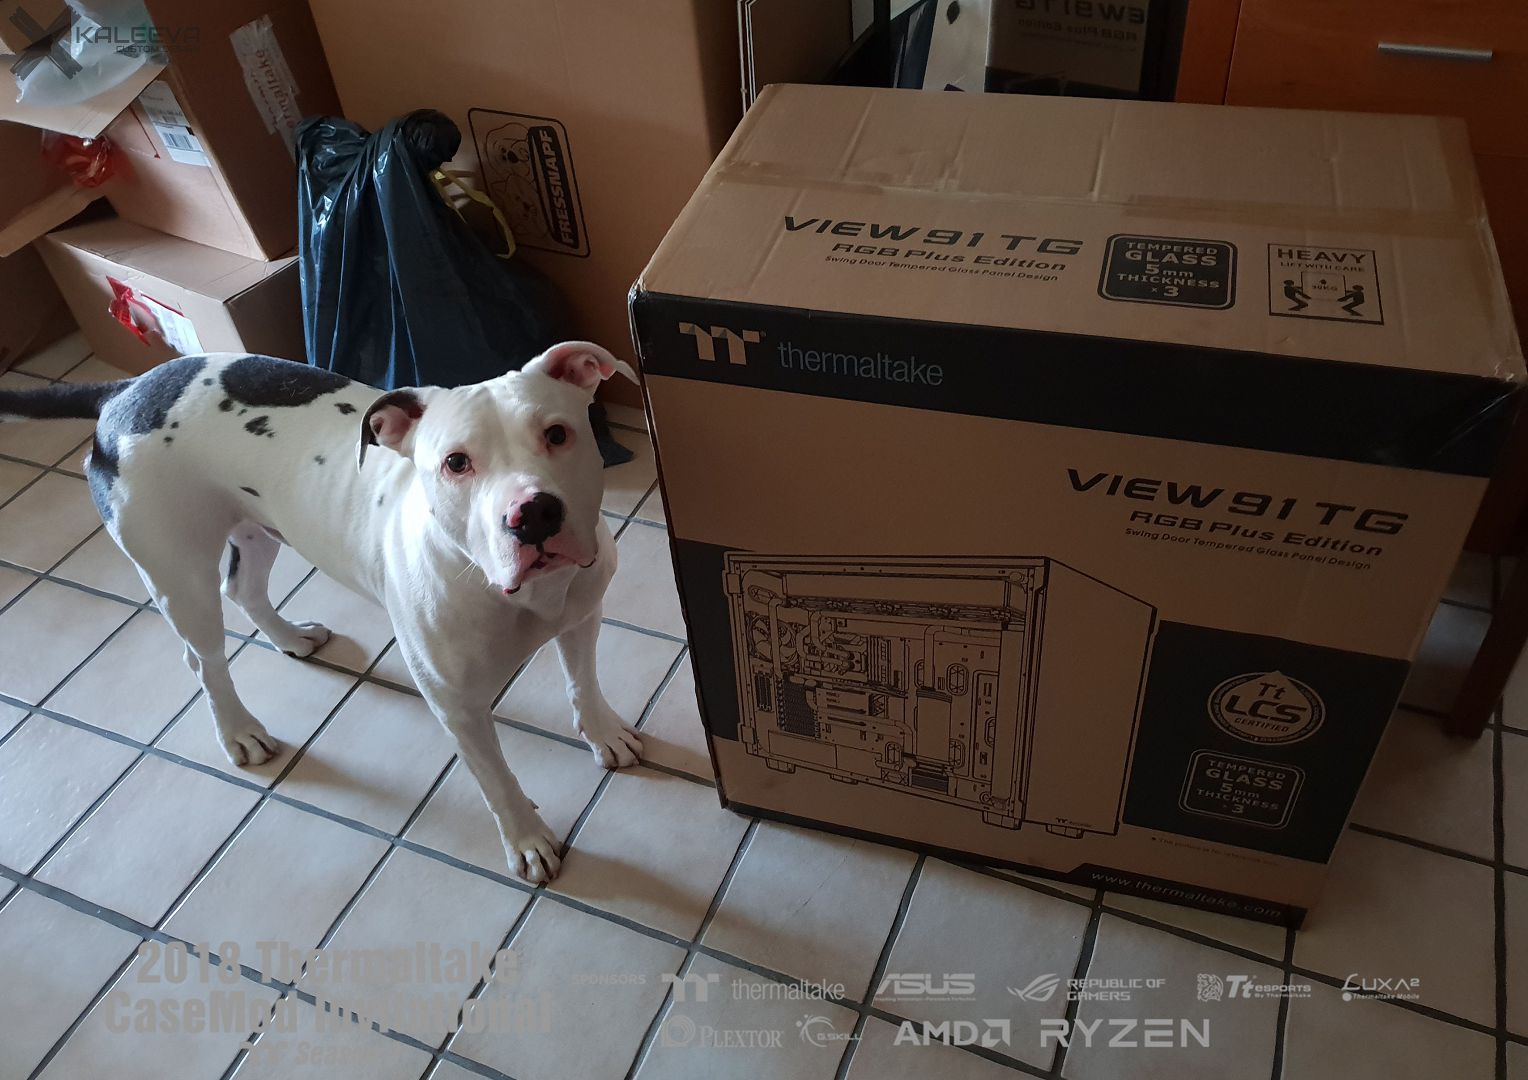
There were more packages from TT today, but more about that later.
Dog for size


-
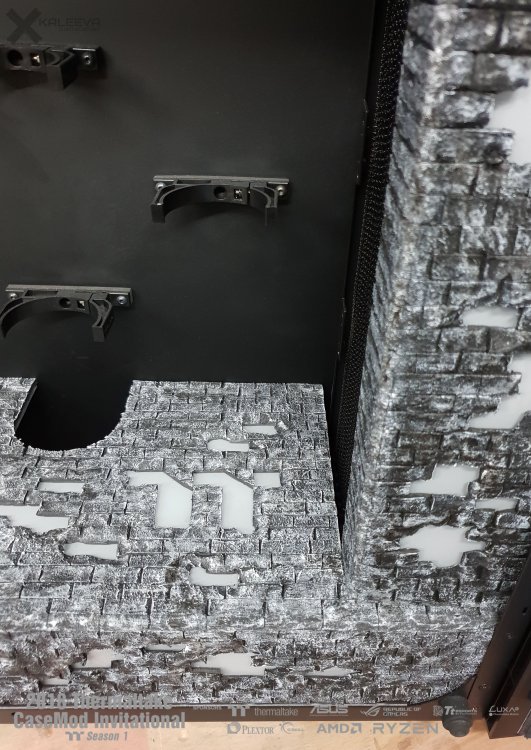
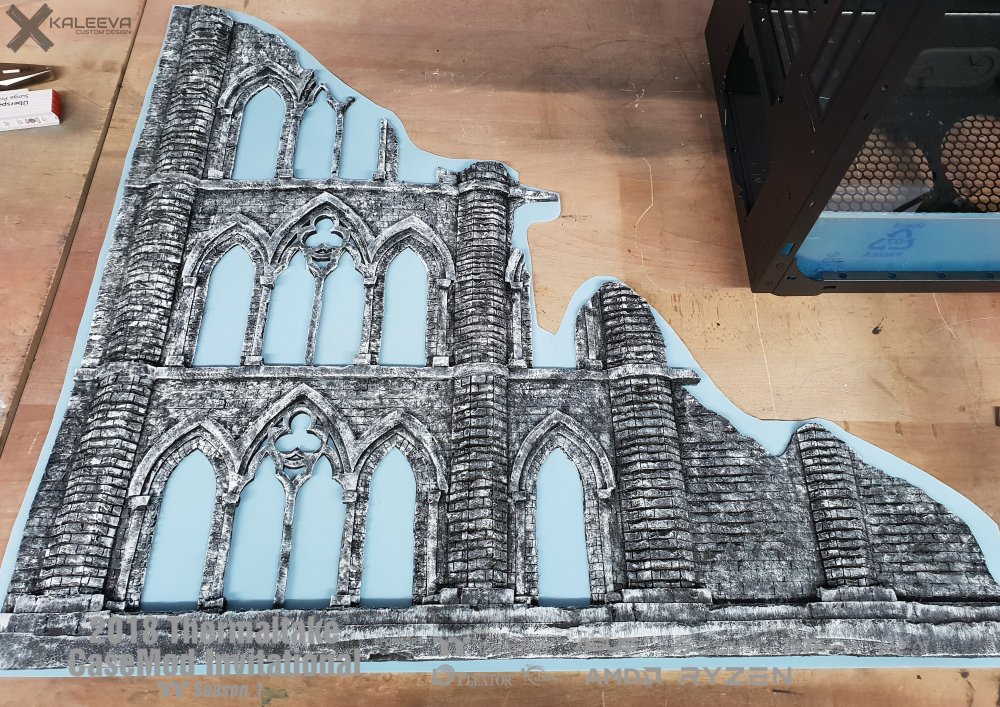
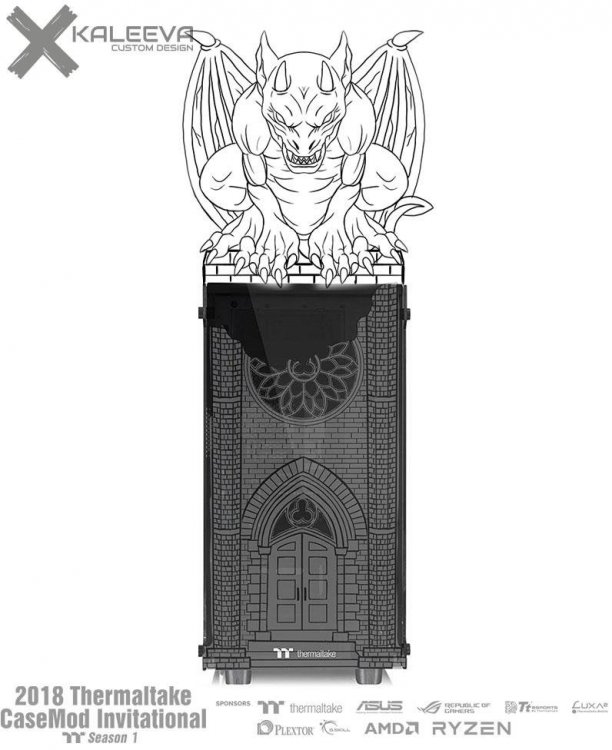
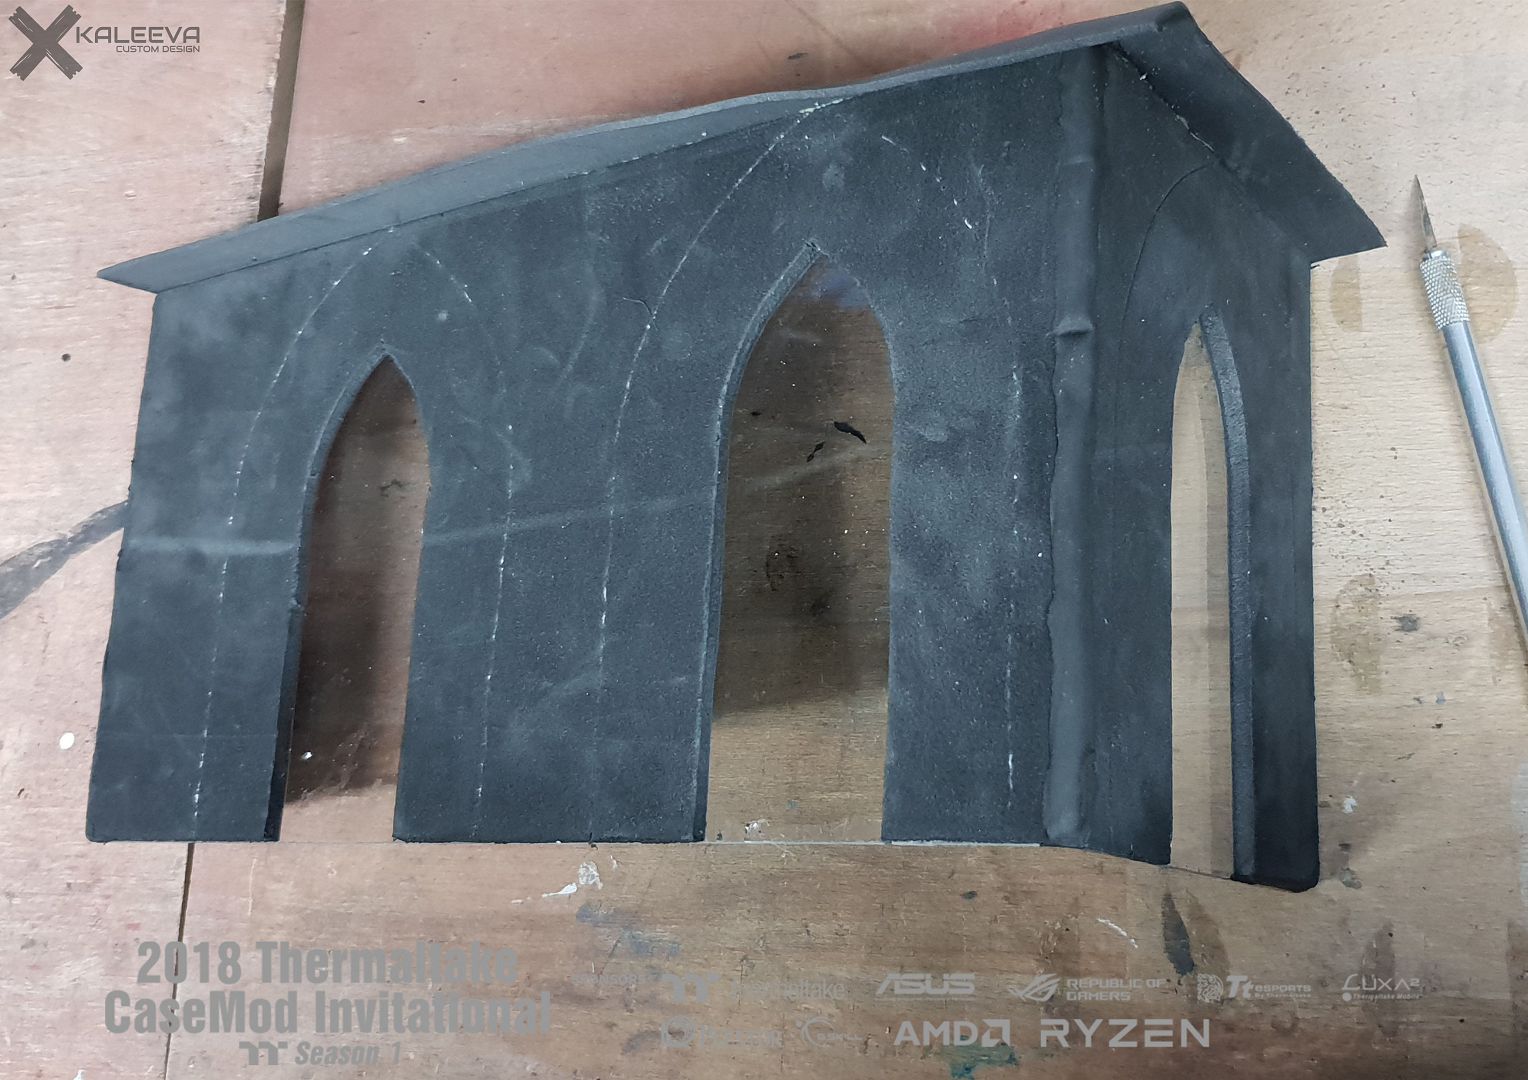
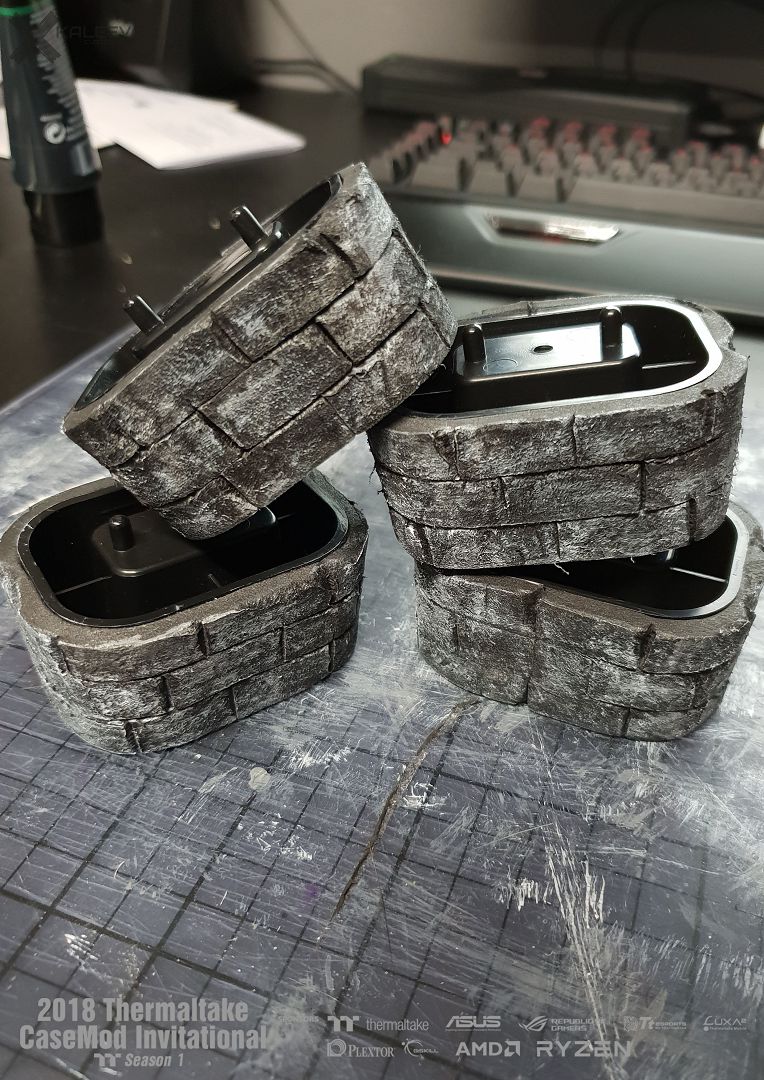
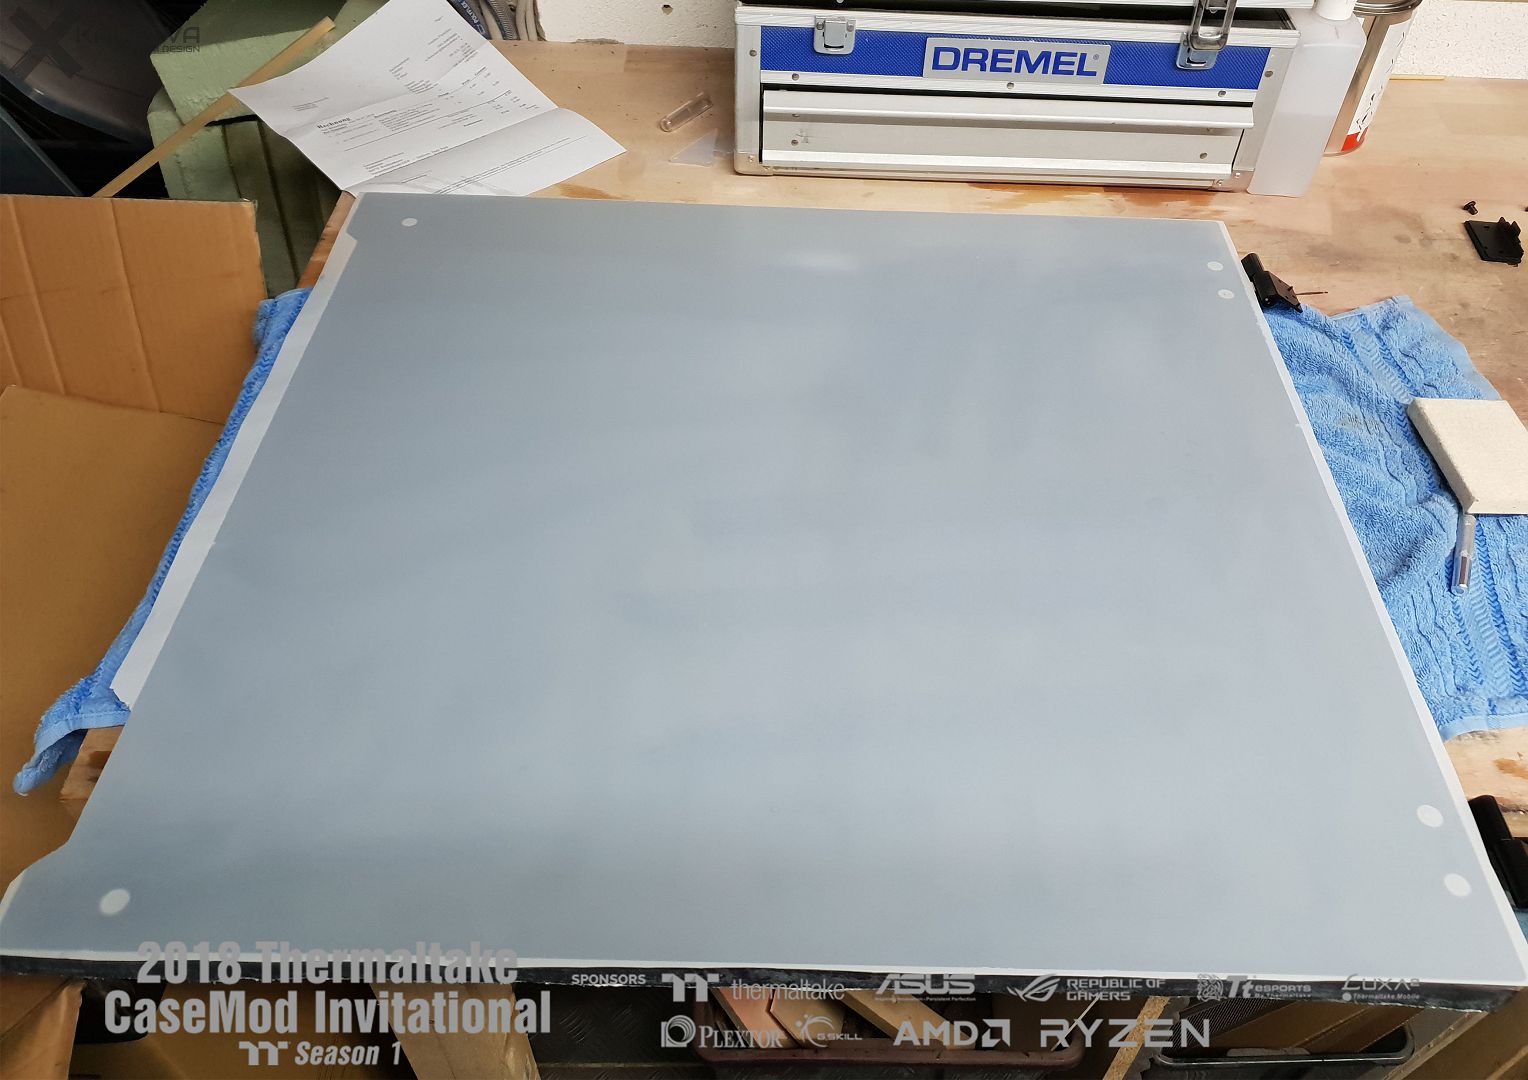
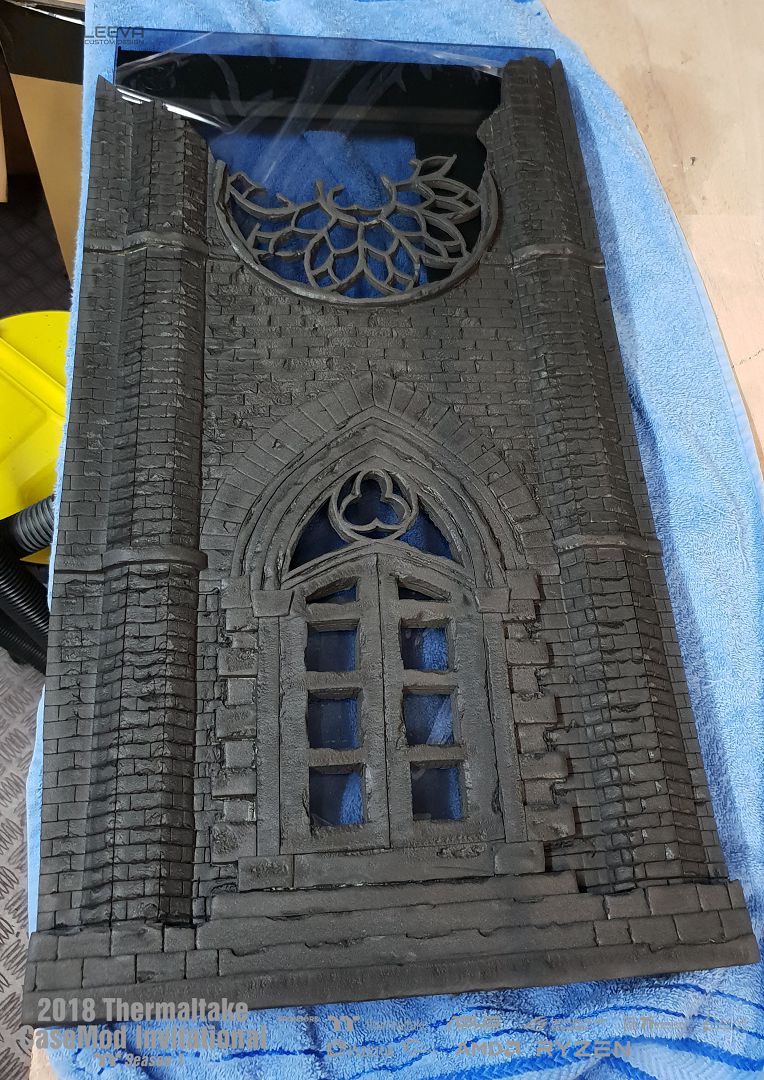
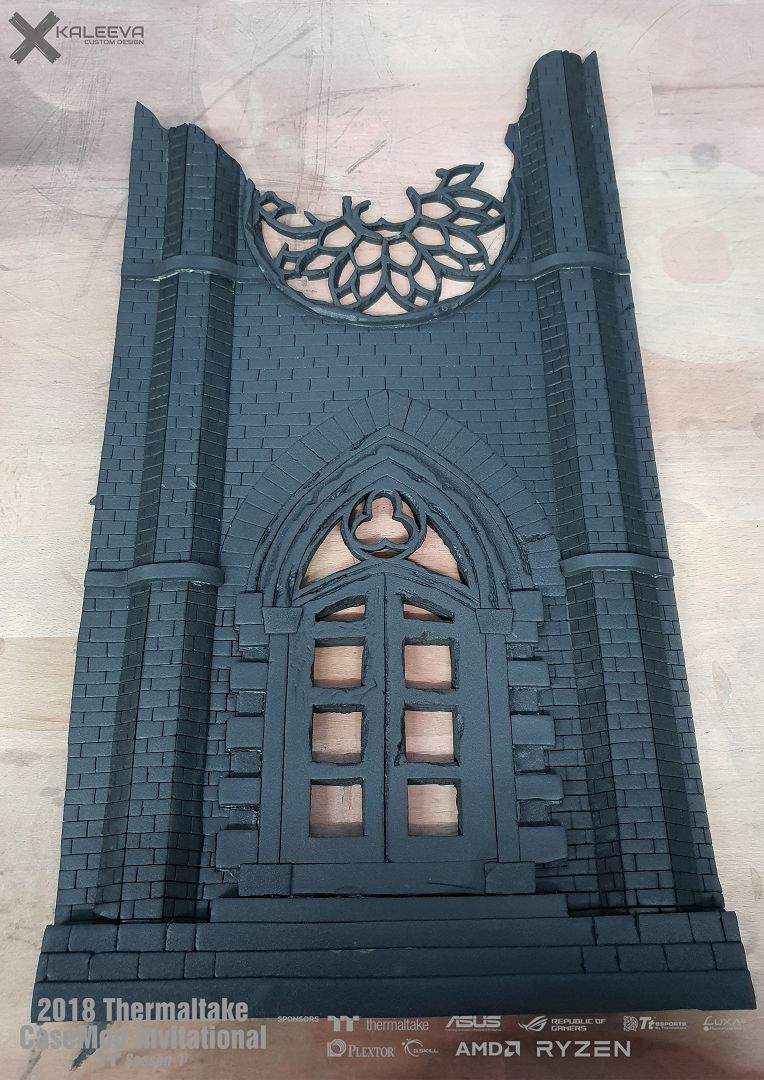
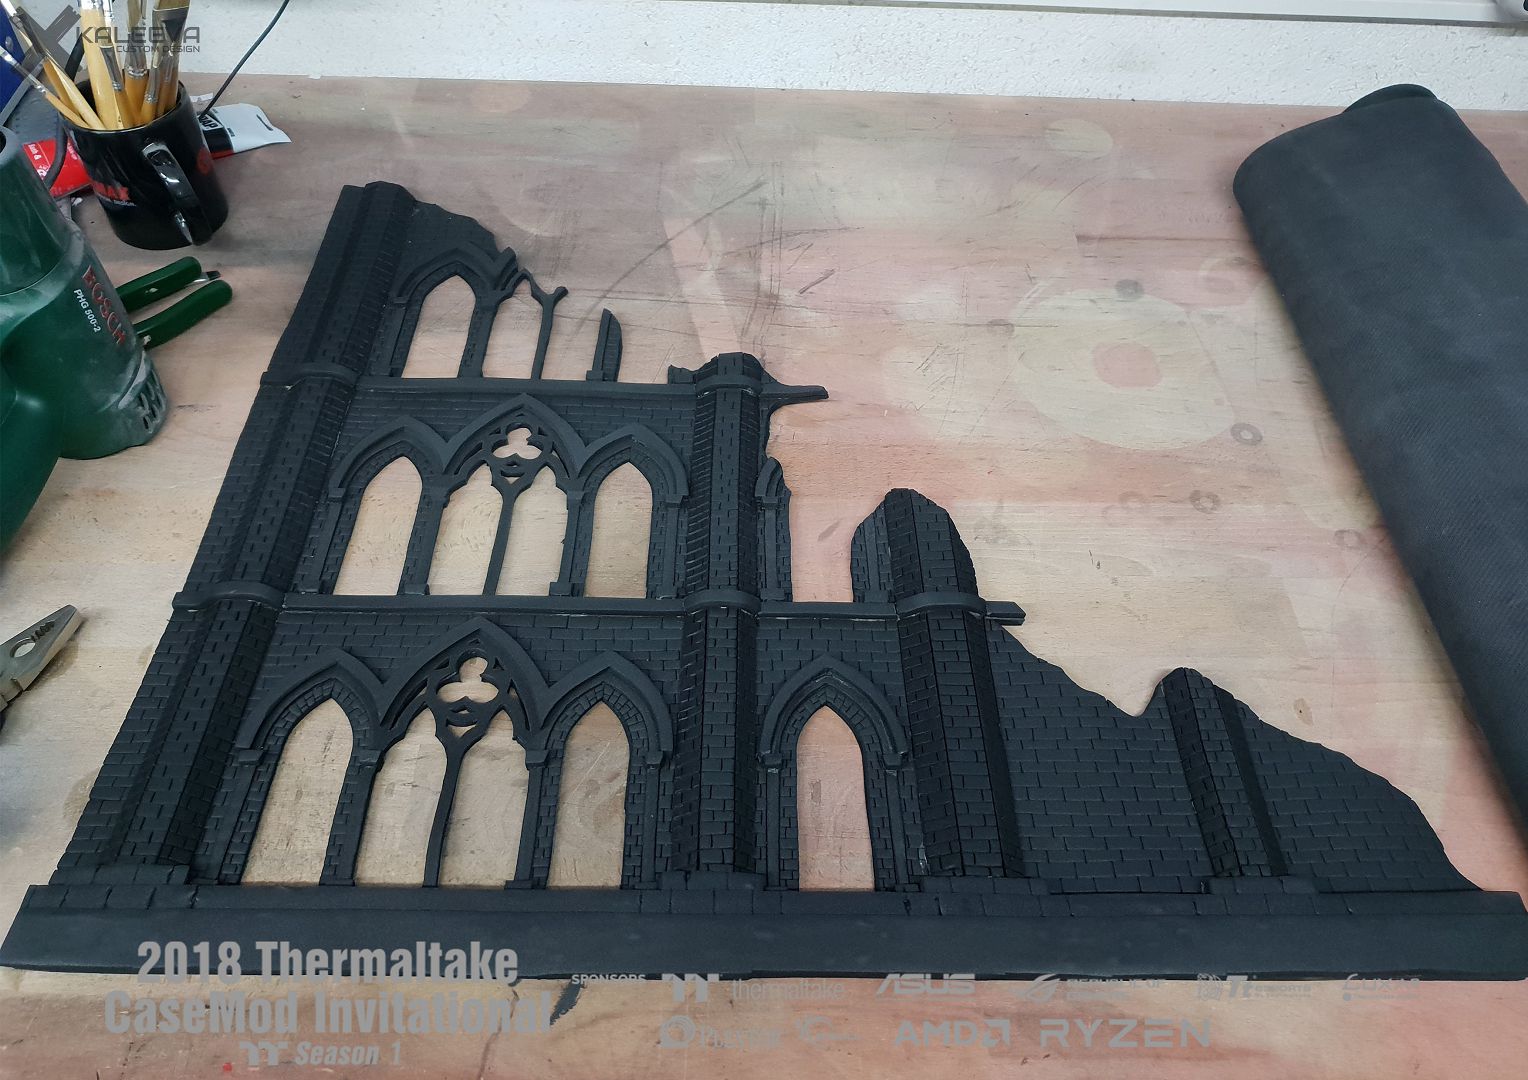
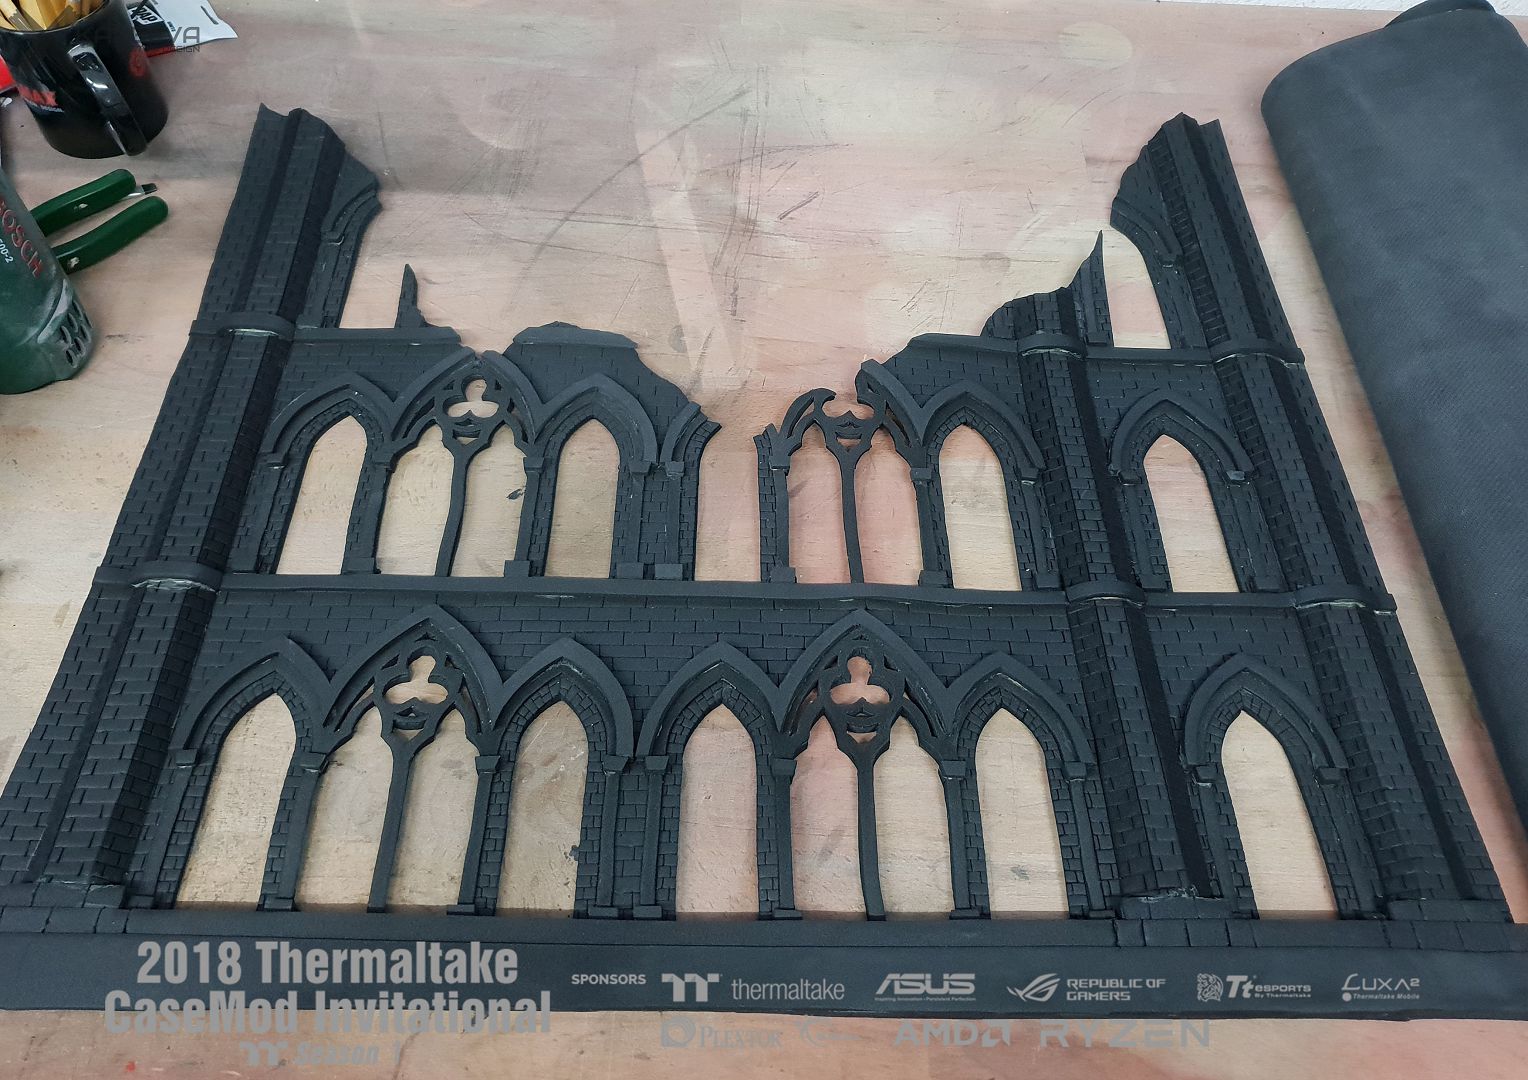
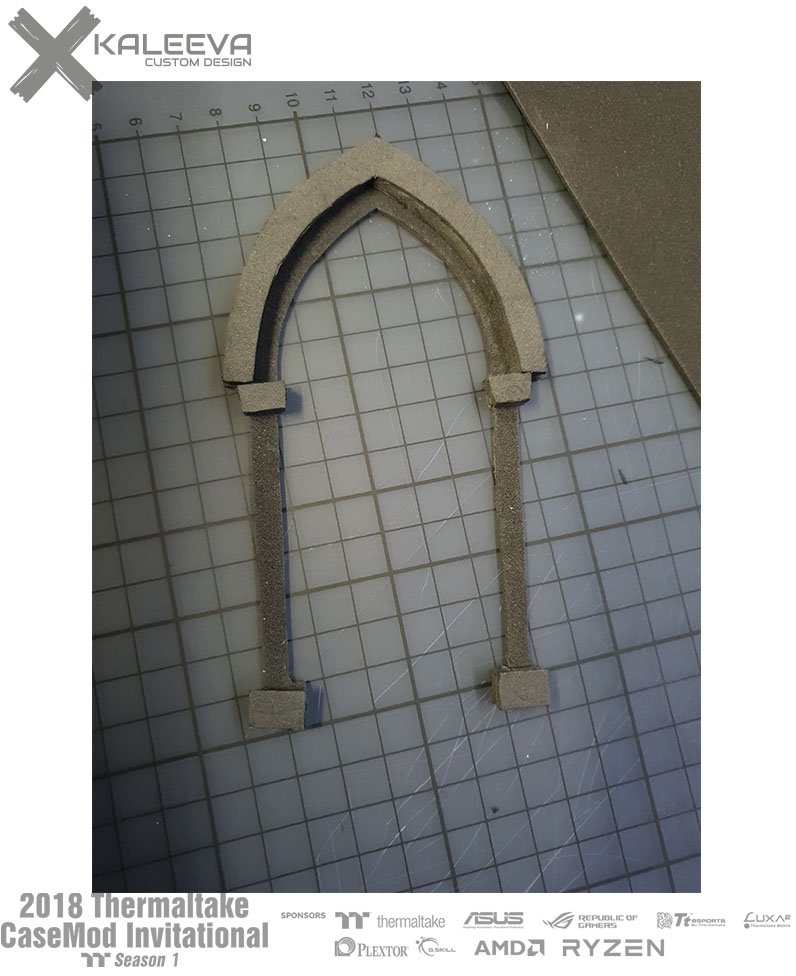
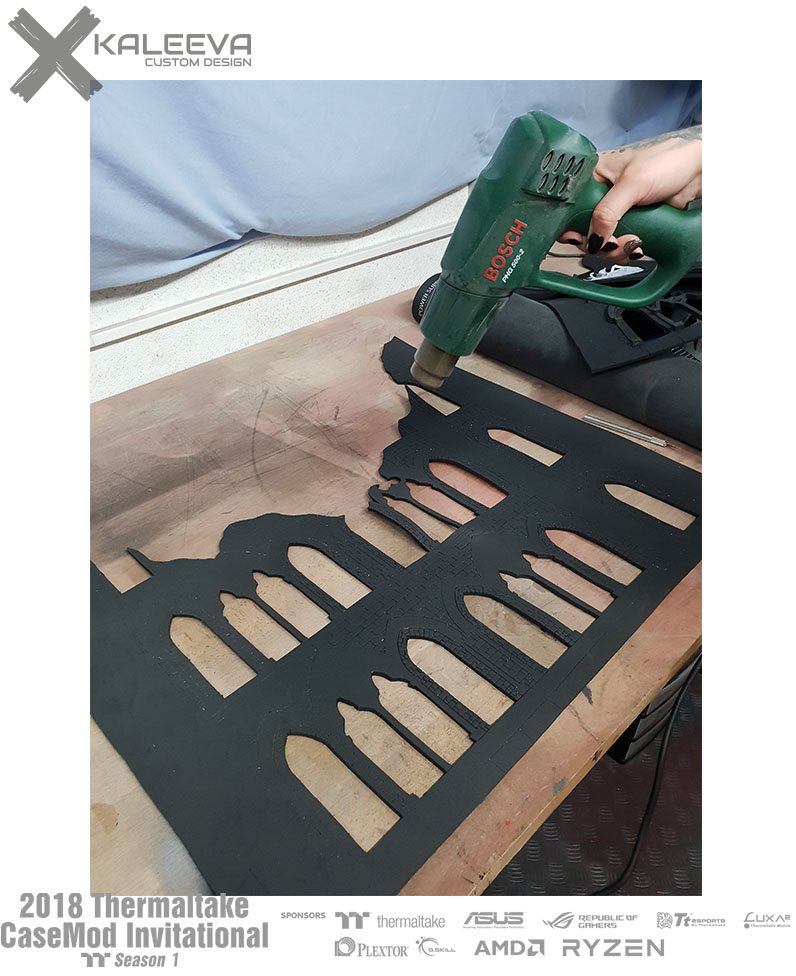
Currently I am working on the EVA foam plates for the glass parts.
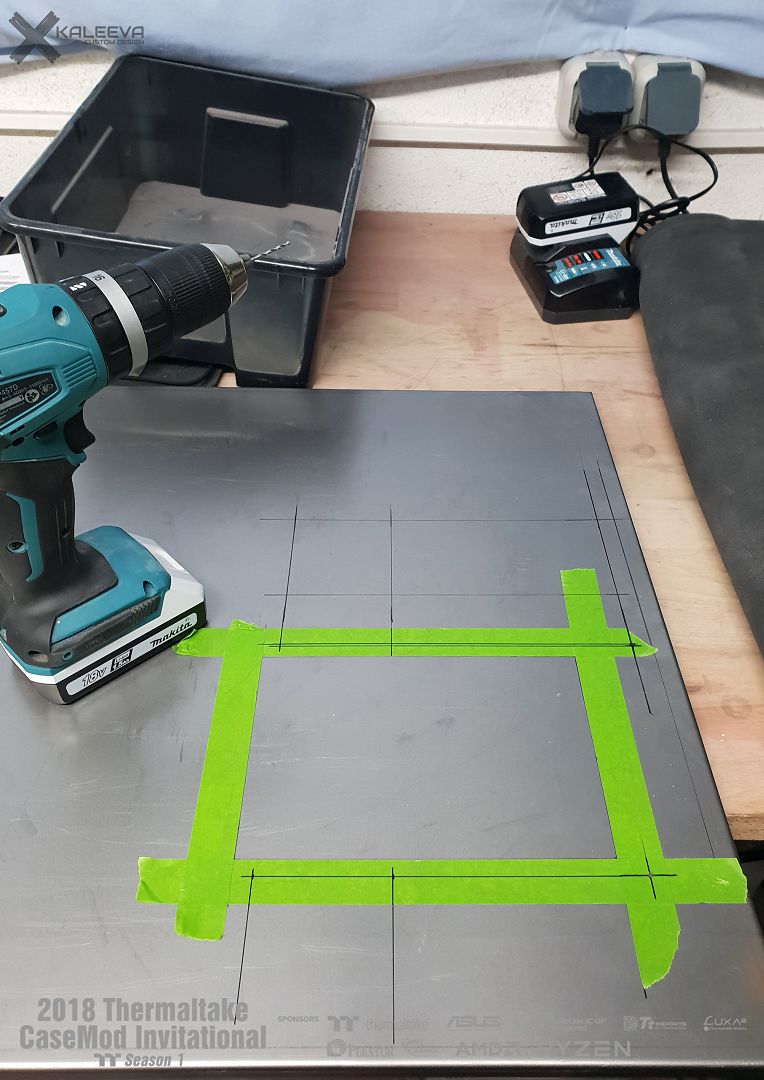
The case still not arrived, but the rough measurements are known and so i started the parts.
I just made it a little bigger on the sides, so I can adjust it later and cut it to fit.
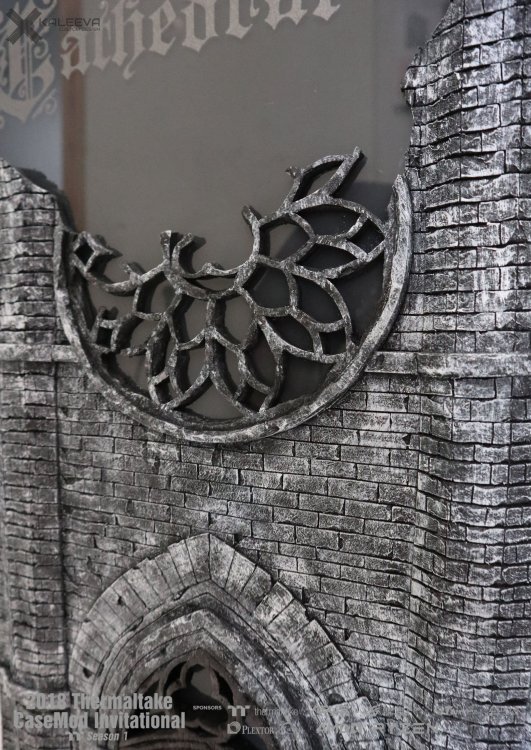
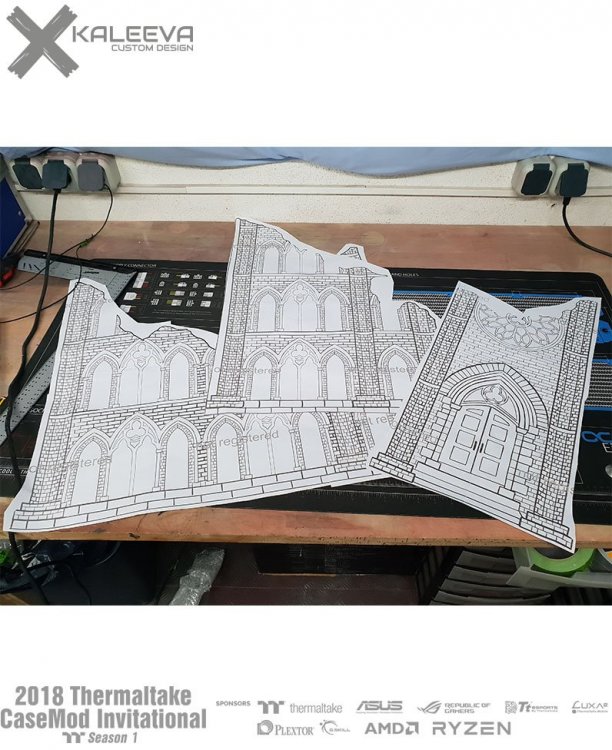
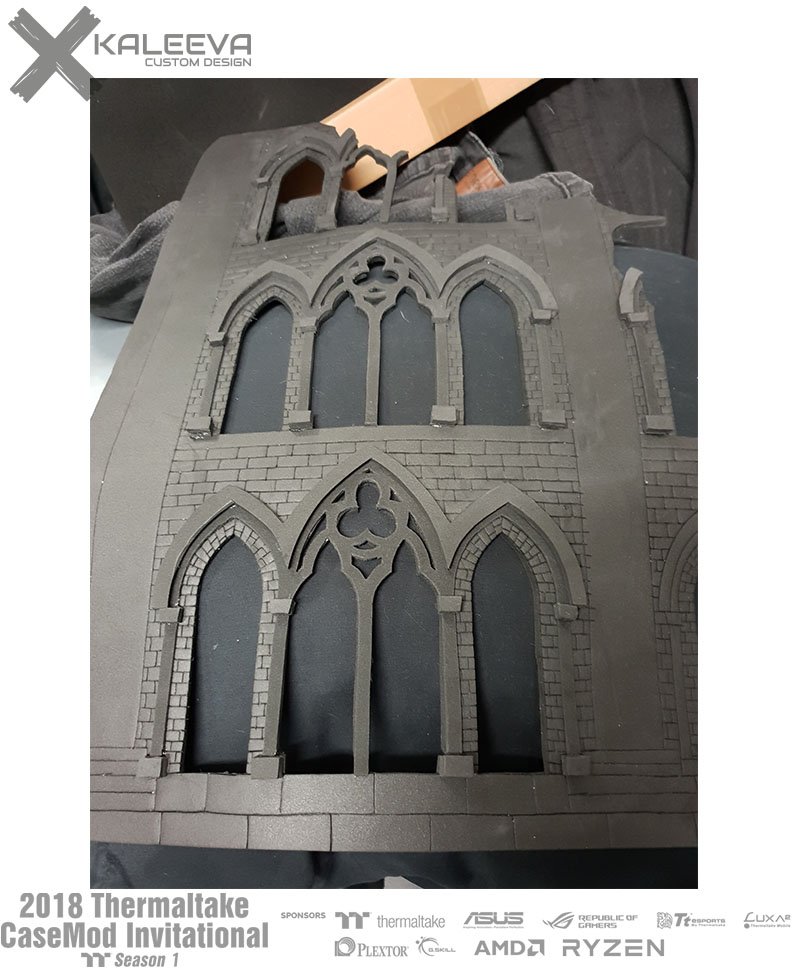
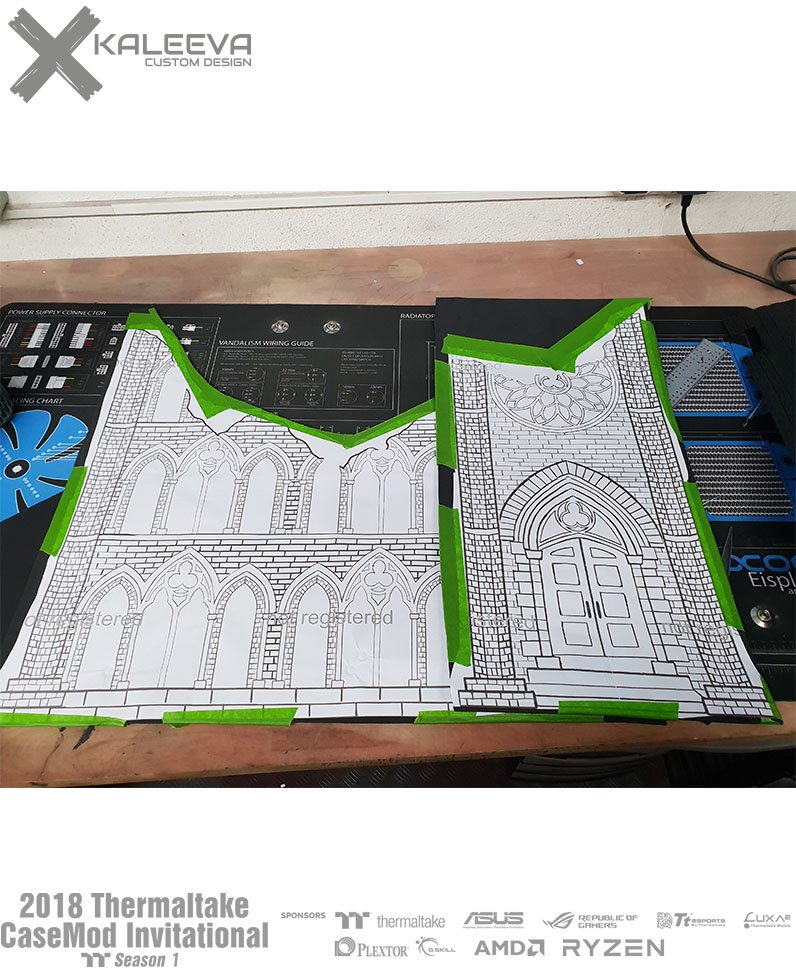
As you can see, there are many details and it takes so much time.
I've already started all three parts, but none of them are really finished. There will also be pictures at the next post.
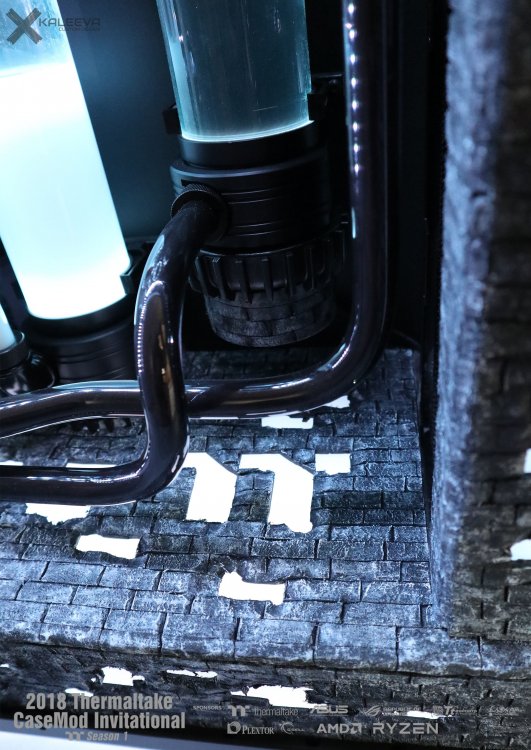
When everything is glued and cut, the details come to make it look like a ruin.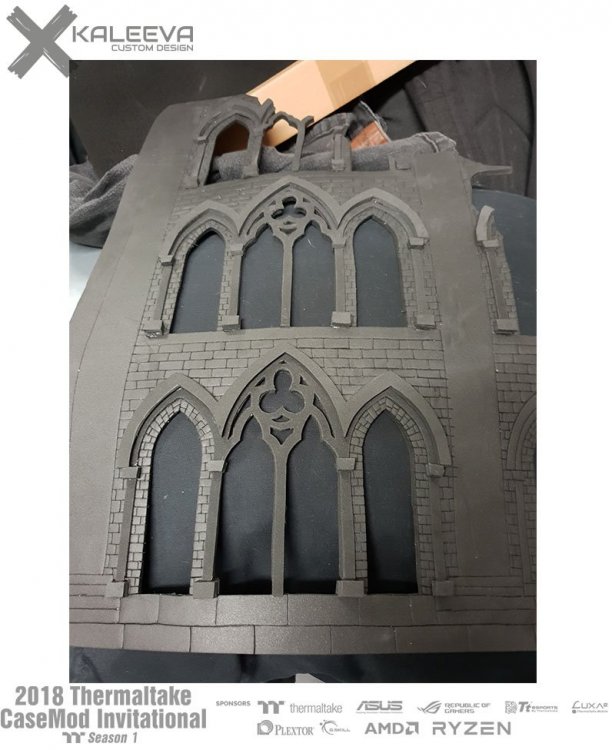


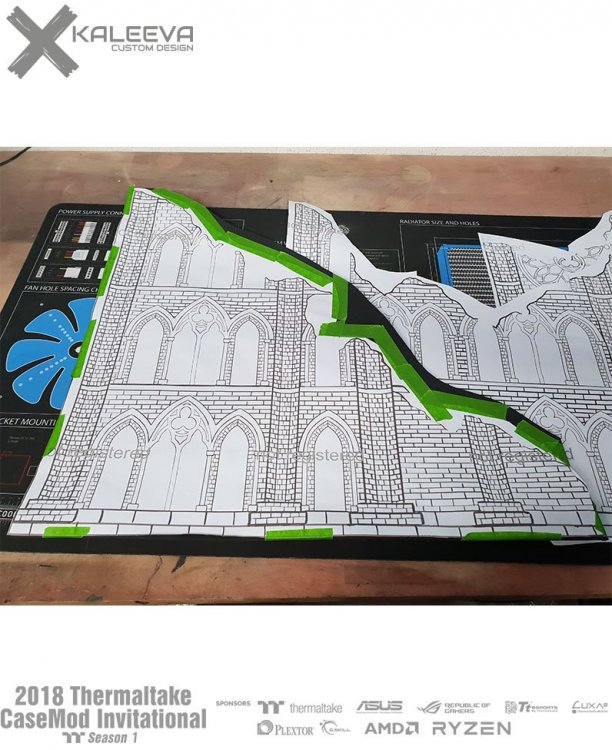


Edit: i don't know why, but the order of the pictures is wrong
-
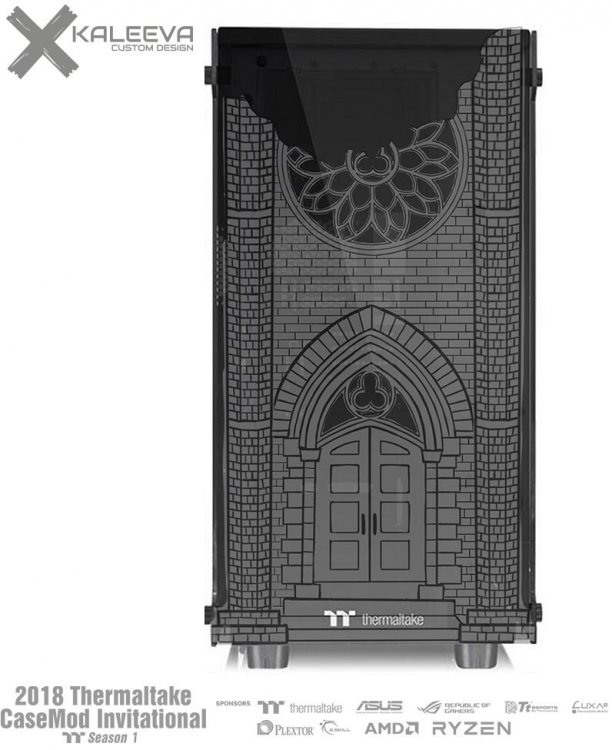
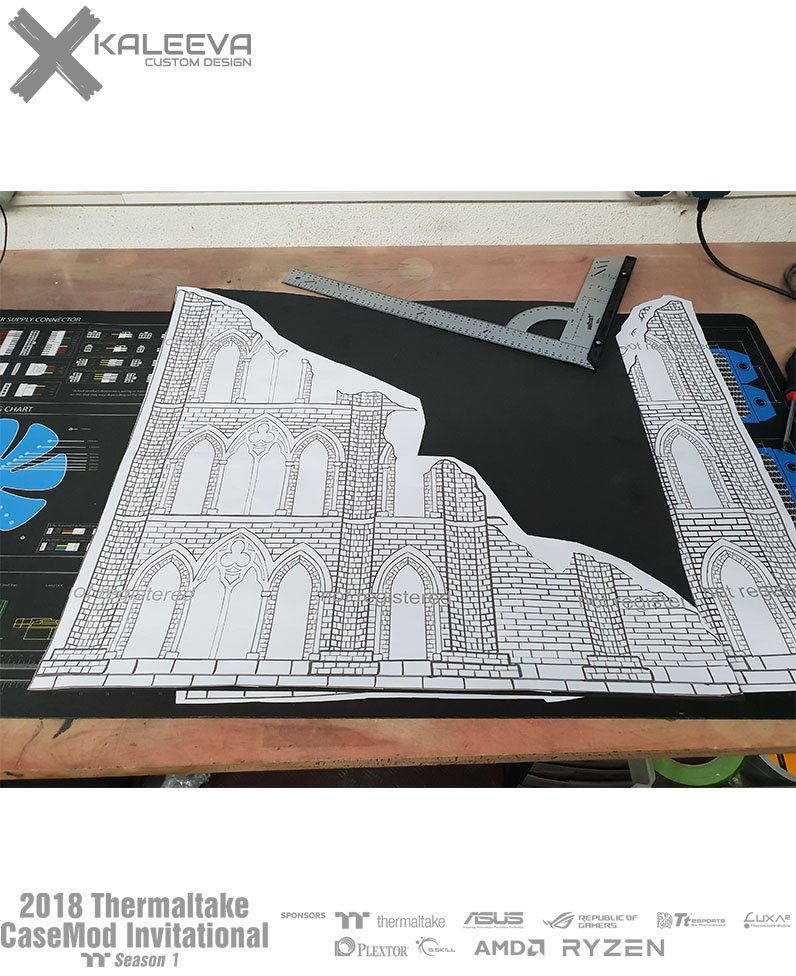
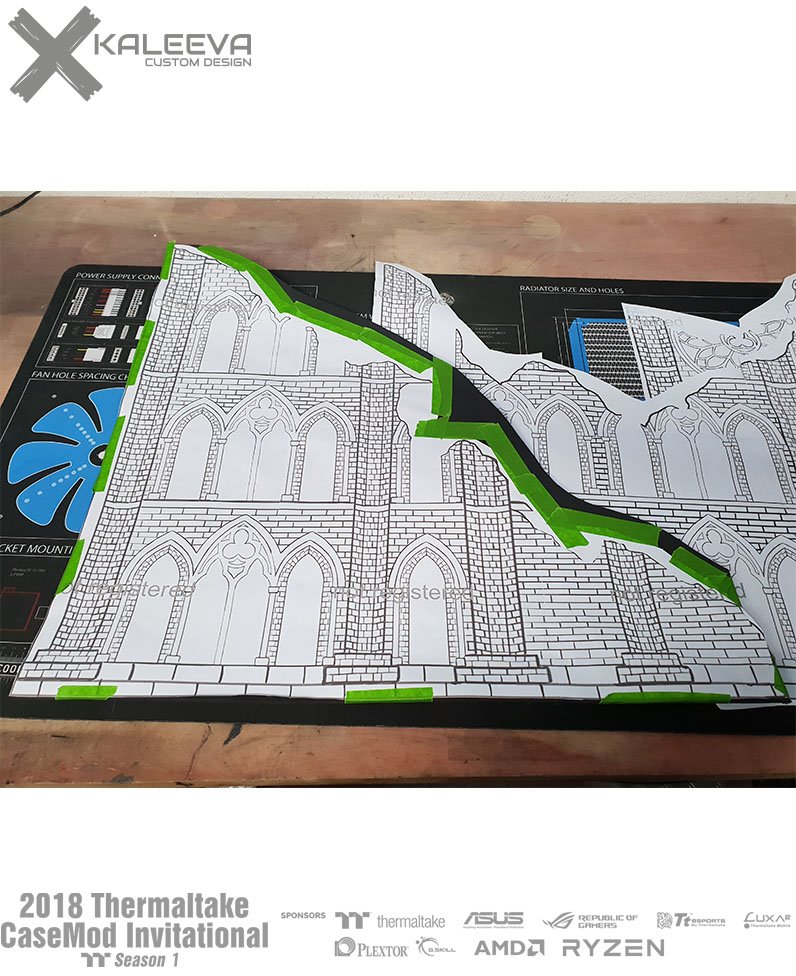
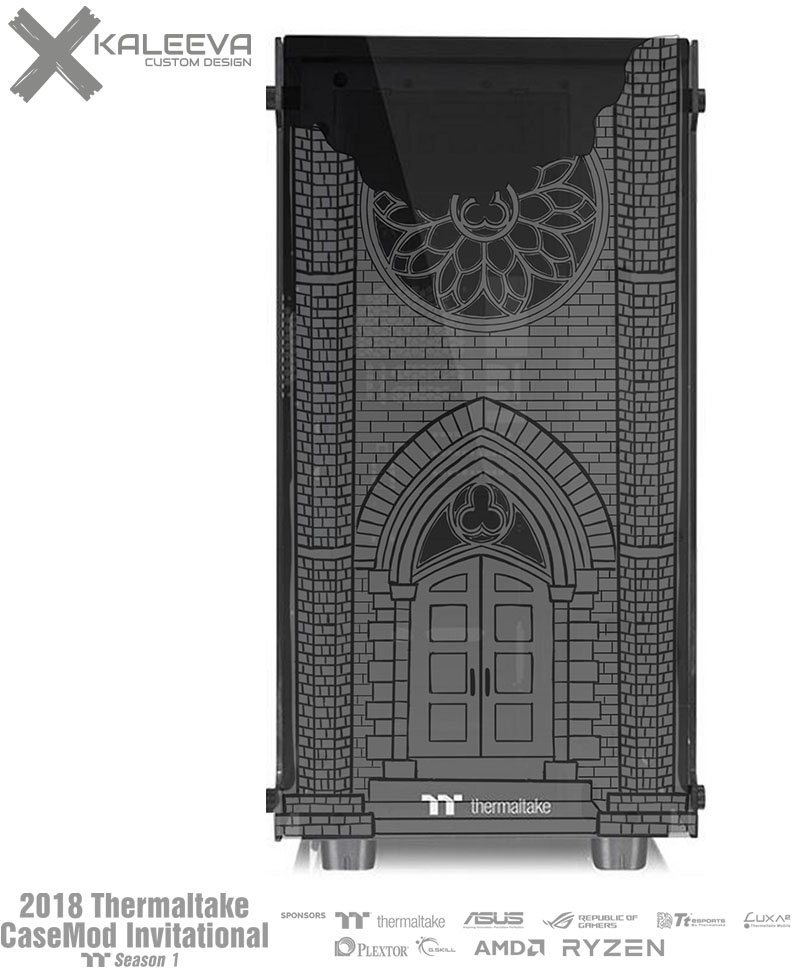
Today I finished the front drawing and made a rough drawing for the gargoyle.
Even if the Gargoyle will not sit exactly the same at the end, because under the feet should be the front panel.
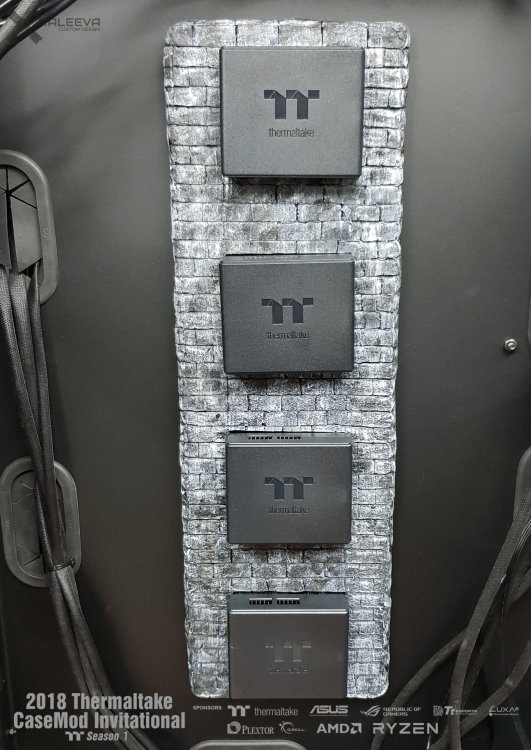
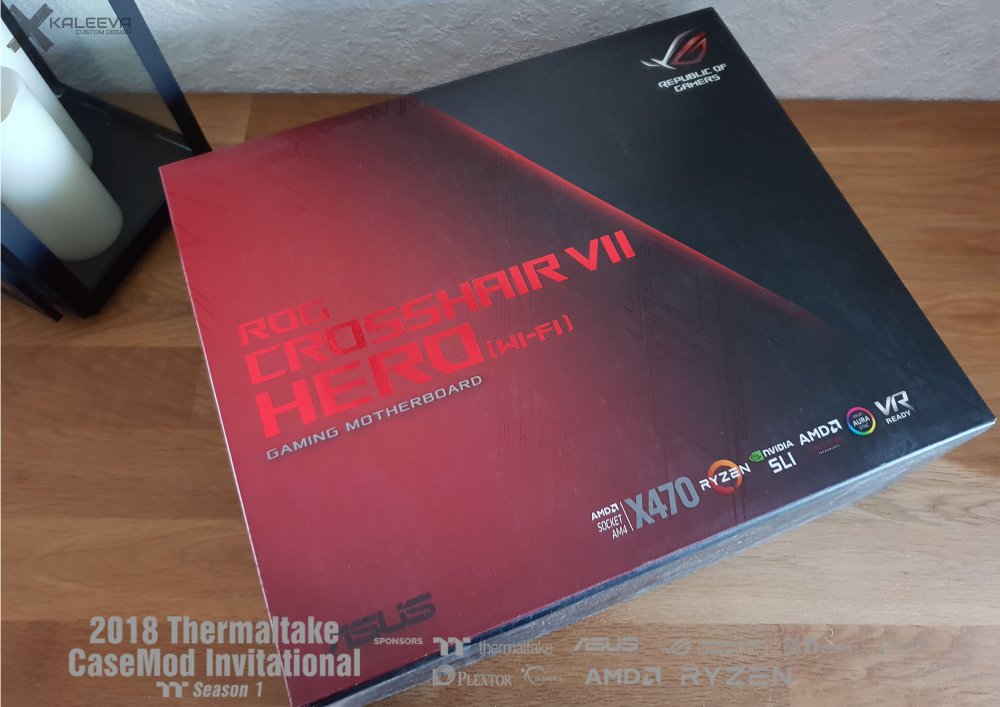
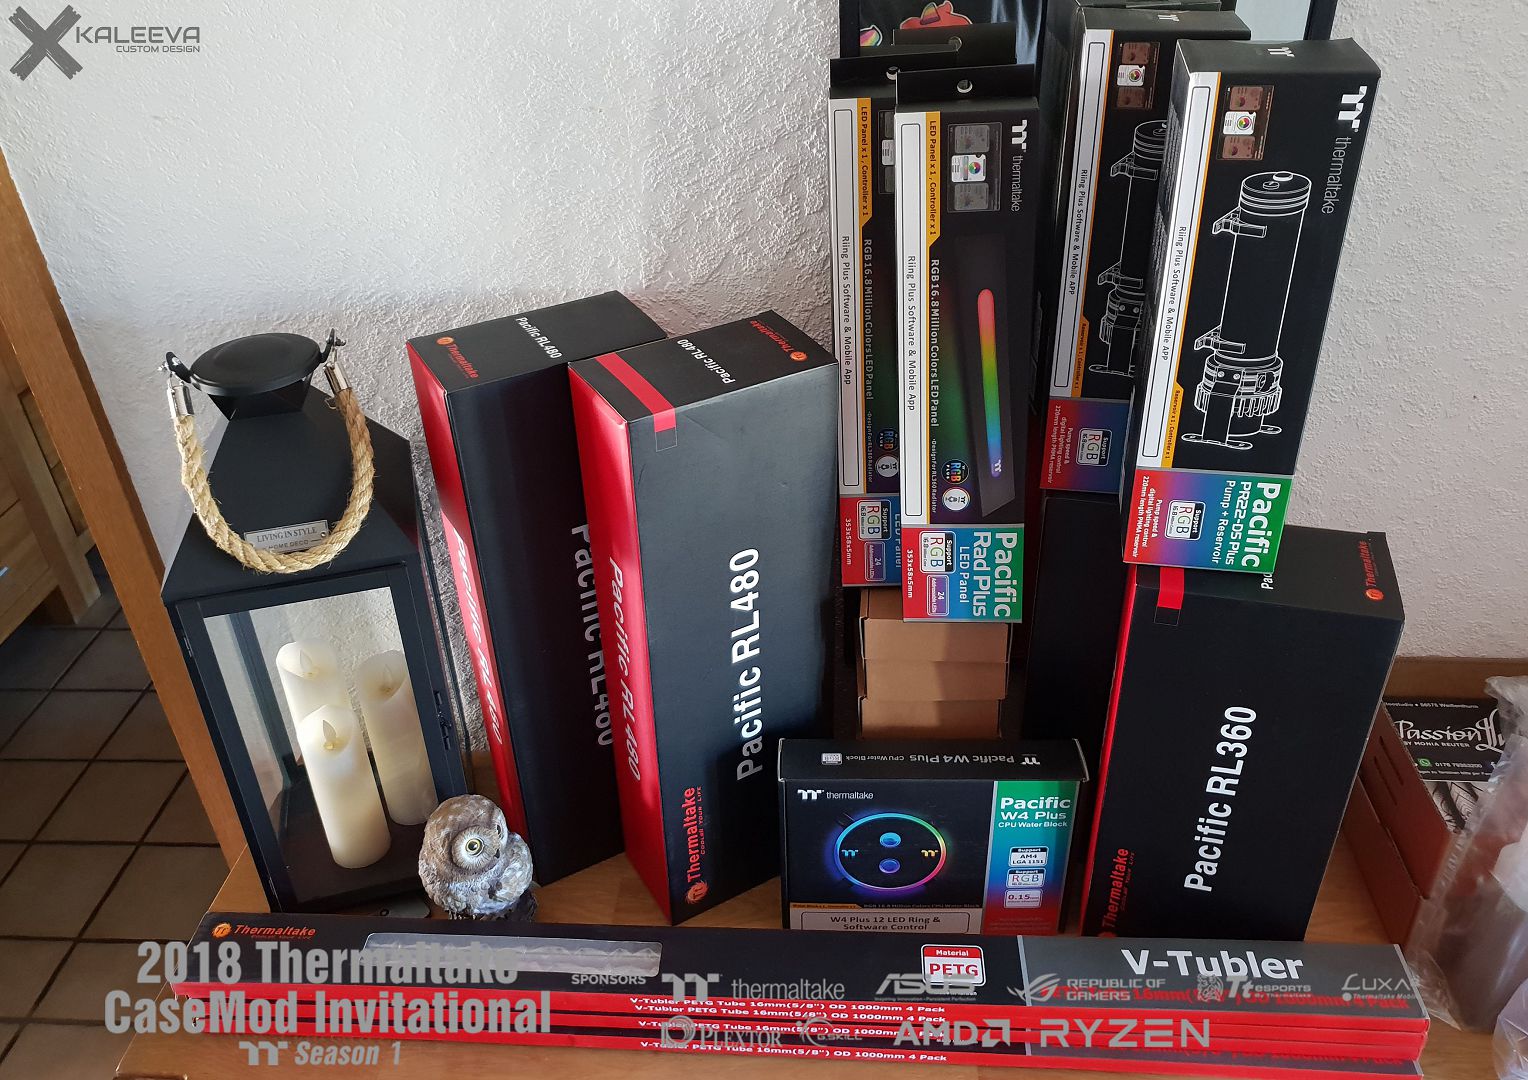
What exactly I make the Gargoyle from I don't know yet, either from foam or from paper mache. I'll test the days to see what I can handle better.Also the first package of Thermaltake arrived =)


[Germany] Monia Reuter
in 2018 CaseMOD Invitational Season 1
Posted
Oh thank you so much =)