-
Forum Statistics
7.6k
Total Topics51k
Total Posts -
Member Statistics
136,031
Total Members16,800
Most Online
Timpelay
-
Posts
26 -
Joined
-
Last visited
Content Type
Profiles
Forums
Downloads
Events
Gallery
Blogs
Everything posted by Timpelay
-

[Sweden] Tim Malmborg
Timpelay replied to TT Amanda's topic in 2023 Thermaltake RAM MOD Invitational Season 1

-
[Sweden] Tim Malmborg
Timpelay replied to TT Amanda's topic in 2023 Thermaltake RAM MOD Invitational Season 1
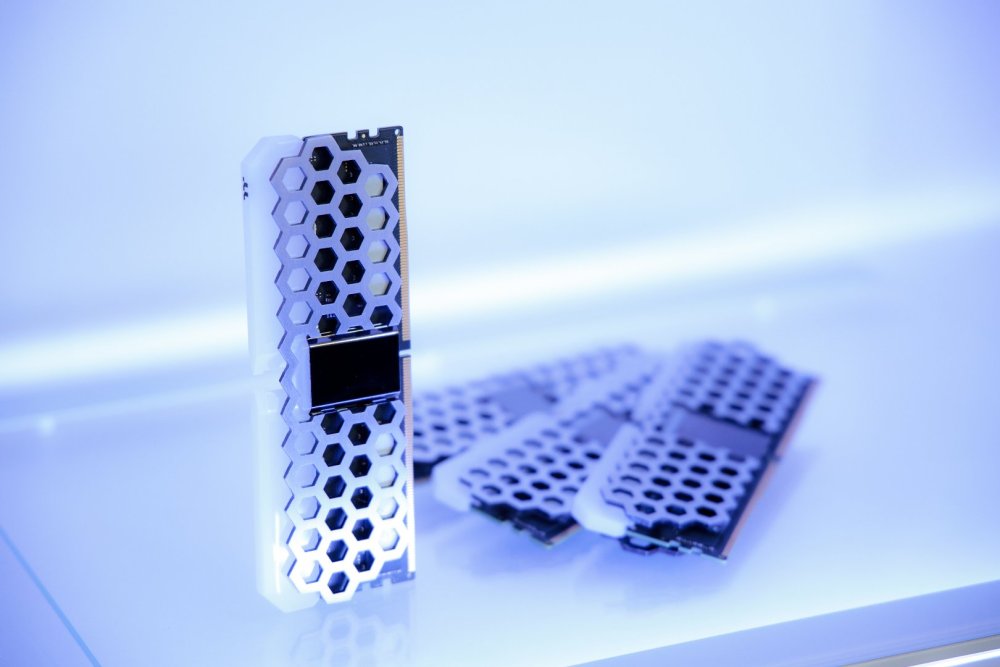
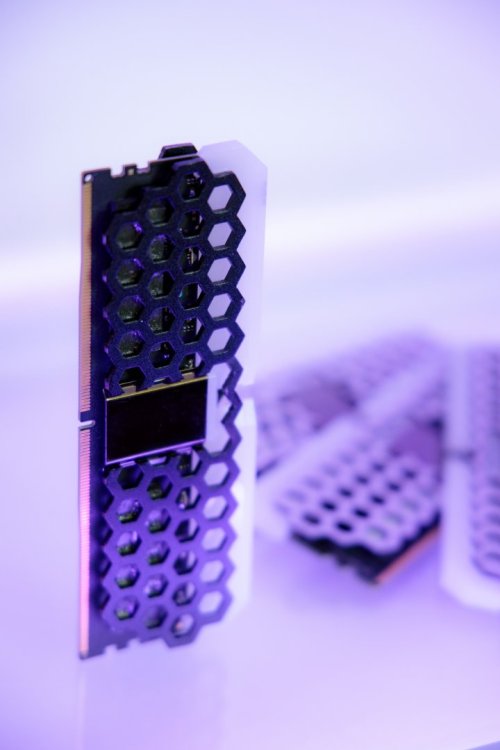
AND they are done! -
[Sweden] Tim Malmborg
Timpelay replied to TT Amanda's topic in 2023 Thermaltake RAM MOD Invitational Season 1
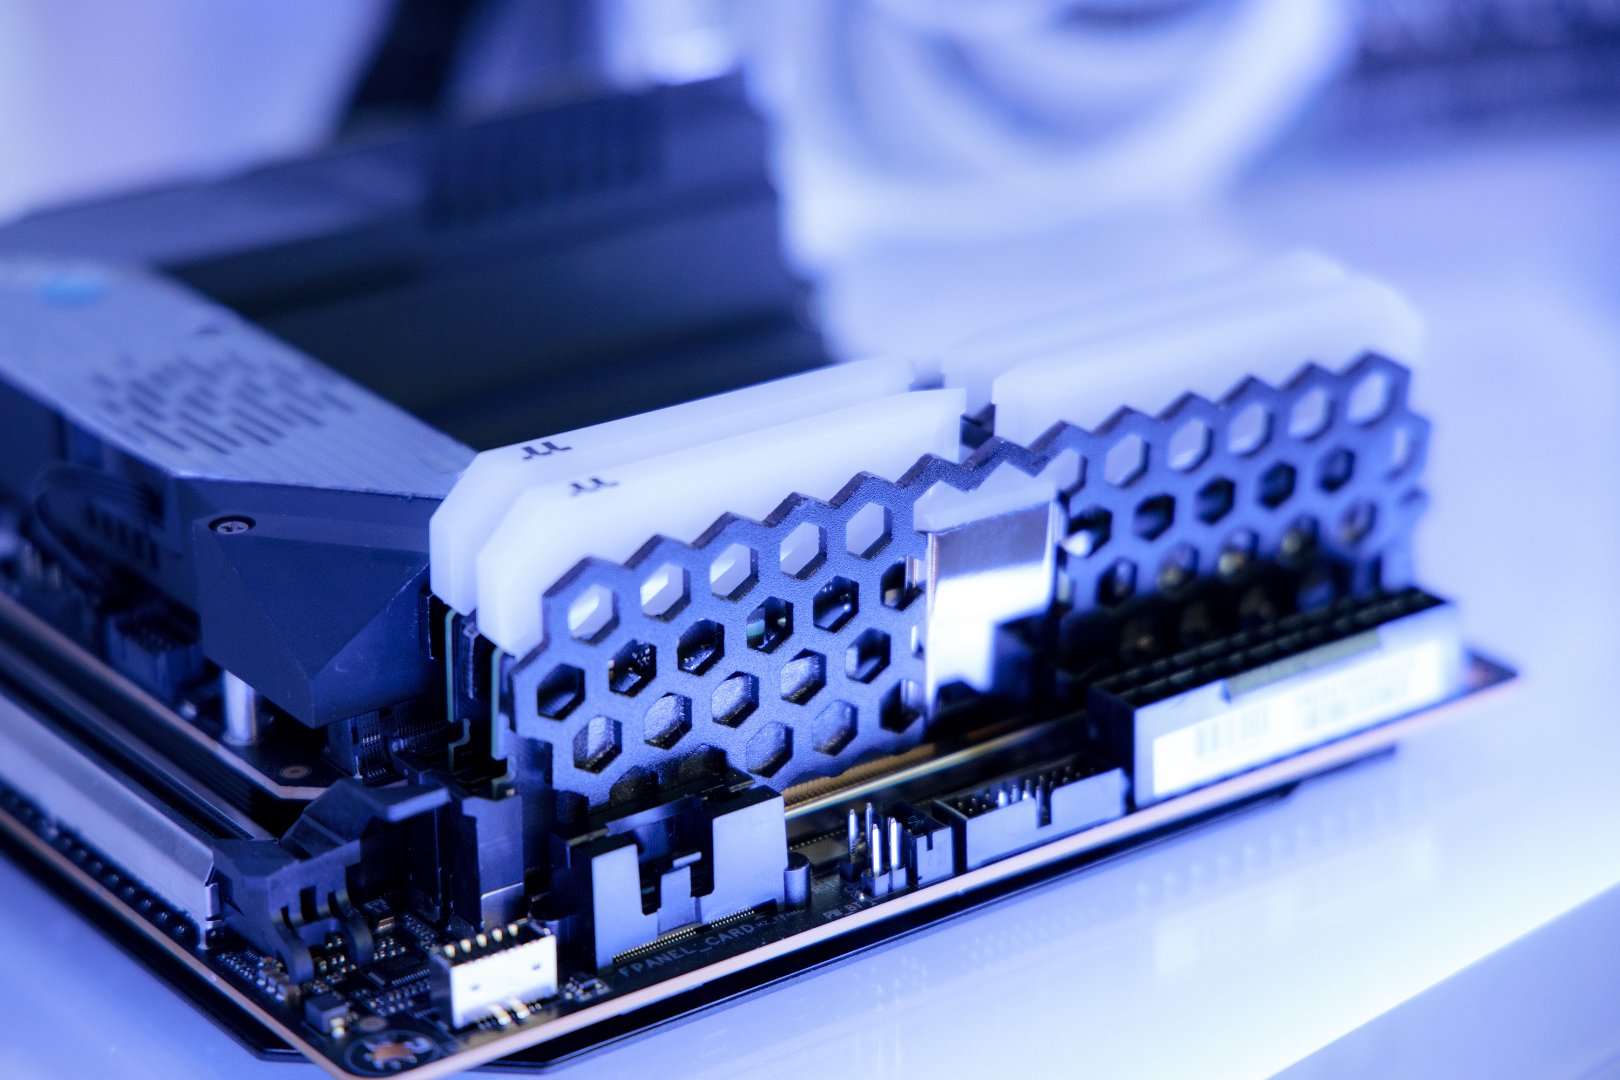
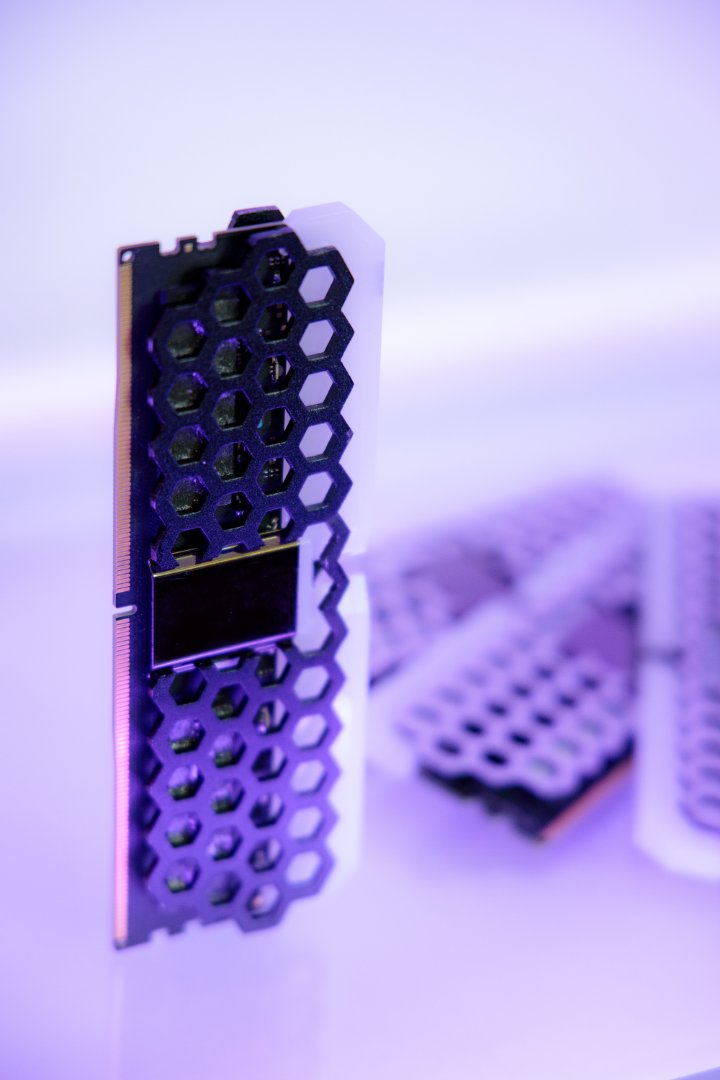
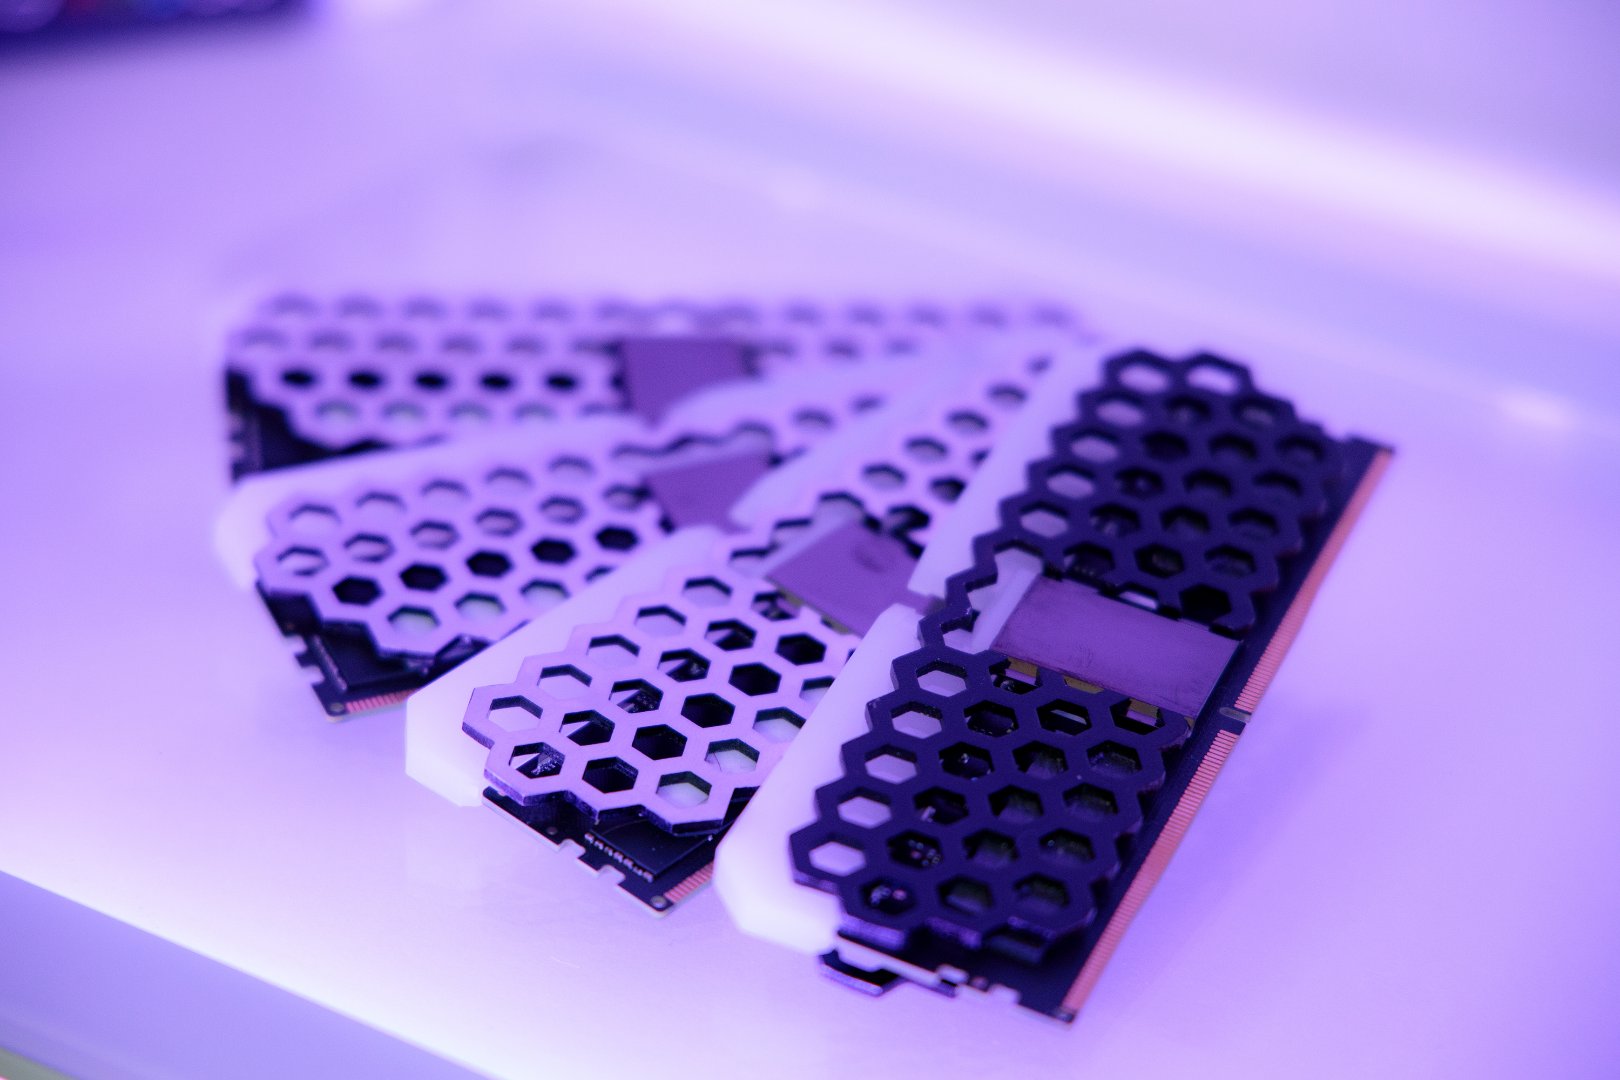
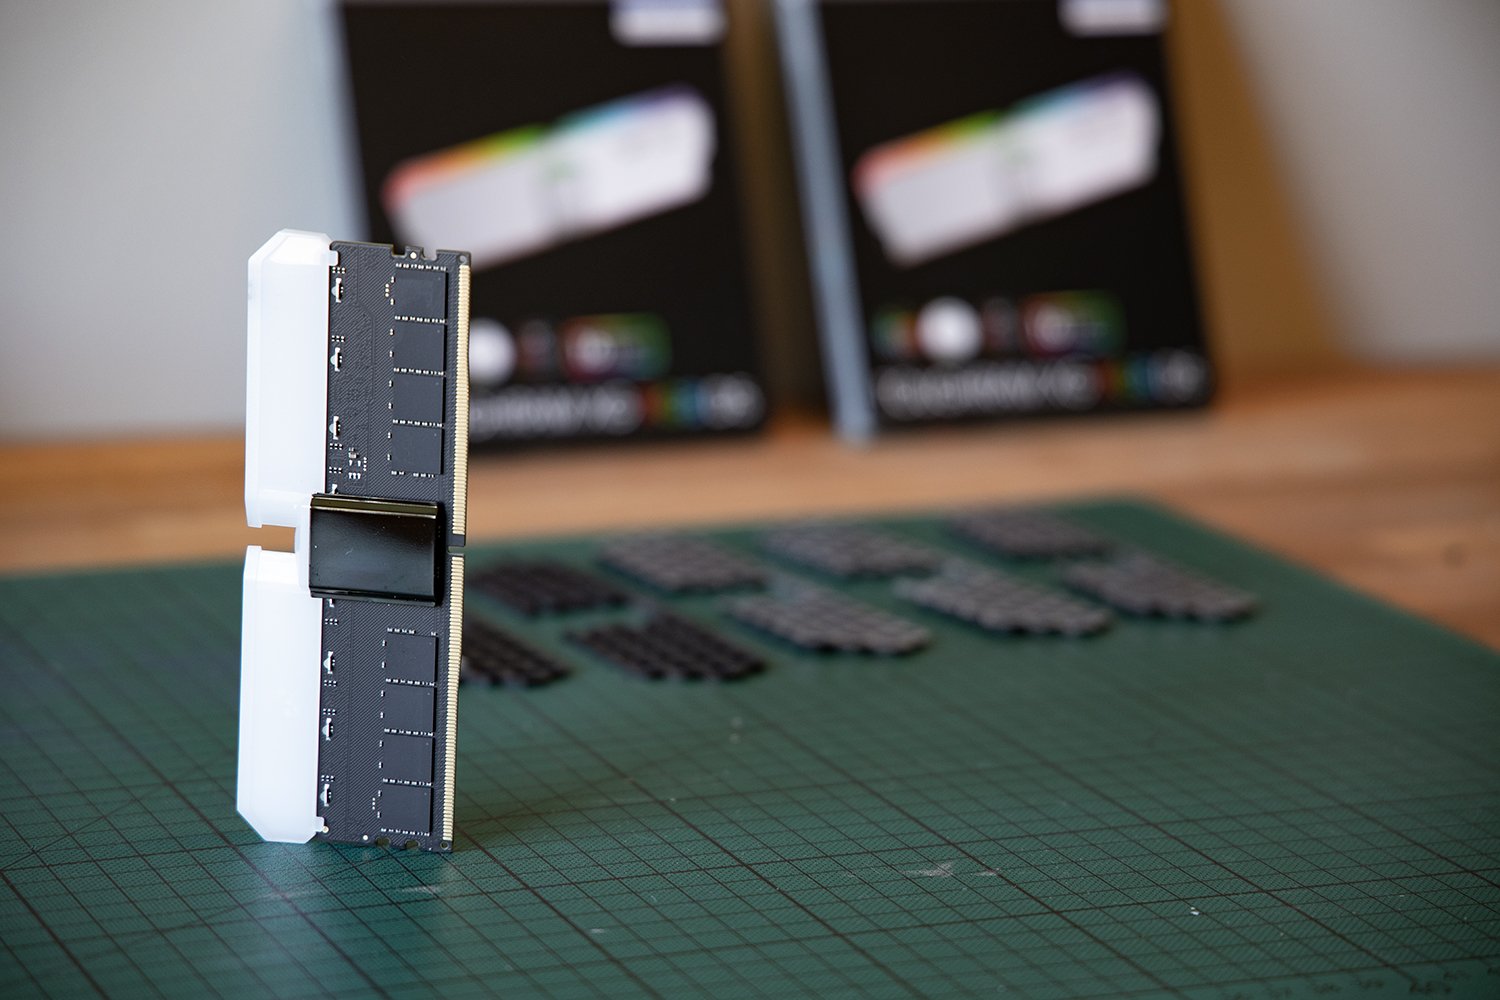
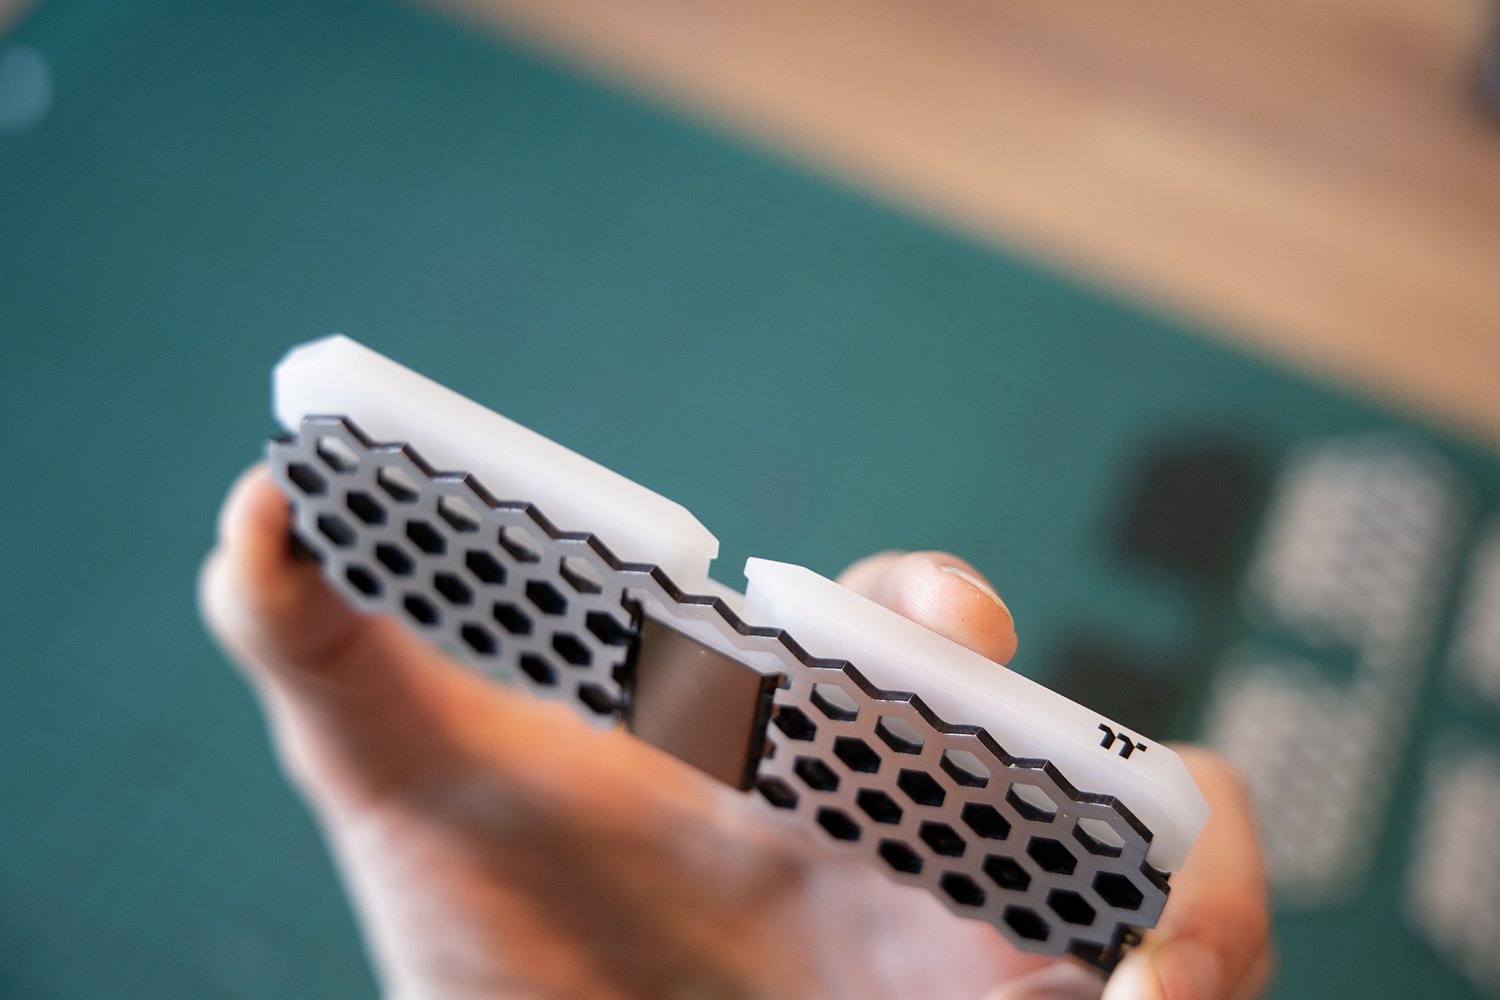
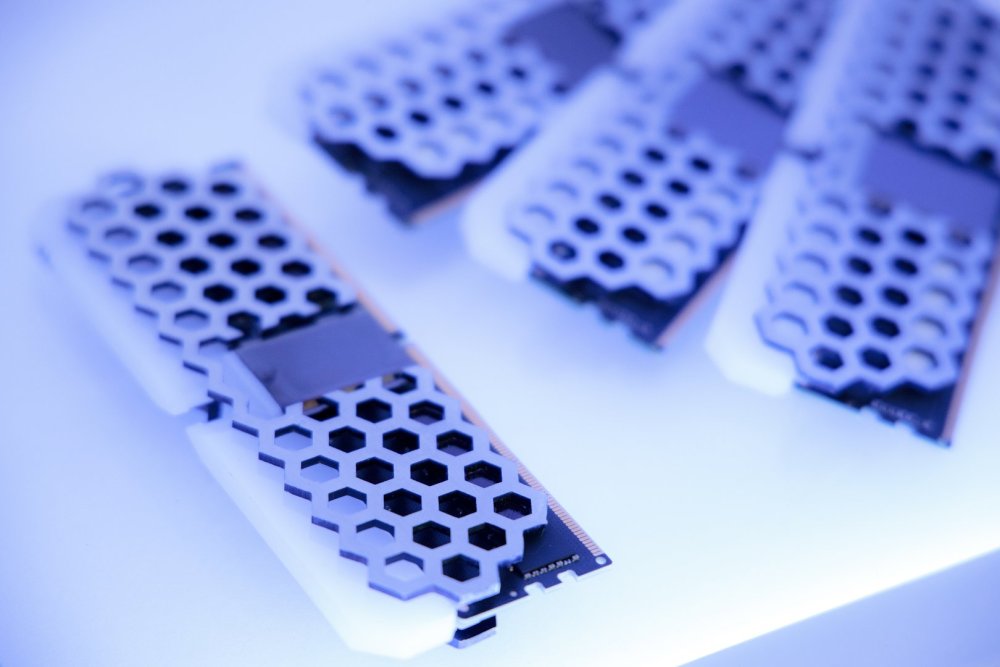
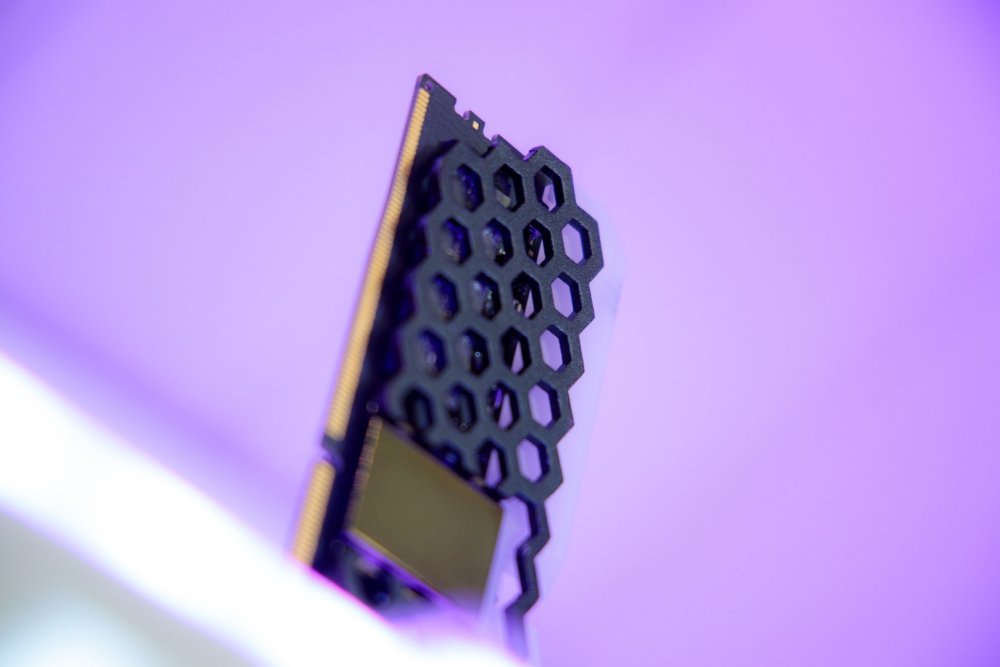
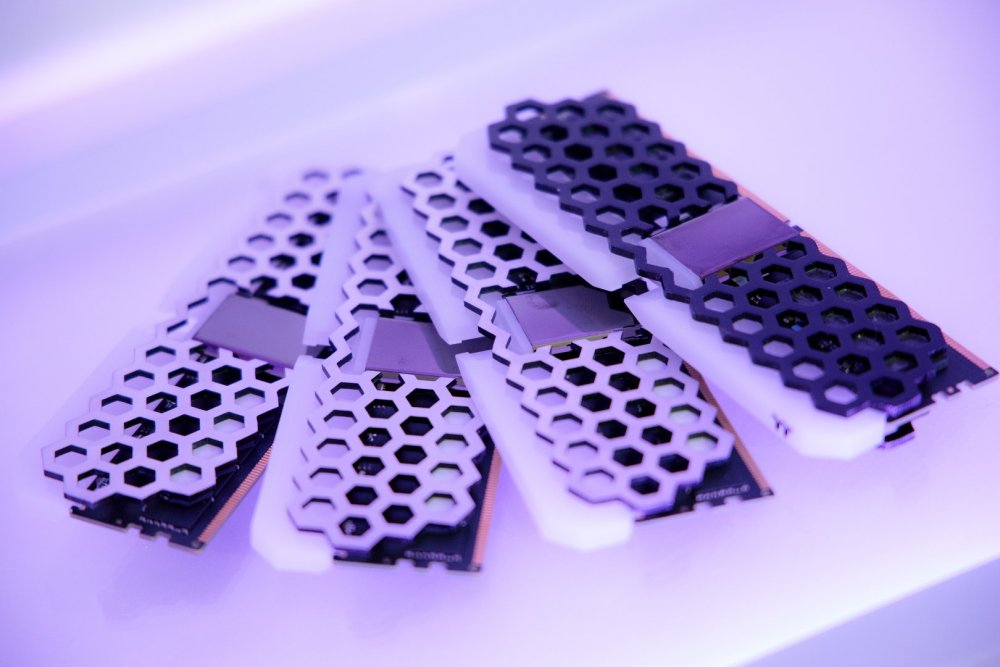
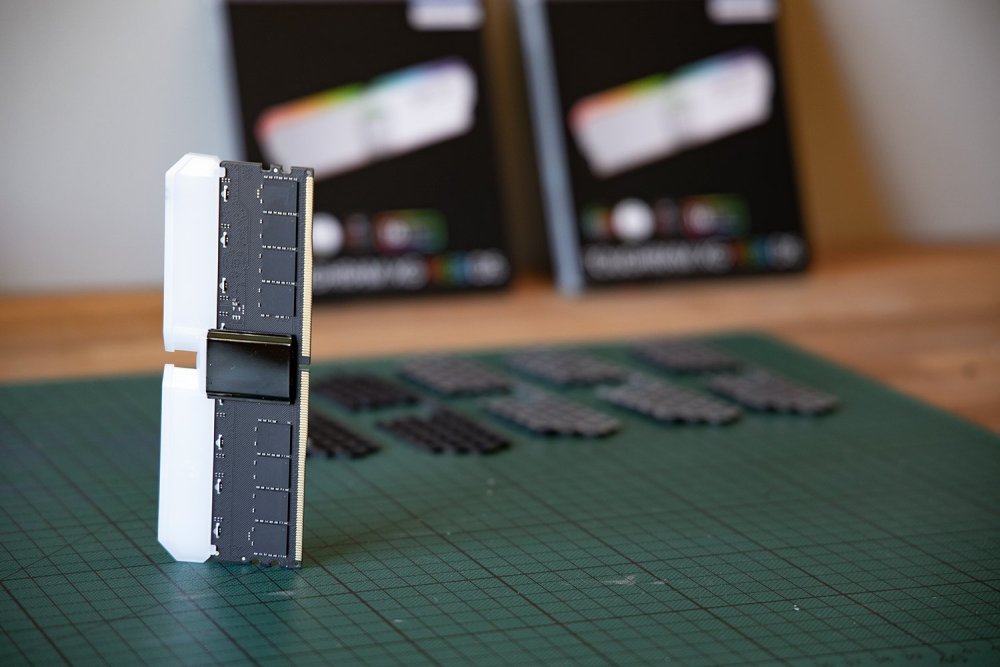
This will be good! Can either use inserts, keep as it is, or paint the pads black inside the combs. Soon finished with all spreaders! Stacking up. Glued the light diffuser to the middle metal plate to keep it tidy in place on the sticks before mounting any spreaders. Assembly time!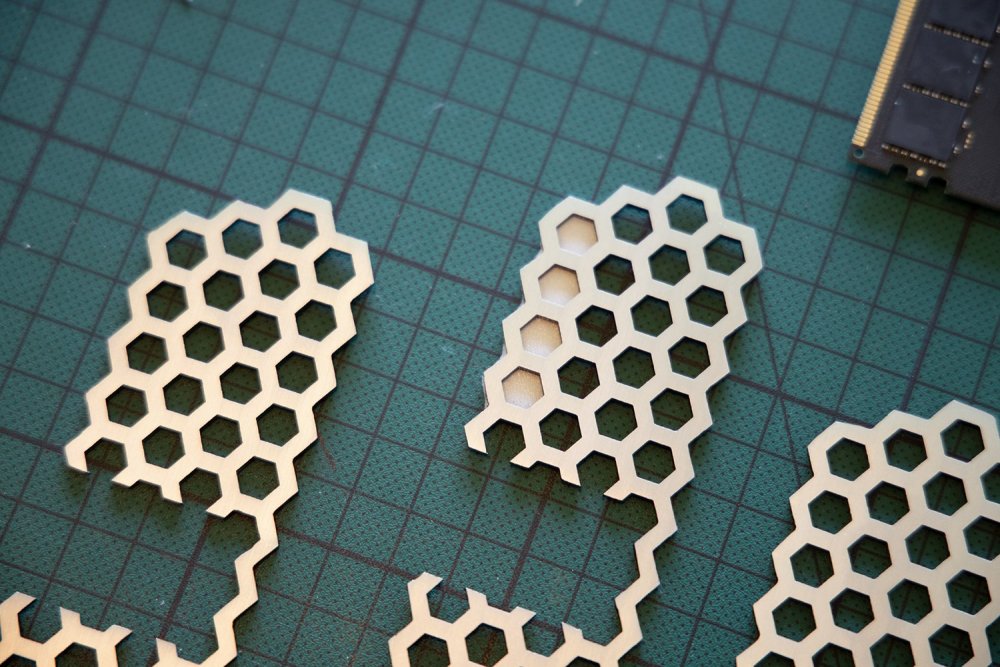


-
[Sweden] Tim Malmborg
Timpelay replied to TT Amanda's topic in 2023 Thermaltake RAM MOD Invitational Season 1
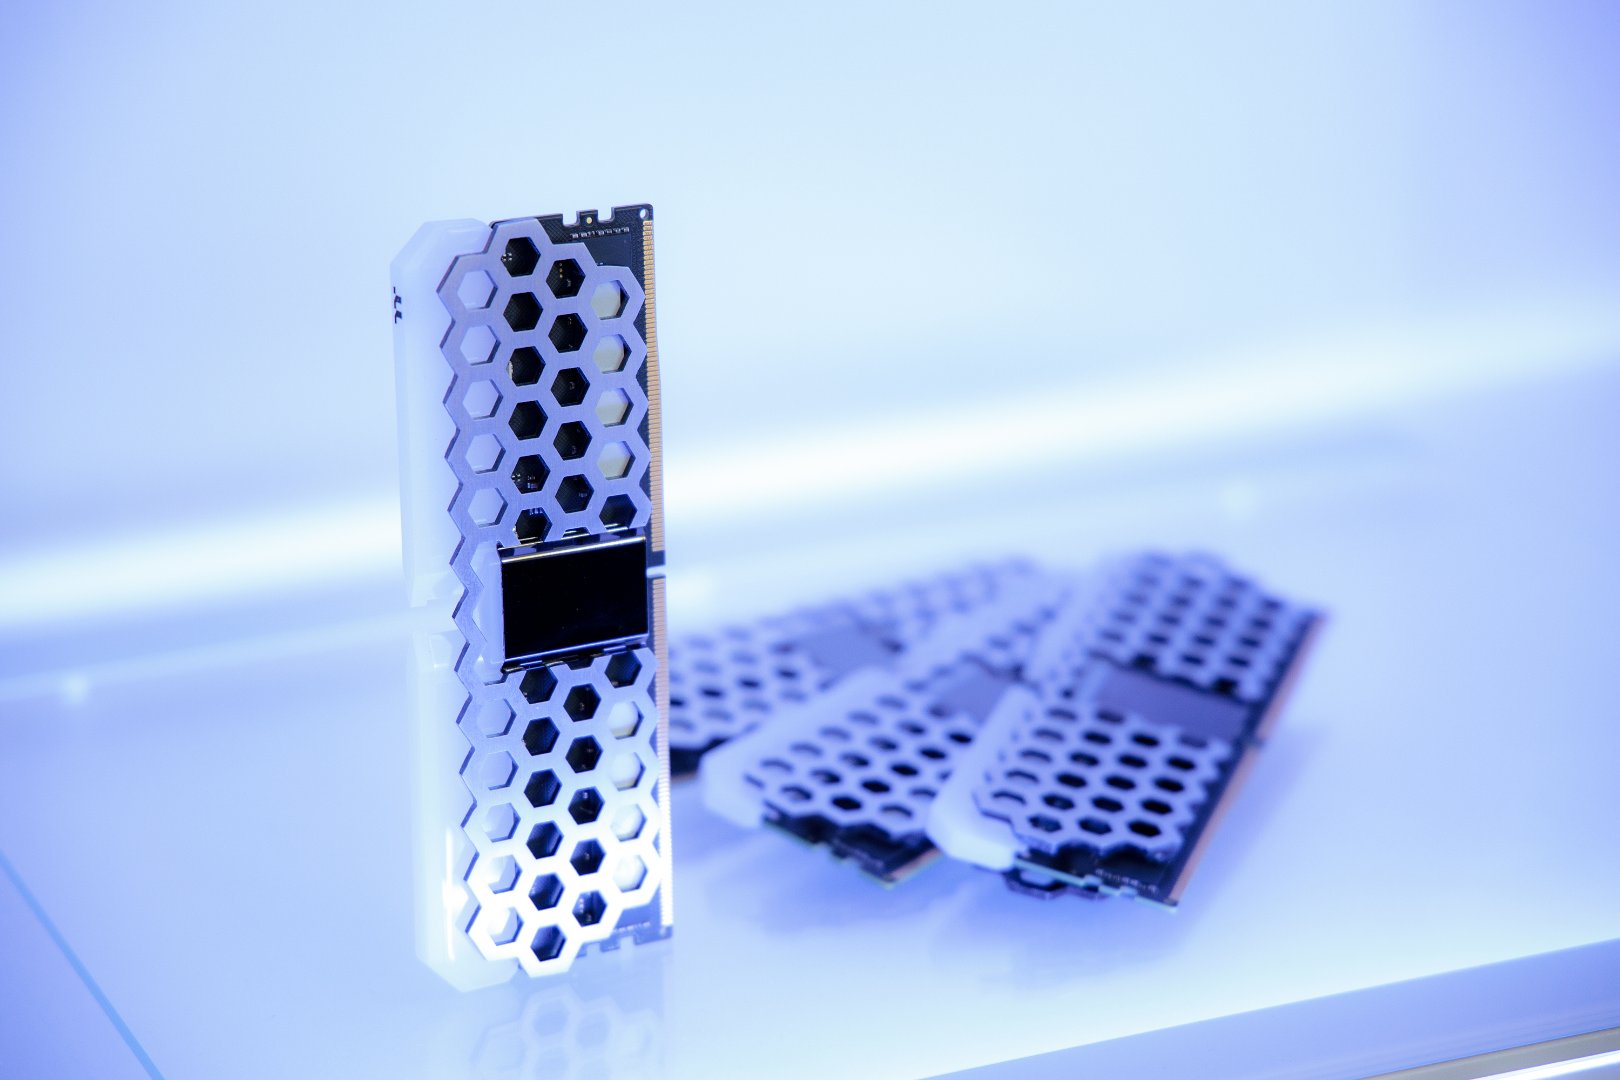
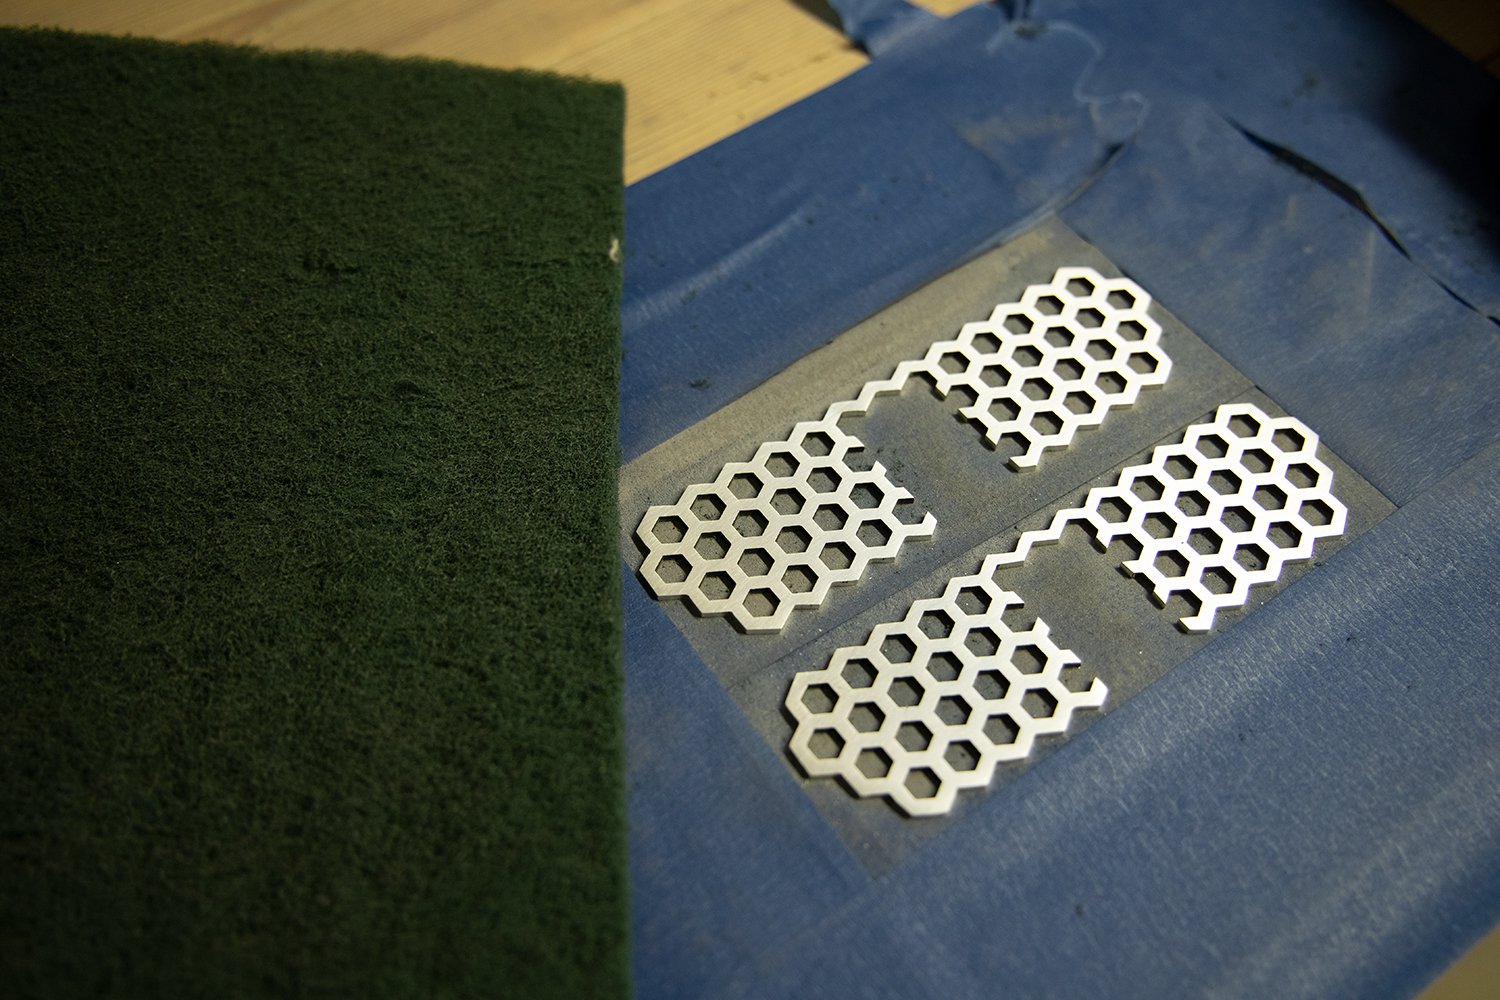
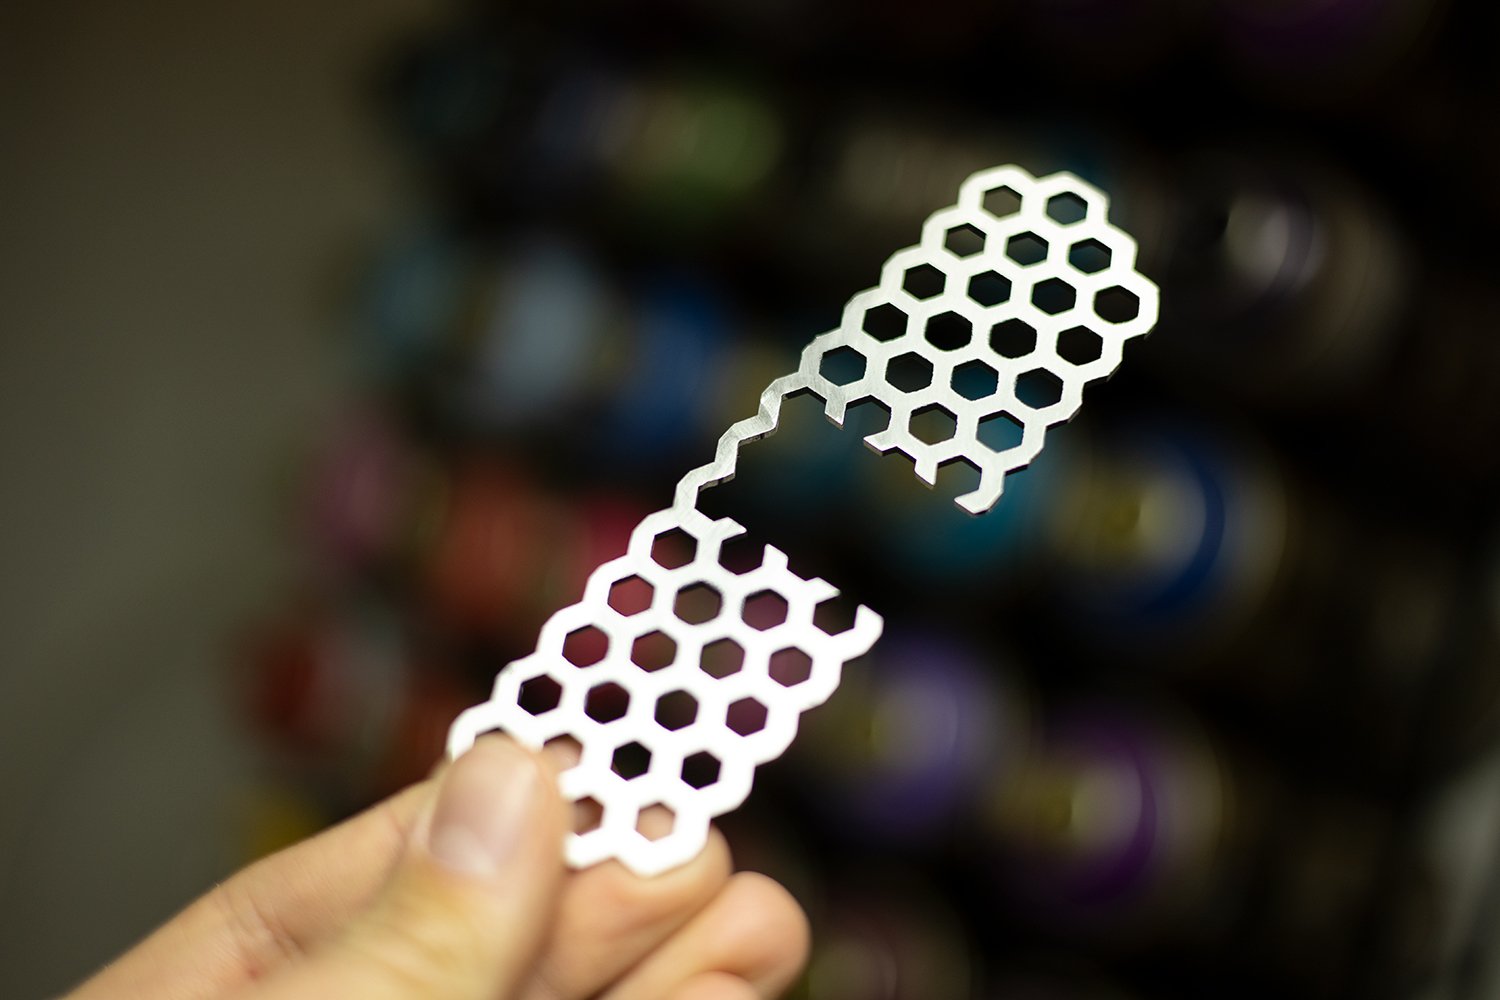
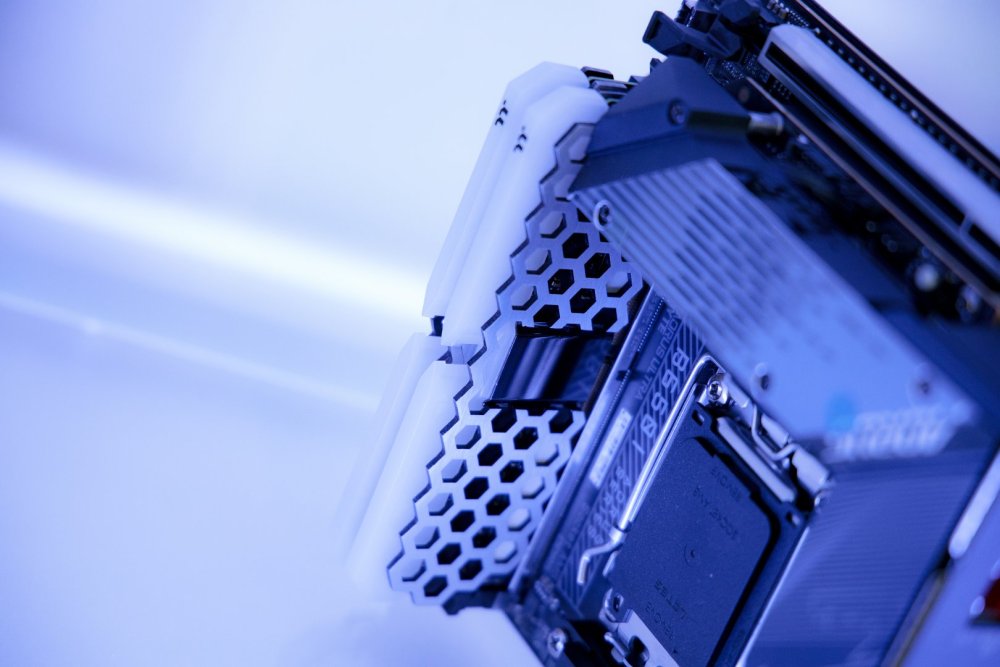
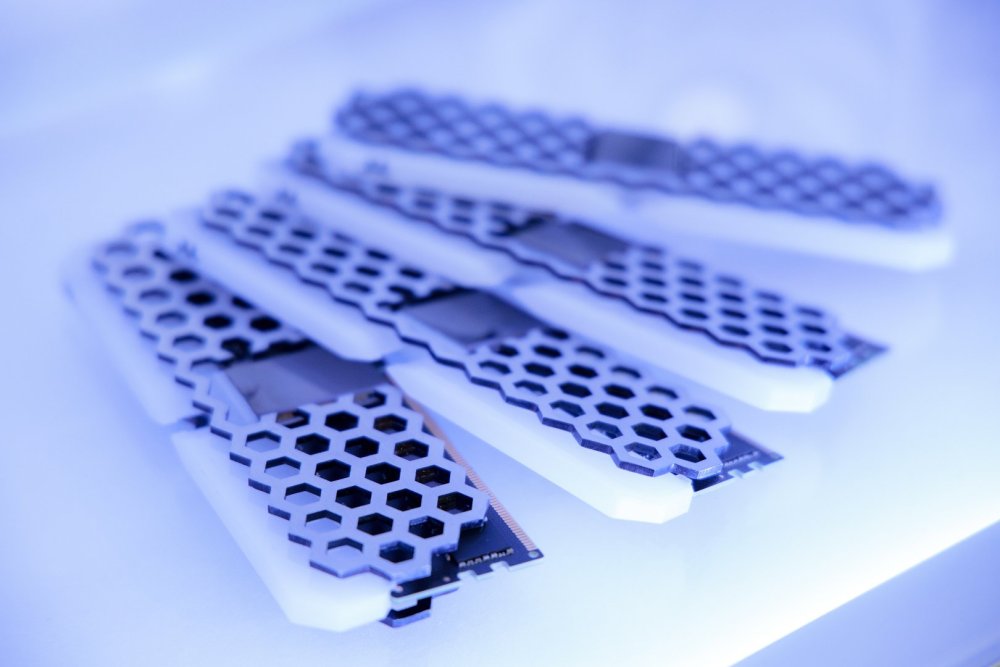
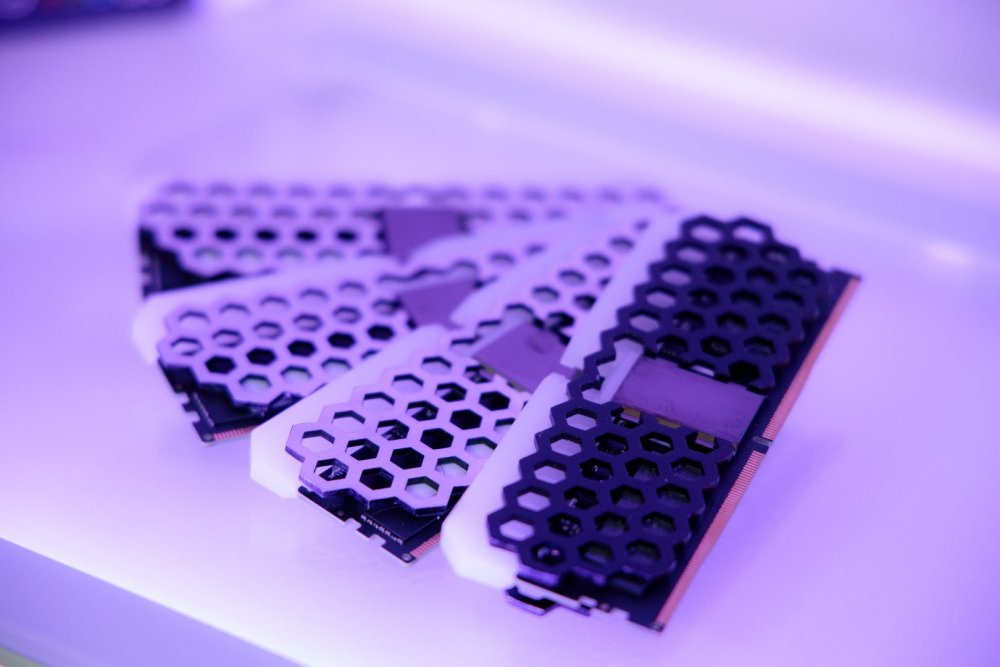
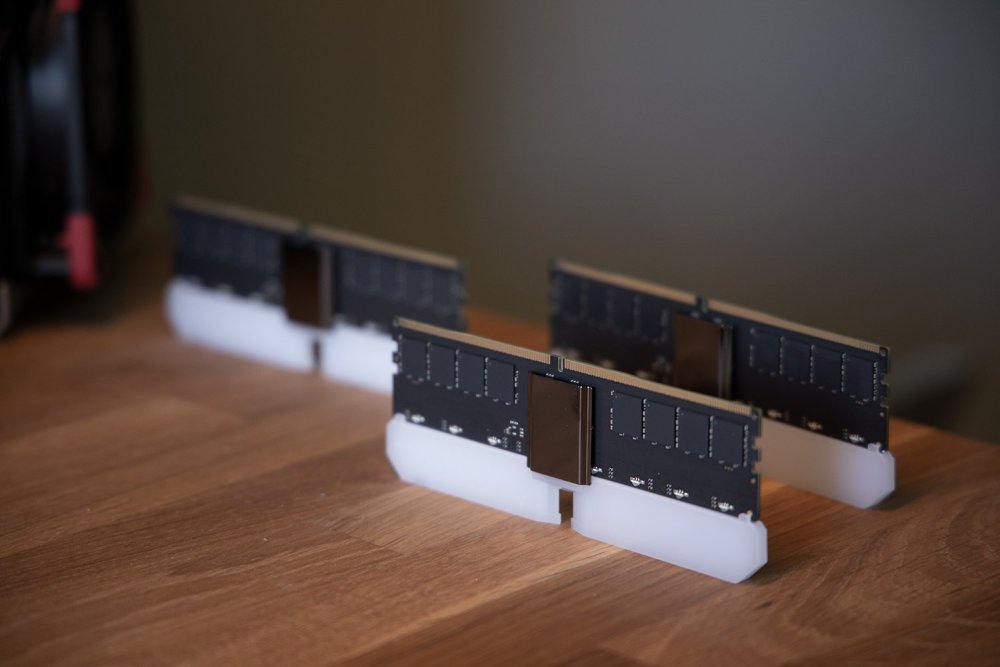
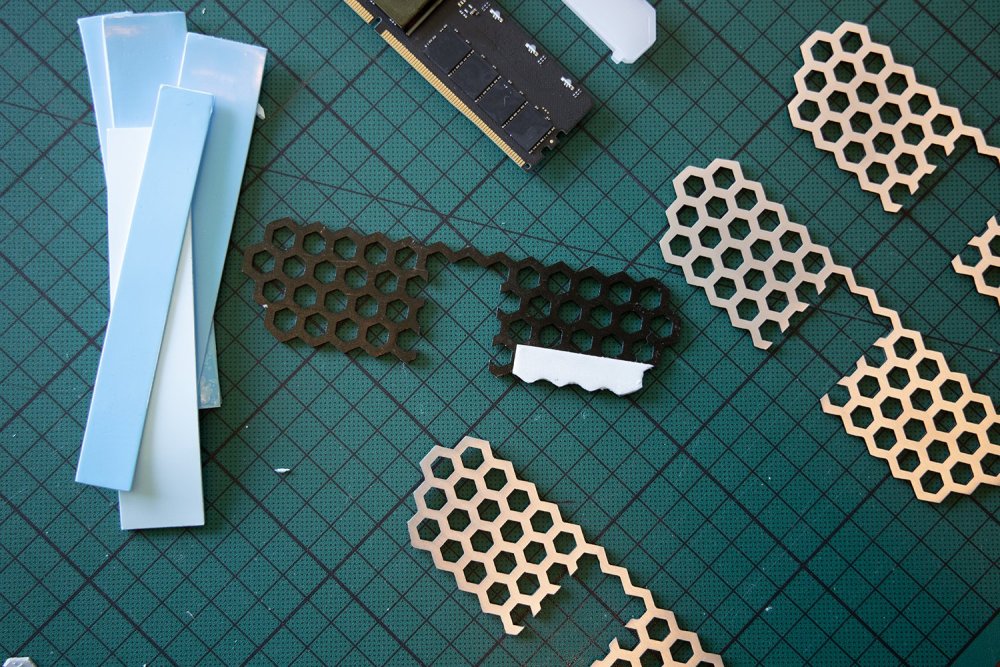
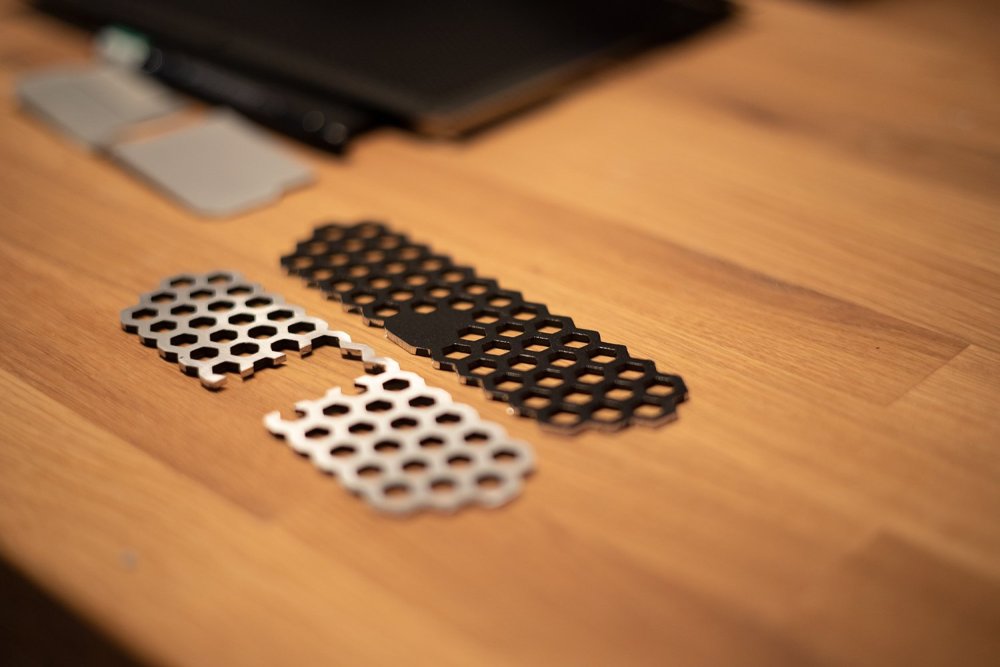
To remove any scrathes and get the final finish I used tape to hold the spreaders flat in pairs when sanding. The 4 bare metal sides are finished and ready for mounting to the actual ram sticks! Worked my way through my stock of thermal pads to find a version that's 1mm thick and really sticky. Lets see if they can hold or I'll order some thermal tape.
-
[Sweden] Tim Malmborg
Timpelay replied to TT Amanda's topic in 2023 Thermaltake RAM MOD Invitational Season 1
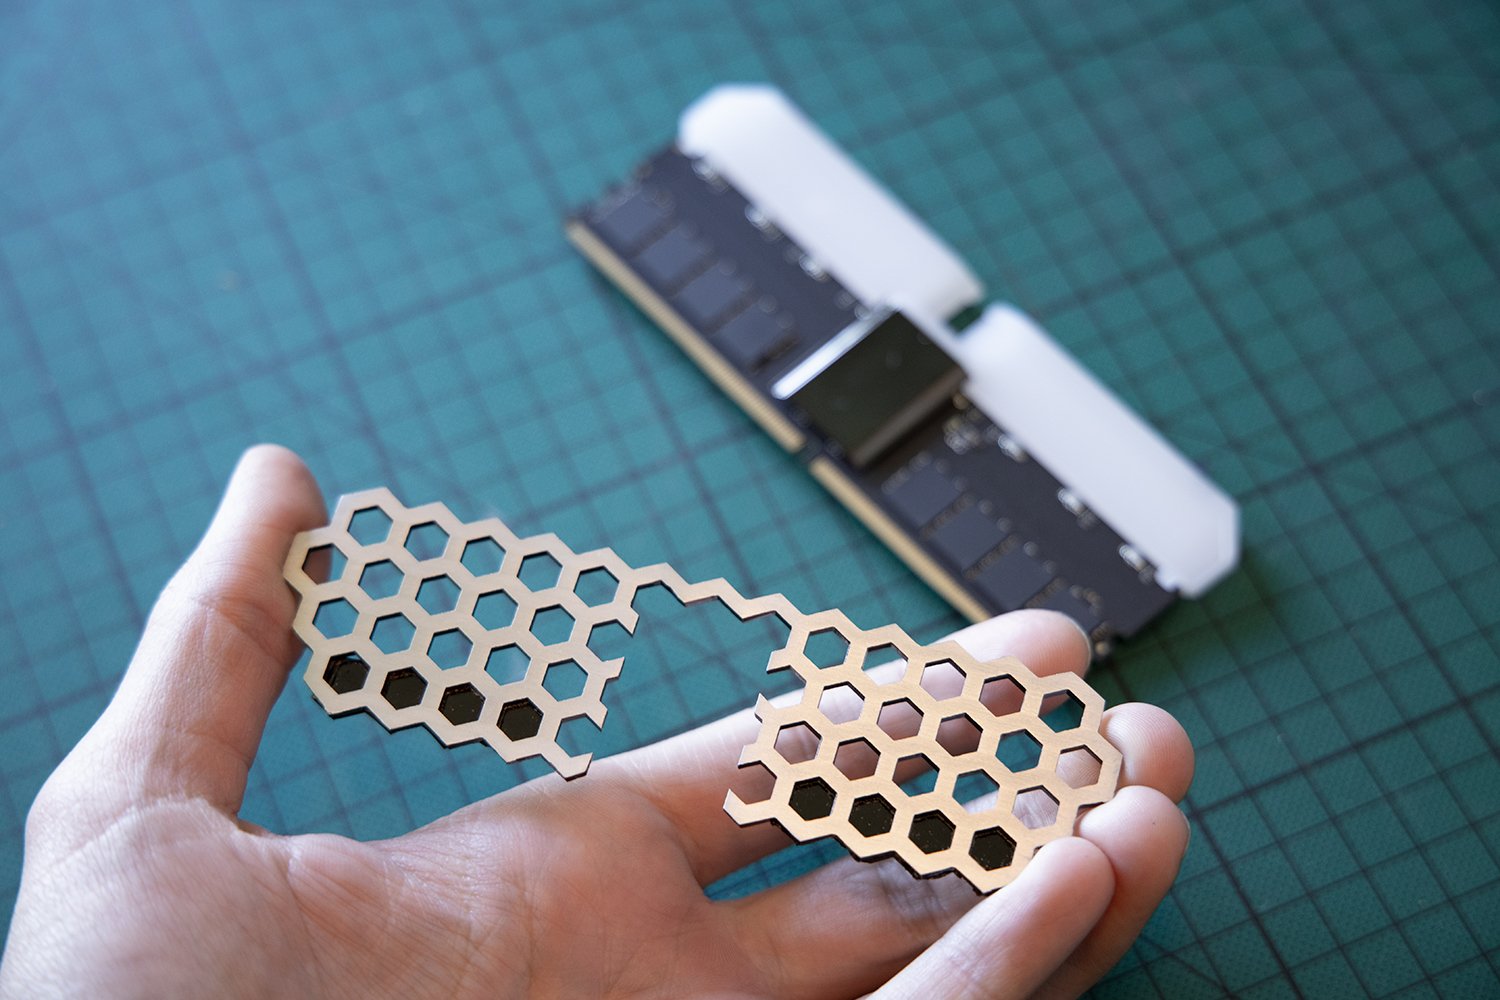
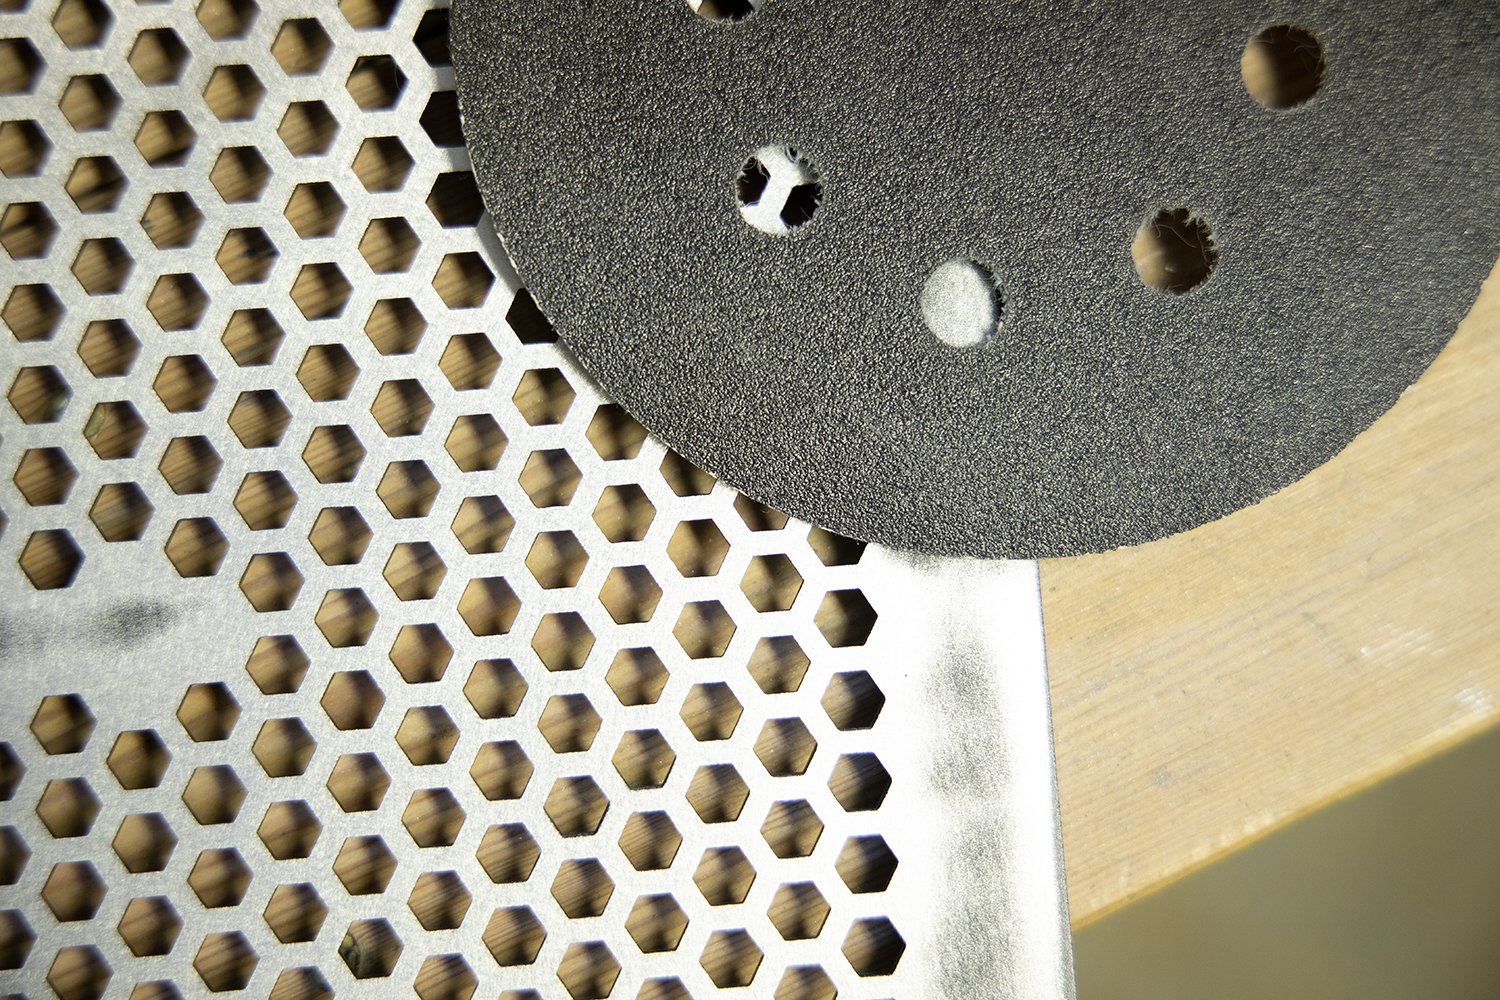
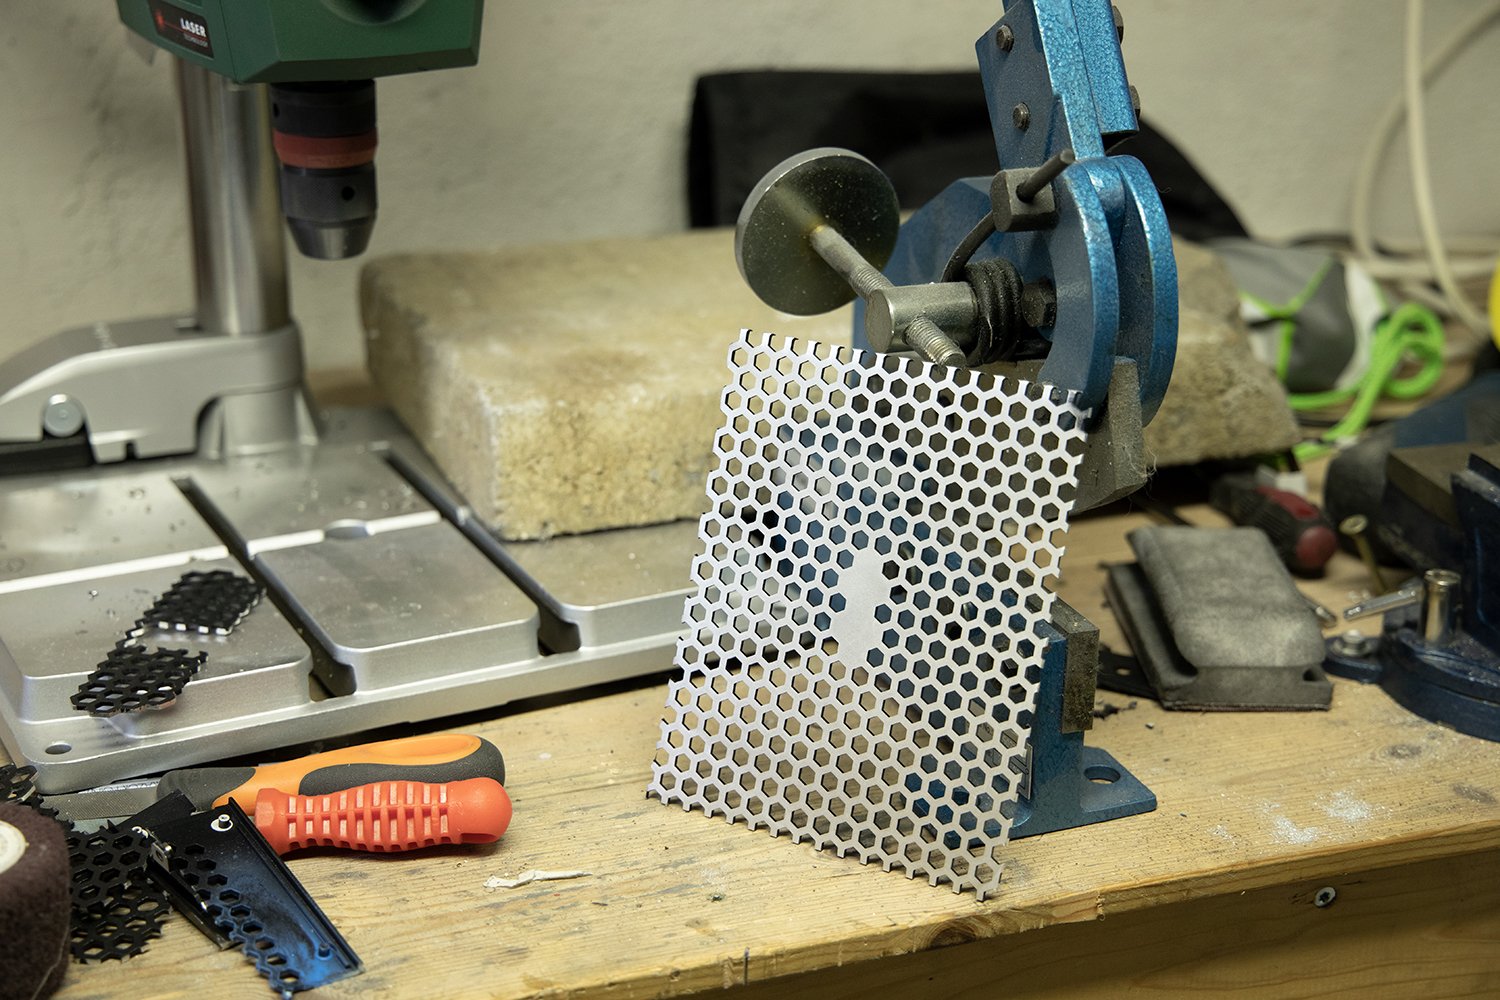
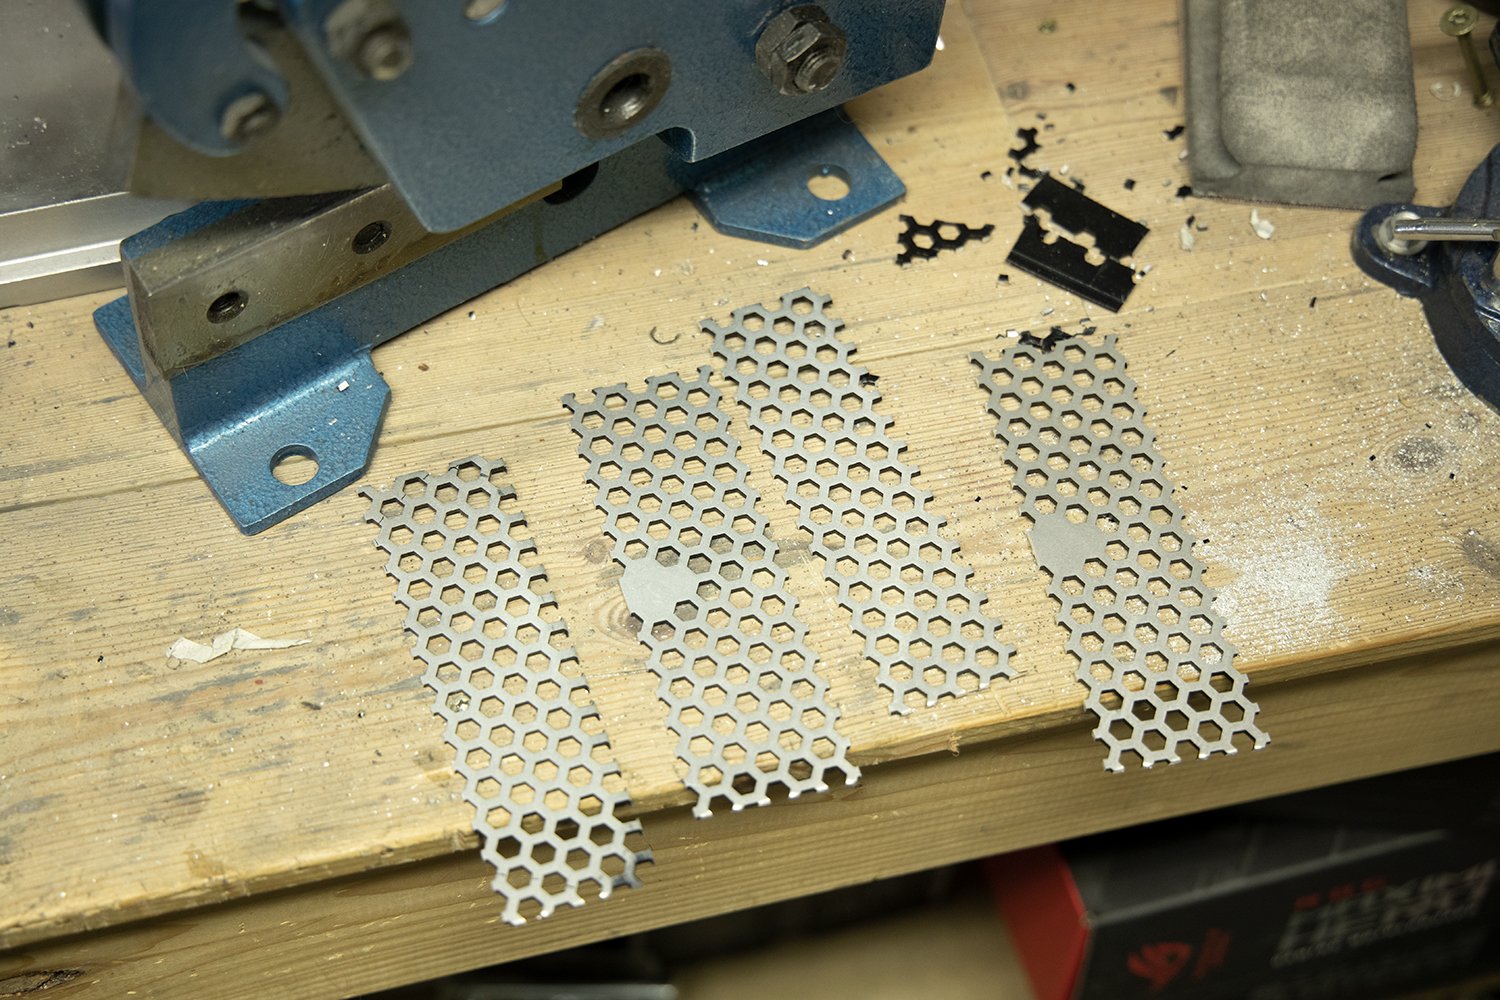
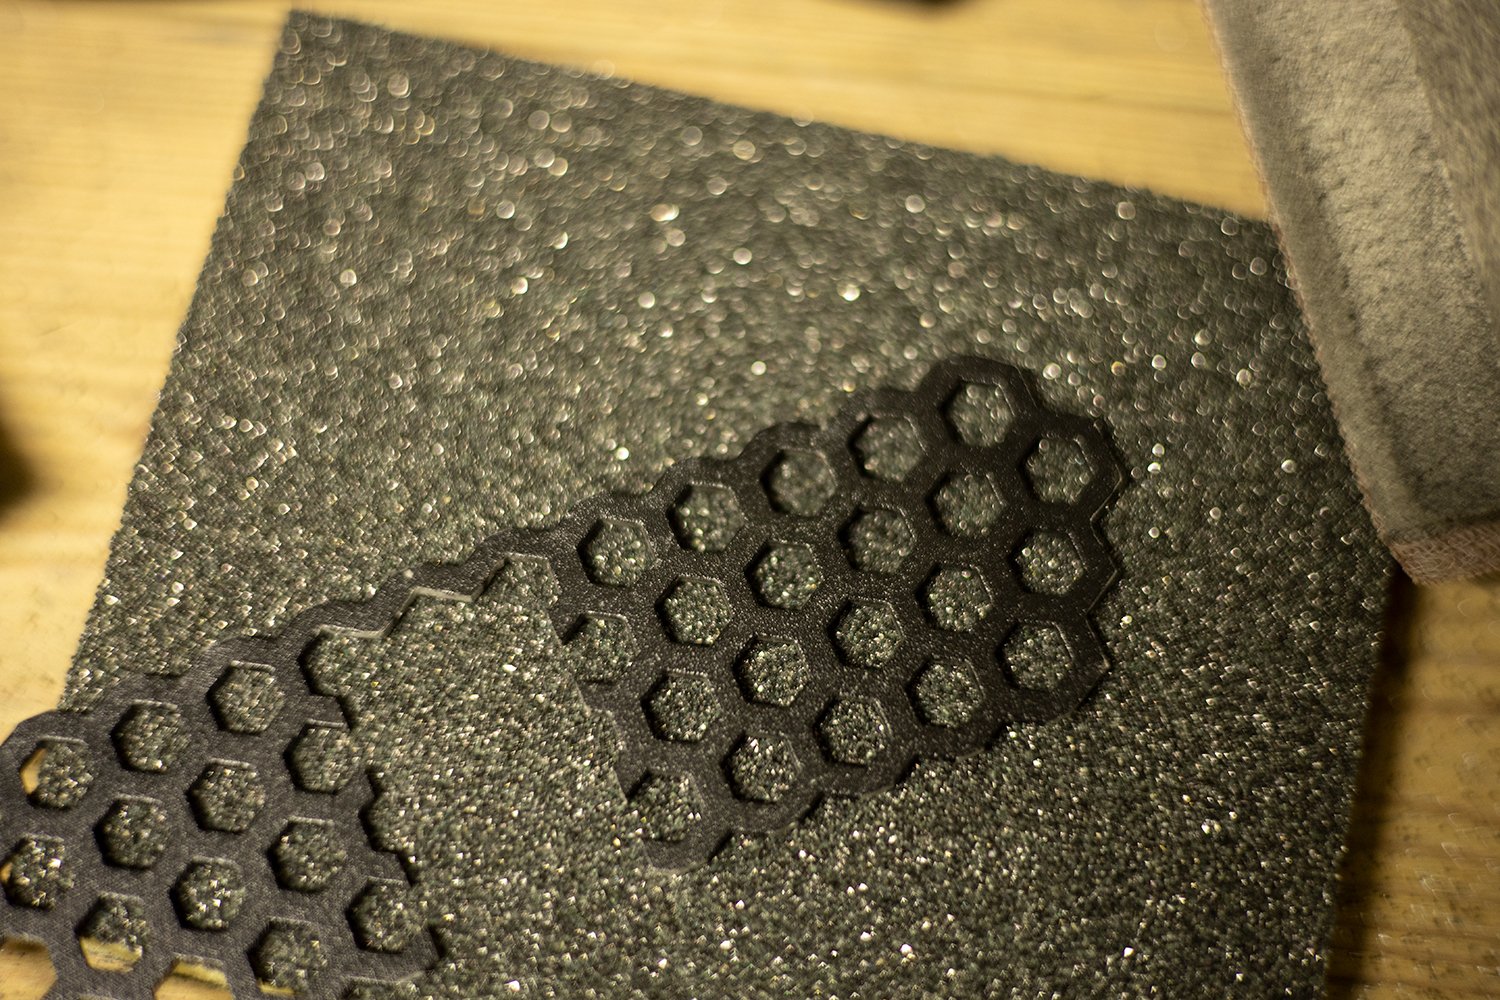
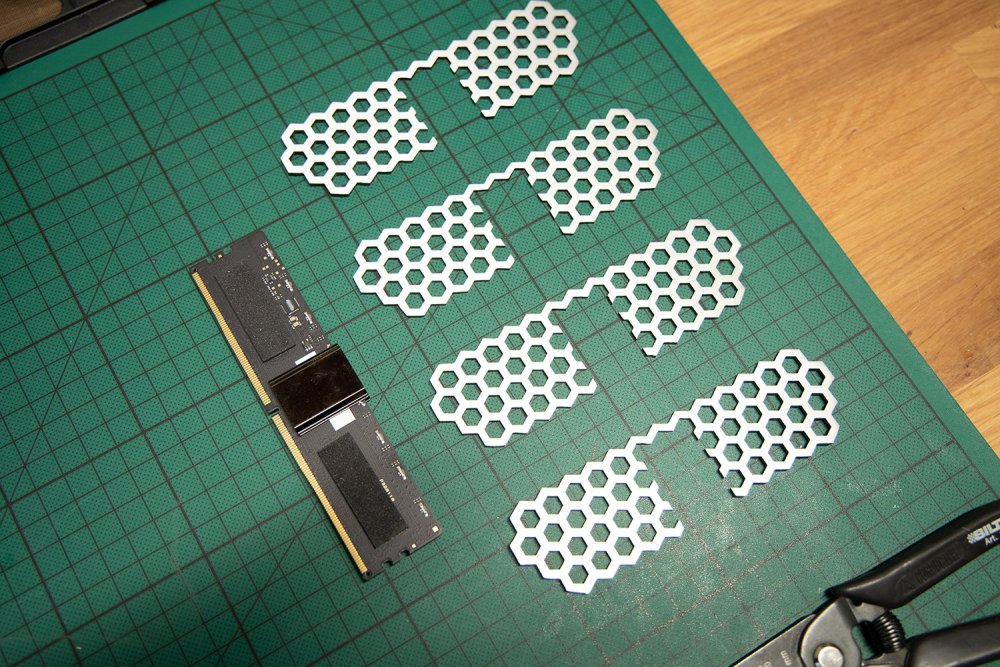
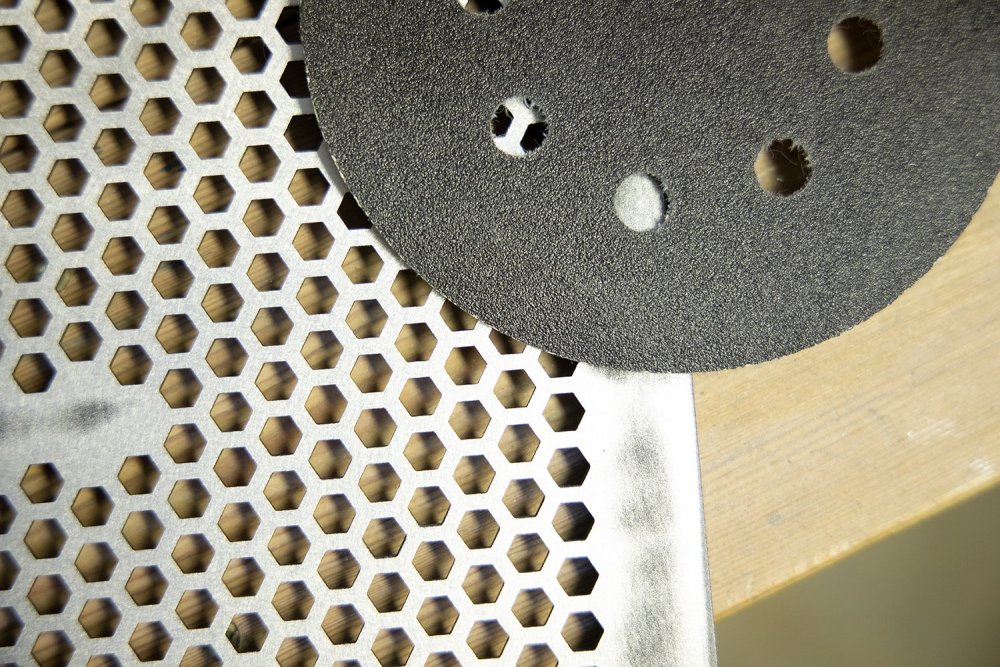
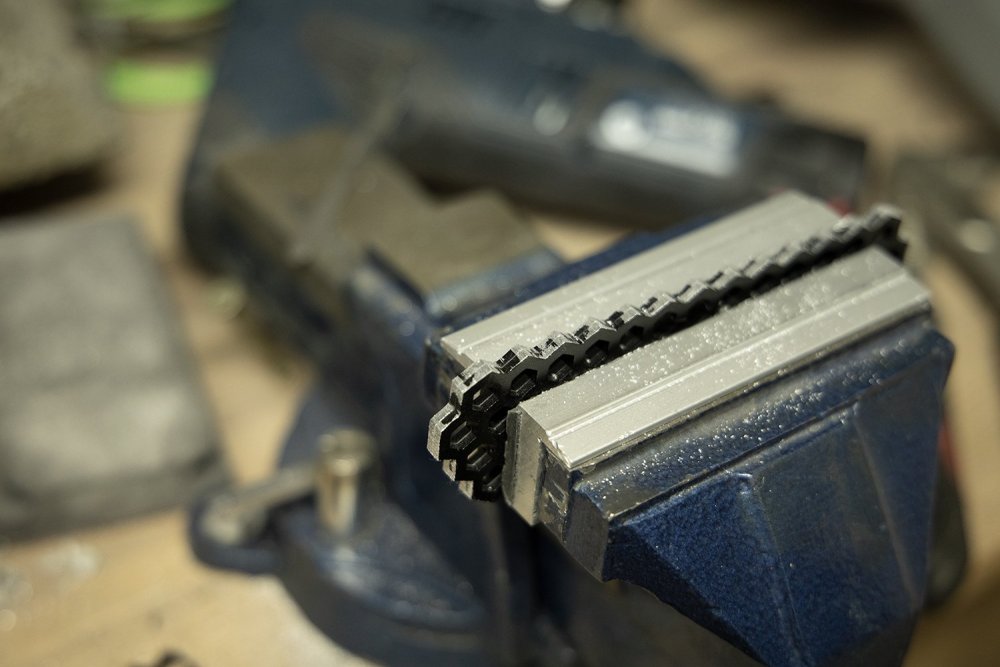
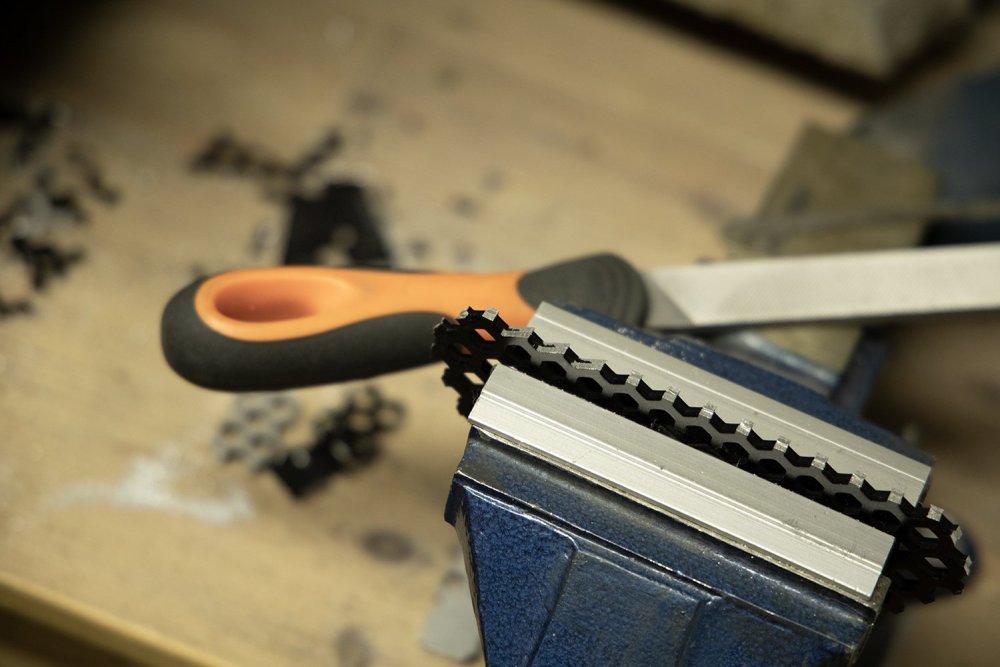
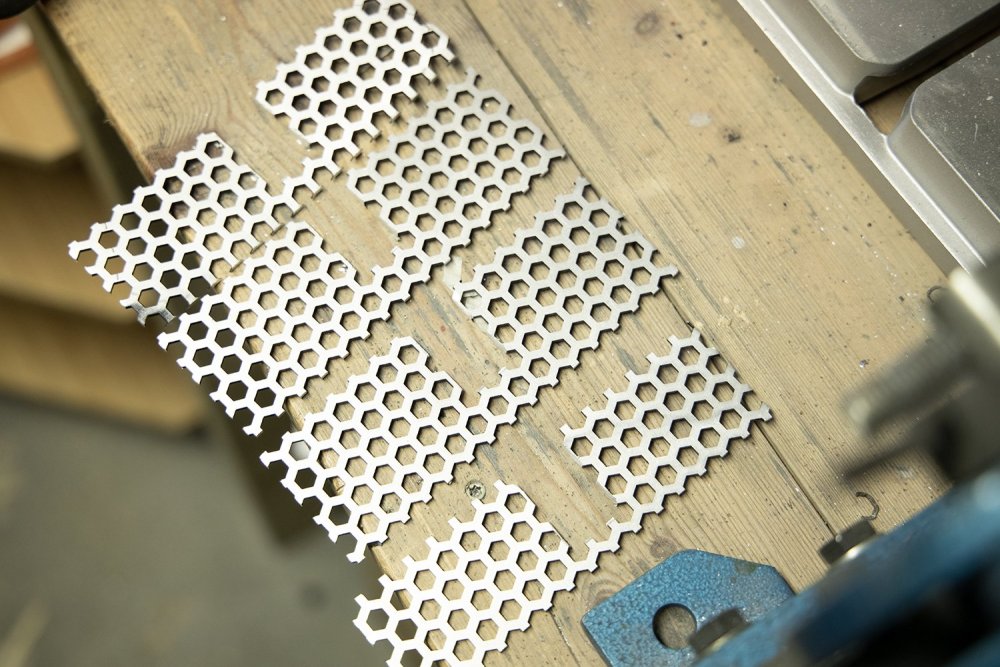
For the second set of 4 heat spreaders I decided to sand and polish the entire sheet before getting into any cutting. I realised that this was much more efficient as I could apply more force with my machine and still get an even surface. After som testing I've desided to go with final grit 600 and hand polish with abrasive cloth instead of mirror polish. This because it will catch the light much better! 80 - 120 - 240 - 400 - 600 grit passes make sure I get what I want With the sheet somewhat in the right finish it's time to start cutting. Did the outlines with my large bench cutter and the middle sections with an angle grinder. Final rough shaping and corner cutting and this is the result: After that I paired them together and use hand files to trim one pair at the time to the right pattern. At last the edges will be sanded and painted. I tried some accent color on some scrab metal I got from cutting and it did not meet my expectation. The black inside and outside edge is much more clean and goes way better with the smooth metal finish.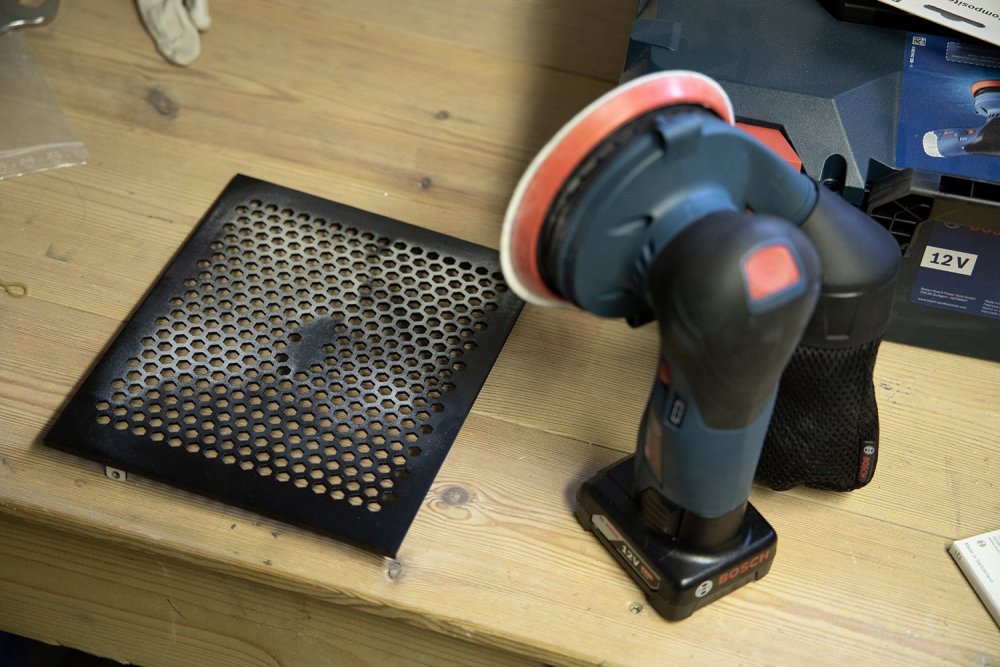


-
[Sweden] Tim Malmborg
Timpelay replied to TT Amanda's topic in 2023 Thermaltake RAM MOD Invitational Season 1
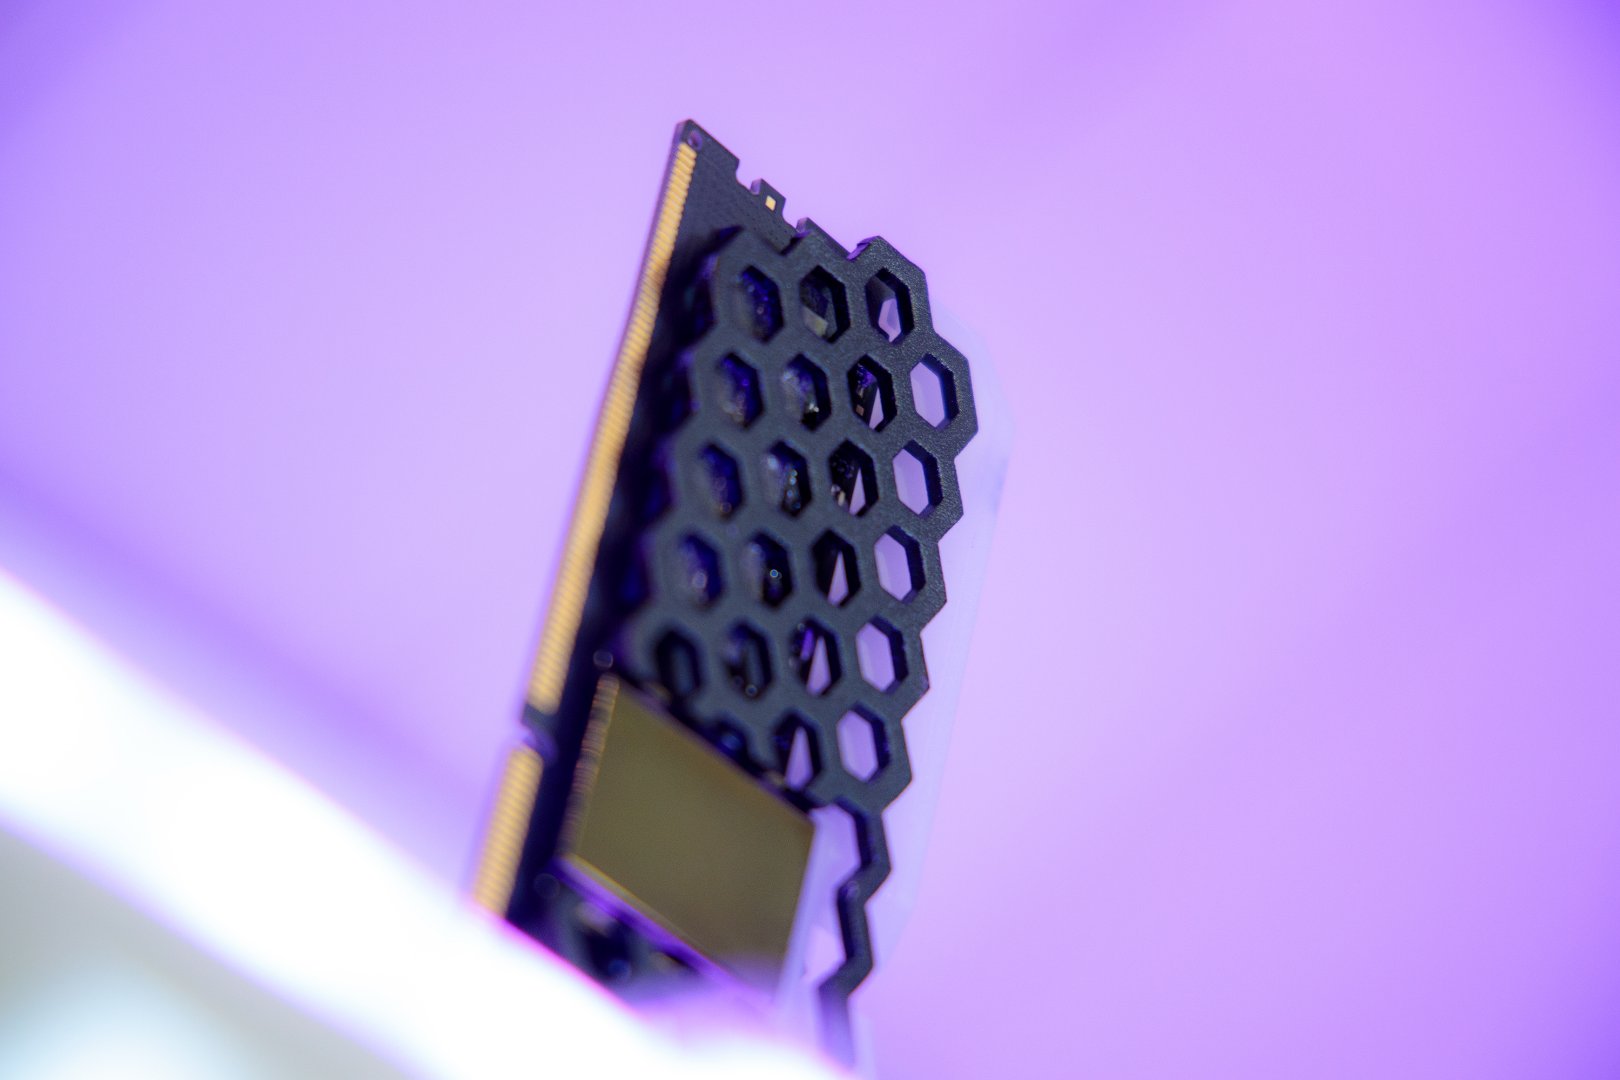
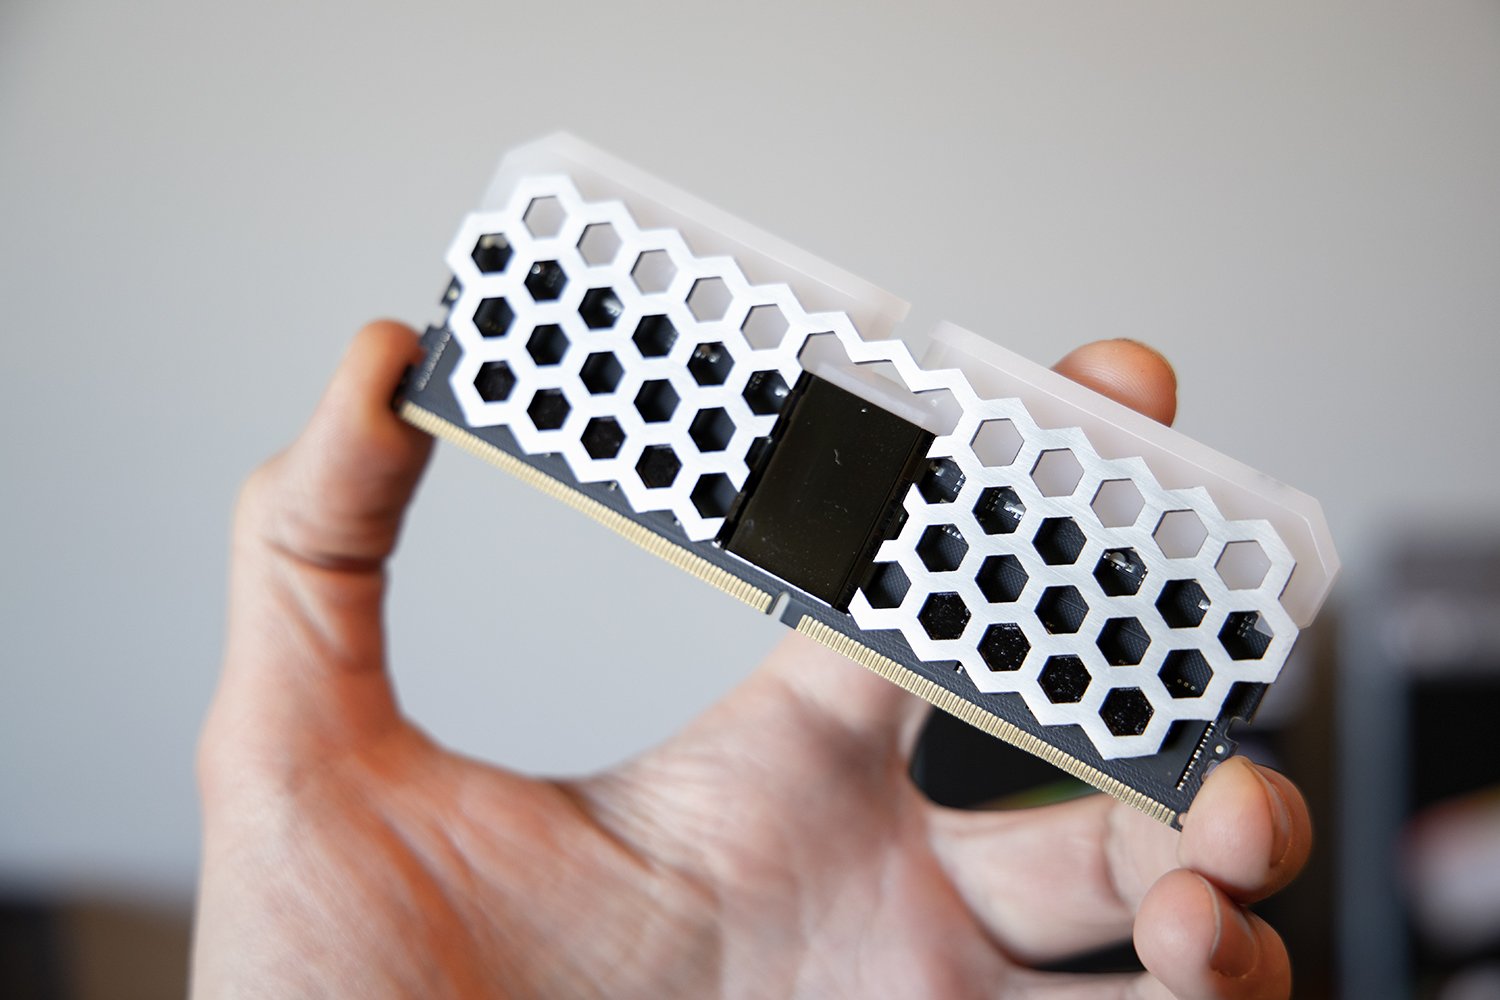
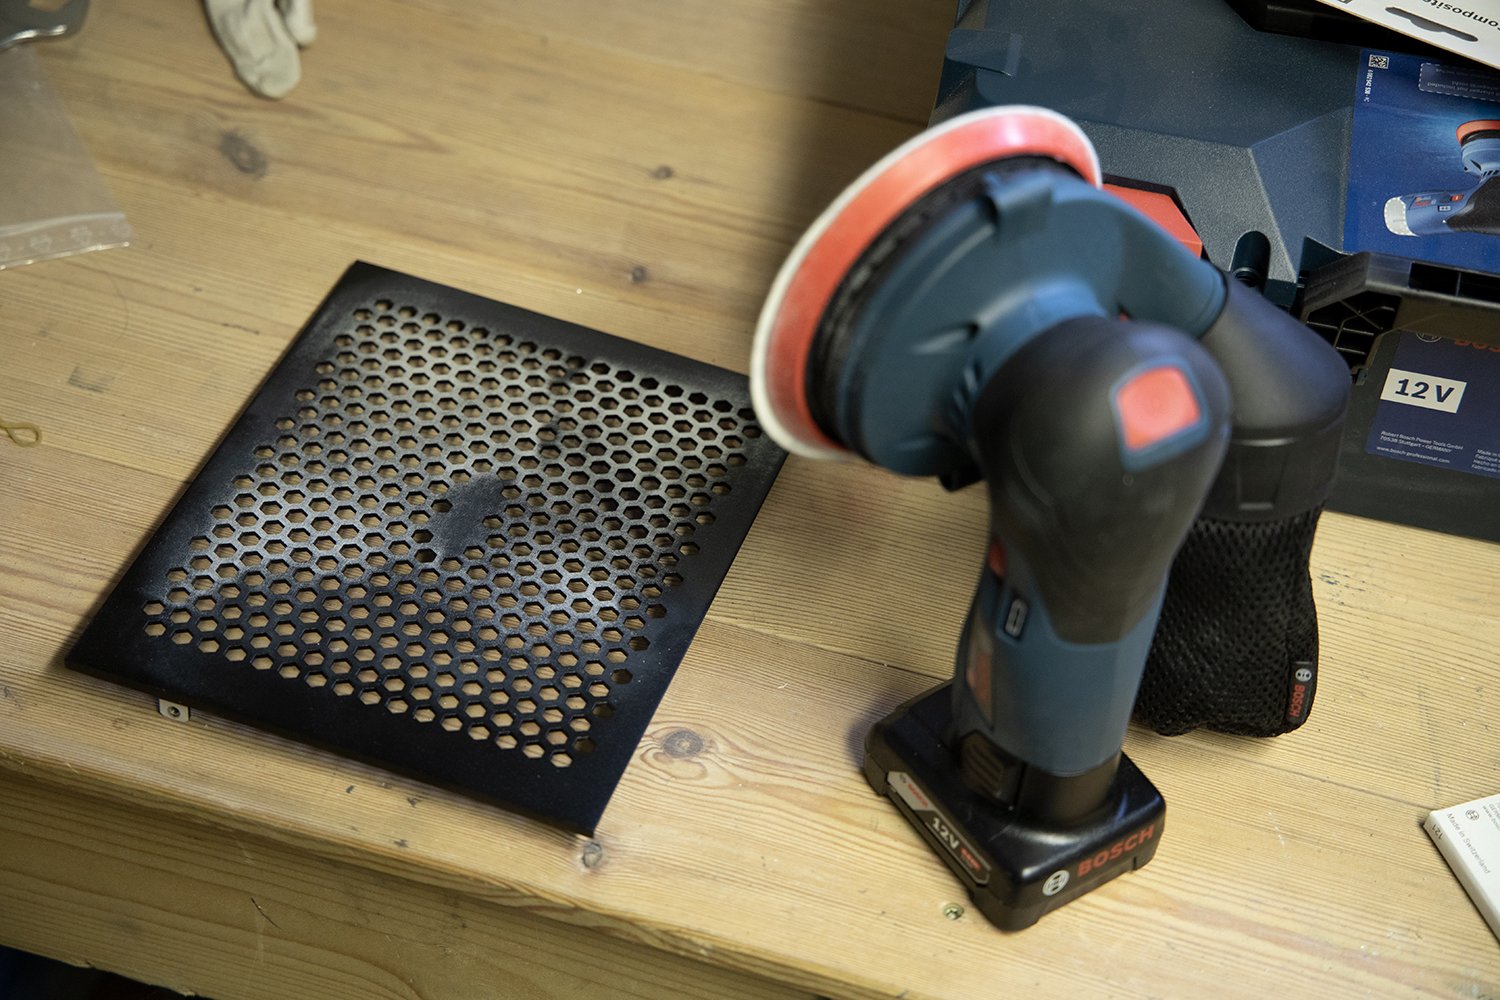
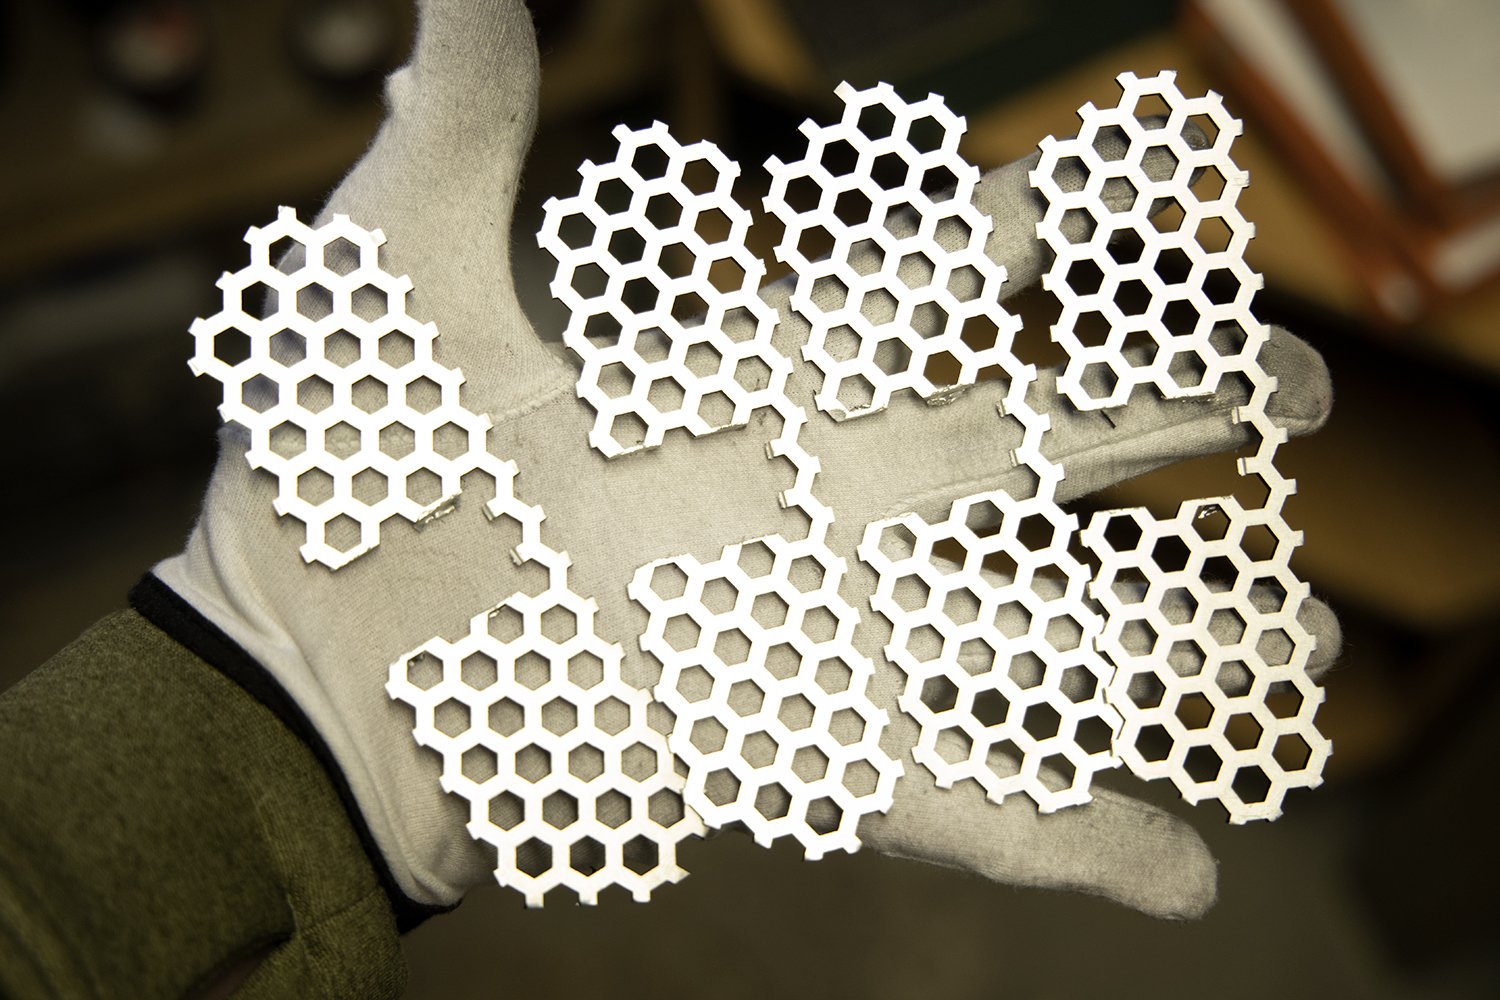
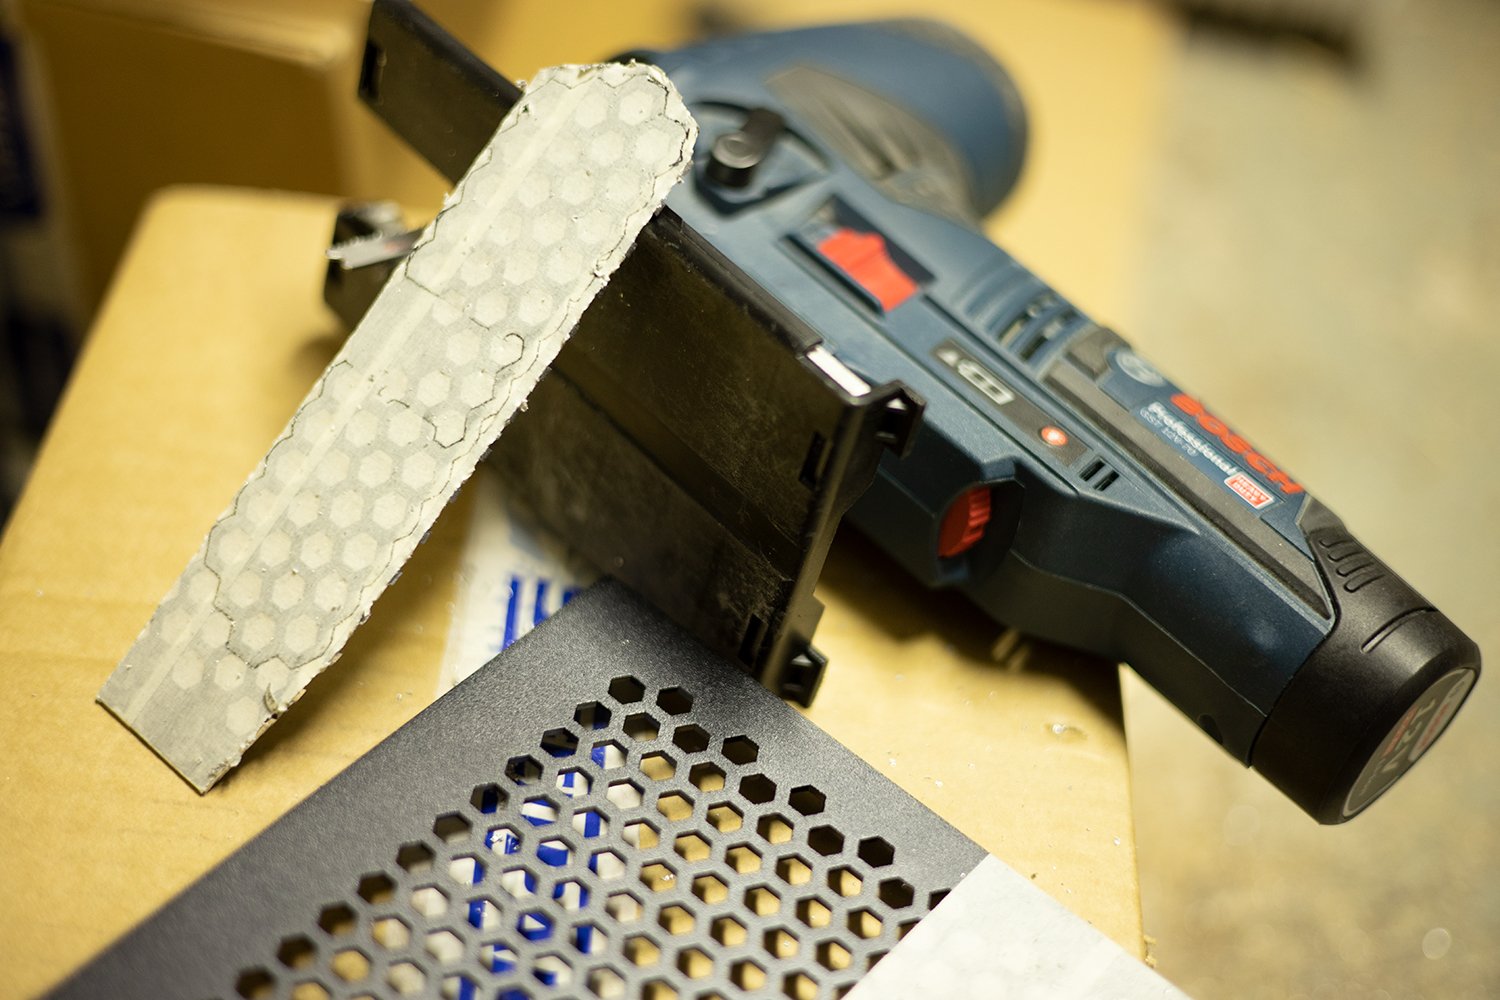
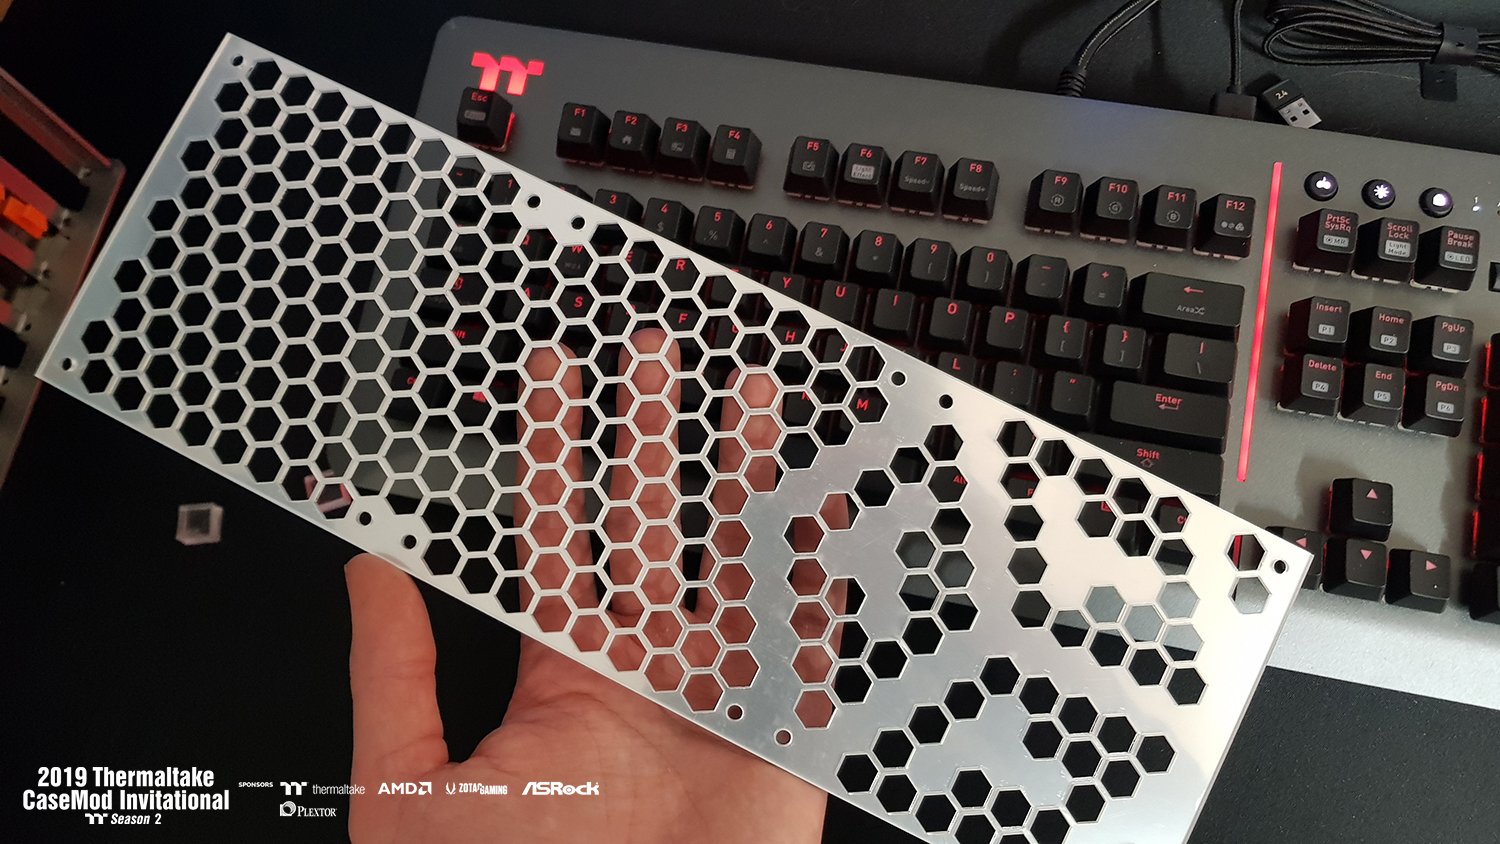
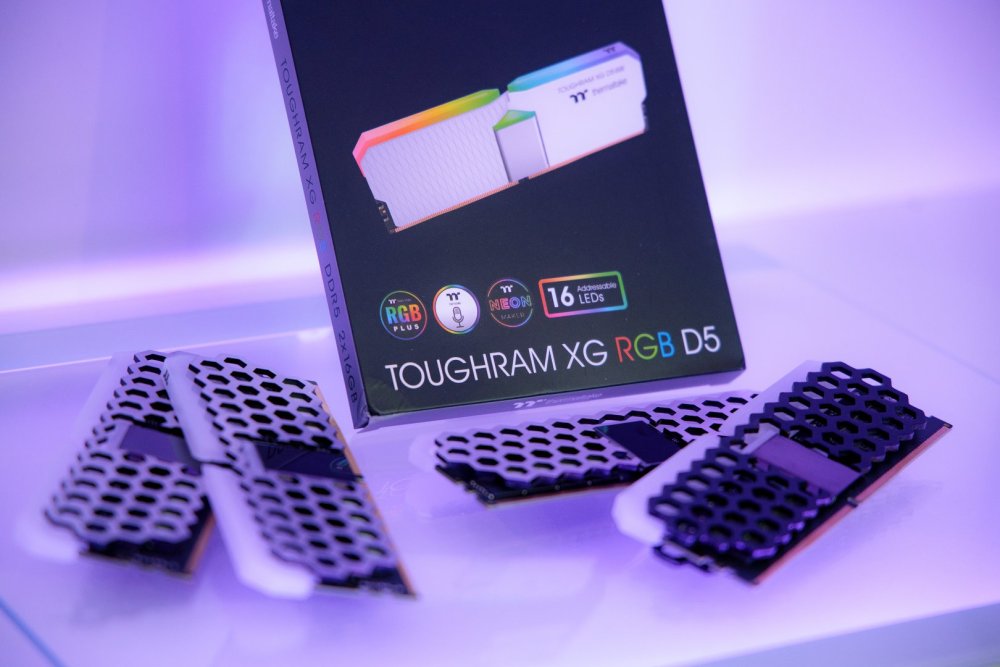
As I want to reuse material I decided to build with these aluminium side panels from another casemod. I tend to save alot of material that could be usefull in the future, and guess what, this is the perfect opportunity. The panels are something like 1,2 mm thick and got this honeycomb pattern that is what I use in many different variations for my brand. I will create new unique see-through heat spreaders for the ram and still be able to keep the center-piece and light diffuser at the top. The competition criteria to stay close to the original design, and yet be unique is important for me. Metal cutter, jiggsaw and files are base tools that I will use to get the heat spreaders into the right shape. The side sanded smooth. There will be a total of 8 heat spreaders when finished. But I'll start with 4 and then try what finish I think is the best. Right now it's tempting to high gloss polish the sides and paint the inside edge of the honeycombs in accent colors. Allthough the combination polished/black is really nice looking. I will probably have to try on some scrap metal to decide.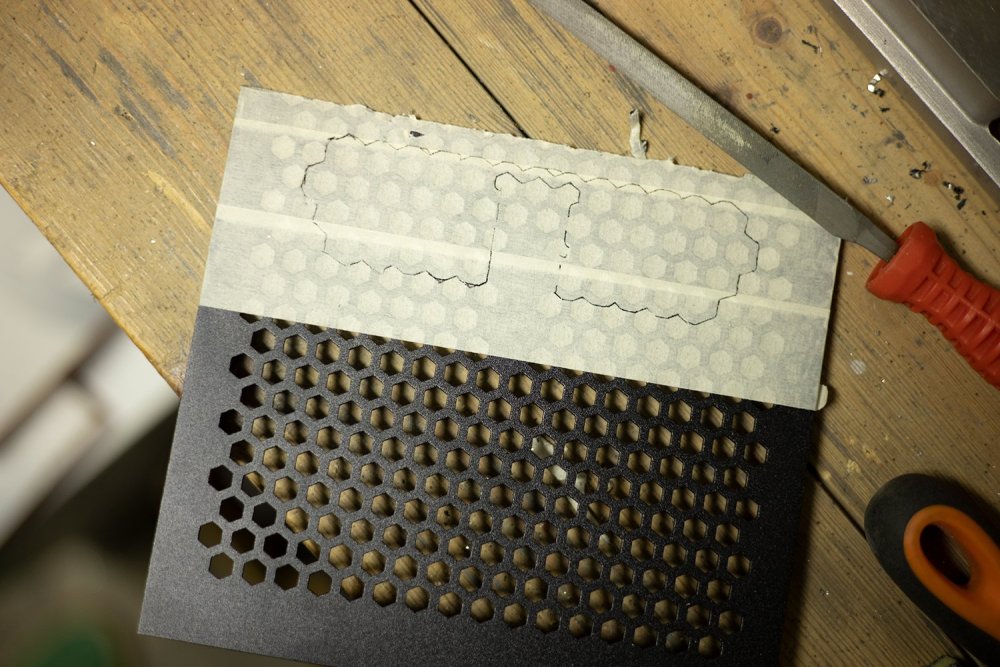


-
[Sweden] Tim Malmborg
Timpelay replied to TT Amanda's topic in 2023 Thermaltake RAM MOD Invitational Season 1
About time to get started! I've been considering a couple of different options for this project before deciding which one to go with. When doing this I came to the conclusion of some things I want to achive: Re-use material or use recycled material. (Reusing aluminium side panels from previous casemods) 2 different surface finishes for the sticks using the same design for all of them. (Smooth bare metal with black edges on one side and blackout on the other) Maintain or improve cooling capacity with the new design. Work with non PC-controlled tools. (Manual metal cutter, jiggsaw, files, sanding/polishing) Focus 100% on the RAM itself Have you ever seen a see-through RAM heat spreader? -
[Sweden] Tim Malmborg
Timpelay replied to Tt Andy's topic in 2019 Thermaltake CaseMOD Invitational Season 2
Thanks! -
[Sweden] Tim Malmborg
Timpelay replied to Tt Andy's topic in 2019 Thermaltake CaseMOD Invitational Season 2
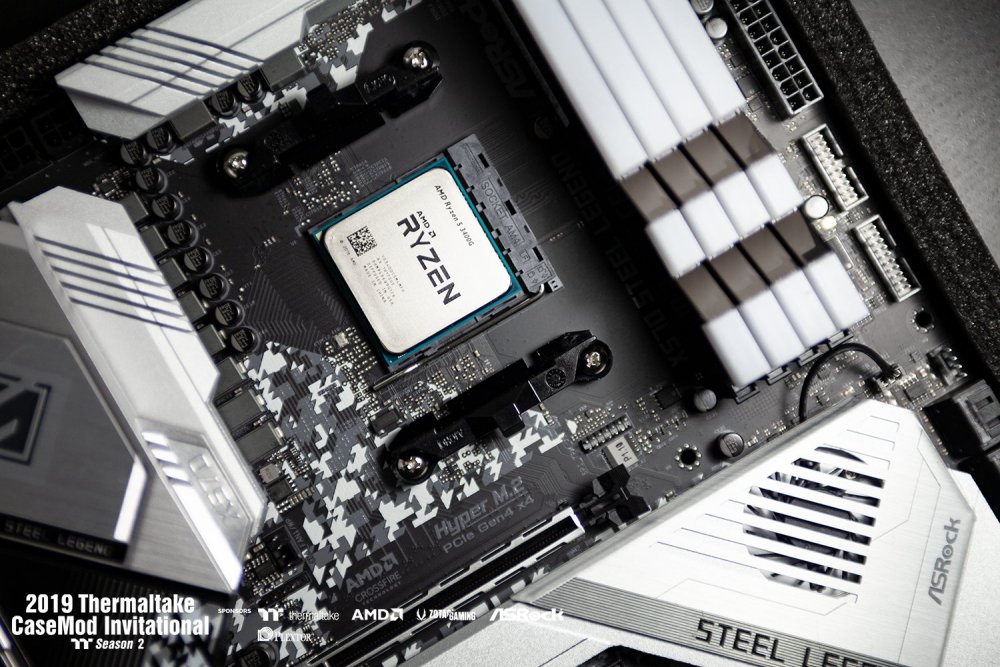
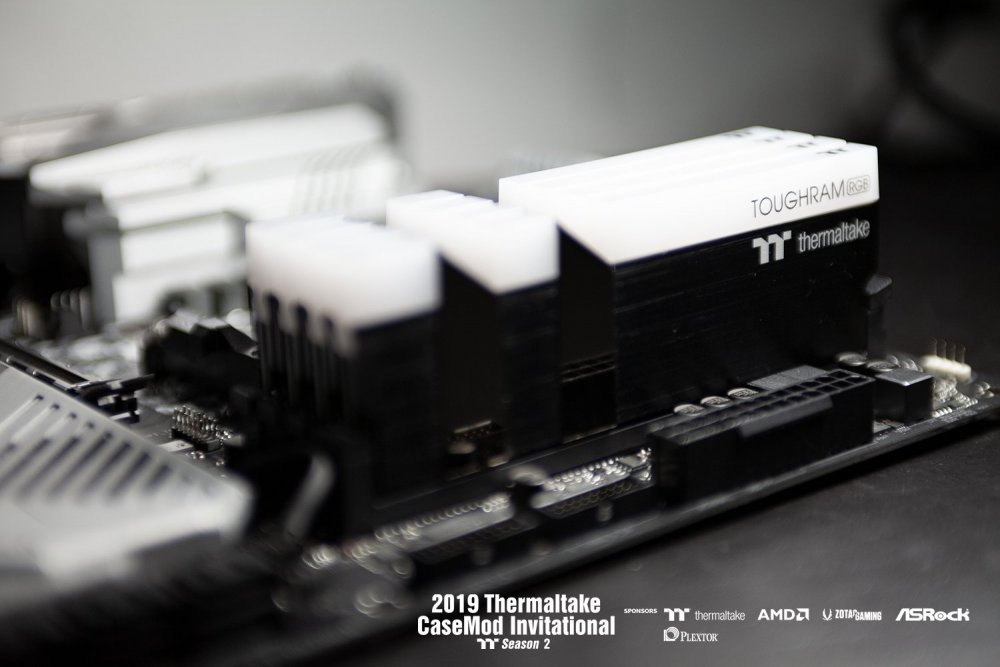
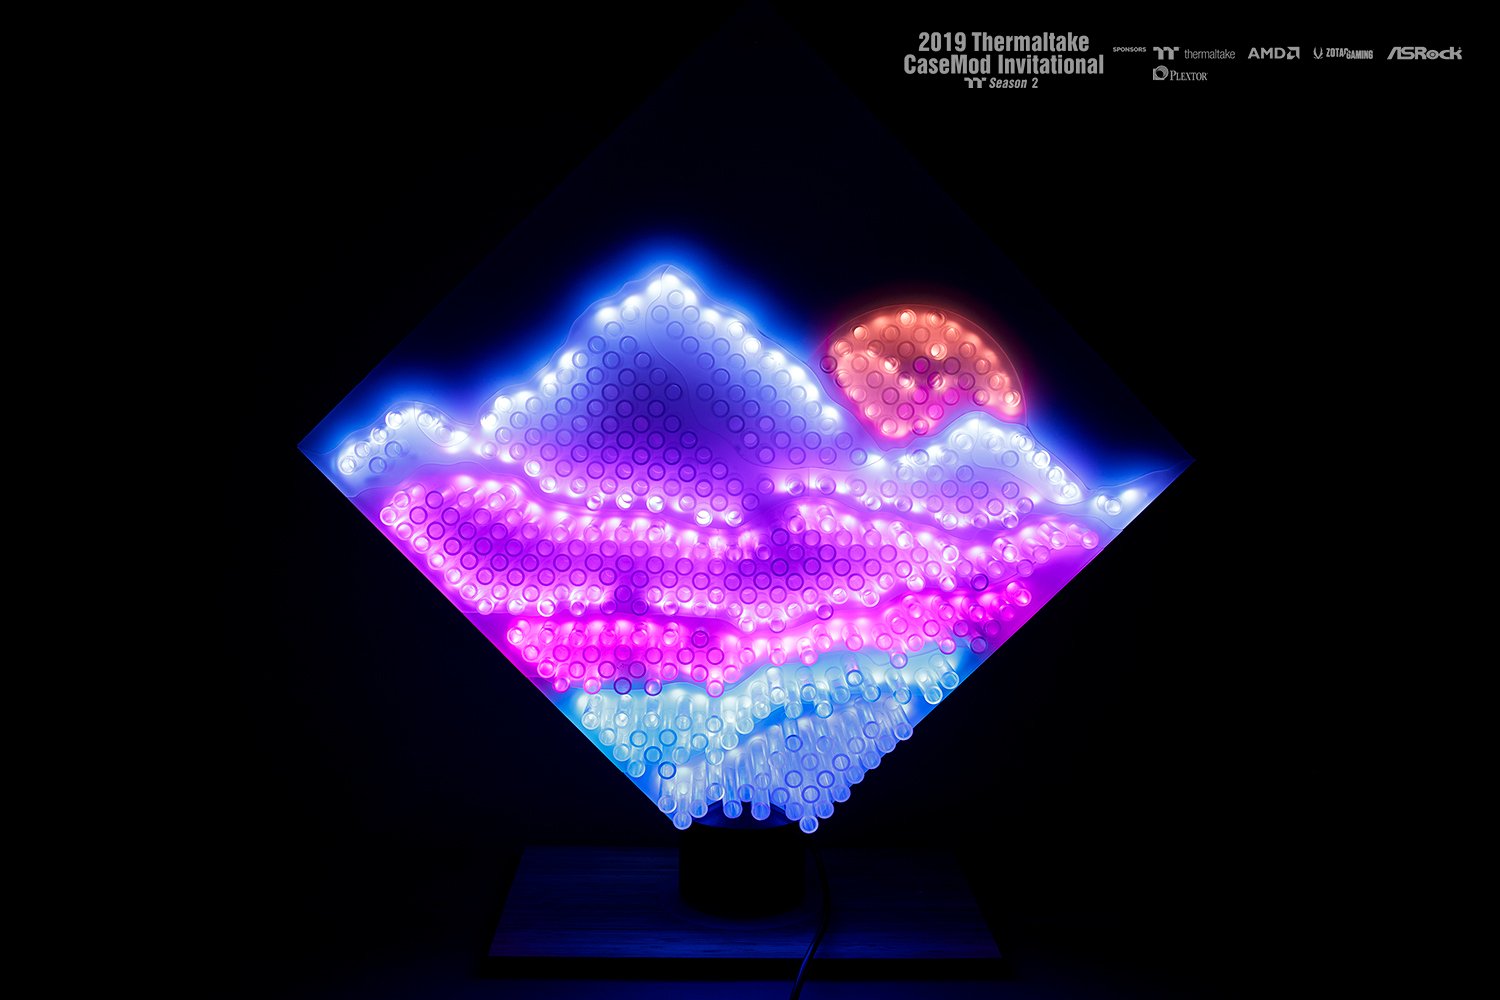
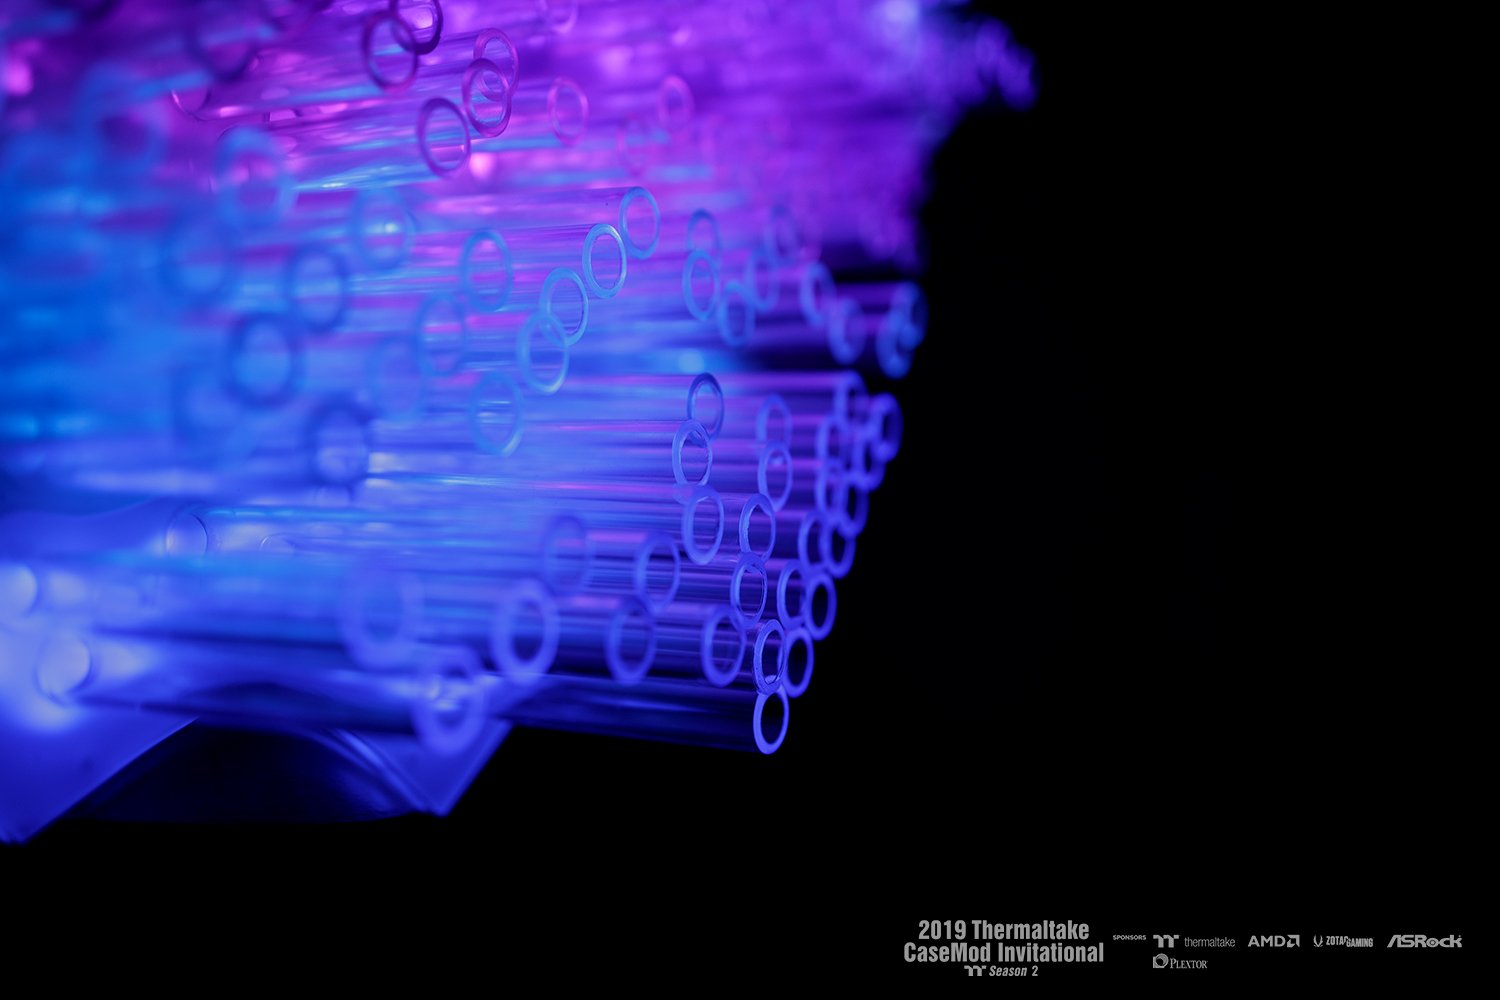
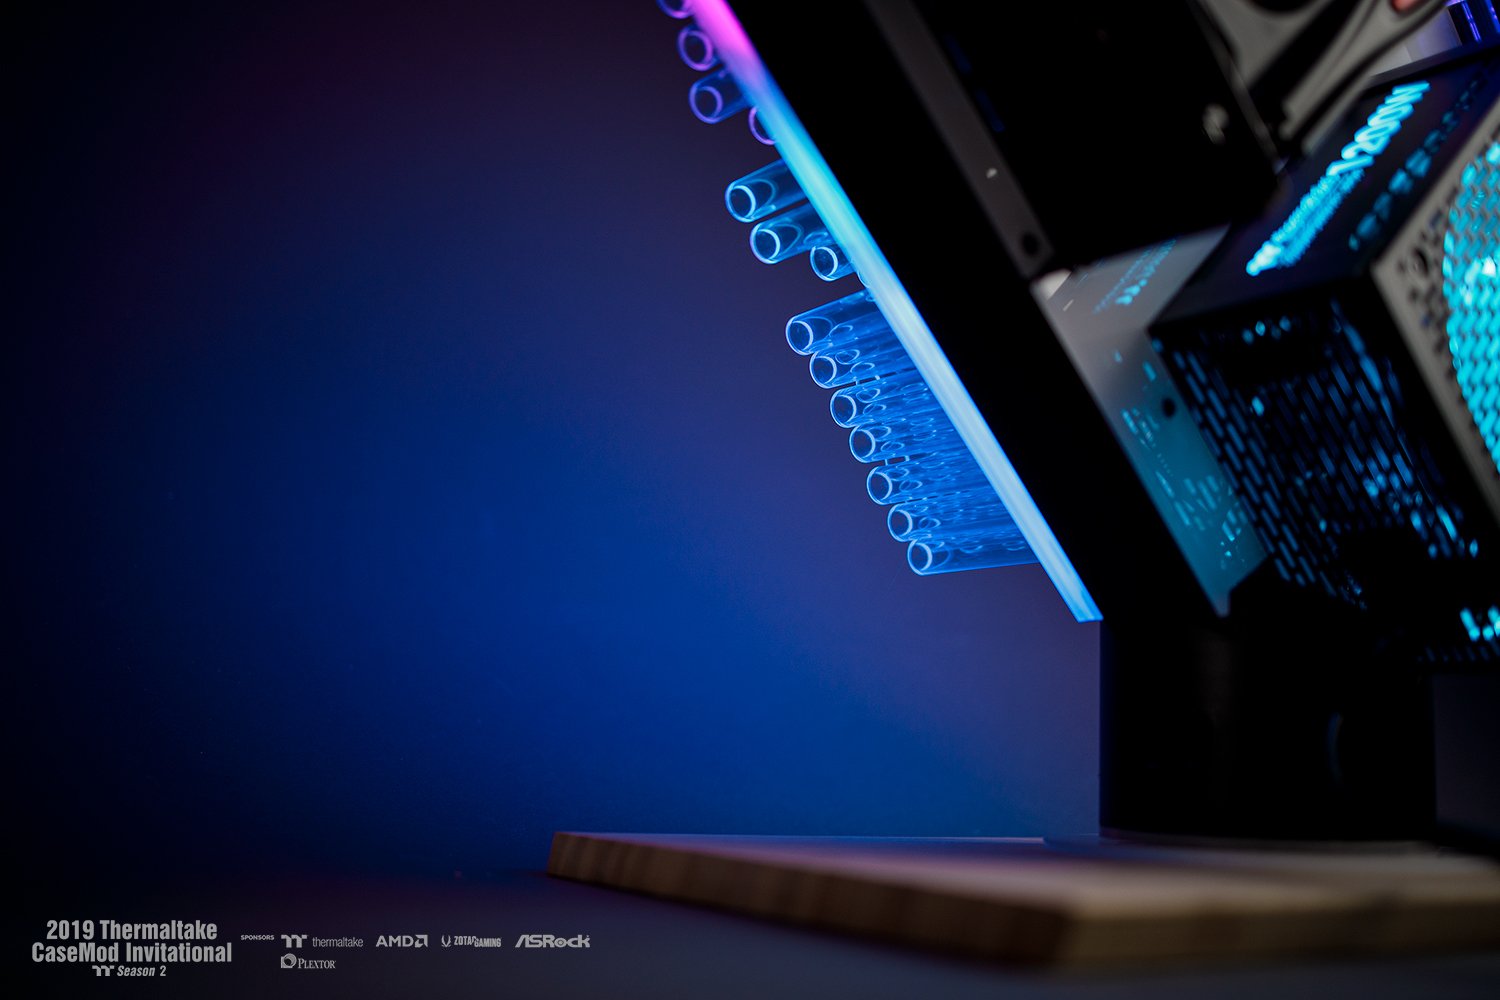
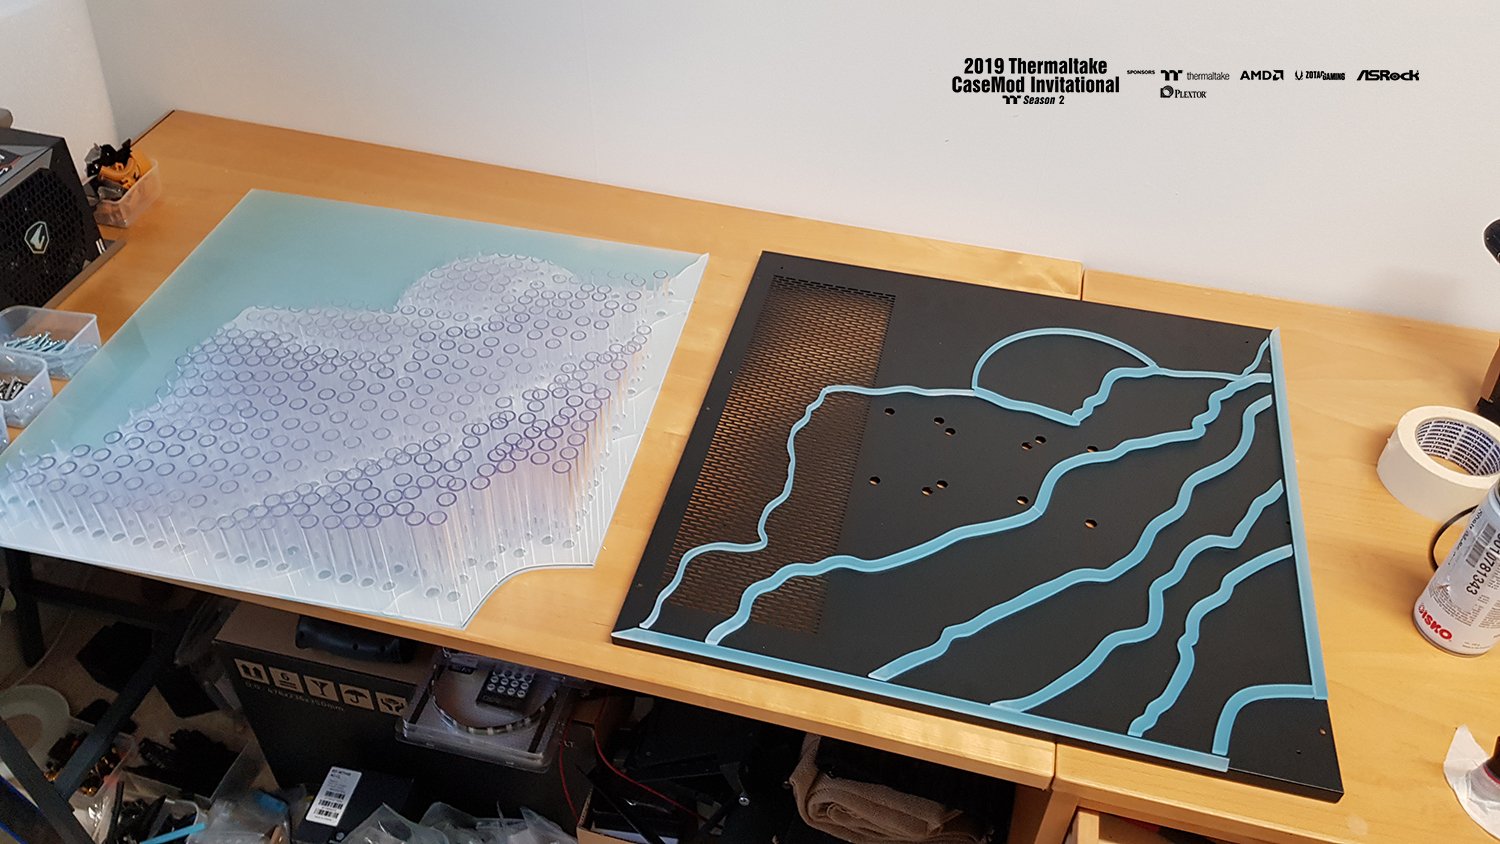
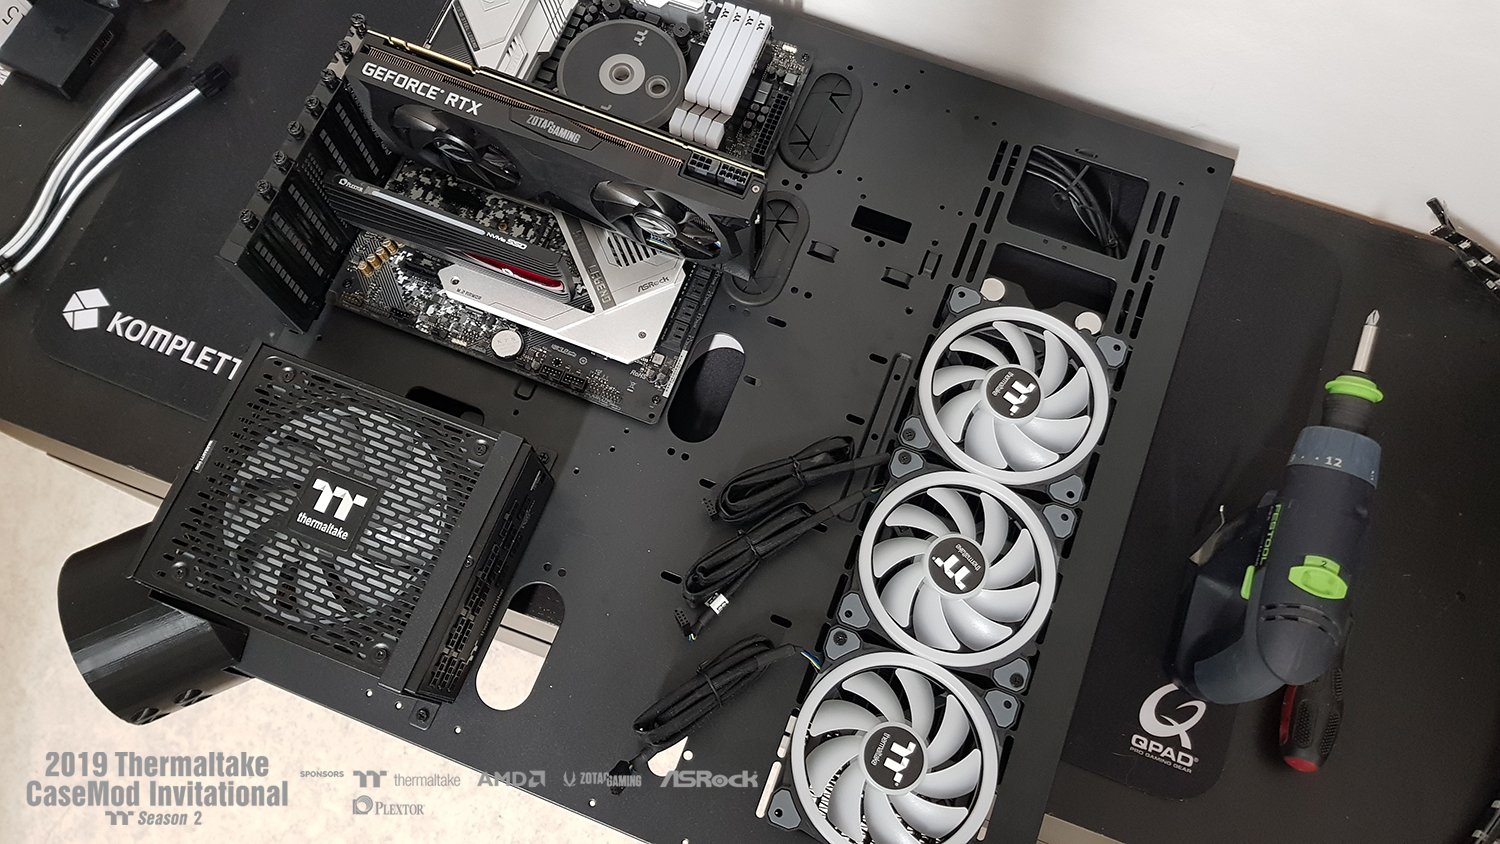
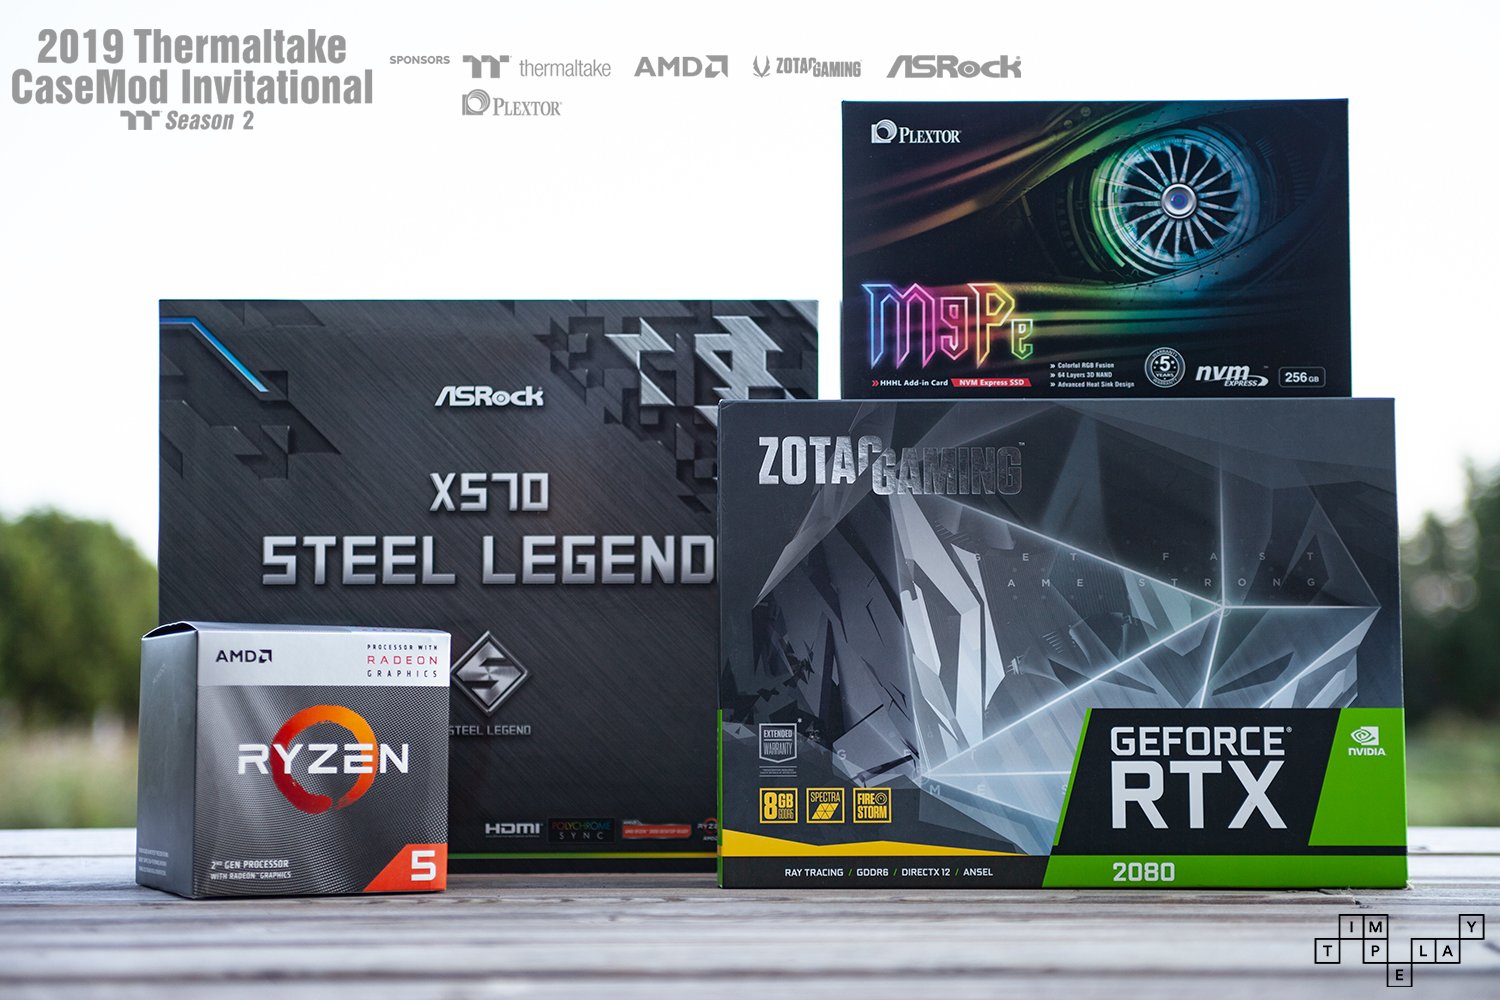
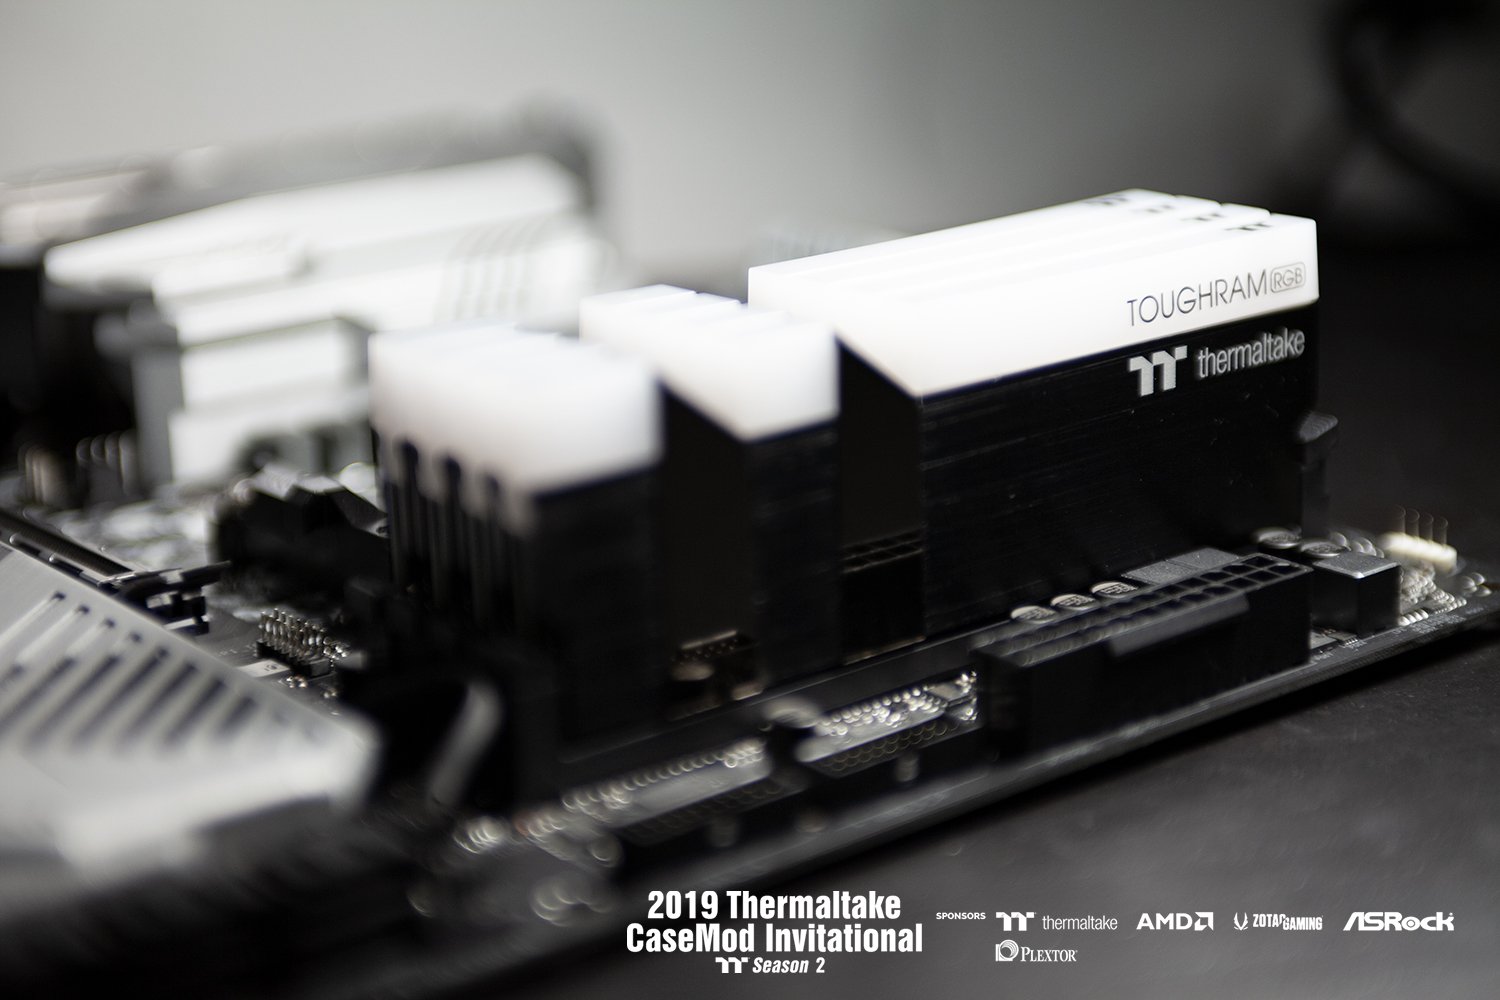
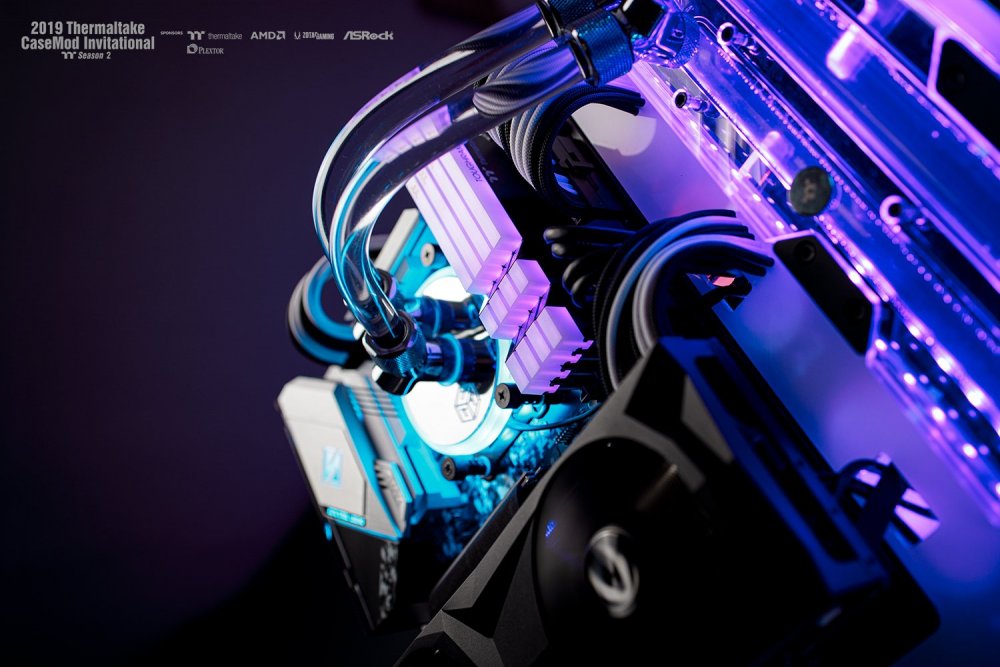
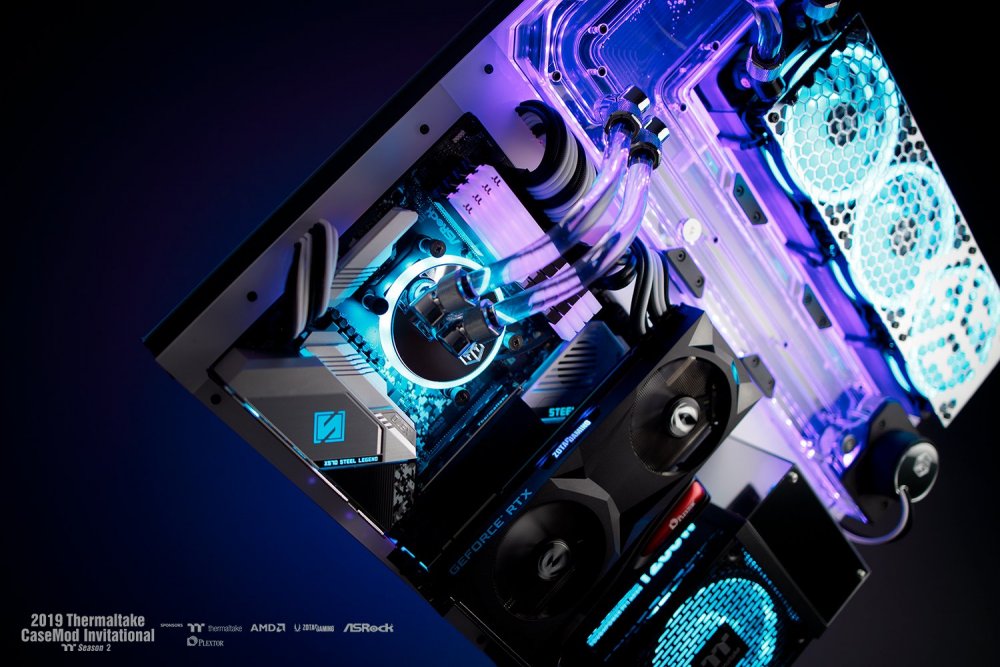
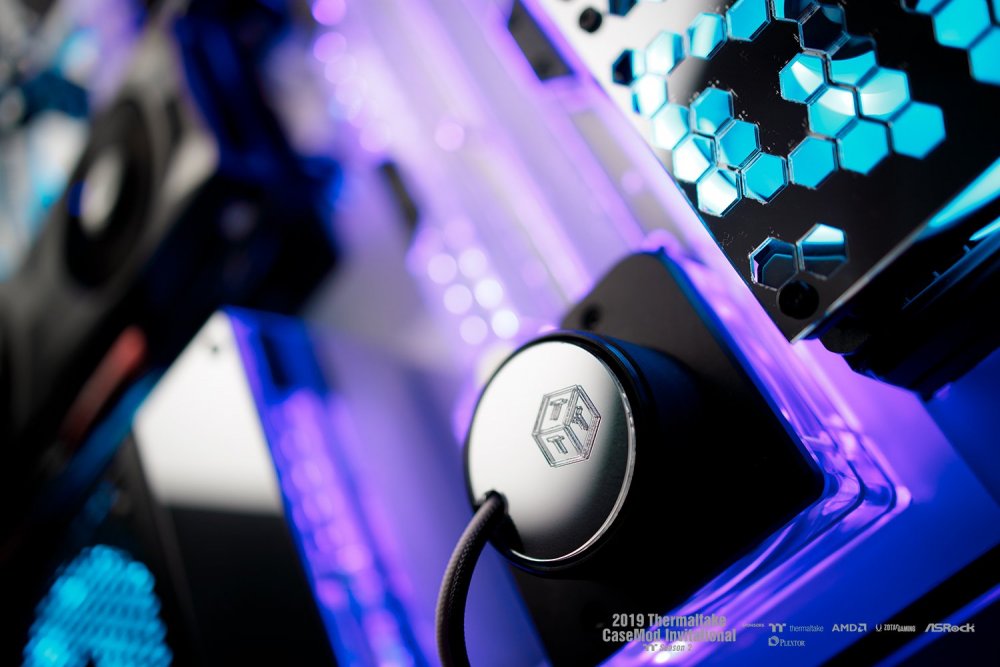
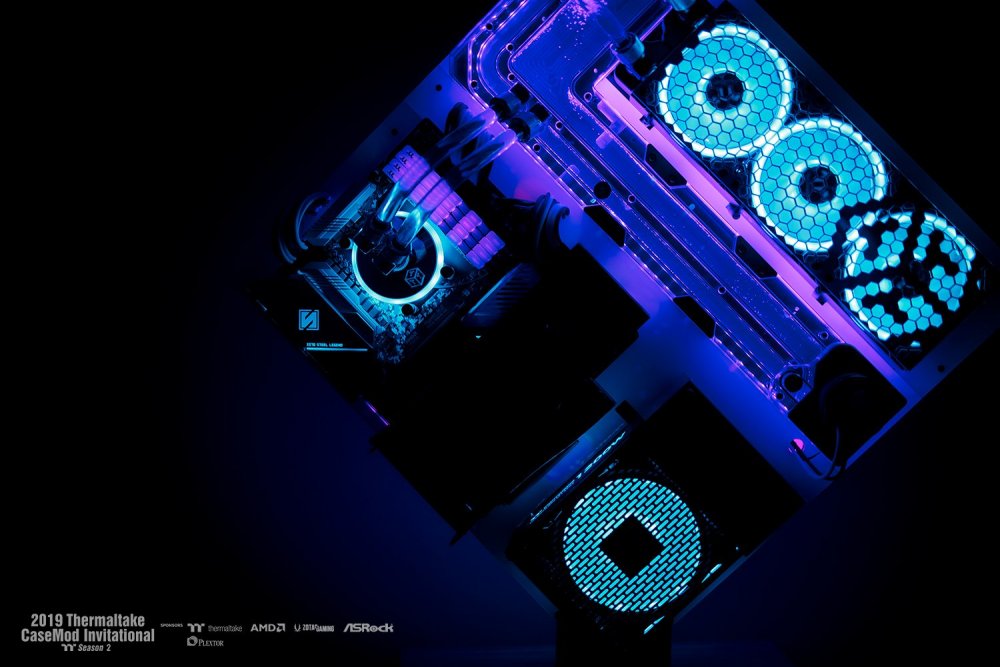
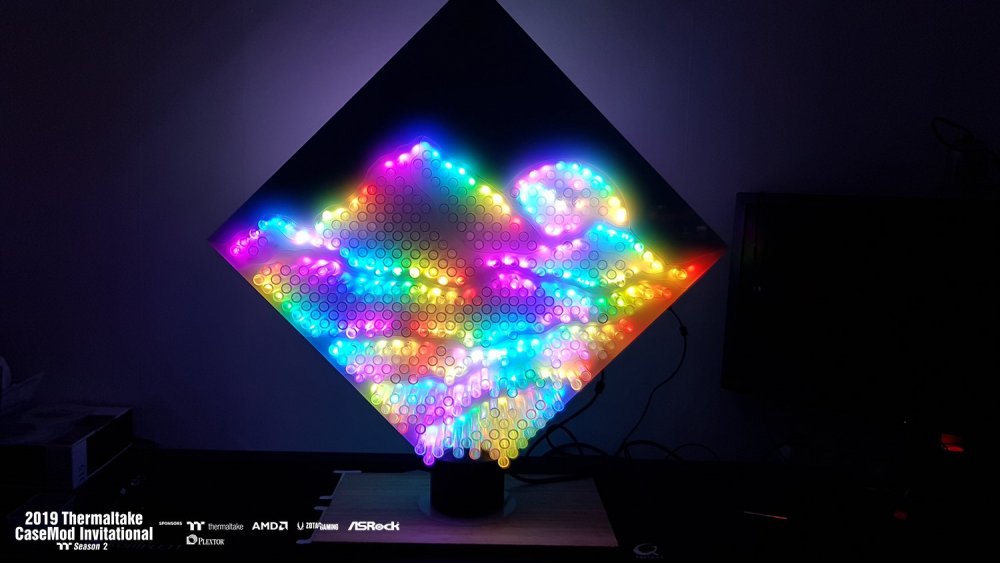
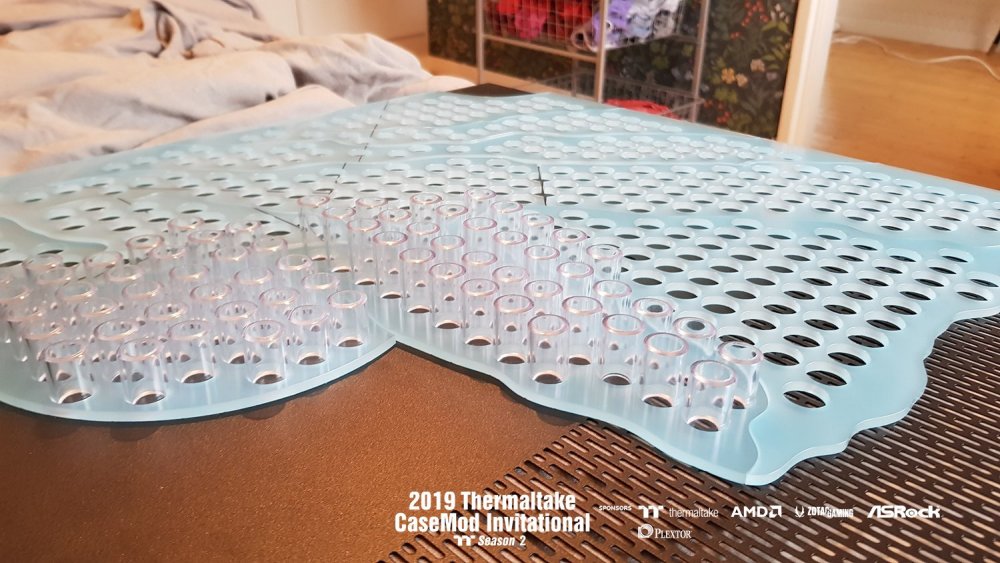
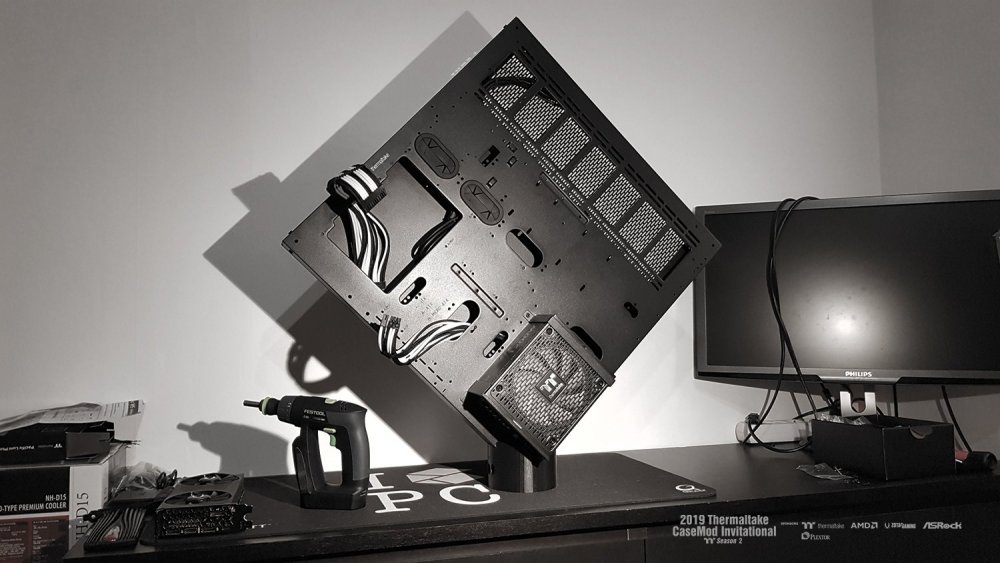
My ambition with this project has been to try somethings that’s not been done before. The Thermaltake P5 is the perfect case for this mission as it’s extremely popular and been previously modded beyond recognition by other modders all over the world. Two key points were set up before the start of this project. • The P5´s original character should be kept. For me, this means doing a casemod were you easily can recognise the original case in the finished mod. • Transforming this case without doing what someone else already have done with it. This meant scanning as many P5 (and similar TT cases) builds as possible before I began my project. The backside straw-art is made from three layers of acrylic. Bottom one acts as separator between light zones and also holds the LED-strips in place for each zone. Middle layer is the diffuse light screen for even light distribution to the pipes. It also acts as the sky with the back painted top section. Top layer holds all ~400 pipes in place creating this magnificent mountain view. As everything is built using TT RGB products ther's possibility to sync and controll by voice through TT RGB Plus - sync all. The front is built to be as slim and clean as possible with laser cut acrylic covers for the entire chassi. Things as CPU-block, pump, fan grille and PSU-shroud are personalized with thin mirror-acrylic. Not that you can't notice, but the entire case is turned to stand on one edge using a 3D-printed stand with a built in turning plate for rotation 360-degrees. Choose side each day! Specification: - TT Core P5 TG V2 - TT Toughpower PF1 ARGB 1200 watt, Platinum - Asrock x570 Steel Legend - AMD Ryzen 5 3400G - Plextor 256gb M9PE NVMe - Zotac RTX 2080 - 32gb TT Toughram RGB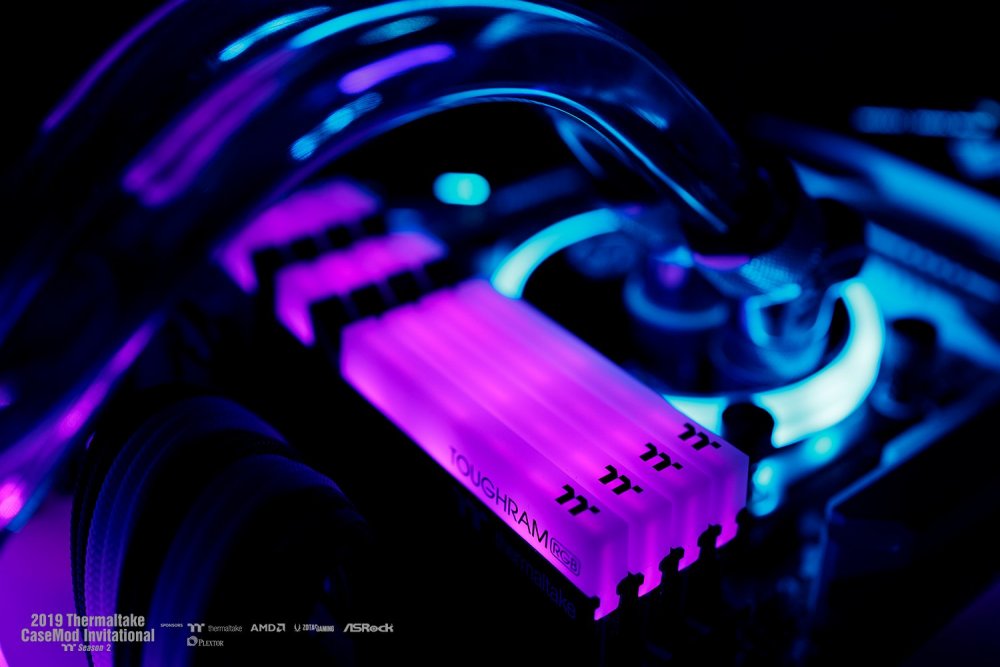


-
[Sweden] Tim Malmborg
Timpelay replied to Tt Andy's topic in 2019 Thermaltake CaseMOD Invitational Season 2
Final assembly! The best part when all parts come together and form what you have been working on for so long! There's much details to show but I will keep that to my final pictures! First start! How about we set som LEDs up See you at the finishline!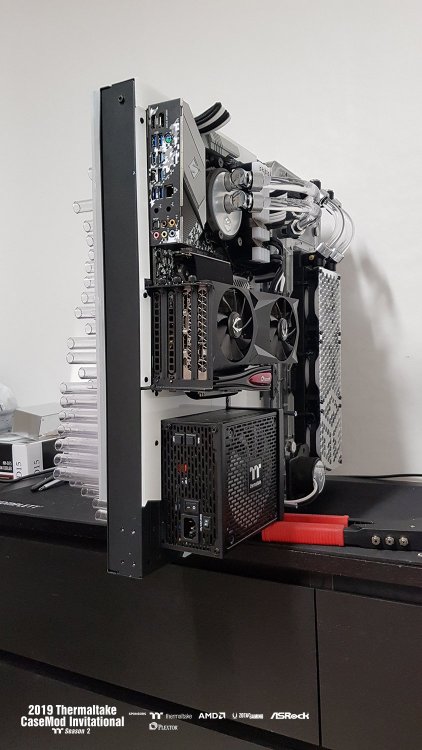
-
[Sweden] Tim Malmborg
Timpelay replied to Tt Andy's topic in 2019 Thermaltake CaseMOD Invitational Season 2
Thanks! -
[Sweden] Tim Malmborg
Timpelay replied to Tt Andy's topic in 2019 Thermaltake CaseMOD Invitational Season 2
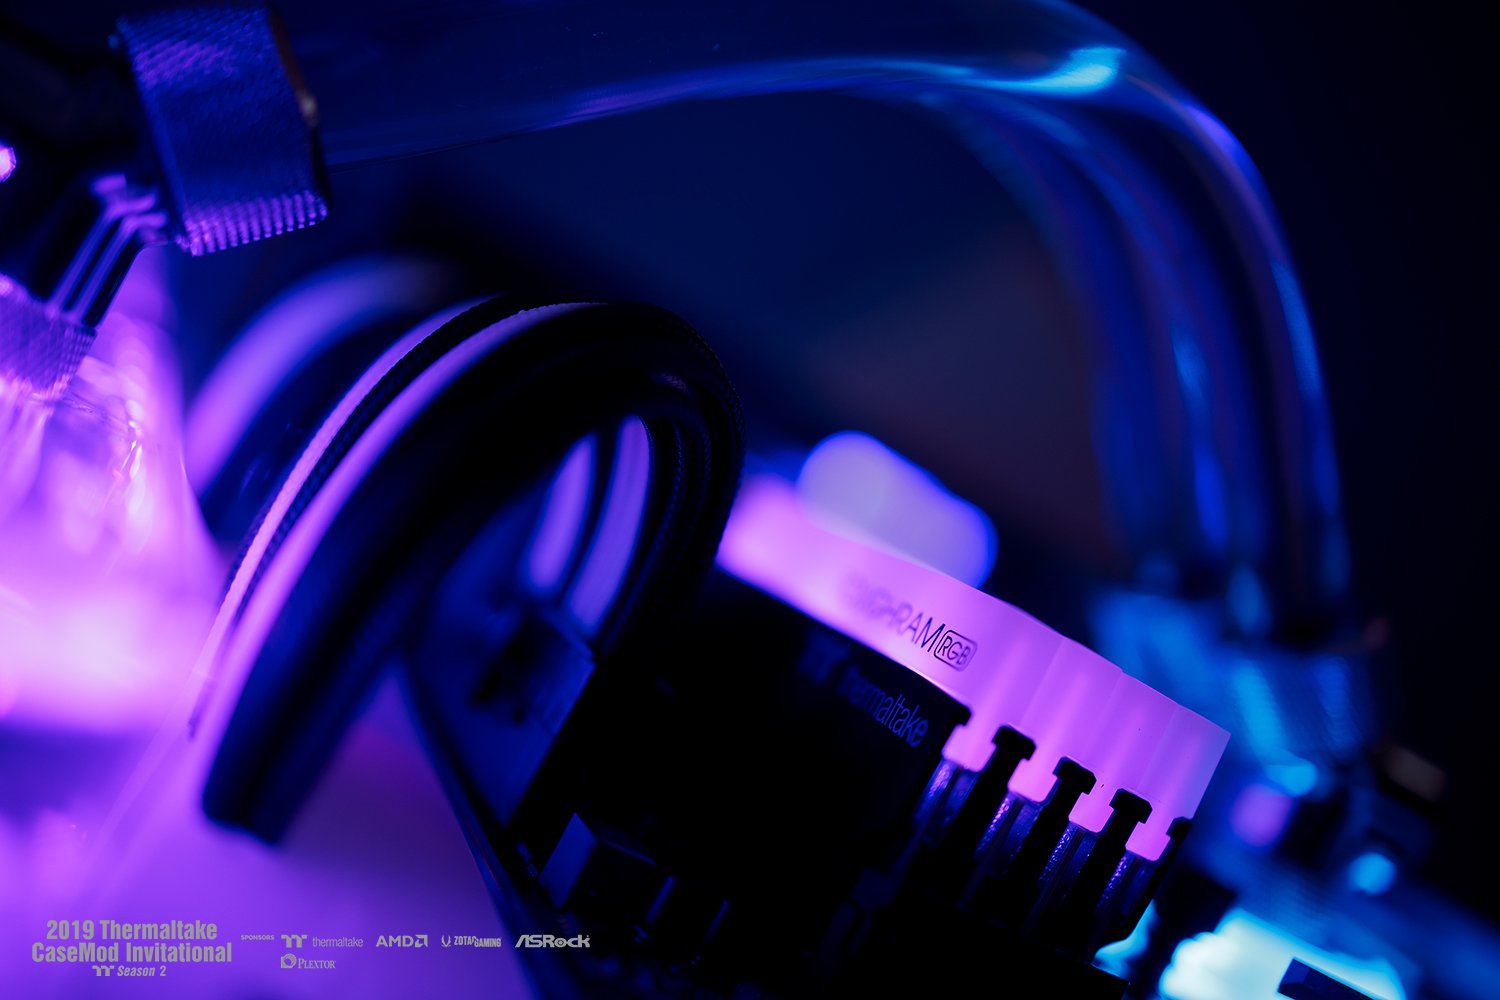
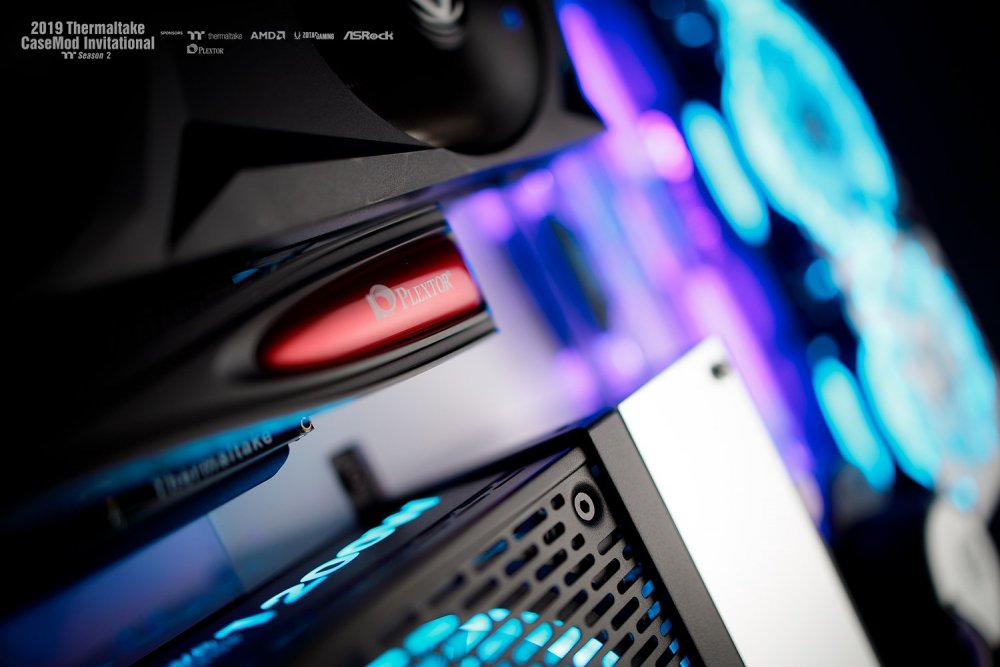
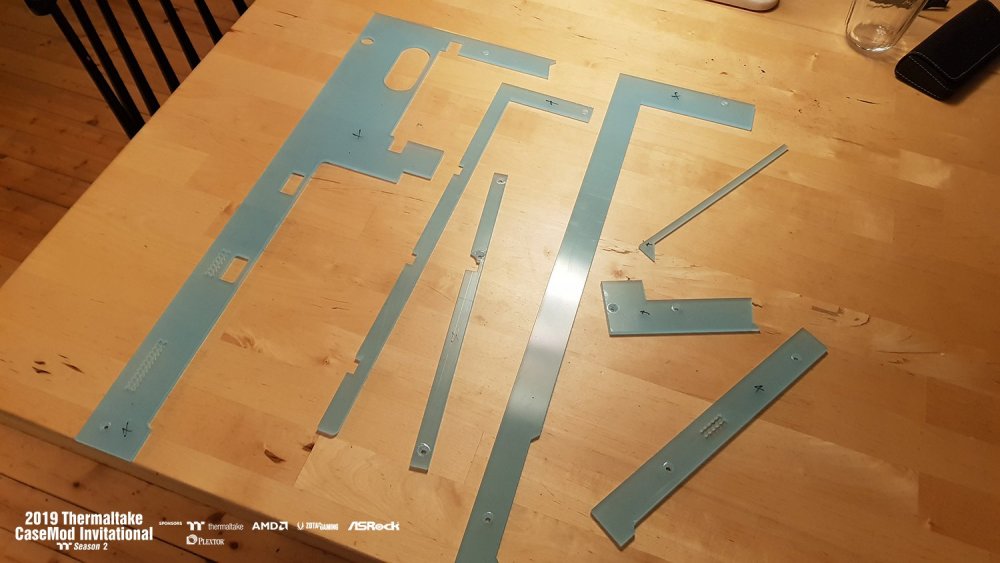
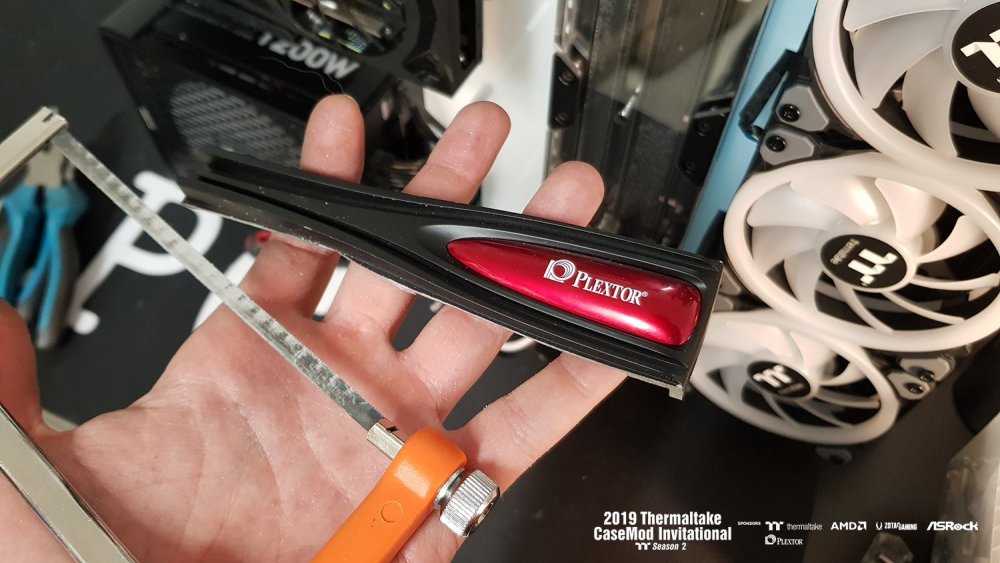
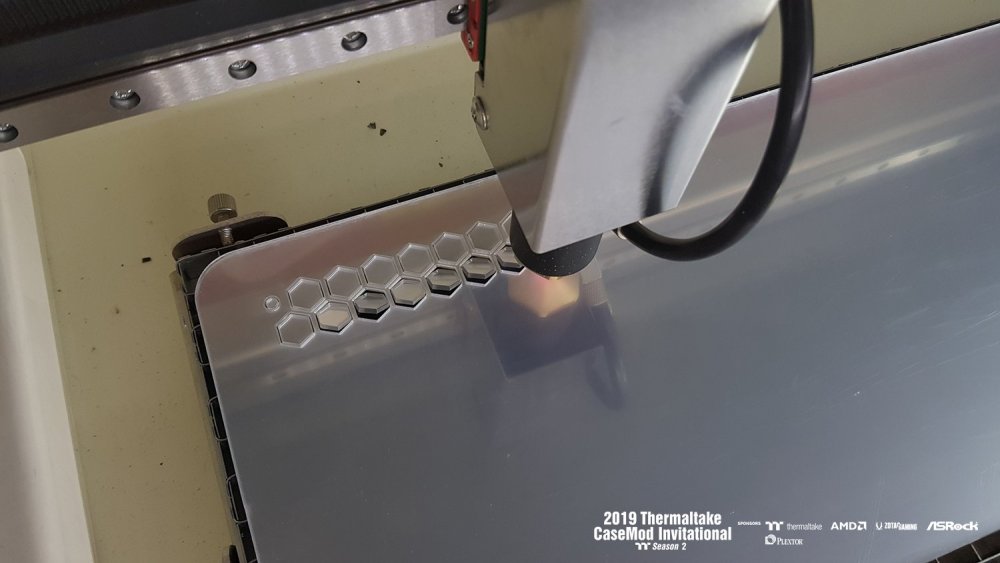
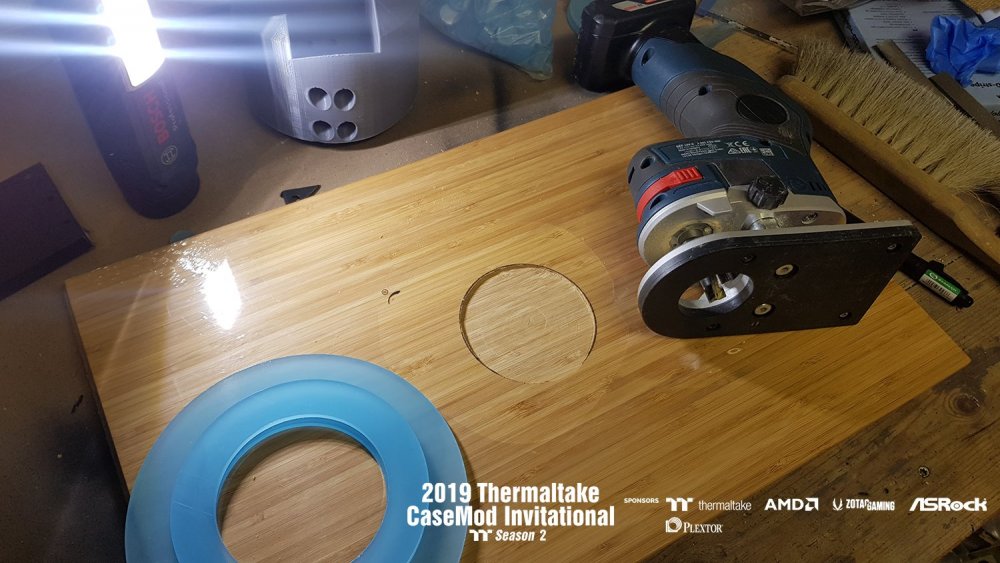
The entire front of the case will be covered with opal - white back painted acrylic. A job that took me alot of time measuring and drawing the case and its components. I then laser cut all pieces after my drawings and had them painted. Here on the picture with the blue protection still on. I also decided to design the covers to be single cable passthroughs for all my sleeved cables. It will look tidy and minimalistic with short cables just entering the acrylic. The sponsored SSD from Plextor is a PCI-E version with integrated M.2 SSD. My layout makes the PCI-E SSD placement tricky and not that clean. So I decided to use the M.2 straight on the motherboard and mod the SSD heatsink instead. I cut it down to a sleek shape and will use it as a cover for the PCI-E riser cable instead. Gonna look pretty #### cool As this mod will be an art piece I will use alot of mirror acrylic to put a new look on things! - Radiator cover - D5 pump back - CPU block - PSU cable shroud Here I'm cutting the radiator cover. I always try to implement my logo and design into every piece of my mods. Will look amazing with the protection removed!
-
[Sweden] Tim Malmborg
Timpelay replied to Tt Andy's topic in 2019 Thermaltake CaseMOD Invitational Season 2
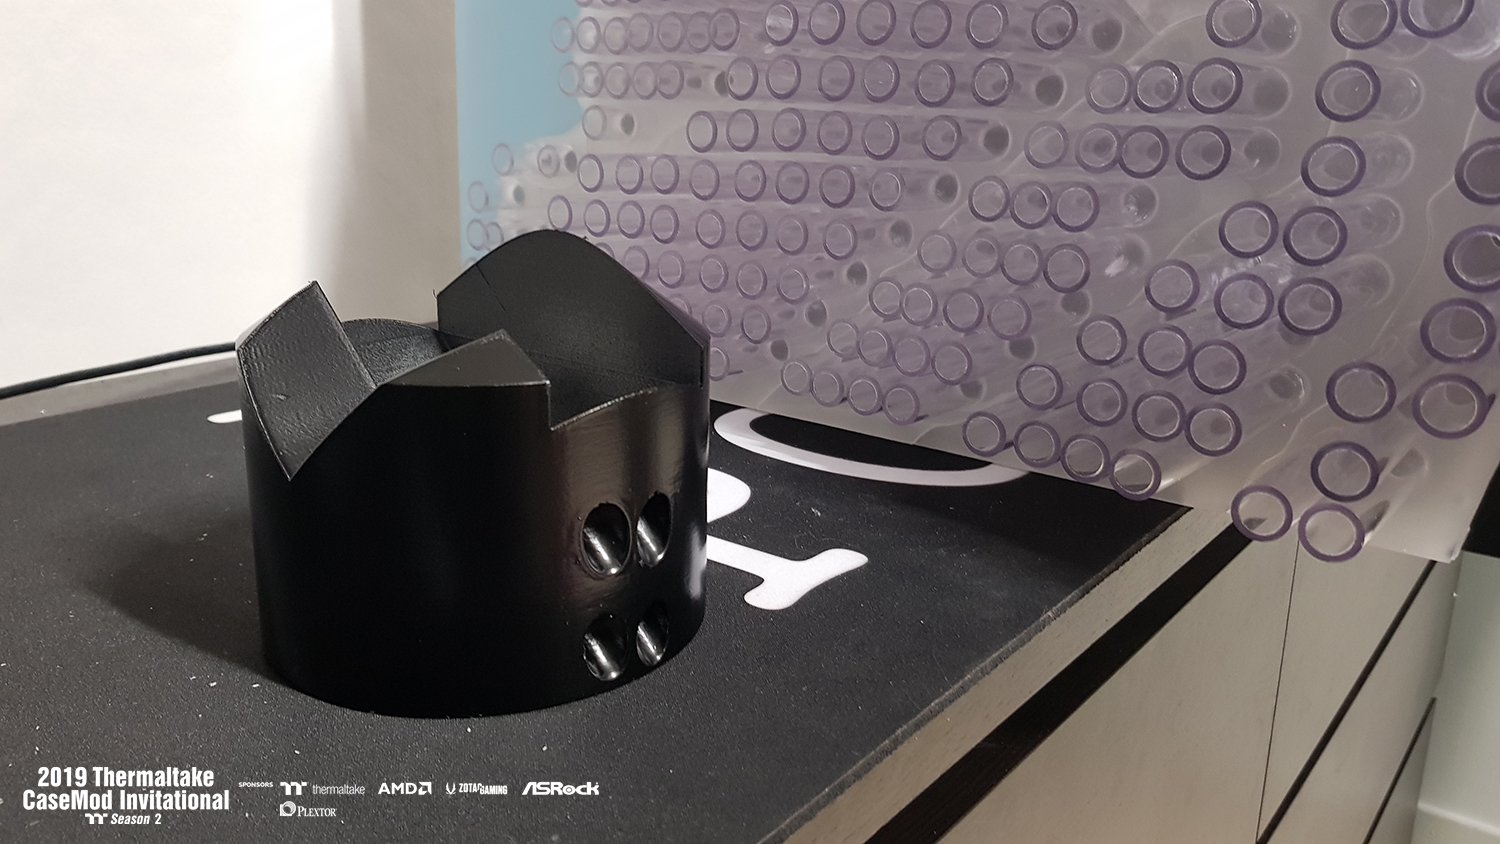
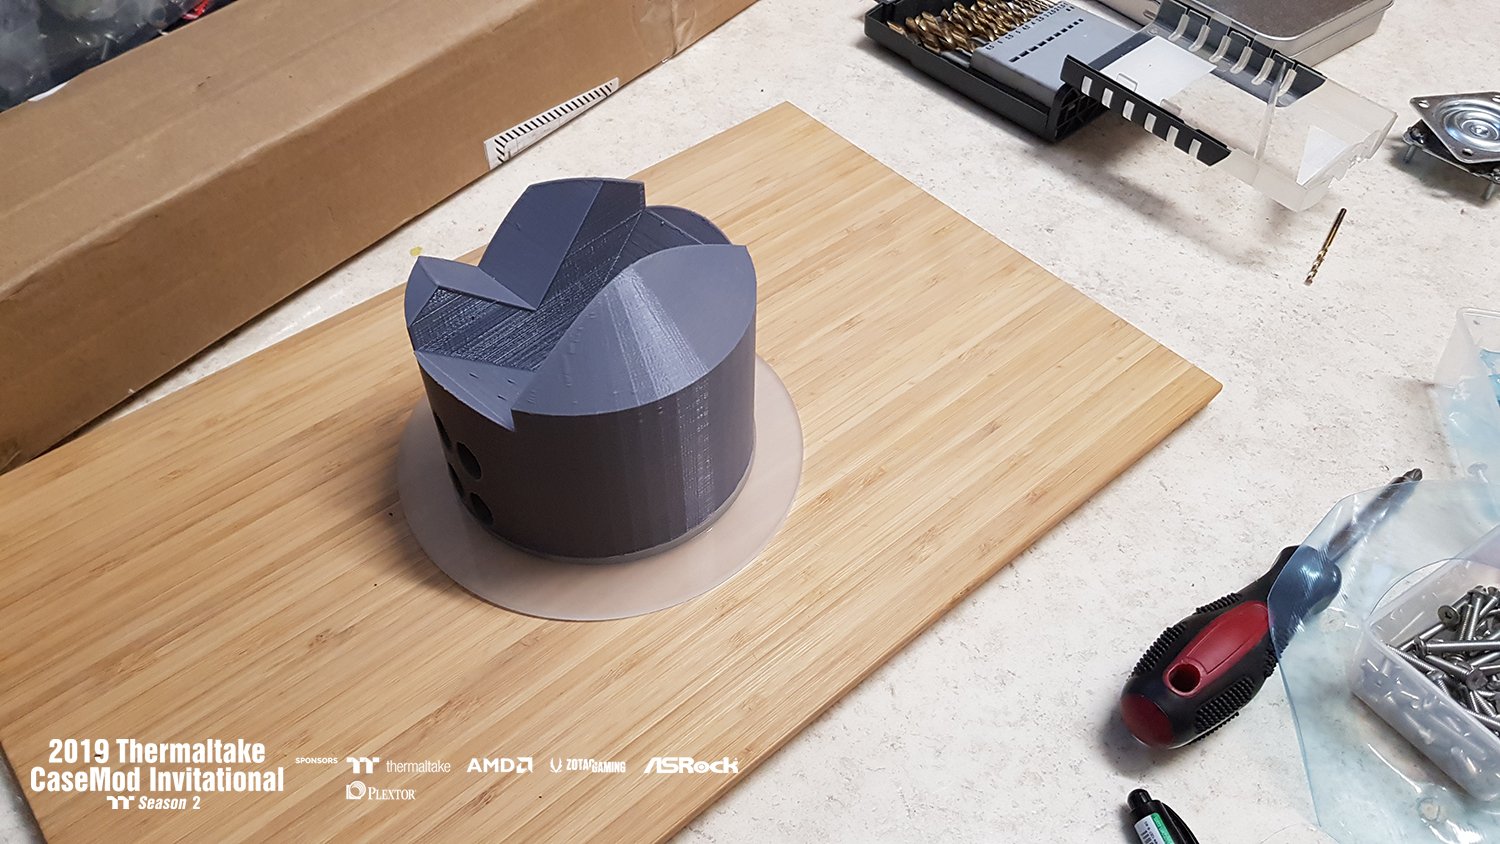
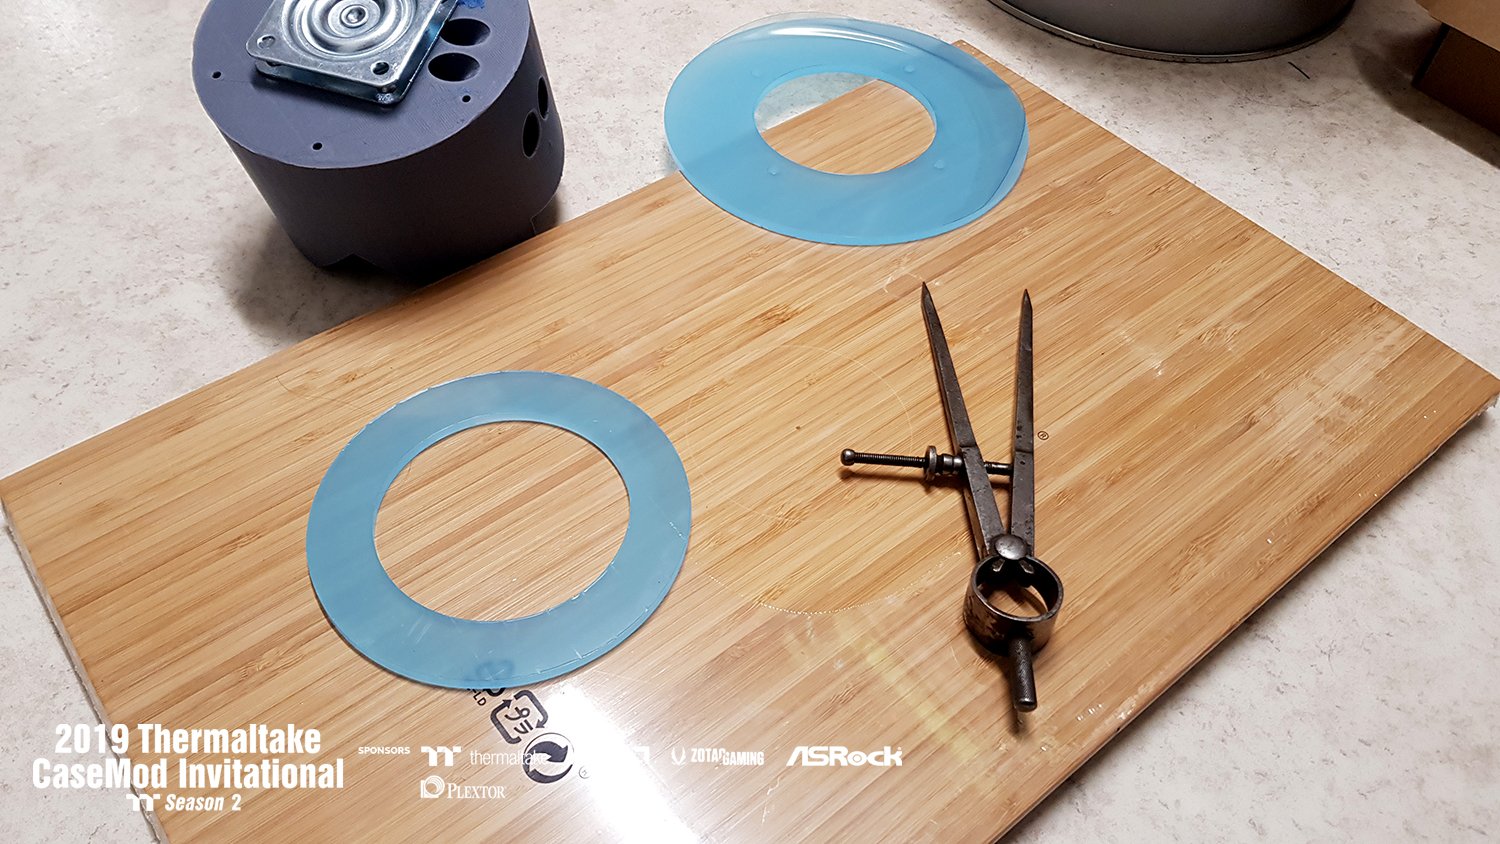
My second revision foot was printed in grey and needed a bit of surface treatment and black paint to keep up to the same level as the other parts. So the mounting procedure is done in a special way to get as stable and possible without any unessesary visual screws. I've attached a laser cut 4 mm thick acrylic ring to the bottom of the foot as the ball bearing turning plate builds approx 10 mm. Then I'll attach a second acrylic to the wooden plate/foot and countersink the turning plate a few mm into it for perfect fit.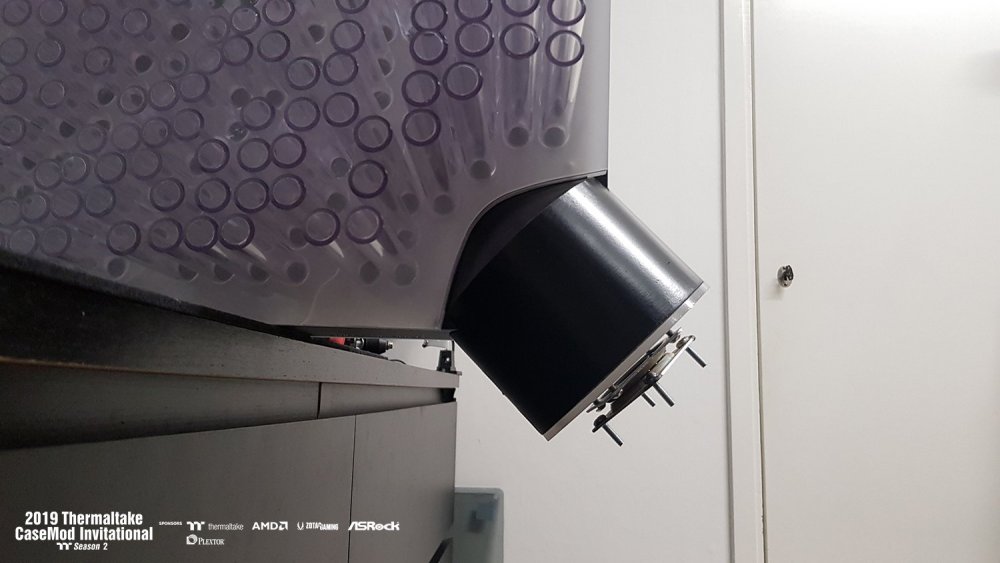
-
[Sweden] Tim Malmborg
Timpelay replied to Tt Andy's topic in 2019 Thermaltake CaseMOD Invitational Season 2
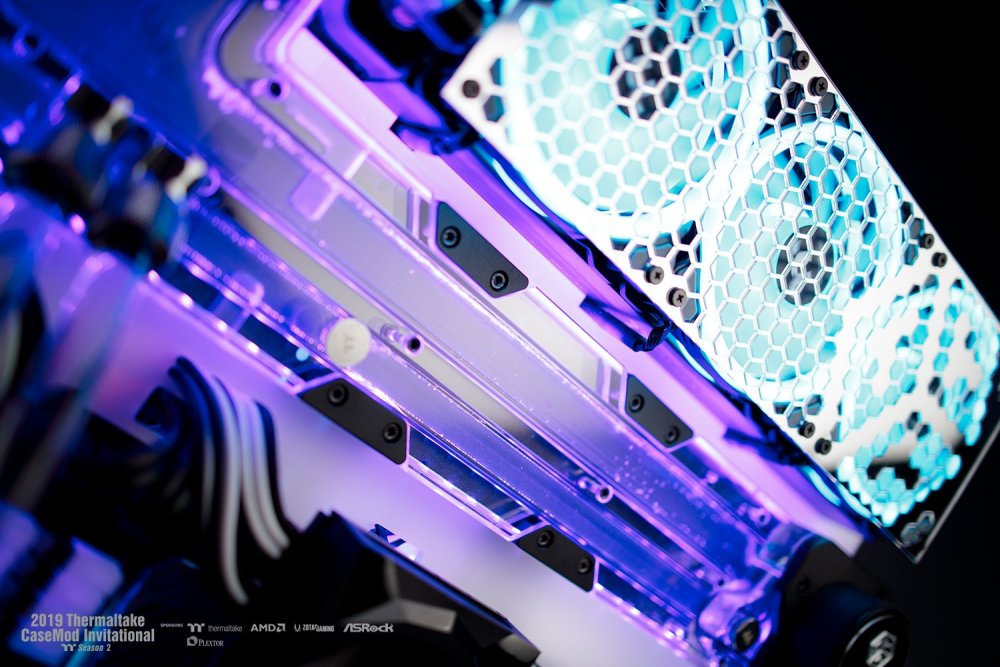
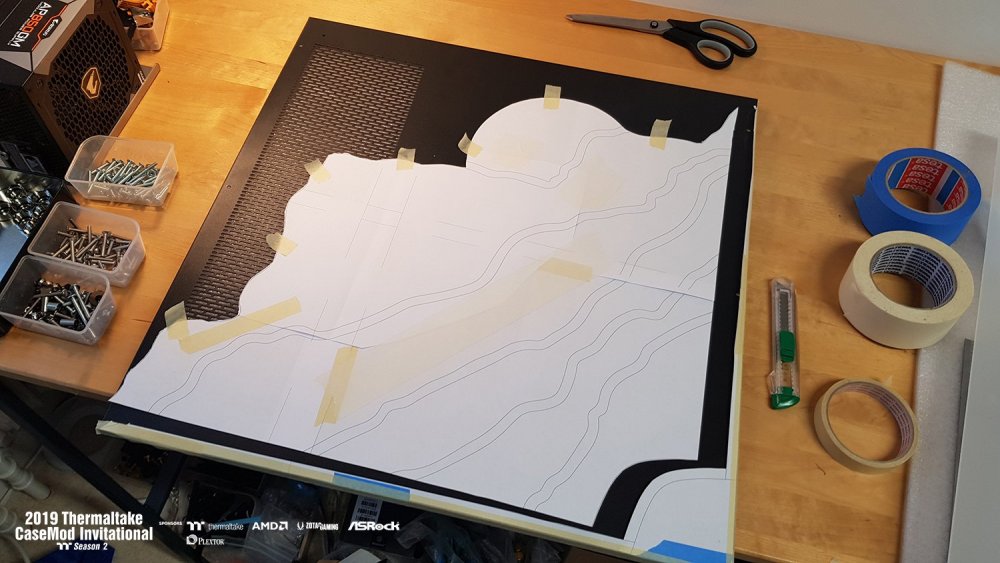
The back panel of the case will need a cut out in the same size as my mountain. This because I want to keep the chassi as slim as possible with the closes acrylic to fit in that space with the led strips. I printed the model on A3 sized paper and taped it together to get the proper outline. I attached it to the backside and used it to jiggsaw the right shape. Here we go! The radiator will still have like 75% direct air flow throughout the perforated section, But as the radiator will be fitted with a 40-50 mm gap all air will easily pass through the vents. The back side acrylic sheet closes to the chassi got the "sky" painted in a light blue color. As the acrylic is diffuse/white this back painted blue will leave a soft color to view at the front. I've decided to not have any lights in this section and also don't want any light to sneak out here.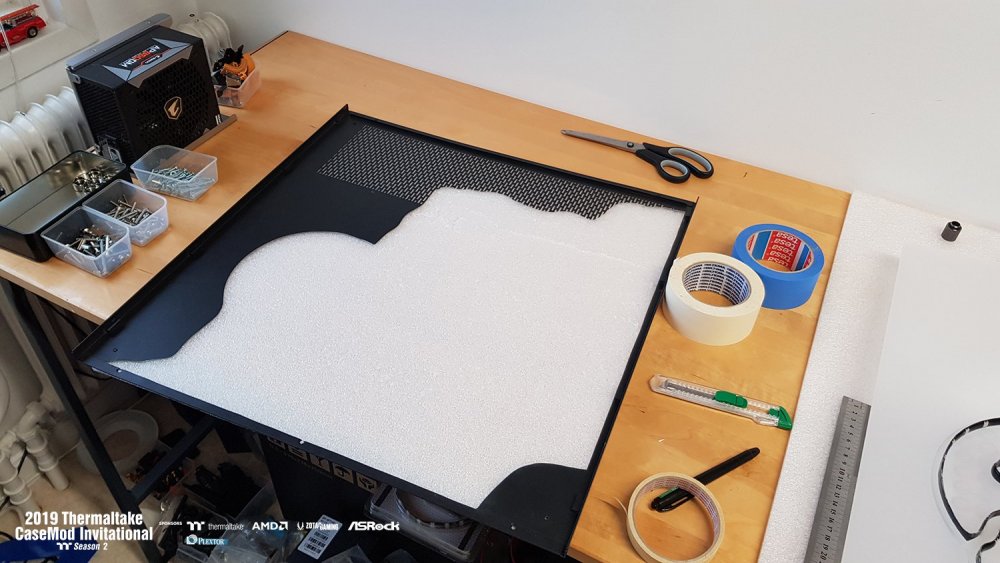

-
[Sweden] Tim Malmborg
Timpelay replied to Tt Andy's topic in 2019 Thermaltake CaseMOD Invitational Season 2
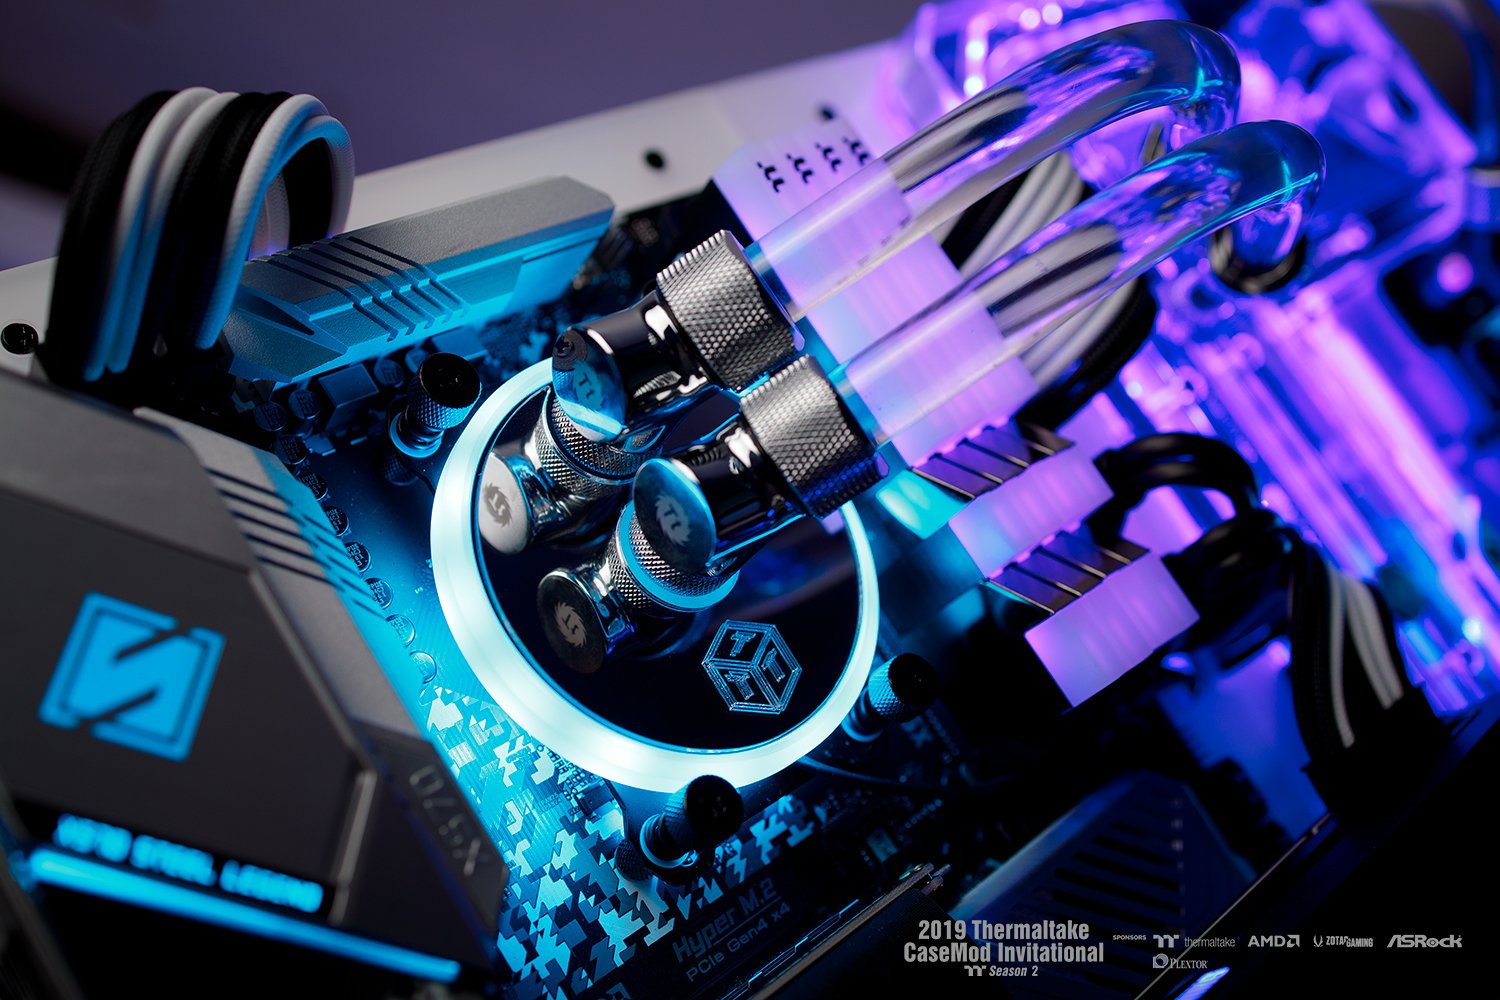
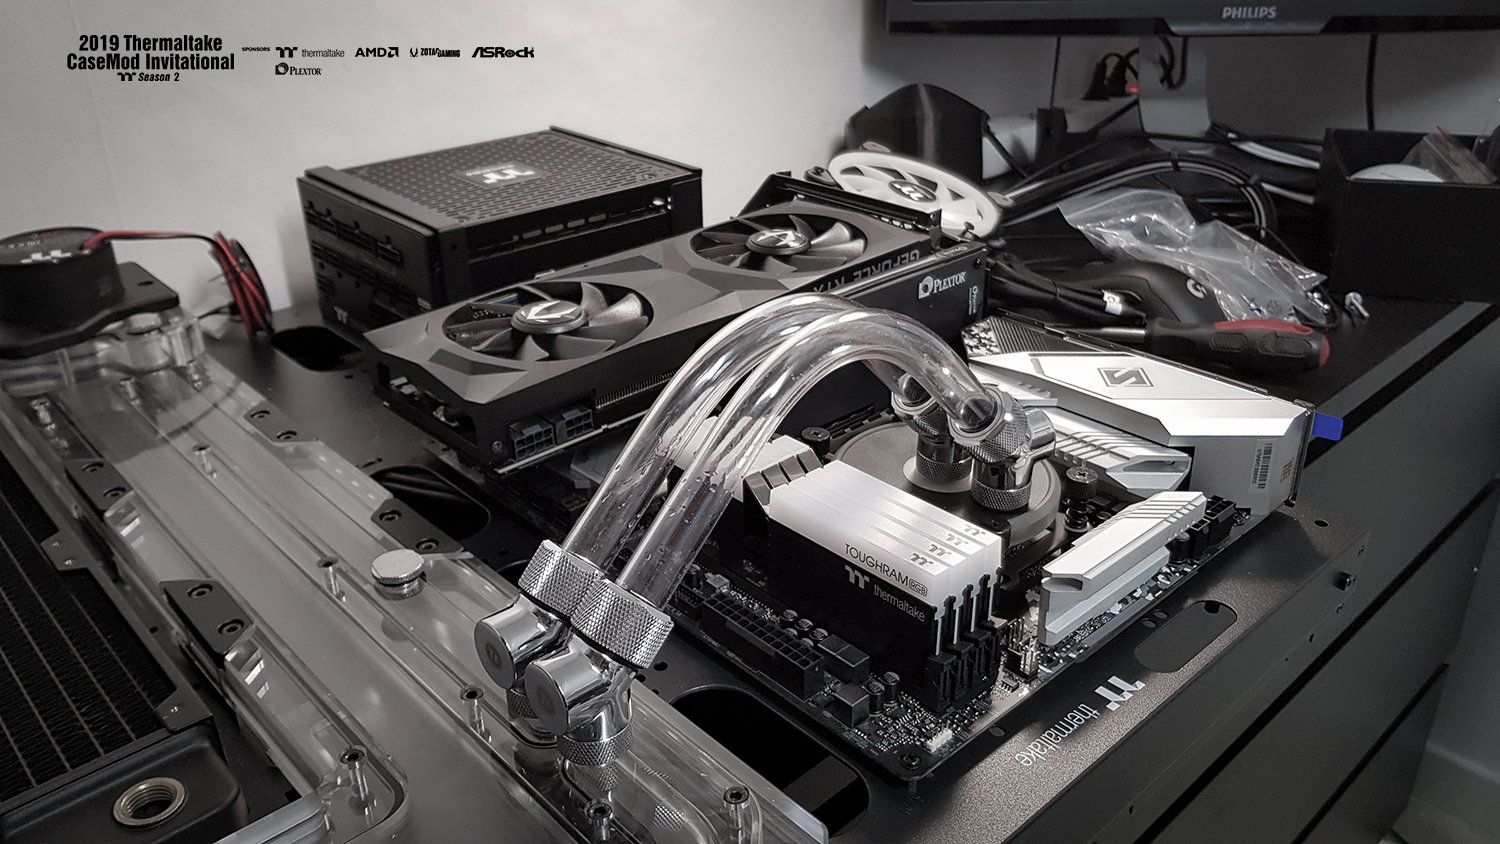
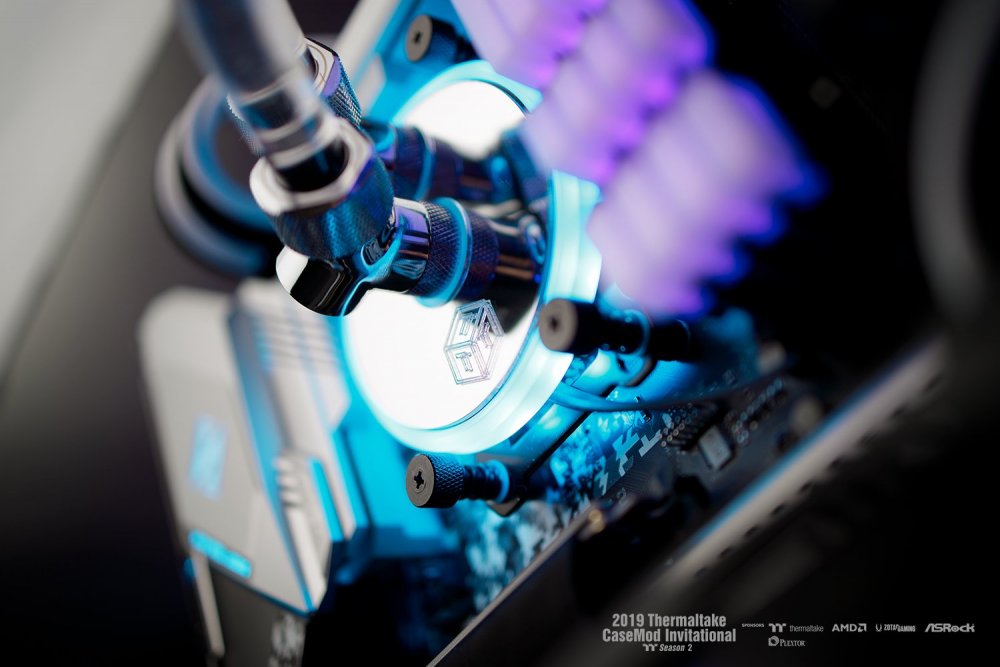
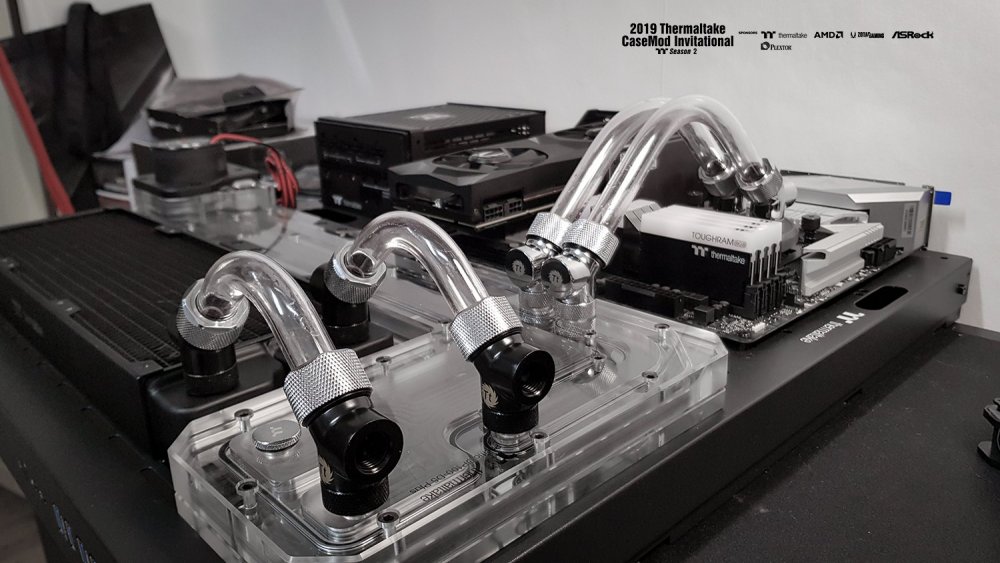
There is often cool to do crazy tube routes with bends, pass-throughs and other stuff. But as this will be an art PC I decided to go for minimalism and actually use just 4 pipes for the entire run. With my modded CPU-block I can use the same parallell bends for the CPU and for the radiator. Full chrome for the CPU and accent black for the radiator. I also choose to use open 45 degrees to the rad which means I can fill at the highest point is nessesary. So satisfied with the good looking bends and the ease of water flow they will provide.
-
[Sweden] Tim Malmborg
Timpelay replied to Tt Andy's topic in 2019 Thermaltake CaseMOD Invitational Season 2
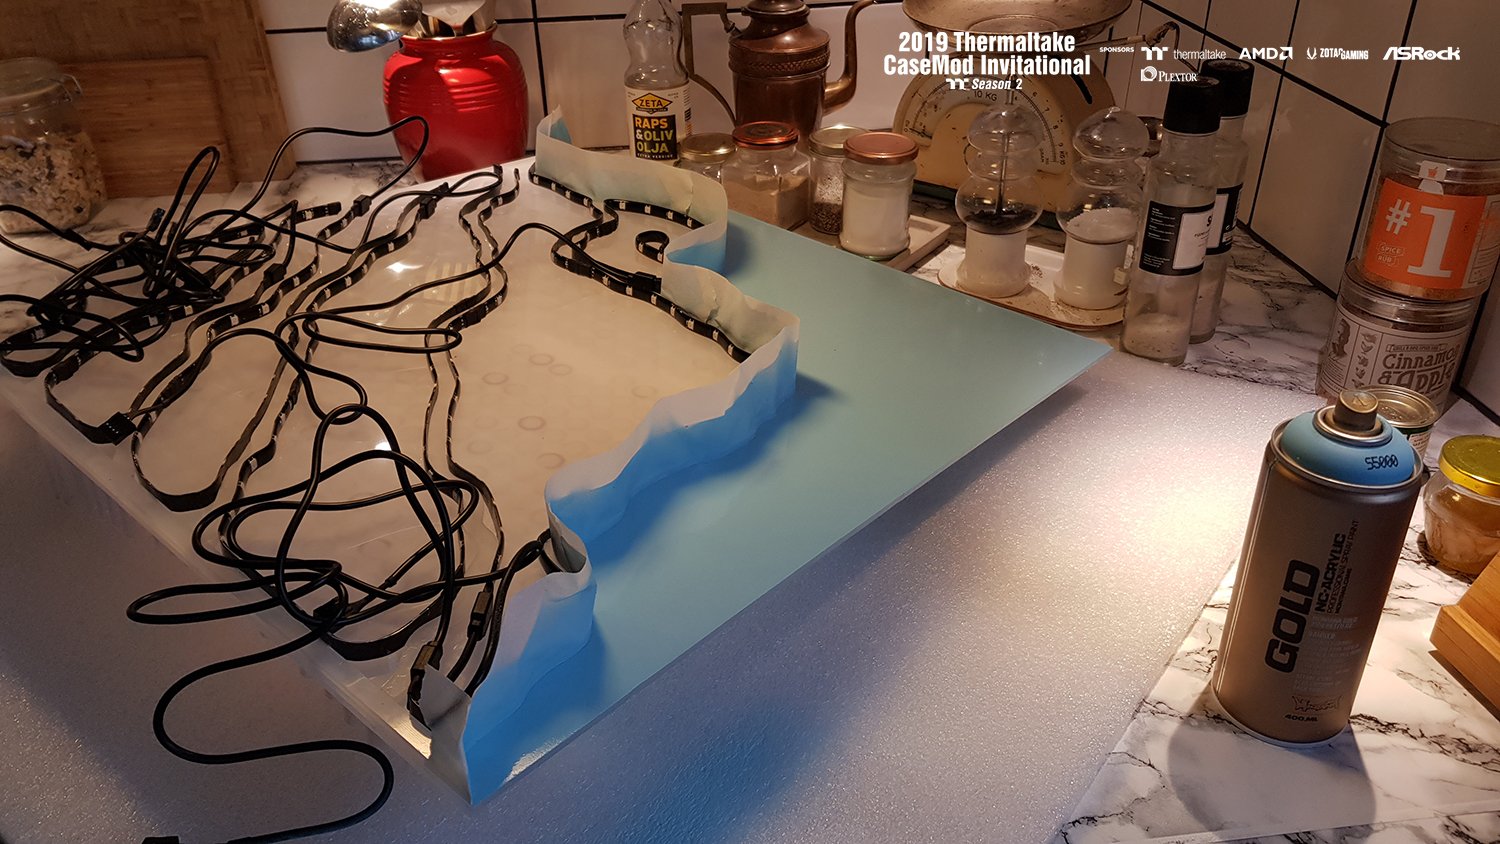
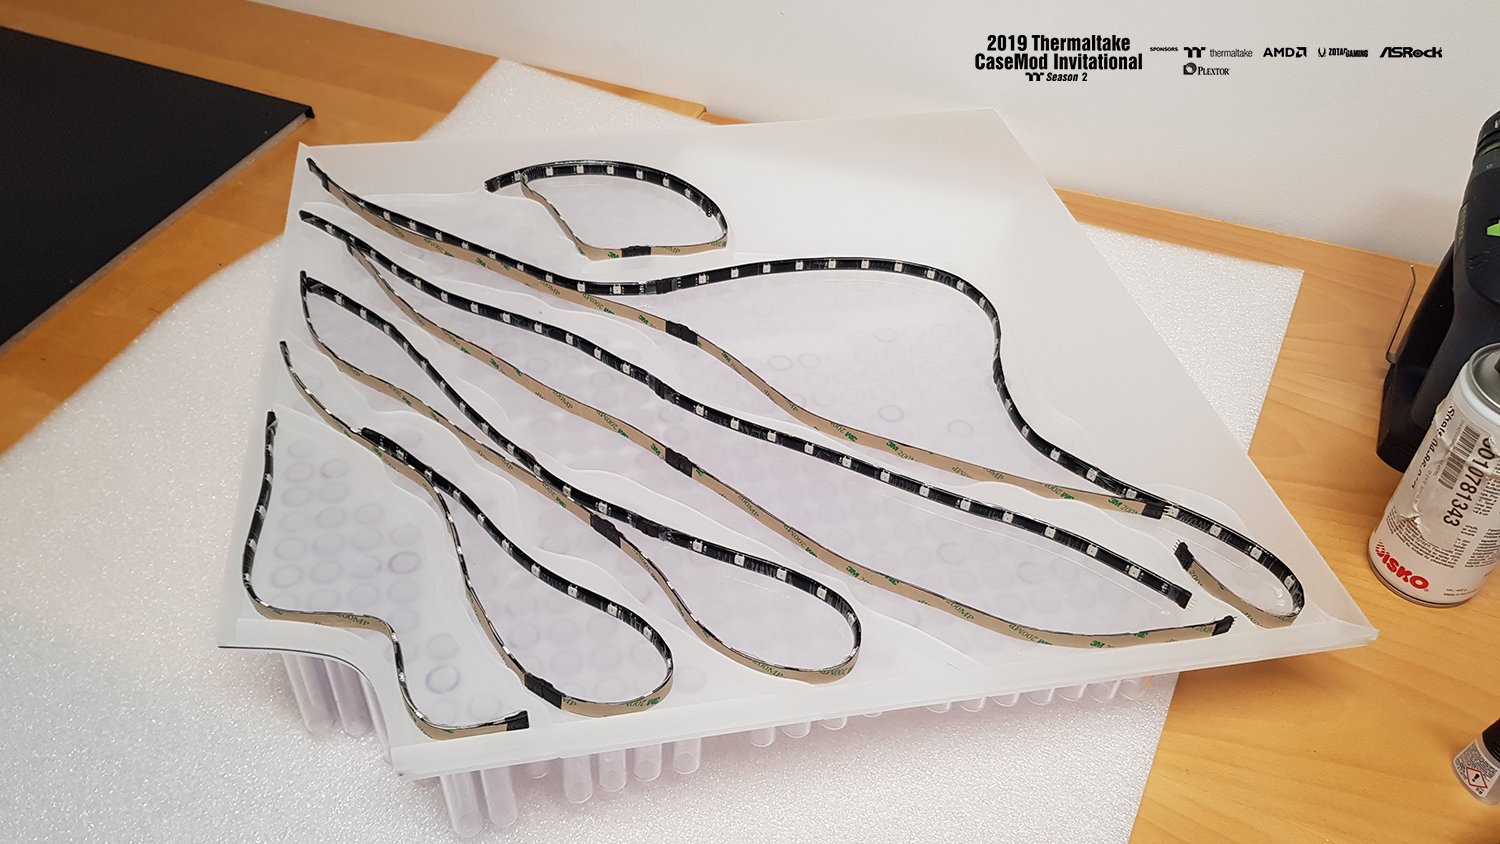
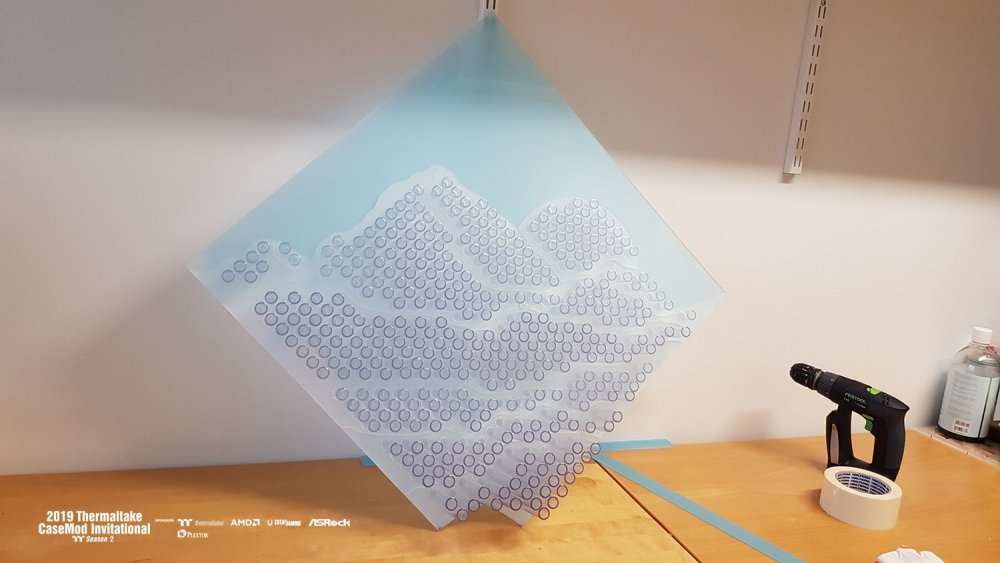
More glue, more hours! And I've managed to make this: As I said before it's a kind of mountain canvas with surrounding. Removed the top layer protection but kept it on the "sky": So the sky will be painted and the 3D art backlit with TT Lumi Plus LED strips! For this I need to make mounts to the strips. I decided to offset my lines between the layers and cut acrylic pieces to glue my strips to. I dont know how good this will work as it's the first time ever I do something like this! But lets make it happen. Many many led strips attached to the backside. The will be chained in a certain way to light up each section!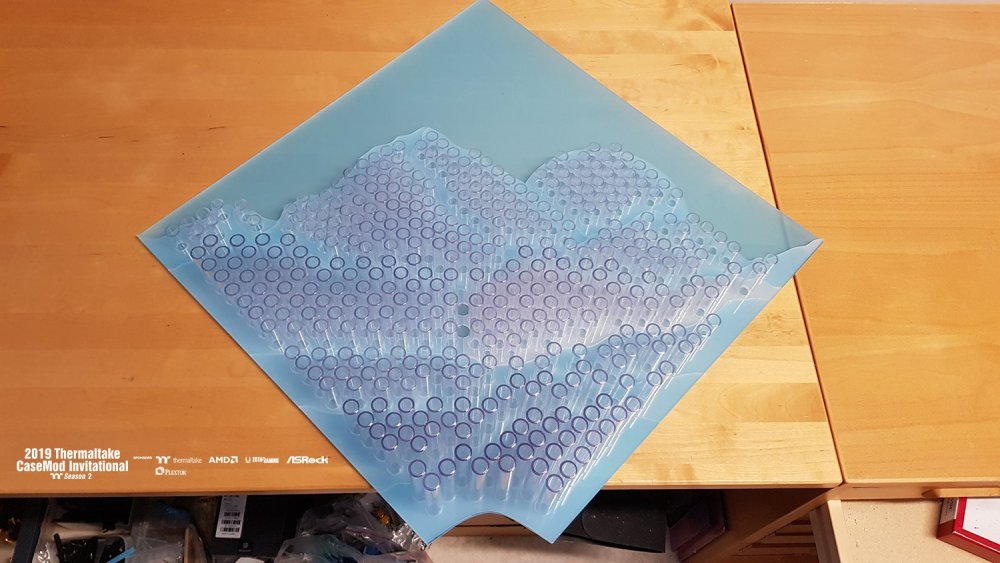


-
[Sweden] Tim Malmborg
Timpelay replied to Tt Andy's topic in 2019 Thermaltake CaseMOD Invitational Season 2
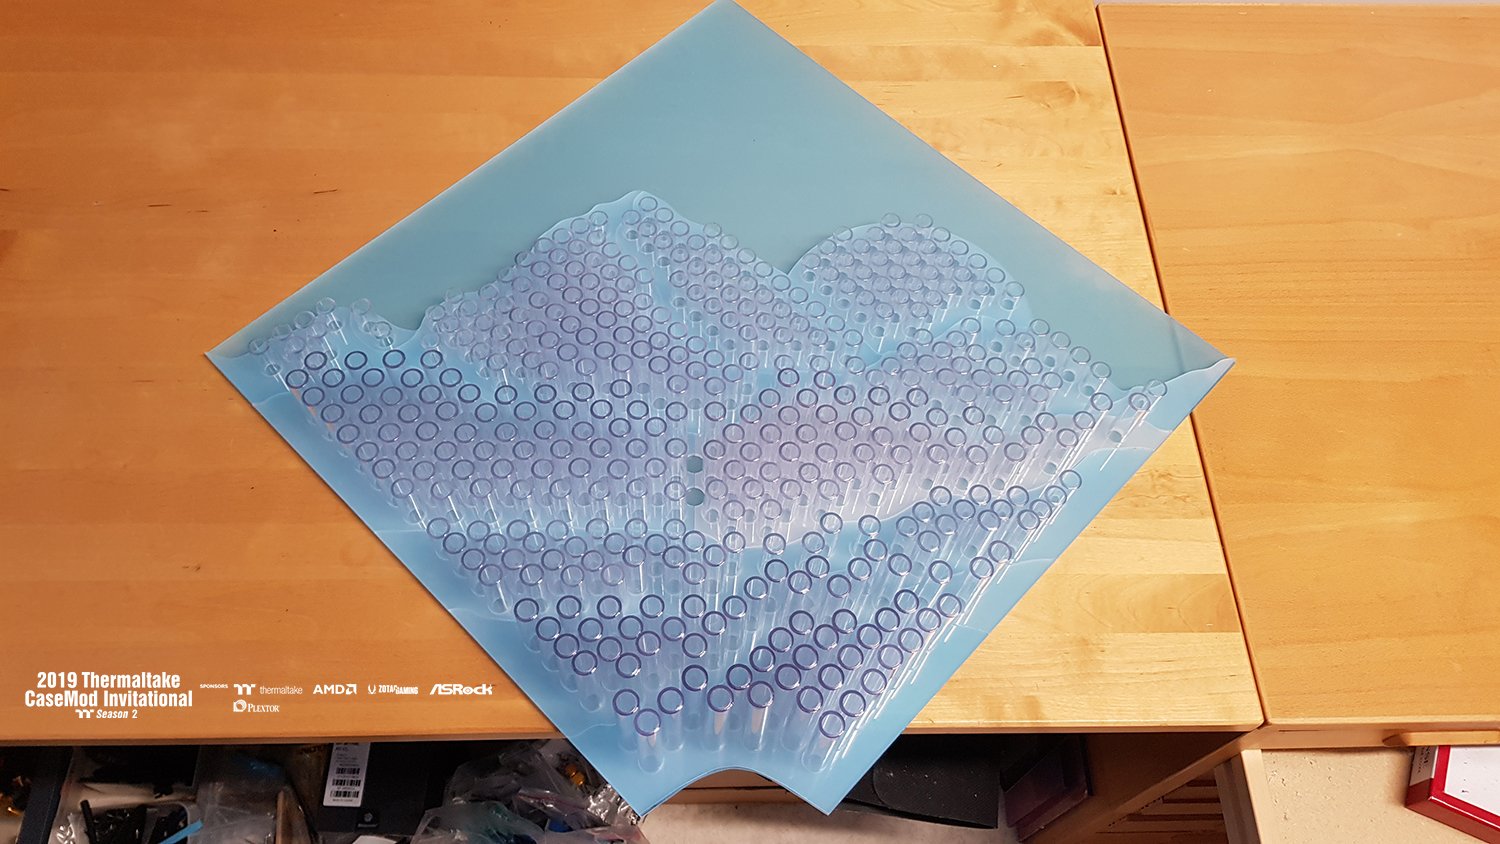
With the foot/stand functional and ready it's timne to take this straw art serious and make something happen! I've got ~400 pipes to cut and glue to their mounting plates.. Just need to put in the hours! Bottom piece! Working my way up from the bottom. Quickly run out of glue so I'll be back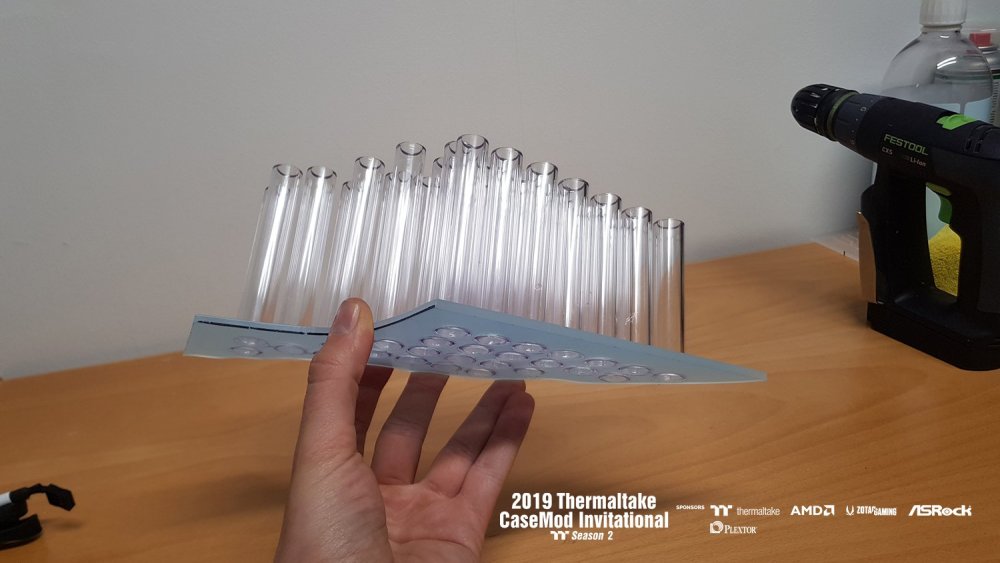

-
[Sweden] Tim Malmborg
Timpelay replied to Tt Andy's topic in 2019 Thermaltake CaseMOD Invitational Season 2
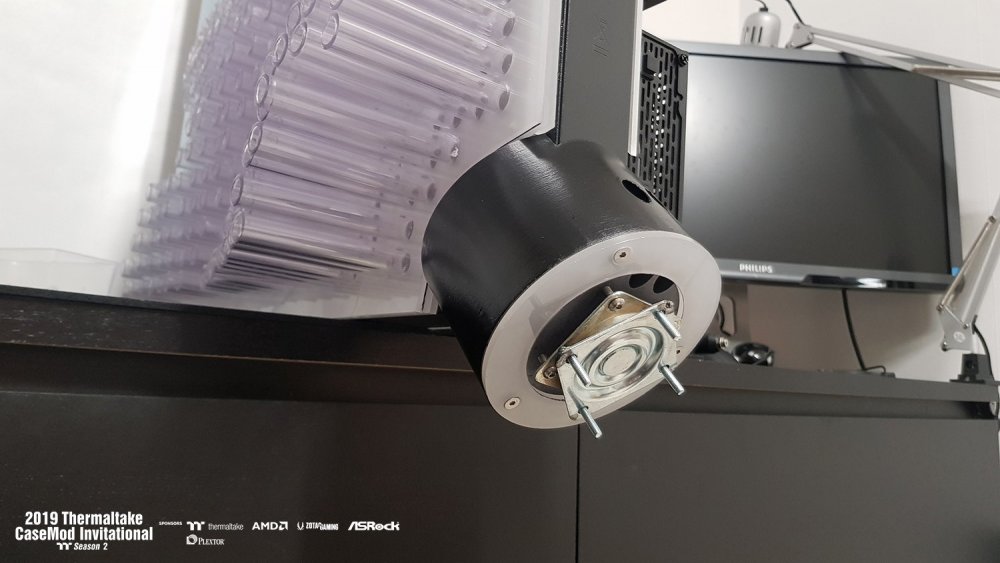
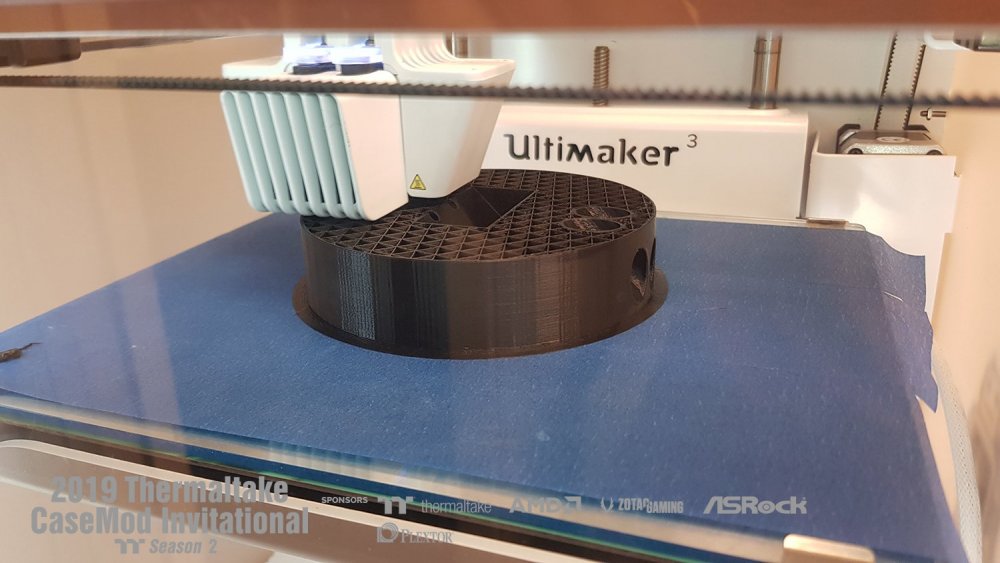
Meanwhile, the work with my stand continues. I made some changes and tweaks to the 3D-model and added mounting holes for a turning plate. I will use a wooden base with a countersunk turningplate and some acrylic spacers for extra support. The finished mechanism. The foot will get a surface treatment and I will probably cut the wooden plate to a more interesting design. But it's good to have a lot of material to make the casemod steady.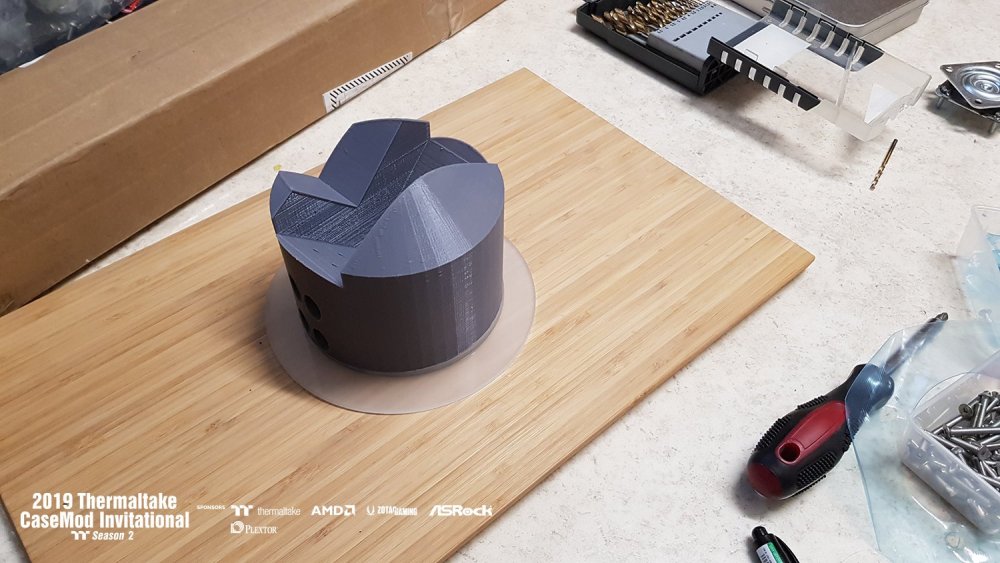

-
[Sweden] Tim Malmborg
Timpelay replied to Tt Andy's topic in 2019 Thermaltake CaseMOD Invitational Season 2
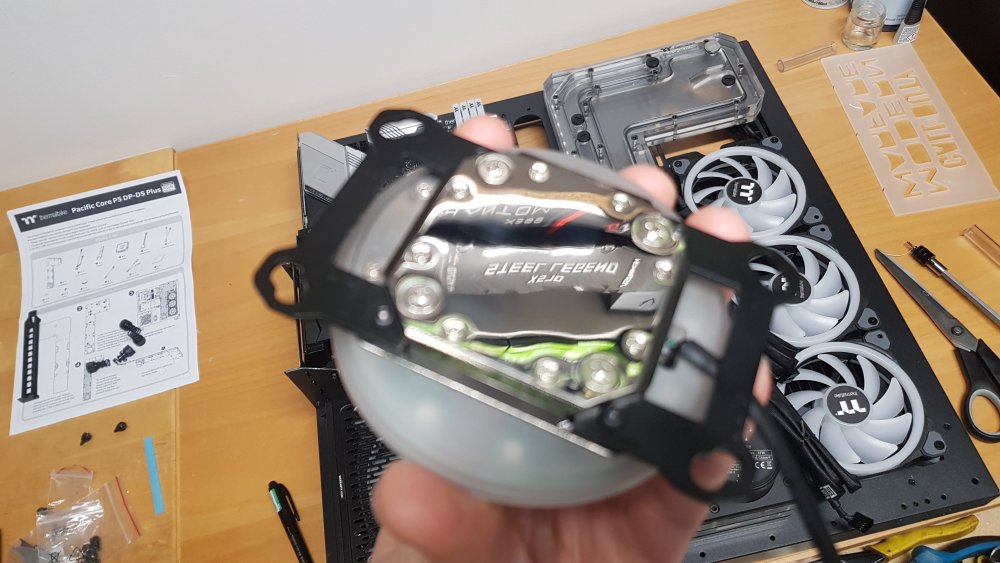
As some of you probably already noticed, the CPU block only mounts at one direction for AMD. But with the distro plate i want the connections turned 90 degrees. This means some modifications to the AMD mounting frame! I cut the end parts of just as much needed to rotate the mounts. Perfect polished reflection of the Steel Legend!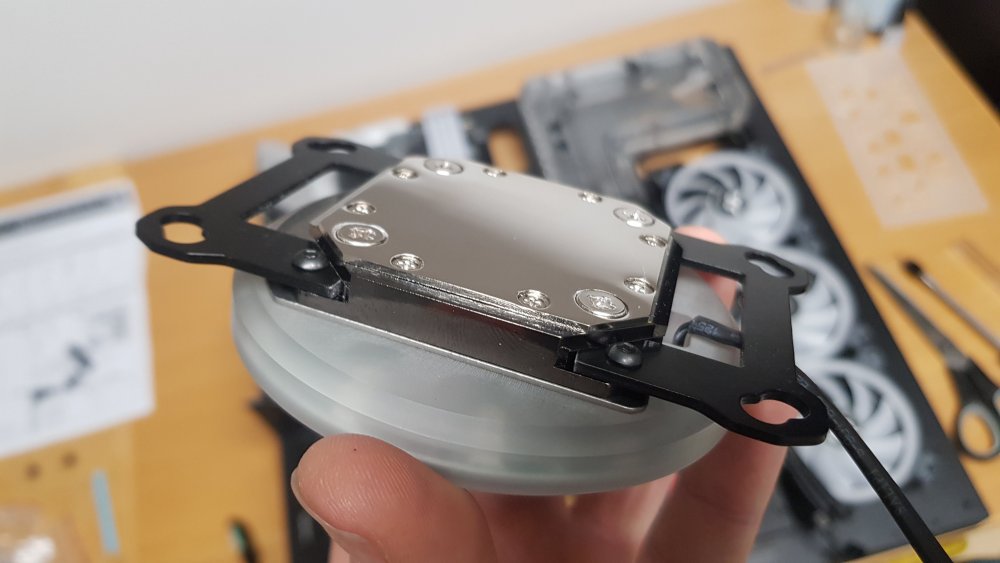
-
[Sweden] Tim Malmborg
Timpelay replied to Tt Andy's topic in 2019 Thermaltake CaseMOD Invitational Season 2
Okey game on! I need to cut 400 pieces of pipe hehe.. I may be mad, but this will look epic when finished!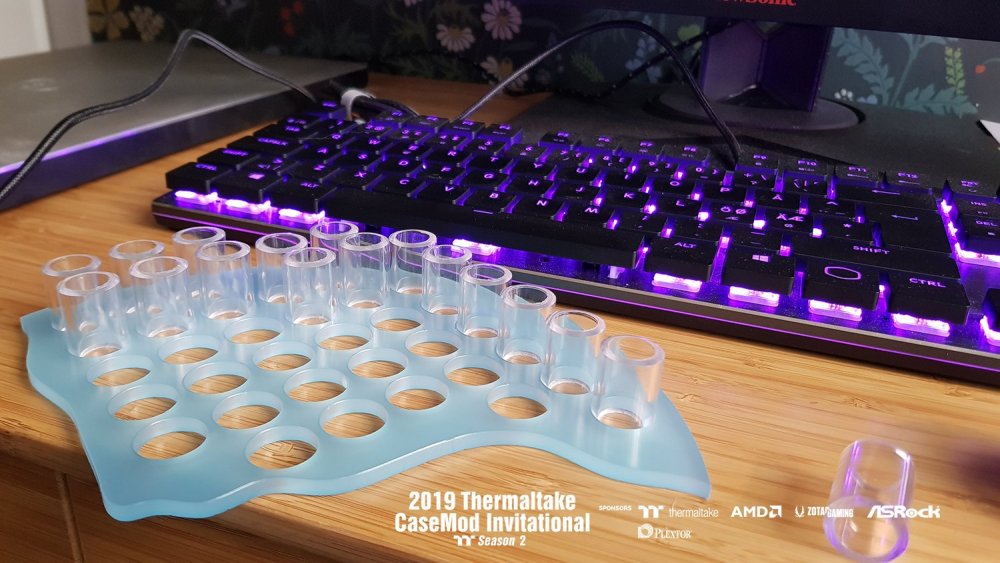
-
[Sweden] Tim Malmborg
Timpelay replied to Tt Andy's topic in 2019 Thermaltake CaseMOD Invitational Season 2
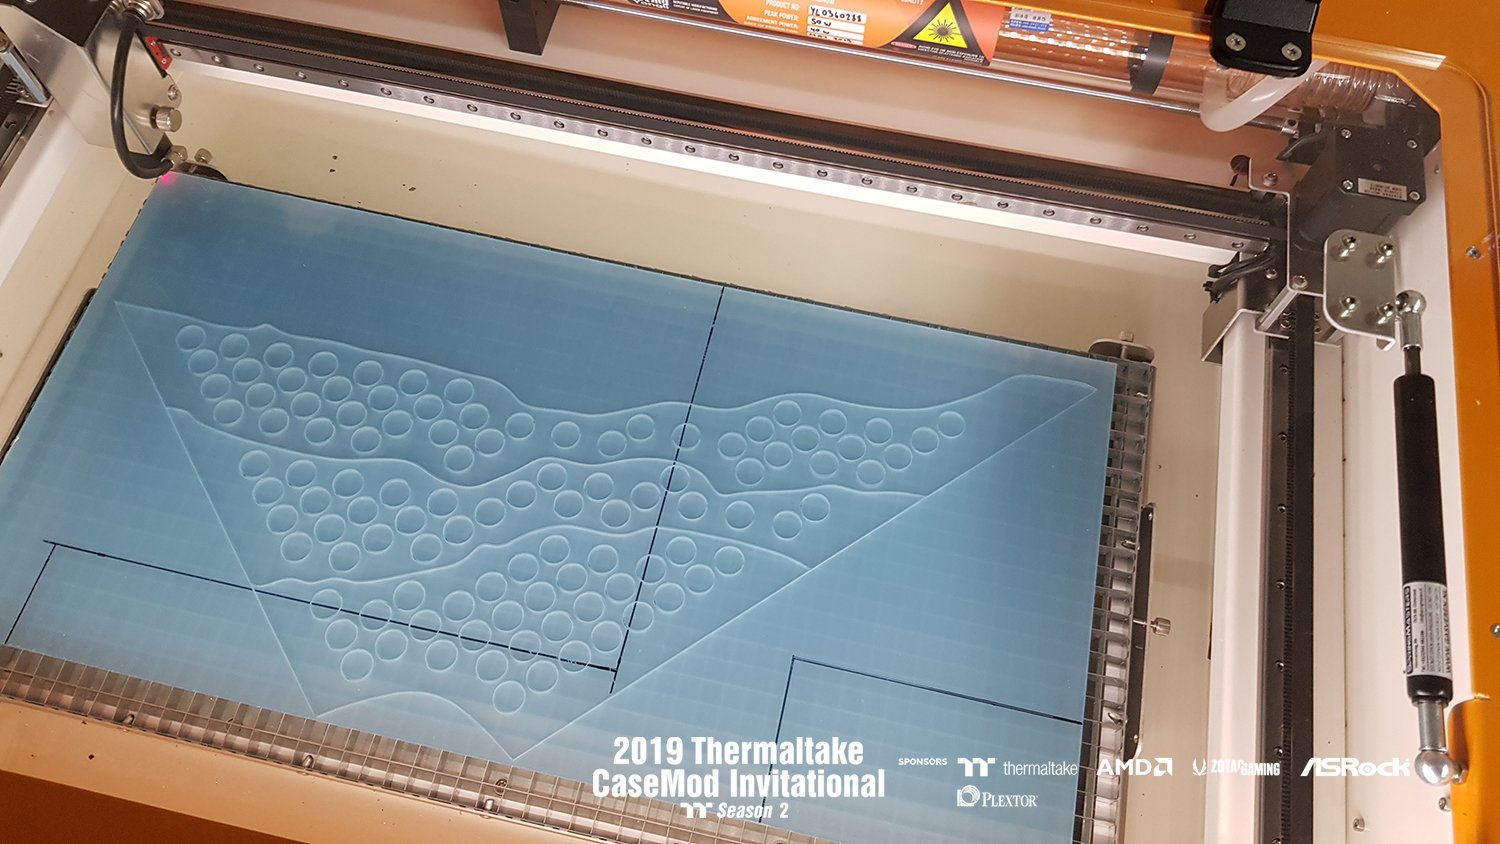
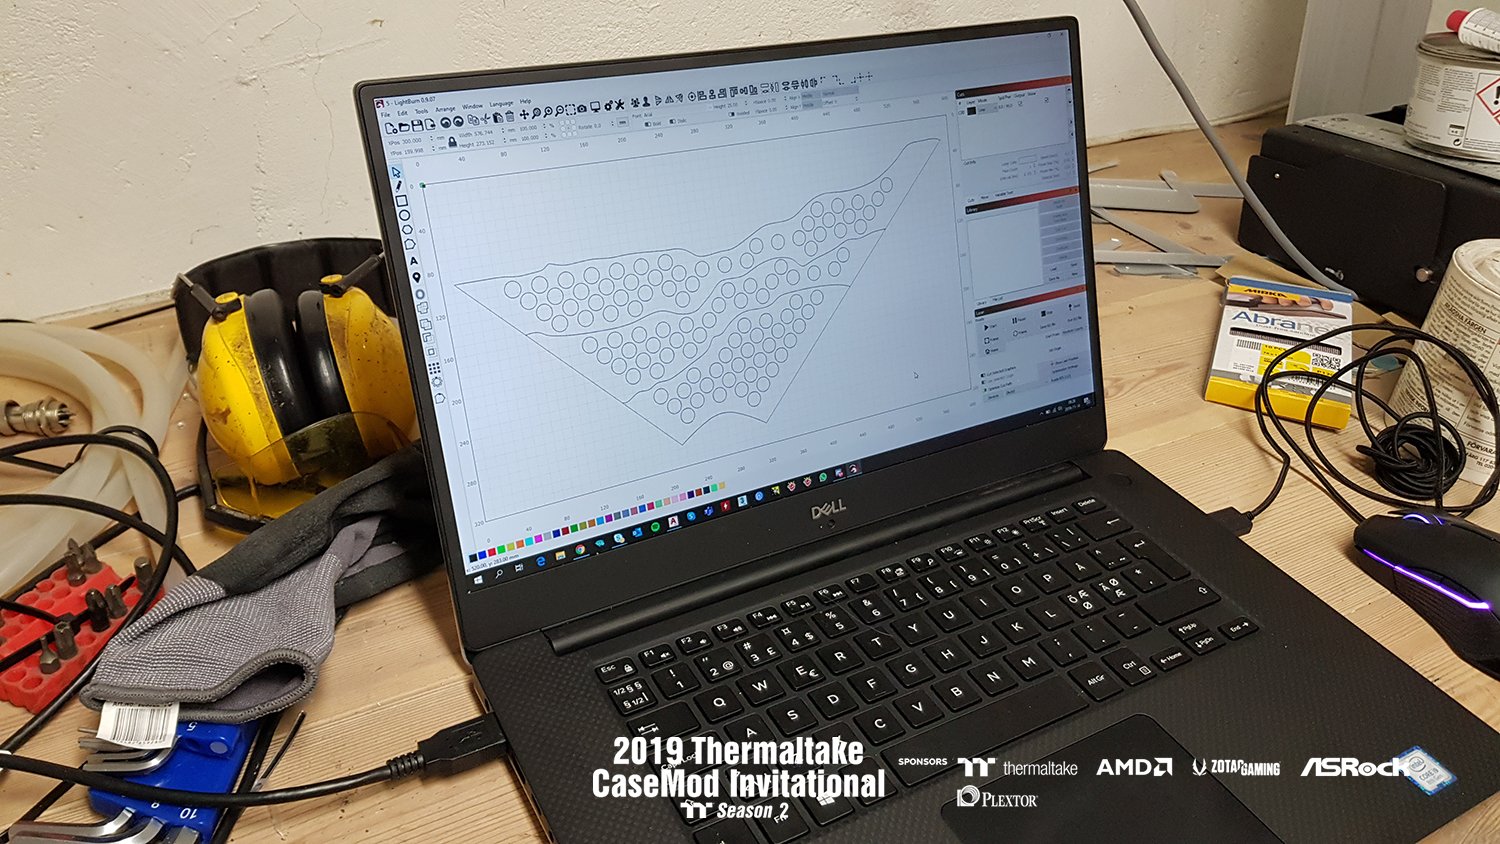
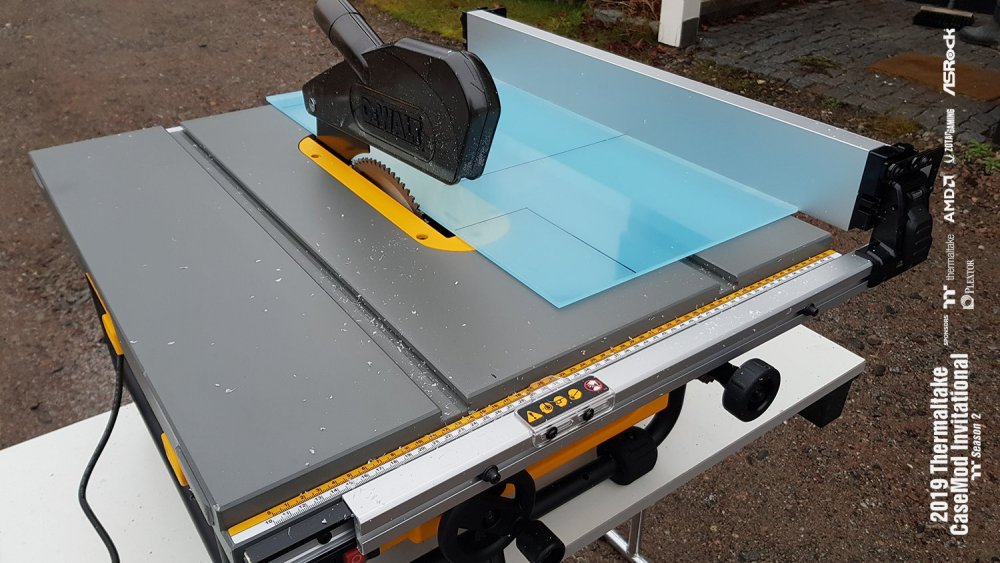
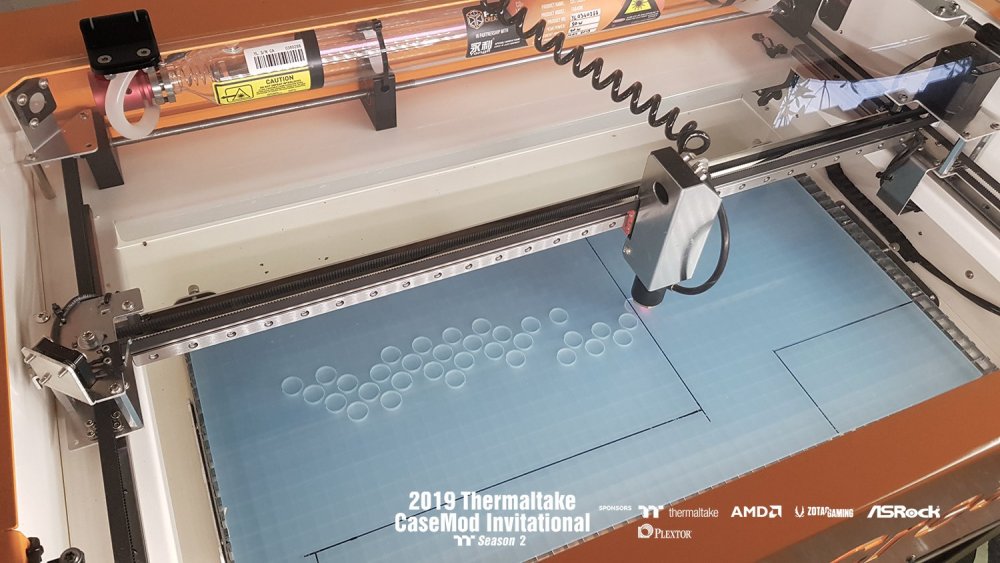
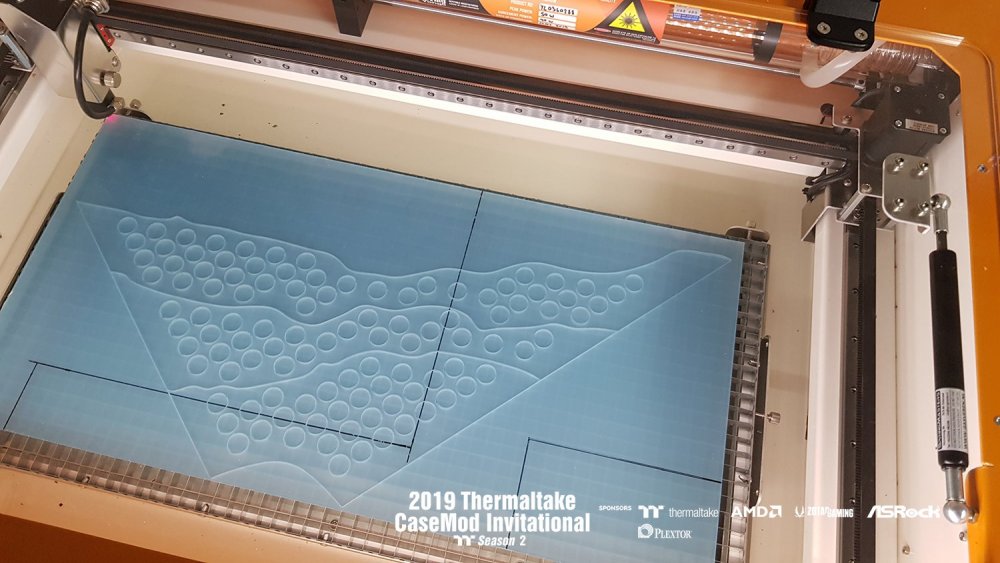
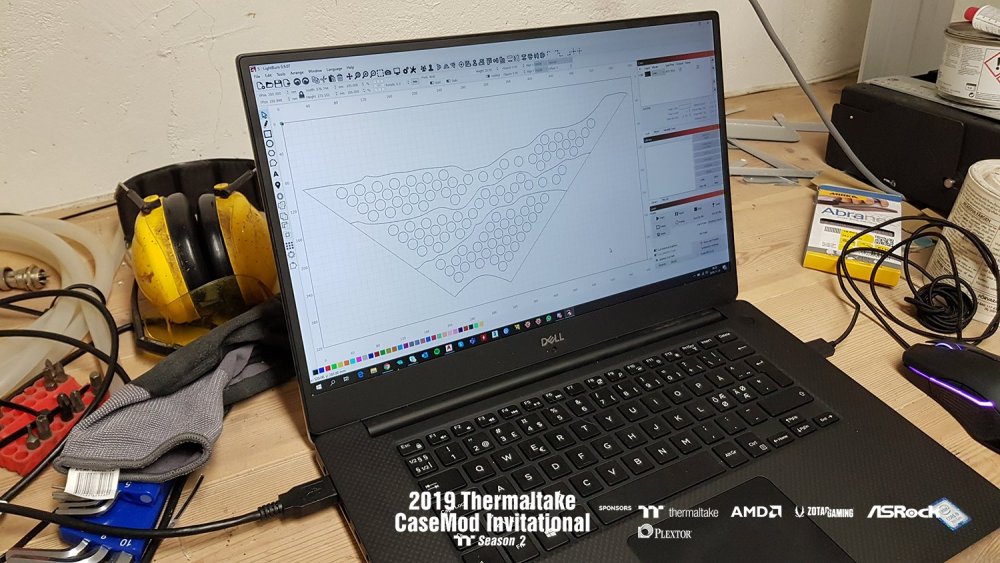
I finally got to pull the trigger on a table saw. Until now I've used my jiggsaw to cut everything. It's good for figure cuts but not very effective on fast straight cuts. So I bought a DeWalt DW745 and a fine disc for acrylic! This to be able to make good cuts for windows etc. and also get the right size of pieces for my laser cutter. Works perfect! Back to actual modding and this is what I've been putting my hours into. I've tried different themes and patterns for my straw art and never got satisfied. I finally found a theme that I like! It will be a kind of mountain canvas with surrounding. May sound strange but I think it will be awesome and classy. So now I've been designing the actual straw(pipe) pattern which was more complicated than I thought. But with patiens I think I got something that is doable! This is the bottom three pieces of the canvas ready for laser cutting! Finished! More to come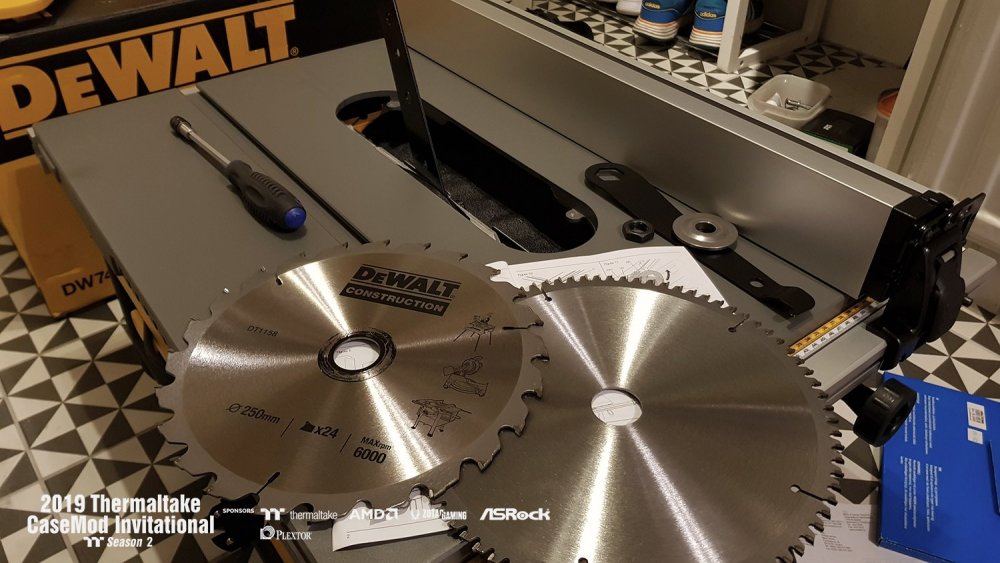
-
[Sweden] Tim Malmborg
Timpelay replied to Tt Andy's topic in 2019 Thermaltake CaseMOD Invitational Season 2
I've been spending alot of time thinking of changing hardware layout and finding a more appealing one. But working my way around I've come to the conclusion that I need to set the layout for best weight distibution. This actually means the original layout is a very good start. Allthough it cant stand by its own because it's to front heavy. I will change this by mounting the radiator on the inside and only fans facing forward. The backside will probably be heavy enogh with the acrylic sheets and the insane amount of pipes..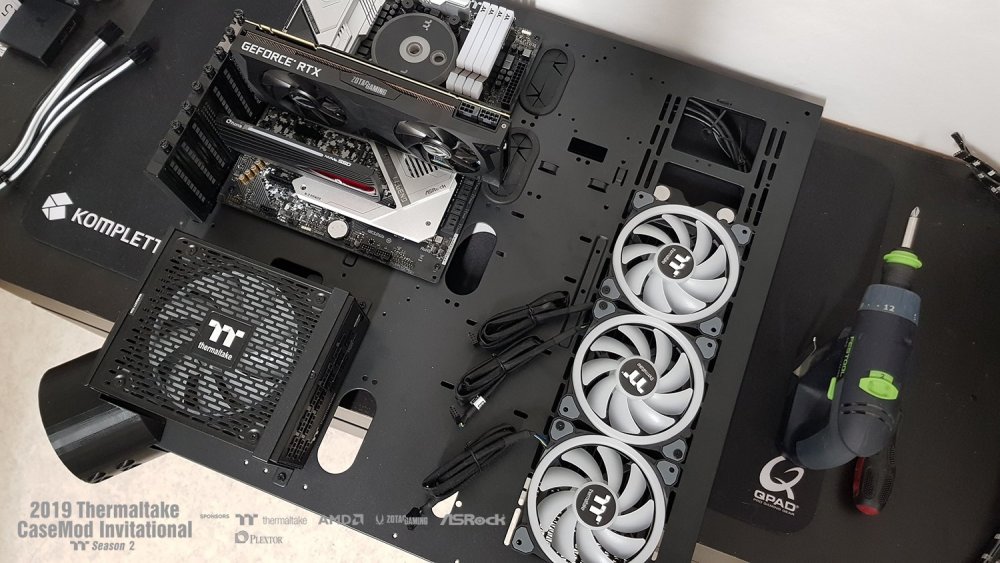
-
[Sweden] Tim Malmborg
Timpelay replied to Tt Andy's topic in 2019 Thermaltake CaseMOD Invitational Season 2
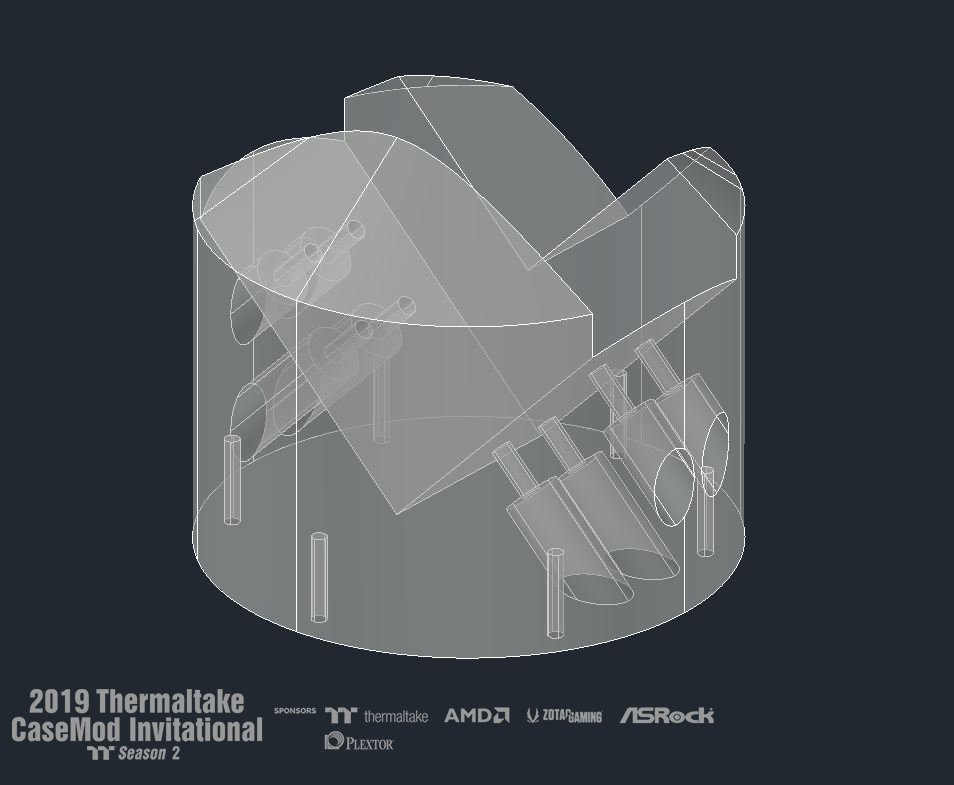
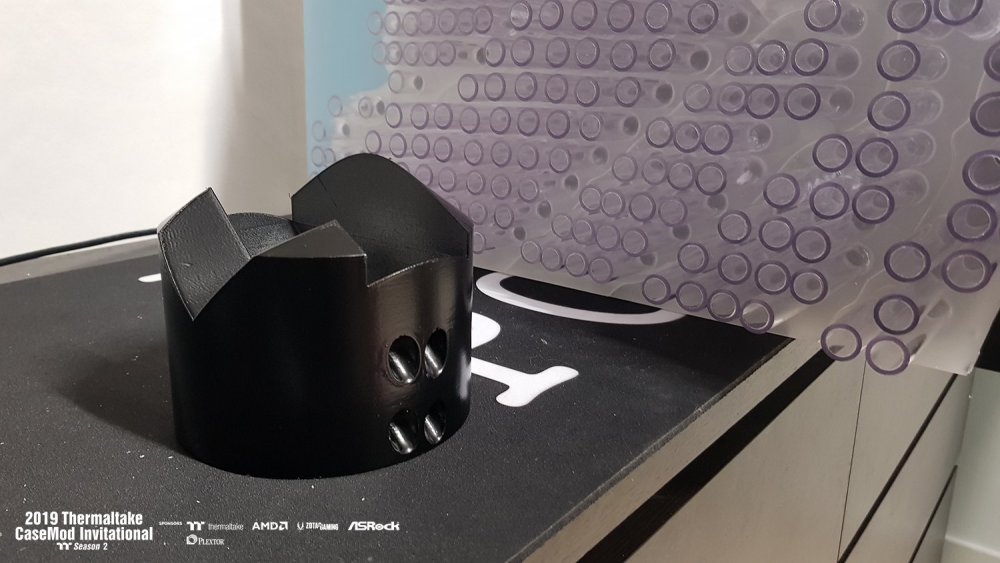
My ambition is to use the P5 case and keep as much as possible of the original structure. The key for me with a casemod is always that you should easily see which case has been used. There's no point of a casemod where there's littarly nothing left of the original case. With this approach there are different ways of creating something unique and new. Let me show you one new way! I've closely measured and designed a 45 degree horizontal rotation stand. This will be the only part with surface contact. As the base is quite small, a diameter of 120 mm there will be a challenge to balance the mod and keep it safe upright. I will need to work with my center of gravity and attach a heavy bottom piece underneath this stand. Something that you probably don't need to consider in an ordinary casemod. PLA plastic is soft and easy to crack, but with a homogen outer design this will be very strong. I made it circular to take full advantage of the material in all directions. 8 reinforced screw holes will attach the stand to one corner of the case and reuse the mounting plate for the original case foot. The cut out is designed to perfectly fit the case and PSU. Lovely isn't it!?
-
[Sweden] Tim Malmborg
Timpelay replied to Tt Andy's topic in 2019 Thermaltake CaseMOD Invitational Season 2
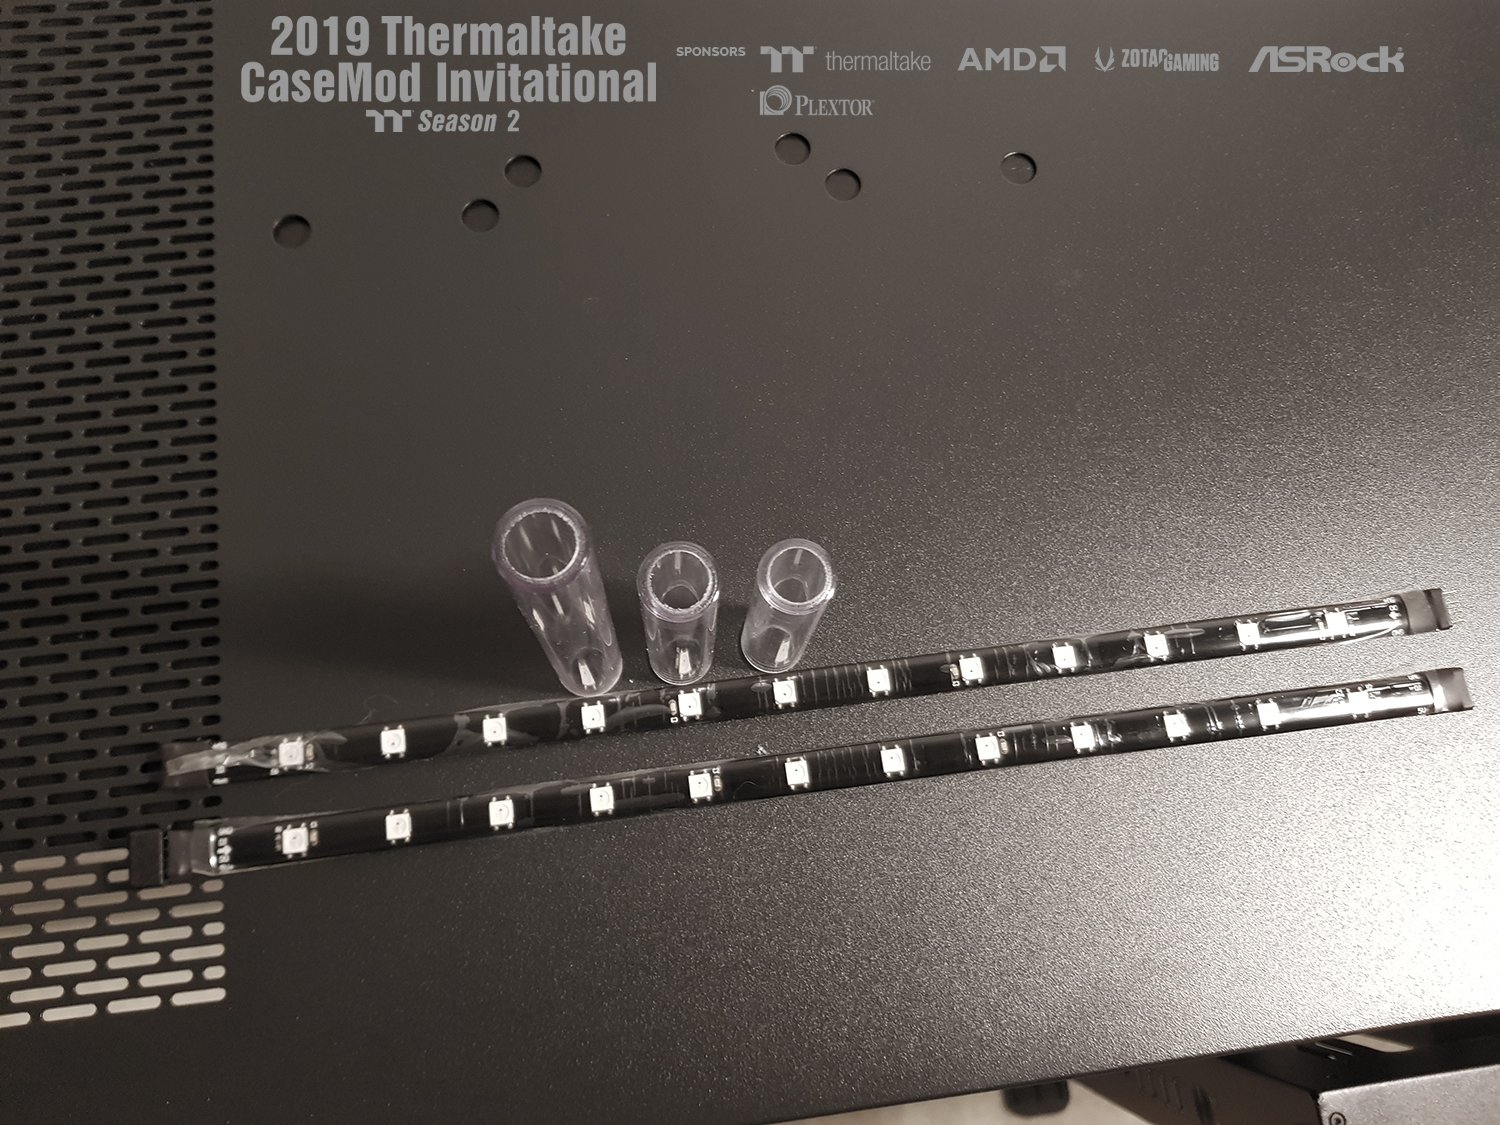
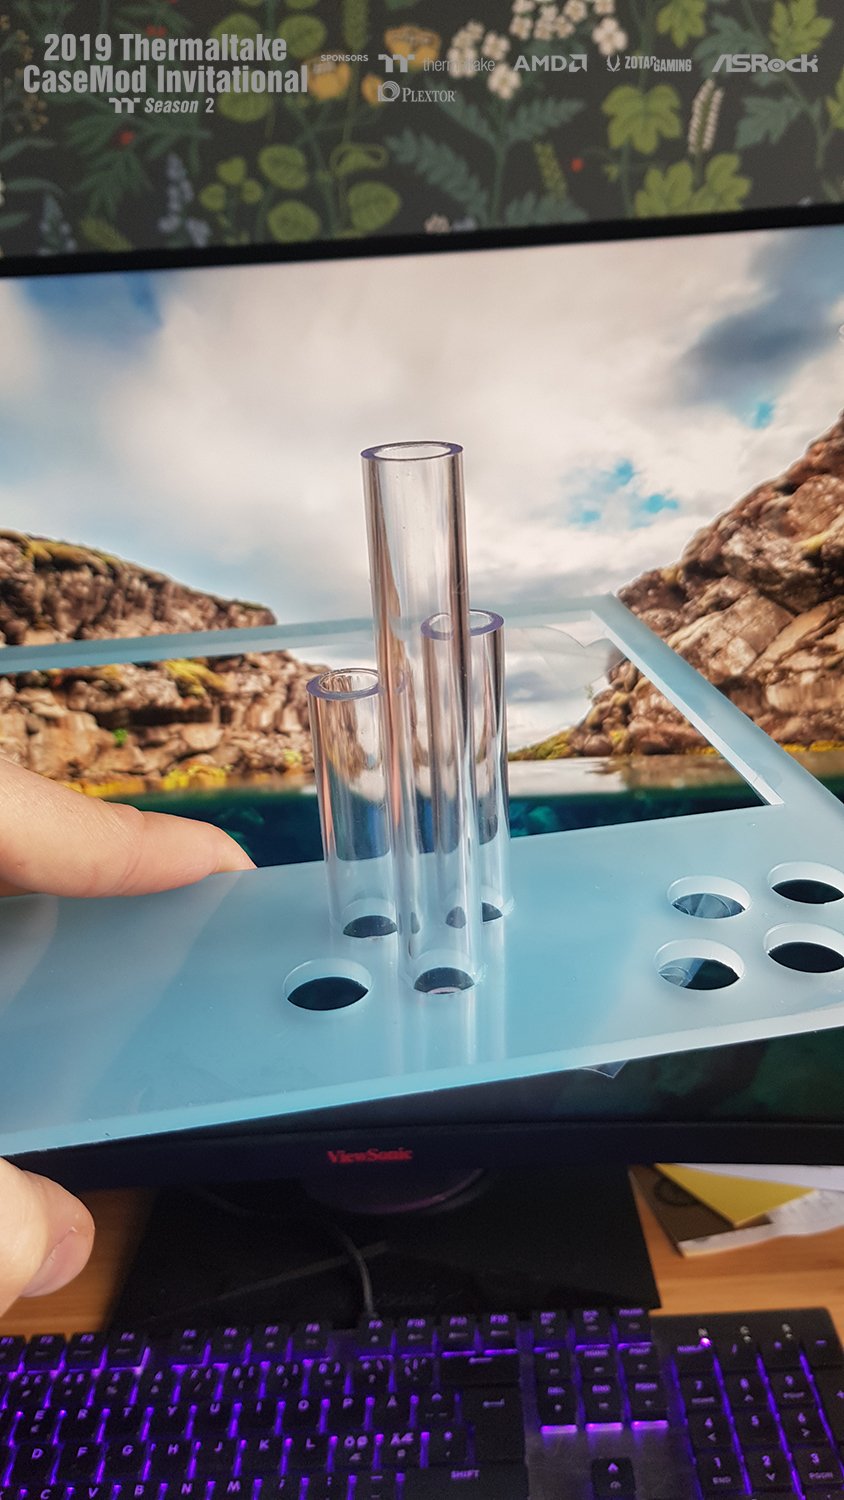
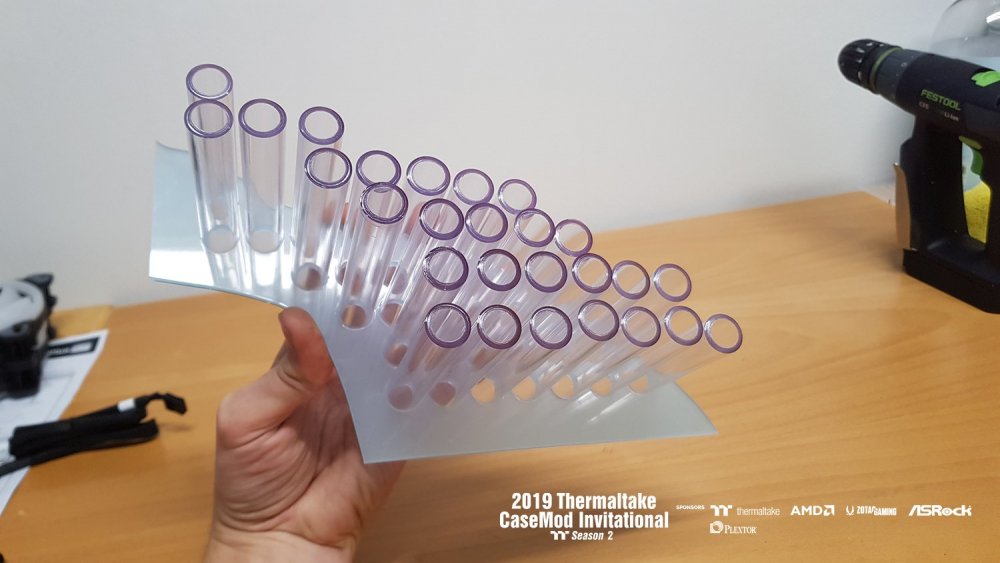
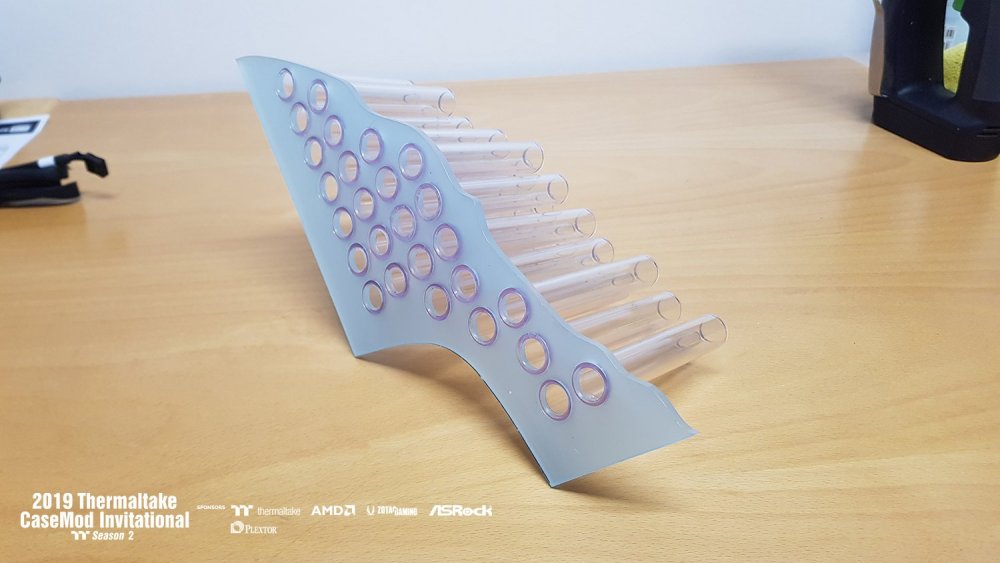
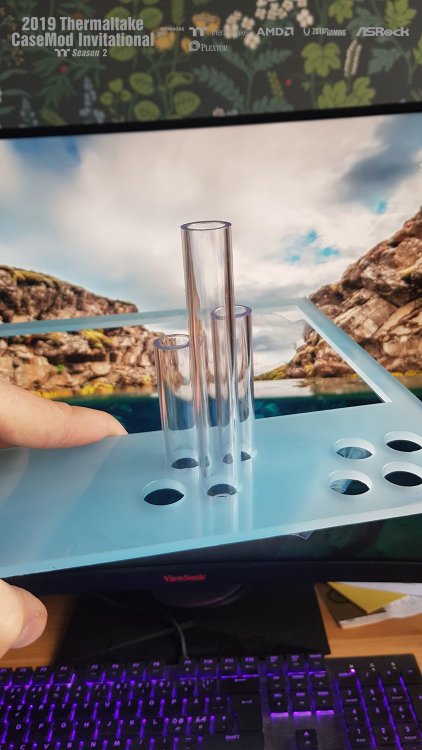
Straw art begins! I'm planning and trying patterns and spacing between pipes to come up with a raster that fits my project. At first I thought of using the LED strips and carefully line up one LED for one pipe. The problem is that I only have 30 cm strips and the connection in the middle will result in a gap. My revised idea is now to apply LED strips in an even pattern and then surface it with a diffuse acrylic plate to spread the light to all pipes. The pipes will then be attached with another acrylic plate with perfect sized mounting holes. This needs some tweaking to get the holes with right tolerances.
-
[Sweden] Tim Malmborg
Timpelay replied to Tt Andy's topic in 2019 Thermaltake CaseMOD Invitational Season 2
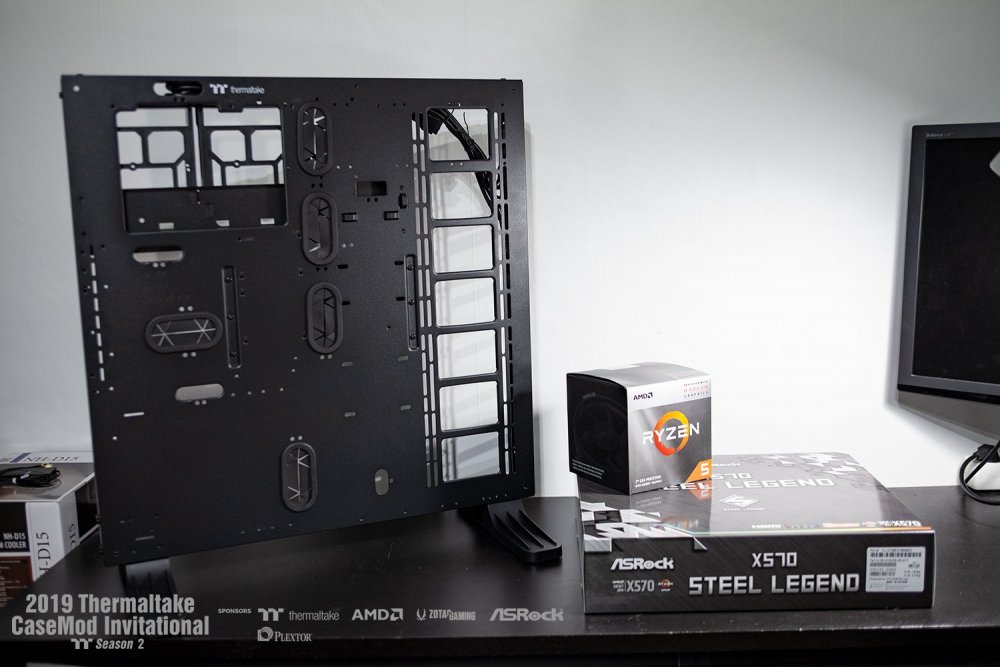
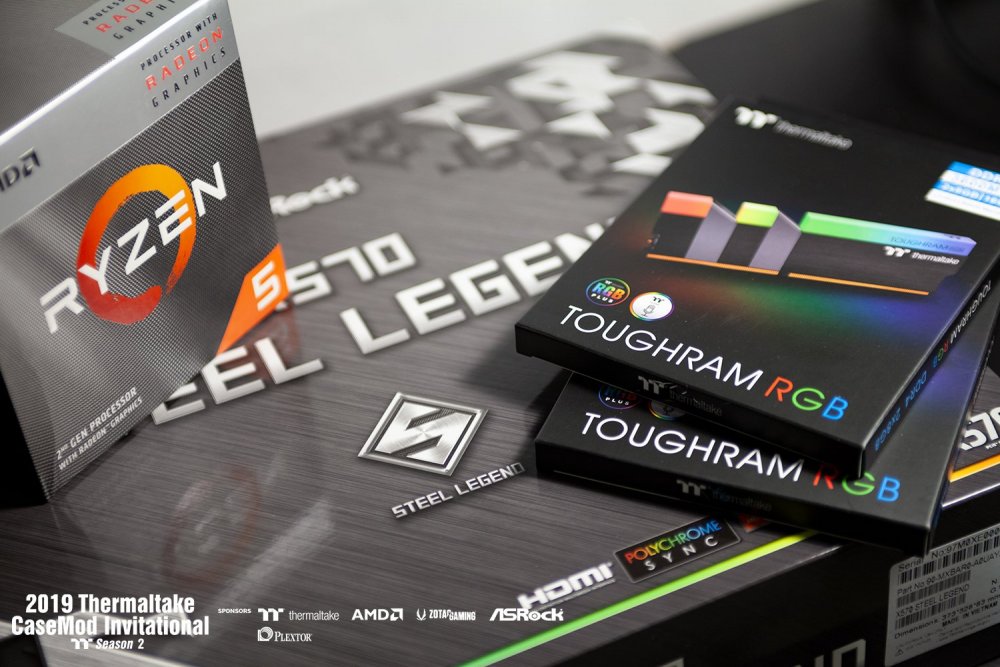
Finally, it's time to get this started! I've had the pleasure to unpack some of the things that have arrived. If I wasn't lucky enough already just to be in here, a hardware package dropped down on me with this stuff Case is lightly put together and now planning process starts. I have a base line idea what I want to do but now I need to figure out how to do it. My design will feature a kind of art form called straw art. This design will be made from PETG tubes and LEDs. I have not decided yet if I should make the art on front or back. The decision will set the rules for an one- or two sided mod!