-
Forum Statistics
7.9k
Total Topics52.9k
Total Posts -
Member Statistics
136,296
Total Members16,800
Most Online

BaluCe
-
Posts
29 -
Joined
-
Last visited
Content Type
Profiles
Forums
Downloads
Events
Gallery
Blogs
Everything posted by BaluCe
-

[Hungary] Balazs Szabo
BaluCe replied to TT Lily's topic in 2022 Thermaltake RAM MOD Invitational Season 1
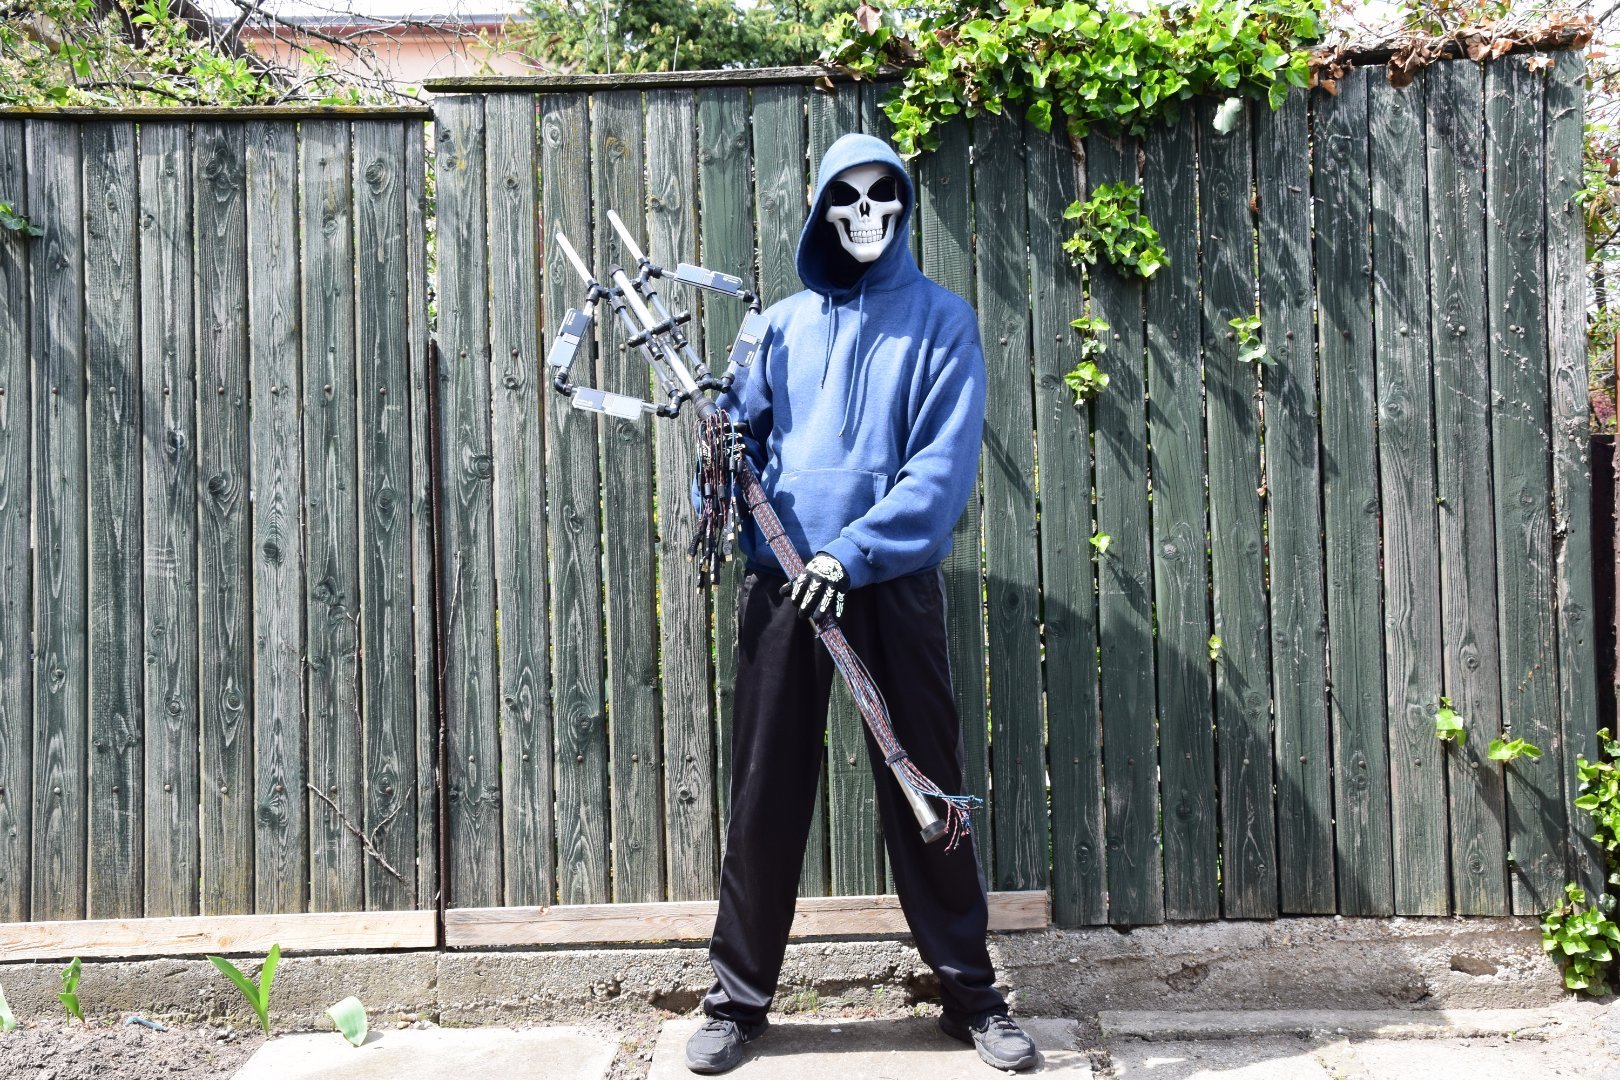
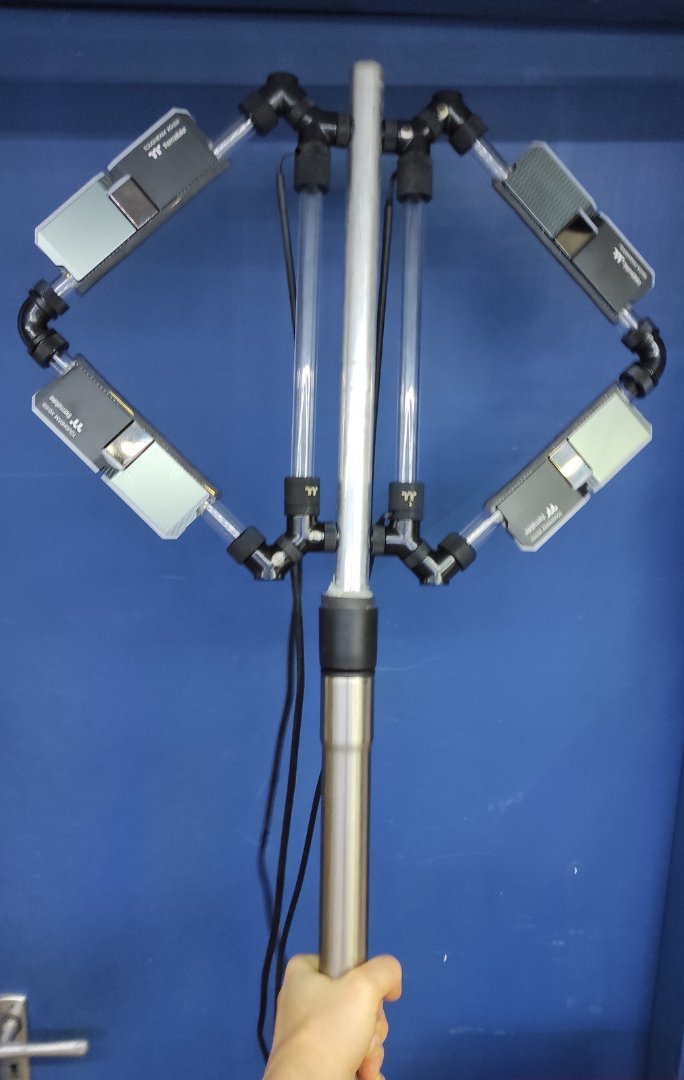
I received a few private questions, and a few came up repeatedly. So here are a few answers. No, the RAMs are not glued in place. Precise cuts and friction holds them there and as you can see it stays there. No, there is no water in the pipes. No it is not battery operated. No, you cannot connect this to a PC, but the RAMs can be removed from this "display". Yes, it is my own design and creation. Yes, it is heavier as it looks. Yes, I could hide a Pendrive and/or a mouse on it. -
[Hungary] Balazs Szabo
BaluCe replied to TT Lily's topic in 2022 Thermaltake RAM MOD Invitational Season 1
The Final Video... just in time... -
[Hungary] Balazs Szabo
BaluCe replied to TT Lily's topic in 2022 Thermaltake RAM MOD Invitational Season 1
Dawn + Fun !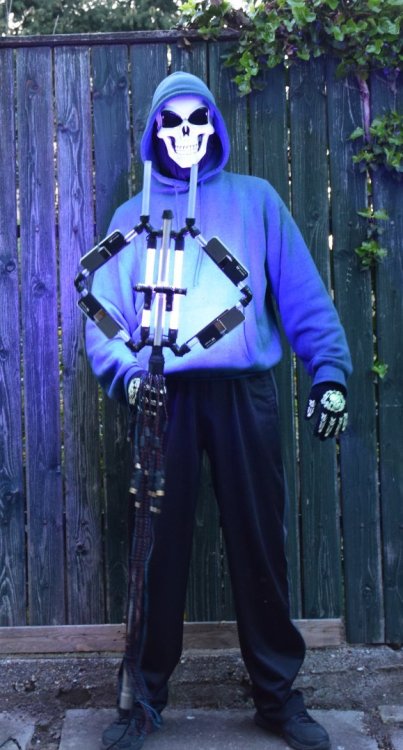
-
[Hungary] Balazs Szabo
BaluCe replied to TT Lily's topic in 2022 Thermaltake RAM MOD Invitational Season 1
Dawn photos:


-
[Hungary] Balazs Szabo
BaluCe replied to TT Lily's topic in 2022 Thermaltake RAM MOD Invitational Season 1
Final dawn / night photos in progress. Video in progress. -
[Hungary] Balazs Szabo
BaluCe replied to TT Lily's topic in 2022 Thermaltake RAM MOD Invitational Season 1
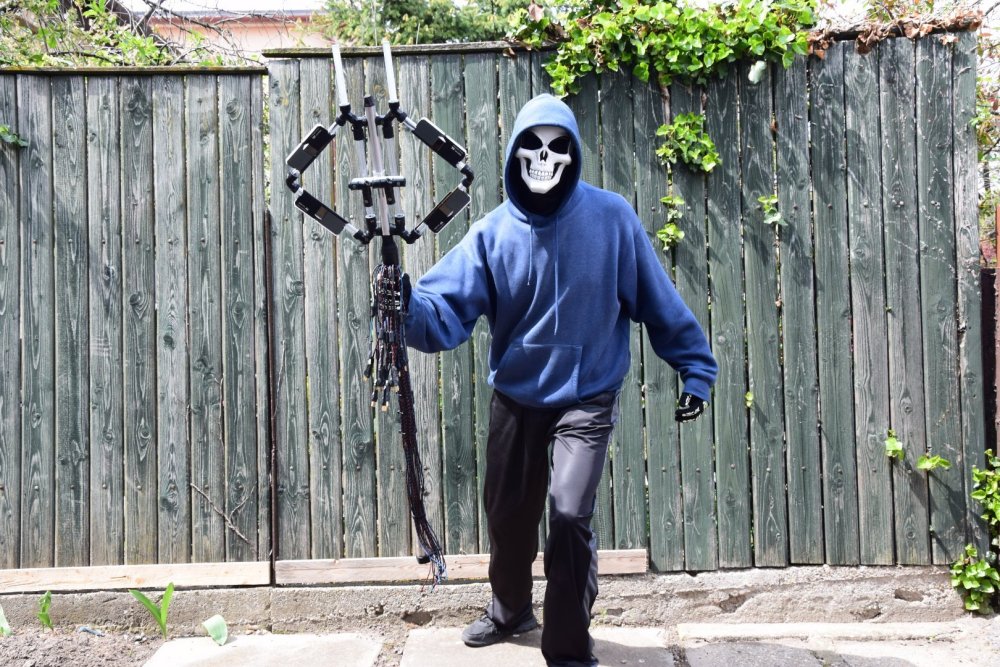
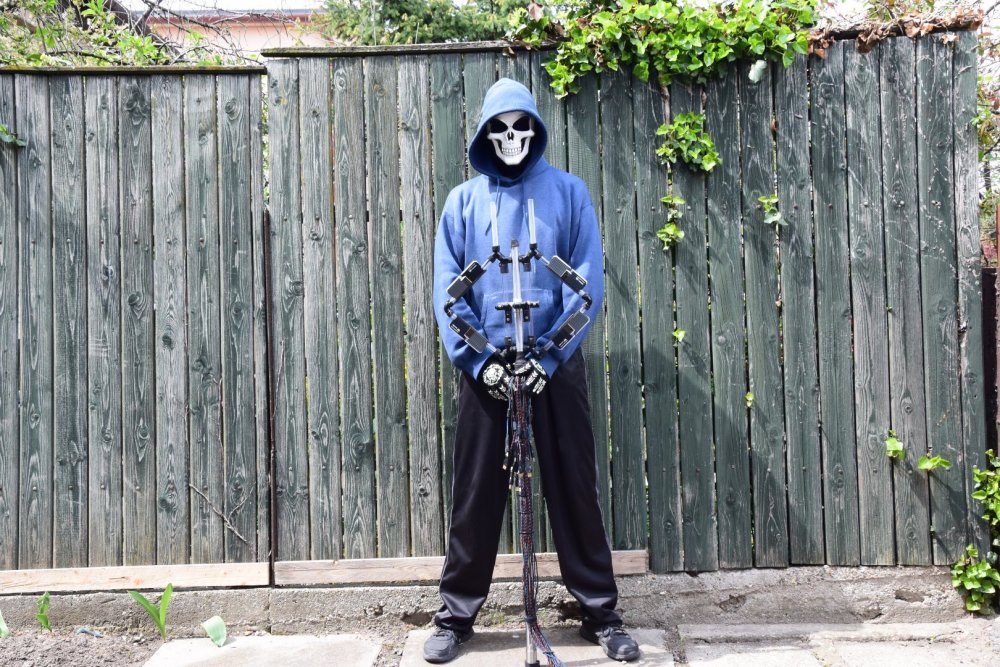
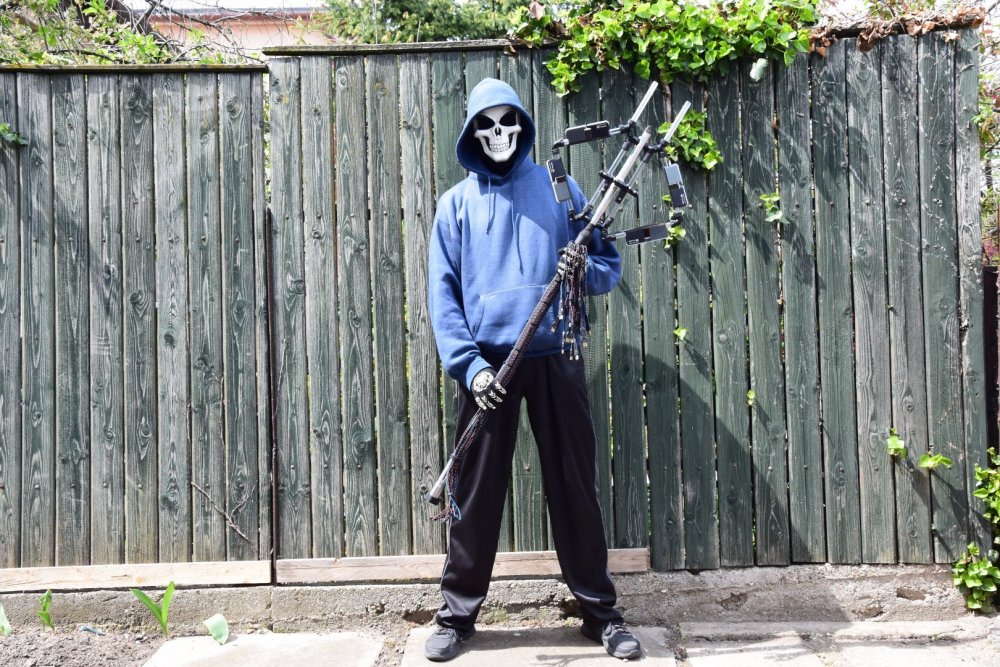
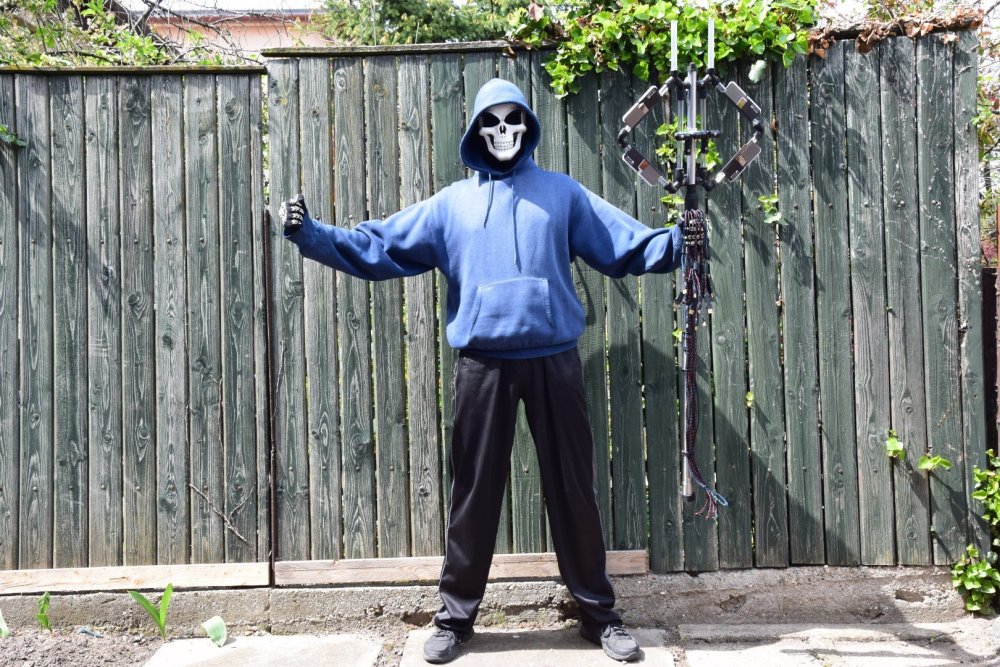
I have not yet regained my strength after an illness. I don't a have professional photo corner or a serious camera. I don't have many tools ... but I had fun !!! 😈💀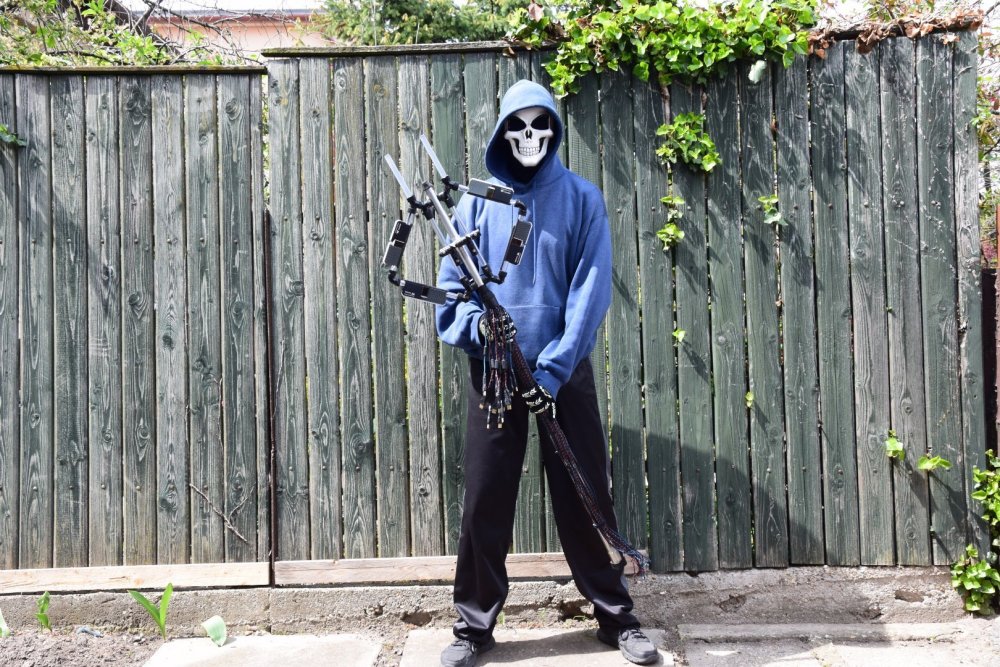


-
[Hungary] Balazs Szabo
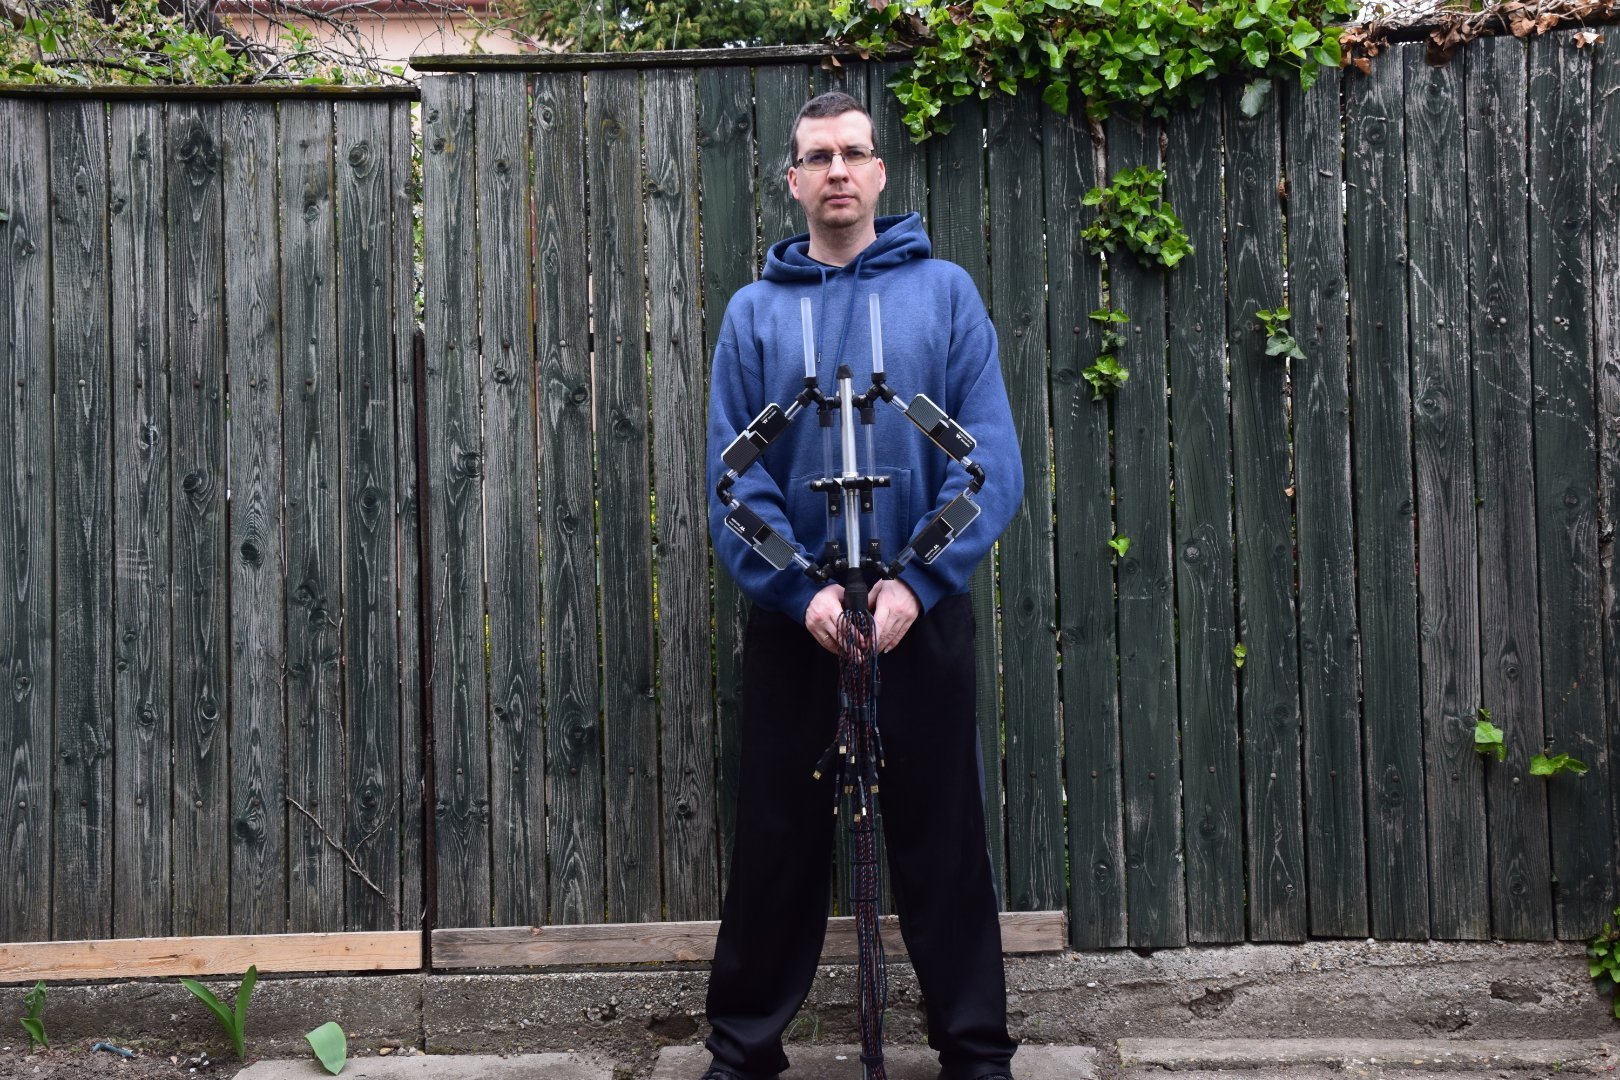
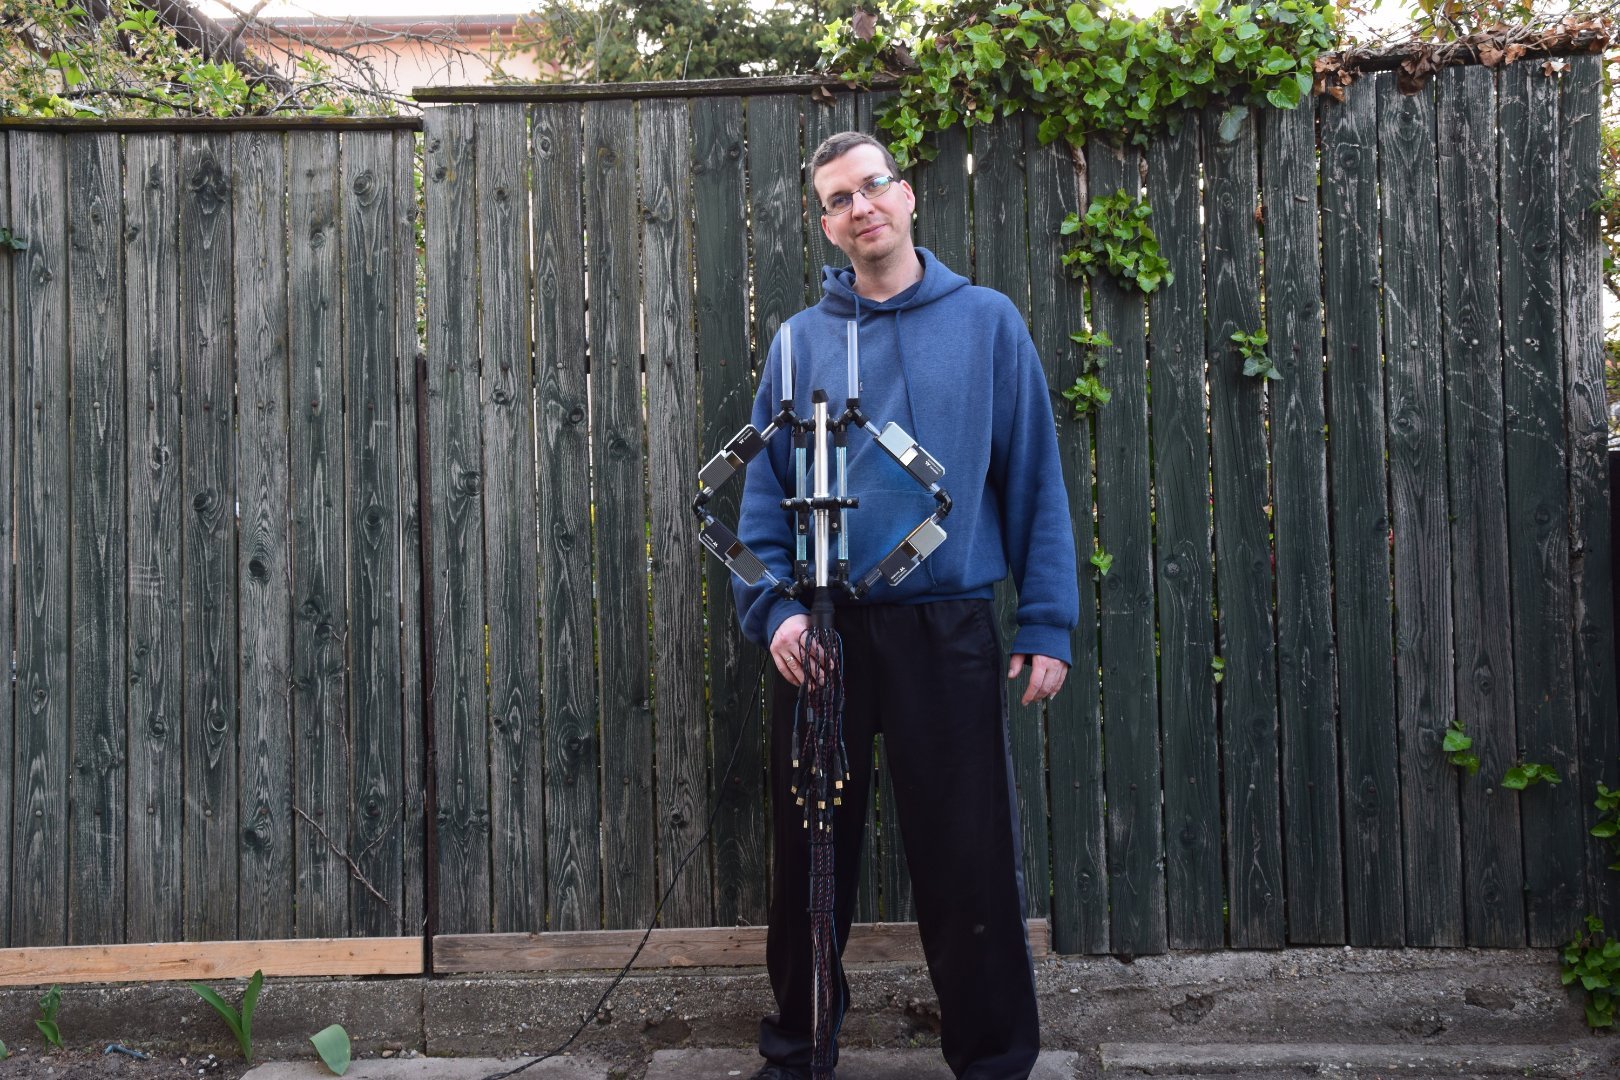
BaluCe replied to TT Lily's topic in 2022 Thermaltake RAM MOD Invitational Season 1
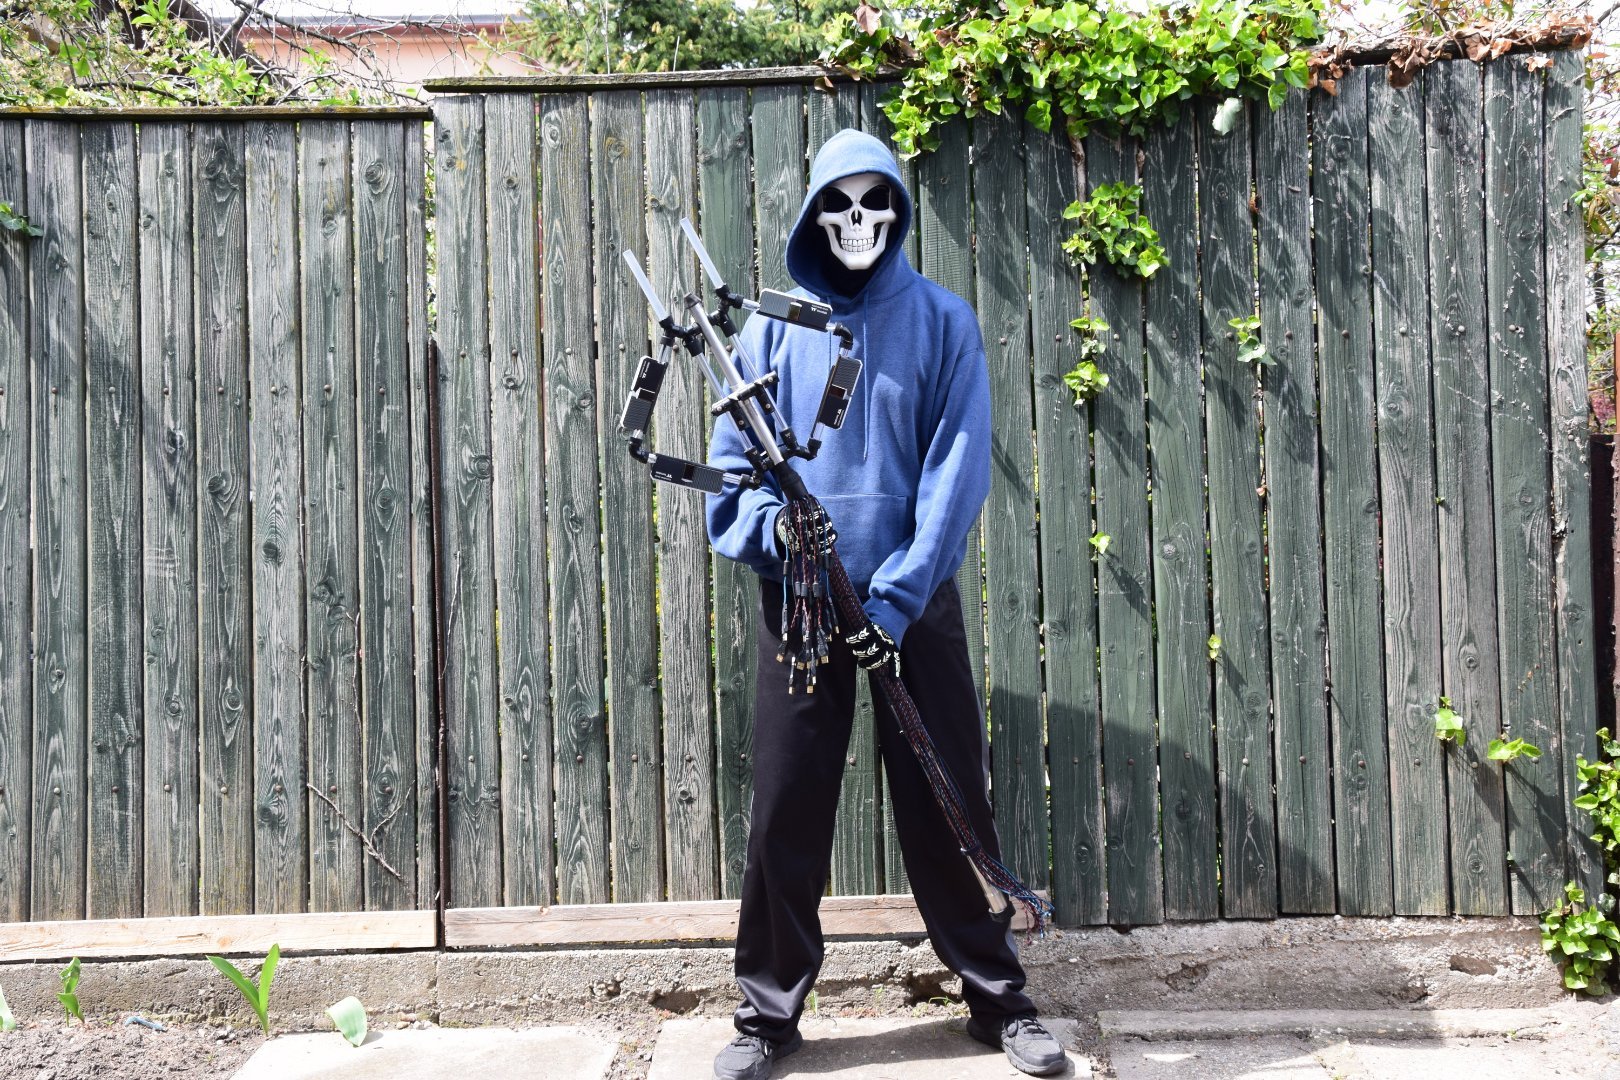
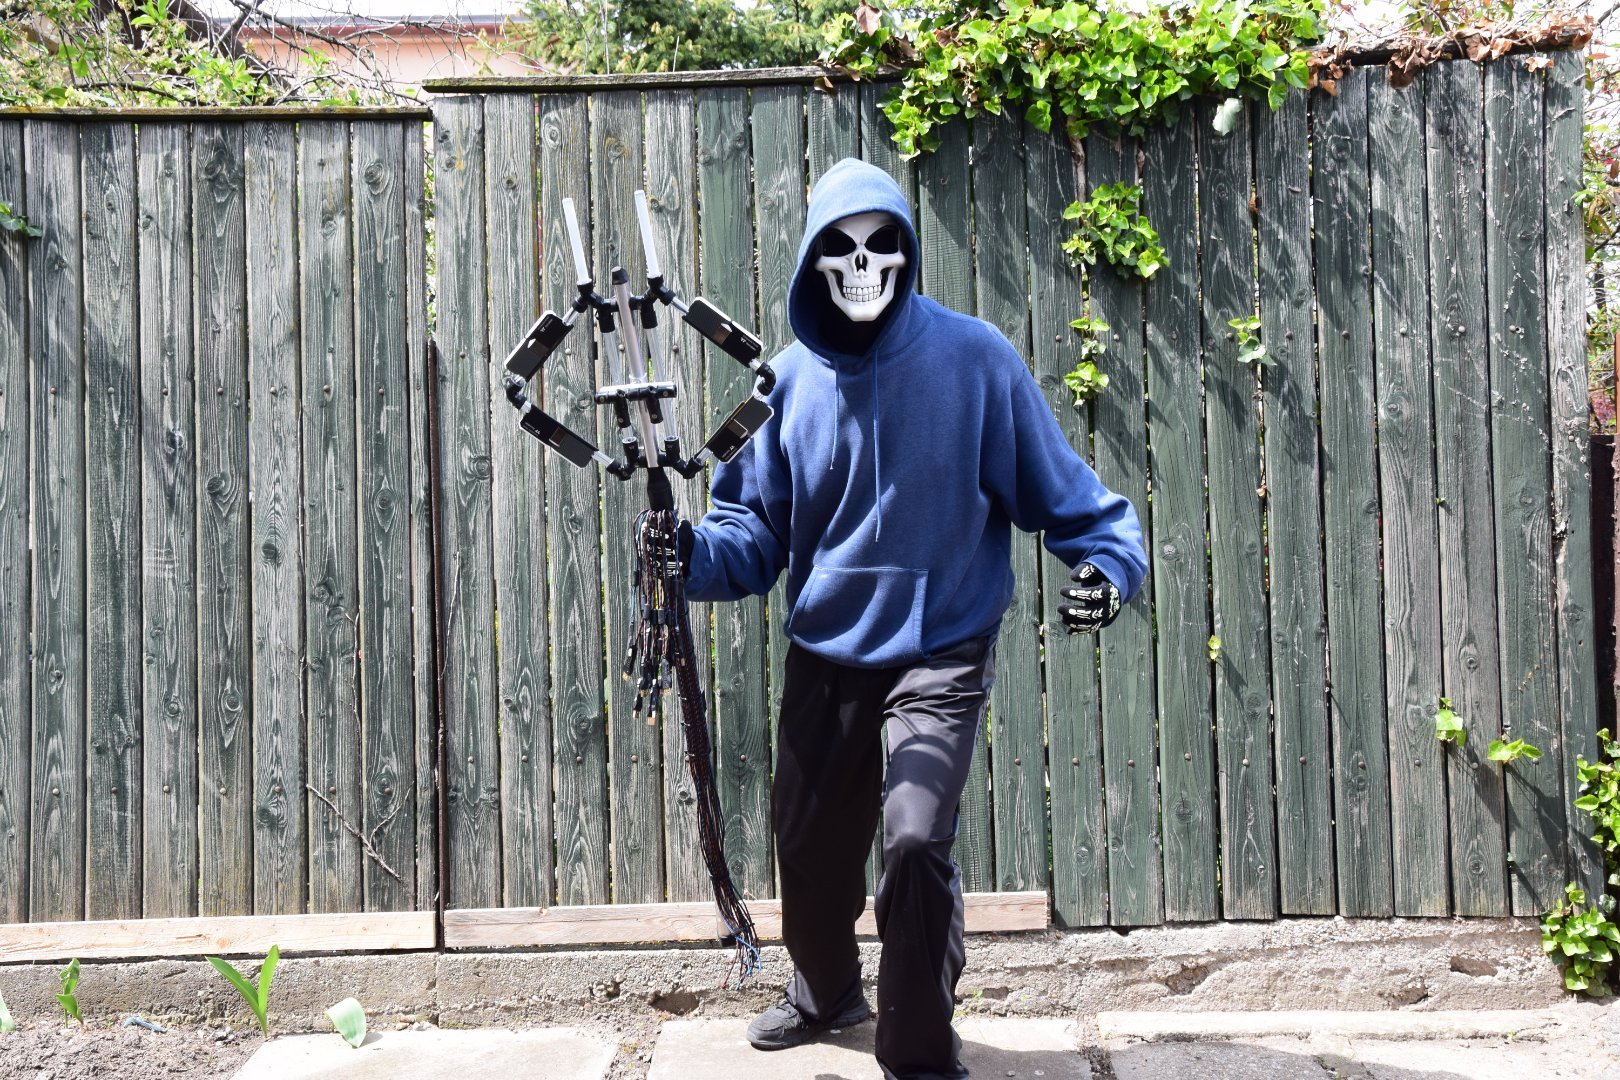
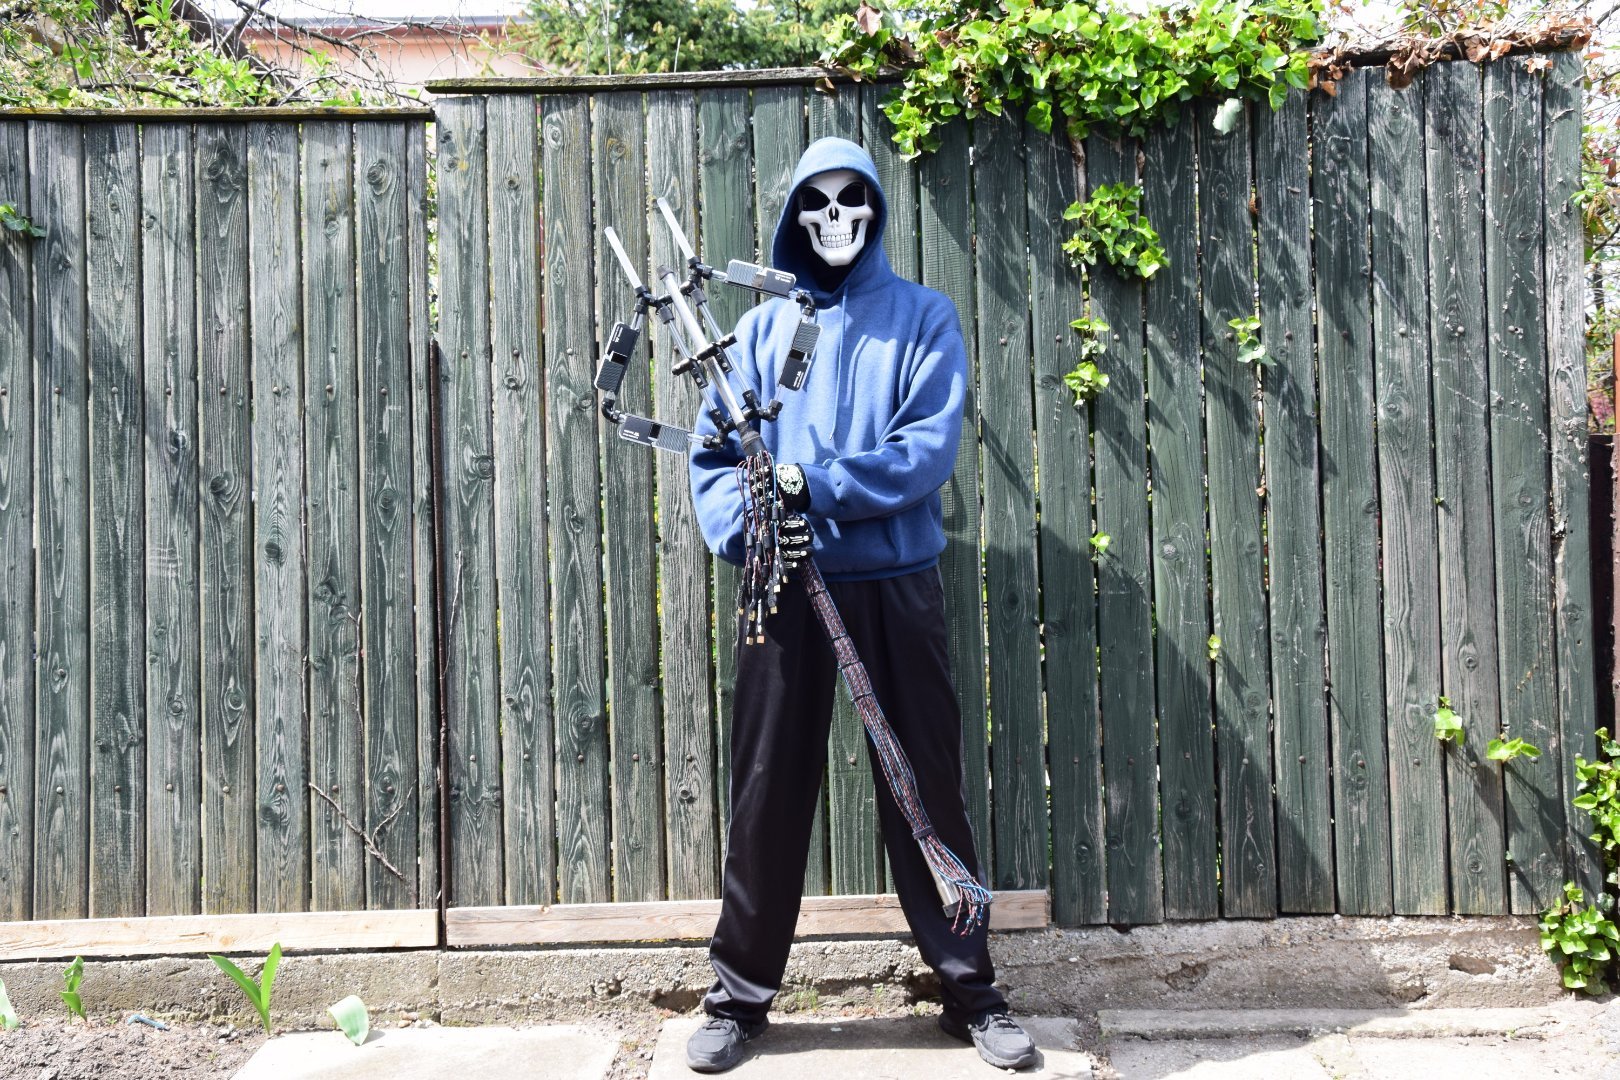
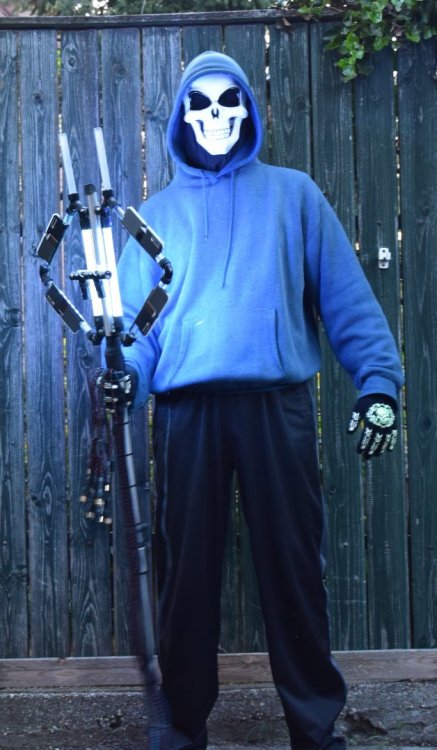
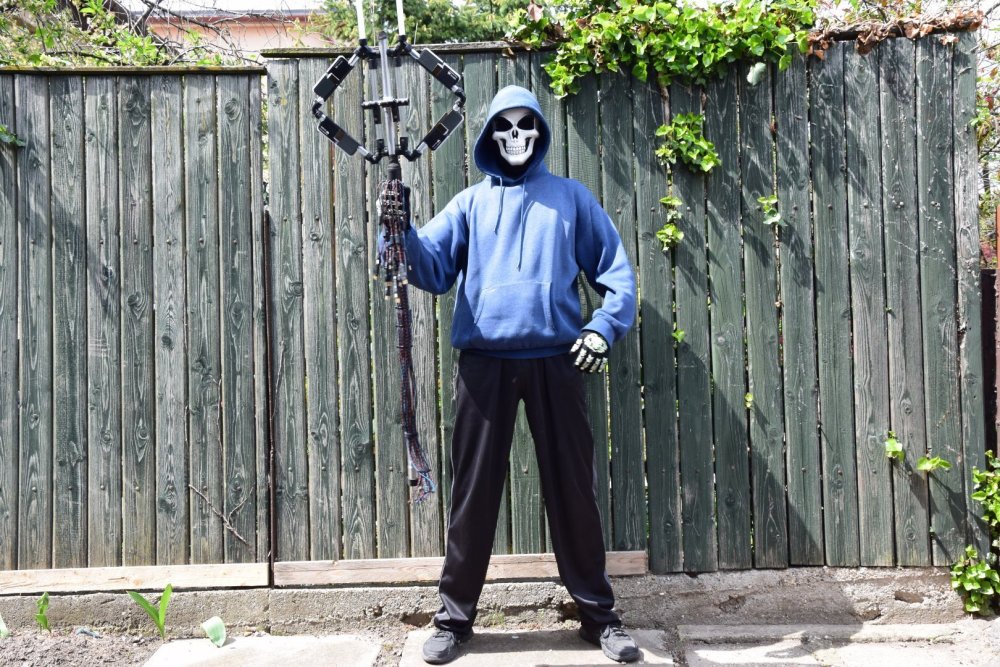
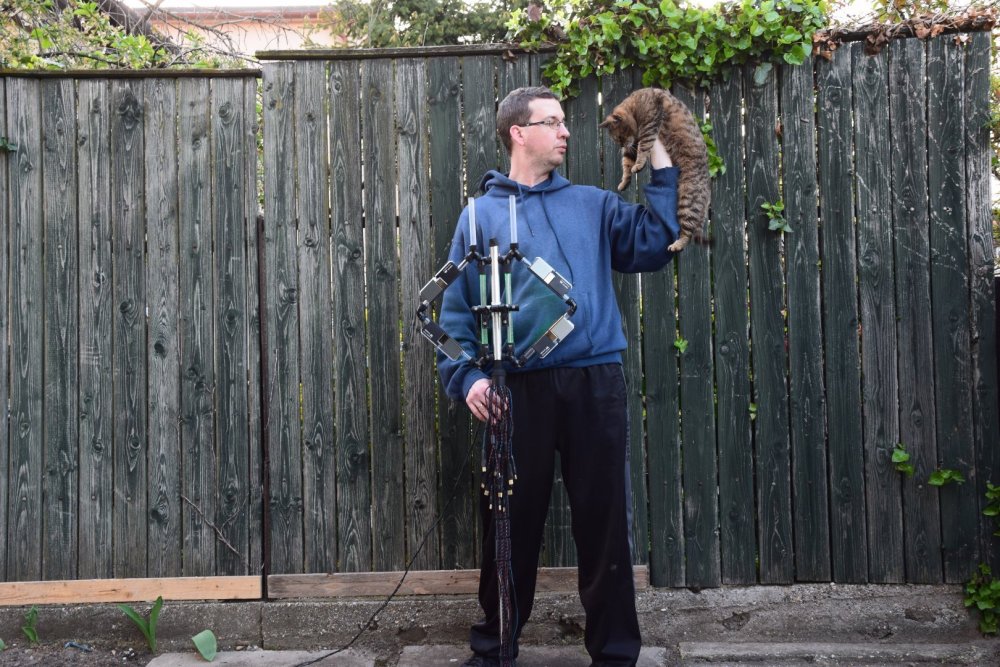
It looks small in my hand, but I am 192cm (6.3 feet) tall plus the shoes. ...and I was able to catch one Photo-troll!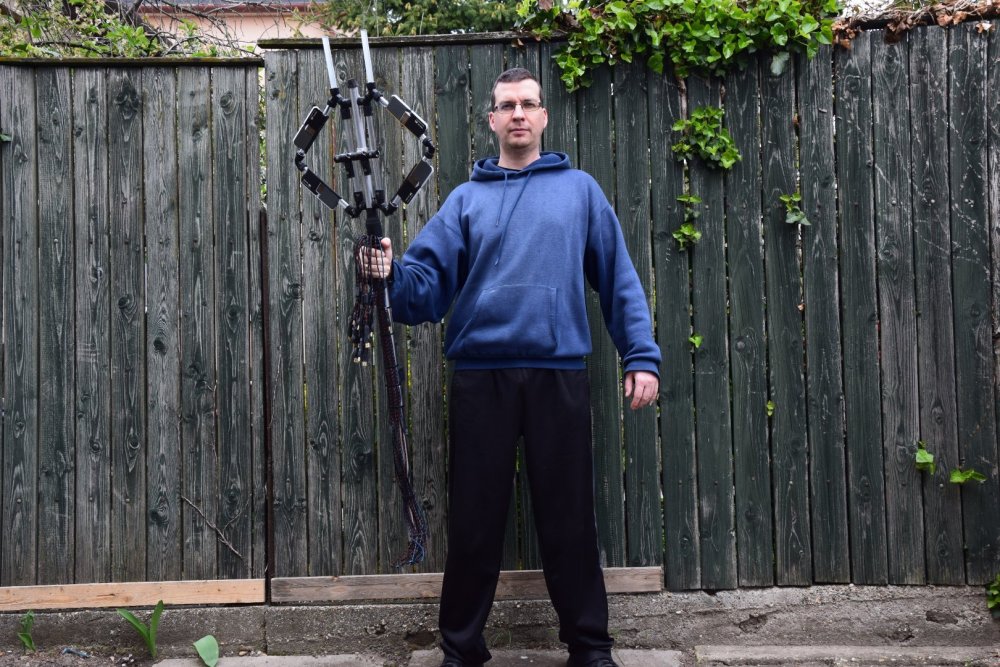

-
[Hungary] Balazs Szabo
BaluCe replied to TT Lily's topic in 2022 Thermaltake RAM MOD Invitational Season 1
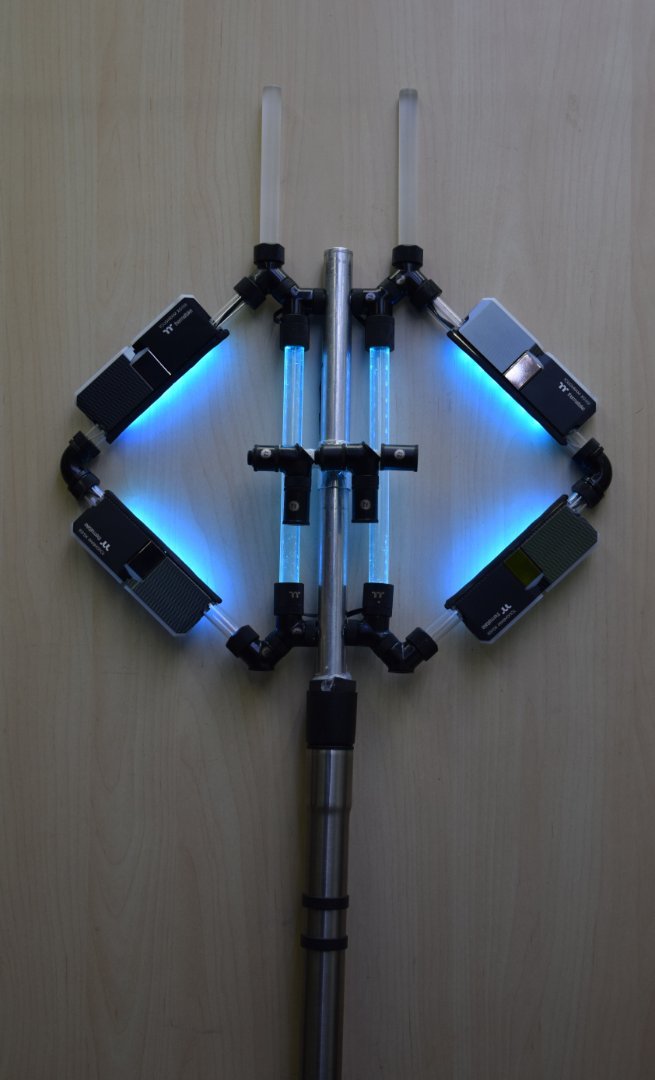
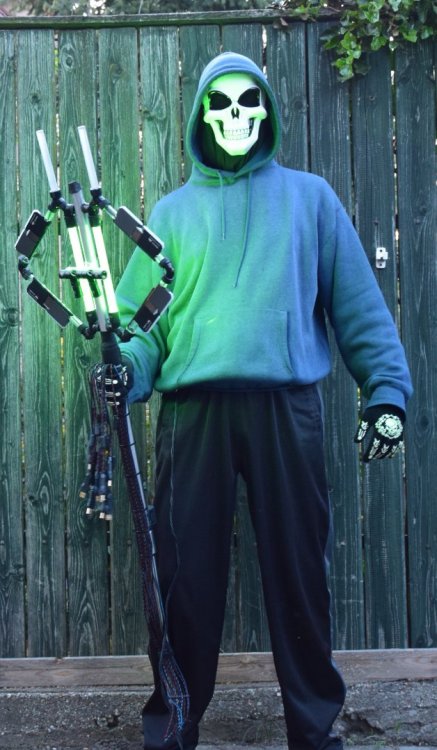
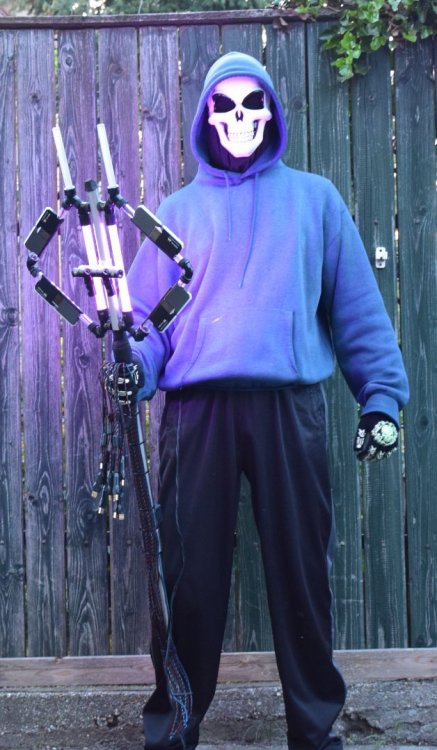
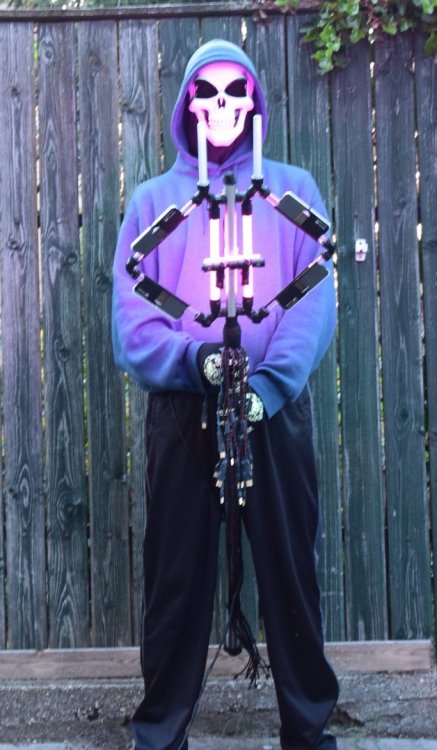
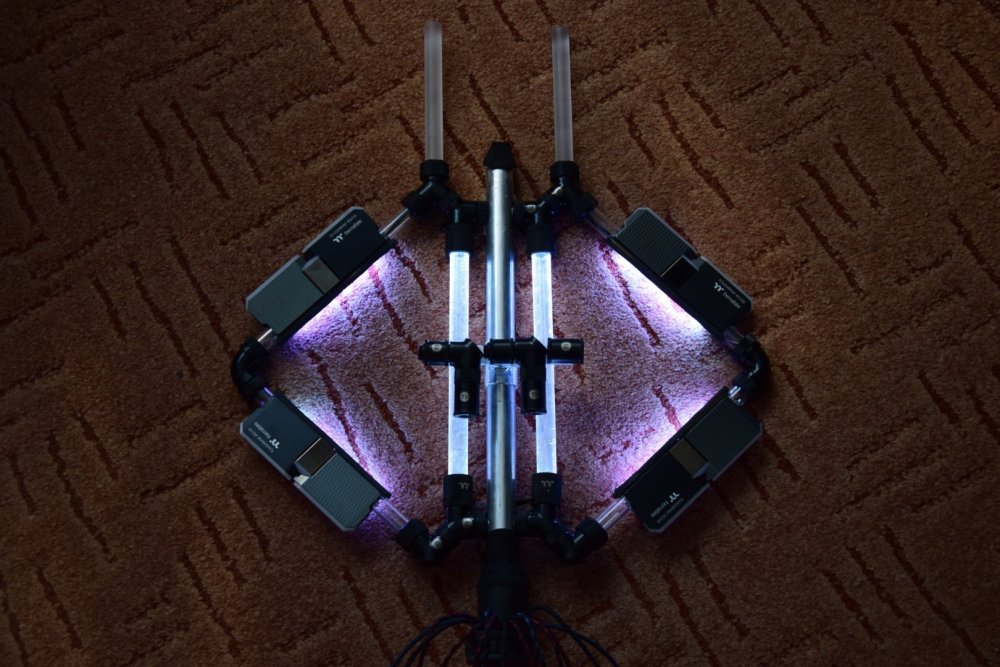
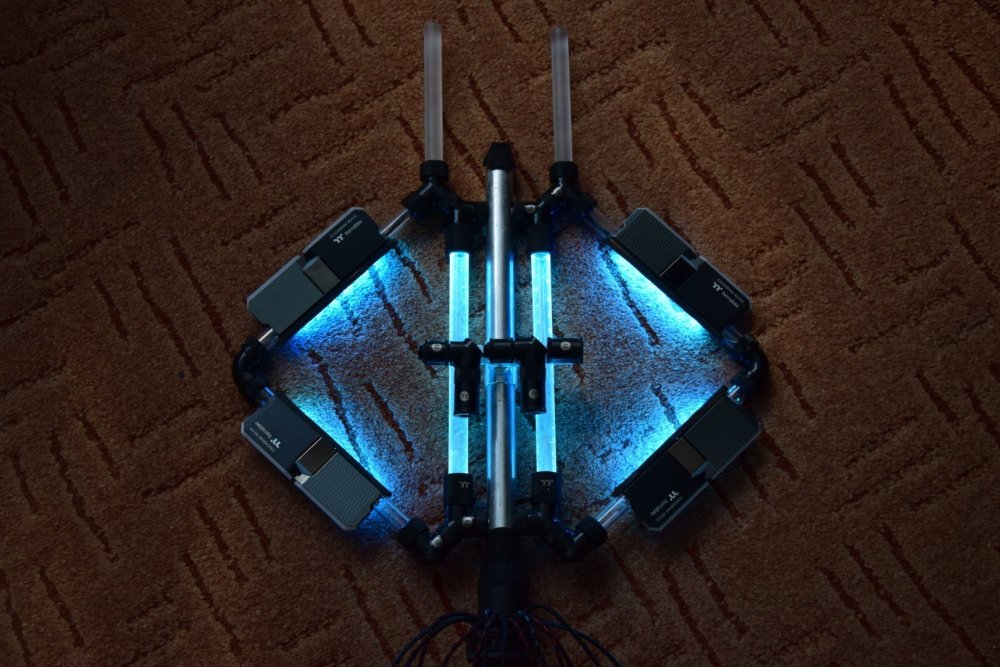
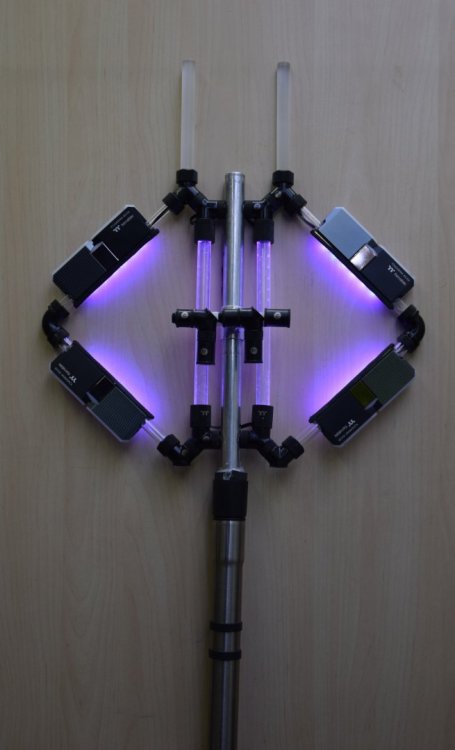
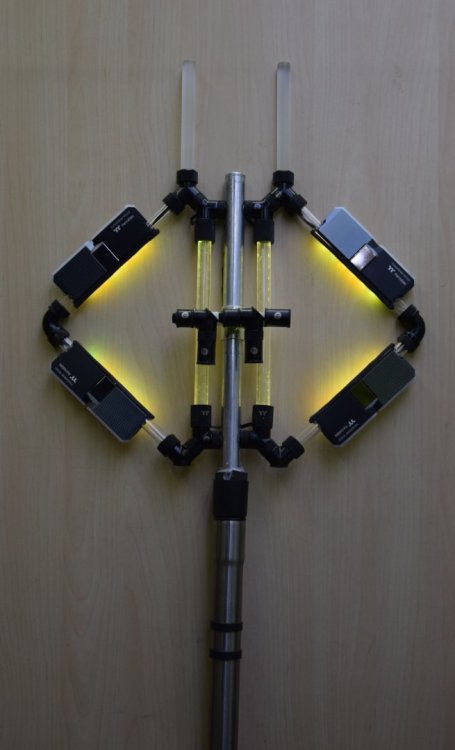
RGB light causes extra FPS in every game! 😁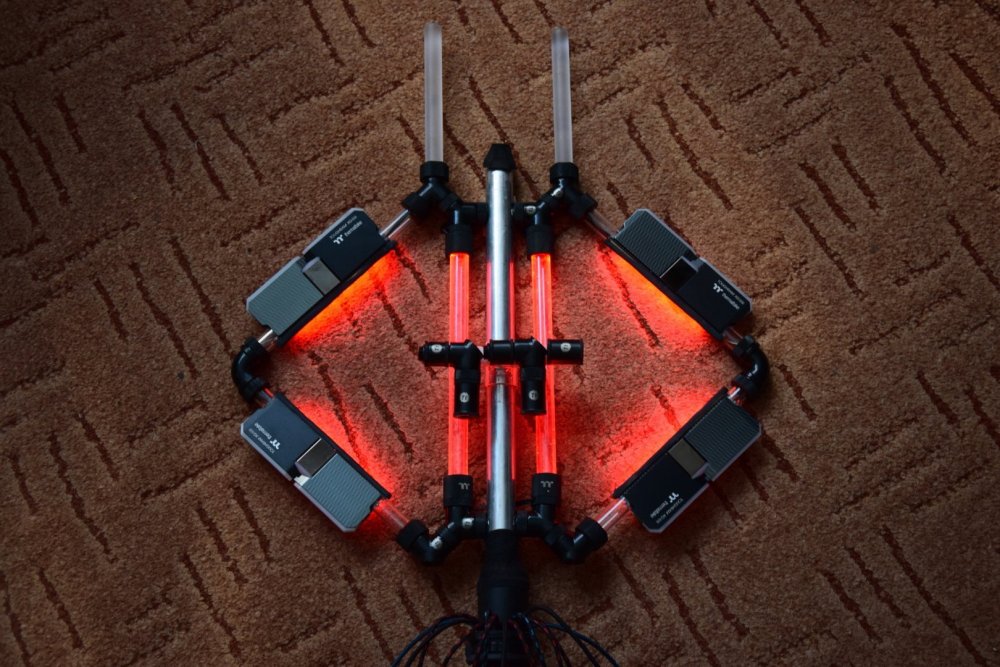


-
[Hungary] Balazs Szabo
BaluCe replied to TT Lily's topic in 2022 Thermaltake RAM MOD Invitational Season 1
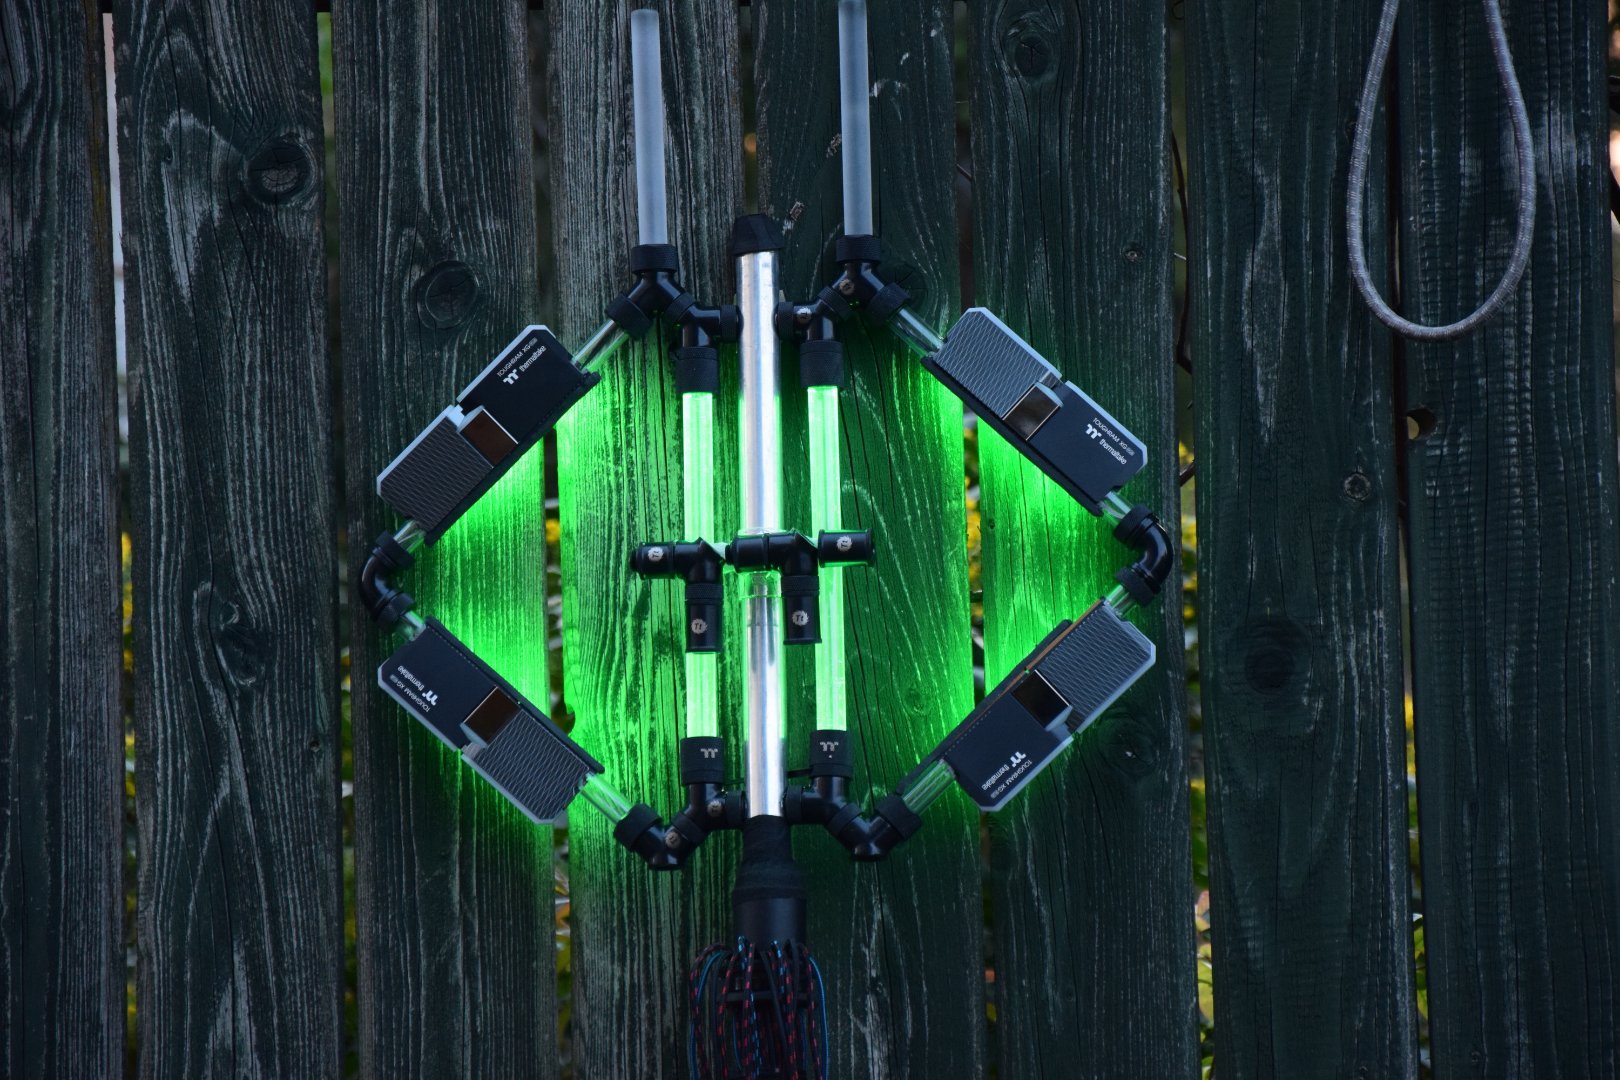
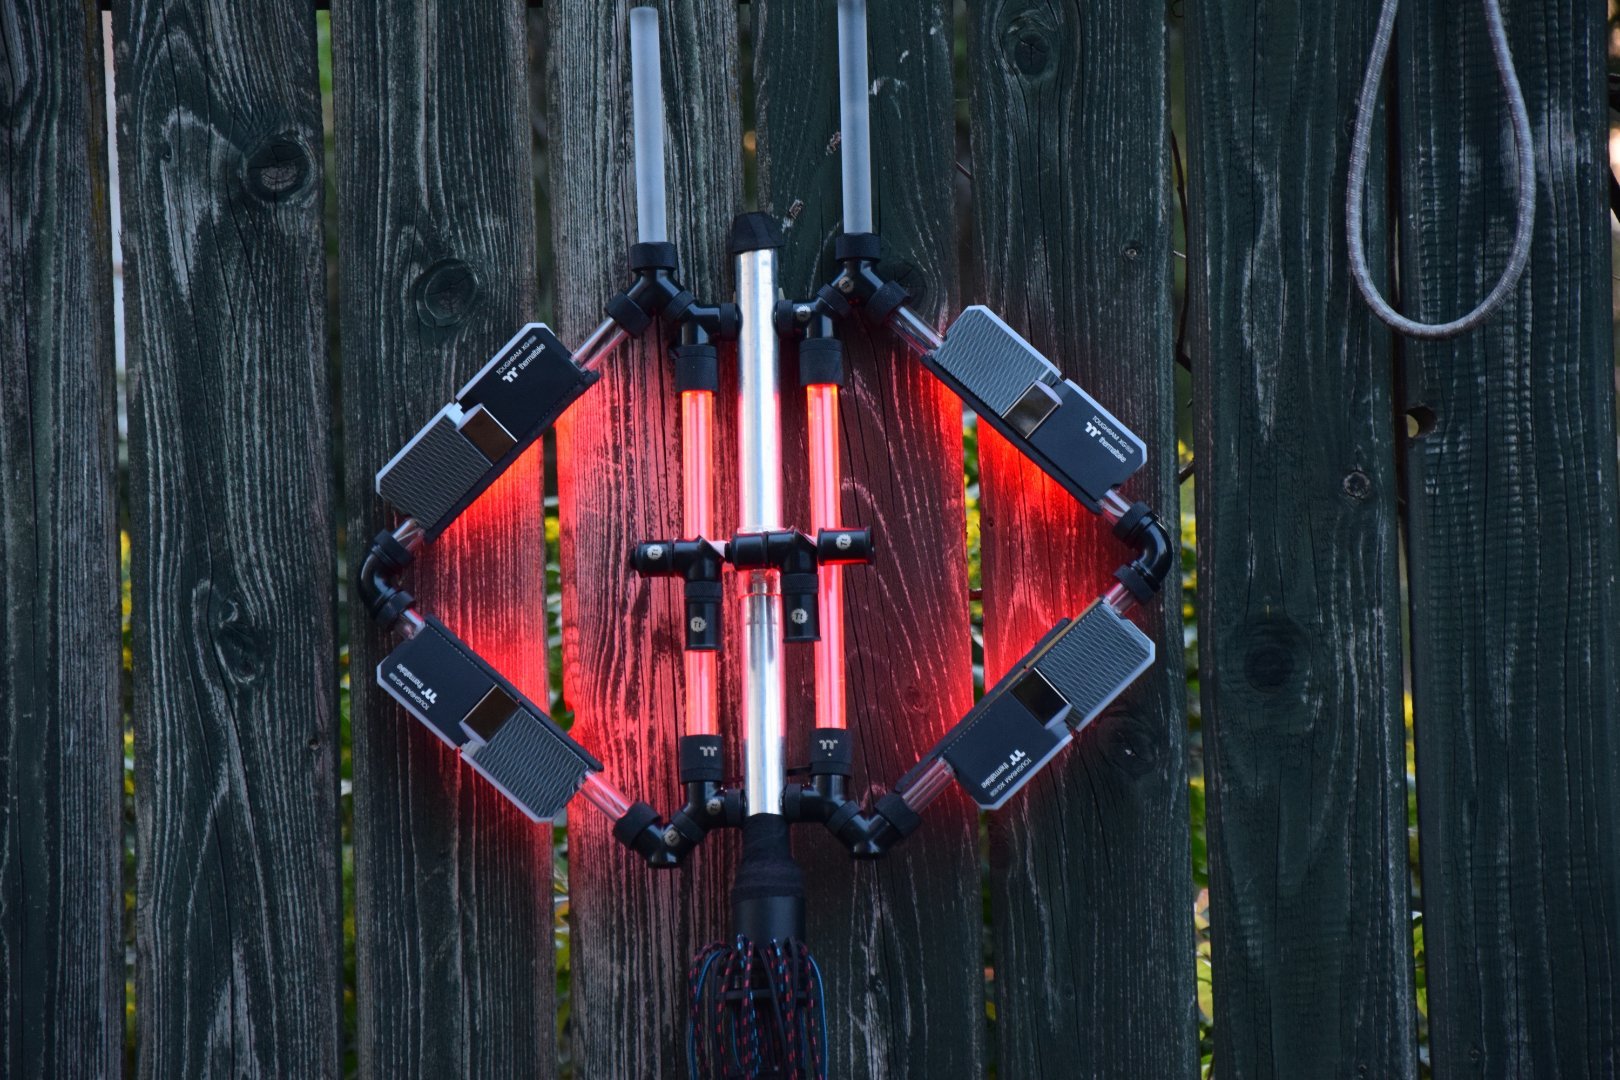
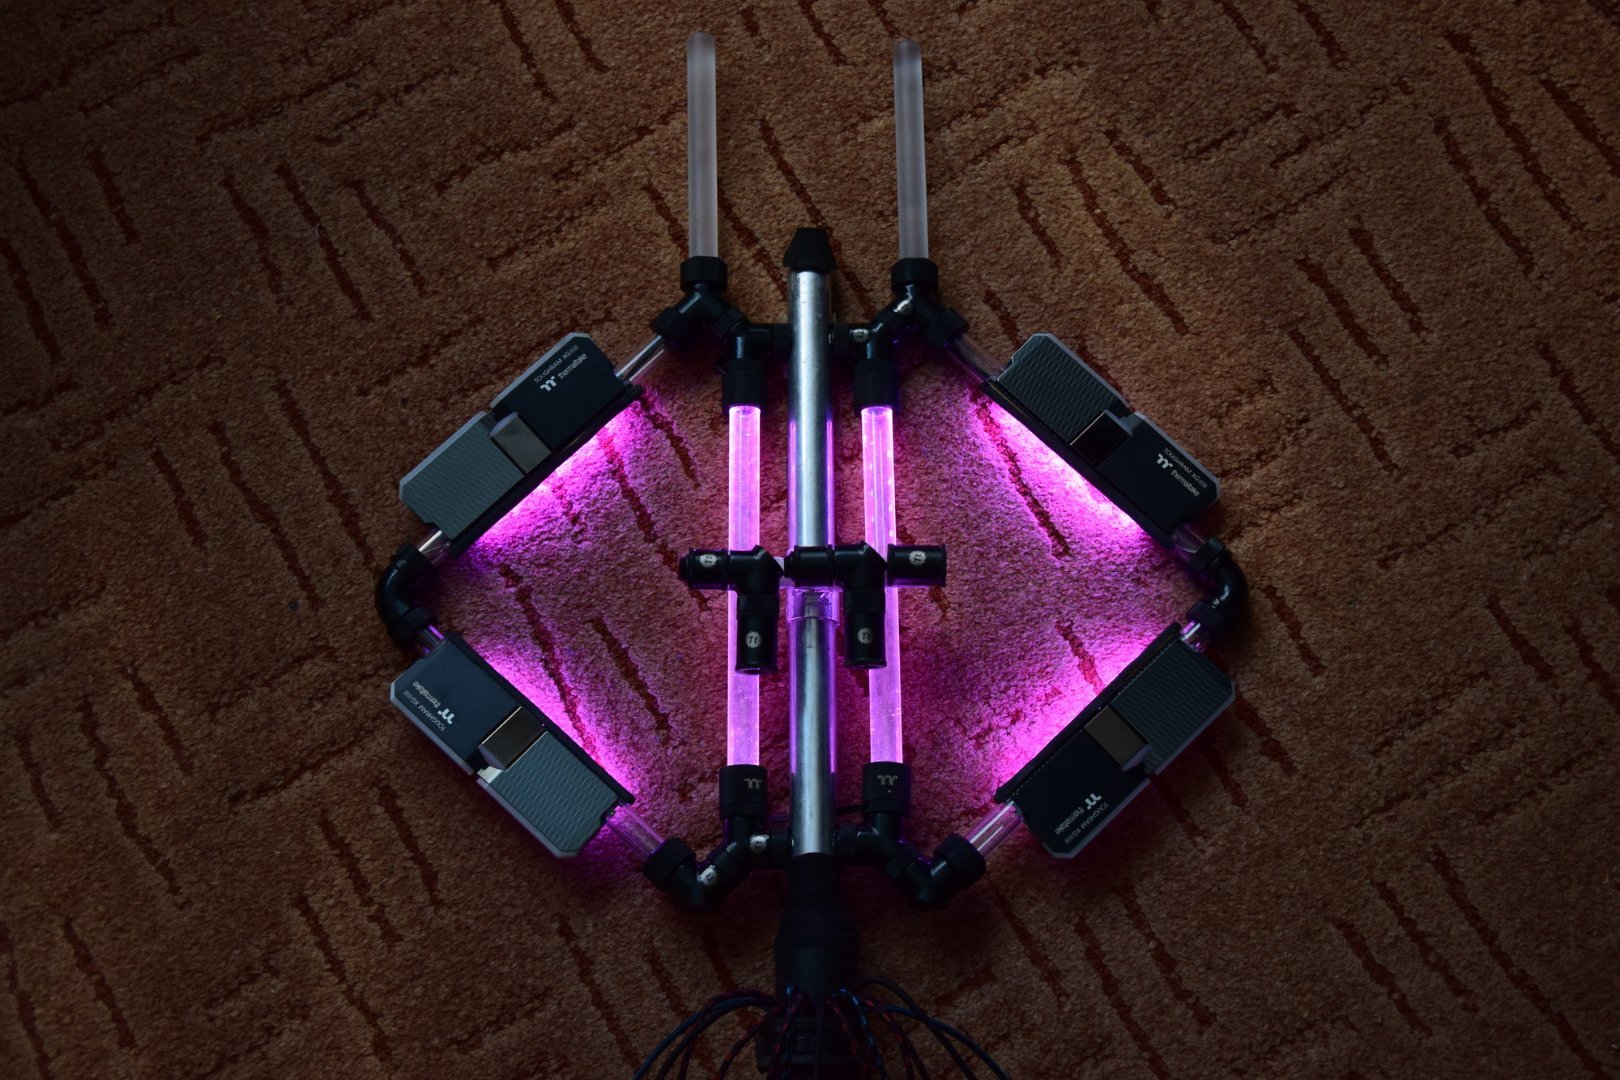
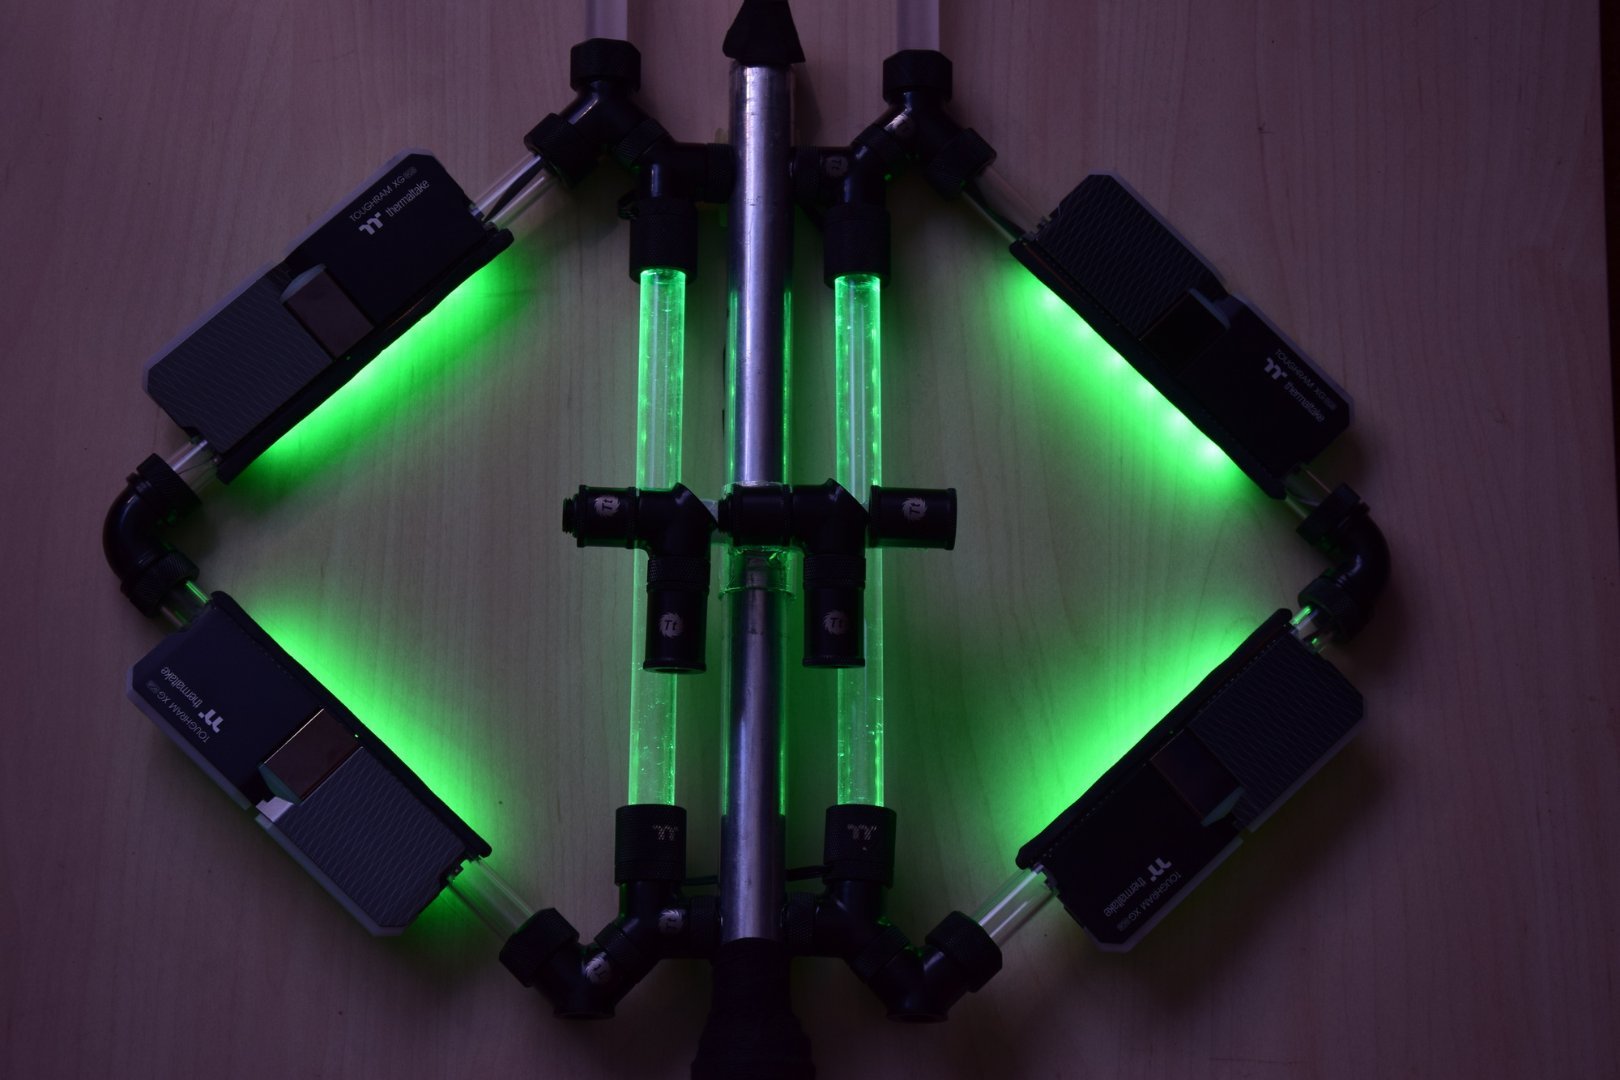
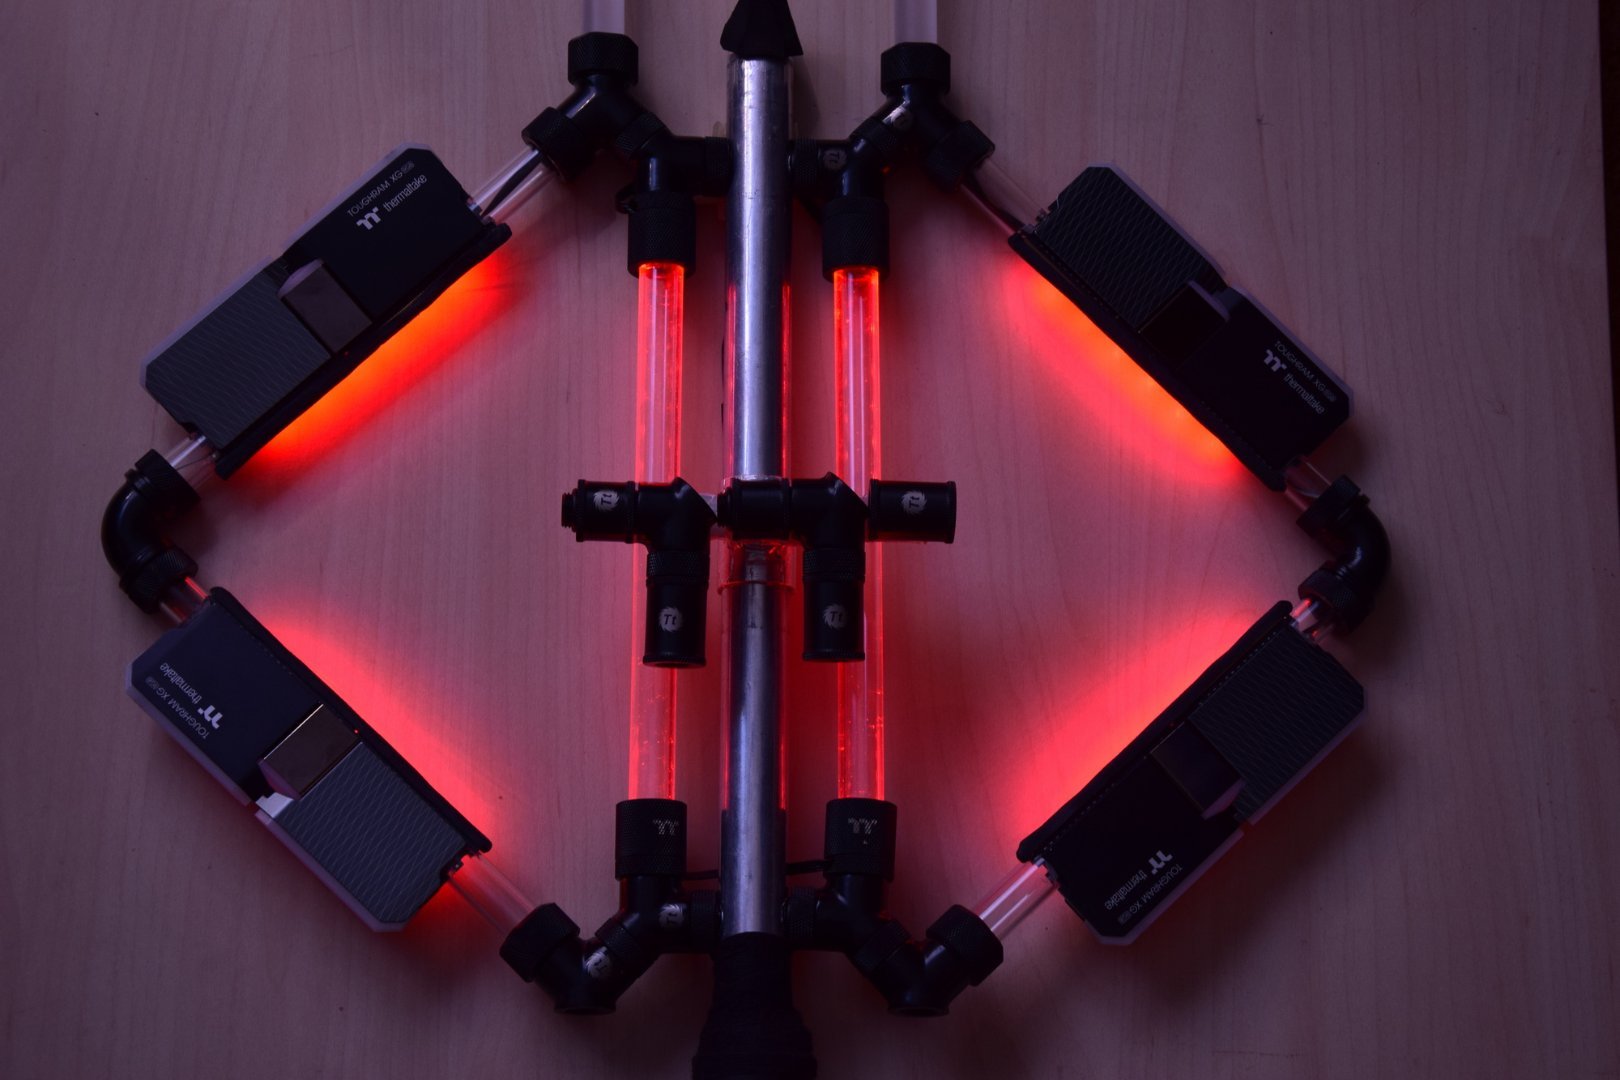
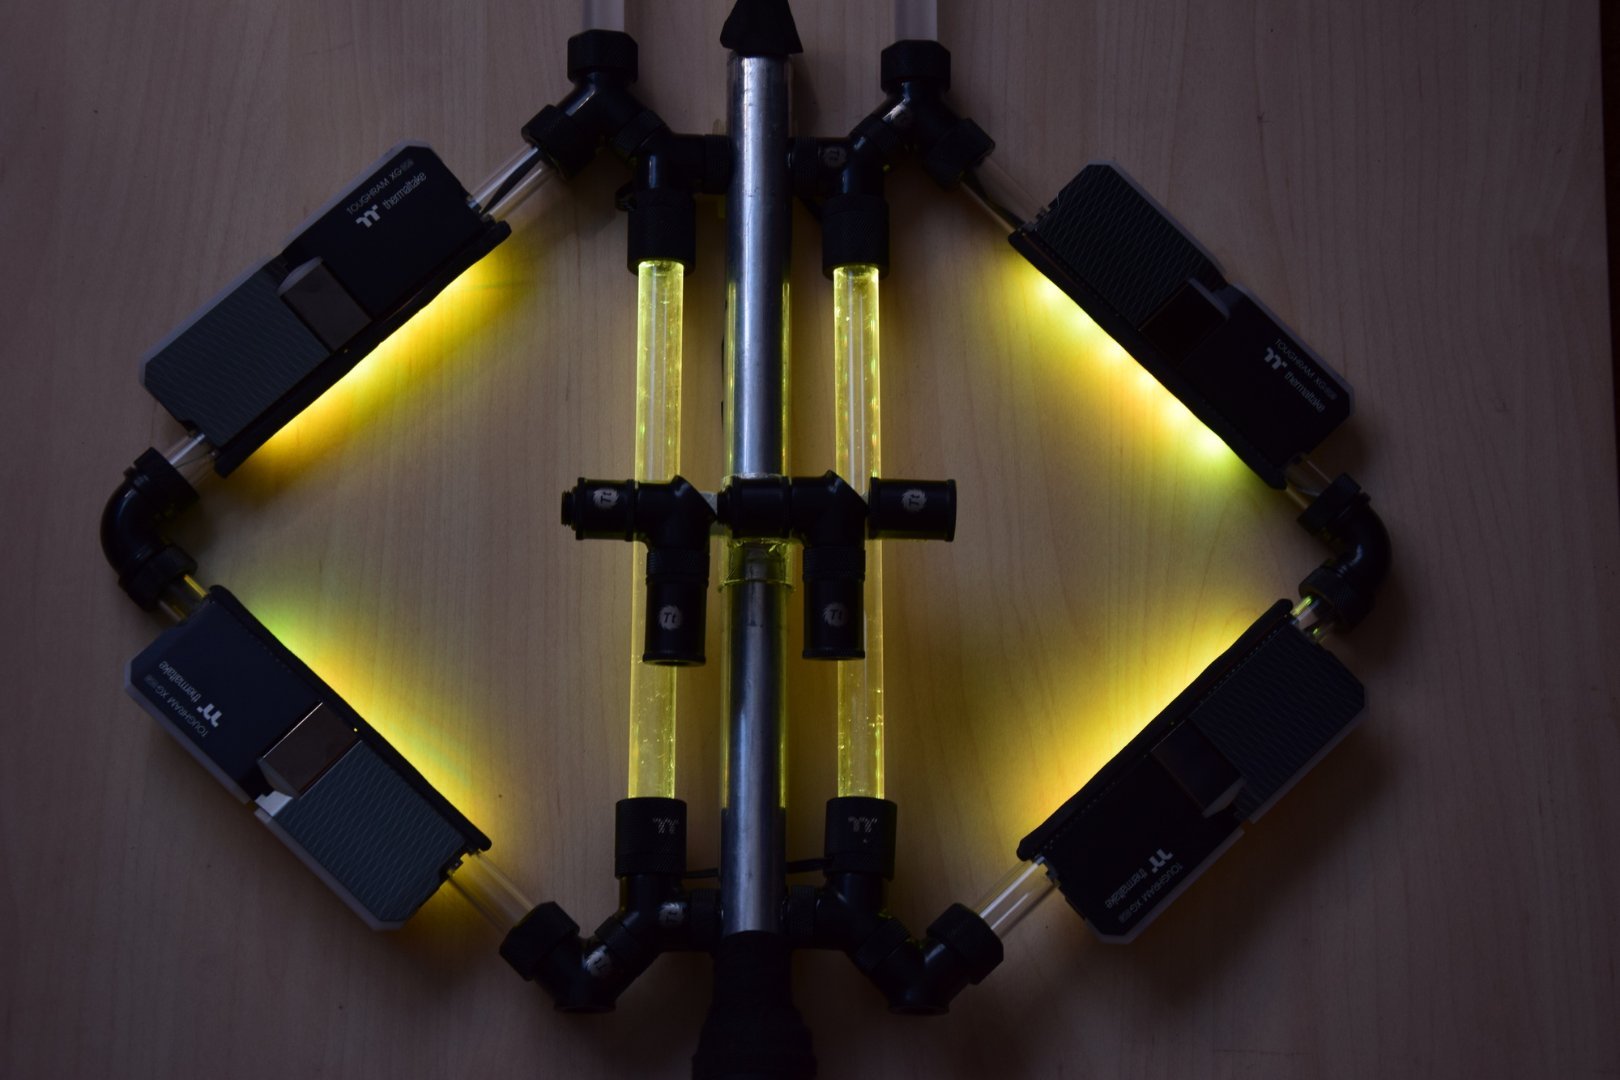
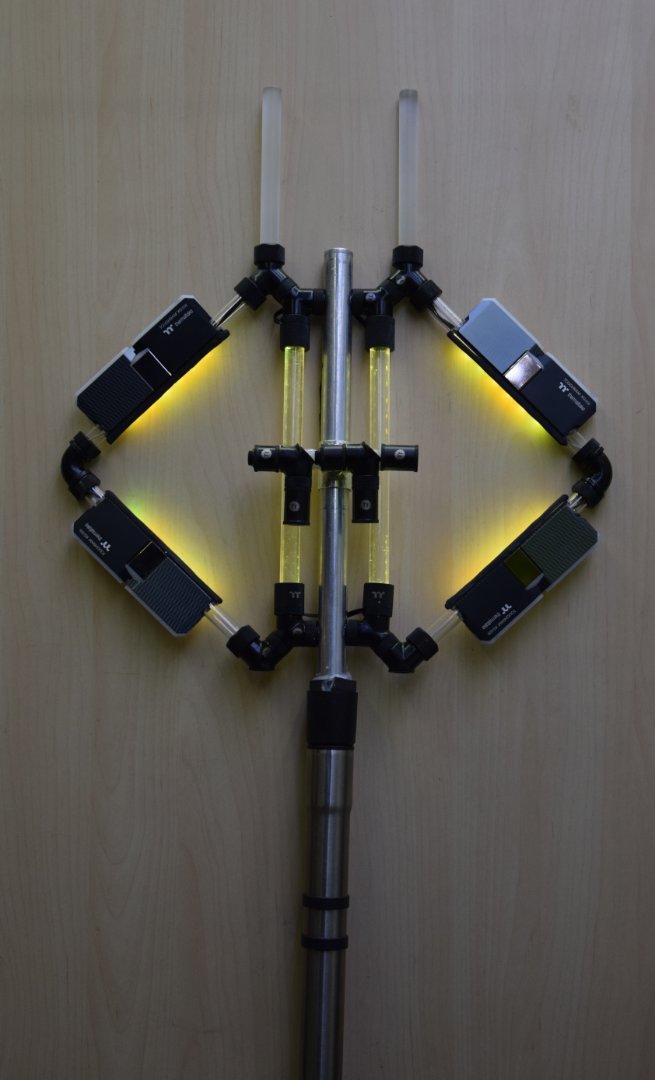
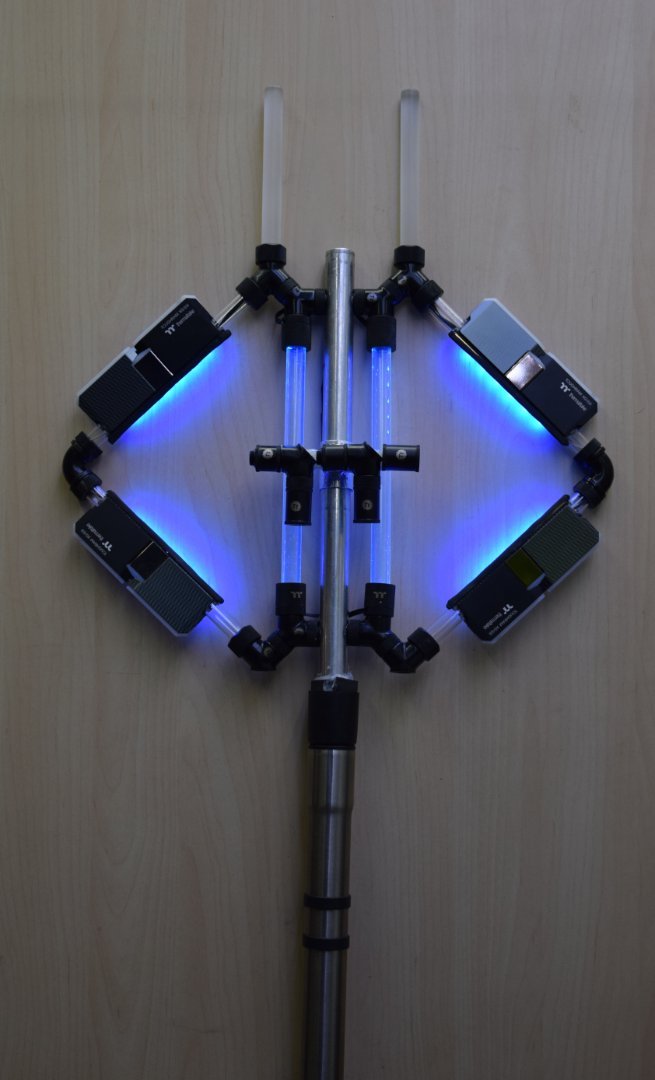
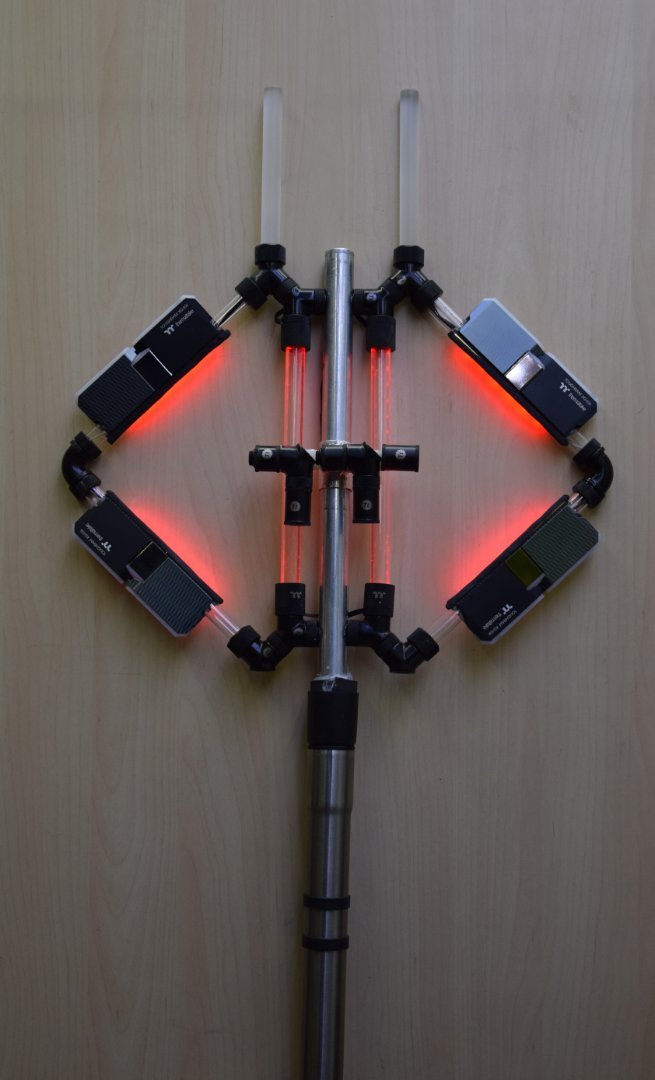
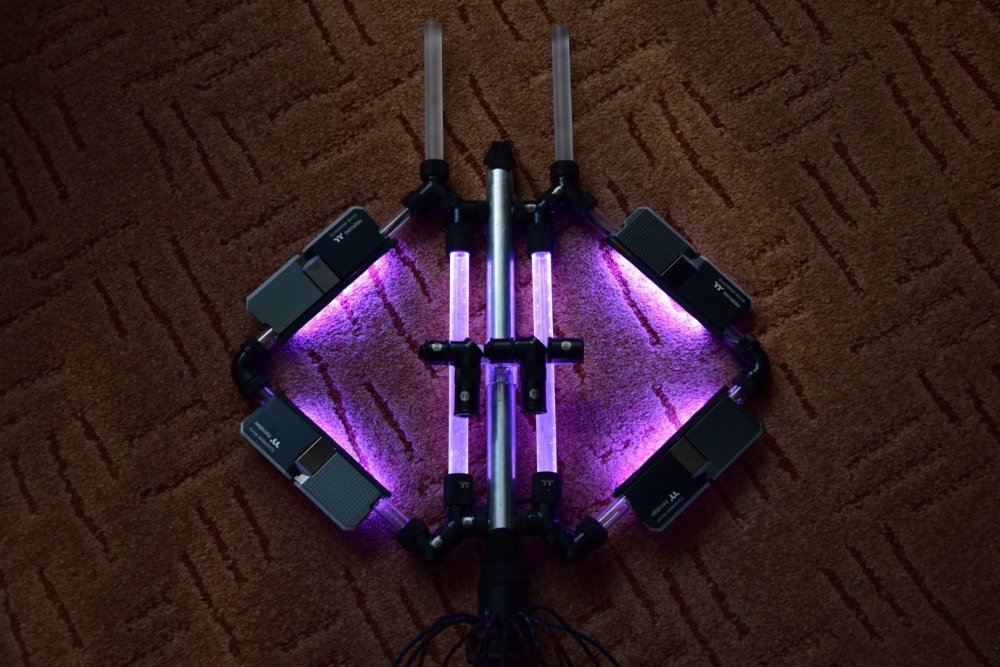
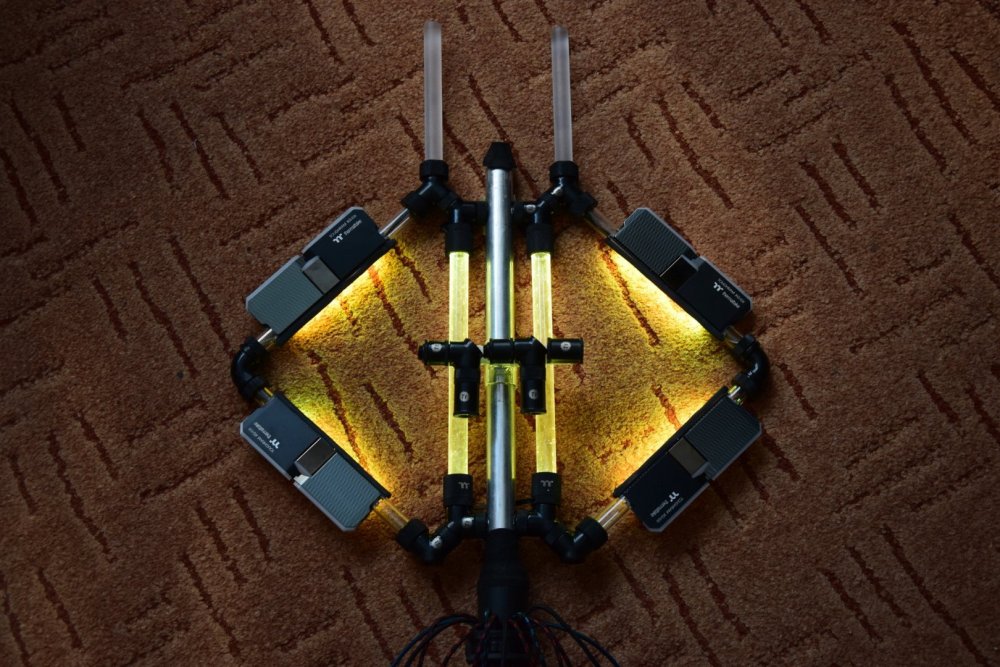
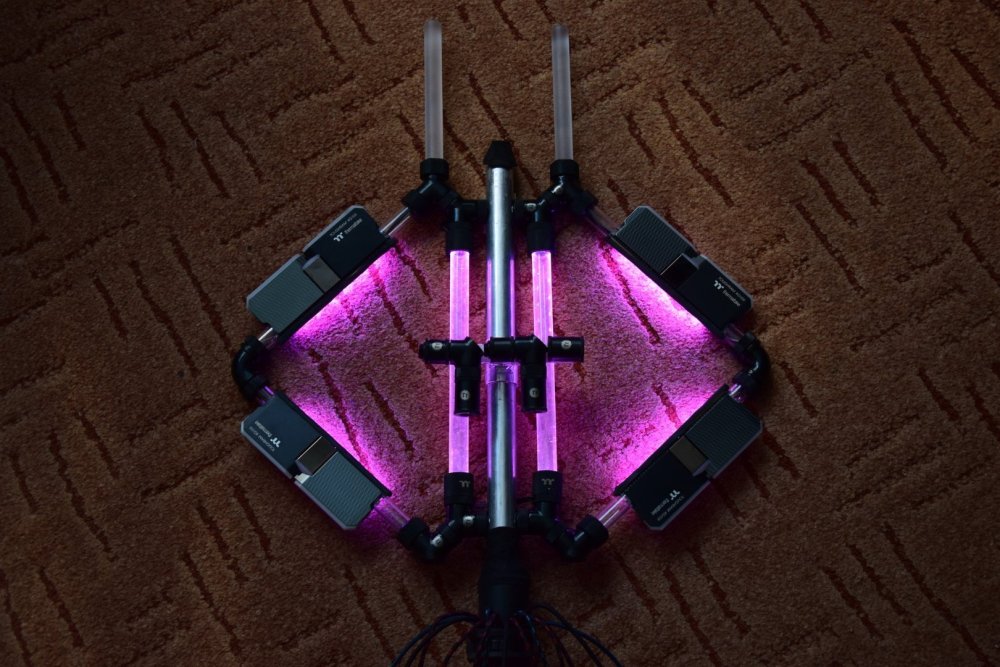
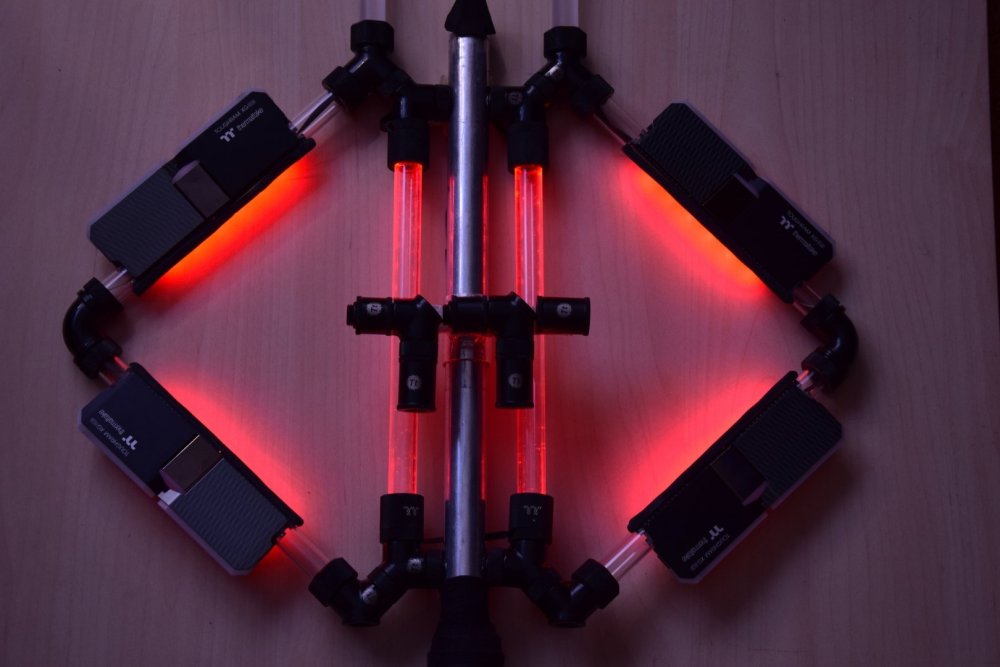
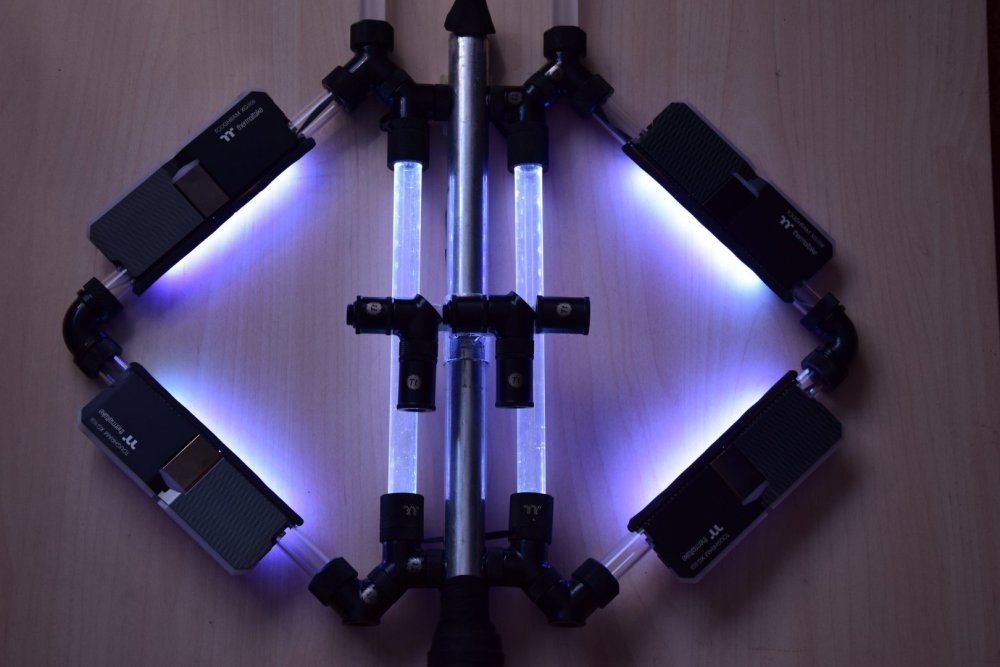
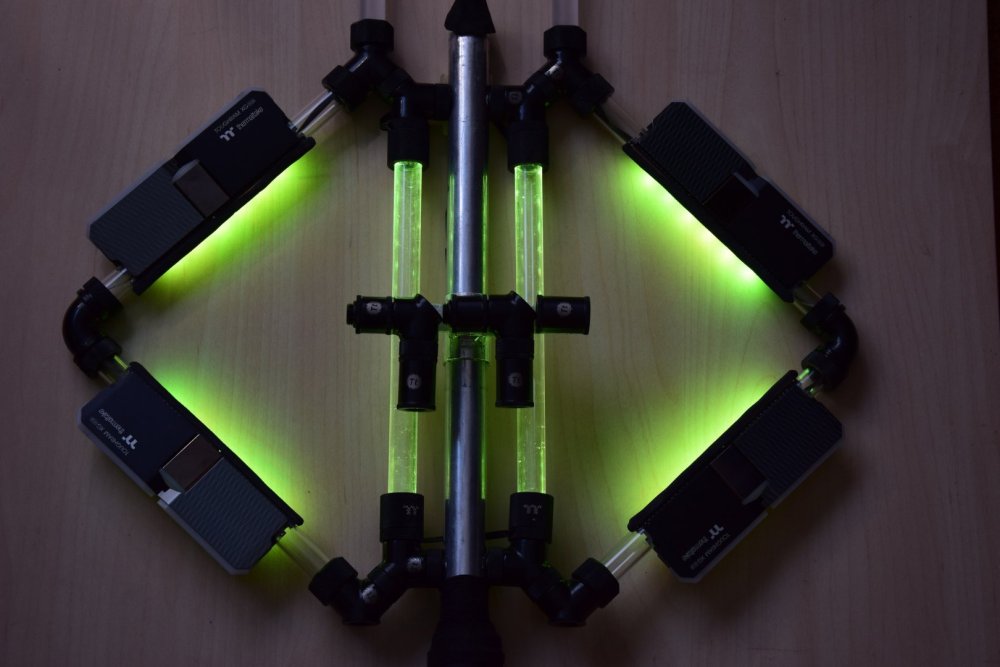
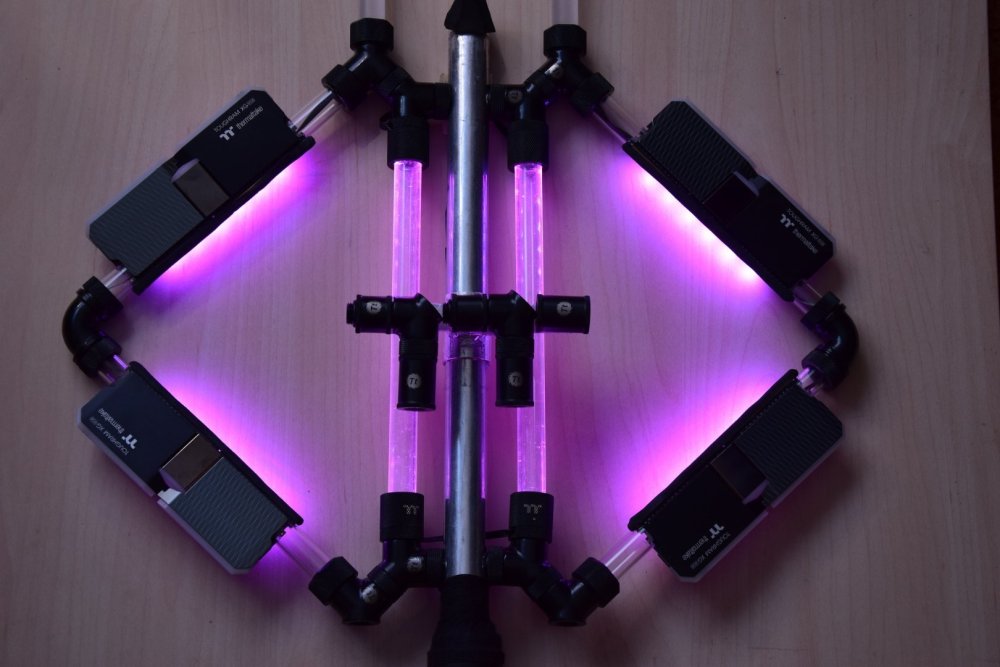
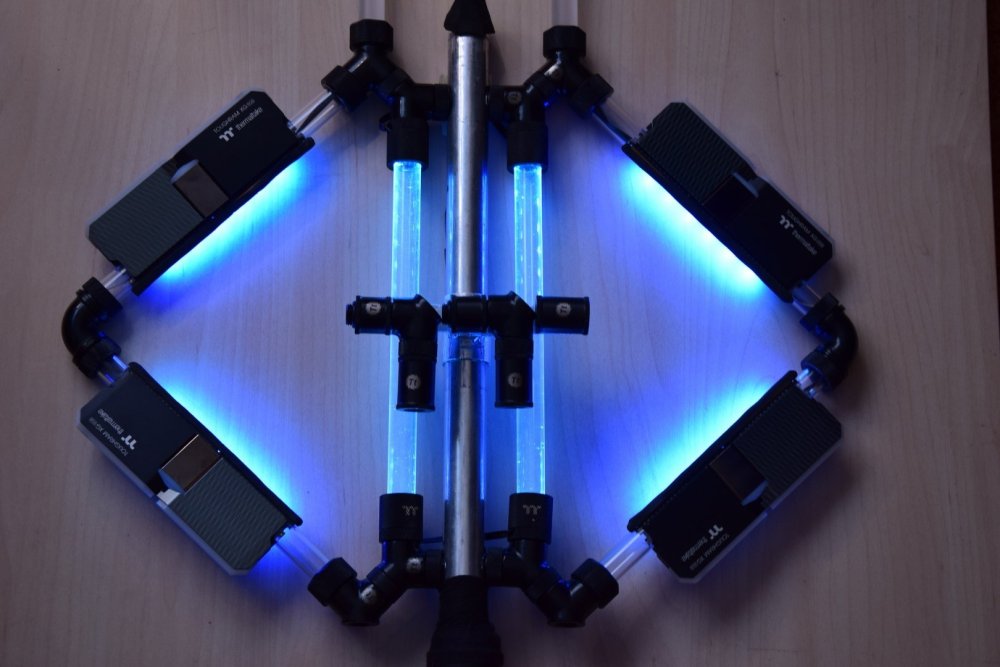
RGB lights in different quantities 😁


-
[Hungary] Balazs Szabo
BaluCe replied to TT Lily's topic in 2022 Thermaltake RAM MOD Invitational Season 1
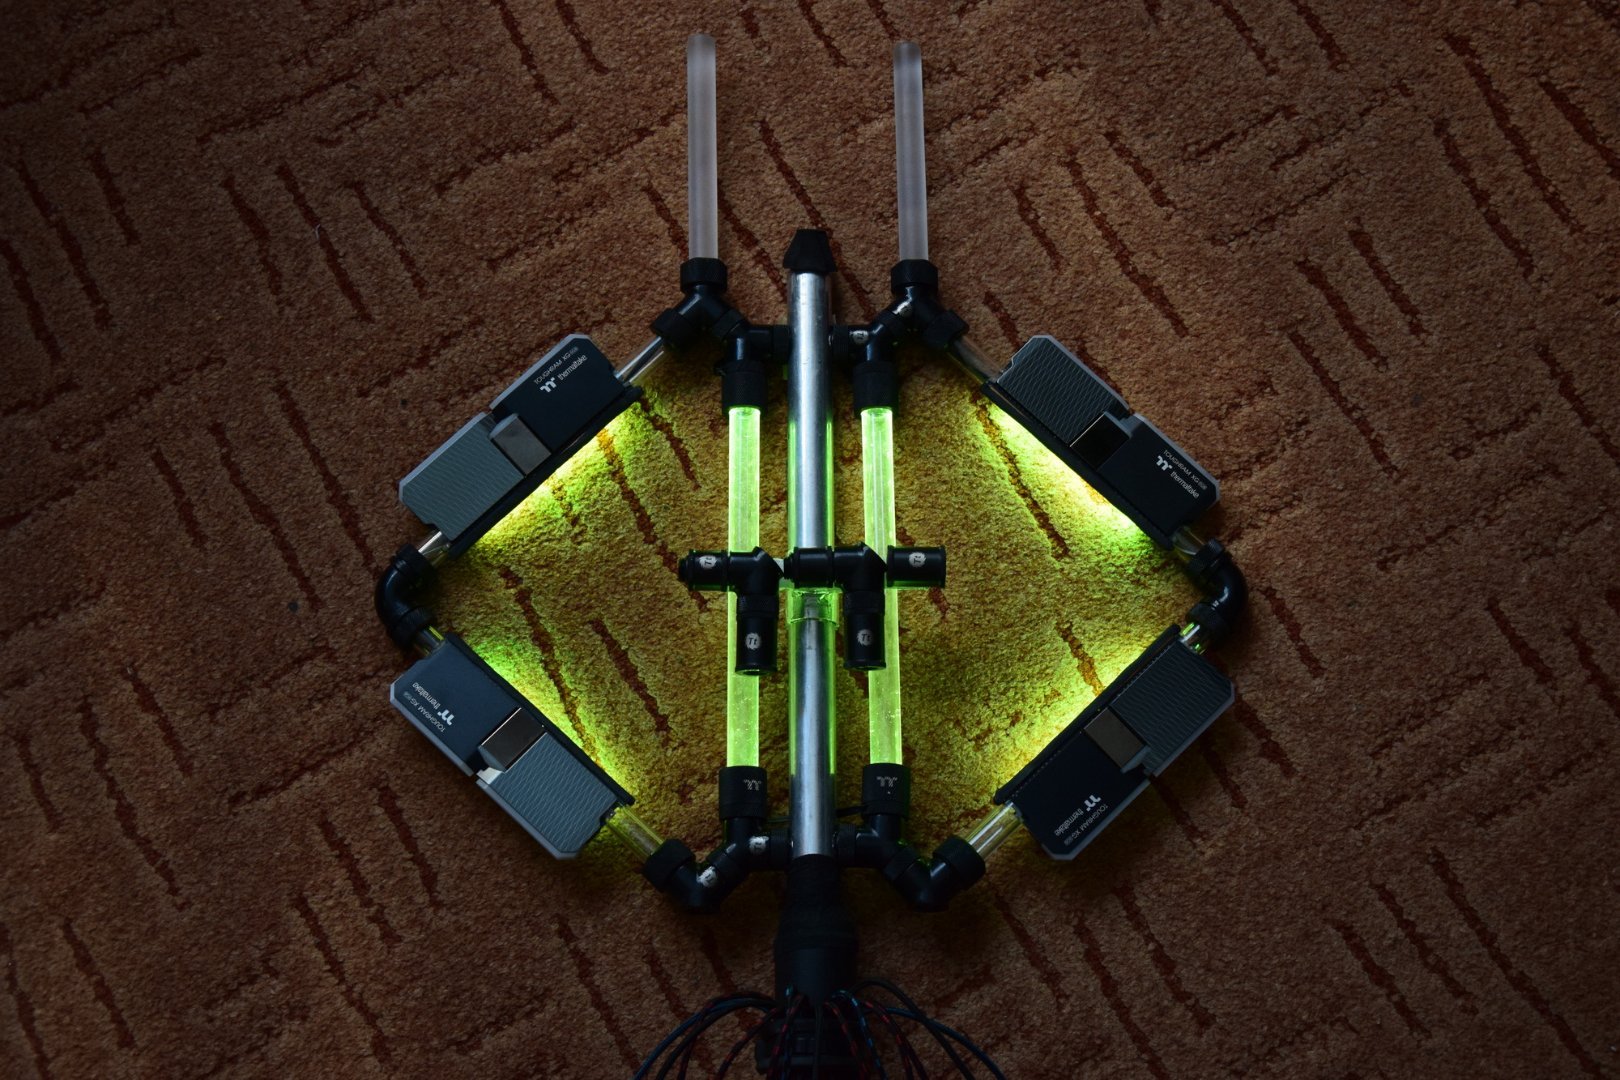
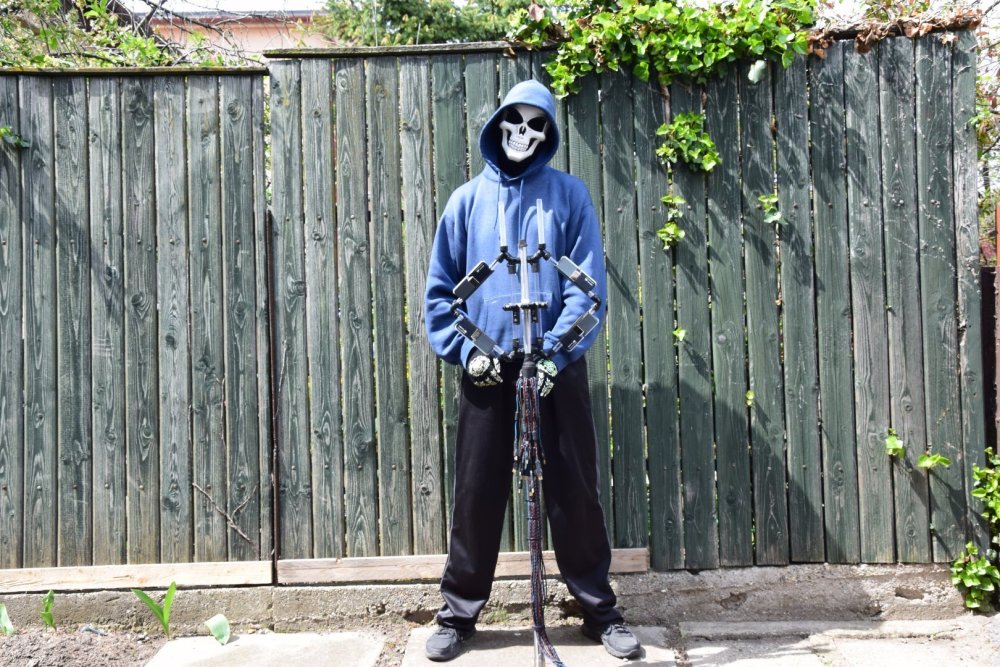
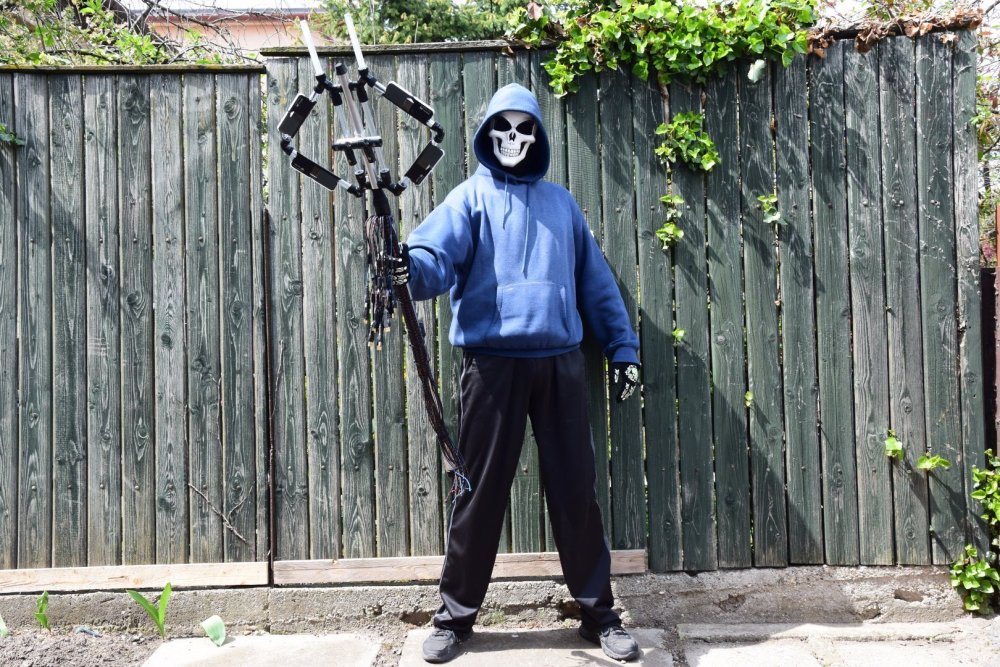
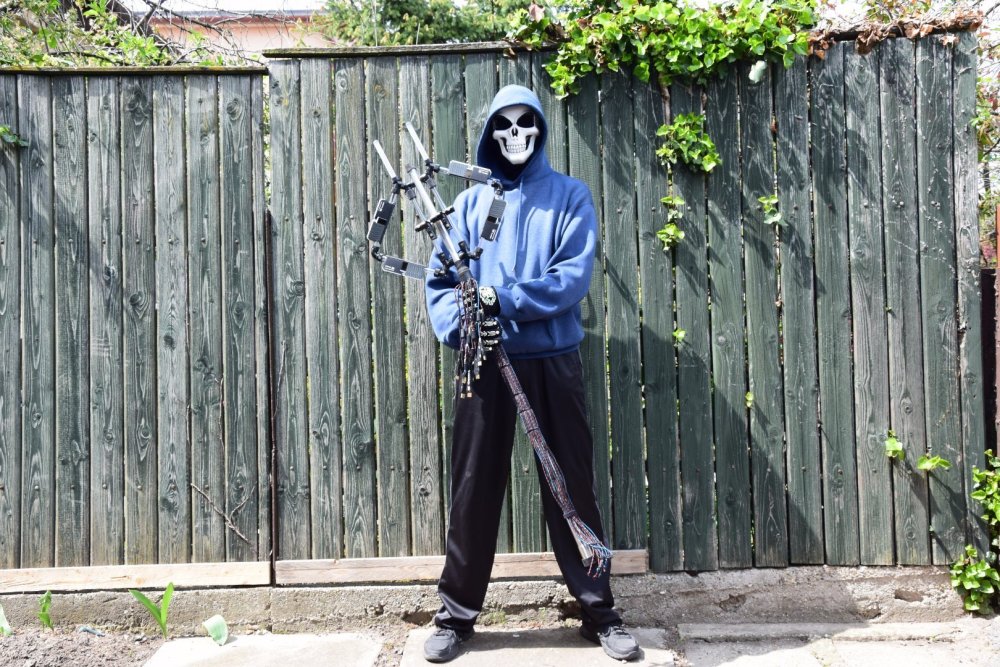
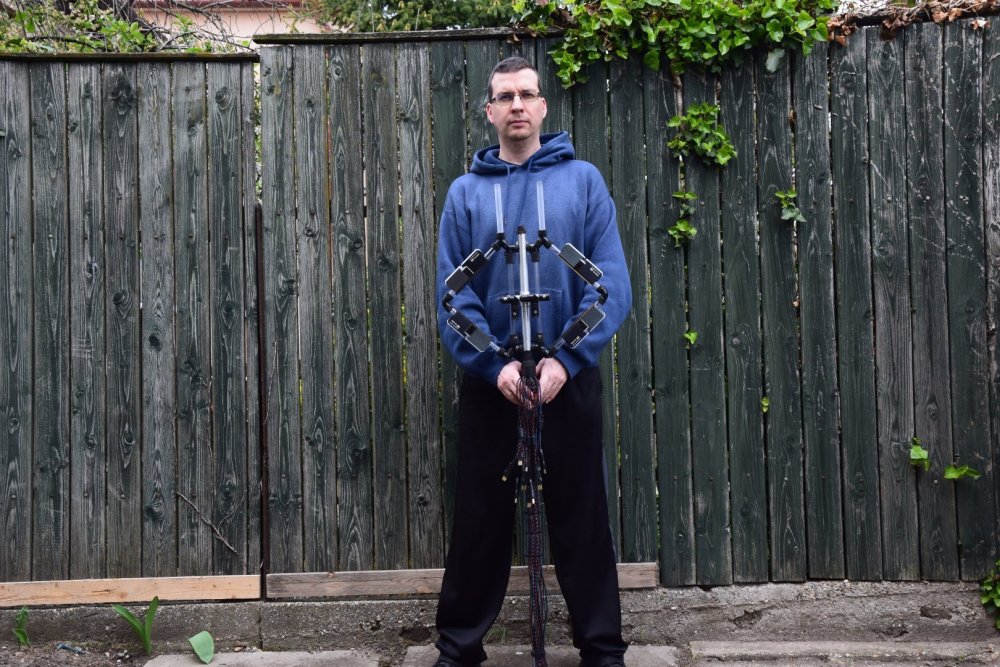
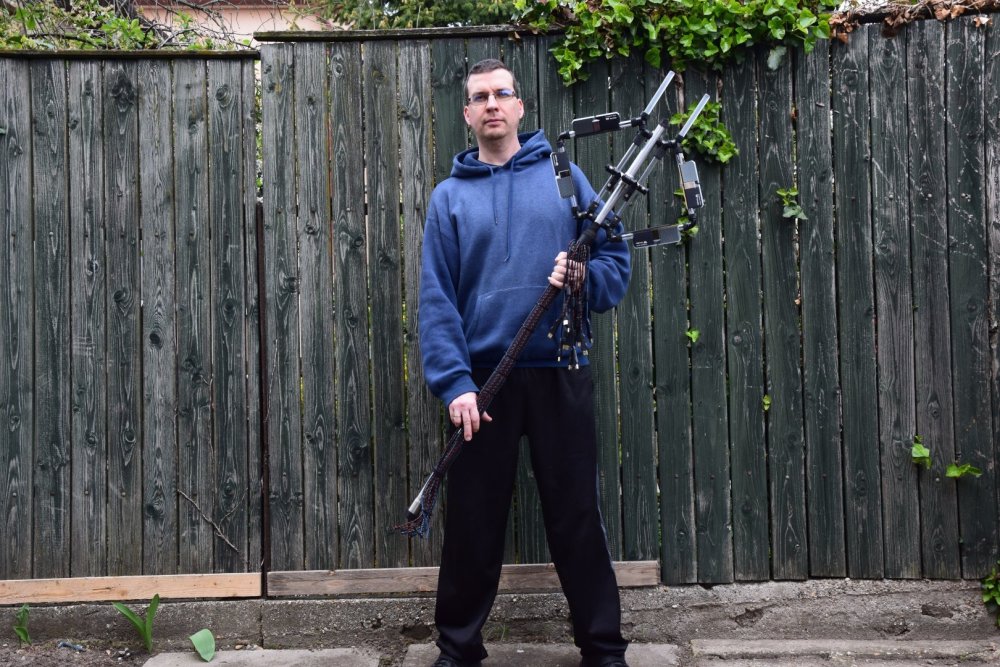
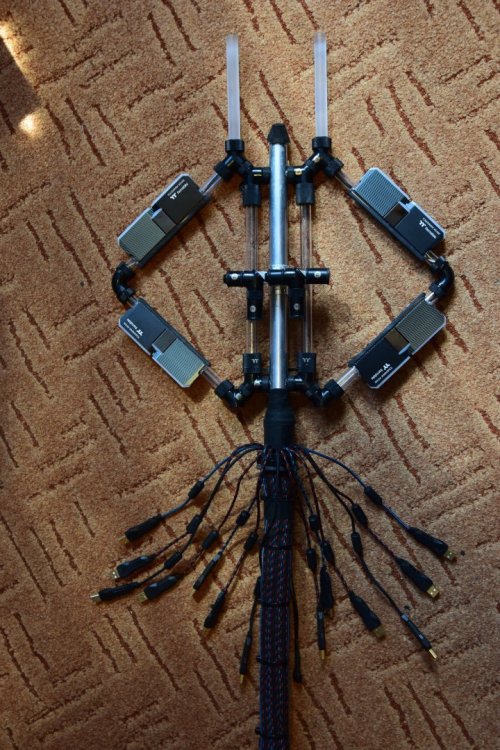
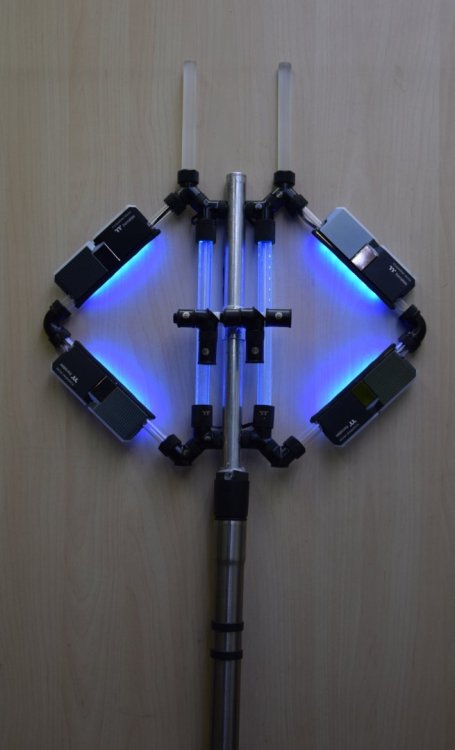
It is big. It is difficult to make a close up picture and fitting in the whole thing.


-
[Hungary] Balazs Szabo
BaluCe replied to TT Lily's topic in 2022 Thermaltake RAM MOD Invitational Season 1
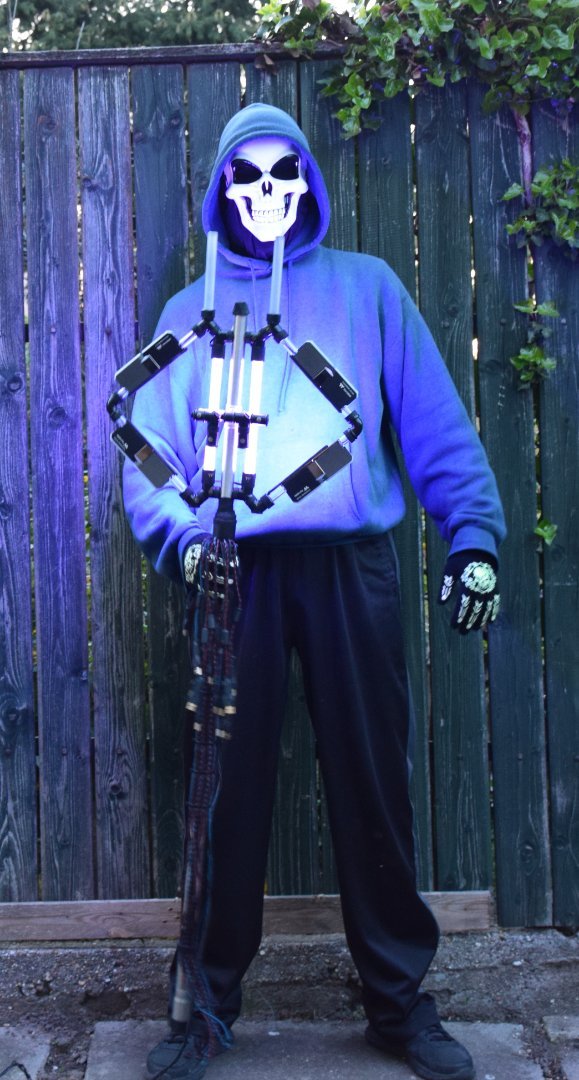
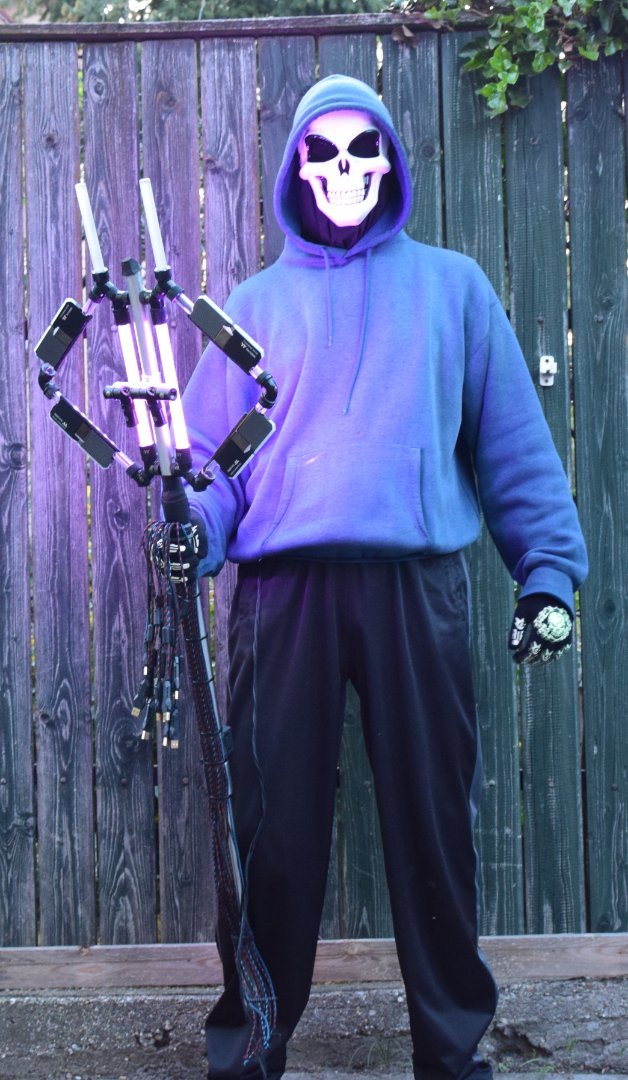
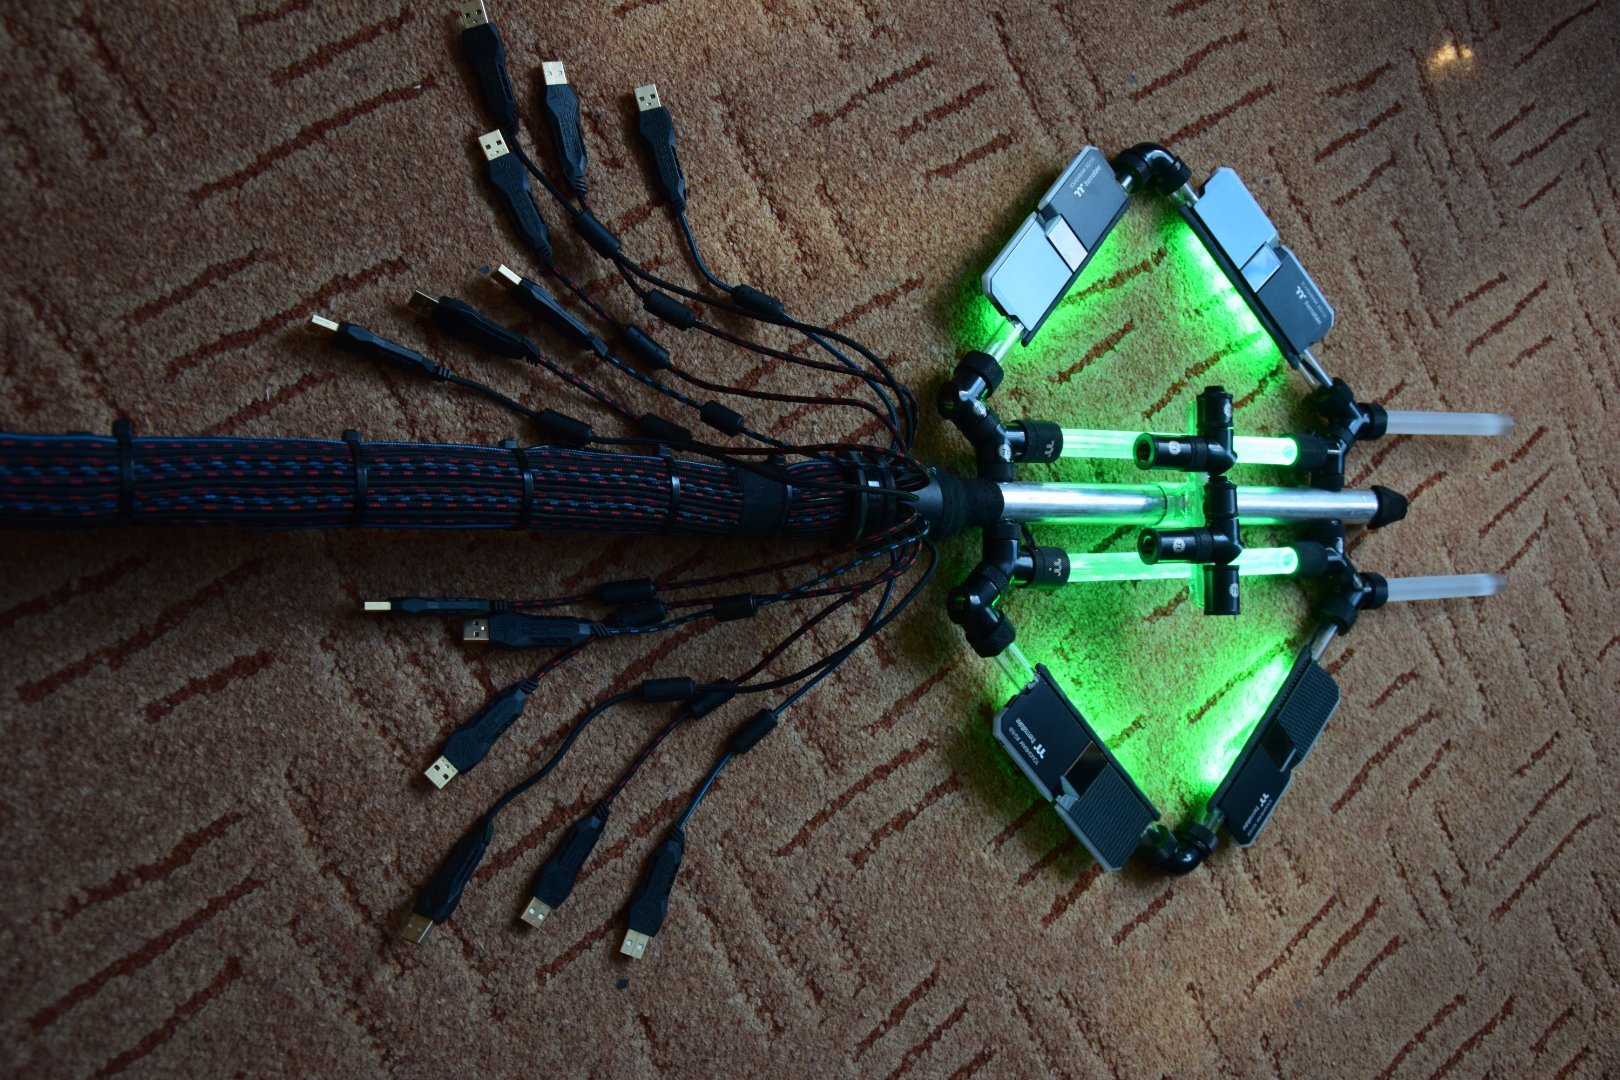
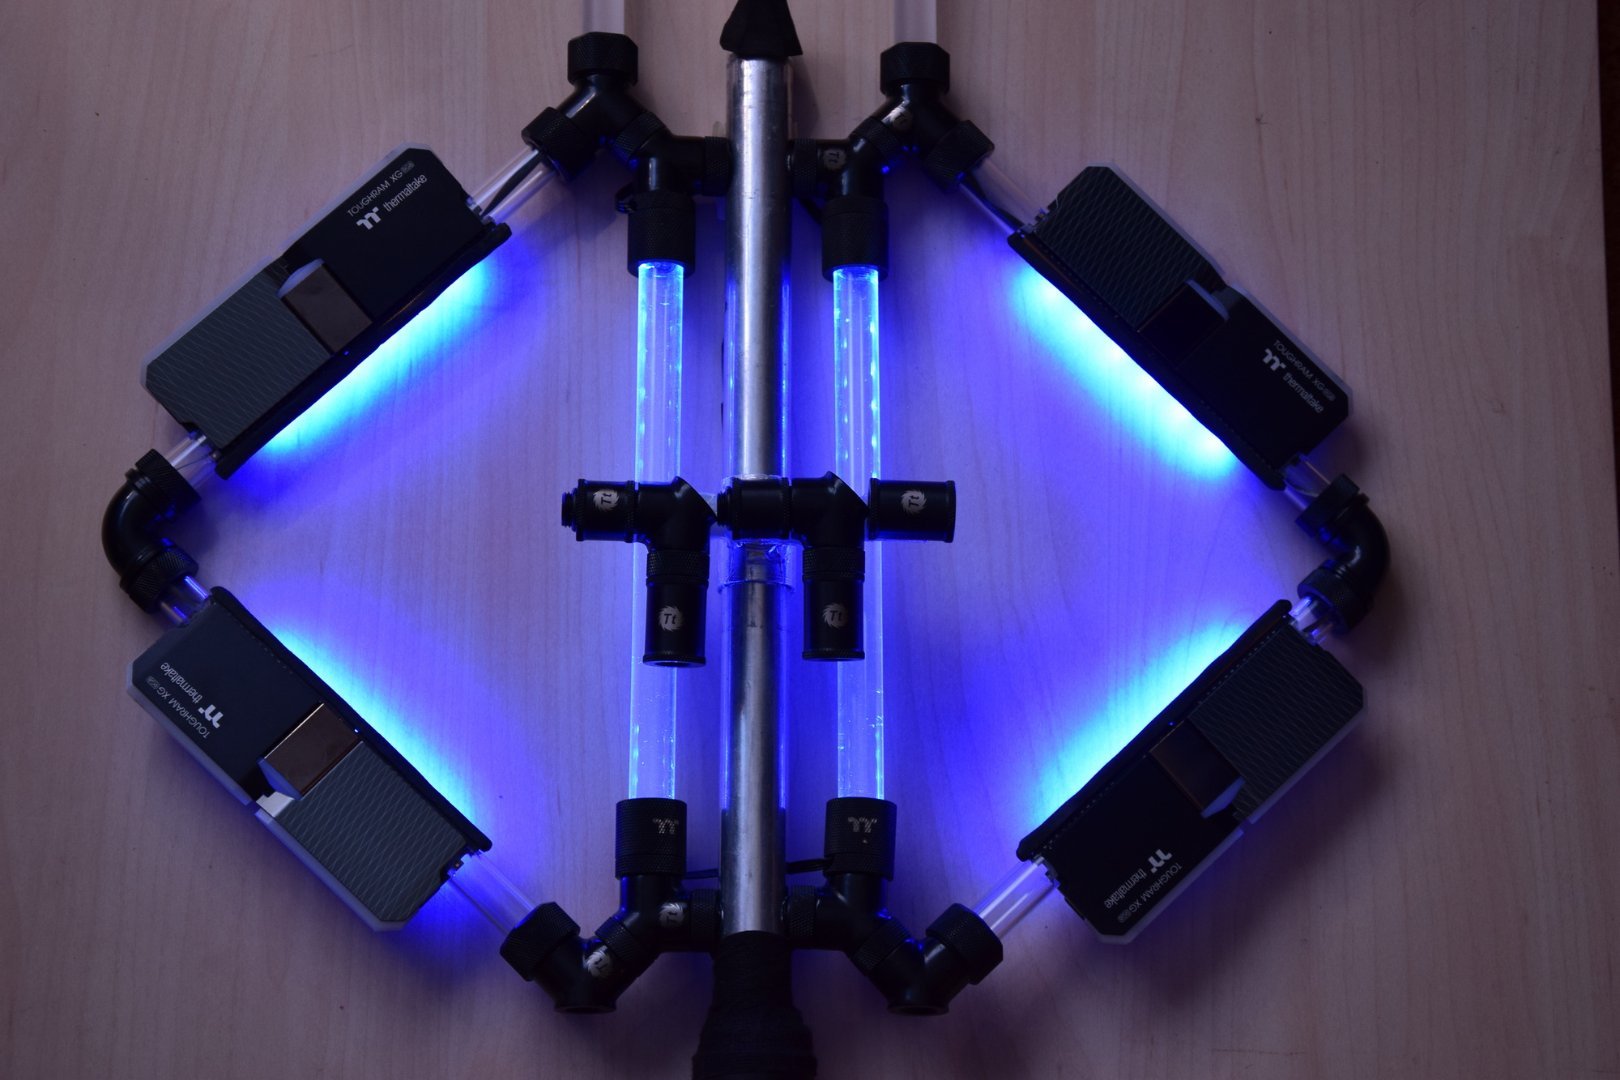
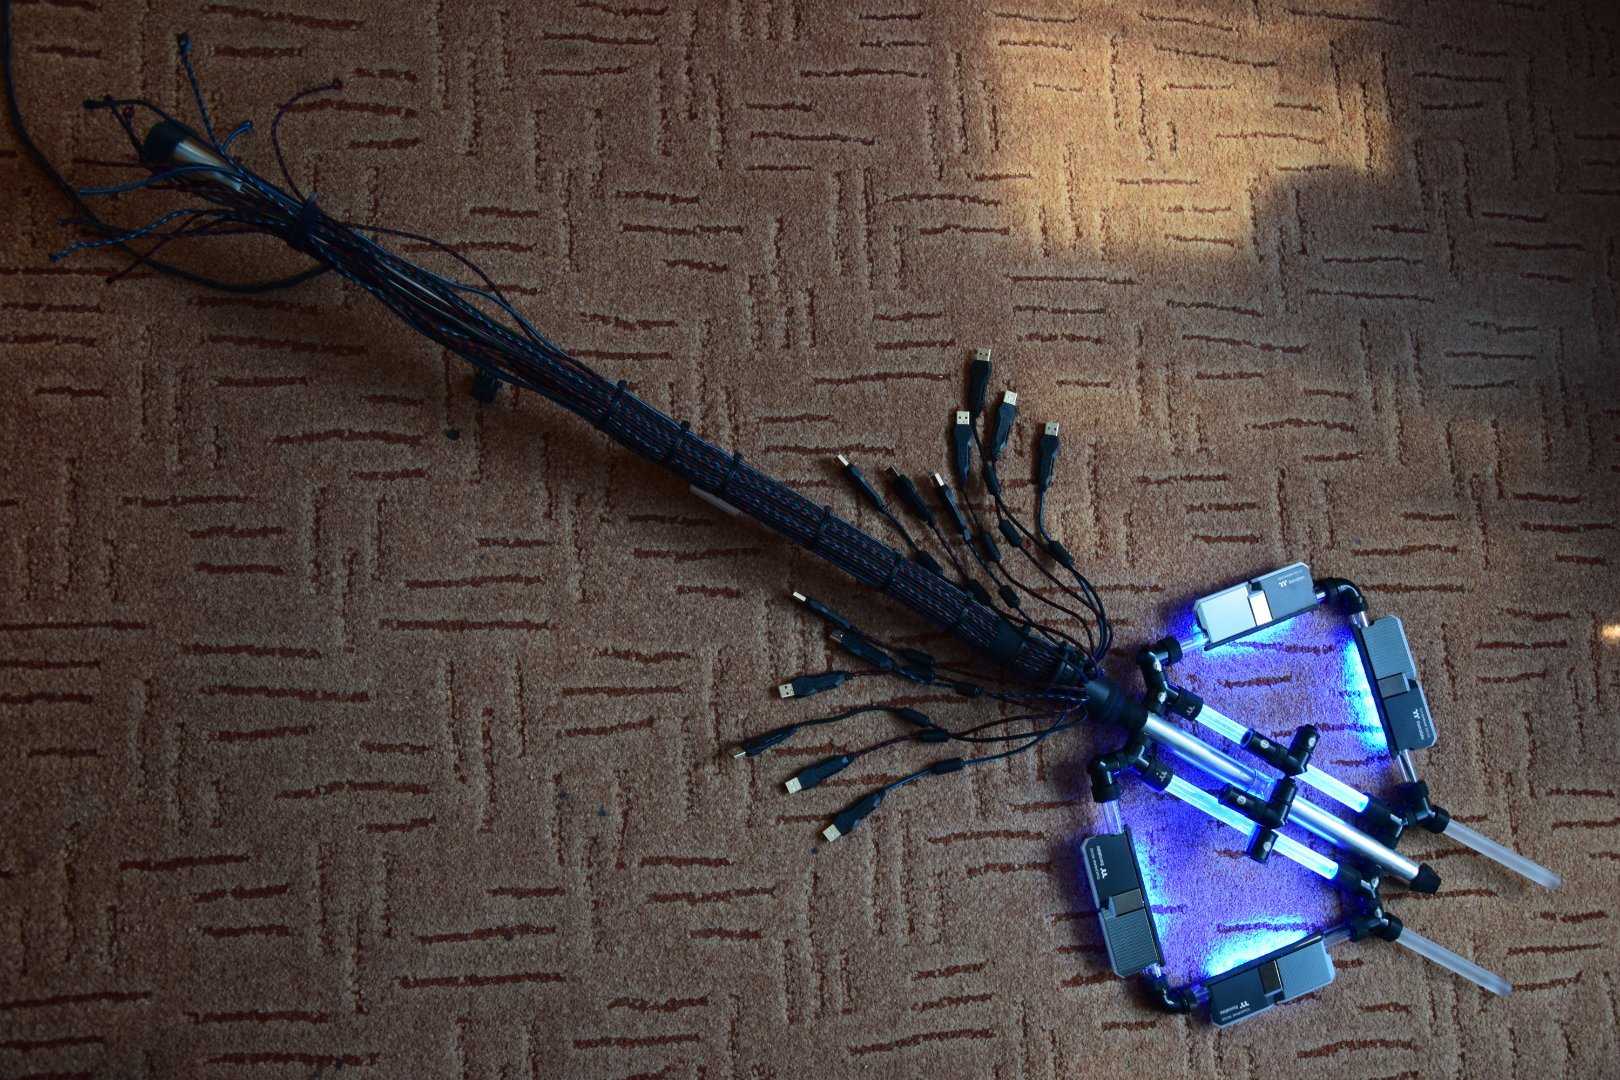
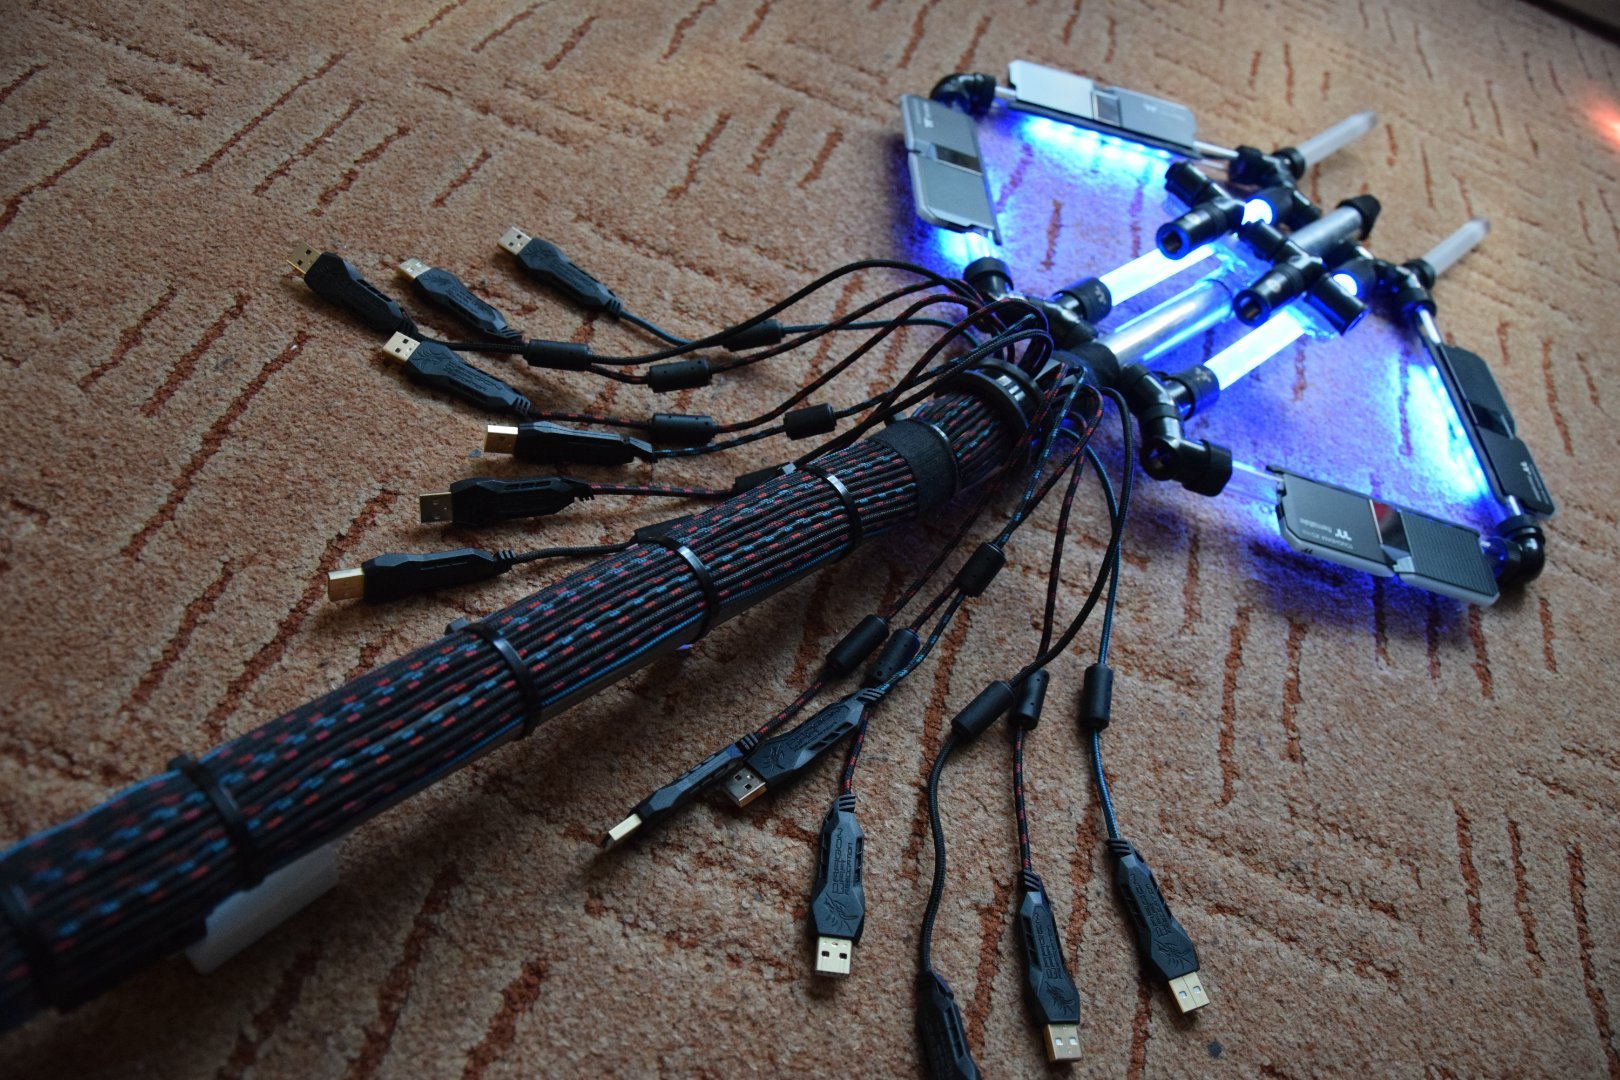
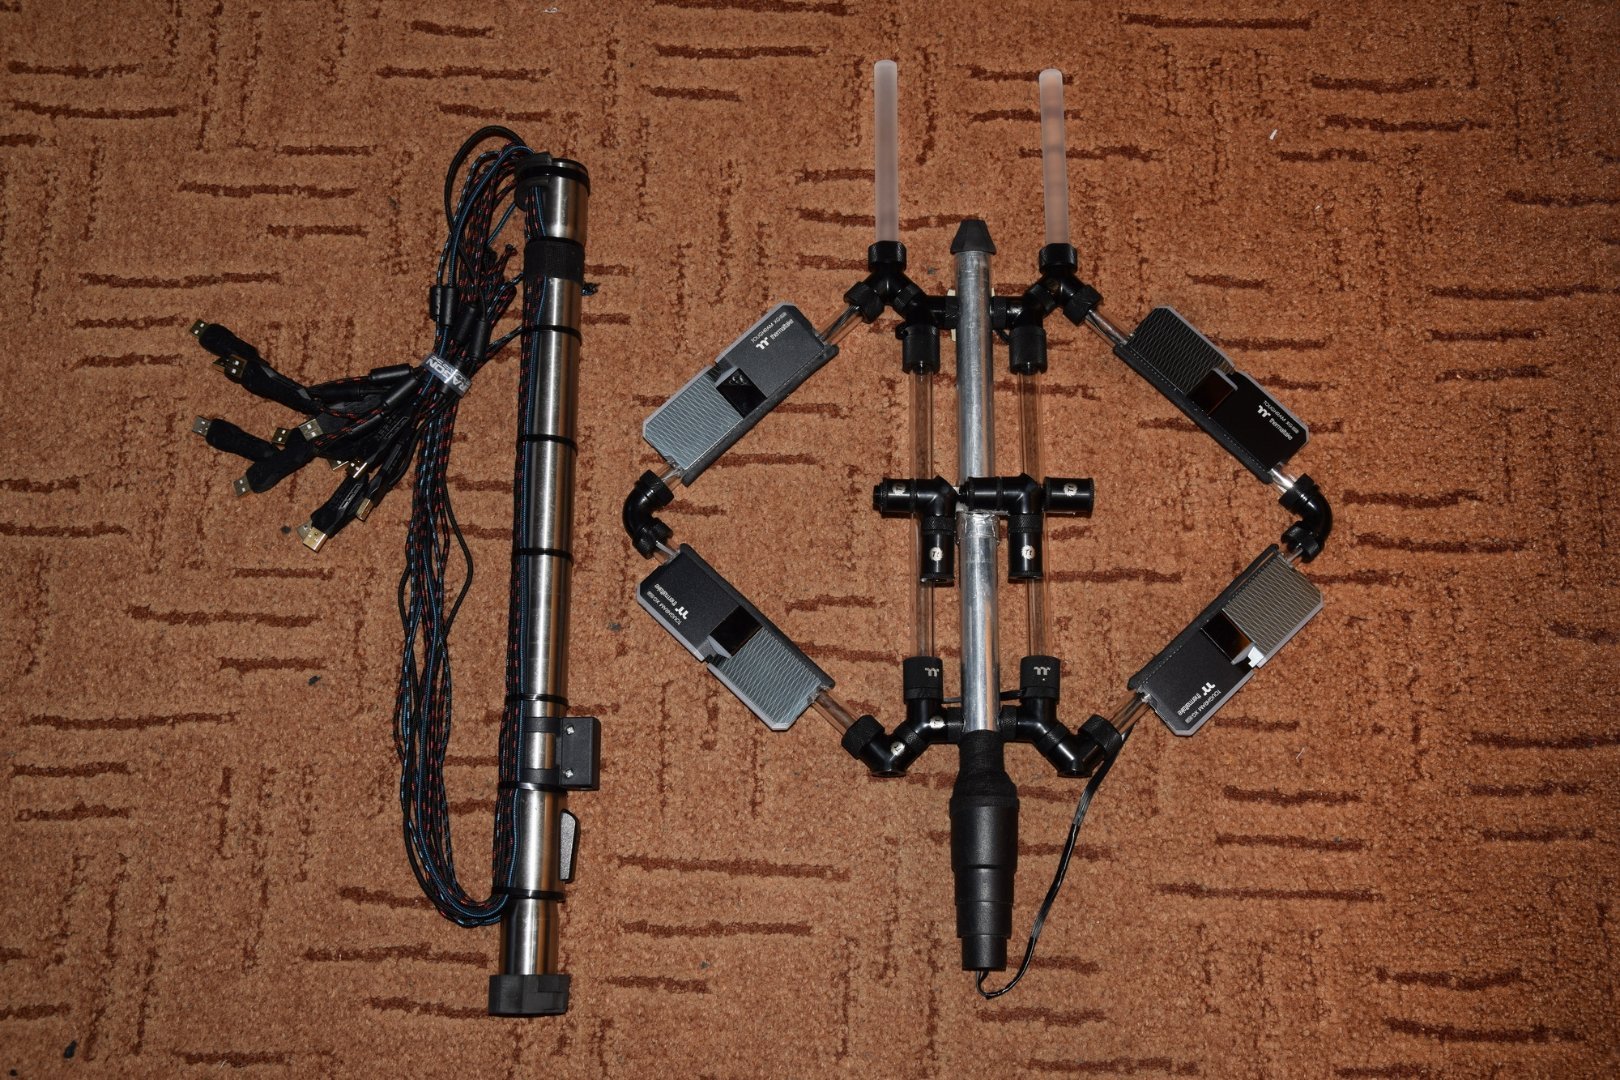
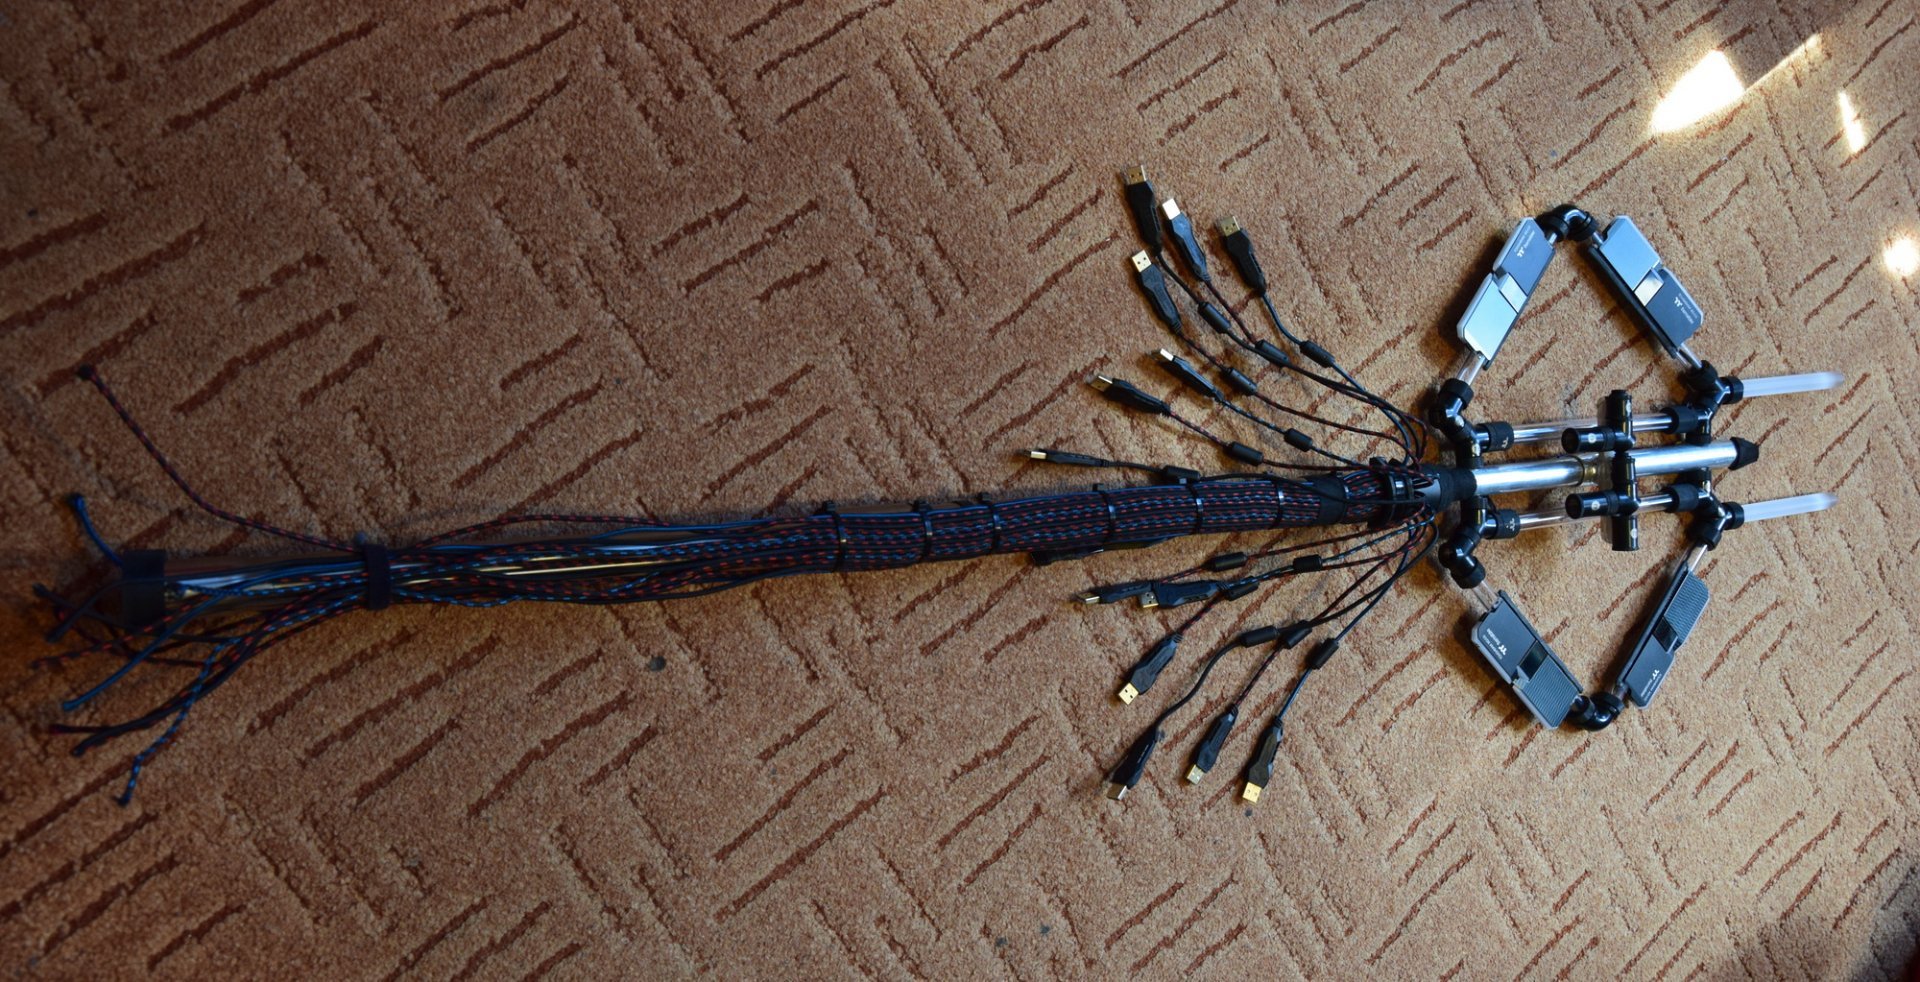
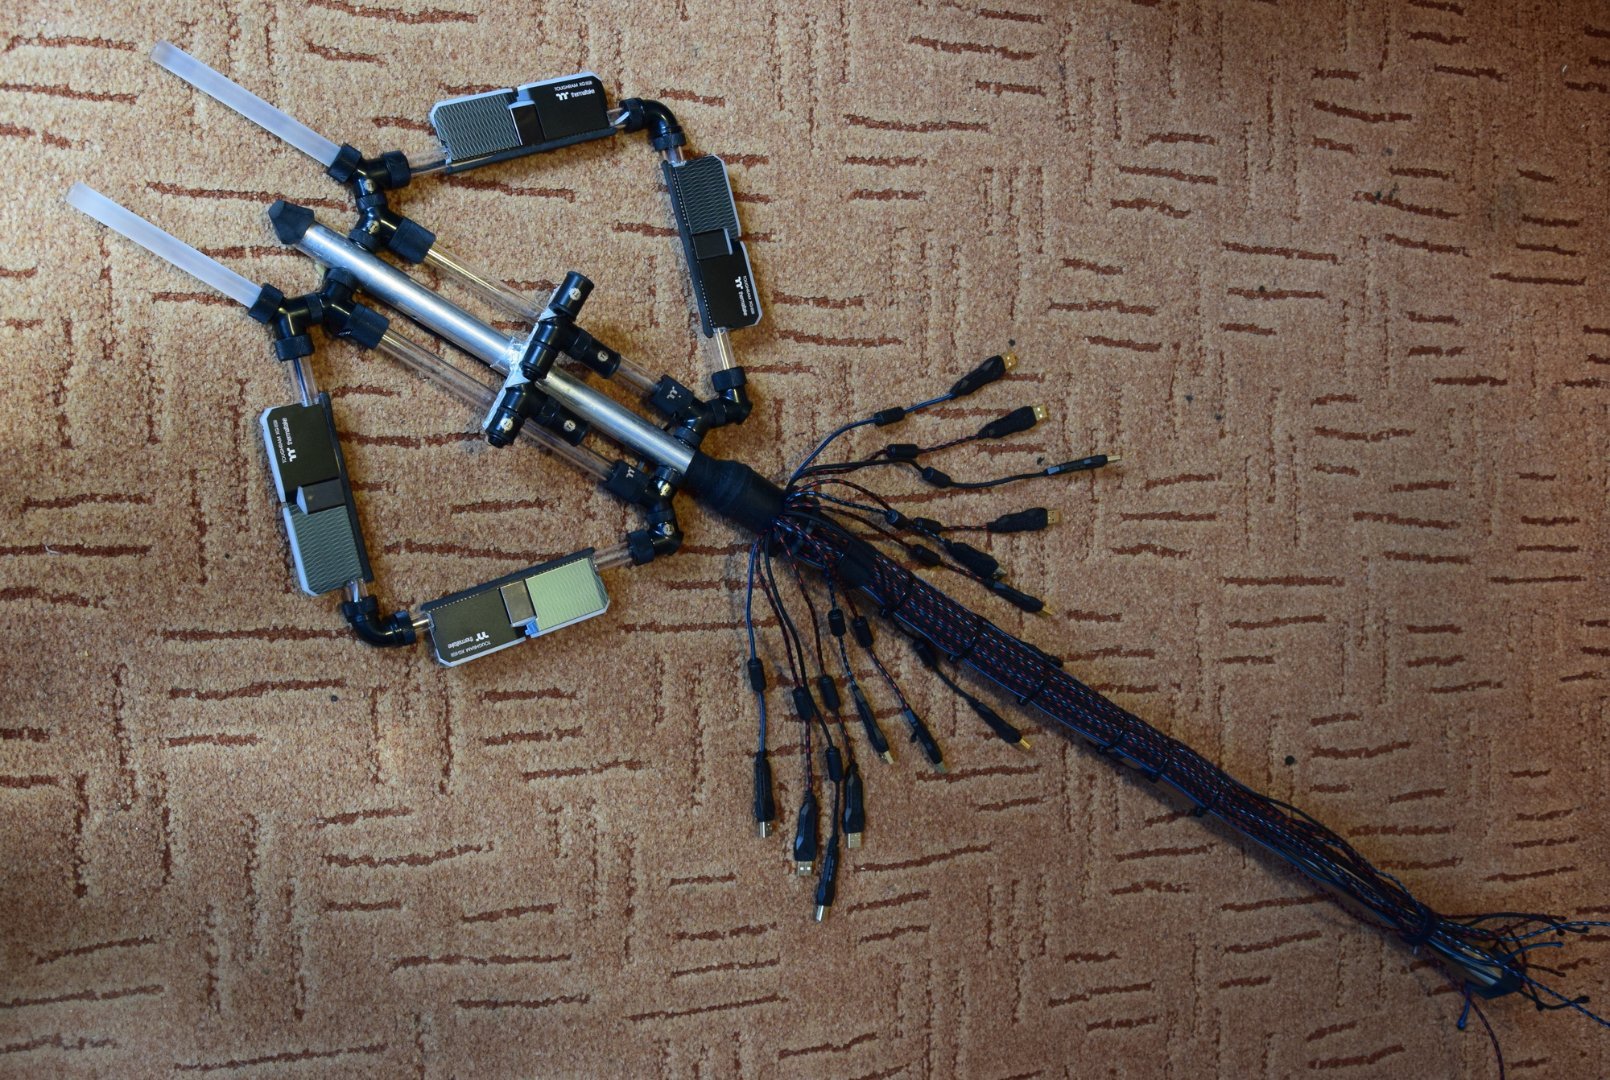
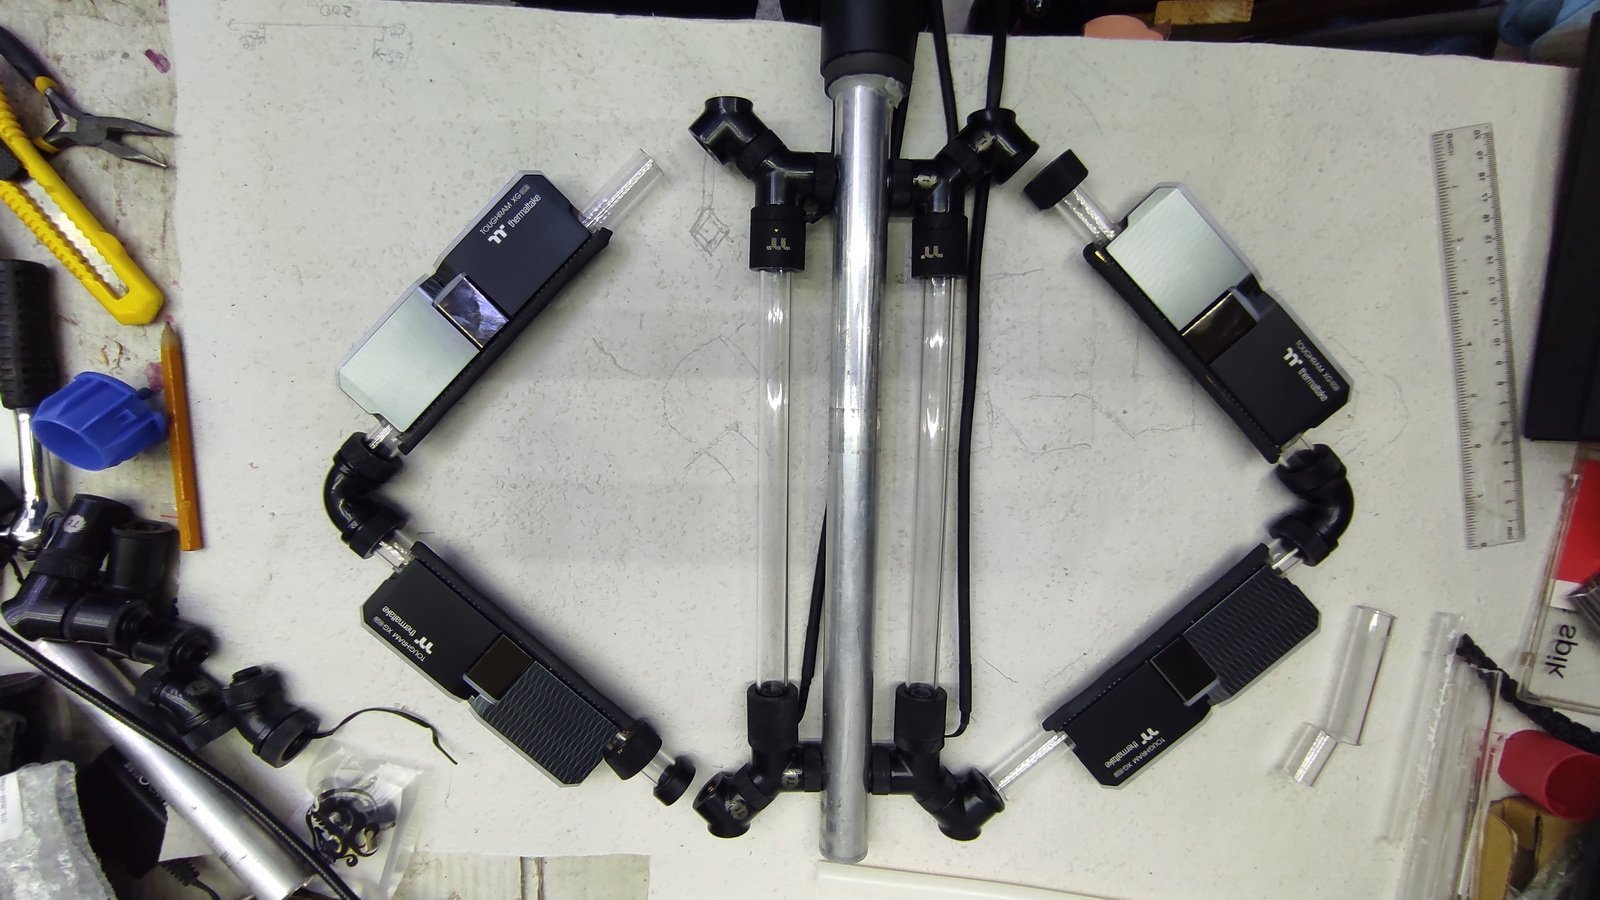
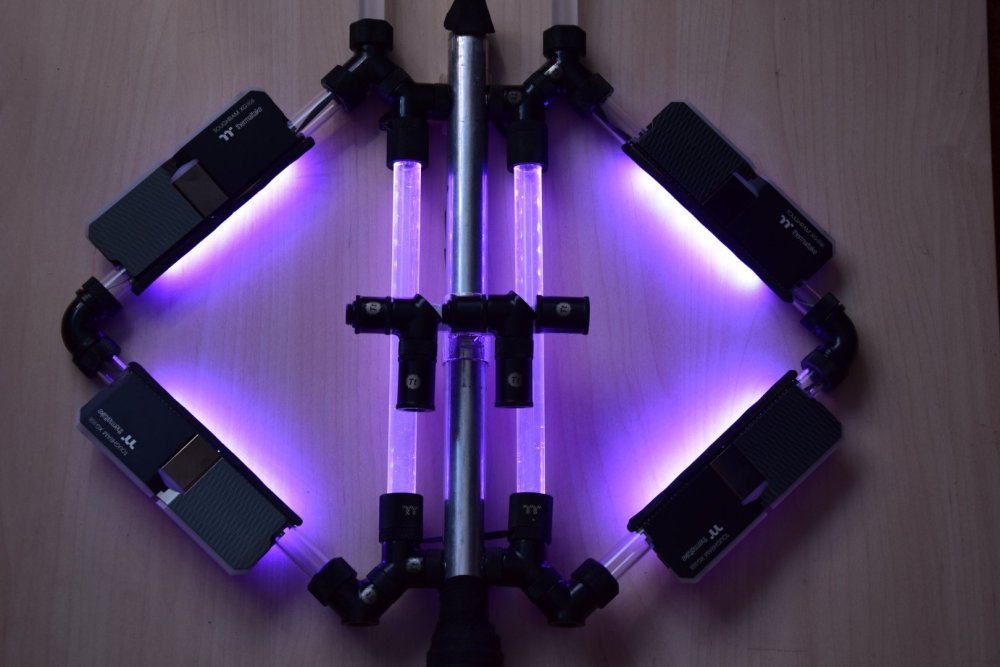
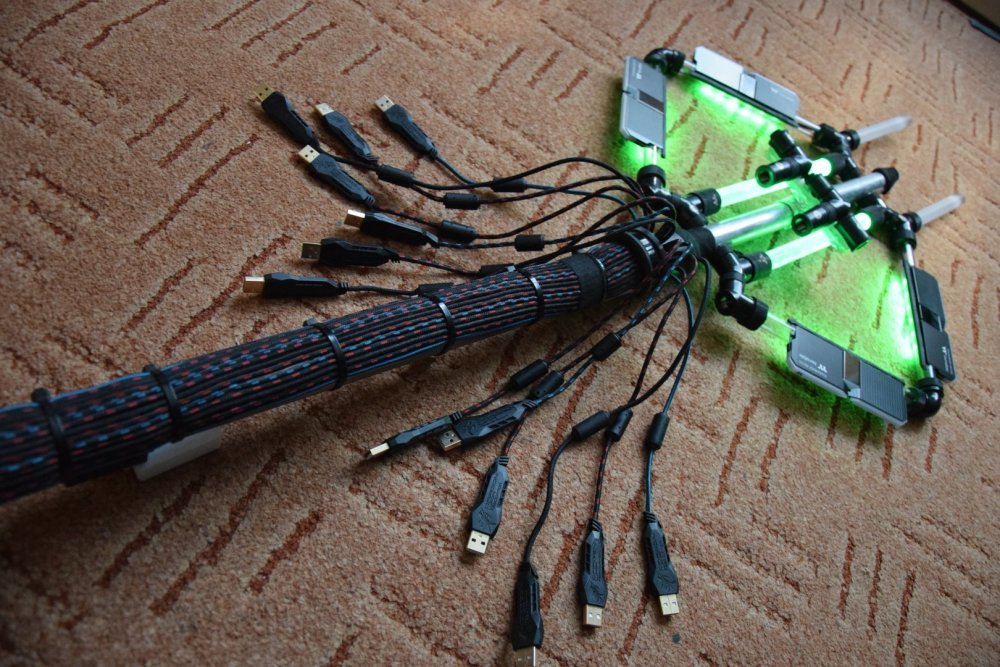
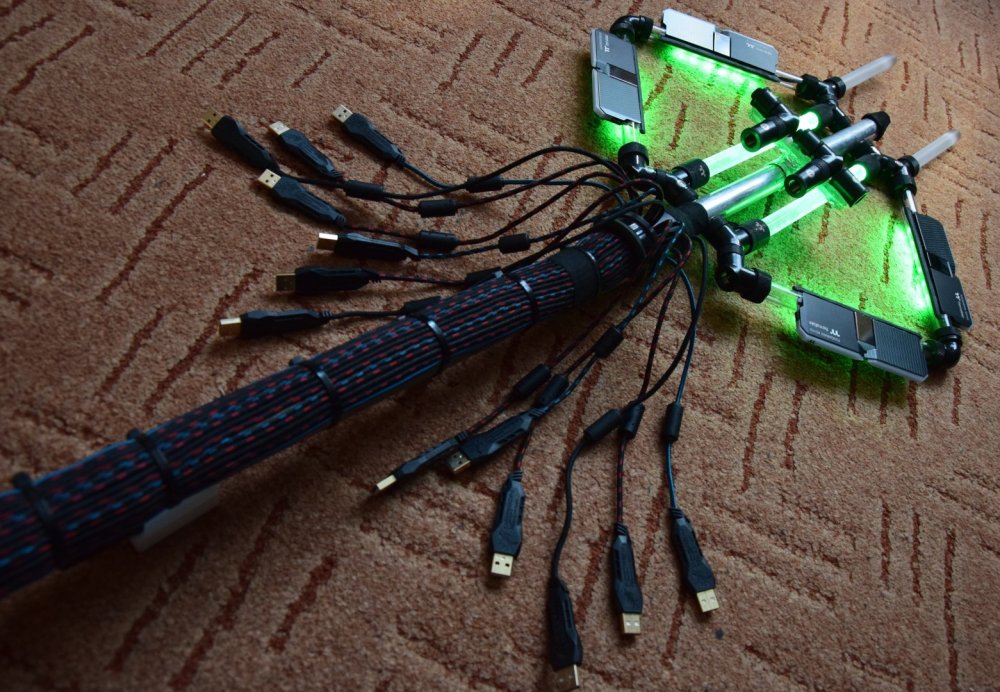
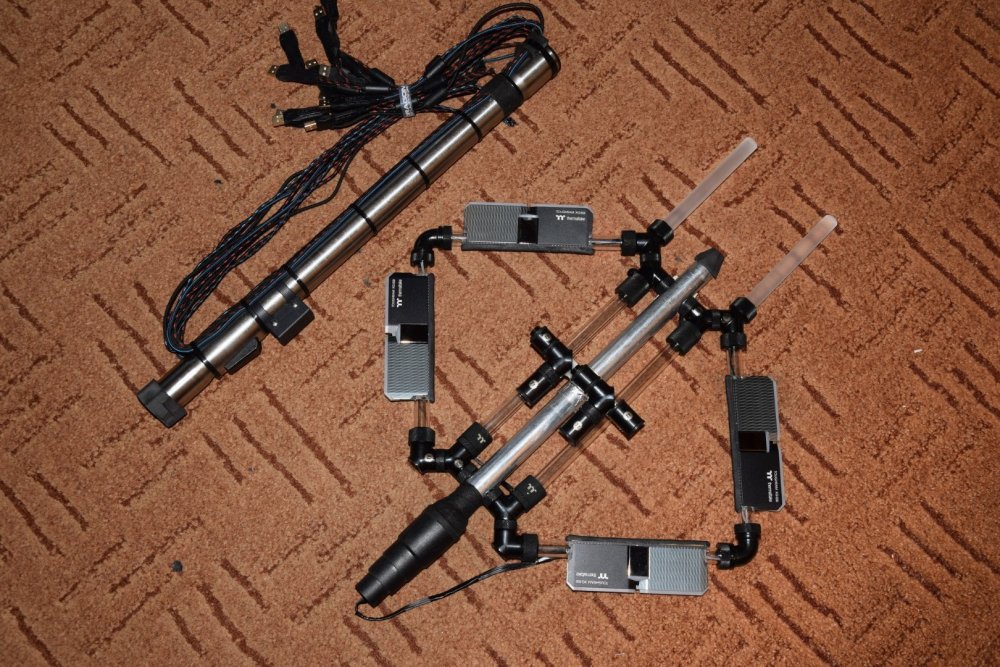
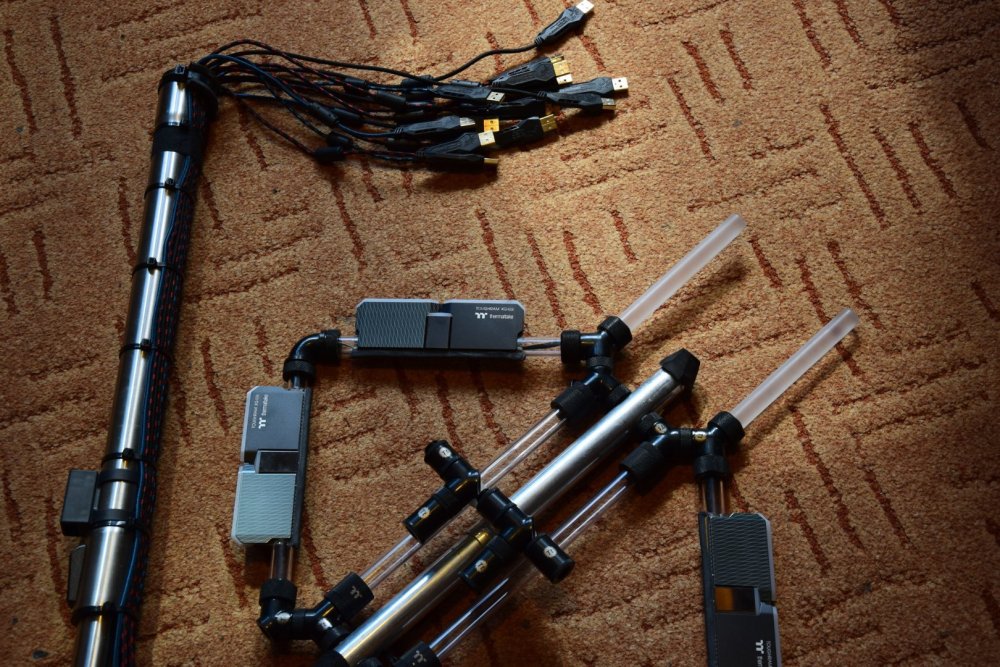
Last challenge: How to take photos from a huge PC-Shaman staff? it was TOUGH! 😅 I received a few Name ideas, but I haven't had the time to make a Vote, so I went with the funny one: PC-Shaman staff ------===== Final Pictures =====------ ...and additional infos... To easier store and transport ti is made a two part structure. The left one is an upcycled part (the rod, the USB cables, foam). The right one is a full build (work photos above). Closed ( and separate) size: Left part: 56cm / 22" Right part: 61cm / 24" , but the top two rods can be removed, so the whole structure could be packed and/or stored. Whole length: 147,5 cm ( 58" ) The USB cables are only for decoration The rod part opened up.


-
[Hungary] Balazs Szabo
BaluCe replied to TT Lily's topic in 2022 Thermaltake RAM MOD Invitational Season 1
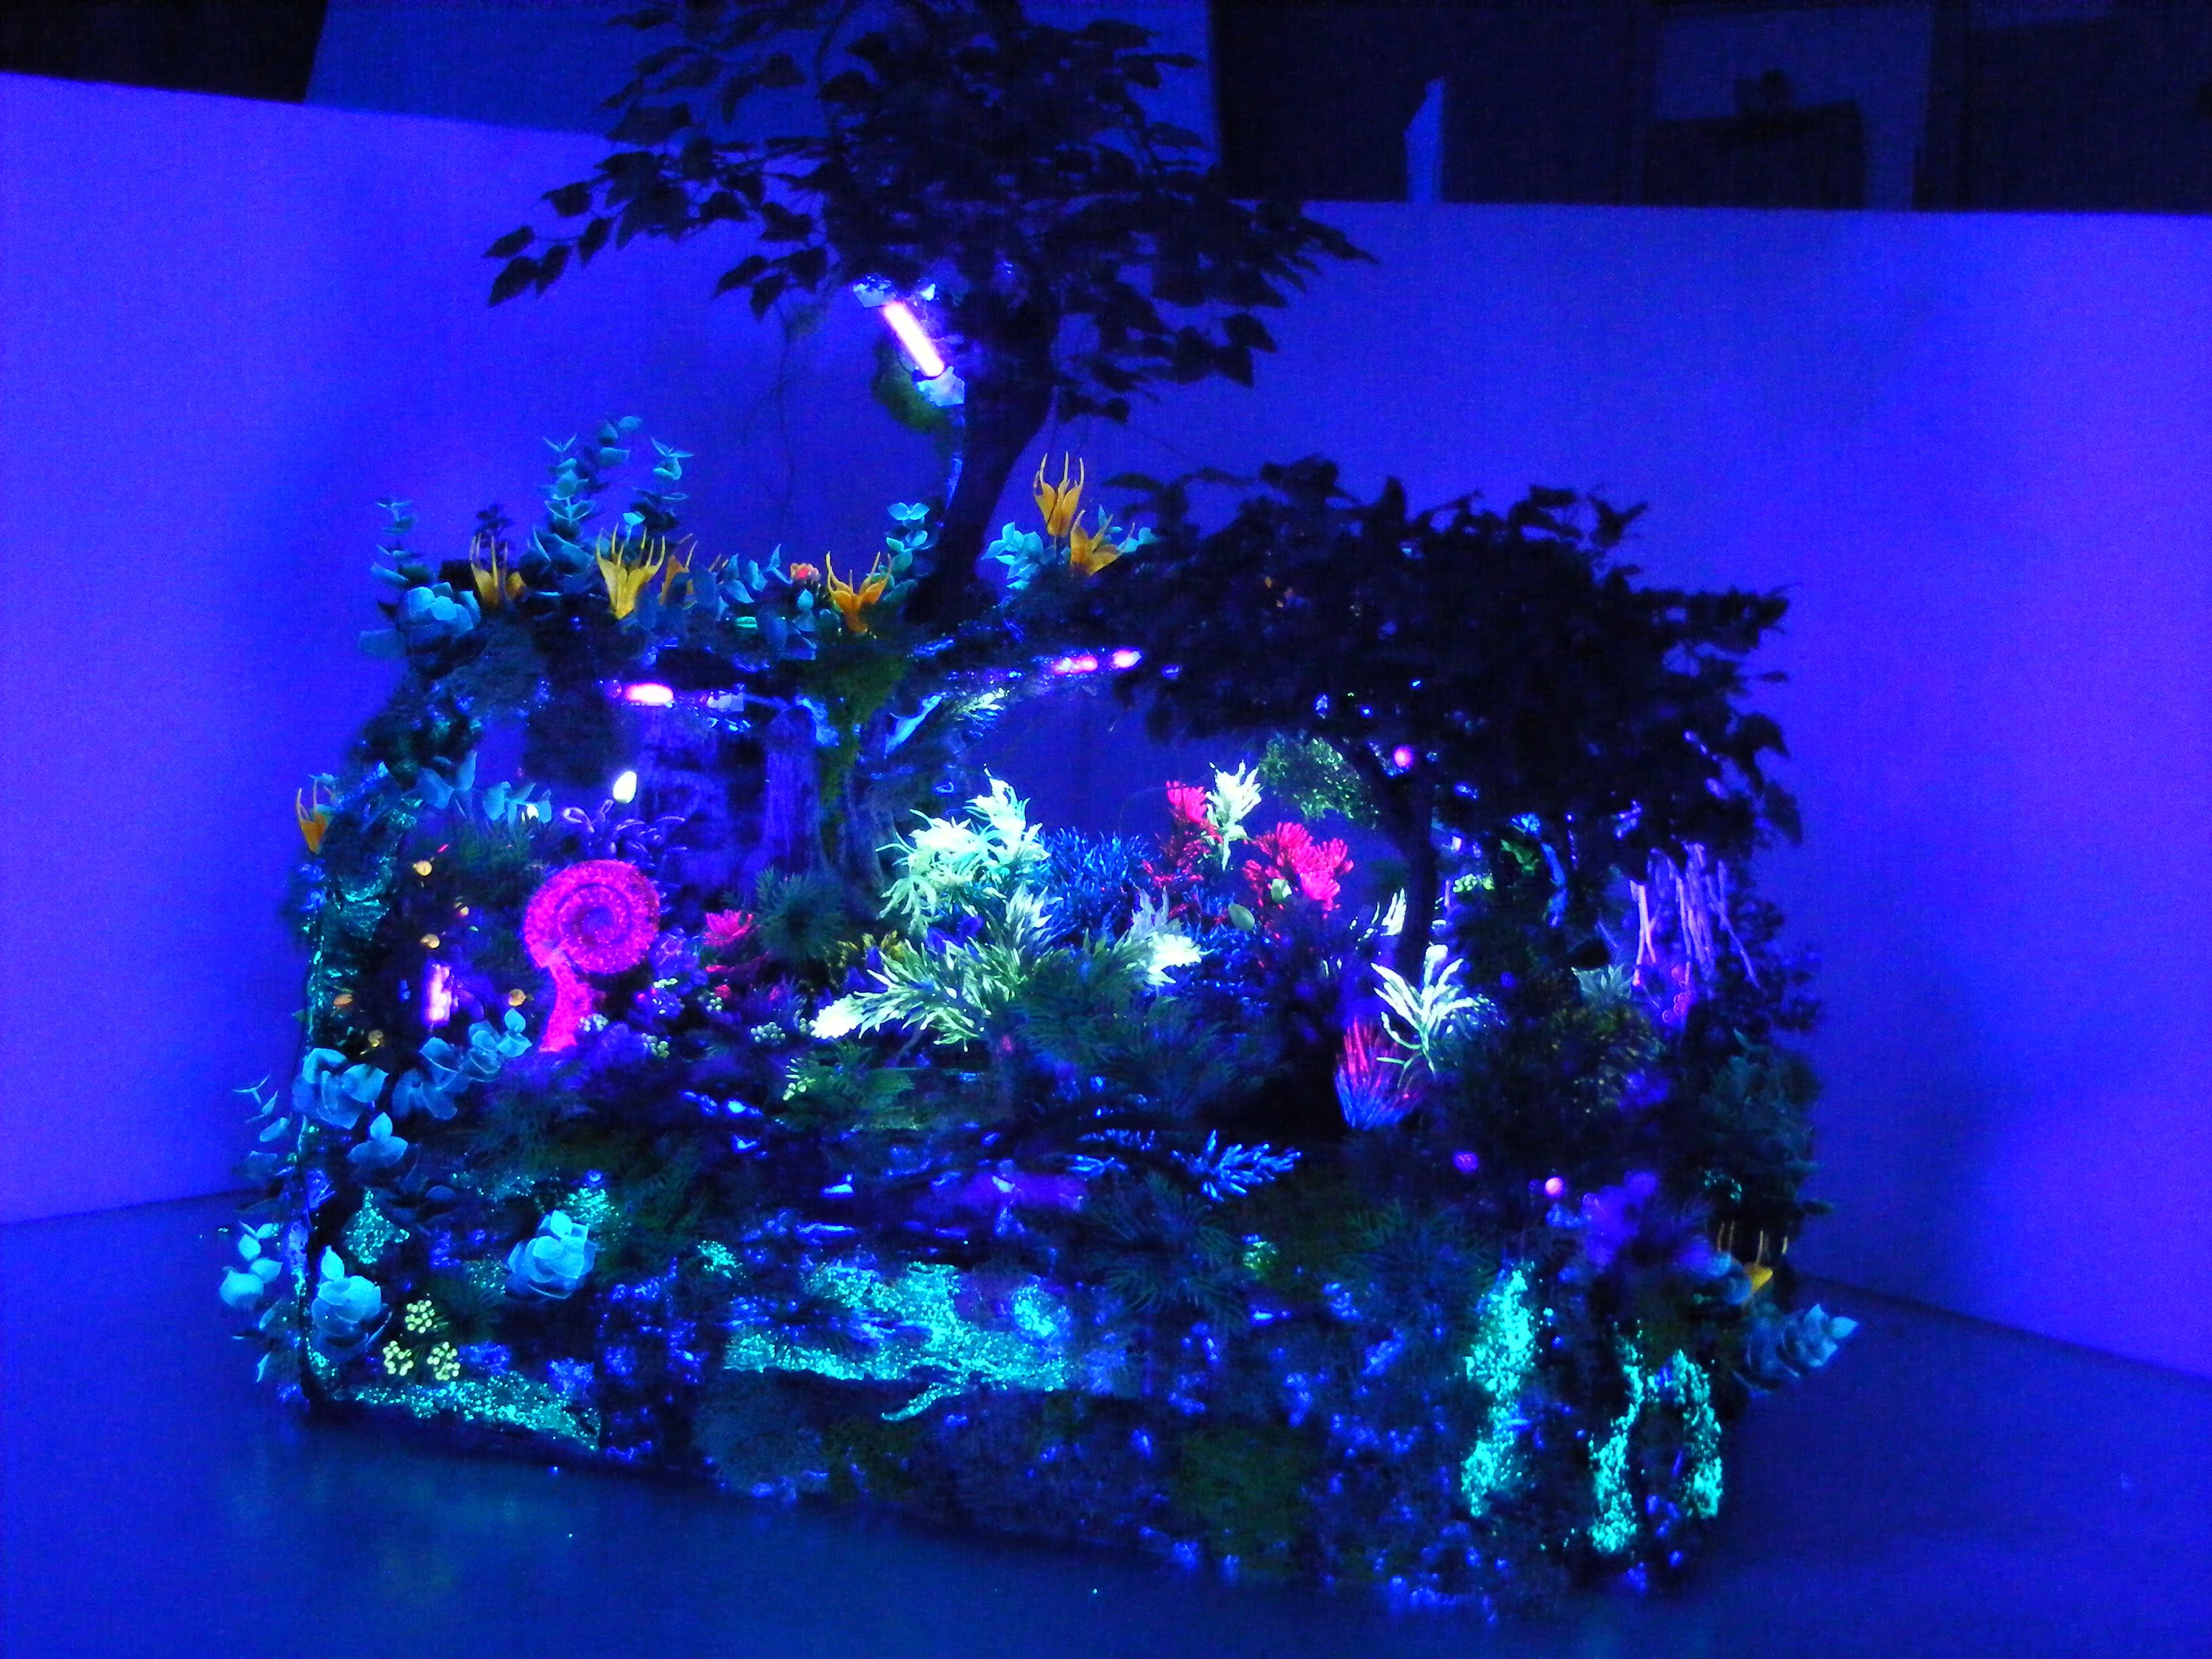
Some RGB fun
-
[Hungary] Balazs Szabo
BaluCe replied to TT Lily's topic in 2022 Thermaltake RAM MOD Invitational Season 1
-
[Hungary] Balazs Szabo
BaluCe replied to TT Lily's topic in 2022 Thermaltake RAM MOD Invitational Season 1
-
[Hungary] Balazs Szabo
BaluCe replied to TT Lily's topic in 2022 Thermaltake RAM MOD Invitational Season 1
-
[Hungary] Balazs Szabo
BaluCe replied to TT Lily's topic in 2022 Thermaltake RAM MOD Invitational Season 1

-
[Hungary] Balazs Szabo
BaluCe replied to TT Lily's topic in 2022 Thermaltake RAM MOD Invitational Season 1

-
[Hungary] Balazs Szabo
BaluCe replied to TT Lily's topic in 2022 Thermaltake RAM MOD Invitational Season 1
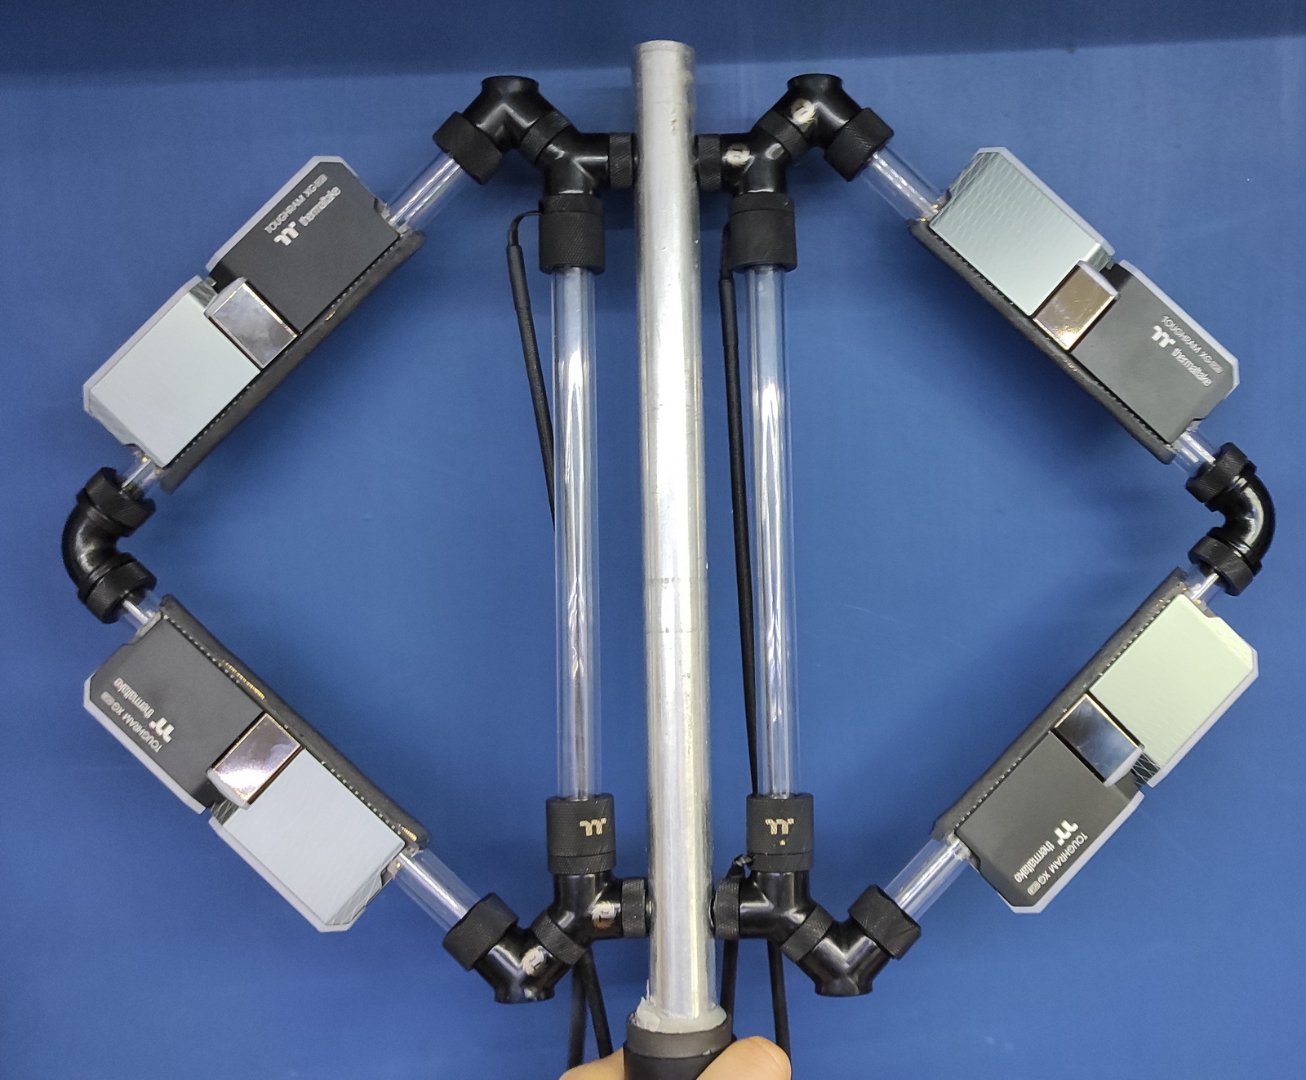
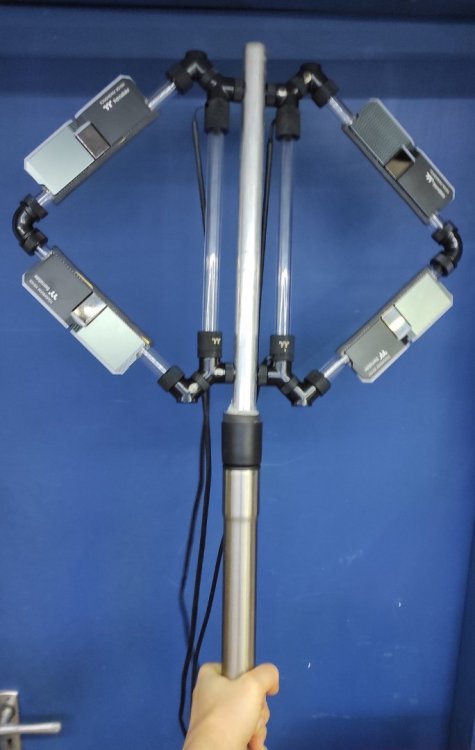
It didn't get small. But at least it is big. I can say that it has become a lifelike size. A picture for size reference.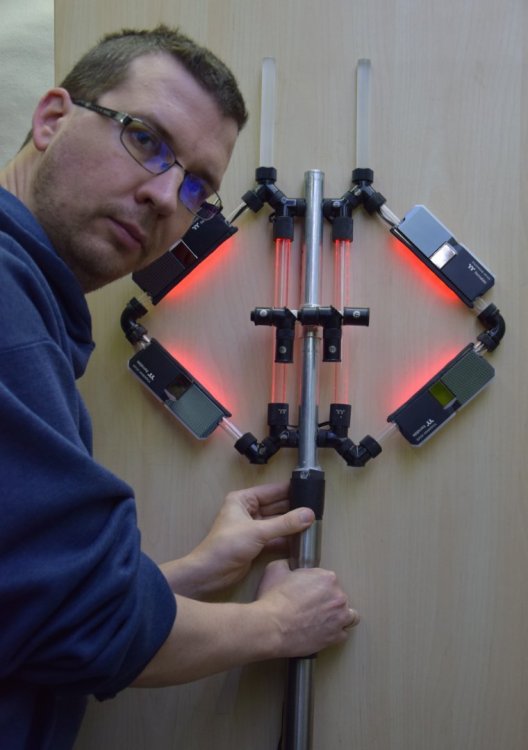
-
[Hungary] Balazs Szabo
BaluCe replied to TT Lily's topic in 2022 Thermaltake RAM MOD Invitational Season 1
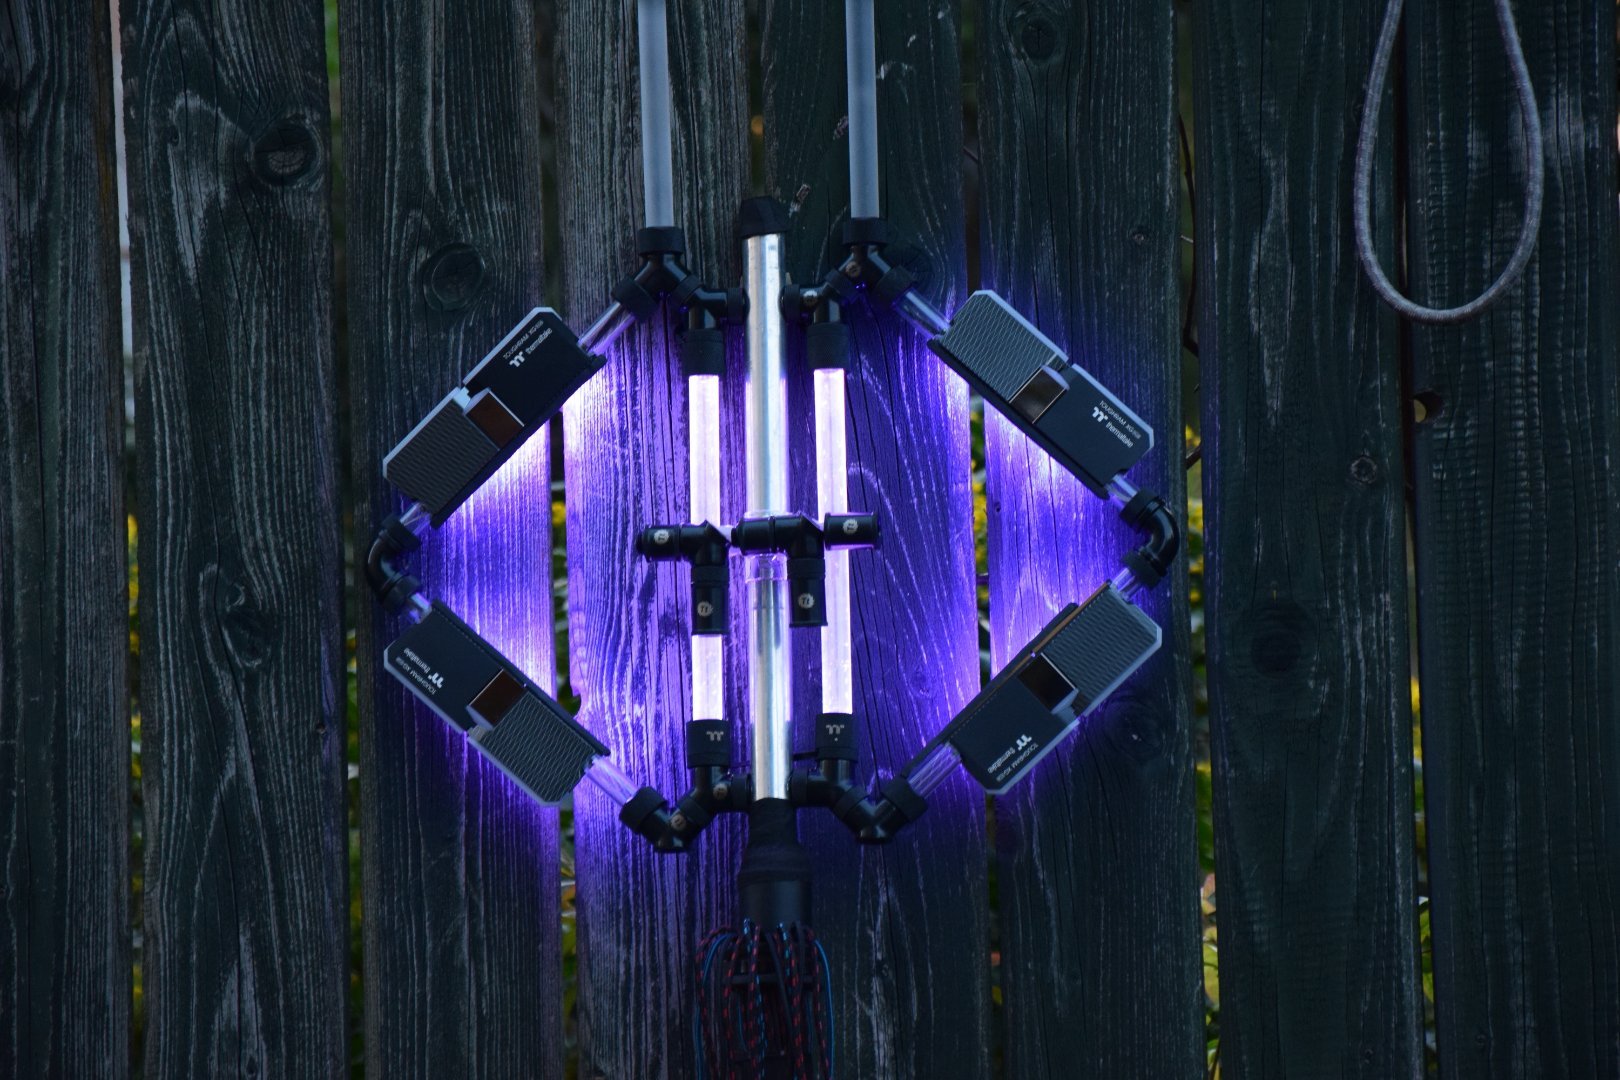
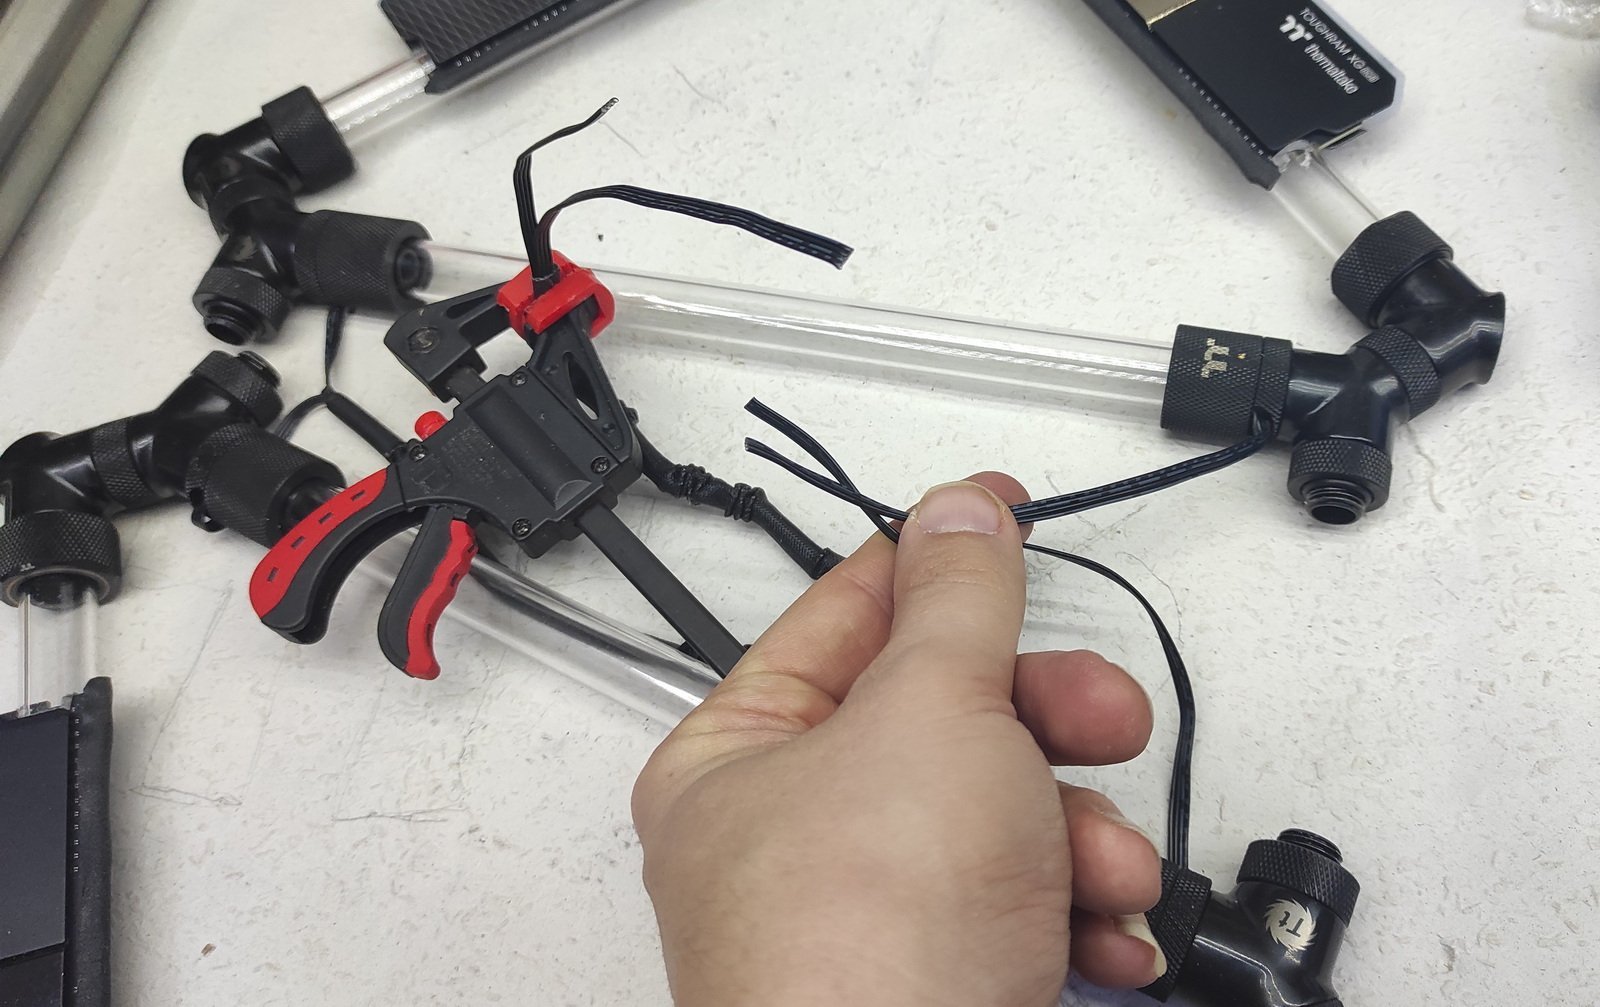
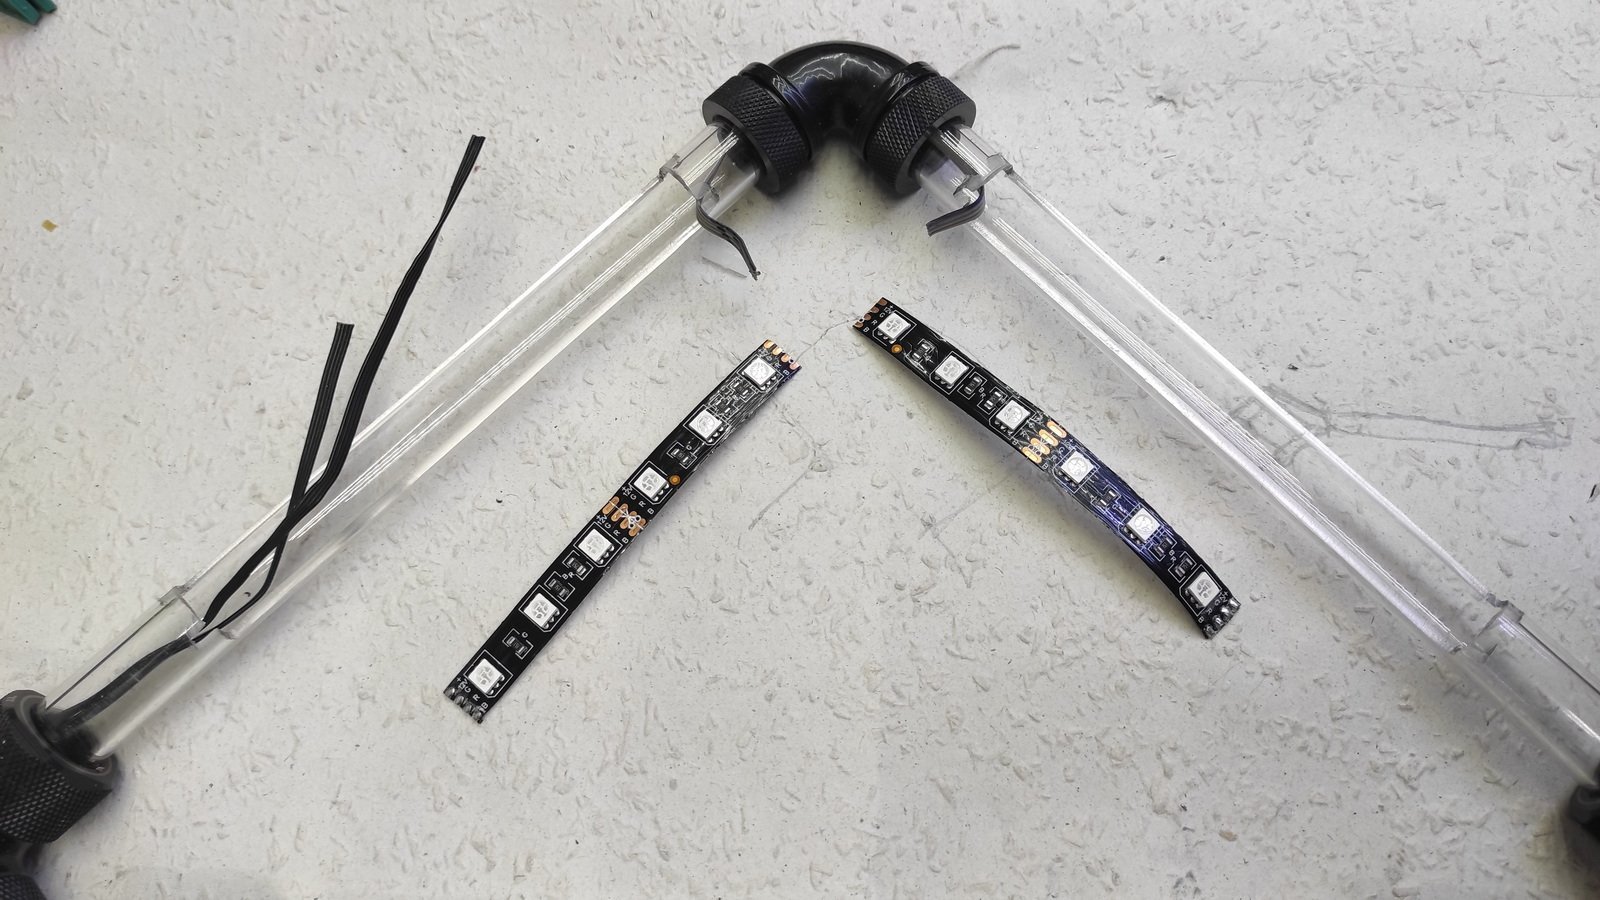
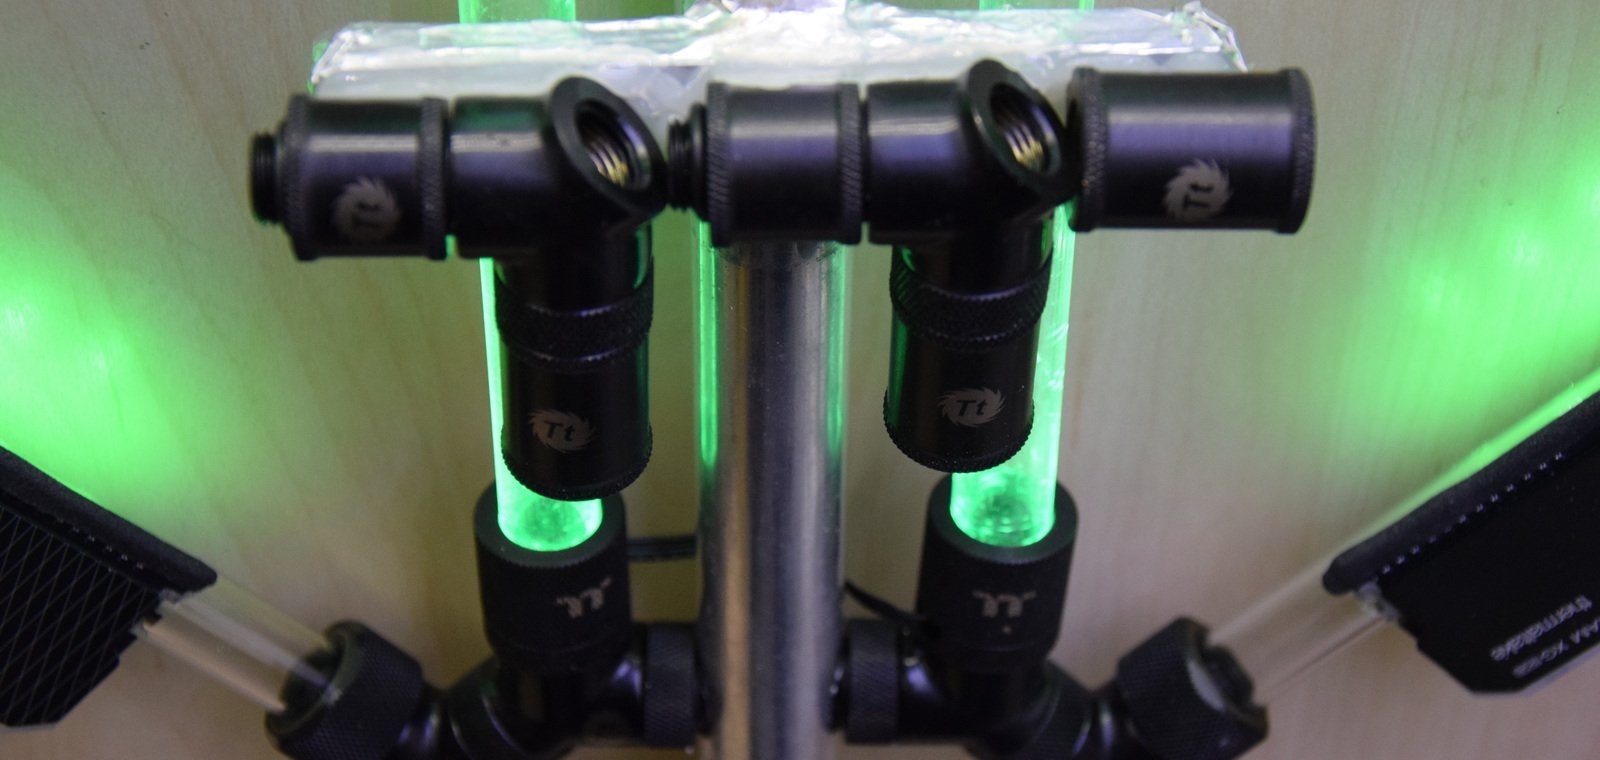
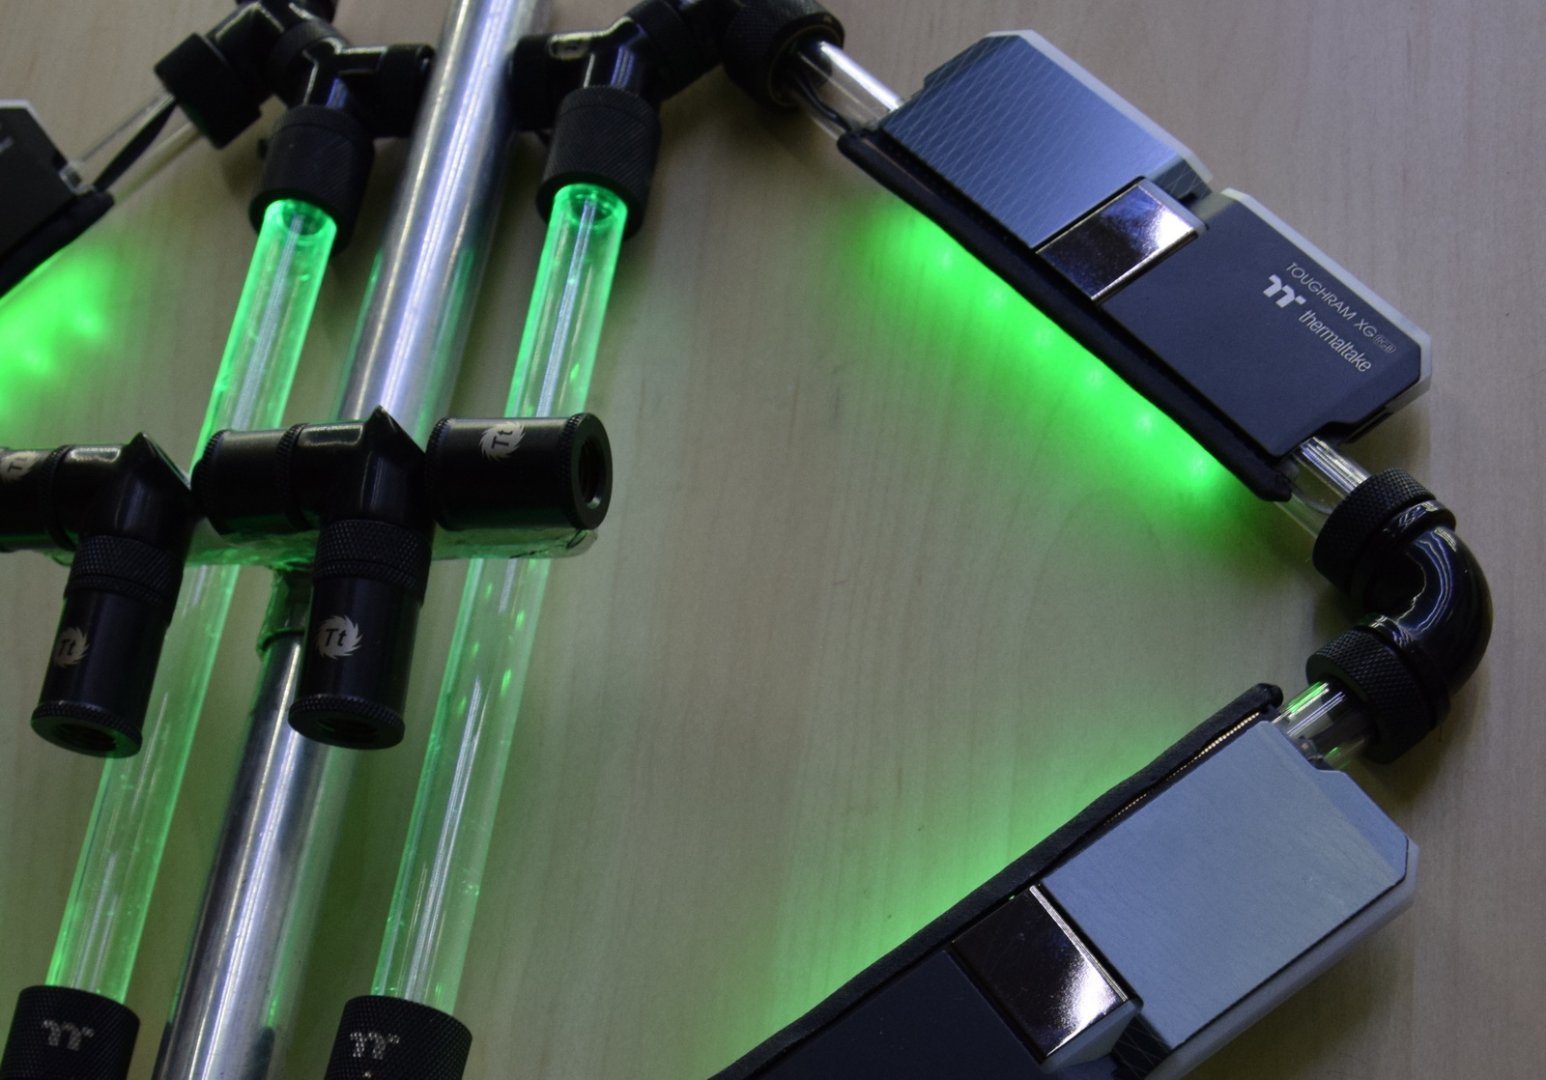
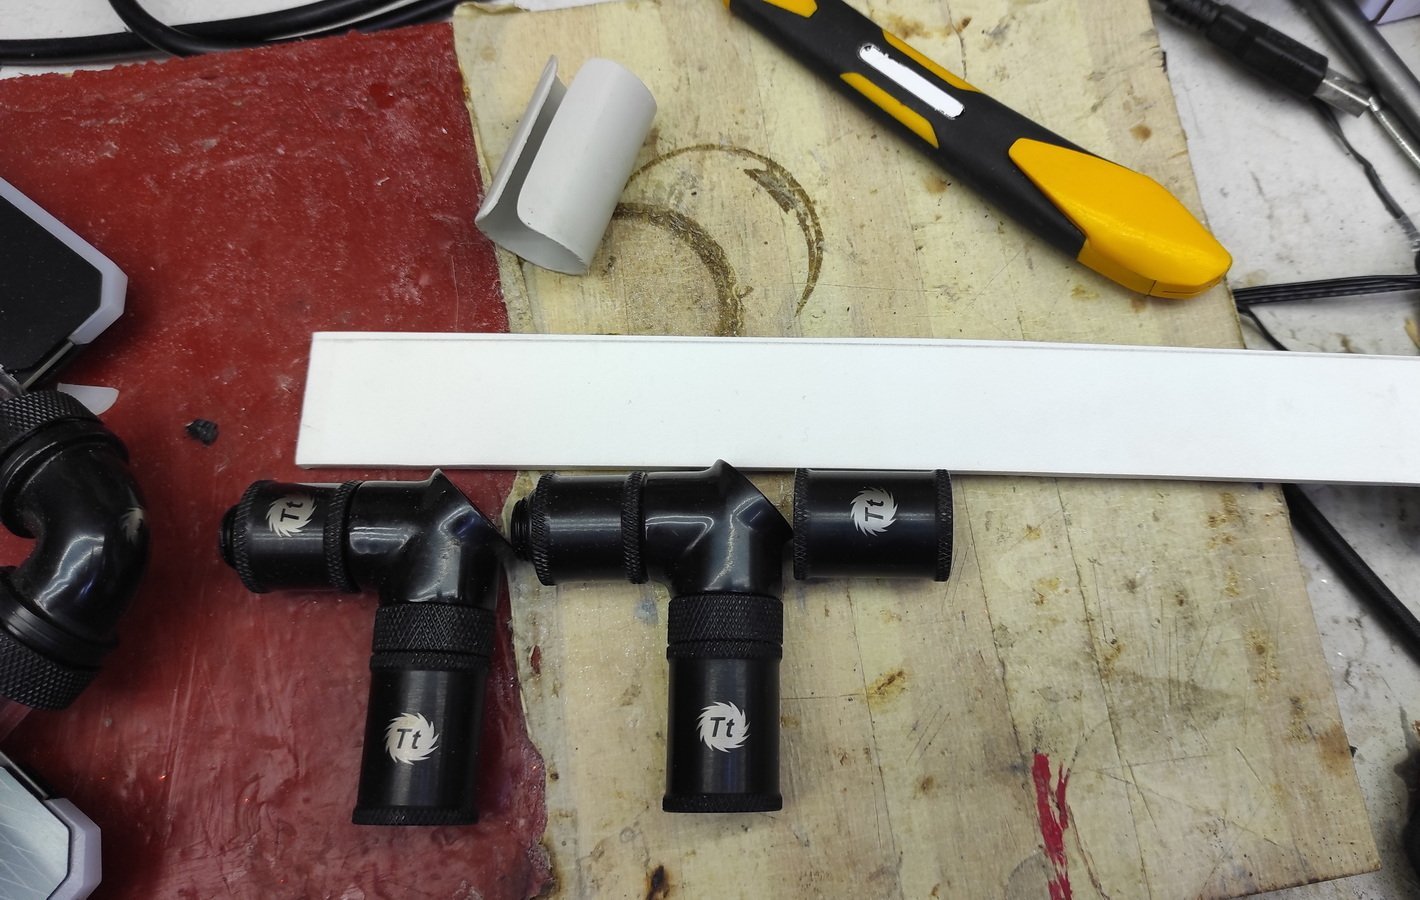
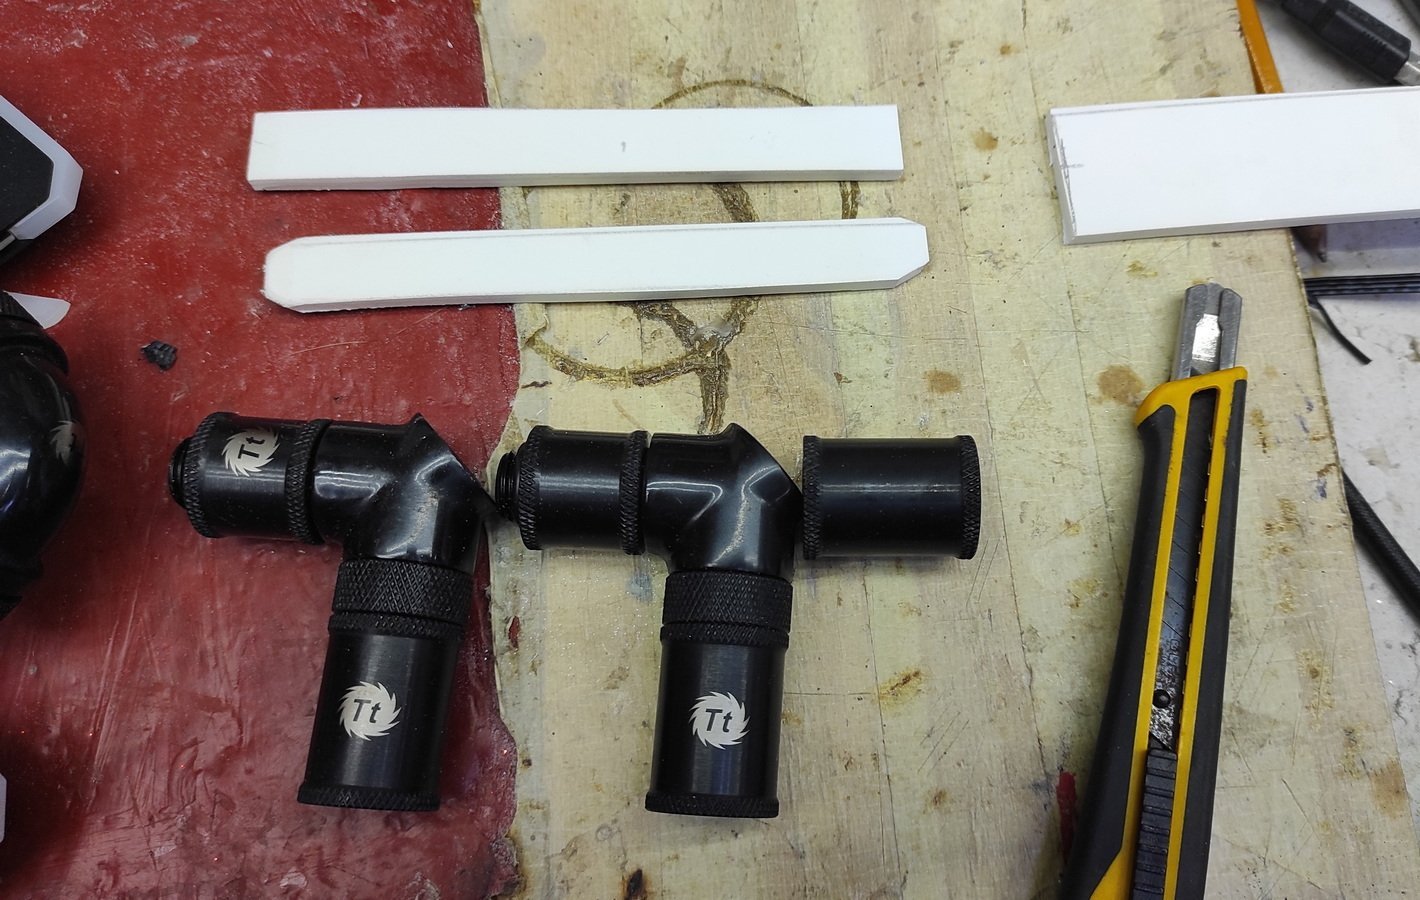
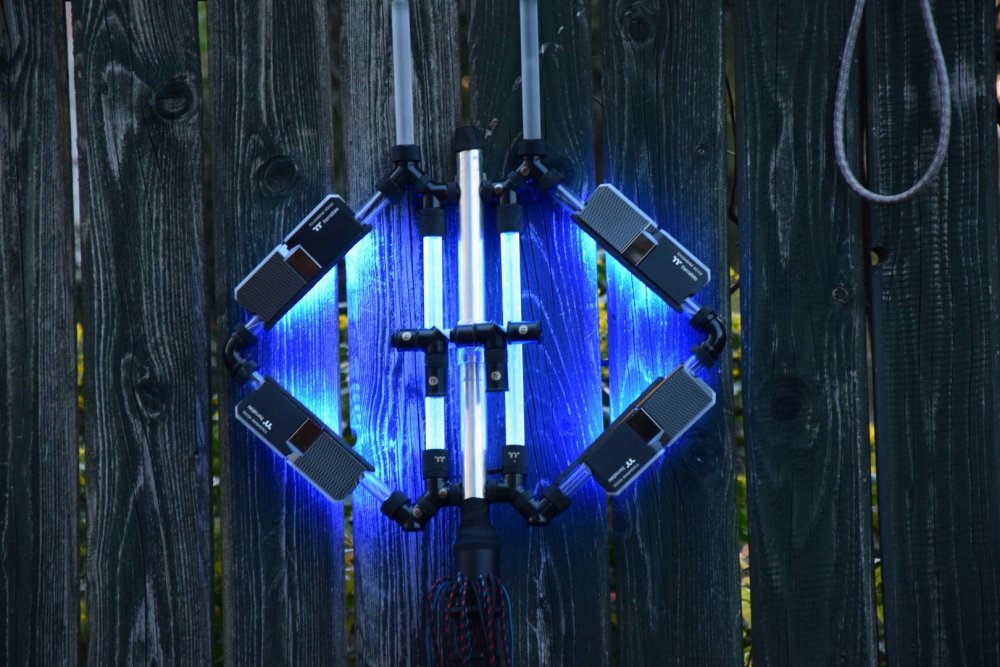
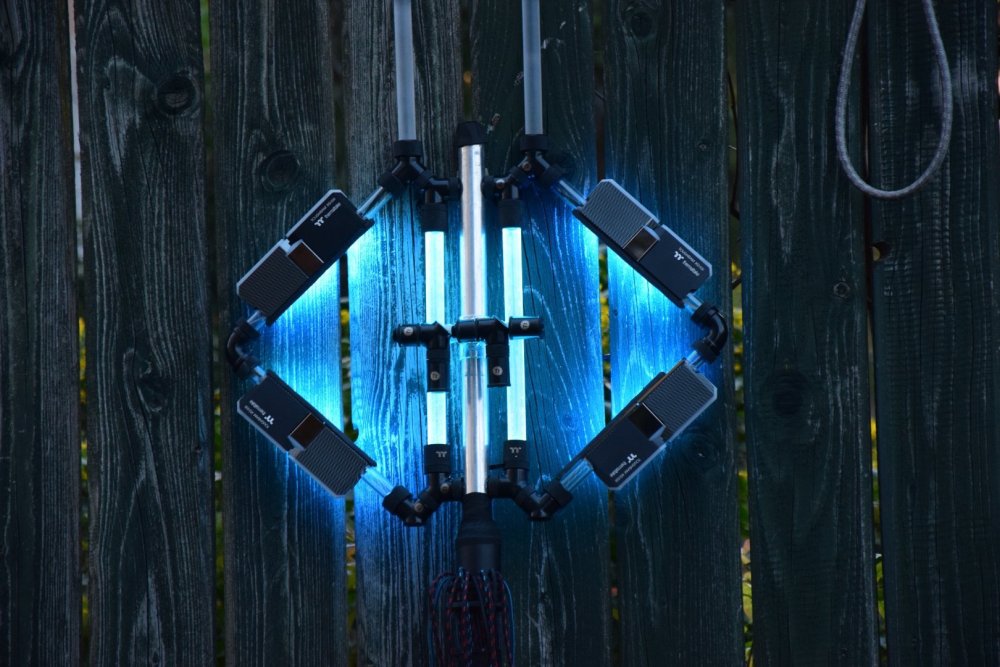
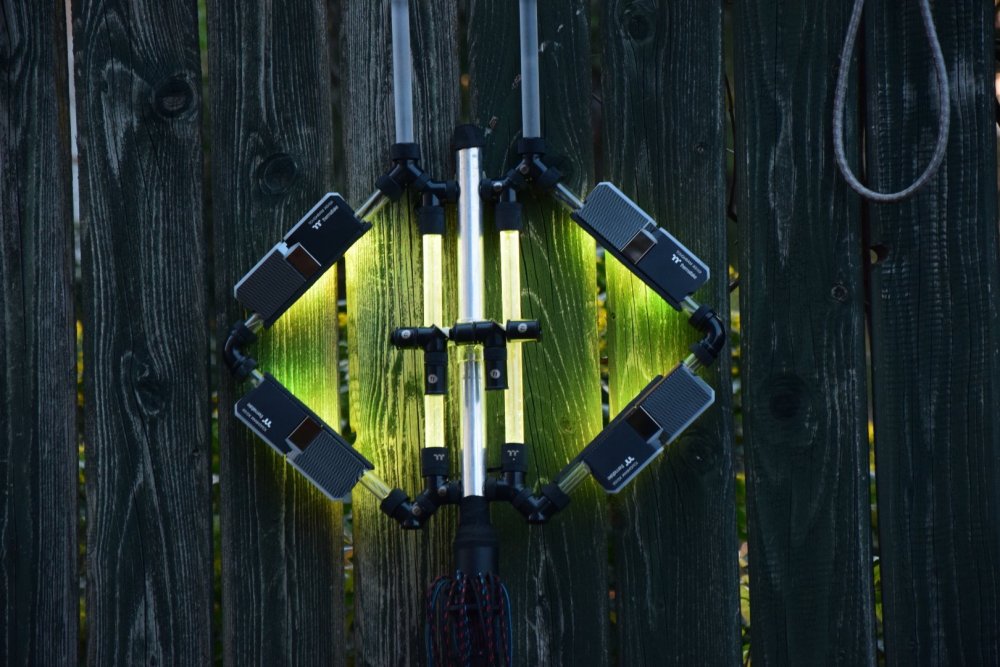
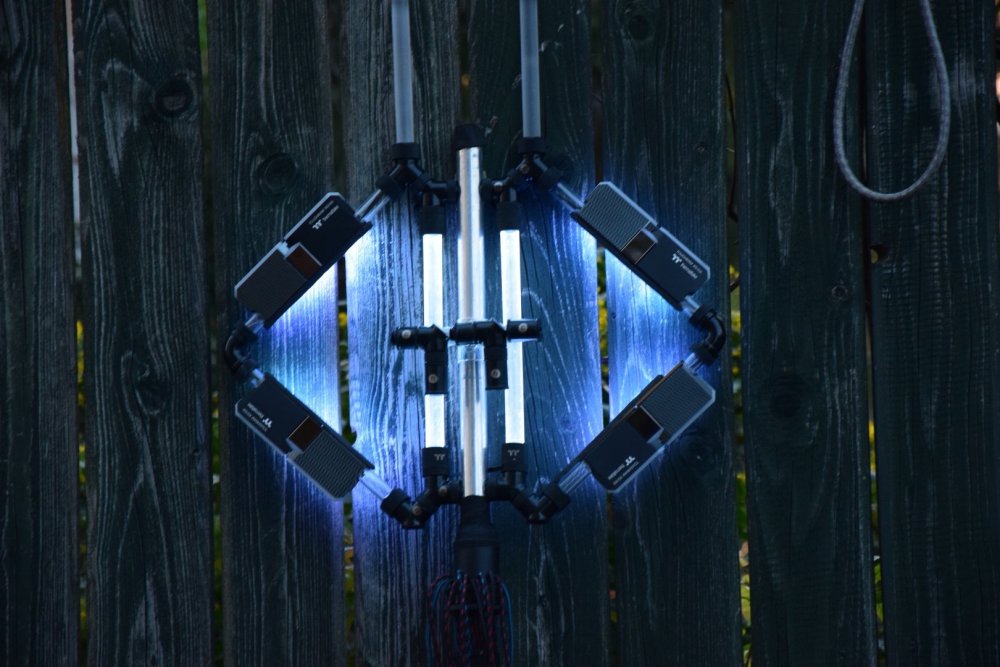
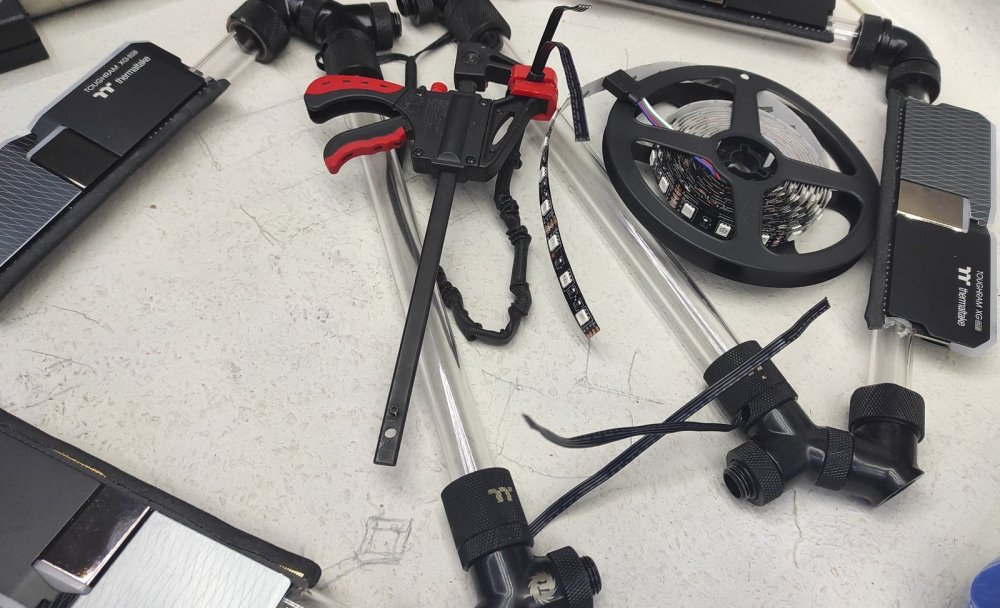
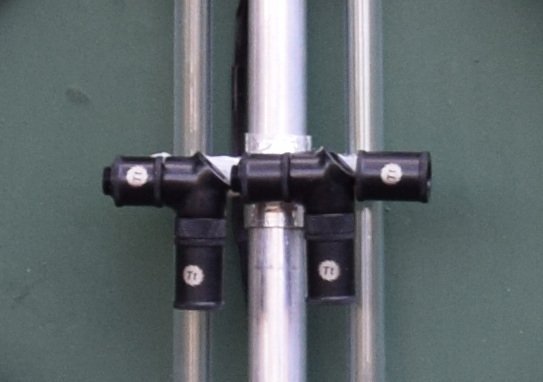
I couldn't find a solution to make the RAM’s own LEDs work, so I had to solve this problem, so the end result looks like I imagined. I got around the problem to light up my "Techno-Mage Stuff". (later on this, as this will be changed ) For the base effect I used Thermaltake Pacific RGB Hard tube fittings. Tried to hide all the wires and put them inside where it was possible. The RGB strips are wider than the inside diameter of the fittings. So, I had to solder them on the spot, with only a few mm space was there for movement, as there is no space to hide any extra cables. All work from the same controller and... it is nearly what I wanted. Whit what color should I take the final photos? Leave a comment with your choice and check back later for more more updates.


-
[Hungary] Balazs Szabo
BaluCe replied to TT Lily's topic in 2022 Thermaltake RAM MOD Invitational Season 1
This is a terrible name for this "Techno-Mage Stuff". It was only a temporary project name. Does anyone have an idea or suggestion for a better name for this project? Please, leave a comment with your idea here. You can be the name giver for this project. -
[Hungary] Balazs Szabo
BaluCe replied to TT Lily's topic in 2022 Thermaltake RAM MOD Invitational Season 1
The end result with TT fittings: Check back later for more more updates. -
[Hungary] Balazs Szabo
BaluCe replied to TT Lily's topic in 2022 Thermaltake RAM MOD Invitational Season 1
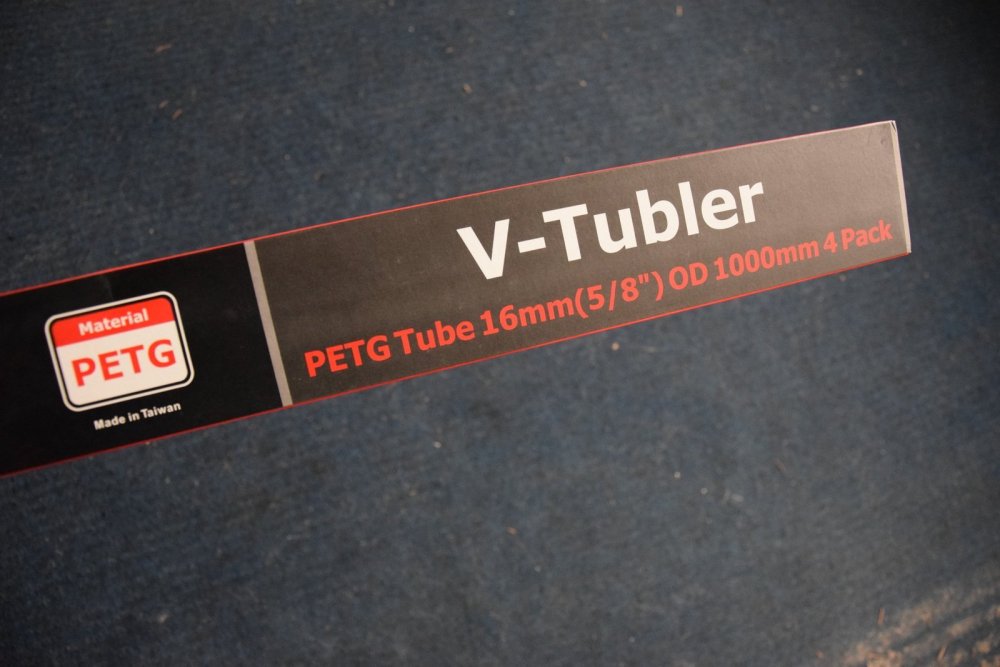
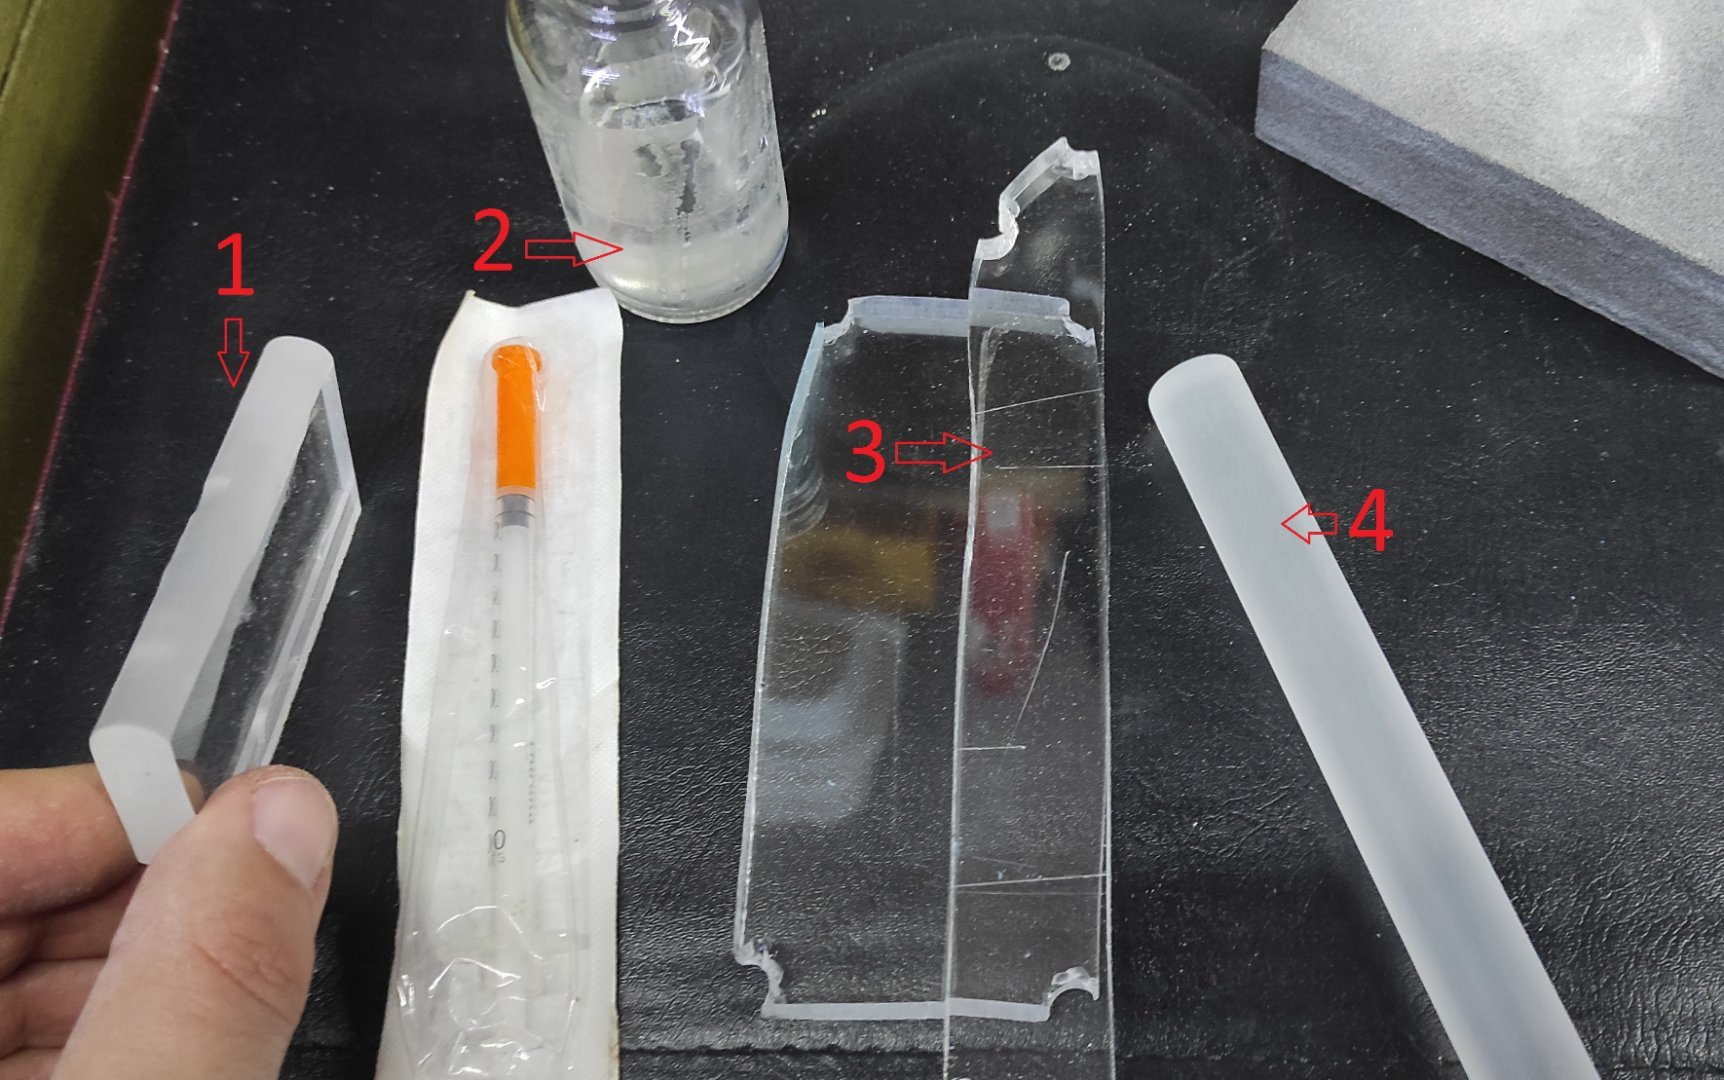
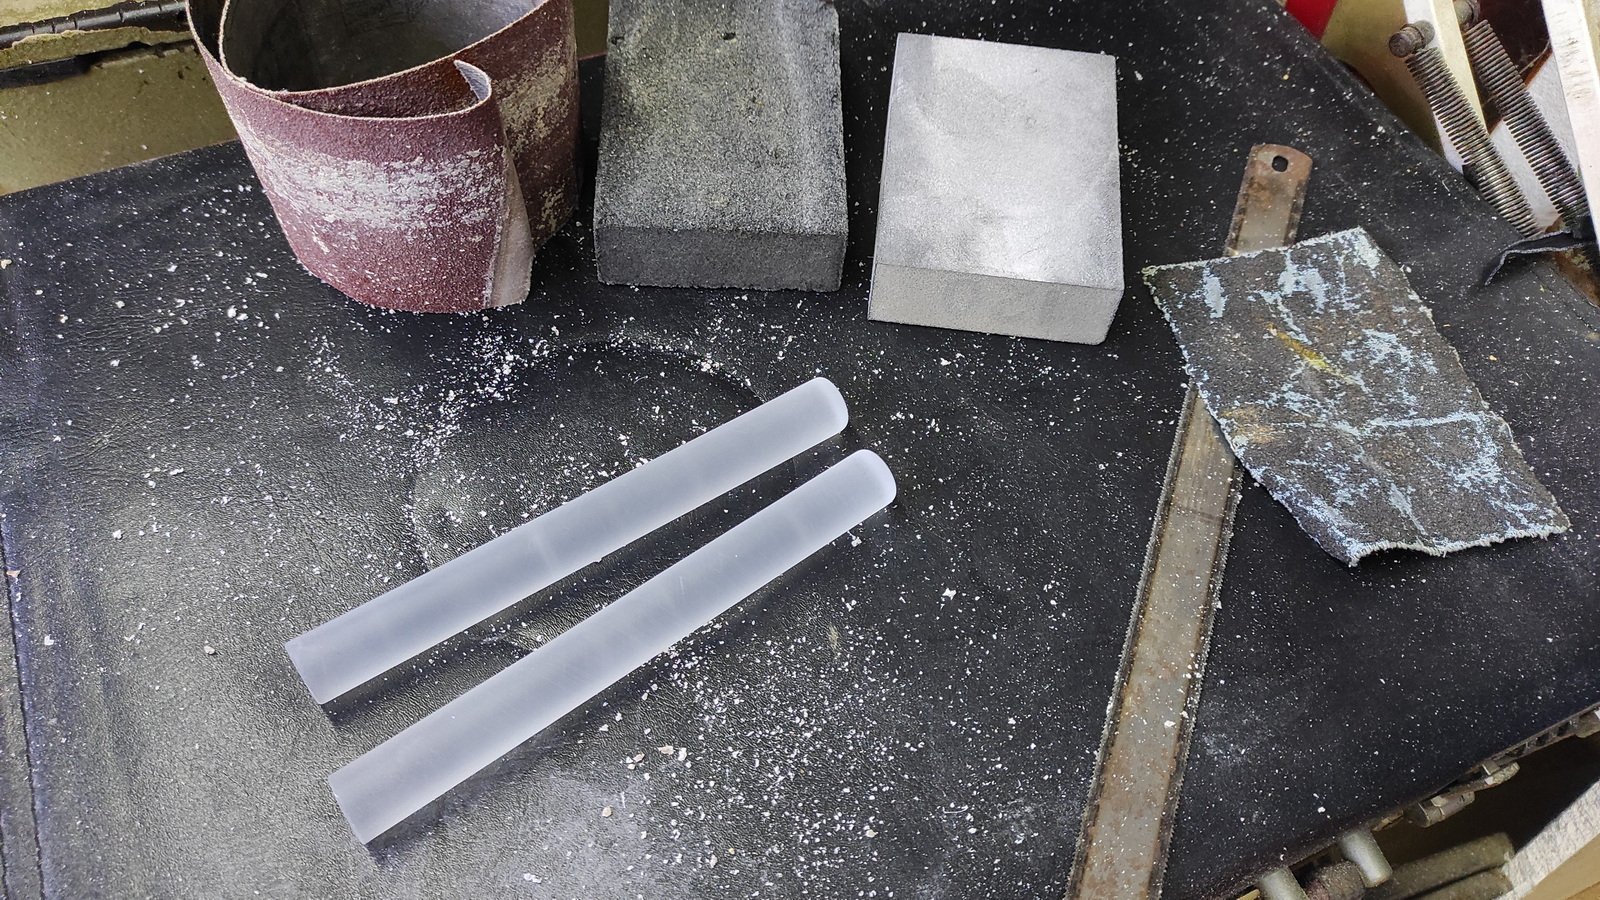
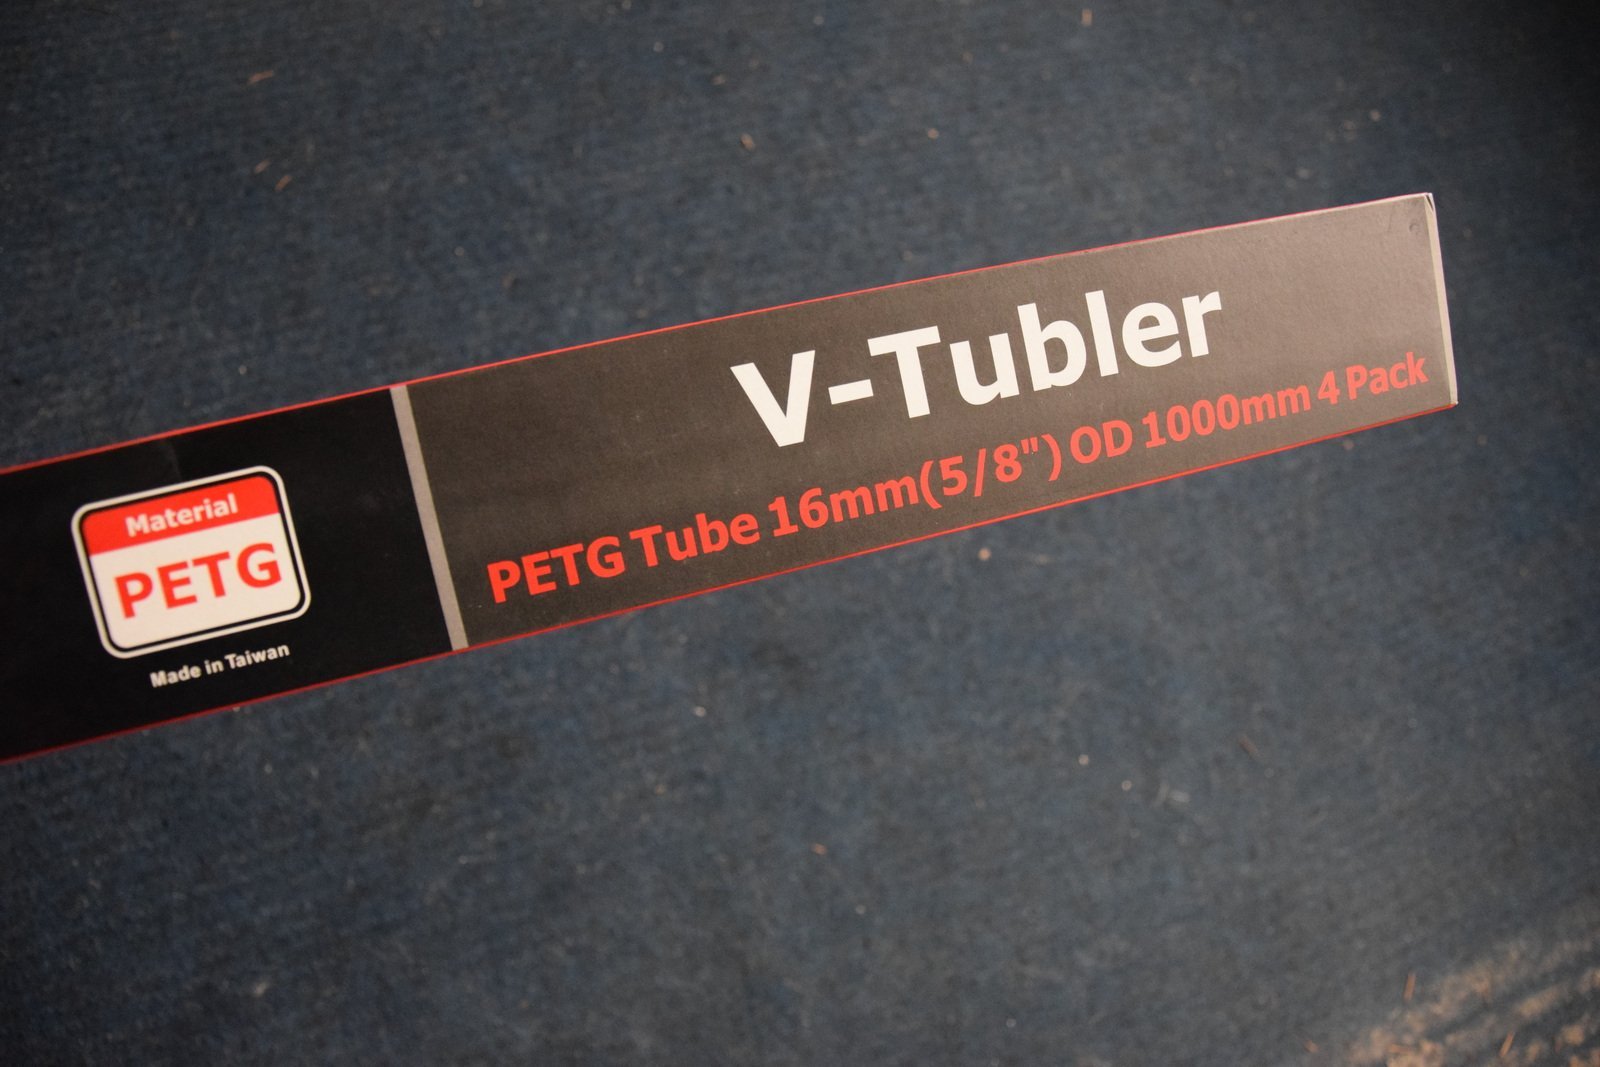
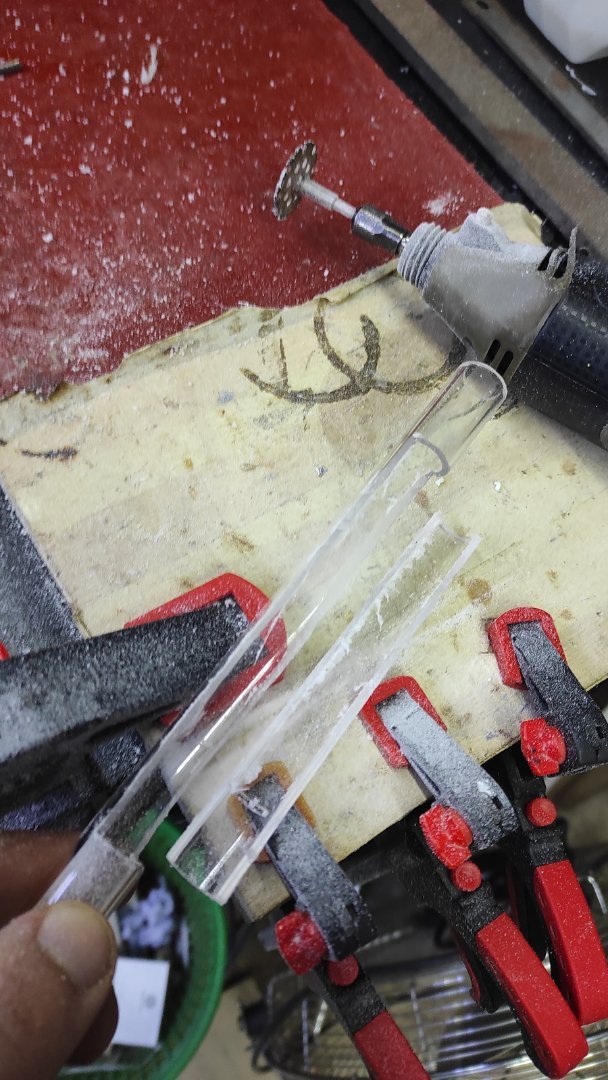
This was a dusty part. 1: a successful test piece. Not perfect, but I found ways what work and what not. 2, Acrylic glue 3, 2*10mm Acrylic cut to size -> rough shaping with Dremel Trio -> lot sanding te reach the Nr 4 stage. 4, Looks as it needs to look, with the diameter near to 16mm (spoiled: I succeeded) And I need Two... With appropriate special tools (like a lathe) it could be done in an hour... but I don't have such serious tools, so all together it took me way more time thill this stage... Check back later for more more updates.

-
[Hungary] Balazs Szabo
BaluCe replied to TT Lily's topic in 2022 Thermaltake RAM MOD Invitational Season 1
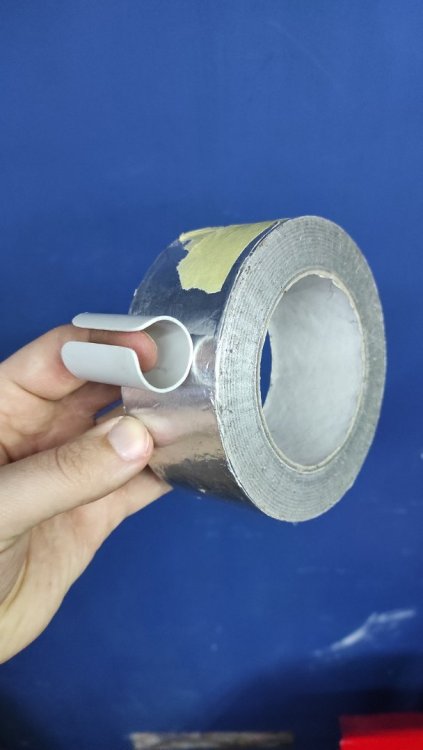
I needed an extra metal looking, but flexible thing.... so I had to cheat a bit. ...and now the "cheating" part: Alu-tape. This will hold the TT Logo / letters on a later time. I solved the other half of it, here the letters go. It is ready, but I forgot to take additional photos from the steps as I enjoyed the creative process so much... Sorry. But it is ready Check back later for more more updates.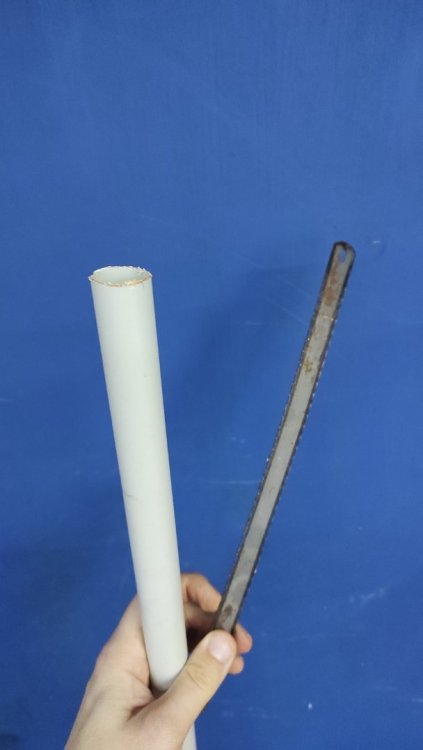


-
[Hungary] Balazs Szabo
BaluCe replied to TT Lily's topic in 2022 Thermaltake RAM MOD Invitational Season 1
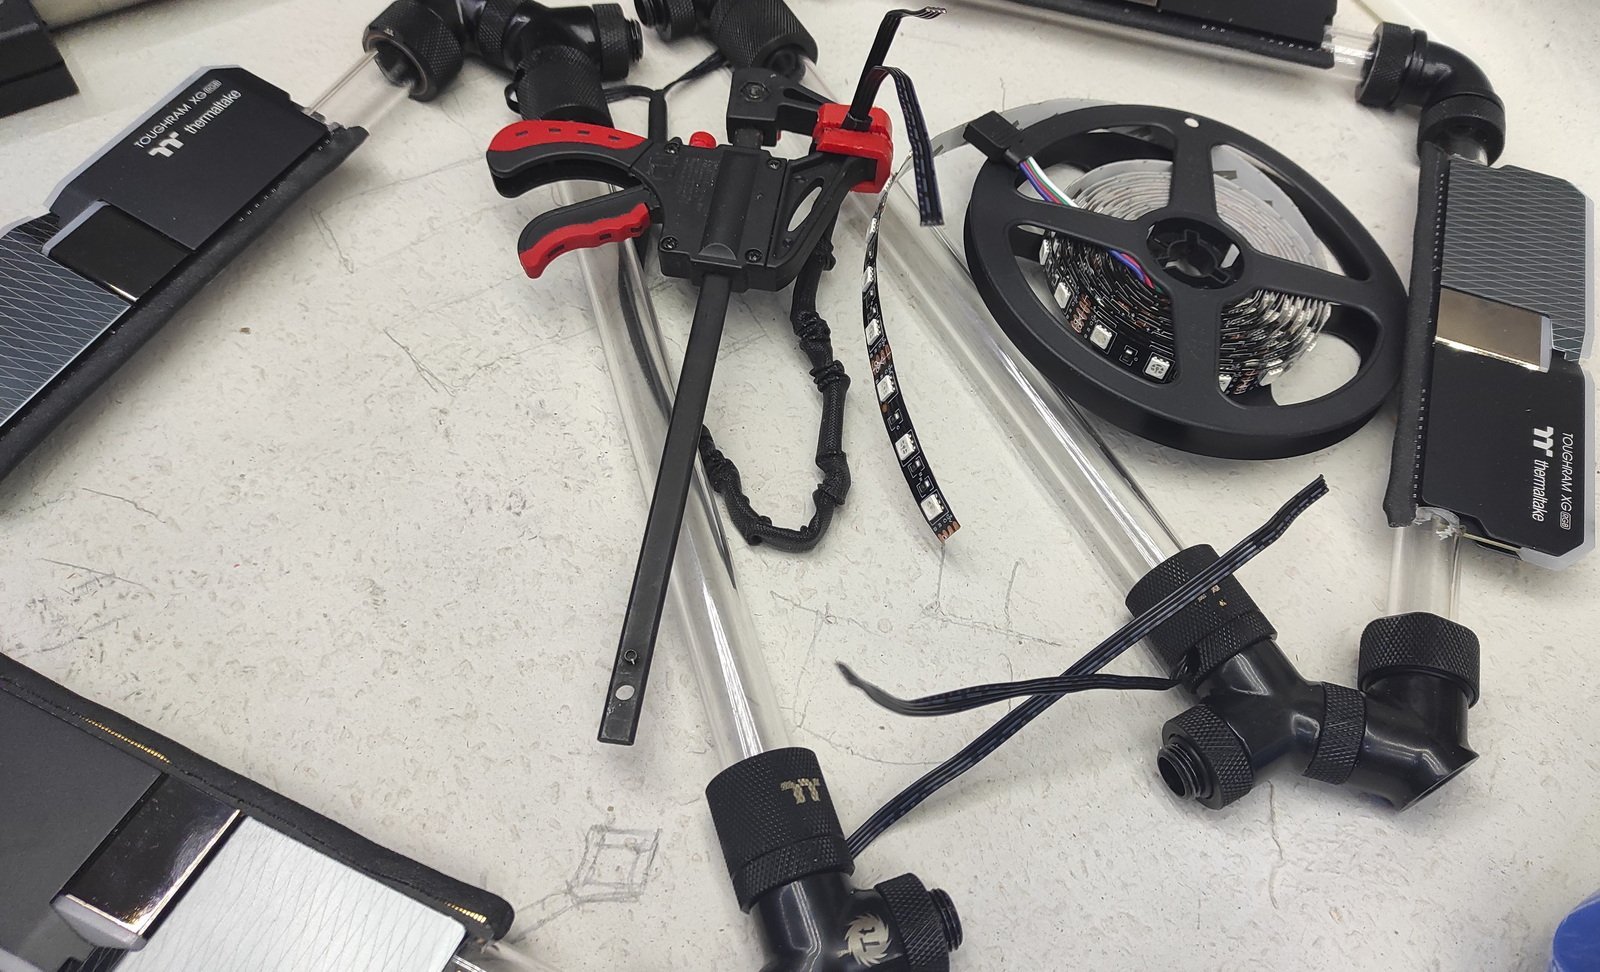
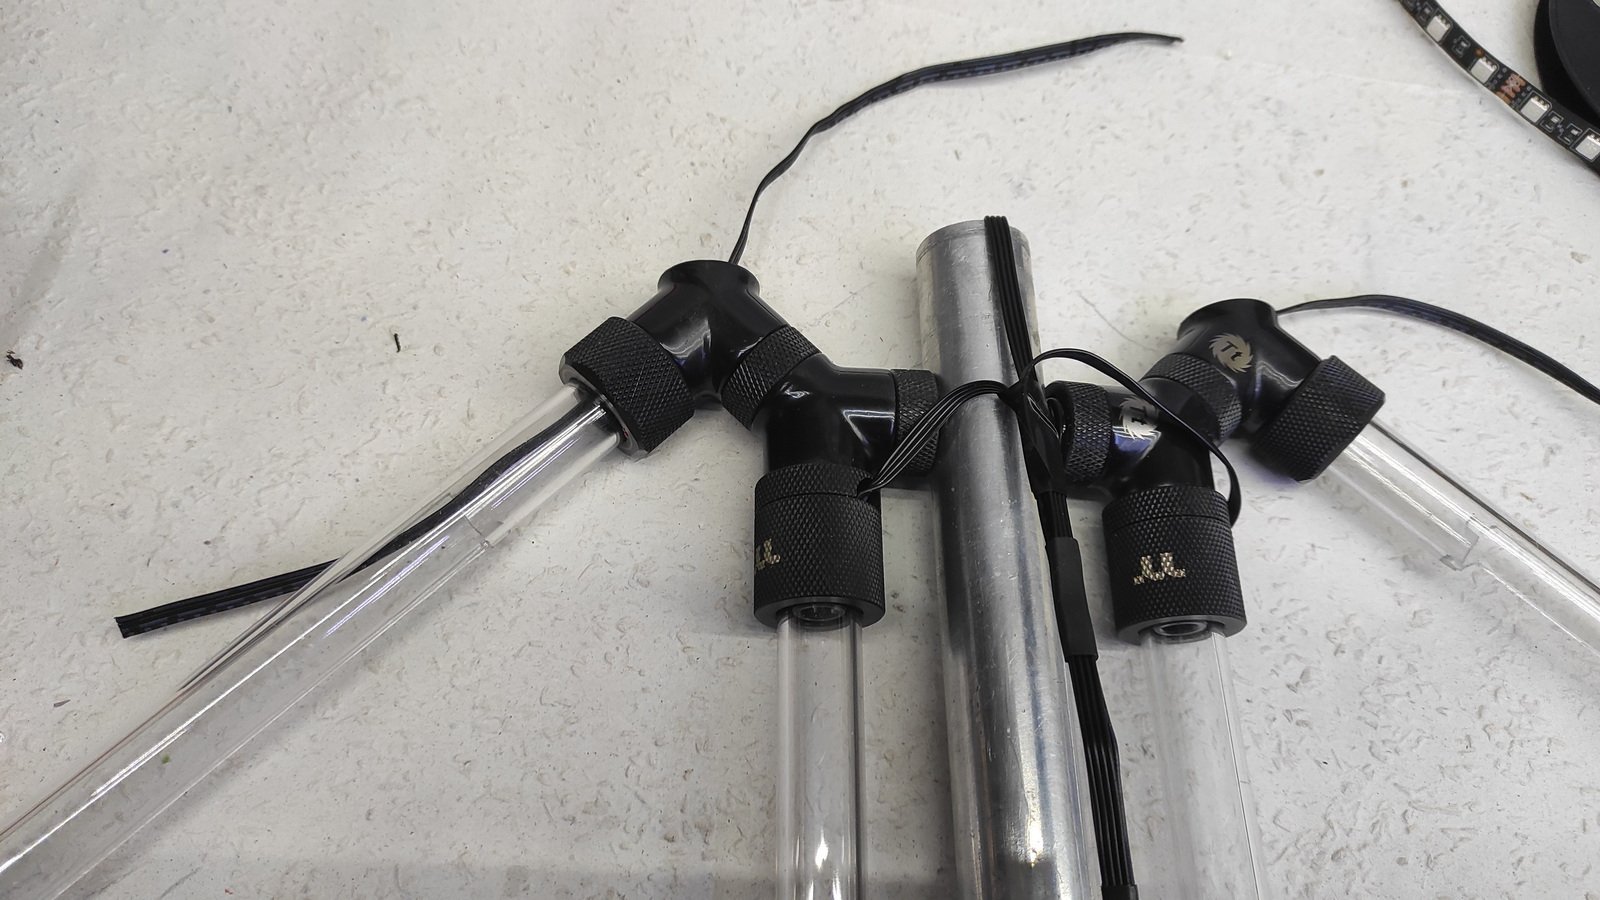
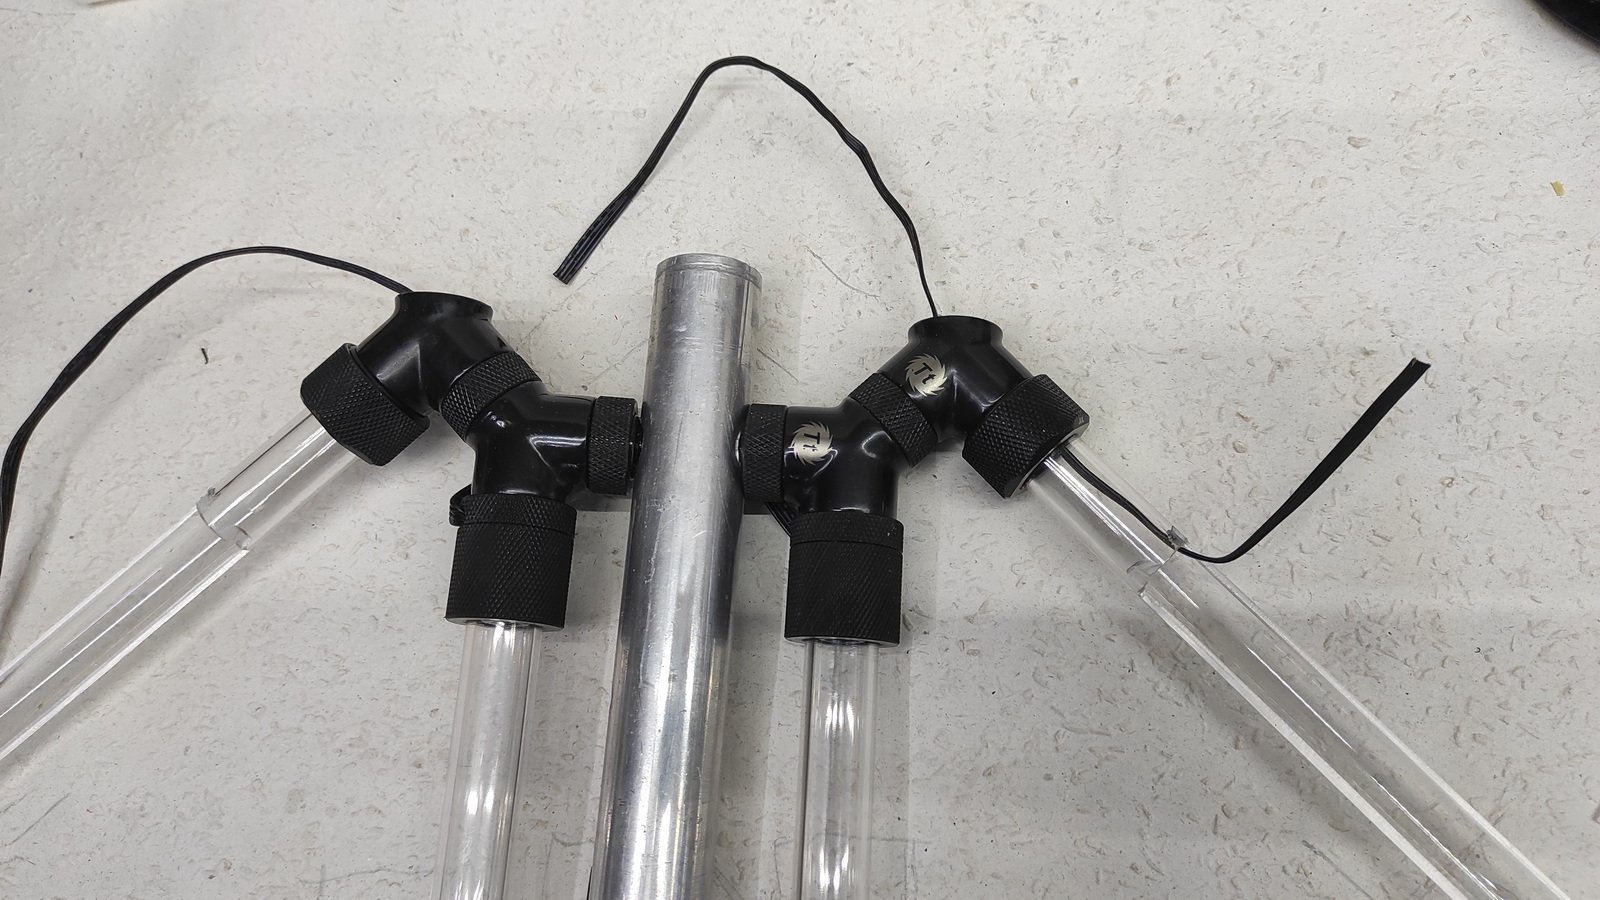
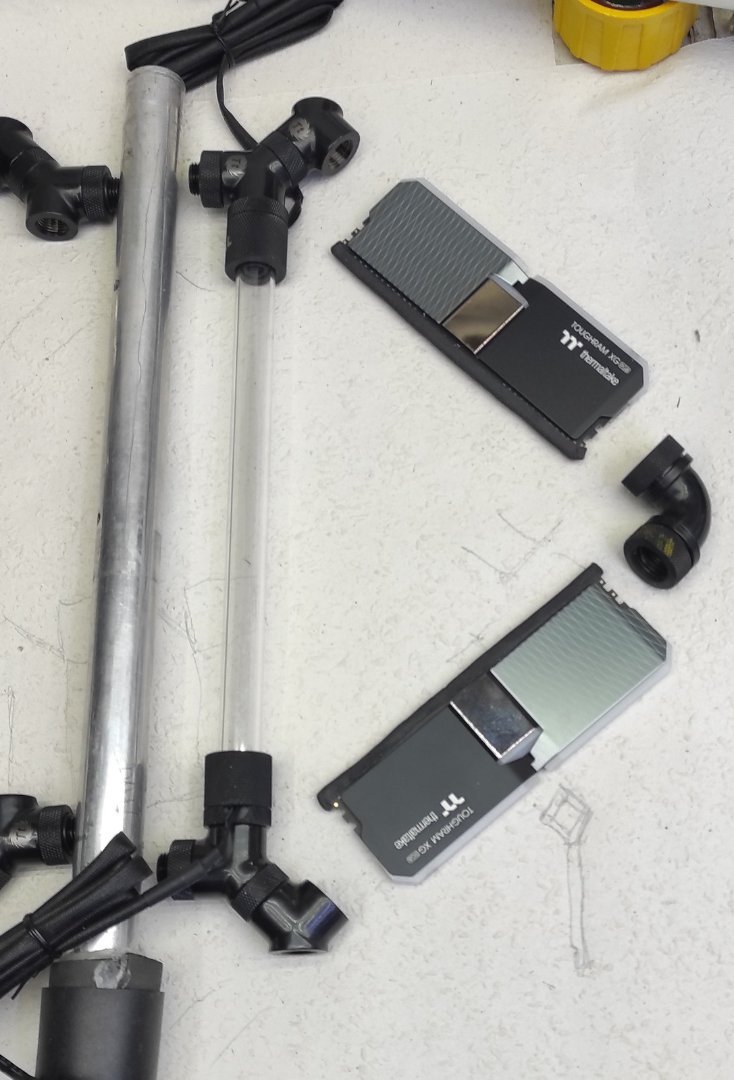
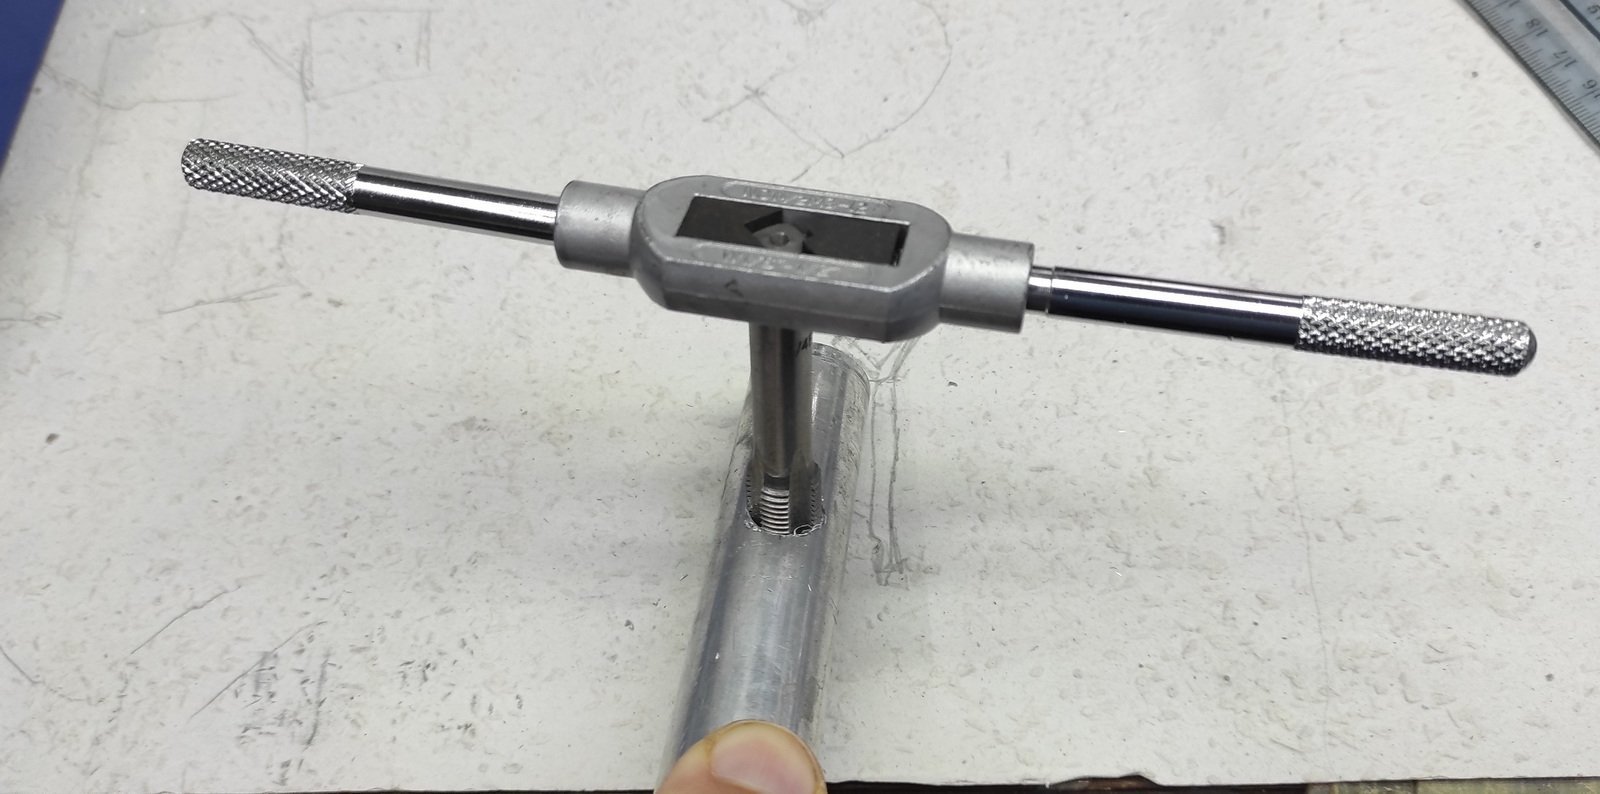
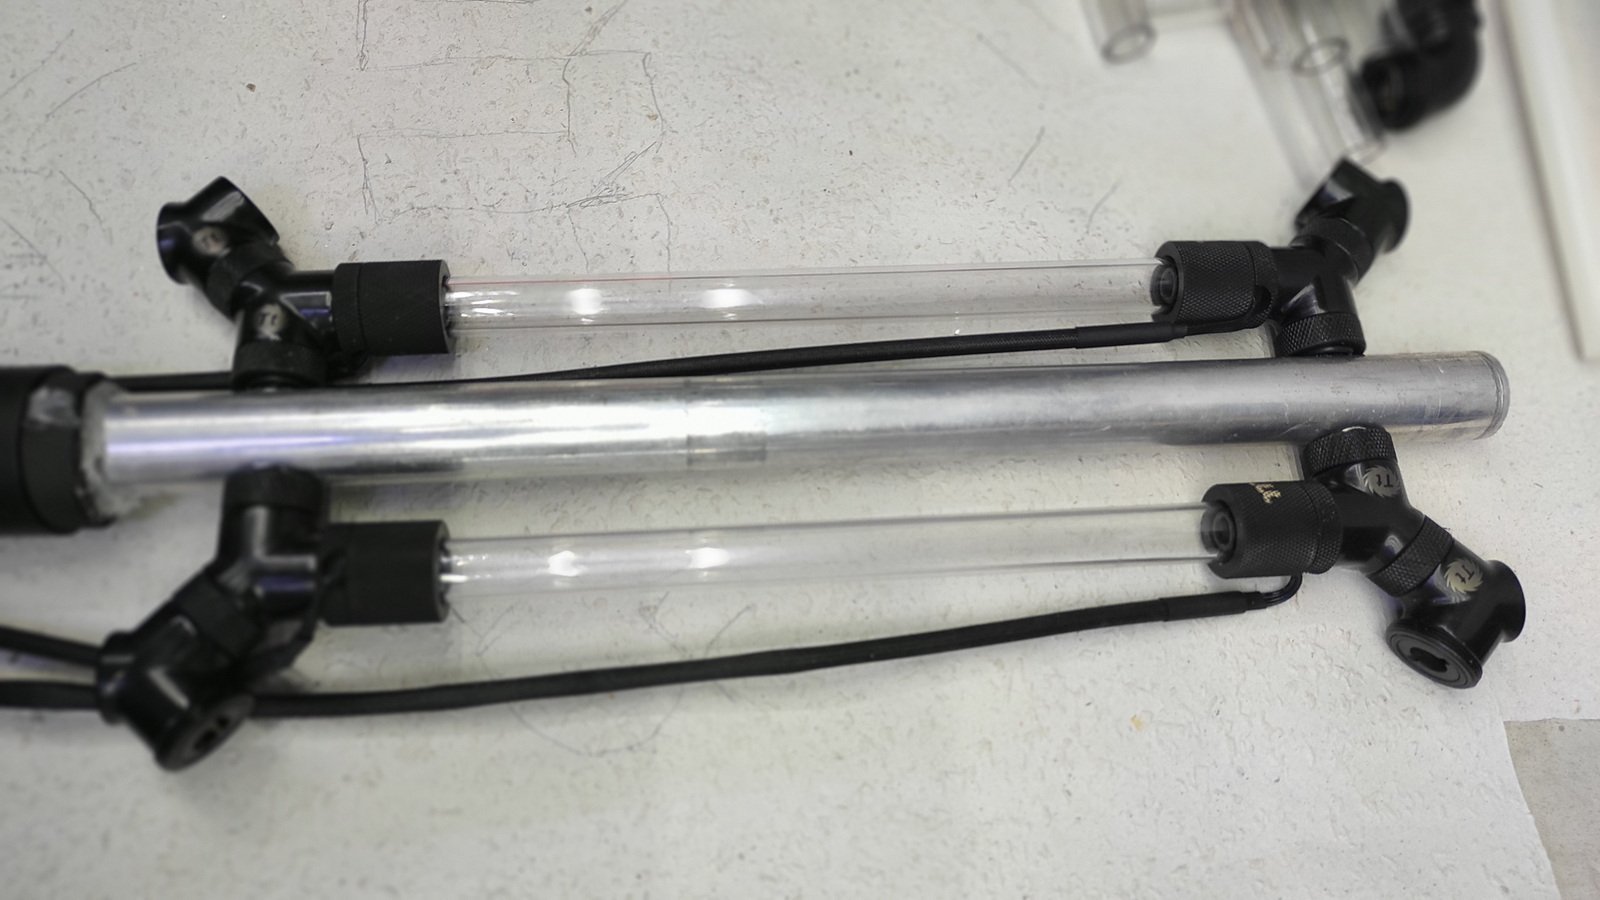
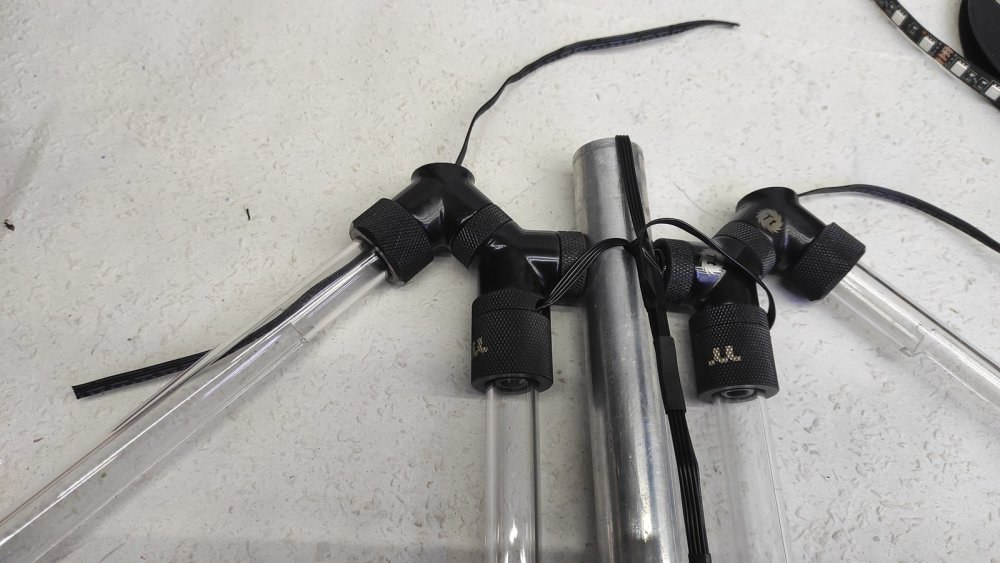
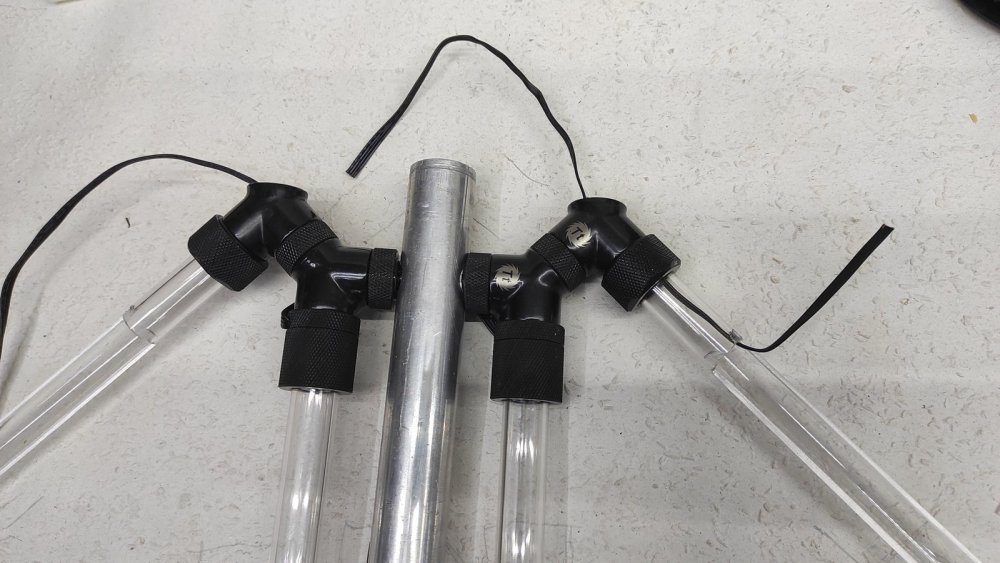
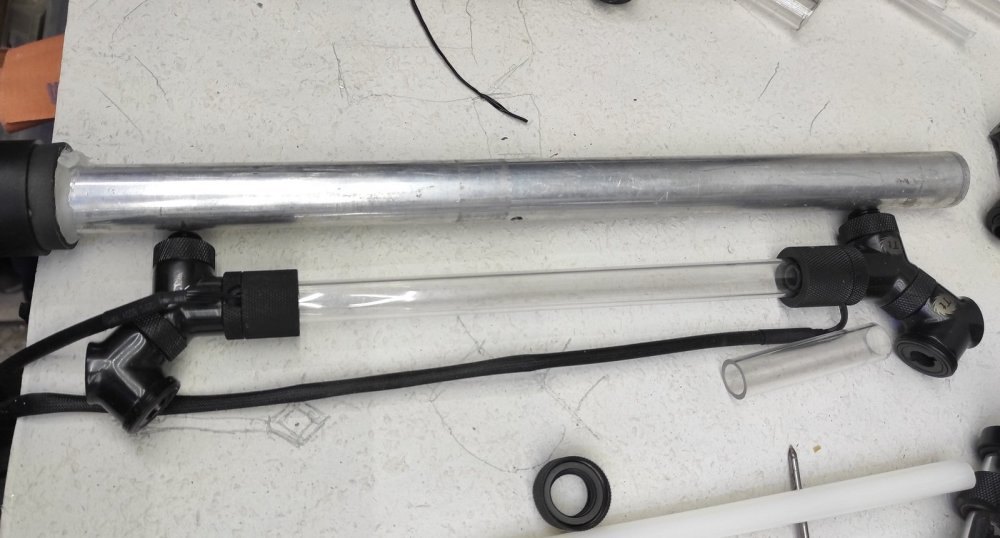
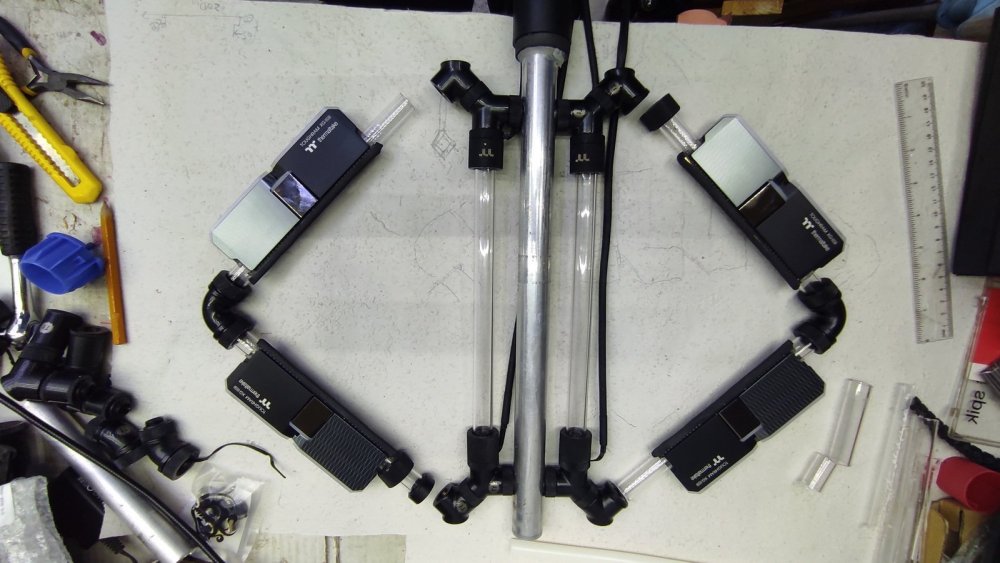
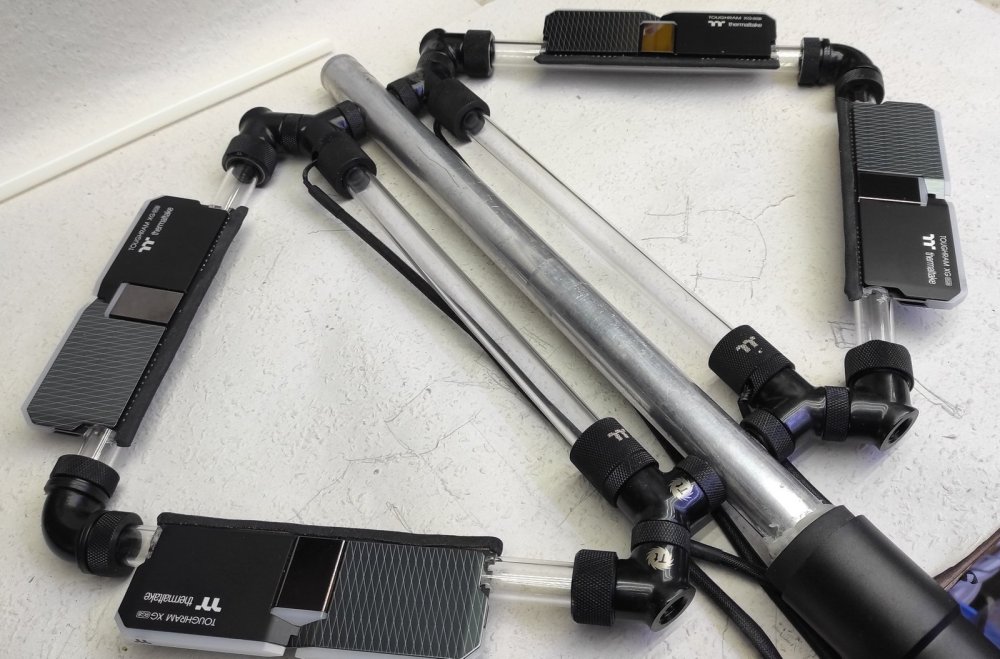
At he first assembly, the structure itself was not stable enough, so I had to modify the plans a bit. I put a metal tube in the middle as a structural brace. The planed layout with additional details. Measuring, marking, drilling, thread cutting, repeat... For free hand drilling it came out surprisingly straight and square. Just a RAMdom picture... First assembly with modified stiffening. Looks fine on the desk... ... and now it can withstand its own weight. There is a lot to sustain, because with the extra metal bar (plus the all the middle pieces), the whole thing has become heavier than I planned. It is true that it is more stable and it holds its shape. It is already heavy... As the pictures the images are moved and blurred from the movement. But at least there is progress. Check back later for more more updates.


-
[Hungary] Balazs Szabo
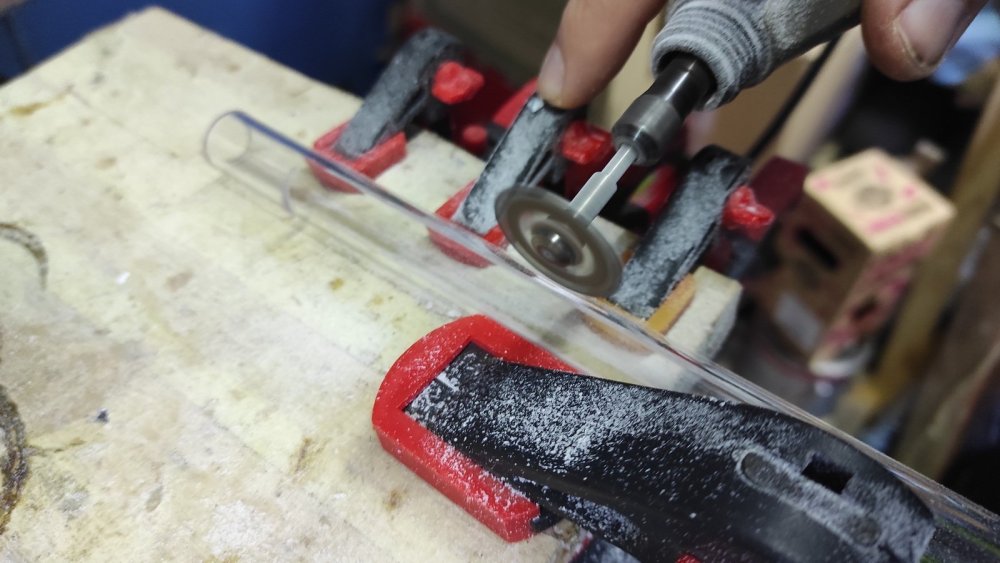
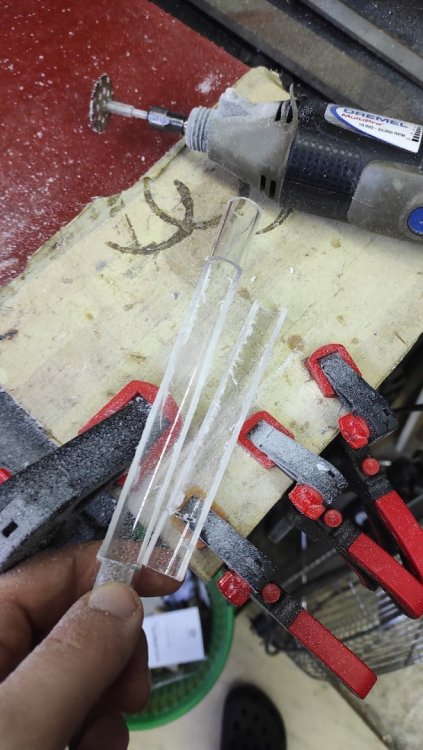
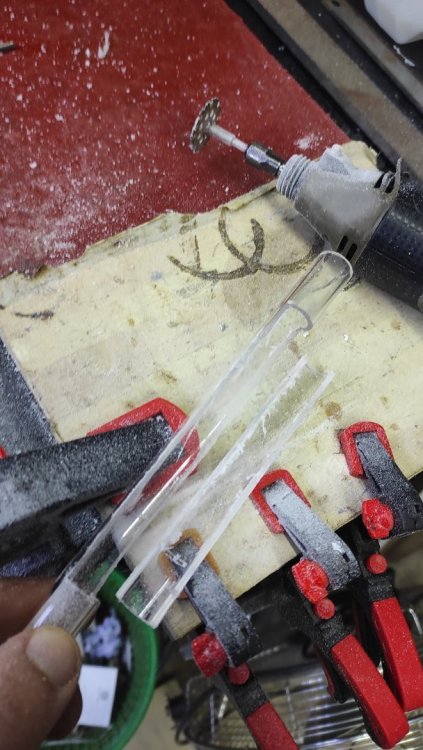
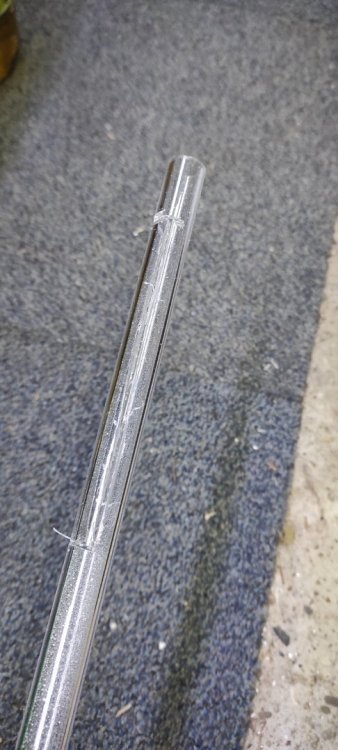
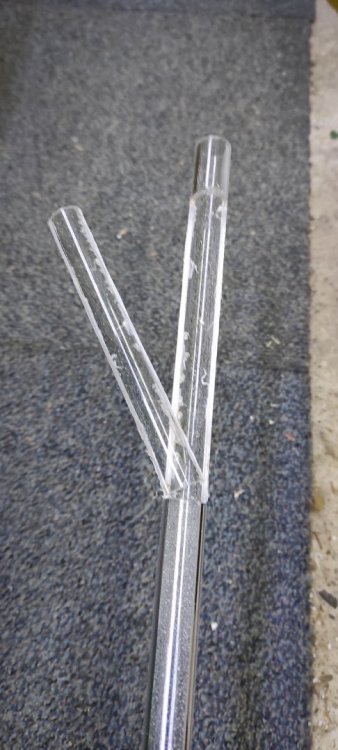
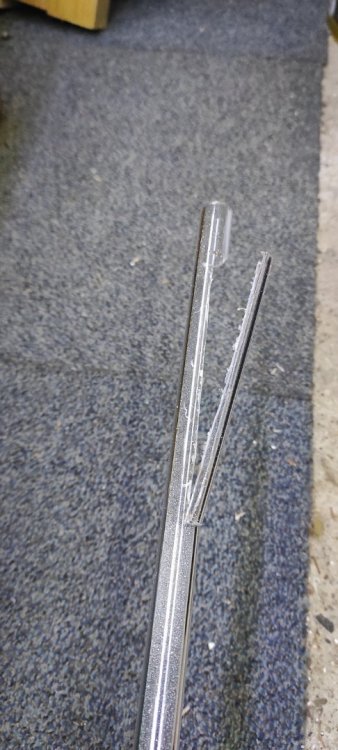
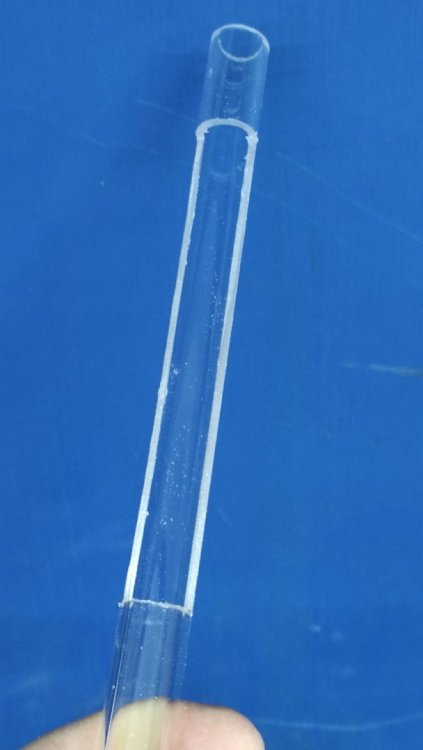
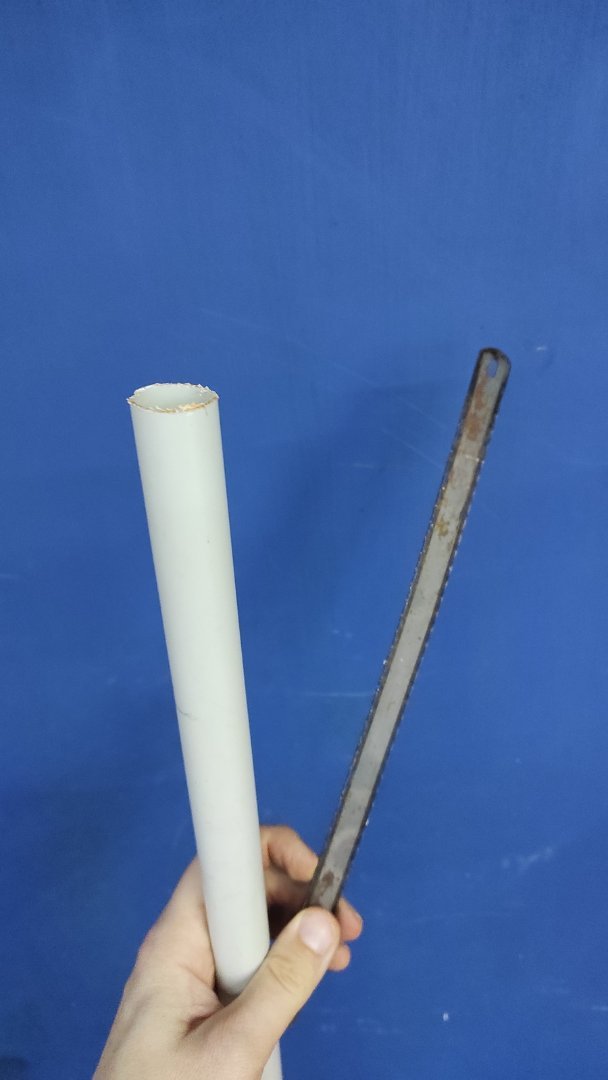
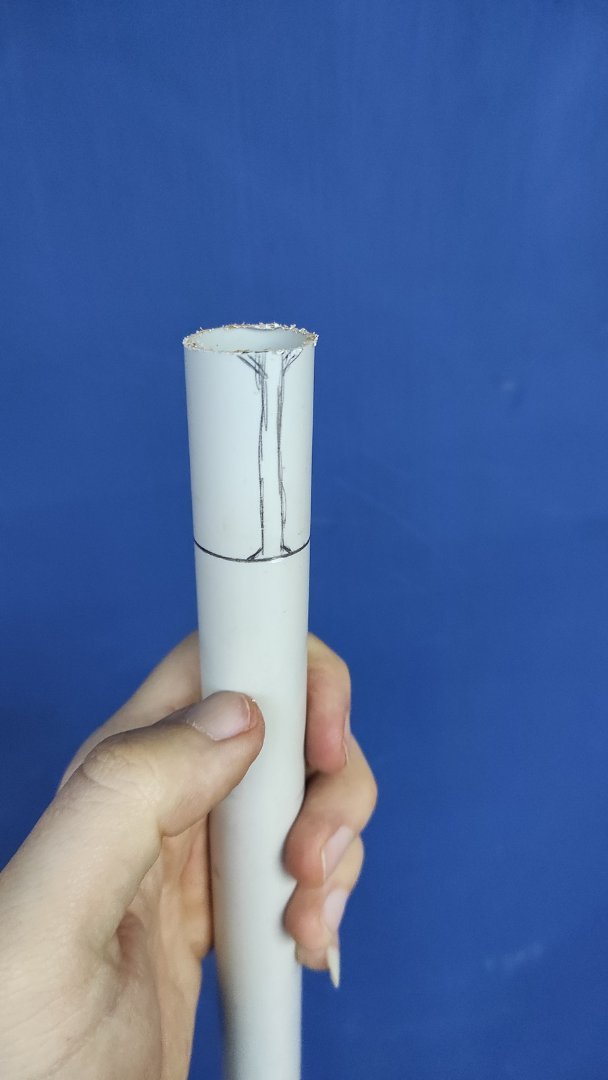
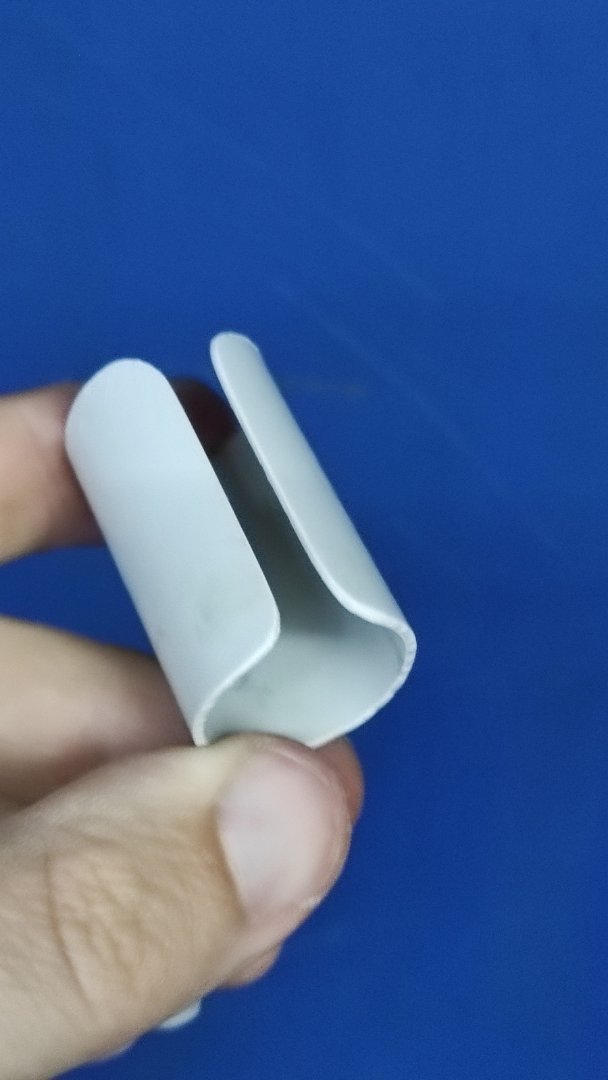
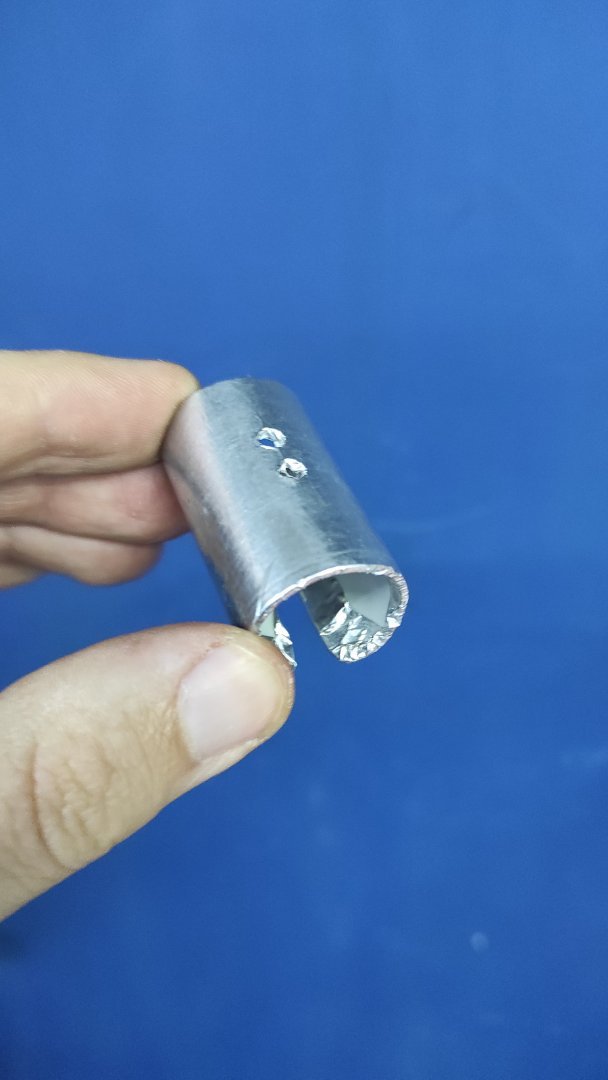
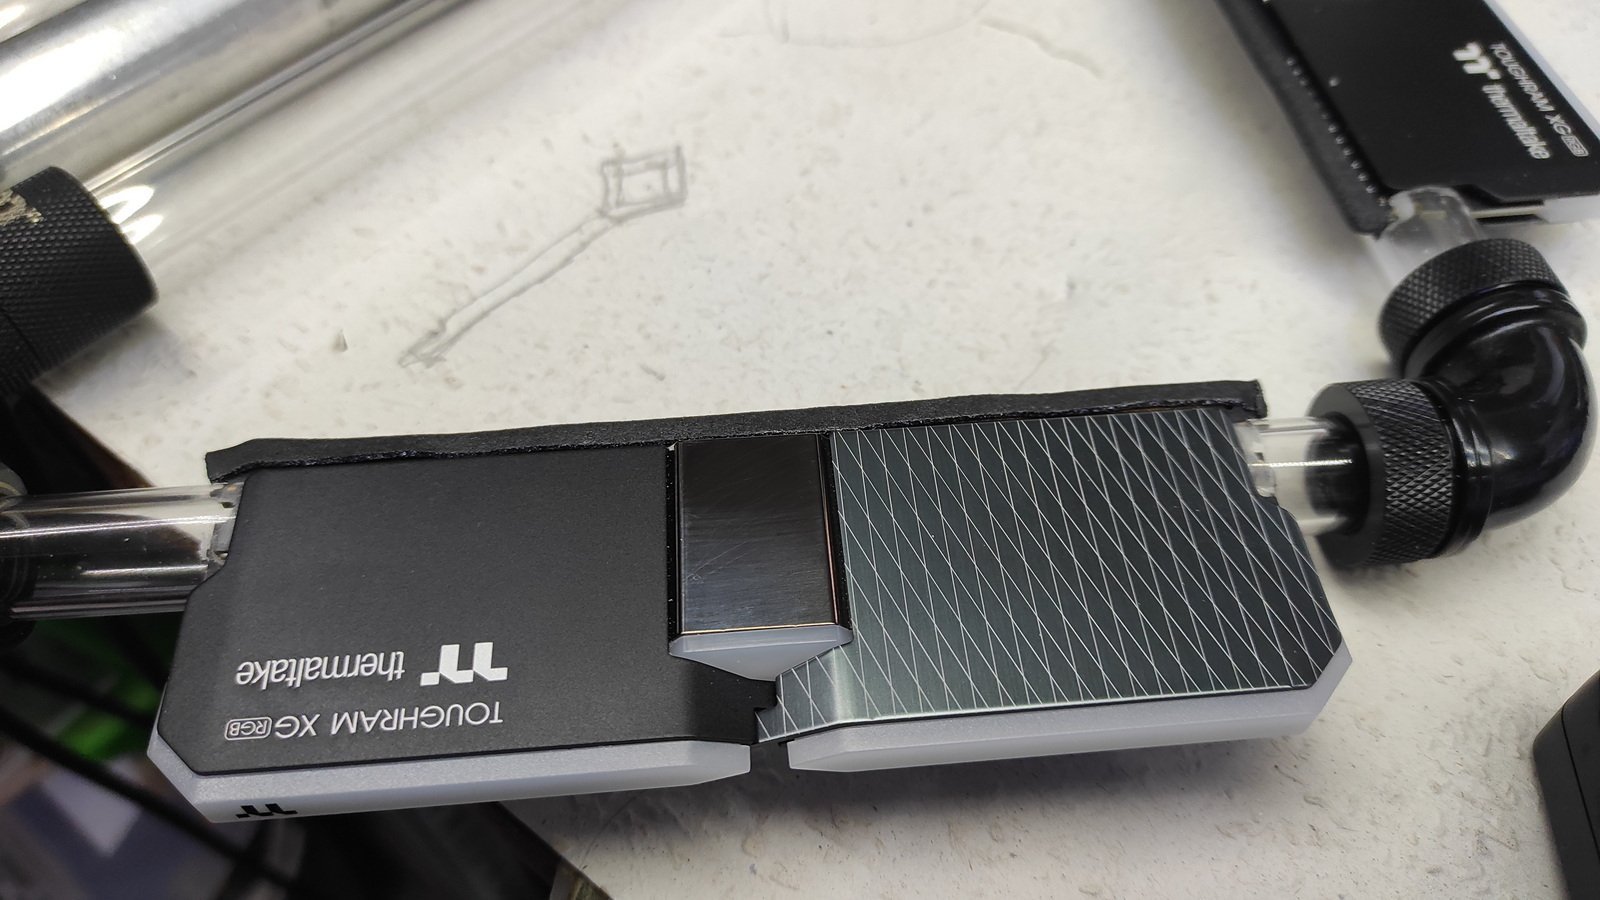
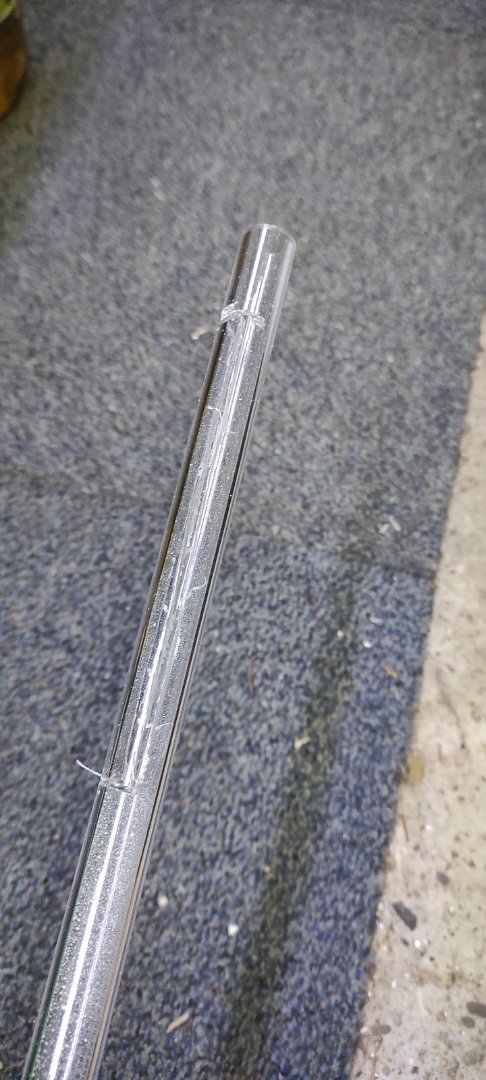
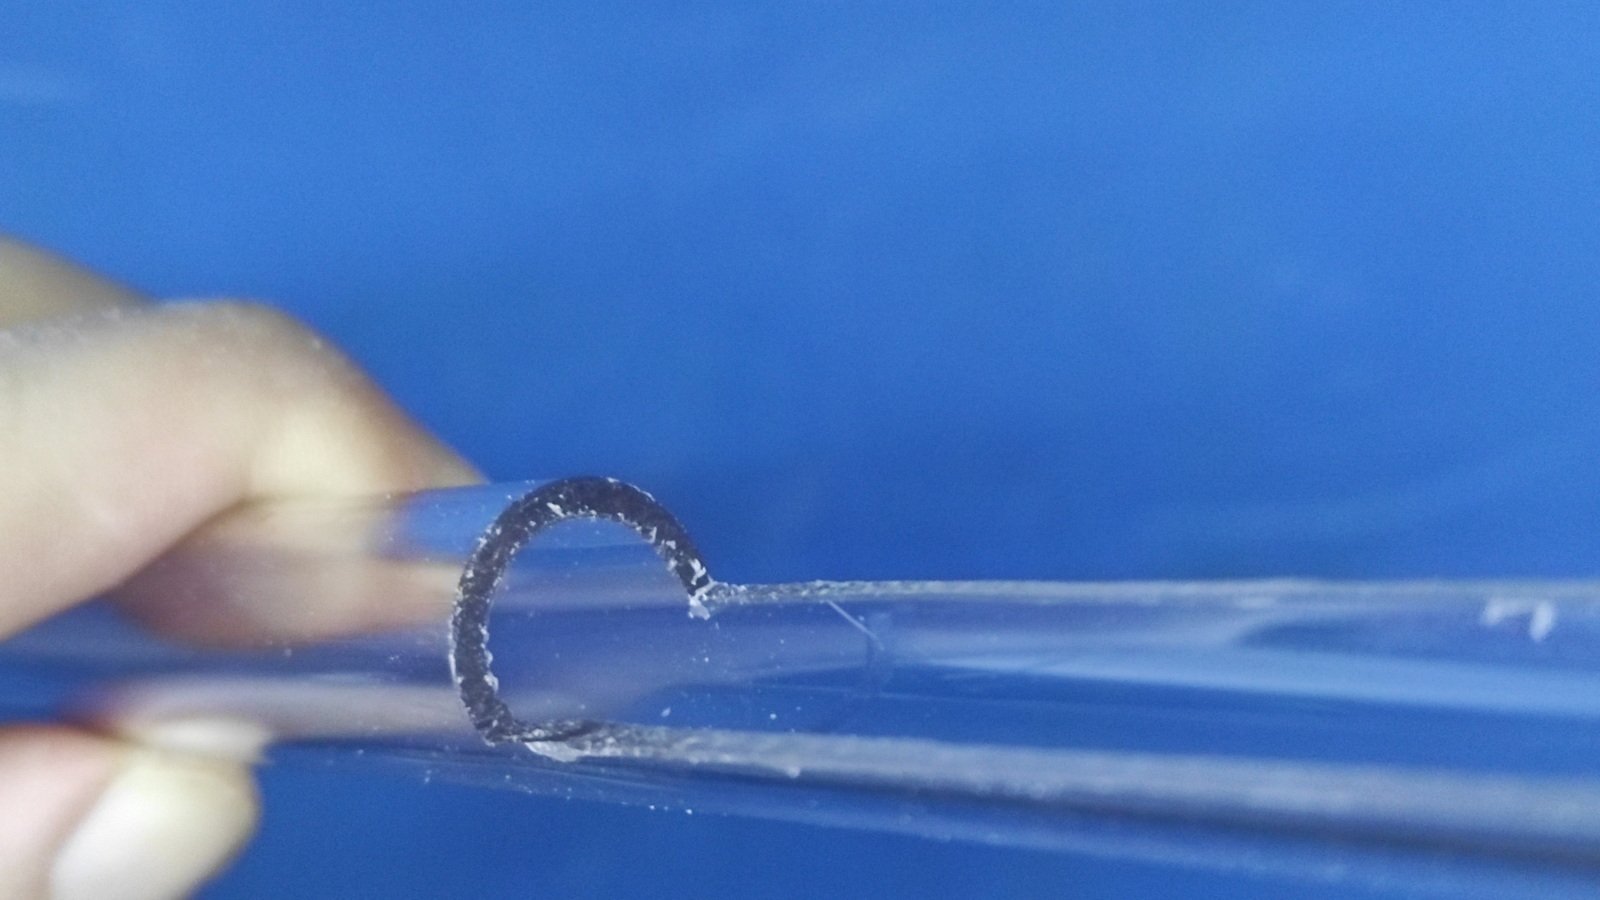
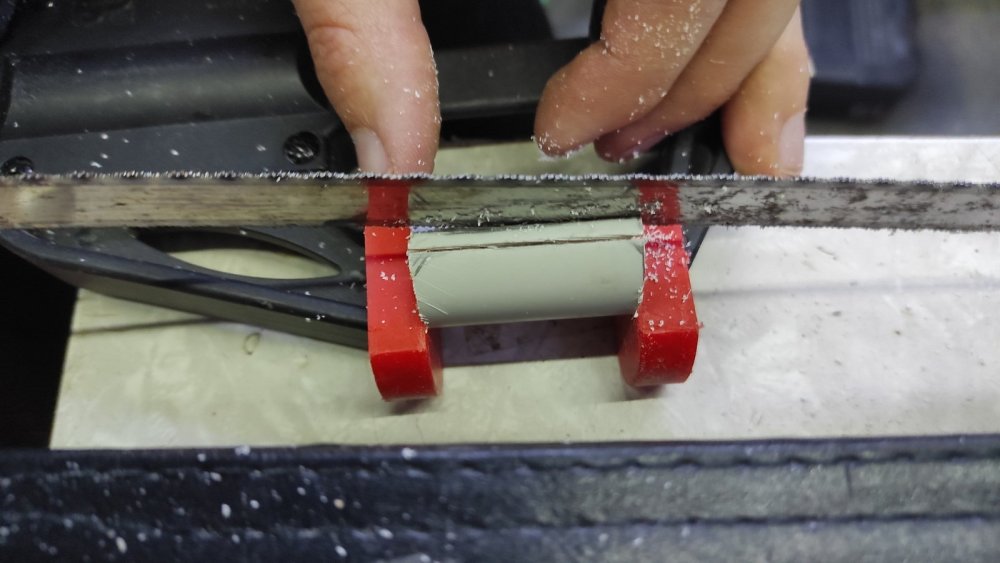
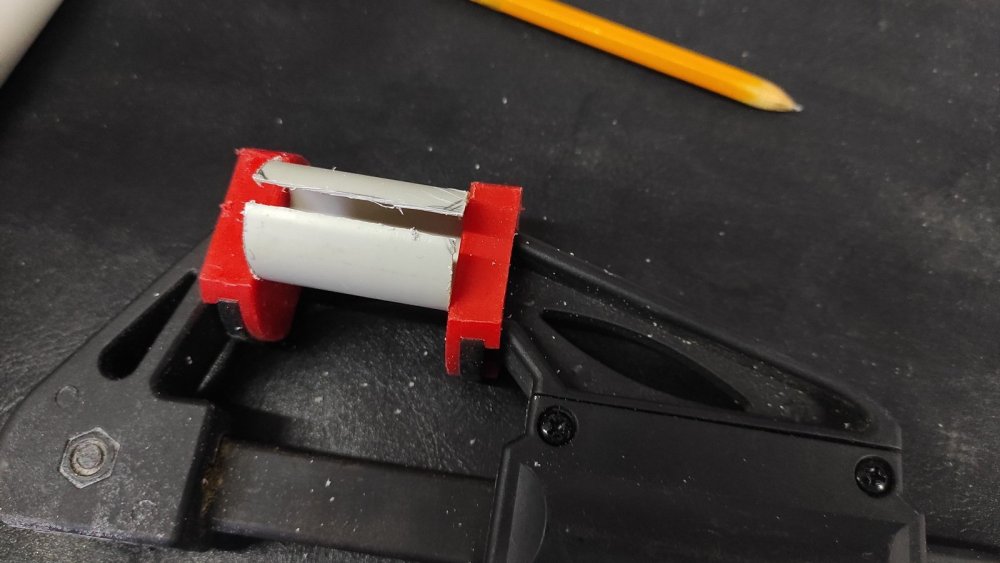
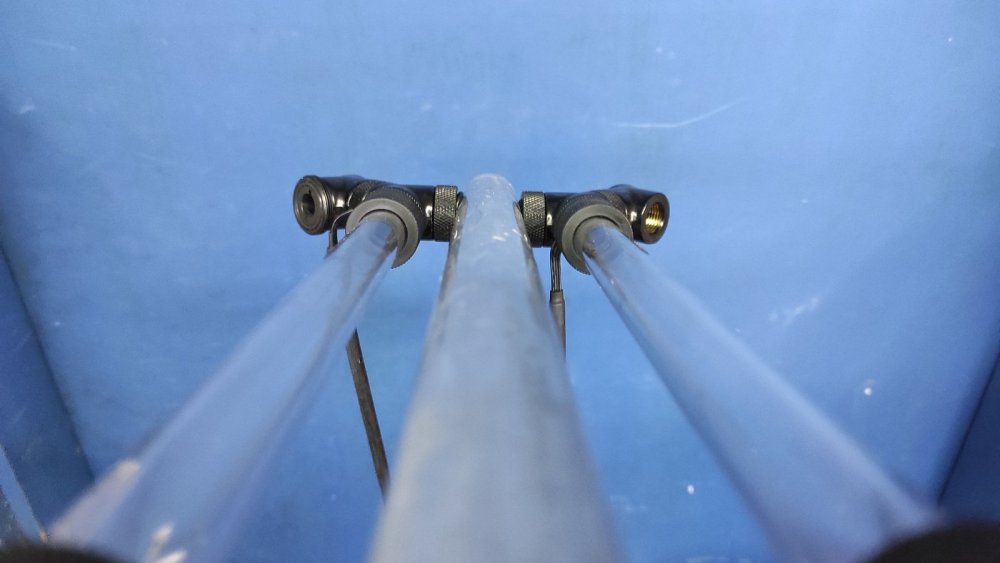
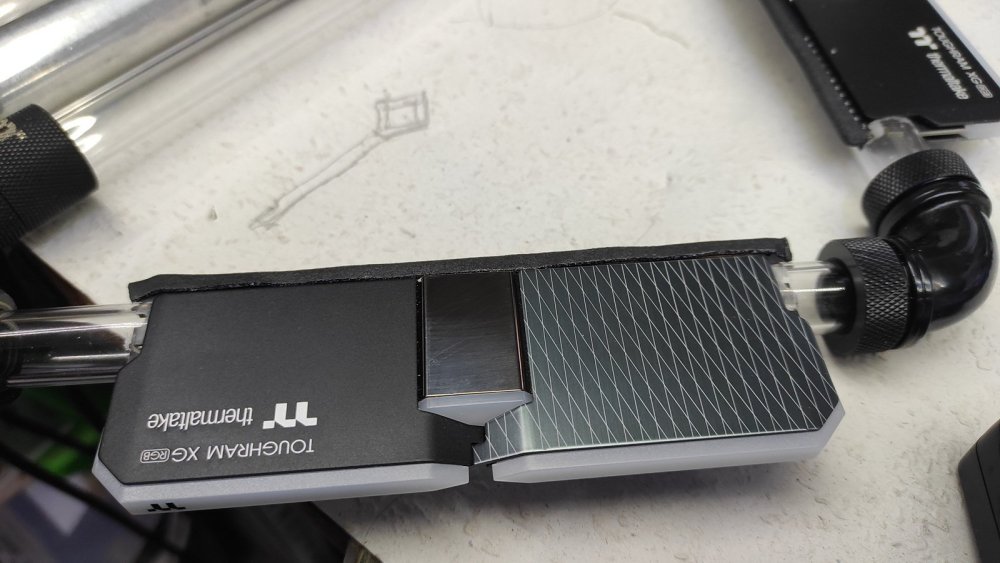
BaluCe replied to TT Lily's topic in 2022 Thermaltake RAM MOD Invitational Season 1
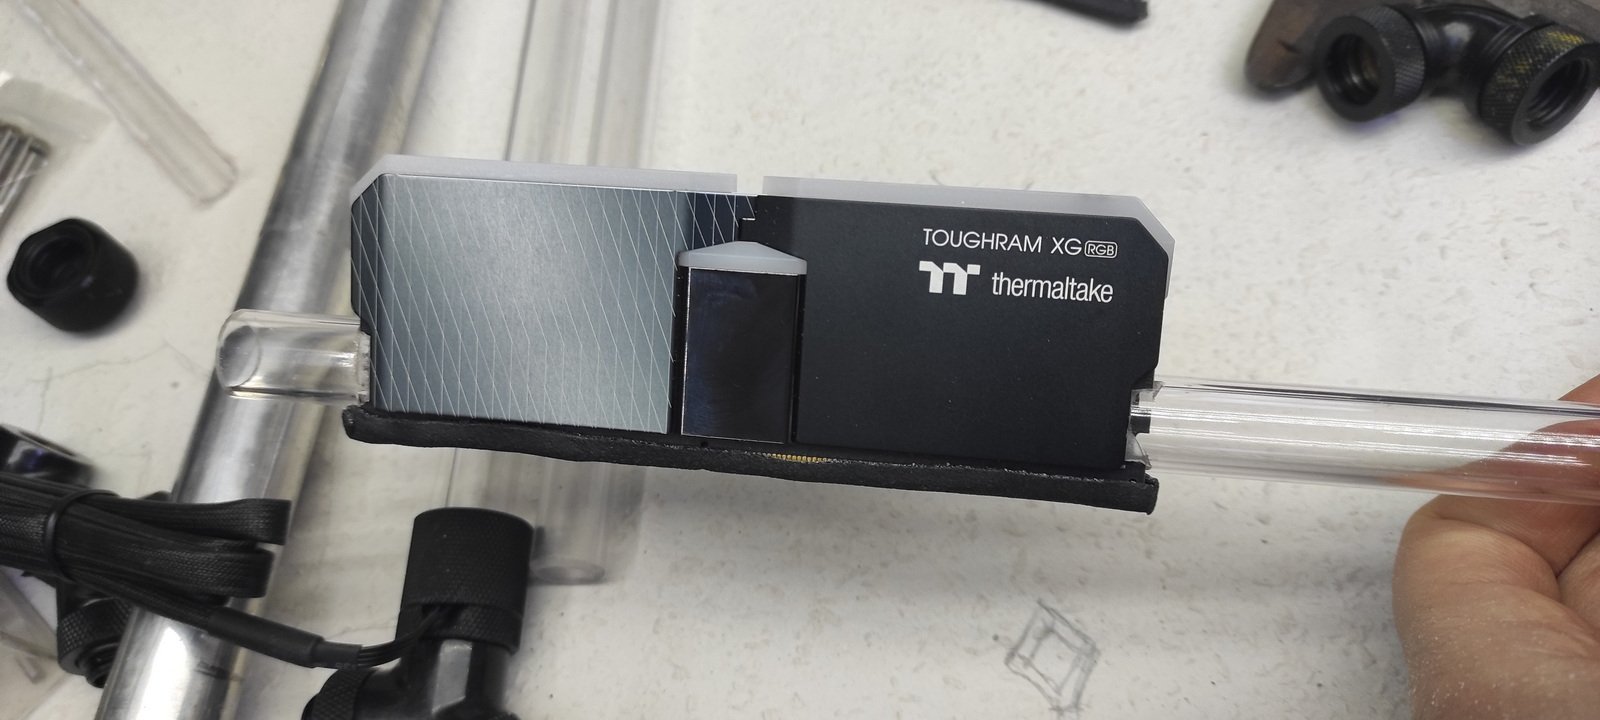
(sorry for bad pictures) It is very difficult to show a translucent thing in pictures. It’s even harder to present if you cut it and shape it. But I still try it. This Ad hoc setup ment to guide the cutting in a in a straight line. My hand / tool was fix and I moved the hardline tubes. Slow movement and patience was the key. There was only minimal difference from the straight line. Here are the steps again, shown on a different spot. After cutting, just a little repair was required with the help of a large file. After cleanup and burr removal I made two extra cuts on on the sides. Two tight cuts. The friction and tension holds the RAMs in place.