-
Forum Statistics
8k
Total Topics53k
Total Posts -
Member Statistics
136,342
Total Members16,800
Most Online
.jpg.f7310f8006b53af51901cdaf5d0ed902.jpg)
Pwnography6
-
Posts
11 -
Joined
-
Last visited
Content Type
Profiles
Forums
Downloads
Events
Gallery
Blogs
Posts posted by Pwnography6
-
-
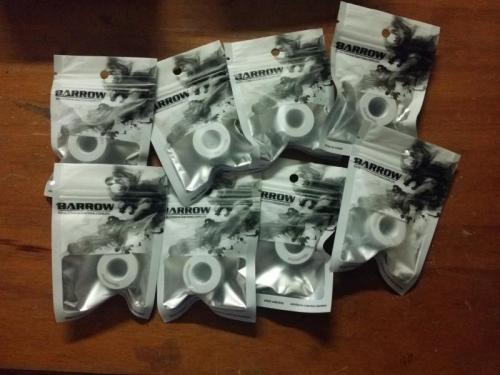
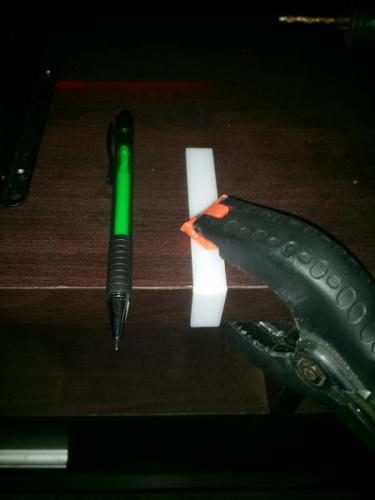
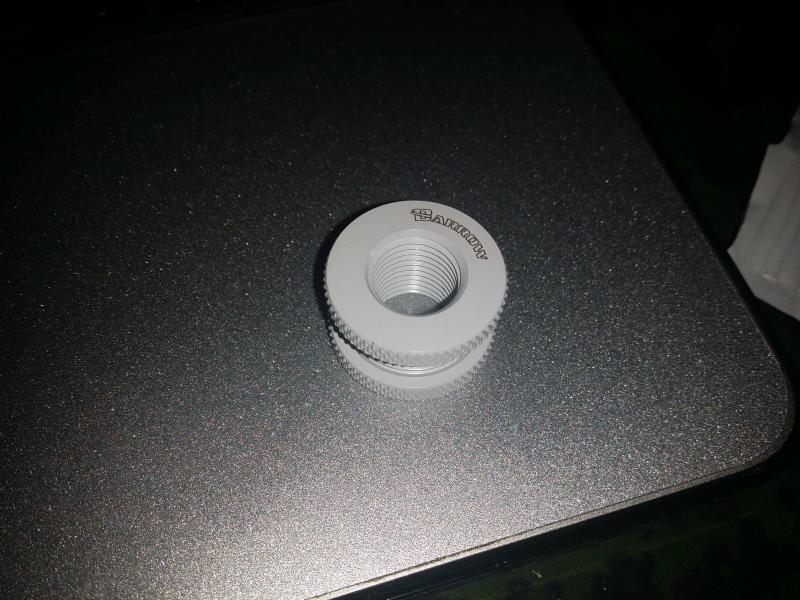
The Barrow bulkhead fittings also arrived today and I must say they are excellent quality. I was very surprised with the quality of both the packaging and fittings. The packaging is a thick little bag with Barrow graphics, which is nice as most fittings just come half wrapped in sponge paper. The Fittings themselves are a perfect white and feel very solid.

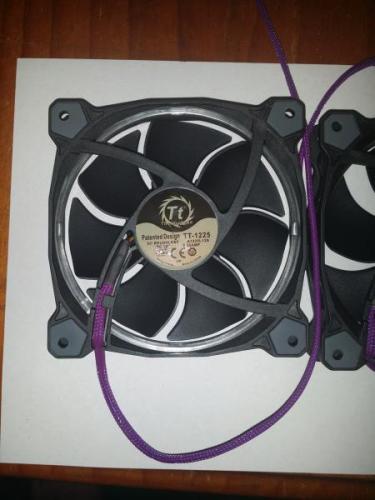
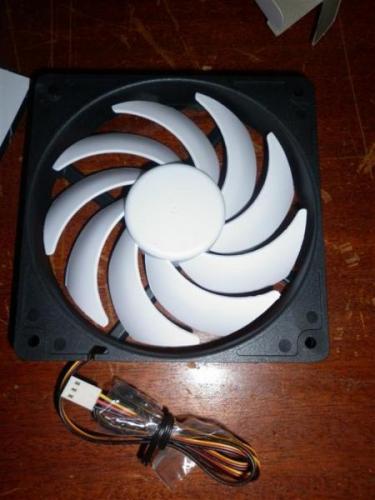
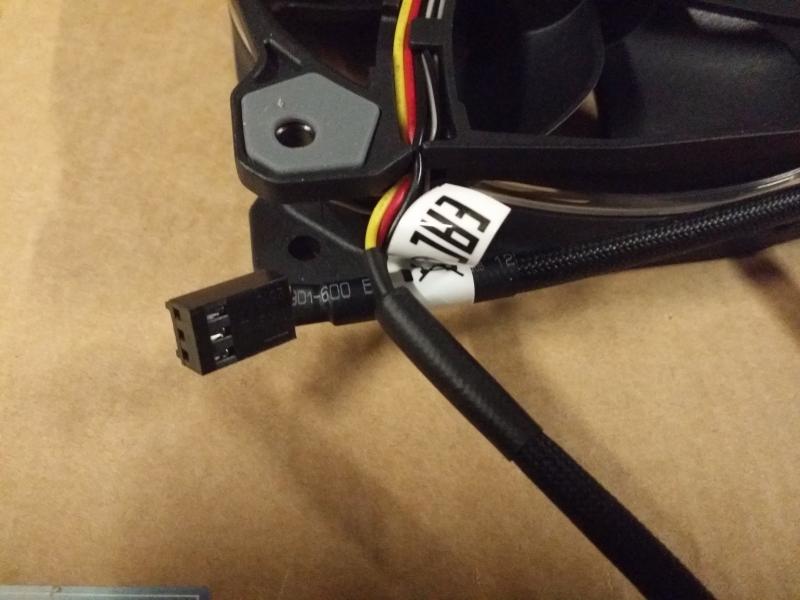
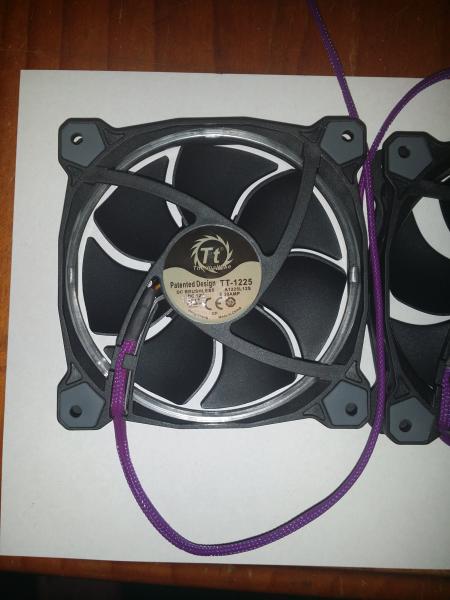
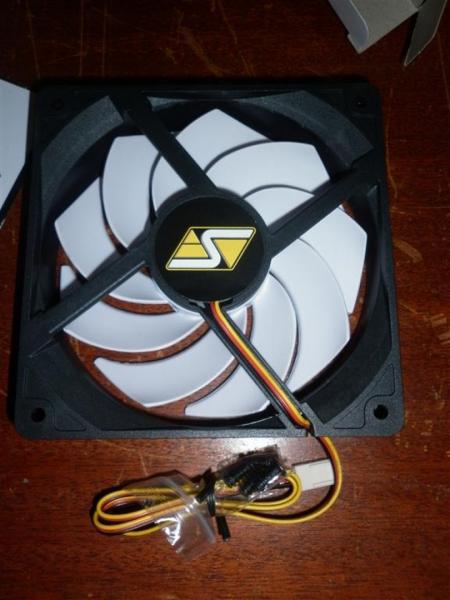
I also received the Thermaltake Riing 120 white LED fans today. Again, I want to give a massive shout out and thank you to the whole Thermaltake team for helping get this build finished!! Without you guys the front of this build would be looking very plain!!!
I don’t know where to start with these fans, they are just sweet. After years of using fairly basic fan setups except maybe my Enermax Vegas trios way back when, I was blown away at the changes that have been implemented into a simple computer fan.
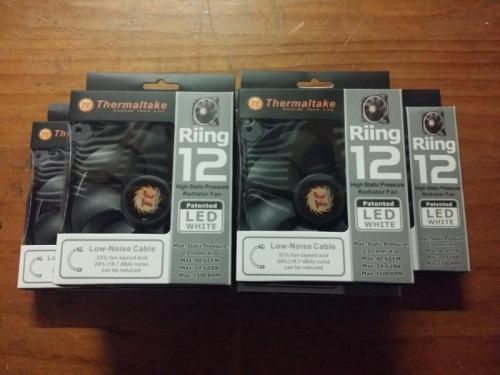
The Tt Riings come standard with a set of 4x radiator and 4x case mounting screws and also include a “Silencer†cable for dropping the fans Decibels from 24.6 down to 18.6dBA. The Riing 120s also come standard with a 3-Pin fan to 4-Pin molex plug adapter and built in corner fan silencing grommets.

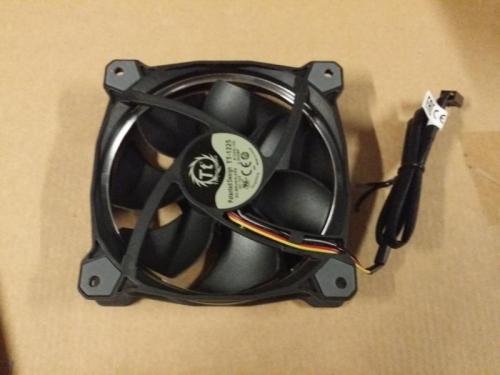
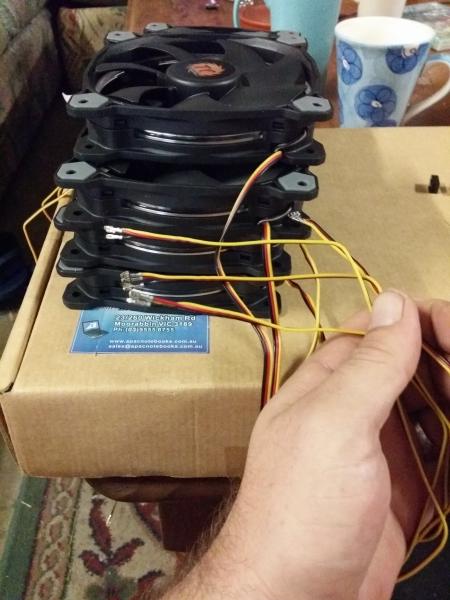
The standard sleeve on these fans was also very unique. Instead of the standard loose braid PET sleeving these had a thick vinyl sleeve with a weaved appearance. This sleeve is a little big for the cables inside, BUT on the plus side they do hold their round shape perfectly. I actually liked the stock sleeve a lot and if my OCD allowed it would have left them stock.

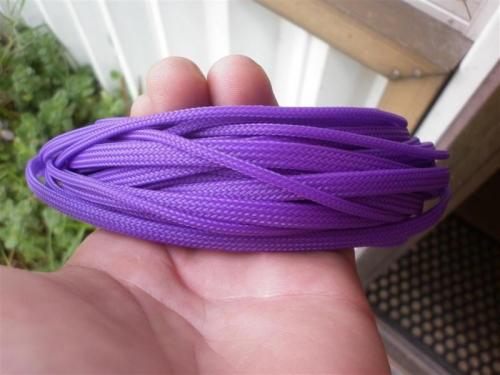
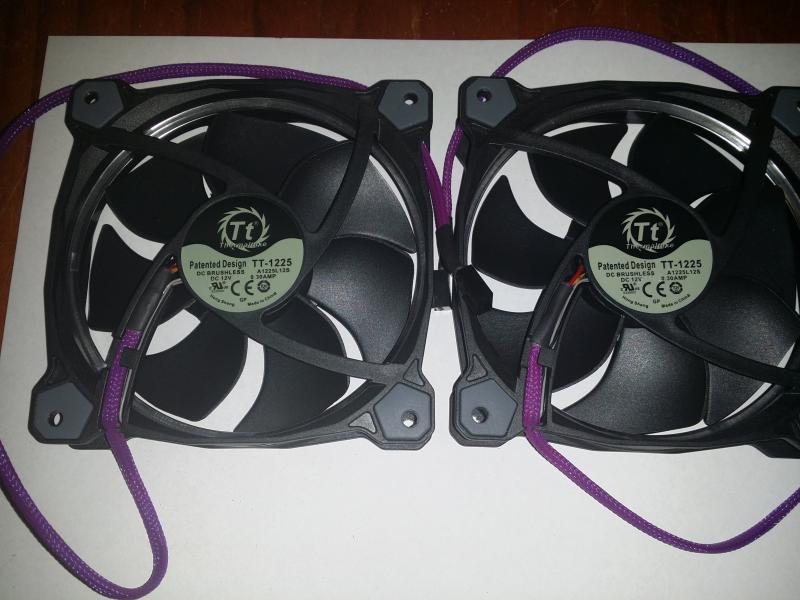
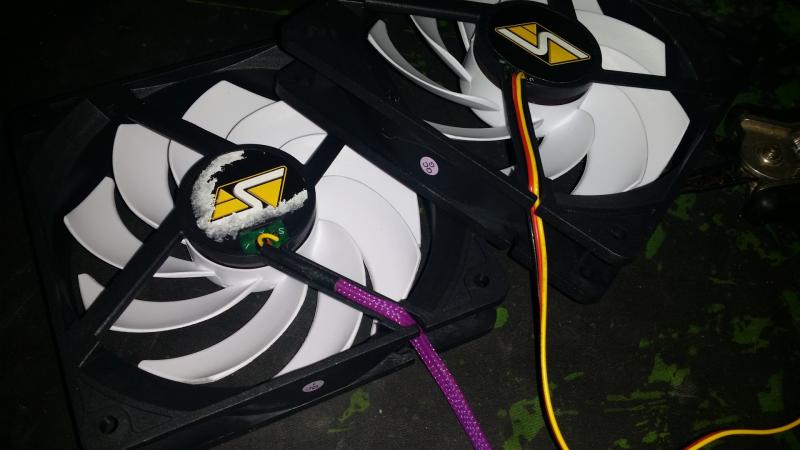
So time to strip these naughty fans down and give them some fresh purple sleeve.

Done and done and looking sexy.

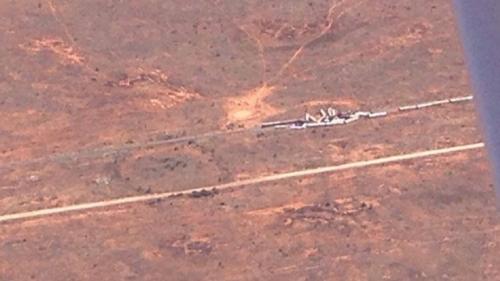
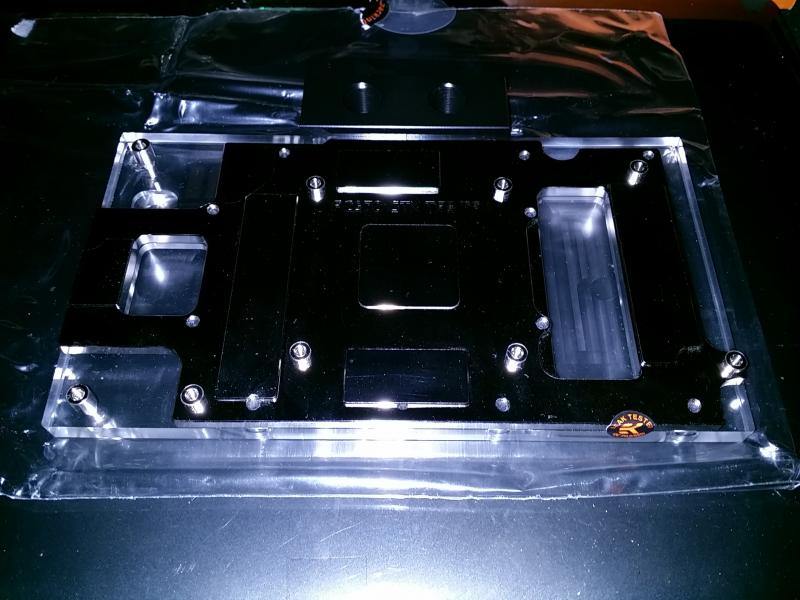
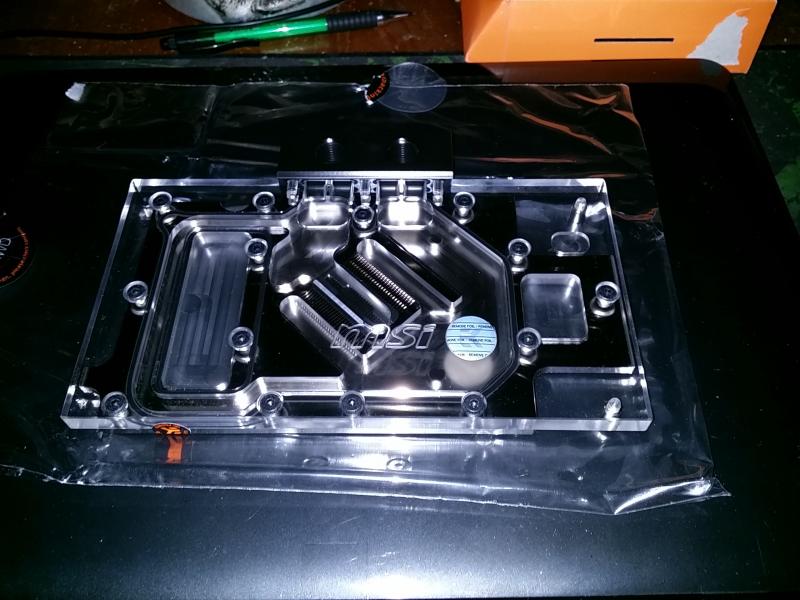
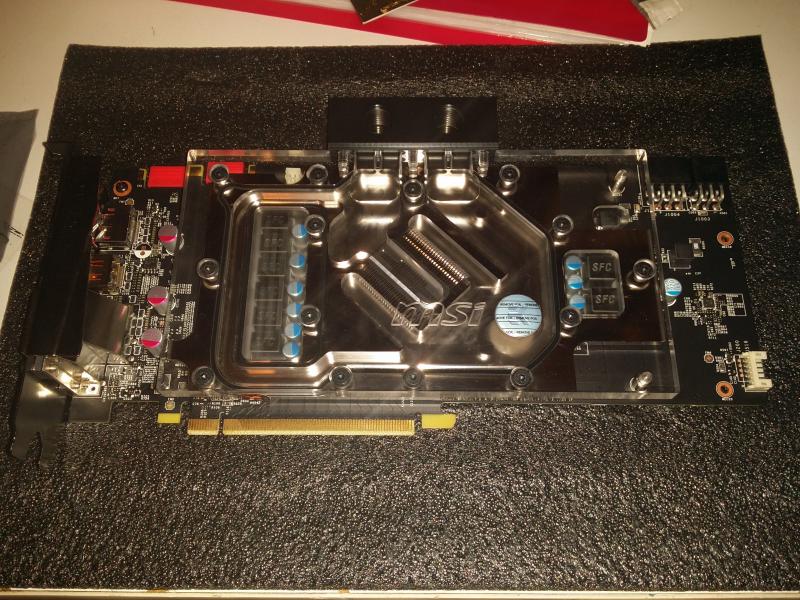
More good news and progress, my block arrived!!!! It was finally scraped of the floor of the desert and made it to my door undamaged.

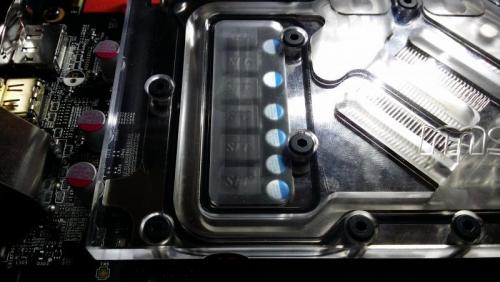
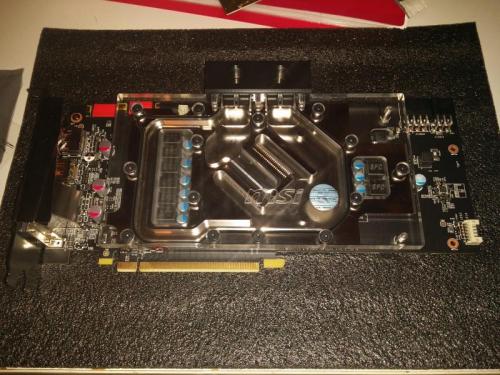
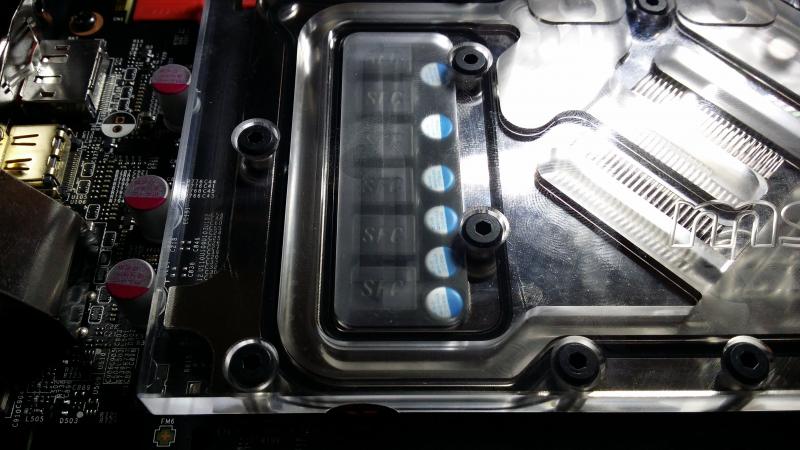
So I got her mounted up to the MSI GTX 970. I love the look of this block but am a little disappointed with the “Caps†windows as the machine marks have left it pretty cloudy looking.
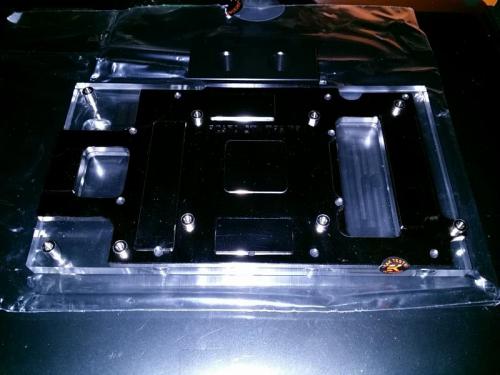

I know my OCD will get the better of me and I will have to remove the block and polish out these machine Marks at some stage.
In other news I have decided that the Frozen Q Helix reservoir does not fit this build so now I am going to have to grab another plain Tube res. I really like the new Monsoon Modulars But they aren’t available in Oz and the price to get one from the States is around $170 so way out of budget. I will most probably just grab a stock Barrow tube res and mod it I think.
So at this point I have limited stuff left to buy. I need a new Tube Res, Dual DDC Pump Top, 2x 140 Fans and a Bunch of Hardline Fittings and Tube. So the home straight for buying parts is definitely in sight. Then just a bunch of Fun modding to take care off!!
I can’t wait.
Thanks everyone for reading and hopefully I can wrap this thing up fairly quickly from here on out.
-
Update #5
I had that last post keyed up for a while but never got around to posting so this is going to flow straight up and cover a good chunk of the last whiles work.
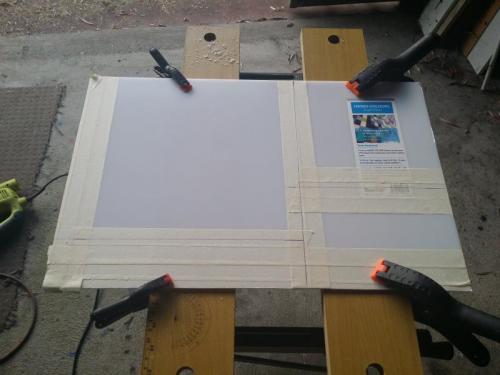
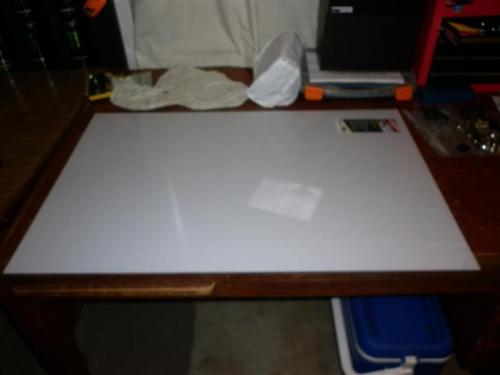
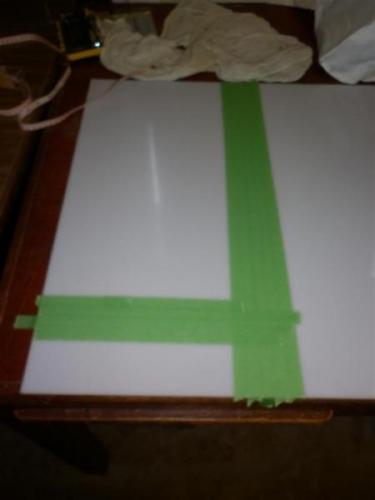
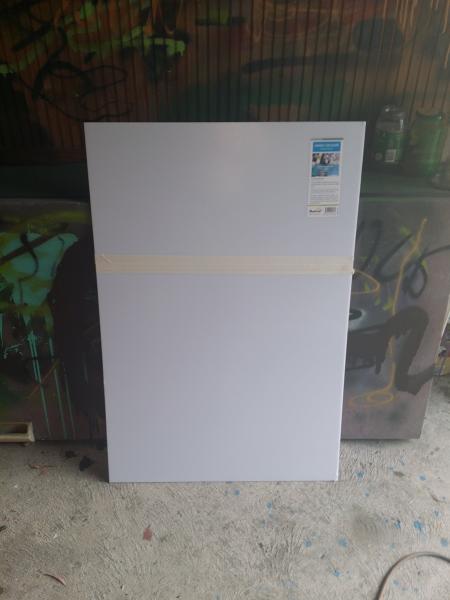
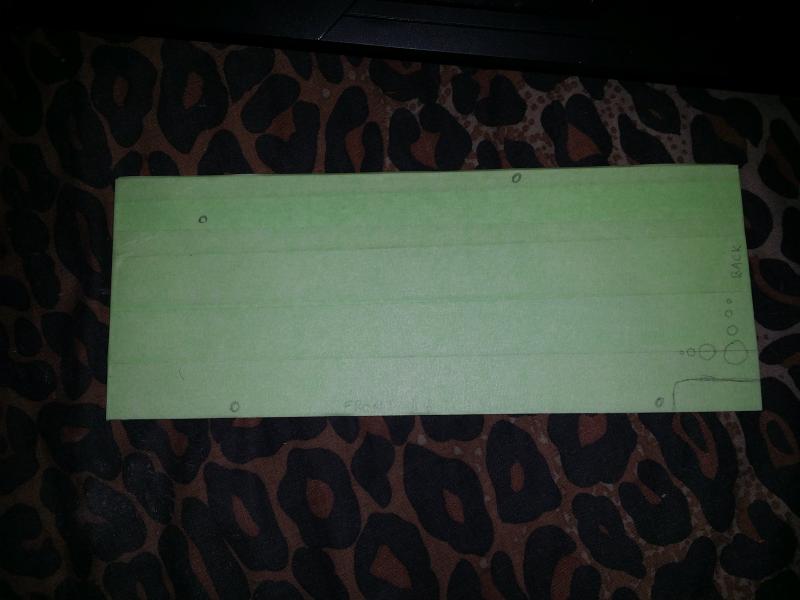
The mod gods where shining over Christmas and I got a lot of bits and pieces and Gift Cards which allowed me to buy more bits and pieces. So Boxing Day I was straight out to the hardware store to pick-up another sheet of the semi-opaque
Acrylic sheet. Thankfully this sheet â€should†nearly do what I need to do.

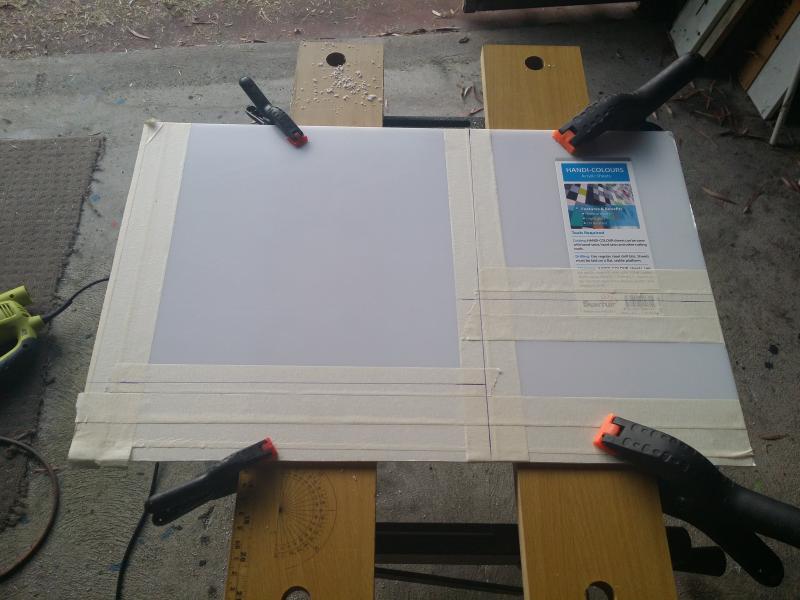
Hopefully the offcuts of both sheets will cover the rest of the smaller Fabrication that needs to be done, because I really can’t afford more acrylic.
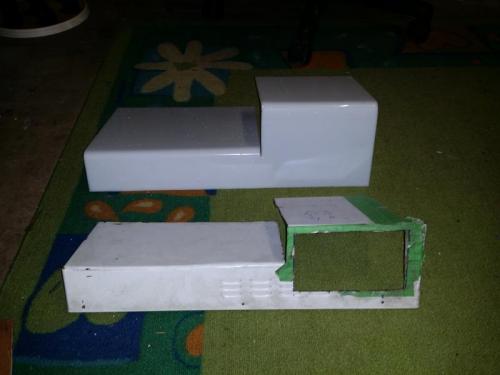
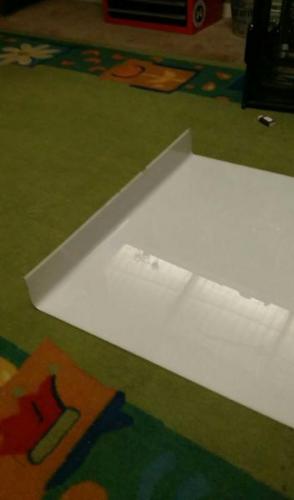
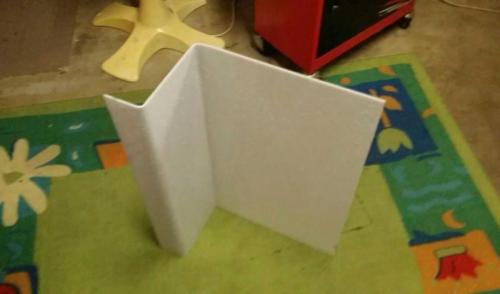
Anyways with acrylic bought I quickly got down to remaking the prototype shroud cover from the previous post. I made this one a bit larger as I have decided to stealth the end caps on the Reservoir on this side also. Please keep in mind that this is NOT mounted in properly as I am still changing these shrouds like the impossible puzzle they are. As they are not mounted properly they also look very warped however the final mount should straighten this all out.


I also had to make the rear panel for the…uh..Rear partition. (Case has to many hidey-holes).

I had a largish offcut so thought I would try and get it to cover the rear of the Danger Den Bay res and Aquaero. Once I added the bend to mount it onto the side of the 5.25 bay mounts it was around an inch short. Oh well I am blaming it on Geiger.

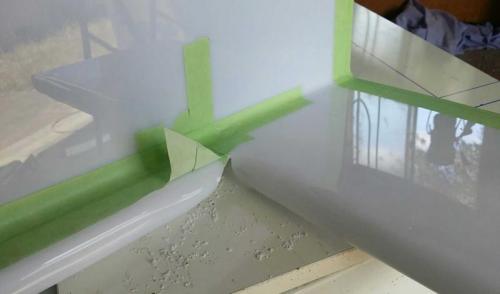
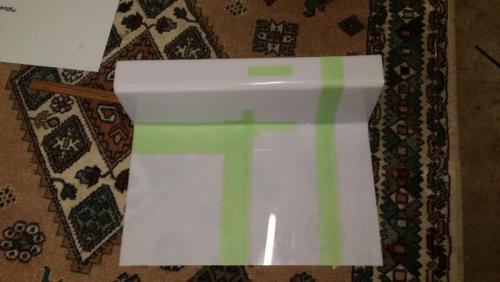
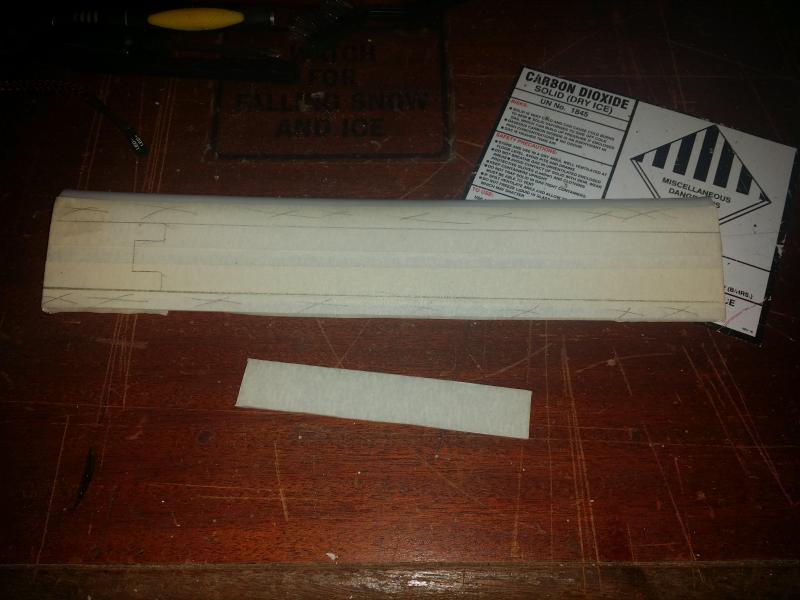
I also am mucking around with a few random custom acrylic pieces but as everything is being made by hand it’s taking me a little longer to sand and file these down to a perfect shape and finish.
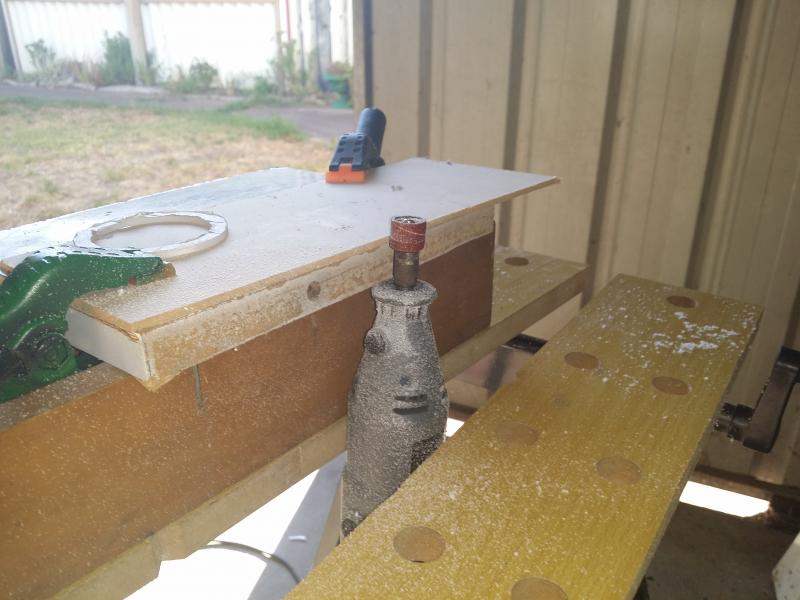
It turned out I needed a Router at one point so I just flipped the Rotary tool over clamped it in to the cutting bench and with a sanding wheel, off I went.


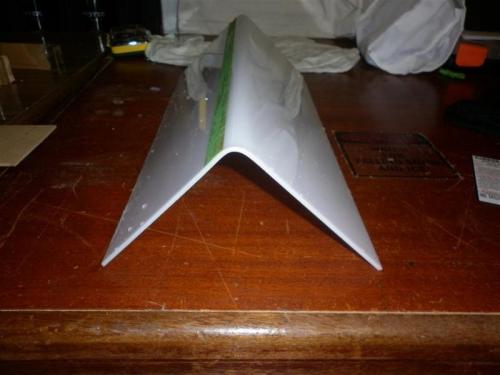
Reservoir Anti-Cyclone is very far from finished at this point.
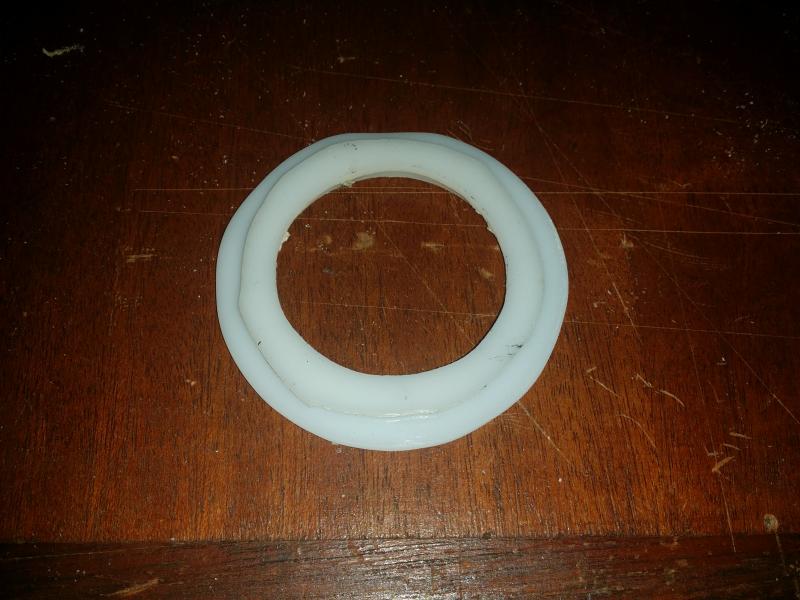
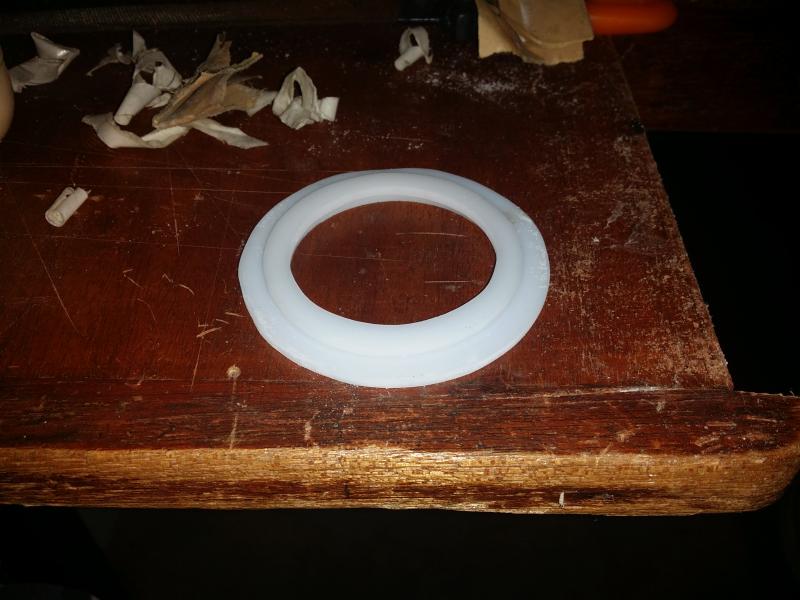
These will be a couple small show Reservoir pass through highlights if I ever manage to get them round enough. (Honestly by hand…. Dumb idea.)
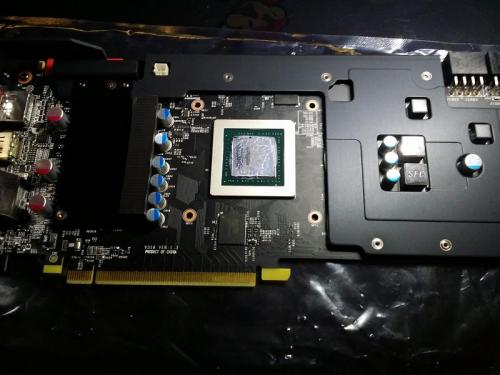
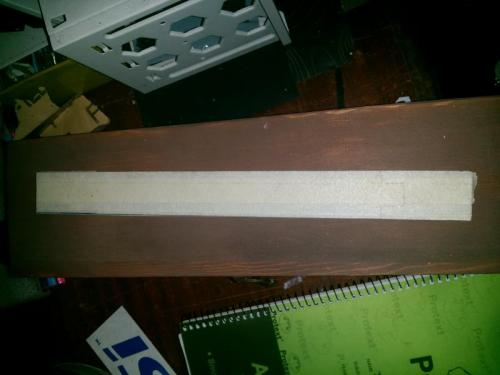
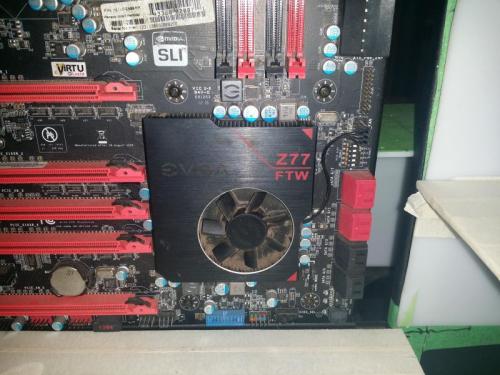
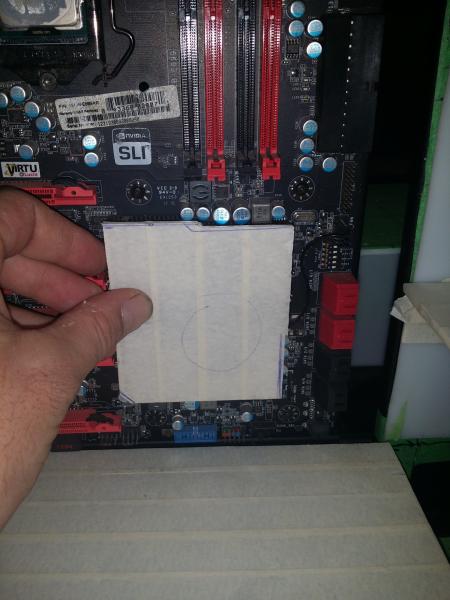
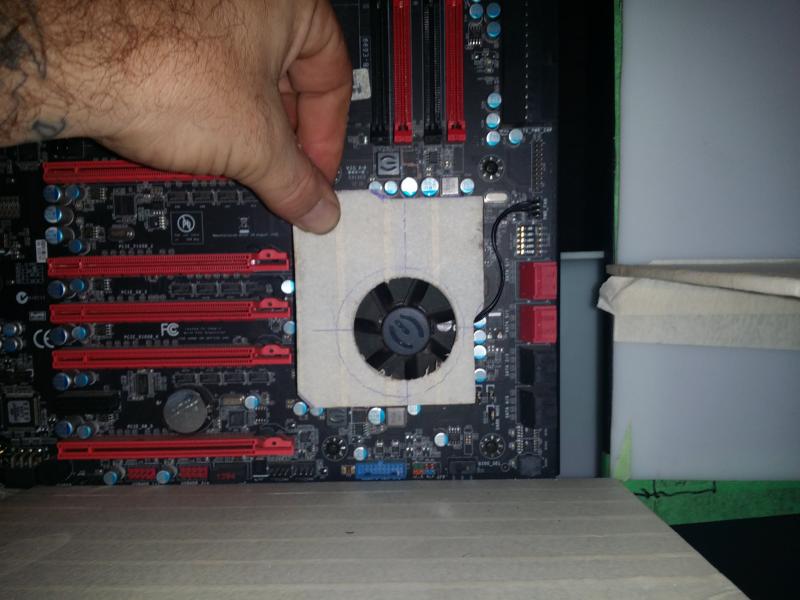
At some point during the 10,000 test fits I decided that the motherboard needed a splash of white so I started a quick South Bridge cover out of a scrap piece of acrylic. Not sure if this will make it on the finished build but its an idea I’m throwing around. Excuse the dusty board I have PCB cleaner inbound.


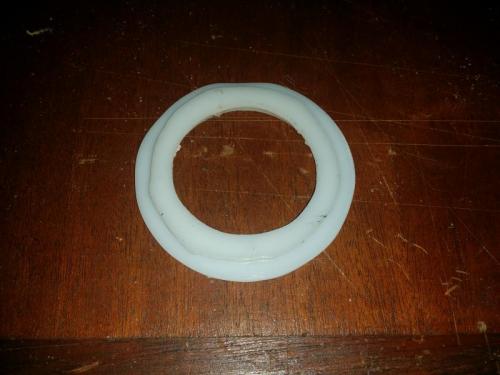
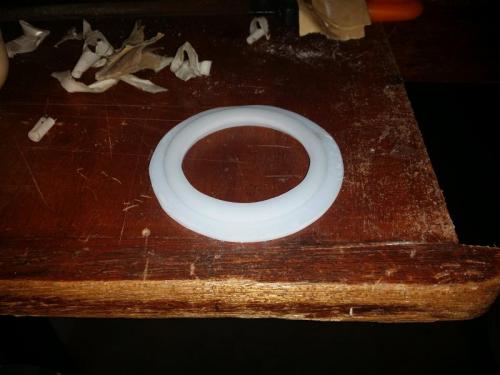
And finally the worlds smallest bend. This fits over the center of the EK spin bay res, however I am not positive if I will use it yet.

-
Update #4
OK So I have a load of updates on the padded cell build so lets get right to it.

First off I would like to give a HUGE shout out to Thermaltake, who have given me the chance to try out some of their awesome Tt Riing 120 Fans (In white of coarse!!) I was really stuck on front case fans and Thermaltake have definitely helped me out a bunch. So big props to the whole Tt family, you don’t know how much I appreciate this!!!!
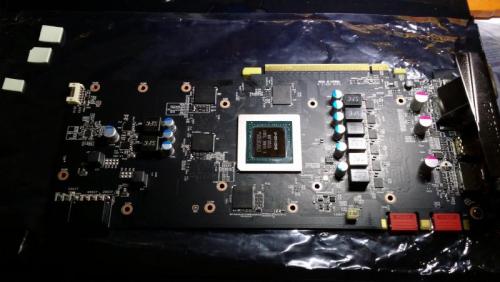
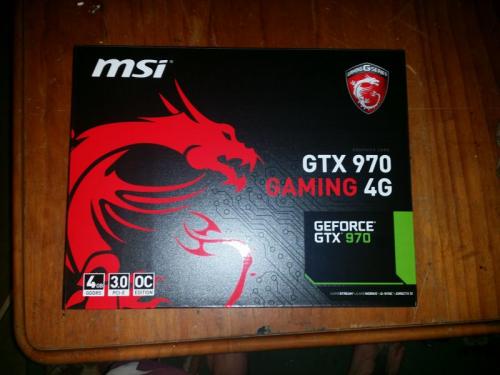
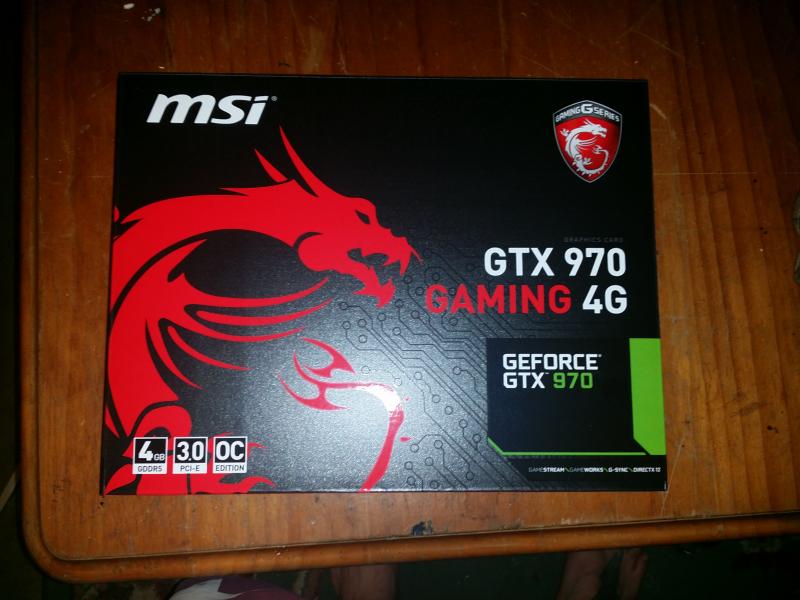
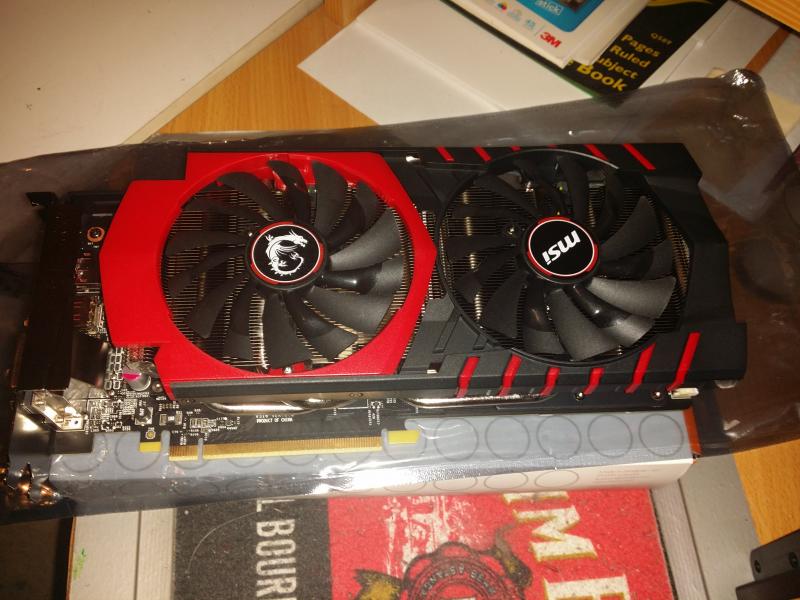
I finally managed to get myself a new Graphics card, a nice new MSI GTX 970 Gaming 4g. Yay, not much of an upgrade but it makes me super happy.
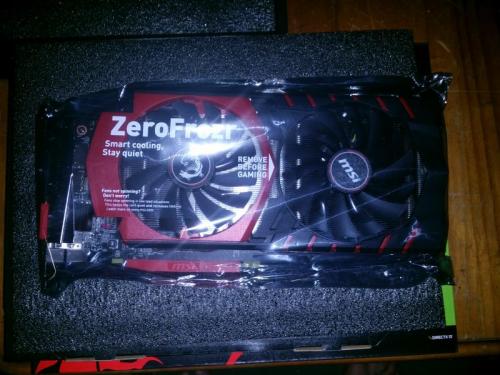

I also grabbed a block for her. This in itself was a huge ordeal. The block was posted on the 1st but unfortunately the train it was crossing the country on had a major delay after it was derailed in the middle of the friggin Australian Desert!! From what I have read no one was hurt as the Train itself didn’t tip over but a number of freight carriages did.
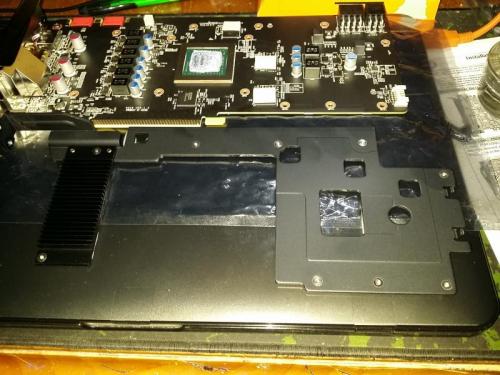
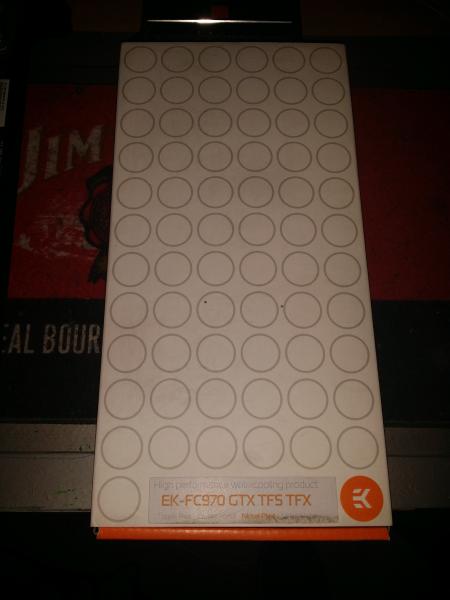
Although the EK Nickel backplates are really nice they wouldn’t really fit with the theme so I started working on a custom acrylic Backplate for the 970. SO far I have it cut to size and not much else, as I need to mount the block before I can mark out the backplate for mounting holes.

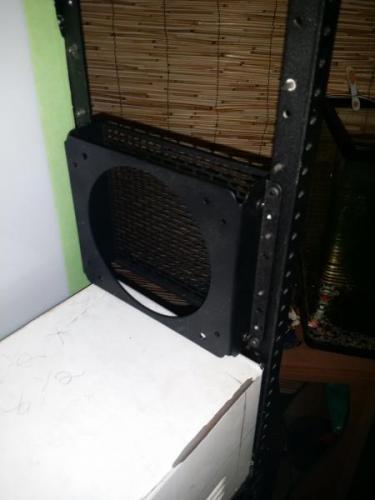
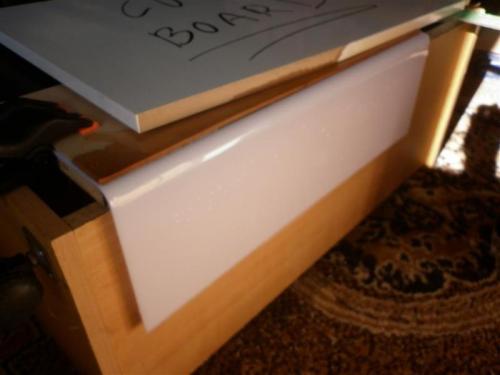
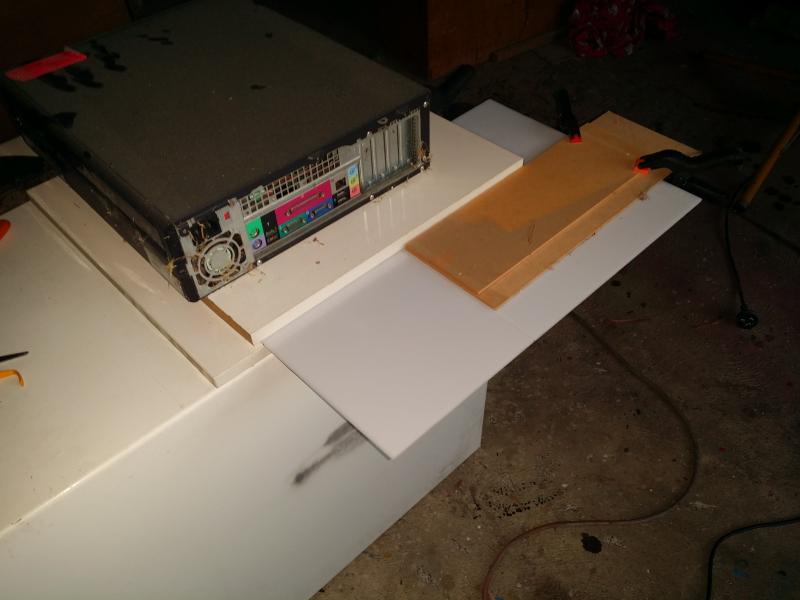
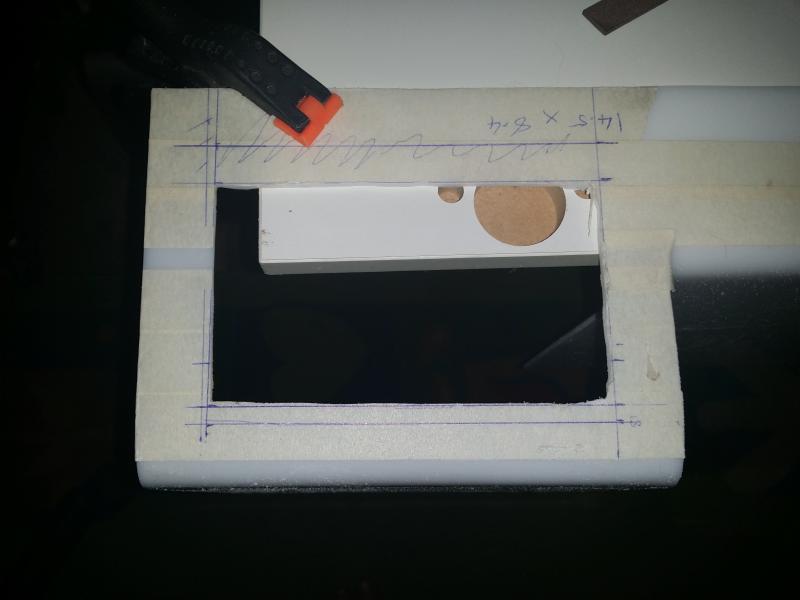
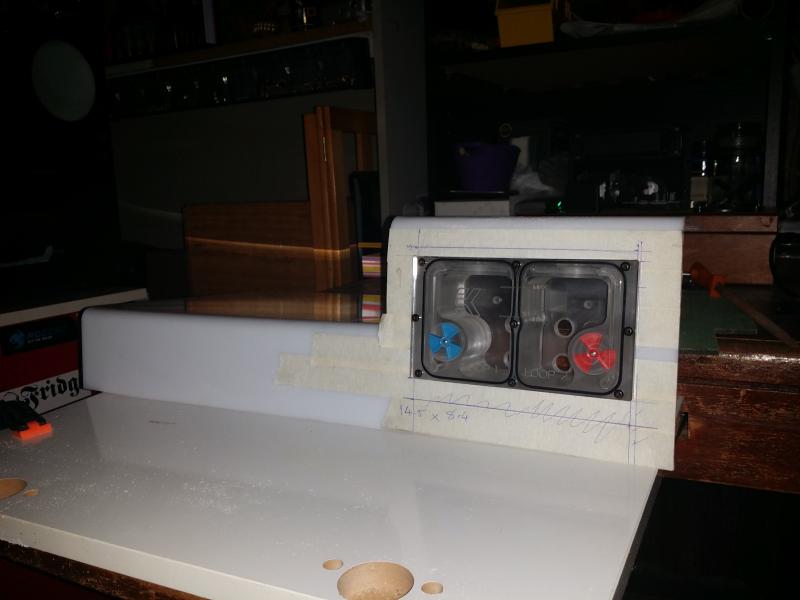
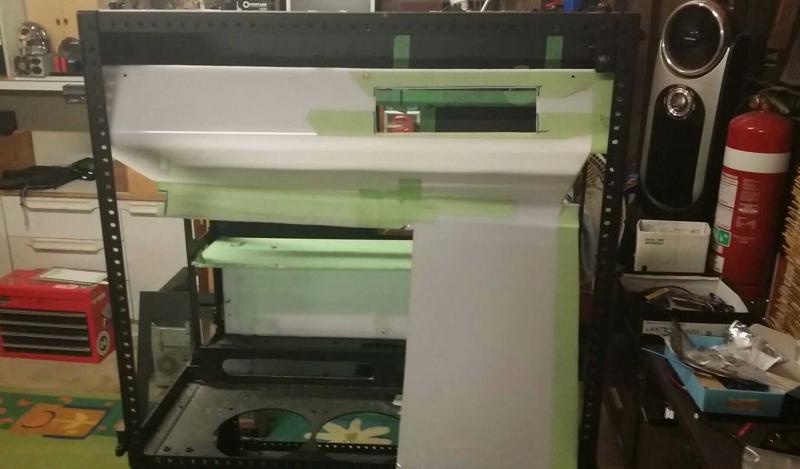
I finally got around to starting the main side shrouds and inlay. Because I am using a thick Alphacool rad I can only just fit the radiator and slim exhaust fans under the roof. This means I am going to have the intake fans in the motherboard compartment of the case. For some reason I hate this idea so I bent a shroud up that will cover the three intake fans and will also hide some of the cables and plumbing.
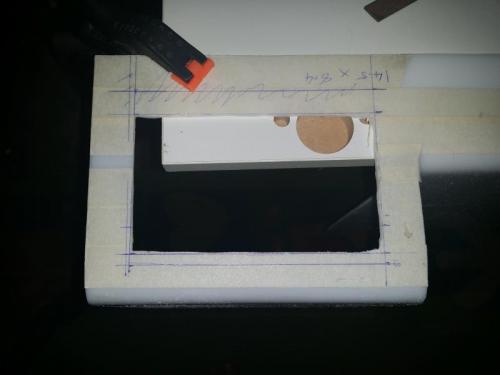
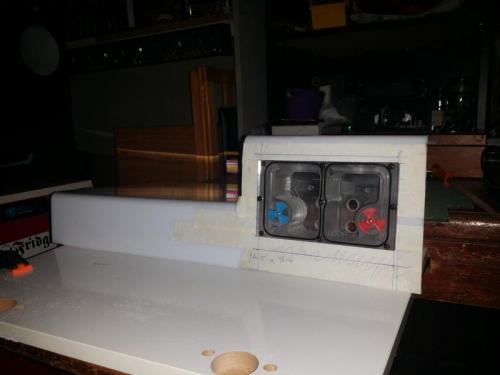
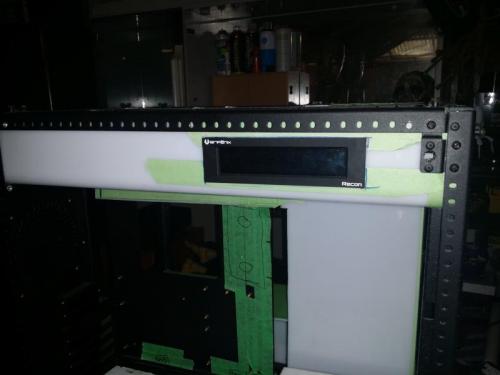
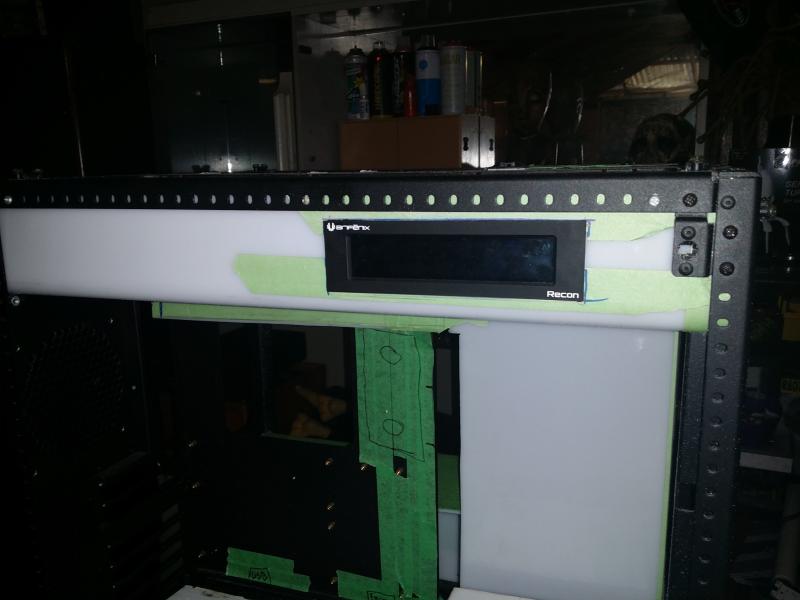
I also wanted to mount the Bitfenix Recon controller into this top shroud to control the top radiator fans. I measured it all up and just cut it out with my rotary tool.
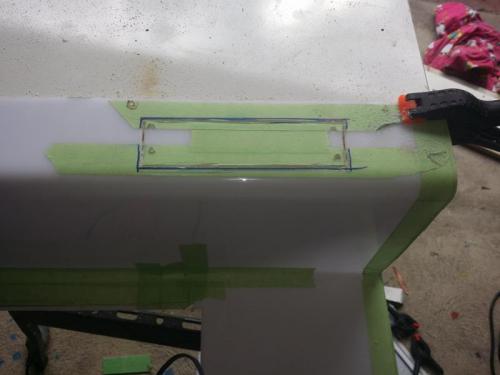

I still need to cut out an intake for the fans, which I will then hide again with a custom 360 radiator grill. Lol.
This shroud will also wrap around the right of the motherboard where it will have a res mounted to it for the CPU loop. I still have plans to change how it sits up against the motherboard but it is very much still in the boring planning stages.
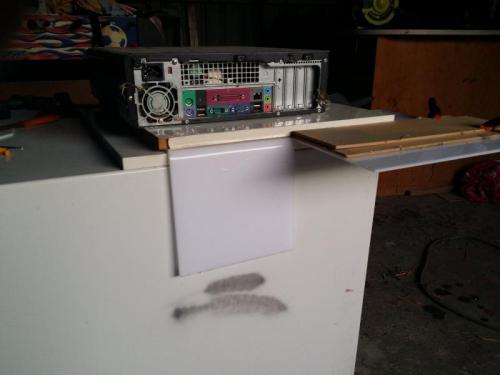
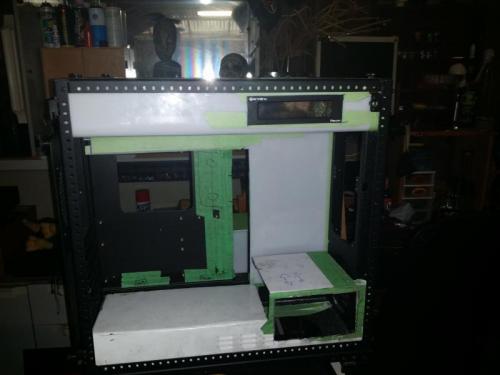
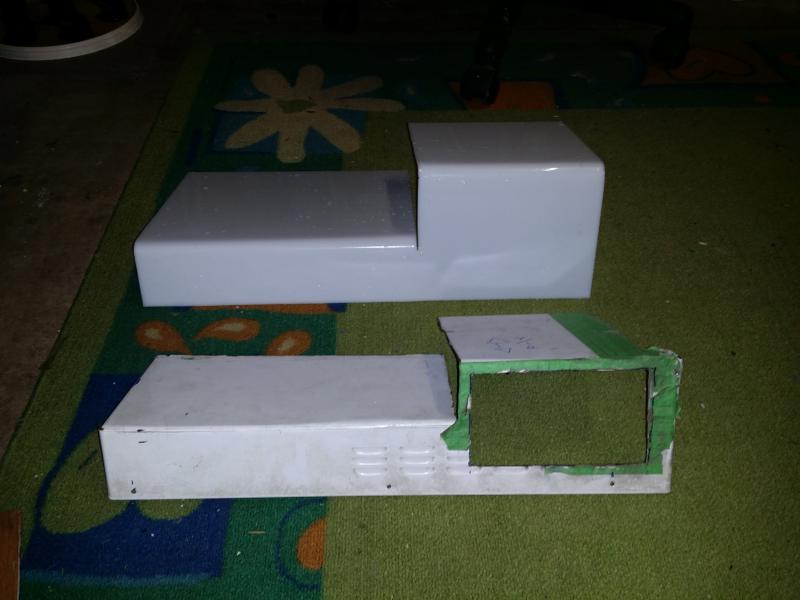
By this point I have also ran out of white acrylic again so I decided to mock up a quick version of the floor shroud for the main side. As I said I had run out of acrylic so after a quick dig thru my junk pile I found an old microwave that had the right proportions for my needs. I stripped the case and took to it with the grinder. As I don’t have a metal Brake bender I clamped the sheet over a brick and bent it over by hand.


It is rough as anything but it should be an ok bend template and definitely gives me an idea how this compartment is all going to sit when its installed. Oh the joys of being impatient.
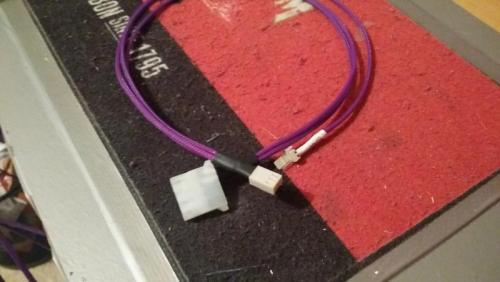
After a convo with the Precision boys I also made the cool to add a second color to my purple sleeve, so sticking with the theme I grabbed some white 3mm PET tight weave. It took a while to get here but I finally got it and it does seem very tight and also seems to be a bit thinner than the purple 3mm.
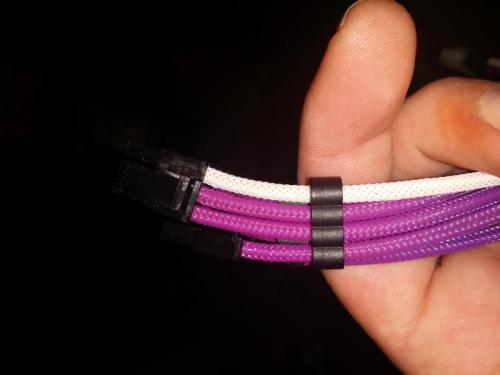
So far I have only made up a few Purple and White cables but I like how they re coming out. I’m going to keep the white to a minimum of either 3:1 or 4:1 cable ratio.
Also Id like to offer this Pro tip to anyone that hates sleeving Never invest in a Aquaero. They are a fantastic product but OH BOY the sleeving.
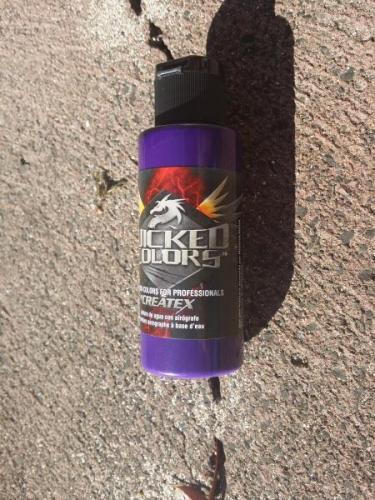
I finally decided on the purple for the airbrushing also, a Nice Createx Wicked purple. I really like this color and it matches the sleeve very well, I’m not sure I will even have to darken or lighten it up the match is so good.
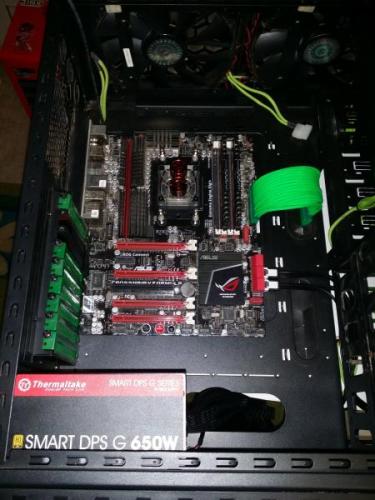
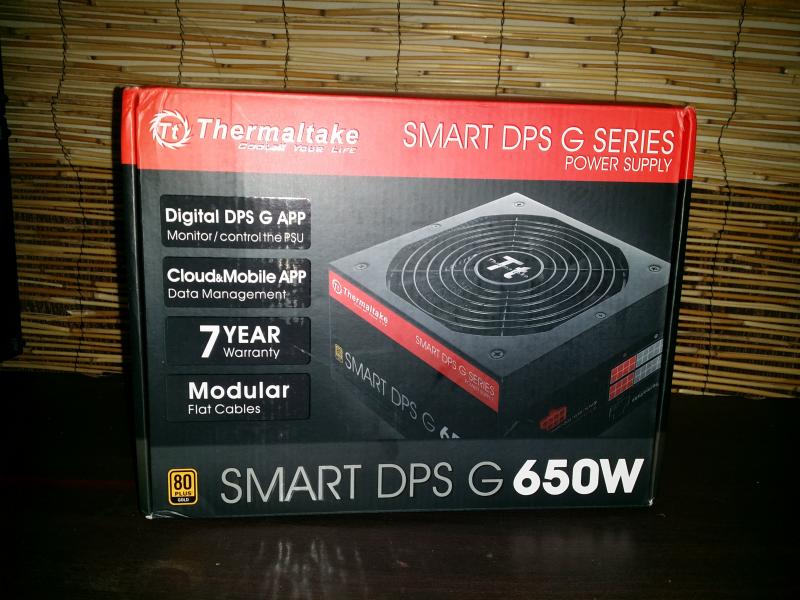
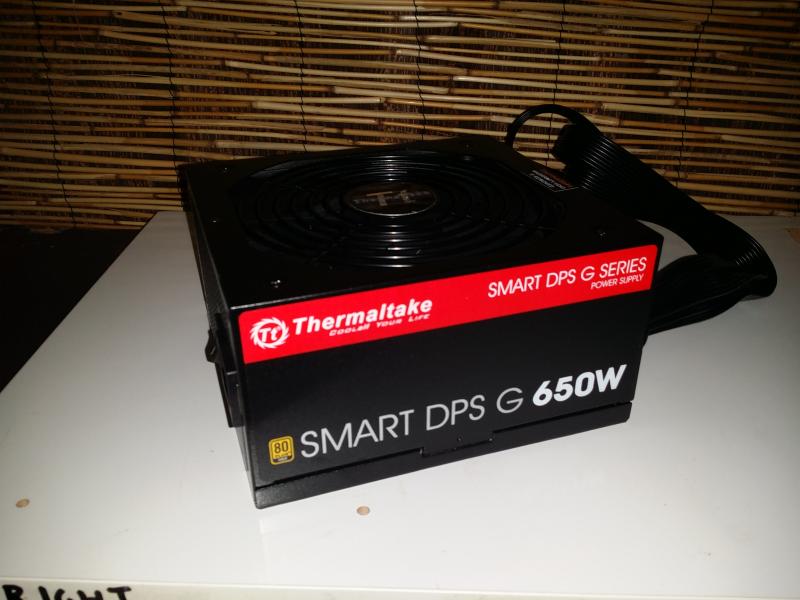
Another nice piece of good news this week is that I was accepted into Thermaltakes SPM Power supply testing program so I scored myself a Tt DPS G 650w Psu. This means I can finally setup my spare rig (AMD) and strip my main Z77 PC to allow me to start moving it into this build.
If you would like to check out my AMD Rebuild/Update it can be found here.
So bit by bit I am getting closer to getting this thing completed, at this point I still have a bit of fabrication, painting, sleeving and actually scrap that have HEAPS to do.
-
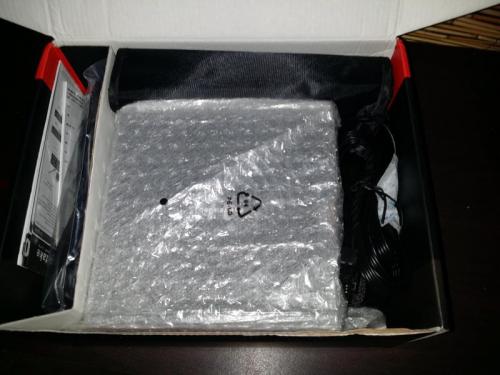
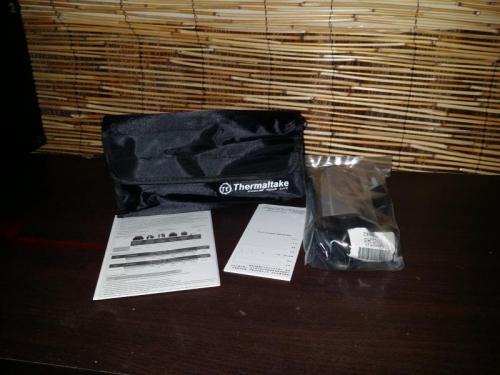
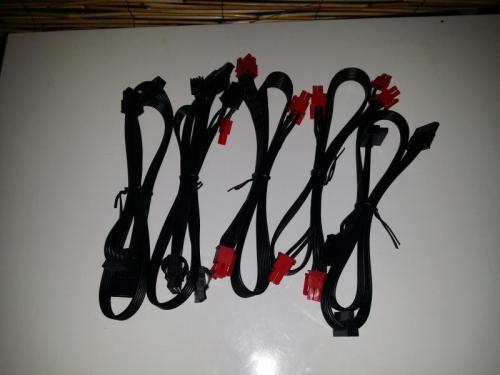
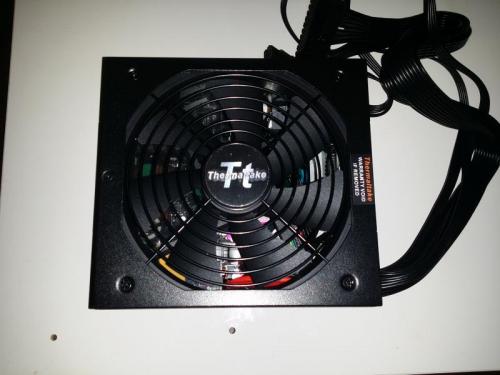
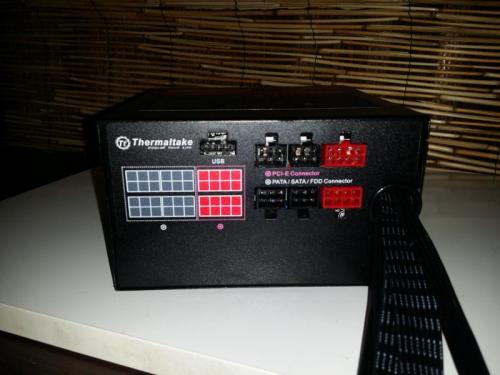
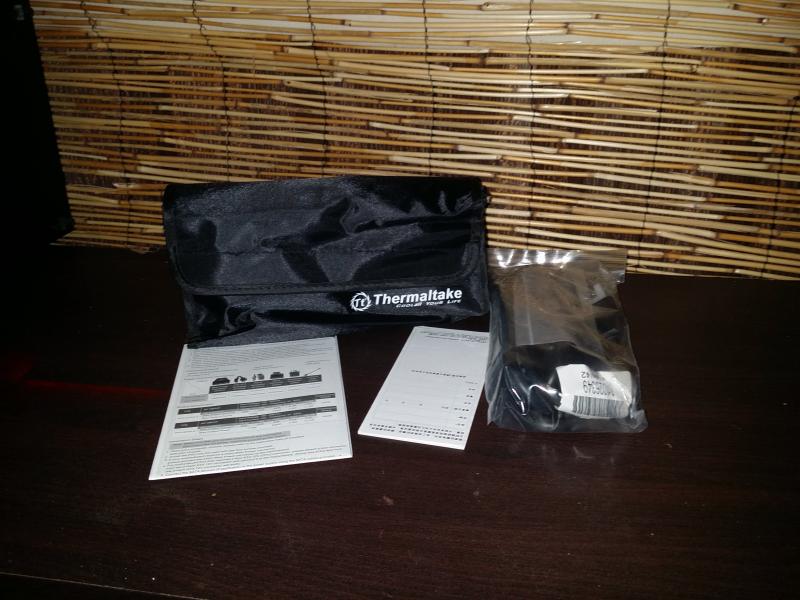
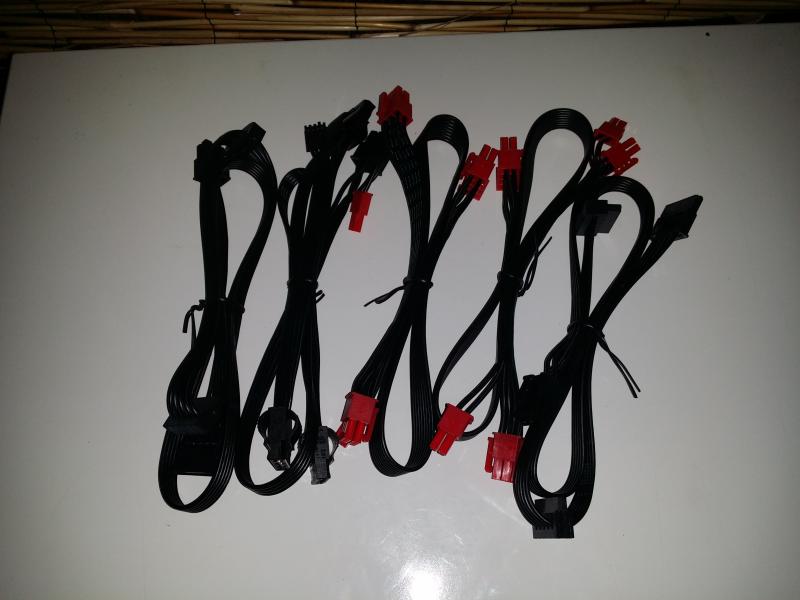
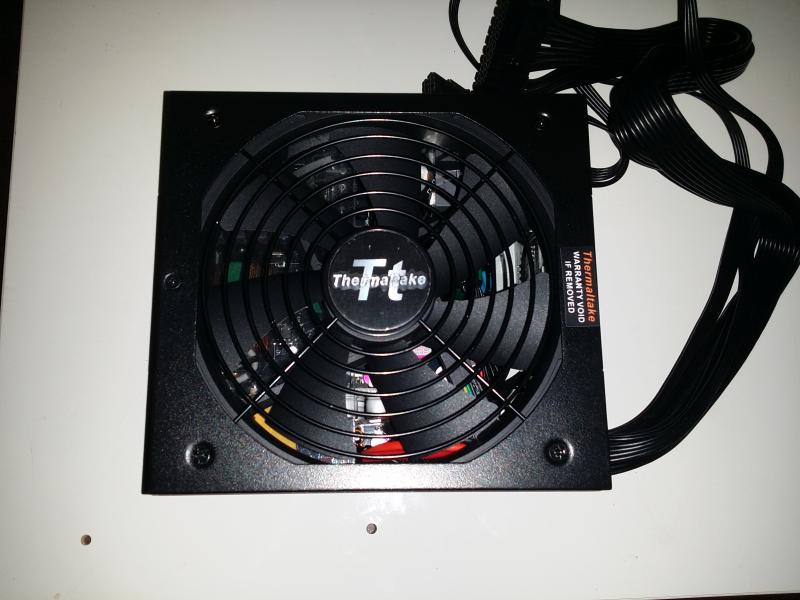
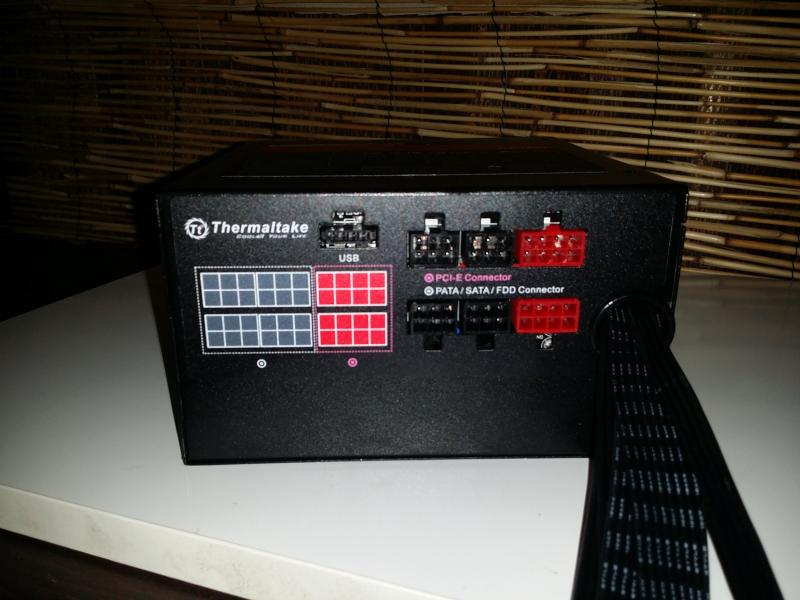
Ok so I was recently accepted into Thermaltake's SPM testing program So I thought I would give a quick overview of the Thermaltake DPS G 650w PSU I received. The unit is 80 plus gold rated and as you can see is a semi modular. Unpacking the PSU it feels very sturdy and features flat cables cables kind of like the old school ribbon cables. All the modular cables are stored away securely in a nice little Thermaltake pouch.
The PSU also comes with a extended 7 year warranty, which is great for people like me who are PSU jinxed.

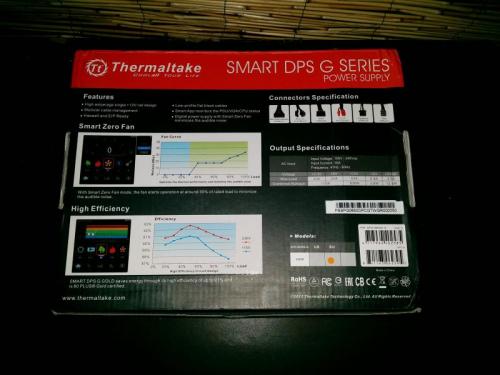

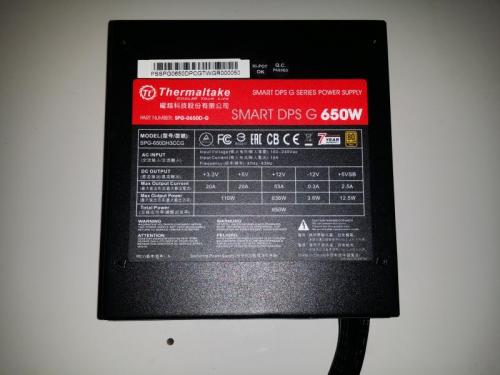
The DPS G 650w also features Tt’s new SPM software for monitoring hardware and power consumption. This information can be retrieved via a desktop monitoring application or a Smart phone app of your choice. (Android/Apple). This is a really cool aspect of these power supplies and lets me keep track of all the numbers my OCD demands. The information can then be uploaded to the SPM cloud where I can reference the numbers later.
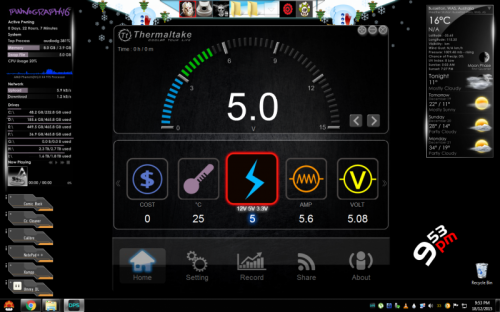
I must confess I have always liked the Thermaltake power supplies but this one is another beast entirely. After a weeks worth of use it has not skipped a beat even with my horrible horrible electricity companies dirty power the unit has held strong. At first I was having a few issues with getting the software to sync but after a reinstall (With Admin rights durp) everything worked. The software has a very easy to understand UI and is accurate and matches up with my own temp probes and software. All in all Im very impressed with the Tt DPS G 650w and will definitely be picking up a more powerful model asap.
Link to the PSU - http://www.thermaltake.com.au/Power_Supply/Smart_Series_/Smart_DPS_G/C_00002720/Smart_DPS_G_650W_Gold/design.htm
Link to main Build Log
-
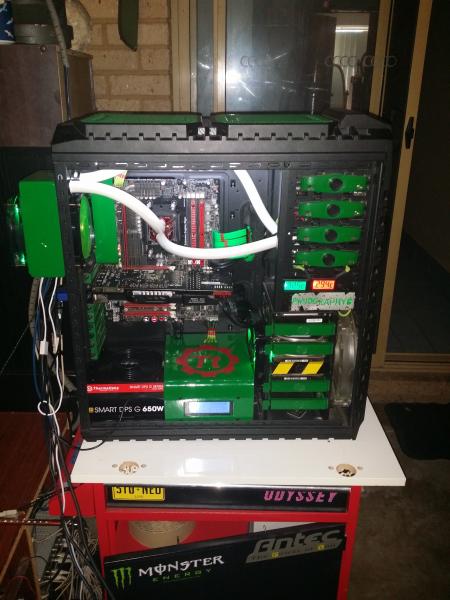
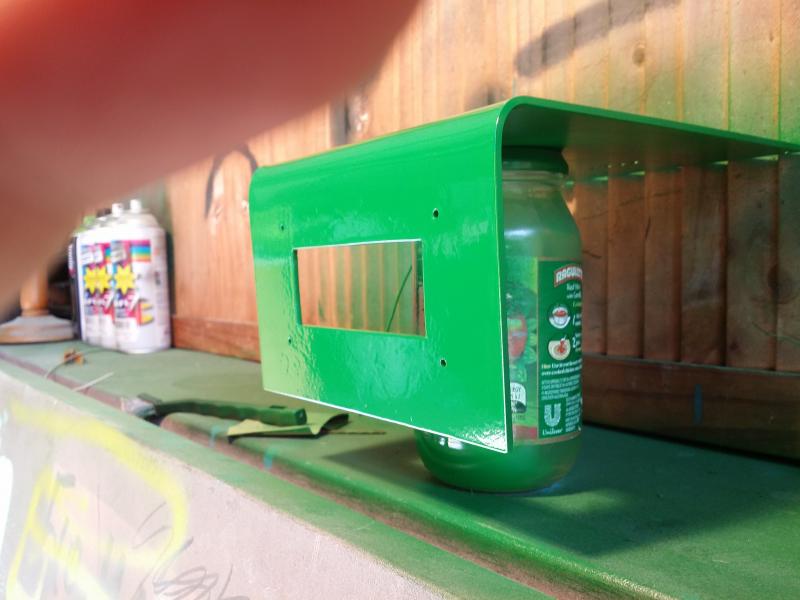
I really wanted to cover up the gross stock rear panel so I pinched a rear connector cover I had made up for the padded cell and gave that a shoot with the emerald green also. I really like how this turned out.

As for sleeving I decided to leave all the cables stock and salvaged what I could from my green cable box. This will hopefully give me some nice clean power results during the PSU testing phase.
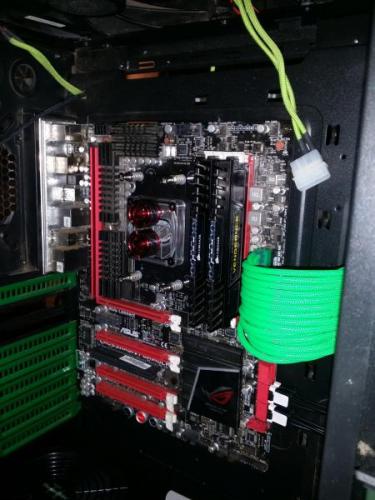
So after some messing round with case athletics and filling and bleeding the loop it was time to boot. I have a major LOVE/Hate relationship with this Asus Crosshair V. It has been RMAd twice as it is one of the most faulty boards I have ever used. It is extremely temperamental, one min it hates ram the next min it loves it etc etc.

So what should have been an easy install turned into a 6 hour endurance session as I swapped Ram and GPUs till I found a combo the board would “Acceptâ€. Unfortunately the memory the board decided it liked was Bright LED blue Crucial Ballistix Tracer ram. For those that have not used or seen this Ram before it is epilepsy inducing and looked completely out of place in this build.
https://youtu.be/rkIRxq4flQg
Luckily after stripping my main PC I could donate some Corsair Dominator GT ram to the system and it ran first go and looked a whole bunch better than the LED crucial kit.
So here she is up and running.


I would like to say a huge thank you to Thermaltake for allowing me to be one of the lucky testers of these great Power Supplies, I hope everyone enjoyed the build.
-
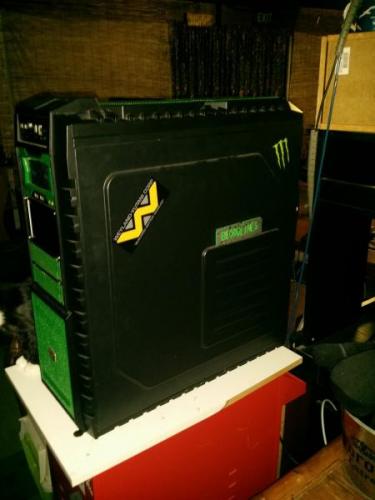
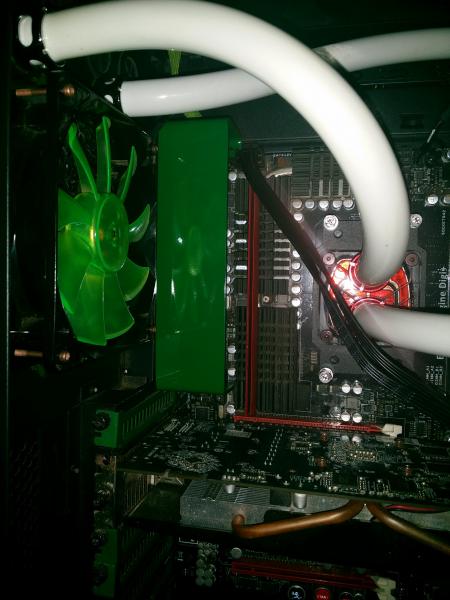
Thermaltake recently started a testing program for the SPM compatible PSU’s and I was lucky enough to be chosen to test a 650w PSU. So I decided to throw together a quick Rig to test her out in. Most of this build is just that a build. A lot of the parts where already modded and painted by me previously but I thought it would be a cool little temporary PC while I finish off the Padded Cell build. I apologize for the lack of photos and the photo quality the build log was kind of a hindsight.

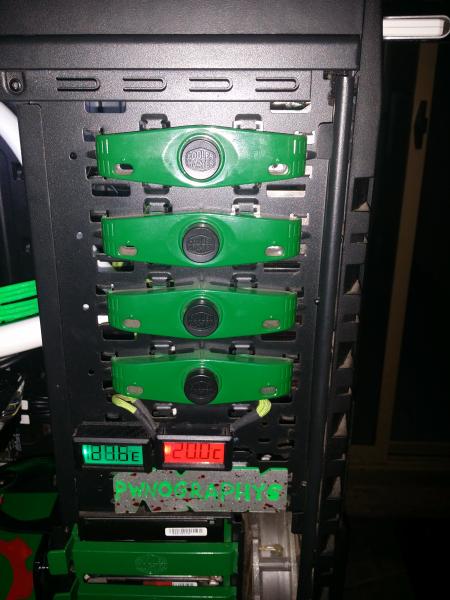
Case – Coolermaster Haf-X
Motherboard – Asus Crosshair V Formula
CPU – AMD Phenom II x4 975
Memory – Corsair Dominator GT 8gb
GPU – Asus 6950 Direct CU II 1gb
PSU – Thermaltake DPS G 650w
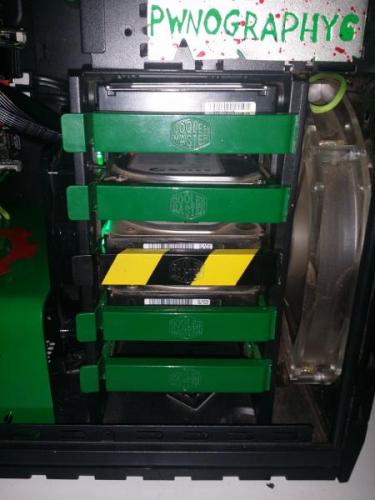
Other bits – Old school EK supreme block, Aerocool Strike X fan Controller, XSPC RX120 Radiators, XSPC Rasa Bay Res/Pump combo, Mixed fans, LCD Smartie, 4x HDD.
First of lets have a quick look at the Thermaltake DPS G 650w PSU. The unit is 80 plus gold rated and as you can see is a semi modular. Unpacking the PSU it feels very sturdy and features flat cables cables kind of like the old school ribbon cables. All the modular cables are stored away securely in a nice little Thermaltake pouch.
The PSU also comes with a extended 7 year warranty, which is great for people like me who are PSU jinxed.
The DPS G 650w also features Tt’s new SPM software for monitoring hardware and power consumption. This information can be retrieved via a desktop monitoring application or a Smart phone app of your choice. (Android/Apple). This is a really cool aspect of these power supplies and lets me keep track of all the numbers my OCD demands. The information can then be uploaded to the SPM cloud where I can reference the numbers later.
Link to the PSU - http://www.thermaltake.com.au/Power_Supply/Smart_Series_/Smart_DPS_G/C_00002720/Smart_DPS_G_650W_Gold/design.htm
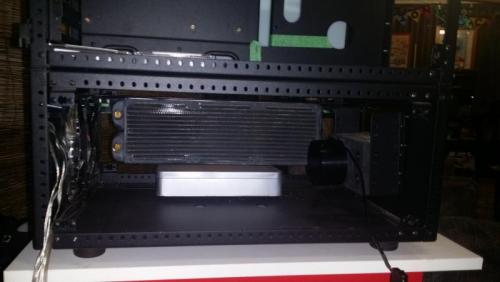
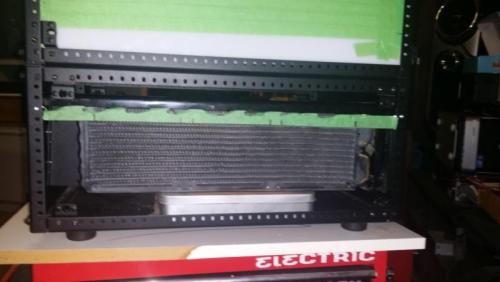
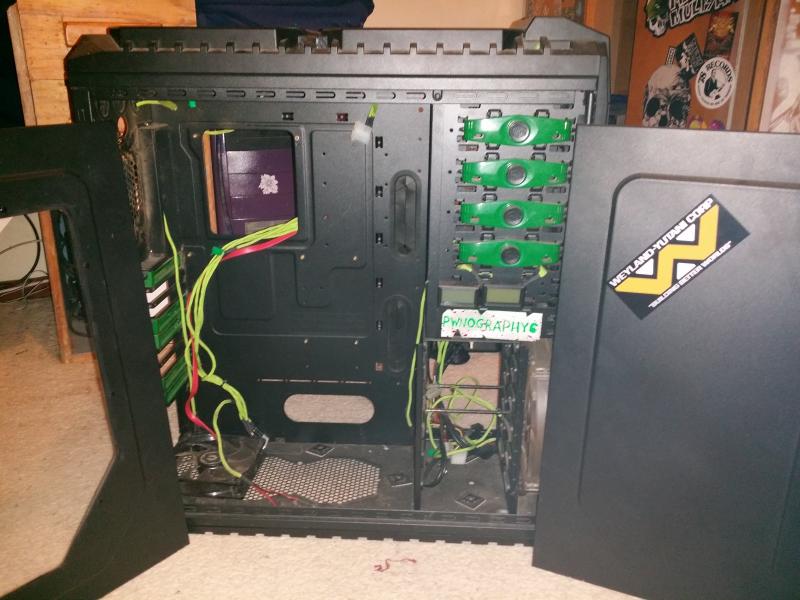
The case is an old project that was already painted which saved me a bunch of time but I did decide to touch up the front mesh panel as a few years of knocks and dust had chipped away some paint. I also had a spare thick 120mm XSPC radiator I wanted to use so I gave them both a quick shot of paint. It worked out perfect as I had only recently grabbed a can of this color green accidentally.
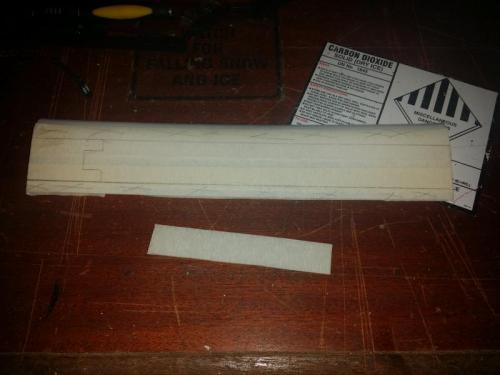
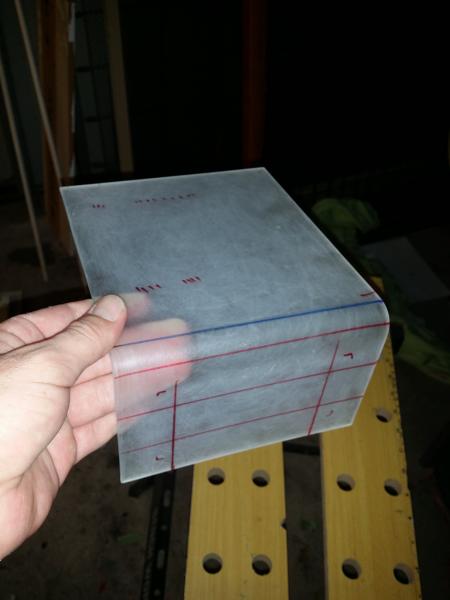
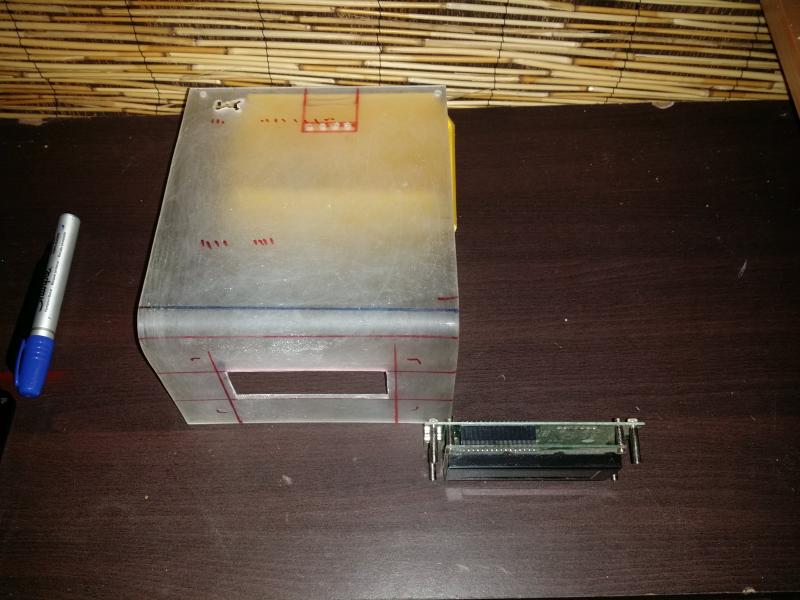
My old PSU shroud that came stock with the case was pretty banged up from the last time it was installed so I chose to make a quick new one. Unfortunately all my good quality acrylic is tied up with another project so the PSU shroud was made from an ancient piece of acrylic that I probably should have sanded a little better. I drilled a few holes to comb the front panel connectors thru and also cut some slots for the USB connectors.


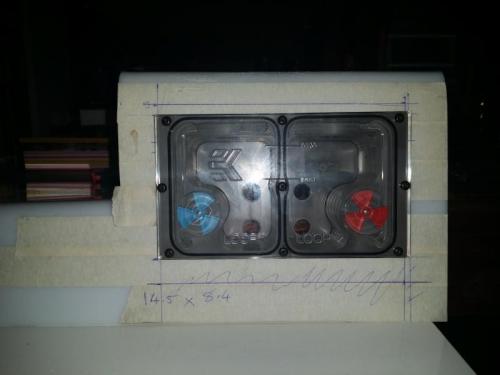
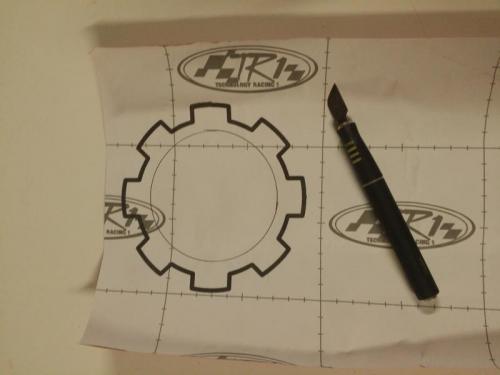
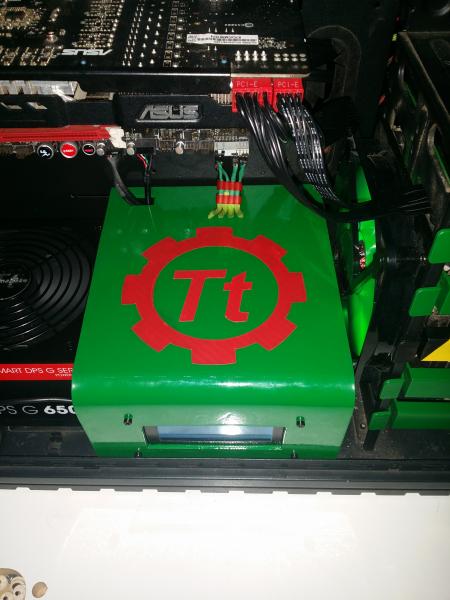
I decided to do something a bit different to the traditional Thermaltake razor sun logo and went with a gear design for the outer circle. I started by printing onto the back of my vinyl, however cutting from the back tore the vinyl. So I instead printed the logos out straight onto the vinyl then just wiped the ink back off the vinyl after I finished cutting the design with my trusty exacto knife.

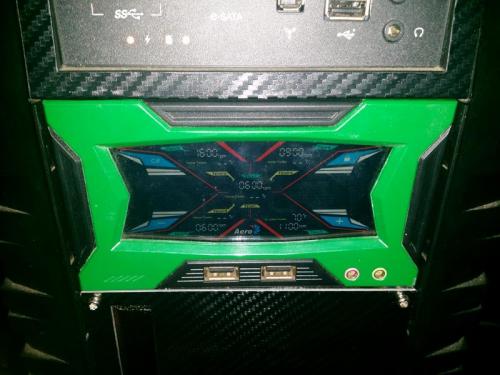
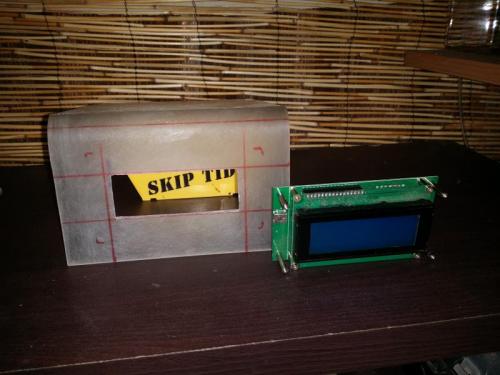
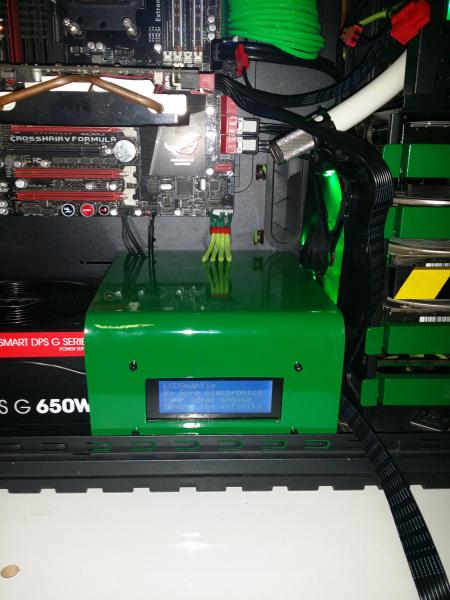
I also wanted to mount in the LCD smartie with the hope of programming it to give me a read out from the Tt Psu app, all though I still haven’t had time to properly set it up.


-
Gonna have to give my vote to Fabio Moma, great build dude.
-
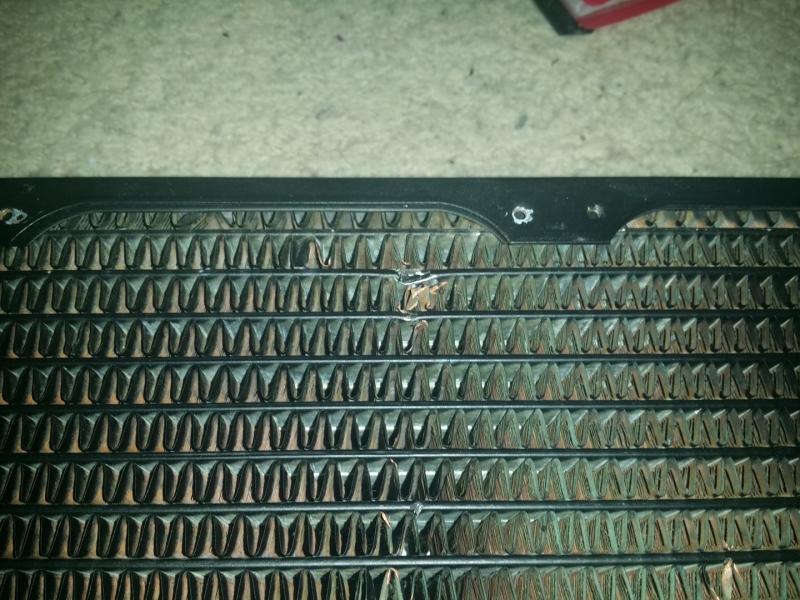
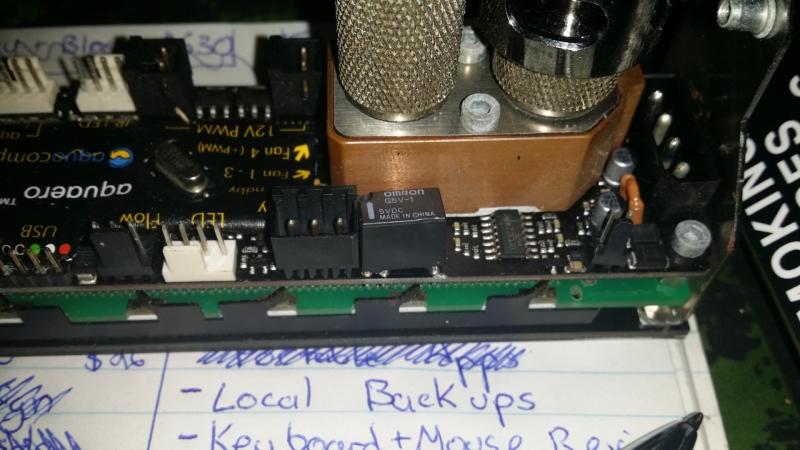
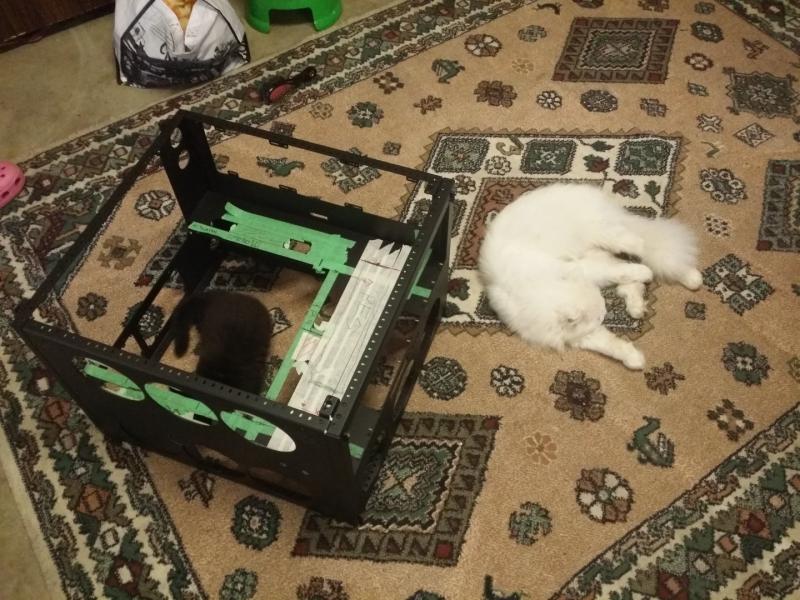
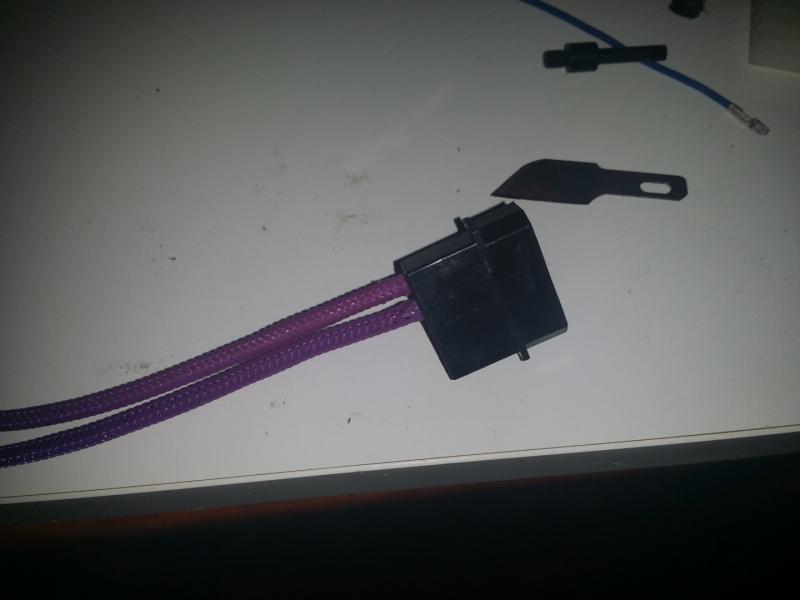
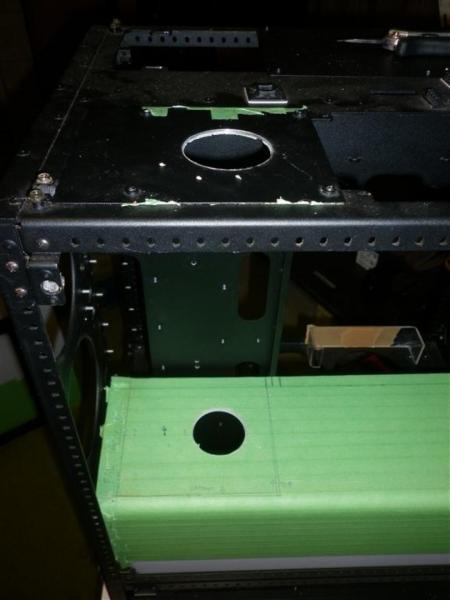
Ok well to start this update we had a slight accident involving our new kitten Geiger, a 360 Radiator and my Aquaero V. Basically I was test fitting the radiator turned around to grab my tape measure and Geiger decided to jump on top of the case knocking the radiator down. He managed to bend a bunch of radiator fins and dinged up the core of my Alphacool 360.
 BUT after testing it doesn't leak so will have to make do for now. Once that crisis was dealt with I checked for any other damage and was destroyed to find one of the Relays on the rear of my Aquaero had also been struck. The top three legs where snapped straight through.
 Fortunately I think it can be saved I jumped on evilbay and found an identical relay, so once I get the nerve up I will have to test out my solder skills and try and repair my poor Aquaero. *Sad Panda*
 Anyways moving on. I managed to lay some paint down on my radiators a couple days ago. I ended up going with gloss white as the airbrushing I will be adding later will be minimal, this way hopefully I can avoid the need for clear coating later.
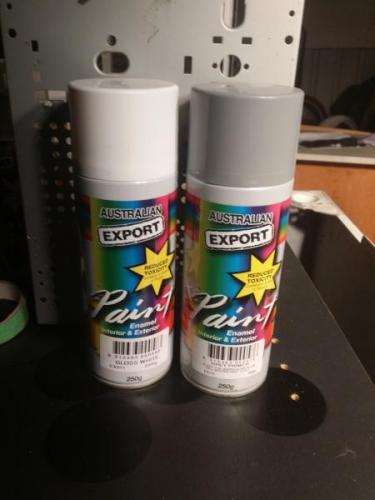 First the Primer.
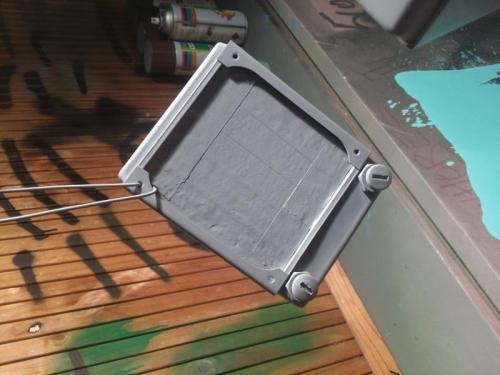
 Then the glorious gloss white. Not bad for cheapo rattles. Will get more photos soon.
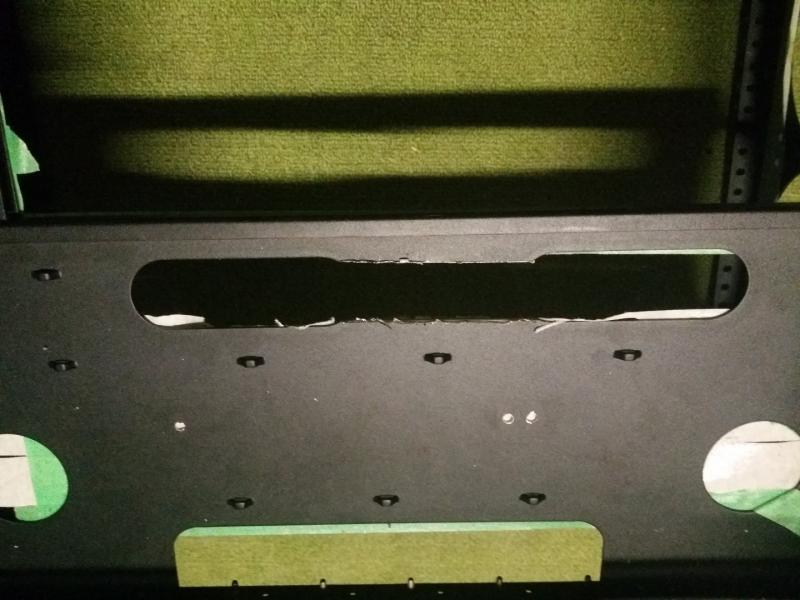
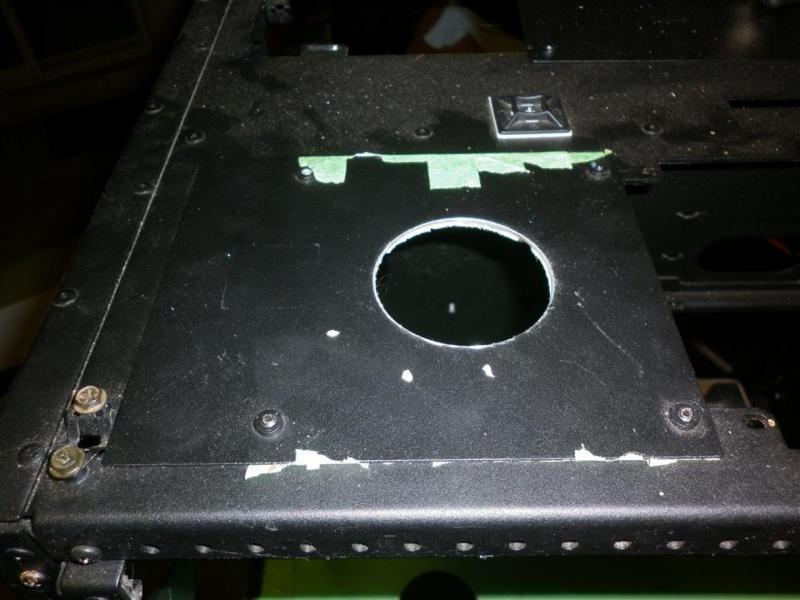
 With the radiators painted I decided to do something I have been putting off for a while...Extending the cable management cut outs. These where only small cuts, but when you are cutting up a case that cost me an unholy amount to import to Australia it all gets a big un-nerving.
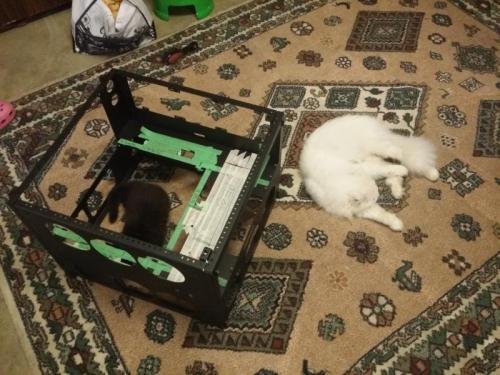

 I cut pretty wide of the line as I would much prefer filing the edges back for 4 hours than trying to fix up a miss cut. I haven't even started to clean up these edges so don't judge. As you can see I just joined up the 2 cable port holes into one giant one. However once the inlays are in place these will not even be visible they are purely to make plumbing easier.The last thing I am stuffing around with is moar sleeving. I decided to give heat shrinkless sleeving ago and after some back and fourth with the Precision Computing team I managed to get a few cables sleeved. Note that I stuffed up here and used Heatshrink with glue so I ended up with some glue residue. But not bad for a first attempt.
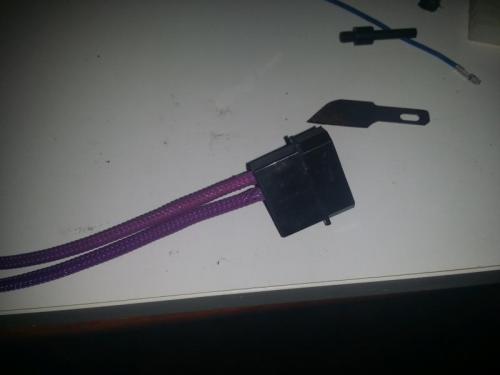 Hopefully I will get a bigger update in soon.
-
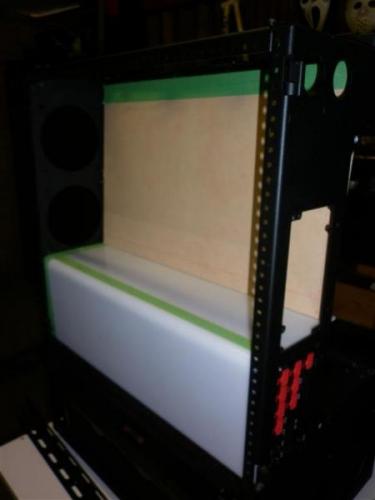
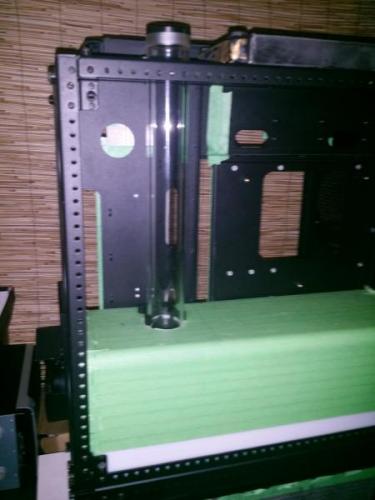
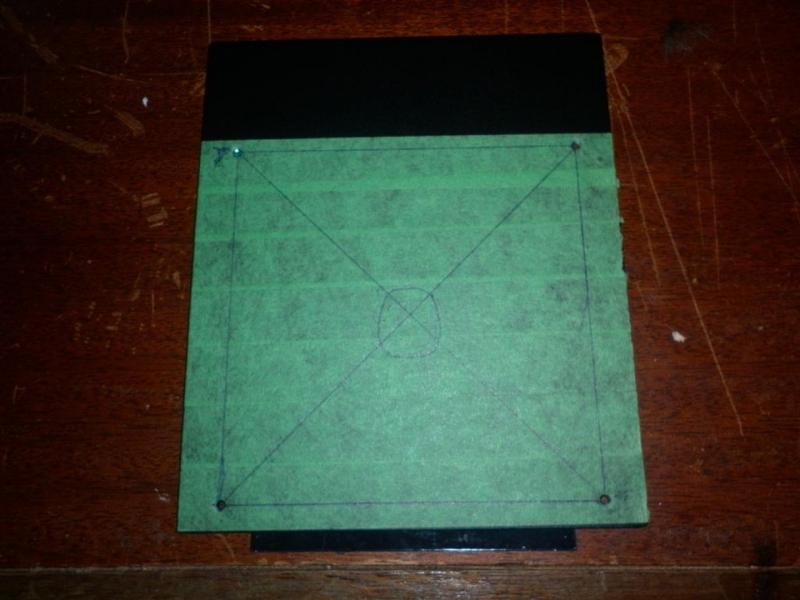
The other thing I am working on at the moment is the case inserts. The whole case and pedestal will have inserts for hiding plumbing and cables. So far I have made the PSU shroud for the right side of the case.
This will also be where the Mayhems Aurora 2 water column which will be part of the ram/show loop will be mounted. The plan is to hide the fittings and just have a solid column through the centre of the case.
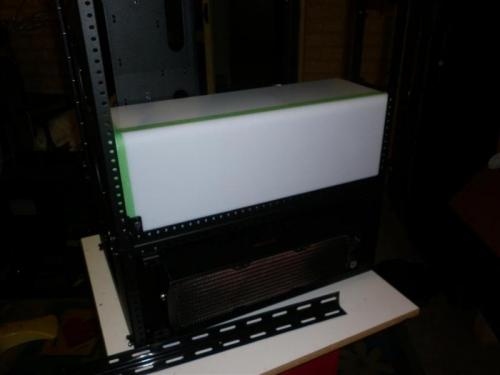

I ended up picking up an el Cheapo 400mm ebay tube res to do the job of the column. I must say for a cheapo no name Res it has surprisingly clear acrylic and is pretty sturdy. The Reservoir will be airbrushed later this week as well as receive a bit of mounting trim and a custom anti cyclone to clean it all up.


Im also working on another insert for the pedestal radiator to mount to. The brackets to mount radiators in the M8 pedestal are not shipped with the unit and cost $40 so I figured I would save myself some case by making my own. These are another WIP part.
The rest of the acrylic inserts just need to be cut, then I just need to chase down some aluminium for the main inserts.
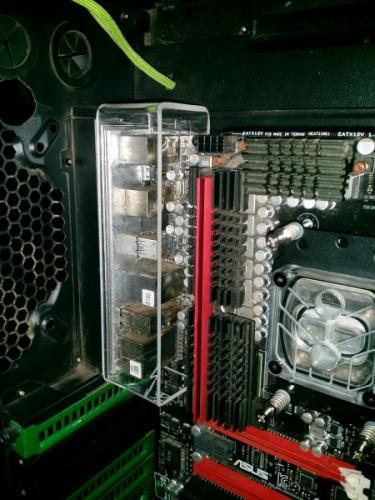
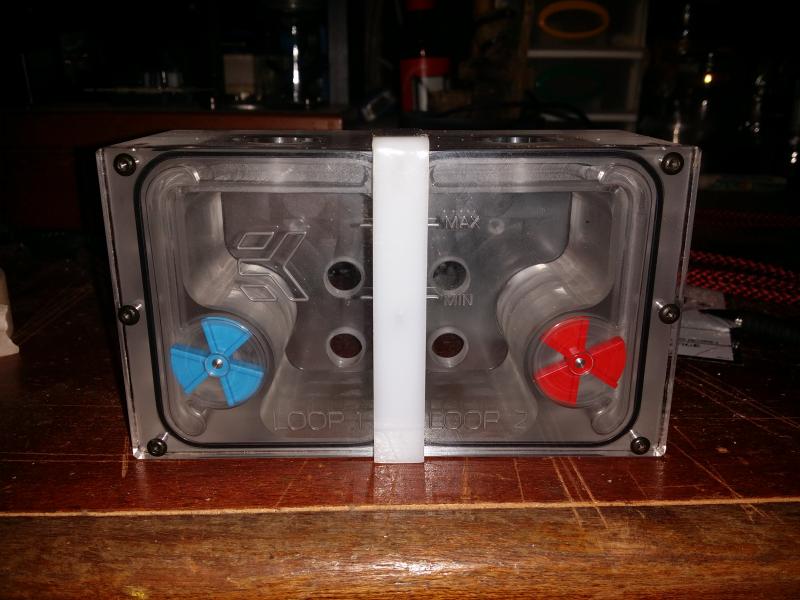
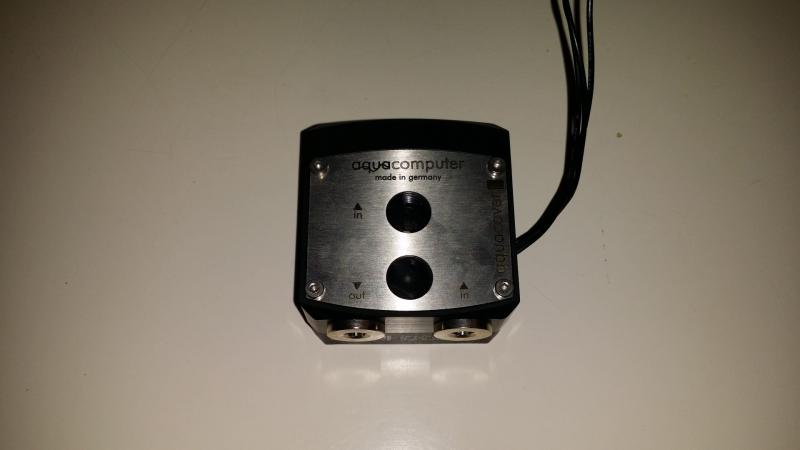
I also managed to pick up a Aquacomputer DDC top and a EK dual bay spin res for under $40 recently so I decided to test fit the top on one of my spare DDCs.
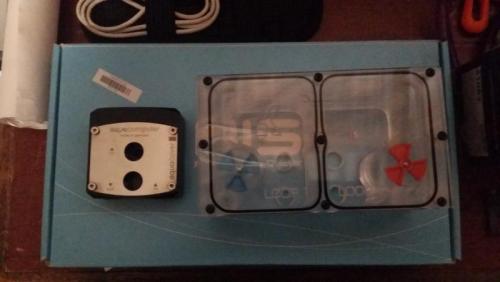
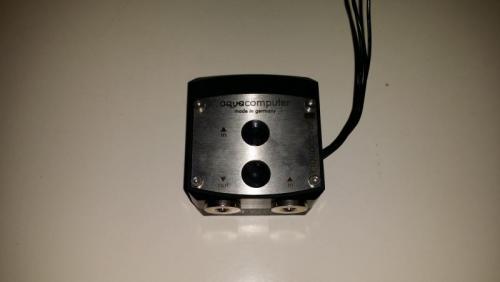
After mounting I think I will be swapping this out for a dual DDC pump just for overkill piece of mind. So if anyone is selling a clear acrylic dual DDC top drop me a message

I also have a crazy idea in mind for the Dual EK Bay res but it is still very much in the “plotting†stages. On some more water cooling related news I received a nice new CPU block from my friend Marc Molella from Precision Computing. Cheers for that Marc!!!

The block on the left is my old Bitspower ram block which will need a bit of TLC before being recycled into this build.
So at the moment that’s all I have to share I am aiming for this build to be completed before X-Mas but that is all depending on finances (Like Usual) At the moment I am trying to save for my new graphics card in preparation for Fallout 4 so mod money is very limited, but in saying that the card should be purchased by the end of October then all I will have to worry about is mod supplies and a billion fans. LOL.
If you have made it this far cheers for checking out my build, it makes coming out of semi-retirement all the worthwhile. More updates to come and I look forward to being a new member in the Thermaltake Community.
-

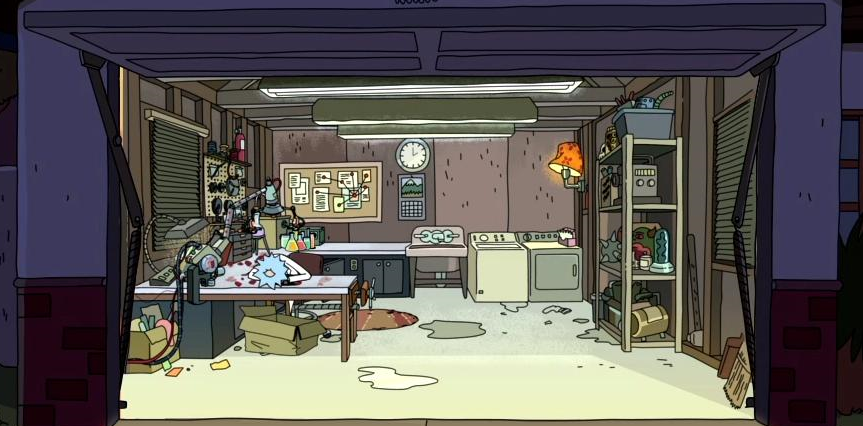
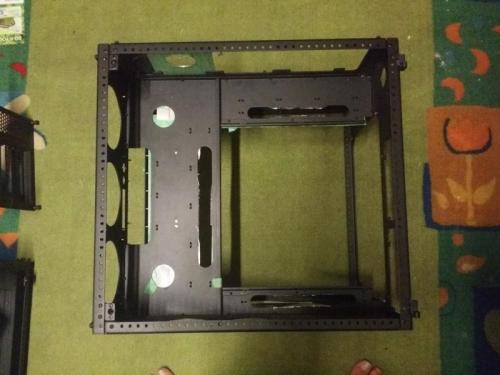
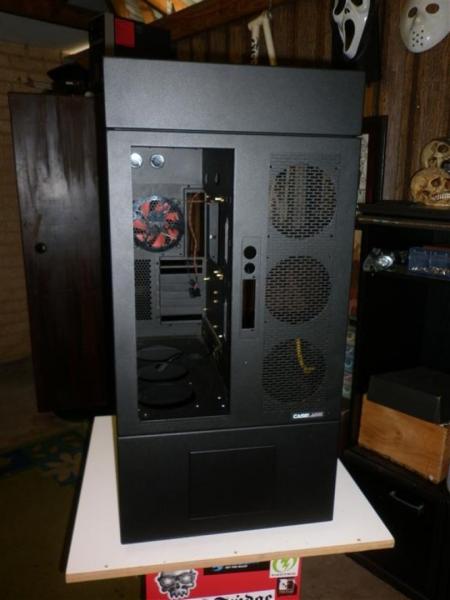
Hi all!!!! For those that don’t know me my name is John and I am an ex-modder, ex-overclocker current PC community commentator (Read as smart-####) from Rural Australia. I have spent the last year or 2 kind of stepping back from the industry and instead concentrating on study and my health. Well First post here so let me sum up the history of this freaking build. Basically I started building in the Caselabs M8 a few years ago (3??) and after a few attempts to fill it up and failing I have decided to make a concerted effort to finally get this thing finished at a level I can be proud of.
Some random photos of how the derelict and unloved the case looks as I type this.


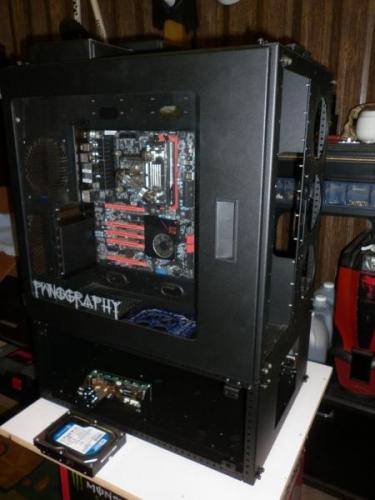
It makes it even worse that the M8 is unused and im currently using a stock standard Antec DF-85 >.<
Major Components-
Just a forewarning about my components. YES I am still on IVY Bridge I cannot afford the upgrade, so If you need flashy latest and greatest this isn’t the build you looking for. For everyone else thanks for reading on.

Motherboard - EVGA Z77 FTW
CPU – Intel 3770k (OCed at 5.1 ghz)
Memory – Corsair Dominator 8gb
GPU – EVGA GTX 970 FTW (PENDING)
PSU - NZXT Hale 90 V2 850w
Storage - Samsung 850, Multiple Seagate Barracudas
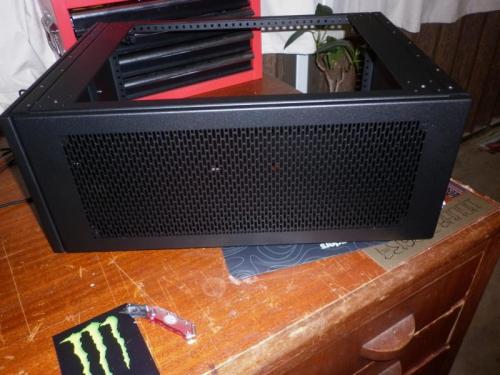
I think I got the original case around 3-4 years ago and since then it has had a pedestal added to it as well as housing some pretty thrown together systems over the years. Most people have probably seen this particular case before in a few previous incomplete build logs (Thunderhorse/Bat country) which were permanently abandoned after financial troubles. To say it best this case has been my unicorn, no matter how hard I have tried I just can't seem to get it together all at once.
A lot of the "Big" ideas have continued on from previous plans for the case and will finally get to see completion. With this in mind some work has been previously completed so the photos may look a bit dated.
So now that is said I can go on with the future plans. The build will have a loose theme of “Insanity", I explained my Idea to a good friend as being kind of like "An acid dream scene in an over-lighted hospital". The planned color scheme I am going for is try keep the exterior as stock looking and dark as I can, while the inside will be VERY white with highlights of purple. This however means unsleeving all my previously sleeved Red/Black cables. Grrr. (Just bear with me on this first post lots of half-finished bits and pieces, so a lot of this post will be catch up.)
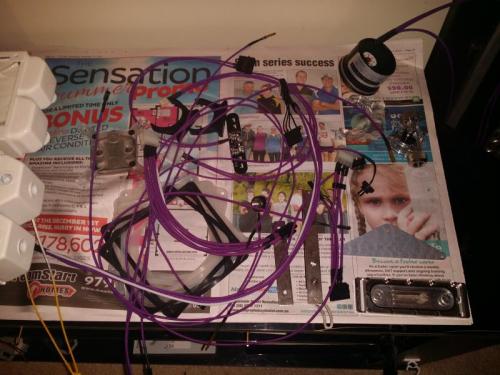
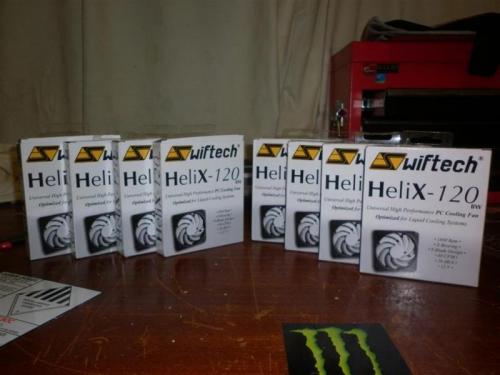
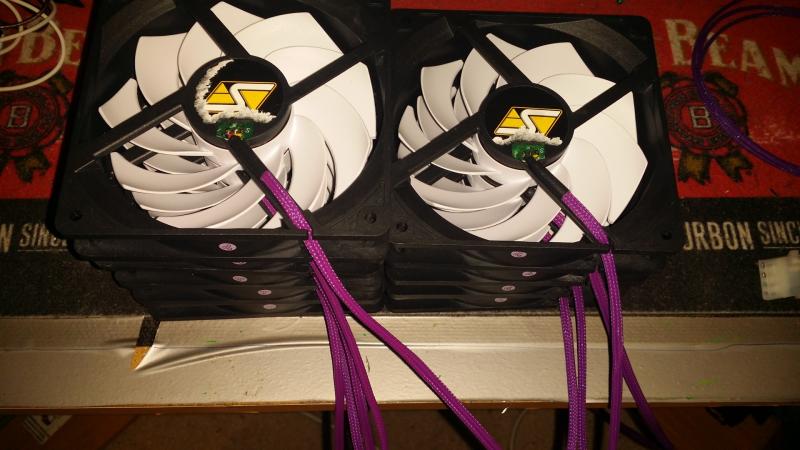
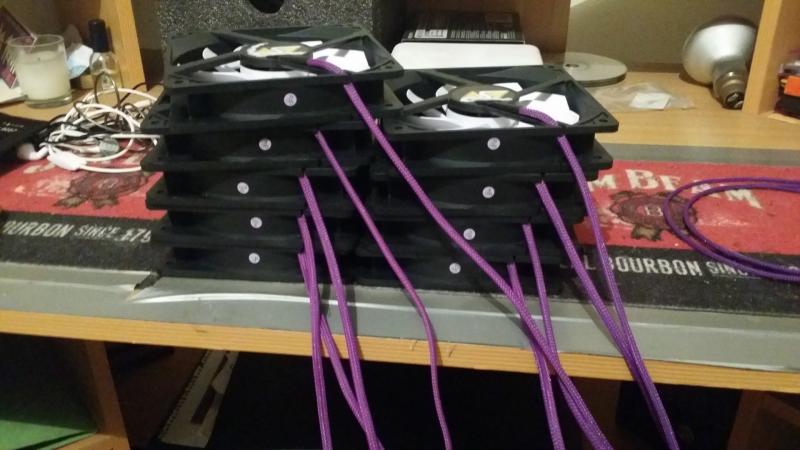
So with the old stuff removed I started sleeving some of the AquaComputer Aquaero V cables along with the 9x Swiftech Helix 120mm fans which will be used for the Radiator “Push†fans. I still haven’t decided on my case fans or the Exterior facing radiator “Pull†fans.
I managed to get a pump some cables and the Helix fans done before I ran out of Heat Shrink. So will have to add that to my shopping list.


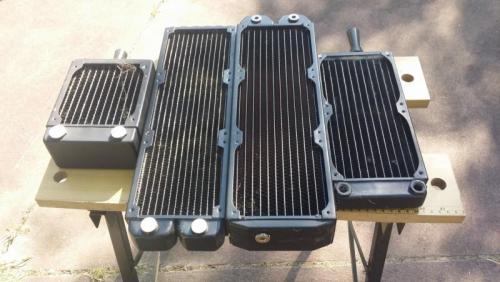
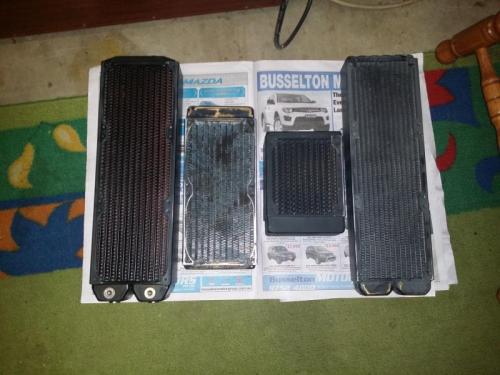
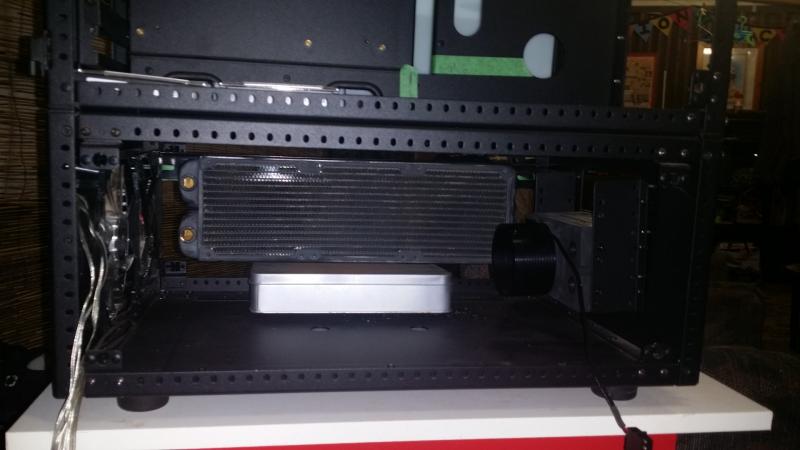
With the sleeving started I decided to also start prepping my Radiators. We have a good range of Mix and match radiators in this build; Alphacool Nexxos UT45 360 and XSPC RS240 for cooling the 3770k, an Alphacool Airplex 360 for the future EVGA GTX 970 and a tiny little XSPC RS120 for the ram/show loop. These are all going to be painted gloss white so I need to knock the shine of them.
A bit of elbow grease and some lazy moments with the mouse sander later and the Rads are ready for a quick wire brush and a wash. All ready for painting once I go grab some more clear and Primer paint.
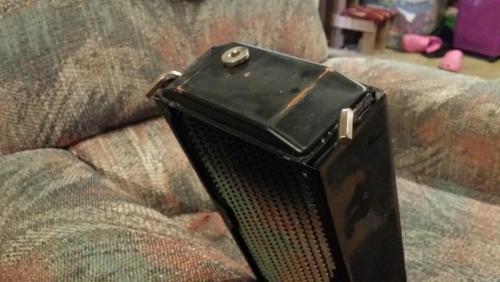
During giving the Radiators a scrub my already damaged Alphacool Rad decided to pop the rest of its welds so will have to also do some surgery on it. When I first bought it, it had some very weak and damaged welds but I just never bothered to RMA it. (#### Hindsight).
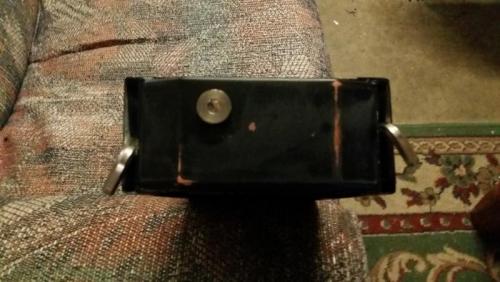
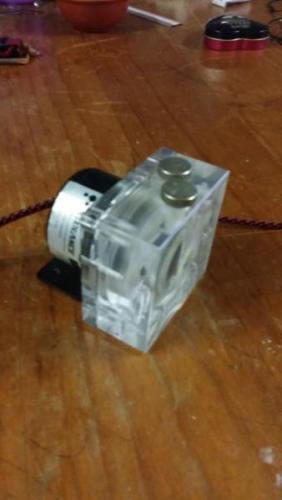
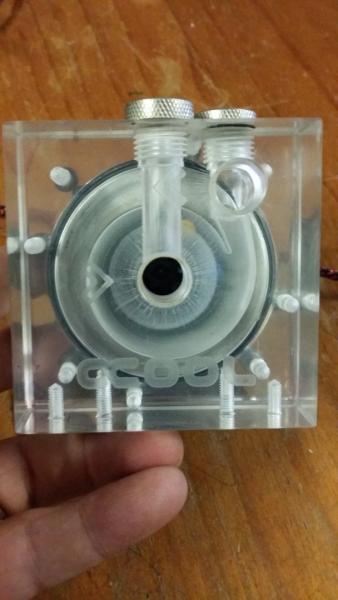
Speaking of Alphacool I also grabbed the chance to dismount my old D5 acrylic pump top as it has crazy crazing. LOL. This pump will find a new home in an old/new Danger Den Bay reservoir I found on ebay….. For $20…… accidently. Man I really miss danger Den . I will of course add more photos on this after I get the Res painted and D5 mounted.


VOTE NOW! - Voting Closed
in 2017 Thermaltake CaseMOD Invitational Season 1
Posted
Great builds by all, but I am Going with my main man Marc on this one.