-
Forum Statistics
7.6k
Total Topics51k
Total Posts -
Member Statistics
136,032
Total Members16,800
Most Online


Tt Leo
-
Posts
101 -
Joined
-
Last visited
-
Days Won
9
Content Type
Profiles
Forums
Downloads
Events
Gallery
Blogs
Posts posted by Tt Leo
-
-
Nice build!!
I am going to share to our Facebook fans as well!
-
A friend of mine recommended the 10 GT for my next build, and when I saw it on Amazon on sale for $150, I jumped on it.
Specs:
Case: Thermaltake Level 10 GT
PSU: Corsair Pro Series AX860i
CPU: Intel I7 5930K
MoBo: MSI Gaming 7 X99S
CPU Fan: Noctua NH-D15
GPU: MSI GTX 980
System Disk: Kingston 240GB SSD
Storage Array: Seagate Constellation ES 4TB (Qty 4) in a RAID 10
Memory: 32 GB (4*8 GB) G.SKILL Ripjaws 4 PC4-19200
(This is pre-fan installation, since the Noctua is a giant hunk of aluminum that blocks the view of everything else)
So far, I'm loving it. The case is super quiet, and the amount of room in the case made installation super easy.
That said, I have encountered one issue: my power button doesn't work. It seems to be a mechanical issue, as the button can be depressed but doesn't spring back. Has anyone else had an issue with the power button on the 10 GT? Is there any good way to get into the case and see if it can be fixed?
Please contact our USA customer support, there will be people helping you directly.
By Email: support@thermaltakeusa.com
By Phone: Toll-Free 800-988-1088
M-F 9:00AM – 5:30PM (P.S.T)
-
you are welcome, let me know if you need any assist or help.
-
Thank you for your love and support for Core X9.
We do have plan to offer the accessory parts for the entire Core X series, which you should be able to get it soon.
Please contact our USA customer support for your requirement, they maybe able to help you at the meantime, before it is available for purchase.
By Email: support@thermaltakeusa.com
By Phone: Toll-Free 800-988-1088
M-F 9:00AM – 5:30PM (P.S.T)
By the way, thanks for your suggestion on the silence panel, we will take that into consideration.
-
Sorry to hear about this,
Please contact our USA customer support, there will be people help you directly.
By Email: support@thermaltakeusa.com
By Phone: Toll-Free 800-988-1088
M-F 9:00AM – 5:30PM (P.S.T)
Let me know if you have any other question or concern that I can help you with.
-

From the inside of the front panel to the edge of the motherboard tray you have around 115mm of space to work with.
which means you are able to fit double side fan on a 64mm thick radiator.for the height, the case itself has 336mm, if you would take out the stands, the structure, panel thickness and etc., it gives you around 310mm for a single unitand when you stack two of them together it comes to 620mm in total height for you to work with. -
Okay so there are 3 HD cages; how do I go about removing one of them (particularly the bottom so I can install my 2 fans). Is there some screw that if I look on the side panel where the Power Fan Connectors are at I will see it?
Thanks.
And HA; oops I installed one 140mm fan on the bottom but way way bottom hehe
there are thumb screws securing the cages, simply remove the panels, you should be able to locate the thumb screws
for details please take a look at the user manual.
-
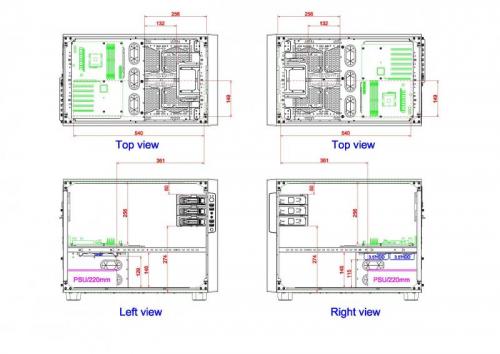
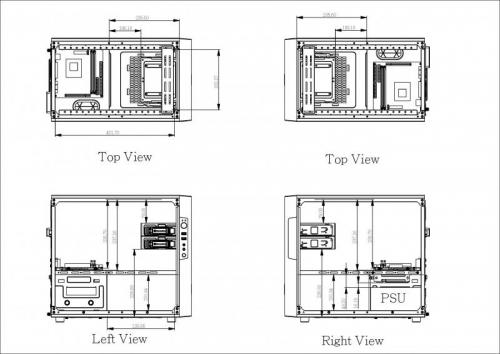
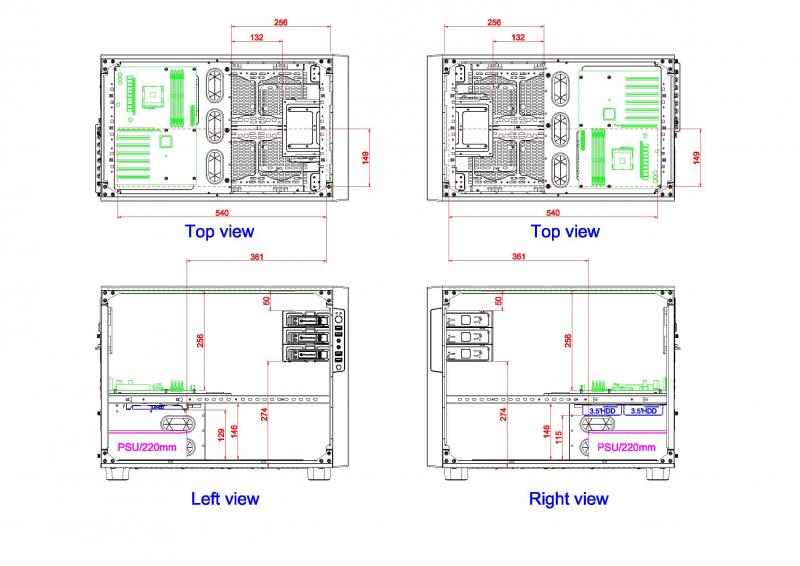
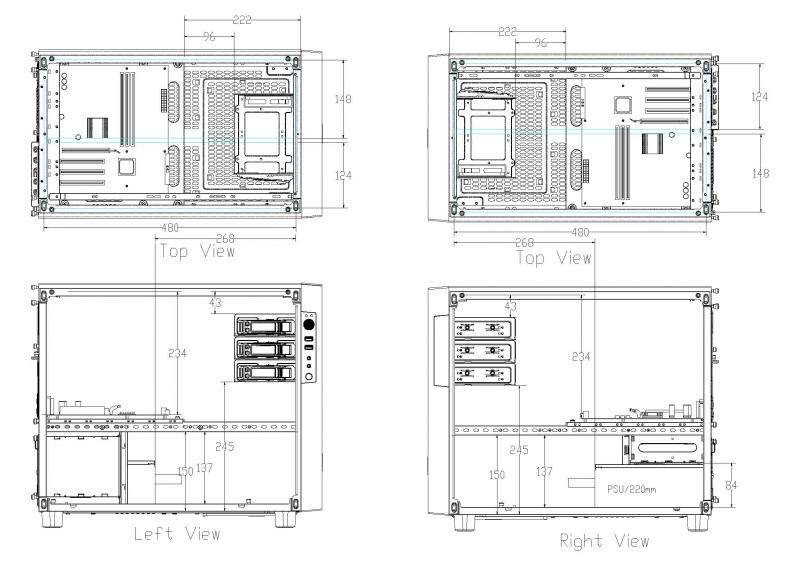
I'm confused.
From website: Dimension (H x W x D) 502 x 380 x 640 mm
Yet I only managed to get these numbers:
Internal height 402mm (256mm+146mm)
Internal width 289mm (149mmx2)
Internal lenght 540mm
I refuse to belive the case is eating 100mm each way.
Also another fun fact from website: VGA length limitation 590mm (without ODD cage)
So I'm ether reading the picture wrong or there are something wrong with ether the website or the chart.
The dimension shown on the website is the external dimension which measures from the very tip of one end to another end which includes the panels, footstands, screws, covers, brackets, thickness of the panels and etc. All the part mentioned takes up space, so when it comes to the internal dimension, you will need to exclude all those mentioned to get a workable measurement.
The purpose of the graph is to provided the space that are save and workable, obviously there are still space in between, for example the depth of the whole case is 640mm, and workable space on the chart is 540mm which leave around 100mm space, and if you would take 50mm out for the front panel, you will left with 50mm inside. This 50mm space is available, but due to structure design it may not be so friendly to work with, plus when it comes to install hardware you dont want to work to it full available space.
Hope I have clear your confusion.
-
Hey guys,
I am fixing you guys a internal measurement graph on the x series,
please refer to the Core X series discussion thread, hope it will help on clarify your concern and builds.
Core X9 is currently ready...still working on the X2 & X1, it should be available soon.
-
Come take a look at our new enthusiast level product line the "Core X series" and join the discussion with us!

Core X Series is a cube style case offering endless stackable options and expandability for enthusiasts to create massive liquid cooling systems, file server or dual systems. The X series delivers outstanding cooling performance with compatibility for extensive DIY/AIO LCS and overclocking components, further enhancing the reputation that the air-cooling units of this series has become renowned for.
Core X9 - The first E-ATX enthusiast level cube case

Product Website:
http://www.thermaltake.com/Chassis/Mini_Case_Cube_Case_/Core/C_00002562/Core_X9/design.htm
Review:
TweakTown Editor's Choice Award and scored 99% overall TweakTown Rating
http://www.tweaktown.com/reviews/6912/thermaltake-core-x9-atx-cube-chassis-review/index.html
Hardwareluxx Excellent Hardware Award
Overclockers Club Editor's Choice Award
http://www.overclockersclub.com/reviews/thermaltake_core_x9/
Others:
Core X9 Modular Part Application
http://community.thermaltake.com/index.php?/files/file/7-core-x9-parts-application/
Core X9 Snow

Product Website:
http://www.thermaltake.com/Chassis/Cube_Case_/Core/C_00002661/Core_X9_Snow_Edition/design.htm
Core X2 - The first mATX enthusiast level cube case

Product Website:
http://www.thermaltake.com/Chassis/Cube_Case_/Core/C_00002563/Core_X2/design.htm
Review:
Pure Overclock Editor's Choice Award
http://www.pureoverclock.com/Review-detail/thermaltake-core-x2-chassis-review/
Hard OCP Gold Award
Core X1

Product Website:
http://www.thermaltake.com/Chassis/Cube_Case_/Core/C_00002576/Core_X1/design.htm
Review:
ThinkComputers gives the Thermaltake Core X1 Case a 9 out of 10 score
http://www.thinkcomputers.org/thermaltake-core-x1-mini-itx-case-review/
TechwareLabs Editor's Choice Award
http://www.techwarelabs.com/thermaltake-core-x1-itx-case-review/
Bit-Tech Approved Award
http://www.bit-tech.net/hardware/2015/02/05/thermaltake-core-x1-review/1
Video:

Tt LCS Certified is a Thermaltake exclusive certification applied to only products that pass the design and hardcore enthusiasts standards that a true LCS chassis should be held to. The Tt LCS certification was created so that we at Thermaltake can designate to all power users which chassis have been tested to be best compatible with extreme liquid cooling configurations to ensure you get the best performance from the best features and fitment.
Check out Tt-LCS video here:
Join the discussion with the rest of us who are interested in this new design and feel free to leave your comment, thought, question or concern to let us know what you think so we can improve upon our design to best fit your need in the future.
Workable Dimension for Planning Your Build:
Core X9
Core X2
Core X1
-
Hi Aroato,
The differences between the two are as follow:- MS-II has full tool-free mechanism for 5.25" & 3.5", but GS-II only has half
- MS-II has top panel dust filter which GS-II doesn't
- MS-II is using thumb screws on PCI-E slots, GS-II is using normal screws
- MS-II comes with 3pin to 4pin adapter & nut setter which GS-II does not
hope this helps
-
Thermaltake Core V21 Micro Cube ChassisAs the latest addition to the Core V Series, the new Thermaltake Core V21 is a quadrate micro M-ATX-based chassis that offers an endless stackable and flexible thermal solution. It allows externally-modular upgrades for enthusiasts to create dual systems. Designed for use in either a vertical or horizontal orientation on the motherboard, users can customize the chassis for the best viewing presentation. A 200mm fan on the front panel ensures that the Core V21 delivers outstanding cooling performance with compatibility for extensive DIY/AIO LCS, further enhancing the reputation that the air cooling units of the series has become renowned for. Guaranteed to be an immensely powerful system, the Core V21 also has the ability to accommodate various overclocking components to boost performance even further where it counts!


 Product Web Page:
-
Our friend Mwave over in Australia has modded the Level 10 GT Battle, check the video out for more details
-
Check this Level 10 GT Snow out from Dactylion.eSport (Slovenia)
-
Hi,
Could you be more specific about how you connect your cables with the components you have
or maybe provide us with a picture or two for us to better understand your issue, thanks.
otherwise you could also contact our customer service for more support
Thermaltake USA Customer Service
Email: ttsupport@thermaltakeusa.com
Toll Free: 1-800-988-1088 M-F 9:00AM~5:30PM (P.S.T)
-
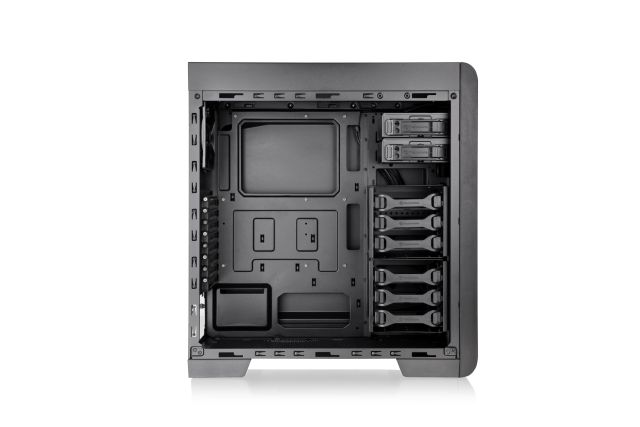
I just received and unpacked mine. I love the size and the interchangeable panels. Now, the only thing that would make it better is if I could easily buy replacement panels - in particular I'd REALLY like an option to buy separate plain blank panels. No vent holes, no window, just formed metal. That would make it easy for cutting in my own mods and whatnot. Being able to buy an additional windowed panel, or vented panel would also be nice, but the blank would be my favorite option.
The window panel will soon be available
-
-
alright, you have clear my concern,
there is no magical trick on connecting the molex head from the controller to the PSU
all you have to do is simply join the two molex together.
and the molex with two pin you mentioned is purposely made,
so, it sounds like you may have a defect controller or a controller was improperly attached for smoke to appear.
For safety concern, please don't use it and contact our customer service team immediately to get a replacement, thanks.
-
did you connect another fan to the controller?
-
The molex you are holding on your hand is the power cable for the fan controller, all you need to do is connect this with your molex from your PSU.

-
This will be a section where you may find some news, updates, or first hand information.

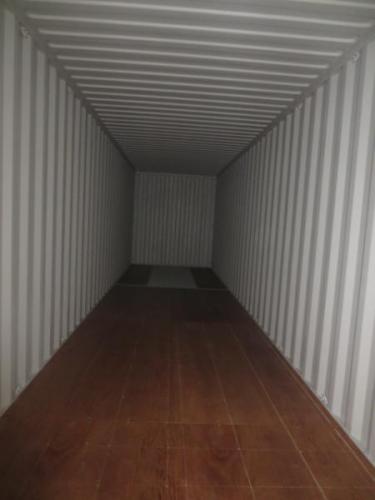
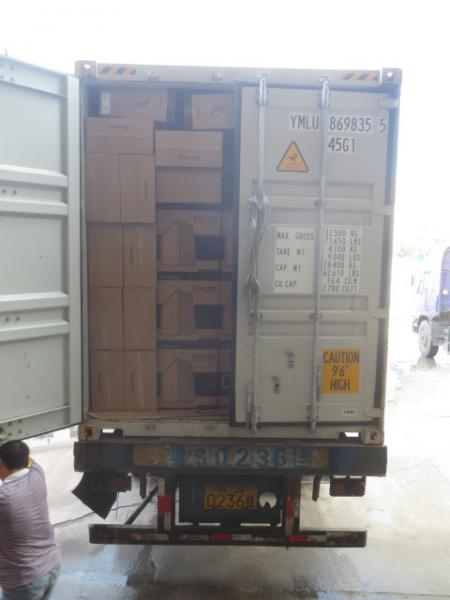
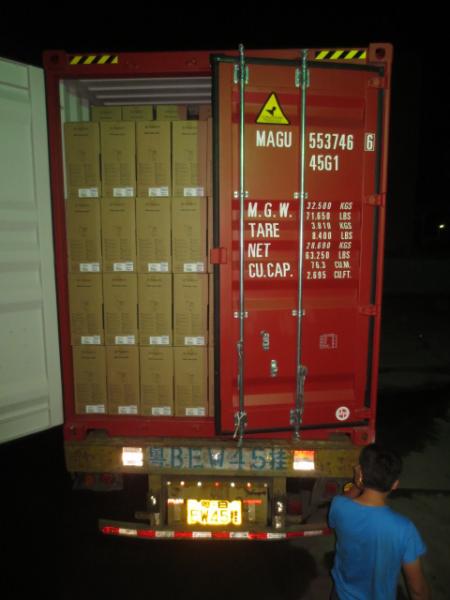
Something like this:
Container one shipping to LA
Ready to pack
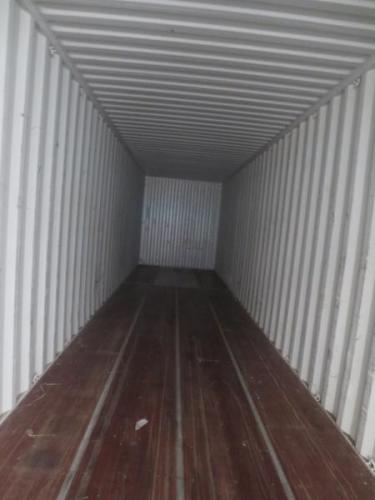
Loaded
Ready to go!
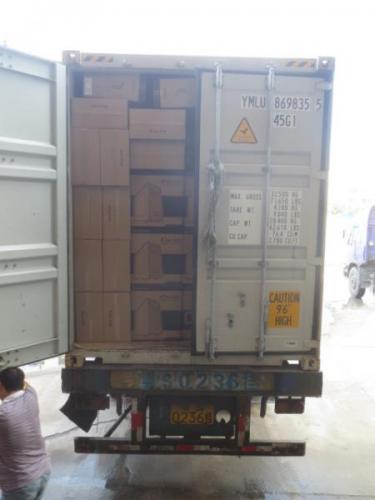
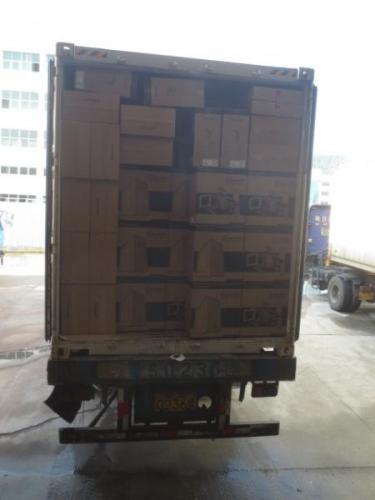
Container two going to Germany

Ready to pack
Packed

Door closing head to the harbor

If you happen to see these two containers on the road, please don't jack it!

-
hey,
can someone please find out specs. on the 200mm fans included in the case.
im getting conflicting info. from various web sites.
thermaltake v71 case fan - blue led 600-800 rpm 13-15dBA [ fan model - tt 2030 ; code - a2030l12s] no manufacturing date.
level 10 gt case - multi colour led (colour shift) - same specs
chaser mk-1 case - same as above
and 200mm thermaltake PURE 20cm fan - model no. and code are the same but specs look different. [800 rpm - 15dBA VS. 800 rpm - 28dBA]
{ http://www.thermaltake.com/products-model.aspx?id=C_00002235 }
Ok few questions -
1.are the fans capable of changing colour?
2.same specs as the PURE 20cm?
3.why can't i read rpm signal when connected to mb?
4.what is the voltage output from the fan controller when on high?
sorry bout all the questions, but i just need to get my facts straight before i sort out my airflow config.
thanks
Answer:
1. Fan colors are changeable only if they have the function with the controller.
2. Besides the size of the fan, all the fan you mentioned has different specs.
3. Signal wire/cable (yellow) is designed for LED color control instead of rpm control, therefore the MB will not be able to read it. It will only work with specific controller.
4. The voltage output from the fan controller when on high is 12V
Basically the fans are made for specific models, the Pure 20 is for general uses that works with MB or general fan hub or fan controller
If your intention is to install another 200mm fan into V71 and work with V71 controller, none of the fan you mention beside V71's fan will work with V71's controller
-
Do you carry a cpu cooler that is under 140 mm in height that would fit in the CORE V1?
Yes, we do, It is called the NiC L31 and that is what we have in there with our V1 picture.
here is the link for you to get more info on it:
http://www.thermaltake.com/Cooler/Air_Cooler_/NiC/C_00002246/NiC_L31/design.htm
-
The Titanium edition will be available soon, if you are interested please visit your local retail to reserve one or contact the distributor for more info.


Level 10 GT Snow - top fan replacement
in Chassis
Posted
There is push and release button at the back of the top panel, simply push down the button you should be able to remove the top panel.
after removing the top panel you will see the screw points which you can change your 200mm fan