-
Forum Statistics
7.6k
Total Topics51k
Total Posts -
Member Statistics
136,025
Total Members16,800
Most Online

RandomDesign
-
Posts
24 -
Joined
-
Last visited
-
Days Won
4


RandomDesign's Achievements
Just Getting Started (2/10)
11
Reputation
-
 nKwoel reacted to a post in a topic:
[Germany] Stefan Ulrich
nKwoel reacted to a post in a topic:
[Germany] Stefan Ulrich
-
nKwoel reacted to a post in a topic:
[Germany] Stefan Ulrich
-
Peter Gerd reacted to a post in a topic:
[Germany] Stefan Ulrich
-

[Germany] Stefan Ulrich
RandomDesign replied to TT Amanda's topic in 2023 Thermaltake RAM MOD Invitational Season 1
And a short video! -
[Germany] Stefan Ulrich
RandomDesign replied to TT Amanda's topic in 2023 Thermaltake RAM MOD Invitational Season 1
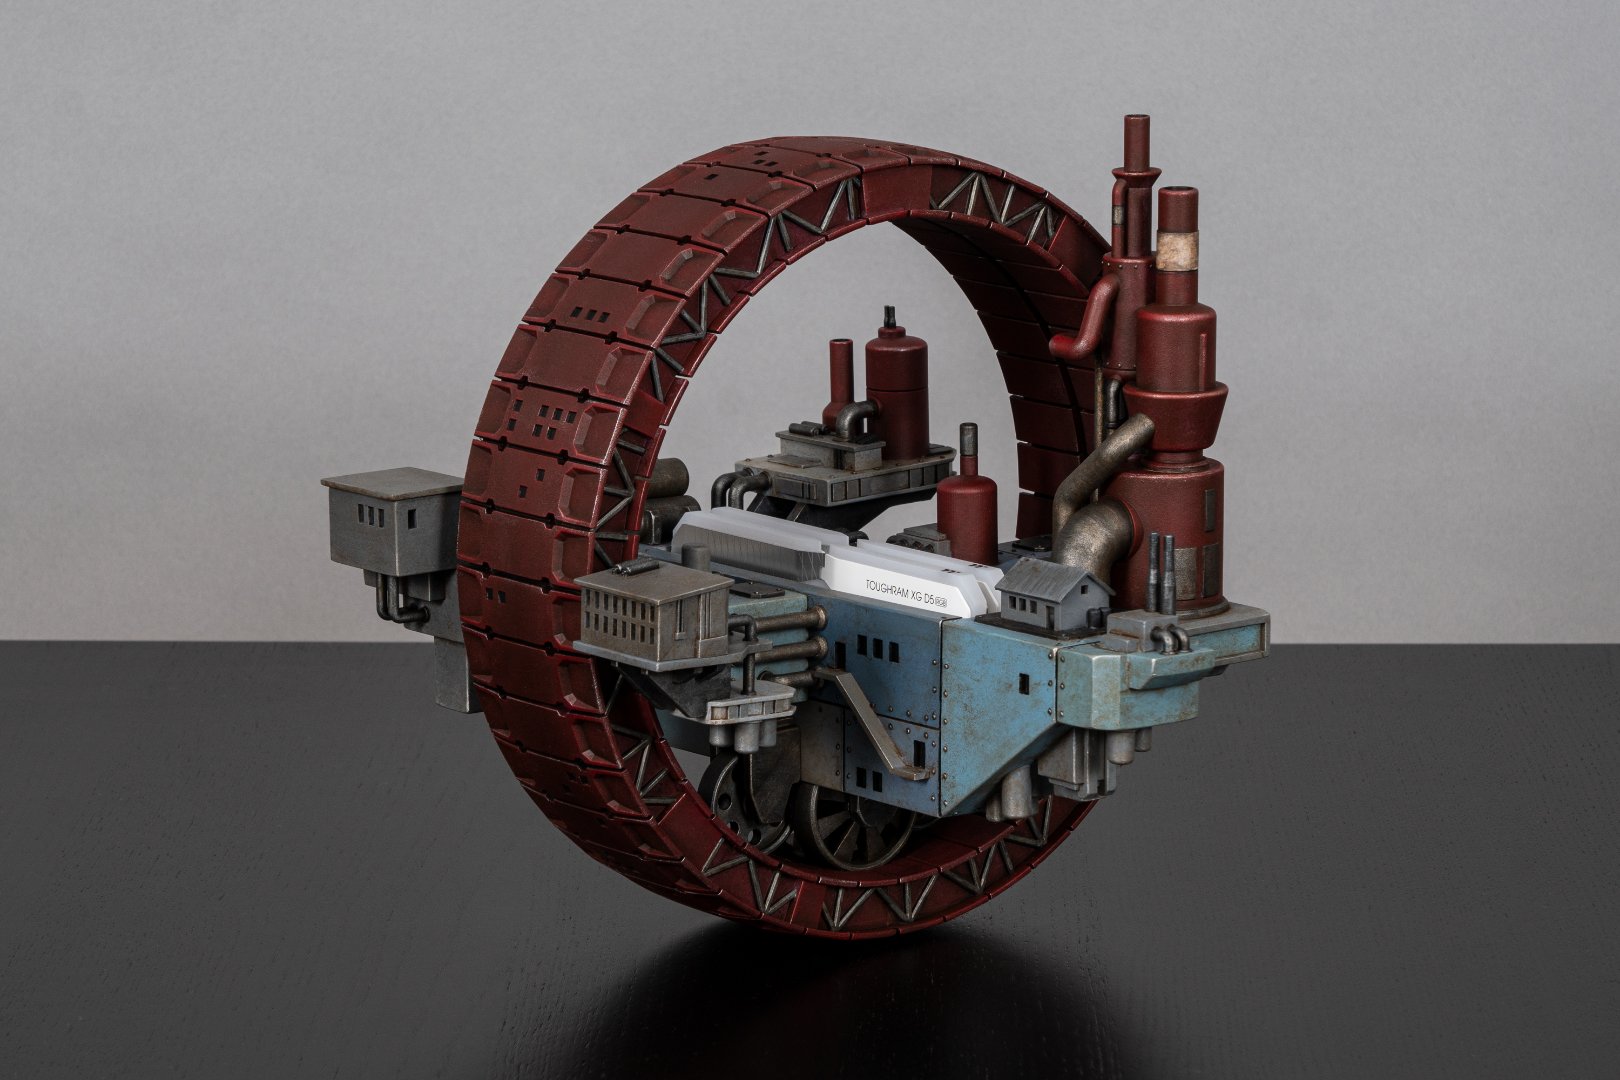
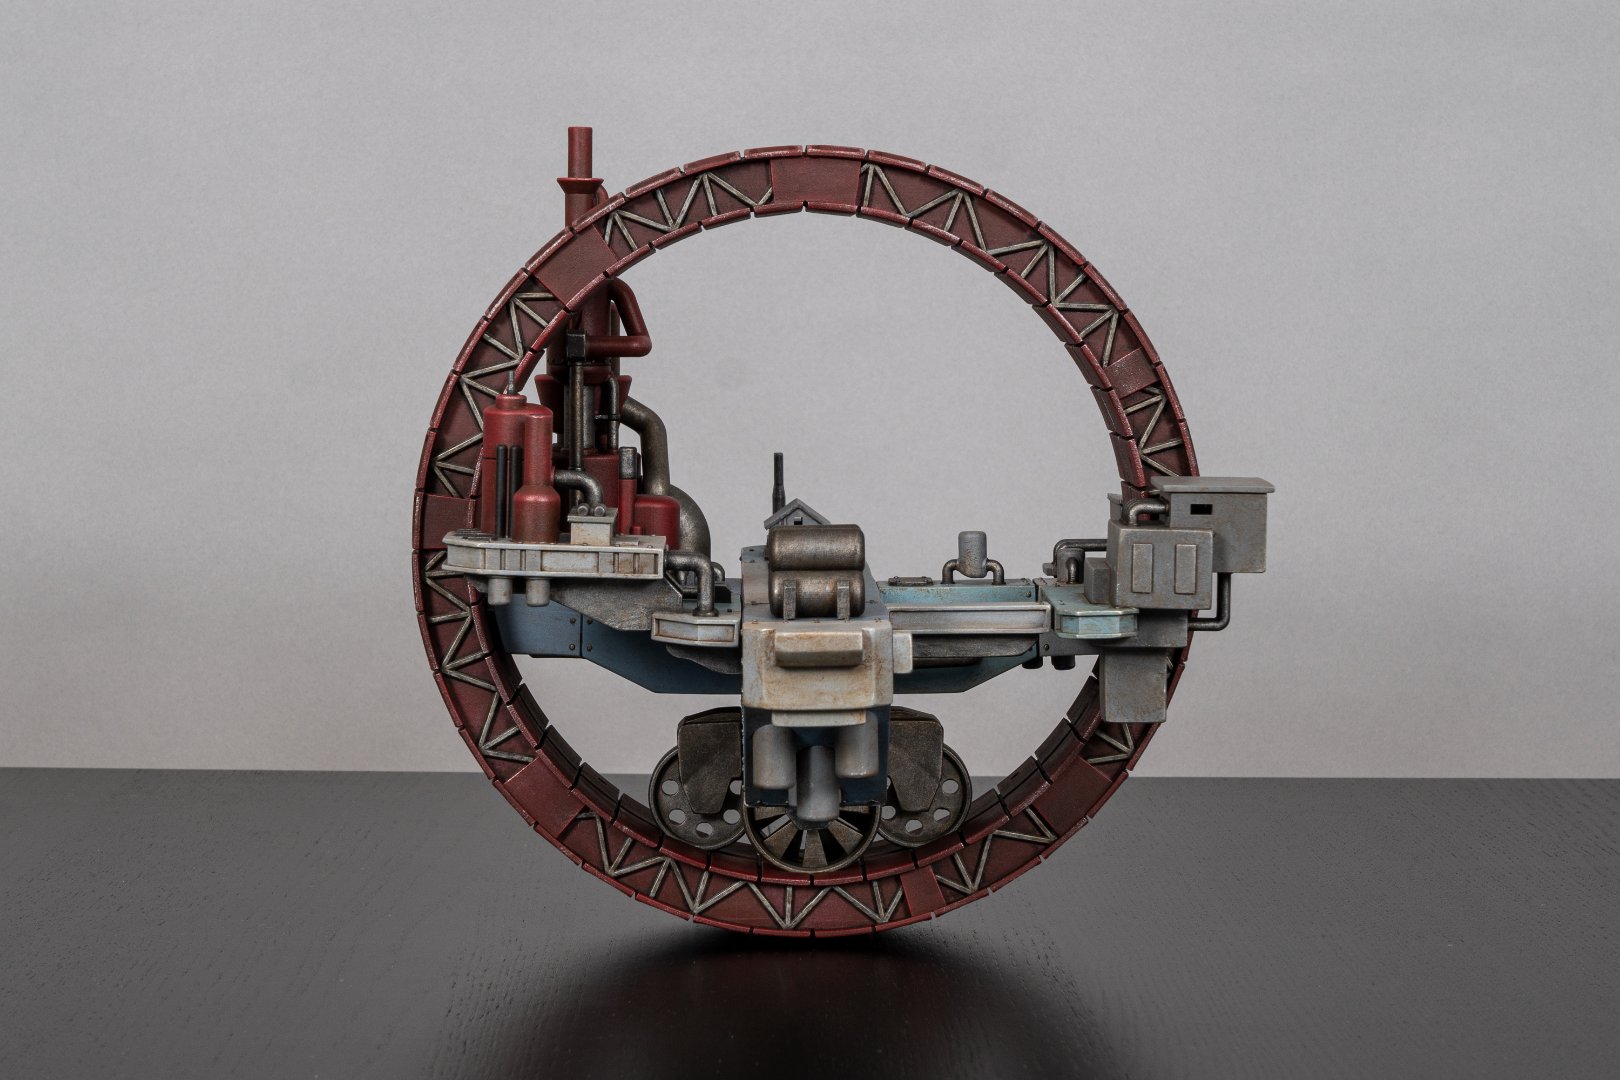
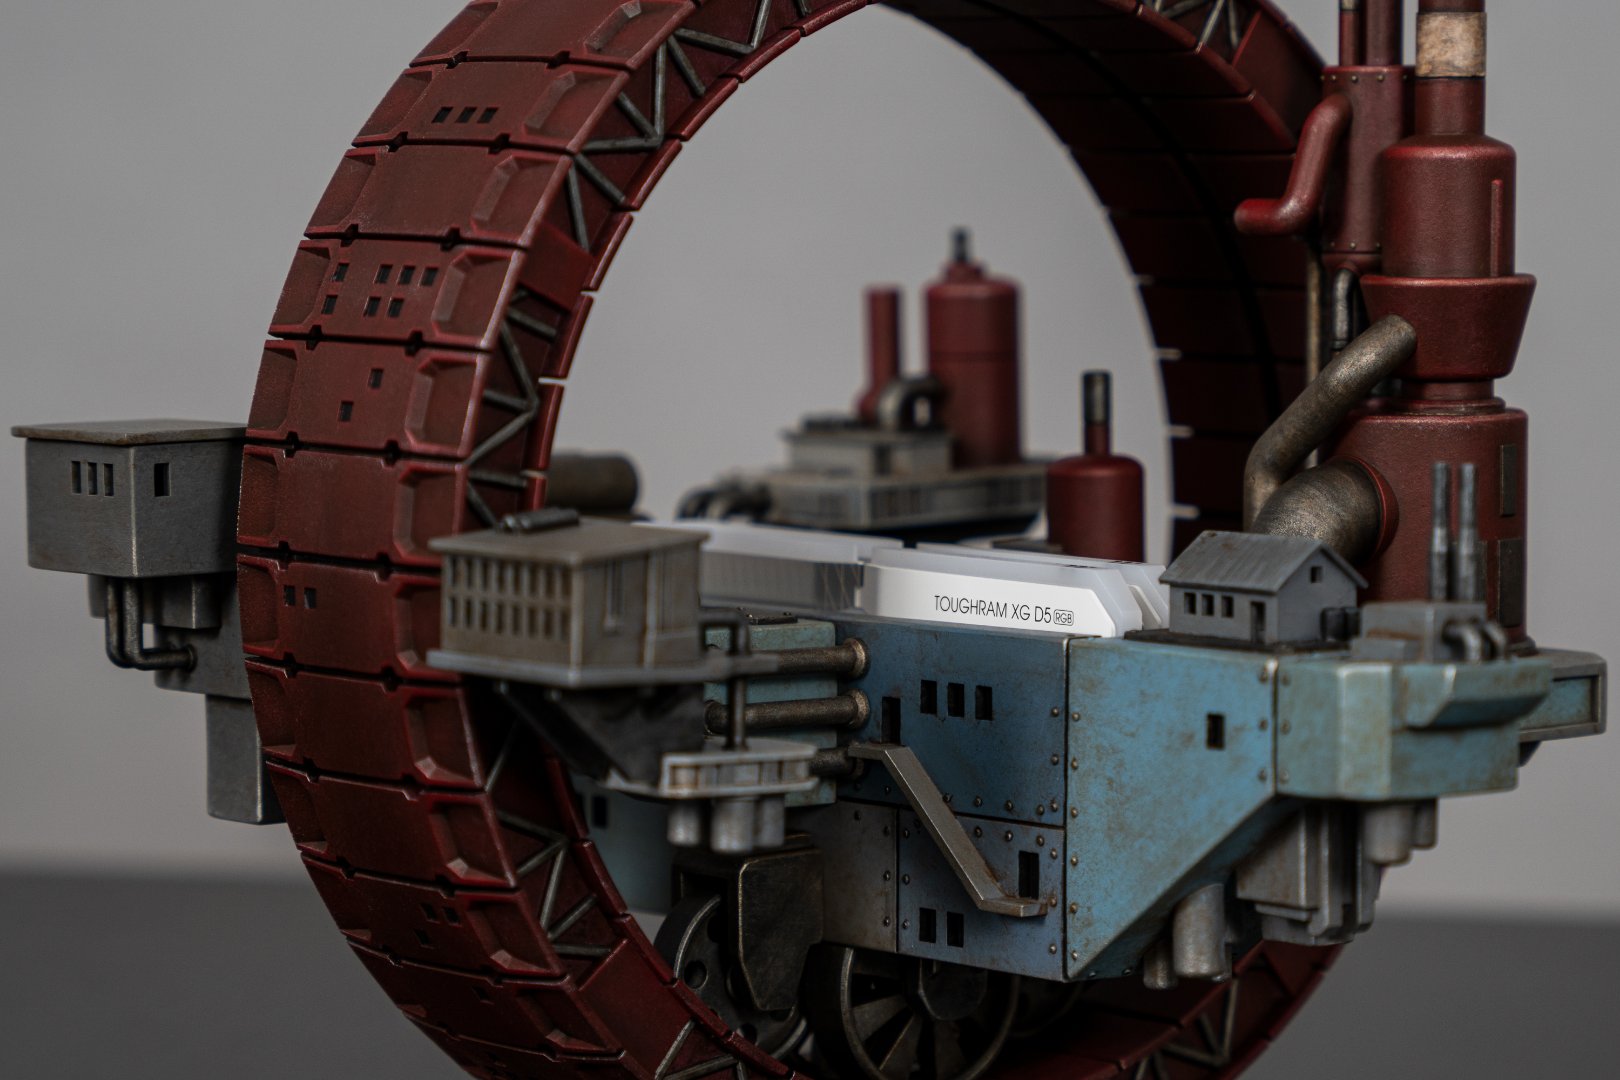
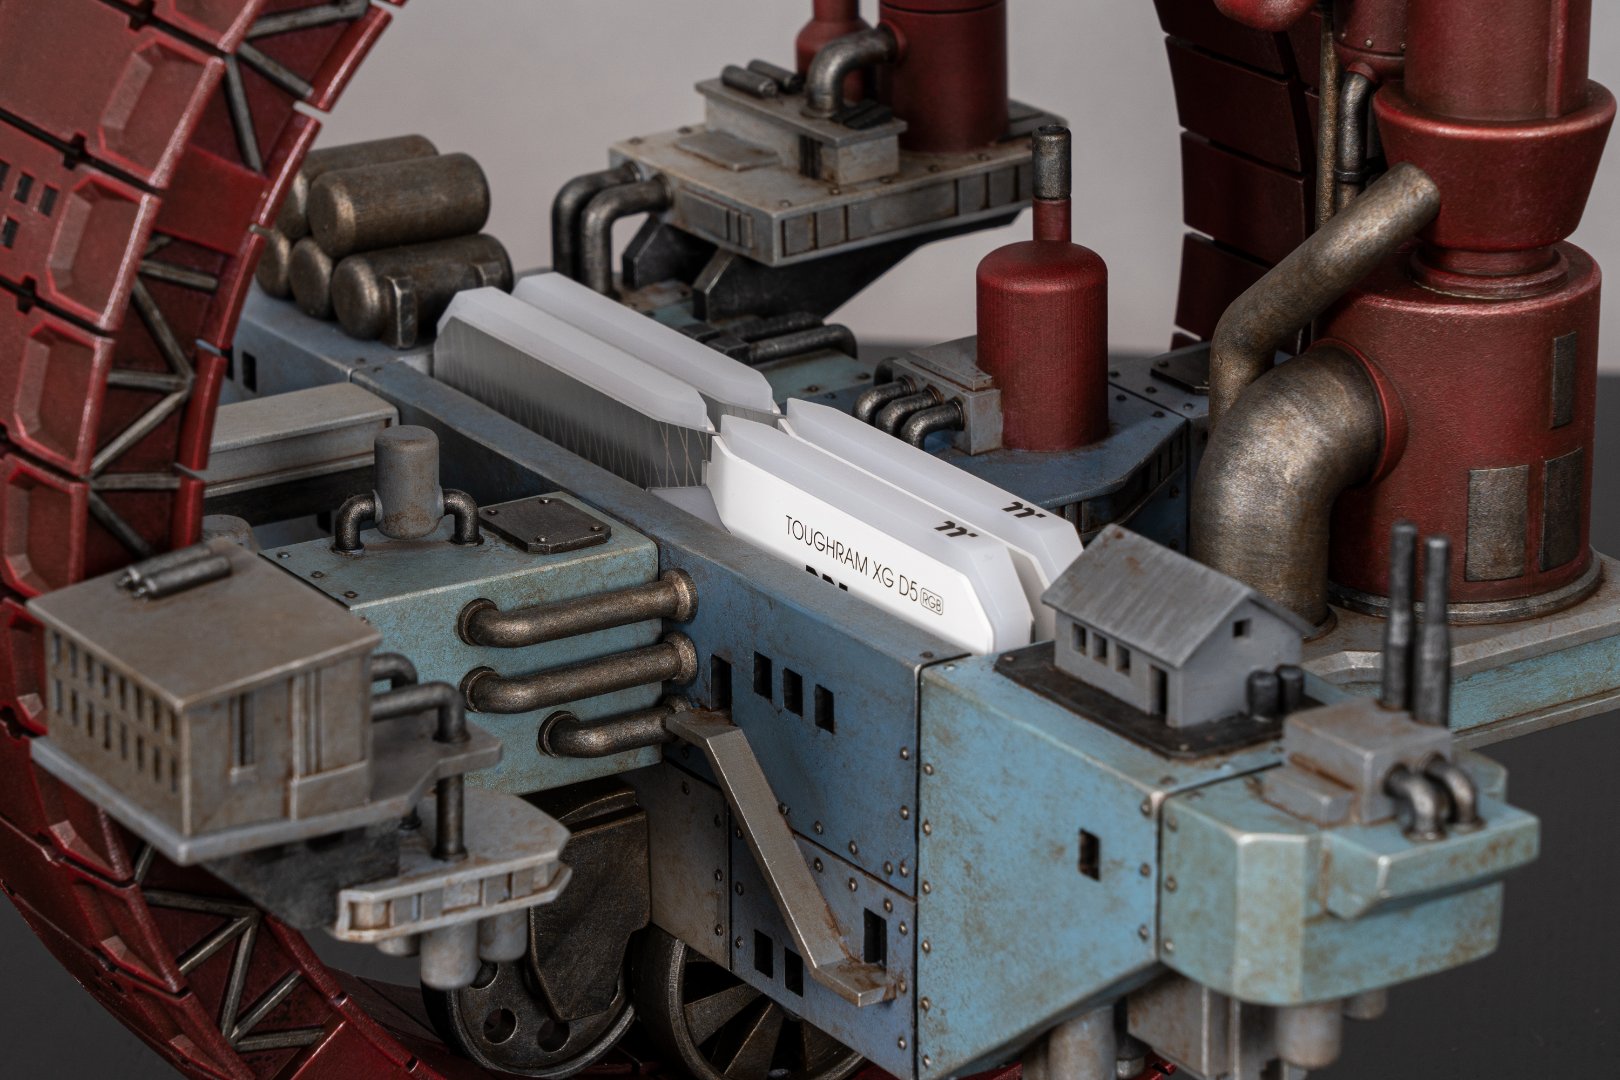
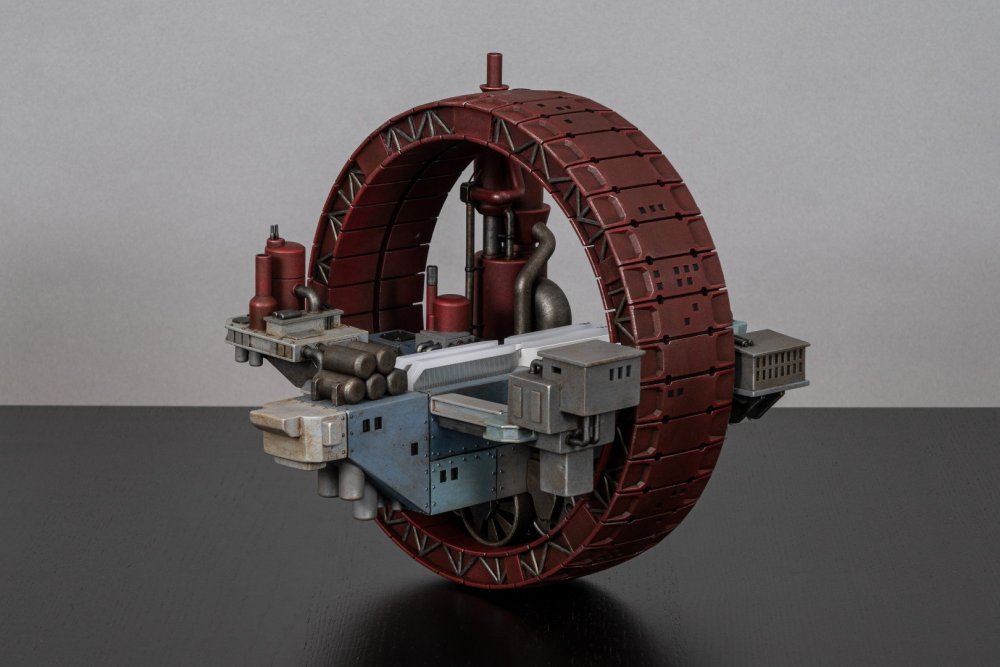
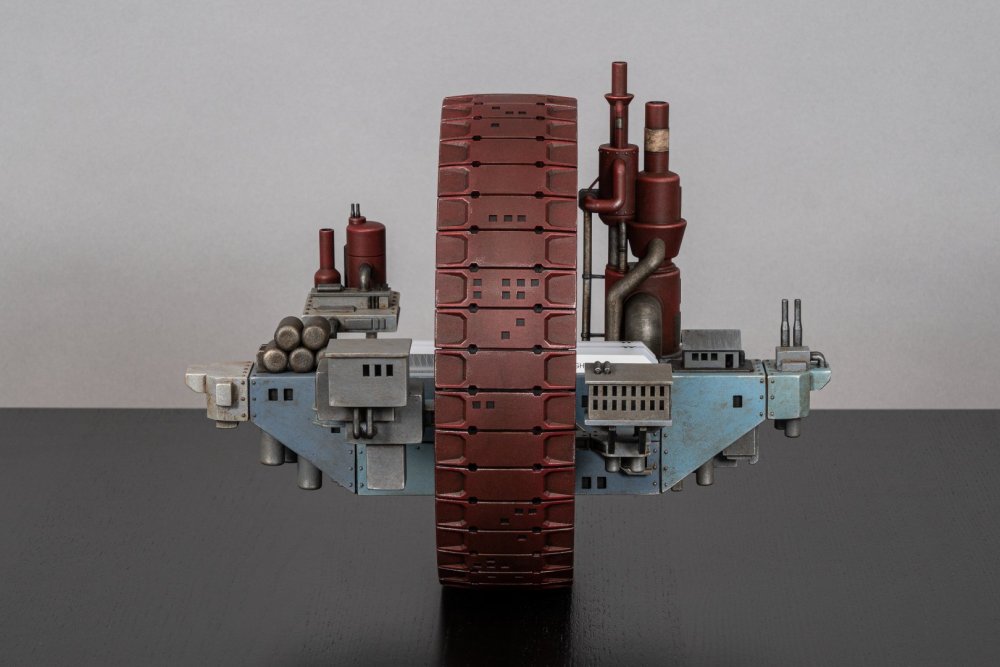
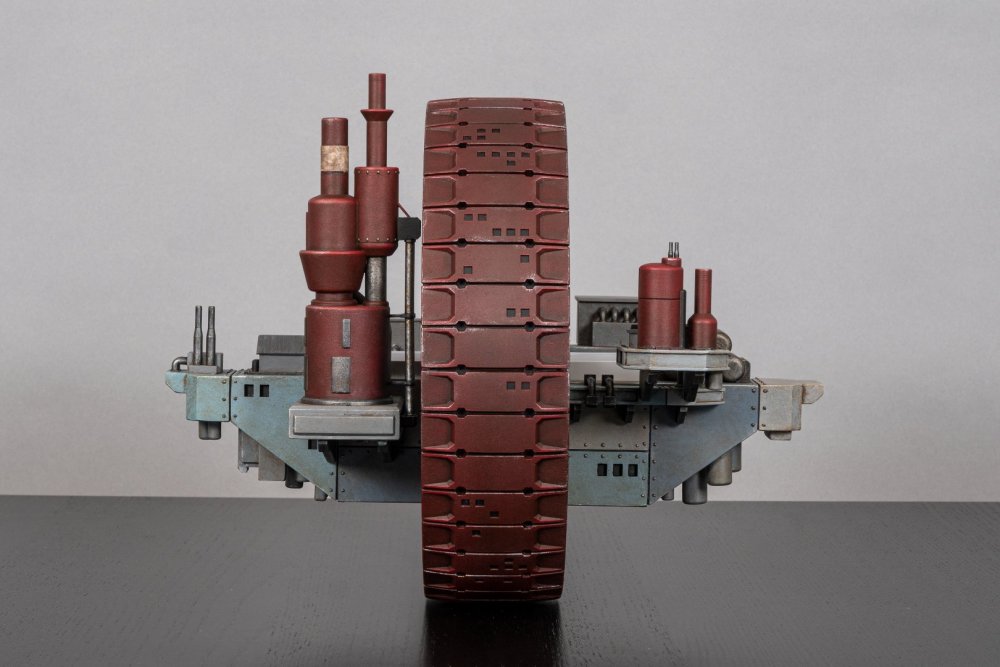
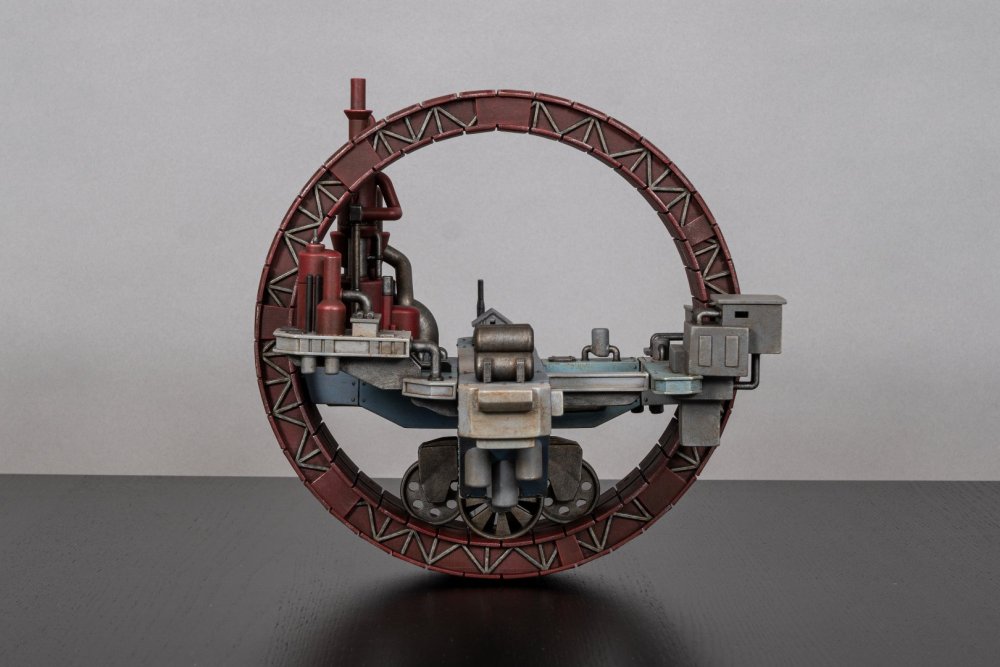
And now for the final pictures. Thanks Thermaltake for giving me the opportunity to participate! Was a fun little project. Enjoy!


-
[Germany] Stefan Ulrich
RandomDesign replied to TT Amanda's topic in 2023 Thermaltake RAM MOD Invitational Season 1
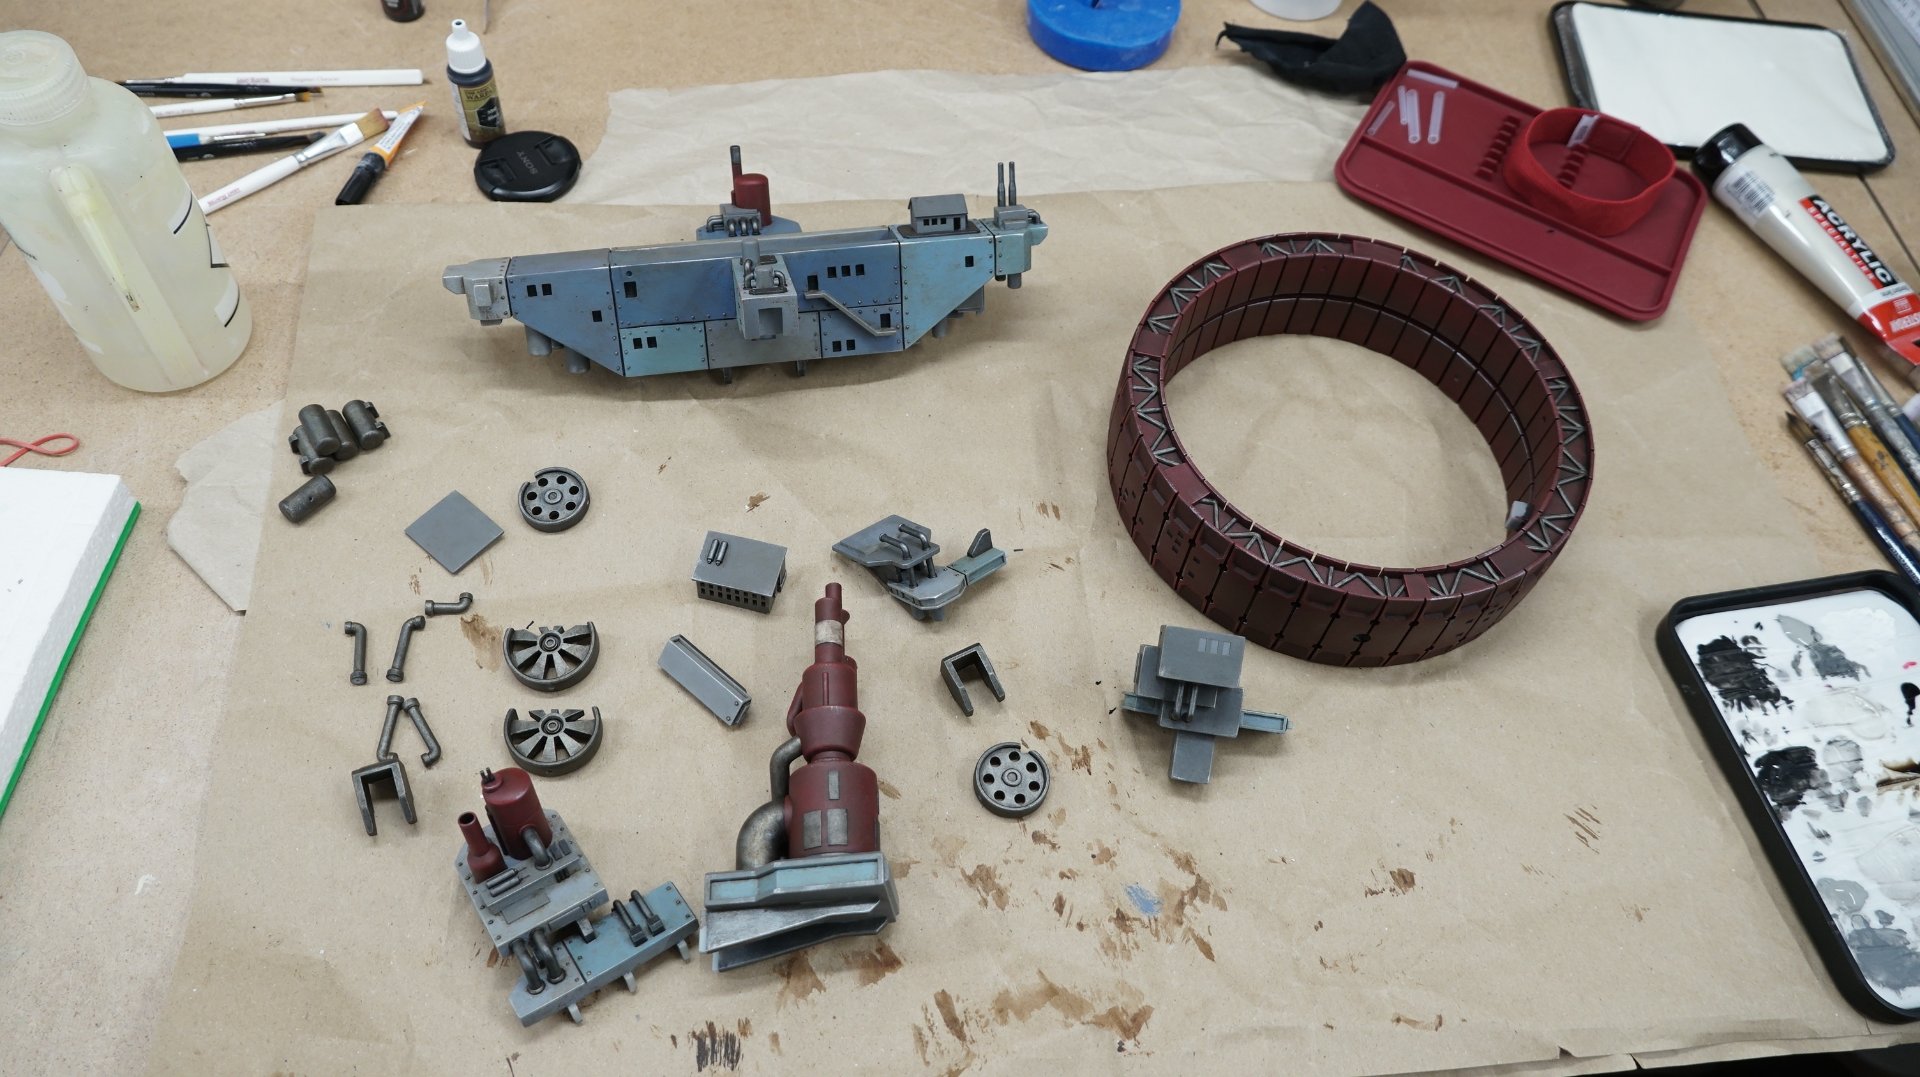
Last quick update before the final images. All parts are now painted and weathered. Going for the final assembly now. The fun part, all parts in the picture will hold together at the end without any glue. All are designed to join into each other.
-
[Germany] Stefan Ulrich
RandomDesign replied to TT Amanda's topic in 2023 Thermaltake RAM MOD Invitational Season 1
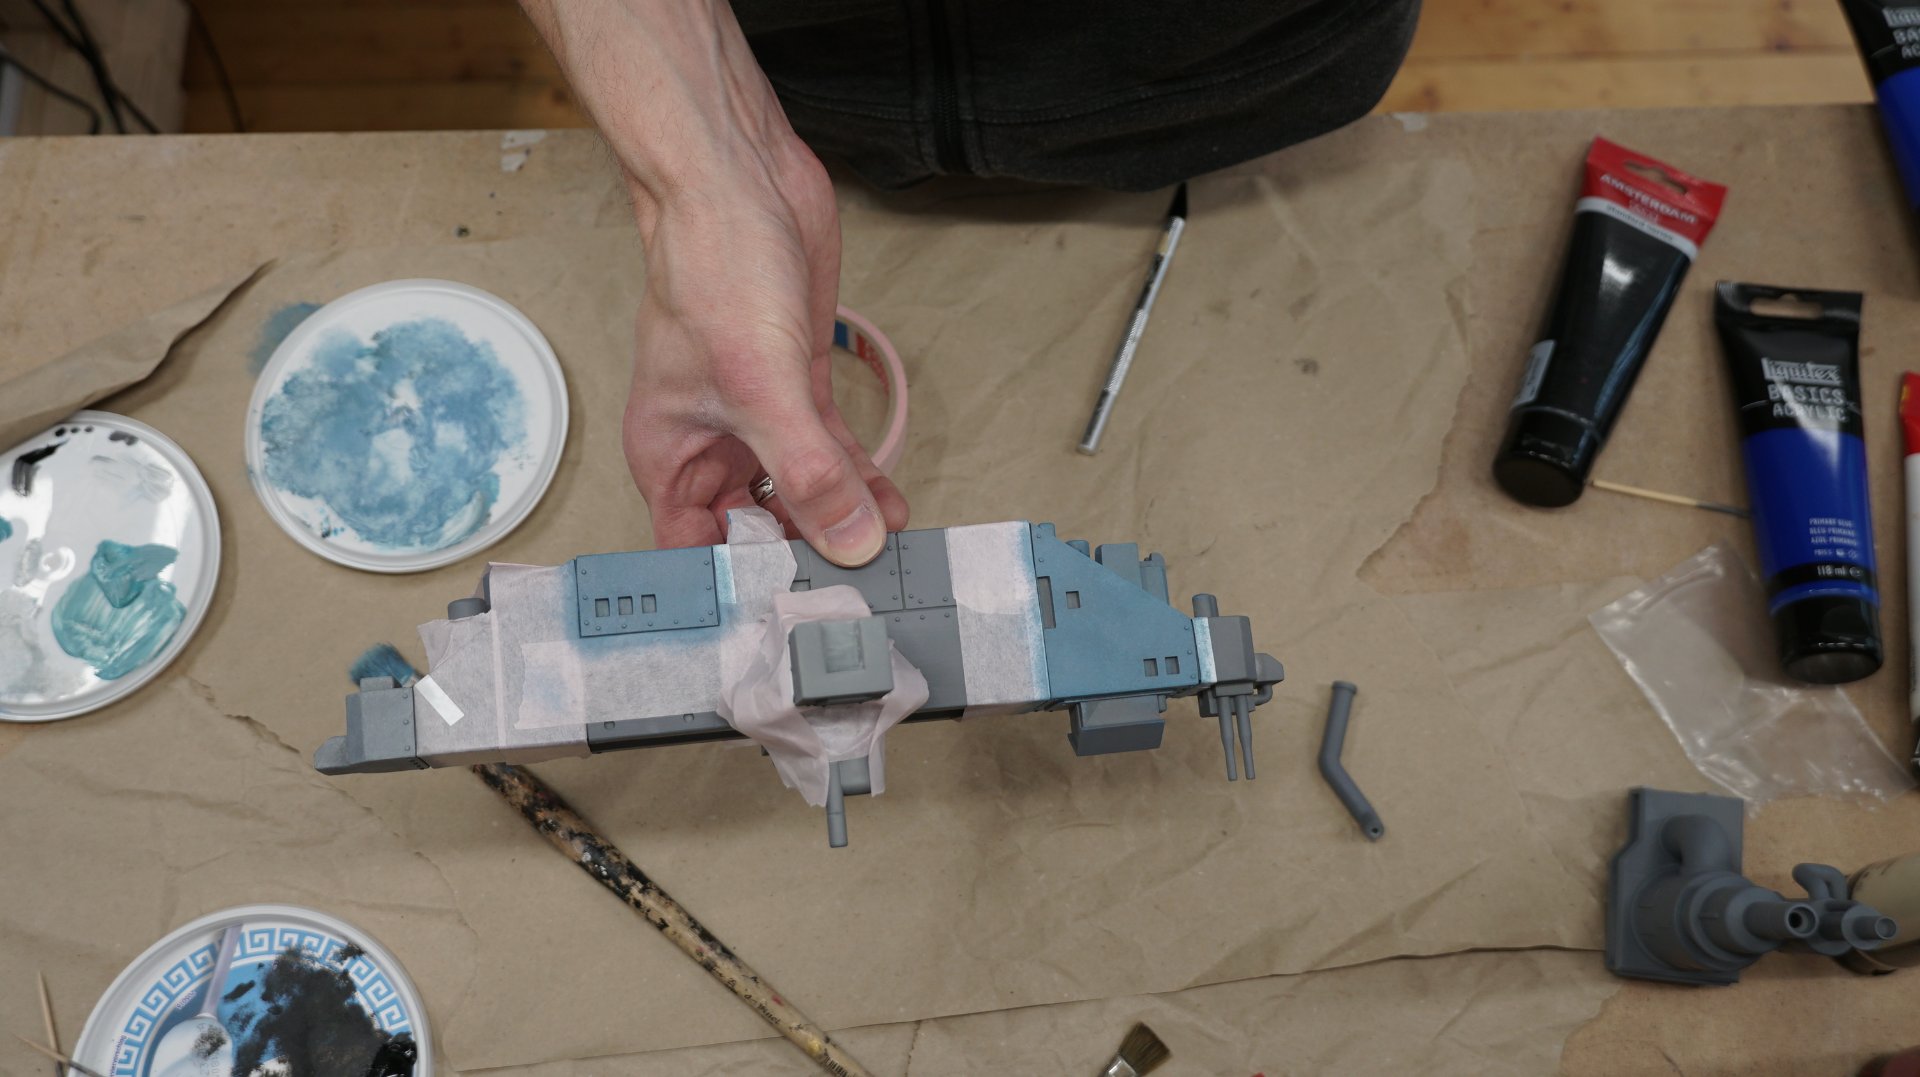
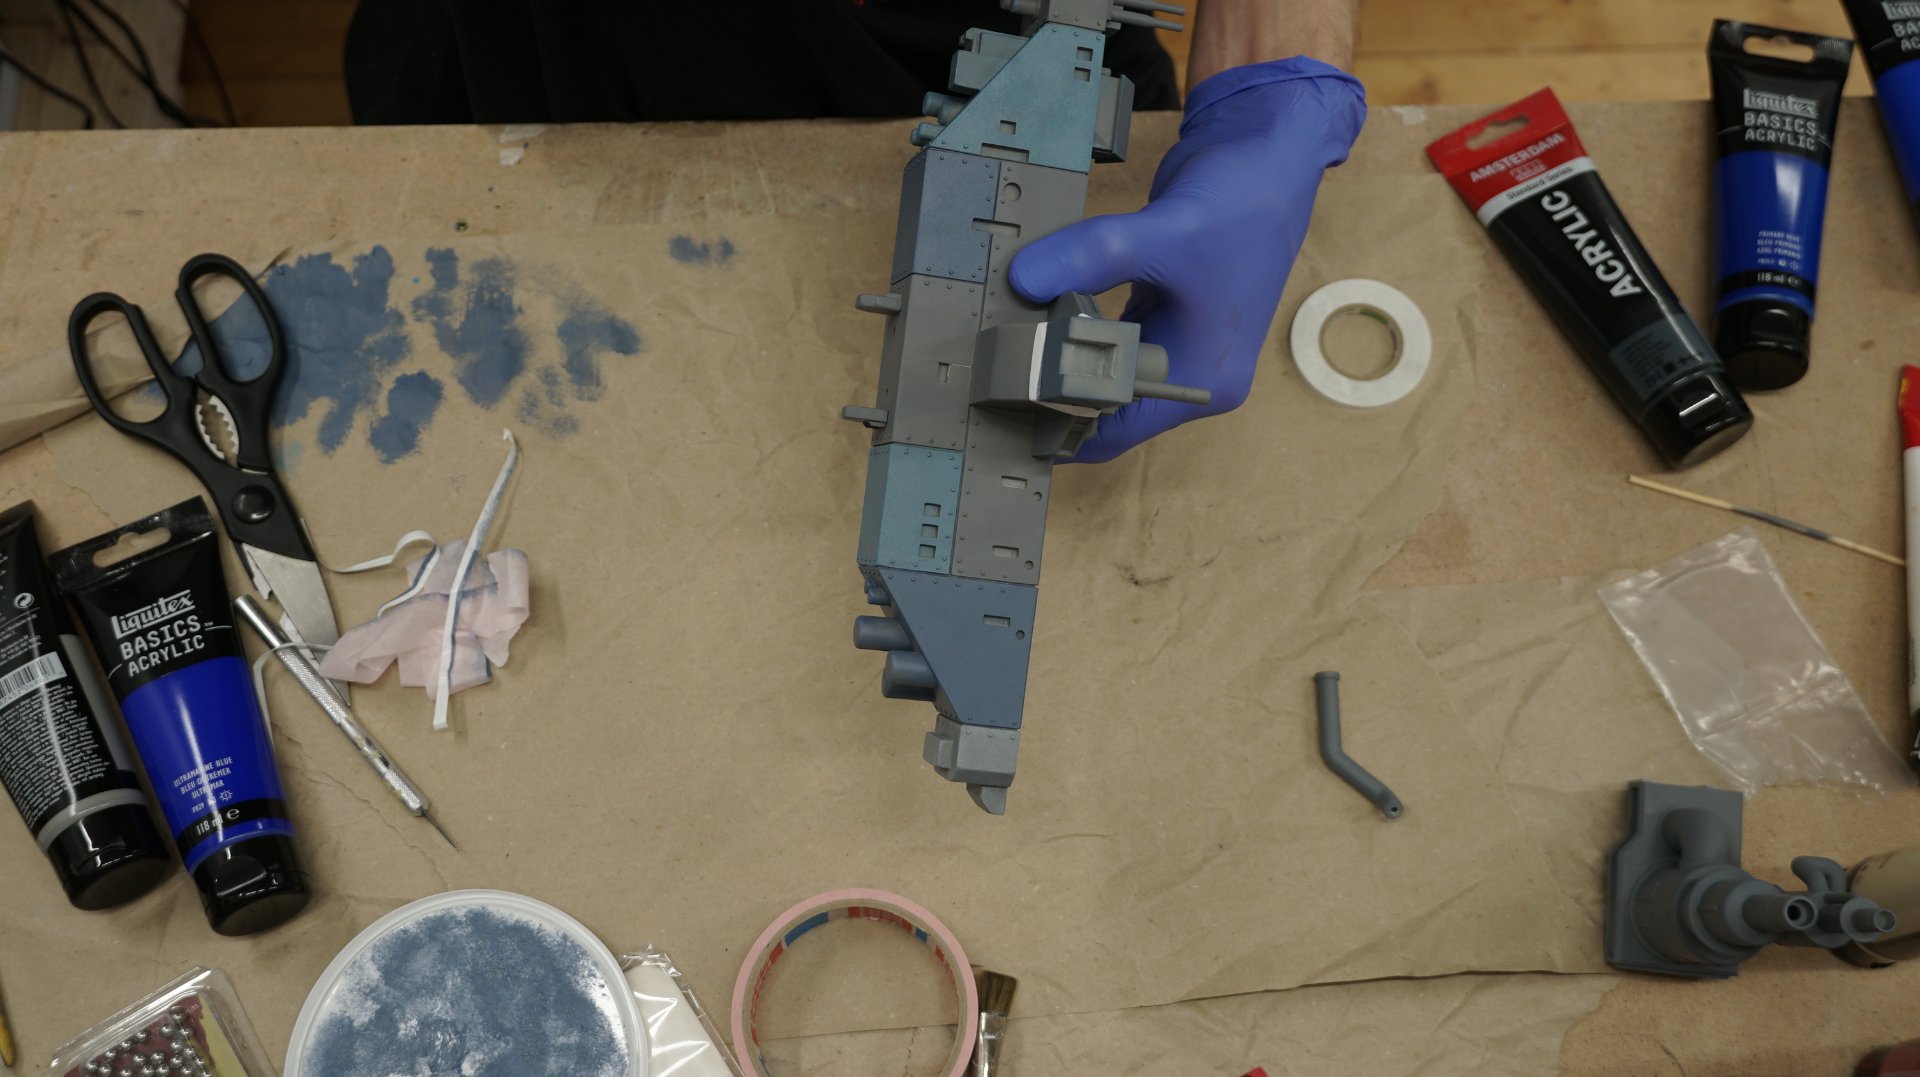
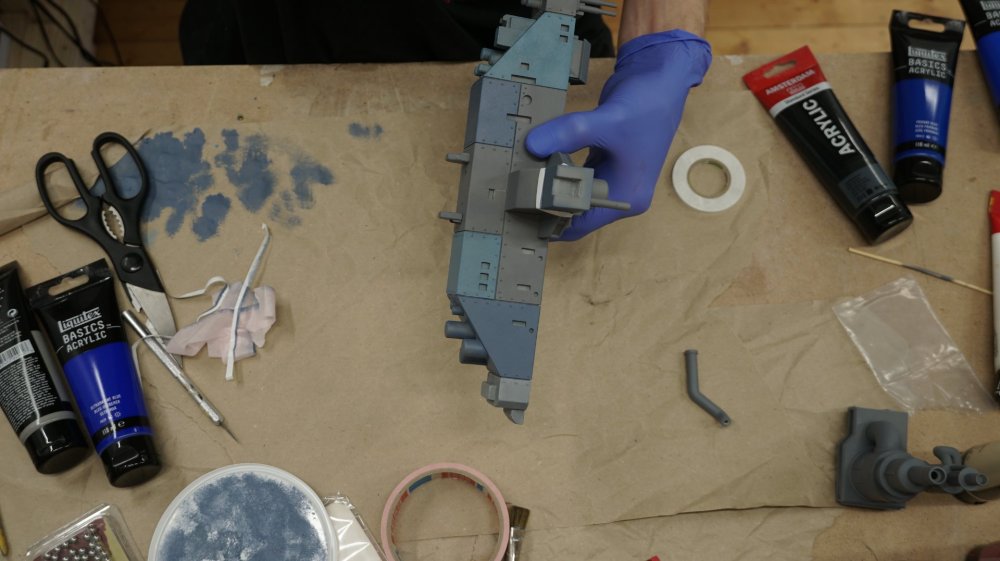
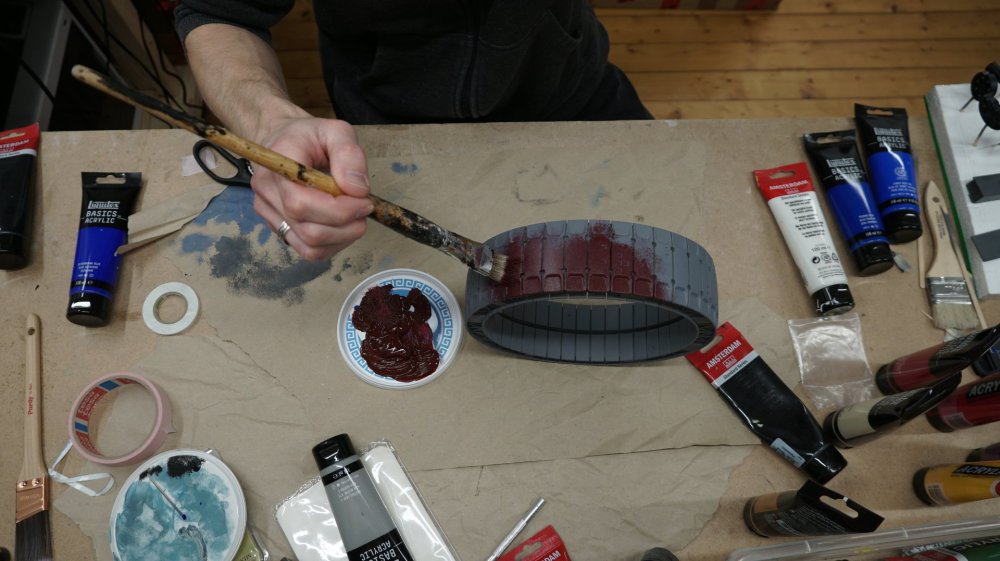
Started with the paint job. The outer ring will get a darker red color. I used a brush to dab on the color. That way, I already get a bit of texture that makes the entire construction looks a little used and old. The main part in the middle got different tones of a light blue and grey for a nice contrast. I masked all the surfaces and then also dabbed on the paint. Next, I am working on the metal parts and will do a weathering before the final assembly.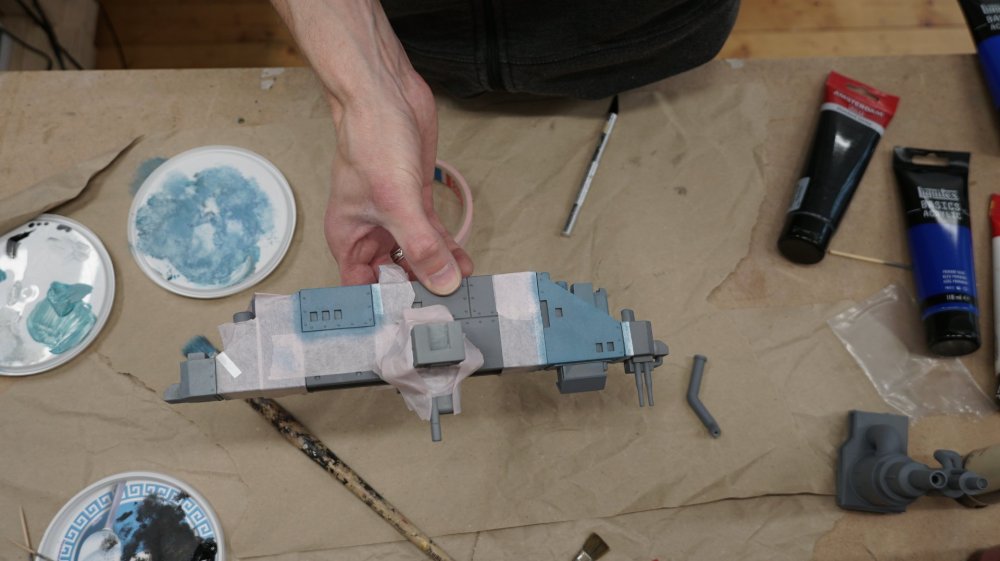
-
[Germany] Stefan Ulrich
RandomDesign replied to TT Amanda's topic in 2023 Thermaltake RAM MOD Invitational Season 1
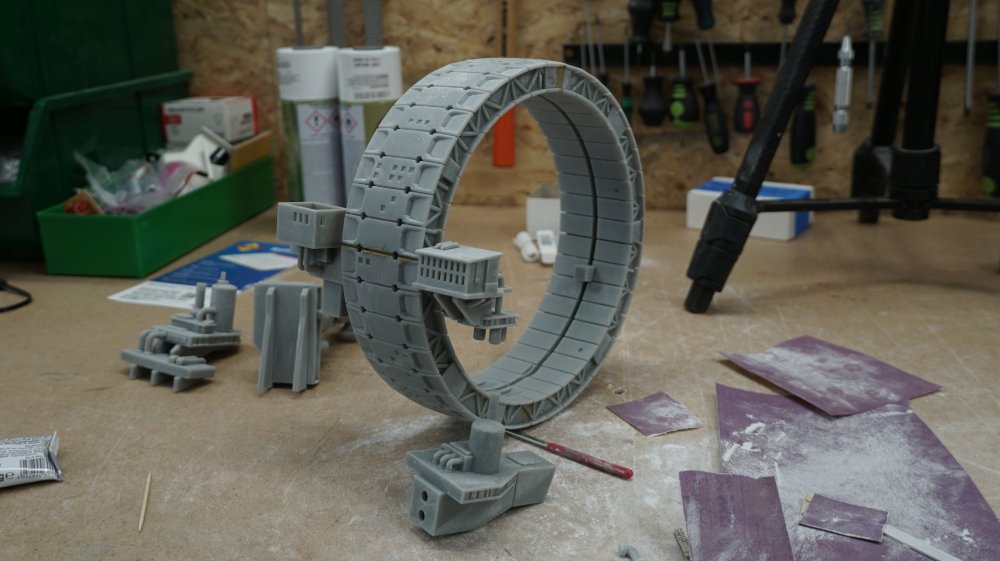
Made a first test fit with all the primed parts. Looks good so far. Now I will start with the paint job and add the last details.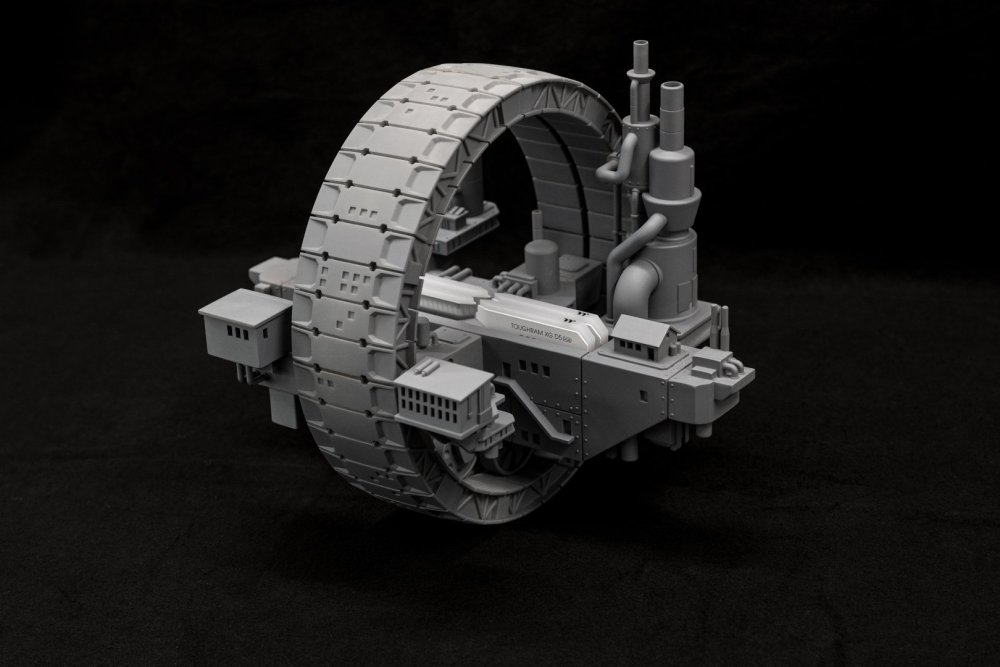
-
[Germany] Stefan Ulrich
RandomDesign replied to TT Amanda's topic in 2023 Thermaltake RAM MOD Invitational Season 1
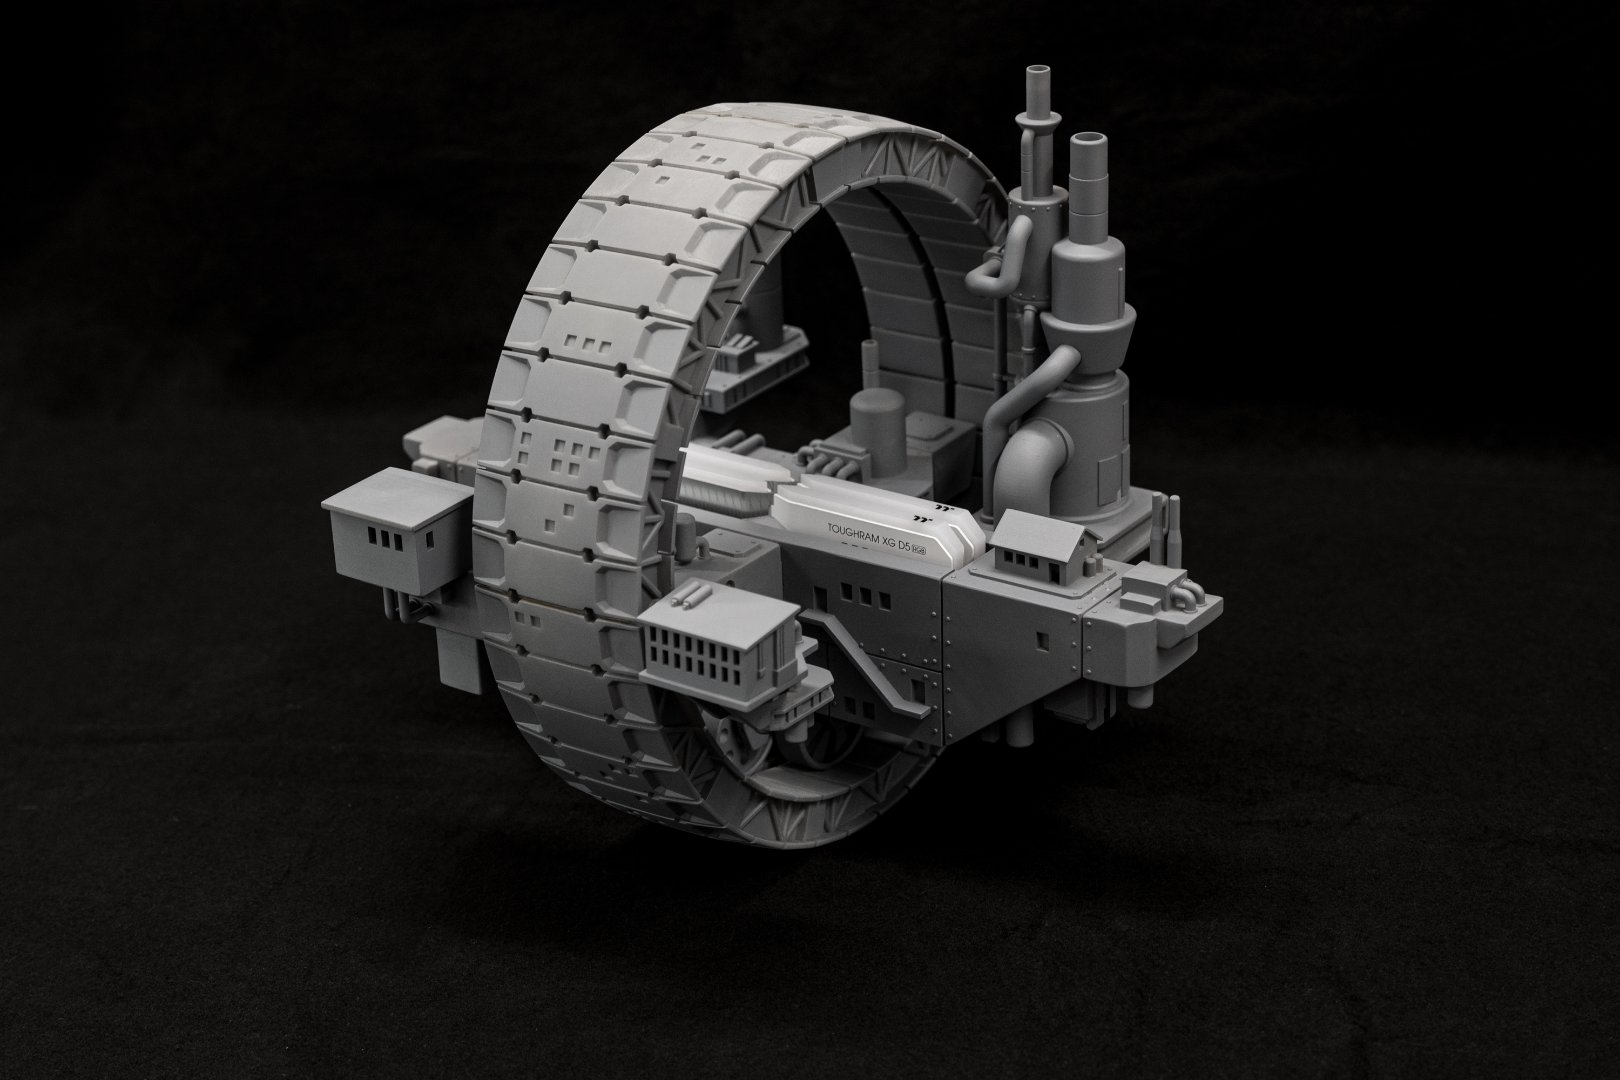
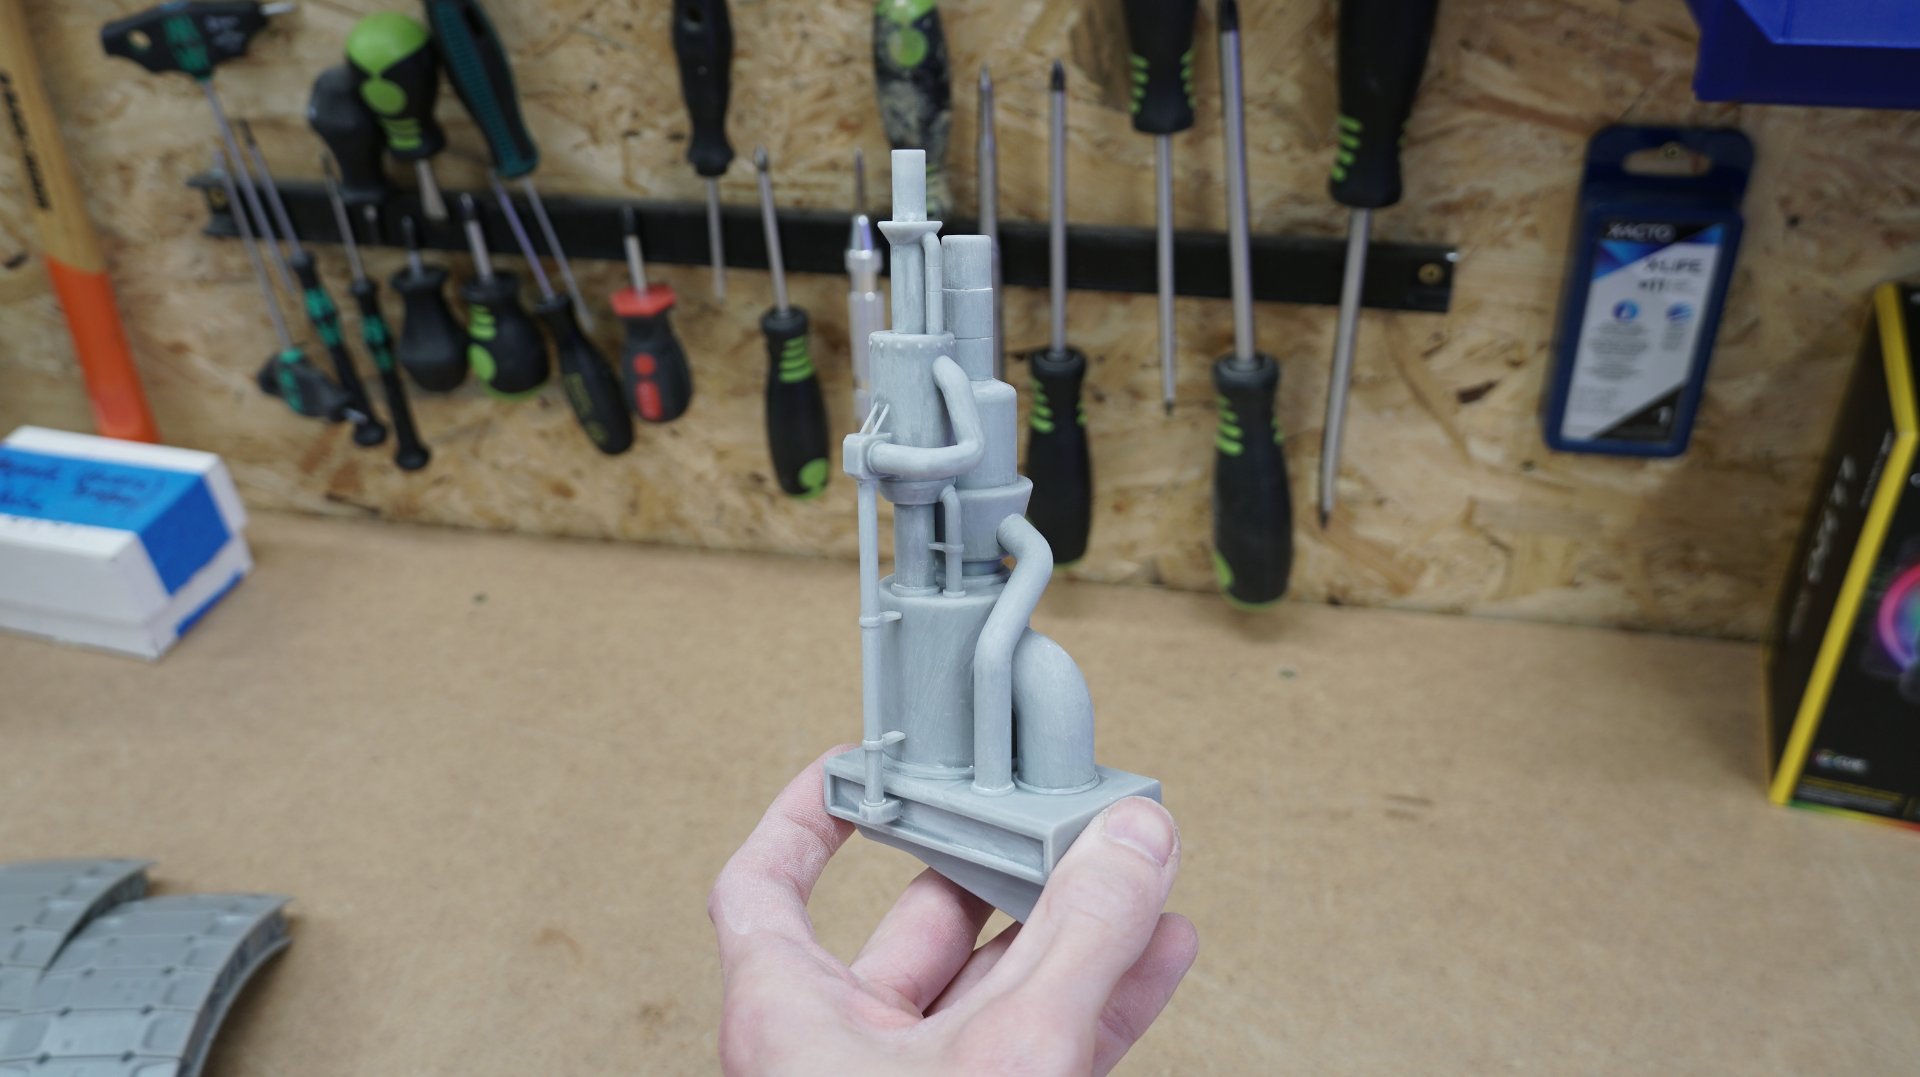
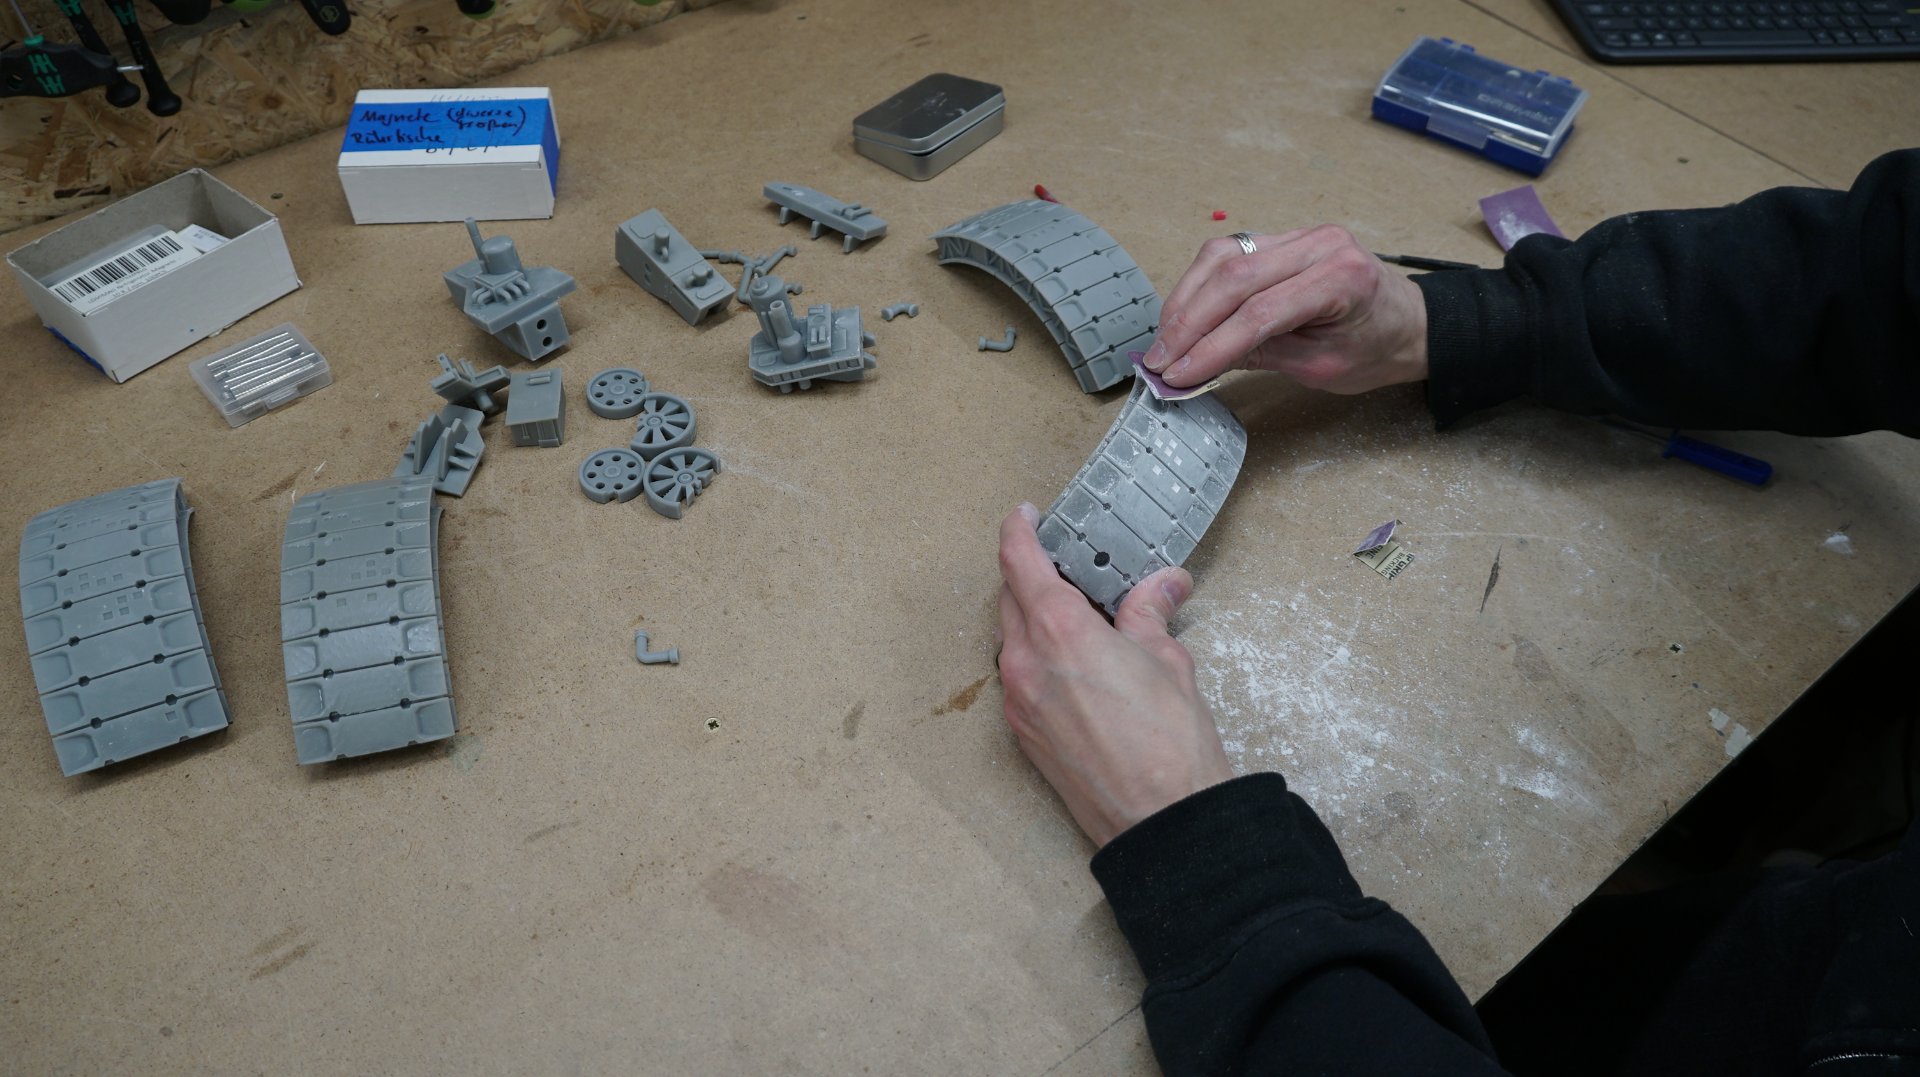
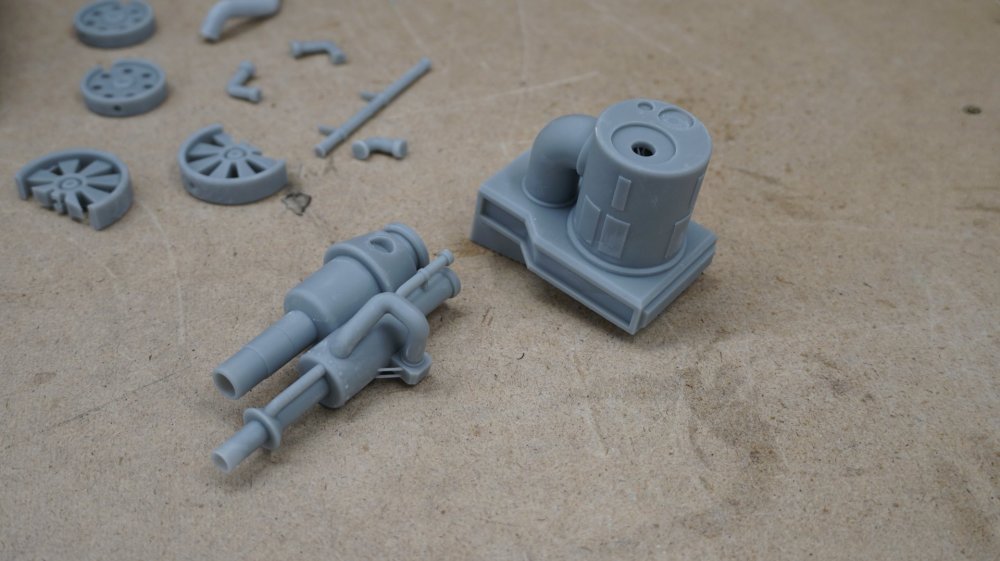
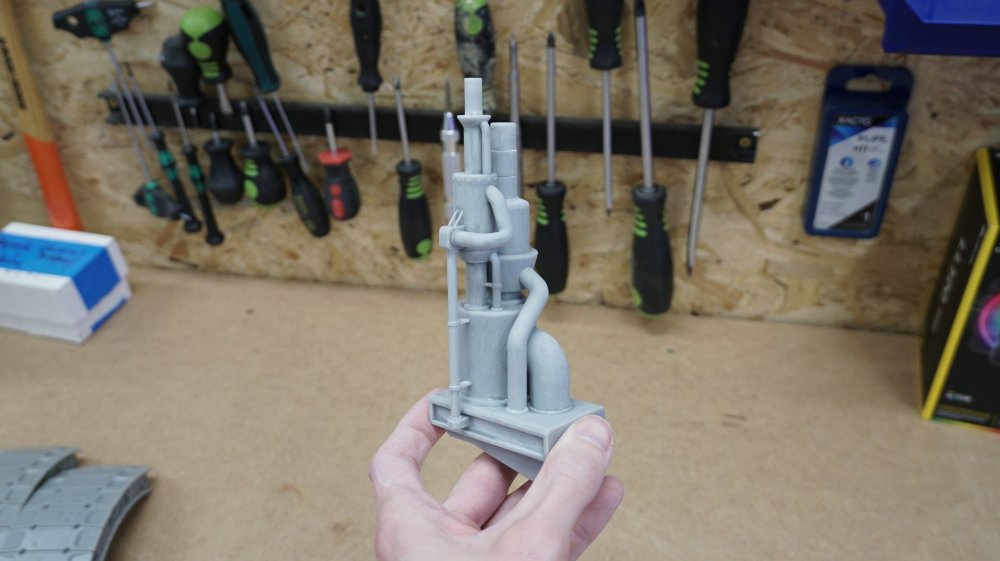
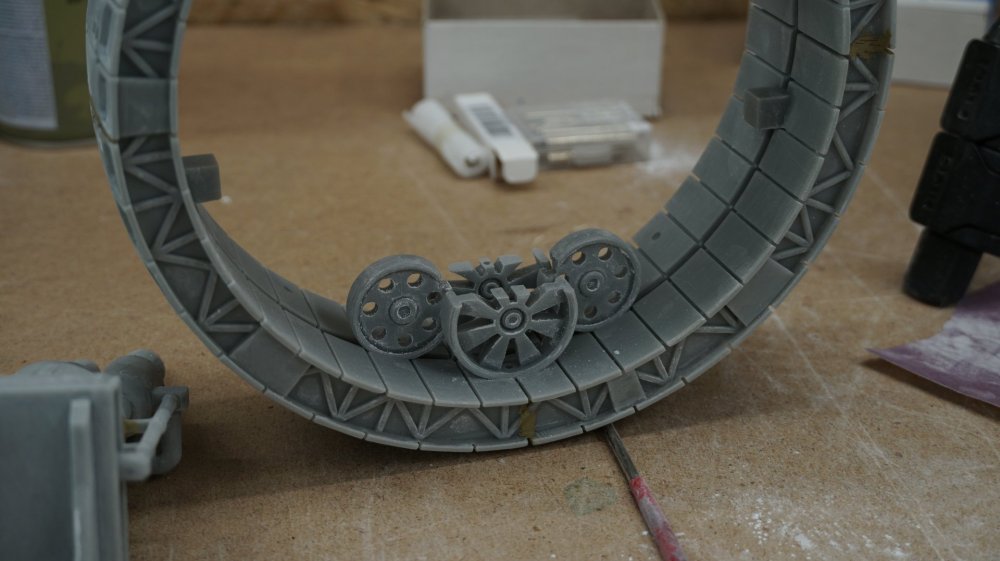
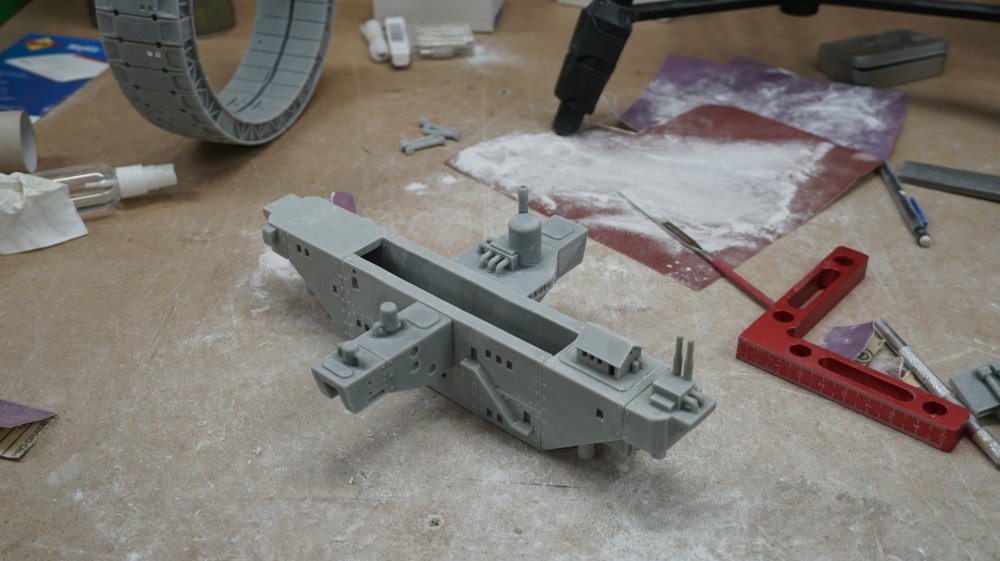
Somehow I thought the deadline was next week *TILT* So I just super speed it up to hopefully keep the delay only two/three days at max. After the 3D model was almost done, I already started printing the parts in resin. Cause I only have a small resin printer, I needed to split up the parts in multiple pieces As you can see, although it is resin printed, I took some time to make some post processing and smoothed out the surface even more. After that, I glued some parts together. Continued to build the parts. I am aiming to have multiple bigger parts, that can be disassembled if needed. Everything is snug fit together, I might install some magnets to get a better holding power. Next up, I am priming all the parts and start the paint job. So I am already on the home stretch. So keep with me a just a little longer. Hope I can finish everything on Wednesday and present you the final pictures.


-
[Germany] Stefan Ulrich
RandomDesign replied to TT Amanda's topic in 2023 Thermaltake RAM MOD Invitational Season 1
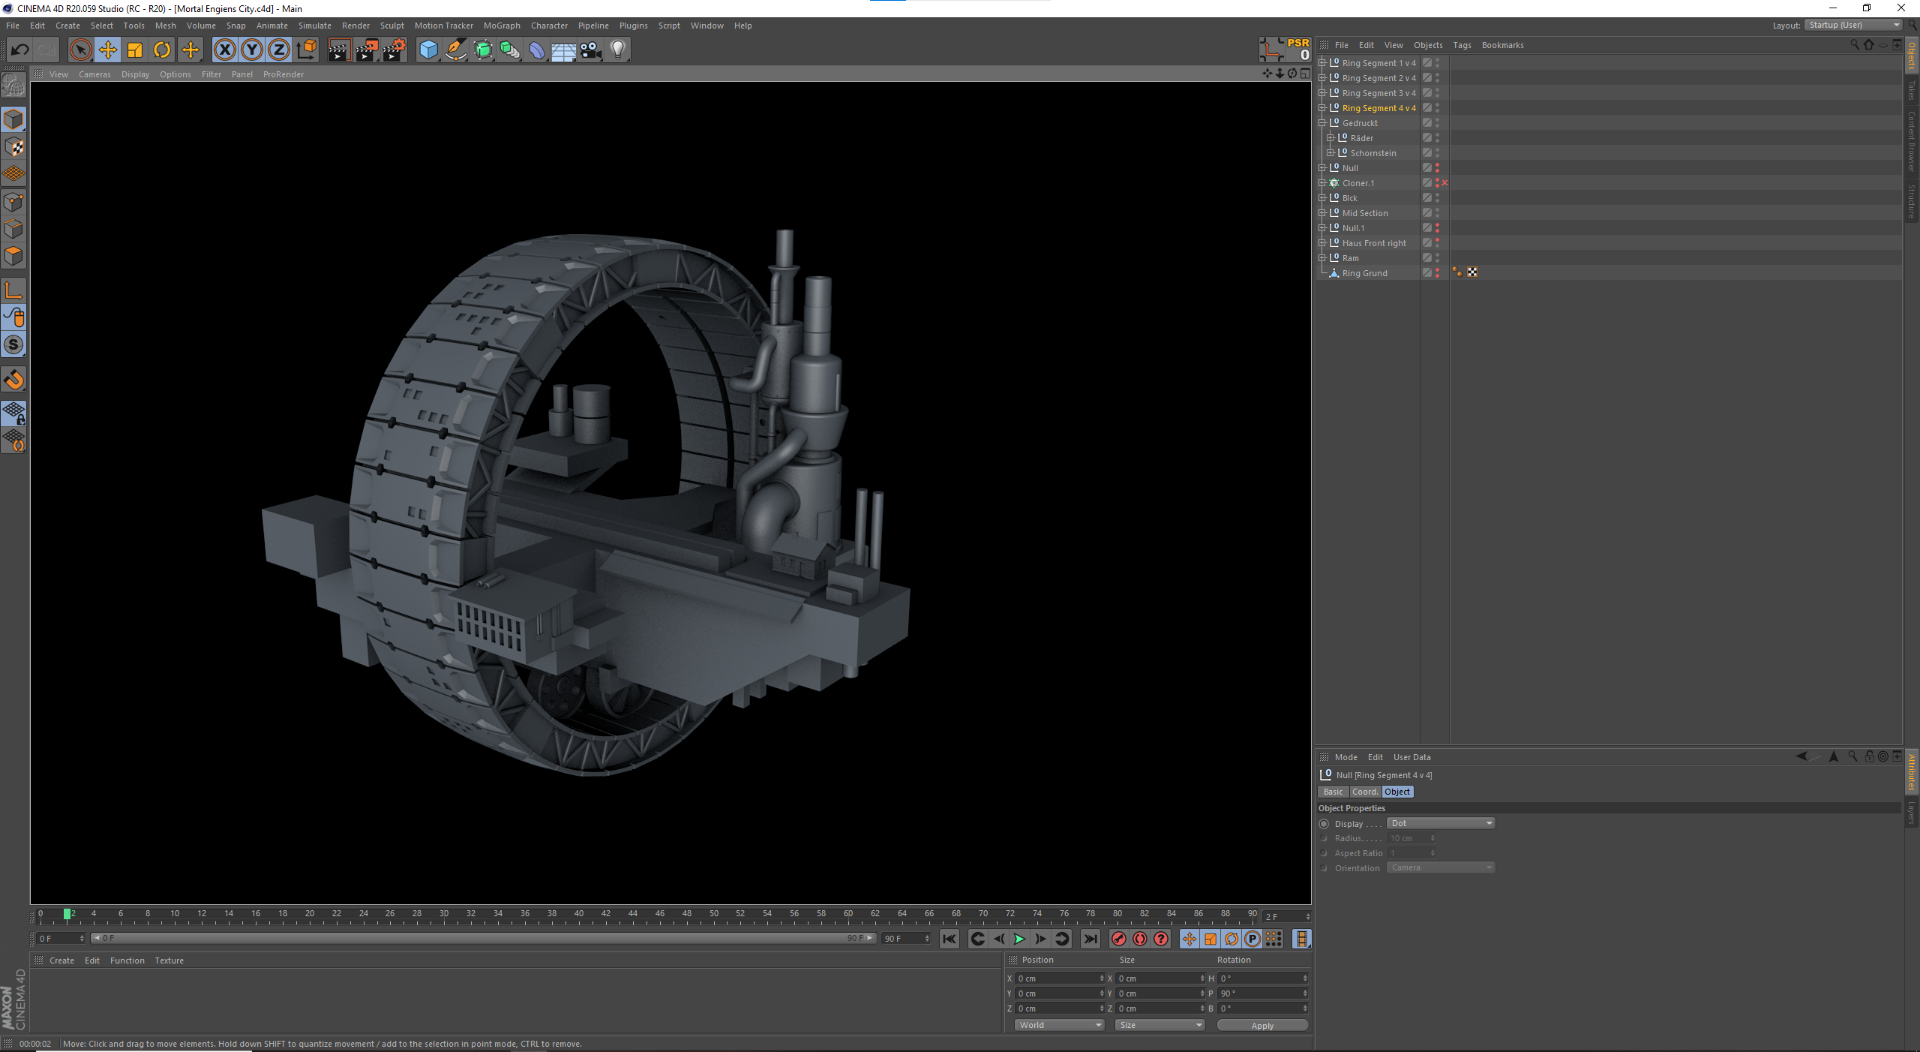
Making some Good progress on the 3D model. The basic shapes are blocked out. I am now adding in the details.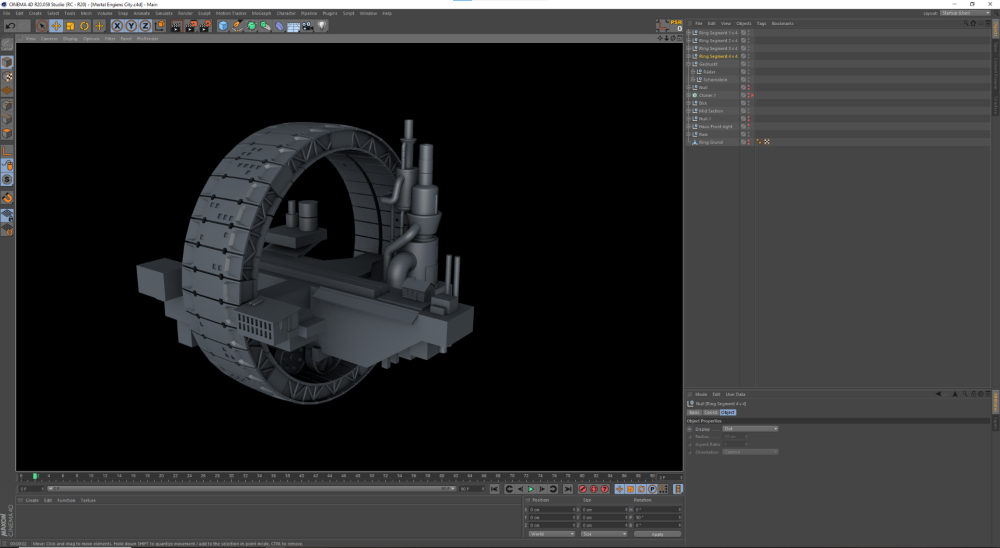
-
[Germany] Stefan Ulrich
RandomDesign replied to TT Amanda's topic in 2023 Thermaltake RAM MOD Invitational Season 1
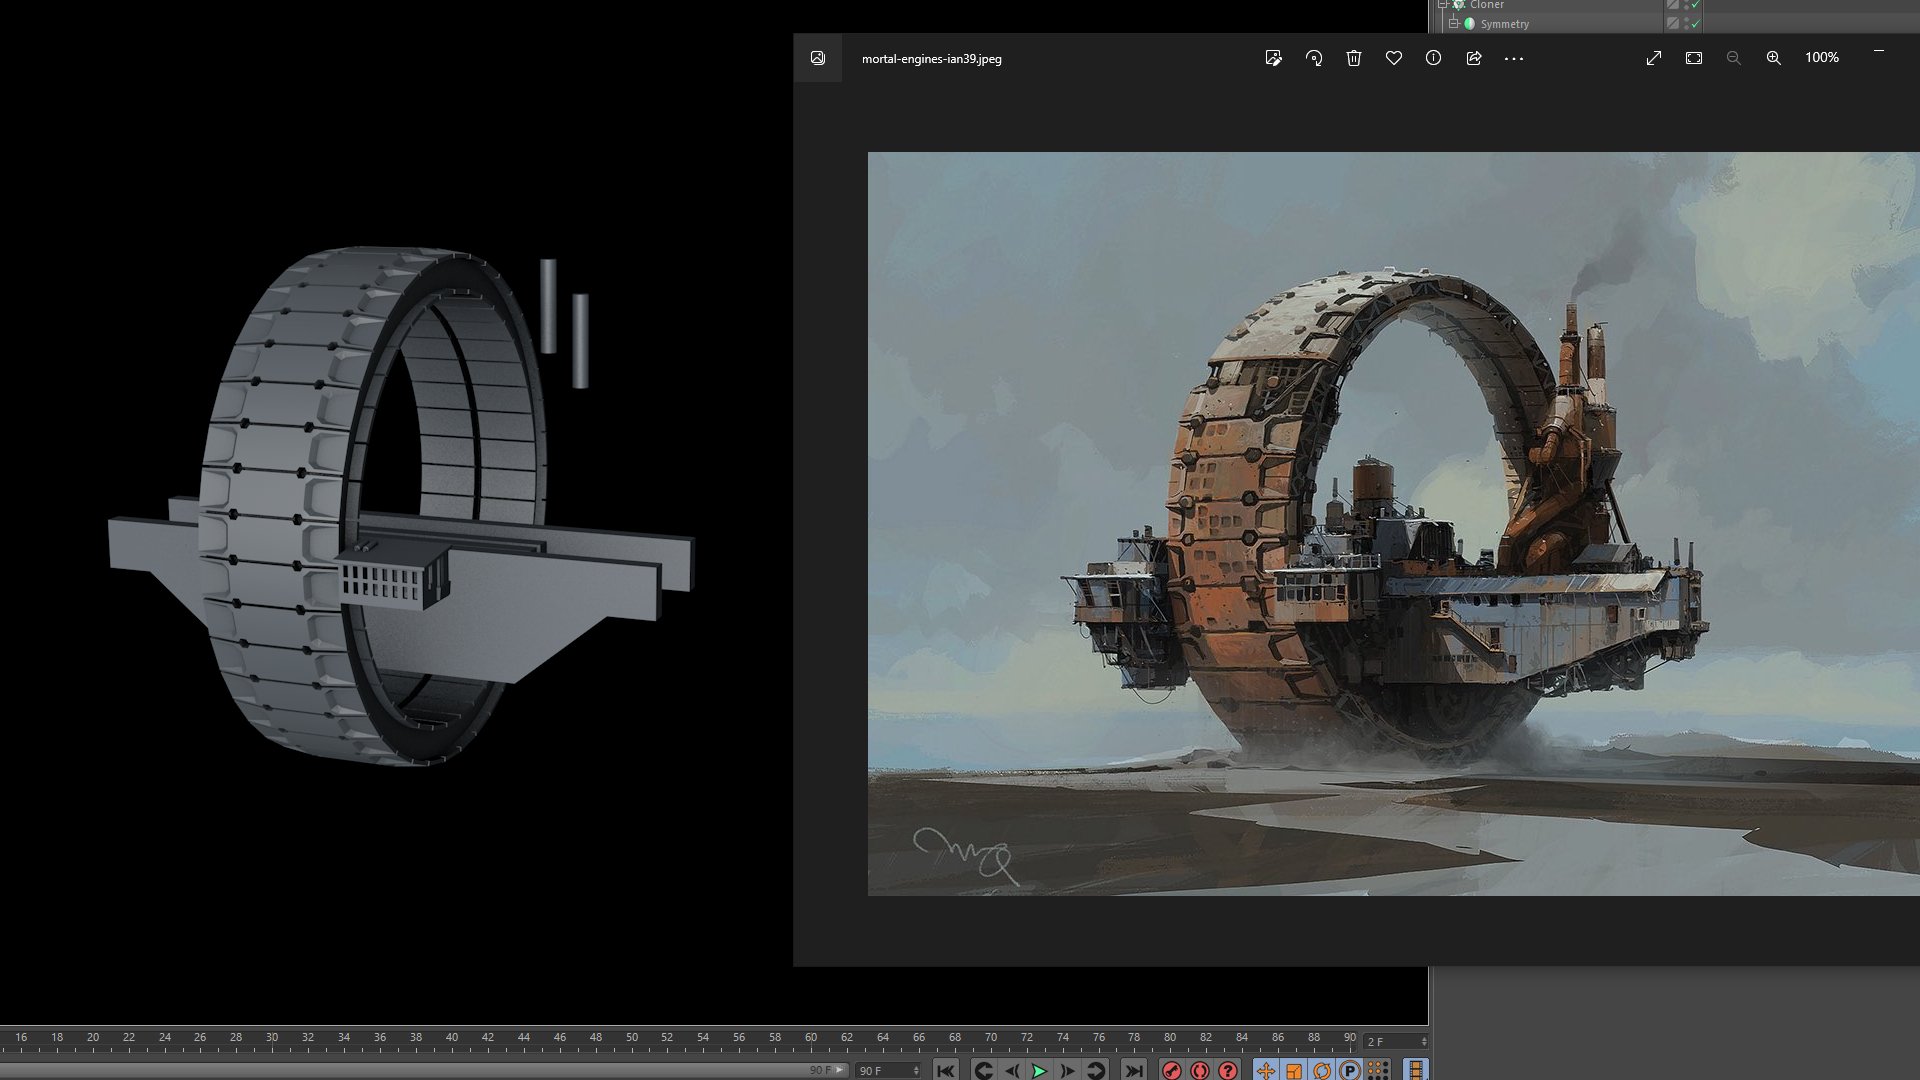
Started converting the concept art into a 3D model. Most parts will be printed in resin later. Hope to finish everything tomorrow and start printing.
-
[Germany] Stefan Ulrich
RandomDesign replied to TT Amanda's topic in 2023 Thermaltake RAM MOD Invitational Season 1
Time to start the worklog! Over the last days, I was thinking about a design that I can realize for this Ram Mod challenge. Playing with some ideas, I came across one of my favorite movies in terms of art design, "Mortal Engines" Taking the general theme of the movie with its predator cities as an inspiration, I was searching for a city that can might be converted into a Ram Mod for this project. I came across this design here, and thought it would just fit perfect. Now, I need to convert the design into a 3D model and start thinking about the best placement for the ram. -
[Germany] Stefan Ulrich
RandomDesign replied to TT Lily's topic in 2021 Thermaltake Ultra GIF Design Invitational Season 1
Thanks a lot. Was actually our very first try for completely self-made animations. Still so much to learn, but it was great fun. -
RandomDesign reacted to a post in a topic:
[Germany] Stefan Ulrich
-
RandomDesign reacted to a post in a topic:
Final Voting Starts Now!
-
RandomDesign reacted to a post in a topic:
Final Voting Starts Now!
-
RandomDesign reacted to a post in a topic:
Final Voting Starts Now!
-
RandomDesign reacted to a post in a topic:
[Germany] Stefan Ulrich
-
[Germany] Stefan Ulrich
RandomDesign replied to TT Lily's topic in 2021 Thermaltake Ultra GIF Design Invitational Season 1
Thanks! Its also my favorite. -
mainframe reacted to a post in a topic:
[Germany] Stefan Ulrich
-
MERRICK reacted to a post in a topic:
[Germany] Stefan Ulrich
-
[Germany] Stefan Ulrich
RandomDesign replied to TT Lily's topic in 2021 Thermaltake Ultra GIF Design Invitational Season 1
Also made a short video and tried to capture how the gifs look in "real" life -
Rob "Deblow" Deluce reacted to a post in a topic:
[Germany] Stefan Ulrich
-
[Germany] Stefan Ulrich
RandomDesign replied to TT Lily's topic in 2021 Thermaltake Ultra GIF Design Invitational Season 1
Haha thx. Was actually also the first time we did animations this way. Was a lot of fun, even though just scratching on the surface of the abilities of After Effects. -
Rob "Deblow" Deluce reacted to a post in a topic:
[Germany] Stefan Ulrich
-
MERRICK reacted to a post in a topic:
[Germany] Stefan Ulrich
-
MERRICK reacted to a post in a topic:
[Germany] Stefan Ulrich
-
[Germany] Stefan Ulrich
RandomDesign replied to TT Lily's topic in 2021 Thermaltake Ultra GIF Design Invitational Season 1
And my last gifs

-
[Germany] Stefan Ulrich
RandomDesign replied to TT Lily's topic in 2021 Thermaltake Ultra GIF Design Invitational Season 1
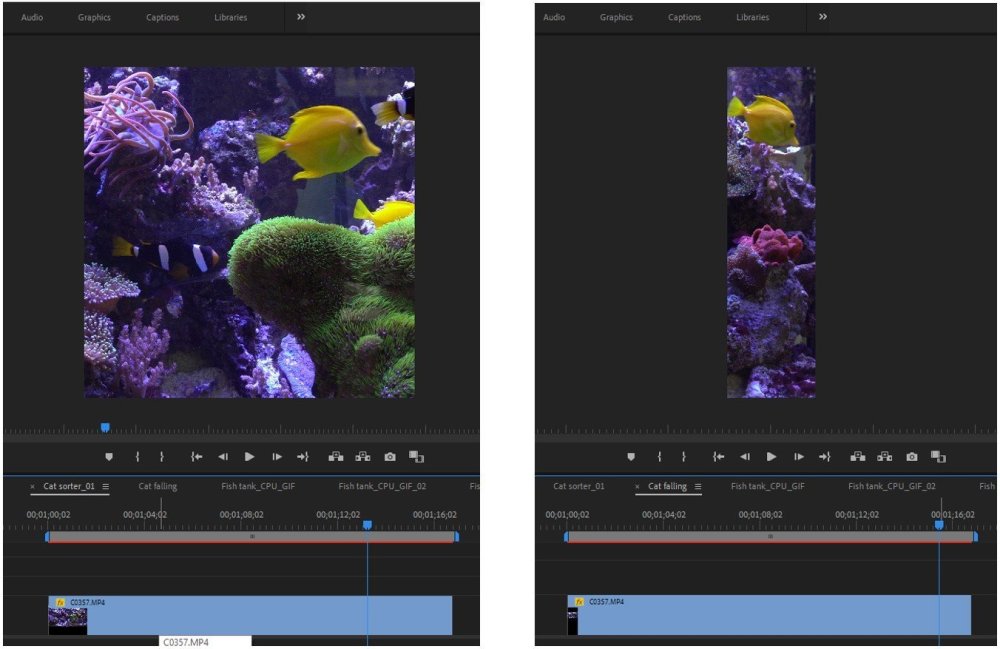
3 .Submarine The idea for the submarine came after visiting the aquarium in Chicago this fall. Kathrin and I were sitting hours in front of some of the tanks, watching all colorful fish. So, I thought that would be a cool idea to have for the CPU and memory display, just as you have fish in your water cooling Friends of ours have really impressive fish tanks and we got the chance to take some nice shots of the colorful underwater worlds. I took the videos in high resolution (4K) that I had the chance to crop them without losing quality (not that it really mattered for the animated GIF). In addition, I wanted that the CPU and memory displays look like two window next to each other. Therefore, I cut the video and used the left part for the CPU display and right part of the same footage for the memory display (see below). I also kept in mind that the actual size of the LCD memory display is longer than the one of the CPU. That is why I zoomed about 1/3 in for the video of the CPU. So, the fish will have the same size later on, when the GIFs are displayed next to each other. For video editing, I used Adobe premiere. Exporting files as animated GIF I imported all After effects videos into Adobe premiere to make final adjustments, such as changing the overall speed of the animation and matching the two videos for the CPU and Memory display in case of the toy kitten claw machine. Next, I wanted to export the video as animated GIFs which turned out to be more challenging than expected. The difficulty is to get a nice small size for your GIF animation without making it look shitty. The GIF needs to be smaller than 20 mb, so you can upload it using the TT RGB PLUS Software. For the two hamster animations, this was fairly easy, because both clips are pretty short (only 5-8 seconds). In Adobe Premier, you can just animated videos as animated GIFs. In the settings, I just changed the frame size to 480 x 480 for the CPU and 480 x 128 for the memory. I kept the frame rate at 25 fps and didn’t change any of the presets for animated GIFs. For the claw machine animation, it was trickier, because the clips are about 30 sec long. After adjusting the frame size, the GIF was still way too big. Therefore, I went down with the frame rate to 12.5 fps and was able to export the GIF with a size of about 18 mb. Most challenging was the fish tank video for the CPU. The GIF got really big (~40 mb), even when I exported it with only 12.5 fps. I also didn’t like that the GIF run no longer smooth because of the low frame rate. One reason, why the fish tank GIF got so much bigger compared to the rather simple 2D animations, is the huge number of colors. One can, however, restrict the number of colors. I rendered the video in Adobe Premier as MP4 (1080 x 1080) and just opened the file in Photoshop. Then, I went to “Export” à “Save for Web (legacy)…” to export the video as a GIF. In the menu, you have different settings to adjust the GIF. One is the frame size, which I changed to 480 x 480. The other one is to reduce the colors to 256 (or even lower). In addition, you can increase Lossy a bit (to 20-30), which will also slightly lower the size of your GIF. Of course, the GIF doesn’t look as great as the MP4 video, esp. not on a big screen, but it will be fine for the small LCD screen of the cooler.