Search the Community
Showing results for tags 'THERMALTAKE'.
-
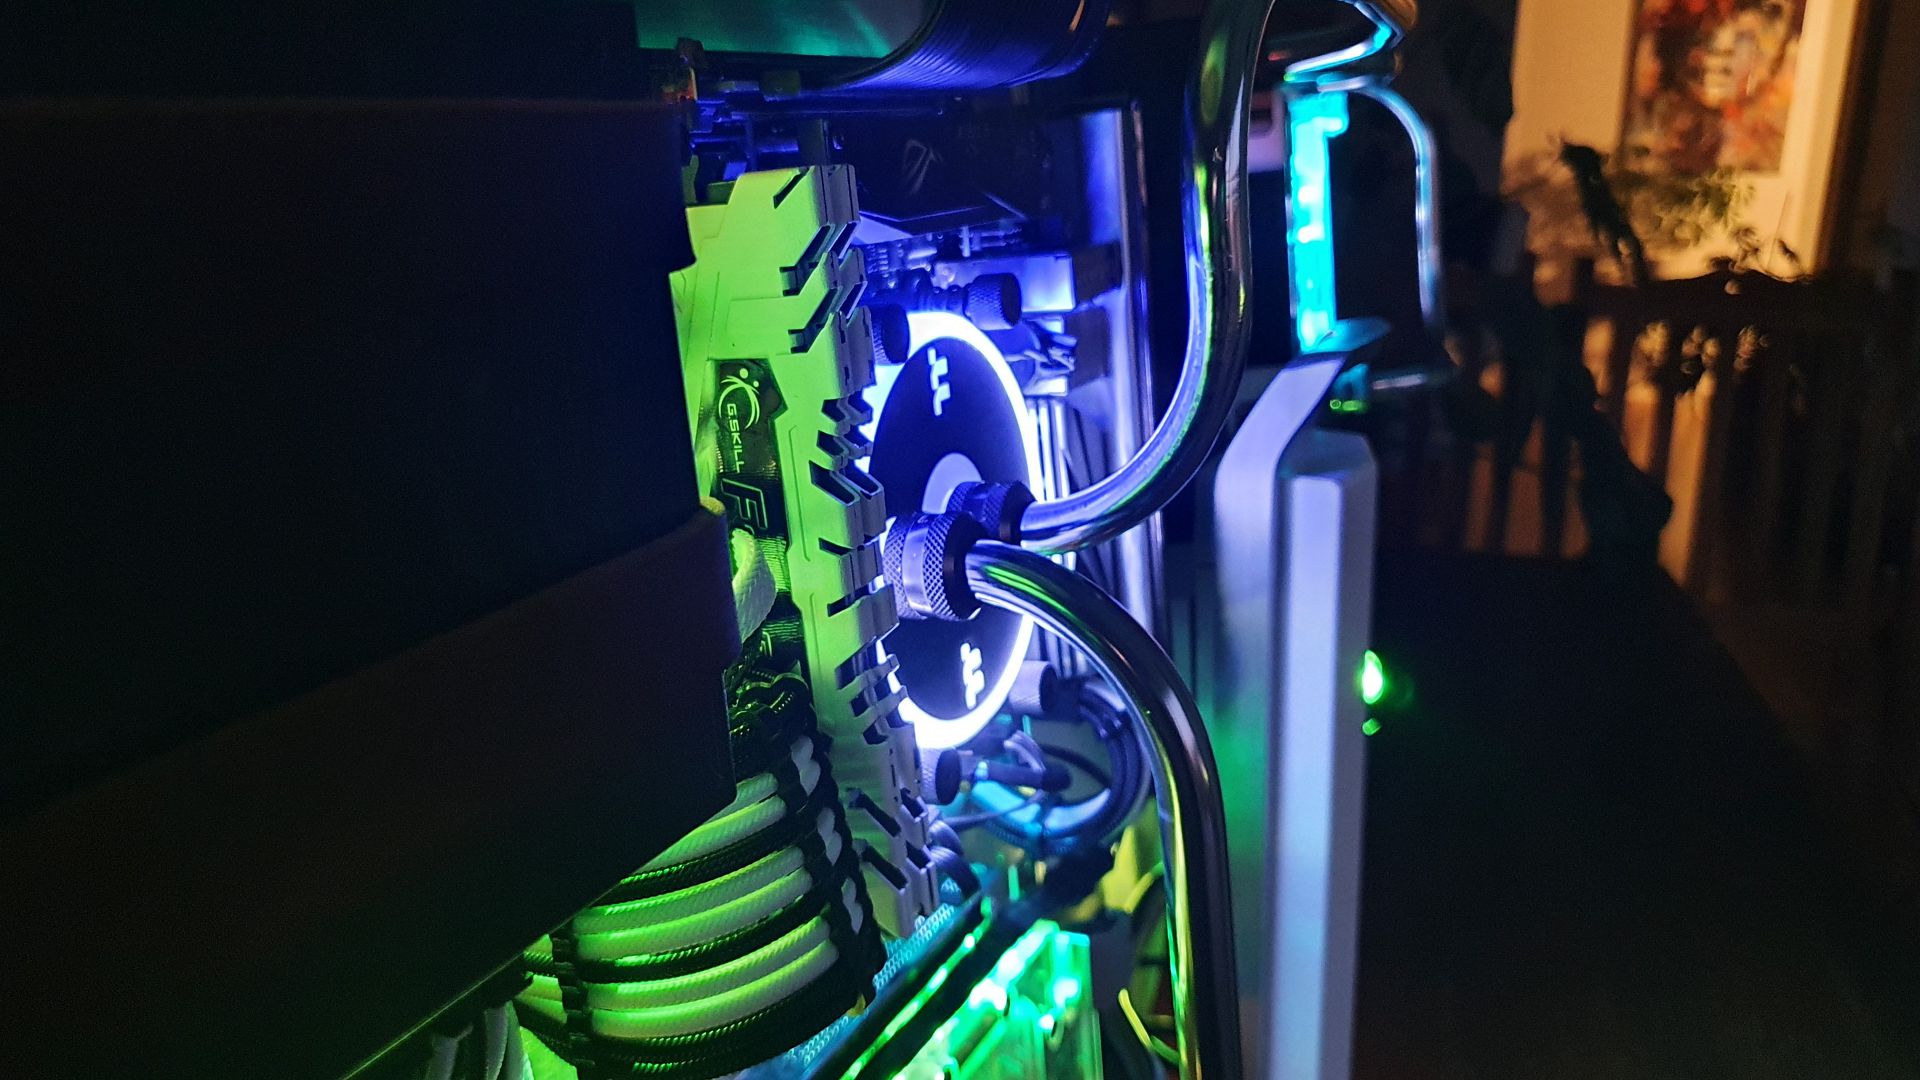
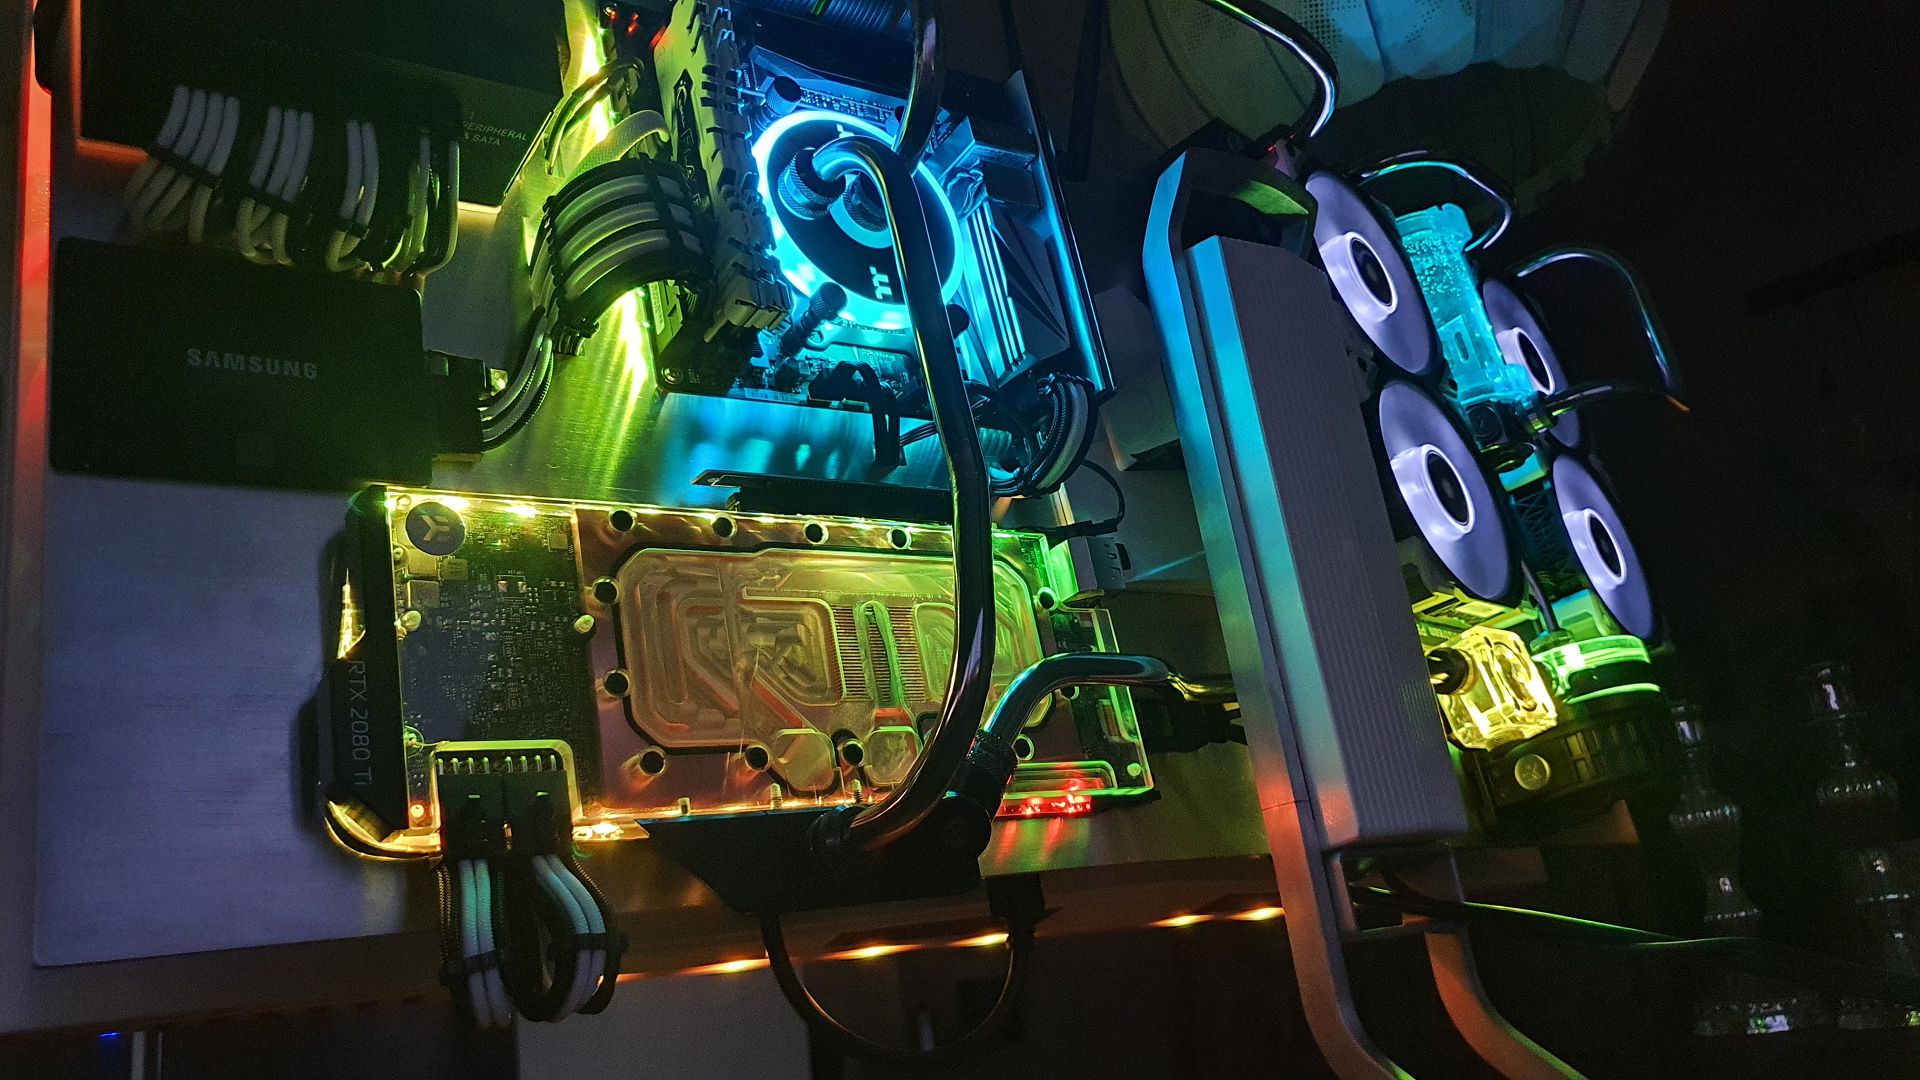
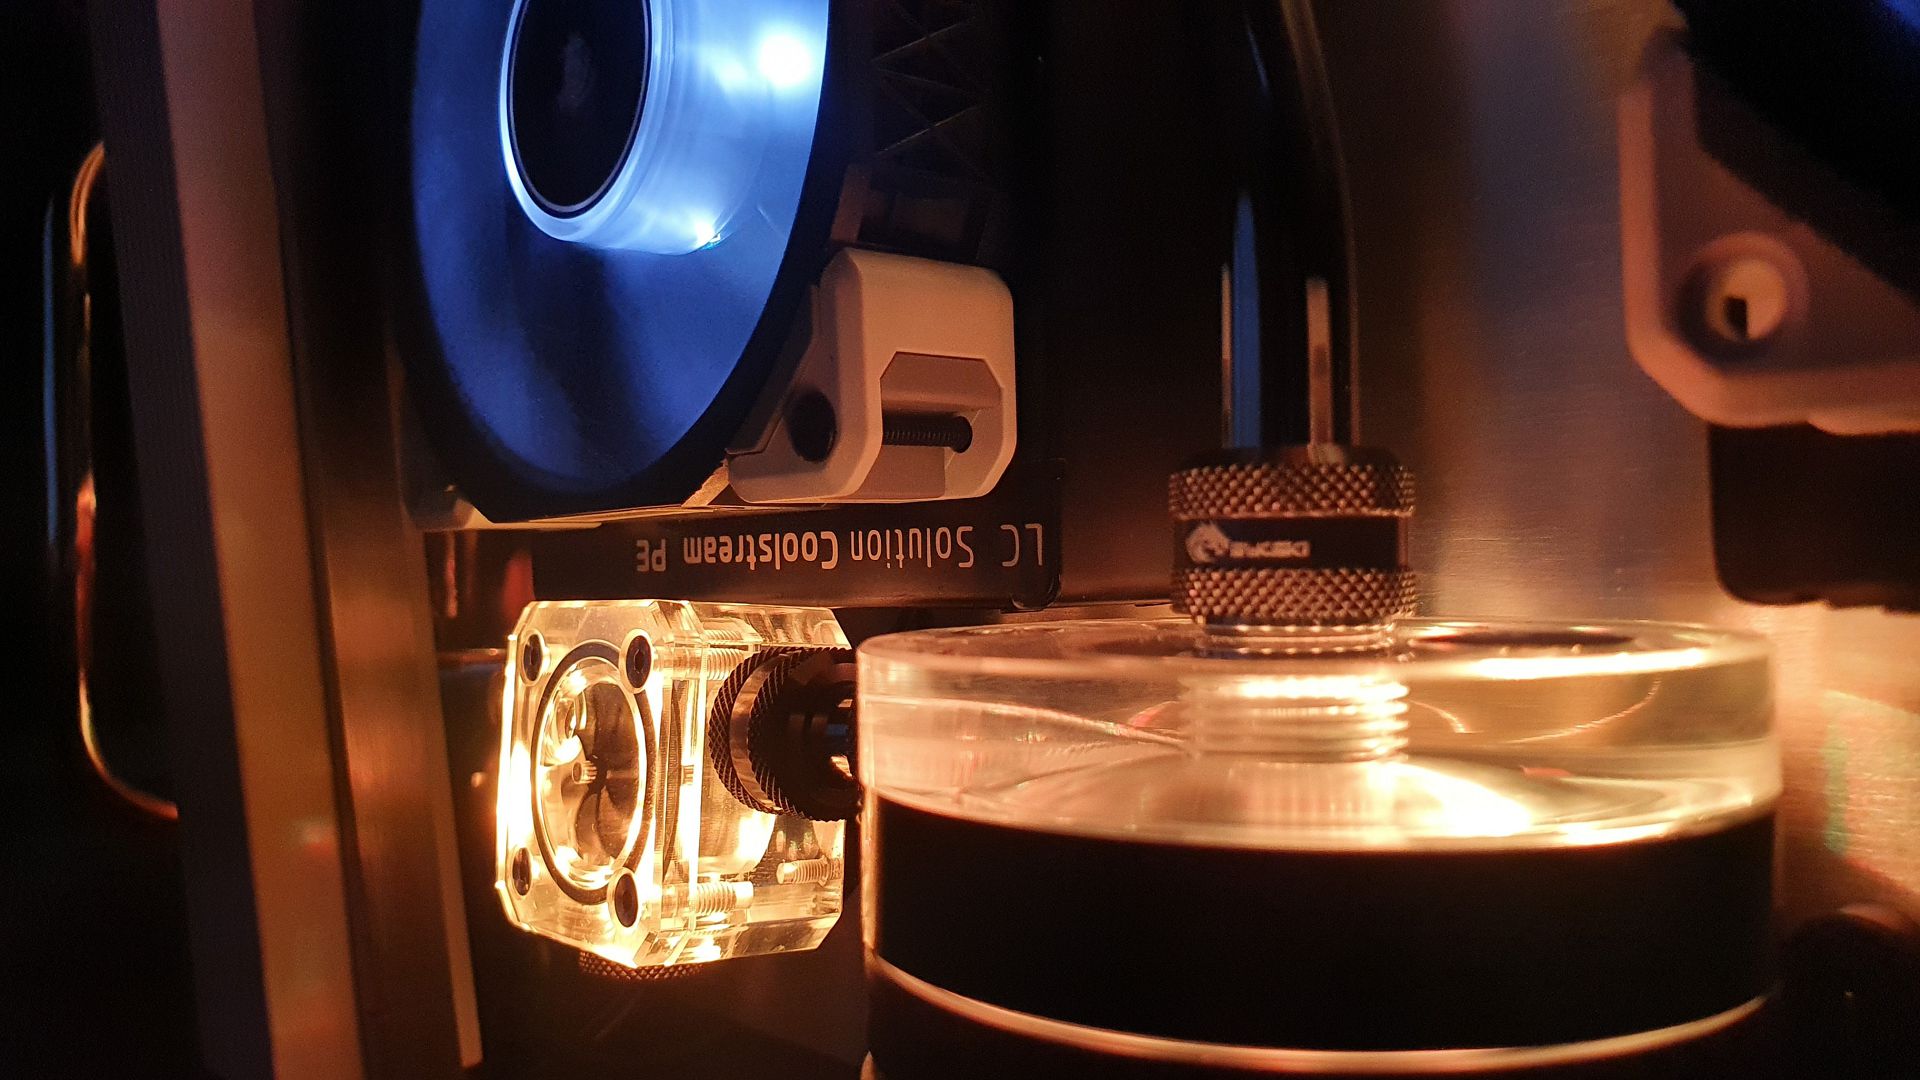
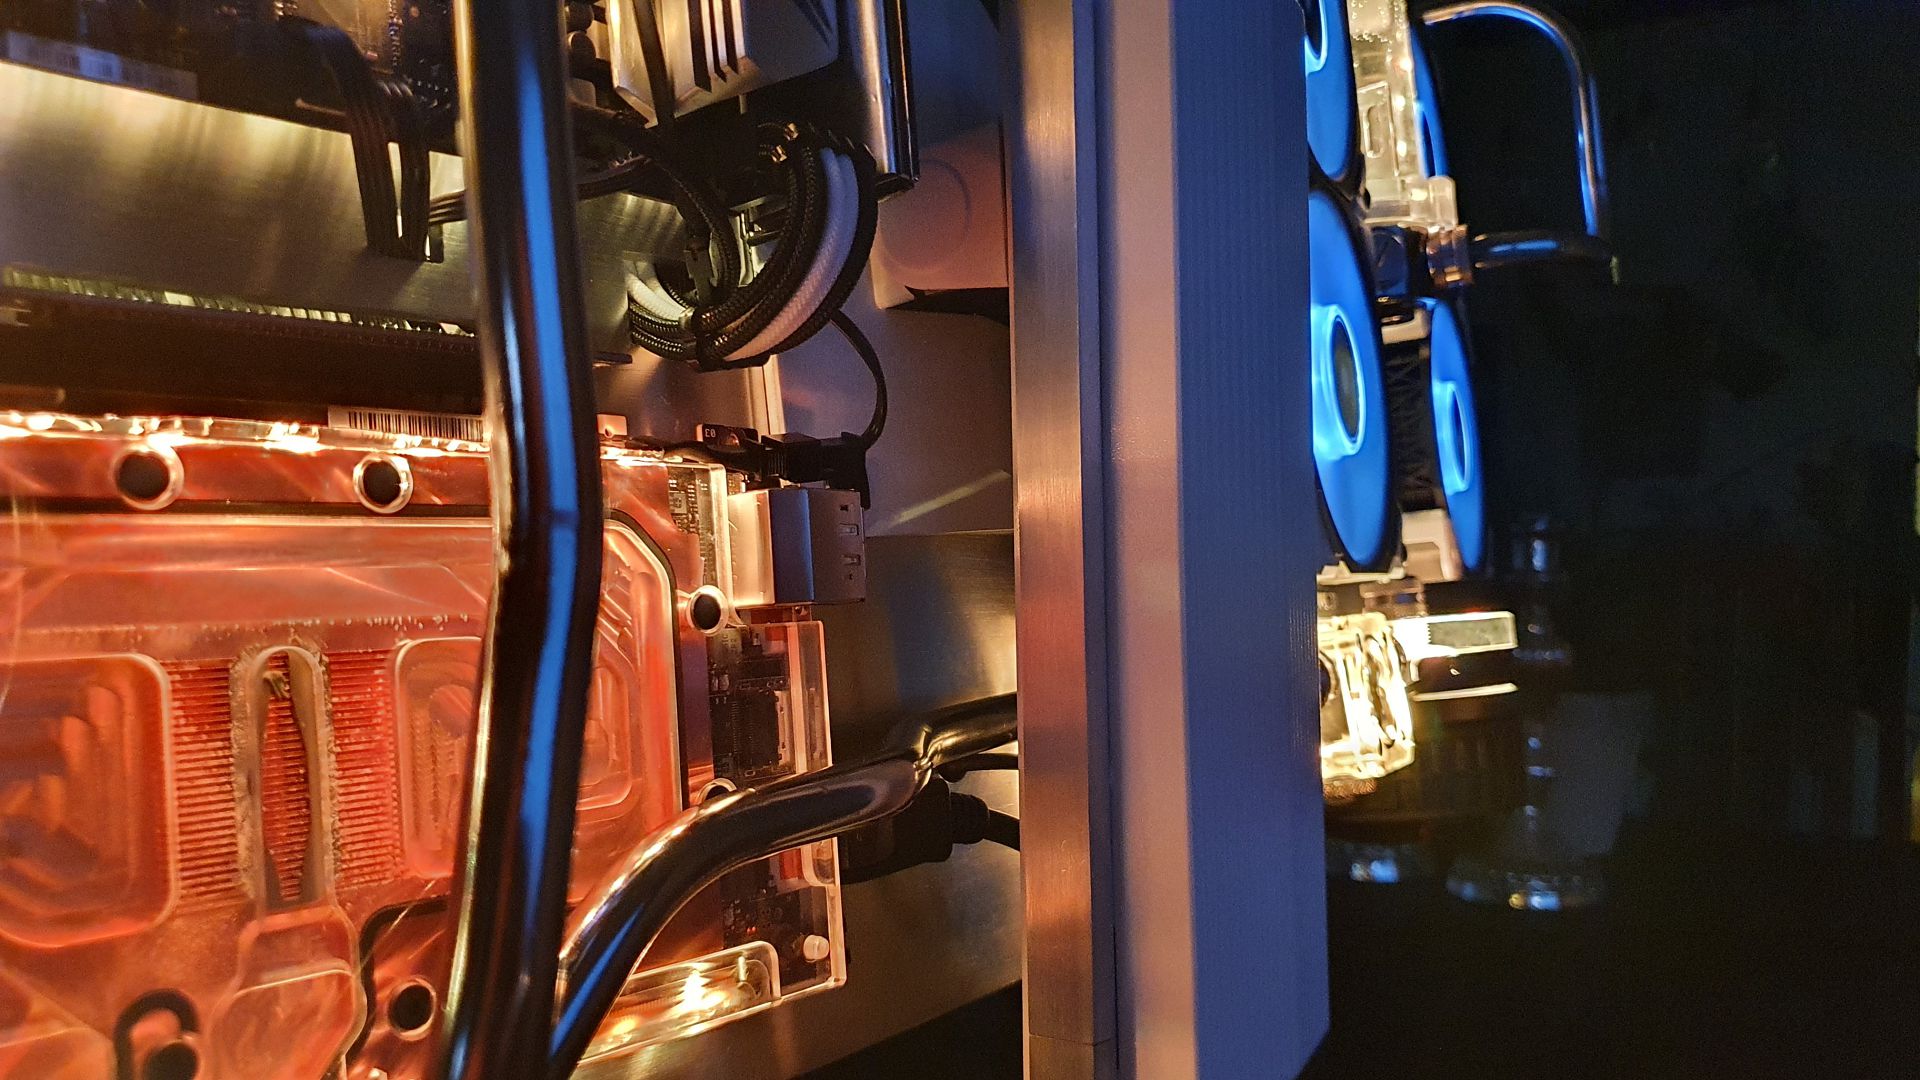
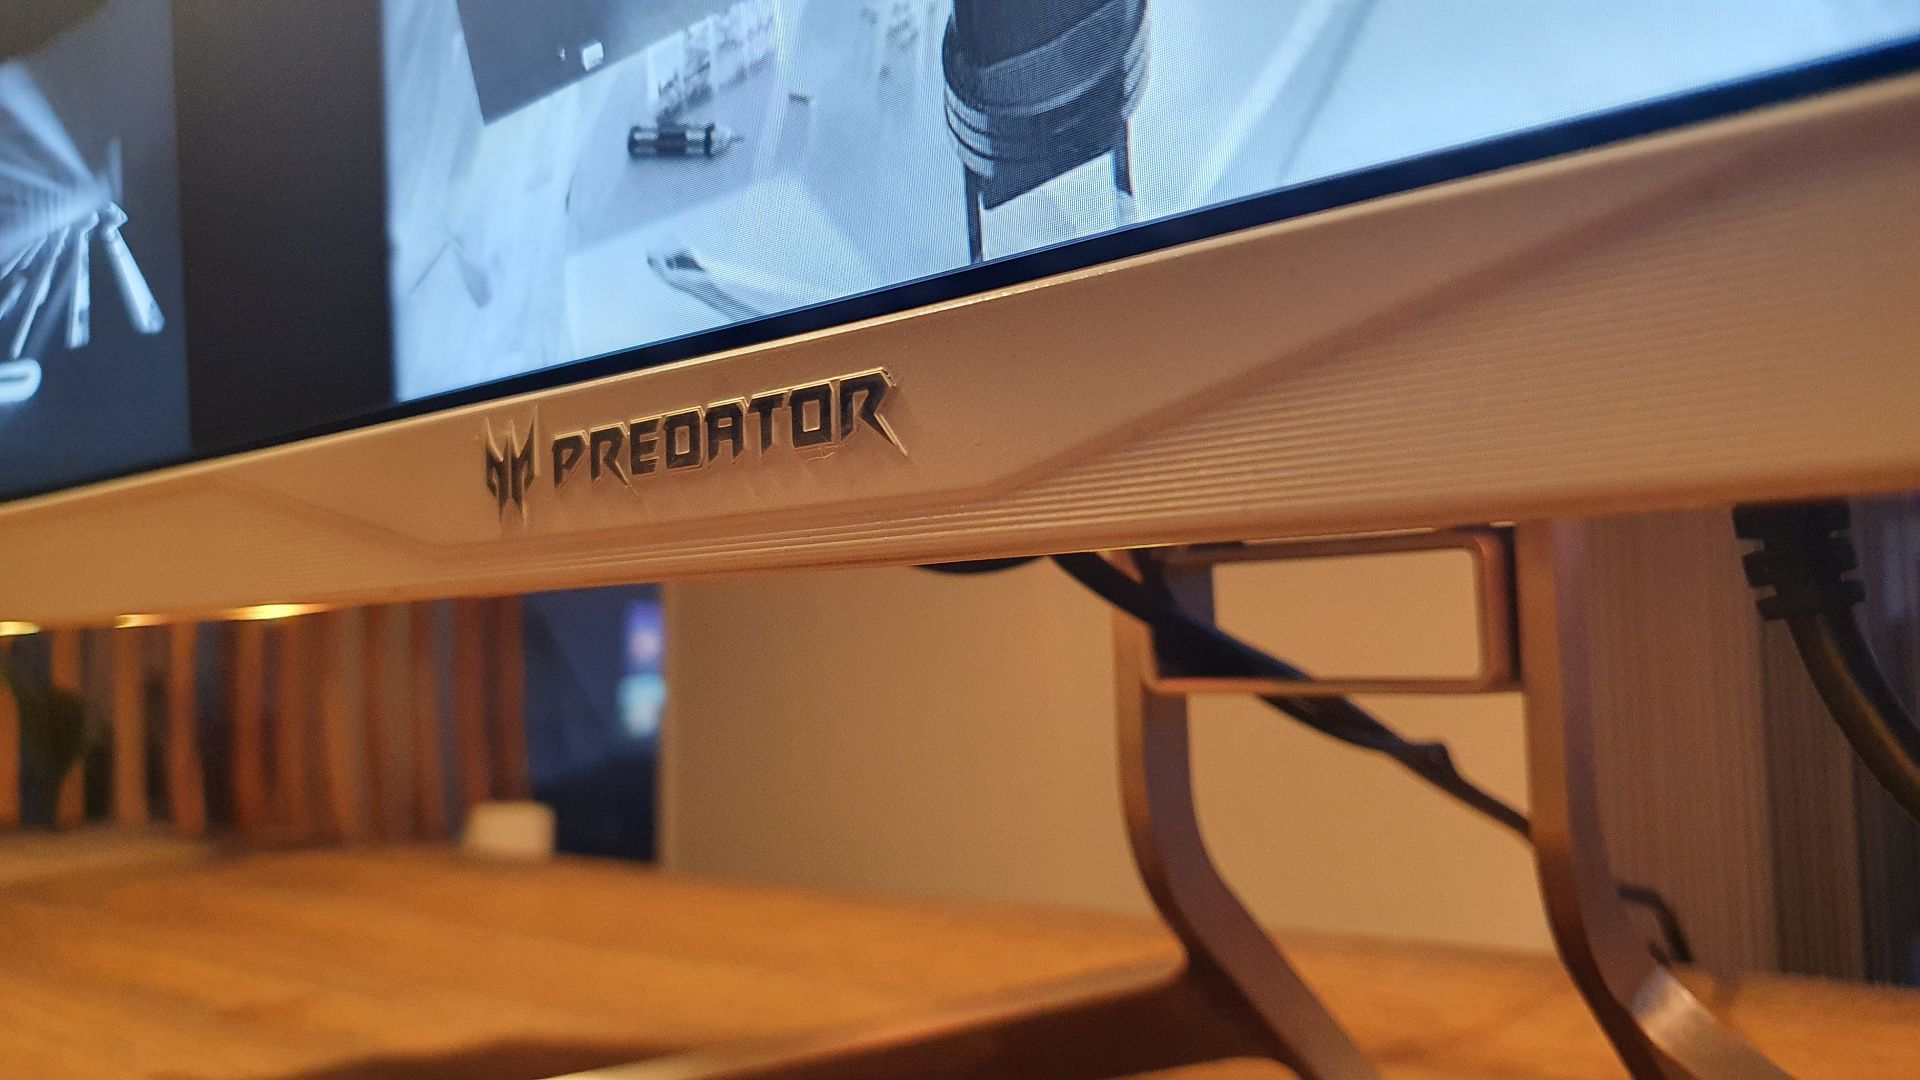
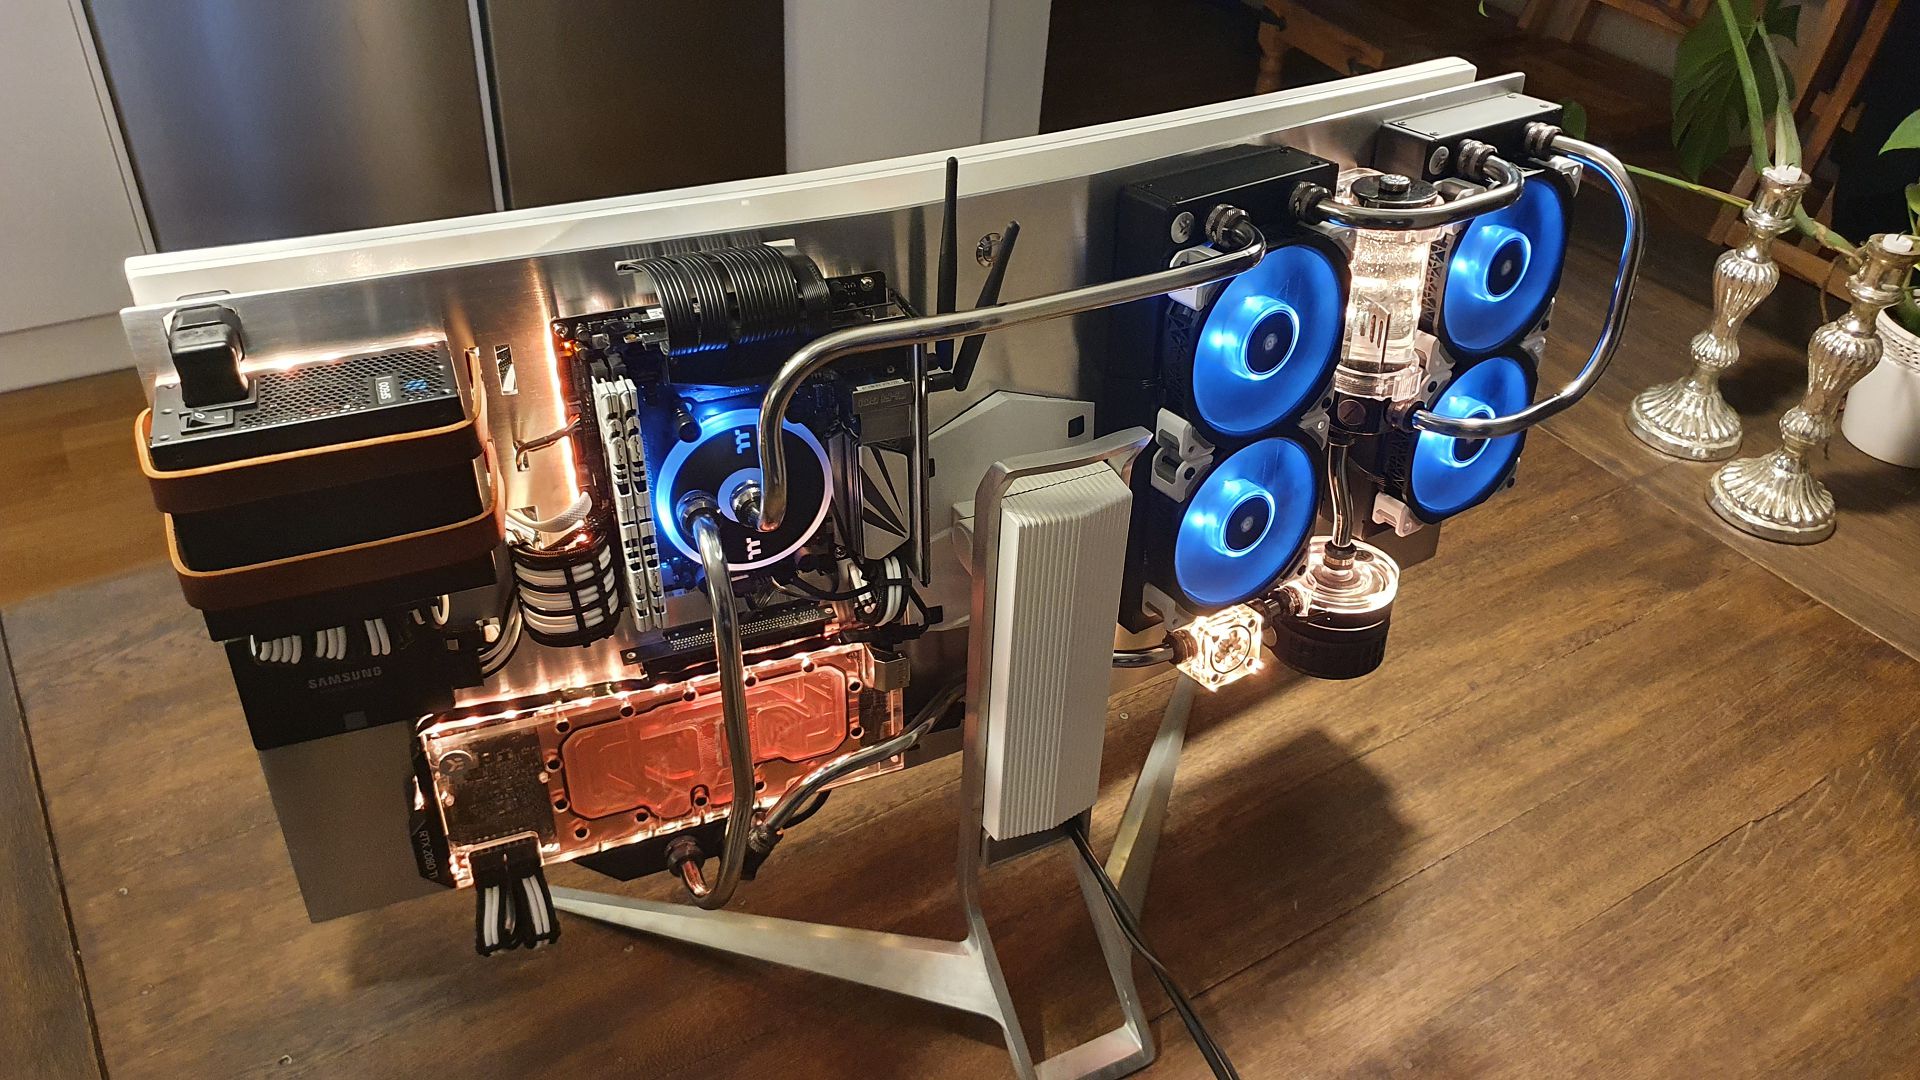
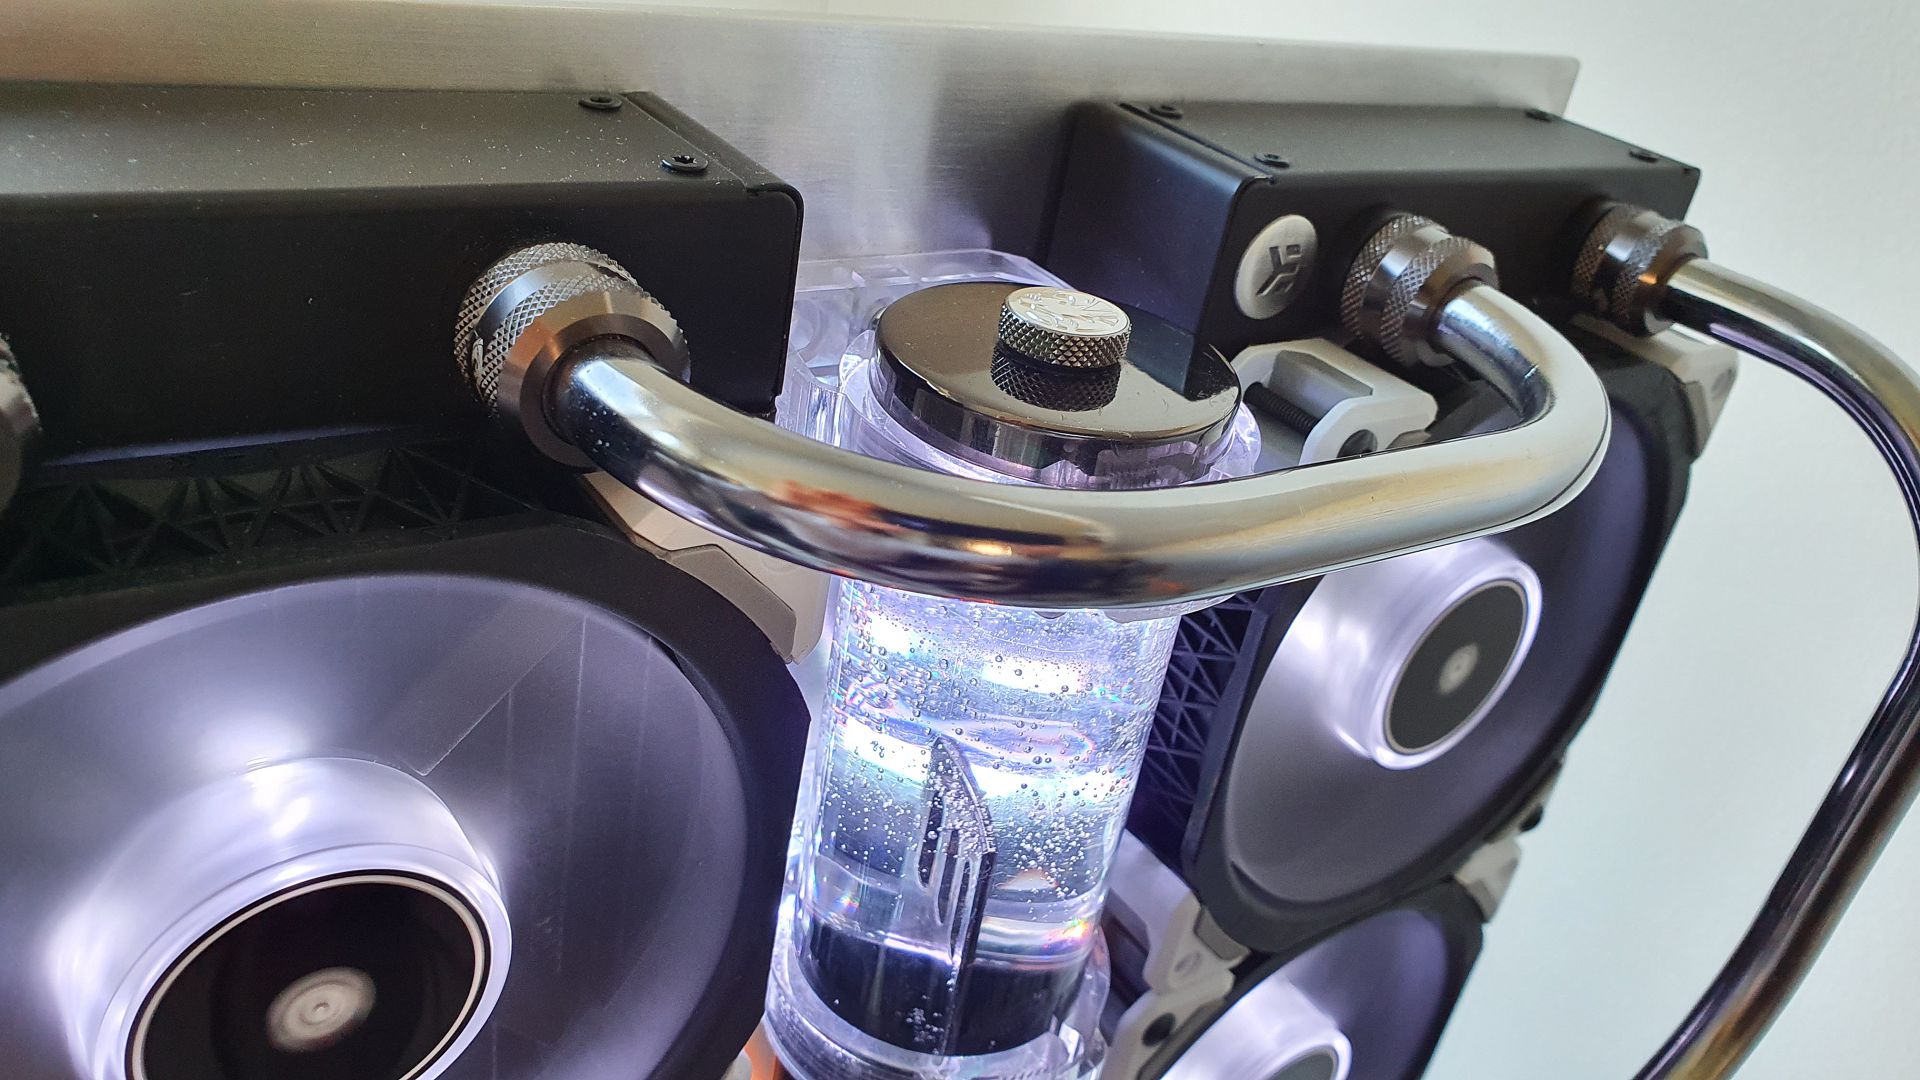
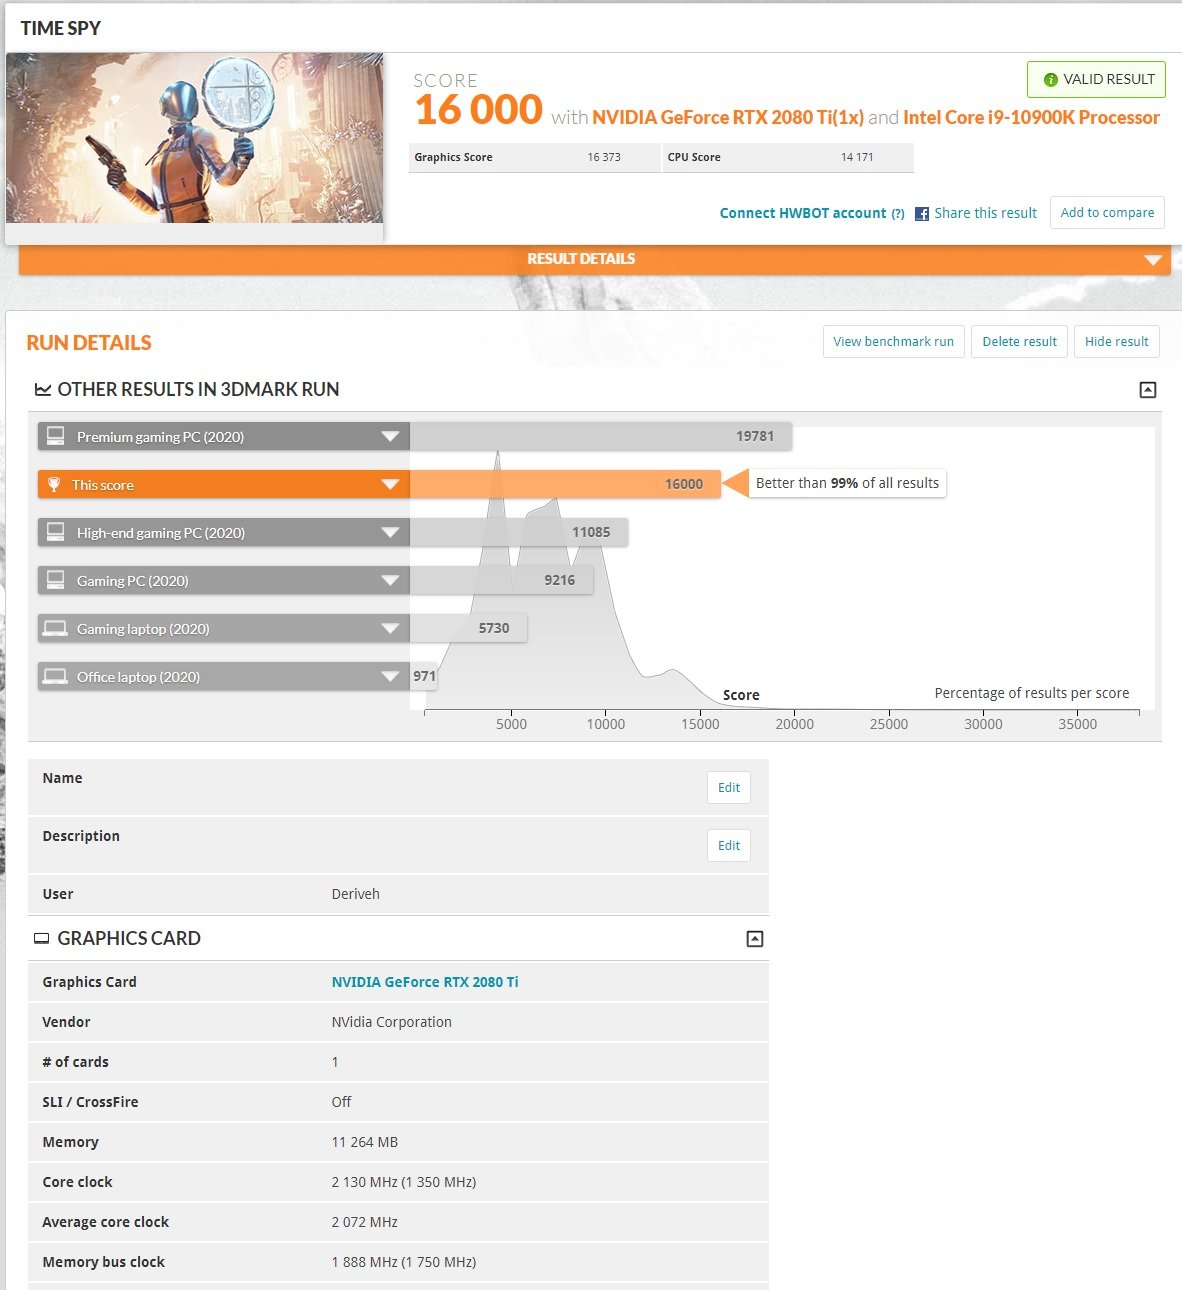
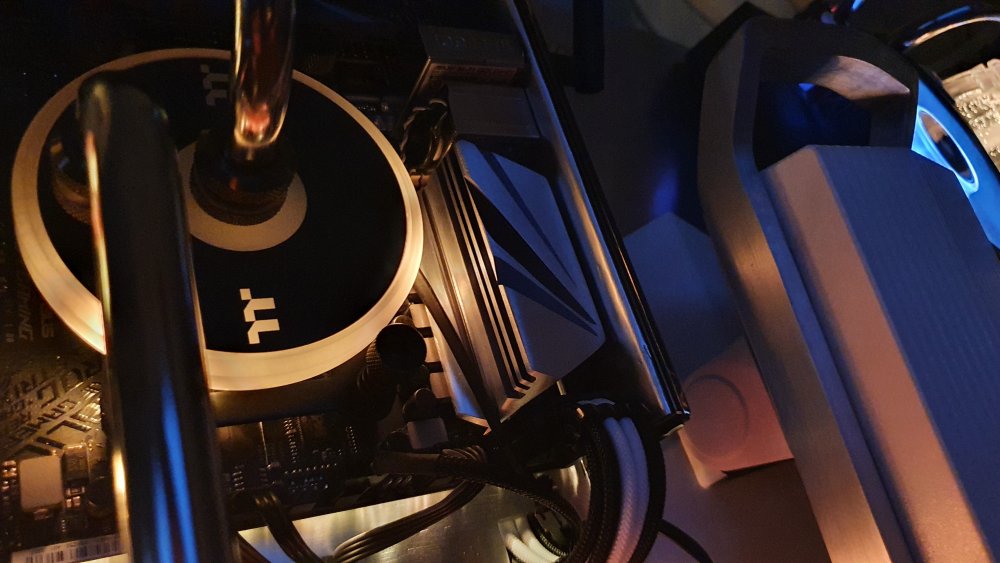
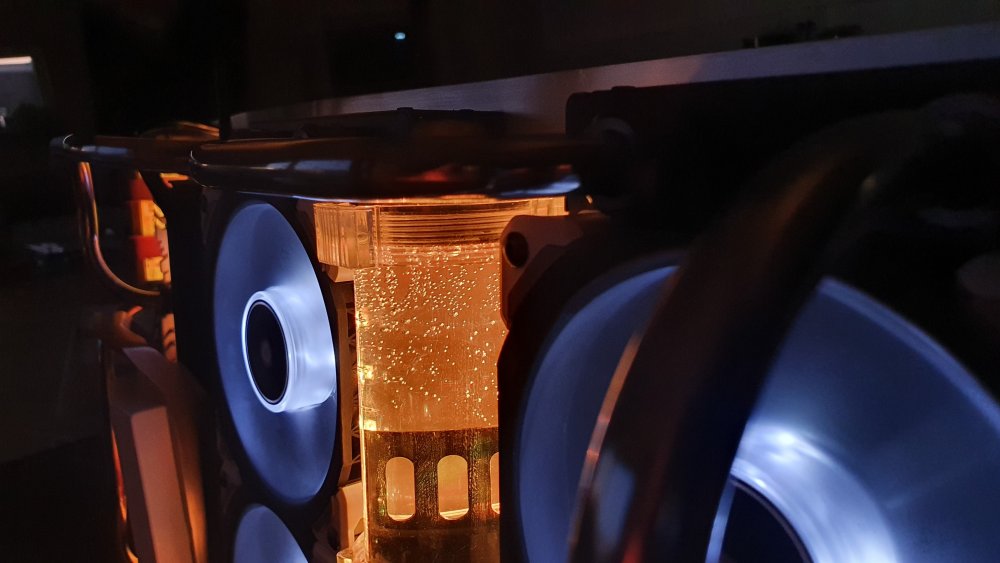
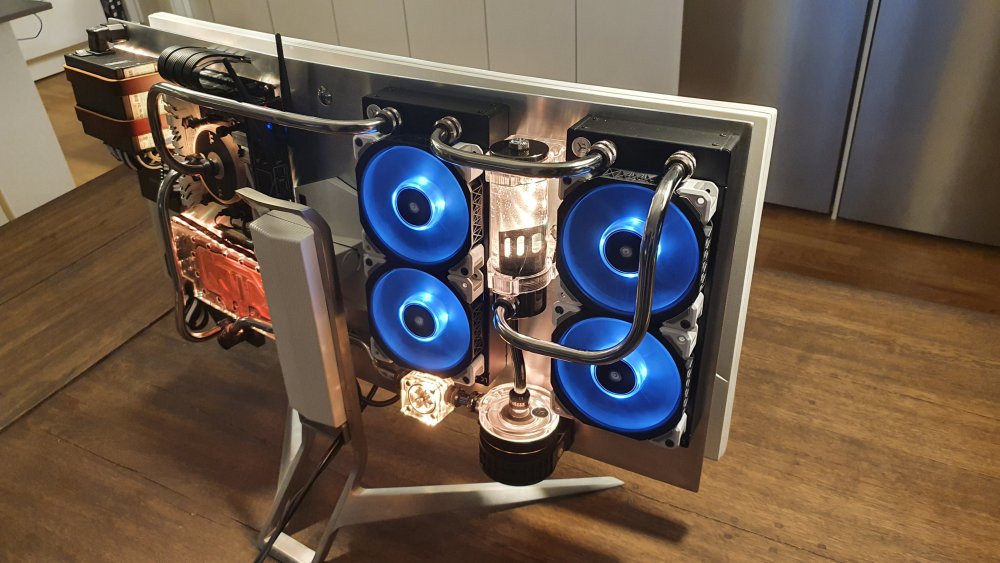
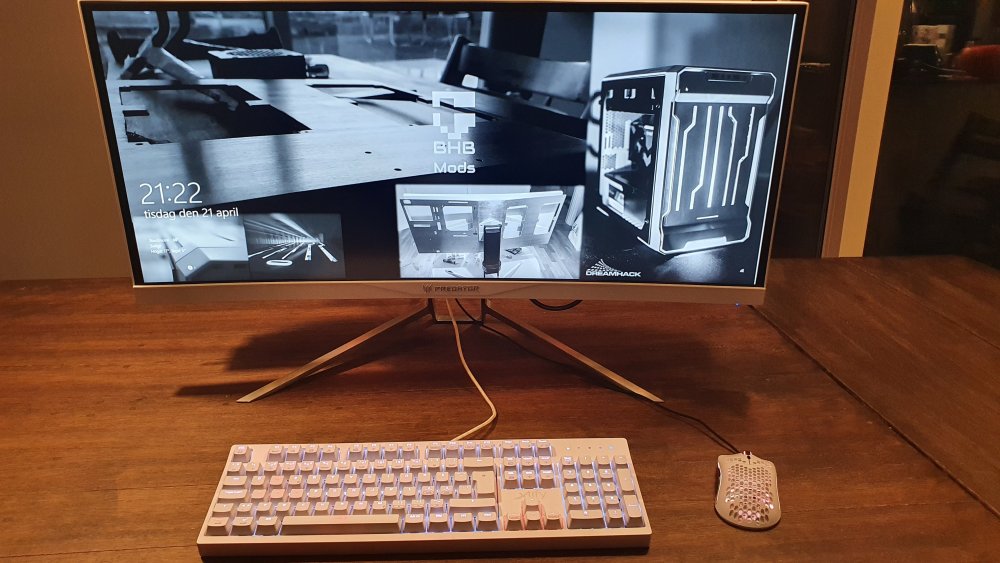
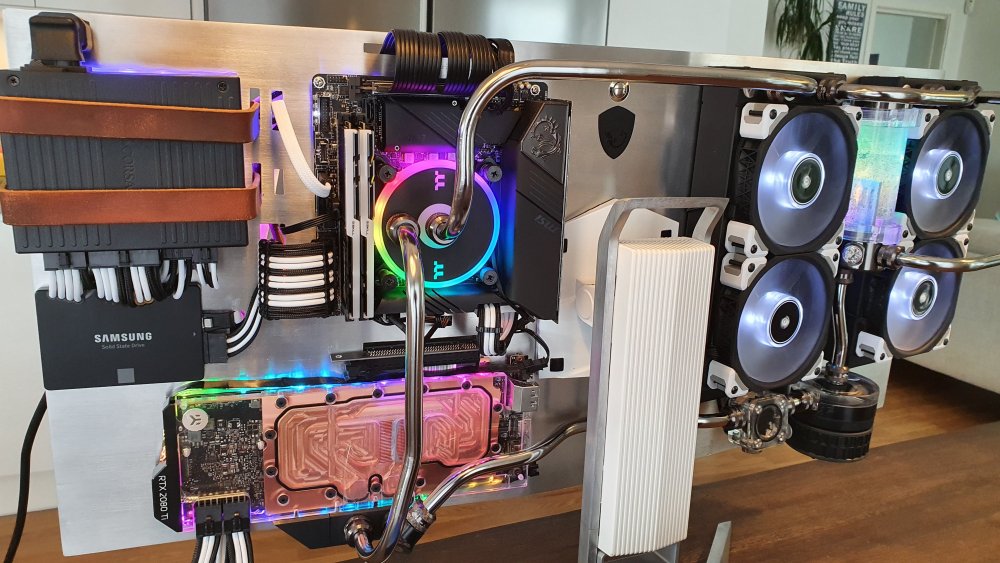
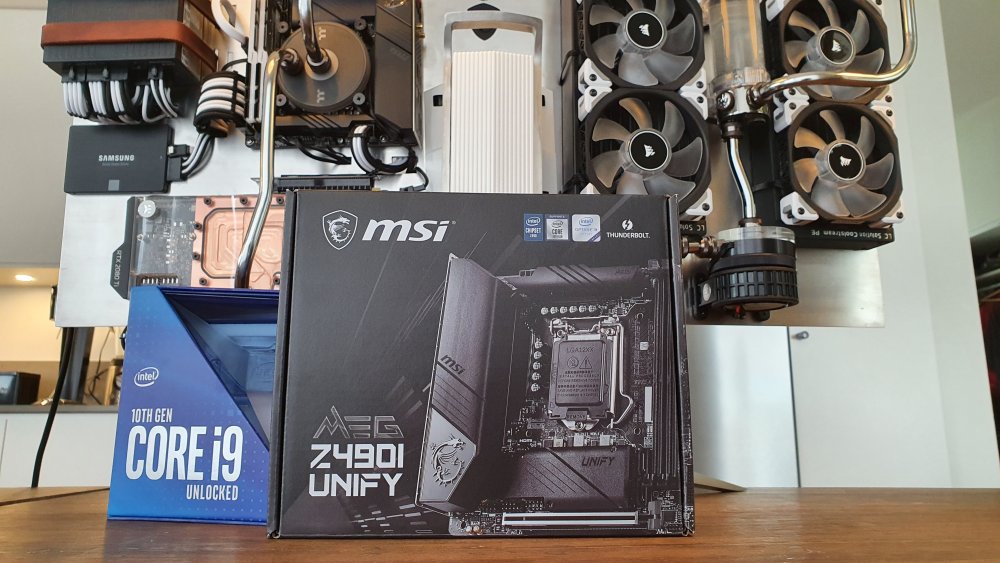
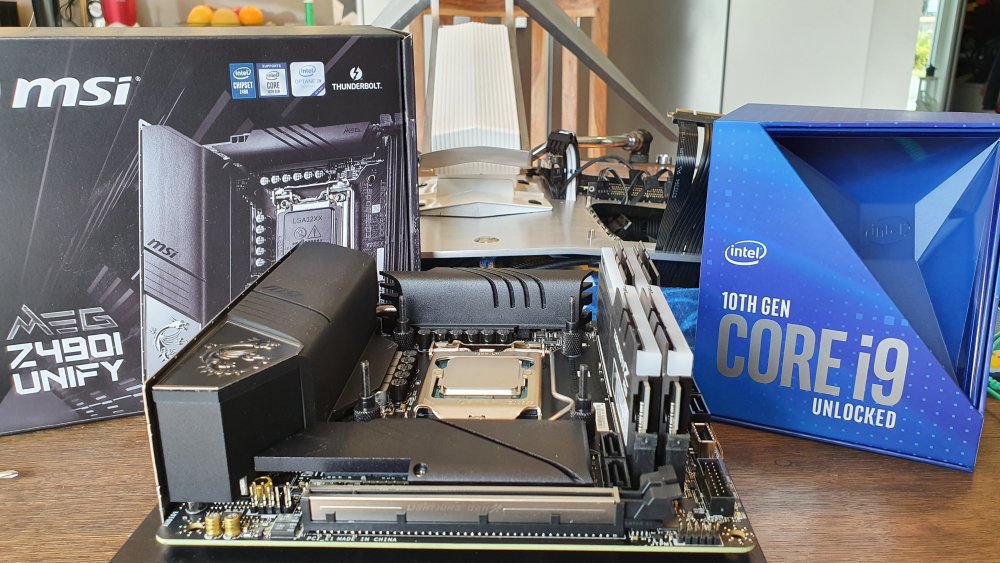
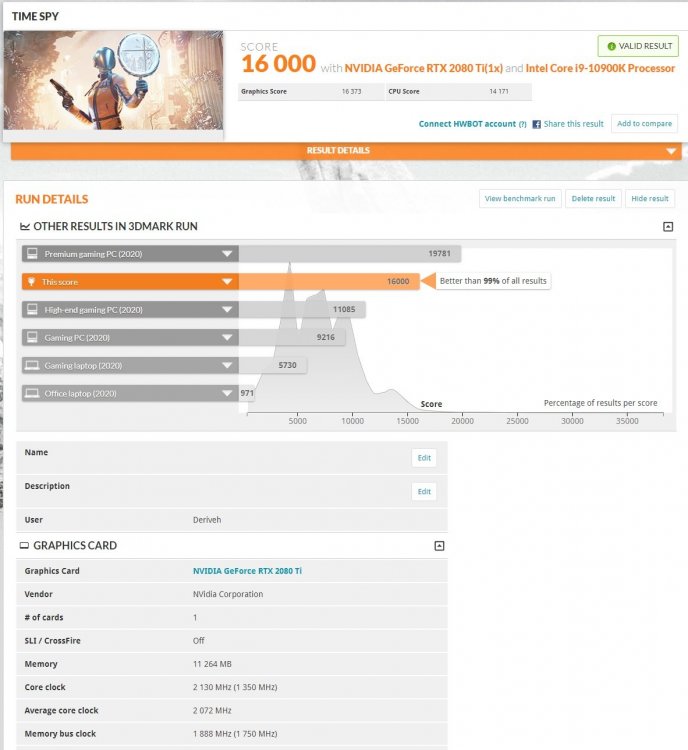
Hi folks! I'm new on the forums here but I figured I'd show of my latest project. This is my second real mod, my last mod Allspark was a lot of fun and I won 3rd place in Dreamhacks casemod championship which really gave me a taste for modding. Right now I have two more projects going on but as I said, here's my latest that I finished last month. Shoutout to @Egxi who has been an awesome teacher in terms of how to make a custom-loop and have been teaching me how to bend copper-pipes! Thank you SO much your guidance has been invaluable! (And for doing that insane bend behind the monitorstand for me, would never have pulled that one off!) **UPDATE** Just a month after finishing the build I got my hands on the MSI MEG Z490-I Unify! The most beautiful motherboard I've had! This called for an upgrade with pristine hardware and it needed to be something with enough umph to test out the OCing capabilities with the Unify series that MSI claims to be great for an mITX board. Thus I got myself a i9 10900K and a pair of high clocked Samsung B-die memory sticks! Here's the results, both in terms of looks and a timespy benchmark. PS: The "blue-looking" LEDs are actually white, damned camera! Specs: CPU: Intel I9 10900k at 5,1Ghz All-core AMD Ryzen 7 3800X @ 4.4Ghz RAM: G.Skill Trident Z 3600Mhz CL 16 B-die at 4000Mhz CL 14 G.SKILL Flare X 3200Mhz CL 14 (B-die) GPU: NVIDIA Palit RTX 2080ti ProGaming OC @ 2130Mhz MOBO: MSI MEG Z490-i Unify ASUS B450-I Strix Gaming M2: Samsung 960 EVO 500Gb x2 SSD: Samsung 850 EVO 256Gb PSU: Corsair SF750 Platinum CORSAIR SF600 Gold Cables: CableMods Sleeved Black/White Pro Waterblock CPU: Thermaltake Pacific W5 Waterblock GPU: EK Water Blocks Vector RTX TI Copper Radiators: EK Water Blocks Coolstream PE 240mm x2 Reservoar: Phobya Nickel 150mm Fittings: Bykski LED: ASUS Terminal and LED-strips Monitor: Acer Predator X34P Build log can be found here: https://builds.gg/bhbmods


-
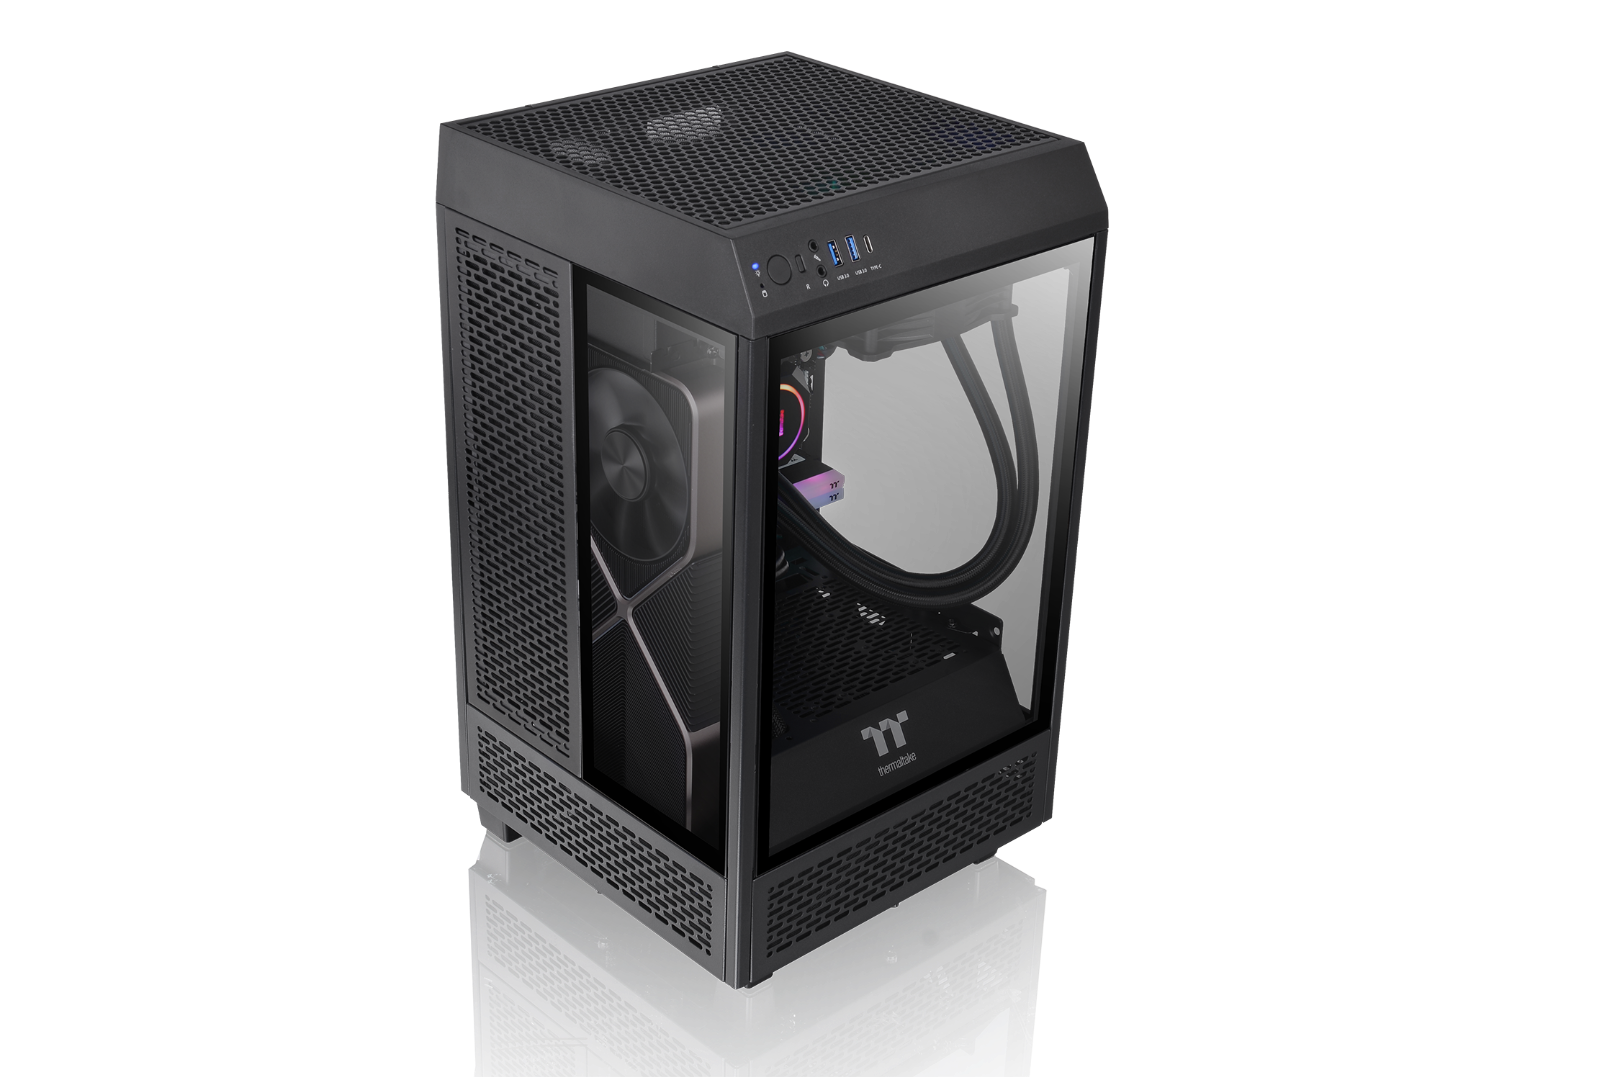
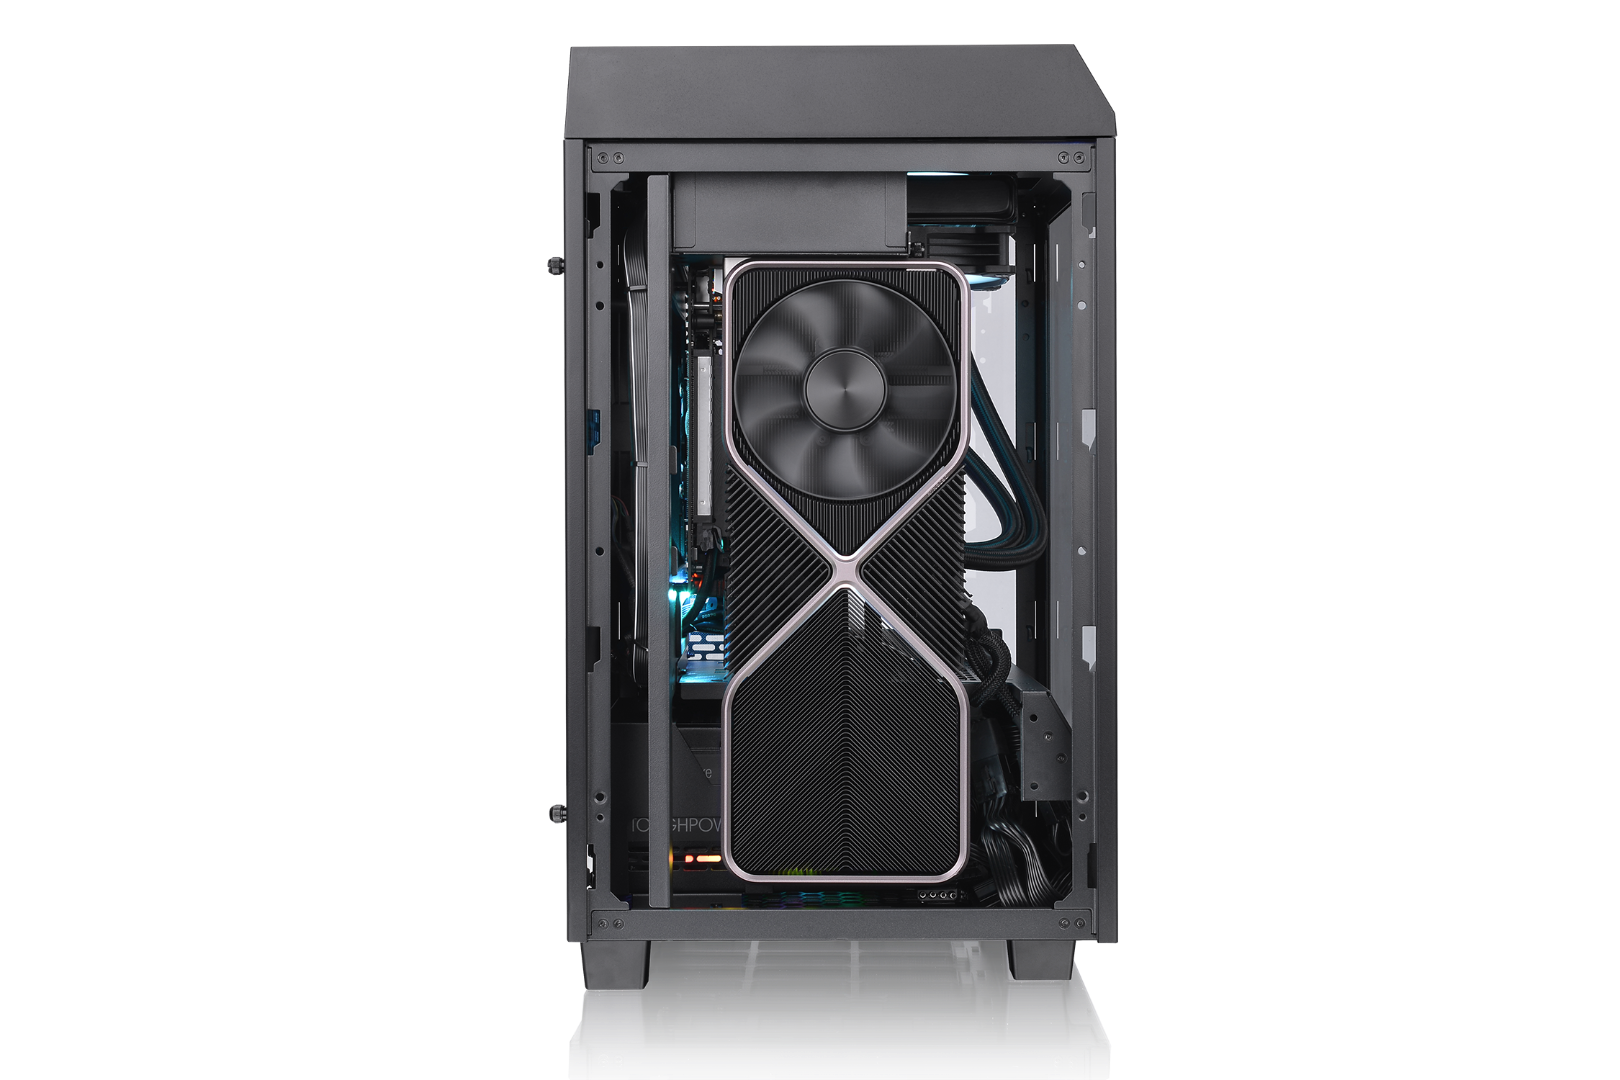
 Will it fit ? The 4070 ti hast a length of 337 mm and the Thermaltake 100 can handle GPUS up to 330 mm. Maybe it will still fit? any Suggestions? Have anyone tryed something else with a 4090 or so?
 -
LEAL MARK ANDREY
-
 OR where can I purchase a Thermaltake Toughpower GF ATX 12V PSU 4+4 Cable or even a Thermaltake cables kit[reputed seller if not thermaltakeuk] /// Hello I am desperately trying to buy an ATX 12V 4+4 cable, a thermaltake one for an 850W Toughpower GF Series Power Supply. You know the 4+4 cables with writing of function on head. Failing that I would be more than happy buying a thermaltake power cables kit,the sleeves, so a full cables kit so a choice of two, 1st a lot cheaper and why I contacted and second because it would improve appearance of my pc, so no harm in that. My PC is down with a cable missing and I need to get it back up, actually missing from PC, it's not a euphemism and very, very recently. I have seen they have a shop on their thermaltake UK website but there are not prices or buy this buttons; if I need to update my phone or do something with regards it can someone please advise. I have seen they supply names of reputed stockists on their website via tab. Ebuyer, Overclockers, CCL, Novatech, maybe others but they don't appear to have THERMALTAKE standalone cables OR the thermaltake cables and sleeves kits. This learned AFTER I had tried contacting thermaltake about the one cable and received no reply, i then started going through ALL their website tabs. Reason they don't just call their 'products' listing a shop and didn't think it was and definitely thought it wasn't when I saw no prices, and ALSO had just seen in browser online, not in a shop, but a general search listing which doesnt actually take you to what the frontend shows] by thermaltake 2 lots of sleeve+ cable kits listed for £35 and £80 respectively but no lone 4+4 Thermaltake 12V PSU ATX Cable[several searches were entered] when I had got no reply on the lone power cable and went back and said I'd be happy to buy that [it has the cable I need aswell as looking nice]. It wasnt said unhappily, it was said Ive just seen in a browser search about the sleeves, looking up thermaltake cables or similar. I getting frustrated tried a lot of search entries for the Thermaltake lone cable. I honestly would like just the 12V ATX 4+4 Cable with function name, made by Thermaltake but am more than happy to buy the Sleeves and Cables from either THEM or a reputed seller, as I dont want to risk my PC. Ive tried contact with them twice, first on cable, no reply, second on either cable OR "lone cable+cables+sleeve kit", i havent received a reply yet, and I said ITS IMPORTANT so they arent answering. Can someone please tell me how I can get Thermaltake to reply, thats the preference OR secondly supply a link to a reputed seller's item specifically[not just their website, the actual item] where I can get a [COMPATIBLE with a Thermaltake GF 850W power supply] 12V ATX 4+4 Cable, I really DID want the exact same function written at top ones, and as said in message to them was happy to buy a few but now I will just take something by a reputed seller by thermaltake firstly or a reputed manufacturer secondly if guaranteed for compatability. I, sorry to say this would still like Thermaltake to reply as if my PC blows up I am not going to be happy. I really, really need to get my PC up and running, something important needs starting yet cant. A few nighters because a radeon graphics card getting installed and specifically associated amd software giving me a black screen and the graphics card not removing so easily has somehow caused my ATX 12V 4+4 cable to go missing [i worked on my pc solely in a small area, taking nothing away from that area], this about exact reason for needing the cable wasn't said in contact with Thermaltake, [no reply back], but it has. You might on happy side think pranks but I need a replacement cable and first choice I'd like a matching one or a few if possible, second the kit but happy for linkage on either. ALL OF THIS WROTE VERY LATE HOURS OF TUESDAY 16TH JANUARY 2024
 -
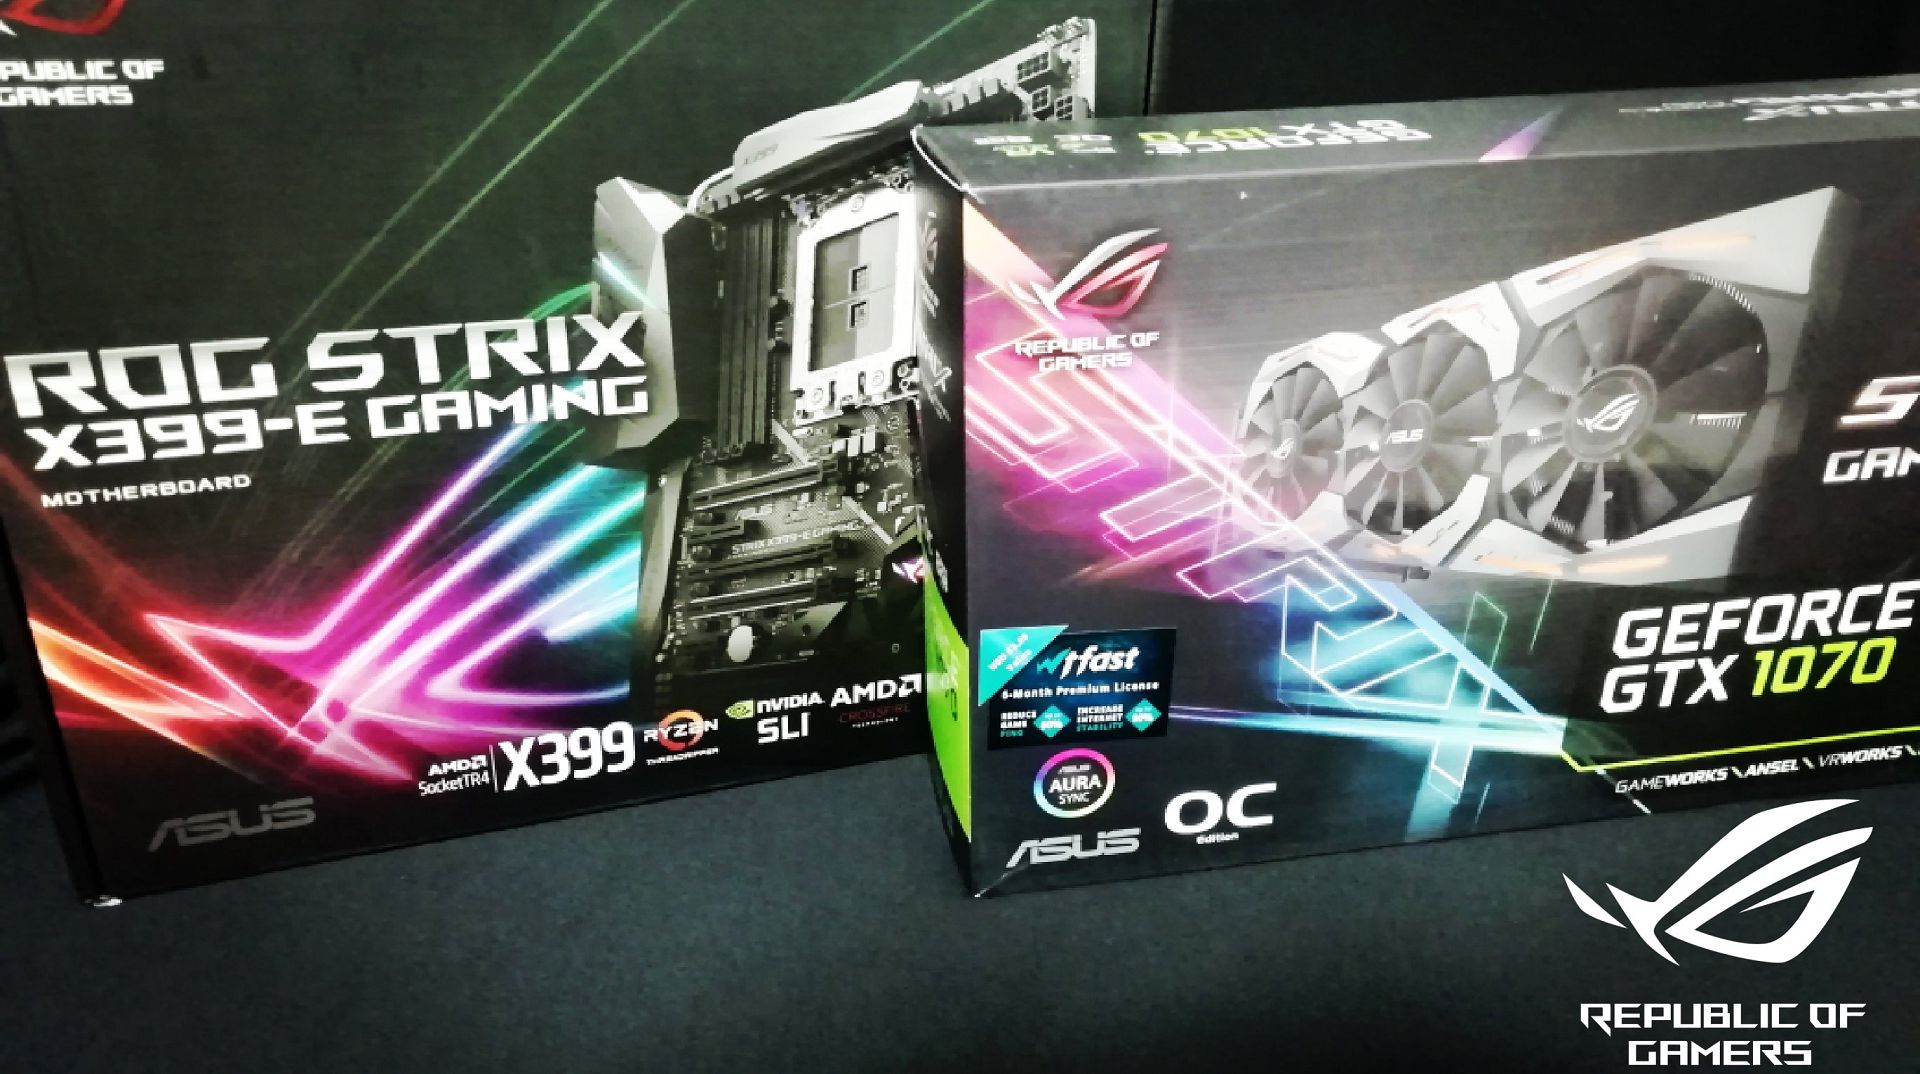
 Welcome to my Project logs of 'Pocket Rocket' What's the deal ? For this project, i'll be transforming a brand new 50cc mini quad bike into a full gaming/show system. I'll be removing the engine and replacing it with the motherboard and GPU's I'll then replace the exhaust system with reservoirs and tubing. There's still some stuff to figure out, but very soon i'll get the quad and figure out all that. Special thanks to my wonderful partners ASUS Republic Of Gamers UK Thermaltake technology inc. TeamGroup Global Cablemod Specs Intel core i7 7800X ASUS ROG Sytrix X299-XE gaming ASUS ROG Strix 1080 OC ASUS ROG Strix 1080 OC TeamGroup T-Froce Delta RGB 16GB DDR4 Cablemod Custom cables (Pro Kit with aluminium Combs) Cablemod RGB/W Lighting Thermaltake Riing Plus 12 RGB Radiator Fan TT Premium Edition Toughpower Grand RGB 850W Gold Fully Modular 2x Pacific T22 Reservoir's Pacific P1 Black D5 Pump w/ Silent Kit 2x Pacific V-GTX 10 Series Transparent (ASUS ROG) Pacific W4 Plus CPU Water Block Pacific M-Pro G1/4 PETG 12mm Fittings - Black Pacific G1/4 PETG Tube 90-Degree - Black Pacific G1/4 PETG Tube 45-Degree - Black Pacific G1/4 Pressure Equalizer Stop Plug w/ O-Ring - Black Pacific G1/4 Female to Male 20mm Extender – Black Pacific G1/4 Y Adapter – Black Pacific Drain Valve – Black Pacific G1/4 Stop Plug w/ O-Ring – Black Pacific G1/4 Male to Male 10mm Extender – Black x3 V-Tubler PETG Tube 12mm OD 10mm ID 500mm 4 Pack Thermaltake Pacific Hard Tube Bending Kit for ID 10mm x OD 12mm Hard Tube Thermaltake C1000 Opaque Coolant Black Thermaltake Pacific RL360 Radiator Photo's! So... Here's some photo's of the quad, it's due for delivery on monday, excited to start. So the quad measures at 1 meter long, 60cm wide and 60cm tall. (Tons of space!) One of the first things i'll be doing is removing the panels from the quad and spraying the underside of them, hate seeing that white. ASUS ROG UK Delivery. First up: Strix X299-XE Gaming motherboard Strix 1080 OC edition graphics cards ASUS ROG HB SLi bridge TeamGroup Global T-Force Delta RGB kits Will update more as the final parts arrive, this is to be hopefully completed BEFORE EGX!! Insane time frame, but i must try Thanks for looking. Craig.
 -
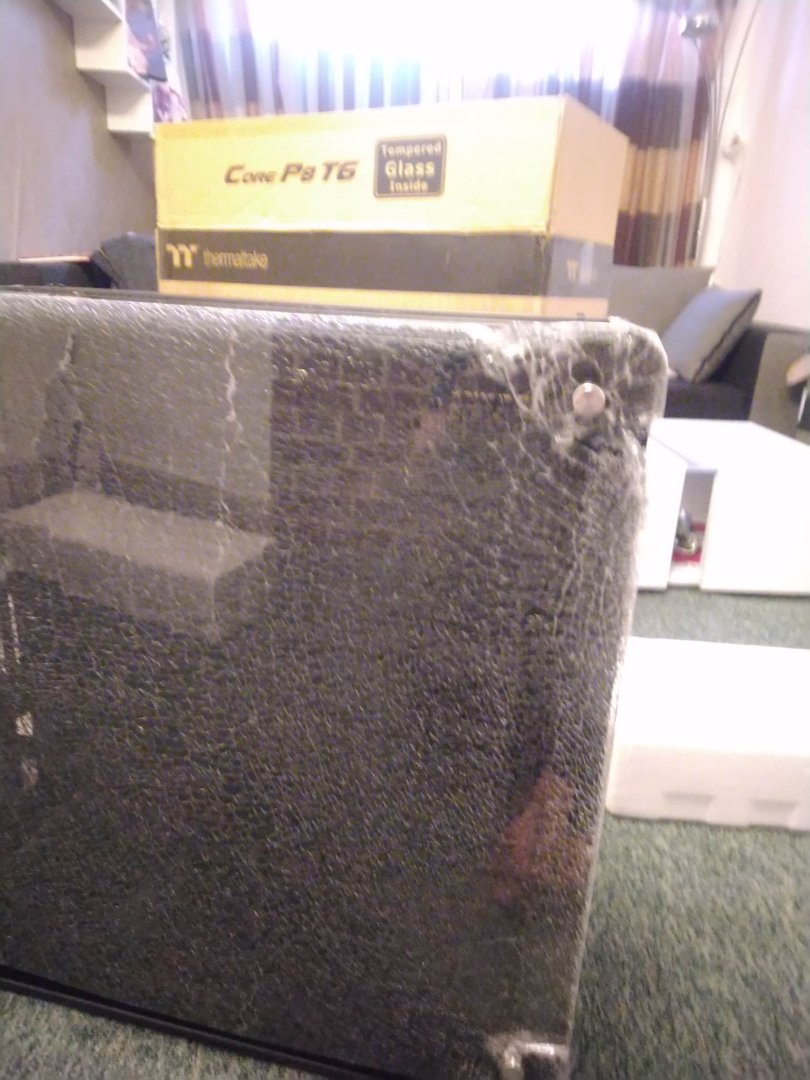
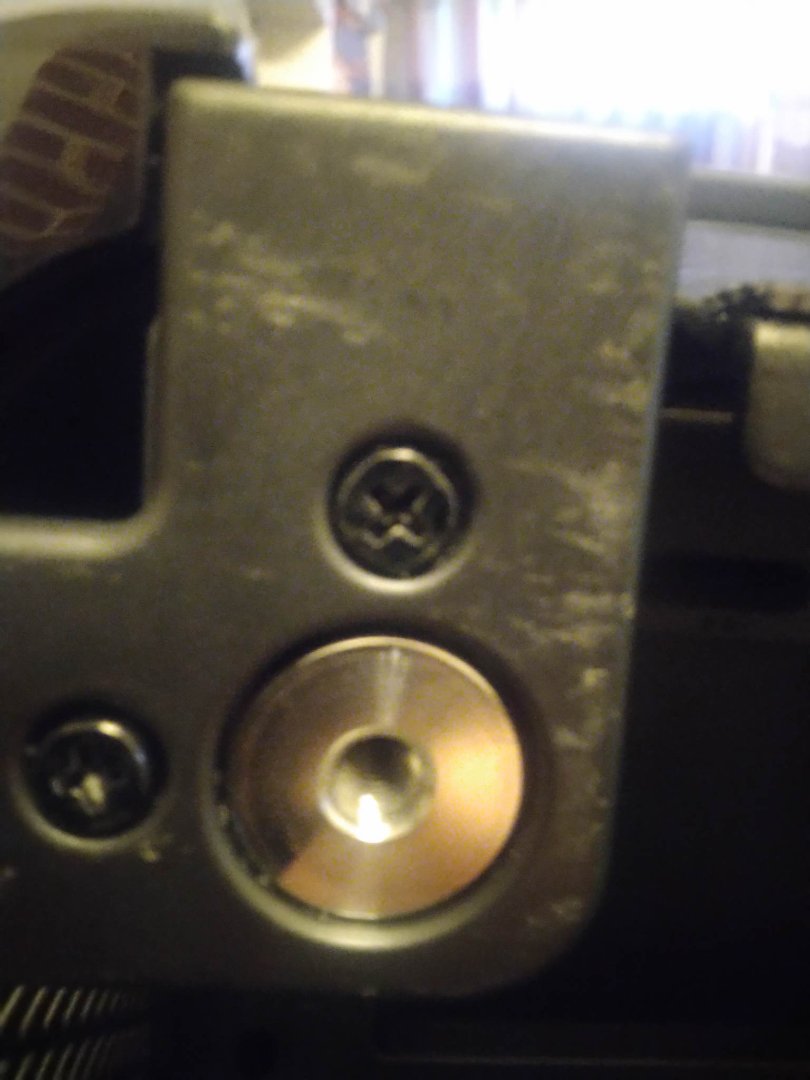
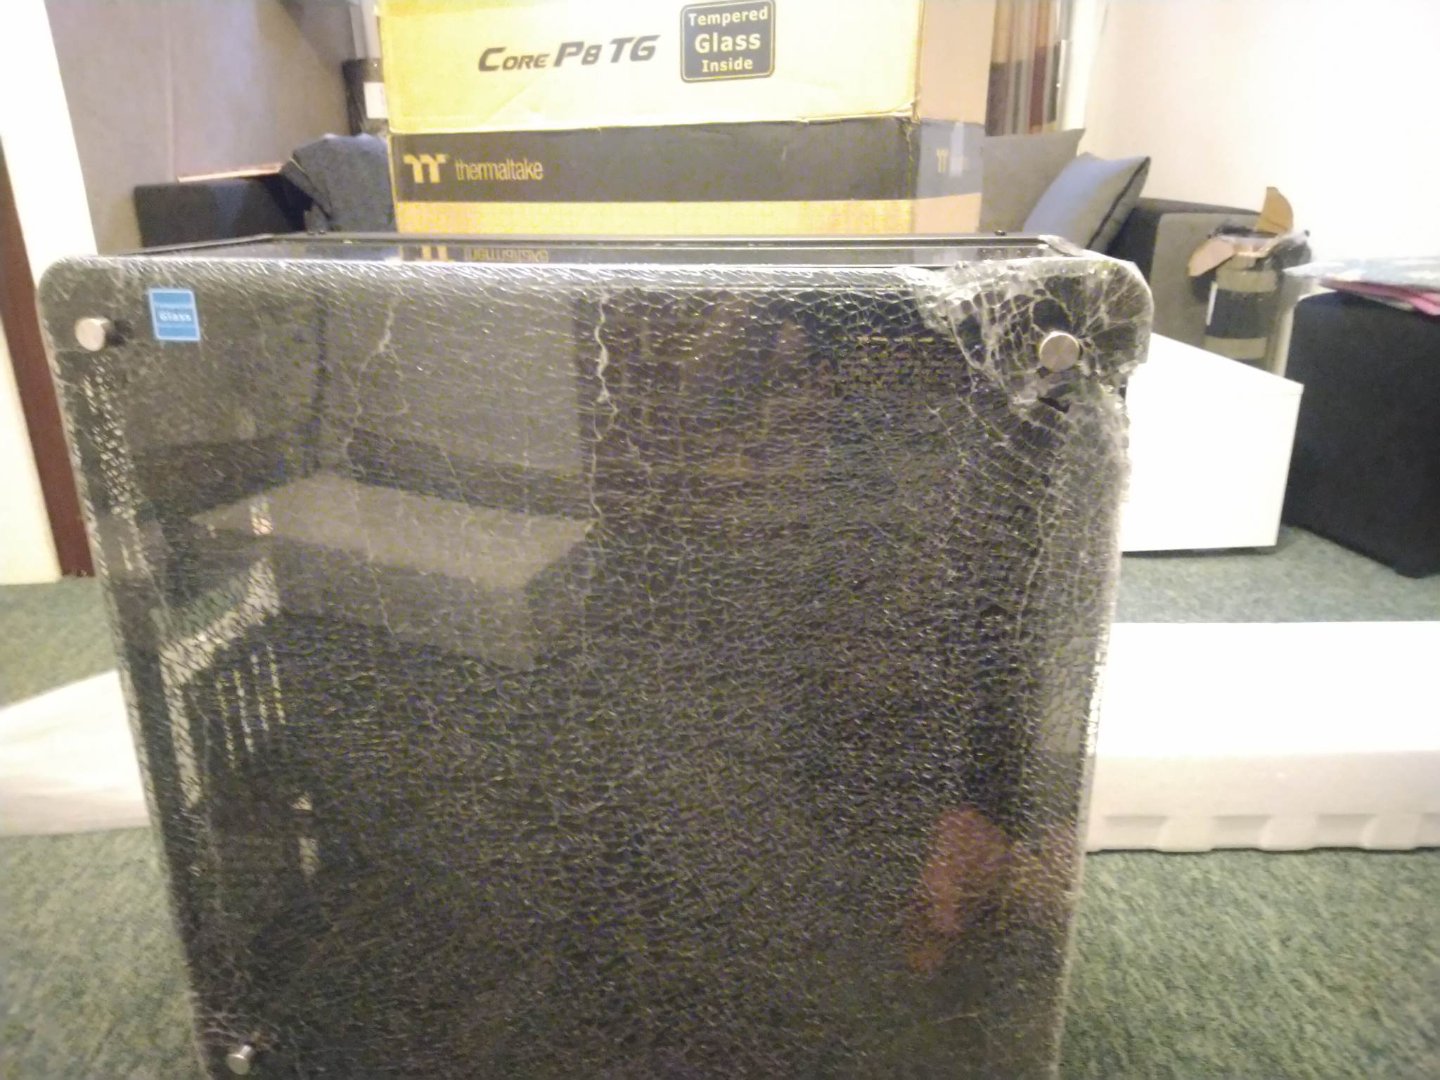
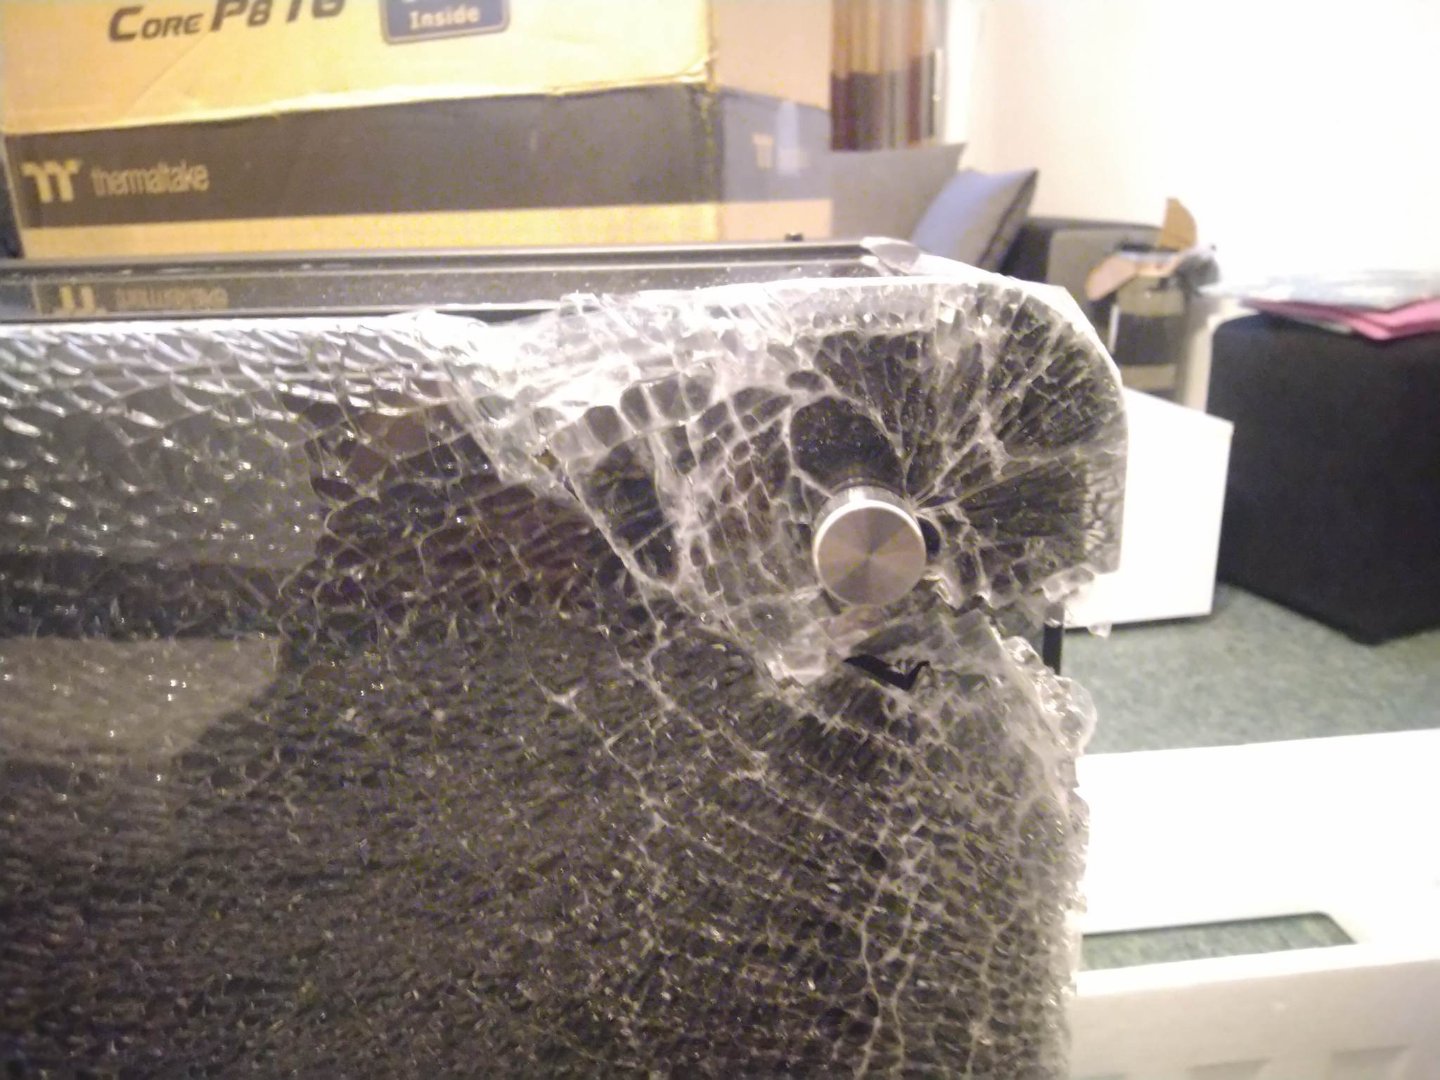
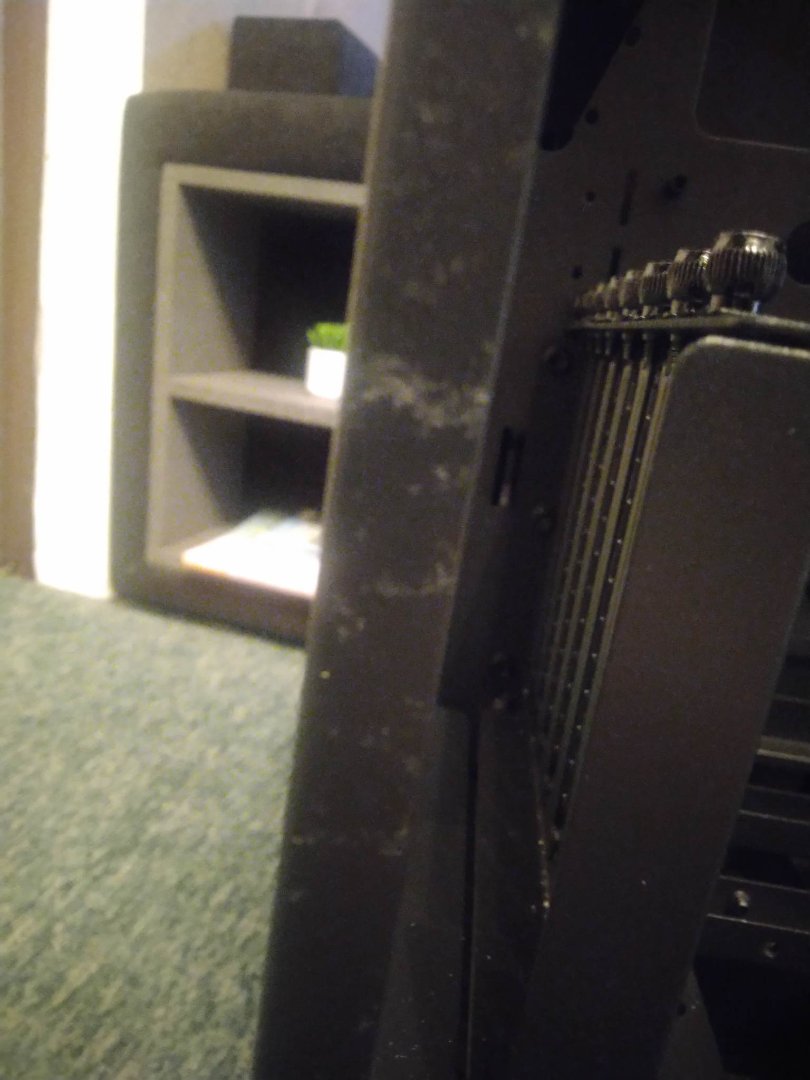
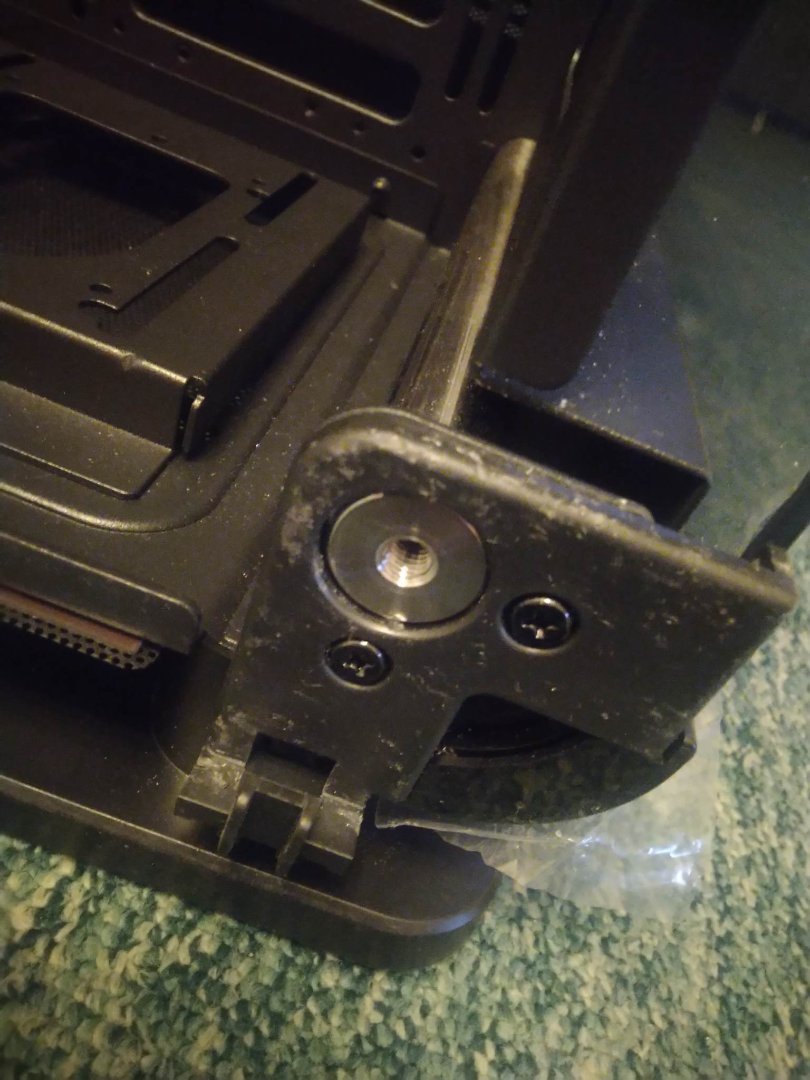
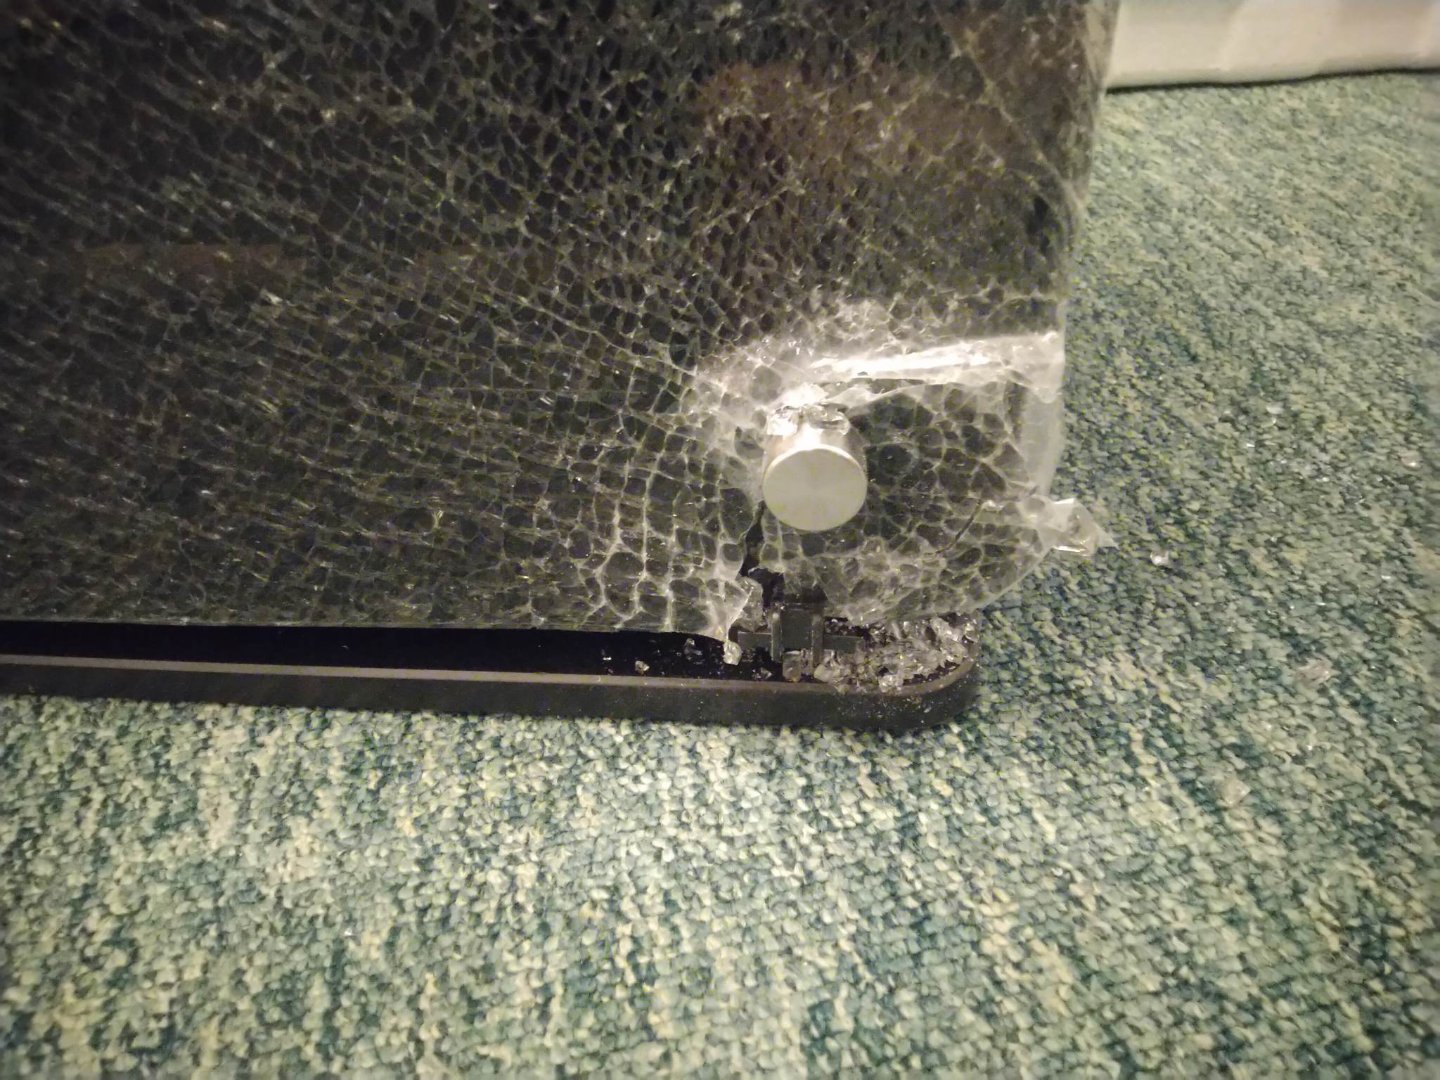
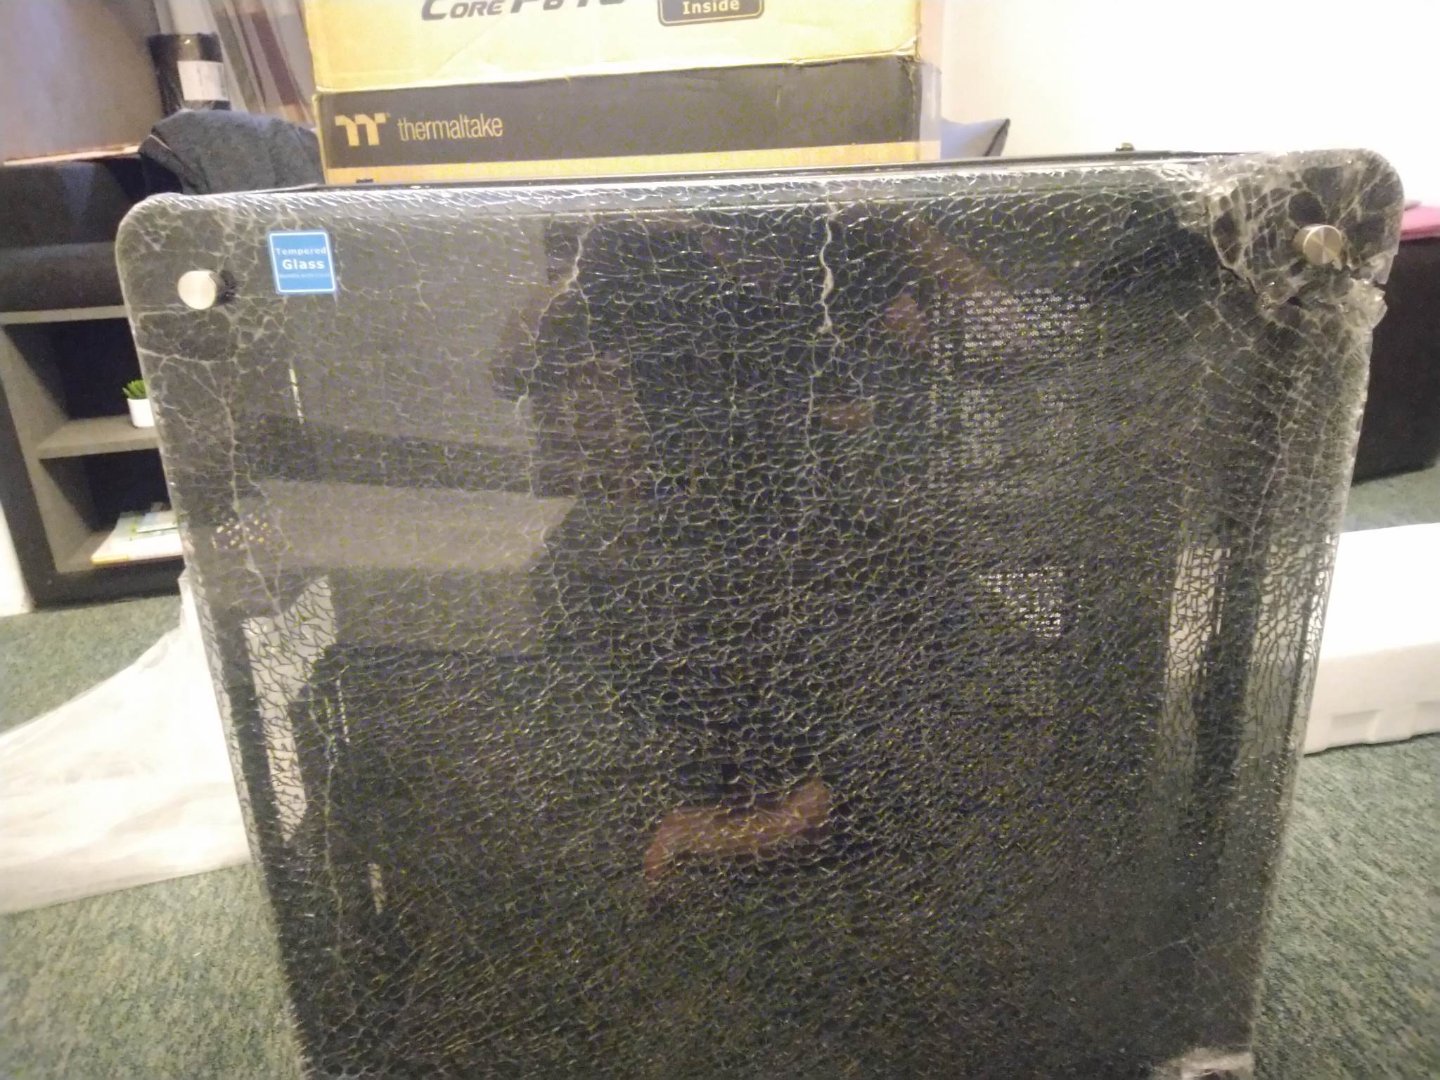
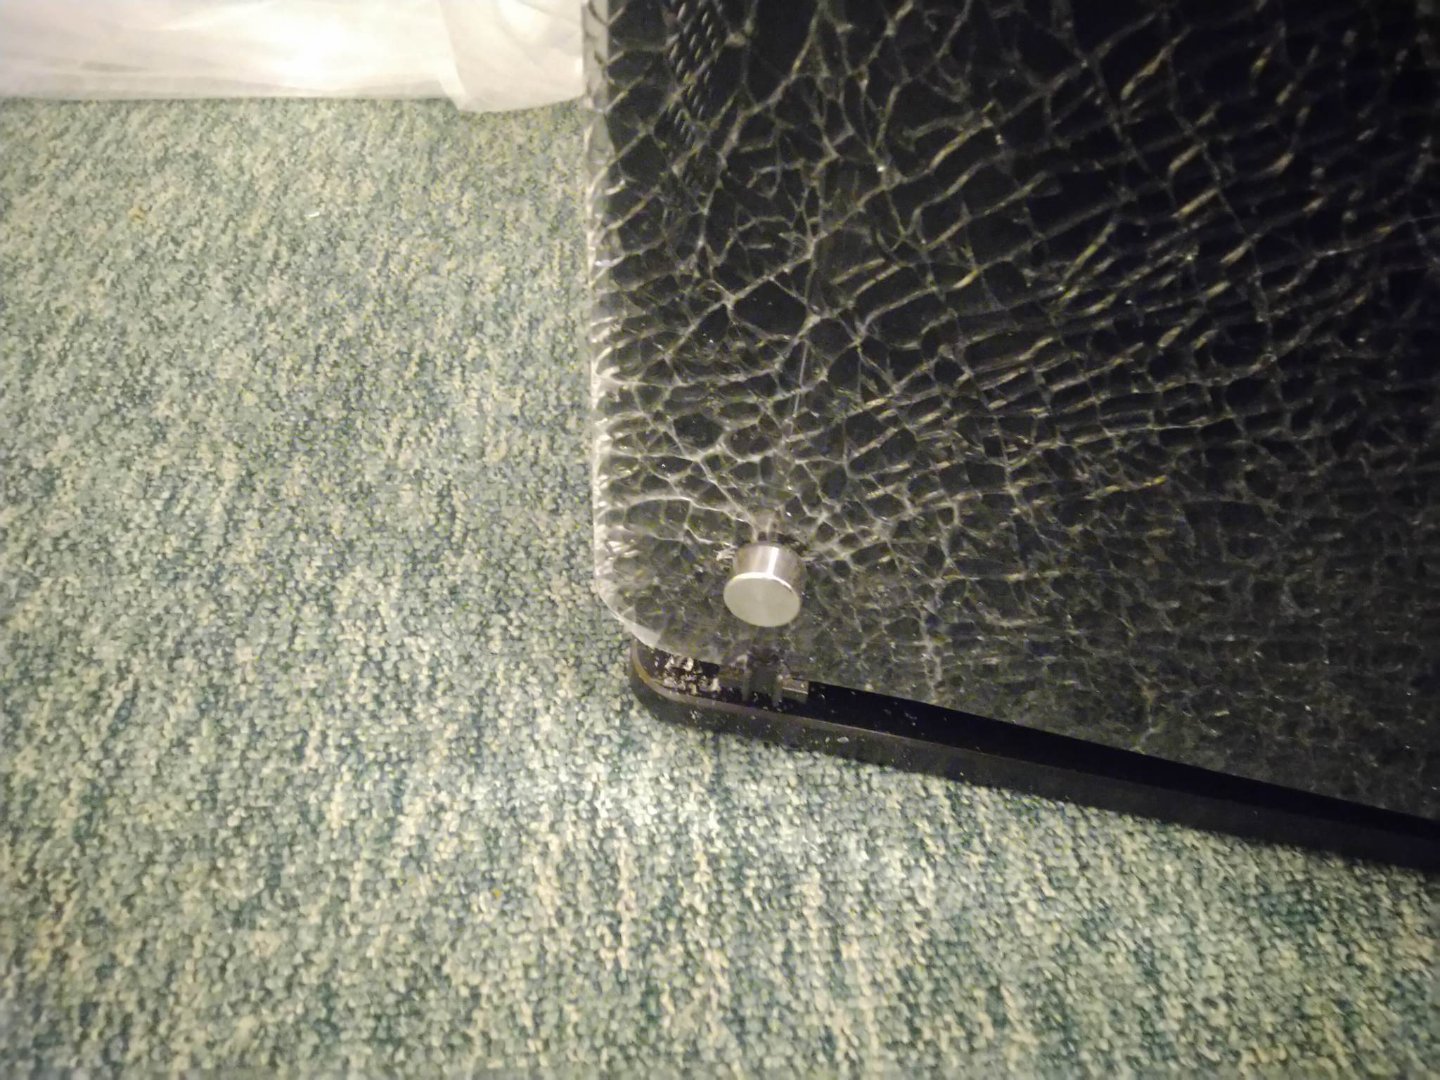
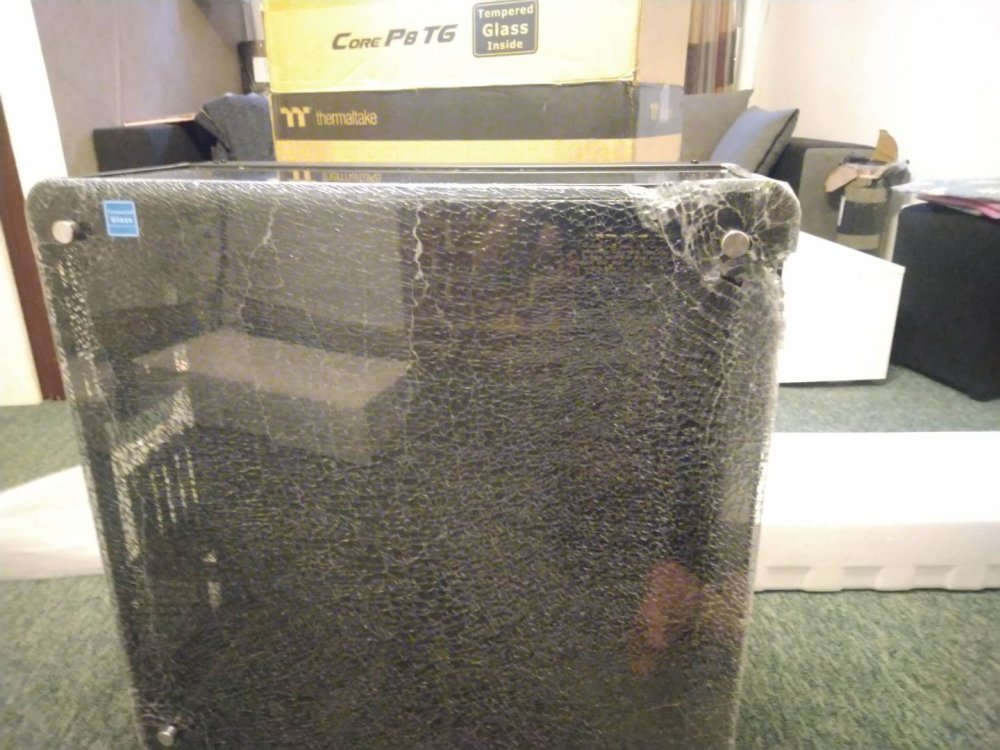
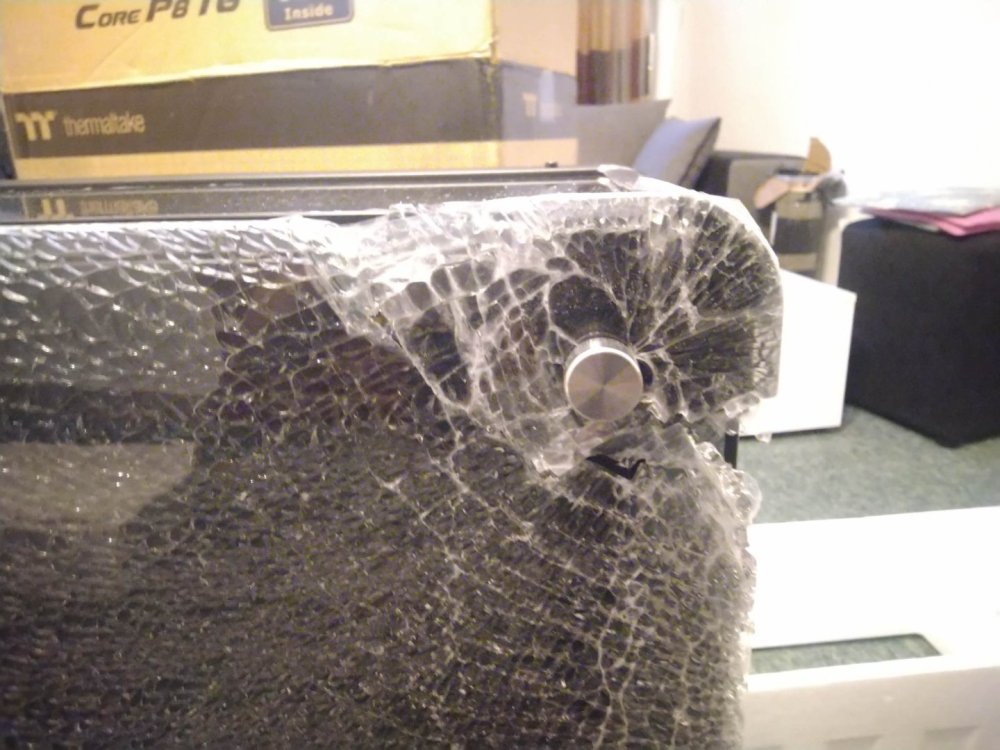
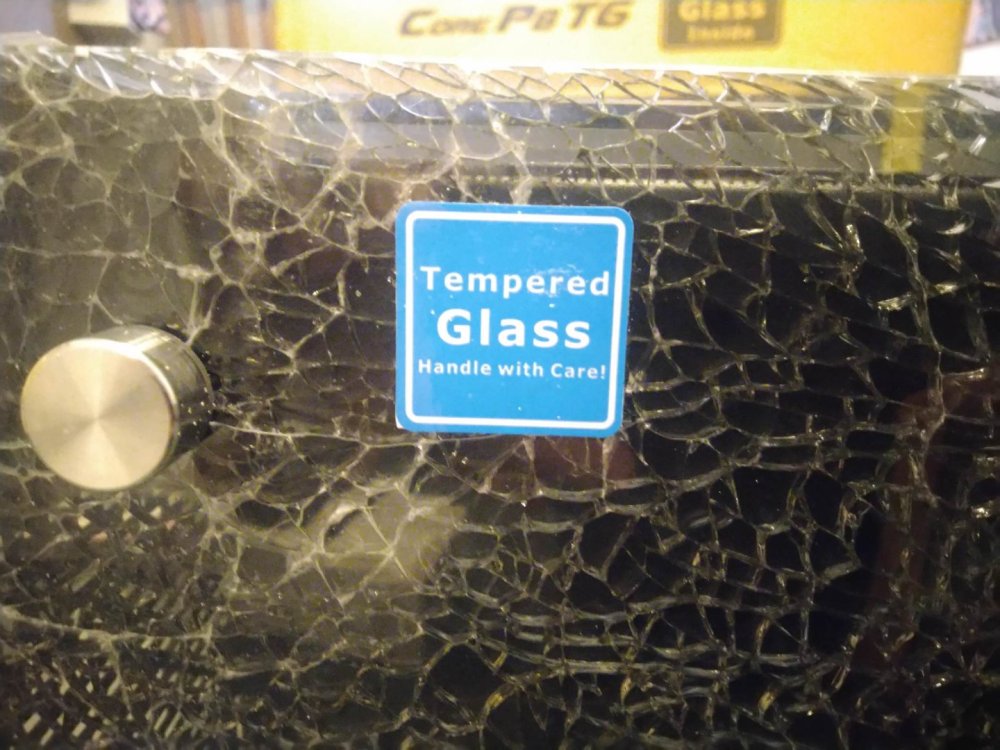
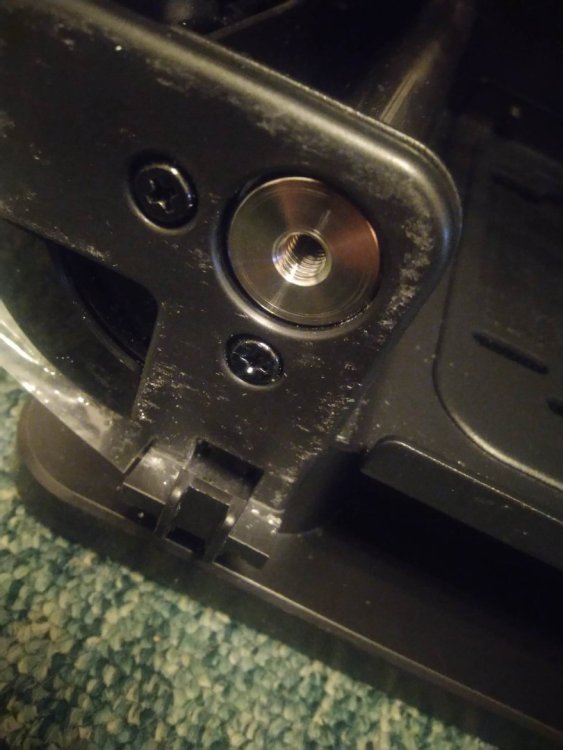
 Hi all, I am currently building a fully water-cooled PC from scratch. I have all the necessary PC parts except for the PC case. I ordered the Thermaltake Core P8 Tempered Glass Full Tower Chassis, a very large computer case, on March 13, 2023. Unfortunately, when the case arrived on March 20, 2023, it was completely broken. The side glass was shattered into a million pieces, and the PC case panels were also scratched. It appears that the case was brutally damaged during shipping. I ordered the case from "https://ttpremium.eu". I have tried to request a refund or a replacement, but they are not responding to my emails, and the phone number provided is invalid. I also tried to create a "Request Form," but I have not received a response. Does anyone have any experience dealing with tech support? Any advice would be greatly appreciated. Here are some pictures: https://drive.google.com/drive/folders/1SYPfxFwIZNagoHaznm9pzVdsXyp0CY9D?usp=sharing I'm very disappointed :( Best regards, Zoltán


-
When i look in RGBplus and compare all the other RGB tools from the other brands like corsair and so. Then i only see some boring effects for the RGB in RGB plus. I know there is neon maker but it dosent work with the newest RGBplus So why cant we have some cool effects rather than these boring effects that dosent do anything cool at all.. Riing quads looks realy great with ther leds but deserves better programming for RGB ! Is it possible we can have these efefcts in rgbplus one day ?
-
Do thermaltake provide Replacement keys for their COMMANDER Gaming keyboards? Cause I just lost one of mine.
-
hello, for some time the computer no longer detects the fan controller. -Fans: Pure Plus 12 RGB TT Premium Edition radiator fan. - motherboard: MSI Thomahawk Max -processor: ryzen 5 3600 Help me please
-
Hello! Here is some general information for steps on how to contact our support here in the USA and setup an RMA for your Thermaltake product if you feel it maybe defective. USA Support and Warranty Claims: http://bit.ly/2qWUJMH USA Technical Support: 800.988.1088 M-F 9:00AM~5:30PM (P.S.T) Thermaltake USA Provides (2) Methods to process your RMA: Option (1) Select "Advance Service" if you wish to do a "Cross-shipment" - Personal Credit Card Required - Allows Replacement Product to be shipped first - Requires Return of Original Product within 45 Days from Delivery Option (2) Select "Next" to continue with a Standard RMA - Receive RMA number and Shipping Instructions - Ship product to Thermaltake USA (Without Accessories) Please make sure to write your eRMA number clearly on the outside of the package For any questions on this process please contact us first before shipping in any product for warranty.
- 13 replies
-
- 2
-

-
- contact us
- information
- (and 8 more)
-
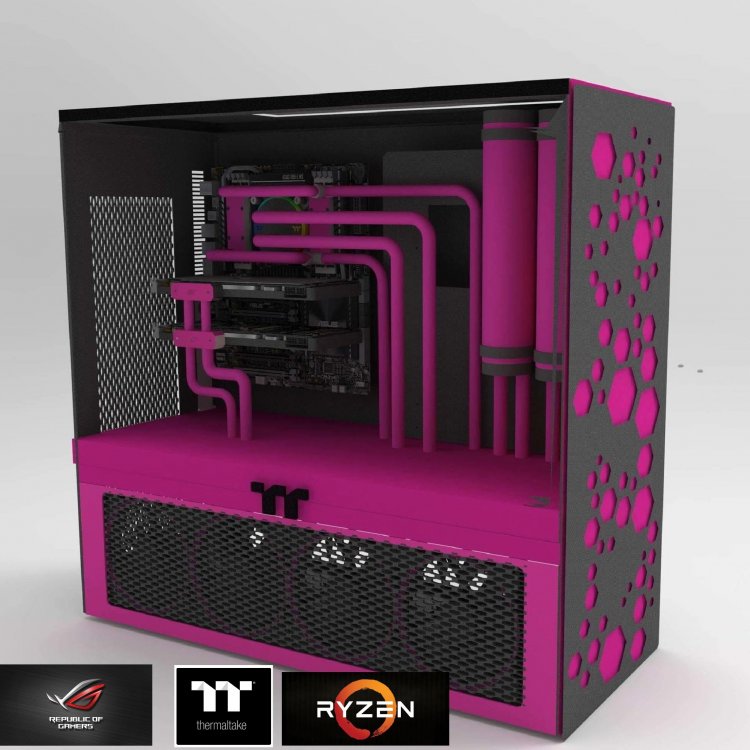
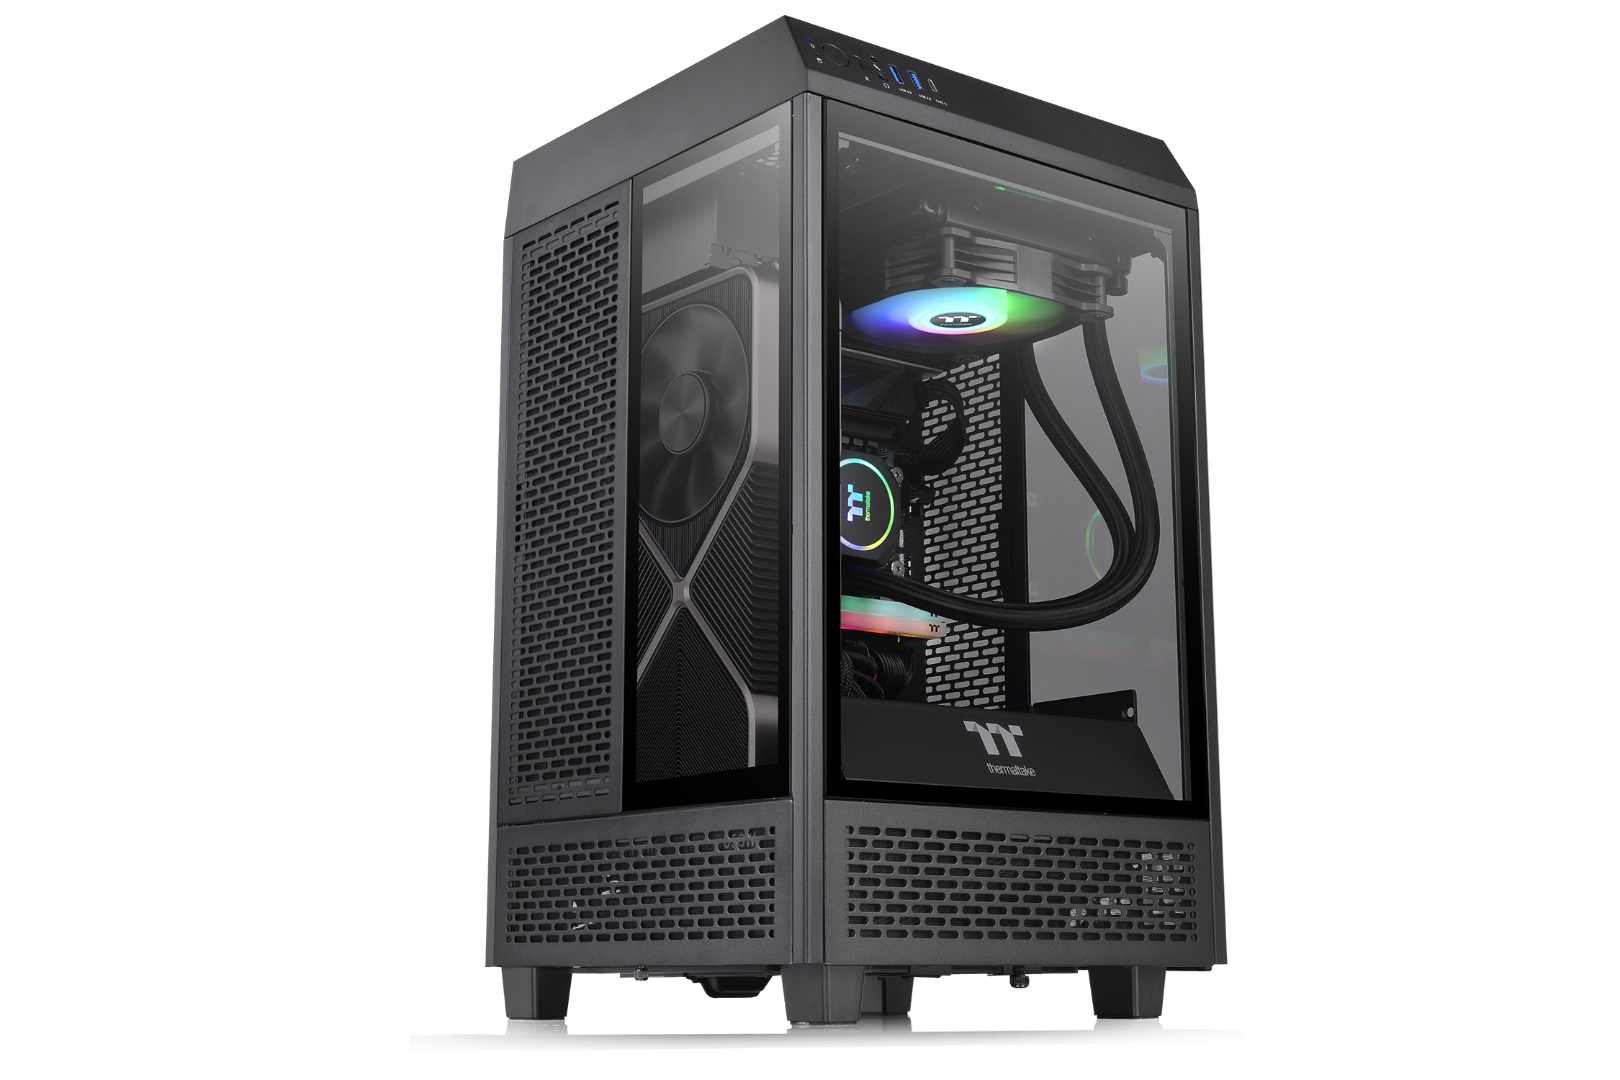
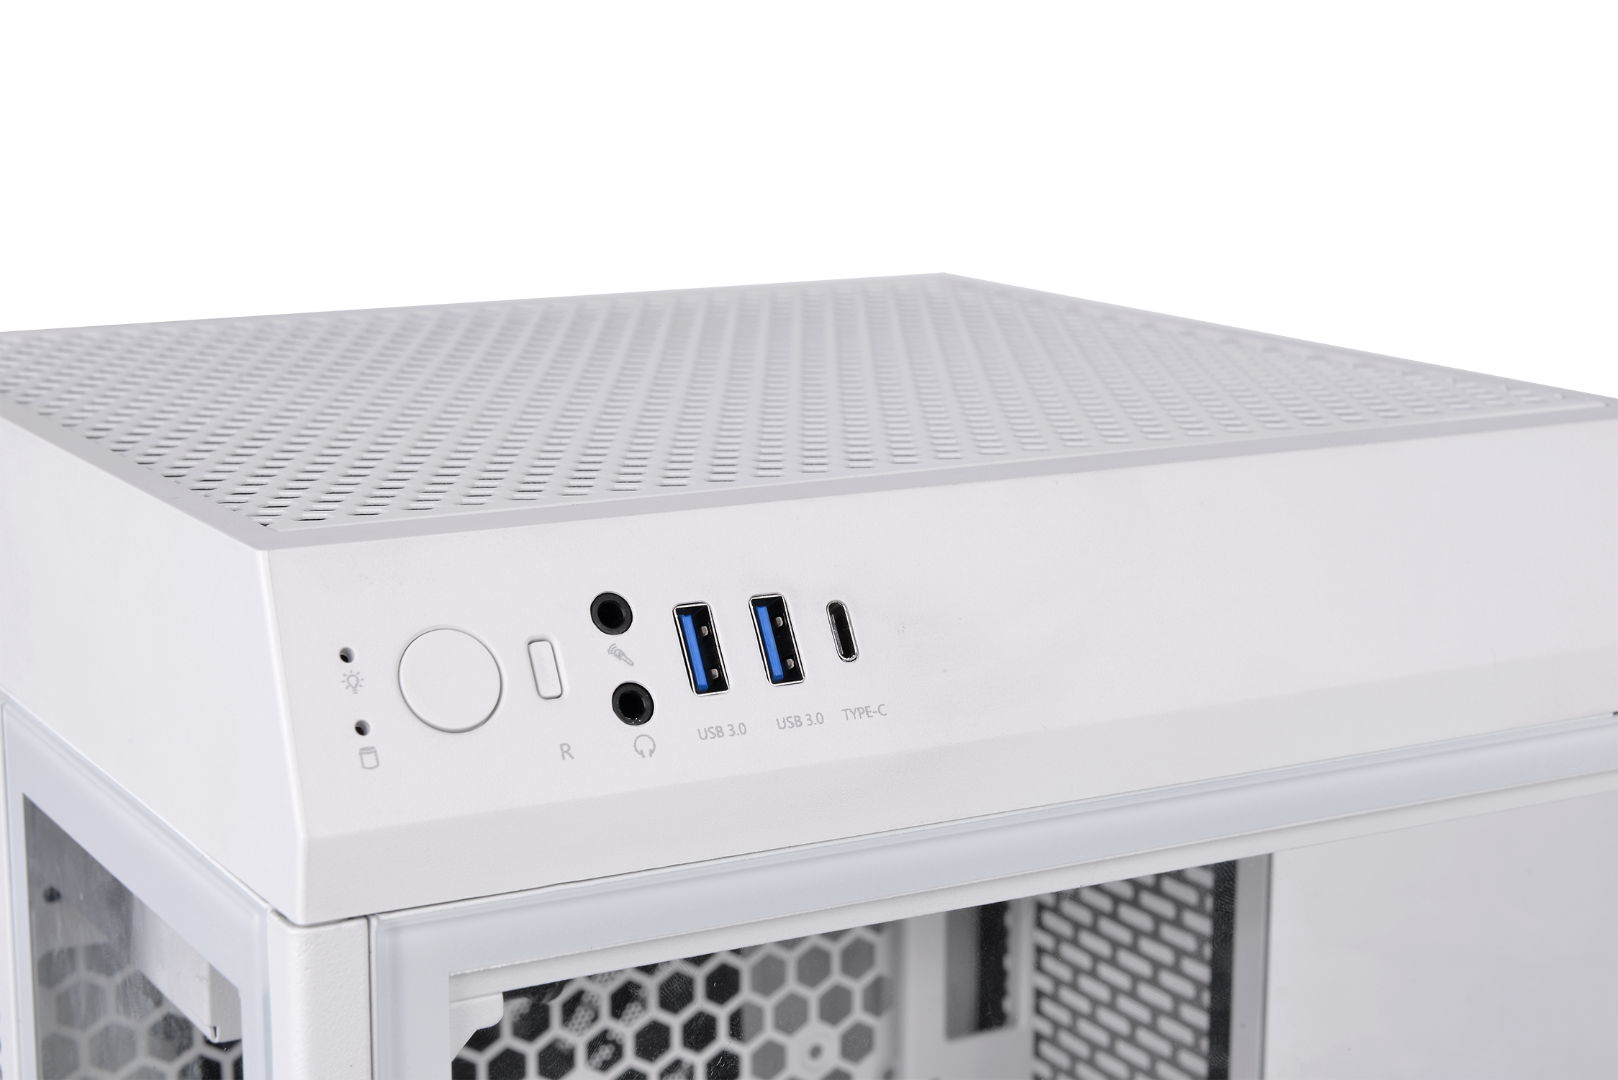
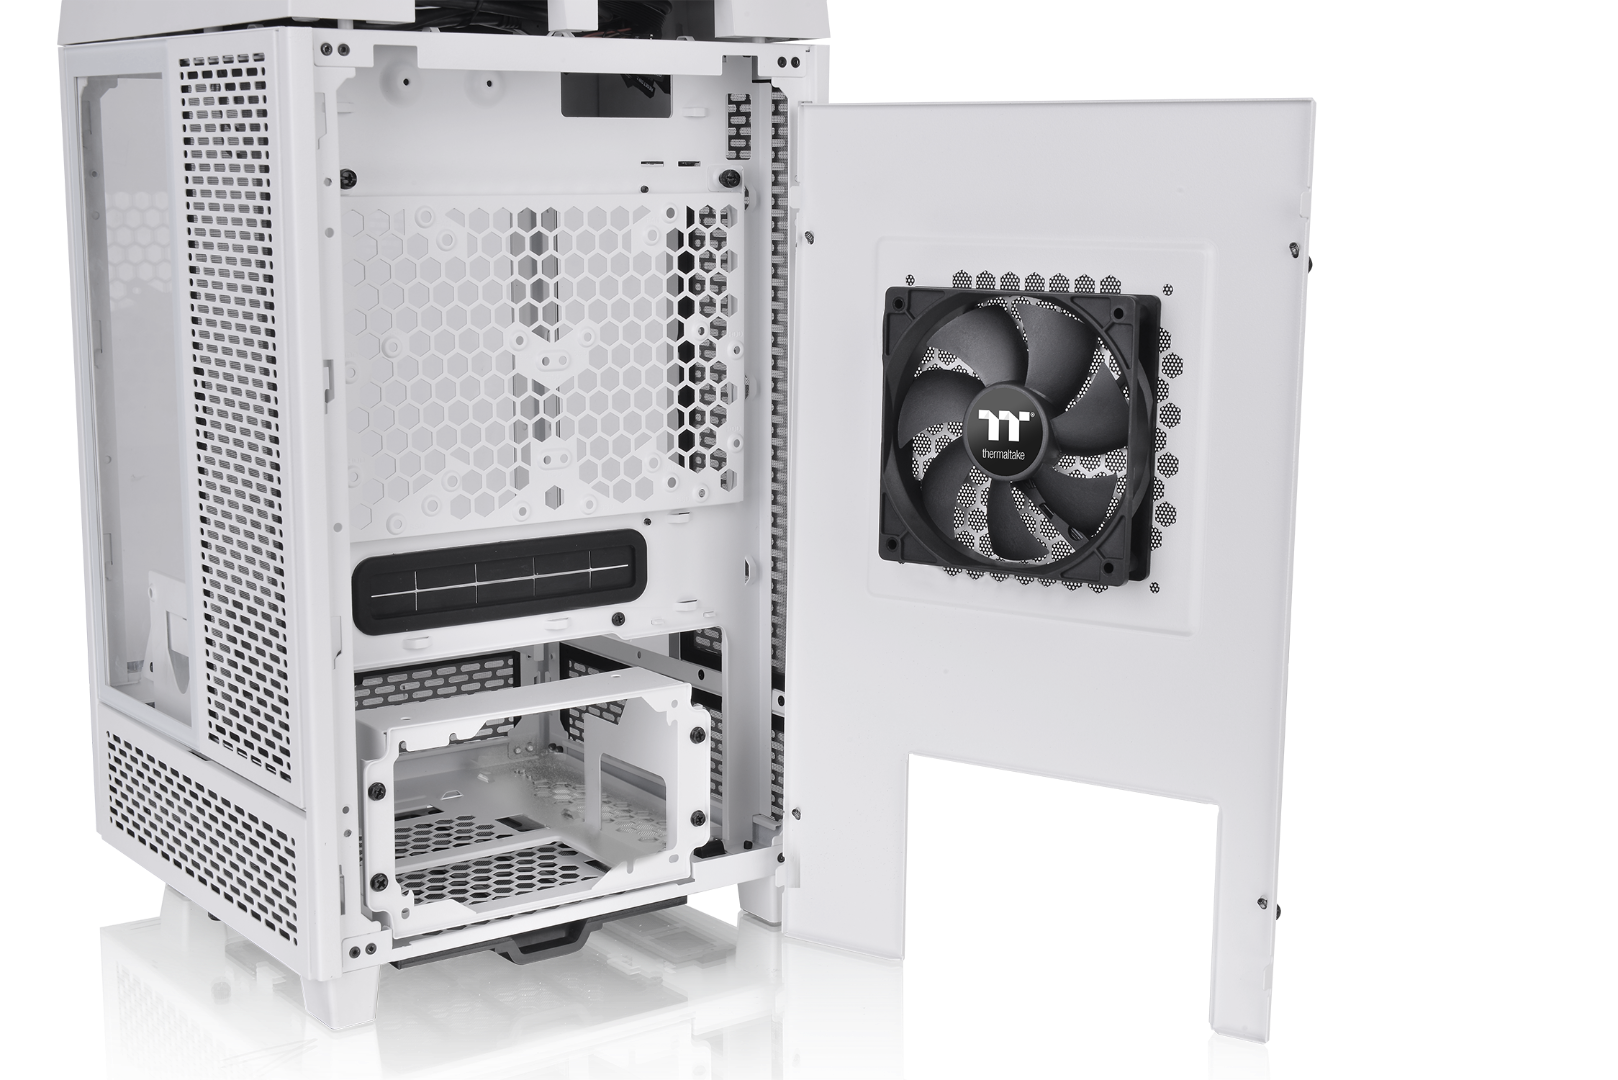
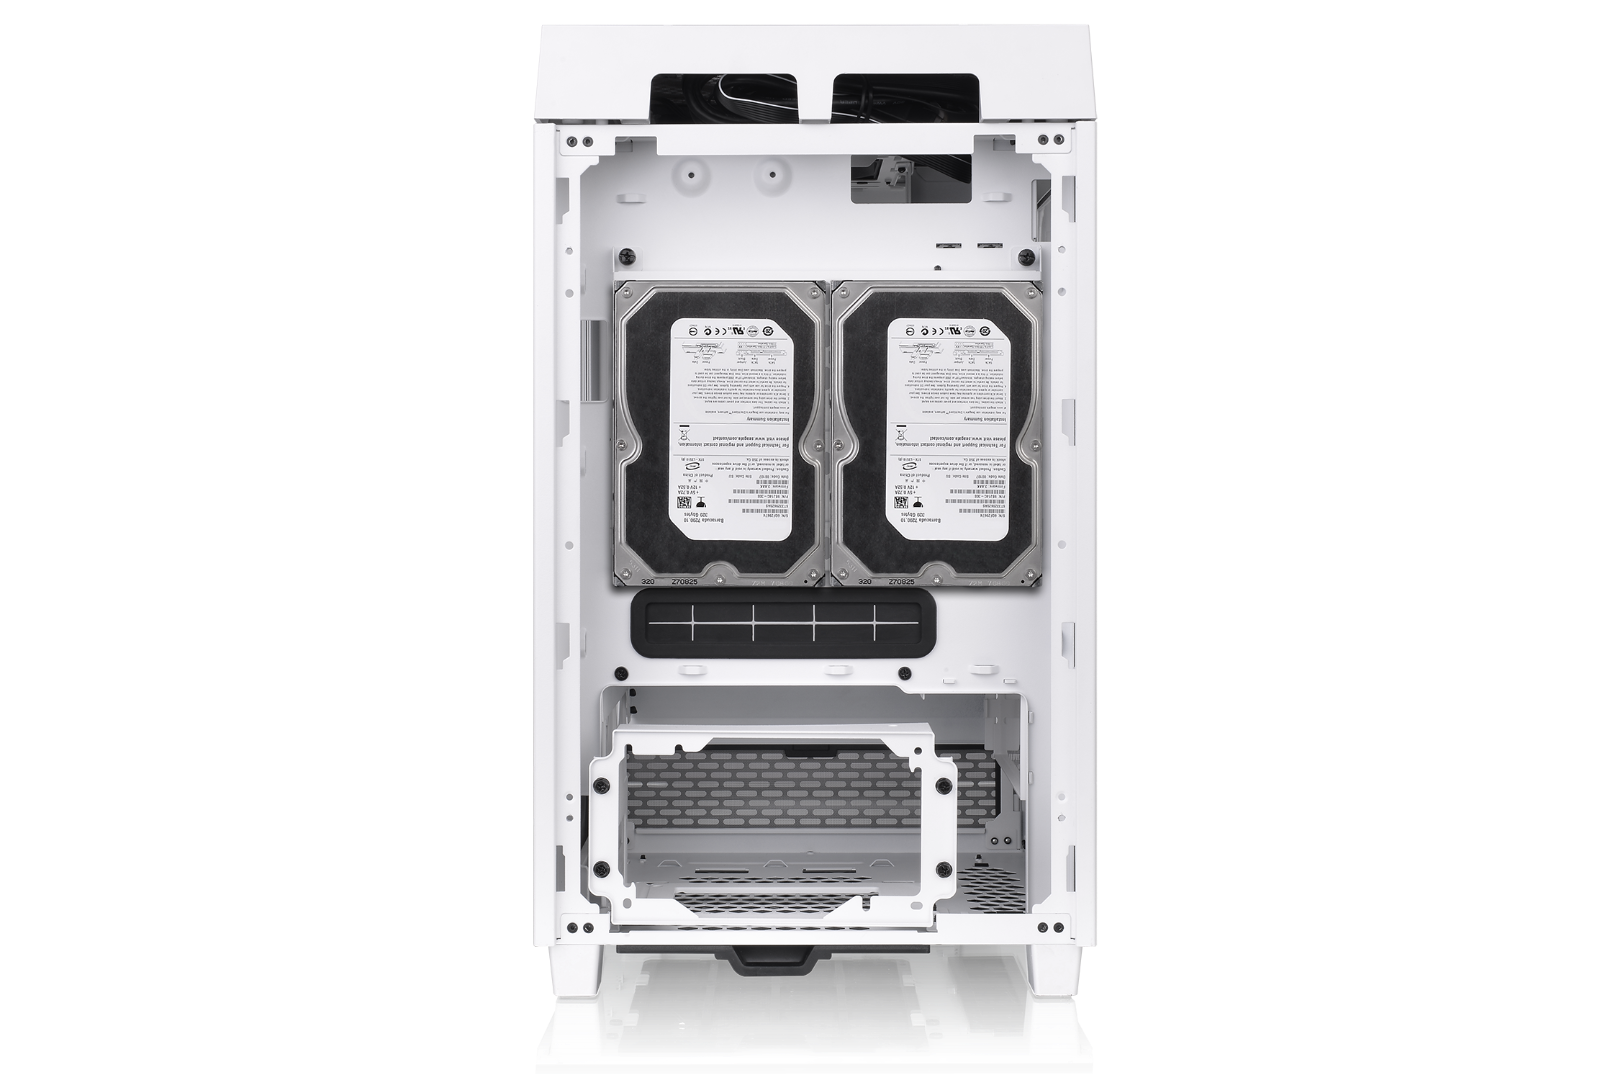
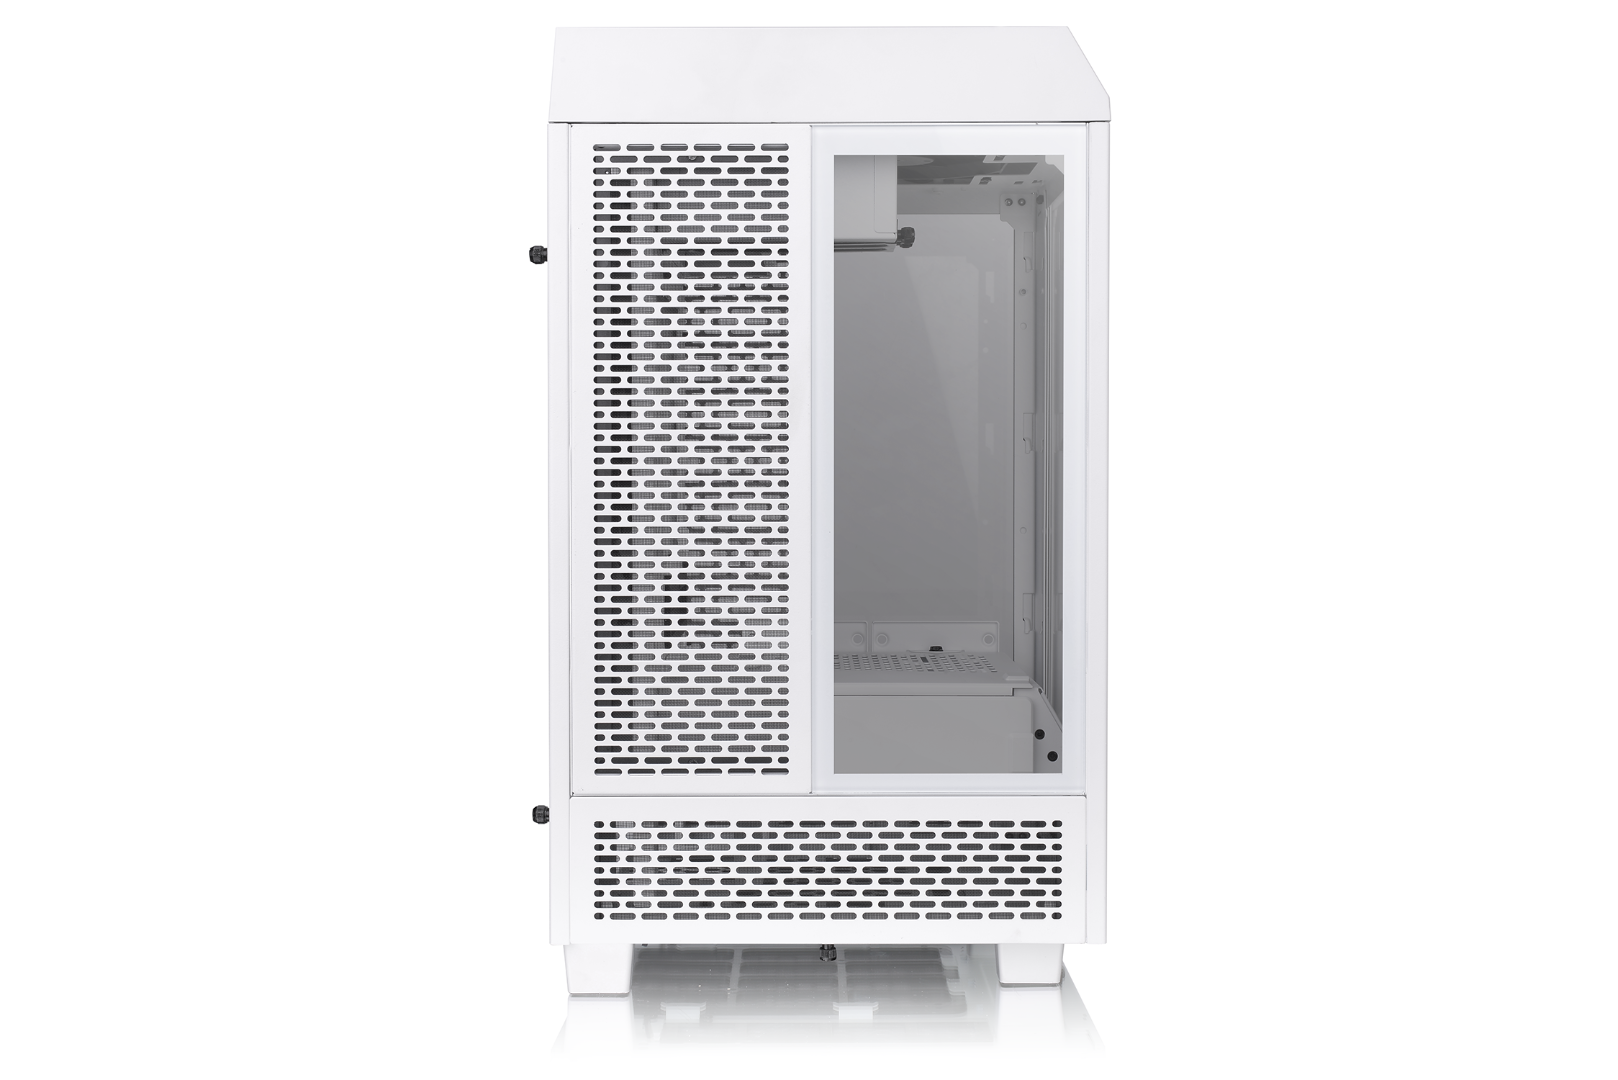
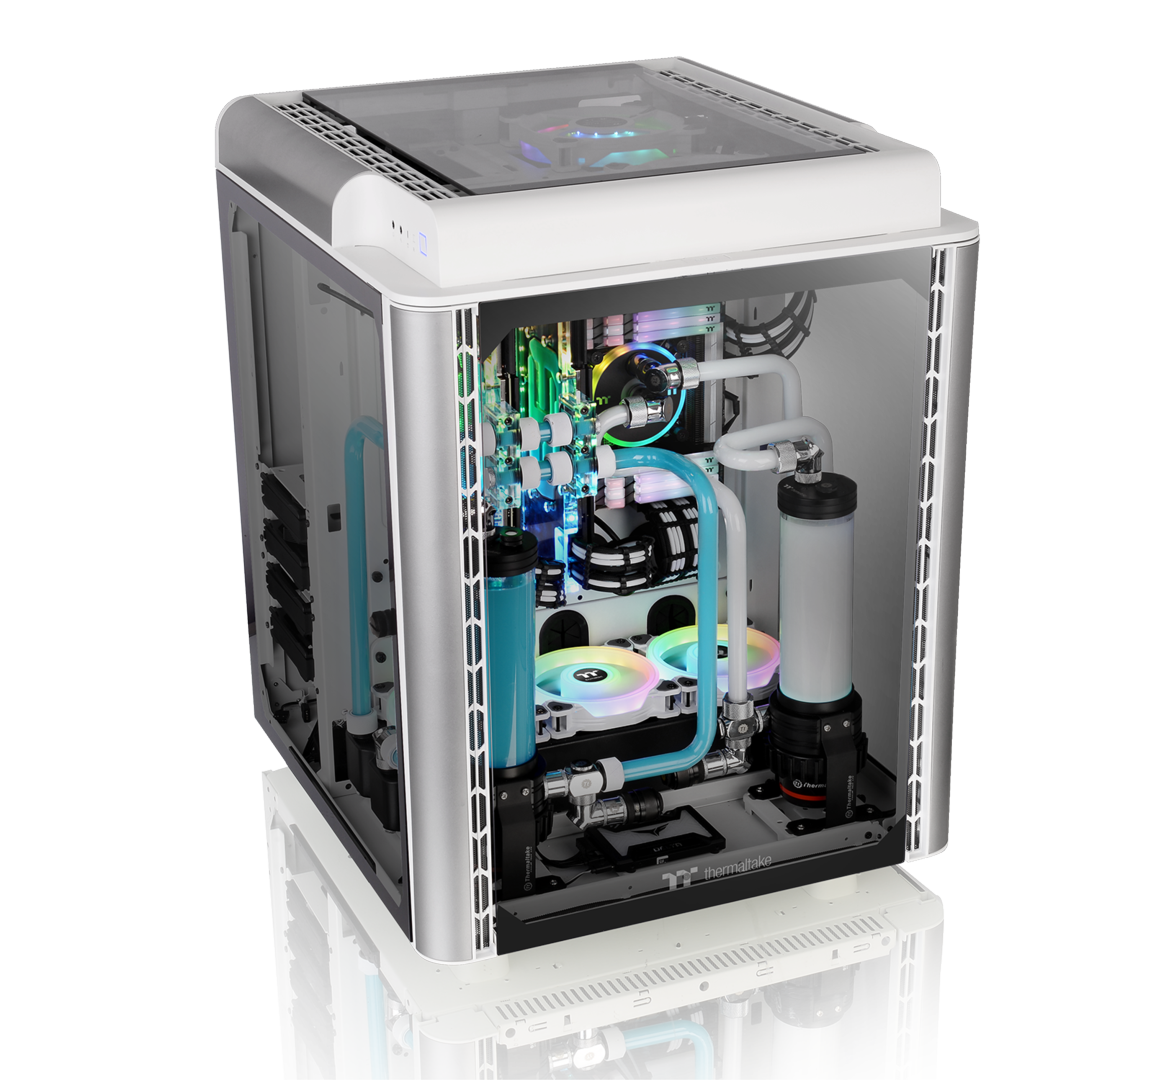
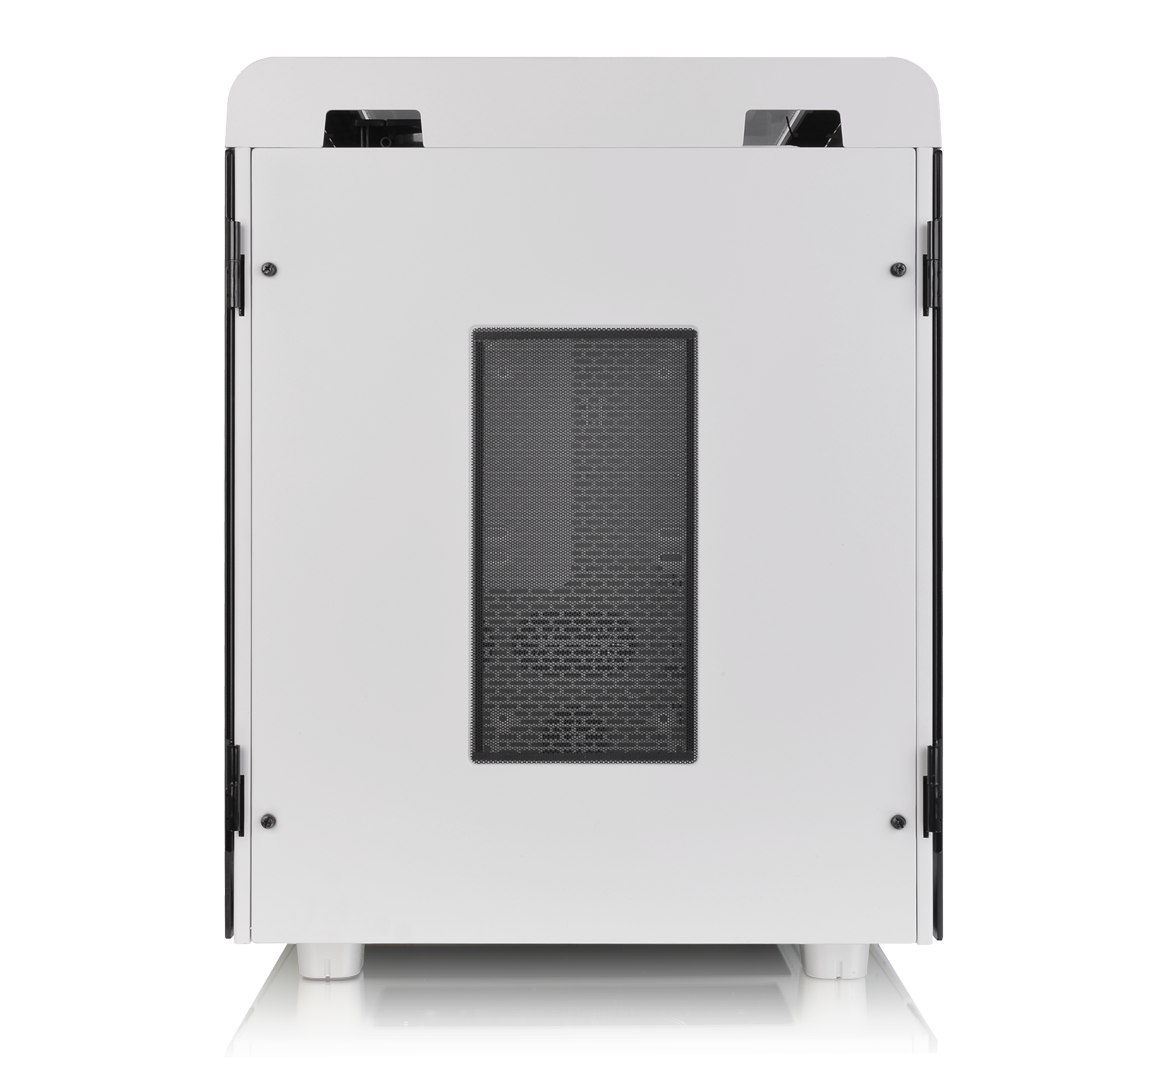
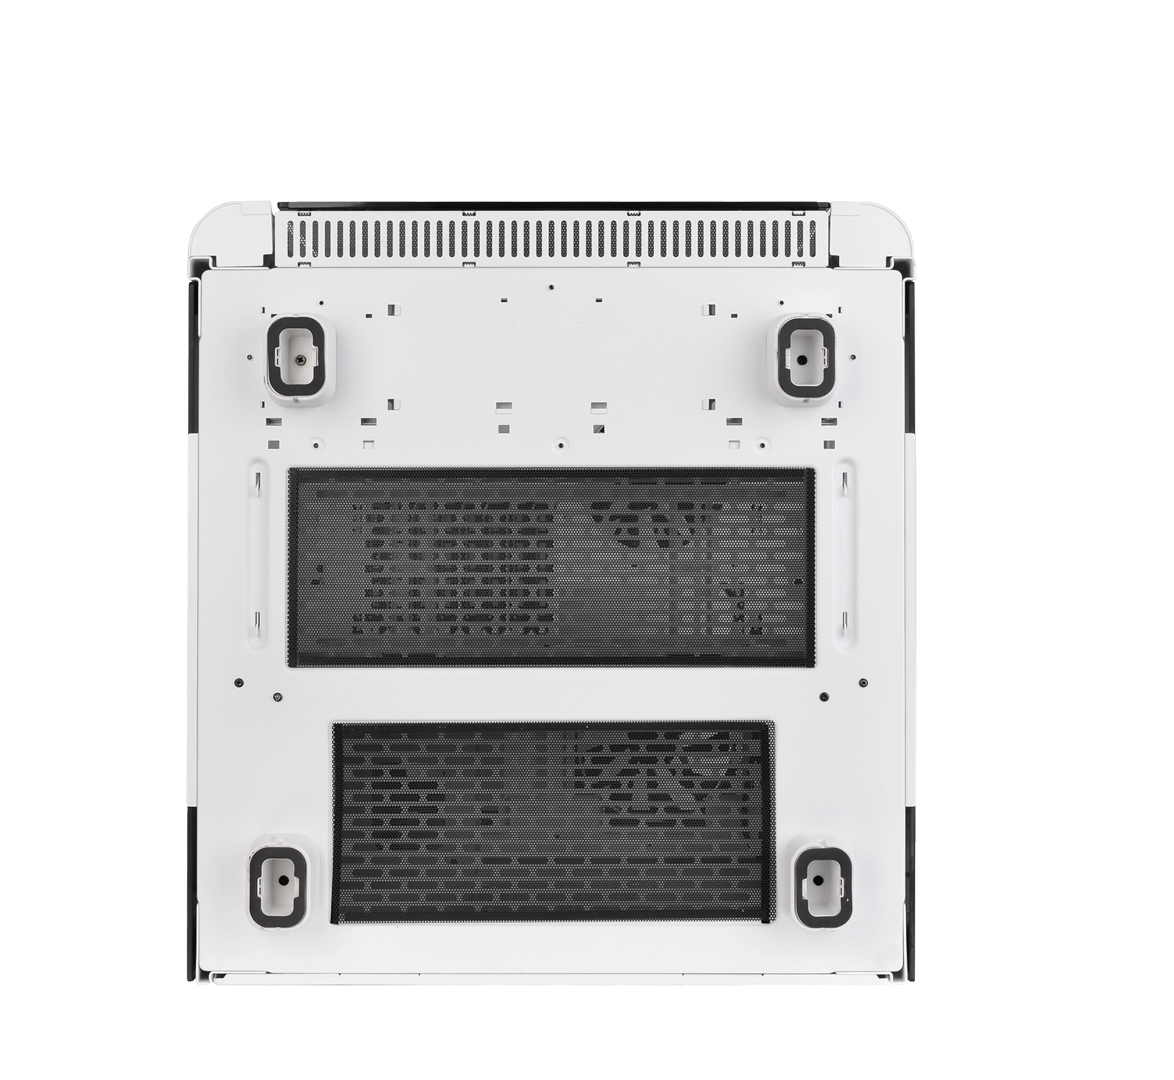
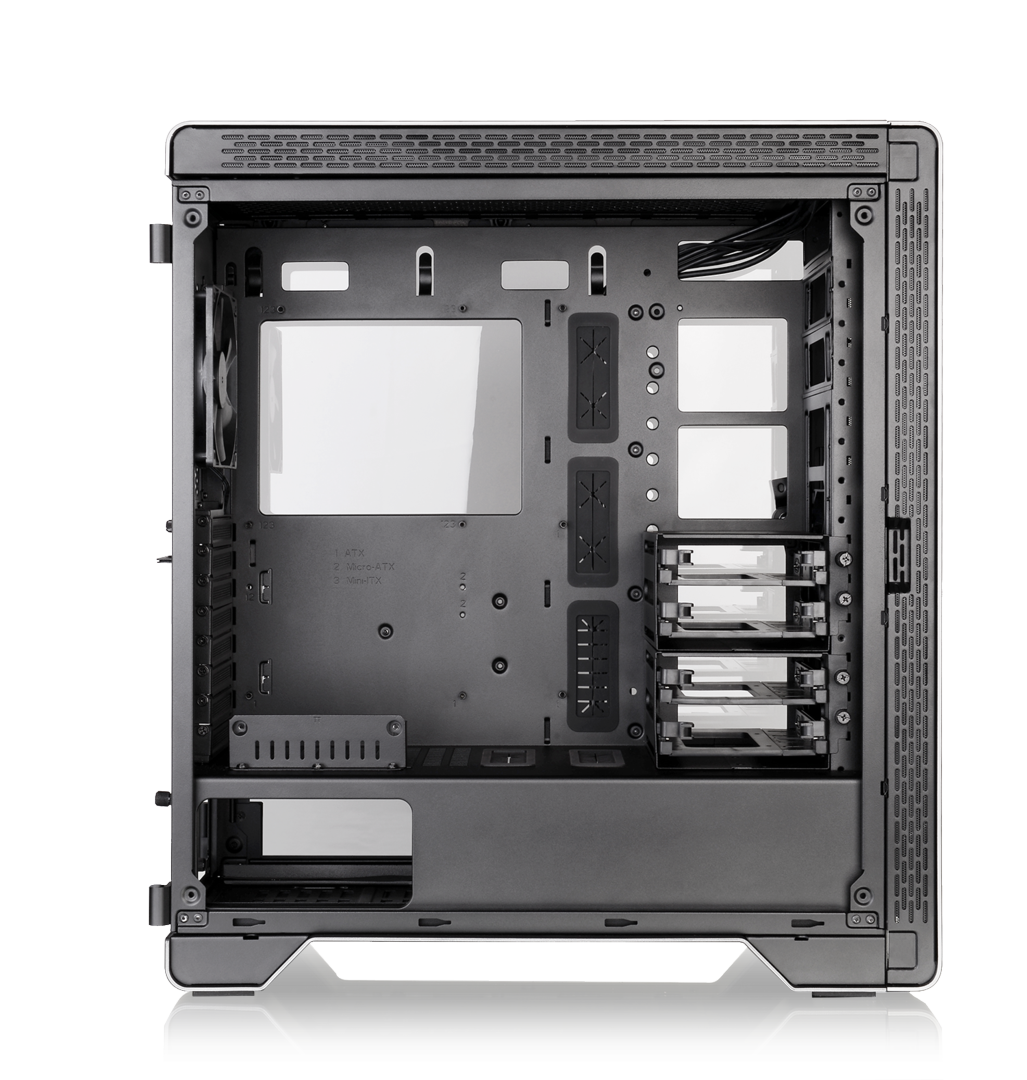
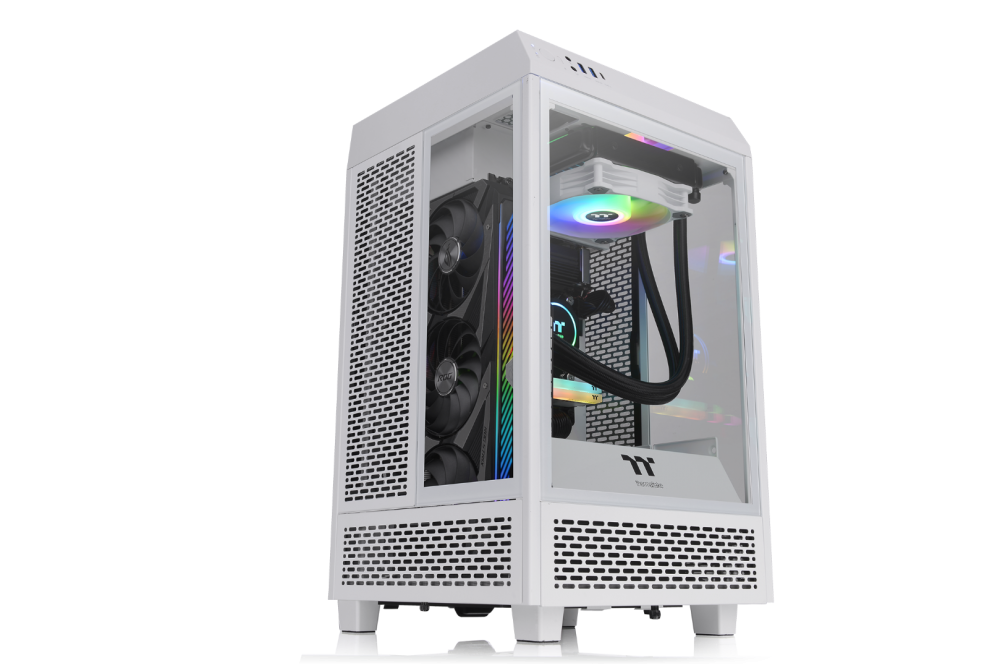
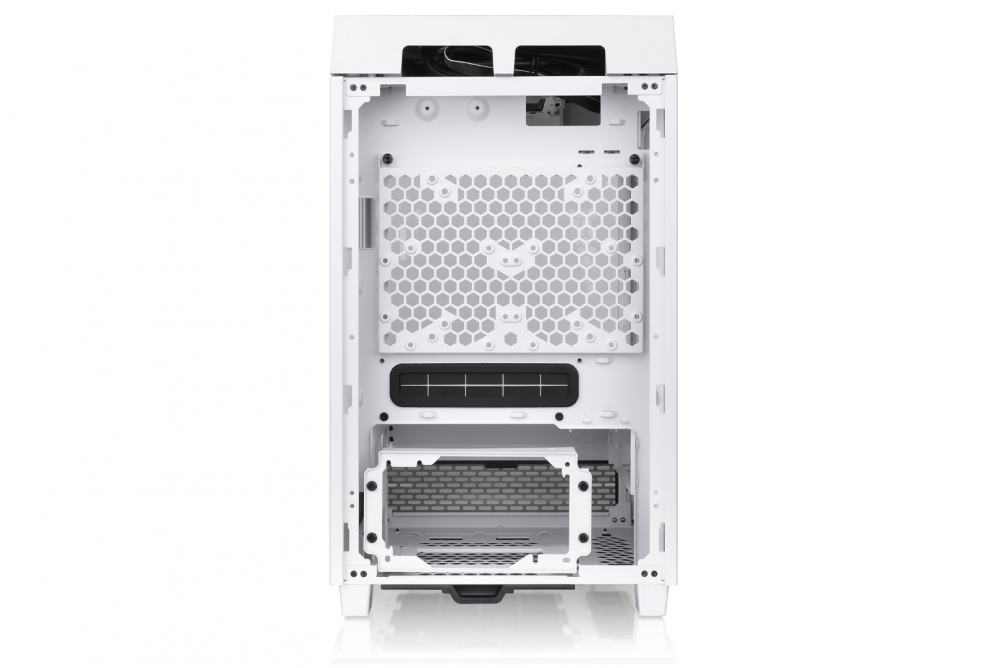
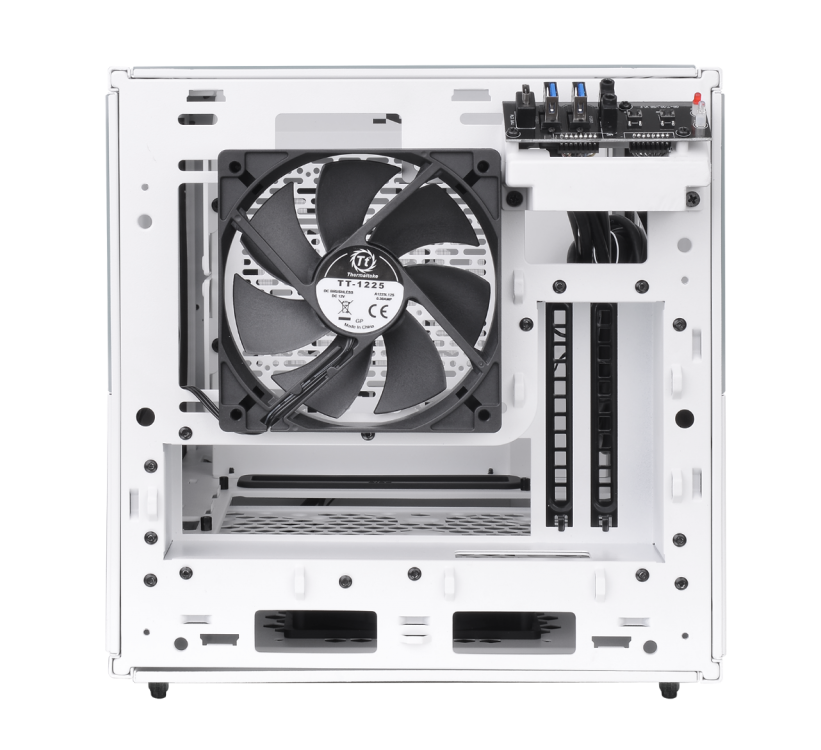
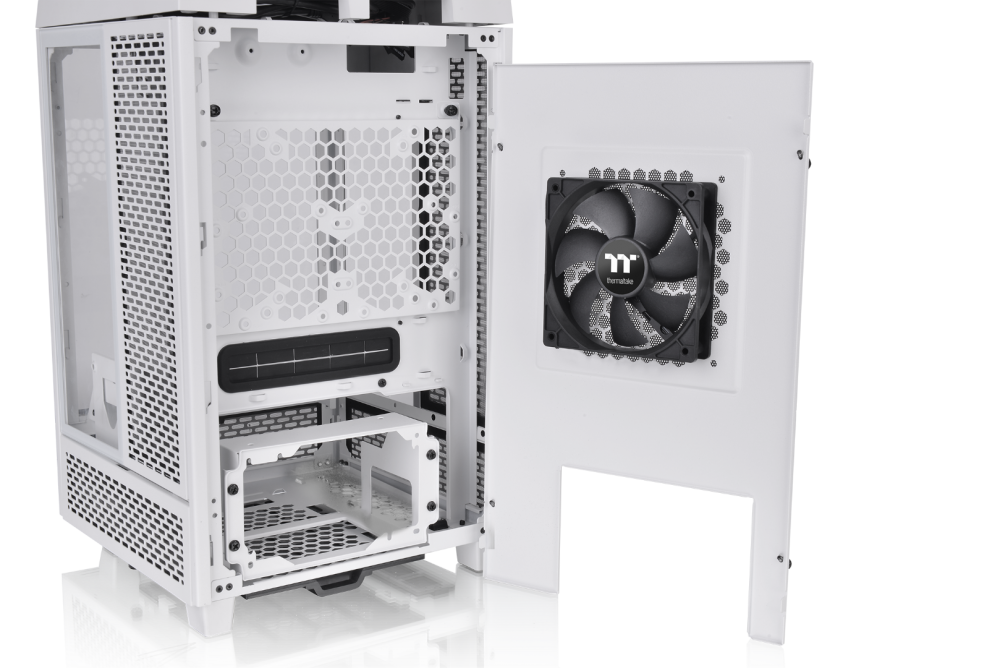
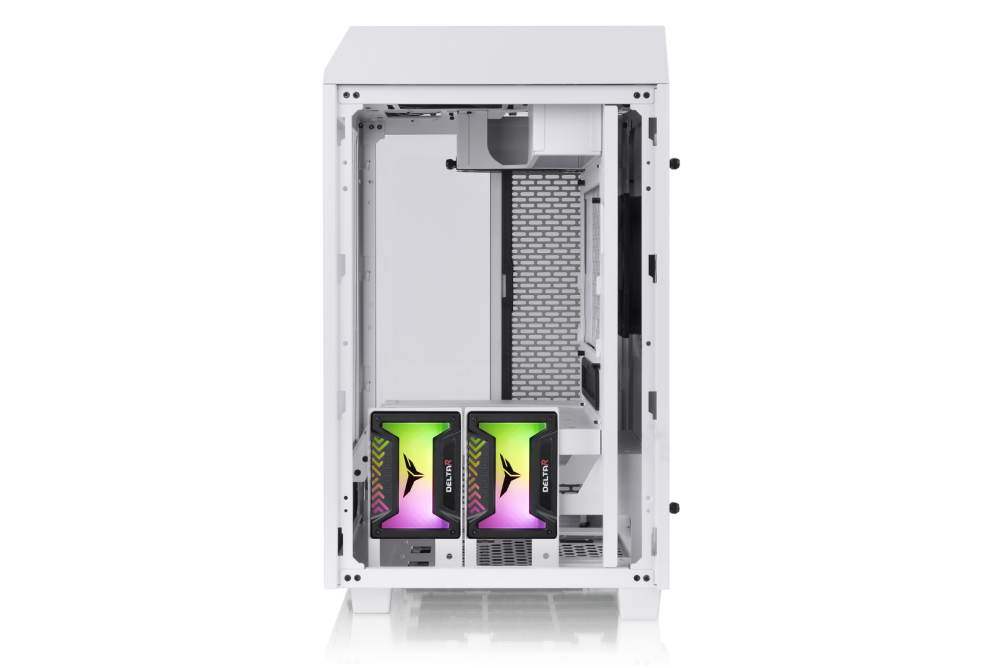
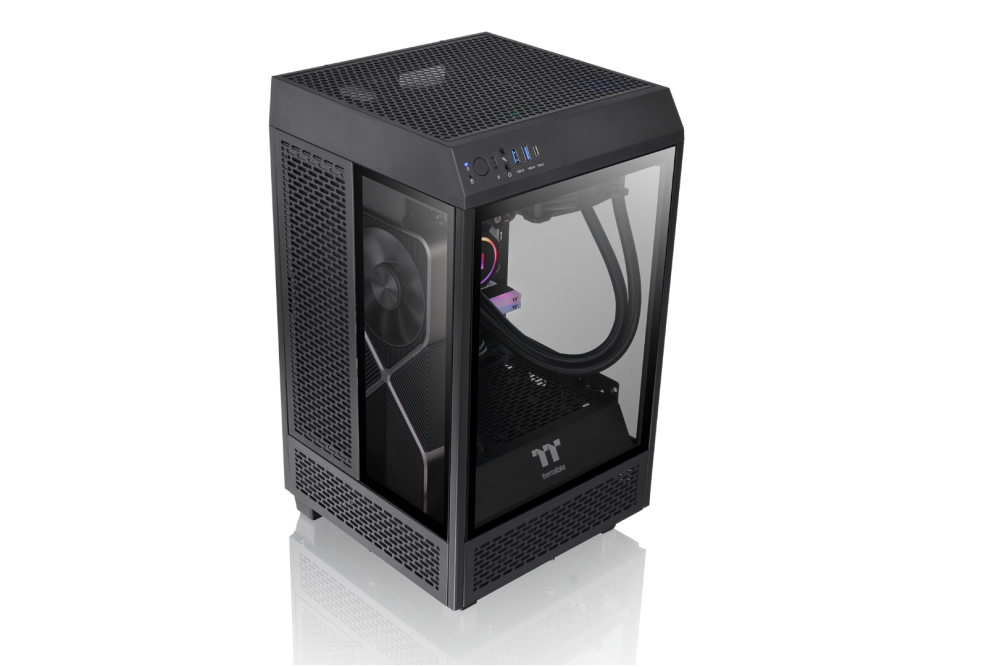
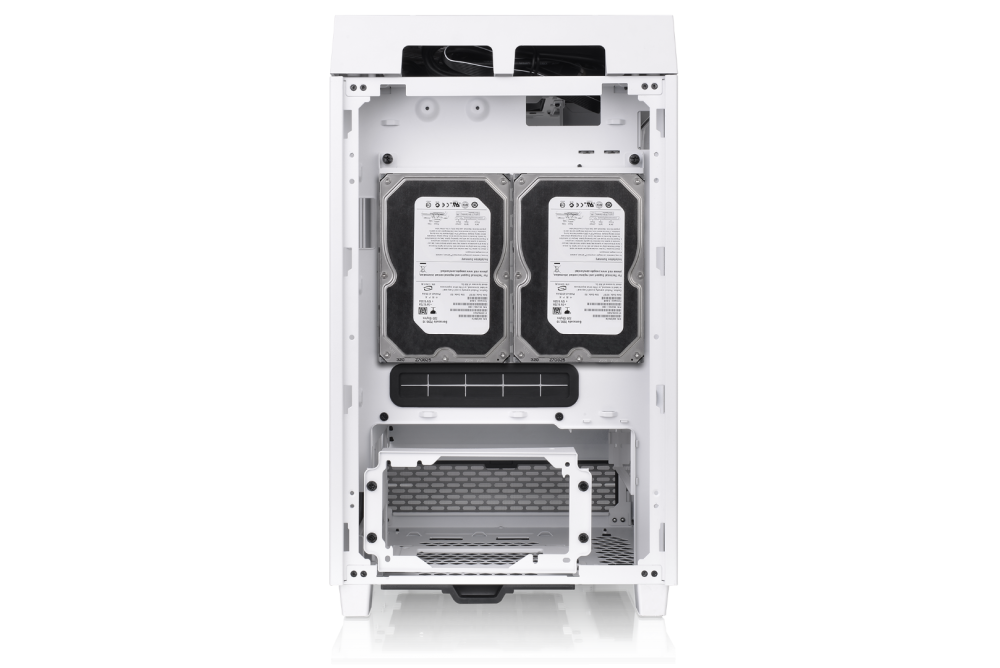
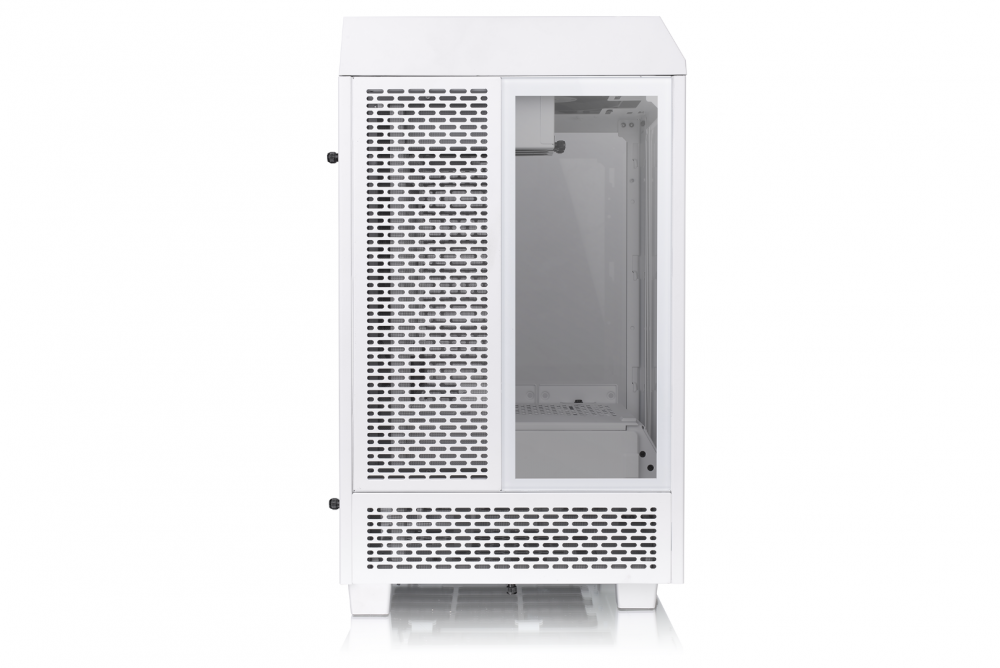
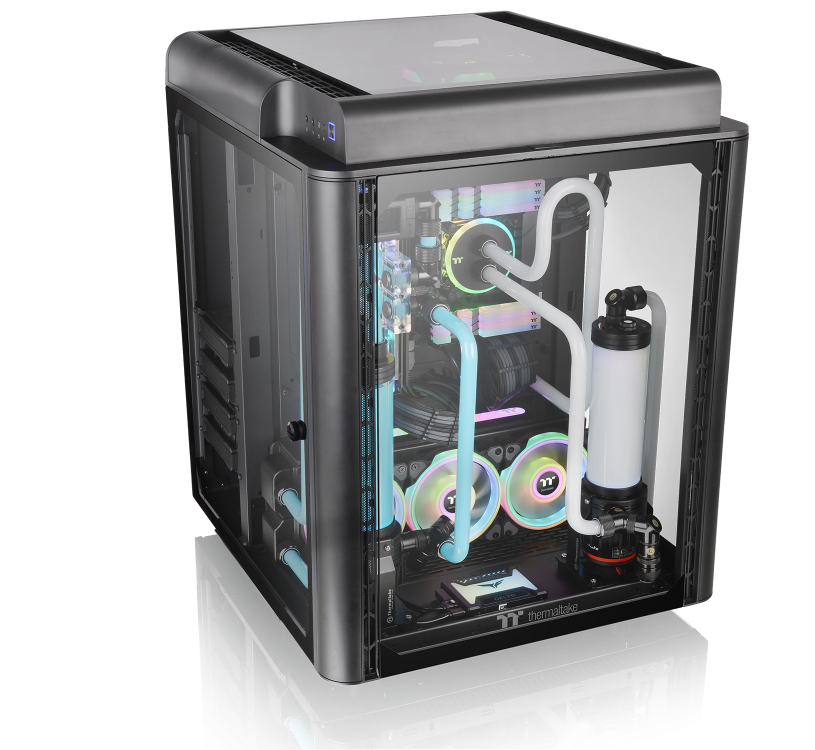
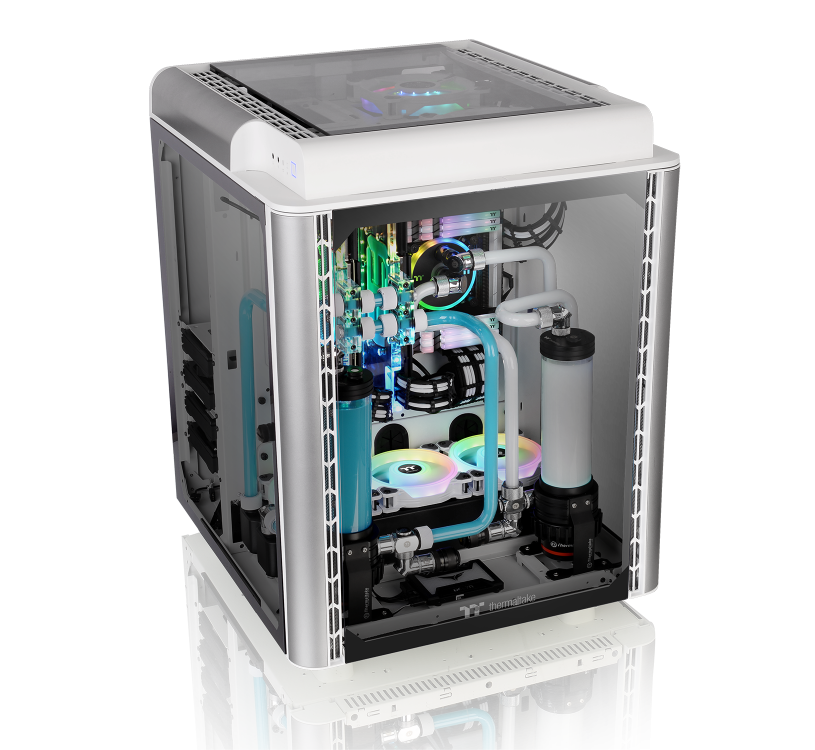
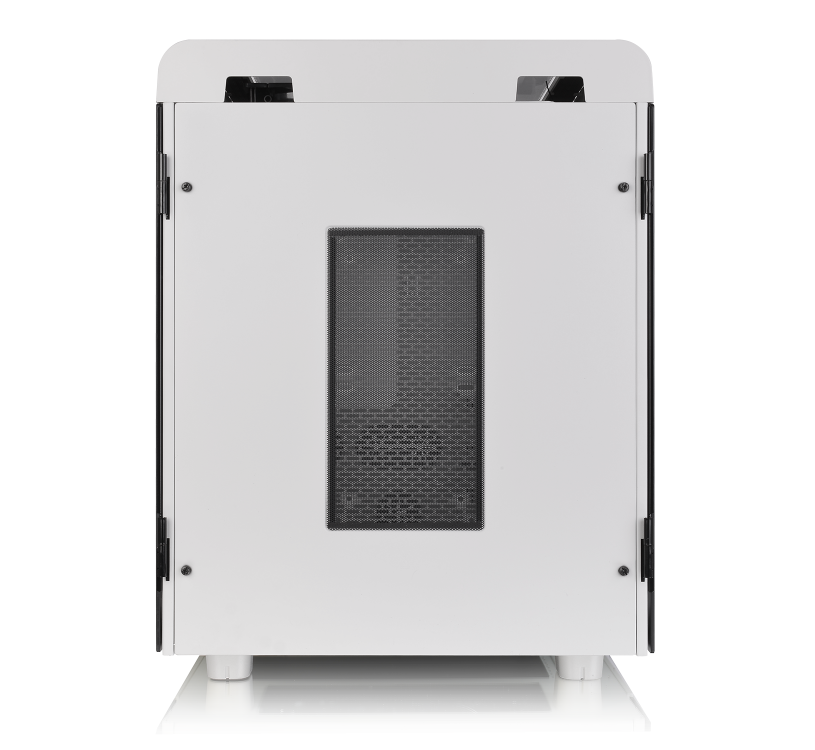
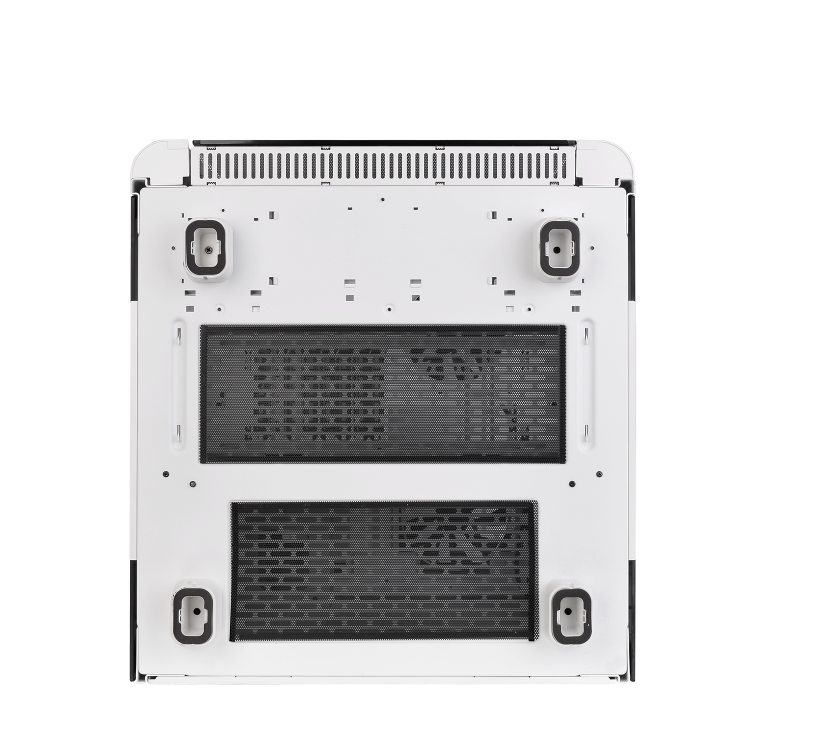
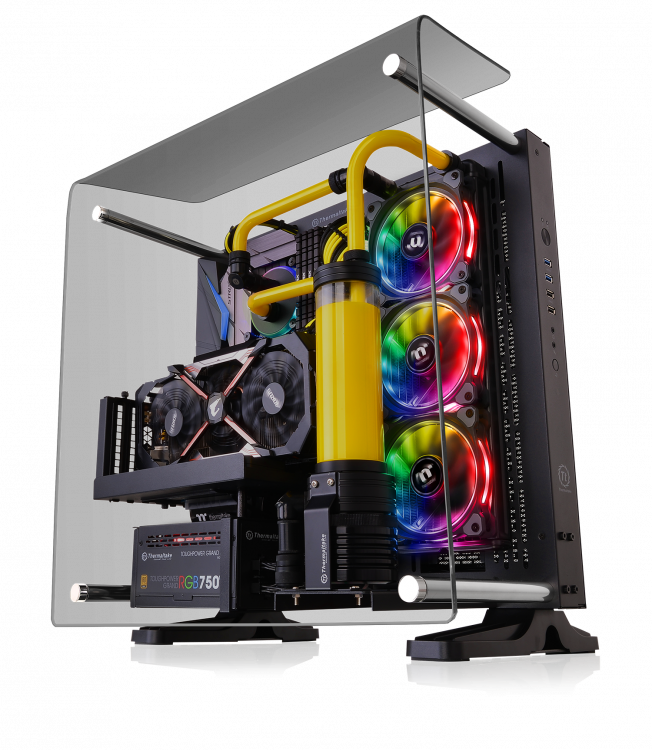
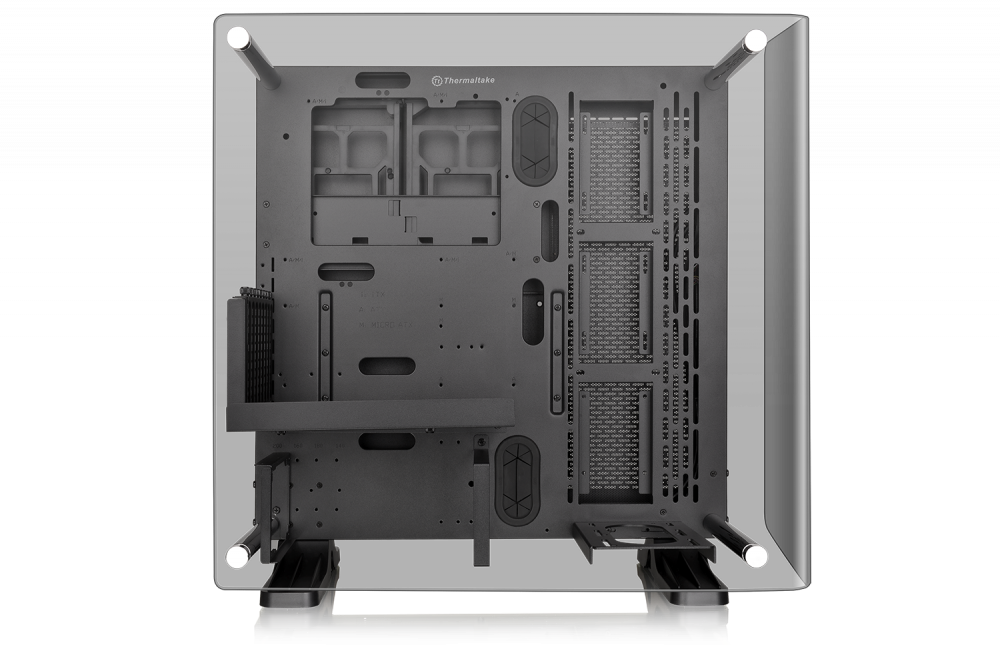
The Tower 100 Mini Chassis Are You READY? I said...ARE YOU READY? Please welcome the first ever vertical mini tower chassis for Thermaltake-The Tower 100 series The Tower 100 mini chassis https://www.thermaltake.com/the-tower-100-mini-chassis.html The Tower 100 Snow mini chassis https://www.thermaltake.com/the-tower-100-snow-mini-chassis.html Let's get a closer look for this gorgeous, pocket sized The Tower 100 mini chassis. -The tower 100 comes with USB 3.2 (GEN 2) Type-C*1 & USB 3.0 *2 -Easy to remove slide-out design side panels -Mini ITX form factor chassis BUT can support ATX power supply -Pocket sized chassis but support HIGH END GPU up to 330mm -Well design ventilation on the side for GPU. DON'T WORRY about the airflow for the GPU. -Pre-installed TWO 120mm standard fans for outstanding thermal performance (one on top and one at rear) - Support TWO 2.5" SSD at the side and TWO 2.5" SSD or 3.5" HDD at rear (without the rear fan) -Support 120mm AIO on top Now, let us know what y'all think about this cute little guy? Are you interesting to have one for you game room? well, personally, i have already built one for my room feel free to leave your comments, questions or advice about The Tower 100. we are more than welcome to answer all your questions about this awesome mini tower chassis.


-
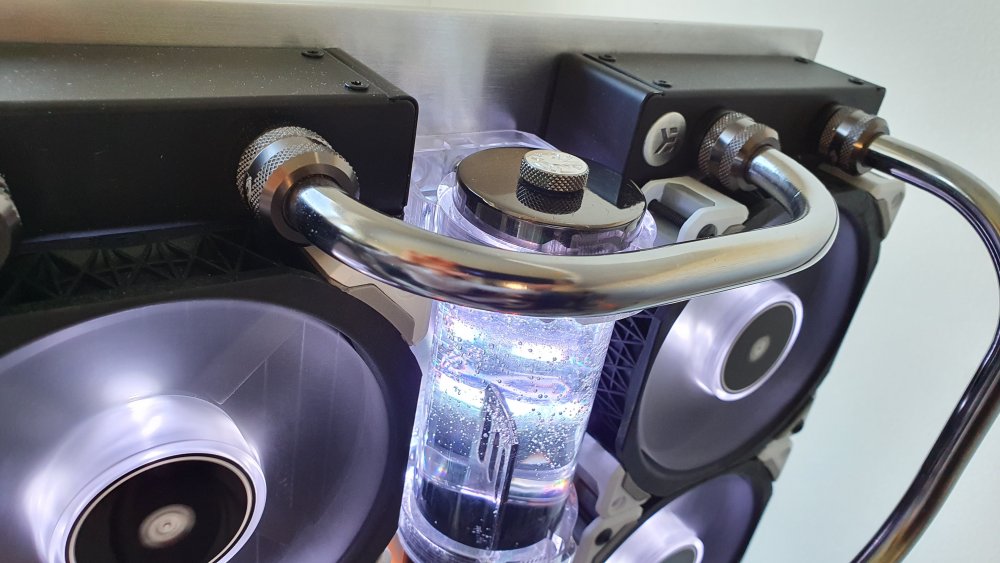
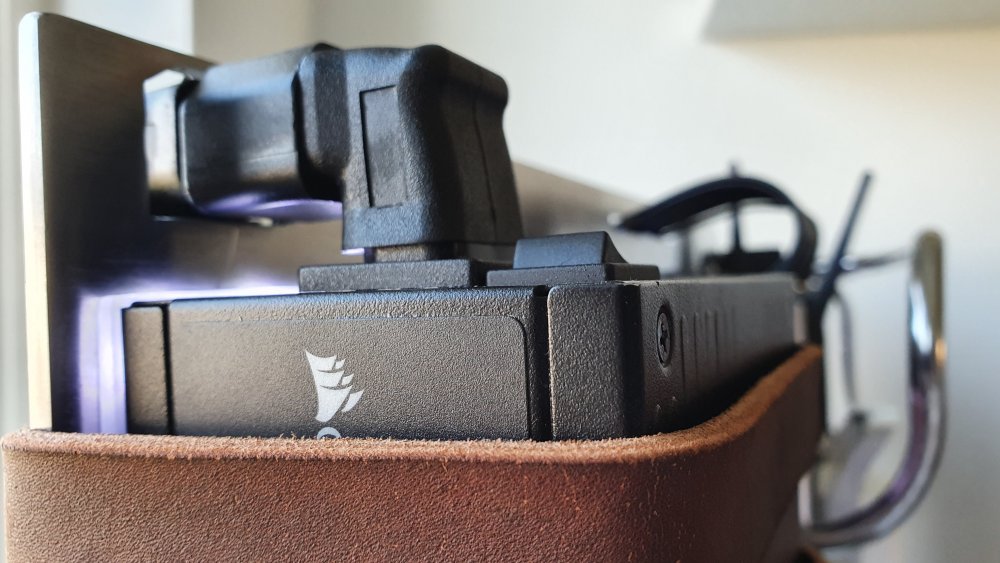
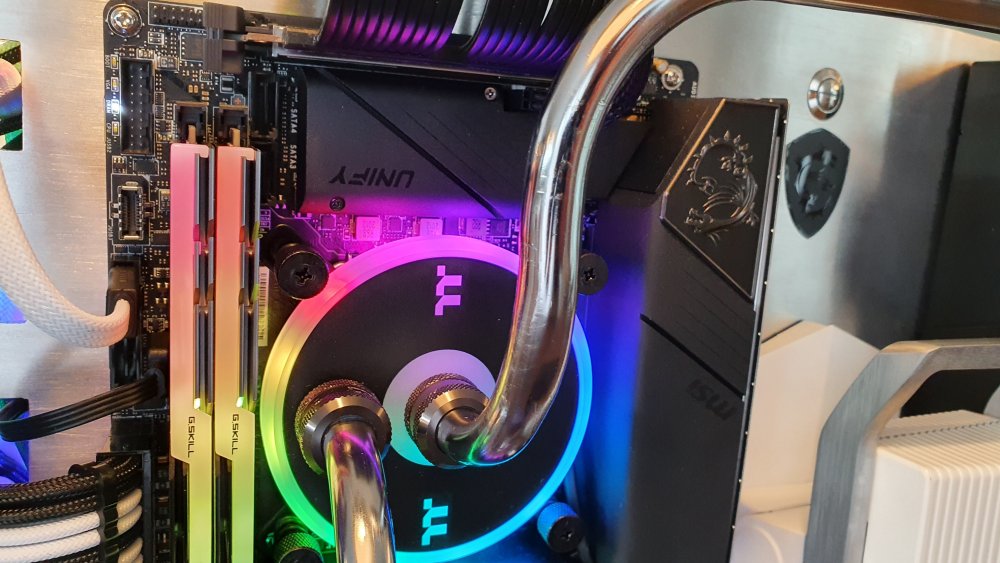
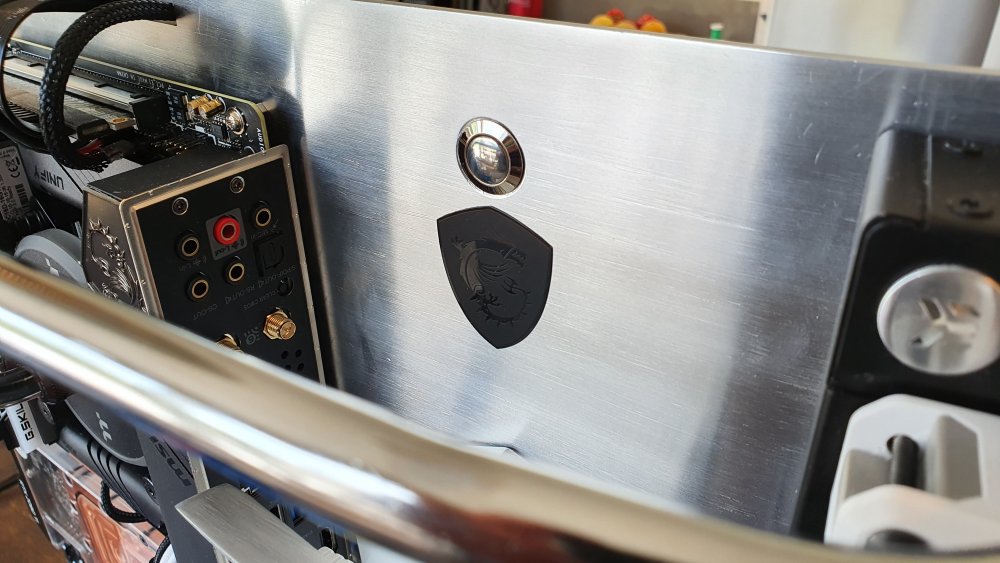
In the build before my last build, I decided to go BIG. It was a few years back, and I was planning on putting dual GPU's, three RAID arrays, three PCIe extension/expansion cards, and at least a dozen disk drives, into my build. So, I did a quick search and decided to go with a full-tower case called "Throne", and what ended up happening was that the case, after alterations (and removing problems), is essentially empty. I had bought a huge case, expecting to need the space, but the end result was a chassis that was so under-utilized it had an echo. With my next build, (in other words, the build I am using nowadays) I thought back on my experience with a full tower chassis. I realized the need for better planning, more detailed thought on what to do and how. I bought the Lian Li Mesh II Performance... and at first, I was very impressed. But once I started working through the build, problem after problem arose. My mobo's VRM prevented my planned installation of a 280mm radiator on the top of the chassis, so I went down in size to a 240mm radiator, which fit without hitting the VRM. But then the 240mm radiator ended up being too thick... when the fans were mounted on the radiator, the fans were touching my RAM DIMMs. My mobo's rear I/O assembly was quite bulky, which became a problem when I went to mount the rear exhaust fan, and that problem only got worse when I decided to switch over to a double custom loop/AIO loop design. The custom loop flowed out from the GPU and into a 140mm radiator that I wanted to place in the rear exhaust position. To pull this off, I had to drill holes through the rear of the case for the tubing connection, and mount the radiator on the outside of the case, while the fan remained on the inside. My front radiator ran into similar dimensional problems, which I will skip for brevity's sake. The thermaltake reservoir/pump combo, which I ended up mounting upright onto the front radiator, was another pain in the neck, as it could not fit between my GPU and the front radiator. I even had problems, in terms of space, with my SSDs, and had to tear out the chassis' sliding HD/SSD module, which was made specifically to be a convenient space saving feature. Small features on the chassis also caused, and continue to cause problems, like how the printed board under the power button and front panel controls is just a little lower than the rest of the chassis, and it catches my custom loop's tubing every time I open the front of the case. These issues are driving me insane! So here is where I get to my point. Wouldn't it be absolutely awesome if there were a top flight computer case design company **cough** {THERMALTAKE} **Cough** **Cough**, that could put together either an app, or website based tool (I know im out of date and showing my age by saying this, but something like Flash) that would allow us custom builders to place our own choice of components, into a virtual representation of their chassis (even if it is somewhat roughly shaped in terms of dimensions). Think about it,... choose your motherboard, place it in the chassis of your choice, and see just how much room there is between the top and the mobo's protruding components. Unsure of where to place your thermaltake Pacific PR22-D5? Make sure it fits where you want to put it, or find out where you will now need to put it. Save yourself perhaps hours of tedious work, by virtually switching where certain cards or components are, without having to actually pull them out and reorder everything. What do you guys think? I know that there would be quite a few issues, like rounded corners, angled surfaces, non-square items, but I think if people were able to "community workshop" item dimensions, it could be very helpful. So? Thoughts?
-
Let me introduce one of our partners - Disrupt Gaming Disrupt Gaming is a professional esports organization founded and based in North America. It is one of the fastest growing esports organizations and field professional players in Rainbowsix Siege and Tekken. You can follow them at Twitter - https://twitter.com/DisruptGaming Instagram - https://www.instagram.com/disrupt.gg/

-
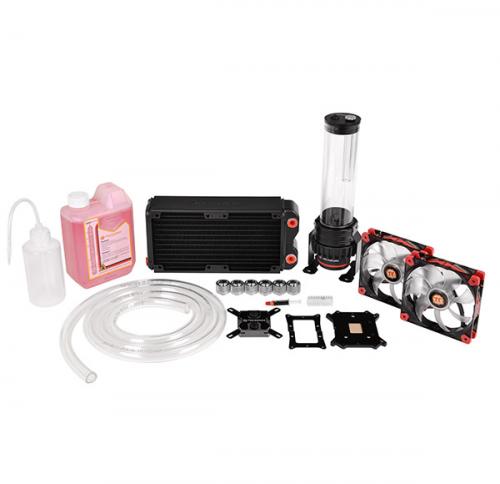
This week for #CES2015 we have announced the Pacific Series DIY LCS (Liquid Cooling System) Components. We have a TON of new stuff coming, this is just the start! Pacific RL240 DIY LCS Kit: (CES Exclusive Launch) Buy Now: http://www.newegg.com/Product/Product.aspx?Item=N82E16835106254 We will continue to update on the full line of Pacific Series DIY LCS Components as they become available! For more information on our Pacific Series Components including, CPU Block, Pump, Radiator and accessories visit our website: http://www.thermaltakeusa.com/cooler.aspx
- 13 replies
-
- 3
-
-
- Pacific
- Thermaltake
- (and 3 more)
-
Hello dear Thermaltake community. We are pcFrog Romania. We sell Thermaltake products in Romania on our webshop. Thermaltake offer in our shop pcfrog total over 490 products. This are just few examples: PC Parts - Componente PC Thermaltake (over 300 products - Cabluri, carcase pc, coolere de carcasa, coolere placi video, coolere procesoare, paste termice, placi de sunet, surse pc.) PC Peripherals - Periferice PC Thermaltake (over 90 products) Gaming accessories - Accesorii Gaming Thermaltake (over 19 products) Notebook accessories - Accesorii de laptop Thermaltake (over 20 products) Salutare comunitate Thermaltake. Gasiti in oferta magazinului pcfrog.ro o gama variata de produse Thermaltake. pcFrog este seller in Romania al brandului Thermaltake. Gama de produse insumeaza peste 490 de repere din categoriile de mai sus. Va asteptam pe magazinul pcfrog magazin online IT, electronice si electrocasnice. Produsele Thermaltake vin insotite de garantie. Toata gama de produse Thermaltake - https://pcfrog.ro/brand/60-thermaltake
-
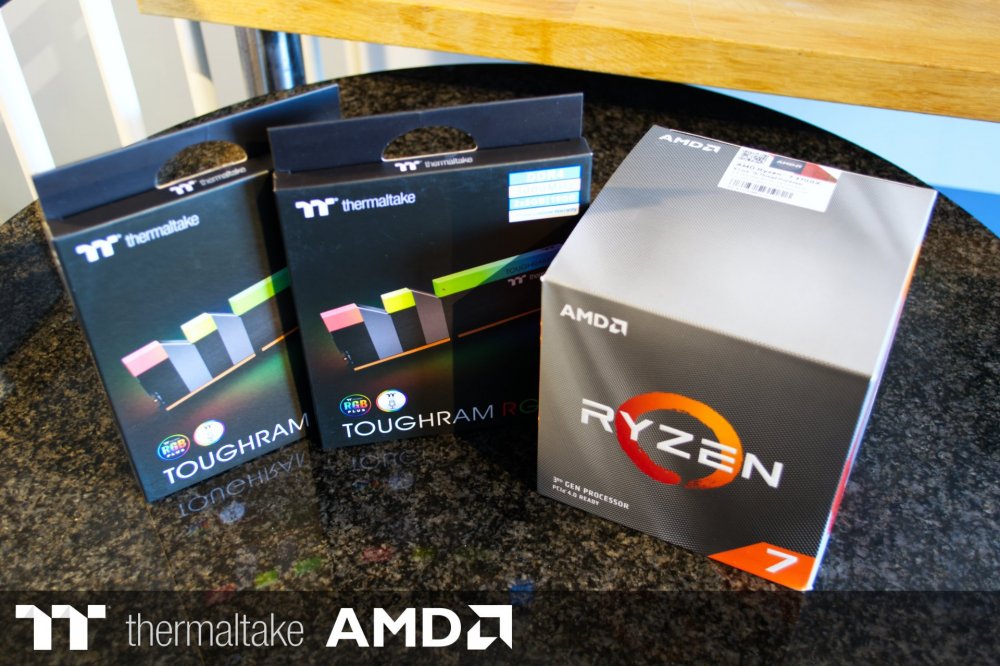
 Hi Everybody, I'm Tom from sunny Birmingham, UK. I work as a software engineer / web developer which I've been doing since university and mainly play PC games and run in my spare time. Been building and modding computers since around 15. My first mod was a side window cut-out and blue CCFL tube lighting, was so proud of that at the time (simpler times). Started water cooling at university on an overlclocked Q6600 which kicked out a lot of heat and kept it up ever since. Current PC is an ITX build with a 280mm and 120mm rad which has been a little workhorse / hotbox for the past year. Onto this considerably more substantial build as a result of being selected for the Thermaltake UK 2020 Case Mod Challenge which has been awesome 😄 and the perfect distraction from current events. Been spending the past couple weeks getting everything together for the planned mods. Anyhow, onto the parts list: Thermaltake View 51 Snow AMD 3700X Thermaltake TOUGHRAM RGB 3000MHz 4x8GB ASUS ROG STRIX X570-F Gaming ASUS Radeon RX 5700 500GB Seagate FireCuda 520 14TB Seagate IronWolf Pro Thermaltake Pacific C360 DDC Hard Tube Water Cooling Kit Thermaltake Pacific V-RX 5700 Series Plus GPU Waterblock Thermaltake Water Cooling Pacific Hard Tube Bending Kit 300mm Thermaltake TTMod Sleeved Cables 300mm Thermaltake TTPremium PCIe Extender 850W Thermaltake Toughpower GF1 A couple photos of all the parts received: Thank you to Thermaltake, AMD, ASUS, Seagate and Scan for sponsoring and who've done a great job at getting the parts together in such trying times. Will be updating this thread over the coming weeks with my progress, at the moment just going to do a quick test set-up and take some case measurements. Best of luck for everyone in the competition and happy building! 😀 Tom
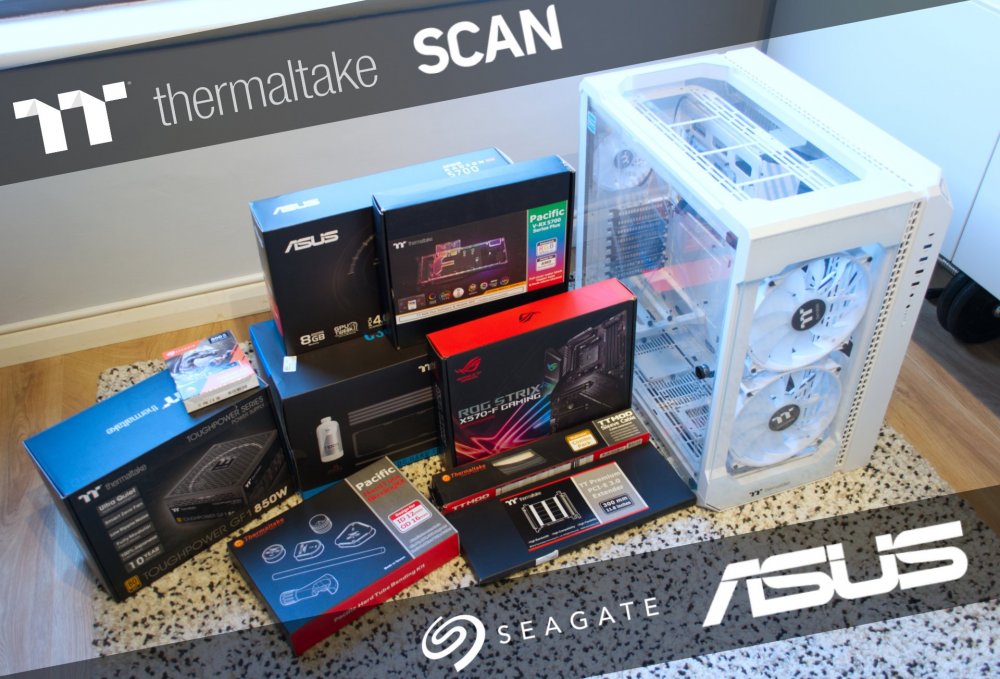
- 9 replies
-
- 4
-
-
- amd
- thermaltake
- (and 5 more)
-
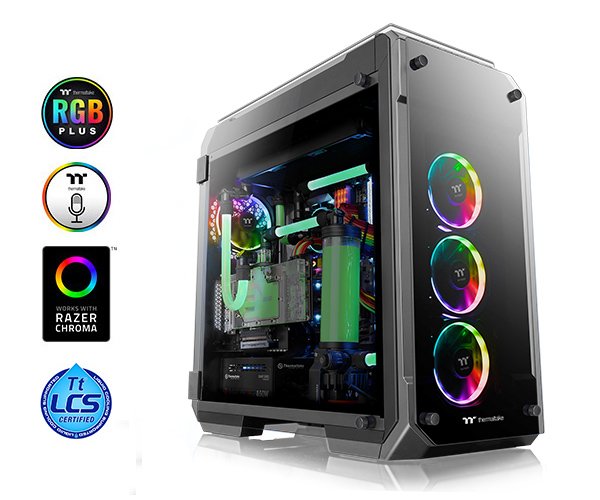
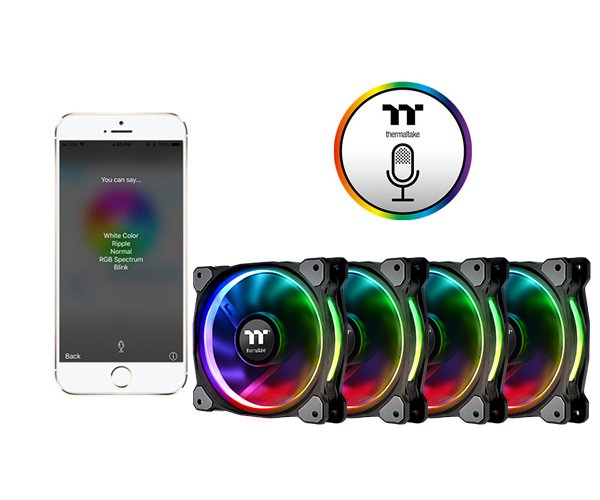
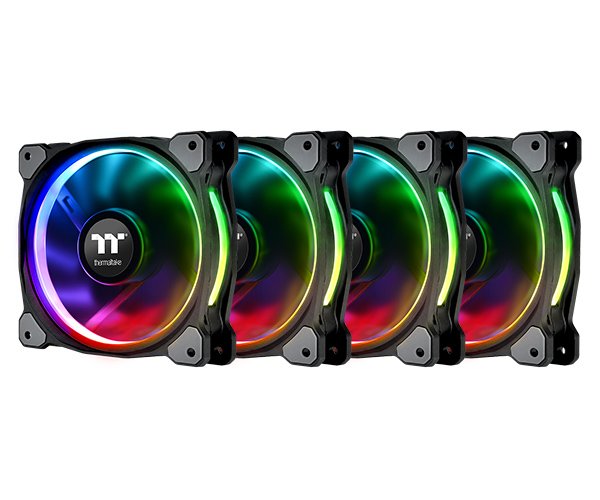
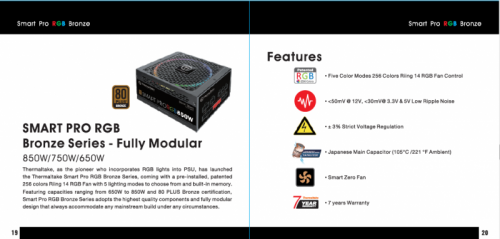
Thermaltake View 71 Tempered Glass RGB Plus Edition Full Tower Chassis *The image is for reference only. Product Link Designed to expand the legacy of the View Series lineup, the View 71 Tempered Glass RGB Plus Edition full-tower chassis features three 120mm Riing Plus 12 RGB front fans and one 120mm Riing Plus 12 RGB rear fan for outstanding ventilation, and its seven drive trays with modular drive racks deliver advanced storage capacity and liquid cooling expansion. This elegantly designed piece utilizes swing-out side panels, and is enclosed in four-side 5mm tempered glass for users to demonstrate their DIY handiwork and enjoy the ultimate internal component visibility. With supports for the latest PC hardware, the View 71 TG RGB Plus Edition is not only fascinating in appearance, and when it comes to performance, the only thing that will limit its capabilities is users imaginations. TT RGB PLUS TT RGB PLUS Ecosystem is the intelligent lighting system for PCs that combines the most advanced addressable LED lighting with Thermaltake’s patented TT RGB PLUS Software. TT RGB PLUS ecosystem provides nearly unlimited possibilities for playing with colors, synchronizing lights to games, music, CPU temperatures or other TT RGB PLUS products, including case fans, CPU/VGA waterblocks, AIO CPU coolers, PSUs, LED strips, gaming keyboards, headsets, mice and mouse pad. The patented software allows users to change the light modes, colors, speeds, brightness, fan speeds, and even supports AI voice control in iOS and Android devices. SyncALL, Say “Hello TT” Thermaltake AI Voice Control Talking to TT RGB PLUS App is an easier, faster way to set lights for your systems. You can ask it to turn the lights on or off, switch lights modes, dim the lights, change light colors, or adjust lights speeds or fan speeds. Preinstalled with 4 Riing Plus 12 RGB Fans Thermaltake Riing Plus 12 Fan TT Premium Edition. 120mm high-static pressure fans with a patented 16.8 million colors LED ring and 12 addressable LEDs, the Riing Plus 12 RGB features compression blades and hydraulic bearing, and can be controlled by the patented TT RGB PLUS Software and AI interactive voice control. Sync with Razer Chroma Lighting All Thermaltake TT RGB PLUS products are able to connect into the Razer Chroma ecosystem. Users who have installed both the TT RGB PLUS Software and Razer Synapse 3 can experience synchronized gaming and RGB lighting effects on their TT RGB PLUS liquid cooling system and gaming gear! From cooldown timers, health bars, and flashy ultimate indicators, to subtle ambient lighting that sets the perfect mood for each game, Razer Chroma provides an experience that transcends the screen and into your full setup, for a truly immersive experience. Works with Amazon Alexa All Thermaltake TT RGB PLUS products support Amazon Alexa Voice Service, allowing you to control the lights or fan speeds by talking to the Alexa-enabled device. With the support of Amazon Alexa, TT RGB PLUS products also offer an additional visual cue for checking current weather condition in your location or anywhere in the world. All you have to do is simply starting the sentence with “Alexa, tell Thermaltake”, then the lighting color will correspond to the weather condition in the location.


-
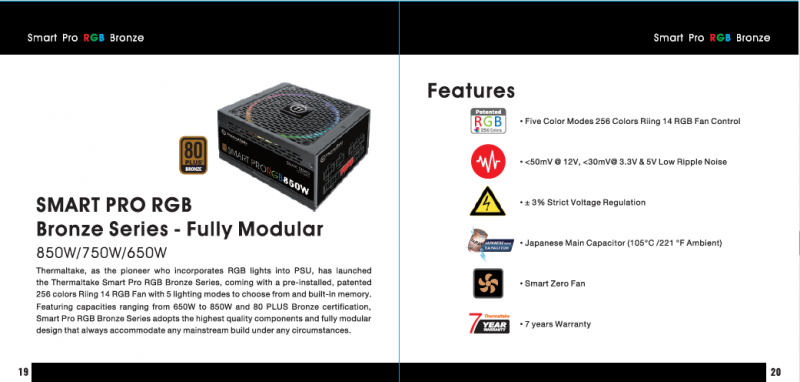
Greeting to all Smart Pro RGB owners: Welcome to the Smart Pro RGB Bronze Owners Club. Once again you have made the right decision...and we thank you for that. Smart Pro RGB Bronze series is our first fully modular bronze power supply alone with the best features and most affordable price ever. Welcome to share your builts and ask questions here, we are looking forward to see all amazing works around the world.
-
I have a Thermaltake level 20 mt argb case, I want to control case fan speed so, tell me how to control fan speed with connector details. Motherboard: Gigabyte Aorus Ultra Z390
-
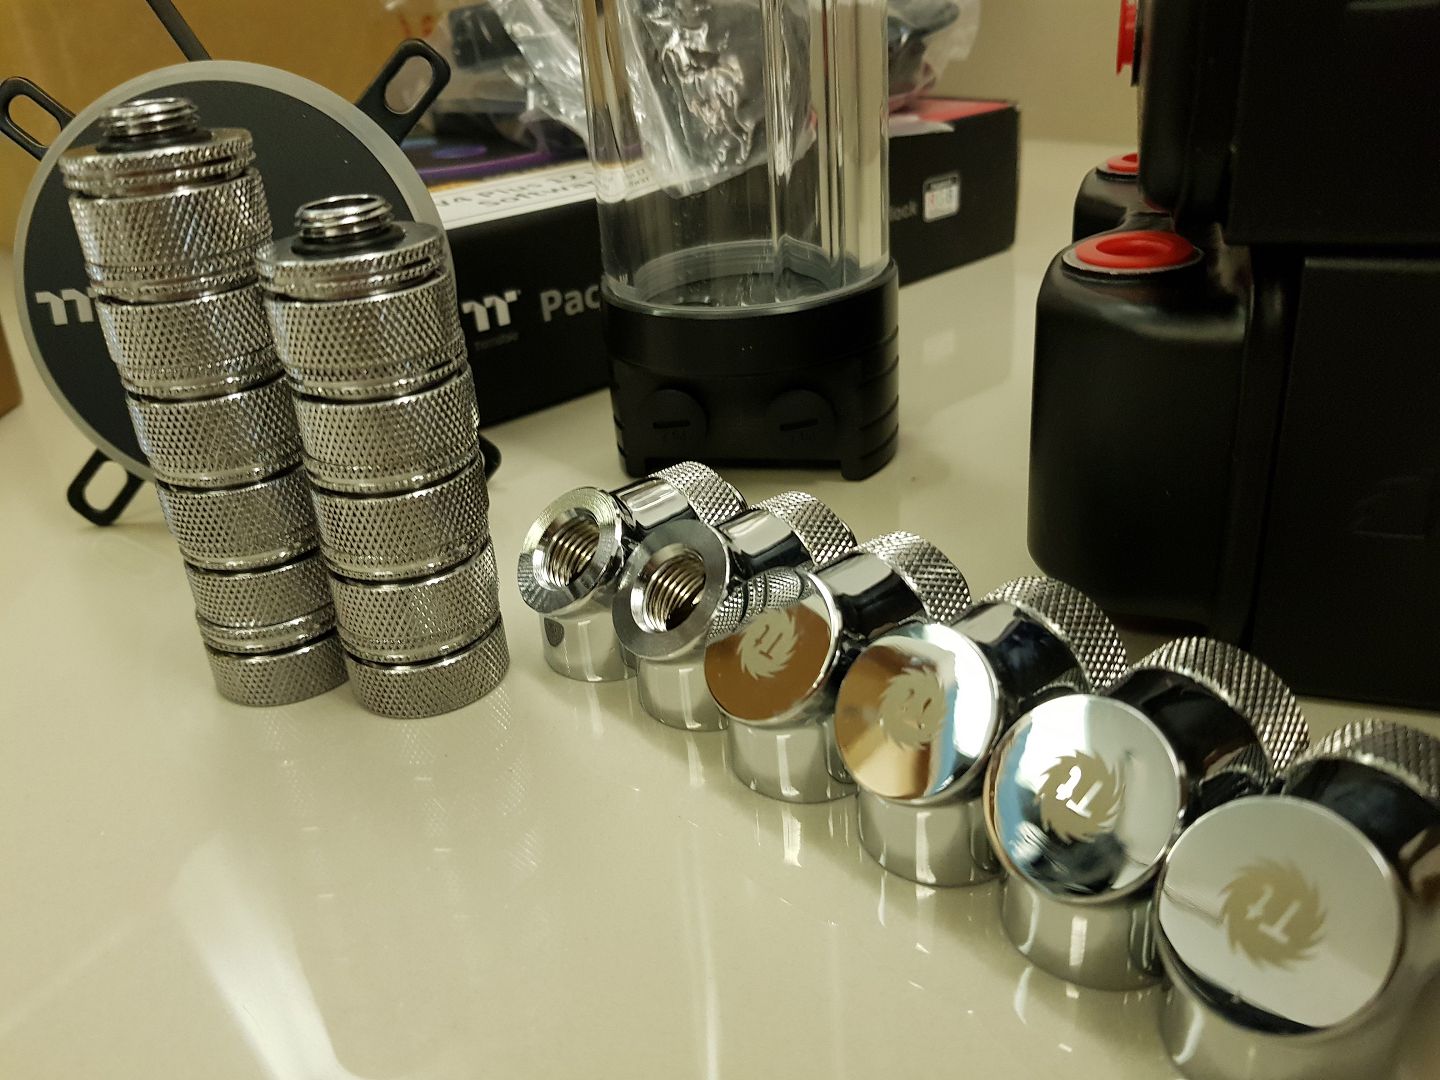
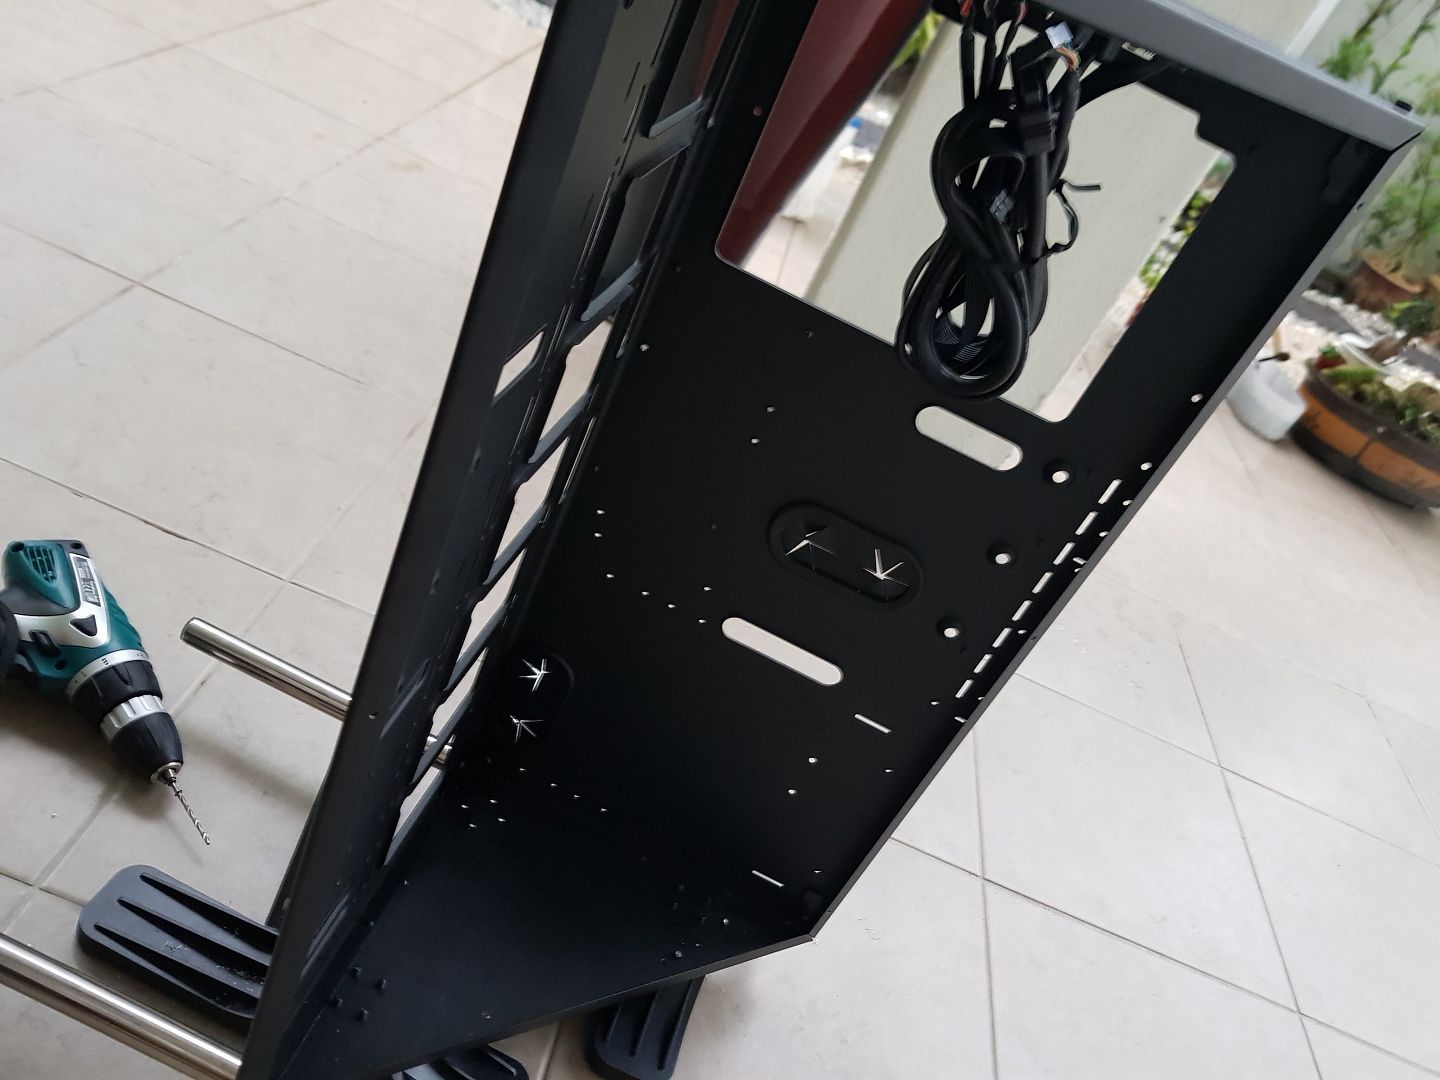
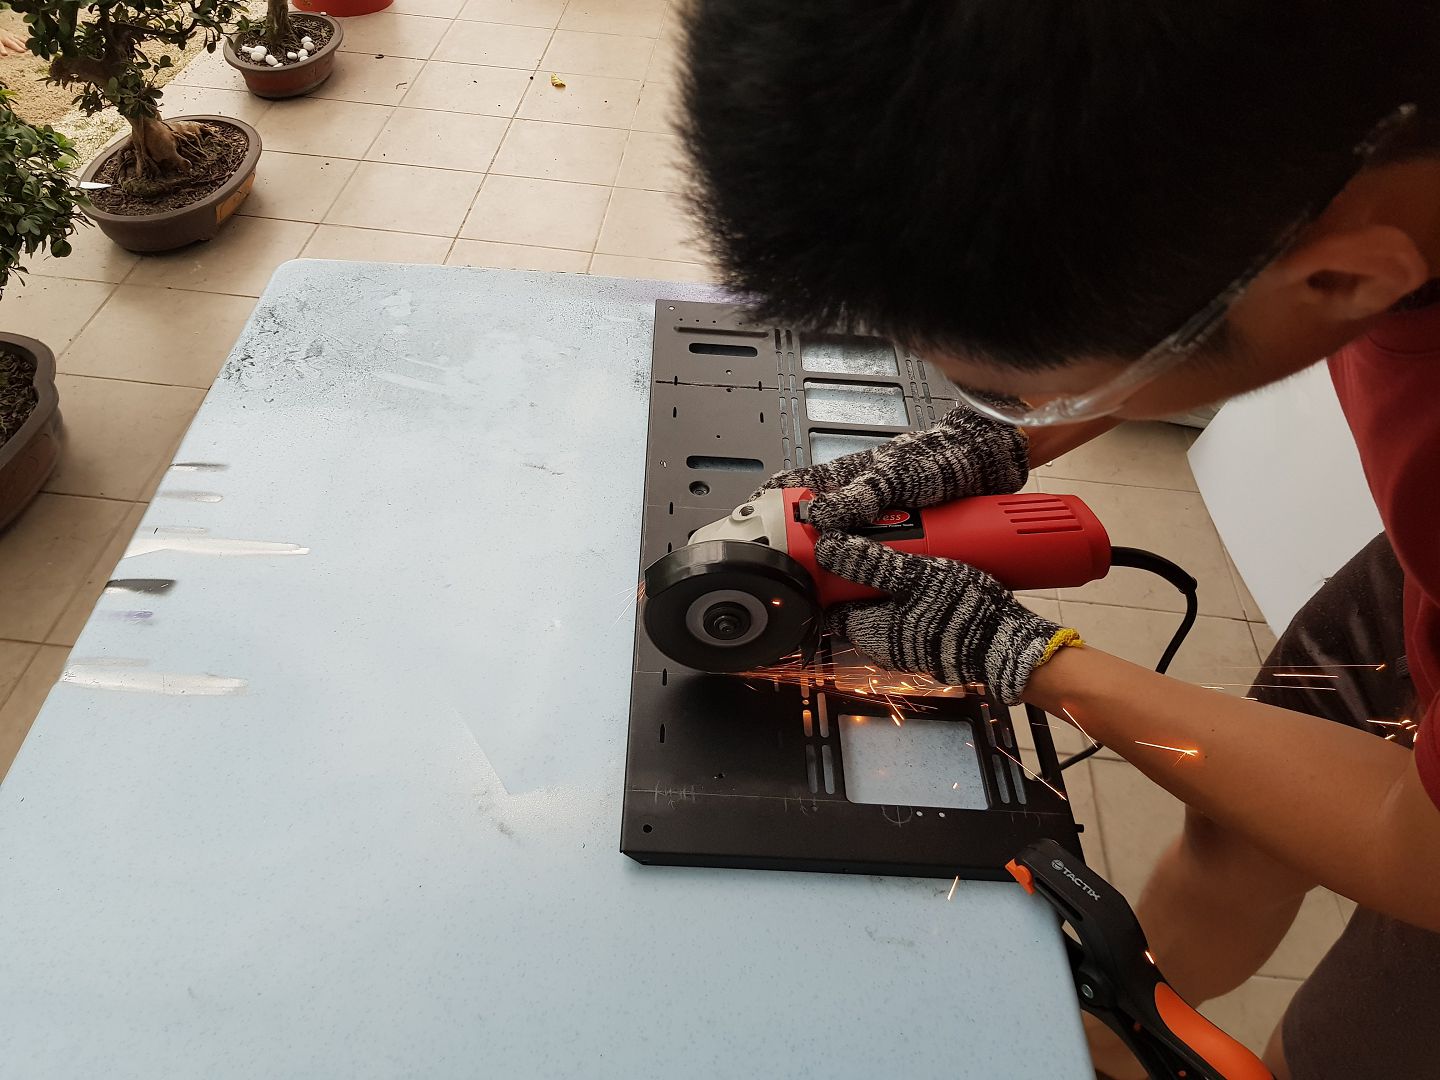
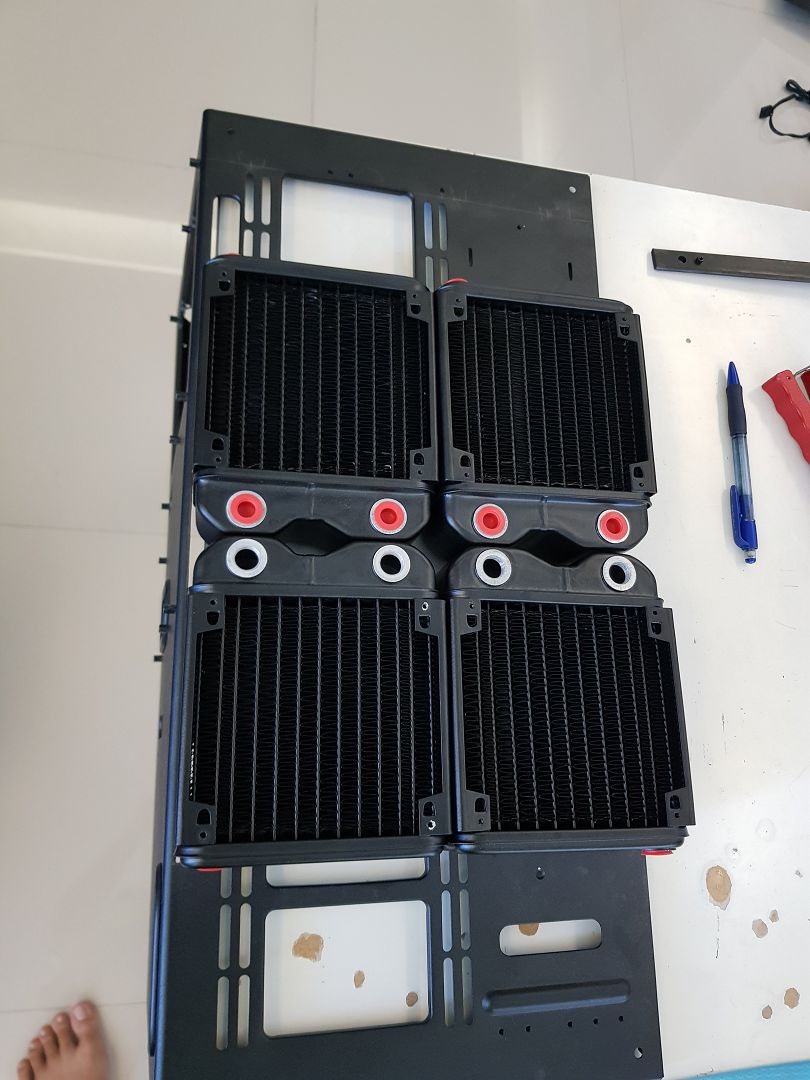
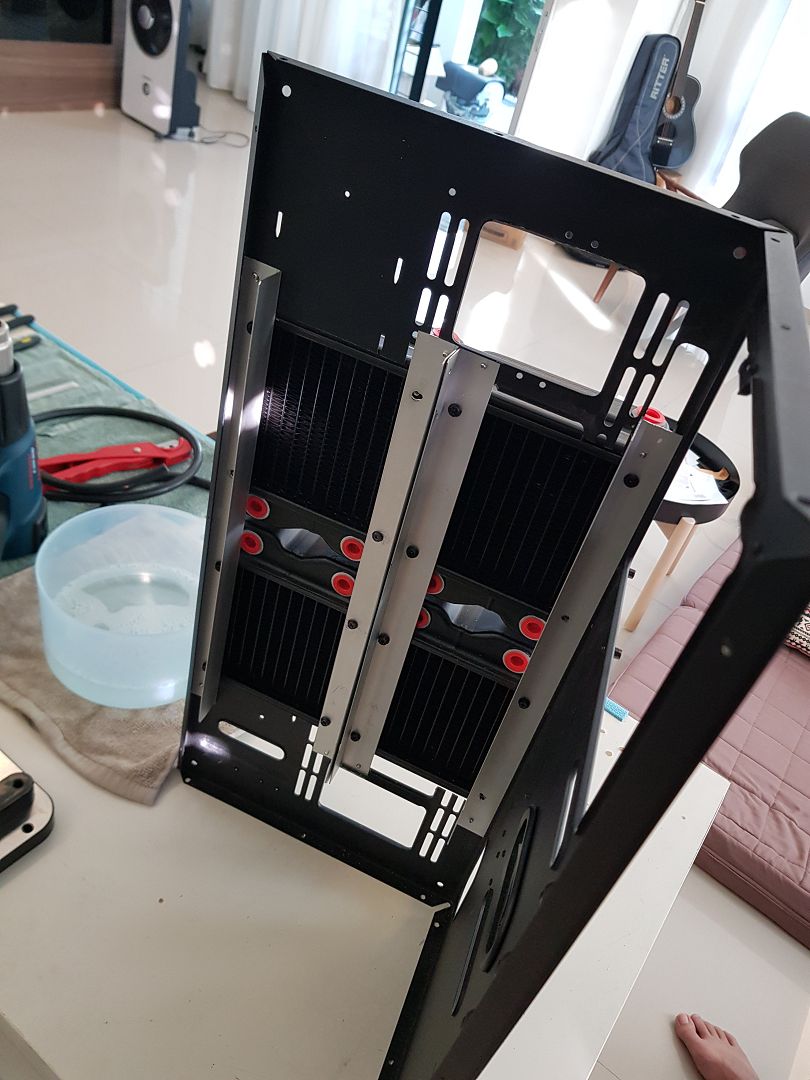
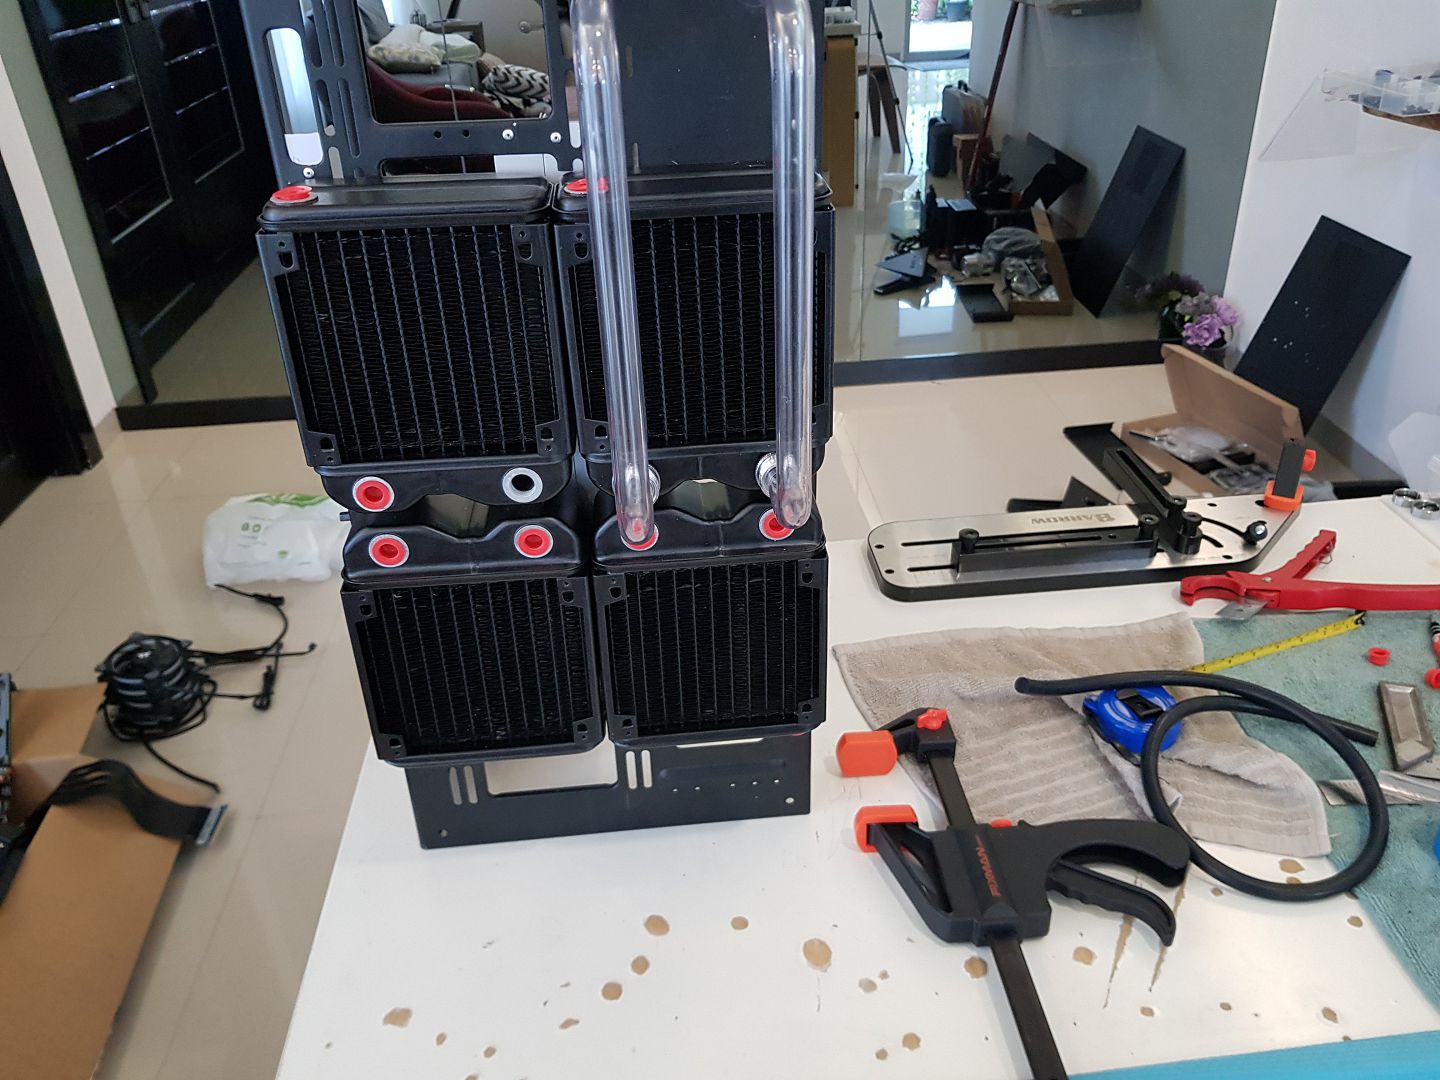
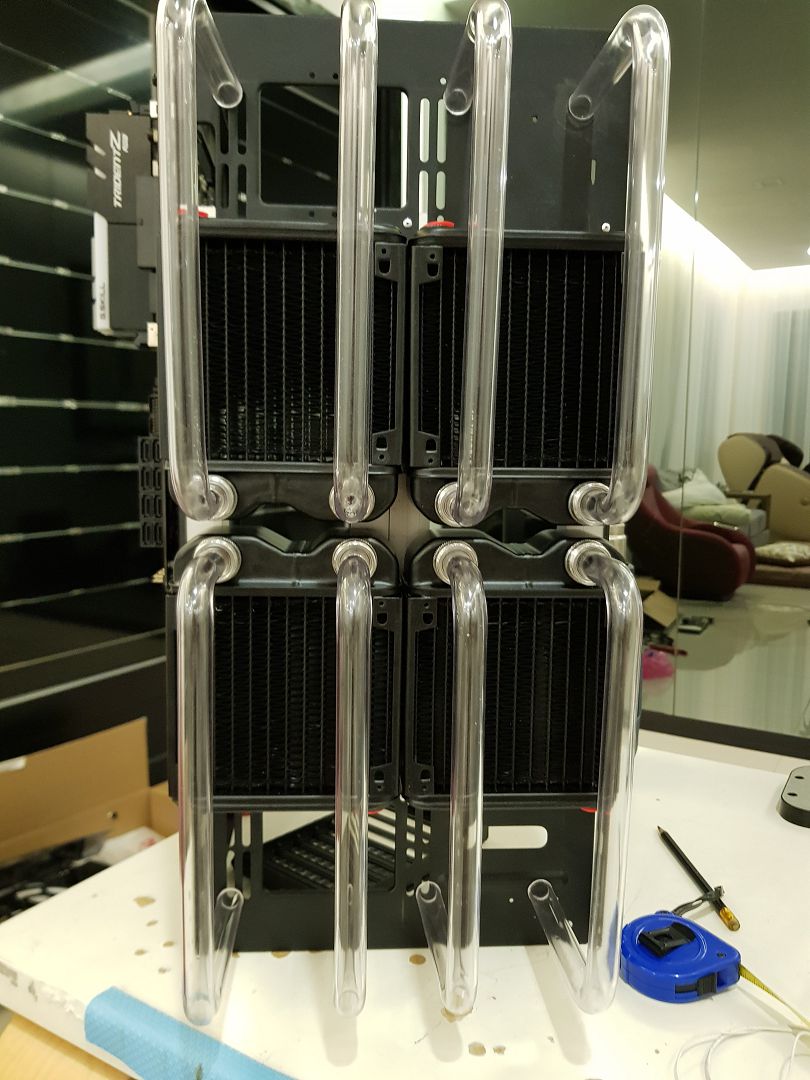
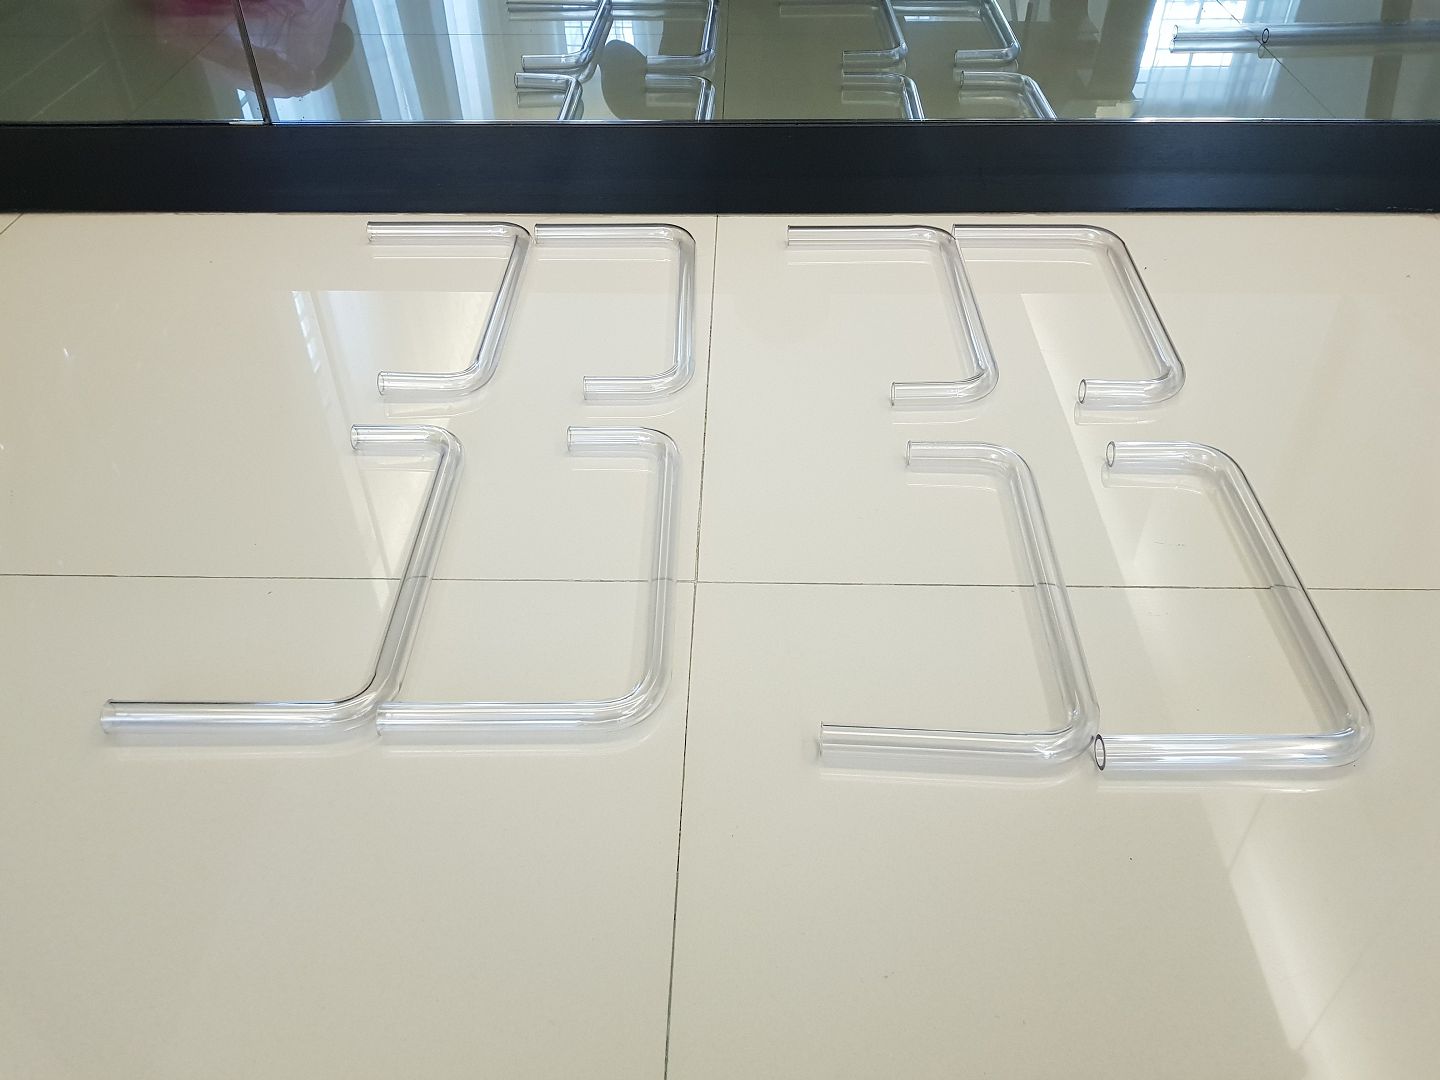
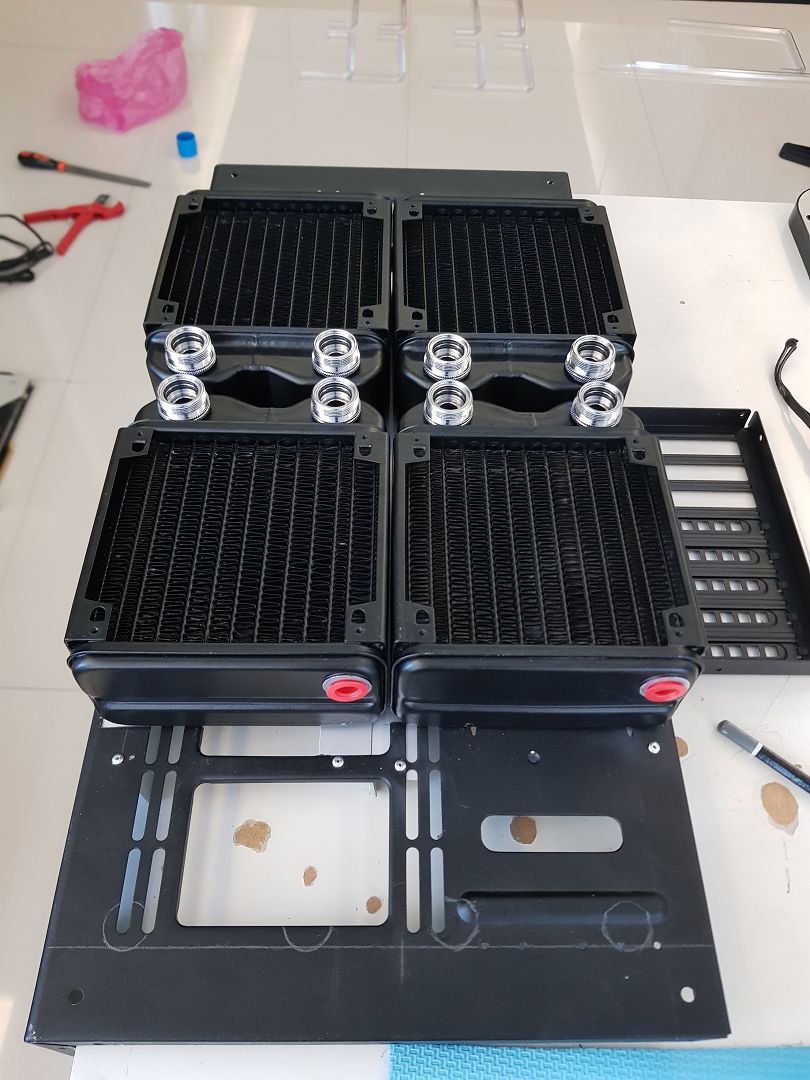
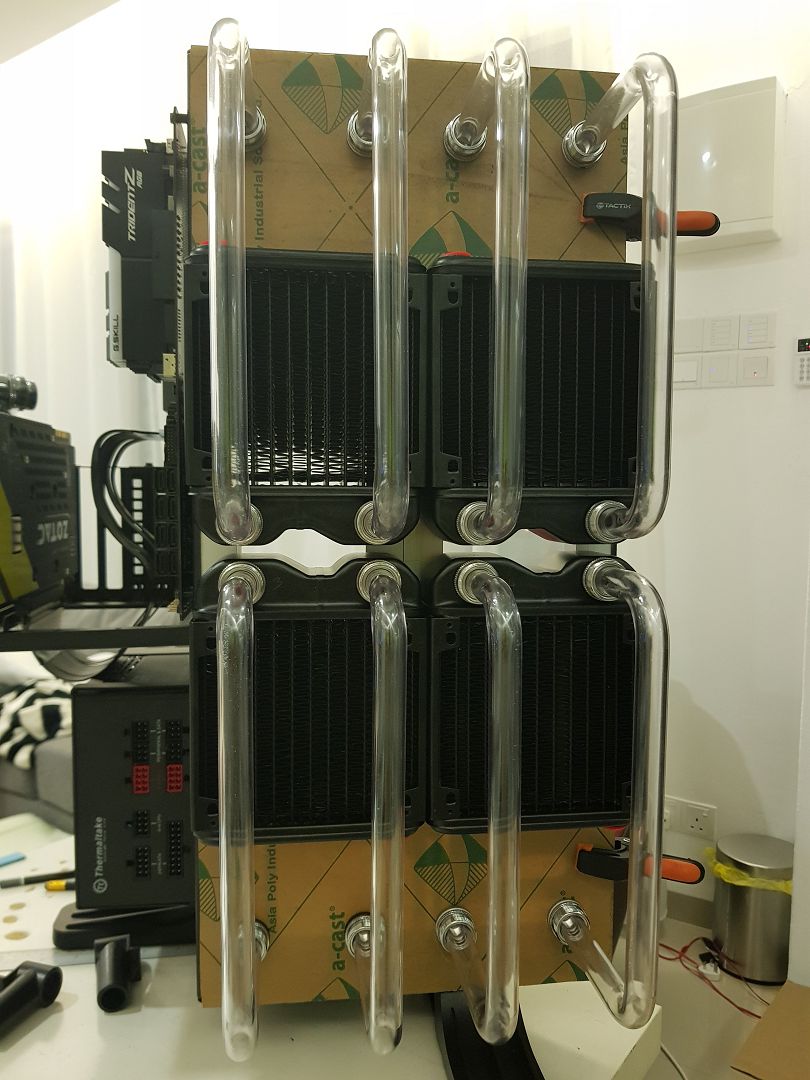
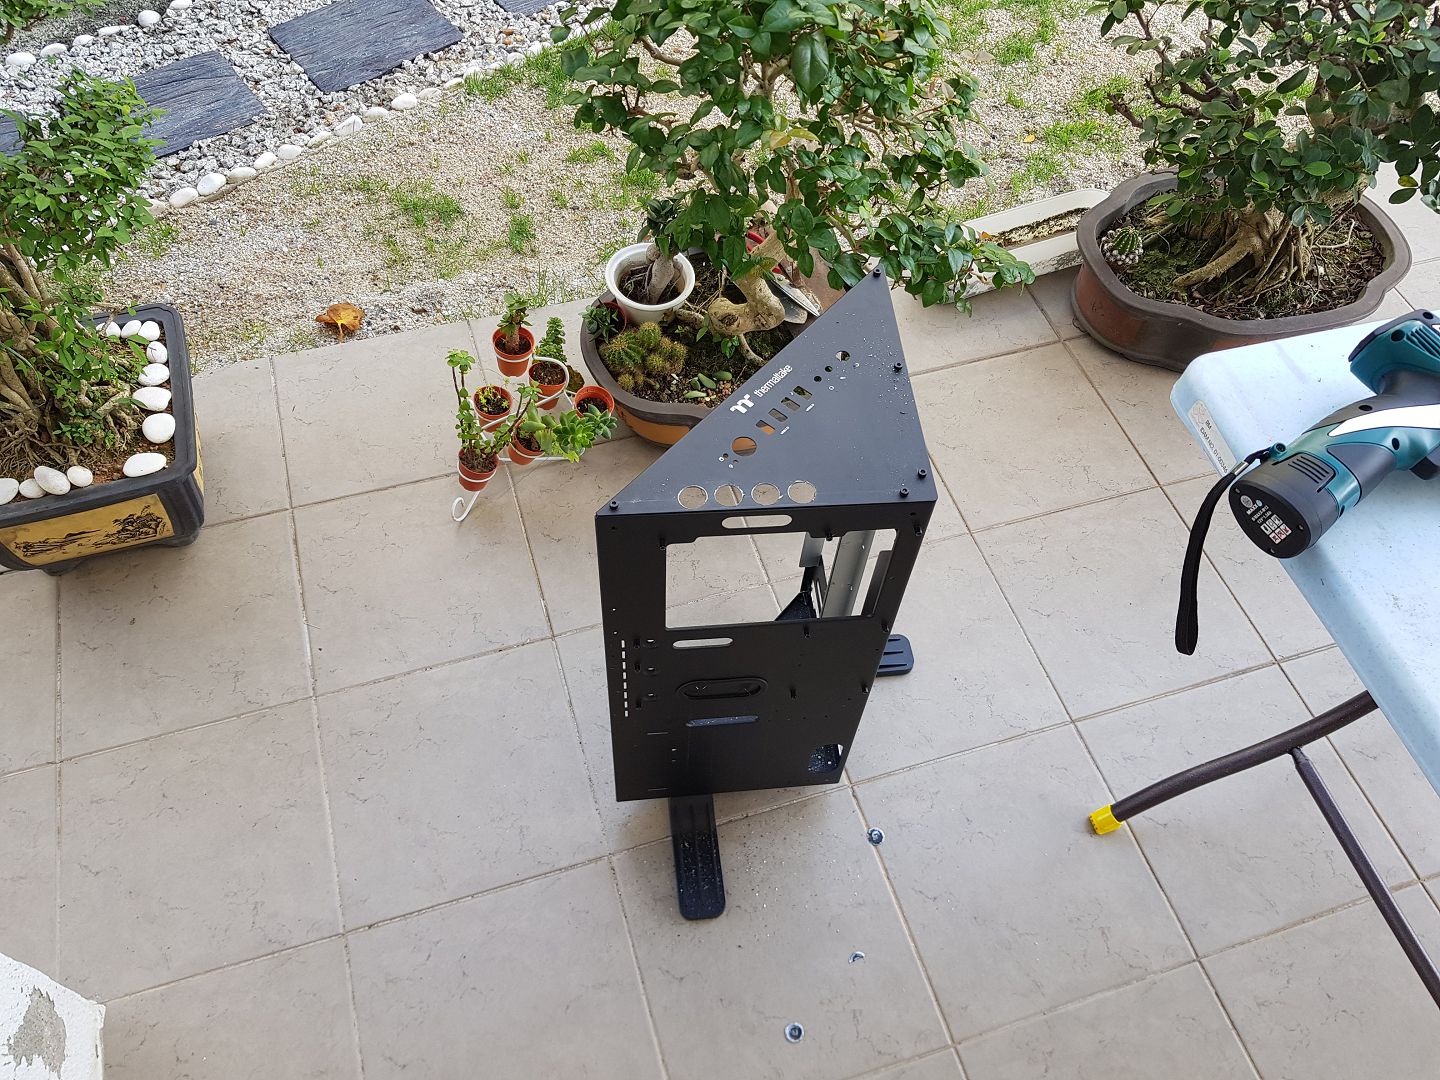
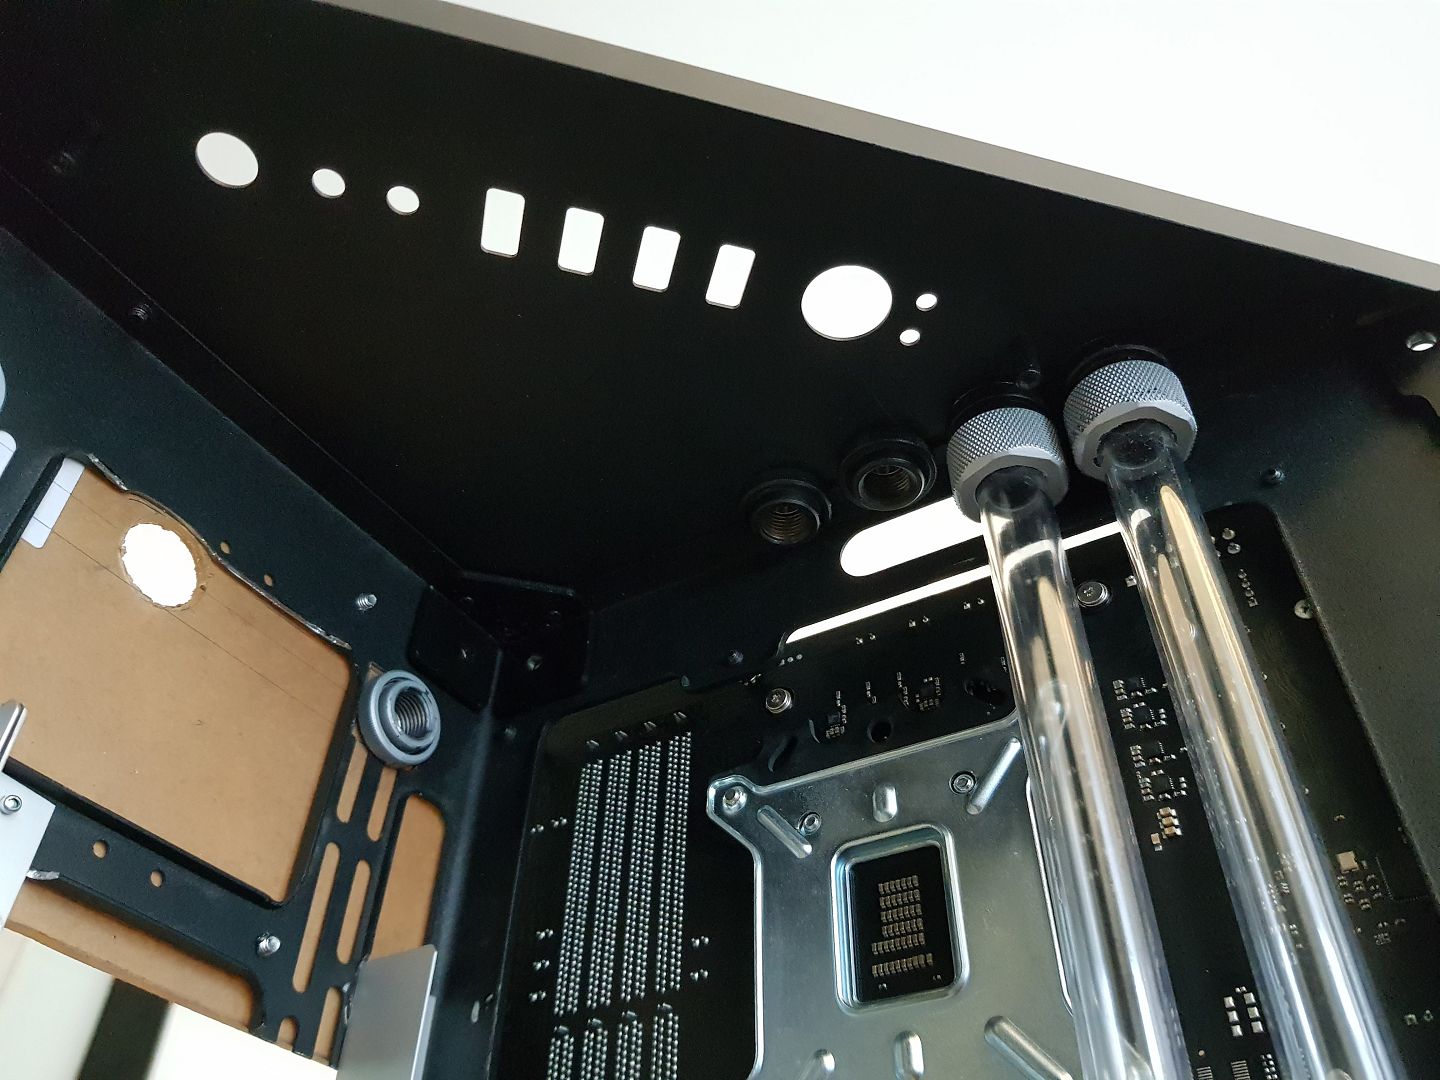
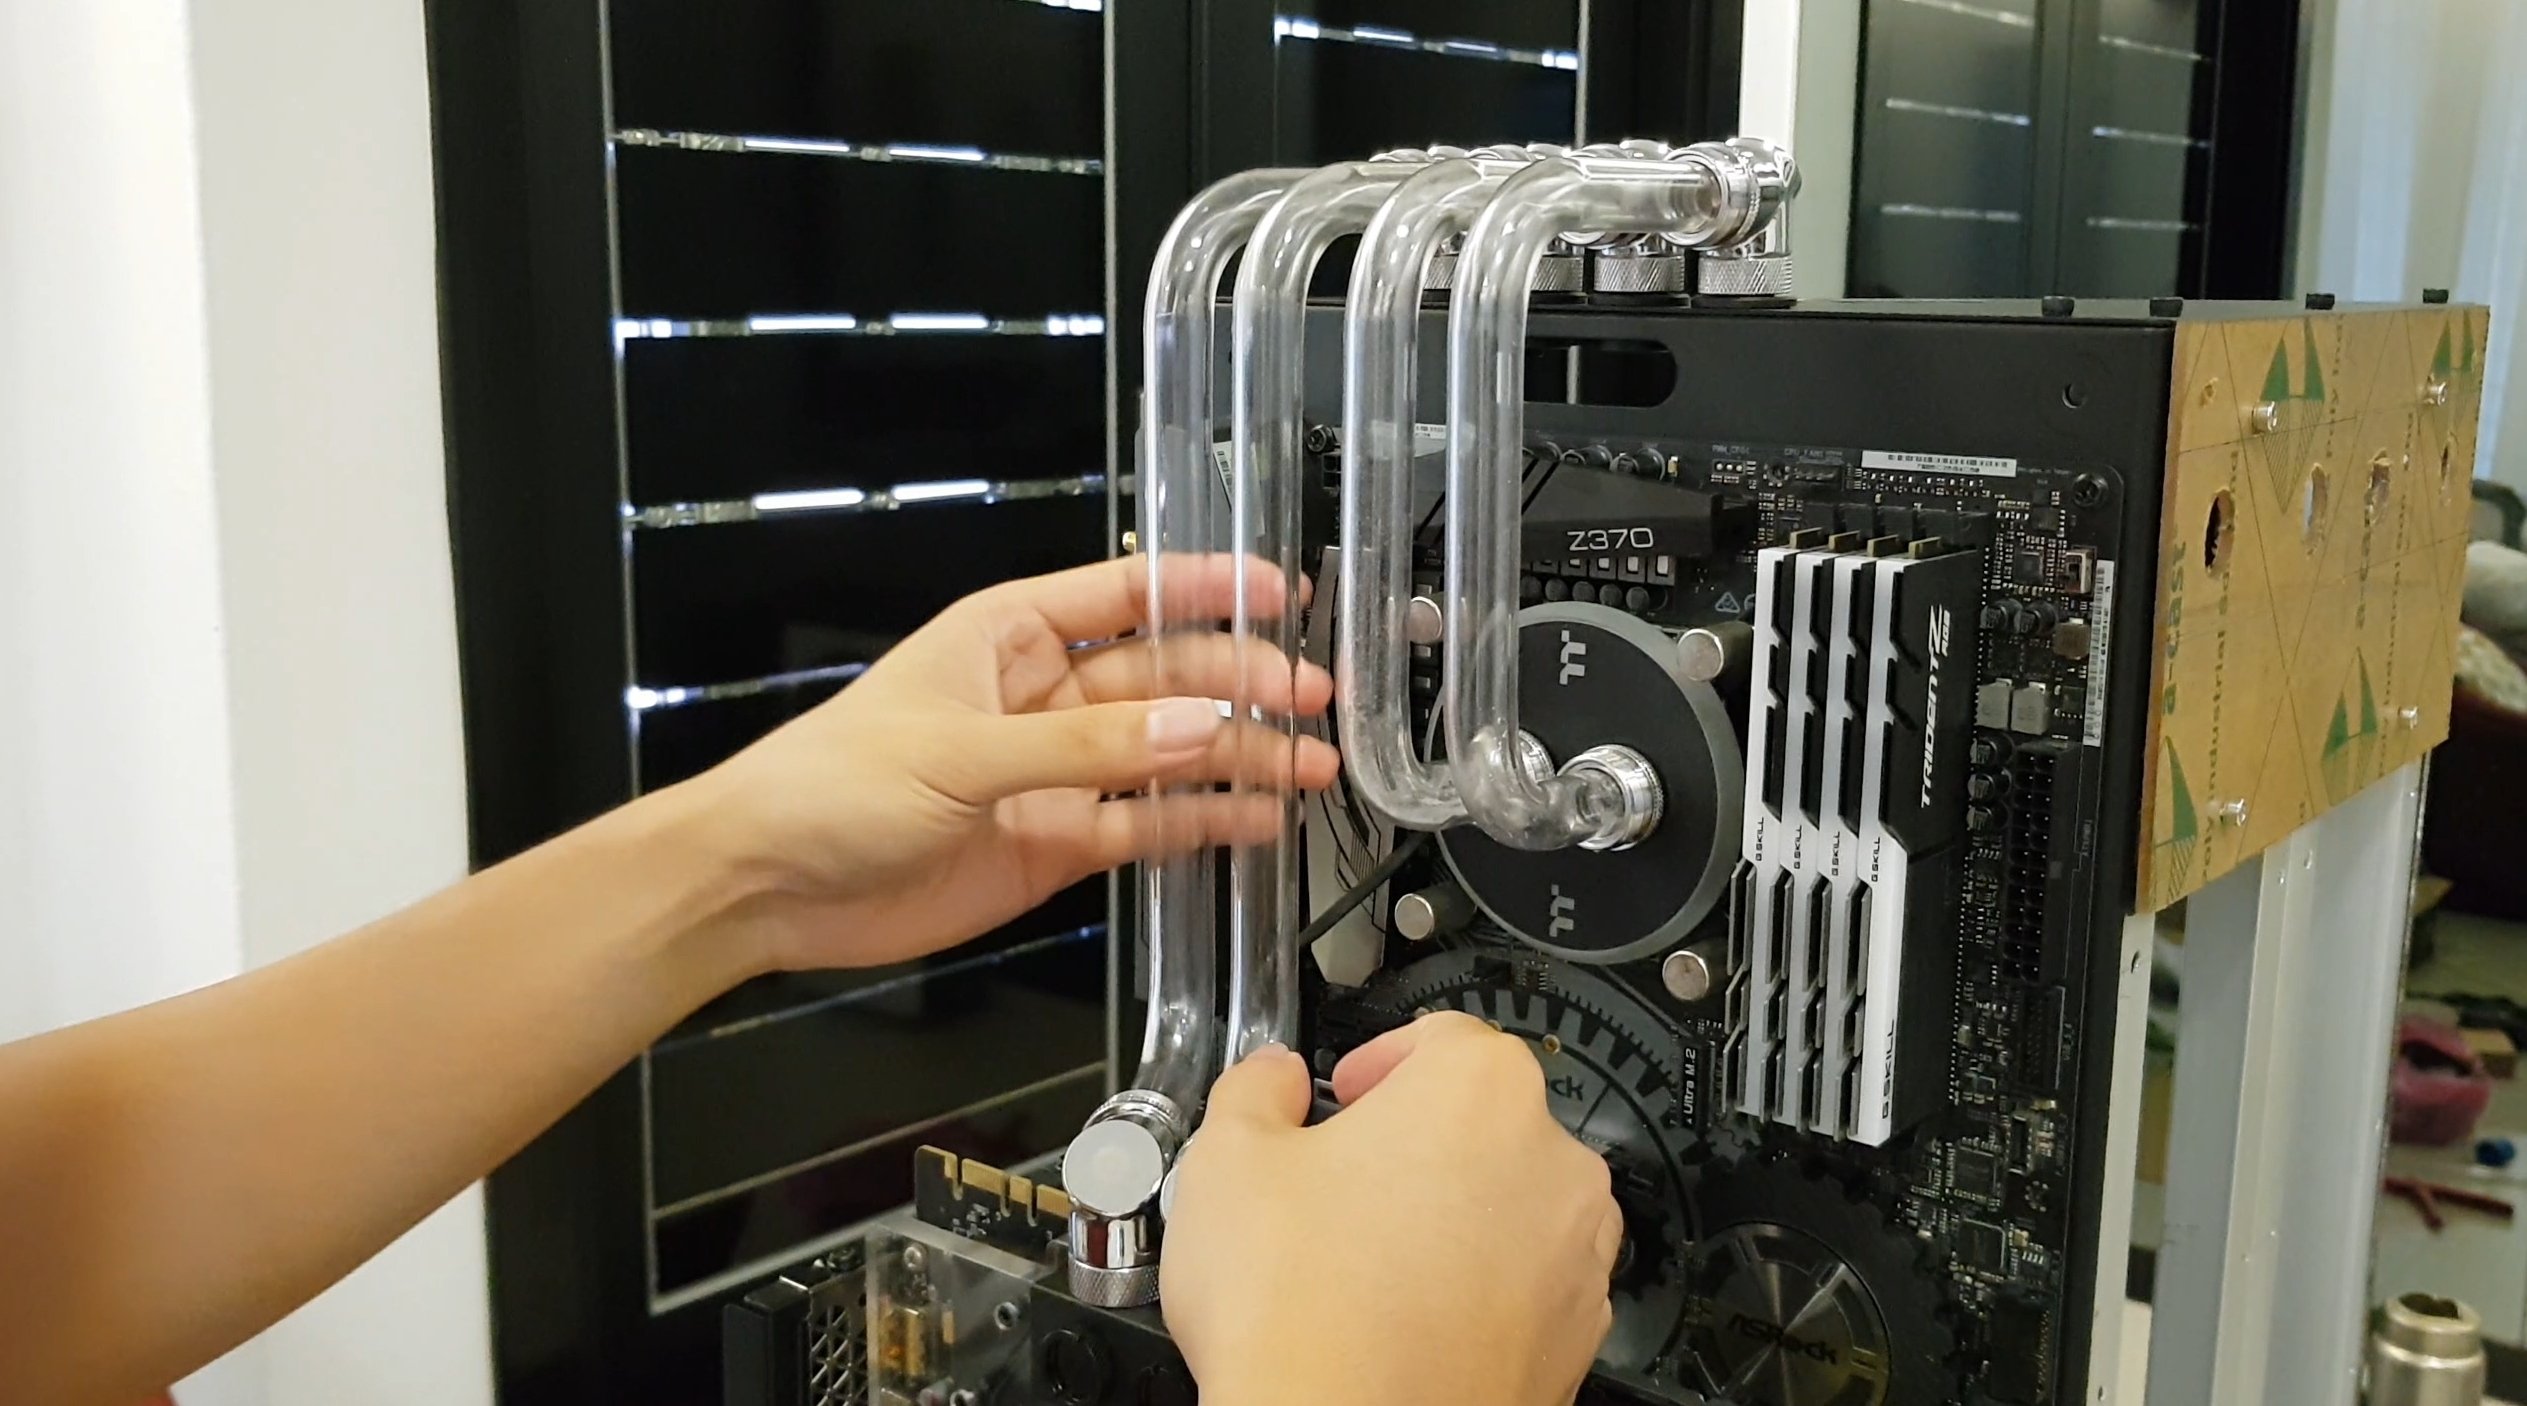
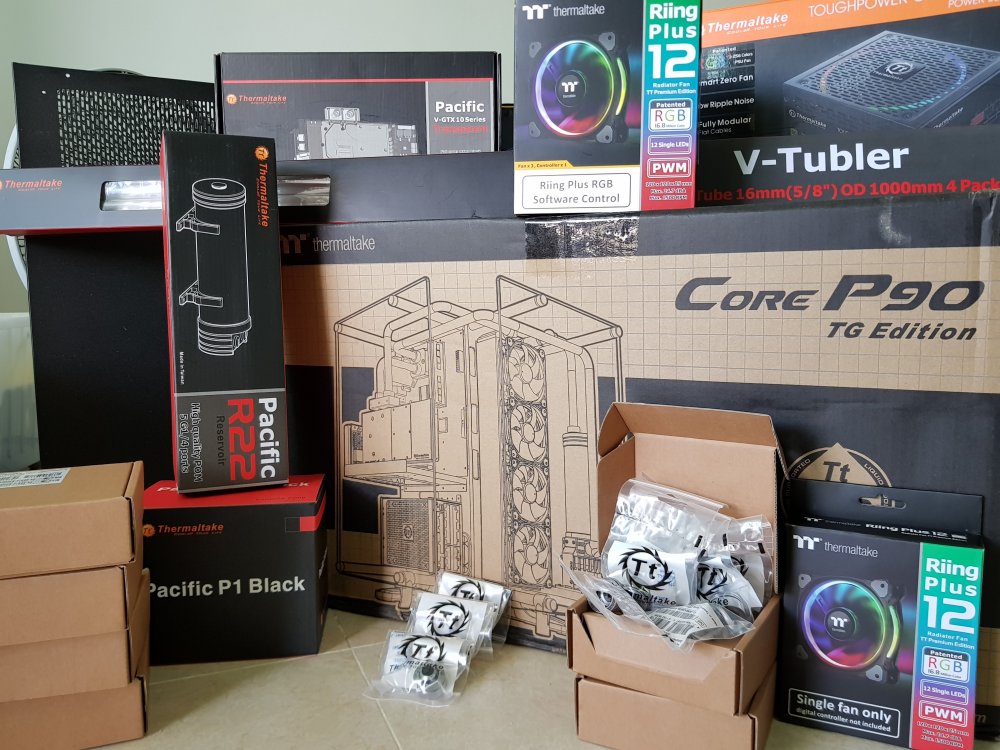
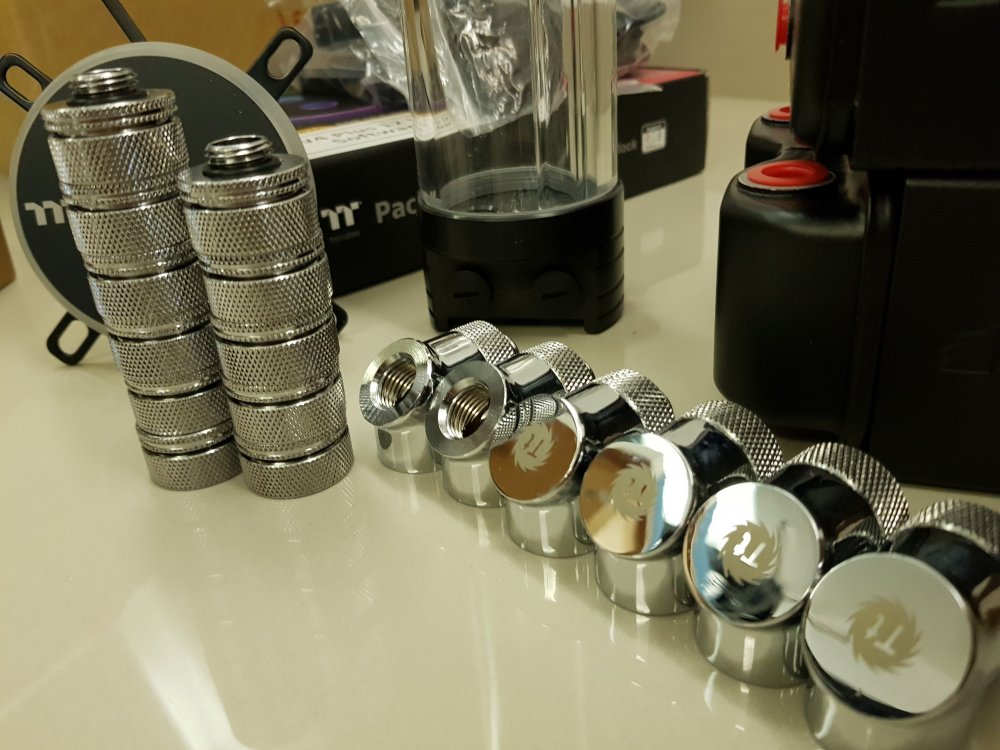
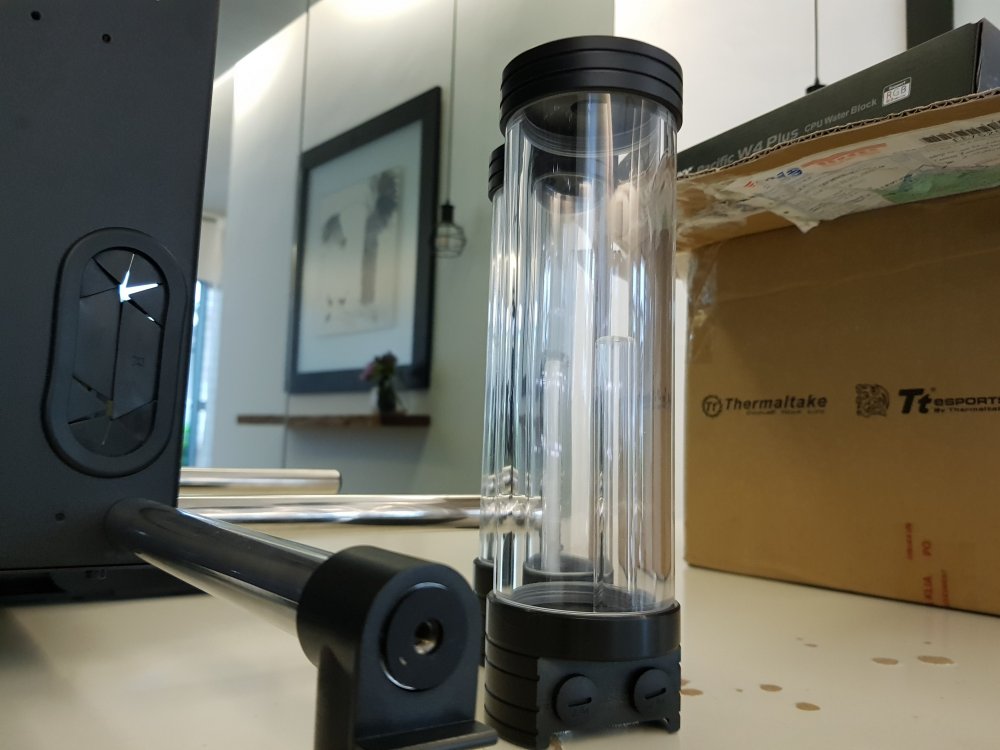
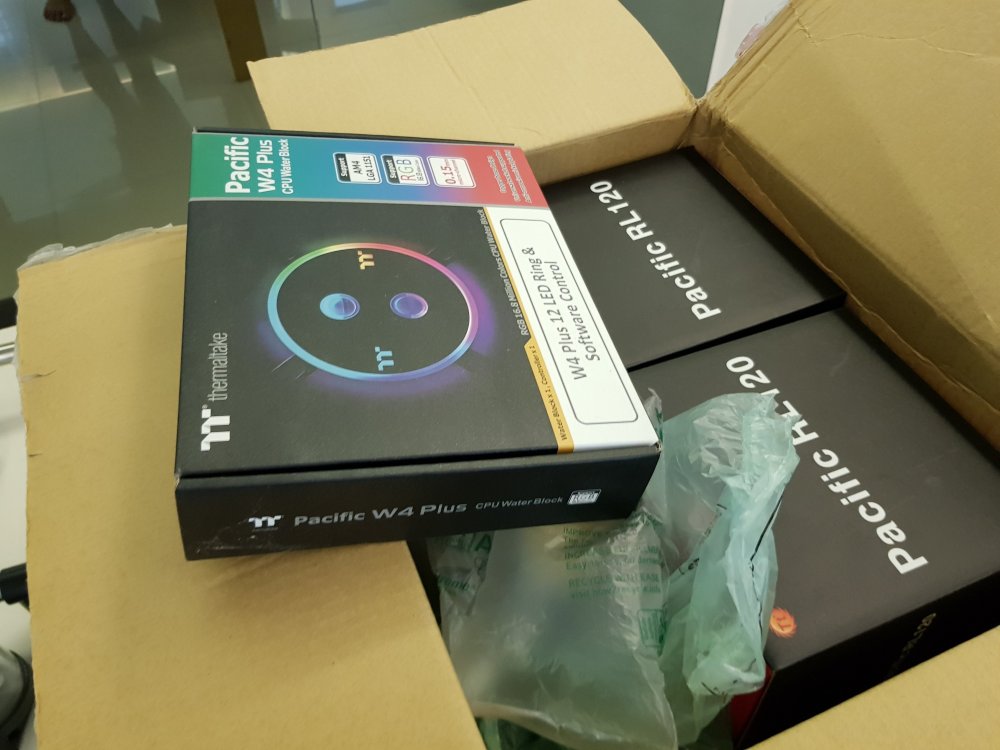
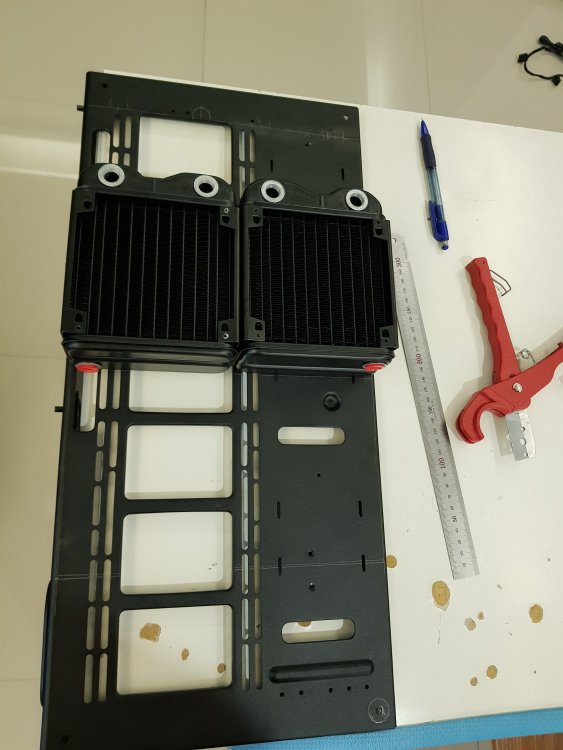
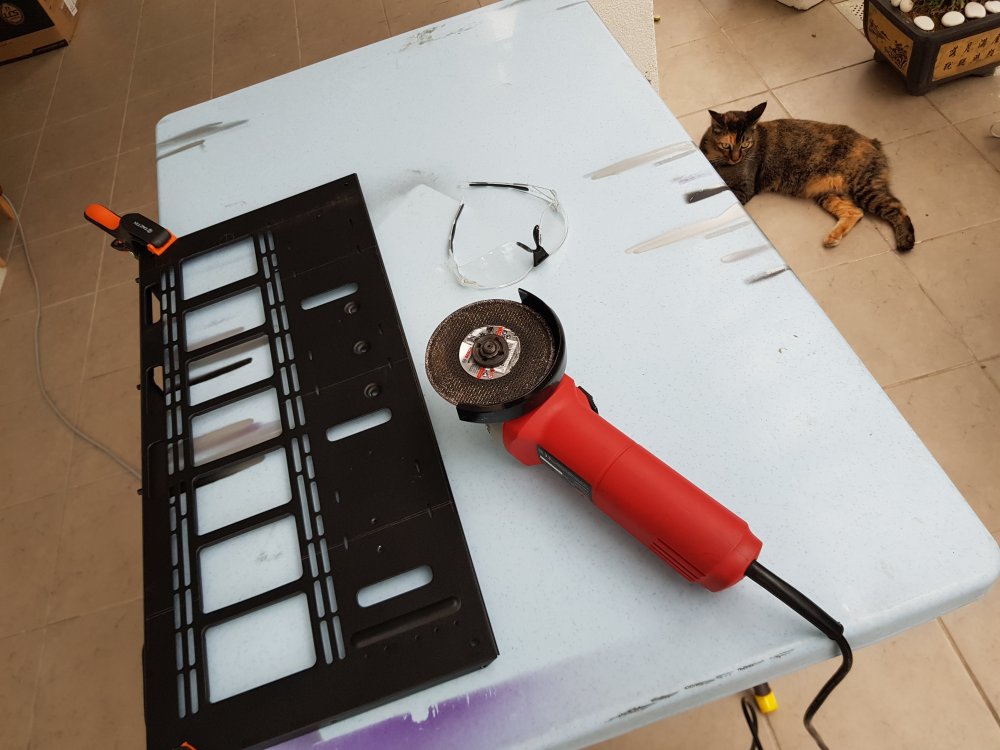
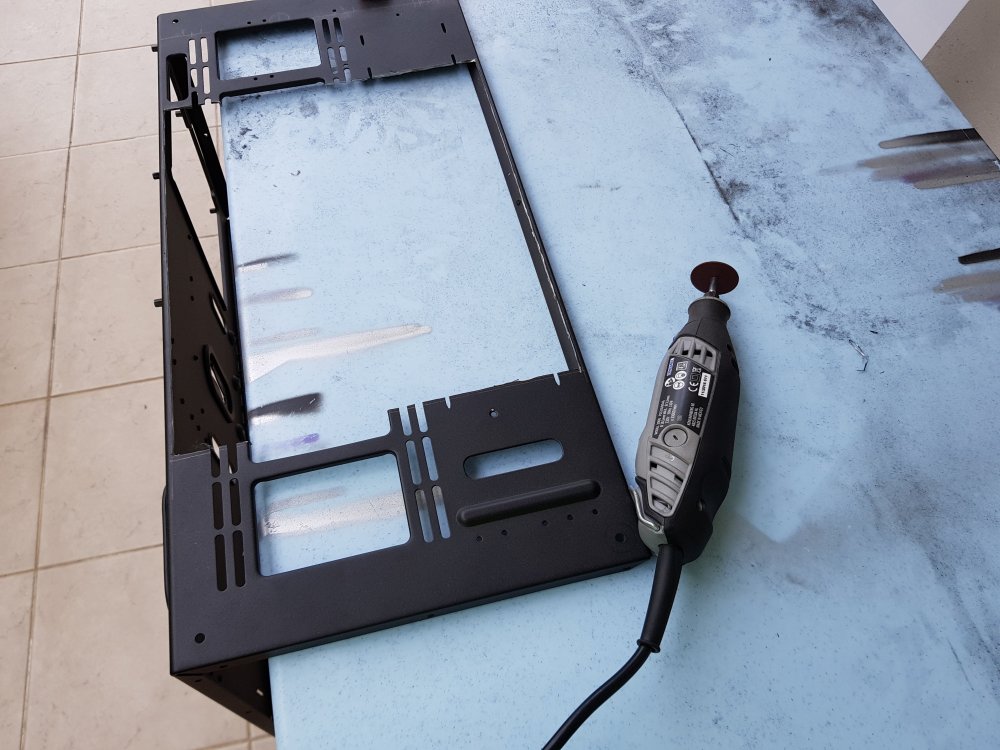
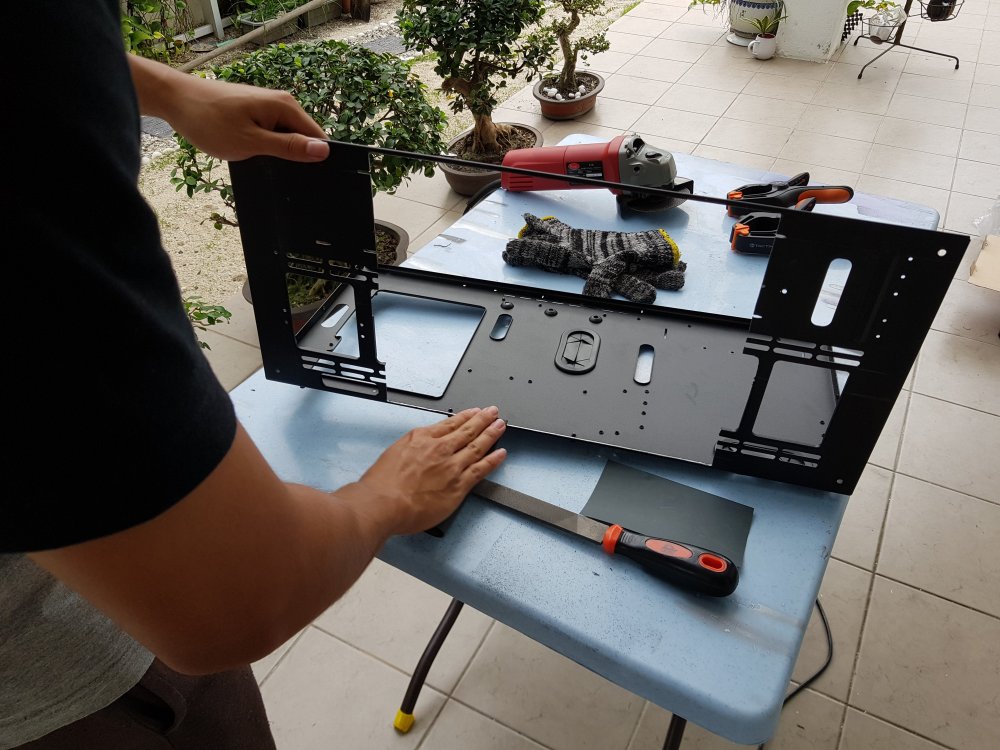
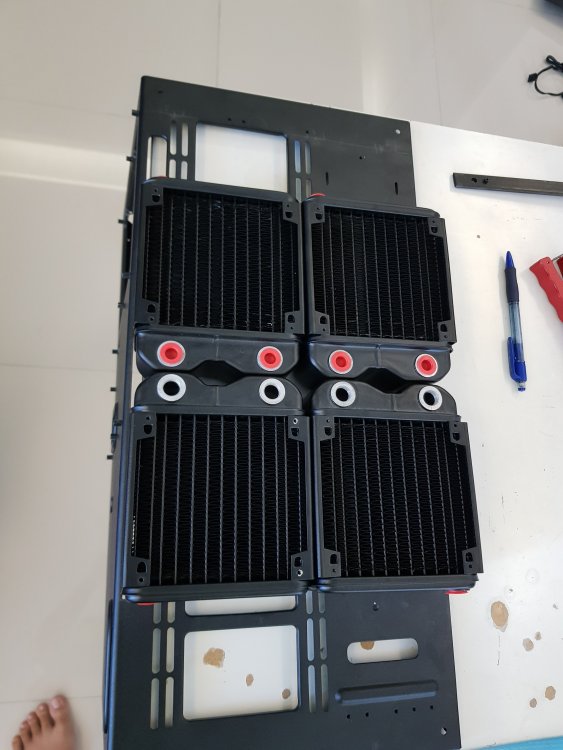
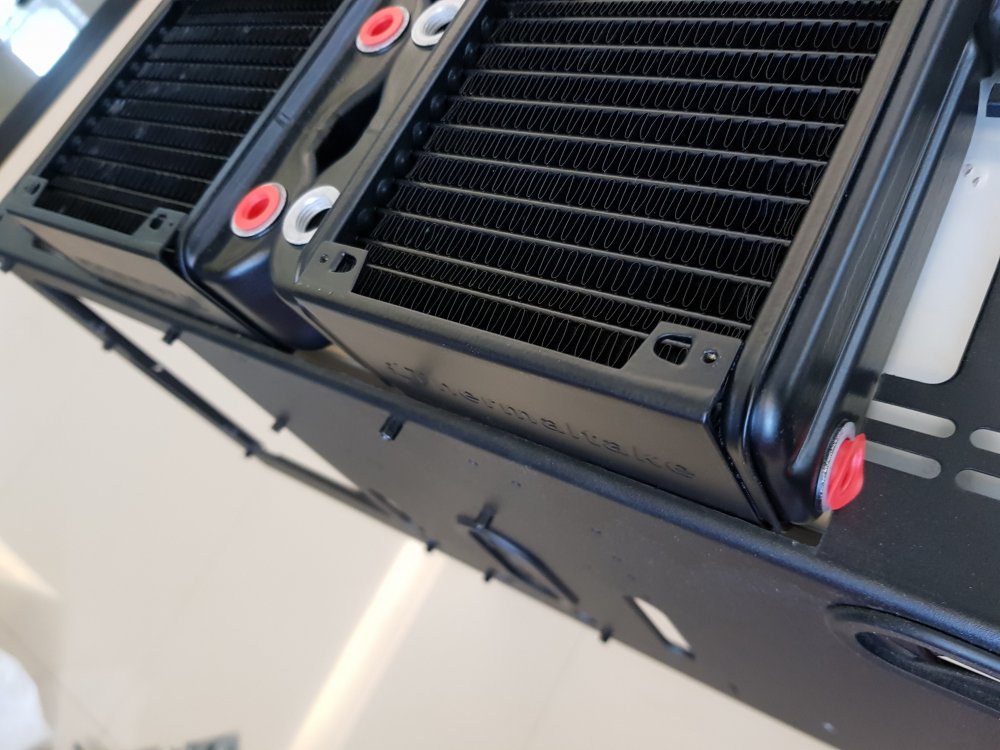
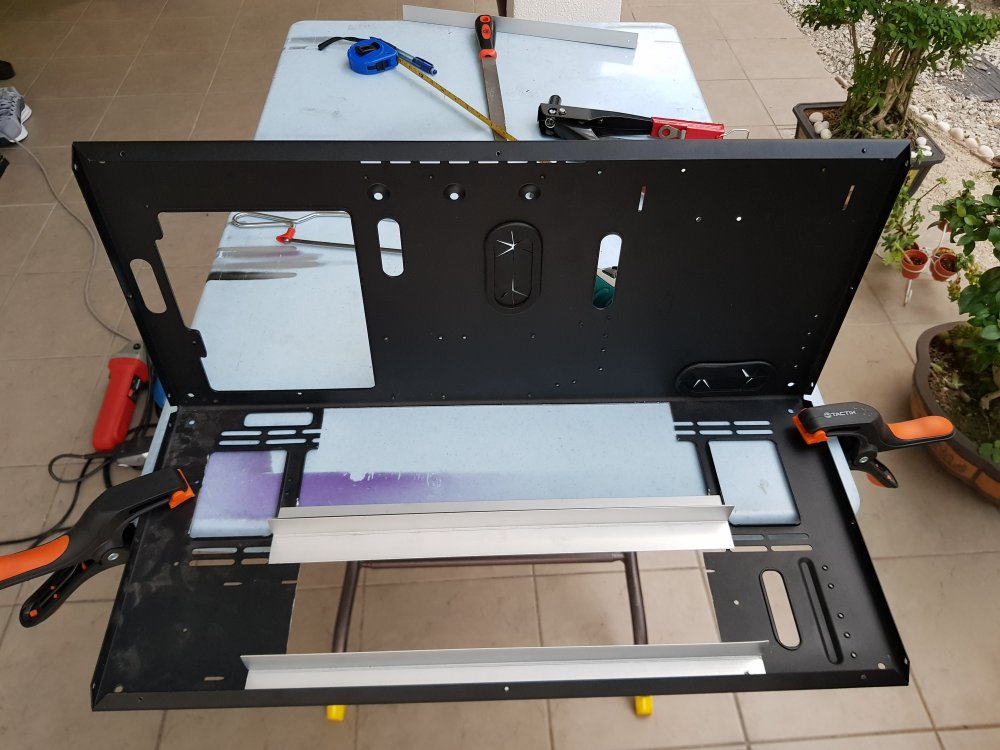
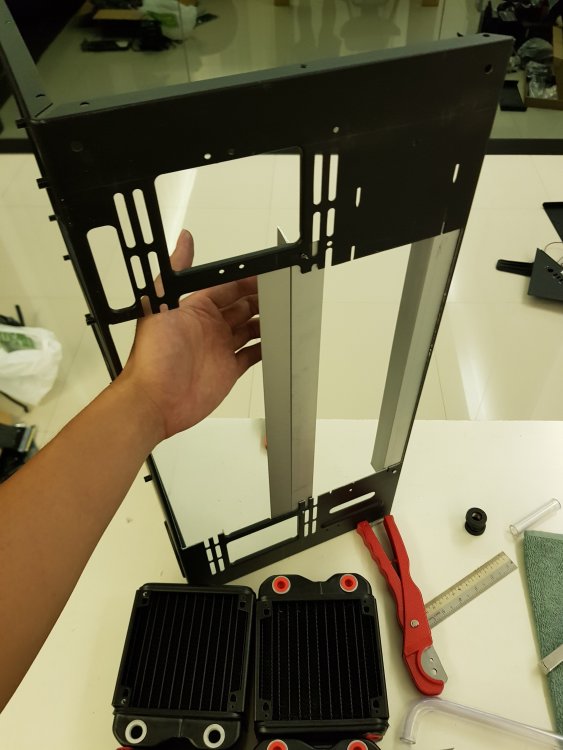
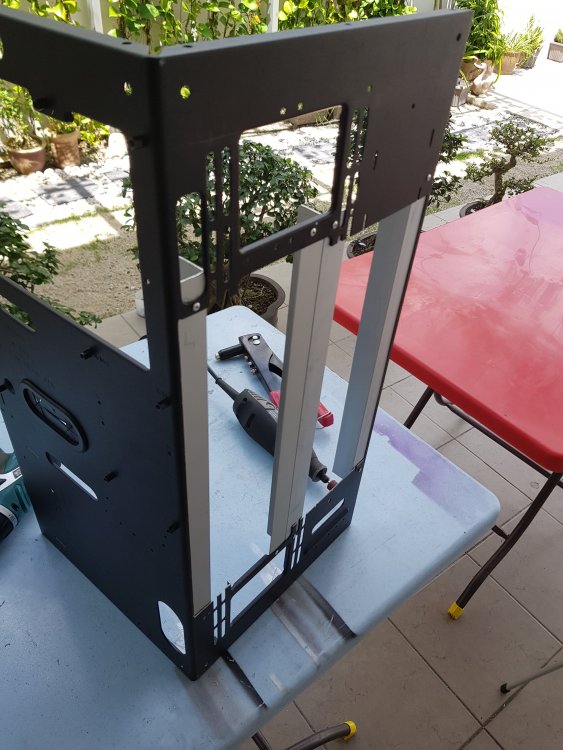
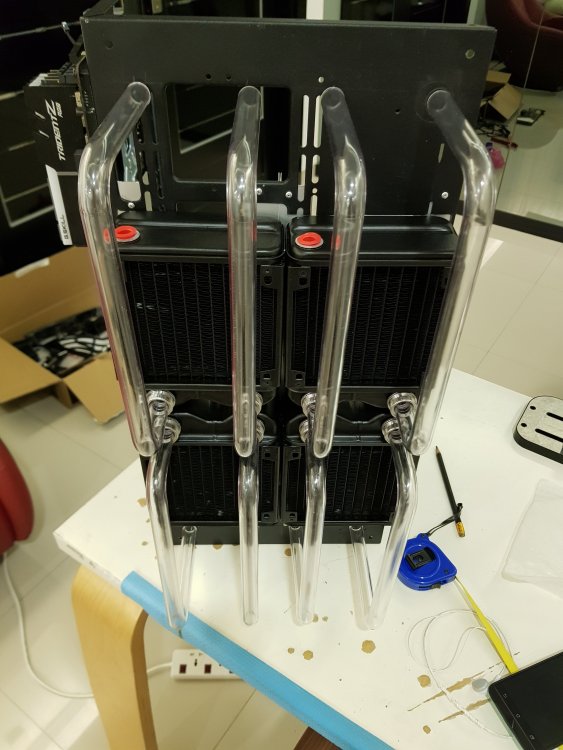
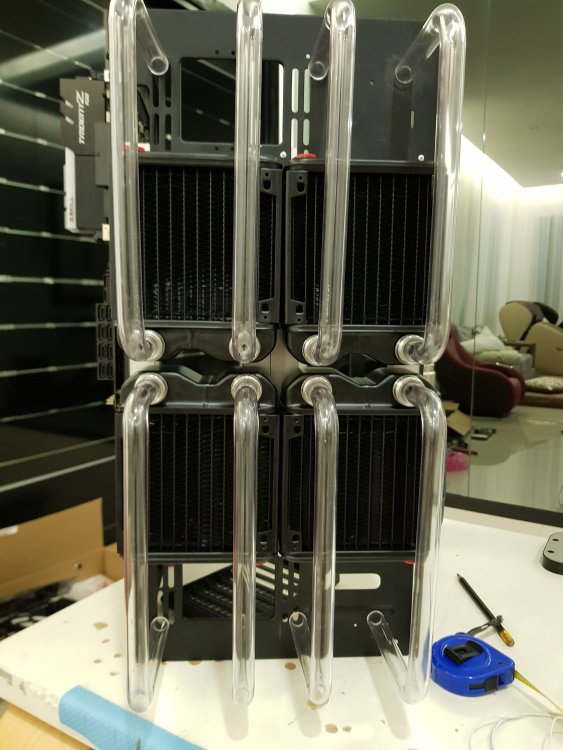
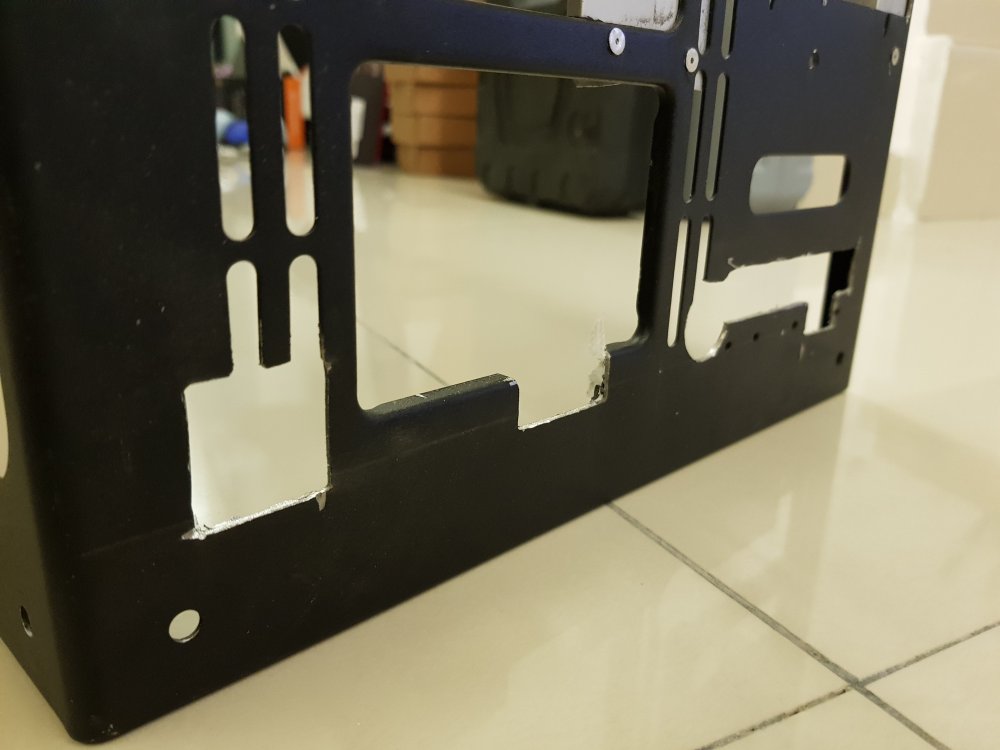
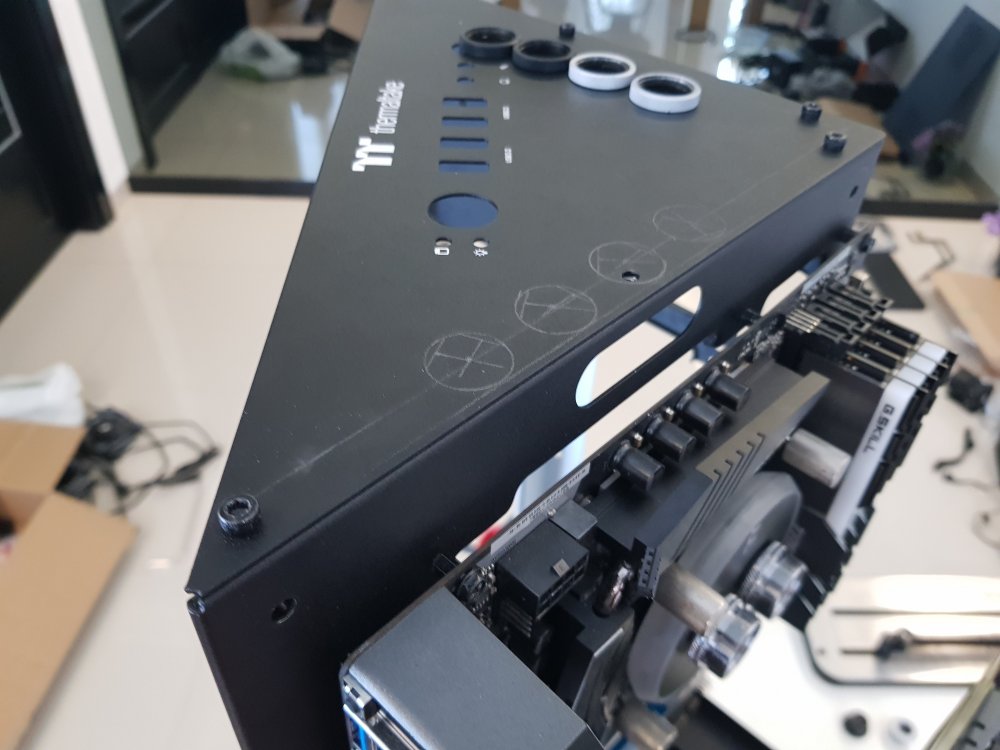
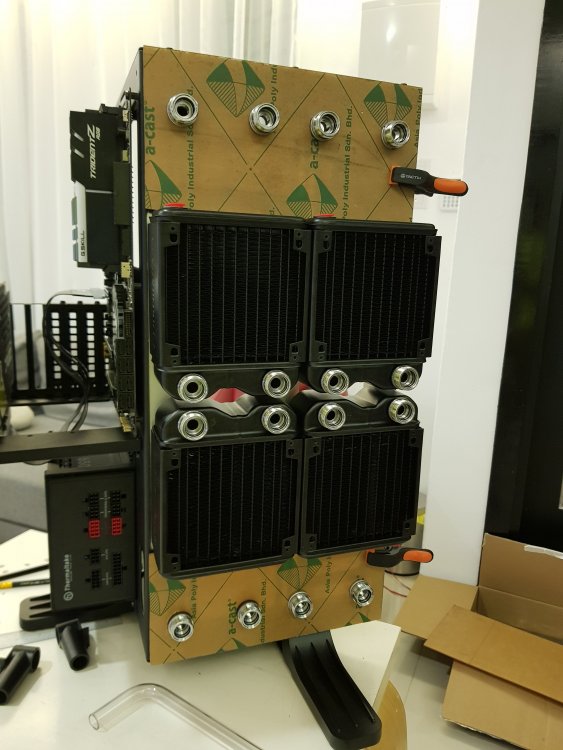
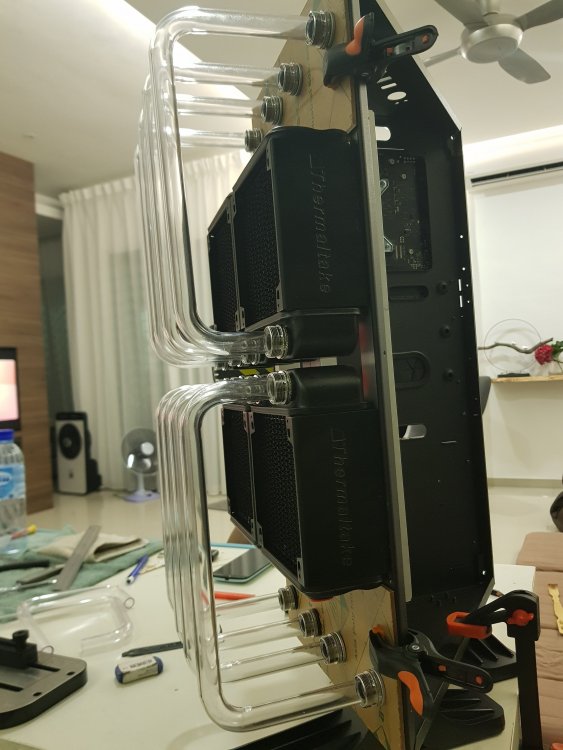
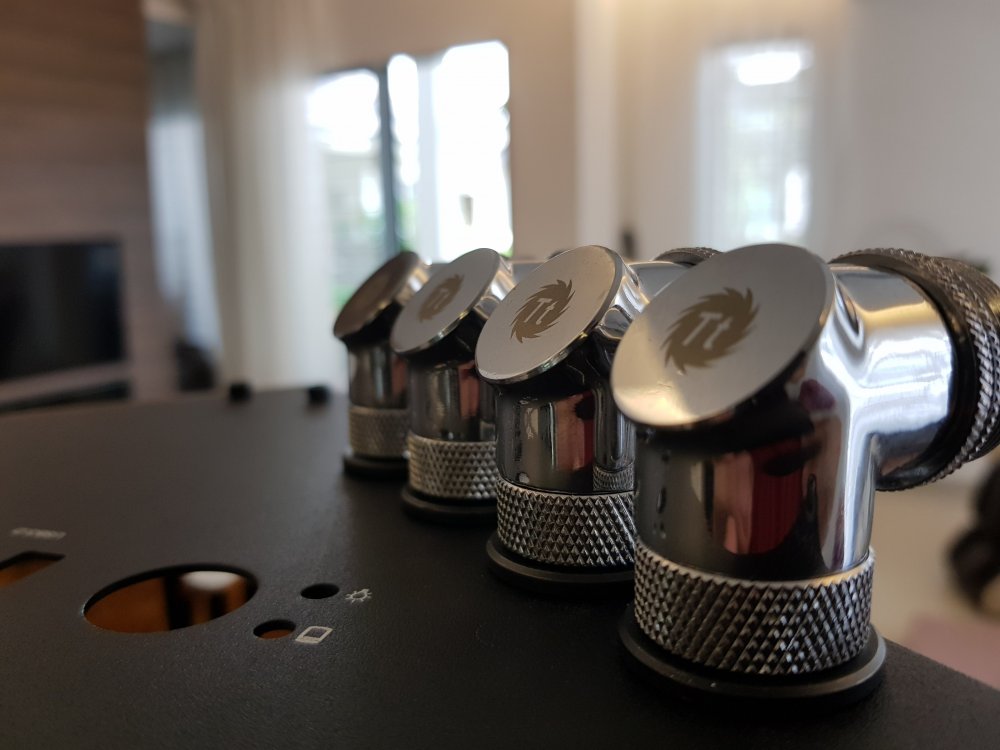
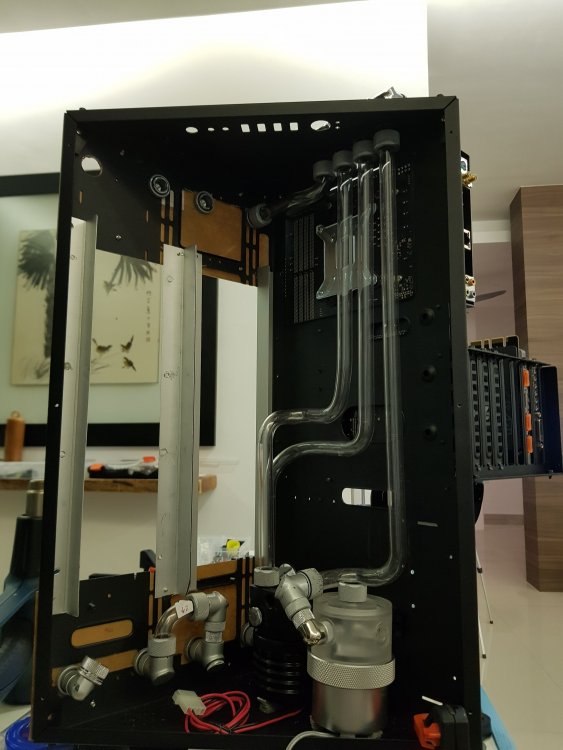
First time posting here, please forgive me if i posted the wrong format. Brief introduction of myself: Im currently a student, casual pc enthusiast who love watercooling too much and started a little bit of modding as a hobby. Got my first ever sponsor from Andy Thermaltake using my first ever build as a proposal (View 71 - JY71, build video: https://www.youtube.com/watch?v=tb3BALoAl4Y&lc=z23xdhowhybterurz04t1aokg52qnykfhp5bfgcsc0cbrk0h00410). Big fan of thermaltake, great products, got sponsorship, dream comes true, life is complete . Core p90 is such an excellent chassis and i'm so fortunate to get this chassis from thermaltake. No doubt 101% effort is going to put into this build! Mod on! Sponsored items! How crazy!! Core P90, such a sexy lady. Chrome Fittings. How elegant. Disassembled the chassis. Figuring out radiator mounting. Meow. Decided to cut out a part of the chassis and make radiator mounting using aluminium frame. Cleaning out the edges using dremel. definitely have to show off every parts that "involved" in watercooling. Bend dem tubes! Always my favourite part of building a pc, which is watercooling. Thermaltake V-Tubler is superb to work with! Holes for pass through fittings. Black and Chrome. No other colours can beat this duo!!! My core P90 backside woopssss! Smexy bare-back!


-
Hey everyone, I am back with a quick build log. Antec asked if I could do a build in their new P120 case and this is my journey. The parts I will be using are, CPU - AMD 2700x GPU - ASUS Dual RTX 2080 RAM - 16gb 3200 mhz Thermaltake WaterRam without the waterblock Motherboard - ASUS ROG Strix X470 - F Storage - Adata SX6000 256GB M.2 PSU - Antec 650W high current gamer HCG Fans - Antec Prizm 120 ARGB All the water cooling parts were supply by thermaltake and I manufactured a custom distro with integrated ddc pump for this build. This is the case. I stripped the full case down and drilled all the rivets out as I want to paint the full case a gloss black with red splash. this would be the biggest part of the build. Before, After, Once the painting was completed I needed to test fit all the parts and plan the loop and get the holes for the front distro. This will be my 1st build where I will be using a DDC pump in the distro plate, I was not 100% sure on how to do this but a did find a guide on the bit-tech youtube channel which helped a lot thanks Alex. This is my design for the front distro. Now time to cut the part. Once I cut the part, I needed to test fit the part and leak test it, I couldn't find my leak tester, so I just filled it up. We did have any leaks so it was time to add it to the build and run the tubes. Time to fill her up, Just want to say a big thank you to Antec for letting me build in their new P120 I was really surprised at how much room was in the case and a big thank you to thermaltake for supporting me in this project. Here are the final photos.
-
Thermaltake Level 20 HT Full Tower Chassis URL: Level 20 HT: https://www.thermaltake.com/level-20-ht-chassis.html Level 20 HT Snow Edition: https://www.thermaltake.com/level-20-ht-snow-chassis.html Thermaltake Level 20 HT Full Tower Chassis Distinctive from most cases on the market, the Level 20 HT full tower chassis is specially constructed to continue the legend of the Level 20 series case family. It features four durable 4mm thick tempered glass windows, two preinstalled 140mm standard fans on the top, and is designed with outstanding system ventilation. The chassis is a premium choice that inhabits a vertical mount design and expansion capabilities for massive custom liquid-cooled systems. The Level 20 HT takes our latest case innovations and wraps them in an ultra-modern style that’s utterly unique in the case market today. Stand out from the crowd with the Level 20 HT. Tempered Glass Window With Ultimate Viewing Angles The Level 20 HT comes with four tempered glass panels at the front, top and both sides which make it easy to display the internal components. For the front and top tempered glass panels, users can easily unlock by pressing down the locking mechanism located on the top part of the glass, allowing quick and easy access. The left and right hinged doors are also equipped with a smart lock security system allowing you to easily secure the inner components of your case. Dust Reduction Well-designed quick removal magnetic fan filters on the back and at the base provide excellent dust protection and dirt reduction, ensuring a dust-free environment. #For more features & details, kindly visit our official website Let us know what you think about our brand new model- Level 20 HT
-
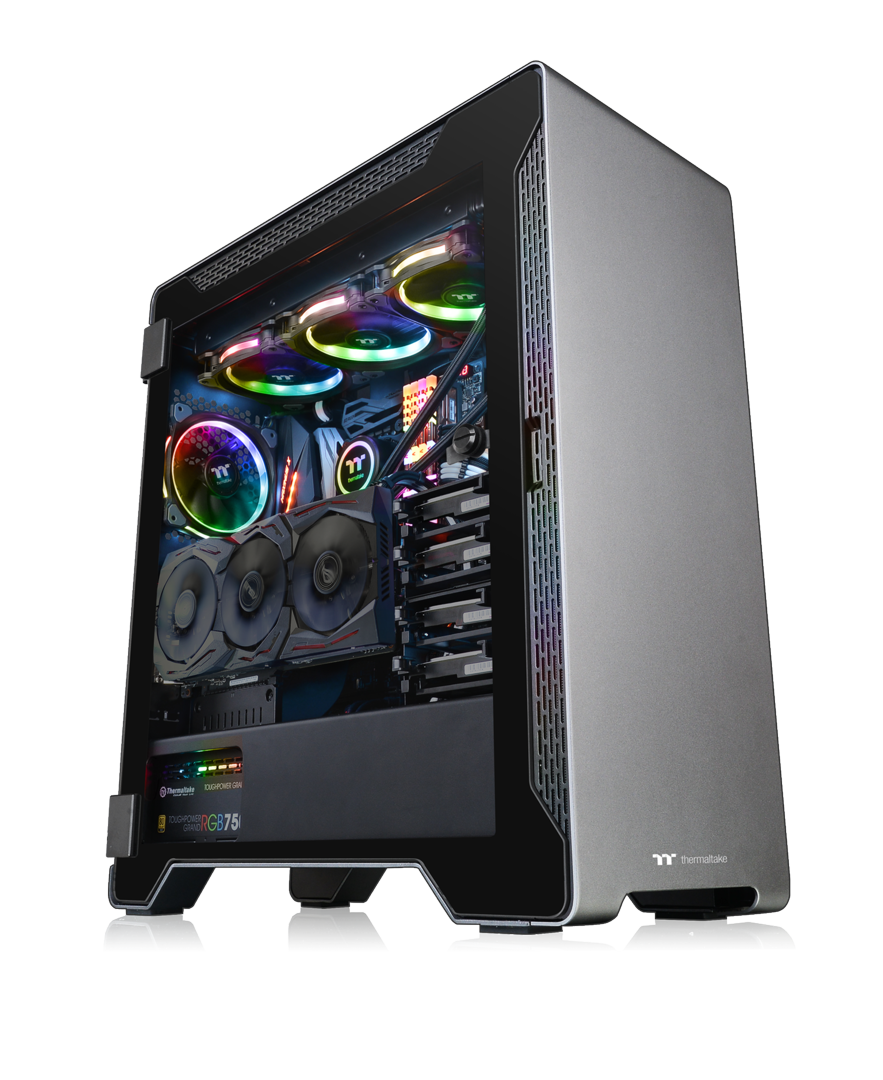
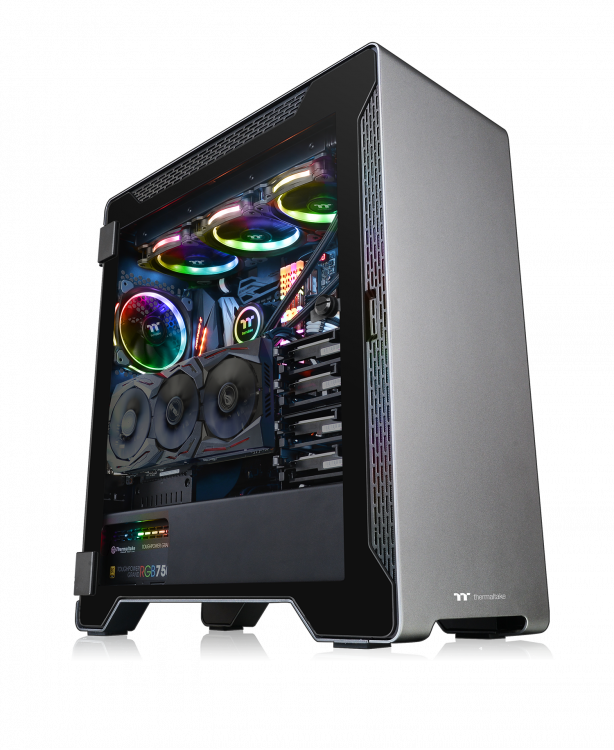
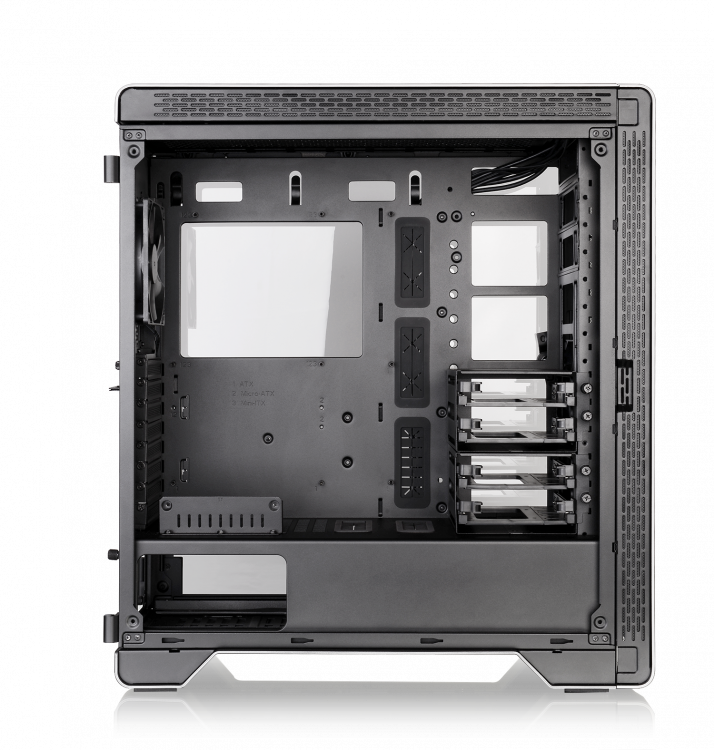
Thermaltake Aluminum Series Thermaltake A500 Aluminum Tempered Glass Edition Mid Tower Chassis *The image is for reference only. Product Link Case Build Video Thermaltake A500 Aluminum Tempered Glass Edition mid-tower chassis features a sleek aluminum front panel, two 4mm tempered glass panels, two pre-installed 120mm front fans and a 120mm rear fan for optimal system ventilation. It has a built-in power supply cover for clean and easy cable management and also supports up to a standard ATX motherboard. Accommodating the latest PC hardware including the most advanced graphic cards and air/liquid cooling solutions, the A500 Aluminum TG is designed for those who are looking for a chassis with the outstanding thermal performance that is further complemented by a clean and simply designed case.
-
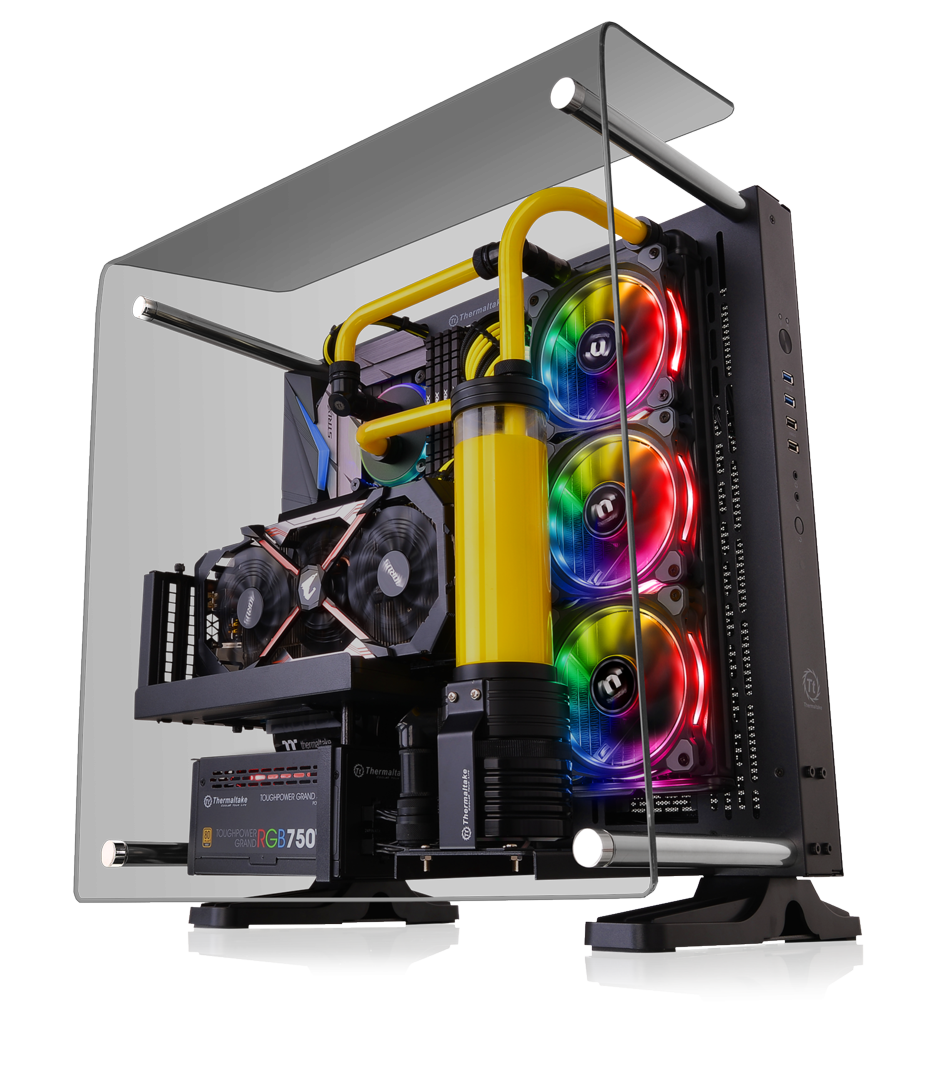
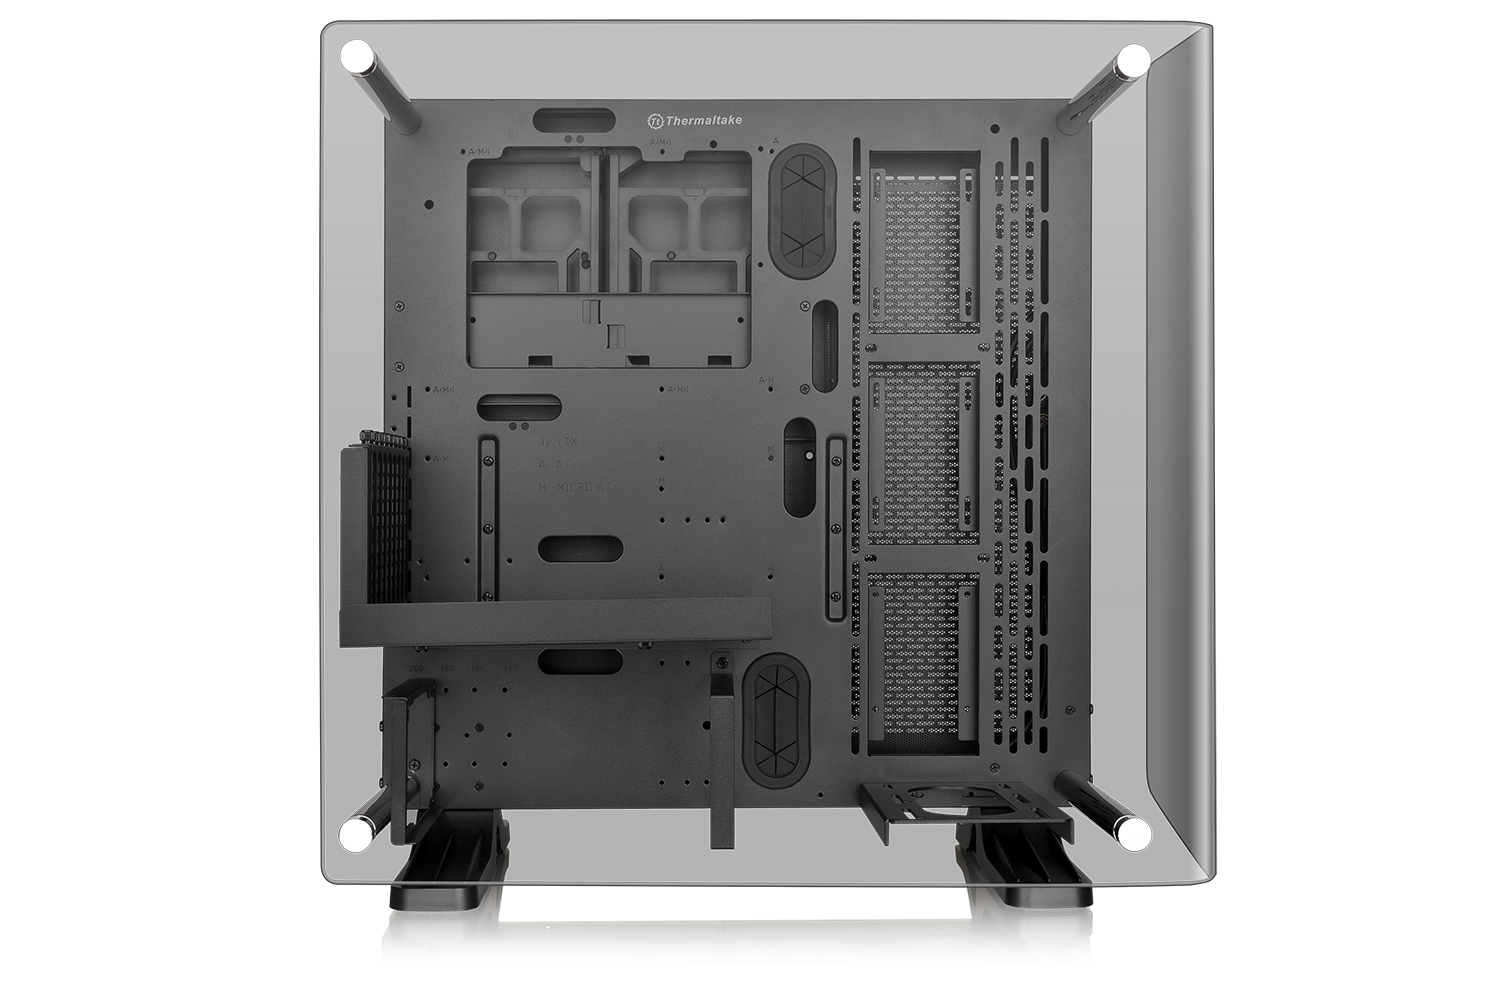
Thermaltake Core P3 Tempered Glass Curved Edition ATX Open Frame Chassis *The image is for reference only. Product Link Thermaltake has kicked open-frame chassis up to a notch and presented the Core P3 Tempered Glass Curved Edition ATX Open Frame Chassis. Open framed PC cases are all about style, about showing off your hardware and taking pride in your system. The Core P3 Curved chassis is the next step in open frame tempered glass case design, with a 90° curved panel; giving you awesome views of your hardware and more options to make your custom system a reality. The chassis is designed with dual GPU and PSU layout options and 3-way stand placements (wall mount, horizontal, and vertical placements), plenty of liquid cooling options and near unlimited flexibility when it comes to building the most advanced customized PC.
-
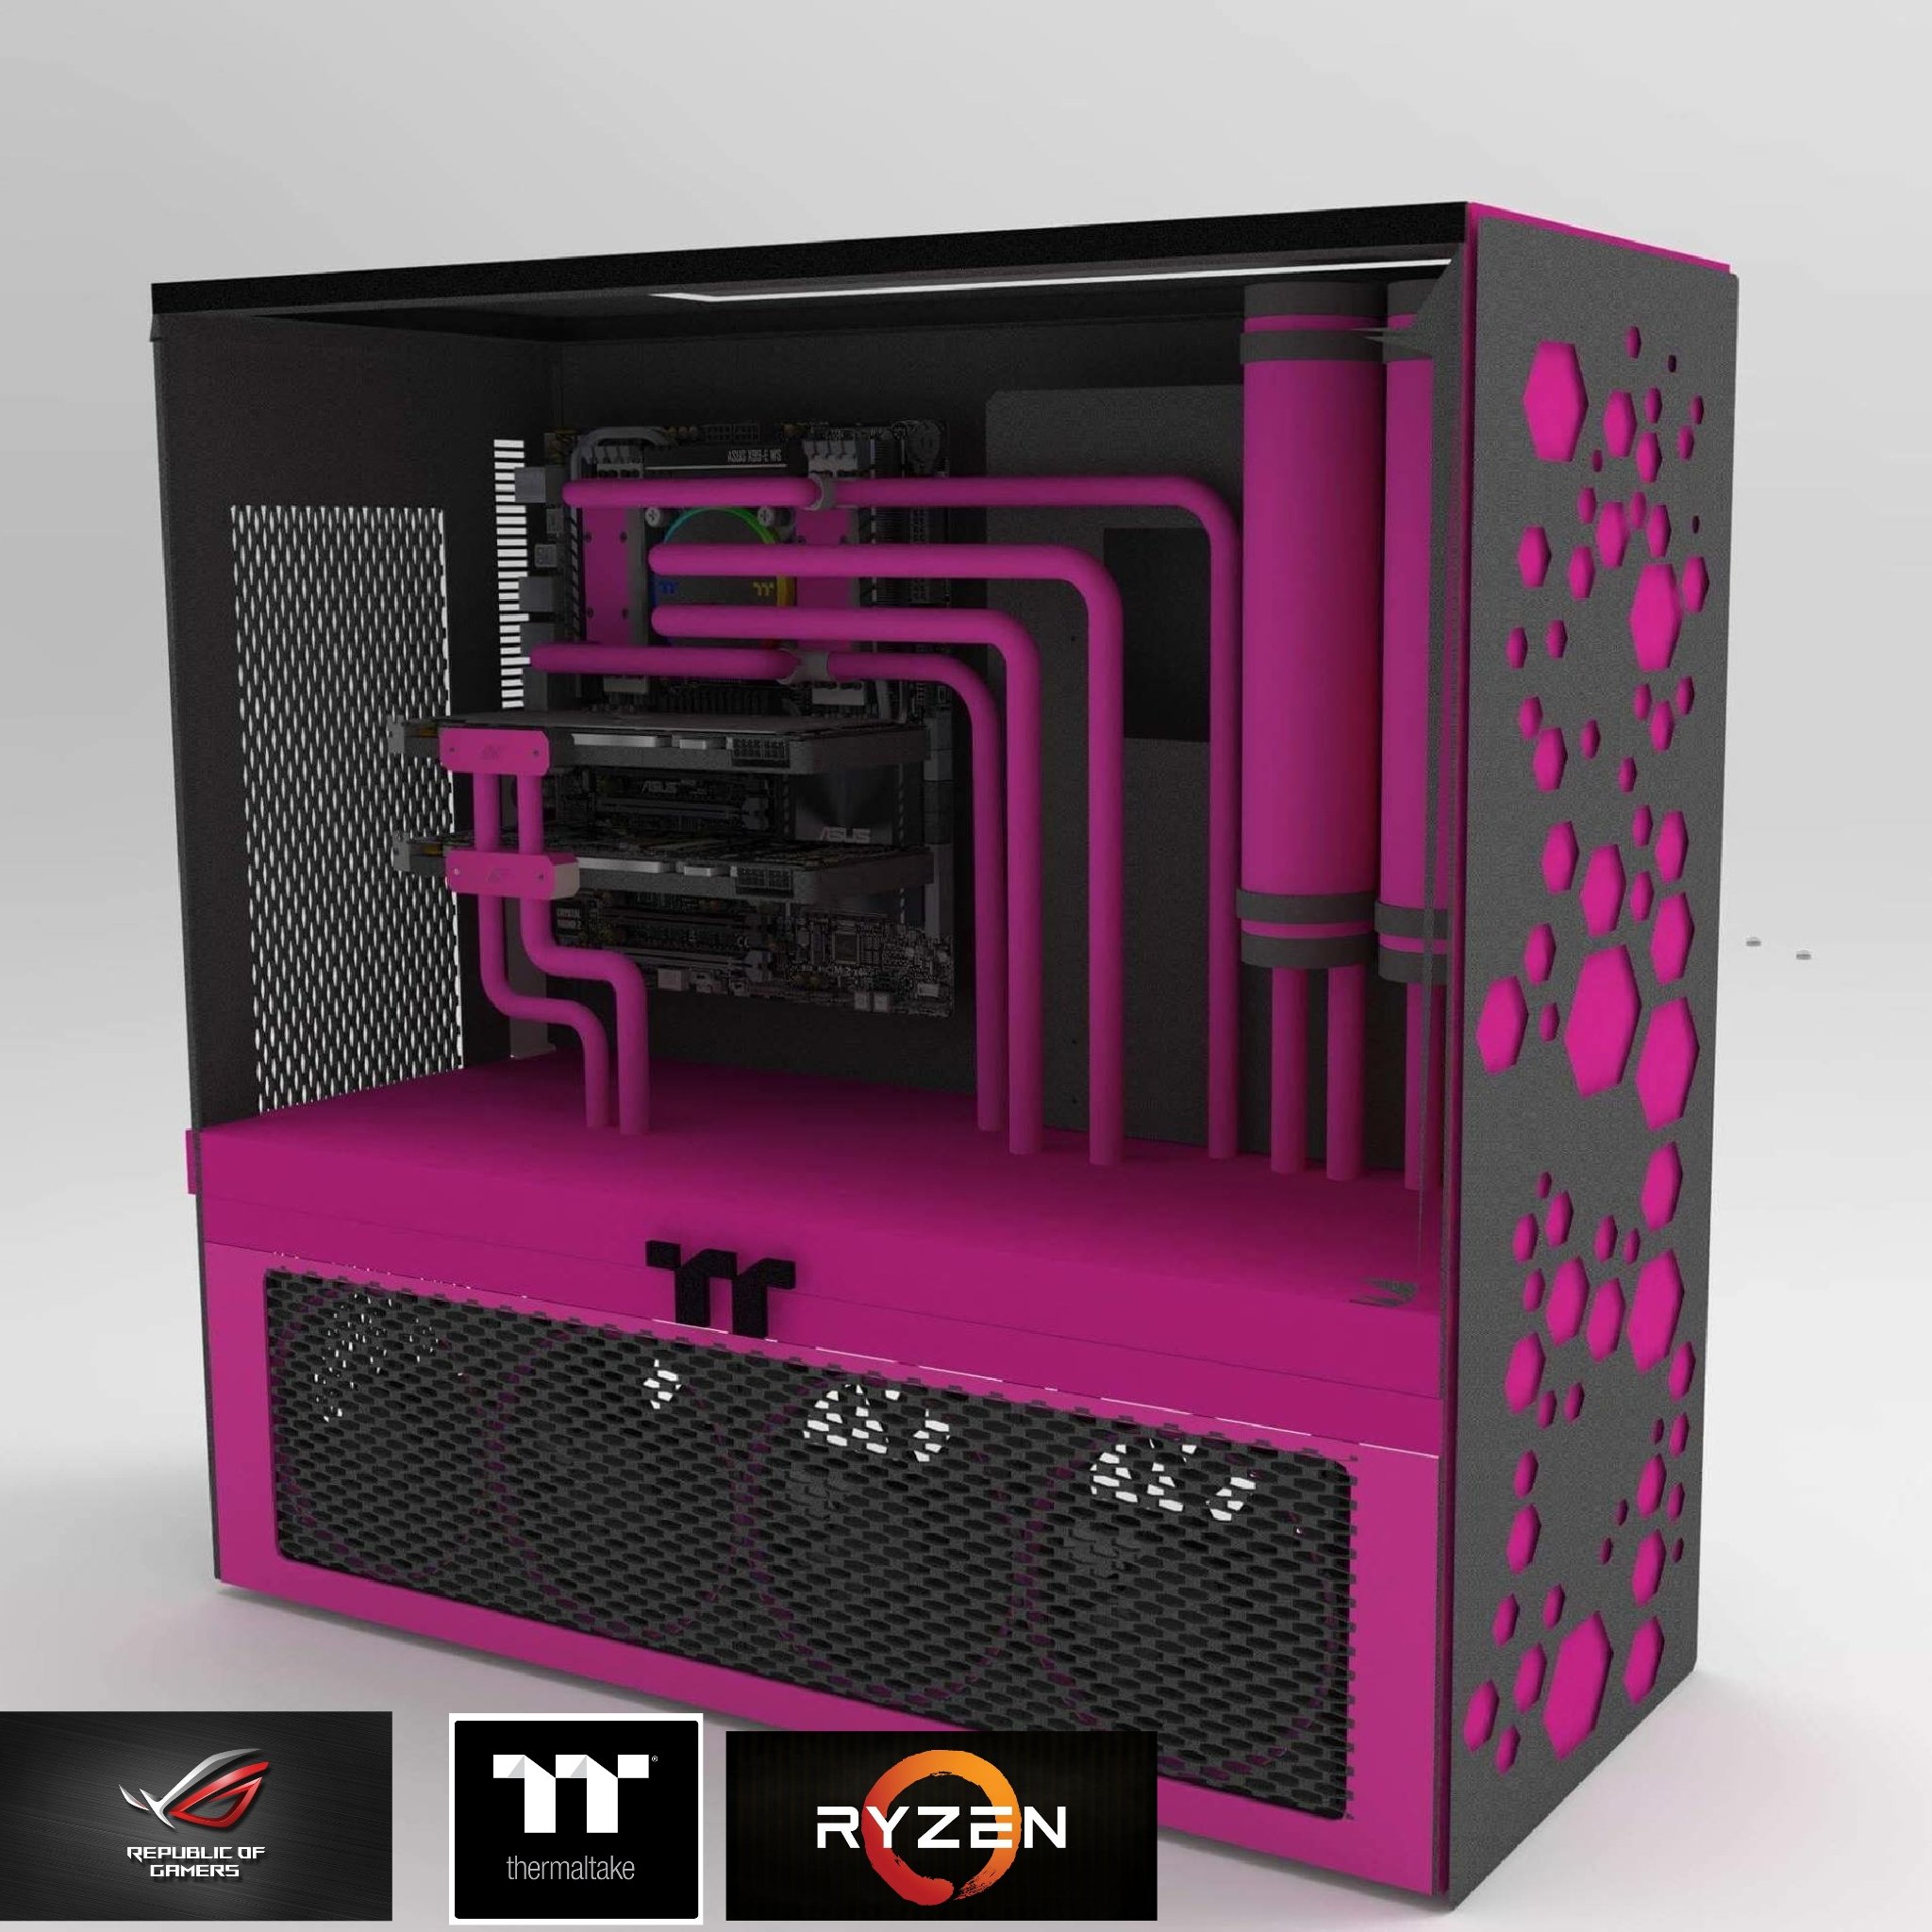
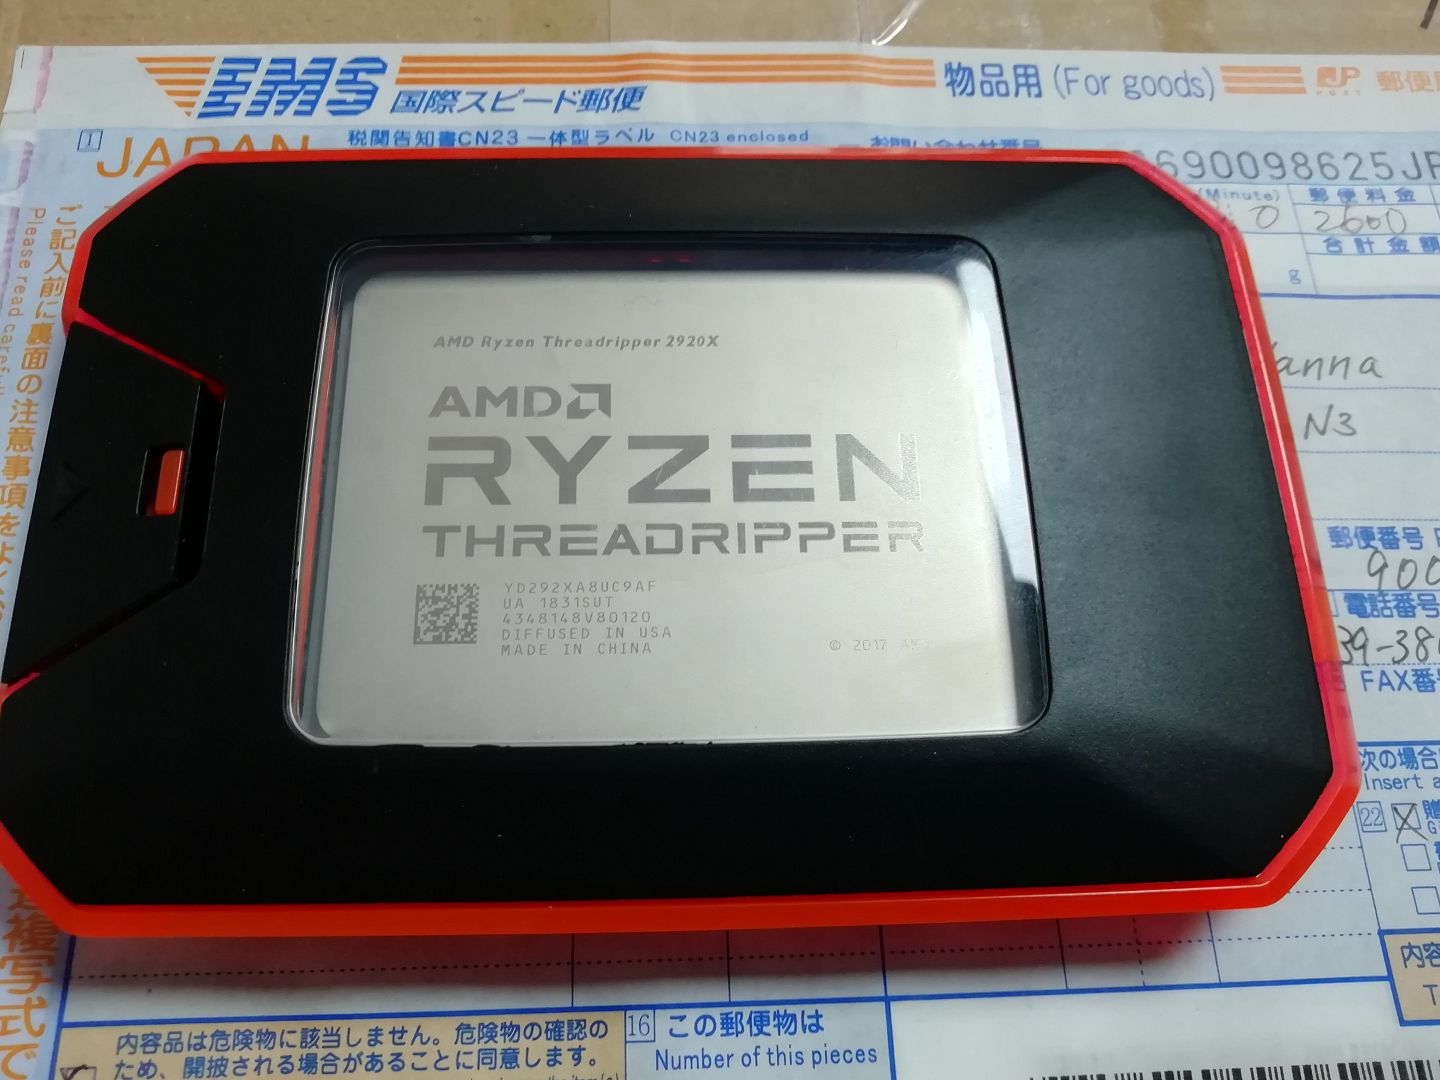
Hi all guys, I'm back to work with the next Octamachine Project. Place the approximate rendering of the Mod, The project will be structured on a Thermaltake level 20 Gt Argb case, I will modify the whole Setting of the case a little, I will use cnc-milled aluminum panels, I will make a backlit Plexiglas backlight and many other changes that you will see Going forward. Sponsors Thermaltake GoodRam Intel Component Case Thermaltake Level 20 Gt Montherboard Asus Rog x399 AMD Threadripper 2920X CPU VGA Asus strix 1070 Ram Goodram 32gb 3200mhz Watercooling Thermaltake