Search the Community
Showing results for tags 'open loop'.
Found 1 result
-
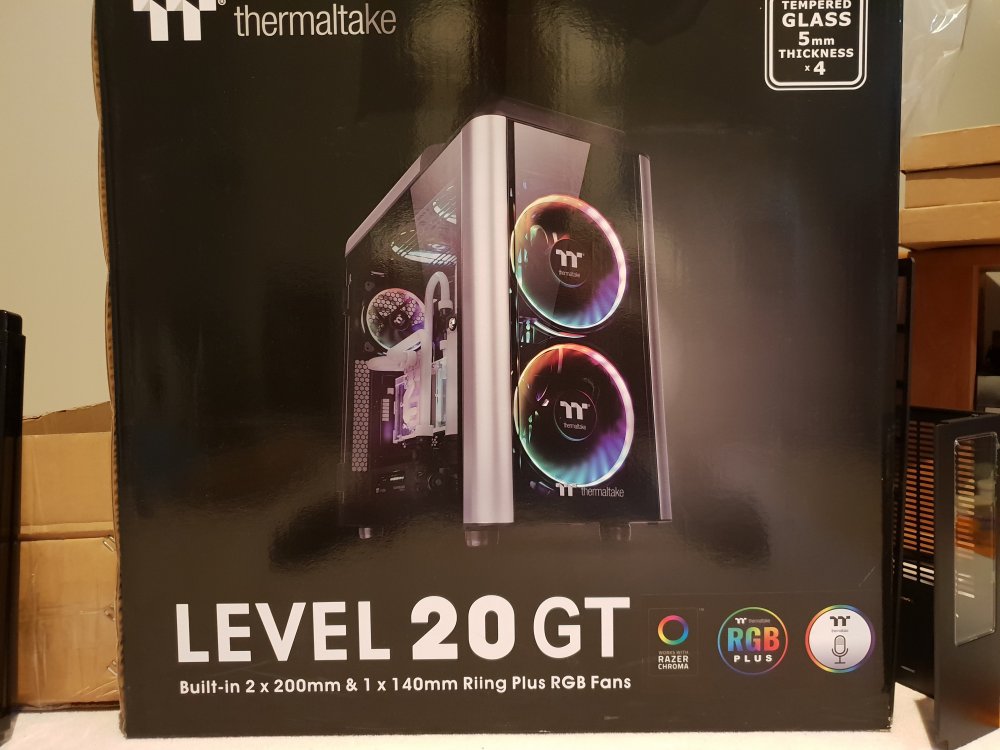
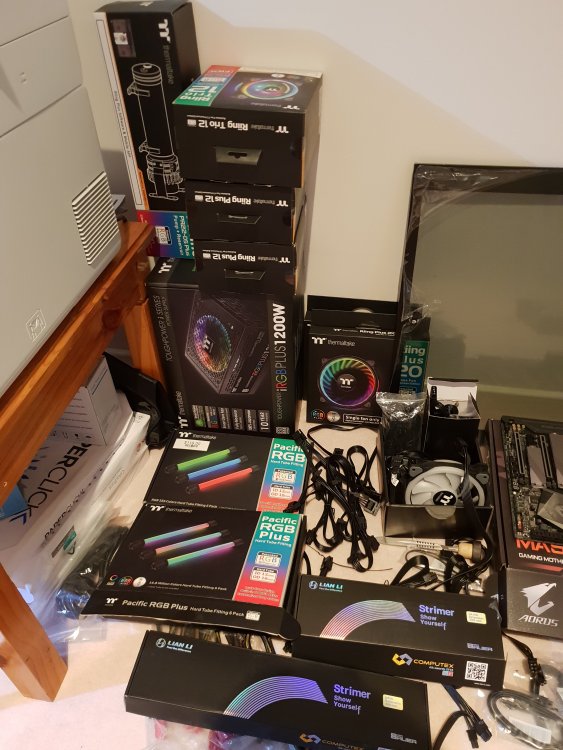
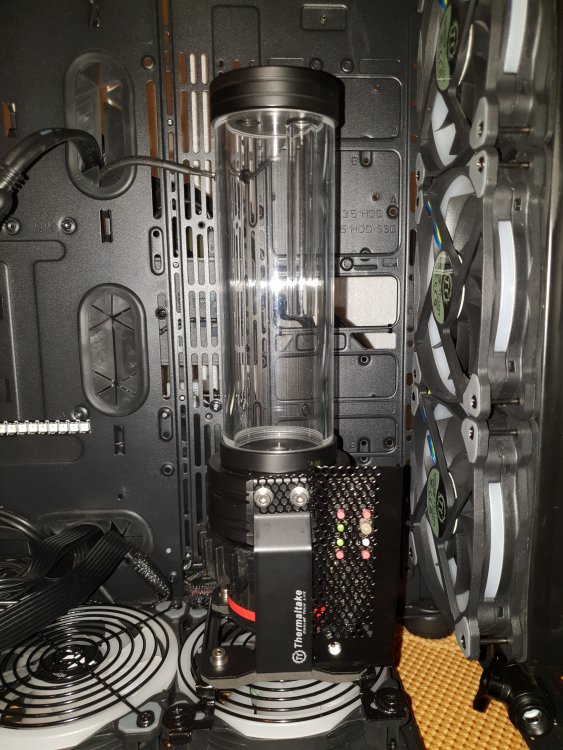
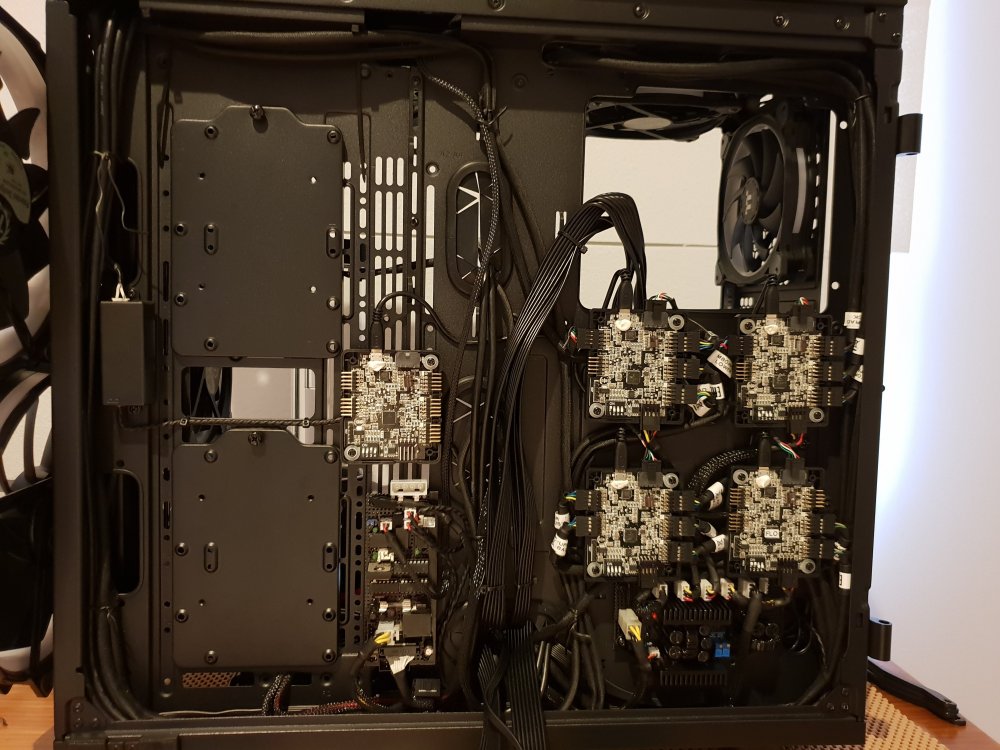
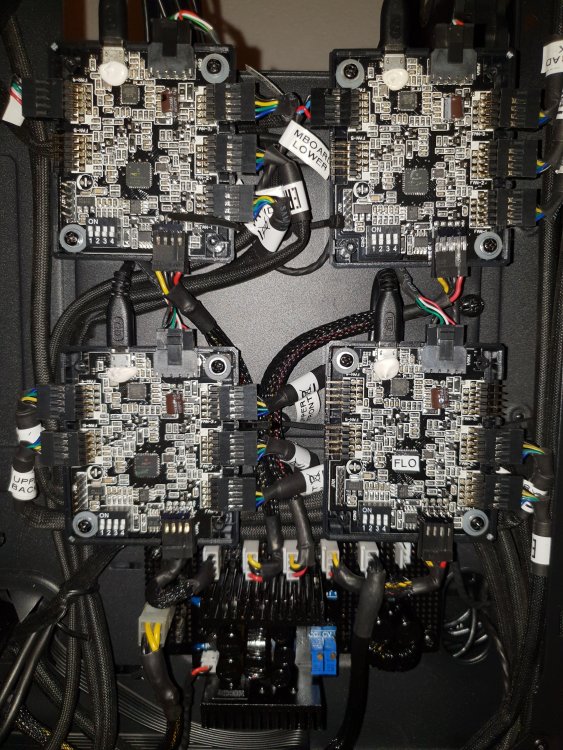
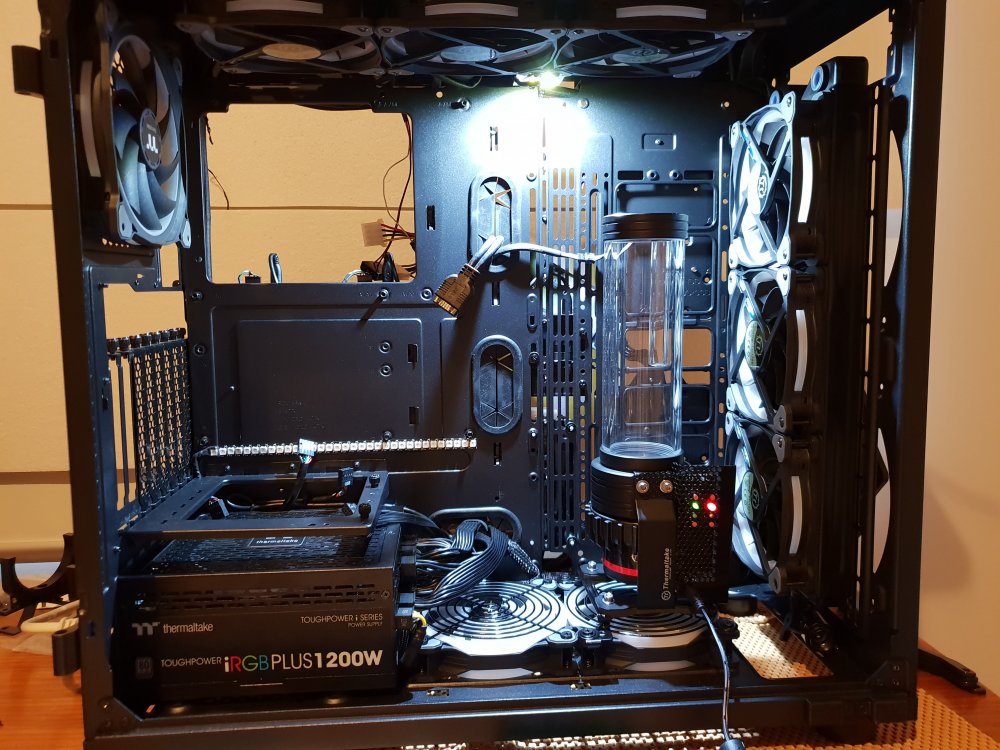
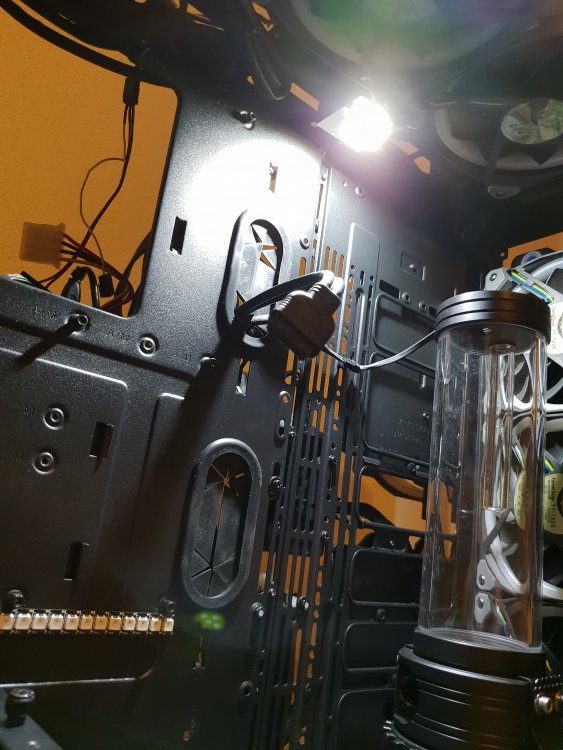
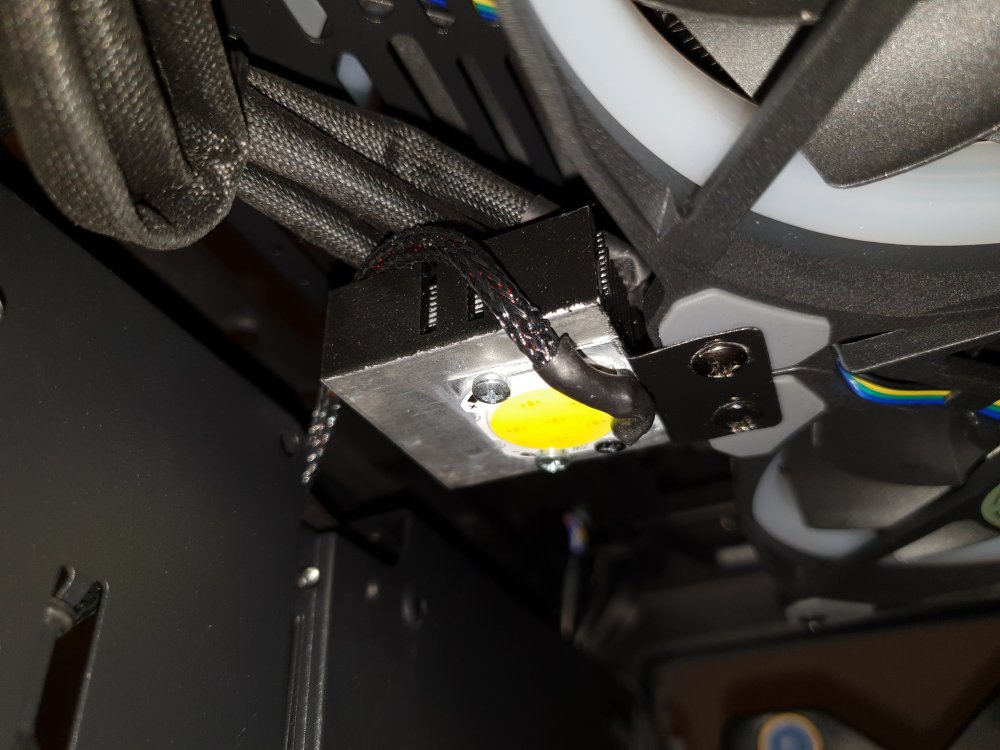
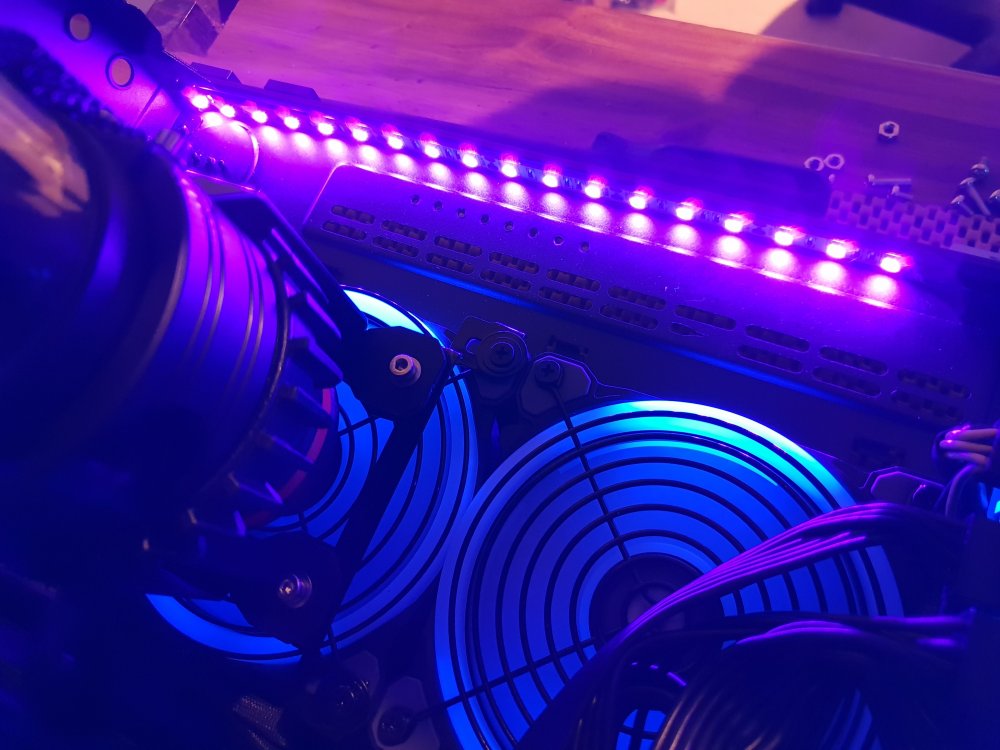
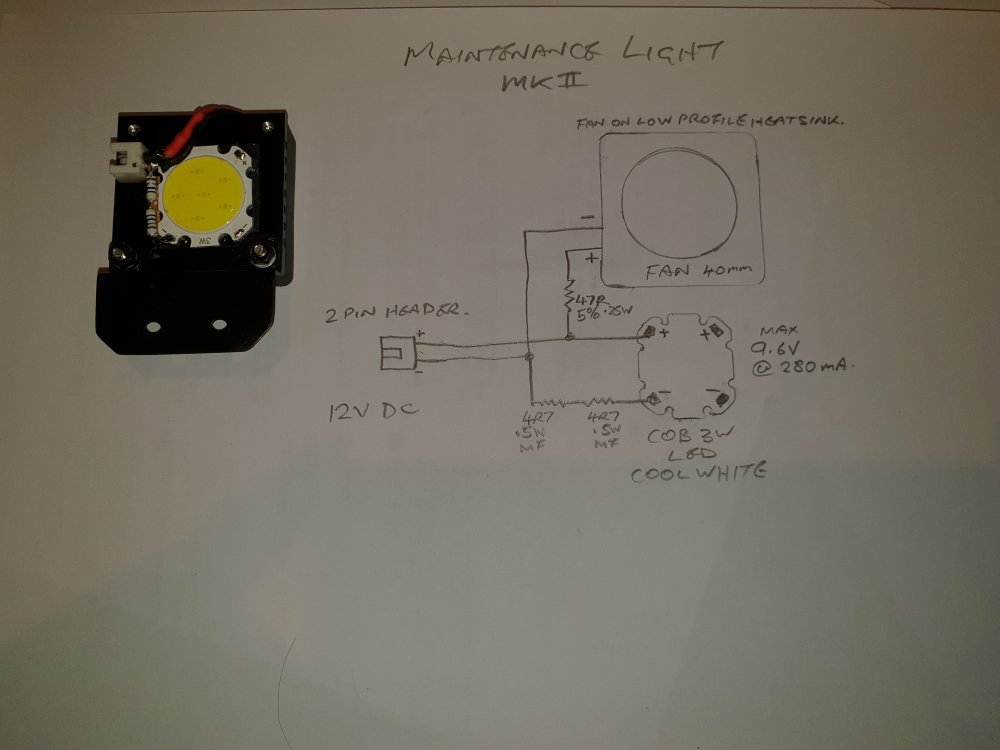
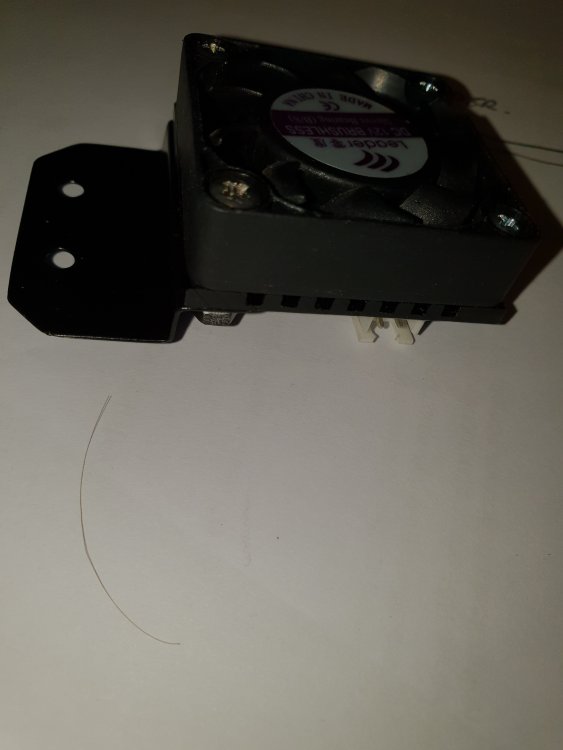
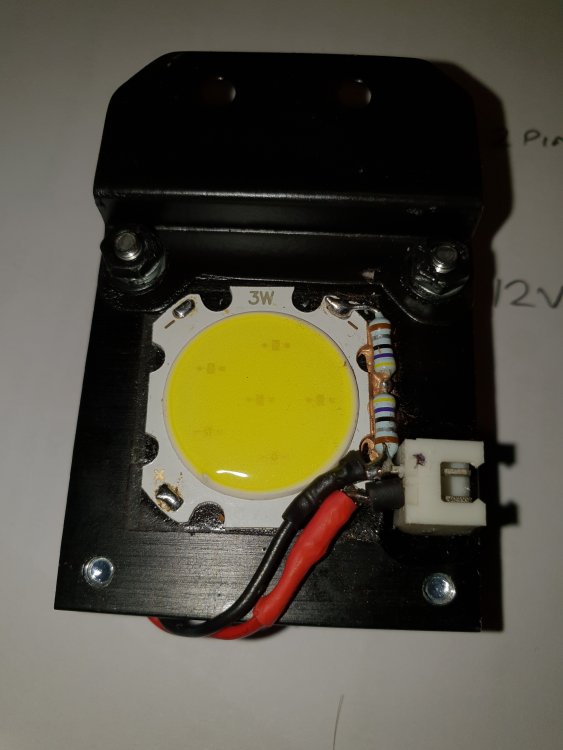
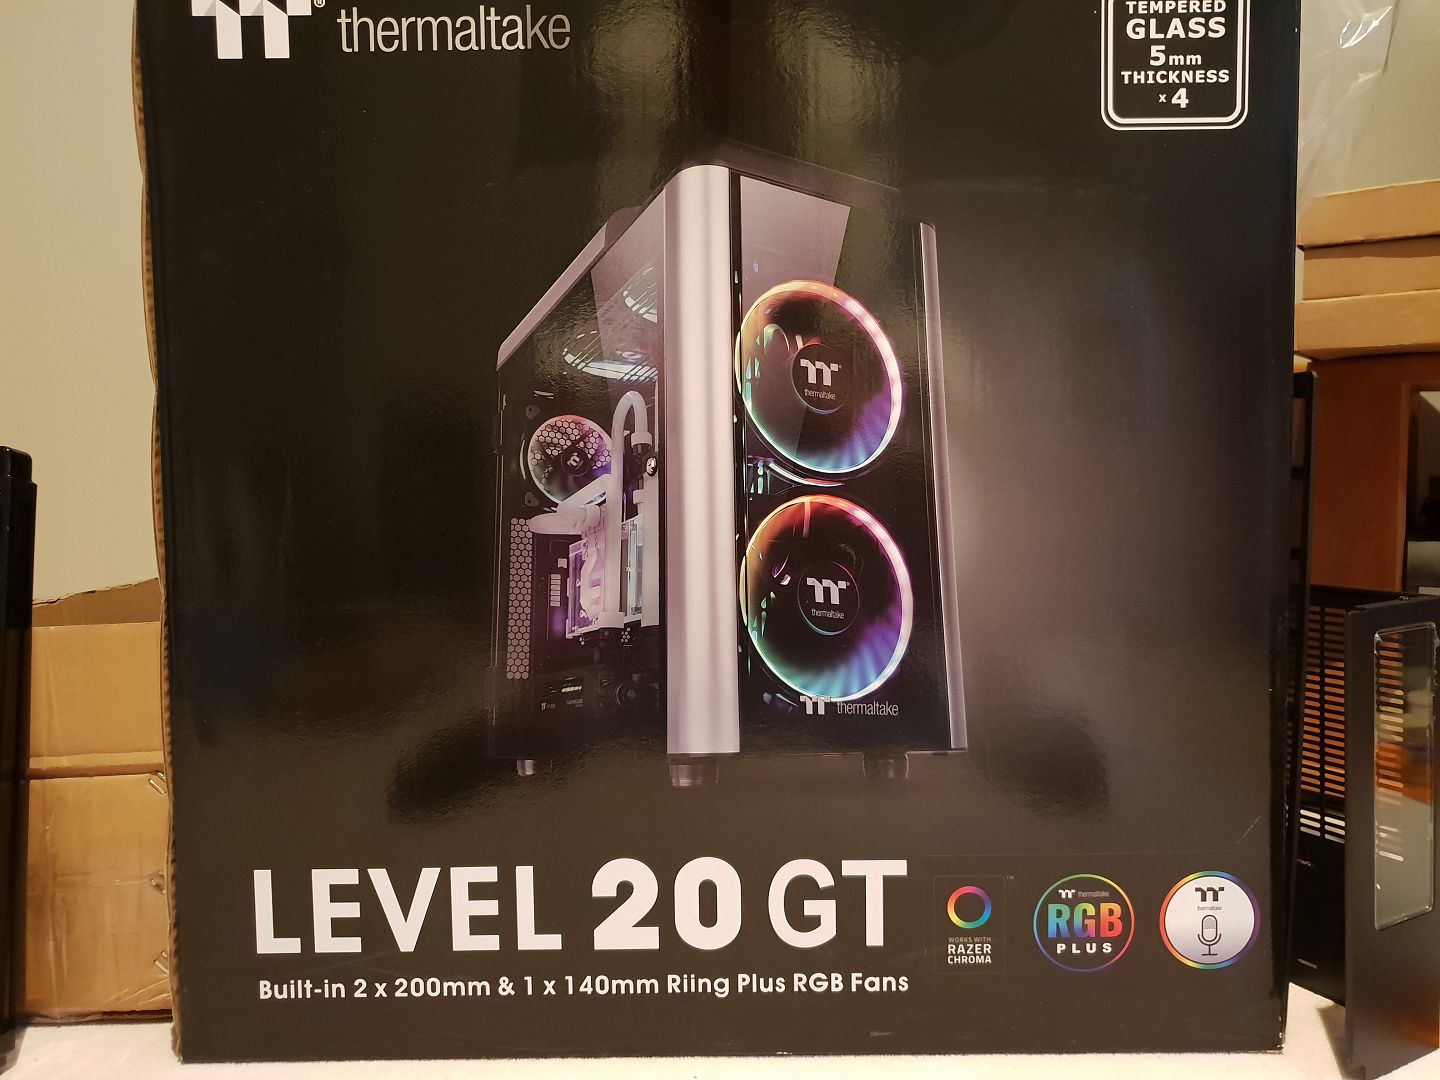
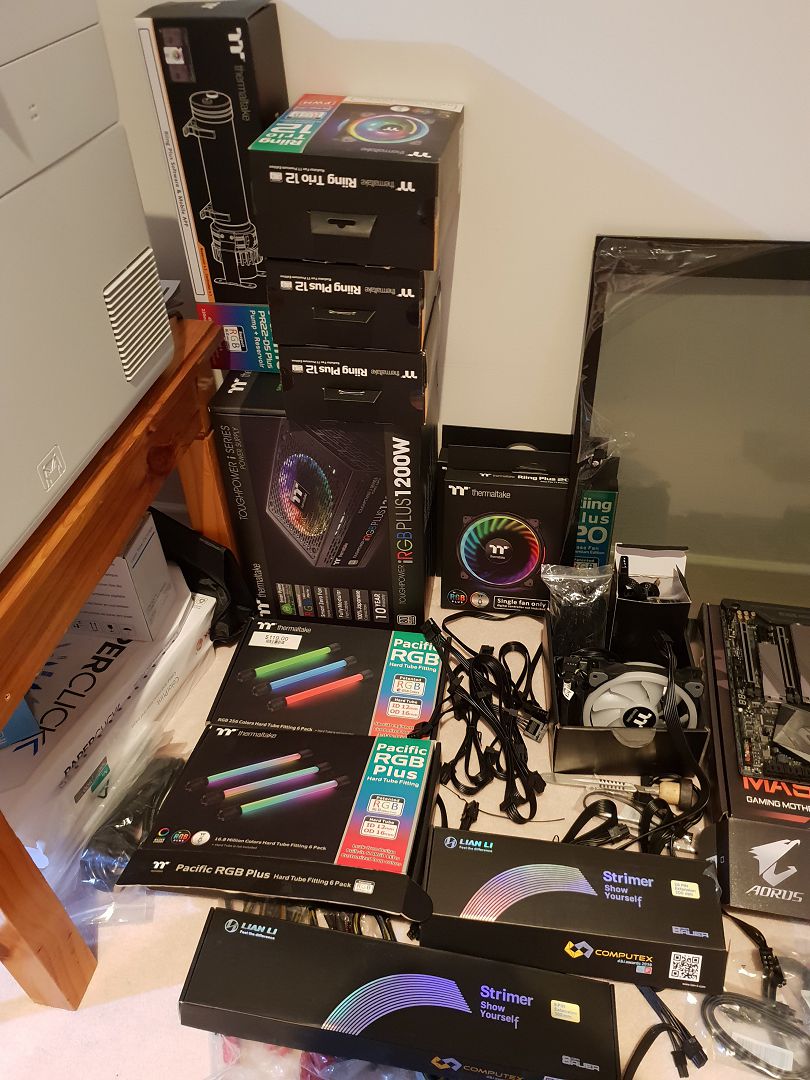
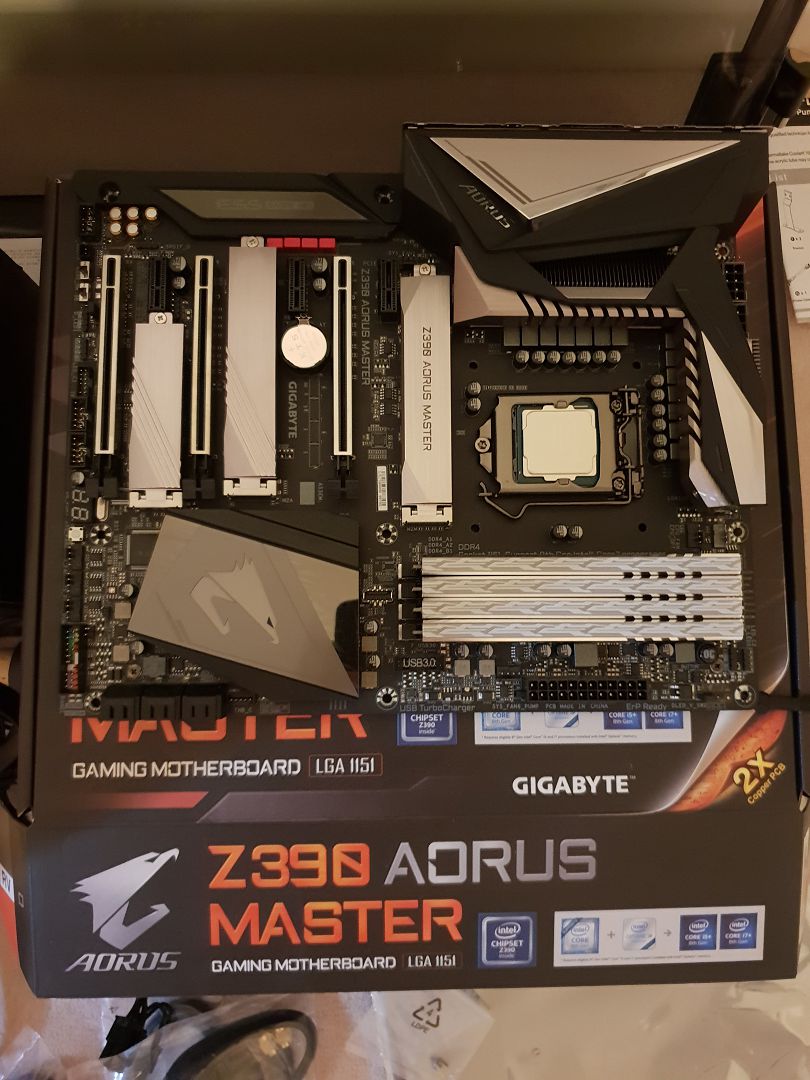
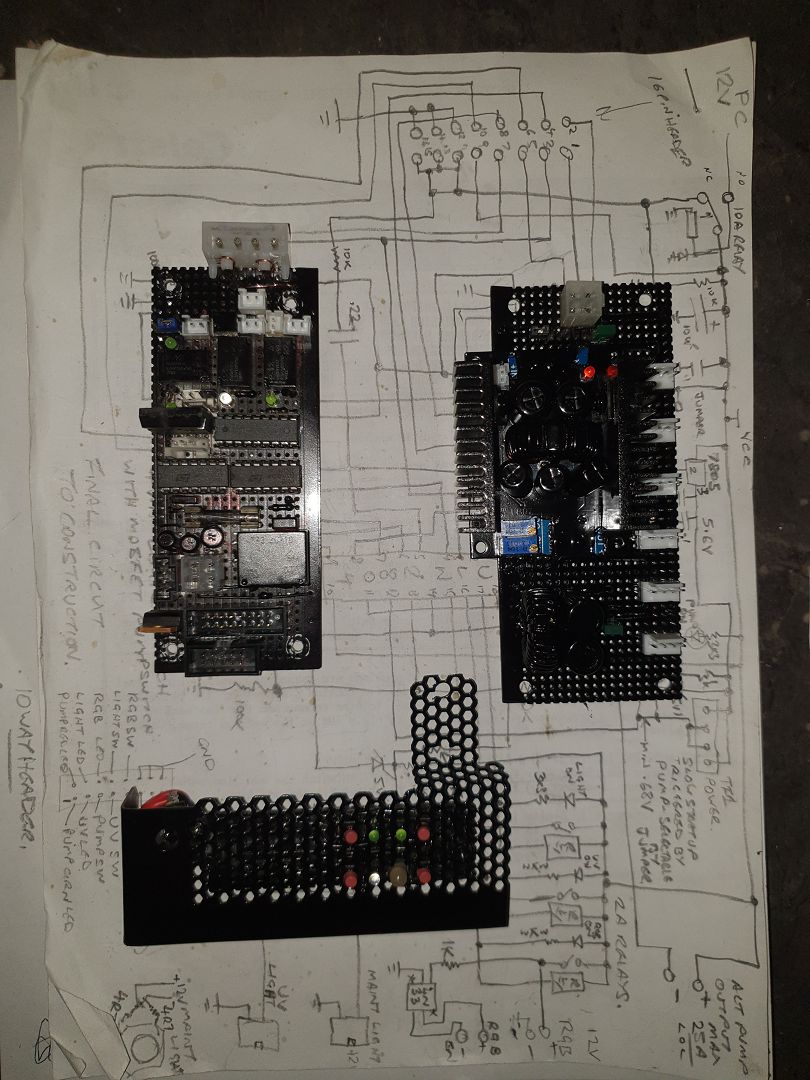
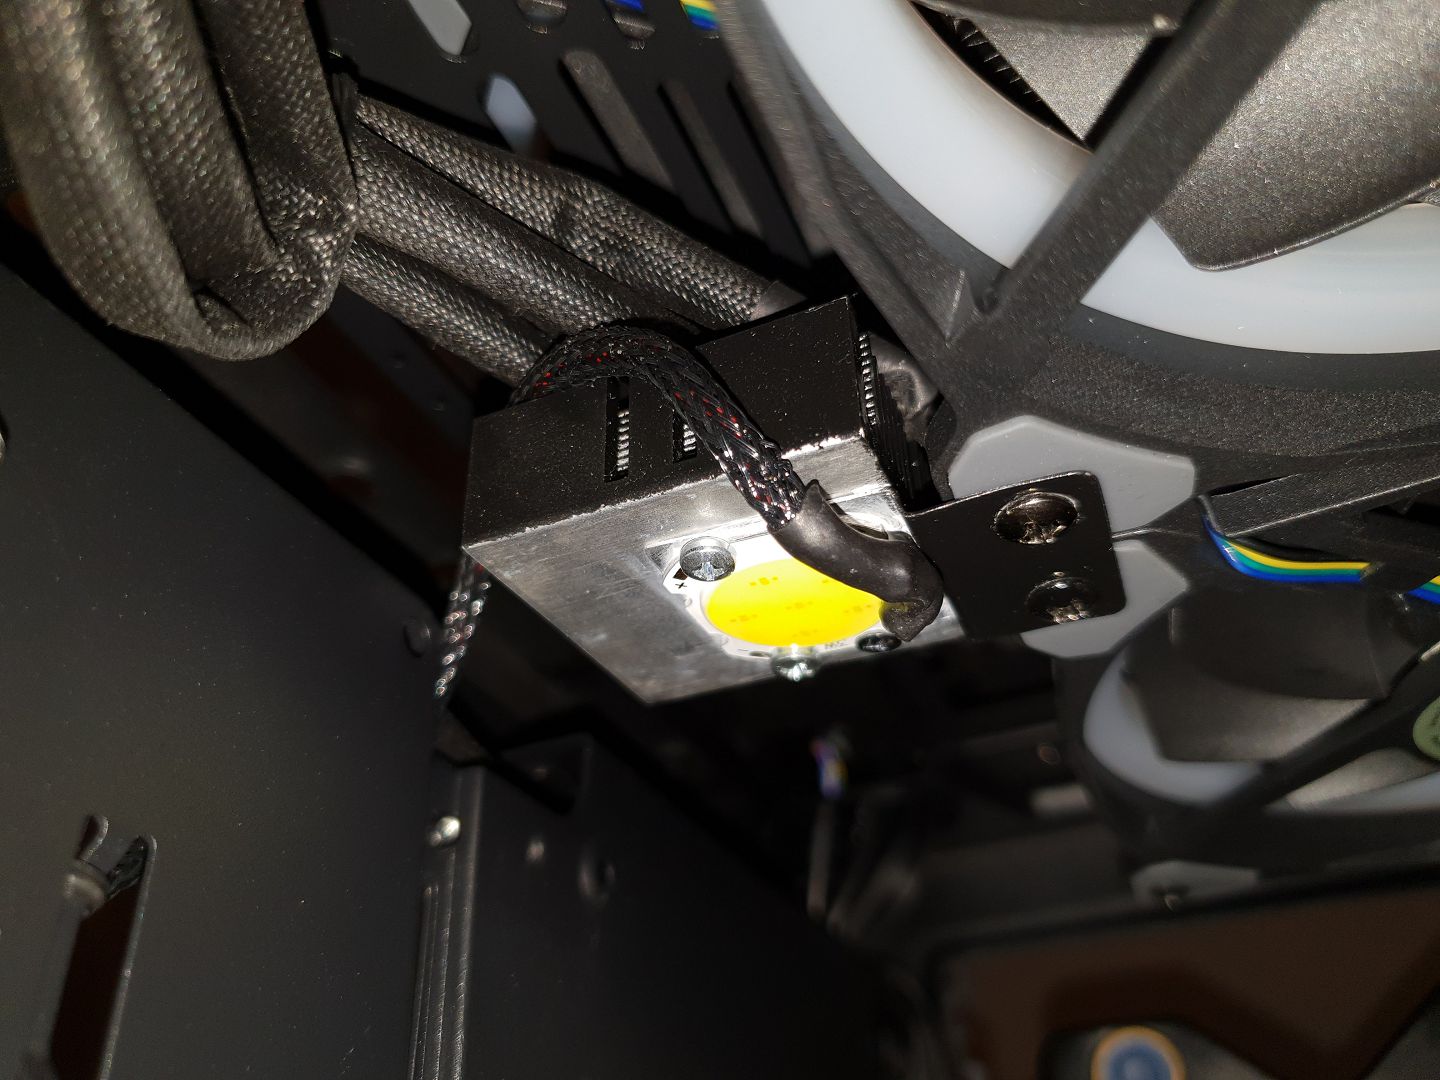
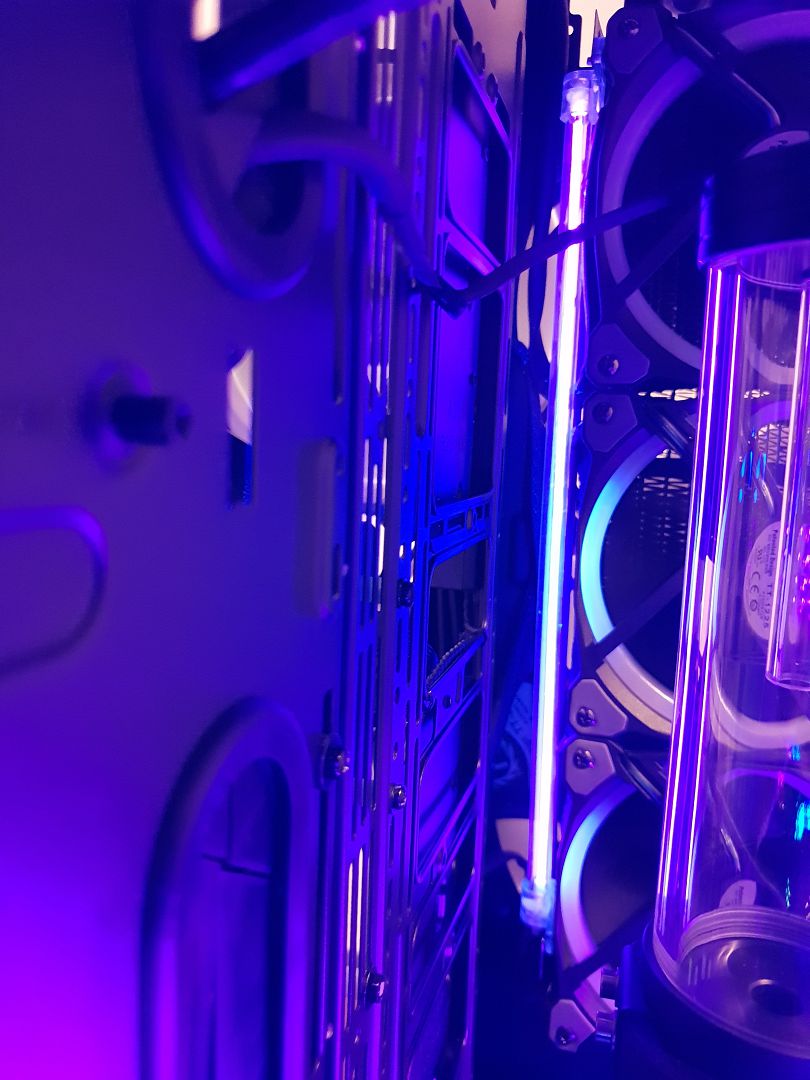
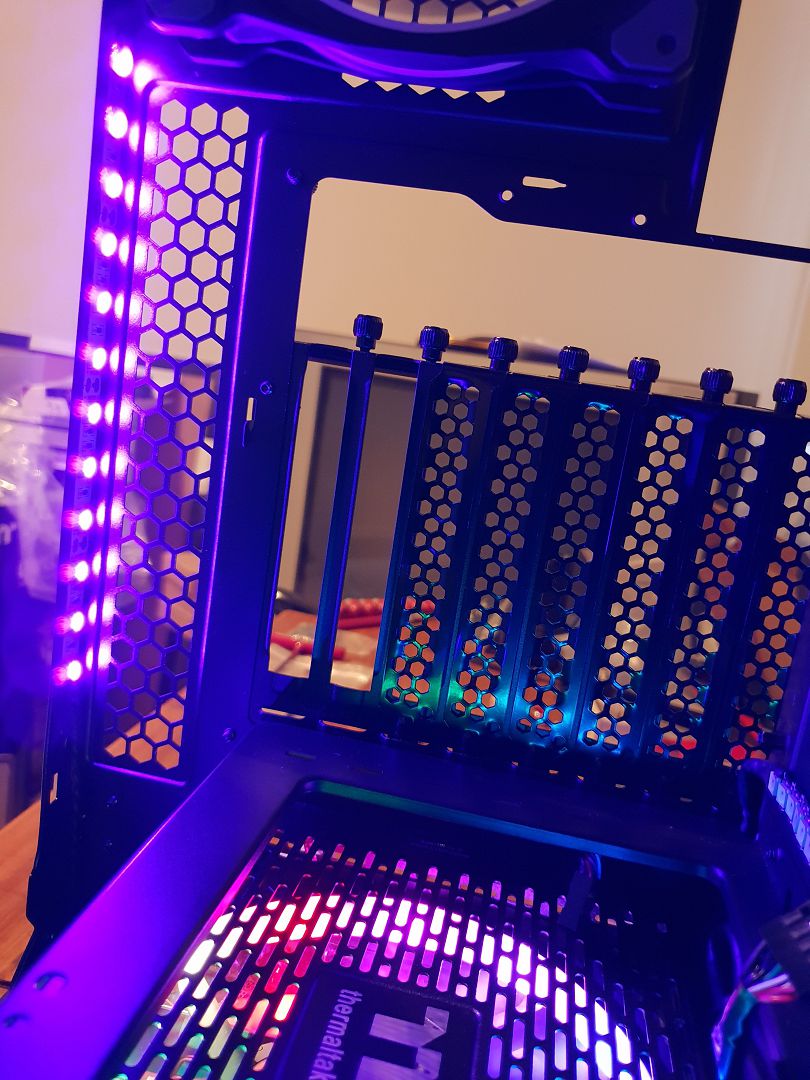
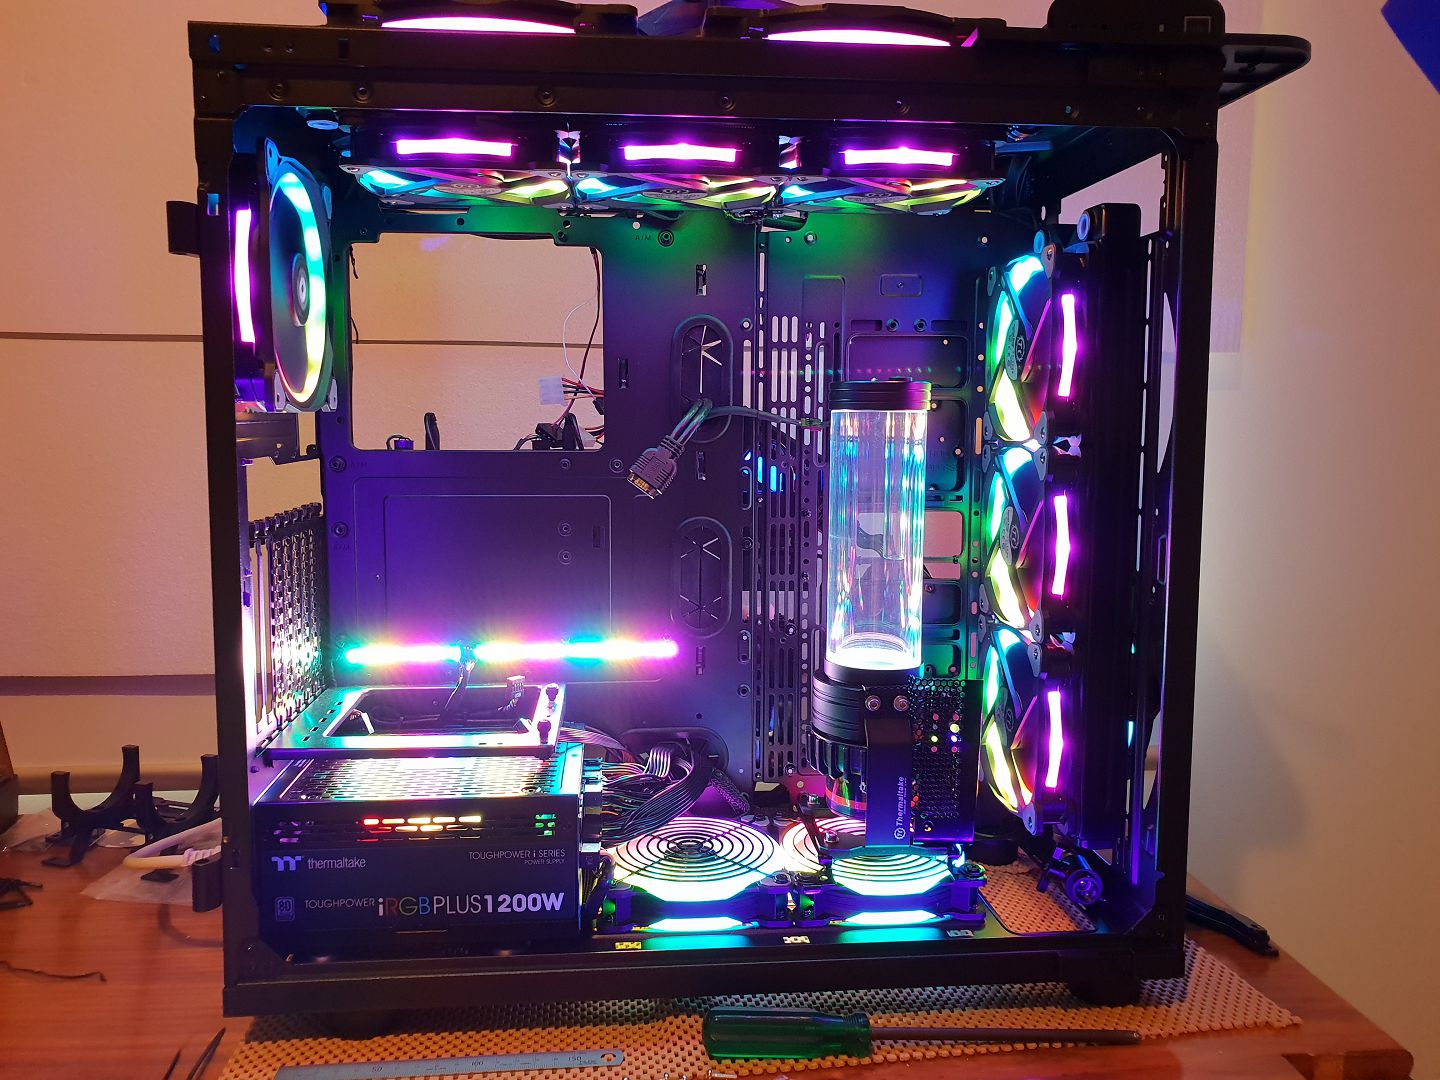
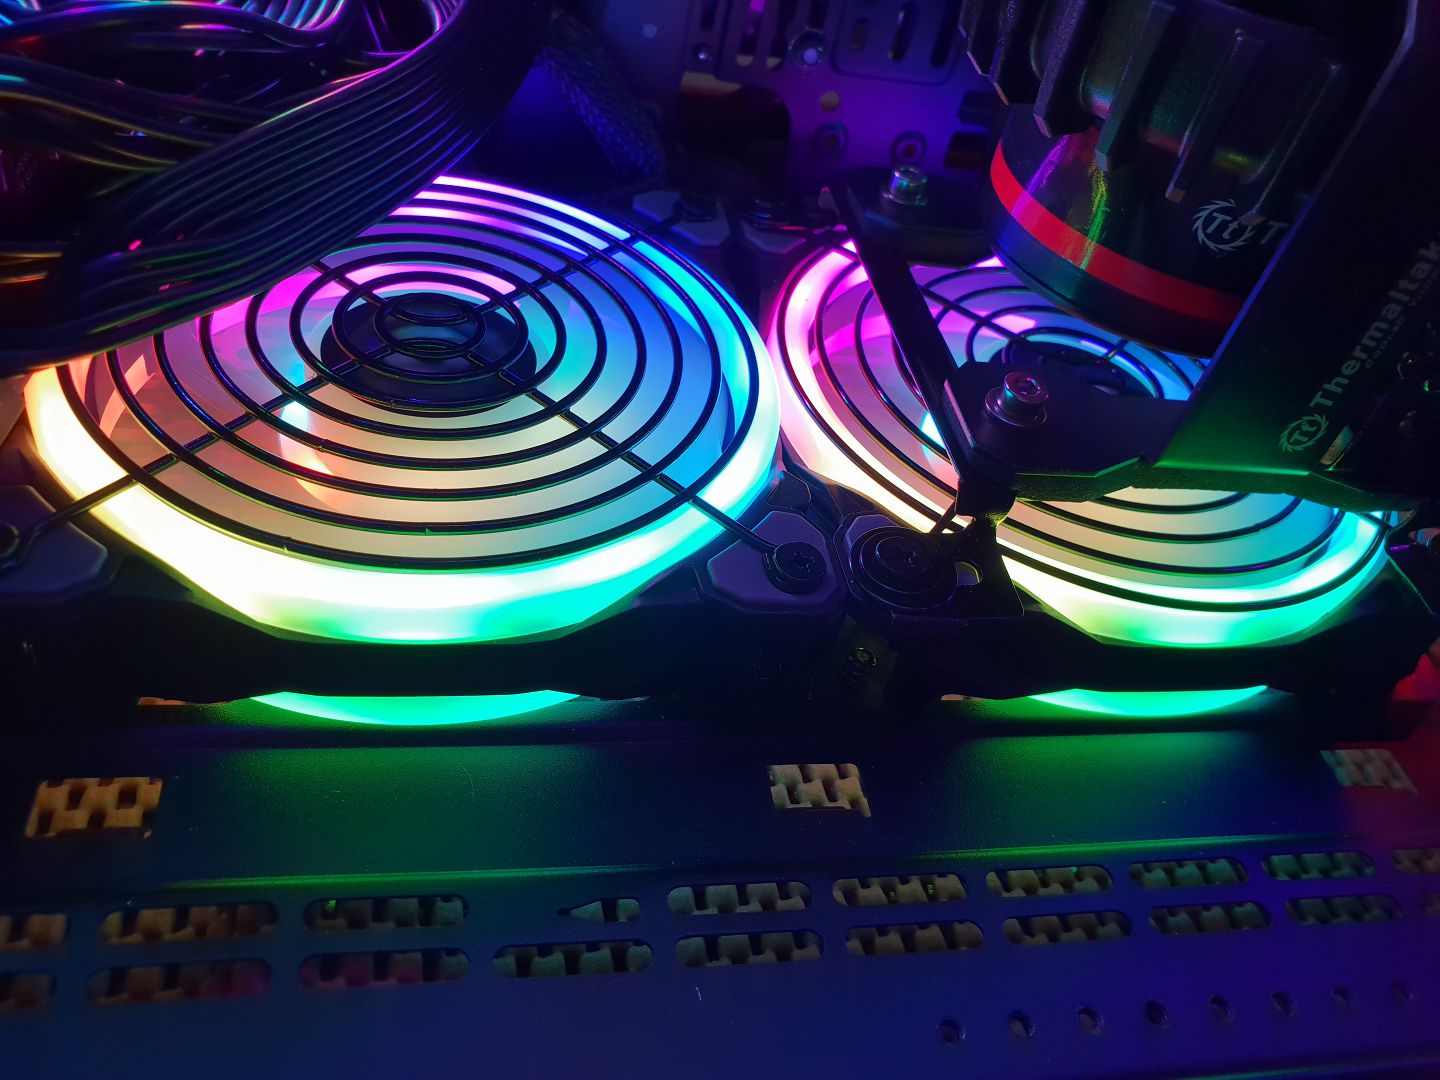
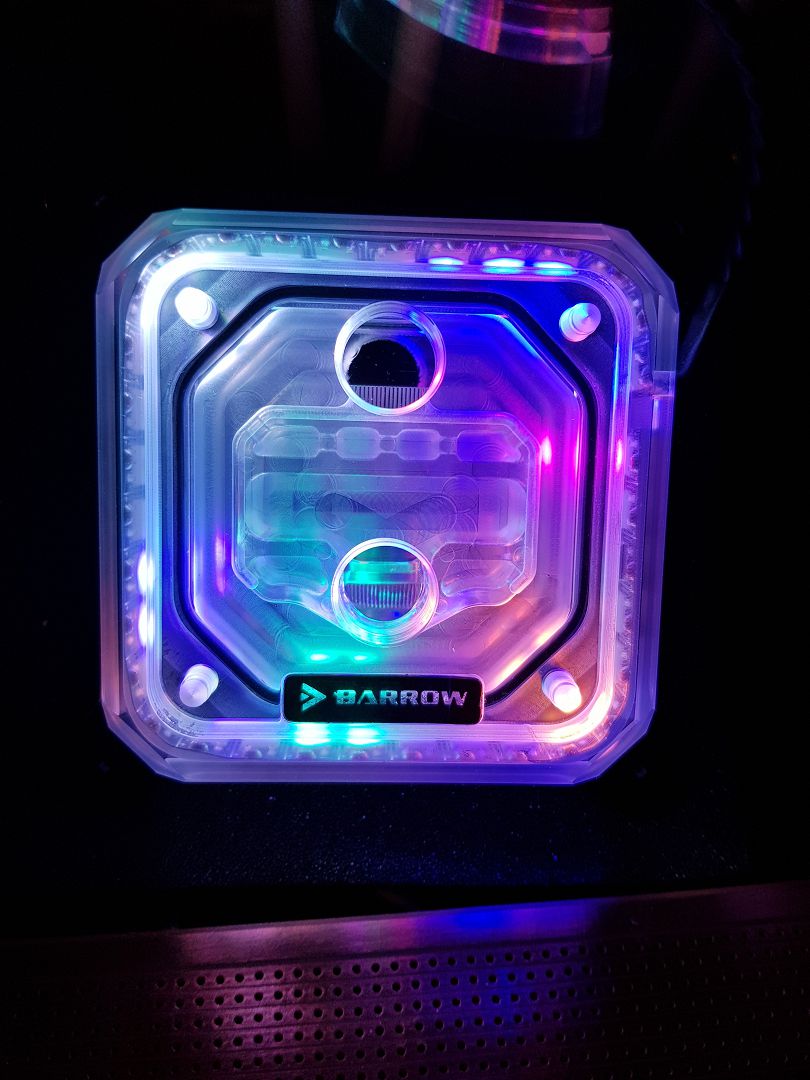
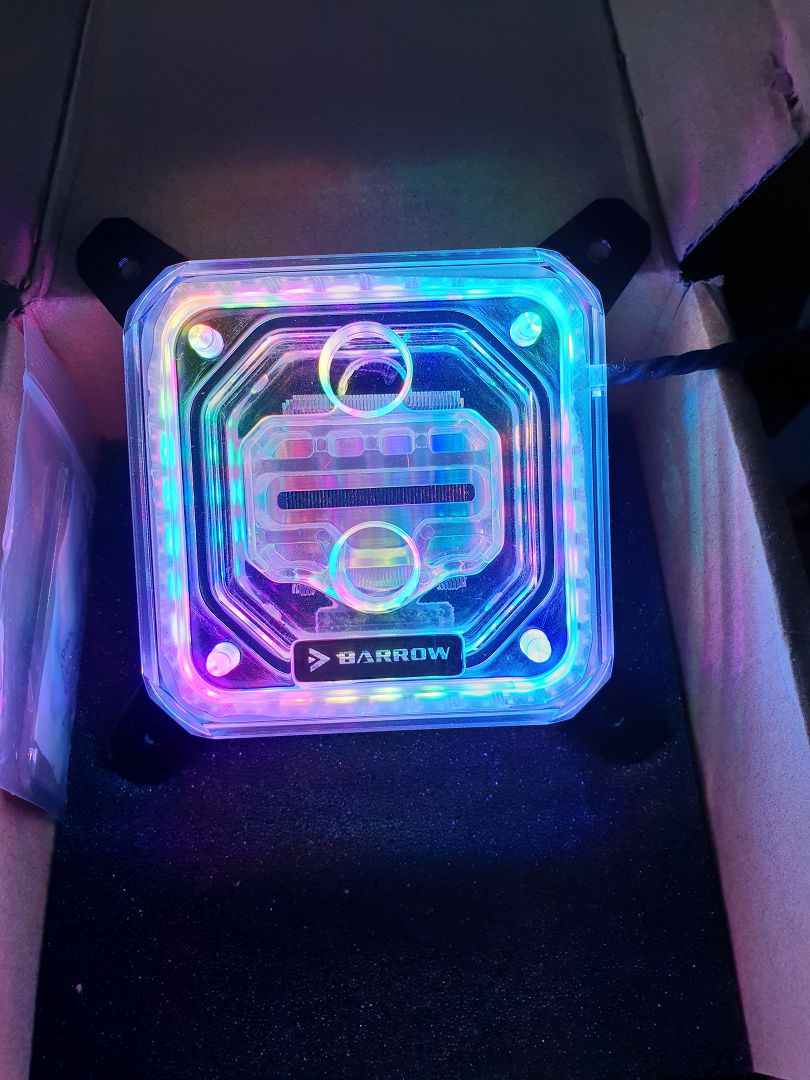
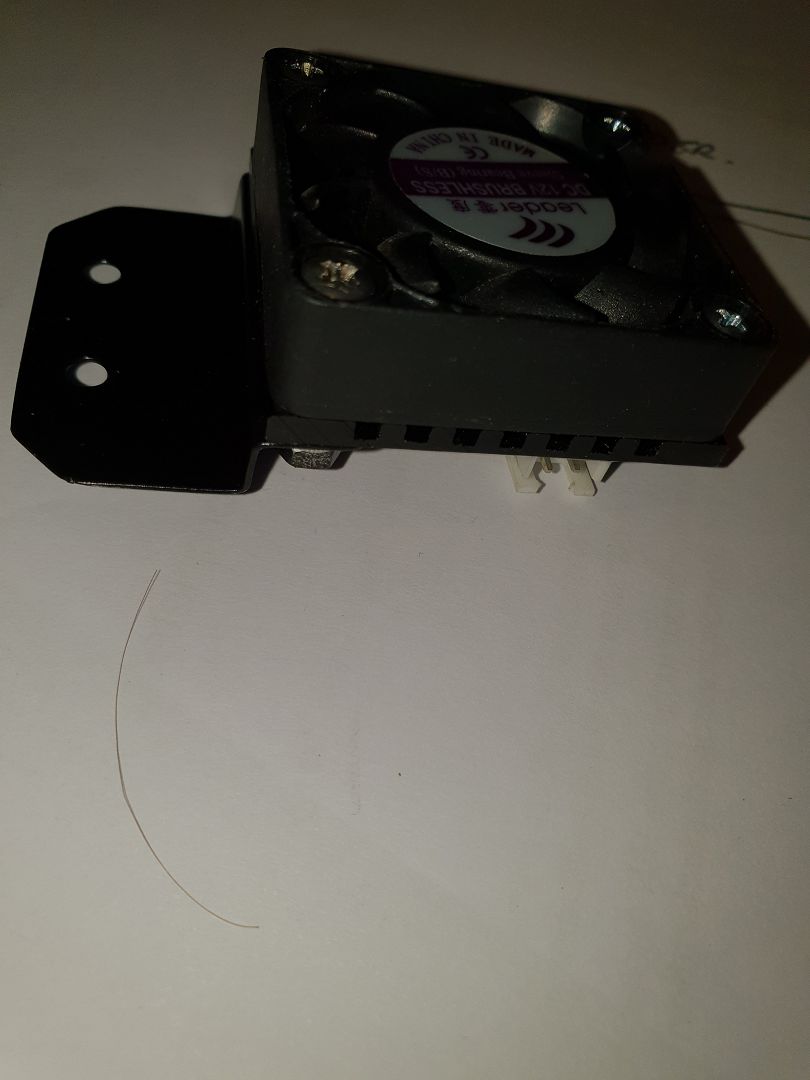
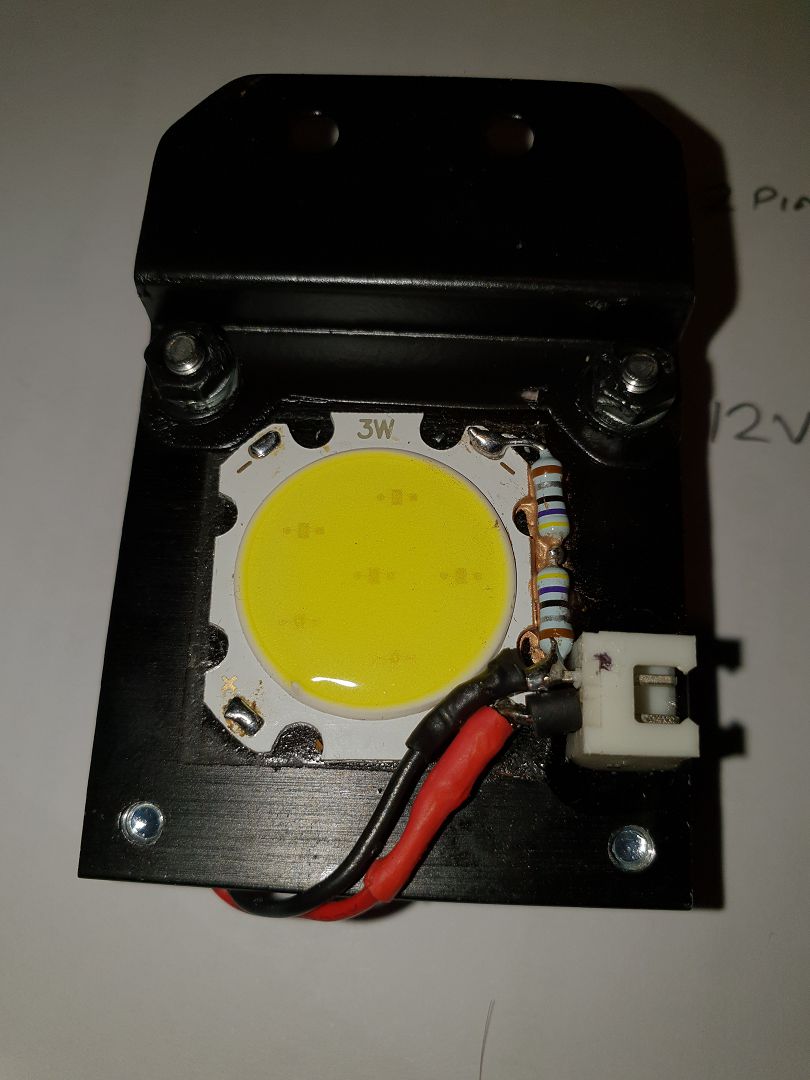
My old rig with Z97 and i5 4690K running AIO cooler was getting a bit dated at 4 years old. As I don't know how long the AIO cooler will last and VR is pushing the 4690K a bit it was time for an upgrade. Walked into Centercom and there is the Level 20 GT plus sitting on the floor in front of me in a very big box. The 200mm ARGB fans got me, as its such a nice case thought I might as well go all out with ARGB everywhere and its perfect for my first open loop which might as well be nuts as well. Scroll straight to the bottom of this blog for the finished product. What to stick in it took a bit of research and based on price and availability ended up with this: 2 x 360x25mm copper/brass radiators from ebay 6x Riing Plus 12 fans for the radiators Another 2x 200mm Riing Plus 20 fans for the top of the case 3x Riing Trio 12 fans for the bottom of the case and 1 out the side TT Gaming riser cable PCI-E 3.0 X16 200mm Pacific PR22-D5 Plus pump Pacific RGB Plus Hard tube fitting set Pacific RGB Hard tube fitting set Pacific TF1 Flow/temp sensor Pacific Flow Indicator 2 iRGB Plus 1200W Power Supply TT Ice blue and Acid green concentrates 2 litres of TT clear coolant Gigabyte Z390 Aorus Master motherboard Gigabyte Aorus 16Gb RGB memory kit TT Toughram RGB 32Gb (2x 16Gb kits) i5 8600i-k CPU (Initially anyway) i9 9900K CPU Upgrade Samsung 970 Evo NVMe M.2 500Gb drive (For system only) Seagate Barracuda Pro 6TB (for game storage) Hard drives and iGame GTX 1080Ti from old PC Lian Li CPU and PCIE Strimmer RGB Cables Bykski GPU water block to suit above Barrow CPU water block (which I've polished to a glass like transparency) Heaps of PETG 16mm tubing and bending tools Heaps of G1/4 fittings, extenders, adapters, couplers and plugs. Turned out to be quite a list in the end which has been sourced through Centercom Bundoora, TT Direct and ebay. Just a little bit of TT stuff....thought I would keep the theme. Aorus Master....couldnt wait for the extreme water cooled version and besides this cost more than the processor, which is a first for me, didn't want to know what the extreme will cost. Edit: Motherboard, processor, memory and Evo HDD were tested to bios with a heatsink and fan to verify these parts were ok before any assembly commenced. PART ONE RGB Design Concept As the case, leads, motherboard and mostly everything else is black I decided to make everything where possible...black thus Ebony Bliss also as everyone else gives their build blog a name so will I. That's a lot of black so Its going to need balls of RGB lighting to even see it. Bring on the 13 Riing fans and other RGB parts listed above. I've also included ARGB strips under the front and lower edges of the motherboard adapted to use the TT Controller plugs. The CPU and GPU blocks both have ARGB strips also adapted to TT plugs along with the Strimmer leads. All this RGB requires power and a lot of it, my calculations averaged around 10A @ 5V and I've added to that. While the TT power supply can deliver 30A @ 5V getting 10A out of it with Molex plugs gets messy plus I didn't want to deny the motherboard any current so a power distribution rethink was required. The UV concentrate looks excellent....suppose it will need UV lighting then. Bring on the cold cathode 300mm tube hidden down back edge of front radiator plus UV LED strip along inside lower and back edges of the case, these also need control. Testing of the pump made me realize that you need control of it to purge out the air etc so some sort of switch control is required. Furthermore this will need to be done preferably without the motherboard, drives etc powered up as many start/stop cycles are required. I could just use a toggle switch or similar but I want this a bit fancier so might as well build something. When working on the PC its always hard to see anything especially when everything is black on black. So a maintenance light to illuminate the entire case would be most excellent indeed. So requirements: Logic toggle switch control of pump, light, UV and RGB lighting (if possible) Ability to run at least pump and light from alternative power supply 12V to 5V converter and distribution board with custom leads Make a very bright 12V maintenance light using a 3 watt COB LED Upper Left - Logic controlled switchboard with MOSFET switched pump and 3x switched relay outputs Upper Right - Power Distribution Board with 12V to 5V 300W converter and 6x output headers Bottom - Pump mounted Master Switch Panel with 4x tactile switches and LEDs (pump LED is a dual colour green/flashing red that was in my breadboard, UV LED is a 3mm UV LED and the other 2 are green 3mm for RGB & maintenance Light functions) As I couldn't find anything like I wanted on eBay I built it instead, the above pics show the fruits of my labor with the 4 way logic switch board, pump mounted master switch panel and TT power distribution board. Discreet logic was used due to laziness however a microprocessor such as PIC or arduino would be better. The switch panel also has a DC power connector to allow a 12V 4A or so power supply. When plugged in the maintenance light comes on instantly and all other functions off, pump, light and UV can be operated in maintenance mode but not RGB as the maintenance 12V is isolated from the PC. In normal running mode the pump, UV and RGB are triggered but not the light. An additional switch board using blue illuminated tactile push button switches will be made to install at the top front of the case to mimic the function of the internal master switch board. A 10 way header is already installed to the switch board for this provision. Very careful drilling required for that exercise. Edit: I did find something on ebay in the end, if someone wants to do something similar with a lot less work search for 4 channel touch switch. The power distribution board consists of a 300 watt buck converter from ebay with an additional output filter and 6 output headers. This will supply up to 6 TT controllers with 12V & 5V and up to 15A or so on the 5V rail all from the PCs 12V supply only. An enable header was added to allow opto coupled control from the switch board however without 5V the TT controllers run the fans at full speed so that could be a problem. Under full load the buck converter only gets warm. Careful not all buck's on ebay meet their specs, the first 200W buck I got screamed horribly and blew up at only a 7A 5V load TT controllers mounted to 3rd hard drive bracket on standoffs as double sided tape wont cut it and surfaces are uneven. Leaving the covers off as the cute little boards are black and I like the exposed electronics on black look. This will provide up to 25 controllable ports for ARGB with the maximum capability of 30 if required. So far I have nicked a lot of parts off old PC peripherals including but not limited to: 2x motherboards for headers, heatsinks, capacitors and other assorted components 2x Floppy drives for power headers 1x stuffed power supply for case steel, massive MOSFET, large choke and heaps of bits 1x DVD burner for header And more The maintenance light consists of nothing more than a 3W COB LED with 2x 4R7 resistors in series on 12V. Works very well and lights up the whole case very well but gets very hot so I bolted it to a chip set heat sink and it seems fine without the fans running. A small bracket I made tucks it up level with the radiator and prevents it blinding you. Edit: I wasnt happy with the first maintenance light, got to toasty in ambient conditions...bring on Mk2 Found a small fan on a low profile heatsink, epoxyed a 2 pin header to the heatsink and slowed down the fan, works perfectly. LED is off center as the sticky pad already was there like that, small bead of compound under the resistors. Yet another custom bracket And here is the UV lighting as installed, will wait till coolant is flowing to see if more strips need to be added. UV Cold cathode behind radiator on more custom made and spray painted brackets....mixed feelings on this as I think UV LED strip is brighter but I bought it so in it goes. UV strips cut to length and wires with headers attached, strips stuck to cut lengths of magnetic fridge magnet (thanks to the real estate agents who put fridge magnet calendars in the letter box. Edit: Pointing up seemed better, lucky I used the magnets. Should do the job. Ok now its starting to look better, strip above power supply will be covered by the motherboard and the motherboard front strip is between the motherboard back plate and PCB. Pump is on a custom bracket I made from part of the case that fell out when I touched it above the front radiator. Lower Trio fans required grilles I nicked off old power supplies and sprayed black, got sick of fishing out dropped screws out of them. By the way you go through a lot of spray paint by the time you have sprayed boards, brackets, screws, washers, standoffs and even plug shells. Becomes a bit of an obsession....but it must be black! Didn't like the TT CPU blocks, sorry TT, and got 2 blocks for the same price as an EK block. This is the Barrow block after I increased the number of LEDs but before polishing. This is the Barrow block after polishing. I followed this guide here and he is spot on, you can get the acrylic polish at auto or hardware stores. This block has now been bolted to the motherboard/processor with Thermal Grizzly Conductonaut liquidmetal compound, seen used in Linus tech tips vids. Has to be the craziest compound Ive ever used, strange almost spooky liquid metal stuff. (But I will NEVER use it again) More to come.....water cooling next........ UPDATE!! Even though the liquid metal compound works so well I will NEVER use it again. When I upgraded the CPU to a i9 9900K I found the compound had totally removed or covered the makings on the i5 8600K CPU and I had to linish the water block back to raw copper to remove it. The compound cannot be removed from the CPU at all. Really nasty stuff. Considerations, comments and suggestions are all welcomed as I'm flying by the seat of my pants here.