-
Forum Statistics
9.9k
Total Topics55.6k
Total Posts -
Member Statistics
136,882
Total Members16,800
Most Online


Nikoline
-
Posts
12 -
Joined
-
Last visited
Content Type
Profiles
Forums
Downloads
Events
Gallery
Blogs
Posts posted by Nikoline
-
-
When is this one in stock again????:
http://ttpremium.com/product/toughpower-dps-g-rgb-1500w-titanium/
It is also out of stock here in DK.
Btw: Do I have to buy the sleeves seperately???
My old one is dead after almost 10 years now.
Nikoline
-
16 minutes ago, ThermalMike said:
Hi,
I do not have a digital copy of the manual on me, but it is in there if you maybe kept the box?
The screws have threads on both sides, one side shorter than the other and the shorter side screw thread is bigger.
You just screw the short end into the MB side then drop on the block, use the white washers and then the thrumb screws to secure it down.
If you need further help, I will try to dig one up or take a picture of one here.
I have the box and also a copy of the manual as pdf.
Next will be buying a cpu and memory.
Tnx so much for your help, Mike
Nikoline
-
13 hours ago, ThermalMike said:
Hi,
The X299 socket is 2066 so the W1 supports it with the other hardware that was originally included in the box.
No backplate, just like X99, just need the other screws that go directly into the 4 threads on the socket and basically the same hardware for everything else.
I use my old motherboard, Asus Z87-Deluxe/Quad with the Intel backplate included in the box.
So for the new motherboard I don't need any backplate????
Do you have a picture of the screws i ned????
Nikoline
-
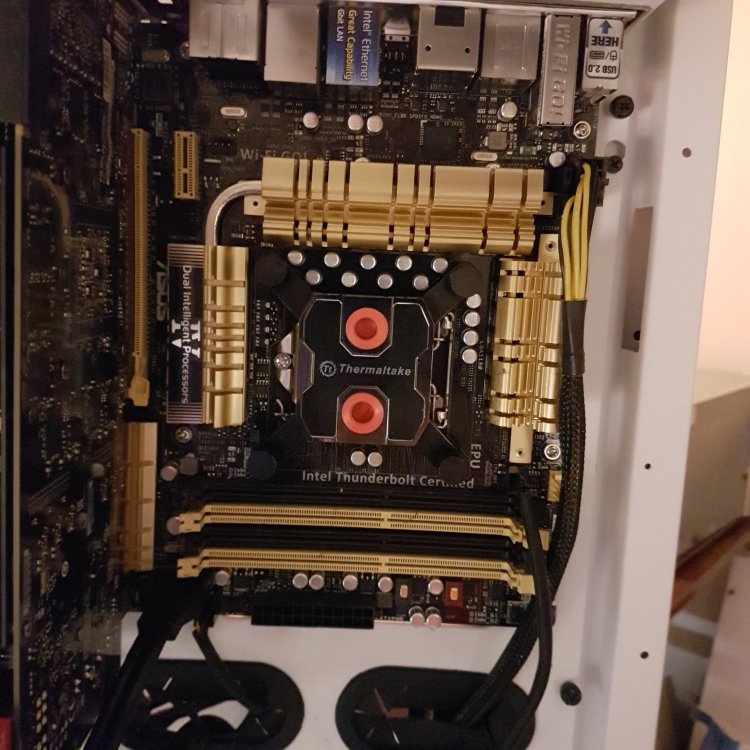
Hi' there.
I bought a new motherboard: Gigabyte X299 UD4 socket 2066 with RGB Fusion.
I have a Pacific W1 waterblock from the old motherboard with socket 1150.
Do I need an upgrade kit or a new waterblock????
Nikoline
-
16 hours ago, ThermalMike said:
Hi,
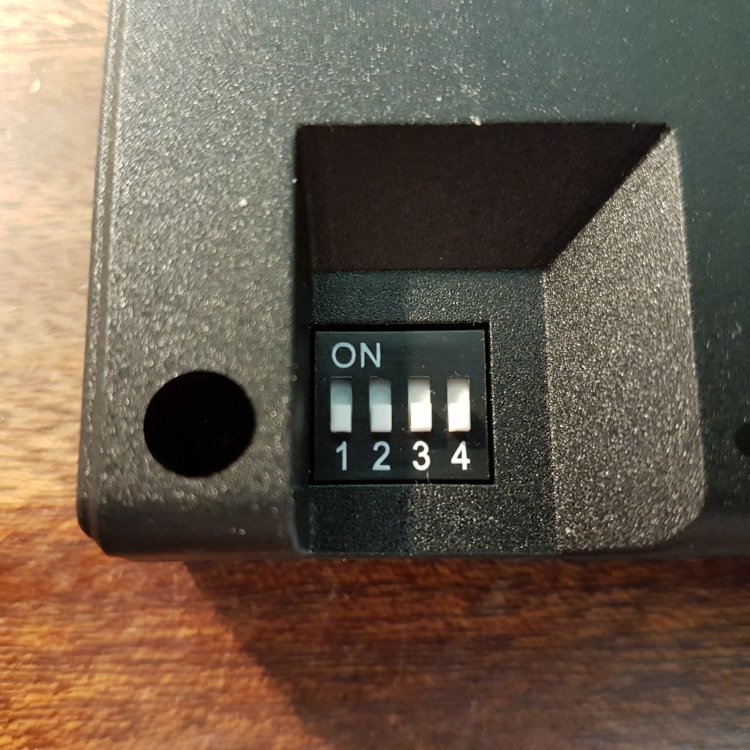
With the Dip switch, you should not have to make any changes if you are running 1 controller, as shown in the picture, that is already set for controller #1.
It only matters when you have more than 1 controller, you can set the controller to any number really, just cannot set 2 controller to the same is all.
Thank you, Mike.
-
14 hours ago, ThermalMike said:
The manual included should explain the installation, you see the bl ack/red cable coming off the pump bottom, that is the power, plan and simple. You will connect this to your molex connector on the PSU, but make sure to never run the pump dry, suggest to either jumper the PSU when filling initially or just use another PSU for that until all the coolant is primed.
If you have any further questions, list them out or take some pics and show us what you are asking for and will try to help
")
It is the DIP Switch settings I am worried about but I found the video for the RGB Fans, but I think is is the same.
I have only 1 controller , so I think it is the default settings like this:
-
On 12/12/2017 at 2:32 AM, ThermalMike said:
Hi,
The PR22-D5 Plus requires 1 molex for power to the pump. For the lighting, it will require the controller supplied to also be connected with also requires 1 molex.
The controller also offers 5 ports, so you have 4 spots open if you want to add in fans or other Plus products to avoid extra controllers.
Thank you.
I got it yesterday.
I remember there was a video about how to connect all this together.
I think it was you, Mike, talking about all this, but I can't find it now.
Maybe someone can help me....
Nikoline
-
Hi' there.
I want to do some upgrade, so I bouhgt a new motherboard: Gigabyte X299 UD4 socket 2066 with RGB Fusion.
I also want a new pump/reservoir and looked at: Pacific PR22-D5 Plus, but can I connect it to the PSU with a molex connector???
Nikoline
-
Hi' there.
I want to do som upgrade, so I bouhgt a new motherboard: Gigabyte X299 UD4 socket 2066 with RGB Fusion.
I also want a new pump/reservoir and looked at: Pacific PR22-D5 Plus -
11 hours ago, ThermalMike said:
Hi,
Honestly it does not matter, I have done it both ways. If I had to choose and based on this with the Tower 900 in my exp, I would use the bottom as the IN and the top as the OUT to give you better room for your tube runs.
Hi Mike.
That was my suggestion too, so now I will just go on and get this "fishtank" up and running.
It's the best case I ever had, there's so much space in it.
I appreciate your help, thank you.
Kind regards,
Nikoline
-
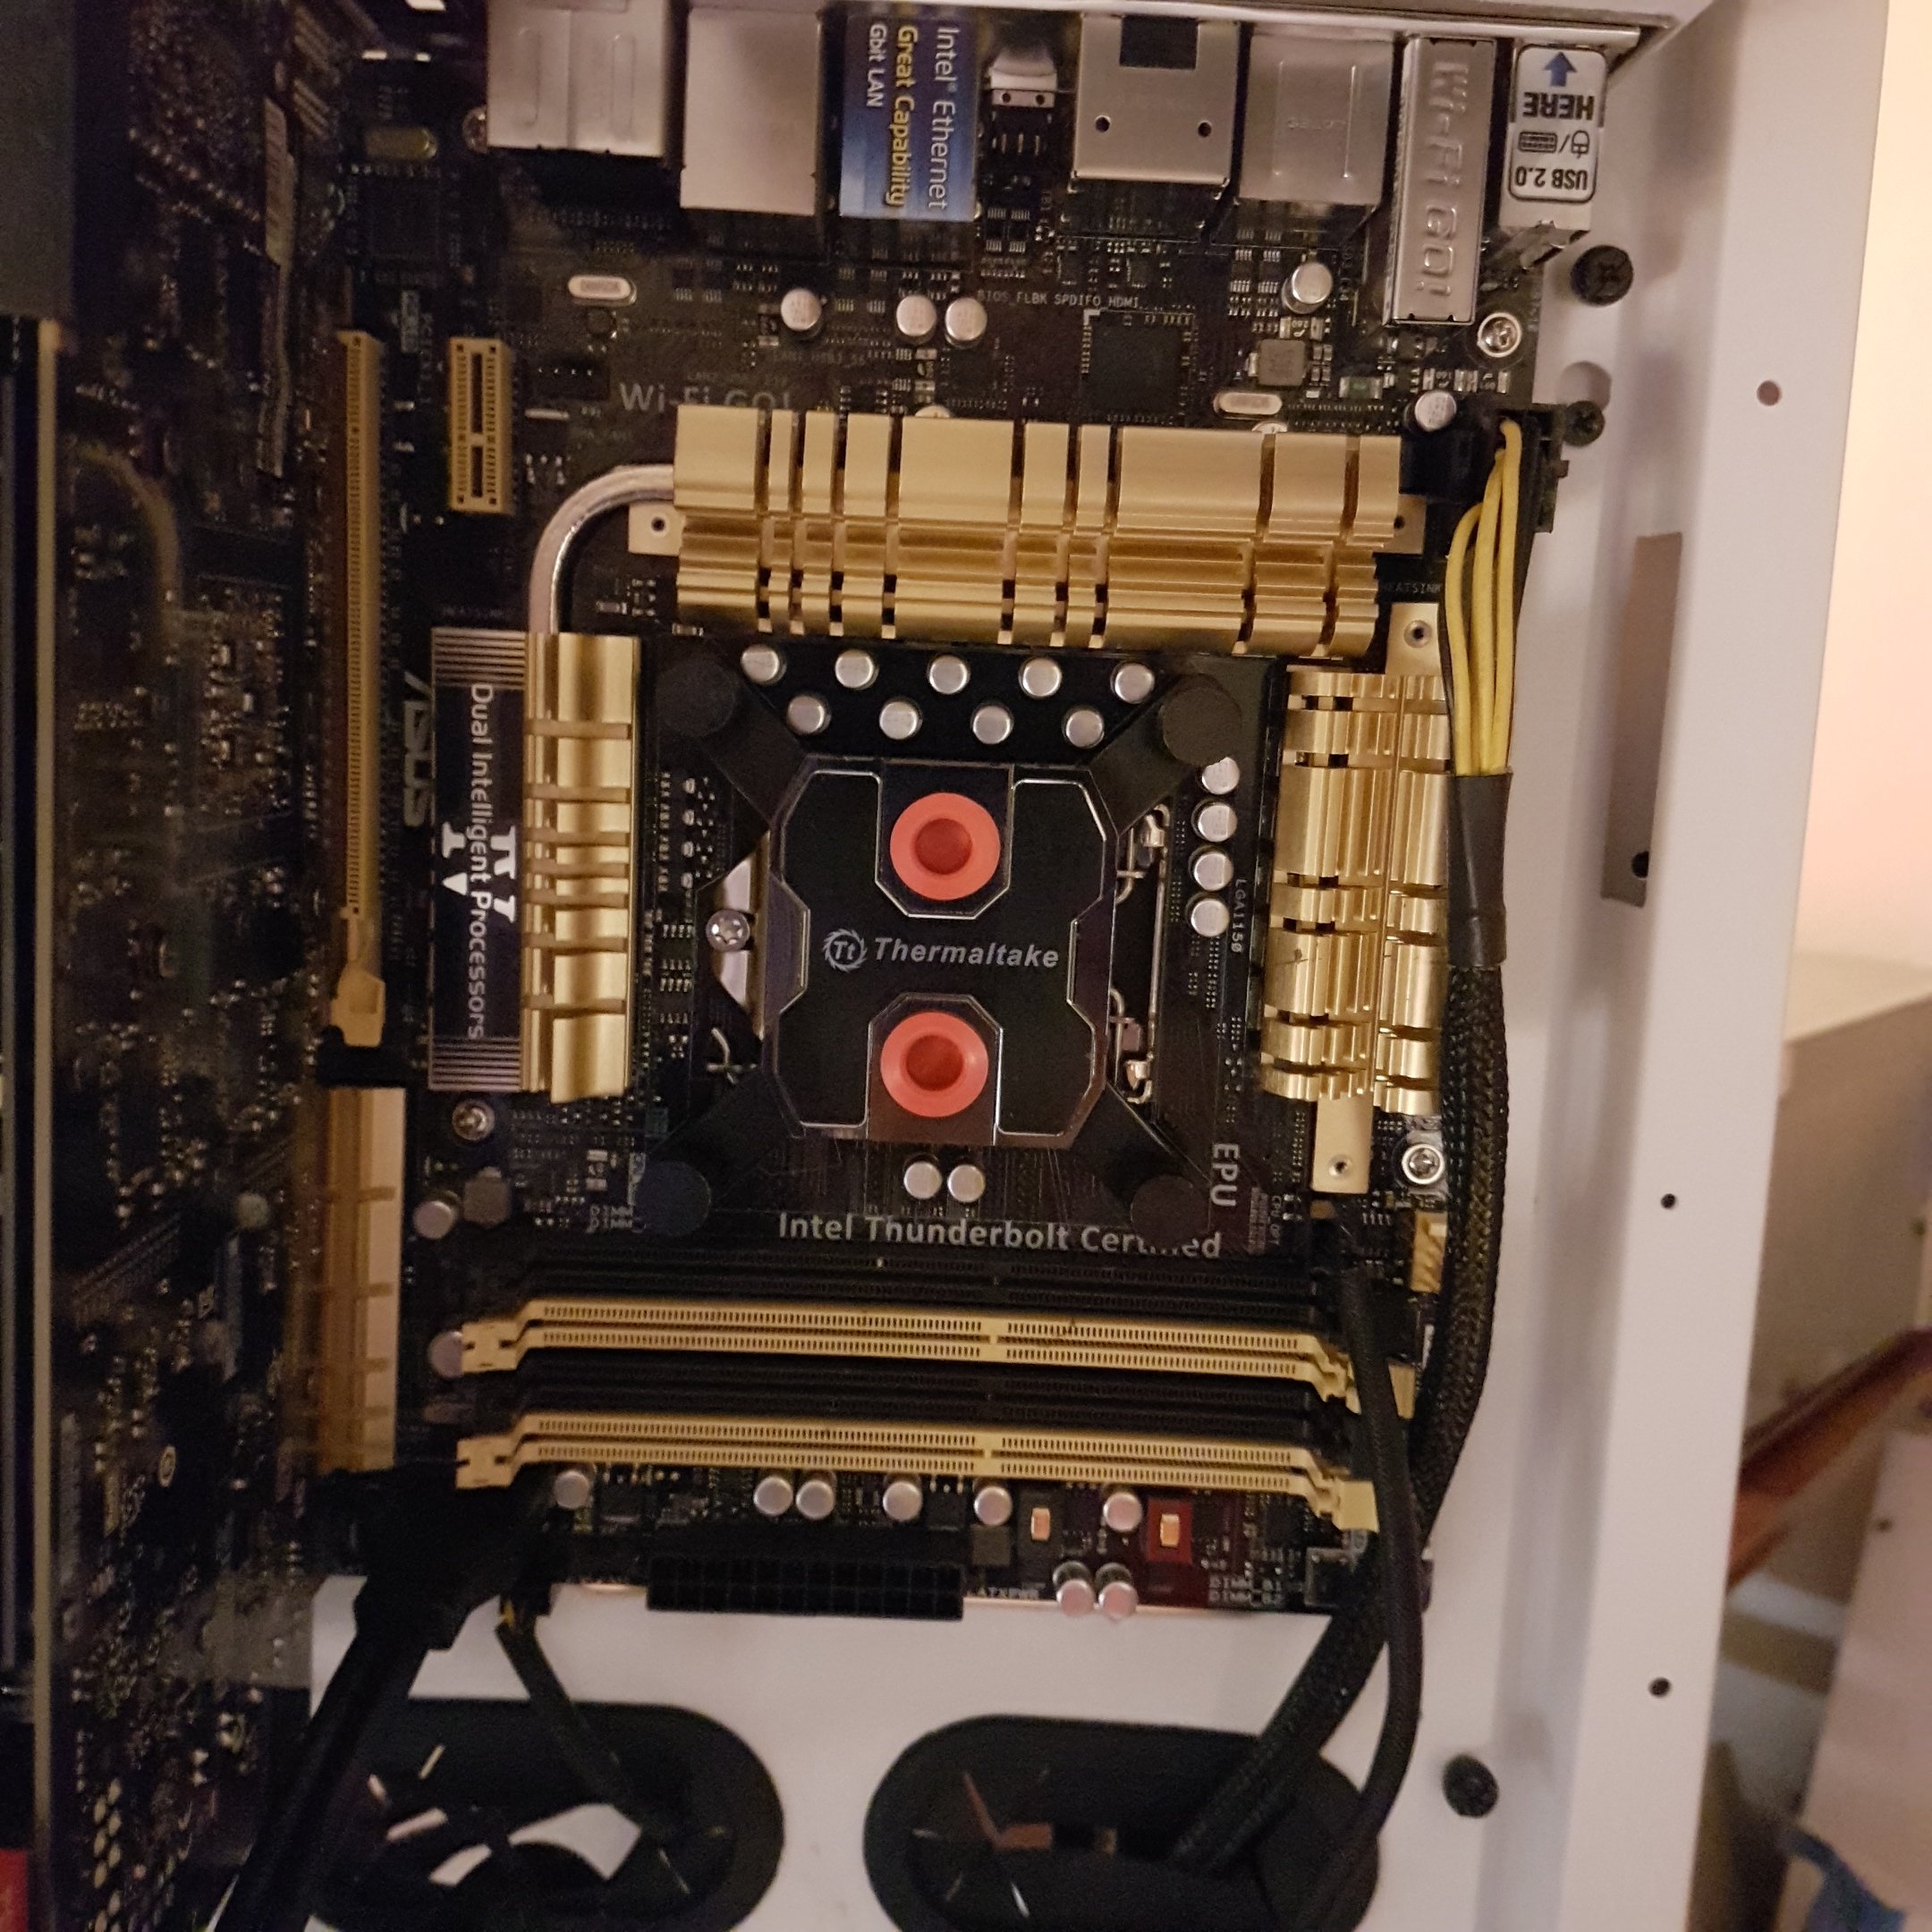
Hi guys!
Where should I have in and out on this waterblock???
It's the Tower 900 case.
Nikoline

Guide from ThermalMike
in Liquid Cooler
Posted
I can't find the guide from ThermalMike about how to connect pump, fans and the controller to the pc.
It is not the video guides, but the guide wgith photos.
Can anyone help me???
Nikoline