-
Forum Statistics
8.5k
Total Topics55.2k
Total Posts -
Member Statistics
137,226
Total Members16,800
Most Online


Sam Ca
-
Posts
35 -
Joined
-
Last visited
-
Days Won
8
Content Type
Profiles
Forums
Downloads
Events
Gallery
Blogs
Posts posted by Sam Ca
-
-
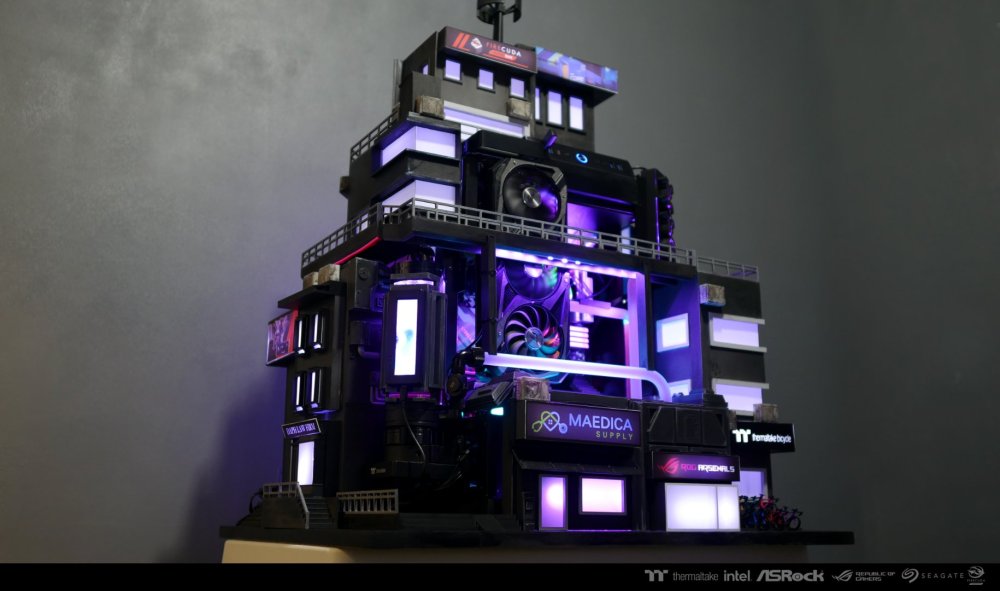
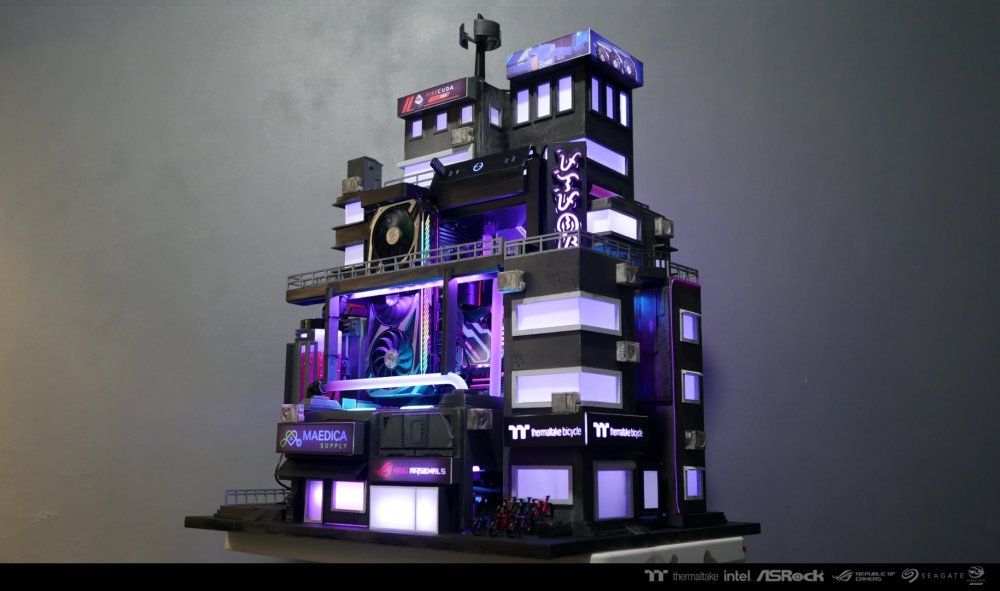
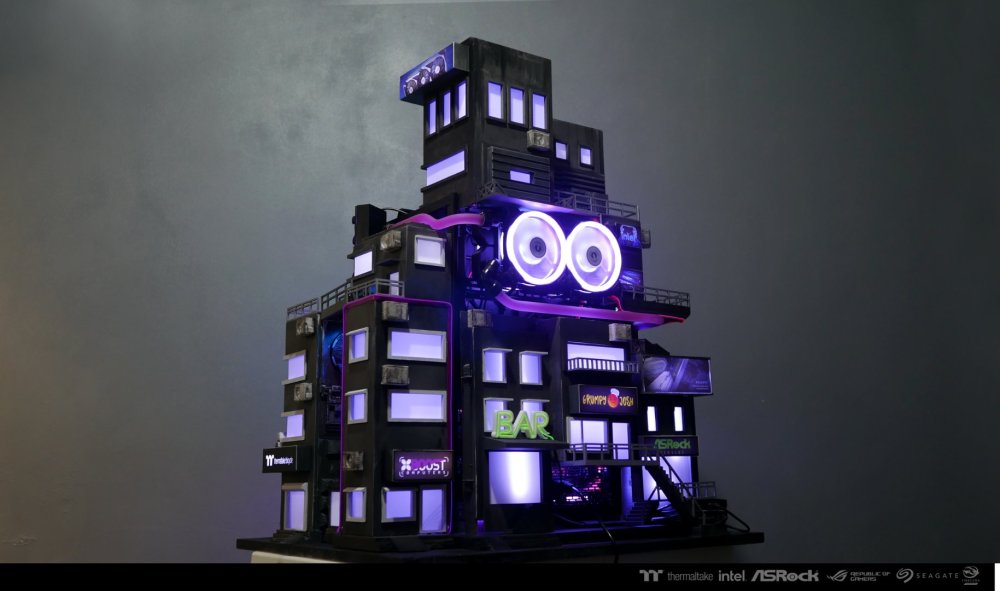
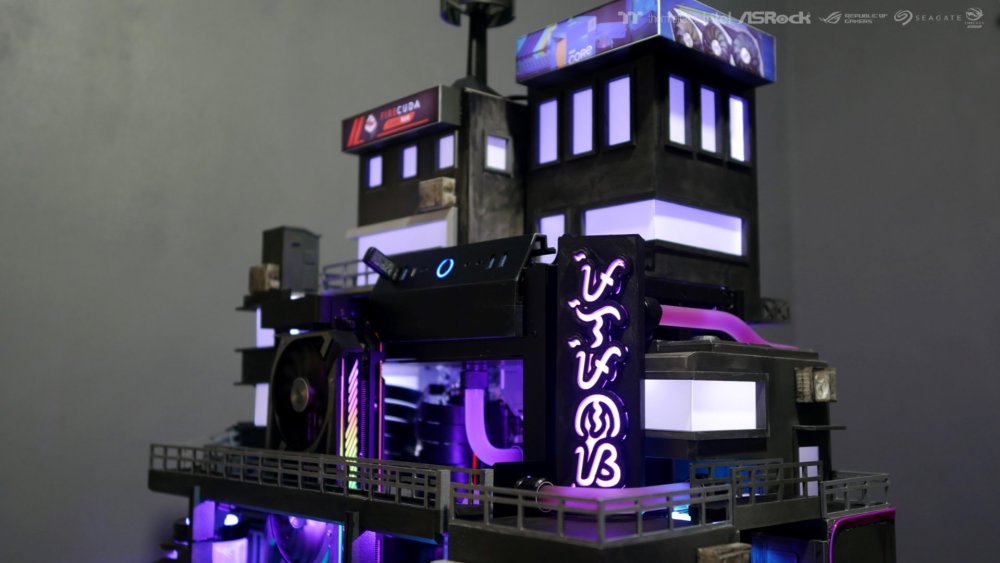
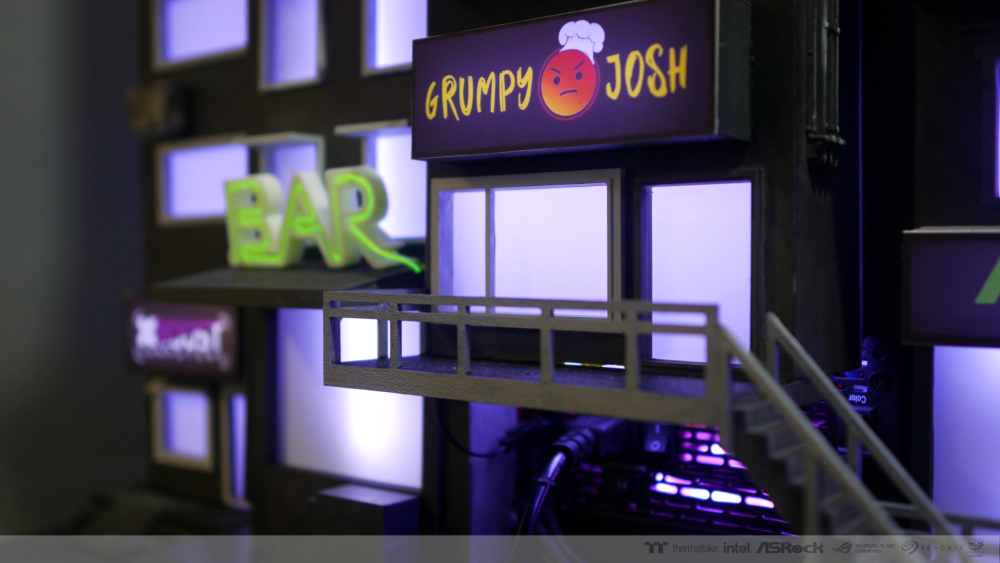
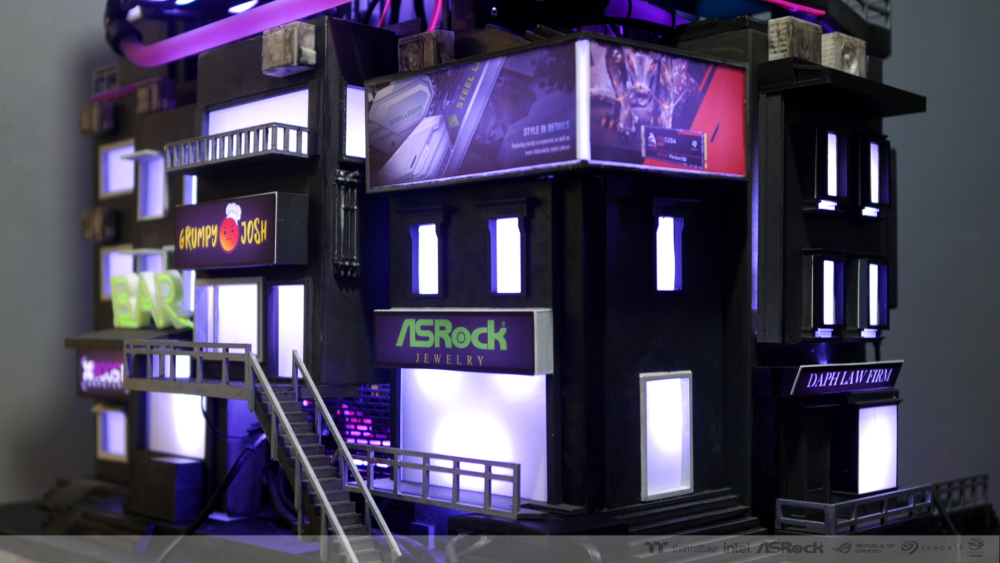
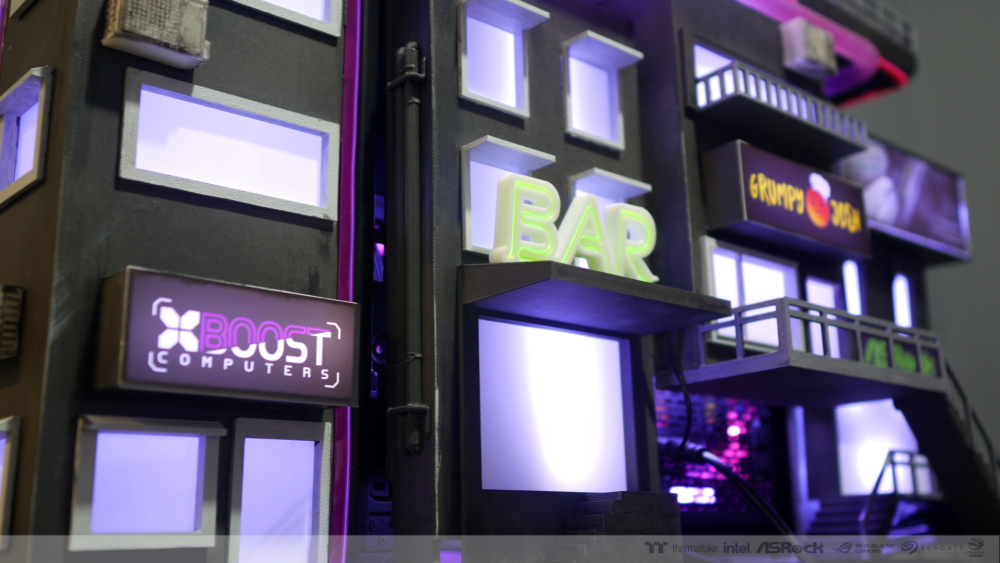
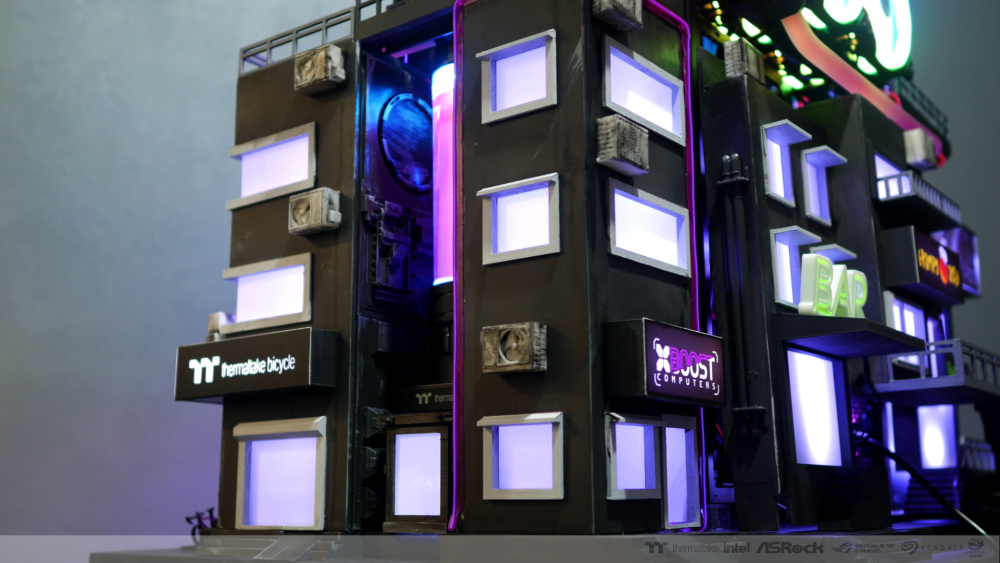
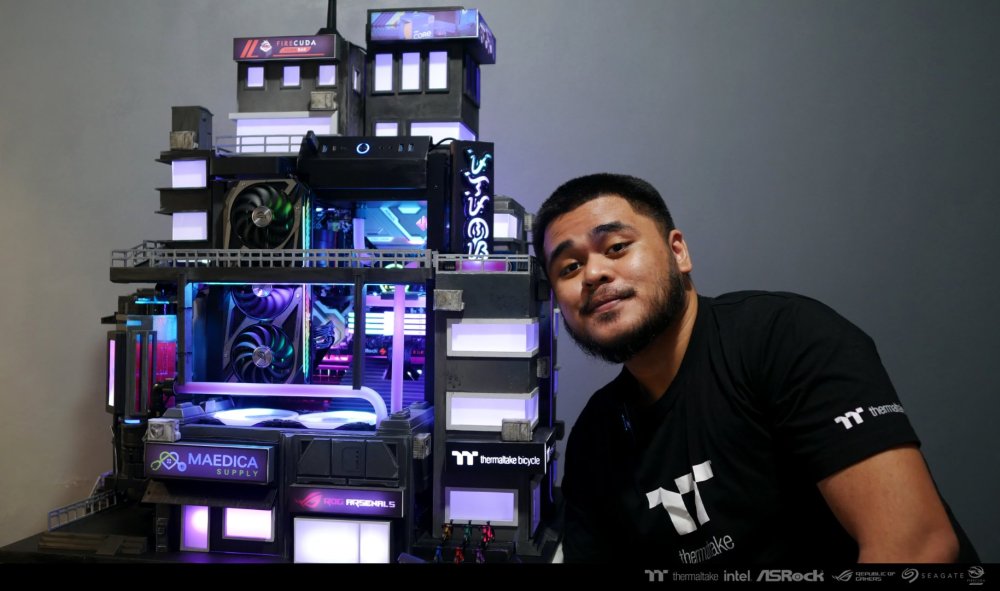
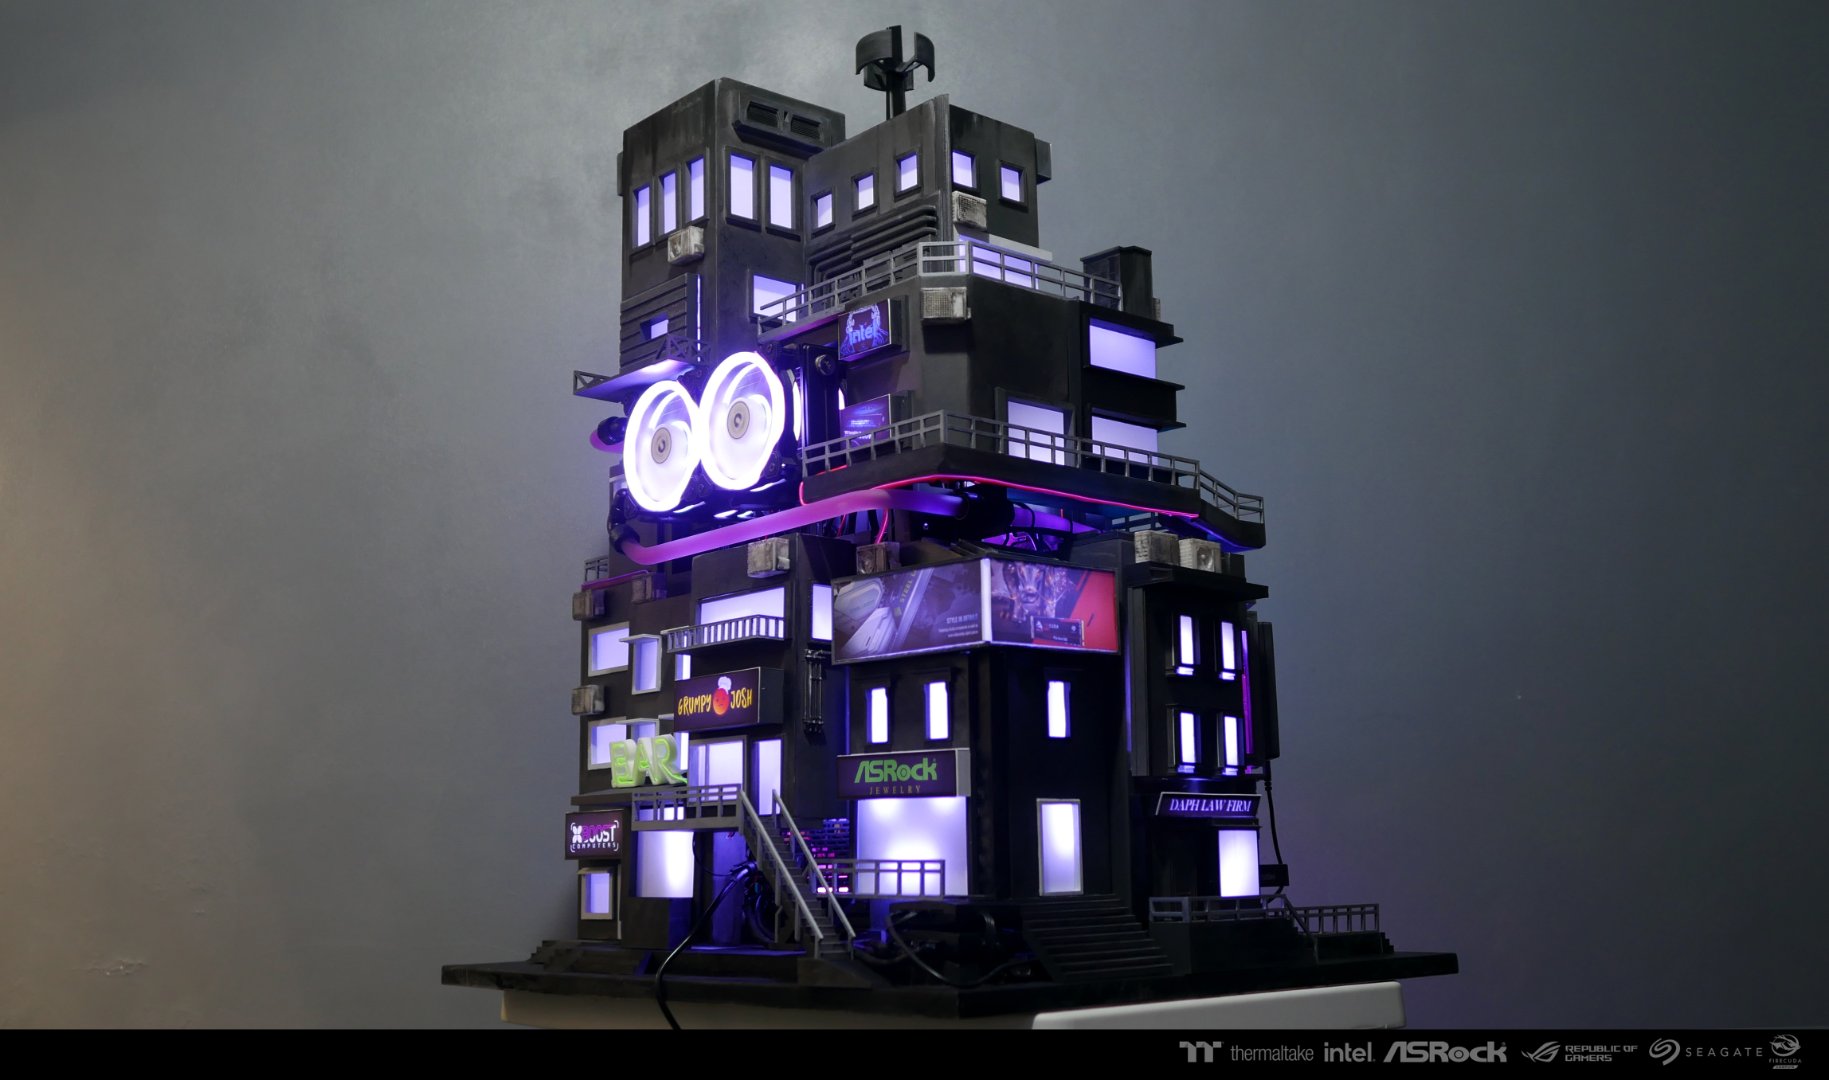
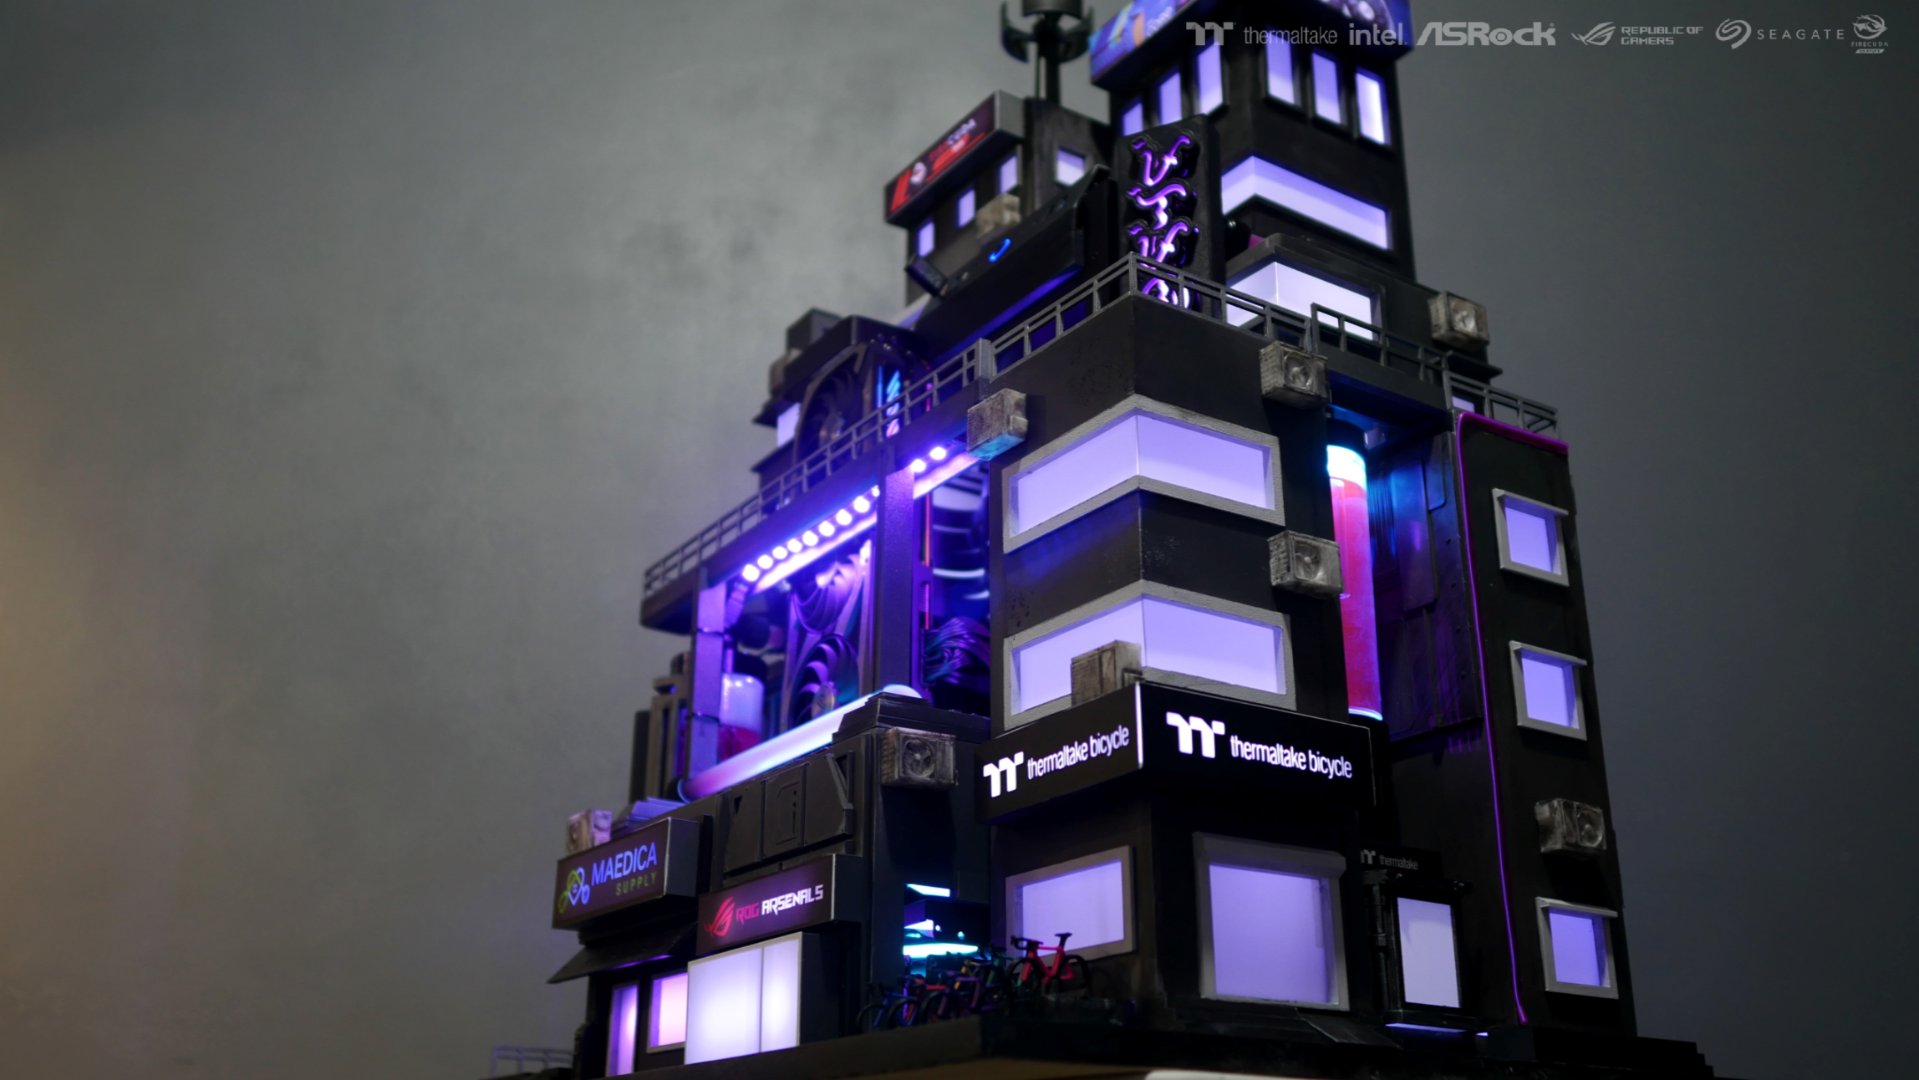
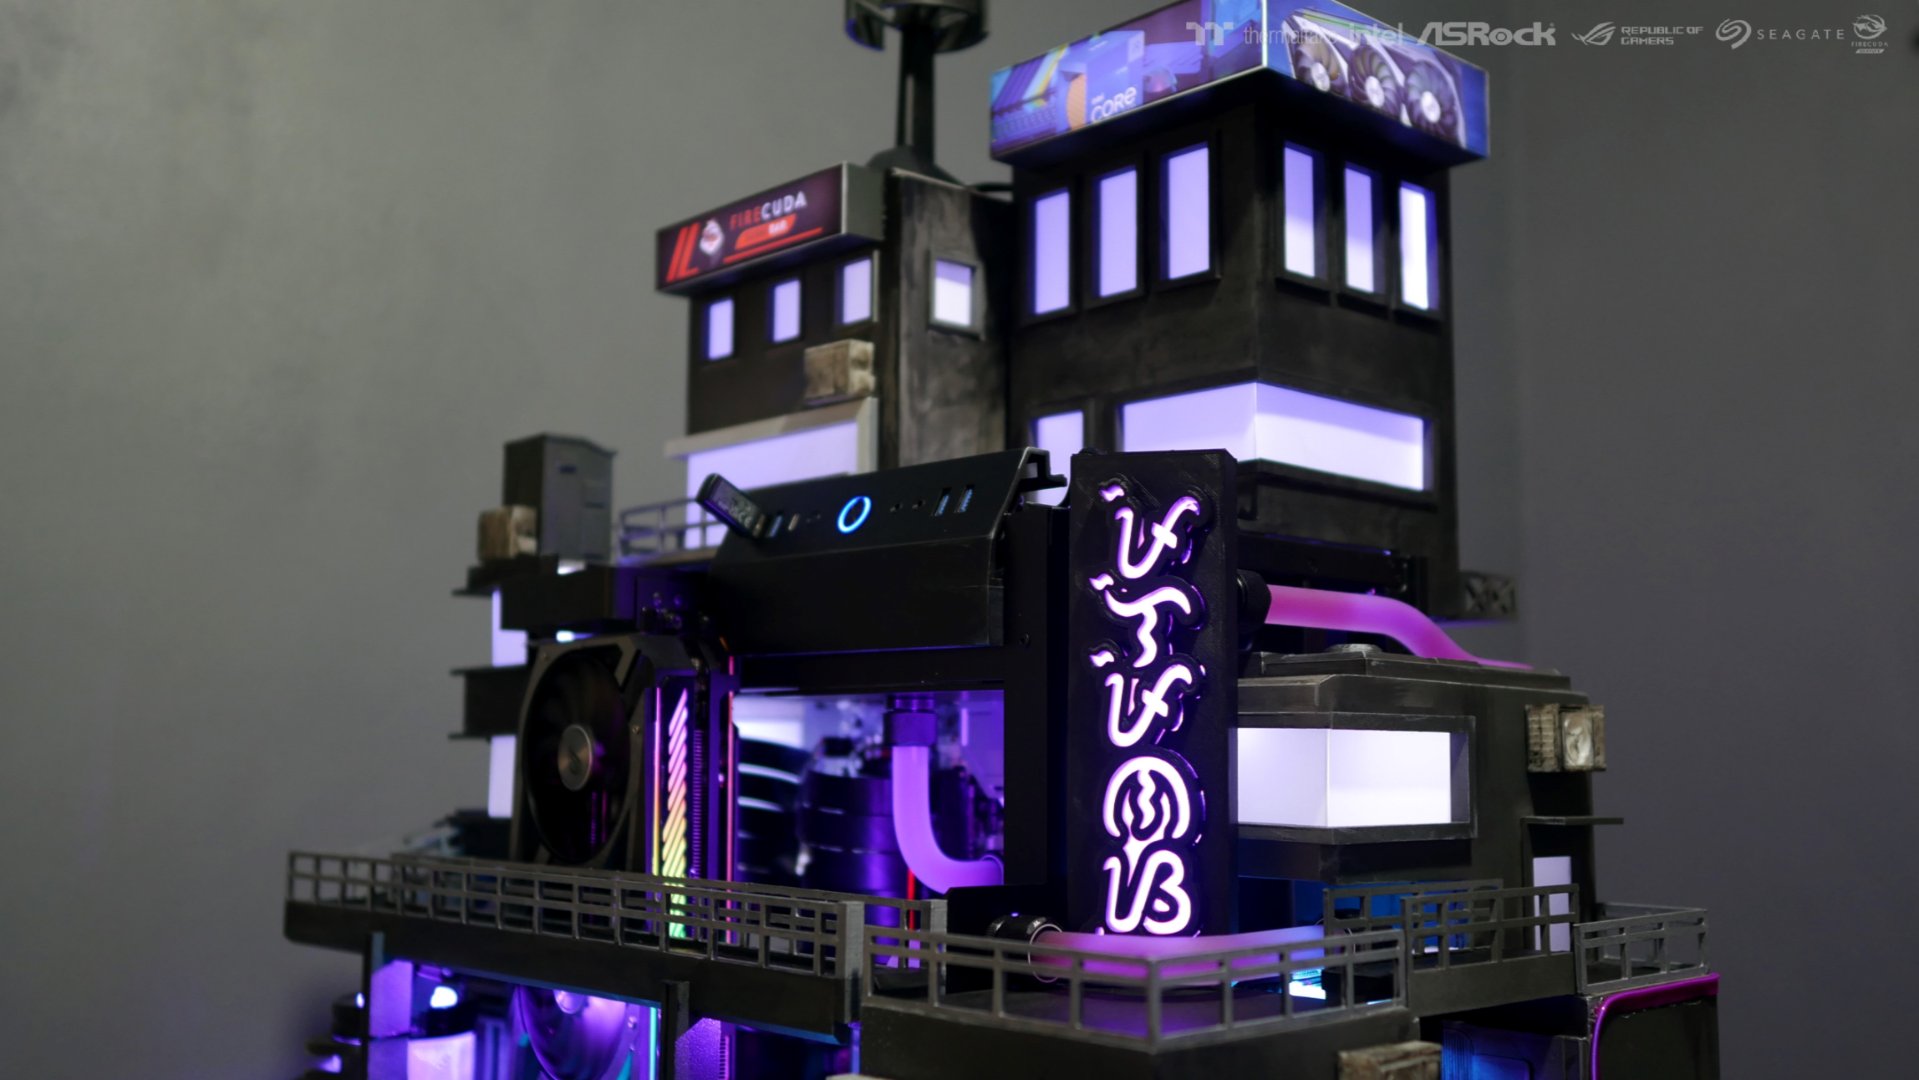
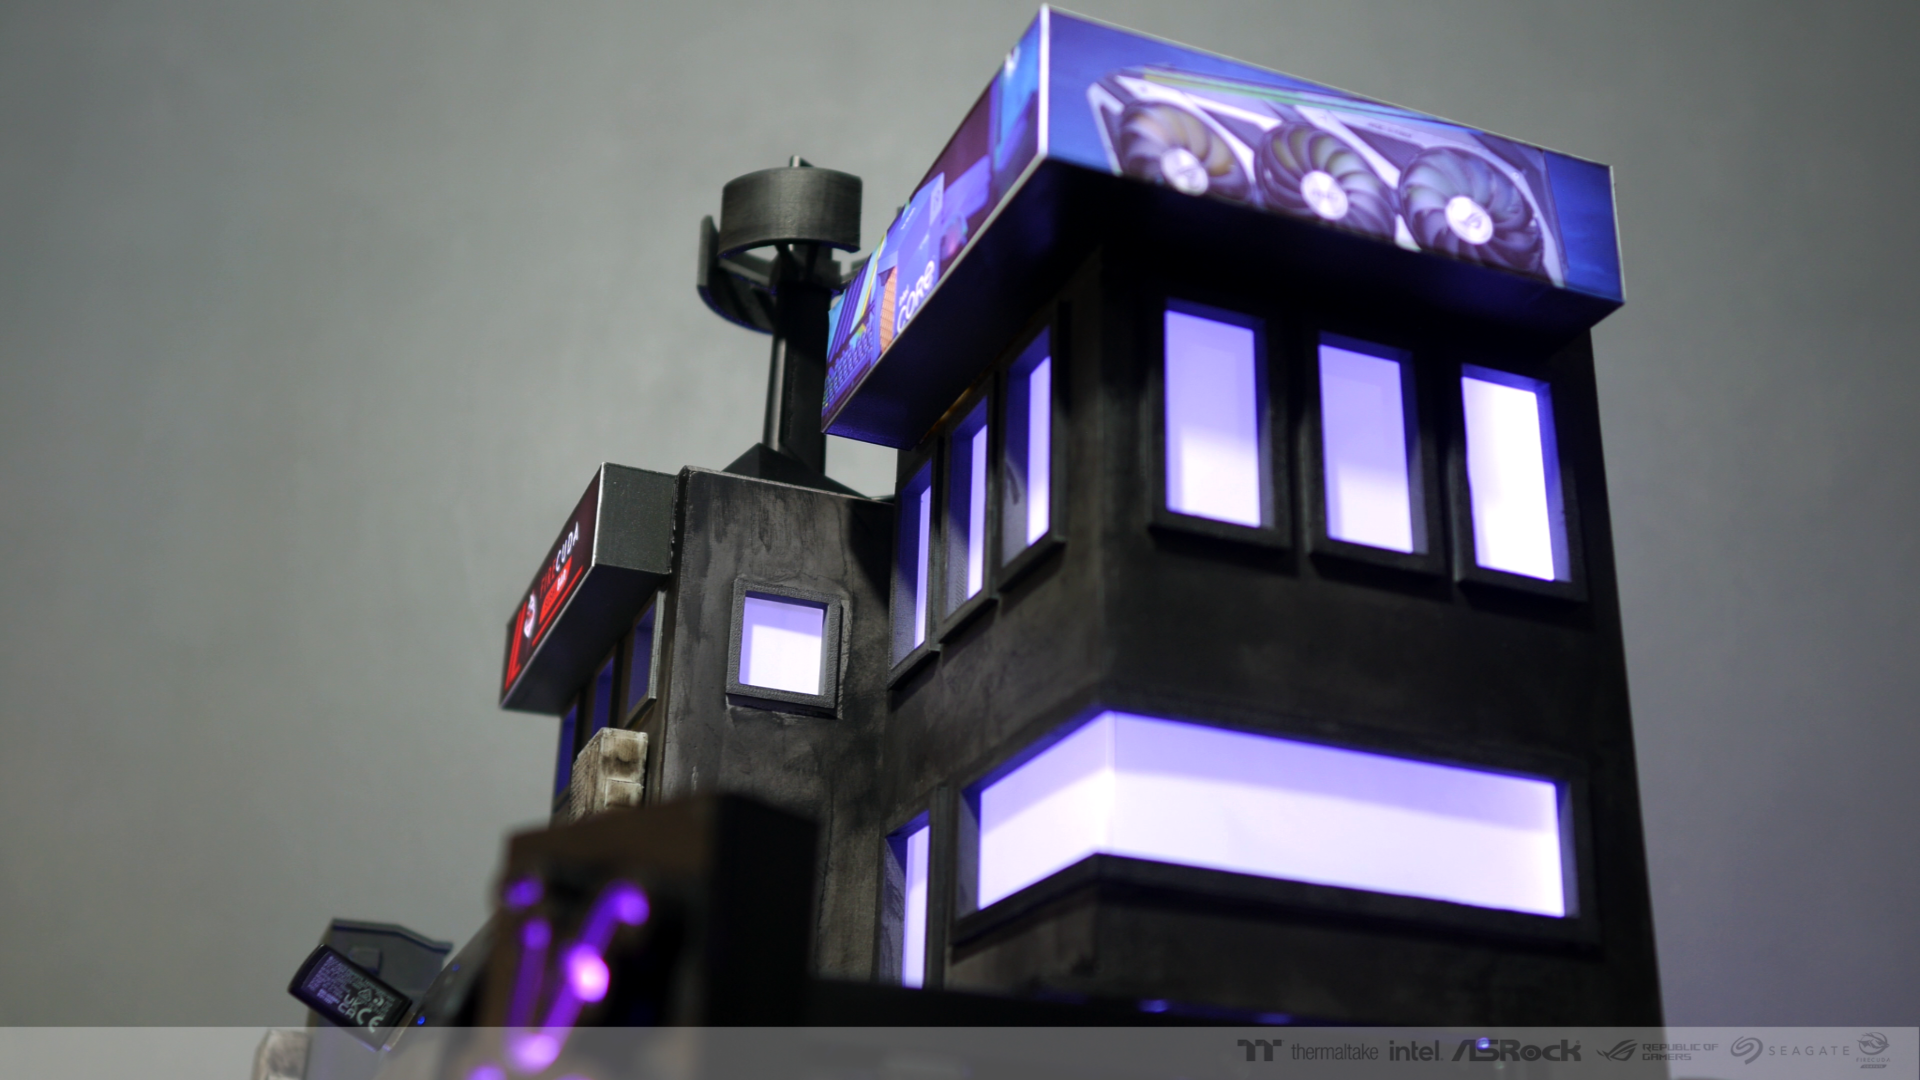
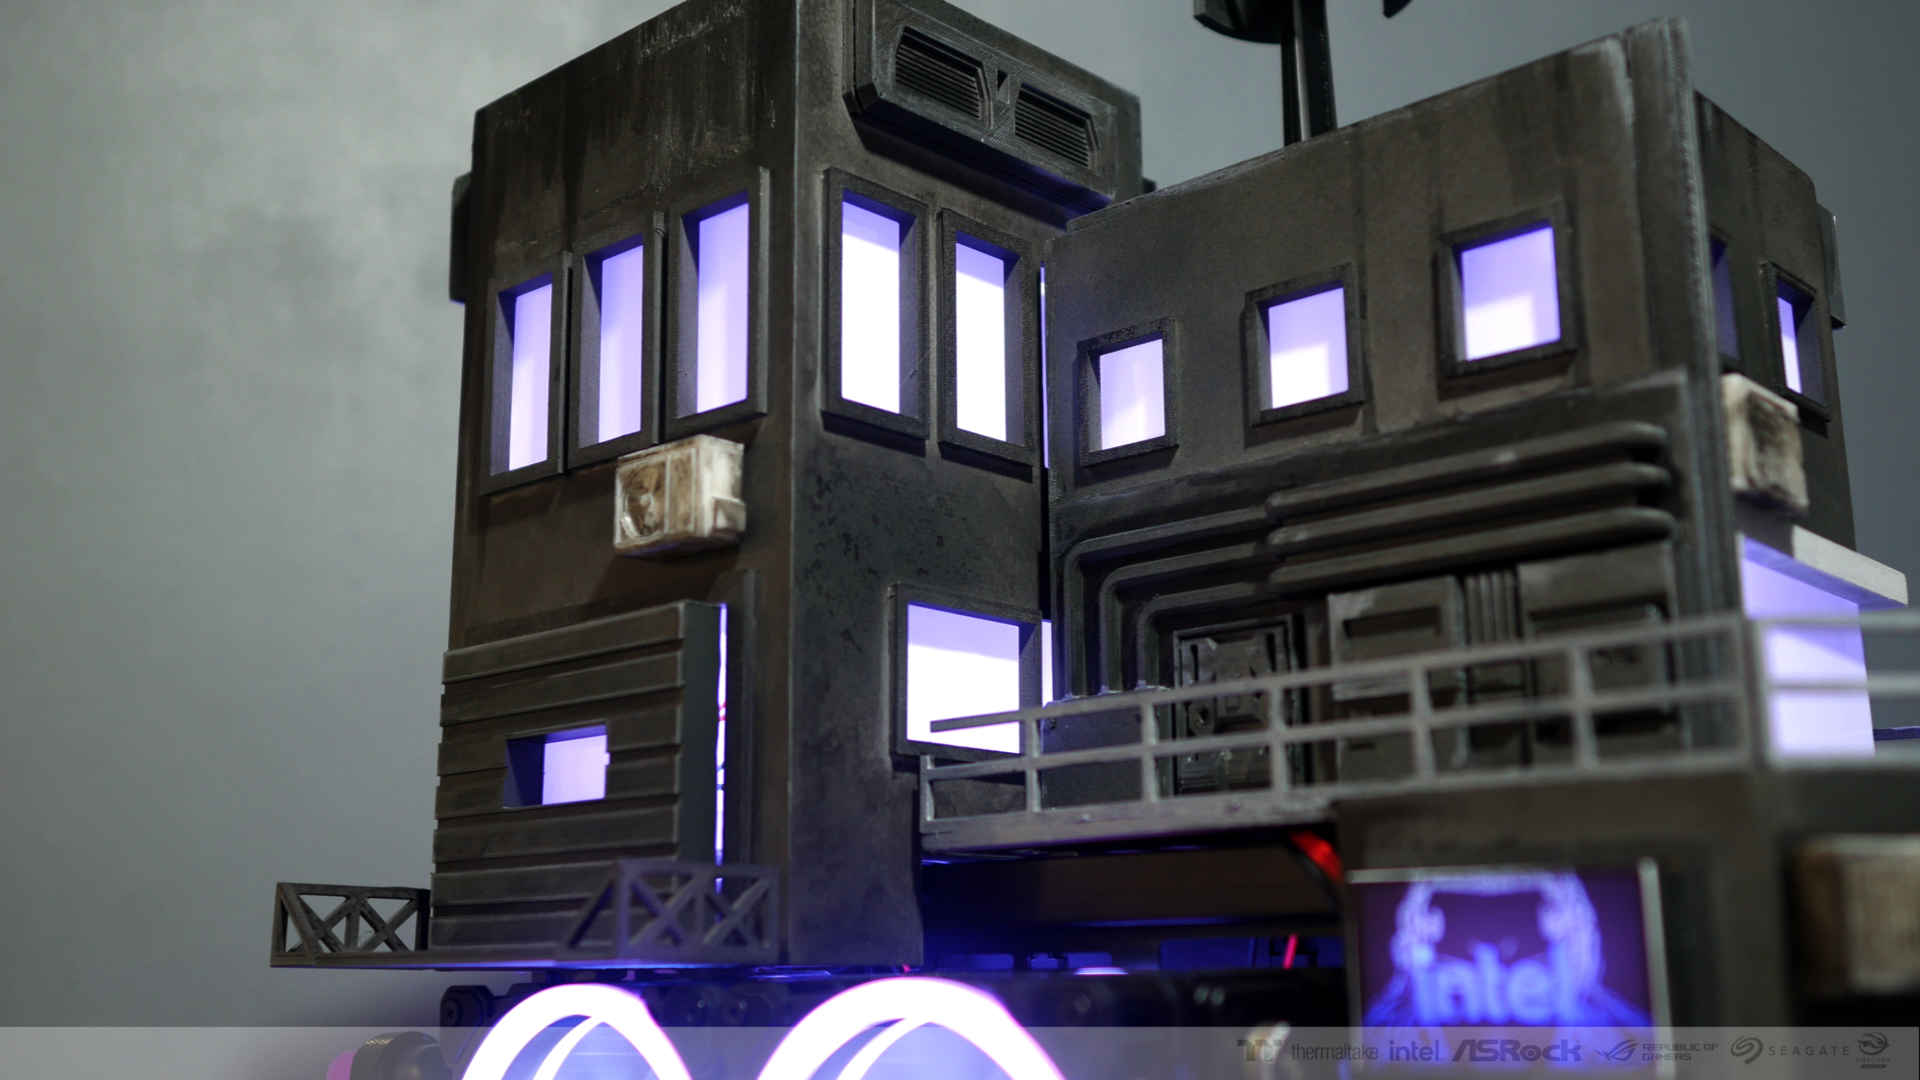
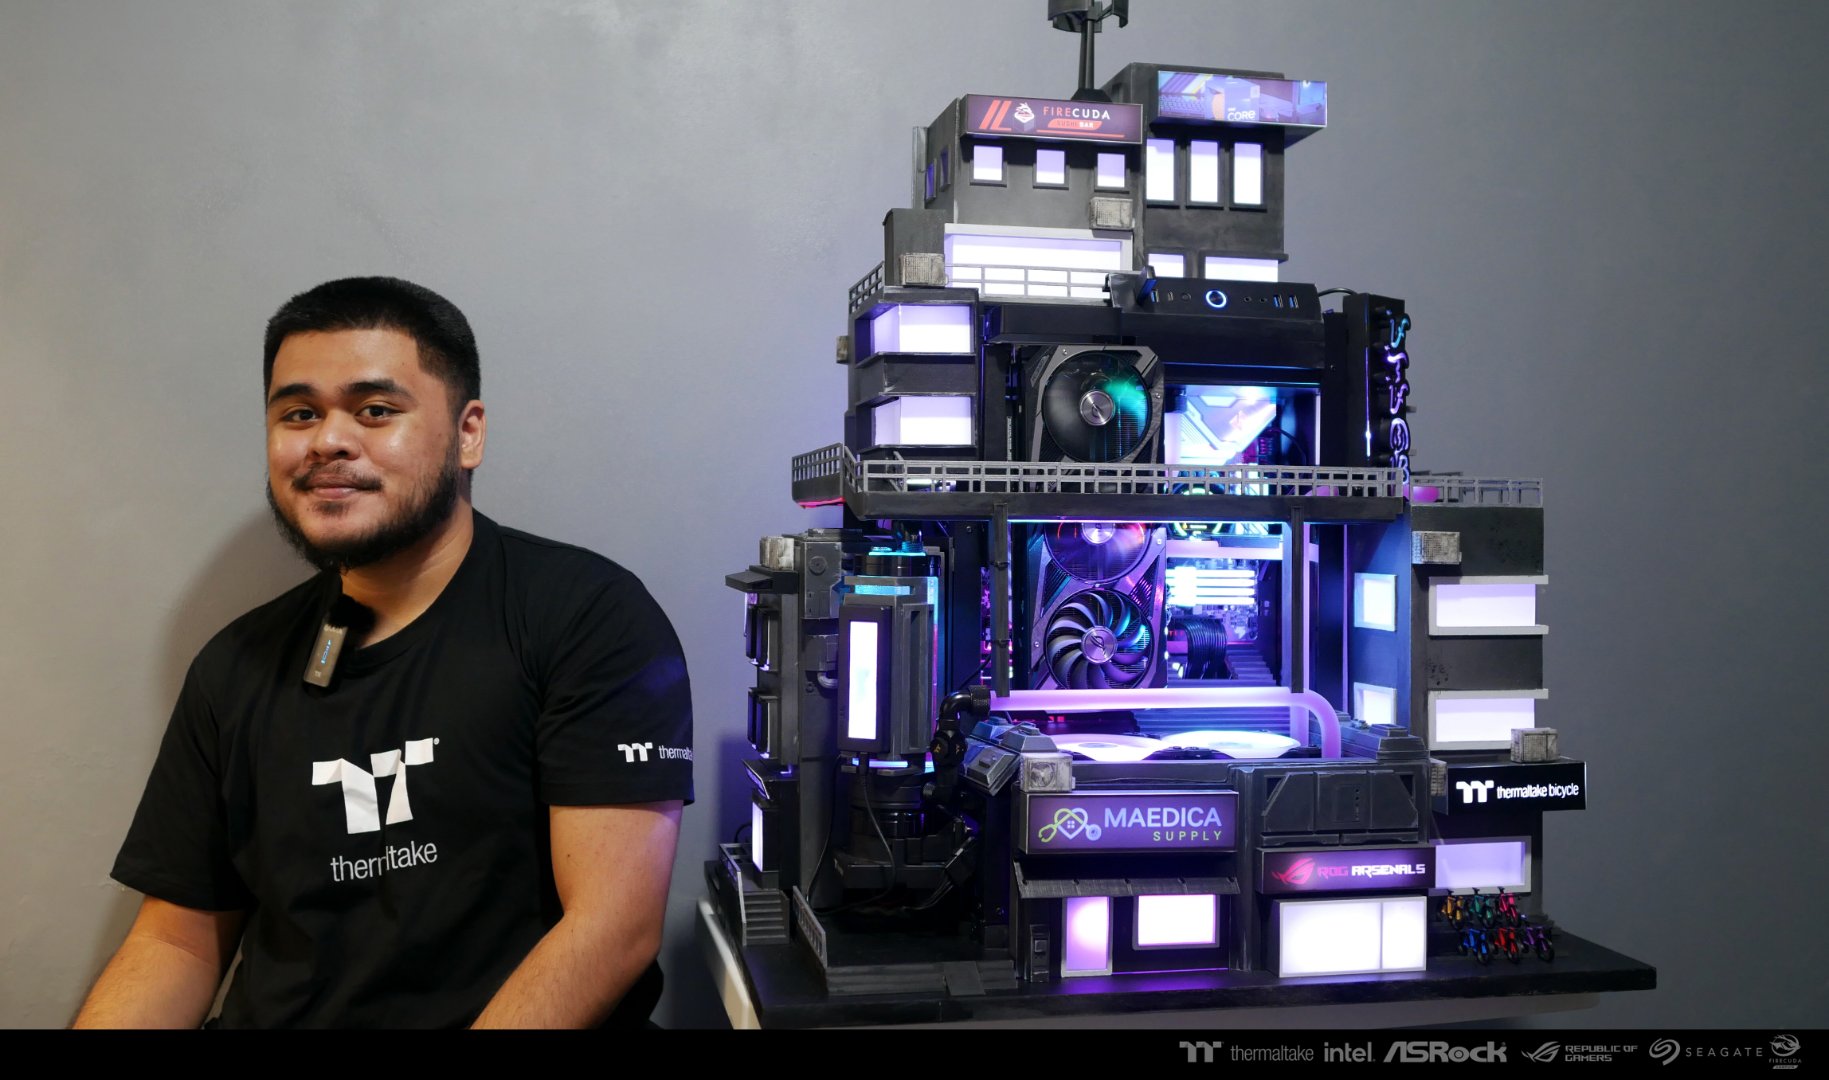
After many hours of the project is finally done!


-
Hand painting the details
")
.thumb.png.dc10cb1db7f431da221a65466c7e9d03.png)
.thumb.png.2dad14492a654fefd2a6a68bfeb5b77d.png)
I used tiny magents to the exterior parts so that it can be detached from the main case easily.
.thumb.png.c127ebad4d5d9a29d8abc5bc6d5932db.png)
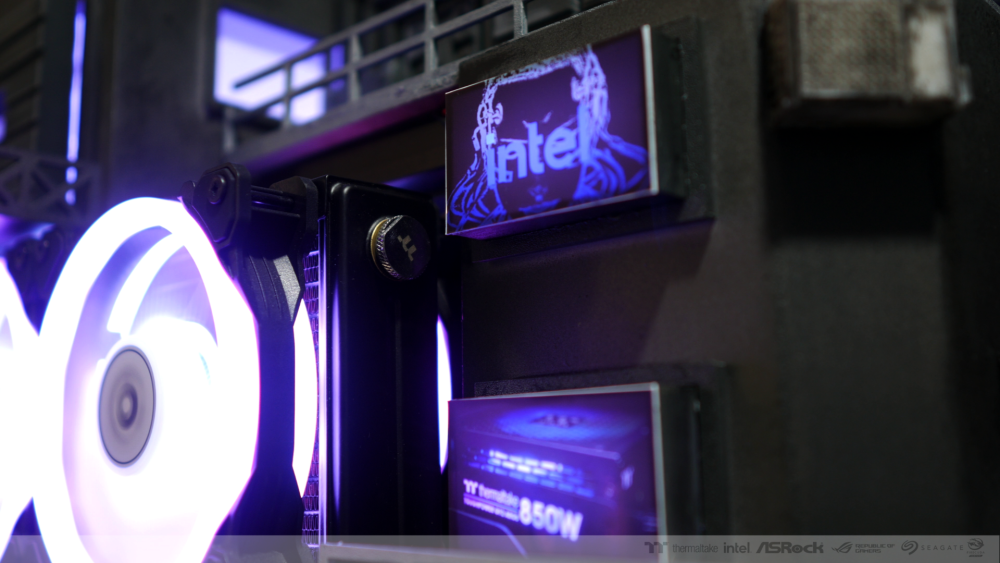
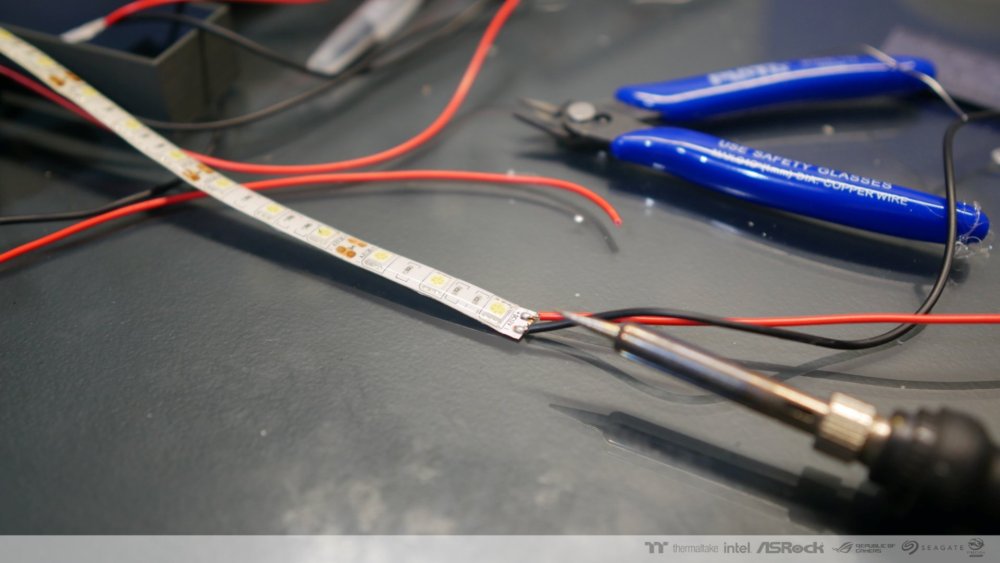
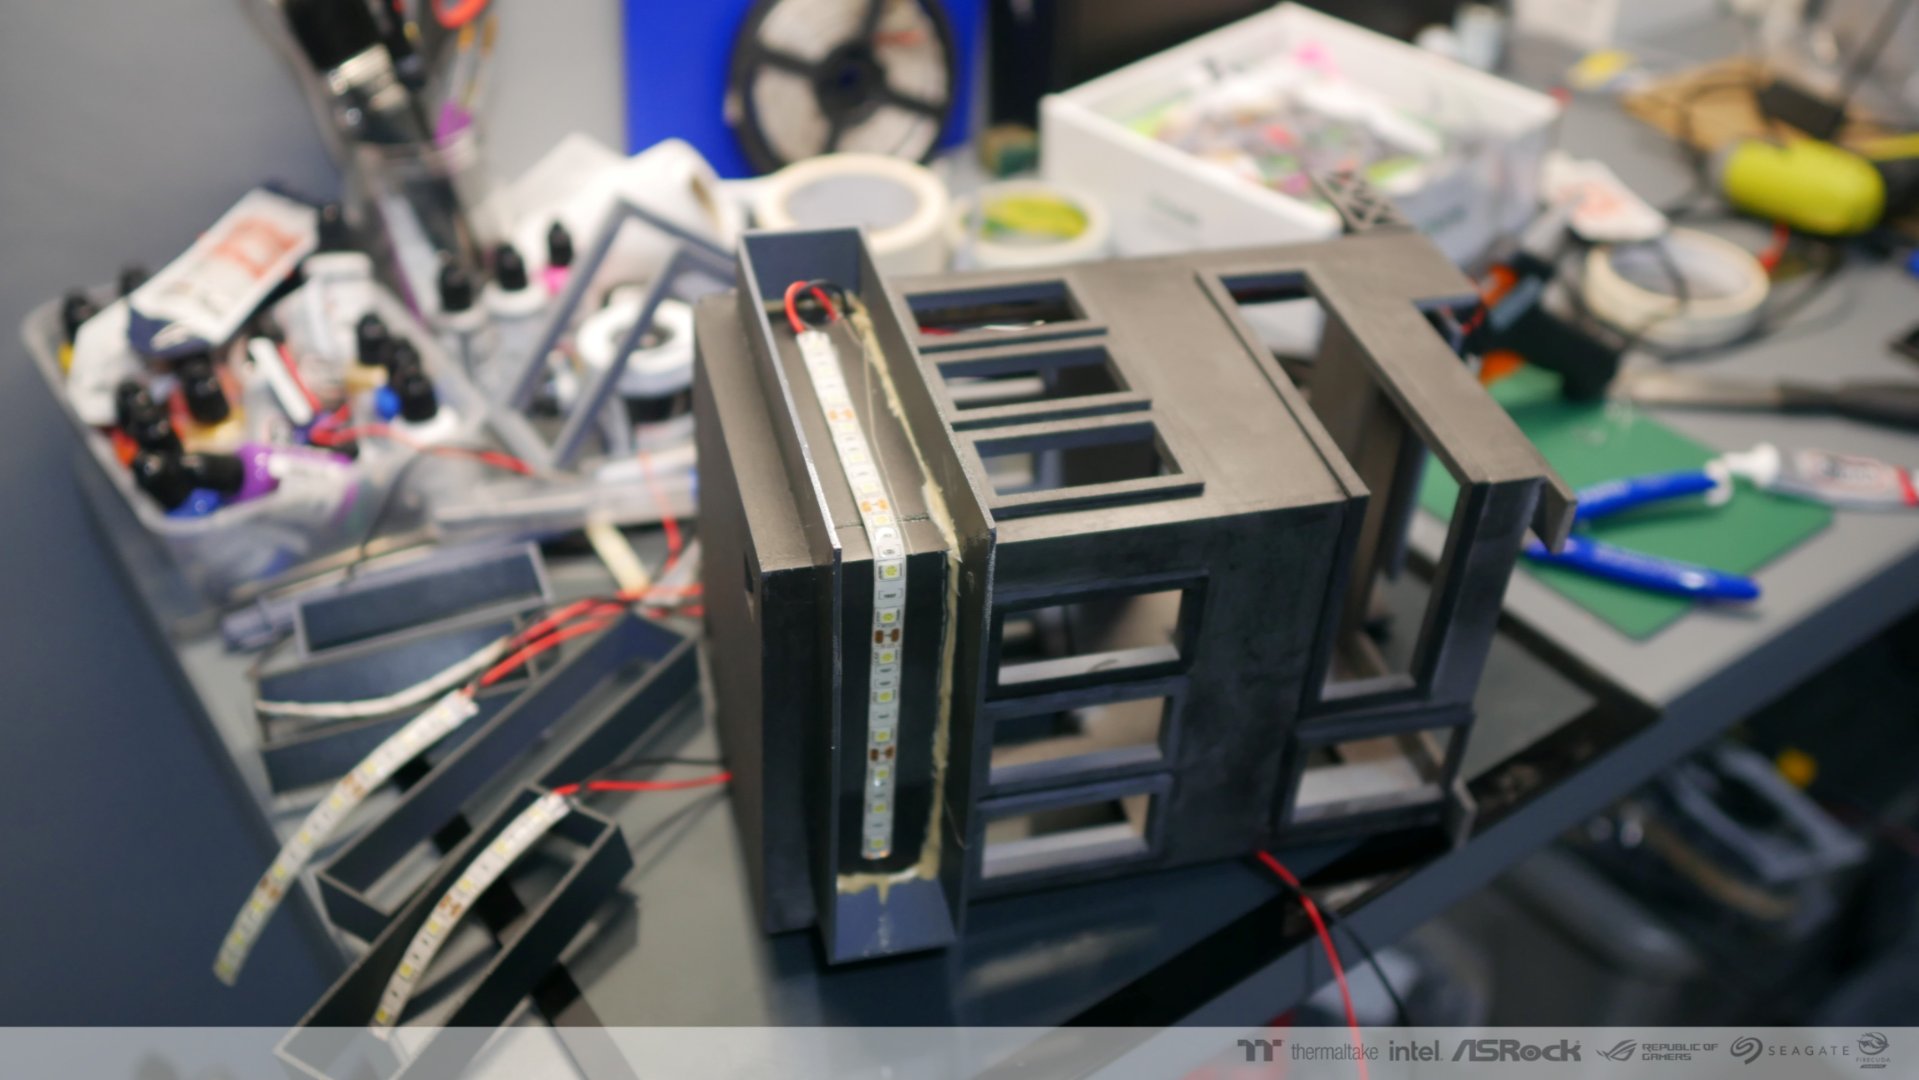
Soldered additional led strips
.thumb.png.6348bf4ab482f09c68bee993807d5c4b.png)
.thumb.png.4d608fb464a9d1359bd30bf20889c440.png)

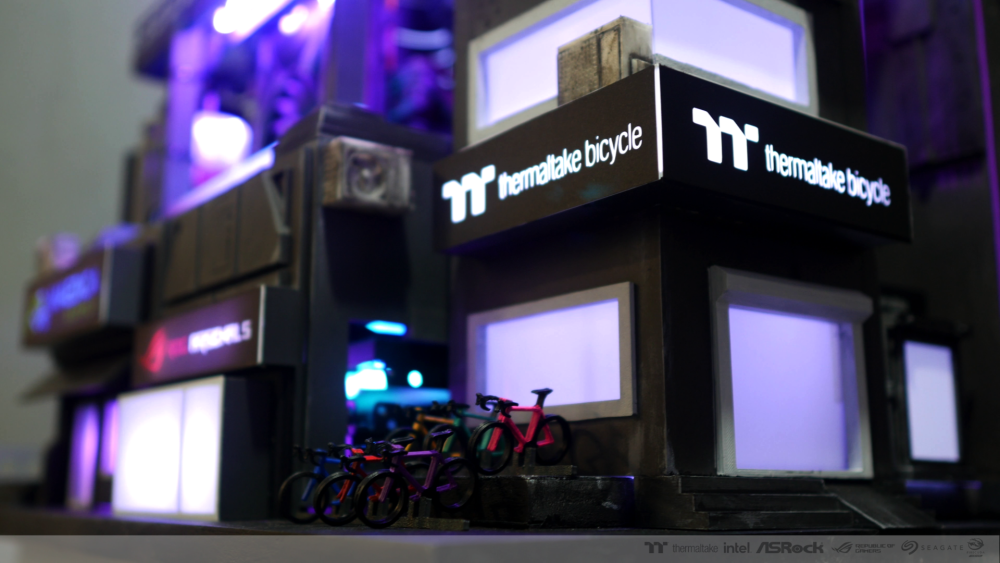
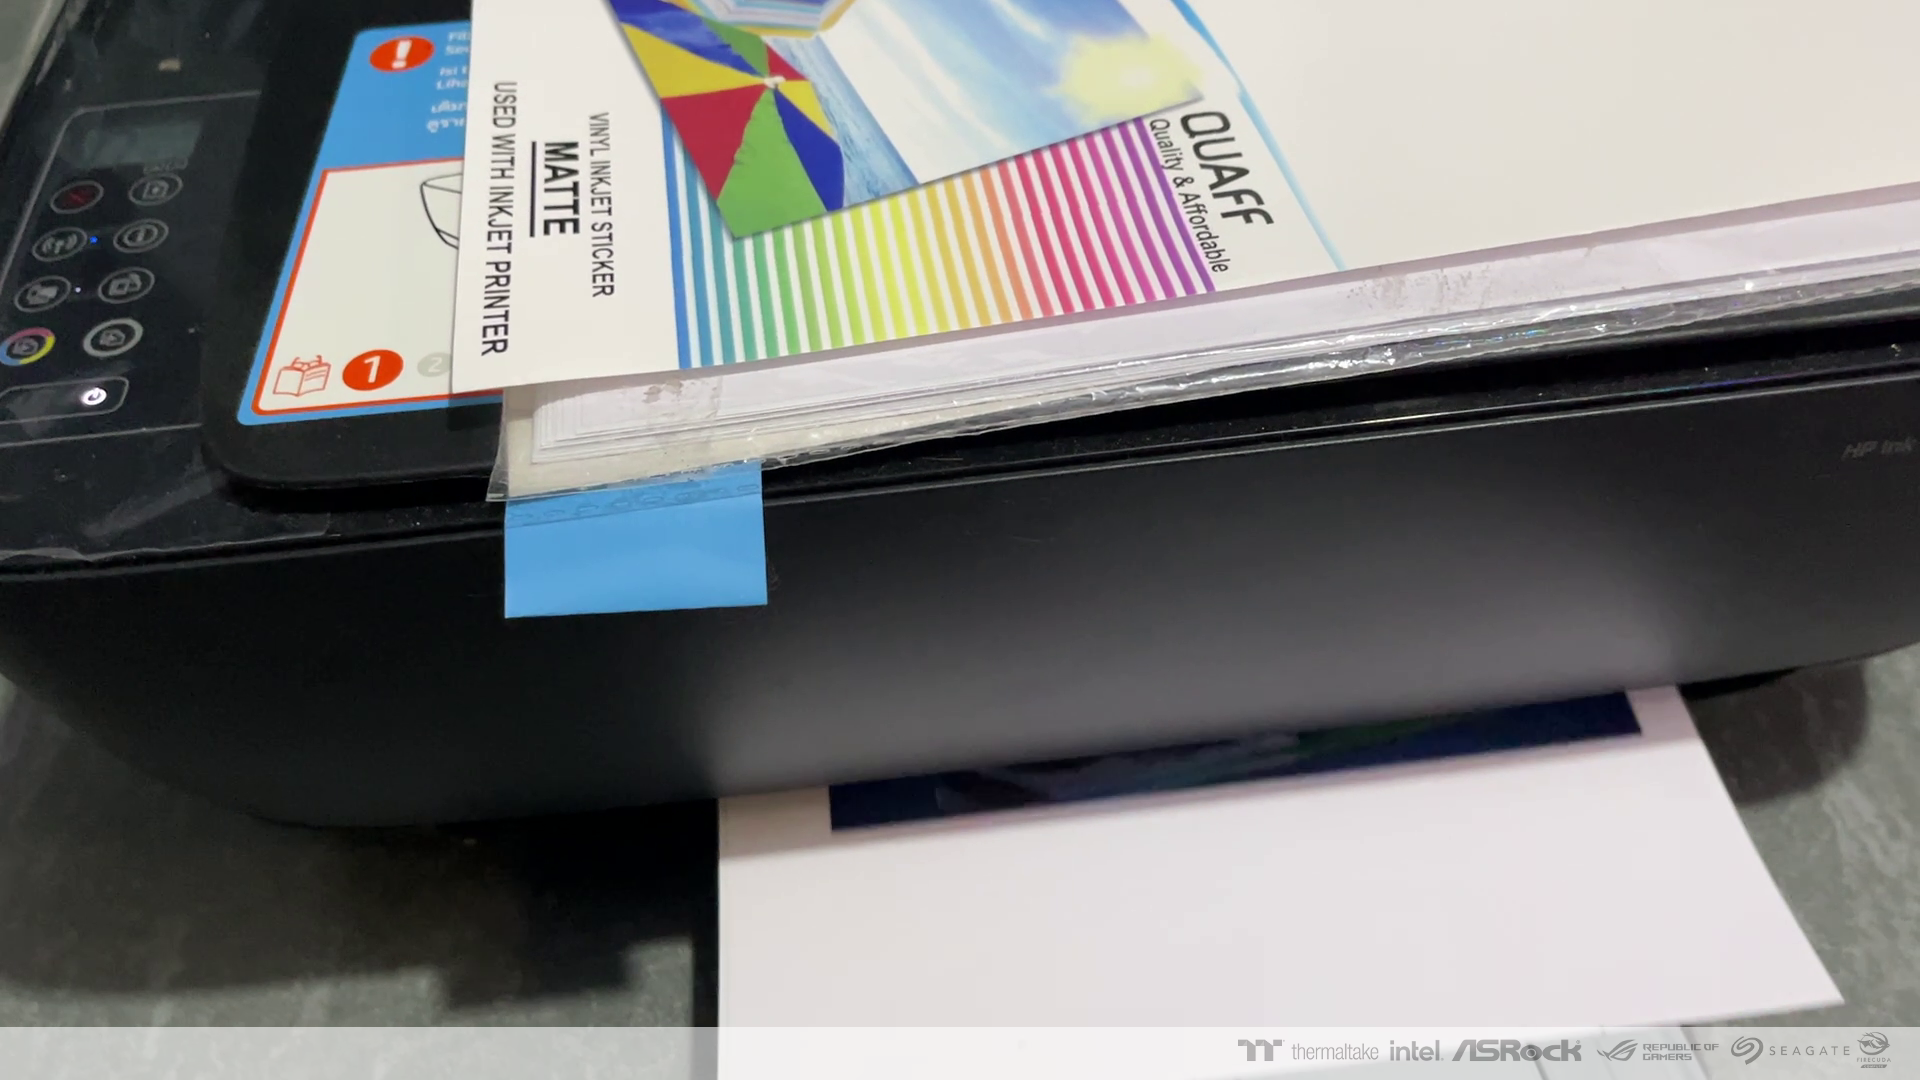
I use printable vinyl inkjet sticker for signages

I used 0.5mm PLA paltes as signage boards.thumb.png.819ef8a0f5d7ca720c2903a72b851c3d.png)
Installation of the signages
.thumb.png.2ae9983ac768e6d851be9258cfef7128.png)
Wifey helped me to paint the remaining accessories for the case mod, very thankful that I had extra hands to help me 🥰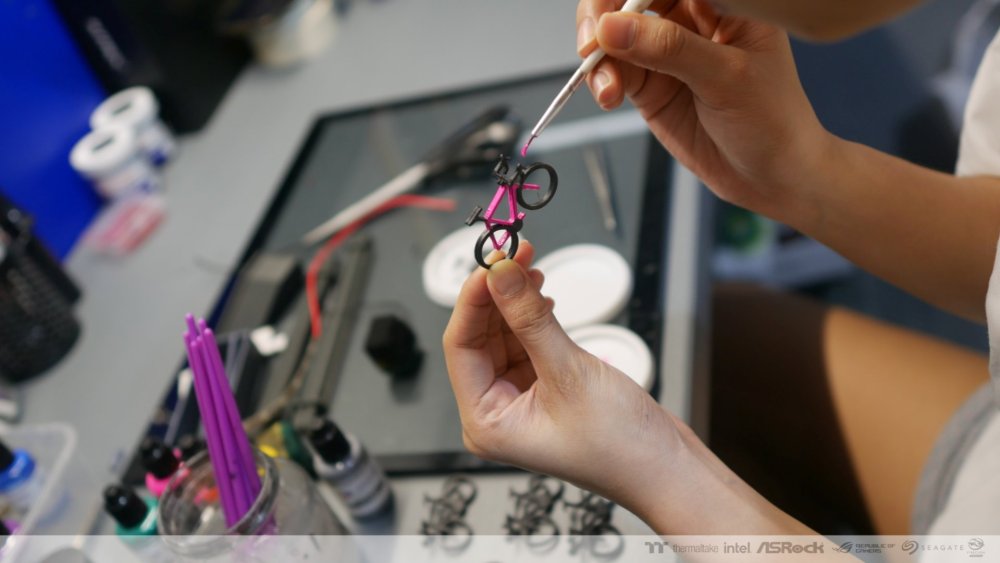
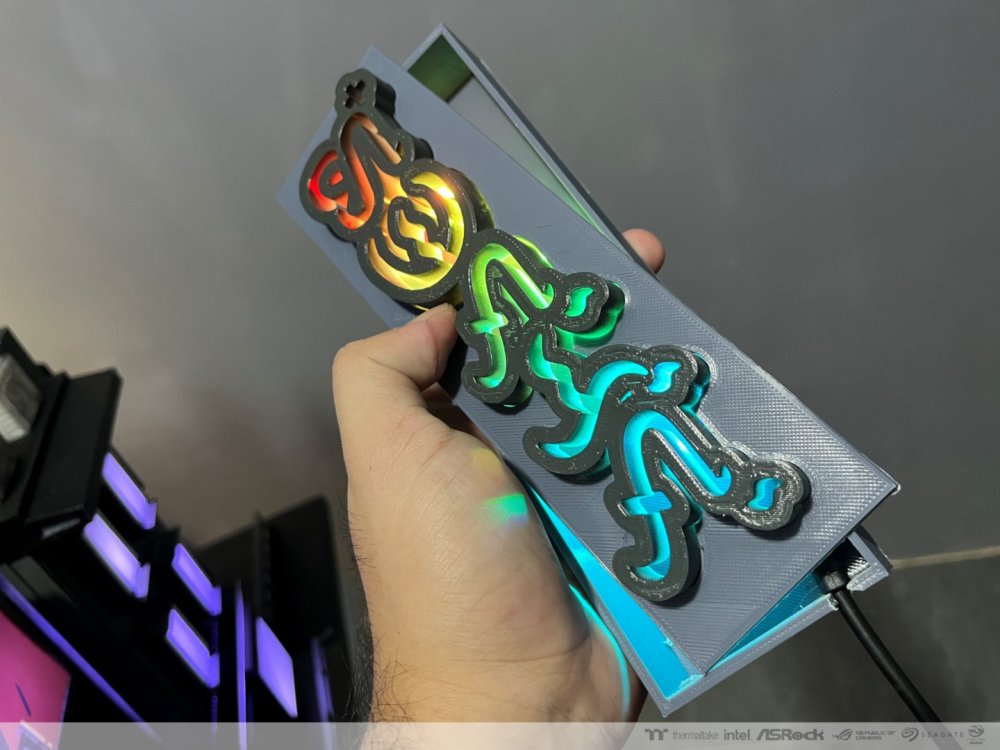
Some additional signs which are 3D printed also and I used mini Neon led lights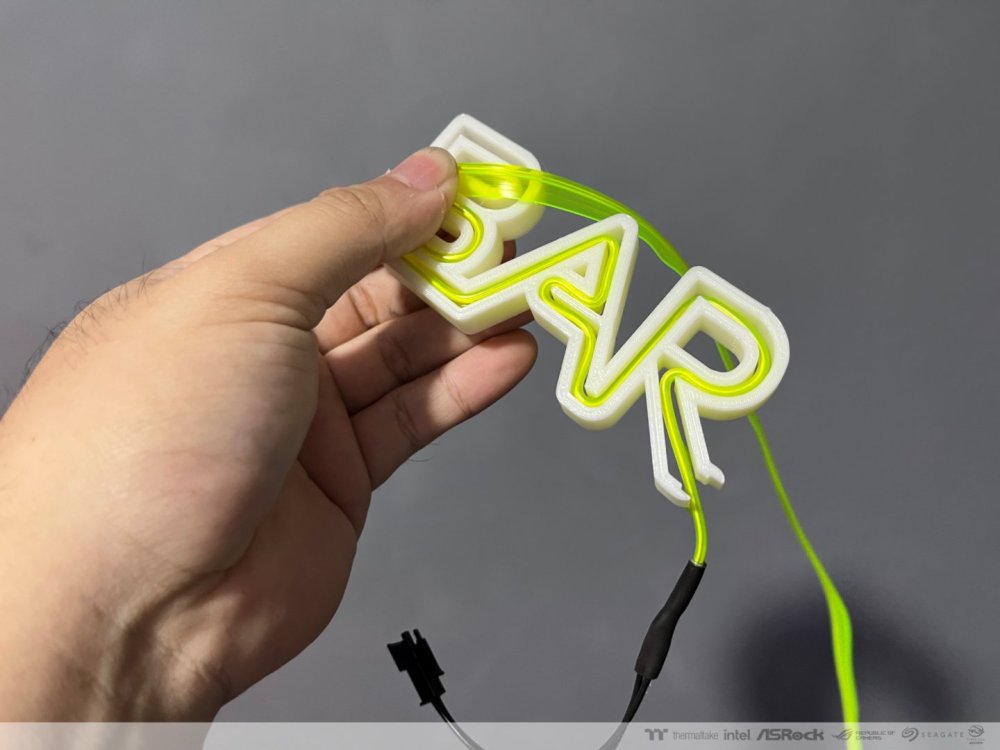
I made this special "Baybayin"(Native writing system of Philippines) sign that means Pilipinas
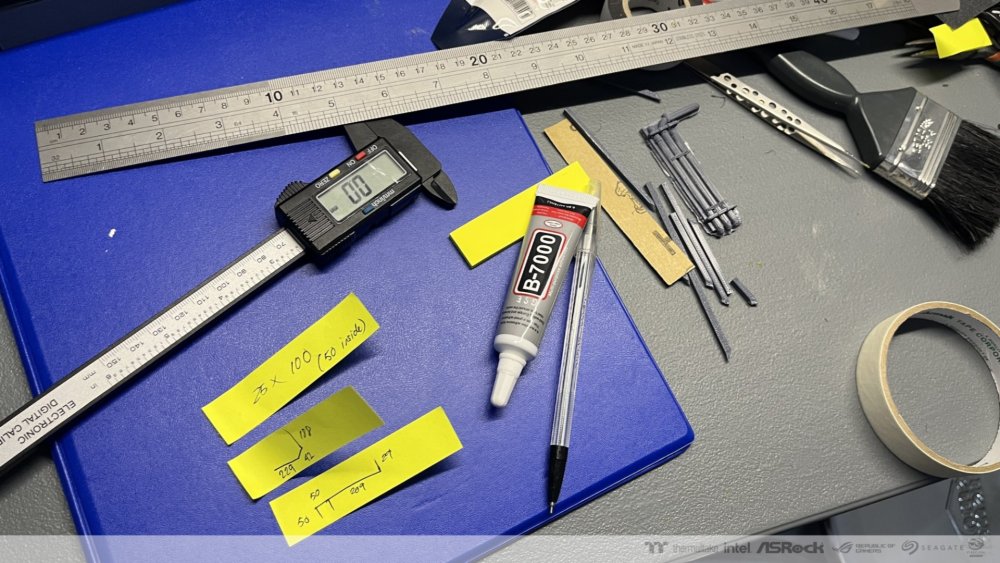
I had to double check everything specially the measurements
-
Modeling and preparing of the 3D parts to be printed.
.thumb.png.6ef1ce4a129b8beb44f593d27a0aec94.png)
.thumb.png.b0d66d5782a9e5a1292f227708072345.png)
.thumb.jpg.d0650b6a29ec38699e23b673c9c0cfda.jpg)
.thumb.png.f14b310ac791e6e17e3fc67fad3d12de.png)
.thumb.png.427235a1da1300db365ba5dcbfc2f056.png)
.thumb.png.026a68f71a3f43ced401dcf8759fe2a3.png)
.thumb.png.396b8eccbdc34d06343bb5b6ba390a44.png)
.thumb.png.0c5e214323ab1e480d34f15eeb100ba1.png)
.thumb.png.b06525994659665e97d41ffab1f6bec9.png)
I made almost 118 different kinds of 3D model to add details to our exterior part of the mod.
.thumb.png.4ccc9d490c6be87c126a83e10f73c8ff.png)
3D printing of the parts:
.thumb.png.82d94b291ef07622239cf99e8c5e53b9.png)
.thumb.png.d7f51724453559c60b782f77c4a8f17b.png)
.thumb.png.58bcd62d0b806984407e38fdf9741cd3.png)
.thumb.jpg.955dc32c7496e6083536390ce53dd14e.jpg)
.thumb.png.c78d9170e9e7ae0971fcd8ece3fd4628.png)
.thumb.jpg.28264e6b2835421c68f84e357b02faf8.jpg)
.thumb.png.841577785dcf384d618cbbee268918b7.png)
.thumb.png.56229e755255e6ec53fe9d88edb54ed7.png)
.thumb.png.d9c790068a98d28b99e1f754fb2ceeb2.png)
.thumb.png.6a316b136ecfe3a7f12e489874ae3c17.png)
.thumb.png.340f30e4c186619c4f3dd12740dc5a53.png)
.thumb.png.879f7076bde1bc5f11eac5c0f08b96d0.png)
.thumb.png.43cd96b458a7766ff62dc081579ef8cb.png)
.thumb.png.3eb86635bc90fc75eda6c4f0dd464445.png)
.thumb.png.399ef1e651e4249090f37864417224d7.png)
.thumb.png.819a9390ce3bd11696585990127d4e98.png)
.thumb.jpg.8910afebd526f24283350543a3b4a547.jpg)
.thumb.jpg.7f3d8f9f512377e07eb19dd2fea0df17.jpg)
The exterior parts of the mod is primer painted again for hand painting + detailing.thumb.jpg.e35f2c683b311ac5efb8e7bf781e2643.jpg)
.thumb.jpg.5d9b9e8f5367769ff9b3e312ade300e2.jpg)
-
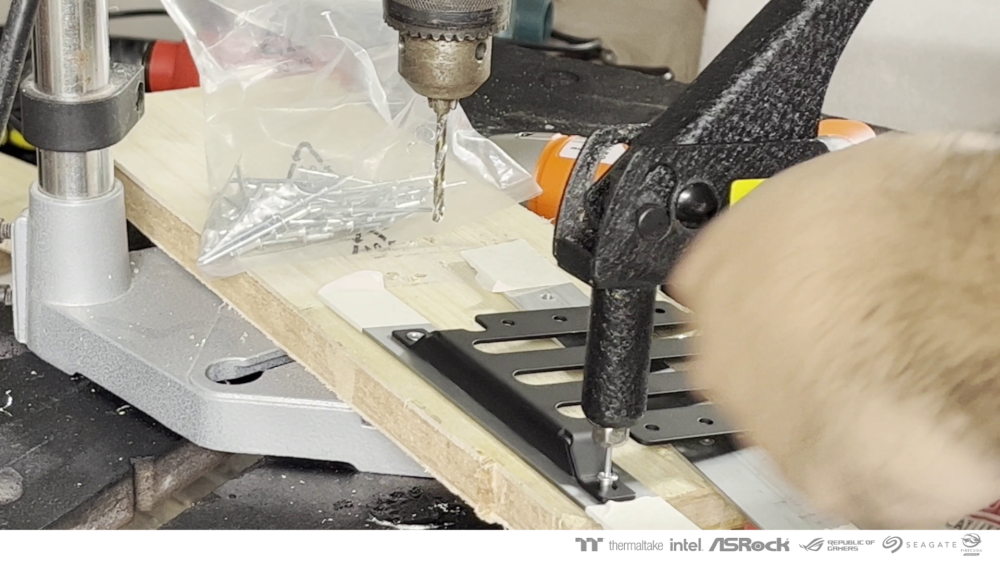
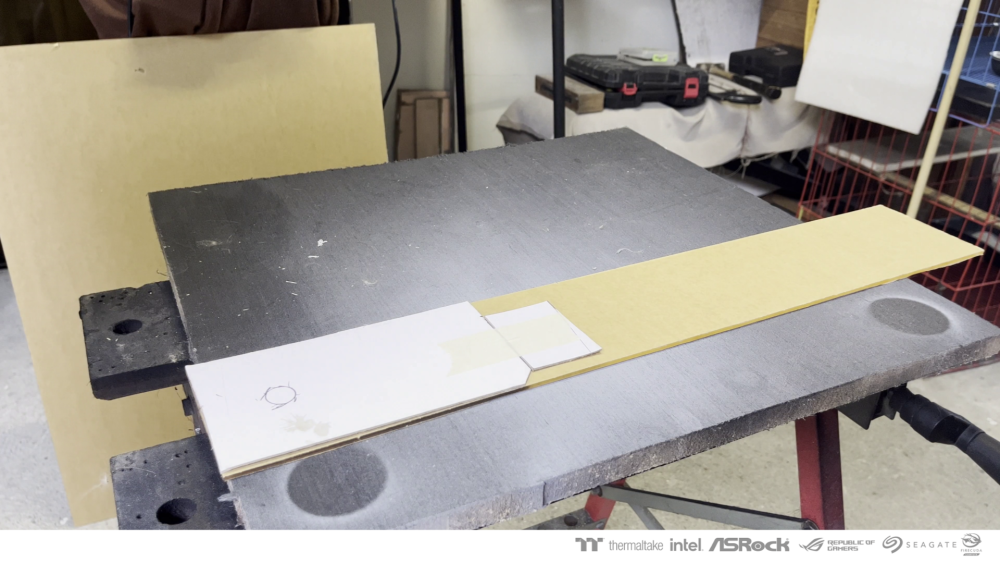
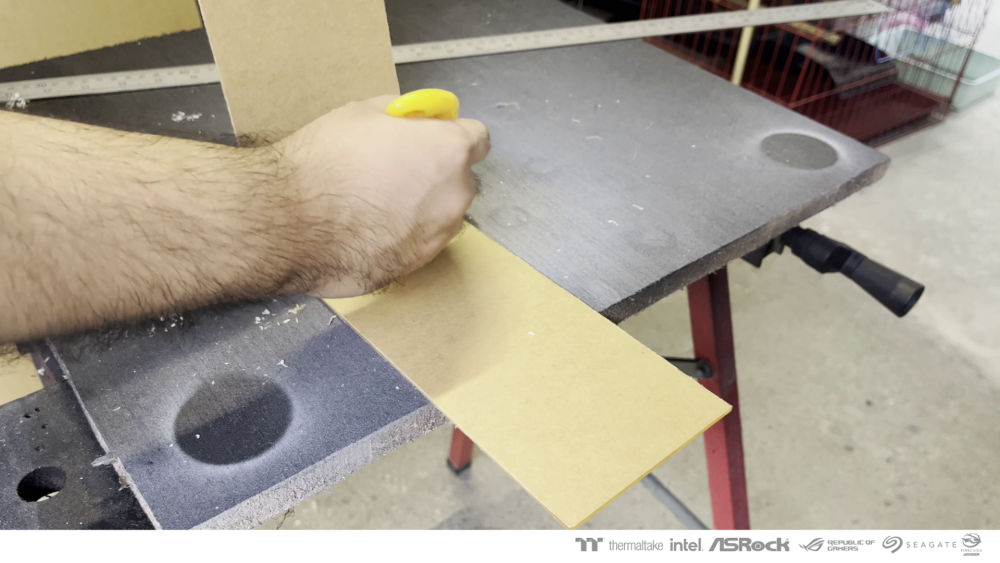
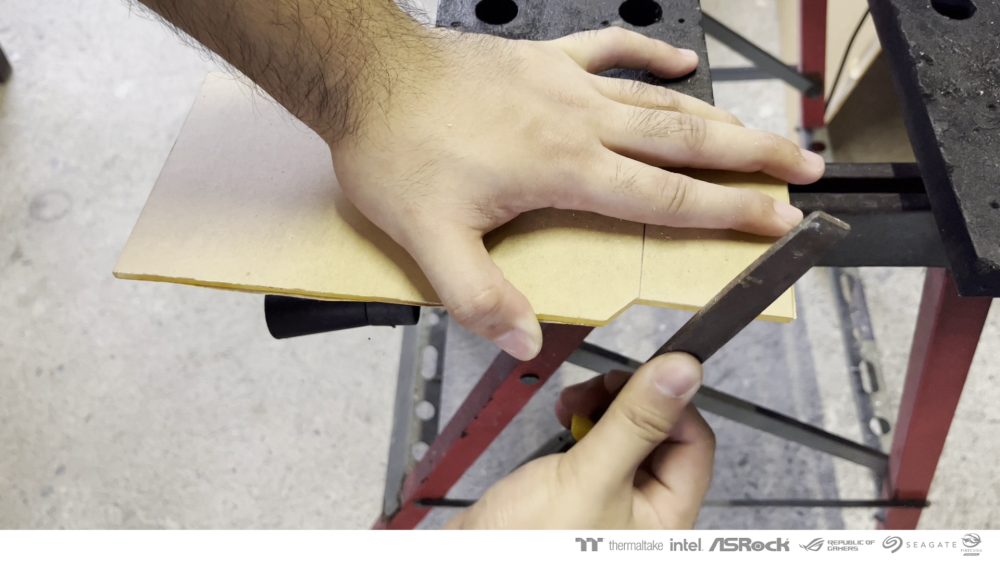
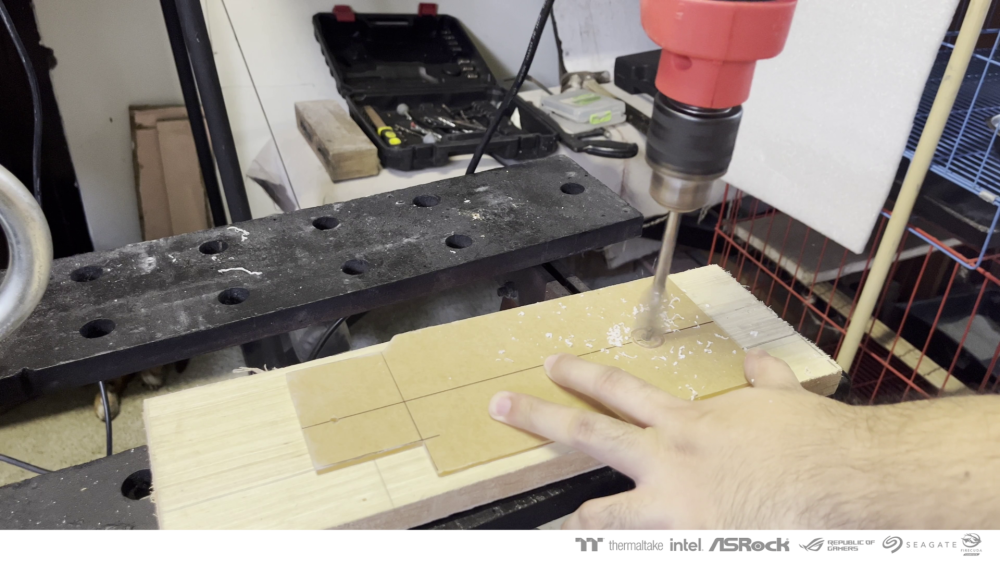
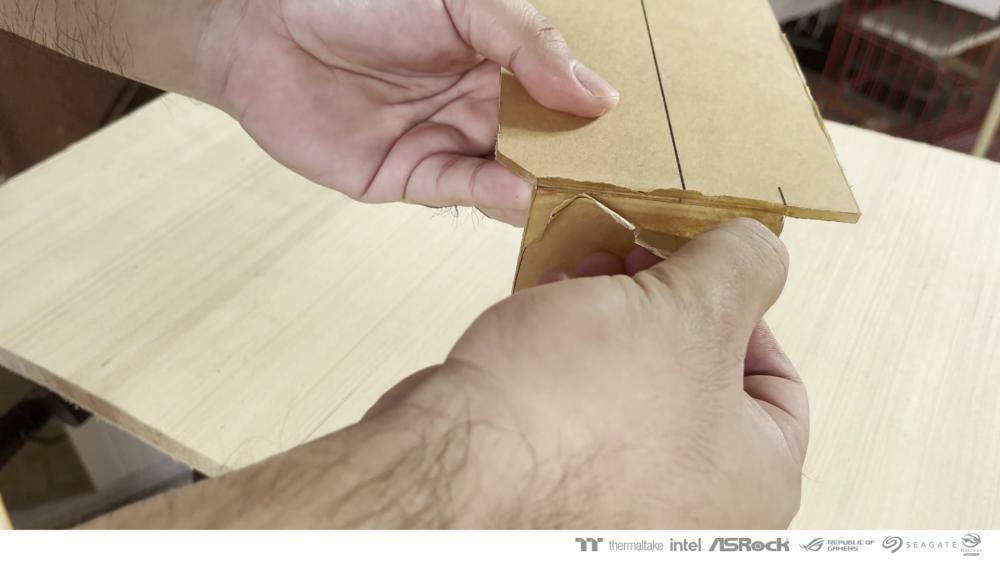
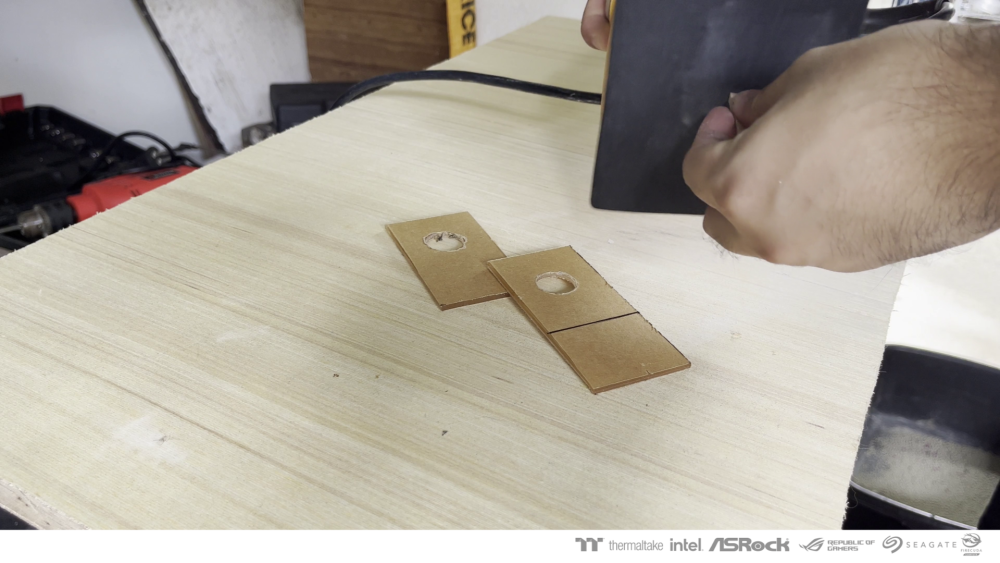
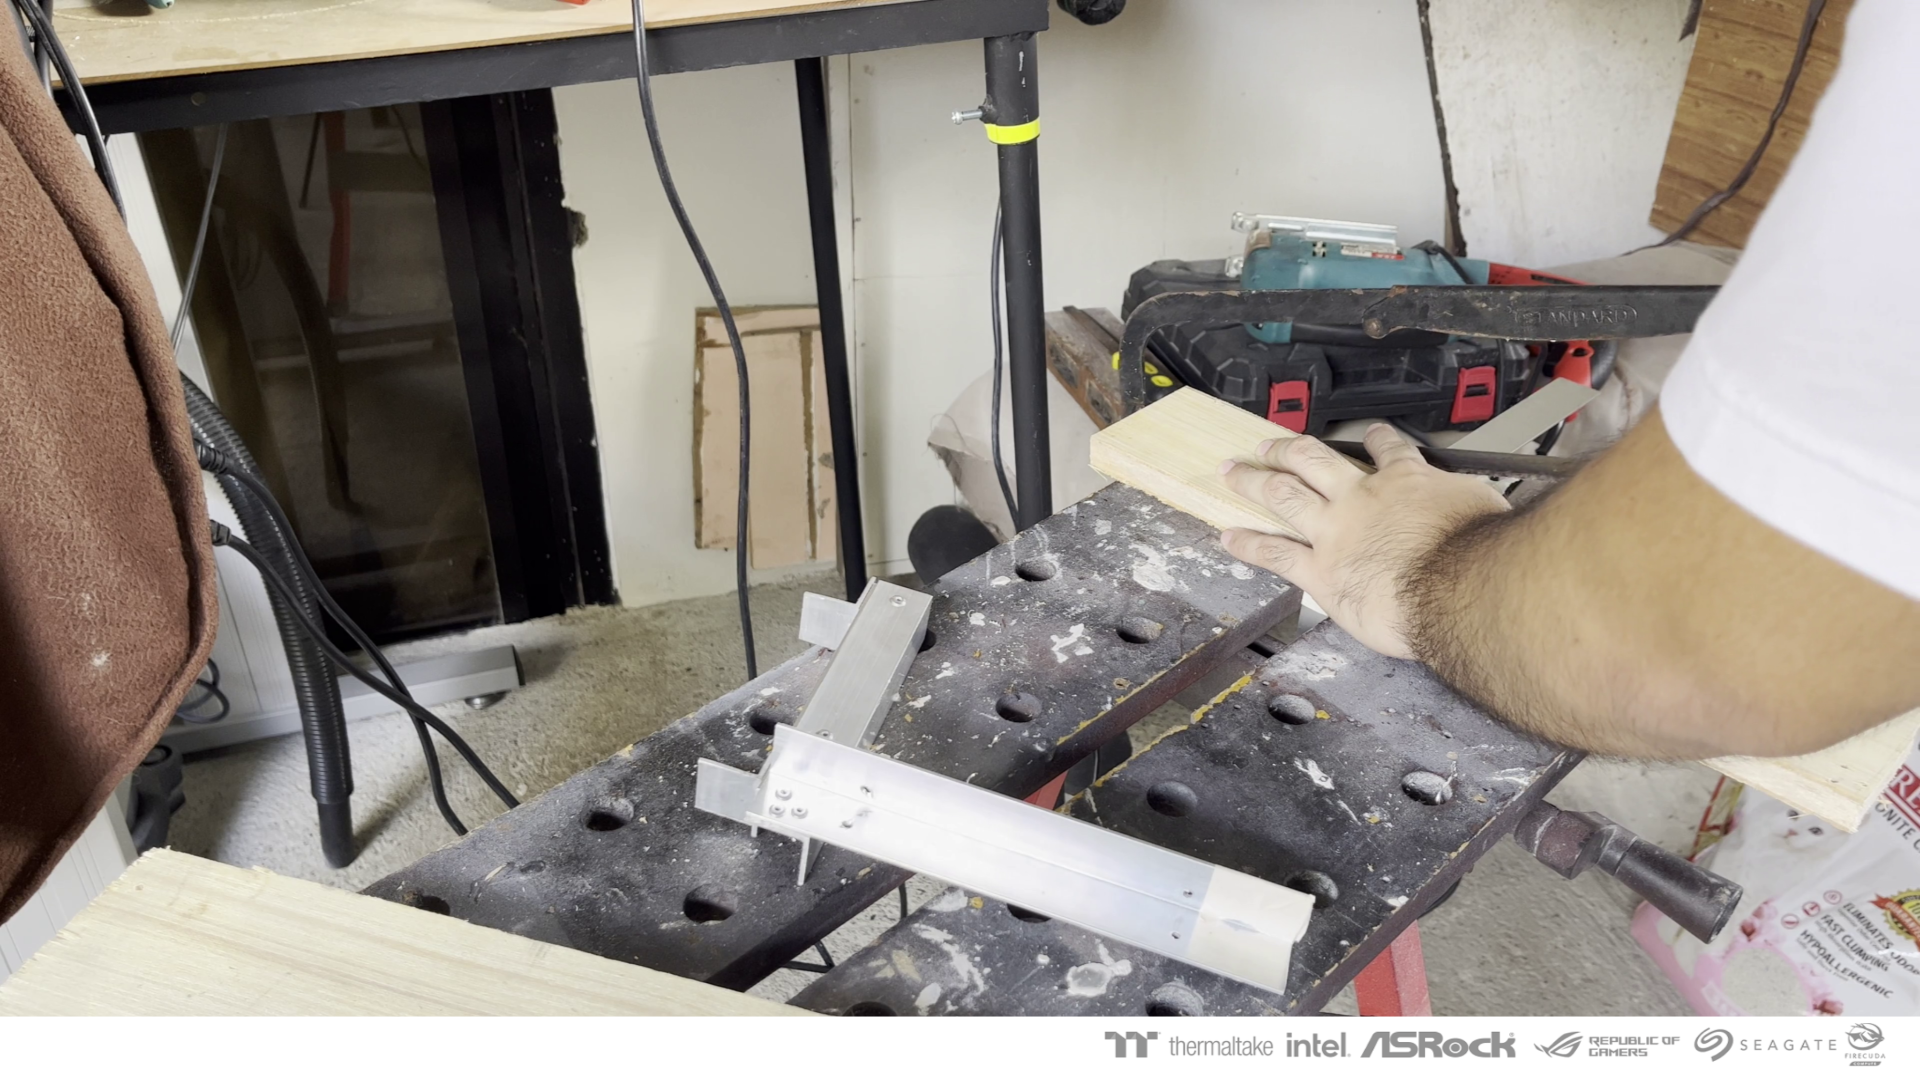
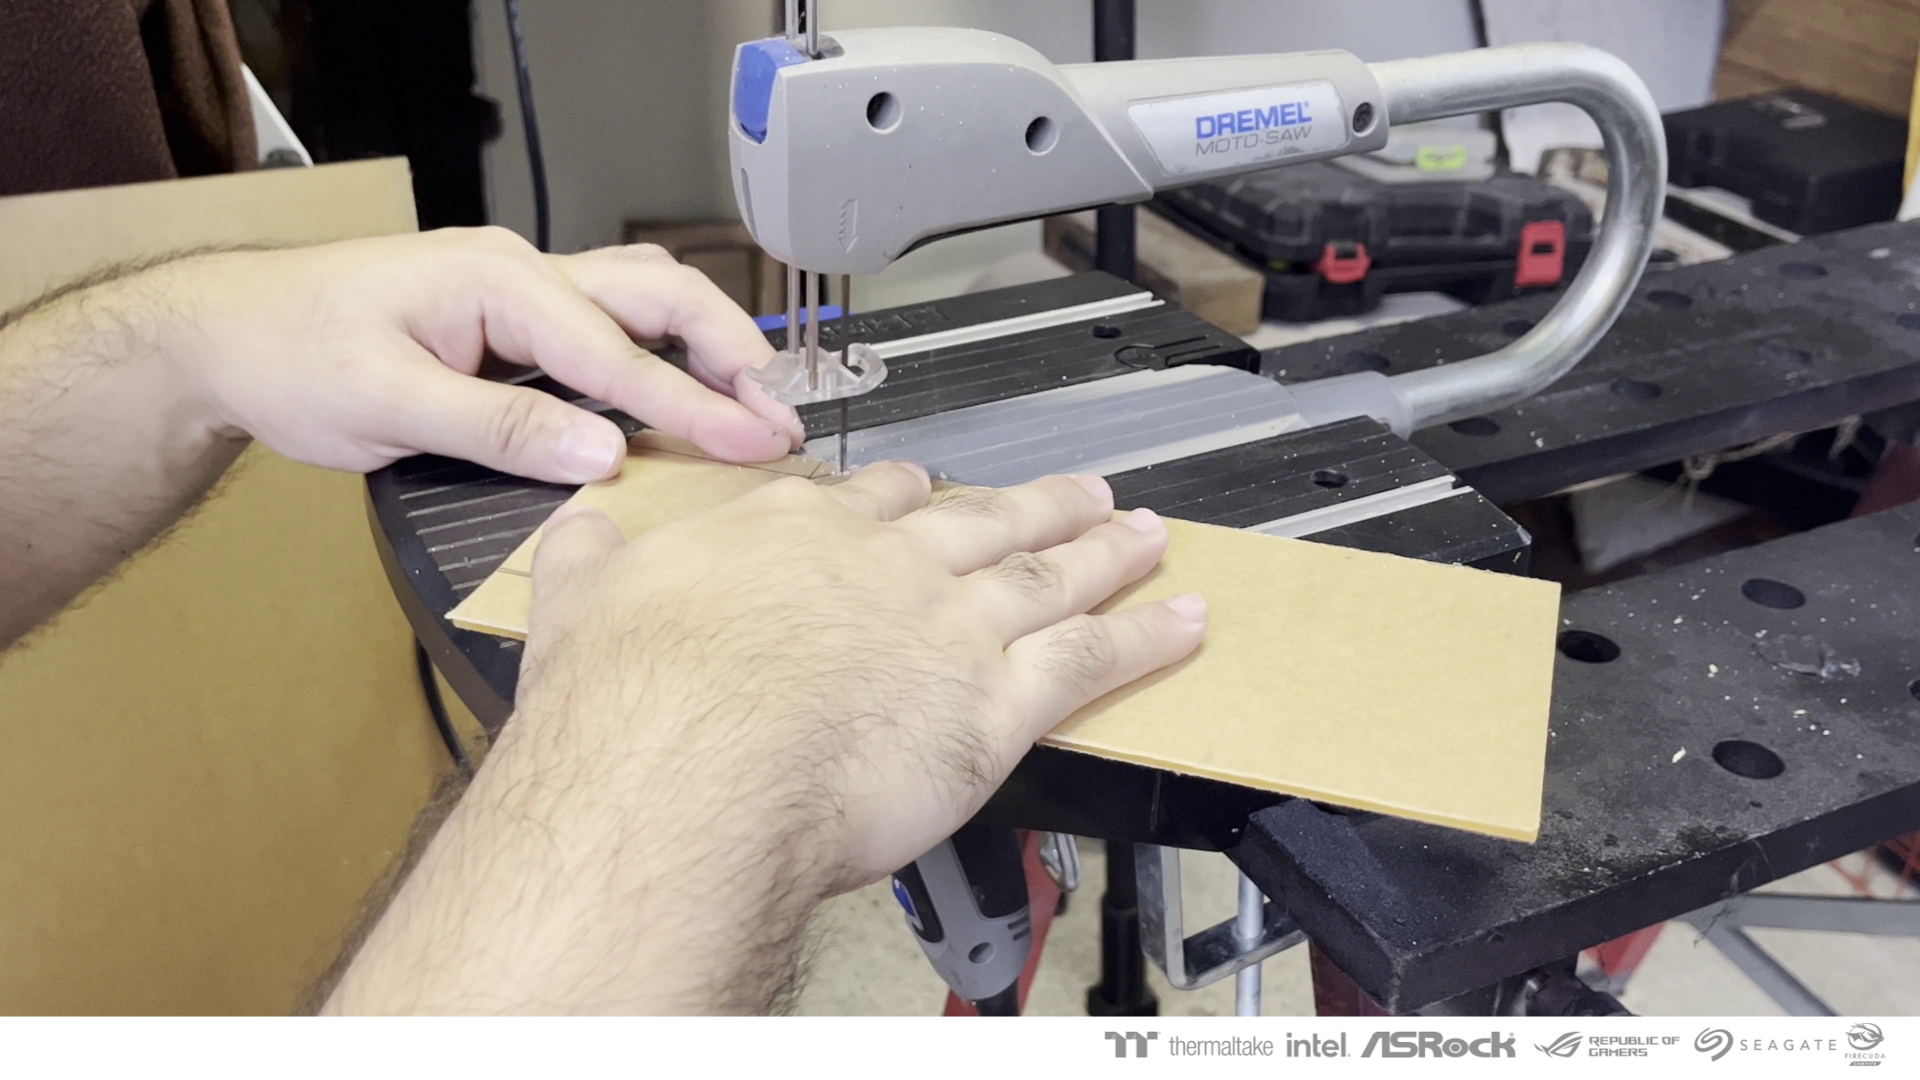
I used my converted plotter-cnc to cut the wood panels
.thumb.png.db303807c6aa8da98b5446ee955ab53b.png)
.thumb.png.6c4cc54c14877c55c4c7d7fc4a1be175.png)
.thumb.png.6af476bf058225ac48d8ceabfab13fcd.png)
.thumb.png.48c27dde0932e68edefd972a5606f1ac.png)
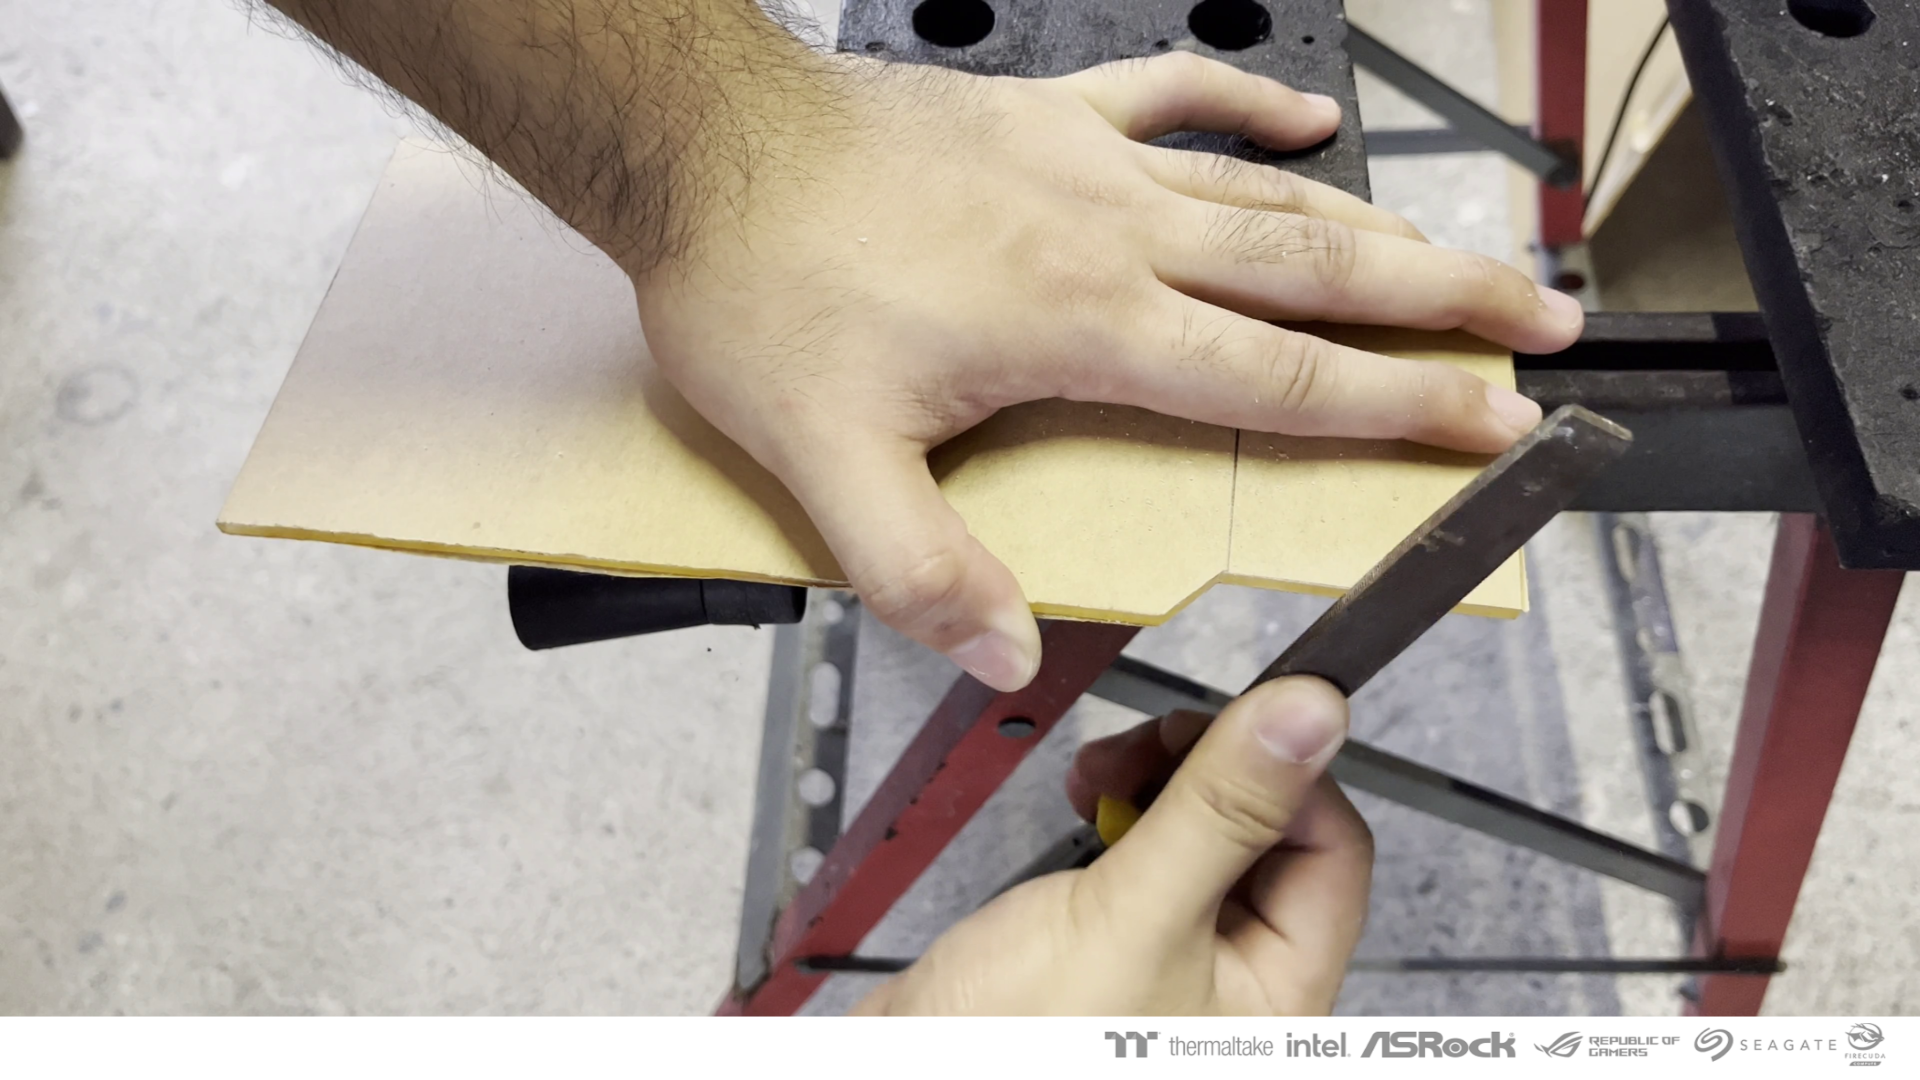
The panels are assembled into shapes that resemble buildings.
.thumb.png.1cf11720f75b4da395a607308d05da38.png)
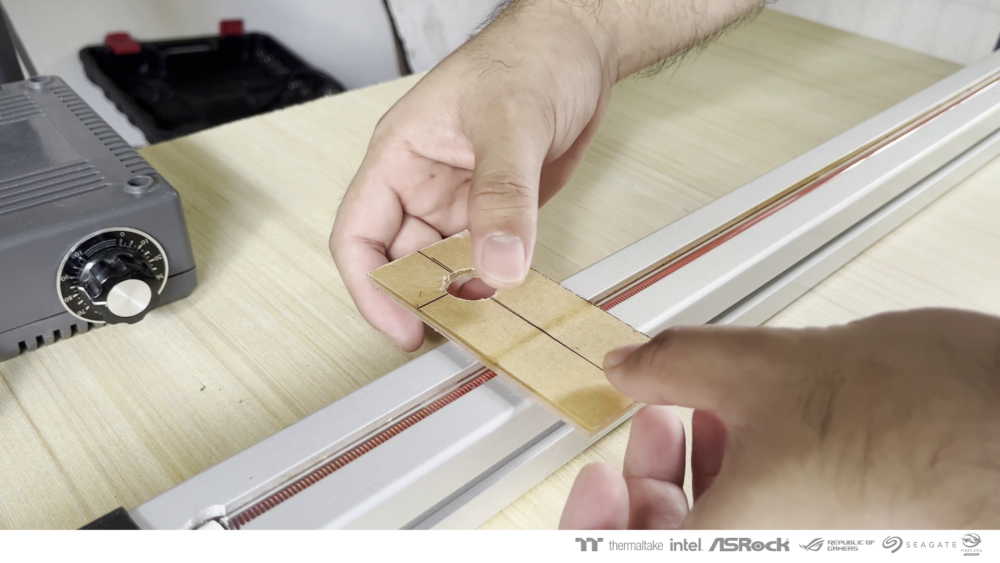
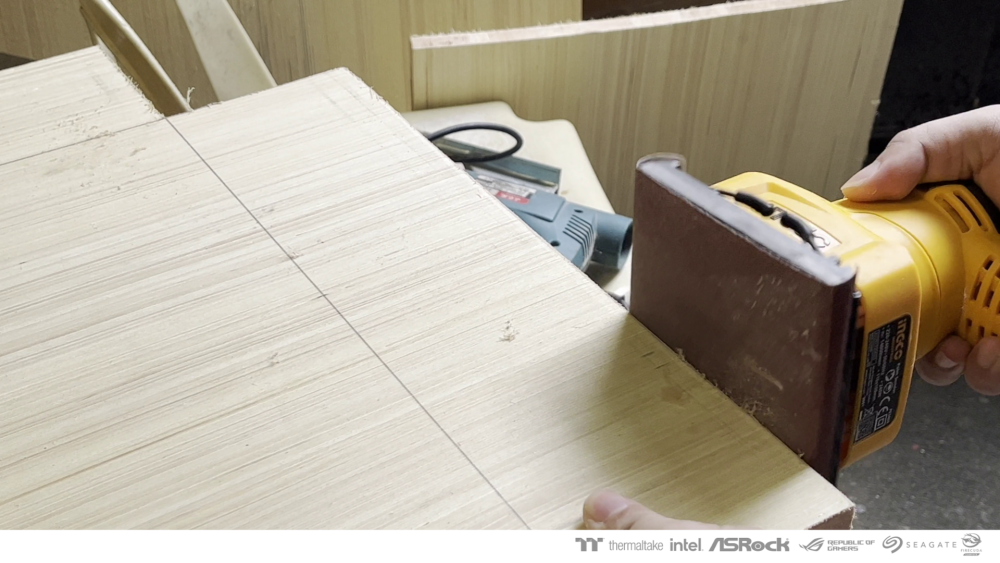
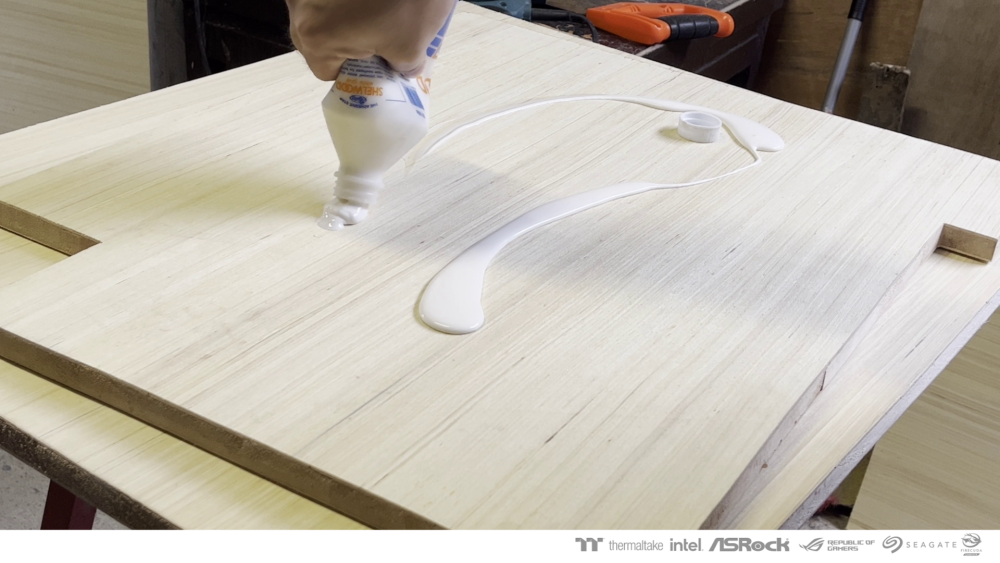
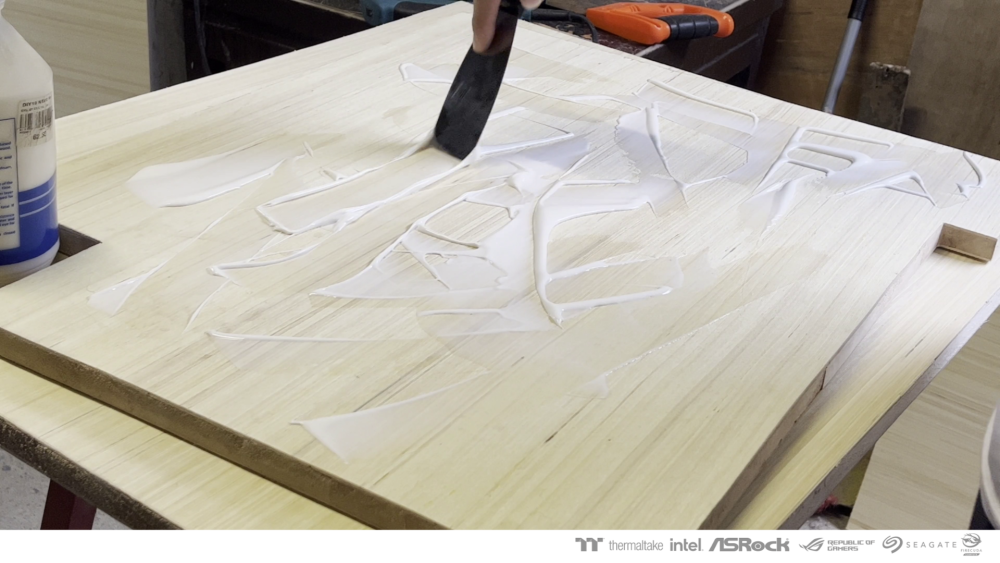
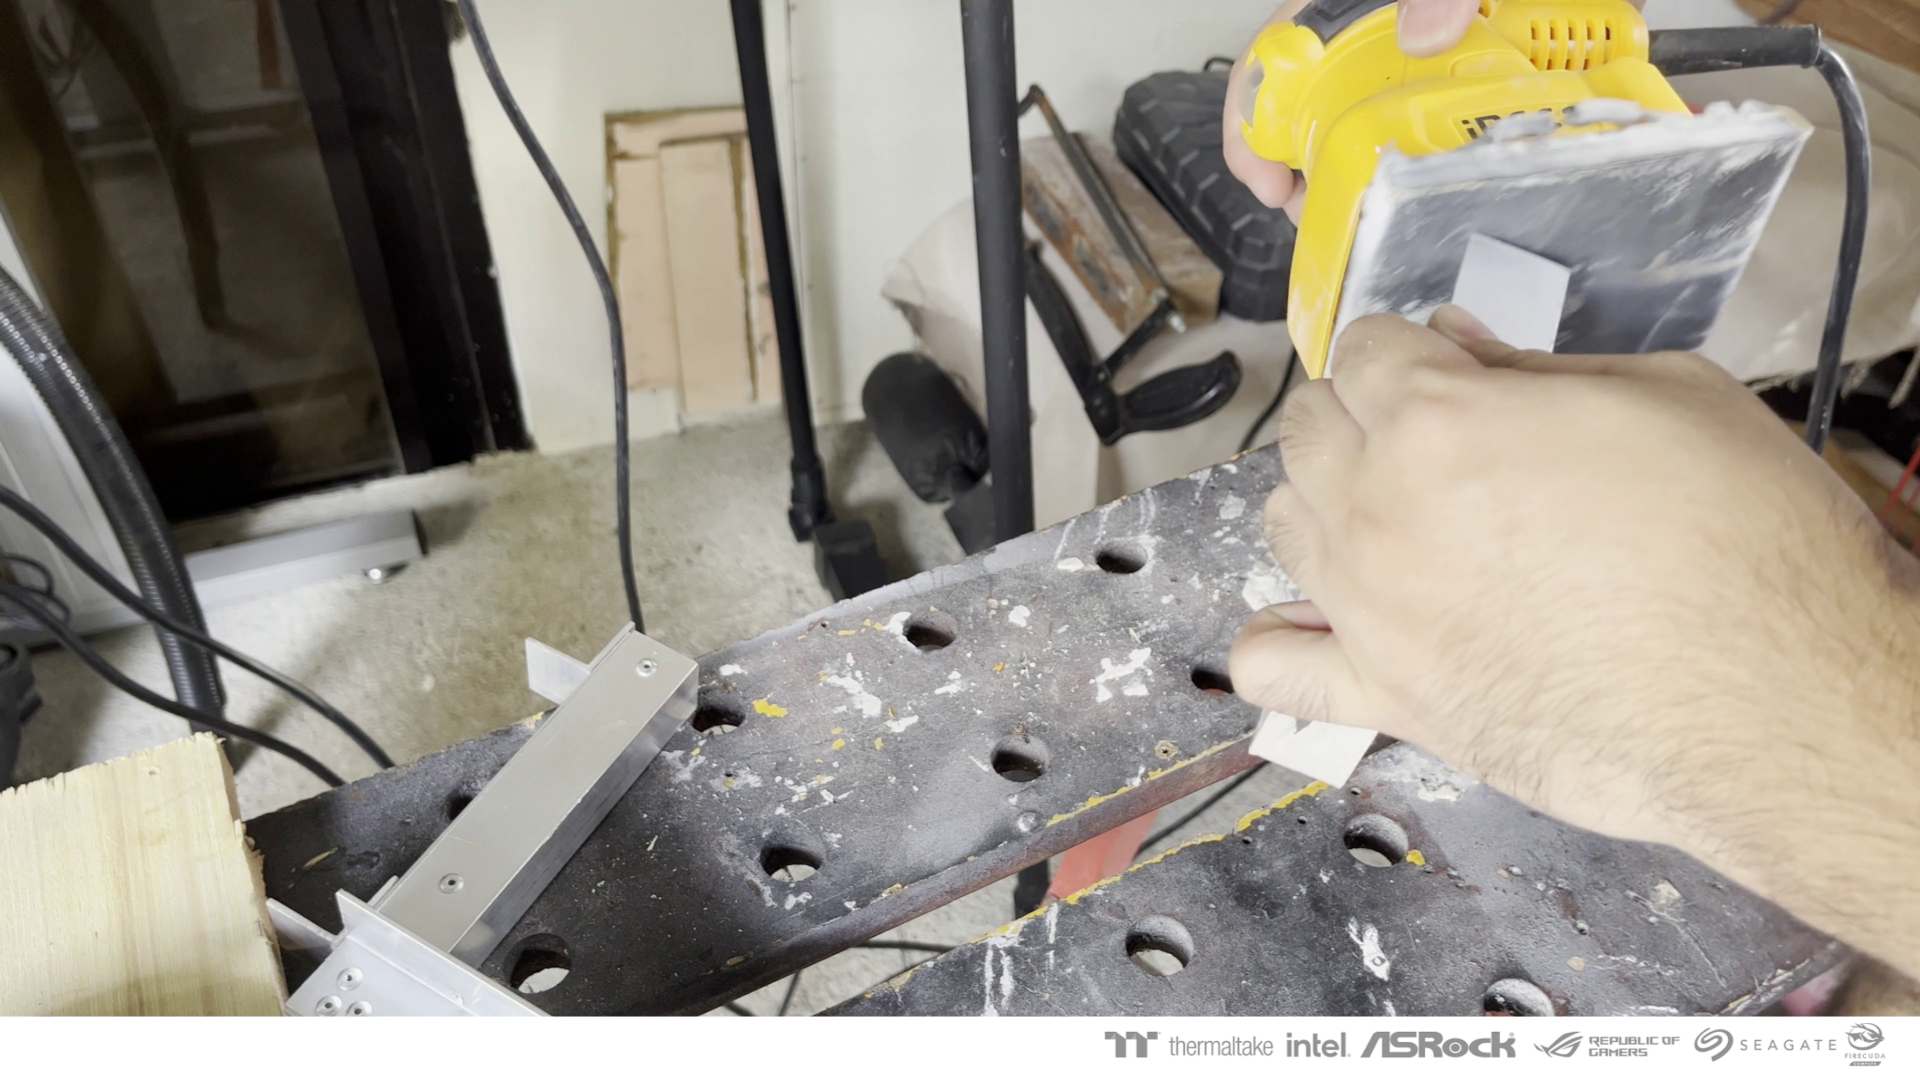
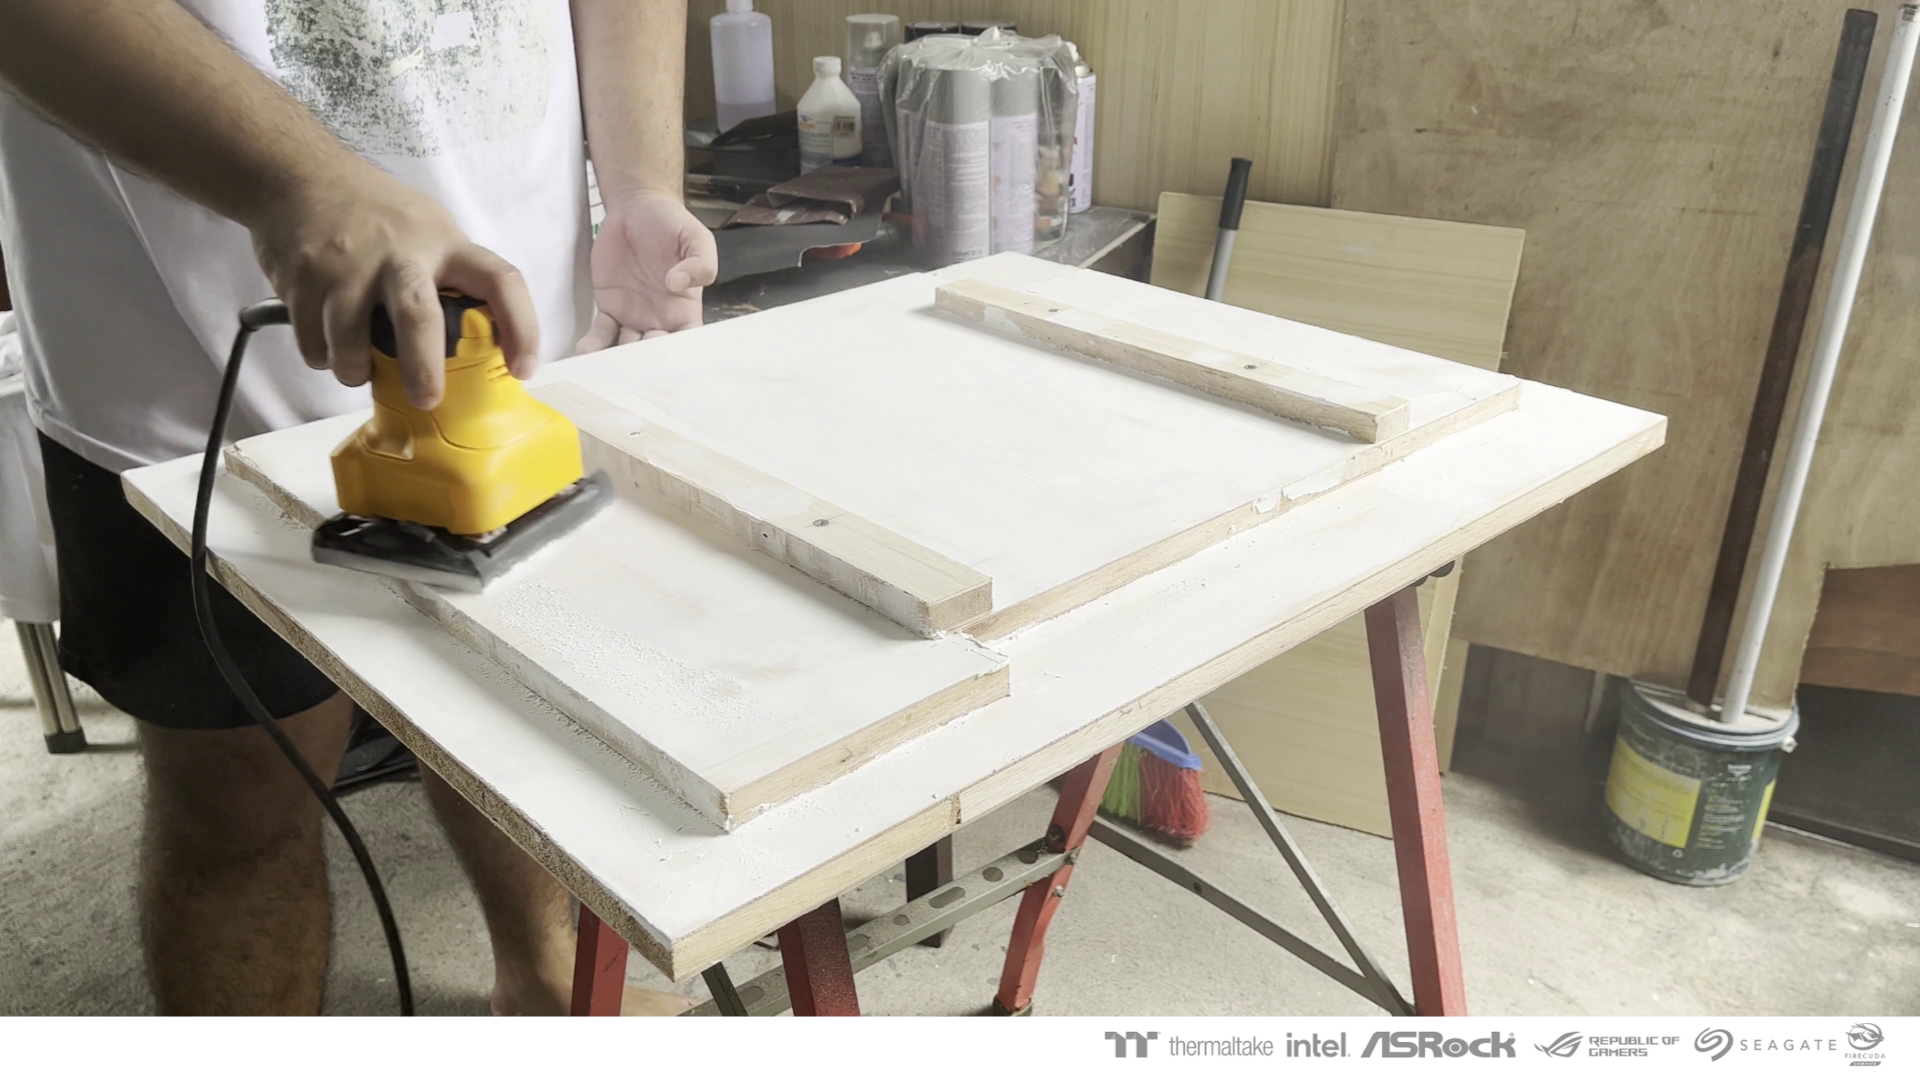
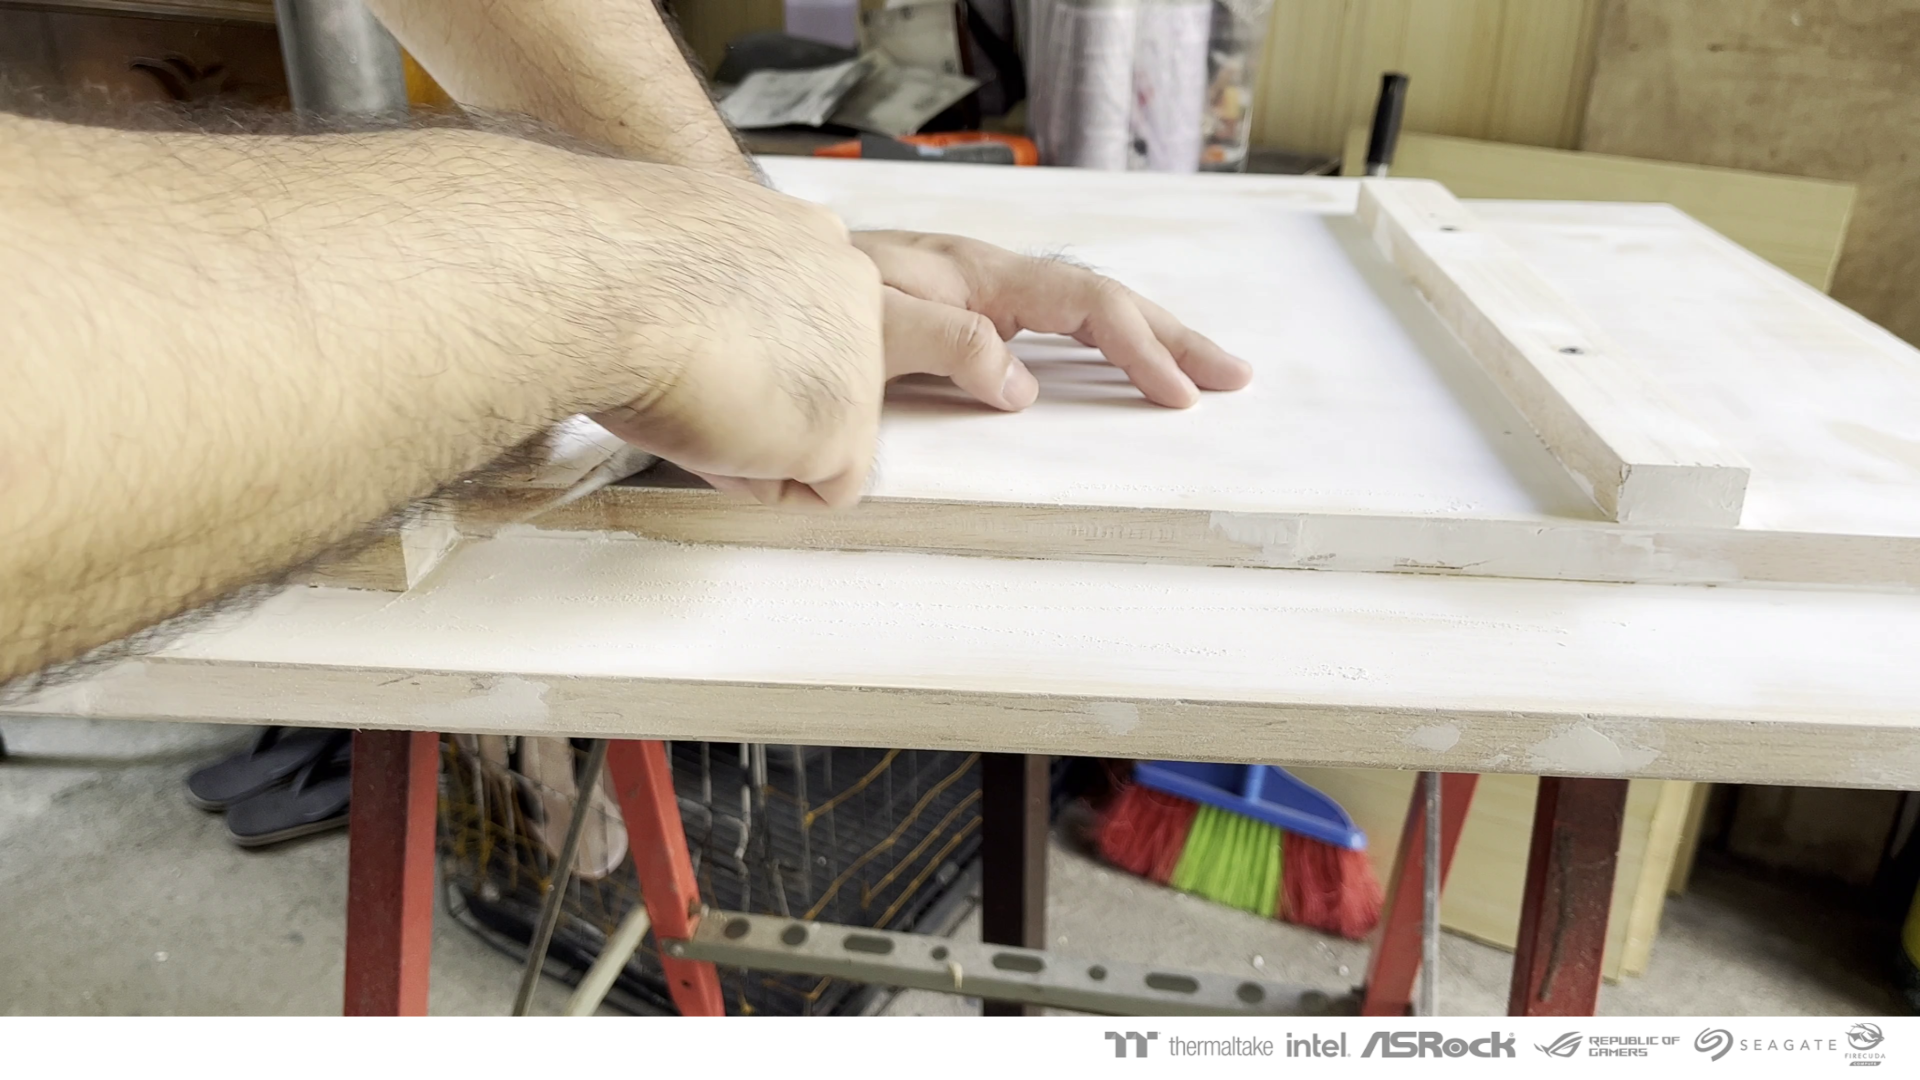
I used filler to make it smooth and sanded it.
.thumb.png.42ac3f7c7b6eb04ab1c4bac04dbbebd5.png)
.thumb.png.a795d387fa26af37b59aecd9274a7b28.png)
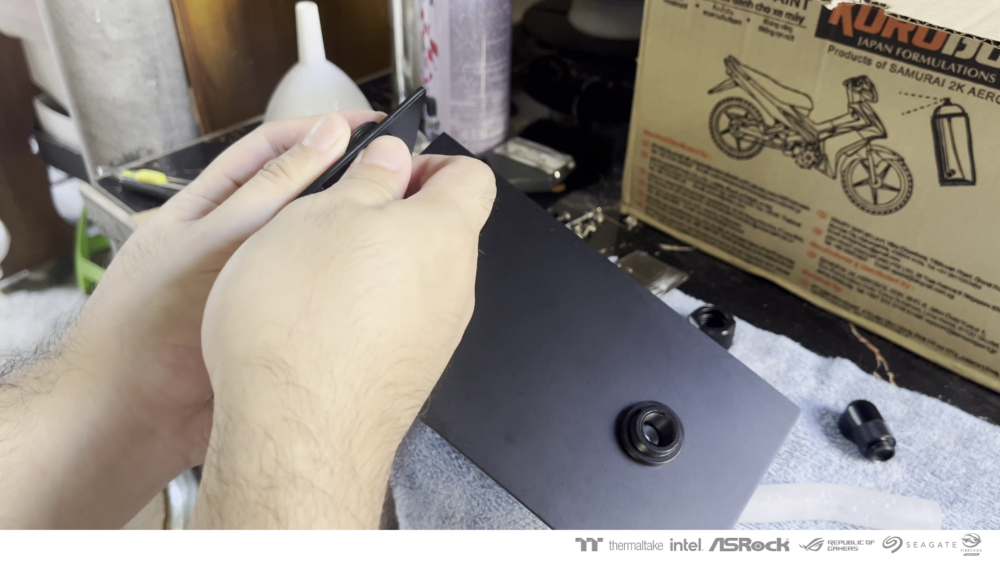
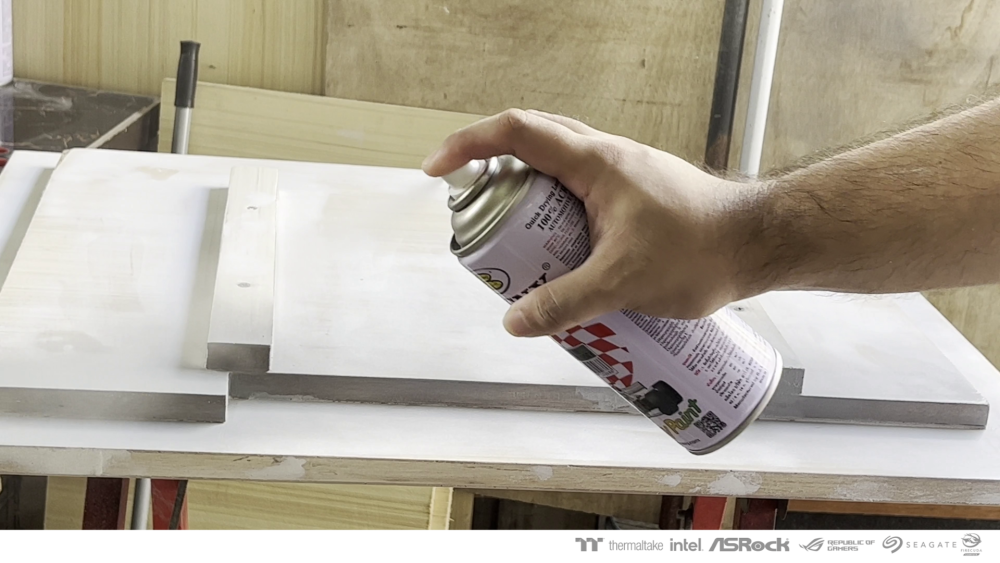
The exterior parts are now primered.
.thumb.png.bcc7f9ac207b6c3282eecf69050a7a3e.png)
.thumb.png.383d28632c40d33d93e751f12f93aad7.png)
-
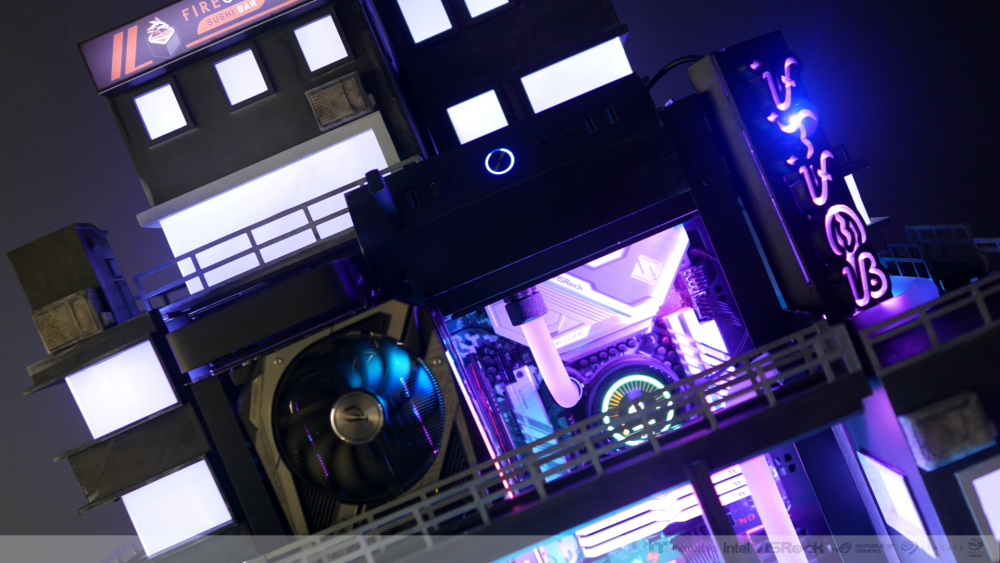
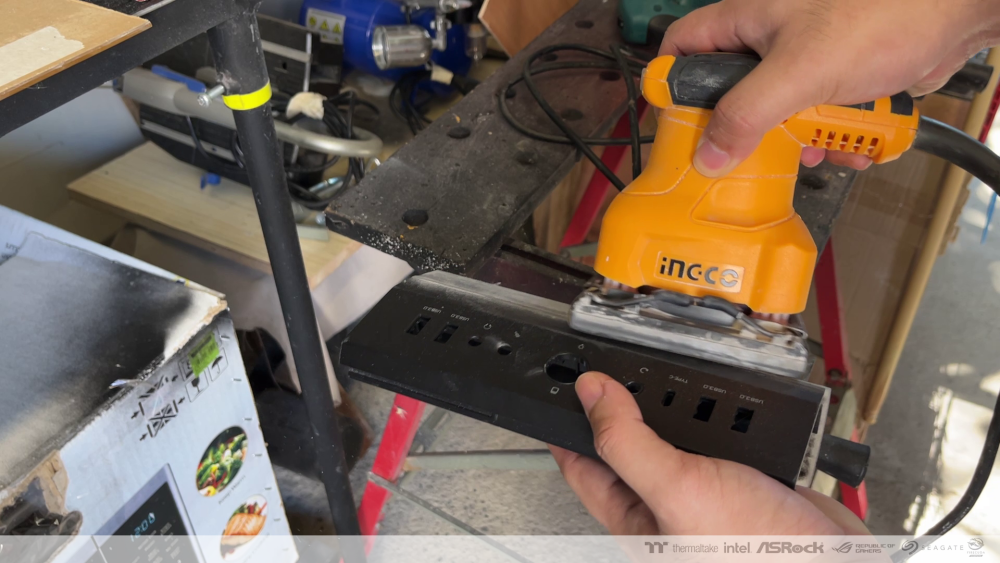
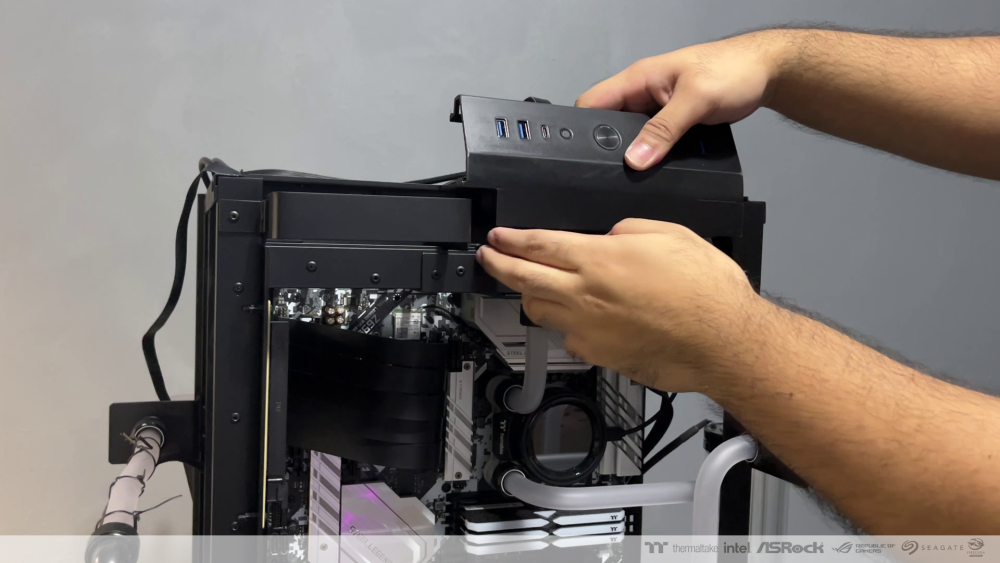
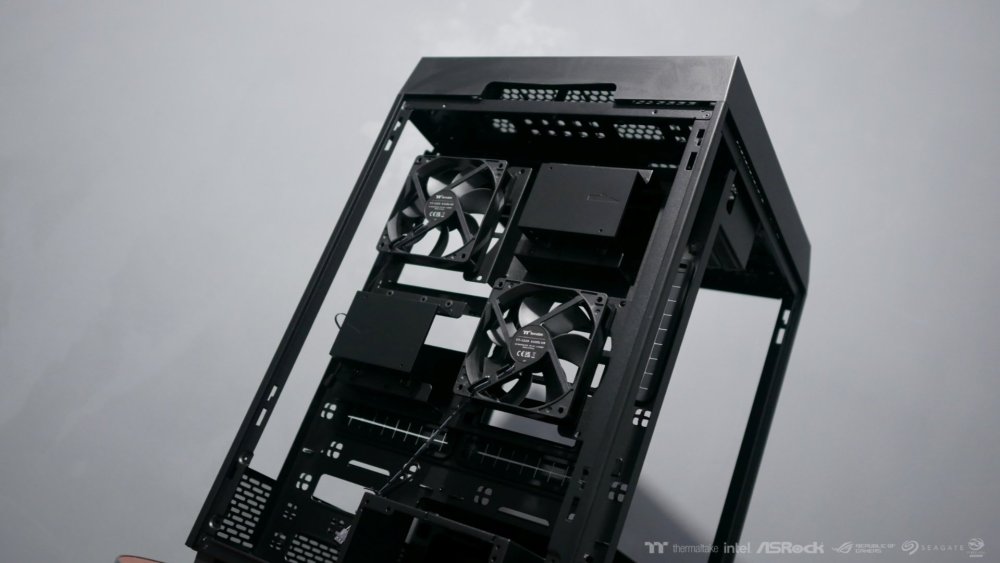
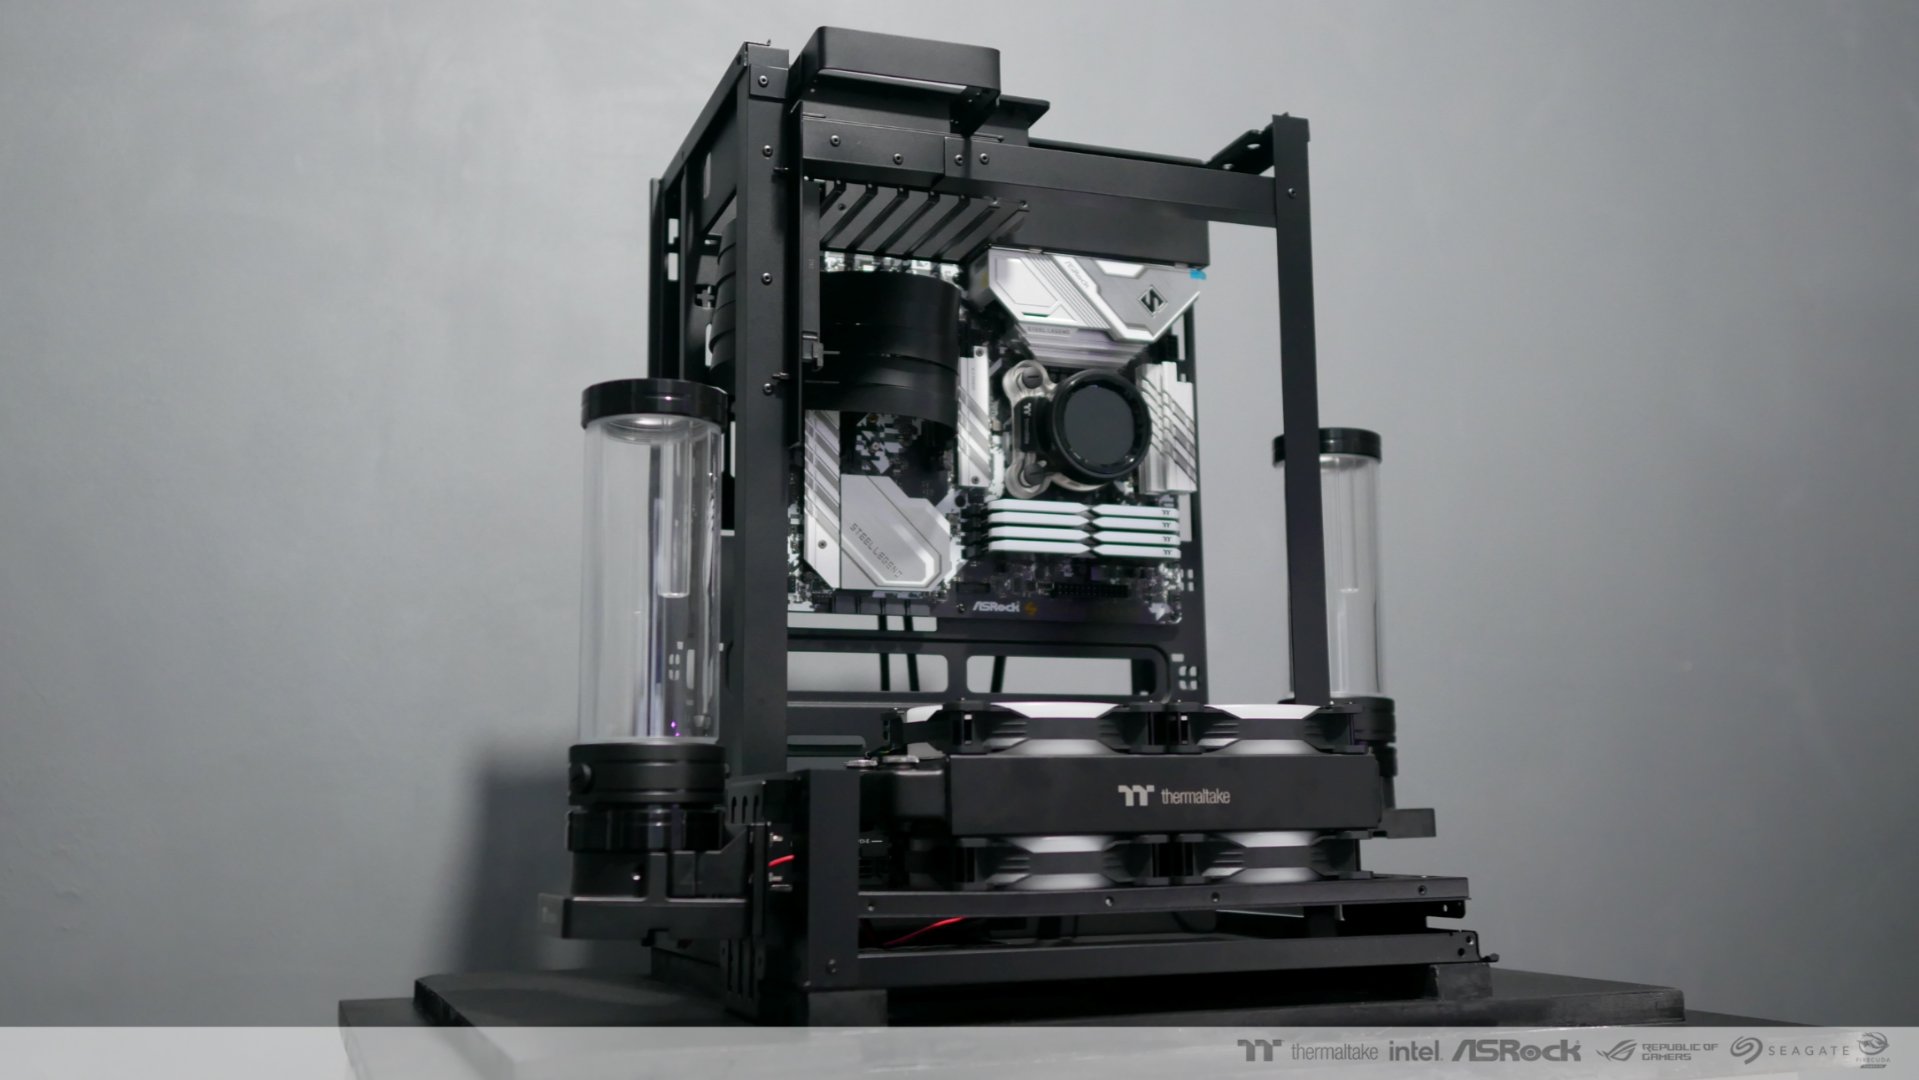
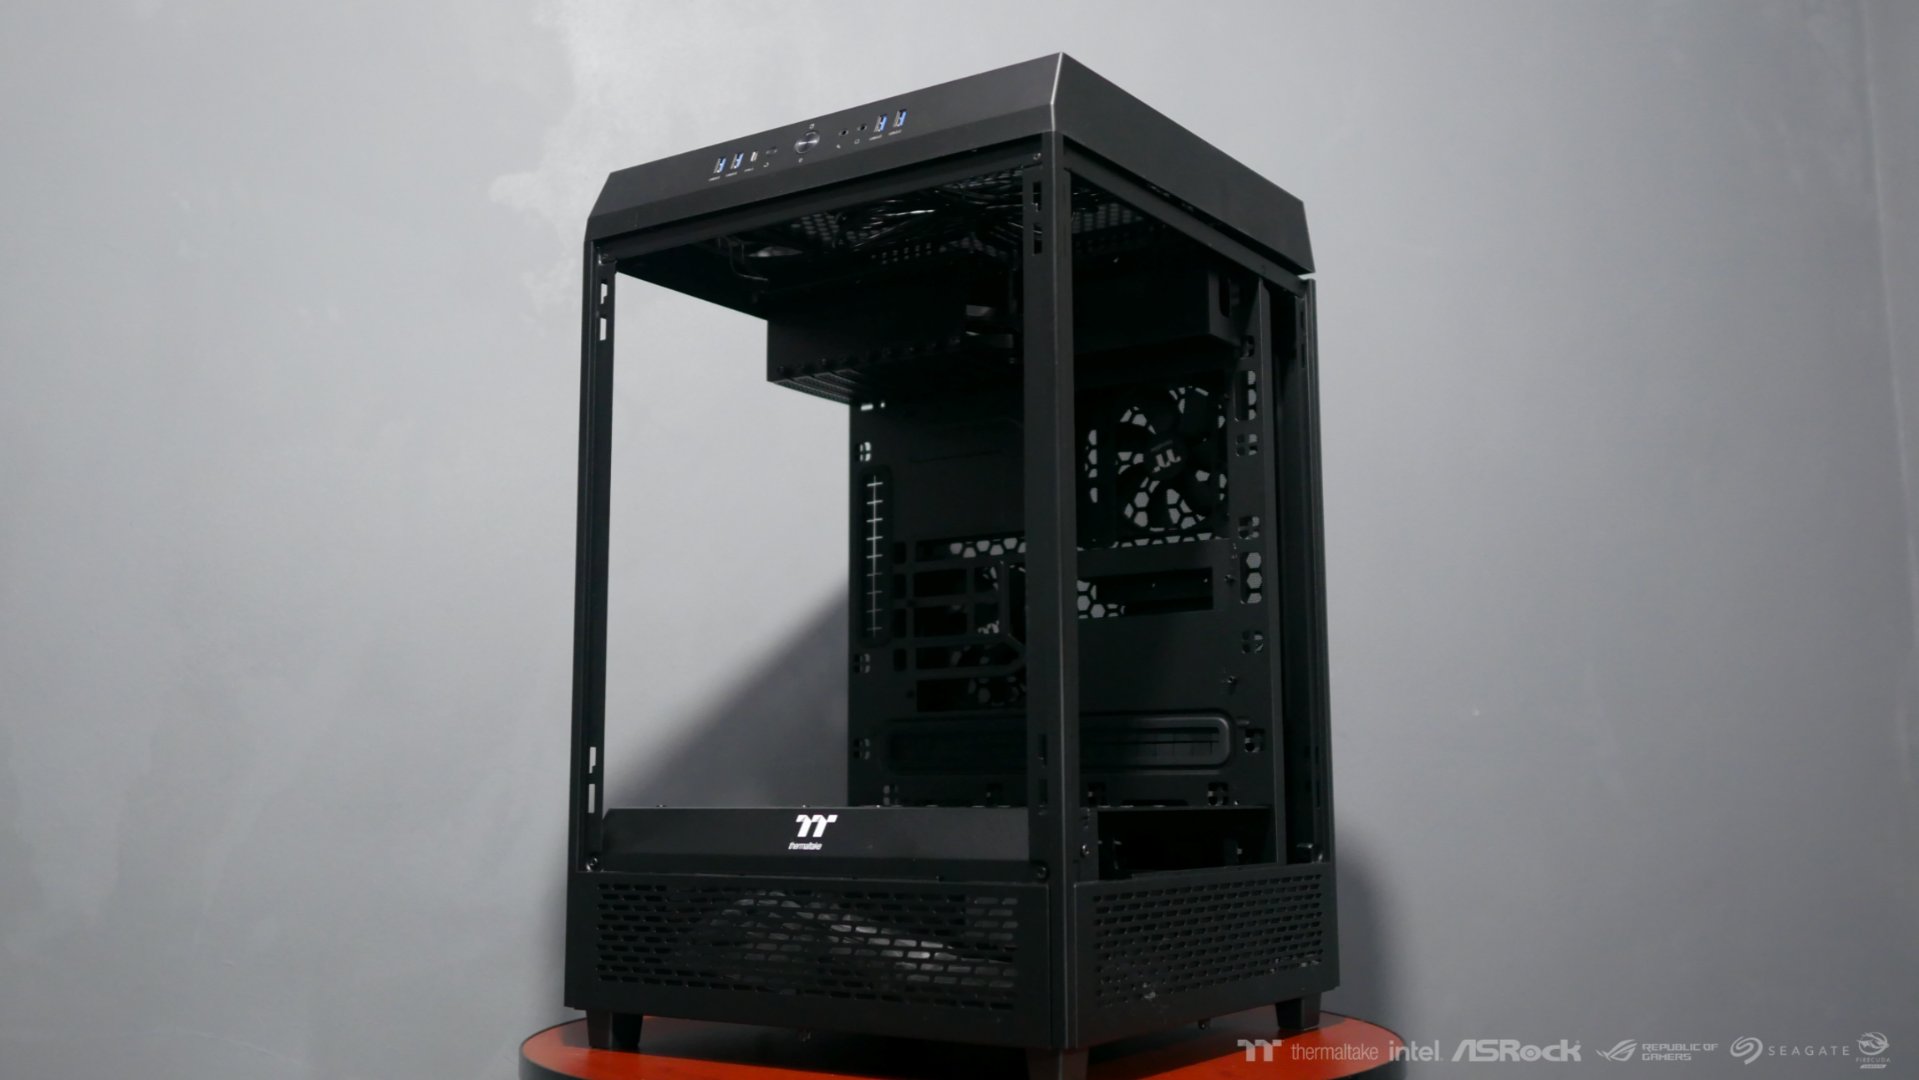
Custom Tower 500 Front IO
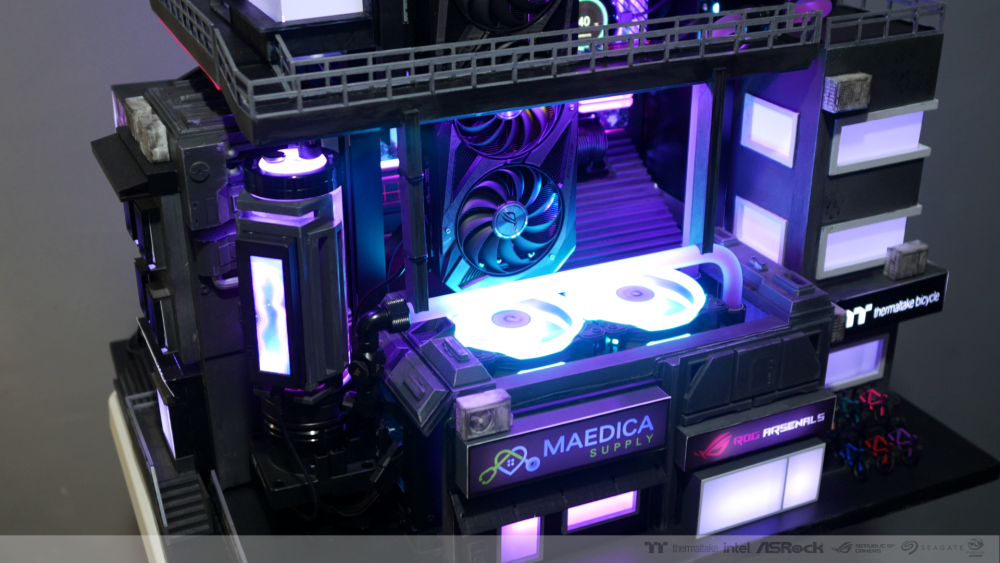
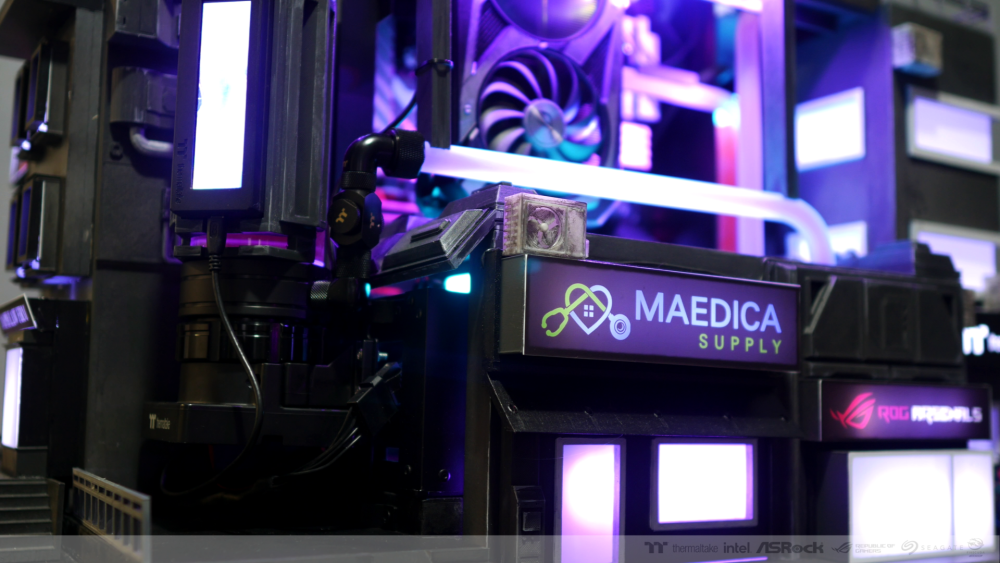
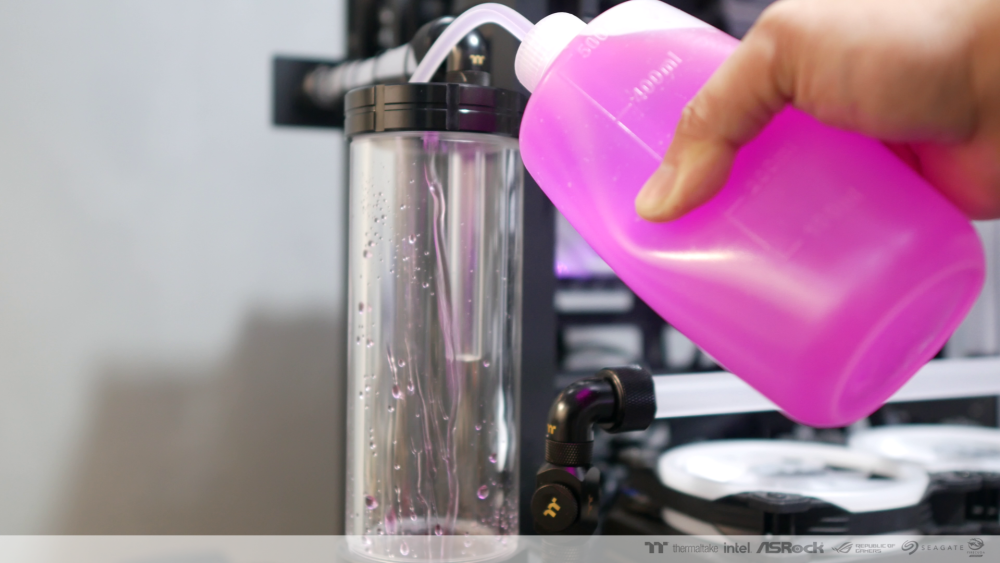
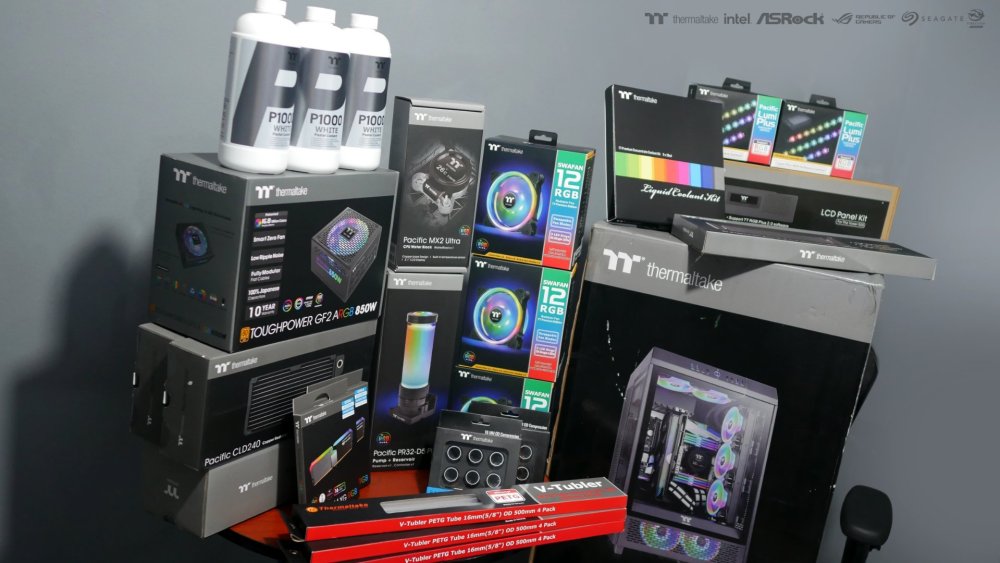
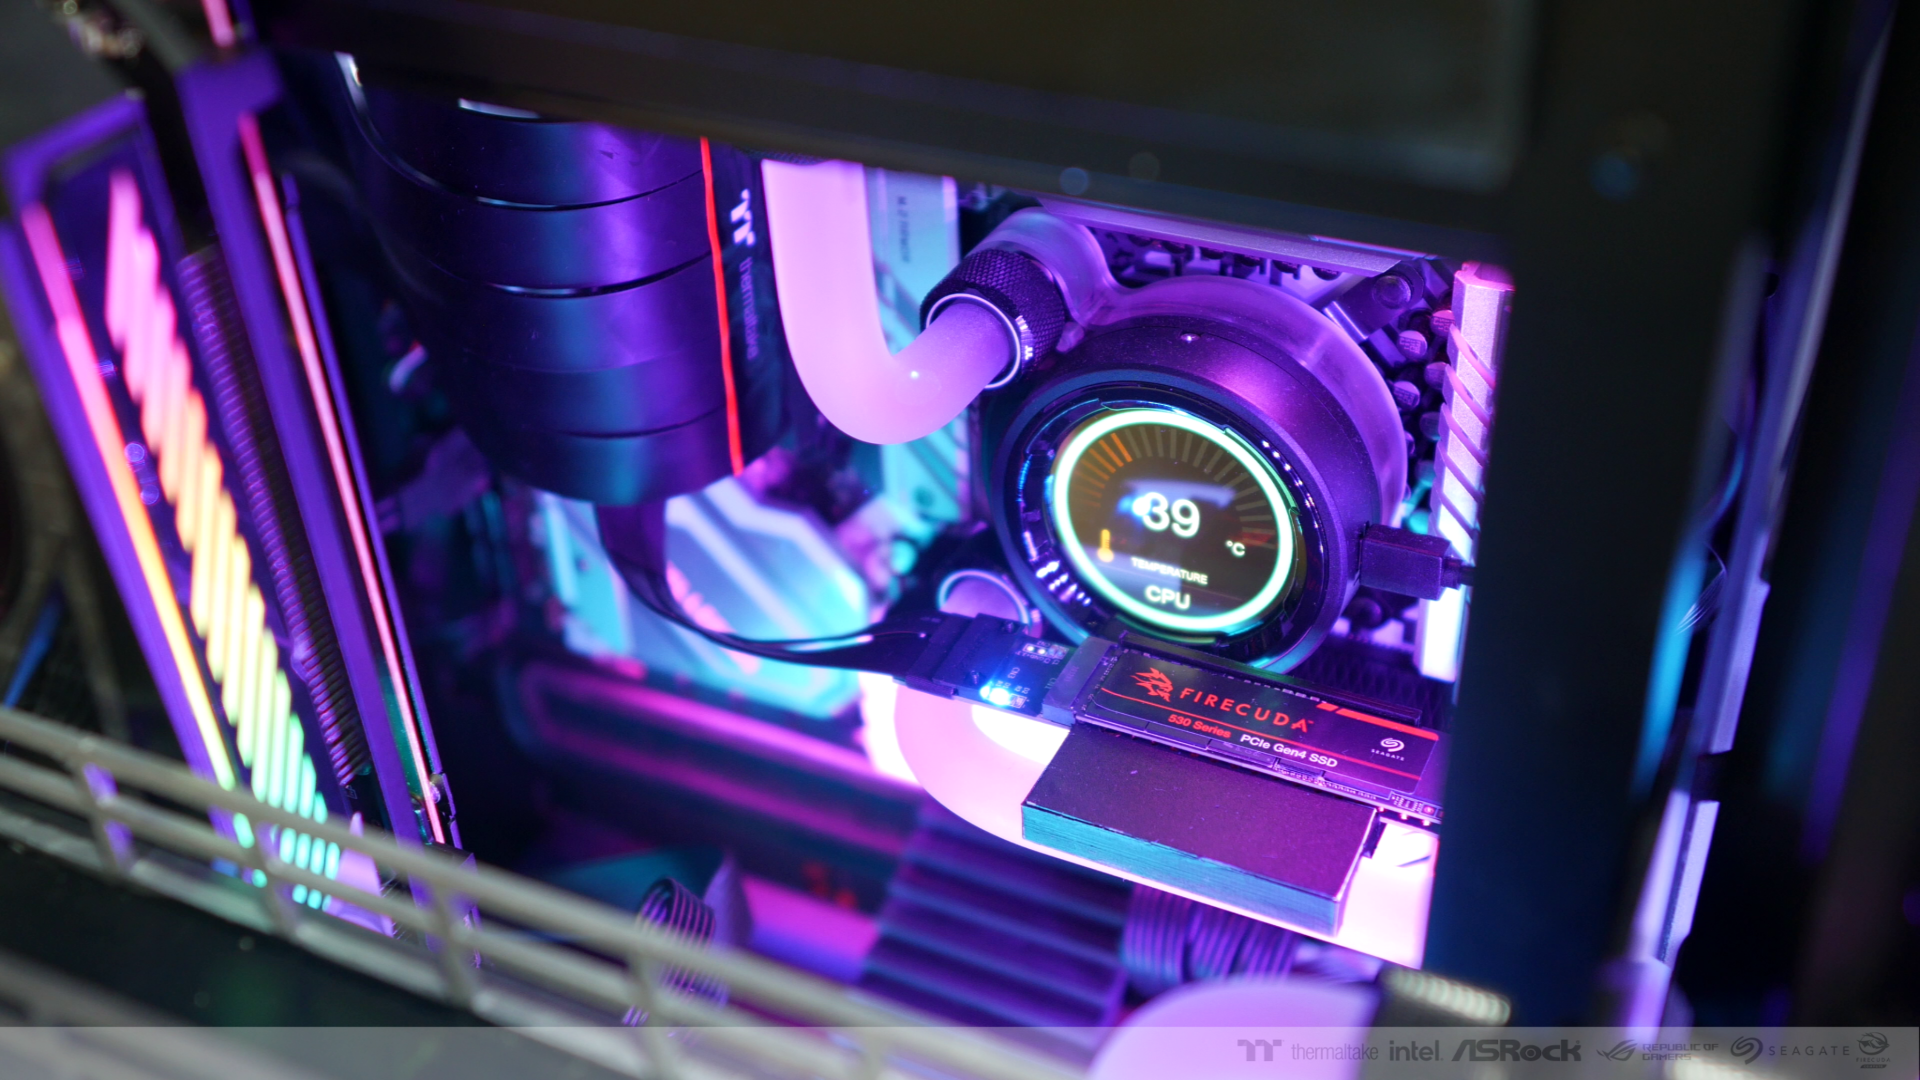
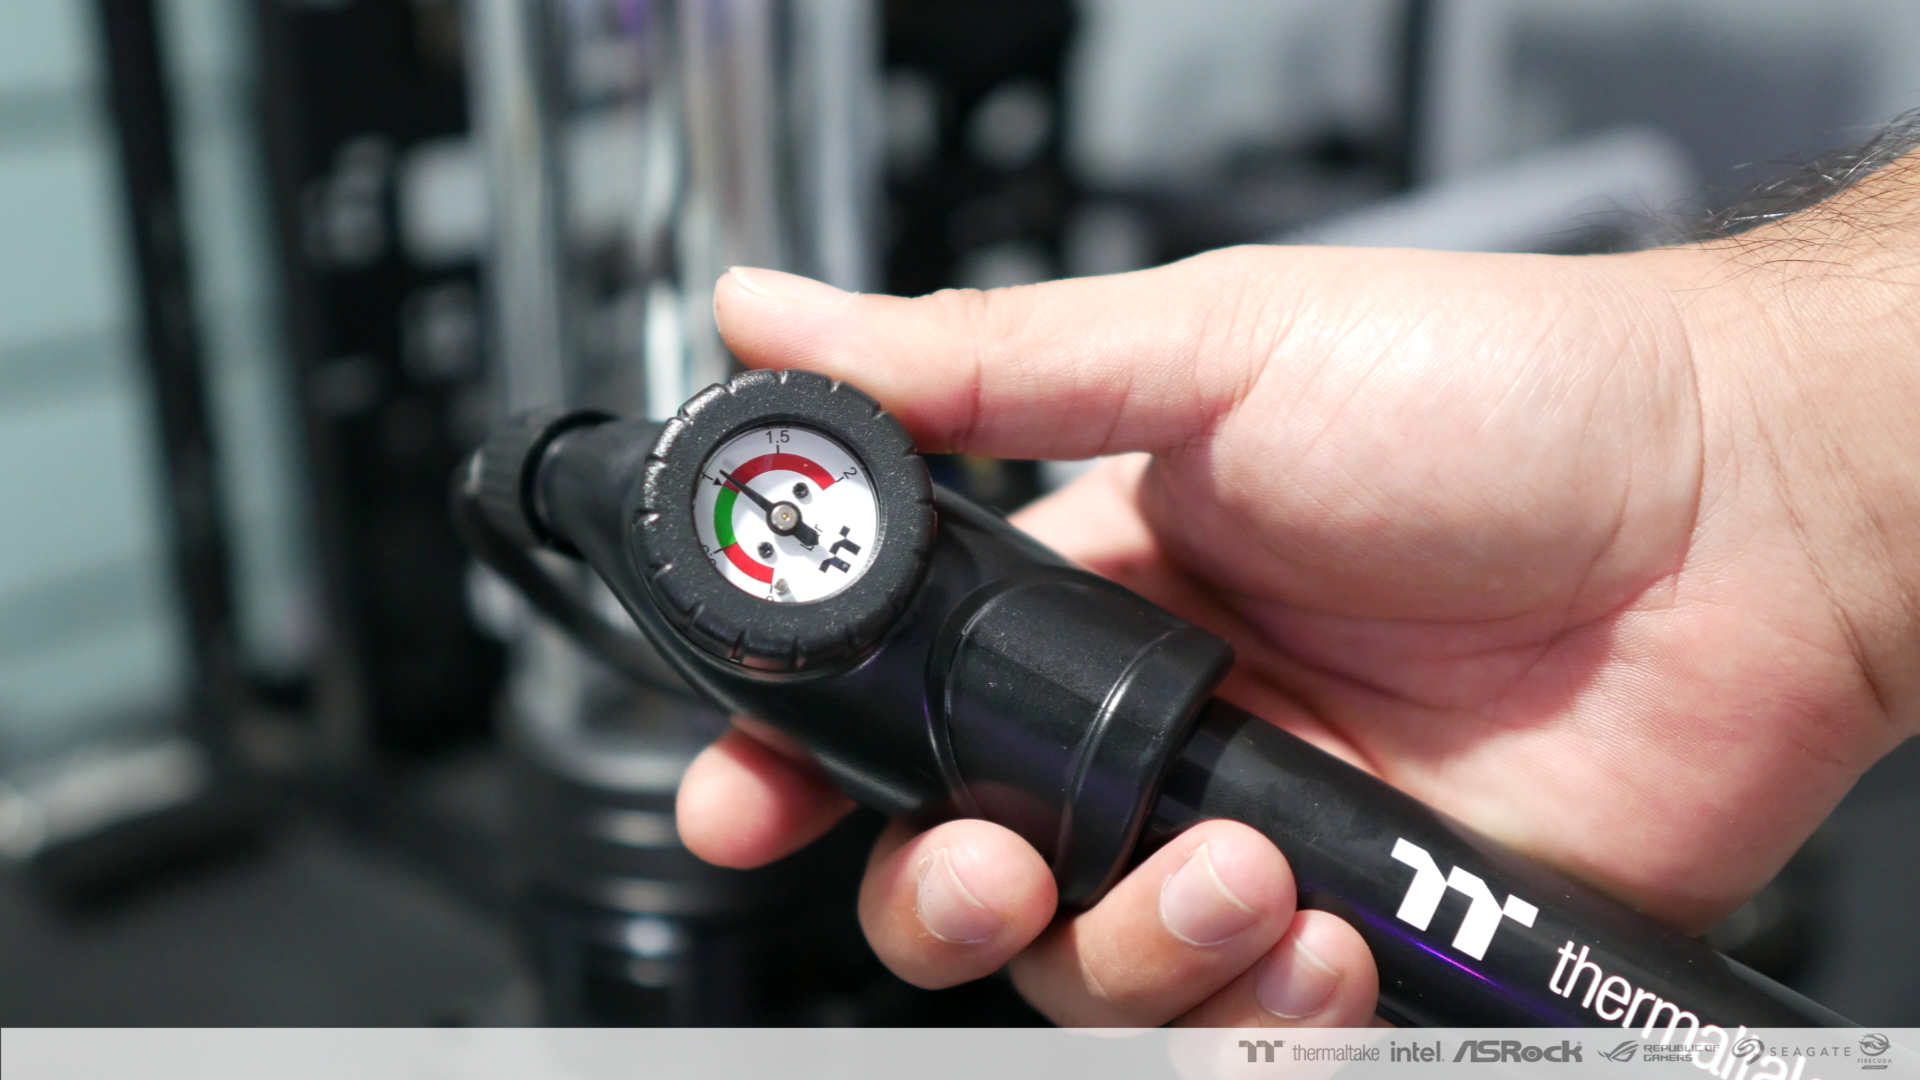
After pressure testing, coolant is added to the loop
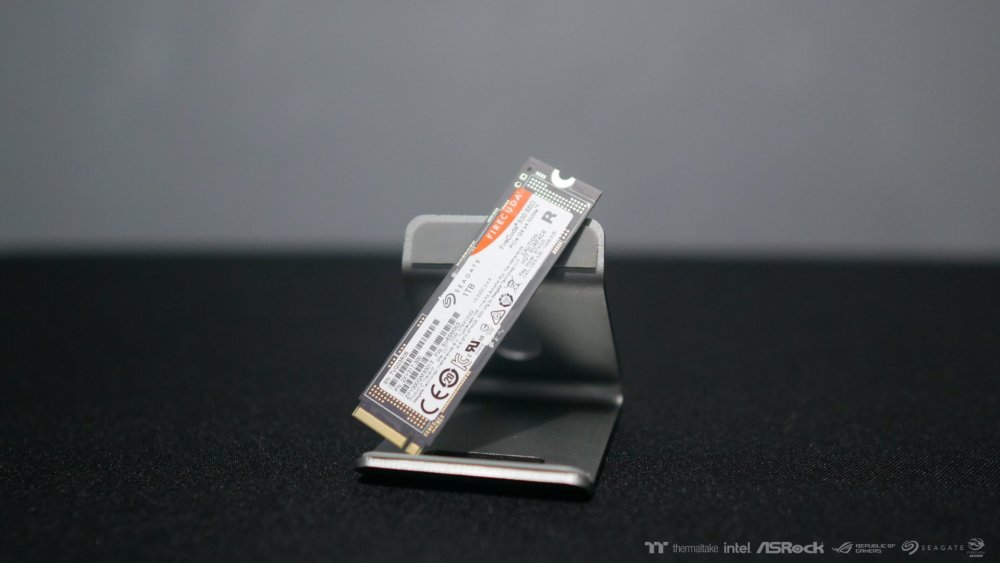
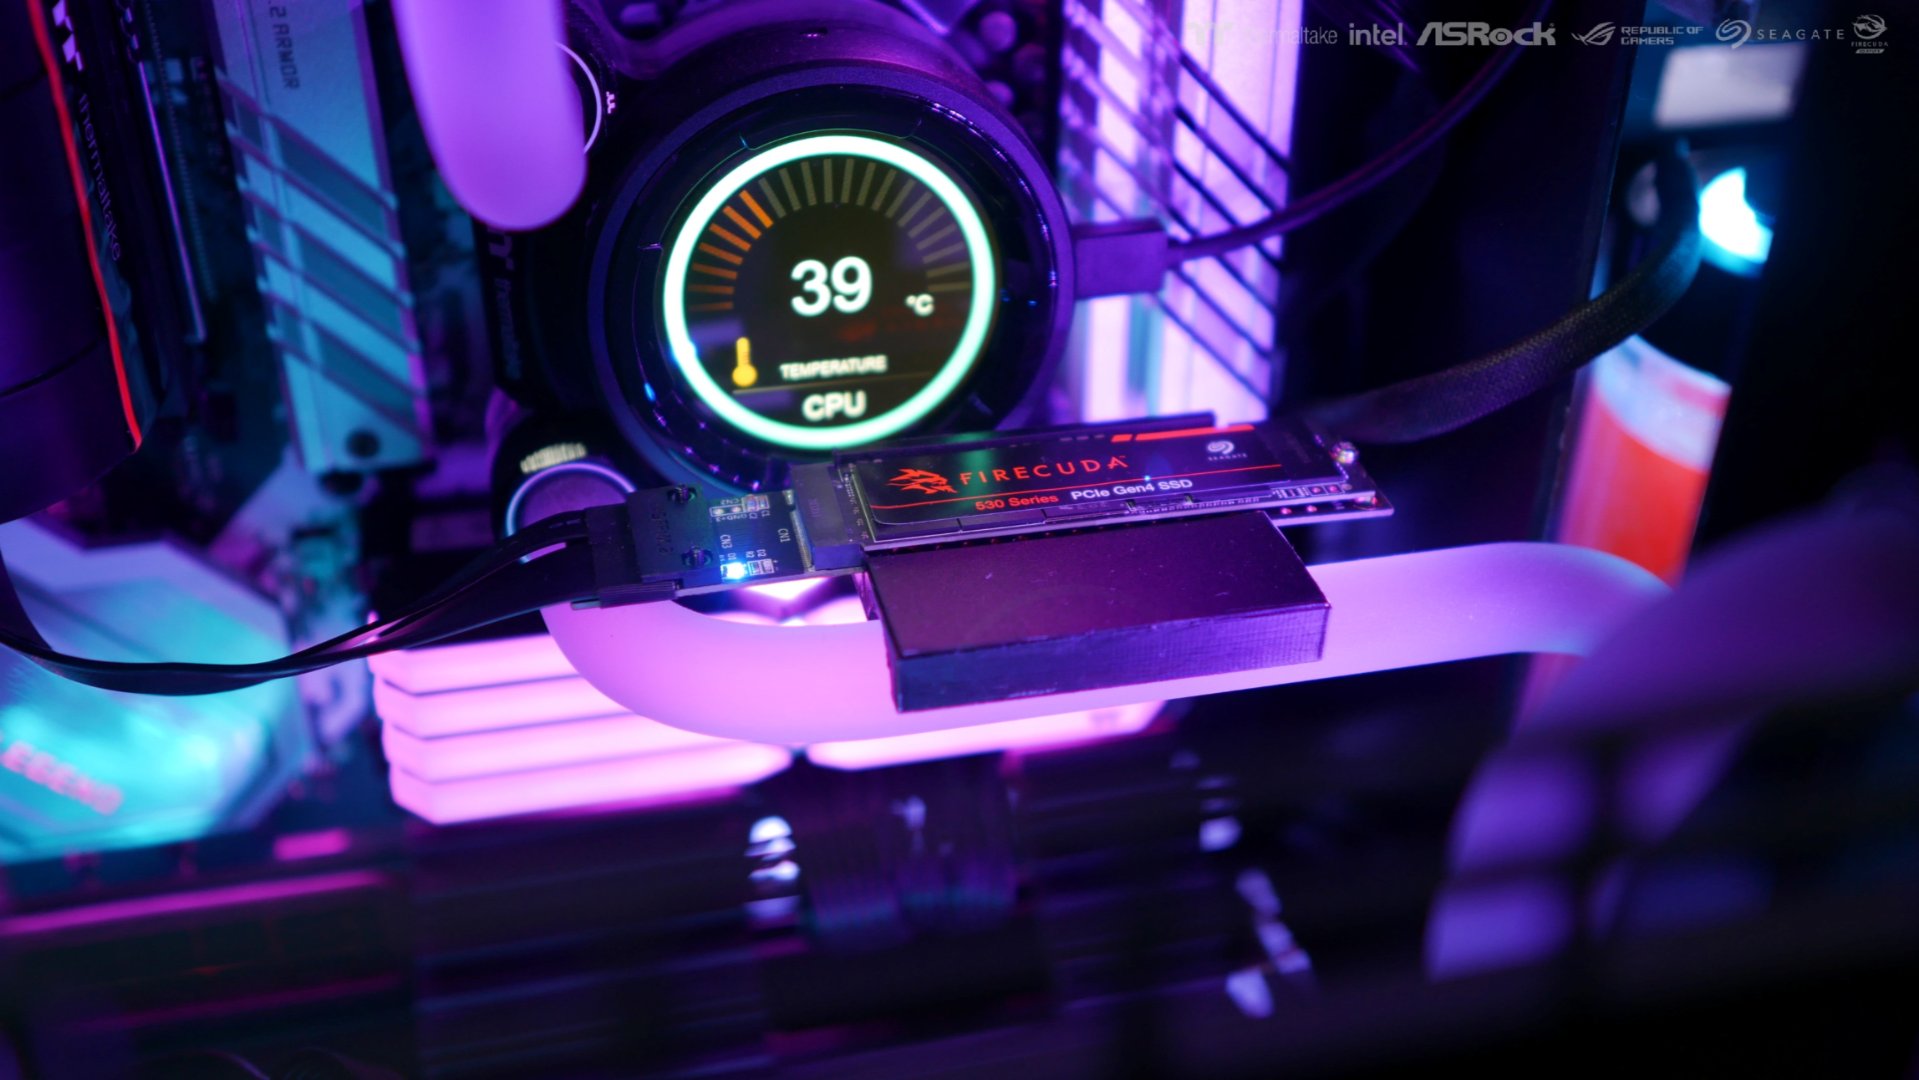
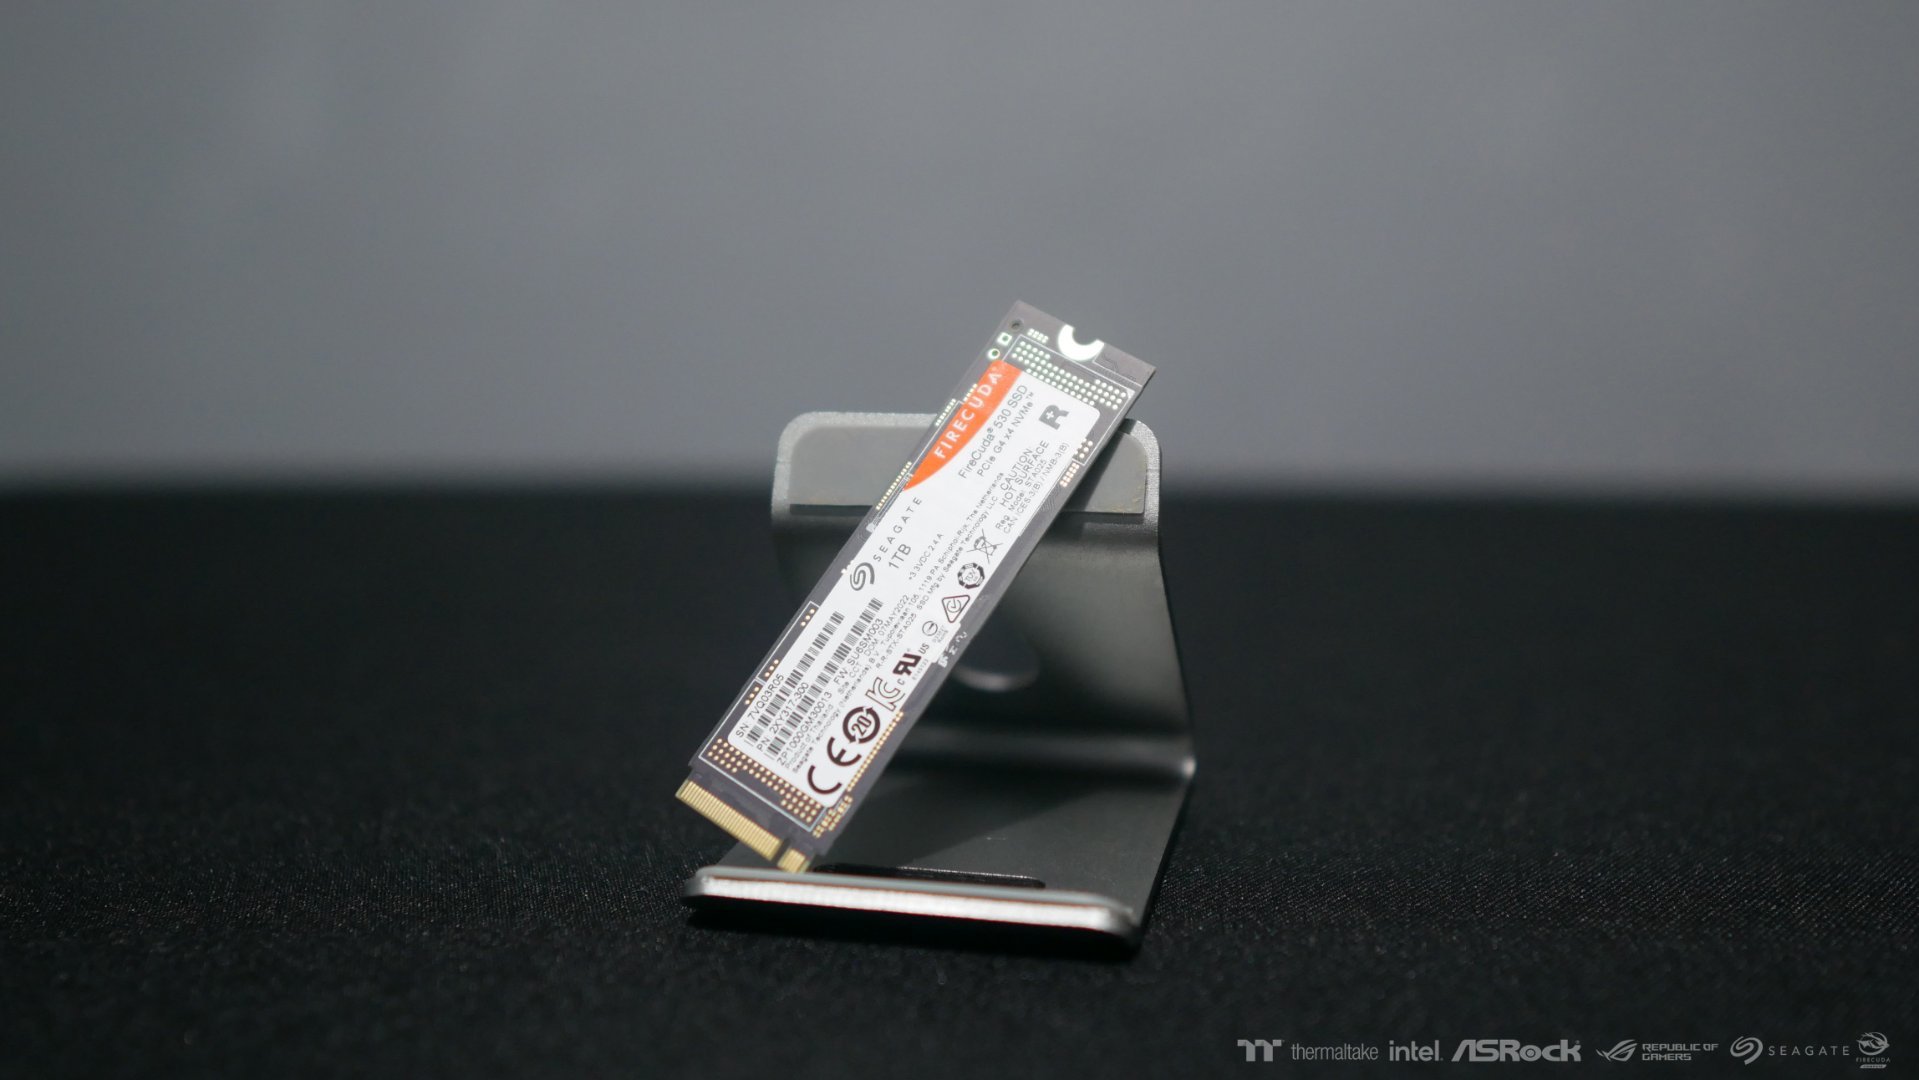
I used a NVME extension cable to showcase the Seagate Firecuda 530 1TB SSD

-
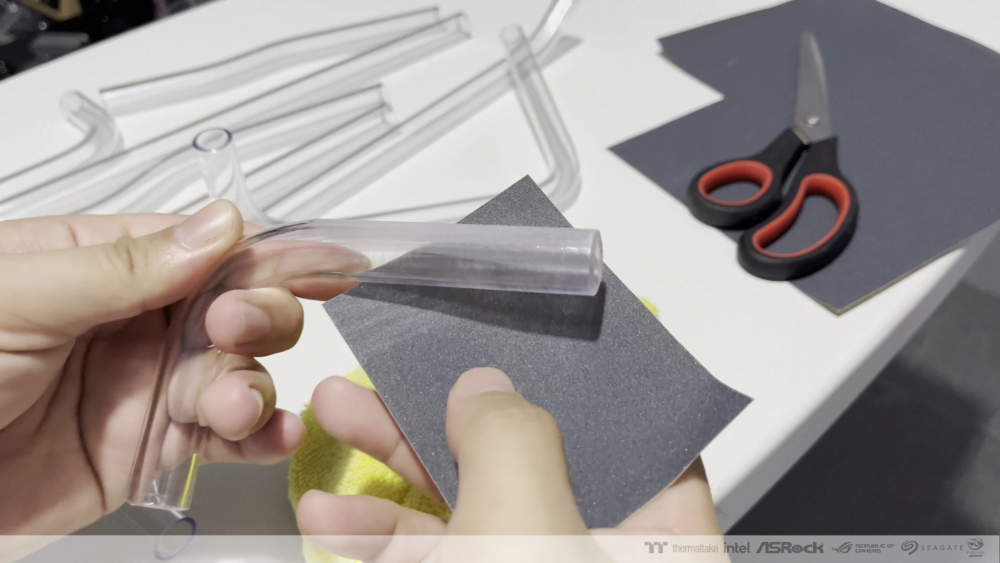
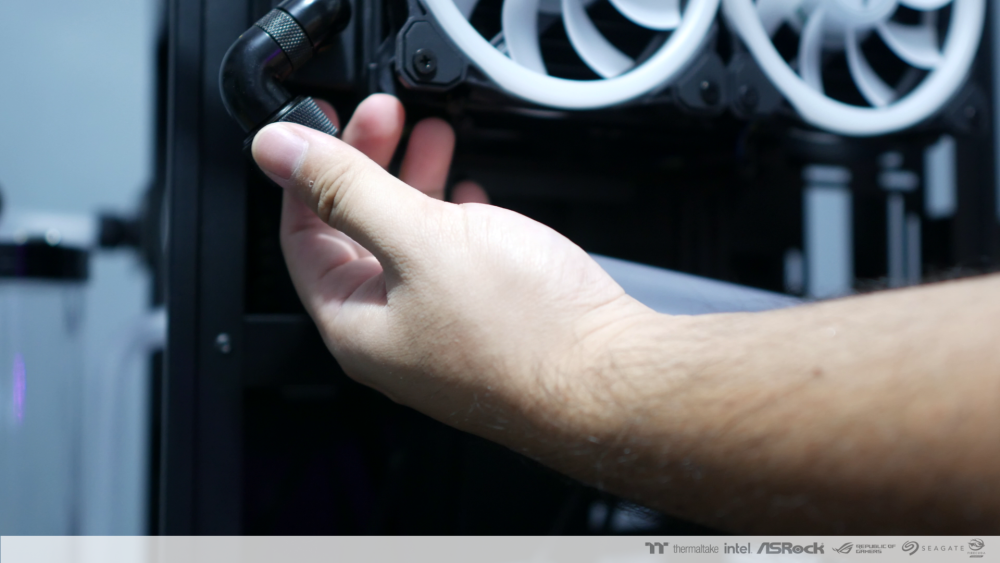
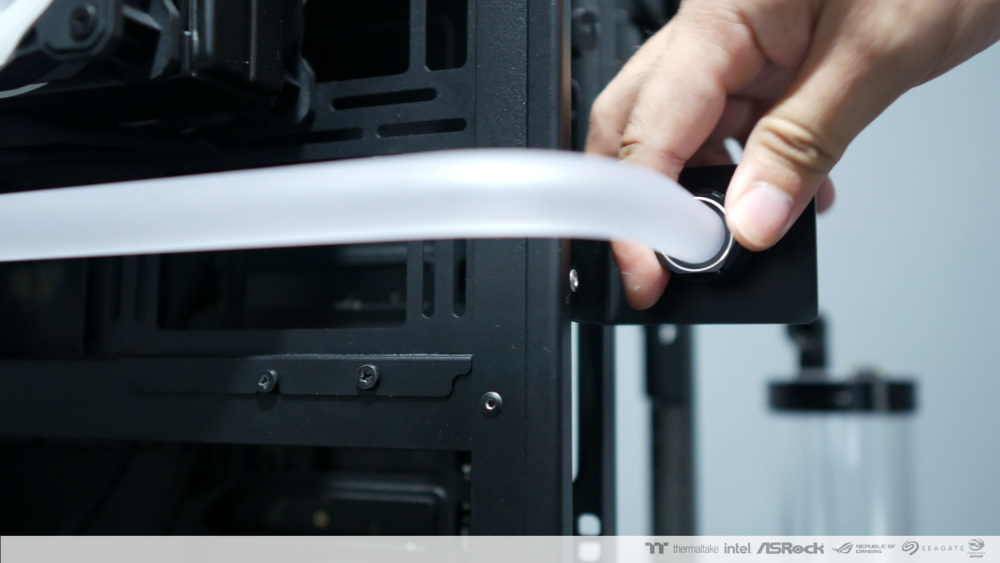
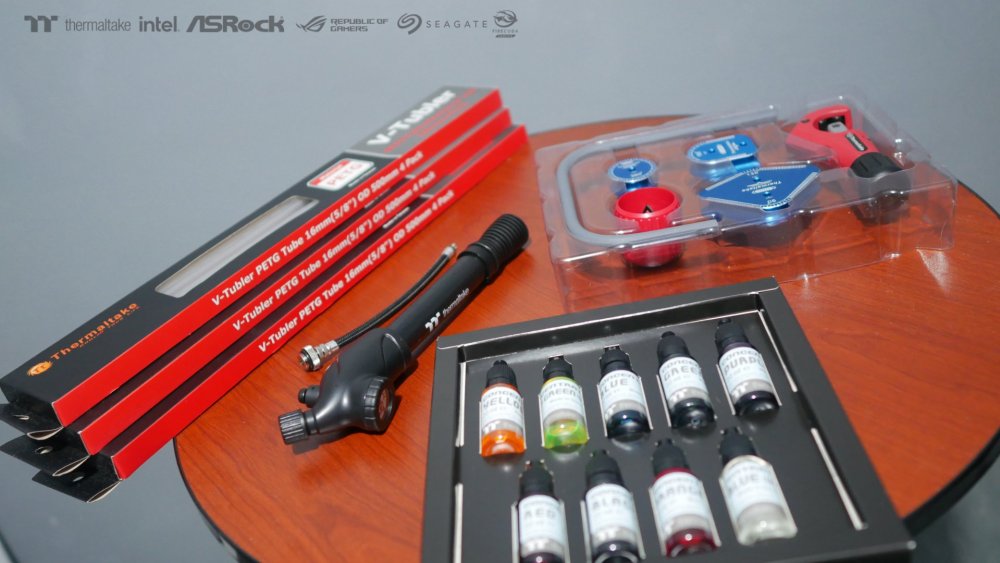
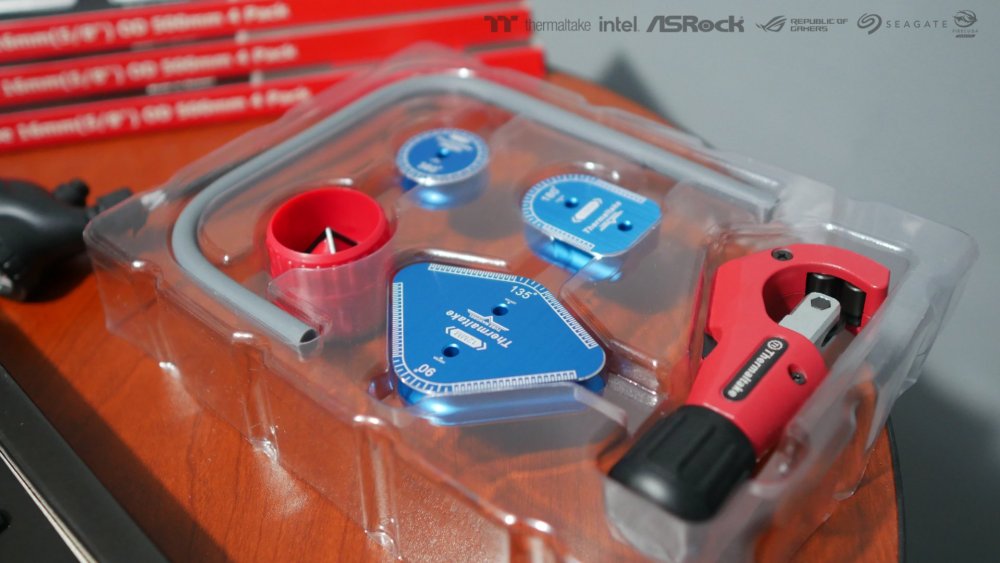
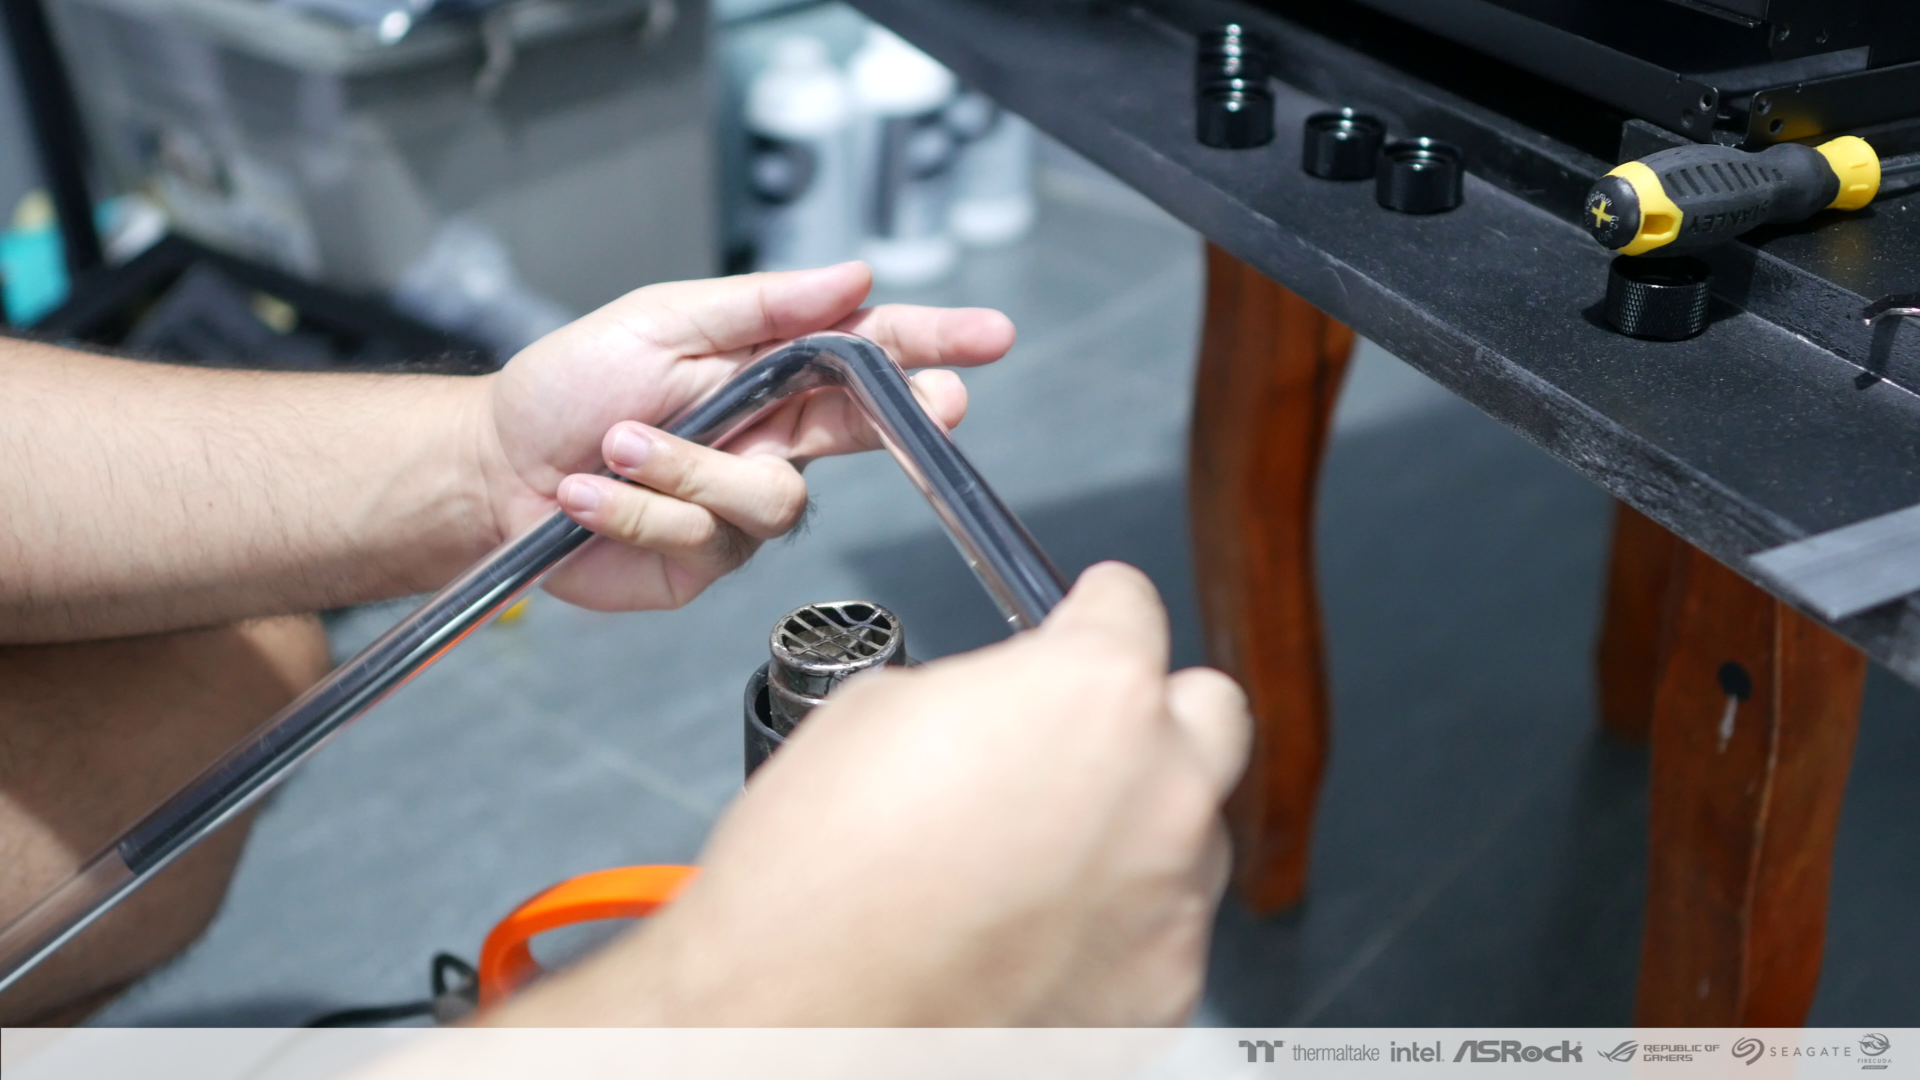
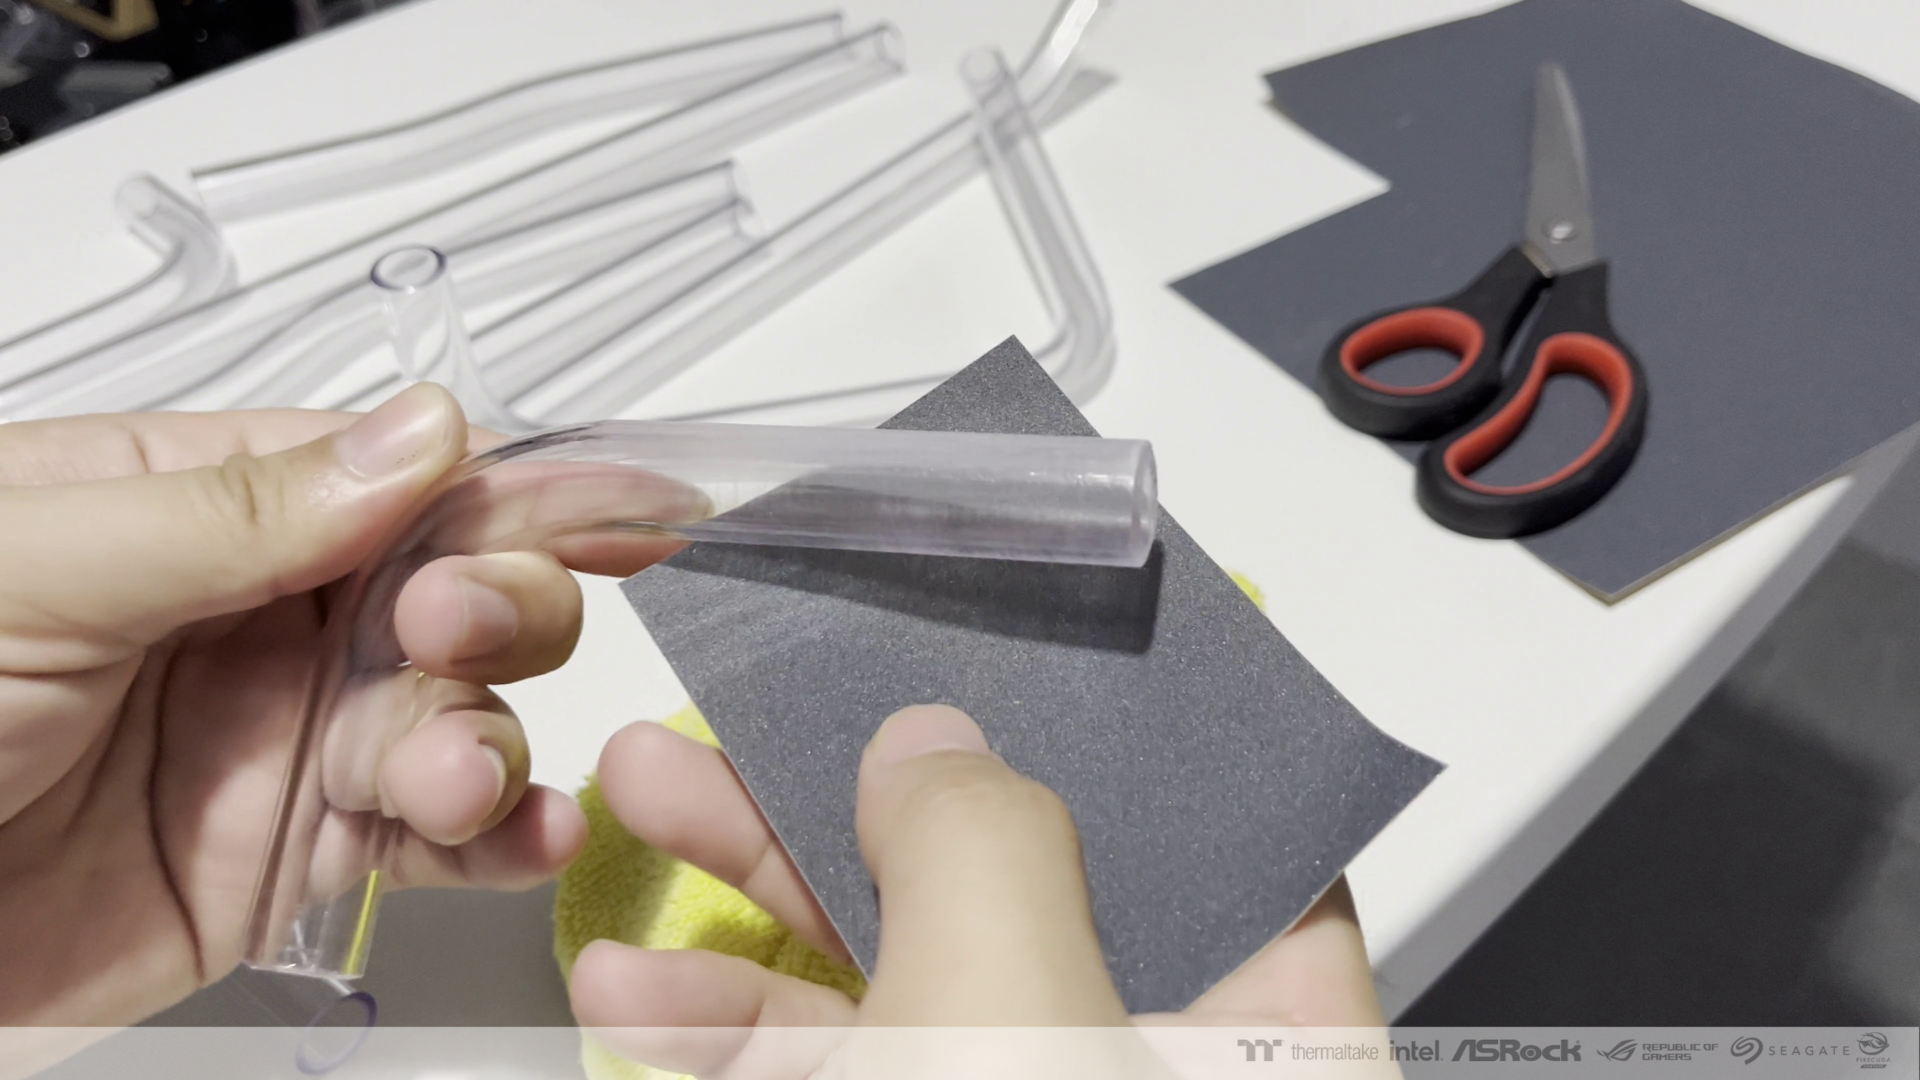
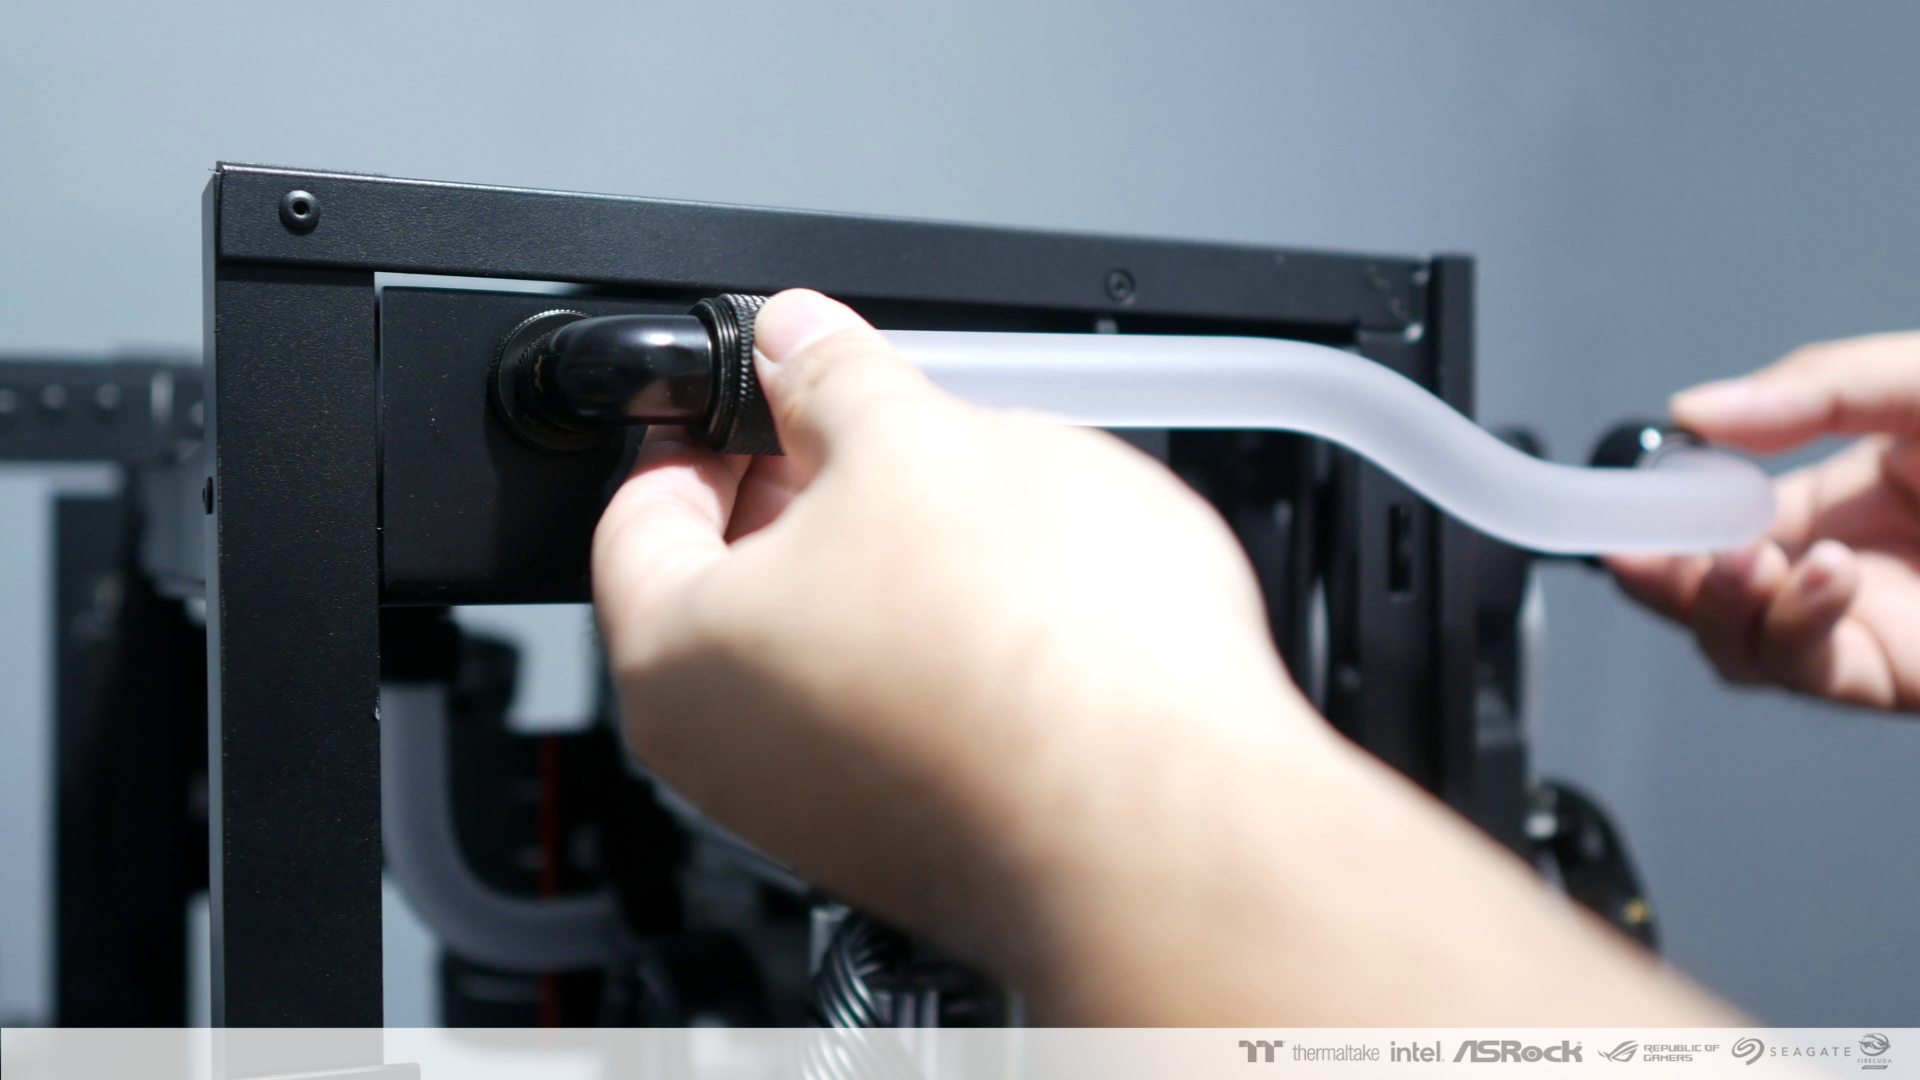
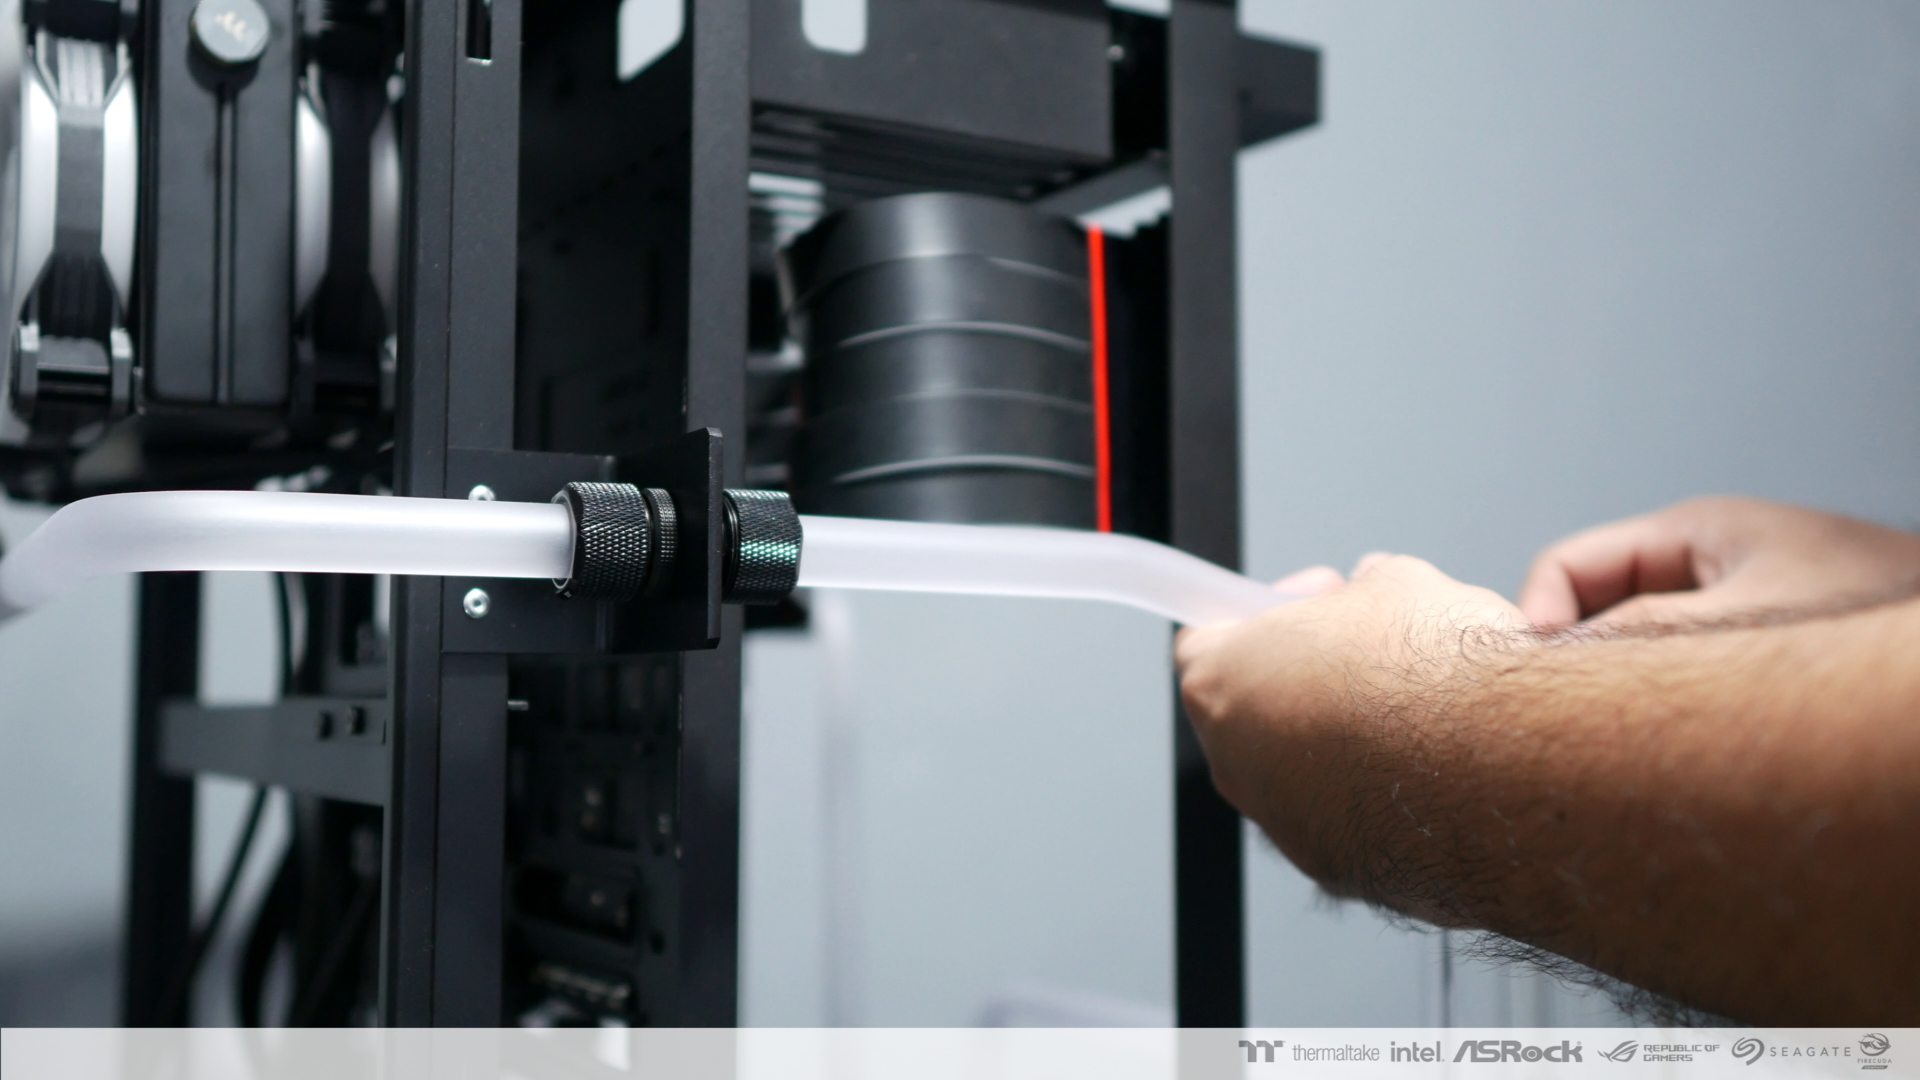
Bending of the PETG Tubes
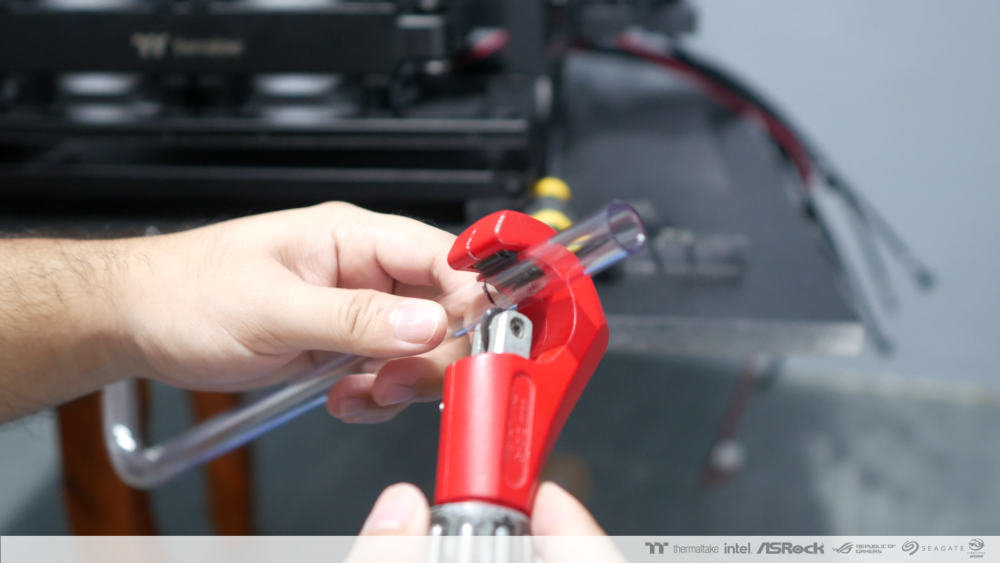

The PETG Tubes are sanded to have a satin/matte look.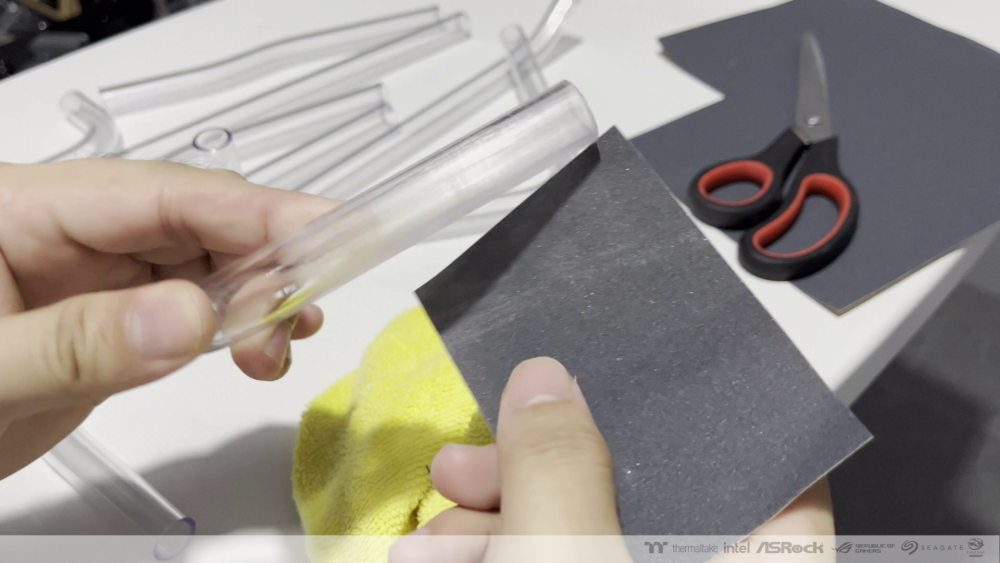

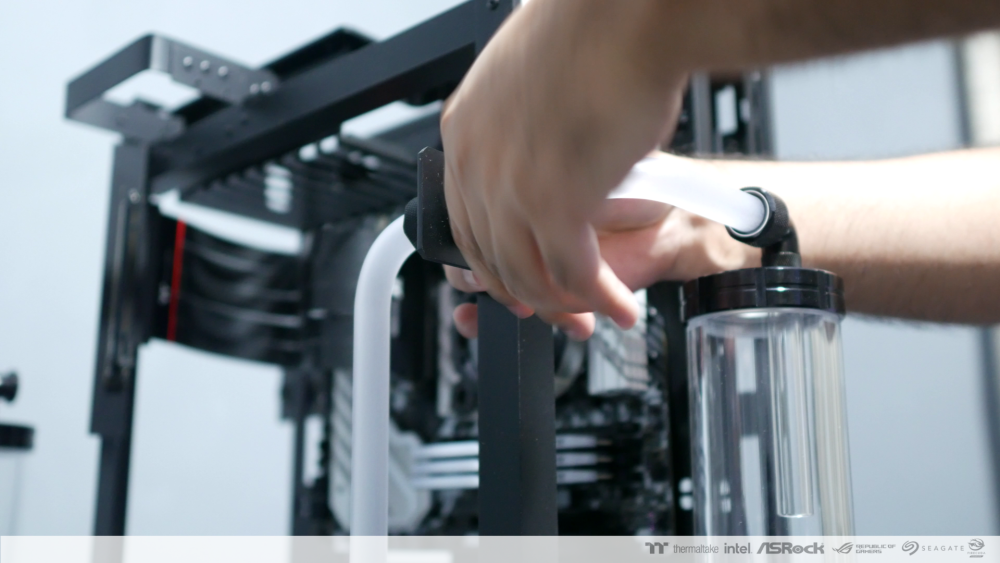


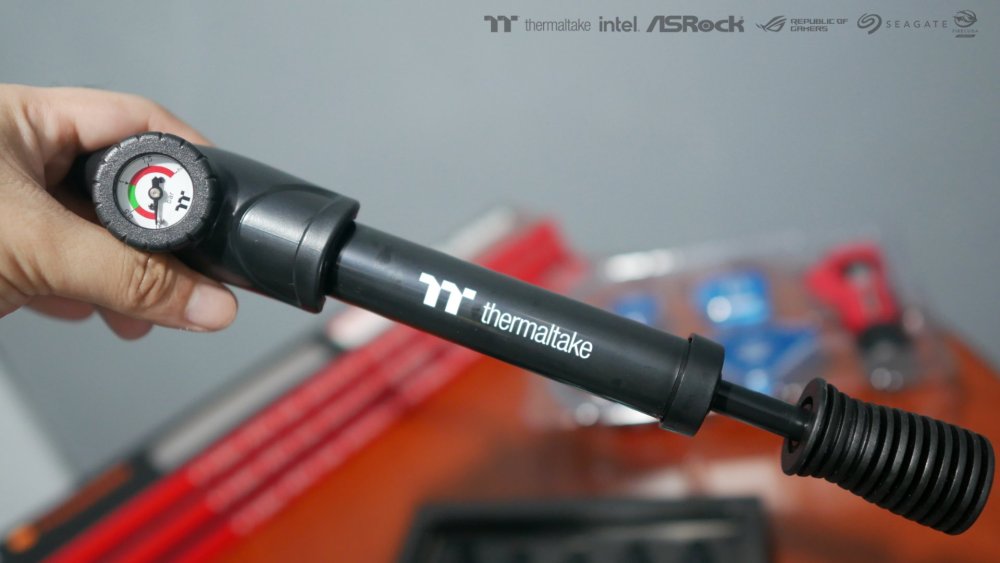
The CaseMOD is pressure tested using Thermaltake Pacific Leak Tester
https://www.thermaltake.com/thermaltake-pacific-leak-tester.html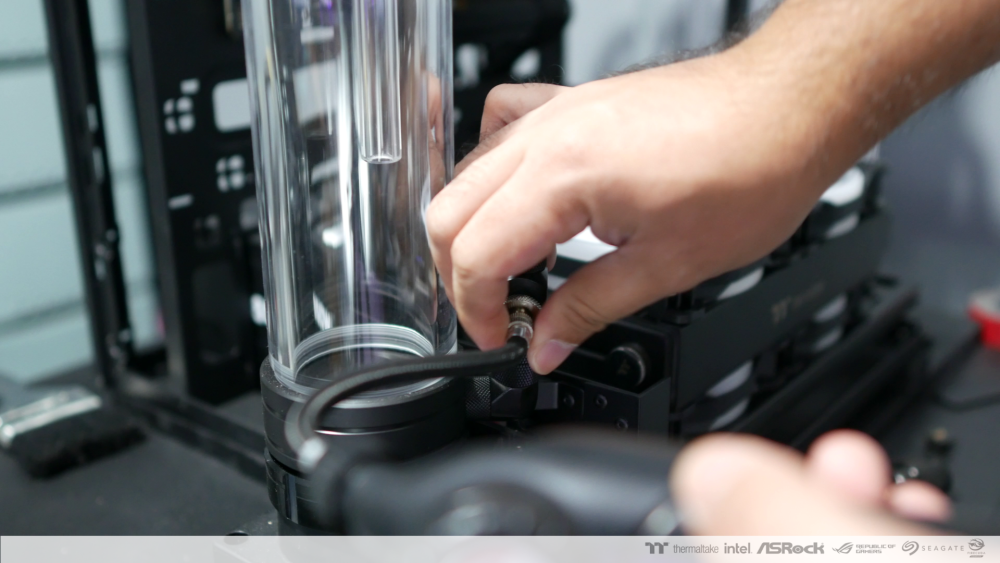

- najiro and Andrew Makin
-
 2
2
-
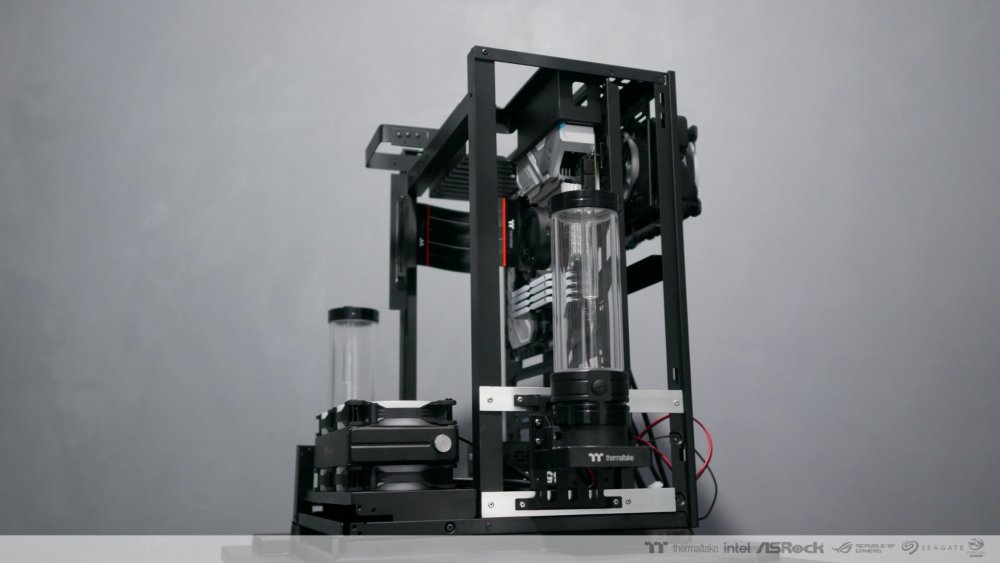
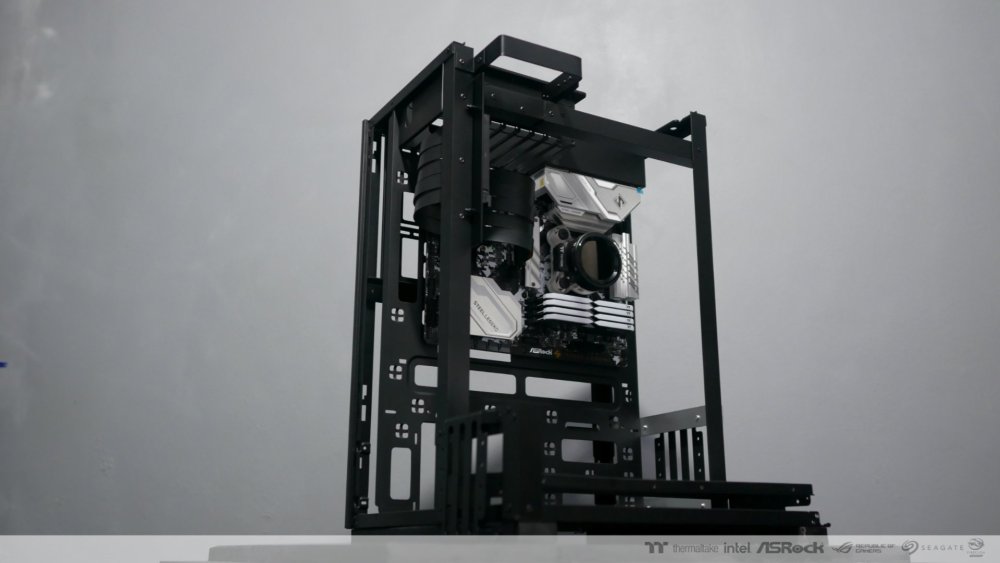
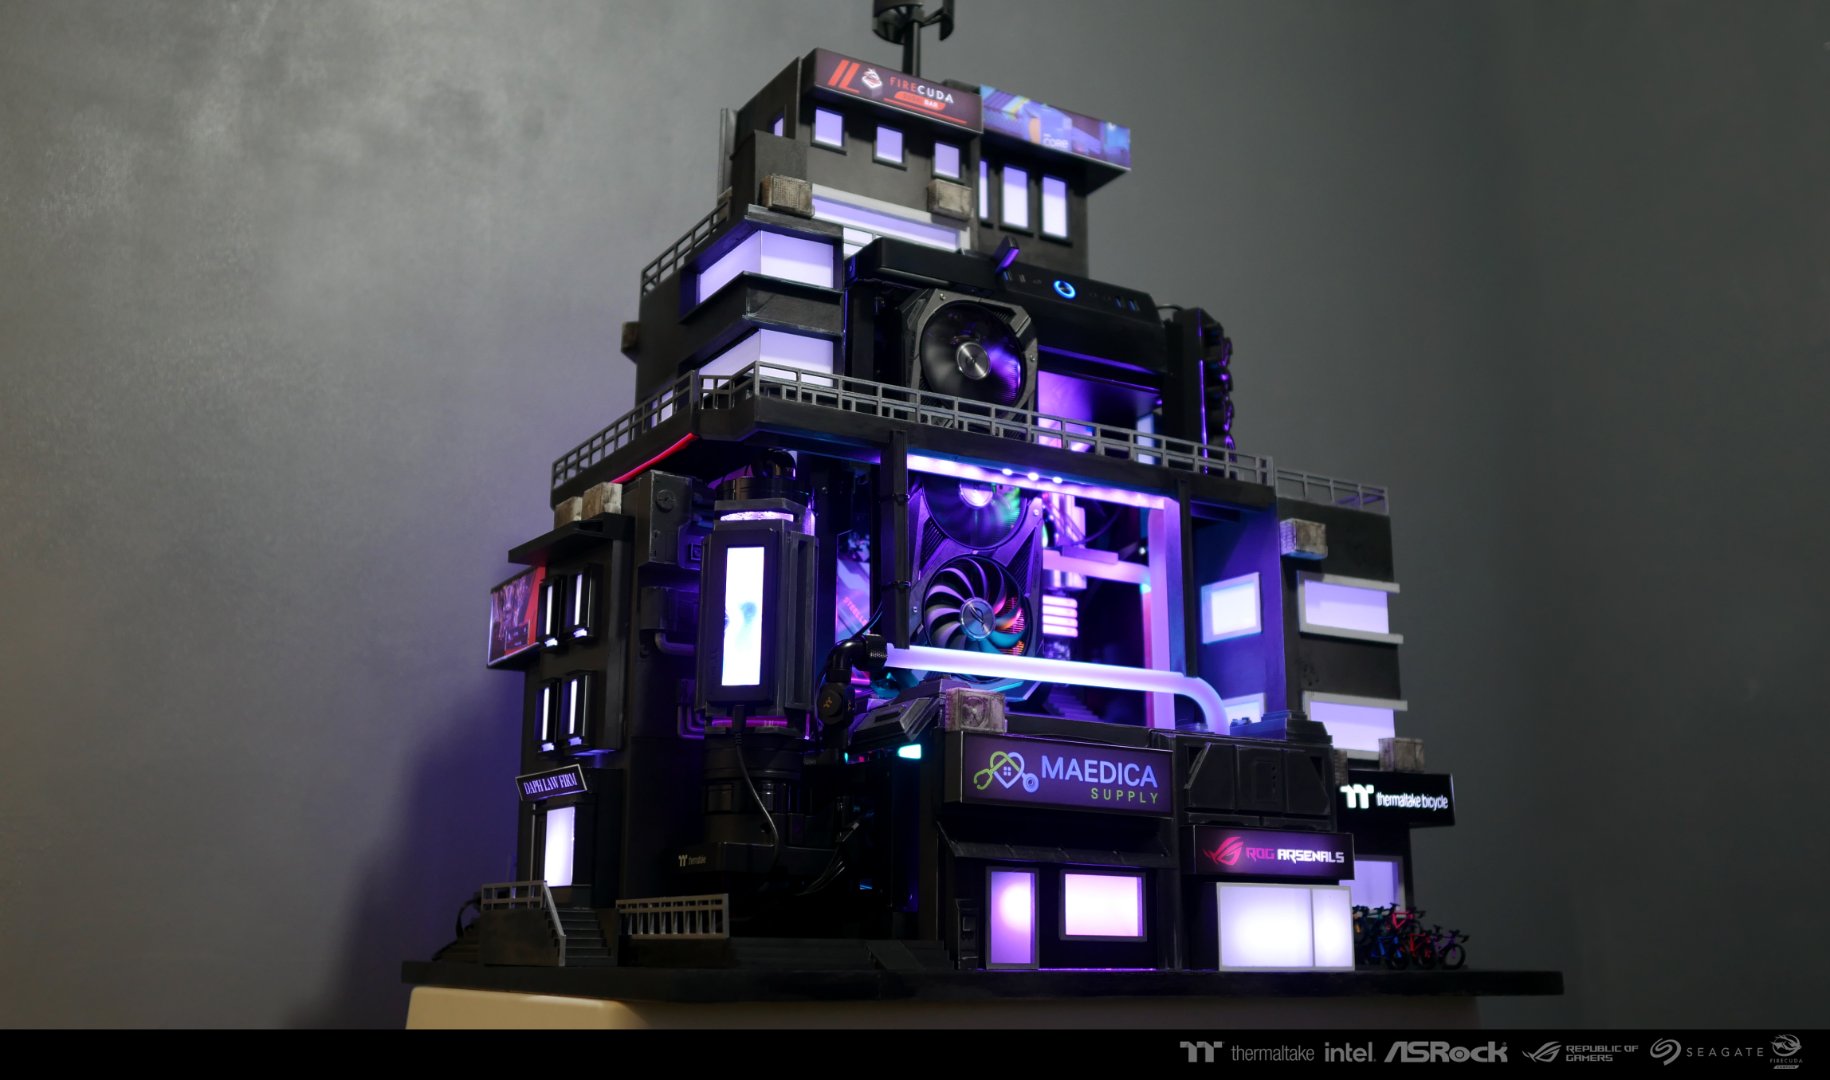
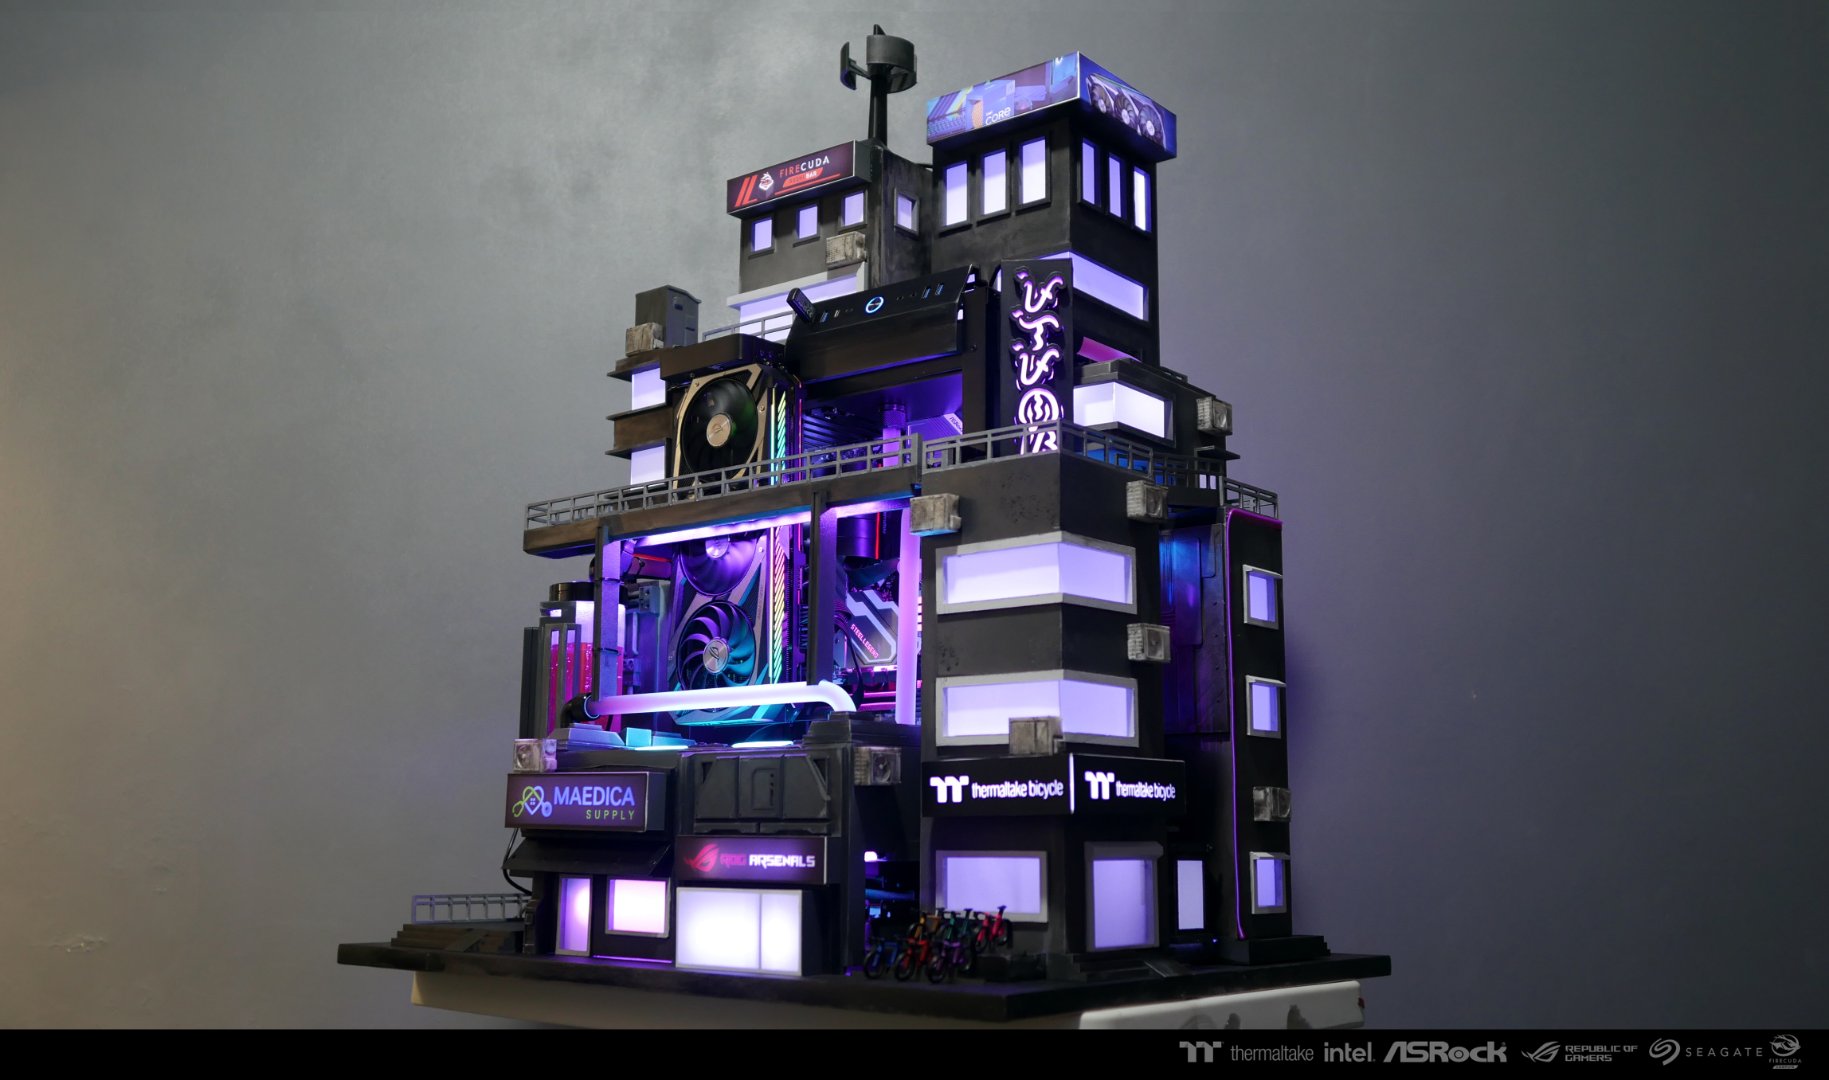
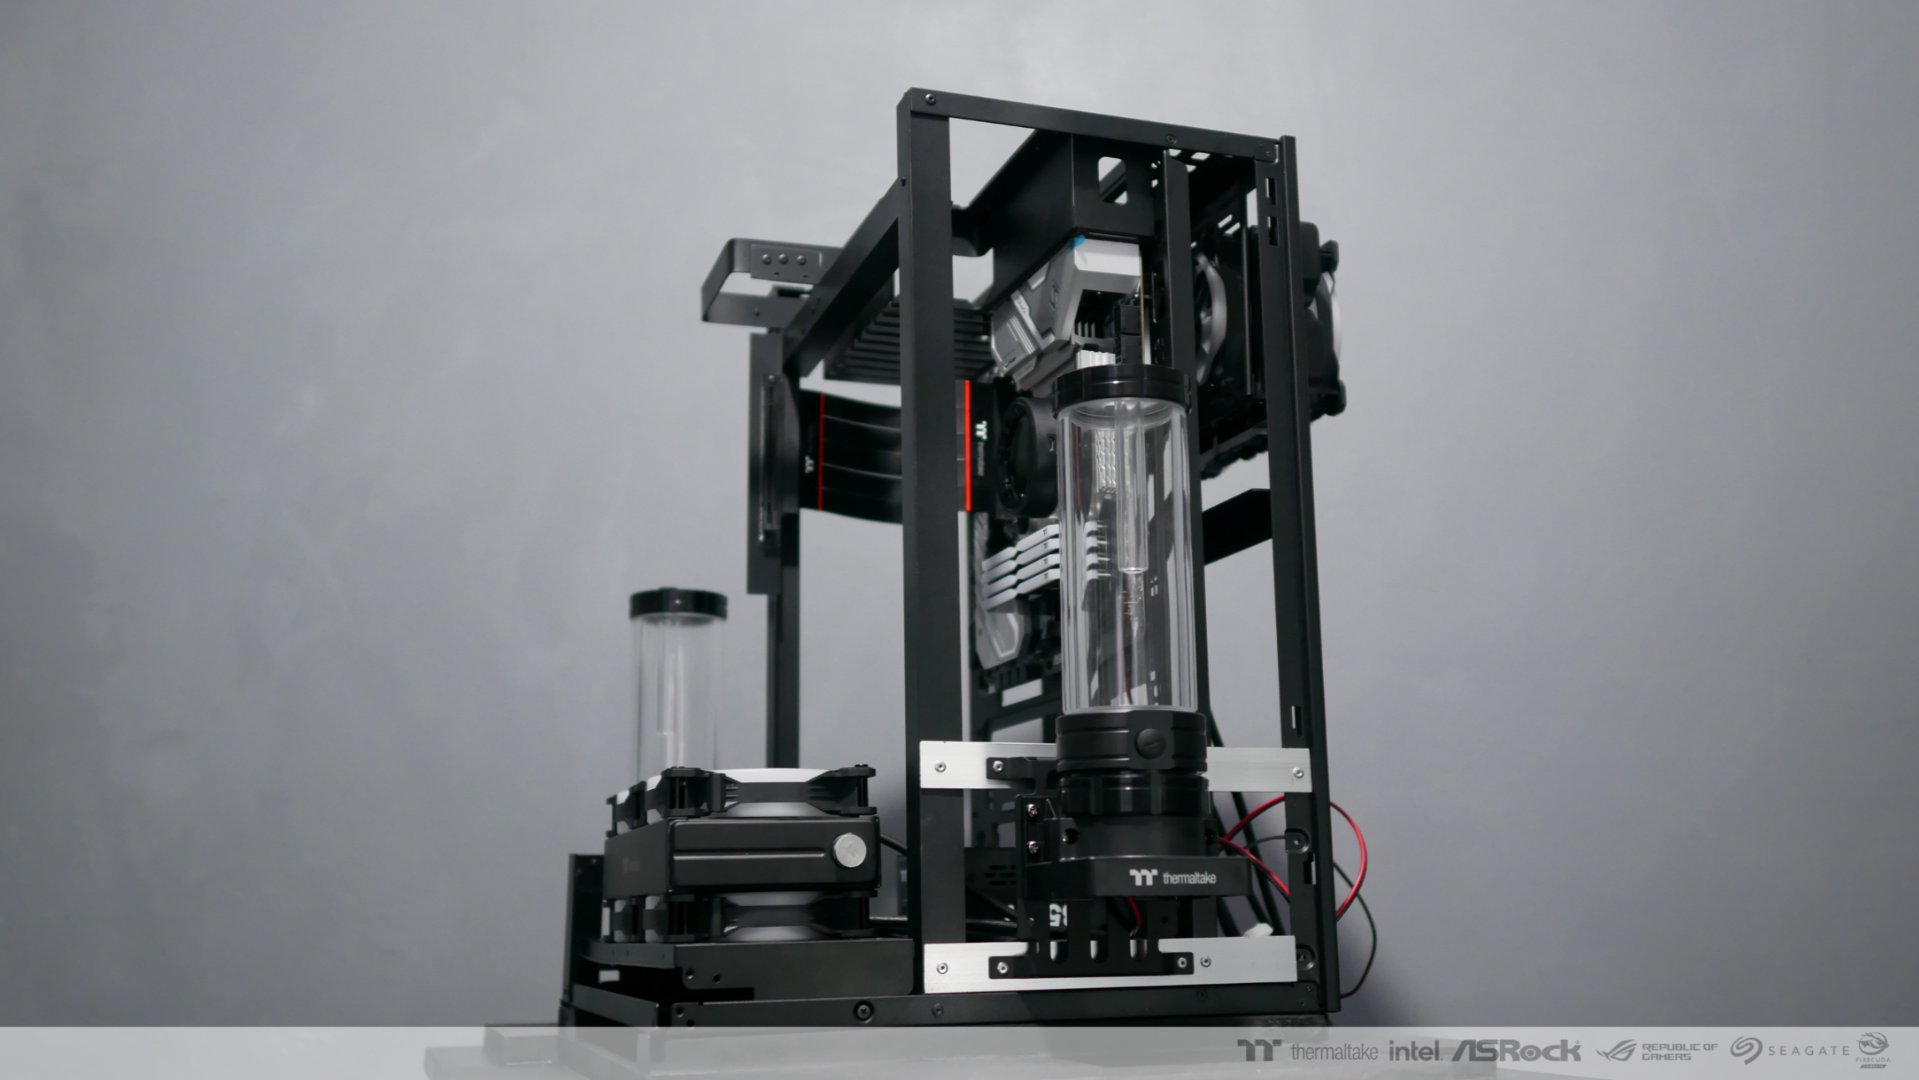
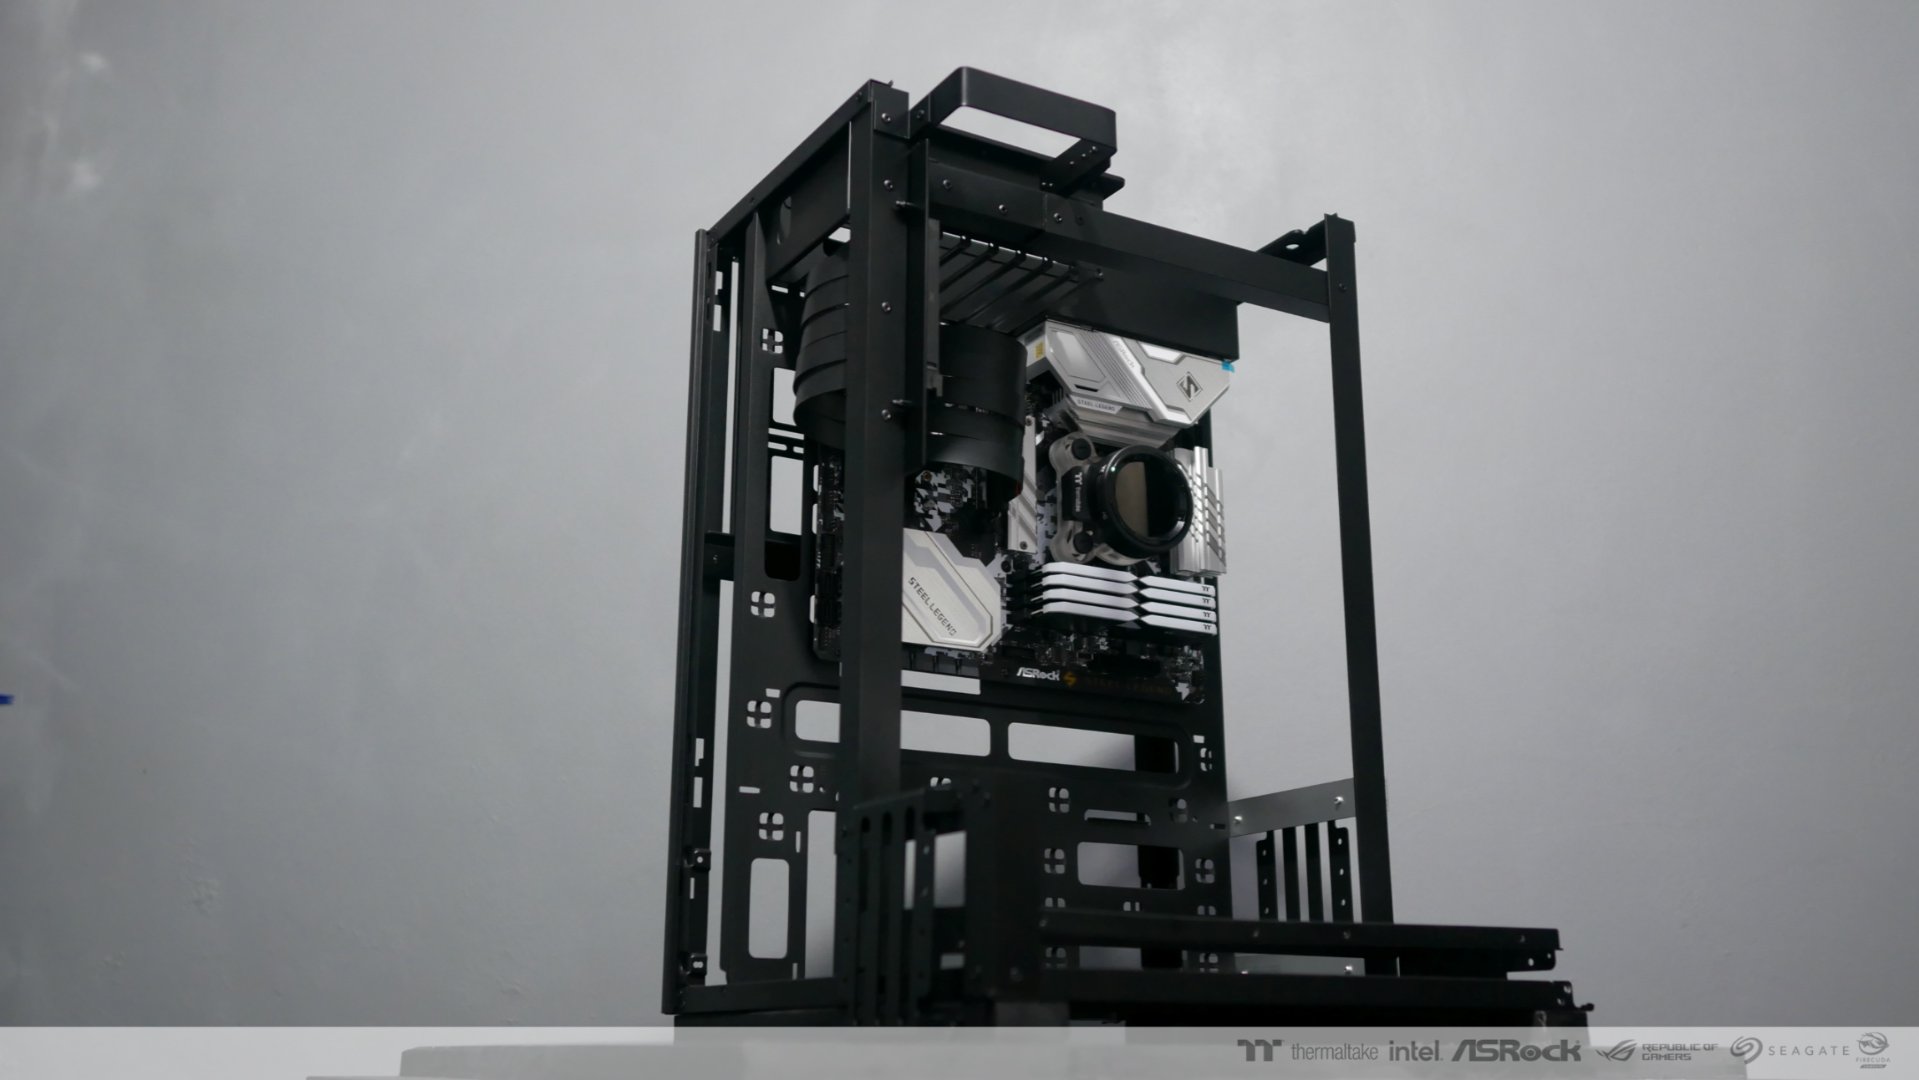
The layout of the main parts of this CaseMOD is finished.
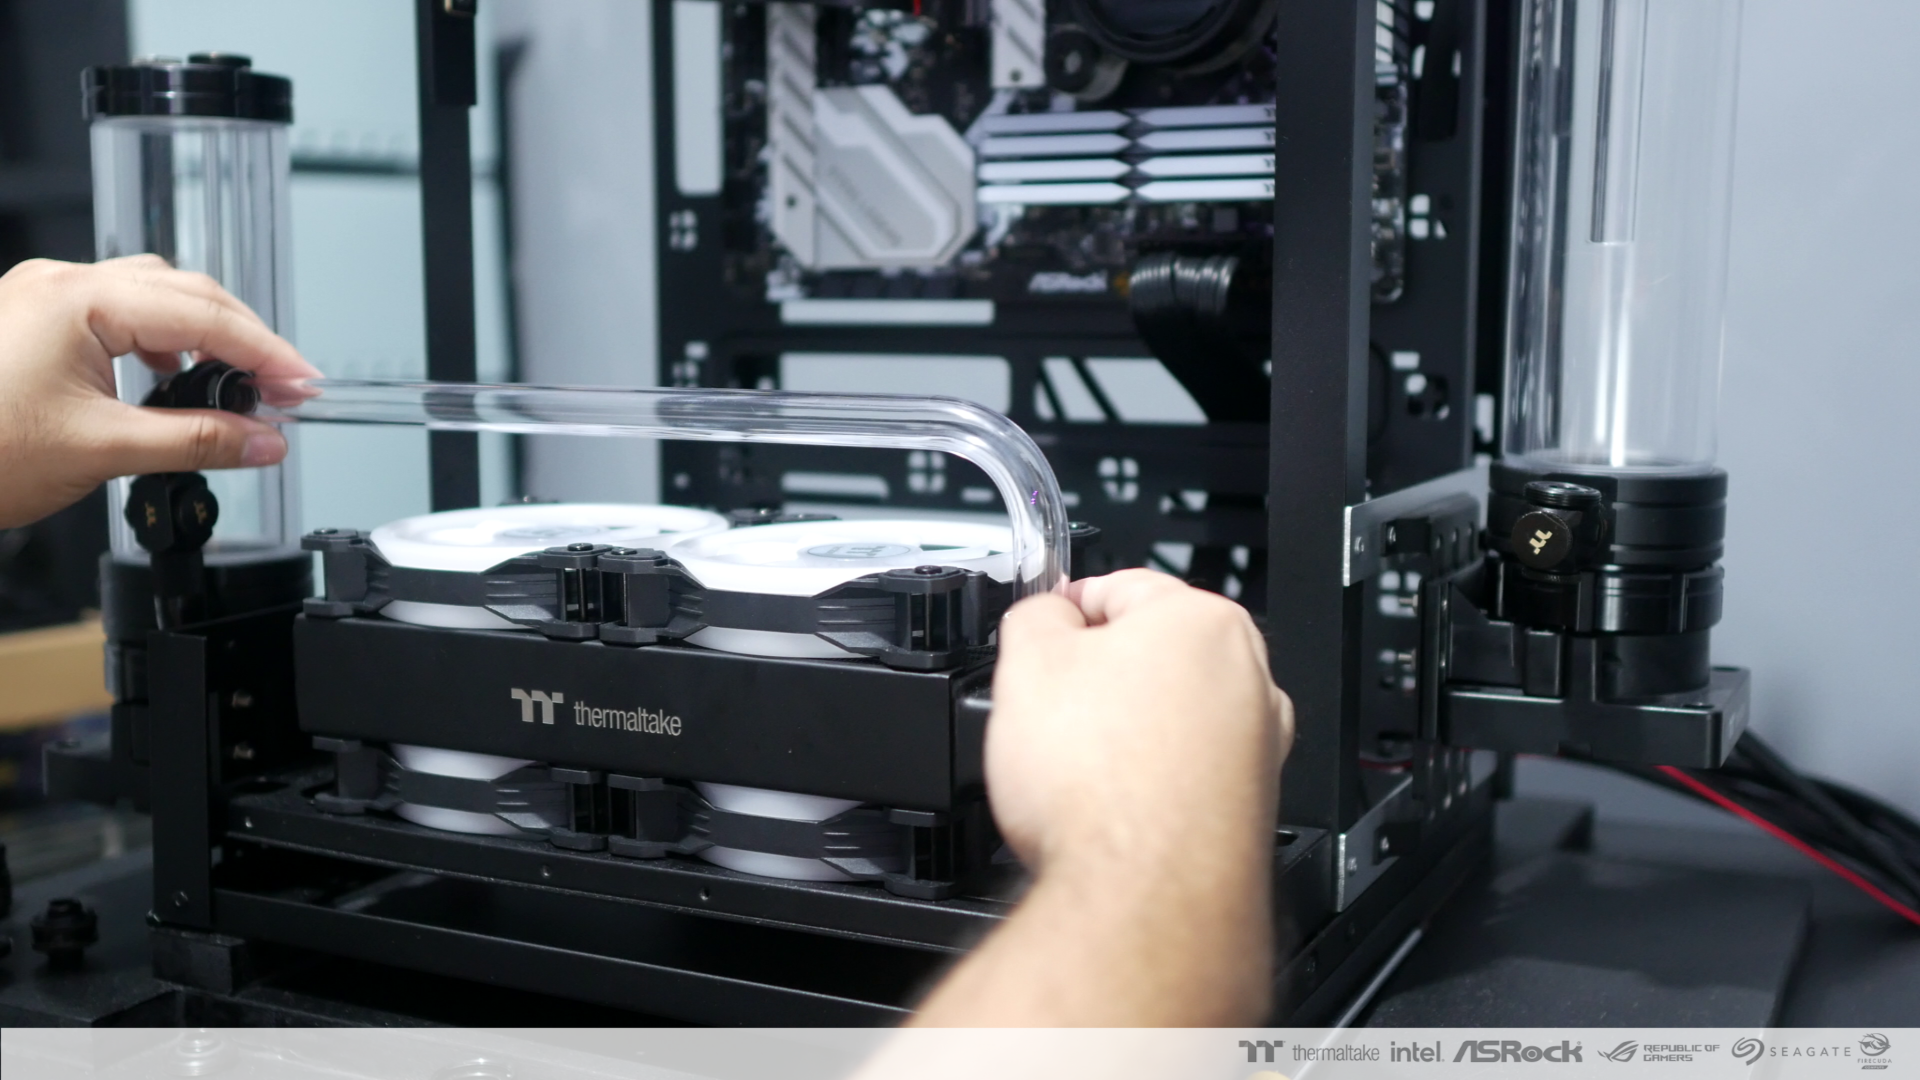
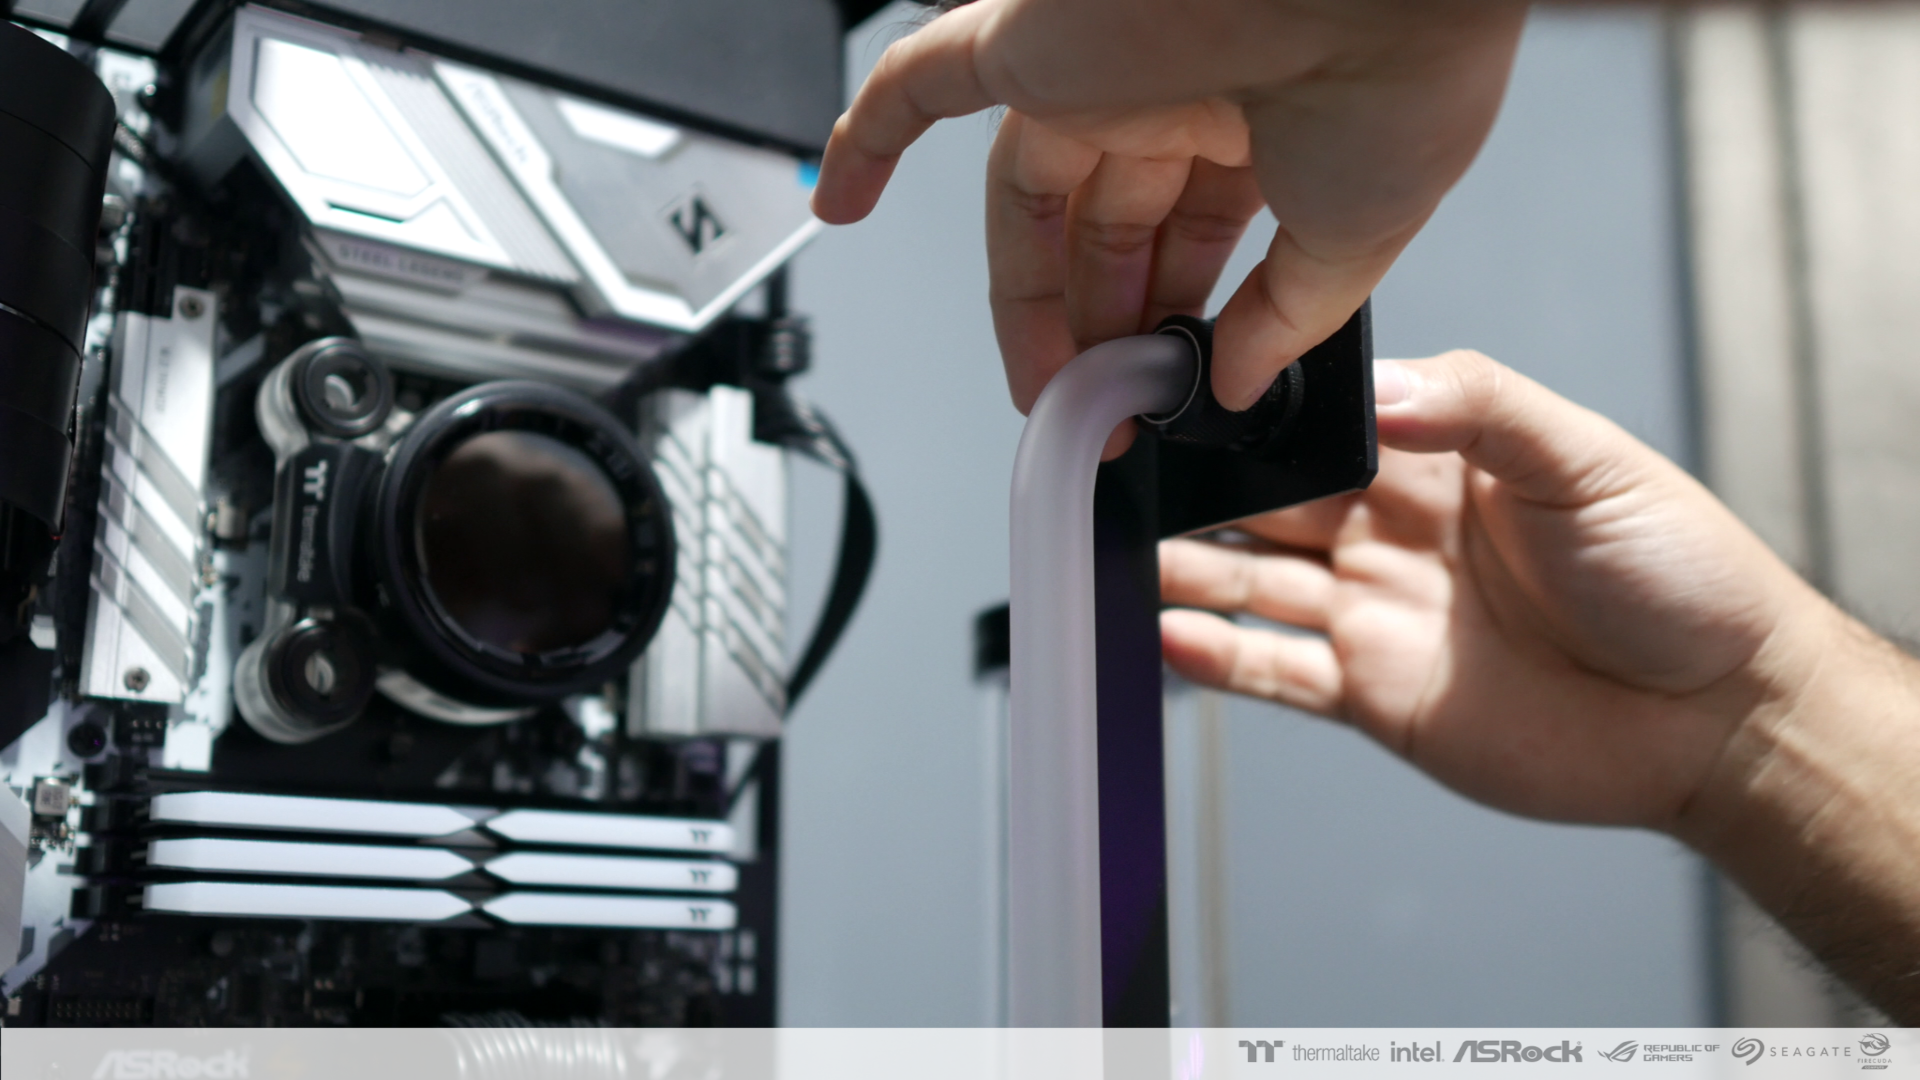
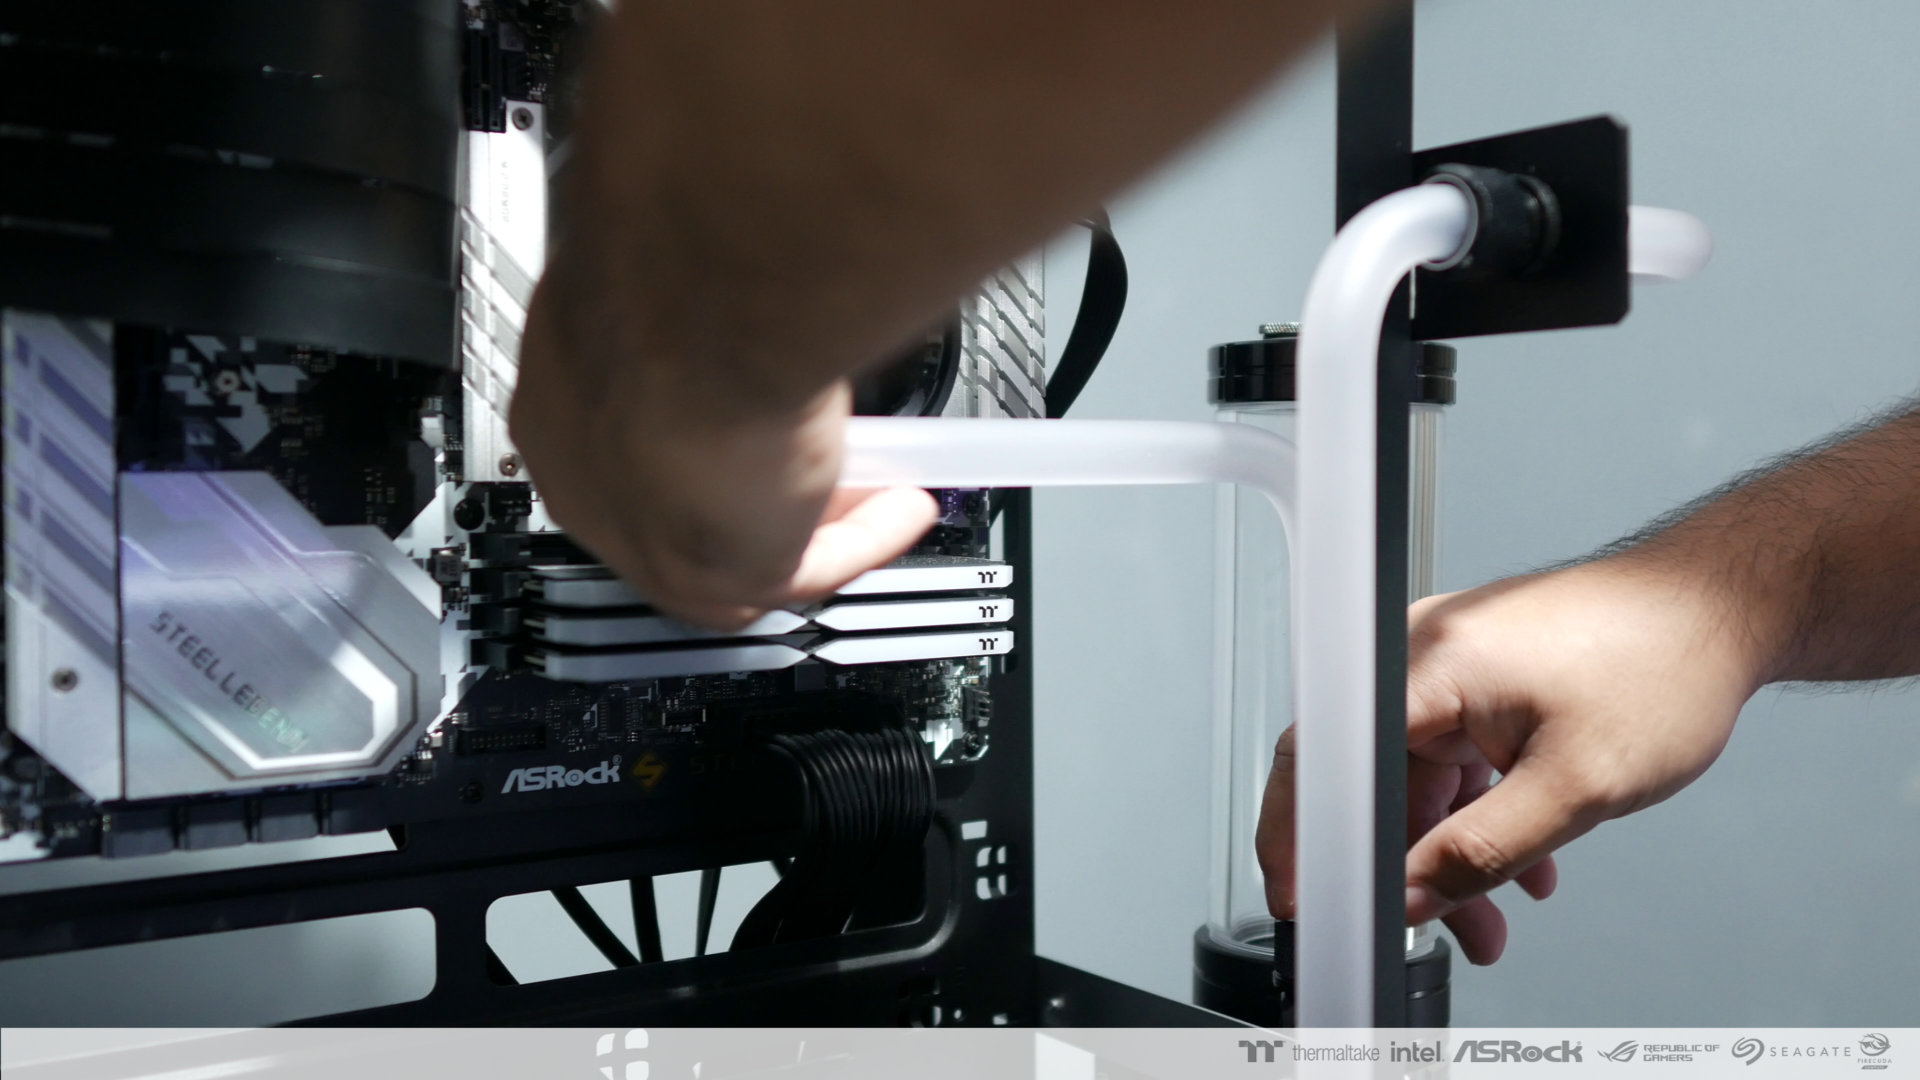
I will be installing the Thermaltake V-Tubler 16mm PETG Tubes around the CaseMOD.
I want the CaseMOD to expose all the sponsored parts as well as showcasing the watercooling parts around the CaseMOD.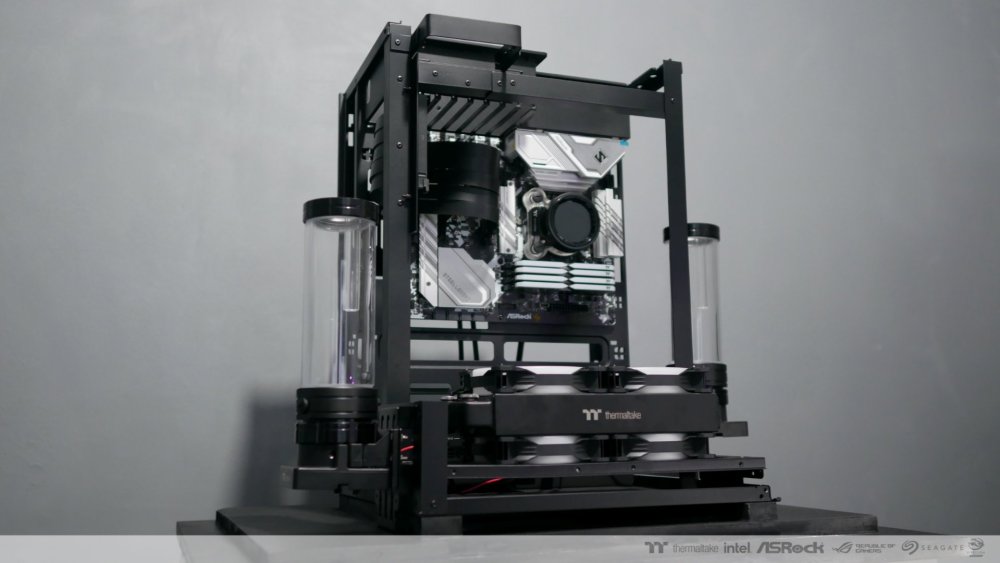

-
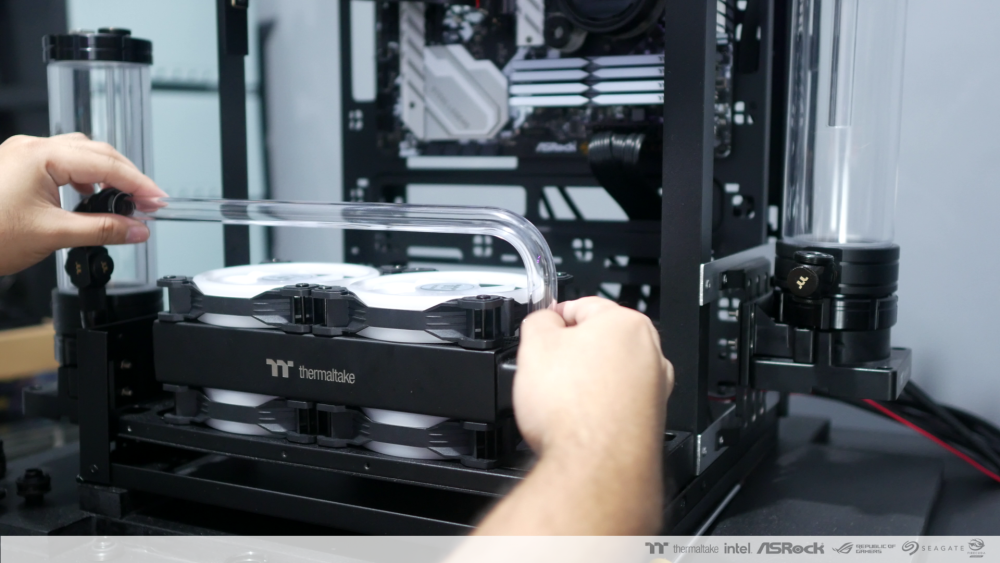
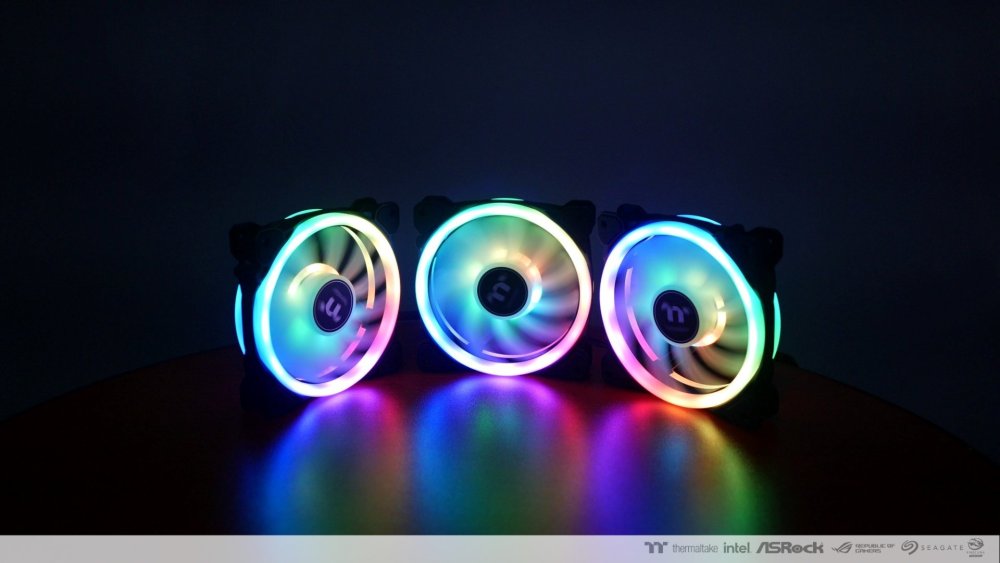
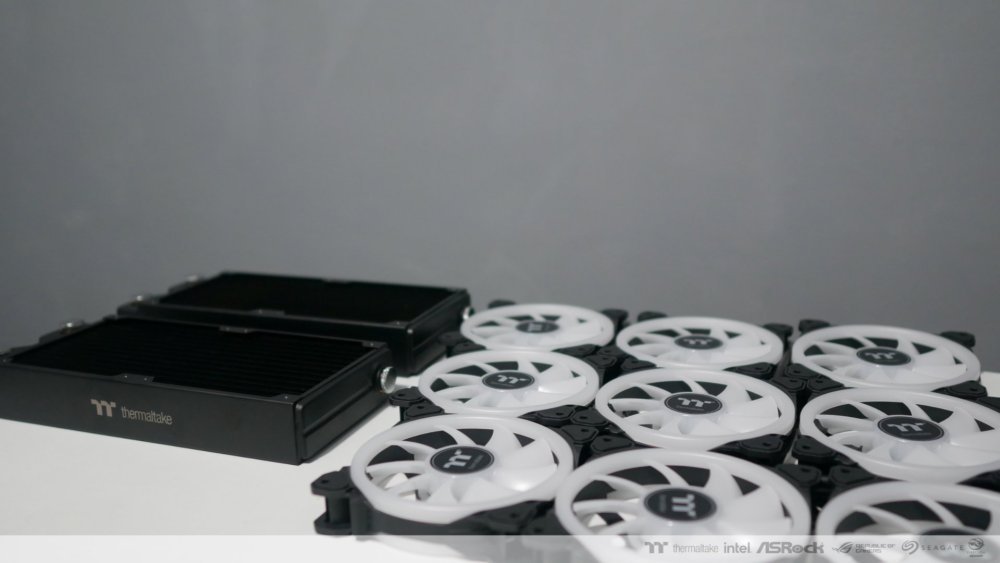
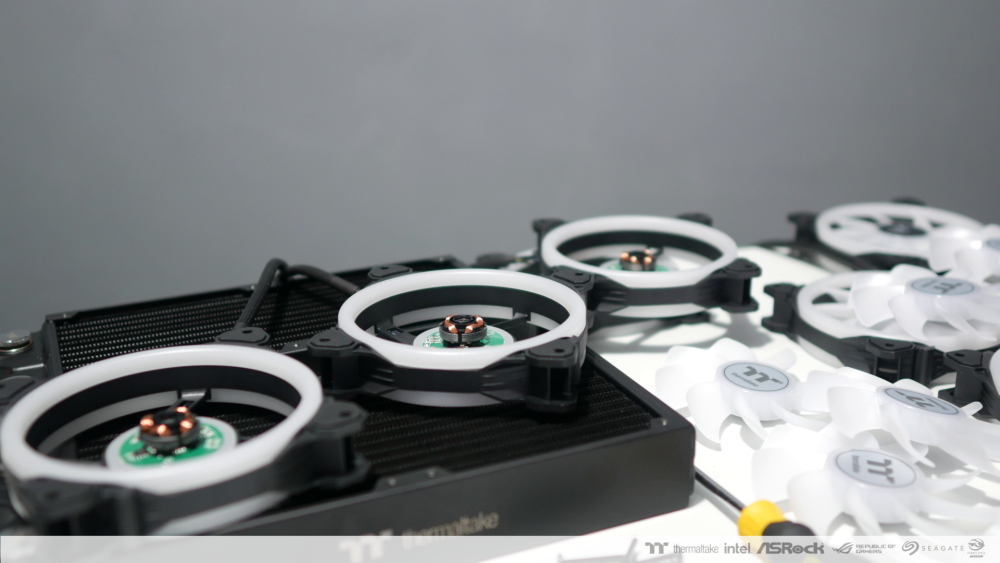
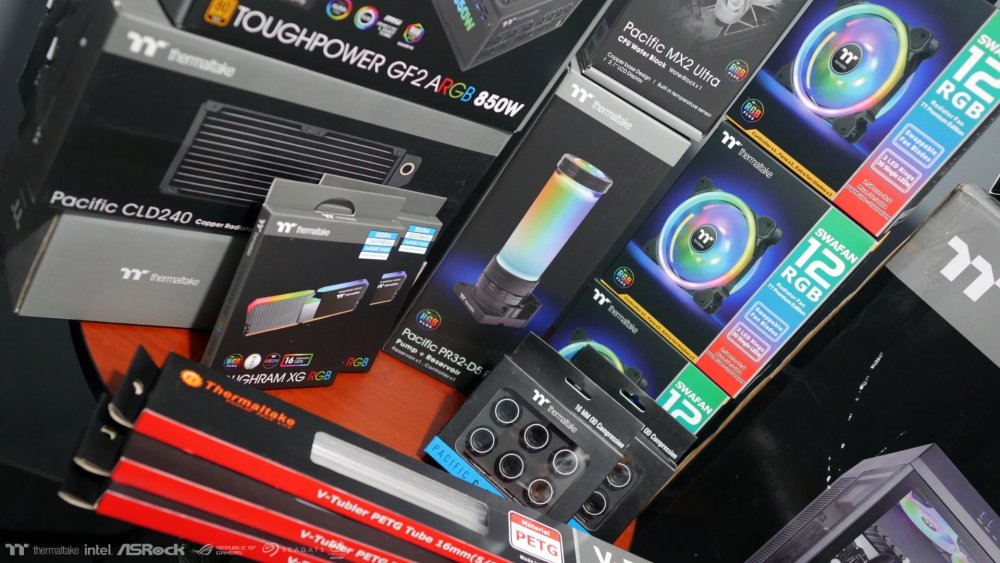
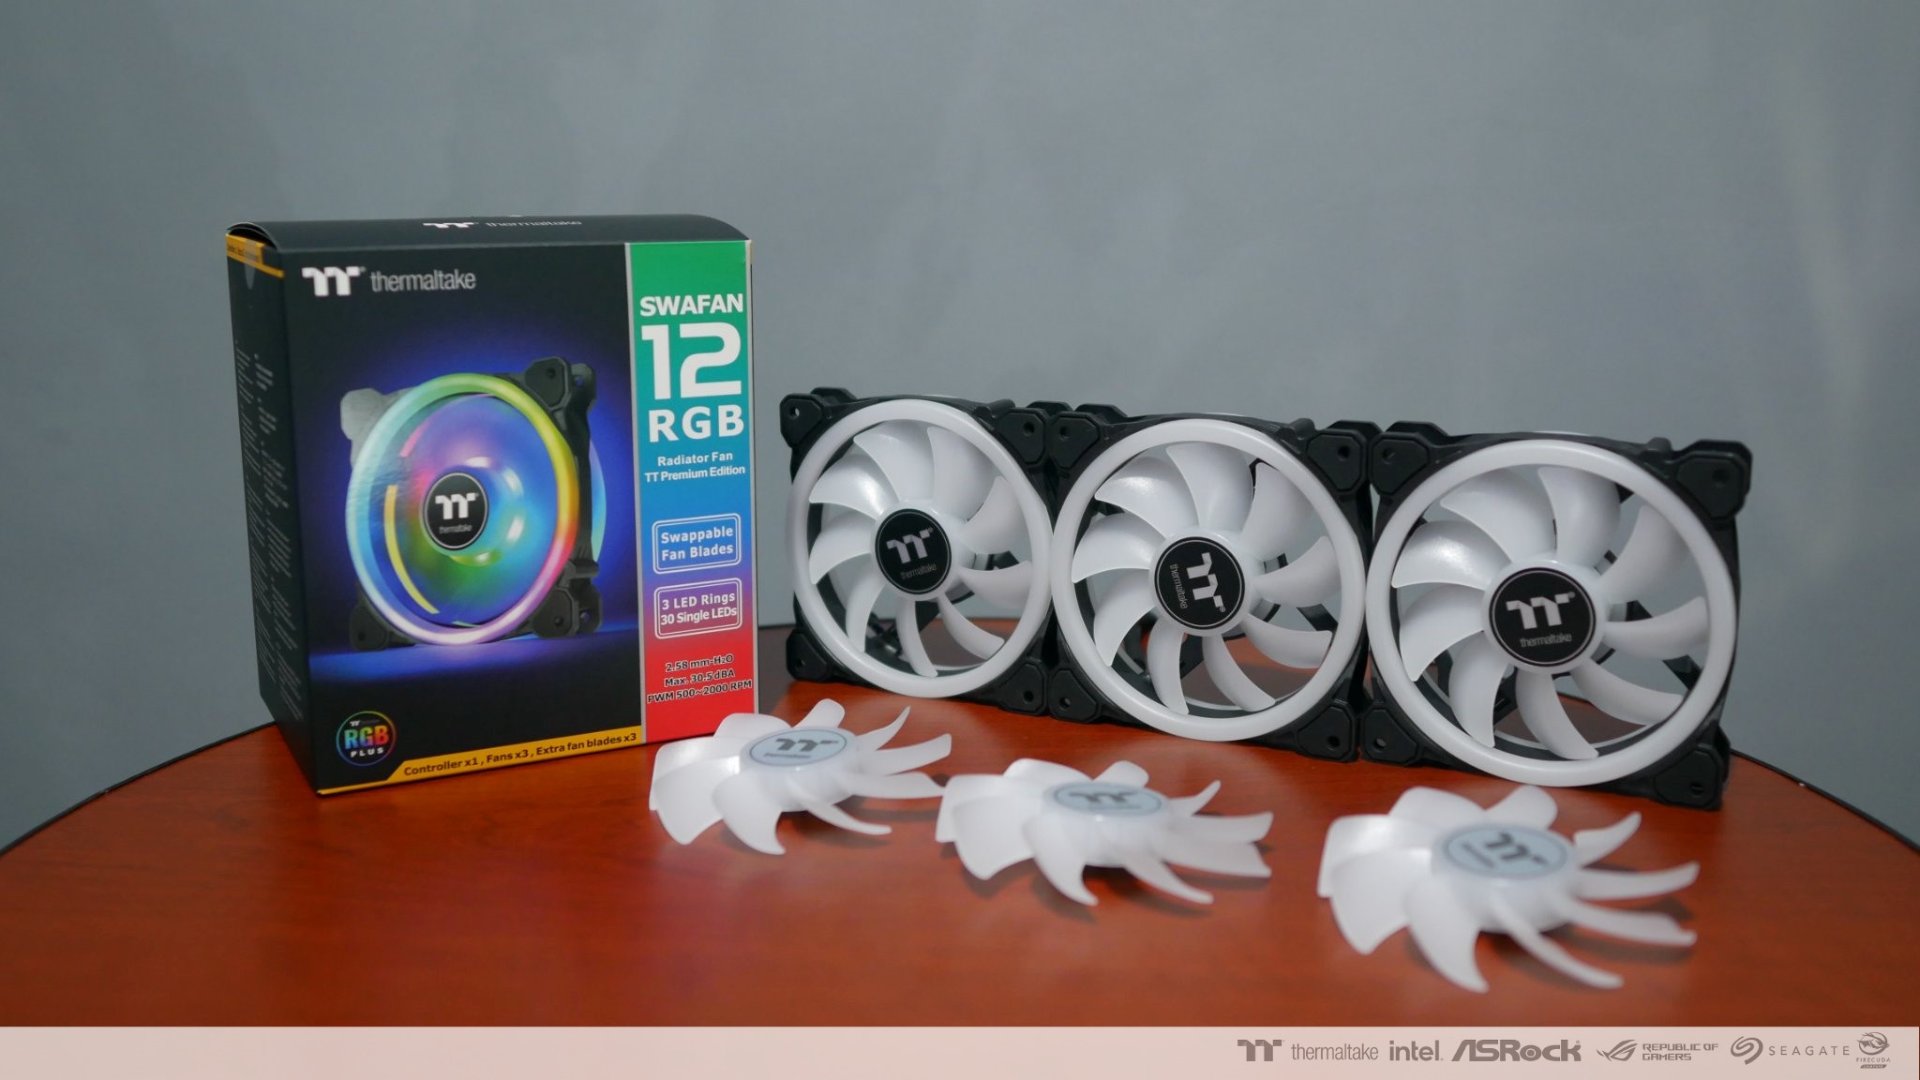
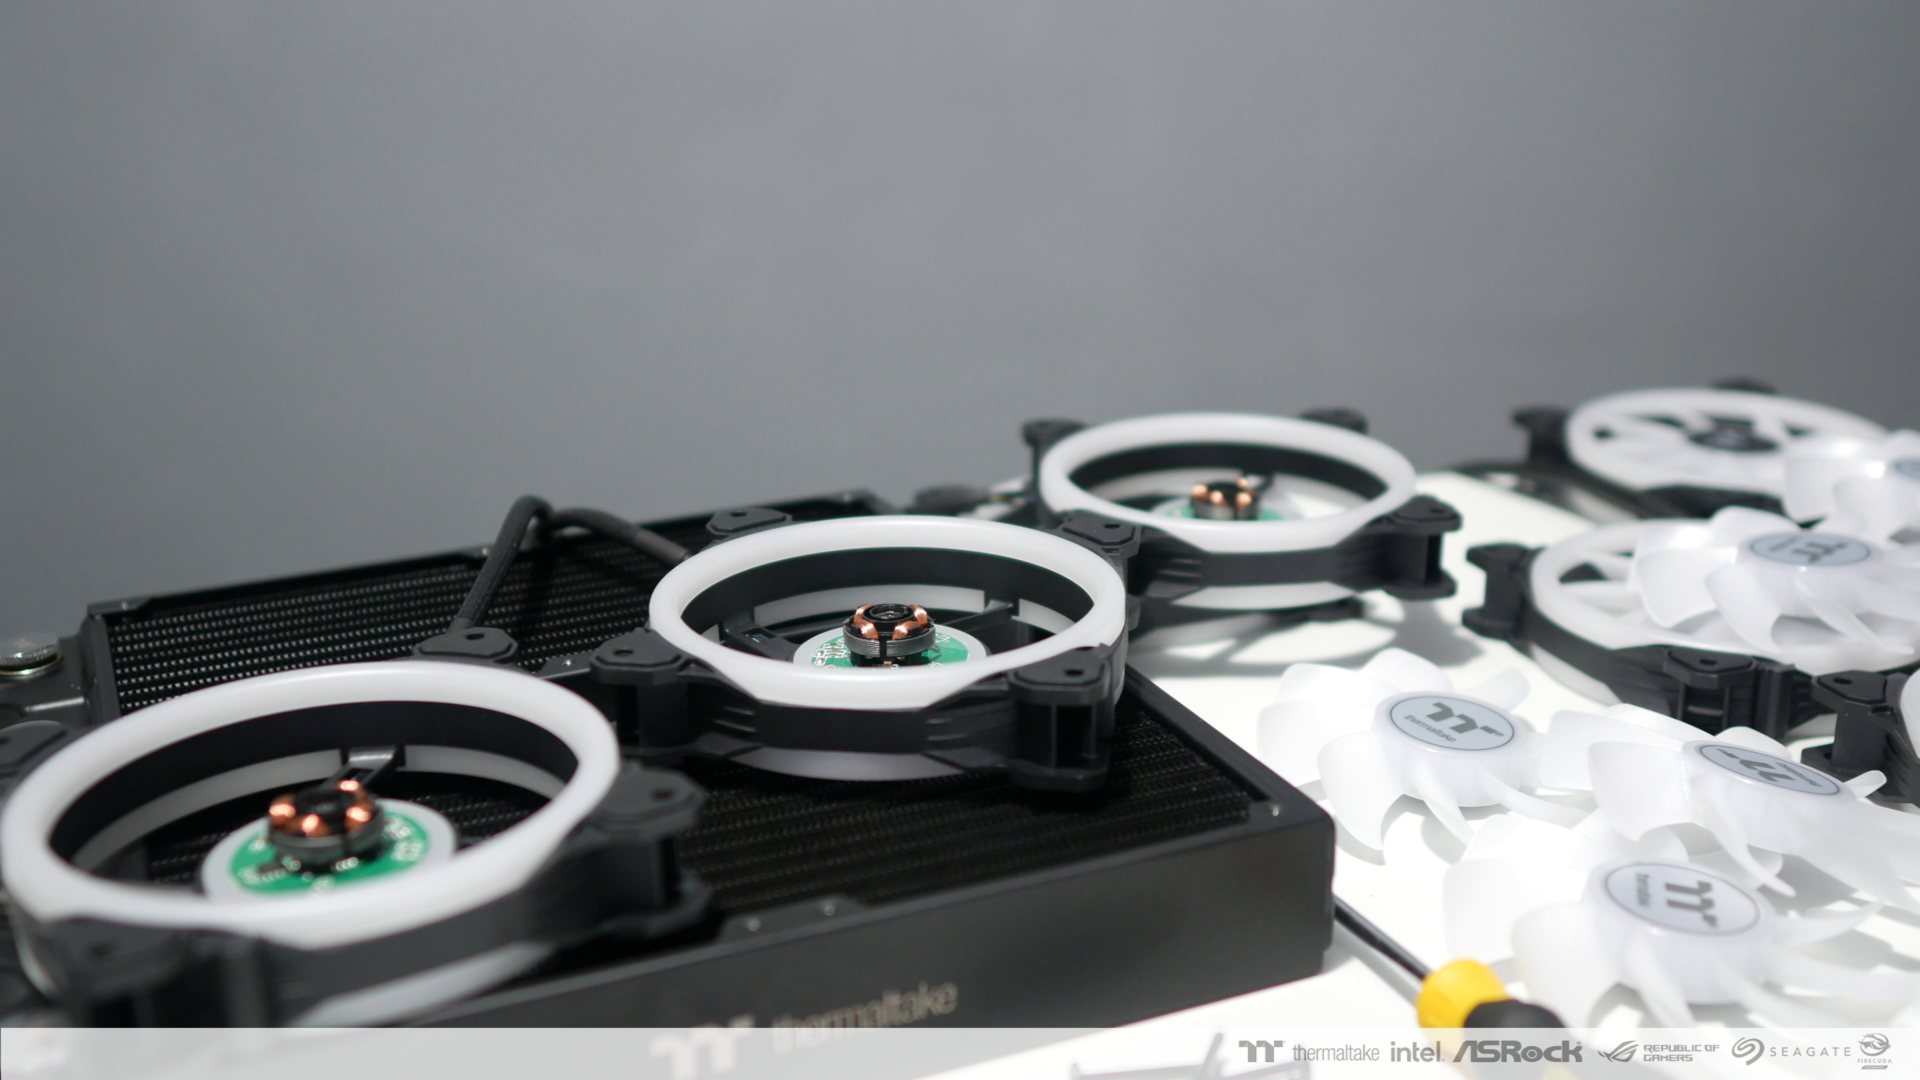
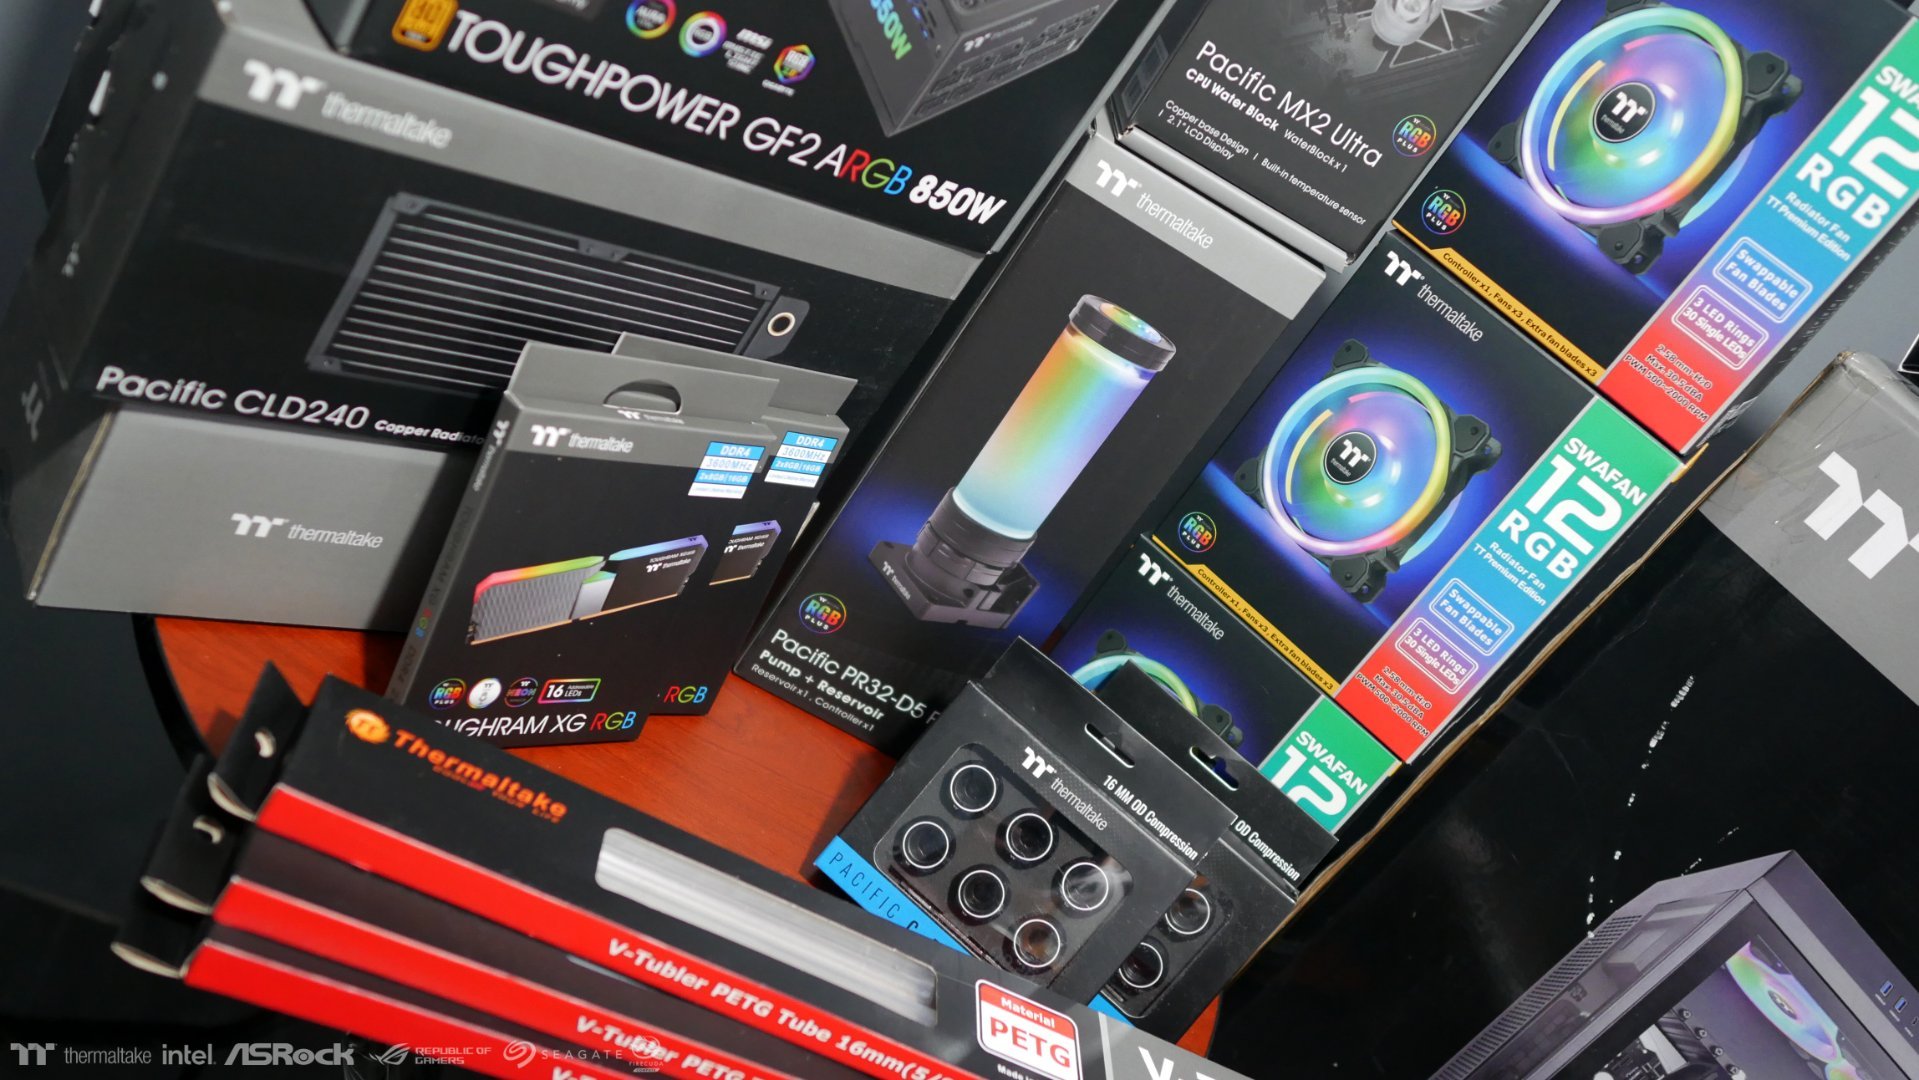
I'll be using Thermaltake SWAFAN 12 RGB for my radiators.
Check out the fans here: https://www.thermaltake.com/swafan-12-rgb-radiator-fan-3-fan-pack.html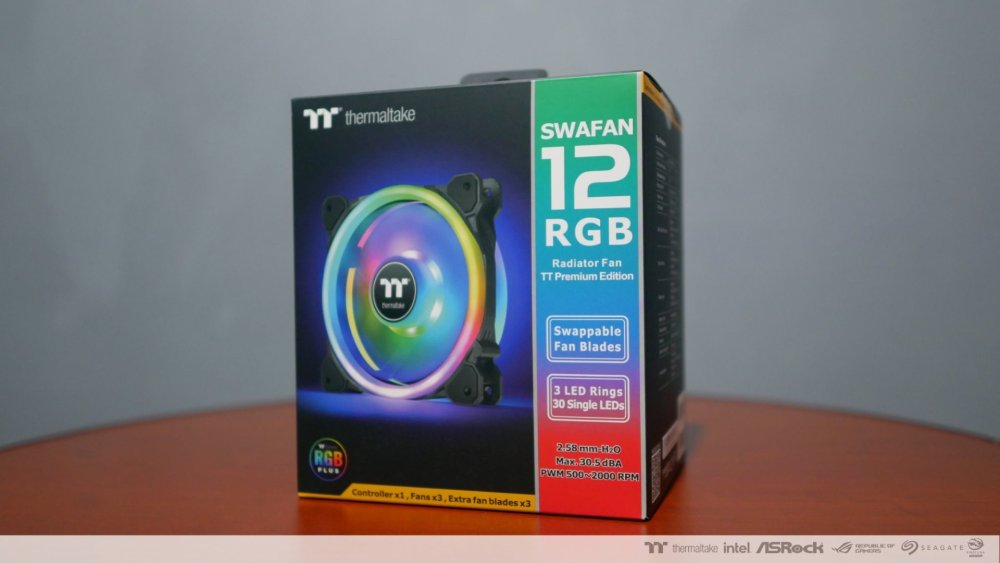

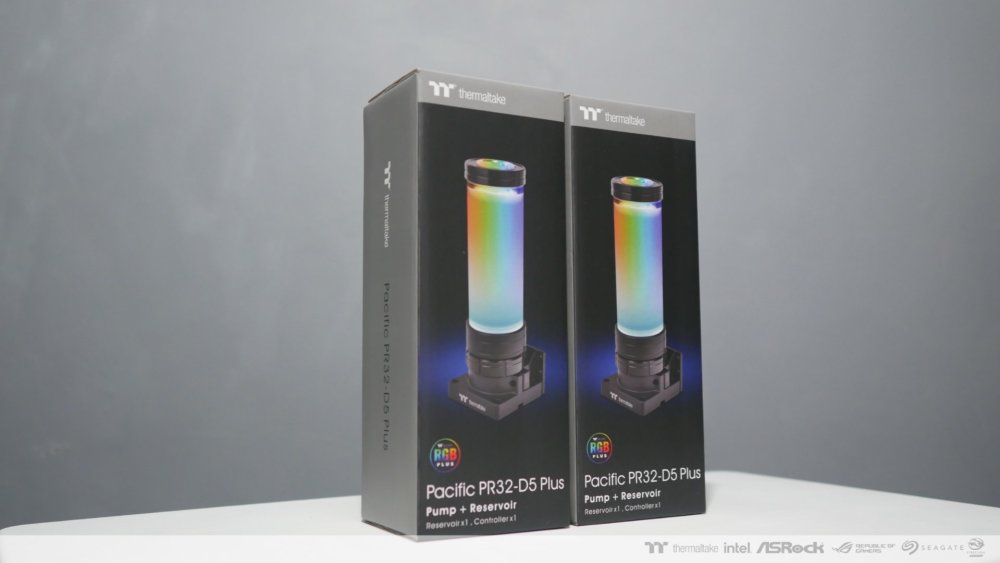
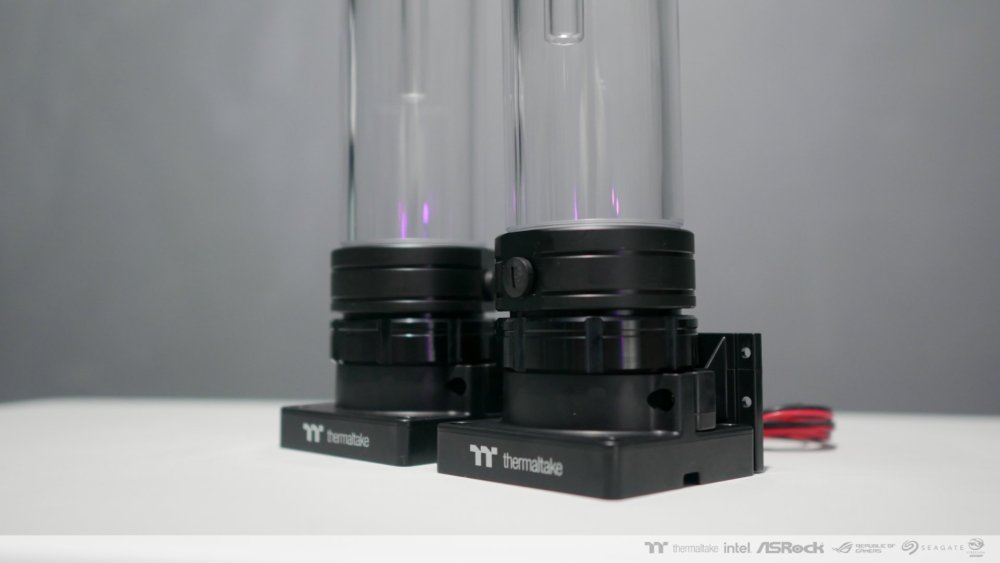
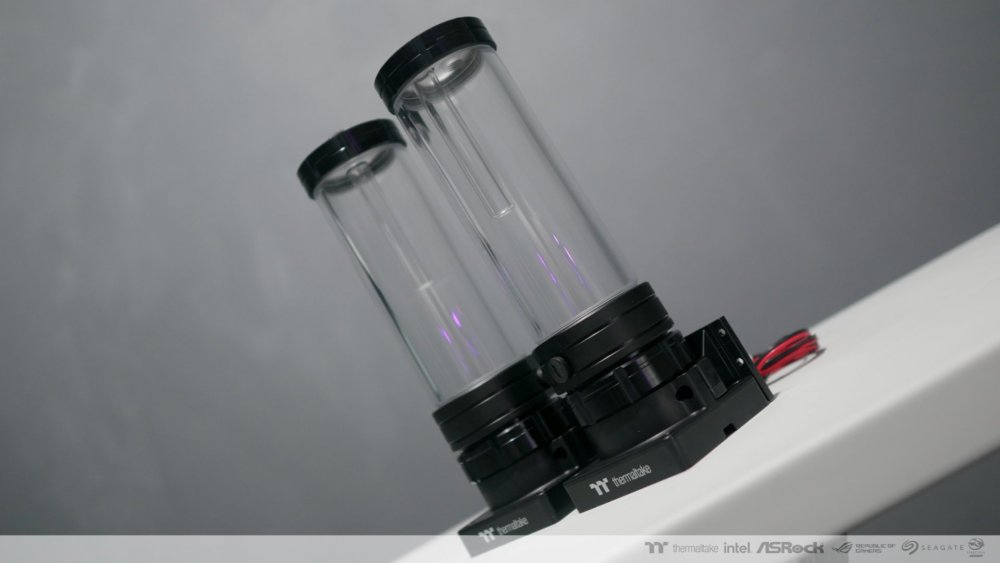
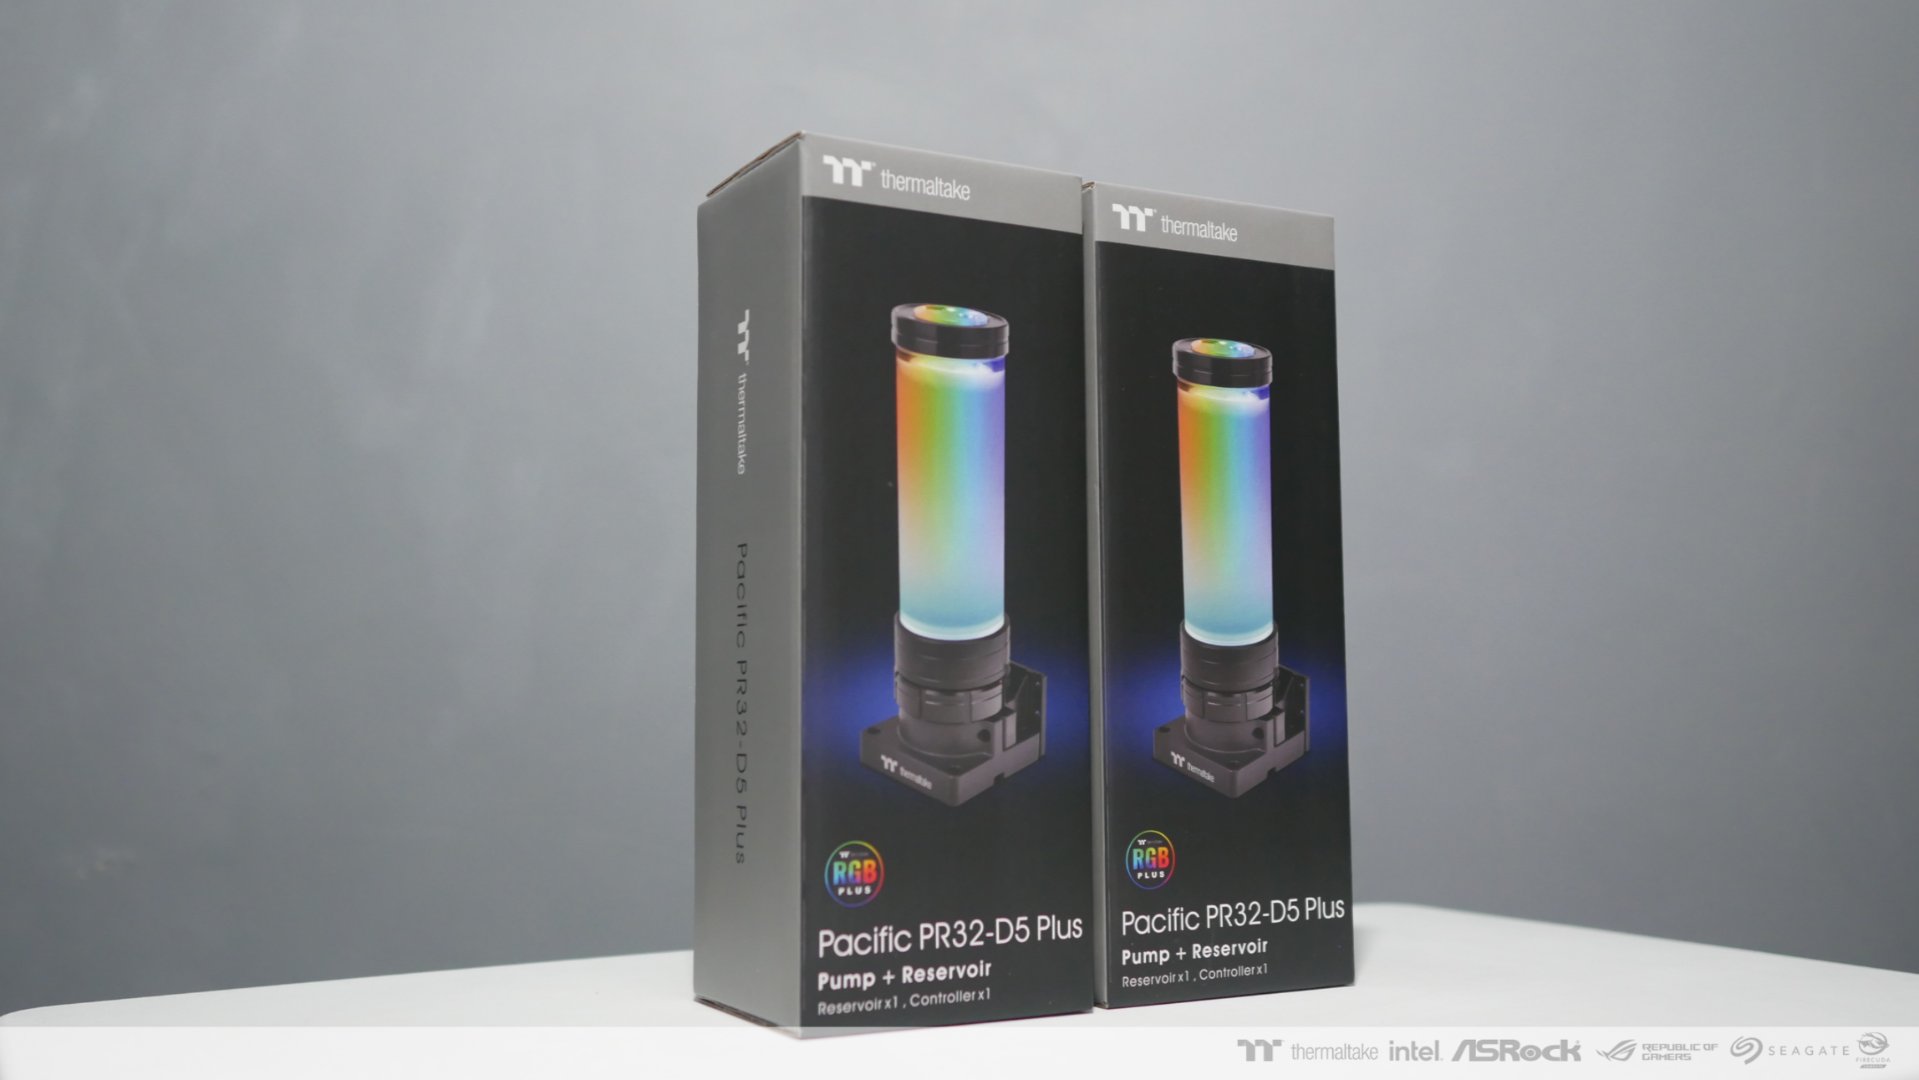
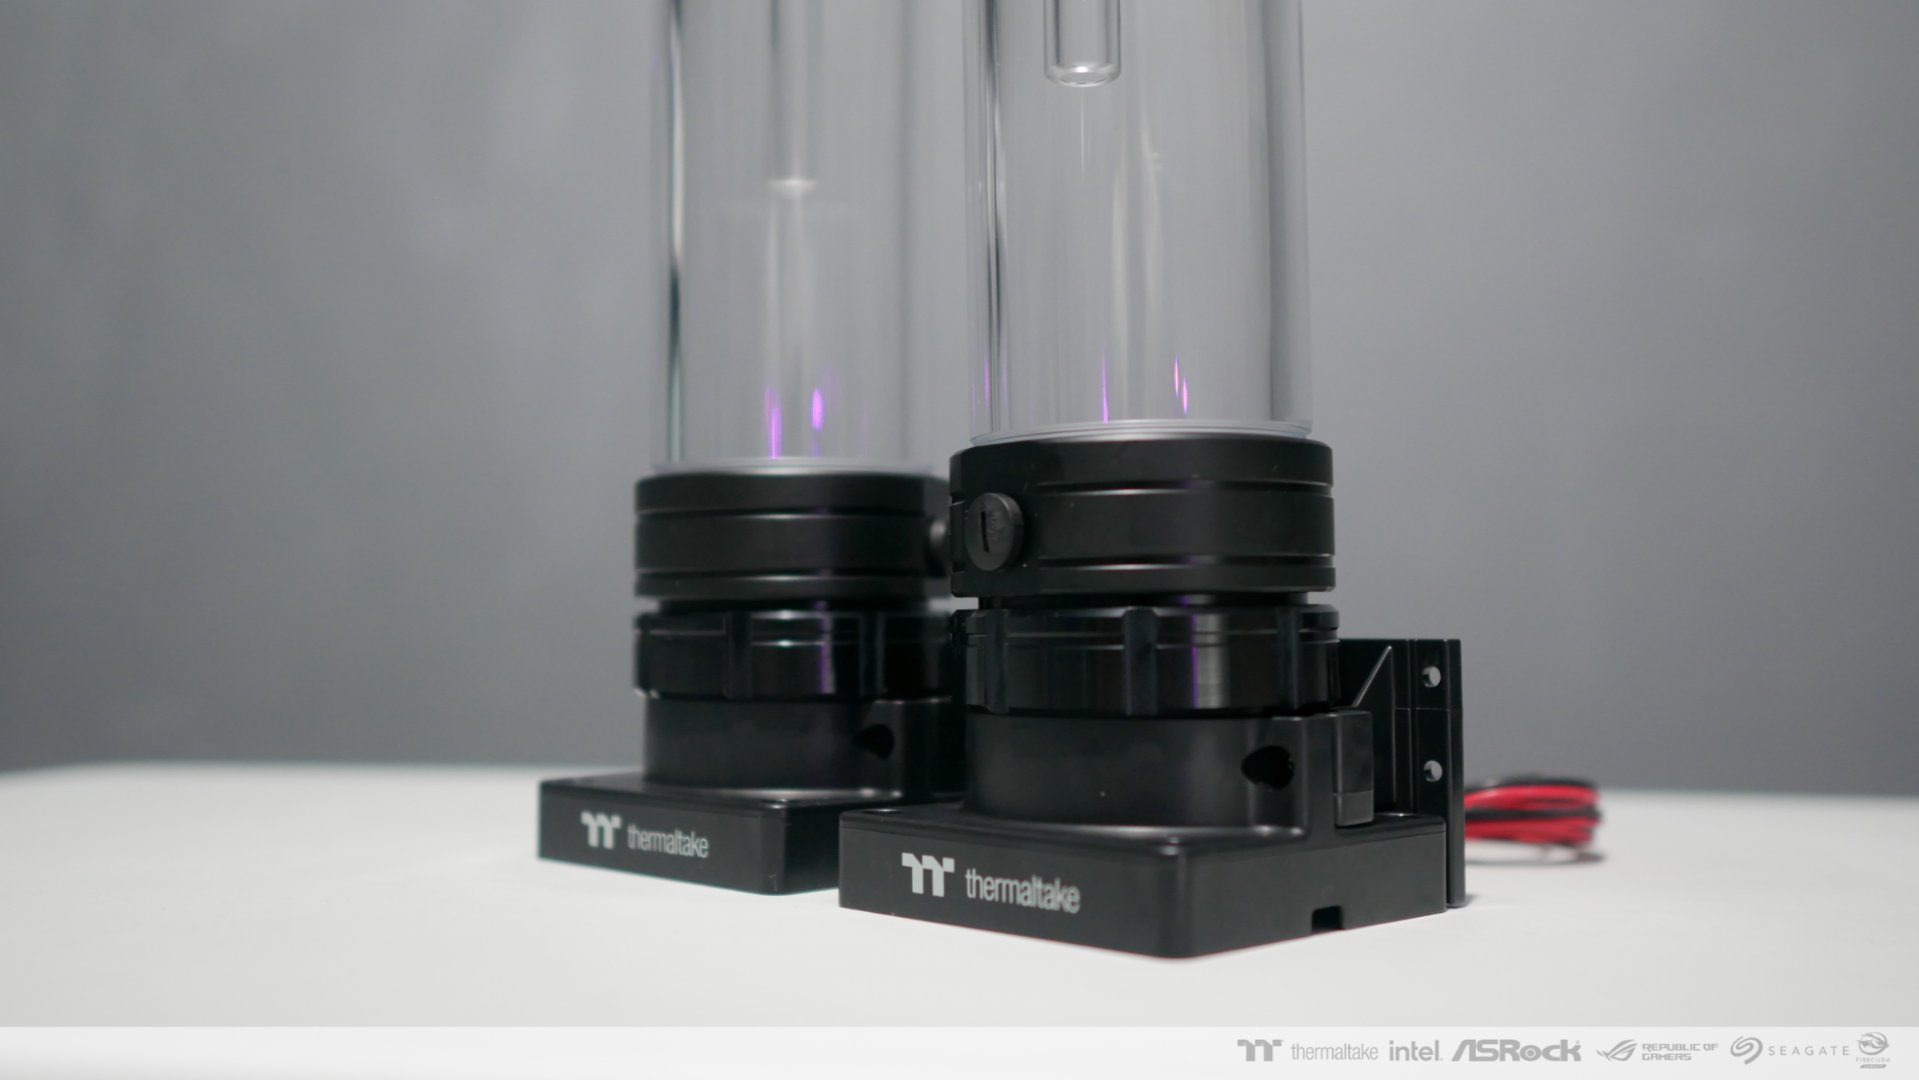
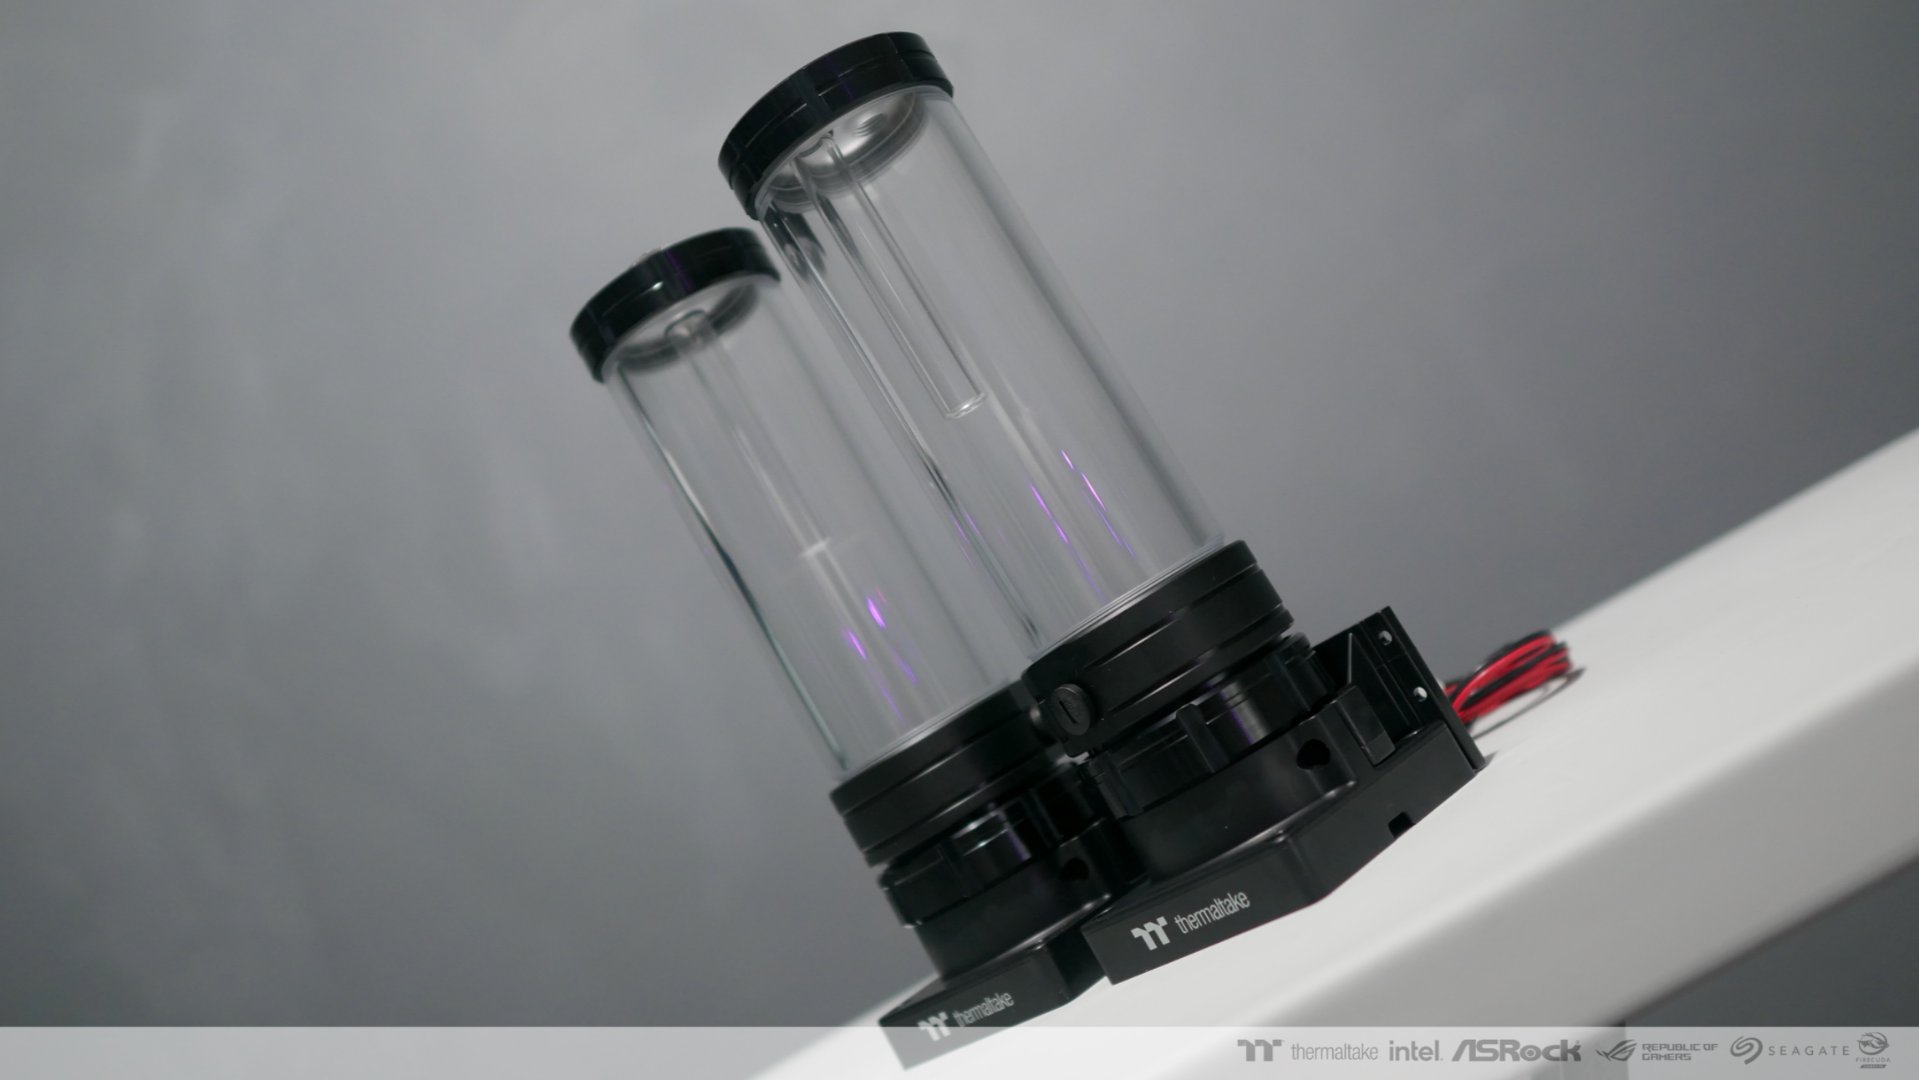
The Pump-reservoir I'll be using are Thermaltake Pacific PR32-D5 Plus Pump.
Learn more about the Pump res here:https://www.thermaltake.com/pacific-pr32-d5-plus.html
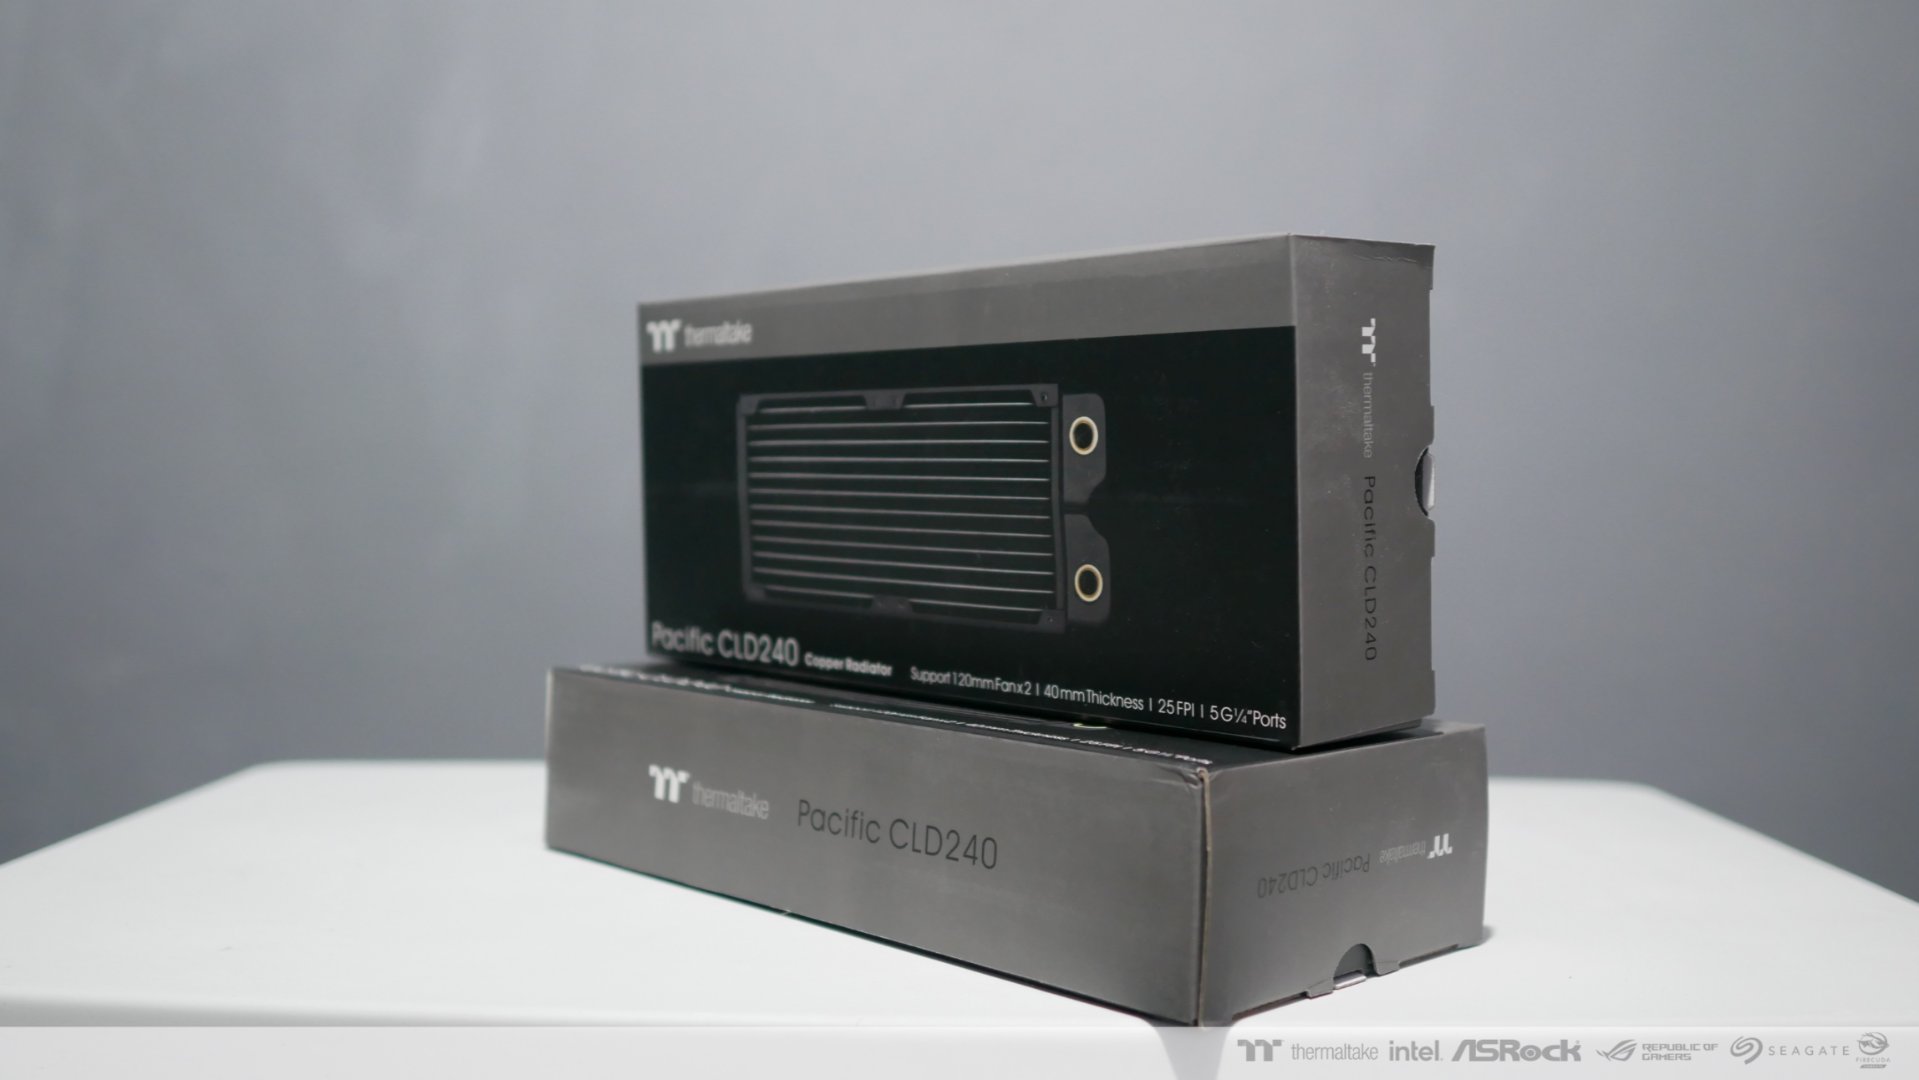
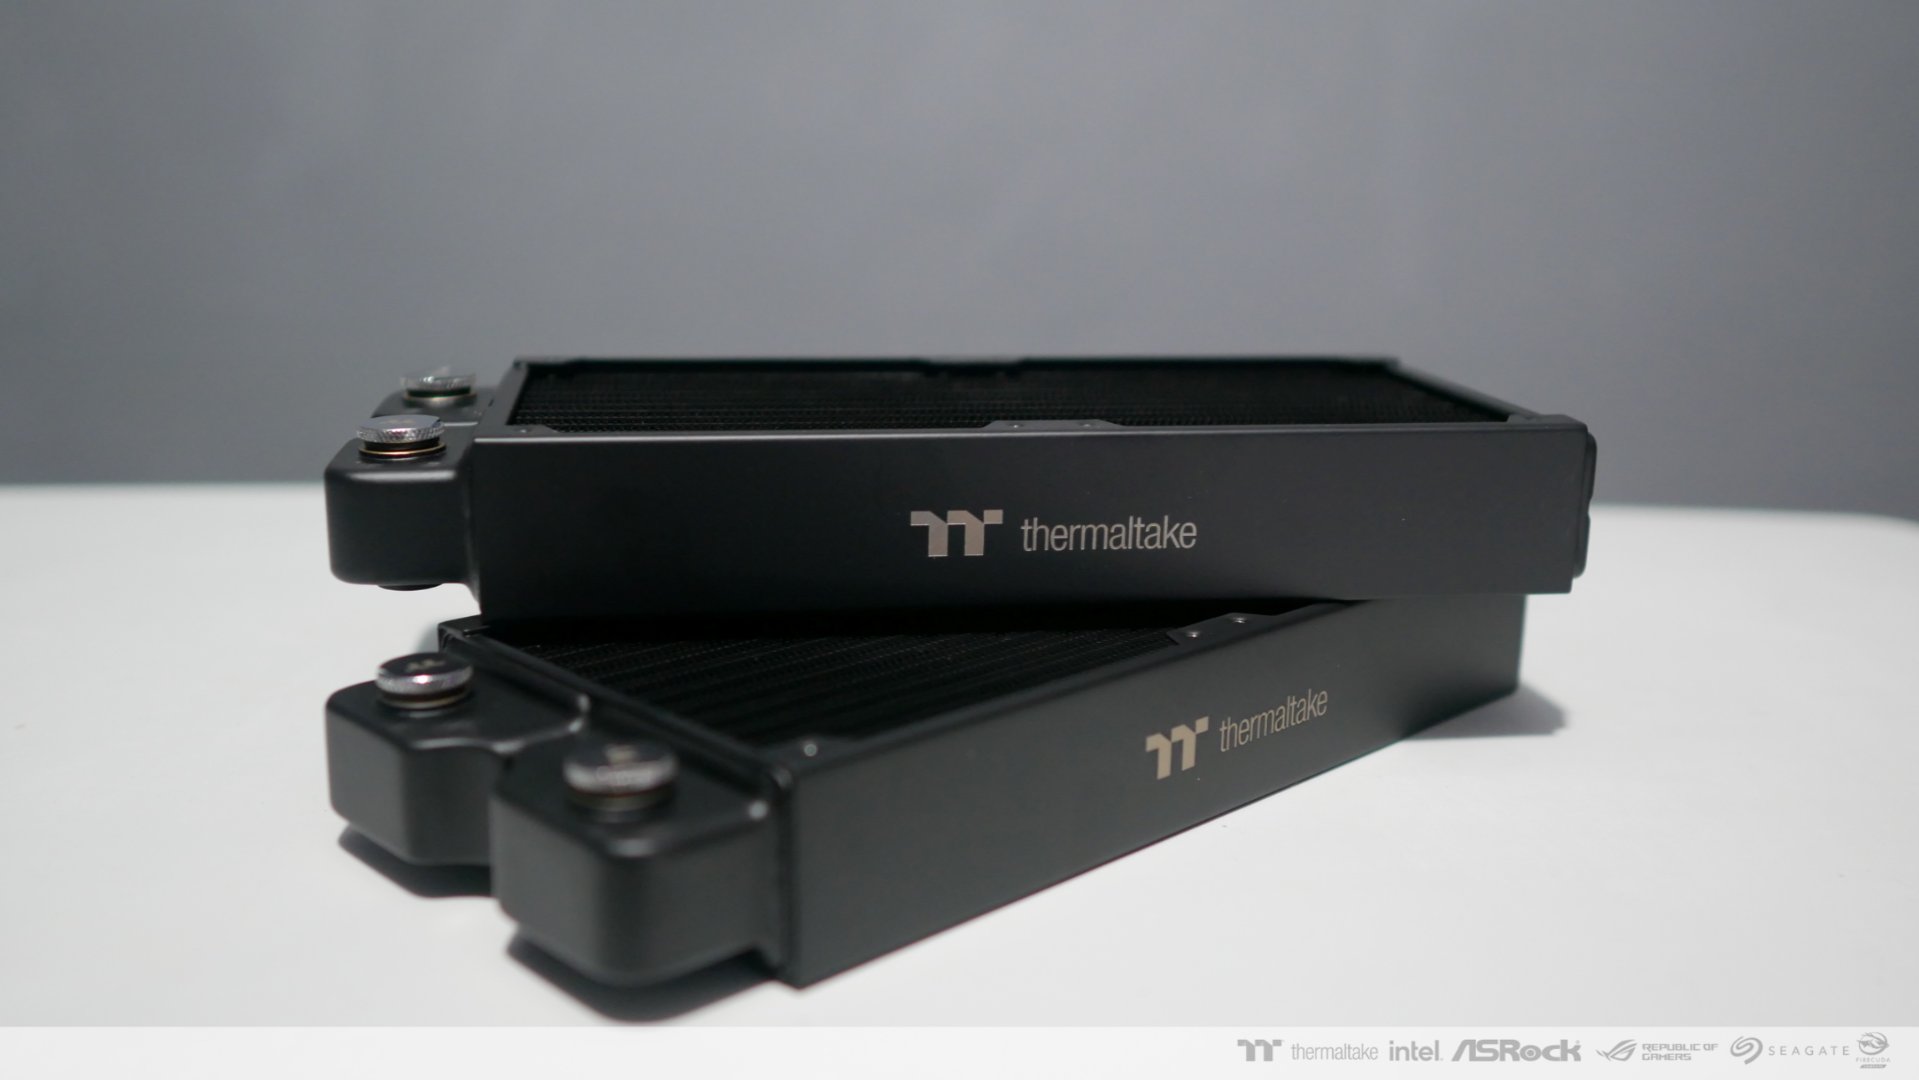
We will be using dual 240 radiators Thermaltake Pacific CLD240, one on the front and on on the rear.
Learn more about the radiator here: https://www.thermaltake.com/pacific-cld-240-radiator.html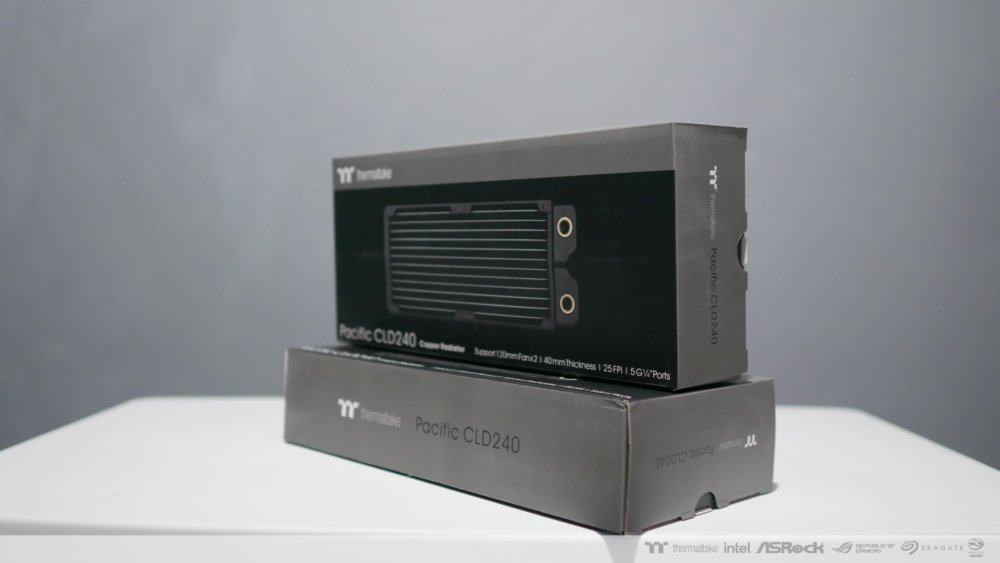

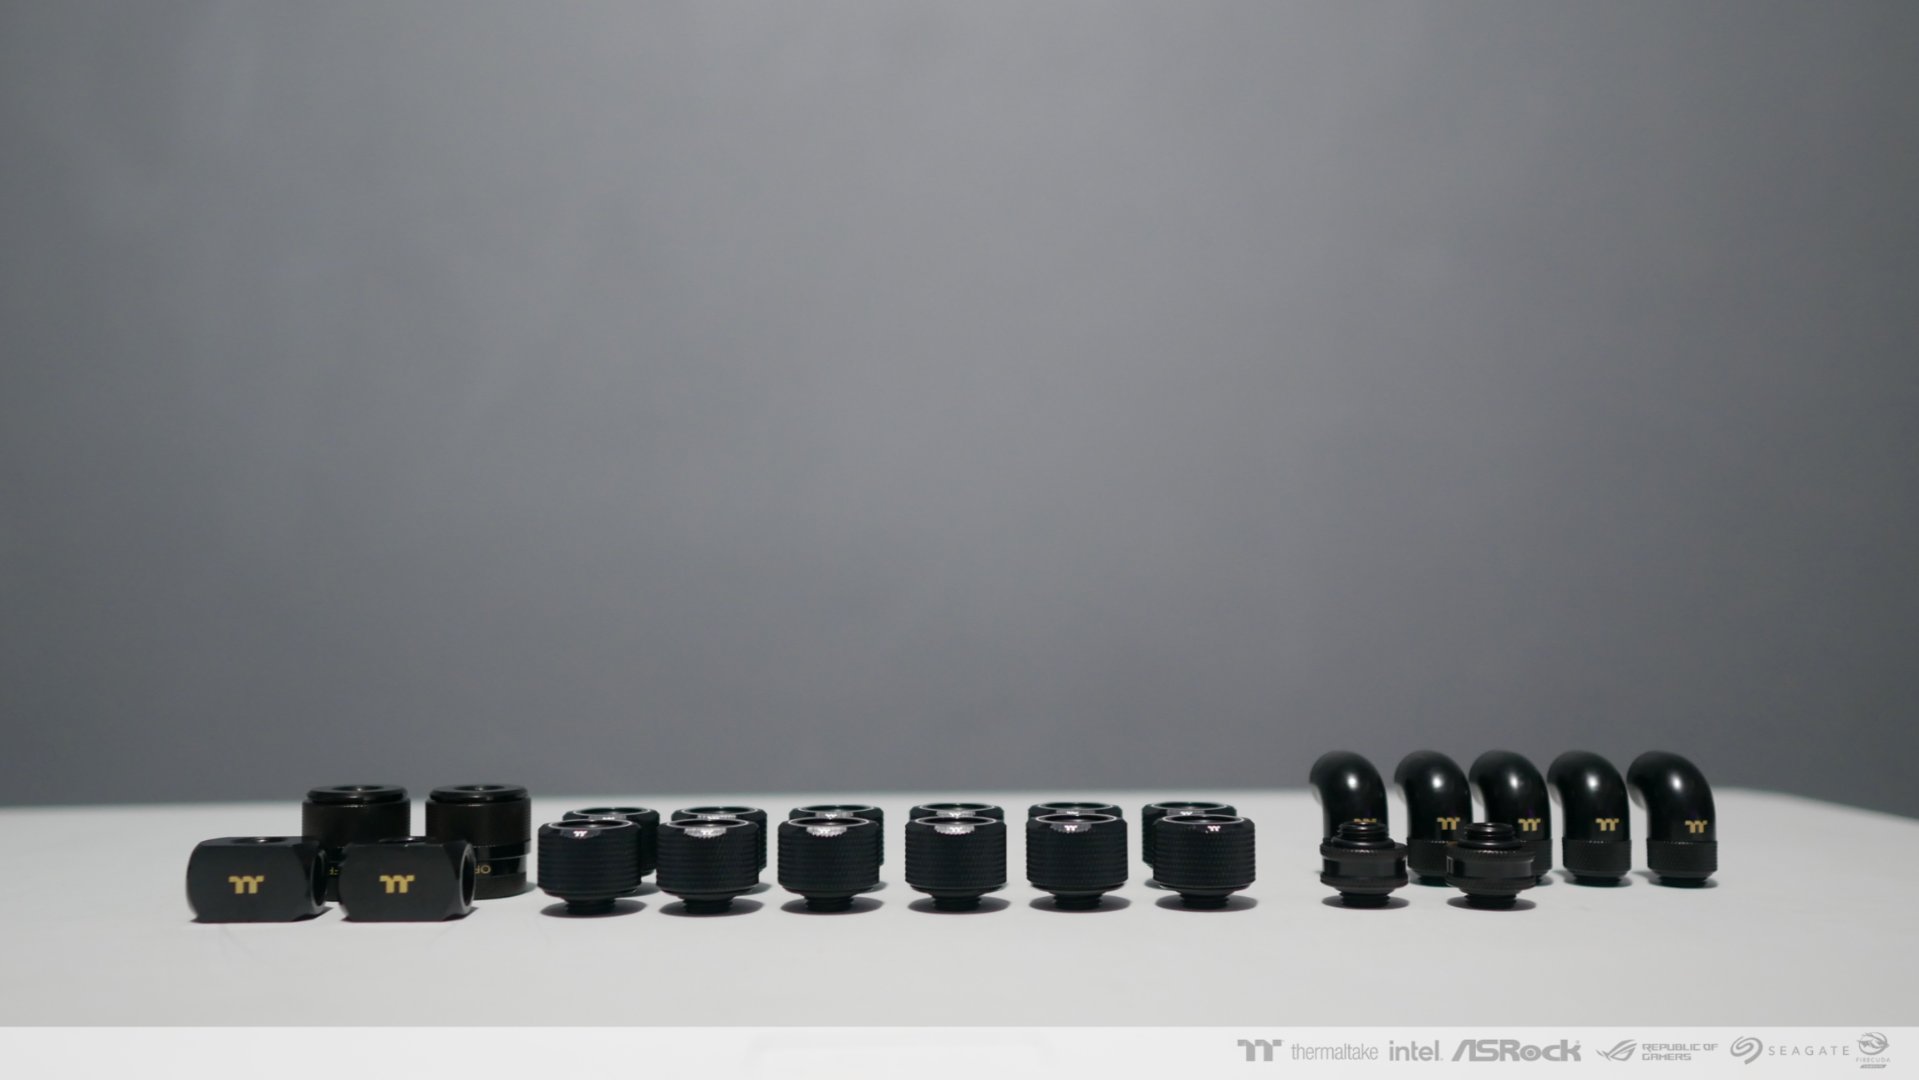
Thermaltake Pacific Compression Fittings and 90-deg male to female fittings: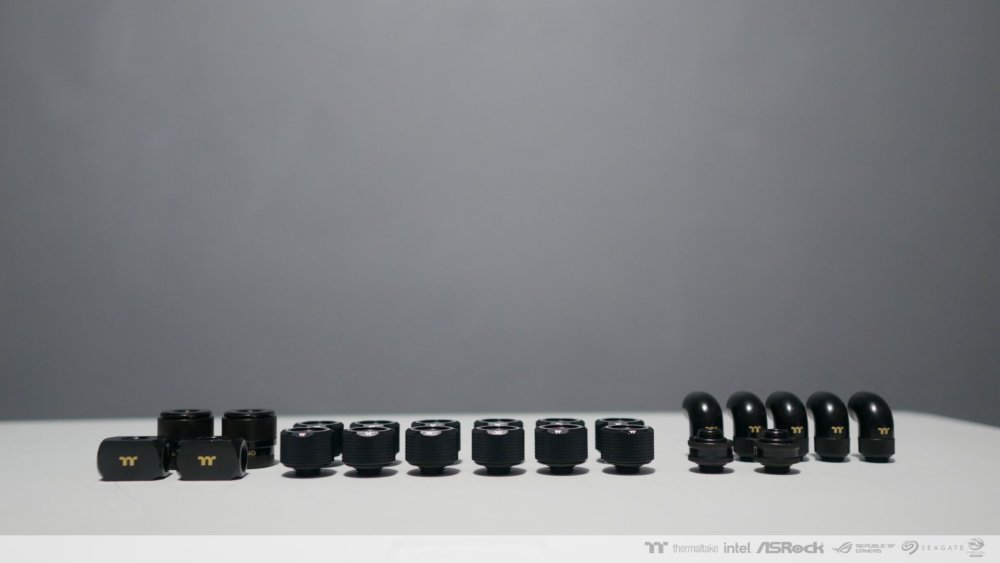
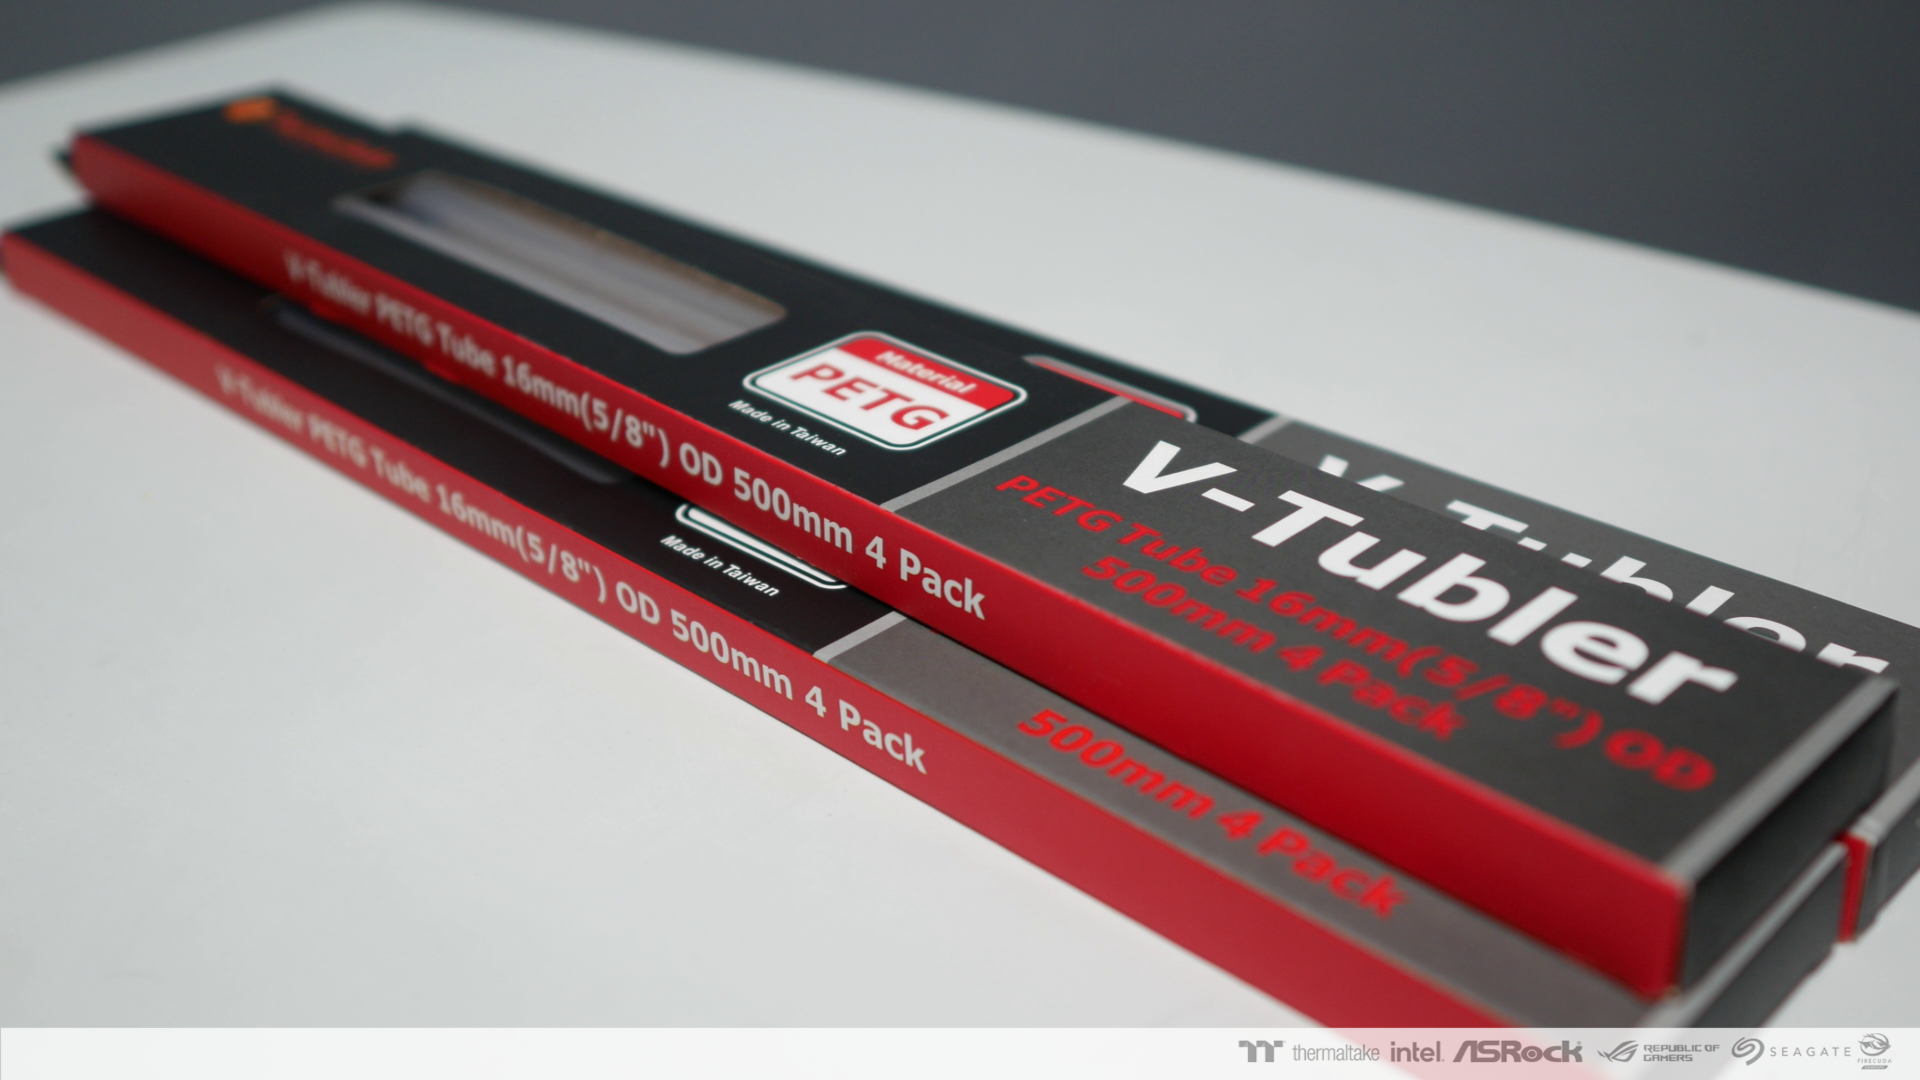
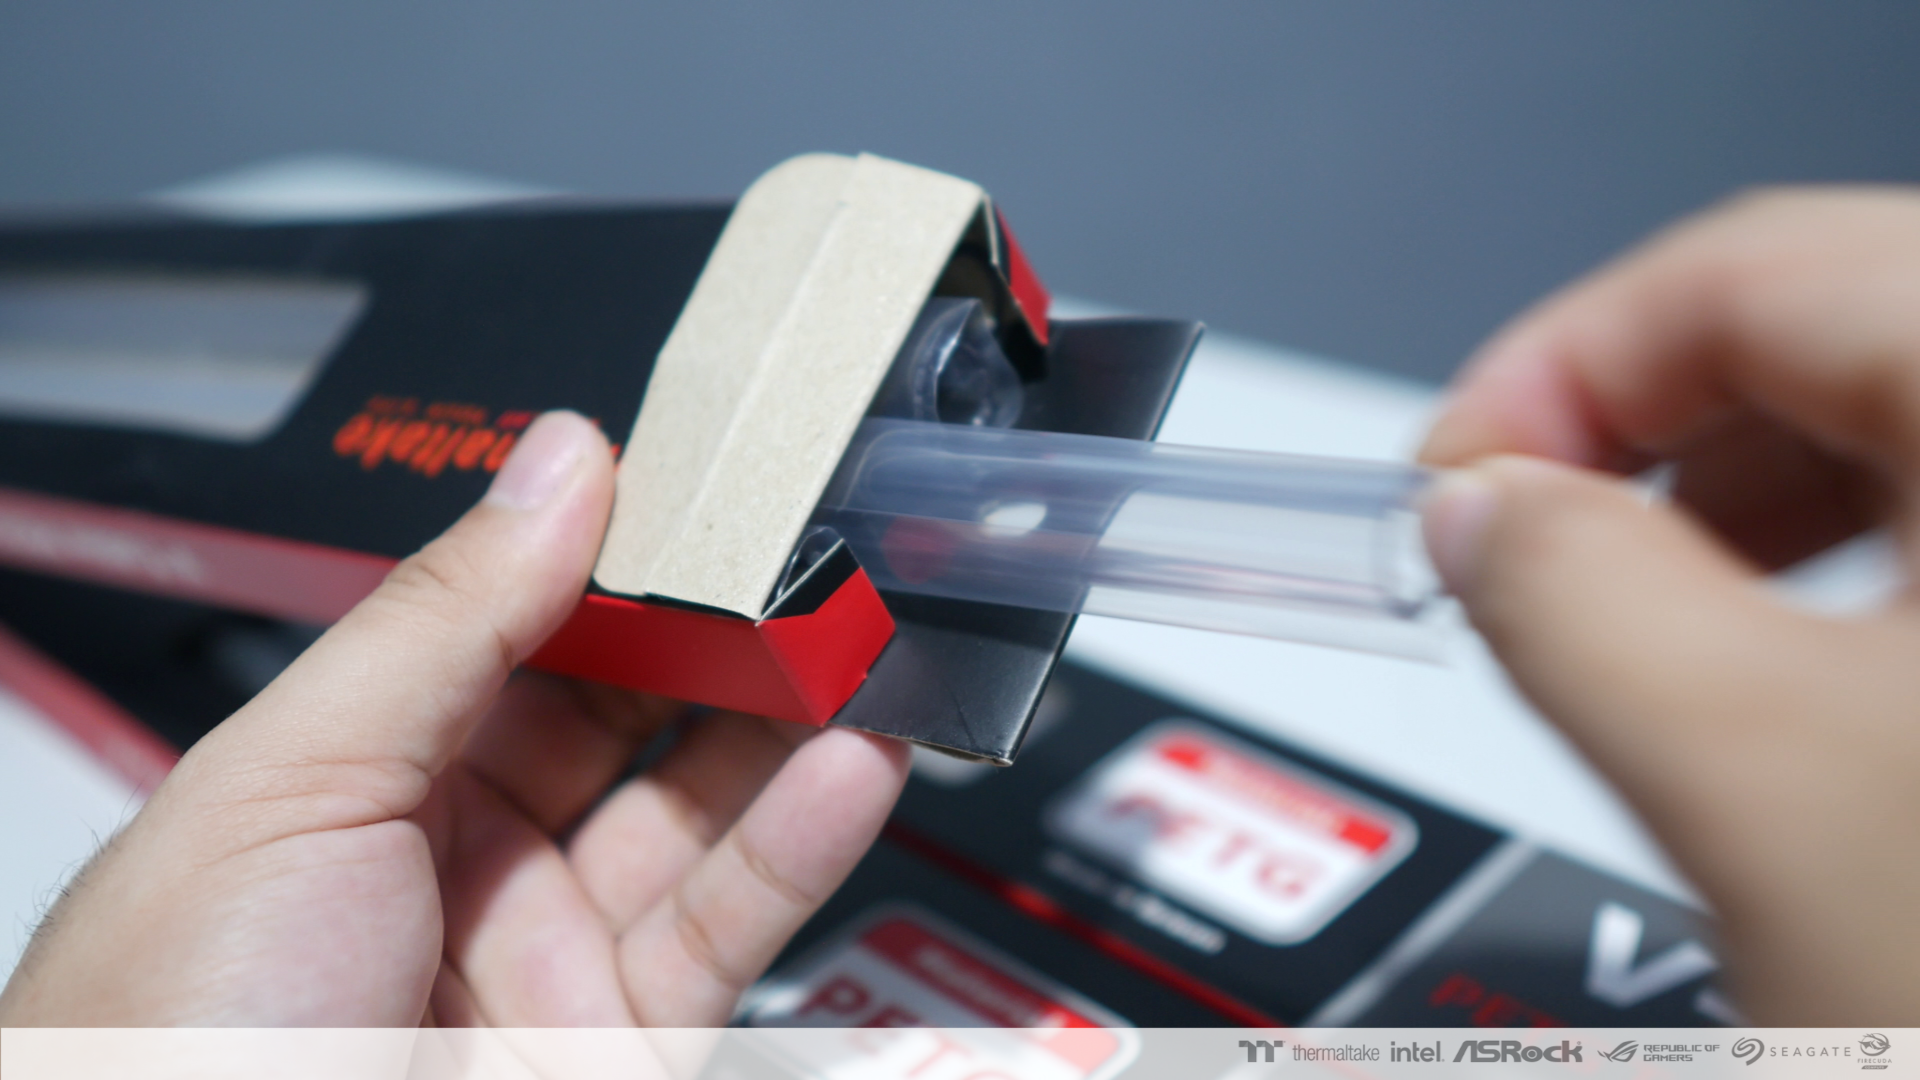
Thermaltake V-Tubler 16mm PETG Tubes:


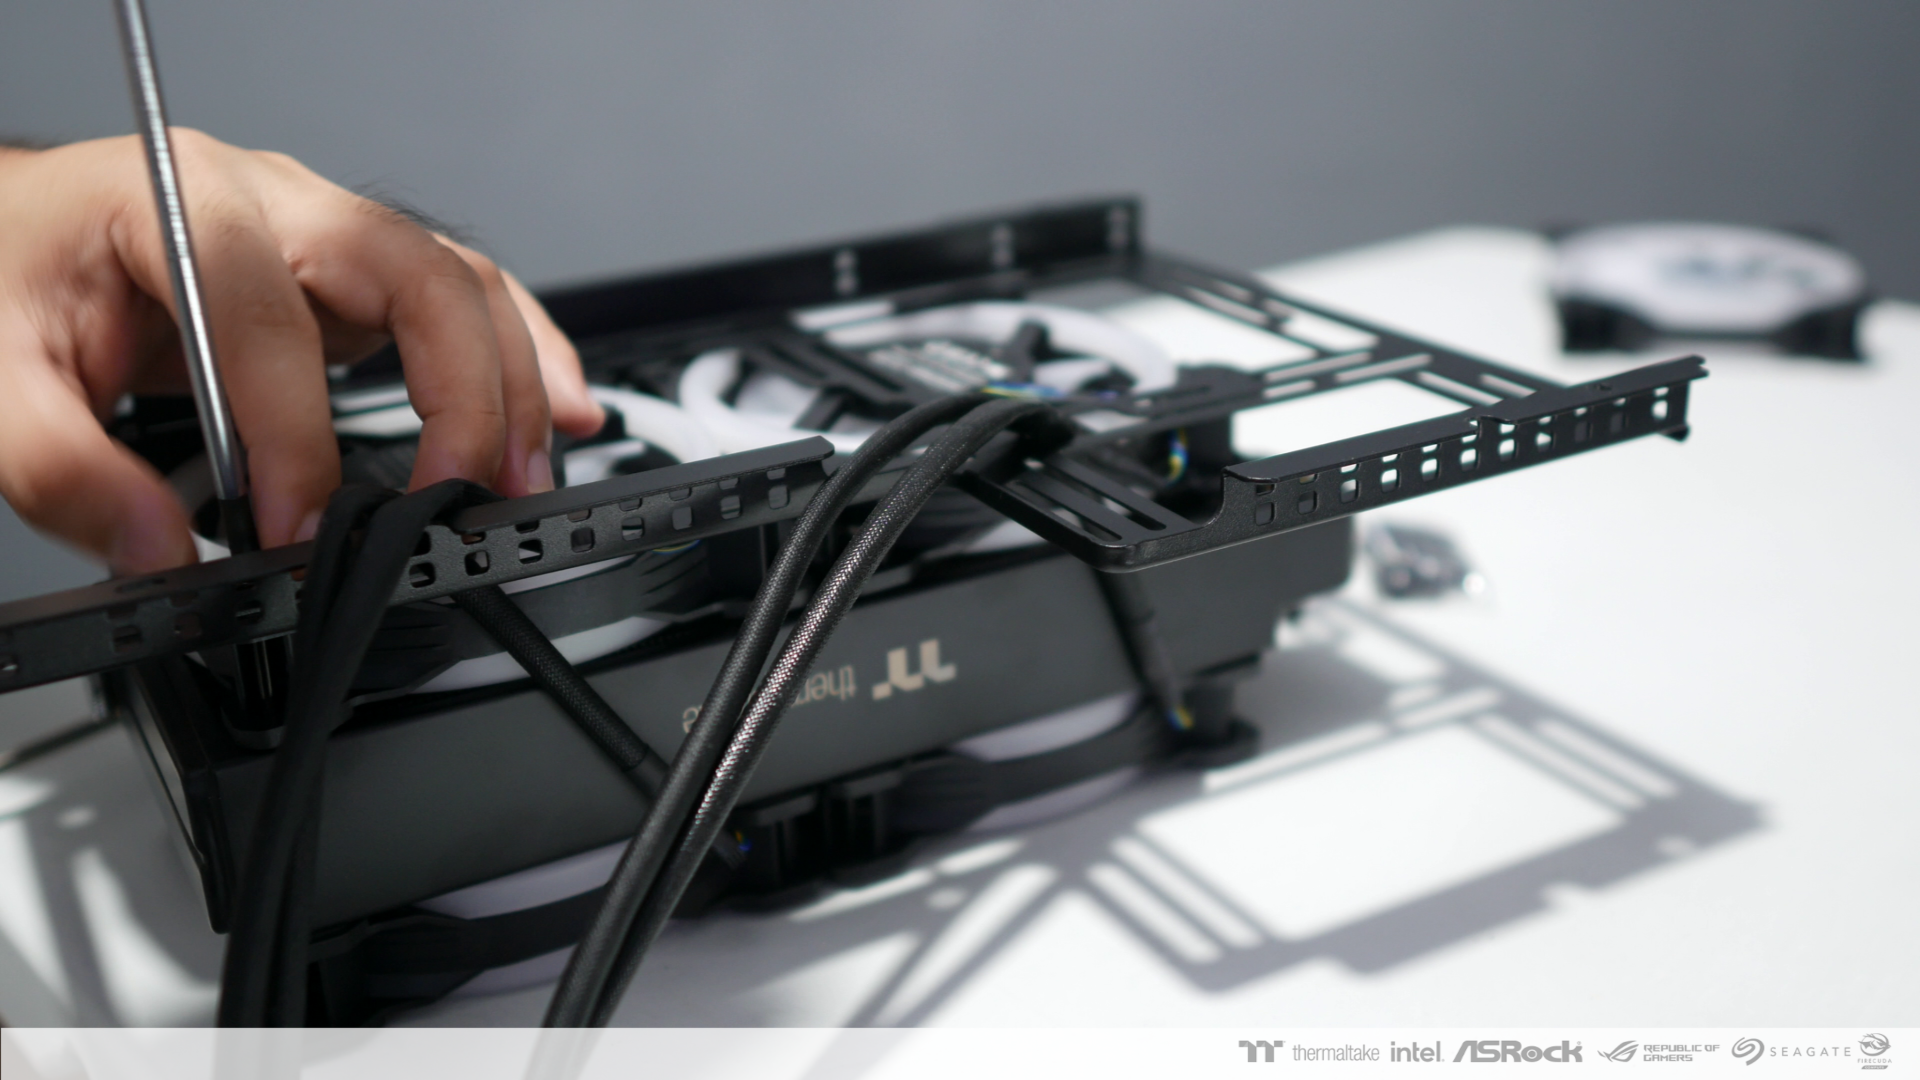
Utilizing the function of the reversible fans of the new Thermaltake SWAFAN 120 RGB:
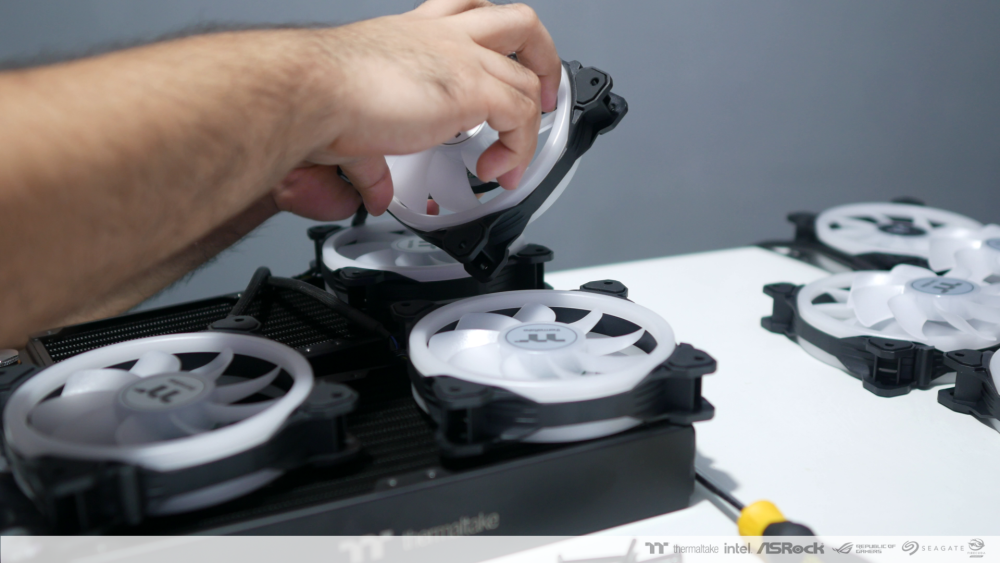
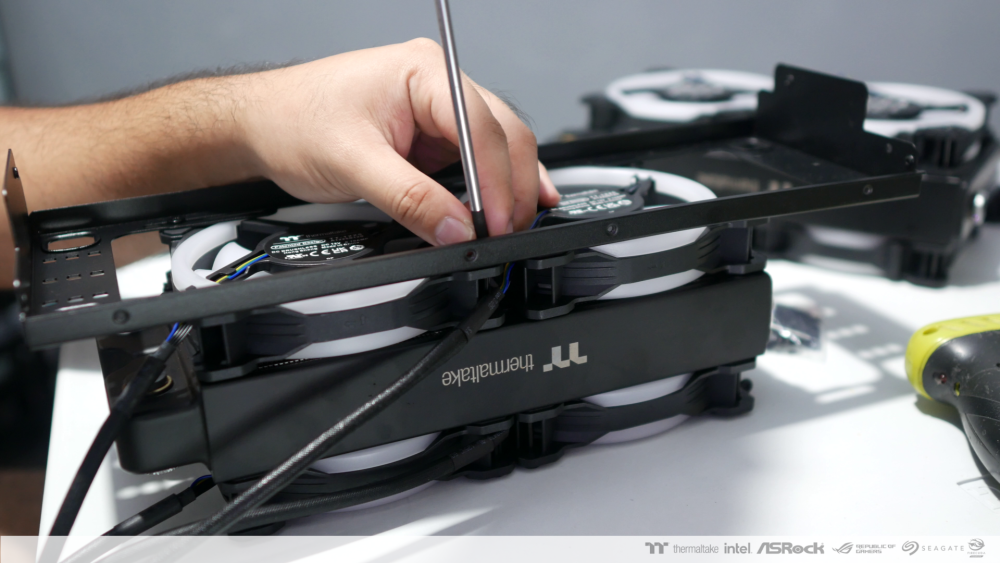
Mounting the fans and radiators to the case bracket:

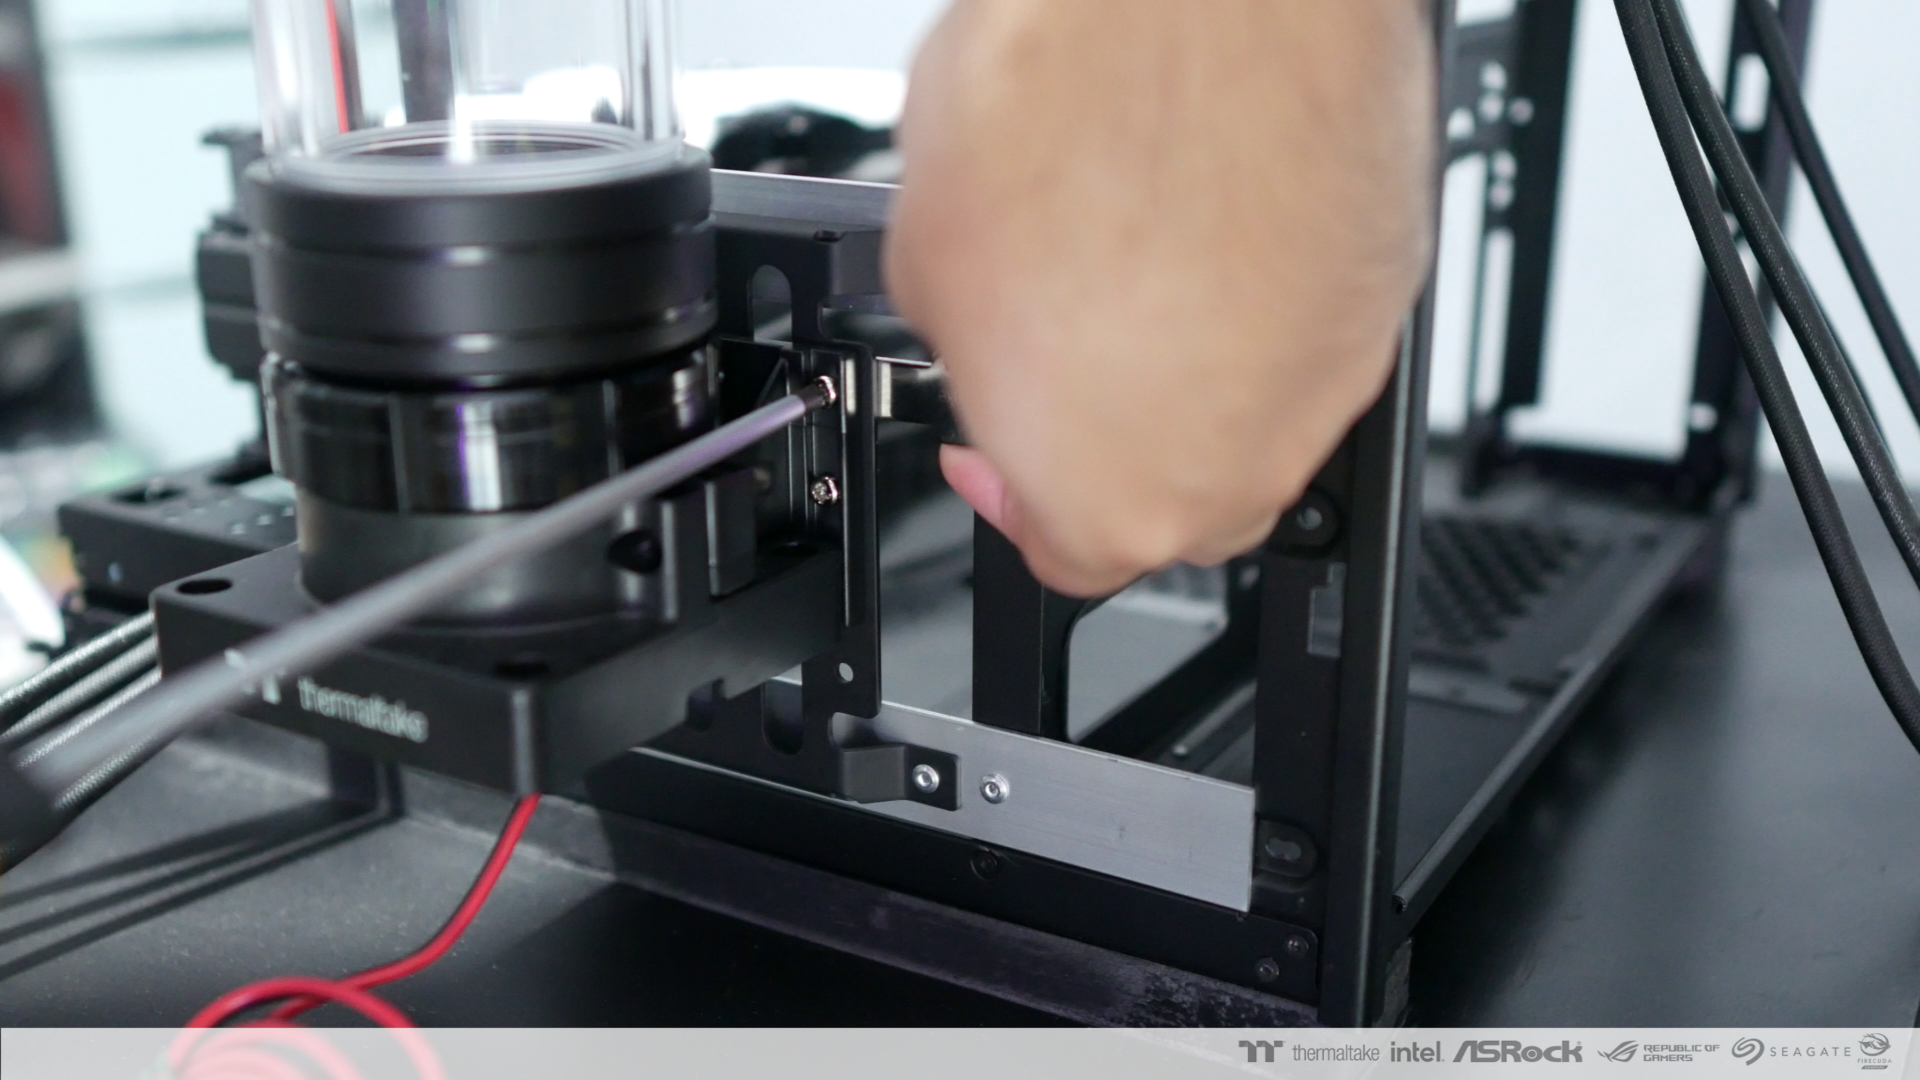
Installing the Thermaltake Pacific PR32-D5 Plus Pump

-
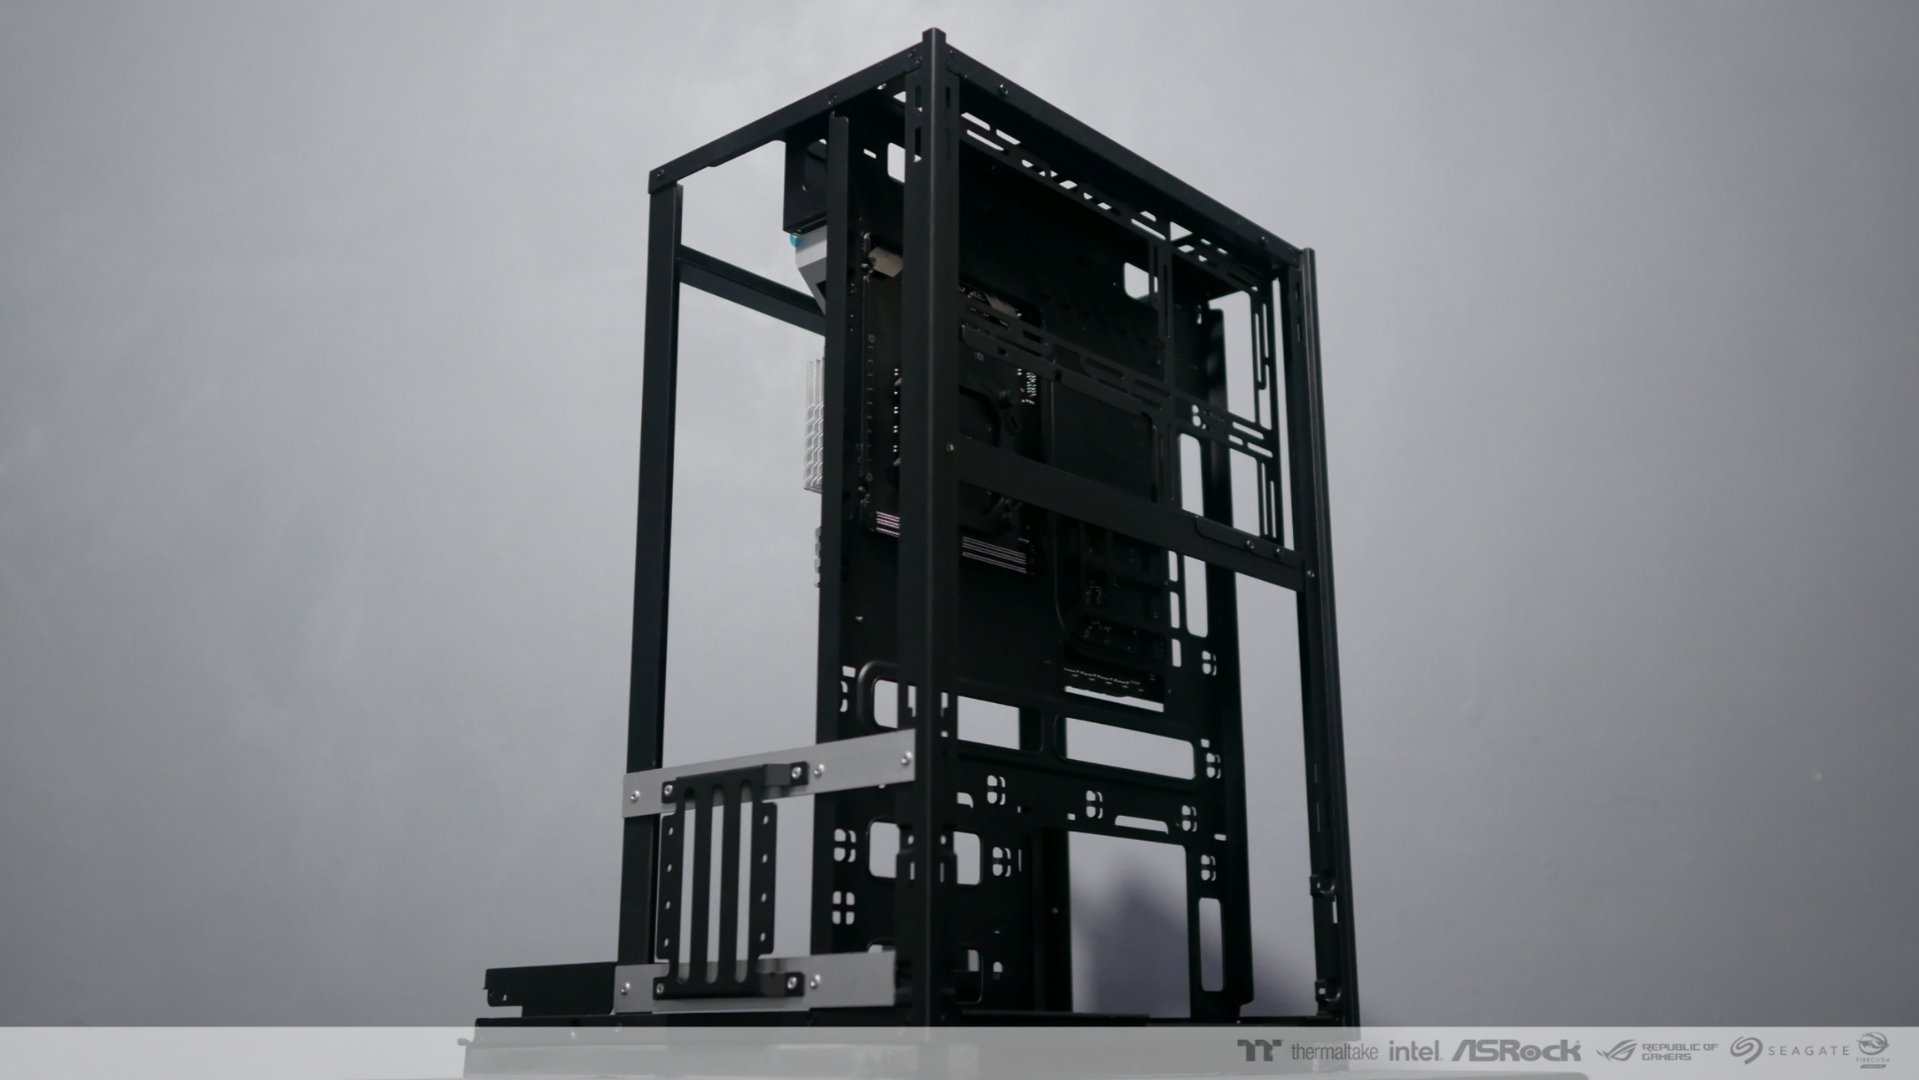
Here's the current state of the CaseMOD:
- Custom front radiator mount
- Custom rear radiator mount
- custom gpu bracket
-
custom pump brackets
The Plan is to maintain The Tower 500's form/layout so that It can be still recognized from the original case design.
The Motherboard, GPU, Powersupply and etc (Main parts) will be using the case itself and not other materials.
-
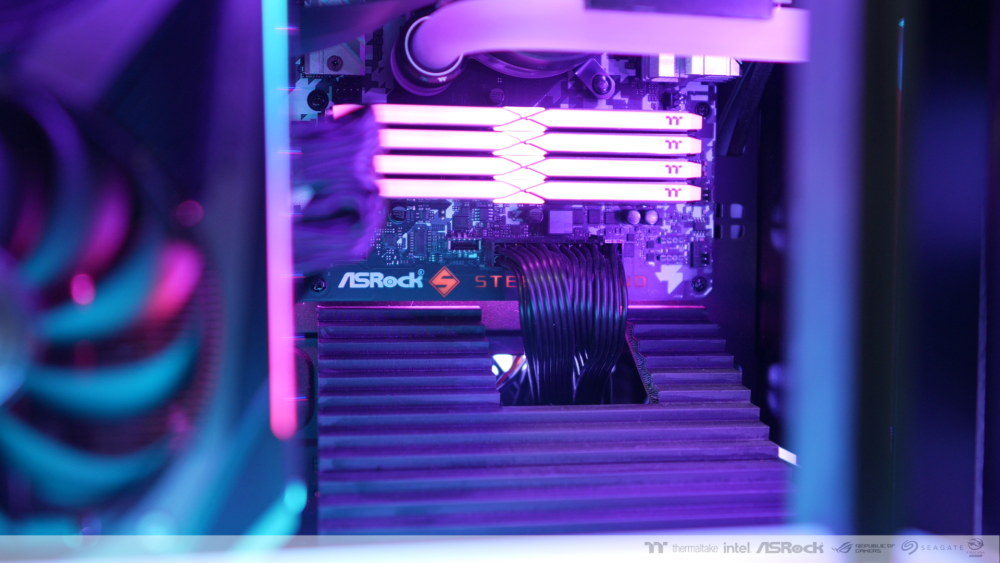
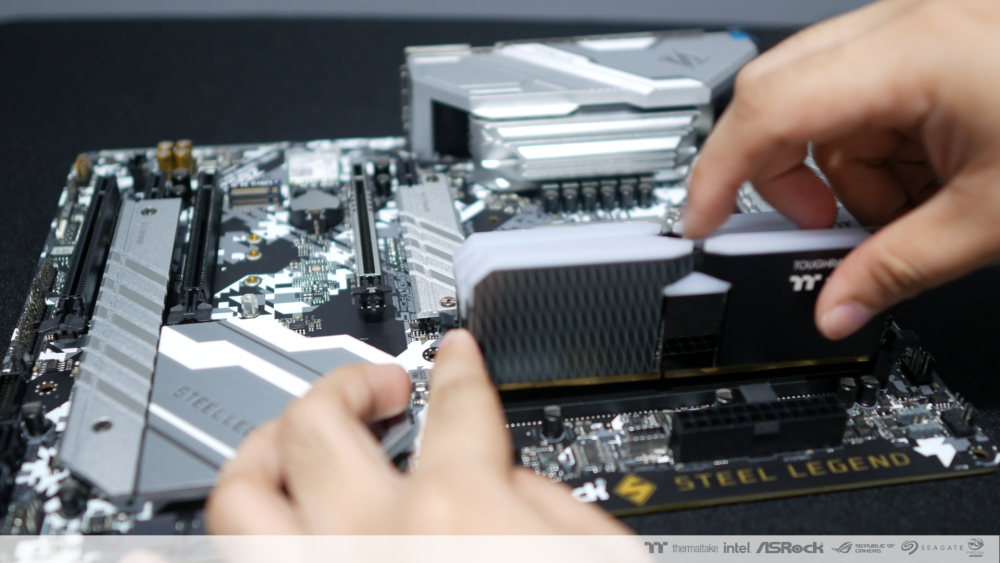
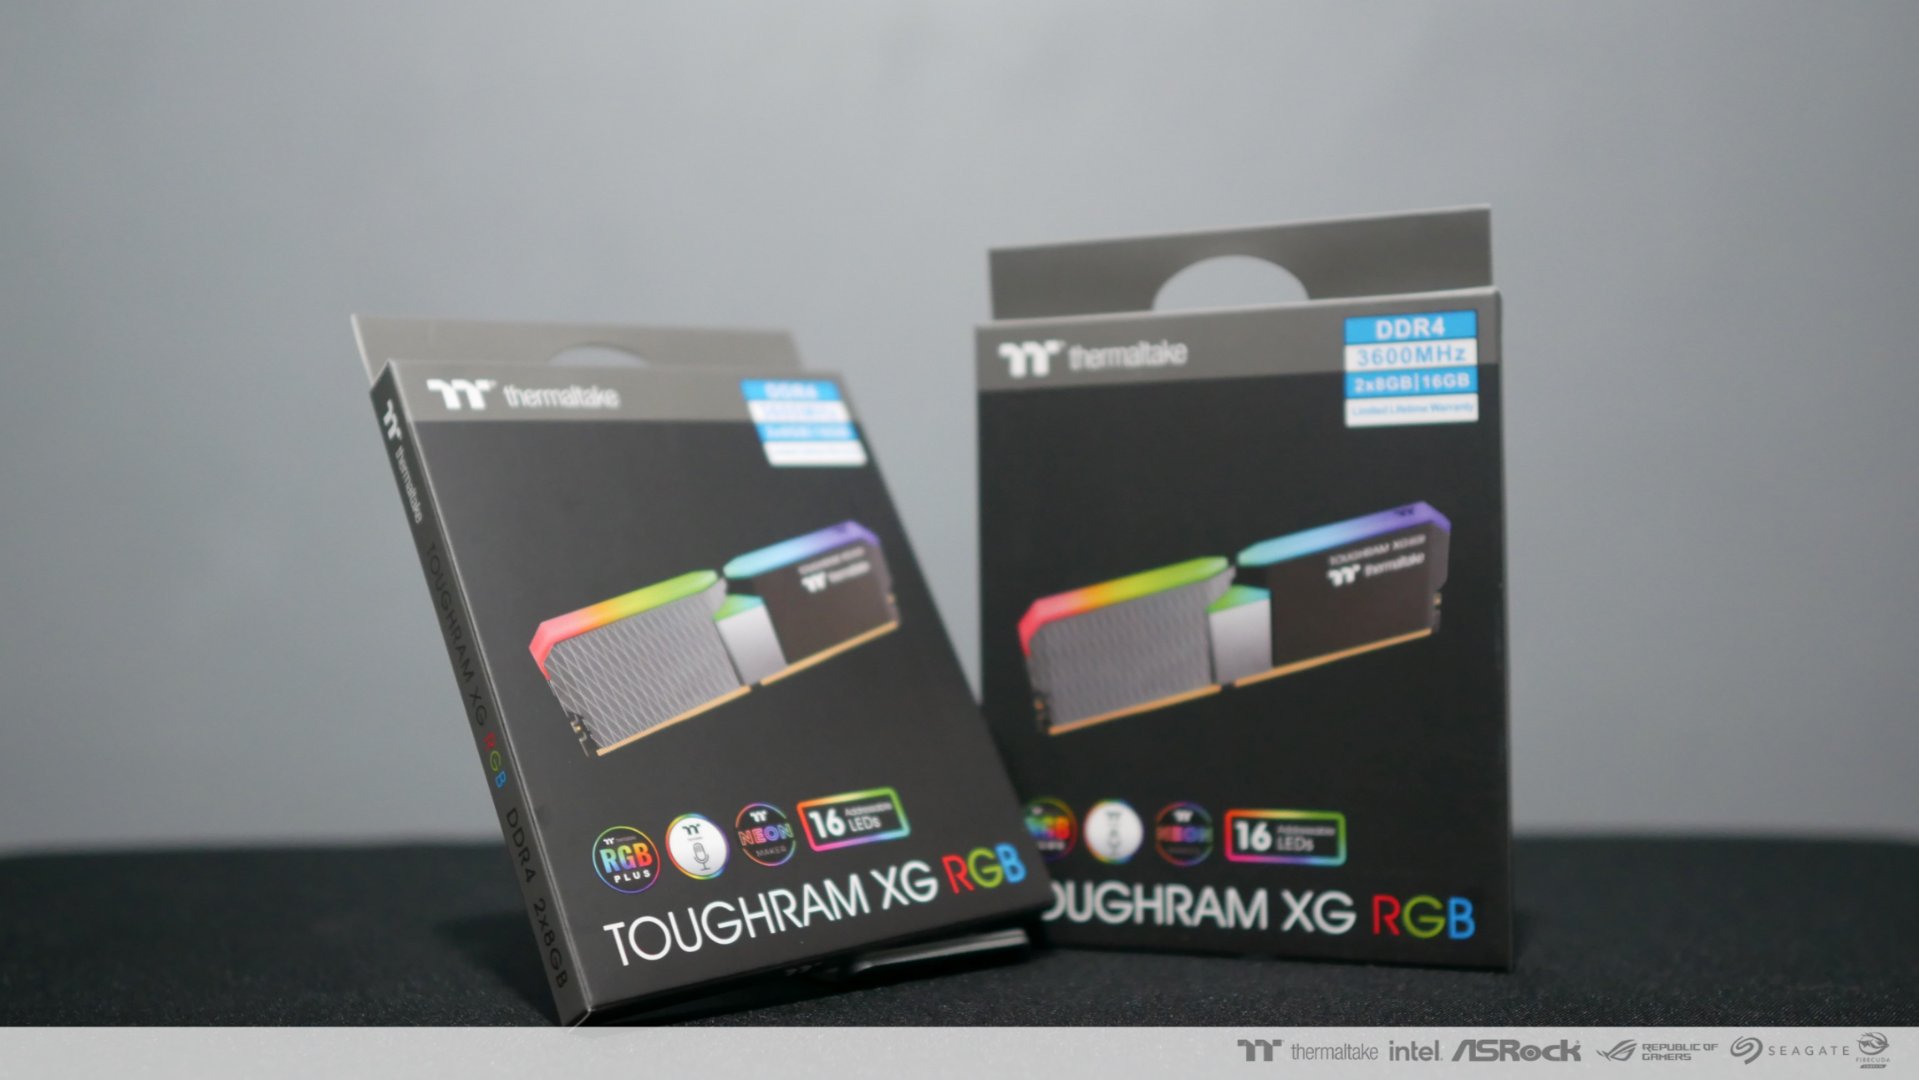
The RAM that I'll be using in this CaseMOD will be ThermaltakeT oughram XG RGB.
Learn more about the RAM here: https://www.thermaltake.com/toughram-xg-rgb-memory-ddr4-3600mhz-16gb-8gb-x2.html

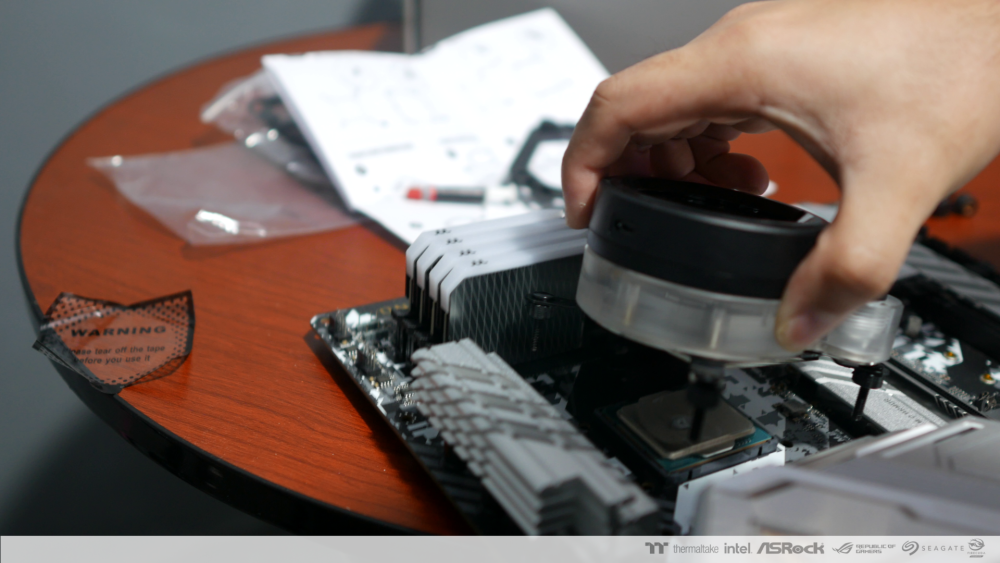
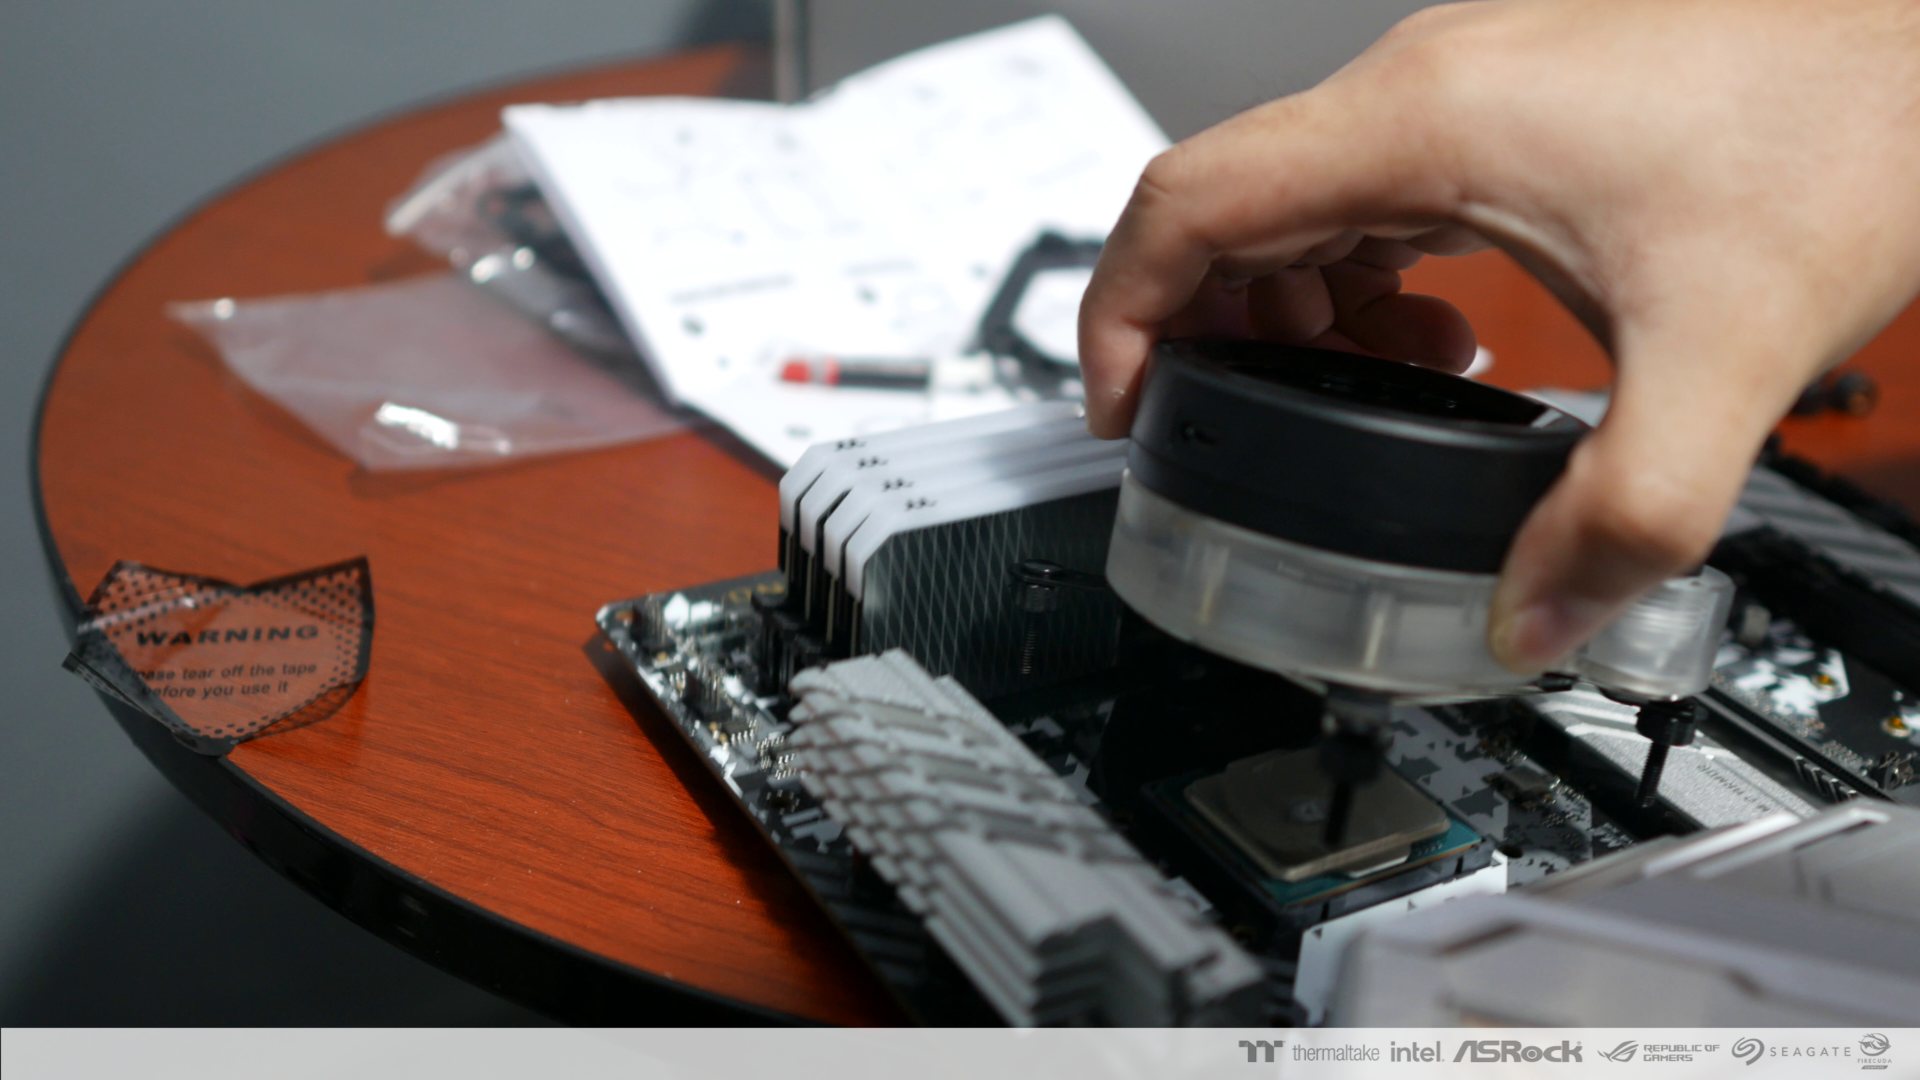
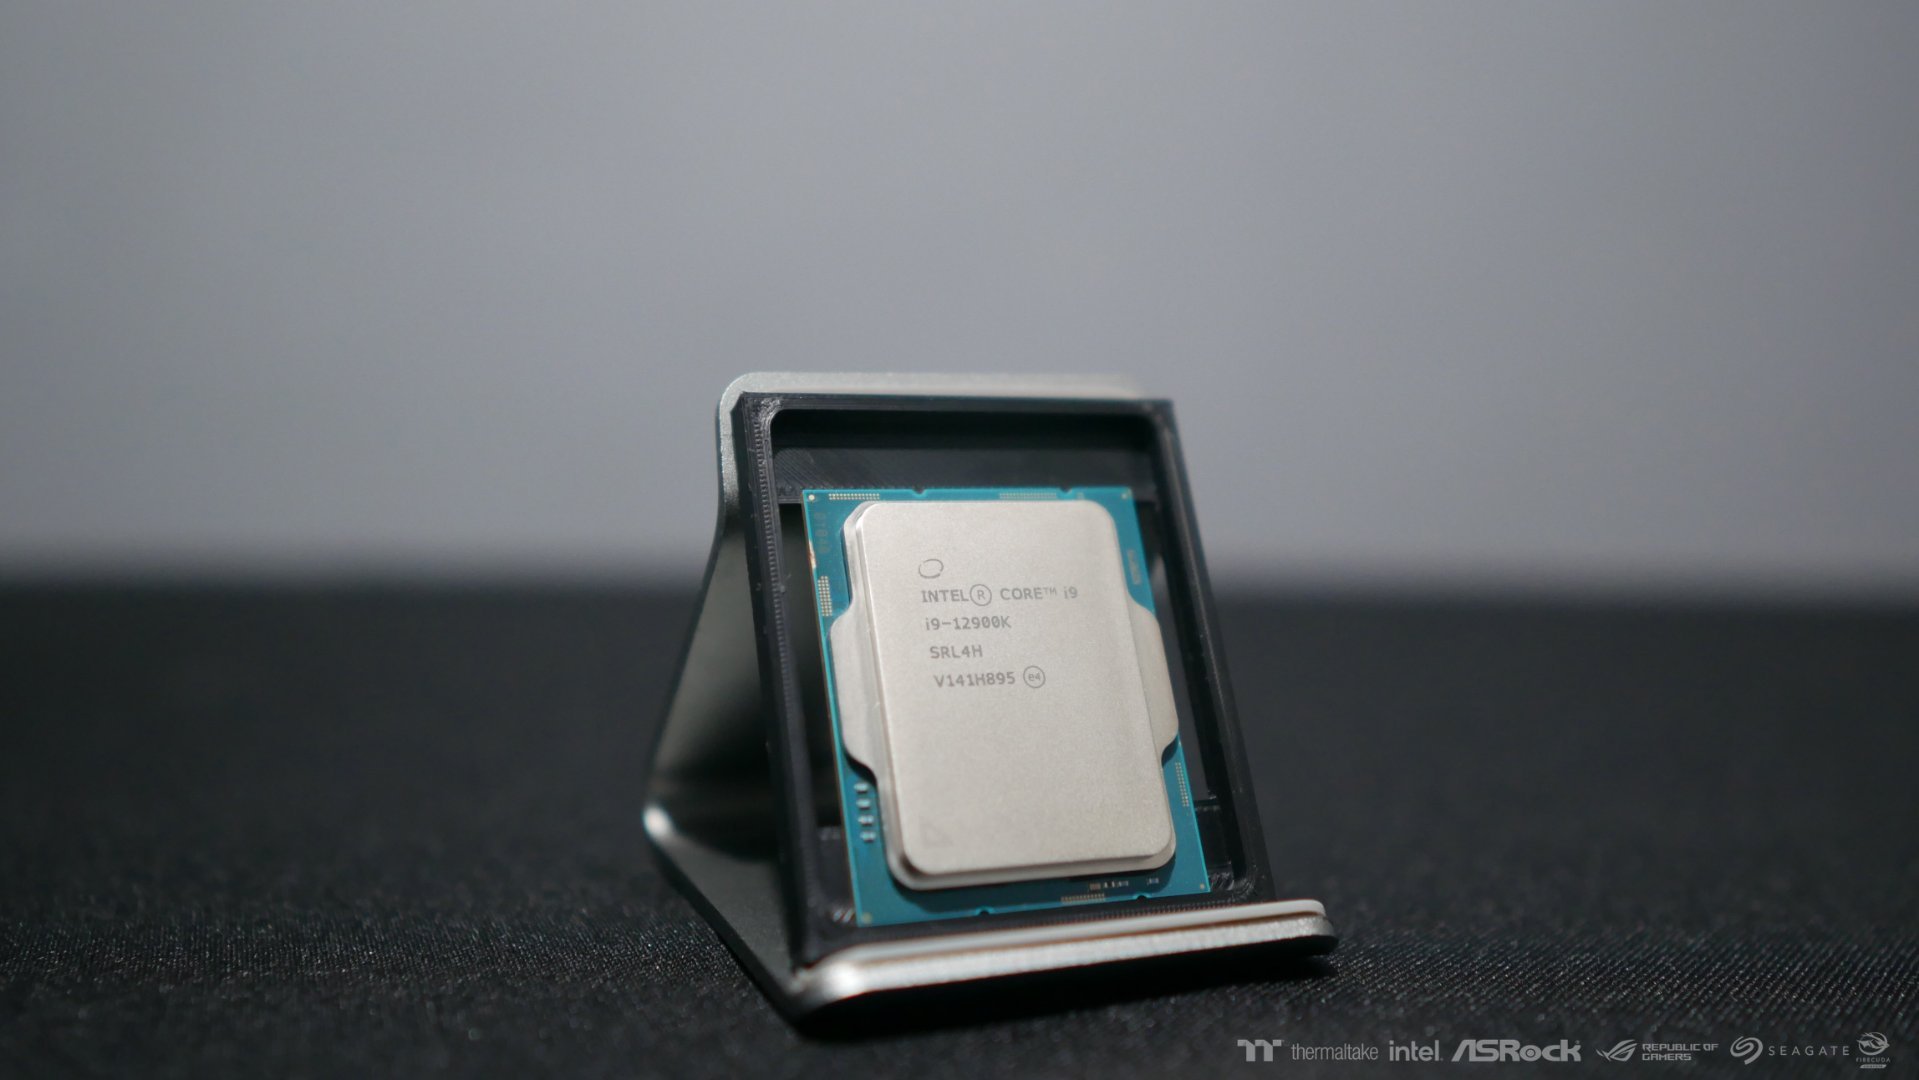
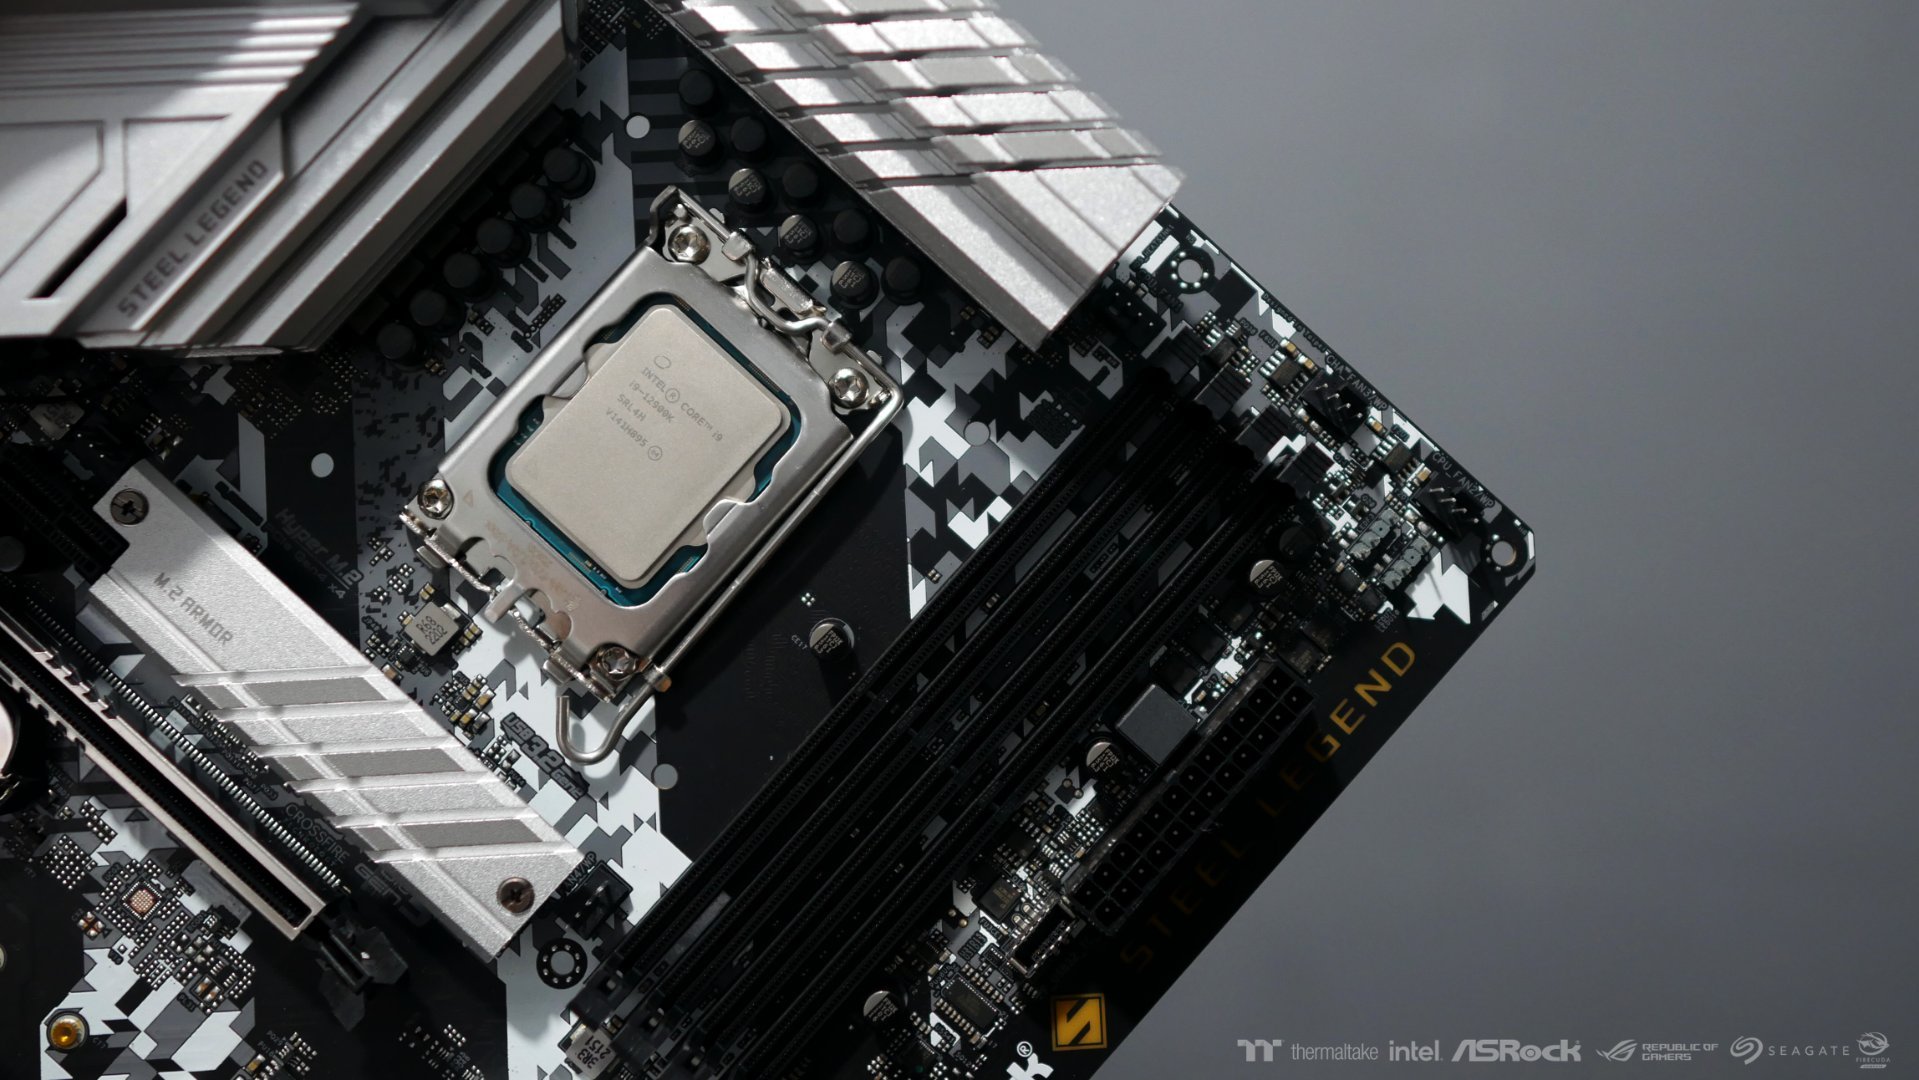
The i9 12900k on this project will be cooled under this magnificent Thermaltake Pacific MX2 waterblock!
Learn more about the waterblock here https://www.thermaltake.com/pacific-mx2-ultra-cpu-waterblock.html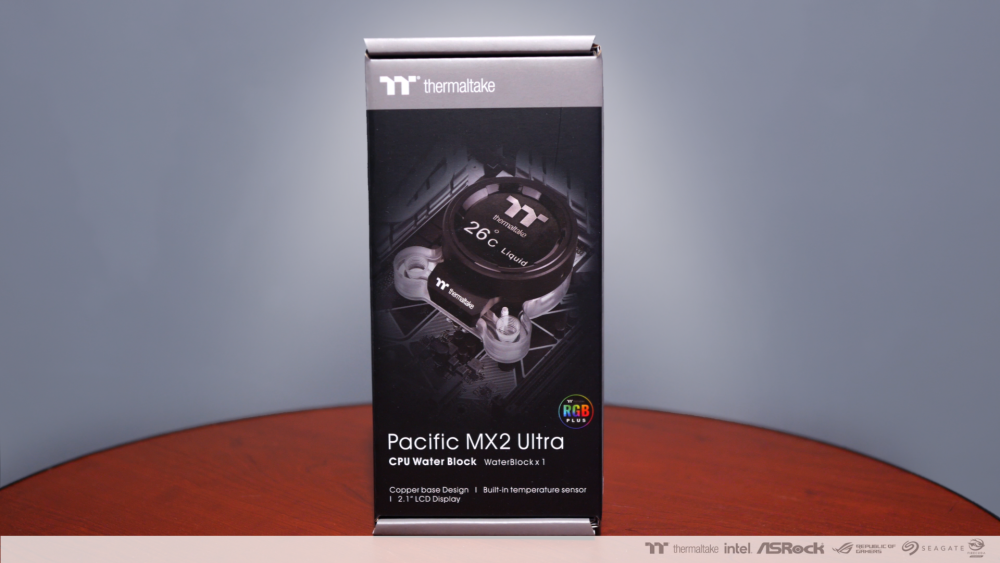

The waterblock is installed to the ASRock Z690 STEEL LEGEND WiFi 6E

-
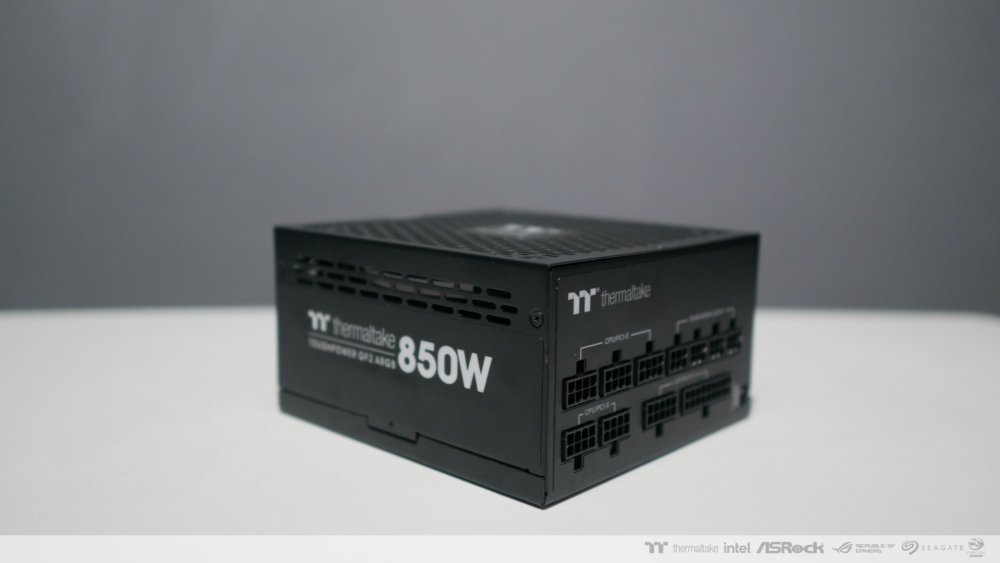
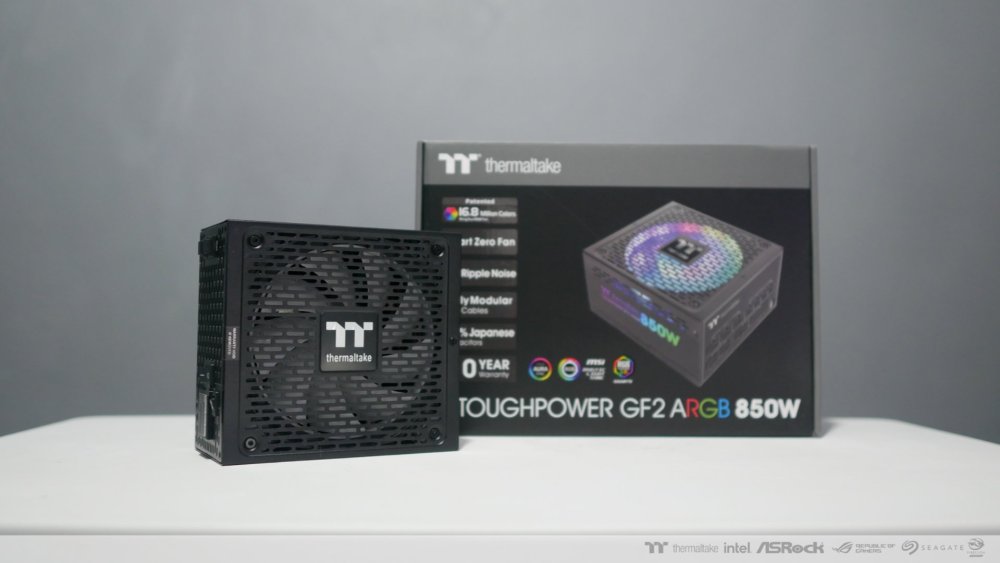
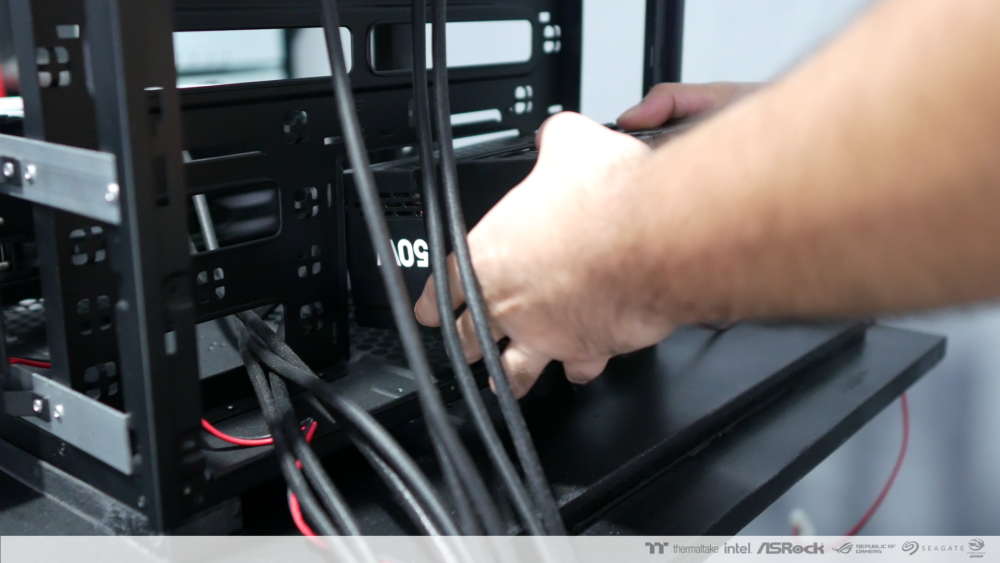
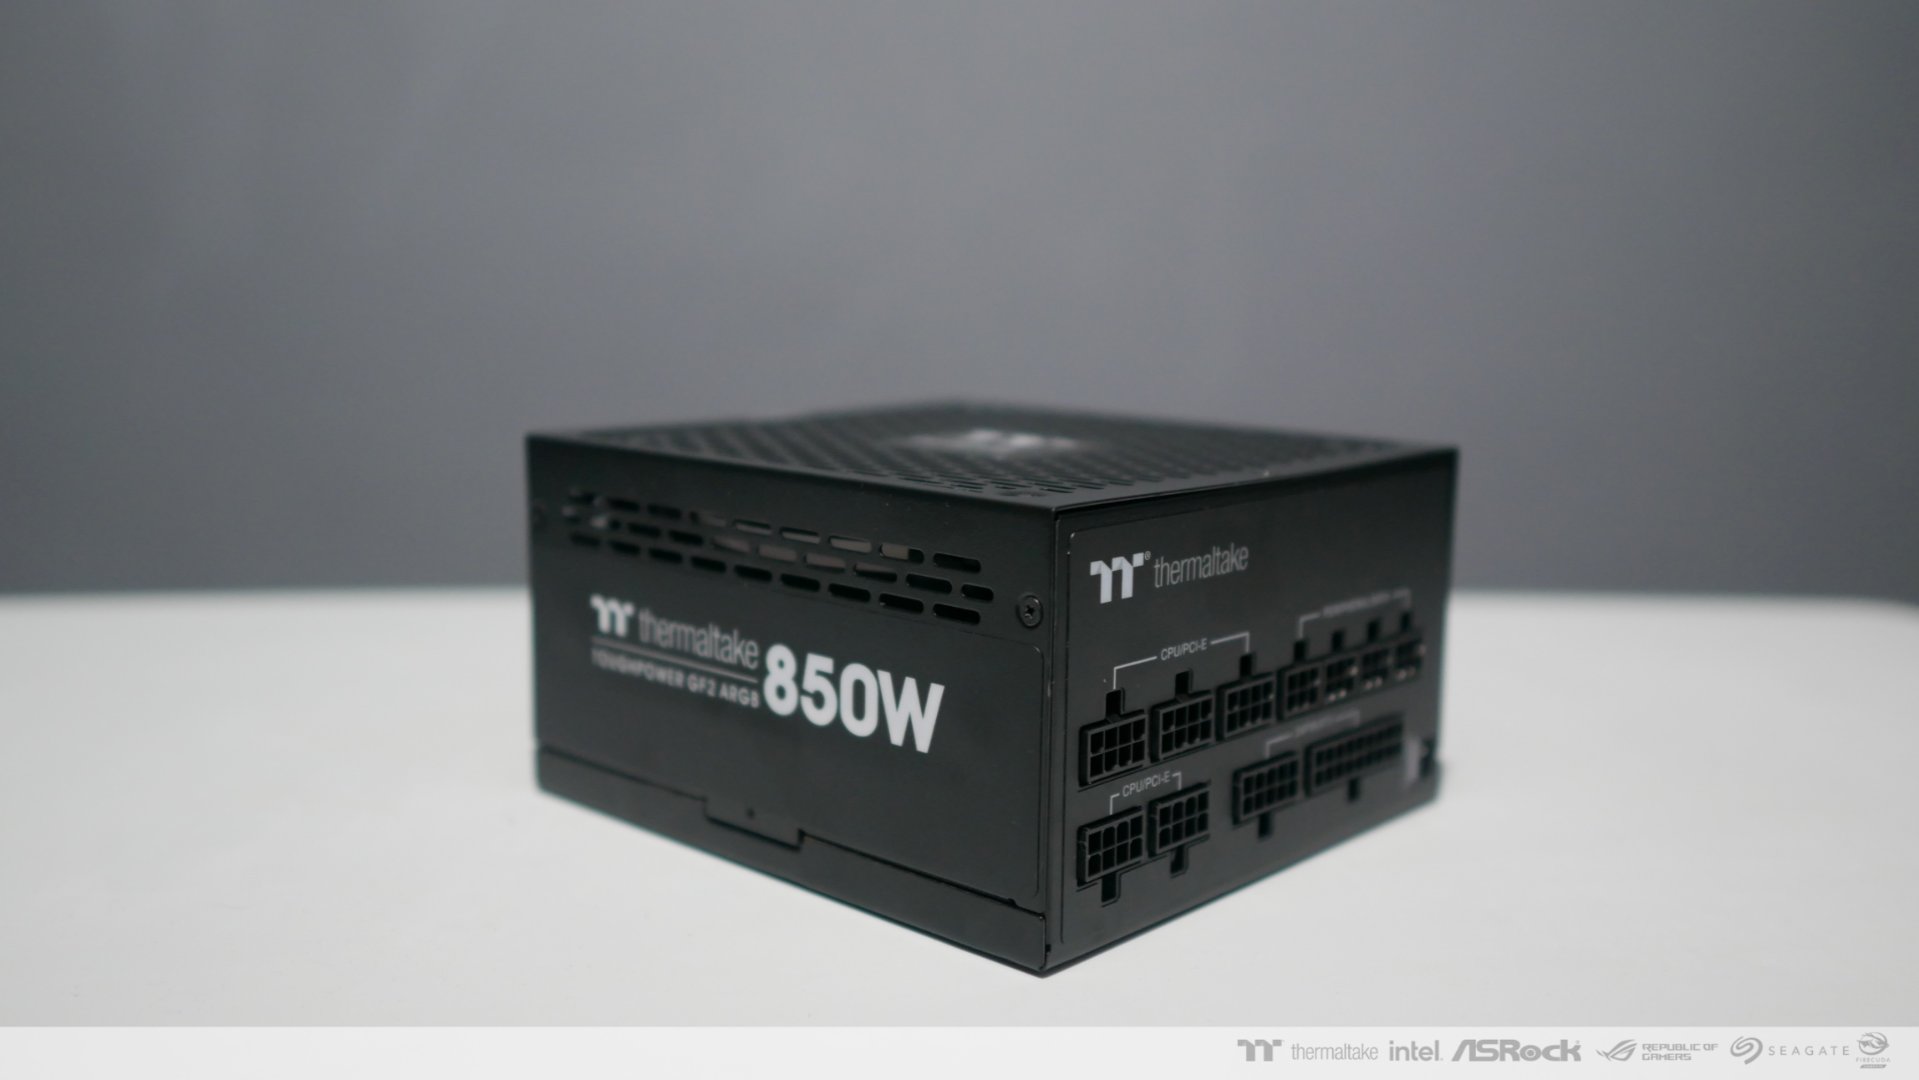
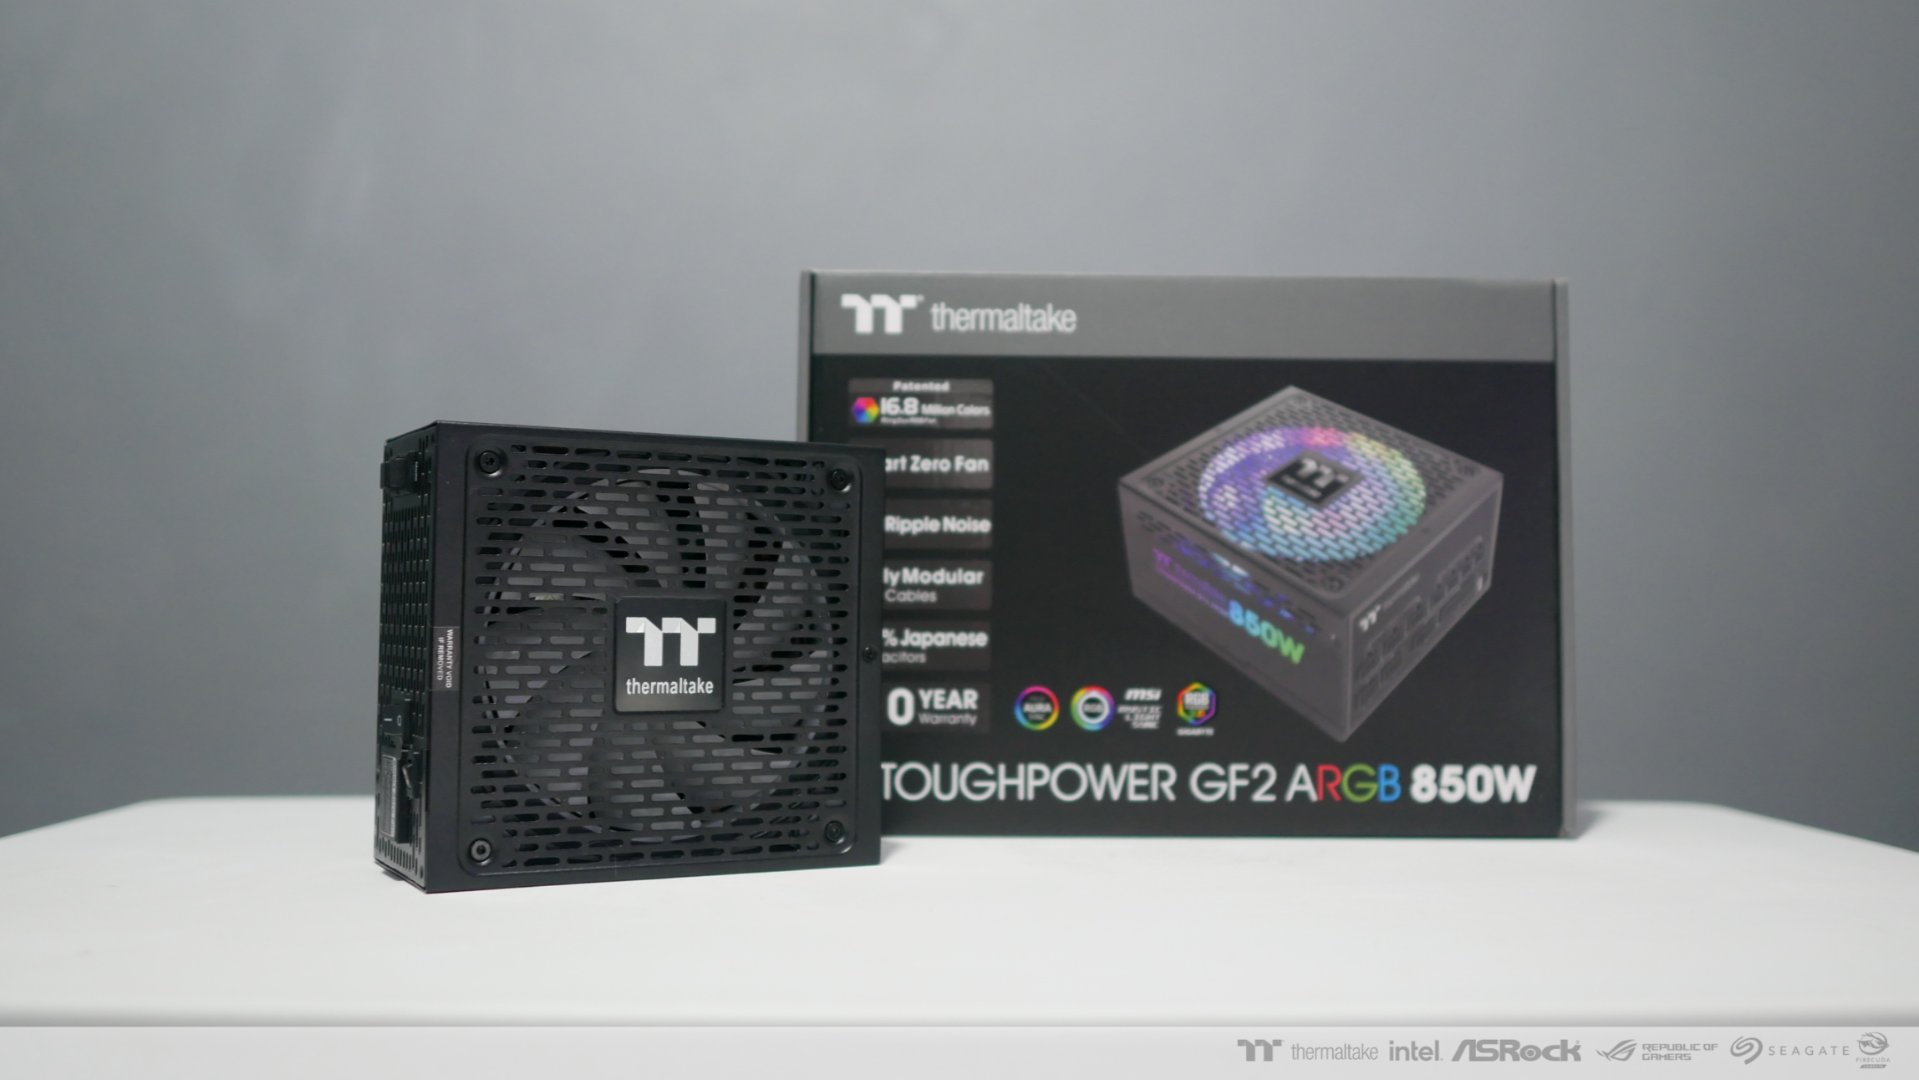
The project will be powered by Thermaltake GF2 ARGB 850w
Learn more about the powersupply here:
https://www.thermaltake.com/toughpower-gf2-argb-850w-tt-premium-edition.html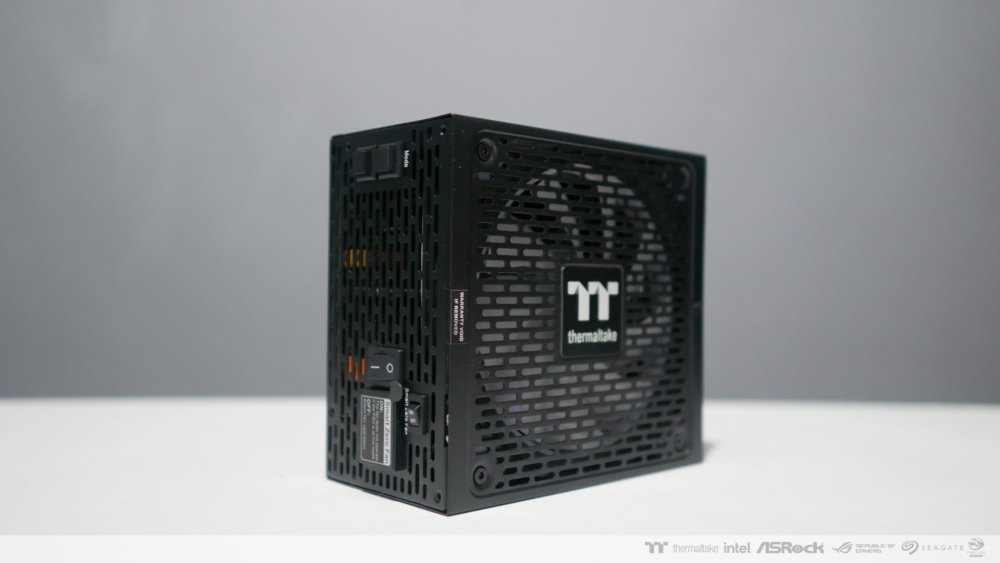
-
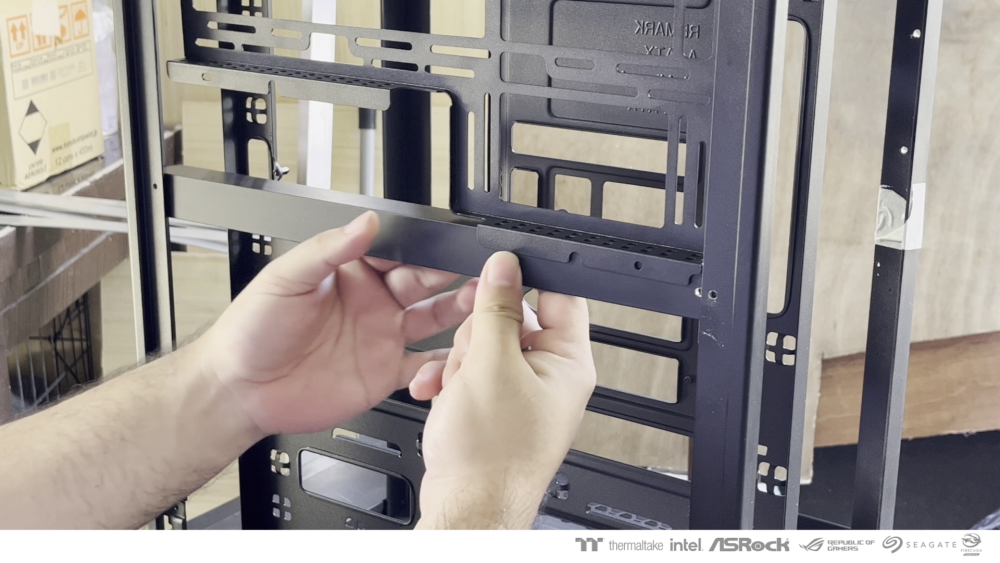
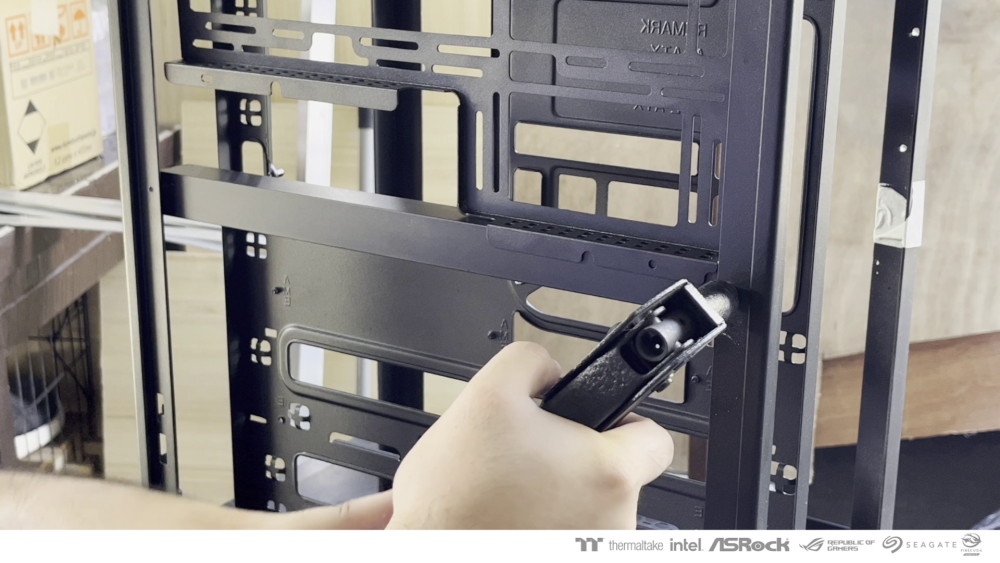
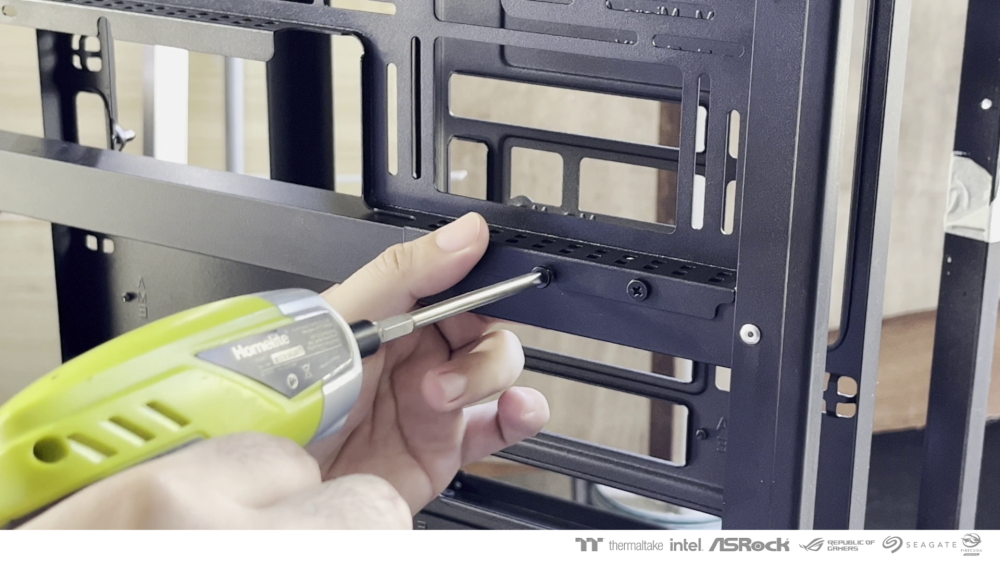
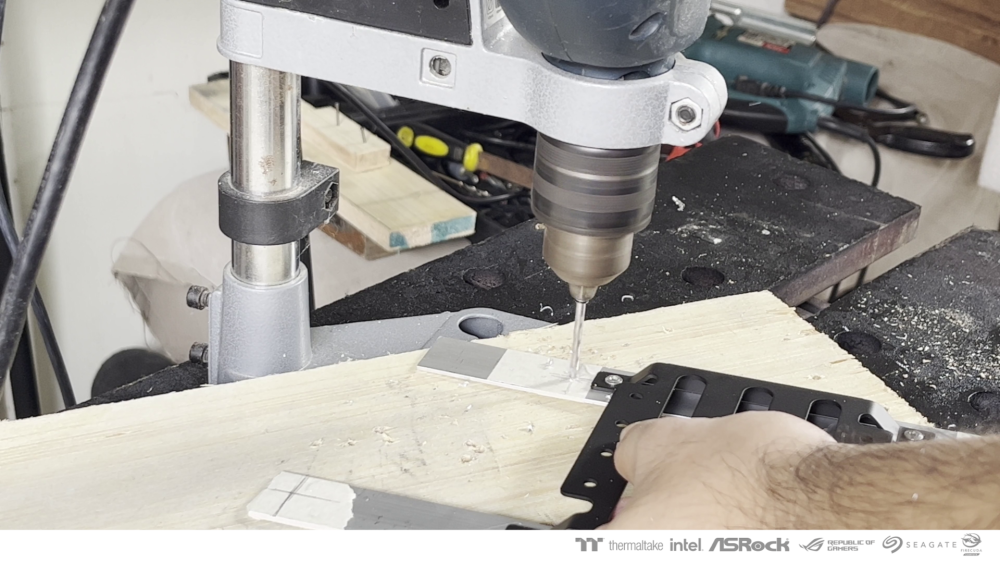
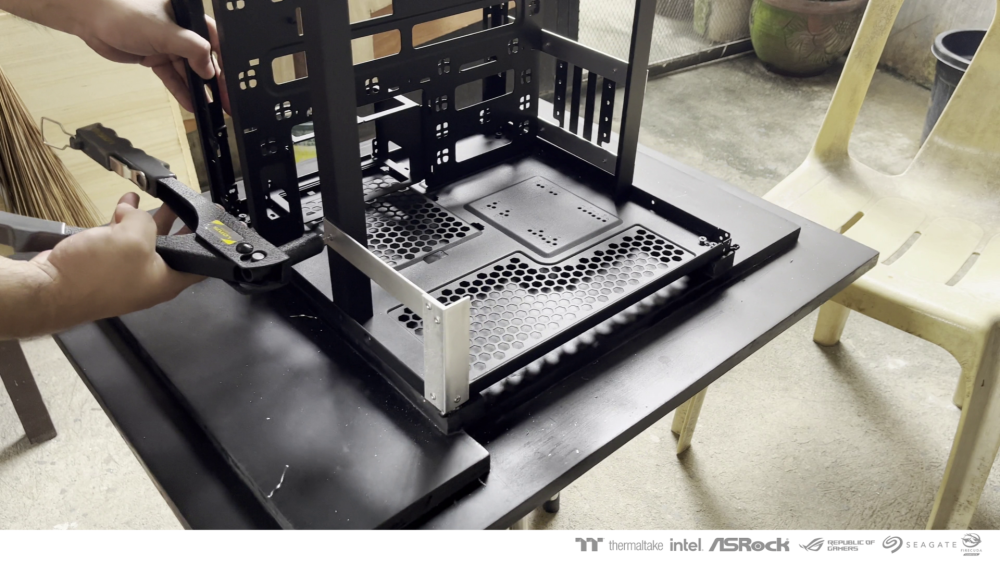
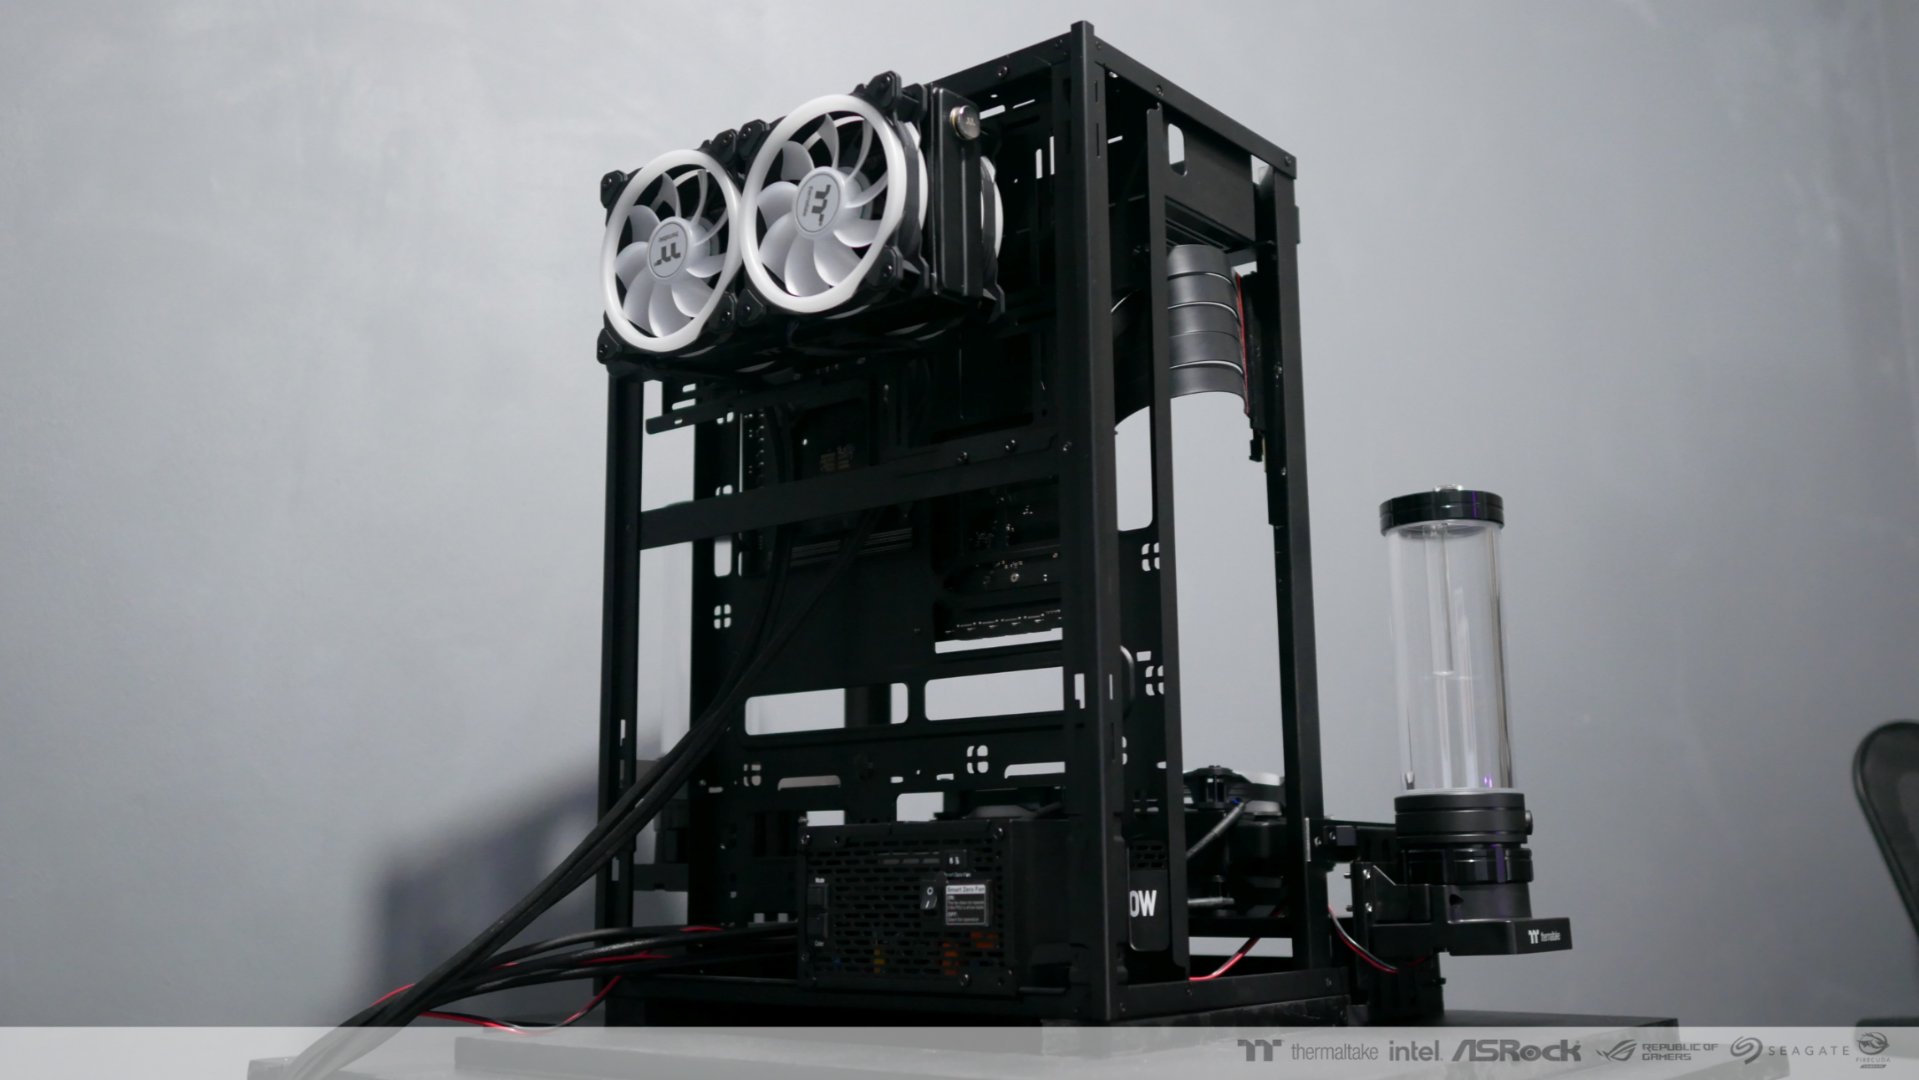
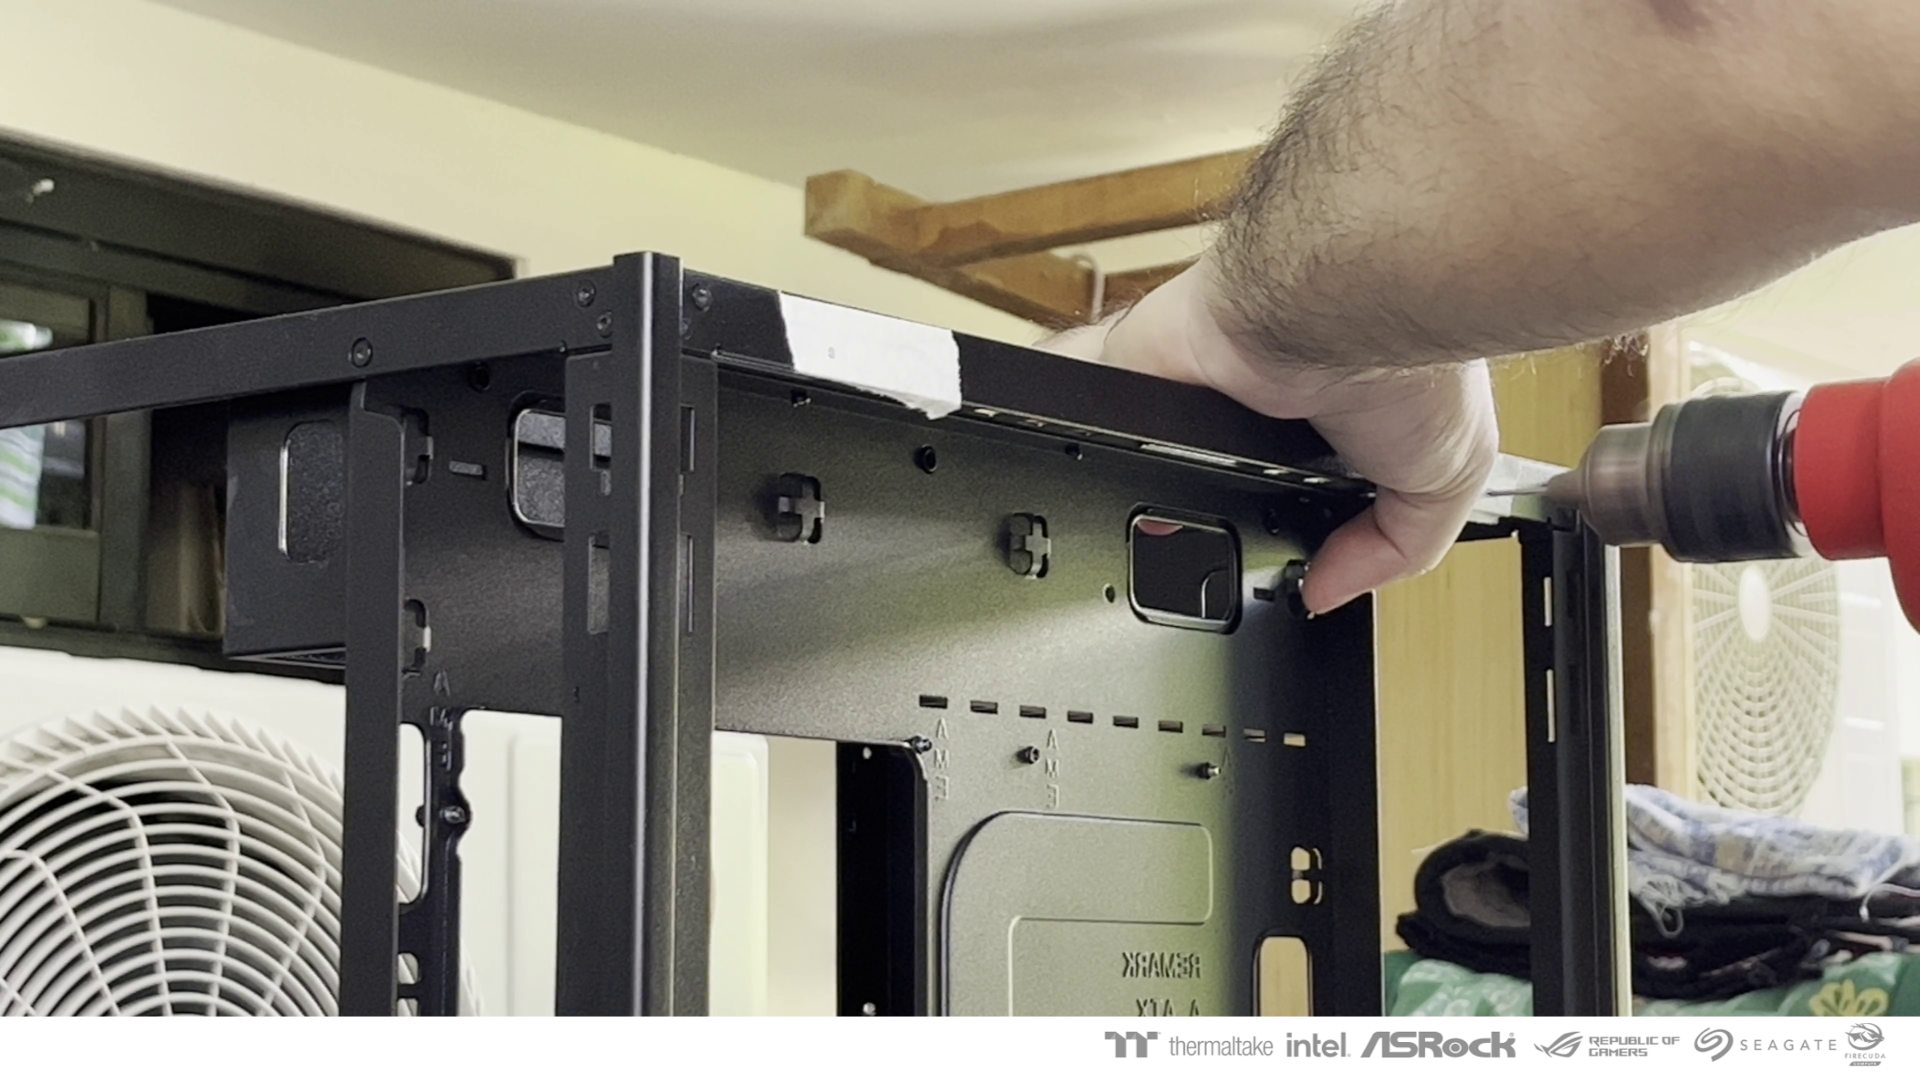
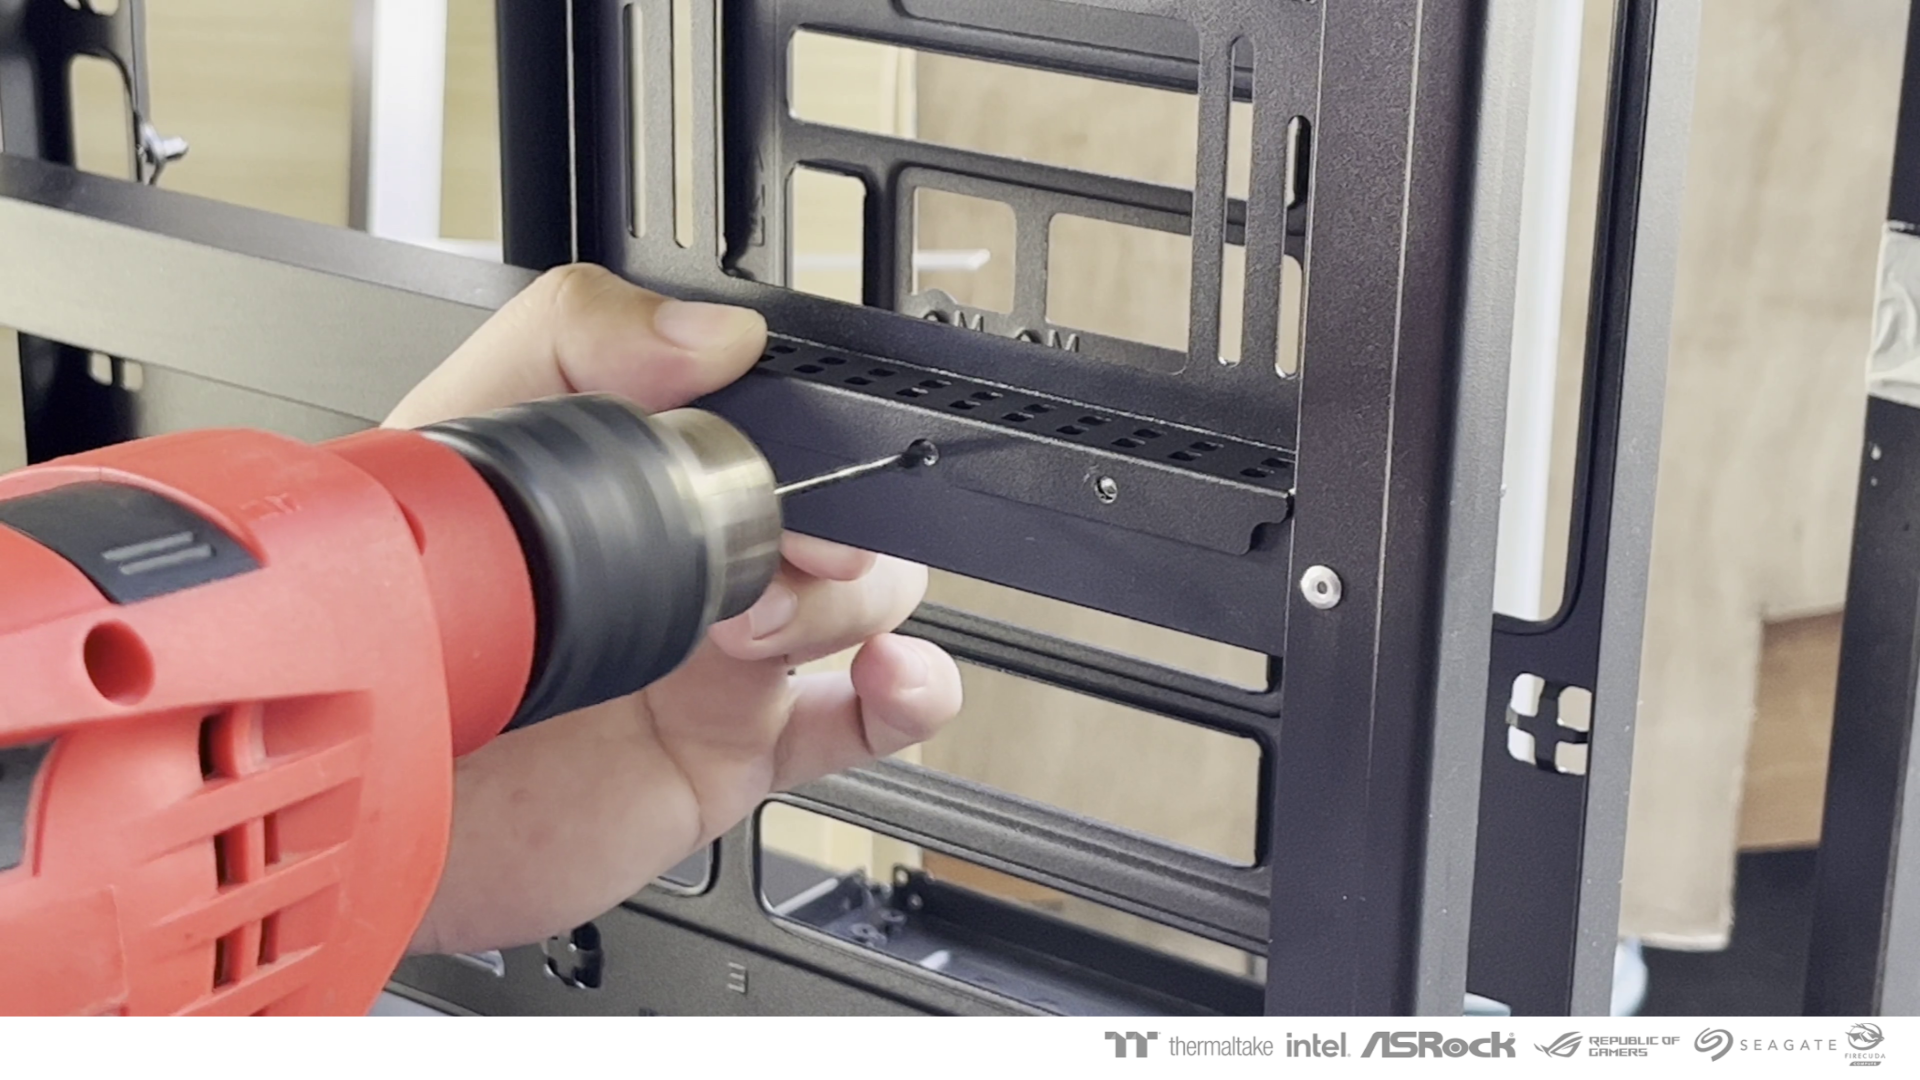
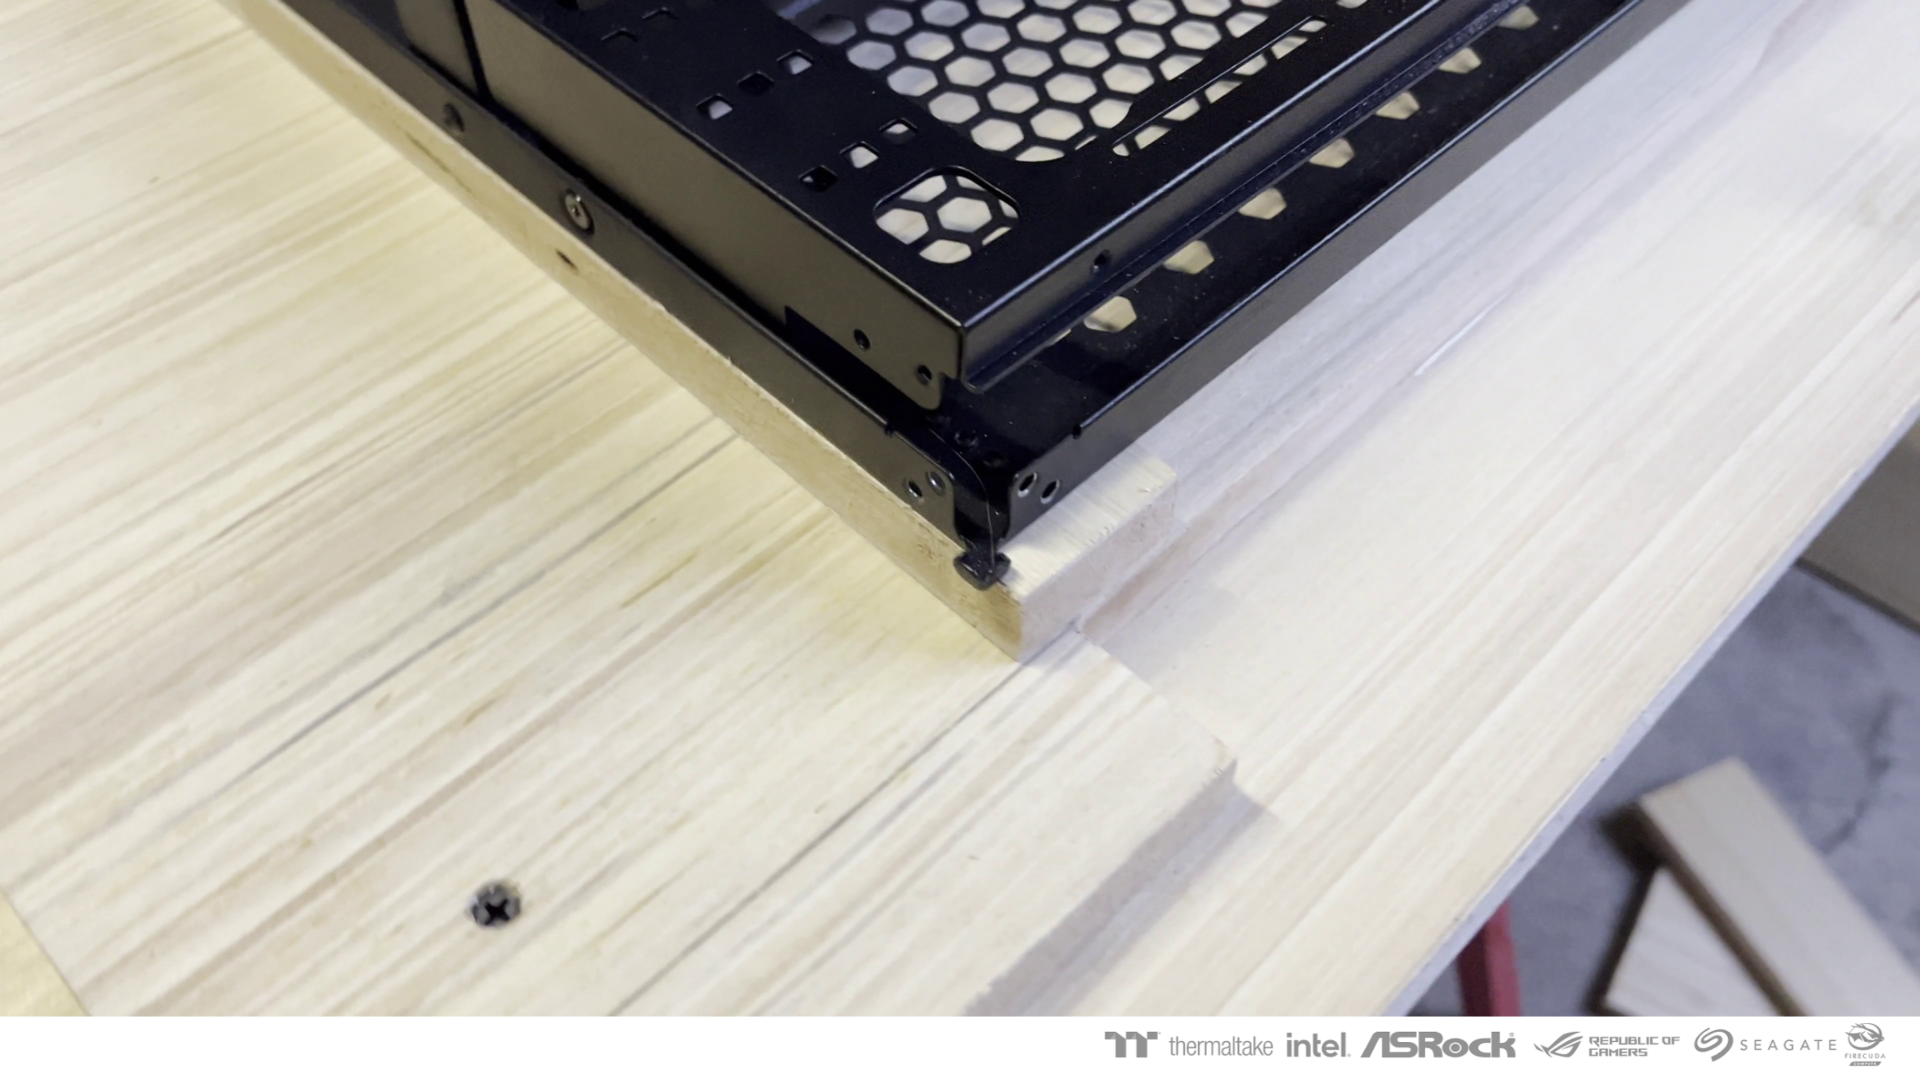
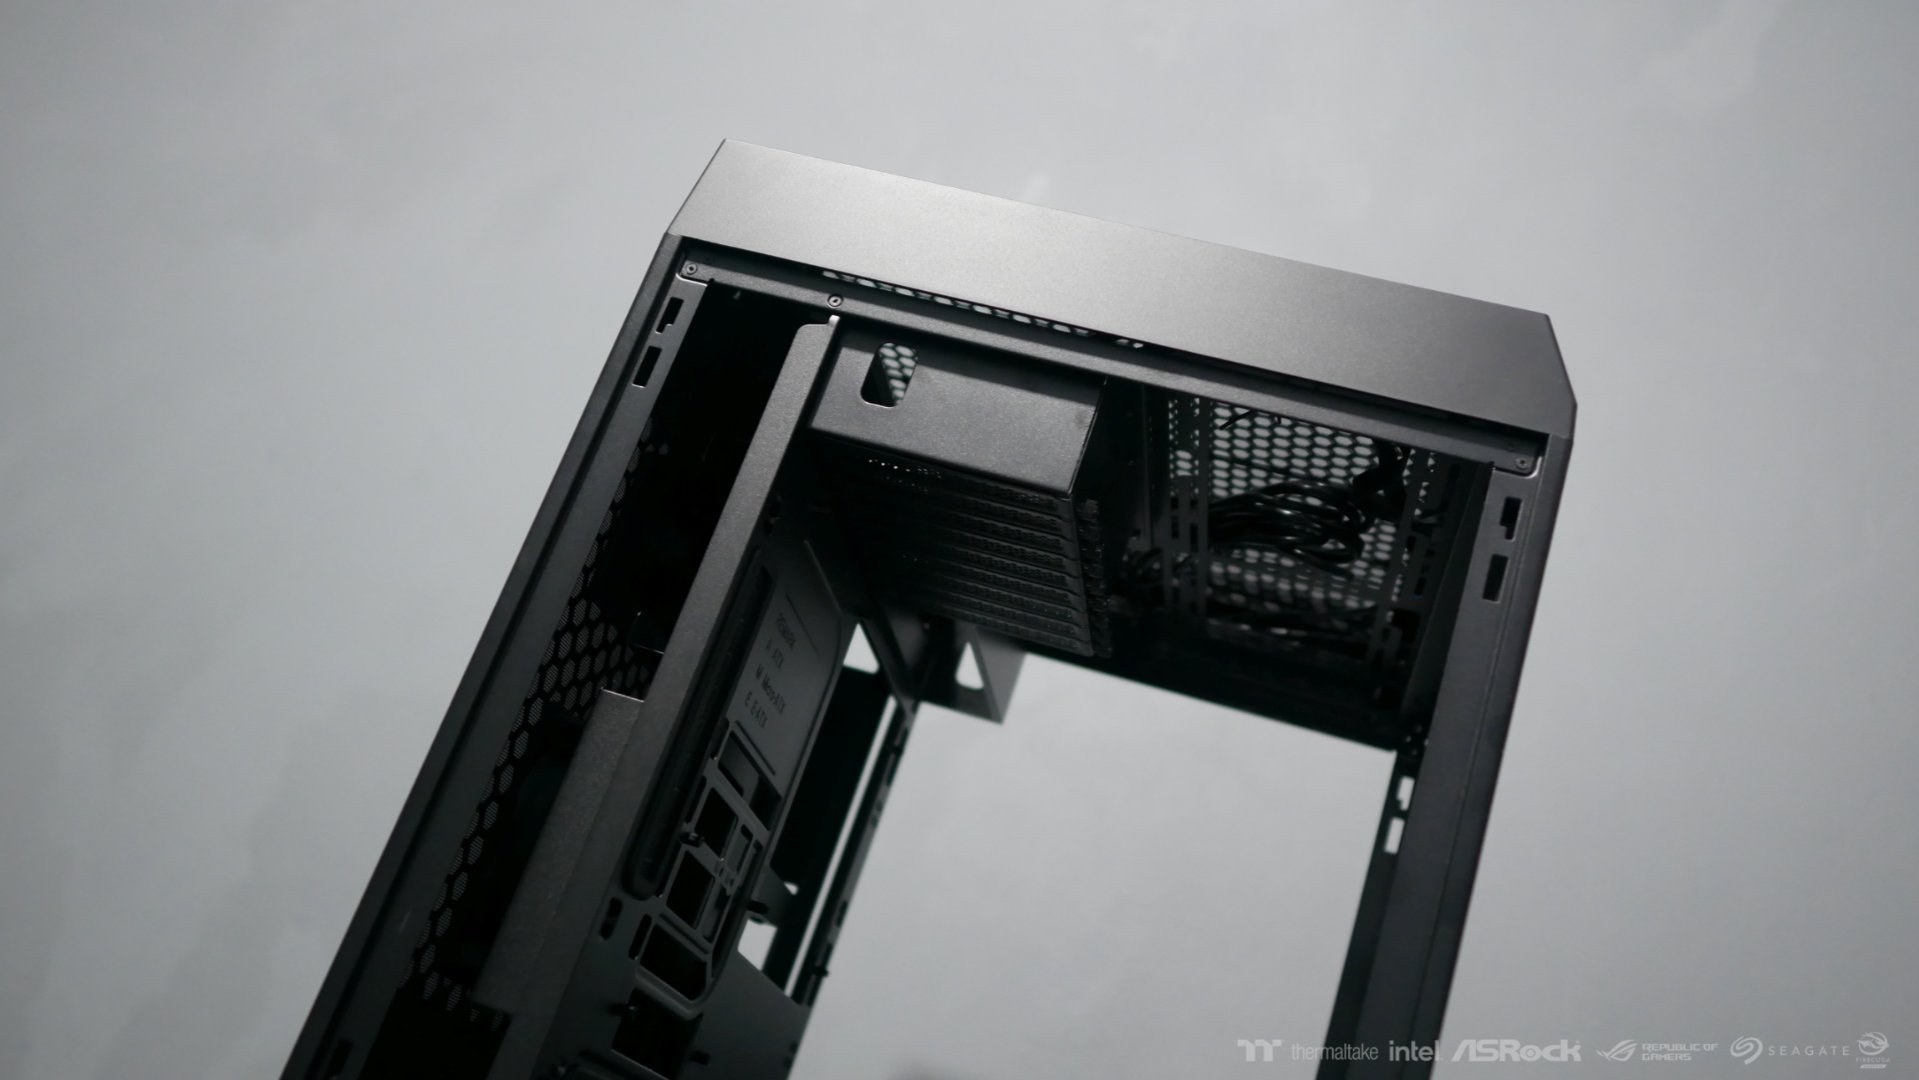
The case is mounted on the base platform using 8 wood screws. This will be enough to hold the case.
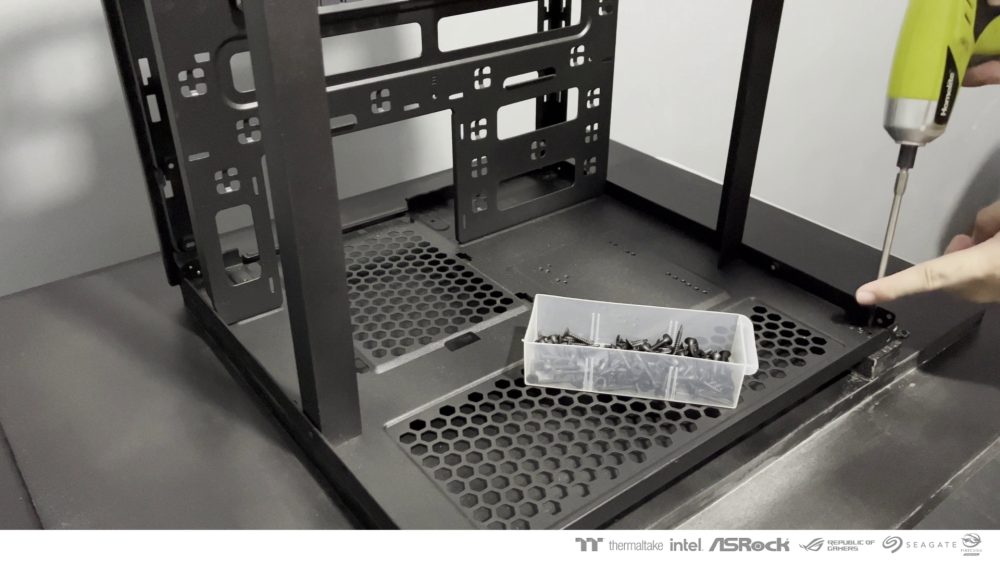
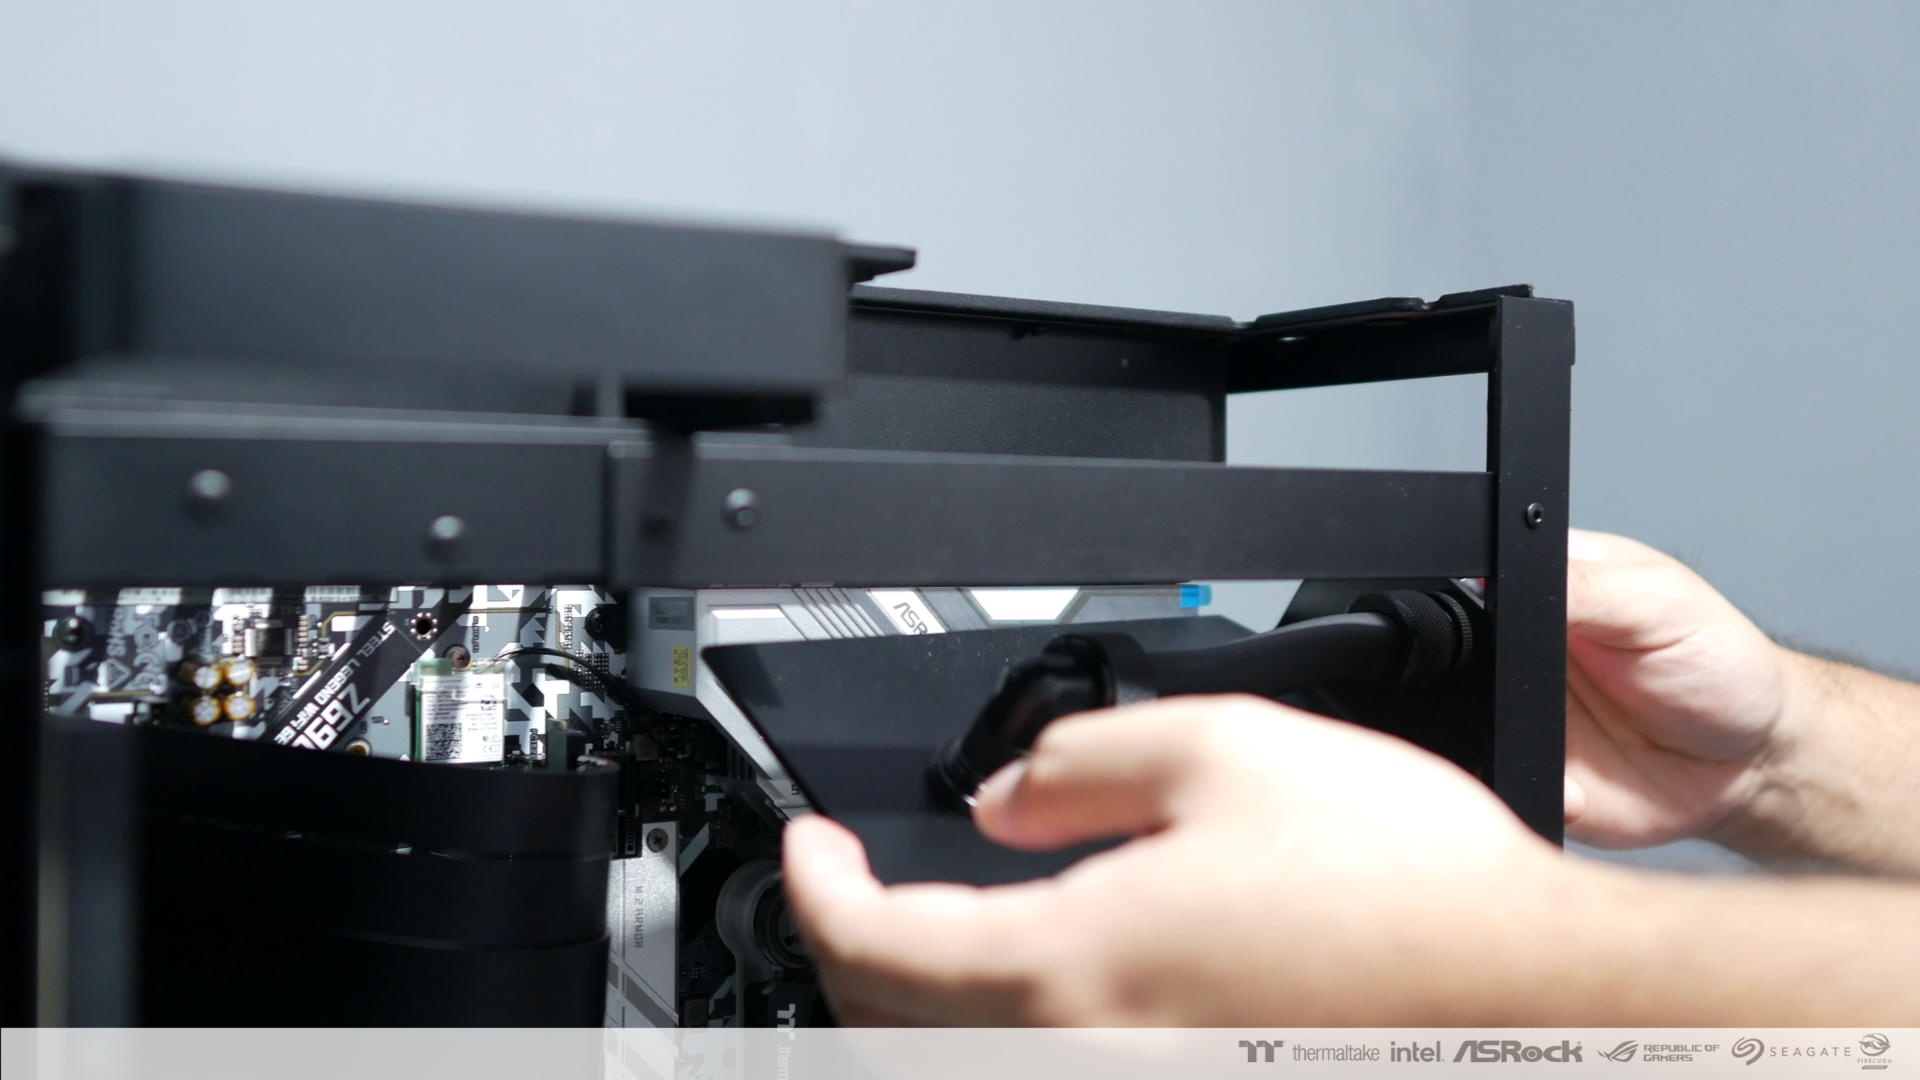
Next are the brackets and mounting for the pump, radiator and fans.
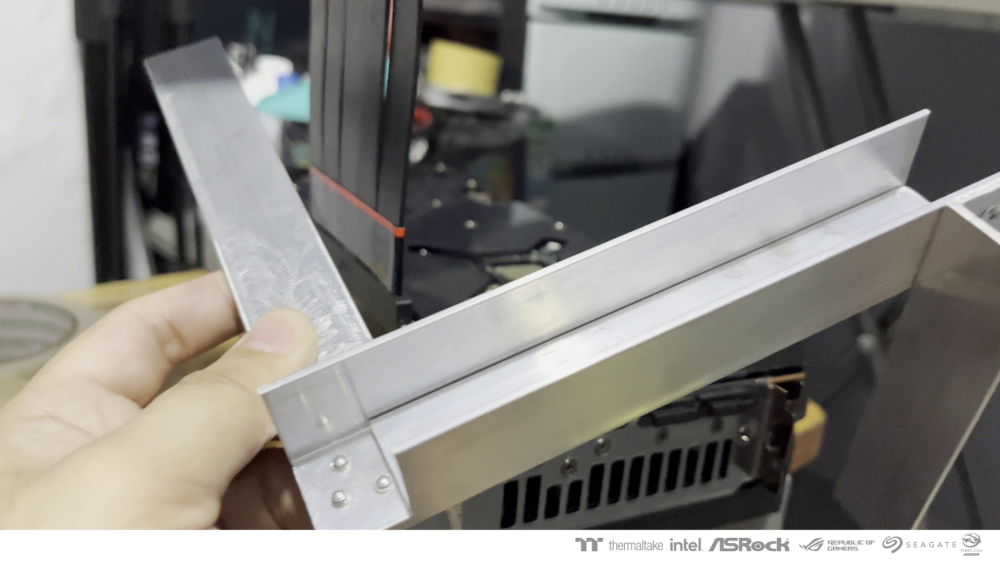
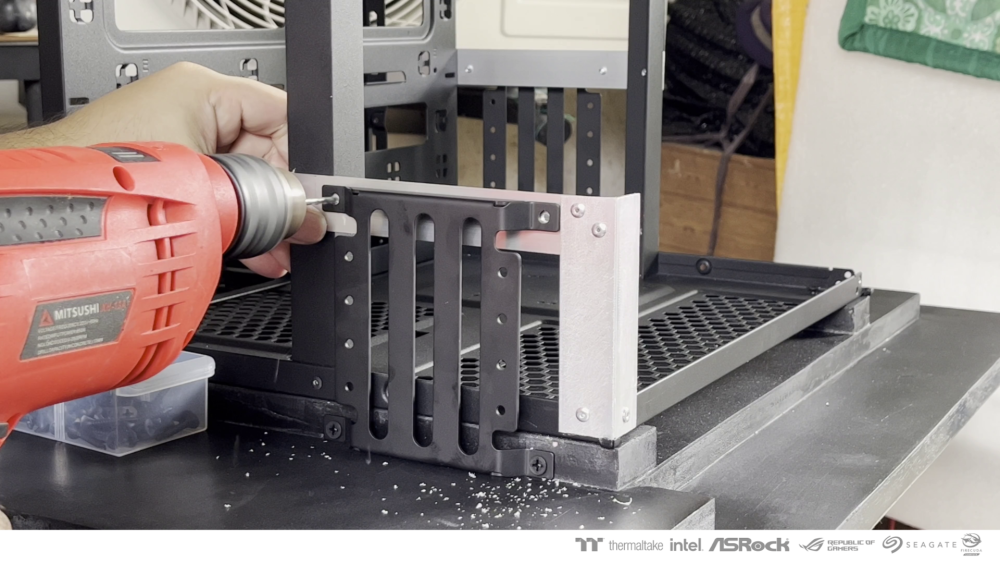
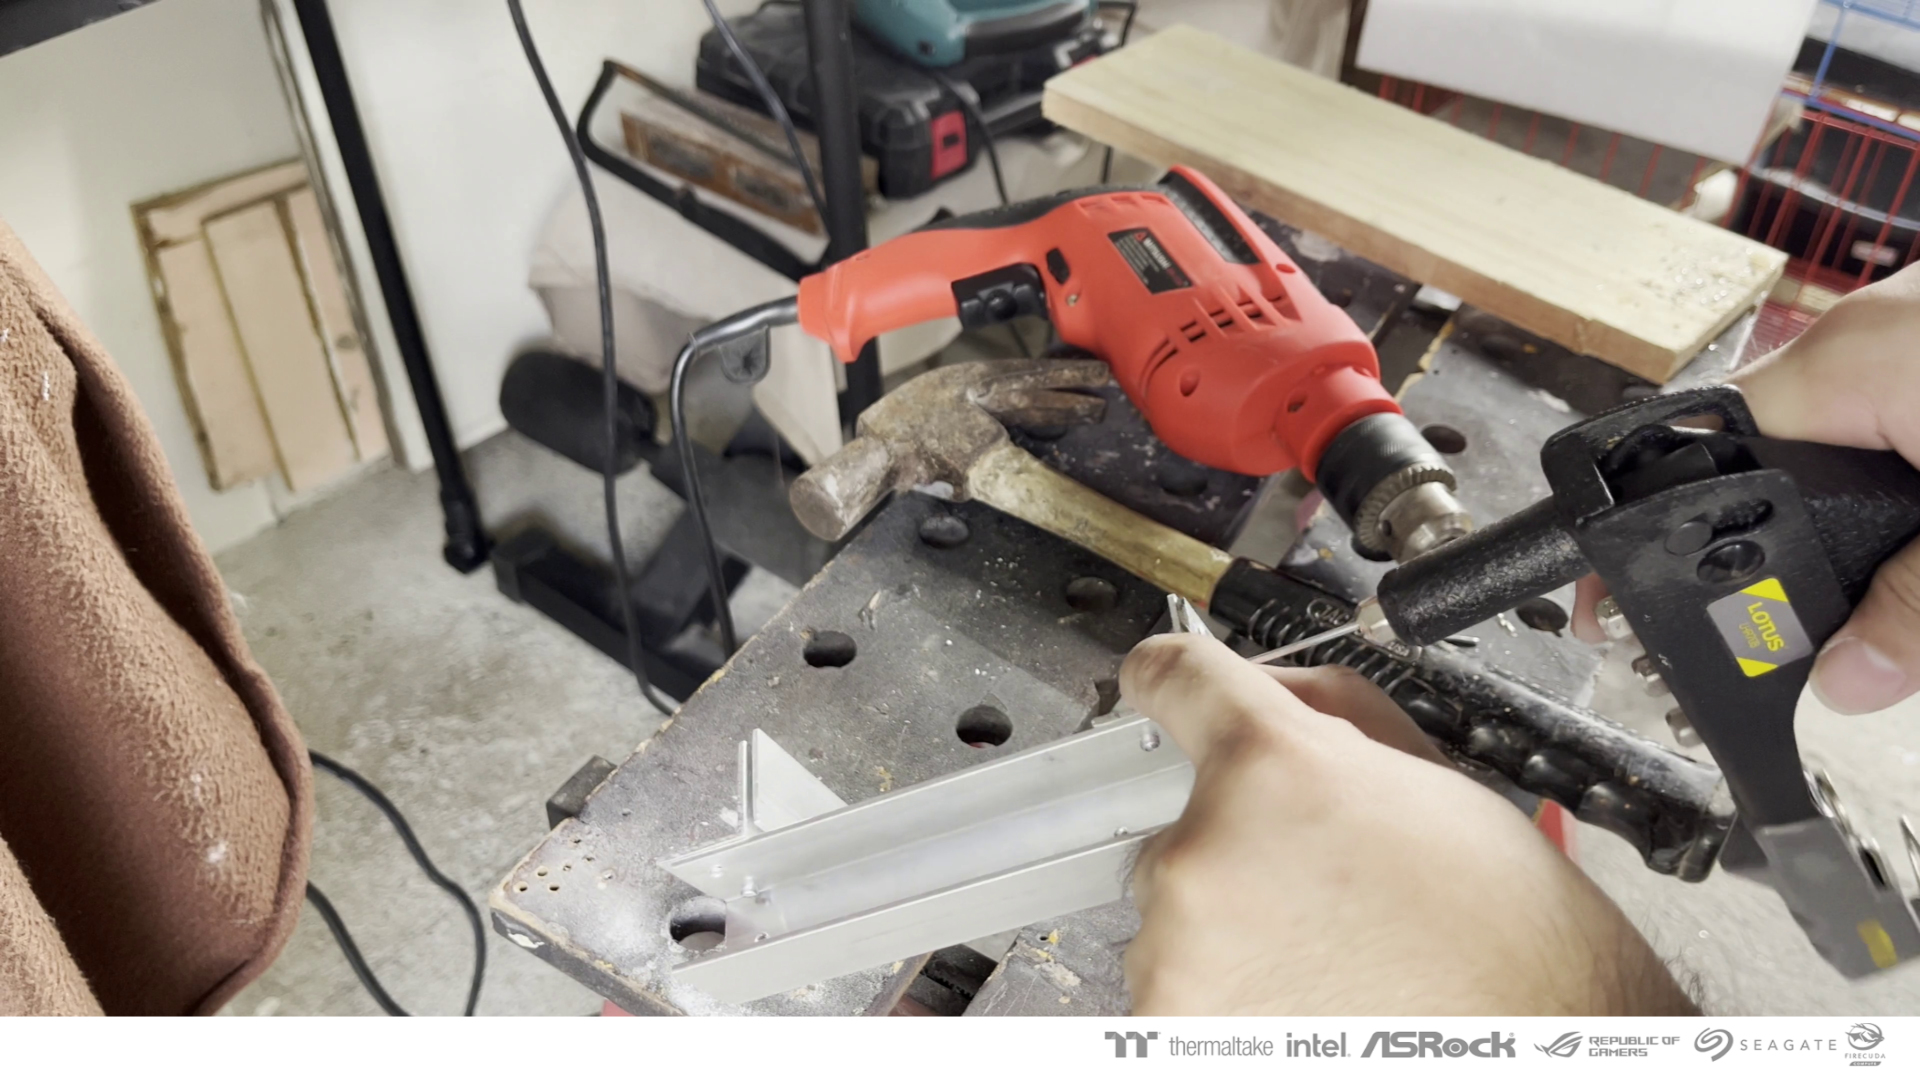
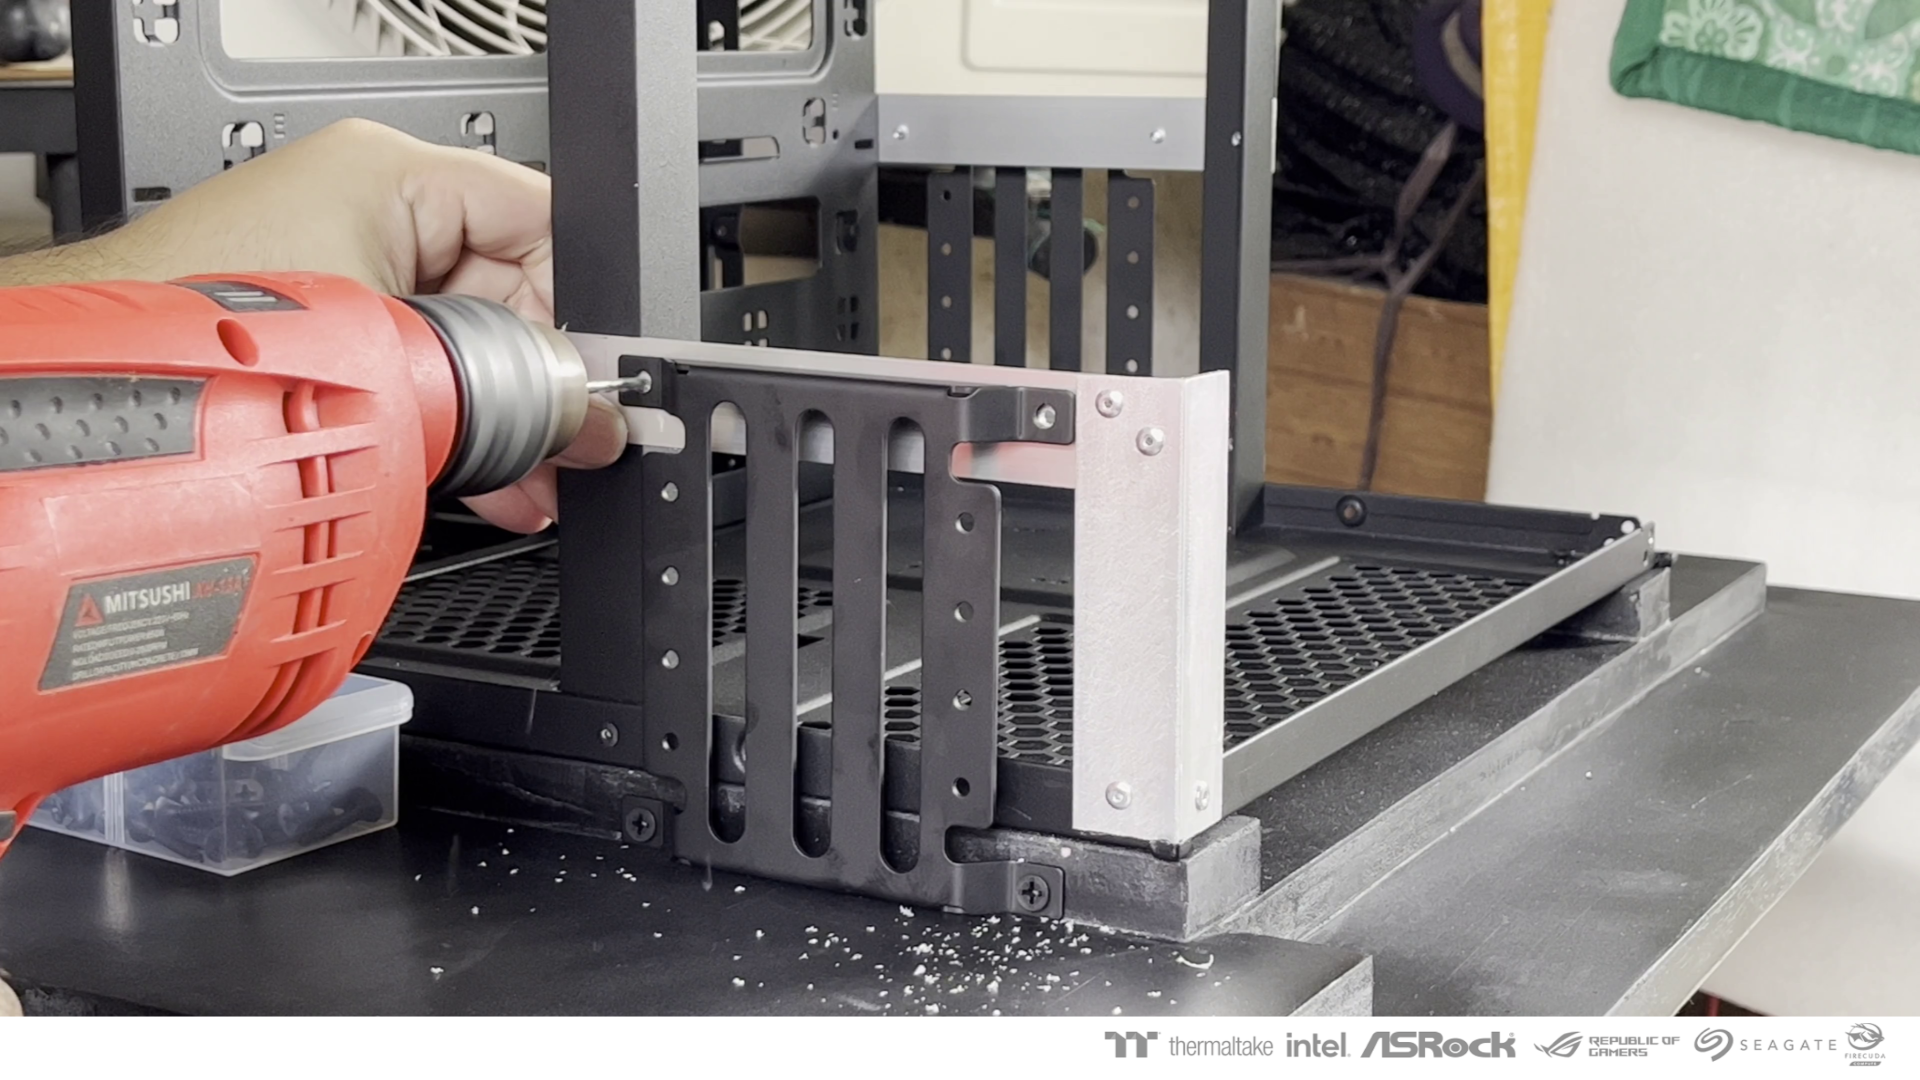
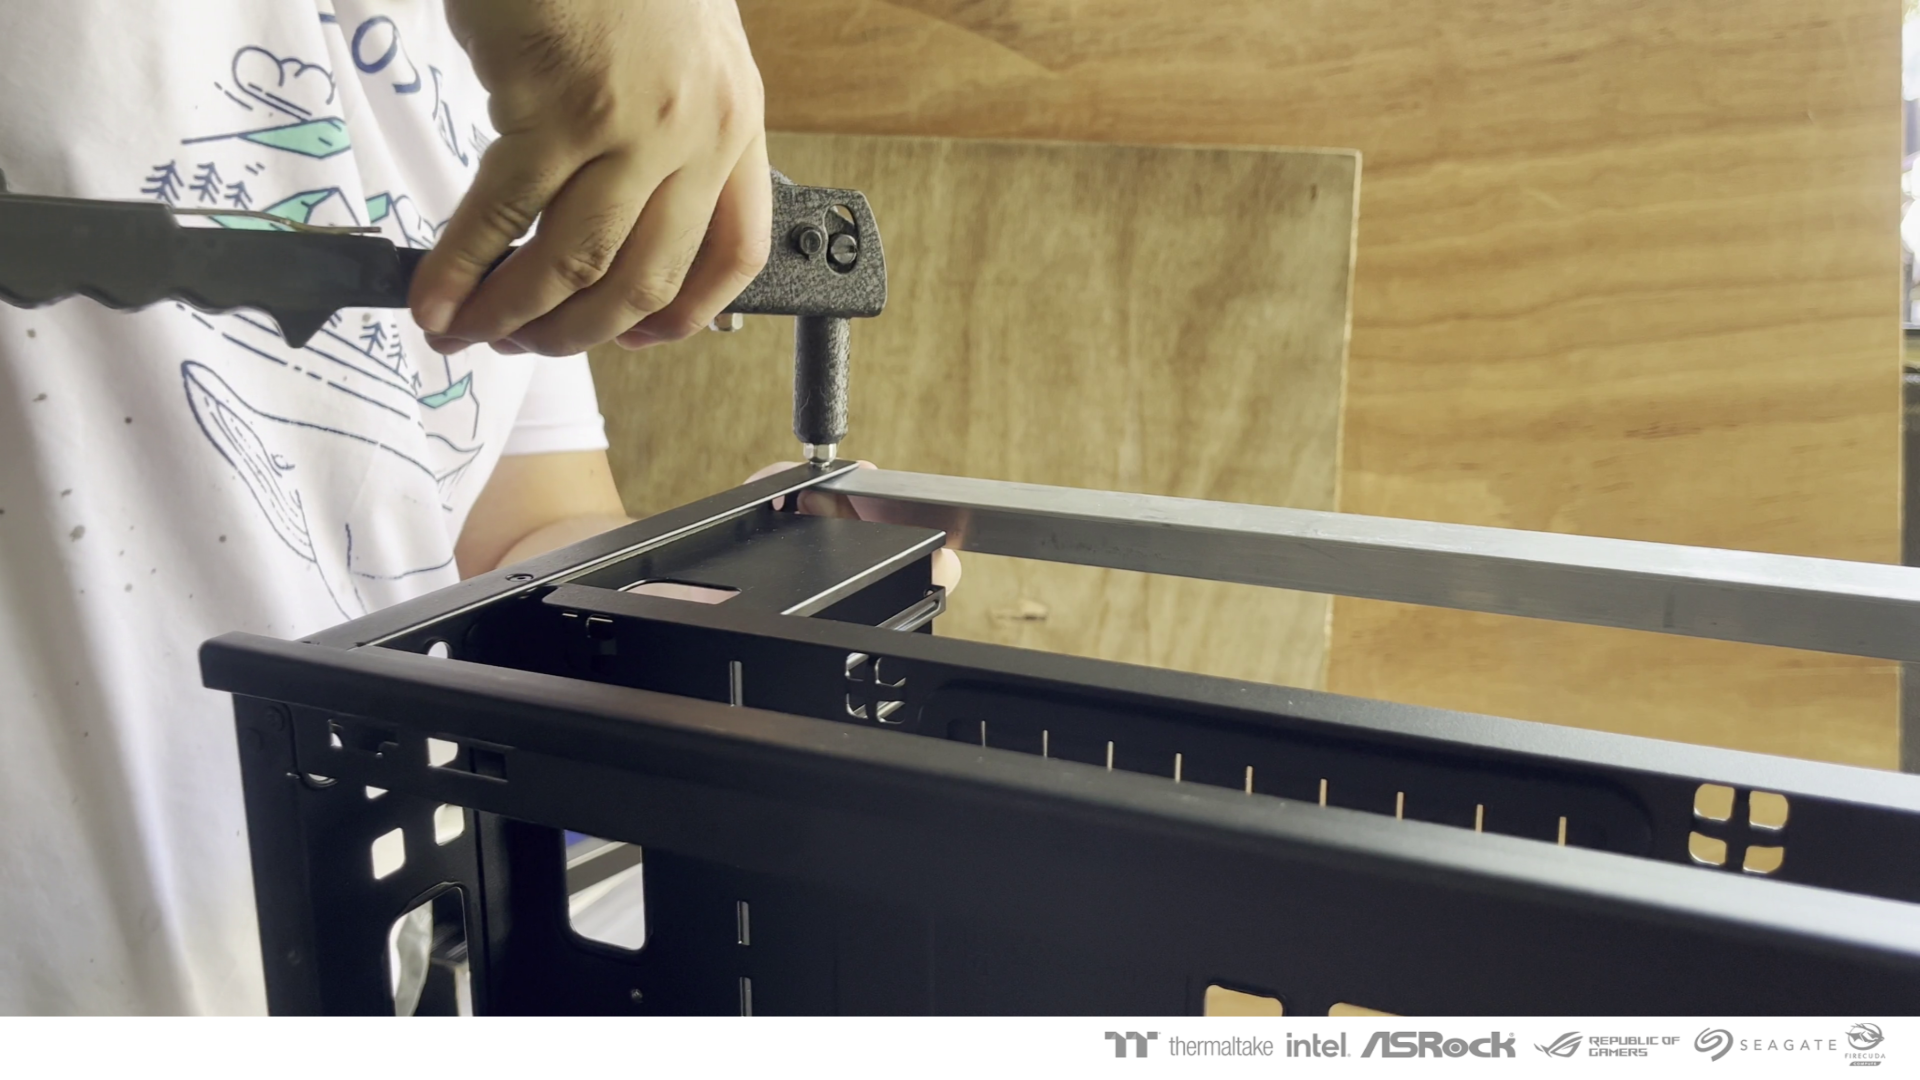
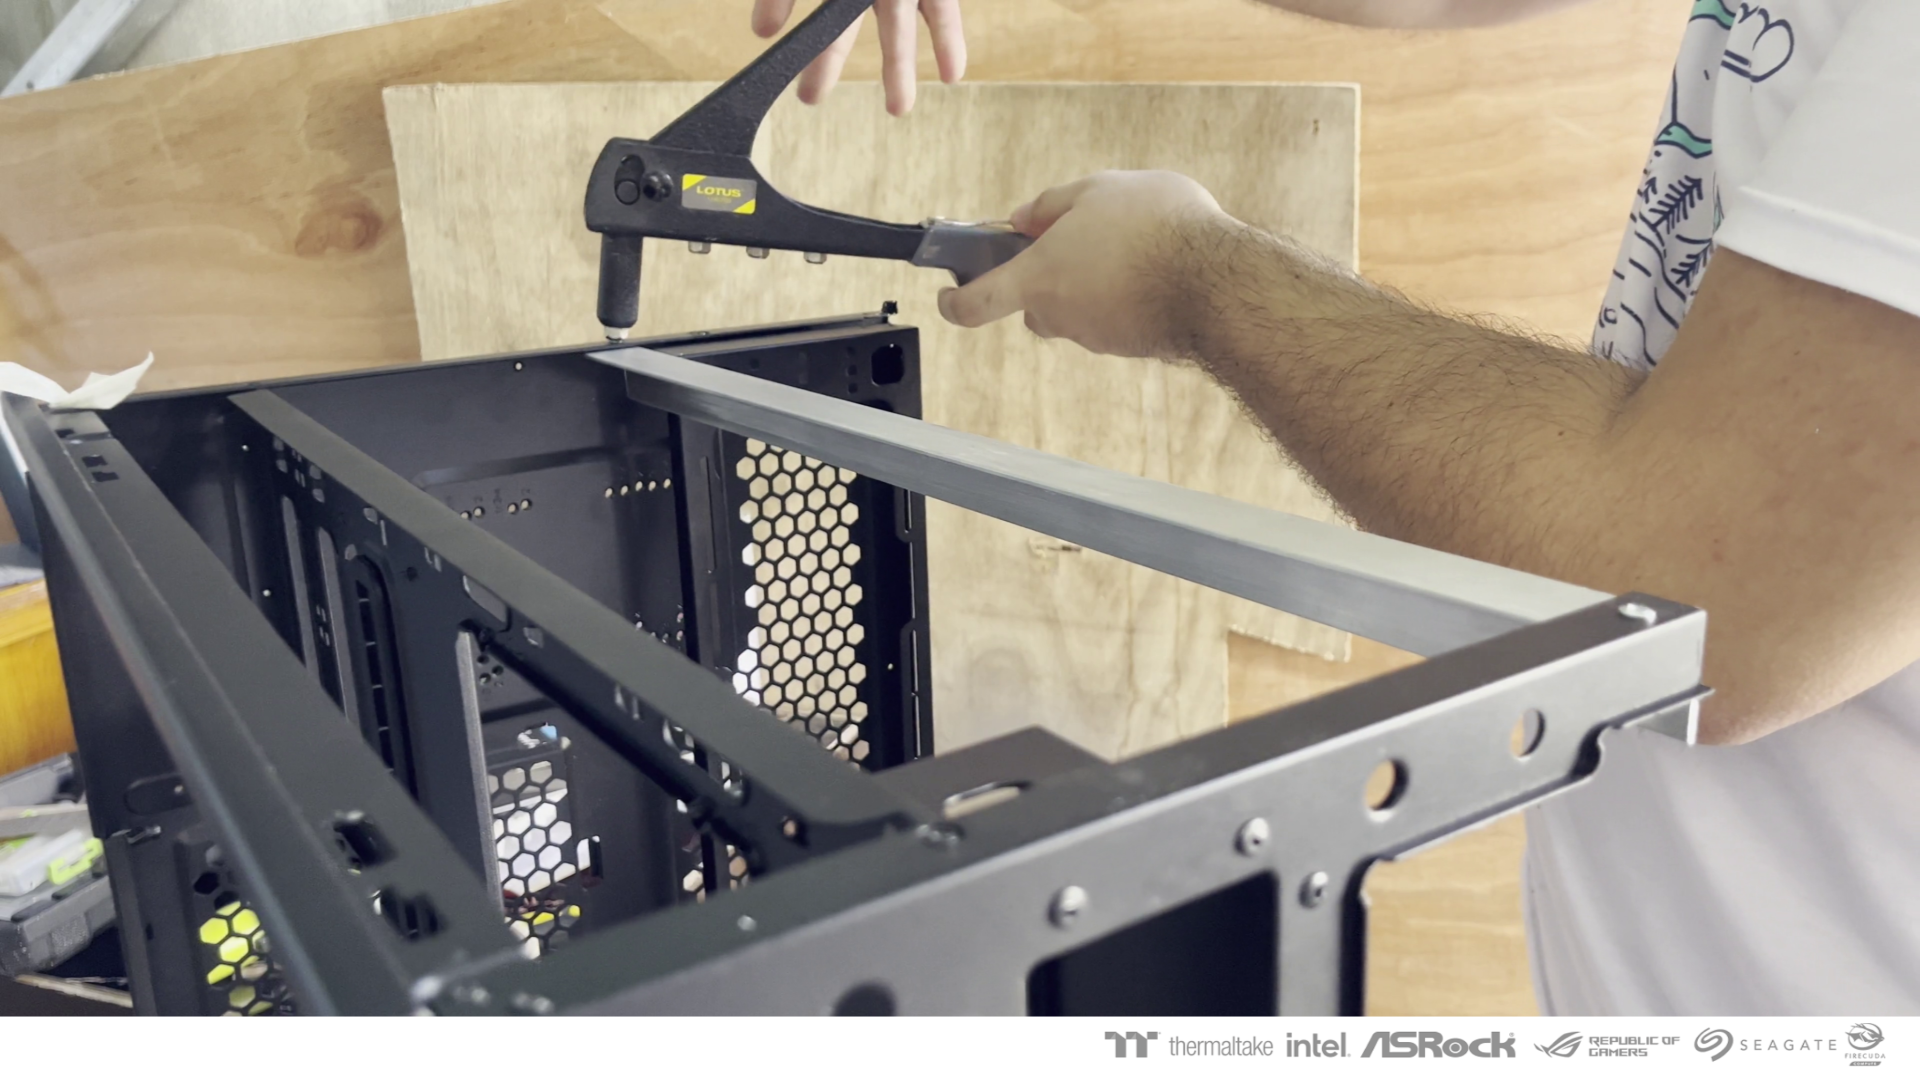
I also made a custom bracket for the GPU using aluminum angle bars and flat bars


I made a custom mounting for the top fan bracket and relocated it to the back part of the case.
I used additional aluminum bar to support the bottom mounting.

Thee D5 pump brackets are also made from aluminum flat bars.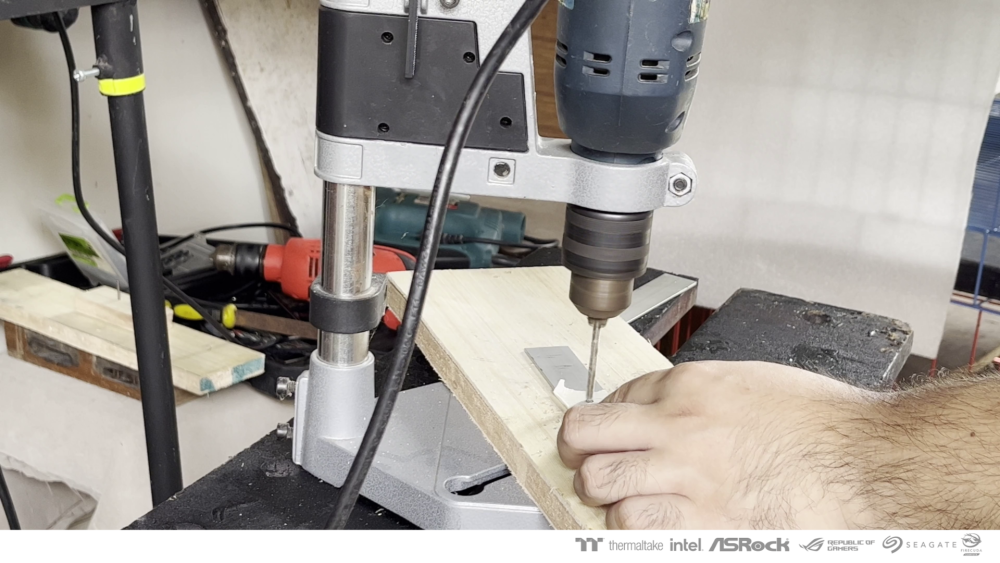
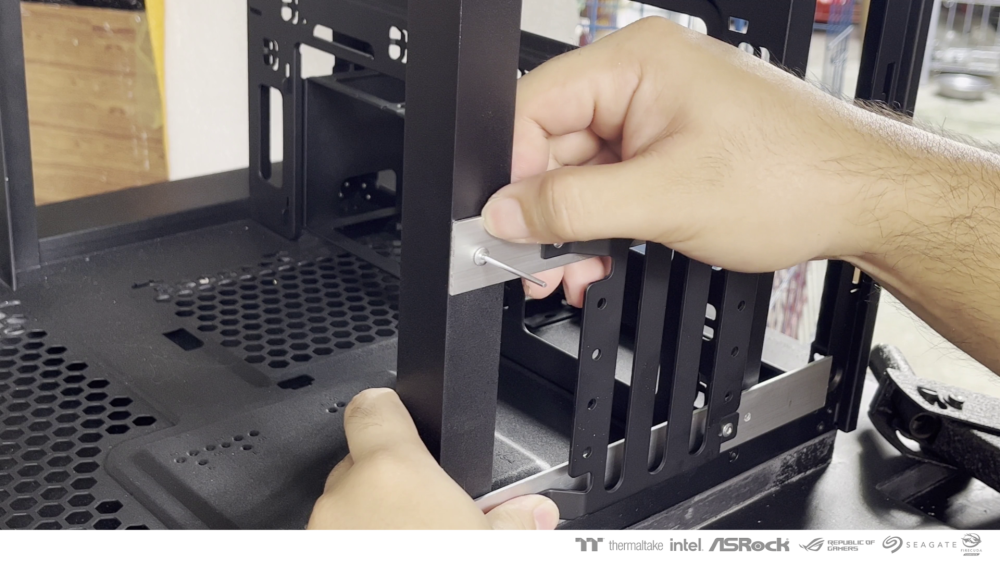
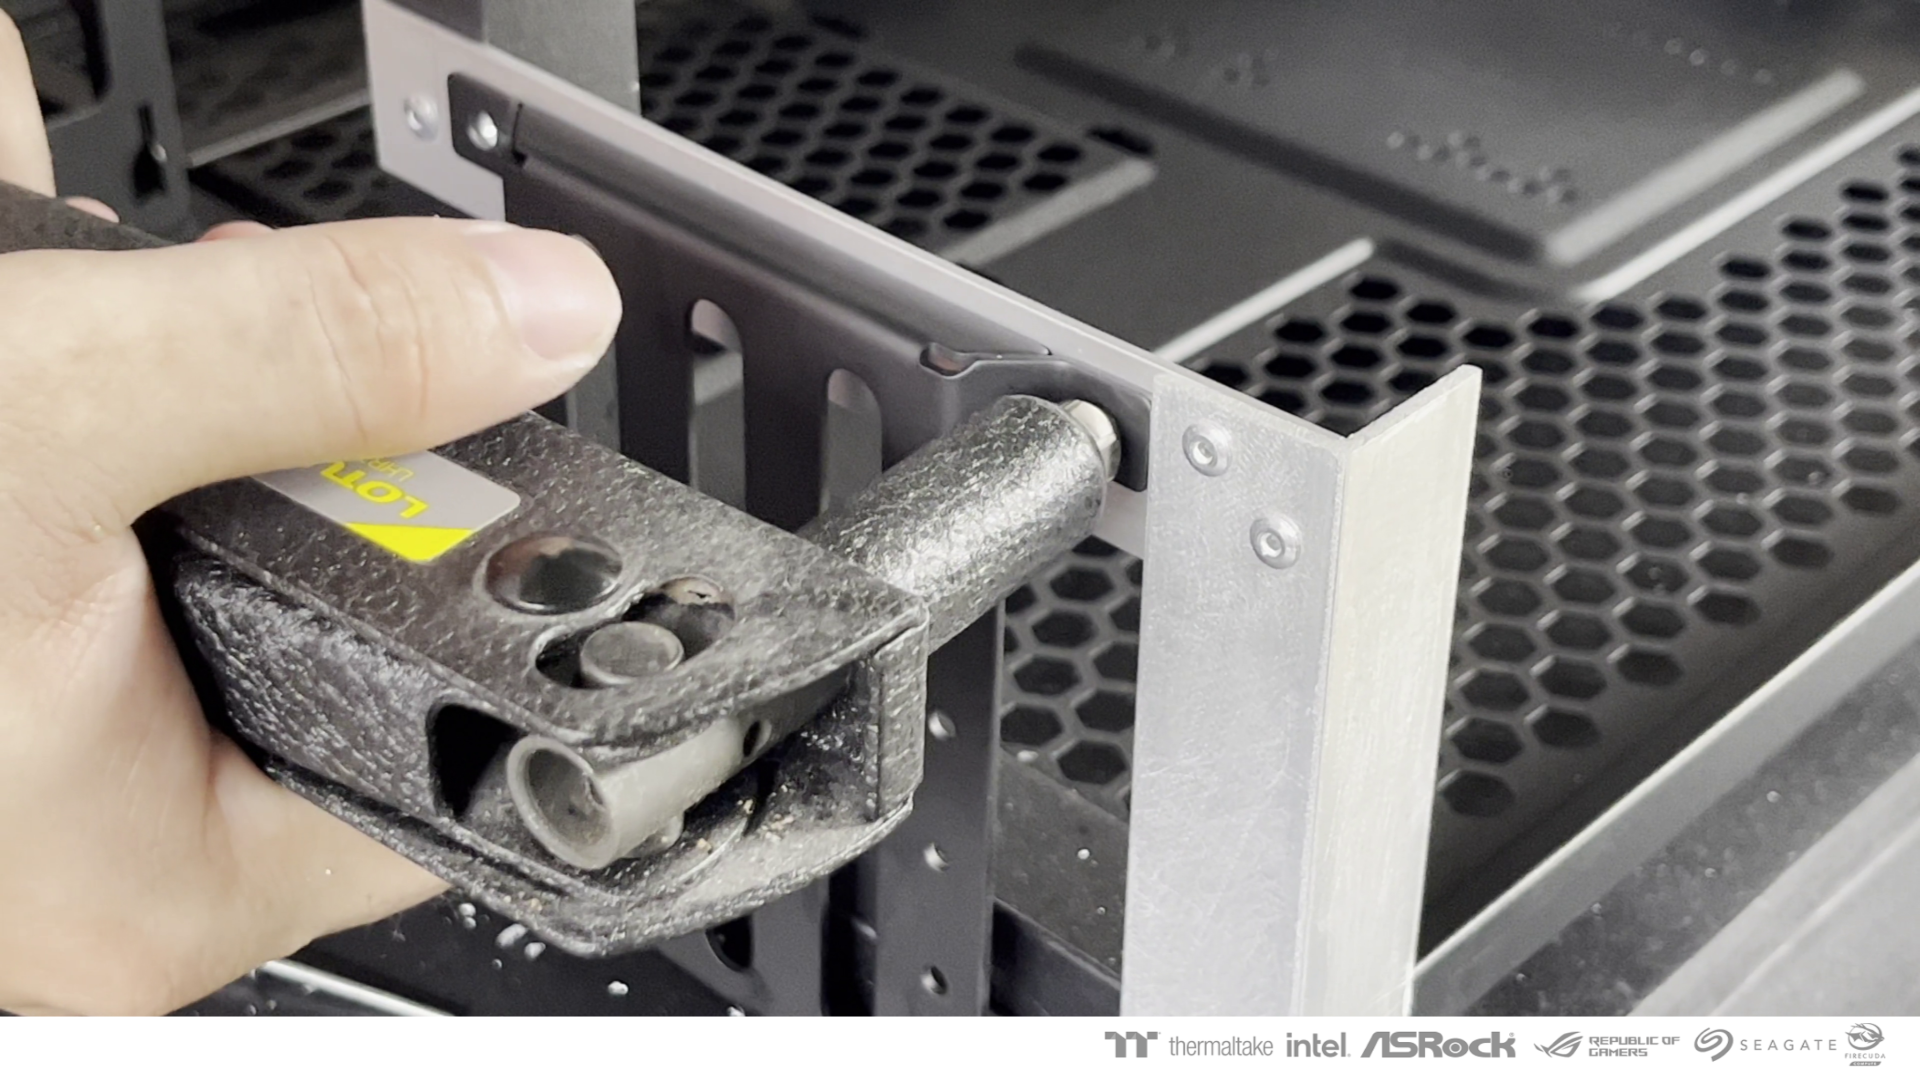
The custom brackets are riveted to the case.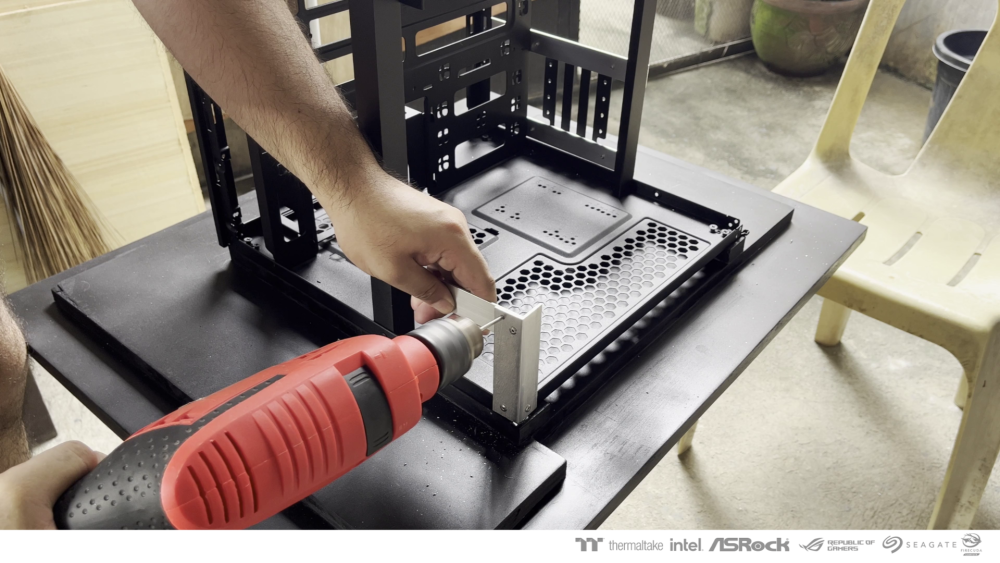
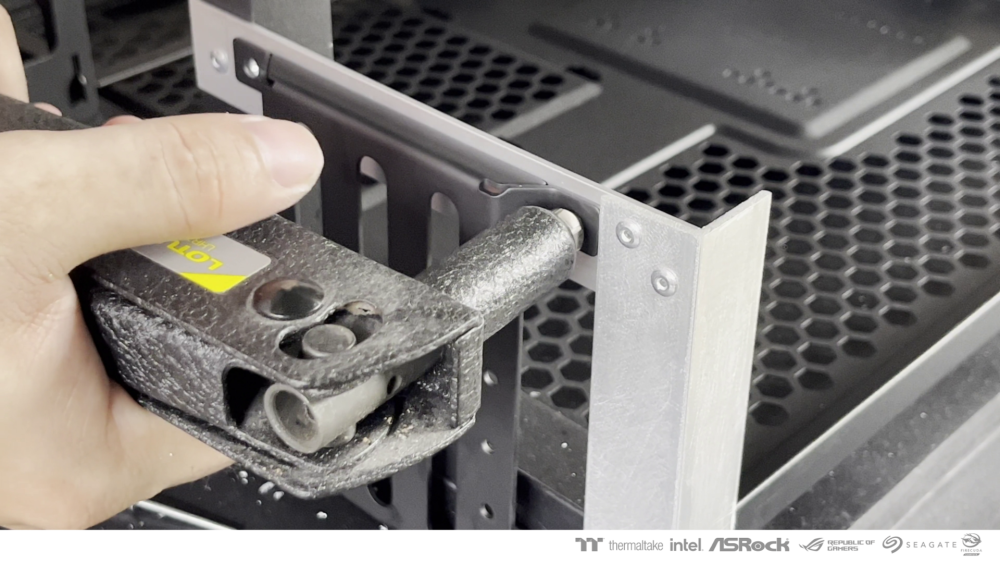
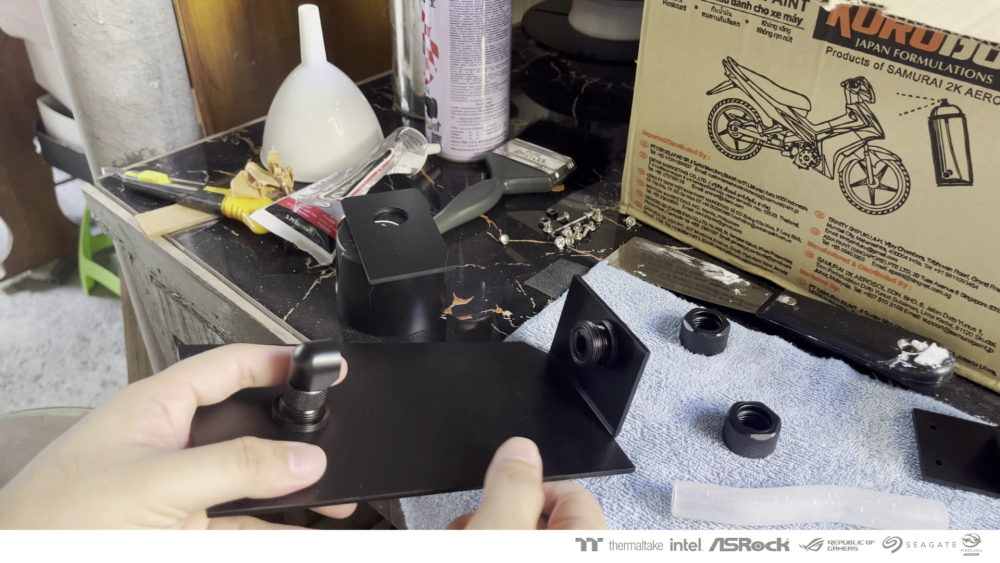
I also made a passthough system for watercooling. The plan is to have tubes around the case to showcase and expose Thermaltake's watercooling parts.
I used acrylic sheet to have a cover of the passthrough fittings to hold on to. This part will be very vital in our casemod because this will enhance the theme that I want to achieve.


-
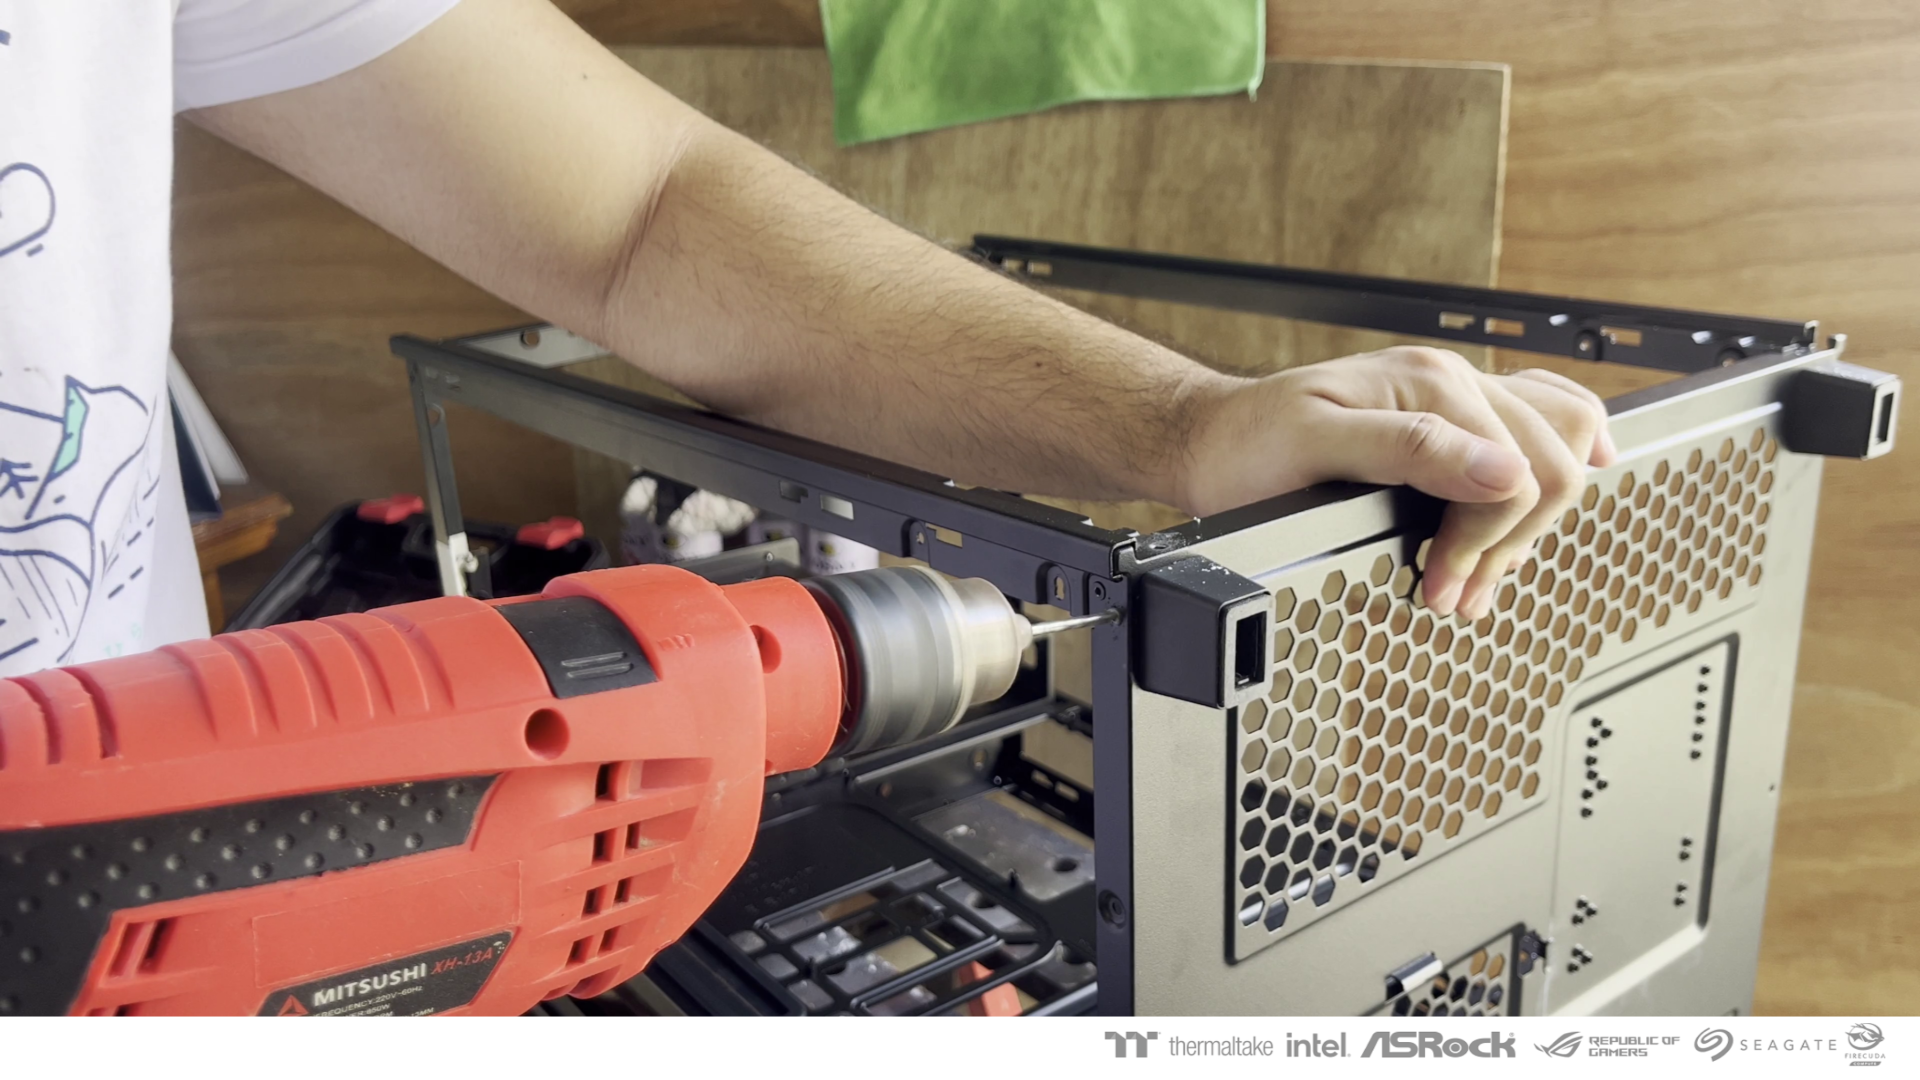
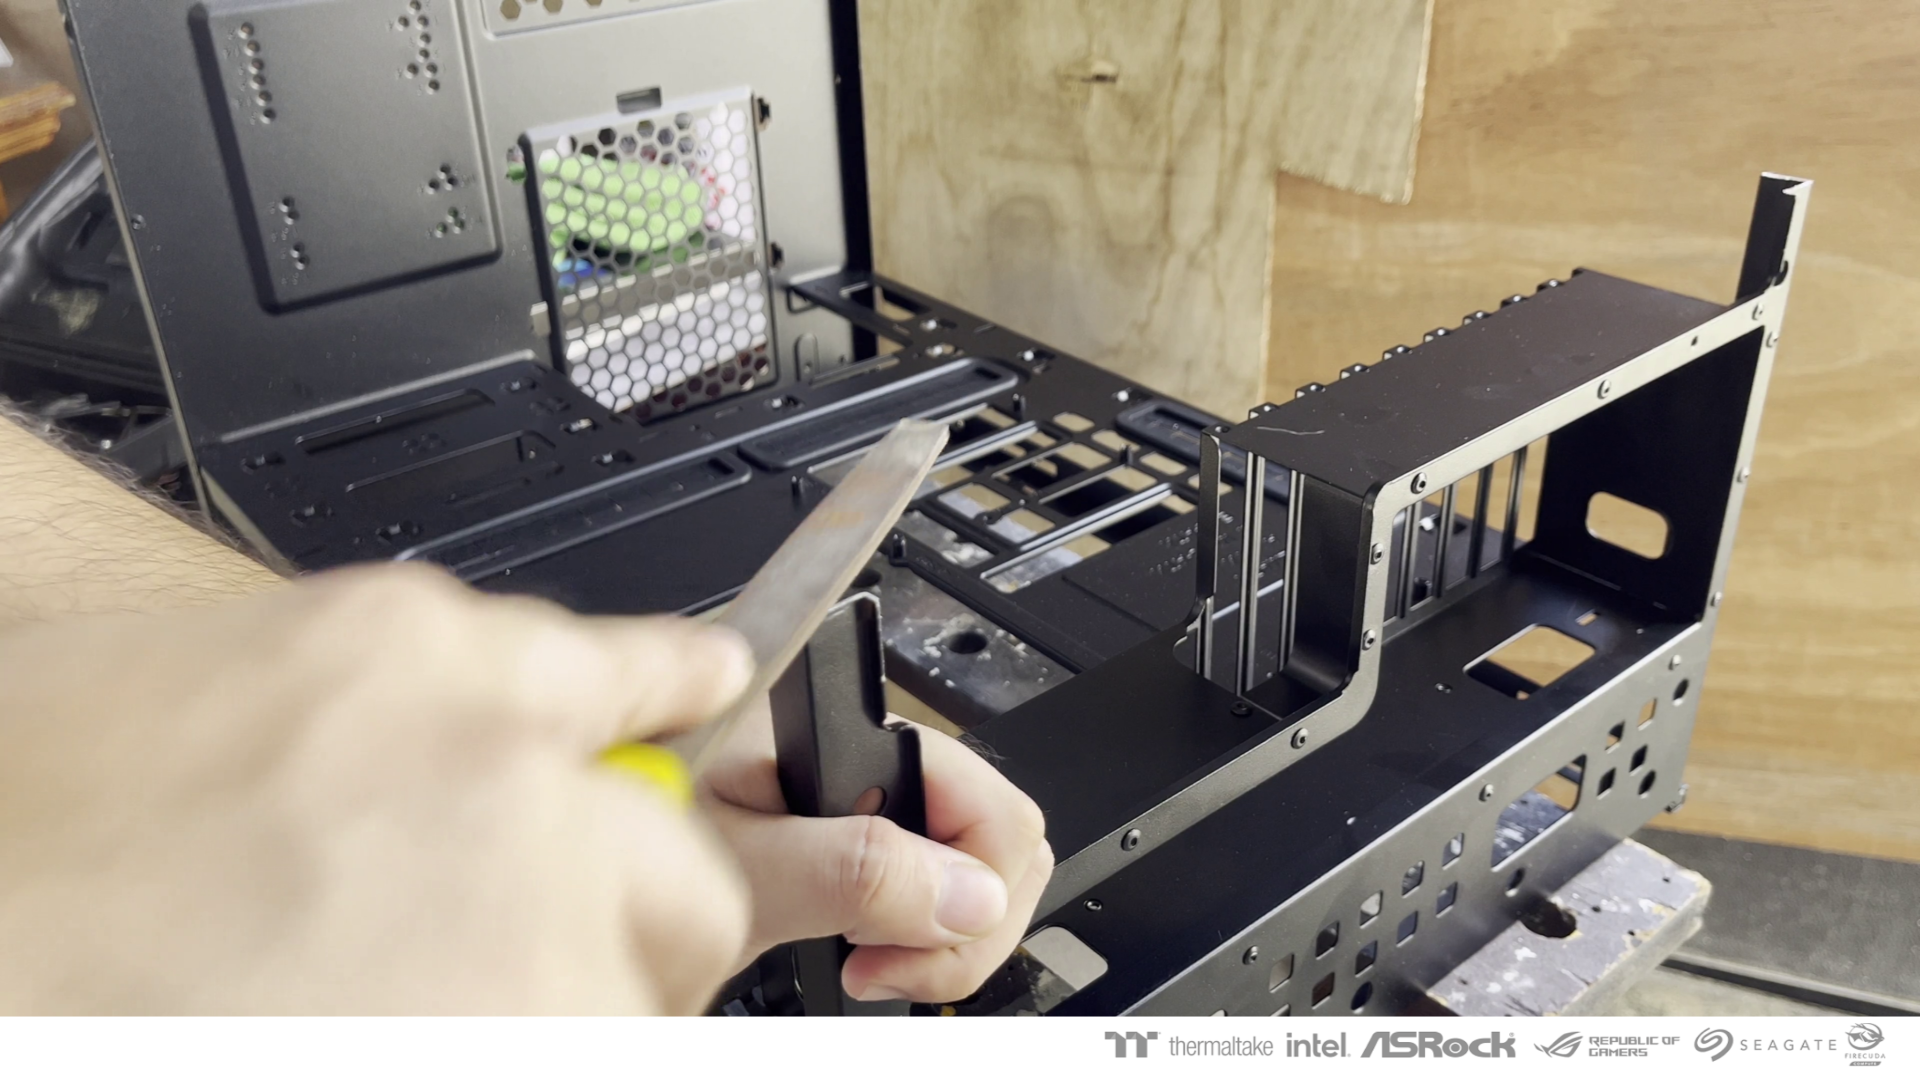
Now the modding begins!
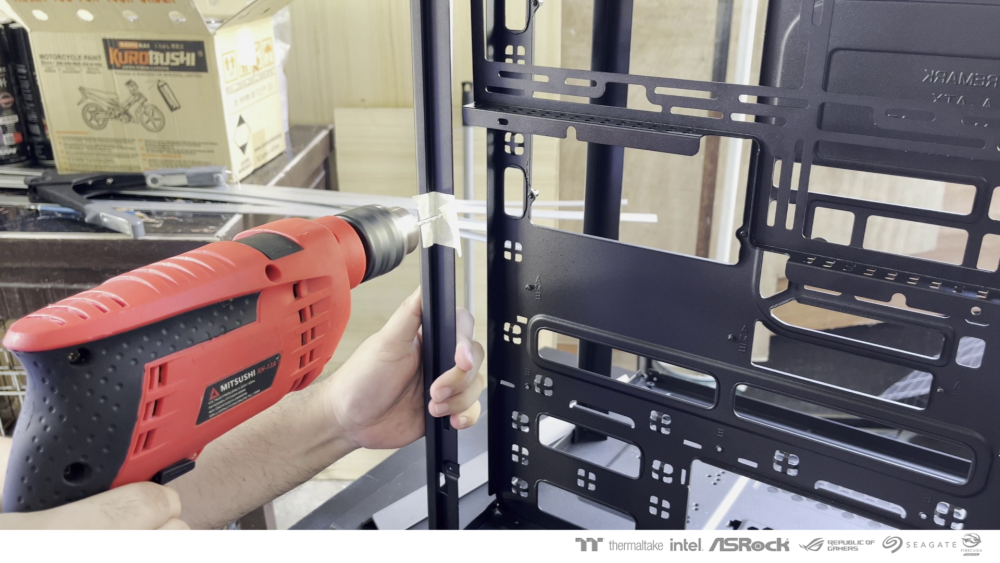
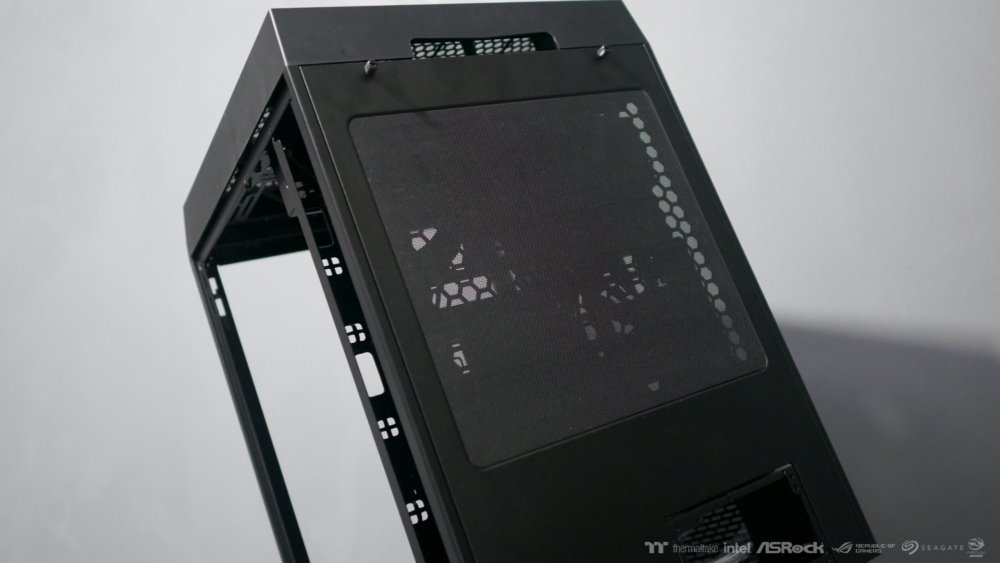
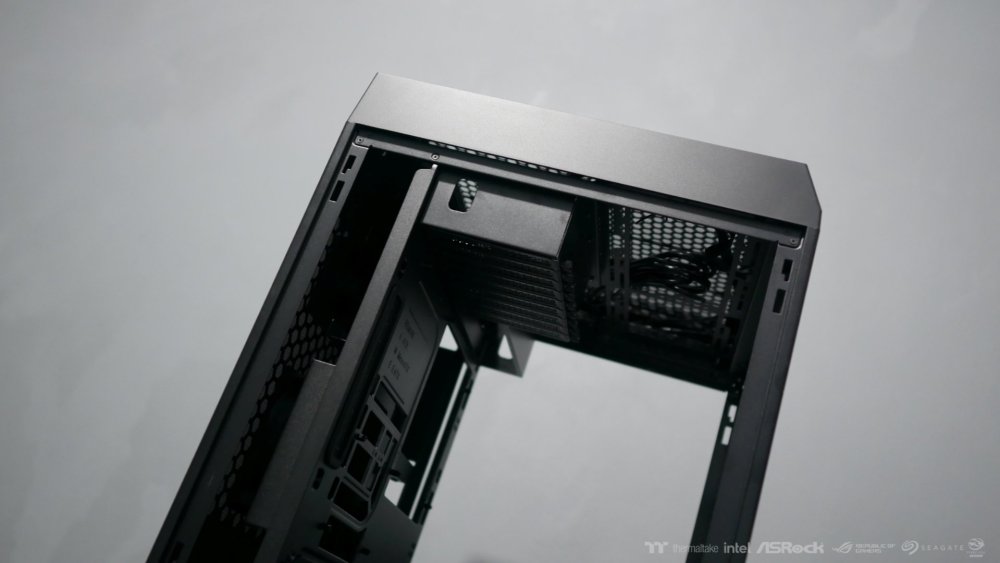
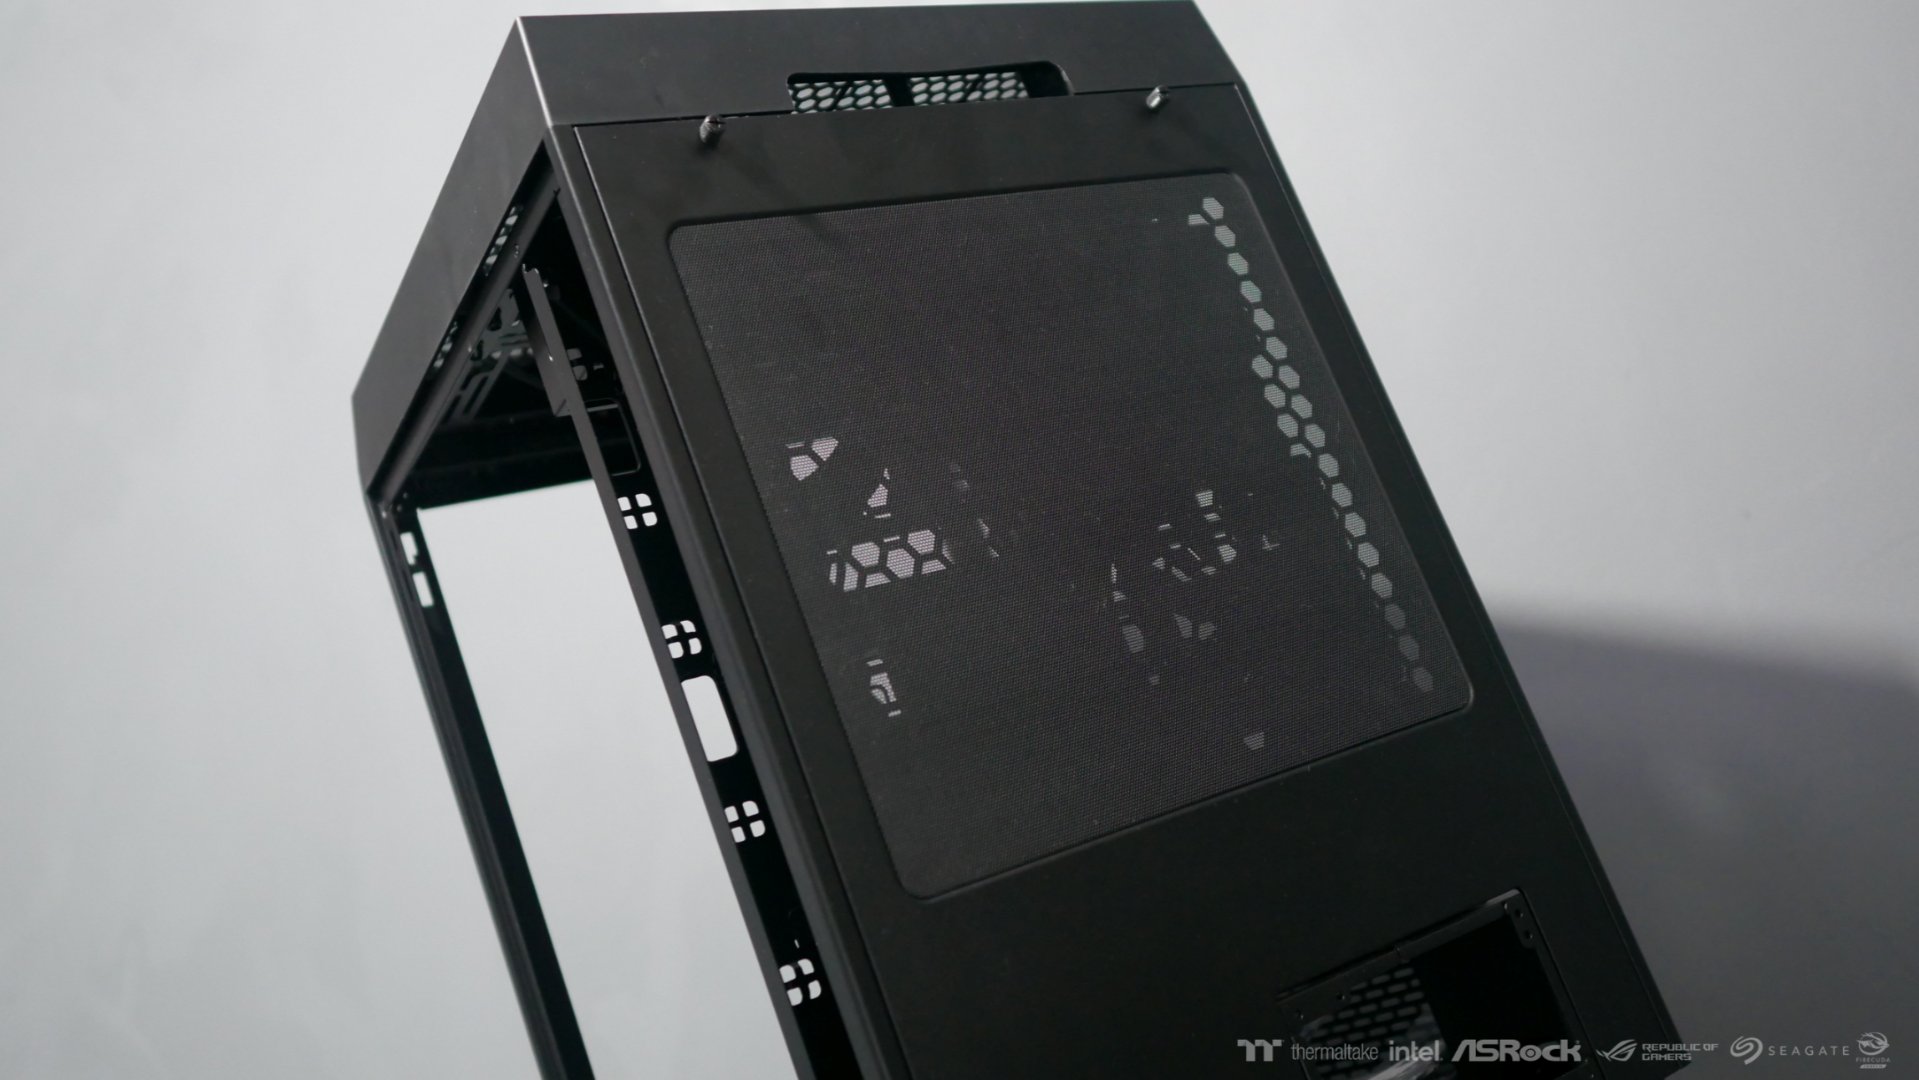
I started by cutting manually the case to remove the front area.
I want to have a semi-open type of case. I also want to expose as much as possible the parts so that It can be distinguished as a computer.
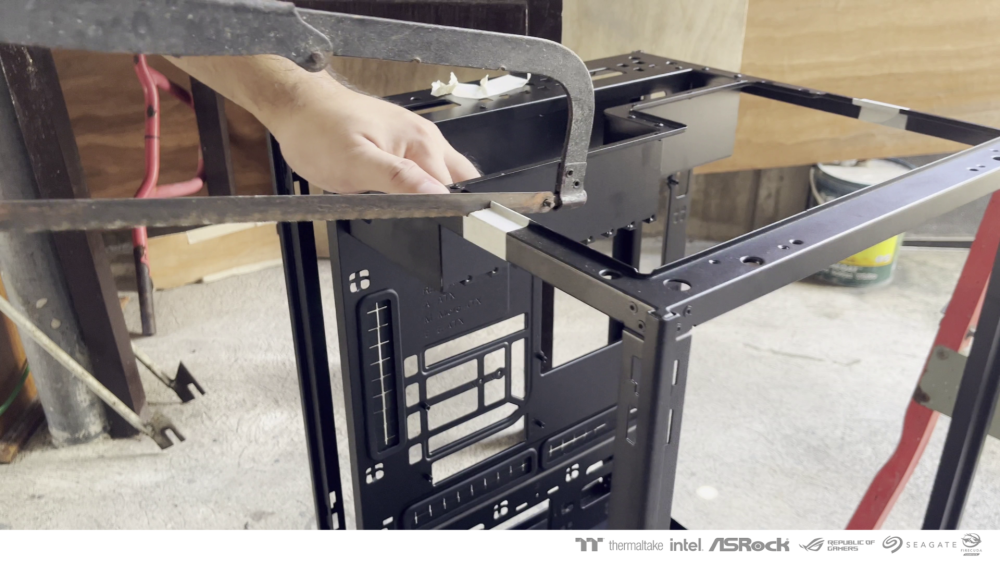

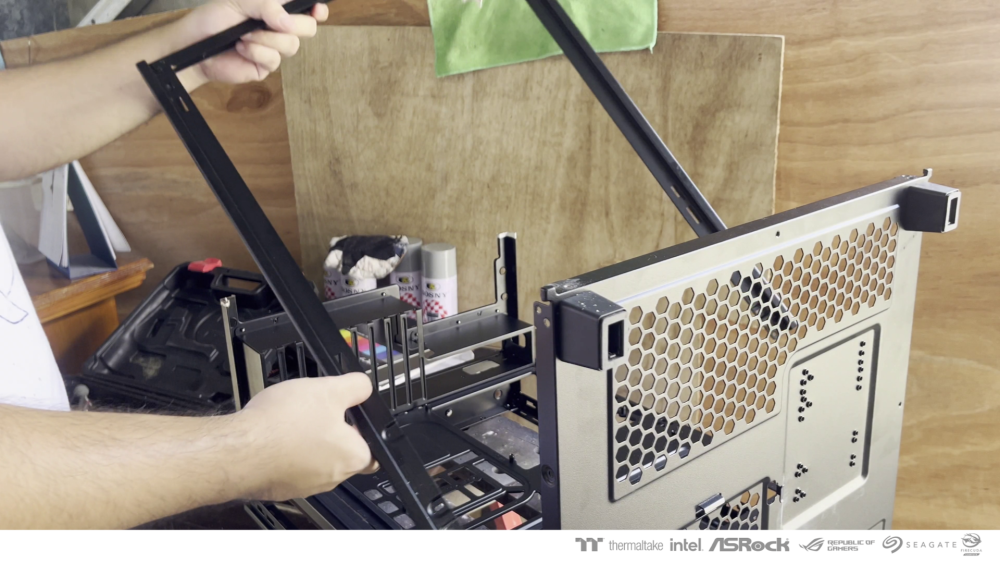


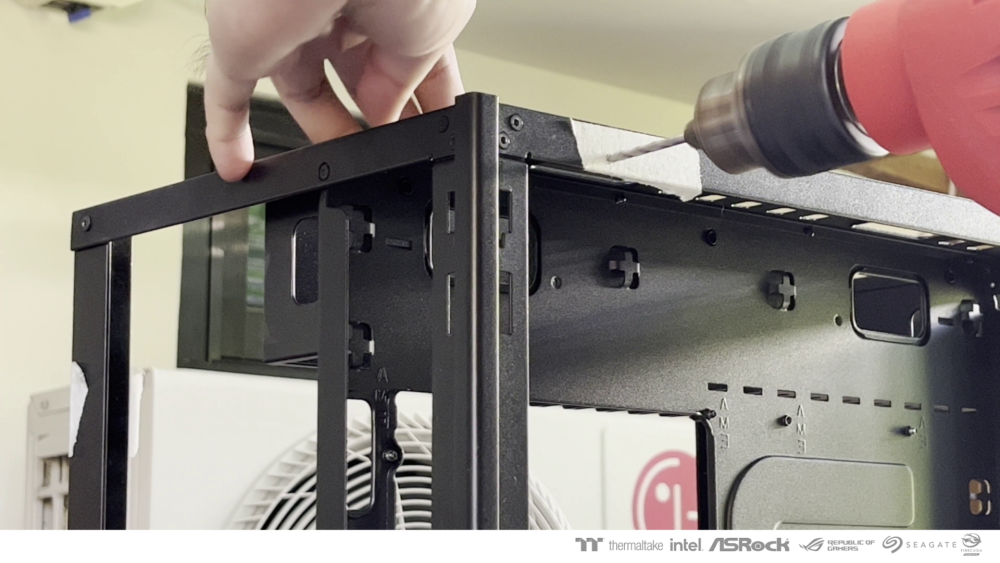
I used aluminum angle bars as support of the case. I used rivets to secure it together with the case.
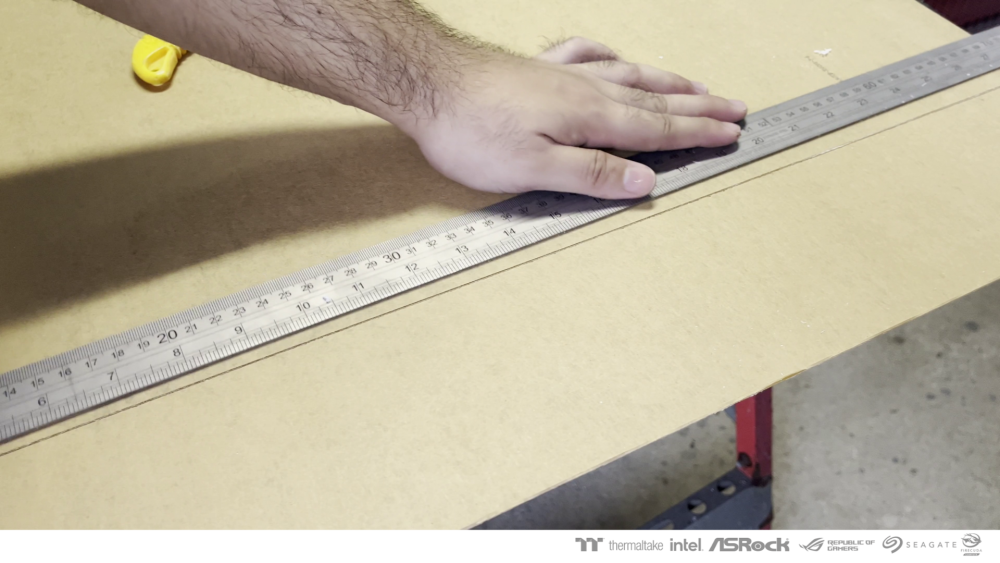
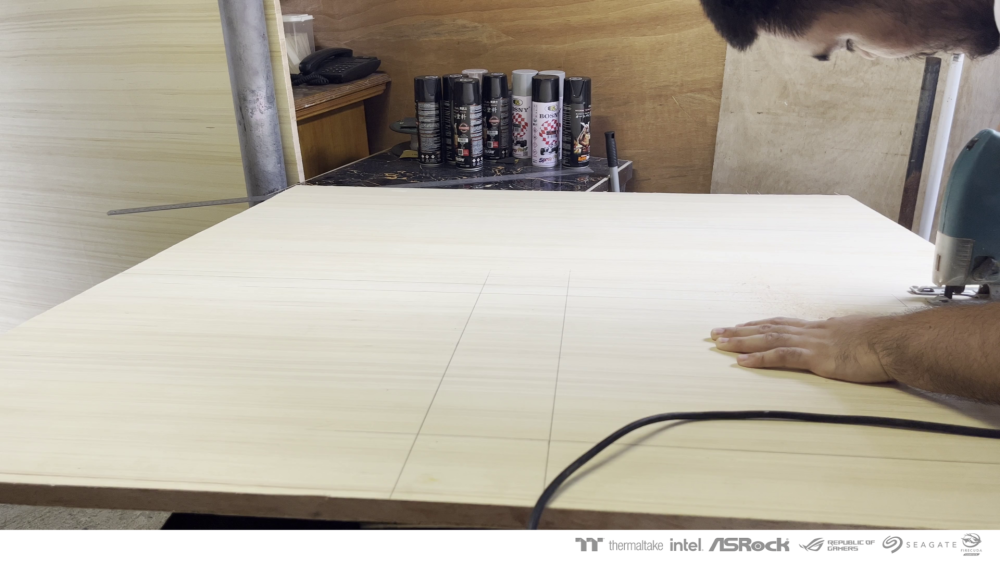
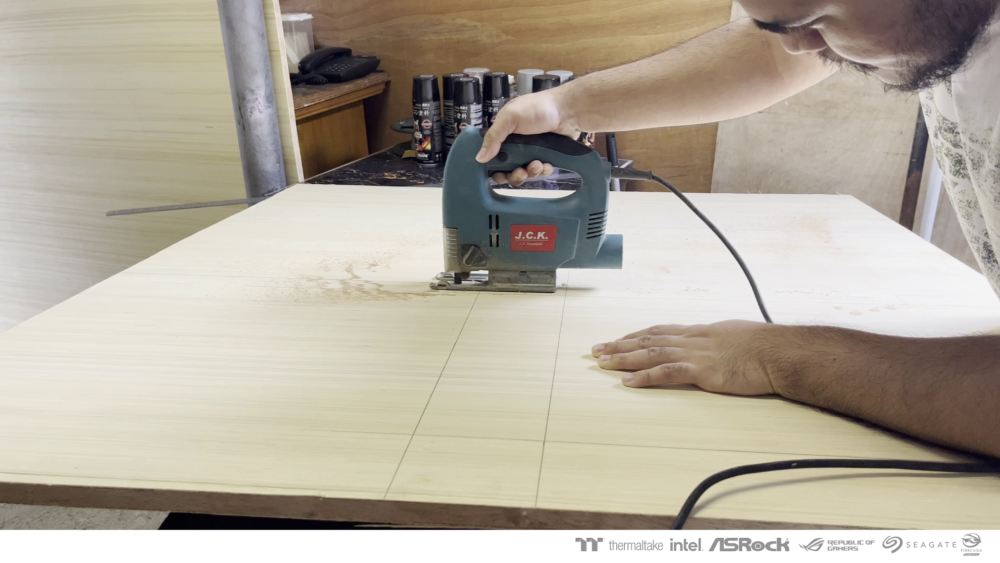
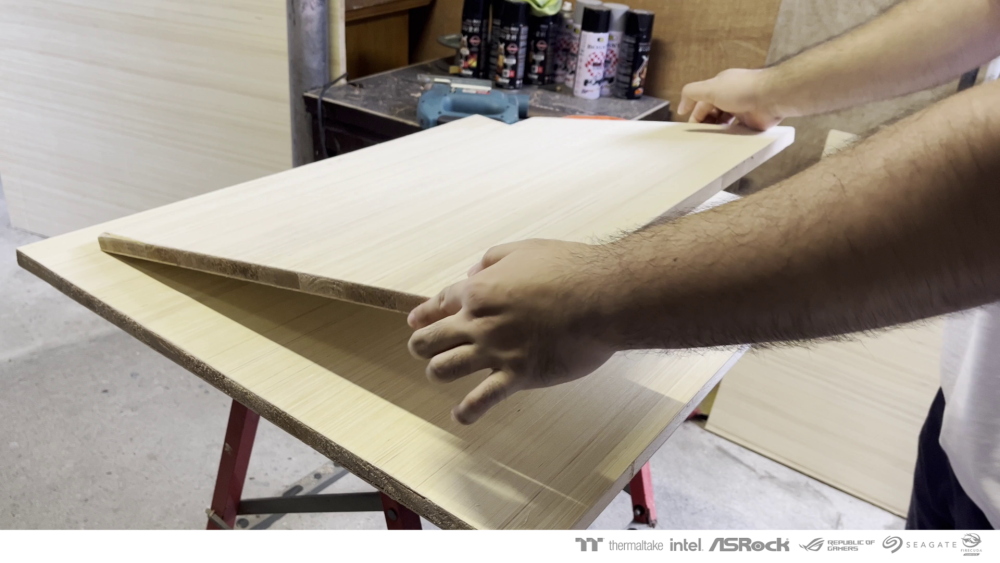
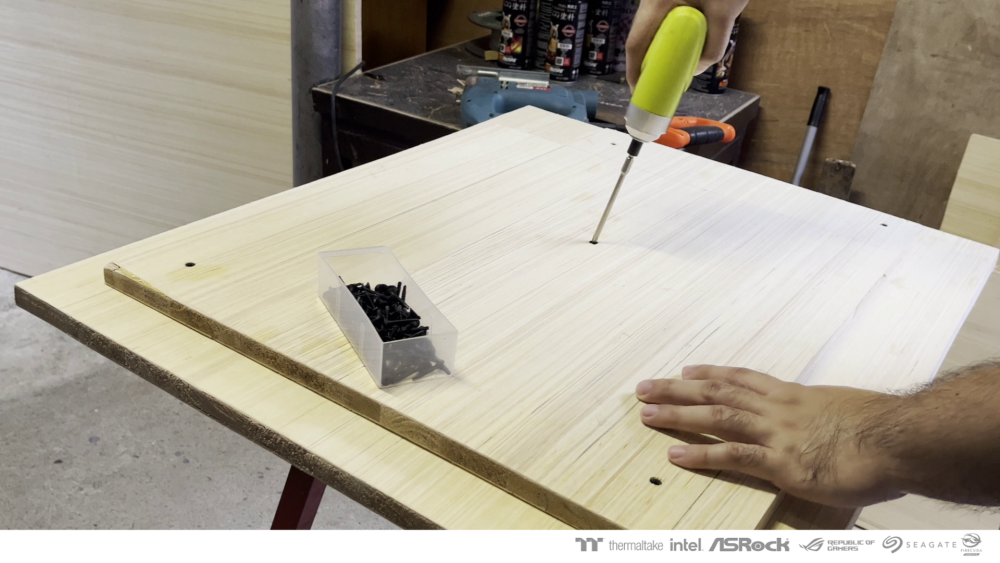
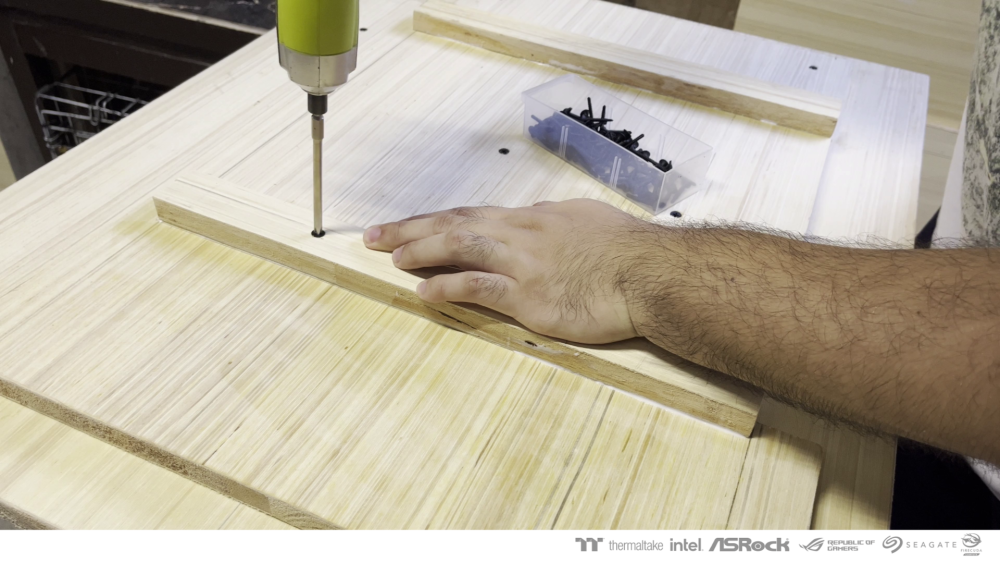
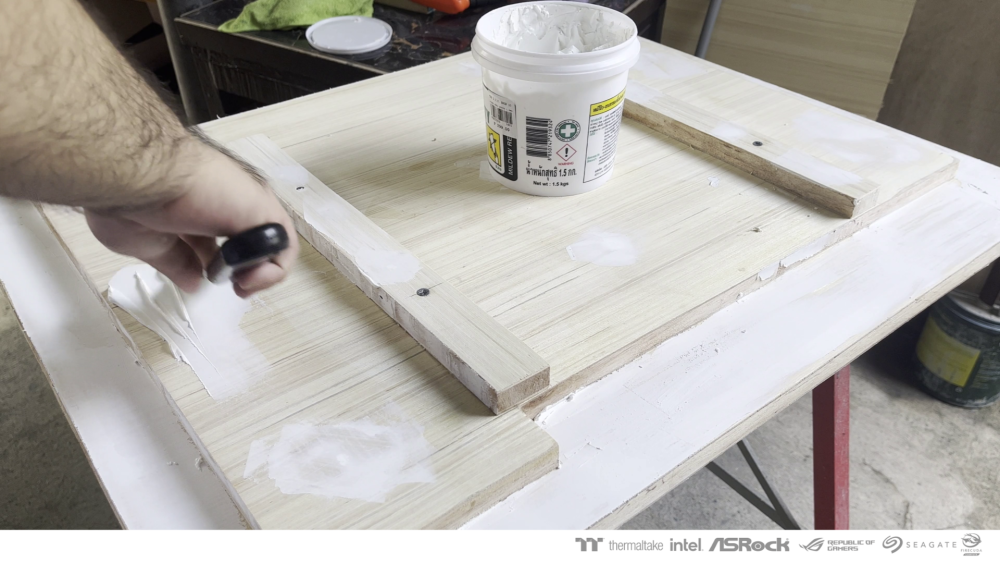
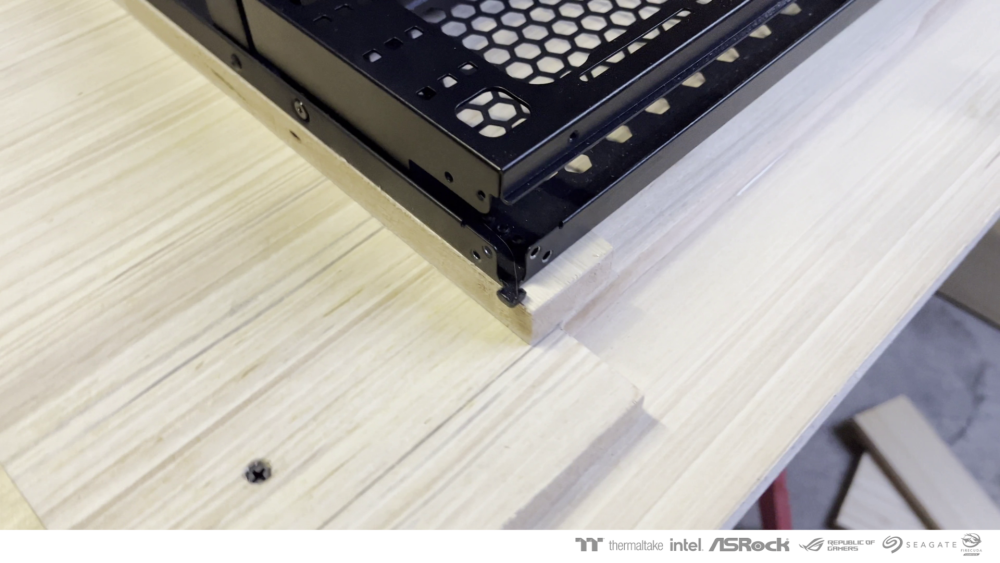
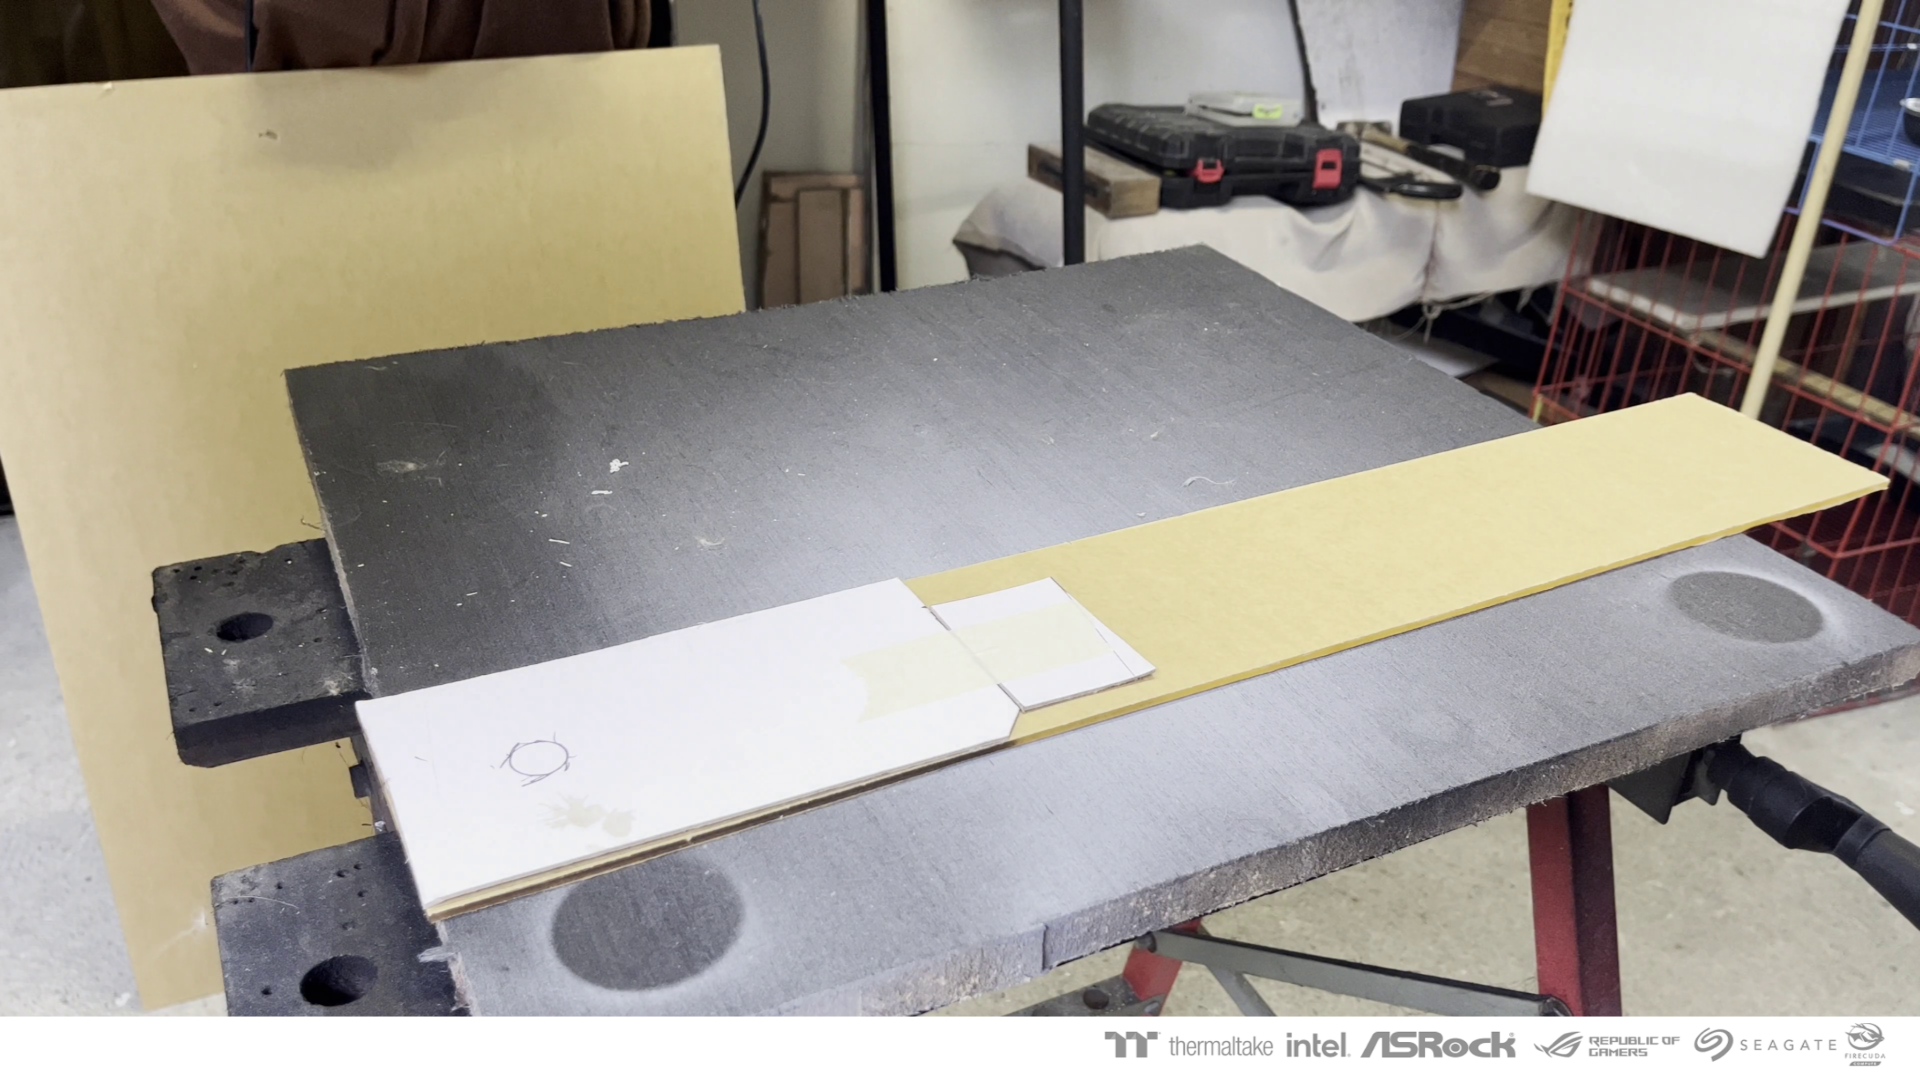
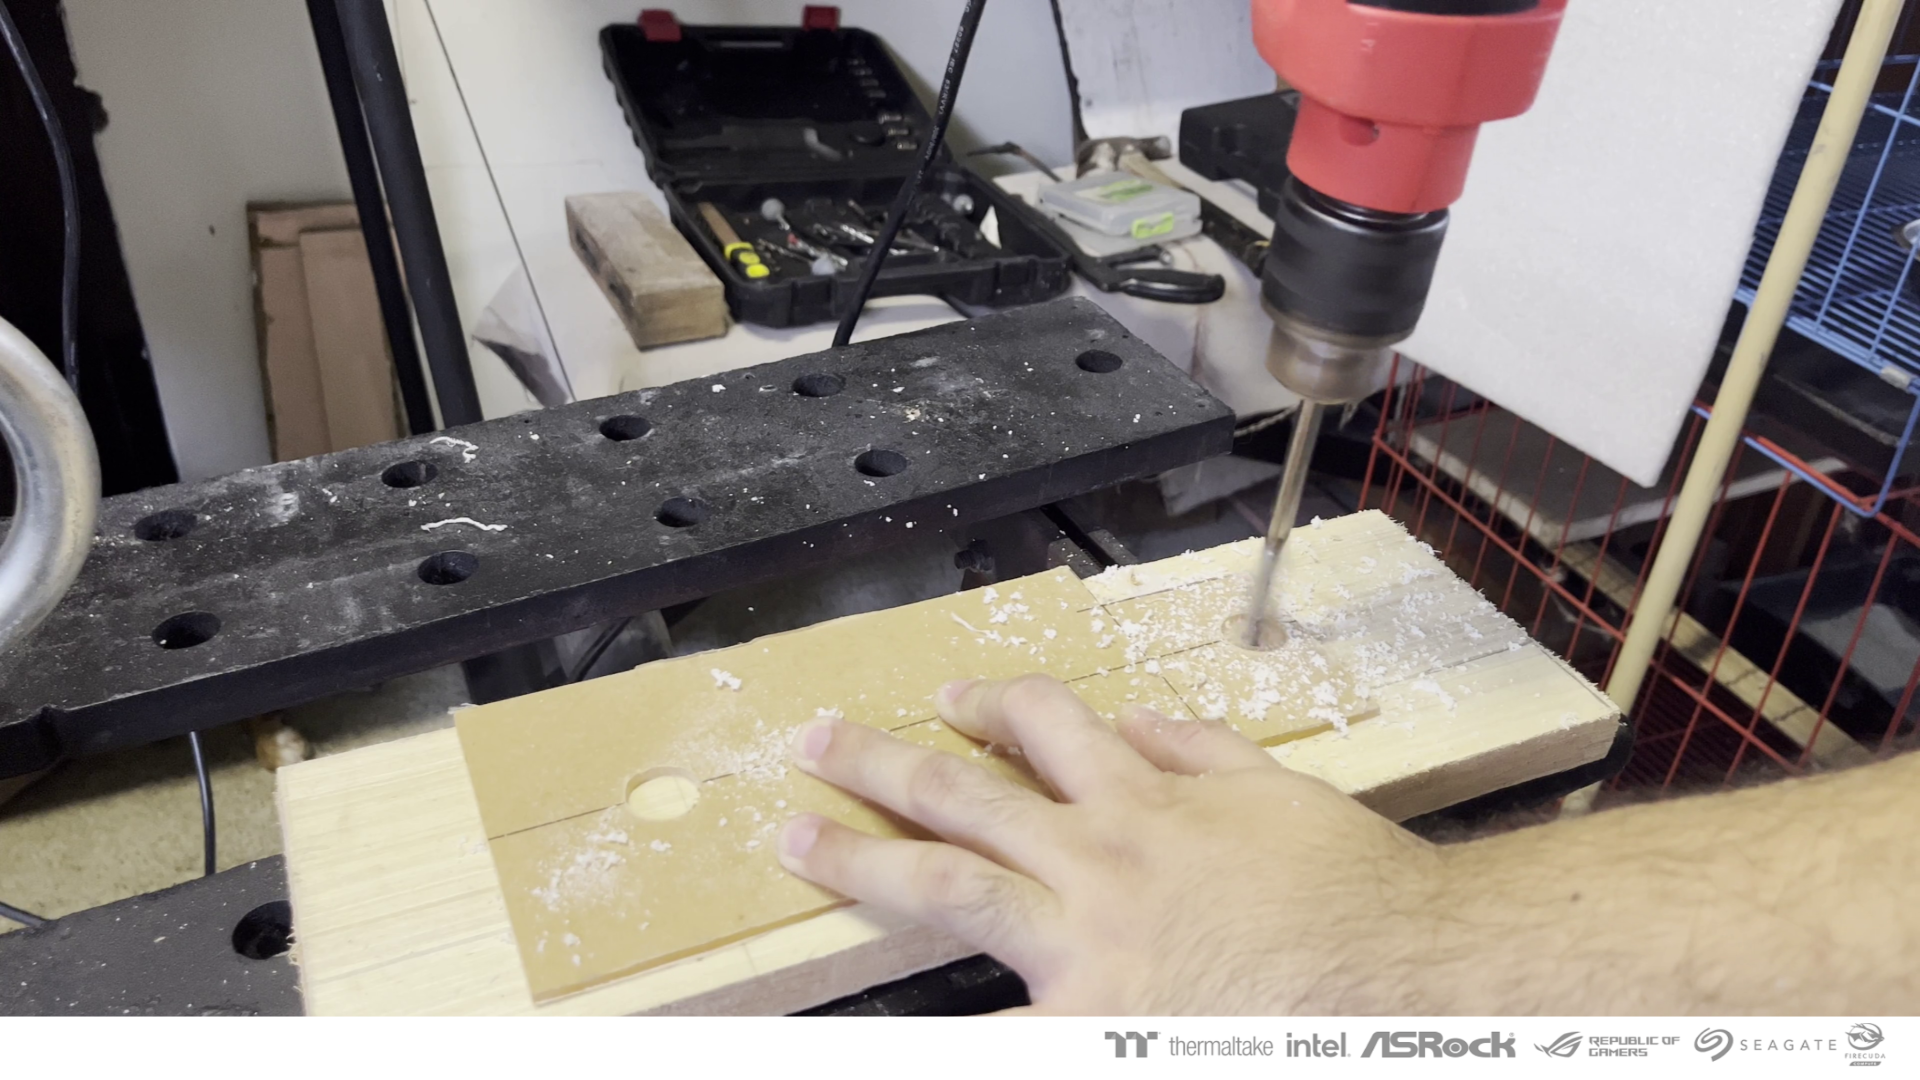
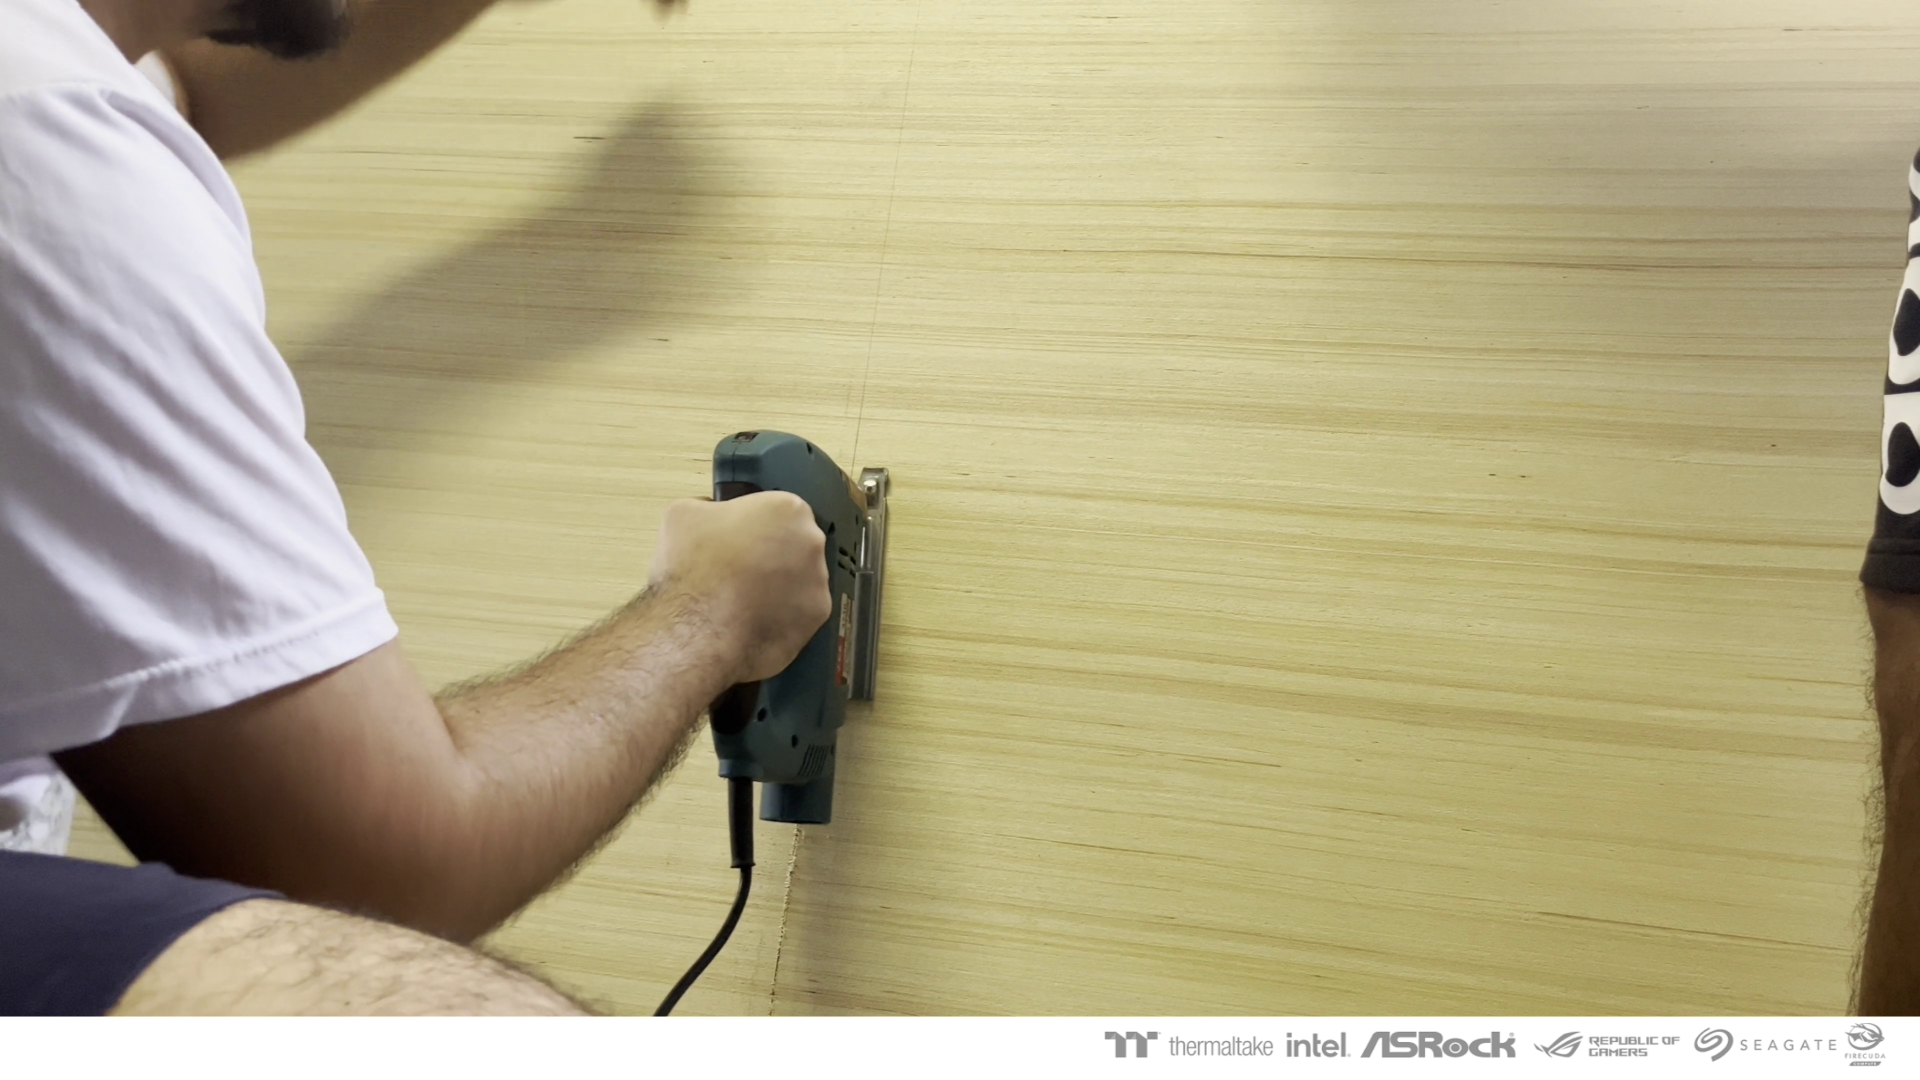
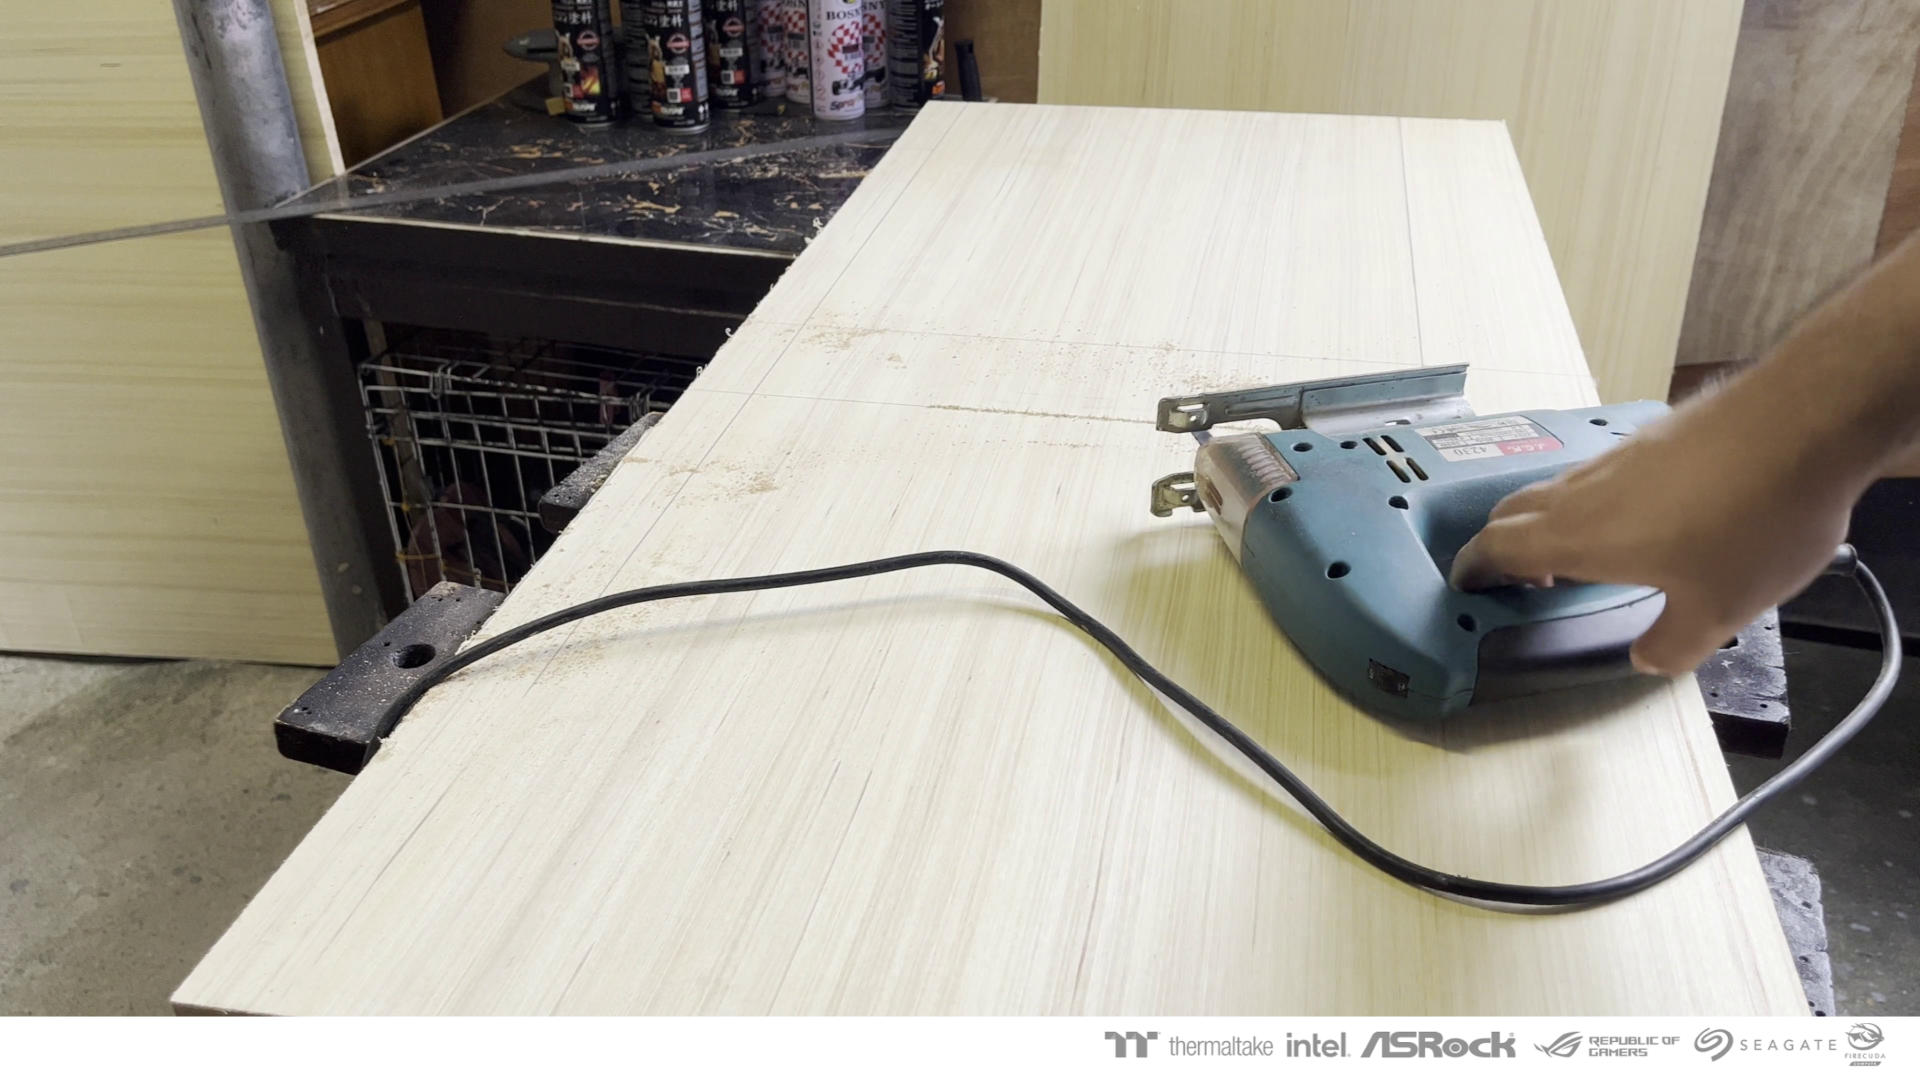
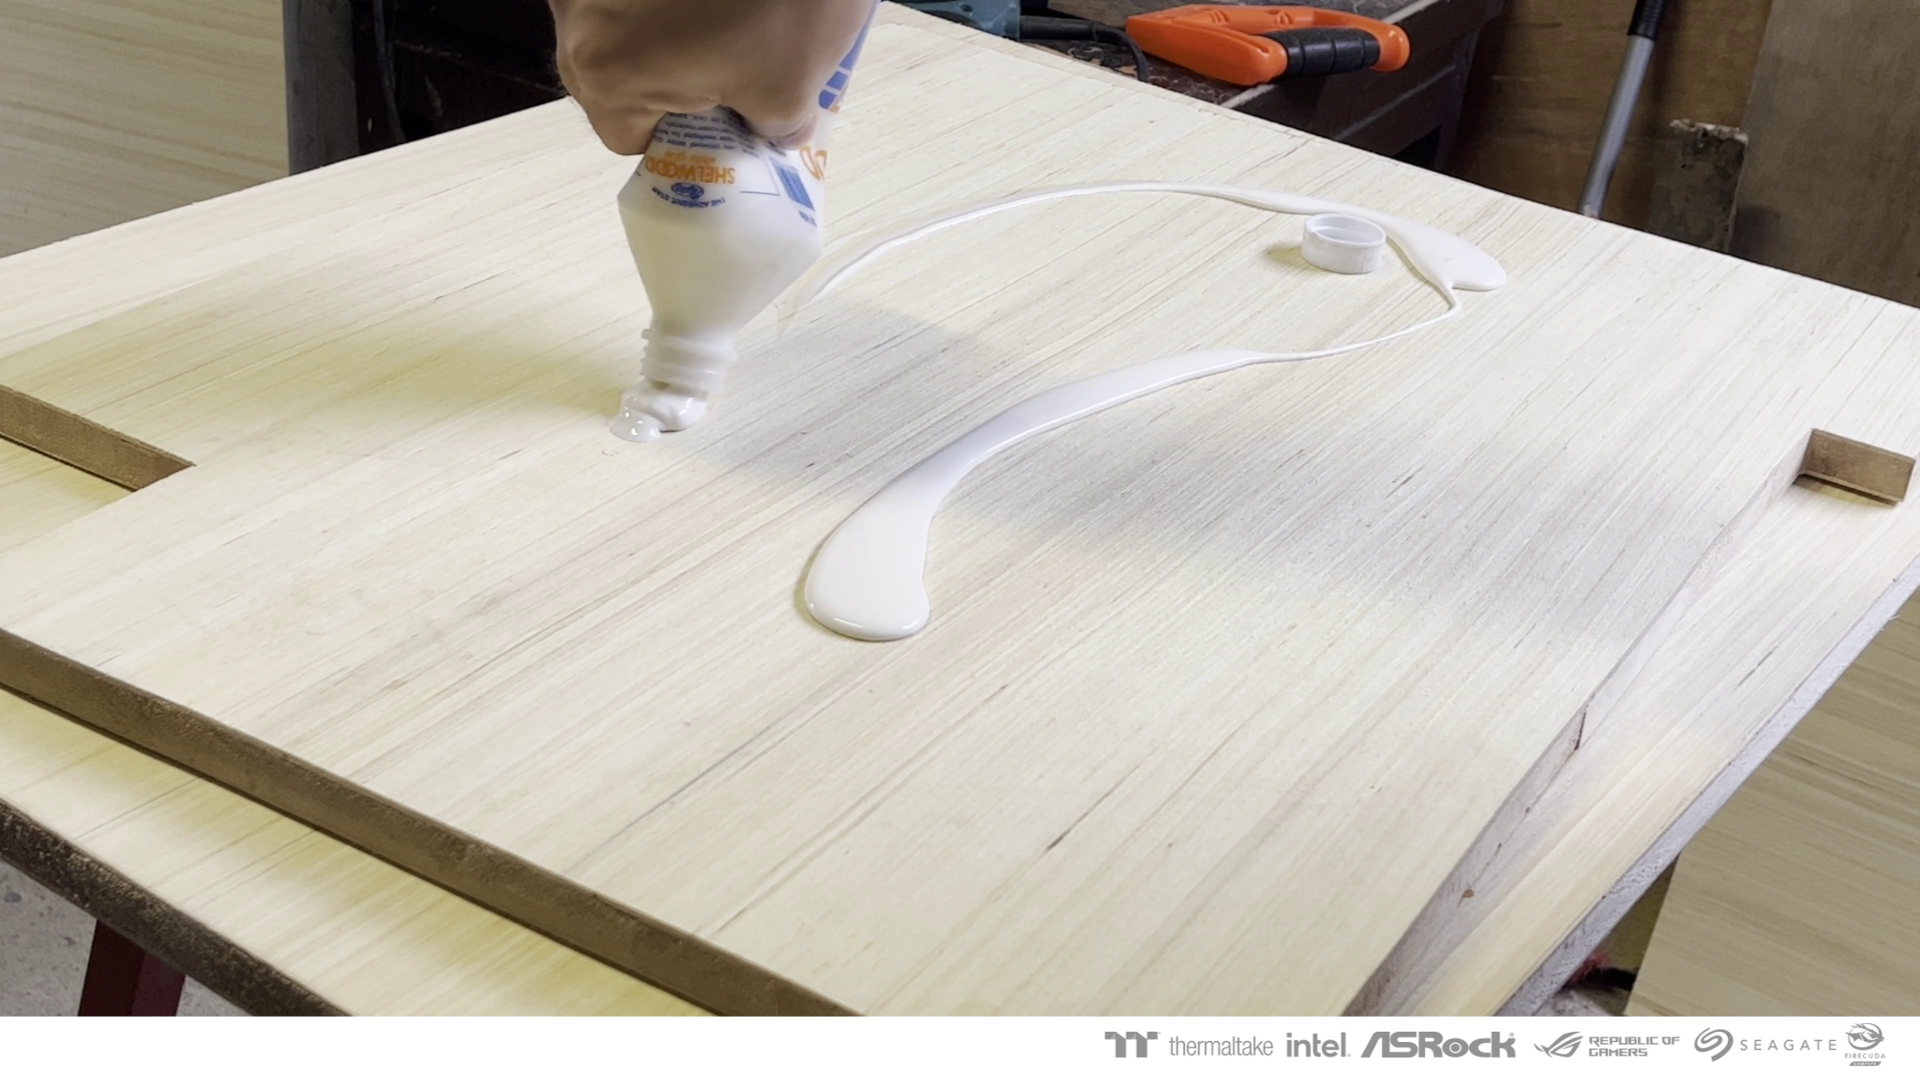
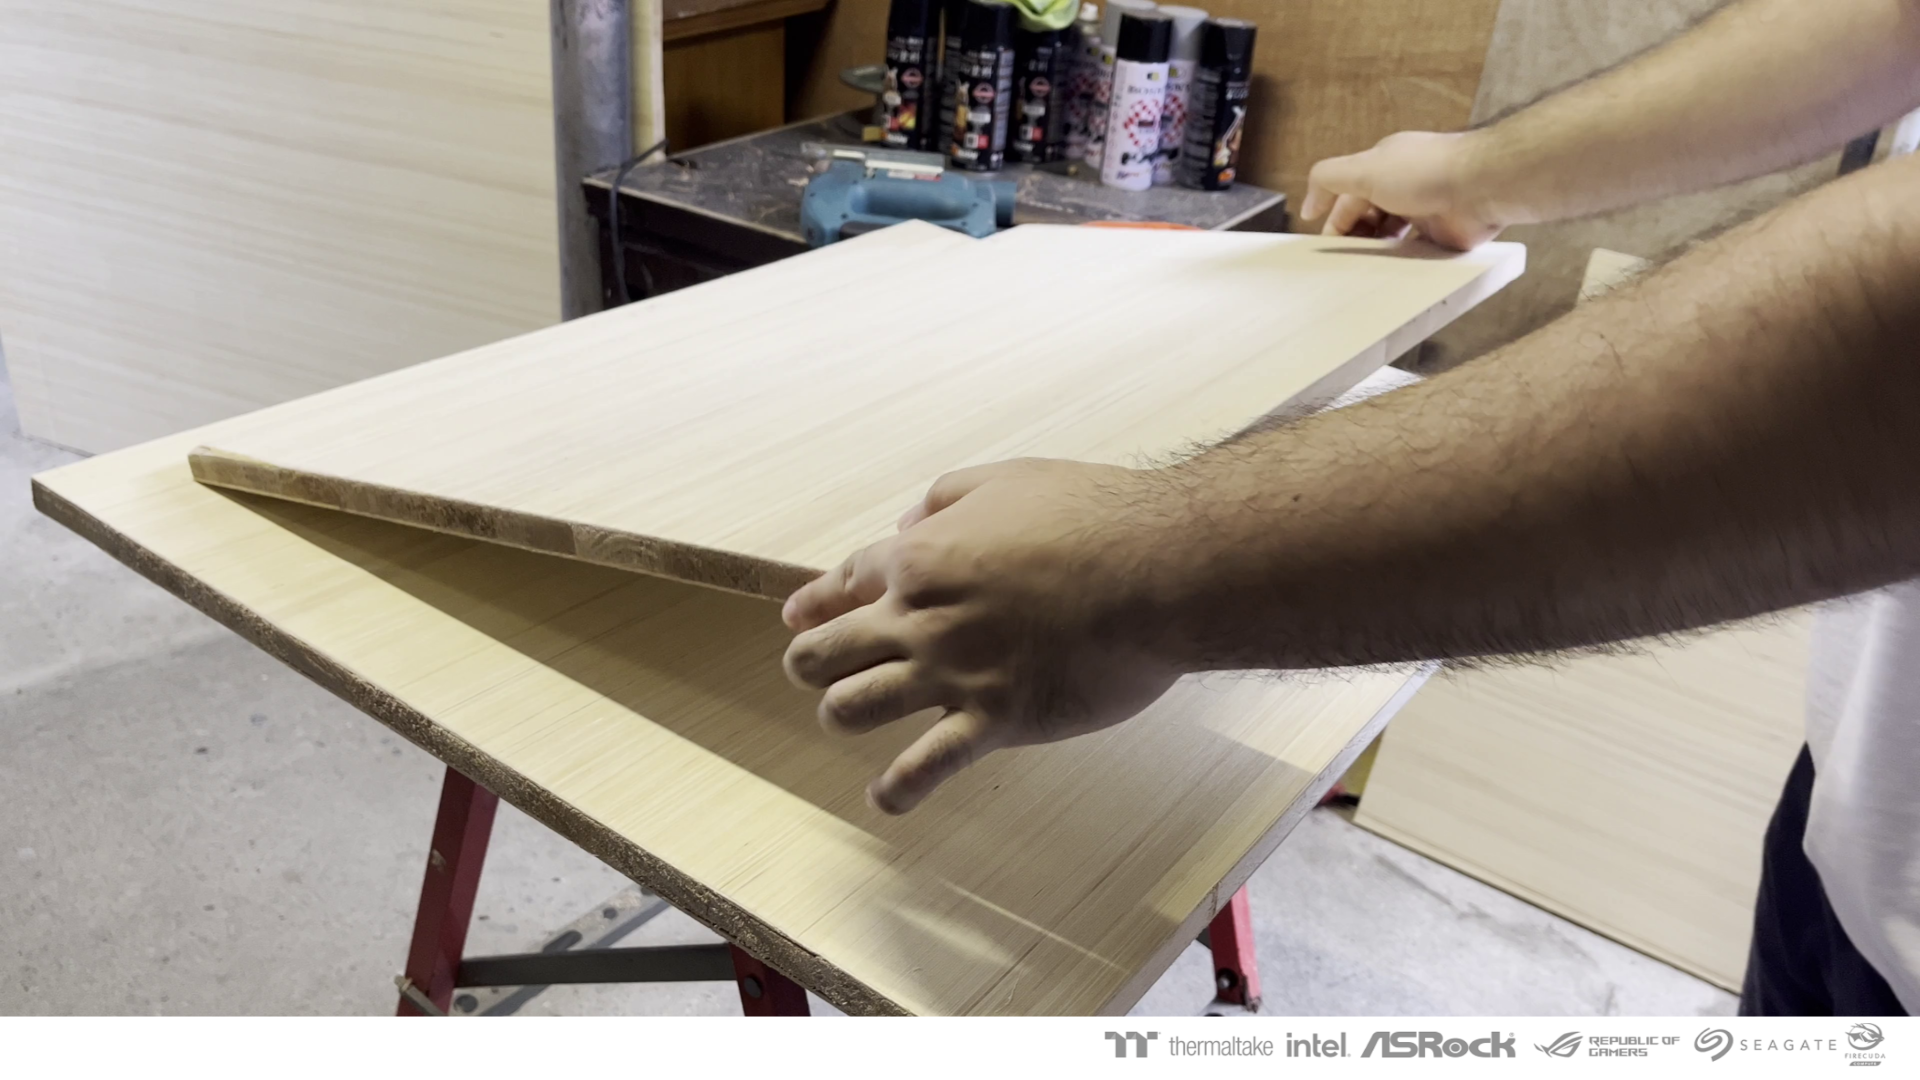
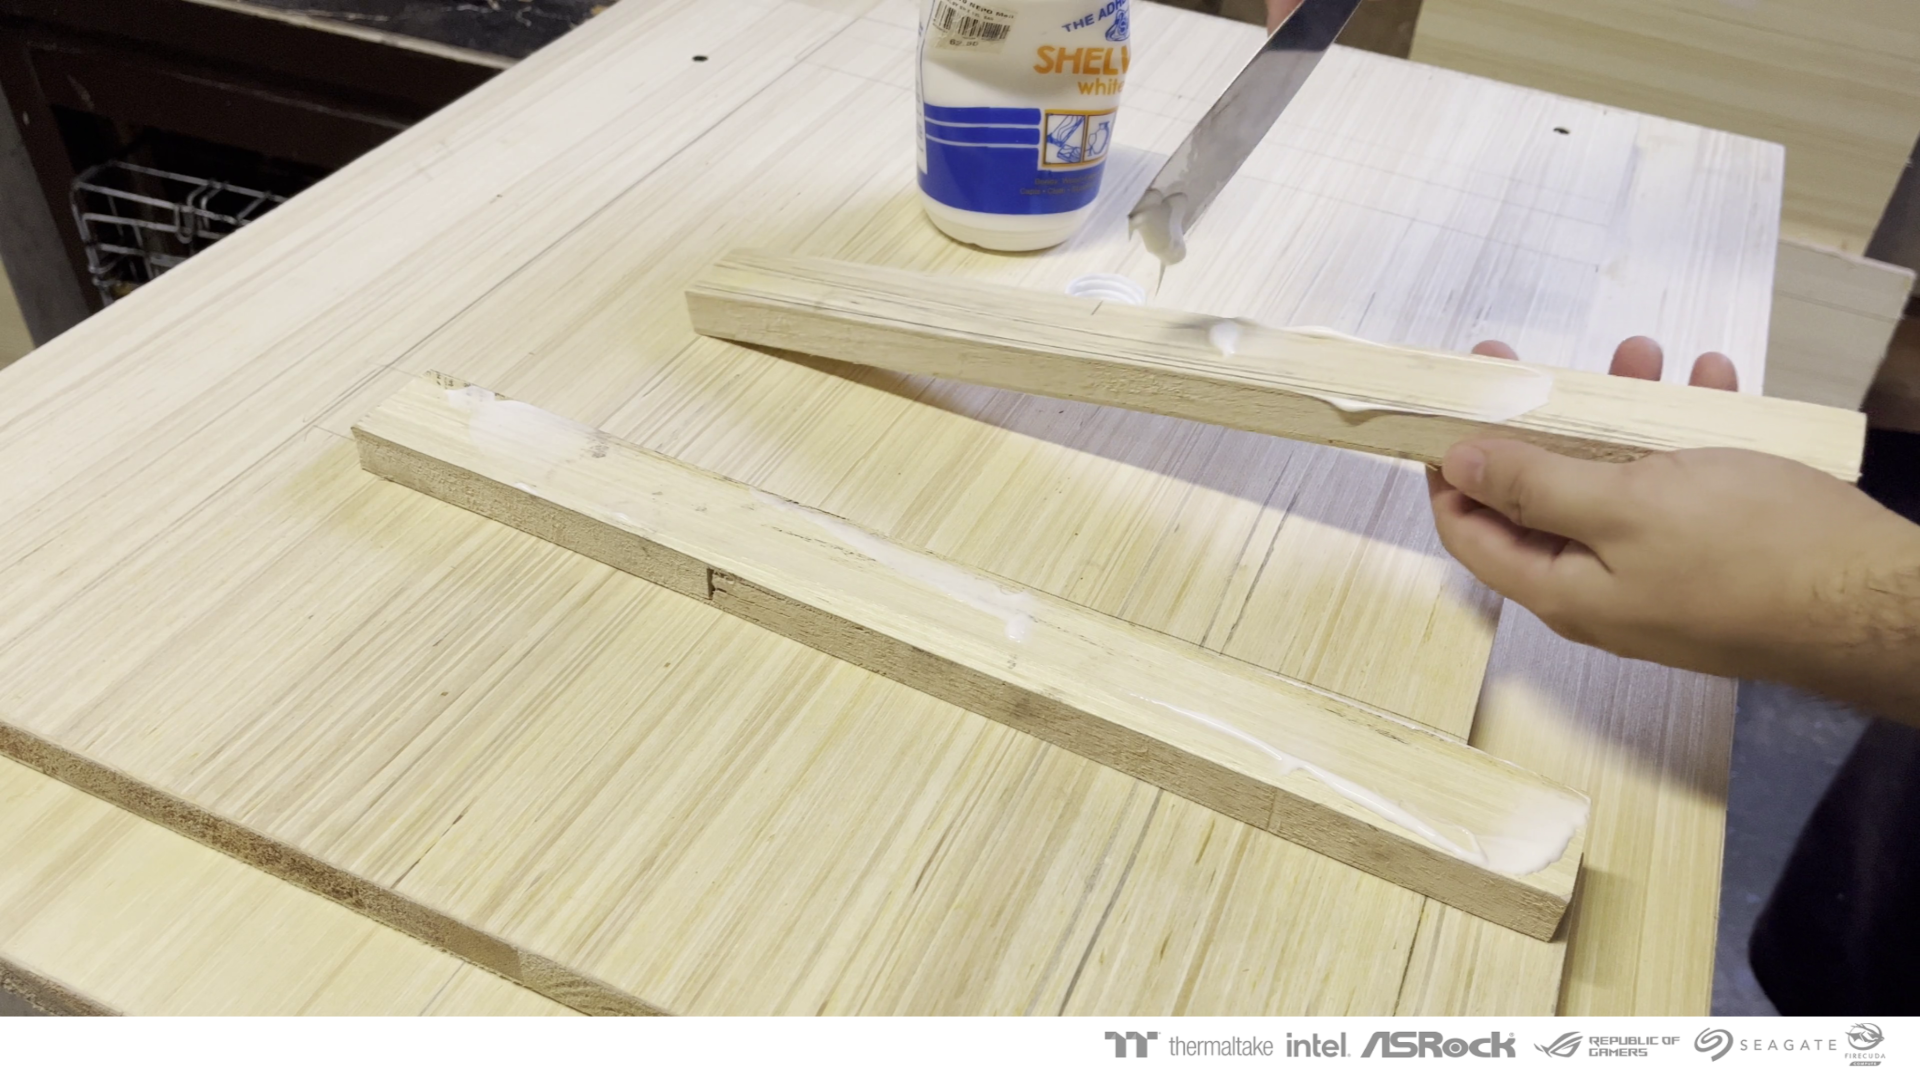
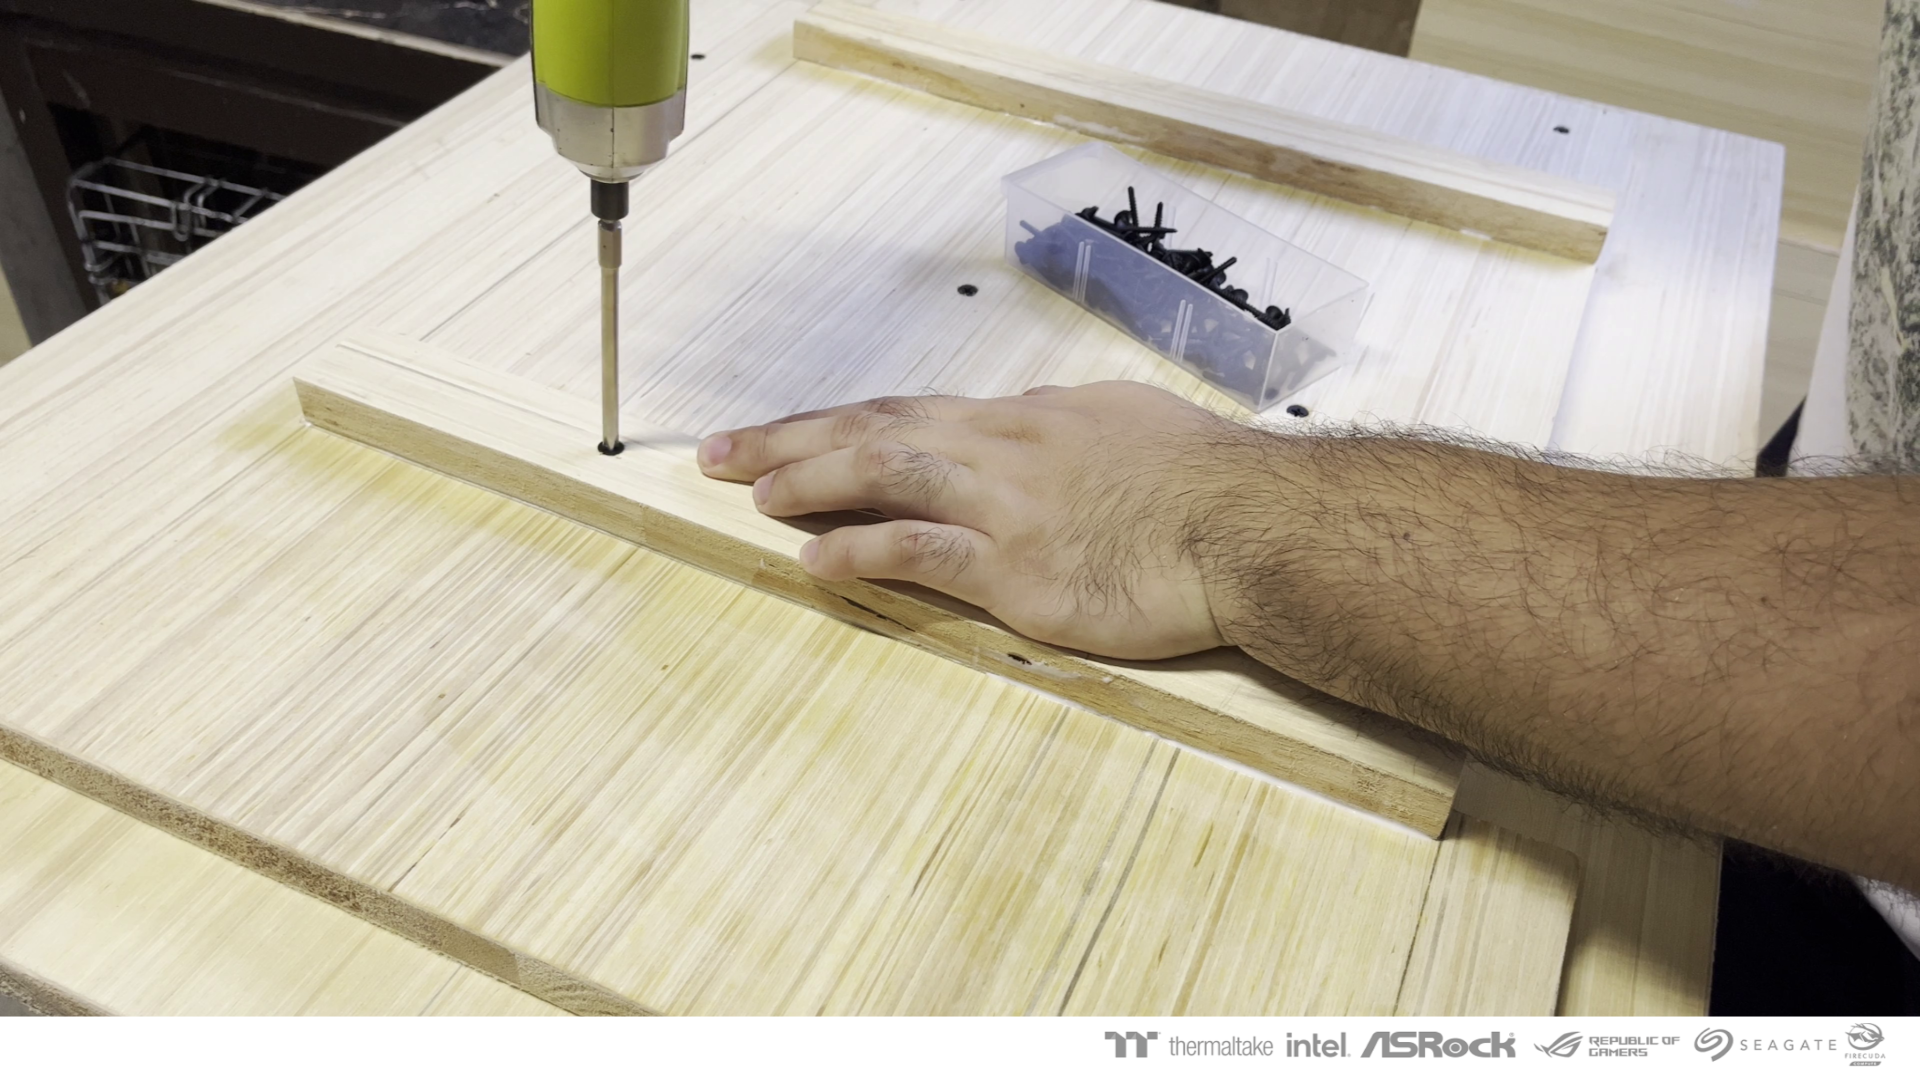
Next is the base, I decided to use wood because it is light and can hold the weight of my casemod.
I cut two pieces using jigsaw and combine them to make a platform using wood glue and securing it with wood screws.


-
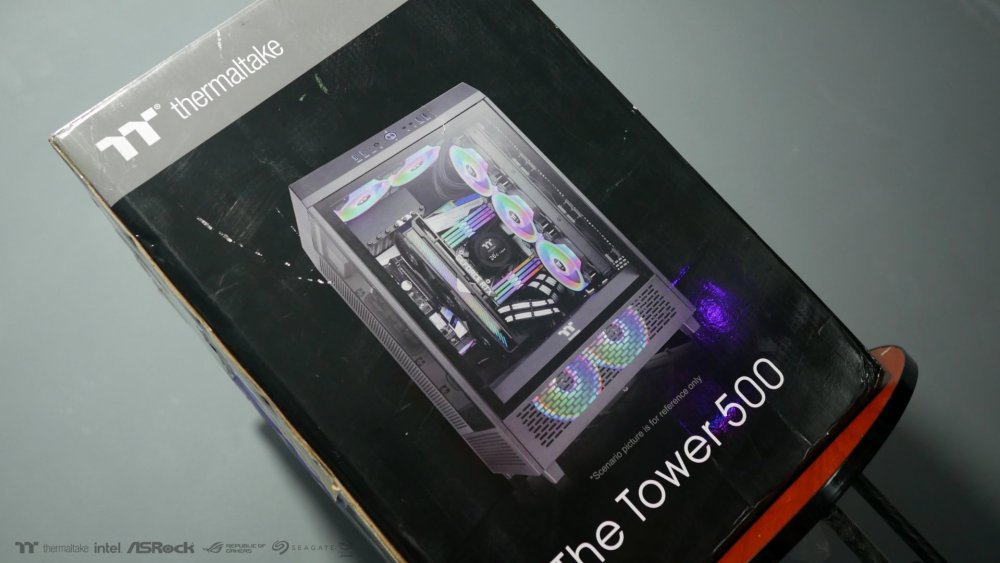
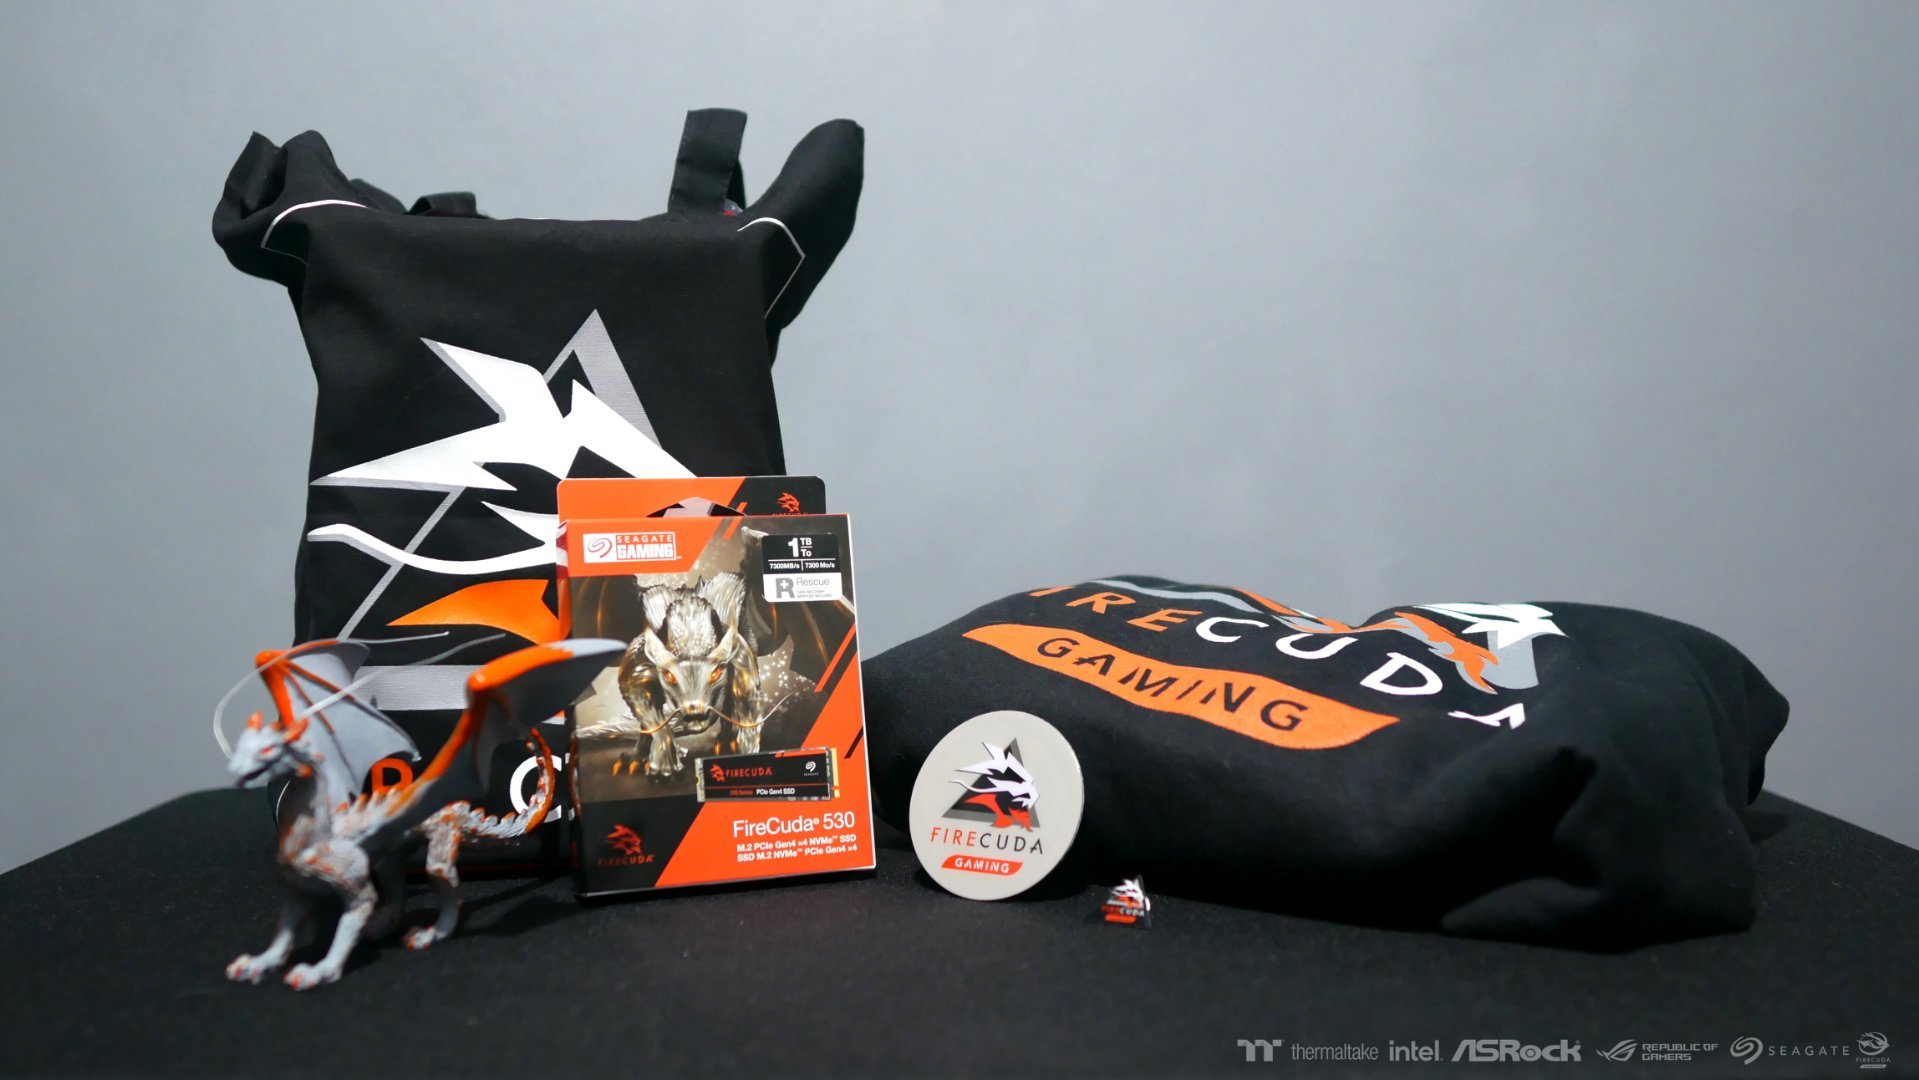
Thank you Thermaltake Technology Inc for sending The Tower 500 Case!
Learn more about the case here: https://www.thermaltake.com/the-tower-500-mid-tower-chassis.html

-
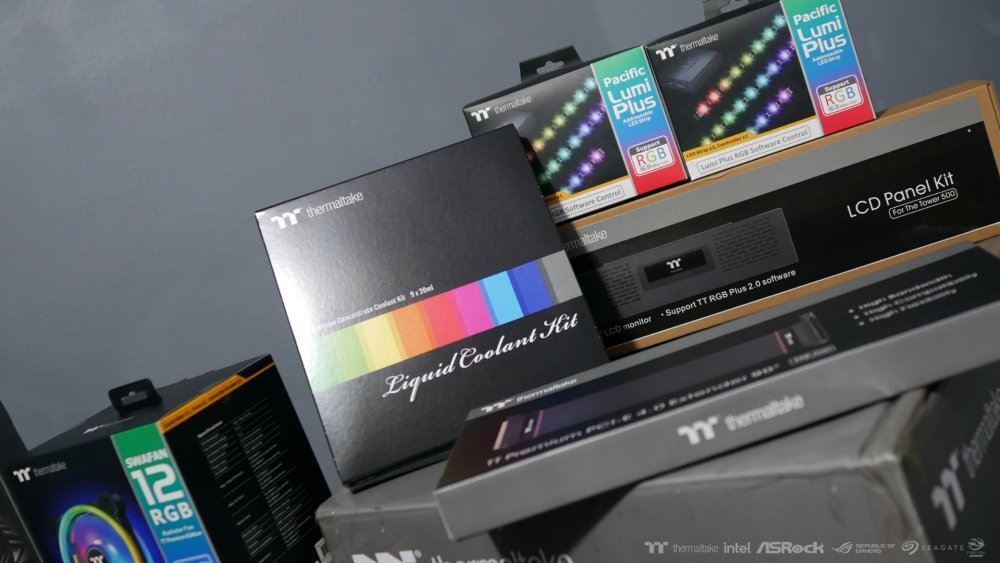
More watercooling parts! Yay!

-
The Tower 500 has arrived together with all of our Thermaltake Parts!
Huge thanks to Thermaltake for providing all these parts.
We will take a closer look each of the parts that we will be using on this CaseMOD in the following days.
-
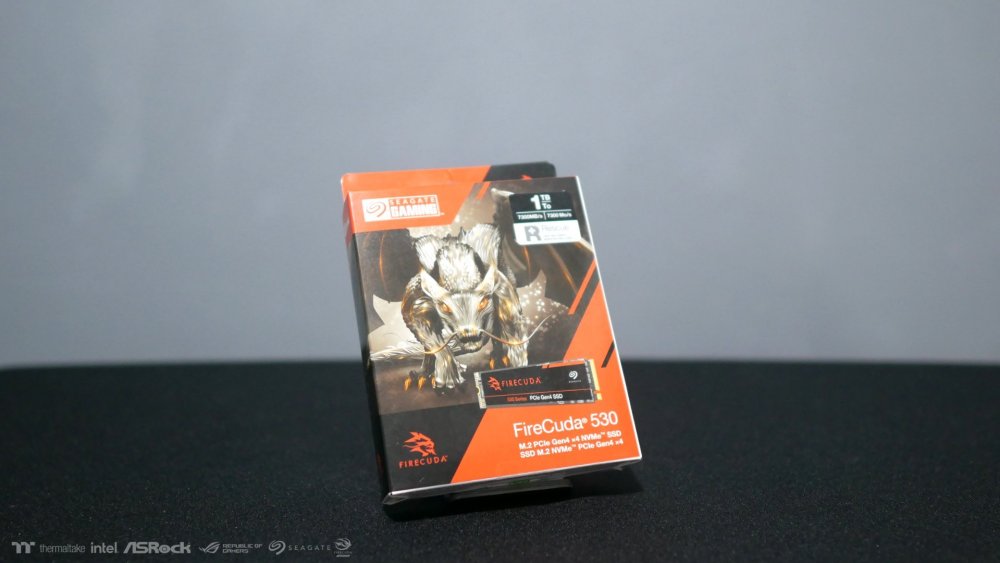
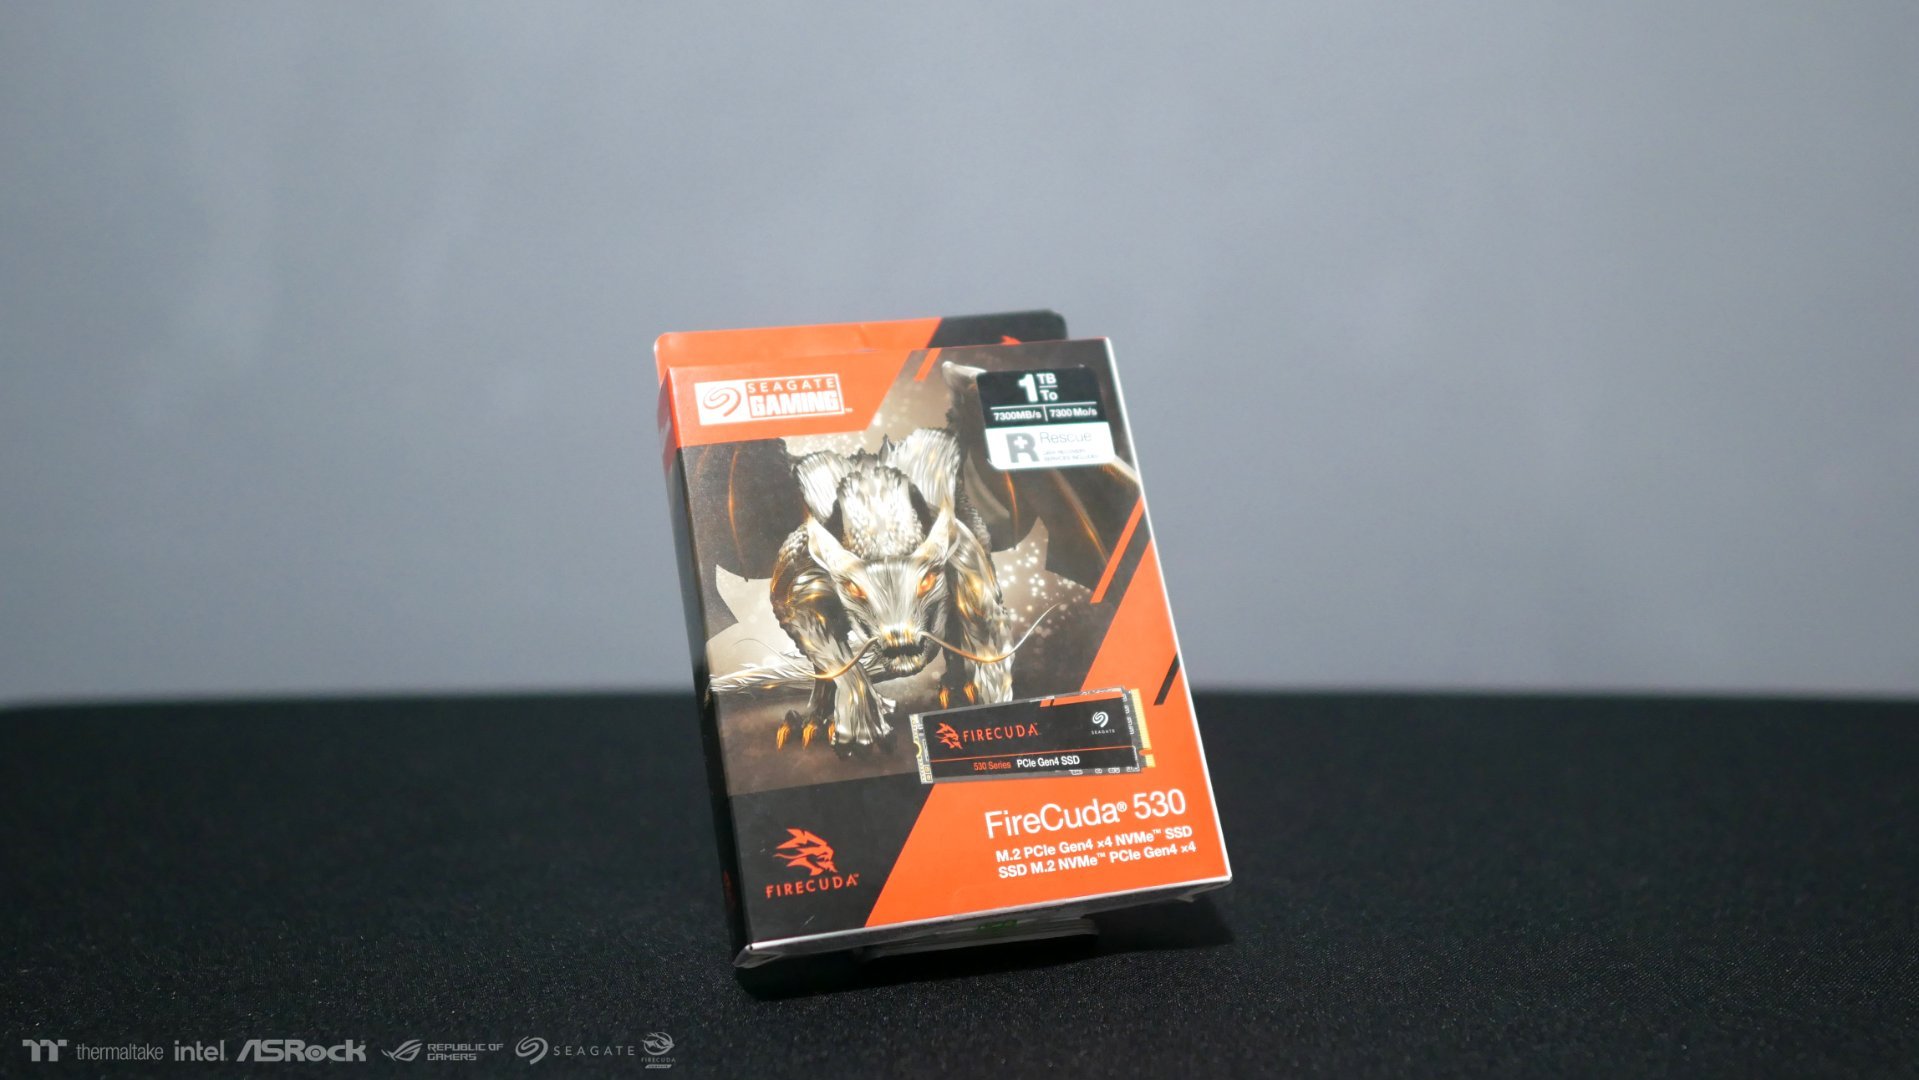
Seagate provides us with FireCuda 530 1 TB for our storage! 😄
This features PCie Gen 4 which is 12 times faster than SATA SSDs
https://www.seagate.com/as/en/products/gaming-drives/pc-gaming/firecuda-530-ssd/#
Thank you Seagate!
-
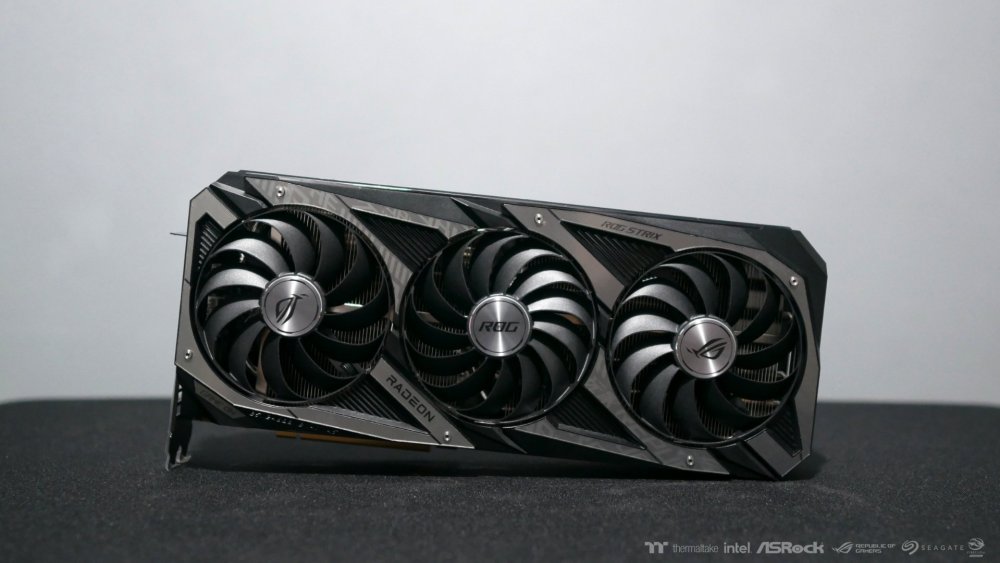
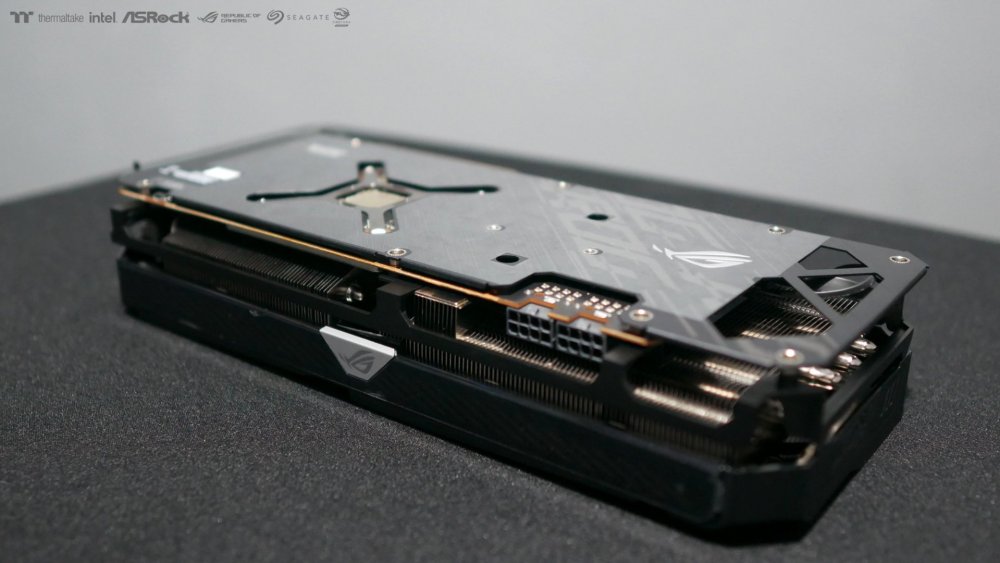
The Power-performance Juggernaut!
ASUS provides us with ROG Strix Radeon™ RX 6750 XT OC Edition 12GB GDDR6
Learn more about the GPU here: https://rog.asus.com/graphics-cards/graphics-cards/rog-strix/rog-strix-rx6750xt-o12g-gaming-model/It has also the modern aluminum design which looks very awesome with our other parts together.
Thank you ASUS!

-
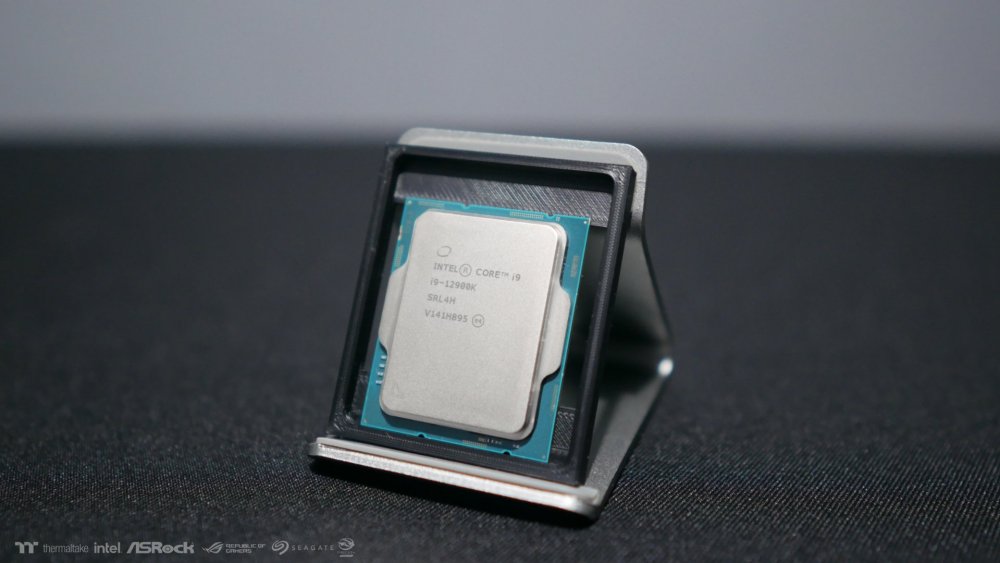
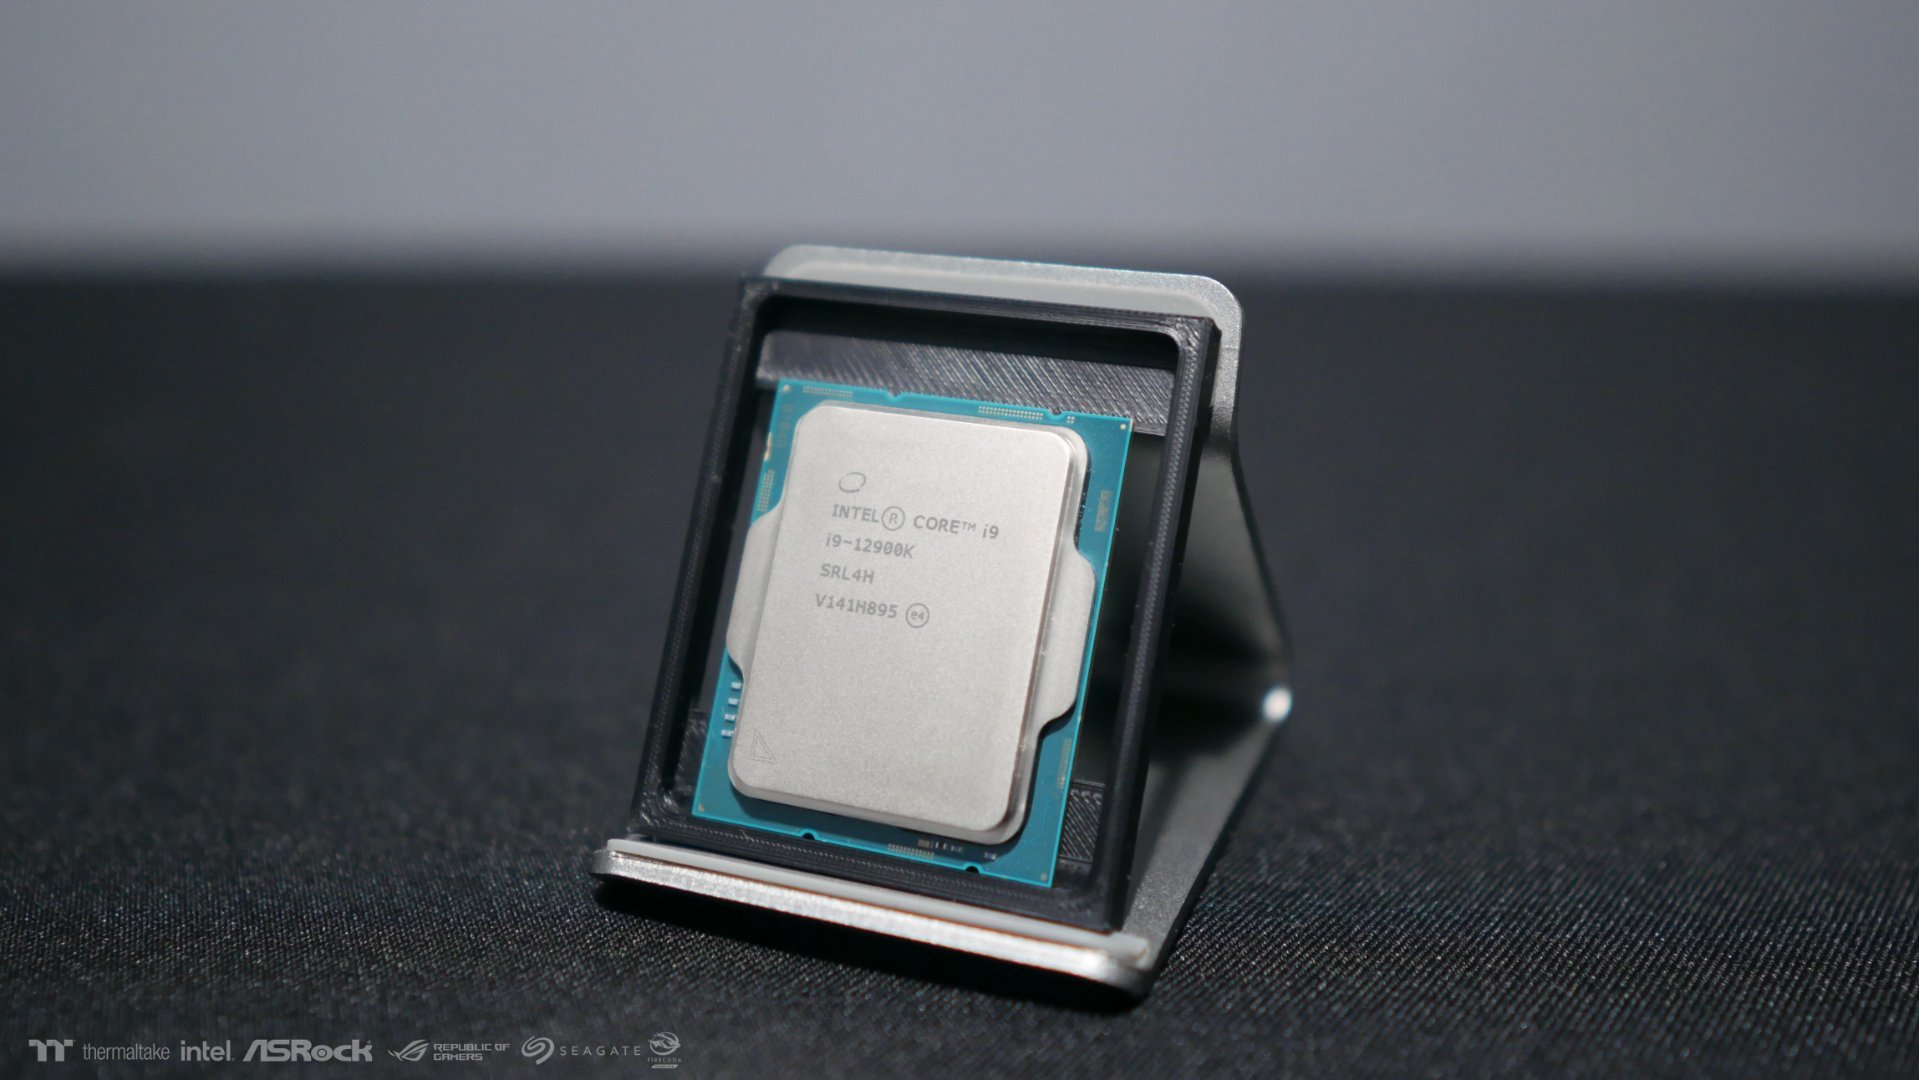
Intel provides Intel Core i9 12900k for our CaseMOD 🥰
https://ark.intel.com/content/www/us/en/ark/products/134599/intel-core-i912900k-processor-30m-cache-up-to-5-20-ghz.html
One of the highest performing Processors this 2022, best paired with our motherboard ASRock Z690 STEEL LEGEND WiFi 6E 😍
Thank you Intel!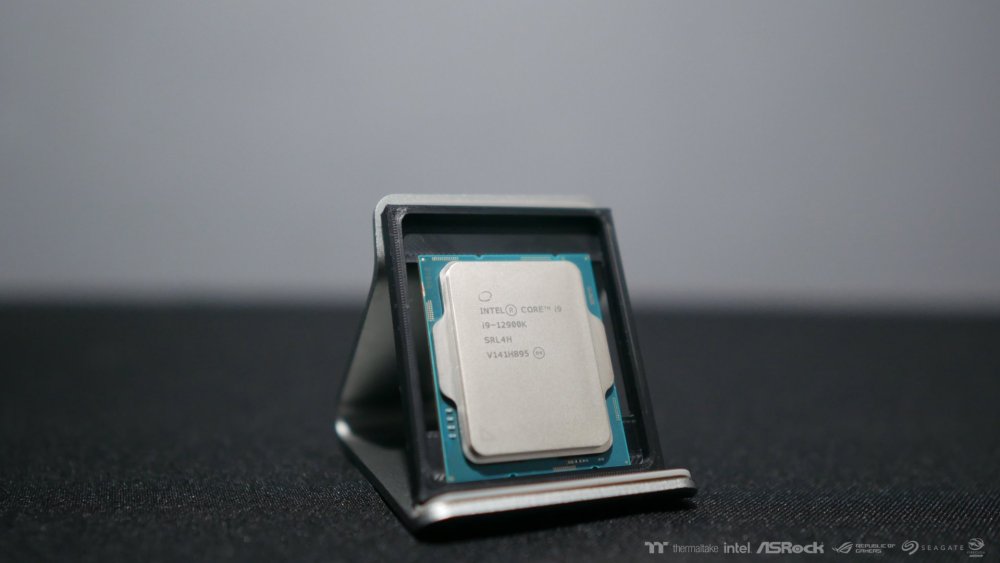

-
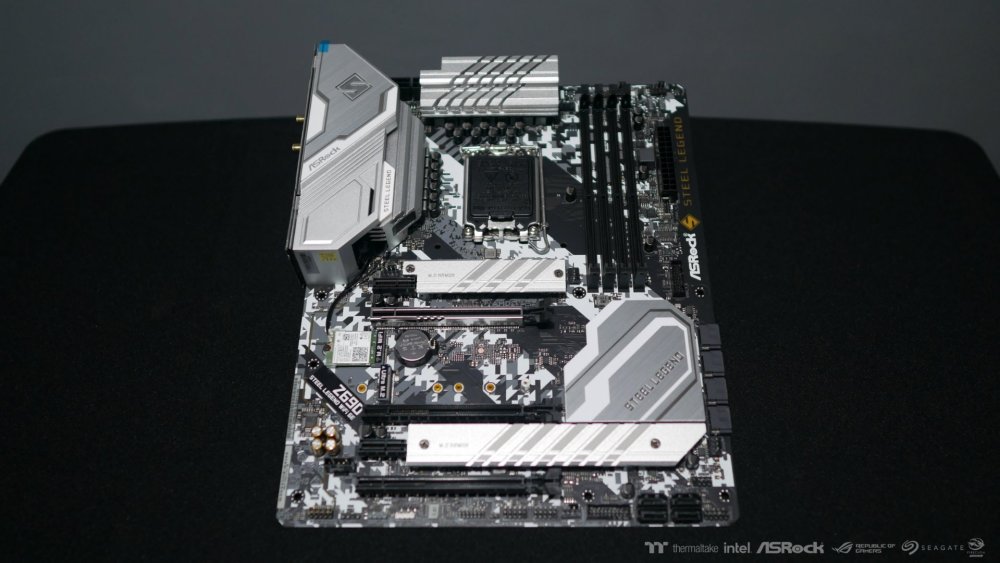
The motherboard we will be using for our CaseMOD is ASRock Z690 STEEL LEGEND WiFi 6E
Learn more about his product here: https://www.asrock.com/mb/Intel/Z690 Steel Legend WiFi 6E/index.asp
The motherboard features a stylish aluminum design with a touch of modern camouflage.
Thank you ASRock!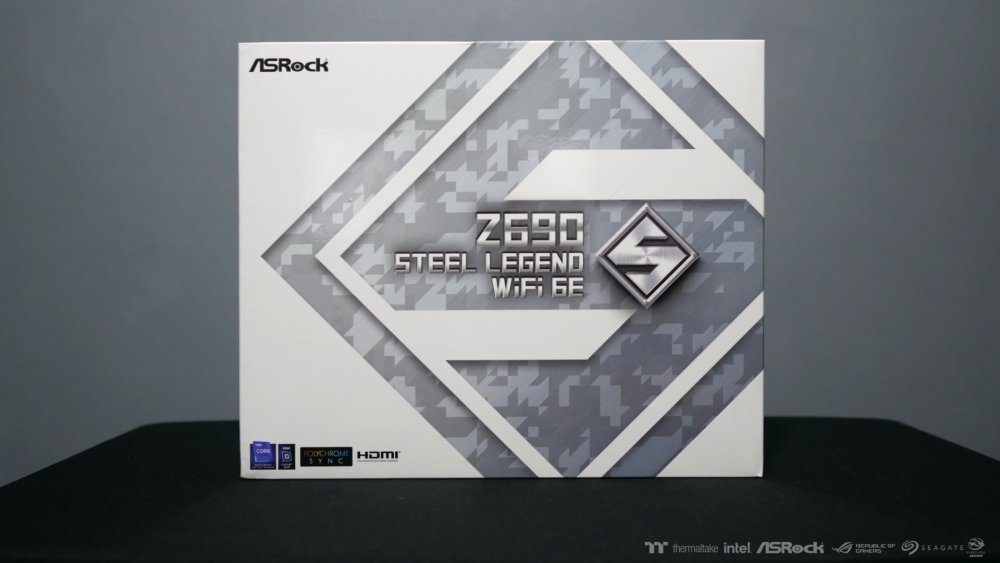

-
Hello everyone! I'm Sam from Samca Studios representing Philippines for this year's Thermaltake CaseMOD Invitationals Season 1.
I'm very excited to be part of this competition, let's have fun everyone and Good luck! 😄 -
-
-
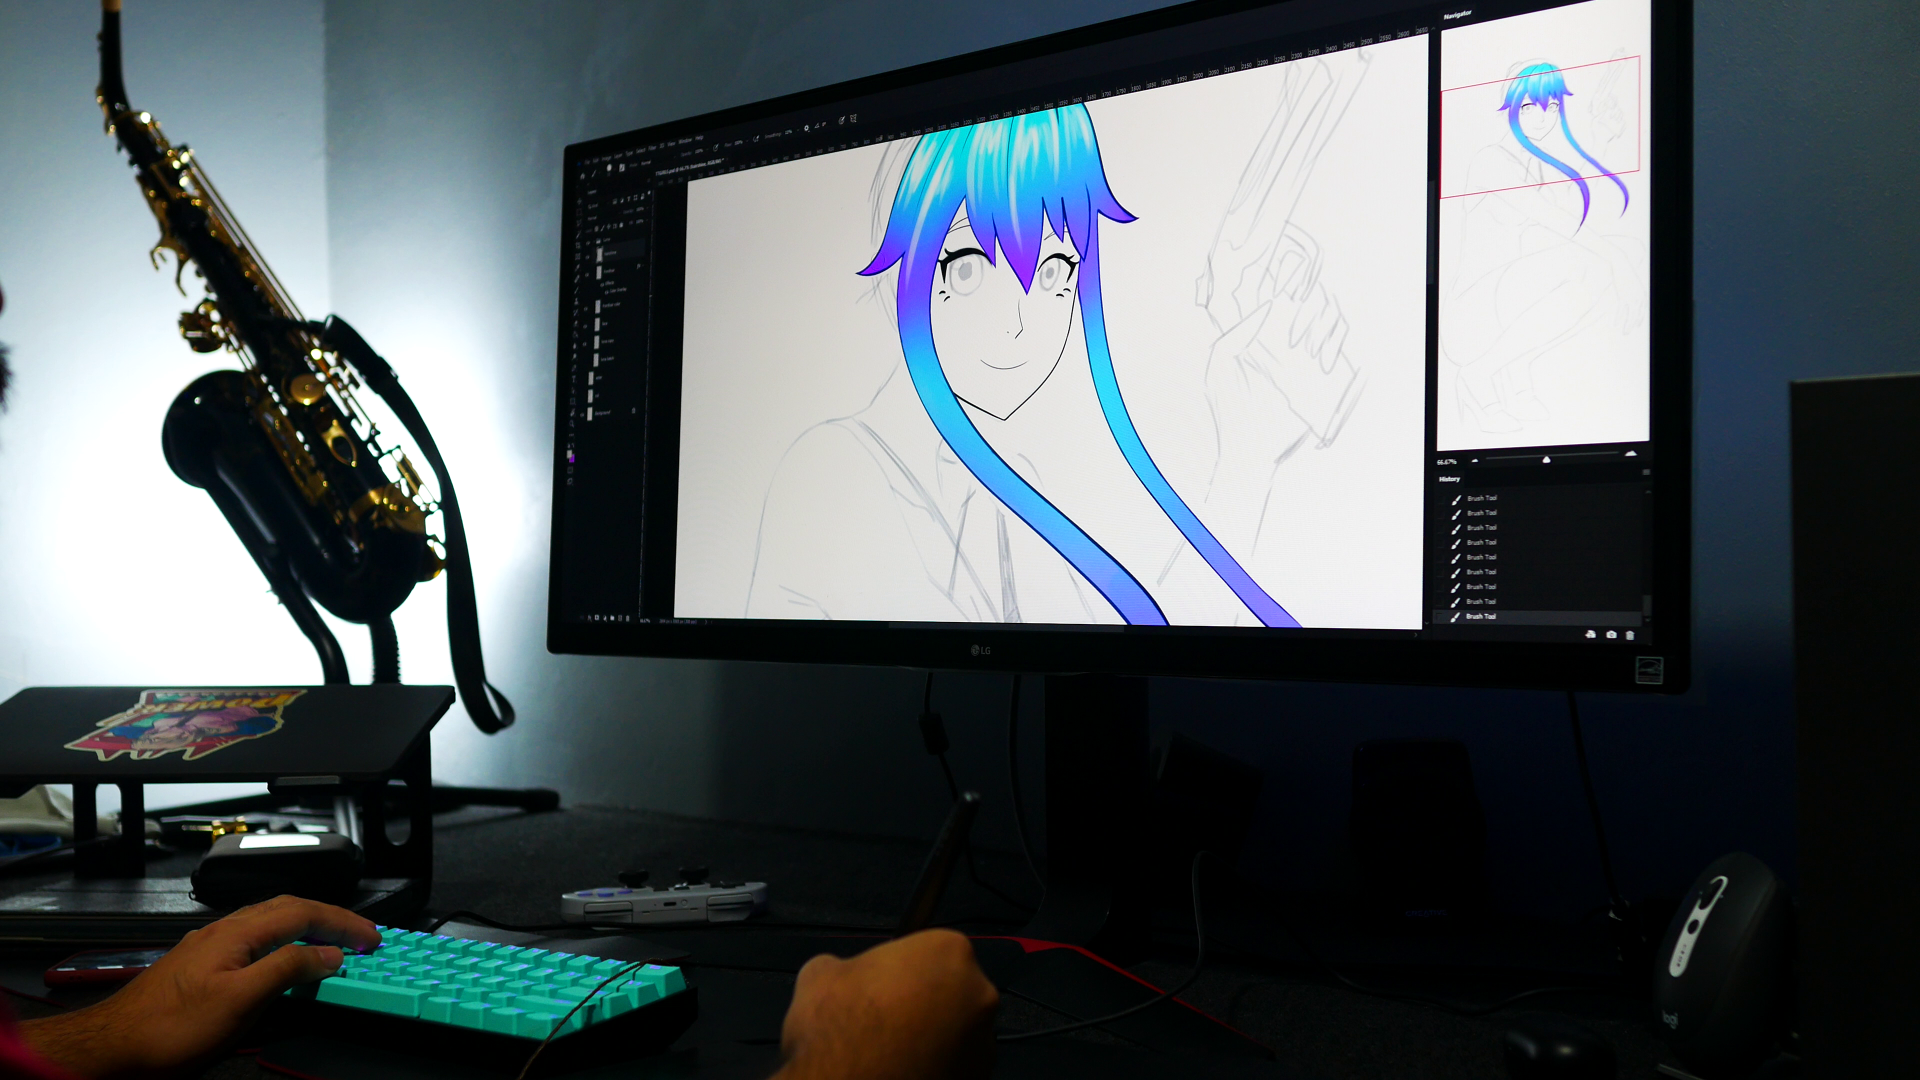
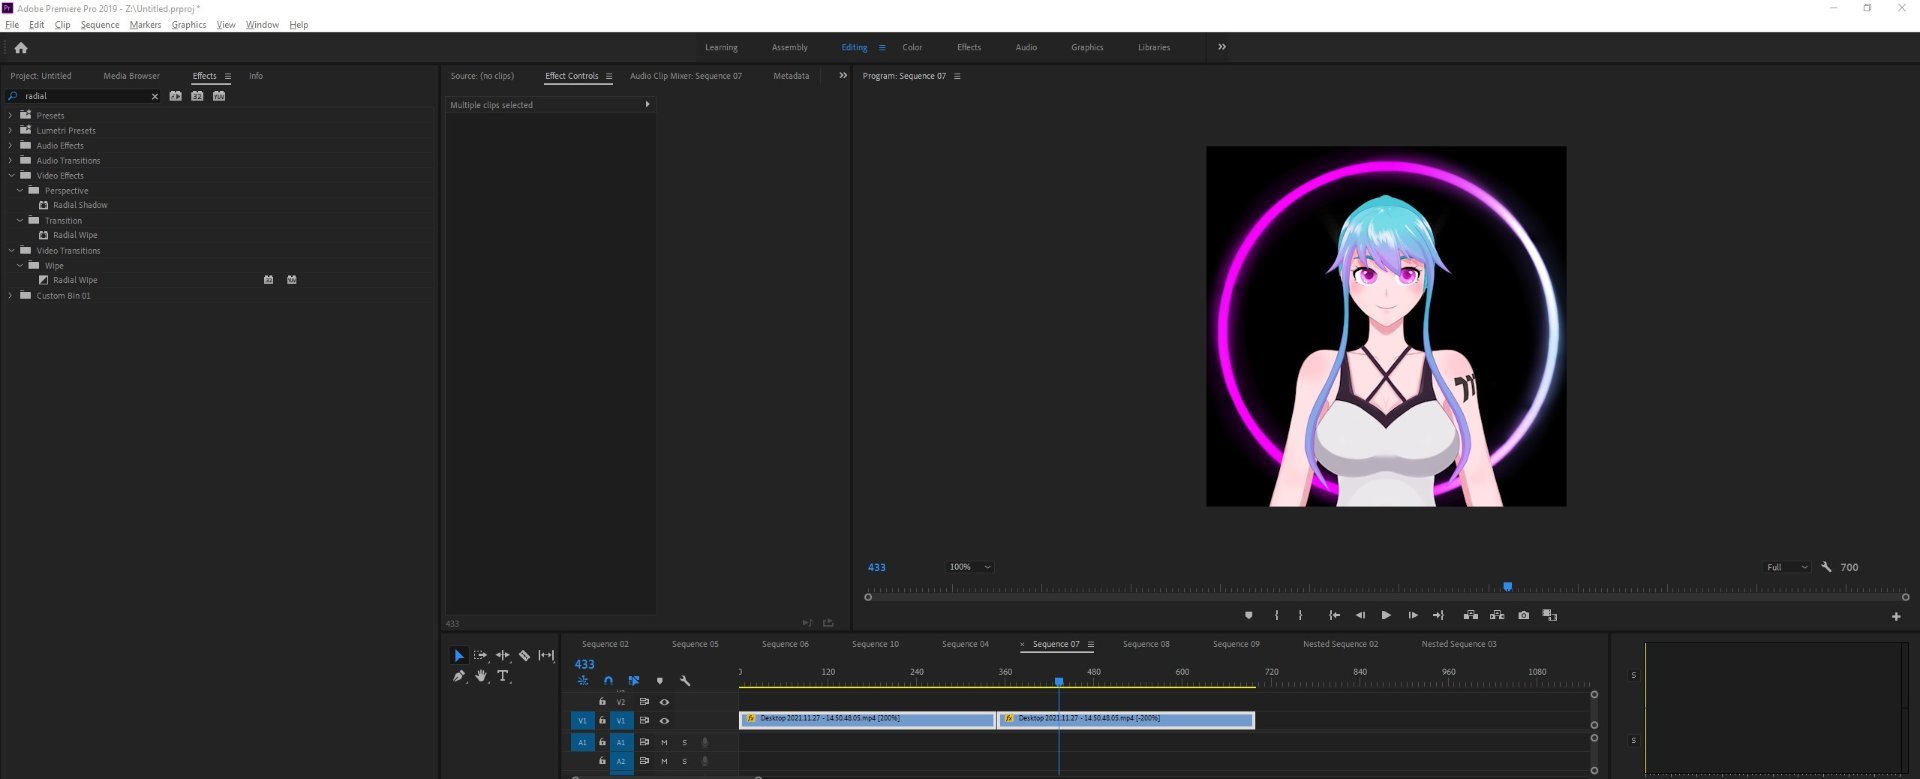
THE PROCESS
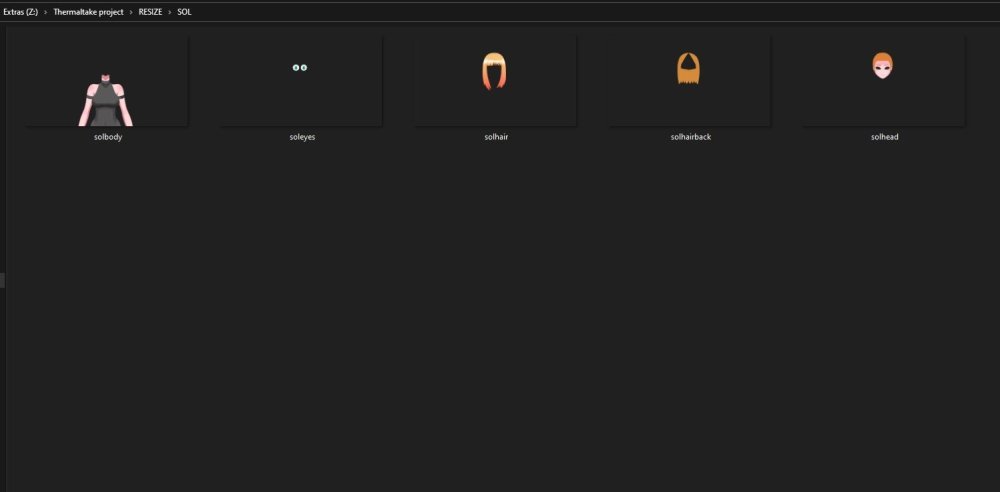
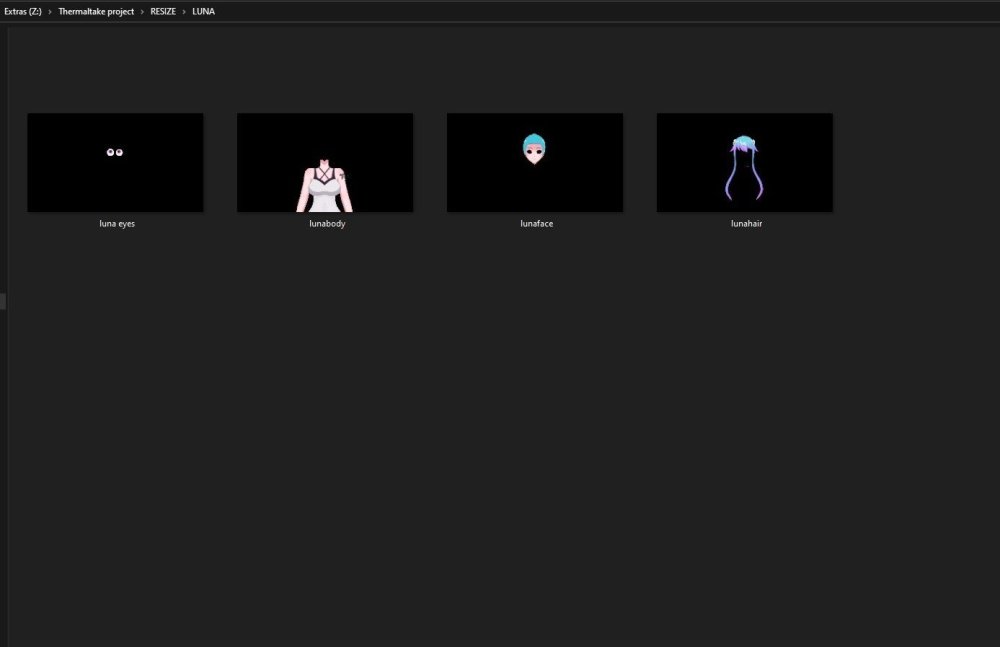
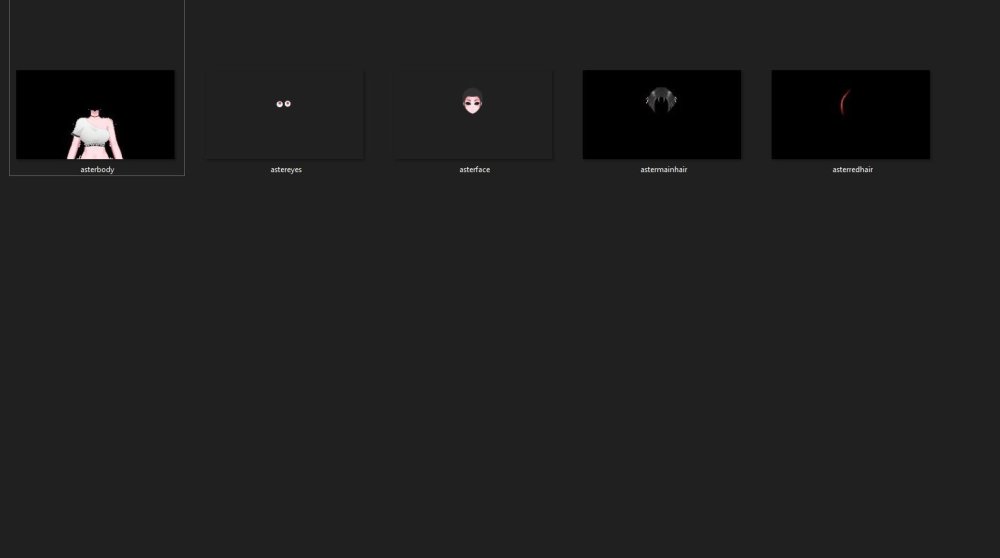
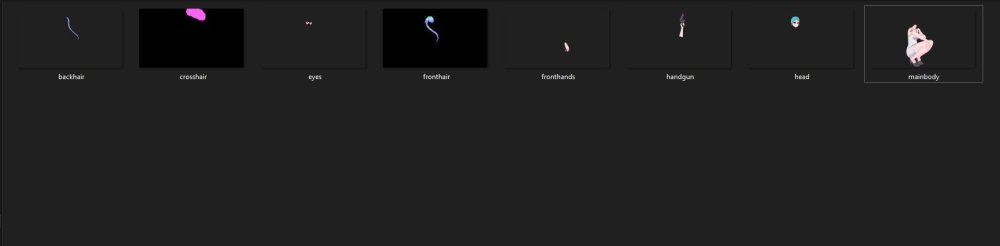
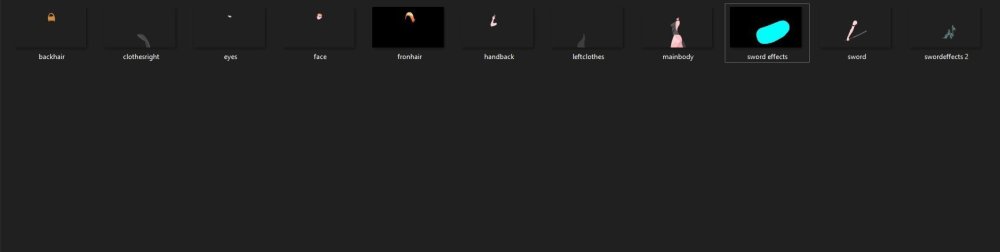
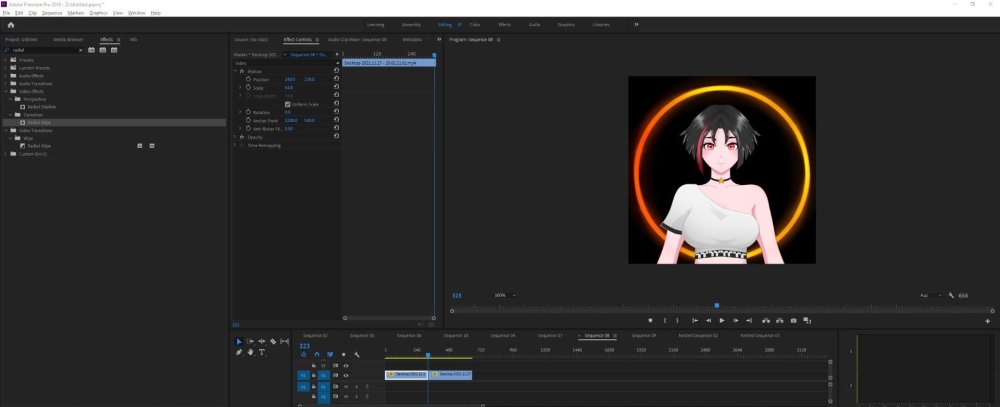
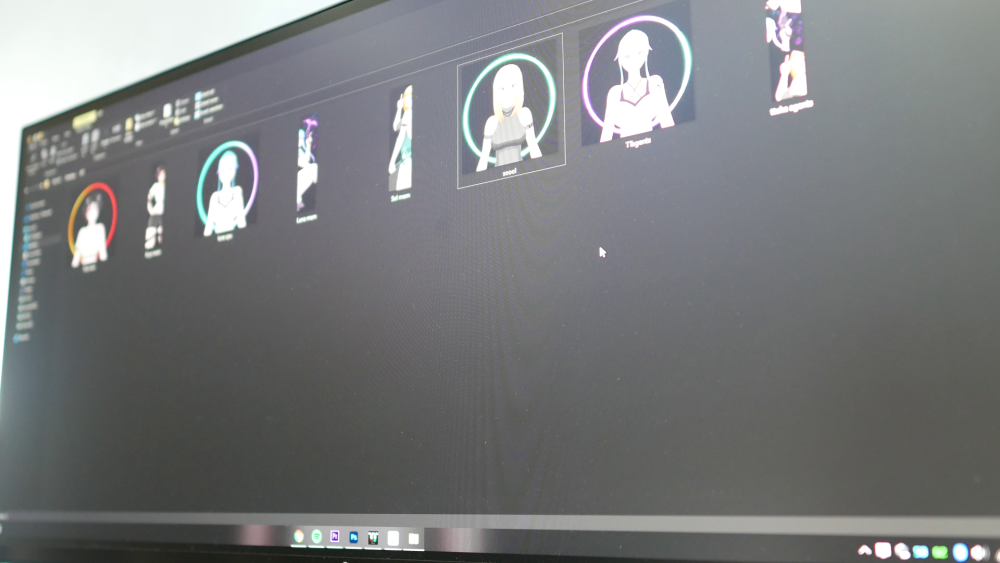
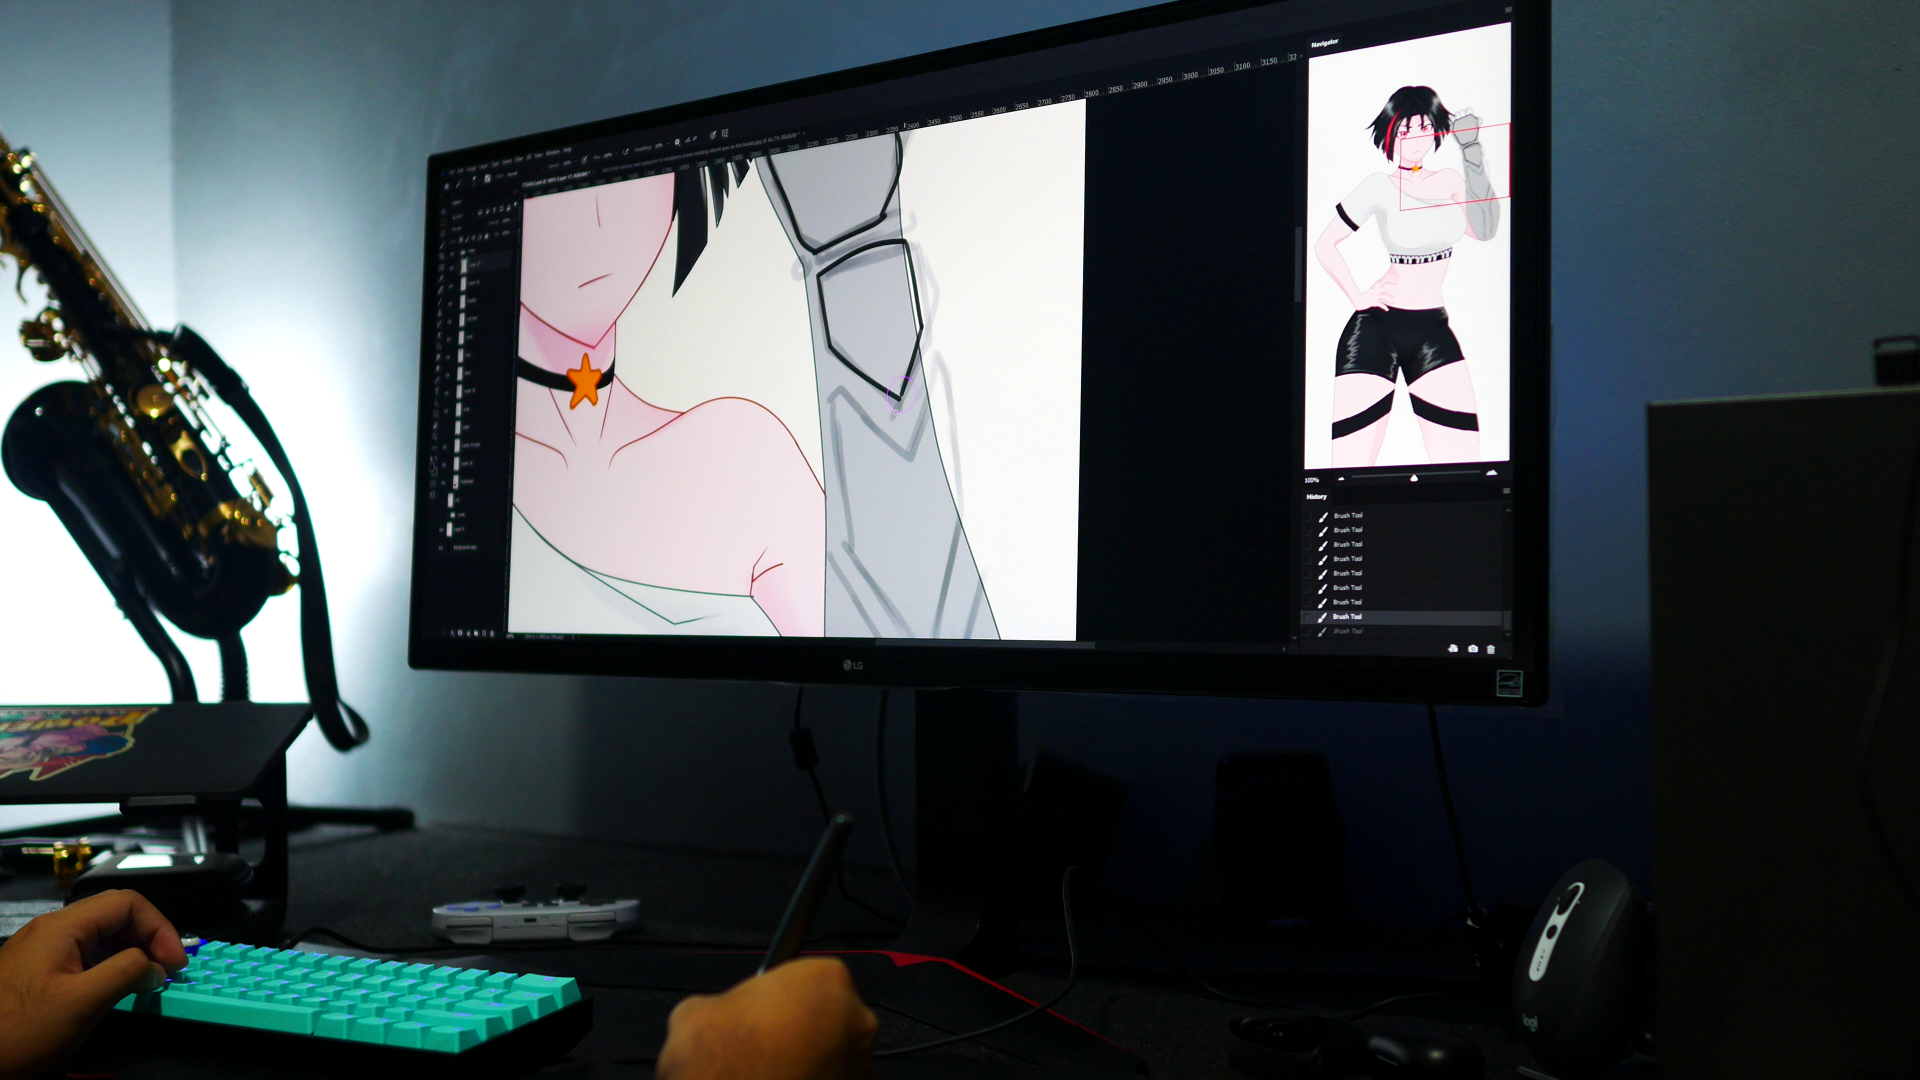
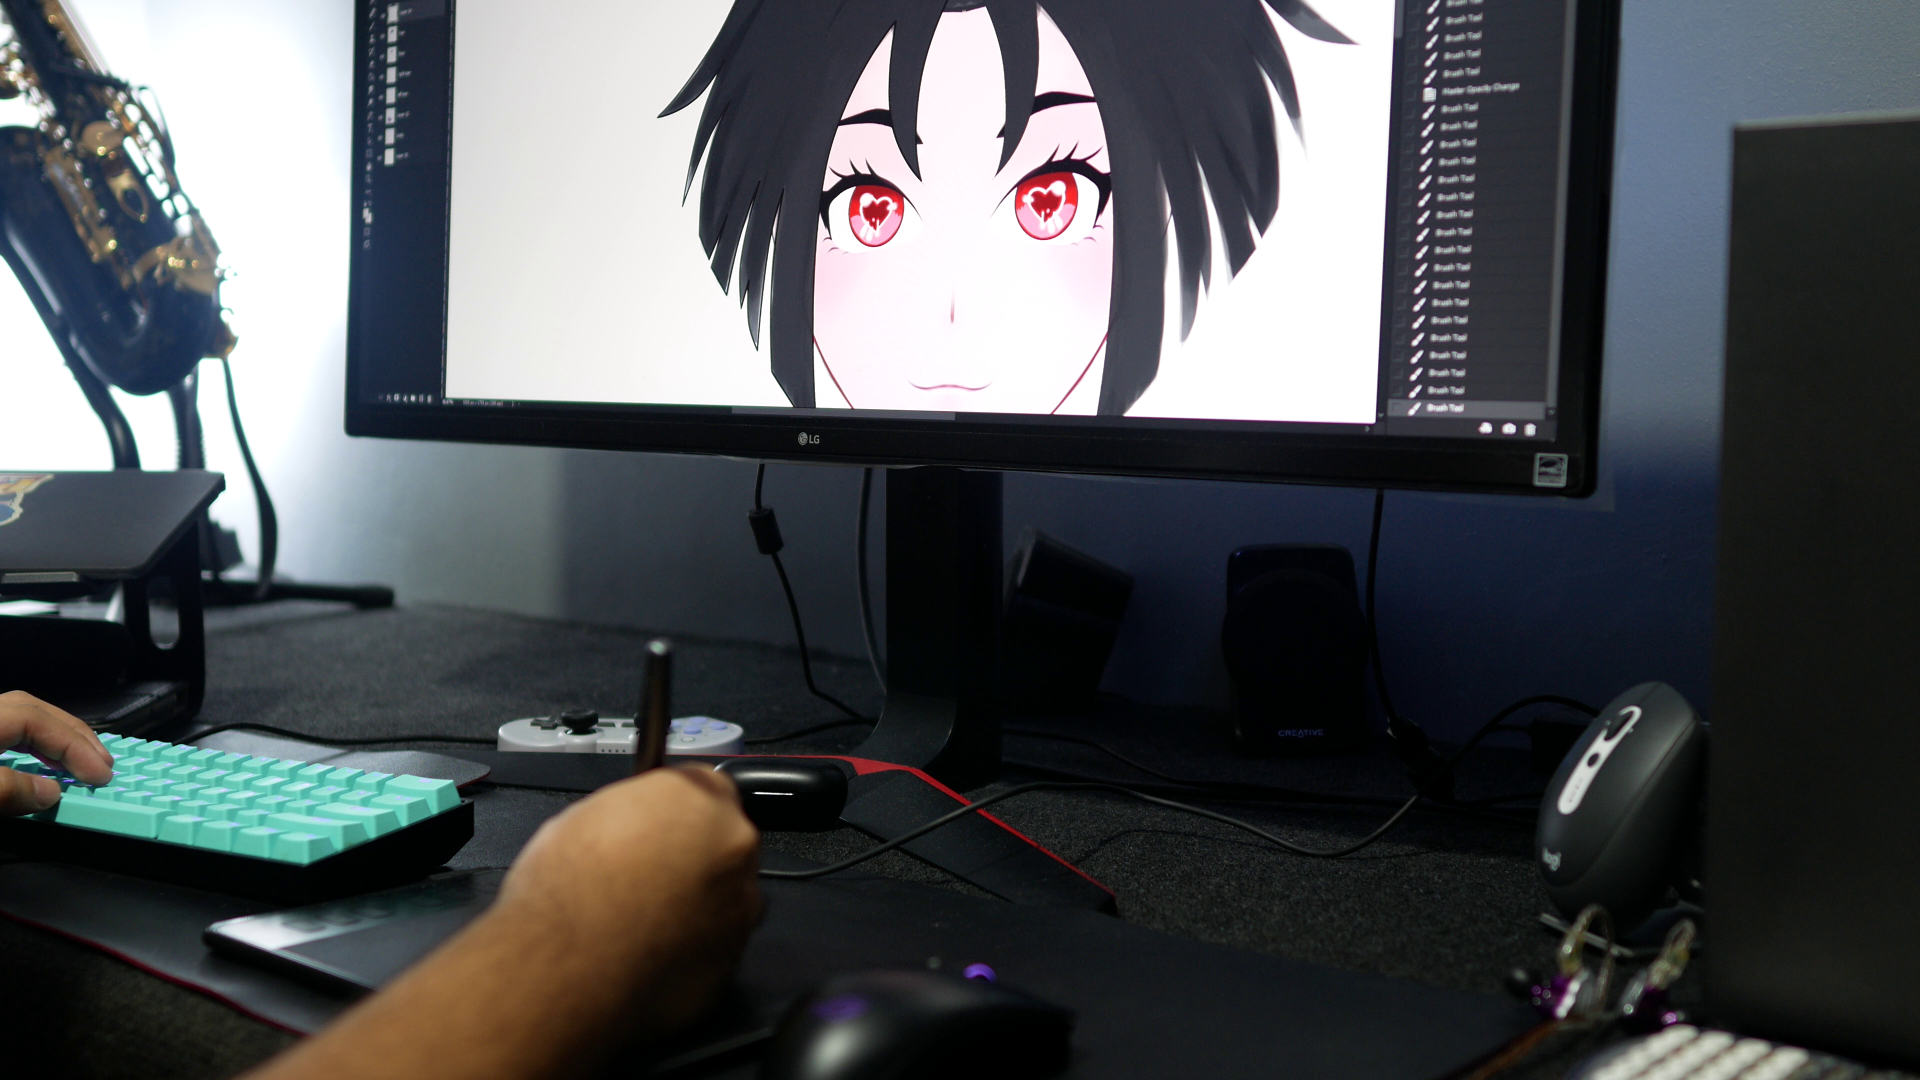
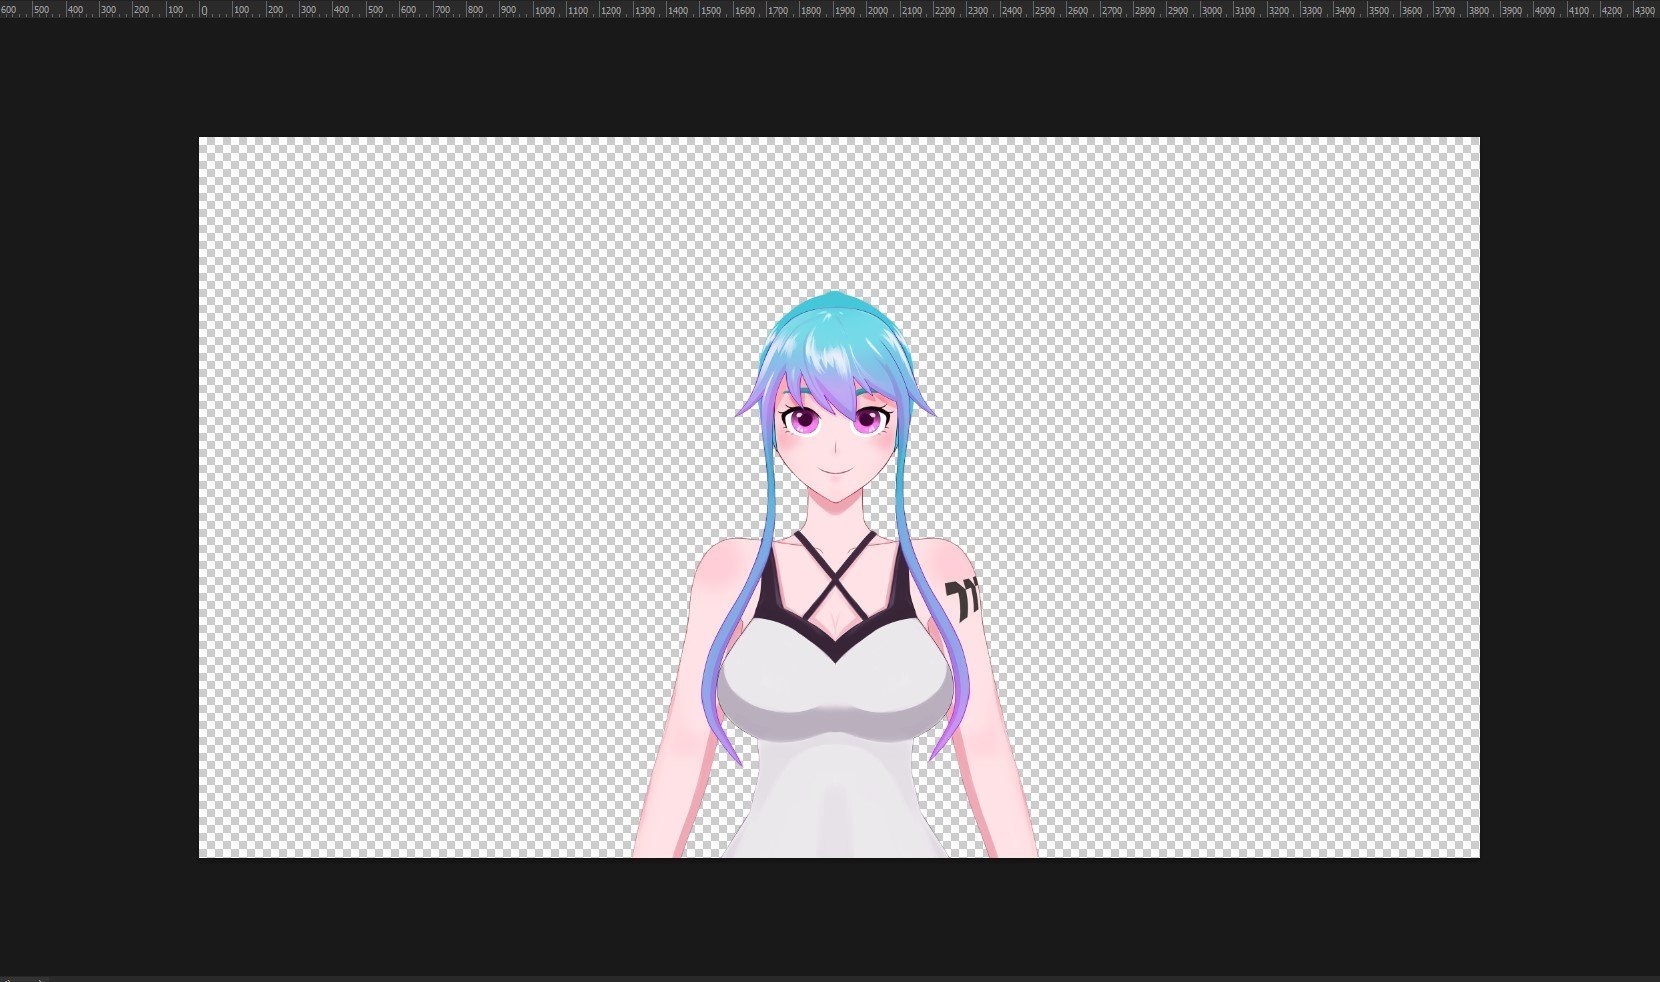
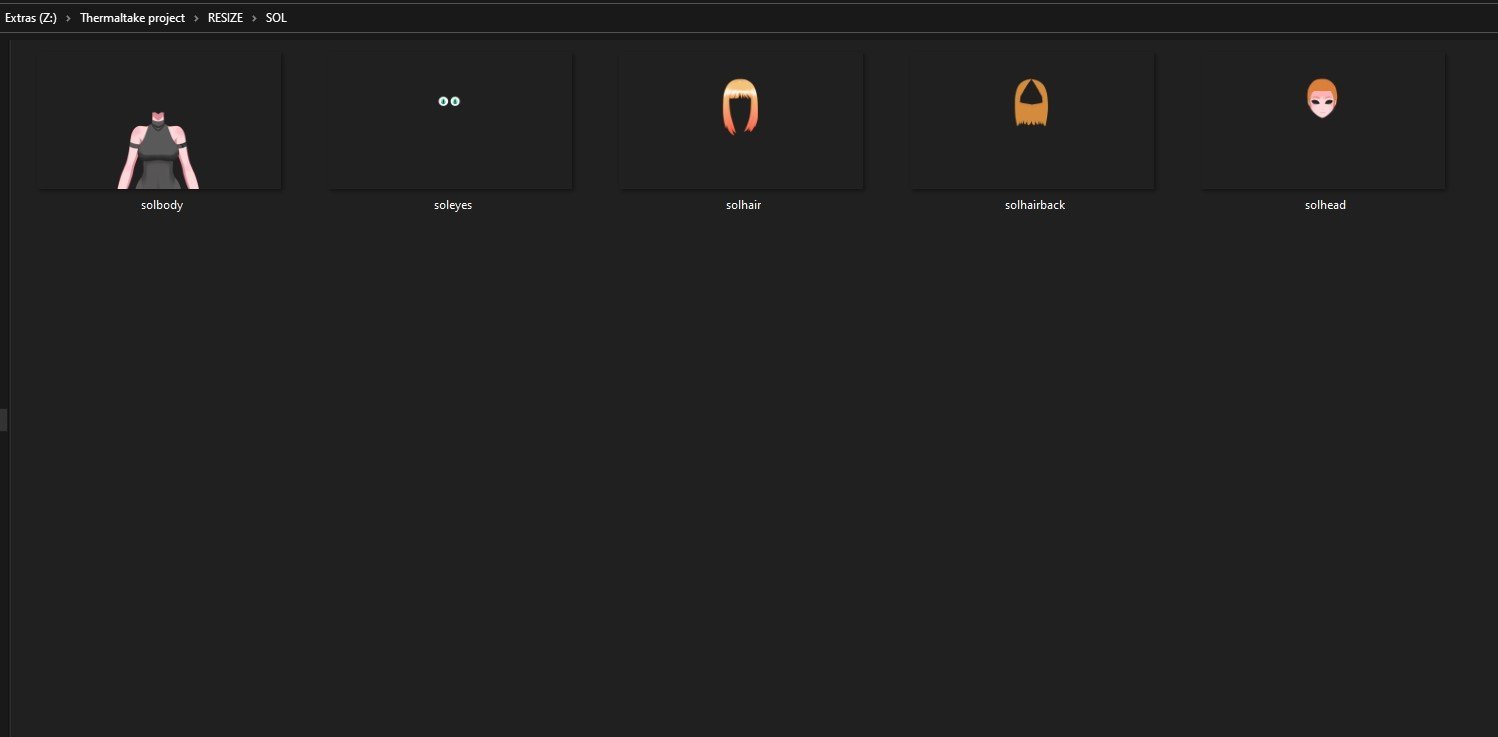
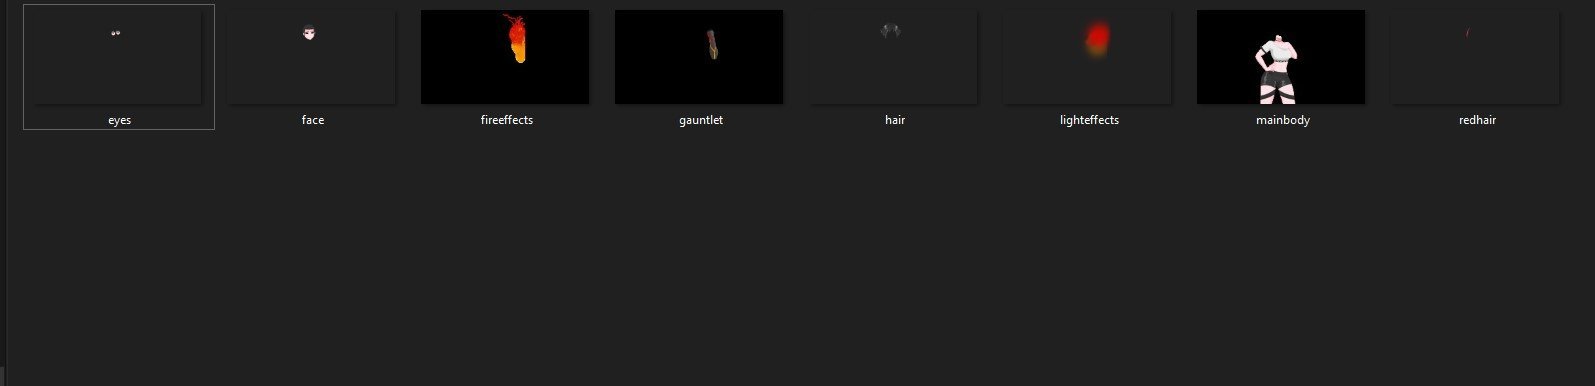
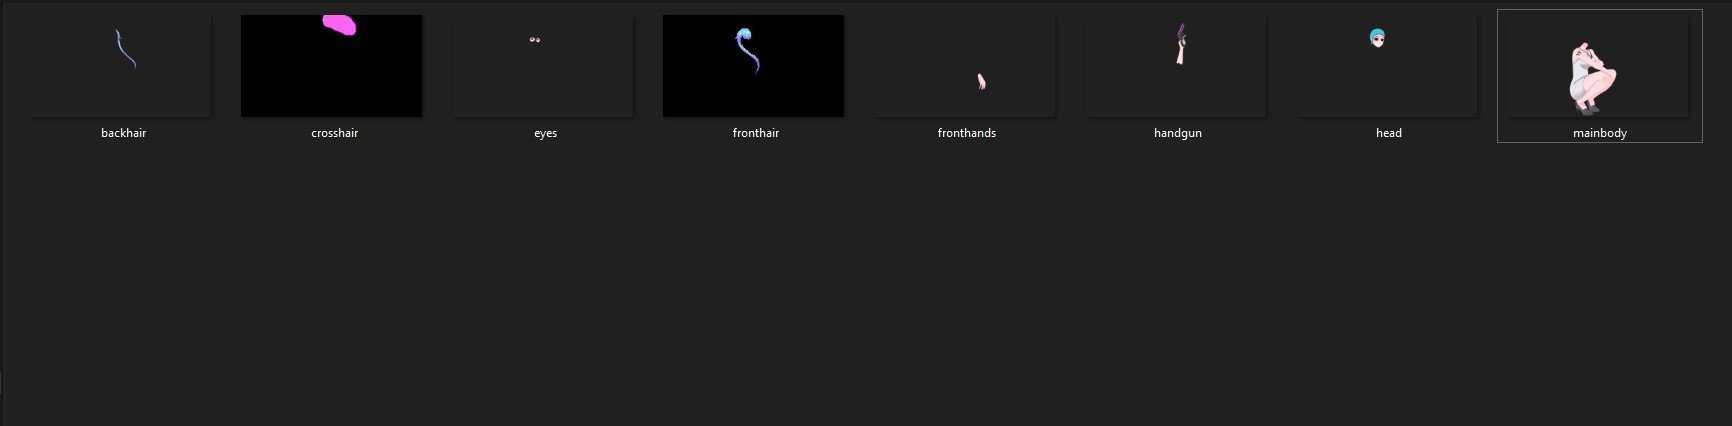
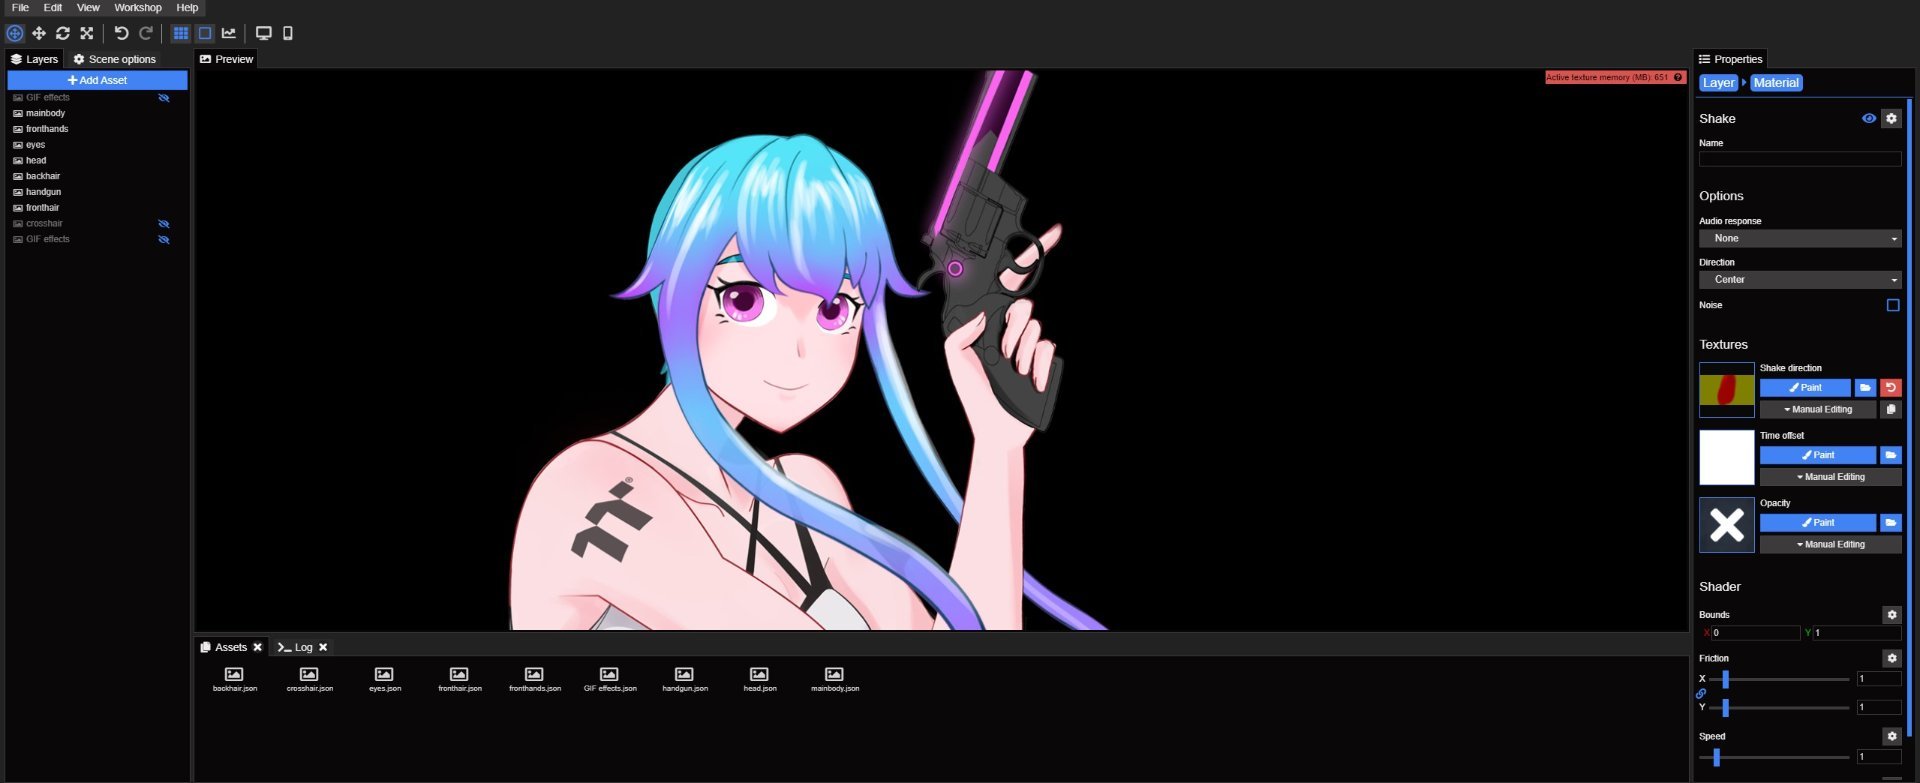
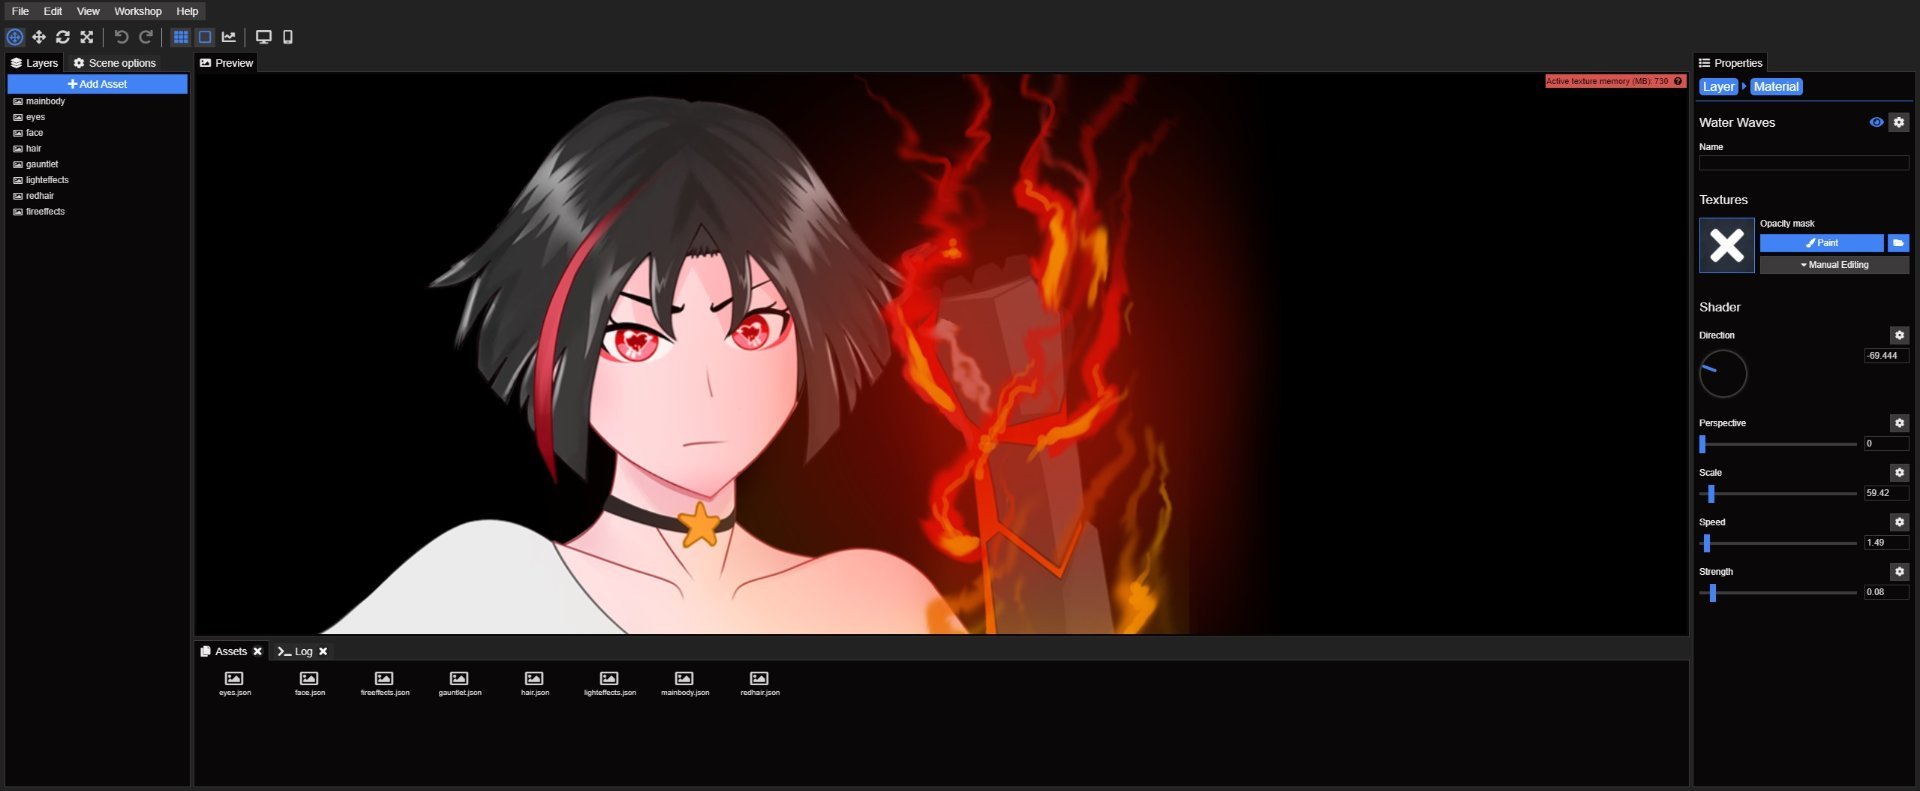
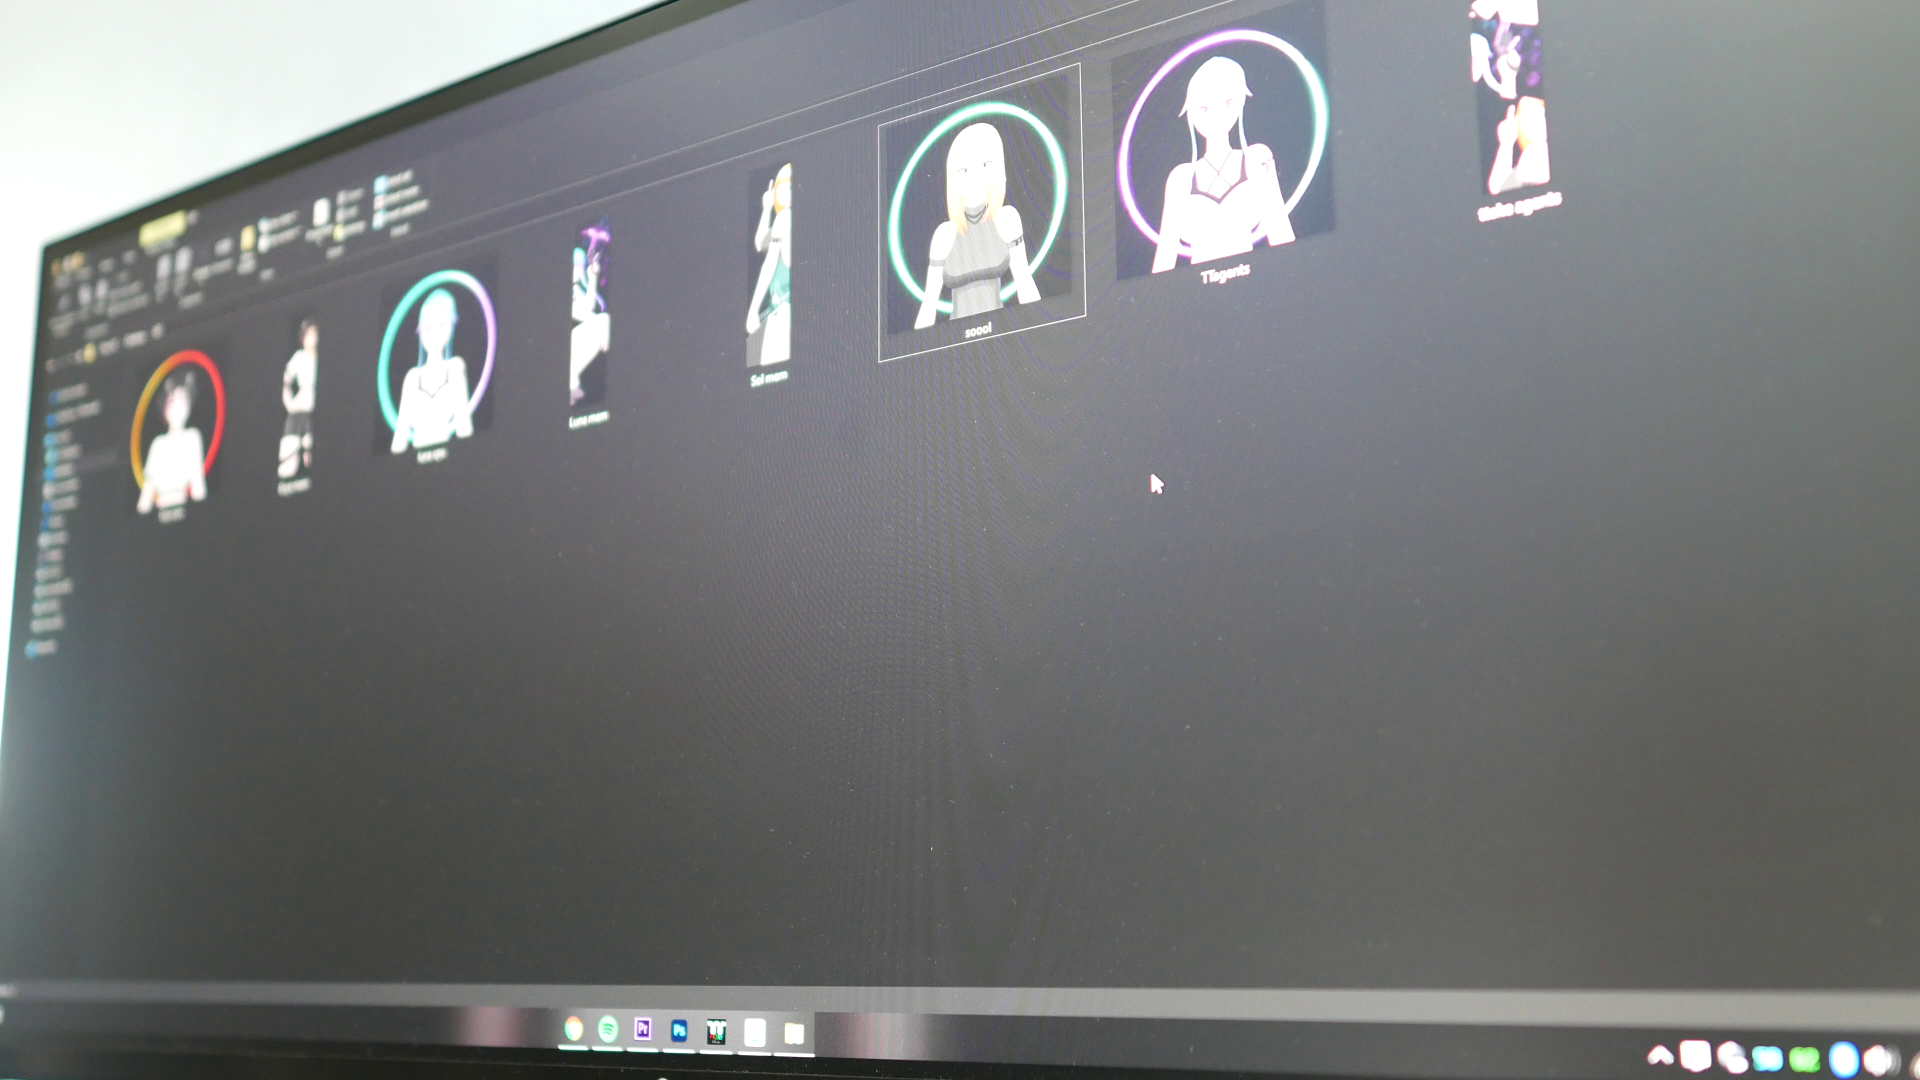
The main software I used is Adobe Photoshop with my digital tablet. I drew all of the characters with their separate parts that needs to move.
(head, eyes, hair, body, effects and accessories)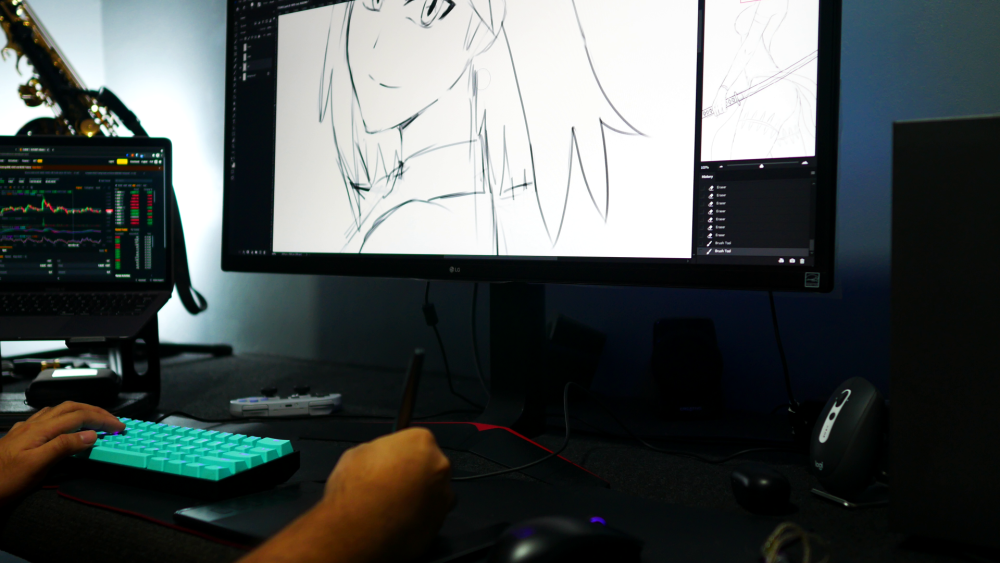
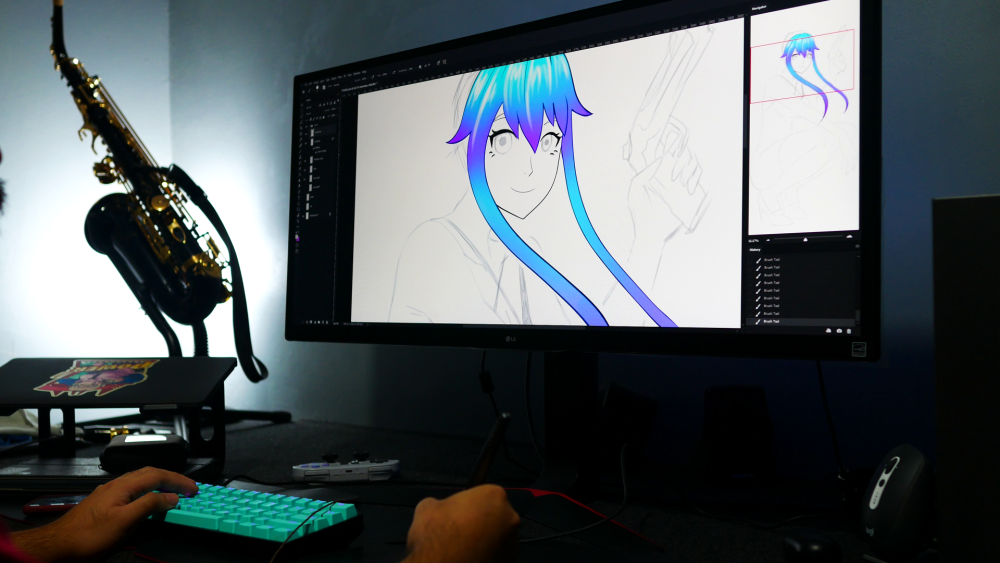


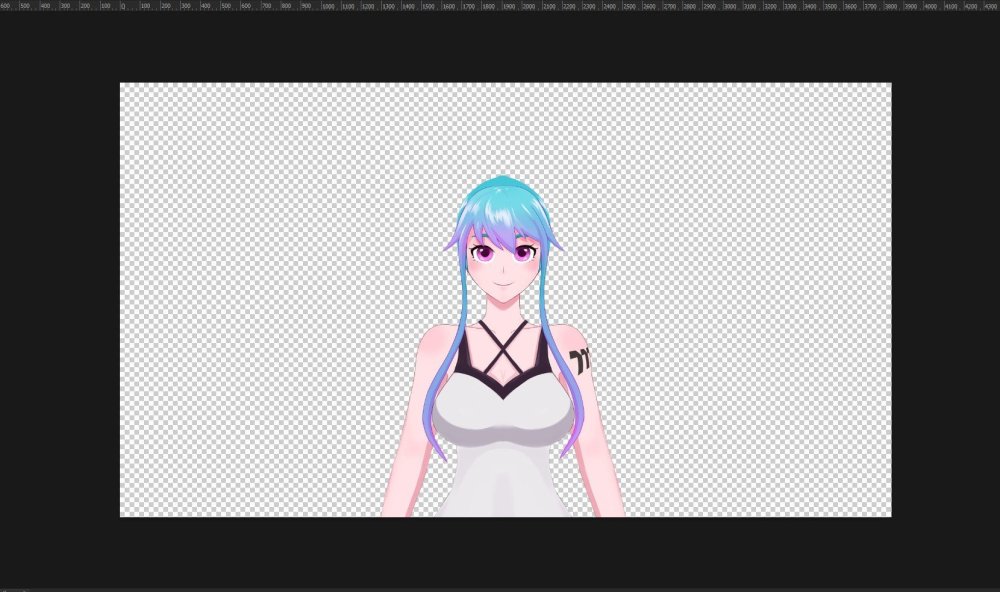
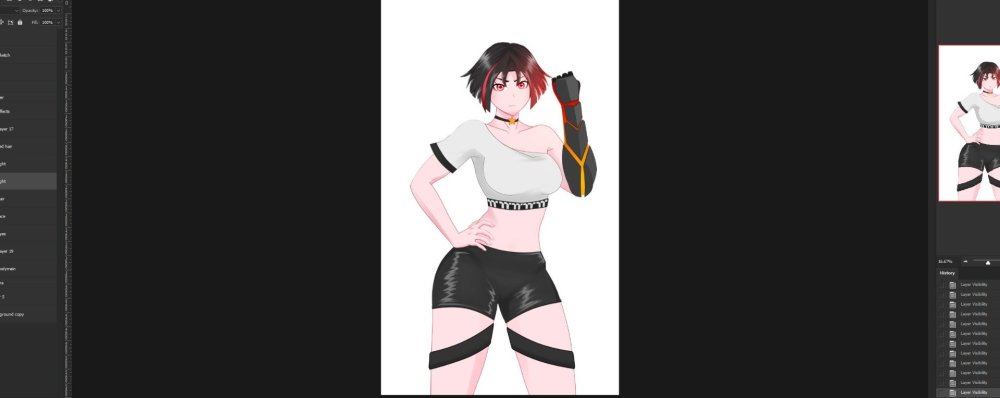
This step took a lot of hours from designing, sketching, line-art, coloring and finalizing.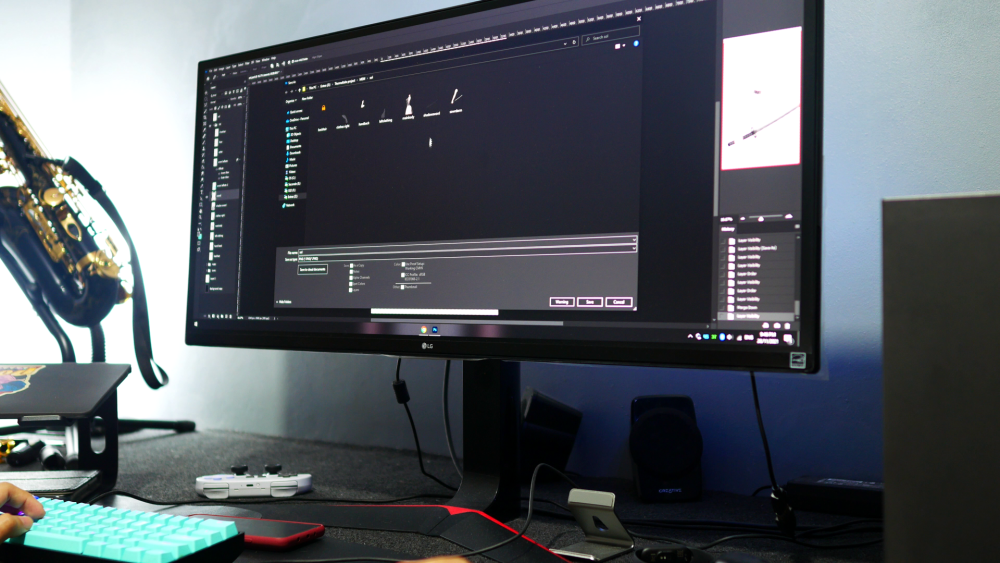

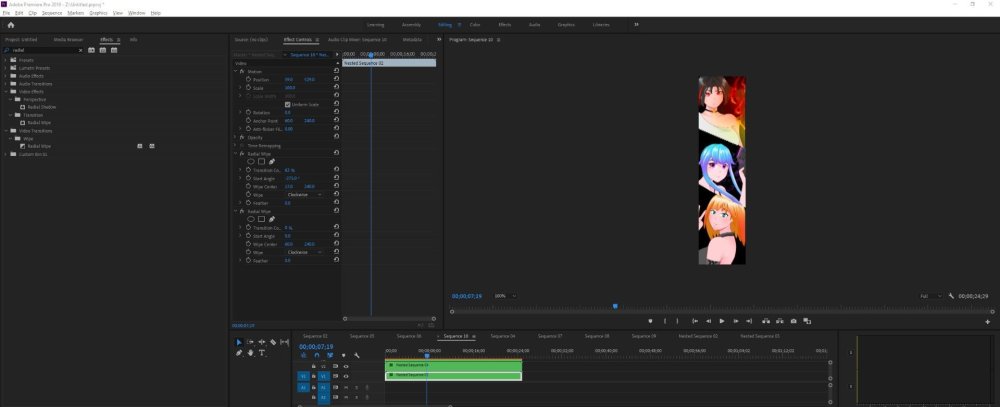
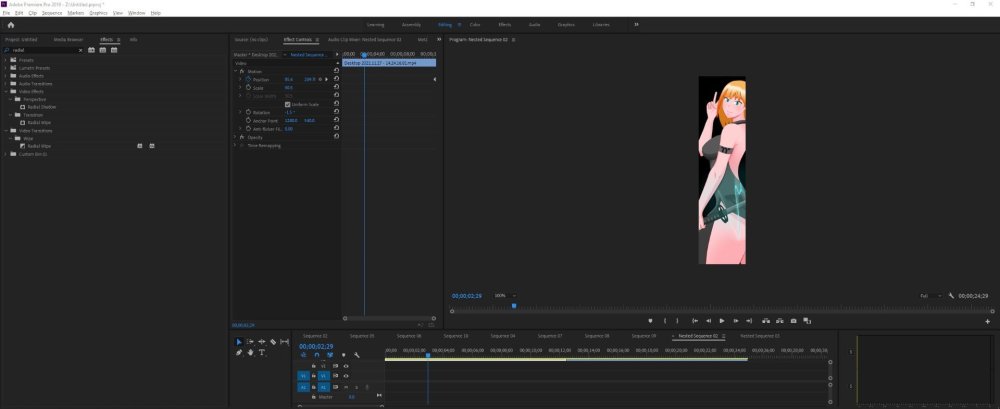
I used wallpaper engine for animating the separated parts. I was able to apply all the complicated movements like blinking, shake, water waves, glowing and breathing effect.

I exported all the videos and used Premiere Pro for looping the animation and adjusting the timings.


.png.50350cdeb807003f8e2b5ccb39a11925.png)
.png.79d0cdadbf49b723f245a27e65eba352.png)
.png.41e75675a64e1085bd8f543eb4e8c4db.png)
.png.8cb71da7404fadaf12a978d07c69a51b.png)

.png.0ee3ddd9eaa57435168b46bccaaca9ce.png)
.png.6c4ea8c5e1af93b9e3462a1e9a4cca39.png)
.png.9df5549a9879eda23ea779e37fe78d28.png)


.png.851693f14219e5c8f752fd42d65c75f1.png)
.png.3437be113c2d26e893dbd06b693f80aa.png)
.jpg.a7f178be40f219938db8f87ccadac482.jpg)
.png.31c4fdaa282640ec337fcbe78db17610.png)
.png.90424600b82e780dcea89ef43fa08067.png)
.png.18023817e5385b27c75860187a62eb2a.png)
.png.c624c40e743968ea1ab875a1a006e8b5.png)
.png.ba6e9aa9ed03a8b2020bd4263b38b708.png)
.png.f627d96efa1b21ee0c94bb873c3cd998.png)
.png.3efa0d3938385b6e8e5217fce6563448.png)
.png.05327d7b69543ff7d257a048e9bc716c.png)
.png.ff6c7a9d50a5f816f361bc49c194ea54.png)
.png.c3e03adf1565b487154eedc8e5be1562.png)
.jpg.f82907941d129f23ff4ab5633c378cb7.jpg)
.png.7f17a6324b6030ddec5535e39f6b76bf.png)
.jpg.be49463049ea4be117f5e7cb45545c6b.jpg)
.png.642d7f802372468ba92b6924f03c71ca.png)
.png.7e789b42ac20c1a08dd93ad4bdf1caa6.png)
.png.4b6fa06cefdb708d013cad3a75c063d3.png)
.png.18fefcca4b03a9374ebcebe868dd85e8.png)
.png.644c686d2be167e56867e2c9559d4d59.png)
.png.1a2cc0c847e78ad97b75fbb726f56415.png)
.png.aa3df31adea78eea79b50298781db42c.png)
.png.3764a3c417d17260397f1970db0af875.png)
.png.3174cb899c050947a2c2d809f4876faf.png)
.png.5ddc5796a23e743c06e483089094e33c.png)
.jpg.093df8452db9d6d58f78032d34f52bf4.jpg)
.jpg.7e8dd5348f0a1f82375c57731713500a.jpg)
.jpg.de40ebb685747971027935d2a269ed3c.jpg)
.jpg.e739429a2e7c1b05e4ab2bcf4aead47a.jpg)
.png.d1eba5f7ea95046c1fb9b9ee024b4d15.png)
.png.e6dc2714e812ec509845df2da742f28a.png)
.png.533226531d7398806f2984716c2e2093.png)
.png.e06f9ddf8952fbe096b075e6e1cdc1b0.png)
.png.abd940528d9848514cb1c260bd5c8cad.png)
.png.b9fdb68f5701298267768786706df7aa.png)
.png.124016030f1e4a0b3d3db85e882ed266.png)
.png.f6a1279a980292184d7f2c1a5884113a.png)
.png.ae3ff781ec5f4a0bb6e0f9ab964efe7c.png)


[Philippines] Samuel Callanta
in 2022 Thermaltake CaseMOD Invitational Season 1
Posted
Youtube Video link: