Search the Community
Showing results for tags 'scan computers'.
Found 8 results
-
(a)JPG.jpg.562ccf8f52aebeb8d595ffaa6698382e.jpg)

-
(a)JPG.jpg.12d75c0b856d4cfddd6e15160e80623f.jpg)

-
(a)JPG.jpg.9f7890ec3ed4b081fb590599726591a6.jpg)

- 28 replies
-
- 1
-

-
- scan computers
- thrustmaster
- (and 7 more)
-
(a)JPG.jpg.5cb59fba8f4c1515f50e8a386275bd9c.jpg)

- 18 replies
-
- 1
-

-
- scan computers
- thrustmaster
- (and 7 more)
-

(a)JPG.jpg.2b07cc6a647a262c1d4a6ced0a0d5dba.jpg)
-
 Well here we go guys... 5 teams, Battle out to be the best in the UK The professional modder and their apprentice. You want more information : https://casemod.thermaltake.com/2024s1ukAcademy/index.html
(a)JPG.jpg.40bf95016192c82002bd0c333f8bb7a1.jpg)
- 4 replies
-
- 1
-
-
- scan computers
- nvidia
- (and 4 more)
-
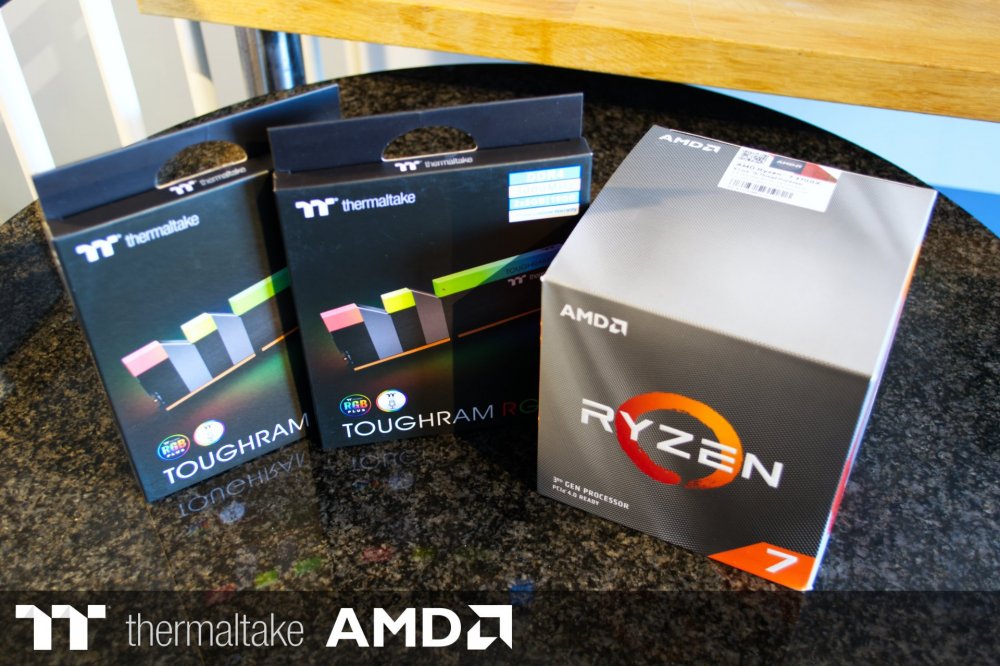
 Hi Everybody, I'm Tom from sunny Birmingham, UK. I work as a software engineer / web developer which I've been doing since university and mainly play PC games and run in my spare time. Been building and modding computers since around 15. My first mod was a side window cut-out and blue CCFL tube lighting, was so proud of that at the time (simpler times). Started water cooling at university on an overlclocked Q6600 which kicked out a lot of heat and kept it up ever since. Current PC is an ITX build with a 280mm and 120mm rad which has been a little workhorse / hotbox for the past year. Onto this considerably more substantial build as a result of being selected for the Thermaltake UK 2020 Case Mod Challenge which has been awesome 😄 and the perfect distraction from current events. Been spending the past couple weeks getting everything together for the planned mods. Anyhow, onto the parts list: Thermaltake View 51 Snow AMD 3700X Thermaltake TOUGHRAM RGB 3000MHz 4x8GB ASUS ROG STRIX X570-F Gaming ASUS Radeon RX 5700 500GB Seagate FireCuda 520 14TB Seagate IronWolf Pro Thermaltake Pacific C360 DDC Hard Tube Water Cooling Kit Thermaltake Pacific V-RX 5700 Series Plus GPU Waterblock Thermaltake Water Cooling Pacific Hard Tube Bending Kit 300mm Thermaltake TTMod Sleeved Cables 300mm Thermaltake TTPremium PCIe Extender 850W Thermaltake Toughpower GF1 A couple photos of all the parts received: Thank you to Thermaltake, AMD, ASUS, Seagate and Scan for sponsoring and who've done a great job at getting the parts together in such trying times. Will be updating this thread over the coming weeks with my progress, at the moment just going to do a quick test set-up and take some case measurements. Best of luck for everyone in the competition and happy building! 😀 Tom
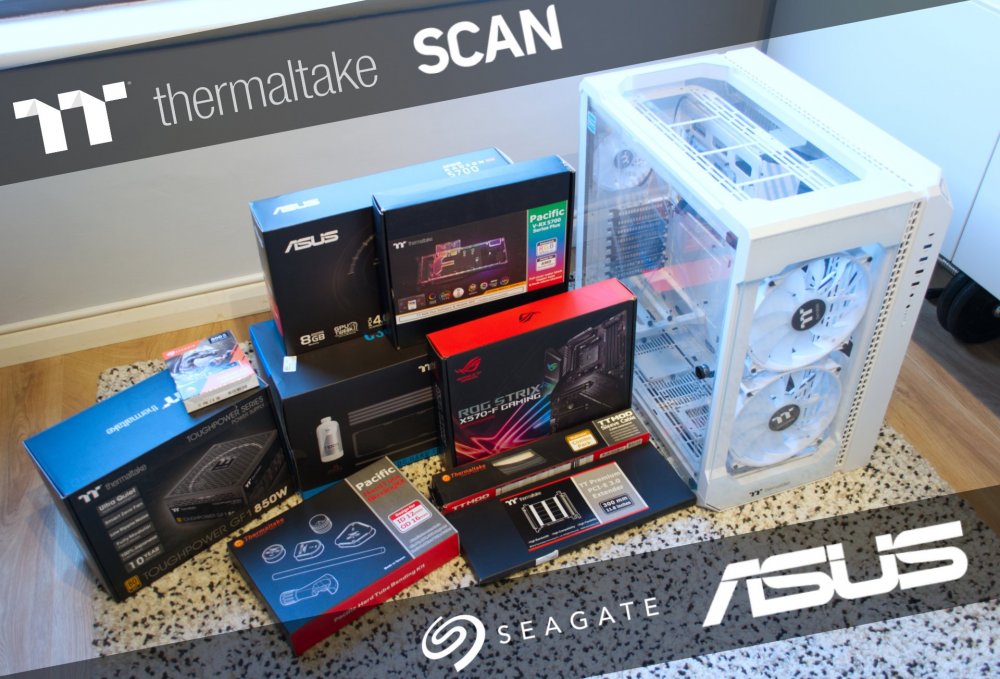
-
Hi all. now that I've found my feet with my new job, it was time to start with some massive re-fresh build projects. This one is for Scan Computers Ltd show room, this will also be doing the rounds at events next year. This wall pc was originally made back in 2015 for Computex. I was asked by HQ if I would like to give this a re-fresh and a new look, so being me I jumped straight in with a plan and a 4 day schedule. Sponsors:- #hyperx #msigaming #thermaltakeuk #scancomputers Component specs:- Mobo:- Msi Z370 Godlike CPU:- Intel 8700k MEM:- 32 GIG Kingston Hyper x DDR4 GPU:- 2 x MSI GeForce GTX 1080 Ti GAMING X SSD:- 2 X 480 GB Kingston Hyper x Savage M.2 NVME:- 480 GB Kingston Hyper x Predator PSU:- Thermaltake Toughpower iRGB PLUS 1250W Titanium Cables:- To The Wire Custom Sleeving. Watercooling Components:- RADS:- 1 x Thermaltake Pacific RL360 1 x Thermaltake Pacific RL480 CPU Block:- Thermaltake Pacific W4 Plus GPU Blocks:-Thermaltake Pacific V-GTX 1080Ti Plus Transparent Fans:-Thermaltake Riing Plus 14 LED RGB Radiator Fans / Thermaltake Riing Plus 12 LED RGB Radiator Fan. Tubing:- Thermaltake 16/12 V-Tubler PETG Fittings:-Thermaltake Pacific range res / res pump combo pacific R22 / Pacific PR22-D5 w/ Silent Kit Flow Meters pacific Flow Indicator One Day 1:- with all of my kit loaded, it was time to travel up the M6 to Scan HQ, they had a build area set aside for me, the mammoth task was about to begin. so after a struggle and 4 men carrying this monster, we goy it set in its build area, and it was time for me to tear this down. Day 2:- Now that I had a blank canvas, it was time to get the mounting panel holes drilled and tapped for the new components. And new holes for the cable routing. My plan is to only have the sleeved cables on display. Now after many hours of drilling, tapping, filing, it was time to mount some components and start on the mammoth cabling exercise. Day 3:- well after a long day 2 (13 hours),it was time to get the raised panels mounted to the frame. This point was critical, and I wanted the raised panels to be spaced nicely apart. And bring them more in line than they were before. Not much of an adjustment, but just enough to step back and say that's better. whilst I was waiting for the paint to dry on the gpu/pump panel. I got on with tubing the cpu loop up. And a little bit of gpu block mounting time..... Now we are getting late into the night now,and finally the gpu/pump panel was dry enough to mount to the main chassis. getting this done now will let me finish off the gpu loop tomorrow and get leak testing. now its time for food and beer. Day 4 ( the final run) :- With a early start under my belt, it was time to get the gpu loop finished and get this monster leak tested. leak testing for 4 hours,( I would of liked longer) not a drop leaking anywhere. it was time to get the final loop coloured fluids in, and get windows installed and ready for the showroom. Well that's completed,now to pack all my kit up and travel up north for the next build.Thats a 1 day build for our weekend event coming up. a full video will be done by Scan computers and the process I went through. I hope you all like,and ill see you all soon. a massive thank you to:- #msigaming #hyperx #scancomputers Adam