-
Forum Statistics
93.2k
Total Topics114.3k
Total Posts -
Member Statistics
173,079
Total Members16,800
Most Online

MPC Project
-
Posts
83 -
Joined
-
Last visited
-
Days Won
5
Content Type
Profiles
Forums
Downloads
Events
Gallery
Blogs
Everything posted by MPC Project
-
 One word that describes this event is THANK YOU ! Thanks to Thermaltake Technology Inc, Kenny Lin and all the people who work hard in the marketing department like Andy Cheng to create an event that includes many characteristics such as creativity, uniqueness and passion in the computer world. Thanks to all those who have followed the evolution of the work and given their support. Congratulations to all the other participants. To the next creation !
 -
Final Voting Starts Now!
MPC Project replied to TT Kristine's topic in 2024 Thermaltake RAM MOD Invitational Season 1
Thank you very much ! -
Final Voting Starts Now!
MPC Project replied to TT Kristine's topic in 2024 Thermaltake RAM MOD Invitational Season 1
Grazie mille ! -
Final Voting Starts Now!
MPC Project replied to TT Kristine's topic in 2024 Thermaltake RAM MOD Invitational Season 1
Thank you 🙏 -
Final Voting Starts Now!
MPC Project replied to TT Kristine's topic in 2024 Thermaltake RAM MOD Invitational Season 1
Thank you very much 🙏 -
[Italy] Marco Di Silvestre
MPC Project replied to TT Amanda's topic in 2024 Thermaltake RAM MOD Invitational Season 1
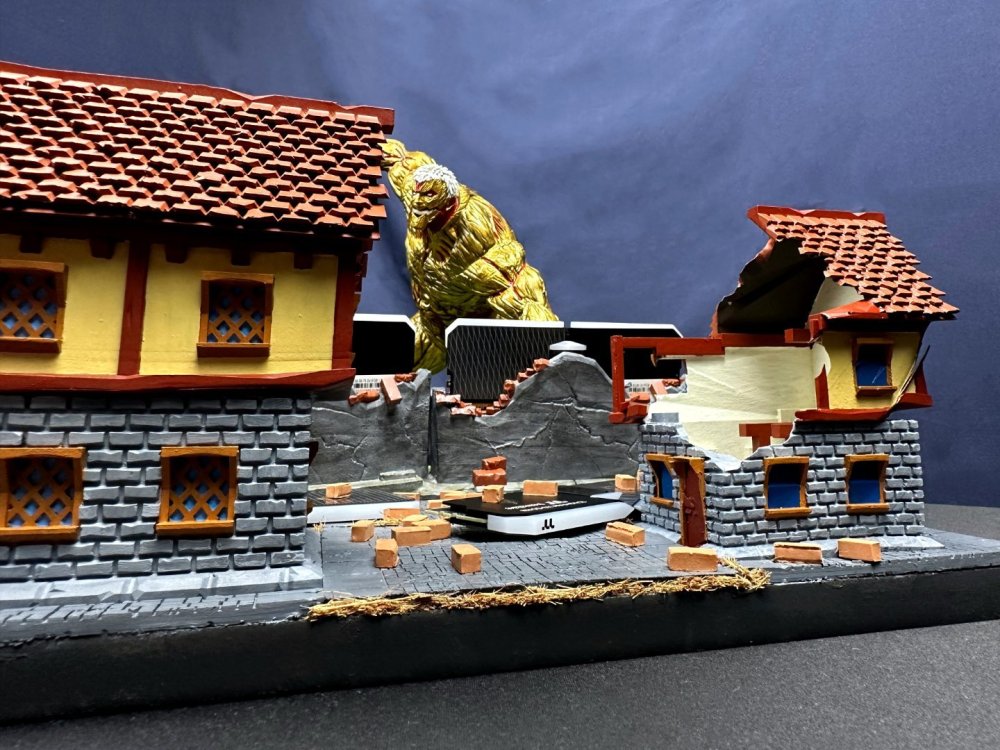
Final video. Enjoy ! -
[Italy] Marco Di Silvestre
MPC Project replied to TT Amanda's topic in 2024 Thermaltake RAM MOD Invitational Season 1
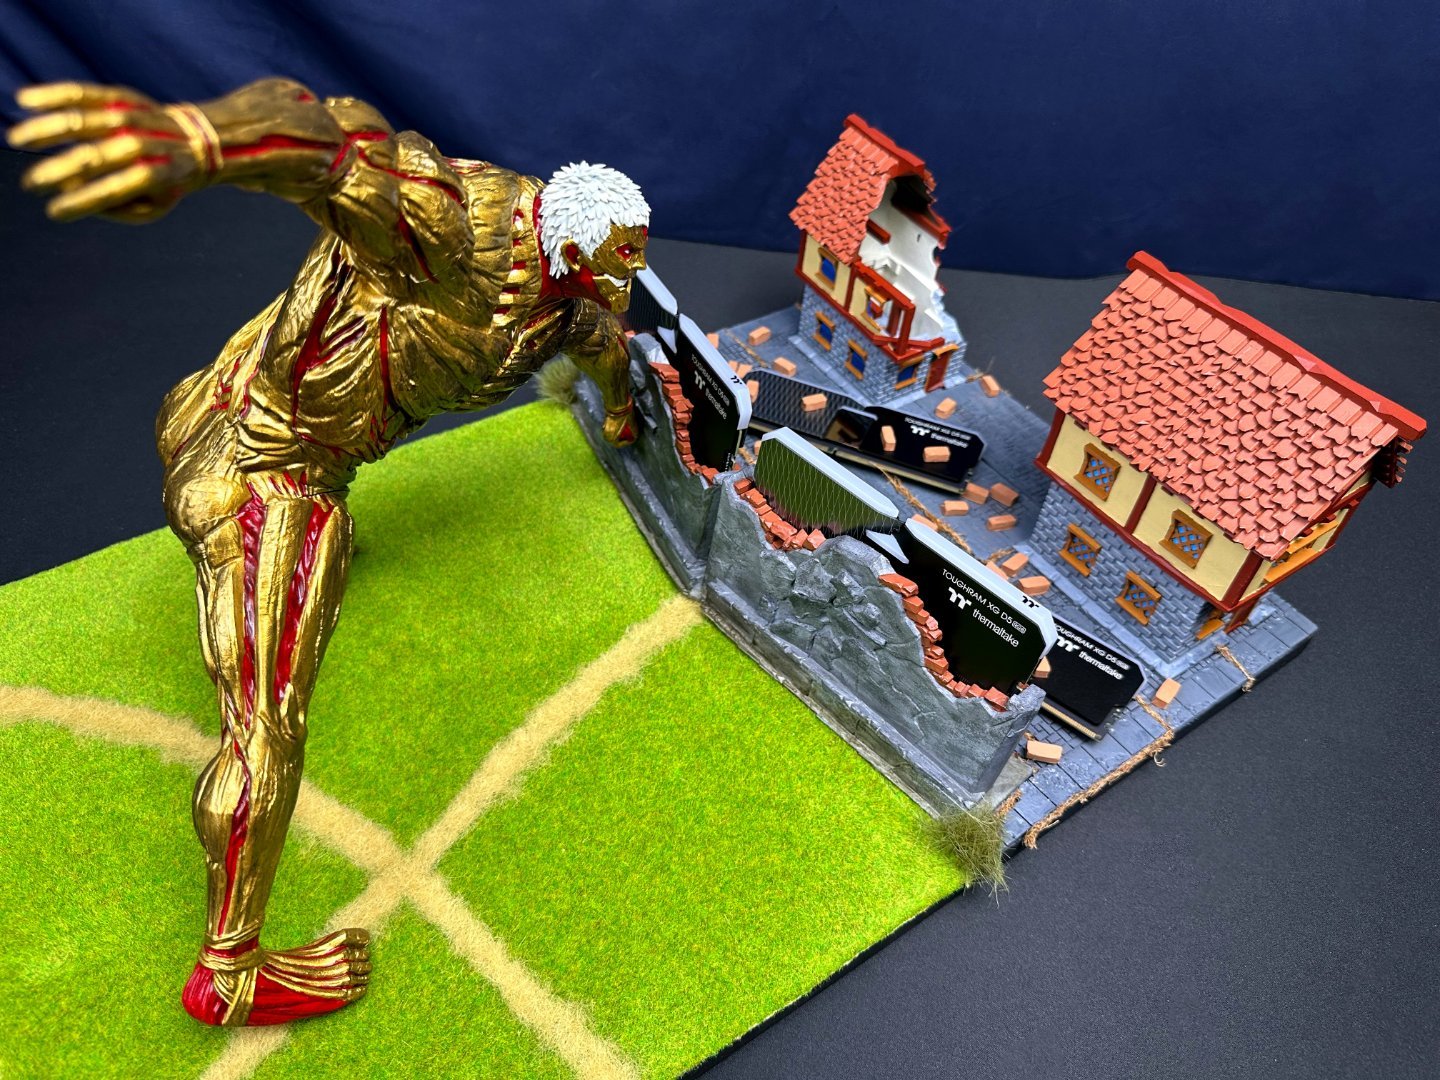
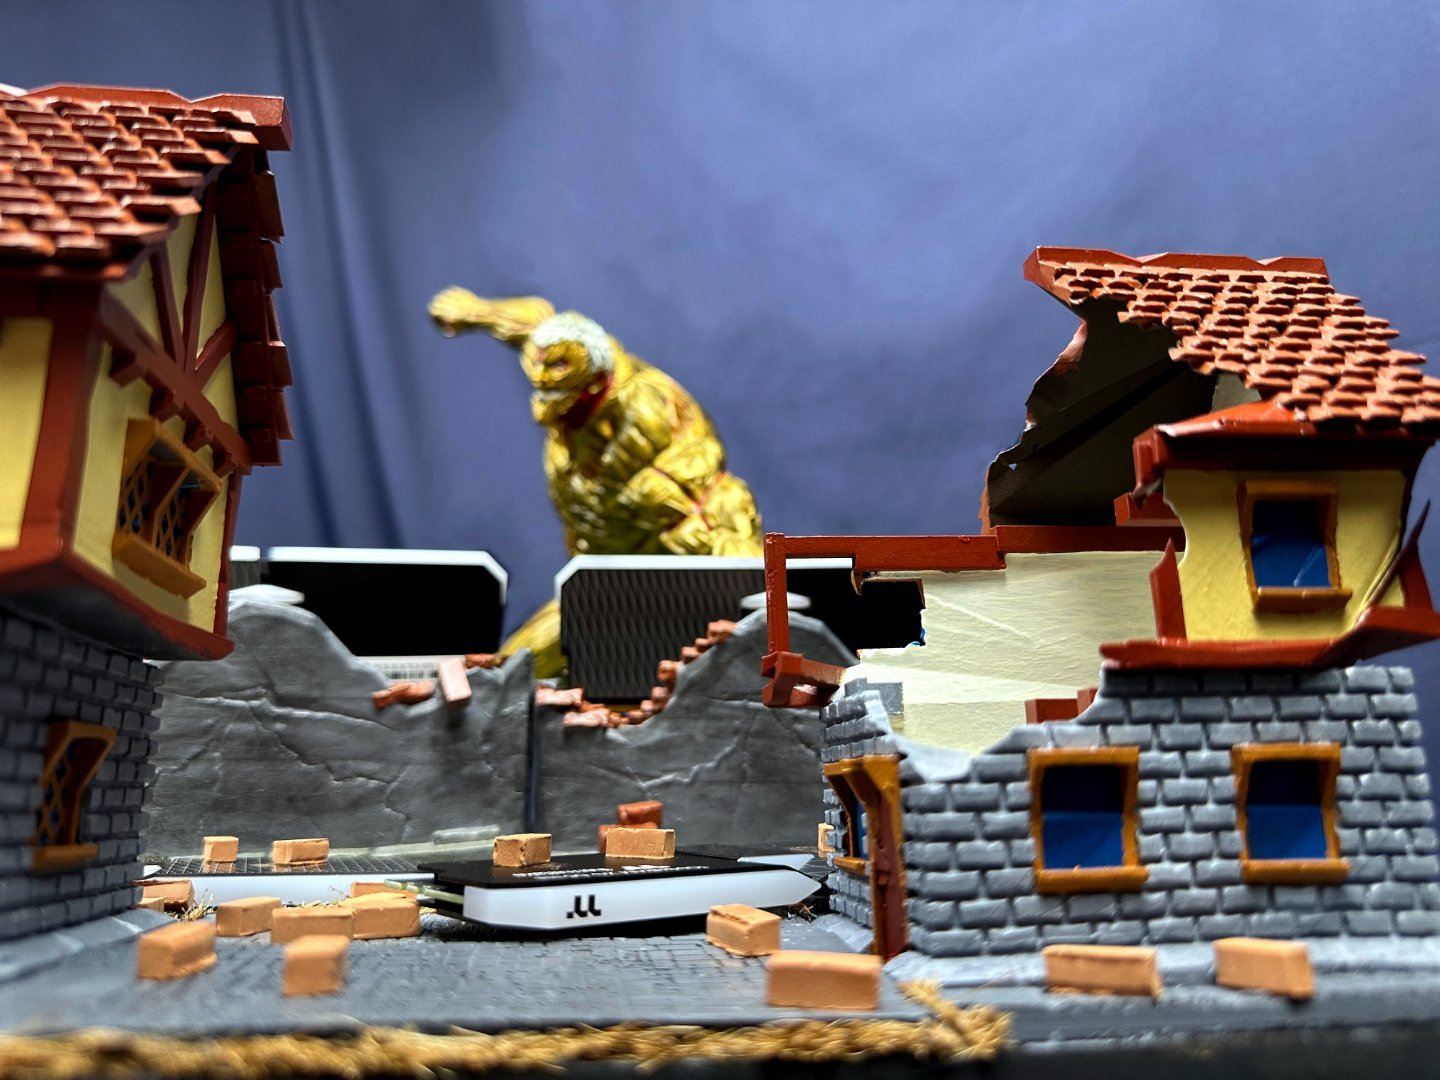
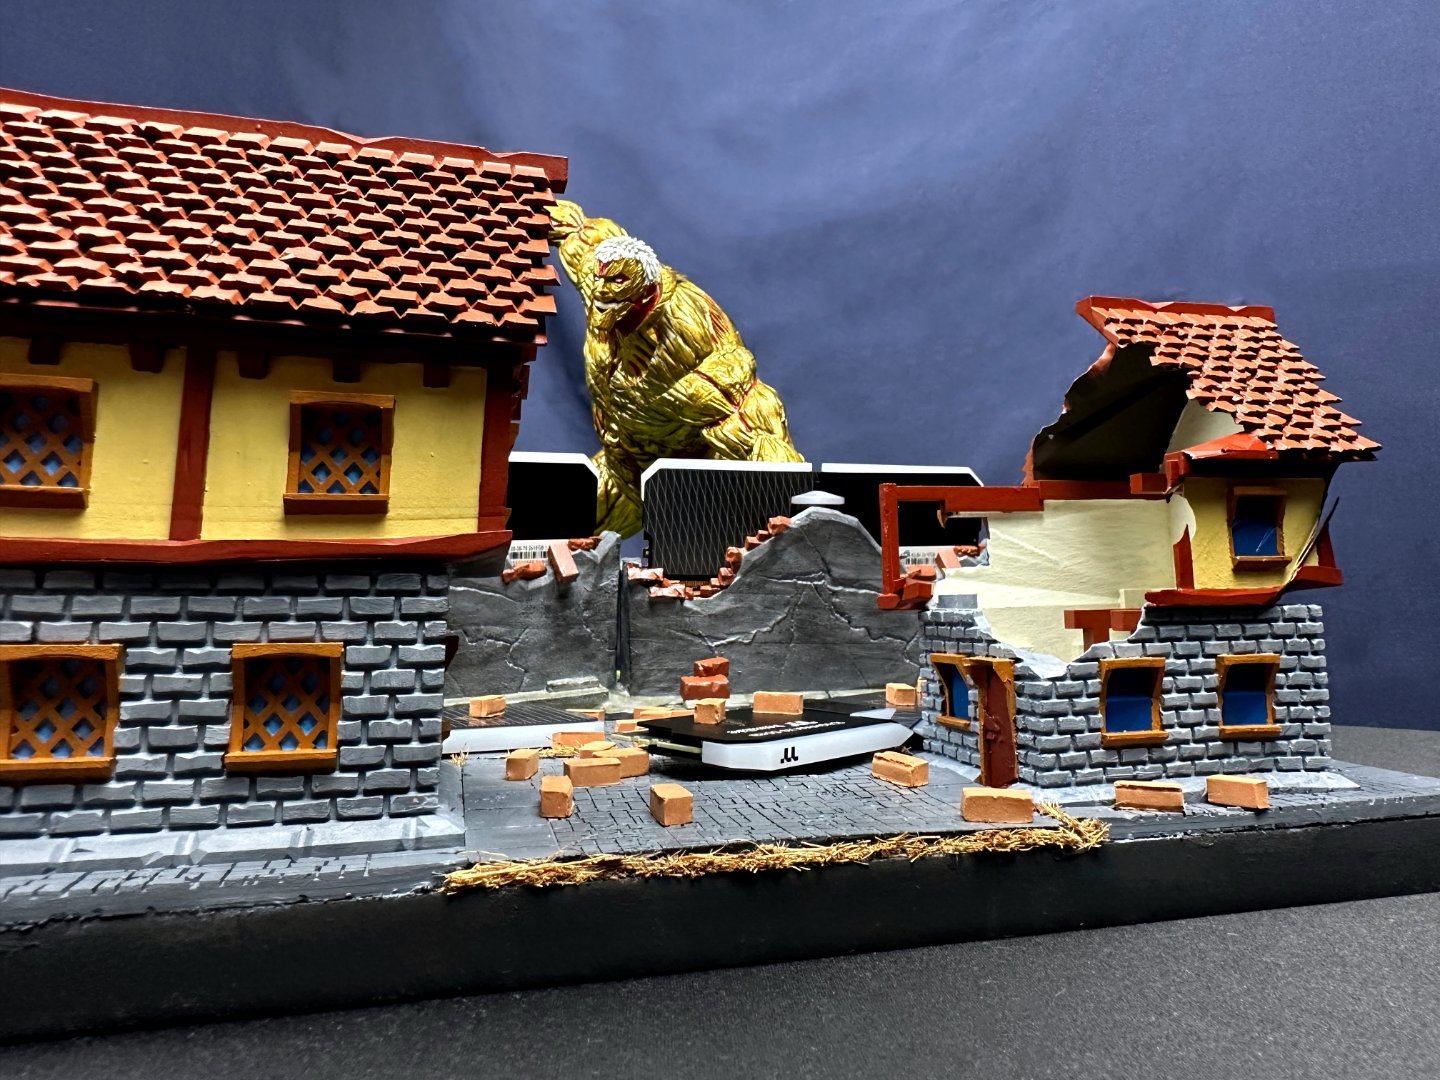
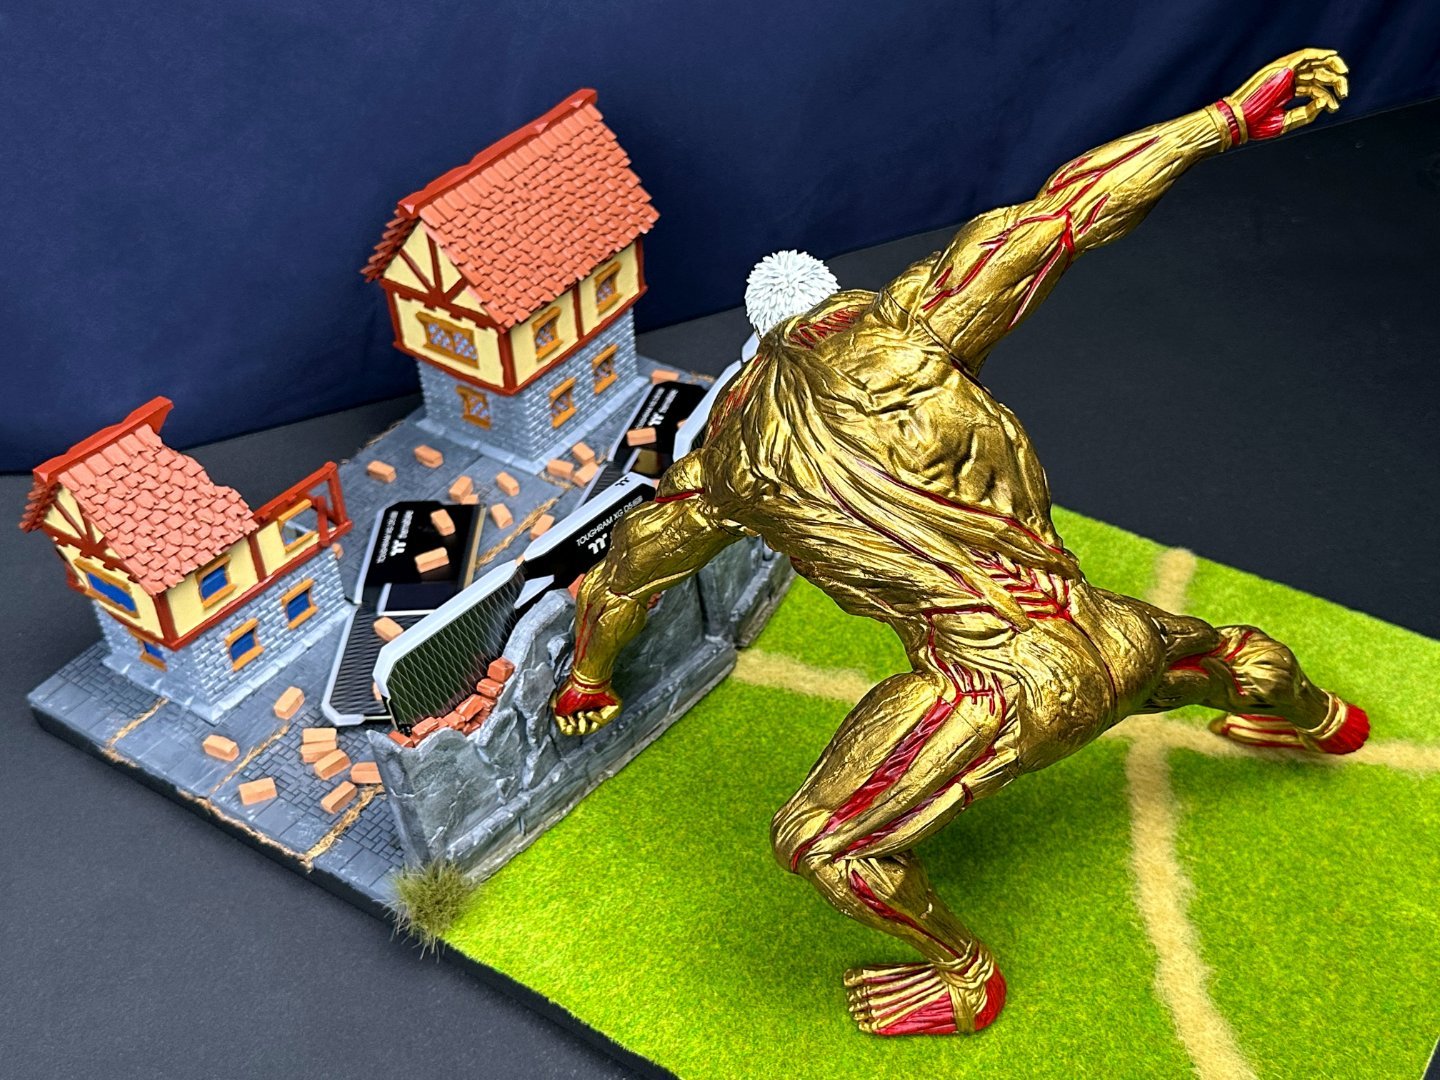
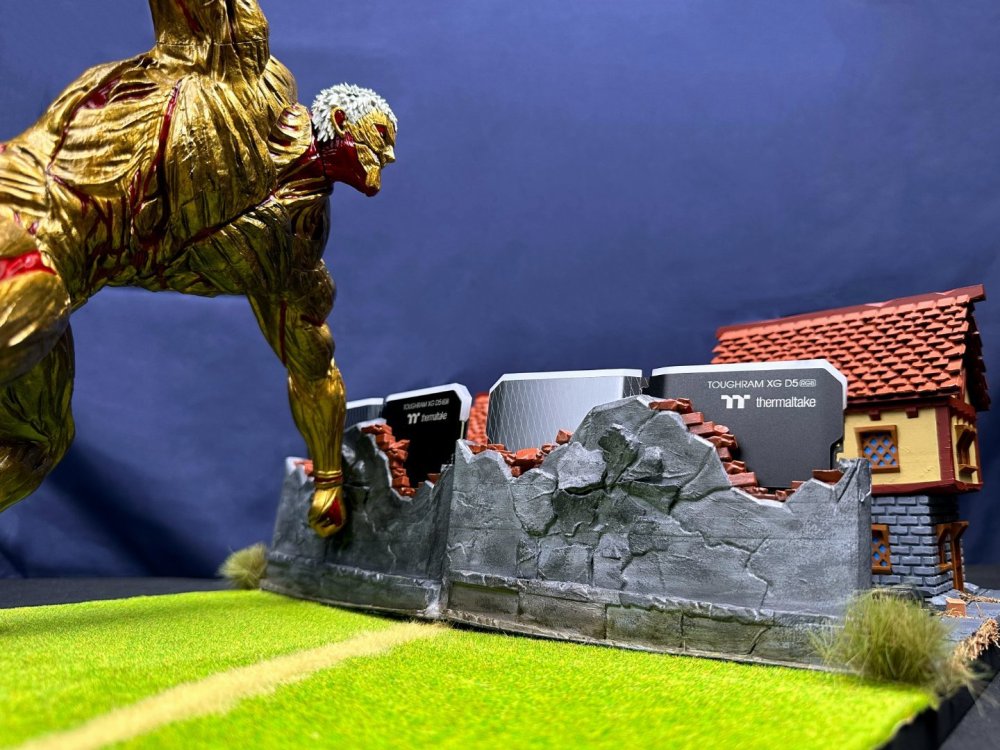
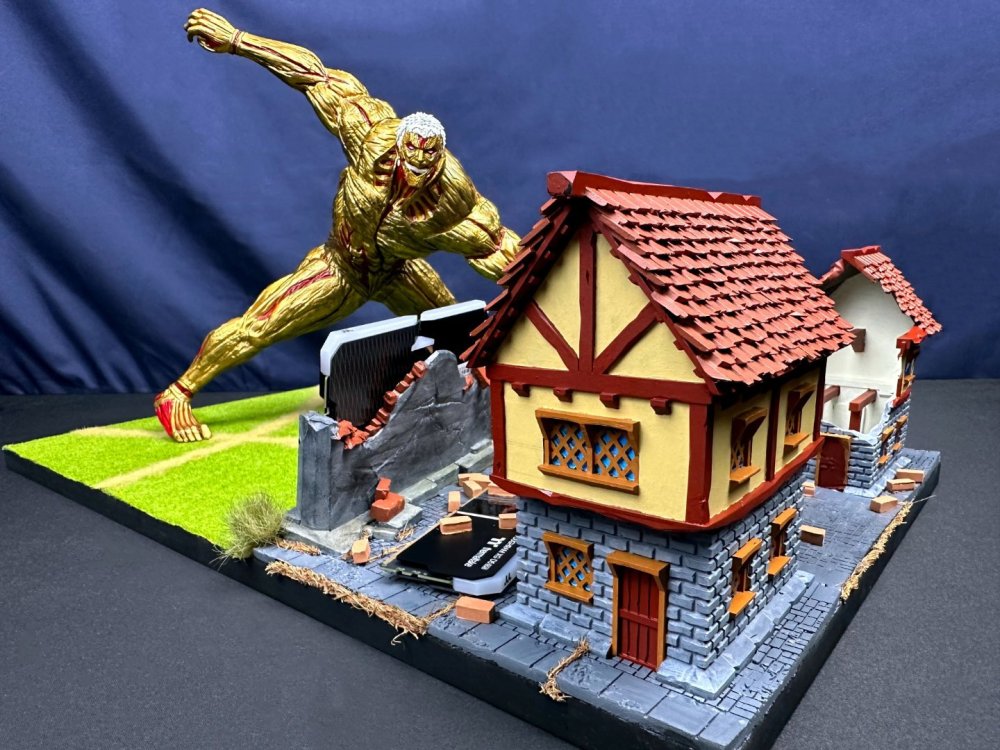
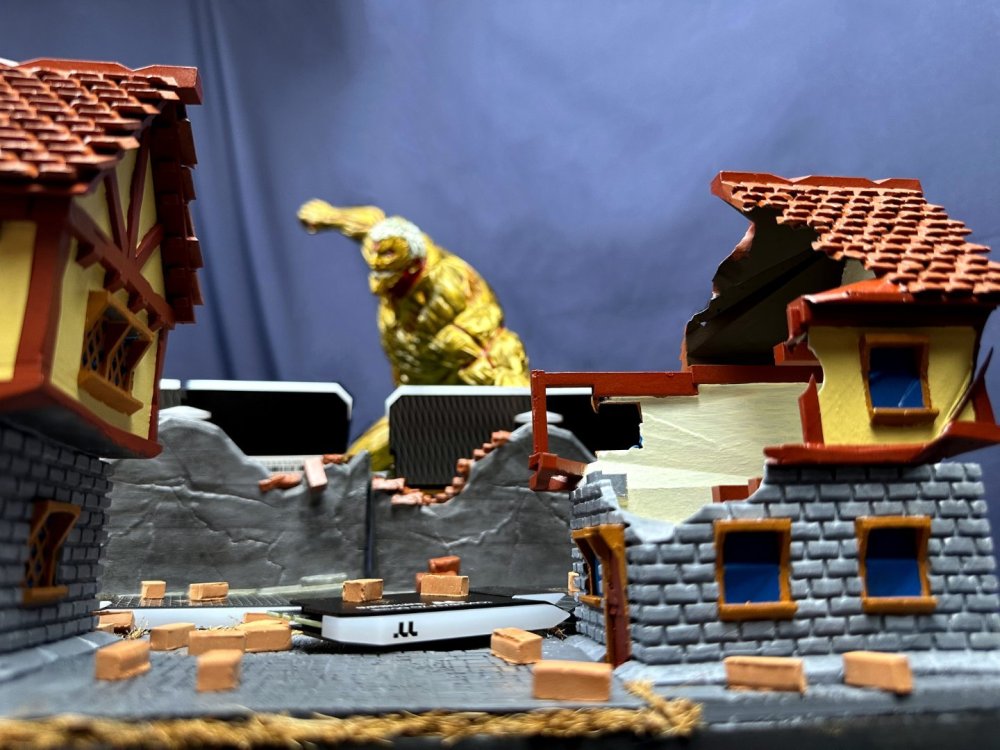
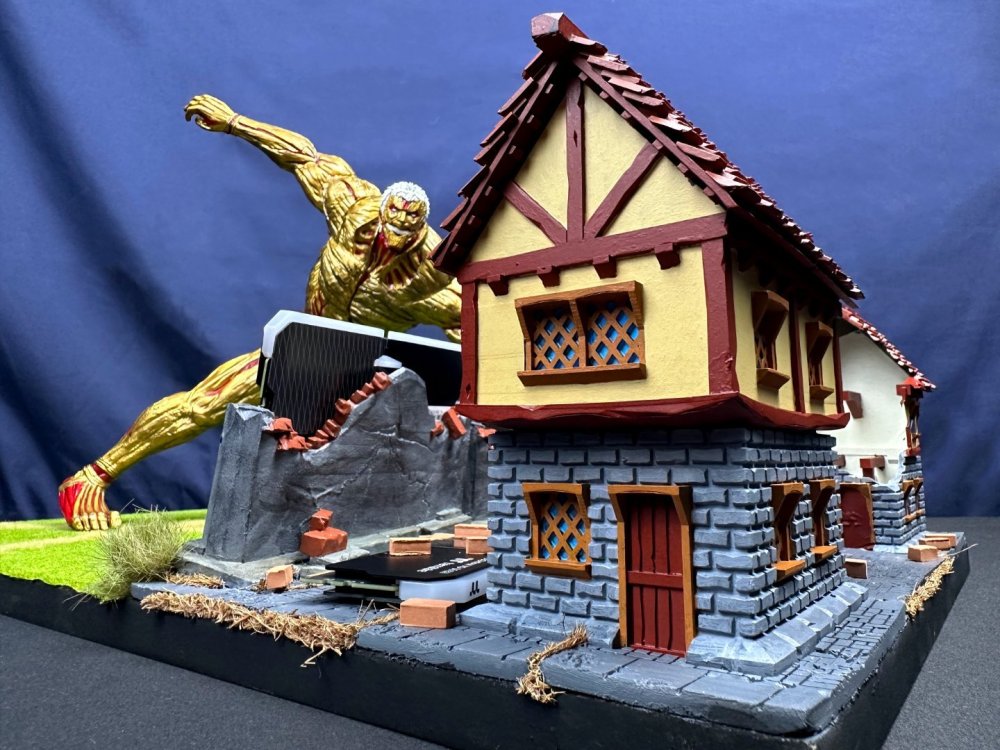
After intense periods of study, design and realization, our wonderful journey together ends here. A journey full of joy and happiness because the final result of the work was like the first thought in my mind, managing to reproduce in a way that is completely faithful and precise compared to my idea. Now we have all discovered the real secret of the walls of the Attack on Titan so we thank Thermaltake for keeping us safe again ! Thanks are due, first to those who have always believed in me and my way of working, to Thermaltake who invited me to this wonderful competition with many quality competitors and finally to all the public that has followed the progress of the work. Thank you all ! Cheers, Marco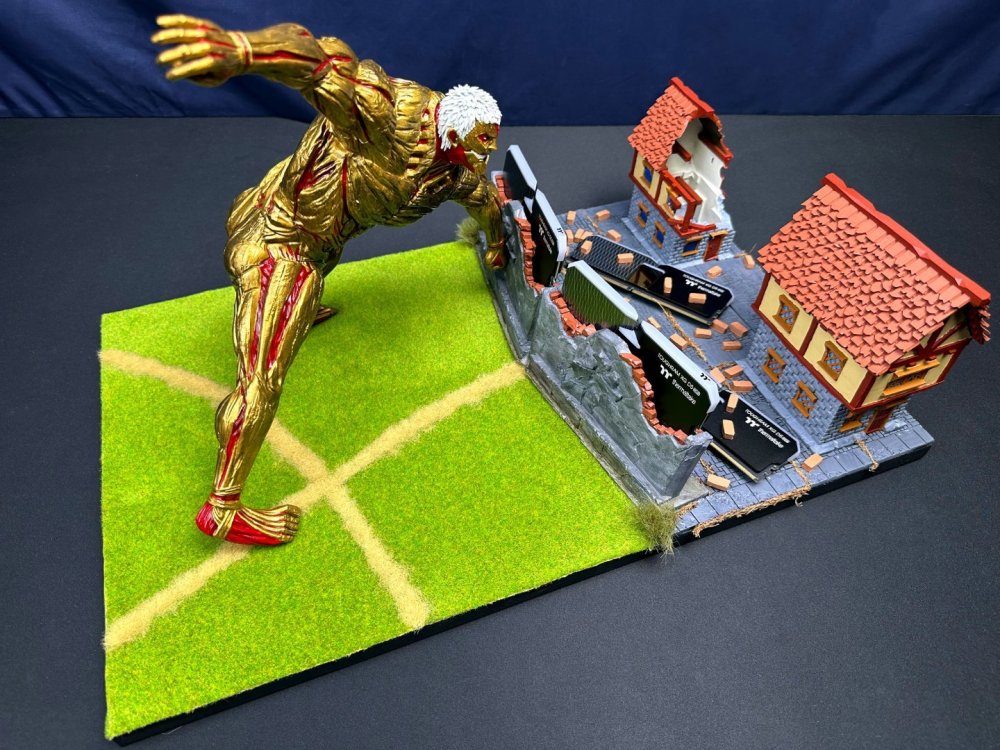


-
[Italy] Marco Di Silvestre
MPC Project replied to TT Amanda's topic in 2024 Thermaltake RAM MOD Invitational Season 1
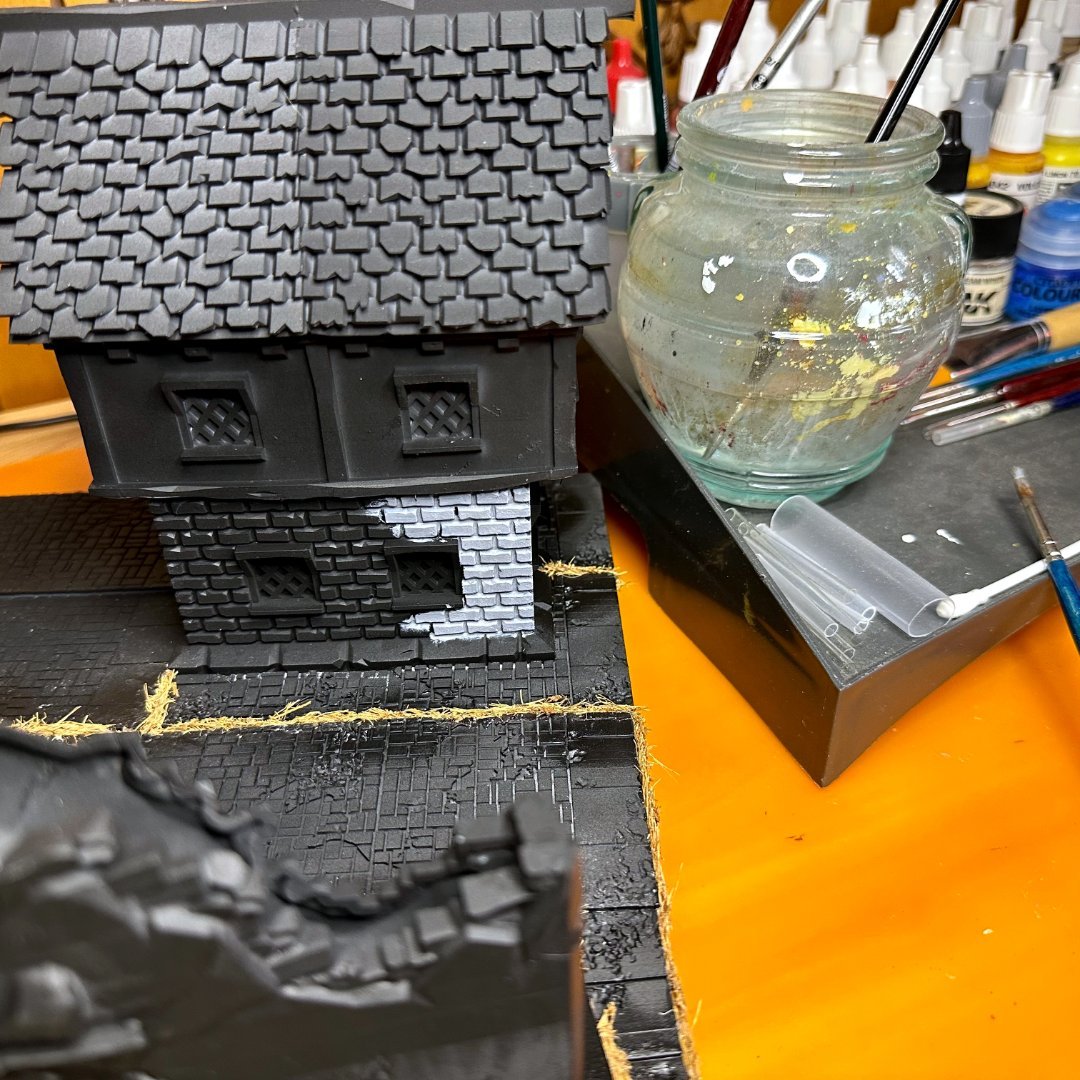
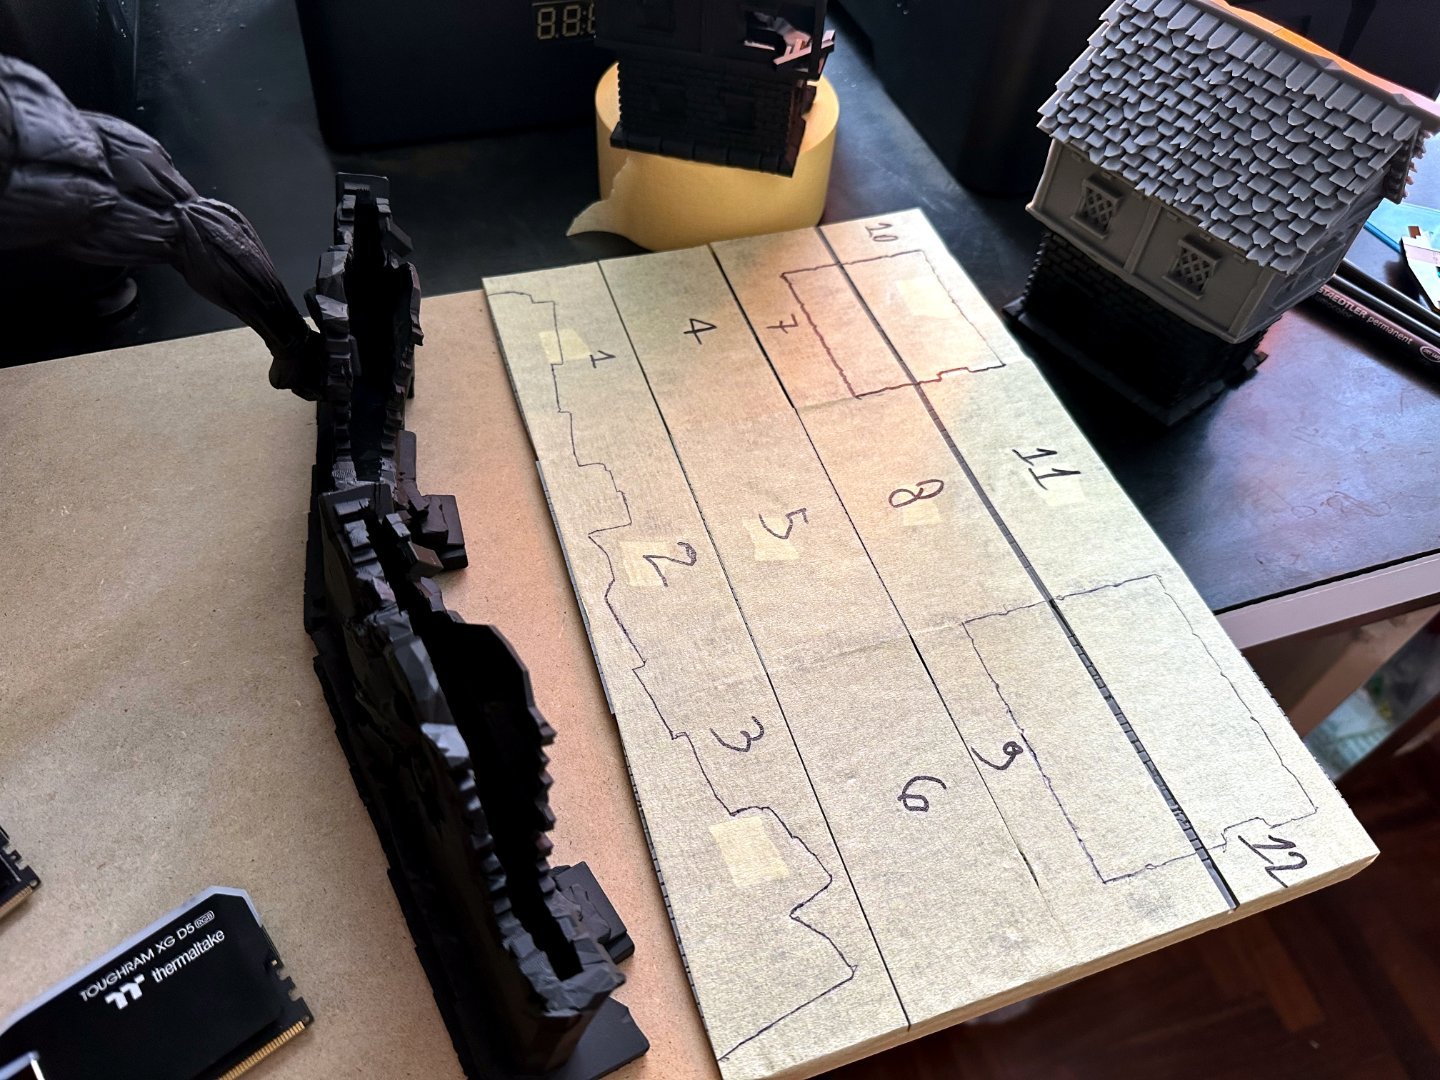
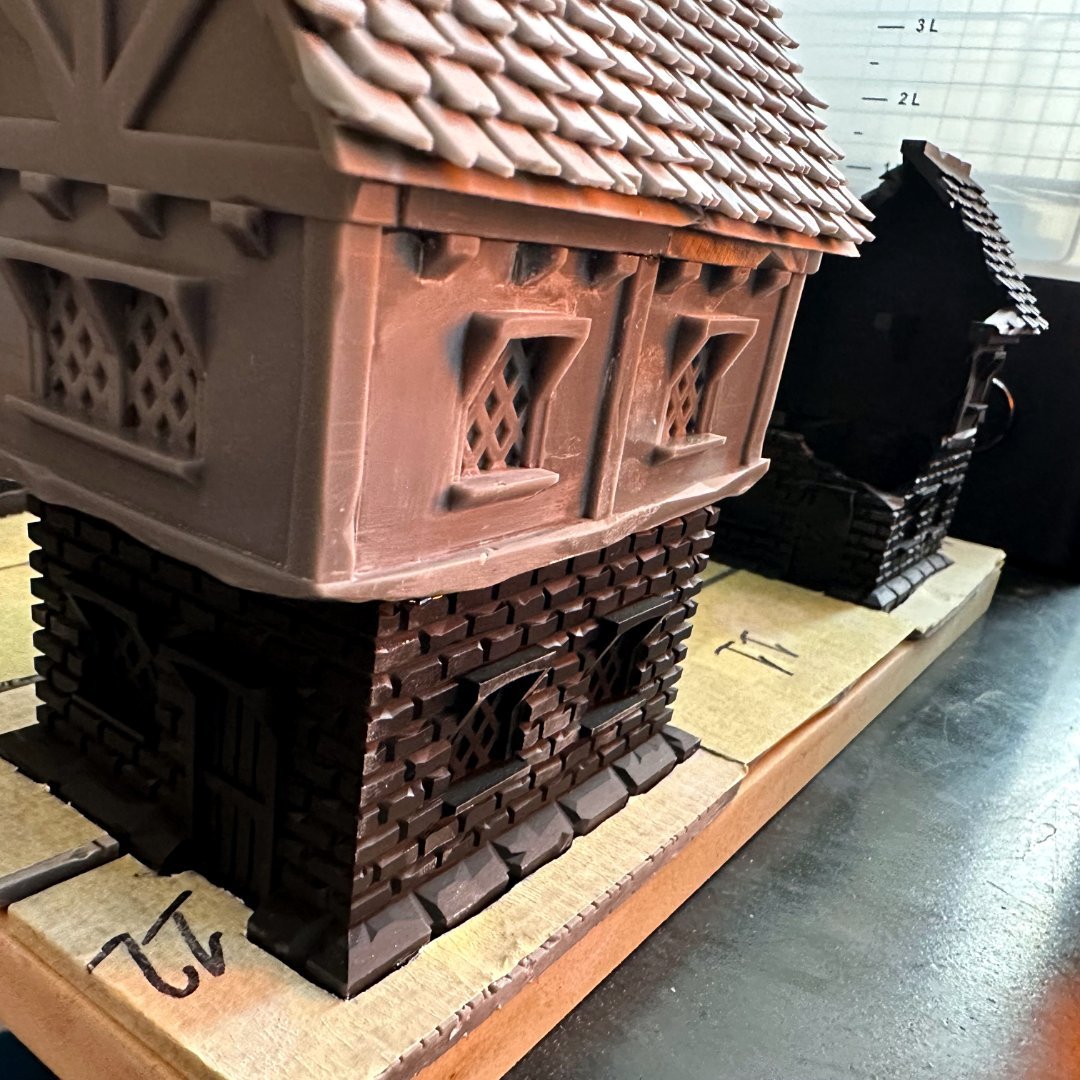
After having glued most of the components and some of the scenic effects along the road onto the base of the scenery, we move on to the long painting phase.

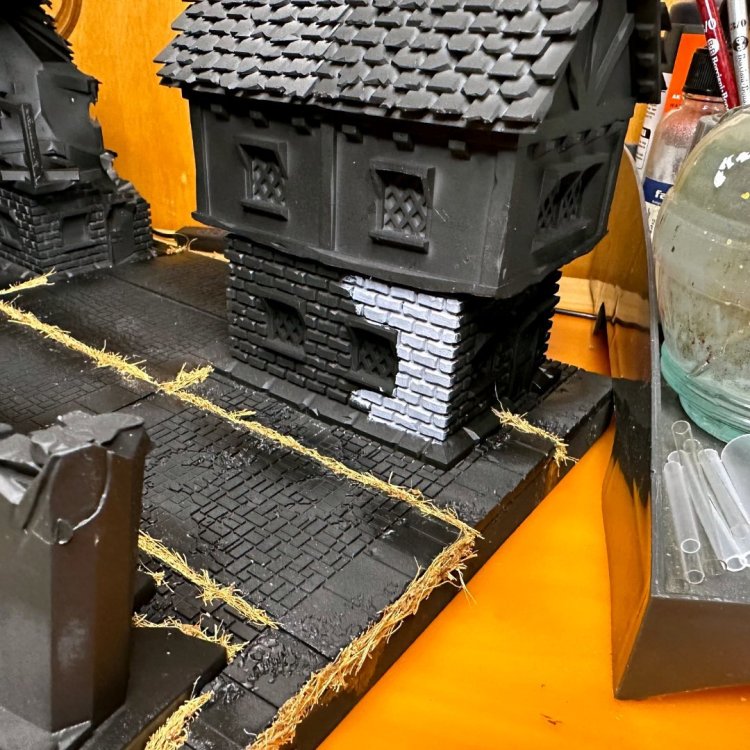


-
[Italy] Marco Di Silvestre
MPC Project replied to TT Amanda's topic in 2024 Thermaltake RAM MOD Invitational Season 1
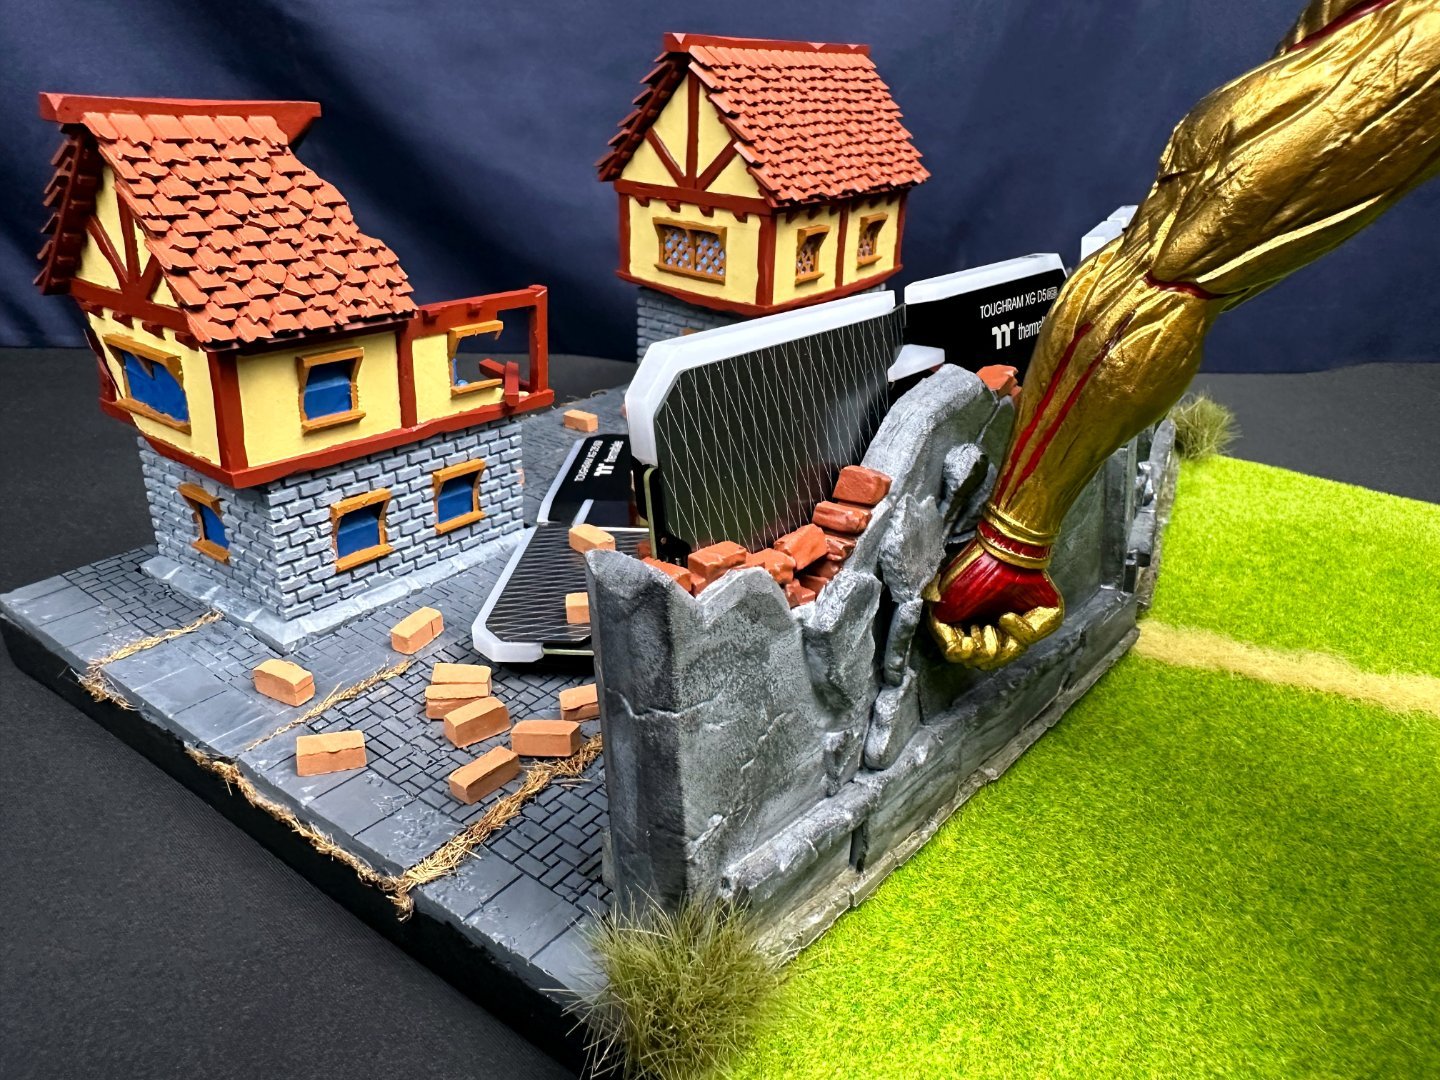
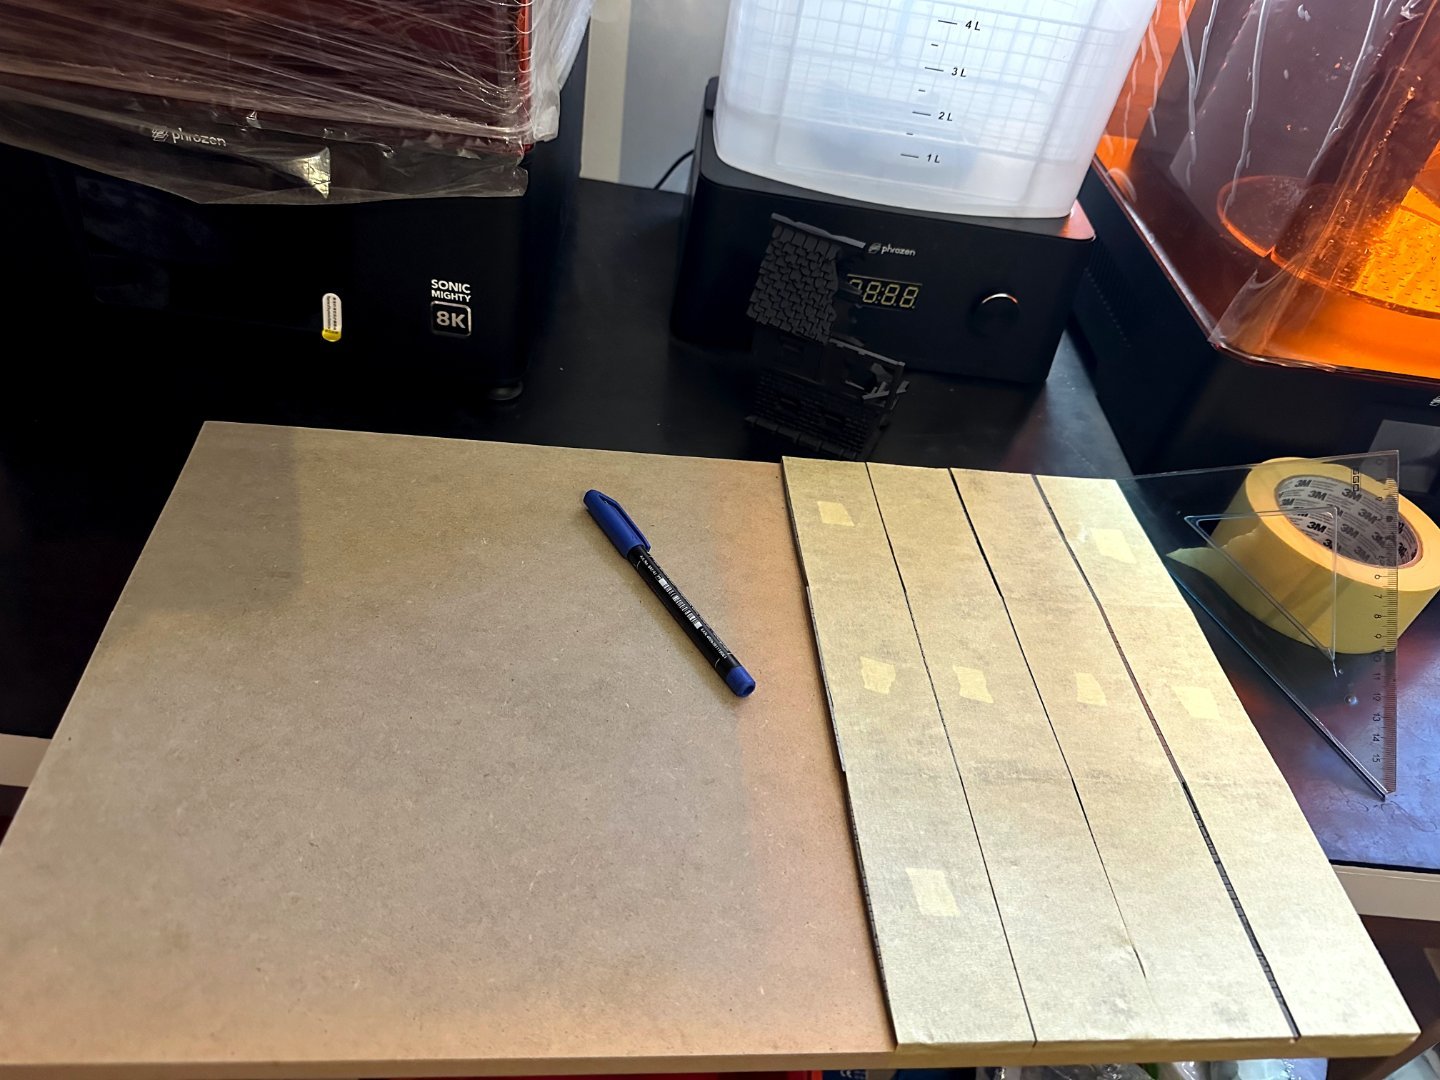
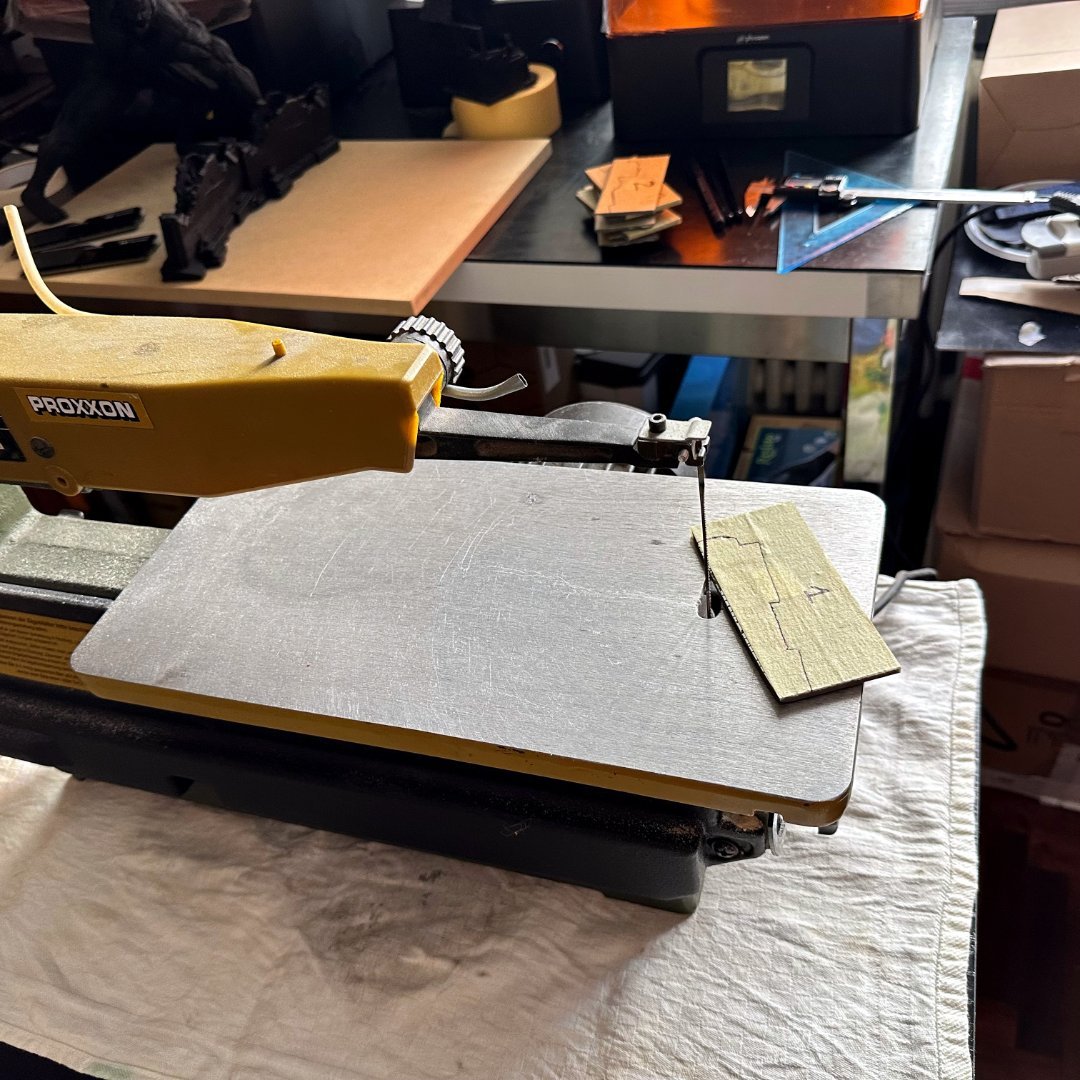
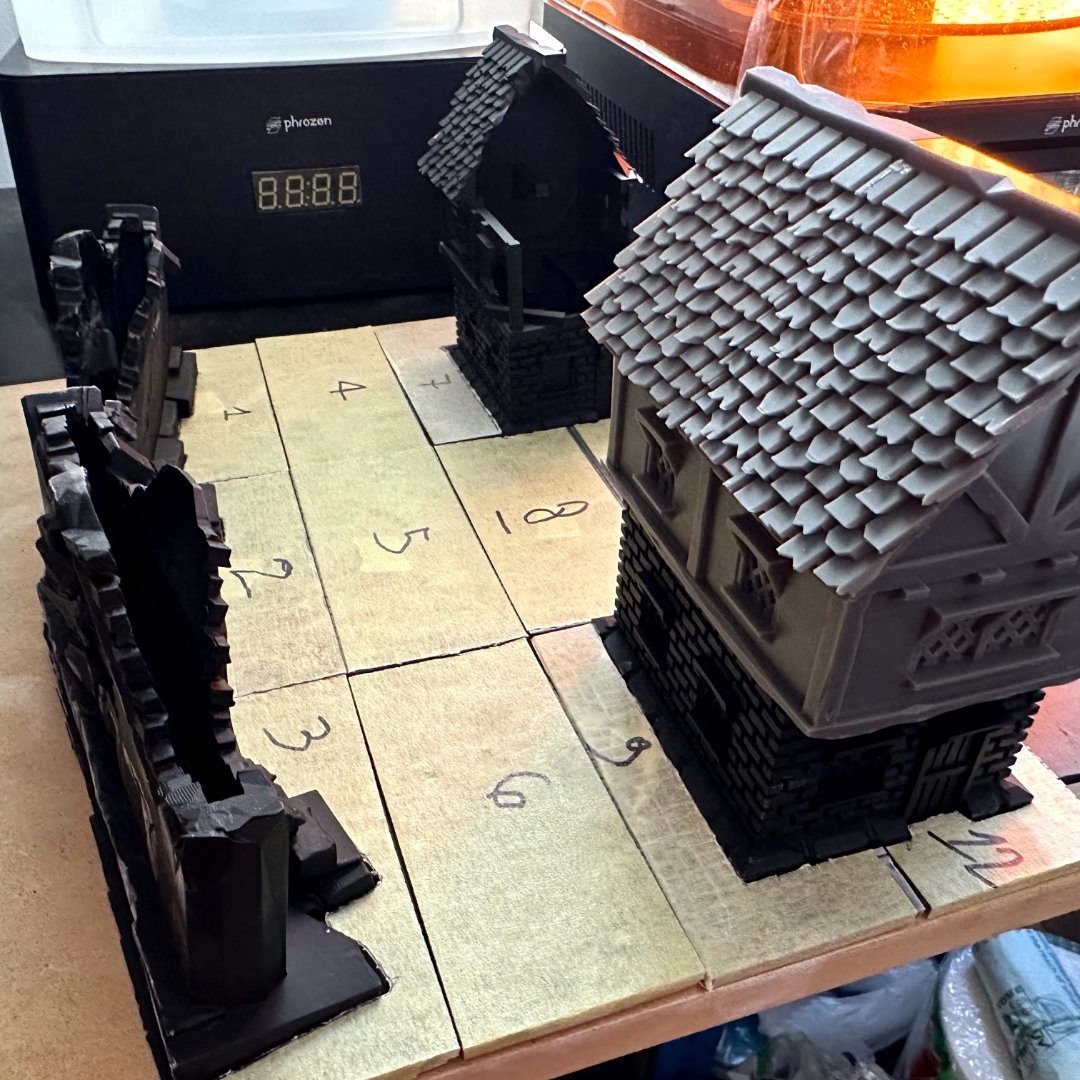
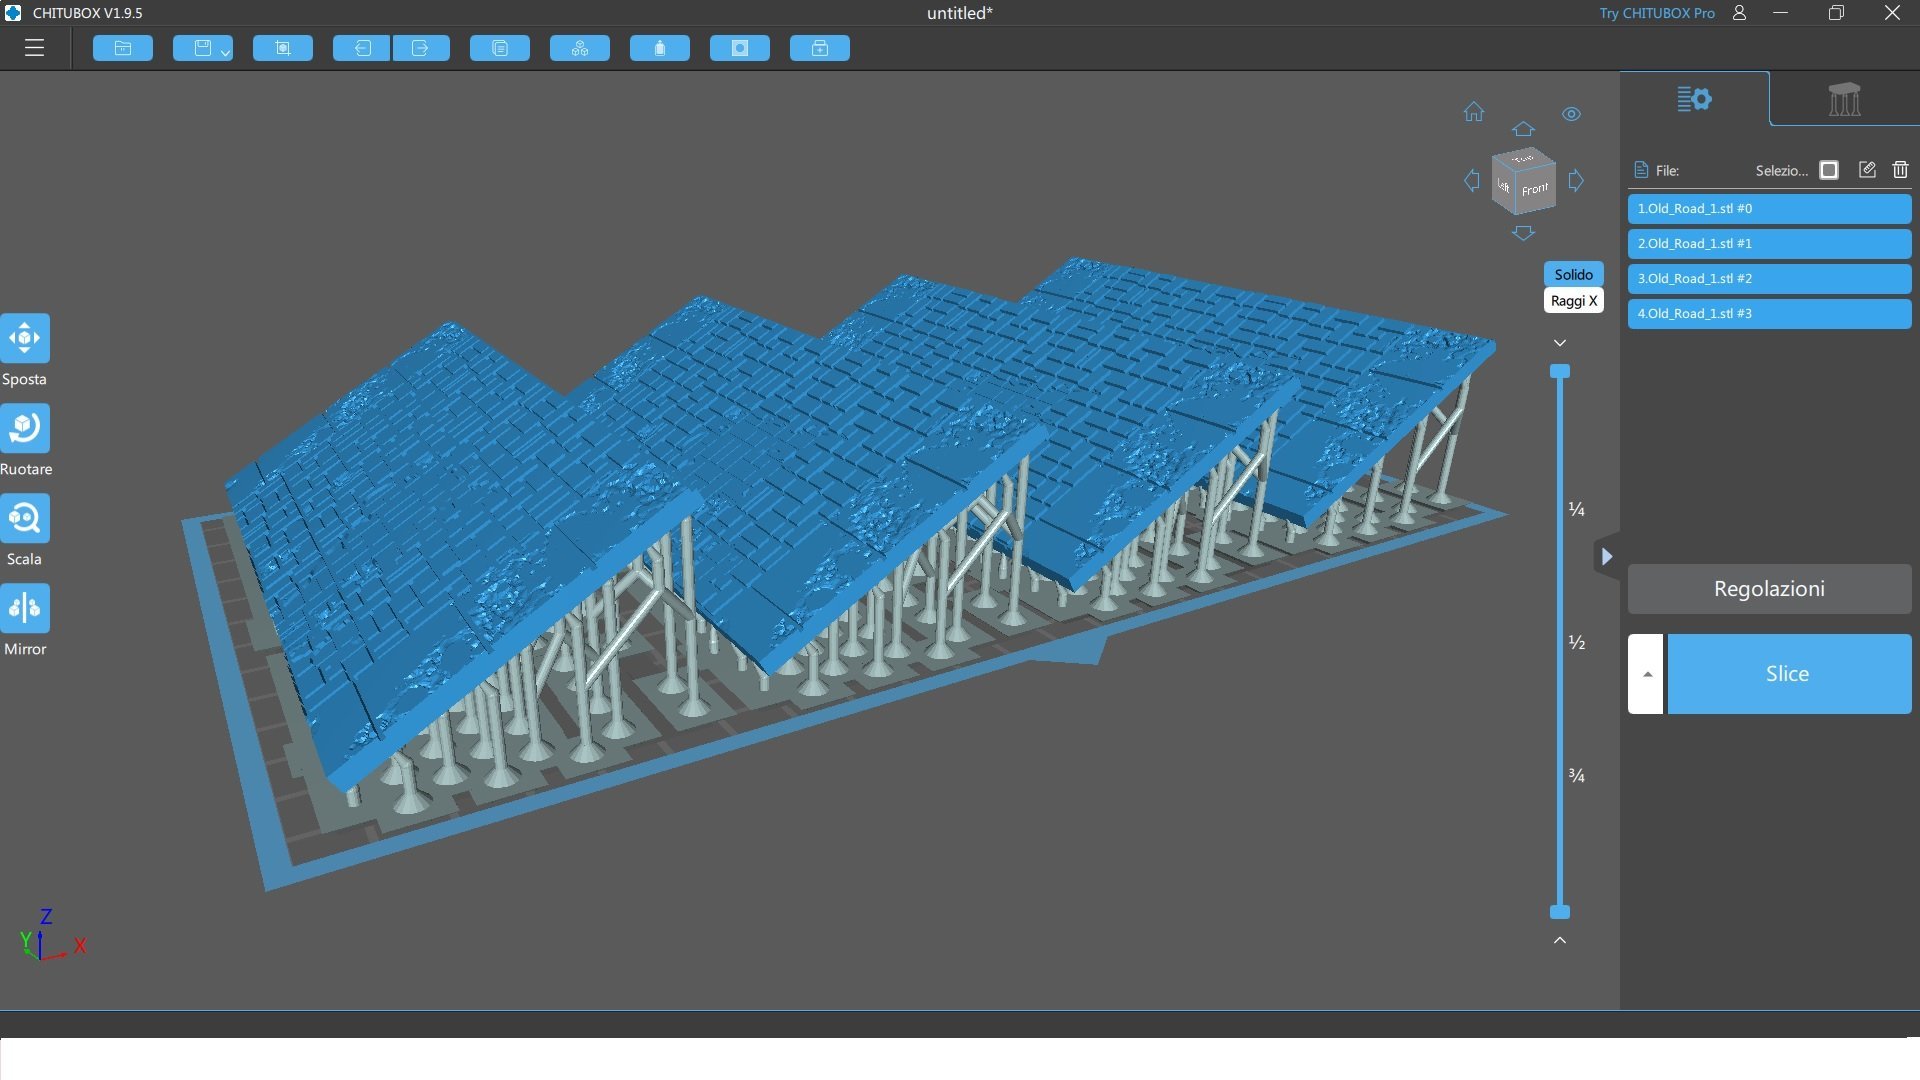
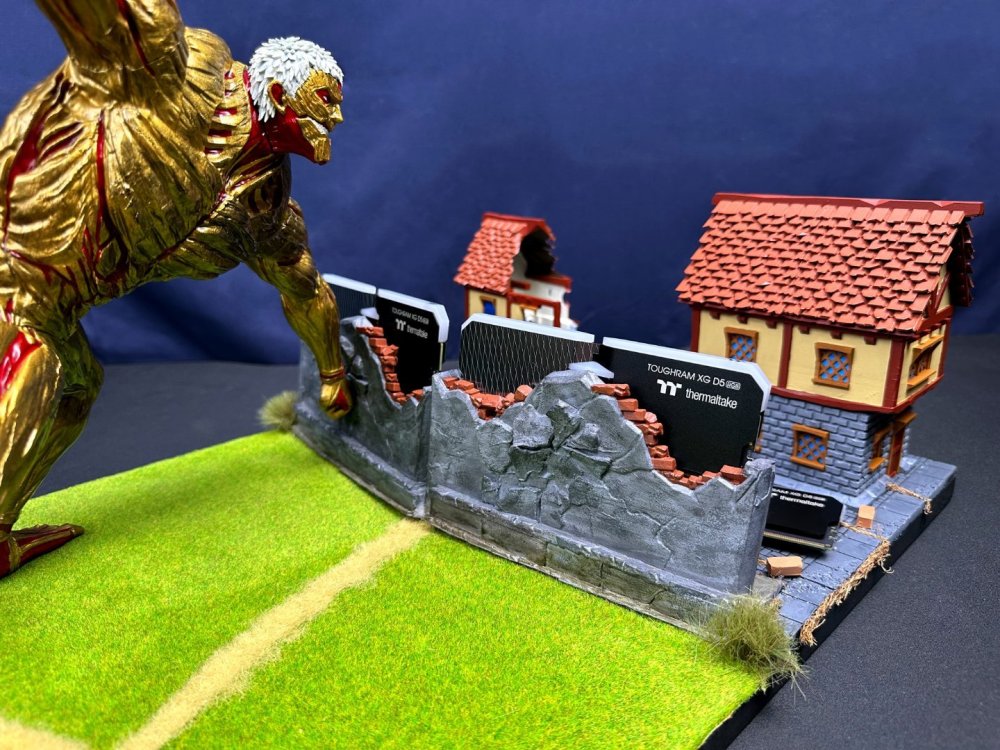
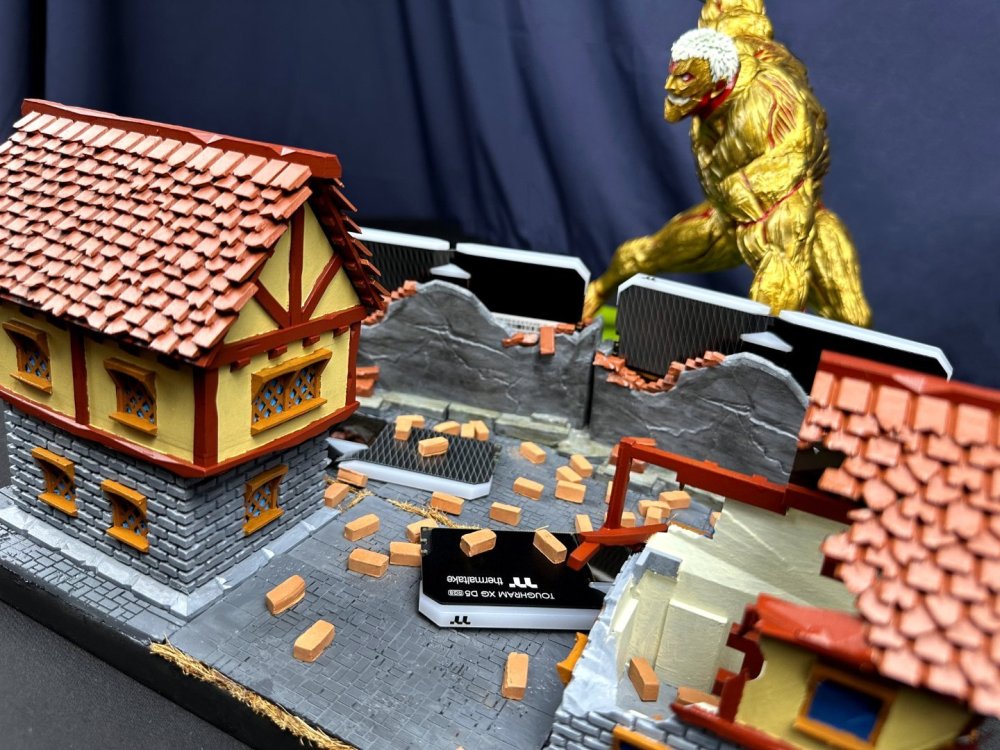
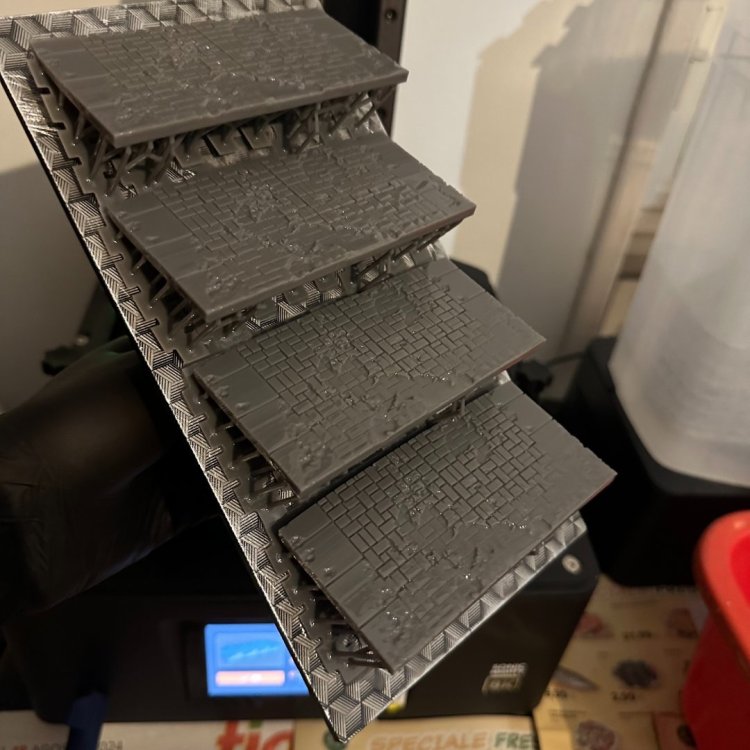
We develop the scenario by precisely shaping the various pieces that make up the road so that the other components fit together. The overall scenario will have dimensions 52 x 33 cm with height of 30cm


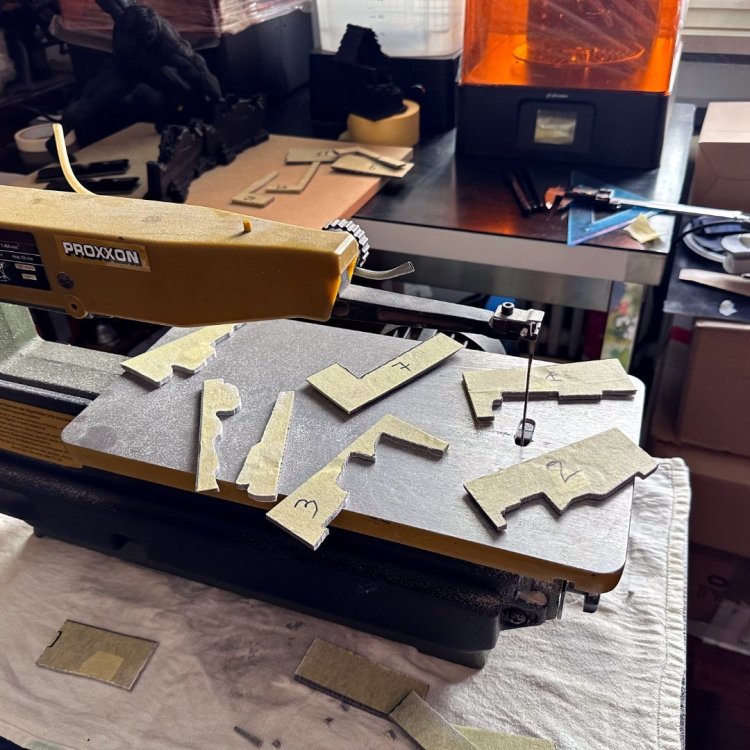


-
[Italy] Marco Di Silvestre
MPC Project replied to TT Amanda's topic in 2024 Thermaltake RAM MOD Invitational Season 1
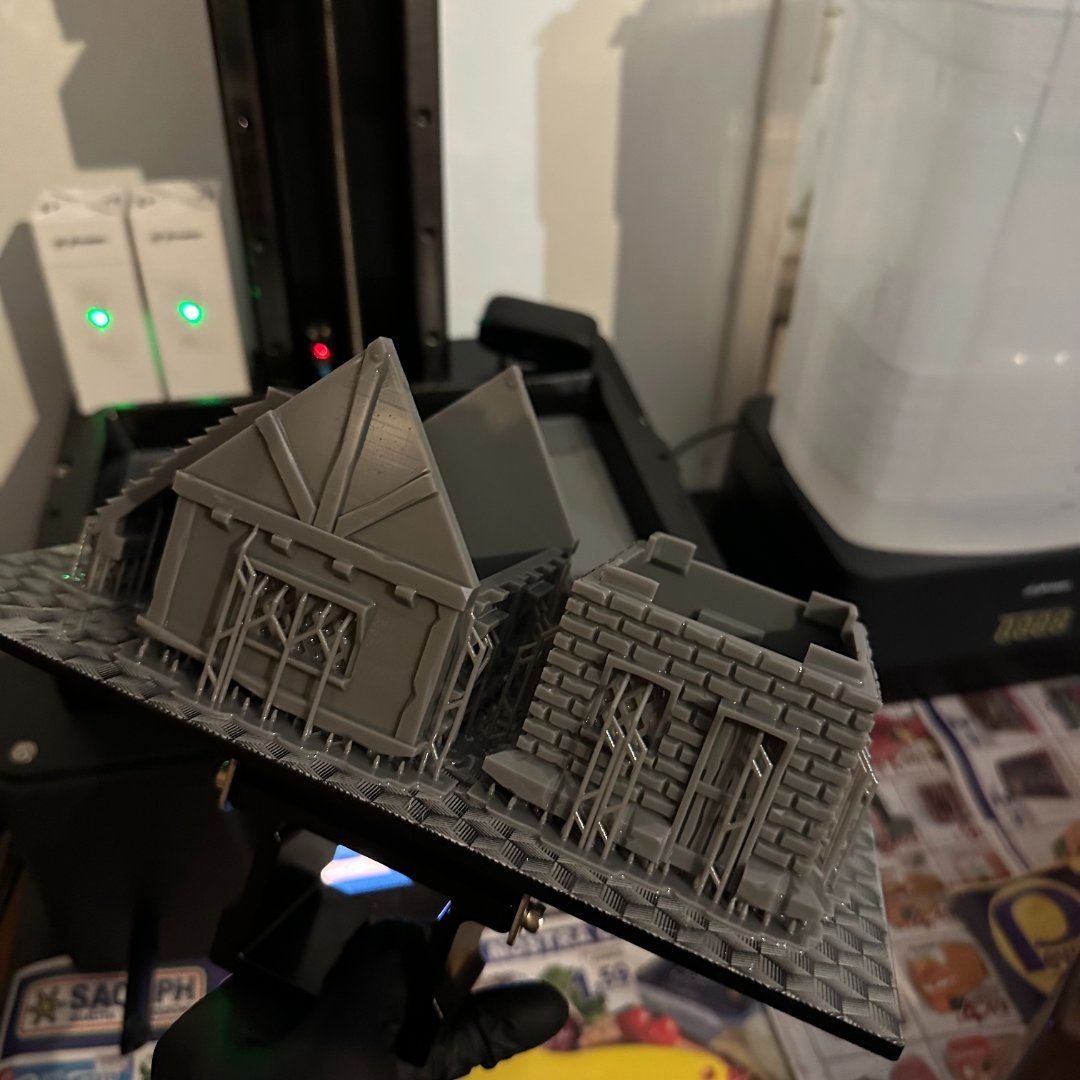
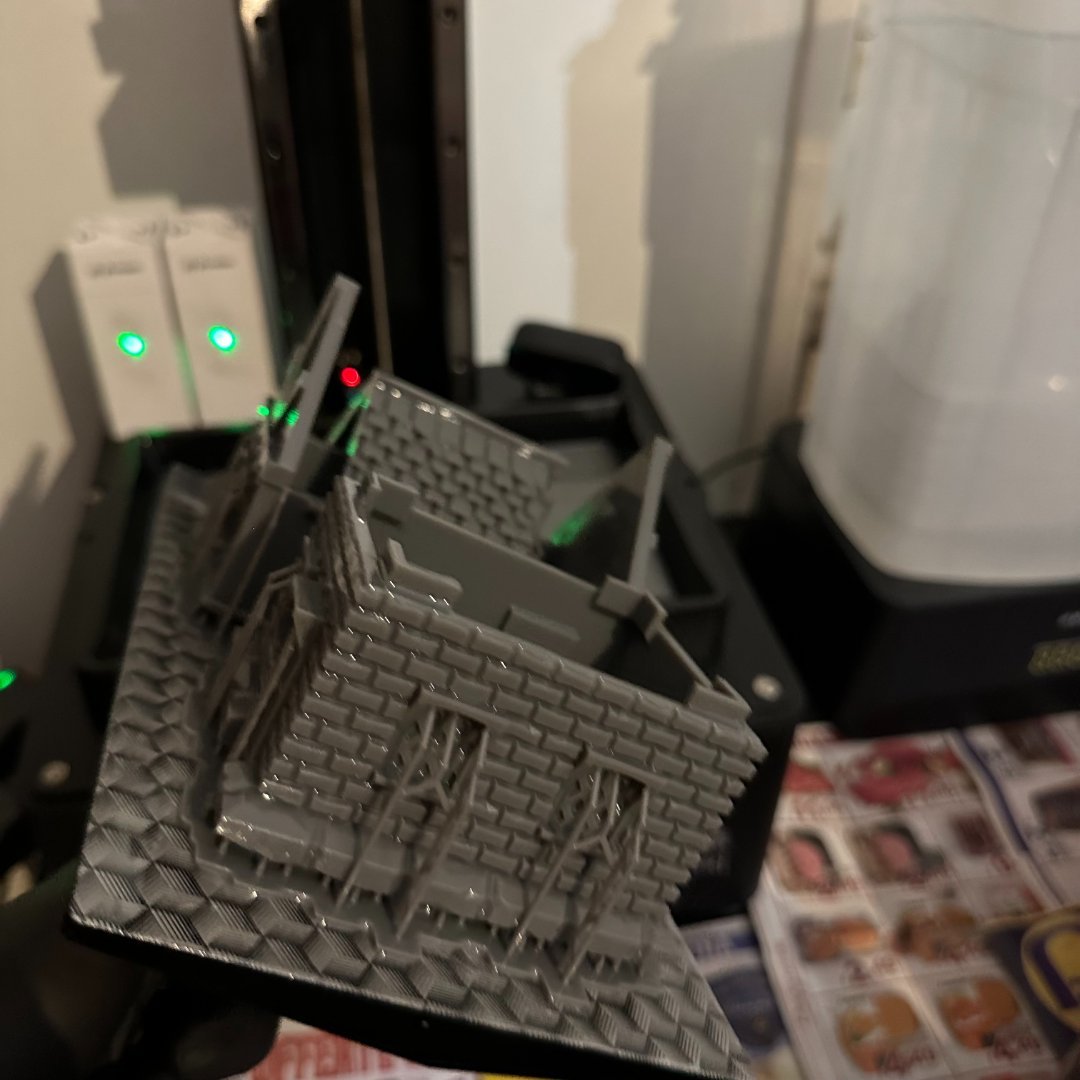
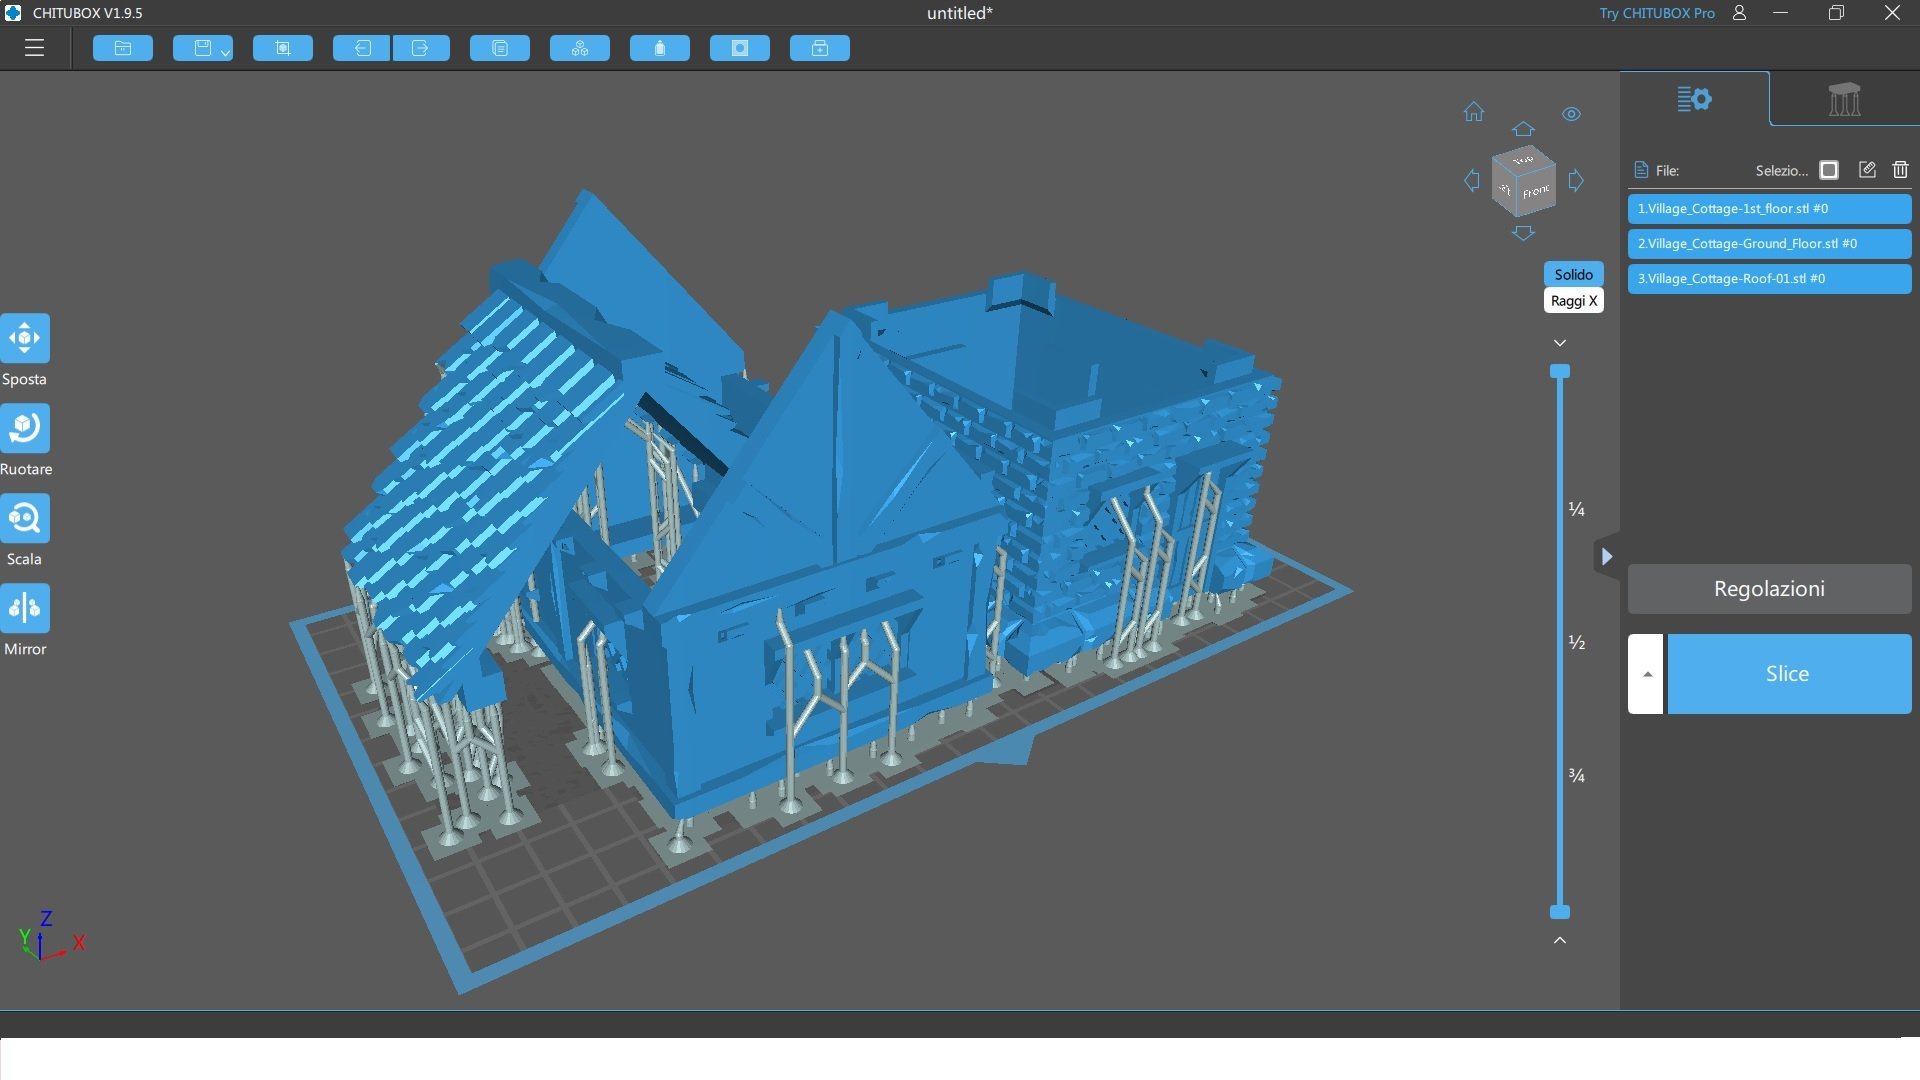
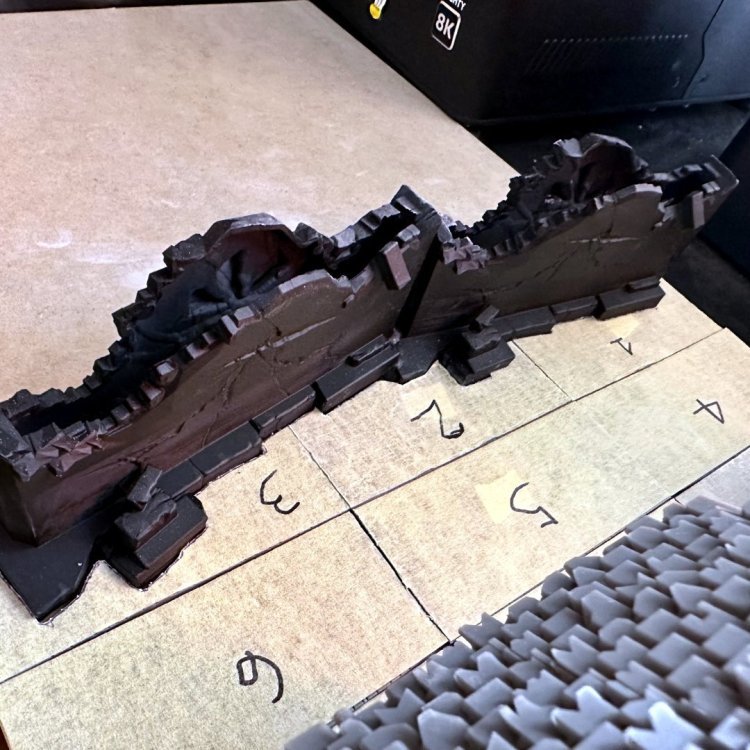
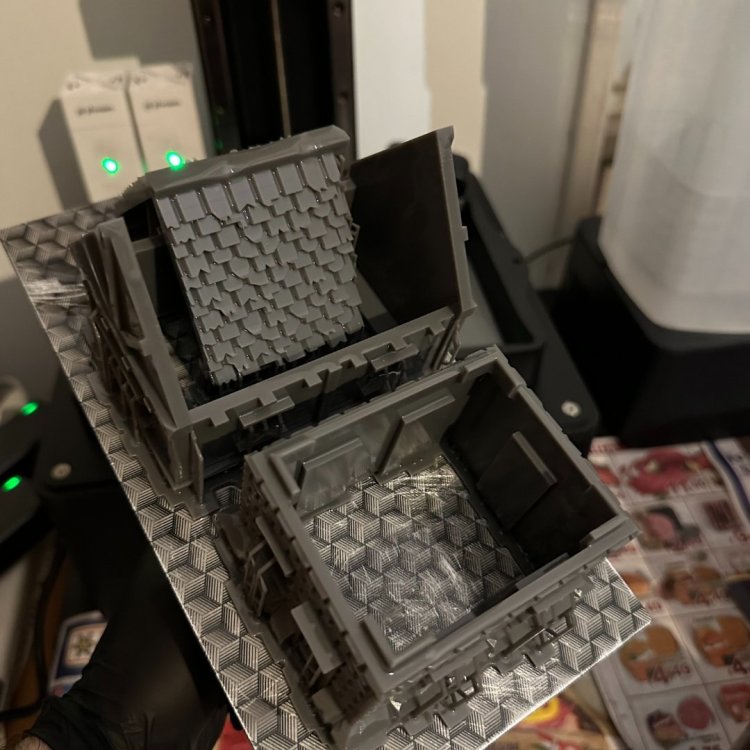
A complete view of some printed parts before gluing.


-
[Italy] Marco Di Silvestre
MPC Project replied to TT Amanda's topic in 2024 Thermaltake RAM MOD Invitational Season 1
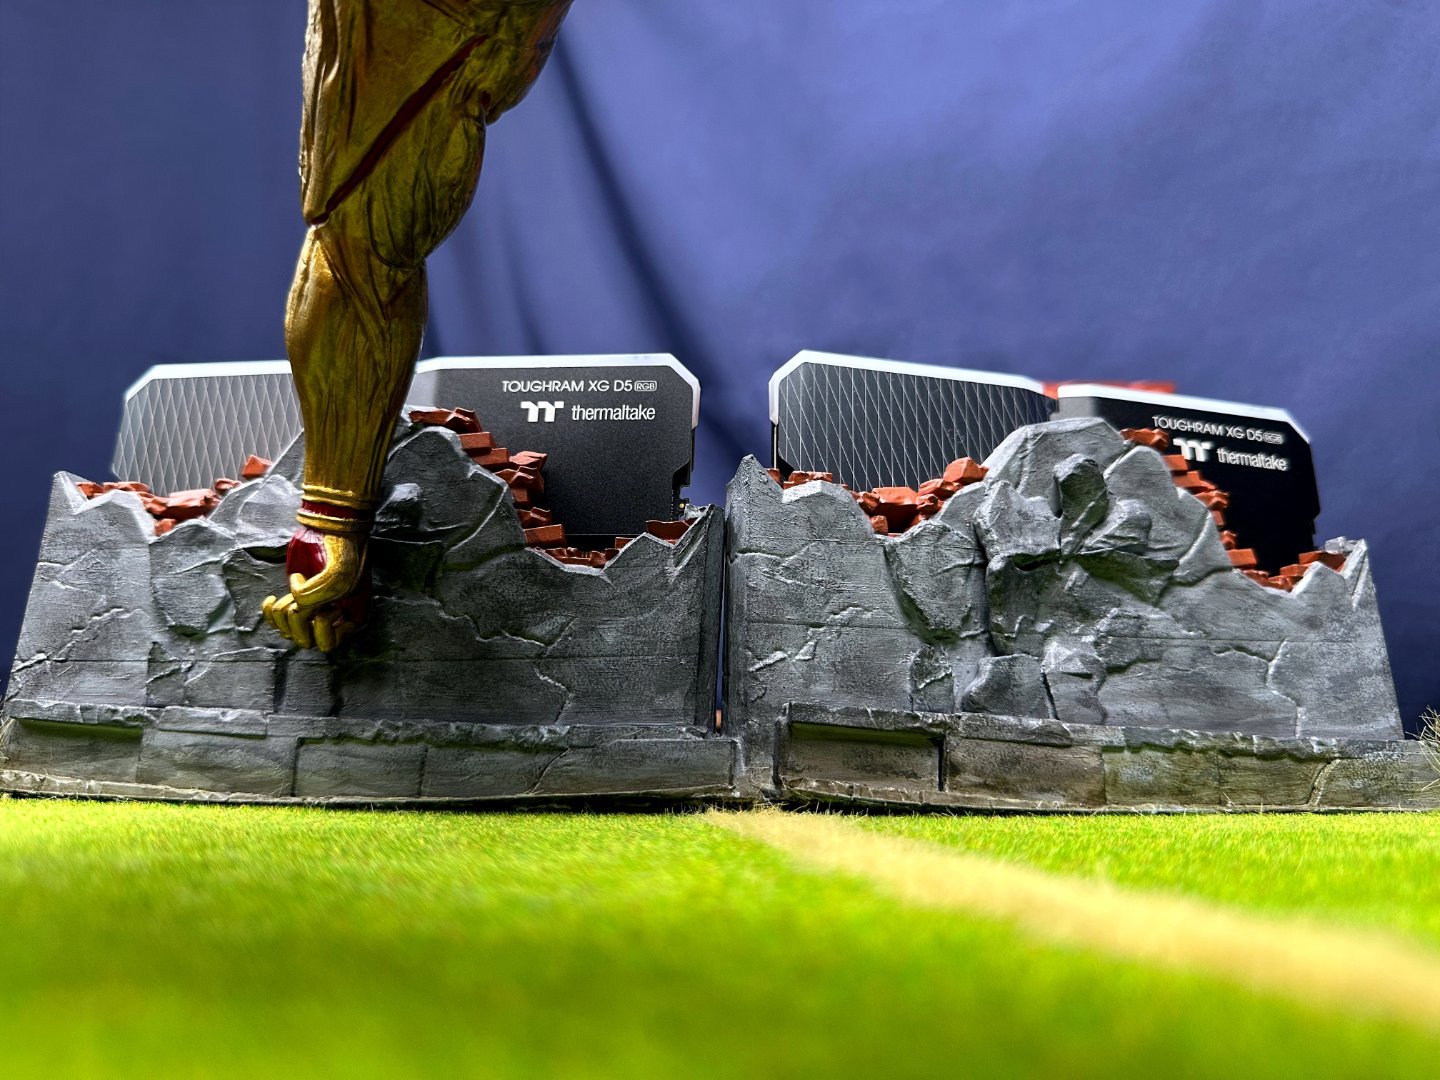
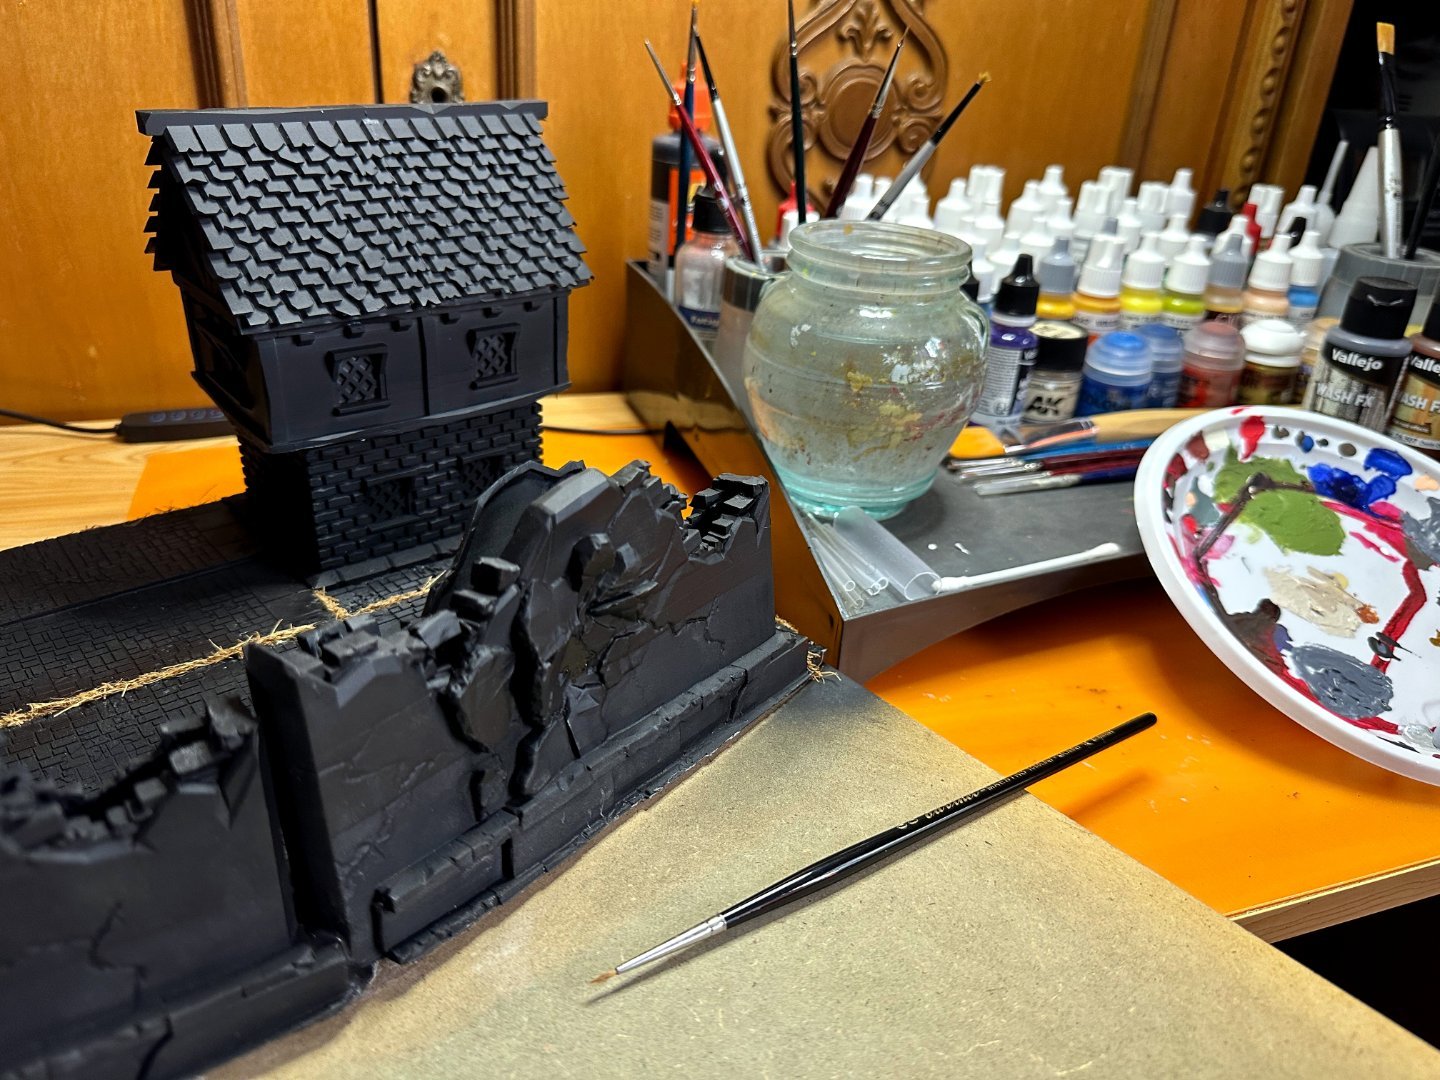
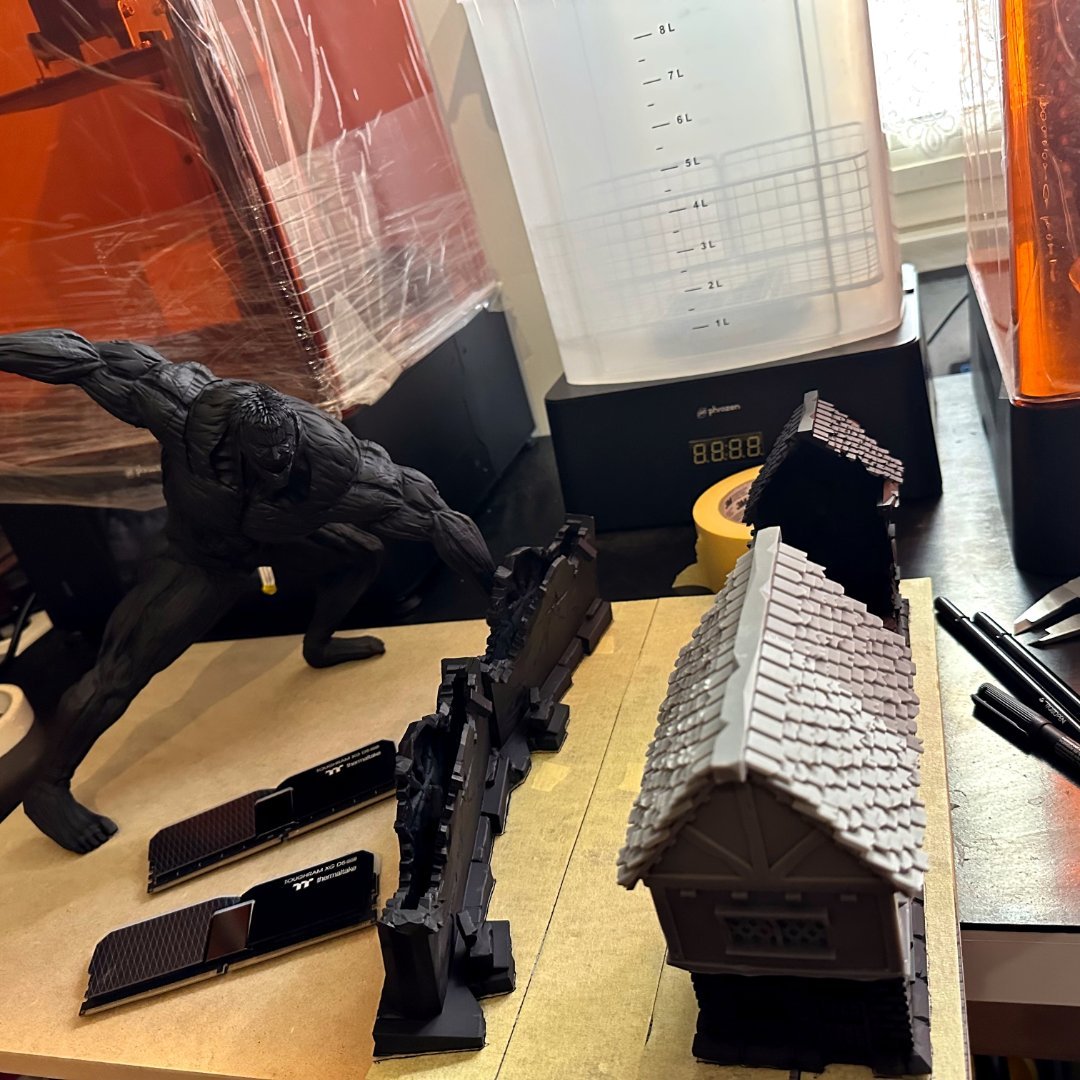
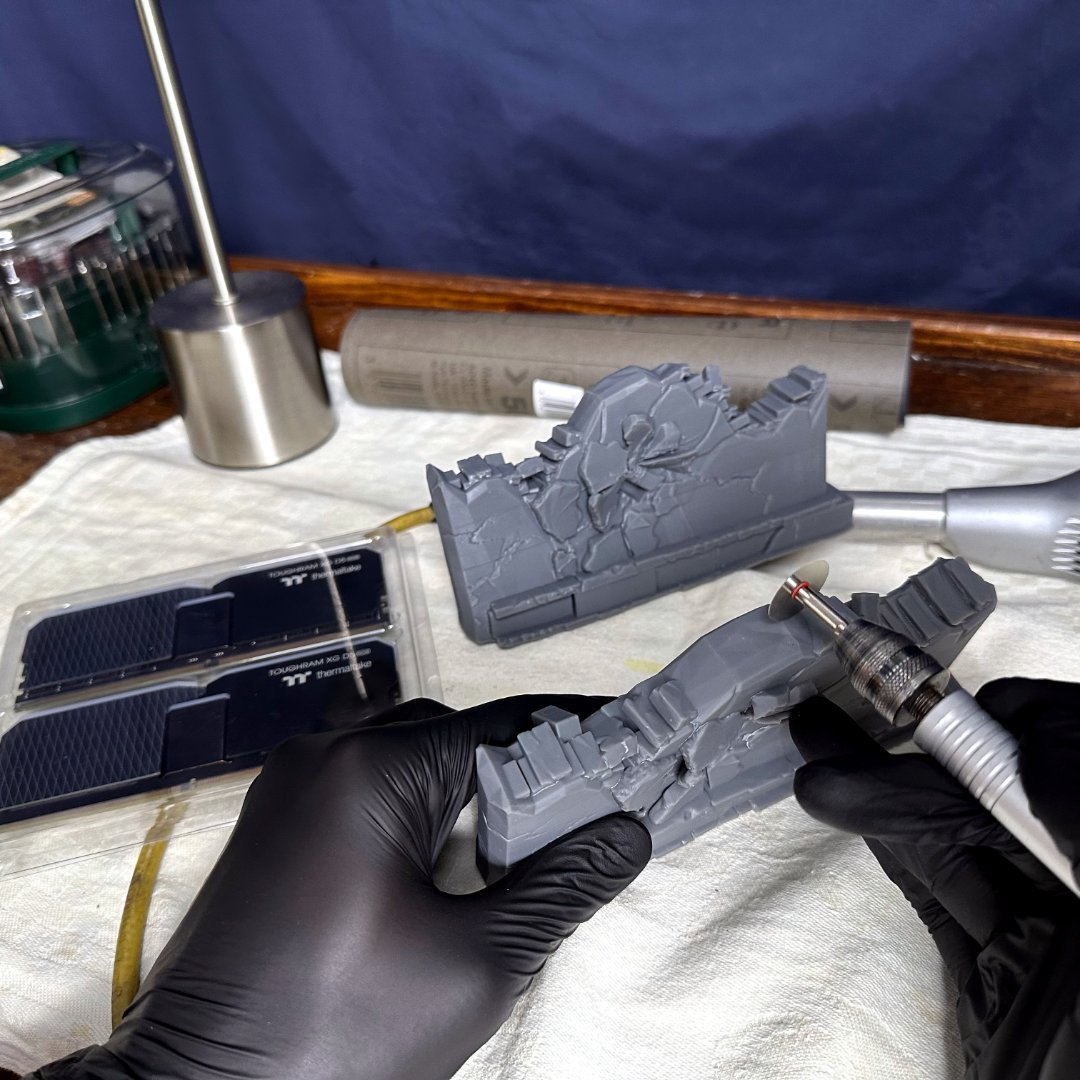
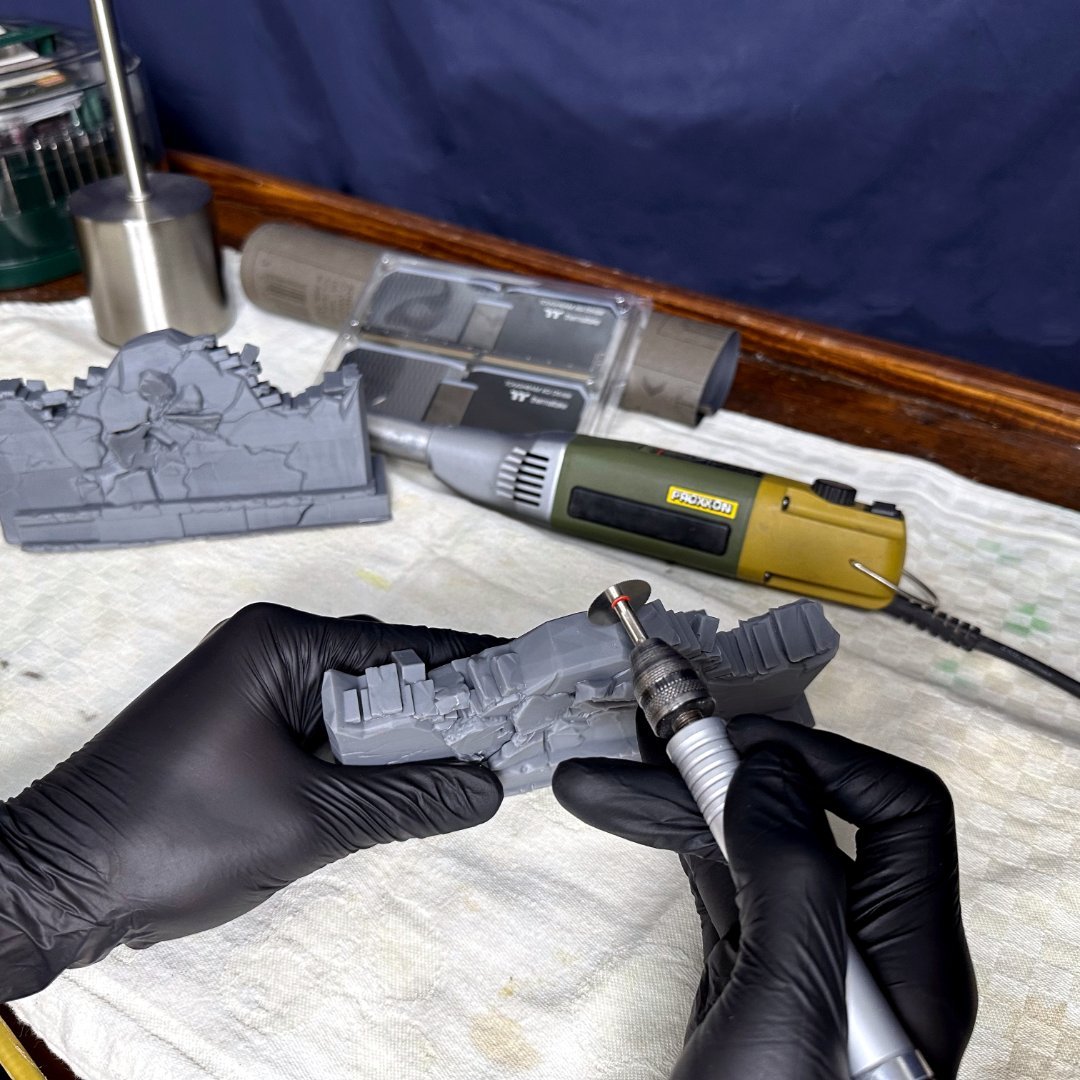
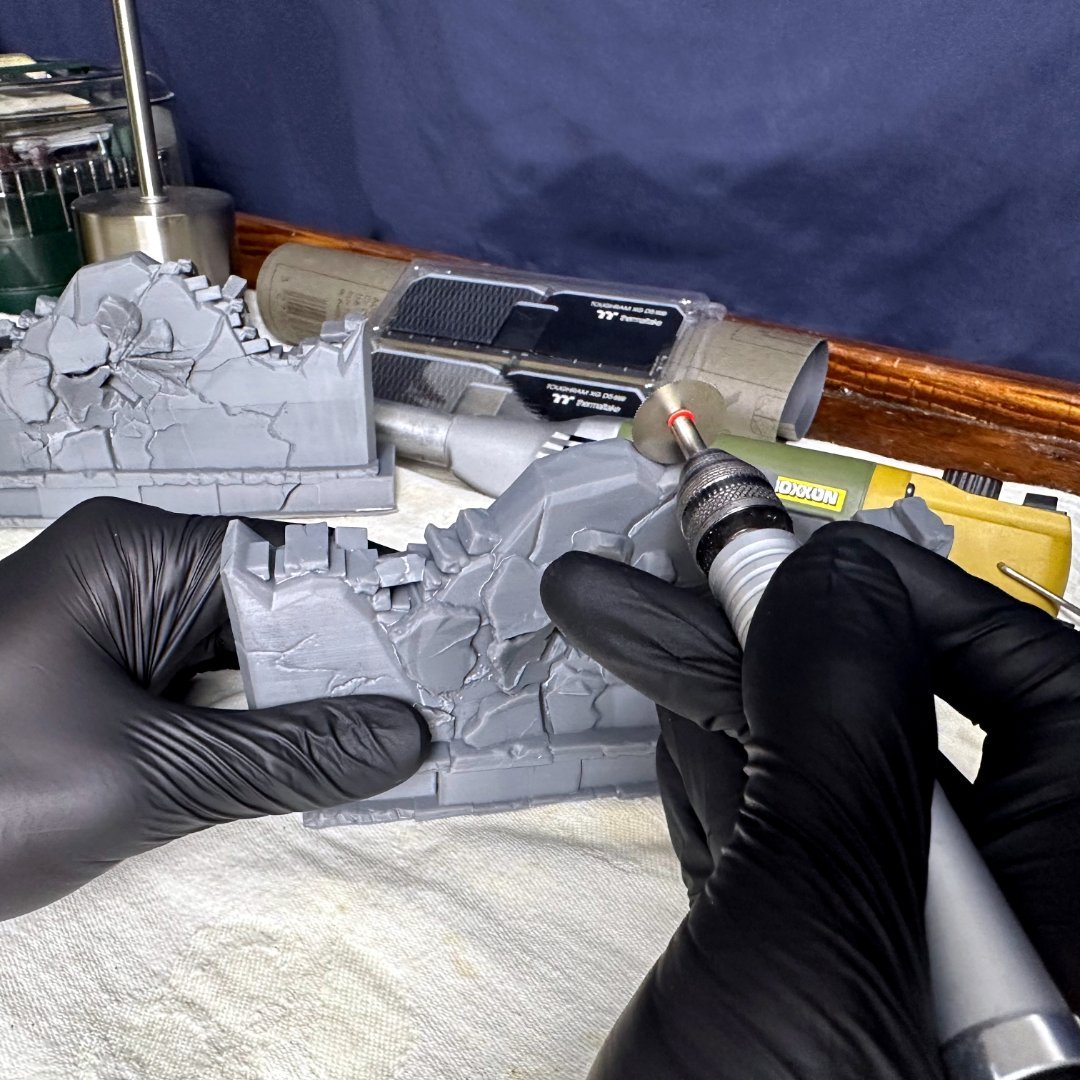
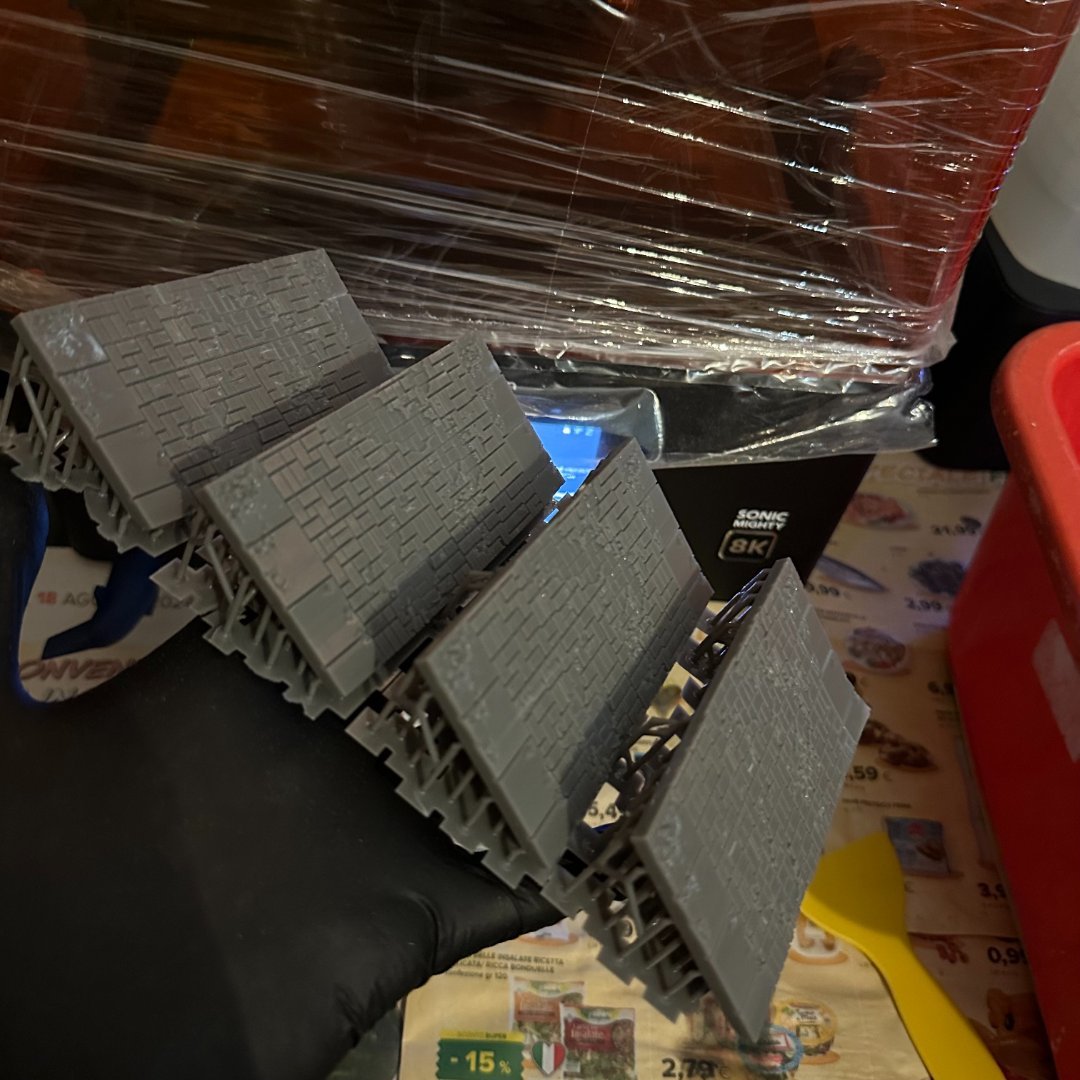
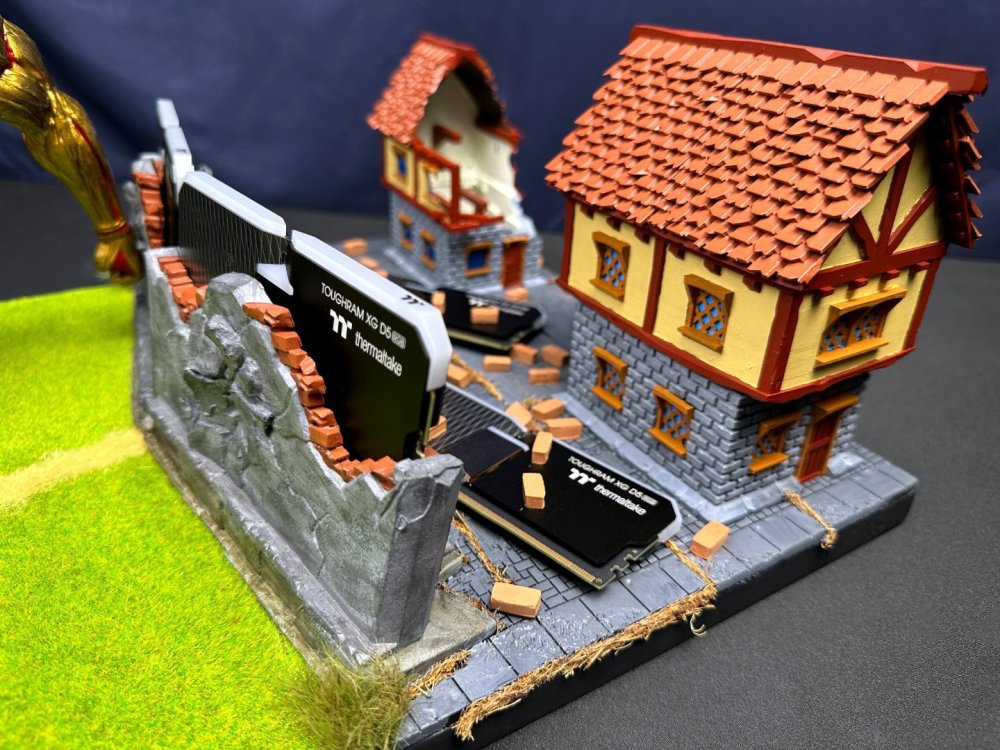
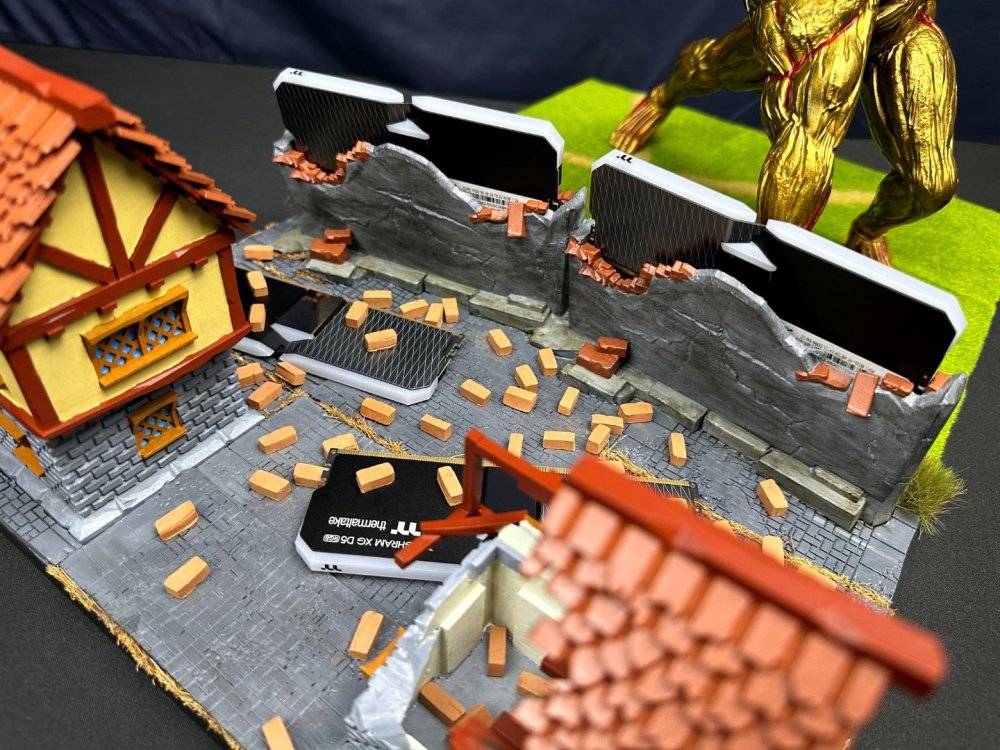
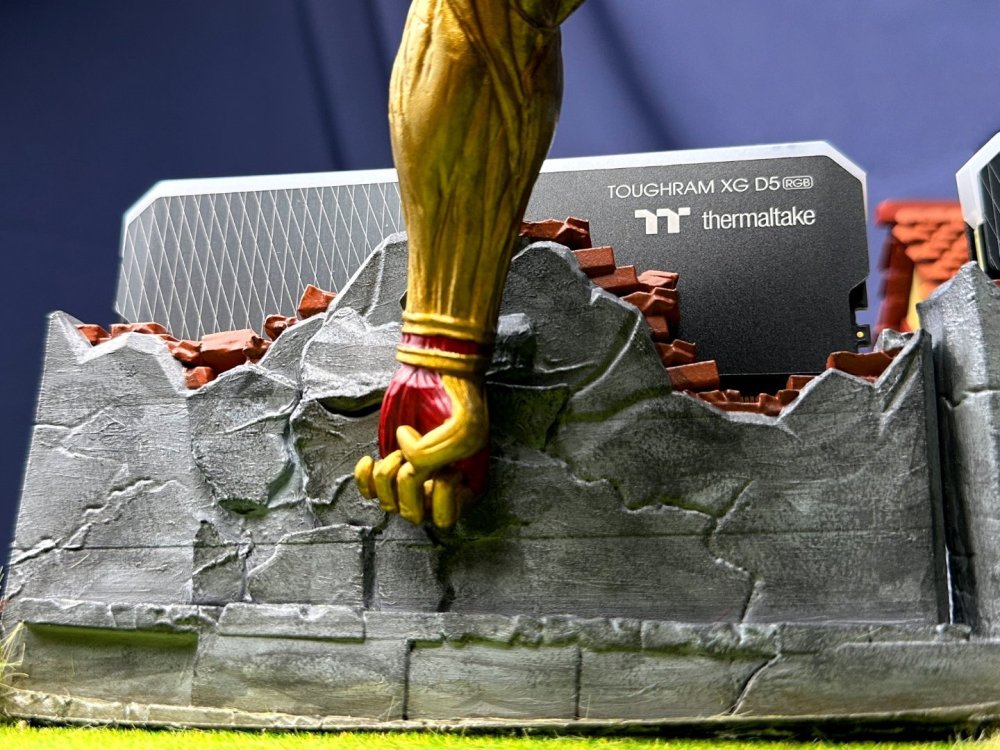
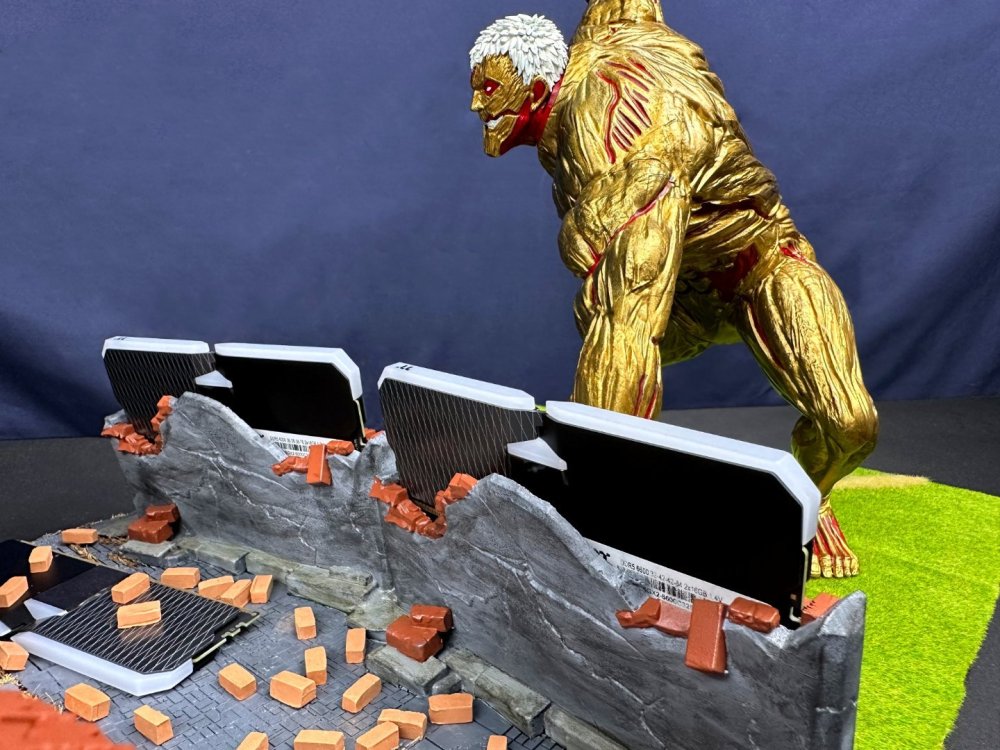
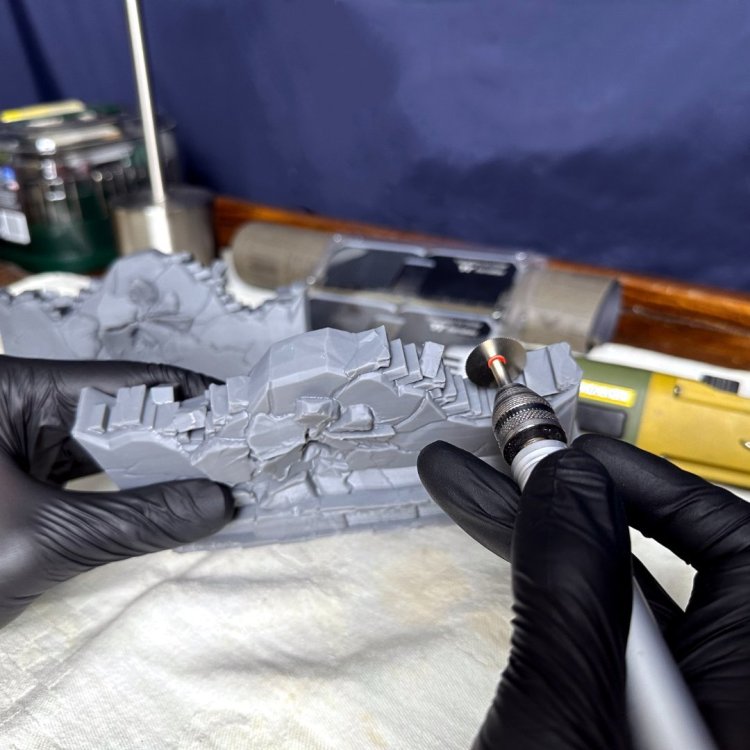
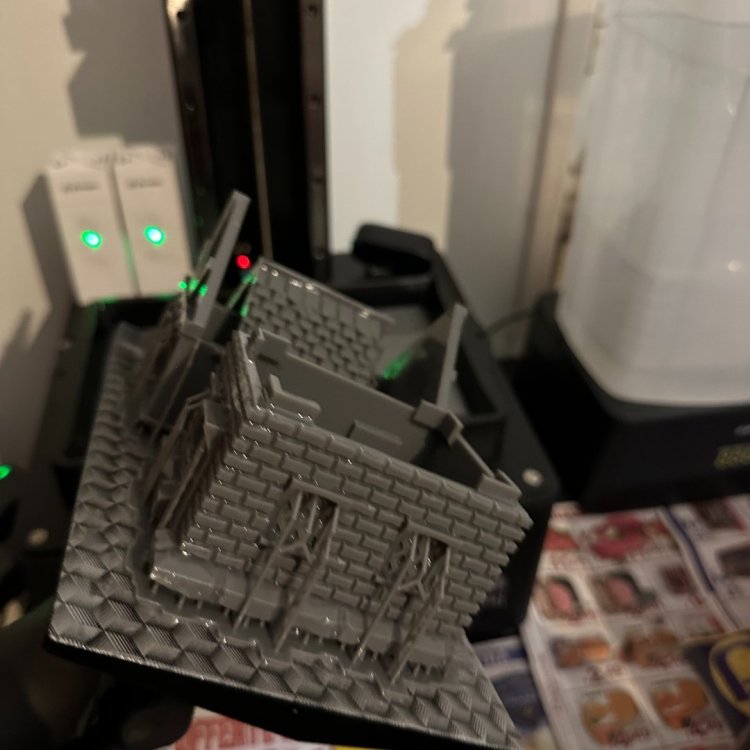
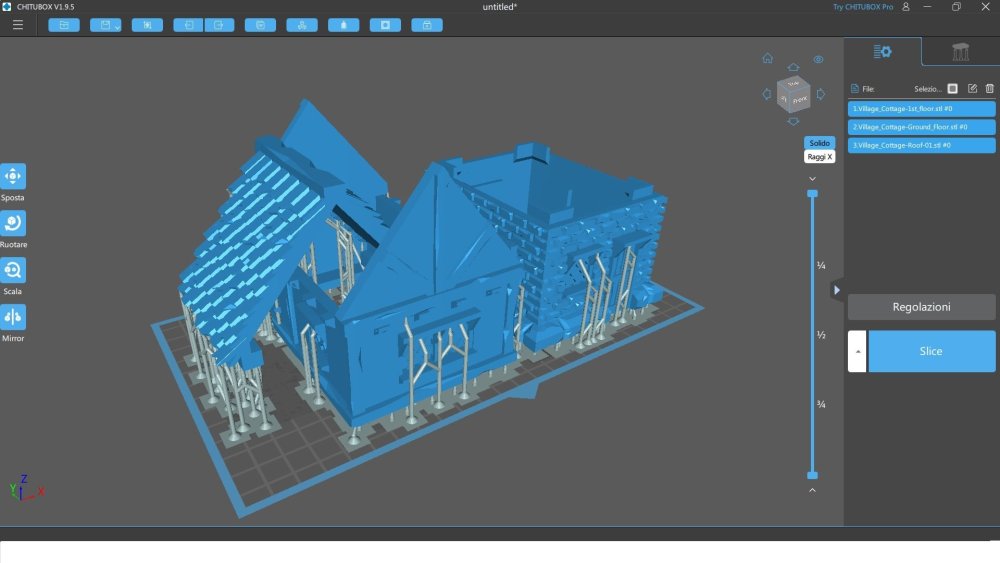
We open the walls of the city to insert inside them the real secret of the walls... They have been printed deliberately empty in order to facilitate the insertion process.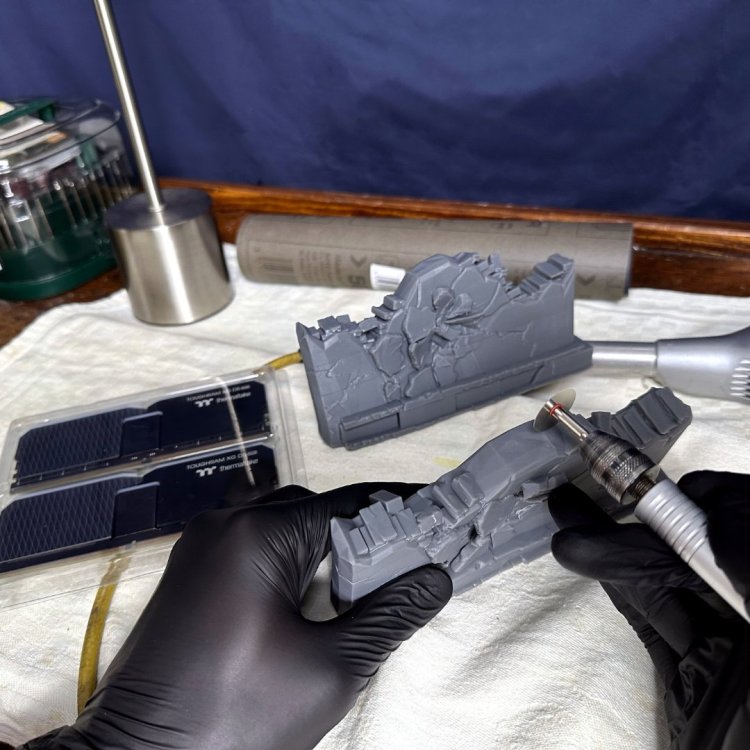


-
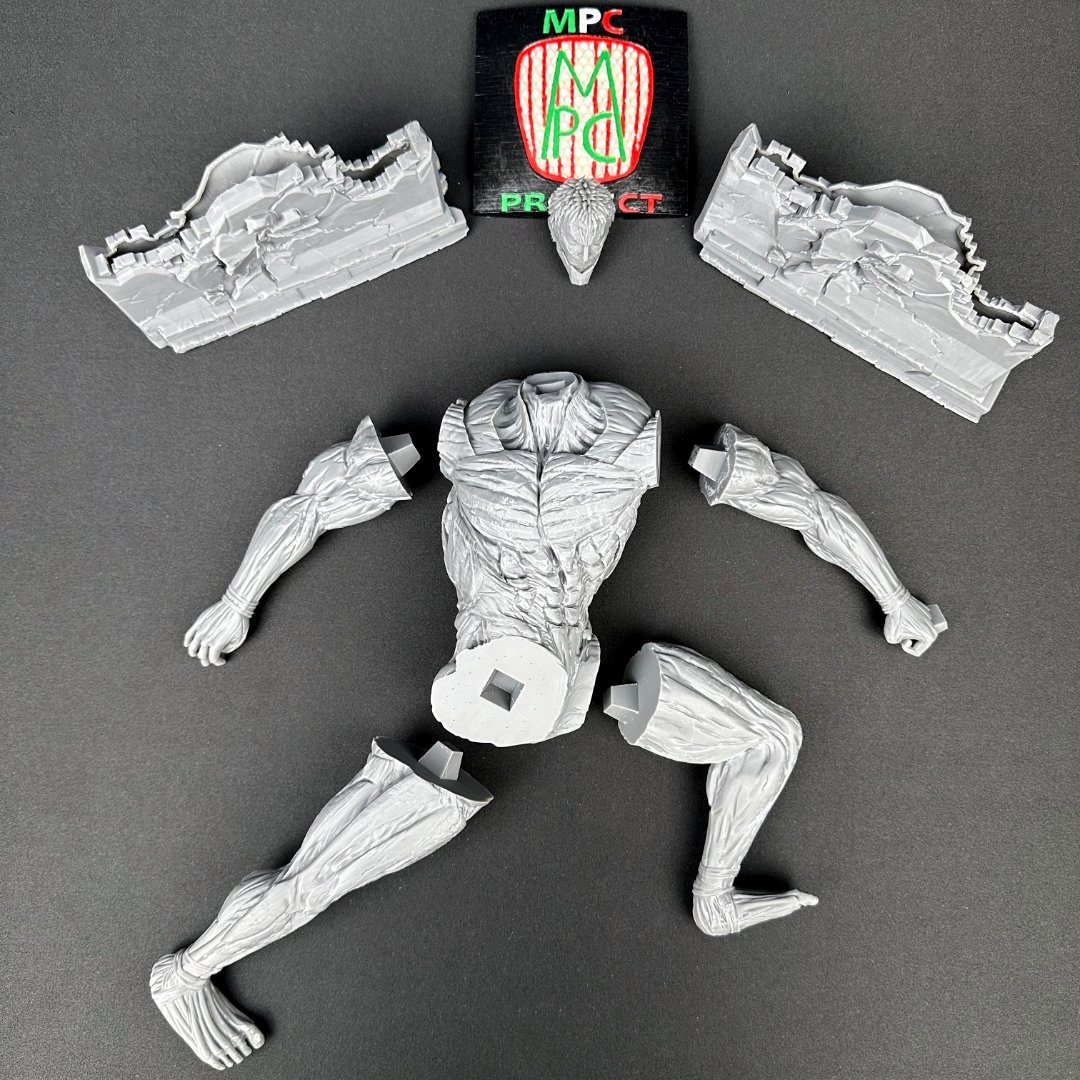
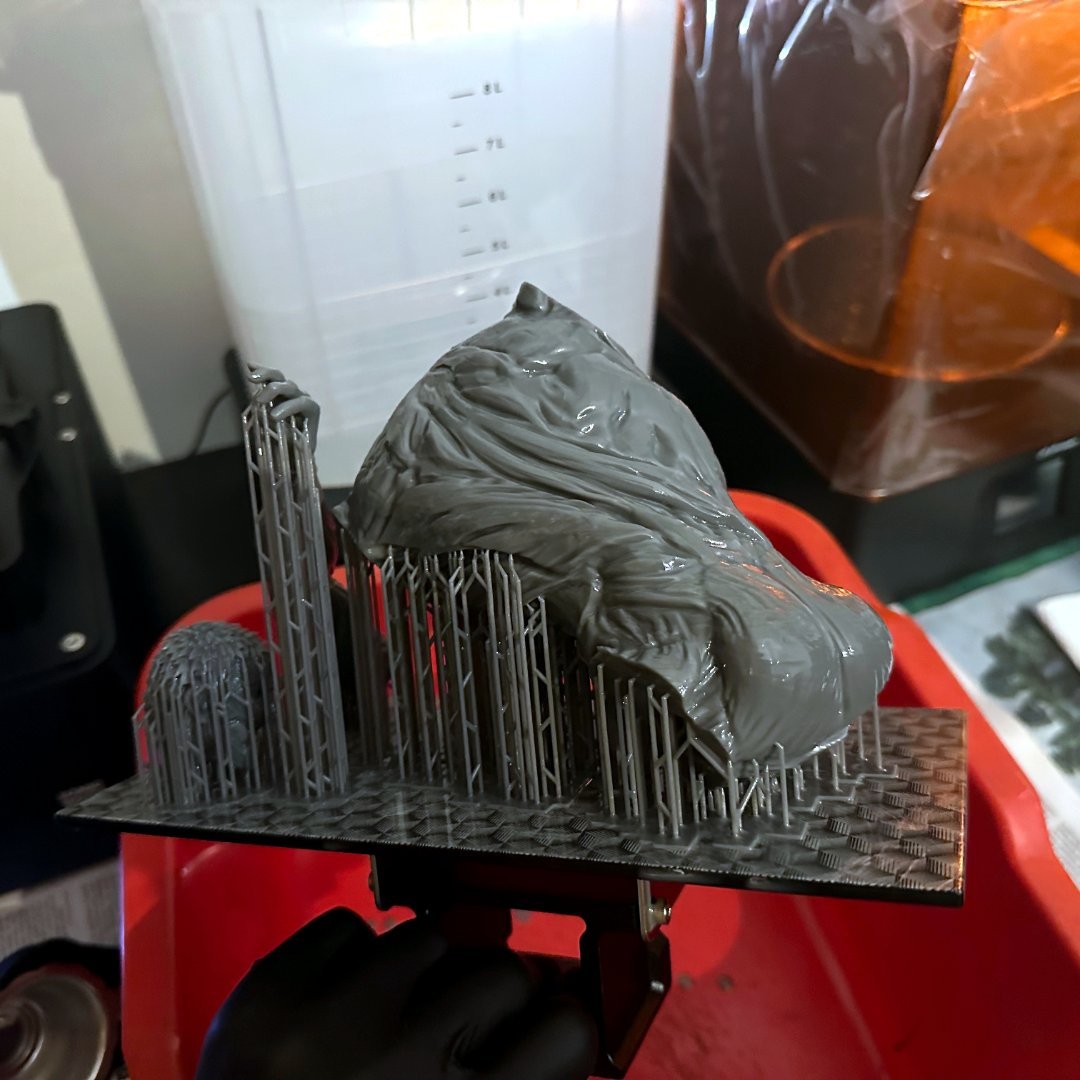
[Italy] Marco Di Silvestre
MPC Project replied to TT Amanda's topic in 2024 Thermaltake RAM MOD Invitational Season 1
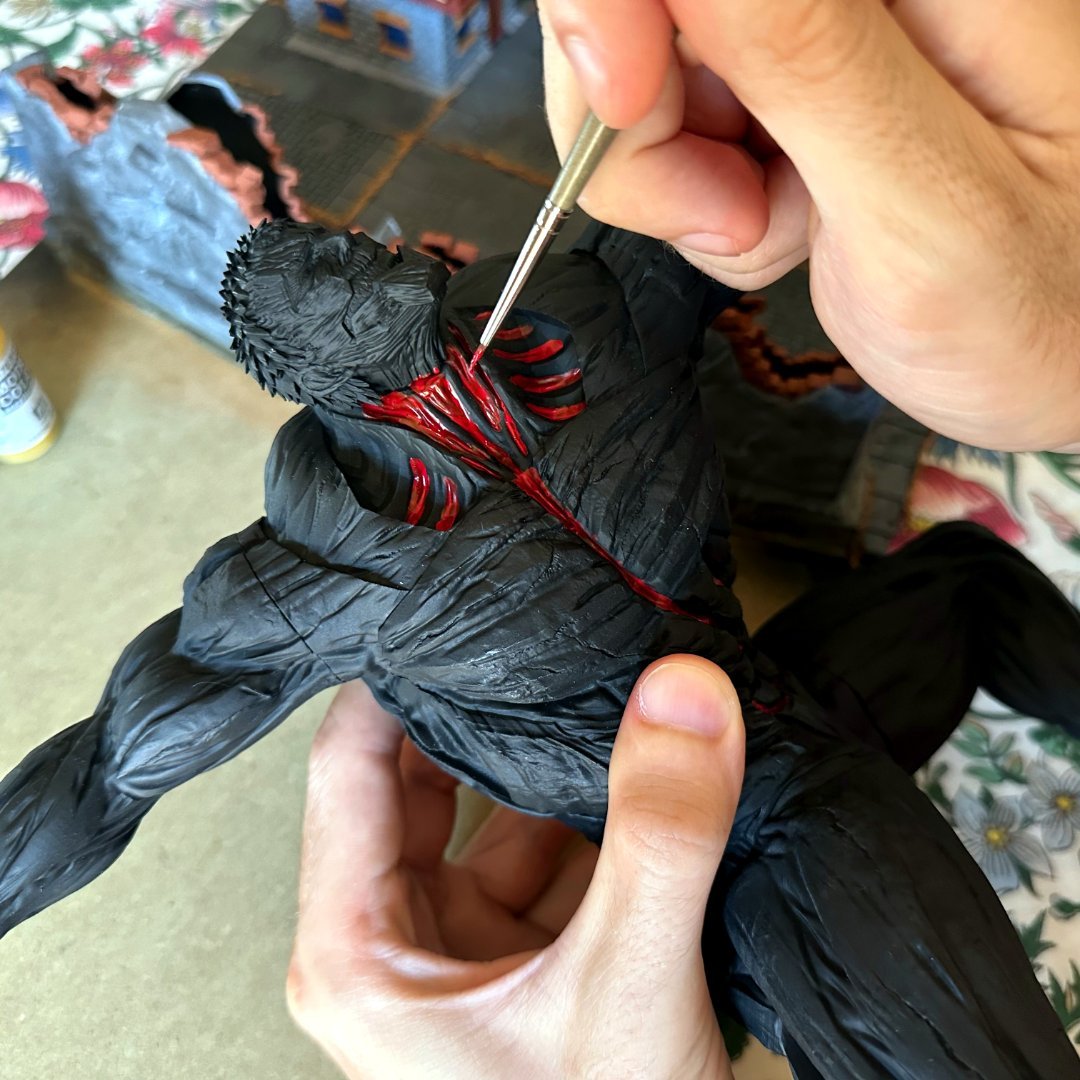
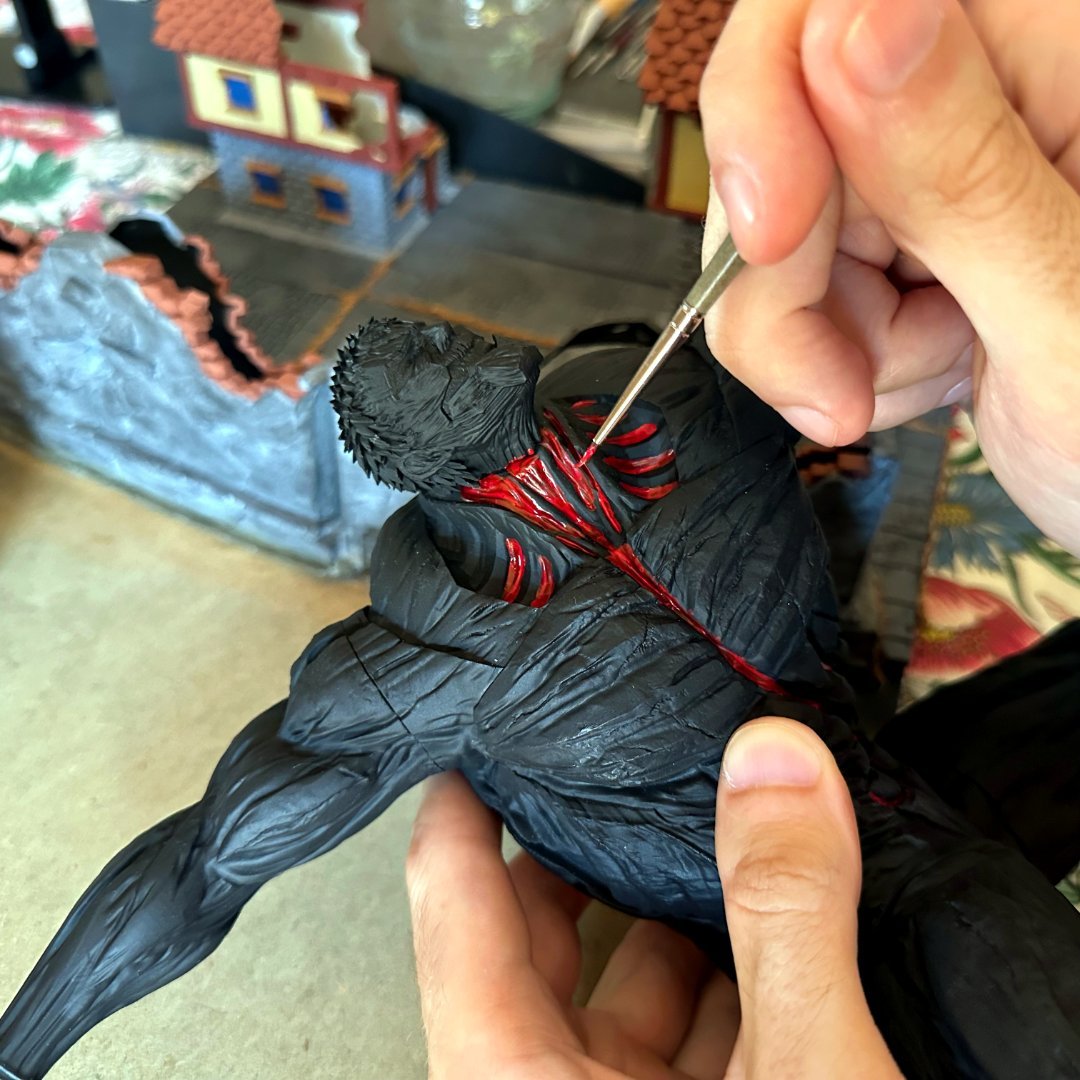
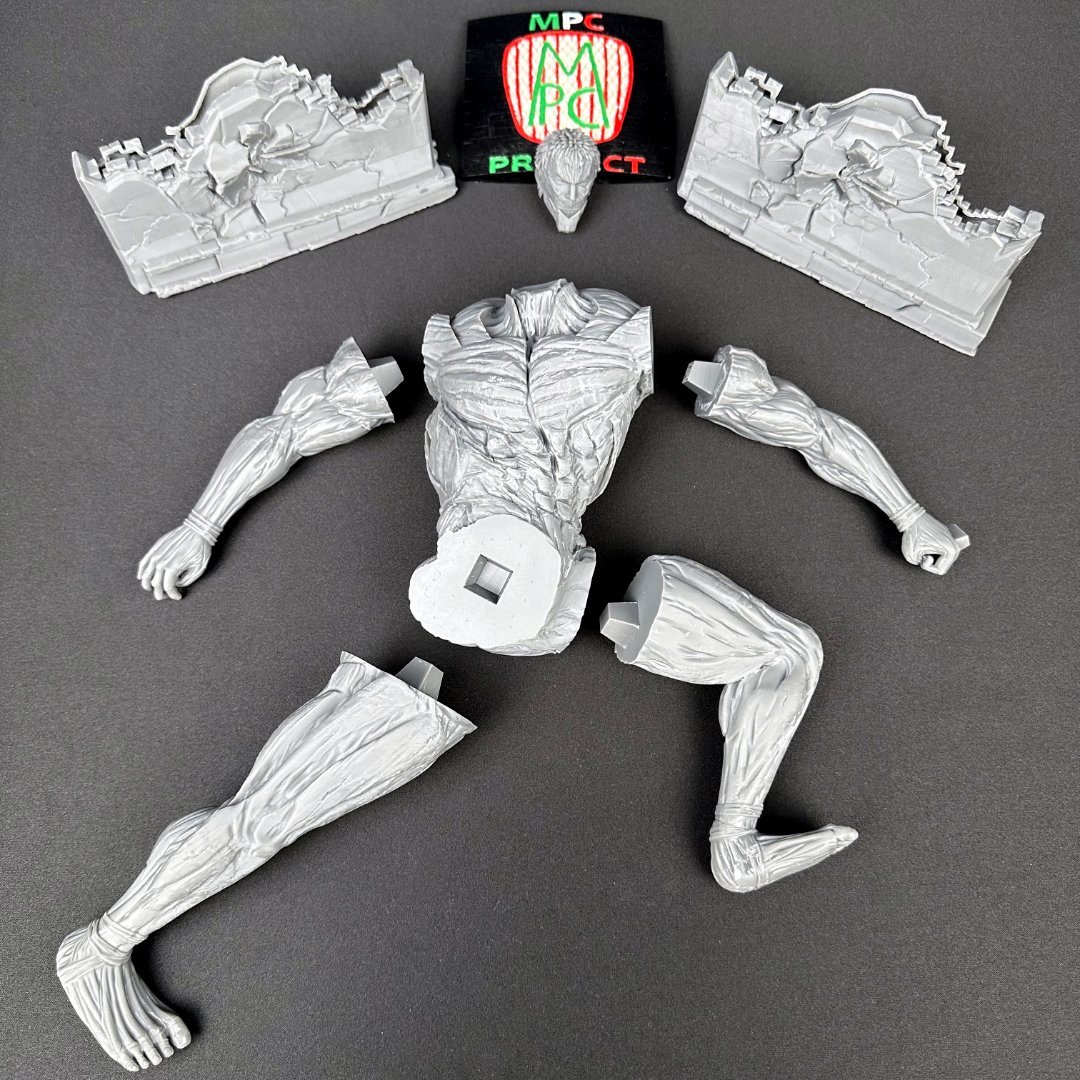
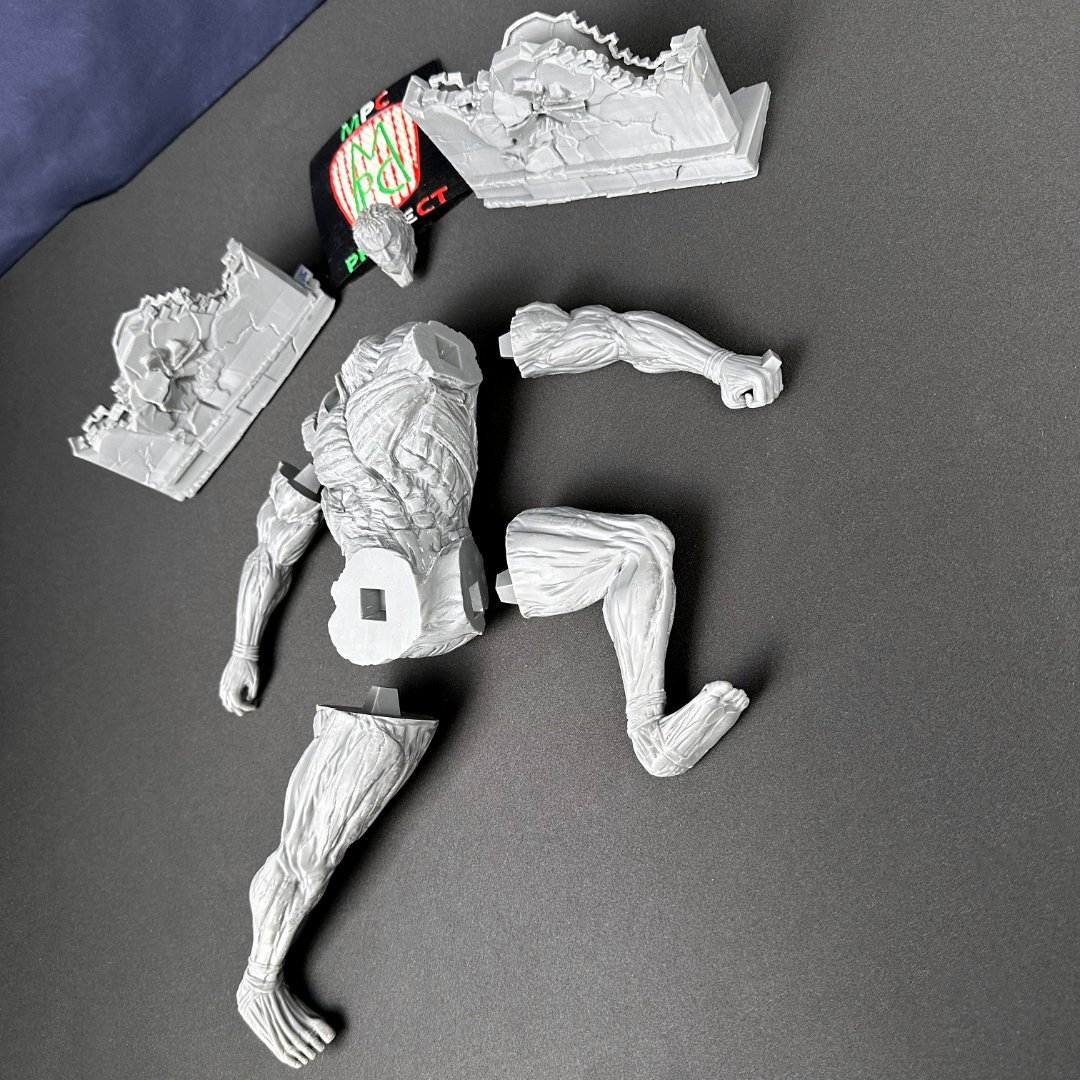
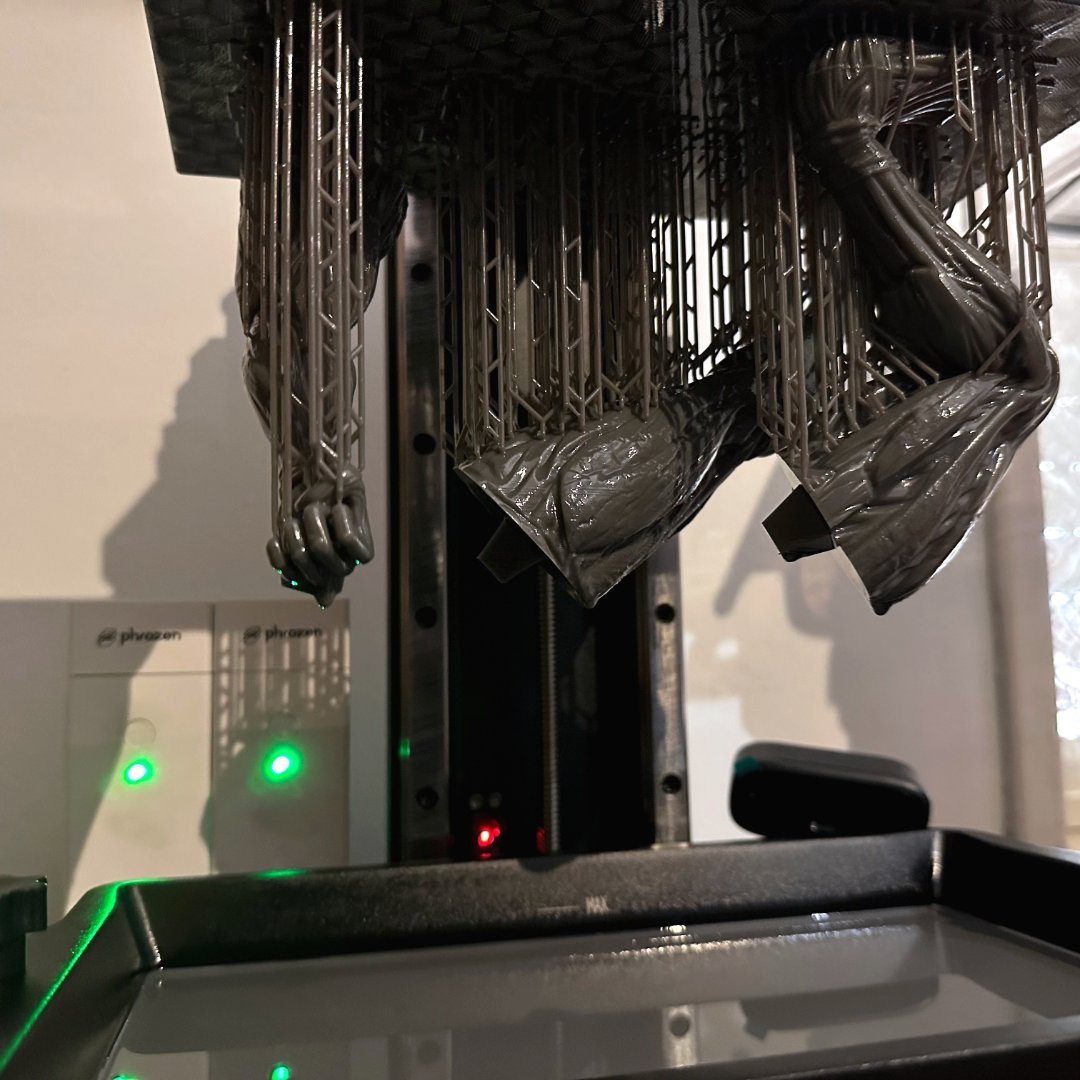
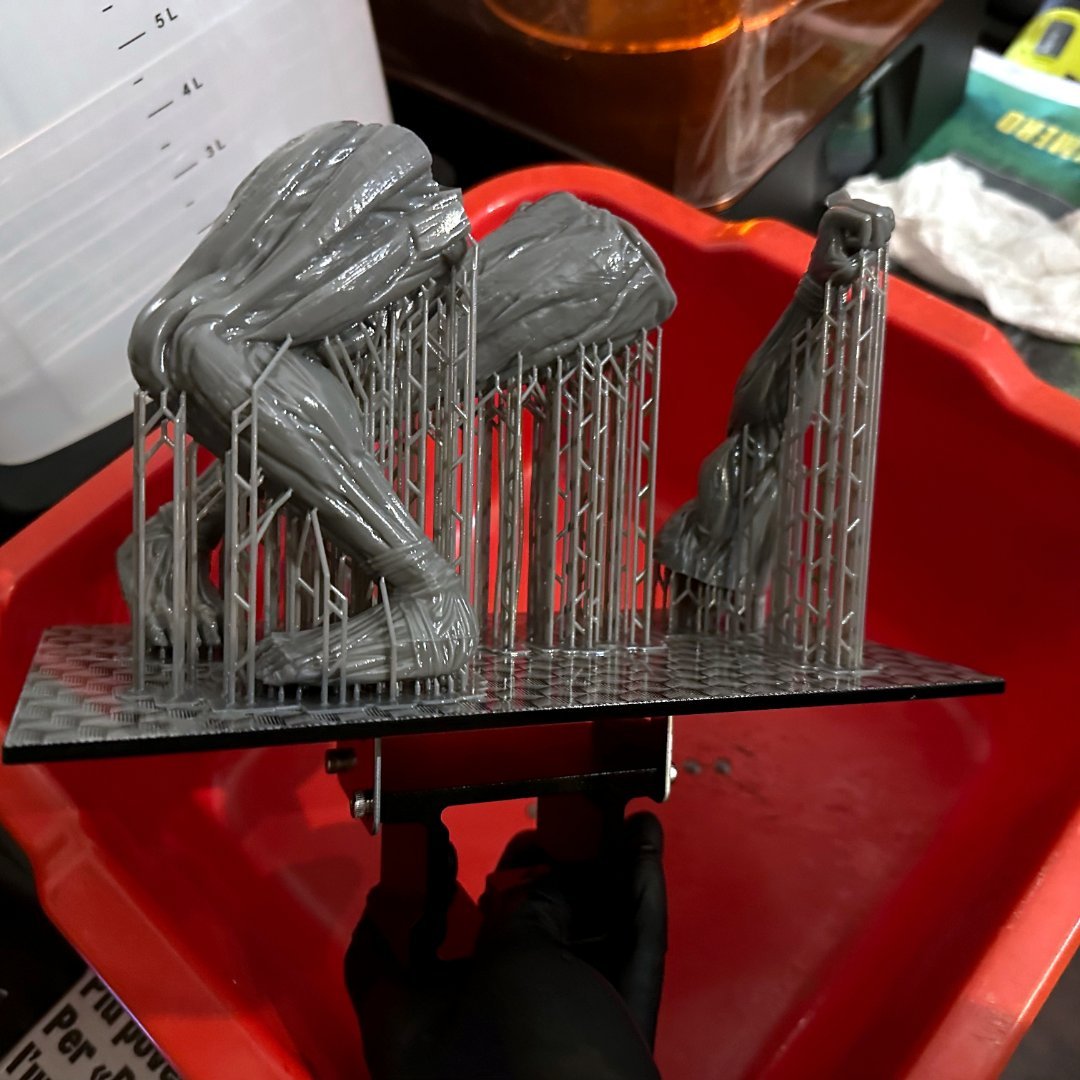
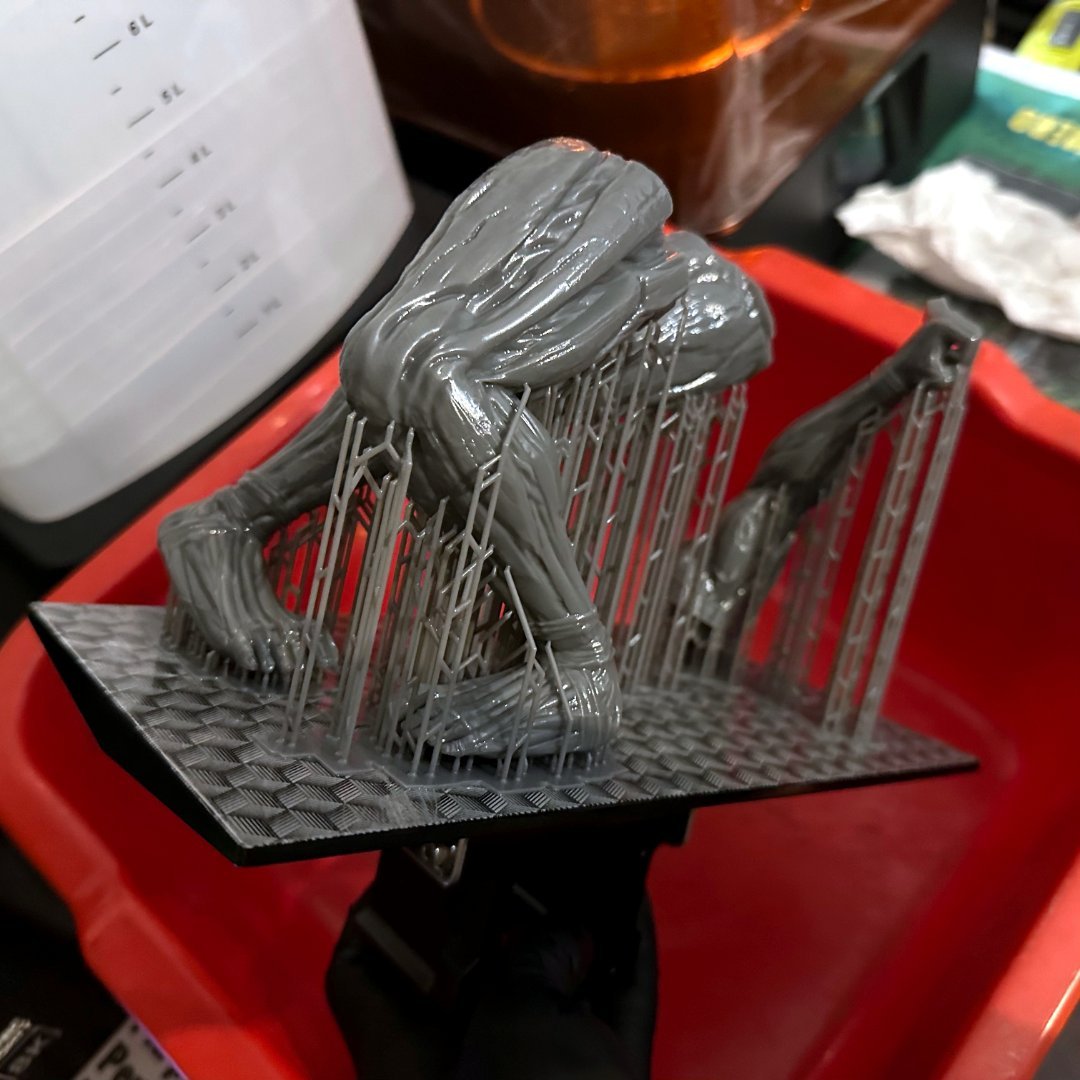
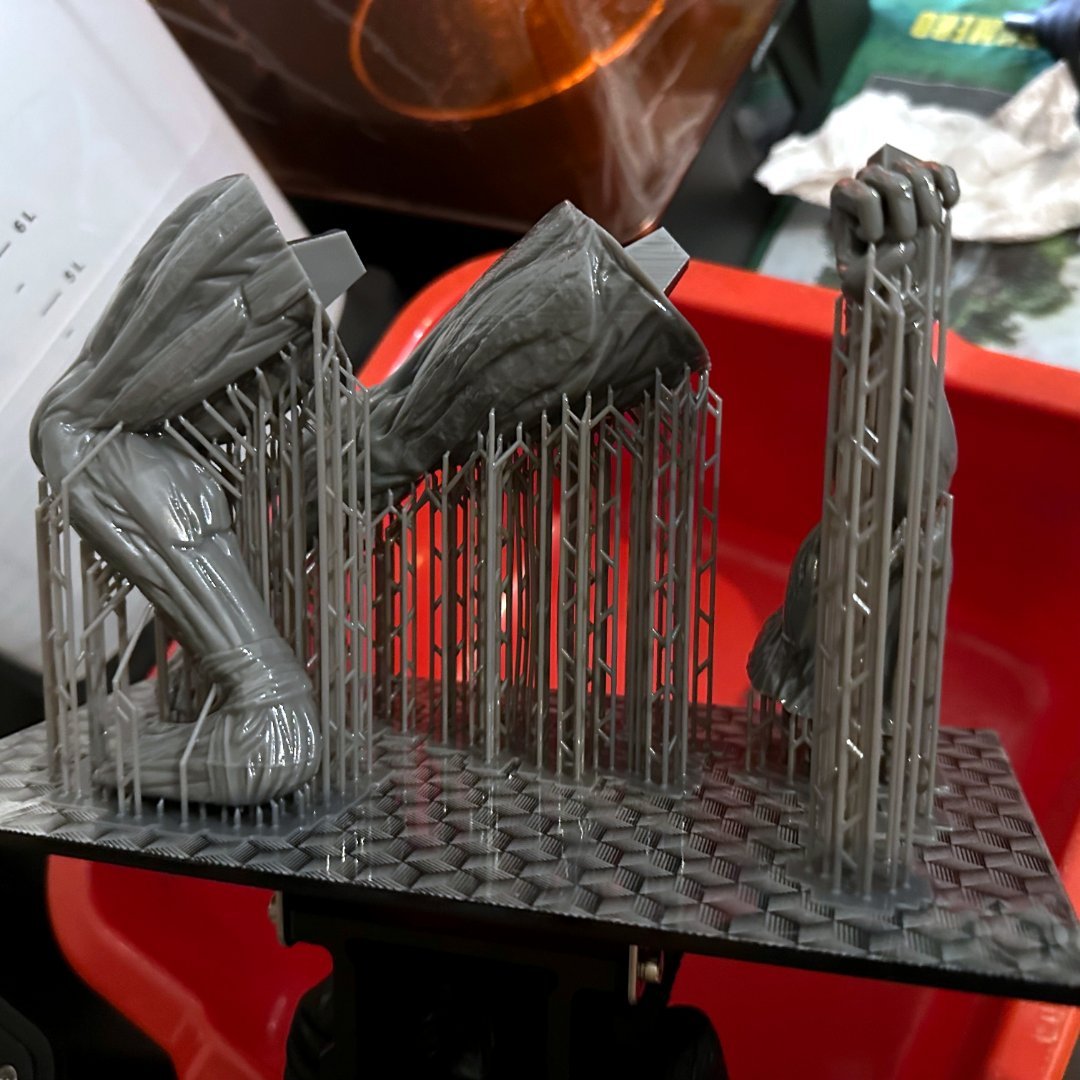
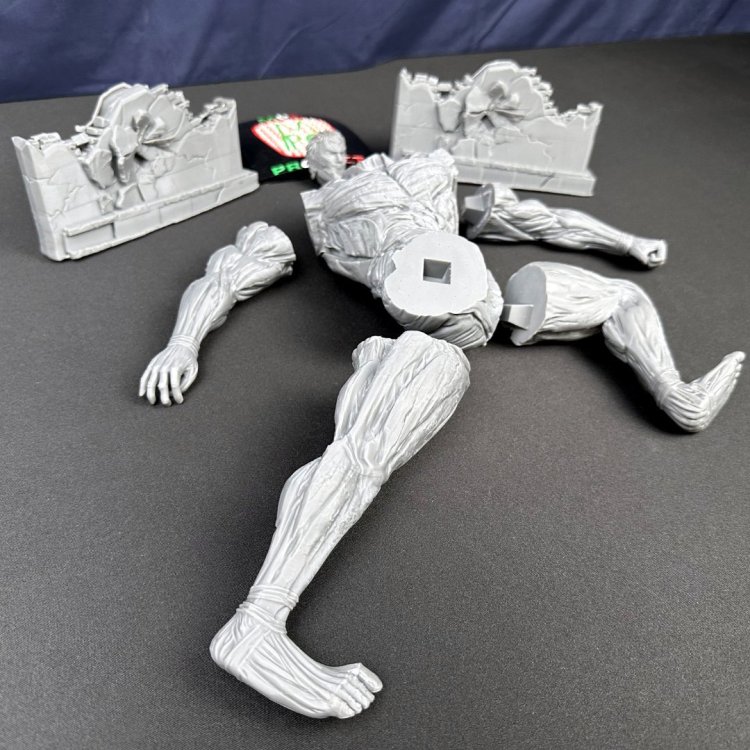
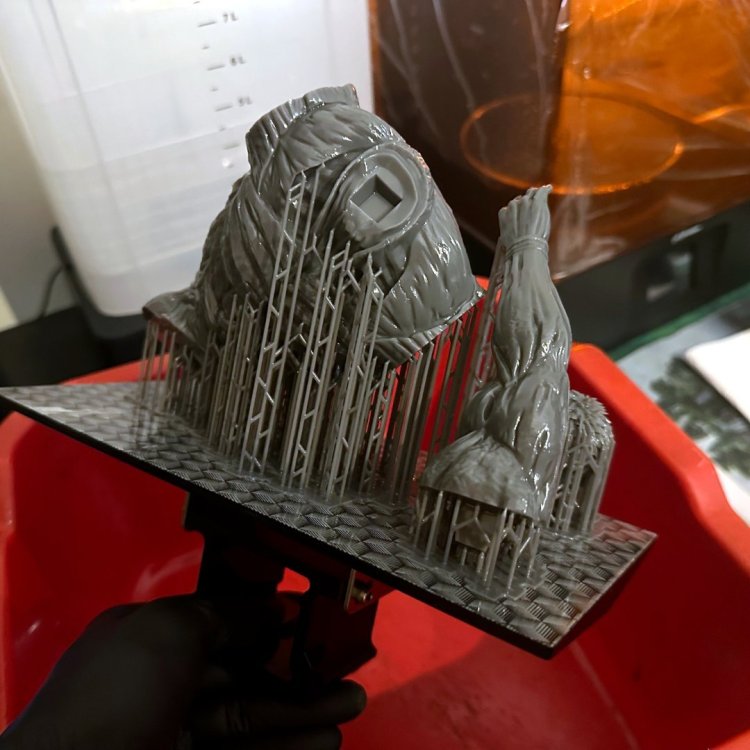
Sixth resin print ! The second part of the armored giant.


-
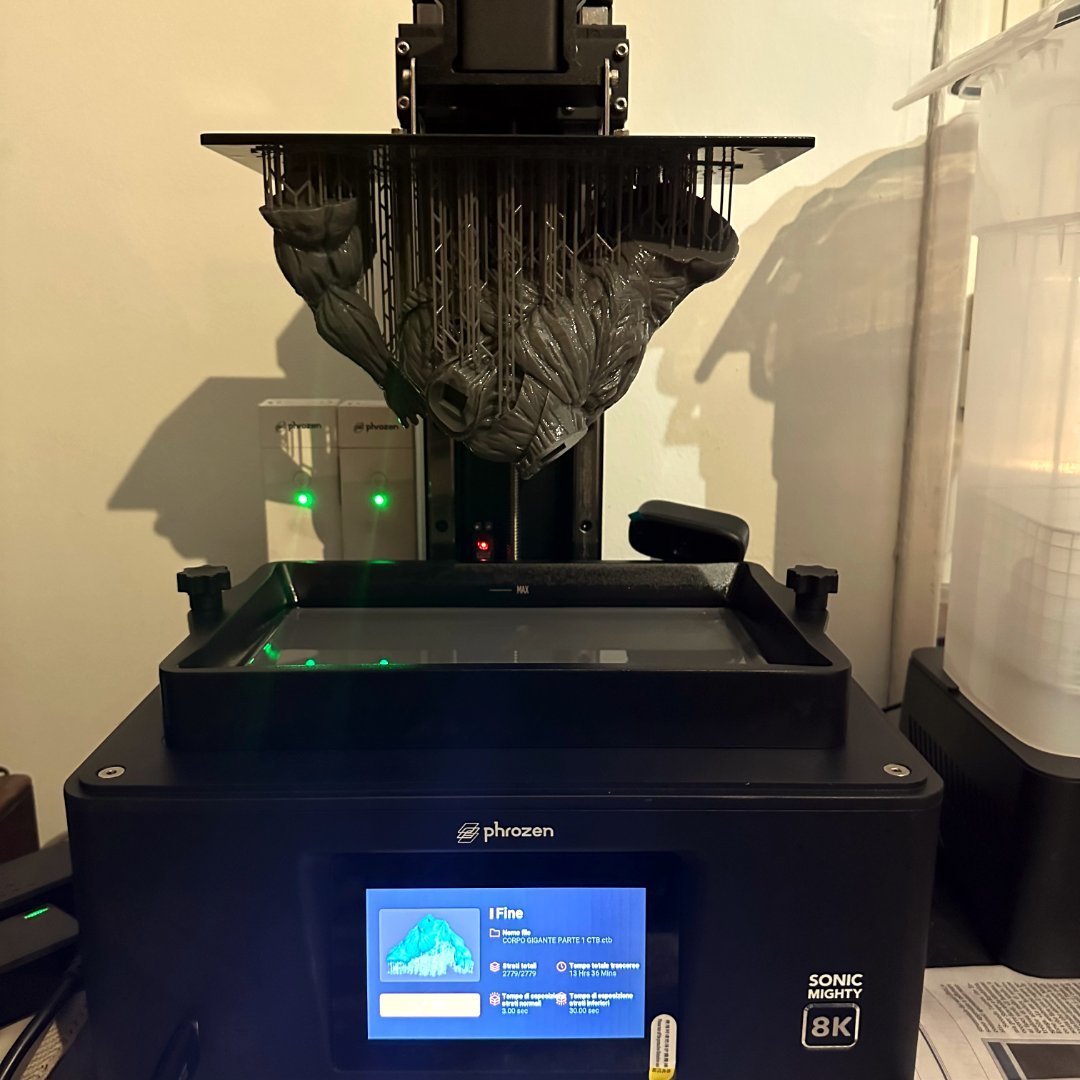
[Italy] Marco Di Silvestre
MPC Project replied to TT Amanda's topic in 2024 Thermaltake RAM MOD Invitational Season 1
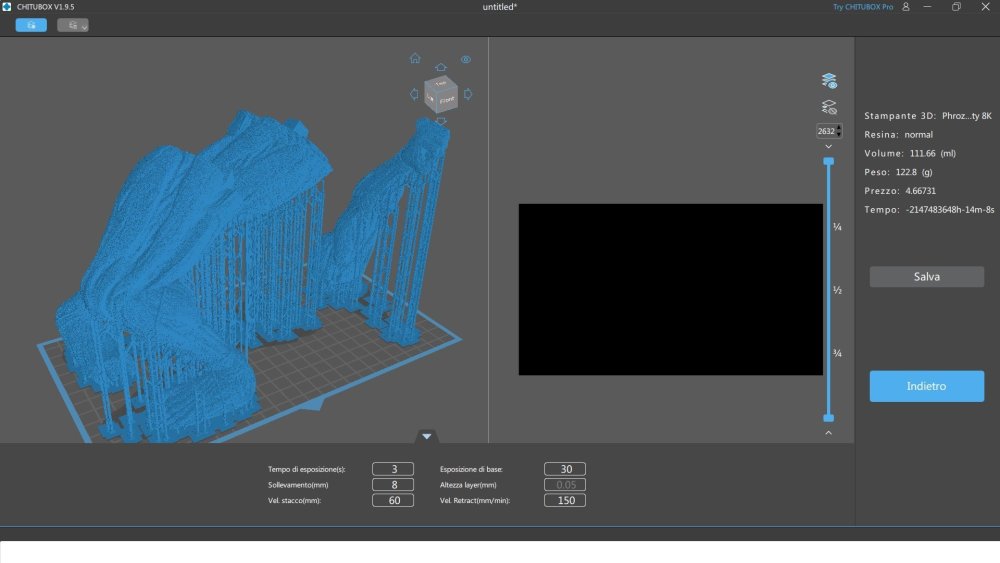
Fifth resin print ! The first part of the armored giant.


-
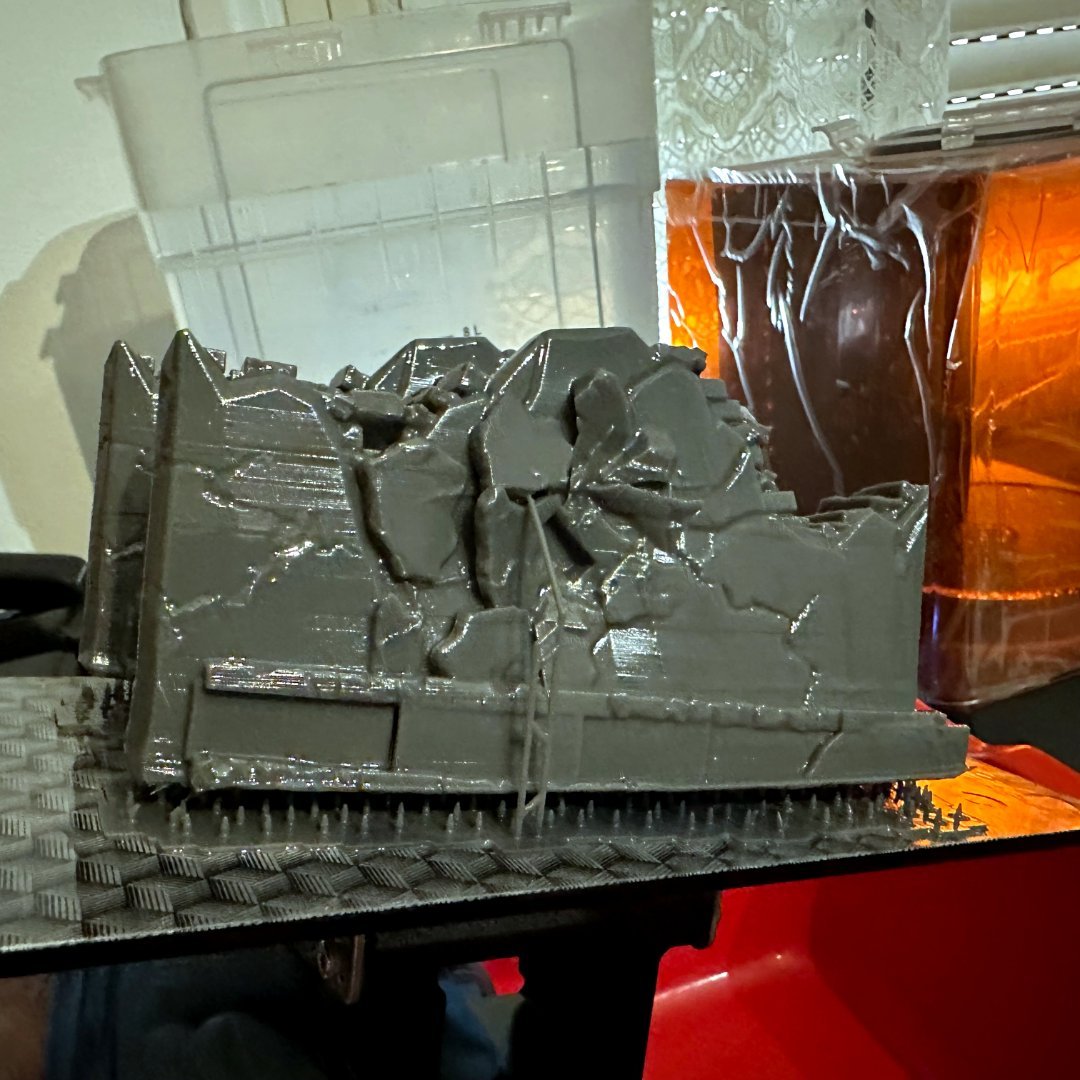
[Italy] Marco Di Silvestre
MPC Project replied to TT Amanda's topic in 2024 Thermaltake RAM MOD Invitational Season 1
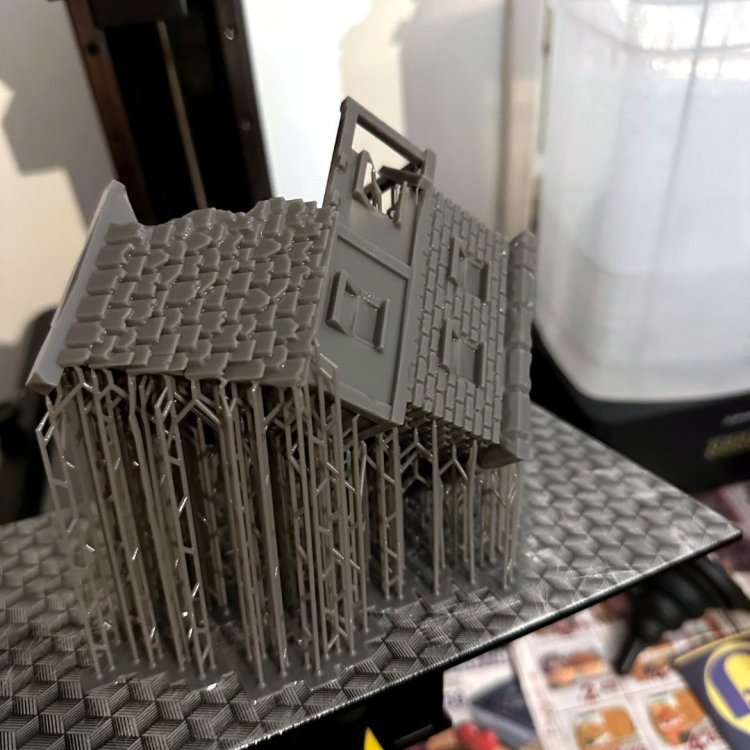
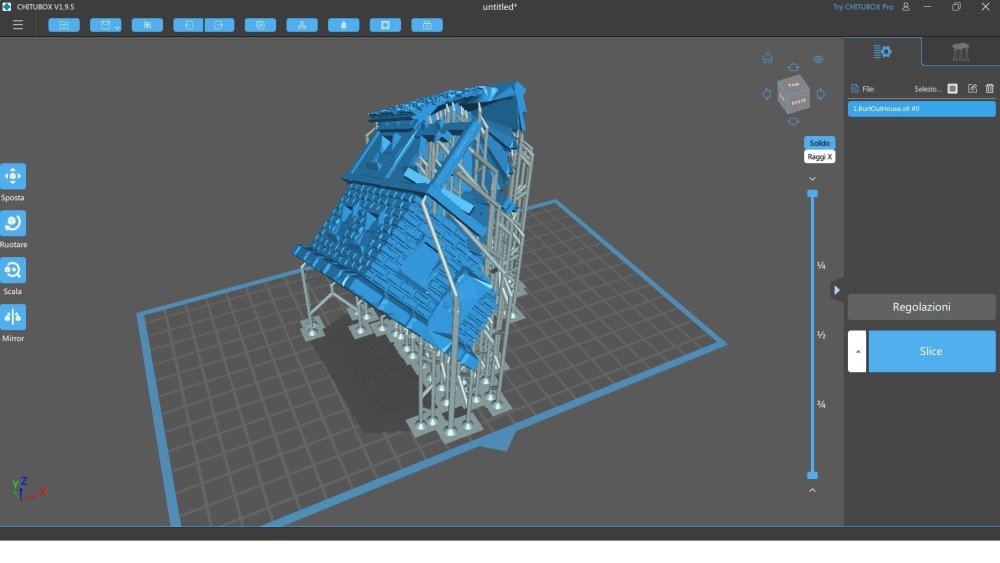
Fourth resin print ! The city walls !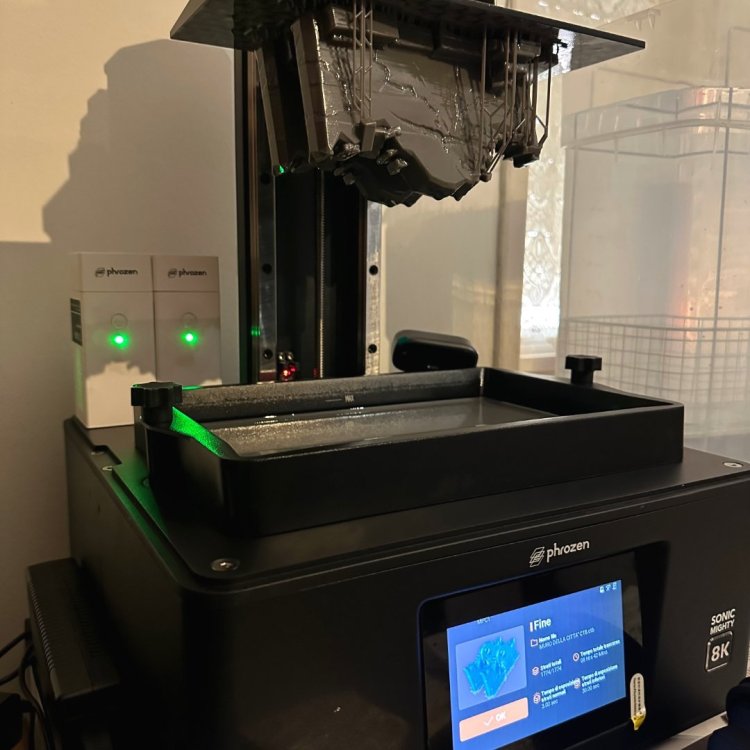


-
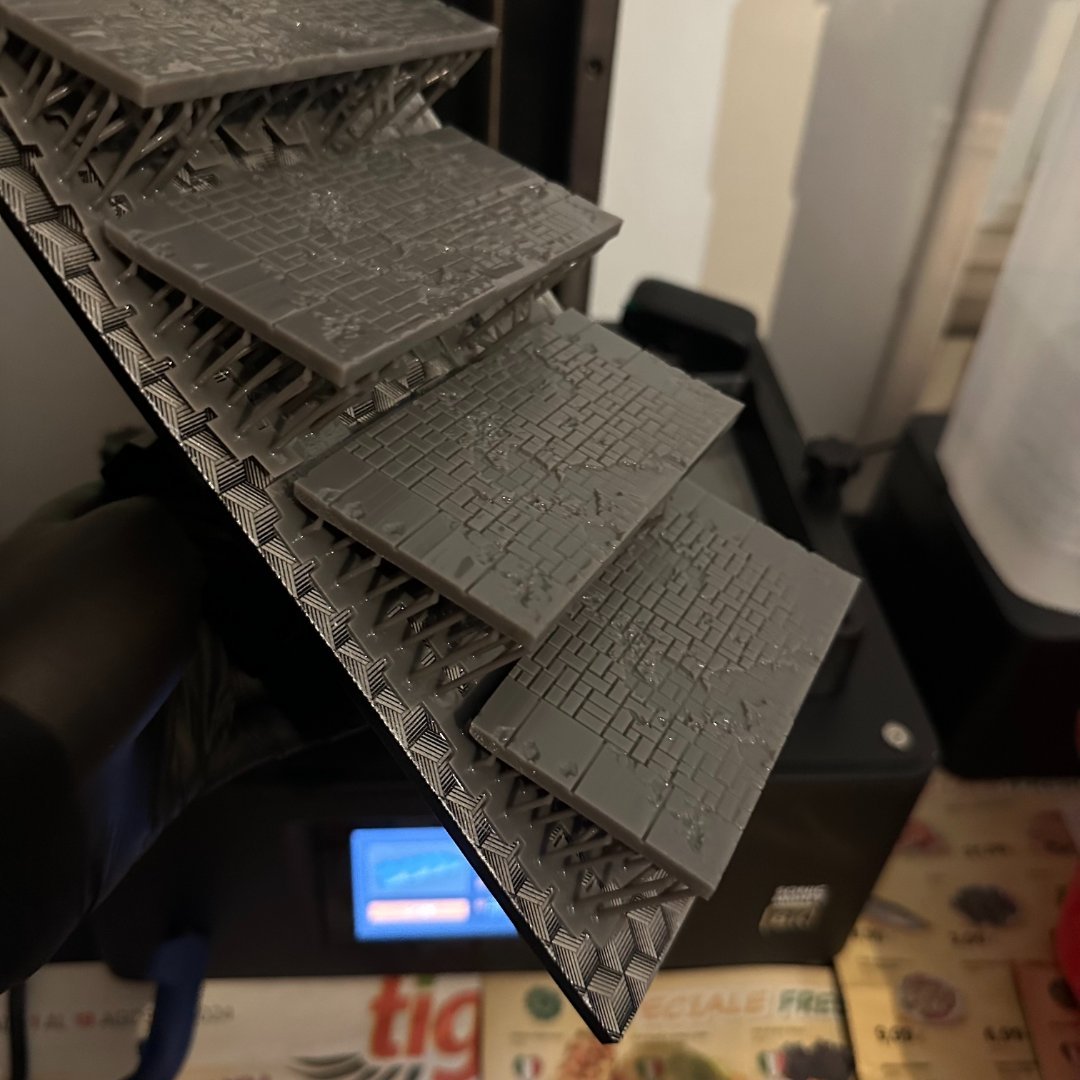
[Italy] Marco Di Silvestre
MPC Project replied to TT Amanda's topic in 2024 Thermaltake RAM MOD Invitational Season 1
Third resin print ! The road to the scenery was also printed ✌️


-
[Italy] Marco Di Silvestre
MPC Project replied to TT Amanda's topic in 2024 Thermaltake RAM MOD Invitational Season 1
Second resin print !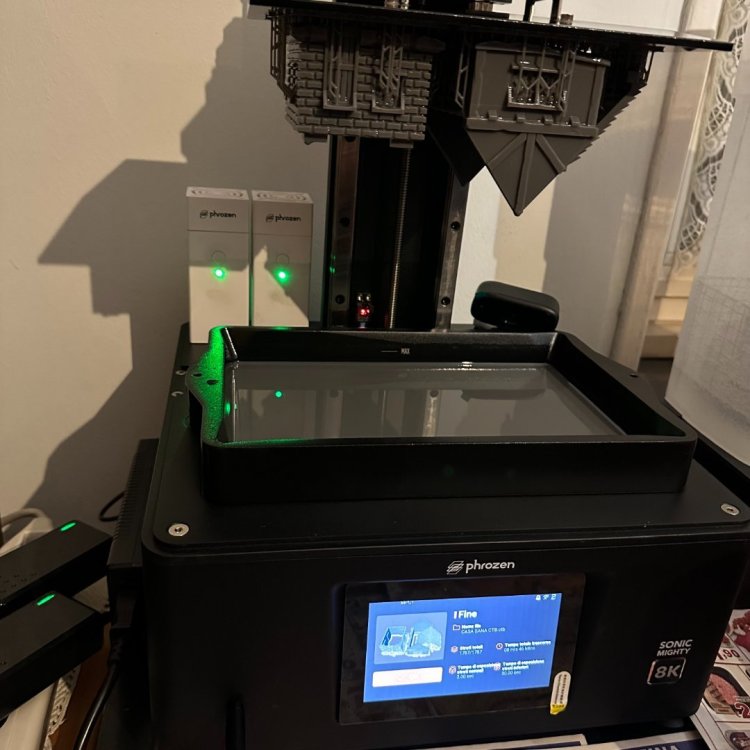

-
[Italy] Marco Di Silvestre
MPC Project replied to TT Amanda's topic in 2024 Thermaltake RAM MOD Invitational Season 1
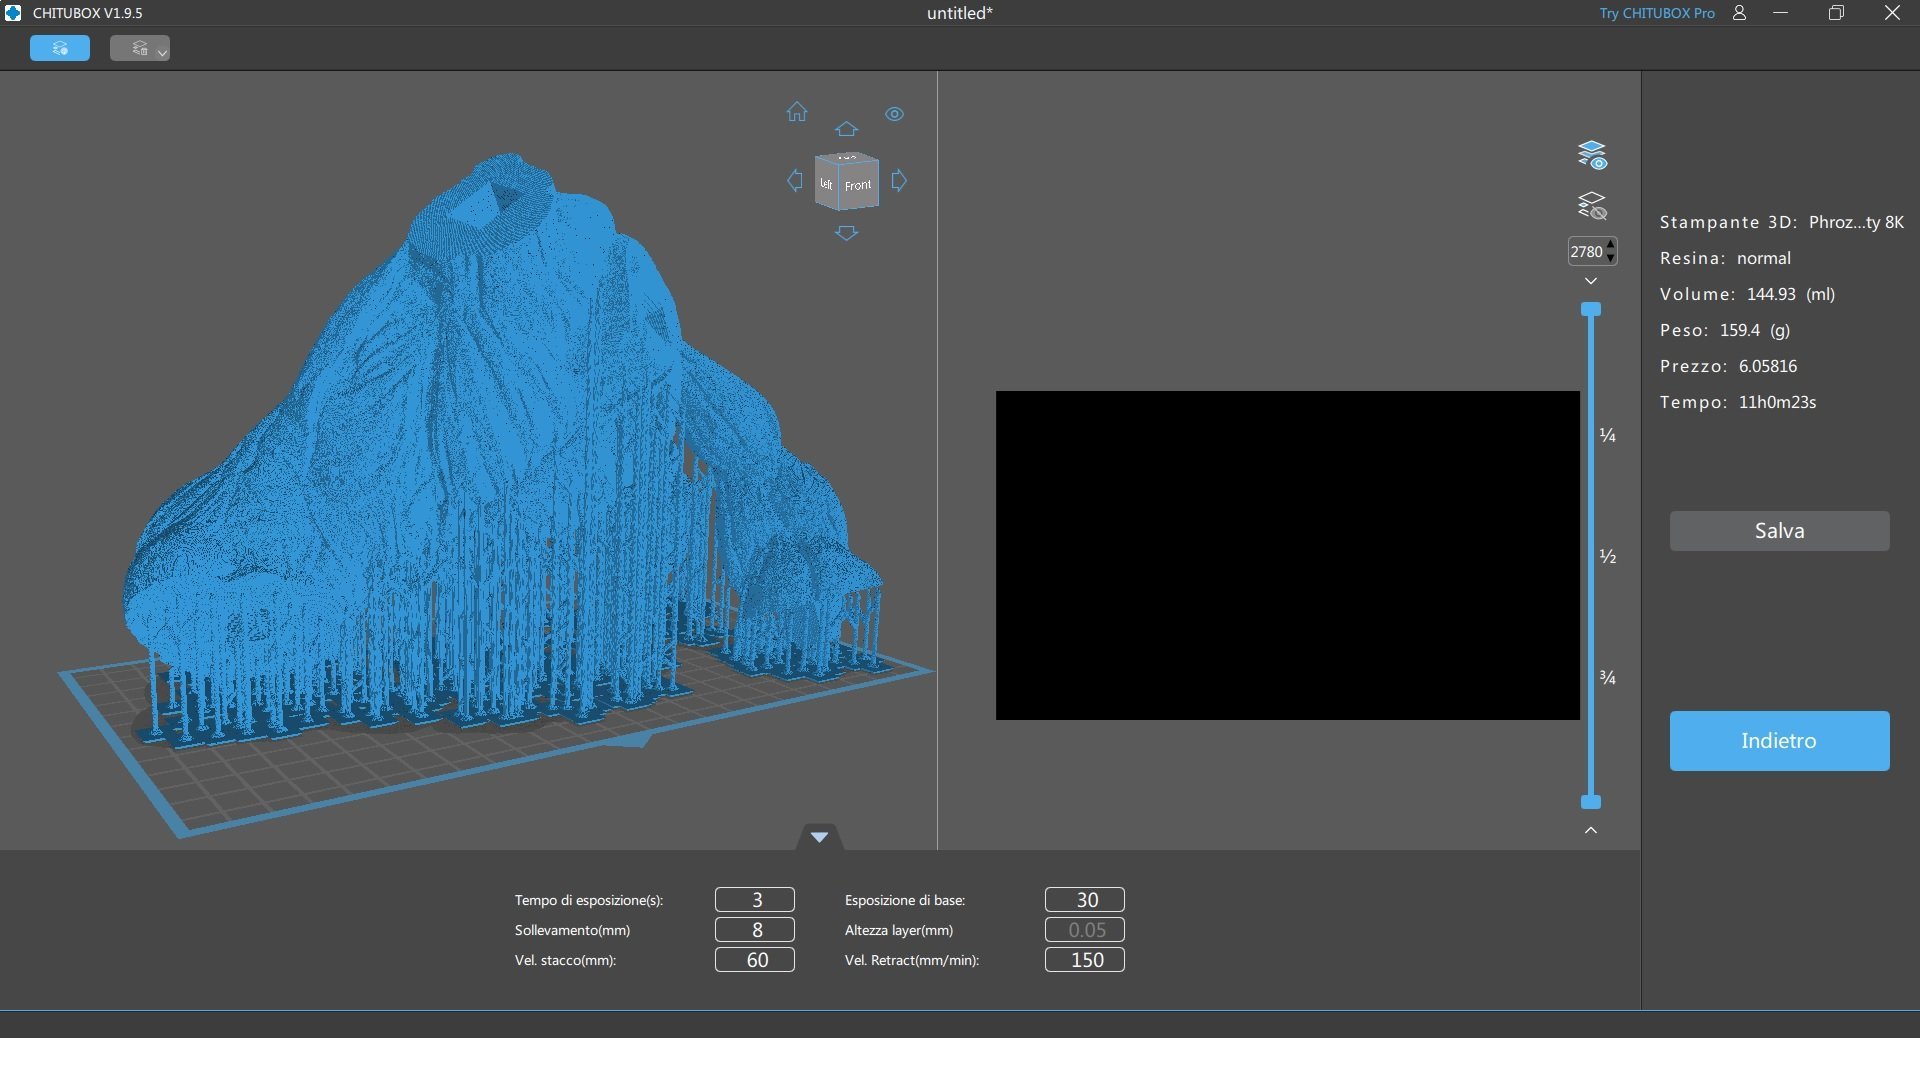
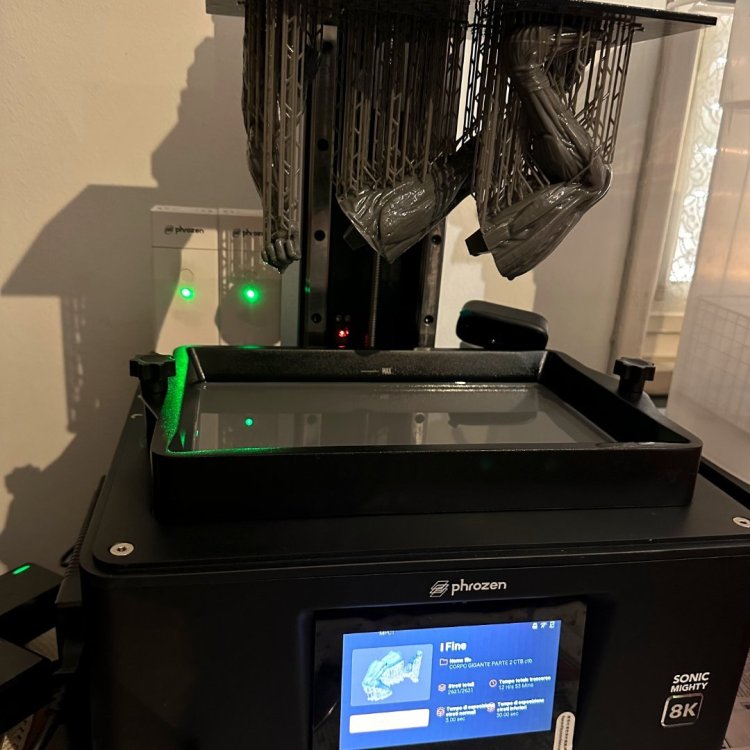
1st resin print ! N.B. : The photos relating to the 3D printing phases are intentionally darker as the resin is photosensitive so exposure to light sources must be limited 😉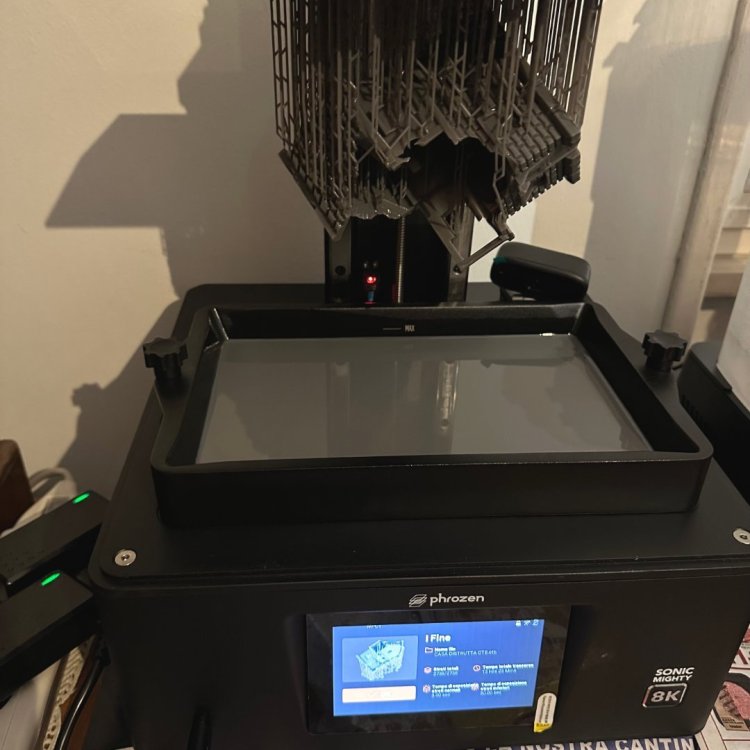
-
[Italy] Marco Di Silvestre
MPC Project replied to TT Amanda's topic in 2024 Thermaltake RAM MOD Invitational Season 1
After choosing the theme and how to make it, we go on to develop the various designs resulting 3D printing phase in resin. The chosen theme is probably already apparent 😀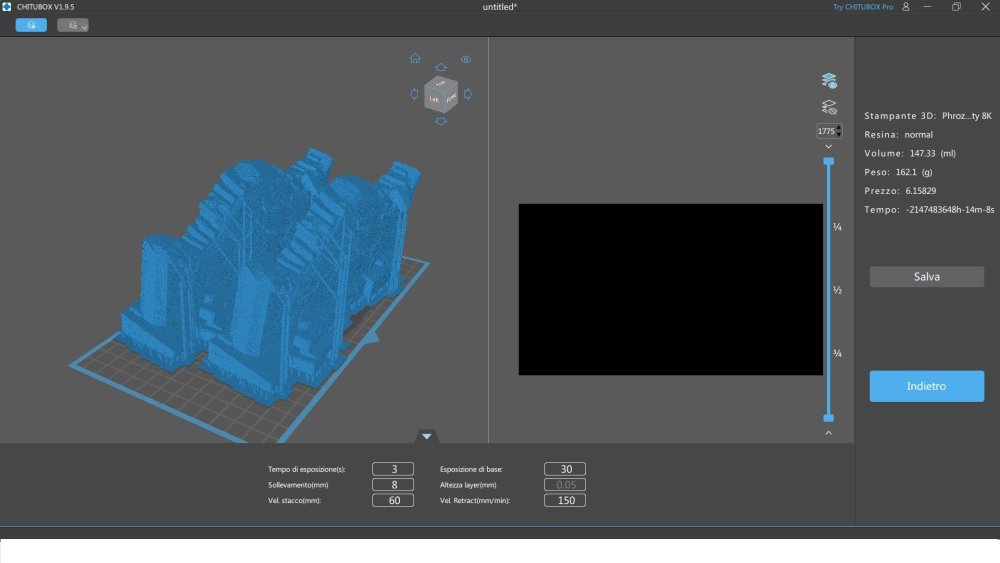


-
[Italy] Marco Di Silvestre
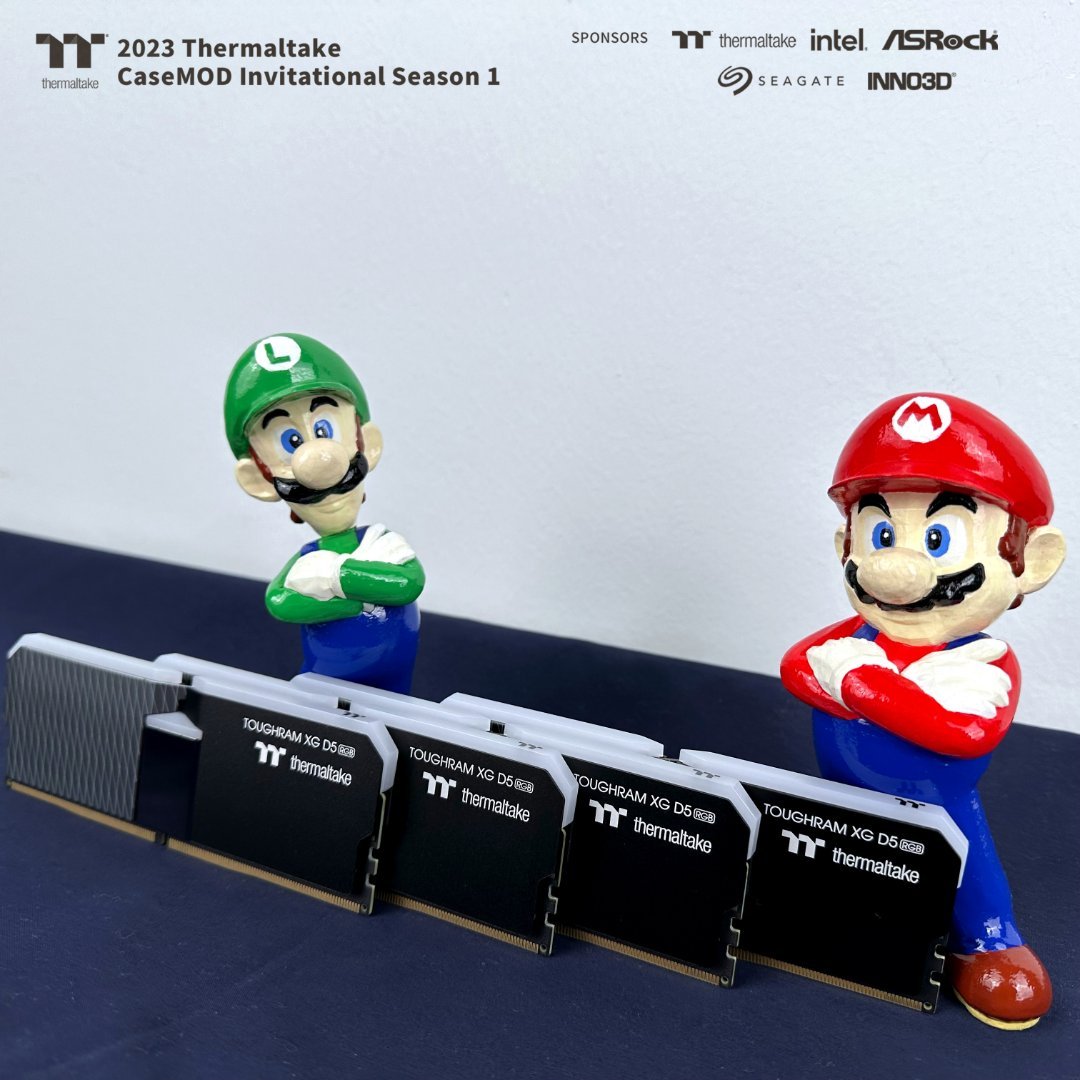
MPC Project replied to TT Amanda's topic in 2024 Thermaltake RAM MOD Invitational Season 1
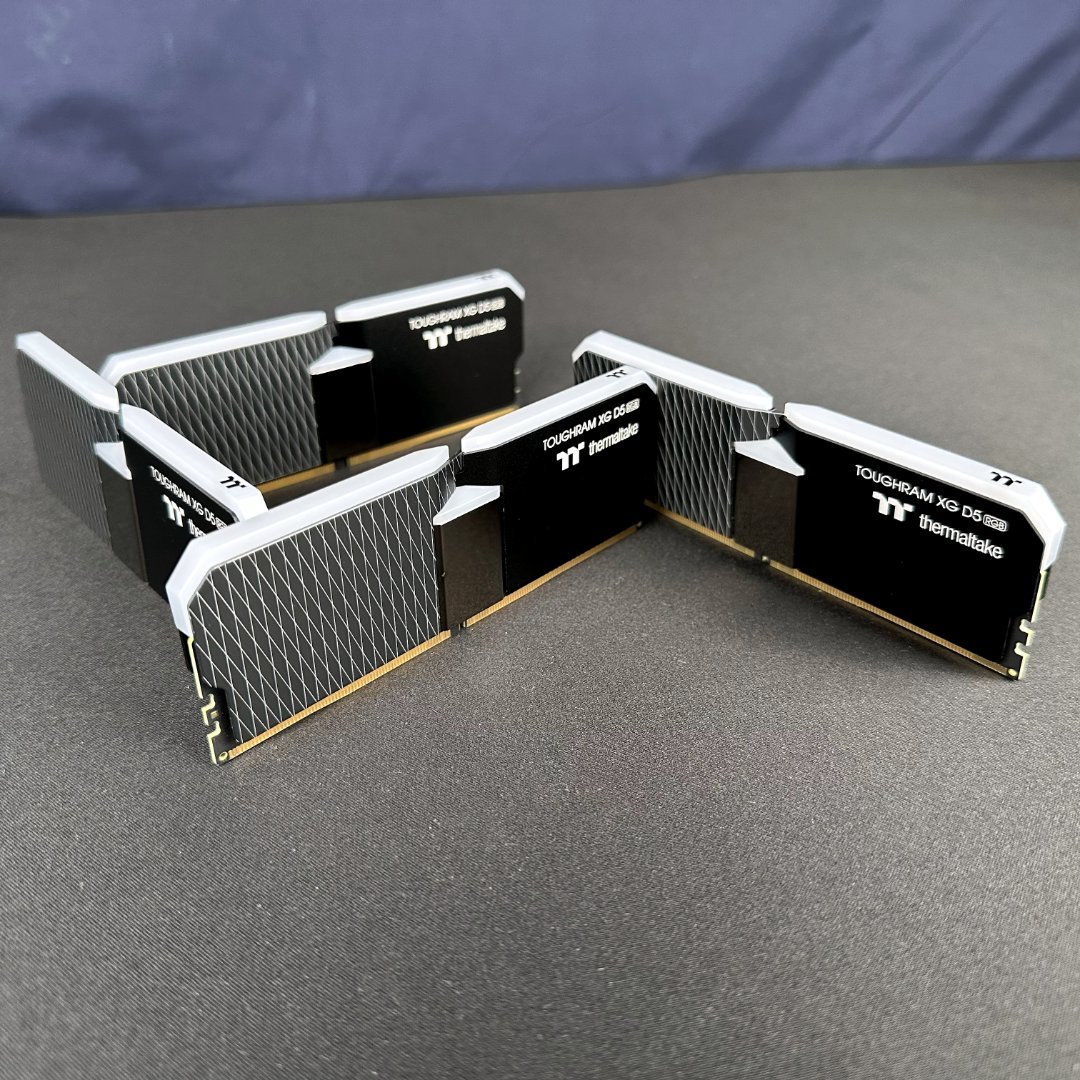
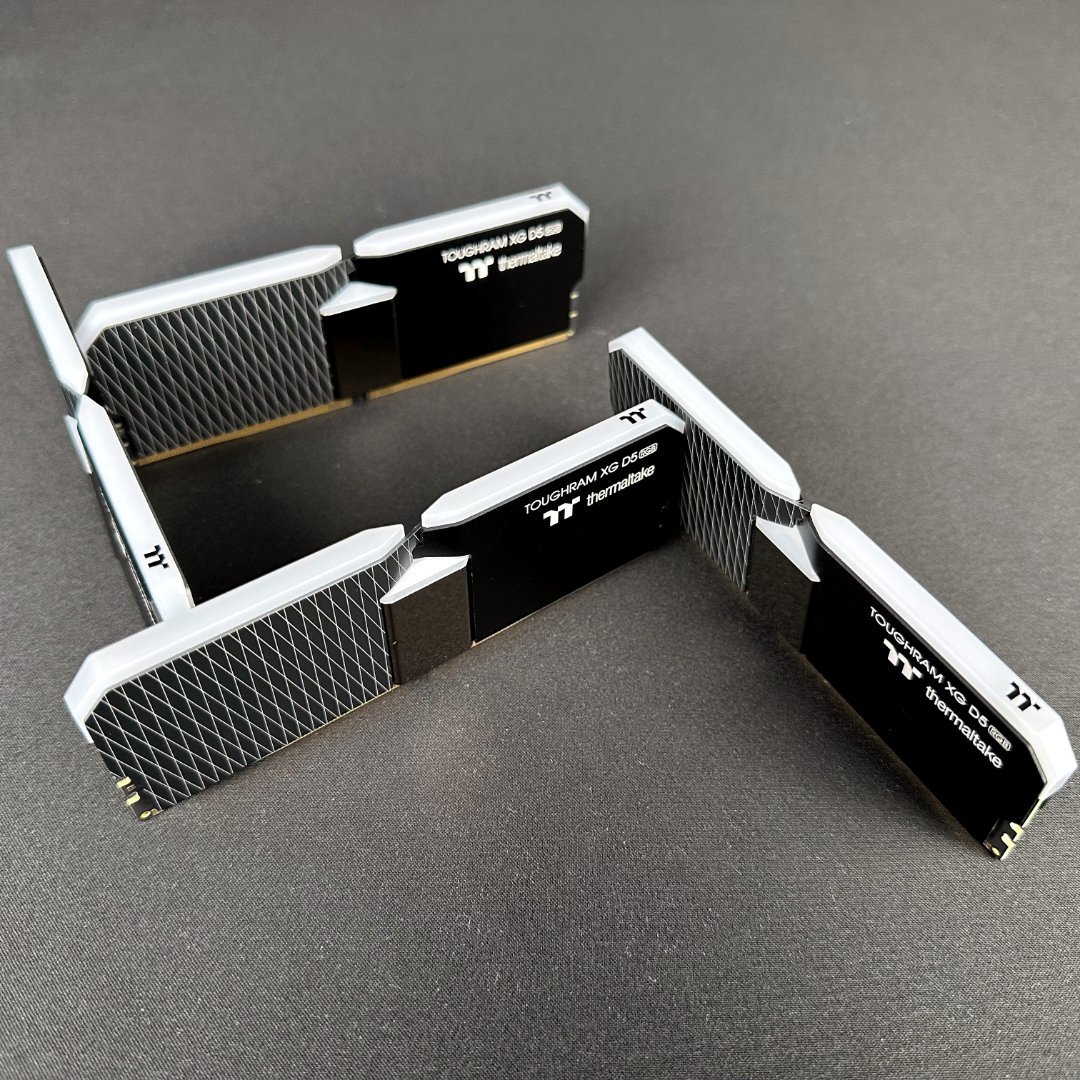
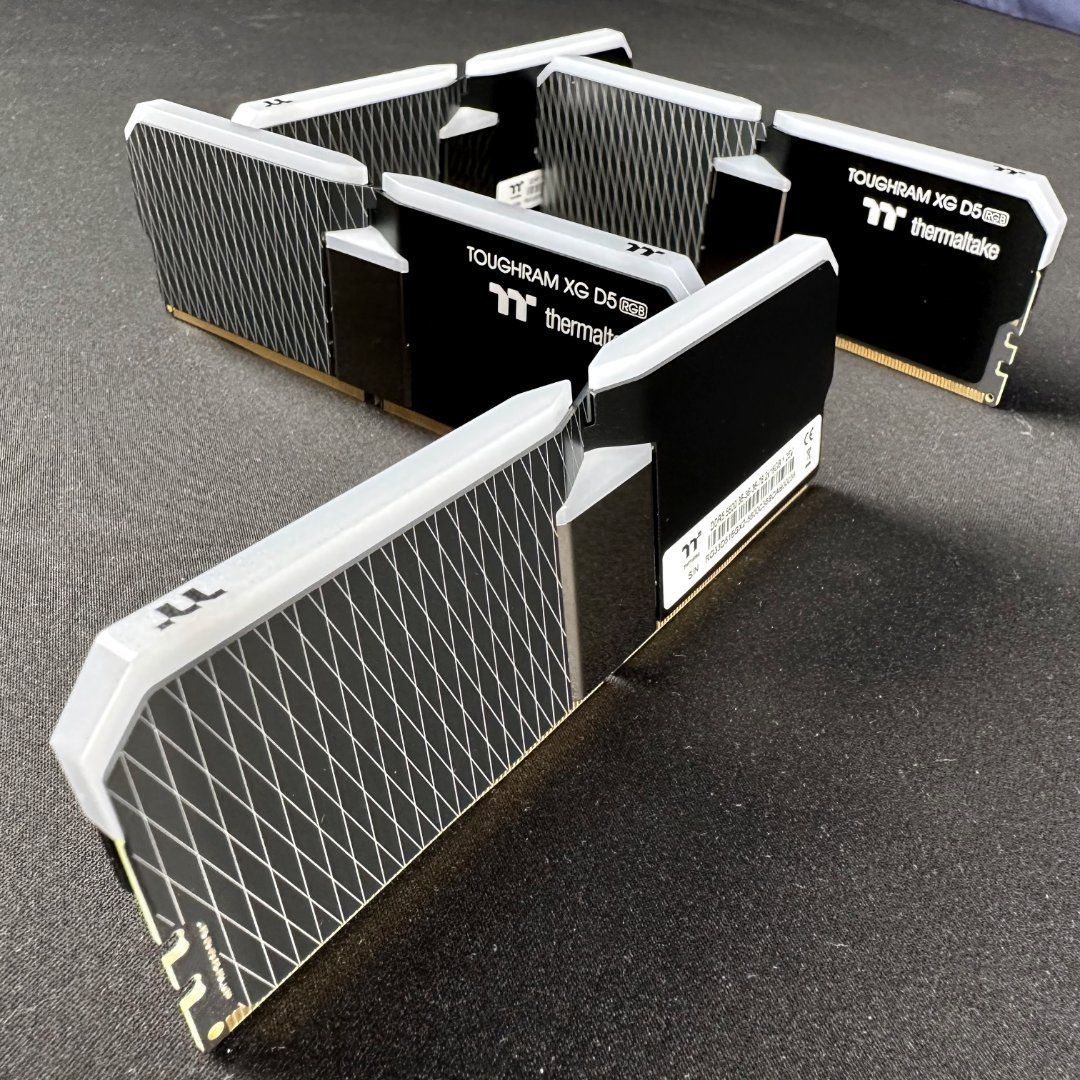
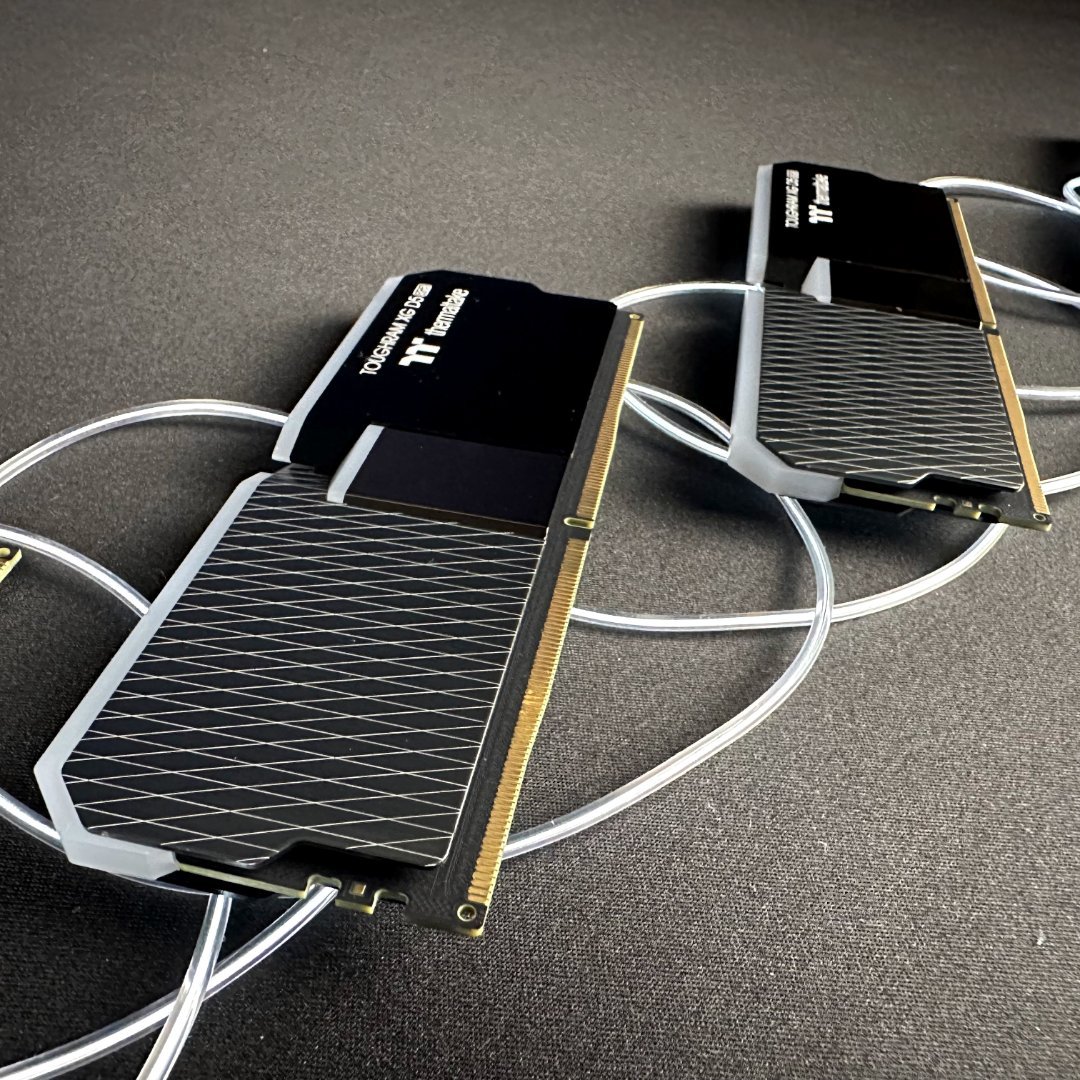
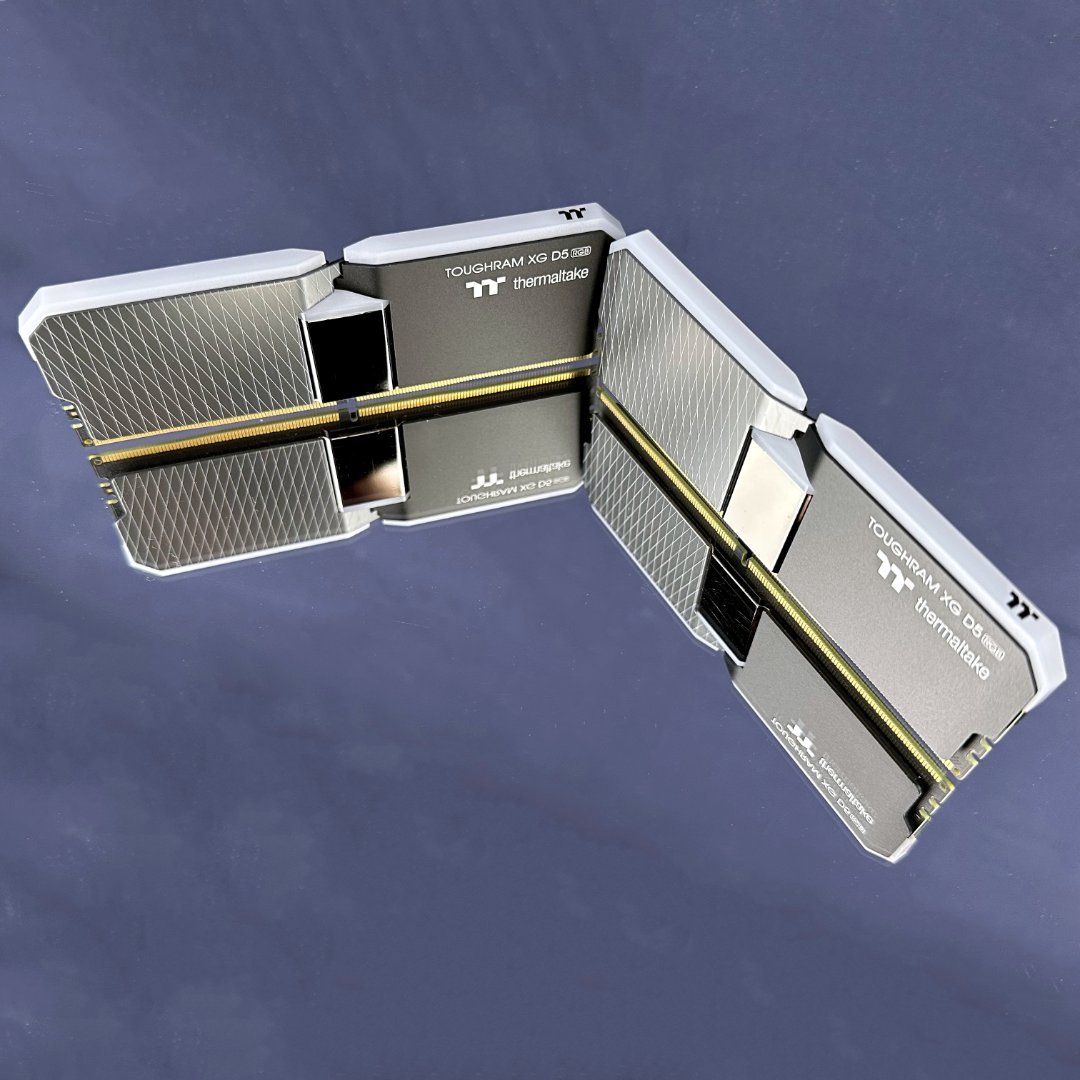
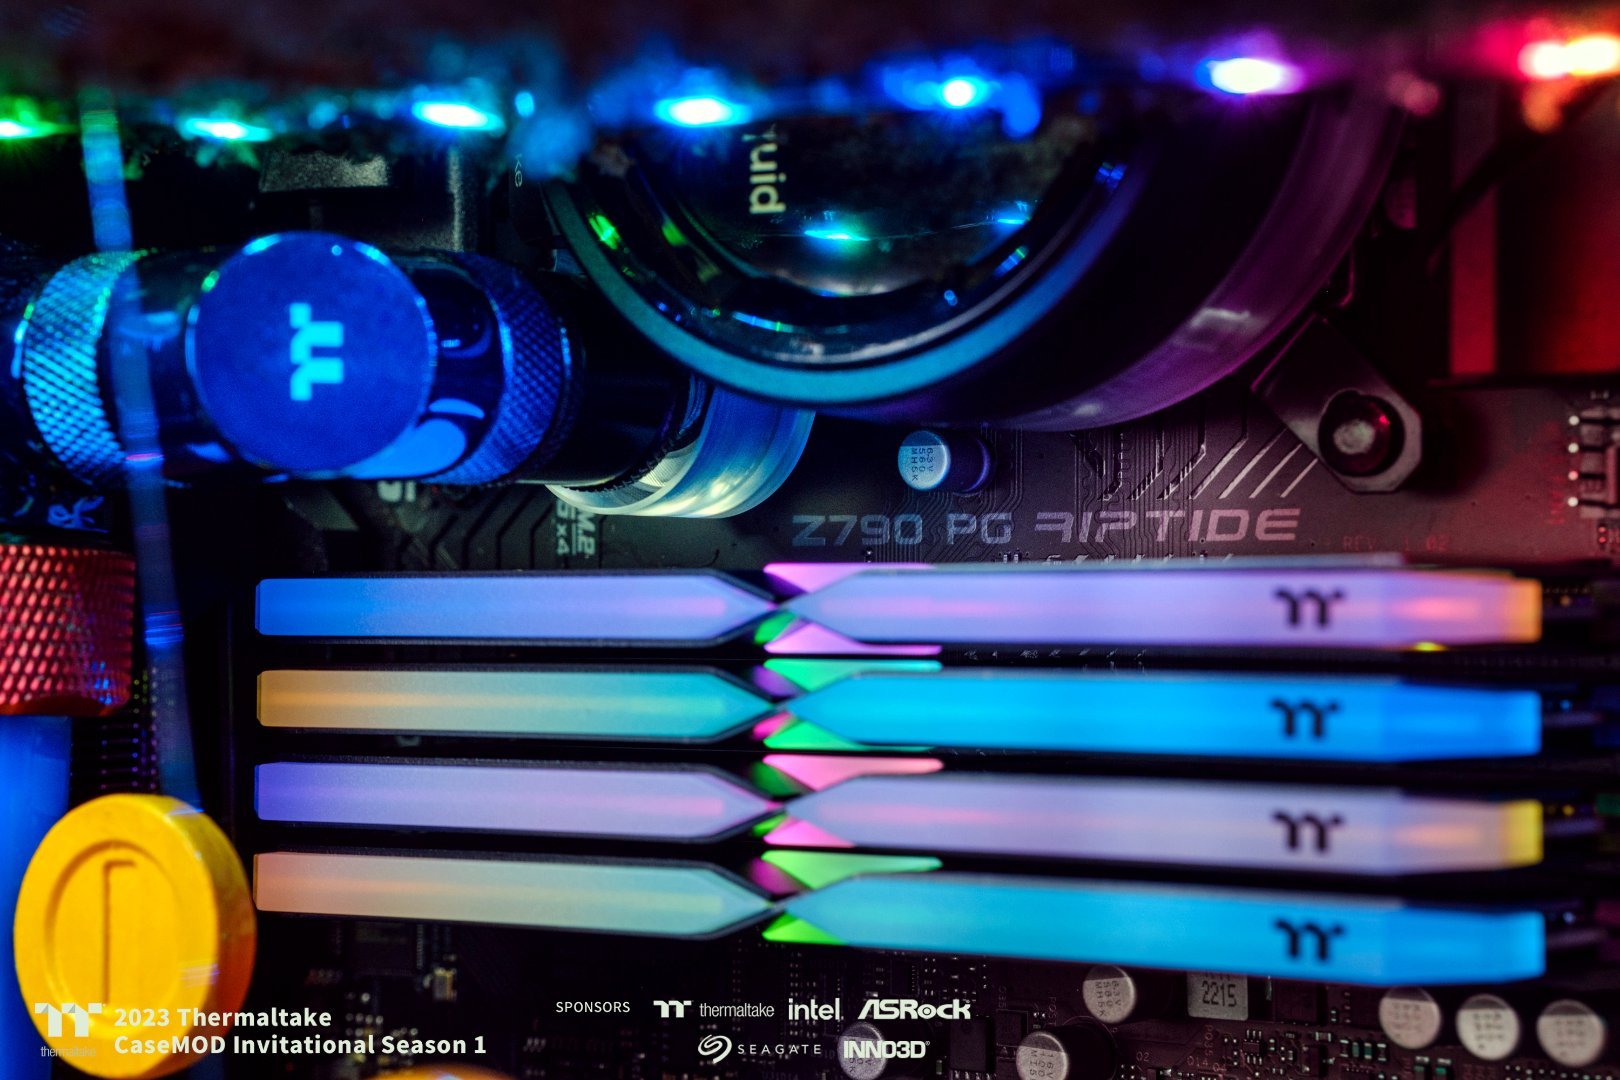
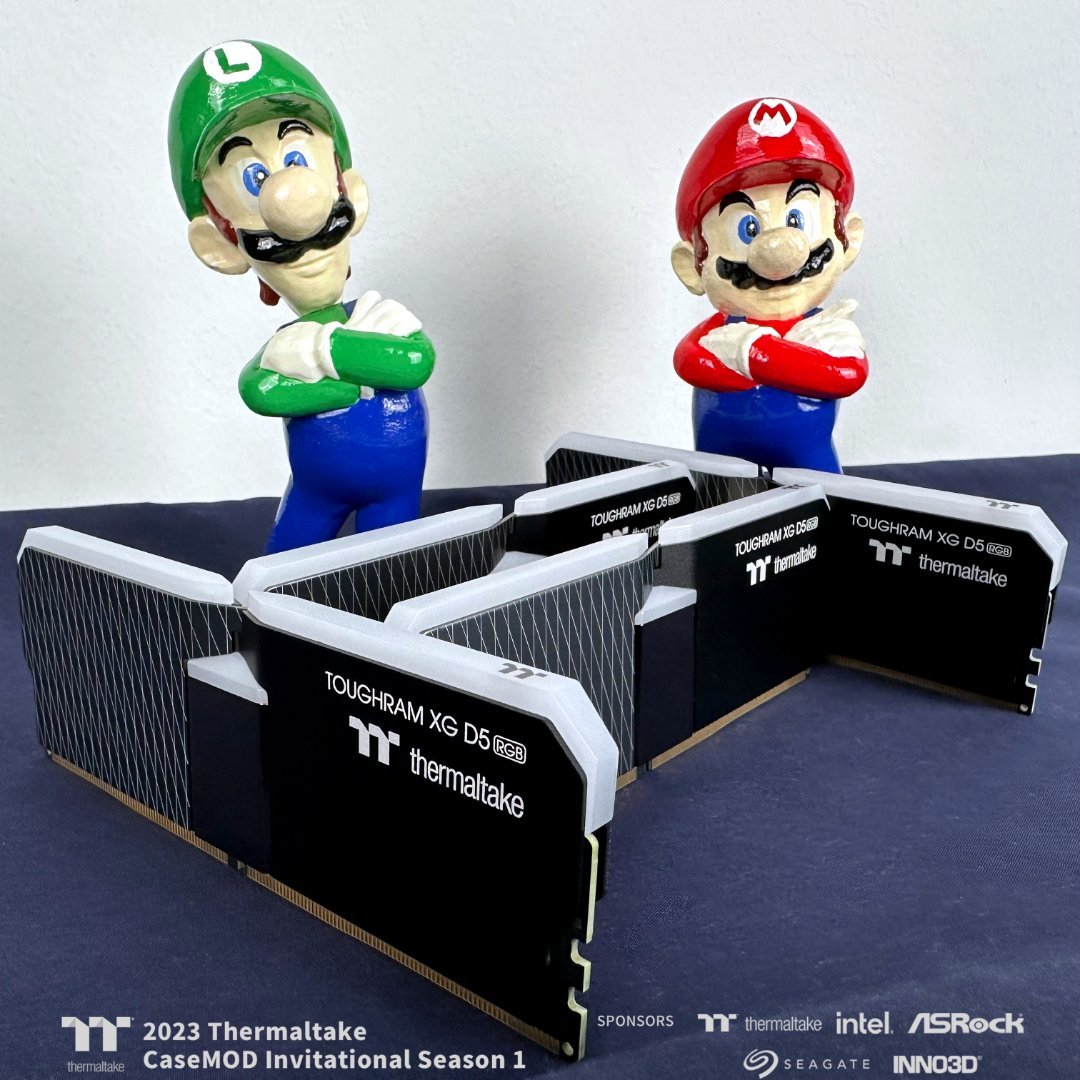
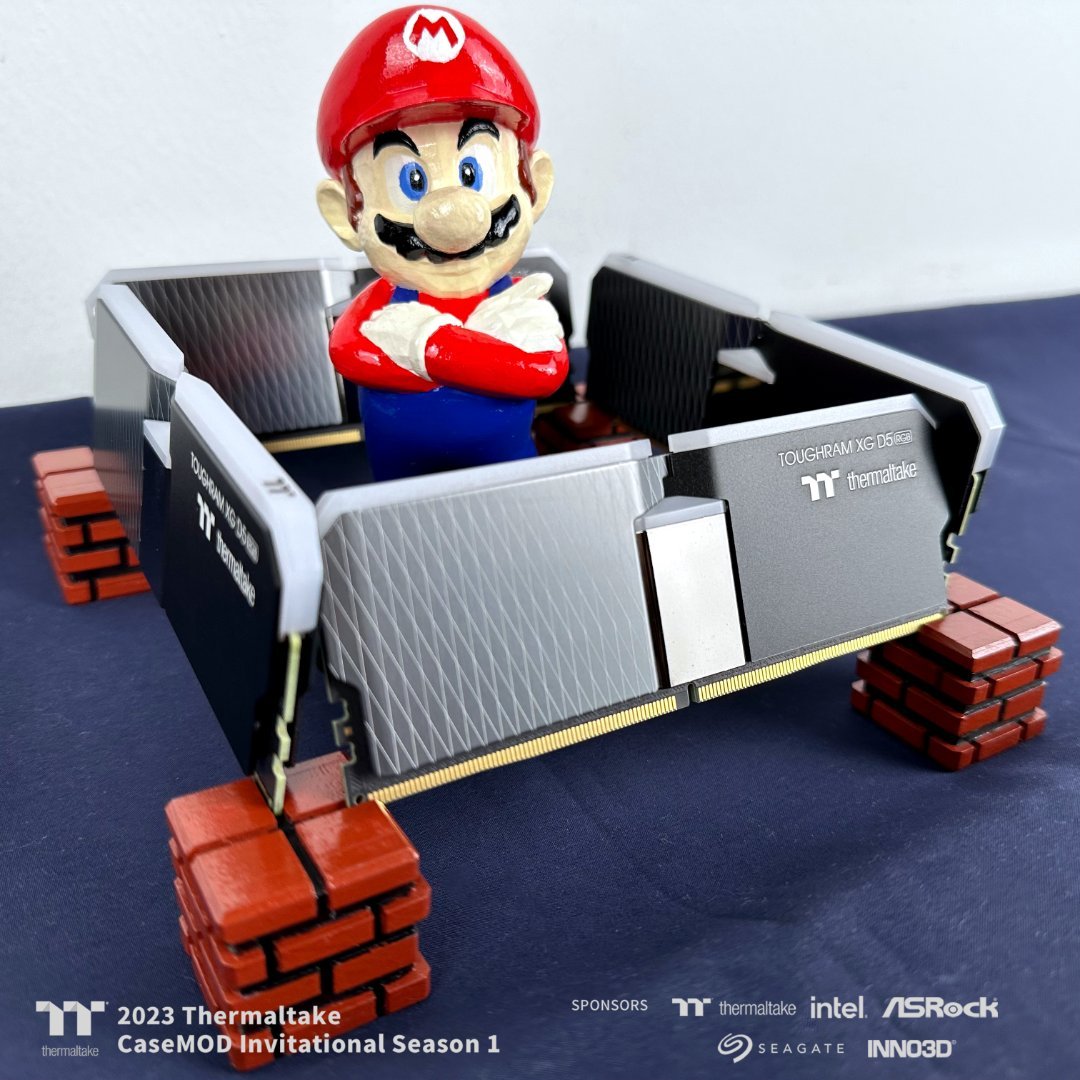
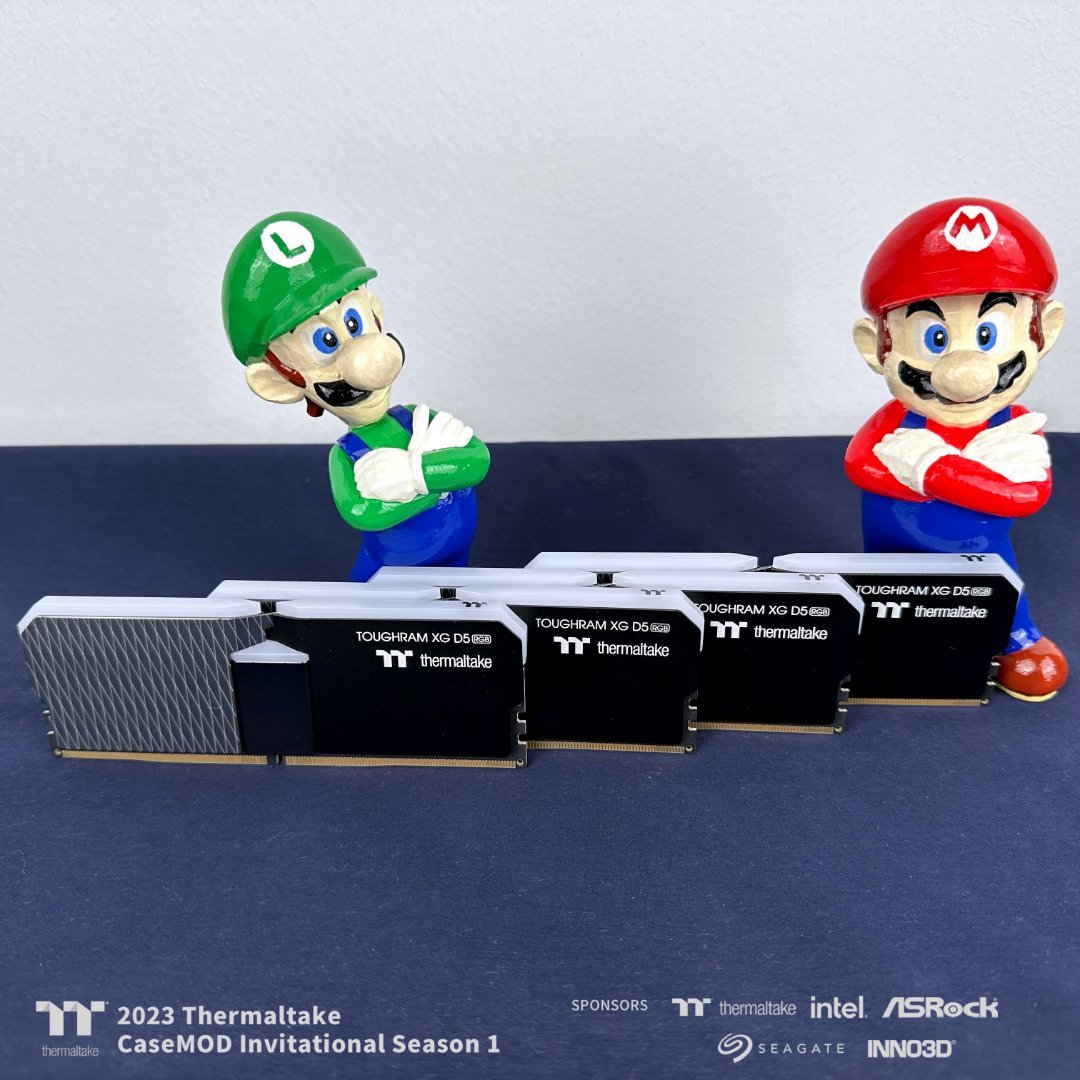
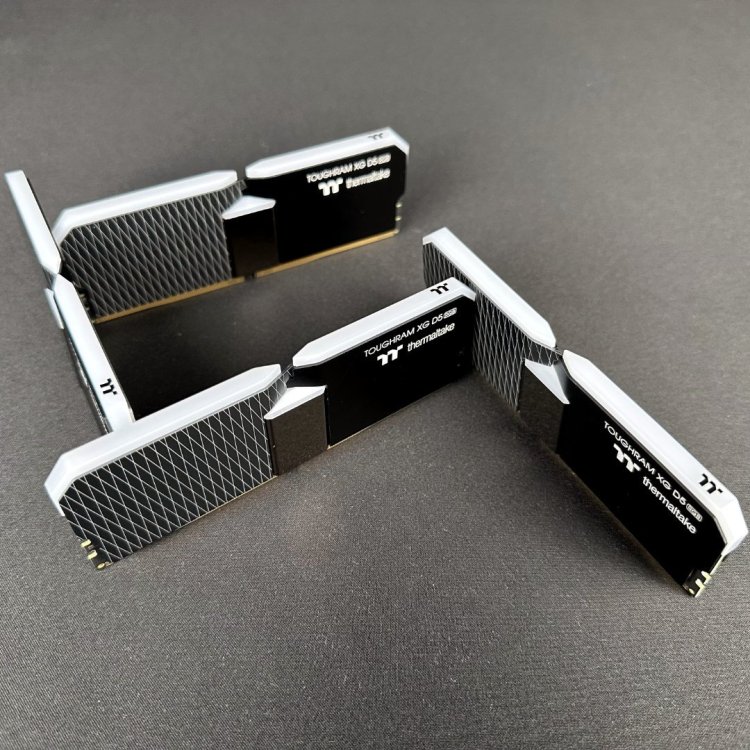
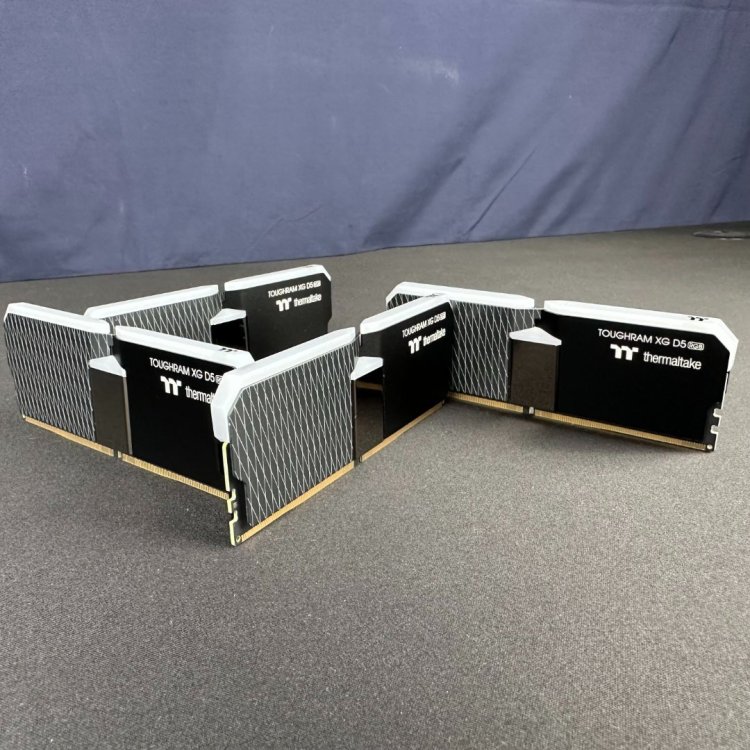
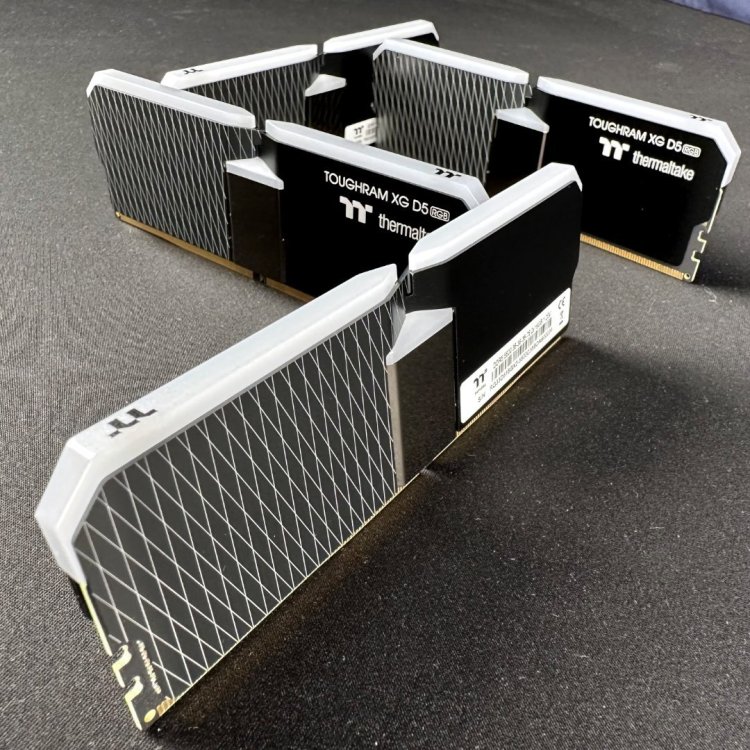
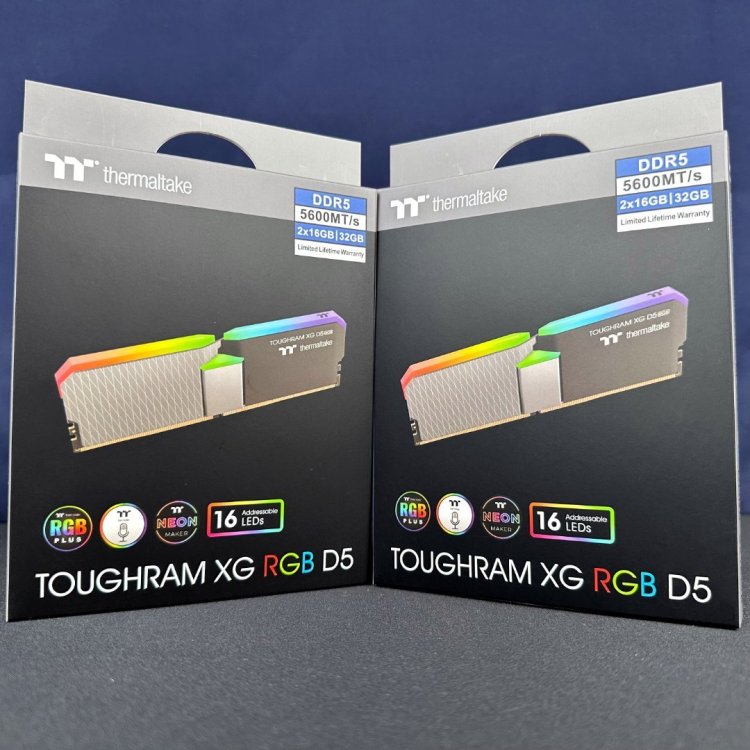
The ThougRam XG RGB RAM in a beautiful show !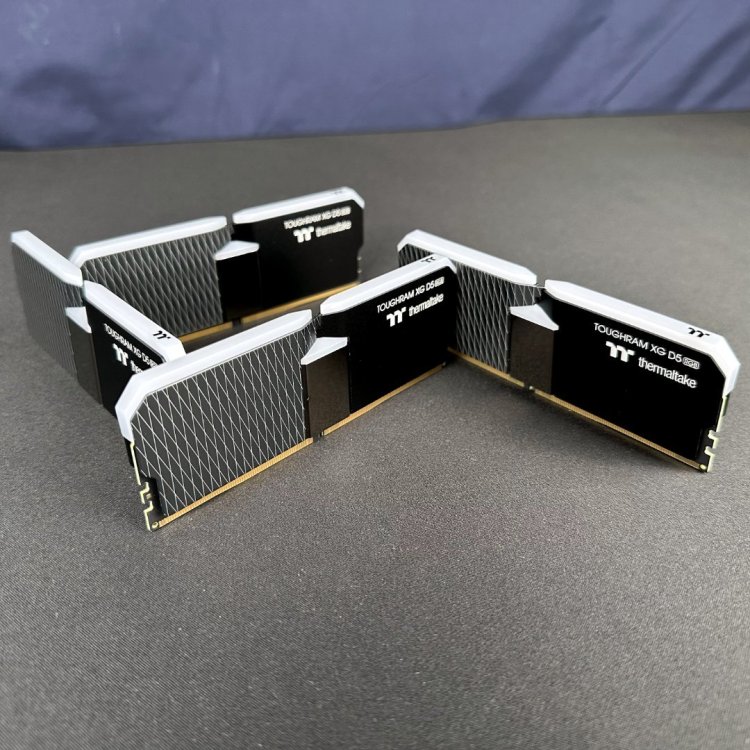


-
[Italy] Marco Di Silvestre
MPC Project replied to TT Amanda's topic in 2023 Thermaltake CaseMOD Invitational Season 1
Thank you ! -
[Italy] Marco Di Silvestre
MPC Project replied to TT Amanda's topic in 2023 Thermaltake CaseMOD Invitational Season 1
With the release of the final video of the completed build, I want to thank the Thermaltake team with all my heart. Thank them first of all for inviting me to this competition, for participating with top level modders around the world. Thank them also for their mentality and ideas to always develop something innovative that marries both the concept of gaming and maker. I hope that I have realized a project that is appreciated by all of you. Thank you for all those who have followed the progress of the work ! Thank you, my dear Andy ! Thank you Kenny for creating an important brand with excellent products and congratulations for his 25 years ! Thanks to all the TT team ! Thanks to all the sponsors : Intel, ASRock, INNO3D, Seagate ! -
[Italy] Marco Di Silvestre
MPC Project replied to TT Amanda's topic in 2023 Thermaltake CaseMOD Invitational Season 1
Thanks bro, I just saw yours too and I've always liked the diorama style ones which enrich the internal spaces of the cabinet very well and which also give a very nice look externally ! -
[Italy] Marco Di Silvestre
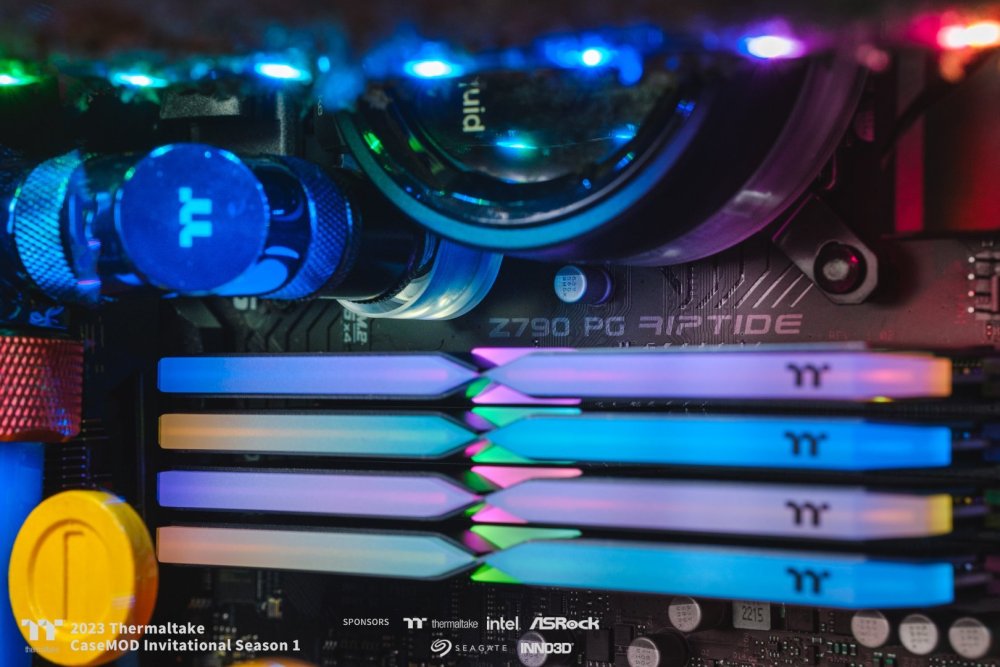
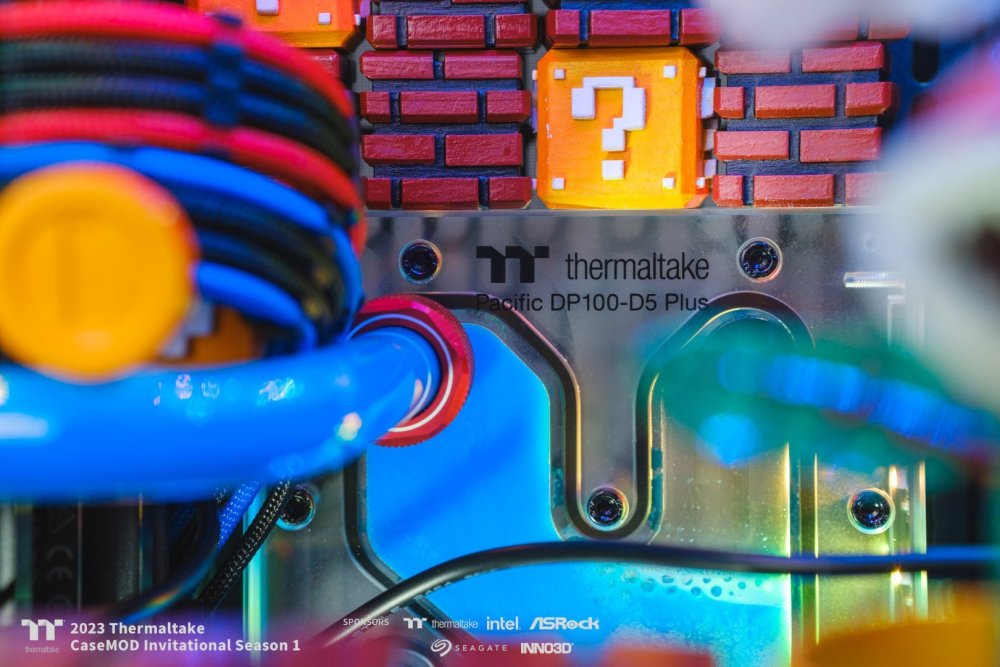
MPC Project replied to TT Amanda's topic in 2023 Thermaltake CaseMOD Invitational Season 1
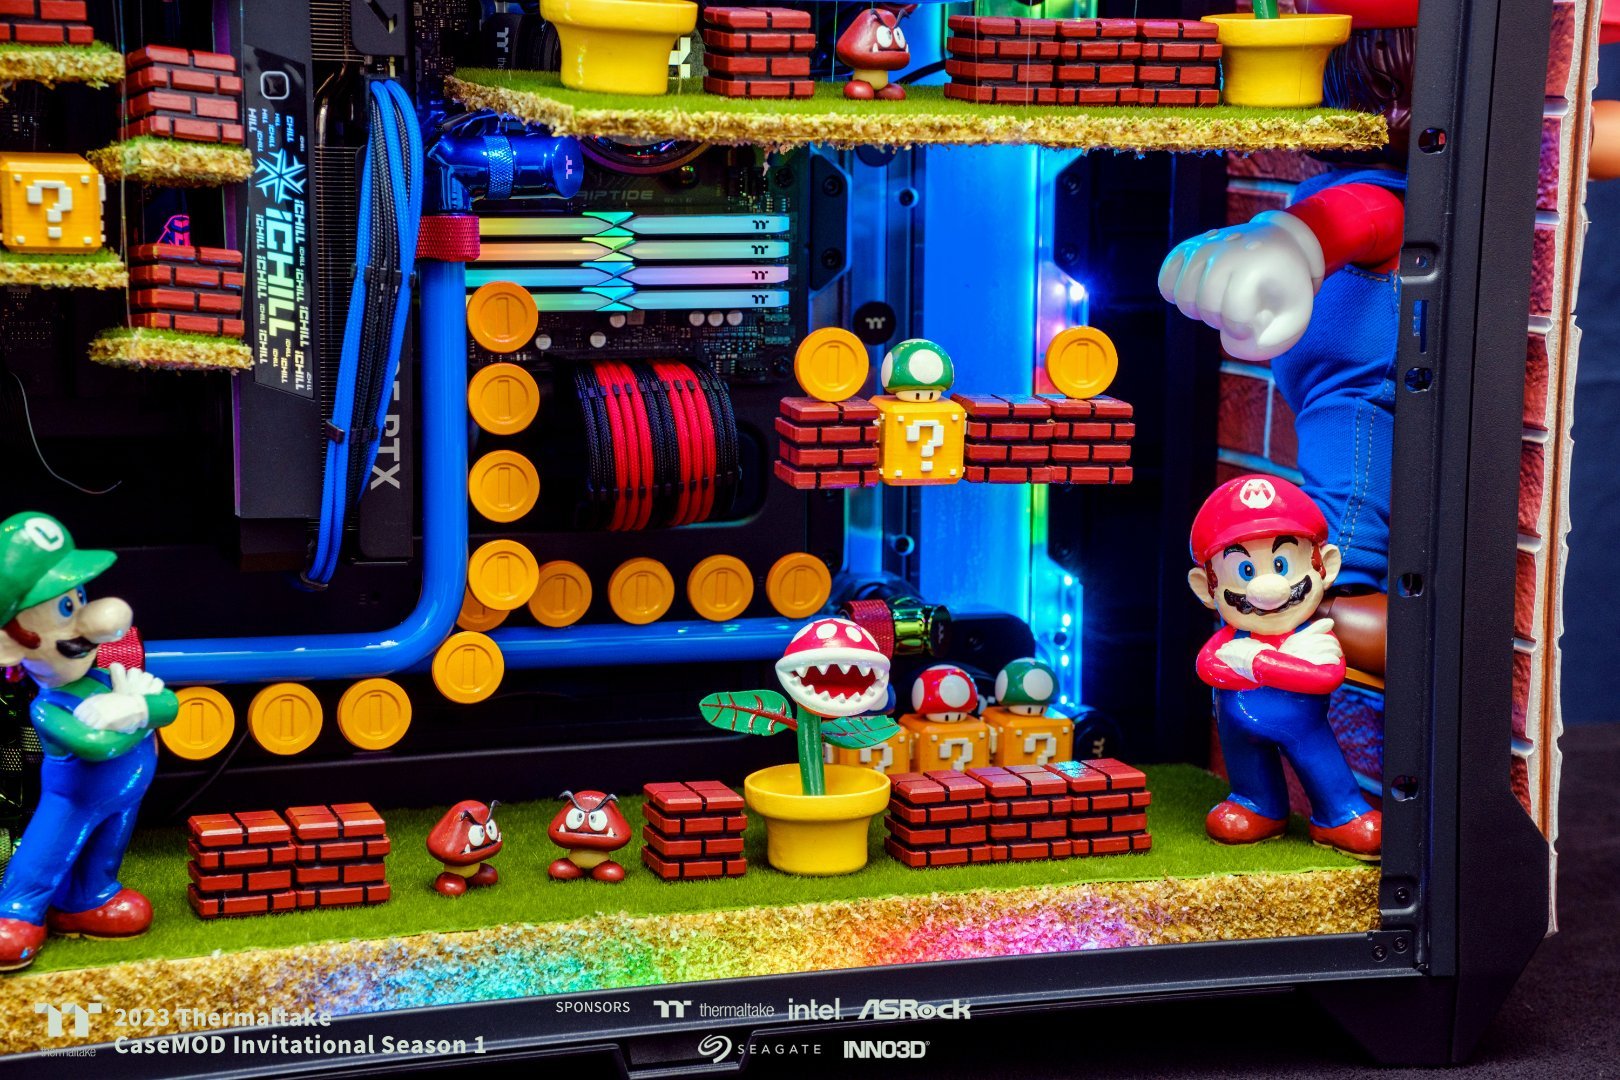
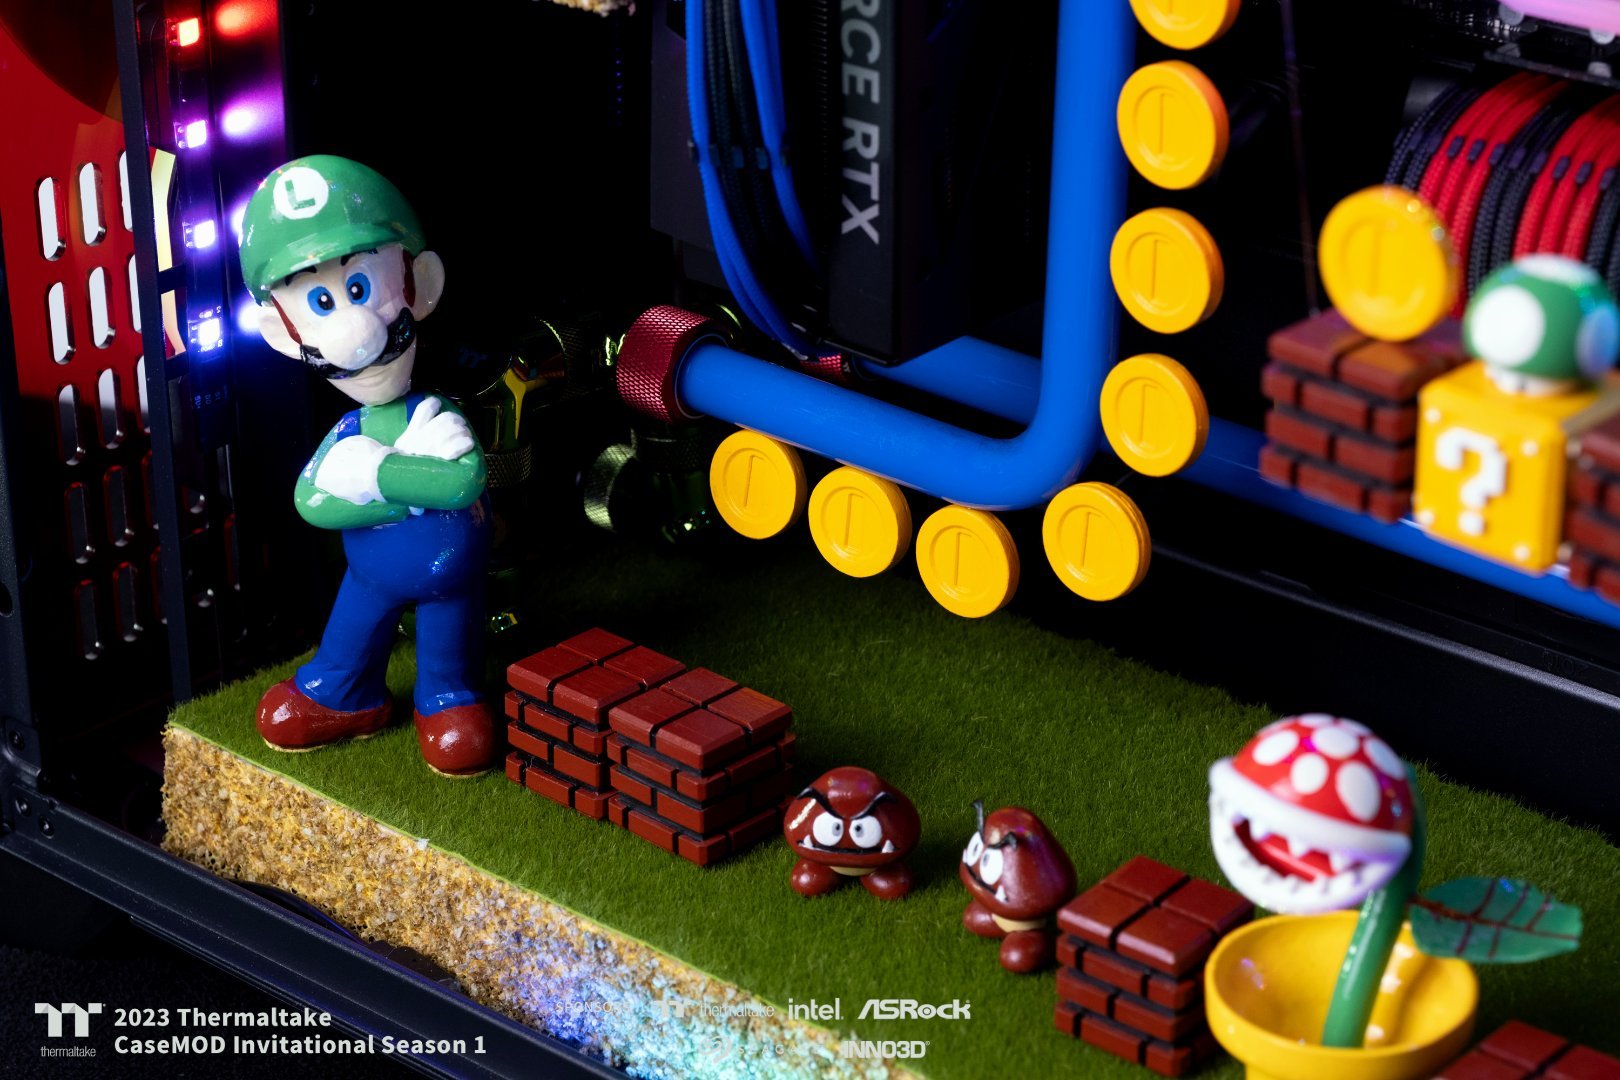
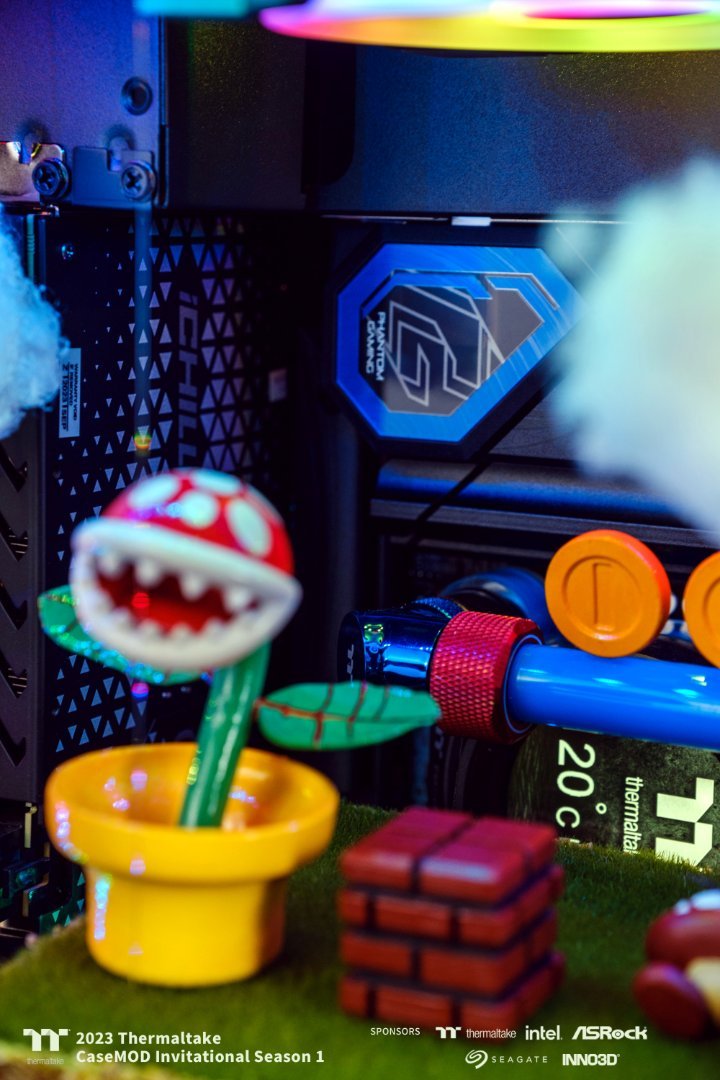
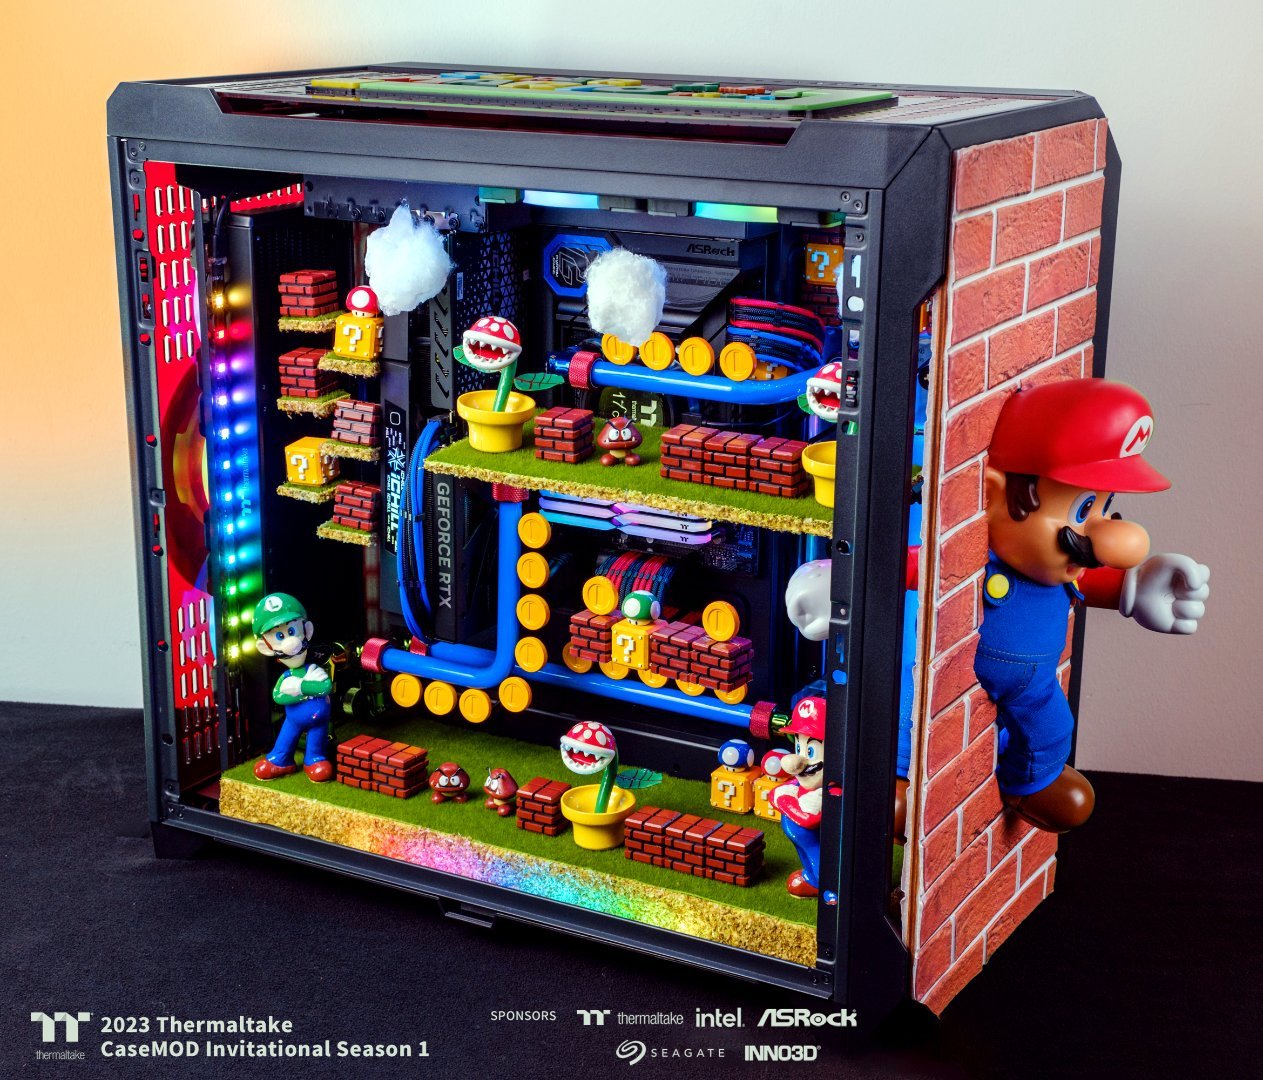
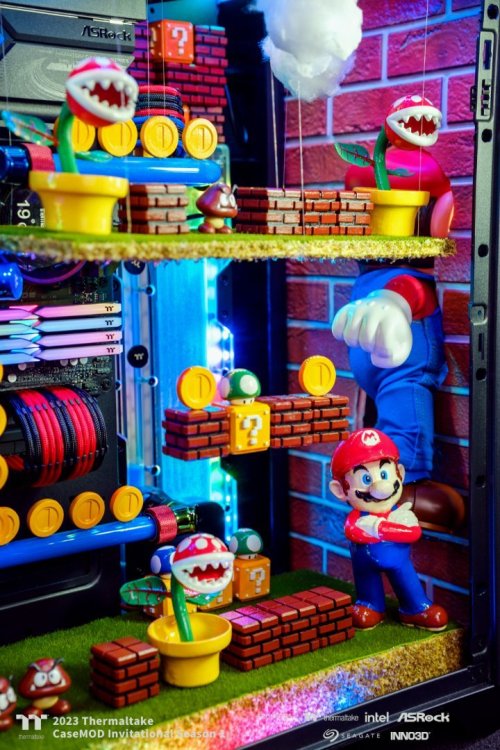
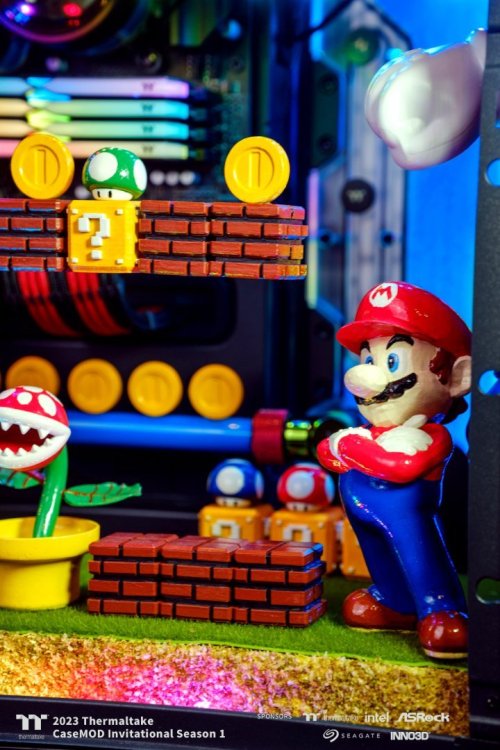
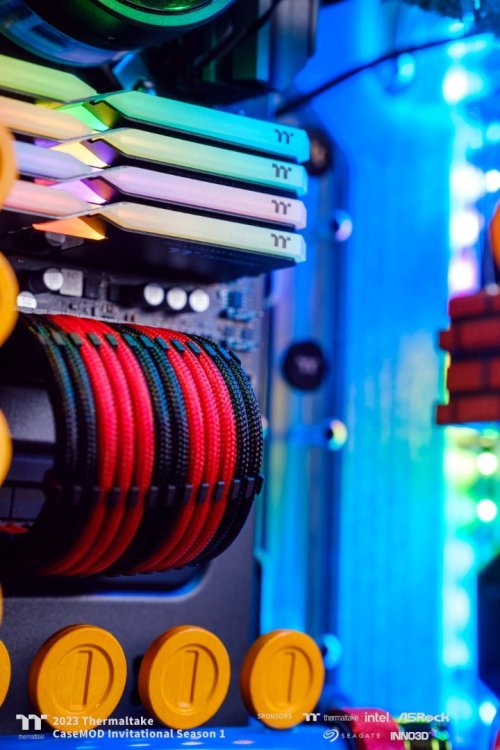
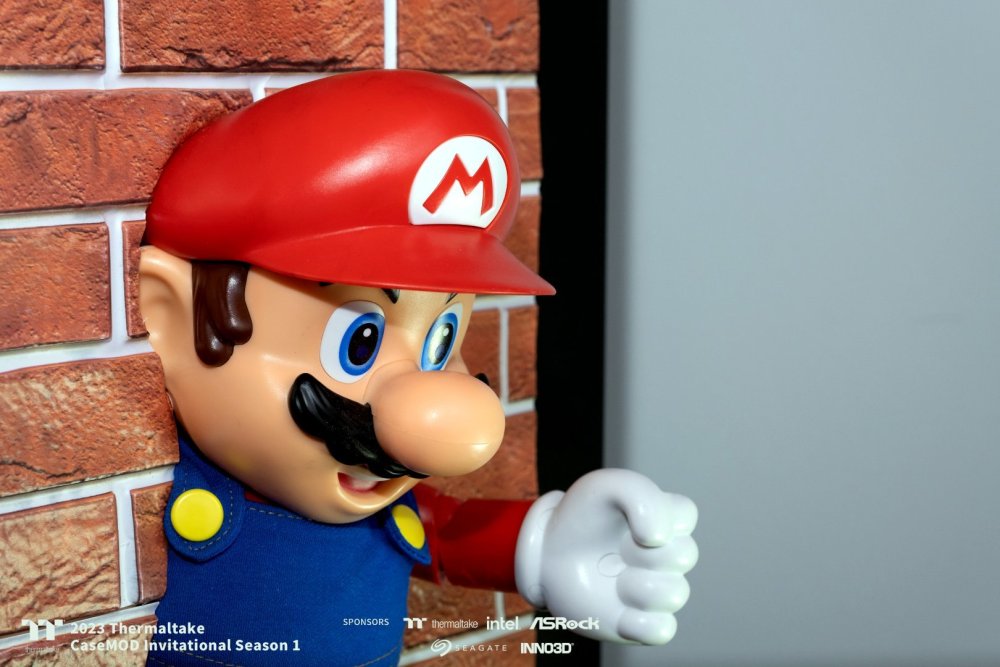
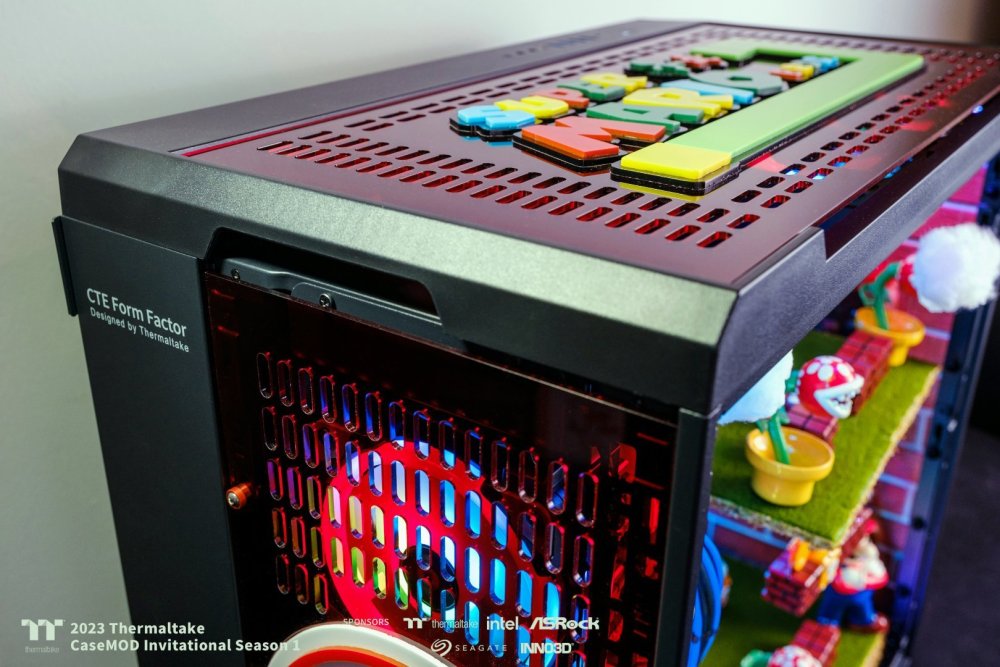
The new home from the inside of Super Mario !
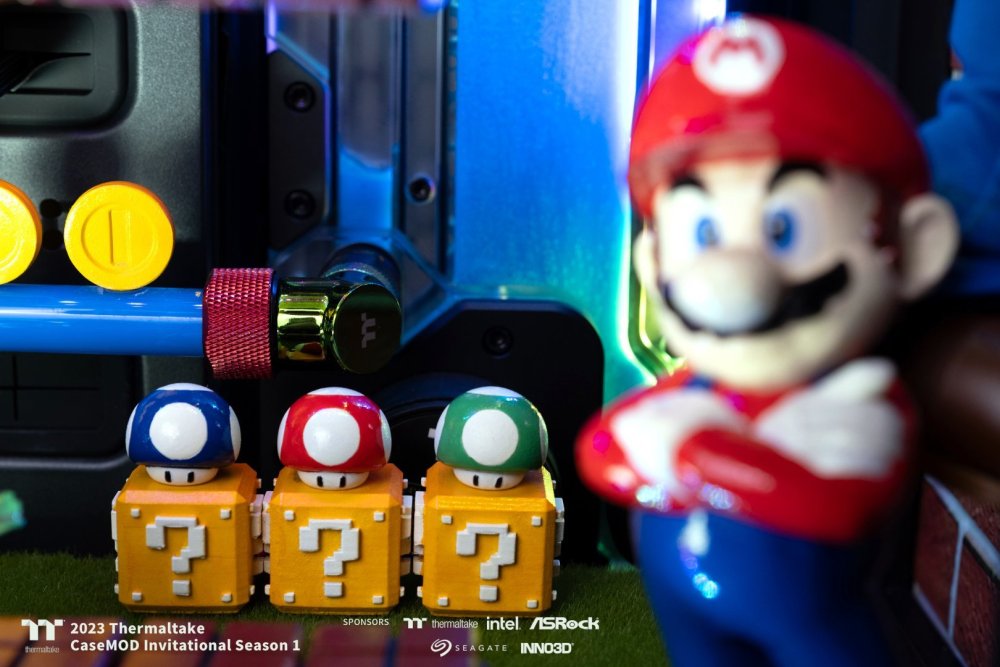
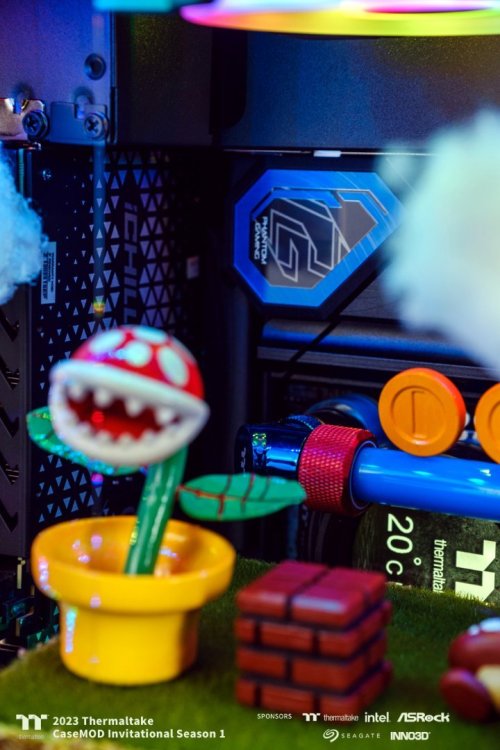


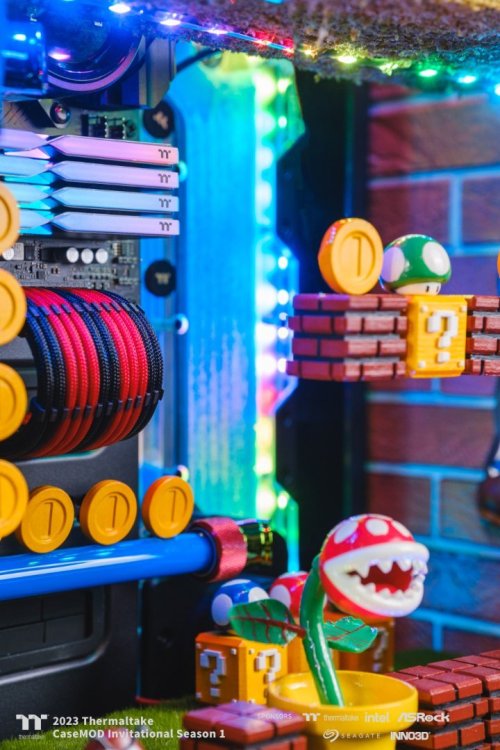
-
[Italy] Marco Di Silvestre
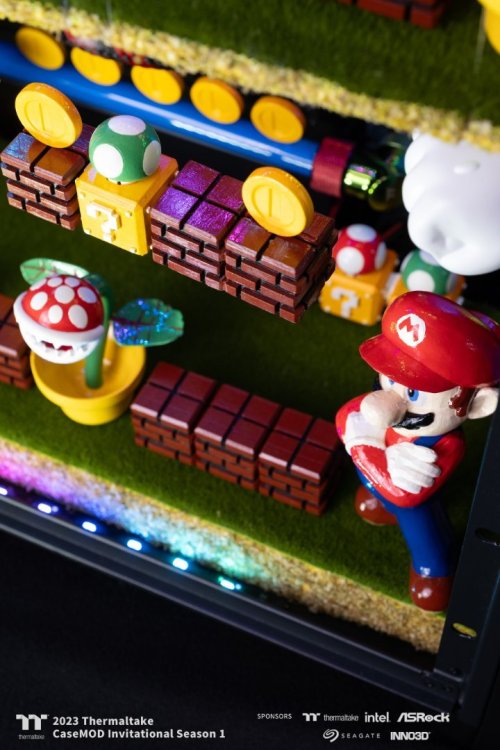
MPC Project replied to TT Amanda's topic in 2023 Thermaltake CaseMOD Invitational Season 1
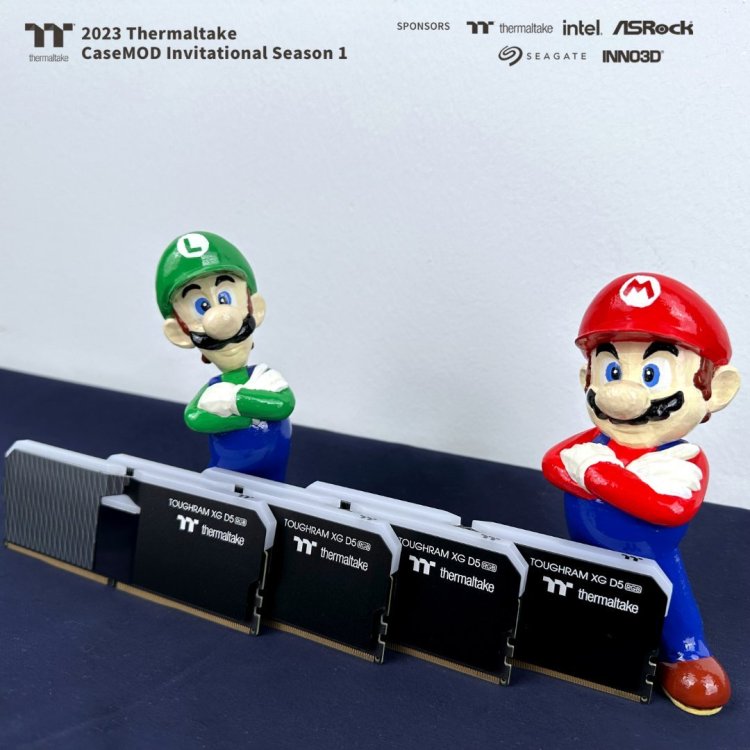
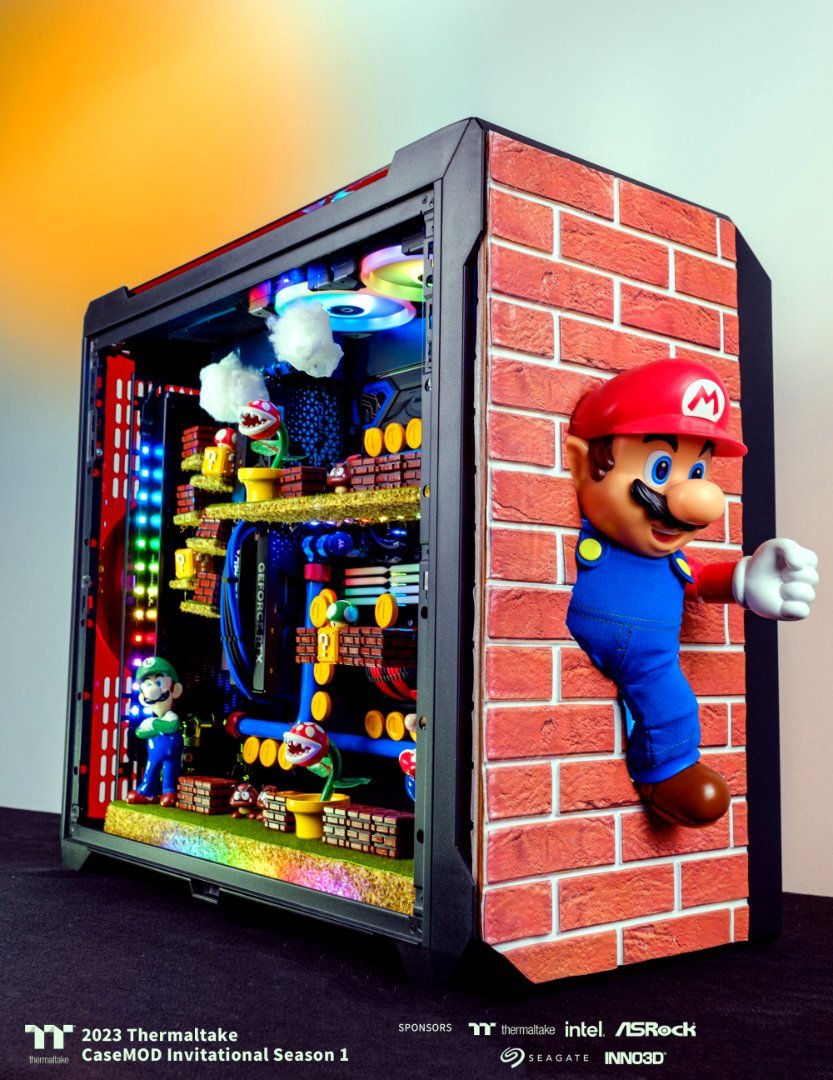
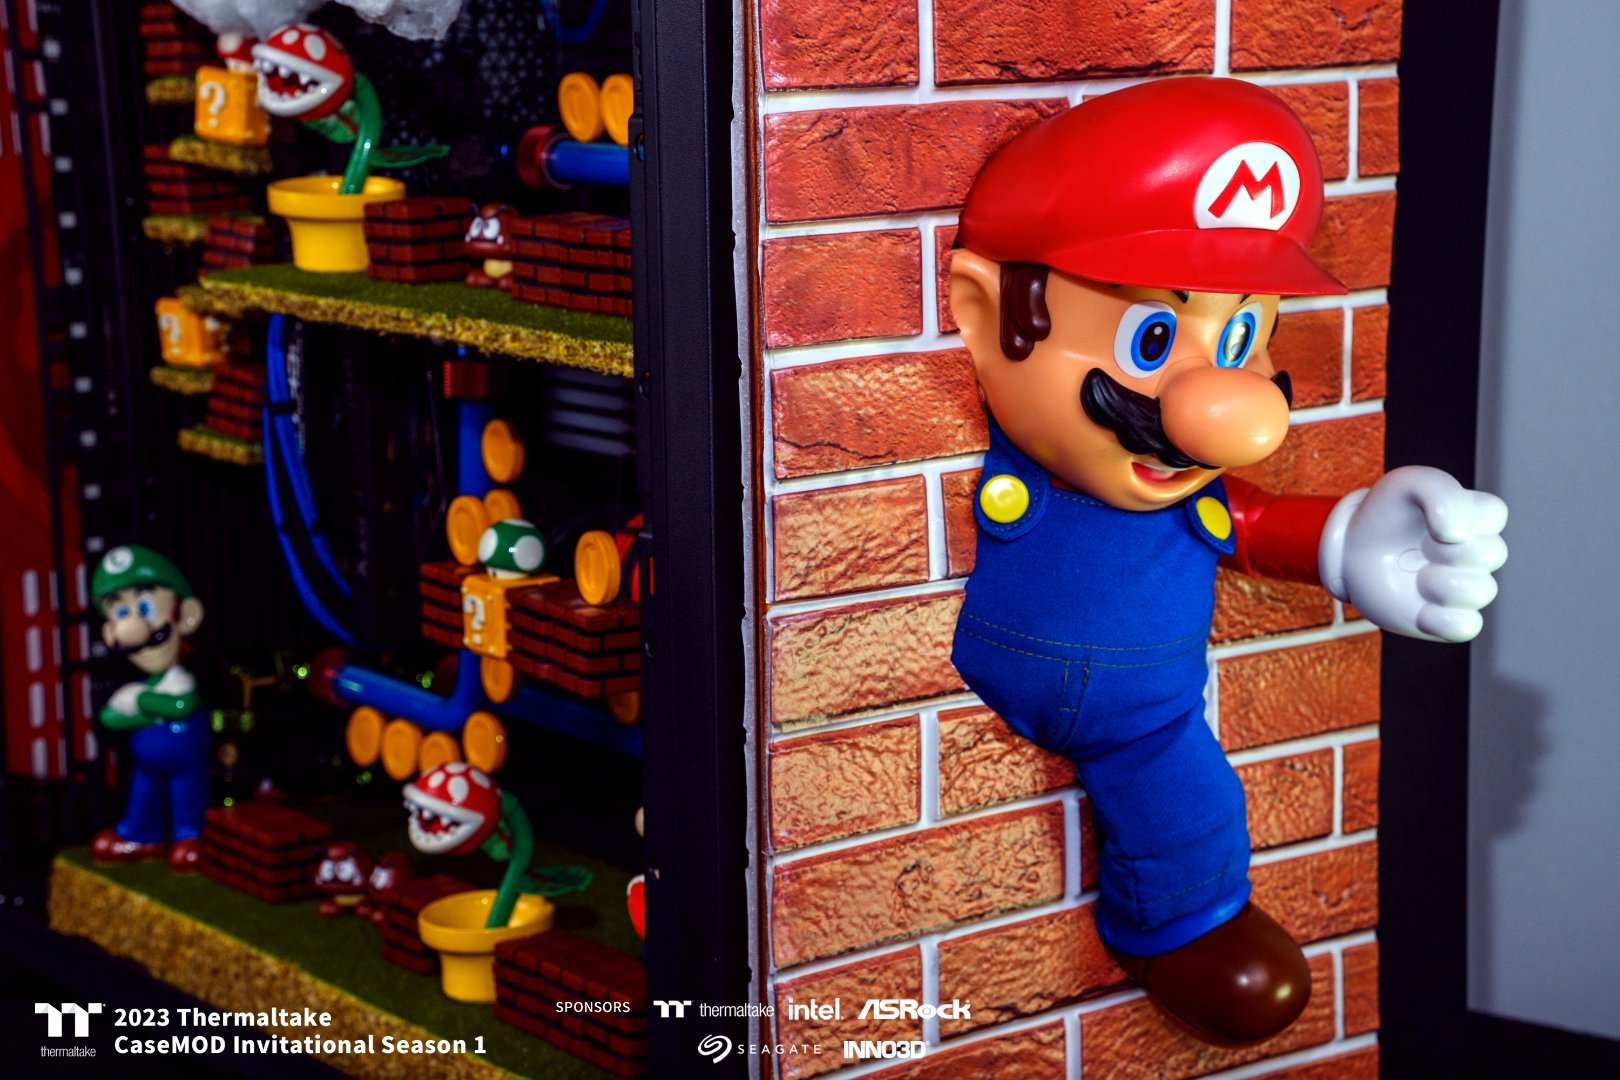
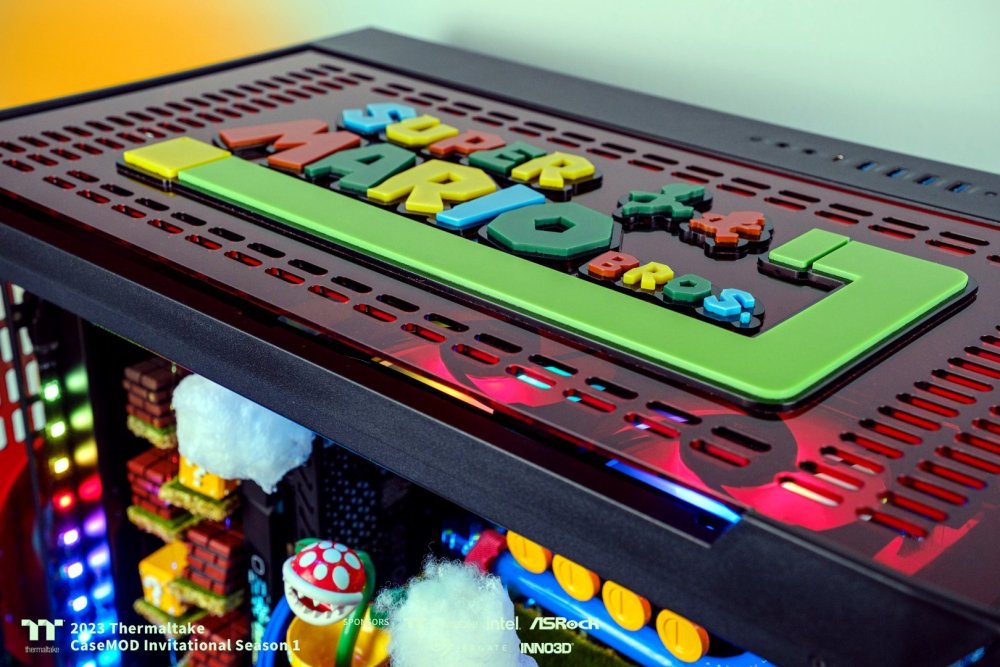
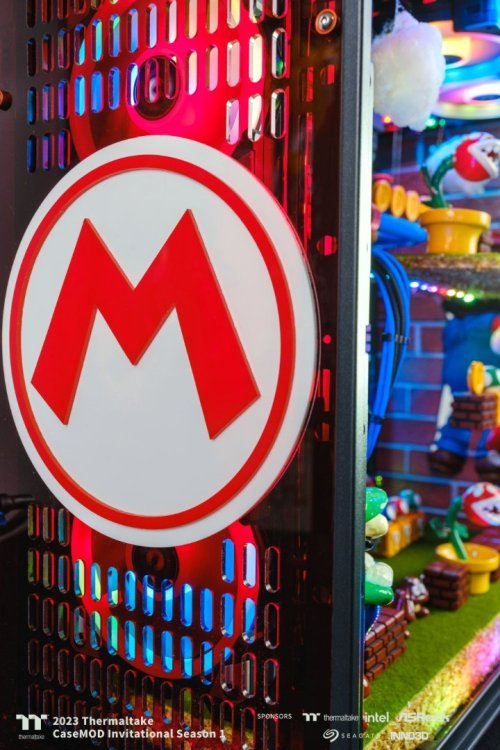
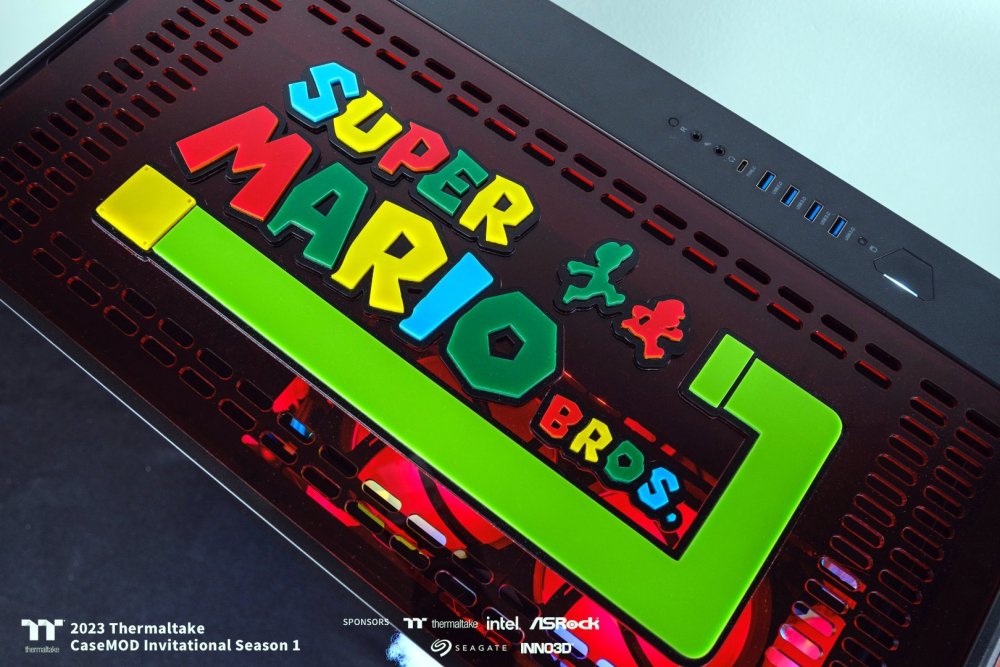
Super Mario Bros is ready for his new adventure ! Photos of the exterior.

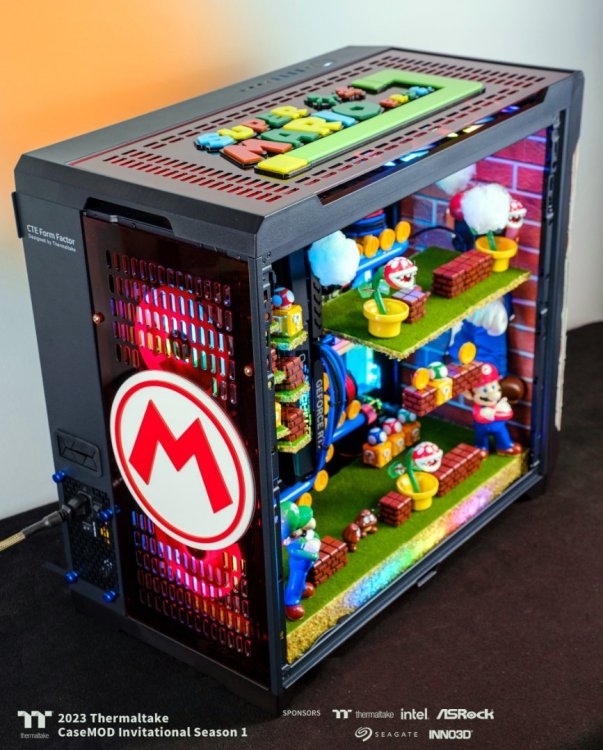

-
[Italy] Marco Di Silvestre
MPC Project replied to TT Amanda's topic in 2023 Thermaltake CaseMOD Invitational Season 1
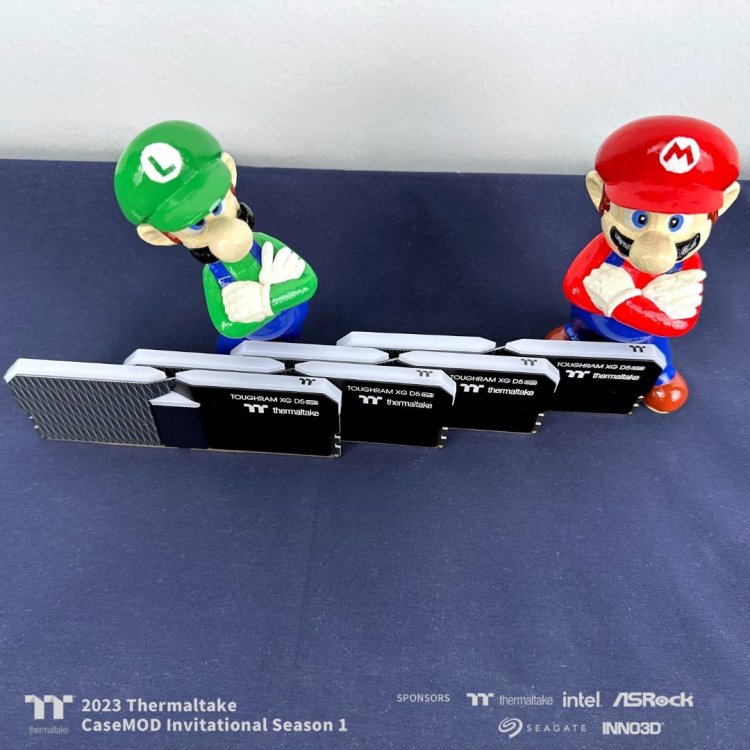
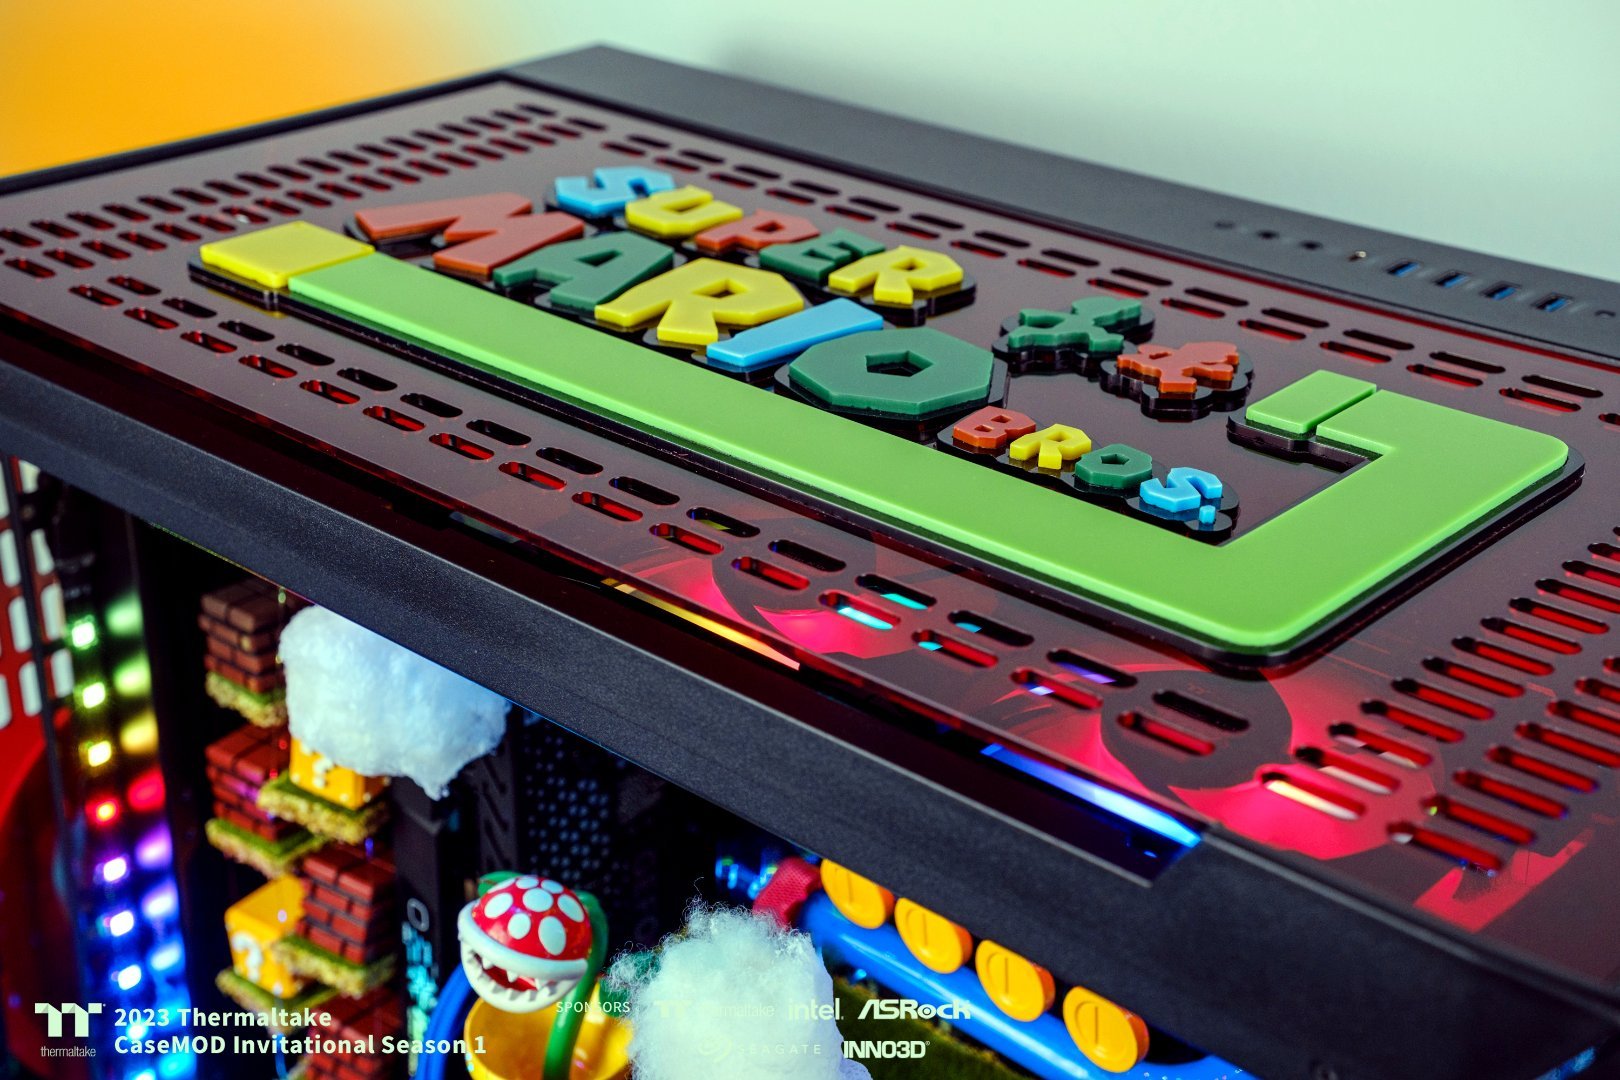
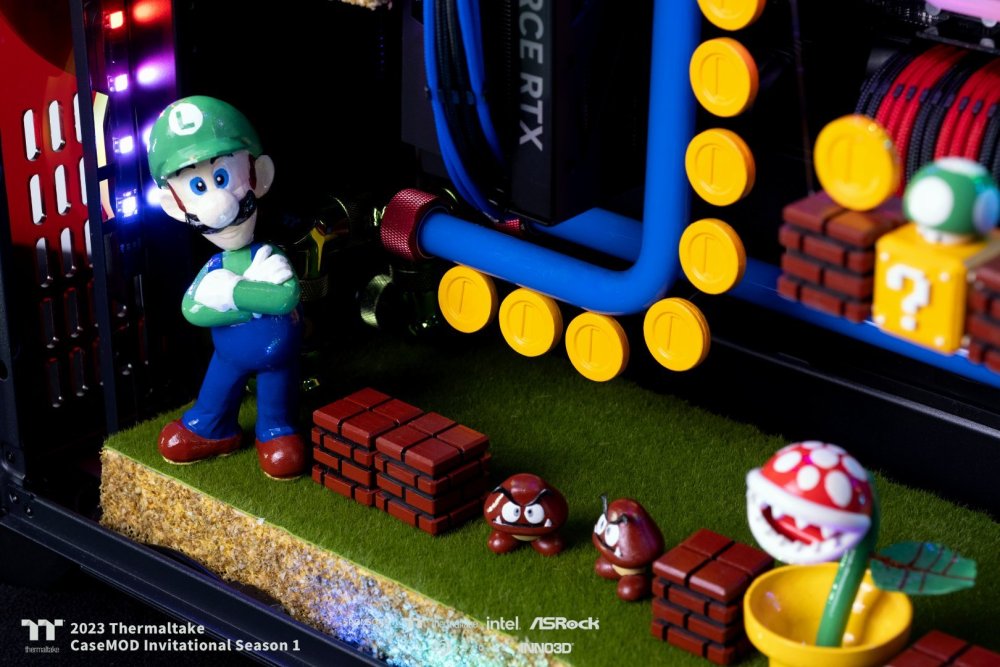
New solid walls for Mario and Luigi !