-
Forum Statistics
8.2k
Total Topics53.3k
Total Posts -
Member Statistics
136,405
Total Members16,800
Most Online


Eatsrootsnleaves
-
Posts
13 -
Joined
-
Last visited
Content Type
Profiles
Forums
Downloads
Events
Gallery
Blogs
Posts posted by Eatsrootsnleaves
-
-
This looks quite interesting, the TT RGB Plus software has driven me partially insane so I'm keen to give yours a go.
Latest update to TT RGB plus hasn't fixed the major profile bugs and quite frankly it's all over the place
As I'm running 5 controllers and 25 devices I might make a good test candidate.
11 x Riing fans, 3 x Trio fans, PR22-D5 Plus pump, Pacific RGB Plus fitting set, 12 way and 8 way Strimer leads, Custom ARGB CPU, GPU and motherboard strips.
Any suggestions on where to start, should I try the beta or go straight for the latest version?
-
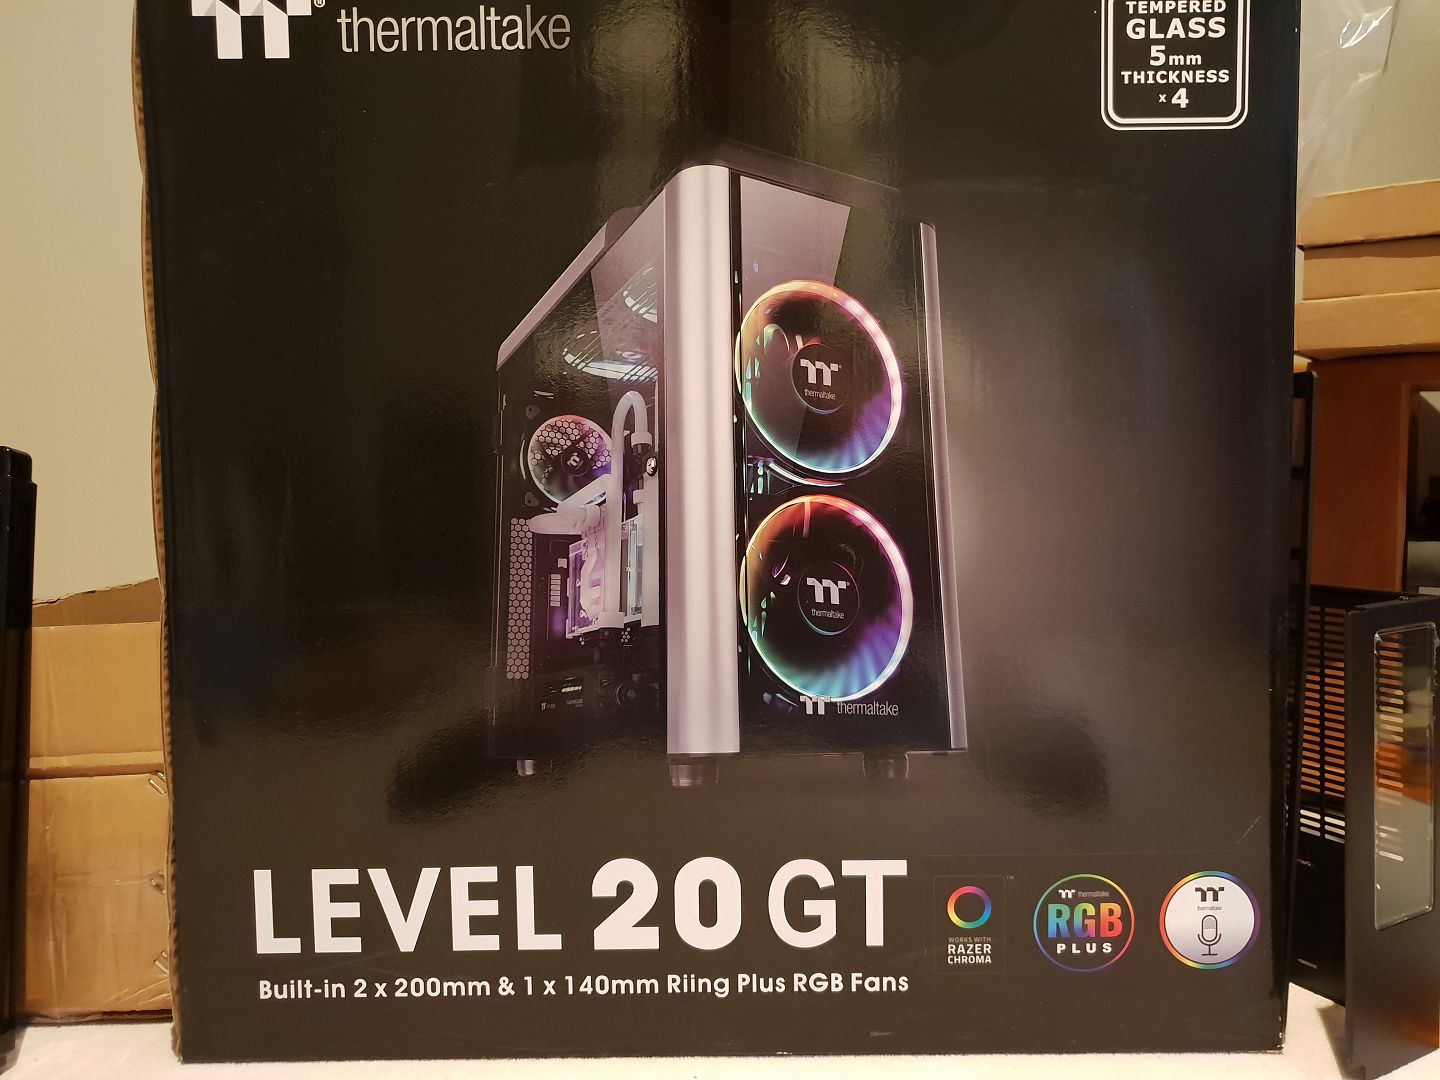
I have found the air flow on the Level 20 GT plus to be excellent. Air gaps exist around all of the glass panels and the 200mm fans move so much air even at low speed.
The only thing against it is the mesh panels behind the glass get sucked onto the fans and create a huge restriction so they may need to be removed.
-
Yep I get this also.
Seagate Barracuda pro 6TB on a Gigabyte Aorus Master MB.
Rest of the specs on my build blog here.
Sounds so bad I initially thought the HDD had failed., as it makes a similar sound. Closing the app and or tray icon doesnt stop it but closing the exe in task manager does. Totally unusable in its present state. Also the longer you leave it running the polling gets louder and sounds really horrible.
I agree that it doesnt need to poll the HDD and the only interaction I can see between the app and the HDD is for recording which is off by default.
-
Part Three
Filling, testing etc
Currently being edited!!
I dont like replying to my own post as it feels like Im talking to myself and I do that enough as it is but its the only easy way to manage this blog.
Well its now most of a water cooled PC, bit to go yet.
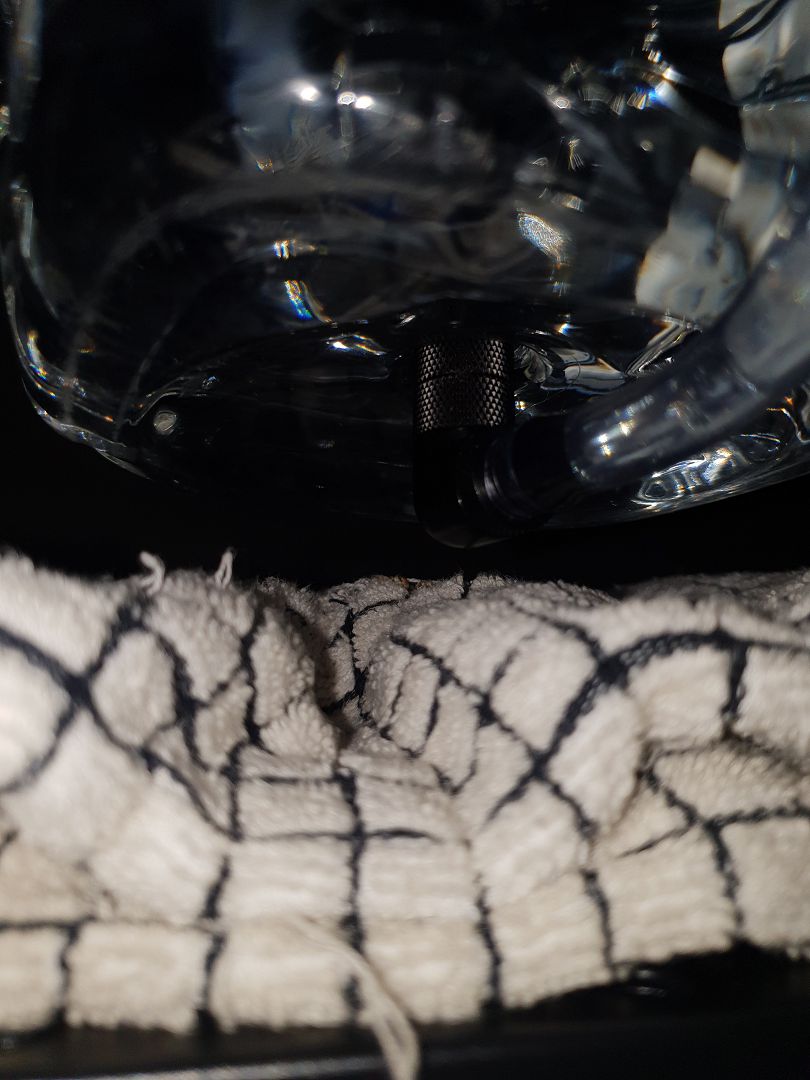
Best part of all not one leak inside the case, only 1 incident underneath with a loose extension creating a slow desk flood but other than that all good.
System filled with distilled water and has run for 2 days....but its not that easy, never is.
Had to run a set of fans as the pump and its RGB lights kept increasing the water temp. There is something to keep in mind the RGB lights in blocks, reservoirs and fittings all output heat and quite a bit of it to. This will add to your thermal load increasing your water temp and needs to be allowed for in your radiator and fan choices.

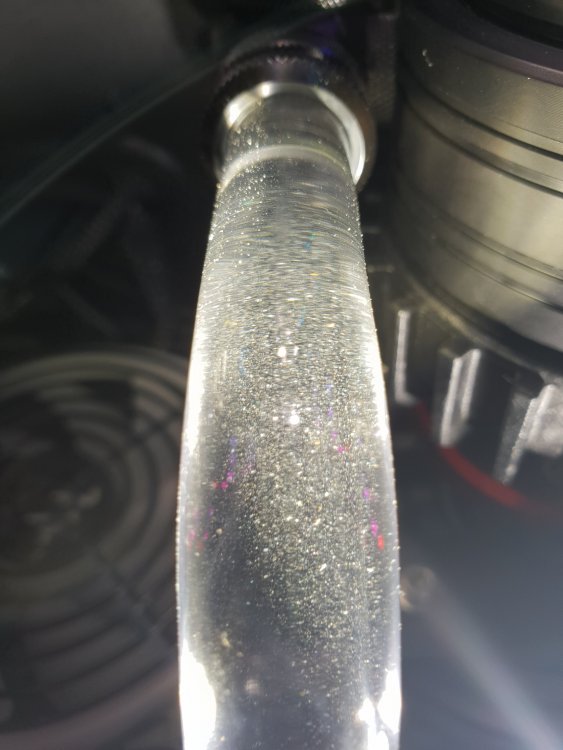
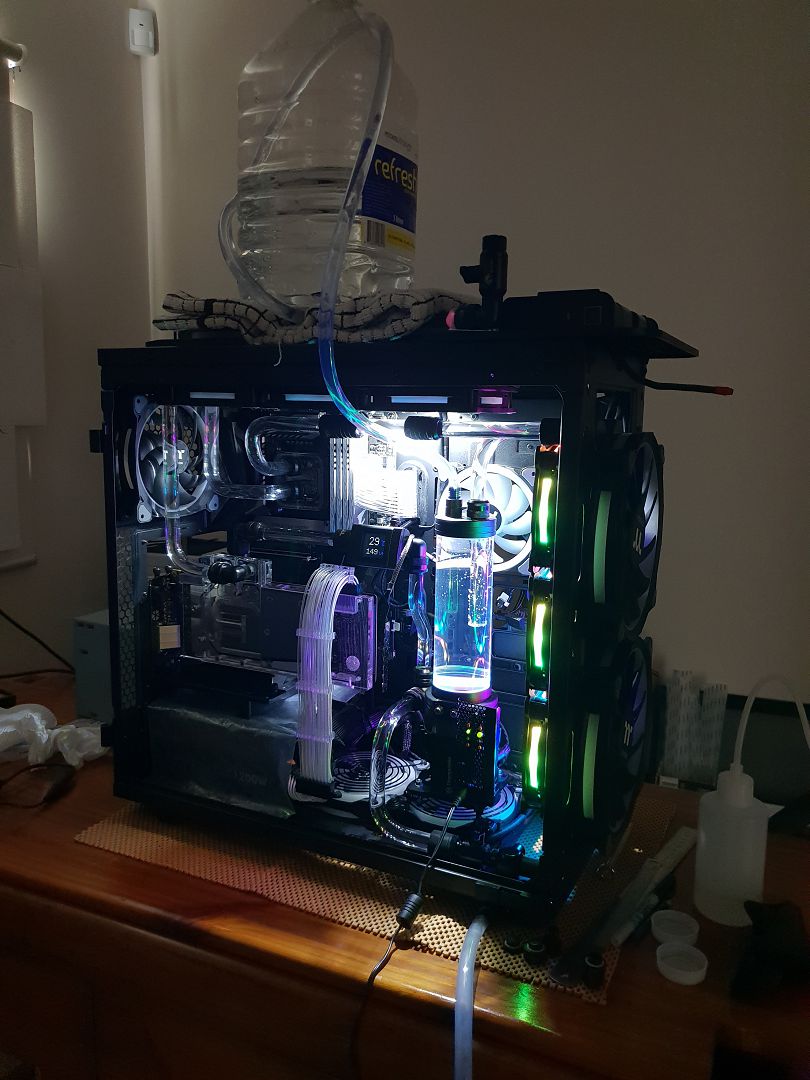
My flushing setup....basically a 5 litre reservoir extension to allow continuous active flushing of the system. This setup worked perfectly allowing me to even detach, refill and reconnect the bottle without adding any air to the system. Output drained at a trickle into another bottle below.

Fittings screwed on a spare distilled water bottle.

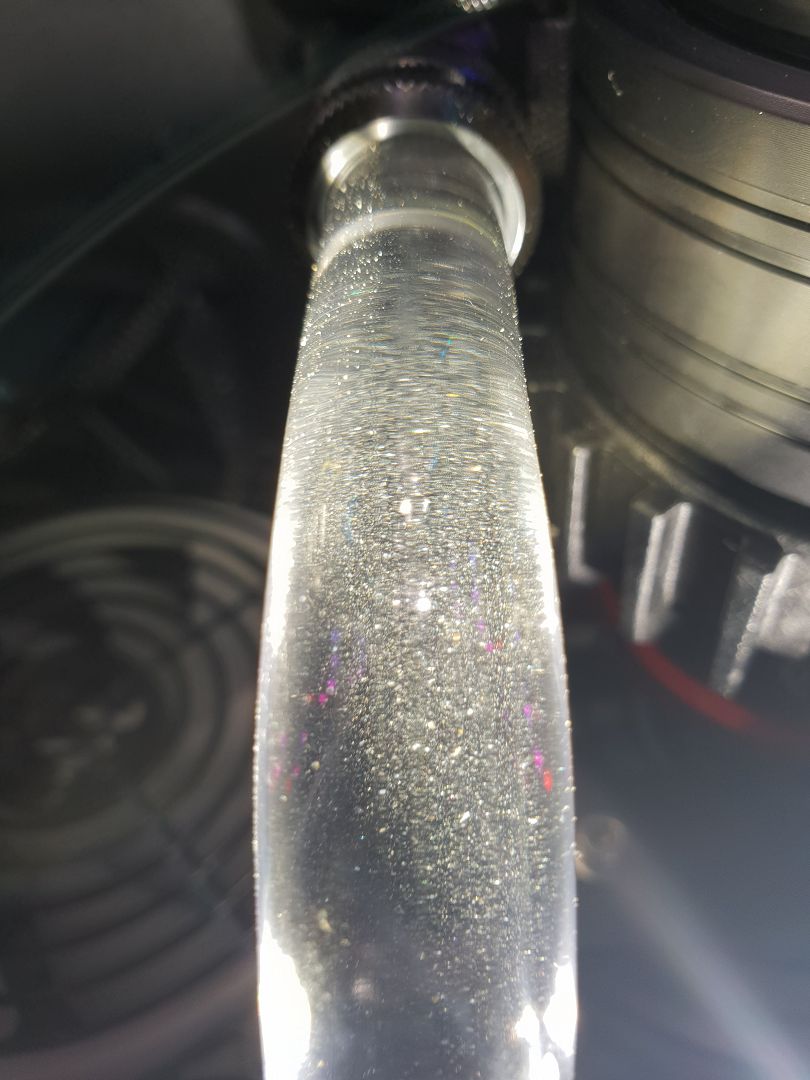
And here is why....more of the microscopic shiny snow globe stuff and heaps of it. I was able to even filter this stuff out onto paper towel and run the water back through the system again. In the end I actively flushed over 20 litres through the system slowly over a long time to remove all the particles.
If it keeps on coming I will replace the offending radiator. Dont buy cheap ones its not worth the time consuming flush process and its hit and miss to get a good one.
Now to actually set up the computer side of this build.
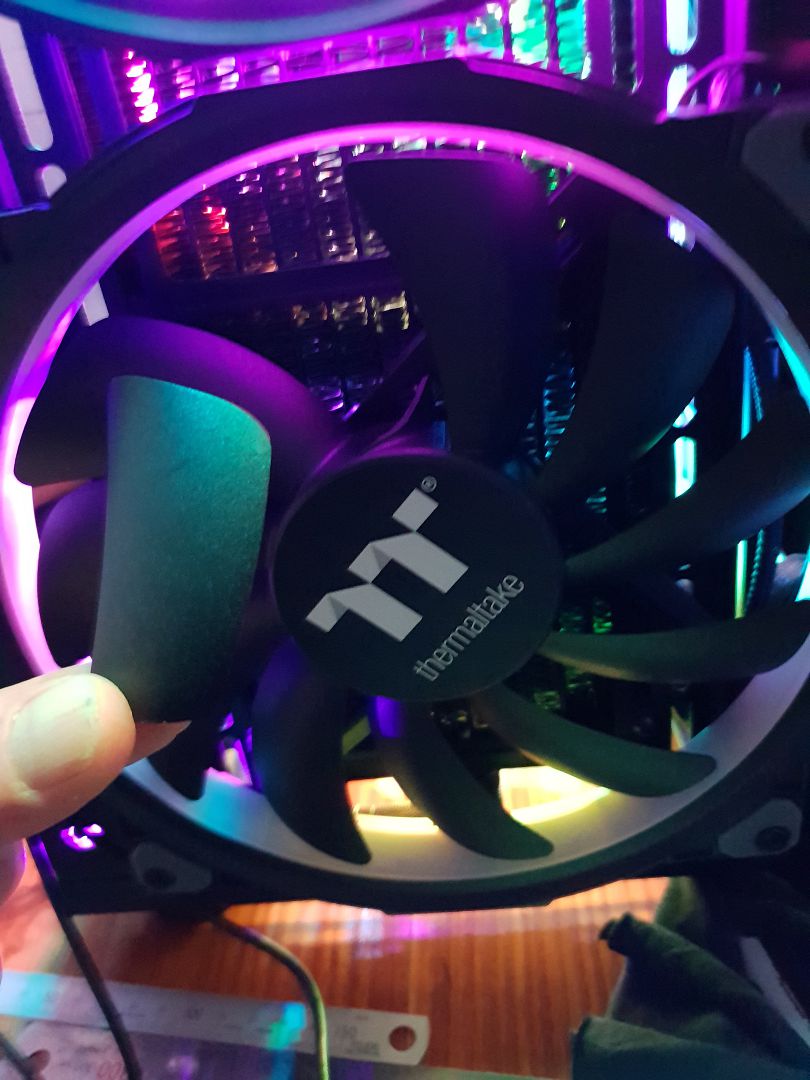
The Riing 20 fans are huge and as such I advise caution around them when they are spinning.
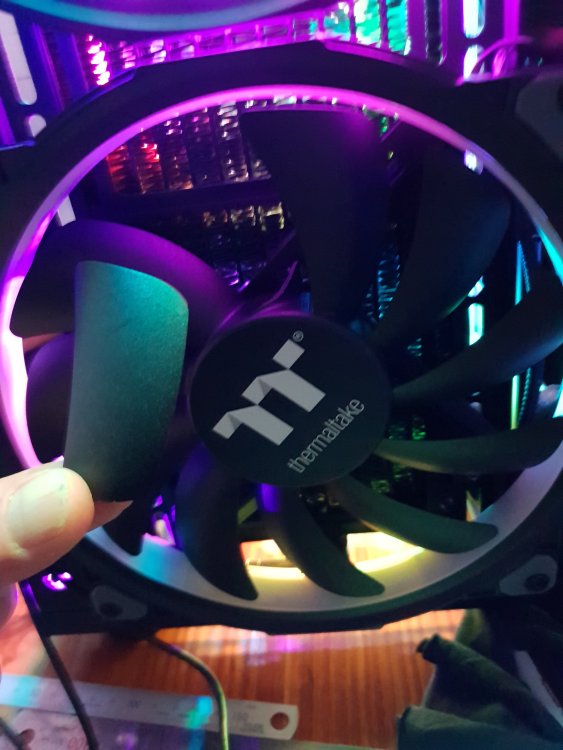
The arm of my glasses got to close with this being the result, excessive cursing followed for several minutes. The fan blade plastic is a bit on the porous or brittle side but luckily accepts superglue.
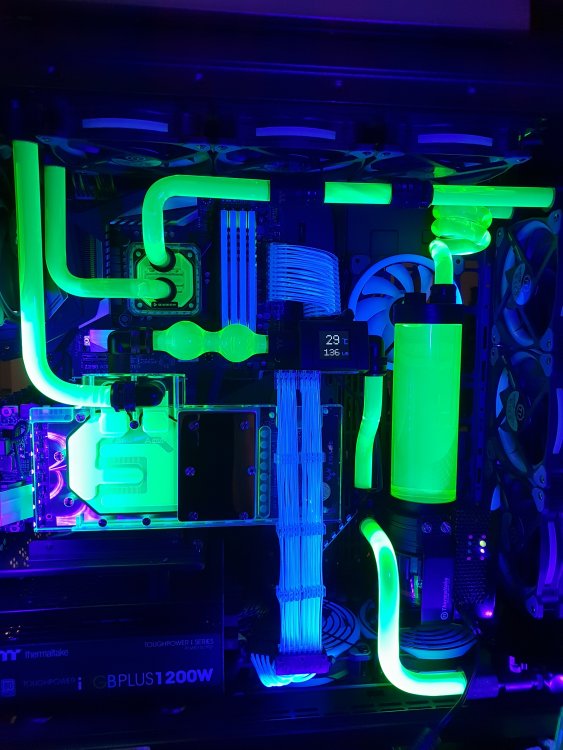
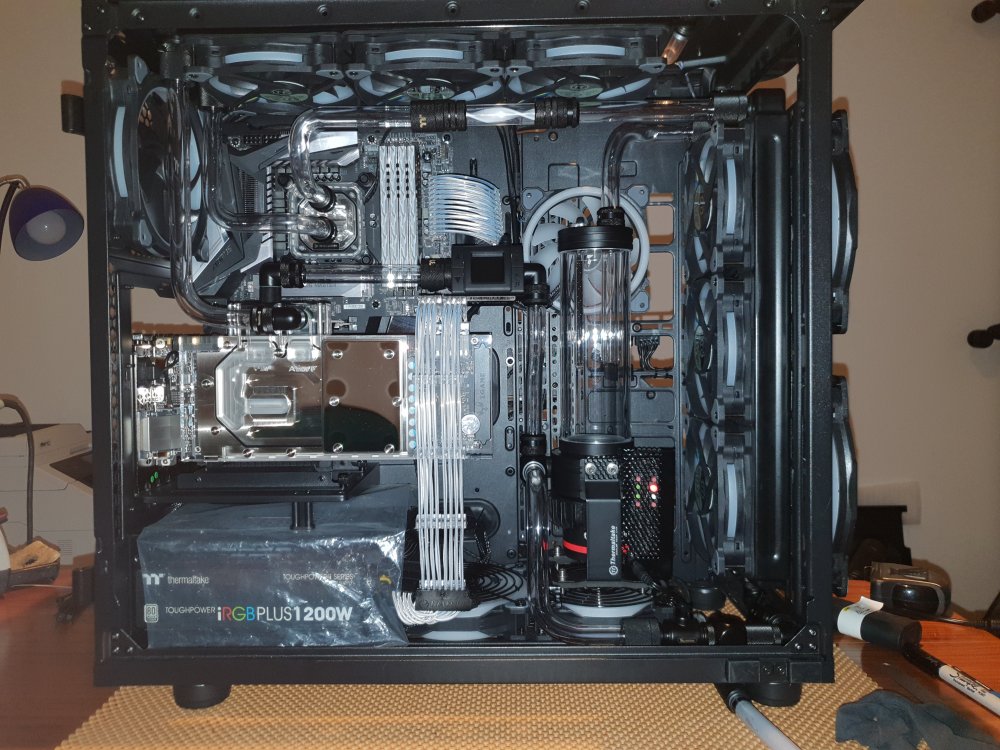
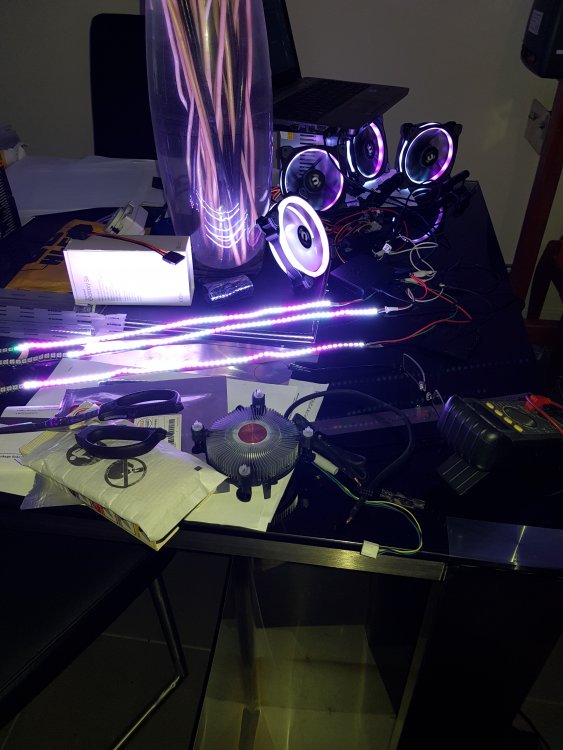
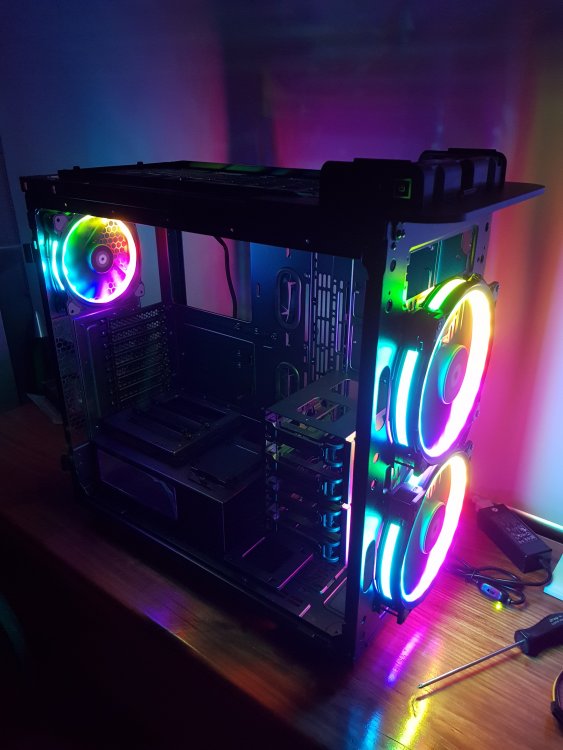
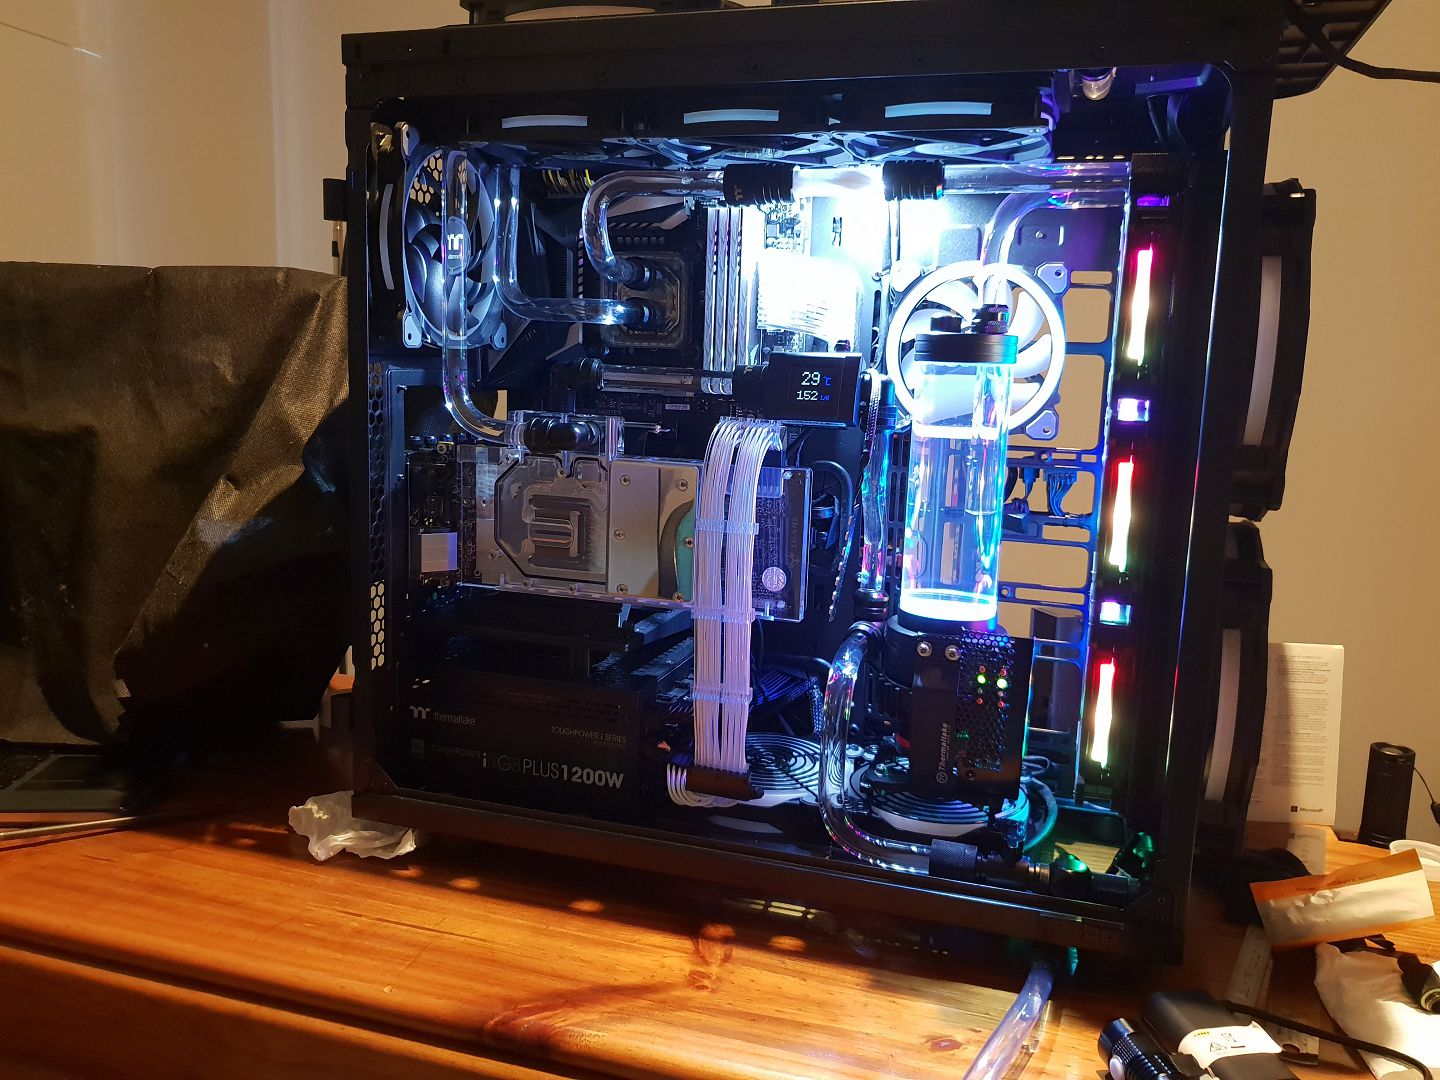
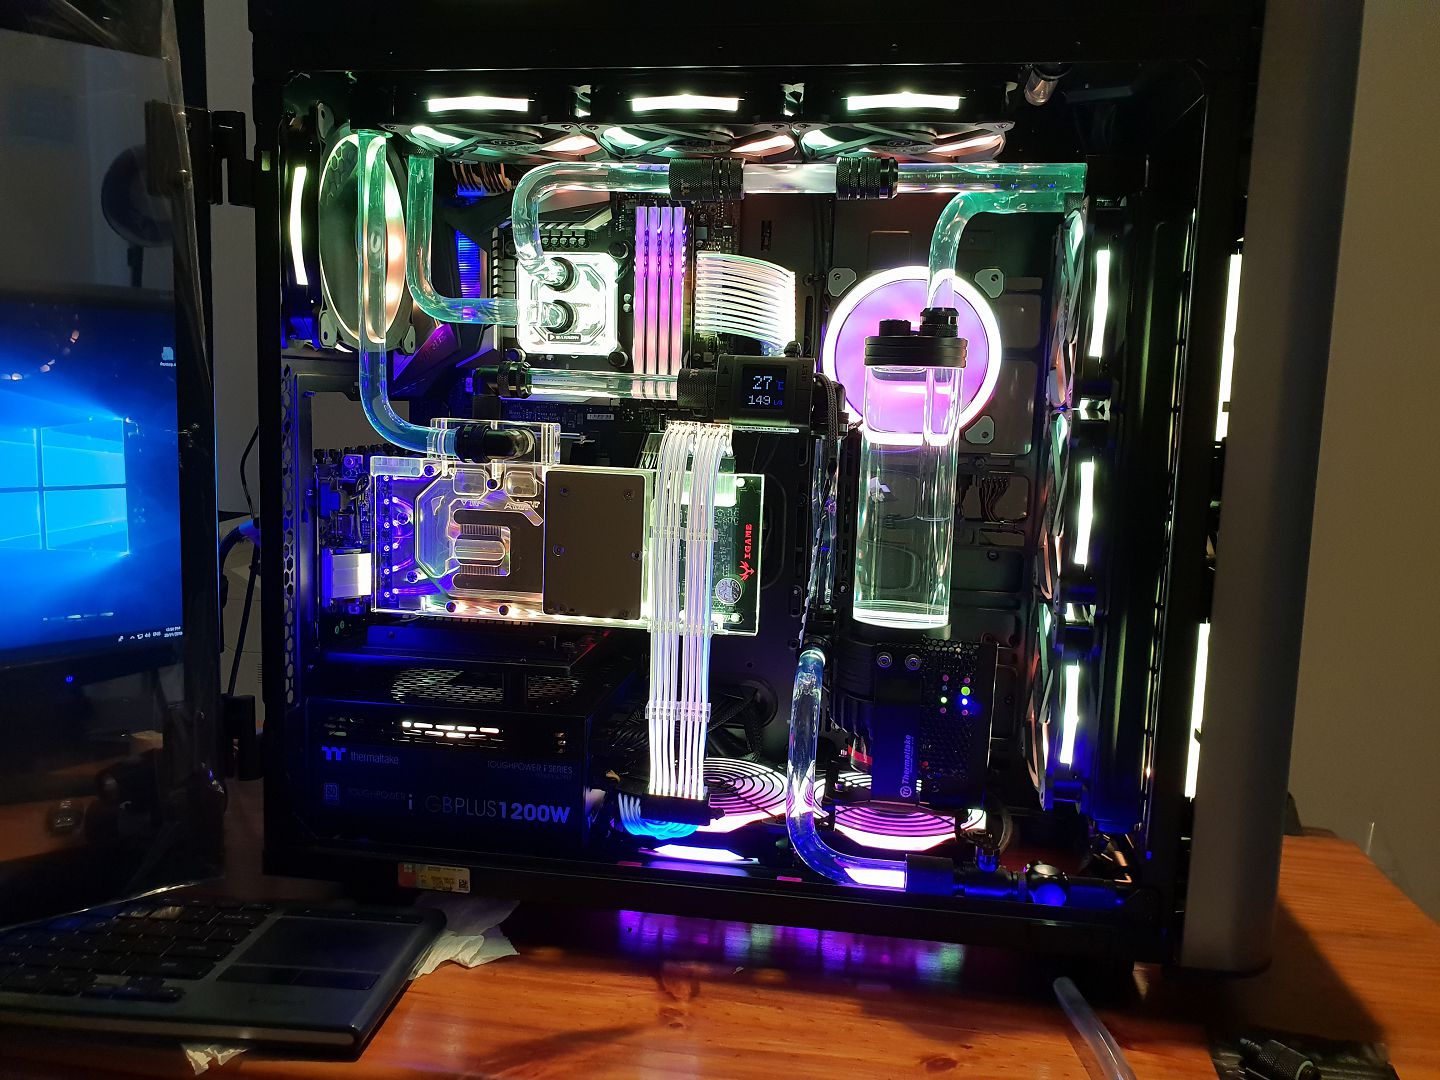
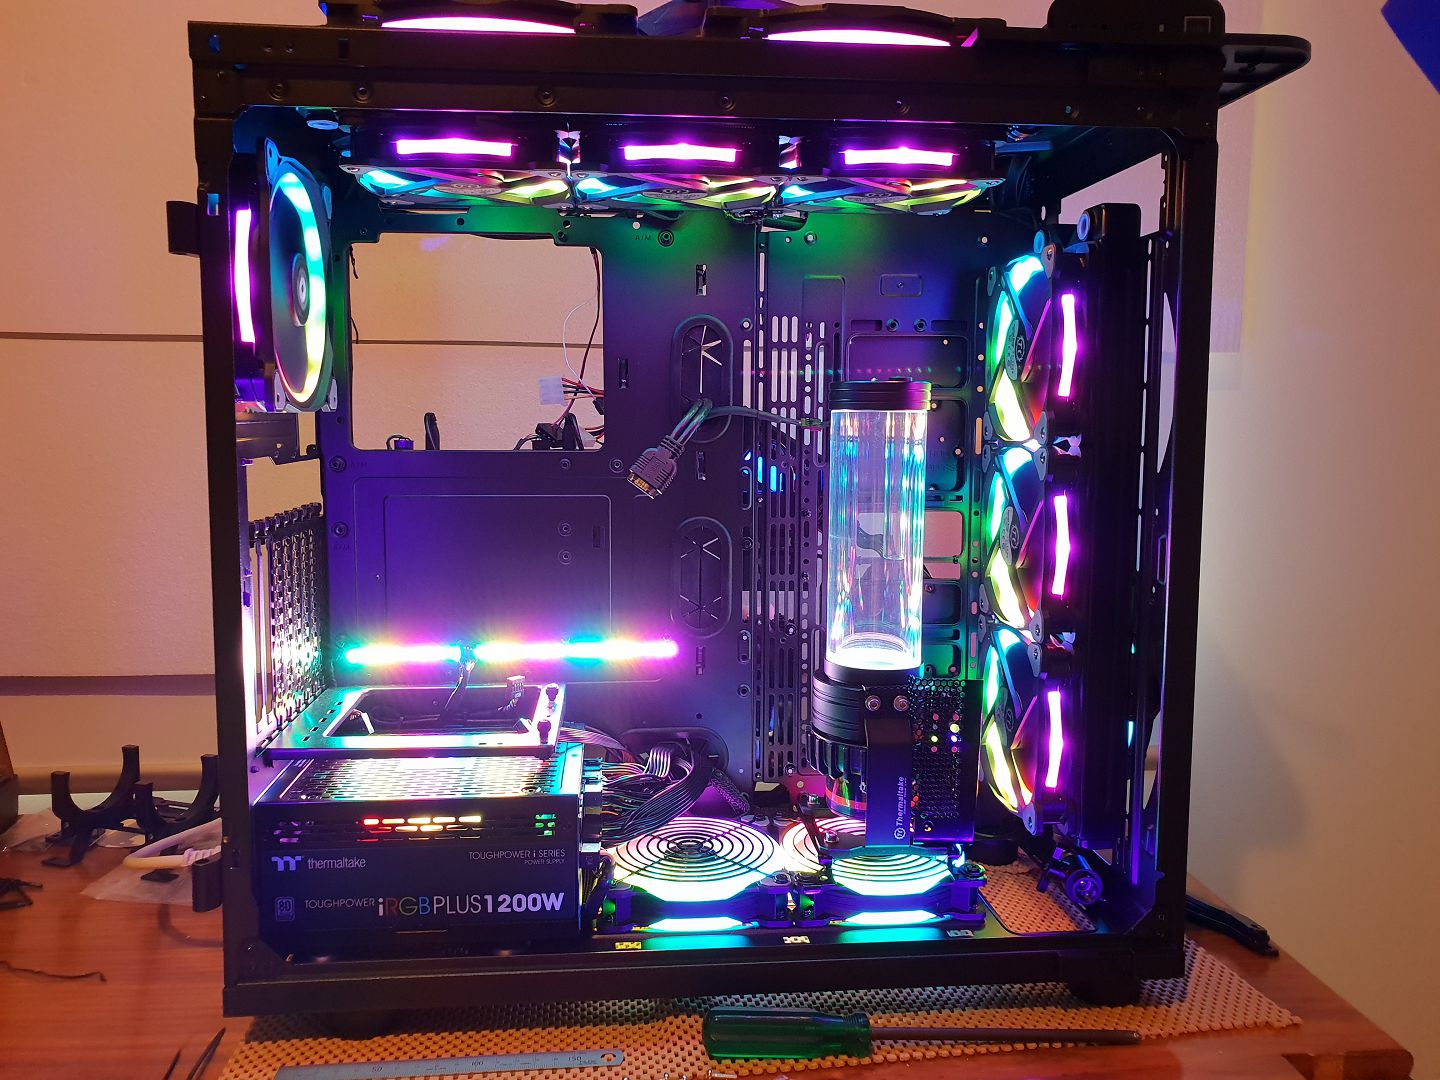
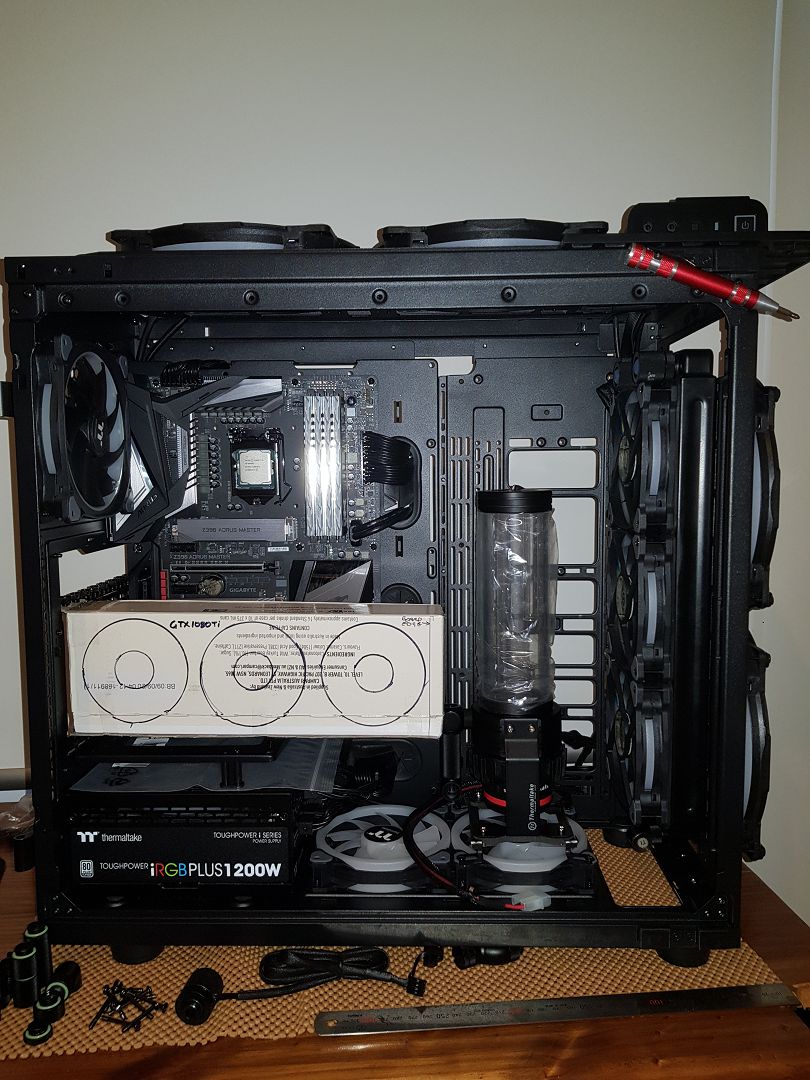
Well here she is in all of her blinding RGB beauty.....
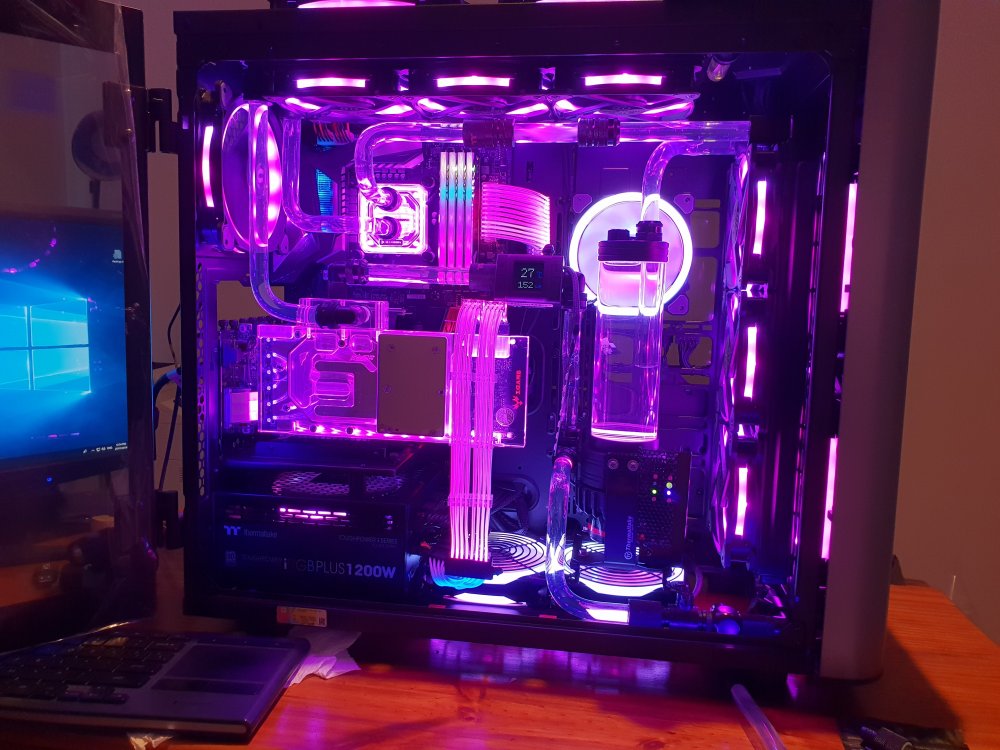

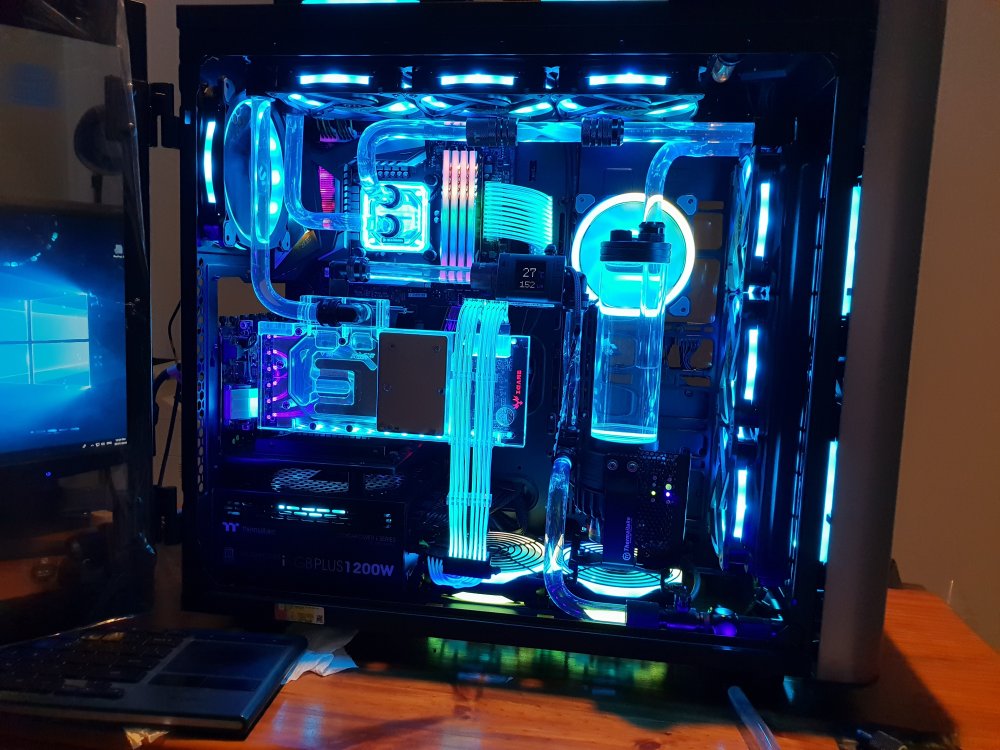
Looks really good with all of the RGB synchronized, pics taken in flow mode, MB strips are offline as I need to do some power tweaks. Motherboard RGB not synced and not sure if I can. Flow rate is acceptable, I think.
Lots of issues with USB hub errors and software crashes, most of which is sorted now and a lot of it due to power issues. The amount of power consumed by the RGB is insane with the buck converter no longer just warm and needing a small fan. Initial tests with the DPS G software showed an approximate increase of 7A on the 12V rail. Excluding the pump load gives approx 60W or 5V 12A or so after the buck converter. The MB strips take another 5V 1.6A or so .

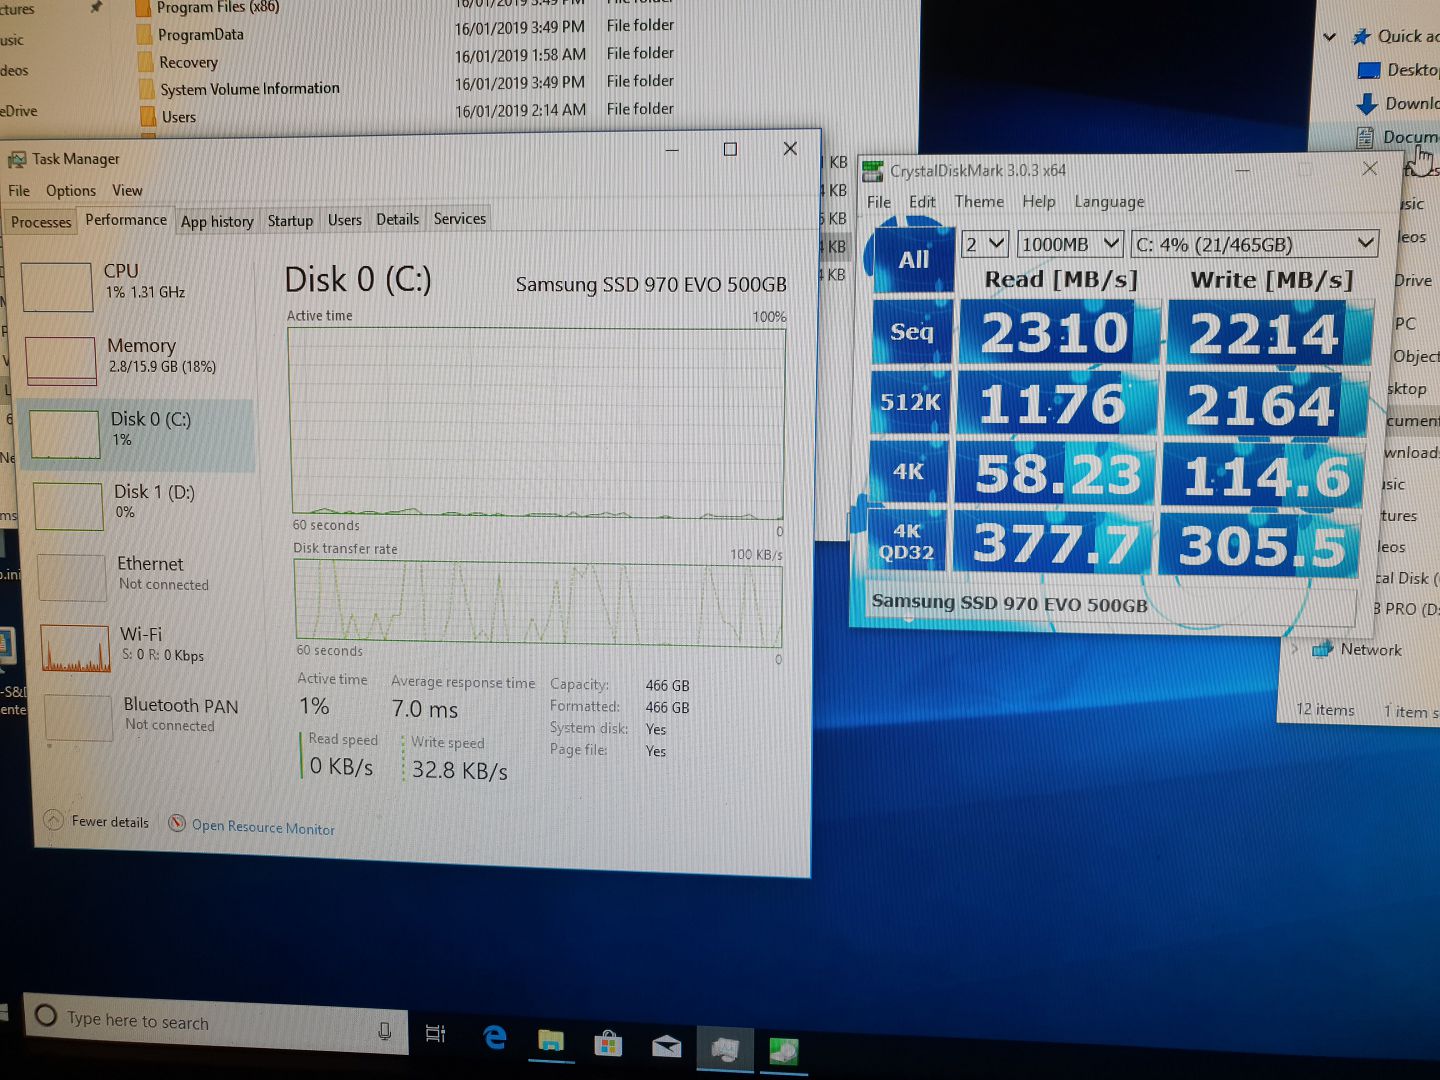
Win10 installation was very quick and after initial driver setup and whitelisting grabbed my copy of Crystal disk mark ran a test and sat there with my mouth open for some time staring at the result. I knew the Samsung Evo would be fast but was not expecting just how fast, all I can say is wow.
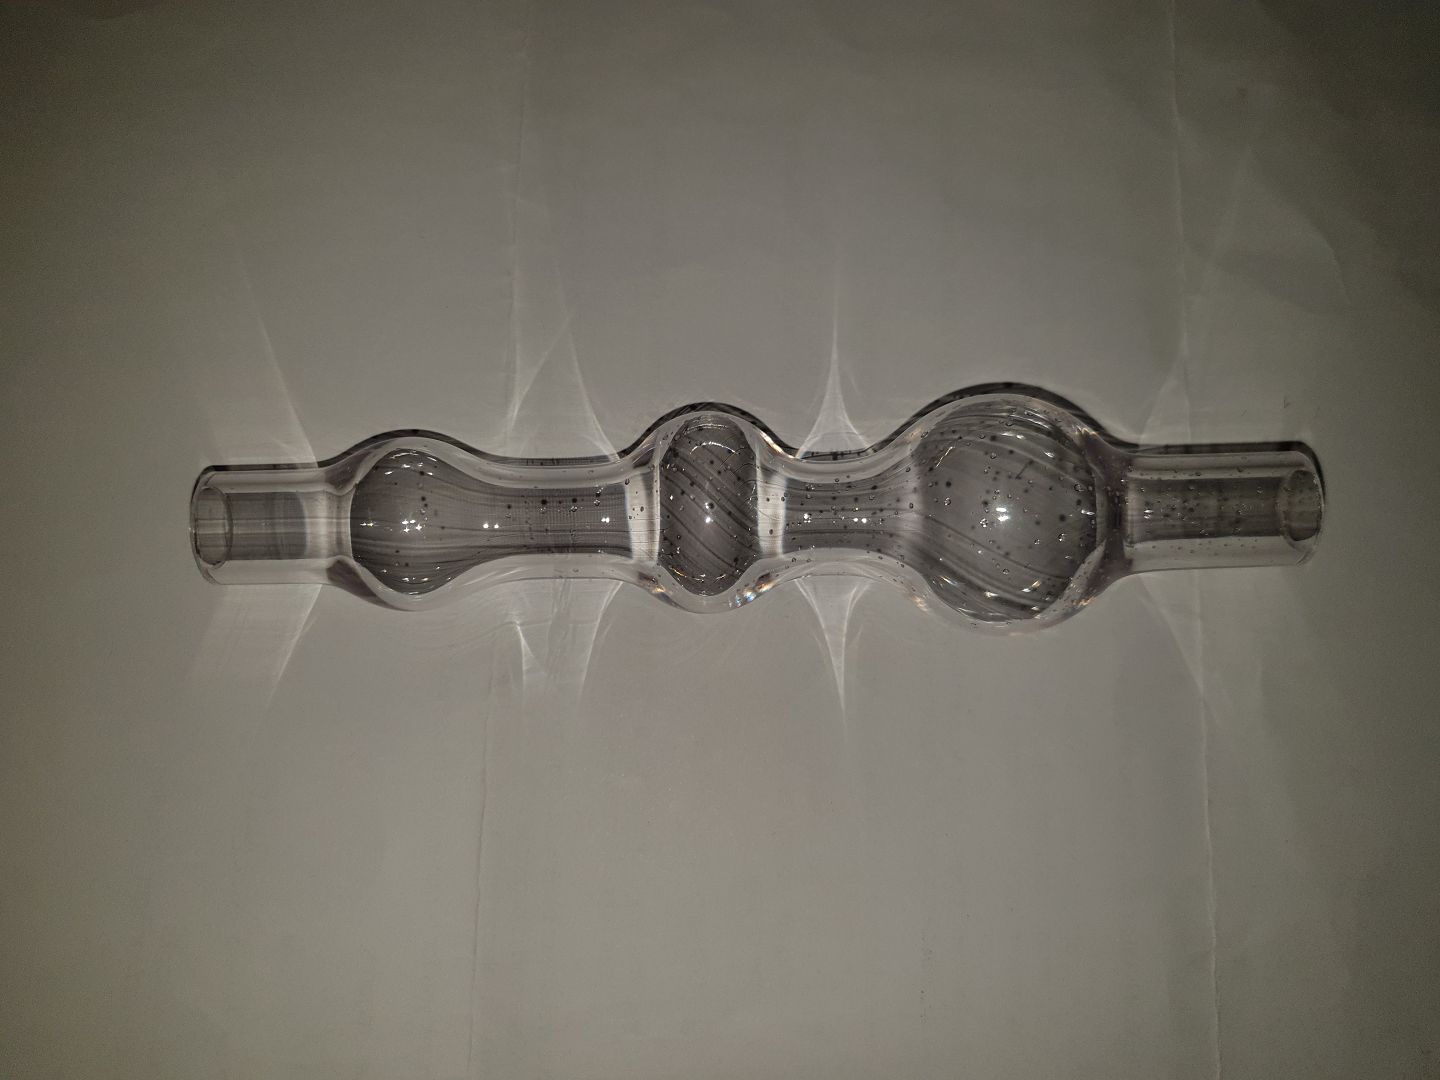
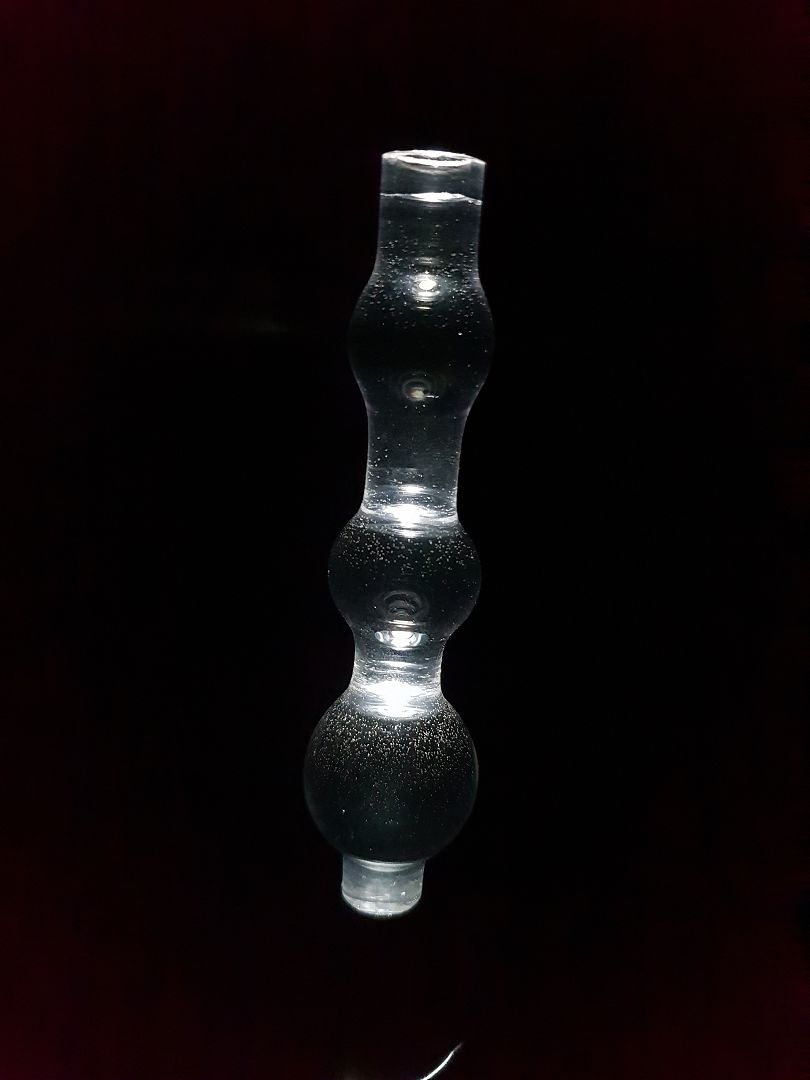
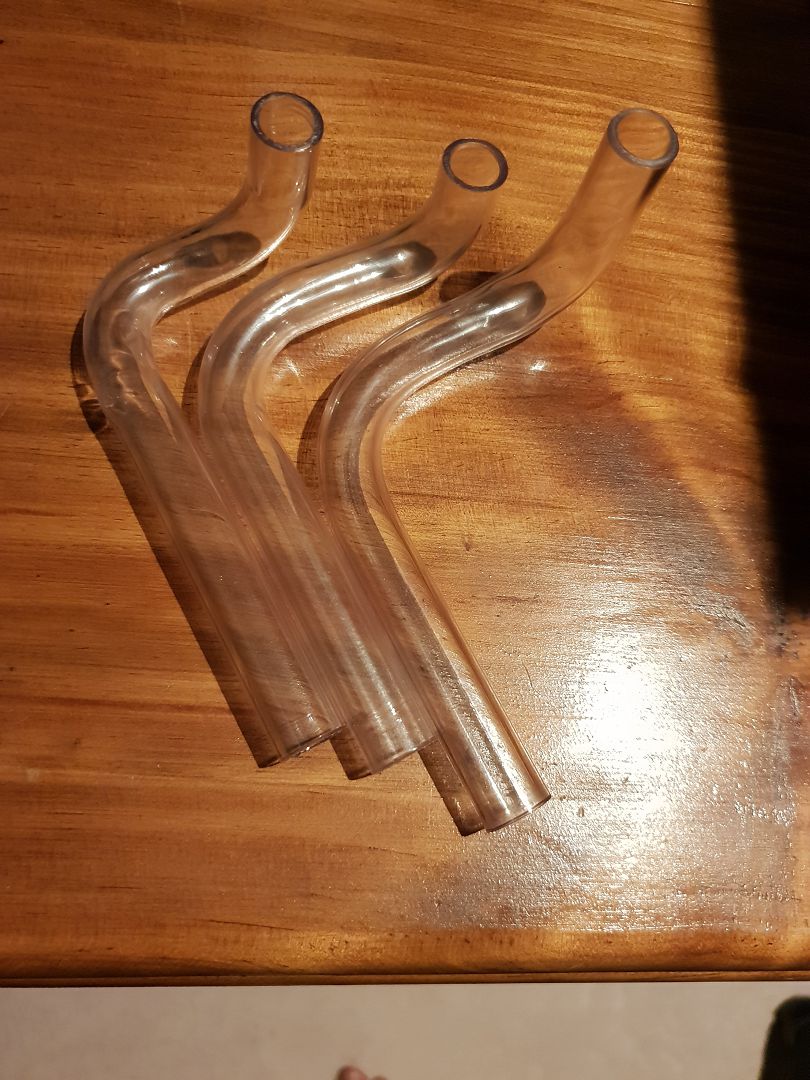
Tried a bit of PETG blowing LOL on a scrap dodgy bend I replaced with surprising results, seems you can make some full on crazy stuff. Will dig out the compressor and see how creative I can get
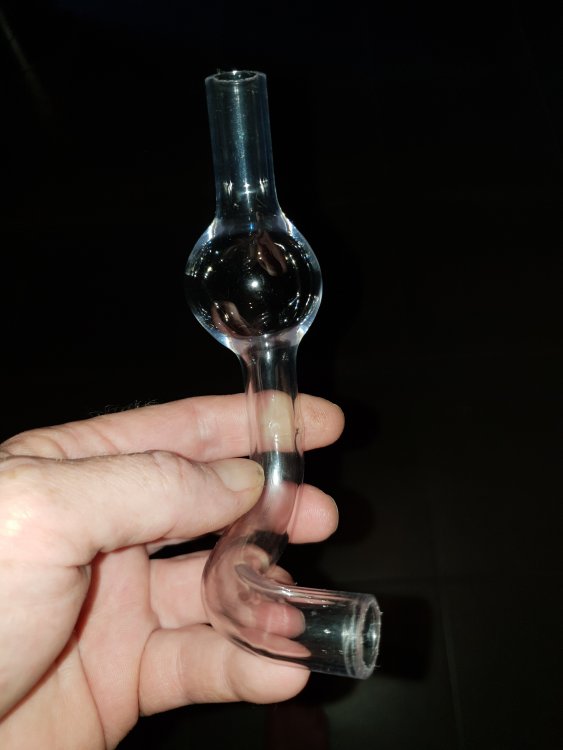
A lot easier than I thought it would be and surprisingly a lot stronger too. Pressing on the ball is just like a coke bottle and it pops back out again.
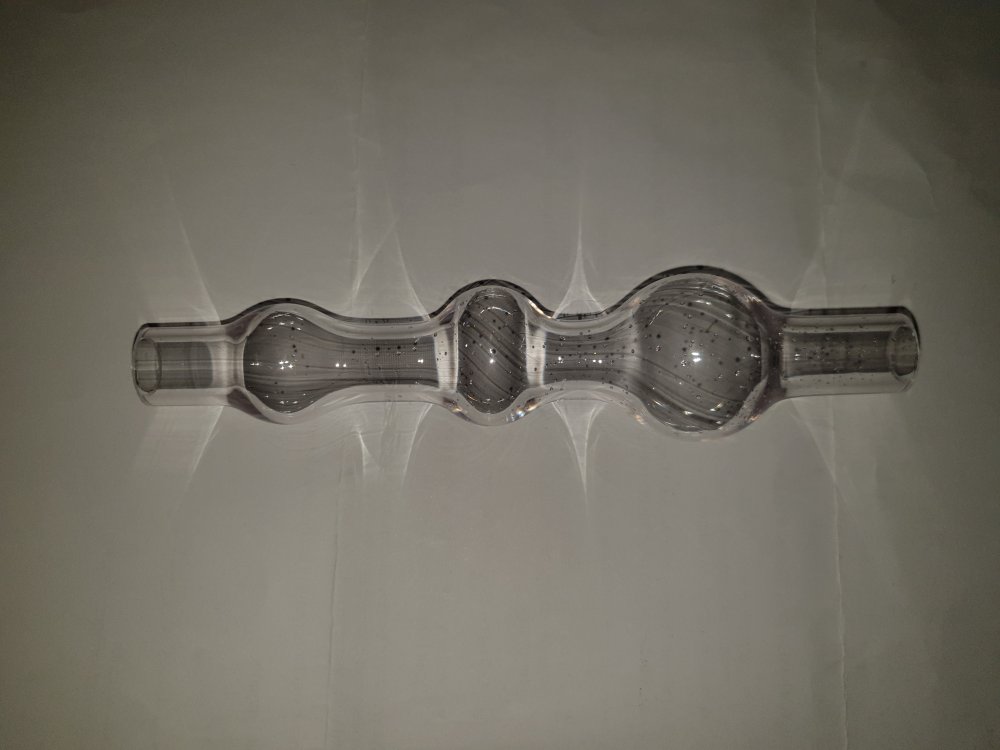
The outcome is quite good as each ball has a magnification effect.
Illuminates well also.
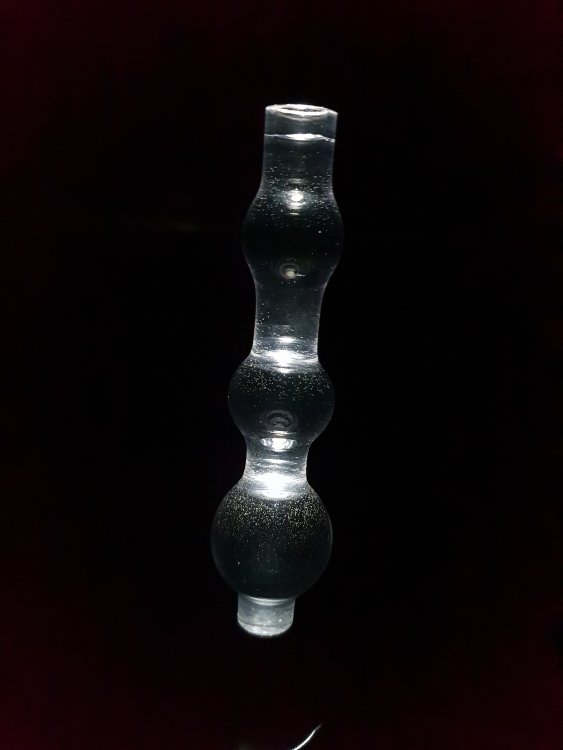
After playing around for a while ended up with this.
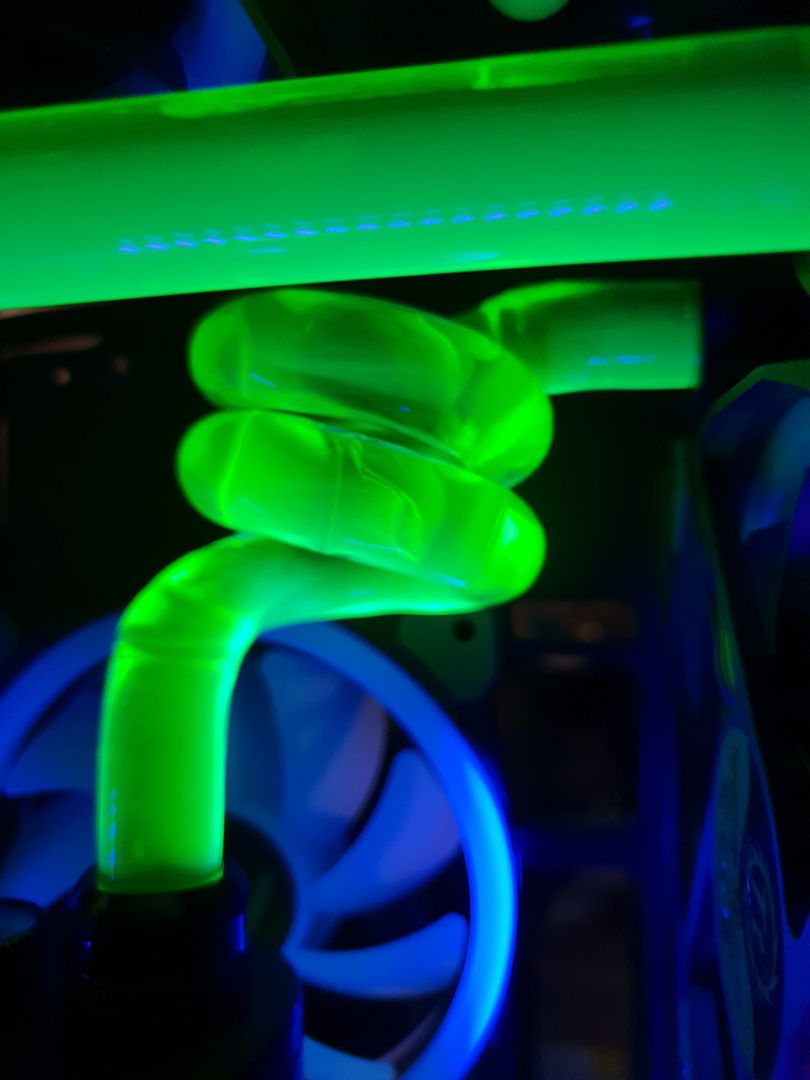
And this....when you start bending tube you know you are going to do a corkscrew just to try it
Couldnt help myself, could be better.

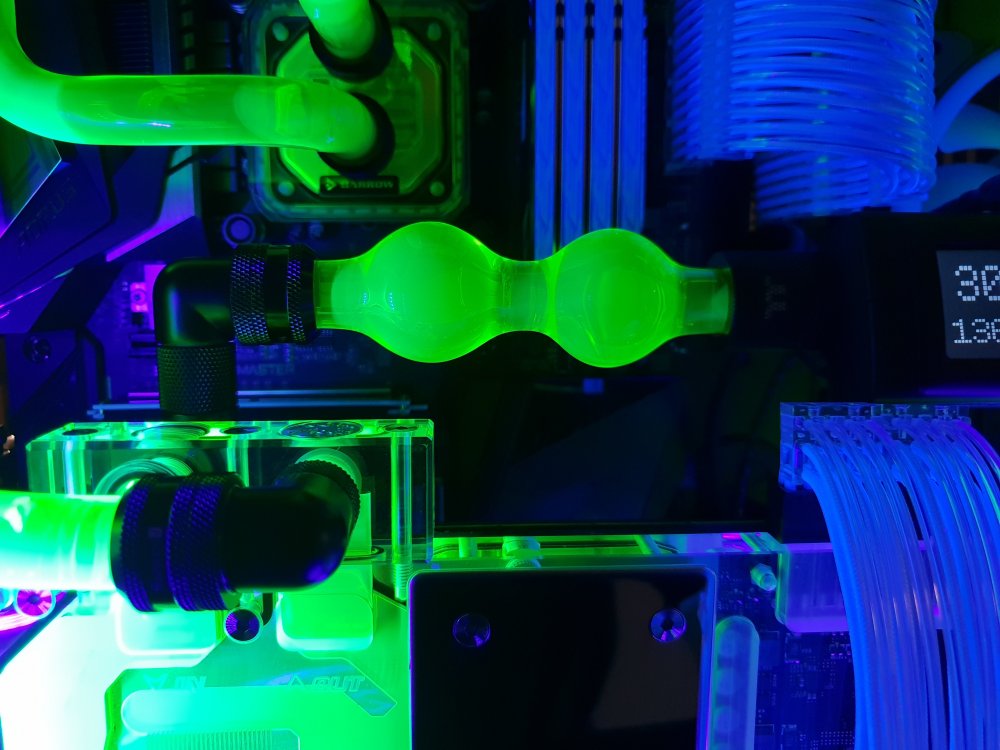
The TT Acid Green UV concentrate really pops with the UV but the Ice Blue concentrate not so much.
Took over 5 liters of distilled water to clear it all out...nasty stuff. So back to clear plain distilled water, for now.
Here is a short video on the operation of the maintenance mode.
-
Progress Update
Construction continues....
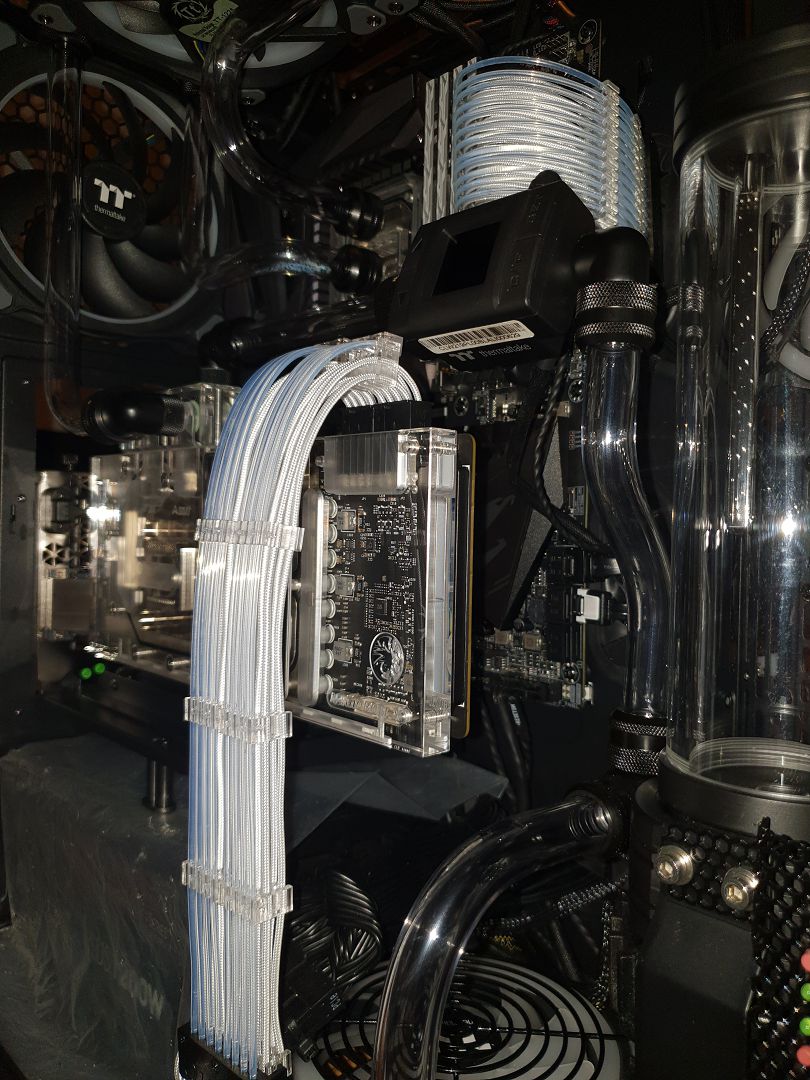
As can be seen there has been progress. RGB levels have reached insanity which is what I was going for. Motherboard is now fitted with CPU and block, Strimmer's fitted (they are a real pain to route) and GPU on block mounted to riser cable and mounts. A spare trio fan was added to the back for additional air output. Running it off a test power supply (which is screaming under the load LOL) as there is no cooling yet so no MB lighting just yet.
Plumbing started but need more fittings and need to make a better bending jig.
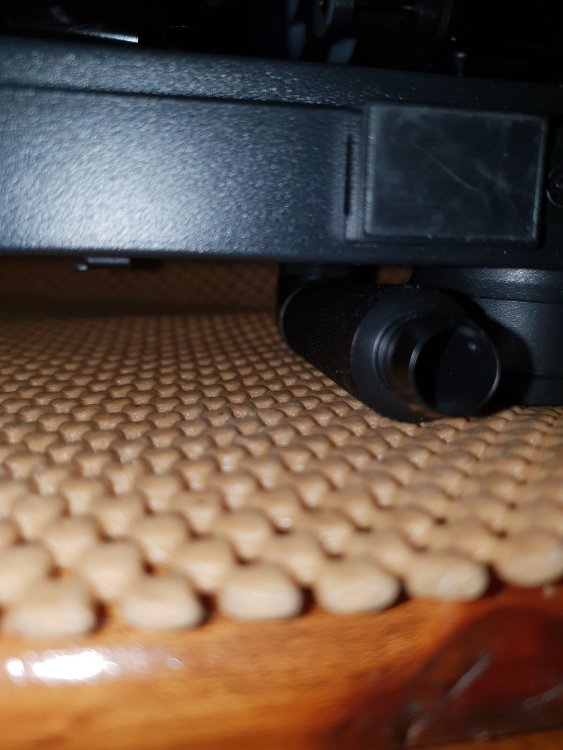
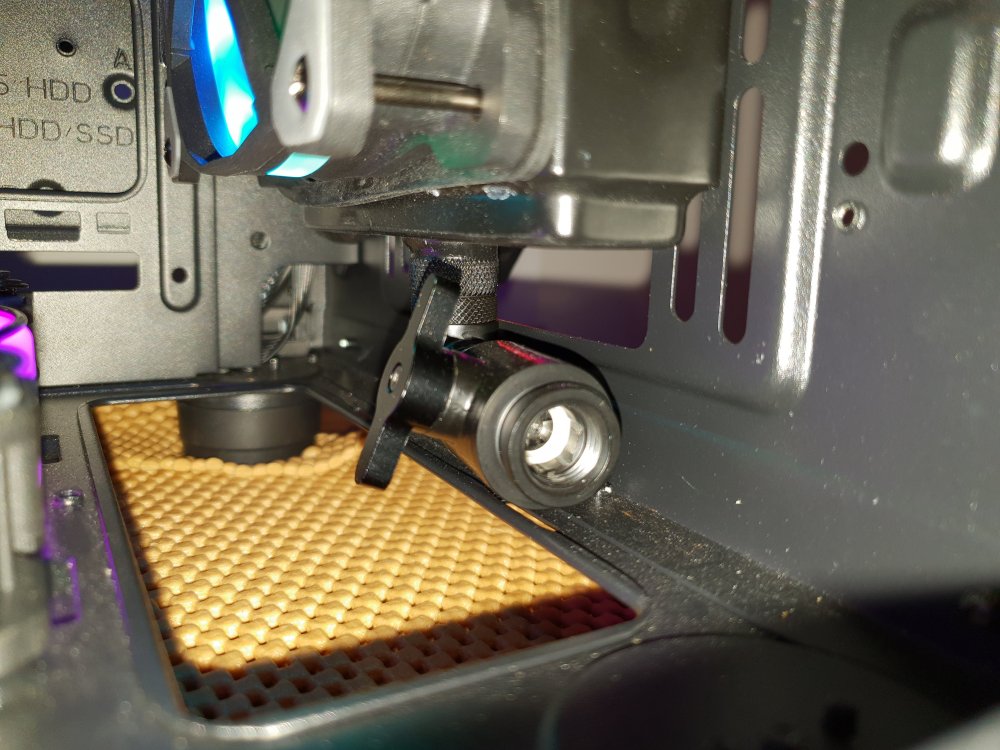
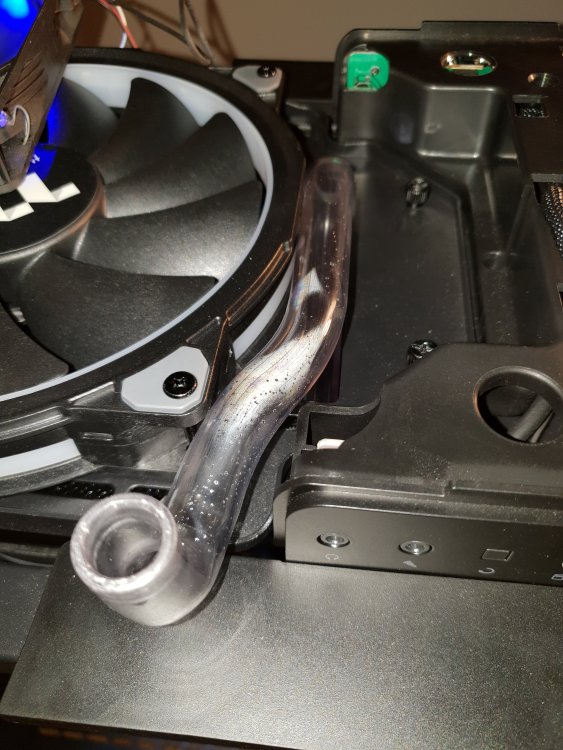
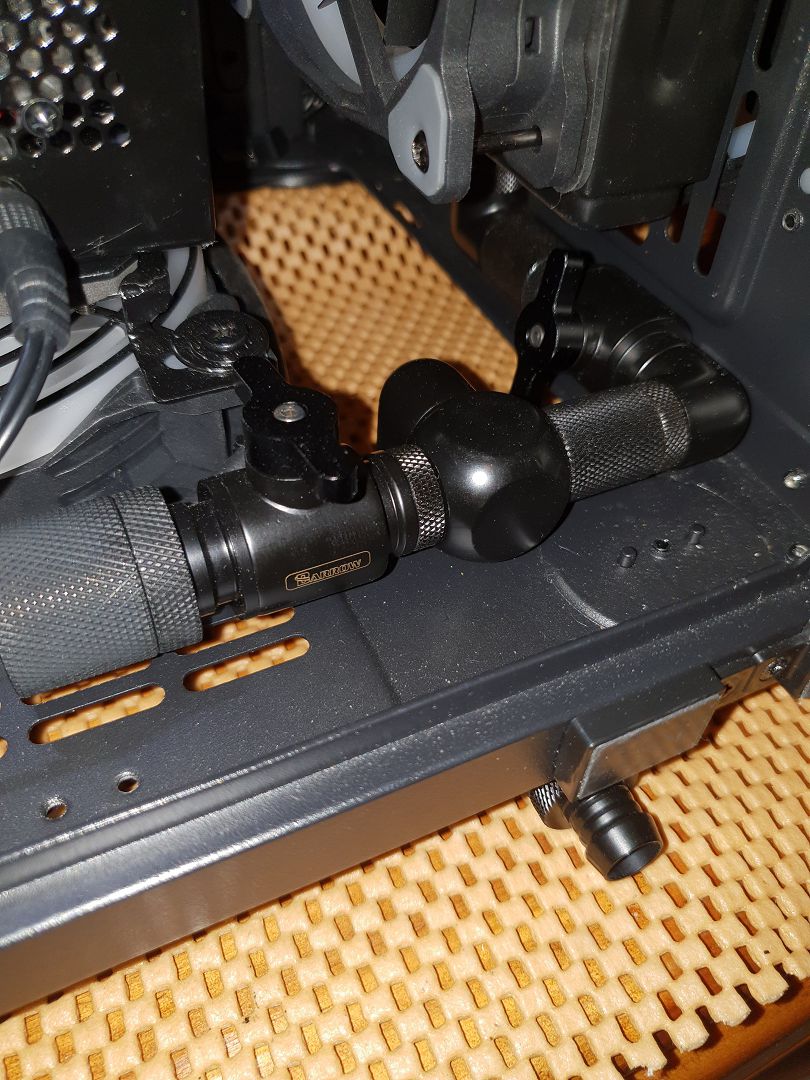
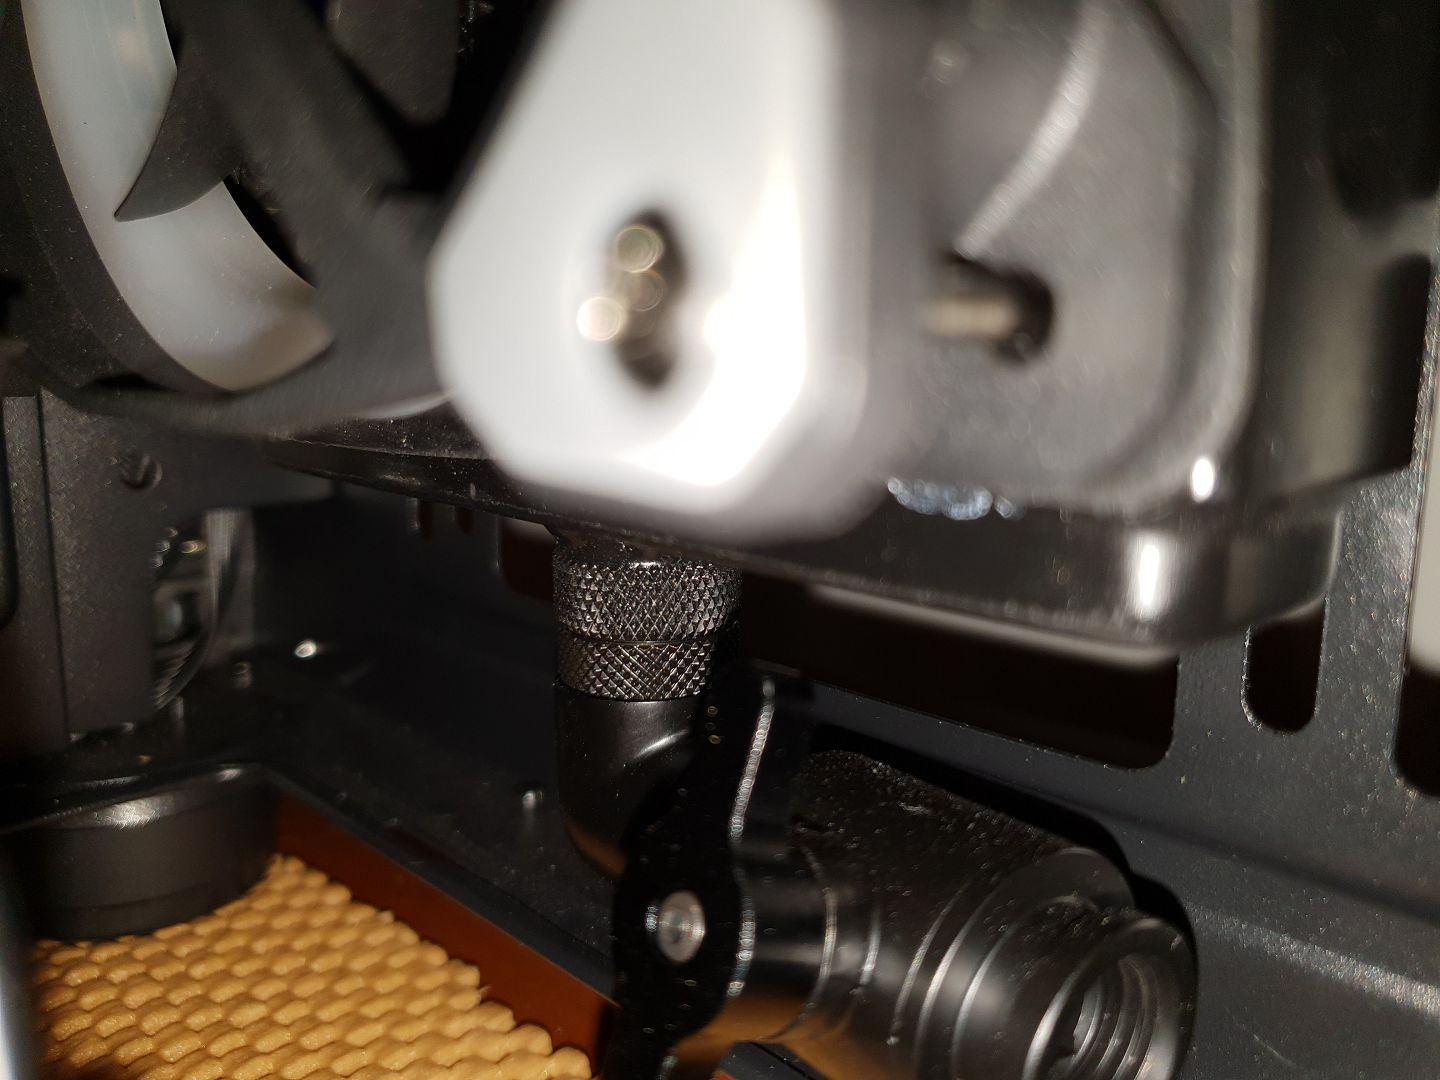
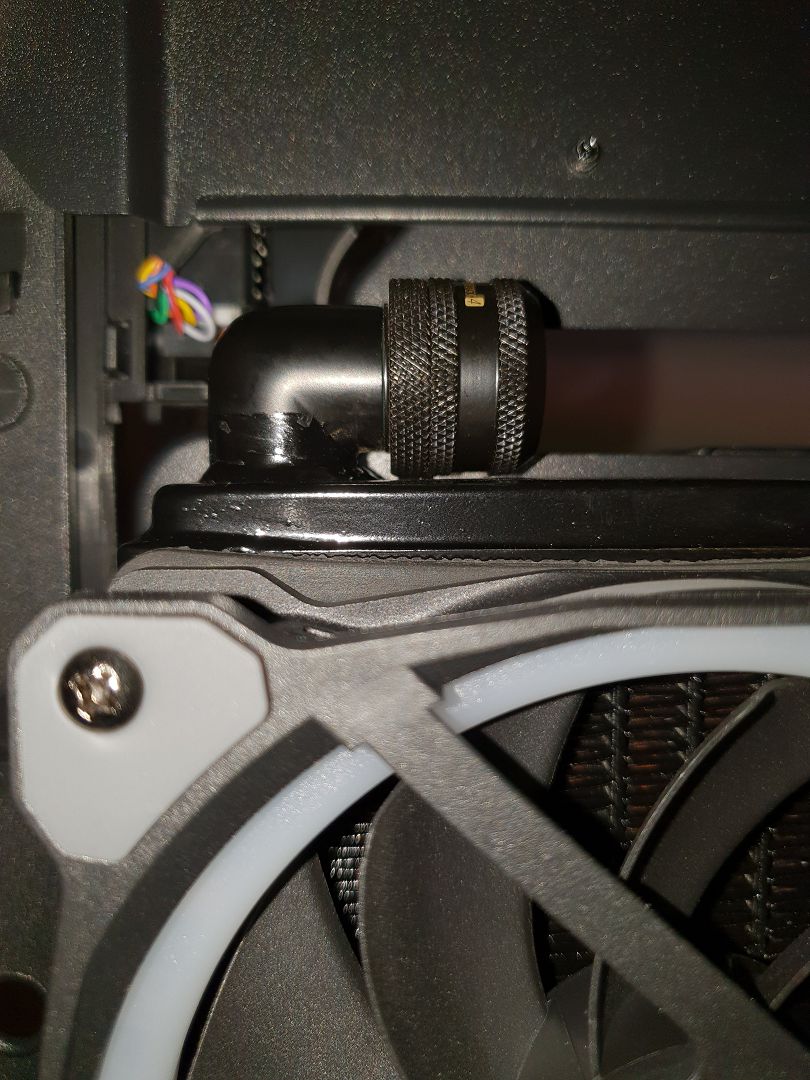
Here Ive combined the drain outputs from the pump and front radiator with taps and fittings to provide one output for draining, might be why I ran out of fittings.
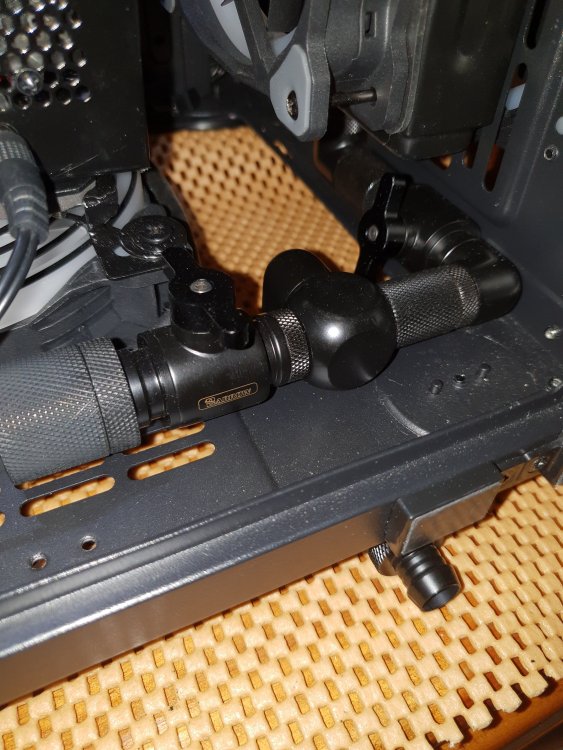
Its been brought out under the case on a rotating elbow so there will be no water drips in the case.
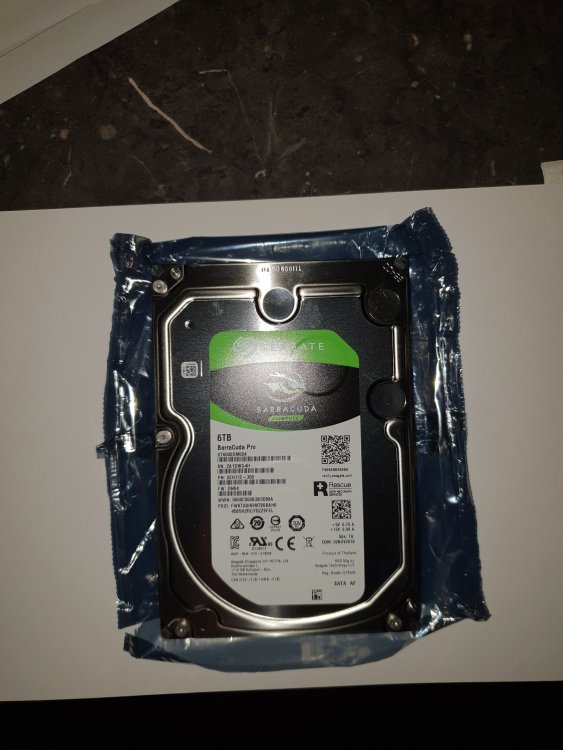
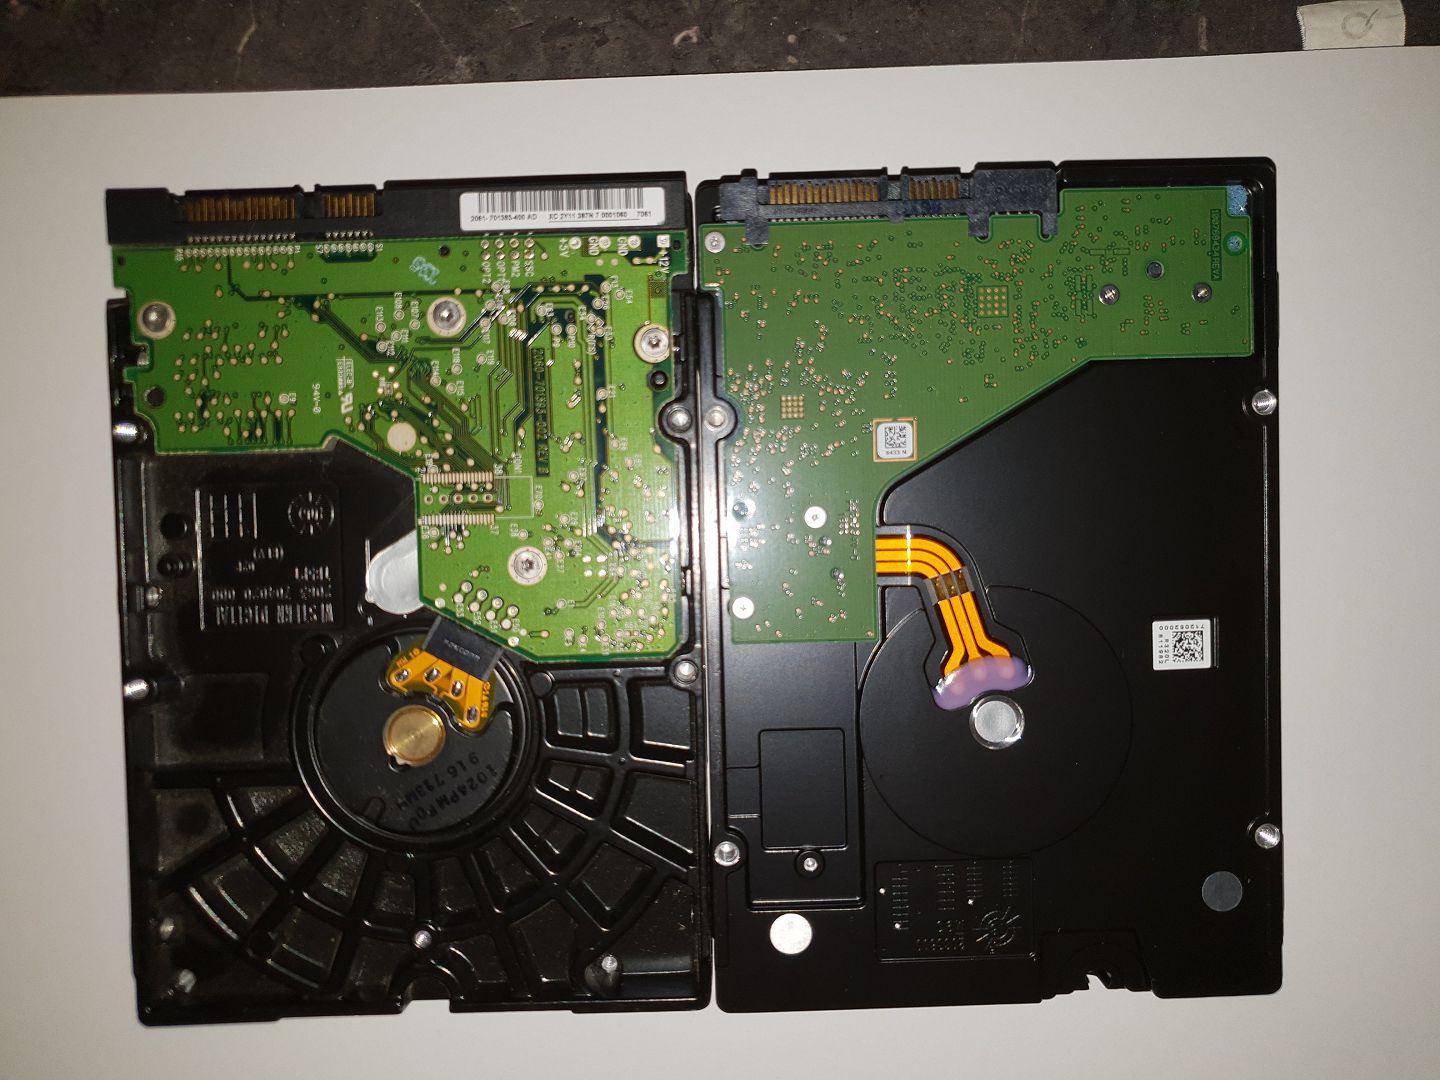
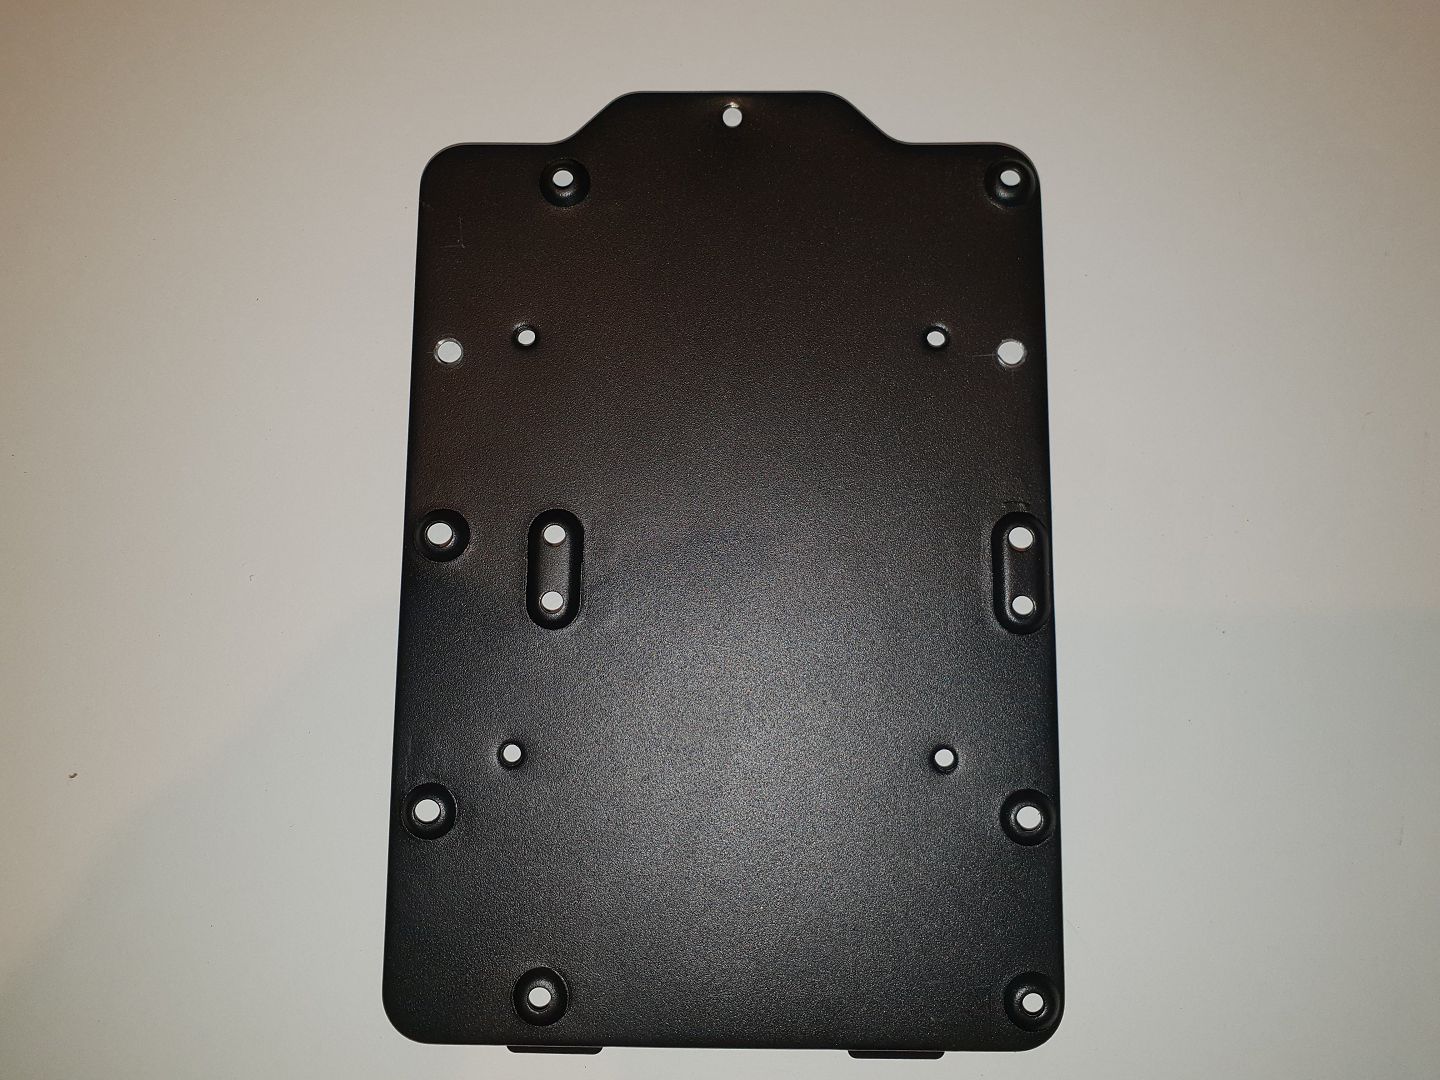
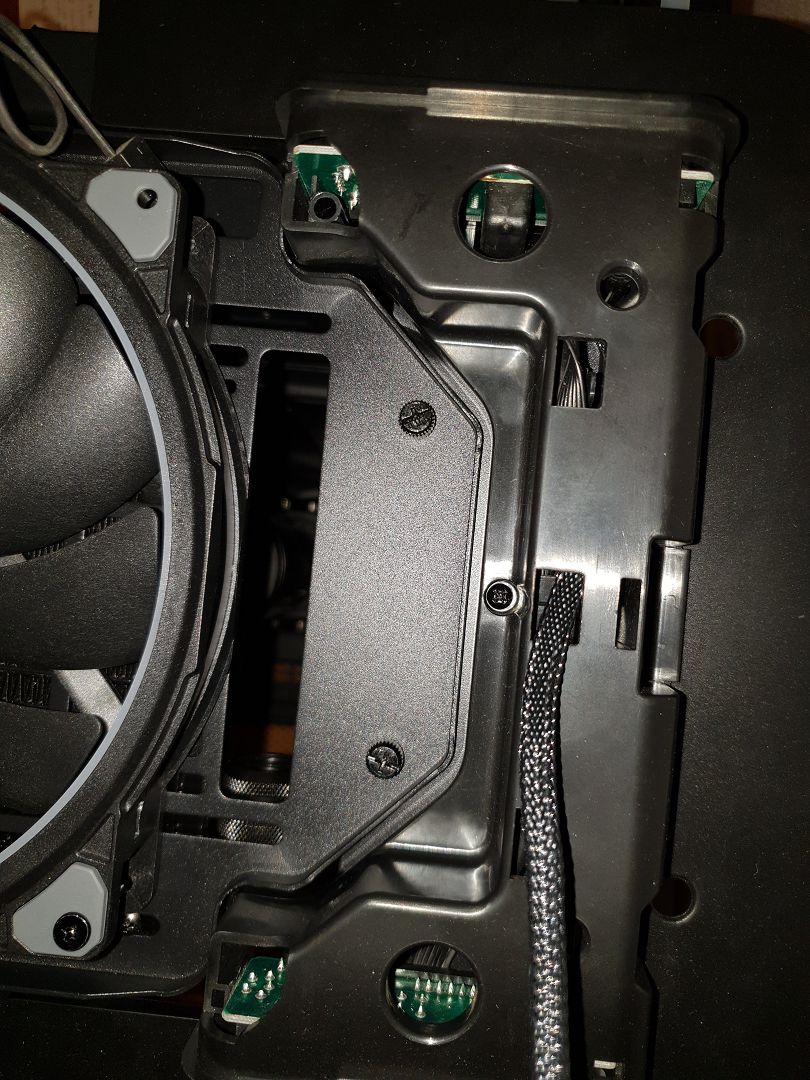
Shiny new Seagate Barracuda Pro 6TB for game storage but there is a problem.
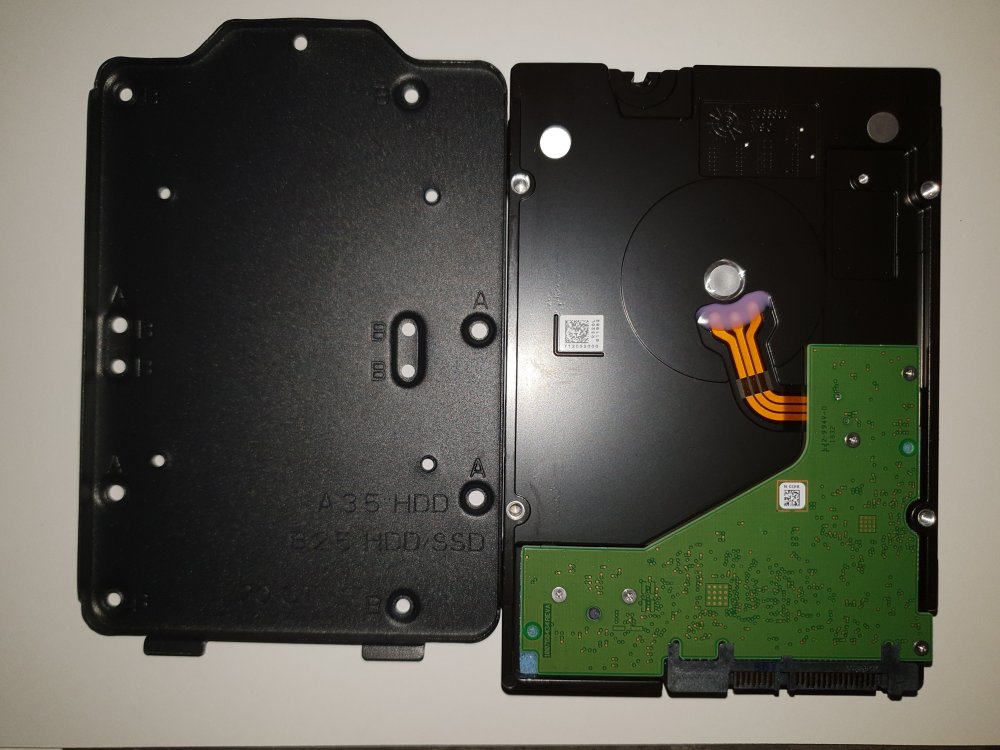
On the left is a generic WD HDD showing the mountings as per 99% of all HDDs out there. On the right is the new Seagate. This had me wondering for a bit....thought I had one to many beers as I had checked this with spare HDDs.
Now why Seagate decided to use a 76mm spacing I cant say but not one of the many HDDs I have exhibit this mounting except a WD Black which has both mountings.

As can be seen there is not a chance of it fitting to the TT HDD bracket, cant blame TT for this I should of got another WD Black. Either way TT need to provide another 2 x A holes (LOL) to the bracket to accommodate this new mounting standard.
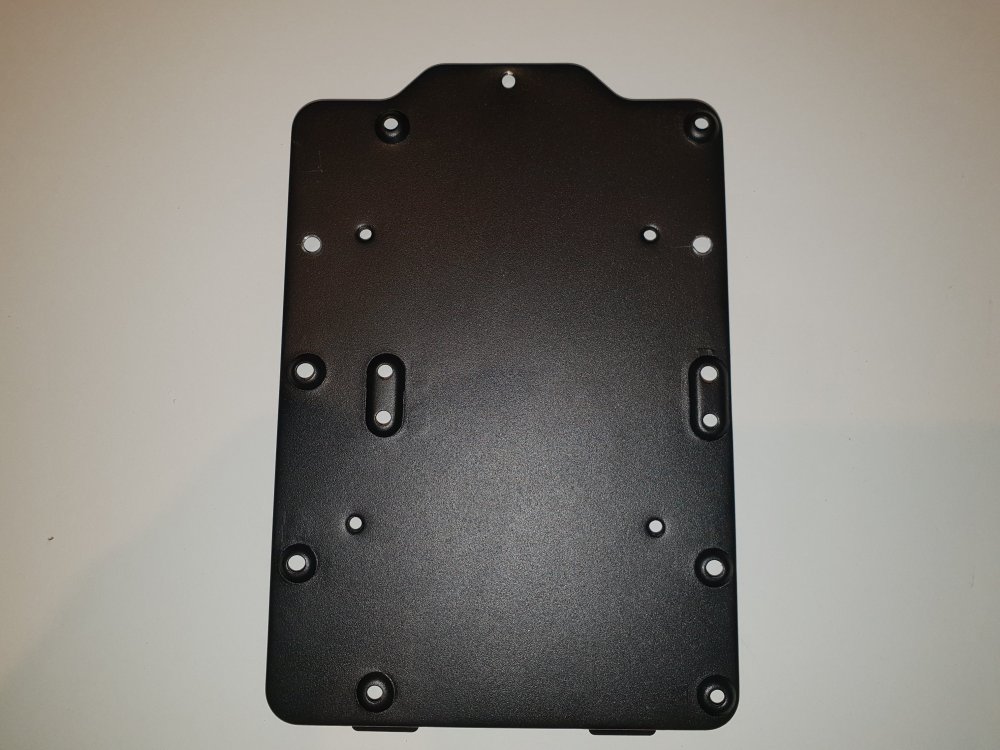
Bracket with 2 new A holes, screws get packed with 3x 3mm washers to match the other pressed standoffs.
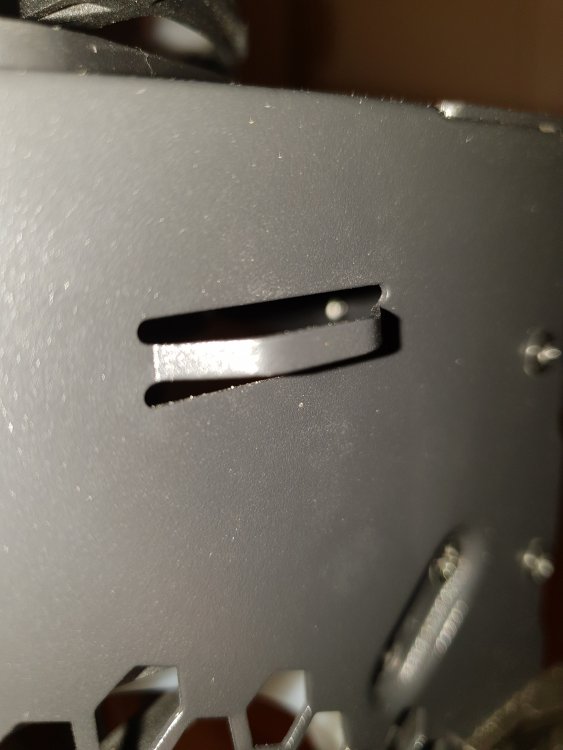
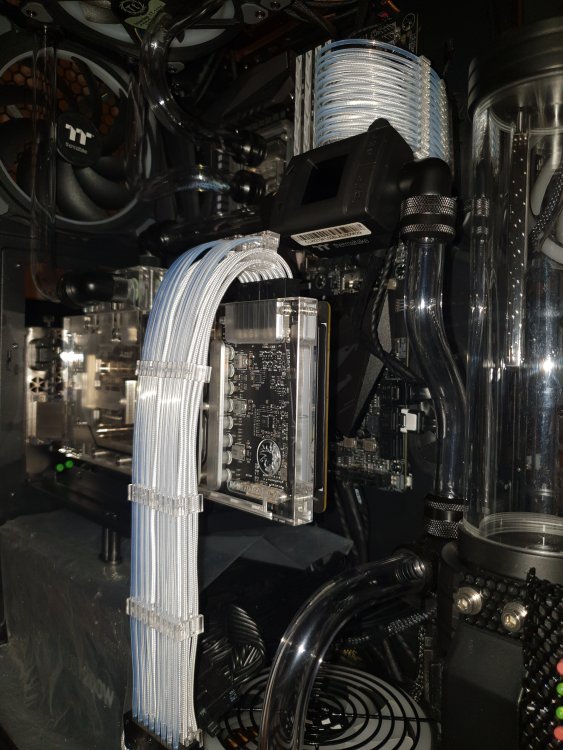
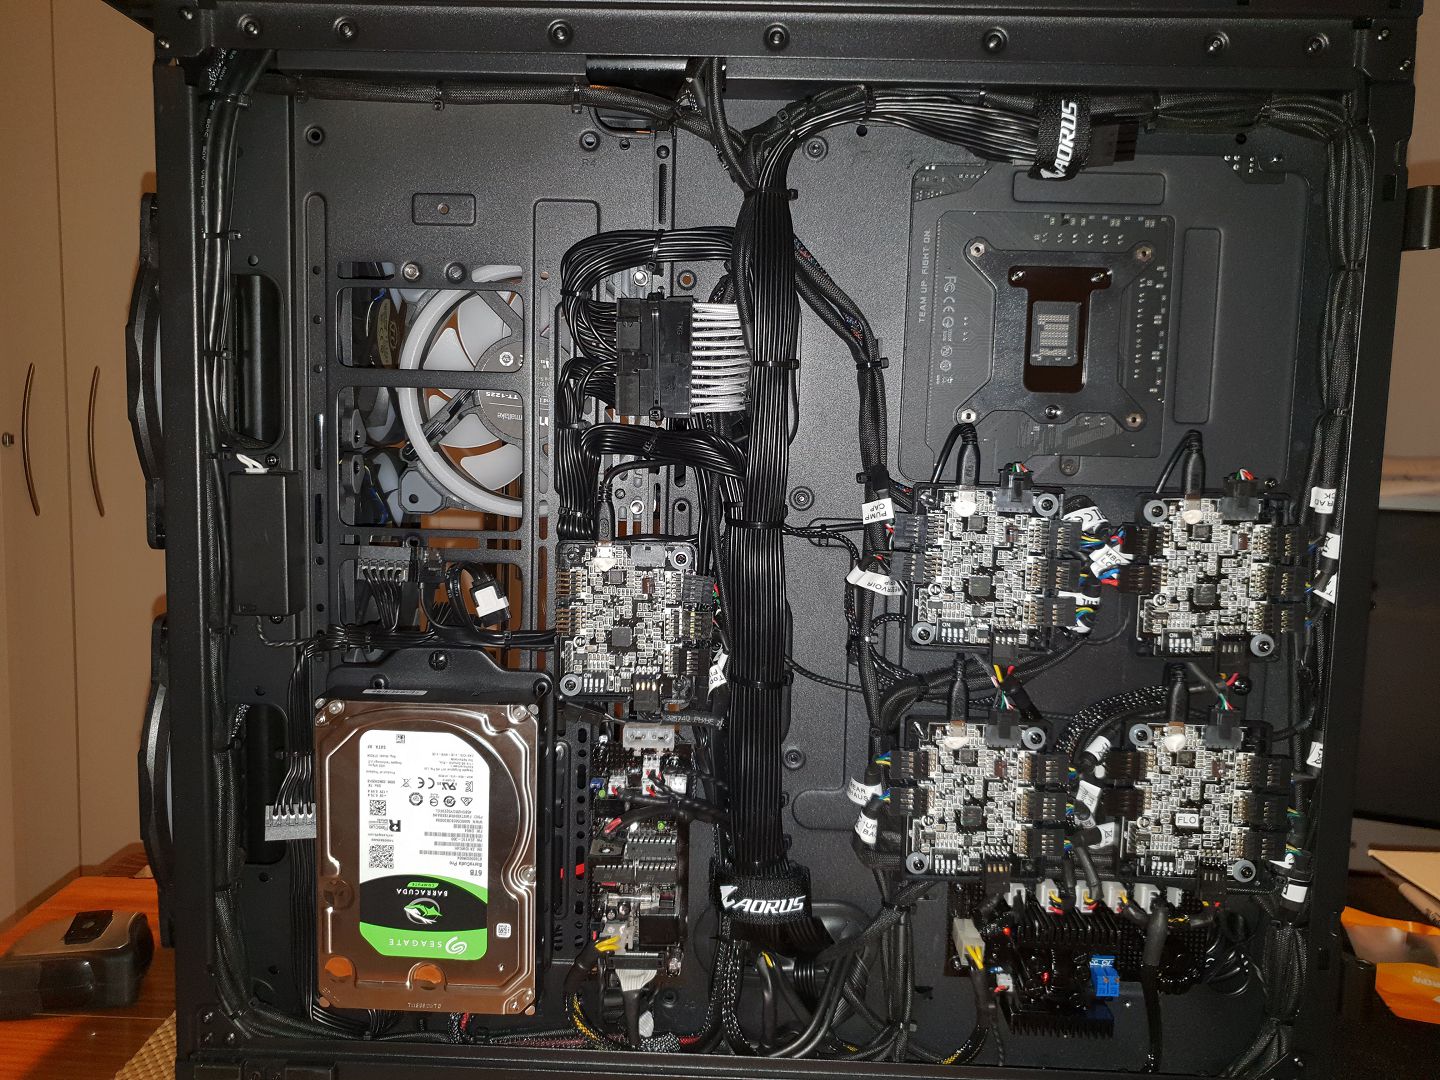
Rear cabling and looming is complete (except for the MB 8 pin power extensions. Would of preferred to have used Velcro ties but with the huge amount of cable and lack of fixing points meant cable ties were the only option. In fact along the top and sides there are no decent loom mounts, just a few holes here and there. Most of the loom is held in place by its shape after it was cable tied.

TT need to add a whole bunch of these to allow Velcro strap/ties to be used. While there are a few on the main backplate there is nowhere near enough.
More fixing points please TT!
Plumbing completed, still need to redo the very first pipe, the breather at the top. Was a bit trickier than I thought and you get better as you go. Found the plastic mandrils for bending tube totally useless, the 90 degree one wasnt even 90 degree. Got some of the best bends free hand. Only jig I used was a piece of board with lots of lines drawn on it, a square, rulers, several blocks of wood, small pieces of conduit to bend around and clamps. The majority of it I'm happy with and with only a total of 6 pieces of 16mm PETG tubing.
Of course there would of been less used if it wasnt for the mistakes.

-
PART TWO
Water Cooling Design Concept
After a lot of research I decided that the D5 pump had all the grunt I should need and the Pacific PR22-D5 Plus pump suited my needs perfectly.
D5 pumps aren't cheap so a single loop will do for my first WC project but it will be a long one.
Decided on two 360x25mm copper core brass tank radiators from ebay, at AUD$56 each.....bargain!
Edit: While getting them from ebay as I wanted to mod them suited my needs I wouldnt recommend it. The overall quality of the radiators isnt bad but be prepared for an excessive flushing experience. Had flushed and vinegar washed them then set them up to run on the bench with the pump. Next day pump was full of microscopic shiny specs, which I can only assume was oxides, looked like a snow globe. Ive had to pressure wash litres of water through them to clean them out so unless your getting creative get good quality EK or Alphacool radiators.
One will be on the inside top the other on the inside front both in push pull fan configuration.
The top radiator really needs a vent or bleed to remove the air for easy filling and the front radiator needs a bottom port for draining.
Loop to be....Pump - GPU - Top rad - CPU - Front rad - Pump
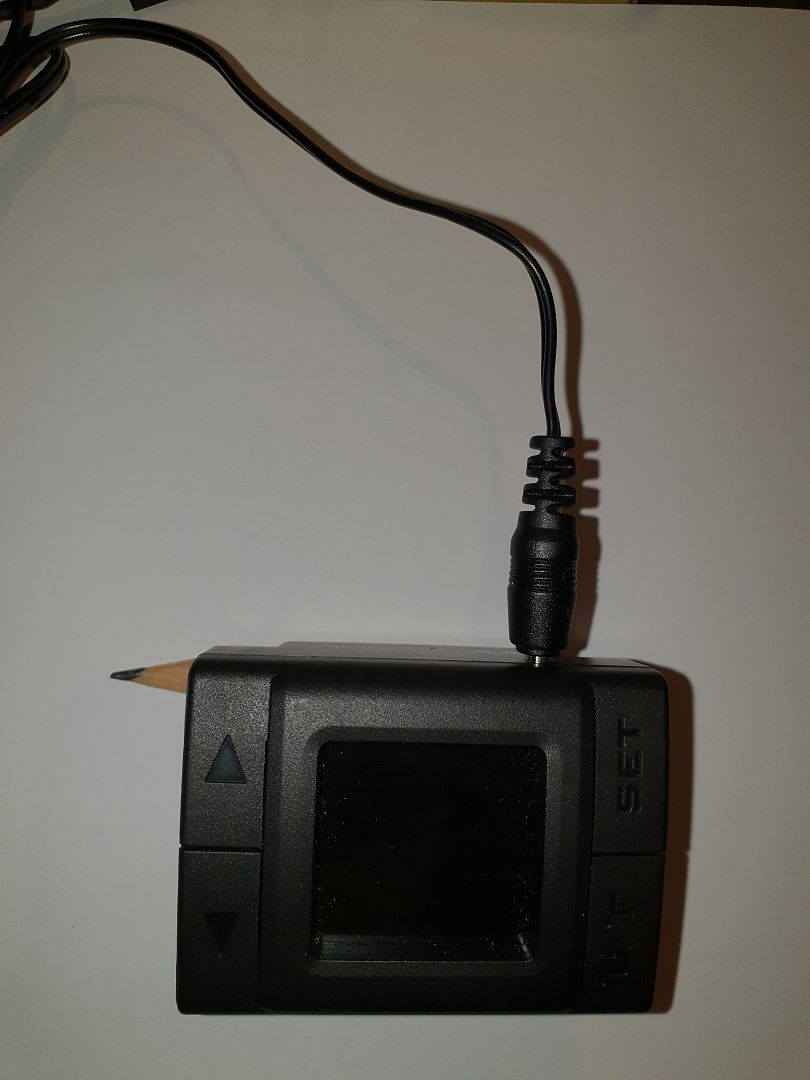
The TT TF1 flow meter is to be powered from a dedicated header/5V supply on the switch board. This output features delayed startup and shuts off with the pump in maintenance mode only (selectable).
Radiator mods
By grinding the paint from sections of the tanks and fittings and carefully drilling holes in the tanks of the radiators I was able to solder the fittings to the tanks easily with a small blowtorch.
As they are both brass the solder created a very strong and water tight bond. The use of pure core solder with water dissolving flux made the removal of the flux after very easy.
More black spray paint....nice....looks professional LOL
Here is the front drain with tap fitted.

Here is the top radiator bleed. Space is tight so I bonded a female to female right angle straight onto the tank.....worked perfectly.
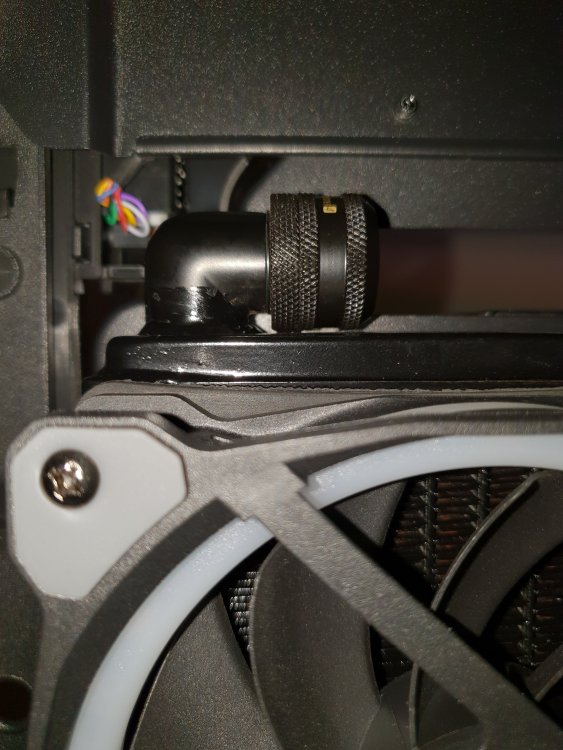
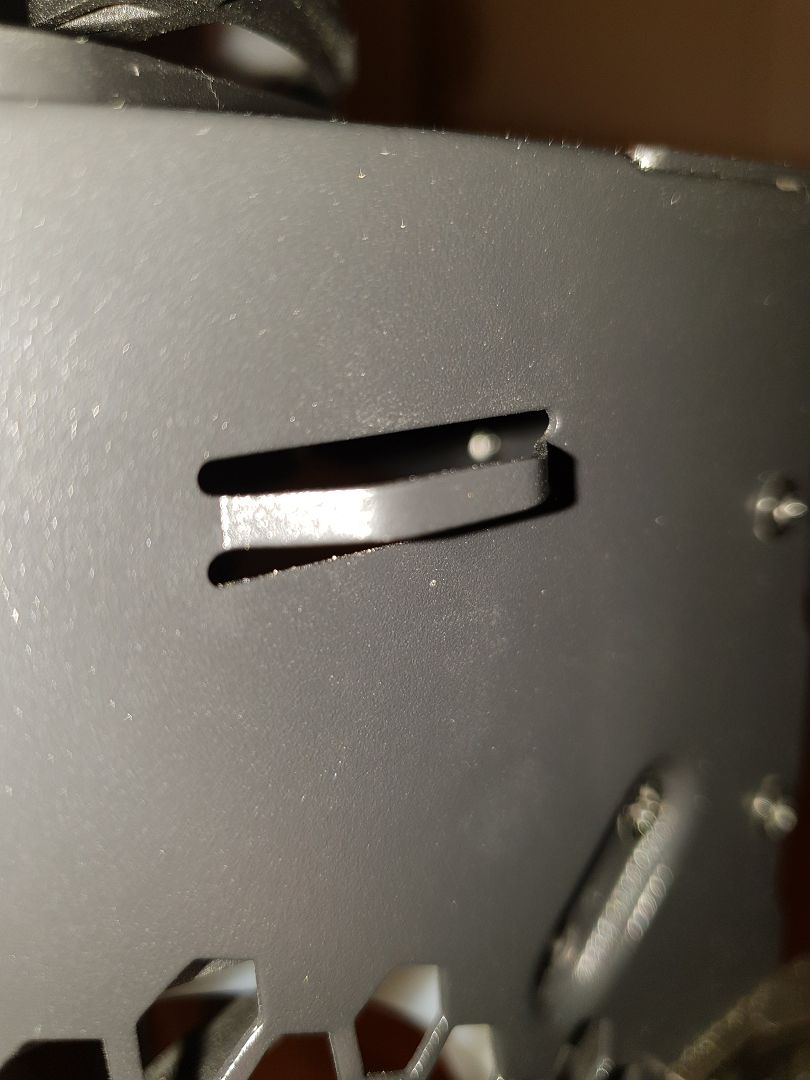
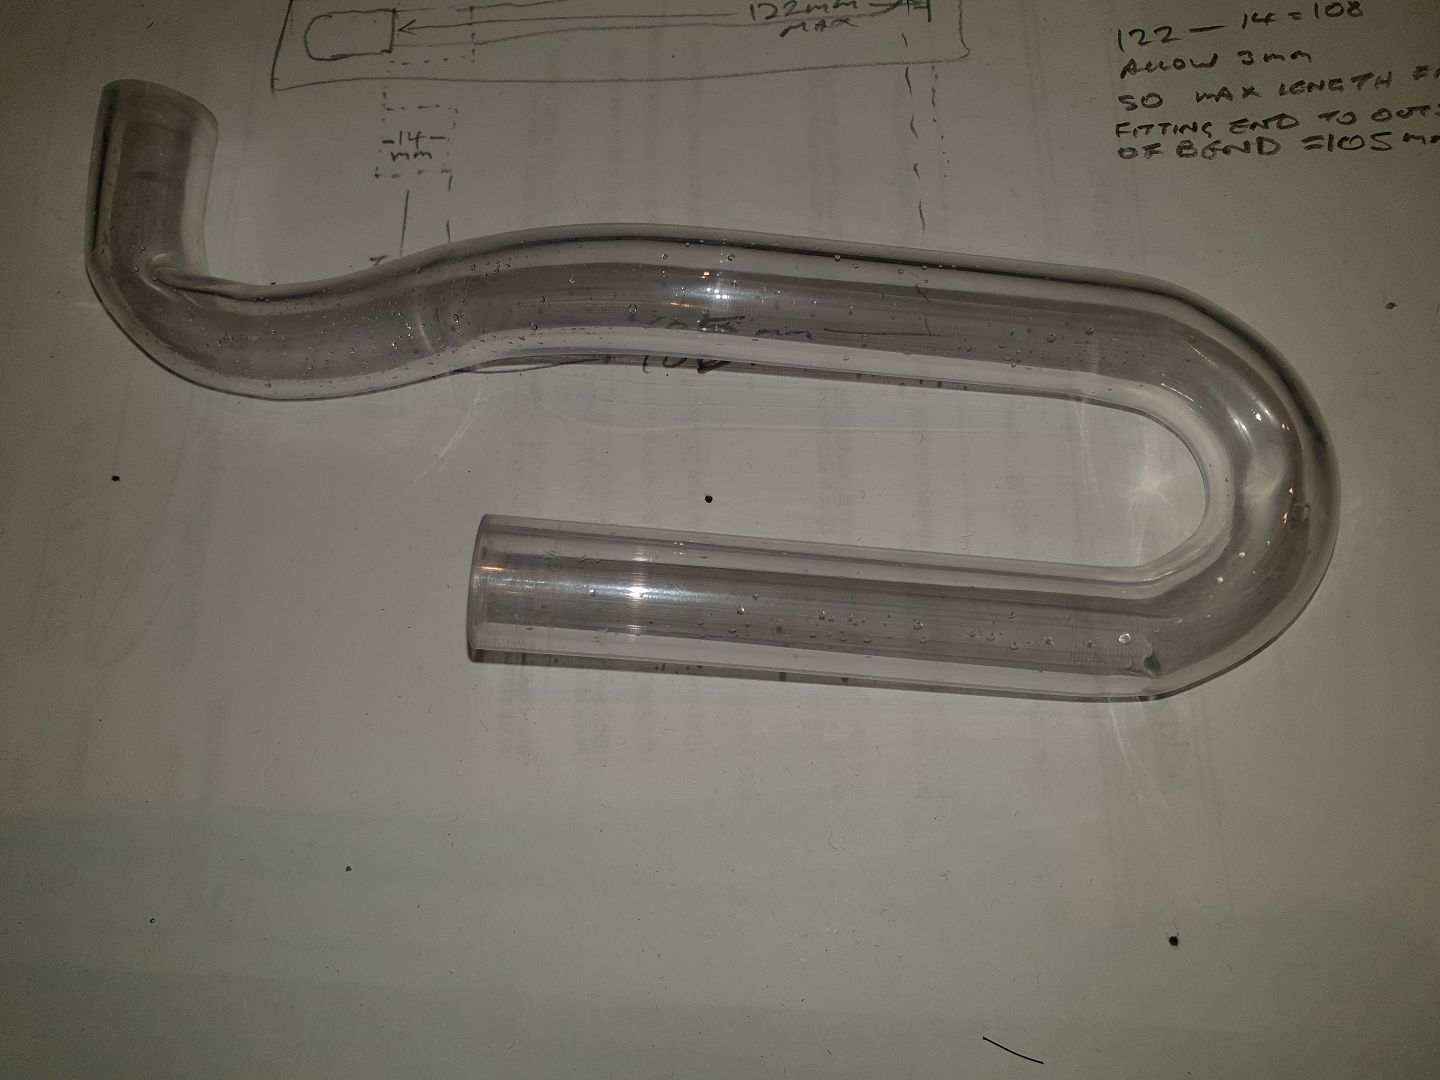
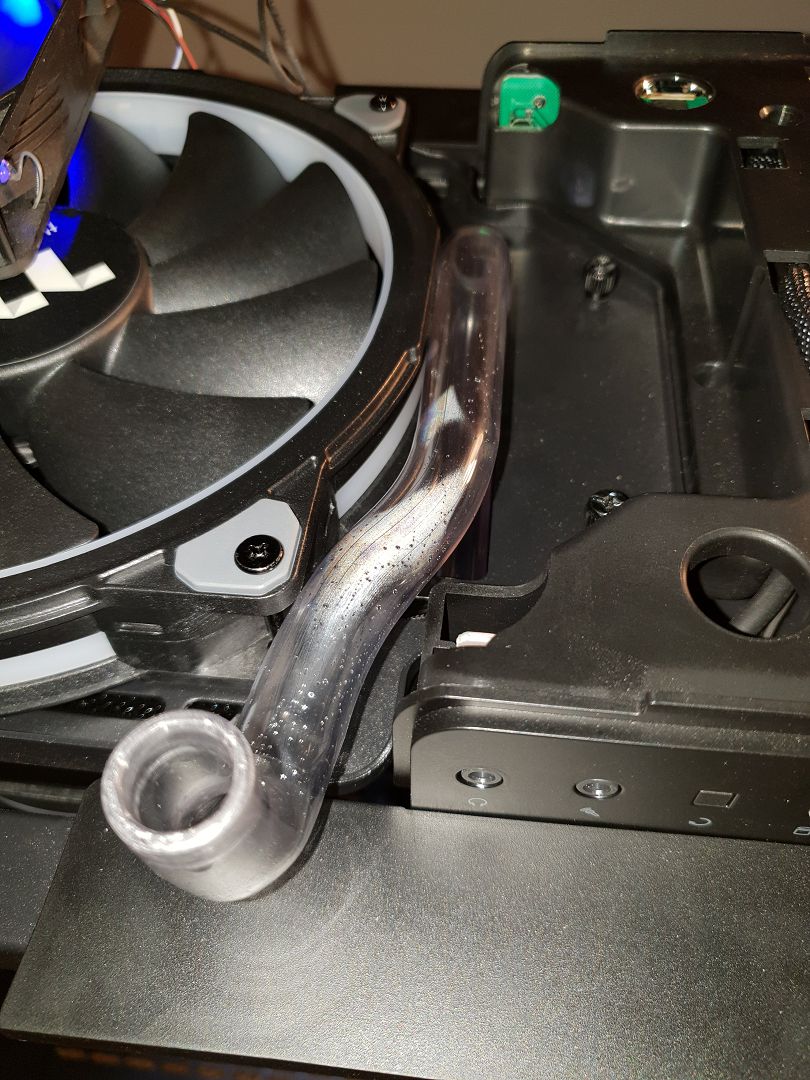
Plan is to bring 16mm PETG tube across and up through this slot to get it above the radiator then U turn it and maybe pop out the side of the case with a bleed valve. Thought this might be a good place to practice bending, if I can bend this the rest should be easy.
Well first bend done and it was a curly one....
Bit dodgy on the end but I can easily redo it later and Ive learnt a few things like dont pull out the bending rod till you know its good cos you wont get it back through the bend.
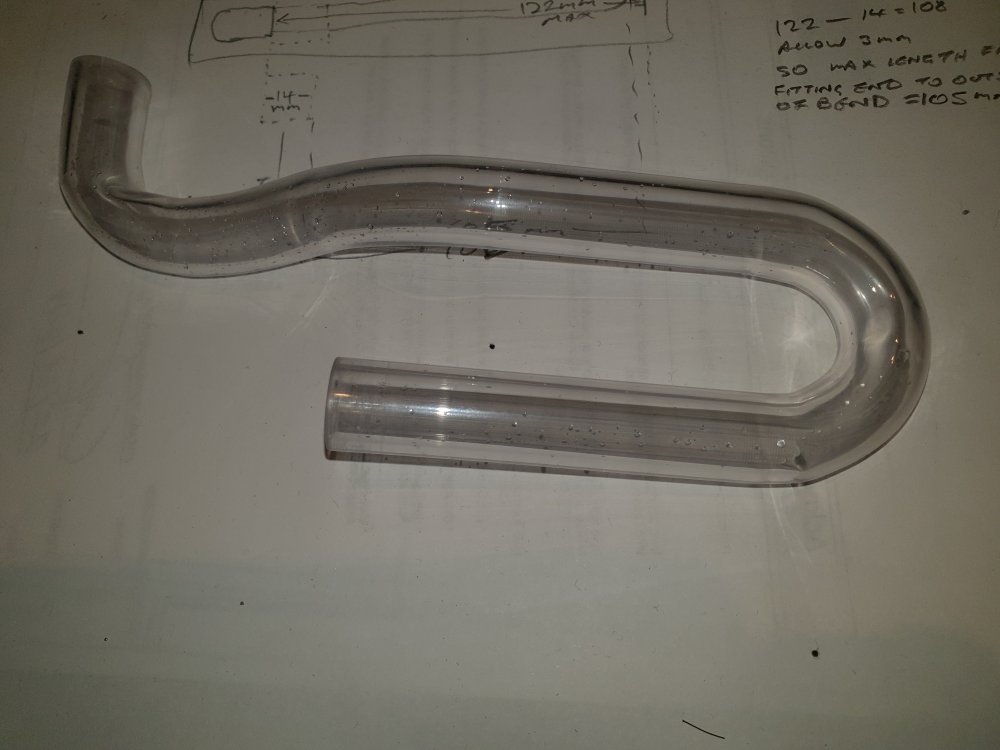
More importantly it fits!

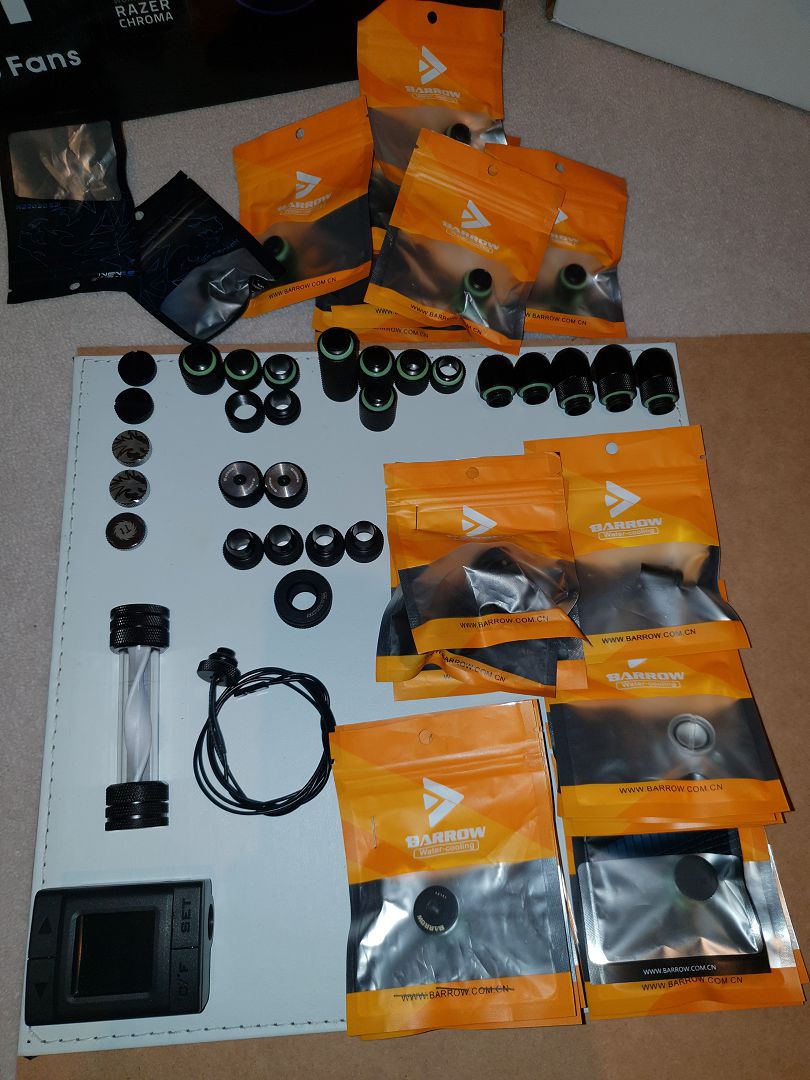
Fittings
Probably a good time to mention fittings. Your going to need more than you think as things will change as the build progresses or so Ive found.
Seems there is another obsession that can happen here as there are so many different types and they are so very well made. Because your not completely sure what you need I found Ive ended up with alot of fittings, joiners, extenders, elbows, rotatable elbows, end caps...and on it goes. The quality of the Barrow fittings is excellent and about a third of the price of EK fittings.
All Bykski and Barrow fittings were sourced from mydiyau for local Aussie stock or ins_mqzje for direct from China.

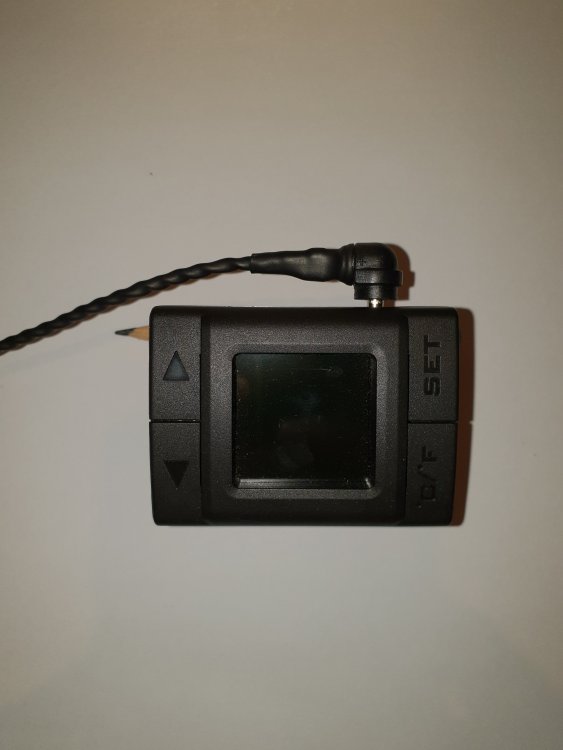
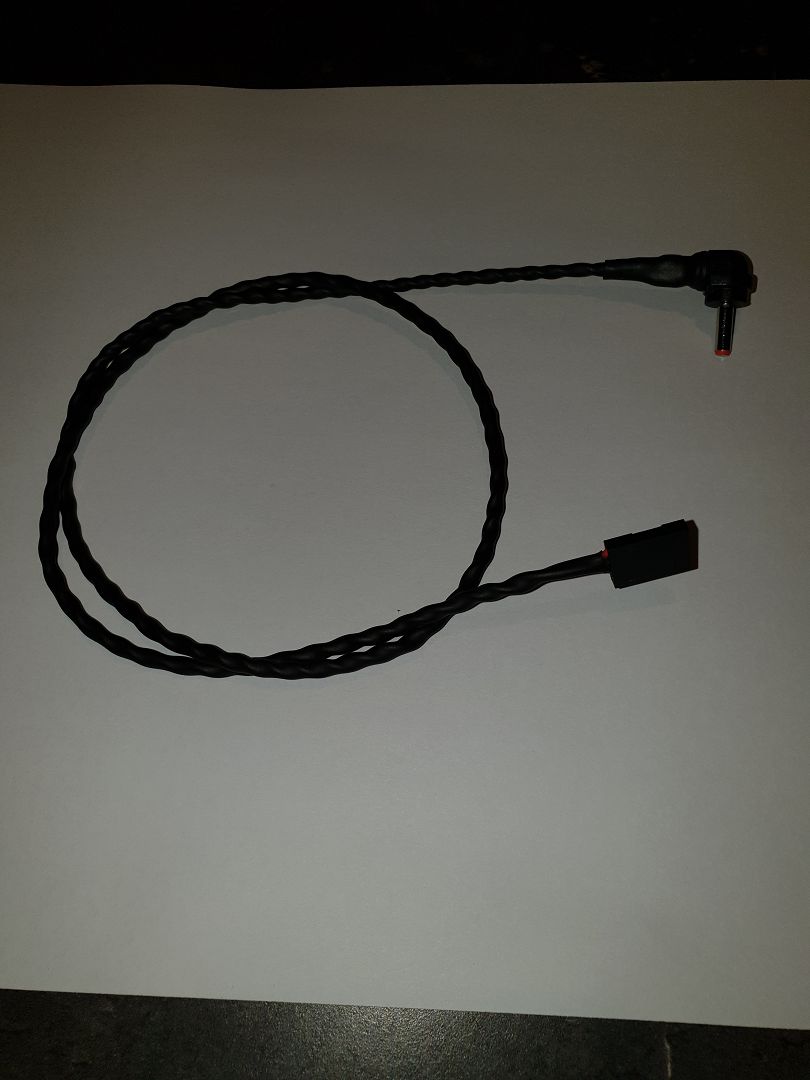
Having a bit of a go at TT here. Had to make a custom power lead for the TF1 not just because I am running it from a custom header but also because the lead supplied is terrible.
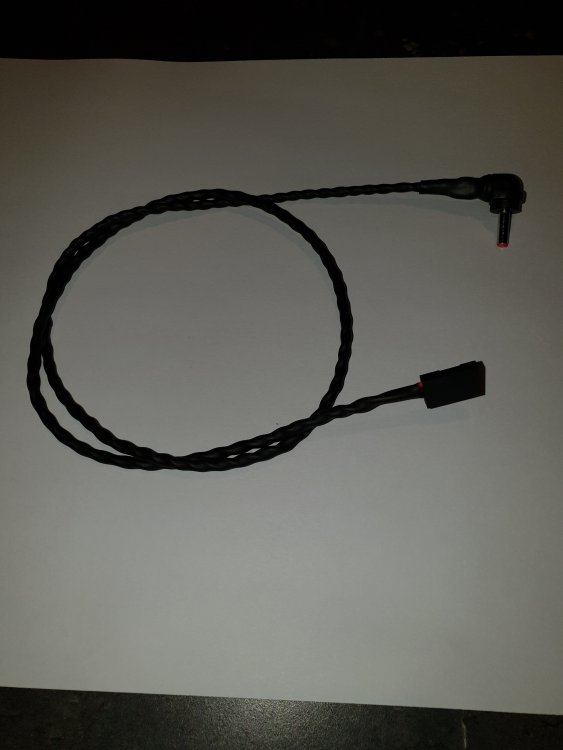
Here is the lead supplied with massive straightplug. Keep in mind here that the objective is to hide as much cabling as possible.
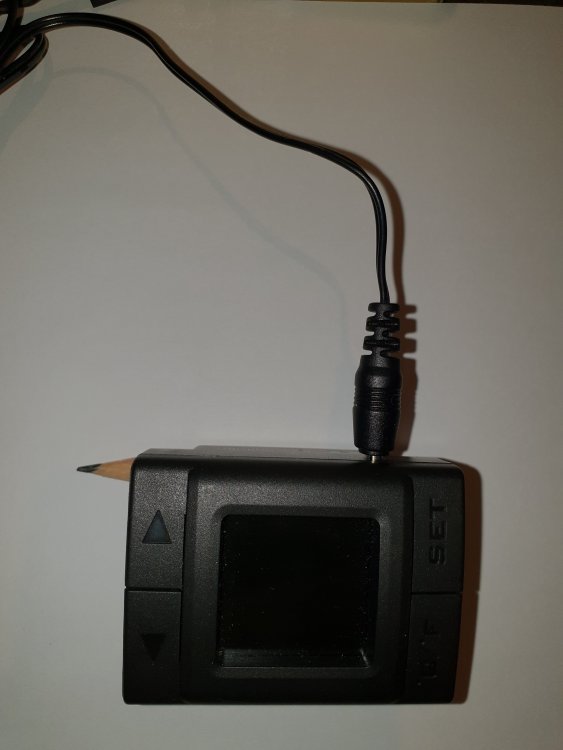
Here it is with my neat right angle plug and heatshrunk cable...much better. As all the fans etc from TT come with expanding or silicon sheath I would expect the TF1 to also.
While I'm having a go at TT I found this also.
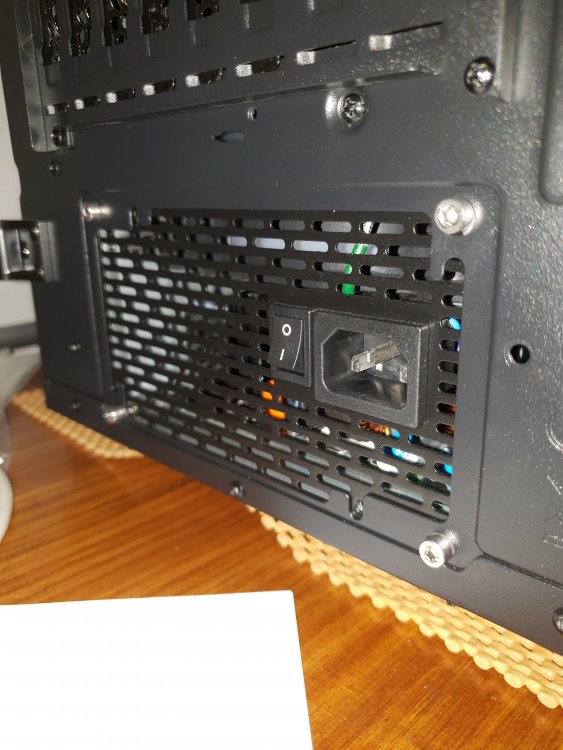
Had to replace the mounting bolts for the power supply as 2 of the threads stripped out on first use, screws supplied where cheese metal also and totally useless.
So far not impressed with this power supply for the money, the flat unbraided lead set supplied is cheap and nasty, but luckily black. Also the 8pin motherboard power leads supplied are not long enough to get to the motherboard headers at the top of the case, they fall short by 150mm or so. This is a TT power supply in a TT case....they should reach should they not. Still waiting for extension leads from ebay that I shouldn't have to buy which I then have to sheath as they are yellow and black. The USB connection is a mini USB all others are micro USB. Lead supplied used both USB ports on a motherboard header. This meant I had to combine 2 lead sets to make a mini & micro USB to motherboard header lead. This keeps the 2nd motherboard header free for actual USB ports.
Edit: And that didn't work either, TT's idea of daisy chaining controllers seems good but in practice there is a limit to the number of USB hubs you can plug into each other. Any more than 4 controllers daisy chained together on the Z390 Aorus Master MB gave a "To many hubs" warning from Win10. In the end I ran 3 controllers off 1 USB port and the other 2 on the other usb port. Modified another lead to plug the mini USB of the power supply into the output of those 2 controllers. Total of 6 devices from 2 ports (1 x USB2.0 header)
All 4 holes drilled and tapped to M4 with M4 stainless steel screws fitted, looks better too.
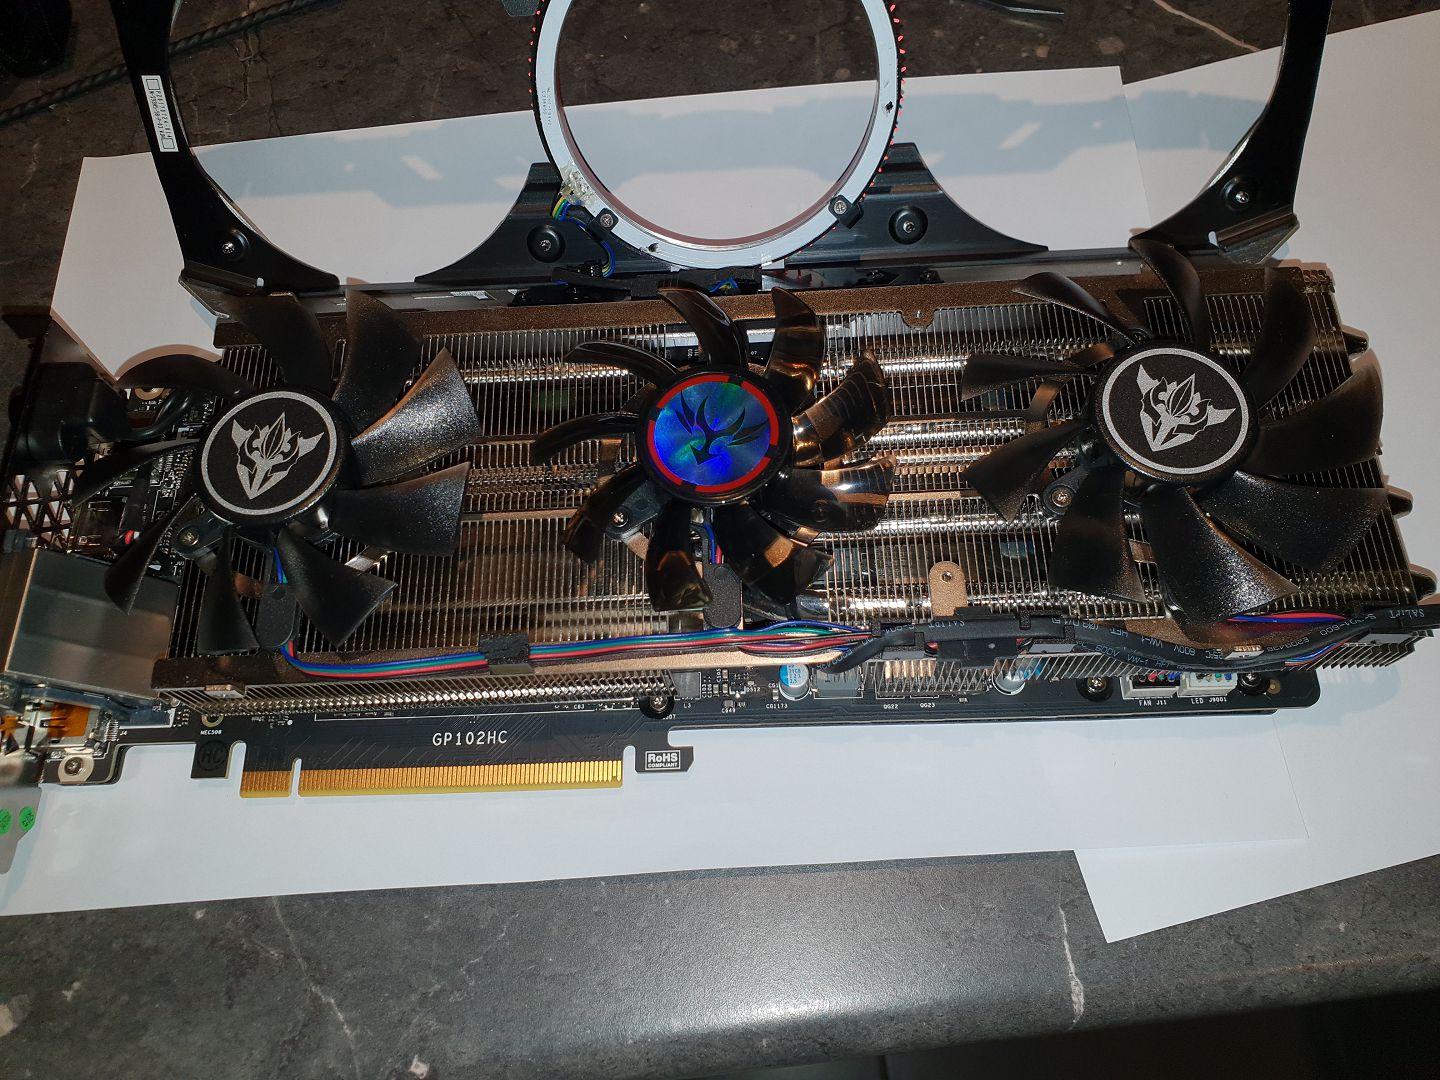
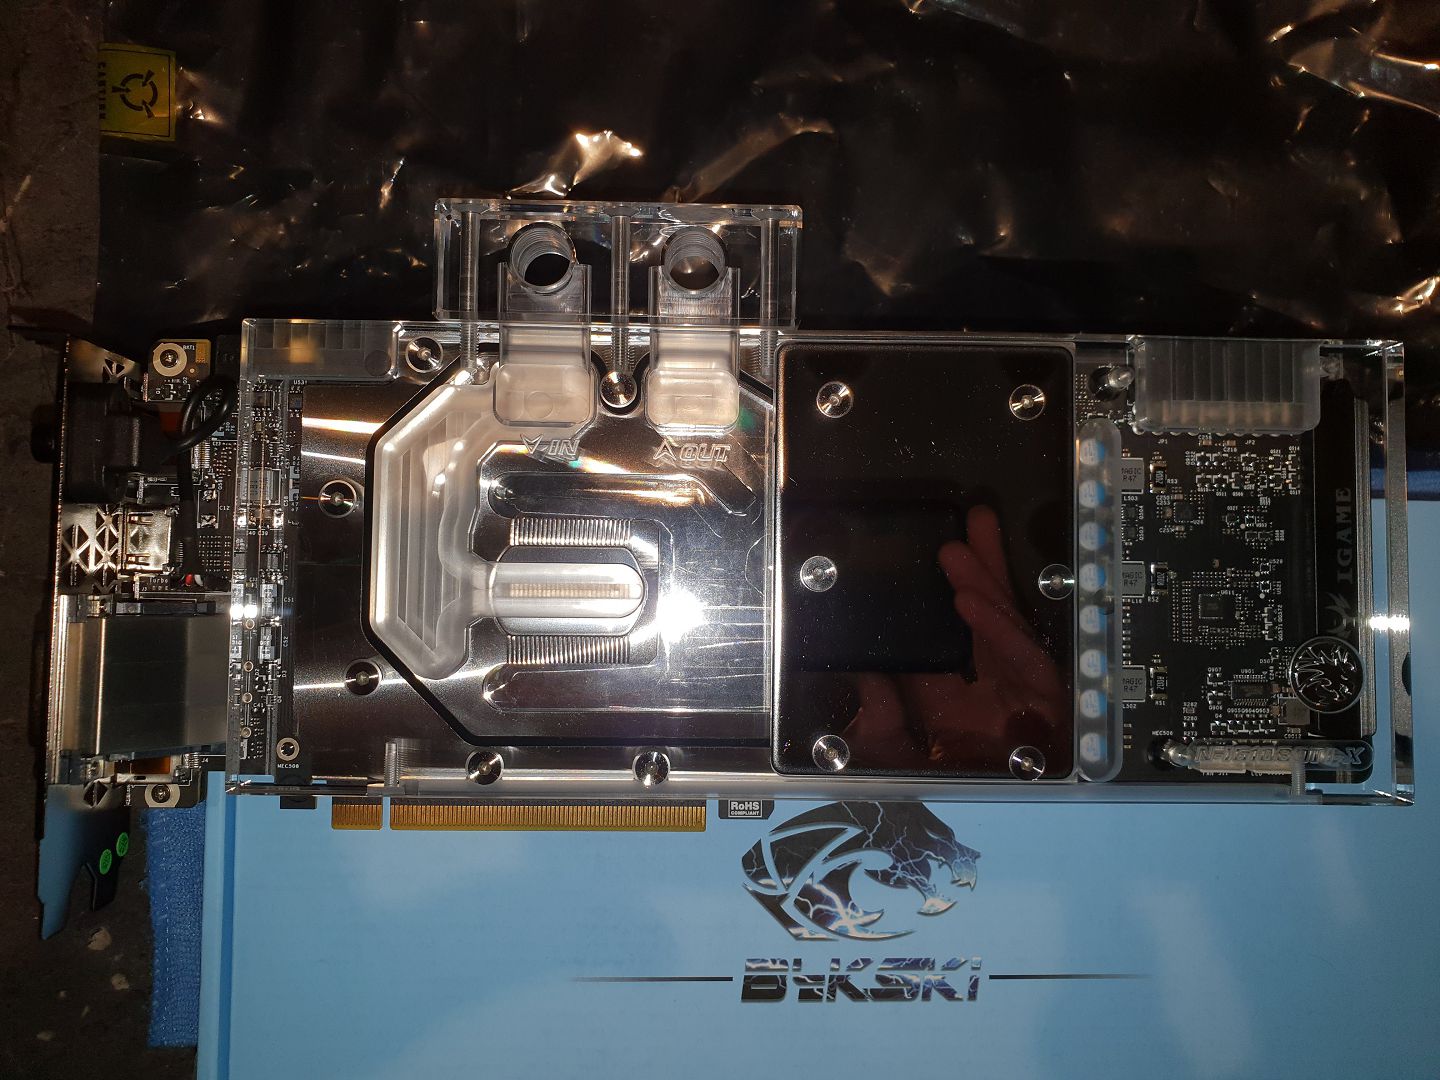
GPU
Colorful igame GTX1080Ti Vulcan AD card I picked up for less than $1000 in the great GTX1080Ti clearance of late 2018, I almost missed out. I had a feeling the 2080 would be a lot dearer and not much better than a 1080Ti which turned out to be correct. Hard to even find a 1080Ti now.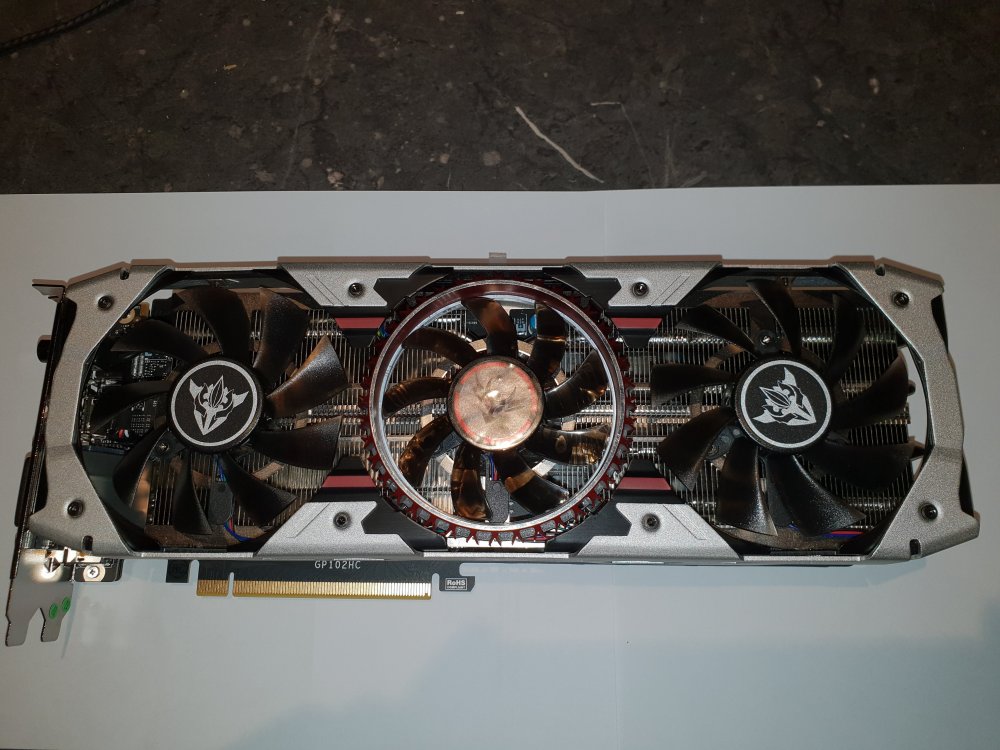
Well there goes the warranty, doubt it would have been useful anyway.
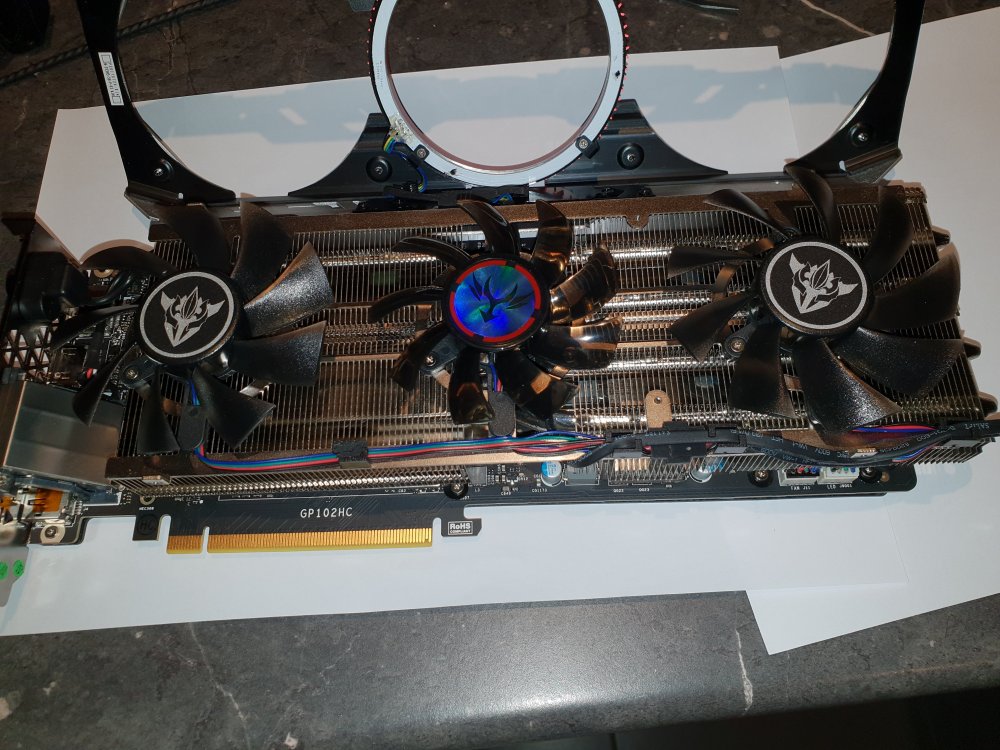
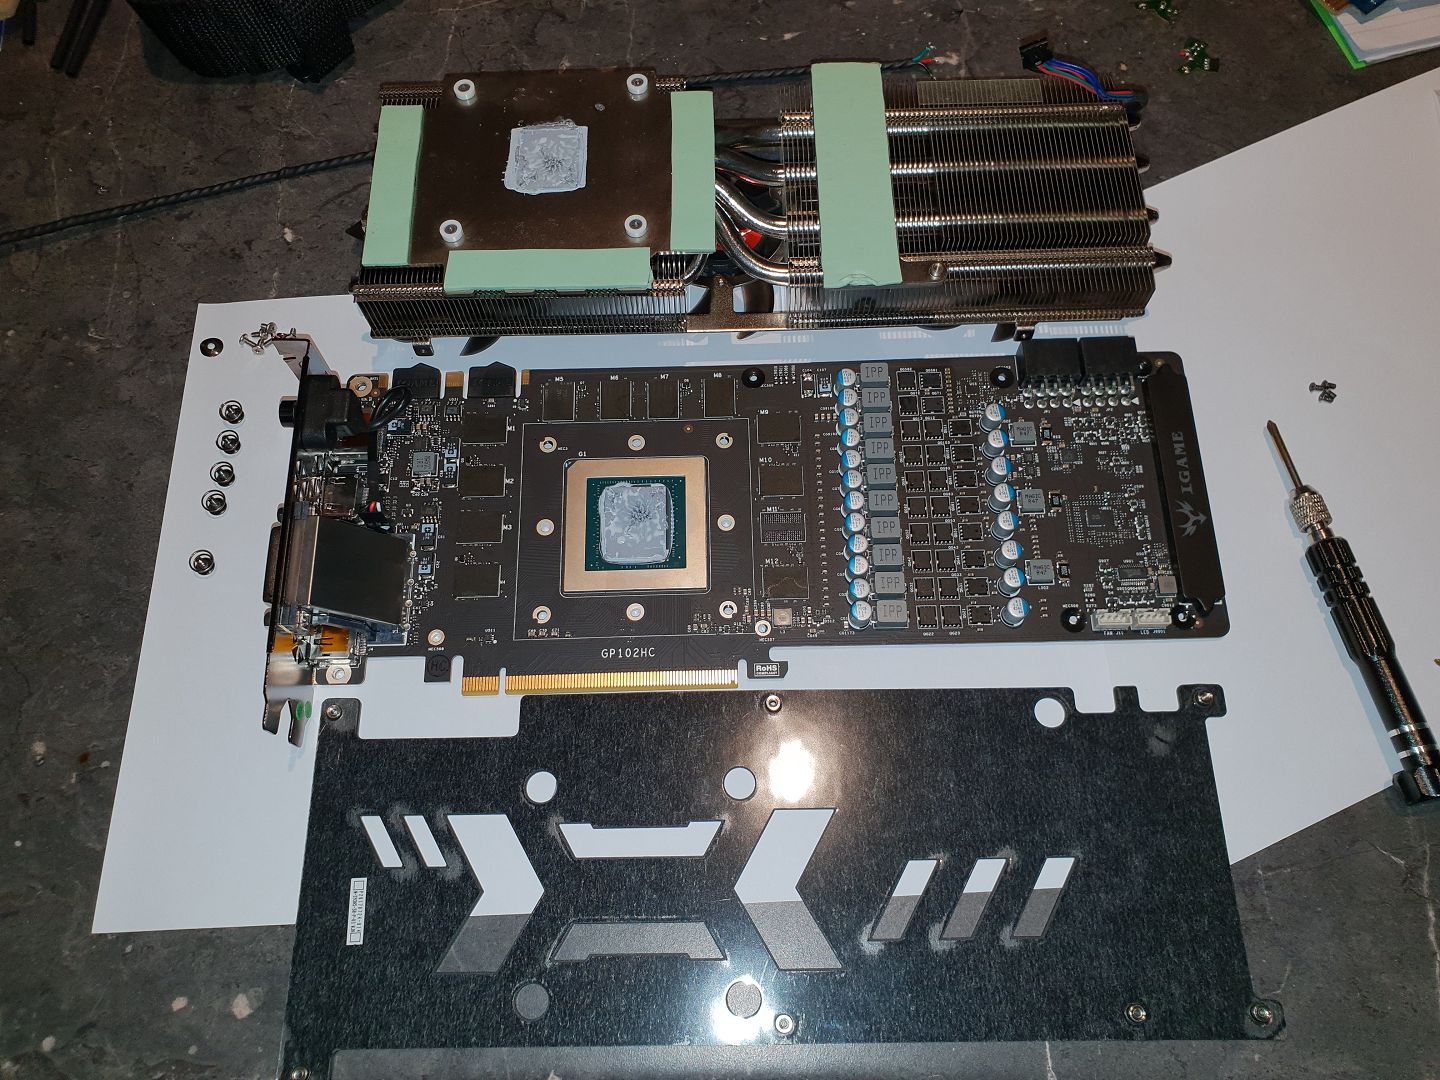
And we are in, excessive amounts of horrible rubbery compound everywhere.
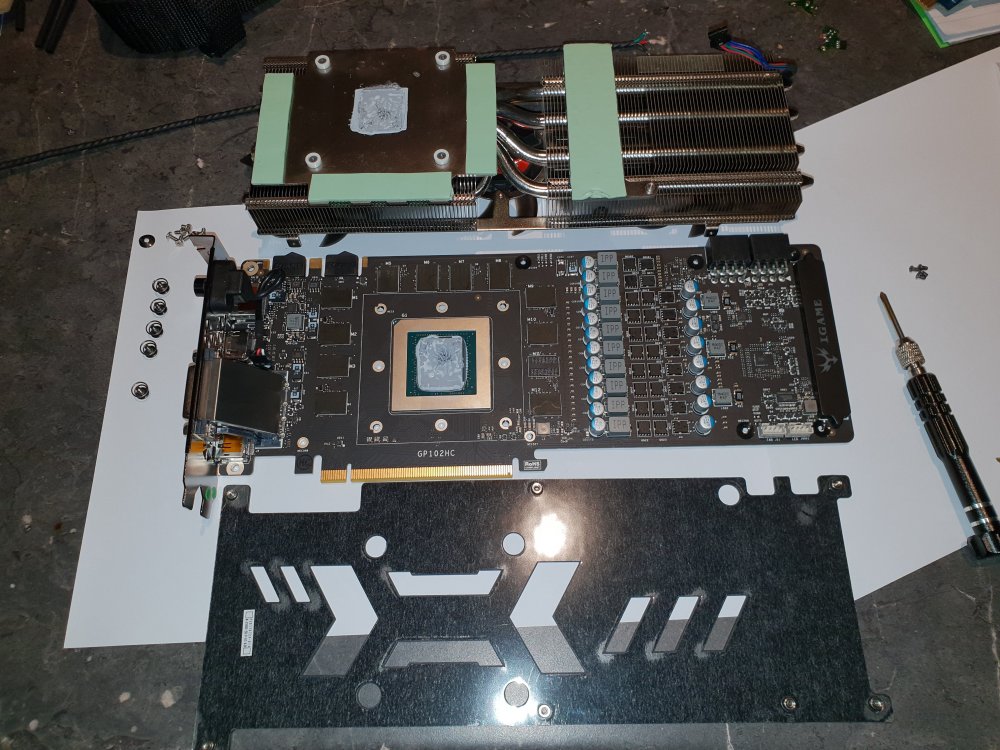
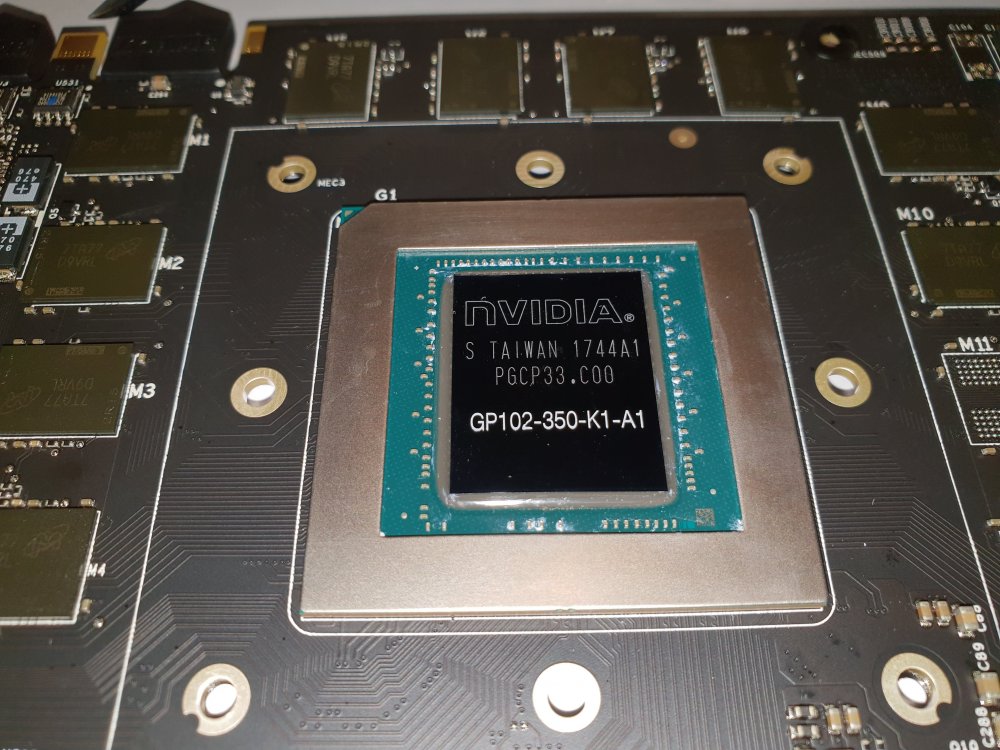
Compound removed exposing the hideously expensive GPU with heatspreadder
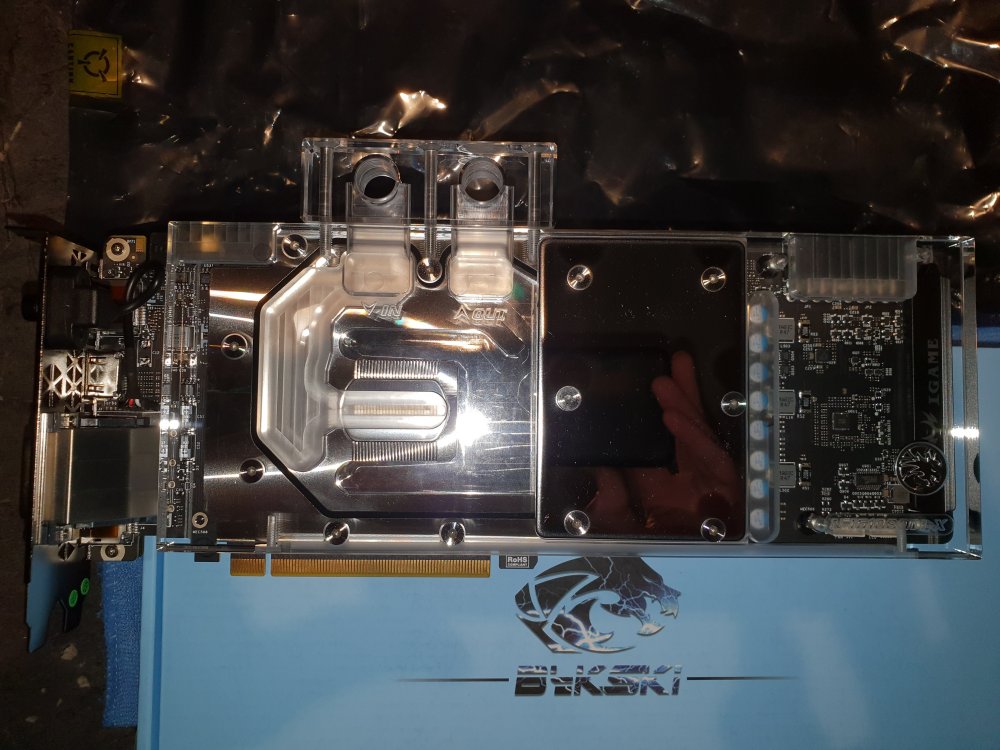
Bykski GPU block fitted with liquid metal, probably overkill but thats the theme here. Bykski was the only block available for this card. Quality is good although I would like to sand and polish the machine marks out of it but dont want to pull it apart yet. They seem to have blocks for every card out there.
I gave the block as much of a polish as I could, looks great.
Considerations, comments and suggestions are all welcomed as I'm flying by the seat of my pants here. -
My old rig with Z97 and i5 4690K running AIO cooler was getting a bit dated at 4 years old. As I don't know how long the AIO cooler will last and VR is pushing the 4690K a bit it was time for an upgrade.
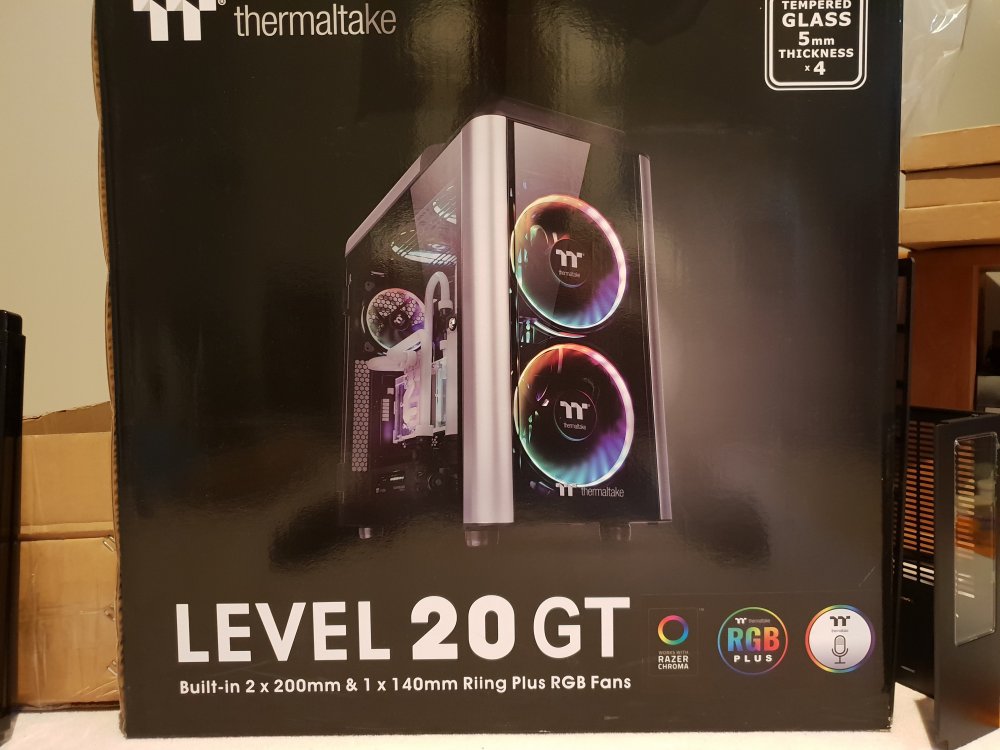
Walked into Centercom and there is the Level 20 GT plus sitting on the floor in front of me in a very big box. The 200mm ARGB fans got me, as its such a nice case thought I might as well go all out with ARGB everywhere and its perfect for my first open loop which might as well be nuts as well.
Scroll straight to the bottom of this blog for the finished product.
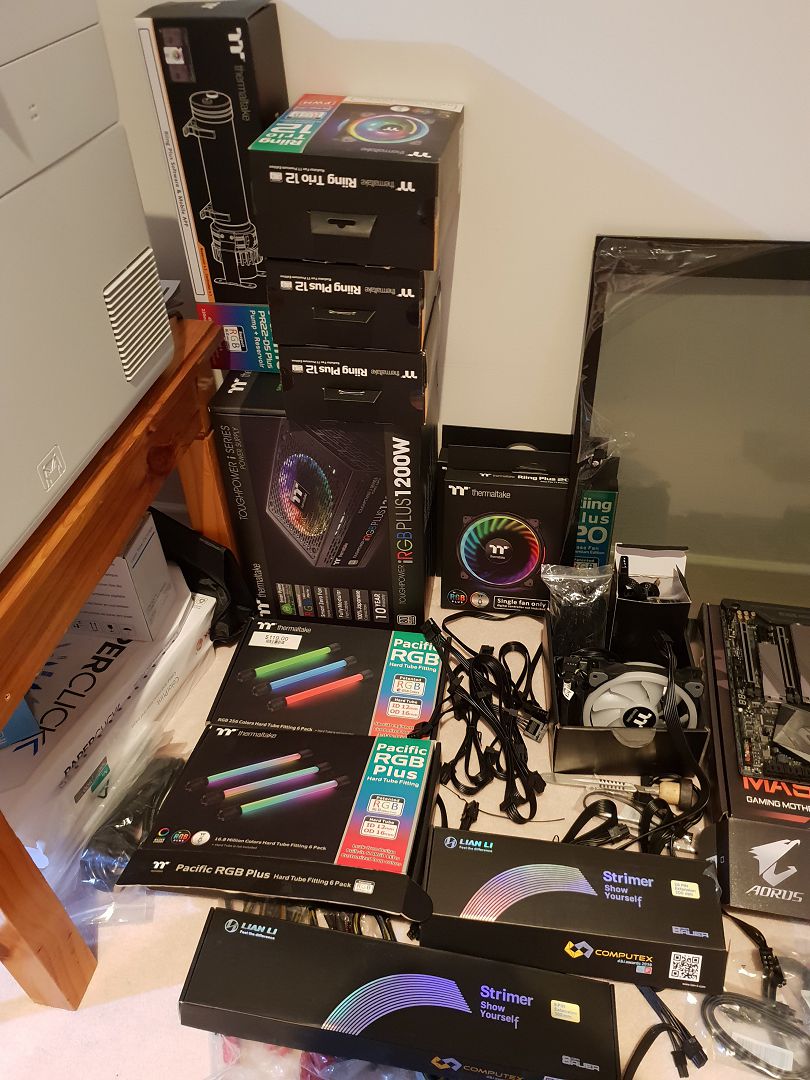
What to stick in it took a bit of research and based on price and availability ended up with this:
- 2 x 360x25mm copper/brass radiators from ebay
- 6x Riing Plus 12 fans for the radiators
- Another 2x 200mm Riing Plus 20 fans for the top of the case
- 3x Riing Trio 12 fans for the bottom of the case and 1 out the side
- TT Gaming riser cable PCI-E 3.0 X16 200mm
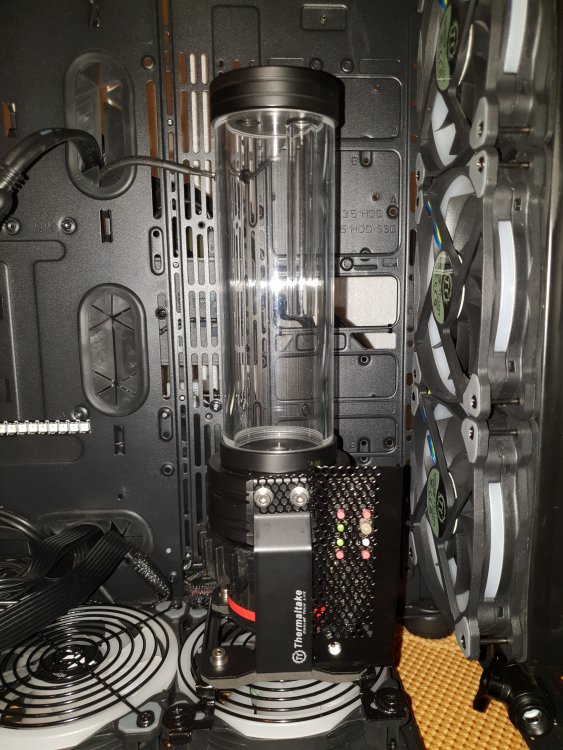
- Pacific PR22-D5 Plus pump
- Pacific RGB Plus Hard tube fitting set
- Pacific RGB Hard tube fitting set
- Pacific TF1 Flow/temp sensor
- Pacific Flow Indicator 2
- iRGB Plus 1200W Power Supply
- TT Ice blue and Acid green concentrates
- 2 litres of TT clear coolant
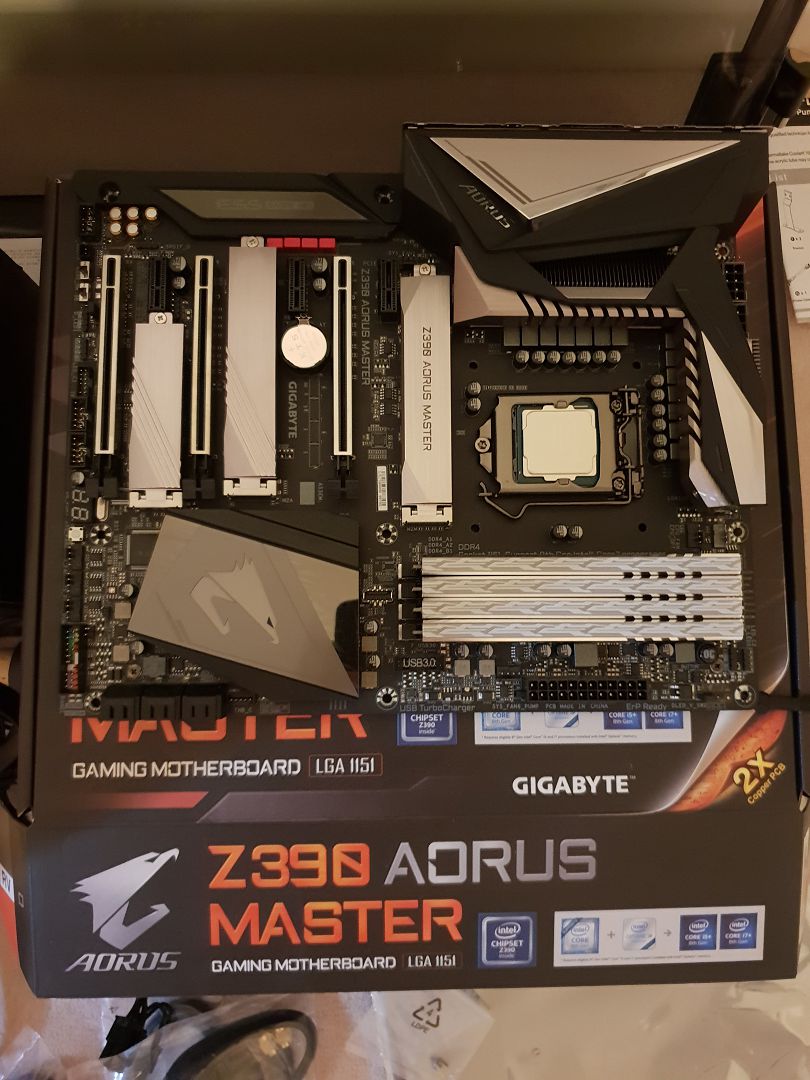
- Gigabyte Z390 Aorus Master motherboard
-
Gigabyte Aorus 16Gb RGB memory kit - TT Toughram RGB 32Gb (2x 16Gb kits)
-
i5 8600i-k CPU (Initially anyway) - i9 9900K CPU Upgrade
- Samsung 970 Evo NVMe M.2 500Gb drive (For system only)
- Seagate Barracuda Pro 6TB (for game storage)
- Hard drives and iGame GTX 1080Ti from old PC
- Lian Li CPU and PCIE Strimmer RGB Cables
- Bykski GPU water block to suit above
- Barrow CPU water block (which I've polished to a glass like transparency)
- Heaps of PETG 16mm tubing and bending tools
- Heaps of G1/4 fittings, extenders, adapters, couplers and plugs.
Turned out to be quite a list in the end which has been sourced through Centercom Bundoora, TT Direct and ebay.
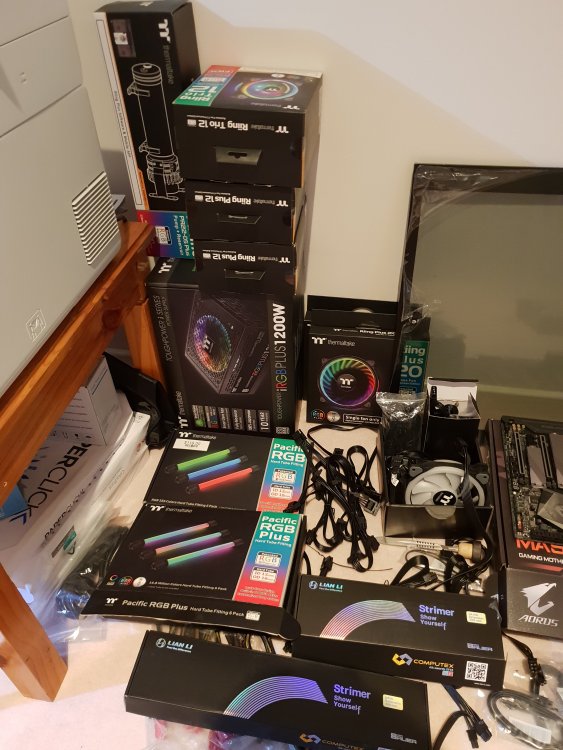
Just a little bit of TT stuff....thought I would keep the theme.

Aorus Master....couldnt wait for the extreme water cooled version and besides this cost more than the processor, which is a first for me, didn't want to know what the extreme will cost.
Edit: Motherboard, processor, memory and Evo HDD were tested to bios with a heatsink and fan to verify these parts were ok before any assembly commenced.
PART ONE
RGB Design Concept
As the case, leads, motherboard and mostly everything else is black I decided to make everything where possible...black thus Ebony Bliss also as everyone else gives their build blog a name so will I.
That's a lot of black so Its going to need balls of RGB lighting to even see it. Bring on the 13 Riing fans and other RGB parts listed above.
I've also included ARGB strips under the front and lower edges of the motherboard adapted to use the TT Controller plugs. The CPU and GPU blocks both have ARGB strips also adapted to TT plugs along with the Strimmer leads.
All this RGB requires power and a lot of it, my calculations averaged around 10A @ 5V and I've added to that. While the TT power supply can deliver 30A @ 5V getting 10A out of it with Molex plugs gets messy plus I didn't want to deny the motherboard any current so a power distribution rethink was required.
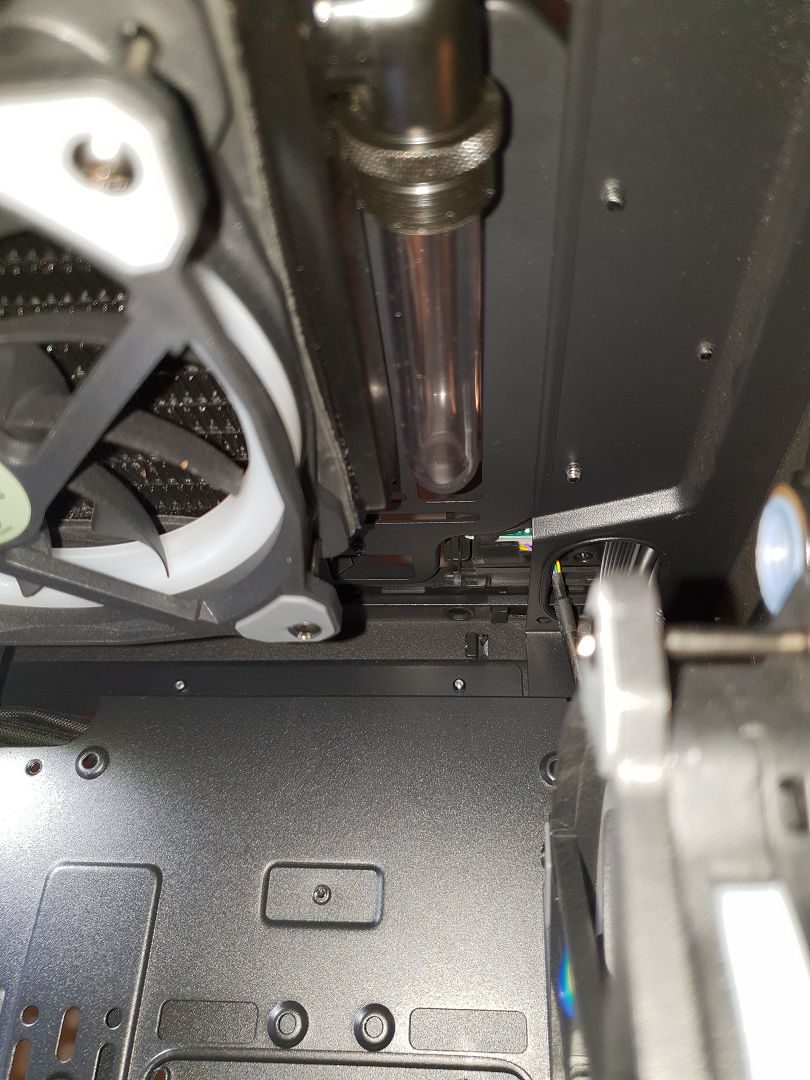
The UV concentrate looks excellent....suppose it will need UV lighting then. Bring on the cold cathode 300mm tube hidden down back edge of front radiator plus UV LED strip along inside lower and back edges of the case, these also need control.
Testing of the pump made me realize that you need control of it to purge out the air etc so some sort of switch control is required. Furthermore this will need to be done preferably without the motherboard, drives etc powered up as many start/stop cycles are required. I could just use a toggle switch or similar but I want this a bit fancier so might as well build something.
When working on the PC its always hard to see anything especially when everything is black on black. So a maintenance light to illuminate the entire case would be most excellent indeed.
So requirements:
- Logic toggle switch control of pump, light, UV and RGB lighting (if possible)
- Ability to run at least pump and light from alternative power supply
- 12V to 5V converter and distribution board with custom leads
- Make a very bright 12V maintenance light using a 3 watt COB LED

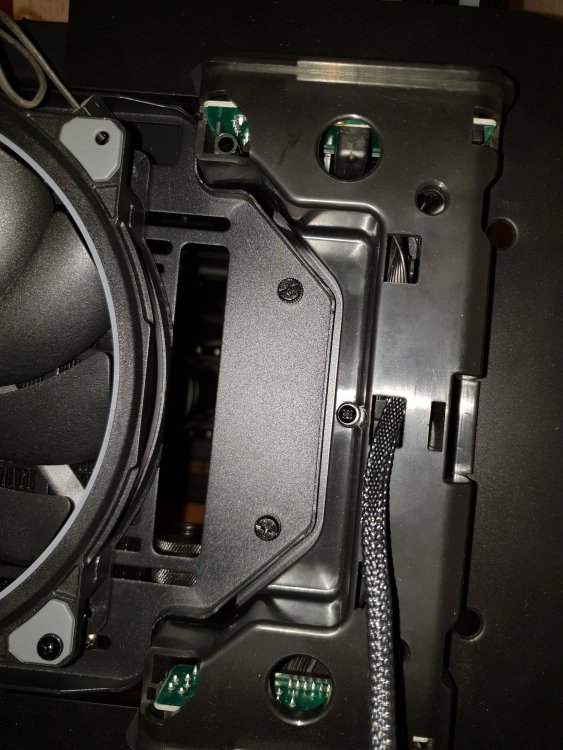
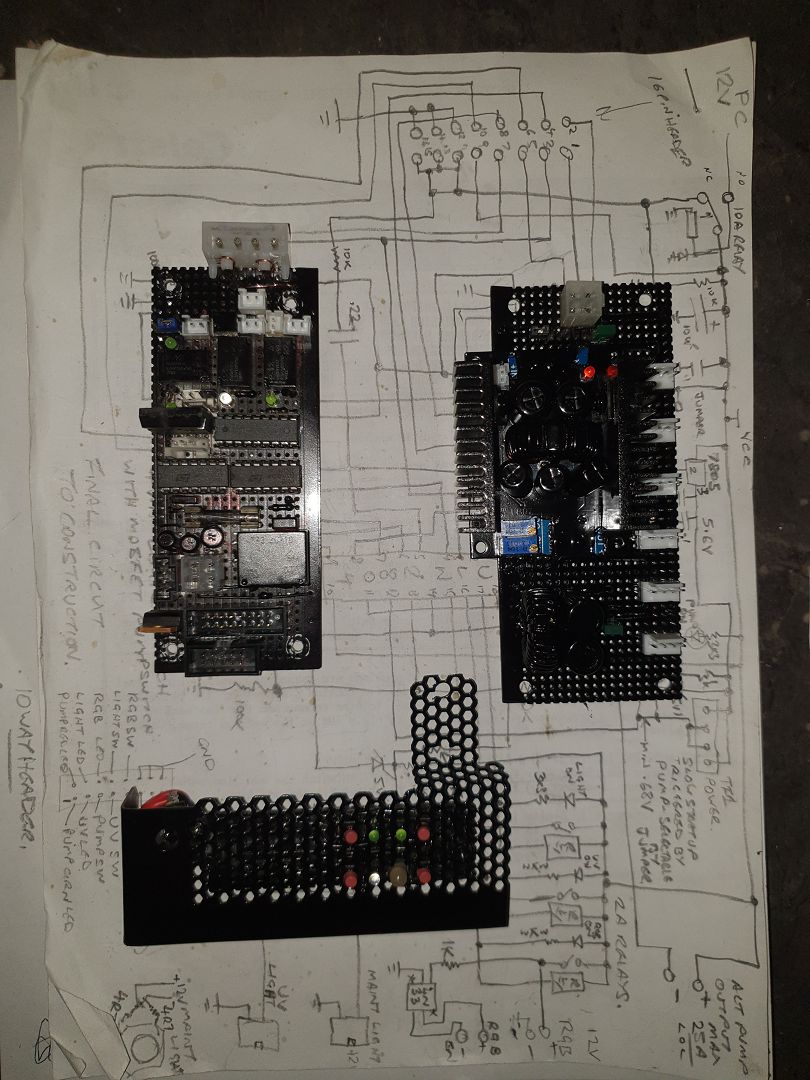
Upper Left - Logic controlled switchboard with MOSFET switched pump and 3x switched relay outputs
Upper Right - Power Distribution Board with 12V to 5V 300W converter and 6x output headers
Bottom - Pump mounted Master Switch Panel with 4x tactile switches and LEDs (pump LED is a dual colour green/flashing red that was in my breadboard, UV LED is a 3mm UV LED and the other 2 are green 3mm for RGB & maintenance Light functions)
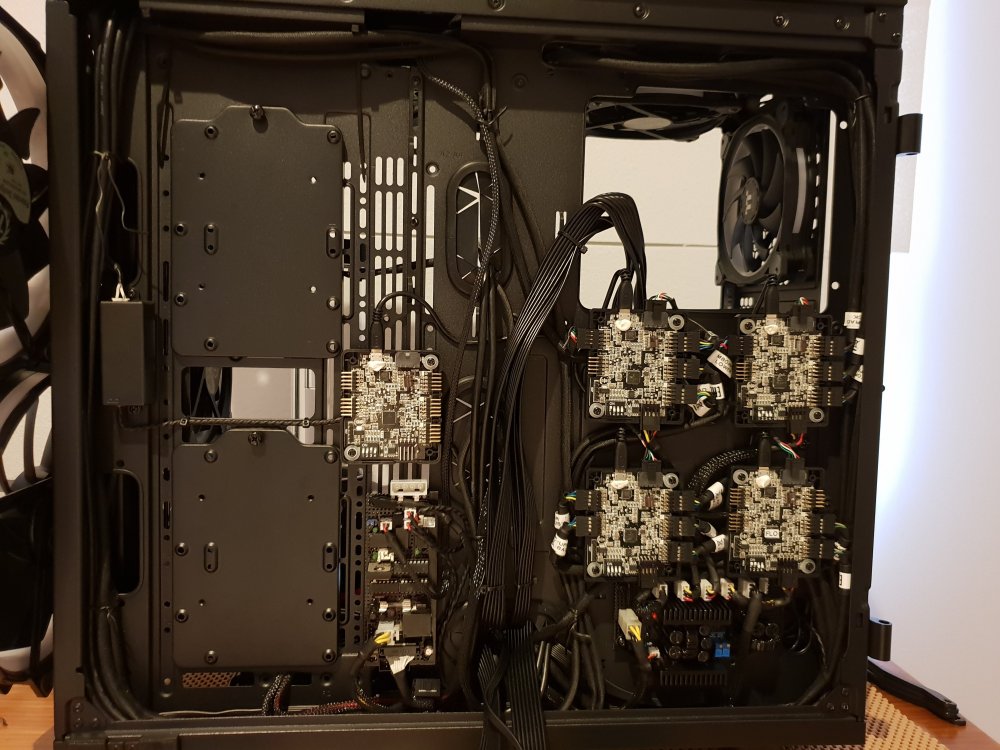
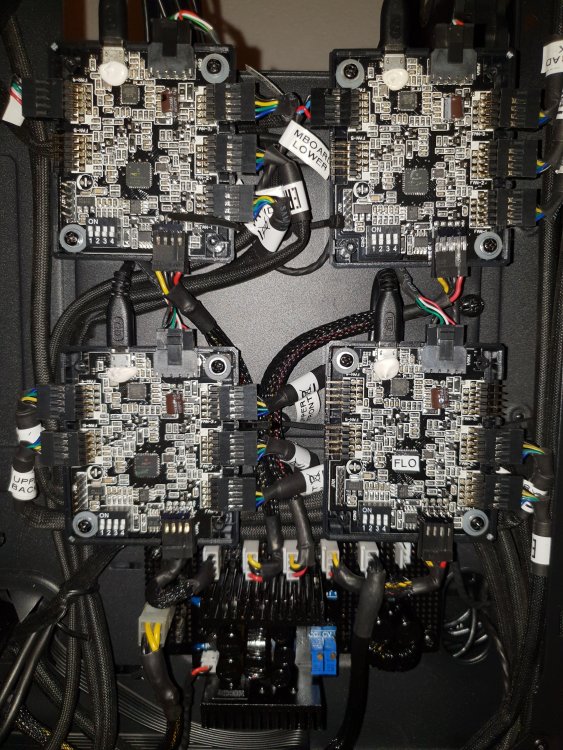
As I couldn't find anything like I wanted on eBay I built it instead, the above pics show the fruits of my labor with the 4 way logic switch board, pump mounted master switch panel and TT power distribution board. Discreet logic was used due to laziness however a microprocessor such as PIC or arduino would be better. The switch panel also has a DC power connector to allow a 12V 4A or so power supply. When plugged in the maintenance light comes on instantly and all other functions off, pump, light and UV can be operated in maintenance mode but not RGB as the maintenance 12V is isolated from the PC. In normal running mode the pump, UV and RGB are triggered but not the light. An additional switch board using blue illuminated tactile push button switches will be made to install at the top front of the case to mimic the function of the internal master switch board. A 10 way header is already installed to the switch board for this provision. Very careful drilling required for that exercise.
Edit: I did find something on ebay in the end, if someone wants to do something similar with a lot less work search for 4 channel touch switch.
The power distribution board consists of a 300 watt buck converter from ebay with an additional output filter and 6 output headers. This will supply up to 6 TT controllers with 12V & 5V and up to 15A or so on the 5V rail all from the PCs 12V supply only. An enable header was added to allow opto coupled control from the switch board however without 5V the TT controllers run the fans at full speed so that could be a problem. Under full load the buck converter only gets warm.
Careful not all buck's on ebay meet their specs, the first 200W buck I got screamed horribly and blew up at only a 7A 5V load
TT controllers mounted to 3rd hard drive bracket on standoffs as double sided tape wont cut it and surfaces are uneven. Leaving the covers off as the cute little boards are black and I like the exposed electronics on black look.
This will provide up to 25 controllable ports for ARGB with the maximum capability of 30 if required.
So far I have nicked a lot of parts off old PC peripherals including but not limited to:
- 2x motherboards for headers, heatsinks, capacitors and other assorted components
- 2x Floppy drives for power headers
- 1x stuffed power supply for case steel, massive MOSFET, large choke and heaps of bits
- 1x DVD burner for header
- And more
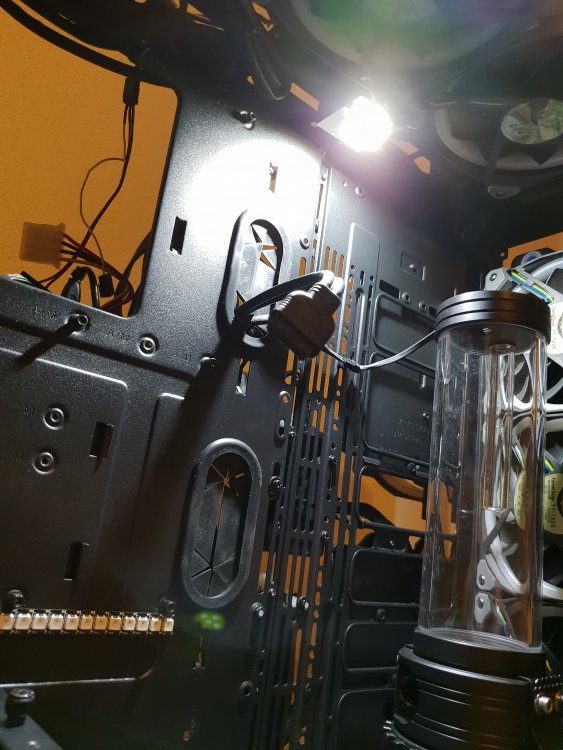
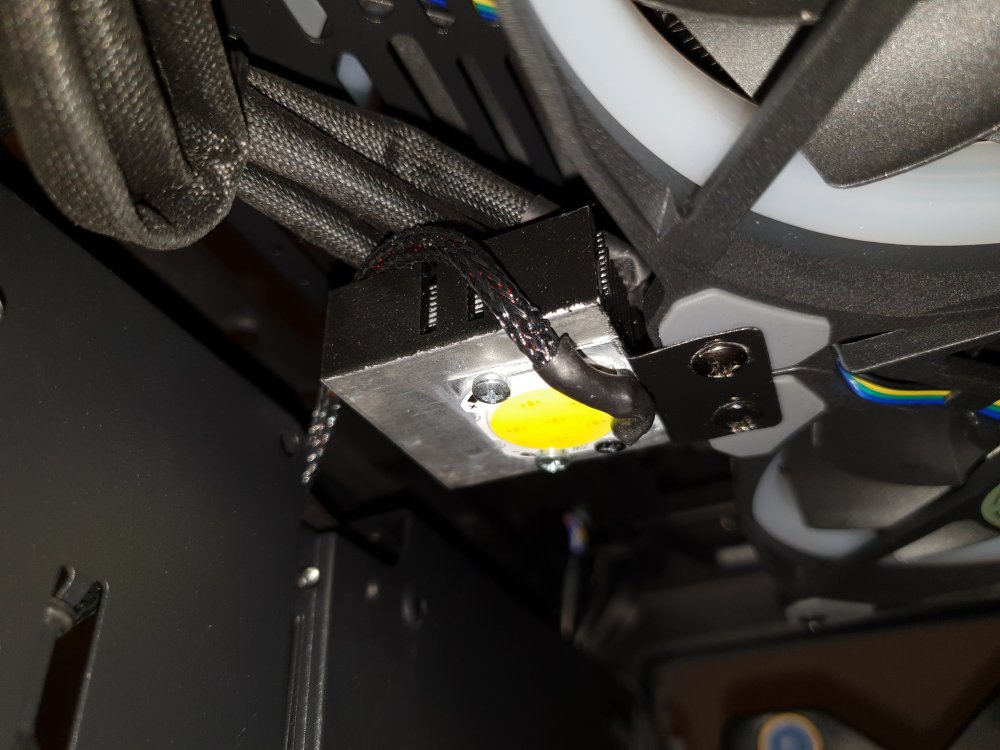
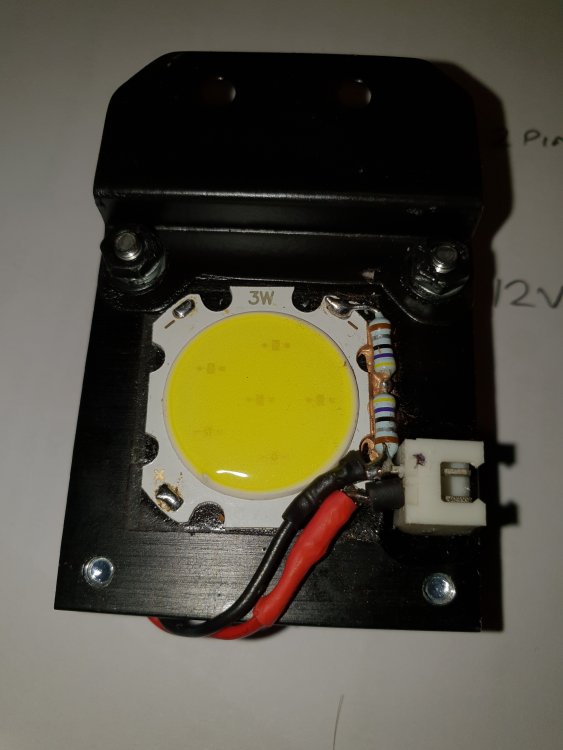
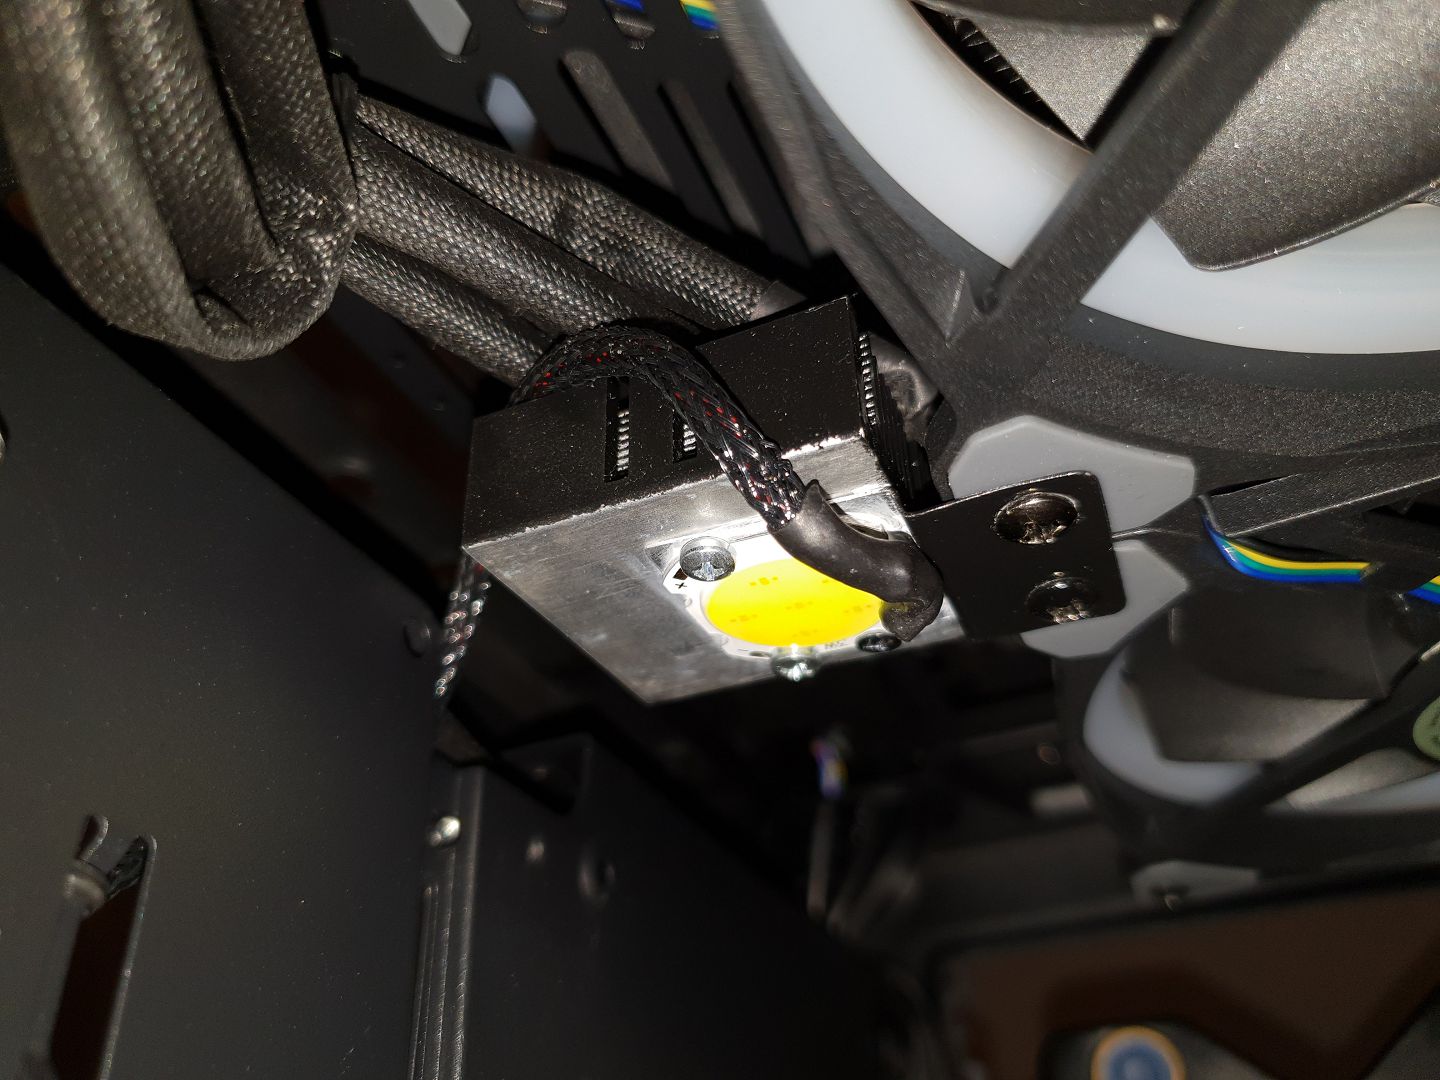
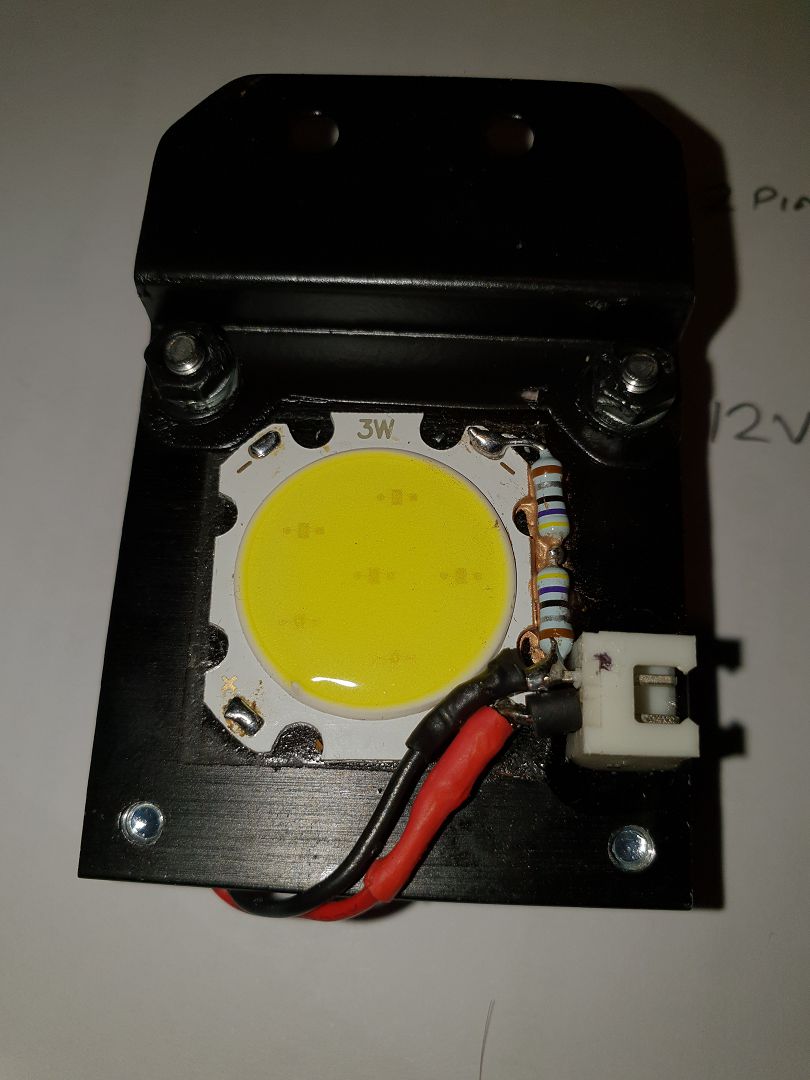
The maintenance light consists of nothing more than a 3W COB LED with 2x 4R7 resistors in series on 12V. Works very well and lights up the whole case very well but gets very hot so I bolted it to a chip set heat sink and it seems fine without the fans running. A small bracket I made tucks it up level with the radiator and prevents it blinding you.
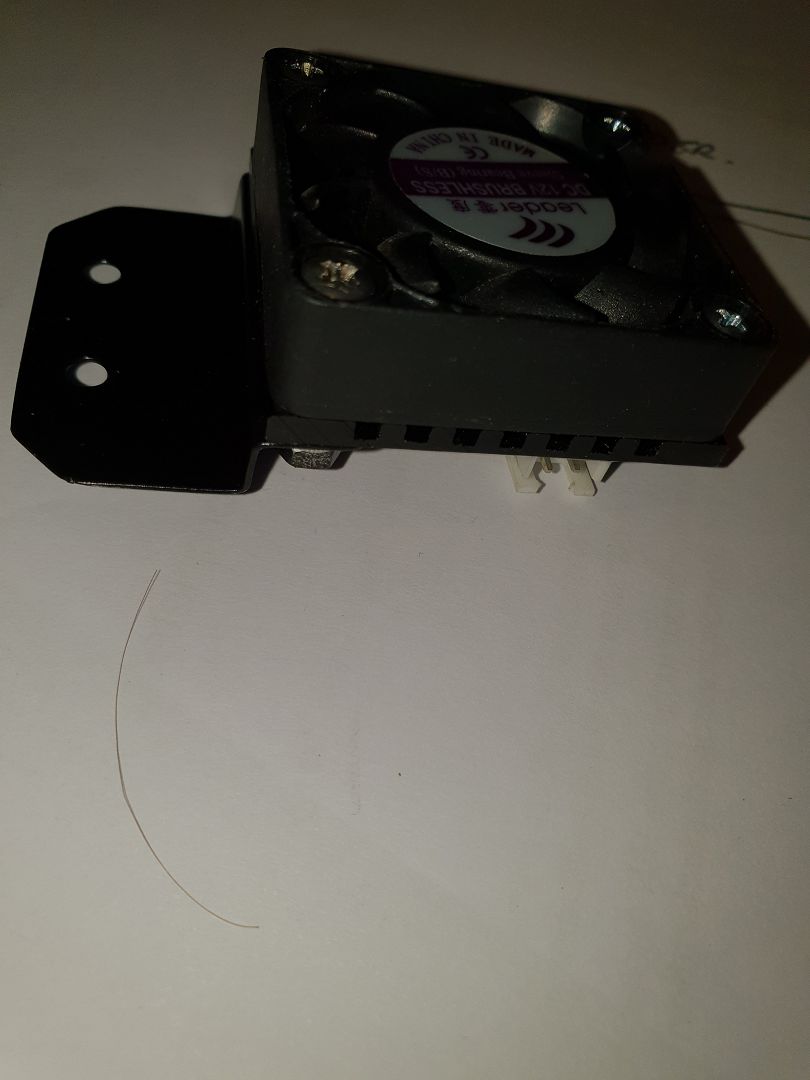
Edit: I wasnt happy with the first maintenance light, got to toasty in ambient conditions...bring on Mk2
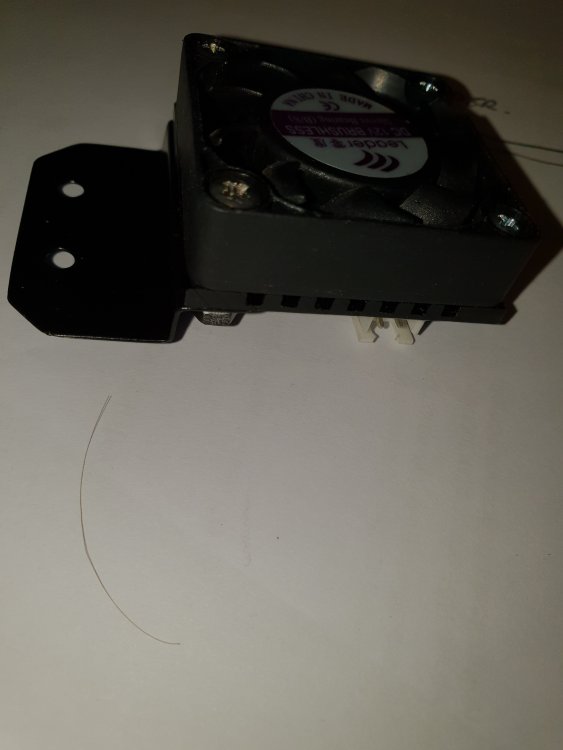
Found a small fan on a low profile heatsink, epoxyed a 2 pin header to the heatsink and slowed down the fan, works perfectly.
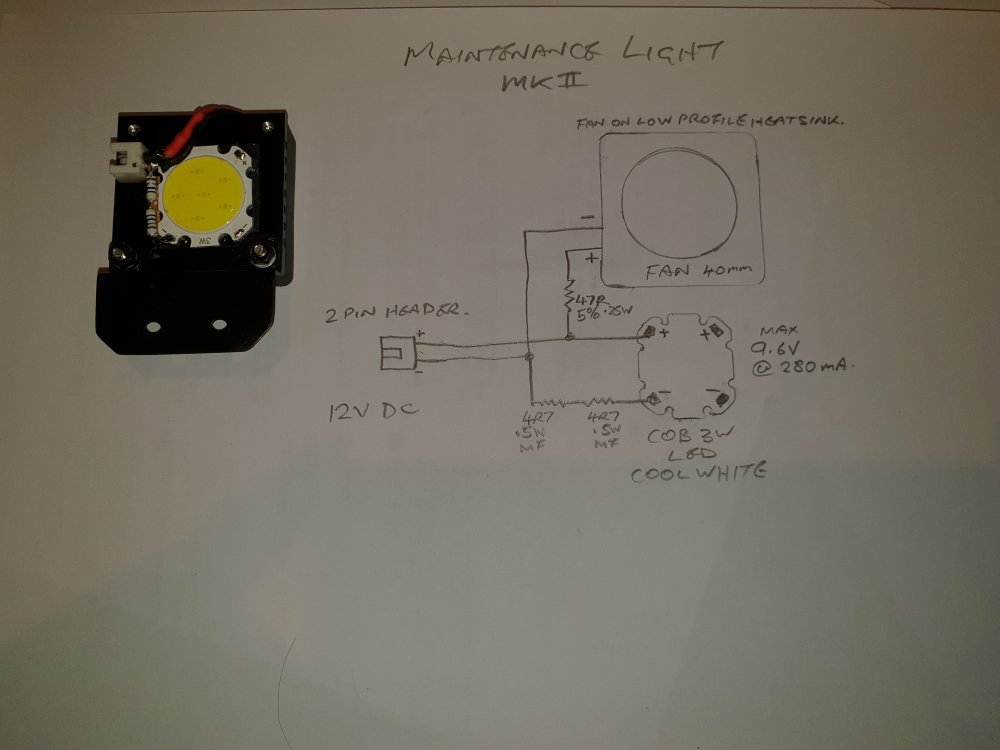
LED is off center as the sticky pad already was there like that, small bead of compound under the resistors.
Yet another custom bracket
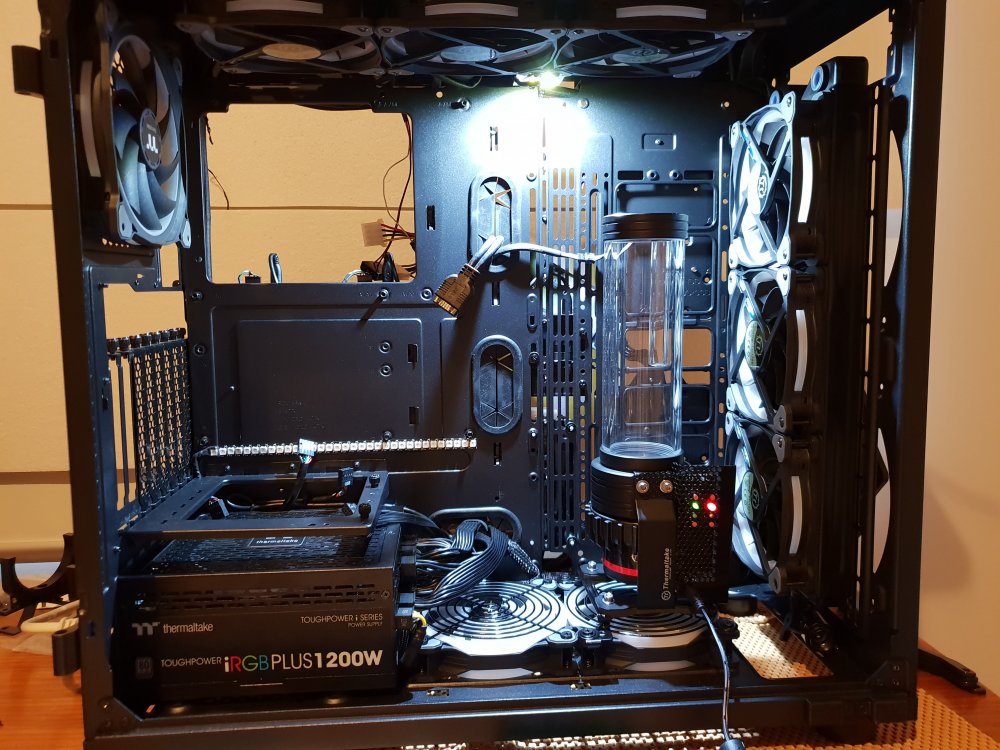
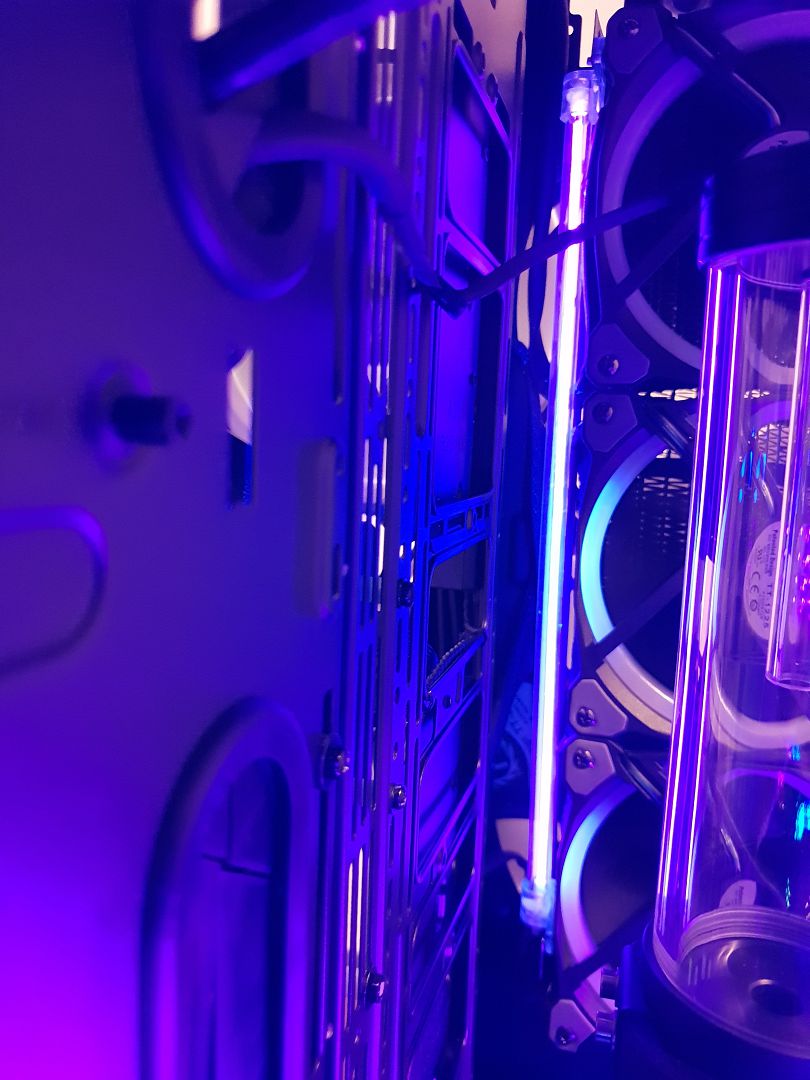
And here is the UV lighting as installed, will wait till coolant is flowing to see if more strips need to be added.
UV Cold cathode behind radiator on more custom made and spray painted brackets....mixed feelings on this as I think UV LED strip is brighter but I bought it so in it goes.

UV strips cut to length and wires with headers attached, strips stuck to cut lengths of magnetic fridge magnet (thanks to the real estate agents who put fridge magnet calendars in the letter box.

Edit: Pointing up seemed better, lucky I used the magnets.
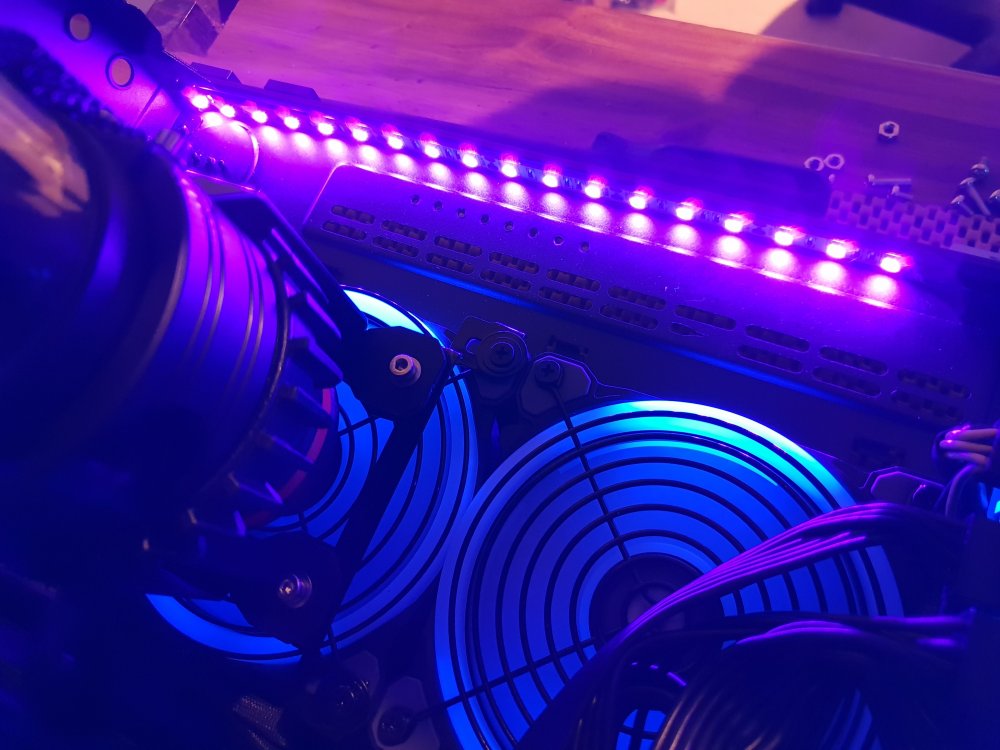
Should do the job.

Ok now its starting to look better, strip above power supply will be covered by the motherboard and the motherboard front strip is between the motherboard back plate and PCB. Pump is on a custom bracket I made from part of the case that fell out when I touched it above the front radiator.

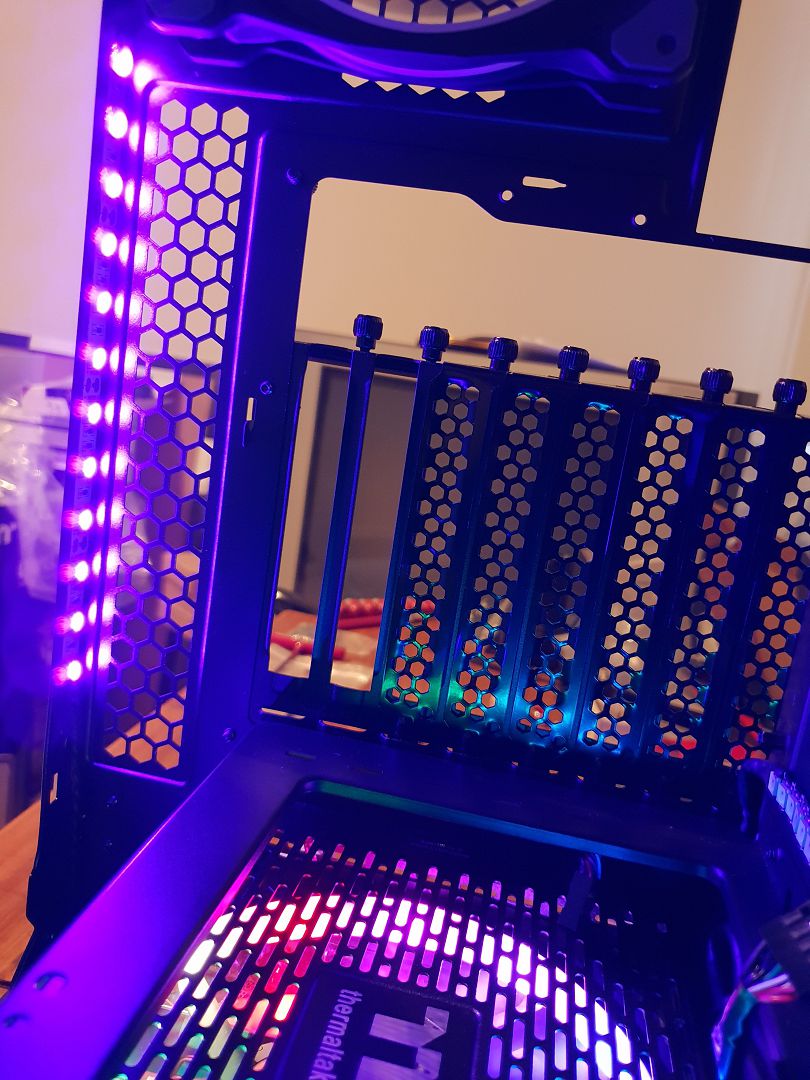
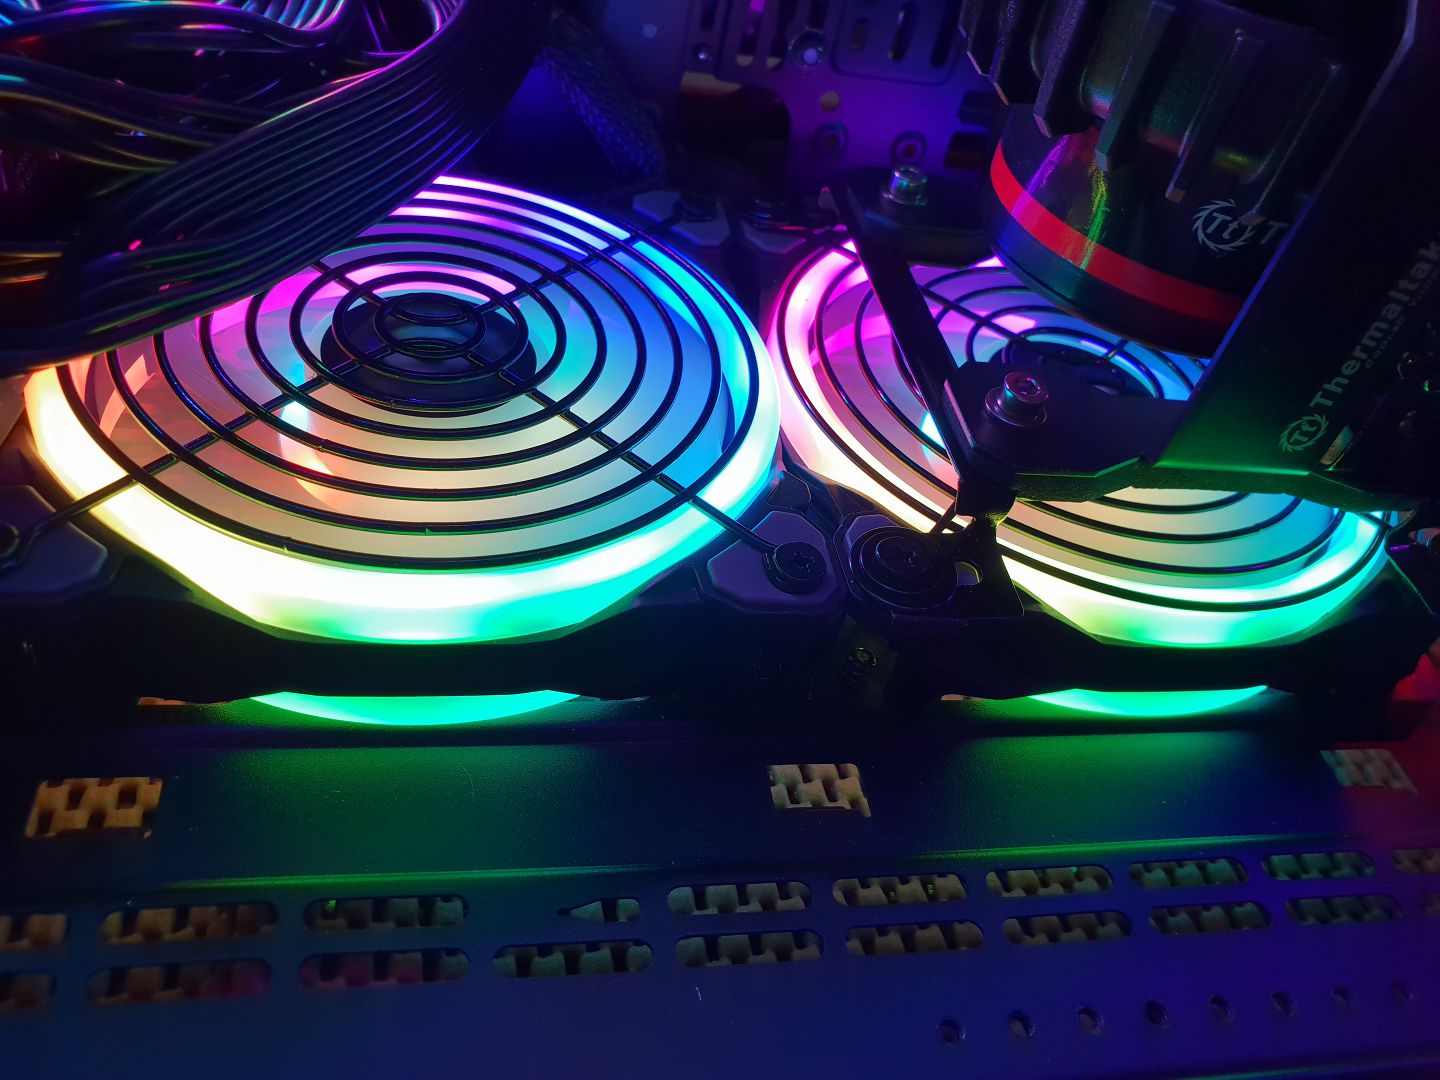
Lower Trio fans required grilles I nicked off old power supplies and sprayed black, got sick of fishing out dropped screws out of them. By the way you go through a lot of spray paint by the time you have sprayed boards, brackets, screws, washers, standoffs and even plug shells. Becomes a bit of an obsession....but it must be black!

Didn't like the TT CPU blocks, sorry TT, and got 2 blocks for the same price as an EK block.
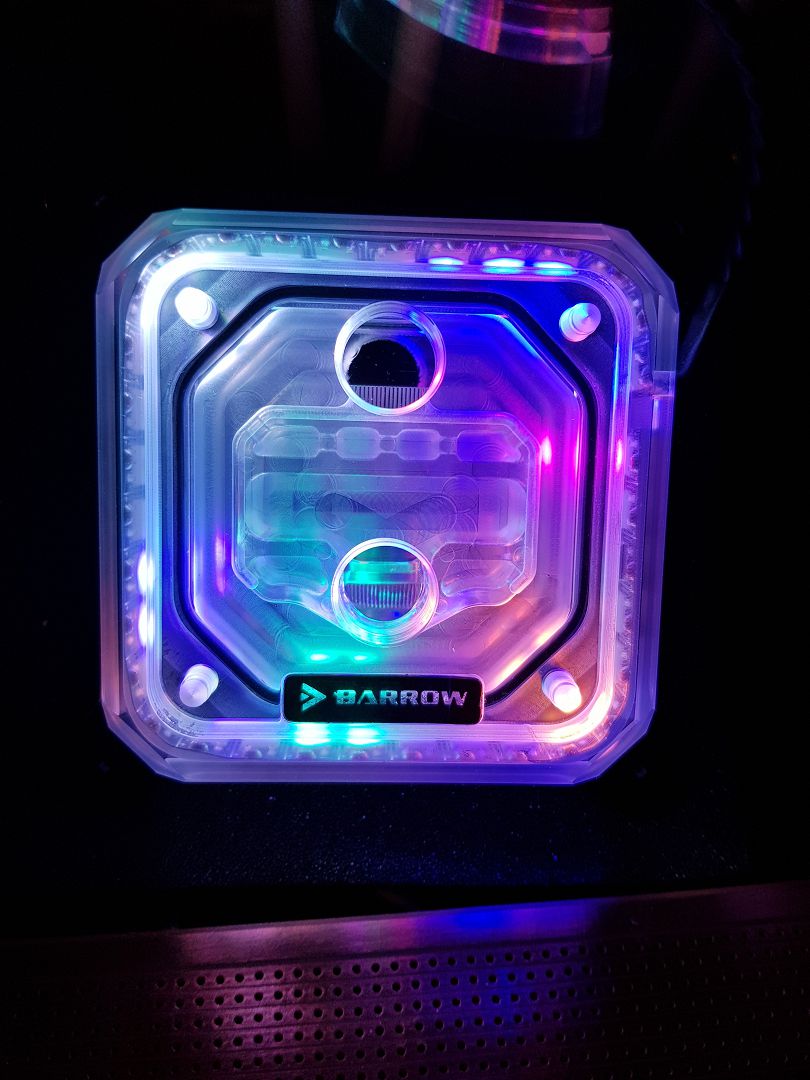
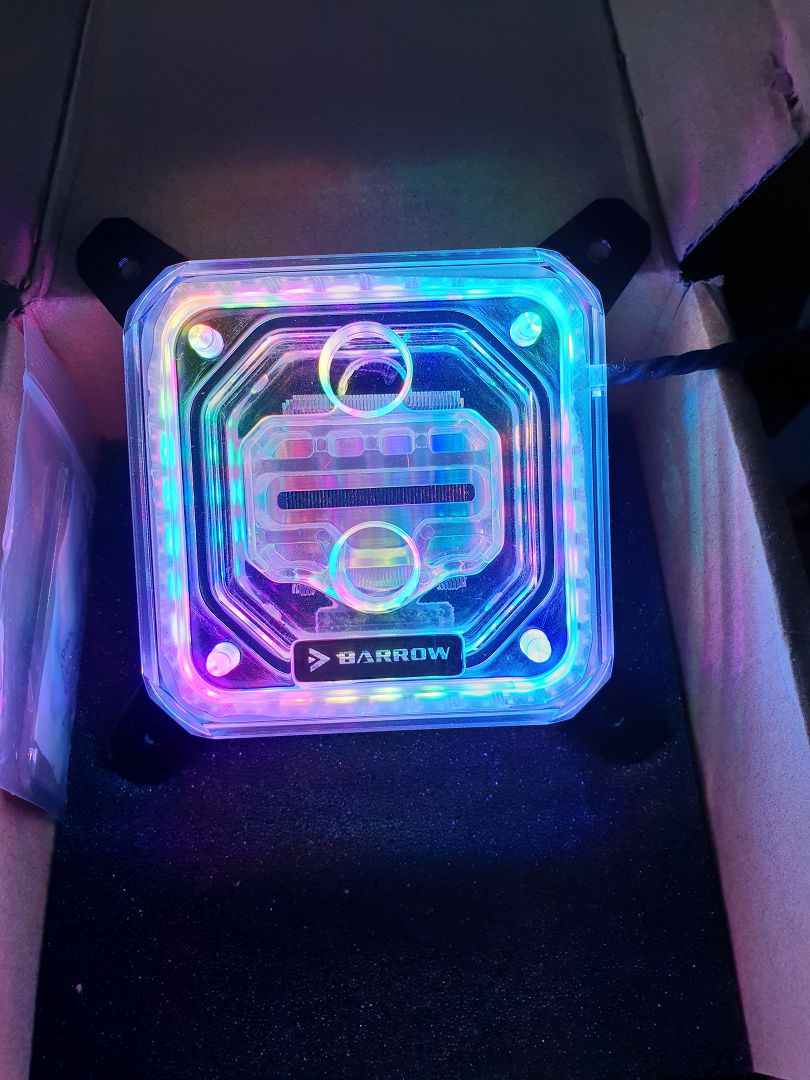
This is the Barrow block after I increased the number of LEDs but before polishing.

This is the Barrow block after polishing.

I followed this guide here and he is spot on, you can get the acrylic polish at auto or hardware stores.
This block has now been bolted to the motherboard/processor with Thermal Grizzly Conductonaut liquidmetal compound, seen used in Linus tech tips vids. Has to be the craziest compound Ive ever used, strange almost spooky liquid metal stuff. (But I will NEVER use it again)
More to come.....water cooling next........
UPDATE!! Even though the liquid metal compound works so well I will NEVER use it again. When I upgraded the CPU to a i9 9900K I found the compound had totally removed or covered the makings on the i5 8600K CPU and I had to linish the water block back to raw copper to remove it. The compound cannot be removed from the CPU at all. Really nasty stuff.
Considerations, comments and suggestions are all welcomed as I'm flying by the seat of my pants here. -
Thats a nice little board, I assume there is some flavour of uP on the other side.
Wouldnt mind one of those also.
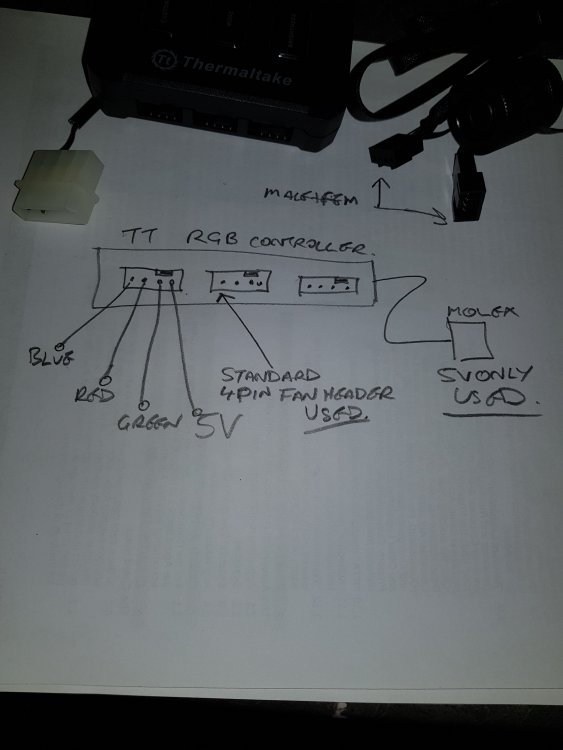
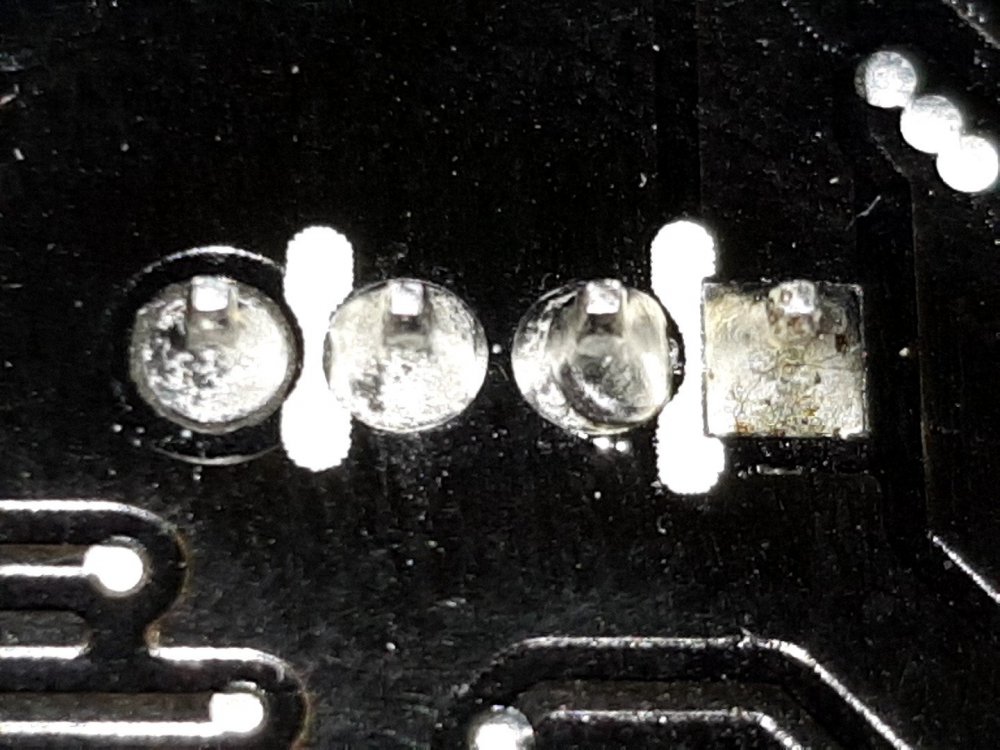
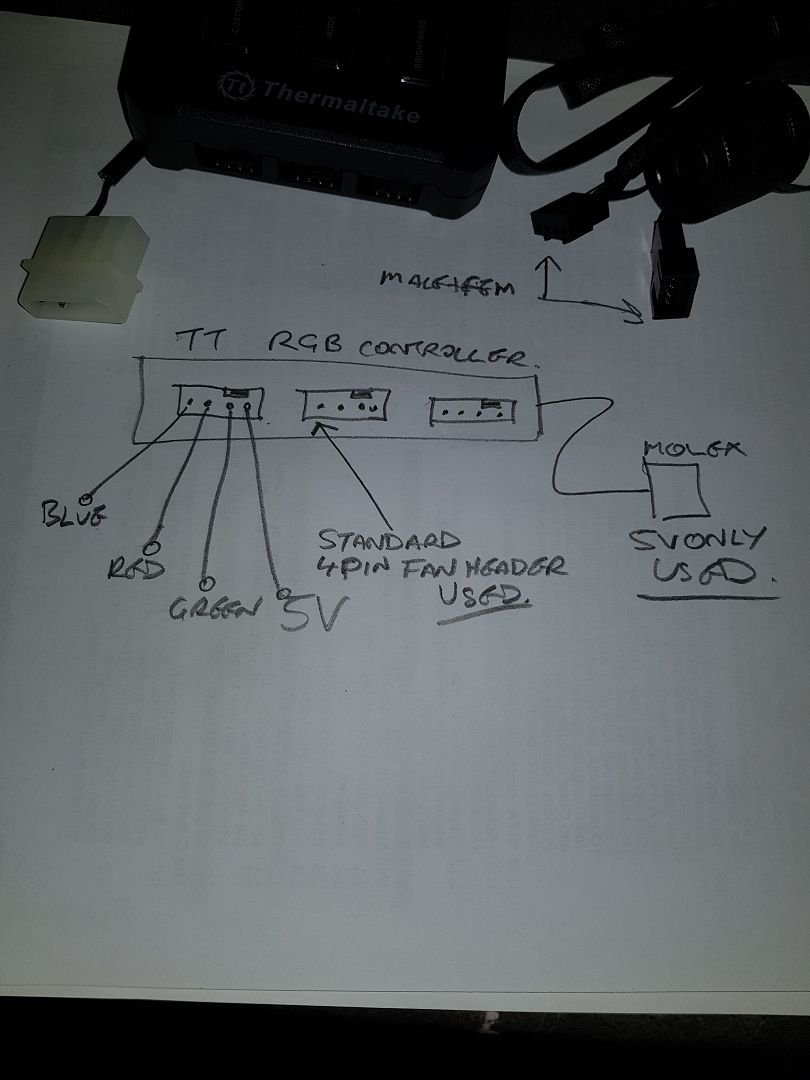
Anyway to answer your question my probing around revealed that its common 5V not 12V thats used in the RGB fittings so I wouldnt put them directly into a motherboard.
Attached sketch says it all really. Hope this helps.
Detail of RGB controller for 4 wire fittings, non addressable.
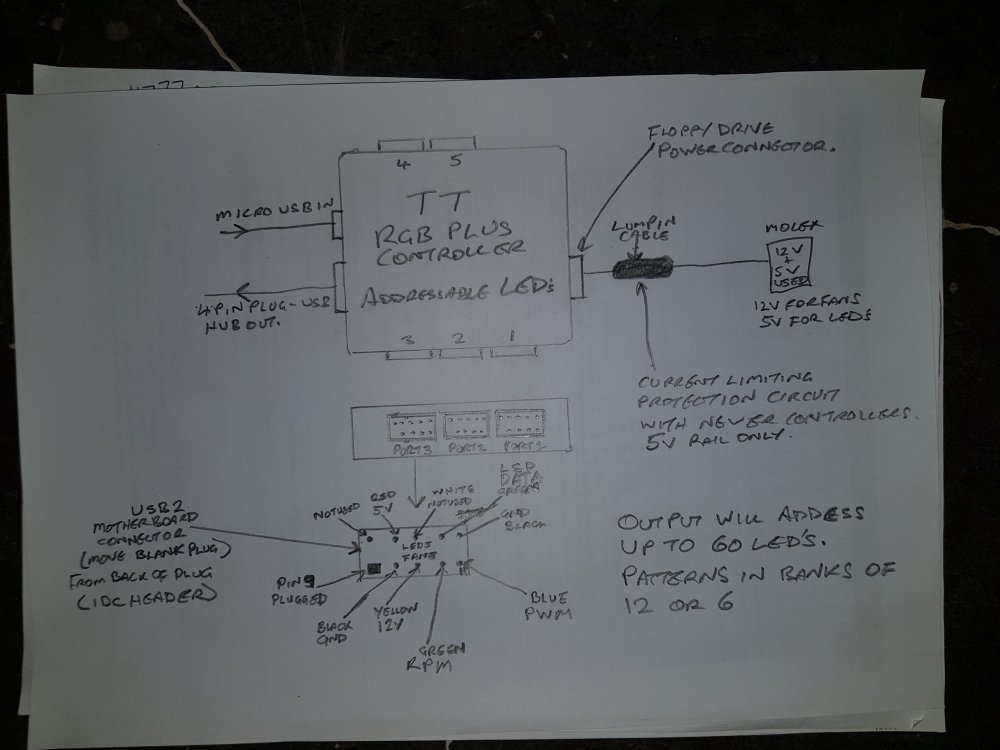
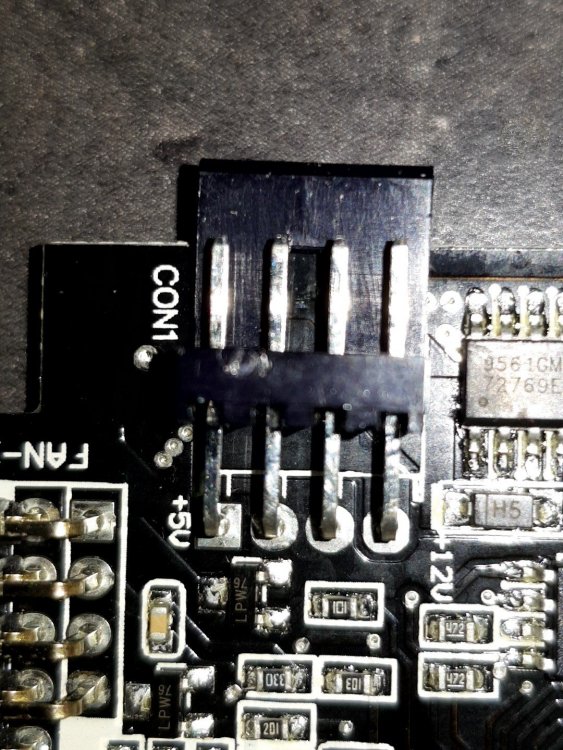
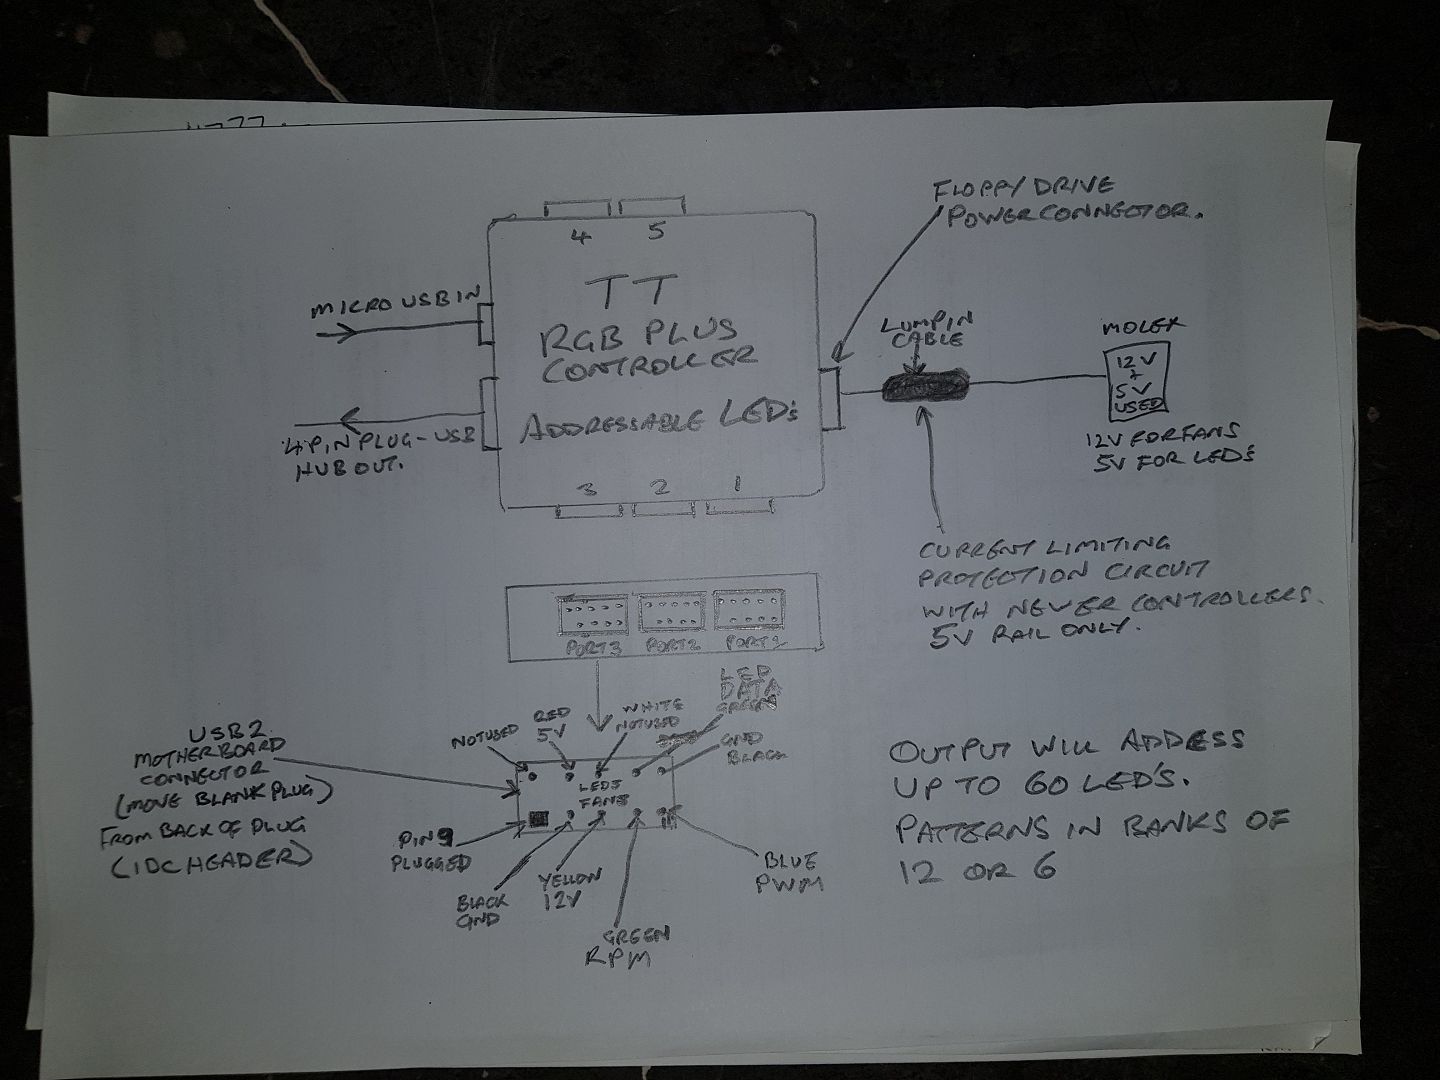
Edit: Didnt know there was Pacific RGB Fittings and Pacific RGB Plus Fittings (4 Wire RGB and 3 Wire addressable respectively) so here's info on the addressable controller for anyone interested.
Info on the addressable controller used with the fans and Pacific RGB pump res combo.
Edit: Can confirm this is also the controller supplied with the Pacific RGB Plus fittings.
Also 5V and output can address upto 60 LEDs on a strip with patterns arranged in banks of 12 or 6.
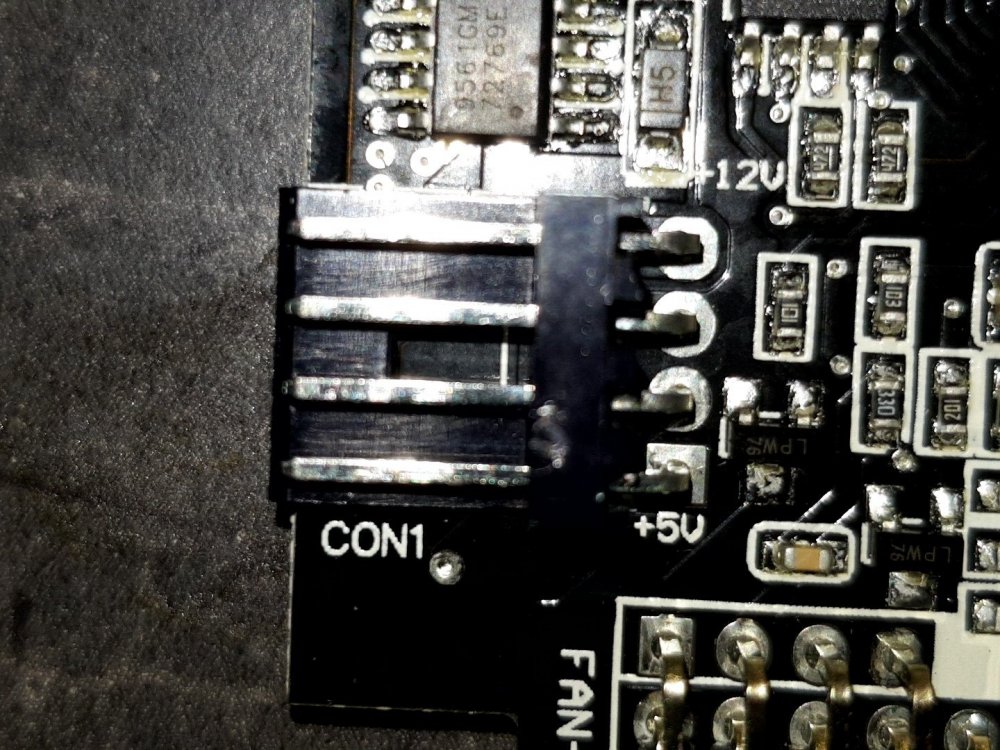
Not sure about the plugs on the fittings but they would have to have the same plugs as the riing fans to use the same controller. Maybe another adapter lead.
Edit: Confirmed 3 mini leads are supplied to go from TT controller to long leads that plugs into fittings. Interestingly one fitting cascades to the next fitting so only 3 TT controller ports are needed for all 6 fittings.
Detail of RGB Plus controller for 3 wire fittings addressable (ARGB)
-
15 hours ago, n-podhabitat6sub3 said:
Thanks for that. A bit of case modding coming up for me then. If TT made the front panel i/o swappable then users could stay current when they upgrade. Another odd thing is USB 2 on the front panel (on the XT). I'm not sure why anyone would need that on a high end case. I've also just noticed that on the Level 20 XT the dimensions are really close to supporting twin 540 or 560 rads along the top side by side. How awesome would that be? Just an inch more width and depth would give good clearance, maybe less. On a happier note those 20cm Riing plus fans in your photo look amazing. I have them also, along with a pair of 14cm riing+ rad fans for case exhaust (I couldn't find any 14cm Riing+ airflow fans in UK when I needed them). They seem to have a watery ripple effect to them when just on static (green). I love it. Apart from all the niggles, the level XT is the most beautiful case I've ever owned. I love the motherboard laying flat and the all round tempered glass. There's nothing else quite like it. I hope your build goes well.
I almost went the XT but thought the GT would give me more room. Not so sure now and running out of room quickly.
Loved the 200mm fans so much I have 2 more on top. 2 x 30mm rads both with 3 x Riing 12+ fans, another 2x Riing 12 Trio fans on the bottem for exhaust plus the Riing 14+ rear exhaust....total of 13 Riing fans.
Ignore the Wild Turkey GTX1080Ti GPU its only there for sizing.

-
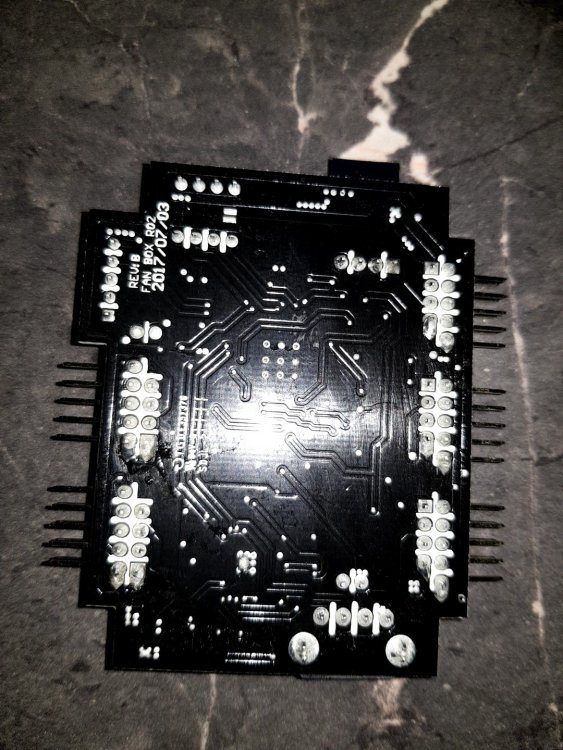
The ARGB controller supplied with the Riing plus12 3 pack I purchased is faulty.
Have to twist the power connector to get it to work at all.
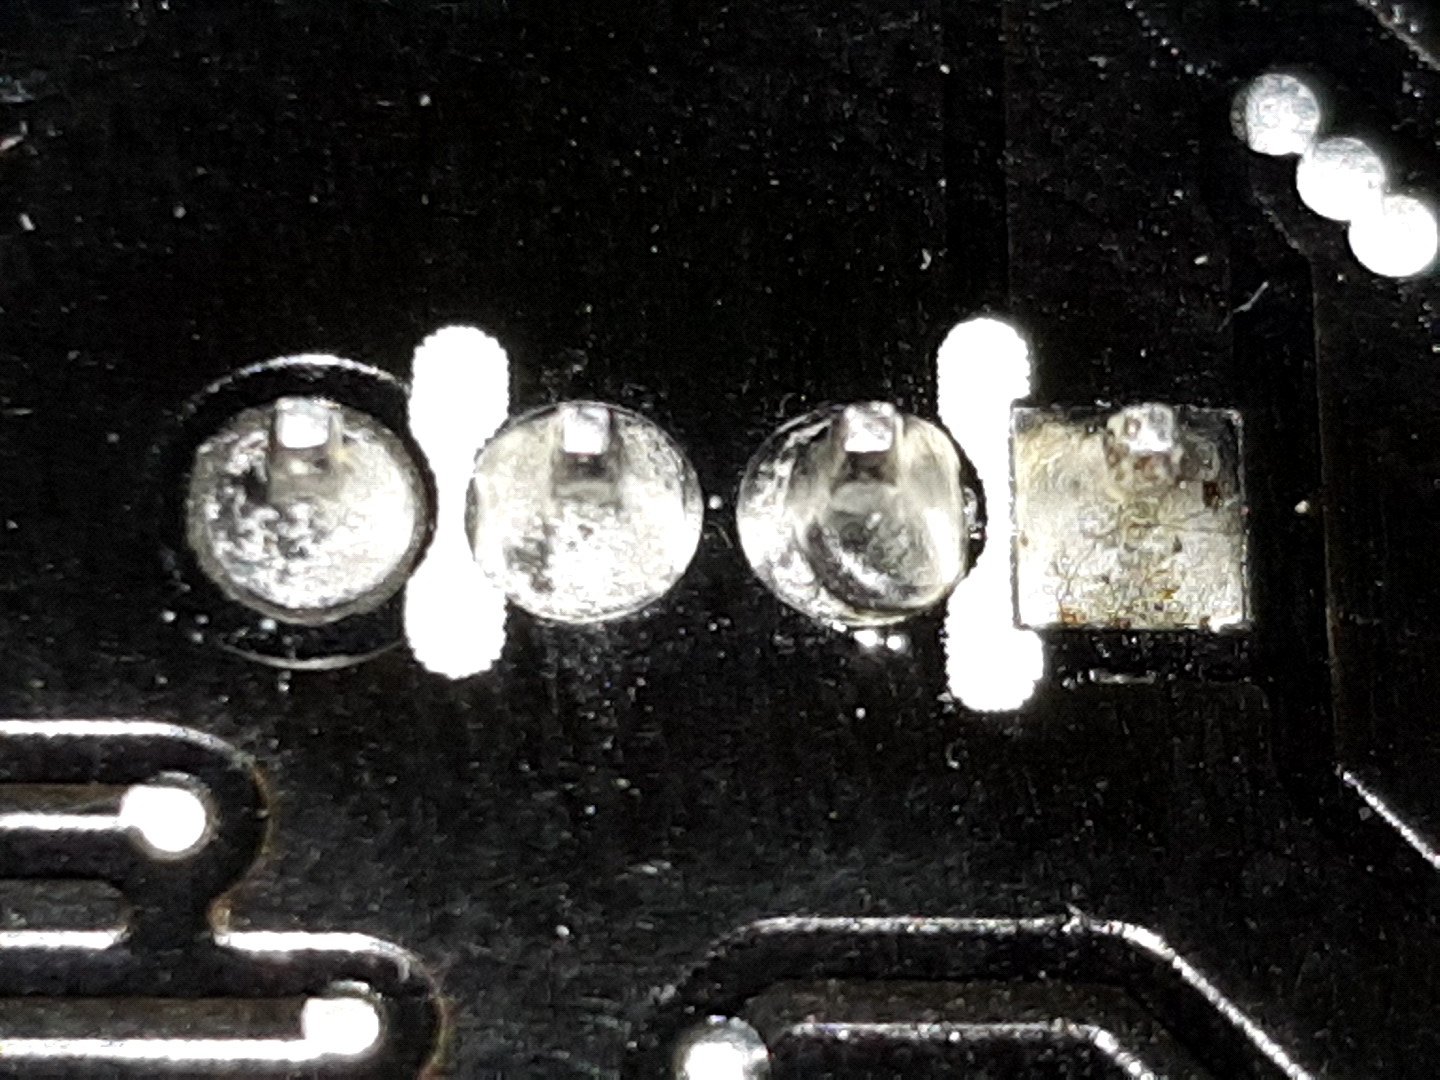
Diassembly and inspection of the power connector shows poor soldering but it turns out this wasnt the problem.
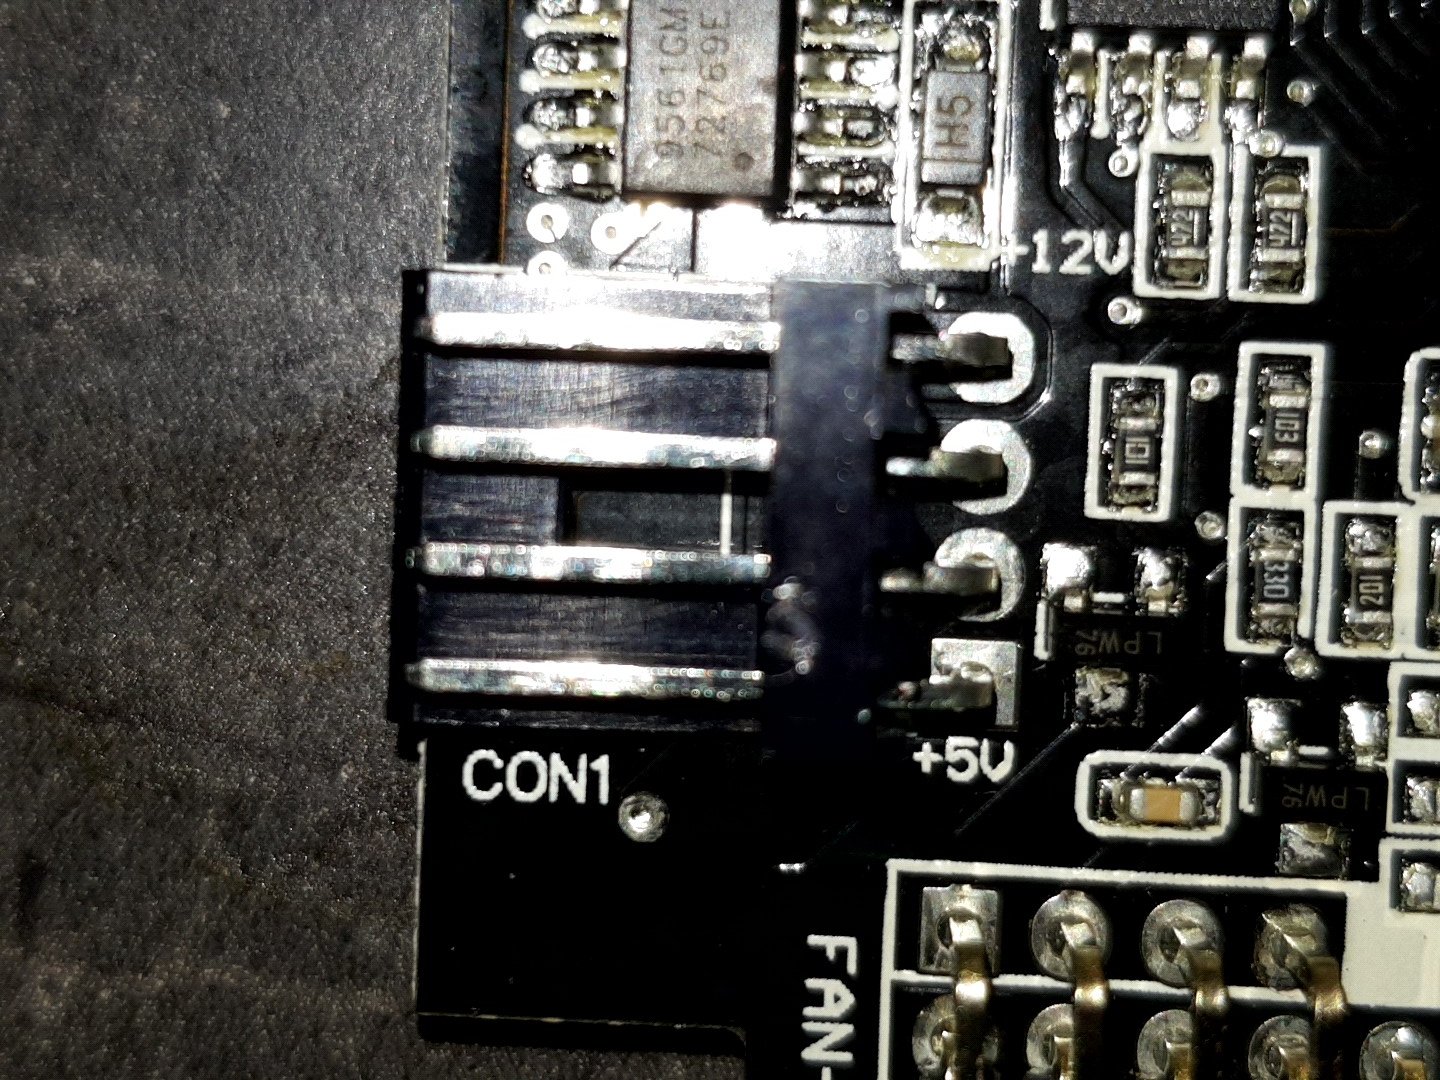
The black plastic part of the power connector slides forward when you unplug it. See pics.
Simply pushing it back down the pins with your thumbnail solves the problem. This can be done without disassembly.
This rendition of the controller has no molded port numbers on the back as prevoius models do with a board revision of B Fan Box R02 2017/07/03.
Also in case no ones noticed yet the power connector on the controller uses a standard floppy drive power connector and pinout so the included power lead does not have to be used.
Both negative pins are required by the controller. If one is broken LEDs will not scroll. If 5V drops to low LEDs will not scroll.
Hope this helps someone else.

-
On 10/12/2018 at 7:43 PM, n-podhabitat6sub3 said:
Urrgh. When I read this, I was literally in the process of taking photos of the underside of the front USB panel - trying to figure out why there appeared to be a USB 3.1 Gen 2 cable missing. I nearly sent the Level 20 XT back, but I didn't, because it's still an excellent case despite this inexplicable design choice. Apart from the obvious beauty of this case, it's hard to see how the Level 20 XT can be considered a good match for modern motherboards when the front panel Gen 2 connector is simply abandoned.
I would love to know if this is hackable with a soldering iron and some patience. I suspect it's not that simple. Maybe Thermaltake could provide an updated panel to attach. Maybe...
Adapter lead is available on ebay to resolve this problem.
I feel that TT should have included this lead with the case though for comparibility with current motherboards.
-
I opted for the Level 20 GT Plus for a new RGB WC rig as the 200mm fans look great.
Seems to be missing the magical USB 3.1 gen2 lead also, not to modern then. This I will need to modify.
Had issues choosing best TT supply to match the case and went for the iRGB 1200 as I couldnt get the 1050 pictured. Still not sure if its the best choice RGB wise. Needs a list of recommended supplies.
Grill behind front glass is to flimsy and close to the massive fans so gets sucked to the front of fans. Fan output reduces by 50% like this.
With front off one fan spindle moves forward after 15min goes out of balance and makes a horrible noise. Needs a tap to push it back in.
Power supply case and riser bracket go against the whole RGB thing with the supply series to match.
Doesnt have the feel of the premium case it is meant to be so far and I havent started the build yet.
The fans do look cool though.


Level 20 GT Plus Build - Ebony Bliss
in System Builds
Posted
Its been awhile since I updated this, a bunch of problems and a major side project has kept me busy.
Seems that even with the 25Amp DC to DC converter the peak currents with all RGB hitting white overloaded it and then the controllers had a hissy fit. As to the TT controllers I've had a good play with them and decided they need to be redesigned.
Internally the uP in the controller is powered by a 3.3 volt low voltage dropout linear regulator and this gets its power from the 5 volt rail of the PC. It's just not good enough the power on the 5v rail us not great at best on a cheap power supply and with the power used by the RGB ligting can fluctuate alot, there is just not enough headroom to play with.
An alternative 3.3 volt supply derived by a buck converter will work much better.
12volt to 5volt 50Amp DC-DC converter bit of overkill but why not, there werent many other choices and I wasnt changing it again. Sprayed black of course, the sticker hiding a paint run.
Modified the distribution board and added voltage readouts for both 12v and 5v. The 5v power cabling from the converter is 4 conductors of 65/0.3 to reduce voltage drop at high currents. The 4 pin 12v in feeds the fans 12v and enables the converter. The converter has a 6pin 12v power feed directly from the supplies PCIe power outputs.
Problem now is the DC - DC converter is starting up to slow and locking up the TT controllers.
Working on it at the moment but plan to run all the microcontrollers in the TT controllers from a central 3.3v converter from the 12v rail to guarantee no issues that's why one controller is hanging loose.
December Update
Controller power issues now resolved by adding small buck converters to each controller to provide 5V from the 12V to run the 3.3V regulators and USB hub chips. This seemed to fix the controller lock up issues and also allows me to switch off the RGB 5V supply without the controllers and software going nuts.
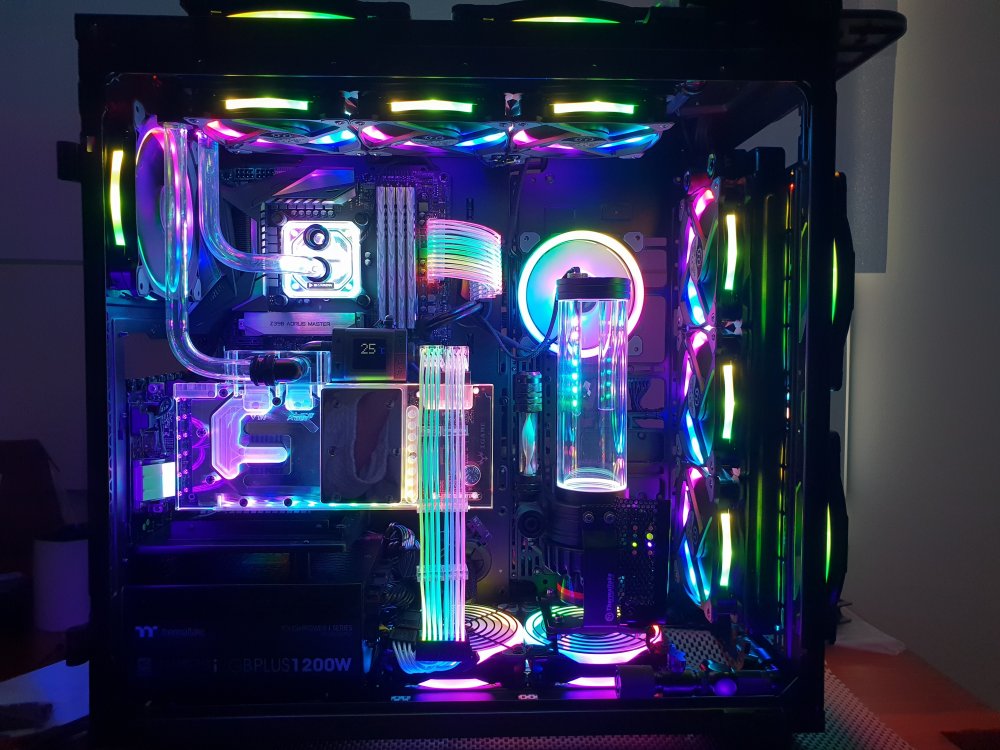
So here it is completed and operational....finally.
Swapped the Gigabyte Aorus memory for 2x 16Gb 3200 TT Toughram RGB memory module kits to match the RGB
Added Mayhems opaque white coolant to make the RGB pop even though its making a mess of the water blocks...oh well.
Short video of the beast (Noise in the background is my dishwasher not the PC, in fact it is very quiet when running )
Efficiency
HWInfo output showing the power consumption at idle with and without the RGB on, power drops by about 60 Watts without the RGB.
Under full load with benchmark software or gaming GPU/CPU temp never exceeds 45 degrees Celsius even overclocked to 2025Mhz.
The heat coming from the radiators is amazing and temps return to ambient within a few seconds, cant believe how good that liquid metal compound is.
In conclusion its taken much longer than I expected to build and cost a small fortune even though I cheaped out on some things.
Was it worth it .......yes, yes it was