-
Forum Statistics
93.2k
Total Topics114.4k
Total Posts -
Member Statistics
173,138
Total Members16,800
Most Online


Richi
-
Posts
70 -
Joined
-
Last visited
-
Days Won
6
Content Type
Profiles
Forums
Downloads
Events
Gallery
Blogs
Everything posted by Richi
-
Dave I can just imagine the mess you created filling up that cup with one hand lol
-
So my last few days were spent leak testing and just ensuring everything was running as it should be. Few things to do first was a quick power up. Love the way this is coming out, and the mobo section has surpised me as all that light in there is coming from the CPU block. I had to drop the ev down – 4 to get this picture otherwise it would be just one big glowing white thing in the center. This is how you see the block when its all bright, of course once finished I will need to take more proper pictures to show the block and the light from cpu block. The next picture should show you in a better way how much light comes off the cooler into the compartment. That’s how light it is in there, you may have noticed the backplate nvidia claw logo has change colors. This is because its made out of some nice heat reactive material. I did have heat reactive paint, but it had too much of a yellowing effect. So I rubbed it down and put the heat reactive vinyl down instead. Oops I nearly forgot to put this in, here is what one of the hyperX SSD’s looks like, you may have glimpsed it before but here is a better picture. Last but not least, added the two tributes to the back panel, the one for #keepfightingmicheal and for the sports most recent sad loss #JB17. Until next time.
-
Thanks
-
So after yesterdays work spent a little time messing about with the f1 wheel display behind the ODD panel after blacking out surrounding areas, this is what it looks like.
-
So have been quite busy with the project, so I’ll just run through the things I have done. So as we have seen the poles for window mount on the case, let us attached the windows to it shall we. One simple task out of the way onto the next one, this time it was back to finishing the loop. So on this build, I wanted no angle connectors inside the motherboard section and also want to ensure that the tubes were one piece, boy did I not realise what I had let myself in for, do you want a clue… well here are the total tubes including the bends for the build. So tubing aside its going well, although I have to say its been a bit down heartening knowing that I have to pull all the tubes out to give them a polish after mocking up. Let me show you why. By using an earlier pic before final tube was put in place. This tube end to end is one piece and runs along the back of the case inside, now look at all the bends after I remove the tubing. I can tell you straight taking these out and putting them back in was a complete nightmare and a almost like a brain puzzler time to move on from the puzzler now. Second on the agenda was the front plate for the odd, I had a piece of dark smoked acrylic lasered with Mercedes logo, but there was an issue, due to the way the ODD bay opens, if this was fixed to the ODD it would interfere with the correct operation as the edge would just hit the case when trying to open. Simple solution is to grab out the dremel and table router accessories. With the 45 degree angle router part in the table it was just a case of taping up the surface that was going to be flat down when using the router and sliding it through the end result is this. As you can see there is now a 45 degree angle on the edge that sits near to the main part of the case which will make the bay still open as intended. Faceplate on front of the ODD, not final though as I plan to blacken it out so it’s not transparent, and yes that is the F1 style rpm, gear and info device that reports cpu usage, temps ect. A couple of other things what had to be done were done, first lay down the vinyl for the build, this luckily for me is a simple one as I have a plotter to do this. List of participants that helped to create this rig and build… Now for the vinyl from nose cone from last year’s champion winning team and driver I am starting to love the way this is coming along, but before I leave you on this post, I think I should show you the amazing piece of hand engraving done, remember like all my previous builds I am lucky to have a wife that is very artistic when it comes to engraving. All done with 1000s of dots to create what you see, simply amazing, here is the picture she used for reference. You can see her art on http://www.xtreme-etching.co.uk. Sorry about late posts it has been hectic around here, but I will keep you updated on the progress as much as I can as I reach the latter stages of the build now.
-
Thanks Sir
-
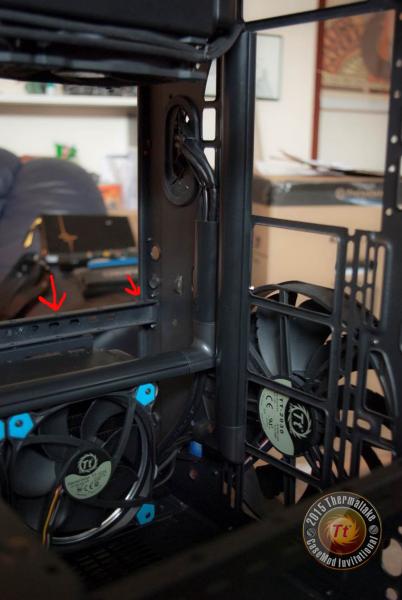
Sorry about the lack of updates guys, got quite a bit going on including a planned move of home to a bigger place (from 1 bed flat/apartment to a 2 bed house with garden), which off topic means I can only get better with my modding as I now will be able to build a little workshop… Anyway back on track and first up, I have to say thanks to MAX keyboard for the custom key set, I did want white, but system is not quite ready for that yet so they were kind enough to supply some of their transparent keys for the keyboard. I only had a few keys customised though, but love the result. Minor customisations, but I still like it, but of course I will be even more happy once the white backlit keys are ready to be made. Moving onto the main rig I decided to start doing the hardline, it has been a mad process, due to there being two pipes that are long, twisty and go from inside the mobo section, the return from GPU going out through mobo tray opening along the inside of case to the back of the pass through at the back of the radiator. Then the last tricky one will be from the back pump, all the way from the pump in the ODD bay, out through the gap in this section and along the inside and out into the tray to the memory block. Thank #### for the Primochill bender, made process a lot easier, anyway here are some pics of how the inside of the motherboard tray is looking. I may make changes to this, but its roughly what it should be, I know the 2 pipe in from mem block is not something that makes sense really, but I like how it looked so I will be keeping it. There are a few other things I need to test out with this plan, but for now I like it. Now why I am here I just thought I would quickly test rad grill/model mount to see roughly how it looks. Looking at this, despite the writing on the model being the right way up, I am not 100% sure it looks right so Ill flip it around to see what it looks like. Ermmm, see not 100% sure on placement up or down, what do you guys think?. Before I leave you today to get stuck in with some more pipe bending let me just show you how the engraving is coming along. Slowly but surely she is coming together, one thing that is on my mind is my own deadline of the 20th to finish the build to get software ect installed to be on display at i55. Let’s hope I match the deadline.
-
Tiny update, please ignore quality of the pics as I took them on phone, first up mock fitting the radiator to see how it sits. It’s only a mock up (support brackets were made from a bit of hard line tubing temp to get the right size for the job), going to replace with carbon fibre effect steel ones, you may have also noticed the pump and res mounted in ODD bay, this is done like this so I can still open the bay to fill ect ect. The mount is temp (behind pump and res) why I wait for real carbon fibre panel to turn up. Also, you may have notice the rad has 90 degree connectors, well the tubing will be coming around the side and going into the connectors behind which then passes into the case will go through inside and pop out the motherboard section. This should give you a rough idea of what I am trying to do. Before I go, I’ll leave you with a shot of how the etching on the back panel is coming along. So far so good, still some other things to add in there, but these are smaller and smaller things to do and with everything going to plan, I just need to ensure I nail it. Back soon with more on this build.
-
Another small little update for you guys, The panel I cut out for mobo section are finally ready, the lacquer has hardened so time to get a few little bits done. Ermm it looks the same, well in fact it is, it’s the closest I could match to the case, although saying that there is one slight difference in the panels. Yes its metallic silver rather than a flat powder coat , so really all that’s left to do is mount the pieces onto the case with the window risers. Now they were ready to go, also as I have the mobo tray out, I thought I would go ahead and put the Bitspower SLI bridge in place, with the CPU block. The loop is not final as I am experimenting still with it, although I have to first organise the mounting of the rad on the gold plate on the case as well as mounting the pump, res and f1 display into the ODD, remember its going to be quite a task on this as I don’t want the loop to hang out the case, but also want a way to insure I can take the mobo tray out still without draining the system. Stay tuned for more updates soon.
-
Another small little update for you guys, some goodies this time, big thanks goes out to hyper X team for supporting me with these goodies. So memory and SSD wise going into this build we have the 256gb Hyper X predator M2 SSD drive, this is standalone rather than with pcie adaptor, the good thing is the MSI X99 Xpower AC contains a M2 turbo slot, which should theoretically provide much higher speeds with this drive than the actual pcie adaptor and I cannot wait to see it in action. The memory is a Predator - 16GB Kit* (4x4GB) - DDR4 3000MHz CL15 Intel XMP and finally the 2X SSD’s are HyperX 256GB versions. Due to the motherboards layout of the M2 slot I am going to have to cover the current logo on the Predator M2 SSD otherwise it will look upside down in case, a Minor thing, but if I can see it, then it simply will not do. Both the SSD’s will be covered, too and again, maybe you will see them maybe you will not, but it still matters to me, if I know it is there it is not good enough. MMM memory and some bitspower boxes, could only mean one thing. #### 1 hour later (yep it took that long as one side of the spreader was stuck to stick almost like it was cemented there, I had to be so careful with this, heating up spreader with hair drier why feeling modules temp to make sure both did not get to hot, lift up a small piece then reheat again. Bitspower spreaders ready to be attached, so as normal had to do some cutting with the heat pads. Finally we are there, now these will be put under some memory Waterblocks so they wont be visible in build, but as it’s a dedication build to F1 and lasts years F1 champion and constructor champions, I thought I would just add something, again maybe not visible when built, but I will know its there. Now why I was attaching bitspower items, I thought I better get the GPU blocks on the 2 Nvidia 980 GTX cards. As I showed in the pictures before, I went with the Gold style block and the white backplate. This was the original design, but I did decide to change one thing for the GPU backplate that will be sitting on top. How about some Heat reactive material for the Nvidia claw ïŠ I love the way it reacts to heat now before I move any further at this point I need to check some clearances in the rig so lets get these cards and motherboard in and work out the layout. Ha ha ha that moment you realise the GPU will not be able to fit in the top slot oops, ok time for a quick rearrangement. Now that’s better, now let’s see how it hooks up in the case That’s better, gone a bit over the top with the Primochill raceways, but it’s just a test at the moment, let’s throw some connectors on there Just messing about checking connection options, waiting for the gpu multilink to turn up so I might as well move onto another piece to do before continuing on. So a big thanks goes out to the guys over at Primochill for the couple of custom plates I have received the first one is to cover the PSU mount, I’ll show the second one once I get onto it, for now though I need to do some cutting to the case, time to whip out the dremel and one of my smaller used cutting disks that’s worn to a small size. Scary moment taking a Dremel to this case, but it needs to be done as I need whole in this area to allow the rad inlet and outlet pass through the case to be routed around the back of it. This is the mock up plate in place (what the radiator will be mounted too, although raised above), just have to work out tube placement when the pass through connectors get here, this is a tight case to work with from the beginning but I am attempting to keep the tubing inside despite the two small pipes that will come out of the rad into the pass through connections. That’s all for today but will be back soon with more updates as I try to get this ready for insomnia 55 to be in exhibition area.
-
Just a small little update with some pics of the keyboard close up. As you can see from photo, what you cant see from the first ones is the keyboard is covered in flakes all over, here are a few more shots. I think it looks amazing and the issue I have is that I think I am addicted to flakes, I have to say despite the price of them, they do add something to the paintwork... ill leave you guys with another sneak peek. Now looking at the mouse a bit closer you may notice the edges are not smooth, this is because they guy that is teaching me redone the mouse after my mess up on it, but he just smacked me in the face by saying you need to learn more first and redone all artwork on palm and button section of the mouse in flakes (red HAM is done in red metalflakes only) enjoy for now
- 39 replies
-
- 1
-

-
- Thermaltake 240mm
- 2014 champion
- (and 7 more)
-
So despite temps hitting over 32 degrees here in the uk over the last few days I have given myself a deadline for the build and had to work in the heat. So It was time to do a few things, including cut the main outer panels on the level 10 mobo section Tape down, mask on and lines drawn and ready to cut. The width is due to keeping the main frame of mobo section hidden (were the bolts go) I had to repeat this process with the L section too. With the l panel I wanted to keep the lines, but remove the mounting areas for the GPU cover. Now that’s all done, it is time to spend quite a few hours with the file, before preparing for paint. I know working with the case I should of normally taken my watch off ect, but due to these pieces being painted there is not much point so even if bits of paint flake off, it does no really matter (hence the use of normal white tape instead of Green or yellow masking tape. Also had to cut a few small pieces I needed to make a cover plate for the mounting of the radiator and also a strip for the radiator. I have had to change the radiator out for another due to the fact the models dimensions were larger than quoted to original so other rad was smaller. Also here Is a sneak peak of the PSU cover I have (thanks to Primochill). So yesterday was pretty productive, first I spent over a few hours rubbing the cut panels down, phew it was hot to so had to jump in the shower twice I got that sweaty. That’s today's post, watch for some more soon.
- 39 replies
-
- 1
-
-
- Thermaltake 240mm
- 2014 champion
- (and 7 more)
-
bellow
- 39 replies
-
- 1
-
-
- Thermaltake 240mm
- 2014 champion
- (and 7 more)
-
Thanks, waiting on a bit of metal now arriving this week to start planning proper on the case, changed one slight thing and rather than rad flushed to case, going to have it mounted up a bit... stay tuned
-
every thing is possible, but limited to 4 characters per side of gear indicator... Back again with a small update, had some issues but finally this turned up for the build, from OnPole.com It took an eternity for minichamps to get it to market, but OnPole was superb in that they got it to me within 2 days of it hitting there store, let’s take a closer look at it. Overall the model is really nice and I have to say minichamps have done a fine job of replicating the race car and they should of with the time it took to get to market. For you F1 fans out there, you should check out OnPole’s website for memorabilia. I do have to say though getting the model, presented another issue, the 240mm radiator I had planned to use to mount the model above is now too small as the car over hangs it, so I still can not cut the part of the case I want due to the fact I have had to order a 280mm radiator. So I am going to have to redo the radiator again oh well. Ill post some more pictures of the car before mounting and a few bits tomorrow of what else has arrived
- 39 replies
-
- 1
-
-
- Thermaltake 240mm
- 2014 champion
- (and 7 more)
-
inspiring to say at least, been asked to do a Starwars mod for someone and I am no way doing graphics cards as I planned now you have done the same colour scheme... I actually feel quite honoured to have had the same idea as you on them.. but I wont do that now.
-

[United Kingdom] Richi Bowzer
Richi replied to Tt Andy's topic in 2015 Thermaltake CaseMOD Invitational
Just a few pics of the final window with RGB lighting. http://www.xtremecomputing.co.uk/images/mods/illusionist/illusionist-window/illusionist-window_19.jpg[/img loving this RGB controller. -
[United Kingdom] Richi Bowzer
Richi replied to Tt Andy's topic in 2015 Thermaltake CaseMOD Invitational
Now the next set of picture are not perfect, but I had to do something, just to show you how many flakes are in the paint job. They are all over the paint, 1000s and 1000s of them Ohhhh candy and flakes…. (not intentially trying to sound like homer simpson with a candy and Cadbury;s flake fetish ) any way let us take a look at it lit up inside. Oops bit bored of the white, lets change it controller to red Love the reaction between red and blue, it’s a good contrast, let me put the panel back on and take a few more photos. Back too the other side of the case SSD placement sticking up through window now let us take a look at the reservoir Yes there are quite a few, well actually one, just part of the little trick on the eyes. I Think I do need to upgrade my ageing DSLR though as I could not take video with it and Kodak HD cam is not working to do a video… but I will add a video sometime in the next 2 weeks. But to be fair please judge your voting on what you see here. This is only fair and respectful to all the people involved. I have to say I enjoyed this build and thank Thermaltake for the invite and have to say a big massive thanks to the sponsors who produced. Thank you so much all. -
[United Kingdom] Richi Bowzer
Richi replied to Tt Andy's topic in 2015 Thermaltake CaseMOD Invitational
So let me tell you a little story, I have to say I am absolutely in love with the paintwork… but I do have one big problem with my build.. Because of the use of flakes and such I found it so hard to photograph it was madness, depending on the light angle towards the build it just is completely different colours, but anyway here goes and I hope you guys enjoy it. Phew thought I would break up the photos so there is a space for you guys to read why other photos load The front featuring the illusionist figure, and yes the same applies all other the case, its just crazy how this paint job reacts to different lighting. I so love this paint job, and thanks to the guy that done the art work I went with for the paint job for teaching me to spray with candy red. Lets take a closer look around them skulls shall we. You may be noticing now how the red has gone to a deeper blood red with light to the side of the case! -
[United Kingdom] Richi Bowzer
Richi replied to Tt Andy's topic in 2015 Thermaltake CaseMOD Invitational
Thanks guys -
[United Kingdom] Richi Bowzer
Richi replied to Tt Andy's topic in 2015 Thermaltake CaseMOD Invitational
OK so a small but quick update on the assembly work on the rig, some bits have failed to turn up. But I must soldier on despite this and make a few changes to the layout inside. Main thing left to do is to sort out sata cable tiding, and clean everything up, I hope by some miracle some things turn up before final photo shoot later on .. let’s hope they do, if so sata drives can be moved to original planned location, if not oh well we all have to adapt. Stay tuned. -
Something came up that made this have to go one hold.... lol no not another mod, just waiting on the model of the f1 car.
-
[United Kingdom] Richi Bowzer
Richi replied to Tt Andy's topic in 2015 Thermaltake CaseMOD Invitational
Ok back onto the mod, a few minor things for you guys to look at, first a very very small little add on, why it may be pointless due to the fact it will be hidden with panels on, I have got a bit rectal about the smaller details in my builds, hence the cable routing I posted earlier, I could of easily just left the wires out as they would not have been seen down there, but in reality I would of known they were messy.. This feature is nothing major but something I wanted to try. So why it is only a piece of vinyl added to the rad it has a little trick up its sleeve. Yes the vinyl has a heat reactive ink that changes through quite a few colours the warmer it gets, so if you like a small rad temp sensor . Also on today’s agenda was to prep the graphics card ready to go in the build as it will be all put together soon, the only problem here was I got bored just looking at the GPU block so soothing had to be done that side tracked me lol… Just a small little detail added, that you might be just able to see once rig is complete but hey, even the devil likes small details on a build even if you can’t see them. Now let us take a little look back at the acrylic piece that separates the mobo and the rest of the build. I do not like the joined together pieces looking so different and why it is another part of the build that won’t be seen, it has to be tidied up. That’s better, it looks a lot more uniform than it did after a few minutes on the acrylic scraper. Expect a lot more updates as I get nearer and nearer to the end of this build. -
[United Kingdom] Richi Bowzer
Richi replied to Tt Andy's topic in 2015 Thermaltake CaseMOD Invitational
Ok before I post another little update, let me show you what turned up yesterday. A very nice box from Tt eSports department, going top left to right we have the Ventus X Mouse, TT ESPORTS SHOCK 3D 7.1, The POSEIDON ZX Illuminated – Brown Switch Edition, The Hyperion Headset Stand and the TT ESPORTS THERON PLUS+ mouse that is compatible with the smart Tt eSPORTS PLUS+ software that can monitor stats.. I have yet to try this headset yet, but I do have to say I love the volume and control on the ear piece, one of my pet hates with headsets is having to reach down and find the volume control when gaming yes there is a clip, but I don’t personally use those so it makes a nice change.. also one grip I personally had with the previous headsets of Tt was the comfort, but these seem to feel like a soft sponge on your head, which is a good thing. I also actually like the headset stand as well, why I saw these sort of things as a gimmick, having a packed desk has made me change my mind, simple but effective. Moving on to the mice. The name says it all with this one and the Ventus X is designed for those of you that suffer with sweaty palms. Having a vent were the main part of you palm would sit is a good idea, I remember back in 2006 a guy actually modded his mouse to put a fan in because of sweaty palms… ewww. The TT ESPORTS THERON PLUS+ mouse is designed with a bit more style in mind and as you can see has a very glossy finish (not for the sweaty palm crowd). But overall quite pleasing on the eye, with this mouse though I would have to use the weights as it feels to light for my liking. The keyboard is actually quite sold, I dropped the thing getting it out of the box and there was not a mark on it, although I do have to say I prefer a blue switch to the brown switch cherry… having said that they do have a blue version, so there is plenty of choice. I have to say a big thank you to Tt eSports division for sending over the goodies thank you.