Search the Community
Showing results for tags 'DIY'.
Found 11 results
-
 indwin7 game customer care helpline number-💯+/8274004829indwin7 game customer care helpline number-💯+/8274004829indwin7 game customer care helpline number-💯+/8274004829 ee
 -
indwin7 game customer care helpline number-💯+/8274004829indwin7 game customer care helpline number-💯+/8274004829indwin7 game customer care helpline number-💯+/8274004829 ee
-
indwin7 game customer care helpline number-💯+/8274004829indwin7 game customer care helpline number-💯+/8274004829indwin7 game customer care helpline number-💯+/8274004829 se
-
indwin7 game customer care helpline number-💯+/8274004829indwin7 game customer care helpline number-💯+/8274004829 ee
-
indwin7 game customer care helpline number-💯+/8274004829indwin7 game customer care helpline number-💯+/8274004829
-
 INDWIN7 Game Customer Care Helpline Number + 91)((+8274004829-)) callUu
 -
 55 ऐस गेम के कस्टमर केयर नंबर ये रहे: +91-6397962935/- 0.6397962935, call me55 ऐस गेम के कस्टमर केयर नंबर ये रहे: +91-6397962935/- 0.6397962935, call me shh
 -
Thermaltake Reveals 3DMakers.thermaltake.com Professional 3D Printable PC Components Website for MAKERS Taipei, Taiwanï¼February 4th, 2016ï¼Thermaltake, a green pioneer in computer chassis, thermal solutions, and power supply units, is proud to introduce the 3DMakers.thermaltake.com, the most professional website offering 3D Printable PC Component Models. This is a platform established for DIY and Modding enthusiasts to share customized PC components ideas. Thermaltake has been supporting the “Maker Movement†since 2015, and to begin the new year, Thermaltake takes it one step further by releasing the 3DMakers website. Users can download the Tt 3D Model from the website. In addition, users are allowed to upload their own 3D design and casemodding photos or videos to the platform. To deliver a perfect user experience, all the content published on the 3DMakers website fulfill Thermaltake’s 4 core values, Excellent Quality, Unique Design, Diverse Combinations, and Boundless Creativity. In the future Thermaltake will add more unique PC related 3D models to 3DMakers.thermaltake.com, and in so create a platform where modder dreams can come true. For more details on the Thermaltake 3DMakers website please visit: http://3dmakers.thermaltake.com

-
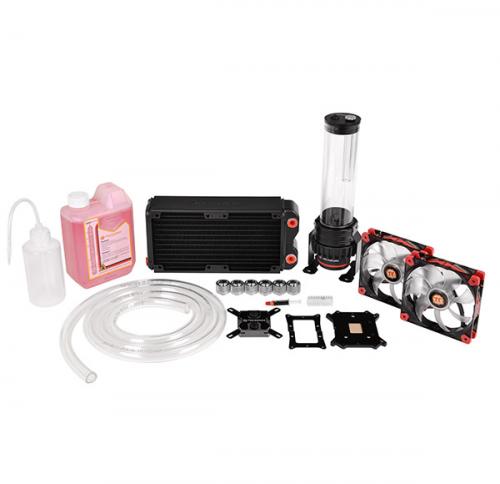
This week for #CES2015 we have announced the Pacific Series DIY LCS (Liquid Cooling System) Components. We have a TON of new stuff coming, this is just the start! Pacific RL240 DIY LCS Kit: (CES Exclusive Launch) Buy Now: http://www.newegg.com/Product/Product.aspx?Item=N82E16835106254 We will continue to update on the full line of Pacific Series DIY LCS Components as they become available! For more information on our Pacific Series Components including, CPU Block, Pump, Radiator and accessories visit our website: http://www.thermaltakeusa.com/cooler.aspx
- 13 replies
-
- 3
-

-
- DIY
- Watercooling
- (and 3 more)
-
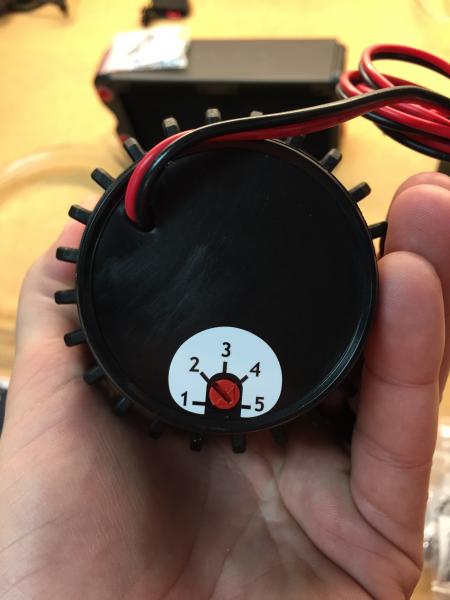
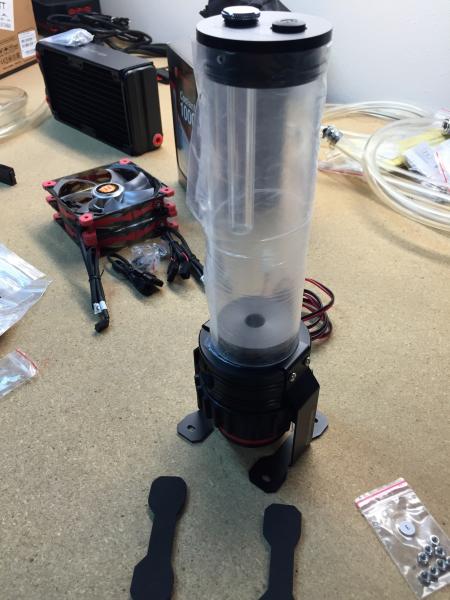
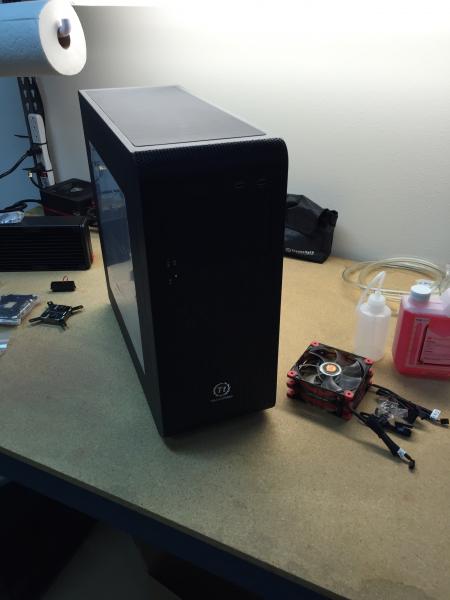
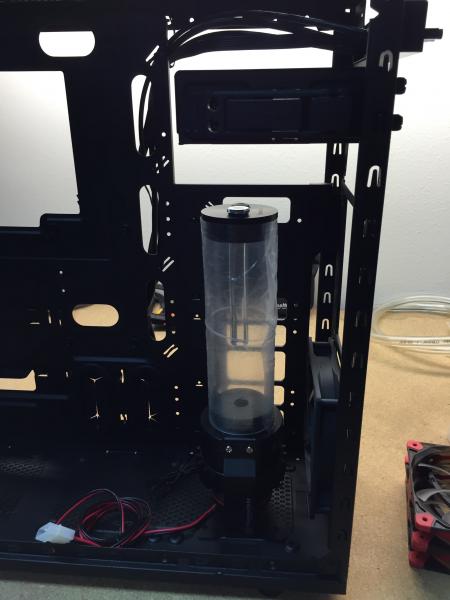
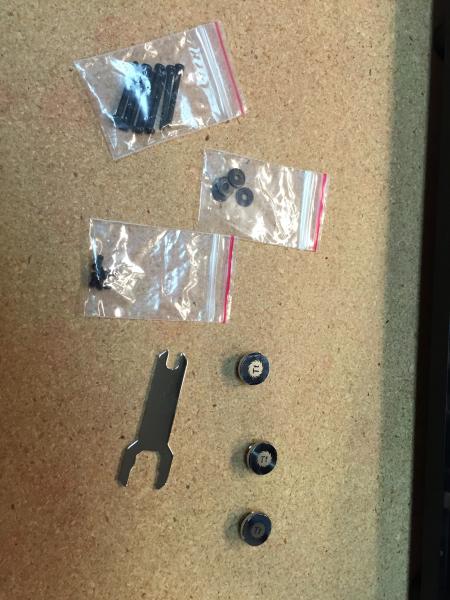
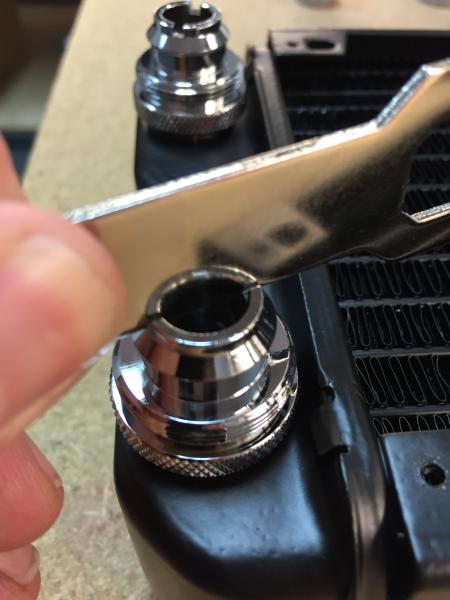
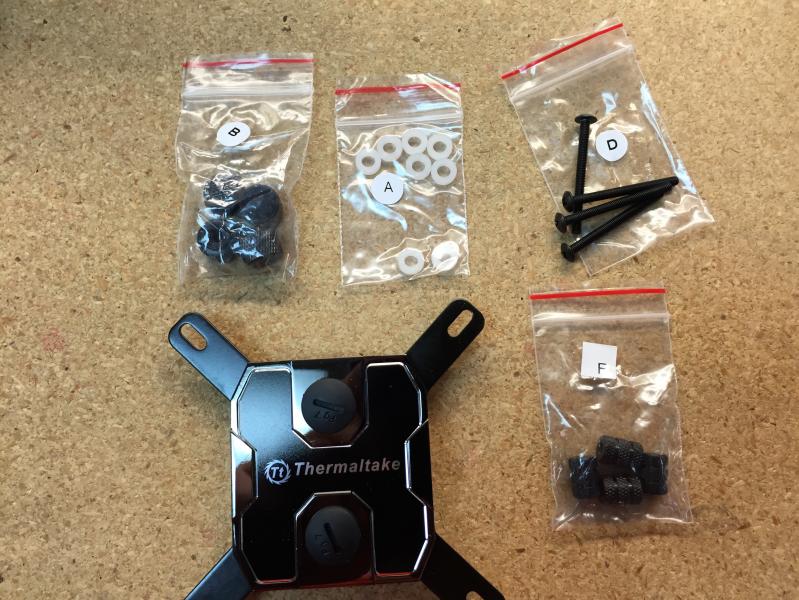
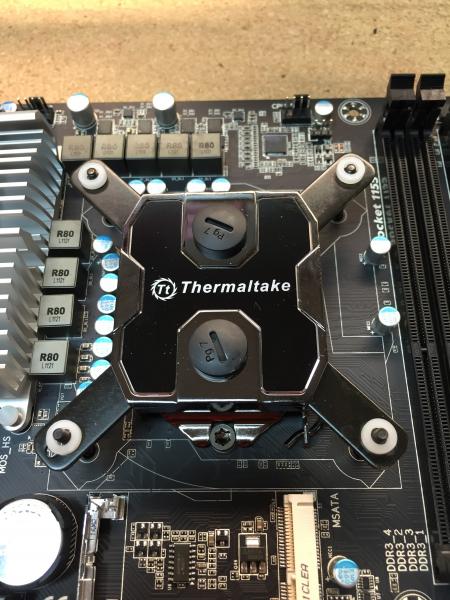
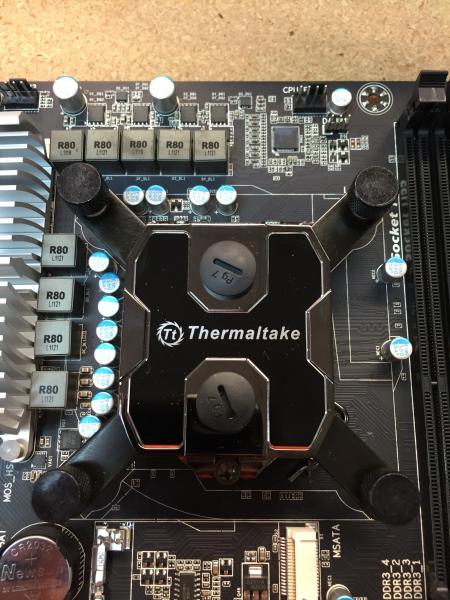
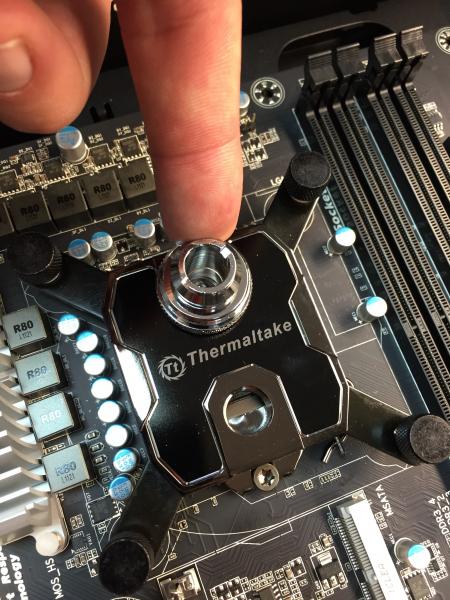
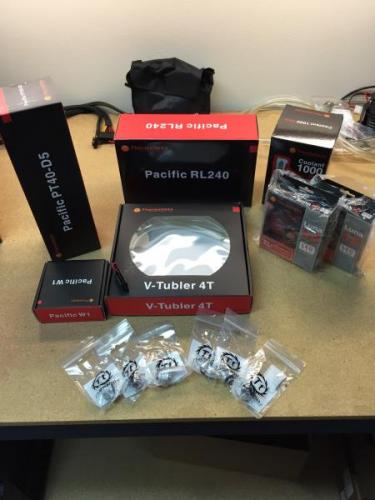
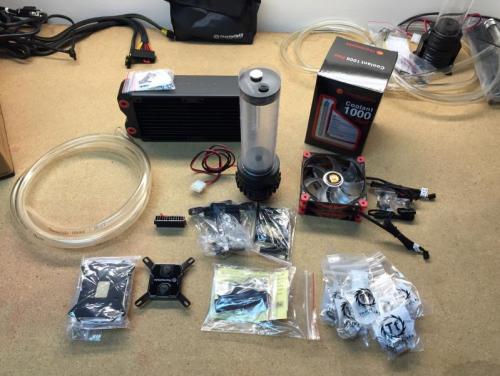
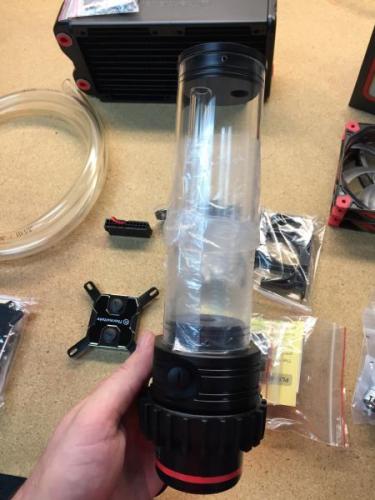
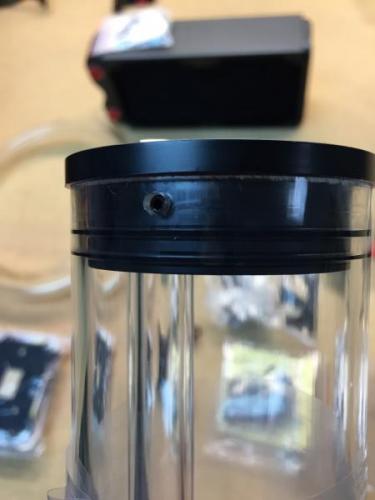
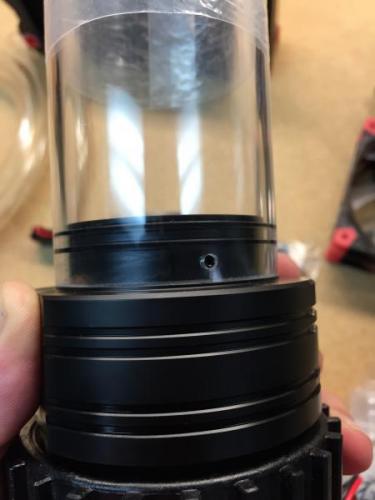
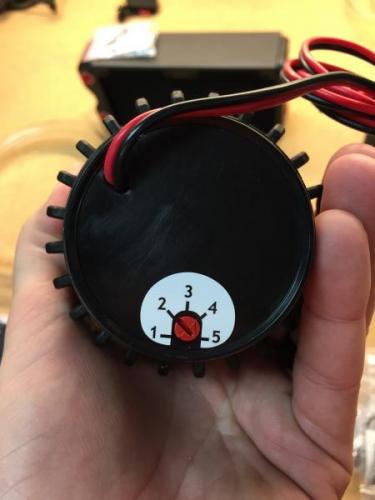
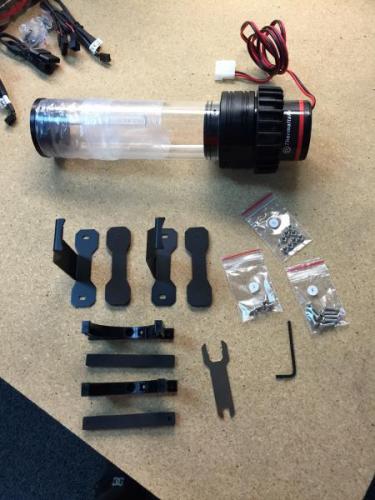
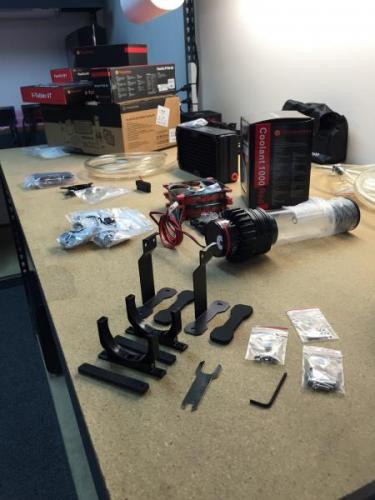
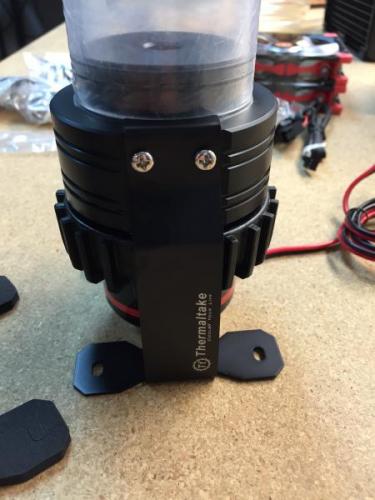
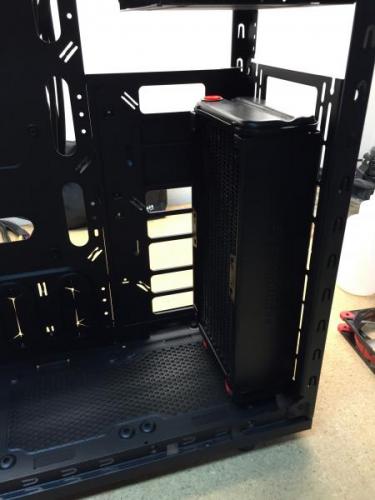
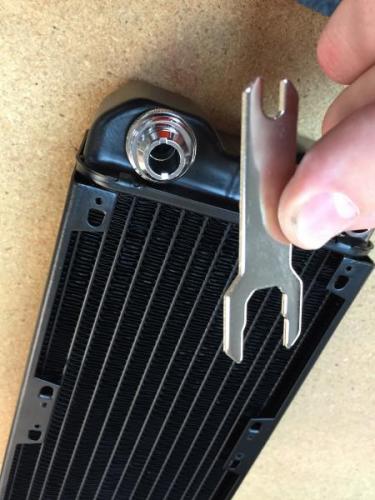
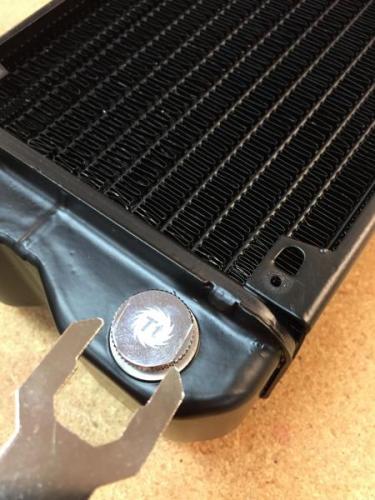
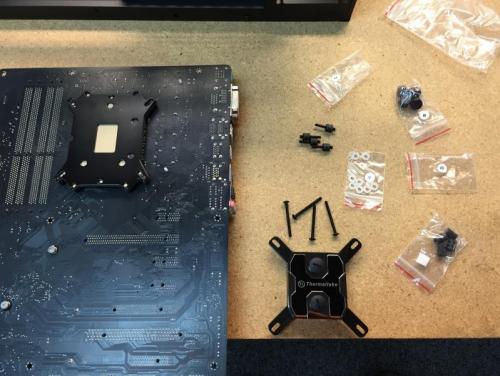
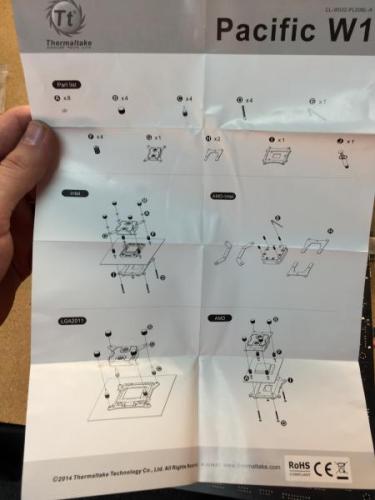
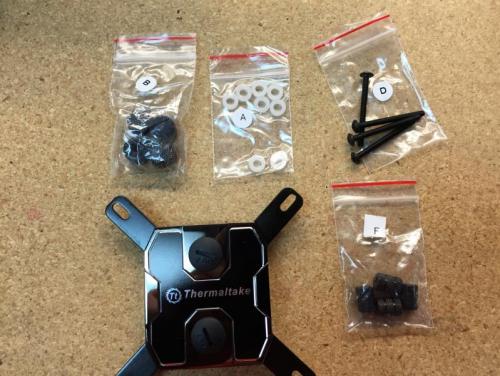
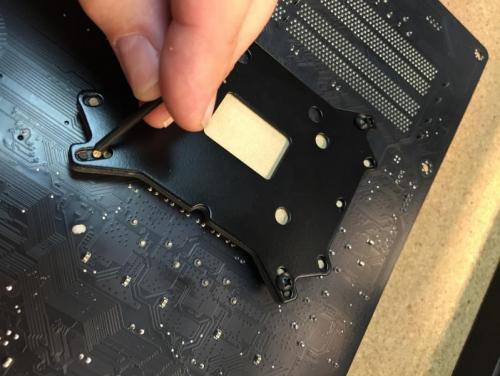
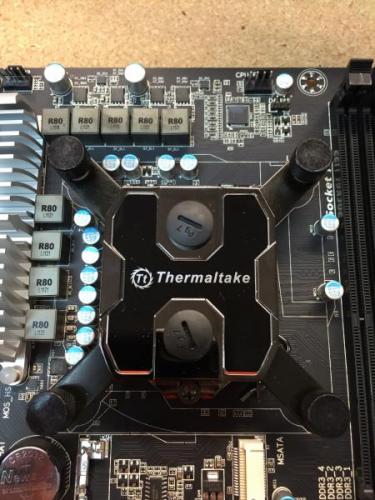
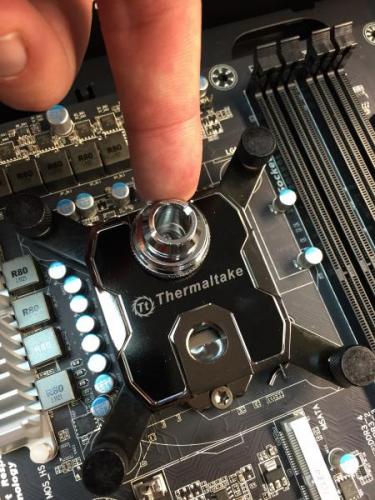
Hi everyone, With the release of our Pacific DIY components and Kits, I wanted to provide a guide focused on the RL240 kit and take you through the installation process to give users an idea of what you will get: RL240 Kit: What you get: - (1) RL240 Radiator 240x120x64mm - (1) PT40-D5 Reservoir + Pump Combo (Includes Hardware) - (1) W1 CPU Water block (Includes Hardware + Thermal Paste) - (1) 4T 1/2" Tubing (6.5ft) - (1) Coolant 1000ml (Red) + Filler Bottle - (6) 1/2" ID 3/4" OD Compression Fittings - (2) Luna 12 Red LED Fans - (1) 24-pin PSU Jumper Here is everything out of the box: Here is the PT40-D5 Reservoir + Pump: When you open the PT40-D5 packaging you will have all the accessories in bags including the mounting hardware. The brackets included allow you to mount the PT40 vertically or horizontally depending on the configuration you want to do. **VERY IMPORTANT** There are set screws on both ends of the reservoir that are to secure the Tube to both ends, these screw do not need to be tightened. Also take note, if you plan to clean your reservoir later, make sure to remove the set screws (Both sides Top/Bottom) prior to removing to avoid causing any stress to the tube when separating. Also take care of the O-rings on both sides to make sure they are in the correct place when putting back together. On the bottom you have the pump speed adjustment that should be set in the "2" position by default. I recommend leaving the speed adjustment alone until you have the system up and running to make any adjustments later. Turing the speed up is only needed when necessary, with the setting of "2" should be enough to support the default kit configuration. Here is all the included brackets and hardware for the PT40-D5 Since I am installing this in our Core V31, I plan to mount this vertically so I have installed the mounting brackets to the pump housing to secure into the chassis floor. Here is a quick look at the Core V31 that we will be installing the RL240 kit Getting ideas on how to place the PT40-D5. (Removed the HDD trays and the bottom ODD for clearance) Now for the (240mm) radiator placement and overview. First you need to remove the orange plastic plugs that came pre-installed. Give the radiator a quick look and make sure everything is ok. Here is the accessories that come included, you get mounting screws for the radiator and for the fans as well as (3) G1/4 port plugs and a wrench tool for easy installation. Before you go through installing everything on the radiator, check the location where you plan to place it and make sure it will work out with the entire system including the water loop to make sure all your fittings and tubing will have proper clearance and your tubing will have proper flow to avoid the tube from pinching around a tight space. It is also a good idea before installation of your radiator to fill the radiator with distilled water and give it a good shake to remove anything left over from the manufacturing process. Fee free to repeat this step as many times as you want until you are satisfied. You can setup the porting anyway you like, for this example I will use the (2) bottom ports on one side for my IN & Out and plug the other (2) bottom ports on the other side with the last plug for the top. Note: Do not tighten the top plug port just yet, you may need to use it for a breather port when filling The wrench is a great tool to use for tightening the ports on your components as the fittings have "slots" on the top so you can use the wrench to tighten and avoid scratching the component or fitting using a standard pair of pliers. The wrench also is designed to help secure the plug ports nicely. Remember, DO NOT over tighten, you will just damage the O-Rings if you gorilla grip the fittings into place. A snug fit is fine. Now we take a look at the W1 CPU block to prepare it for installation to the motherboard. You will get a simple installation guide showing how to install for Intel or AMD type CPU's. Take note of the accessories labeled for each Intel/AMD. Now install the back plate to your motherboard and punch out the foam holes for your CPU Socket type to install the mounting screws to. Once the back plate is installed and the mounting screws are through the motherboard, secure the CPU in place and apply thermal paste. Then seat the W1 CPU block onto your CPU first and make sure everything lines up correctly. When ready set the (4) plastic washers after placing the CPU block. Then install the (4) screw caps and tighten them in the "X" pattern to apply appropriate pressure evenly as you secure the block. These only need to be hand tight and you should be able to tell when each one is secure very easily. Now you can install the fittings on both ports, don't forget to use your wrench!


- 22 replies
-
- 2
-
-
- Watercooling
- RL240
- (and 4 more)
-
Thermaltake Pacific Series DIY LCS Now available @Newegg
ThermalMike posted a topic in Liquid Cooler
Hey Everyone! The Pacific Series DIY LCS Components are now available @Newegg! Newegg - http://goo.gl/RYG0cJ You can also search Newegg's NEW Category "DIY Cooling" to easily find Thermaltake as the Primary NEW DIY supplier! Built-to-Order your very own DIY Liquid Cooling System Today! Pacific P1 (D5) Pump - http://goo.gl/Deif3y Pacific Radiators - http://goo.gl/LnkDZz Pacific PT40 Pump + Reservoirs- http://goo.gl/uOQRvR Pacific W1 Waterblock Intel/AMD - http://goo.gl/vLfYk5 Coolant - http://goo.gl/m2dPth Tube - http://goo.gl/lh2jgS Fittings (Compression, Bard, Fill, Plugs, Extensions) Colors: Chrome or Black http://goo.gl/HhoMDQ We want your feedback and your questions! Feel free to contact anyone from Thermaltake for assistance.- 5 replies
-
- 1
-
-
- Pacific
- Thermaltake
- (and 5 more)