Search the Community
Showing results for tags 'custom'.
Found 8 results
-
Hi guys. My first post here so I thought I'd make it a good one. It's been a dream of mine to build a reservoir and integrate it into the window of a case for some time. I initially went down the path of having someone else (A very well known custom PC builder with a huge Youtube presence) do all of the design work and production for me, but after waiting nine months with no communication from them except to sometimes reply to an email giving me excuses as to why we'd blown out the initial six-week timeframe, I decided to do it myself. Here is where it all started. This was done up in paint hastily as a way to try and visualise what I was going for. Now, I have some design experience and could have done the next step myself, but as a high school teacher I rarely find the time and since we were in the middle of marking season, I decided to outsource the designing to a fantastic case modder in Italy, FlowMods. He was absolutely fantastic, and offered me a more than reasonable price. From top to bottom it measures at 570mm. Go measure that. YOU SEE THAT?! That's absolutely huge! So, now I had to source the case and acrylic block for machining. The block itself was actually quite cheap, but the shipping. Good lord. It was more than the #### block! And yet, it was still the cheapest option I had. From Sydney to Canberra it cost me $57 to ship it. The block itself was only $45. Here it is, and where it'll be sitting on the case window. My next job was to find a CNC shop with the equipment to machine acrylic this size. I eventually came across a shop called "Devilish Racing", who despite the name mostly built custom equipment for the Australian Defence Force. Naturally, Defence work took priority, so after about two and a half months I dropped by and picked up the freshly machined reservoir, threaded for M4 bolts to hold it to the window and G1/4 for the water cooling connections. He even cut the holes in the window for me, which was nice of him. So that was the easy part. Next came the polishing. This stage took about six hours in total. I needed a few things. 600 and 1200 grit sandpaper. Kerosene. Most people wet sand acrylic with water, but kerosene is more viscous than water, so I drowned my sandpaper in that instead. A drill and polishing attachments (Reasonably cheap). Brasso. WD-40. Plastx headlight polish. FW1 cleaning wax. As you can see, the reservoir was quite cloudy from the CNC process. So my first step was to hit it with my kerosene drenched 600 grit sandpaper. This took about an hour. As you can see, it looks much clearer already. Next step, 1200 grit sandpaper and even more kerosene. Another hour :'( The improvement was a bit harder to see this time, but it felt MUCH smoother. After this came the brasso and drill polishing kit. Thankfully this was nowhere near as physically taxing as the sanding and significantly faster. So it looks much clearer now. Brasso is fantastic stuff and was recommended to me by Ross at Devilish Racing (the CNC shop that produced the reservoir). The only problem was that it gunked up the threads. This was something I would have to deal with a little later on. So, this is where I used the Plastx. The reservoir was much clearer already, but still cloudy in some areas, especially those the polishing attachments couldn't reach. I neglected to take a photo of the reservoir immediately after hitting it with the Plastx, but you can see the impact it had in this photo where I'm cleaning out the threads with WD-40. So I found that even though I was doing this part by hand, I couldn't quite clear up the internal corners. I grabbed my Dremel kit and attached the small polishing tools to finish that job. Something I once again forgot to take a photo of. But here is the reservoir after, about to get another hit from some Plastx. As you can see, it's already very clean at this point. Following this, I gave it a final polish with some FW1 cleaning wax. Naturally, I only applied this to the outside. You don't want wax residue flowing through your loop. Here she is, looking crystal clean. Polishing is now complete, thank ####. So with the polishing out of the way I now had to measure and cut the O-Ring cord to fit. Please ignore my pyjamas. You can usually use superglue for this bit, but I opted for an O-Ring connecting specific glue (Sureloc SL406 Cyanoacrylate). Here it is fused together. Looks good, hey? Nearly done now. The first step of sealing it up was to bolt down a select few of the screws so that everything was lined up. This is the part where I had to be most careful. If I overtightened a single bolt, the entire thing would be ruined. I set my electric screwdriver to its lowest torque setting so that at the slightest touch of resistance it would automatically stop. I lightly tightened each bolt three times after they had been fully inserted so ensure that there would be no leaks. I cannot stress enough how careful you have to be here. As soon as you feel resistance, move on and come back around to it. After tightening every single bolt in the first pass I found that the bolts I'd first done now needed additional tightening. Here it is all fastened and ready to begin filling for the leak test. SUCCESS! Here she is! Finished at last.
-
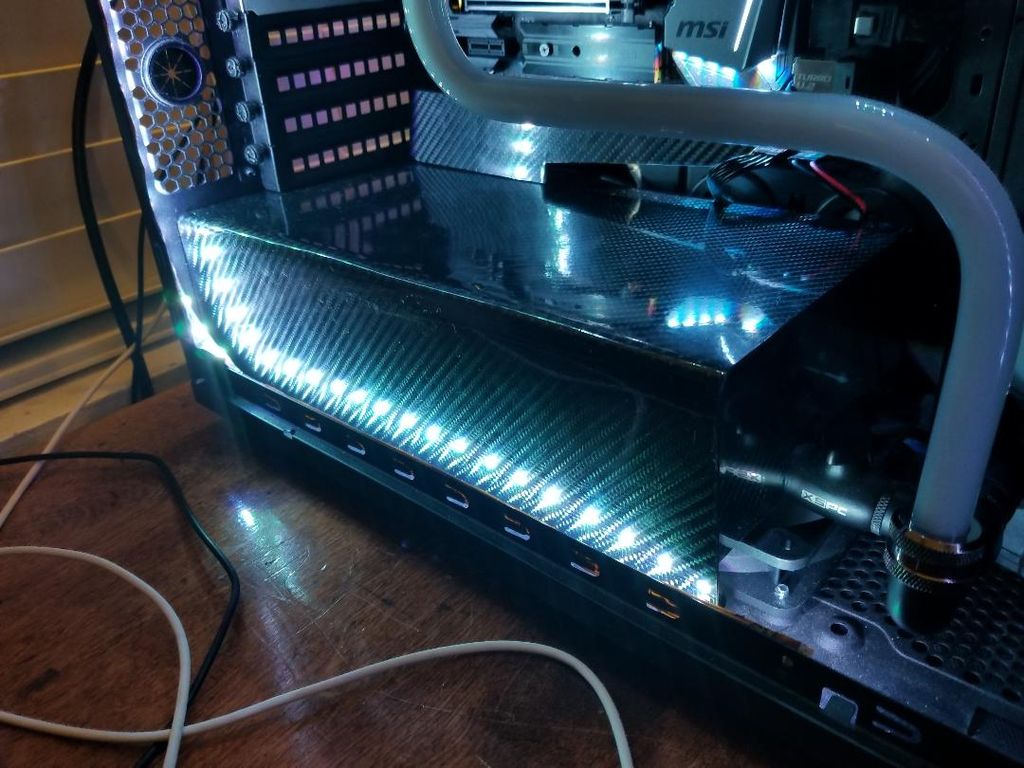
Just wanted to show off my new custom loop I just finished Building. Core V31 Case, MSI Gaming M5 Mobo, I7-7700k Overclocked to 5.3 GHZ, 8GBx2 Hyper X Savage DDR4 Ram overclocked to 3000MHZ, EVGA GTX 1080 SC2 with EKWB Waterblock, Raystorm Pro CPU waterblock, ThermalTake Pump and reservoir combo, a 280mm Radiator and a 360mm Radiator with Corsair Fans, custom RGB LED setup. Also I made that custom RGB GPU backplate with 6661 in it. A BlueRay DVDRW Drive, SSD and SSHD Drive. Random Carbon Fiber pieces. Hard Tubing and random XSPC triple seal Fittings. About to try and start my next build for the University Of Alabama's 2017 National Championship Win. Thinking of going for "The Case 900" with the MSI gaming M7 motherboard, Hard Tubing, 2 Thermaltake d5 pump reservoir combos, my gtx 1080 with a custom LED backplate of some style to represent The University Of Alabama. A black Supremacy EVO waterblock. Still Gonna use hard tubing but thinking of going with a grey and red coolant color scheme.
.thumb.jpg.5bfdeccd04ef368e5e59e14606cd21d6.jpg)
.thumb.jpg.ff382dacb812f81b5a53877b31a5f5a8.jpg)
.thumb.jpg.1e95a41a938cab3fef009ba1c0e0e8f6.jpg)
.thumb.jpg.7bd0de0a27a07a4b0792005f8246faaf.jpg)
.thumb.jpg.2c670b2d651e21ef860d87517dc741e3.jpg)

-
Starting a new project! Project Thunder is based on a beautiful black X71 by Thermaltake! As all my mods, it will have custom liquid loops and this time the color theme will be a little bit different Stay tuned! Thanks to Thermaltake Technology Inc
-
Hi! I've purchased a View 31 TG RGB a few days ago, it's an amazing case and all, but I can't get the fans to do the full RGB spectrum at once...all I can get them to do a full RGB thing like in this video The best I can get them to do, is be a solid colour that slowly fades into another. How do I get the full rgb thing?
-
My name is Dustin Porter and I am the owner of REDLINEeliteModz Facebook.com/REDLINEeliteModz Thermaltake asked me to build a twin Core P3. Specs. CPU-Intel i7 4790k Mobo-ASRock Fatal1ty Killer Z97 RAM-Corsair Vengeance Pro 32GBs GPU-EVGA 970 PSU-Tt DPS RGB 850 G Storage-2X Corsair Neutron XT's 480GBs Raid0 All Thermaltake Water cooling parts. Sposors. A HUGE thanks to Thermaltake and CableMod Enjoy!!
-
Hello, My name is Dustin Porter and I built REDLINEelite Desk I Built the desk in July of 2014 and recently Rebuilt the desk into what it is today. A lot of hard work along with Thermaltake Sponsorship, I have created something truly incredible. My shop is now ready for the desk rebuild She is in the shop. Lets get to work Time to disassemble I angled both sides. The straight front was boring I had to make bigger panels for the front And there it is. Looks pretty good. I made this a while for something, I cant remember what but im going to use it for a monitor stand
-
Hello, my name is DJ Madrid age of 21 and also known as Kryptek PC Casemodz, I am from the Philippines. And also, thanks to Thermaltake my major sponsor for this build project, thank you so much for this oppurtunity, more power! And now, let's go to the build. This project will be named "45Deg" or "45 Degree", the position of the motherboard is something new in our eyes because normally many of the mods today are rotated into 90 degree or 180 degree inverted, so I decided to make a 45 degree rotated motherboard position. I'll be using Thermaltakes water cooling parts, case, power supply and Riing fans. Here is my isometric 3D design using Google sketchup Pro. Hope you'll like it
-
Hello, my name is Dustin Porter. I have been building and modding pcs for about 7 years and I love every bit of it. Back in july of 2014, I built a desk from the ground up I call REDLINEelite. Im new to this forum and I hope you all enjoy my build. I apologize in advance, I lost some pictures so bare with me. http://www.techpowerup.com/forums/threads/redlineelite-desk-pc-mod.206797/


.jpg.29090ecc6fae9e23eef6d022befb8459.jpg)
.jpg.af96568195d0d4430c0cc59982bd029d.jpg)
.jpg.4d900bd1837767415184fa9ad00ec8d6.jpg)
.jpg.7d94863e2d7760a13a07f91e5ff19121.jpg)
.jpg.93e1355b36e6f9cfc51baaa0a56ef324.jpg)