Search the Community
Showing results for tags 'water cooling'.
-
Hi, how do I make them go fast it's to hot in here! haha Can I control the speed of the fans? how do I tell which fan I am effecting? Can I control the speed of the water pump? Yes I have the TTRGPPlus app running and it shows 5 instances of... fans? I can set two of those instances to PWM and get them to run at 100% but the other three instances onl;y give me rgb control, no speed control. full specz: i7 8700K 3.7 8TH / MSI B360-A PRO / CRUCIAL 32GB (X216s) / Samsung 970 PRO 1TB M.2 2280 NVME / VENTUS X3 3060RTX / thermaltake floe riing rgb 360 tt premium
- 2 replies
-
- help
- floe riing rgb
- (and 11 more)
-
Hello. I installed a PR22 pump some time ago and would now like to upgrade my rig and bought another PR22. The new pump however has the D5 base rotated, so the cable comes out the other way and I can see the technical specification, whereas the first pump is rotated 'correctly'. Another issue is, that the top of the new reservoir is rotated so that the RGB-Cable comes out another way and the water inlet/air ports are at other places. Is there some possibility to rotate the pump and reservoir to match the existing one, as I'm mounting them next to each other and it would look bad if they are so differently rotated. Thank you for your help.
-
Hi guys. My first post here so I thought I'd make it a good one. It's been a dream of mine to build a reservoir and integrate it into the window of a case for some time. I initially went down the path of having someone else (A very well known custom PC builder with a huge Youtube presence) do all of the design work and production for me, but after waiting nine months with no communication from them except to sometimes reply to an email giving me excuses as to why we'd blown out the initial six-week timeframe, I decided to do it myself. Here is where it all started. This was done up in paint hastily as a way to try and visualise what I was going for. Now, I have some design experience and could have done the next step myself, but as a high school teacher I rarely find the time and since we were in the middle of marking season, I decided to outsource the designing to a fantastic case modder in Italy, FlowMods. He was absolutely fantastic, and offered me a more than reasonable price. From top to bottom it measures at 570mm. Go measure that. YOU SEE THAT?! That's absolutely huge! So, now I had to source the case and acrylic block for machining. The block itself was actually quite cheap, but the shipping. Good lord. It was more than the #### block! And yet, it was still the cheapest option I had. From Sydney to Canberra it cost me $57 to ship it. The block itself was only $45. Here it is, and where it'll be sitting on the case window. My next job was to find a CNC shop with the equipment to machine acrylic this size. I eventually came across a shop called "Devilish Racing", who despite the name mostly built custom equipment for the Australian Defence Force. Naturally, Defence work took priority, so after about two and a half months I dropped by and picked up the freshly machined reservoir, threaded for M4 bolts to hold it to the window and G1/4 for the water cooling connections. He even cut the holes in the window for me, which was nice of him. So that was the easy part. Next came the polishing. This stage took about six hours in total. I needed a few things. 600 and 1200 grit sandpaper. Kerosene. Most people wet sand acrylic with water, but kerosene is more viscous than water, so I drowned my sandpaper in that instead. A drill and polishing attachments (Reasonably cheap). Brasso. WD-40. Plastx headlight polish. FW1 cleaning wax. As you can see, the reservoir was quite cloudy from the CNC process. So my first step was to hit it with my kerosene drenched 600 grit sandpaper. This took about an hour. As you can see, it looks much clearer already. Next step, 1200 grit sandpaper and even more kerosene. Another hour :'( The improvement was a bit harder to see this time, but it felt MUCH smoother. After this came the brasso and drill polishing kit. Thankfully this was nowhere near as physically taxing as the sanding and significantly faster. So it looks much clearer now. Brasso is fantastic stuff and was recommended to me by Ross at Devilish Racing (the CNC shop that produced the reservoir). The only problem was that it gunked up the threads. This was something I would have to deal with a little later on. So, this is where I used the Plastx. The reservoir was much clearer already, but still cloudy in some areas, especially those the polishing attachments couldn't reach. I neglected to take a photo of the reservoir immediately after hitting it with the Plastx, but you can see the impact it had in this photo where I'm cleaning out the threads with WD-40. So I found that even though I was doing this part by hand, I couldn't quite clear up the internal corners. I grabbed my Dremel kit and attached the small polishing tools to finish that job. Something I once again forgot to take a photo of. But here is the reservoir after, about to get another hit from some Plastx. As you can see, it's already very clean at this point. Following this, I gave it a final polish with some FW1 cleaning wax. Naturally, I only applied this to the outside. You don't want wax residue flowing through your loop. Here she is, looking crystal clean. Polishing is now complete, thank ####. So with the polishing out of the way I now had to measure and cut the O-Ring cord to fit. Please ignore my pyjamas. You can usually use superglue for this bit, but I opted for an O-Ring connecting specific glue (Sureloc SL406 Cyanoacrylate). Here it is fused together. Looks good, hey? Nearly done now. The first step of sealing it up was to bolt down a select few of the screws so that everything was lined up. This is the part where I had to be most careful. If I overtightened a single bolt, the entire thing would be ruined. I set my electric screwdriver to its lowest torque setting so that at the slightest touch of resistance it would automatically stop. I lightly tightened each bolt three times after they had been fully inserted so ensure that there would be no leaks. I cannot stress enough how careful you have to be here. As soon as you feel resistance, move on and come back around to it. After tightening every single bolt in the first pass I found that the bolts I'd first done now needed additional tightening. Here it is all fastened and ready to begin filling for the leak test. SUCCESS! Here she is! Finished at last.
-
Hello all, hope everyone having the time of there lives, i'm an owner of a Thermaltake Versa N21 and I read all the instructions, but could this be due to using a smaller ATX? I have a none Tt AIO cooler mounted on top as tubes but the fans face the bottom, but the fans touch my ATX connector and bend it a ton, I have spoken with a representative and mentioned and addressing the issue. tried everything even taking the top panel of, and use Tt Blue Riing 120mm / 25mm on top of the radiator and just set the top panel on the side to prevent and fan blades breaking. and it was awesome because i ran both the fans on top, and the 15mm sized fit perfectly mounted fans bottom. its a forgot to mention these 15mm thin 120mm fans are the Luna 120mm 15mm fans, and i have a AMD FX 8370 4.0GHz 8 core and these smaller fans, doesn't cool enough, I really hope i can grab them. because i need strong idle temps we're going from 88F - 124F and 112F its like an elevator ride, Any of you guys own the Versa n21 Chassis? successfully? I wont ito make my new build happy. I am not sure if just a 120 20mm could change if the smaller fans don't cool. it's mind-boggling. If there isn't anything for 120mm / 15mm (slim) hopefully i can get this corrected.And was bored the other day, and got my PWM splitter and stacked like 6 fans and the one of the bottoms inside the case. had temps like 42F (cold weather could probably cause it) and with all those fans stacked safely and was getting ridiculous frame rates and so on, even had the 4.3Ghz boost enabled, tried out Killing Floor 2 and other games with massive and ended up staying around 72F and hardly seen it heat up much! but I really wish I could get a 120mm /15 radiator fan with powerful Static Pressure. If not I could use one up, btw I am using stock Corsair Vengence DDR3 32GB (1333MHz) memory, and video card which is kind decent in this era, it is also not overclocked. I am on by the previous build so I don't stress out the components and damage long term. Crippling . hopefully, everyone gets to enjoy there up and coming Christmas & New Year. Sorry for the long thread, just frustrated about my fans cooling the radiator. in 240mm configuration. Hopefully, we can all solve these issues. Thanks in Advance!
- 1 reply
-
- water cooling
- water loop
-
(and 1 more)
Tagged with:
-
Hello, I´m the new guy here. Actually I had a account here before, many years ago but I cannot remember the name and maybe it has been deleted due to inactivity. Some of you may have seen me in other forums too Since I´m nearly done with my old Project, I guess the time has come to start another one. I have chosen a Jonsbo W2 Black Window PC case as a base. I like this case because it´s quite small, elegant and doesn´t look exaggerated. I´ve received this large package just in time before Christmas. I want to thank PC-Cooling GmbH for the kind support and for the trust. I guess that I´ll enjoy this Project a lot. Though this case is quite small, it is possible to build a nice Water Cooling inside. Concept: This Project should achieve a nice, industrial look and also contain a high quality, custom Water Cooling. I will adjust the Aluminum front in order to achieve a better air flow. These pictures are just a quick idea and the final result might differ. The second panel will also receive a window in order to have a look at all the components inside. I will remove the "front panel" and build it in the case front instead. I guess this is the best position for a "front panel". Philosophy: Every modification is performed through hard work, by hand, without the use of automated processes like eg. Laser, CNC etc. I try to work as precise as possible and also to document my progress with great care and details. Whenever it´s possible, I will also develop and build all electrical circuits by myself. I won´t use prebuild stuff like eg. LED stripes if I´m able to achieve the same results by using my ingenuity. I would only use this kind of stuff if there isn´t any alternative possible to implement my idea. Expect everything you could from a guy who has the drive to hold on to his visions. Social Media: Don´t miss any Updates about my Projects. Subscribe to my Facebook Page: GorgTech Engineering PC Hardware Parts: CPU: Intel Core I7 7700K Mainboard: Asrock Z270 Taichi RAM: 16GB GOODRAM IRDM DDR4 RAM HDD: 240GB GOODRAM Iridium Pro SSD GPU: AORUS Radeon™ RX580 8G PSU: Cooler Master V550 Sound: Creative Labs Sound Blaster ZxR Water Cooling Parts: Alphacool Eisblock XPX CPU - Intel/AMD - polished clear version Phobya CPU Mainboard Backplate 775/1366/1155/1156/2011 Alphacool Eisfluegel flow indicator G1/4 square - acetal Alphacool NexXxoS ST30 Full Copper 240mm Radiator Alphacool NexXxoS ST30 Full Copper 280mm Radiator Alphacool NexXxoS ST30 Full Copper 120mm Radiator Alphacool Eiszapfen 2-way ball valve G1/4 - Chrome Alphacool Eiszapfen double nippel rotatable G1/4 outer thread to G1/4 outer thread - chrome Alphacool connection terminal TEE T-piece round, G1/4 - chrome Alphacool double nipple G1/4 outer thread to G1/4'' outer thread with O-ring - Chrome Alphacool Eiszapfen 13/10mm compression fitting 90° rotatable G1/4 - chrome Alphacool Eiszapfen 13/10mm compression fitting G1/4 - chrome sixpack Alphacool Eisbecher D5 150mm Acetal reservoir Alphacool Eispumpe VPP755 - Single Edition (Rev.2) Masterkleer tubing PVC 13/10mm (3/8"ID) Ultra clear 3,3m (10ft) "Retail Package" (BPA free) Rubber grommet for 13mm Aquatuning AT-Protect-UV Crystal Blue 1000ml Alphacool Eiszapfen L-connector G1/4 inner thread to G1/4 inner thread - Chrome Alphacool Eiszapfen screw plug G1/4 - deep black Alphacool HF L-connector G1/4 outer thread rotatable to G1/4 inner thread - Chrome Alphacool NexXxoS GPX - ATI RX 580 M01 - incl. backplate - Black Alphacool D-RAM module (for Alphacool D-RAM cooler) - Black Alphacool D-RAM Cooler X4 Universal - Plexi Black Nickel Alphacool HF 14 Smart Motion Cooling Plate - Nickel Sponsors: PC-Cooling GmbH supports this Project with a high quality PC Case. Aquatuning GmbH supports this Project with a high quality, custom Water Cooling and some extra items. Noctua supports this Project with Highend Fans. Cooler Master supports this Project with a enthusiast Power Supply. Creative Labs supports this Project with a high end Sound Card. Asrock supports this Project with a elite Mainboard. GOODRAM supports this Project with plenty of RAM and a fast SSD. notebooksbilliger.de supports this Project with a Flagship S.1151 CPU. Aorus supports this Project with a fast GPU.
- 40 replies
-
- jonsbo w2
- aquatuning
-
(and 2 more)
Tagged with:
-
Okay I need to keep the front Optical bays so top mounting is out. I want to mount a single 480 on the left side of the bottom I want to use the AlphaCool NexXxoS Monsta which is 86MM thick with push pull SP 120 Fans which are 25Mm thick can anyone tell me if there is enough room for that? with the fans or do I need to switch to just push or get a thinner radiator? It looks like I could get a 120x2 on the front panel and still keep the Optical bays can anyone confirm that?
-
Hi guys! I am Filippo and I am a 20 years old italian modder! Last year I finished a mod with Cooler Master Italy, called Project Alpha, which had a lot of success! Then I had the luck to be invited to participate in a big project for Nanoxia, which invited me to Germany to build a desk pc for their booth at Computex in June 2015! I am going to introduce this new mod sponsored by ThermalTake that I thank you immensely for the support! The Mod, in white & black theme, is based on a Core X9 Snow Edition to which I decided to remove the original front and midplate and to replace them with two pieces of acrylic completely designed by me and made with laser cutting and CNC milling machine! The project includes two liquid cooling loop which will respectively cool the CPU and 2 GTX 970 strix! Each loop has a D5 pump and a 480mm radiator connected by rigid pipes while under the midplate I assembled systems with flexible tubes to facilitate the assembly operations. The threads for fittings mounted on midplate were hand made, and the work was not so easy. The hard part was being able to have a tip that does not split open the plexiglass out of the hole, I solved that problem by bringing the drill bit to changr the cut angle to the company I'm referring to the works in acrylic! All cables are sleeved by me, it wasn't easy since it's the first time i made a full sleeved cable set, but sleeves from Icemodz are amazing, and the will be cool But let me say the components of this mod, which I list below: HW: Asus Maximus VII Ranger i5 4670k 2x Asus GTX 970 Strix Thermaltake Thoughpower Grand Platinum 1200w HDD: 1TB Barracuda Ram: 4x4 DDR3 1600 Avexir Core Red Led SSD: 1x Samsung 850 EVO 256GB Loops: 2x pumps D5 Thermaltake (Pacific P1 black) 2x trays cylindrical Thermaltake (Pacific T22) 2x 480mm radiators Thermaltake (Pacific RL480) WB 2x GPU Asus Strix 970 Thermaltake 1x WB CPU Thermaltake Pacific W1 8x Fans Thermaltake Riing White LED Several fittings Thermaltake Chrome Tubes 16/12 PETG ThermalTake DP Ultra liquid Aquacomputer Aquaero 5 LT Power Adjust 3 Ultra by Aquacomputer 2 Temperature sensor to monitor the loops temperatures. I take this opportunity to thank ThermalTake and especially Andy, who supplied me with such a large number of components to build this mod to re-enter in the world of modding after a stop of some months. I also thank Mundi from Icemodz.com who provided me all the material needed to create my sleeved cables! I leave you to the photos of the progress! Filippo Thanks: Photos:
- 11 replies
-
I am new to this forum but far from new to PC building and Mods. I don't say this to give away my age, though I know it will...I remember when moding consisted of pulling apart the old beige cream colored cases, which powered those lovely green CRT monitors, maybe adding a fan or spray painting bits and pieces. Today, that old way of doing things is out the window. No longer is a bit of spray paint or a case fan (or dare I say...an upgrade to a 56k modem.) Gone are those simplicities and though I miss them some days, I absolutely love the attention to detail that goes into new builds. Coming out of the garage of todays builders, are the Ferrari of computers. Beasts that conquer the bench tests and frag any off the self pc no matter what brand is printed on the box. It is these type of builds that have kept me intrigued over all these years. I can not count the number of PC's under my belt anymore but I do recall the feelings I had the very first time I tore a system down and by some miracle, managed to get it back together. It is the same feeling I still get when I open up a new motherboard or graphics card and smell that unique fragrance that only new electronic components can claim. I took a short break, (2 years) which in this 'game' can be an eternity. I still followed many other builders online, in awe, of most of the things these people where doing to their rigs. I have since put a lot of thought into my next build. The problem I kept running into was, "What case am I going to use?" I have, in the past had this same problem as I am sure many builders have found themselves in. Typically I would pick a case make some heavy changes such as rotating the motherboard tray 180 degrees. For this new build however, I wanted to start with a case I loved, unlike those in the past I only liked. I found the perfect one (actually two in a stacked configuration) in the Core X9. This is the first build I have ever followed in a video documentary as well. I know a million videos are out there of unboxing, building, finished products, but I wanted to do things a bit differently and not only show all those things but cover the 'whys' for my components, explore alternatives for those wanting to spend less money, and generally offer some advice that has come with the wisdom only the experience of time can find. I am here to see what others are doing to their Core X9 boxes too. Most of the info out there consist of CES Thermaltake images or videos. (Which are excellent) I just feel like this is such a versatile chassis that I would love to see all the combinations others can come up with. Good luck with all your builds... Arial
-
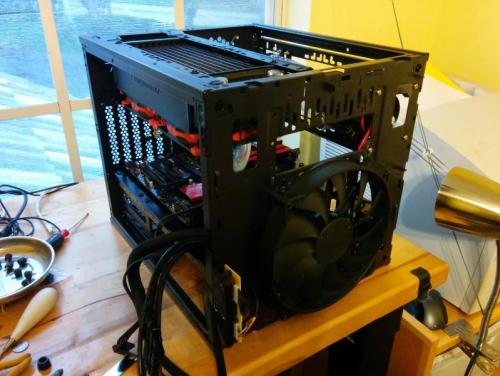
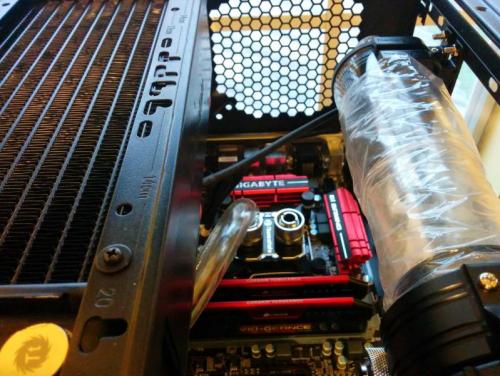
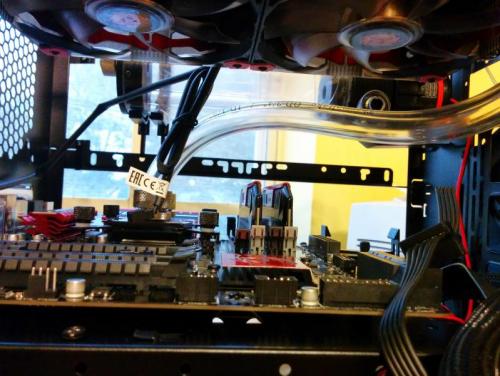
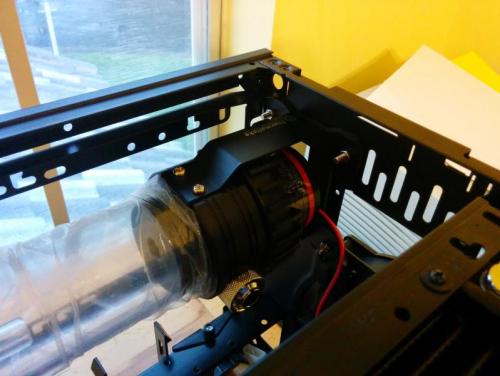
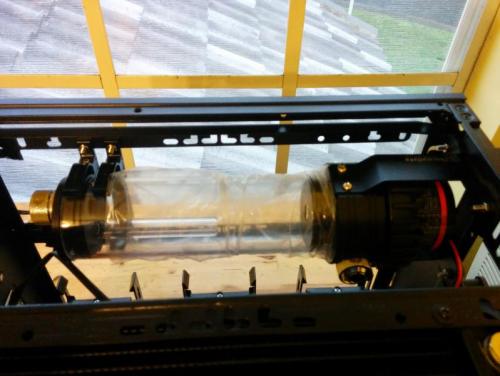
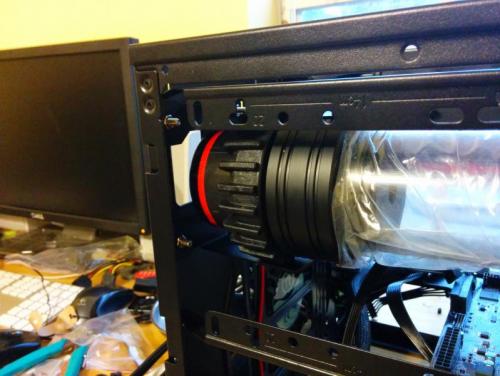
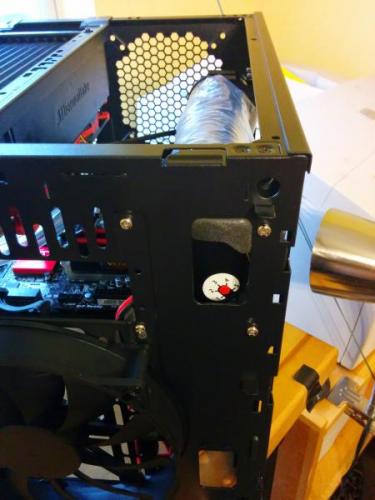
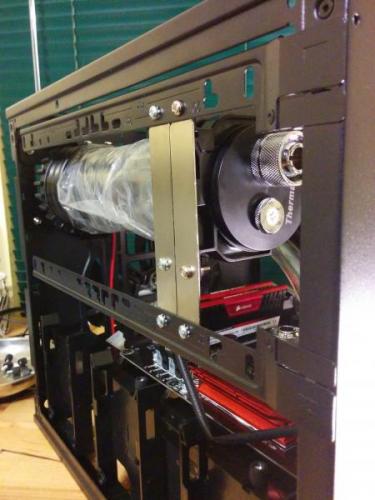
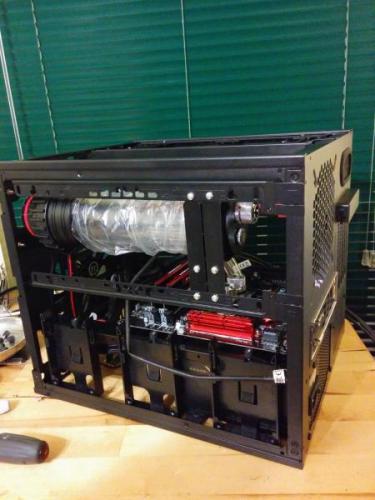
I started to build a system featuring the RL-240 Water Cooling Kit and the amazing Core V21 case. For a while I had a problem figuring out just where and how to mount the large pump/reservoir. I did a bit of custom mounting... easy... just a few holes... so I've decided to share the build up to this point. I have a few 90 Degree fittings on order to make my life a bit easier... Note: You can even adjust the pump speed easily as the adjustment dial is exposed thru a cutout in the front (already available). The mount for the far end of the reservoir is made from 2 old expansion slot covers. Edit: Now Painted Black.
- 8 replies
-
- pacific
- thermaltake
-
(and 5 more)
Tagged with:
-
What is your most preferred radiator size?
- 4 replies
-
- rad
- water cooling
-
(and 1 more)
Tagged with:


