Leaderboard
Popular Content
Showing content with the highest reputation on 07/12/2020 in all areas
-

Project: I.S.A.C. by Andy Makin
AcuteJungle66 reacted to Andrew Makin for a topic
Oh I definitely will 😅 back on it already 👍1 point -

Project: I.S.A.C. by Andy Makin
Andrew Makin reacted to AcuteJungle66 for a topic
Looking awesome so far Andy! Scares like that with your eye are never fun, glad you're okay. Absolutely cannot wait to see the finished product, just don't hurt yourself any further please1 point -
Project: I.S.A.C. by Andy Makin
AcuteJungle66 reacted to Andrew Makin for a topic
Ahoy hoy modderinos Back once again for the renegade master, wait, no, for another episode of Project ISAC. You know how I should the tray fit nice and snug? Yeh well a little 2 snug, it needed a few mm trimmed off the edge as well as a couple of notches put in for where to top rad hole has a lip. This took far longer than I thought, even with the rough cut file, it's likely down to me not having very good technique as I'd do a couple of strokes that would take a lot off, then apparently nothing would be removed for the next 5 mins 🤔 Probably made harder by the difficulty in clamping it to something solidly. Also had to take a smidge out the corner to go over where the rad mount is fixed to then floor. With the tray now sitting properly flat I could get to work on planning, measuring and marking out where the pass-through holes for the water and main power cables. This took quite some time as things didn't quite line up as I'd previously thought, so the loop needed a re-think. What I'd previously been planning for the power cables got scuppered when covid dried up my supply and 'plan b' turned out to not be viable either. Rather than passing the cables through holes I'll be using aviator connectors, this will separate the front and back nicely though and their different styles/themes. Even once the overall layout and design was set, it took quite a while to get everything exactly right, particularly with the aviator connections as I'd have to make sure the thin hex nut that fixes them in place has room to turn, while also trying to get them as close together and lining up with the connections on the motherboard. As they're quite small and light they'd have a tendency to shoot off at the slightest nudge. In the end I had to stick them down with blu tack, but that made adjusting their positions harder. A lot of faff, but it was important to get these positions and measurements spot on. Ever seen a GPU backplate with a 6-pack? Well now you have 😂 I had planned on getting into those lines with a wire brush wheel, but when I saw how awesome it looked after the initial pass with the abrasive wheel, I had to keep it. I punched and then drilled out all the holes with a 4mm bit to start off with. Once they were done, I took the tape off so it didn't interfere with the next steps and marked what size hole was needed next to them. I also put a cross through the motherboard mounting holes, just to make sure there wasn't a mix up, as that's exactly the kind of ####-up I'd make 😅 Particularly for the 24pin holes, I wouldn't be able to get the drill in from the back of the sheet because it would bump into the bent-up section, so I had to do it from the front. Took an age to get a configuration that worked, trying different combinations of my odd bits of wood propping it up trying to get it to rest on top of the workmate, when all it took was hanging it over the edge and 1 piece on the rails. 🙄 First I widened them all the just under half an inch with a step bit with lots of increments, which helped keep them all in check and in line. Then It was time for the big boy 😲 I'd be taking it up to 5/8", so marked the 11/16 in red so I knew when to put the brakes on. Like a glove 😄 I was using cutting lubricant to stop the step bit trying to grab on and dig in too much, kept the swarf fairly neat for the clean-up. Pretty happy with the first set. The last hole has strayed off a little, but you can only really notice up close and once it's got the connectors and wires over them it won’t be noticeable. People probably wouldn't have noticed if I hadn't pointed it out 🤔😅 After drilling out the holes for PCI and EPS power, now it was time for the G1/4 pass-throughs, for which I'd bought this 20mm hole cutter specially. Get some interesting patterns of swarf in the saw after cutting. One looked like a christmas tree! After that I deburred and cleaned up and holes and then had to cut some out of the bottom of the case. Now I always where my safety specs, but I hadn't been wearing any other face protection while cutting and sanding most of the time and had seen some horrid sights while blowing my nose, so I'd been careful today and worn a mask. While cutting with my jigsaw something shot out, hit the face mask and ricocheted under the safety glasses and into the corner of my eye 😖😳 Luckily, it was one of those moments where everything seems to slow down (like some sort of danger activated Max Payne-esque bullet time) and I'd seen whatever is was flying towards me and managed to get my eye shut in time. Still stung like a #### though. I rushed off to the house and checked my eye for any damage or debris which there didn't seem to be. I thought my contact lens out and rinsed my eye with the contact lens cleaning drops I have. Seems I had very lucky escape, especially as it was the left one, which is my dominant eye. WARNING - Eyeball closeup With my eye cleansed and calmed, I grabbed the goggles from my mayhems blitz kit and quickly finished off the cut and tidied it a little. My reaction to being struck in the eye had caused the cut to go a deeper than intended, but it shouldn't matter too much. I'd had just about enough and my nerves were still pretty shook as I hastily filed and sanded any rough edges from the case and called it a day. Really please how the holes came out, all bang on bar that one, which is really tricky with a hand drill and an aggressive chunky step bit, especially in such a tough material. Obviously there still some more to come out of the case for the PCI and EPS power cables, but that can wait till my hands stop shaking. 😕 That's all for now folks. Be sure to stay tuned for another episode of "What Andy maimed next" 😅 Same Crap time, same Crap channel.1 point -
Chris Connor - Project SparklePony - #TTUK2020CaseModChallenge
Colin McNally reacted to AcuteJungle66 for a topic
Has it already been a week since the last update? Well, I better get cracking then! So the next thing I wanted to get sorted out was the panelling/trim on the 'business side' of the case. I kind of had an idea of how I wanted it in my head, but thought it safe to try with foamboard first. Which is just as well, since the prototype was a fair bit wonky: But at least it served its purpose, it enable me to fine tune things a fair bit before moving on to the actual acrylic pieces. So a little bit of jigsaw action resulted in: So my inital thoughts were that I was at least happy with the shape and relative symmetry of it, and I like that some of the lighting was coming through the acrylic; but ultimately I decided that I would like it better if I painted it. Which then gave me an idea. What if I put on some stars (as in the stickers we used to get at school for doing a good job), painted over it and then peeled them off? I wonder if that would work: So slapped some primer on it and put it to one side for now, as I wanted to turn my attention to the front and top panels: Managed to get it bonded at least, but I knew that getting the seams all smoothed out would require a little bit of elbow grease later on. Same with the front, quite a bit messy here as I was slapping it on there a fair bit. But it was nice to see how the front would look with the panel filled in like that. Frankly I quite like the look, was exactly what I was going for! So I put both of those panels to the side for now, so they could cure, and moved on to putting some paint down on the trim panels from earlier: Not too shabby. Some slight imperfections due to not having a sealed painting booth, but only really noticeable if you really get up close and personal. These should hopefully do the trick. The last week or so we've had fairly wet weather up in our neck of the woods, so when I got a brief dry spell I took advantage of it and cut out the acrylic for the other side panel: With that cut at least, I just need to get it bonded to the panel then smooth out the seams. Then we can get cracking on making a stencil for it and getting it painted. But there's a good chance that will be one of the last items we tackle. With more dry weather this week, it was then time to keep working on the top and front panels. I knew from the get-go that this was going to be tricky for me, and would require building up the seams/sanding down/rinse repeat. So not quite done with them yet, but I'll get there. I'm just hoping that the weather is dry when I am finally ready to slap primer on them. With those sitting outside to dry, I figured I would turn my attention back to the interior; as there are still a few things to take care of. First up was seeing how the stars turned out: Sorry about the reflections, it's a bright day so the TG makes it a bit tricky. Crappy photo aside, the stars turned out pretty well. Whilst not exactly my cup of tea, my stepdaughter absolutely loves them; so that's the important thing! I also think that the black edging (which is just a roll of rubber moulding) really just sets it off, just needs some slight tweaking so it is nice and straight. I'm also going to clean up that area on the right close to the latch for the glass, so it looks a little bit more streamlined. Originally we were planning on using Armour Etch to engrave a design on the glass, but I am not convinced at all. We (it's not just me) feel that once we take care of some of the other decorations in there, that it would then just become 'too busy' or detract from the interior. But once all the other bits are done we might change our mind. Please feel free to let us know what YOU think. I cannot take credit for this next small alteration, as it was actually my partner's idea; and in my opinion it was a really good one: Just a little bit of black mesh at the front, just for a bit of contrast. Plus of course it does serve the functional purpose of collecting some of the dust, so that is bonus. Whilst it looks fairly black from that angle, once you shift a bit it then lightens up a fair bit: Not too shabby at all. Well that is all for now, I just have a few more finishing touches for the interior as well as tidying some things up; and then I can focus on getting these exterior panels all sorted out. With only 2 weeks left, I was really hoping to be done this week so I would have all of next to work on the final video; but depending on the weather, I very well may be cutting it close! As always, thanks for the support and feedback, it has been great fun so far. Stay safe!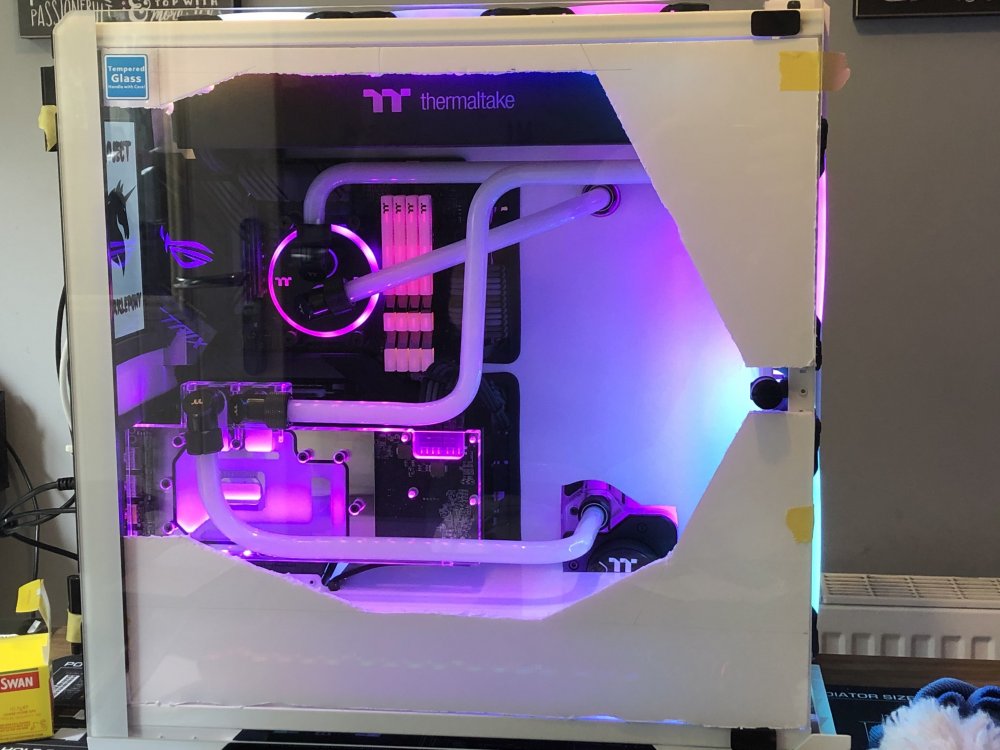
.thumb.jpg.013231f7de75eefe34bce1b5d9de0038.jpg)
.thumb.jpg.8867362c5af2e1458a0d7a305cc8f604.jpg)
.thumb.jpg.9ba34608a5caac8ddda2e47dcd1ece74.jpg)
.thumb.jpg.a552a8d63c4ac794870df9c27973eb26.jpg)
.thumb.jpg.6124fdaee426521b728dce6407f318fc.jpg)
.thumb.jpg.3a24774f467634708d58e8e455f33eb7.jpg)
.thumb.jpg.51b1d8b6774a79f856bd4ba4da92b8ca.jpg)
.thumb.jpg.0741f9aa54e8a92808af5014b129b262.jpg)
.thumb.jpg.d29121cddb43f58018308d0bdc3dd402.jpg)
.thumb.jpg.620b4929a2e33e9341d5ee38c9a0a6eb.jpg) 1 point
1 point

.jpg.b4a4e6677ba65fccb992b4c8e0420845.jpg)
.jpg.769aa237cc47ae1d460d2559876f673d.jpg)
.jpg.3ca369456727b35b9cbf21f0b832585e.jpg)
.jpg.8d1b2b642c89800068f8b12f568fff0d.jpg)
.jpg.1b14fee3c3c5ccf3182f0bea6461c67b.jpg)
.jpg.47d1df43e0d735d7d51eca7f06117eb1.jpg)
.jpg.4ea01715e6732df94e6b292c5aa8ff4d.jpg)
.jpg.e2bb8d56a7f4e7051d8f5c15d79d0e91.jpg)
.jpg.9843d3fadd82b0a21a12bfa671156aab.jpg)
.jpg.205a21280183998bbe5a8d5c95a0fb4f.jpg)