-
Forum Statistics
94k
Total Topics115.2k
Total Posts -
Member Statistics
172,976
Total Members16,800
Most Online


Explore Modding
-
Posts
21 -
Joined
-
Last visited
-
Days Won
3
Recent Profile Visitors


Explore Modding's Achievements
Just Getting Started (2/10)
10
Reputation
-
 Narinsorn Rattanabuppha reacted to a post in a topic:
2024 Thermaltake CaseMOD Invitational Season 1 Winner Announcement
Narinsorn Rattanabuppha reacted to a post in a topic:
2024 Thermaltake CaseMOD Invitational Season 1 Winner Announcement
-
 Thank you for this amazing opportunity and congrats to the other winners!
 -
Narinsorn Rattanabuppha reacted to a post in a topic:
Final Voting Starts Now!! (April 10th - April 25th, 2025)
-
najiro reacted to a post in a topic:
Final Voting Starts Now!! (April 10th - April 25th, 2025)
-
Much appreciated man! 🙏
-
Explore Modding reacted to a post in a topic:
Final Voting Starts Now!! (April 10th - April 25th, 2025)
-
George Antonopoulos reacted to a post in a topic:
[Italy] Alessandro Zaiti
-
George Antonopoulos reacted to a post in a topic:
[Italy] Alessandro Zaiti
-
[Italy] Alessandro Zaiti
Explore Modding replied to TT Kristine's topic in 2024 Thermaltake CaseMOD Invitational Season 1
And a quick "Making of" Shorts to see a bit of the process in video: https://youtube.com/shorts/-Dl19cVhBzw?si=Mm-M1YXBmUo0hoIo -
[Italy] Alessandro Zaiti
Explore Modding replied to TT Kristine's topic in 2024 Thermaltake CaseMOD Invitational Season 1
And now some B-roll: -
[Italy] Alessandro Zaiti
Explore Modding replied to TT Kristine's topic in 2024 Thermaltake CaseMOD Invitational Season 1
Here's a quick video on the GPU mod I made using the Palit Maker 3D model: -
 modLab reacted to a post in a topic:
[Italy] Alessandro Zaiti
modLab reacted to a post in a topic:
[Italy] Alessandro Zaiti
-
[Italy] Alessandro Zaiti
Explore Modding replied to TT Kristine's topic in 2024 Thermaltake CaseMOD Invitational Season 1
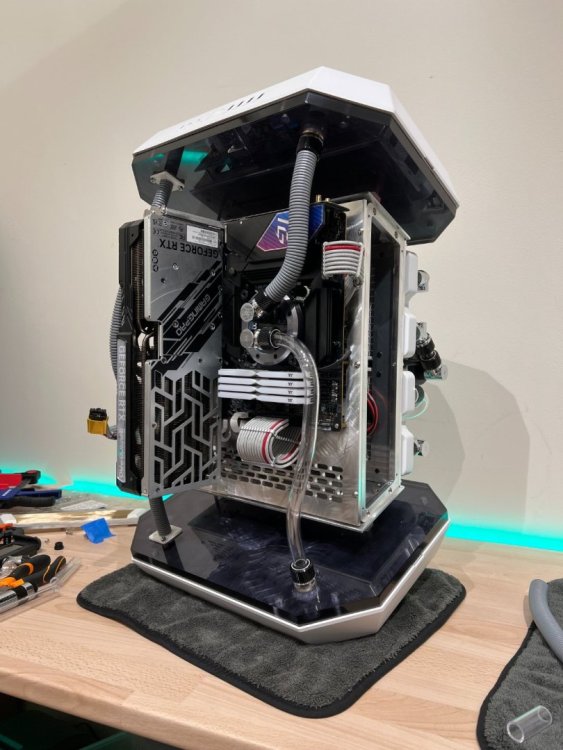
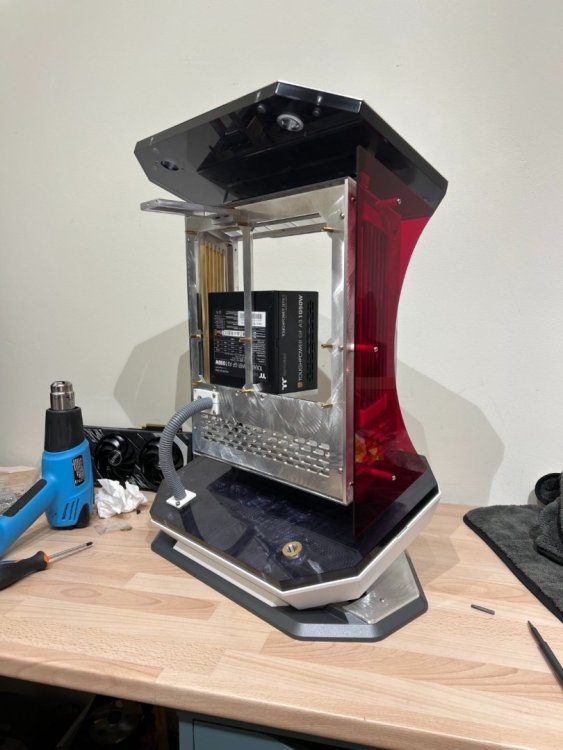
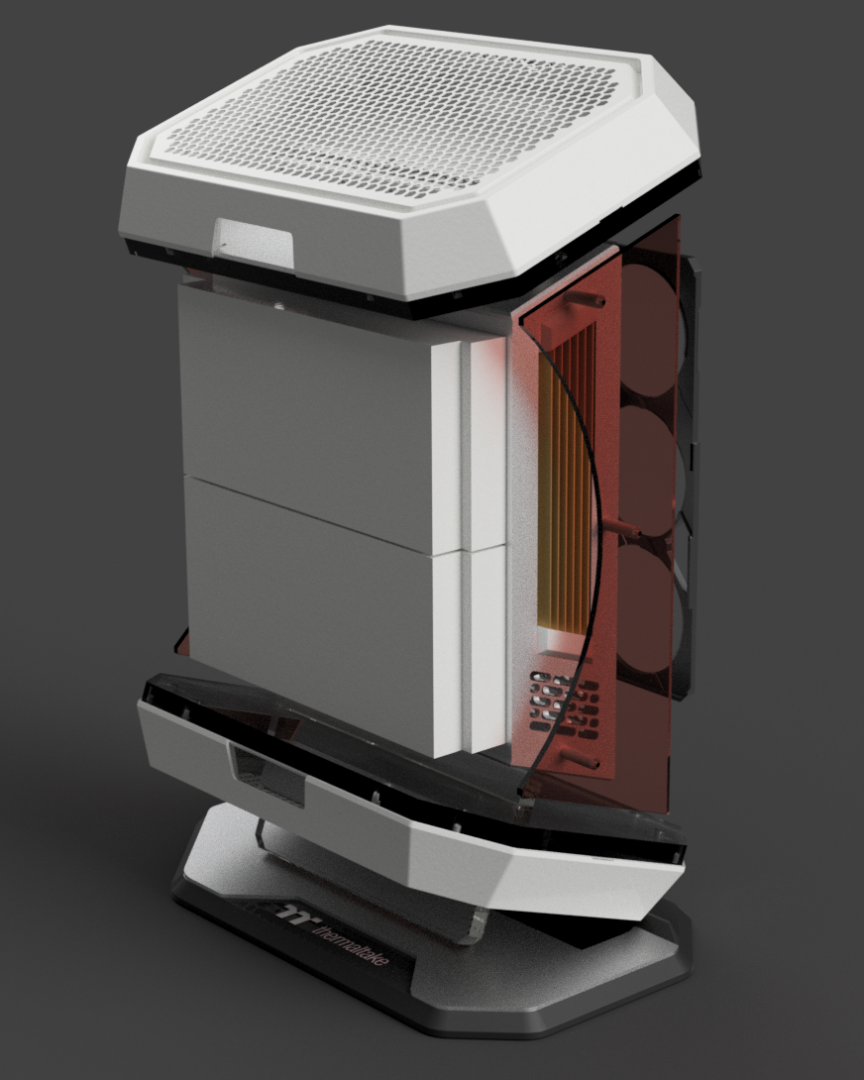
Presenting TRISMEGISTO - my vision of the Tower 600 case! Angled top and bottom, floating centerpiece and tubing everywhere for a mix of my usual Sci-Fi inspiration paired with some industrial elements. The name, color scheme and choice of materials come from Trismegistus (Persona 3 videogame), with this predominant aluminum finish combined with brass details and red acrylic side wings to add depth and color shifts depending on the point of view. The hardline tubing is partly clear and partly covered with corrugated pipes, creating an aggressive industrial effect which plays really well with the angles and colors/finishes of the build. Huge thank you to the sponsors of this competition @thermaltake_global @palit_global @asrock_official @intelgaming @seagate For providing all the hardware: Thermaltake The Tower 600 - https://www.thermaltake.com/the-tower-600-mid-tower... Asrock Z890 Lightning WiFi - https://pg.asrock.com/.../Z890 Lightning WiFi/index.asp Seagate SSD Storage - https://www.seagate.com/.../intern.../ssd/barracuda-510-ssd/ Intel Core Ultra 7 265K - https://www.intel.com/.../intel-core.../specifications.html GeForce RTX 4070 Ti Super GamingPro - https://www.palit.com/palit/vgapro.php?id=5057&lang=en Thermaltake Toughram XG DDR5 64Gb - https://www.thermaltake.com/toughram-xg-rgb-d5-memory... Thermaltake Toughpower GF A3 1050W - https://it.thermaltake.com/toughpower-gf-a3-gold-1050w-tt... Thermaltake Watercooling - https://www.thermaltake.com/.../custom-liquid-cooling.html More content coming soon!.thumb.png.e07a4612887eb8f9544c6b1a7d90b2d7.png)
.thumb.png.d3c62730d42f41fd364928aac9a825e3.png)
.thumb.png.8525924968afeb79546bcad5e3bae492.png)
.thumb.png.a4e38d8e822f682ccce6cc3748dd53d9.png)
.thumb.png.16ed88d625449ca062729fecd8764503.png)
.thumb.png.397f9ee75ed74f478a78d3e80b57889a.png)
.thumb.png.966f2b69f073d763b5e288b1b5876bd8.png)
.thumb.png.051395174dcd2d8d3086d6804b9a502e.png)
.thumb.png.f91e5502577ecfc12a81303c27a5a957.png)
.thumb.png.64ae6fd4f60d2cdf2d9e4a39ce49f360.png)
.thumb.png.50353b6e5ff17eb567896ac4746bbe1a.png)
.thumb.png.138fffbeecbb607de87f5d860ad2a23f.png)
.thumb.png.2ee83f4d08713c25424df560f5648443.png)
.thumb.png.20cc2ae57a868fee30266934f65b03b9.png)
-
[Italy] Alessandro Zaiti
Explore Modding replied to TT Kristine's topic in 2024 Thermaltake CaseMOD Invitational Season 1
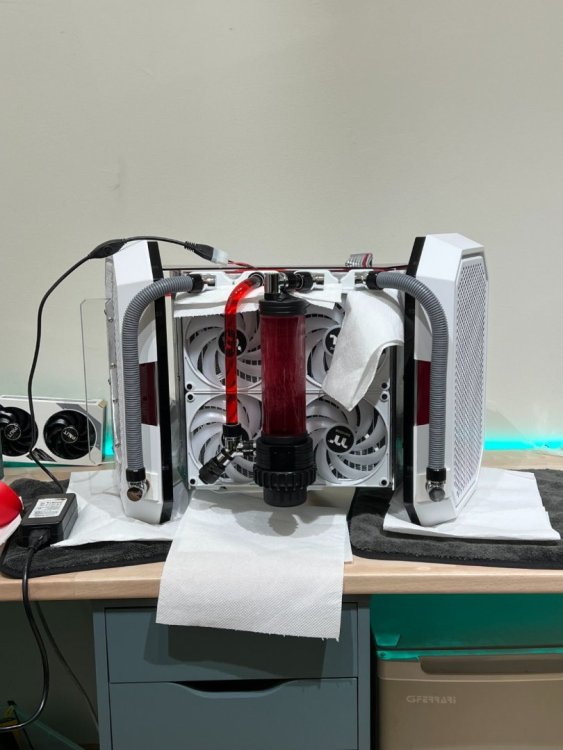
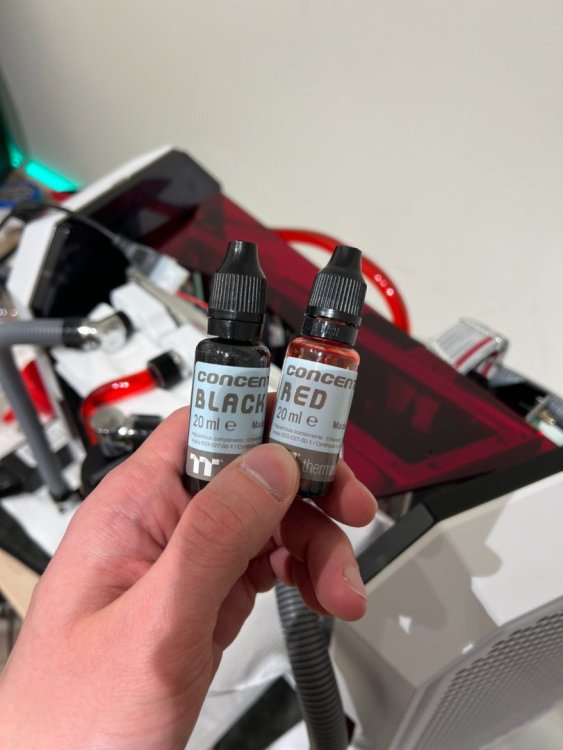
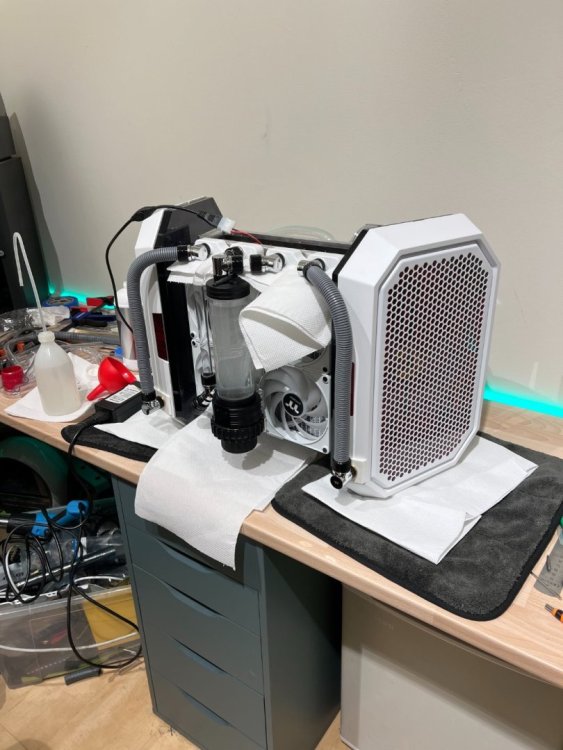
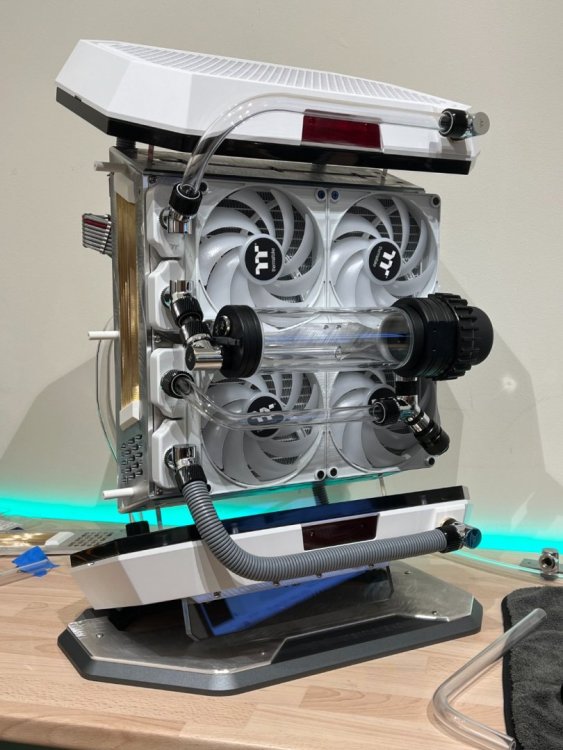
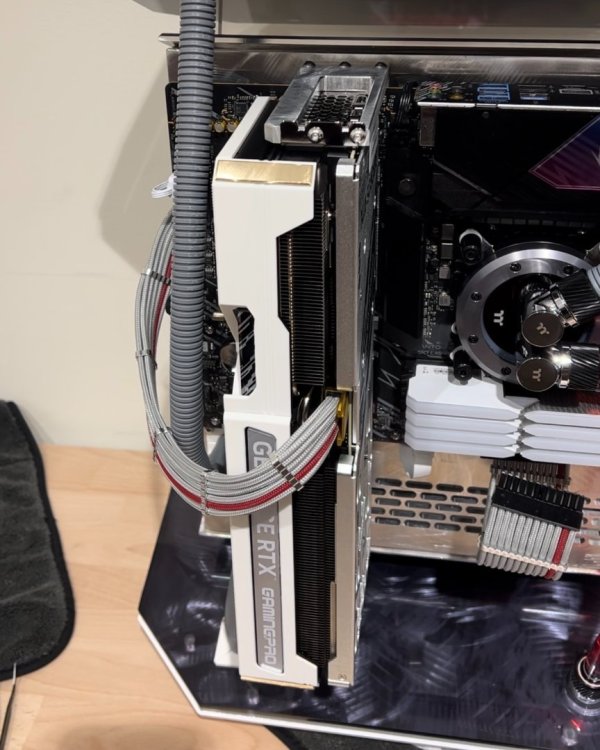
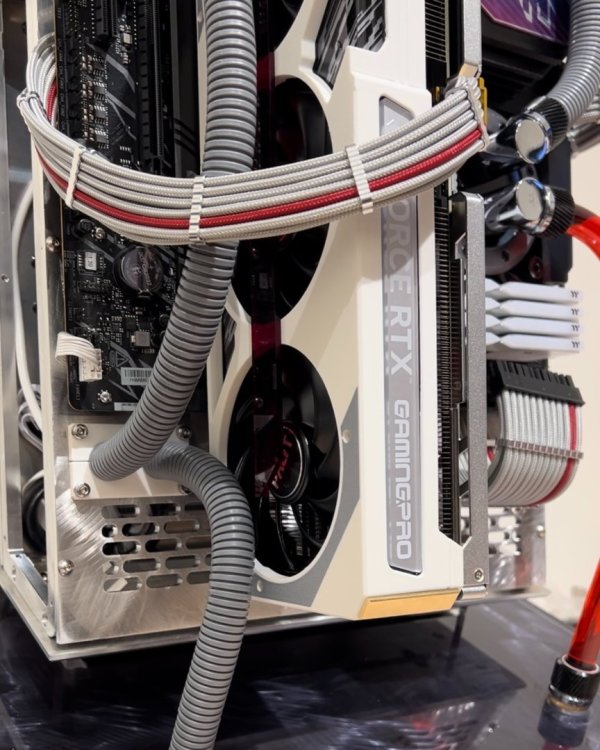
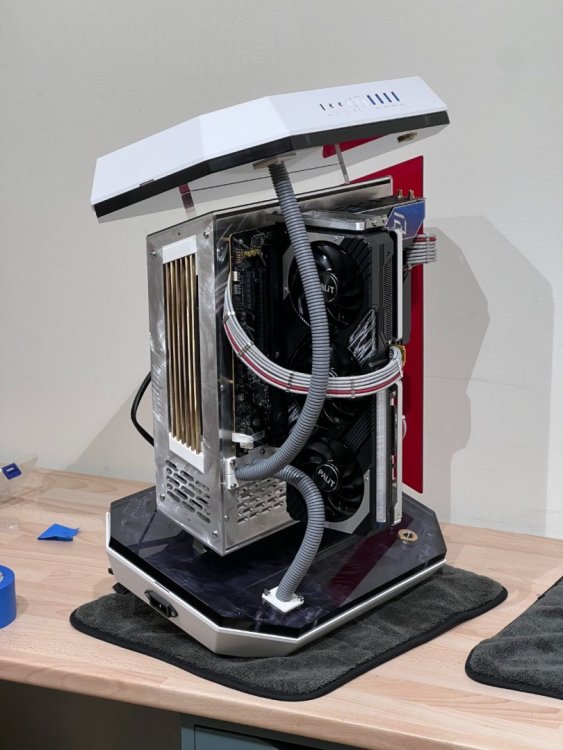
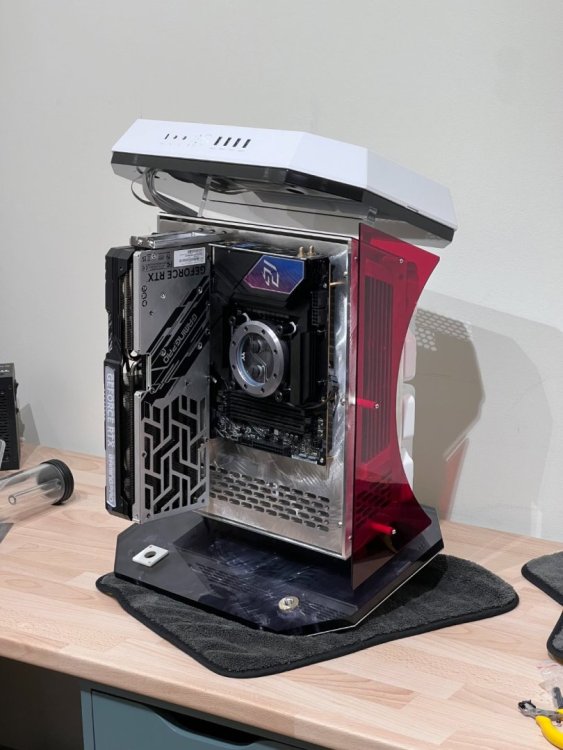
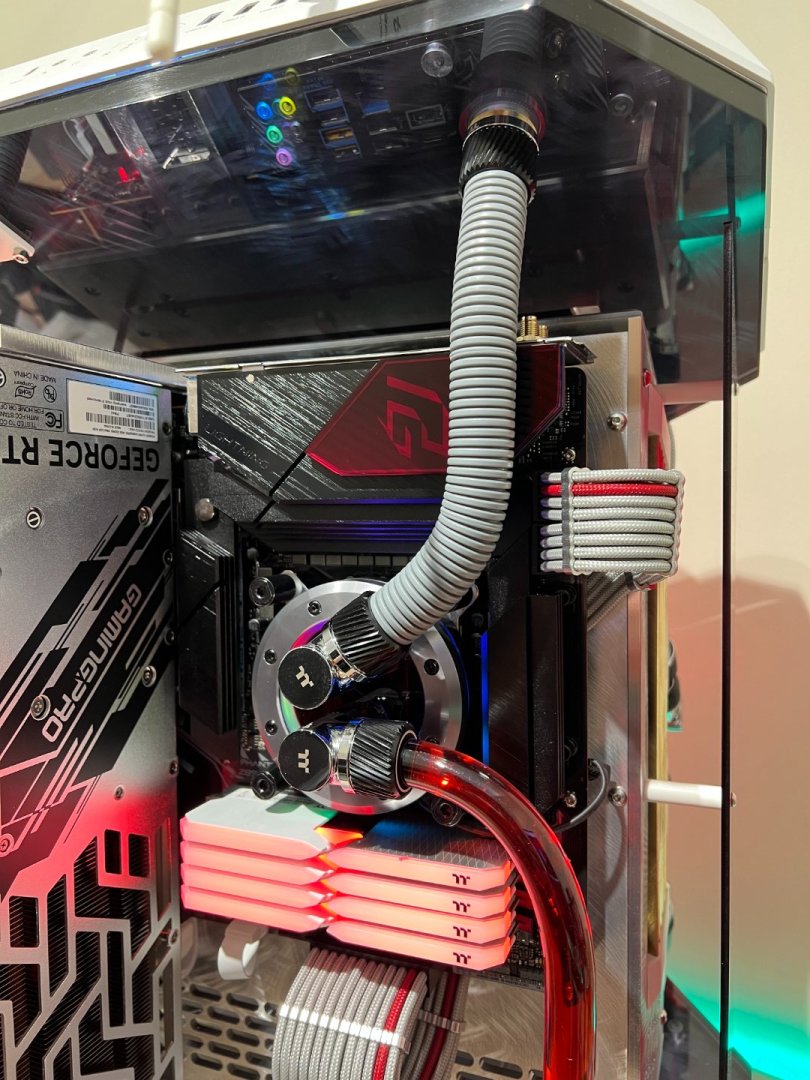
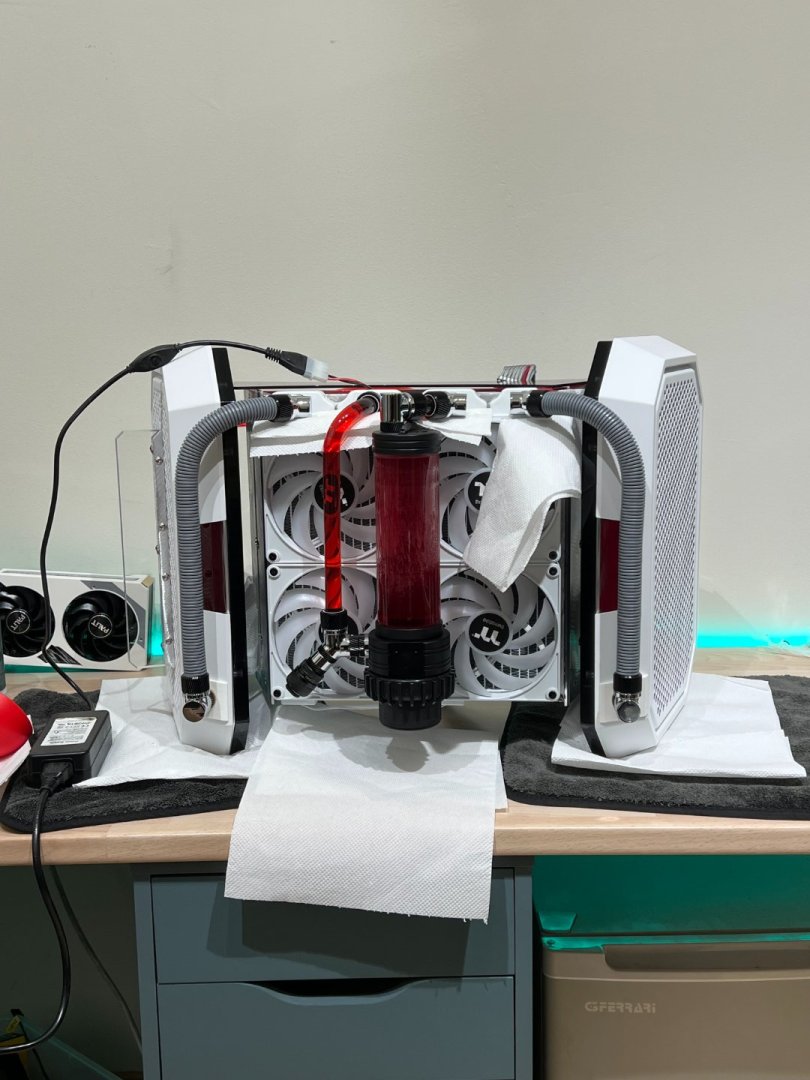
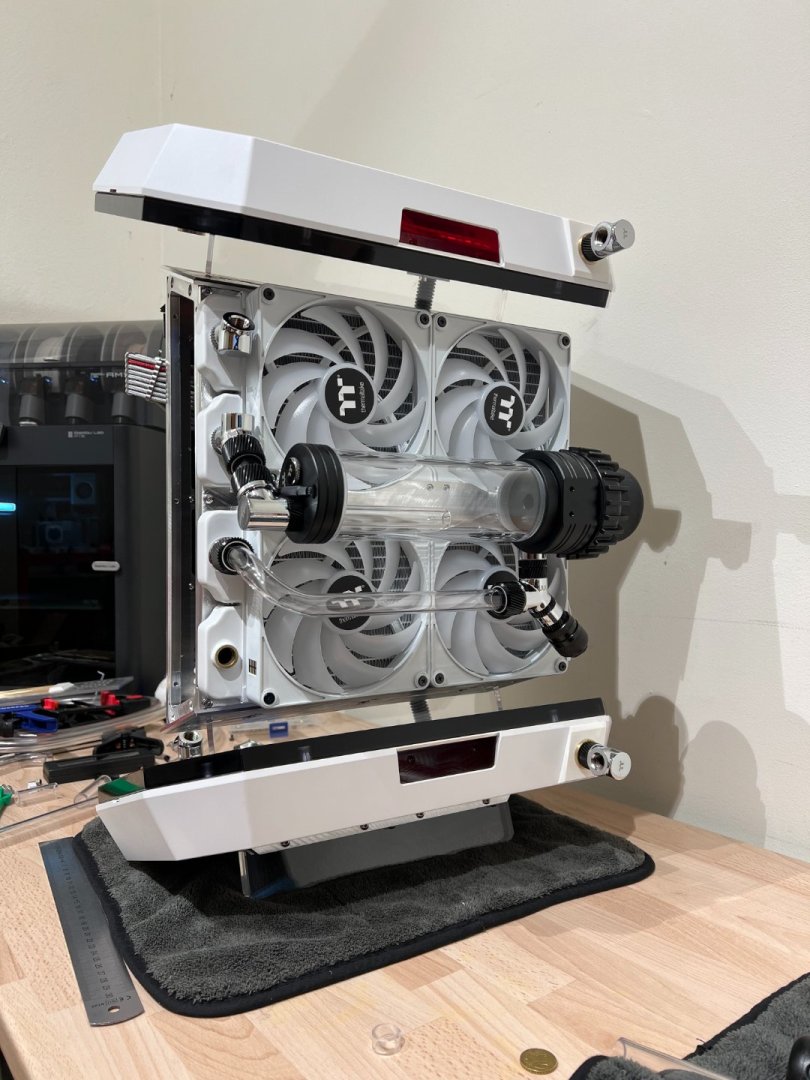
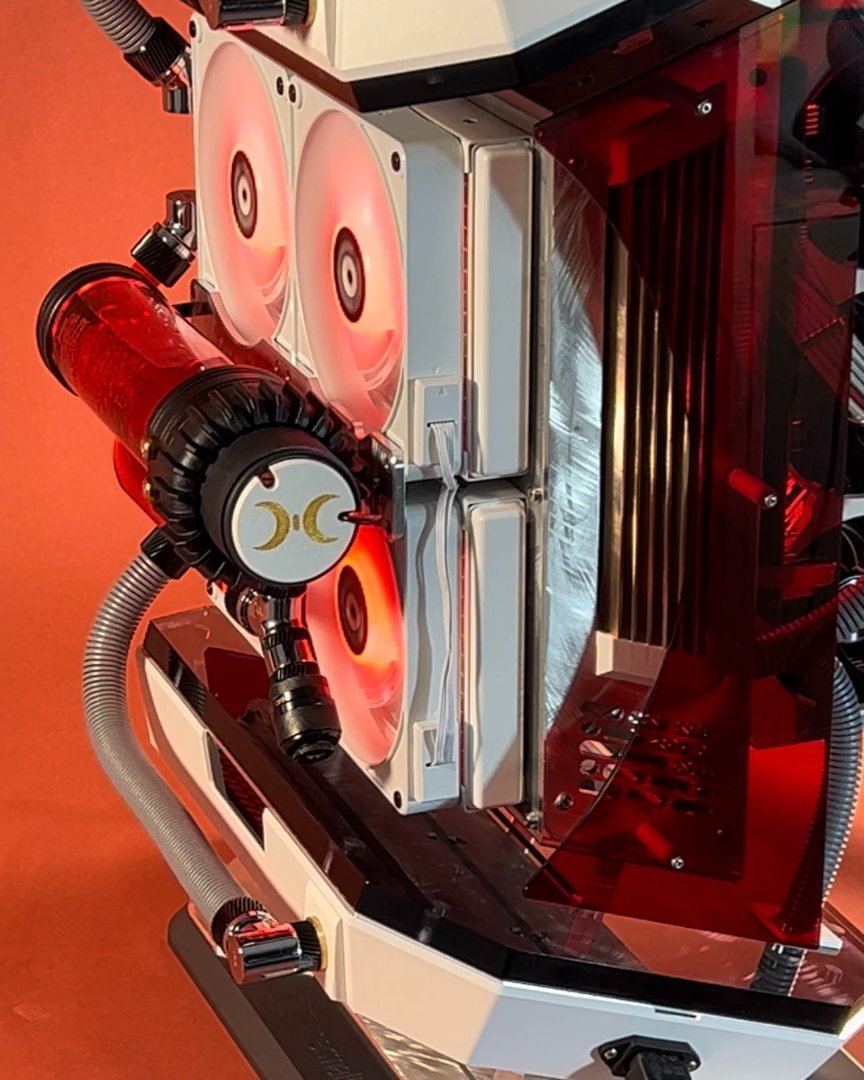
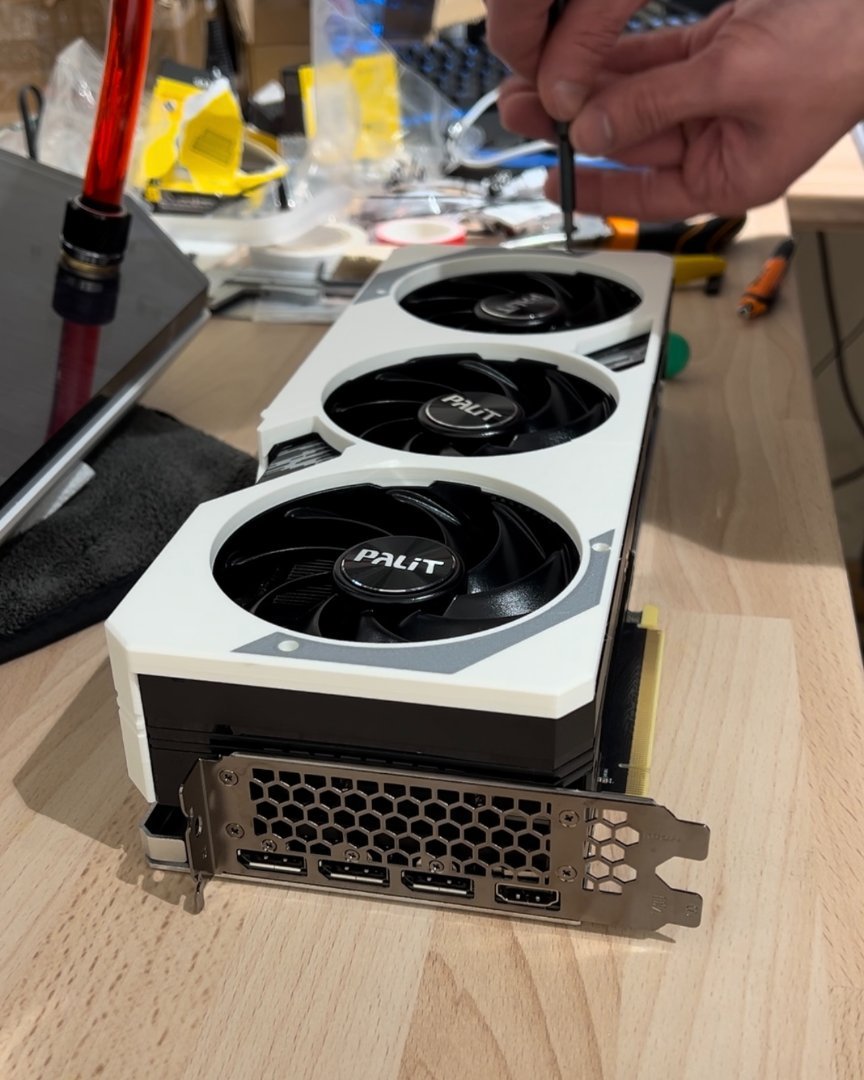
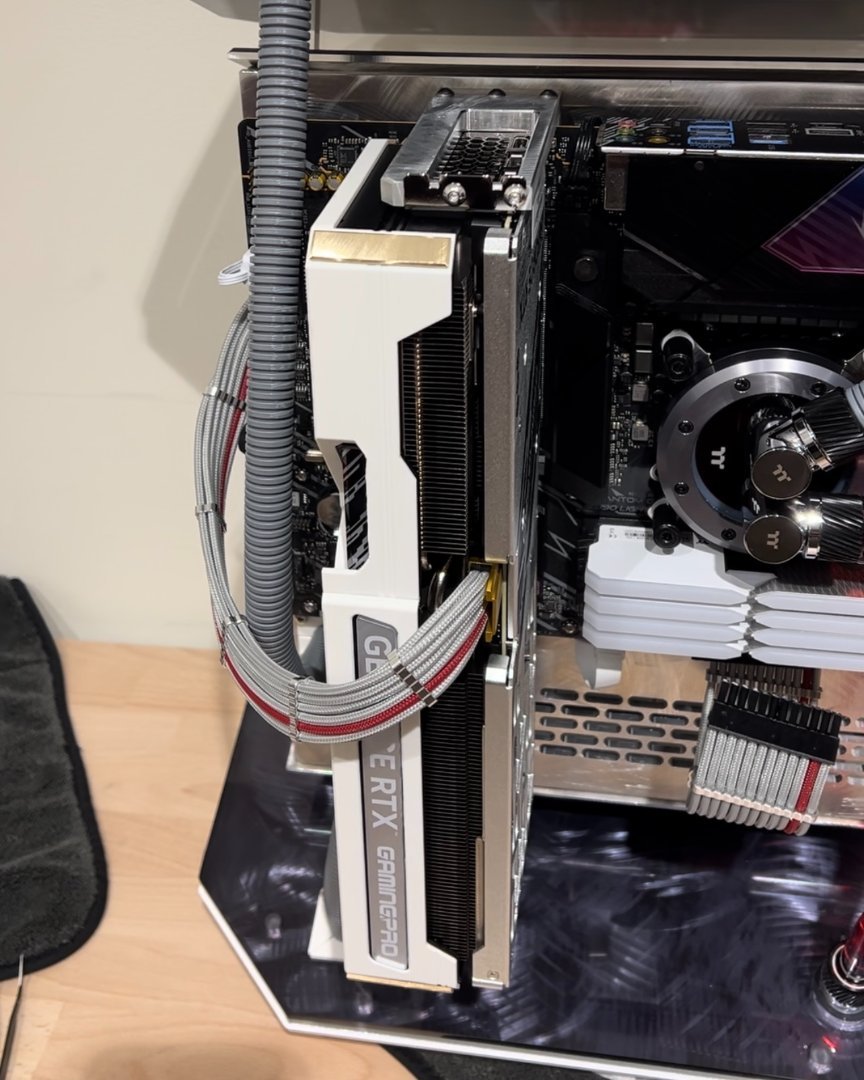
This is the last update before the final result! Let's wrap it up the remaining tubing and some details The tubing was a real challenge on this one, the 20 degree angle of the top and bottom panels didn't play nice with it, because it created a lot of offsets that needed to be addressed with some slightly intricate bending. Luckily PETG can withstand multiple heat and reheat! To spice things up a bit, I sourced some corrugated pipes to cover some of the hard tubing to keep that industrial look going. Also took me a while to figure out which tubing to cover and which leave clear Leak testing time! This looks killer even laying horizontal to be honest, but it would need a custom pedestal for this that I don't have time to make now. Maybe after the deadline! Of course the coolant must be red! To achieve a darker tone, similar to the red acrylic I'm using, I mixed some red and black concentrates. Now to the final touches! Handcut a quick cover out of the same red acrylic for the motherboard, as that blue/purple on it really didn't go well with the theme. Problem solved! Next was the GPU mod making use of the Palit Maker feature! Palit offers 3D models to 3D print your own custom shroud for their GPUs. I printed a white shroud with grey accents and then glued on a couple of brass strips to blend it in. I originally also put a simple strip of red acrylic in front of the fans but I didn't like the look so I ditched it. The red will come from the lighting! And cherry on top, a little cover for the pump bottom, good chance to slap my logo on this baby also sneak peek of the final shooting setup!


-
[Italy] Alessandro Zaiti
Explore Modding replied to TT Kristine's topic in 2024 Thermaltake CaseMOD Invitational Season 1
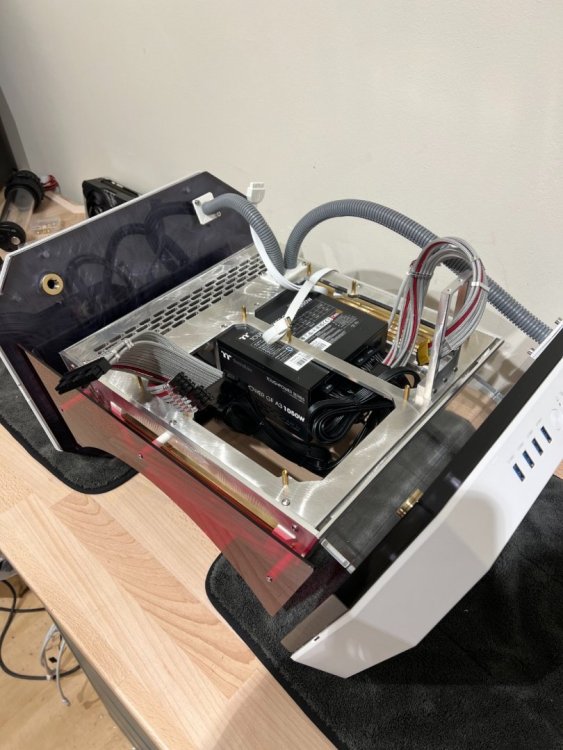
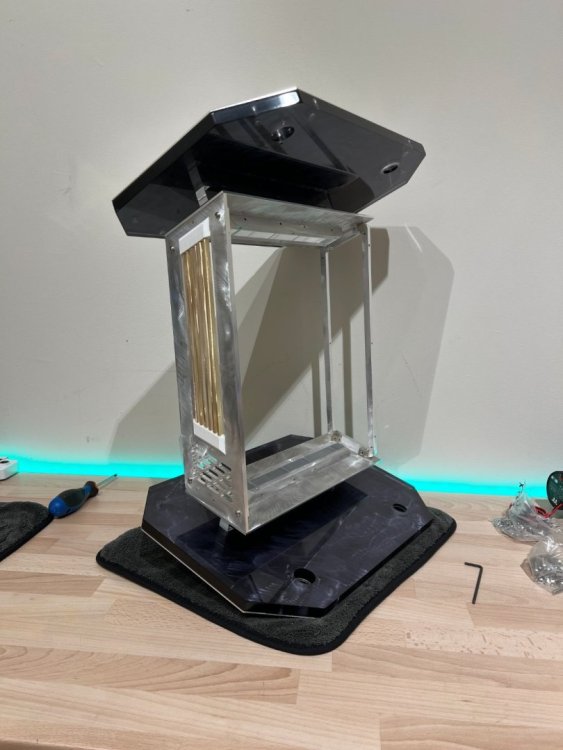
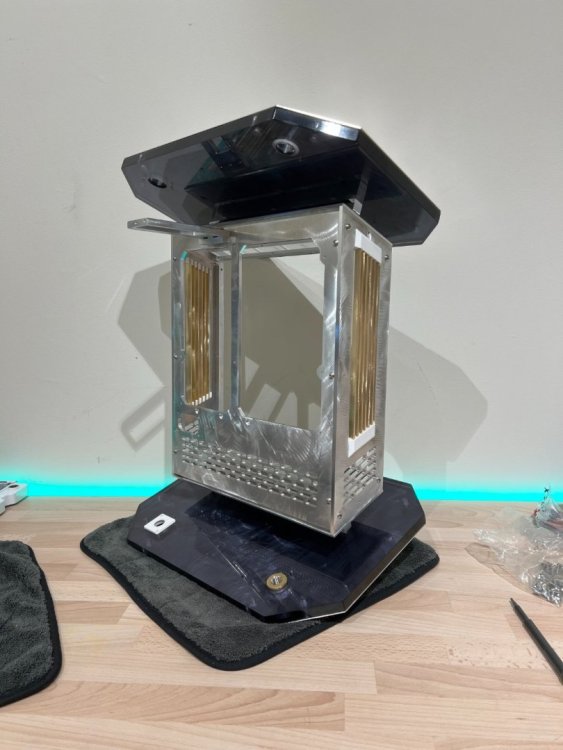
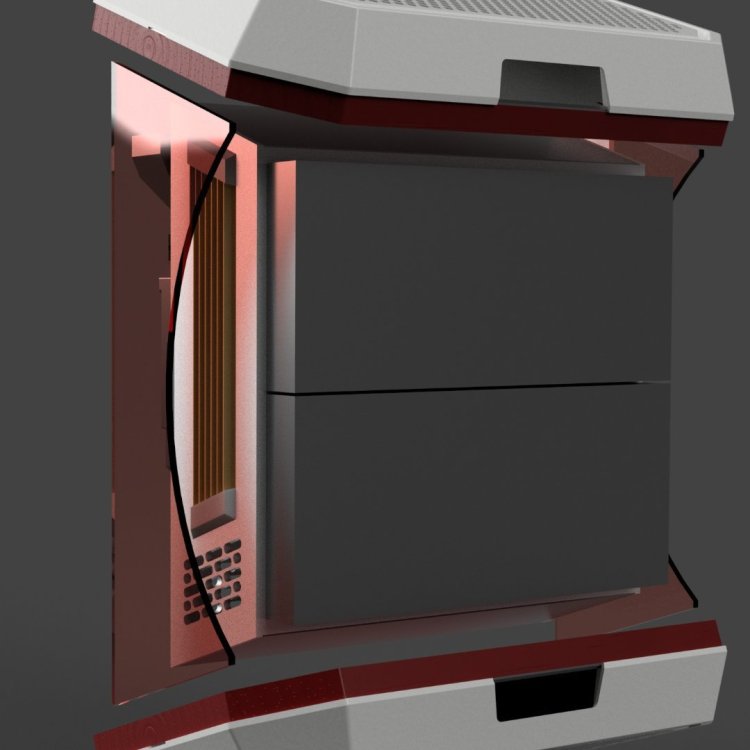
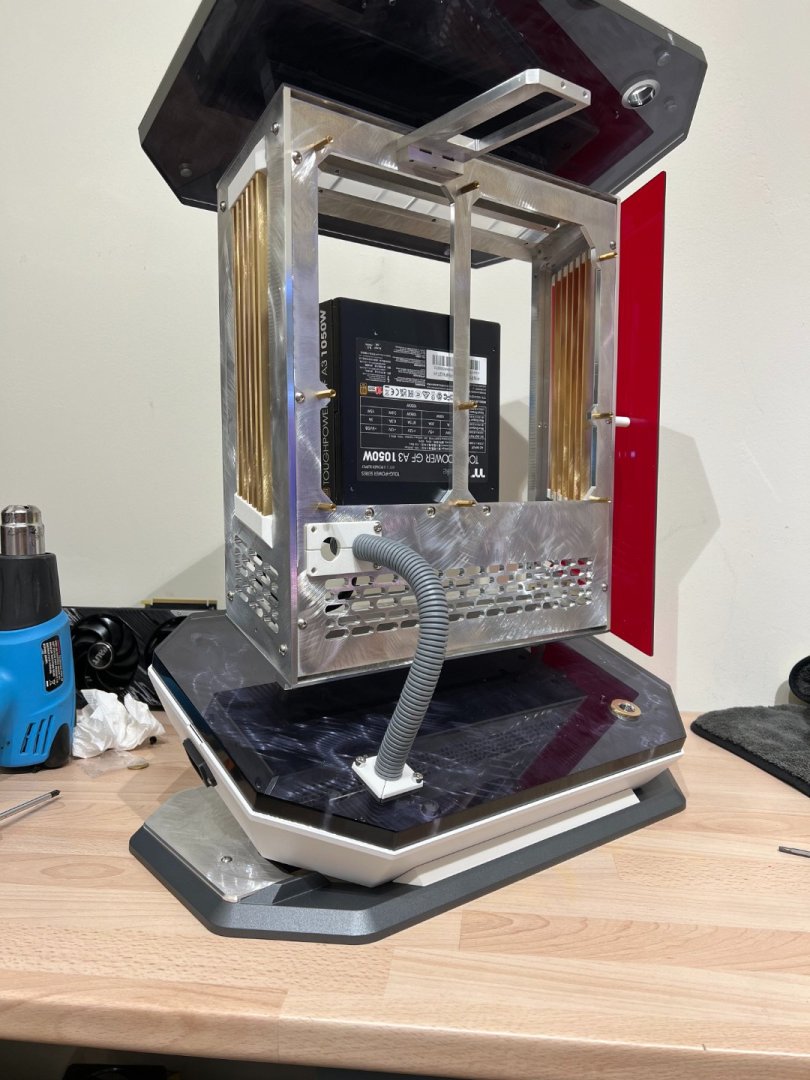
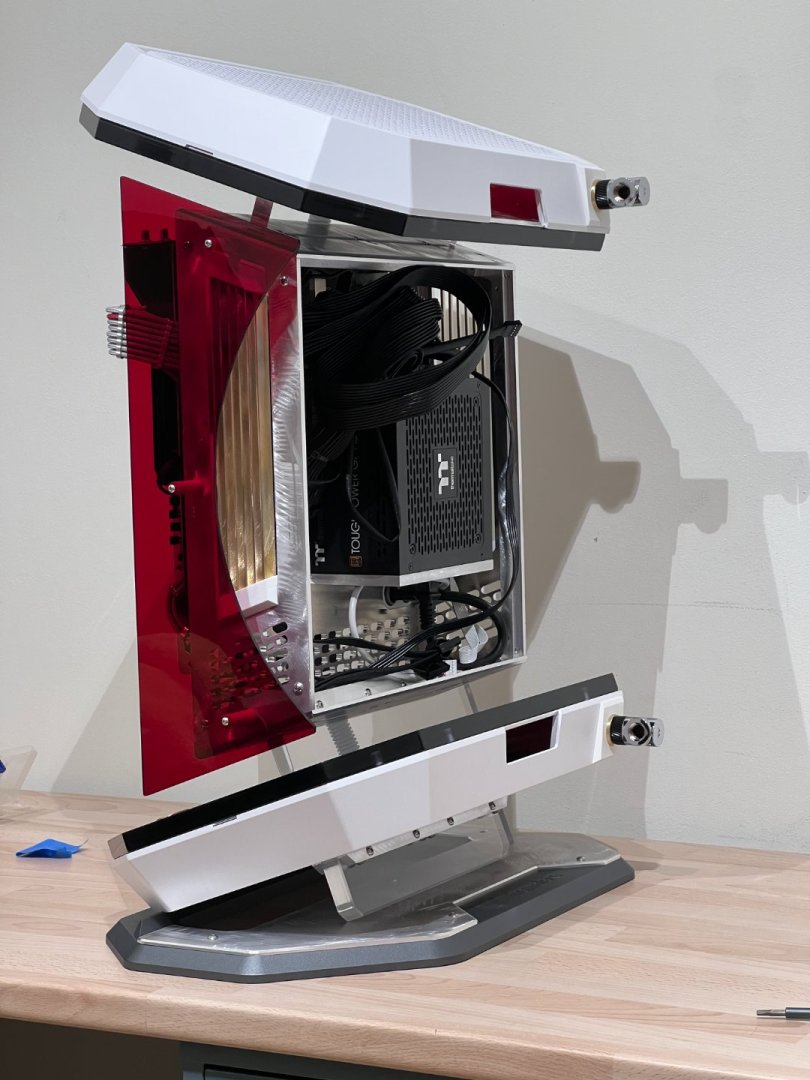
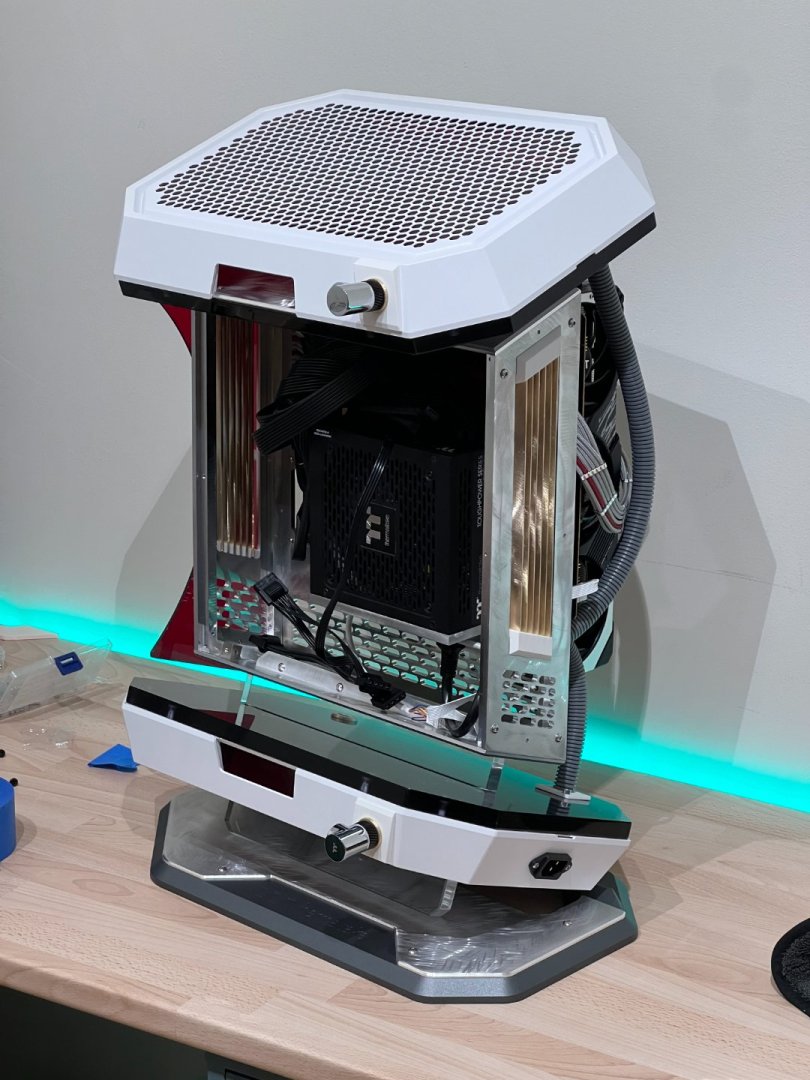
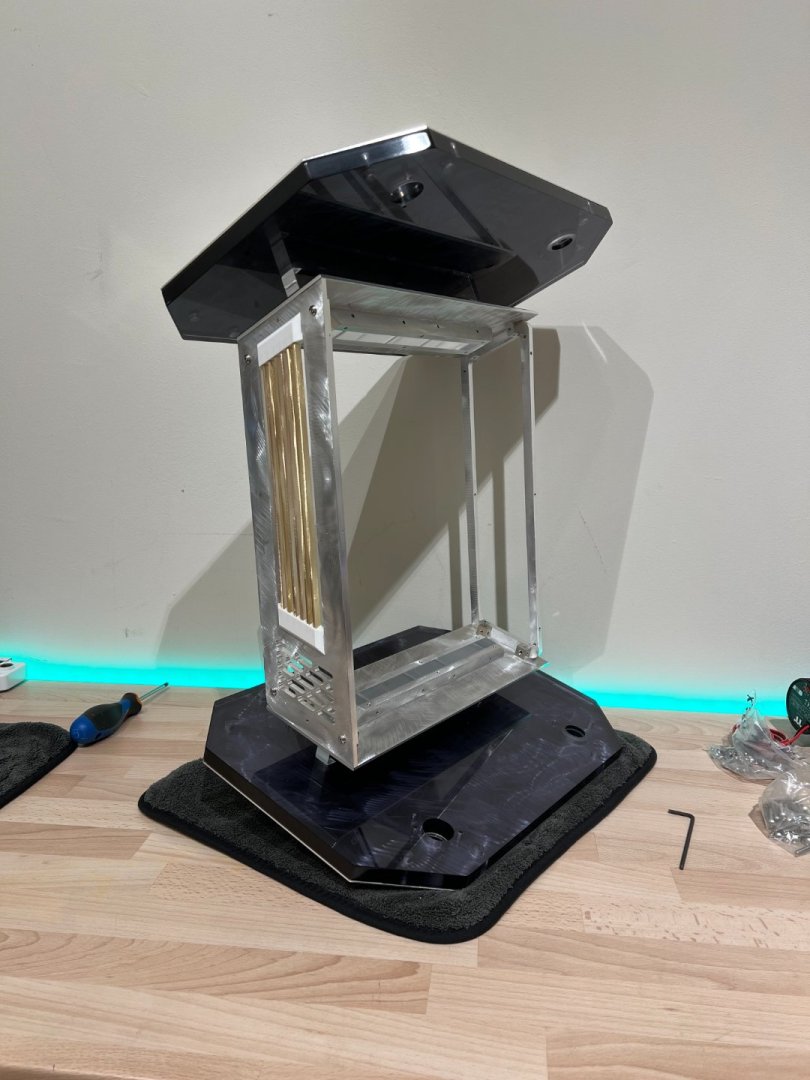
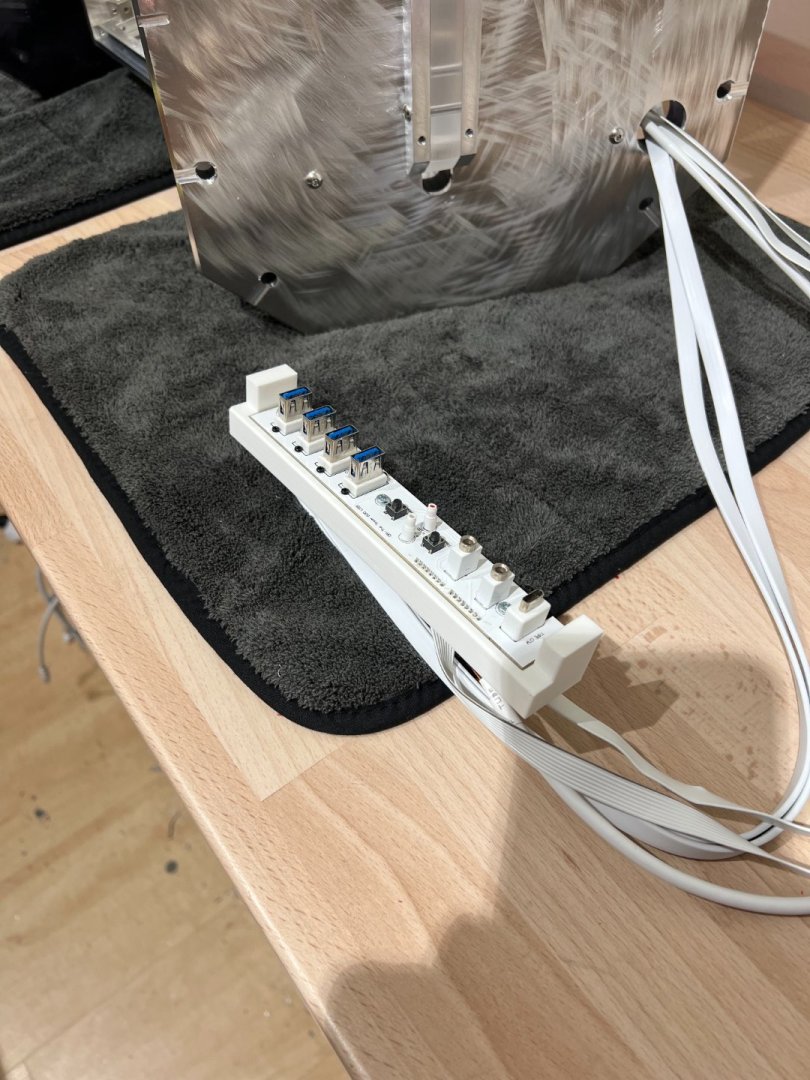
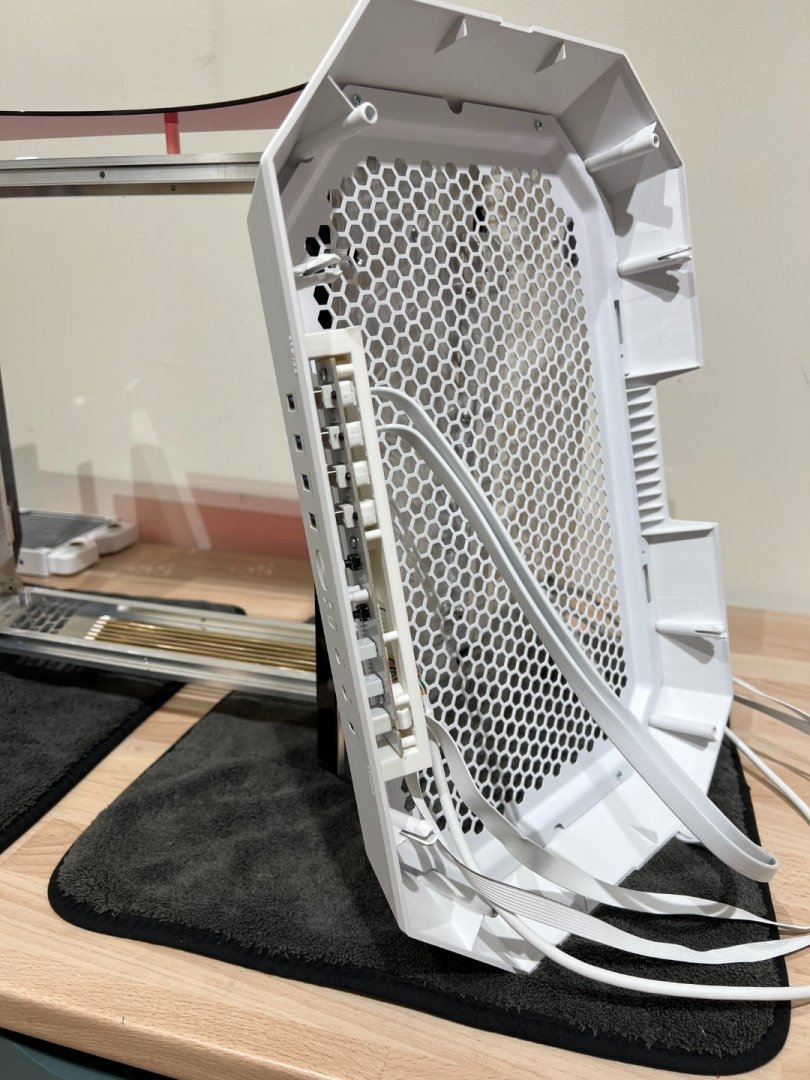
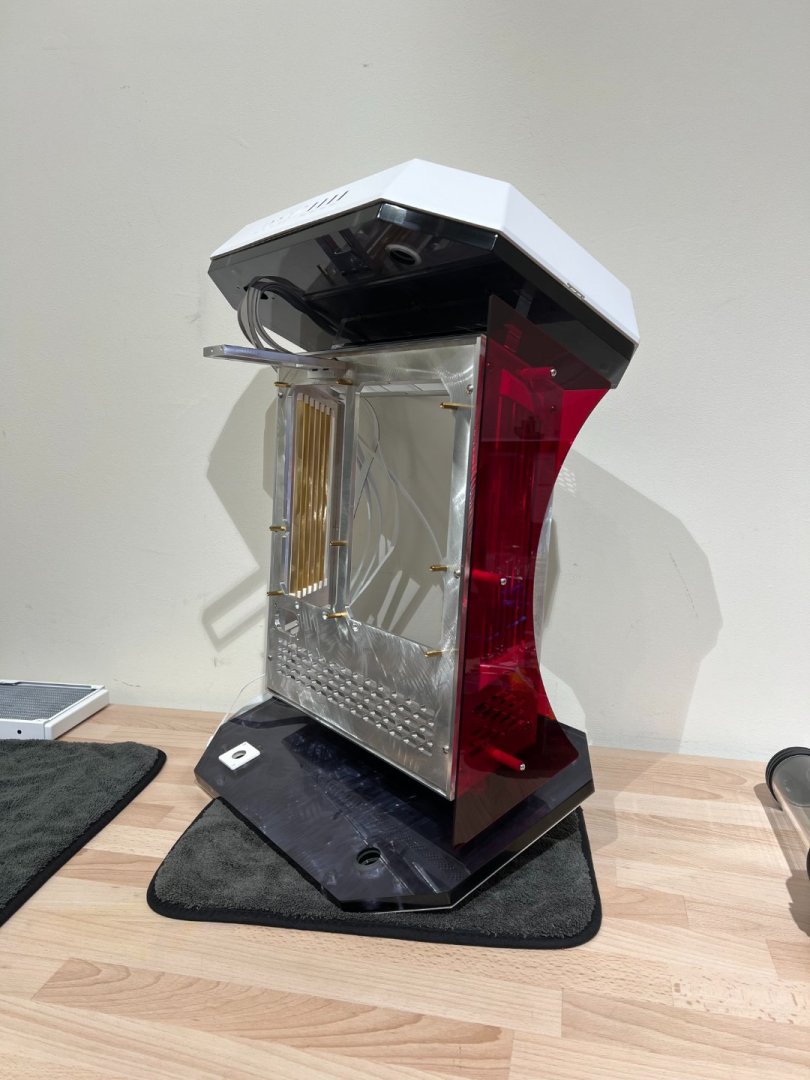
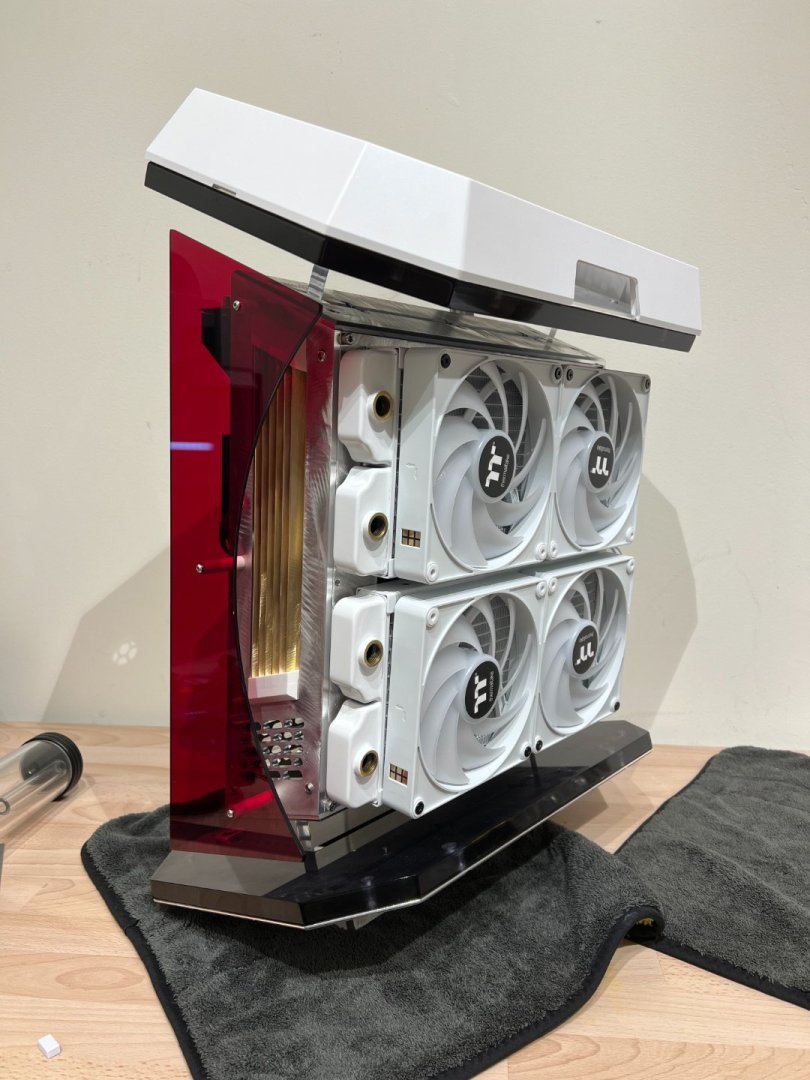
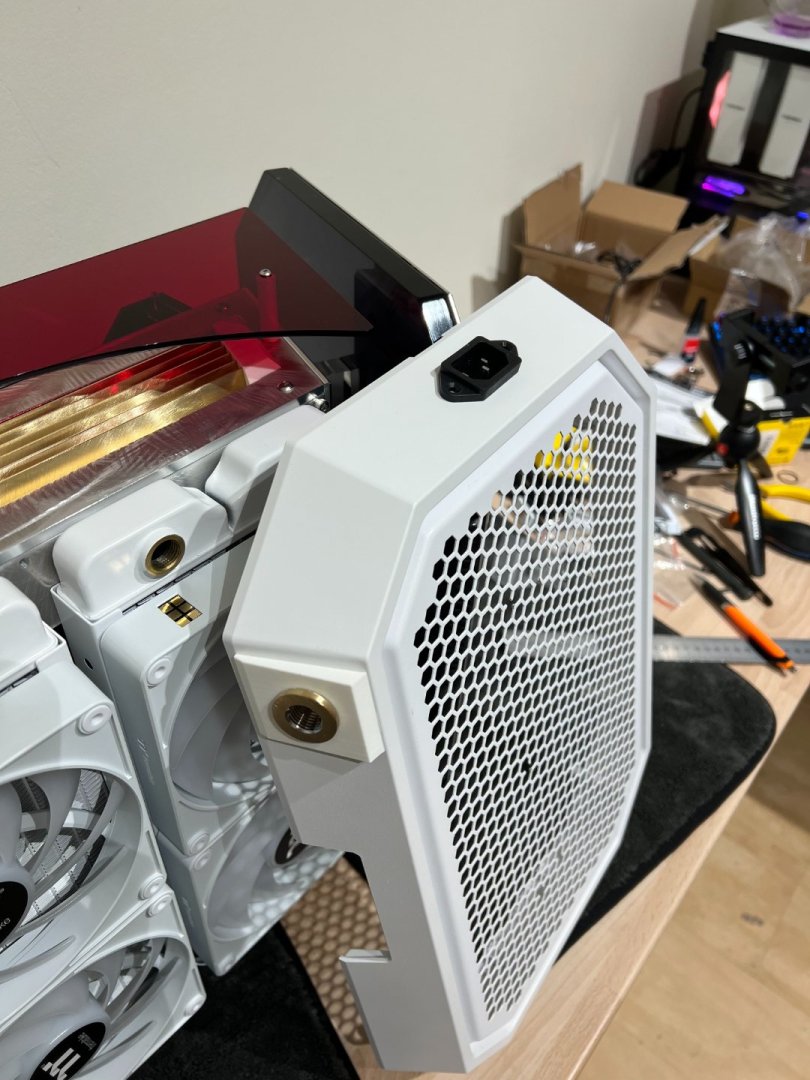
I finally attached both of the Tower 600 with all the required tubing and wiring. I also put red acrylic behind the honeycomb grid to go along with the theme. This meant I could finally mount the little acrylic stand and put it on the base from the Tower 600 Chassis kit. Looking good! Now time for a really fun part of this project imho: corrugated pipes to route the front I/O cables and the passthrough power cord I'm using corrugated pipe with custom 3D printed clamps to securely attach it to the panels. This gives the whole thing kind of an industrial Sci-Fi vibe while cleanly routing cables that would otherwise be in the way. It also preserves the floating look of the centerpiece, because of course the easy way would have been to just route them directly from the top and bottom, but the clear acrylic braces would have lost their purpose! PSU mounted too, now time to start sorting out all the cable management! This is no easy task since this design doesn't leave much space for cables. Could be way worse though considering how compact that compartment is, especially with the PSU inside! Looking forward to the "where is the PSU?" questions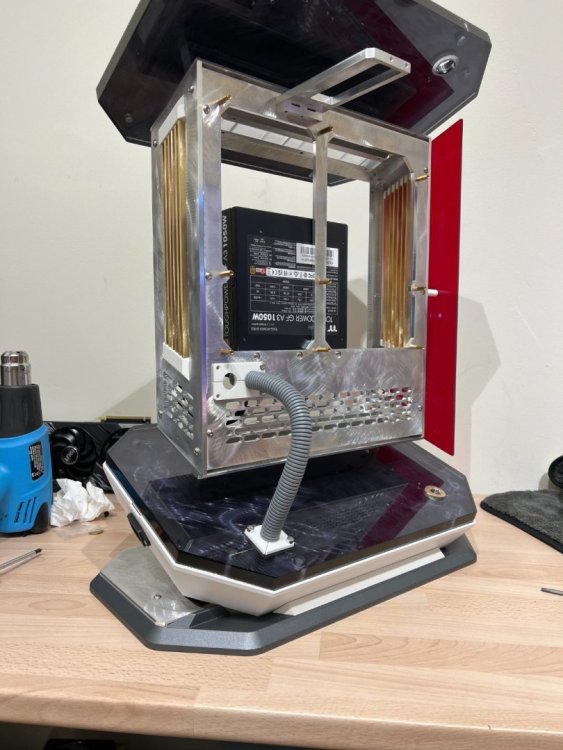


-
[Italy] Alessandro Zaiti
Explore Modding replied to TT Kristine's topic in 2024 Thermaltake CaseMOD Invitational Season 1
It's time to start the final assembly while I finish off some remaining parts and modifications! This whole structure is pretty complex and requires careful assembly because of tolerance and the use of angles. If I don't tigthen up all the screws in the right order, the rigidity of the structure may be compromised. Meanwhile, I designed and printed a new bracket for the front I/O panel of the Tower 600 to be mounted directly onto the top cover rather than to the case itself. Then I cut and polished the red acrylic side pieces which really bring the whole thing together. This got me very excited to see the final result! I also started putting together the cooling portion of the build, with radiators and fans. Still need to design and produce a custom bracket for mounting the res/pump. And also a quick test fit of the main components Both the top and bottom Tower 600 cover are getting custom passthrough ports to support my custom loop madness. The bottom one also received a passthrough power port for a clean and unique power chord routing.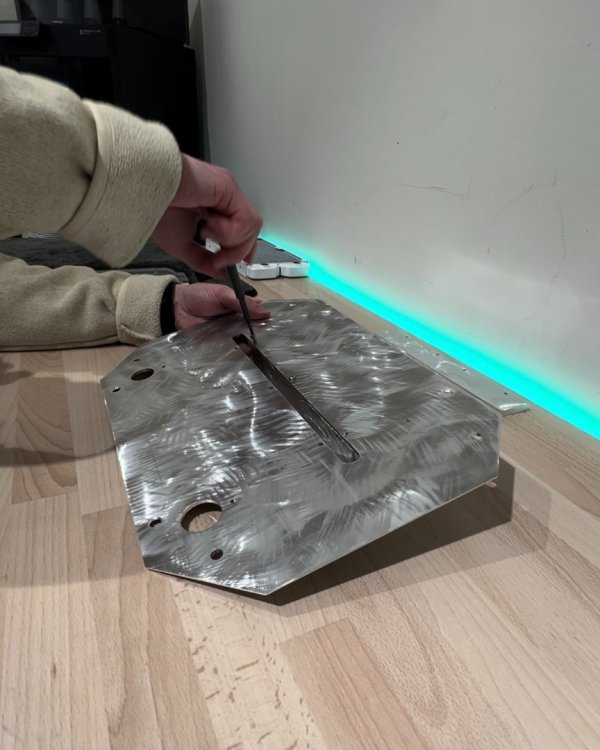


-
[Italy] Alessandro Zaiti
Explore Modding replied to TT Kristine's topic in 2024 Thermaltake CaseMOD Invitational Season 1
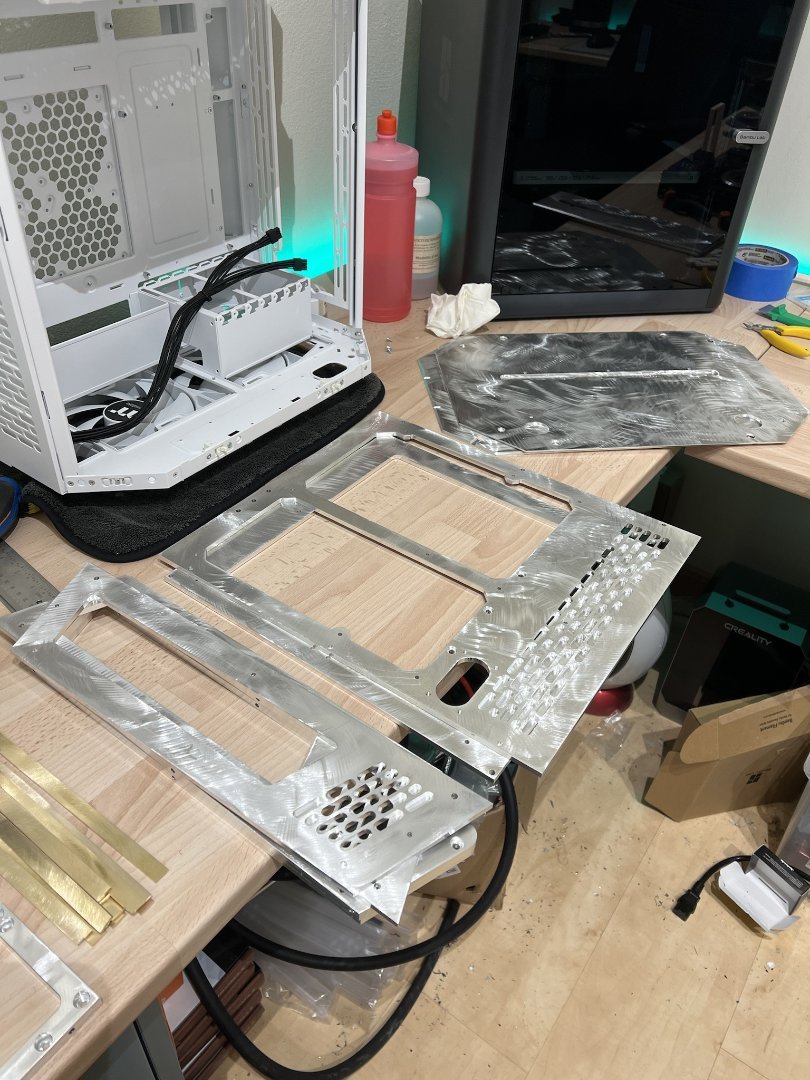
Alu parts finished, acrylic polished, and everything washed up and ready to be assemble! Just need to print some more brackets and stuff now, as well as figure something out for the GPU mod. Final rush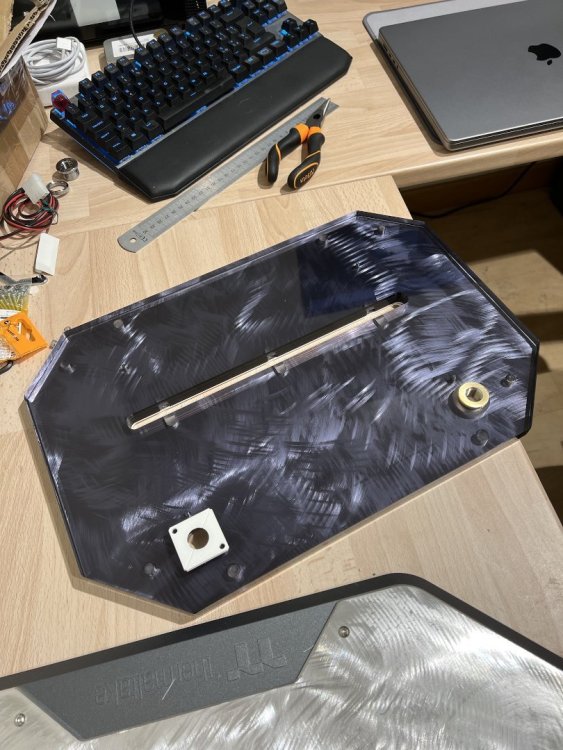


-
[Italy] Alessandro Zaiti
Explore Modding replied to TT Kristine's topic in 2024 Thermaltake CaseMOD Invitational Season 1
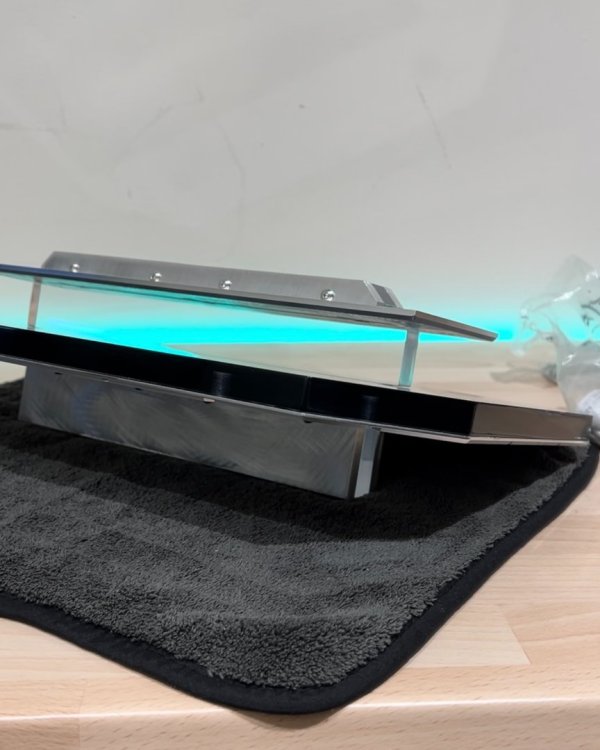
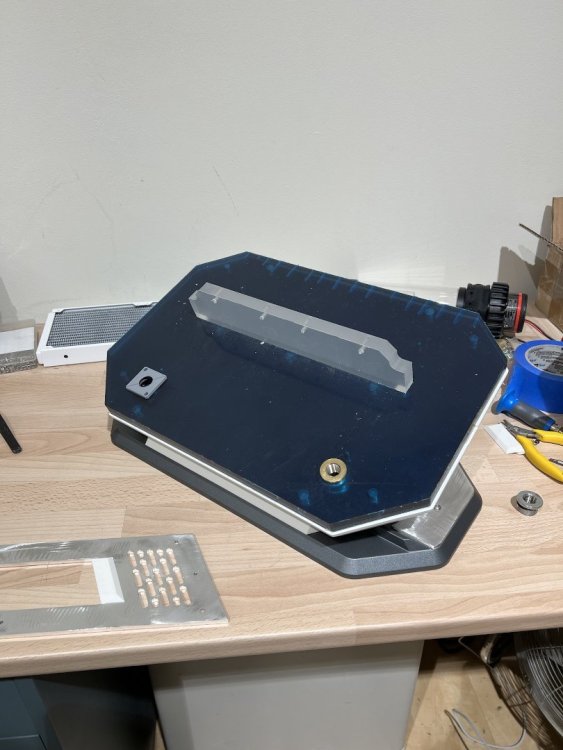
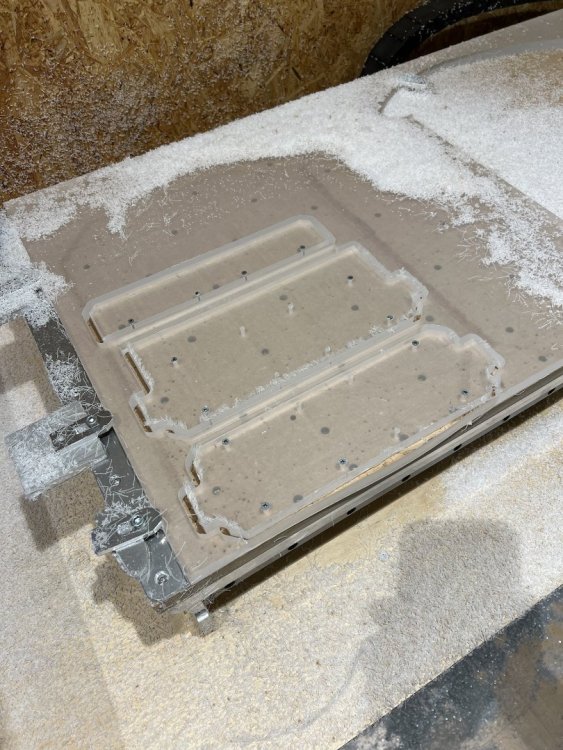
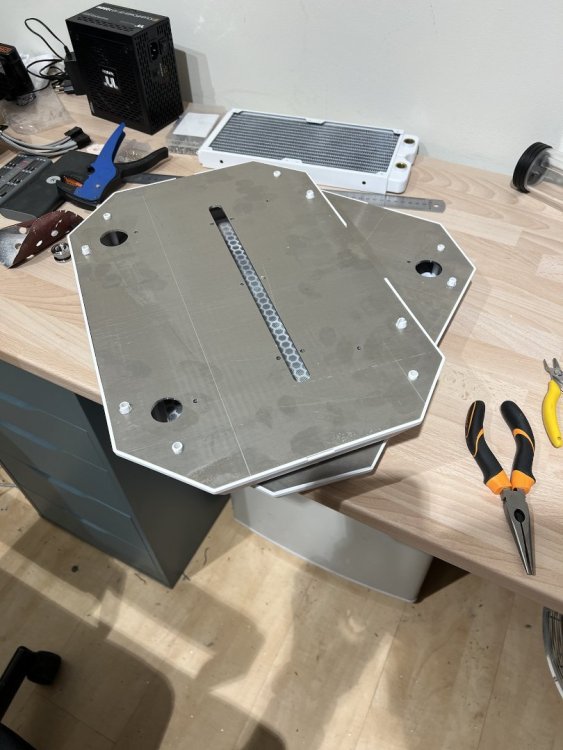
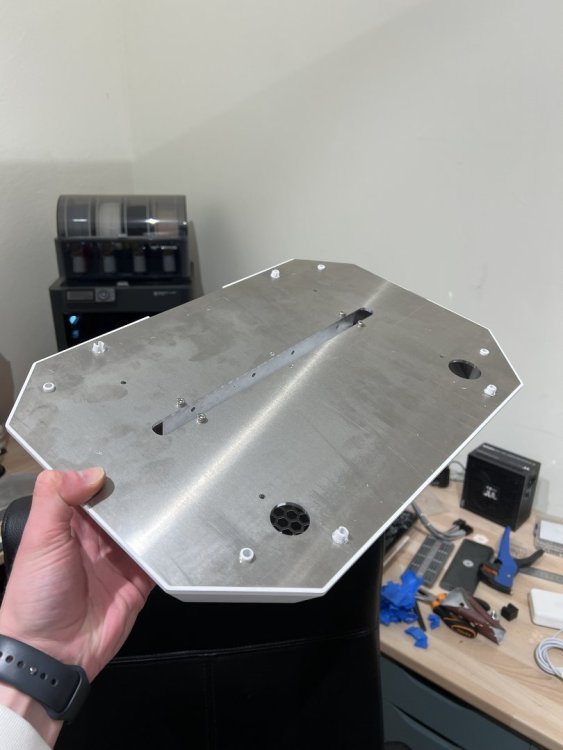
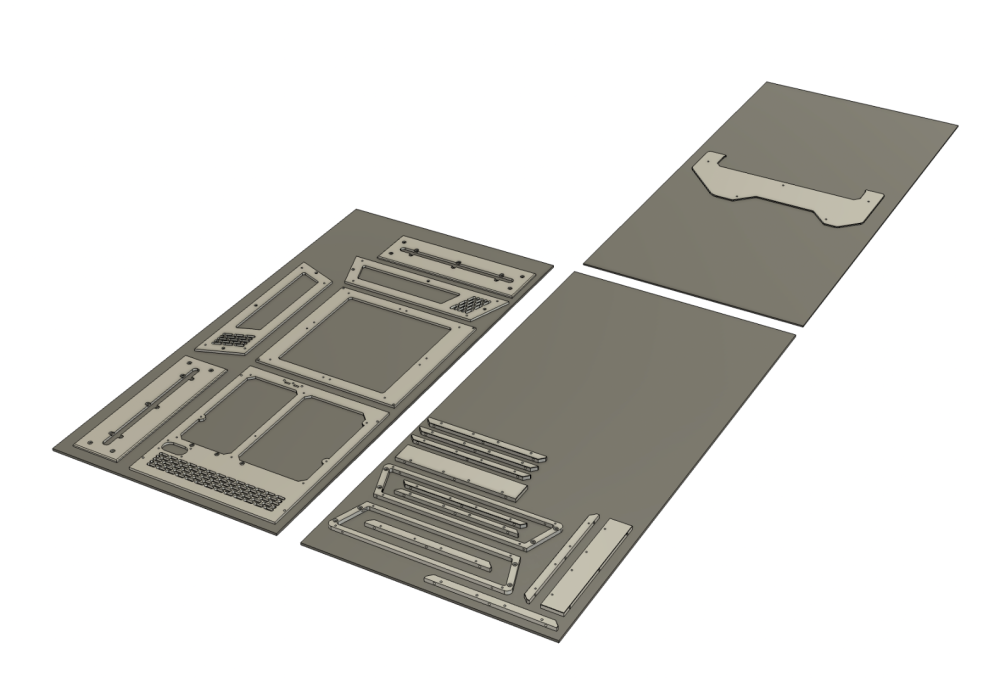
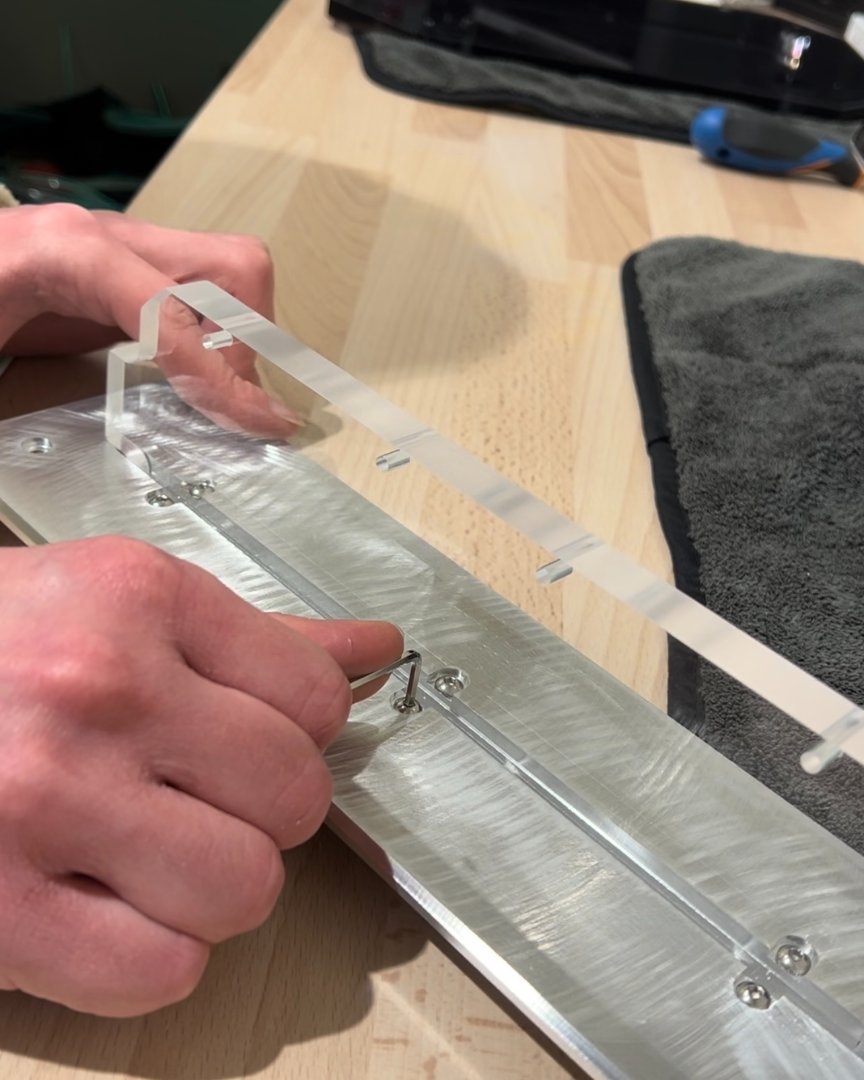
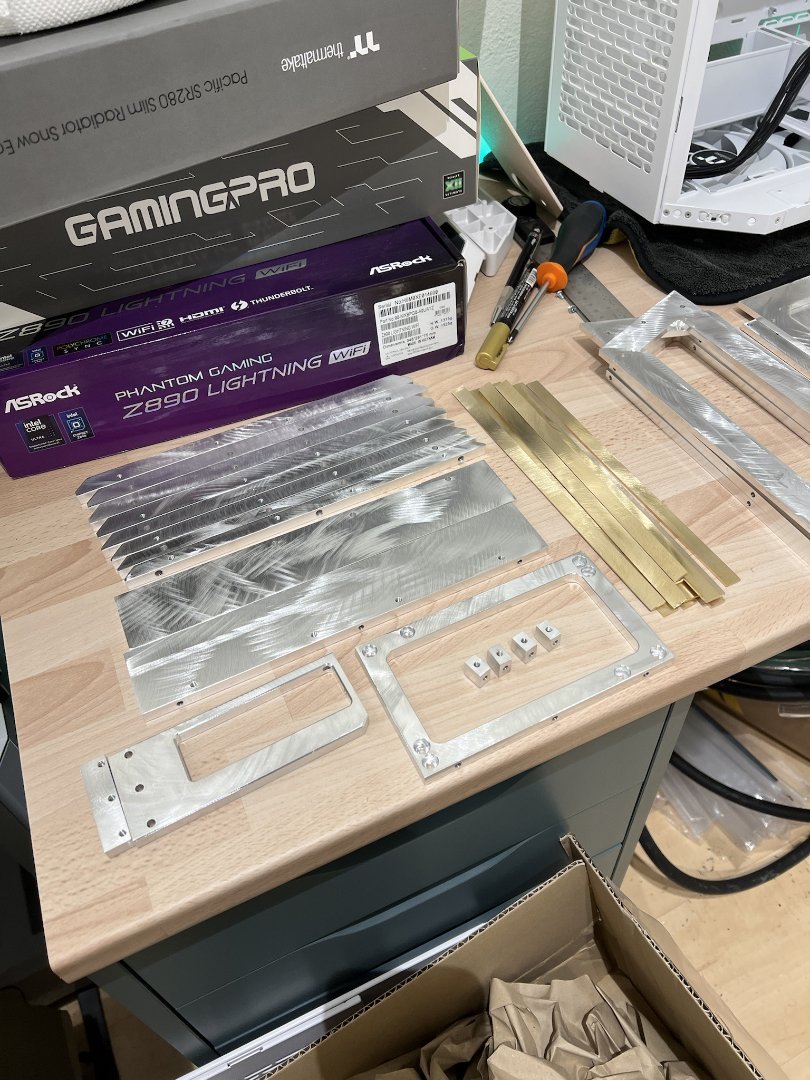
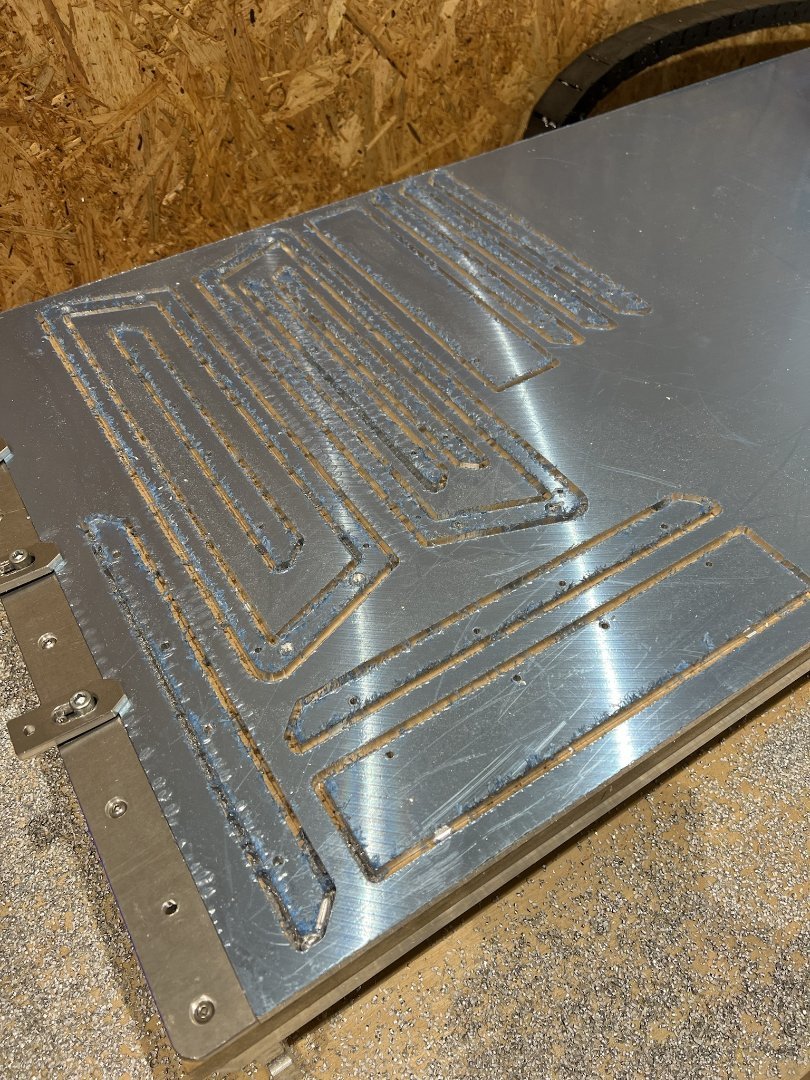
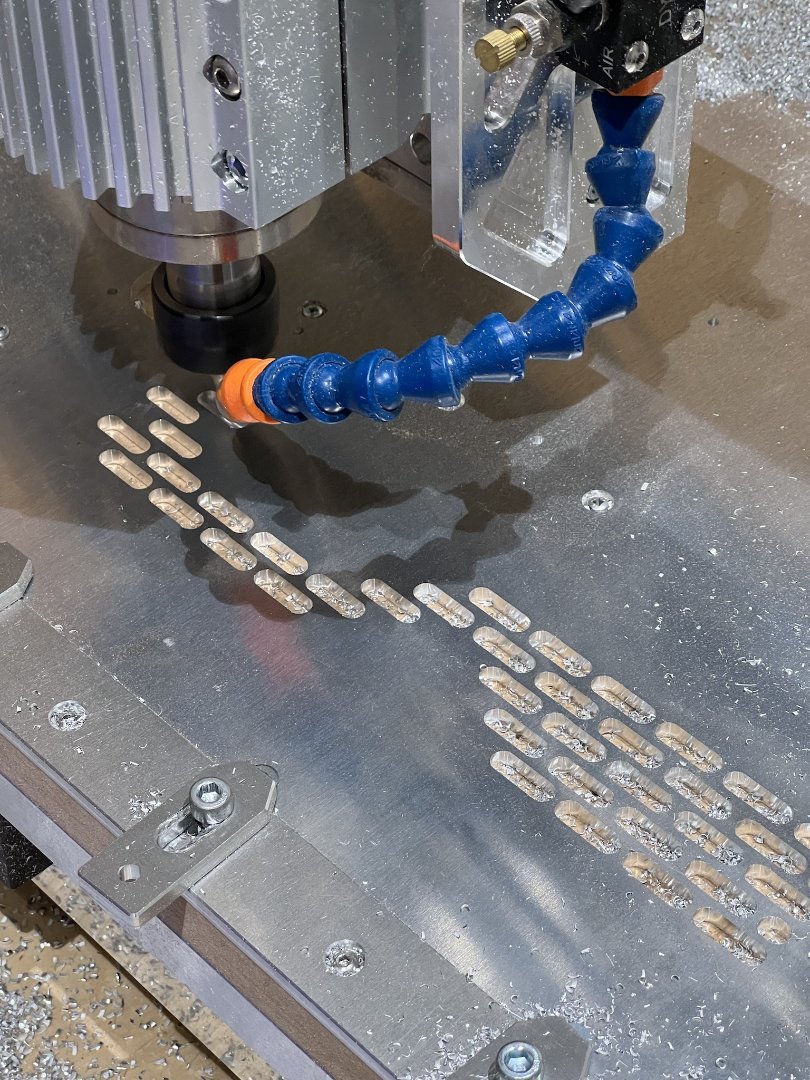
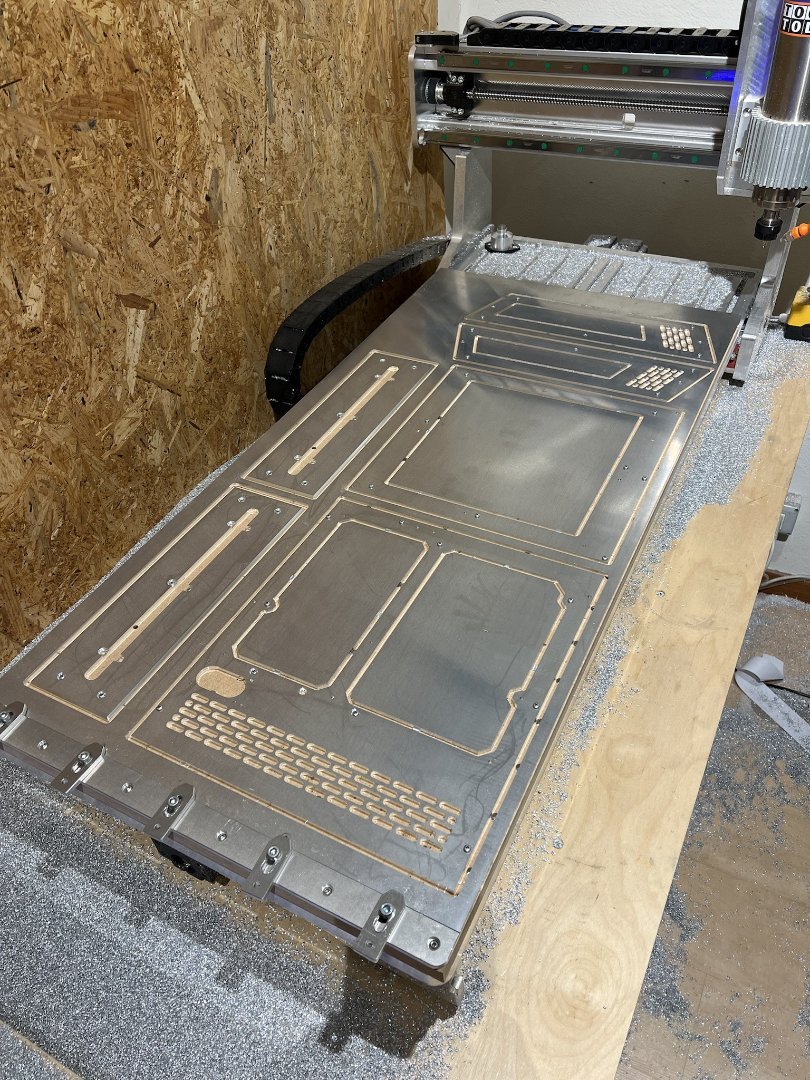
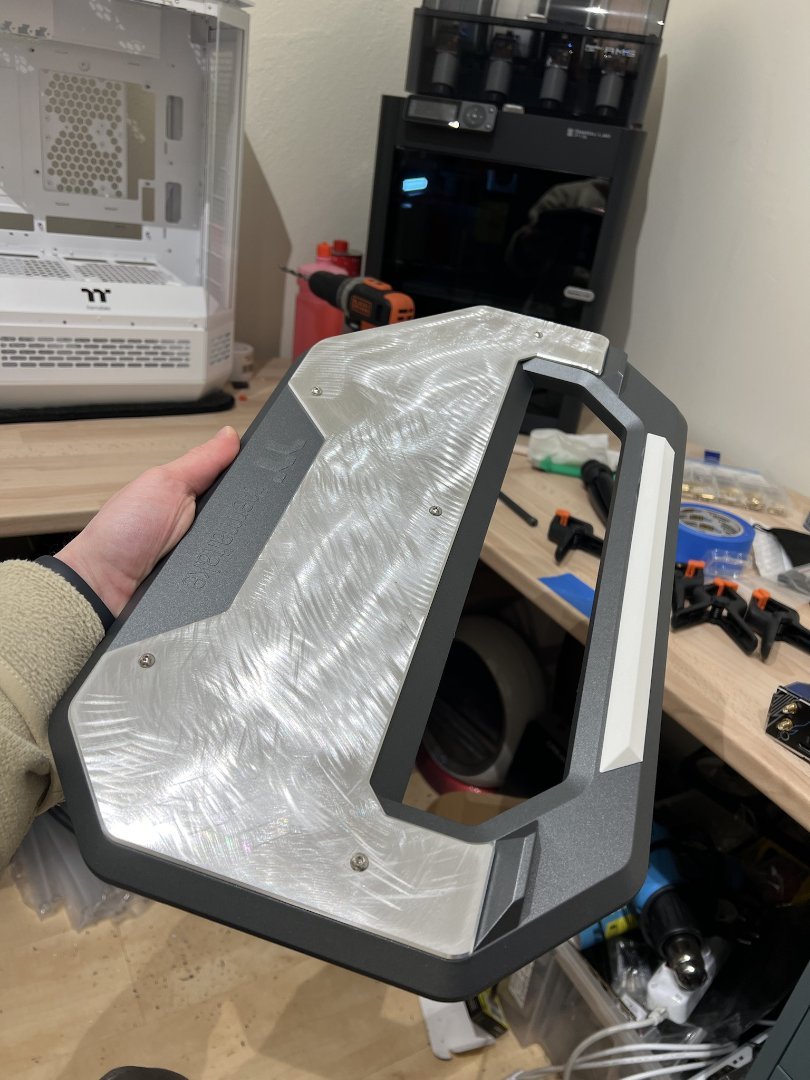
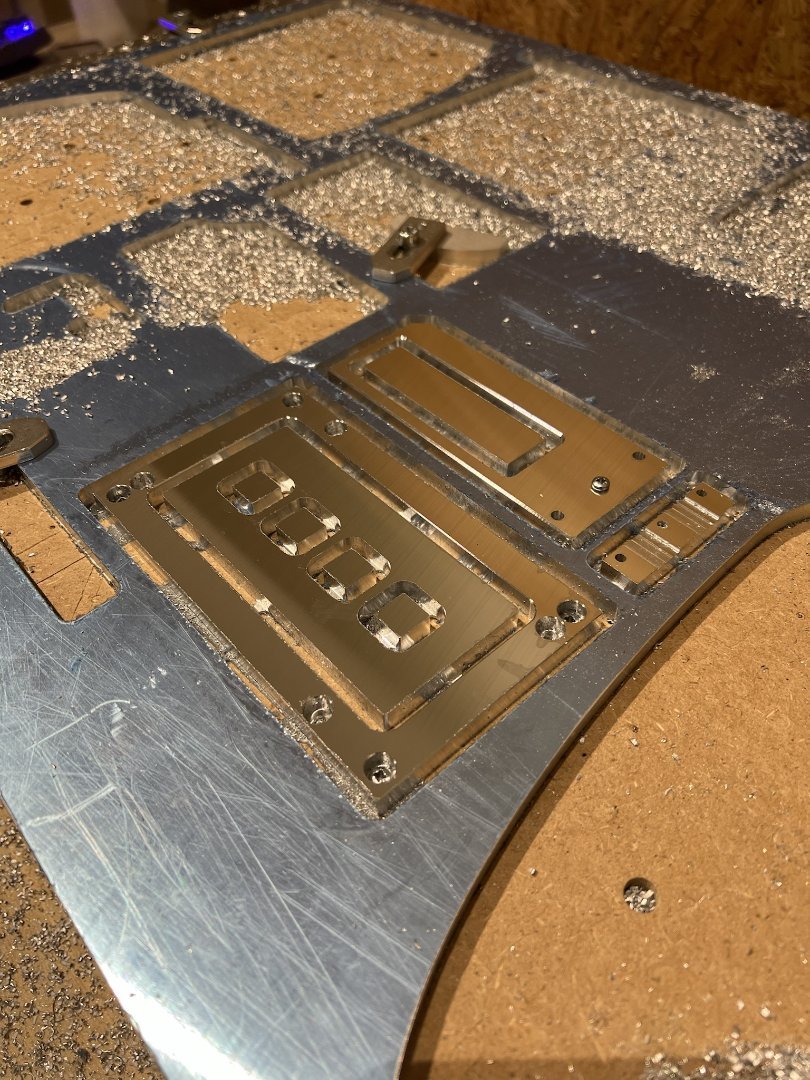
The grind continues! Now we'll be taking a look at probably the most sensible parts, because it required very tight tolerances to perfectly fit the original case. These will replace the top and bottom structural panels. The main challenge here was getting the attachment points for the plastic covers just right so that they would clamp in place securely and be detached just as well! Turned out great so I doubled down! Only thing I had to add after machining was just some chamfering on both sides of the clamp holes. Continuing with the structural parts, I moved to the 15mm clear acrylic for the centerpiece connecting brackets as well as the pedestal. Quick fit test! Once the clear acrylic was done, I took out the smoked one to cut the two top and bottom panels which will hold passthrough fittings and also those little grey brackets that you'll see more of soon enough! Also went ahead and printed the side air vent connecting parts and cut the brass strips. I decided to go with white 3D printing filament as it perfectly matches the white of the original case parts. This is pure metal shine heaven!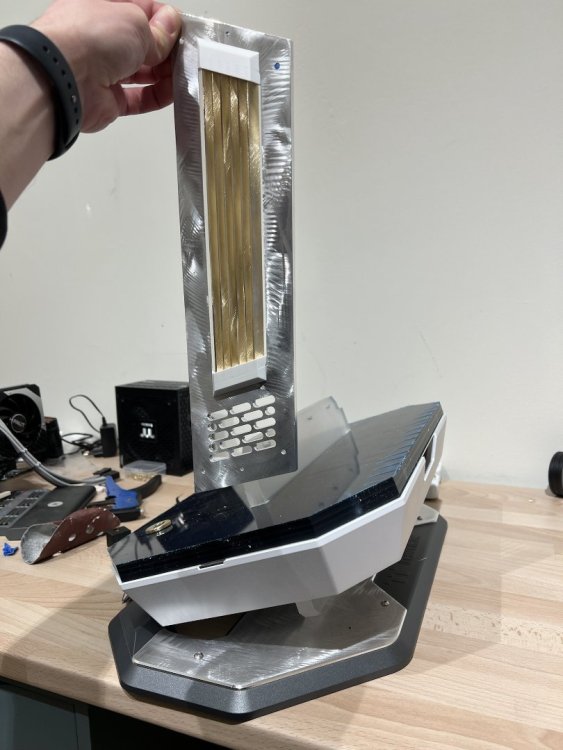


-
Explore Modding reacted to a post in a topic:
[Italy] Alessandro Zaiti
-
Unltd.Pn.Modded reacted to a post in a topic:
[Italy] Alessandro Zaiti
-
[Italy] Alessandro Zaiti
Explore Modding replied to TT Kristine's topic in 2024 Thermaltake CaseMOD Invitational Season 1
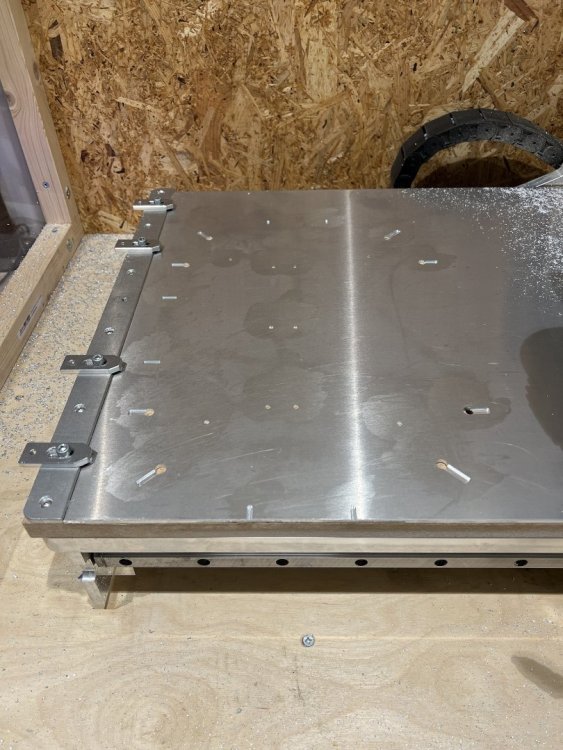
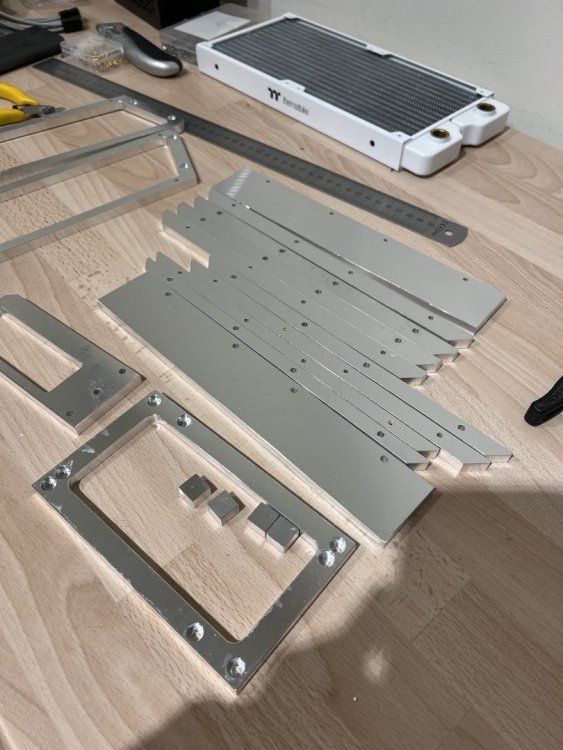
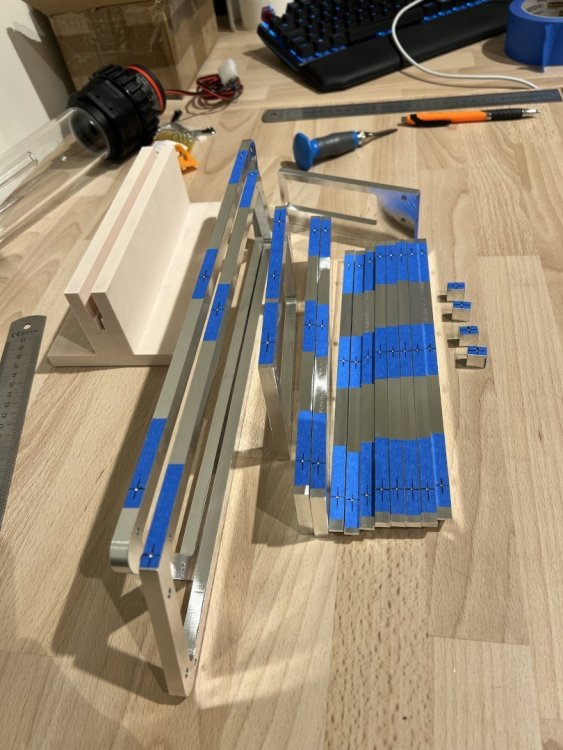
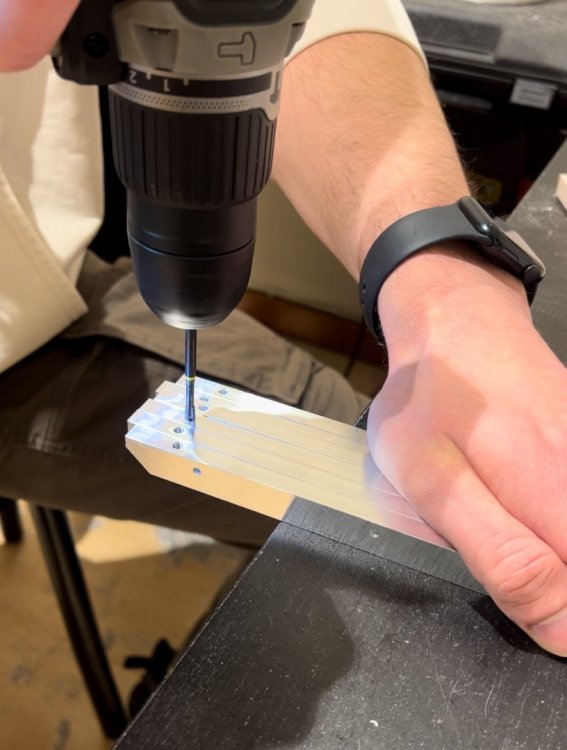
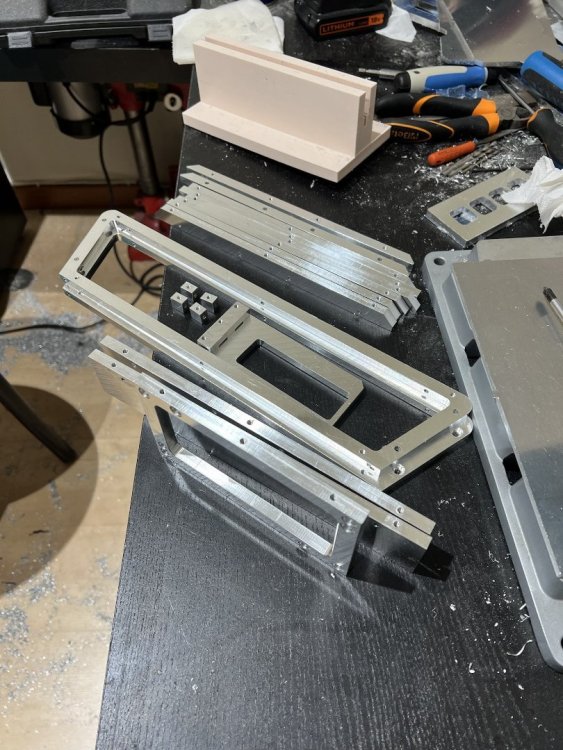
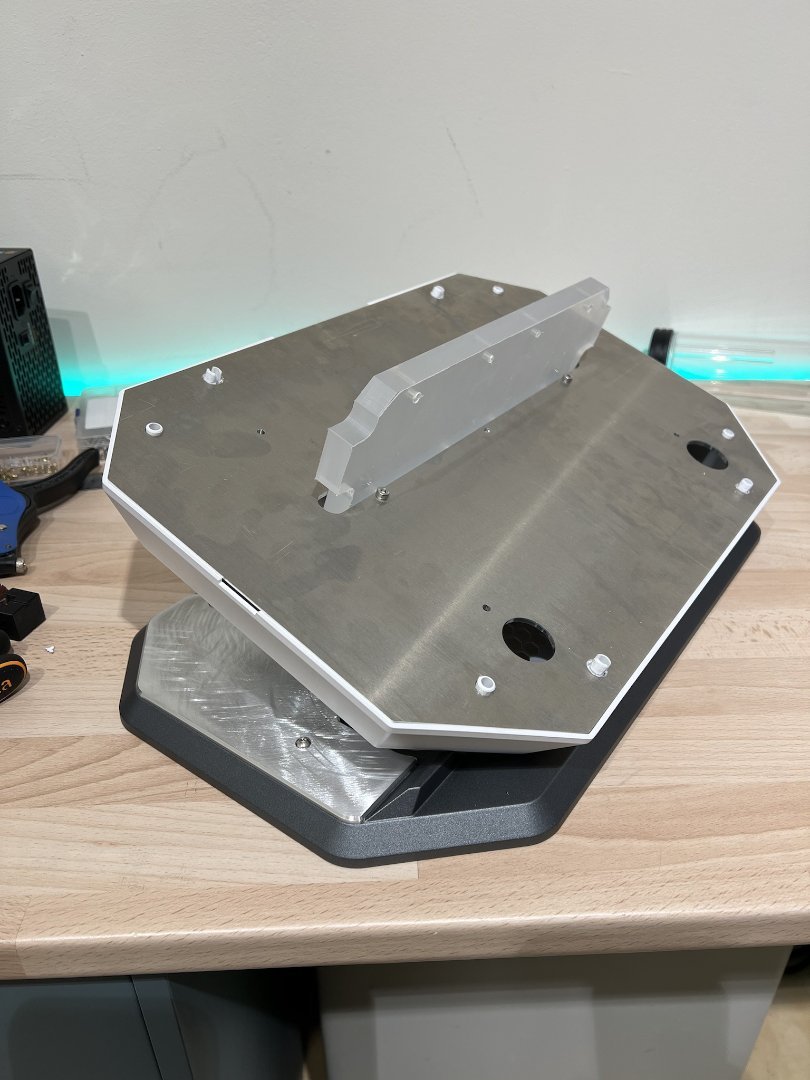
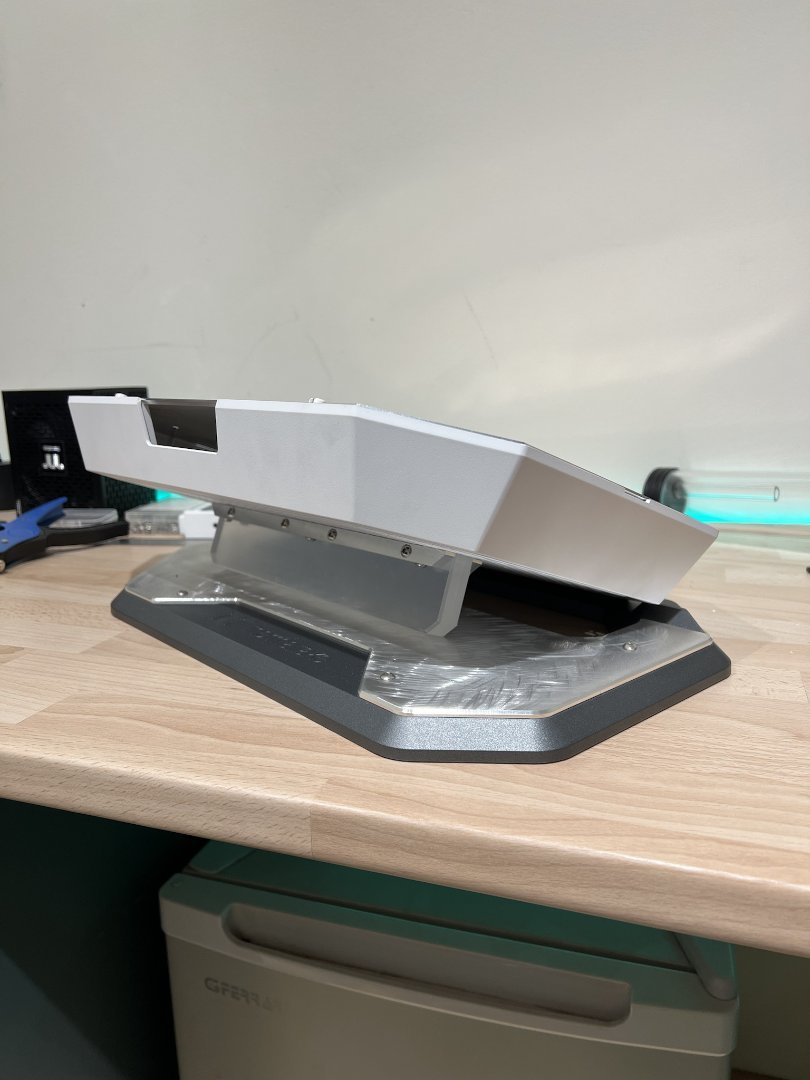
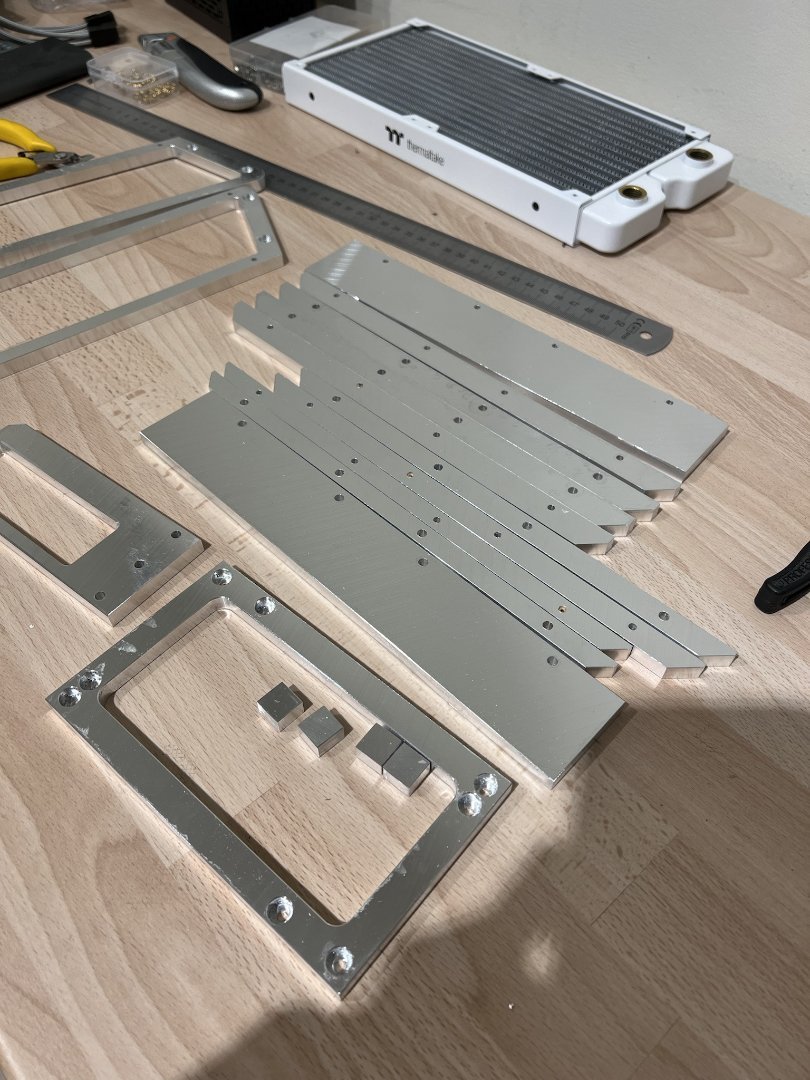
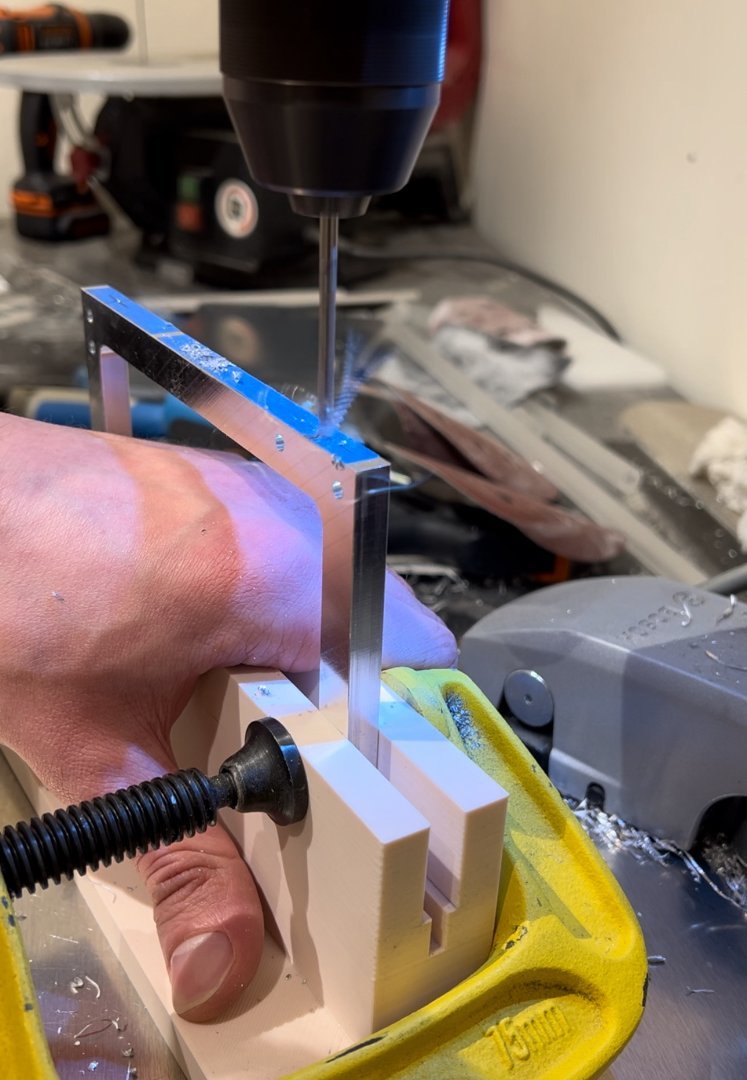
Let's start with most of the 8mm aluminum brackets that will do the majority of the work holding everything together! They will require quite some additional holes to the edges which will be done later on the drill press Next up, all the 5mm alu panels that will be assembled to form the centerpiece, where all the hardware will be installed! Air vents are a clear tribute to the bottom front section of the Tower 600, since this unique angled design didn't allow me to use the original panels Meanwhile I completed the modifications on the pedestal from the Tower 600 Stand Kit: a 3mm alu covered was added, together with a little 3D printed piece on the front which will serve as a stop for the case to rest. Here you can also have a glimpse of the abstract finish I will use on the alu panels, just to stir things up a bit More 8mm brackets! Now let's prep all of the 8mm brackets for edge drilling and tapping. Measure, mark, punch, drill and tap... countless times! Hah! Most boring part done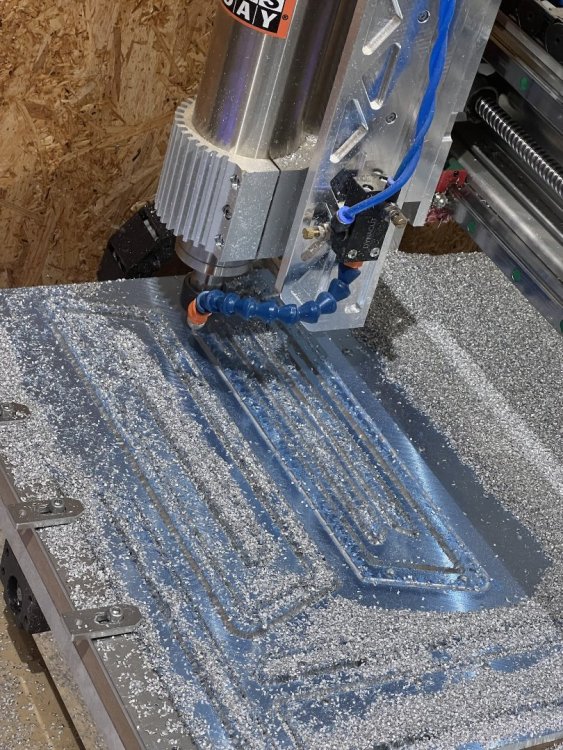


-
[Italy] Alessandro Zaiti
Explore Modding replied to TT Kristine's topic in 2024 Thermaltake CaseMOD Invitational Season 1
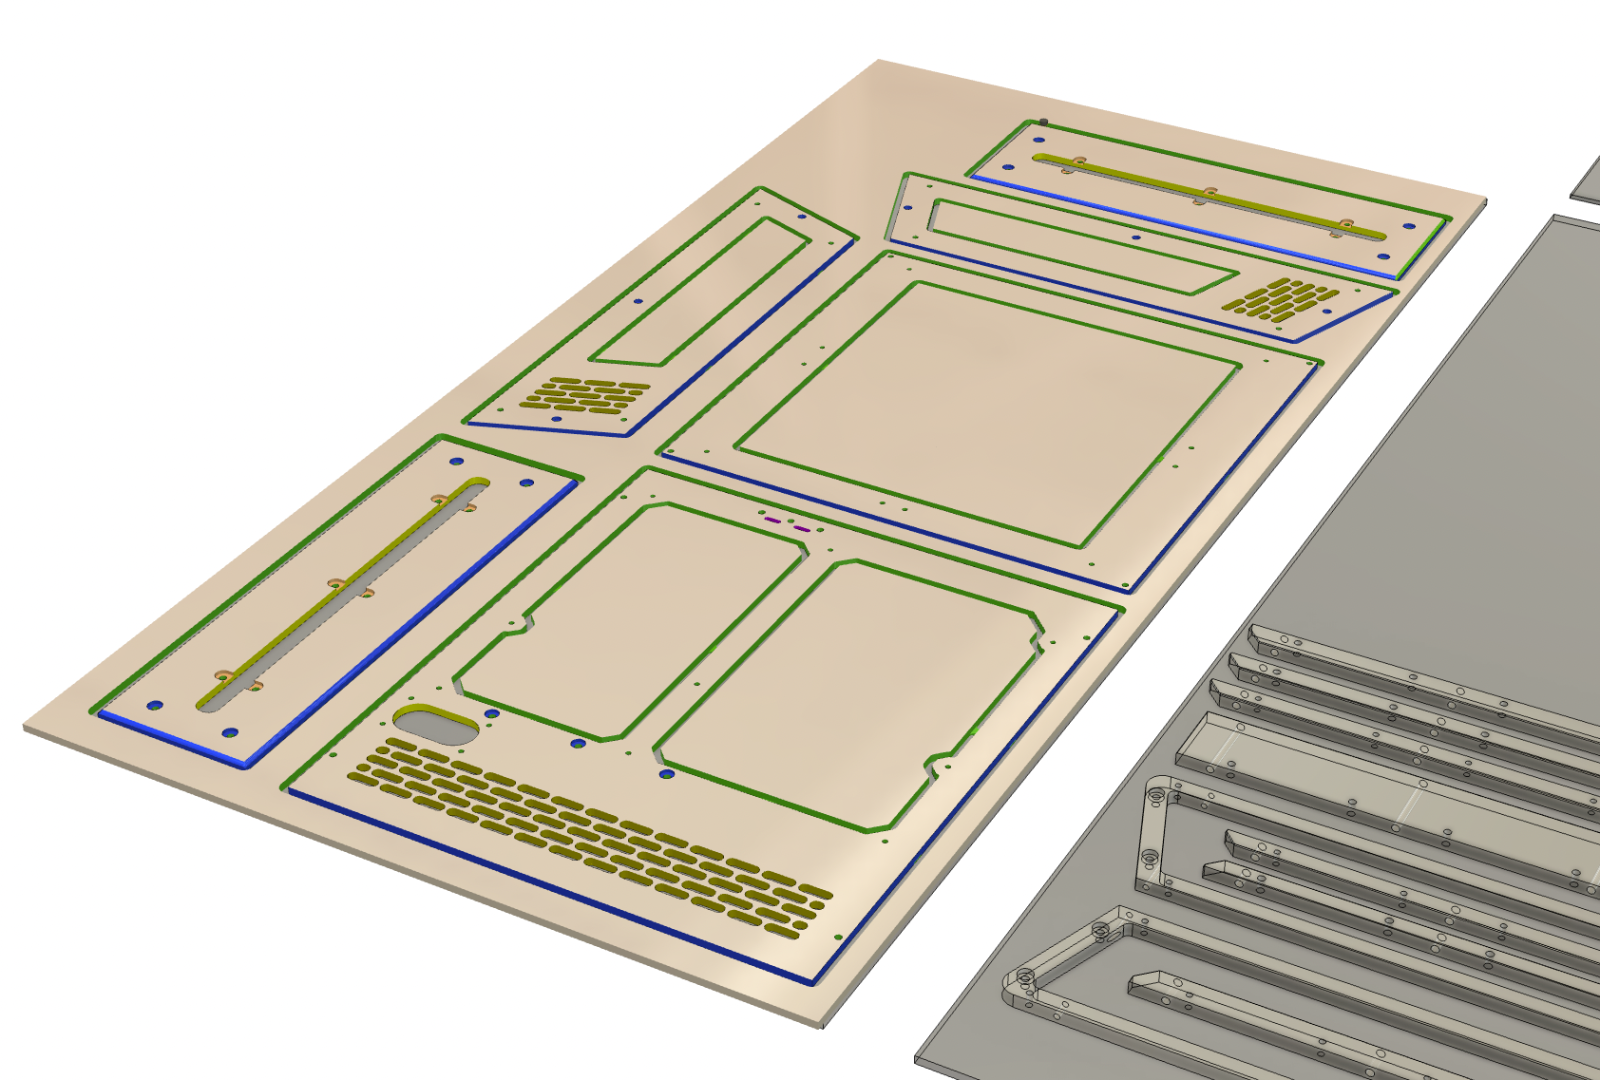
With less than a month left, the design is basically finalized! Not much has changed since the last updated, aside from some small details and parts that were missing. BUT I came up with something to enhance the tridimensional stance of this build, and those two little thingies on the smoked acrylic panel at the bottom are a hint! Also currently thinking about the modifications for the Palit 4070Ti Super Gaming Pro, I'll probably blend it in using the same red acrylic I used for the side elements Last but not least, I finally have a name for this... TRISMEGISTO. It's now time to start preparing the files for the CNC machine, then let's get grinding!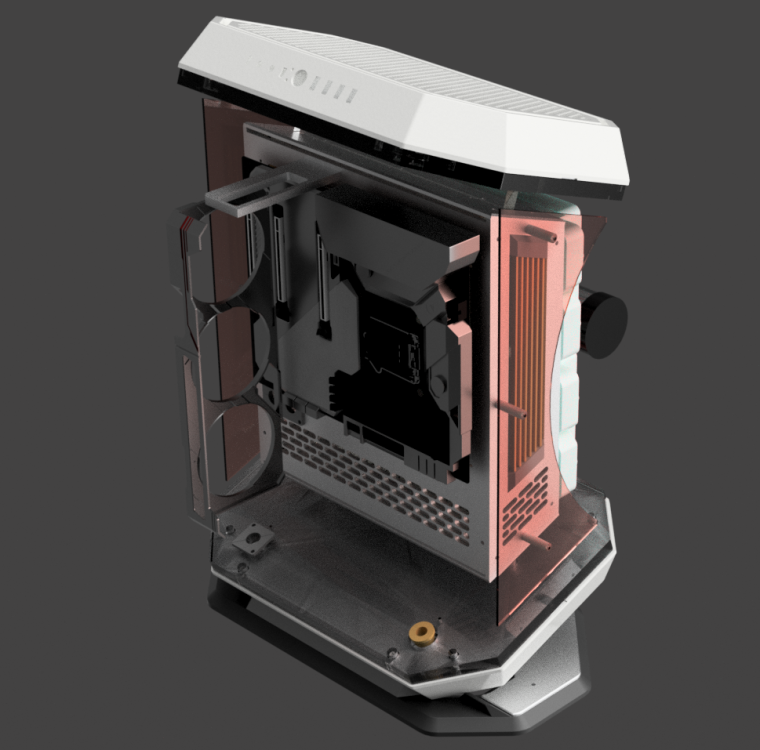

-
[Italy] Alessandro Zaiti
Explore Modding replied to TT Kristine's topic in 2024 Thermaltake CaseMOD Invitational Season 1
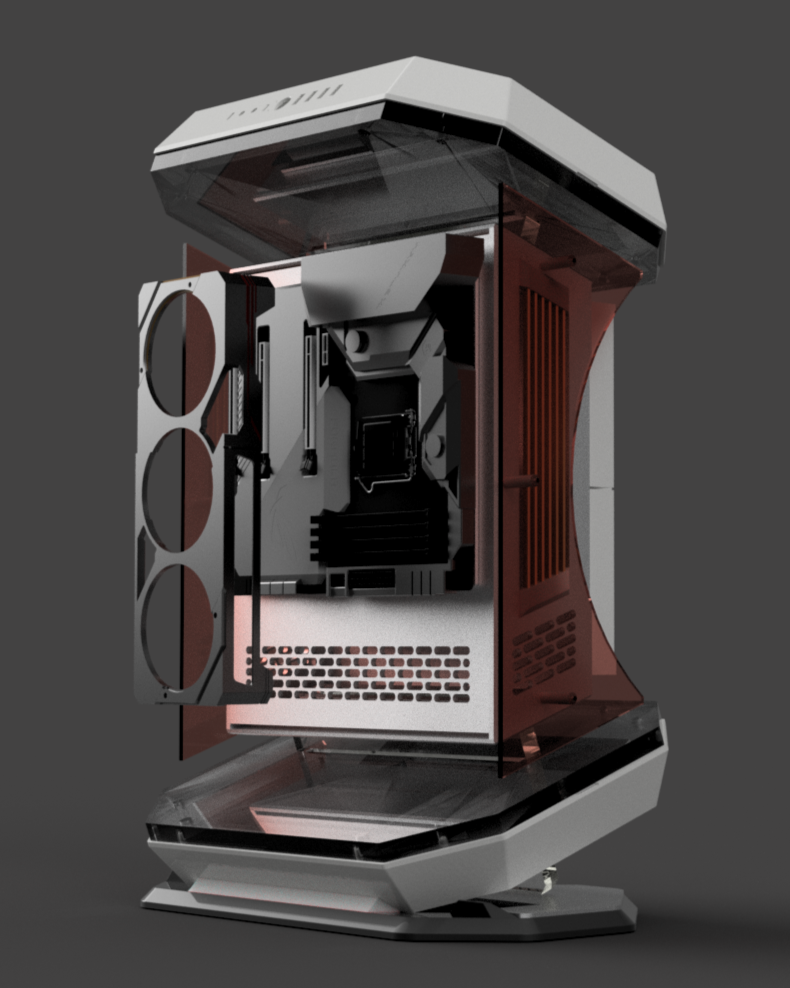
Modelling works continue! I made all the mounting points for the top and bottom sections, which will be connected to the centerpiece using 15mm clear acrylic, for that nice floaty look! I also tackled the pedestal and thought it would be cool to re-use the base from the Chassis Stand Kit as it fits the overall shape pretty well! Of course it needs some modifications itself in order to be used in this new scenario

-
[Italy] Alessandro Zaiti
Explore Modding replied to TT Kristine's topic in 2024 Thermaltake CaseMOD Invitational Season 1
I THINK I found a semi-final design for the side elements and also started adding some vents, using the same design as the original bottom section of the Tower 600 as well as adding some more aggressive vents with brass fins. At this point I'm likely ditching the wood for top and bottom sections since it's becoming more and more of an aggressive design rather than a clean and classy one, so I'm thinking of using 15mm smoked acrylic to make it extra mean! Can also use the transparency to play with engravings and stuff.
.thumb.jpeg.4d14002c20aaa09236611c6805256b3c.jpeg)
.png.85c706851644cf82adc8069f3c9bc3c8.png)
.png.67abef69e1cc5d104b2e0d55ee9545f1.png)
.png.427a2874657c3878138223875479cdaf.png)
.png.66b1bff9fb18956bd737a3e5c851ddad.png)
.png.ddf6f4a2fc182c3101c9db9029eaac99.png)
.png.f2f81eabcd7c7ac7da1a21be3775f092.png)
.png.41abed925f4b0ab02d5ba48d09130864.png)
.png.c4da2ff7a6933d6e819c64721984da4c.png)
.png.fa4d7736d582b715f8586534e930a5a2.png)
.png.0827d7f5e4d7ade0b4994612062ce35f.png)
.png.43a80f2e7012f3b2e5dc63a38d90c795.png)
.png.974196416894245603ab5719317384be.png)
.png.d409d58de593cbf0778c62d0e2dfafb6.png)
.png.511540df39320e05adf883496220533c.png)


.jpeg.e682d2dbfbaabcefe2fc3b04ed8a95af.jpeg)
