-
Forum Statistics
93.5k
Total Topics114.2k
Total Posts -
Member Statistics
172,965
Total Members16,800
Most Online

tagmods
-
Posts
29 -
Joined
-
Last visited
Content Type
Profiles
Forums
Downloads
Events
Gallery
Blogs
Everything posted by tagmods
-

[Australia] Ethan Cooper
tagmods replied to TT Lily's topic in 2022 Thermaltake RAM MOD Invitational Season 1
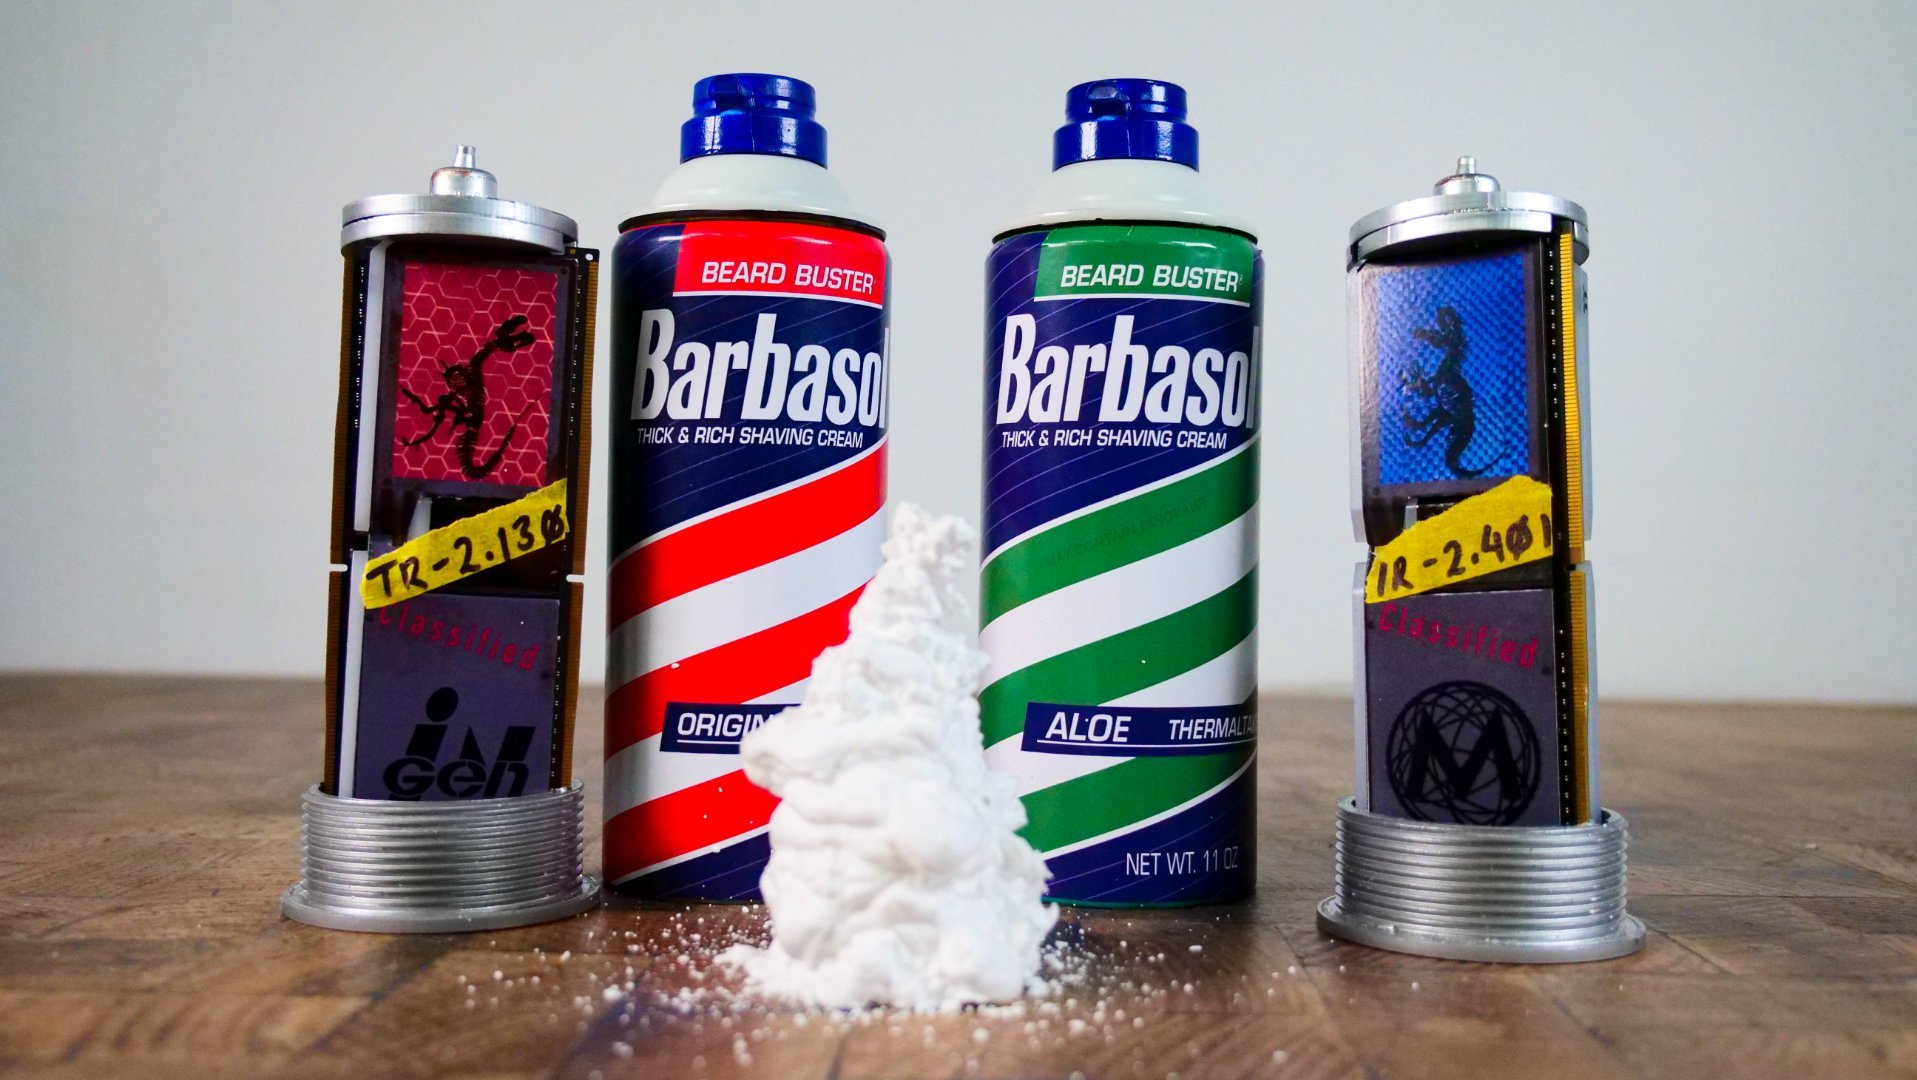
AND WE ARE DONE! Here are the Photos: https://drive.google.com/drive/folders/1S0Y4A_nSU4tdlXBaLNdgxpe9Cg9BKxYJ?usp=sharing And a Quick Video on how it all works! https://drive.google.com/file/d/1g-5DbobDxv4wwQSGuxtgtVBNrE27r_mw/view?usp=sharing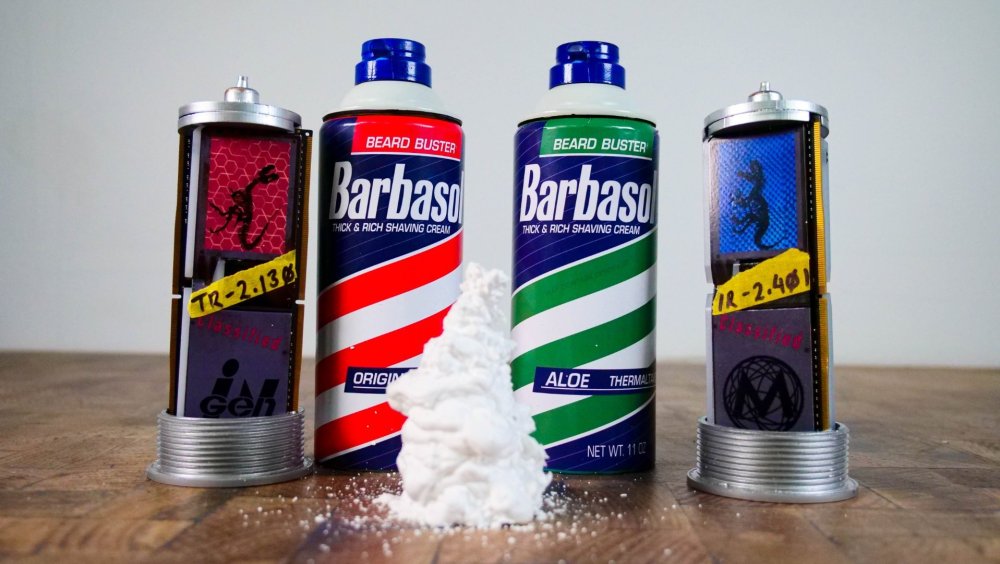
-
[Australia] Ethan Cooper
tagmods replied to TT Lily's topic in 2022 Thermaltake RAM MOD Invitational Season 1
Now to wrap the cans. Turn the RAM into samples and get some final shots done!
-
[Australia] Ethan Cooper
tagmods replied to TT Lily's topic in 2022 Thermaltake RAM MOD Invitational Season 1
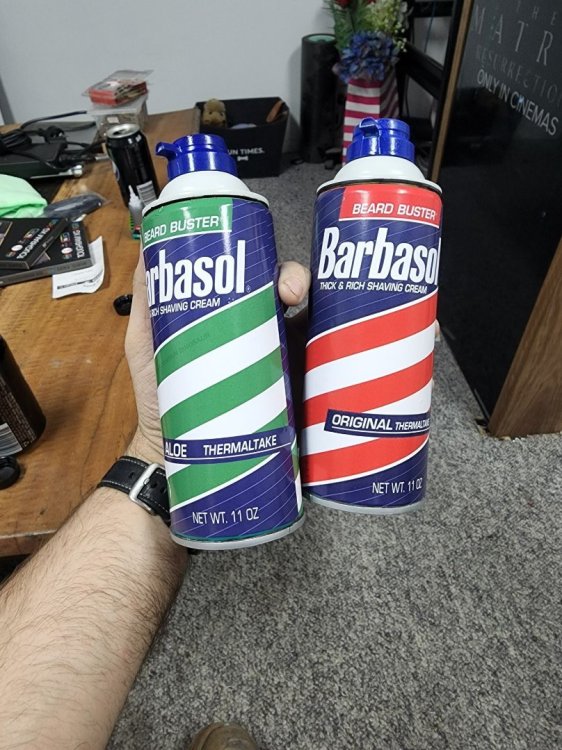
Decided since we have 2 cans that we should also do the Aloe variant!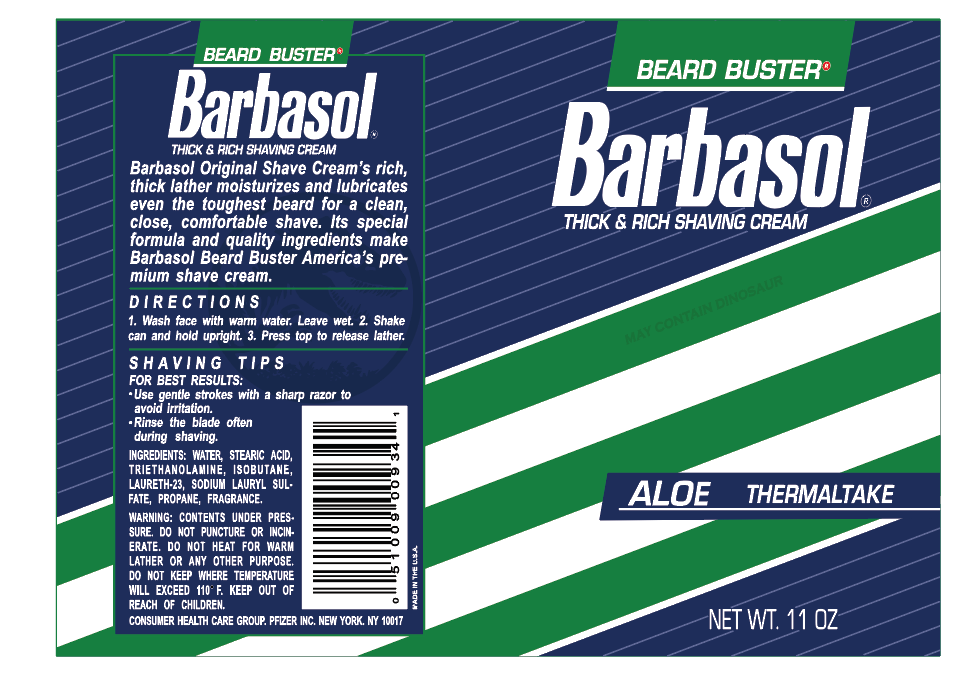
-
[Australia] Ethan Cooper
tagmods replied to TT Lily's topic in 2022 Thermaltake RAM MOD Invitational Season 1
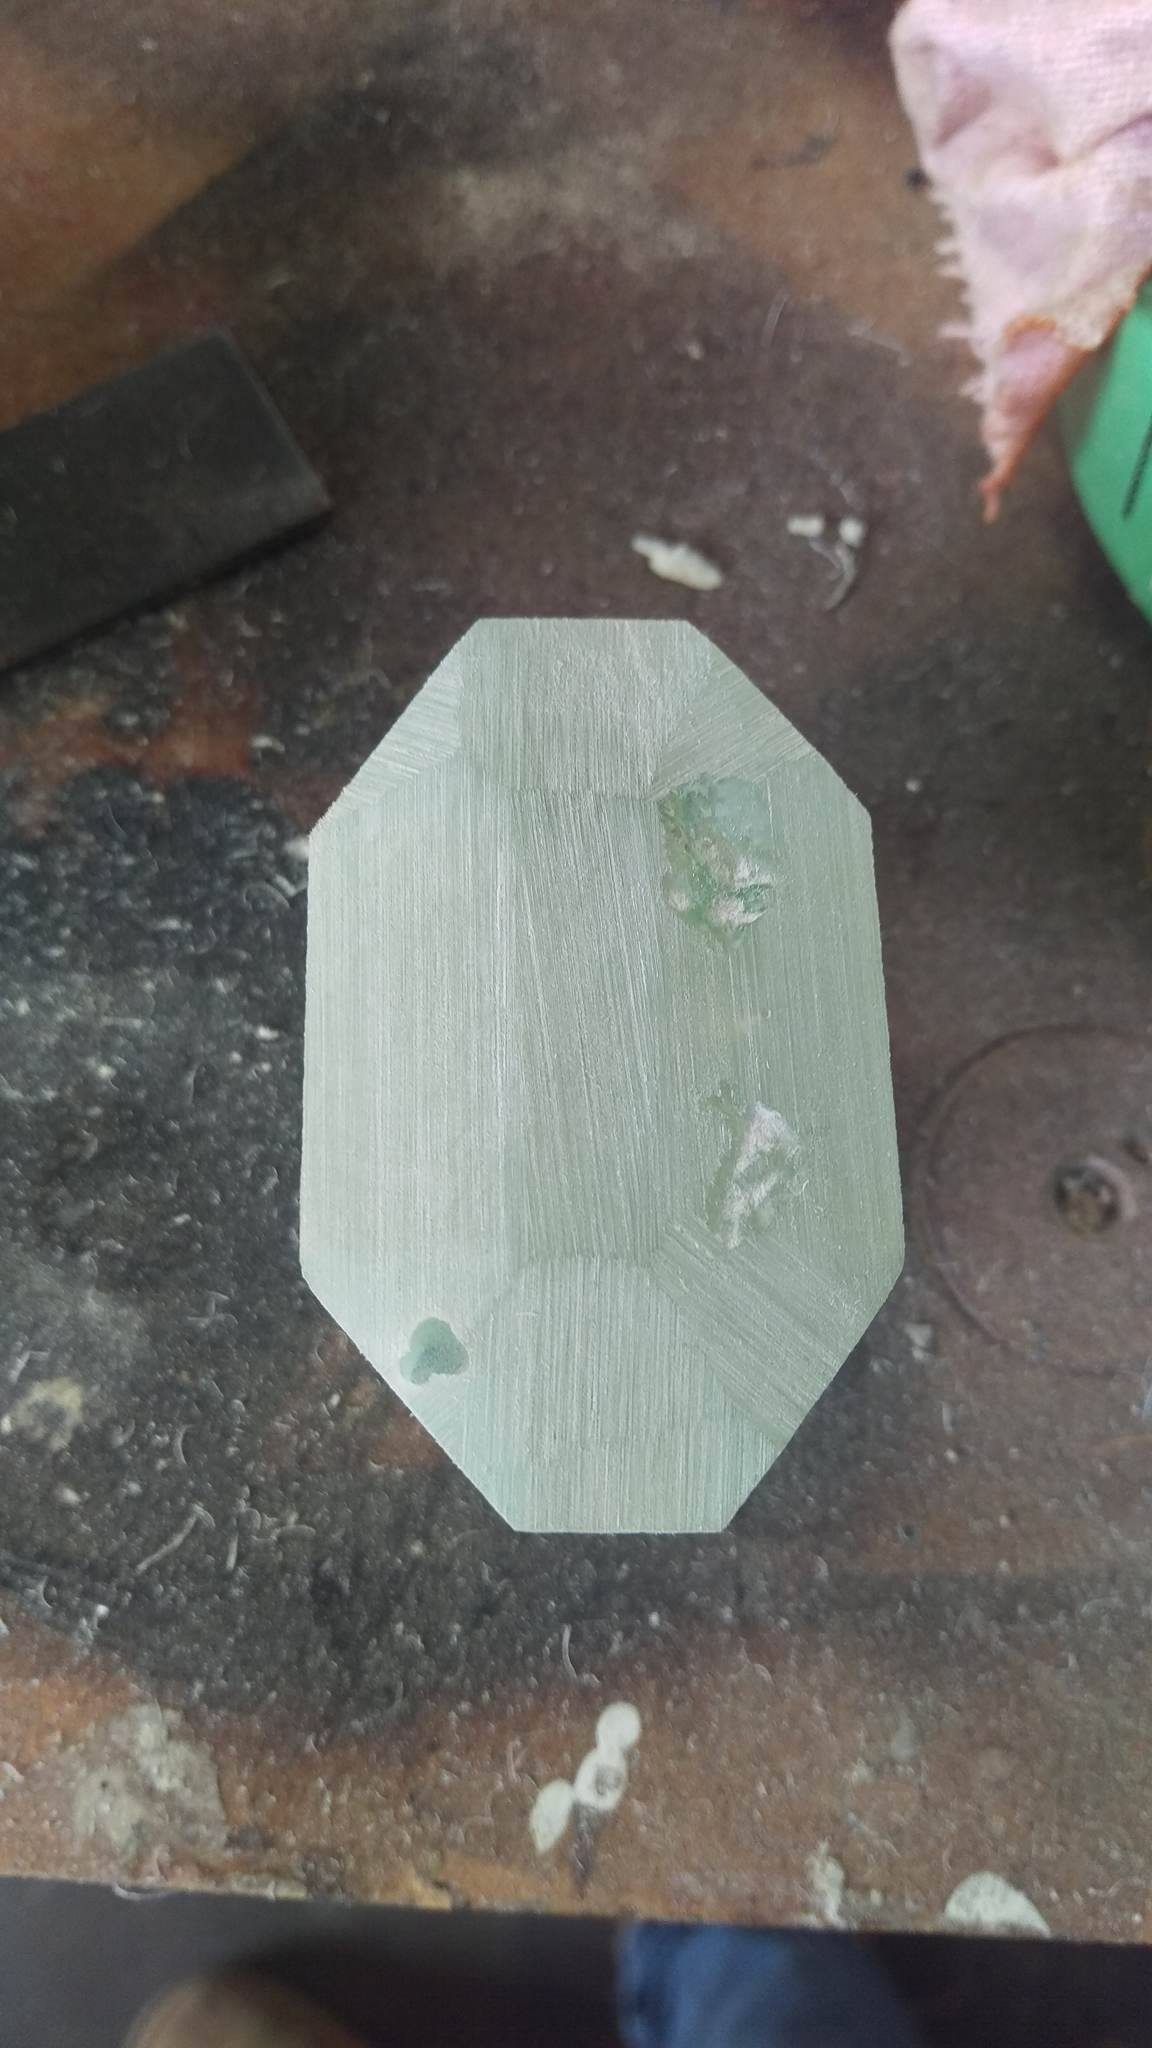
Step 5: The Lablel! I needed to recreate the old school Barbasol can label in Illustrator so it could be printed and wrapped on the can. I started by recreating the label exactly as seen on screen. I then added some extra flourishes that hint at both Thermaltake and dinosaurs.
-
[Australia] Ethan Cooper
tagmods replied to TT Lily's topic in 2022 Thermaltake RAM MOD Invitational Season 1
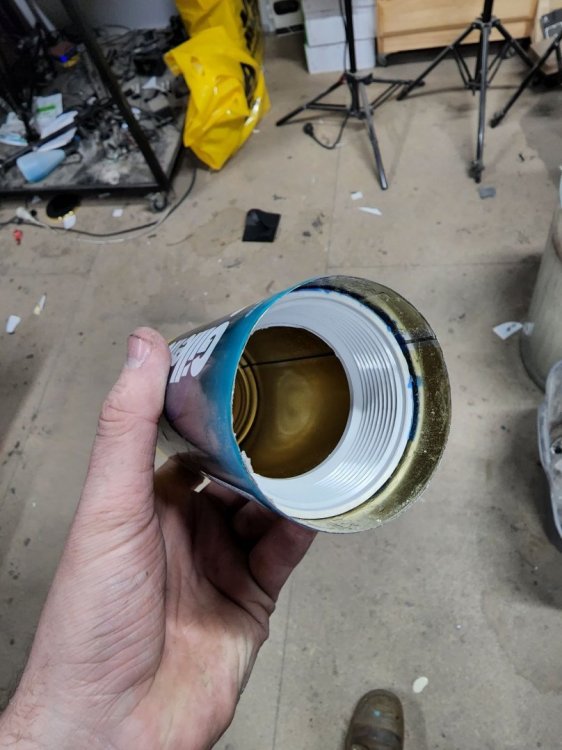
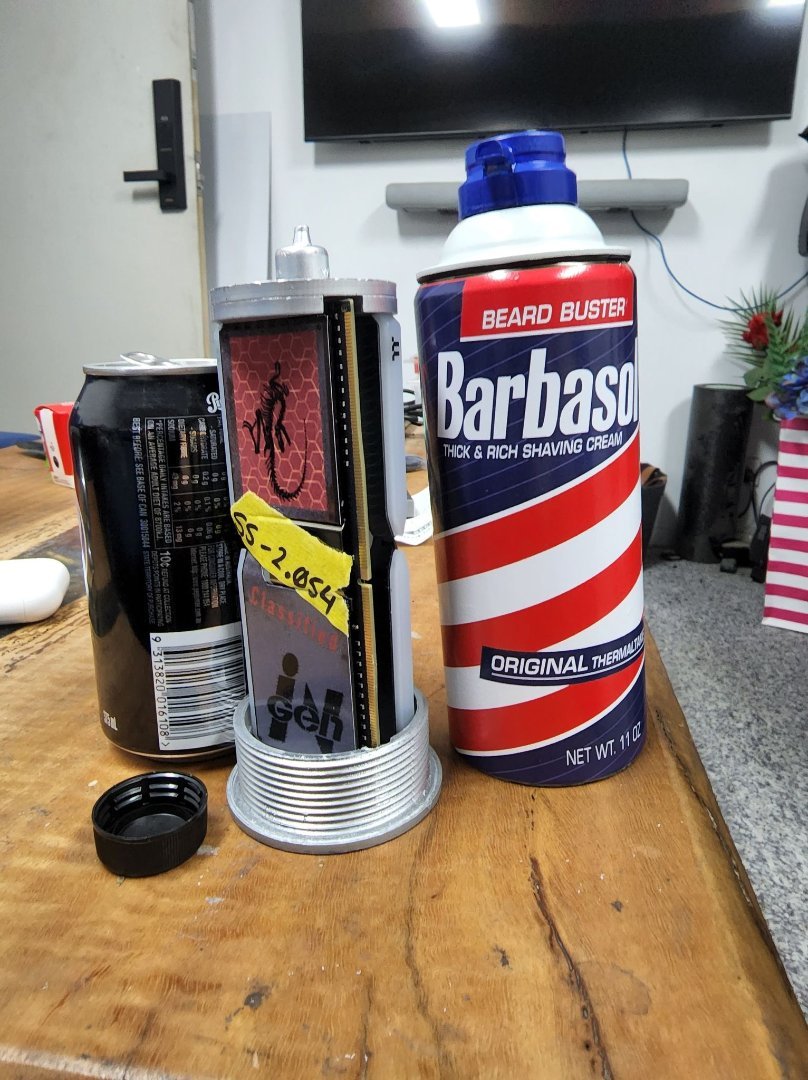
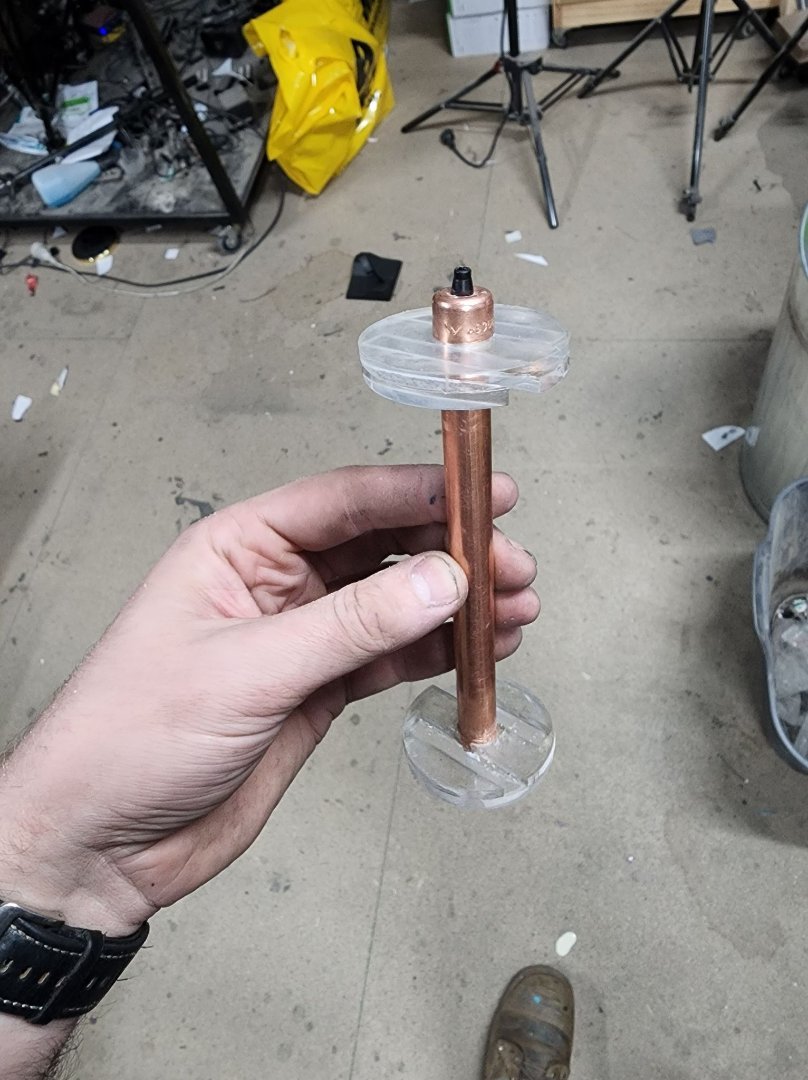
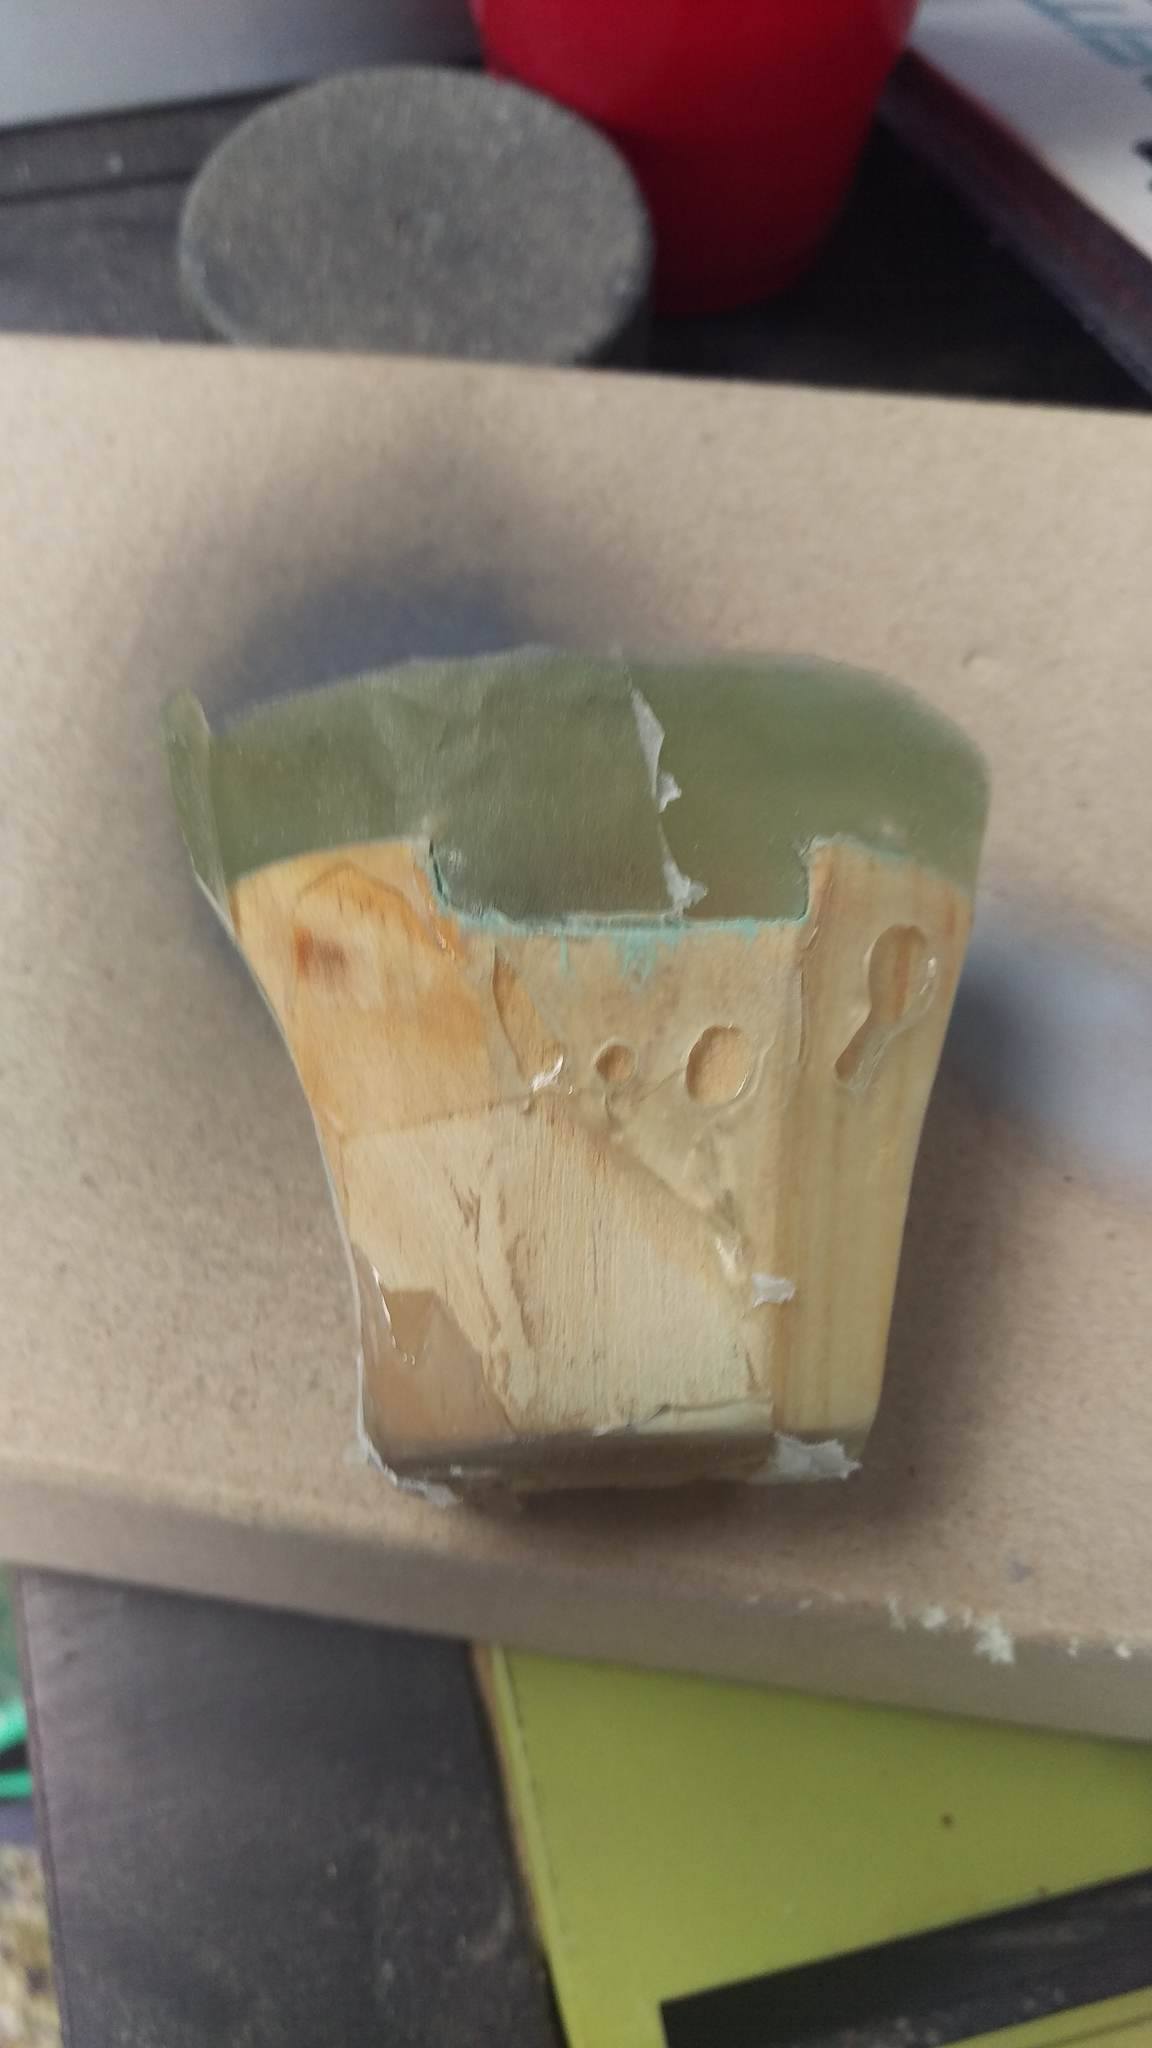
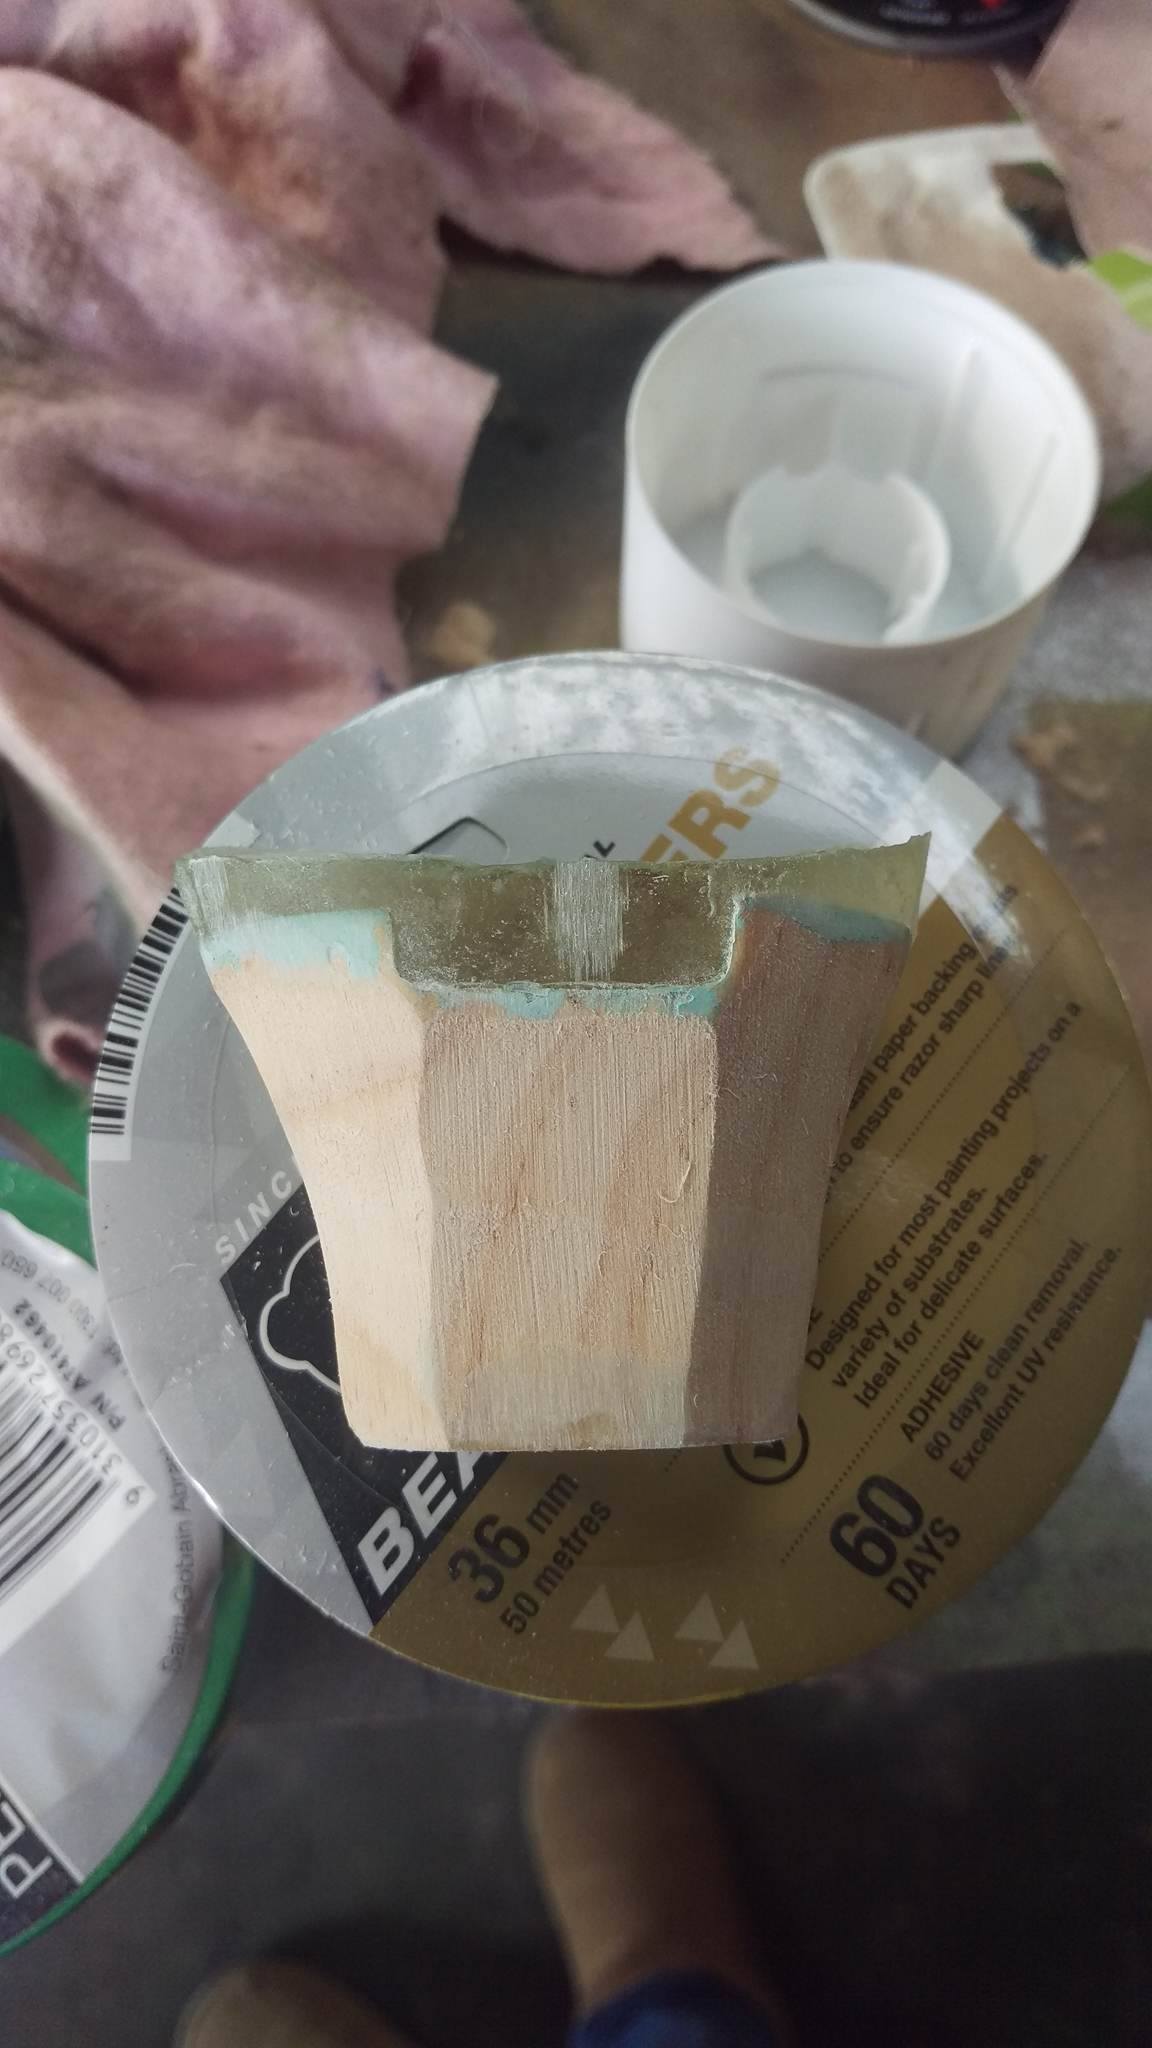
With a Solid based can that is easily removable it was time to work on the cartridge that would hold the RAM! Step 4: Build Cartridge The idea here was to hold the RAM steady so it could be easily removed and the samples (RAM sticks) could slide out to be examined

-
[Australia] Ethan Cooper
tagmods replied to TT Lily's topic in 2022 Thermaltake RAM MOD Invitational Season 1
Step 3: Cut and weld in an Acrylic Buck so the solid base returns!
-
[Australia] Ethan Cooper
tagmods replied to TT Lily's topic in 2022 Thermaltake RAM MOD Invitational Season 1
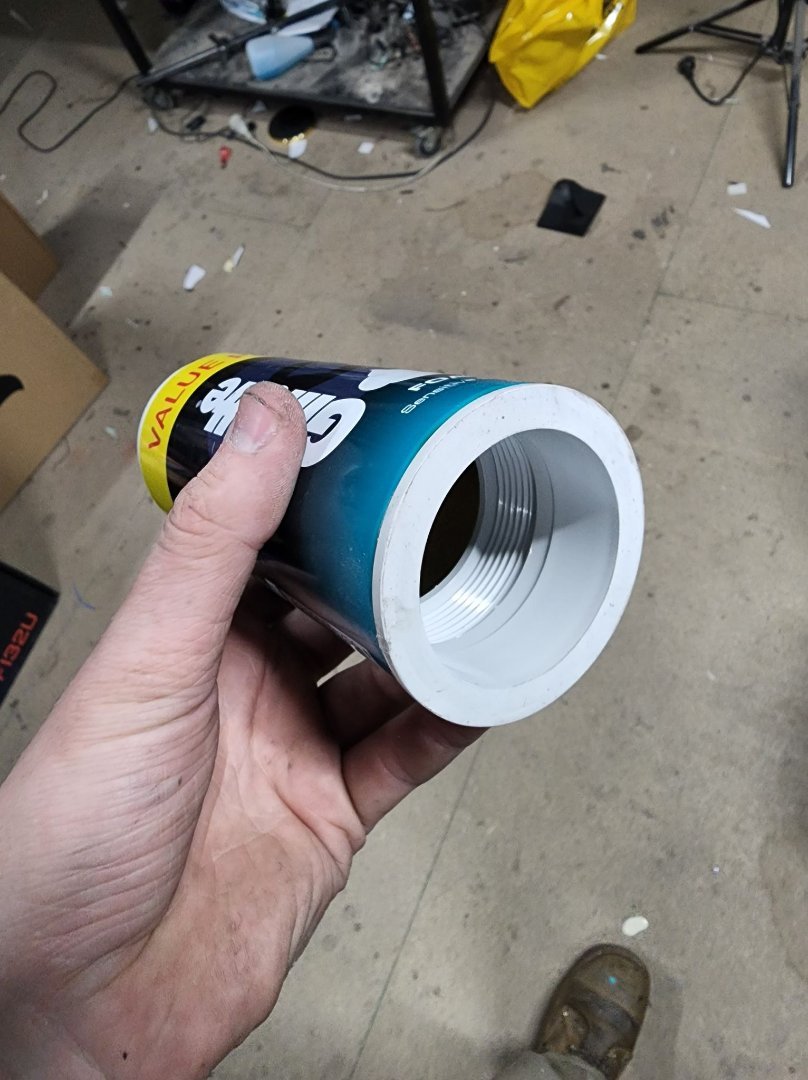
Step 2: Luck out and find PVC fittings that fit perfectly after being shortened!
-
[Australia] Ethan Cooper
tagmods replied to TT Lily's topic in 2022 Thermaltake RAM MOD Invitational Season 1
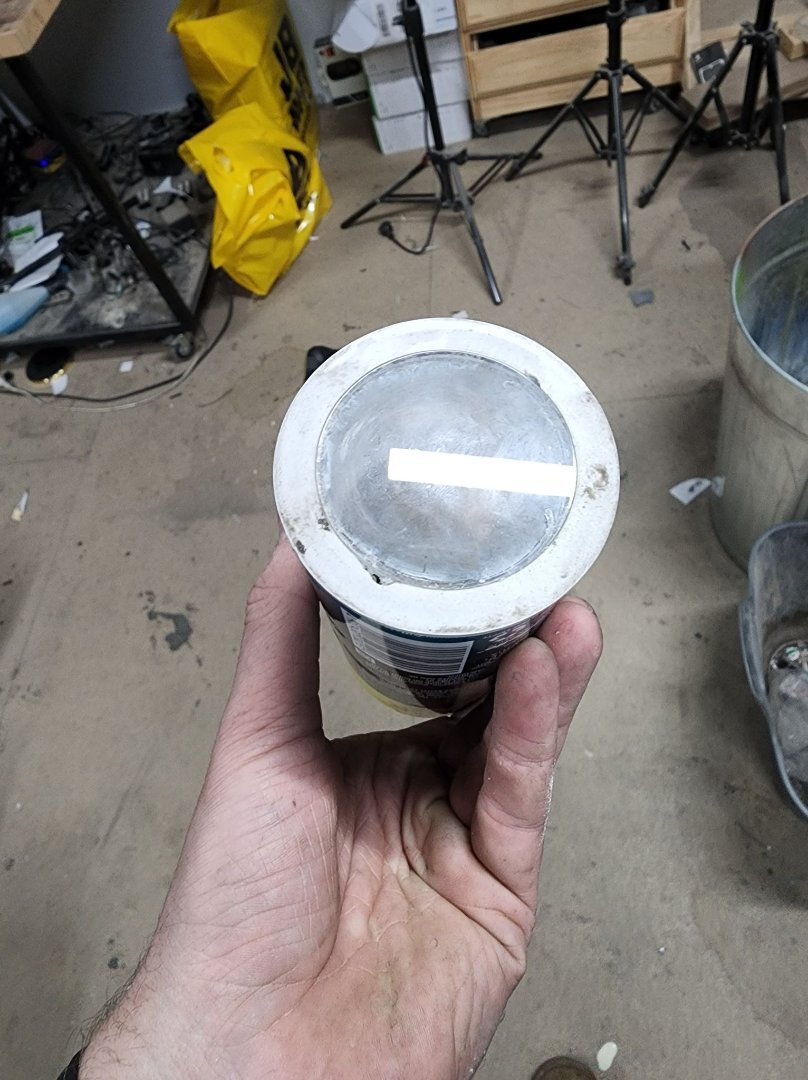
Hey All! Sorry im late to the party the whole team got buried with F1 We are building a Thermaltake Variant of the Barbasol can with Jurassic Park Dominion around the corner it made sense! Step one: Drain a can of shaving cream and cut off the bottom!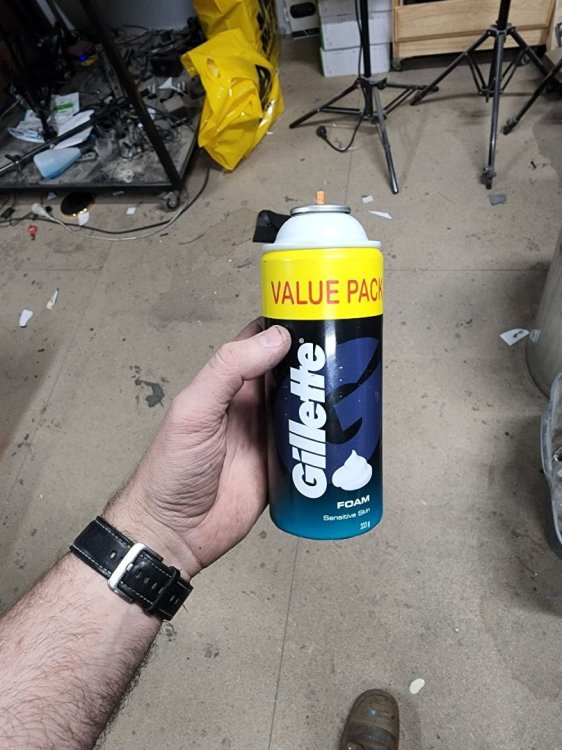
-
[Australia] Ethan Cooper
tagmods replied to Tt CCH's topic in 2020 Thermaltake Neonmaker Lighting Mix Invitational Season 2
Here is my final submission! https://www.youtube.com/embed/iBa9AA026ac NeonMaker_2020_TAGMODS.mp4 -
[Australia] Ethan Cooper
tagmods replied to Tt CCH's topic in 2020 Thermaltake Neonmaker Lighting Mix Invitational Season 2
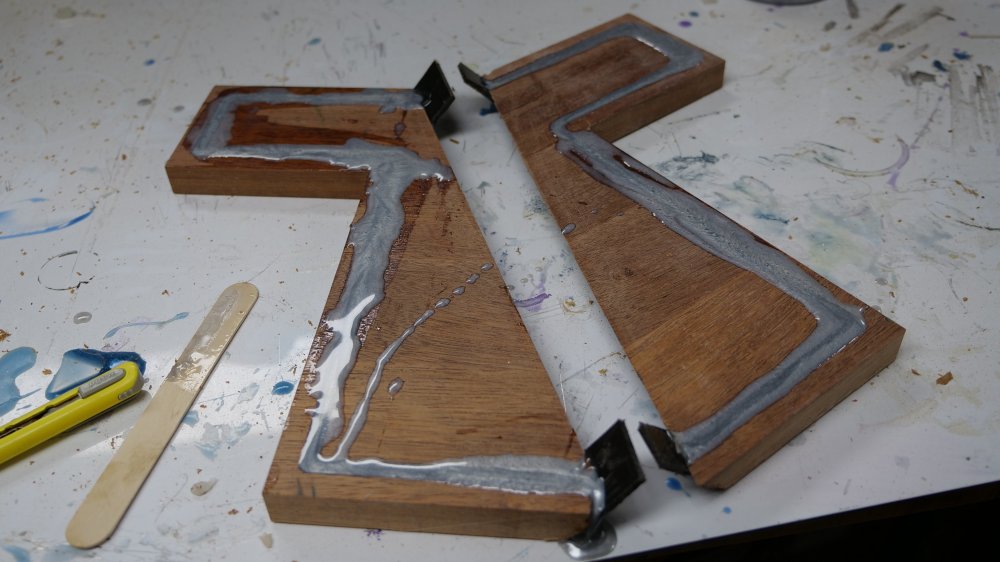
I took some scrap butcher blocked Merbu i had from a different project and threw it on the CNC to out part of the thermaltake logo. I also cut a recess to inlay some silver resin because why not!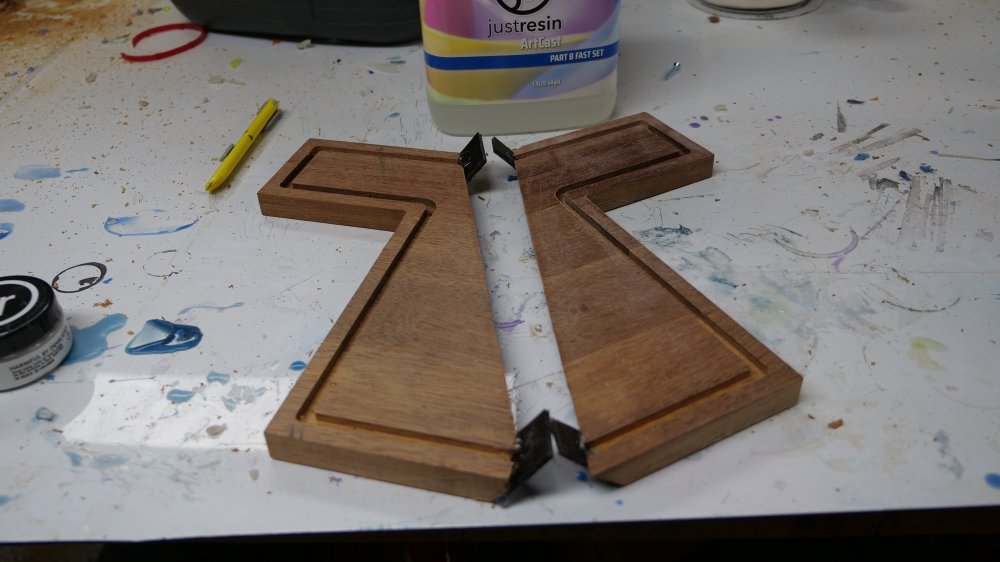
-
[Australia] Ethan Cooper
tagmods replied to Tt Andy's topic in 2017 Thermaltake CaseMOD Invitational Season 1
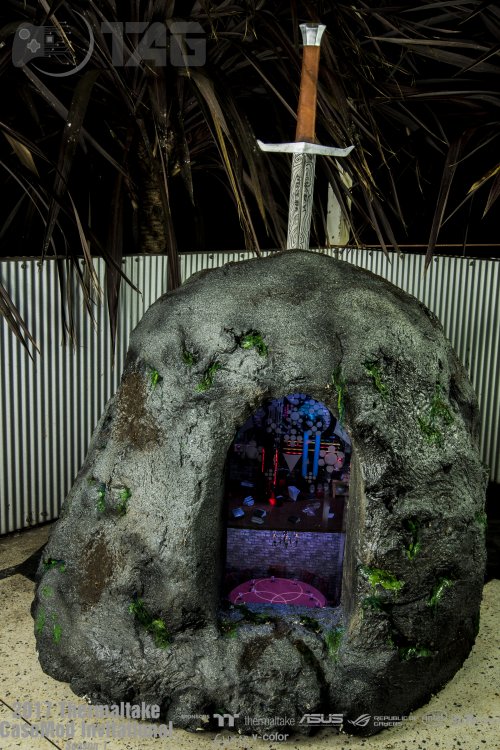
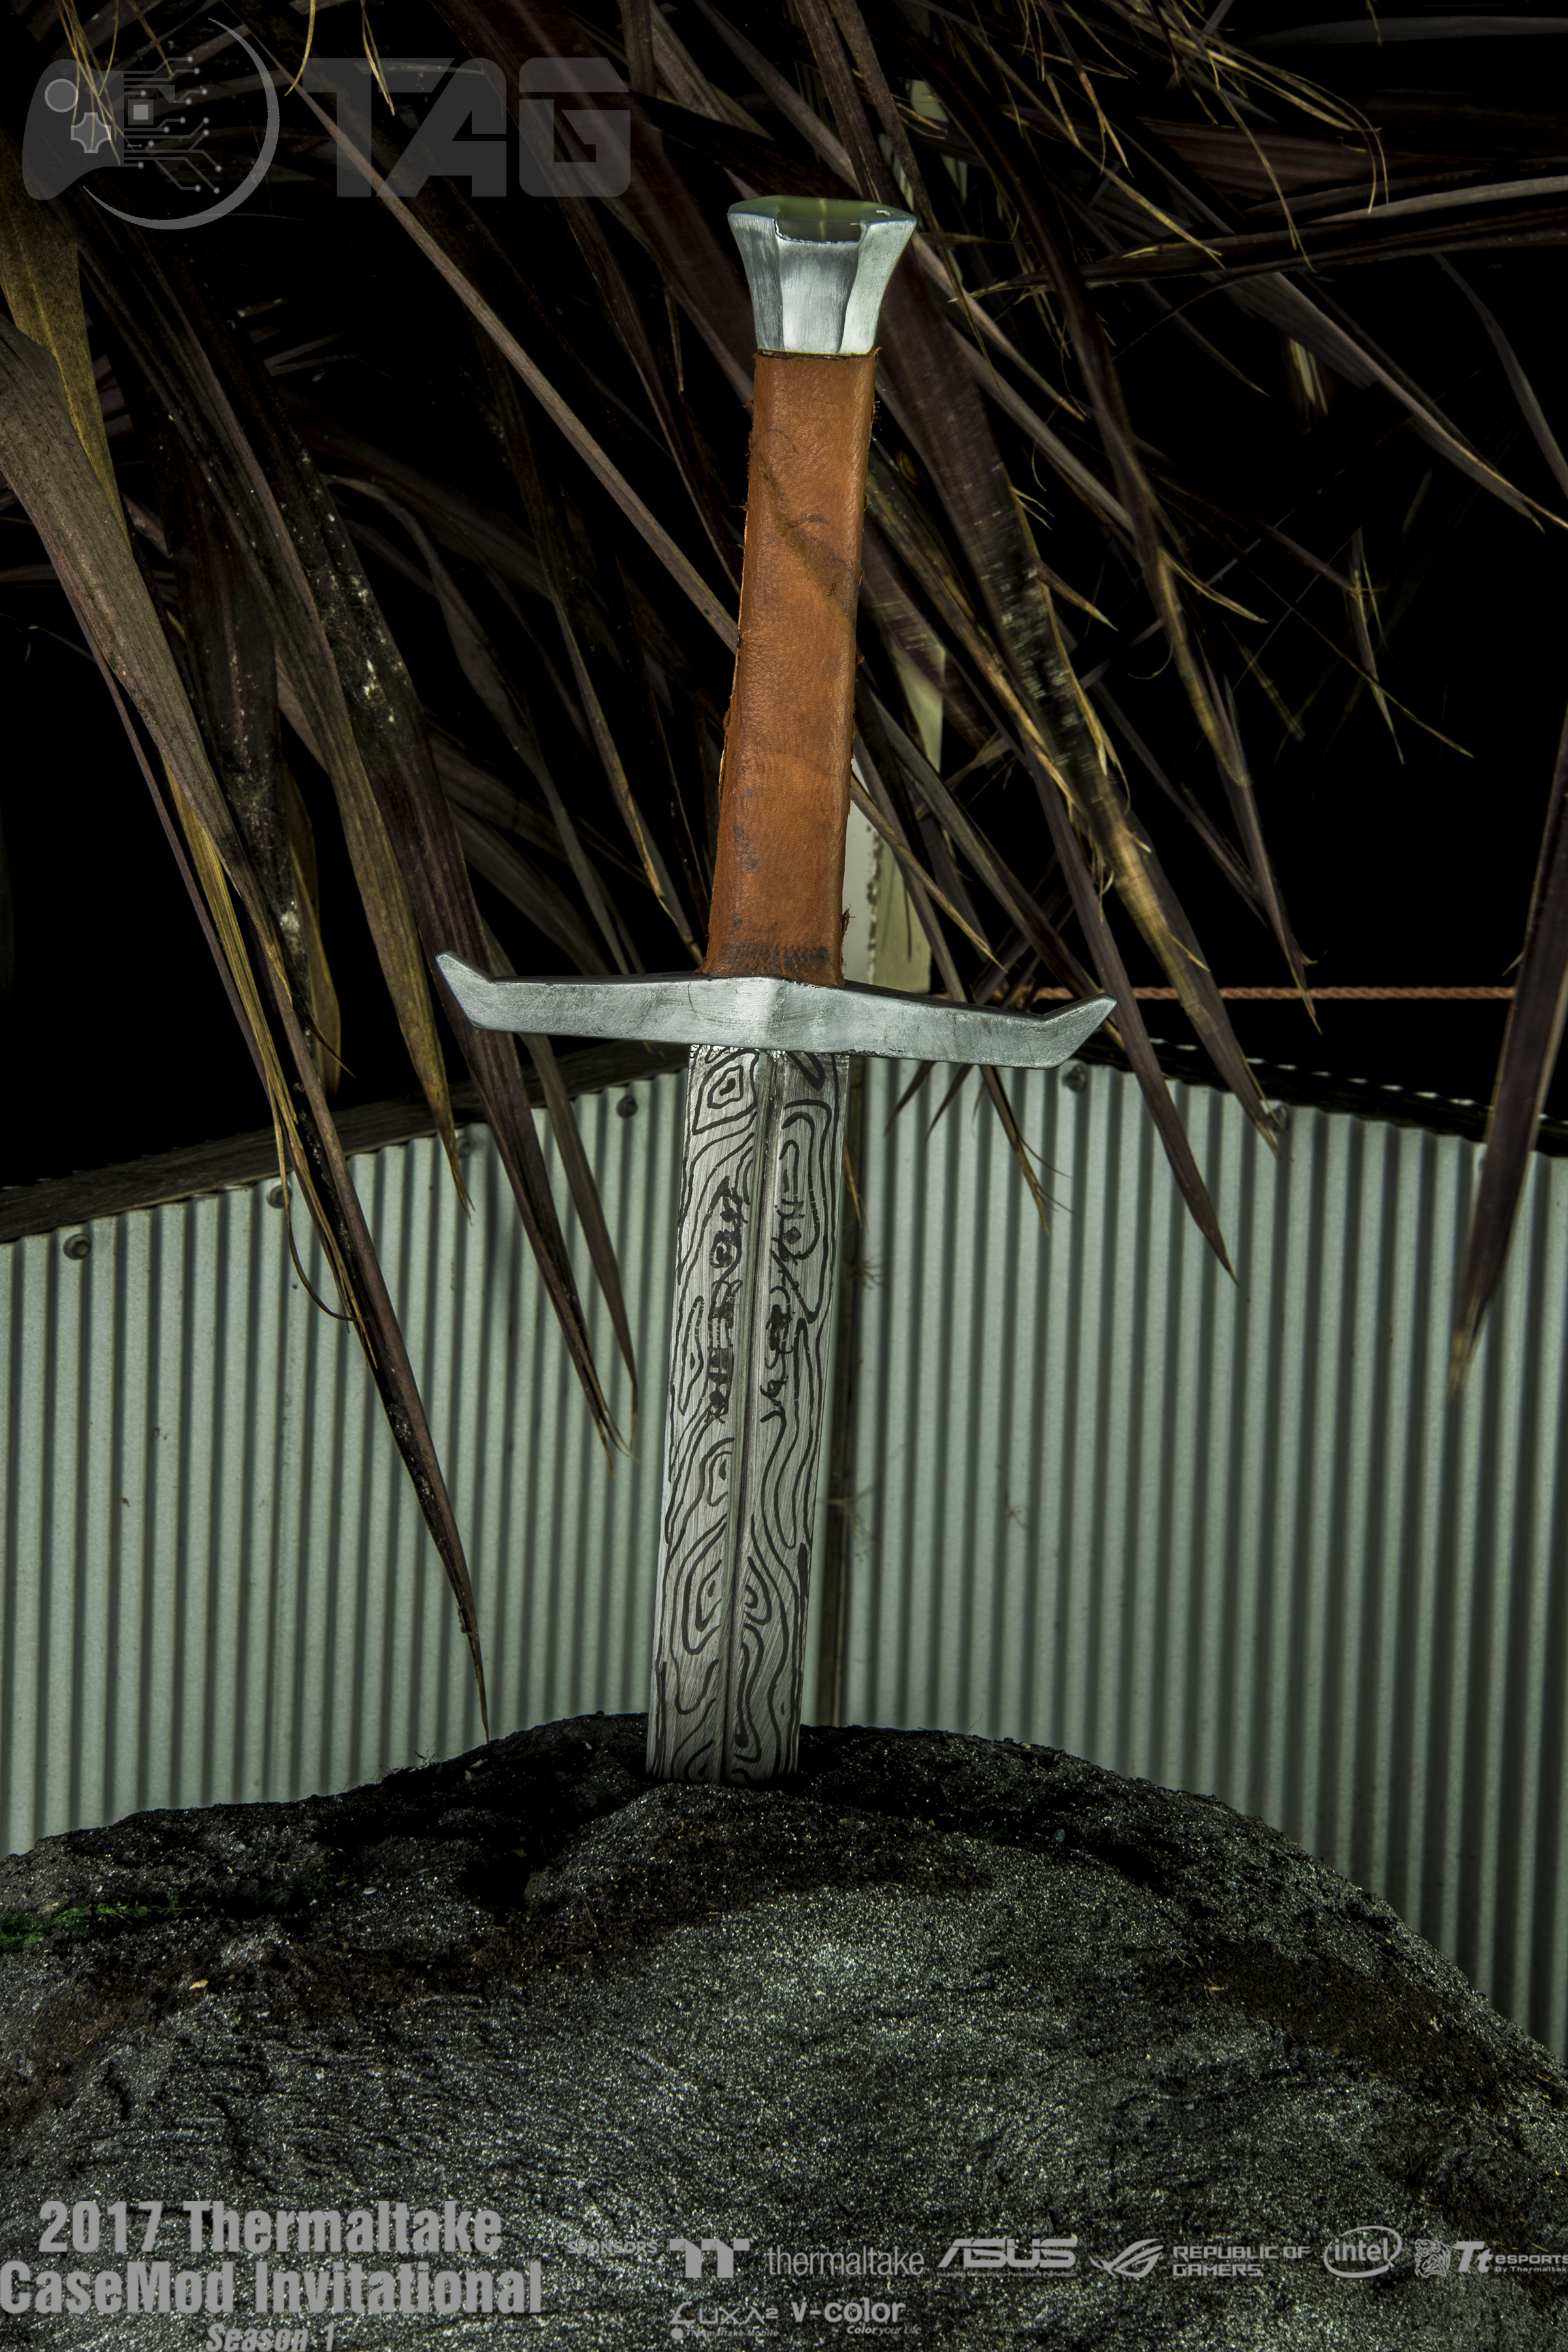
And it is finished!!!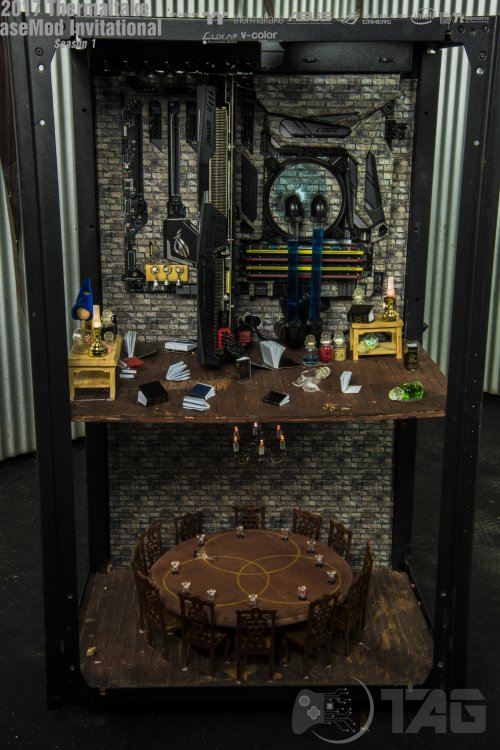

-
[Australia] Ethan Cooper
tagmods replied to Tt Andy's topic in 2017 Thermaltake CaseMOD Invitational Season 1
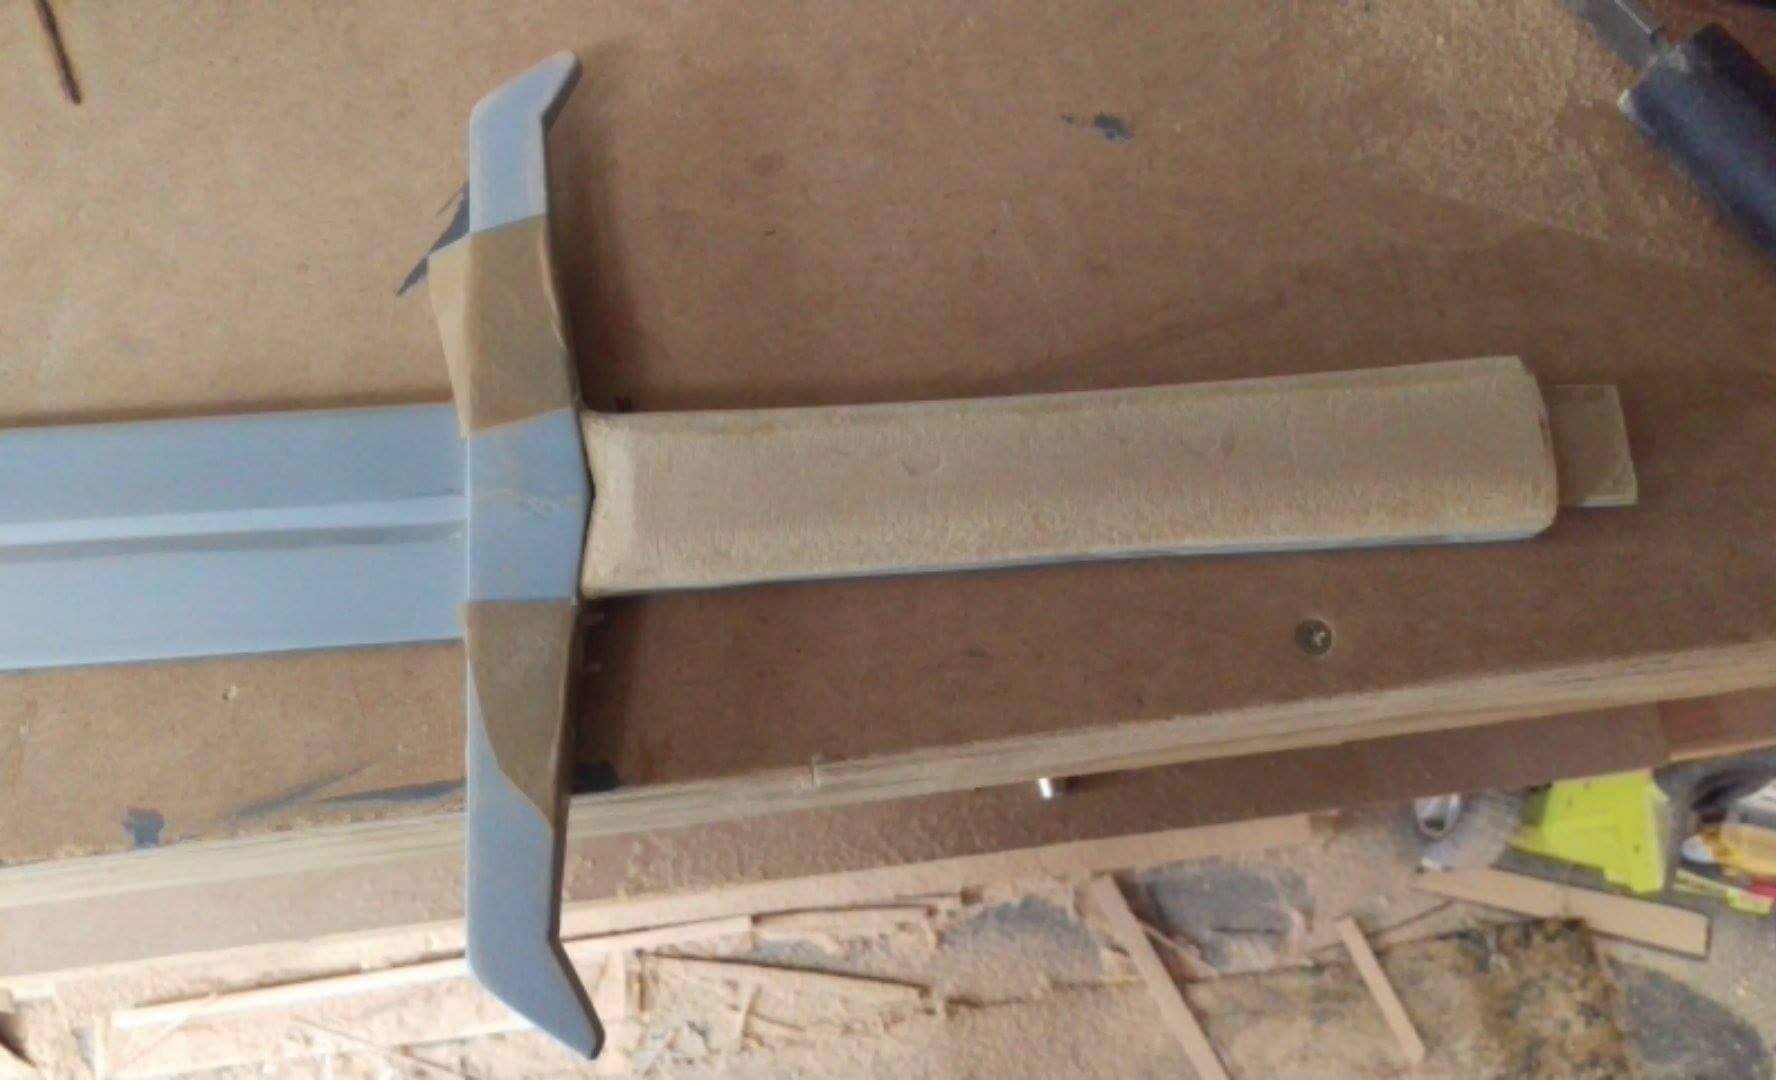
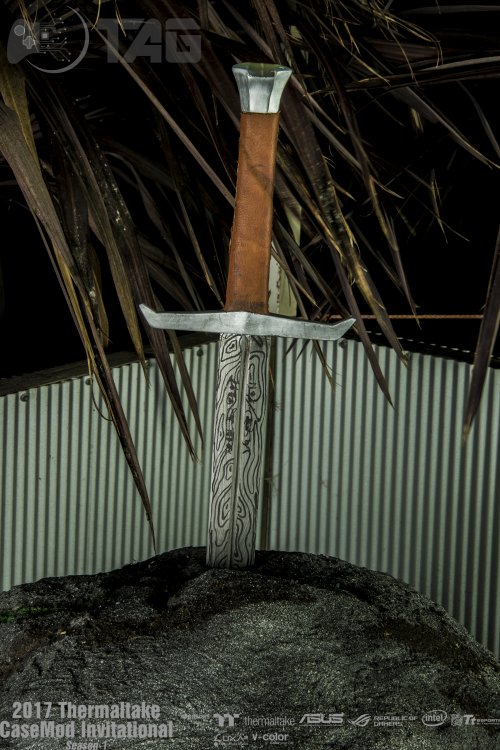
And the pommel is attached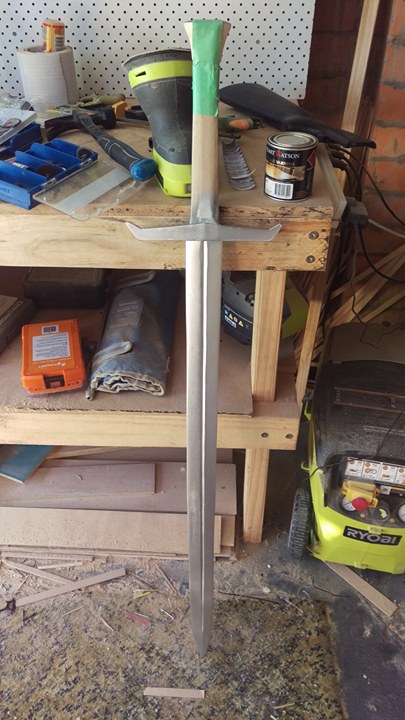
-
[Australia] Ethan Cooper
tagmods replied to Tt Andy's topic in 2017 Thermaltake CaseMOD Invitational Season 1
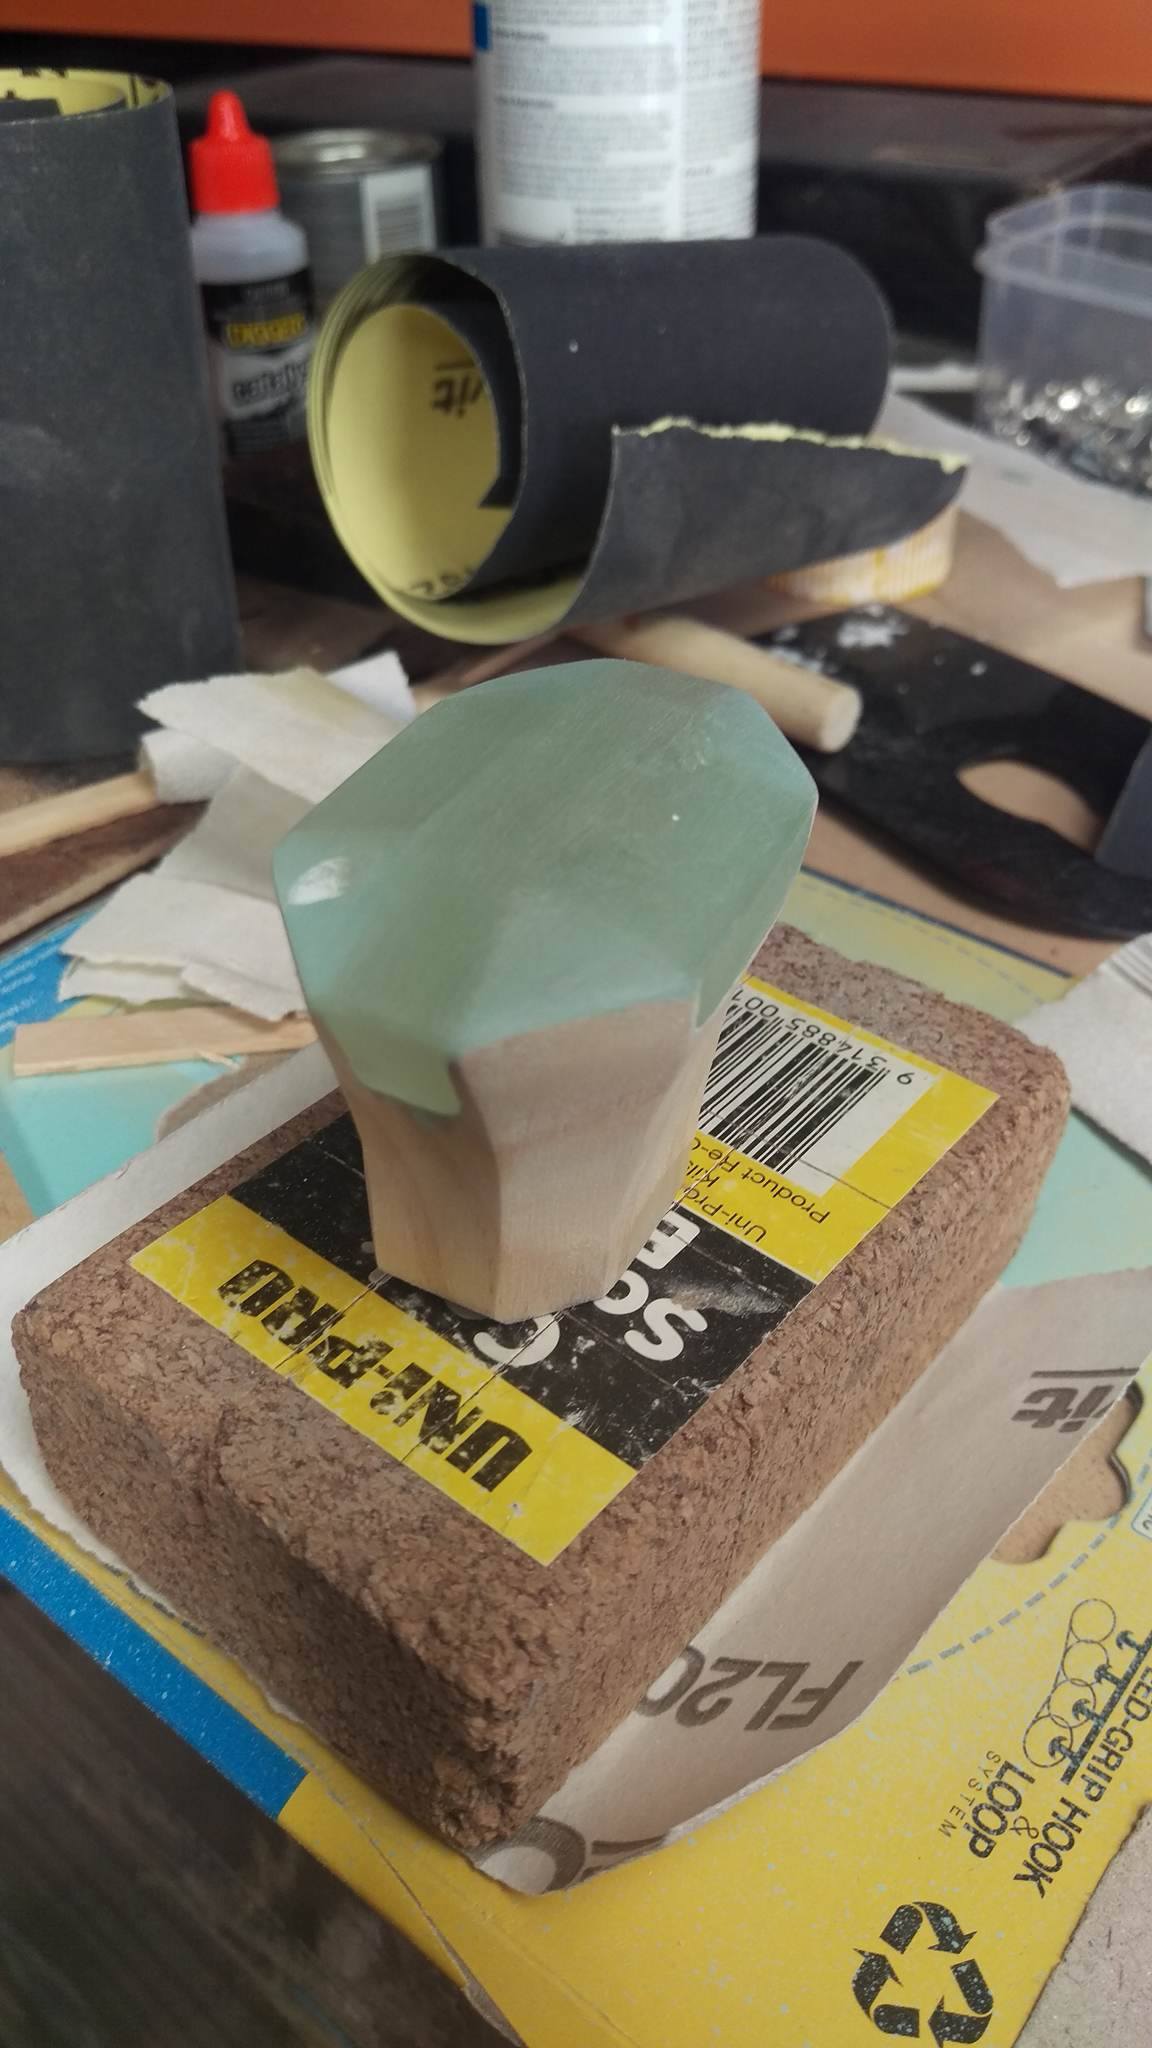
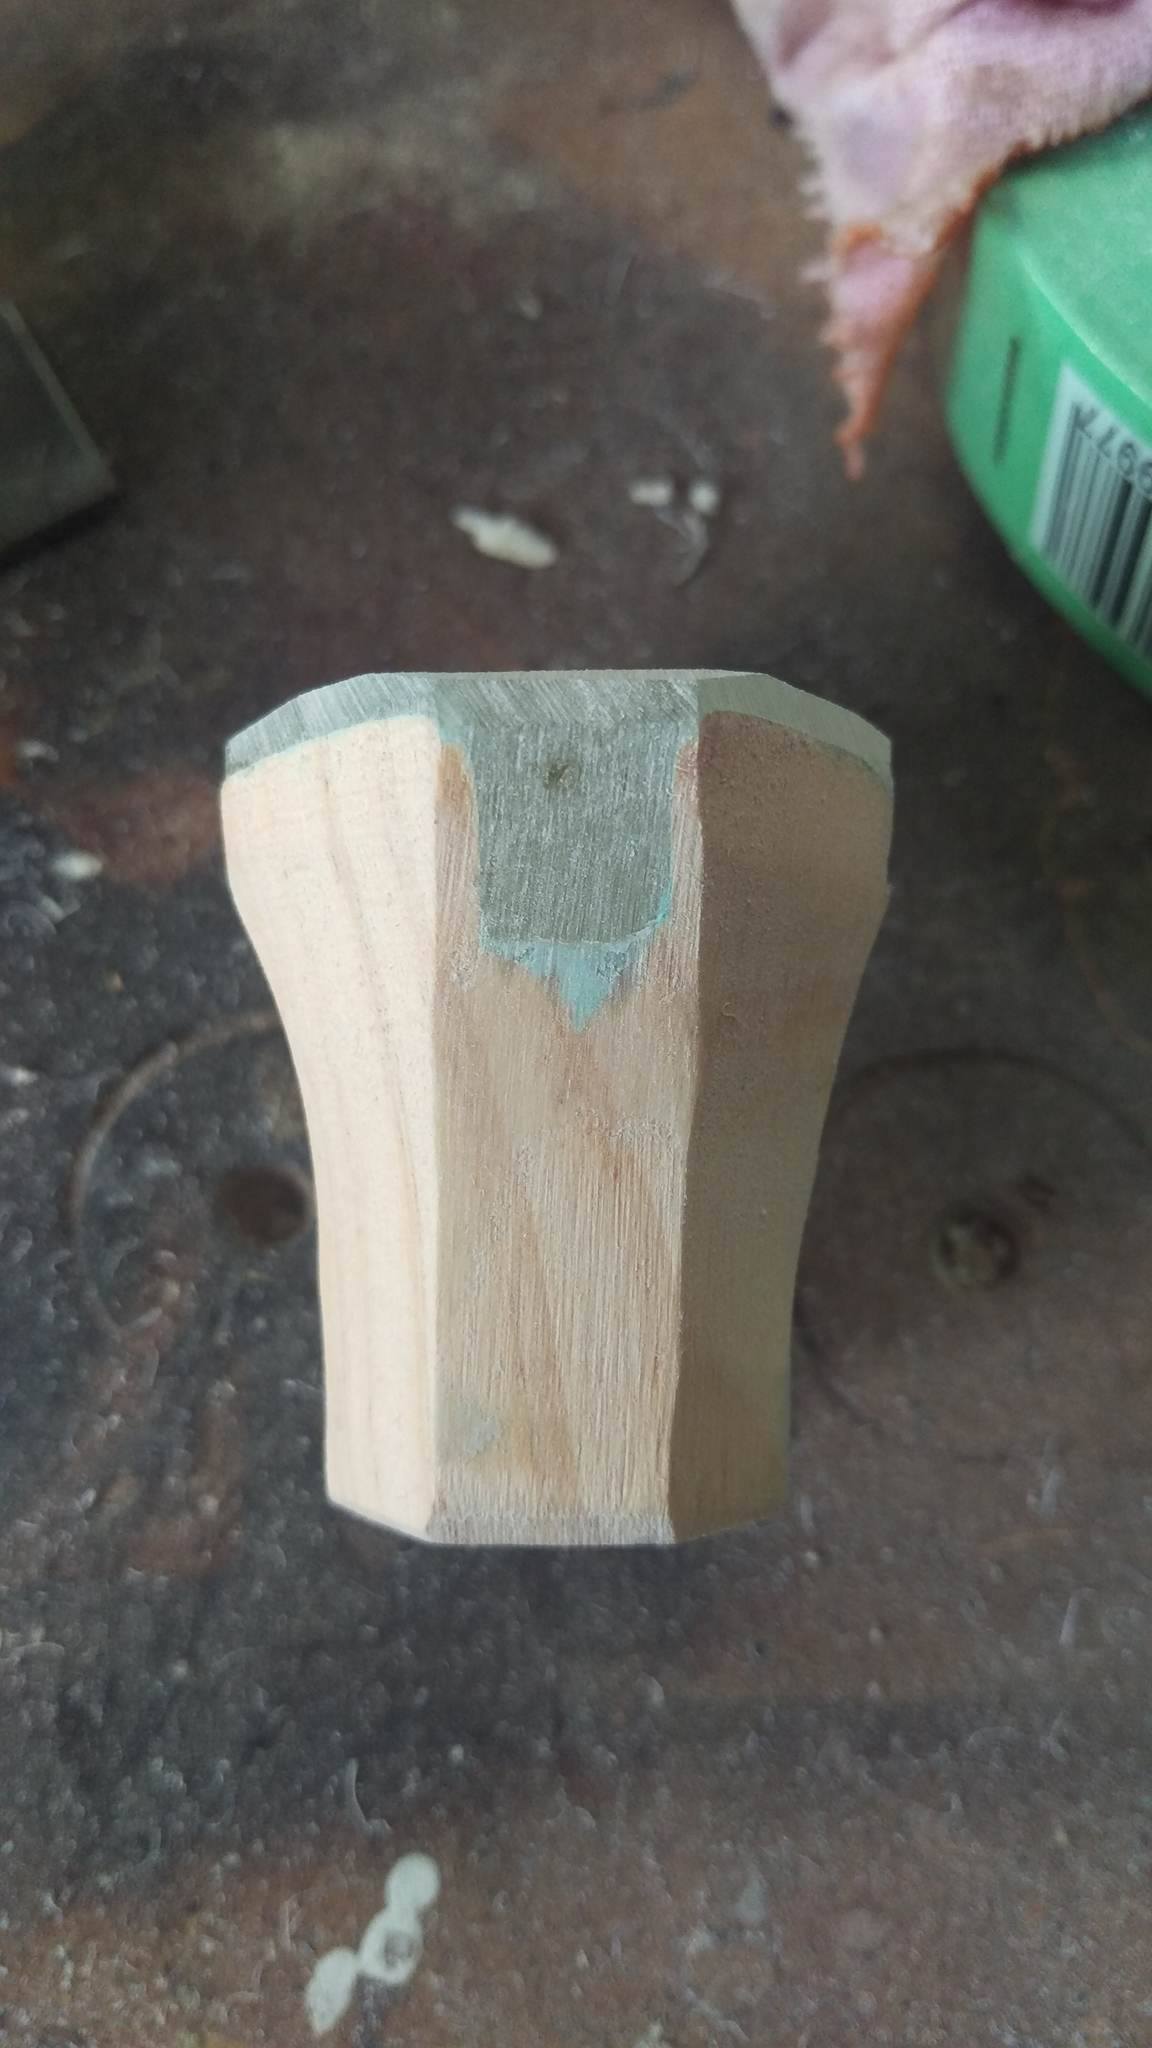
Time for paint!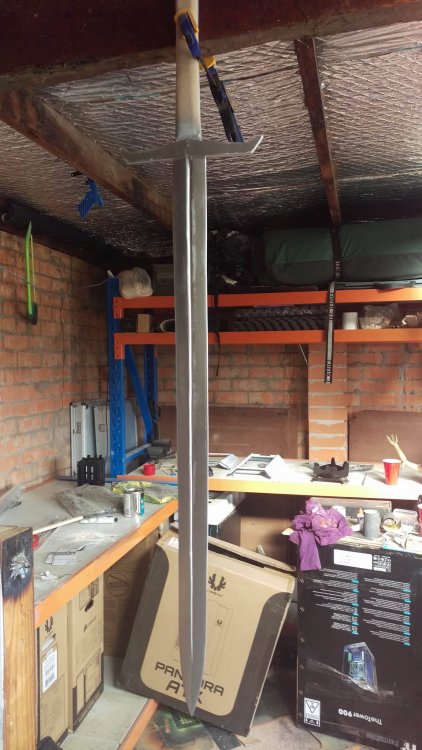
-
[Australia] Ethan Cooper
tagmods replied to Tt Andy's topic in 2017 Thermaltake CaseMOD Invitational Season 1
Attacked it with the belt sander to tear it down and then worked up the grits to get a nice smooth top Nice and polished


-
[Australia] Ethan Cooper
tagmods replied to Tt Andy's topic in 2017 Thermaltake CaseMOD Invitational Season 1
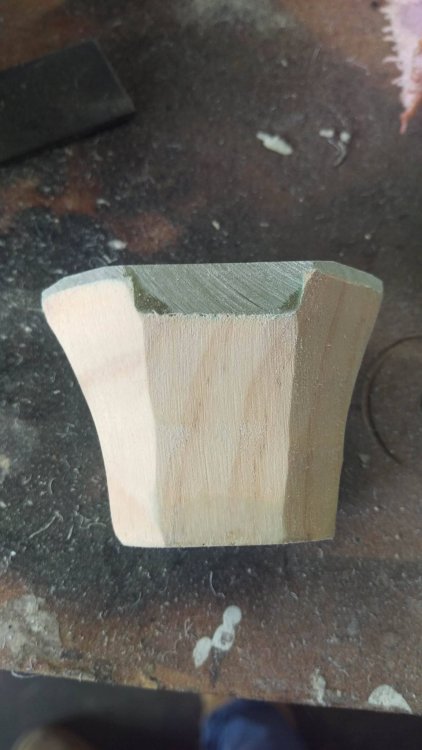
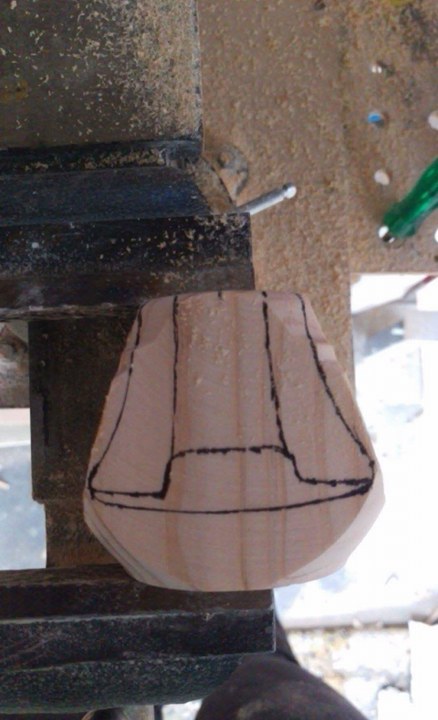
Further shaping of the pommel and filled the top with resin. Its a bit messy so better clean it up!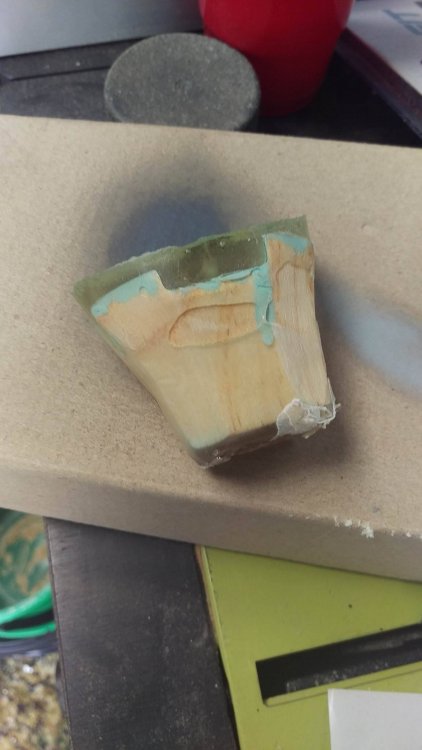


-
[Australia] Ethan Cooper
tagmods replied to Tt Andy's topic in 2017 Thermaltake CaseMOD Invitational Season 1
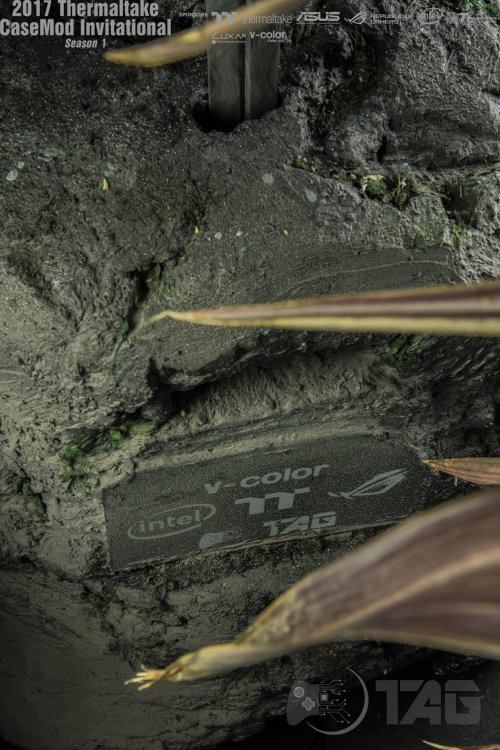
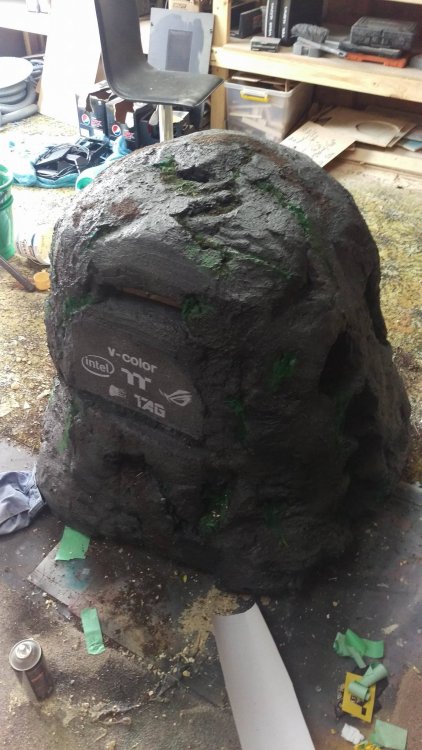
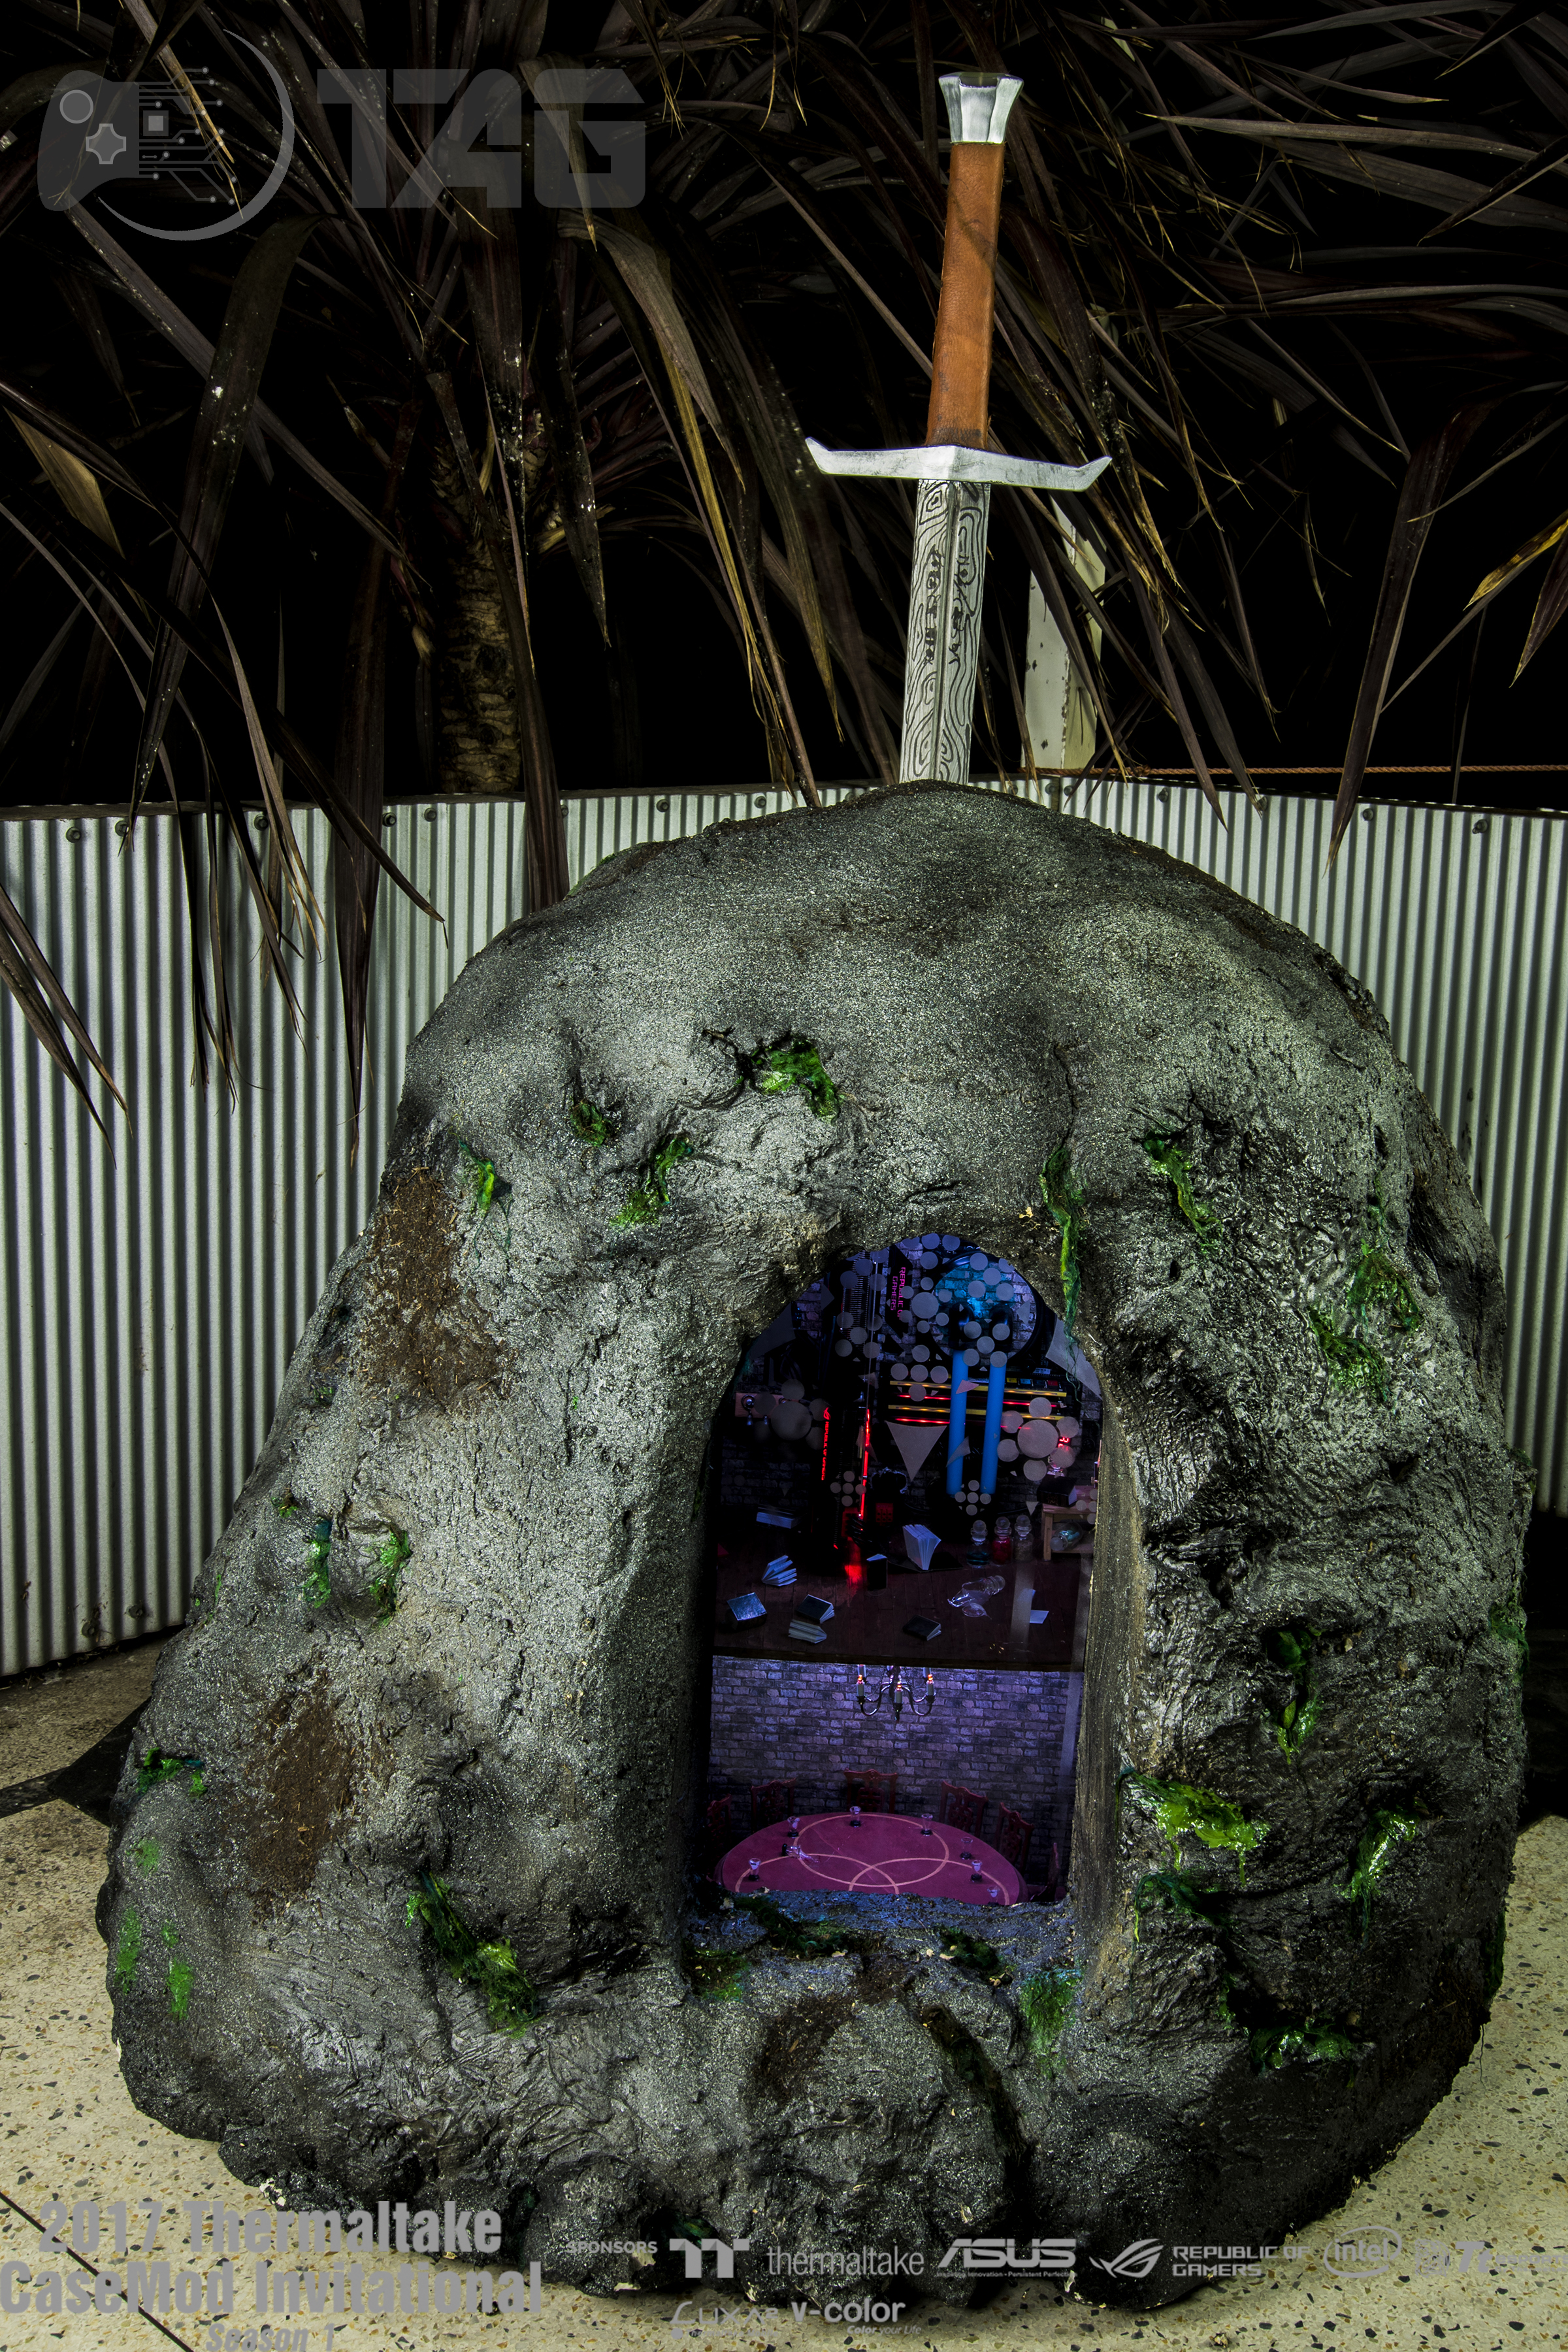
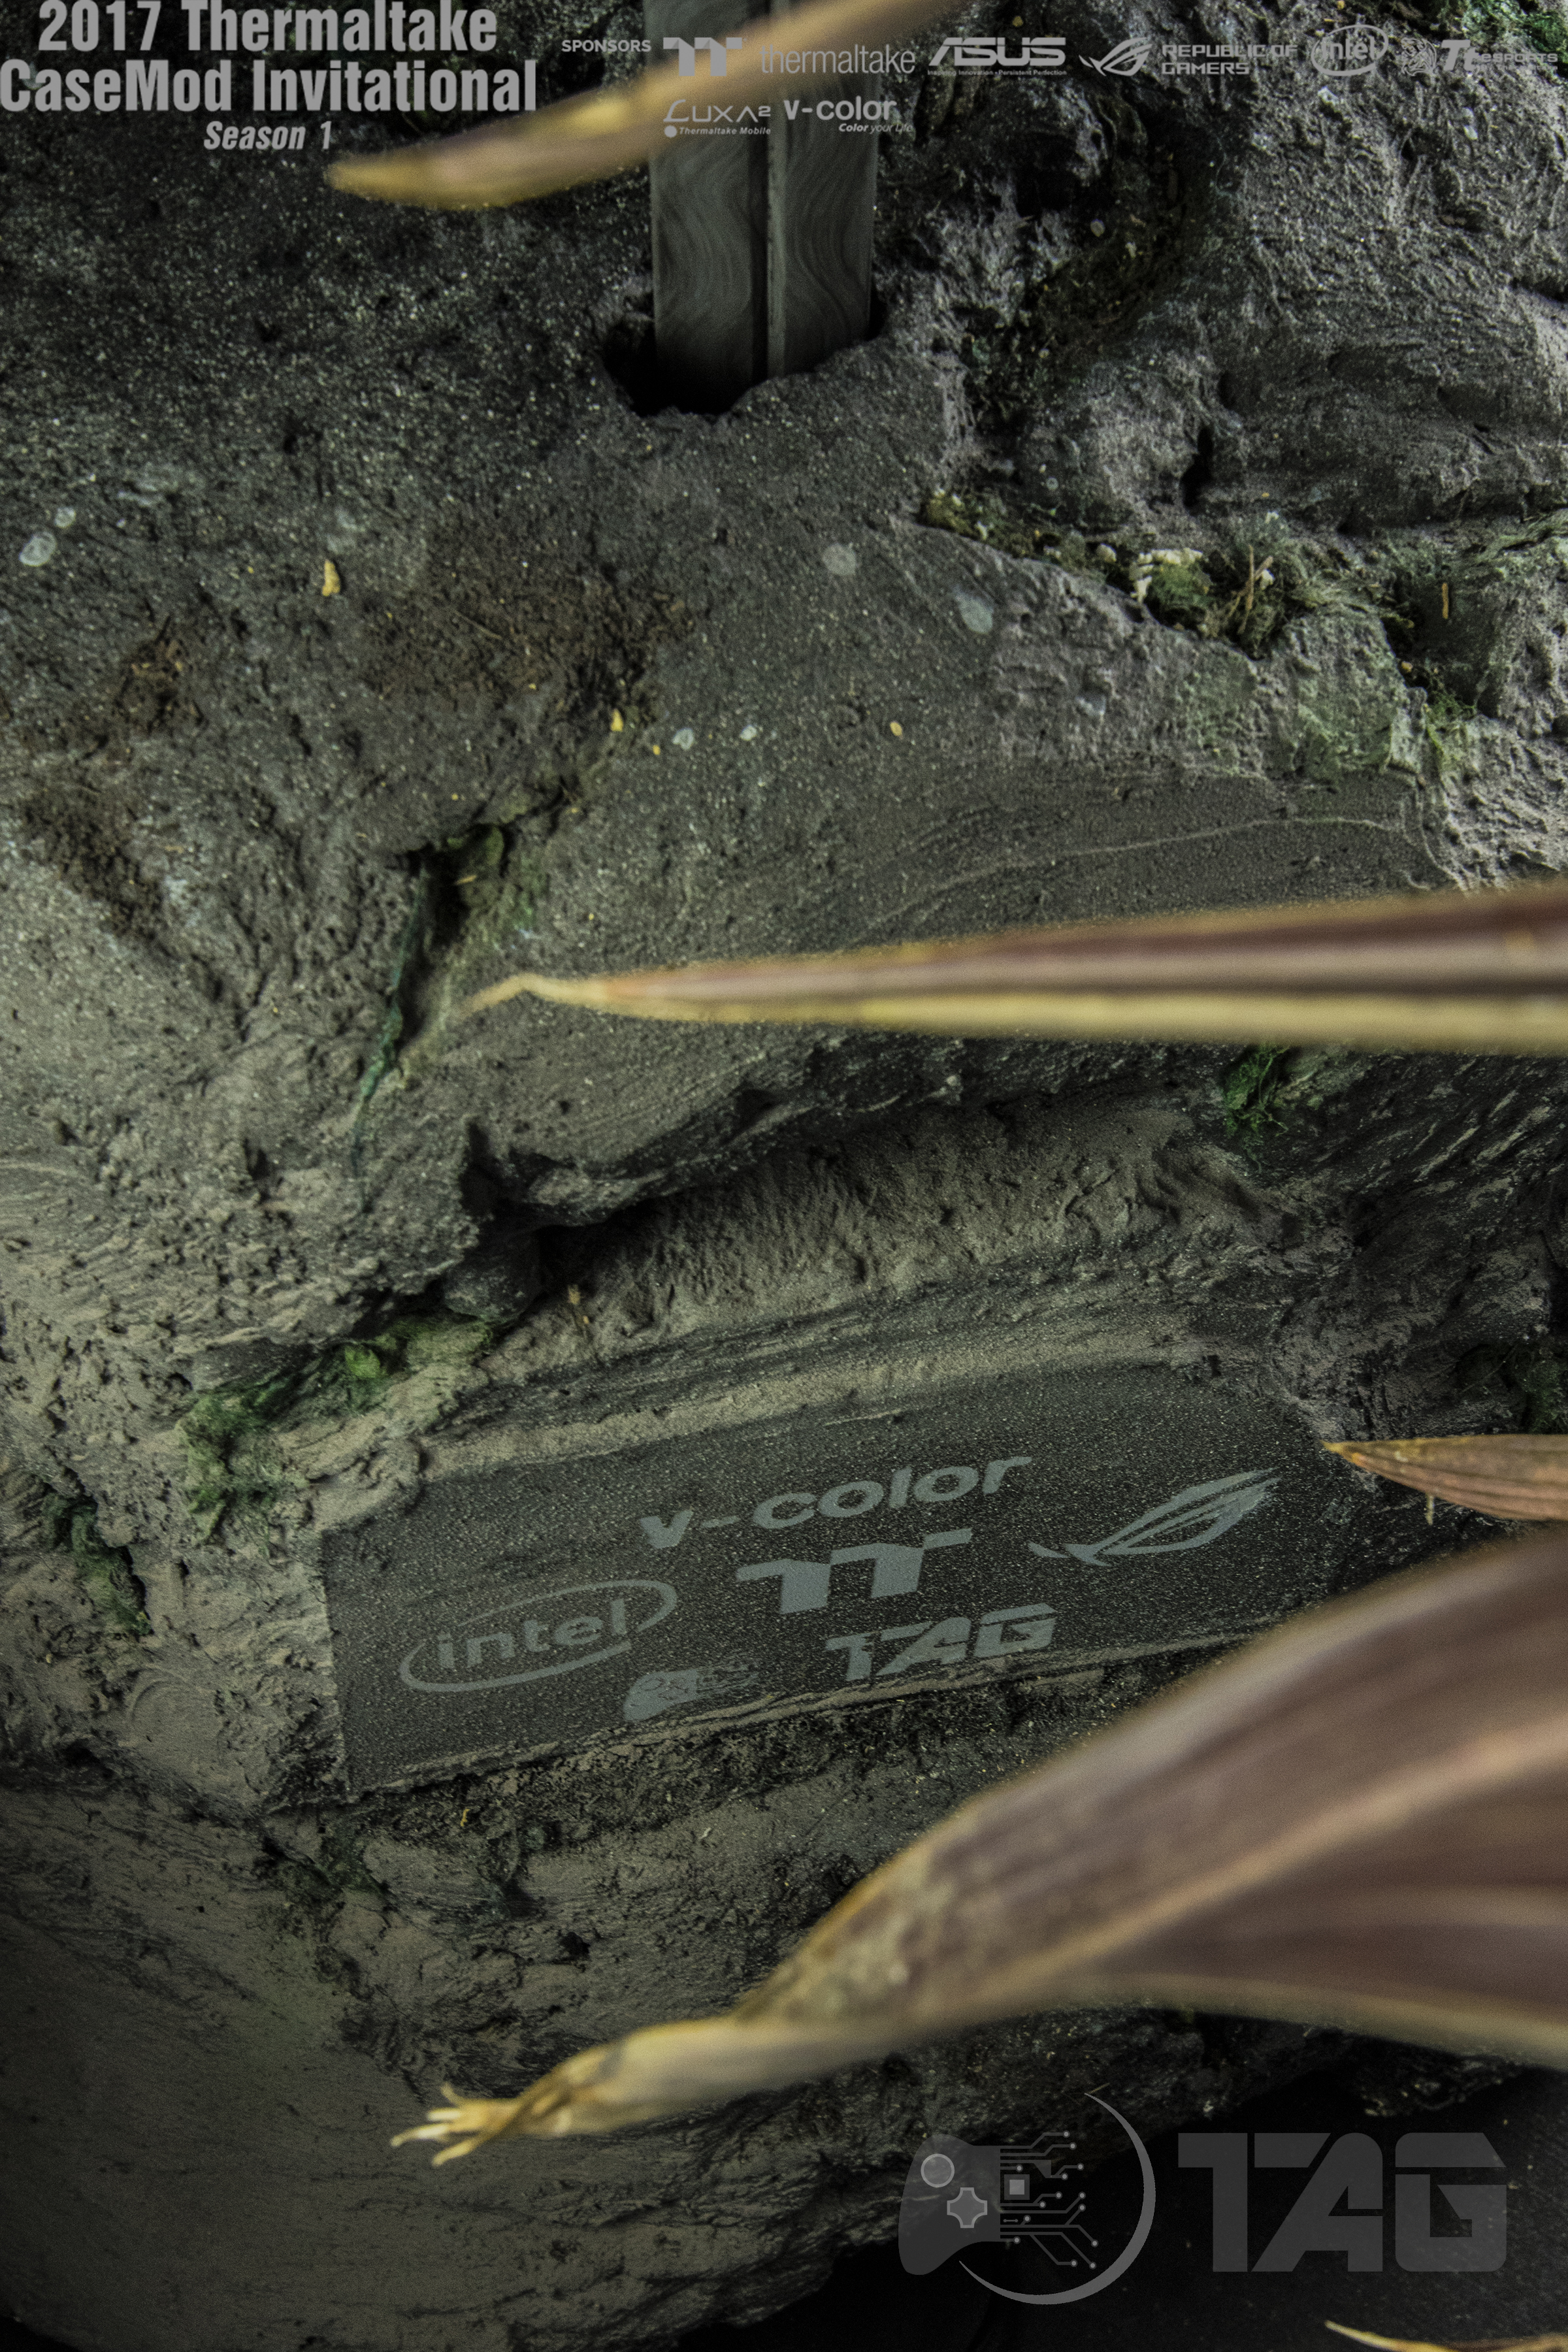
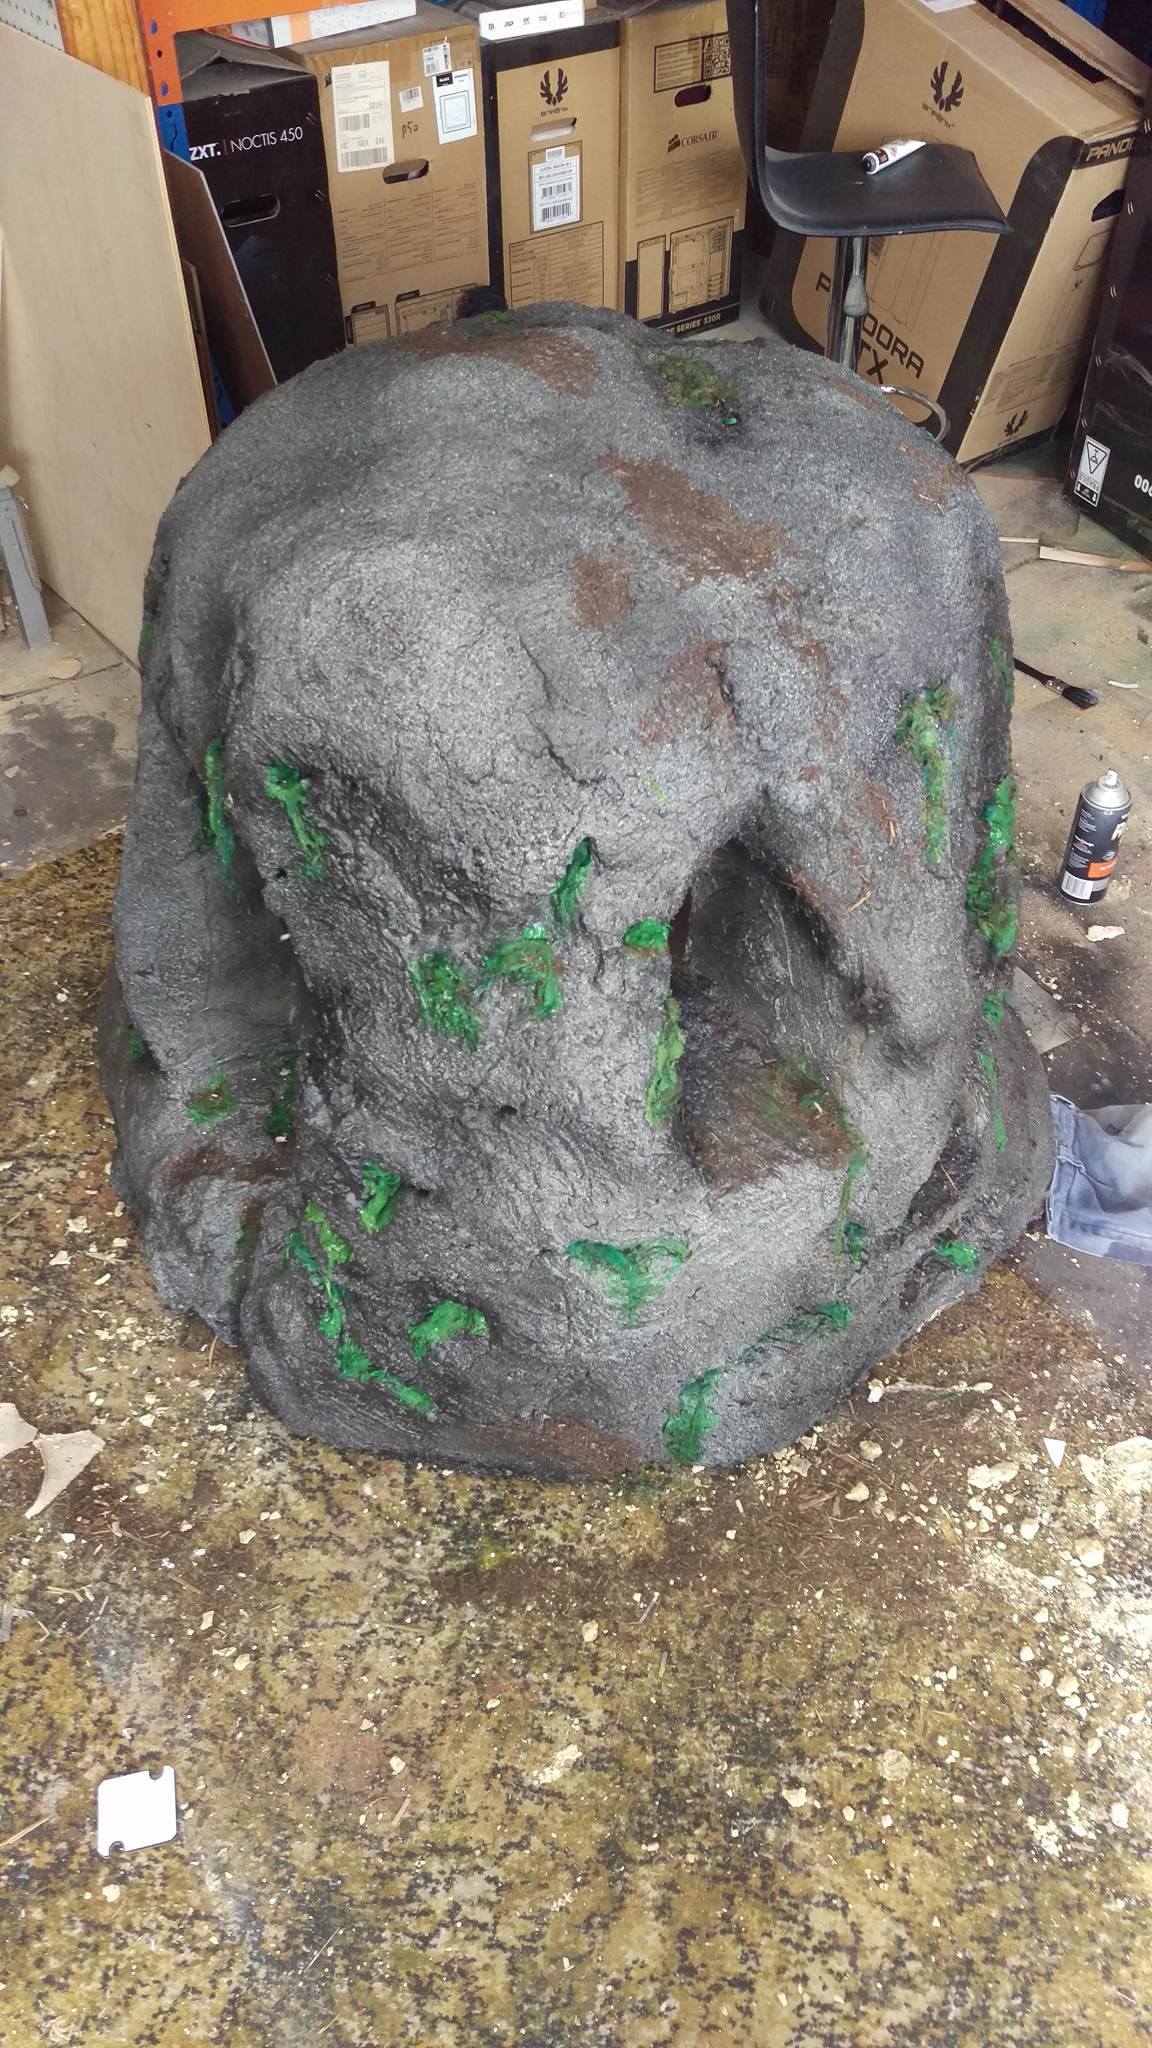
Added the sponsor logos to the rope. Painted the moss better colors and added driveway dirt
-
[Australia] Ethan Cooper
tagmods replied to Tt Andy's topic in 2017 Thermaltake CaseMOD Invitational Season 1
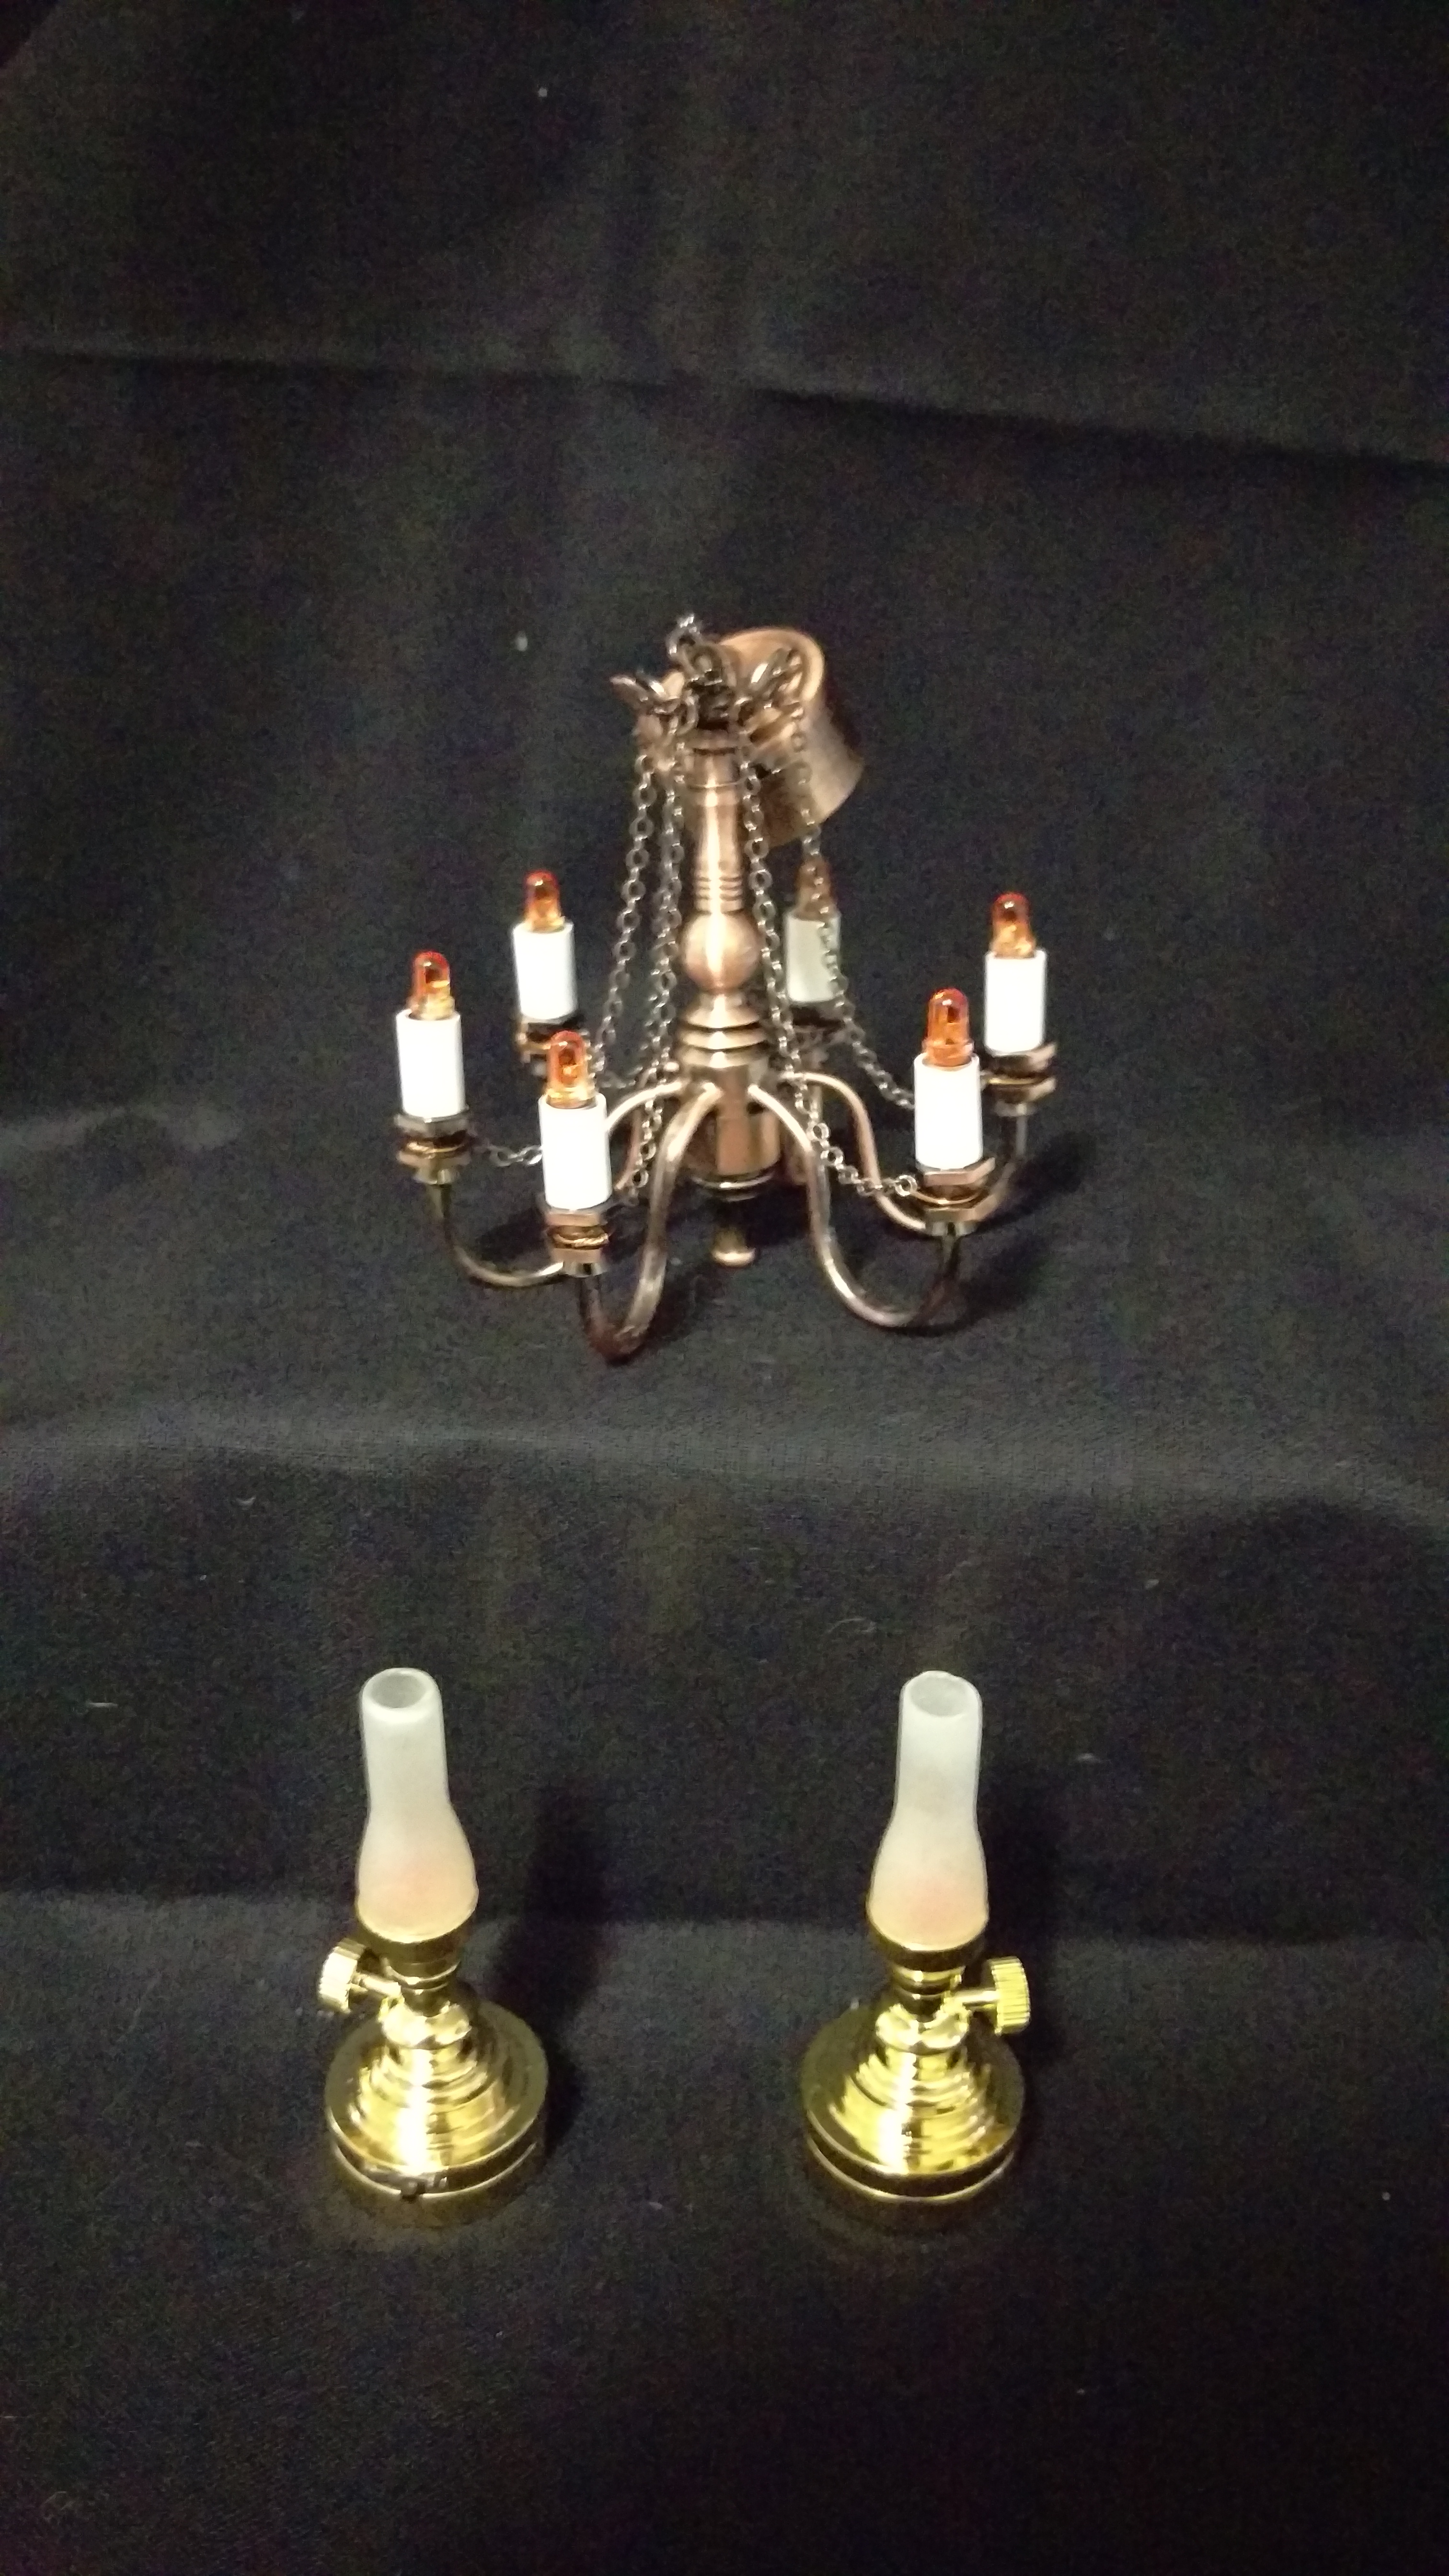
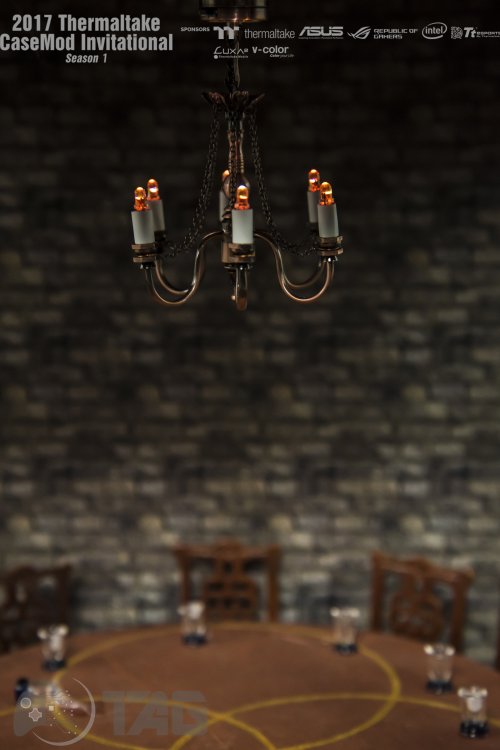
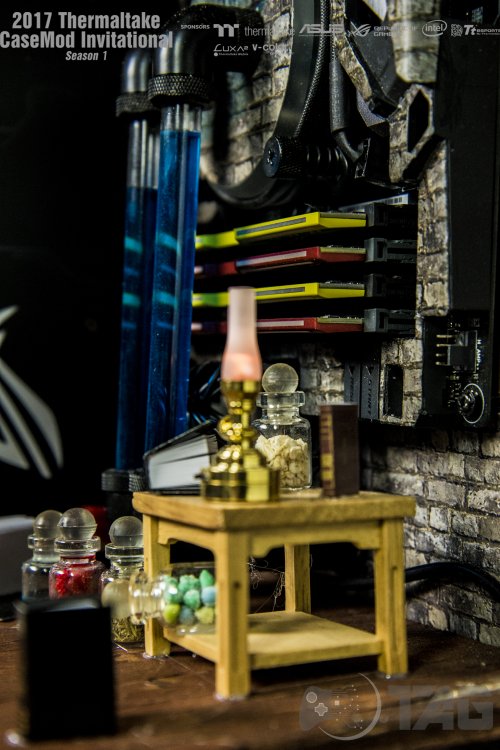
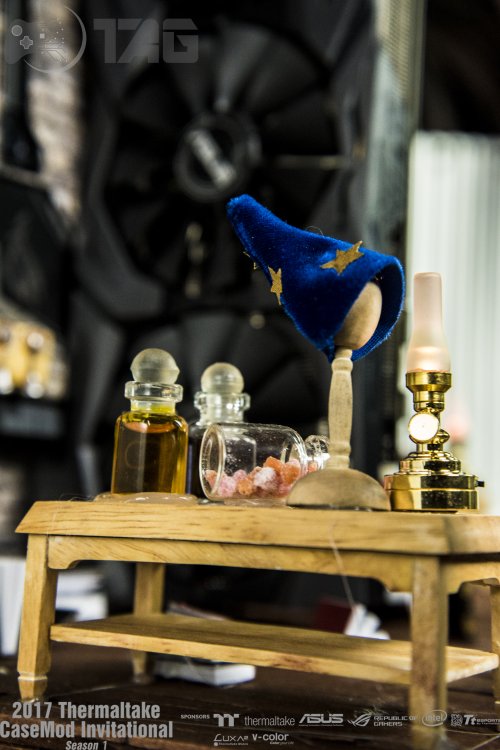
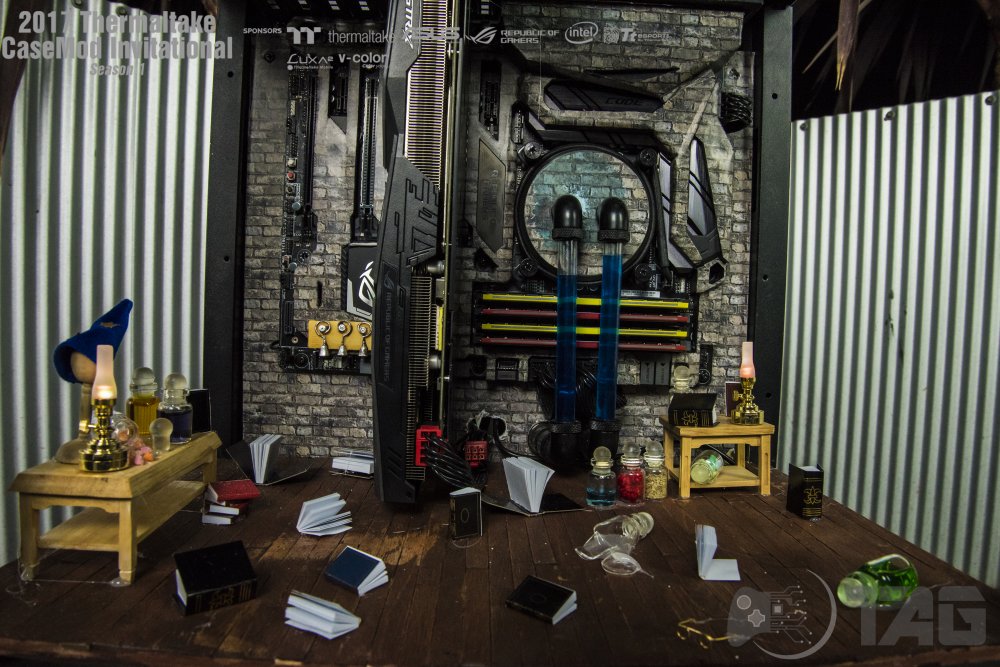
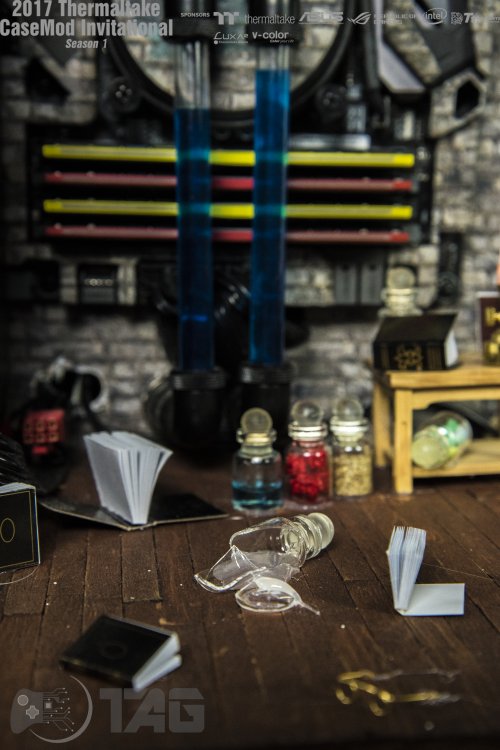
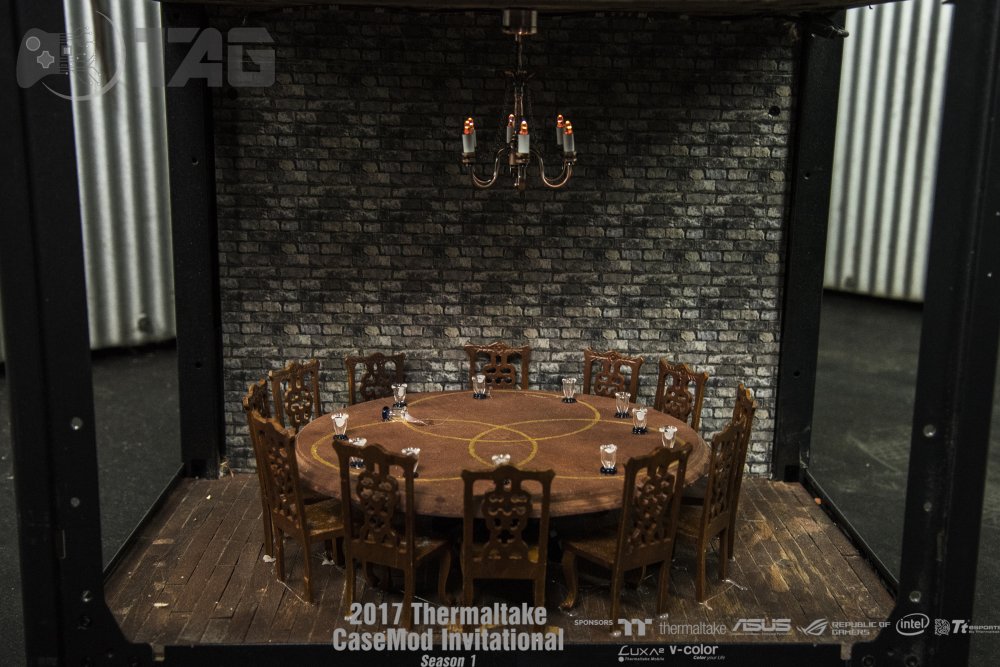
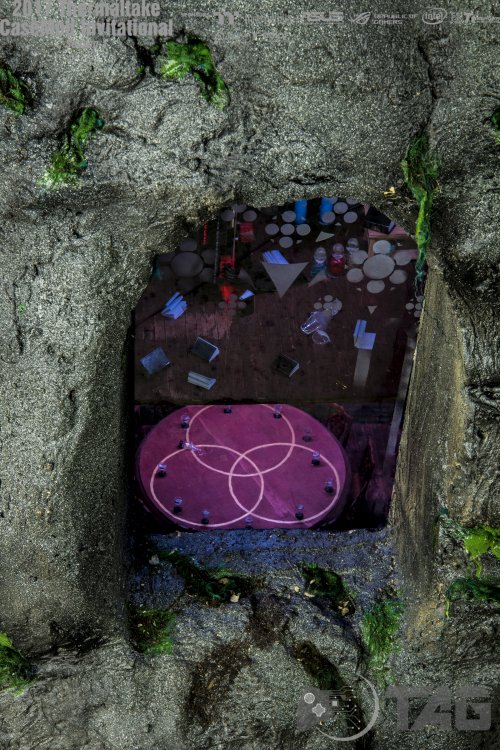
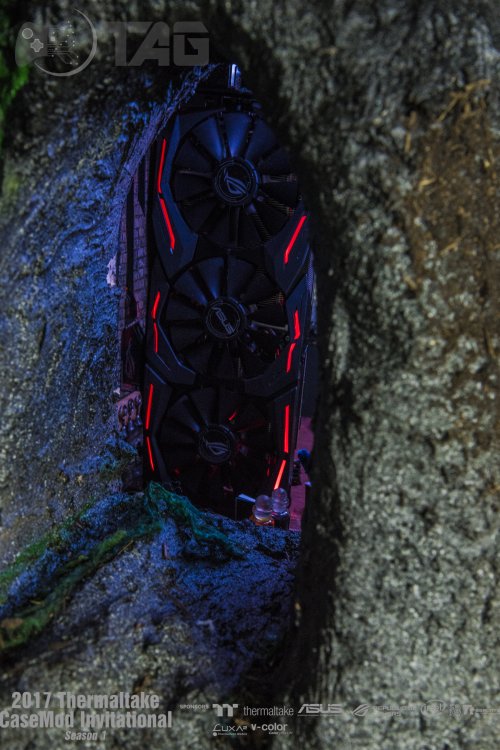
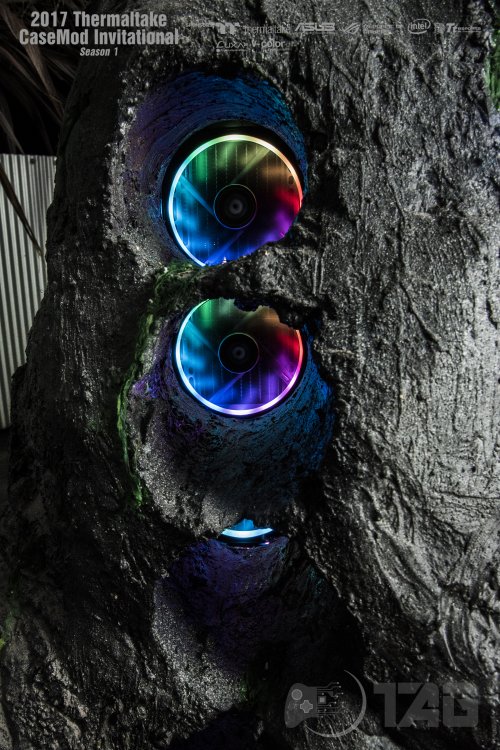
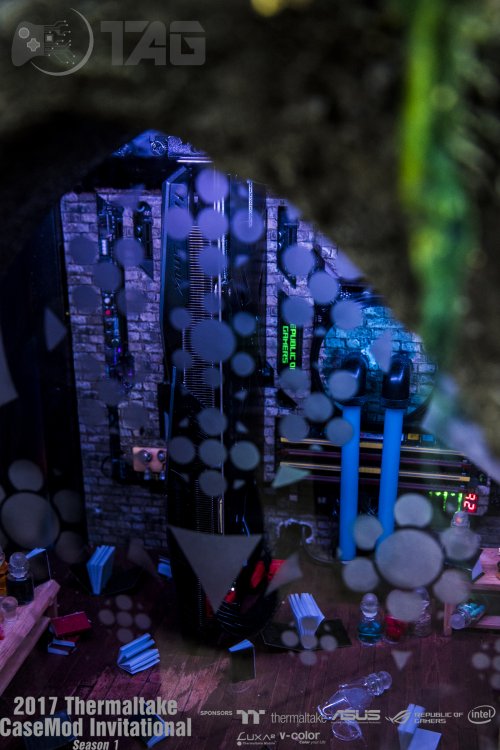
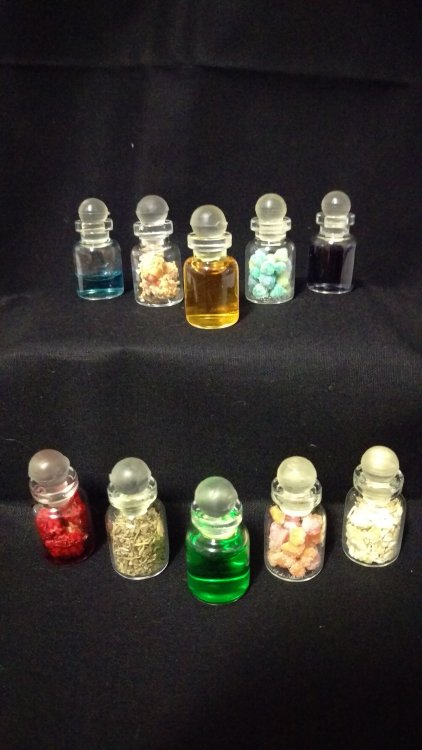
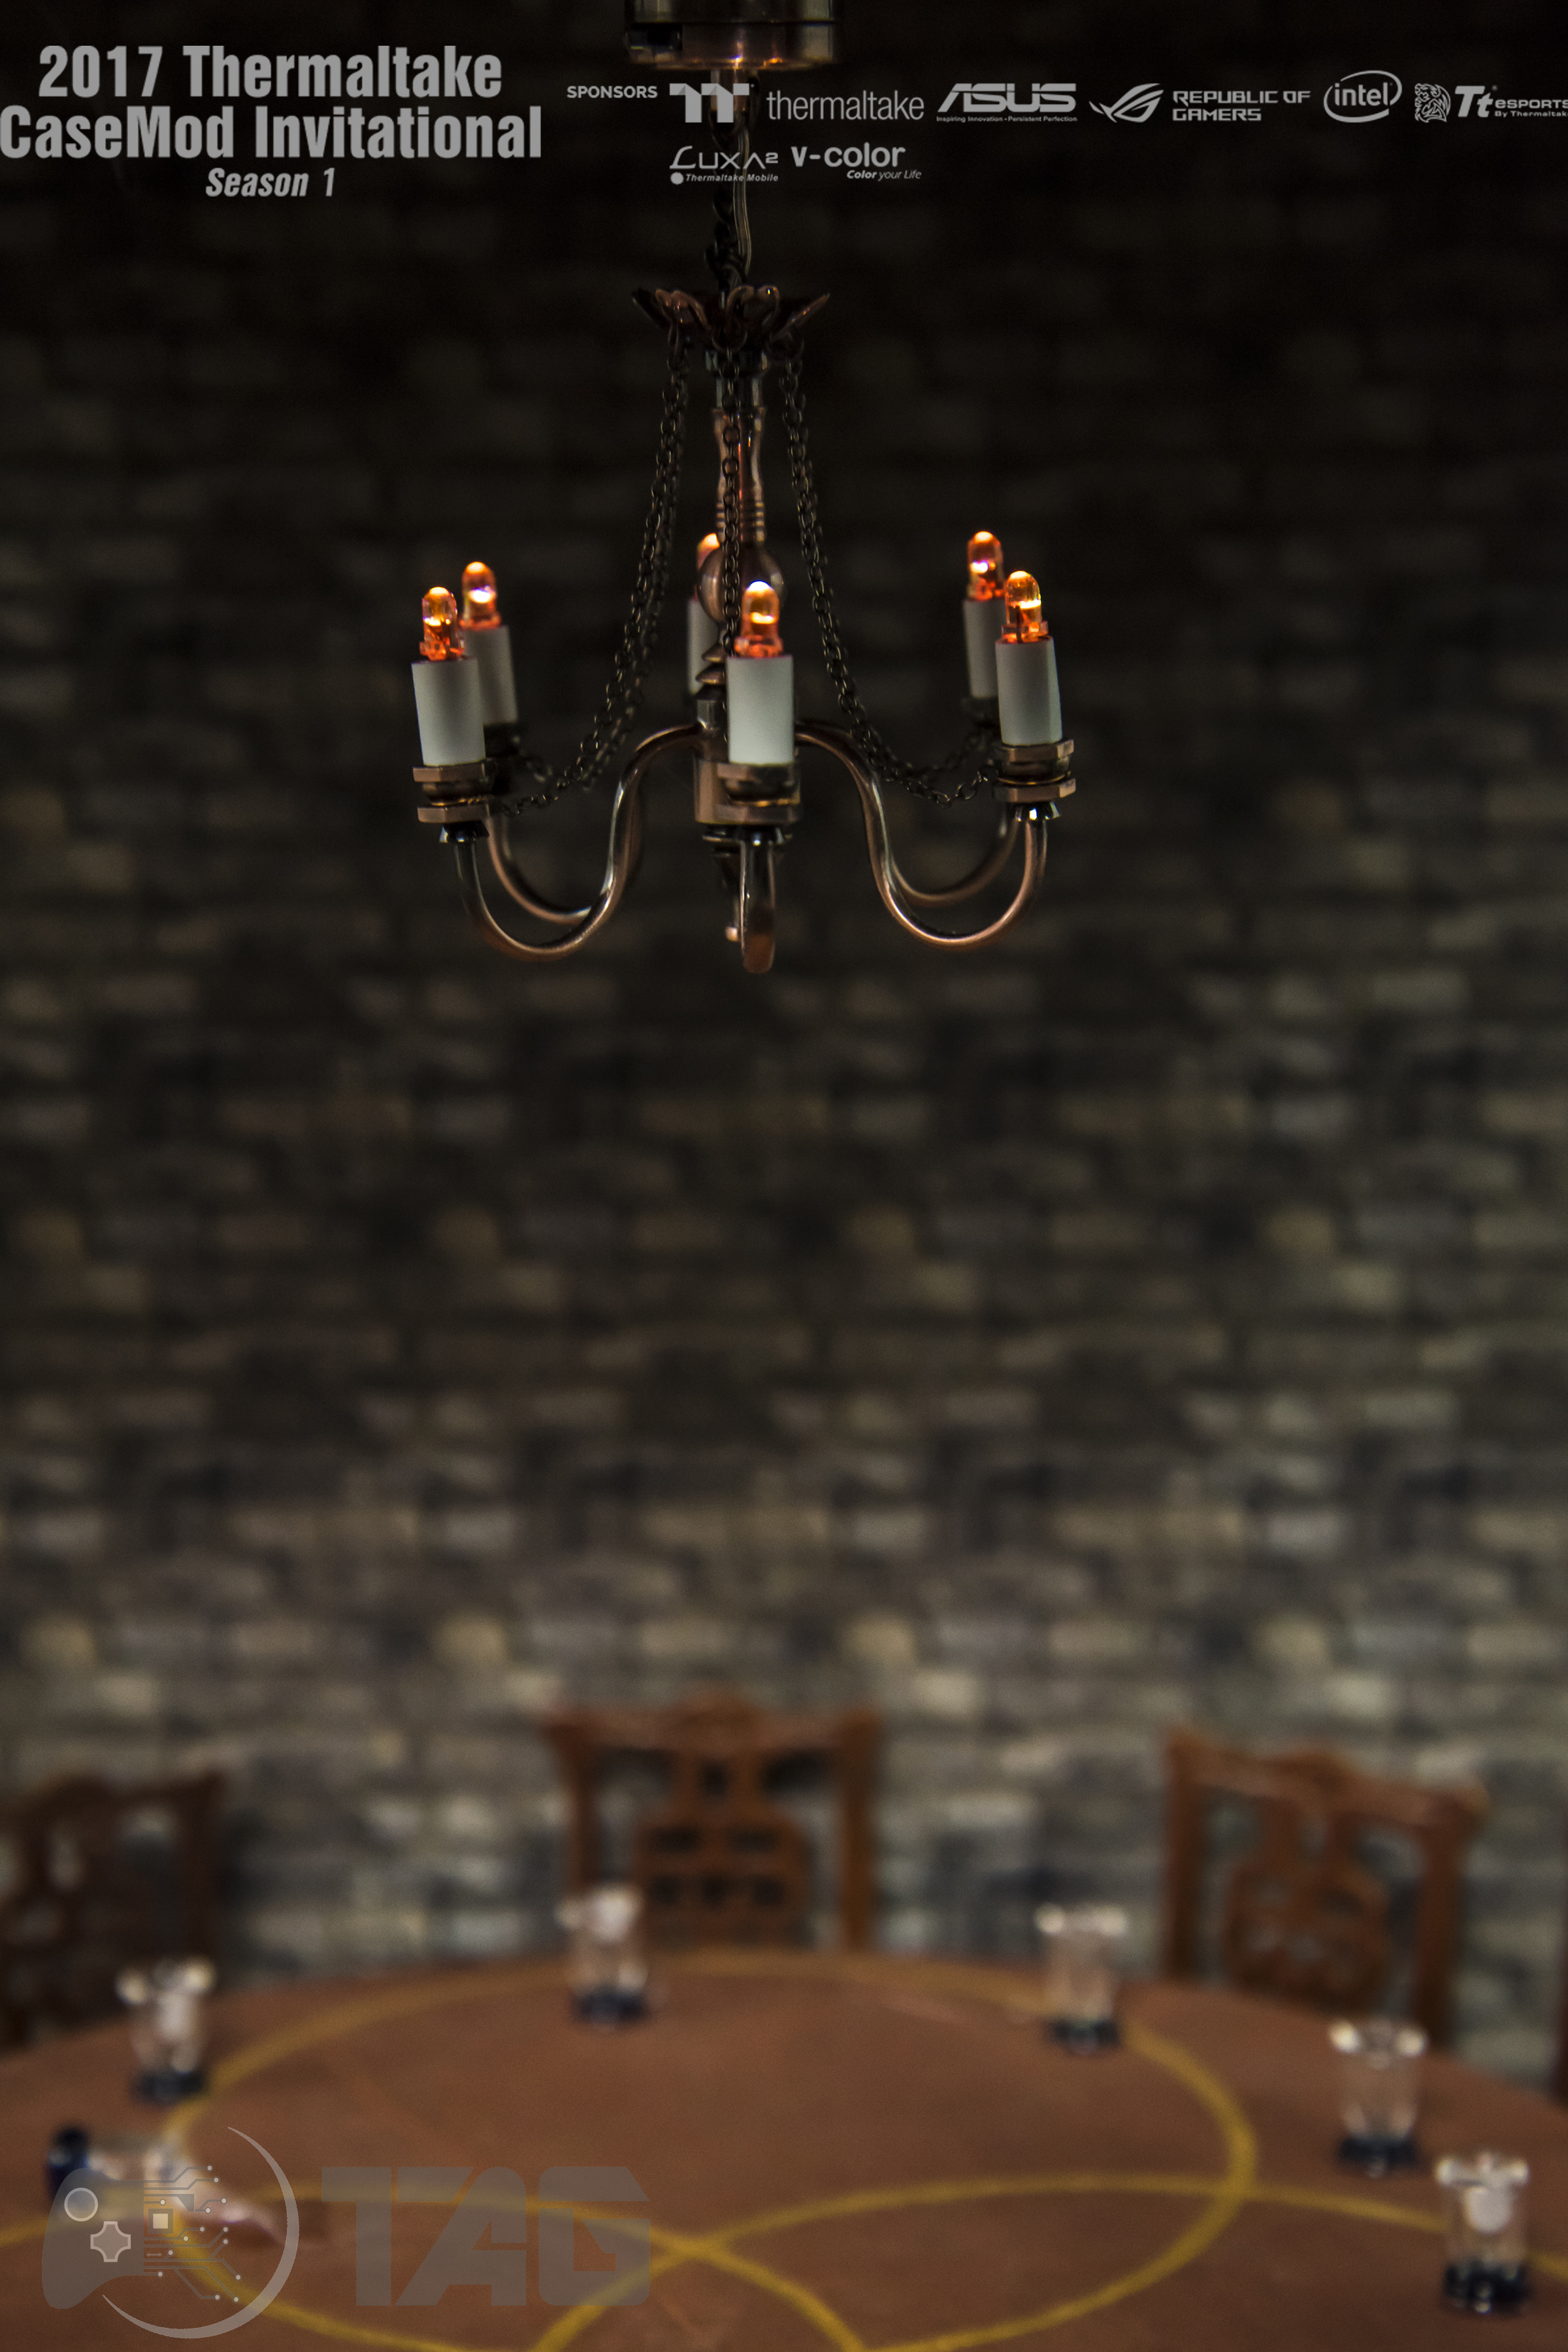
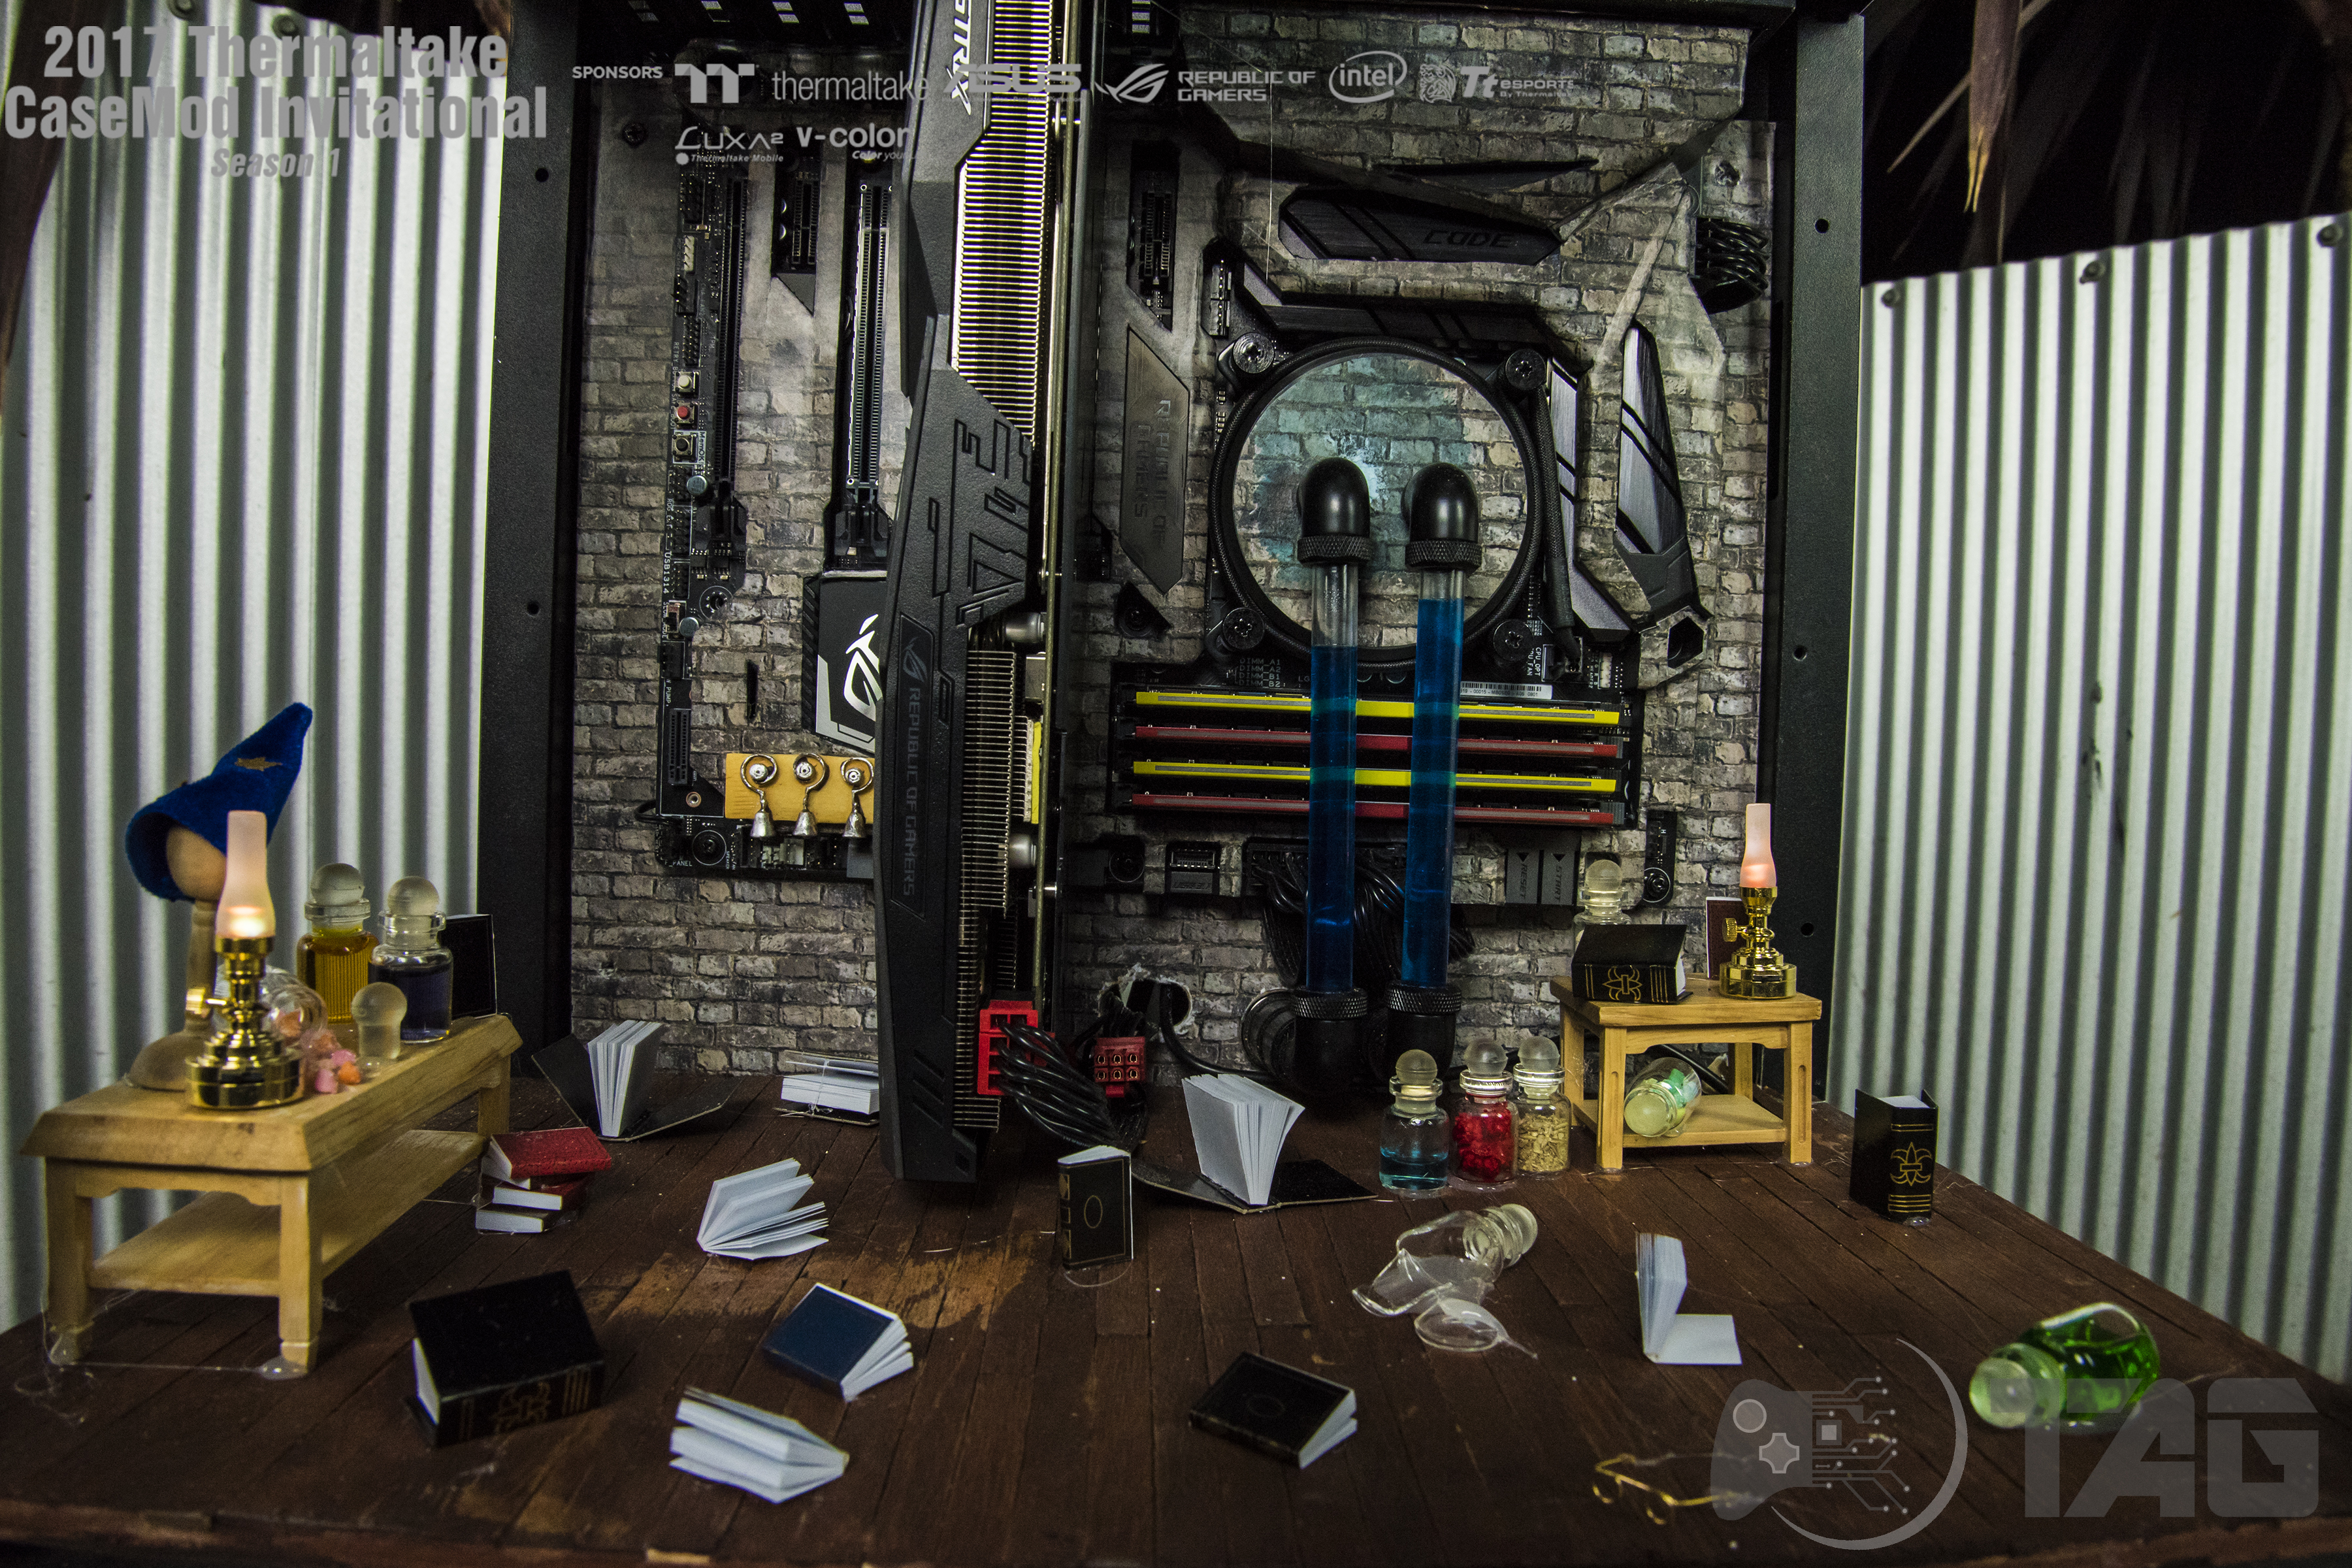
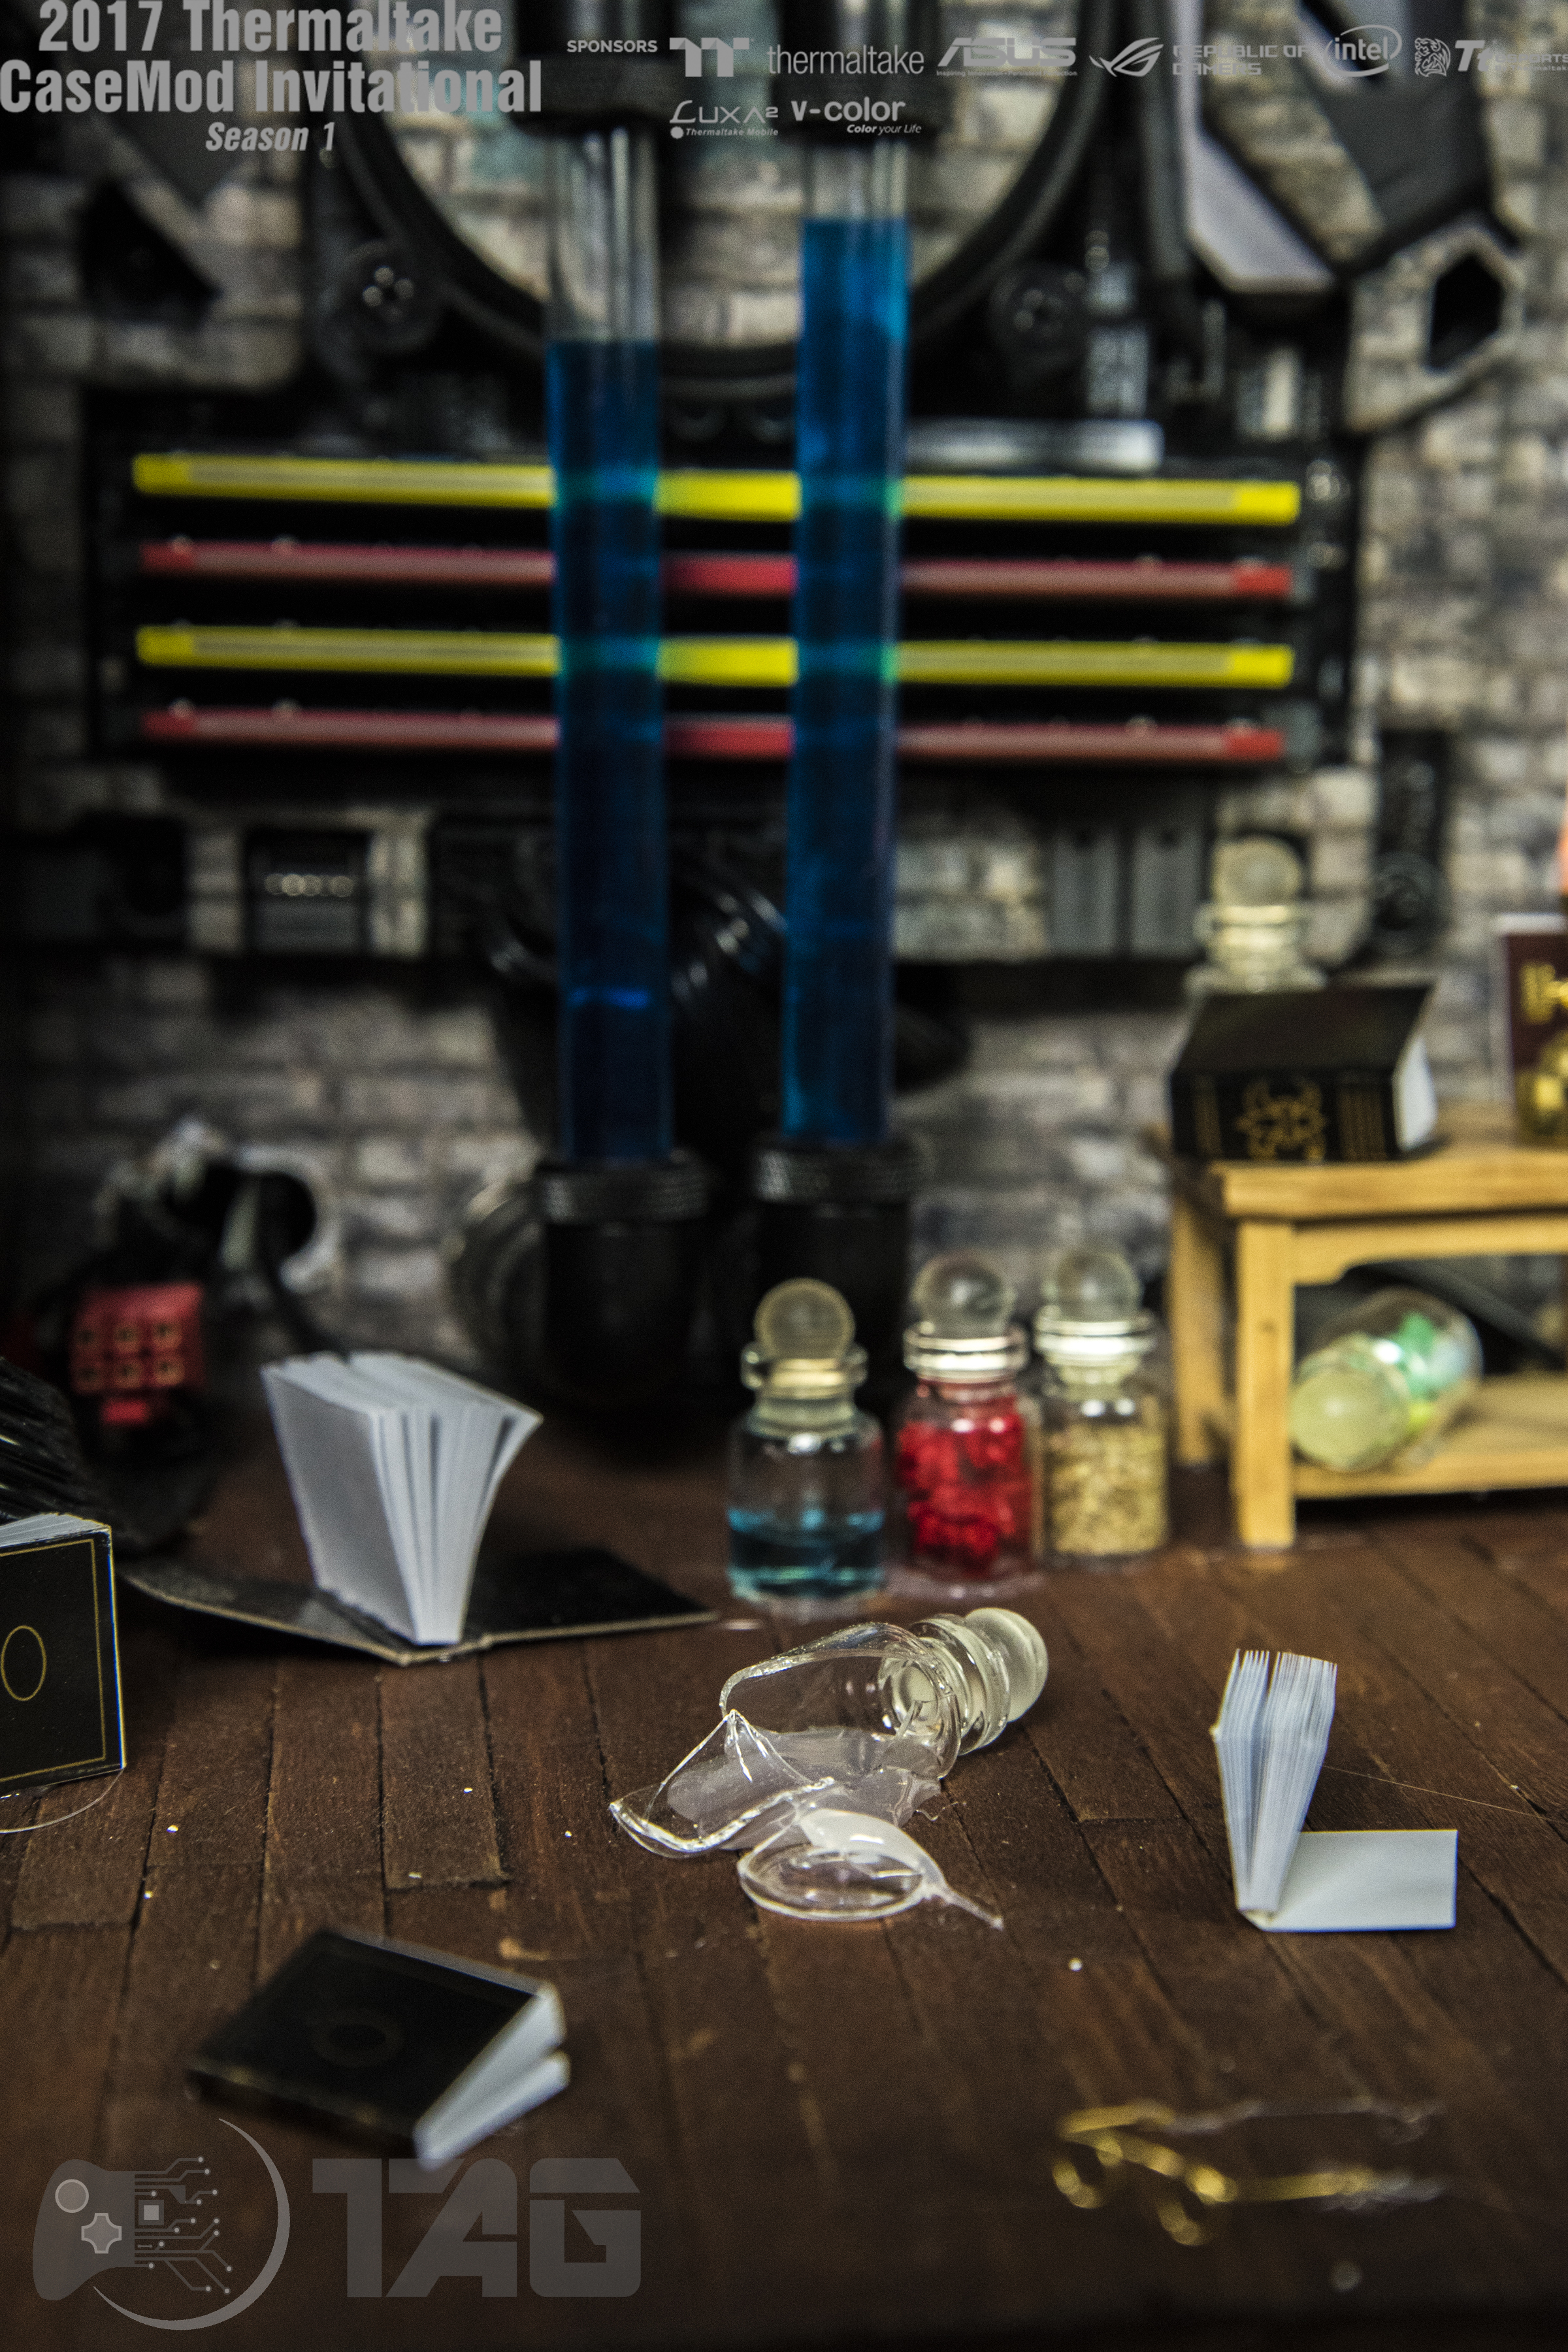
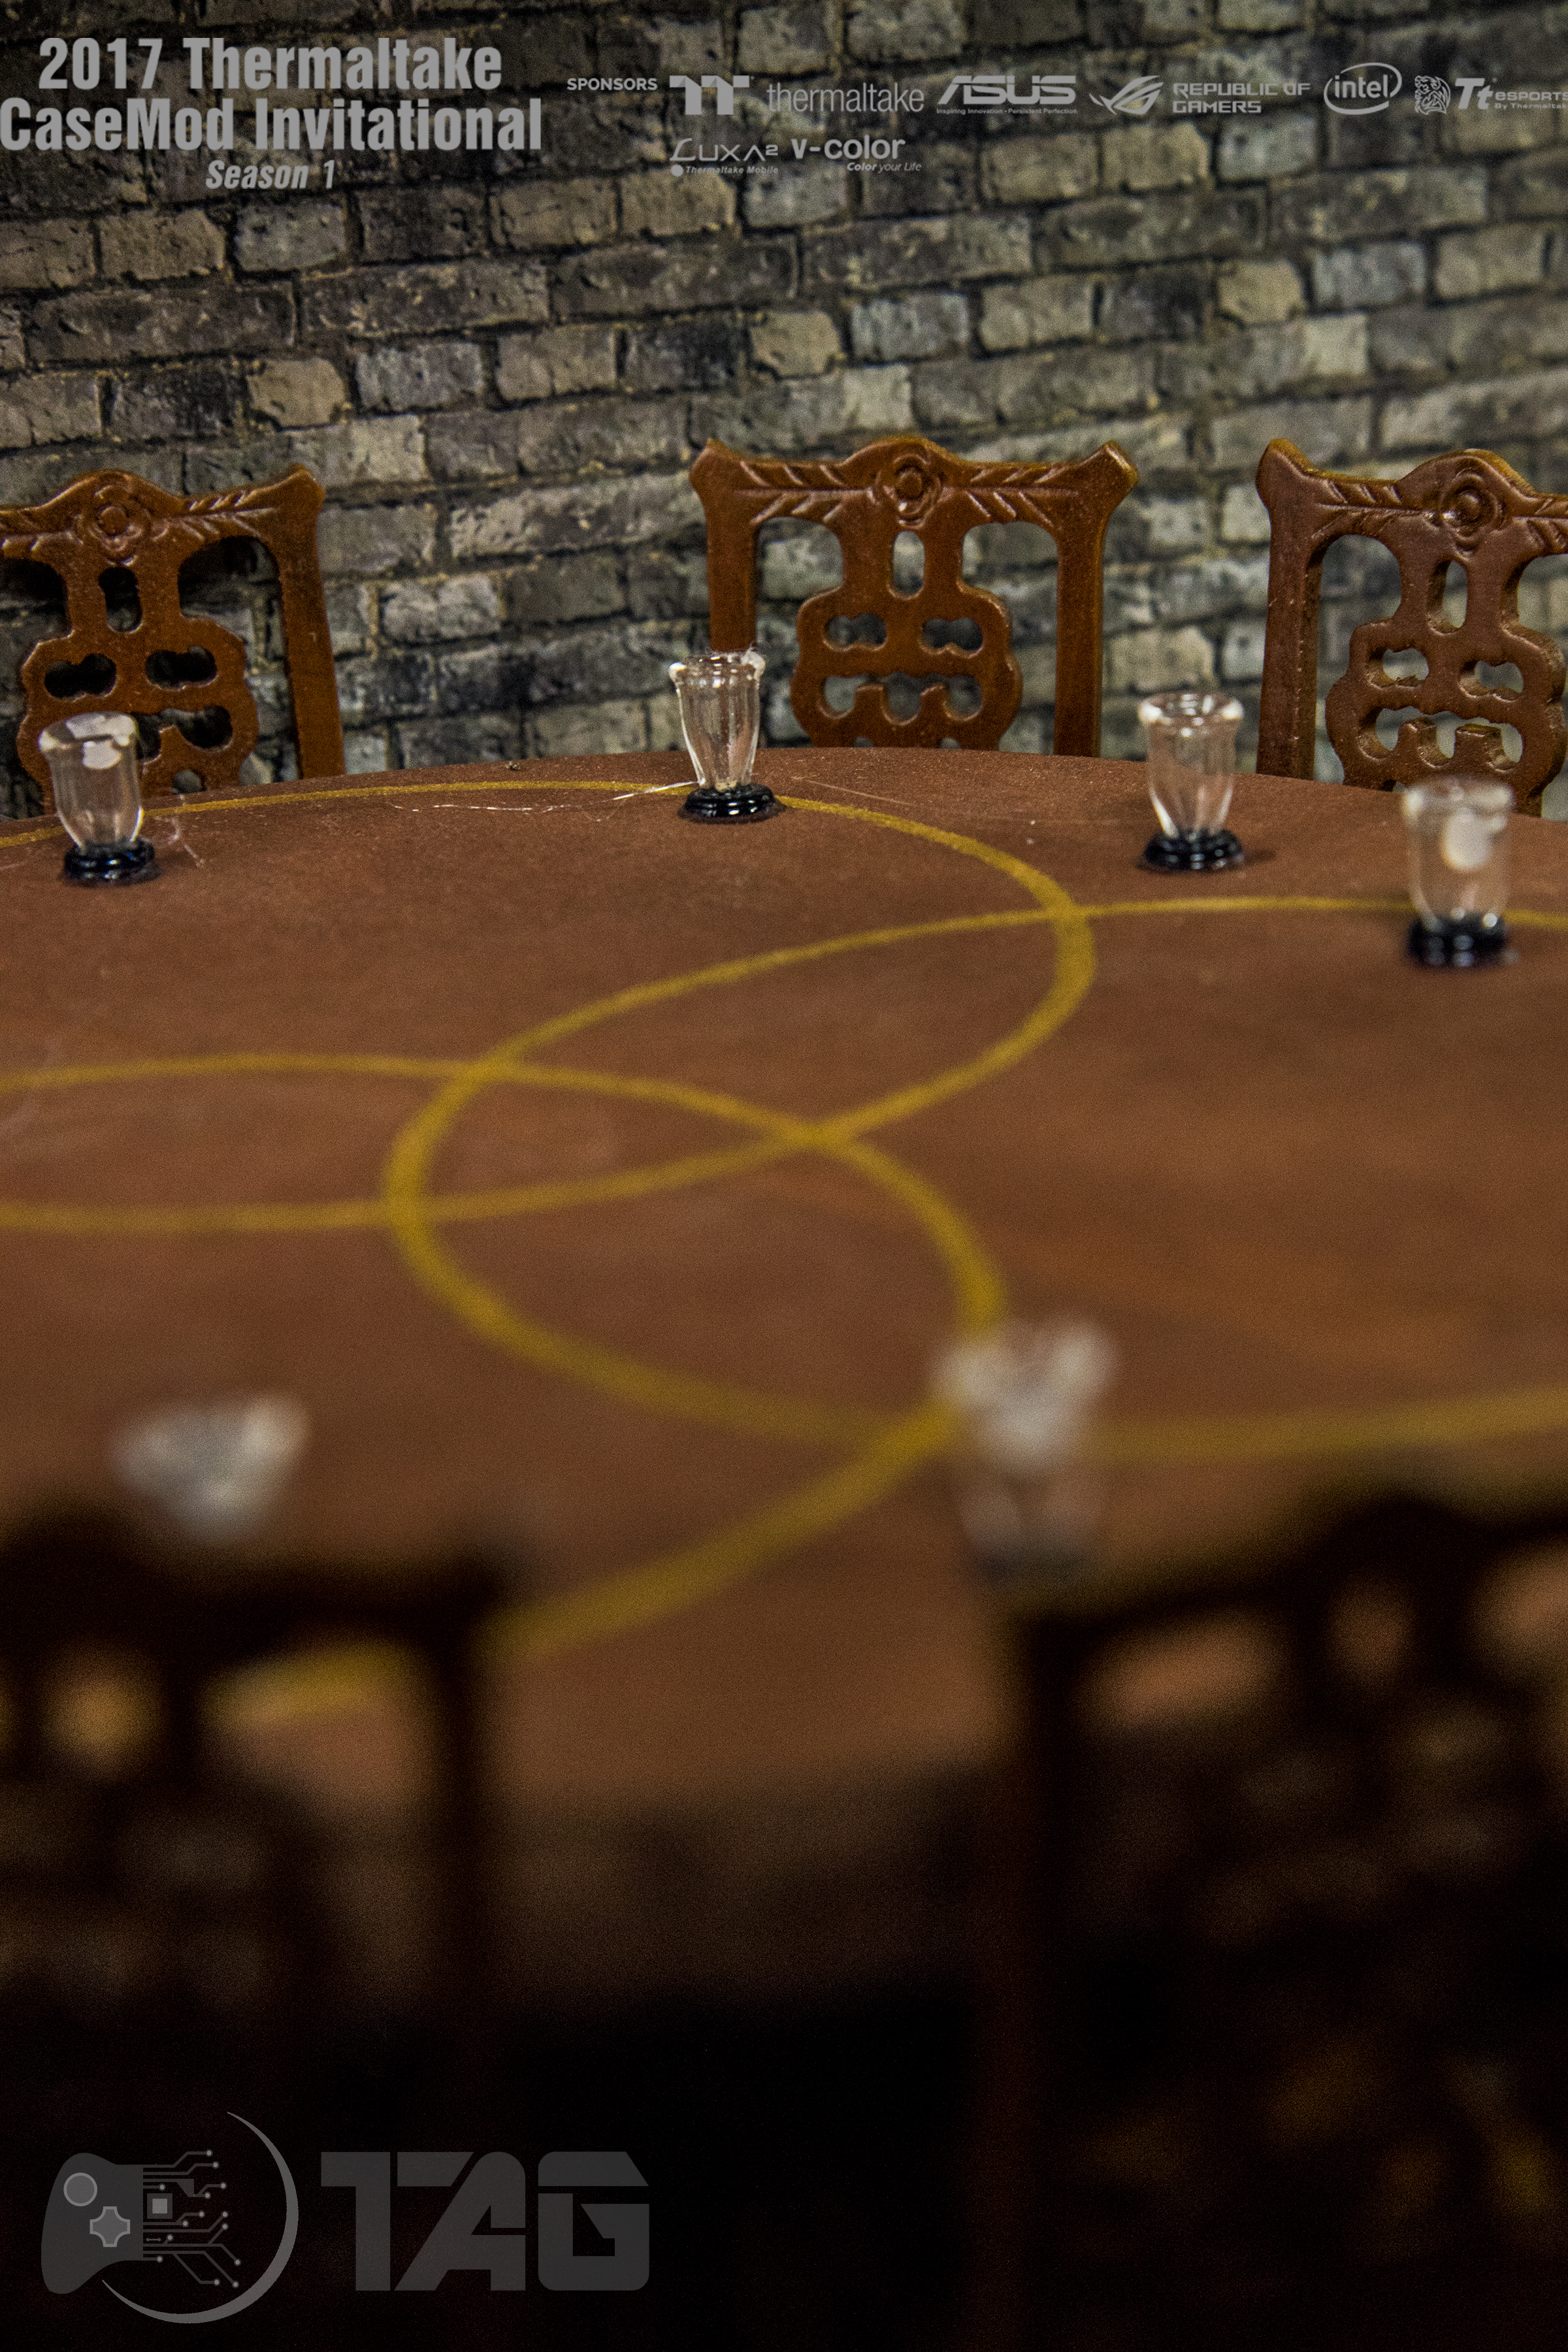
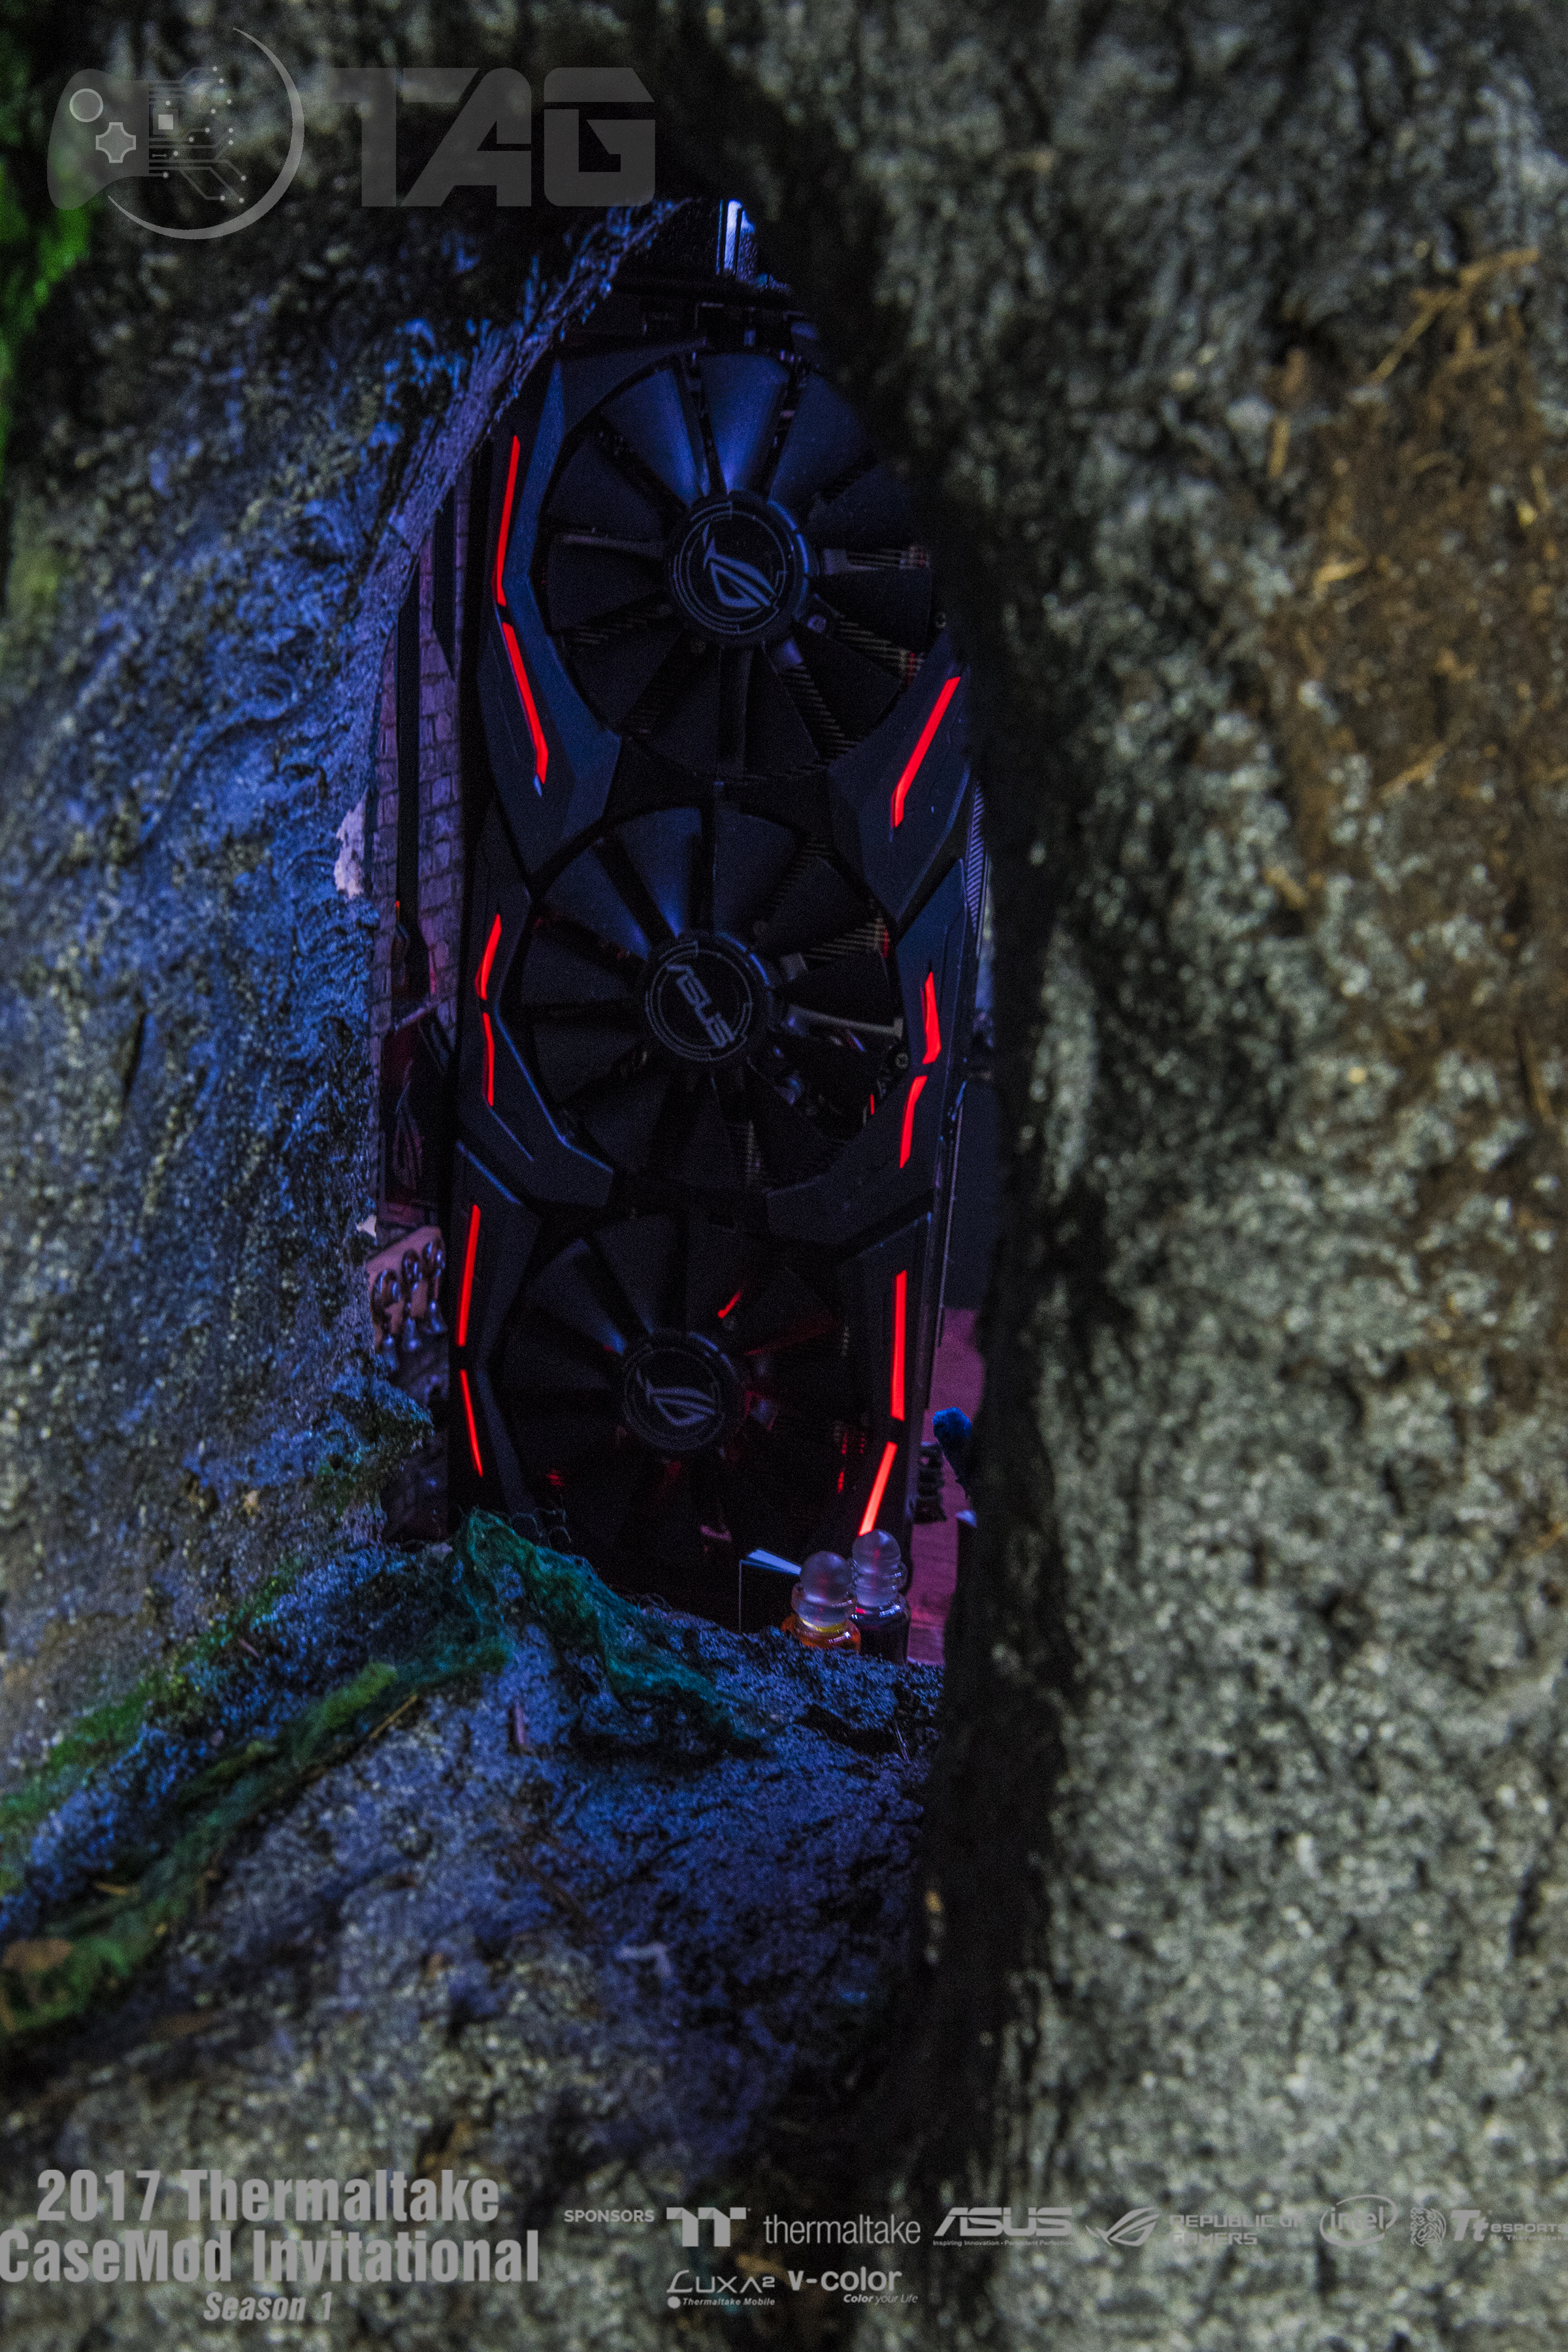
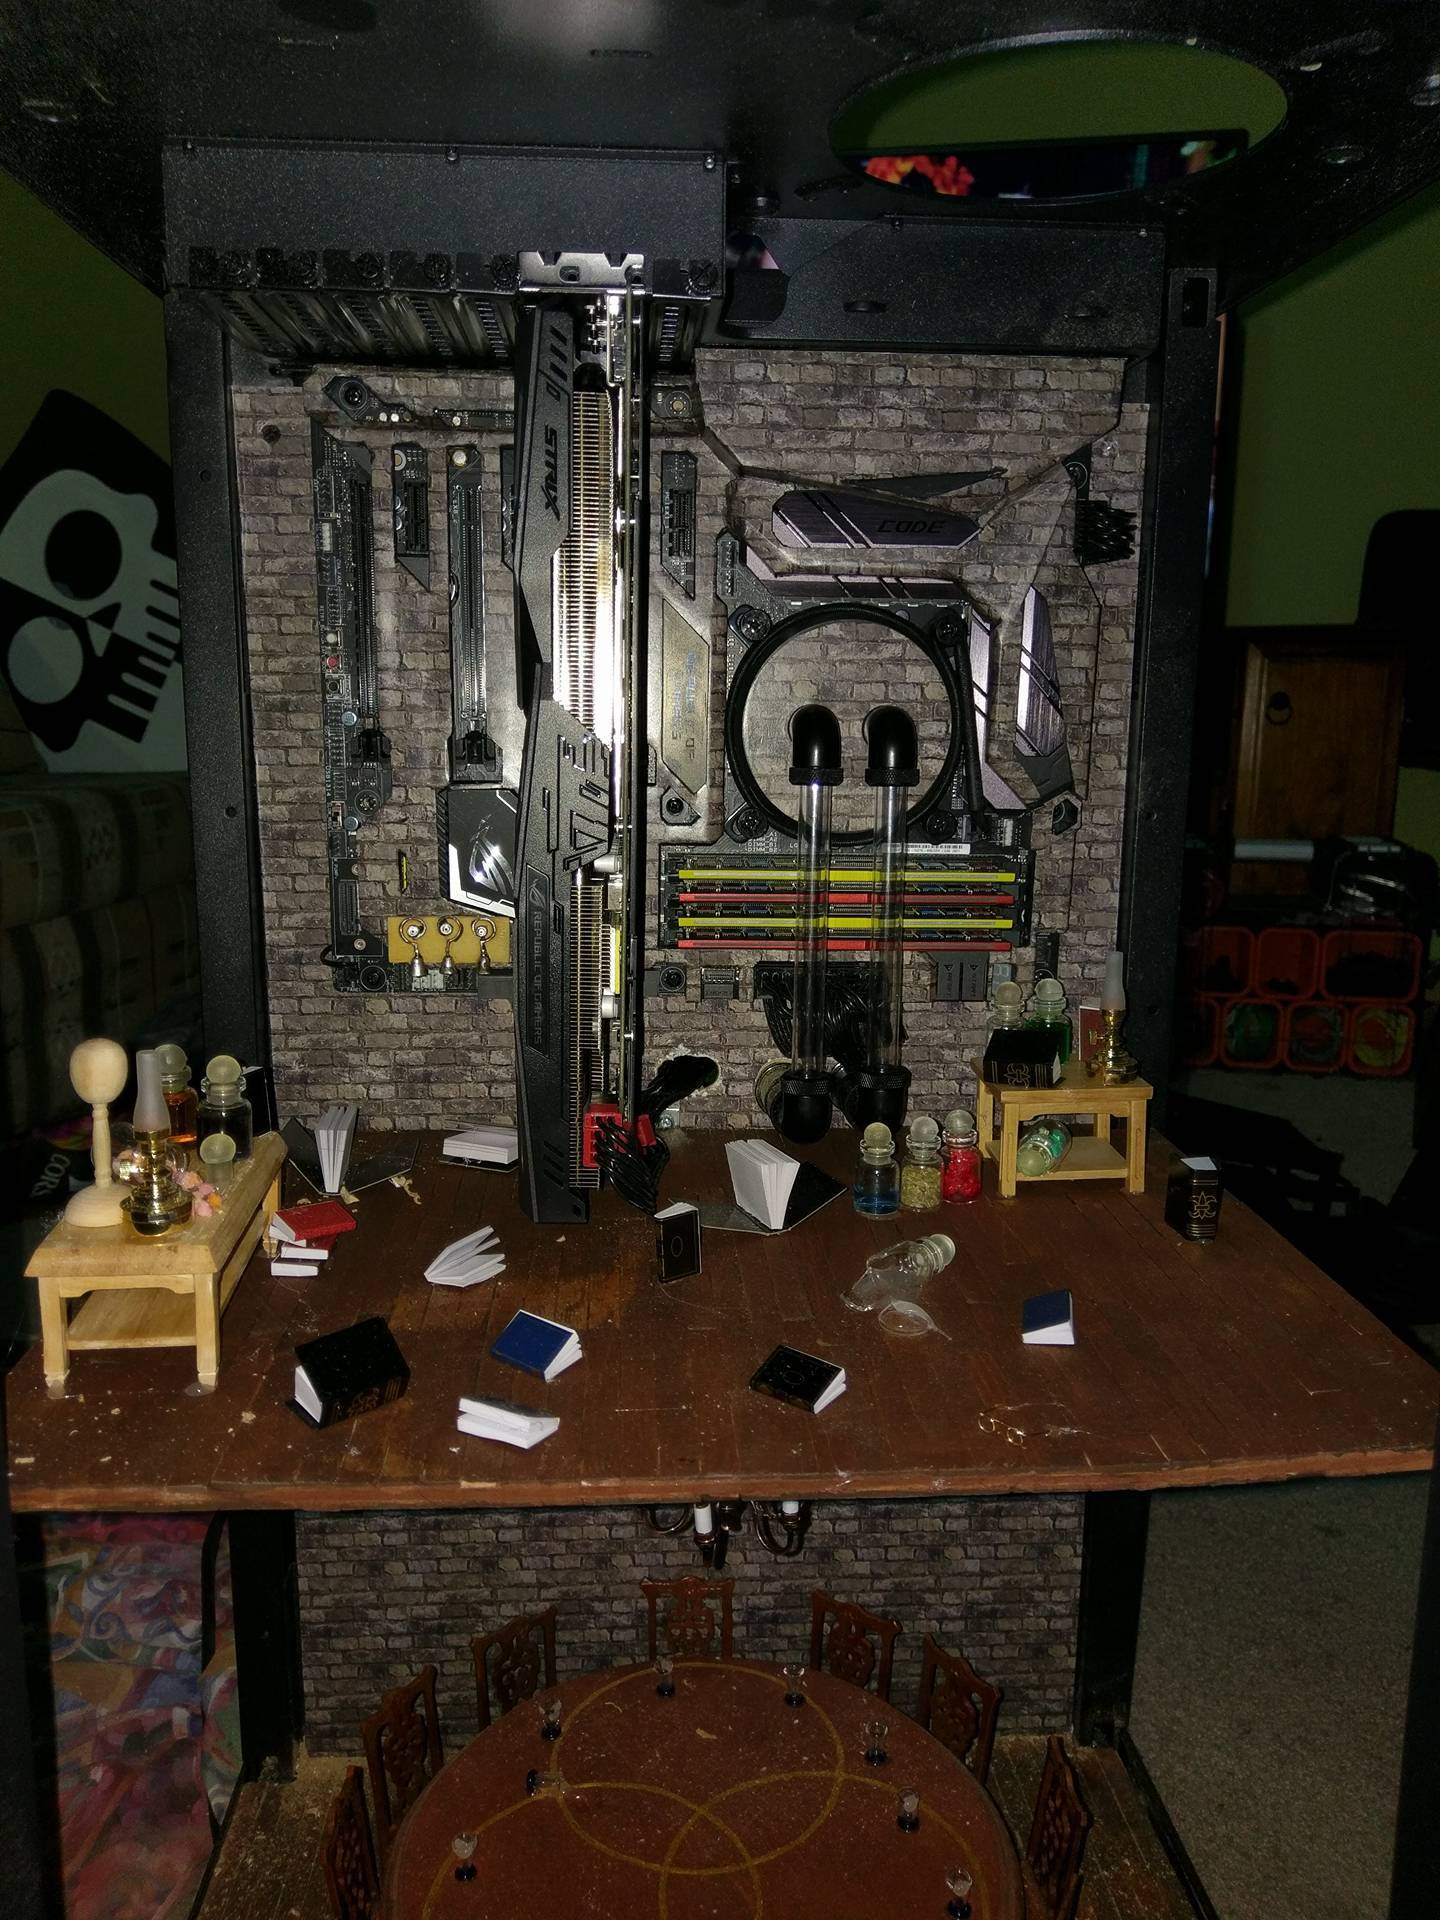
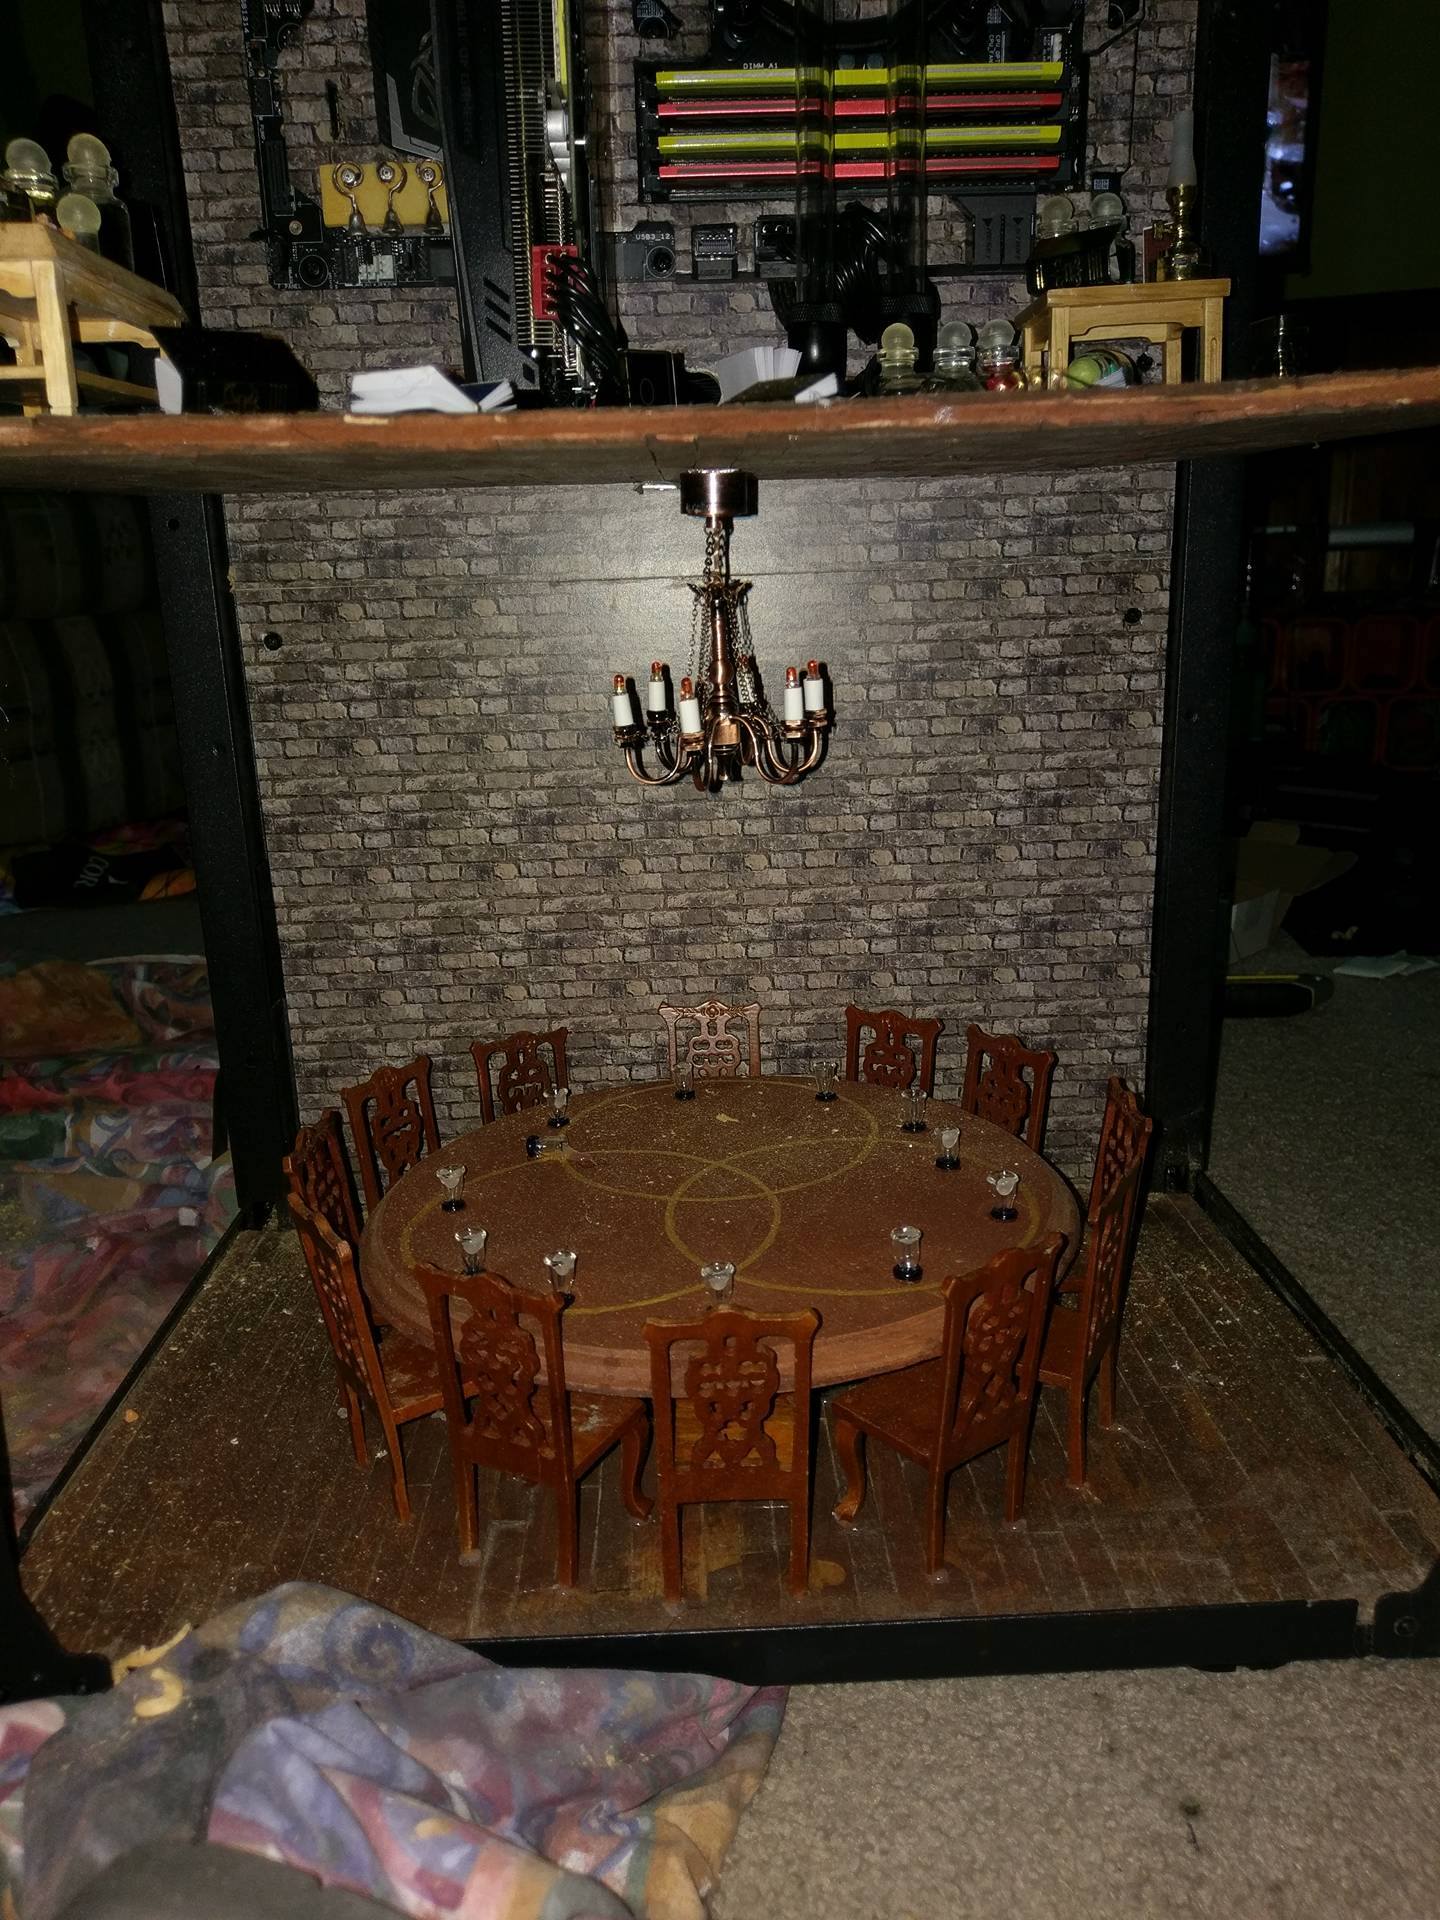
Starting to put the insides together. Merlin's Lab is chaotic which i think represents the character well Pipes run down to passthroughs. Coolant will be blue when its all filled Crazy happy with how the table and chairs have turned out! My replacement RAM also arrived hence the 2 colours as 1 stick arrived broken. GPU is a RX480 as my 1070 also arrived broken... Australian Couriers must really hate me... I made all the tables and chairs. Books, glasses and little bottles were purchased from a miniature store.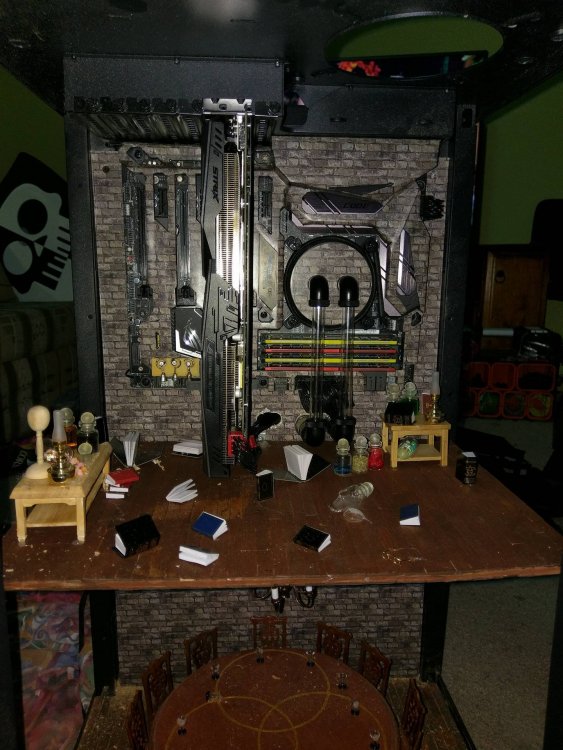

-
[Australia] Ethan Cooper
tagmods replied to Tt Andy's topic in 2017 Thermaltake CaseMOD Invitational Season 1
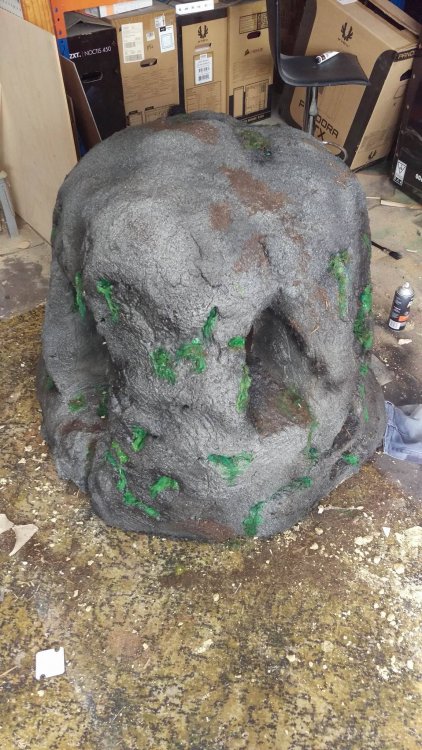
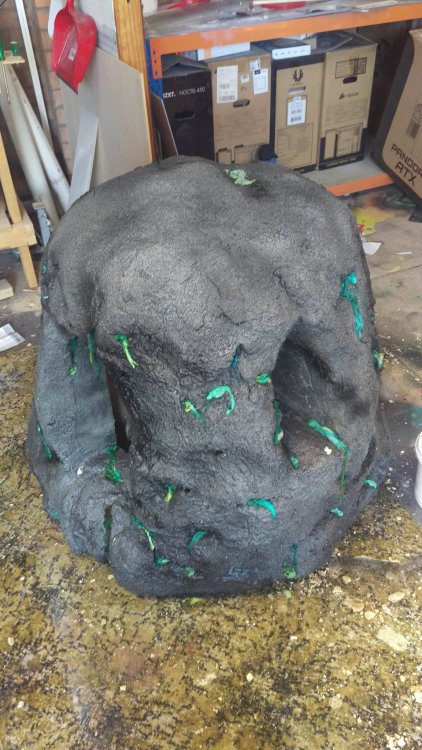
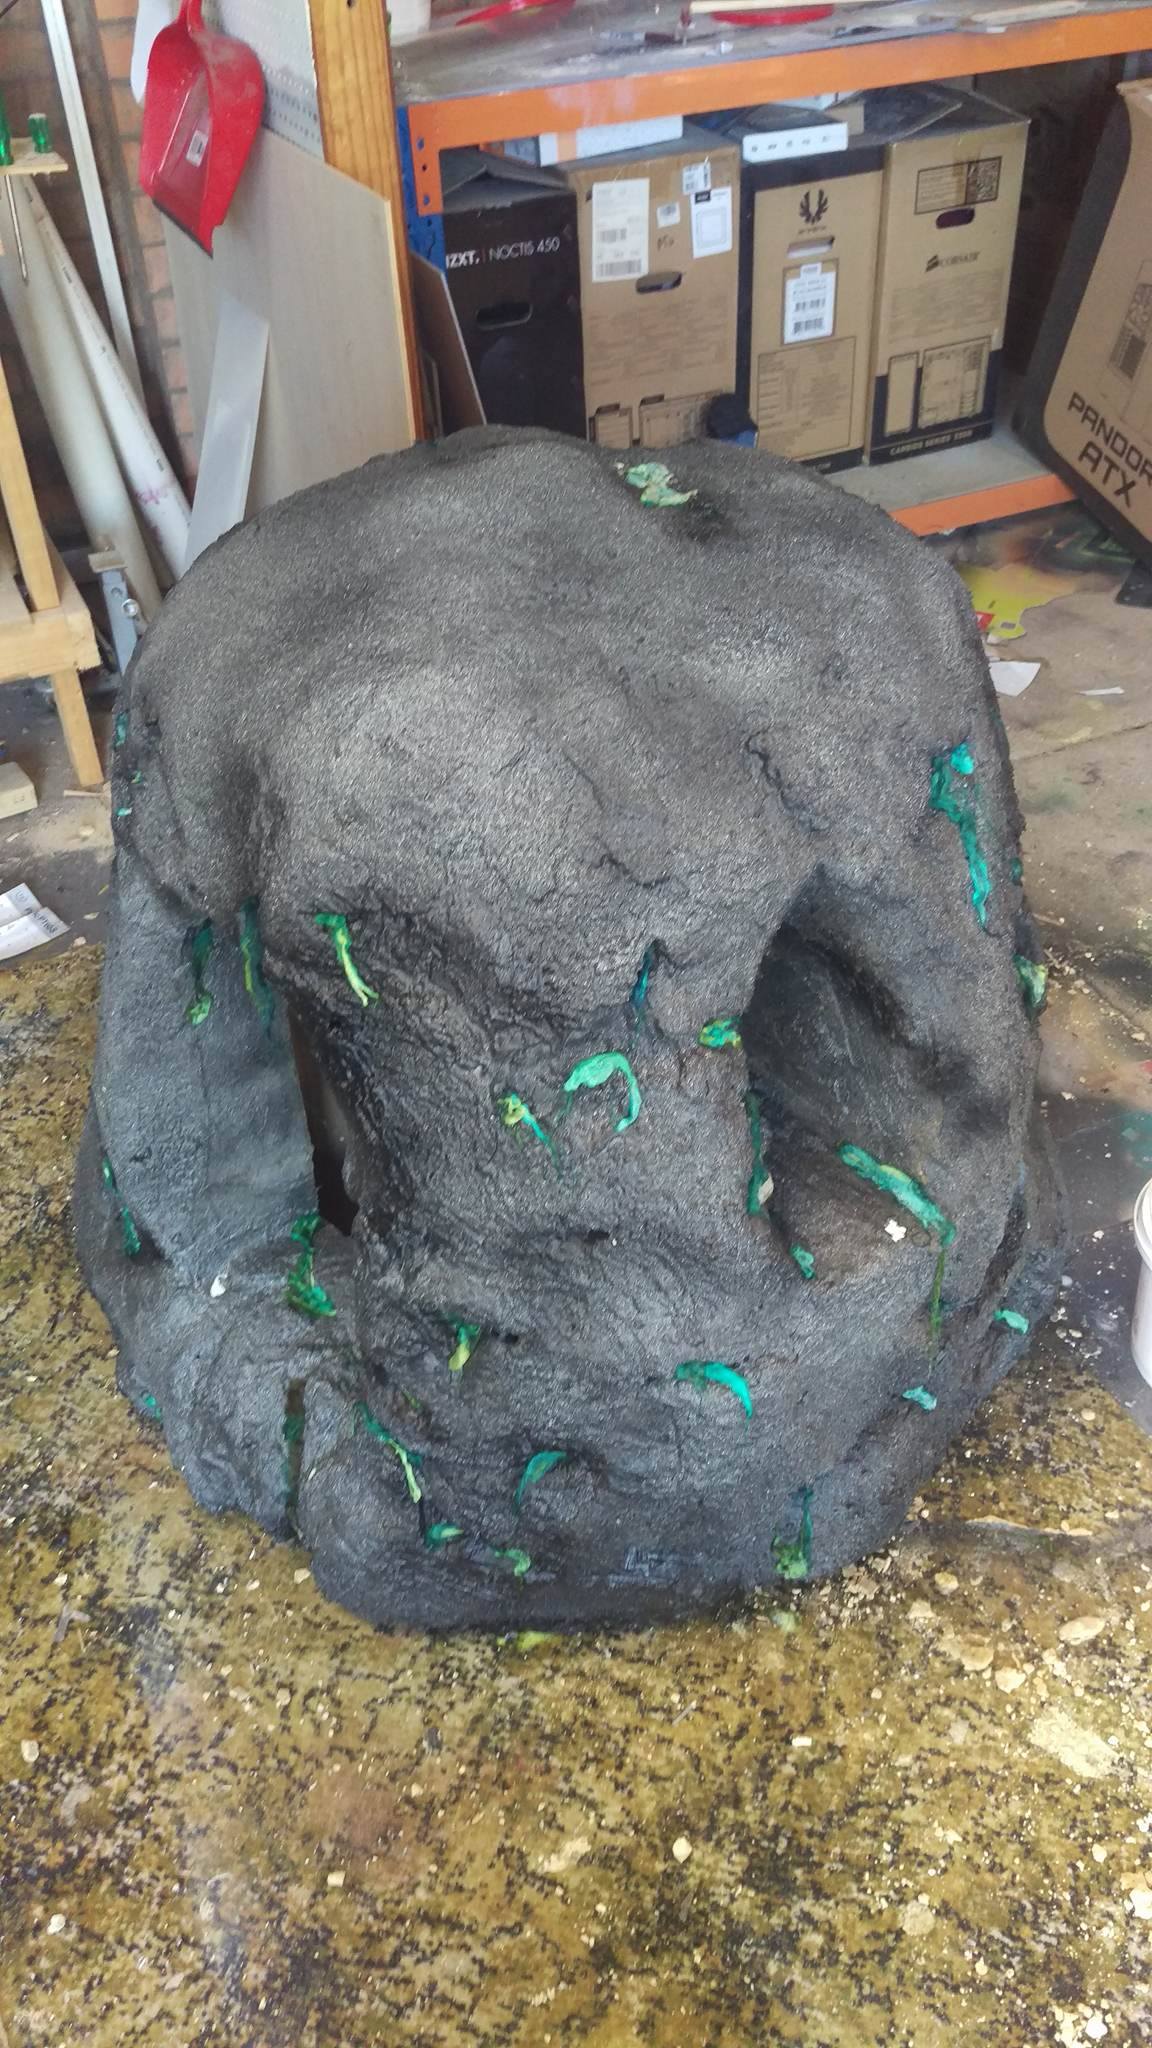
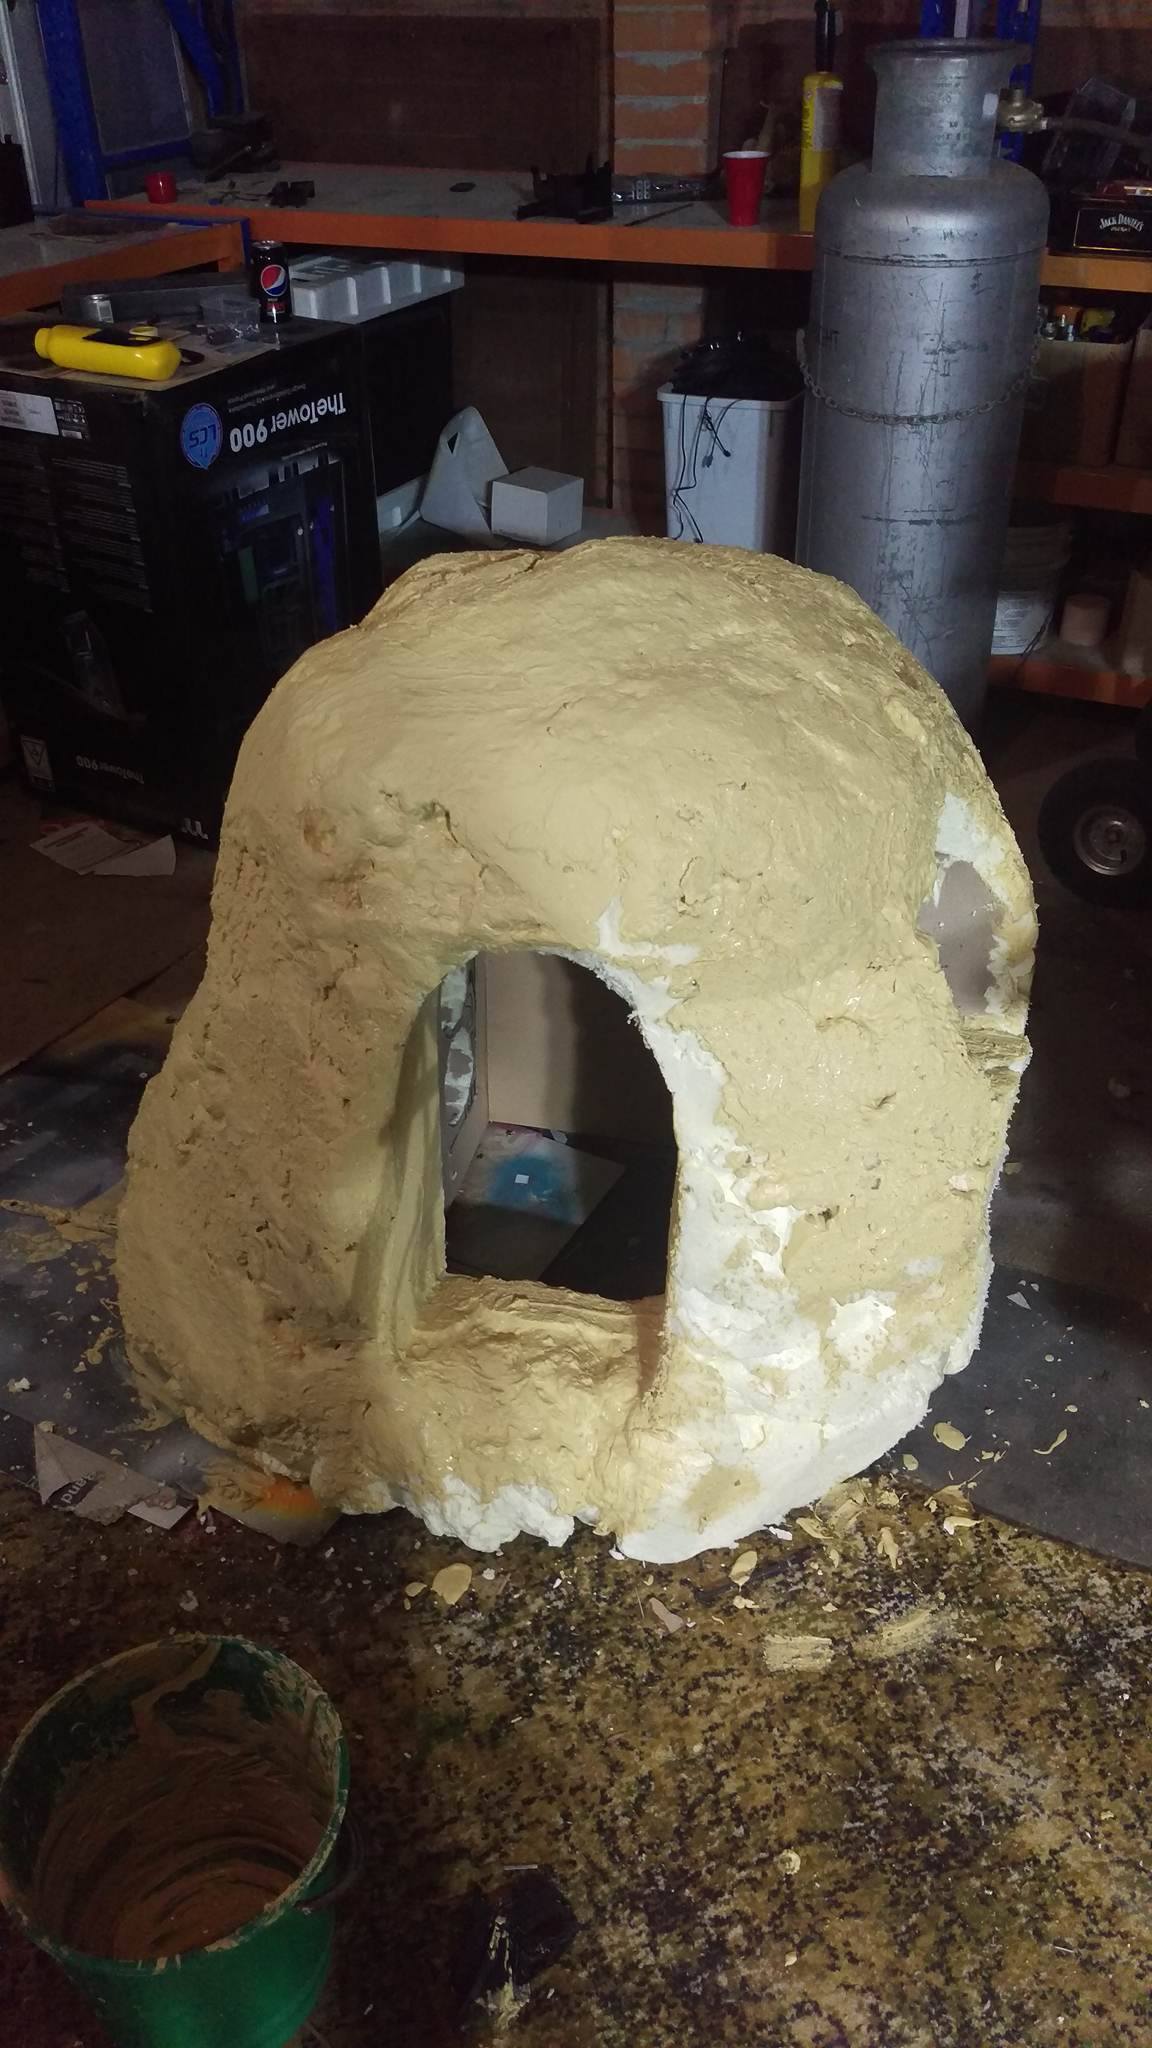
Painting the rock and adding the basis for moss.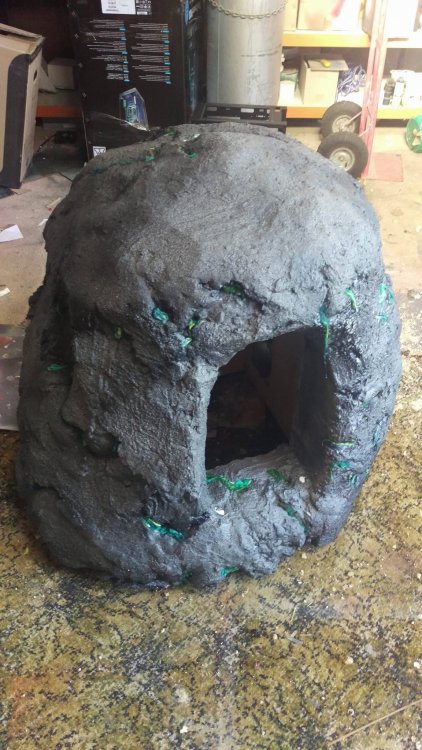


-
[Australia] Ethan Cooper
tagmods replied to Tt Andy's topic in 2017 Thermaltake CaseMOD Invitational Season 1
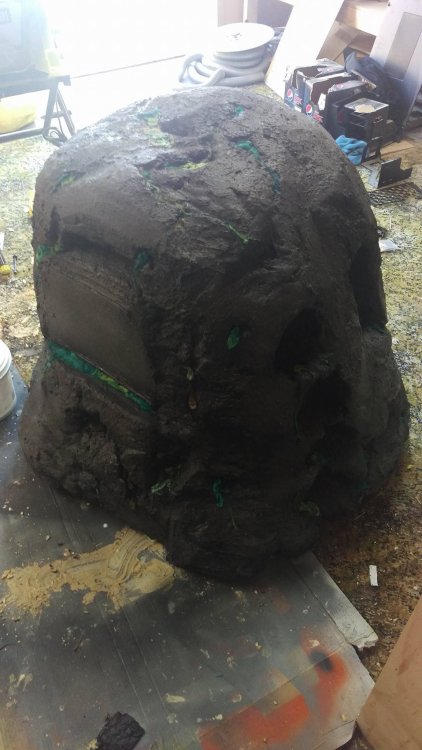
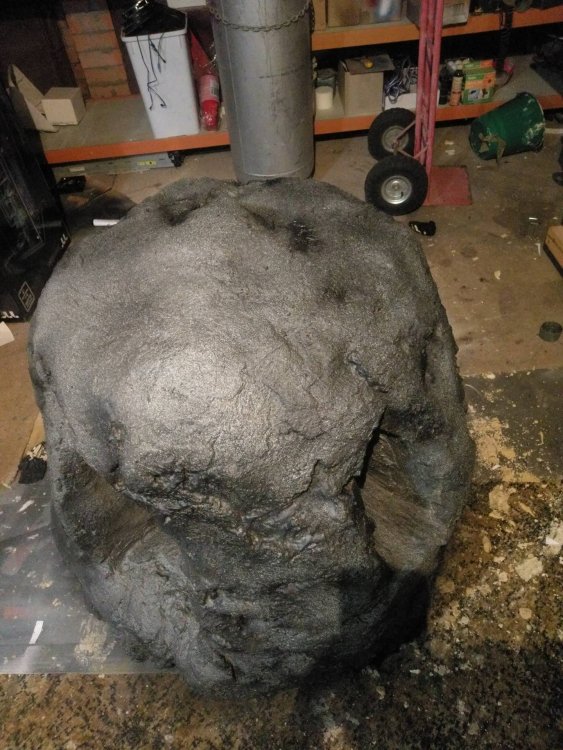
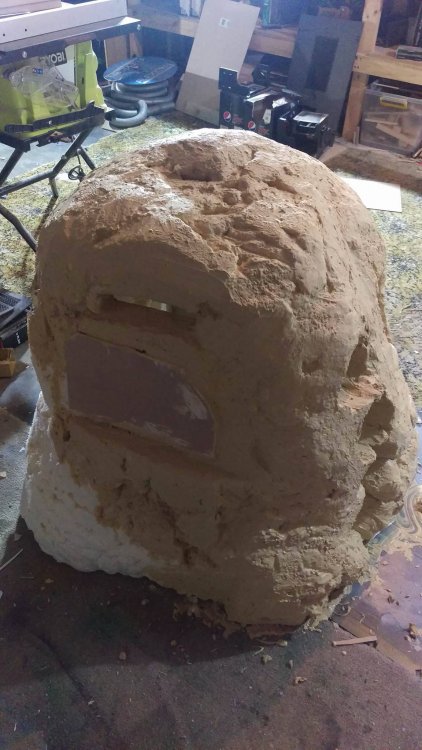
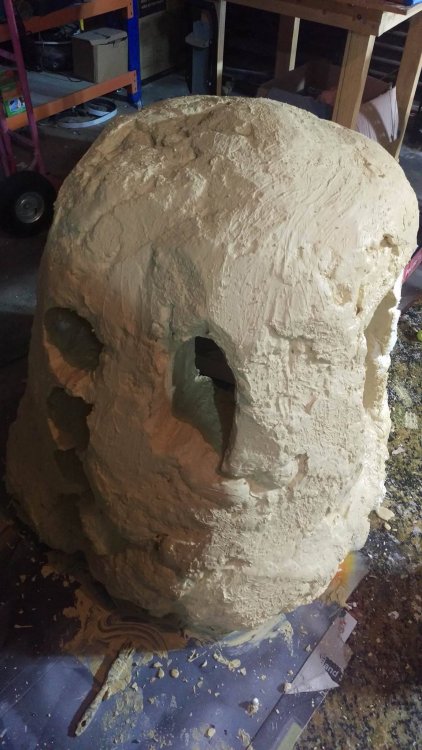
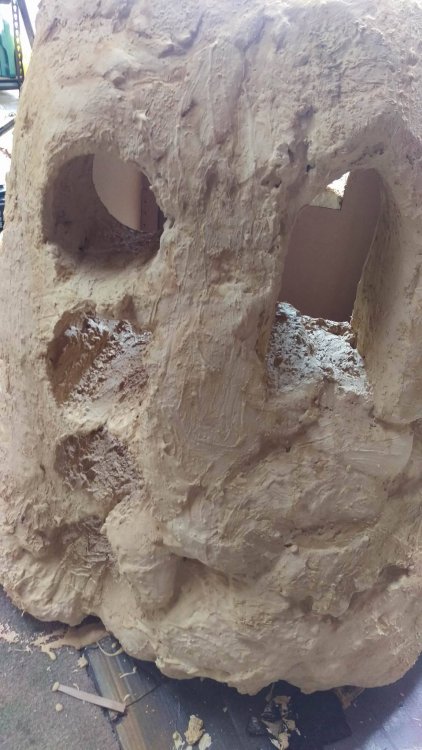
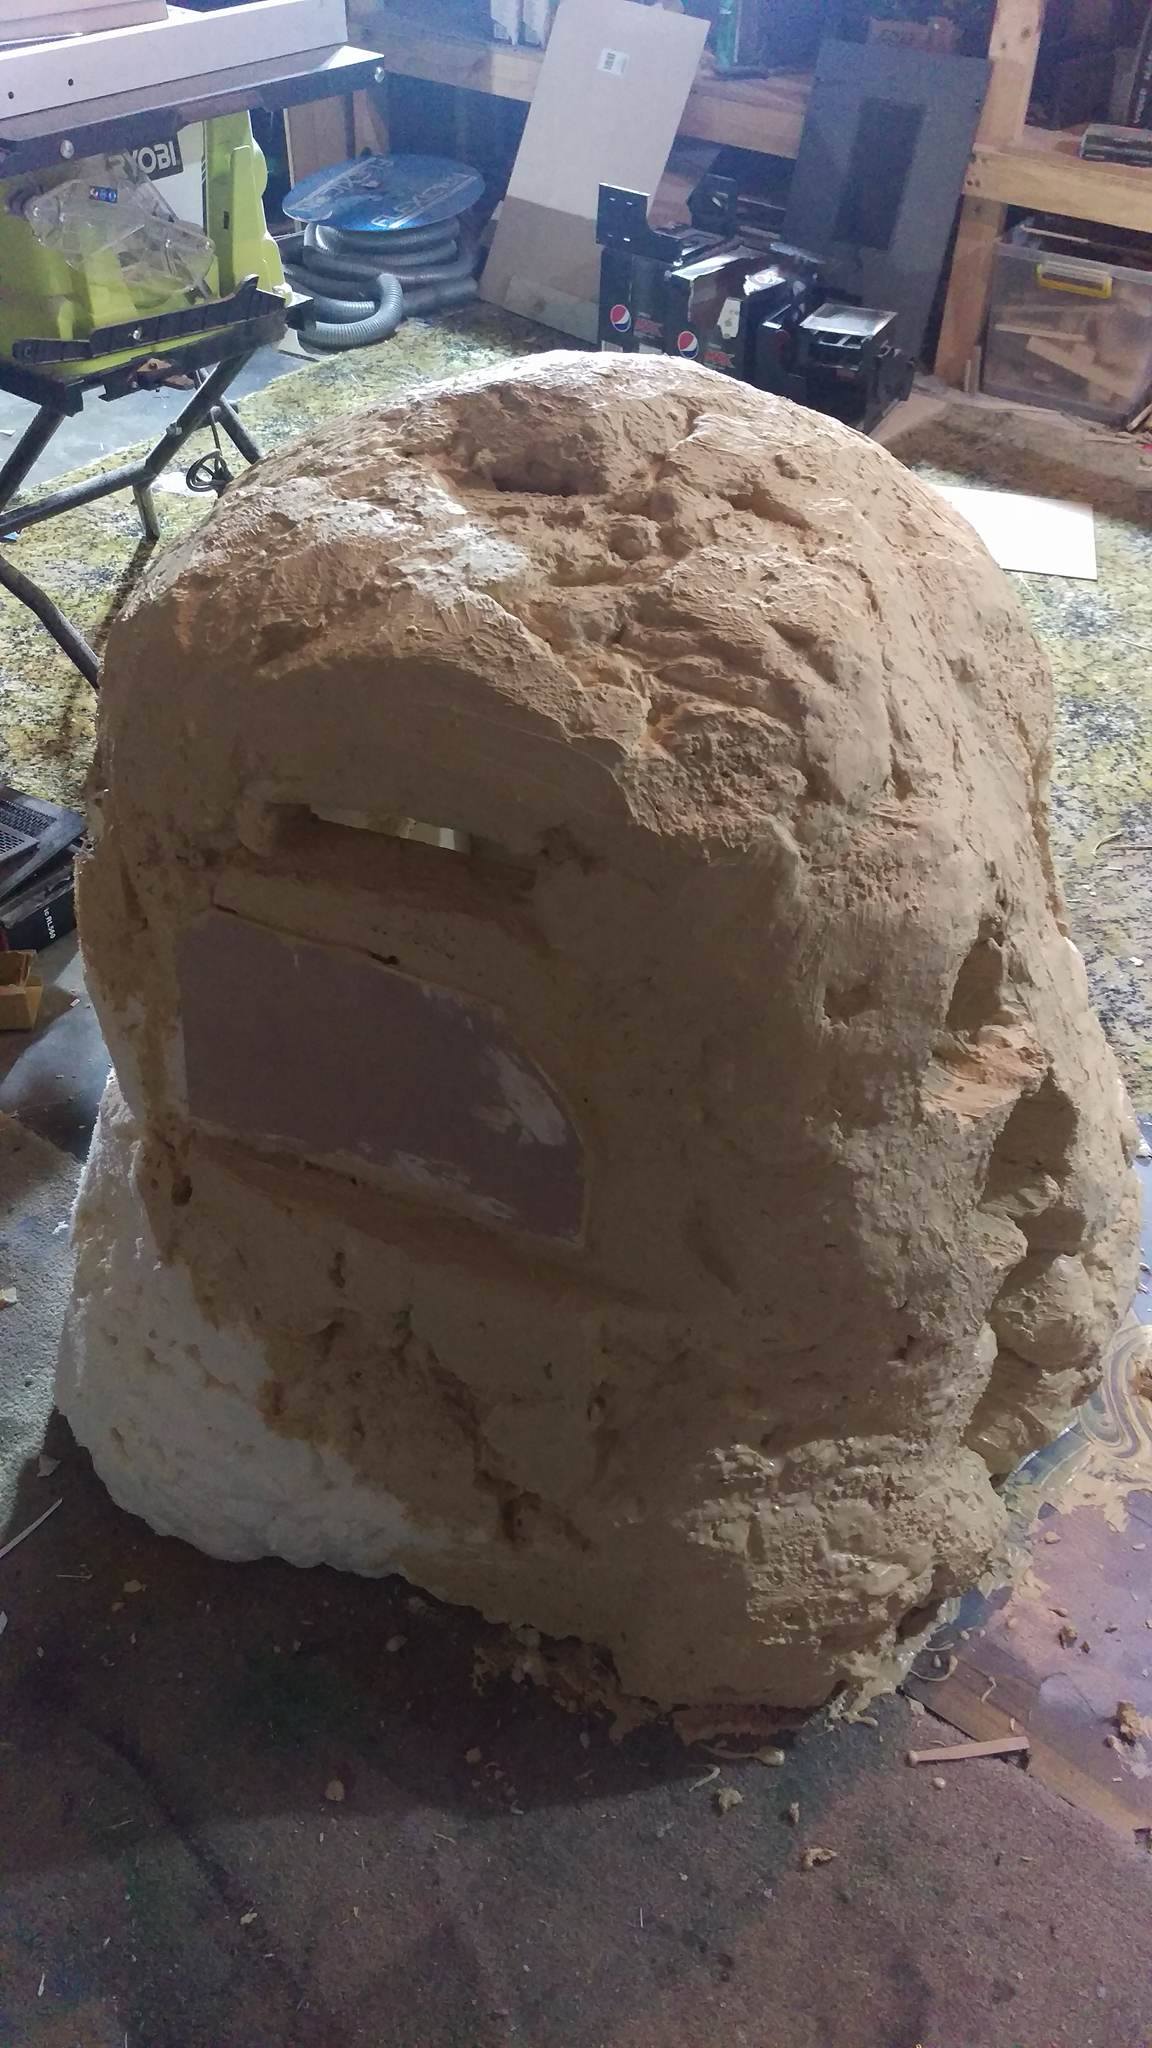
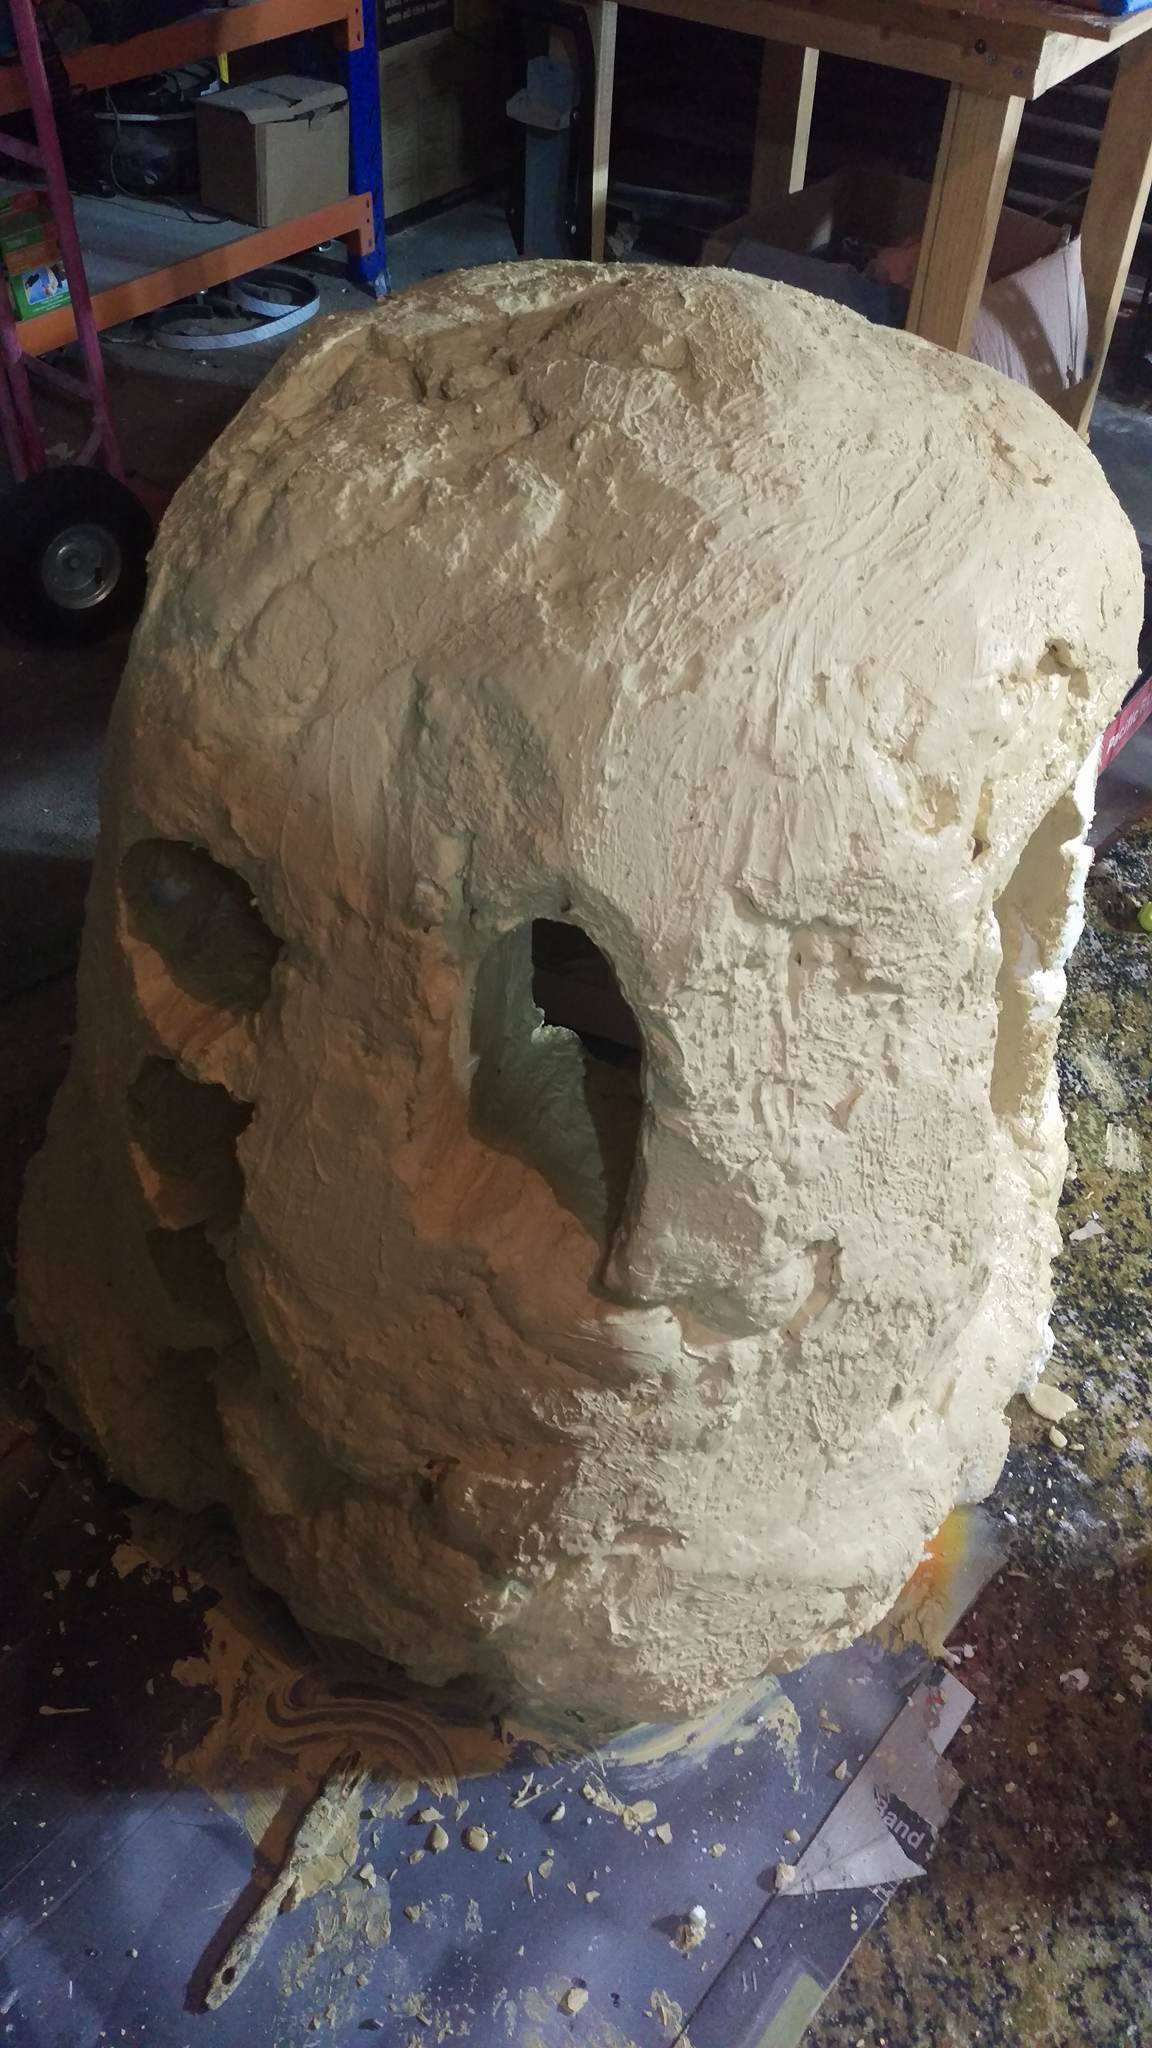
Shaping the big foam blob and covering it in spackle to give it the correct texture all the way round. Added MDF Panel at the back to make a flat spot to put sponsor logos.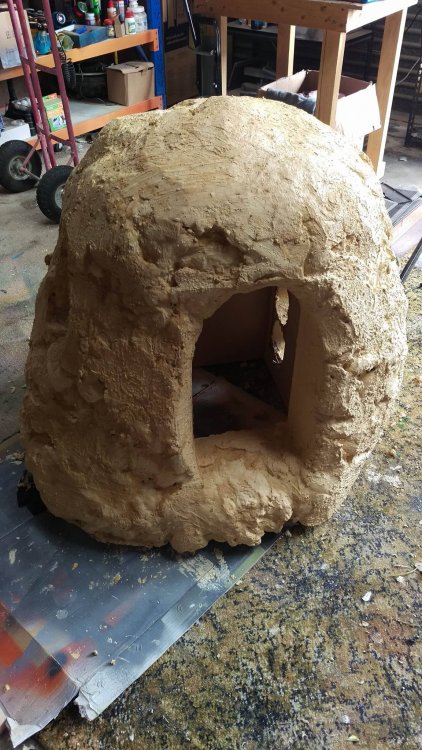

-
[Australia] Ethan Cooper
tagmods replied to Tt Andy's topic in 2017 Thermaltake CaseMOD Invitational Season 1
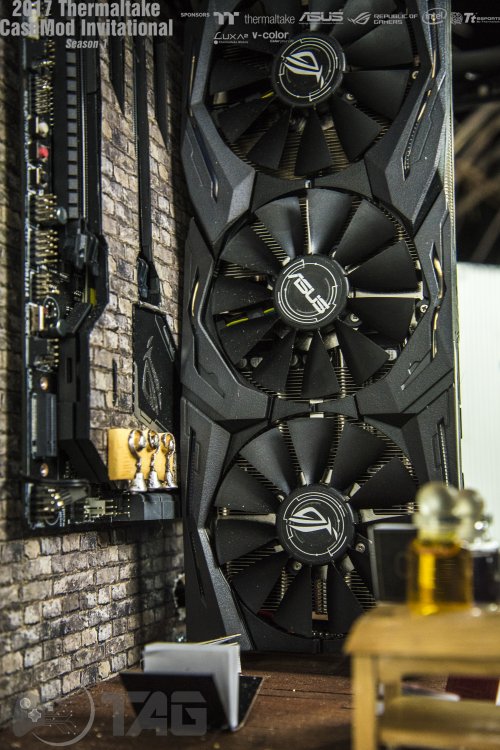
Bricked the motherboard!
-
[Australia] Ethan Cooper
tagmods replied to Tt Andy's topic in 2017 Thermaltake CaseMOD Invitational Season 1
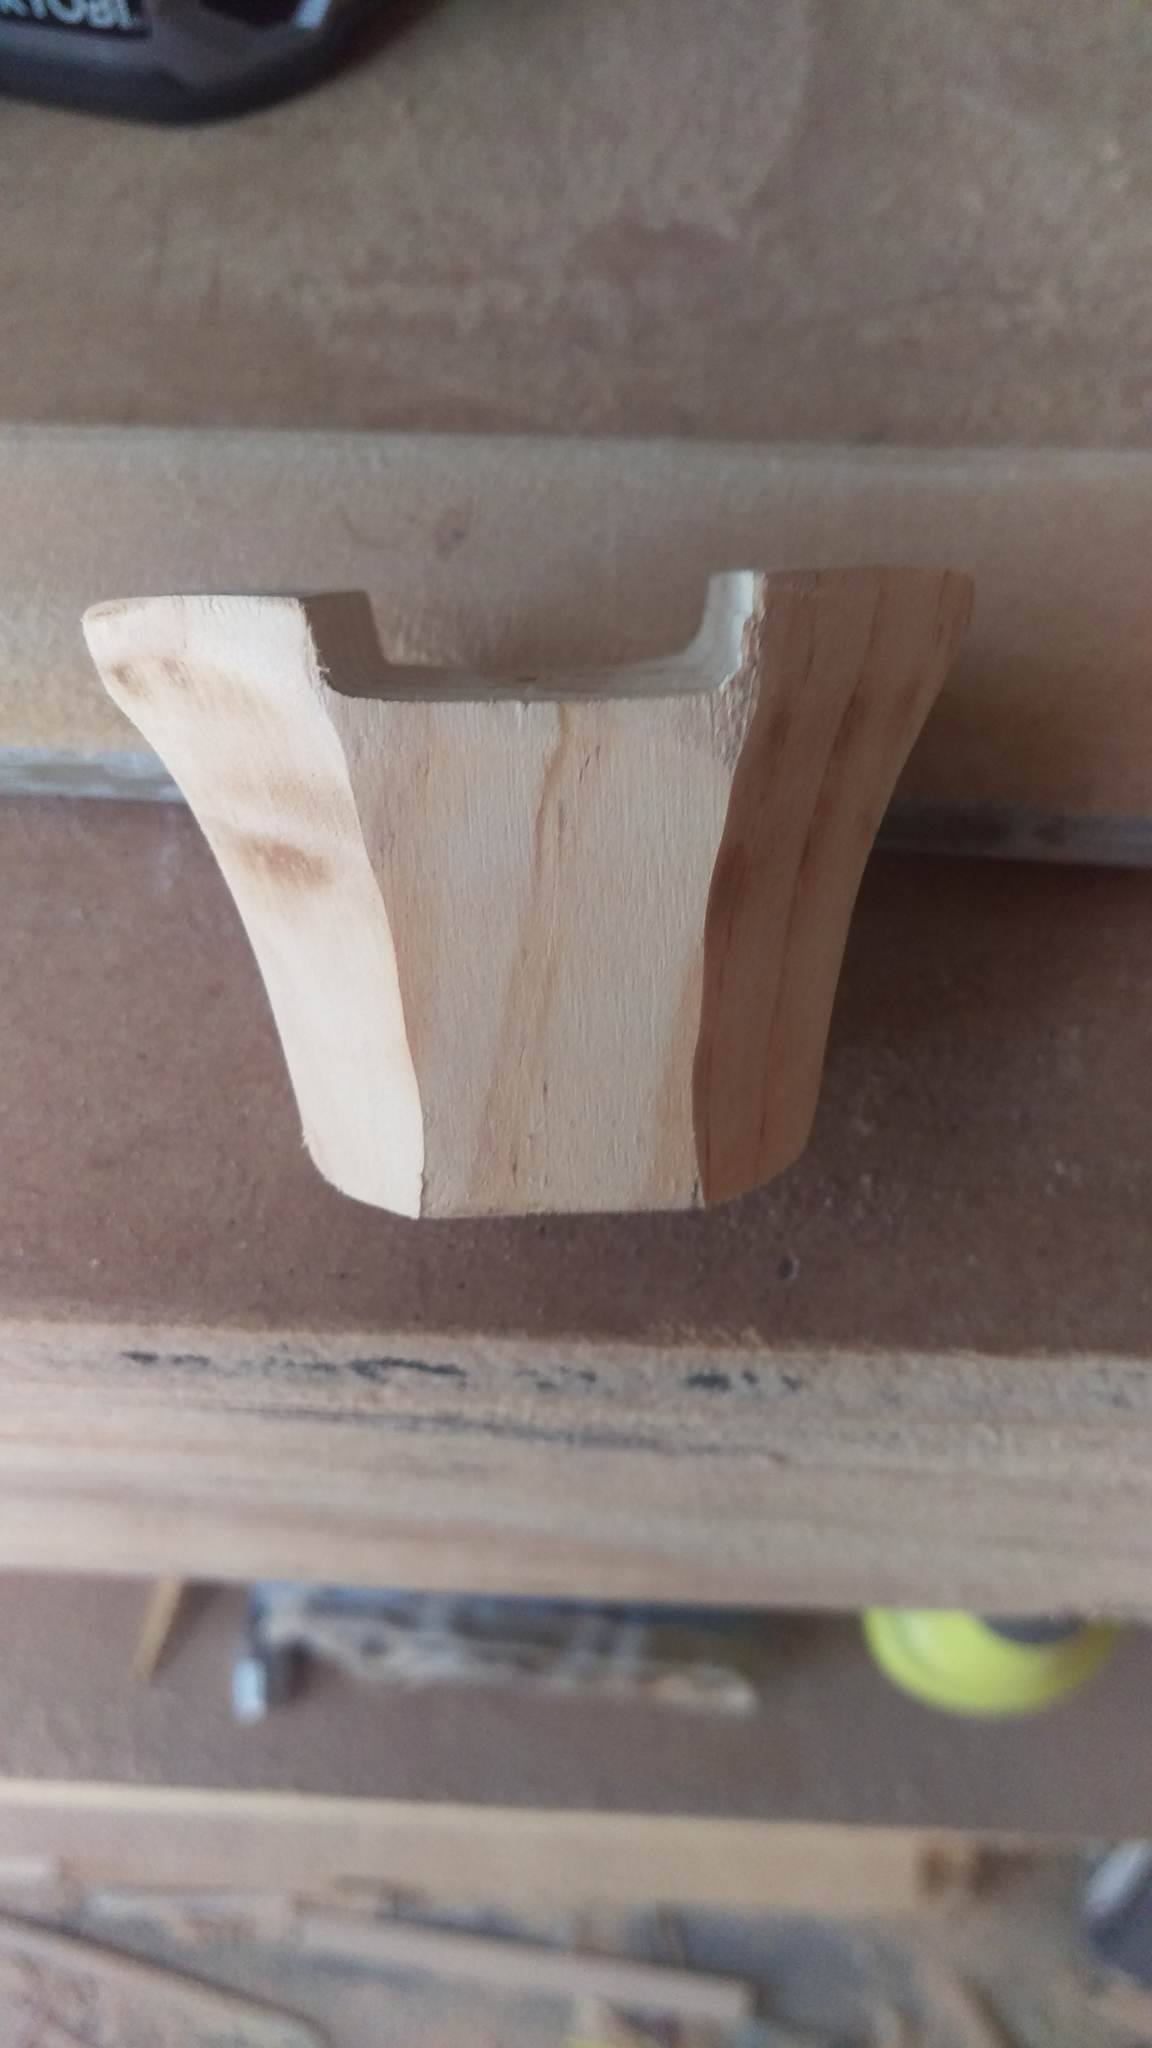
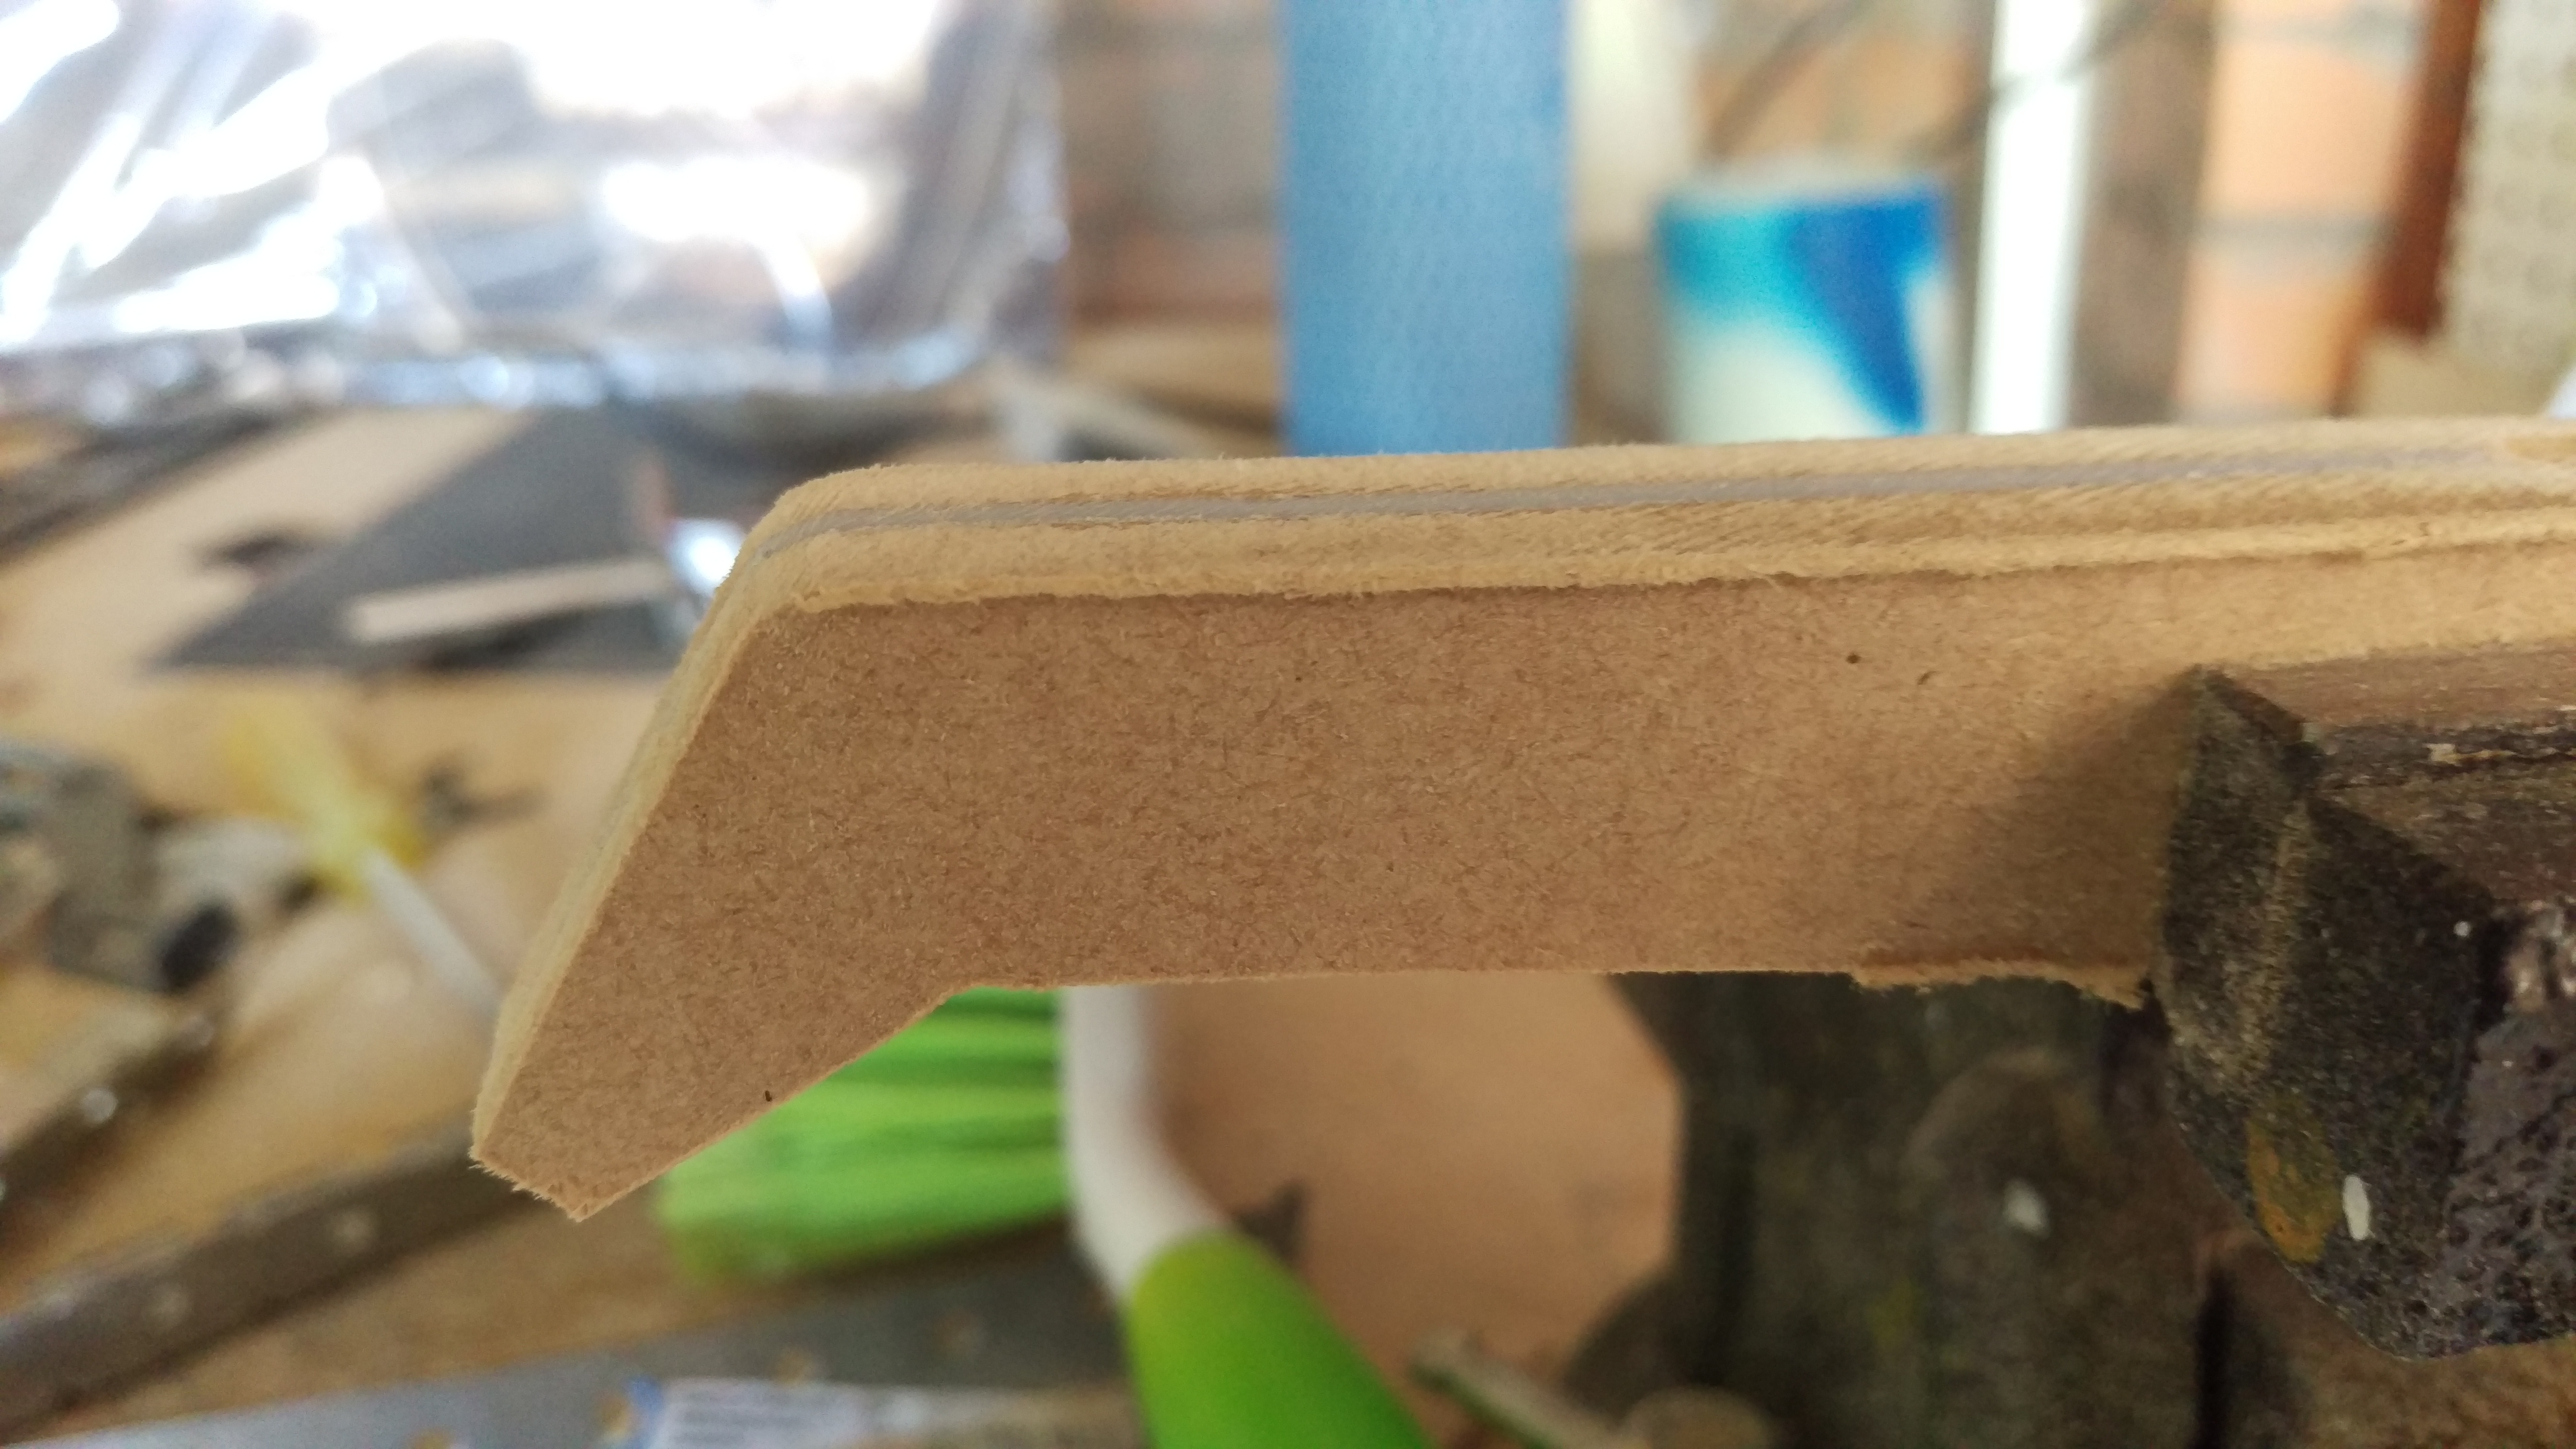
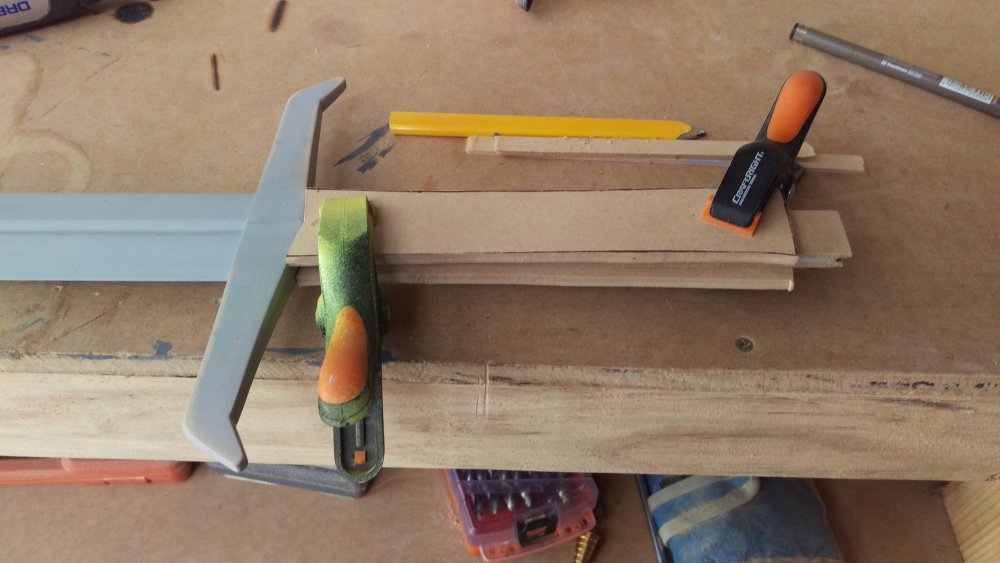
Further shaping of the pommel.thumb.jpg.53bd7a228bfdc51d8d453a4244ffbd42.jpg)

-
[Australia] Ethan Cooper
tagmods replied to Tt Andy's topic in 2017 Thermaltake CaseMOD Invitational Season 1
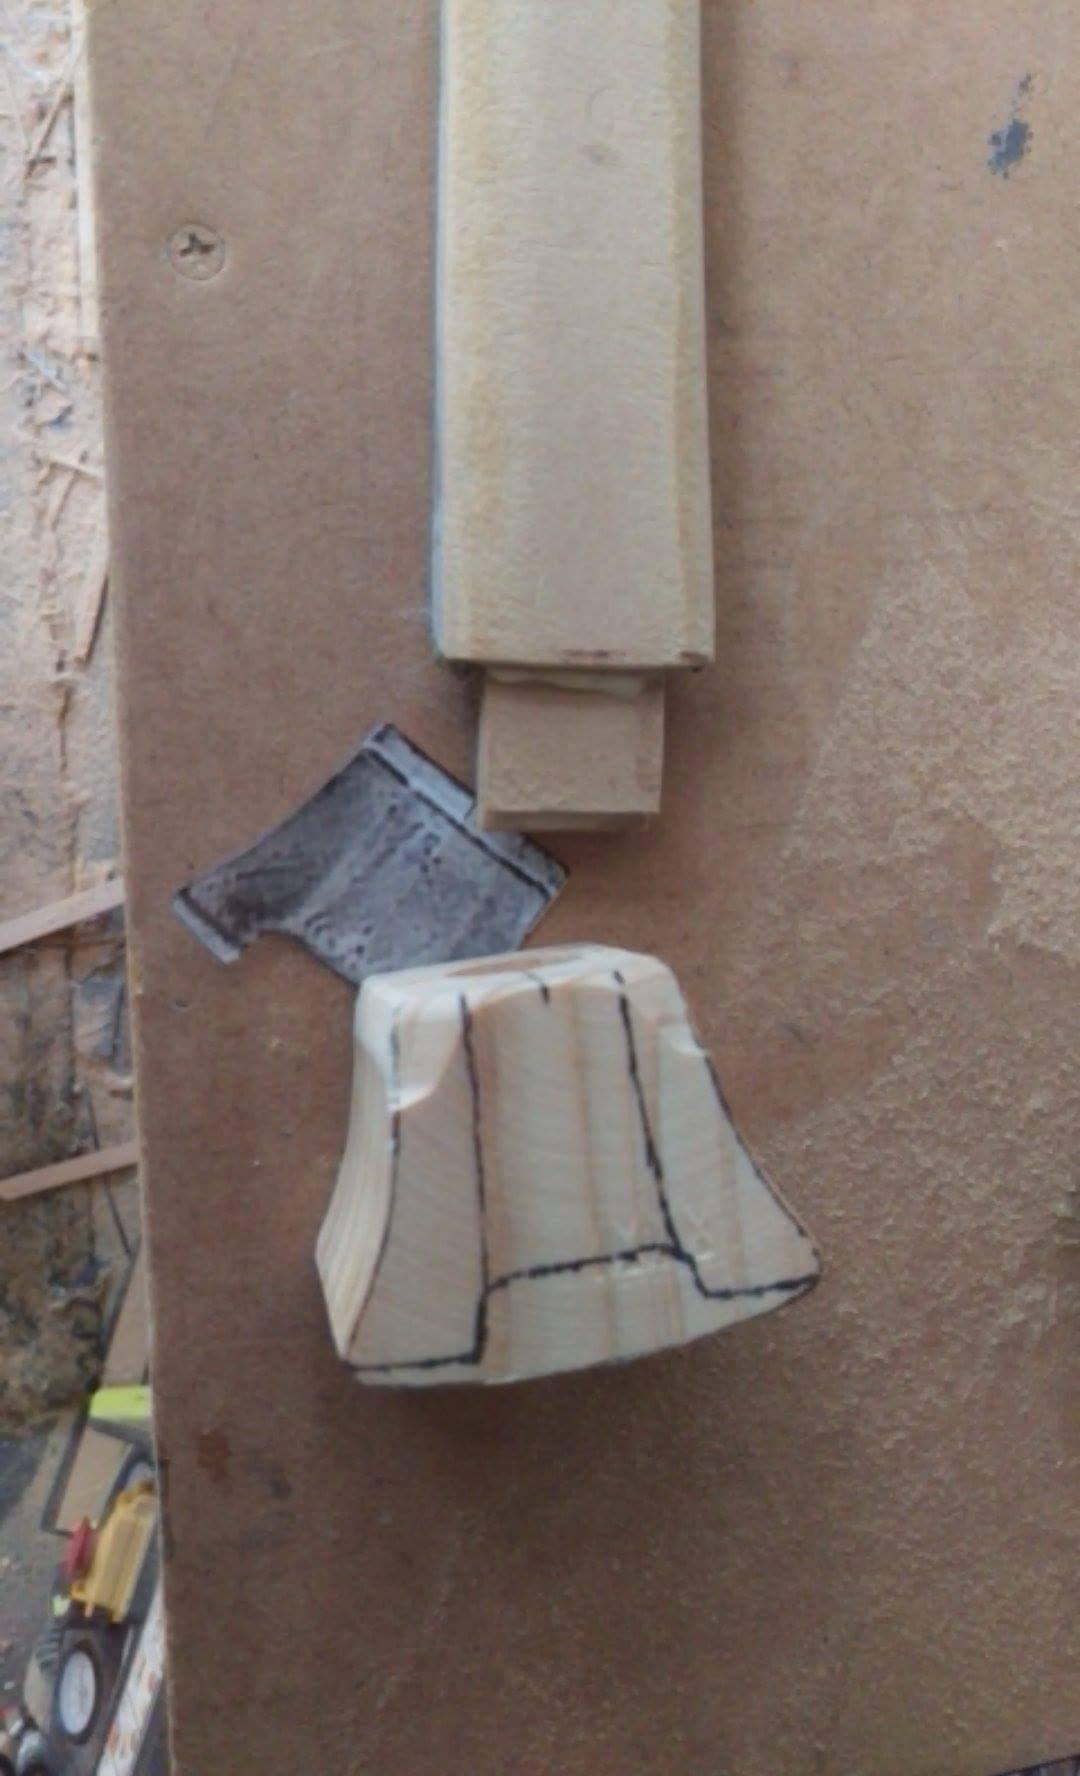
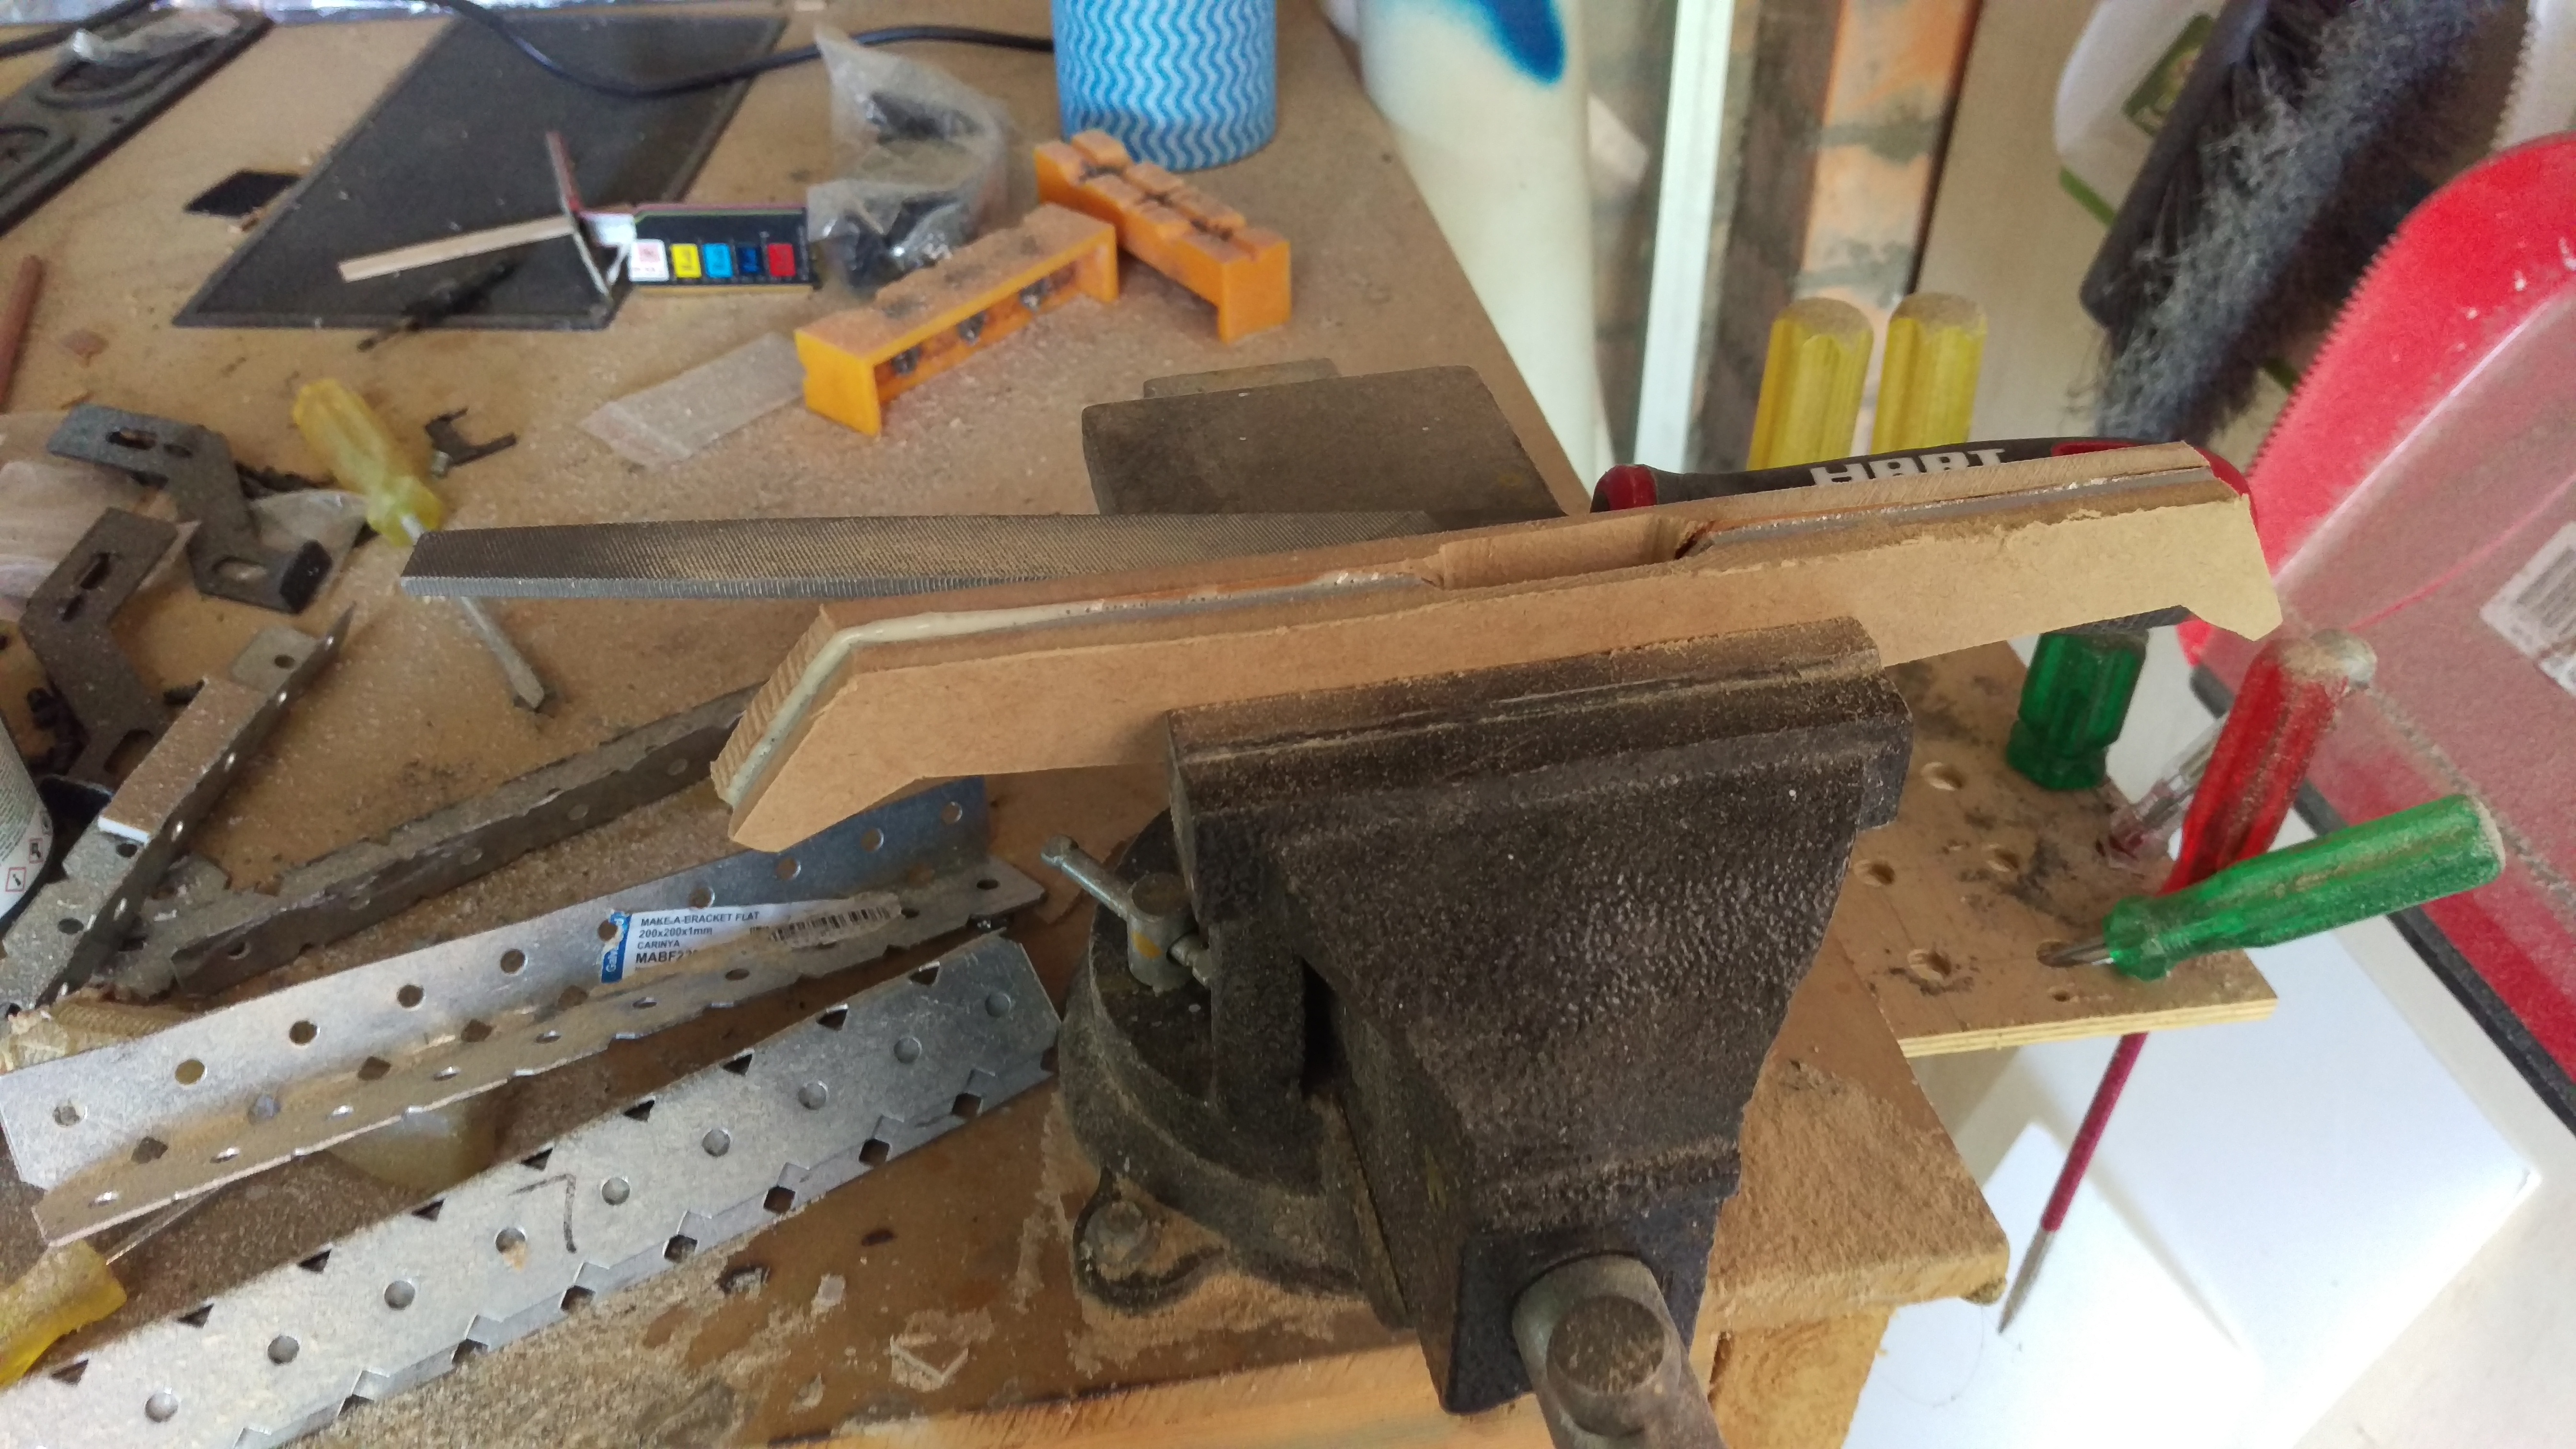
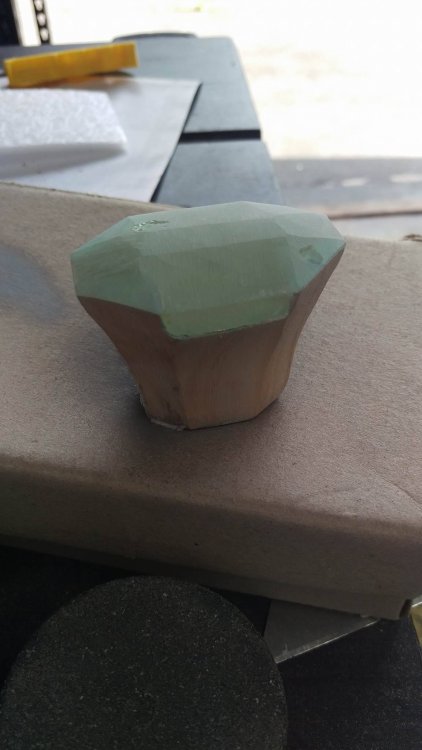
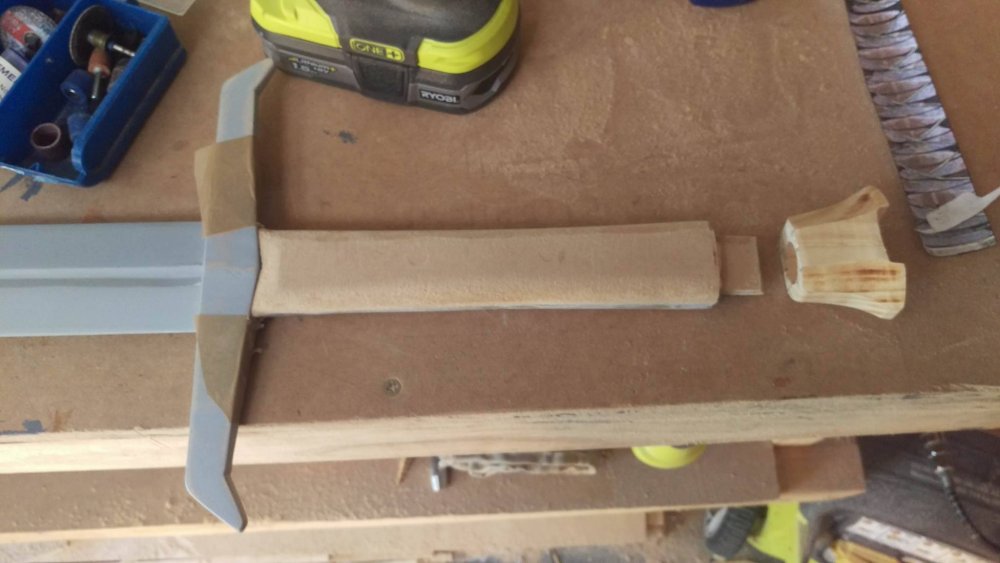
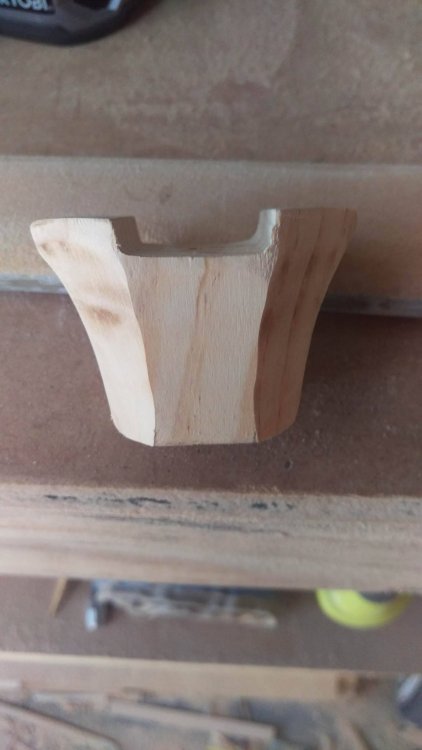
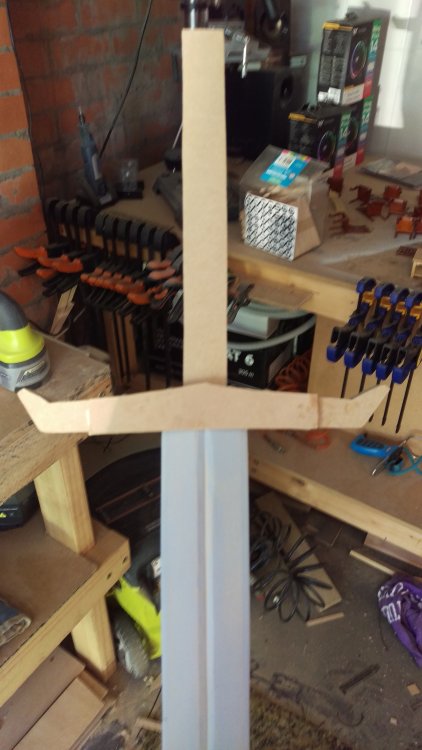
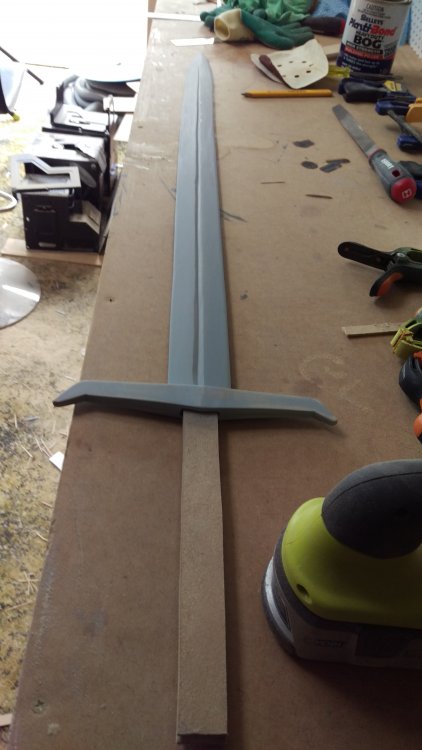
Shaping the handle ready for the leather wrap and beginning to shape the pommel!

-
[Australia] Ethan Cooper
tagmods replied to Tt Andy's topic in 2017 Thermaltake CaseMOD Invitational Season 1
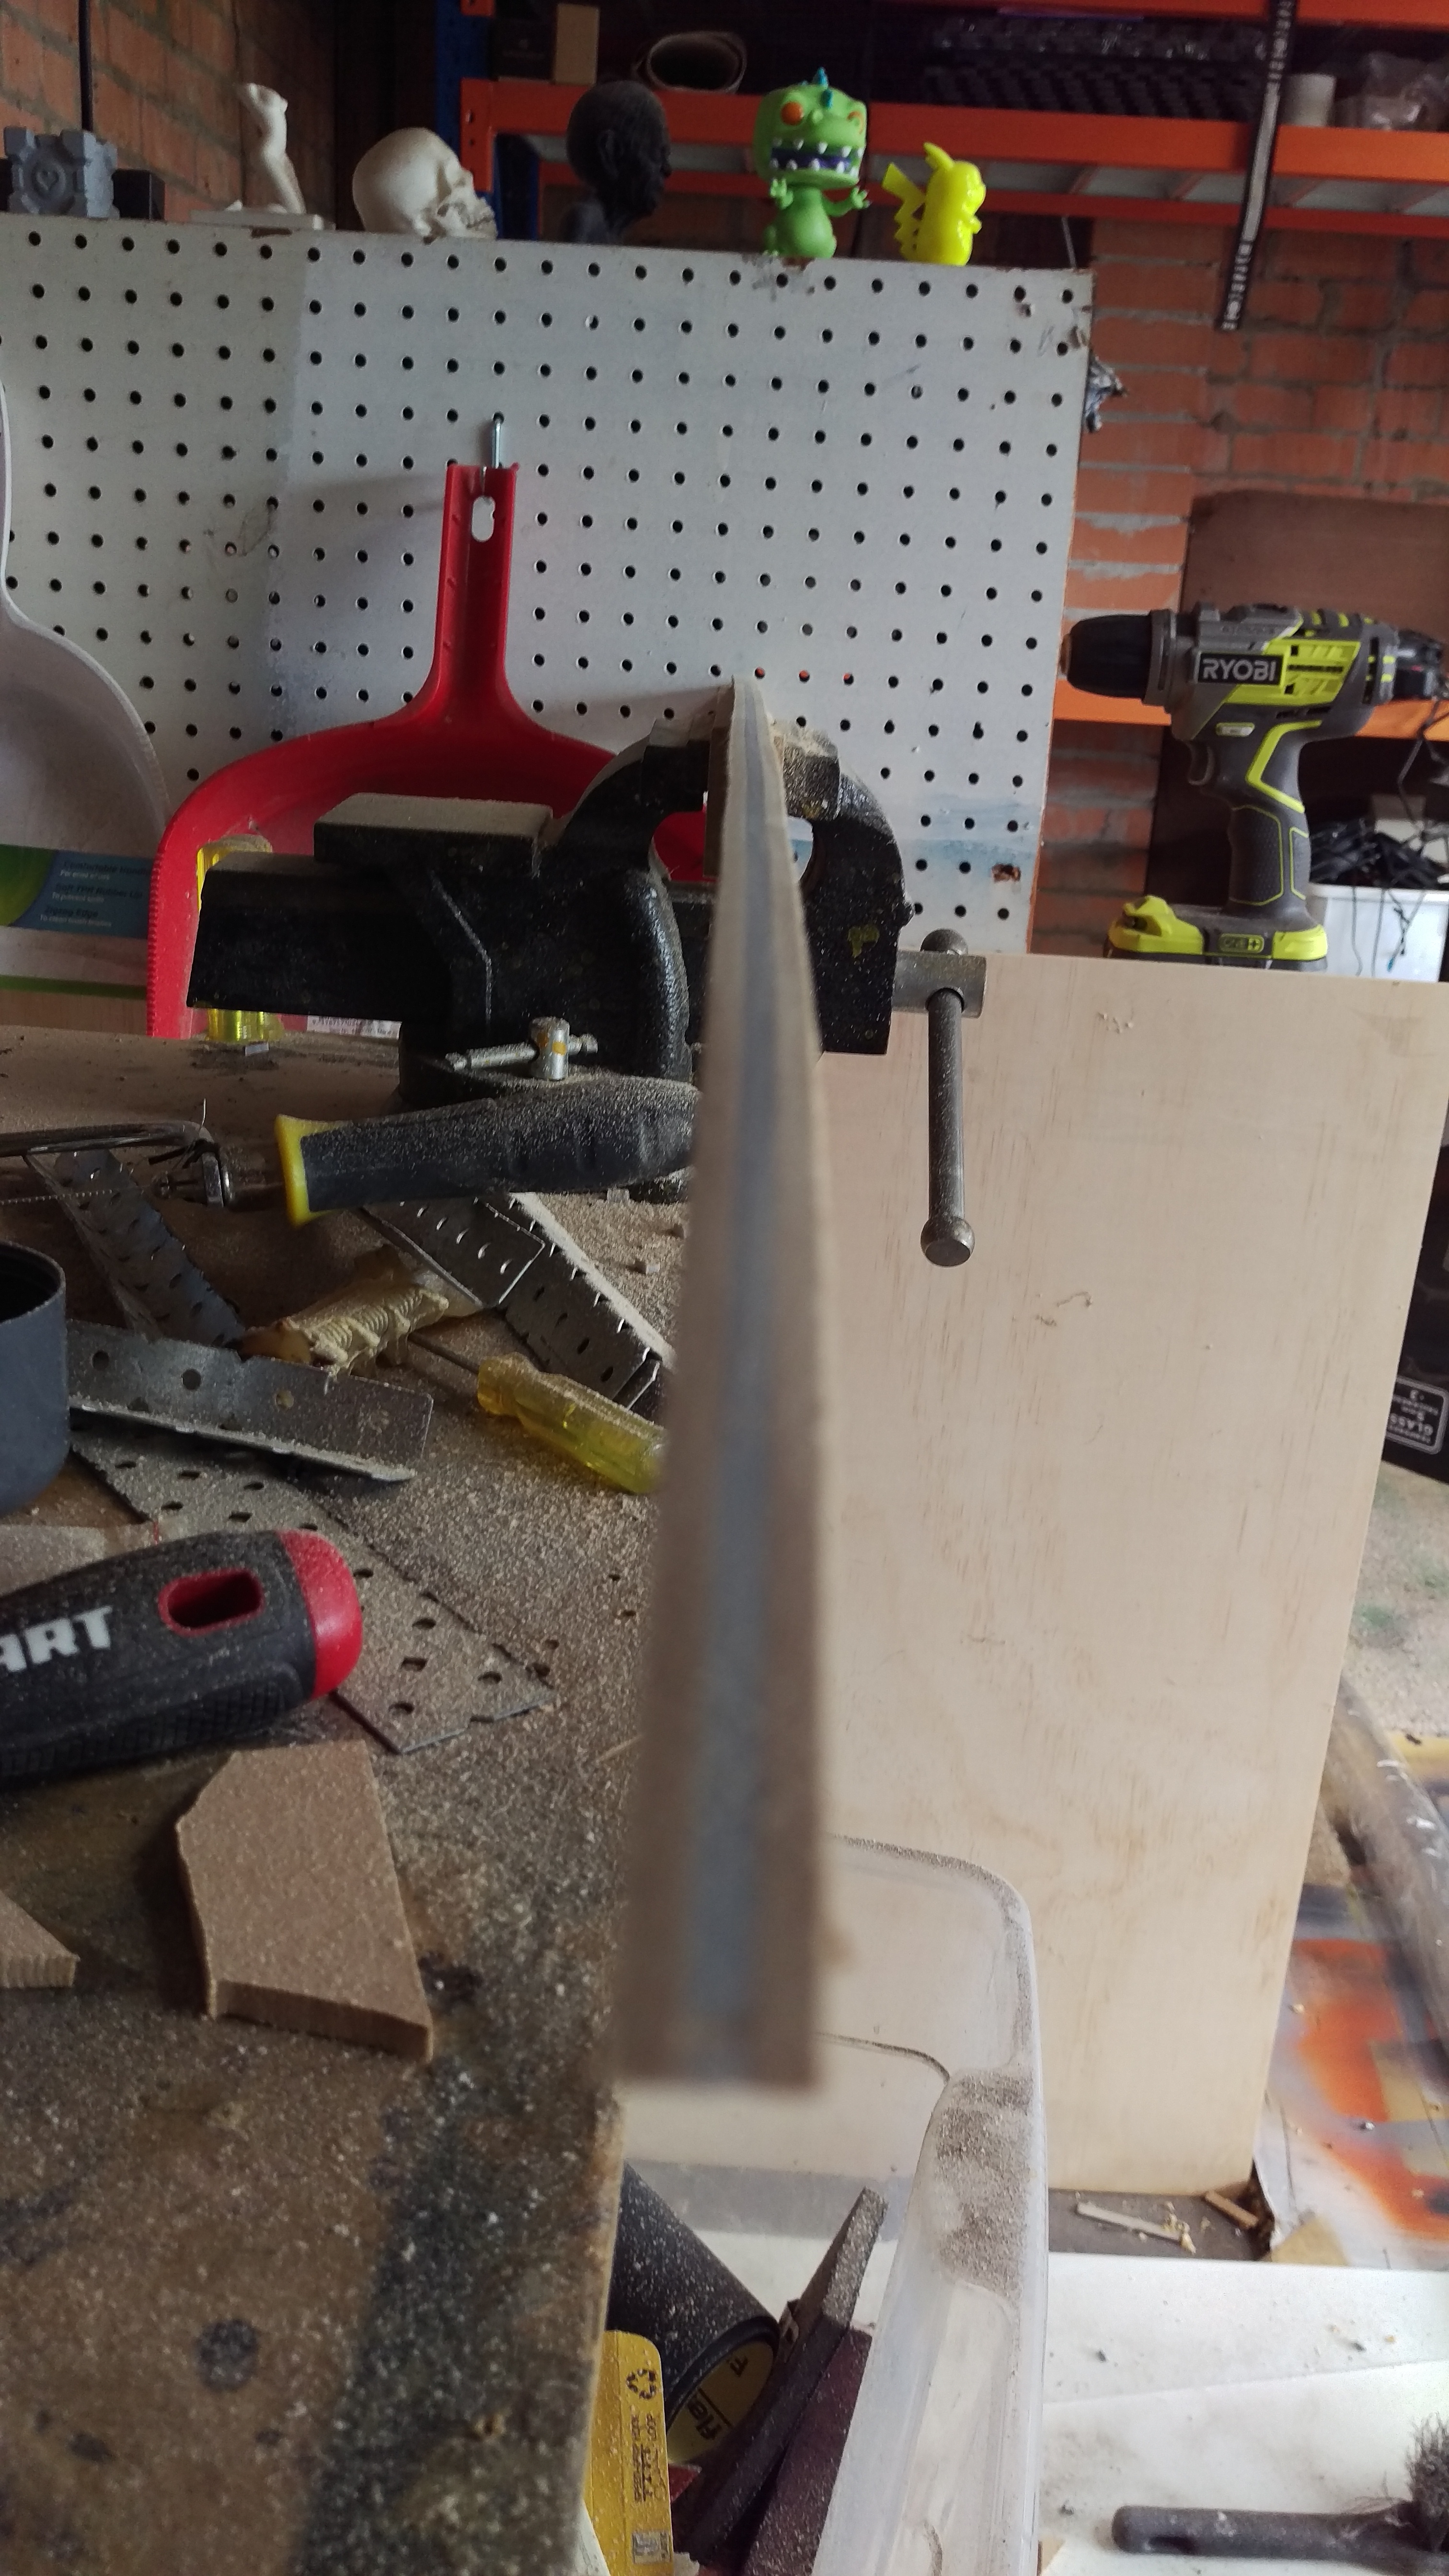
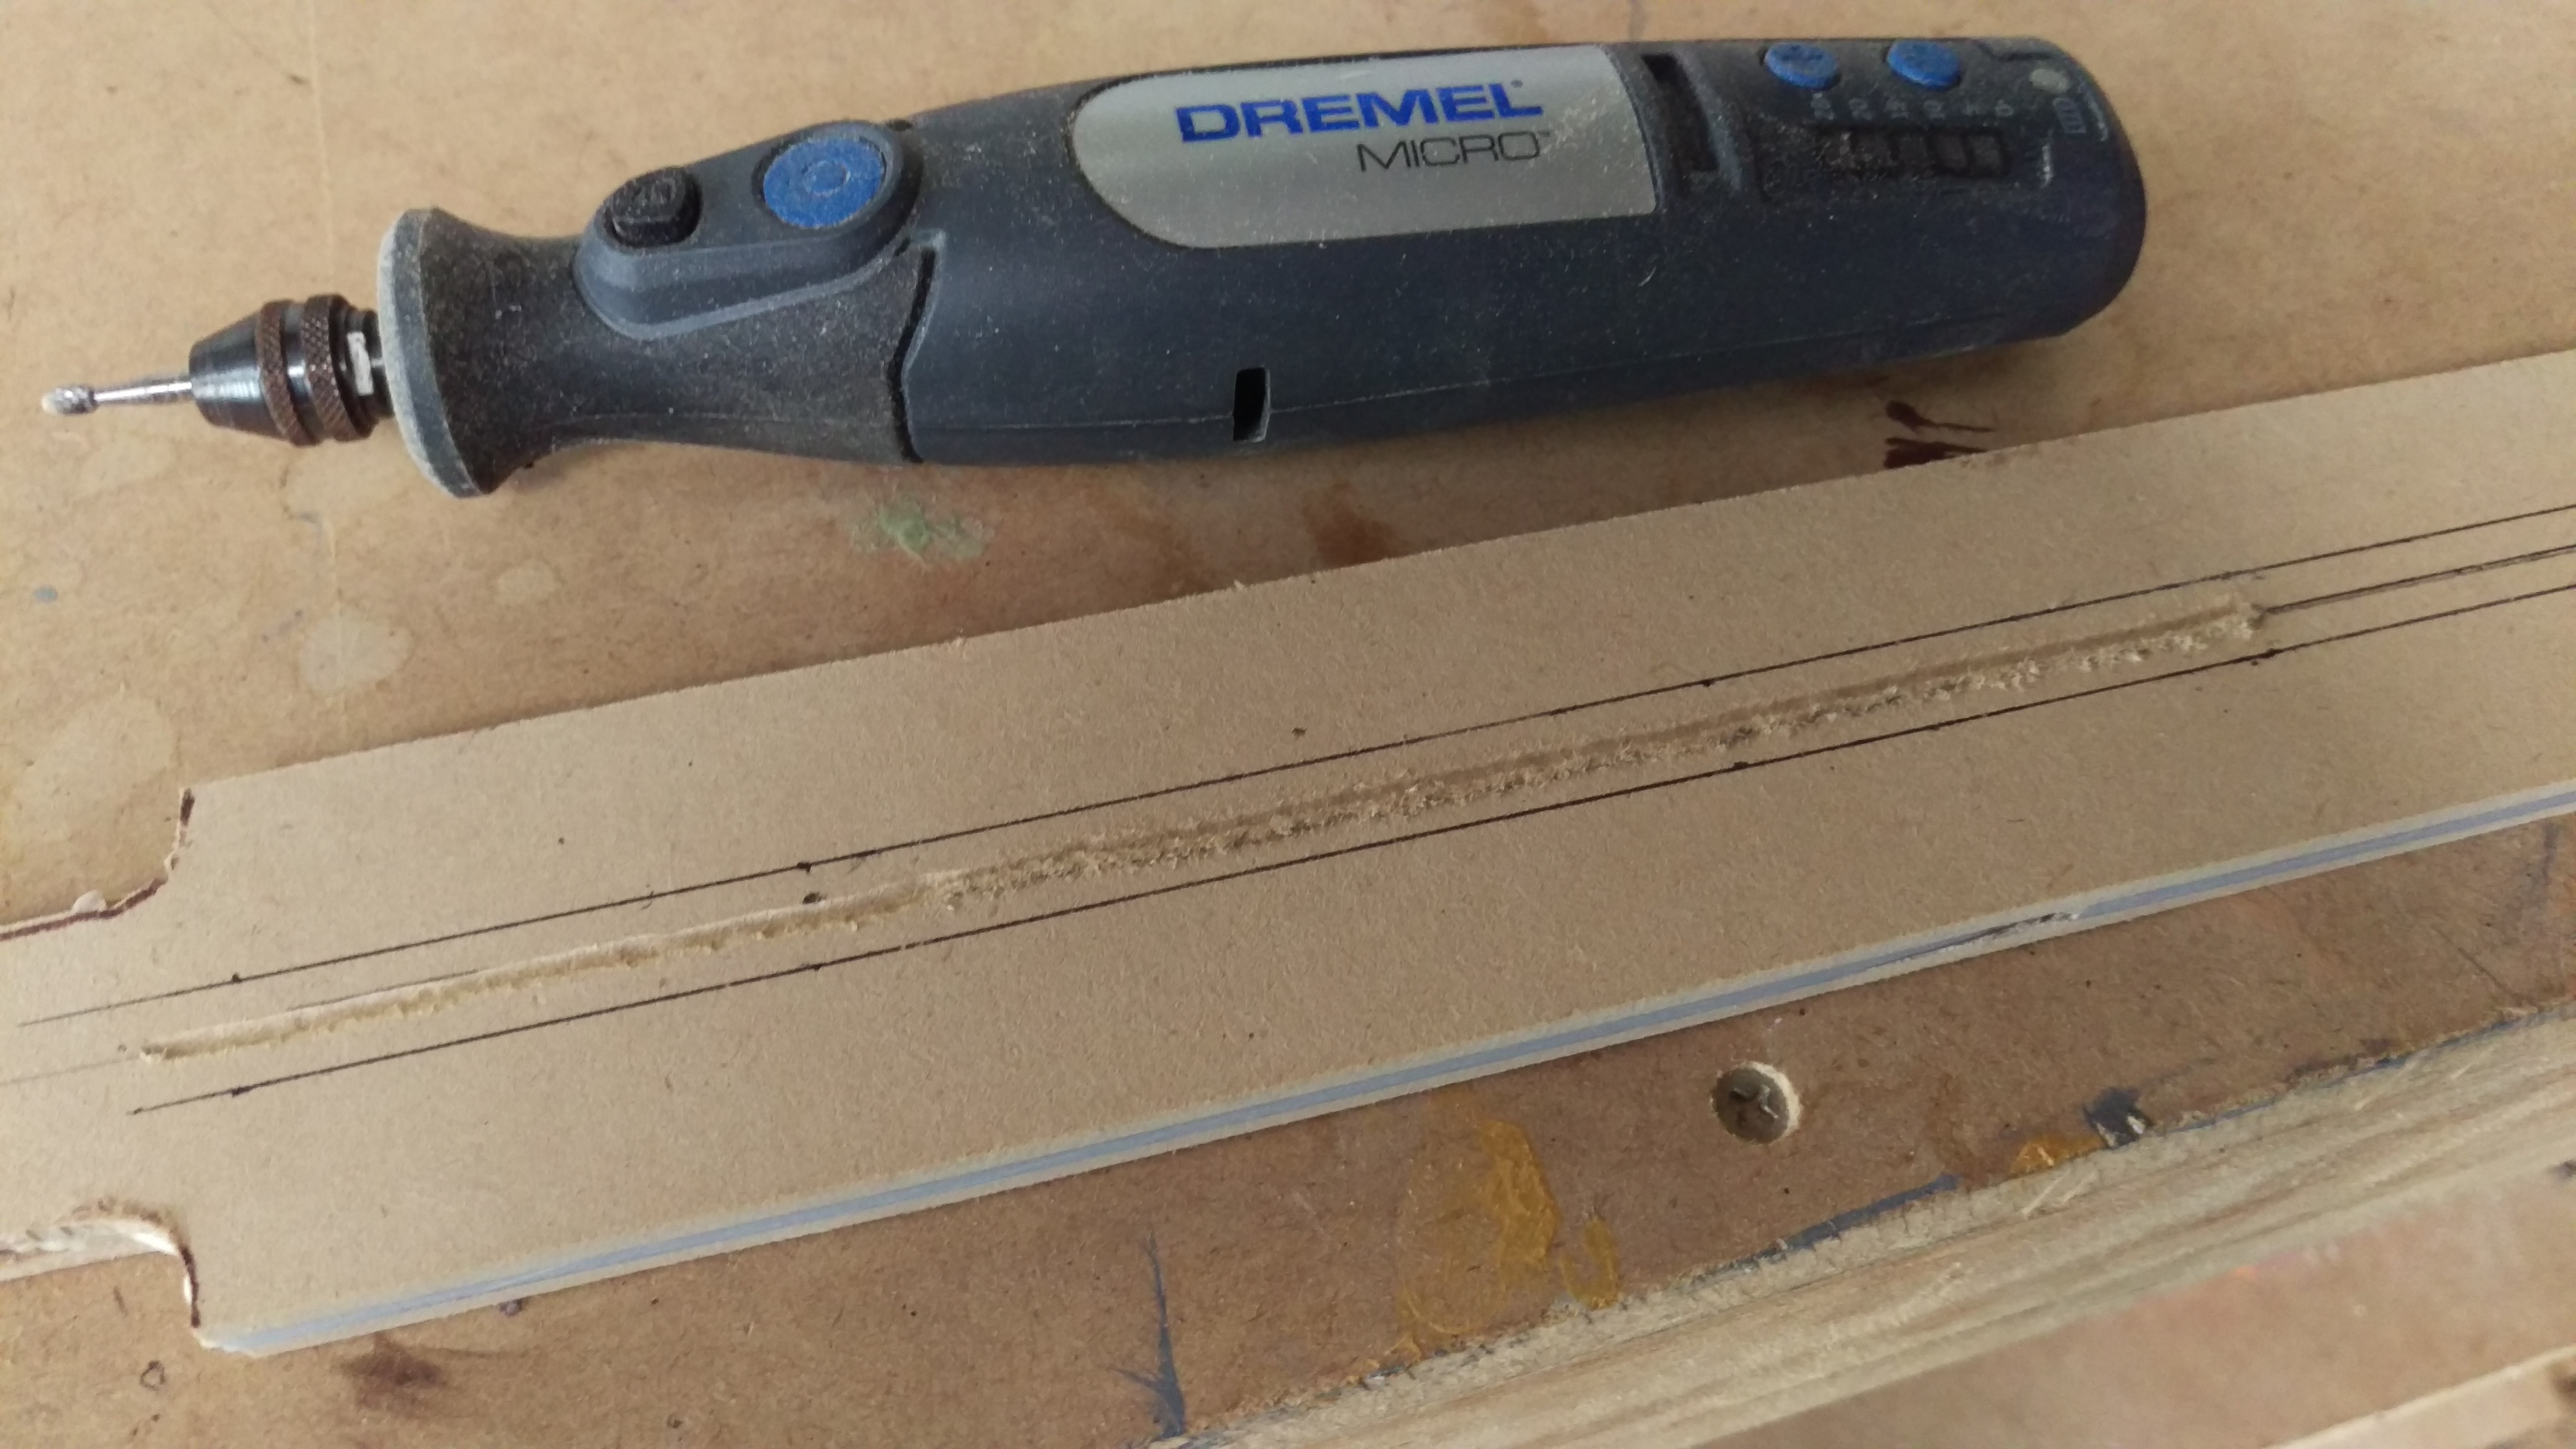
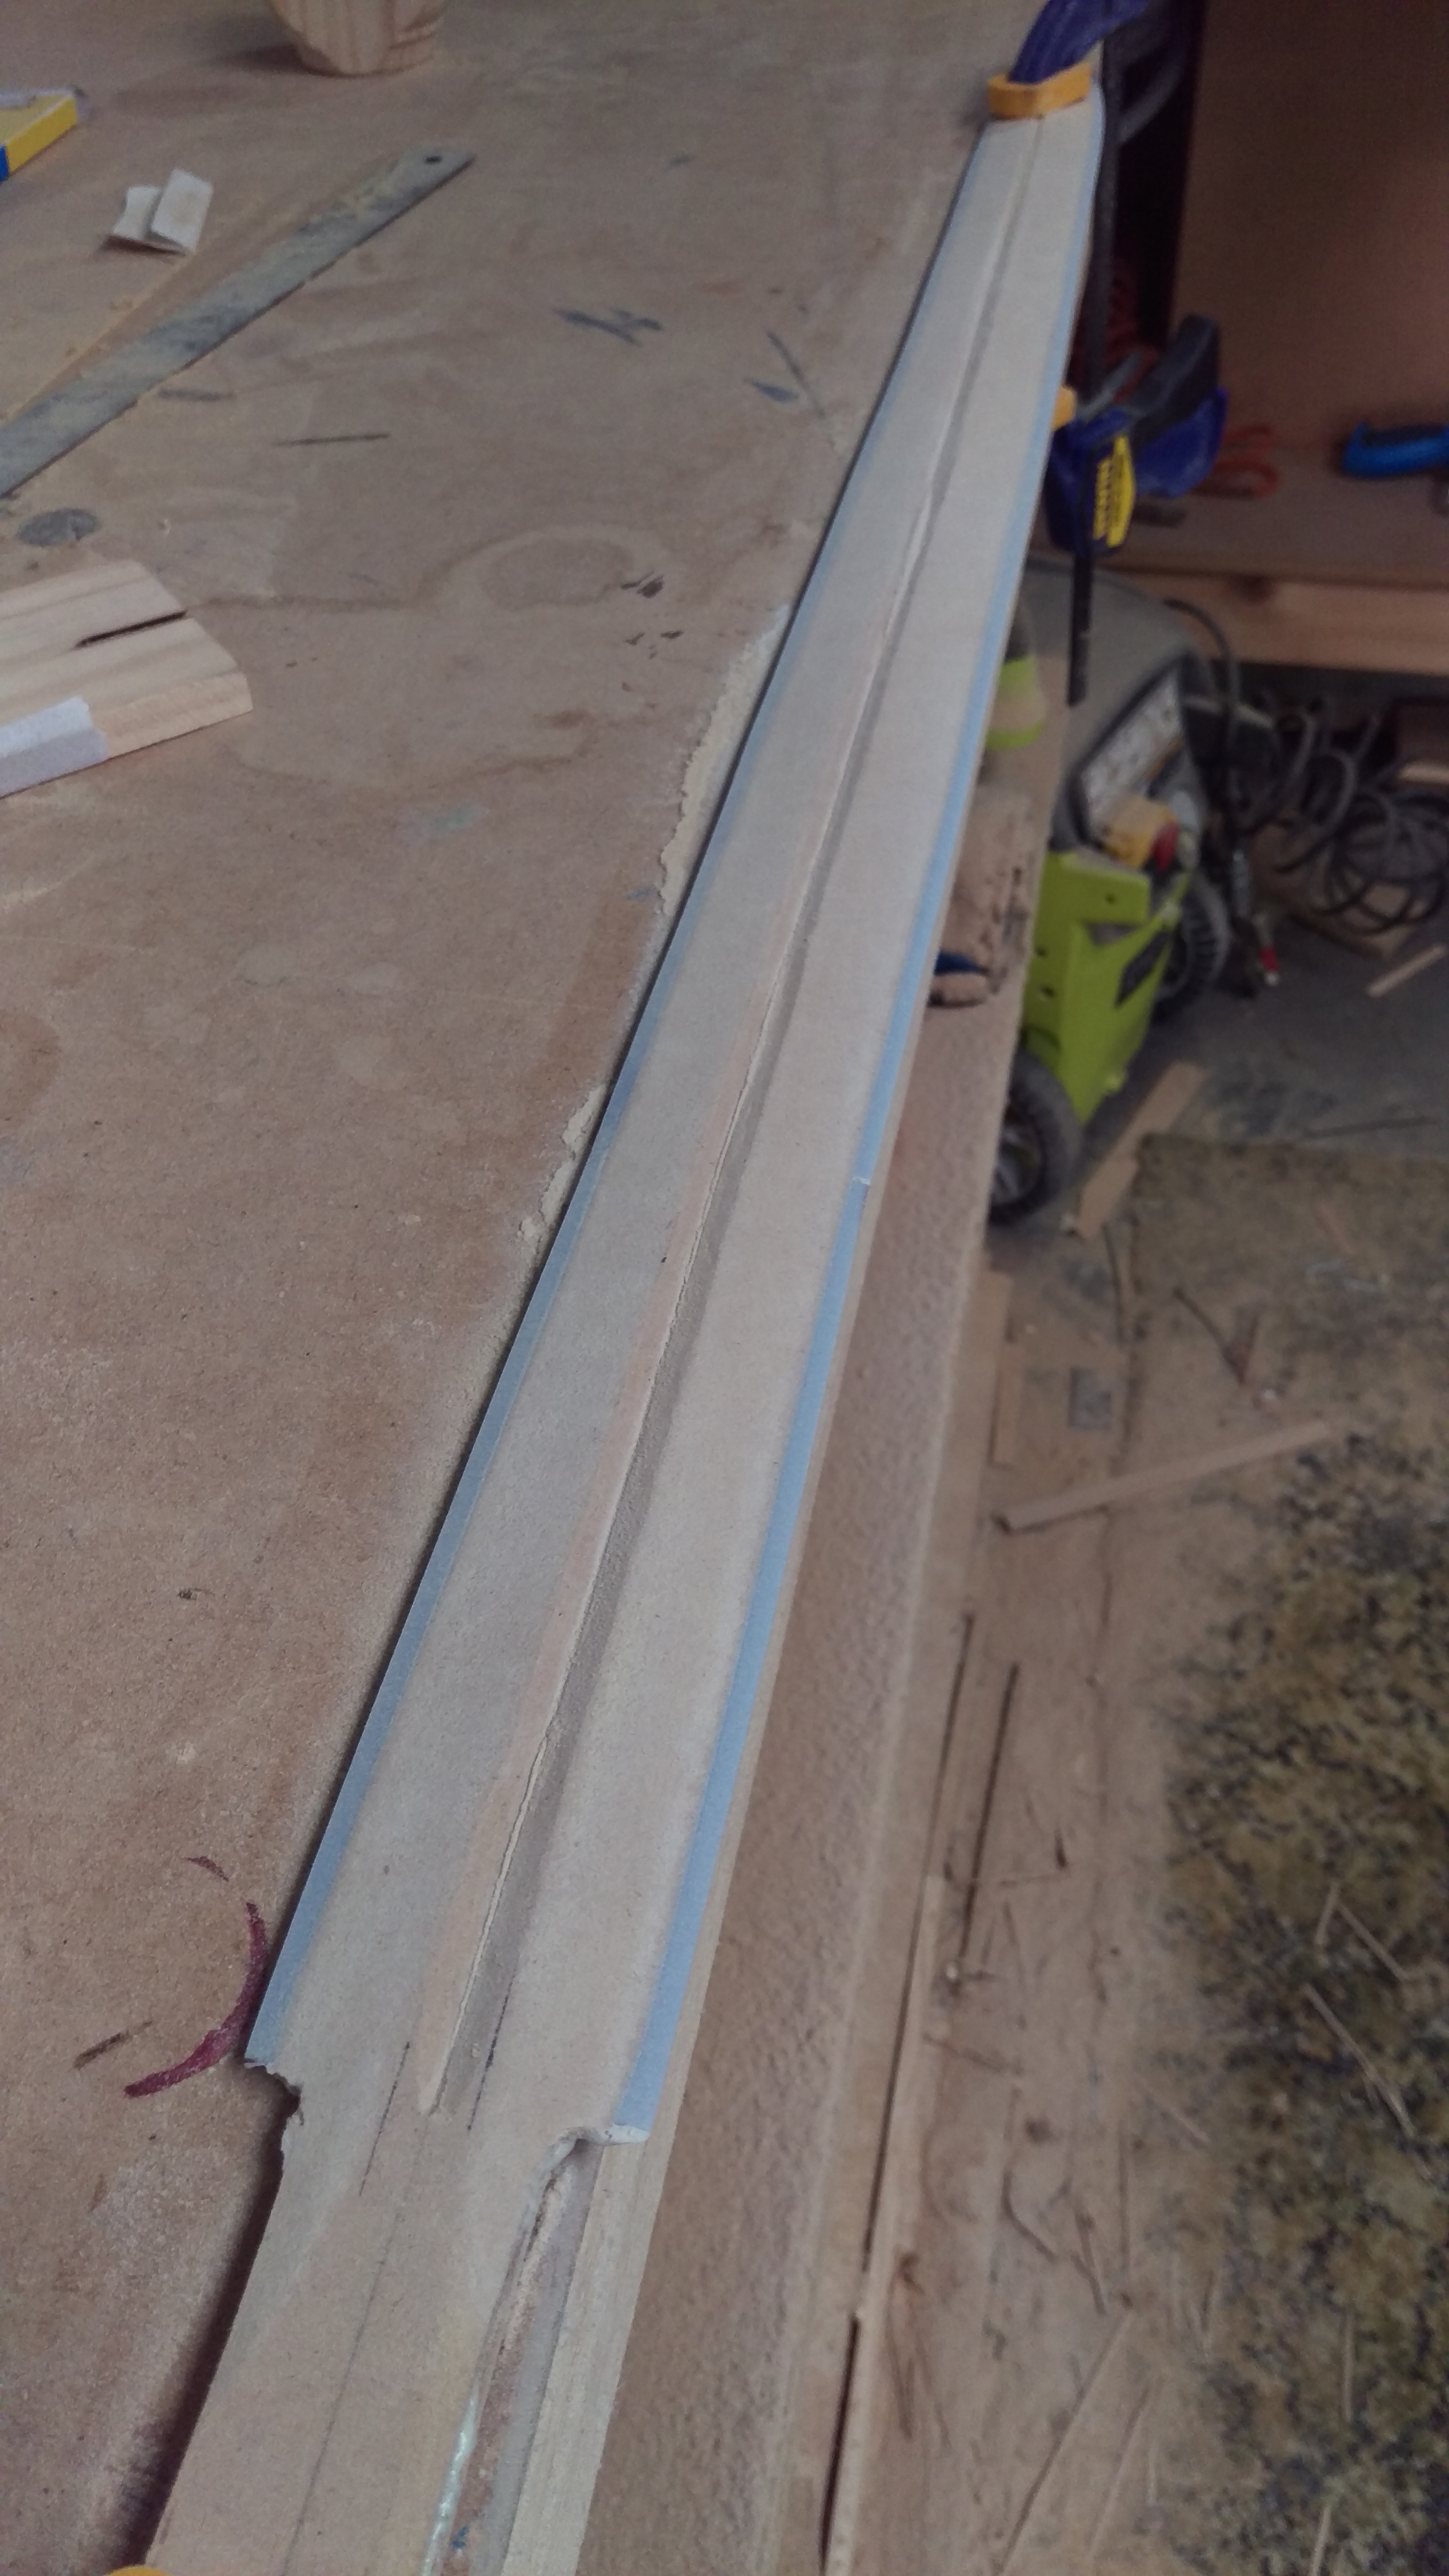
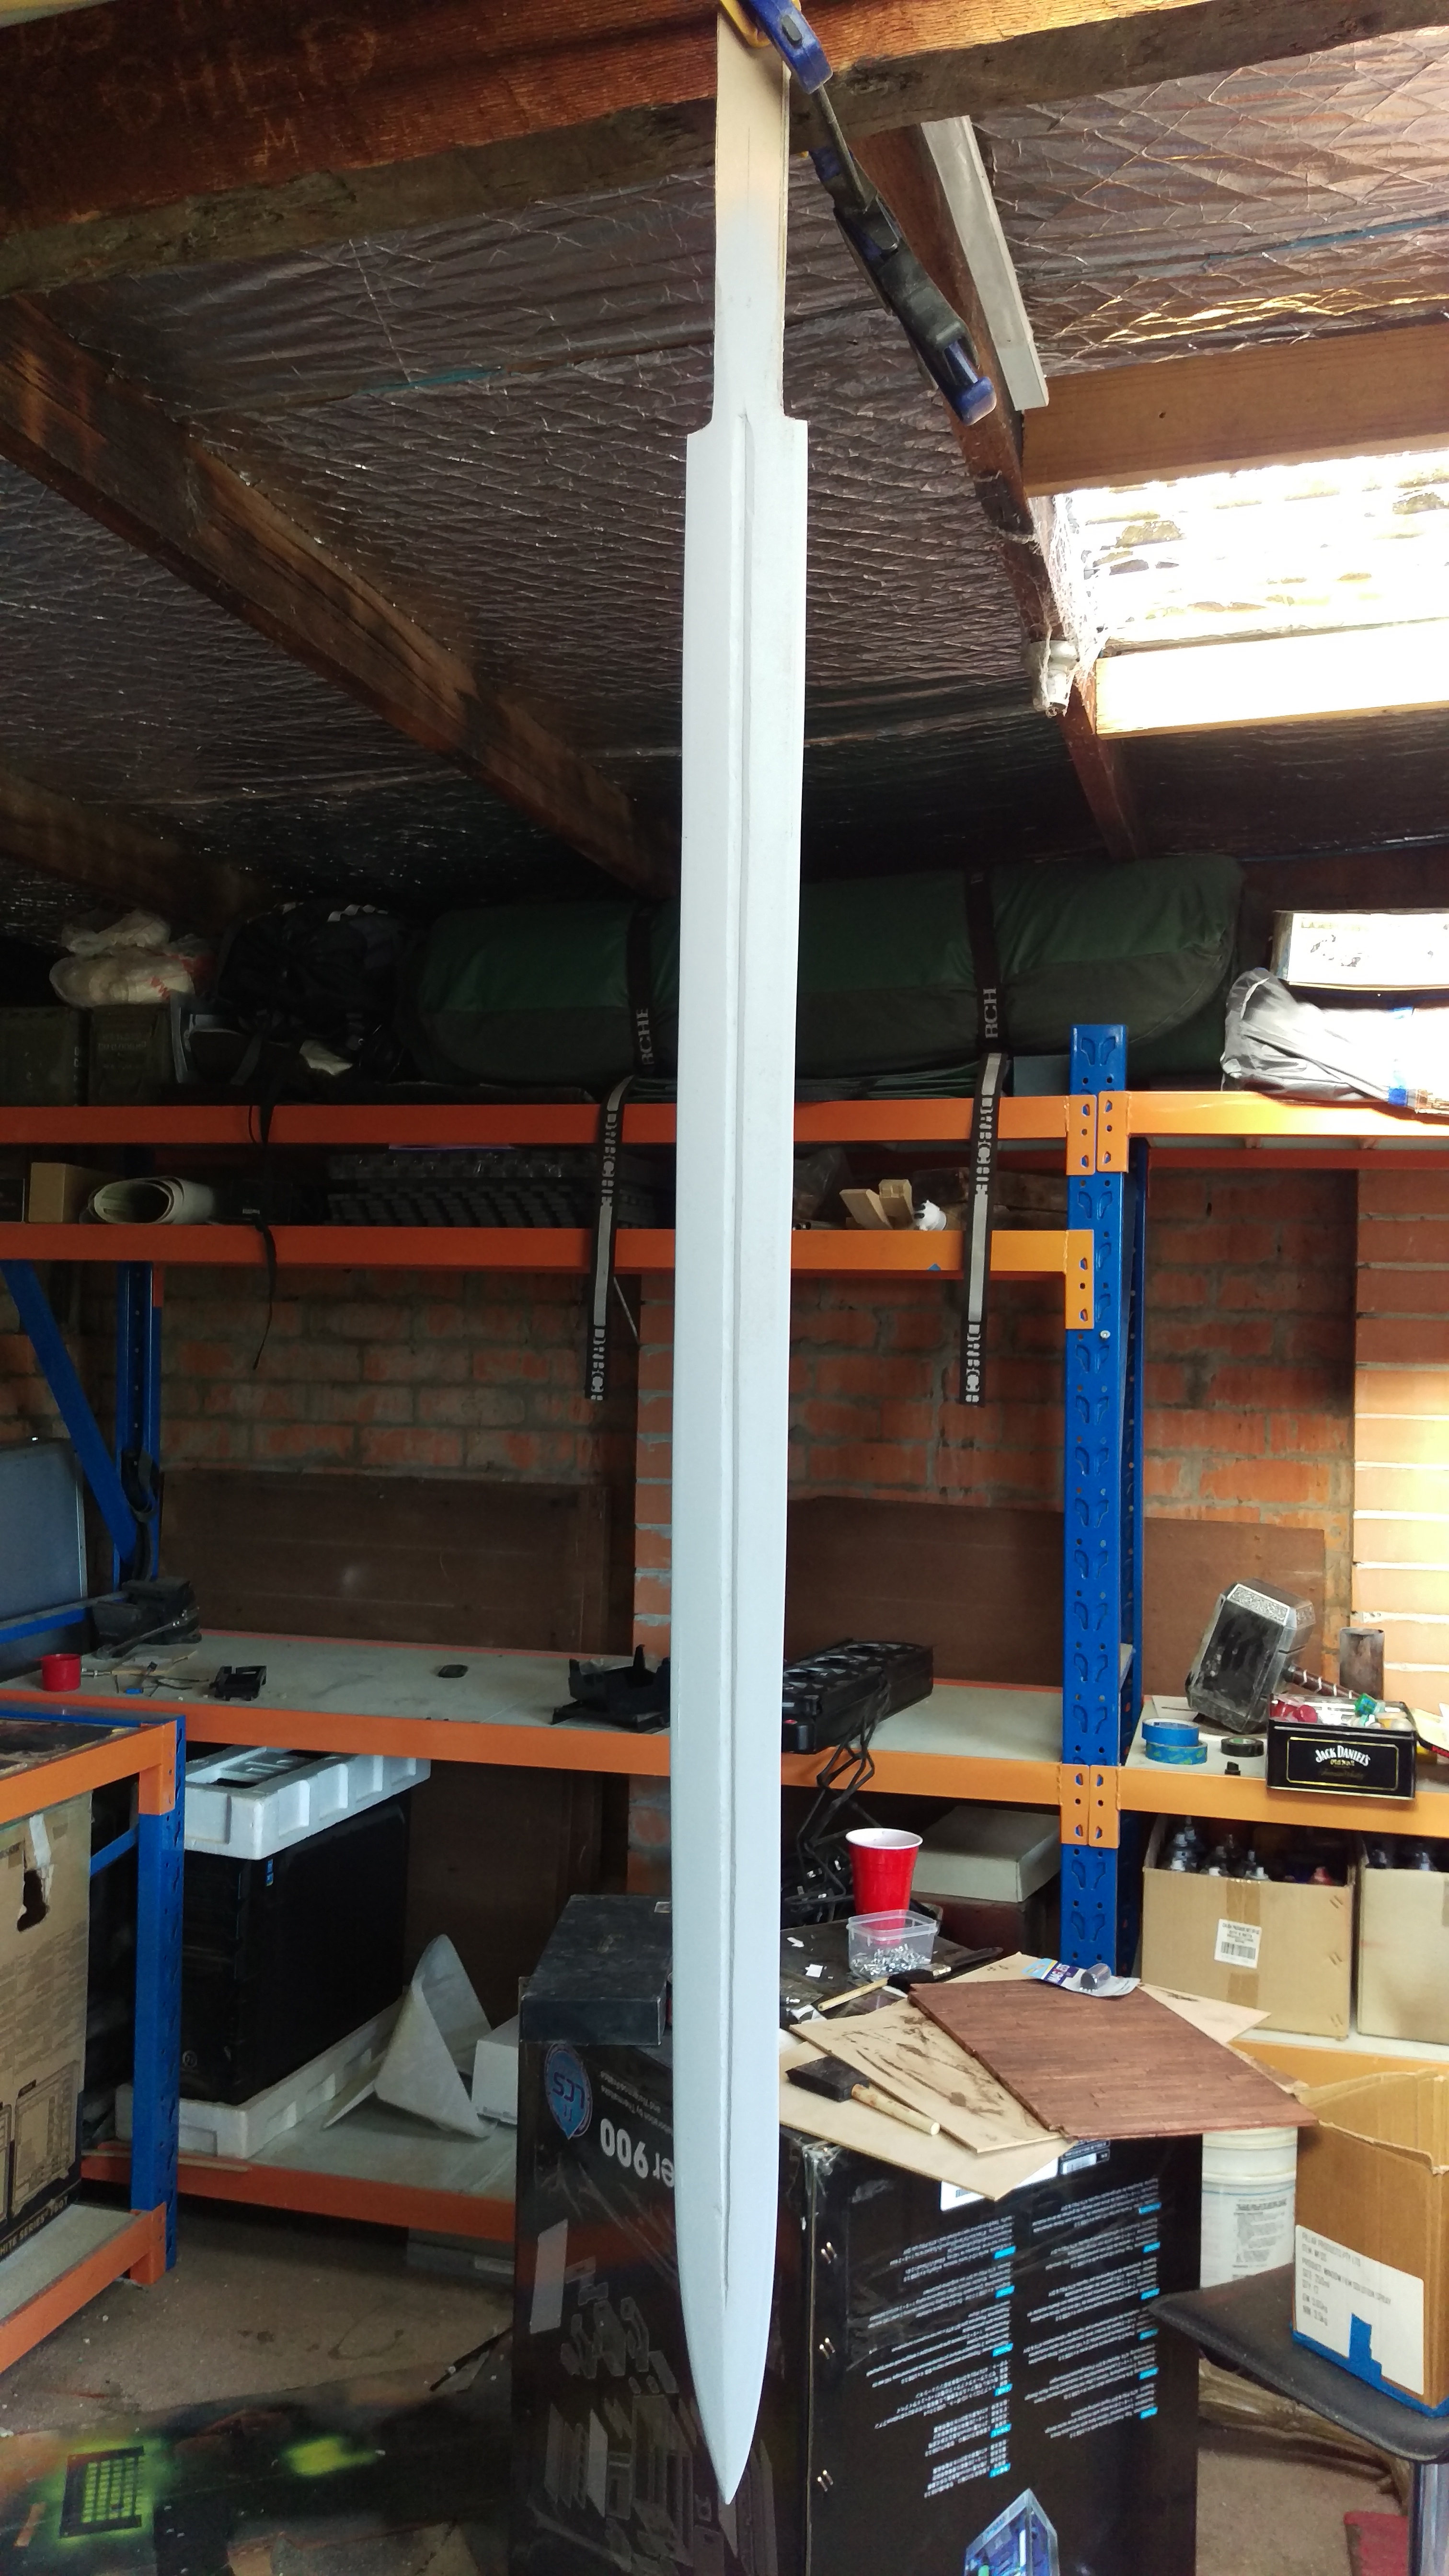
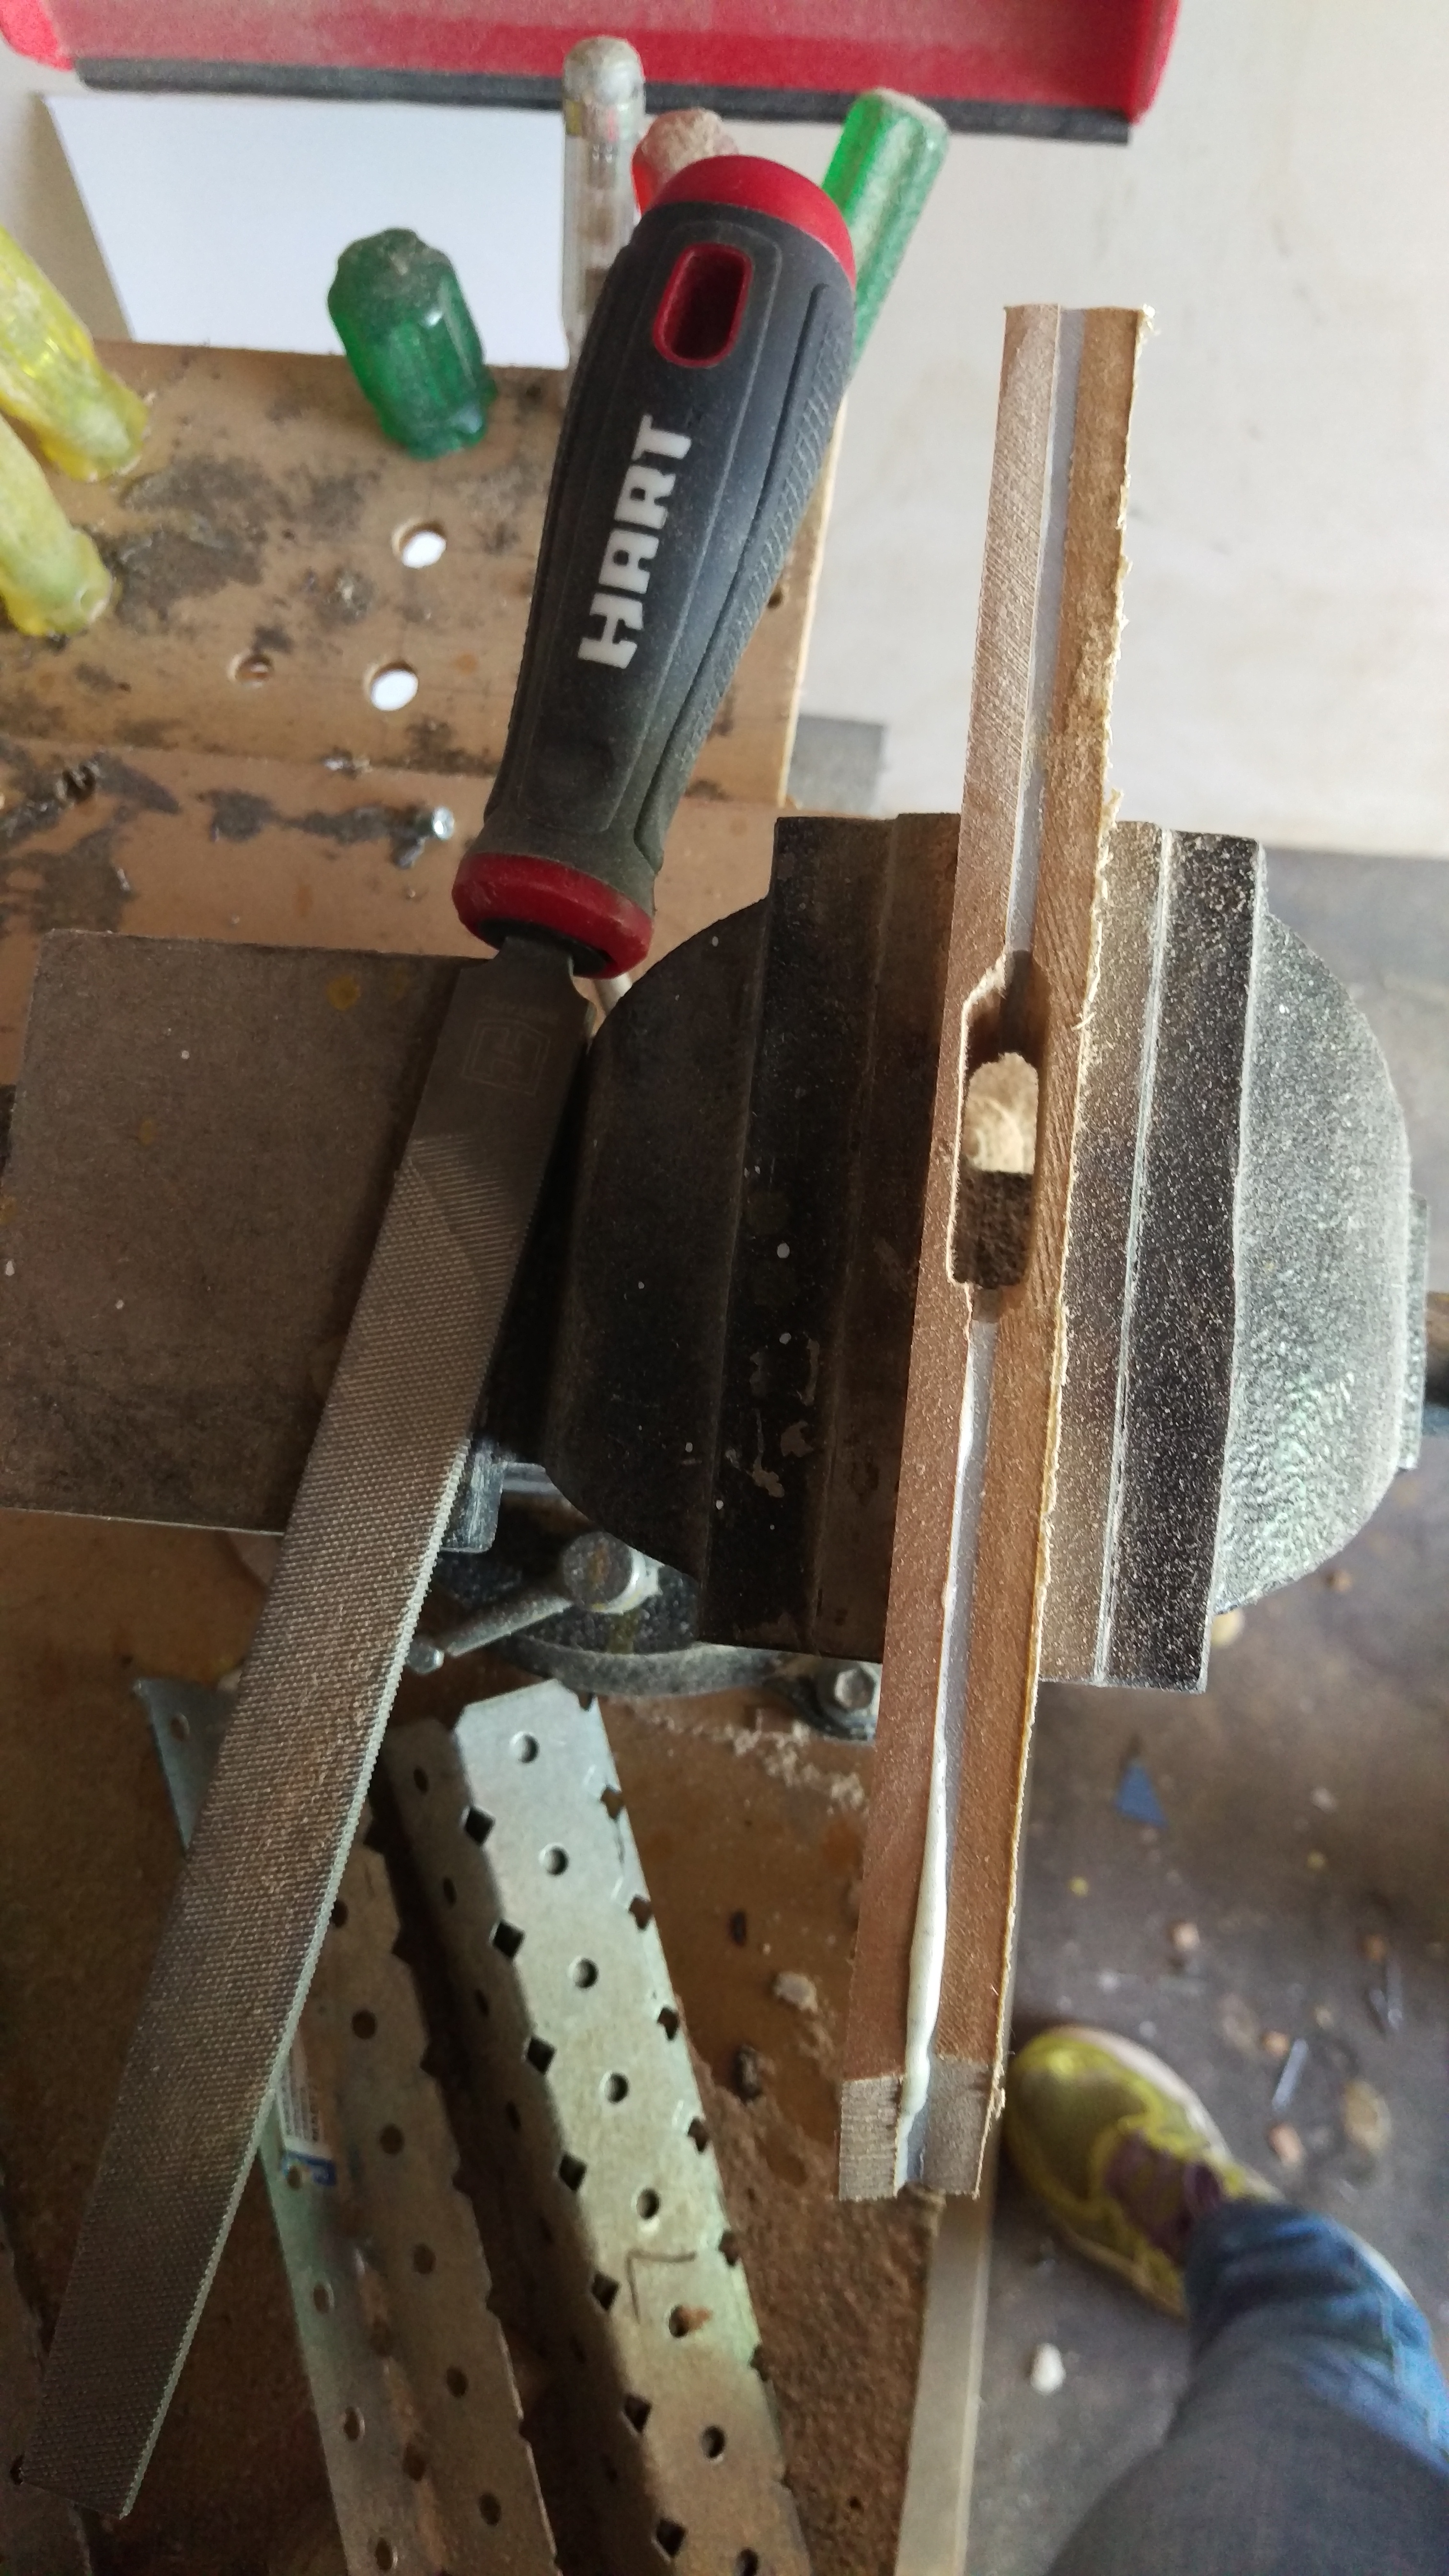
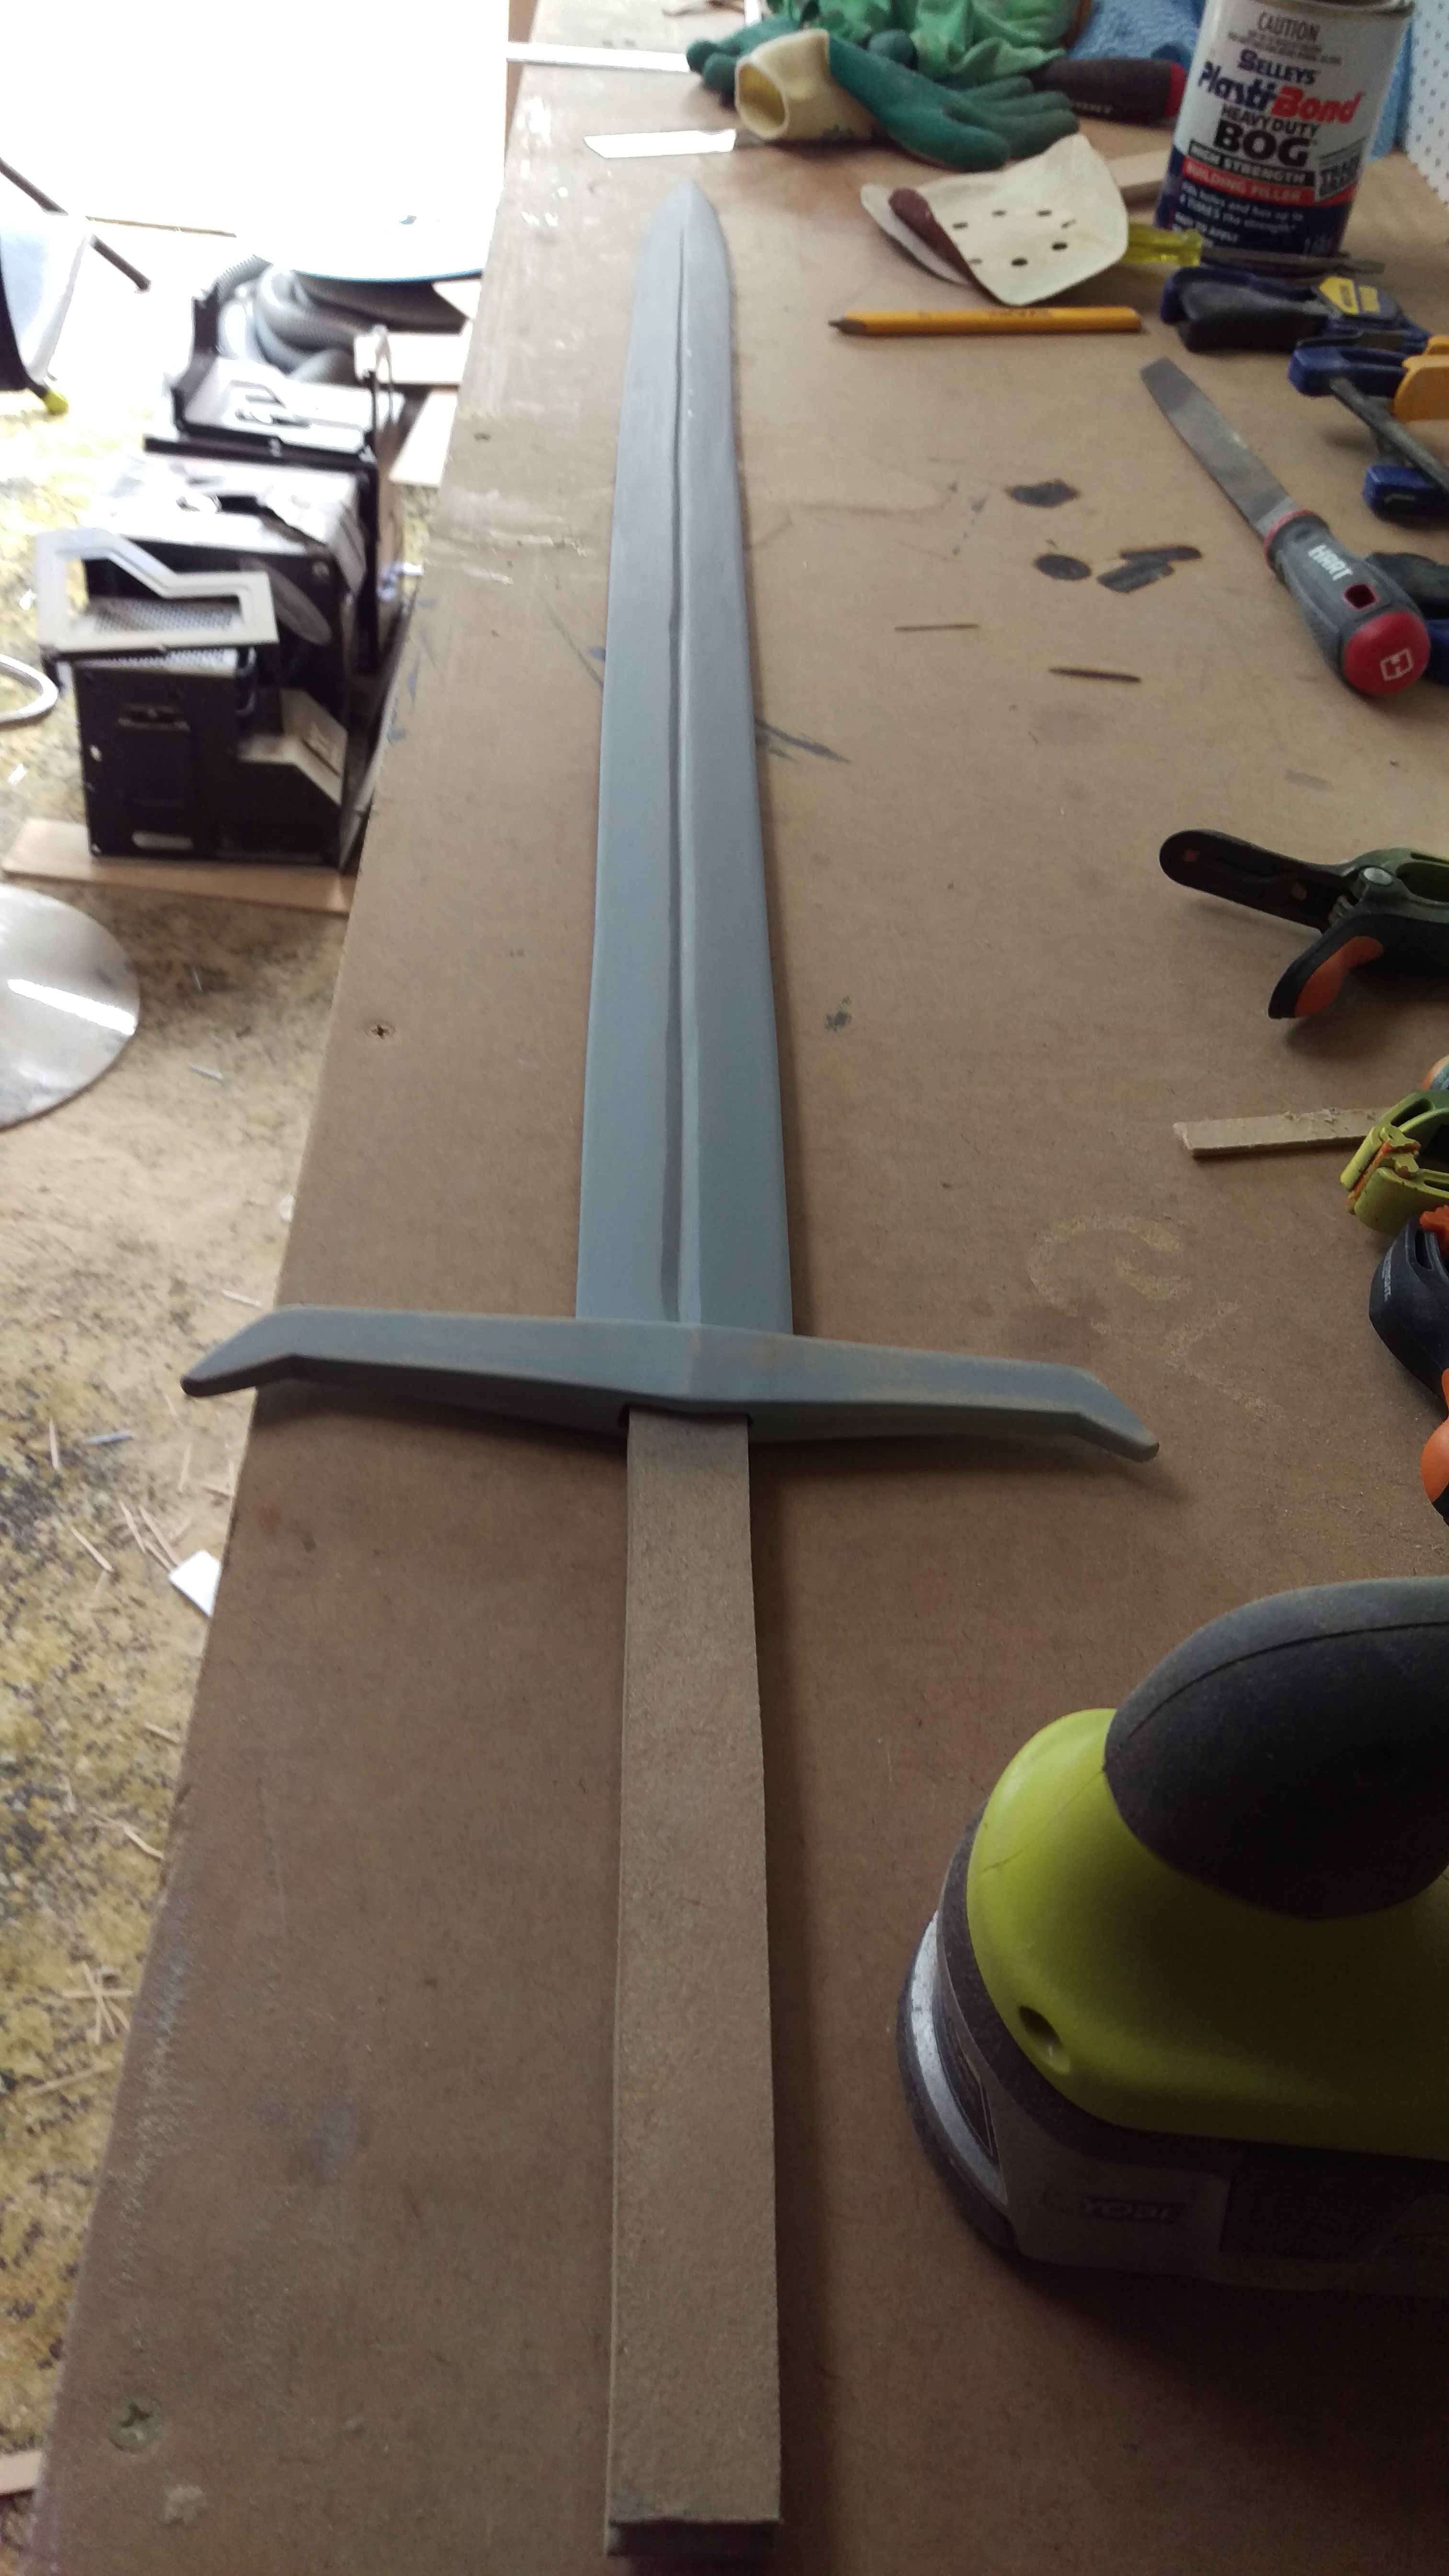
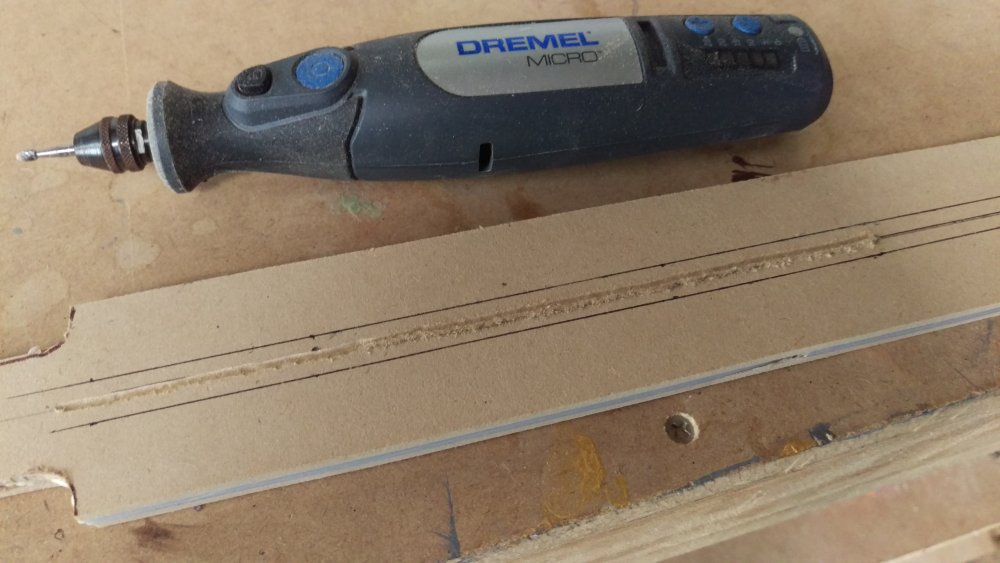
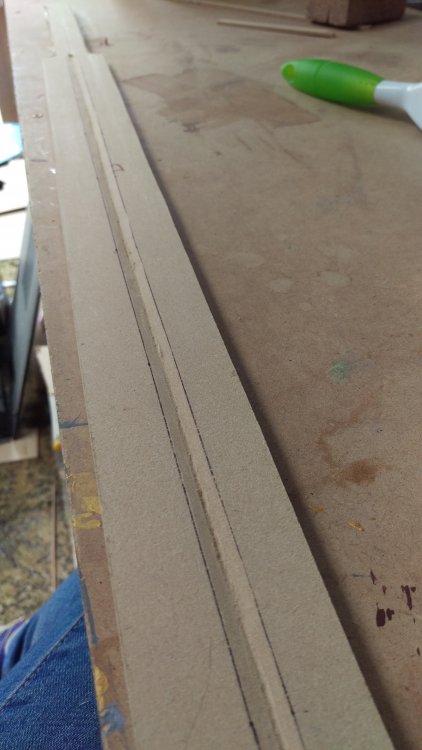
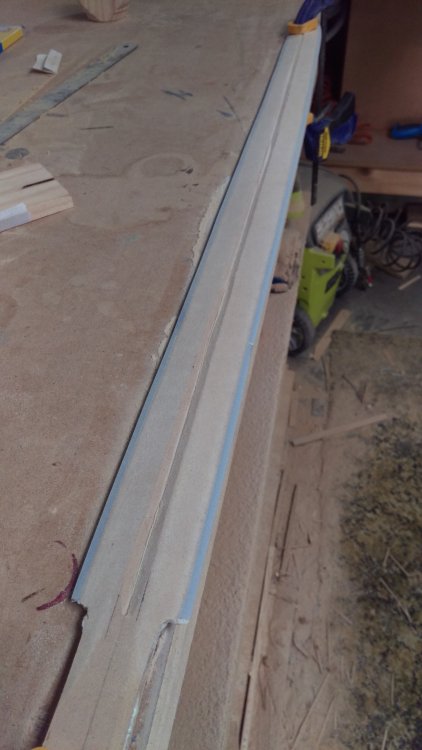
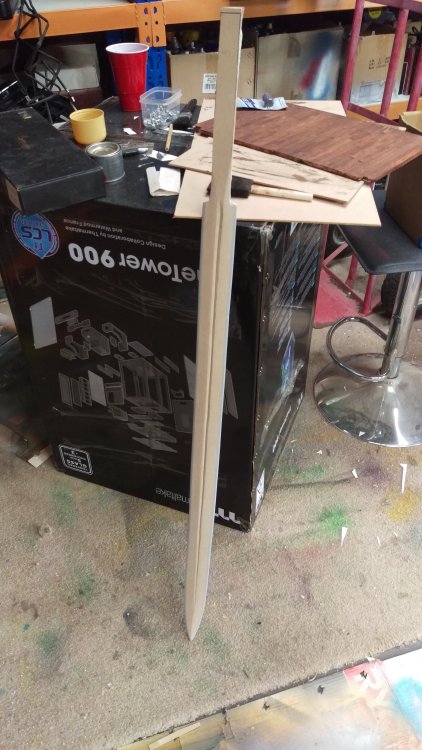
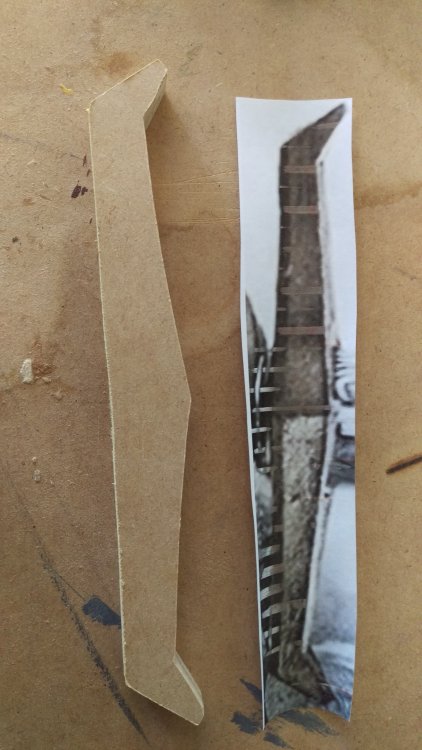
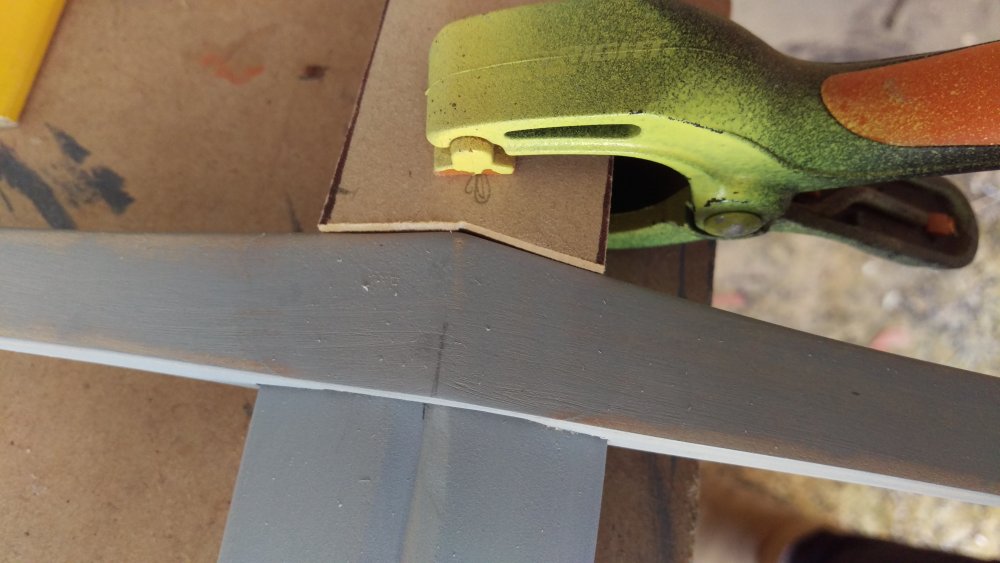
Now to make a full scale sword! ^^ This is what im trying to achieve The blade is 2 sheets of 3mm MDF glued to a sheet of 3mm acrylic and shaped. Constructing the Hilt. Made the same way as the sword ^ Primer Starting on the handle For those that havent figured it out. Im building a King Arthur PC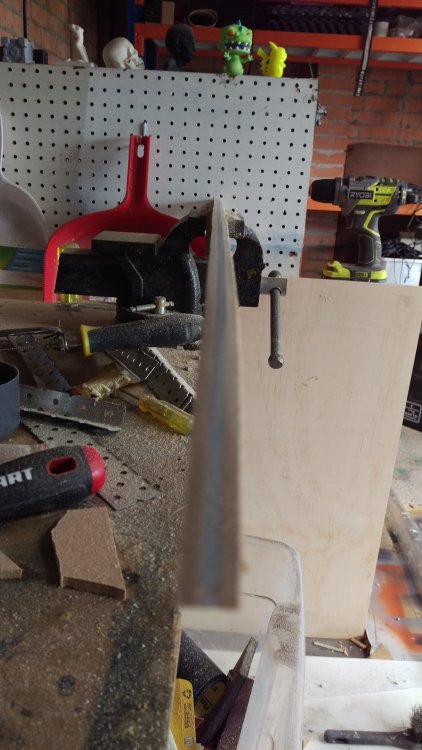


-
[Australia] Ethan Cooper
tagmods replied to Tt Andy's topic in 2017 Thermaltake CaseMOD Invitational Season 1
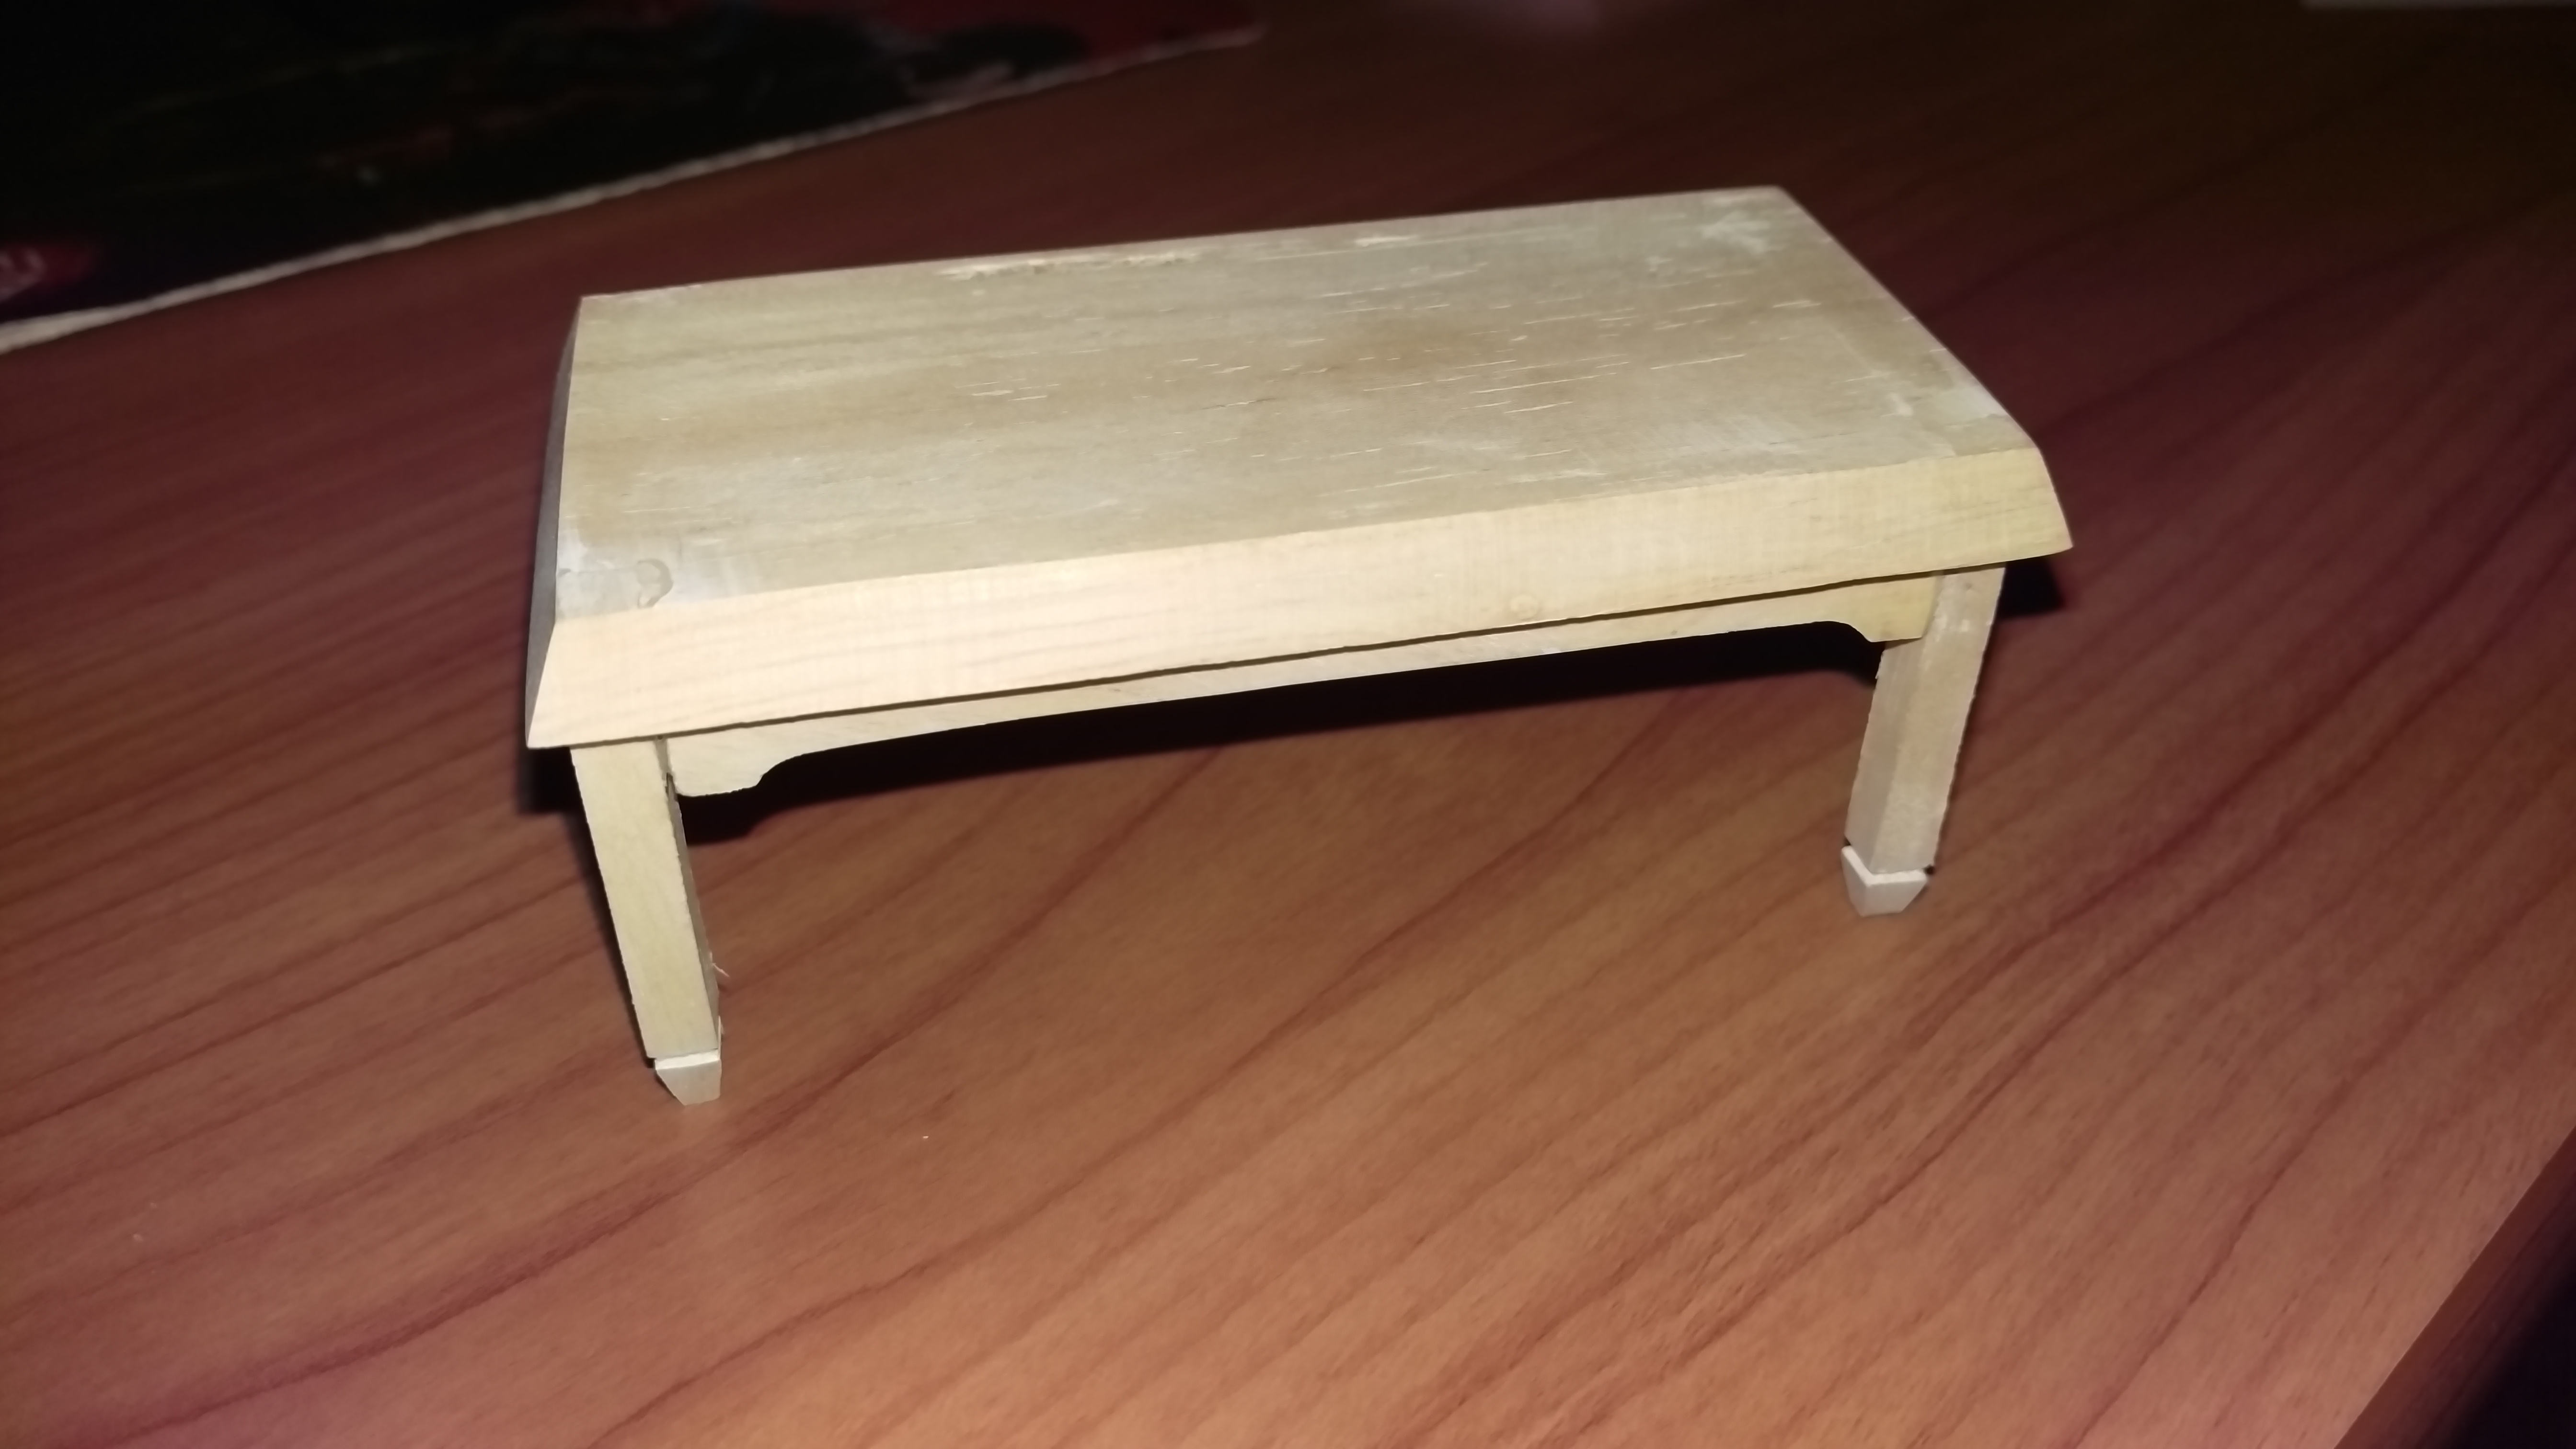
Another little table made from Plywood
-
[Australia] Ethan Cooper
tagmods replied to Tt Andy's topic in 2017 Thermaltake CaseMOD Invitational Season 1
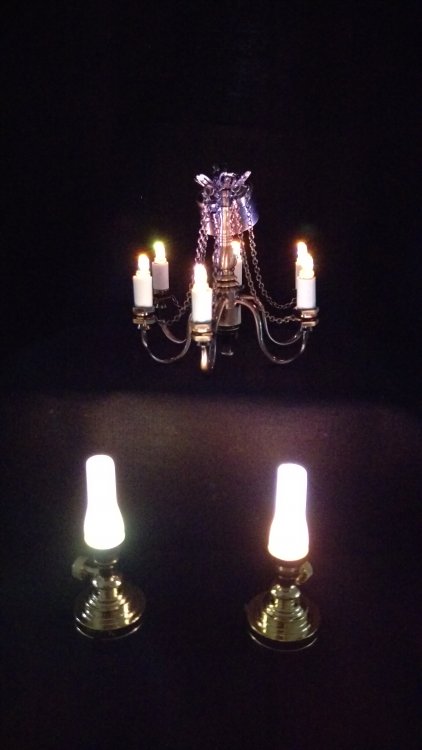
Ive now made a boatload of mini chairs... bottles and lighting. The plot thickens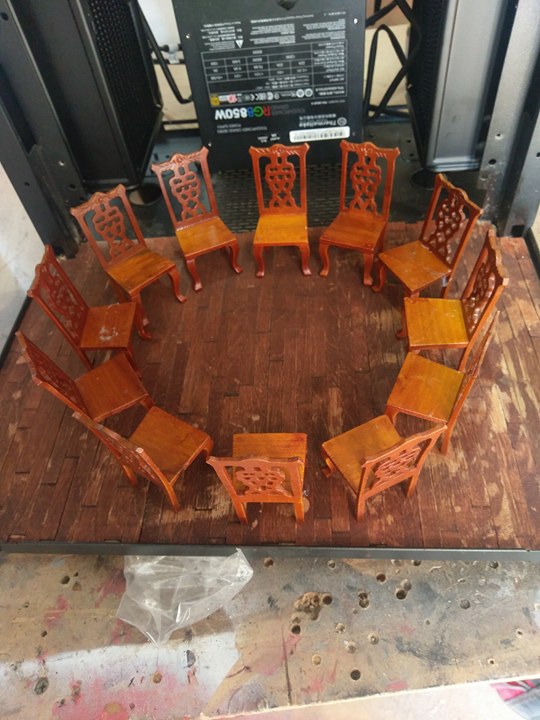


.jpg.26343b9171a24aca603ac54c937479b3.jpg)