-
Forum Statistics
9.1k
Total Topics56.1k
Total Posts -
Member Statistics
137,091
Total Members16,800
Most Online


TT James
-
Posts
162 -
Joined
-
Days Won
9
Content Type
Profiles
Forums
Downloads
Events
Gallery
Blogs
Posts posted by TT James
-
-
3 hours ago, Matthew HG said:
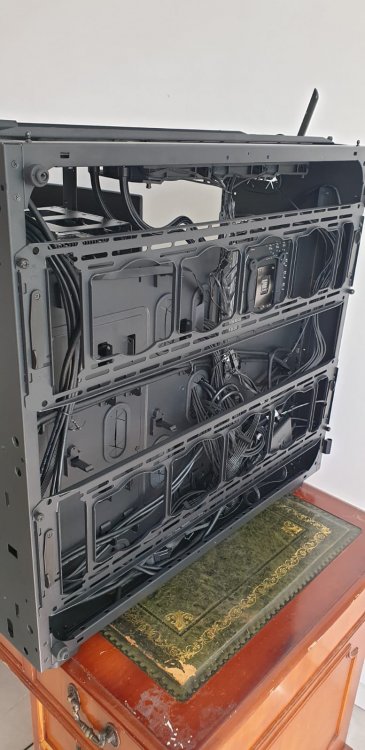
Hi all, I have the new TT V250 ARGB case. Love it, but the controller issue is confusing. The included fans are plugged into the controller.
The built in SATA power plug is plugged in properly, but that is where I cant go further.
I cant find the wire that is supposed to connect the RGB button to the controller. Is it integrated into another plug that goes into the motherboard? I didnt notice any cable that said RGB or anything 2 pin eiither aside from the usual stuff, unless the reset switch is the one I am supposed to plug into the controller instead of into the motherboard? Unfortunately the user manual I found online does not tell me this. Since I think the case doesnt have an actual reset button, I am guessing this is the answer but dont want to mess around with what I am not sure about.
But there is another issue. I was given 2 wires to help plug the controller into the motherboard. Not Completely necessary, but even so, one of your wires is said to be for MSI. My MSI B450 Tomohawk Max board does have an RGB pin port setup, but it is a 4 pin, and your cord has only 2 pin opening, 1 space that doesnt allow a pin and then another pin opening.
I have no pin slots that I can find that will fit this connector

Hello
thanks for choosing V250 ARGB. that is a great budget case for ARGB lighting fans.
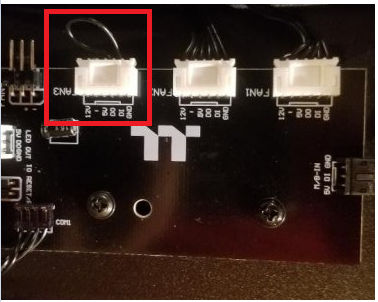
and for the RGB button, it should be connected when you bought it. kindly check the image below.
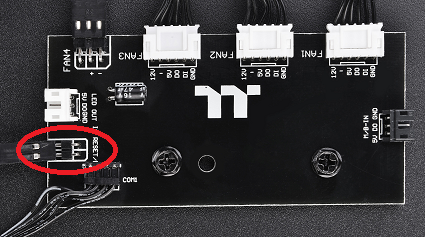
the header with RED circle is for the RGB button. all you have to do is to connect the RGB button cable to this header. do not need to connect to M/B.
unless you do not want to control the lighting via RGB button, if so, you could connect the cable to the M/B and make it to the reset button.
and for the MSI B450 Tomahawk, this M/B does not support 5V ARGB device. there are only 2 12V RGB header.
you cannot connect 5V cable to 12V header. the Voltage isn't right.
so seems like you can only control the lighting effect via the RGB button.
James
-
On 3/31/2020 at 2:51 AM, PFDennis said:
I just unboxed my new Core P7. It's a beautiful chassis, but not a great manual. On page 1 it lists Accessory: Part I and Part II. I found the bag with all of Part II and no Part I. I know most all those parts come with a motherboard, but nowhere does it indicate that. It also lists all the screw counts, so I'm thinking I was supposed to have another bag of parts. Can't find that info anywhere. Anyone know the answer? Thanks.
Upon further inspection, I'm also missing the CPU mount, the PSU mounts, and a few other parts. I've emailed Thermaltake through Customer Service. Hoping for a reply.

check the inbox!
-
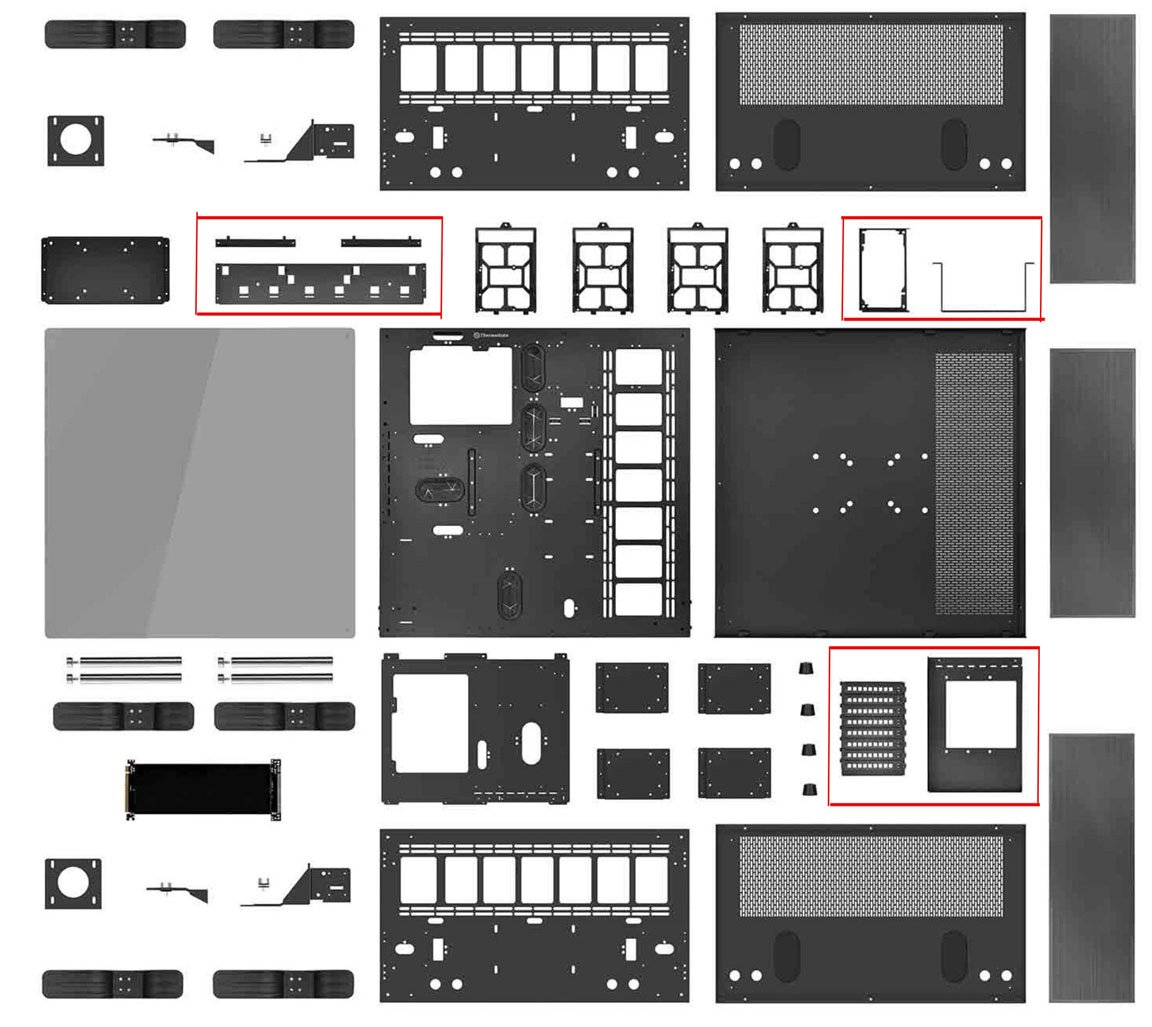
On 3/28/2020 at 6:19 AM, Frostensen said:
I'm looking into buying an F31 case because it's perfect for my needs. However I can't find a non tempered glass version (in the country or internationally). I'm interested is there a way to obtain that solid panel piece somehow? Is it produced anymore at all? Any help would be greatly appreciated.
Hello Frostensen
would you please let me know where you at? I could check the inventory for you or I could try to find a way to help you out!
thank you
-
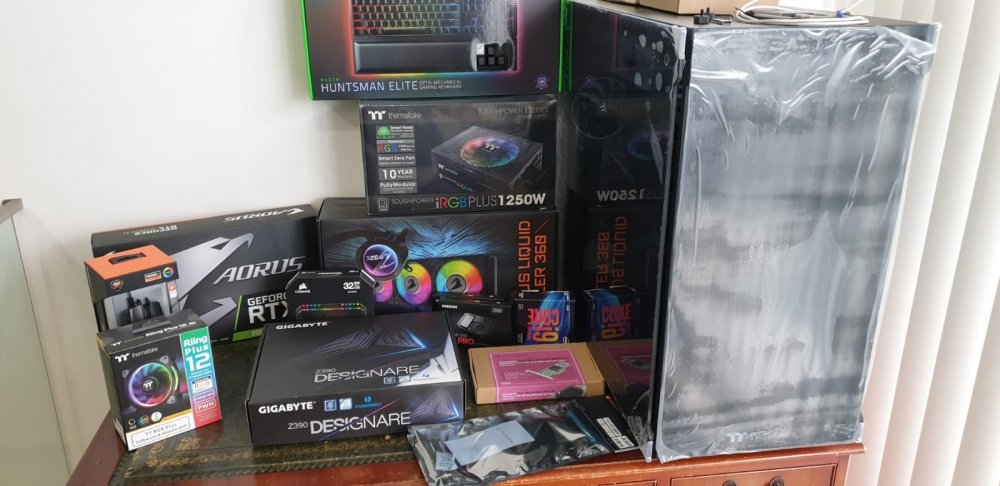
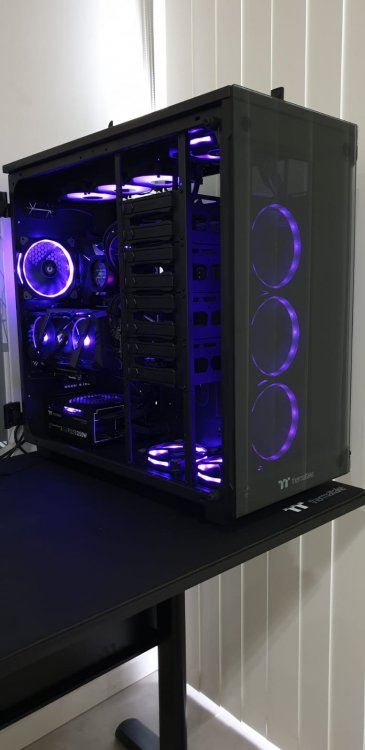
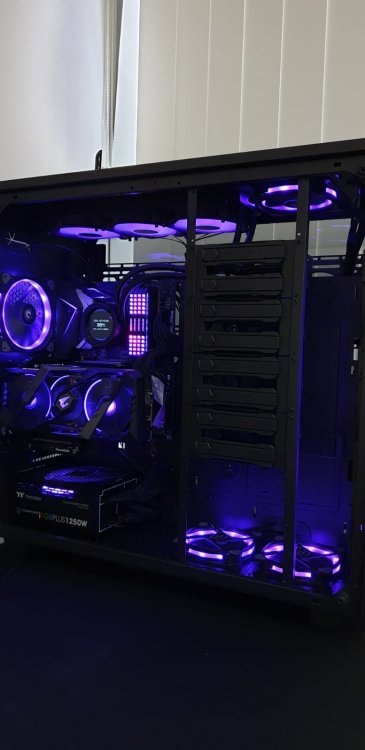
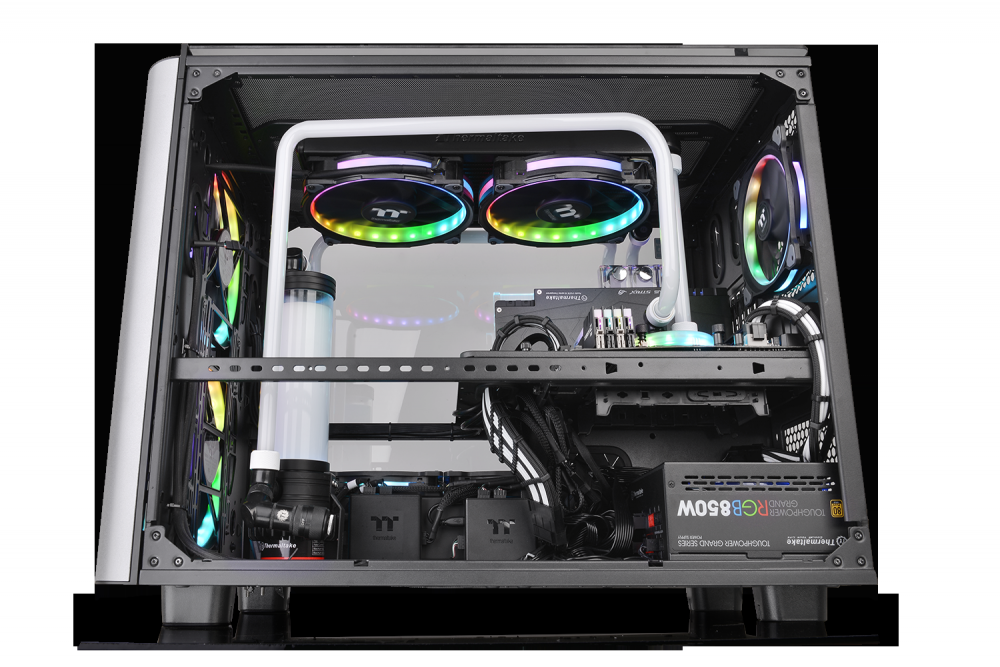
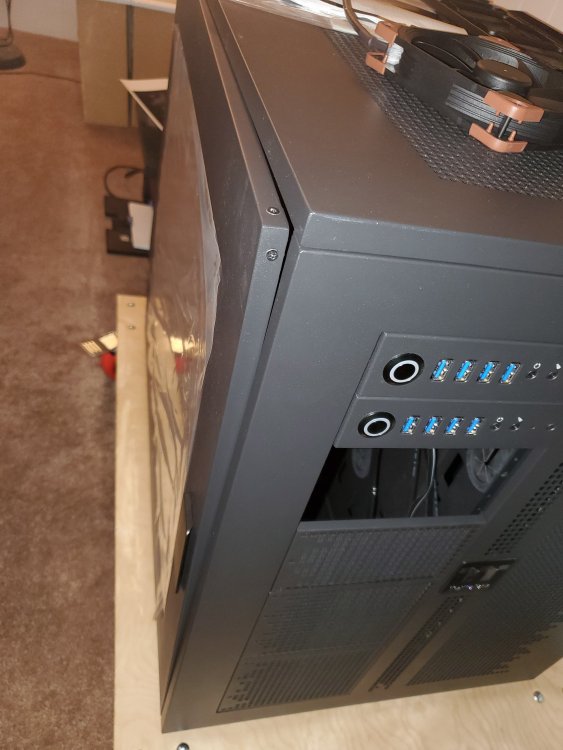
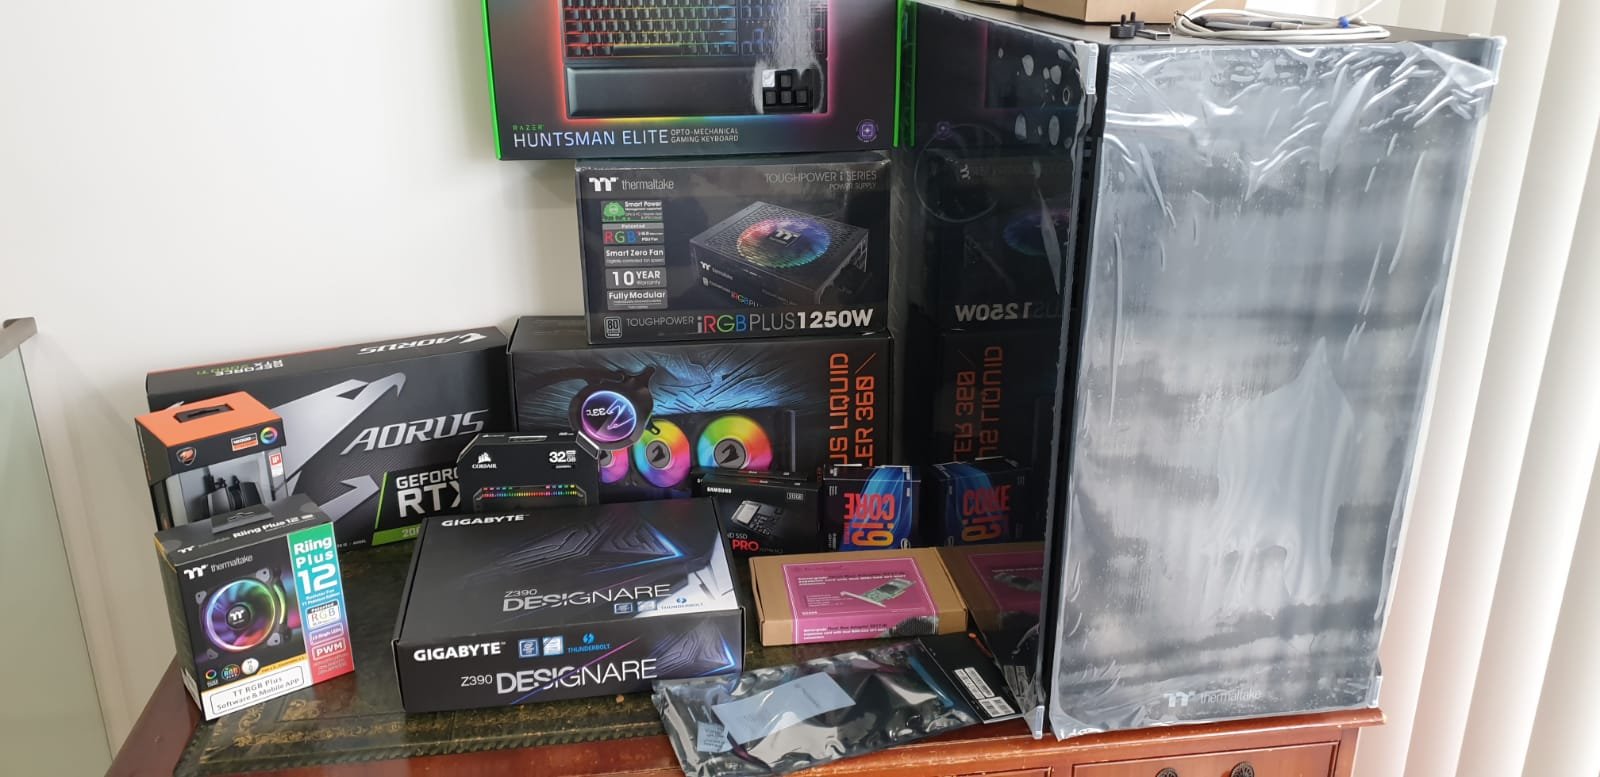
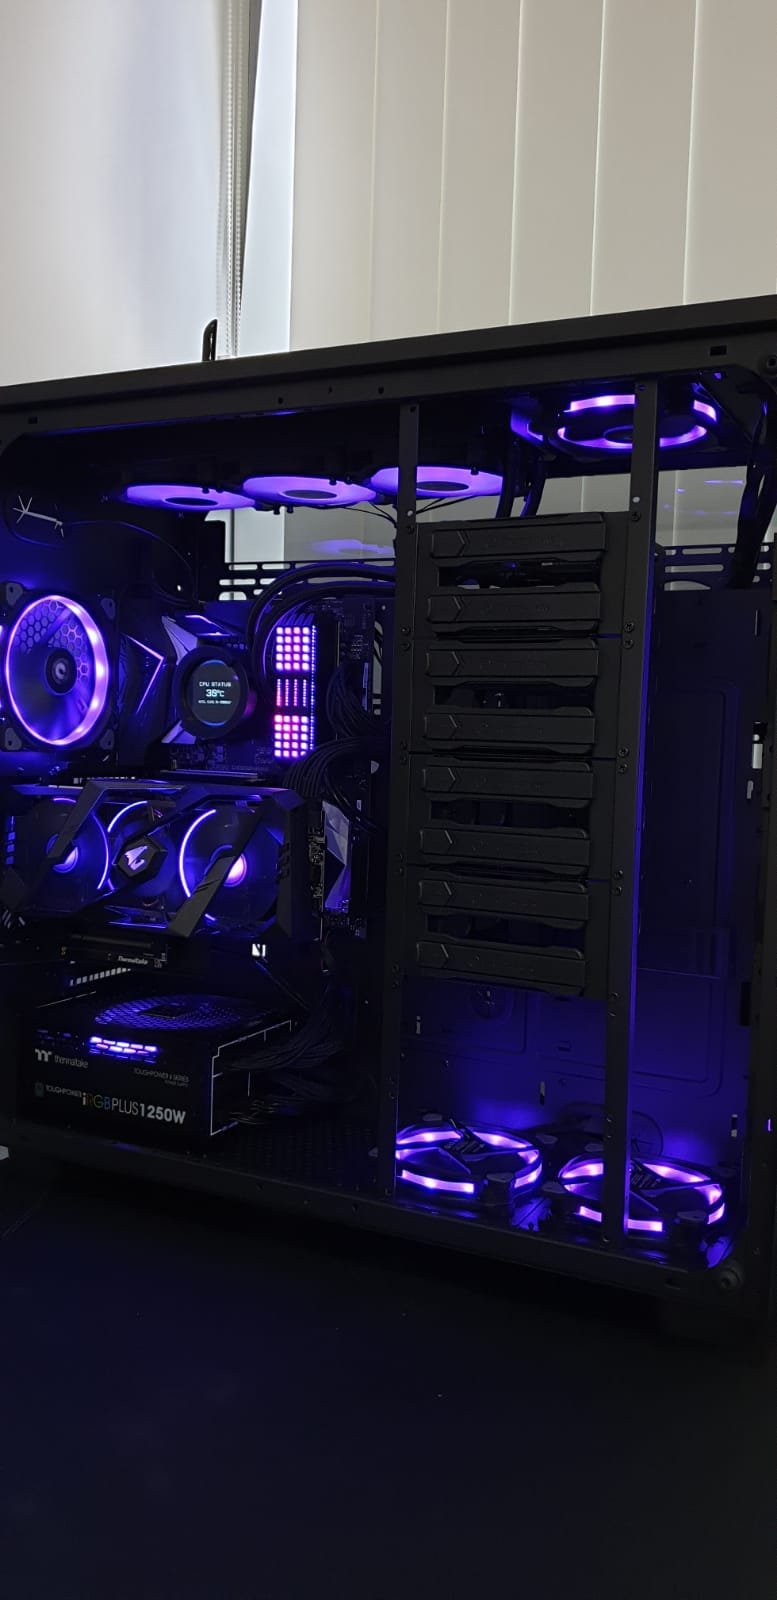
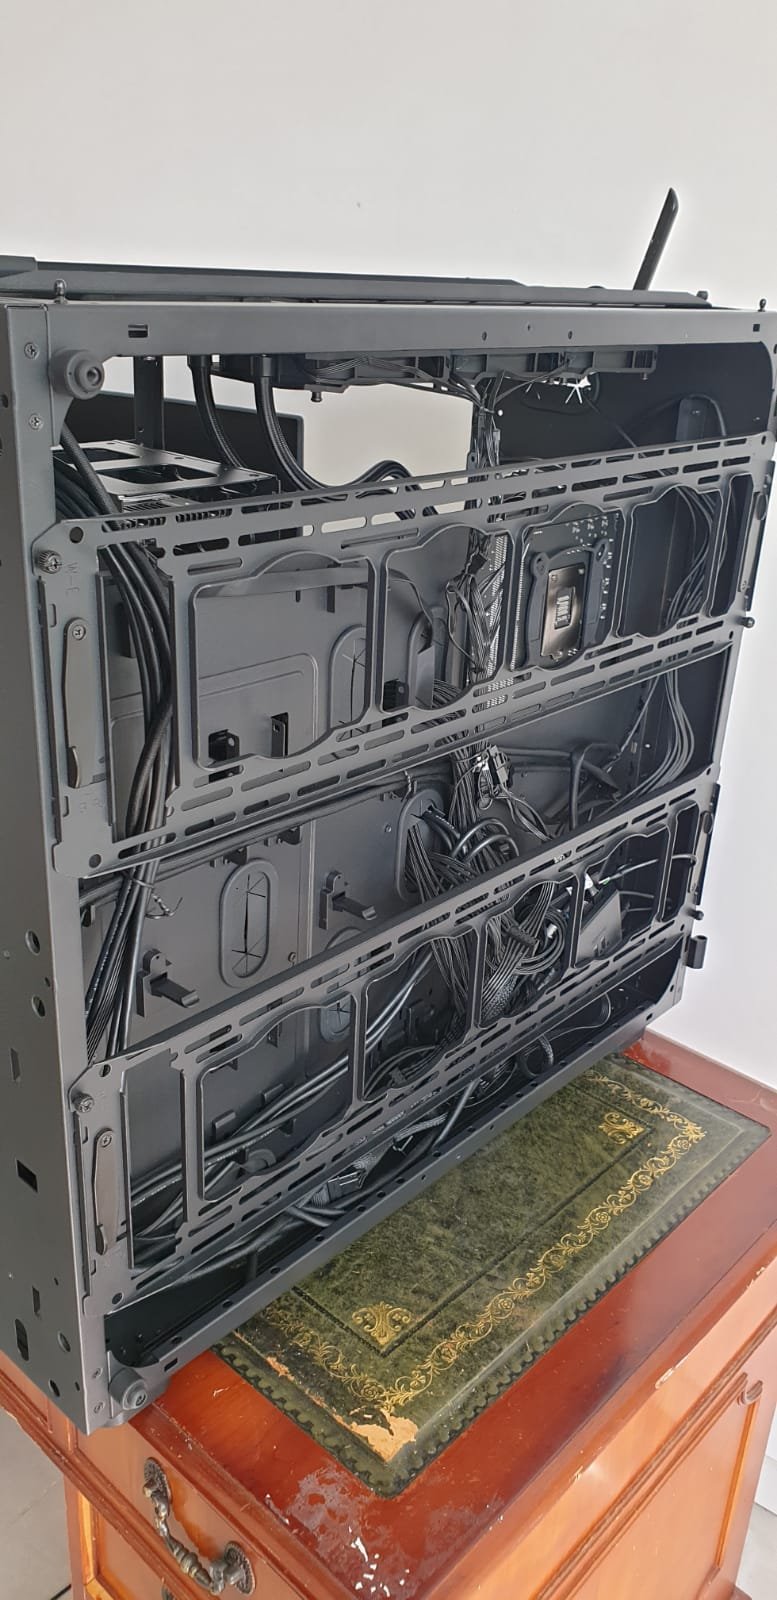
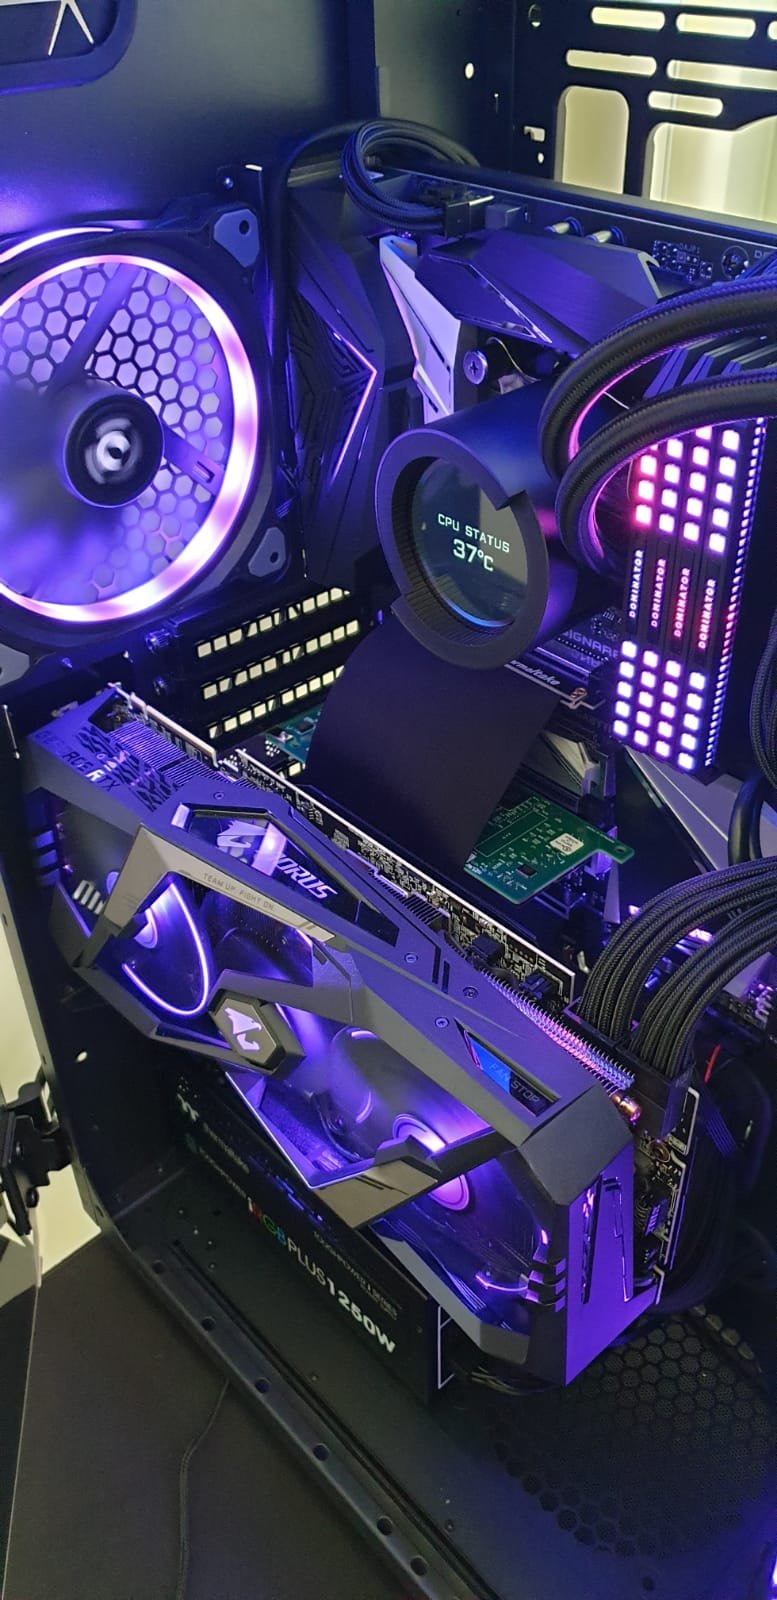
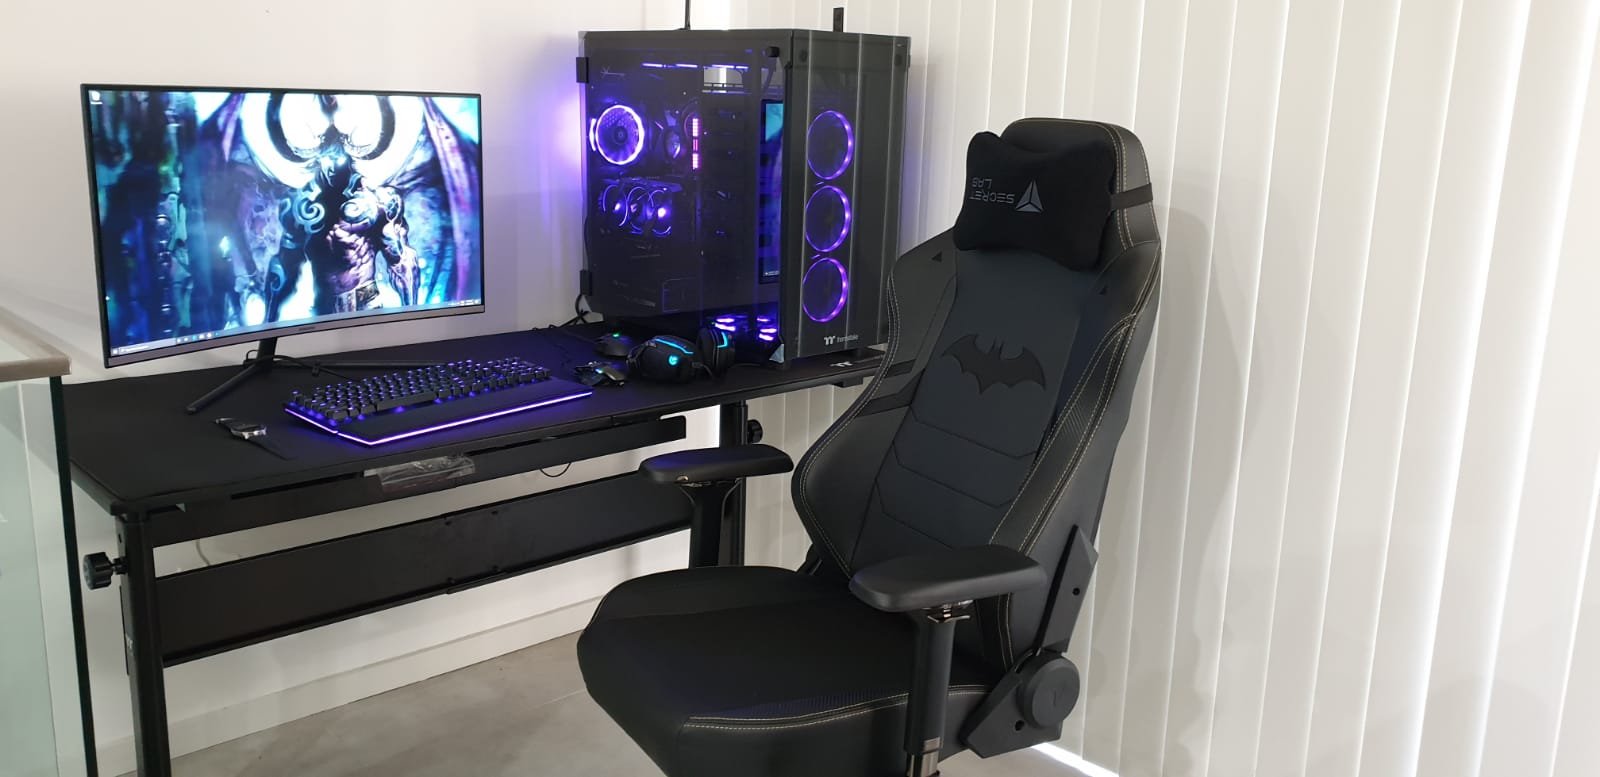
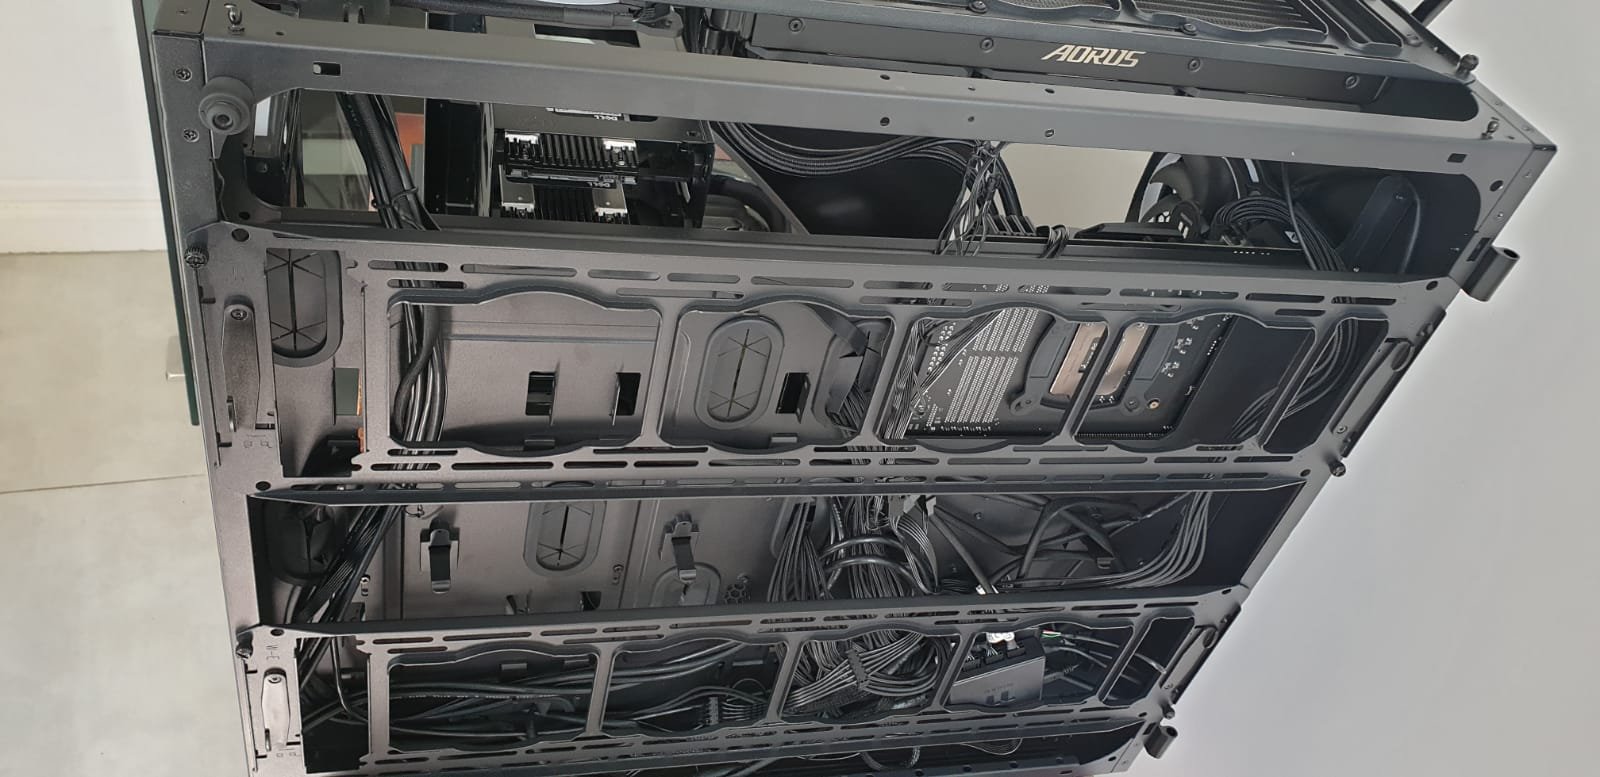
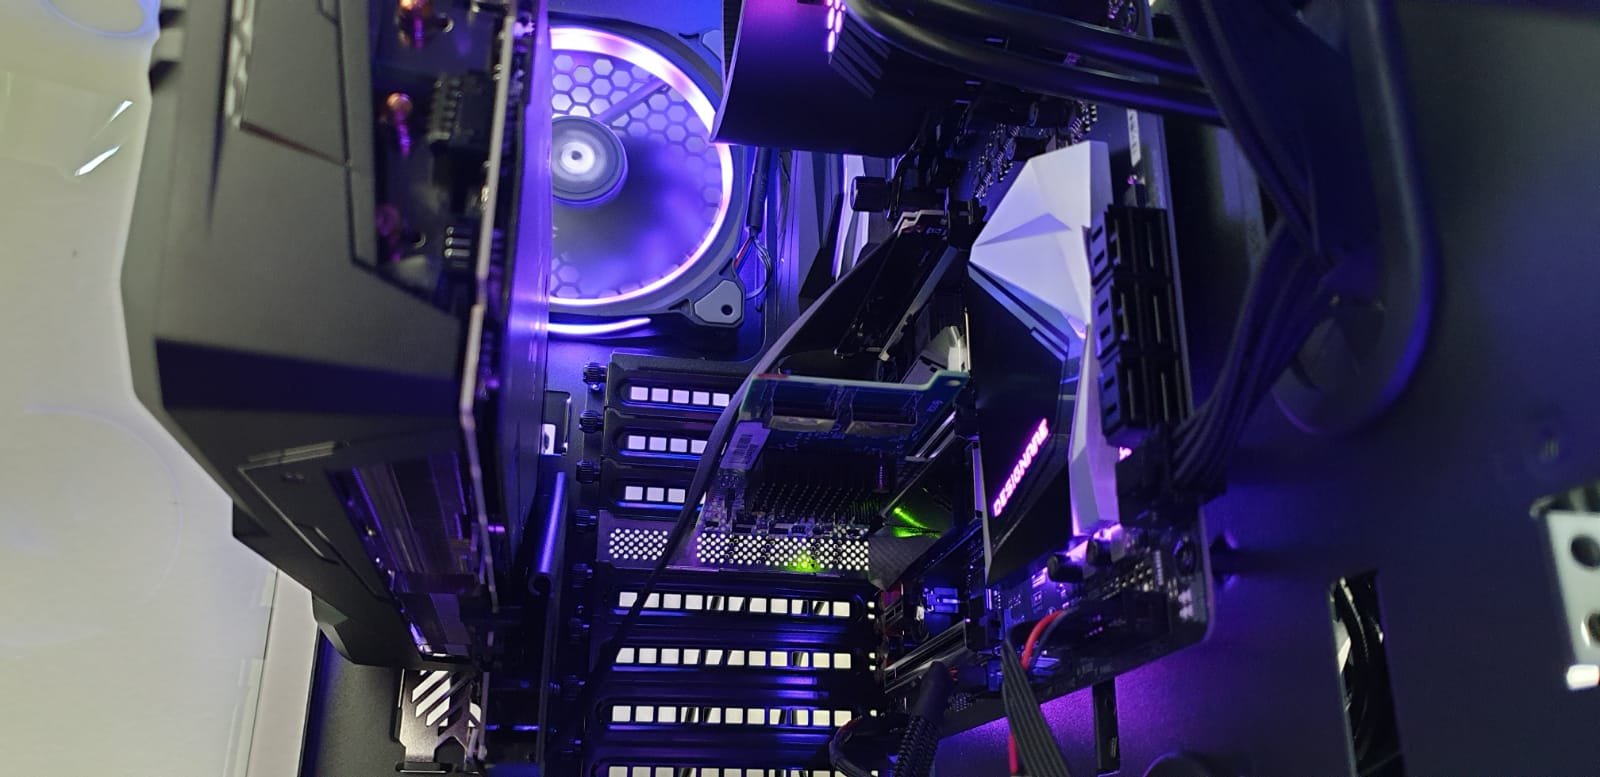
On 3/29/2020 at 8:35 AM, FattyPatty said:
Hey Team,
I was unable to find a topic on View 91 Ownership by any of the Tt boys. I have recently built a new rig into this behemoth and isnt she a beauty! I am happy to share my experience.
https://www.thermaltake.com/view-91-tempered-glass-rgb-edition.html
Taking any questions.
.thumb.jpeg.d72f7a7780dbbcfbb9b1c943d12e7455.jpeg)

.thumb.jpeg.454261c72ec8ce4d800a5ed44bbed82a.jpeg)

.thumb.jpeg.ecda6ae560ac193aa33e8fb62eaf54c7.jpeg)

Wow! the built is awesome! looks fantastic!
-
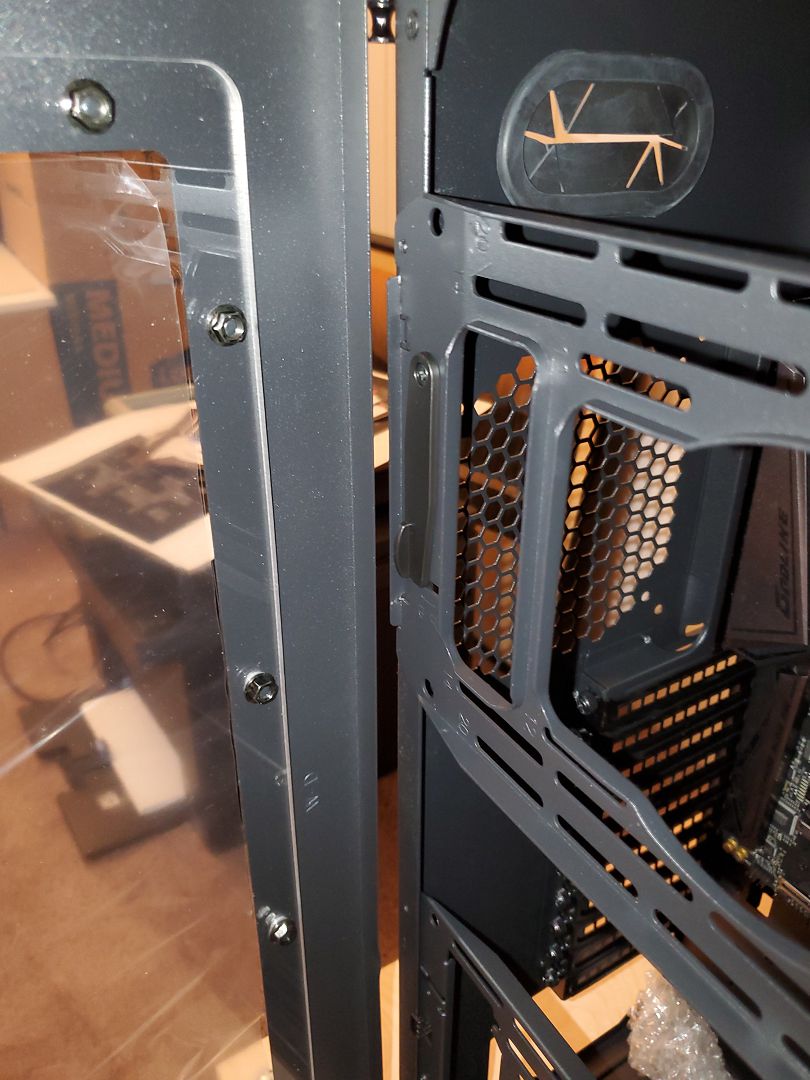
2 hours ago, Fuzzy said:
Hi, So I am building a monster v1. already have the case and mobo. the rest will be soon.
Core V1
MSI B450i Motherboard
Ryzen 7 3700x
Zotac mini RTX 2070 super
1tb m.2 ssd
32gb ddr4 3200 16 cl ram
evga 650 gq 80+ gold modular psu
It should be able to run minecraft
")
Hello,
it would be great if you could share your final building with us!
V1 is one of the great value case.
-
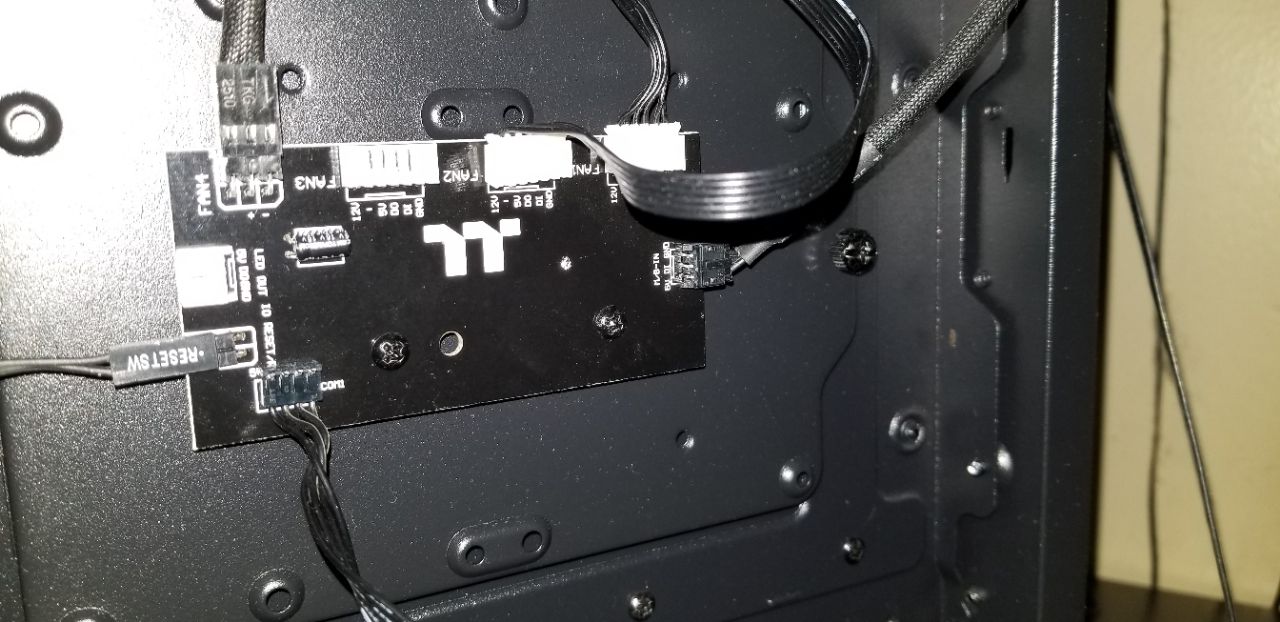
37 minutes ago, Bubbabad said:
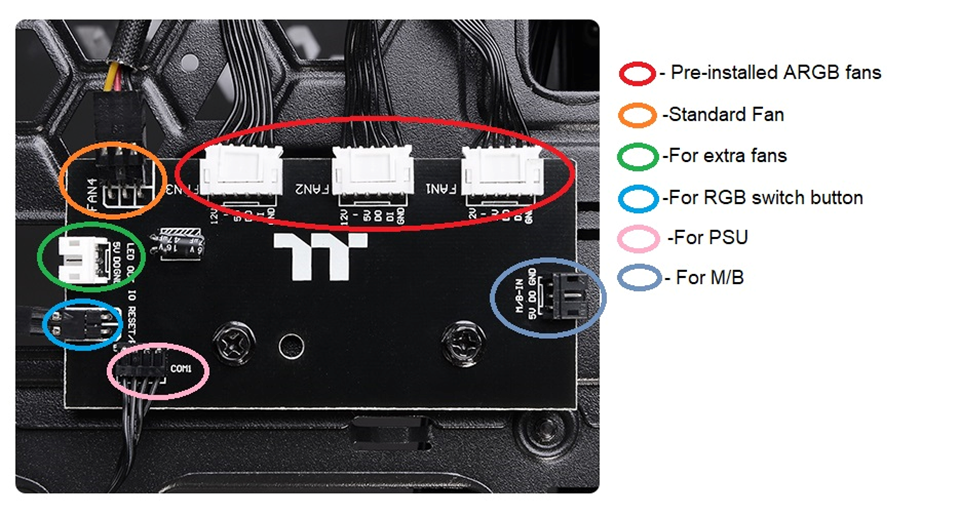
See screenshot below - No cable or documentation came with case for this connection.
Any help would be appreciated.

Hello Bubbabad
thanks for choosing View 51 TG ARGB. Hope you like it.
and the header you asked is the one for connecting other Thermaltake fans.
for example, if you buy our Pure 12 ARGB(https://www.thermaltake.com/pure-12-argb-sync-radiator-fan-tt-premium-edition-3-fan-pack.html)
you can connect the fans to the control board via this header . so that you can control all the fans either from RGB button or M/B sync
thank you
-
13 hours ago, kurdtnz said:
I have recently built my first pc using the TT Commander c35 case but the top left usb port is not working,anything I should try?
check the message
-
On 2/22/2020 at 10:21 PM, James Rose said:
Currently, I see Fans A1, A2, A3... all male... but I have no idea how to connect to motherboard (since all fan ports on motherboard are also male). Am I supposed to purchase another fan cable (male to female perhaps?) to connect A3 to mother board if A1 and A2 are occupied by the fans that came with the case?
Hello James Rose
Which case do you have?
thanks
-
PM you!!
-
18 hours ago, frozensun said:
I own this case,but I need to know if 200mm riser cable is enough of length for installing card vertically?
From what I can see,and I did measure 2-3 cm more is requires,so I suppose I need 300mm TT cable?
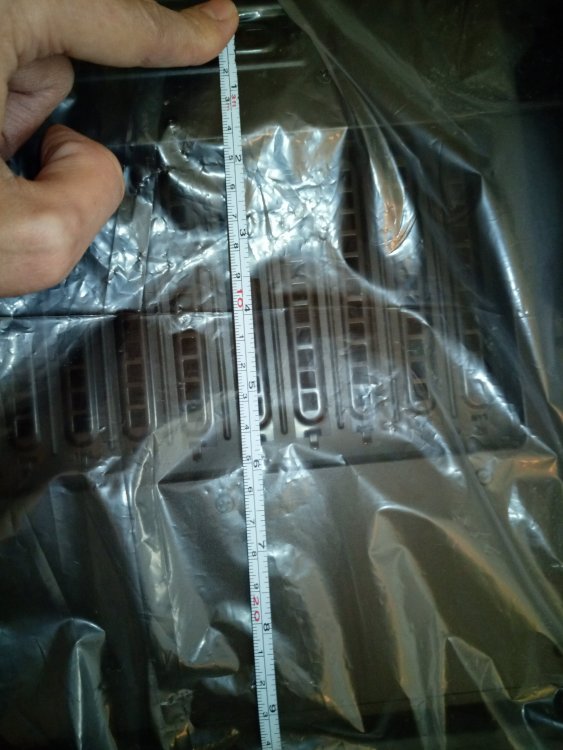
Hello frozensun
this is James from thermaltake!
thanks for choosing View 91.
and yes! you're right! you need at least 300mm riser cable for this giant beauty!
James
-
On 1/17/2020 at 11:42 PM, Sprookets said:
Hello all,
New Level 20 XT owner and compiling parts for my 9900KS build.
I moved my existing old rig into it for now since I don't have a laptop to use daily.
I have enough MB connections for the 5 total fans on my old rig, but they were originally on a 5.25 Bay Fan Controller.
Question: Anyone have any options for where you could install a fan controller in this case?
I guess worse case I could run extensions out the back WC grommets and attach/leave it on the top of the case, but that isn't my best desire.
Question: Is there an accessory plate that attaches to the internal opening next to the MB tray on those same rails? That would give a nice flat area to mount any other WC accessories as well?
I don't mind having to remove a side panel for adjustments as I can always see the FC display through the glass and it will be pretty set after I make final fan adjustments for whatever loads I test.
Hello Sprookets
this is James from thermaltake!
thanks for choosing Level 20 XT. that is a beauty case with outstanding view.
for the fan controller, we have them at the bottom and stick with the radiator. like below image
we believe there are the better place to hide the controller.
thanks
-
7 hours ago, GregAMD said:
I'm using a View 37 that I bought over the Christmas break for a new AMD Threadripper project.
The fans all work fine and the LEDS all work when they are run in one of the numerous "case: mode.
But when I switch it to AURA mode only the fan attached to fan port #1 syncs with the ASUS MB. the other two are dark. (spinning, but dark)
If I unplug the fan in port 1 and plug in a different fan, then that fan lights up... So the fans (and their LEDs) are fine...
Is there some trick or software to install to get AURA to talk to the other two fans?
Thanks!
Hello GregAMD
this is James from Thermaltake Case Team
could you please shoot a quick video for me---how do the fans connected on the ARGB control board and "If I unplug the fan in port 1 and plug in a different fan, then that fan lights up."
so that I would have better understanding on how's going on and figure out how i could help you with!
PM me if there is any further concern.
thank you!
-
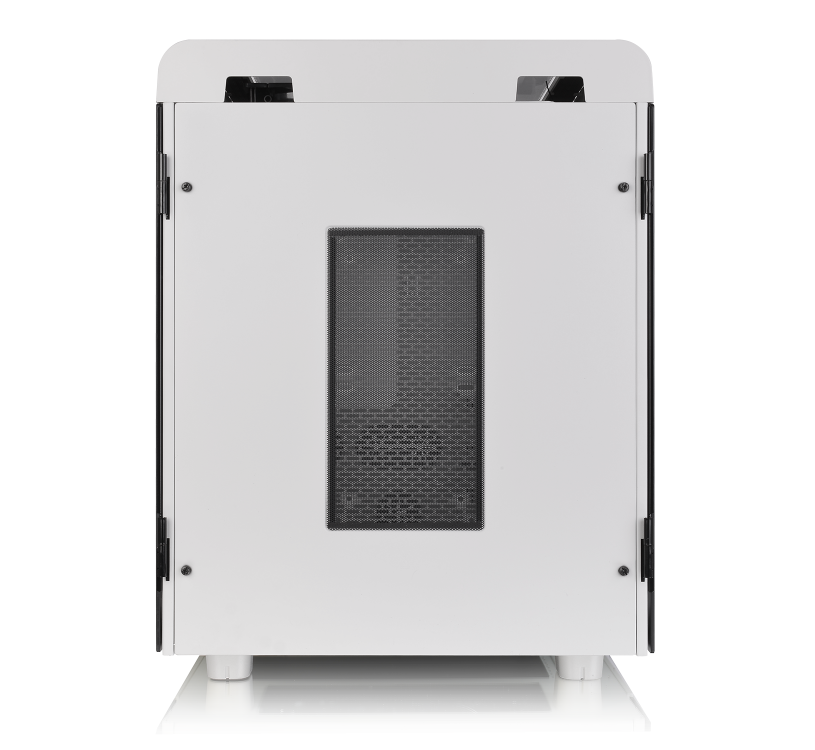
On 1/14/2020 at 1:35 PM, PCDesignerRy said:
I will do my best to describe this issue as plainly as possible. When attempting to install the side-mounted locking fan bracket for my W200 case, with the bracket installed on the side of the hinge panel with the window, it seems to block the hinging door from closing just barely when installed. I tried turning it around to the left and right, but, the only way I can find so far to get the door to close with the bracket installed is to install the bracket backwards, with the locks facing out and the bracket installed from the inside. I am hoping that maybe someone has an idea of how to properly get these installed where the doors will close, and can give me a better understanding of how to install mine. If so I would sincerely appreciate it and this would be a huge weight off my mind.
Thanks!


Hello PCDesignerRy
One question! why do you want to mount the fans at the left side?
there is no way in or out for the airflow on that side.
the bracket can be installed only on the other side of the case. like to image below
welcome to PM me if you still have any concern
James
-
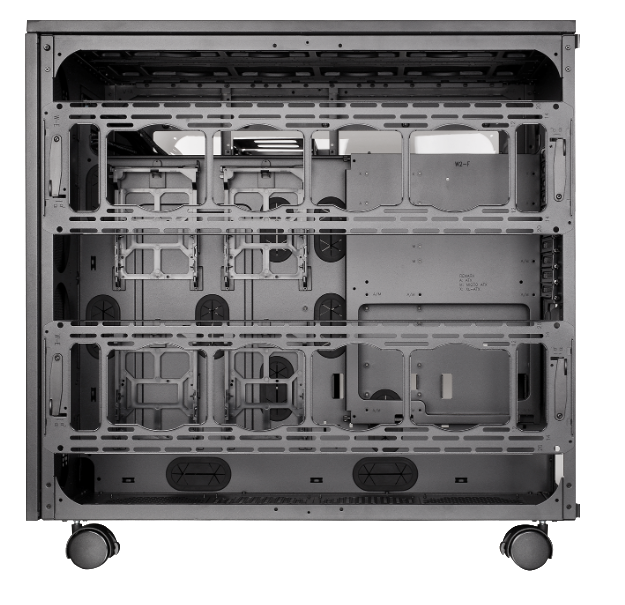
3 hours ago, Kitsan said:
Hi,
I did try google but maybe I was using the wrong terms, I was wondering if I could buy an additional 2x HDD cages to fix into this location:
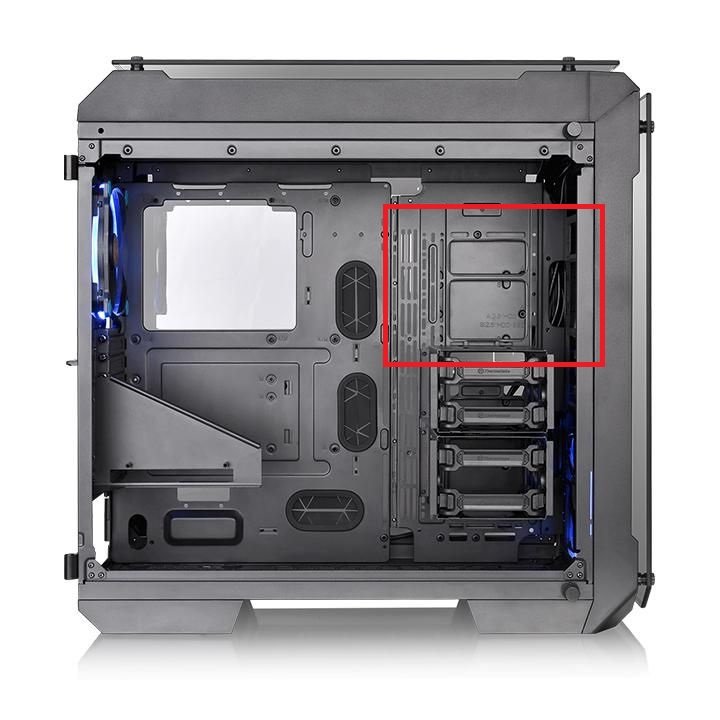
PM you! check the inbox
-
1 hour ago, MikoRoG said:
Hows it going? I'm trying to find some info on Vertically Mounting my GPU in my Level 20 HT and cant find anything anywhere. Does anyone know what bracket is used? Thermaltake does not have anything listed in there search bar. Might just have to 3D Print my own if I cant find anything but figured I'd ask here first.
Hello MikoRoG
unfortunately, we do not have bracket to support vertically mounting the GPU in Level 20 HT.
for the original design, there is only one way to mount the GPU-Horizontally.
if you would like to mount it vertically, you may have to 3D point by yourself.
But, i will forward your request to our R&D department to see if they could have a 3D file for that bracket and upload to our Thermaltake 3D Makers
https://3dmakers.thermaltake.com/
thank you for choosing Level 20 HT.
that is a HUGE and gorgeous chassis.
James
-
On 12/29/2019 at 2:08 AM, jujunet said:
Hello,
What about this issue ? Any solution/workaround ?
Hello
we did try to sync our control board and ASUS X570 series M/B, and it worked! our engineers are still testing right now to see if they could figure out the problem.
if there is any updates, i will get back to you all.
James
-
15 hours ago, JJShepp said:
Looking at the View 91 it looks like a W100 with glass panels. Is the similarity just cosmetic or is there compatibility between them. Could you mount a view 91 on a W100 pedestal base?
Hello JJShepp
you're right! View 91 and W100 share the same case body.
but i'm not sure what you mean by " Could you mount a view 91 on a W100 pedestal base? "
do you want to put View 91 on W100?
James
-
7 hours ago, Lococoyote said:
After a lot of research I decided no the View 31 for the vertical gpu and ability to mount more than two hard drives.
It is capable of three out of the box, with more mounting options under the mobo and from what I'm seeing possibly a second cage on top of the first.
I've emailed Thermaltake an received one response in three which was little more than sorry to take so long, with the others not responded to.
Anyone know how I can get more hard drive trays and maybe another cage?
Thanks
Message you!
-
9 hours ago, PCDesignerRy said:
Hi all,
I've ordered and am getting ready to build out of the W200 case by Thermaltake. This case comes with wheels and I was just wondering if anyone knows if the stock wheels can be replaced with a more aftermarket variant of wheels.
Thanks for Info!Hello PCDesignerRy
thanks for choosing Thermaltake chassis.
W200 is one of the best choice to build your own system! the internal space is HUGE!
and the wheels are removable.
James
-
Thermaltake Level 20 HT Full Tower Chassis
URL:
Level 20 HT: https://www.thermaltake.com/level-20-ht-chassis.html
Level 20 HT Snow Edition: https://www.thermaltake.com/level-20-ht-snow-chassis.html
Thermaltake Level 20 HT Full Tower Chassis
Distinctive from most cases on the market, the Level 20 HT full tower chassis is specially constructed to continue the legend of the Level 20 series case family. It features four durable 4mm thick tempered glass windows, two preinstalled 140mm standard fans on the top, and is designed with outstanding system ventilation. The chassis is a premium choice that inhabits a vertical mount design and expansion capabilities for massive custom liquid-cooled systems. The Level 20 HT takes our latest case innovations and wraps them in an ultra-modern style that’s utterly unique in the case market today. Stand out from the crowd with the Level 20 HT.
Tempered Glass Window With Ultimate Viewing Angles
The Level 20 HT comes with four tempered glass panels at the front, top and both sides which make it easy to display the internal components. For the front and top tempered glass panels, users can easily unlock by pressing down the locking mechanism located on the top part of the glass, allowing quick and easy access. The left and right hinged doors are also equipped with a smart lock security system allowing you to easily secure the inner components of your case.
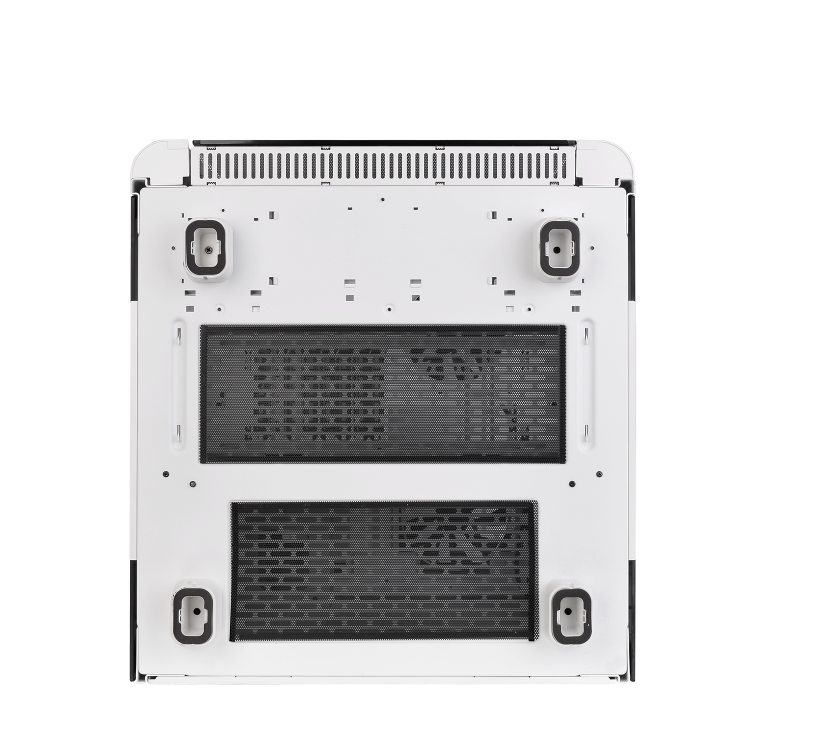
Dust Reduction
Well-designed quick removal magnetic fan filters on the back and at the base provide excellent dust protection and dirt reduction, ensuring a dust-free environment.
#For more features & details, kindly visit our official website
Let us know what you think about our brand new model- Level 20 HT
-
1 hour ago, Belezeebub said:
I wasn't planning on changing my case but I found out today that the Motherboard I want is XL-ATX Form Factor; 32.5cm x 27.5cm
Before I plop down for a new case anyone tell me if "The Tower 900" supports this new form factor I can find very few cases listing XL-ATX.Hello Belezeebub
for XL-ATX M/B, there are only three cases for View 91/W100/W200.
Tower 900 cannot fit this M/B
-
On 11/7/2019 at 3:02 PM, RoundGraf said:
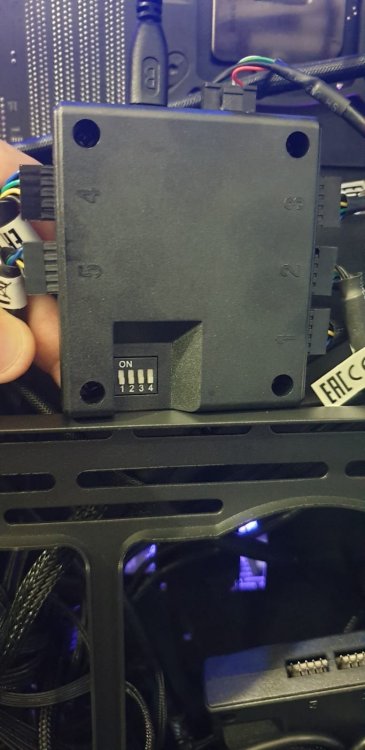
Hi. I bought the Thermaltake Level 20 GT ARGB a week ago, and I can't get the front case fans to sync with the Asus x570 Rog Strix E motherboard. The front fans are connected to the control board in slot 1, and 2. The reset connector is plugged in, along with the rear fan, the SATA power connector is also plugged in, and the 5V plug going to the 5V RGB addressable header on the motherboard. I hold down the RGB button on the case for 3 seconds and all I get is 1/2 of the fan illuminated on top, and the bottom fan is completely dark. If I press the RGB button again on the case, both fans are fully illuminated and work fine. It just acts odd when being controlled via Aura Sync. I had another board sent out from TT but same thing. What am I doing wrong??

Hello,
for the control board, there should've a jumper for Fan 3. like the pic below.
and to sync with the M/B, have you tried to press the RGB button for 3 seconds? the fans will blink in RED and then should be okay for M/B sync.
and our engineer will test the ARGB control board with ASUS X570 M/B to see if there is any problem to sync.
-
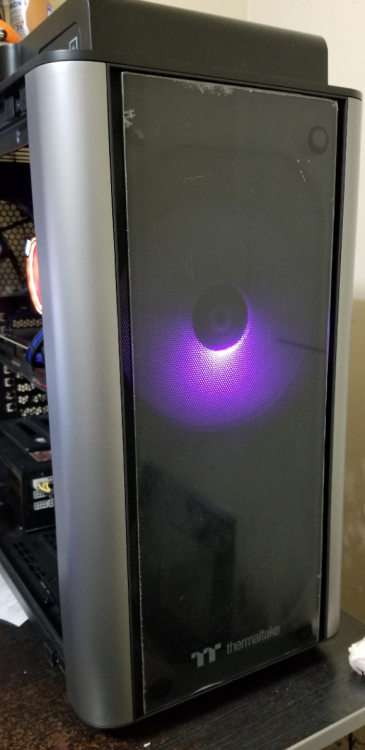
6 hours ago, SickMunkey said:
So we made a build yesterday and the fans in front worked fine. Well after about 20 mins we noticed the top fan on front of the case is not working. We are having trouble figuring out why this fan isnt working. Any ideas?
Hello SickMunkey
Do you mind take a picture for the control board?
thank you
-

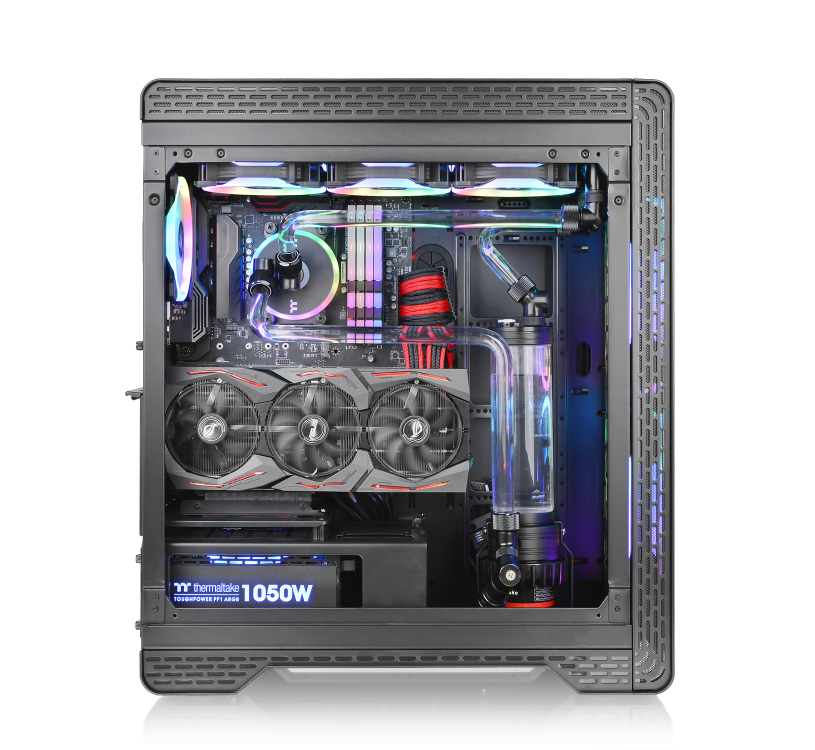
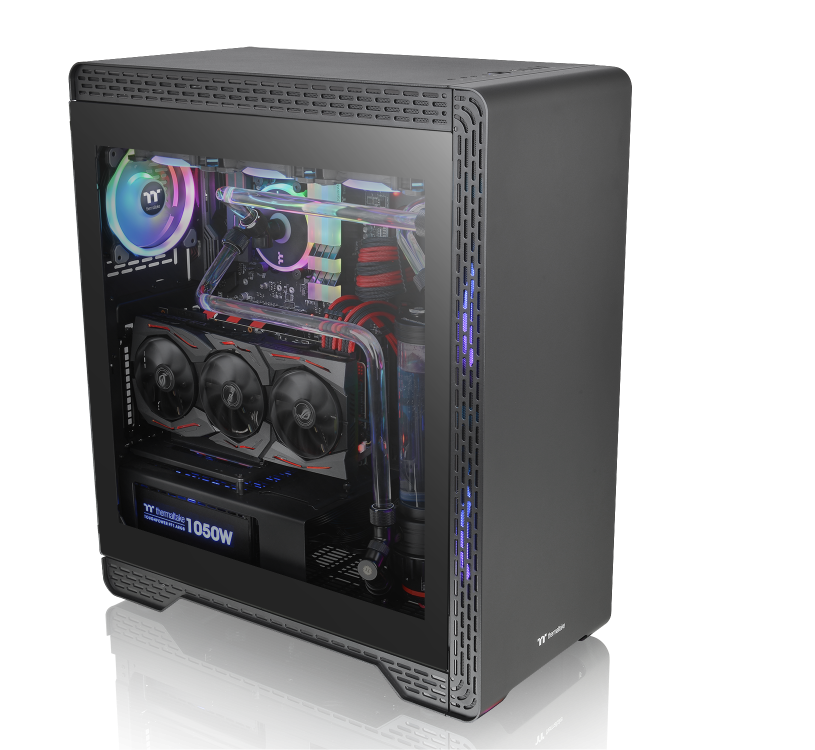
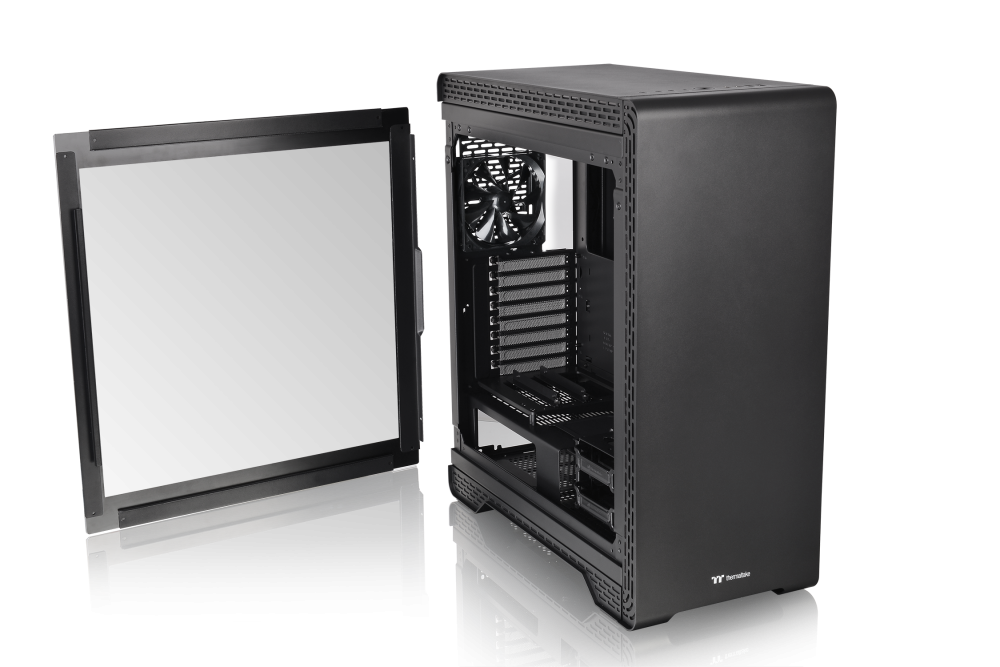
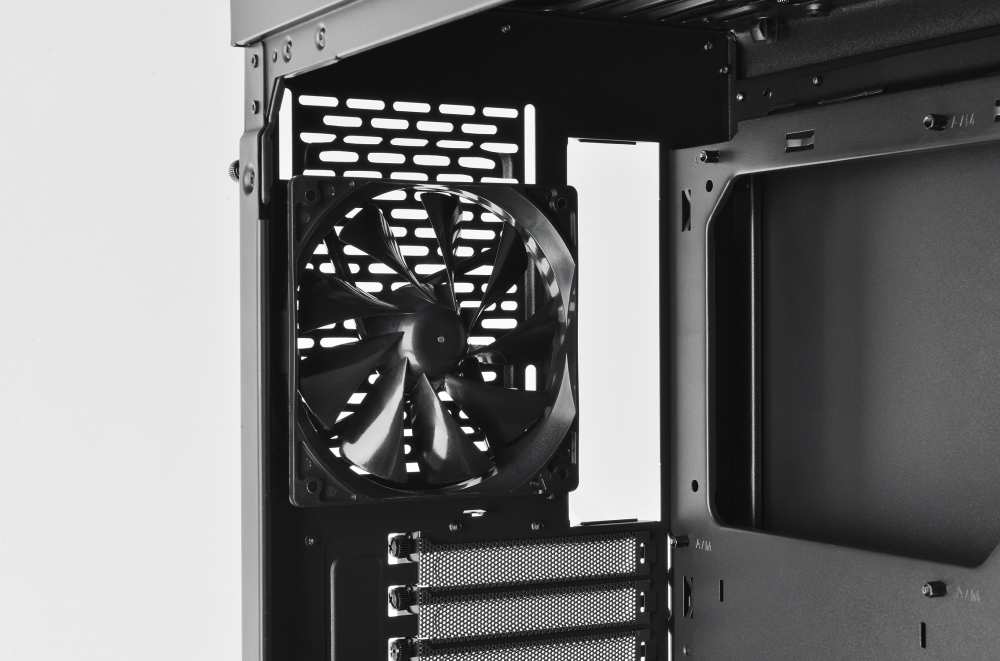
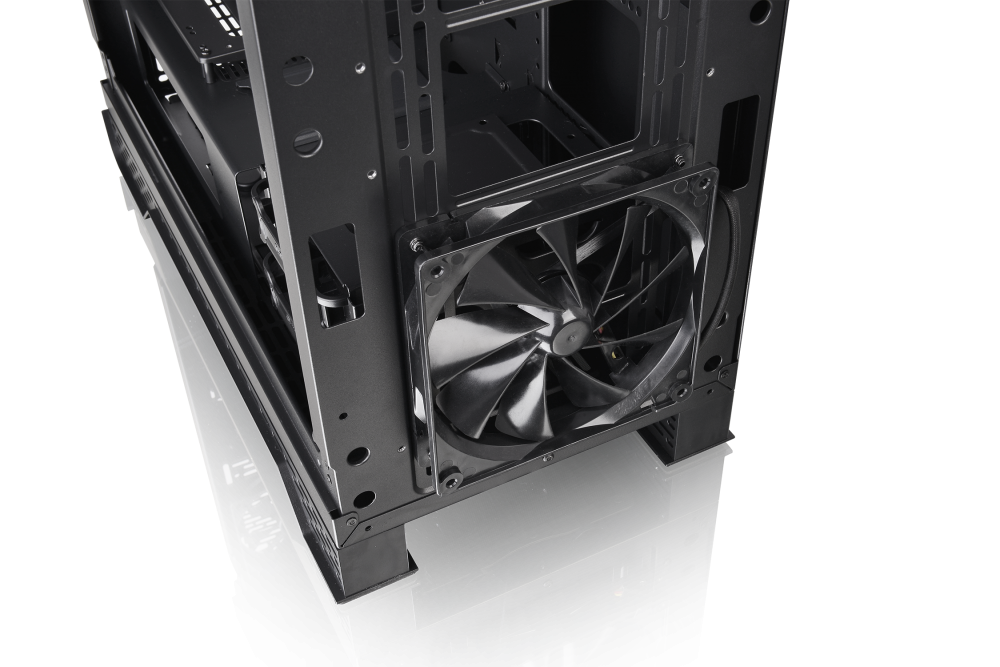
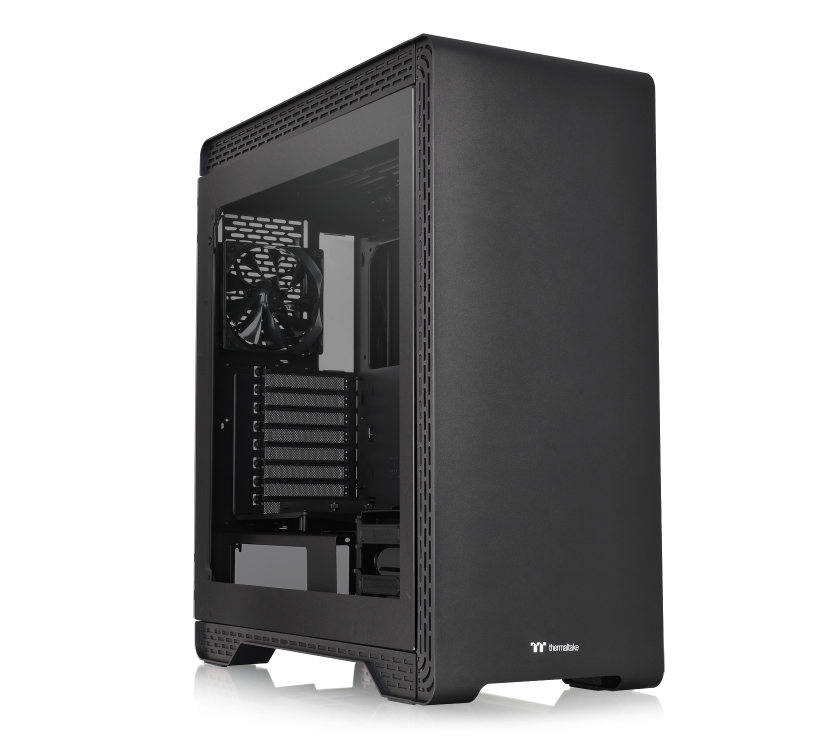
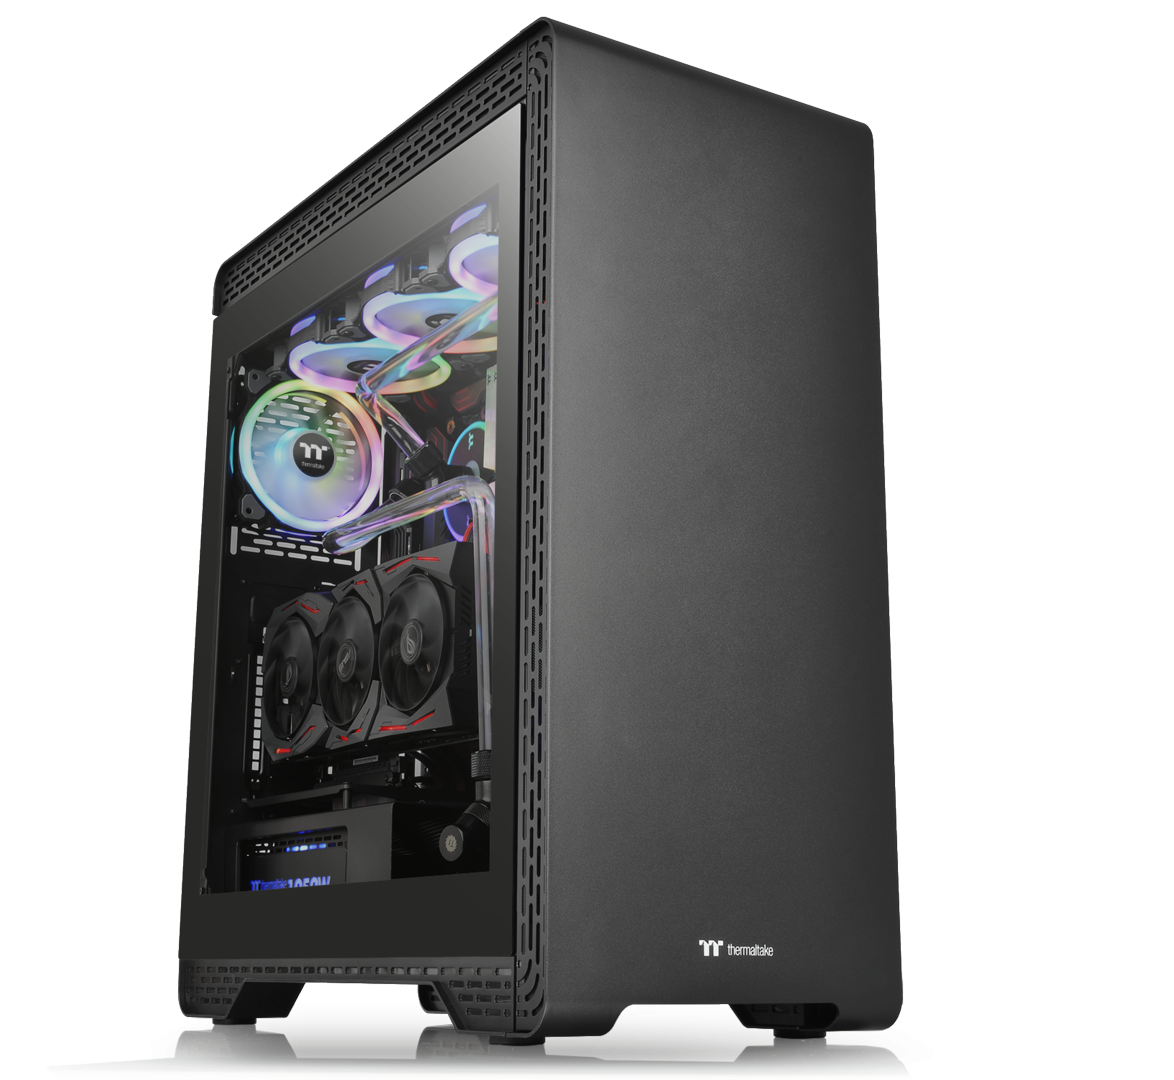
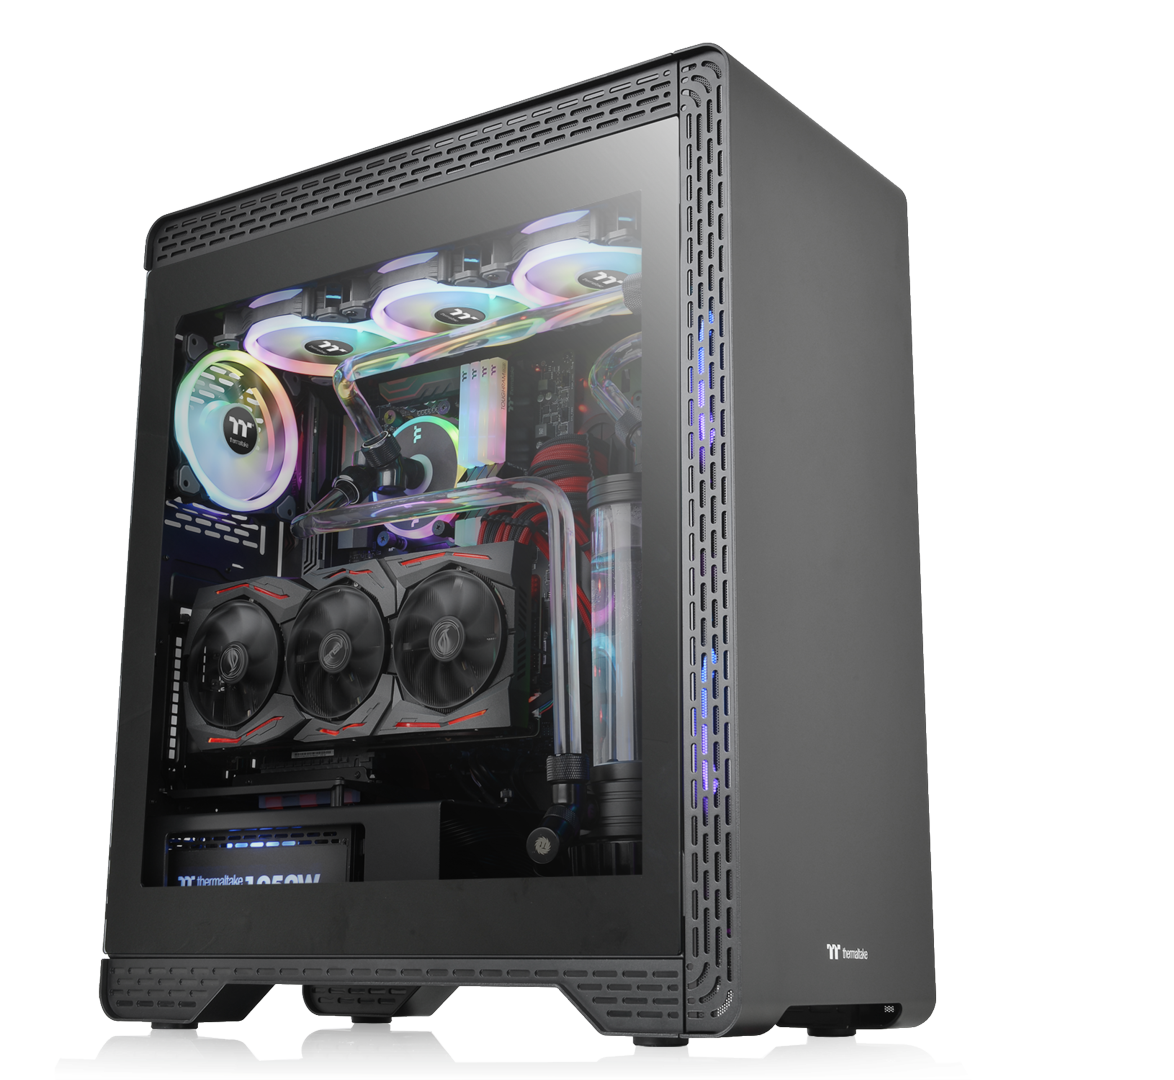
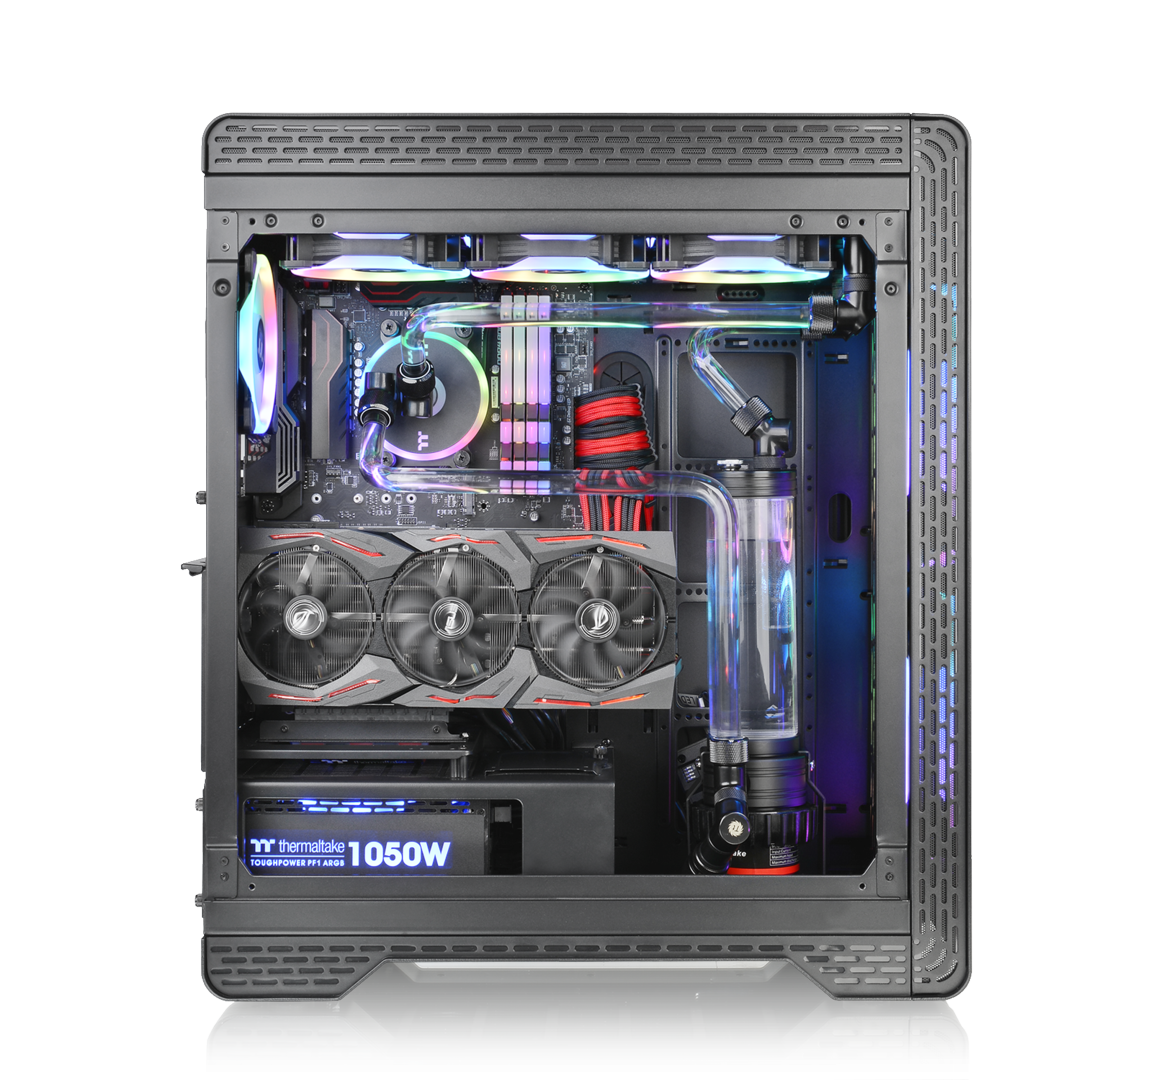
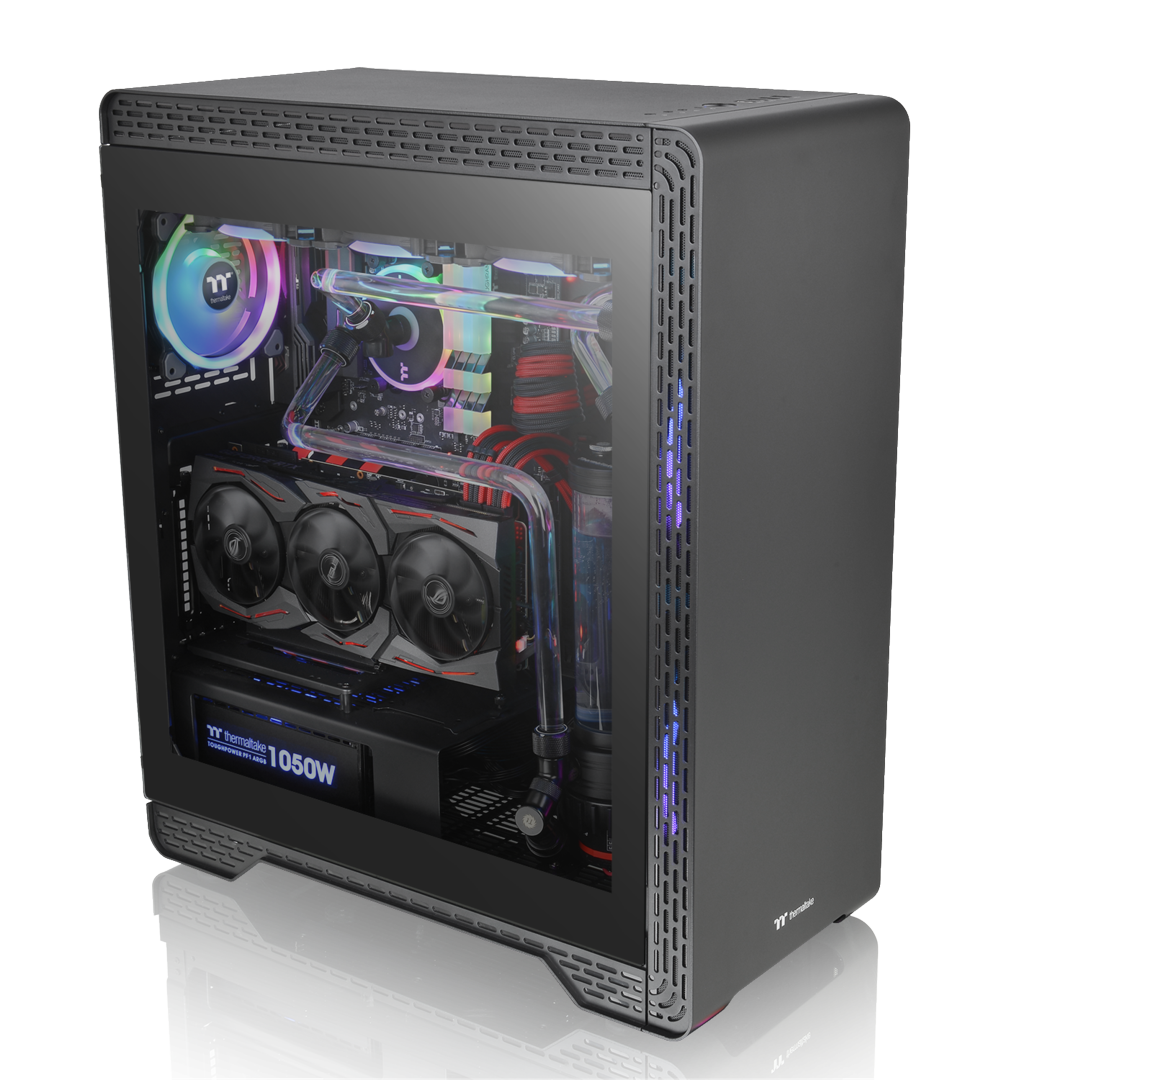
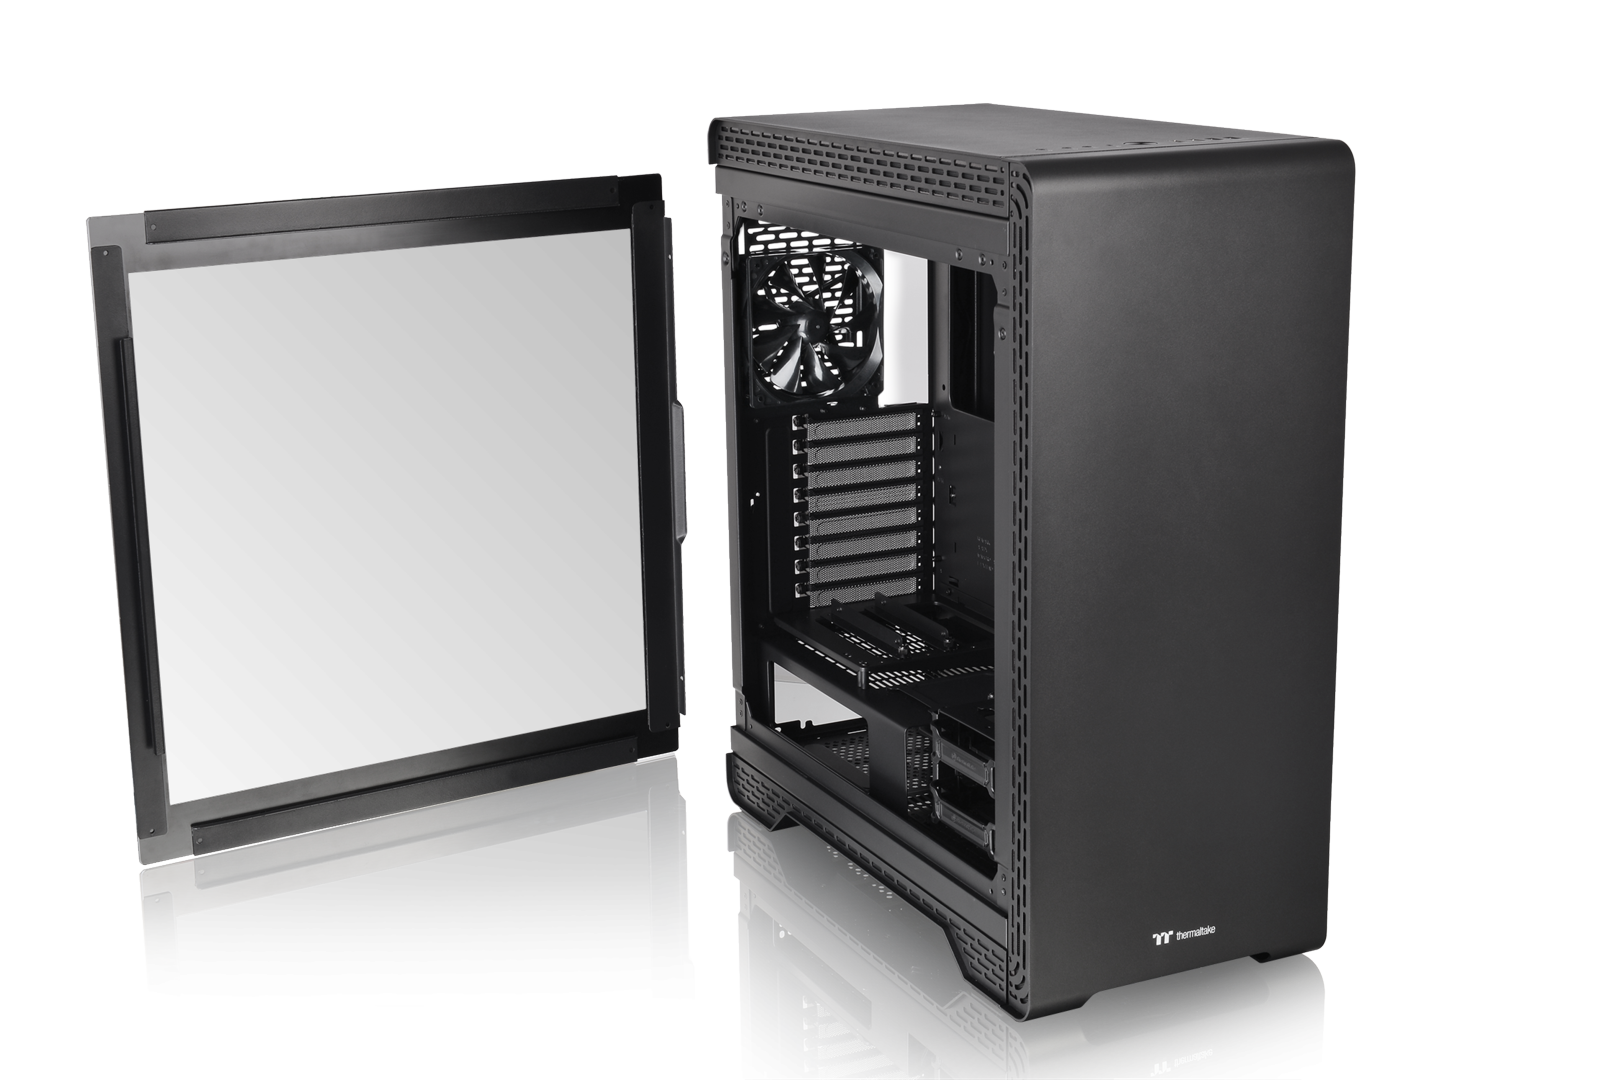
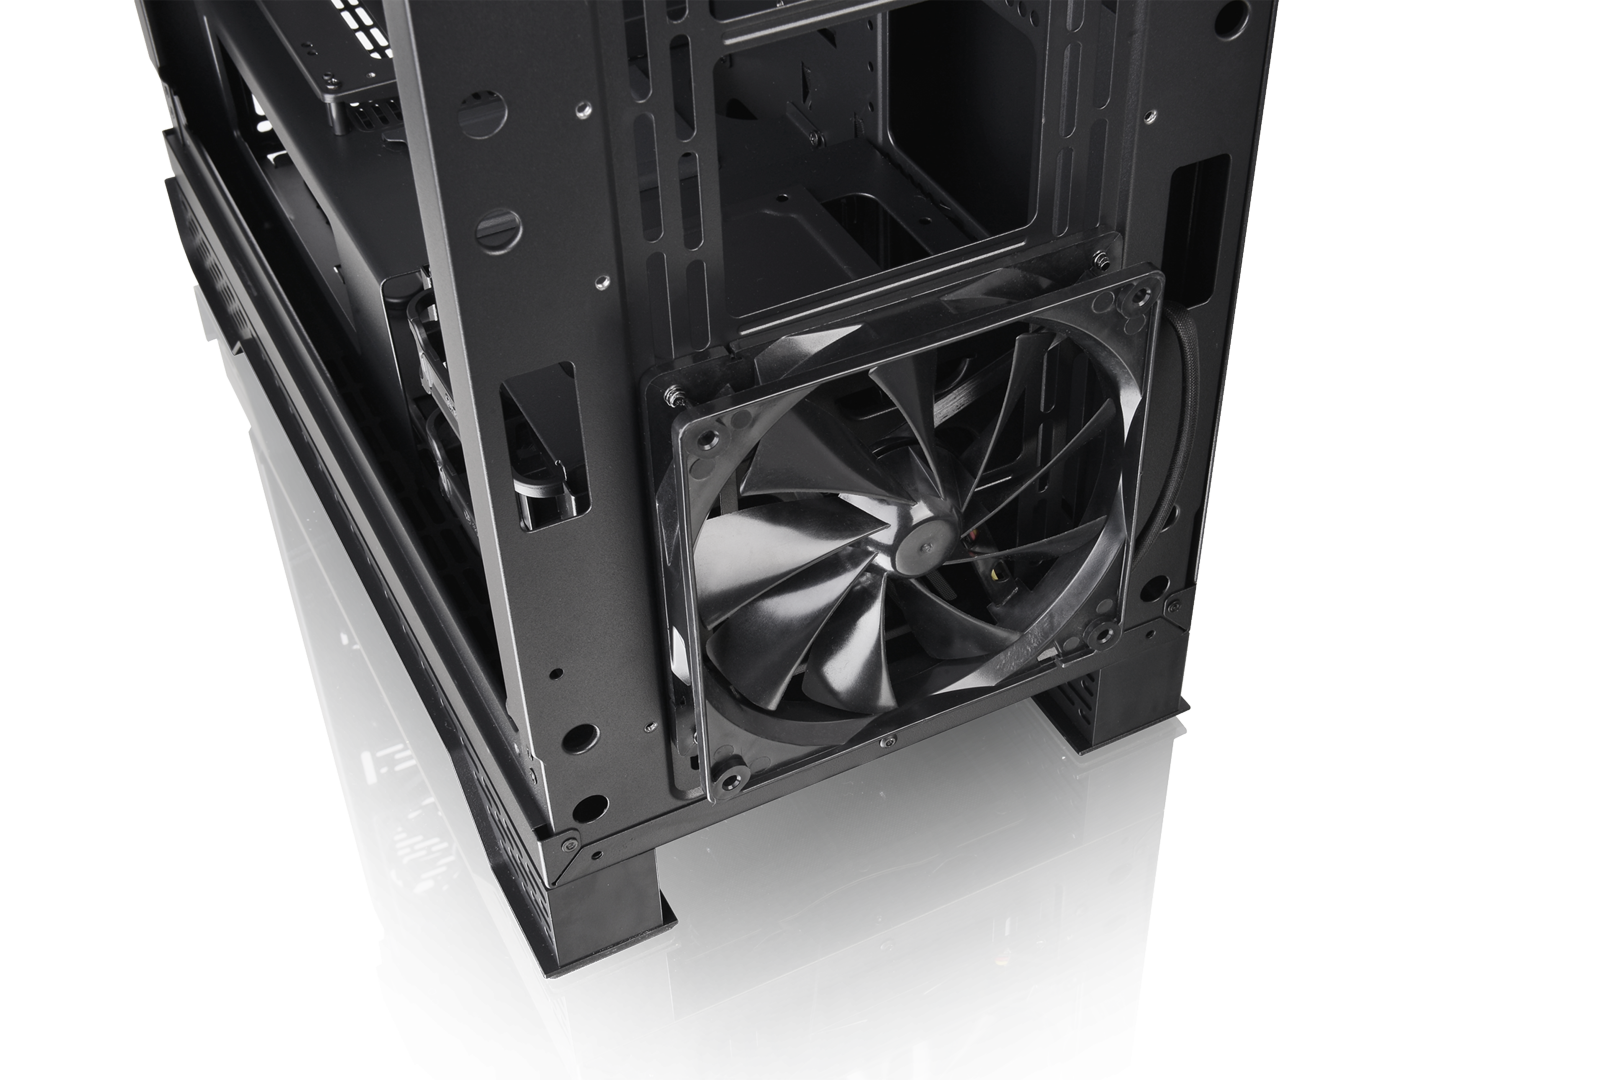
S500 TG Mid-tower case comes with one tempered glass panel on the left, one pre-installed 140mm front fan and one 120mm rear fan, supporting motherboards up to ATX.
MSRP: USD $99.99
URL:https://www.thermaltake.com/s500-tg-mid-tower.html
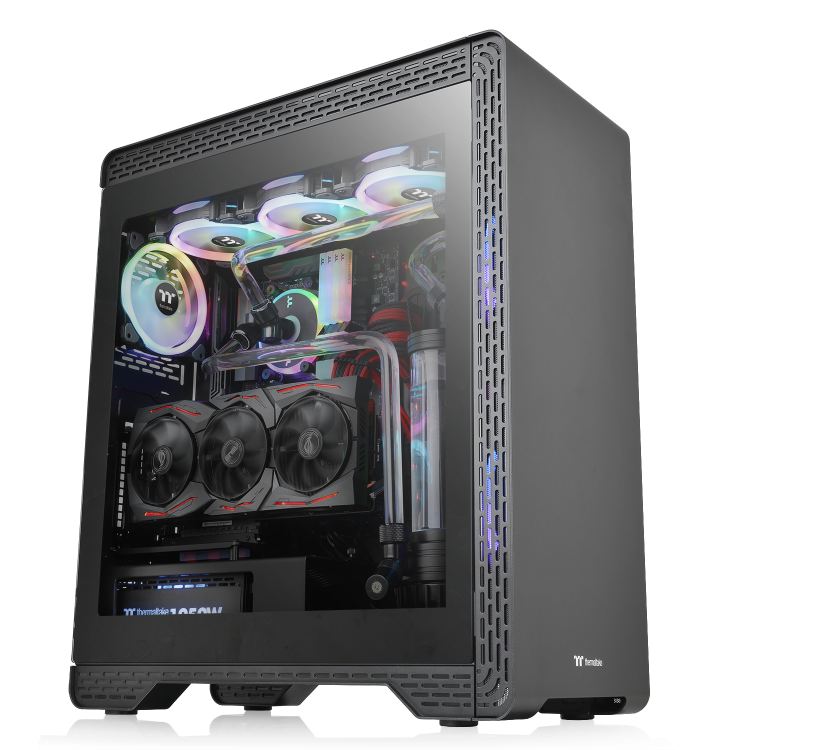
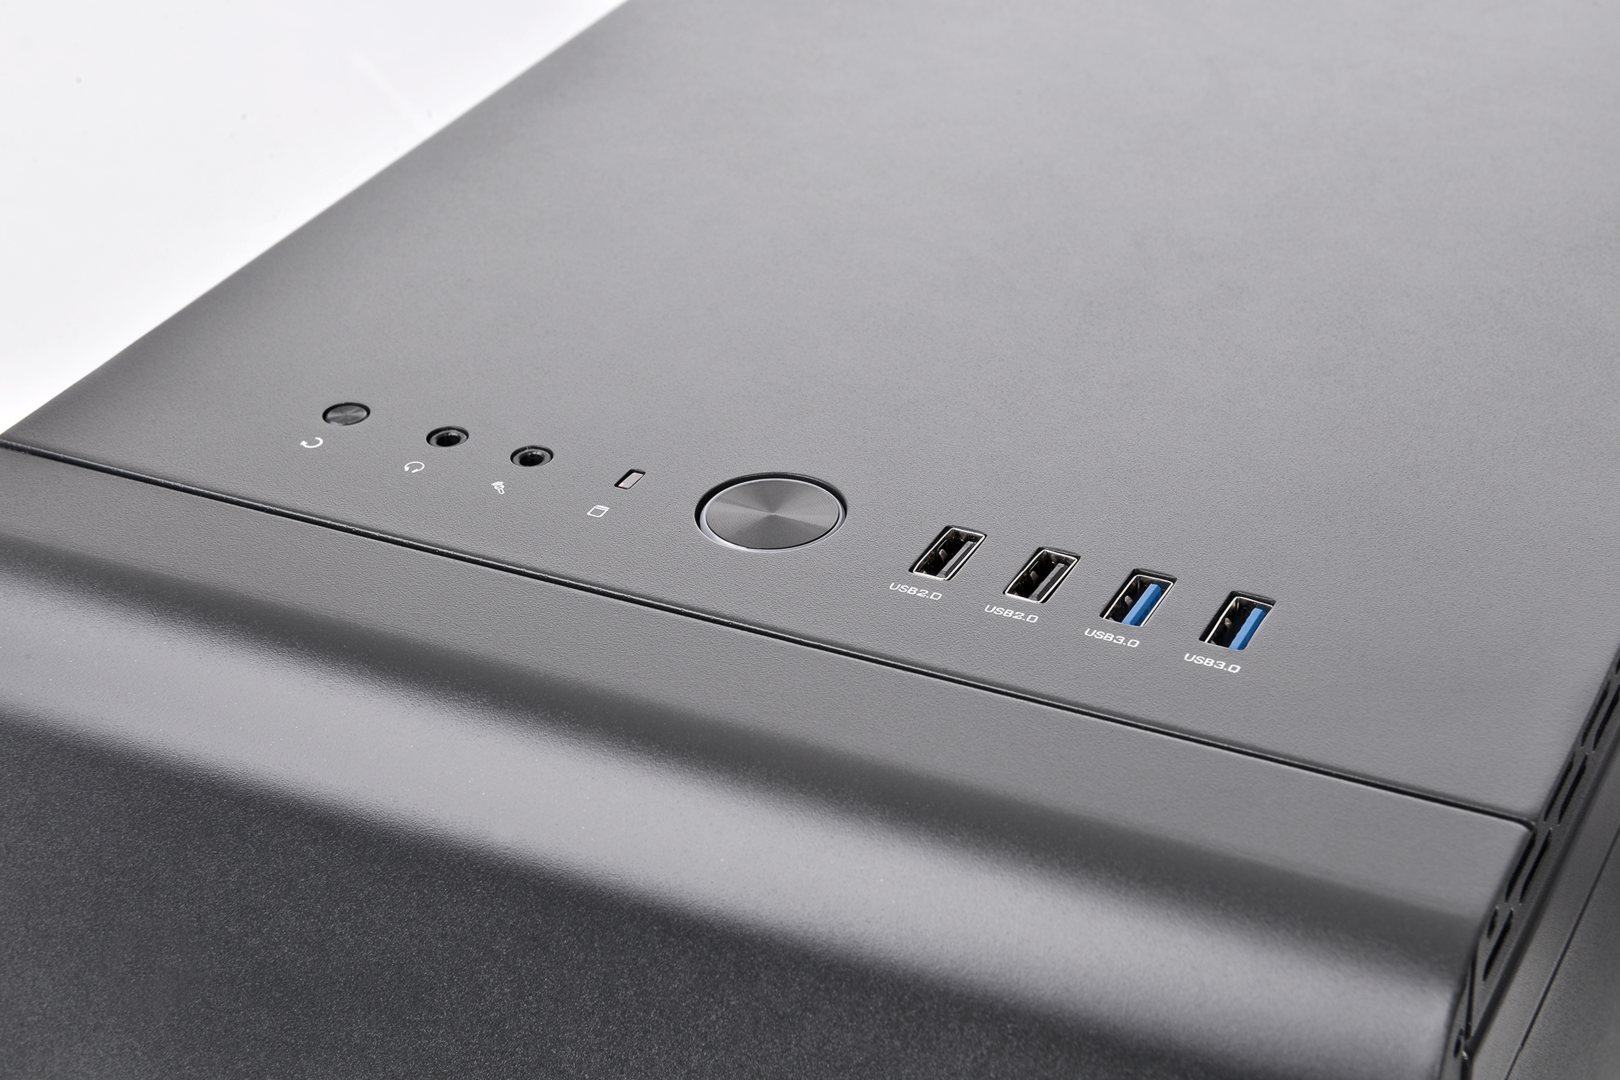
Thermaltake S500 Tempered Glass Edition Mid Tower Chassis
S500 Tempered Glass Edition mid-tower chassis combines sophistication and elegance and is all built with a modern Steel case construction. The S500 is manufactured with one Tempered glass side panel. Two preinstalled standard fans, 140mm at the front and 120mm at the rear to enable outstanding ventilation. S500 TG incorporates a full modular design, vertical radiator & GPU mount, Patented Rotational PCI-E slots, and the support for 200mm fans. The flexibility is limitless for high-end components.
For storage this case has four drive trays with modular drive racks, delivering advanced storage capacity and great liquid cooling expansion. S500 TG is a great fit for users who are looking for a modern and stylish chassis.


.jpeg.c3ae62c6a1c758d7161c9620ab1f5ca4.jpeg)

.jpeg.a33613fb0ccc22010252bc10c310af5b.jpeg)
.jpeg.938ac909a86dd144b87387bd2a085838.jpeg)


Thermaltake Core X71 spare parts where to buy?
in Chassis
Posted
Chk inbox!