-
Forum Statistics
93.2k
Total Topics114.3k
Total Posts -
Member Statistics
173,078
Total Members16,800
Most Online

SIA Tech Mods
-
Posts
45 -
Joined
-
Last visited
-
Days Won
3
Recent Profile Visitors
12,103 profile views


.thumb.jpg.ee1fab68c539773c37a7d534a6464f56.jpg)


SIA Tech Mods's Achievements
Just Getting Started (2/10)
6
Reputation
-
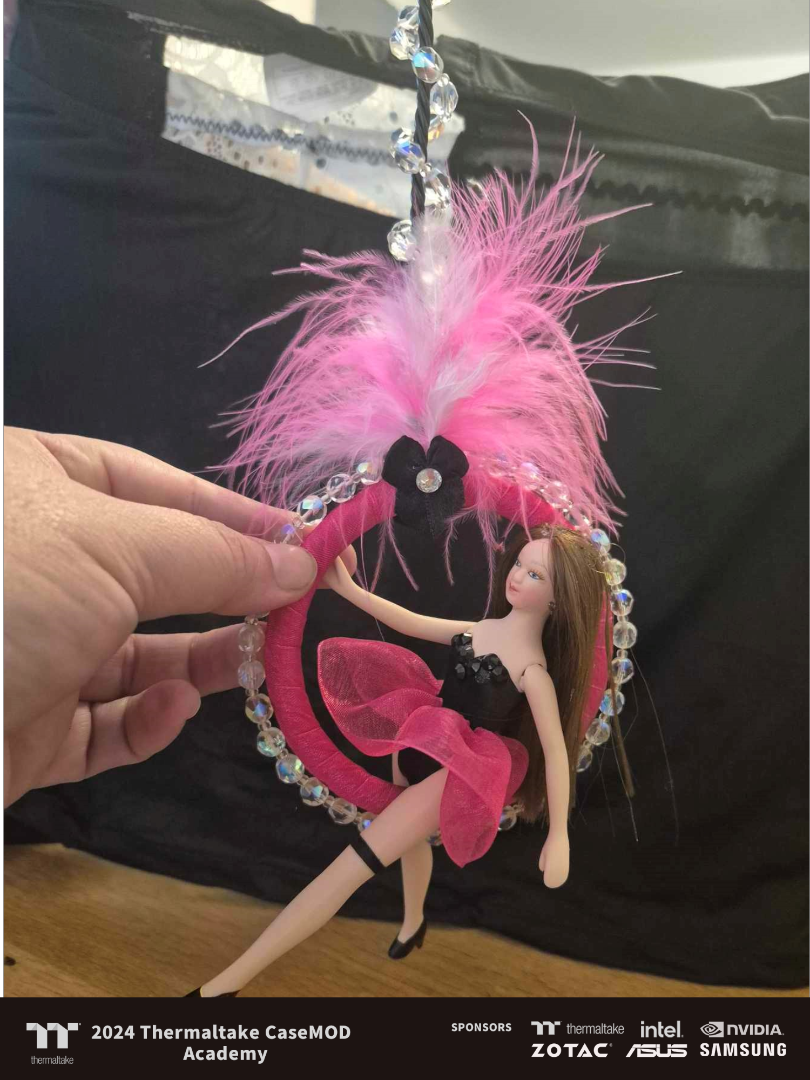
You're not wrong, you did an amazing job on the layout and the design as a whole, but still, don't be so naive, you need to talk about the double stitching. how you created the dresses from all the bits, that to me was all useless and I couldn't see where you was heading with it all, not forgetting the spinning hoop with the doll sat on it too, how you changed the power delivery for the motor that it runs on to use USB. The doll that's stood on the stage near the GPU, that is just something else you made out of nothing. They/We want all the details from you.
-
 Congrats guys. 😁
 -
 SIA Tech Mods reacted to a post in a topic:
2024 Thermaltake RAM MOD Invitational Season 1 Winner Announcement
SIA Tech Mods reacted to a post in a topic:
2024 Thermaltake RAM MOD Invitational Season 1 Winner Announcement
-
RVFER reacted to a post in a topic:
NERDS & NOOBS
-
The last few bits of work have been taking place, once I get the photos sent to me I'll get them all posted here. The rig is looking amazing though, I have nothing to teach here anymore, it's been a journey, an experience I won't forget, some stress, lots of laughs and a couple of minor injuries and mishaps but would I do it again... Without a doubt! Never in a million years could I of ever thought I'd of been entering a modding competition as a teacher and more so with my cousin, Cheryl, it was never anything I saw her taking interest in despite her inquisitive mind, I originally asked one of her sons but he wasn't too interested, Cheryl, however was very interested, kept asking me practically every time we spoke and it took me a couple of weeks to realise the perfect candite was indeed Cheryl, at that point I obviously took her up on her request and it's been a pleasure. Big thanks to all the sponsors for making this possible and for the memories they've helped create.

- 18 replies
-
- 1
-
-
- scan computers
- thrustmaster
- (and 7 more)
-
Some outstanding work cut by Praetex Design here! Been looking forward to this piece and it will soon be in our hands... (I'm scared to get finger prints on it though. 😅 ) Today Cheryl has been busy making a pole for a motor that will soon be fitted, this bad boy motor can do a whole 2rpm... But is perfect for the dancer, we'll have pictures of progress tomorrow once its fitted along with a couple of other touches.

-
We have a building, wonder what could be in store? 😅😉 A little more detailing but this is looking mighty fine for the entrance, I love the fact that Cheryl has been creative with this build... but seriously who'd of thought to use metal straws! However they do the job fine and look amazing once fitted!. There is actually so so much attention to detail with this themed build, anyone who knows the movie will know what I mean and for those that are like me and haven't a clue, Cheryl will be coming along to share ALL these details, such as the way the letting is spaced out, things come in odd numbers... it does get interesting and gives you more to look for!


-
Final Voting Starts Now!
SIA Tech Mods replied to TT Kristine's topic in 2024 Thermaltake RAM MOD Invitational Season 1
Much appreciated. Mind me asking what you took into account? -
SIA Tech Mods reacted to a post in a topic:
Final Voting Starts Now!
-
SIA Tech Mods reacted to a post in a topic:
Final Voting Starts Now!
-
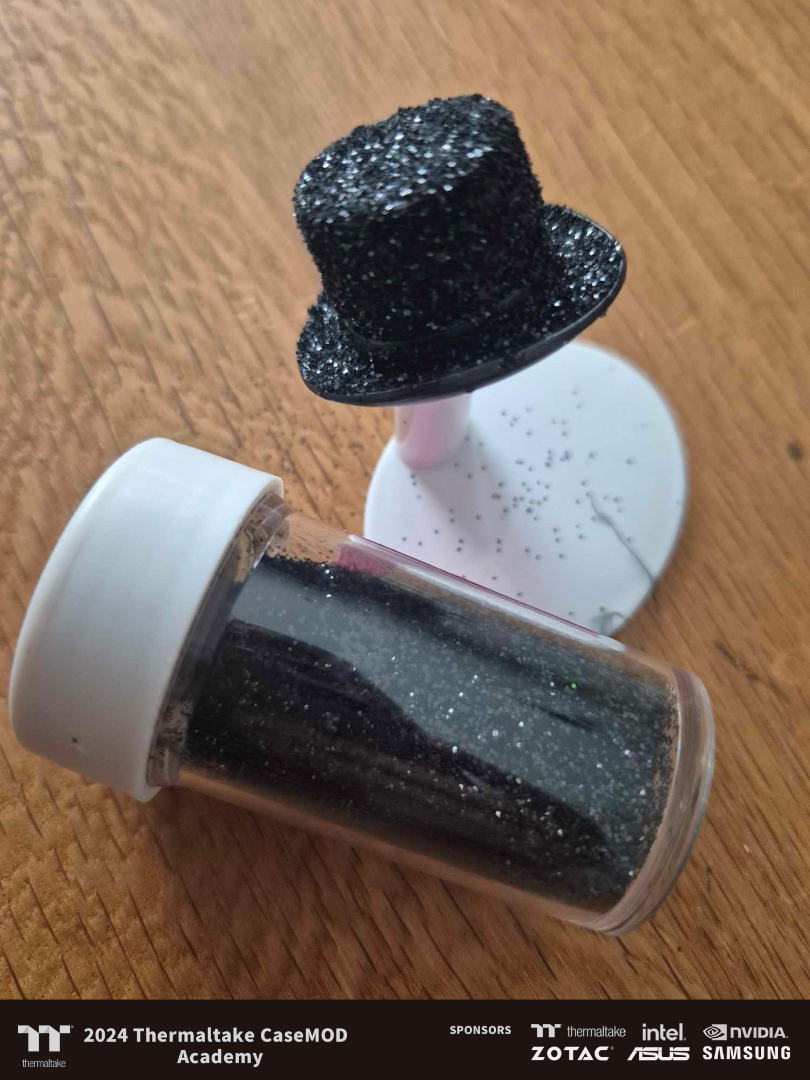
Some fine needle work here along with some lettering 'Burlesque' that has been hand painted by Cheryl and of course fronted with some gold glitter! I personally love that touch, it reminded me of the days when I first started modding. We've had a couple of setbacks over the past week and not much has been done but not once did Cheryl give up, she has also used up over 8 meters of tubing... around half of it on one area but once I get chance to go to hers we'll be filling the loop, I'll update with some newer photos and I'm sure you'll see where half of the tubing went but she didn't quit on the run until she was happy. Cheryl has a very creative mind and it's great to see her being let loose on the modding scene along with some great backing from our sponsors she's turning out one heck of a show for you!


-
SIA Tech Mods reacted to a post in a topic:
NERDS & NOOBS
-
Cheryl is busy making the curtains to frame the stage otherwise known as the chassis, this will go over the acrylic window that we have sent over to Praetex Designs. The time Cheryl is putting into these parts is inspirational for all, she is showing true dedication that is great to see, more than once she's even spoke about her next mod! It's good to hear her being so enthusiastic, quite a natural on our hands here, she know's what needs doing and gets on with it.


-
RVFER reacted to a post in a topic:
[United Kingdom] Michael Dexter
-
RVFER reacted to a post in a topic:
[United Kingdom] Michael Dexter
-
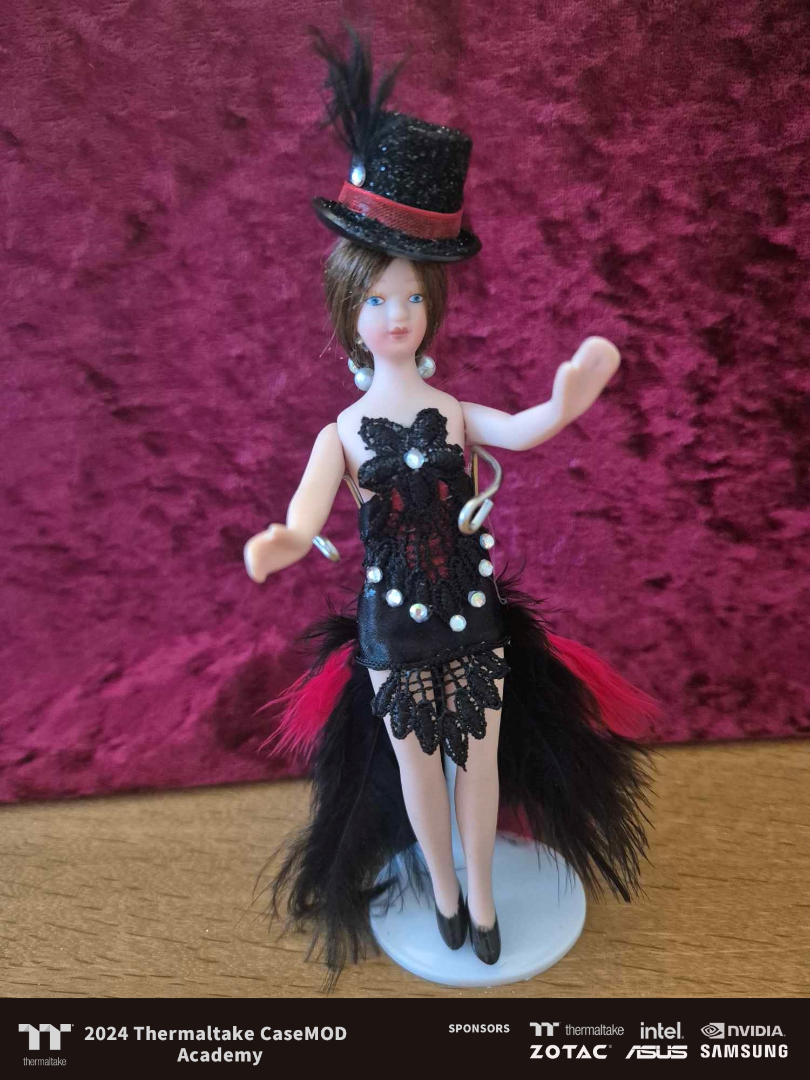
It's starting to look a lot like Christm.... nooo, that's not right, It's starting to look a lot like things are coming together, Cheryl has done a great job building her vision from what I called a bunch of dolls, they certainly do look the part now! I know I keep saying it but I am loving how this is turning out, there's so much to look at already and anyone who knows anything about the theme will have lots of details to look out for... Apparently odd numbers is one of them so we present 3 dancers.


-
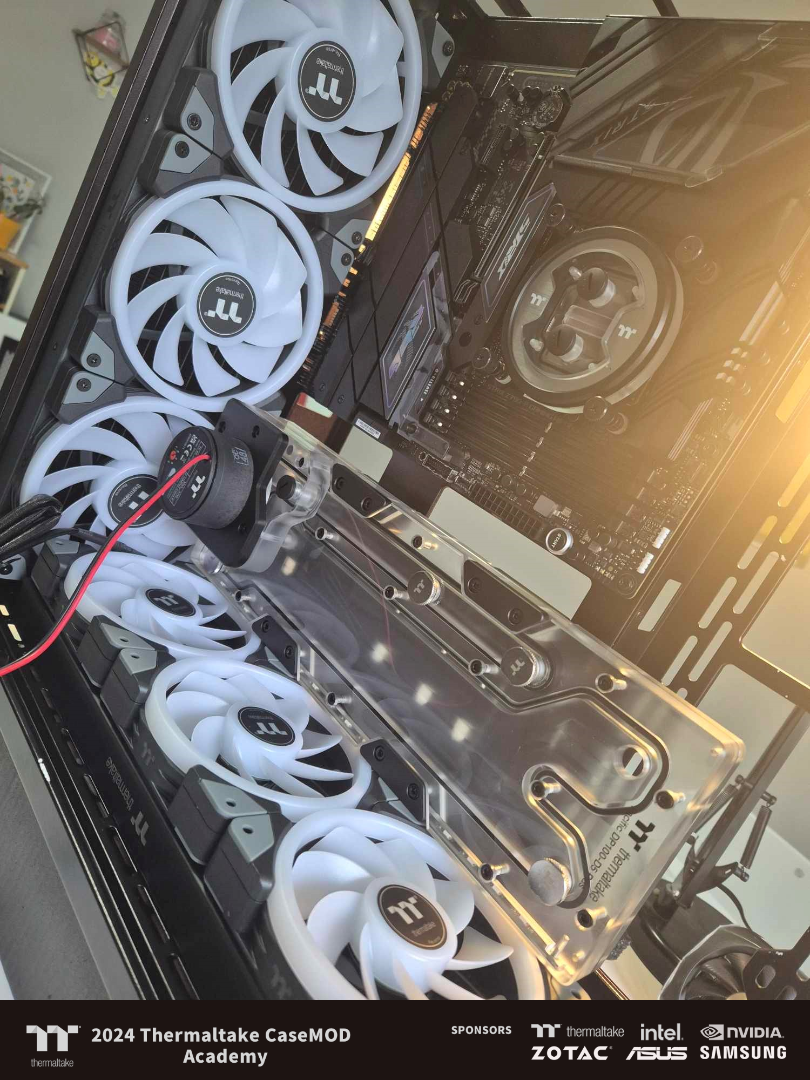
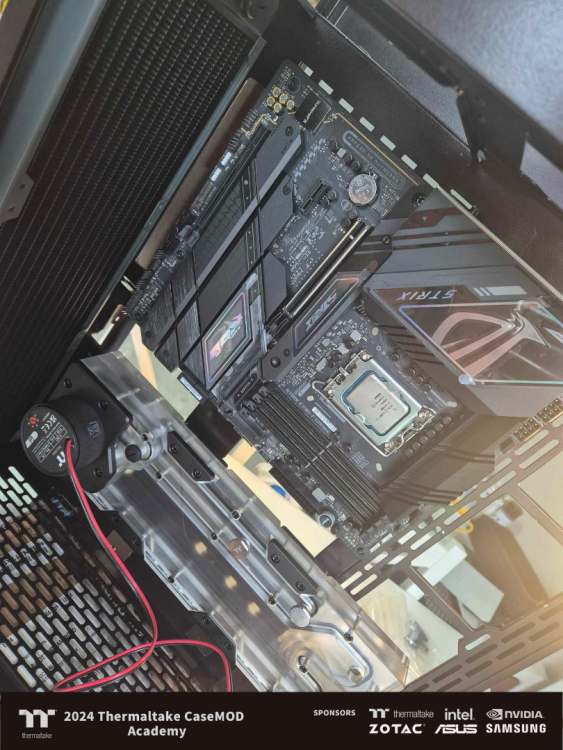
Offt Cheryl has been at it again and decided on a slightly different placement for the GPU, despite having to now rethink the loop order and parts, as it stands she may not be able to use all 3 rads but knowing Cheryl she will find a way! Nonetheless I'm much liking this layout more than any other she's conjured, the case looks so much fuller and the loop layout will be easier for her this way too which is all well and good as she wants to be creative with the tubing, I feel she may 'meet her maker' with some of the ideas she has for tubing but they can be simplified too, we'll just see how she handles it and we have plenty of tubing, 8 meters to be exact so there's plenty for trial and error. I did try get a video of the work she's done today but I didn't realise how low my battery was, so we recorded very little, there will be more progress tomorrow and I'll be going with a full charge on my phone. Hoping to move on to some of the tubing tomorrow as Cheryl doesn't really want to start with any of the extra parts she is putting in until it's basically in working order, she's having a hard time visualising what she can do exactly and where which is perfectly fine, she's never looked into a PC before let alone built one and modded it! She's doing great though and even gave me a tip or two along the way. She's such a pleasure to work with and teach.

-
SIA Tech Mods reacted to a post in a topic:
Final Voting Starts Now!
-
SIA Tech Mods reacted to a post in a topic:
Final Voting Starts Now!
-
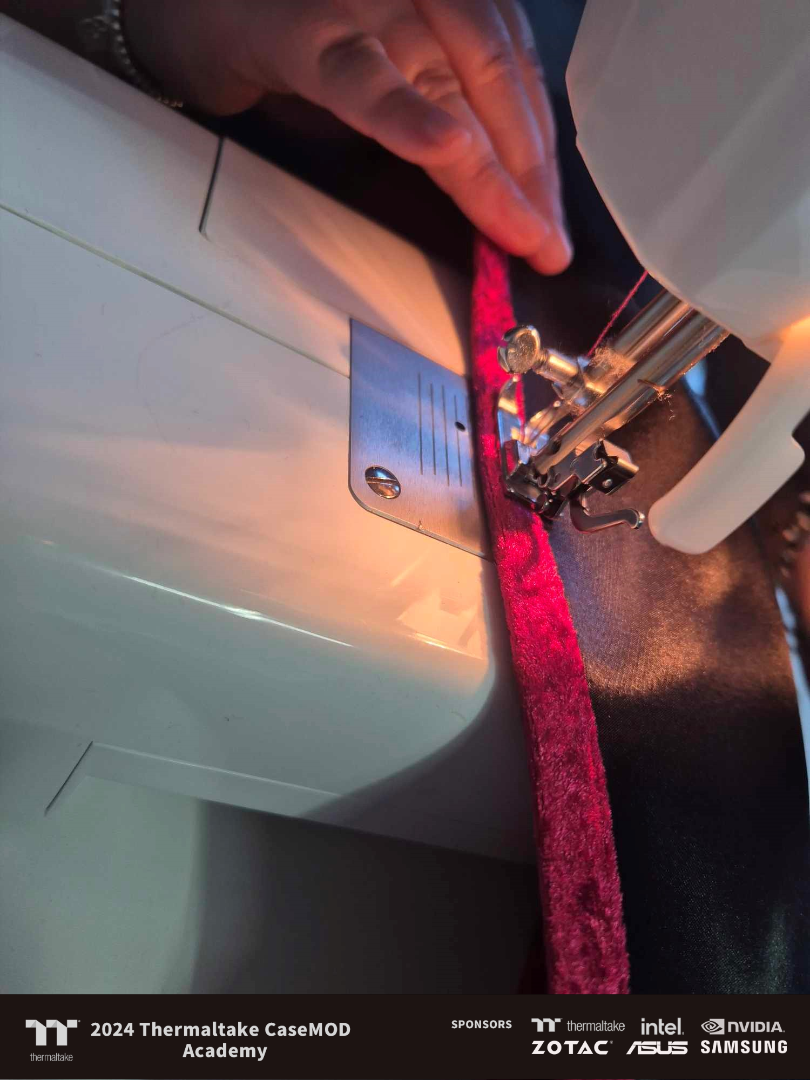
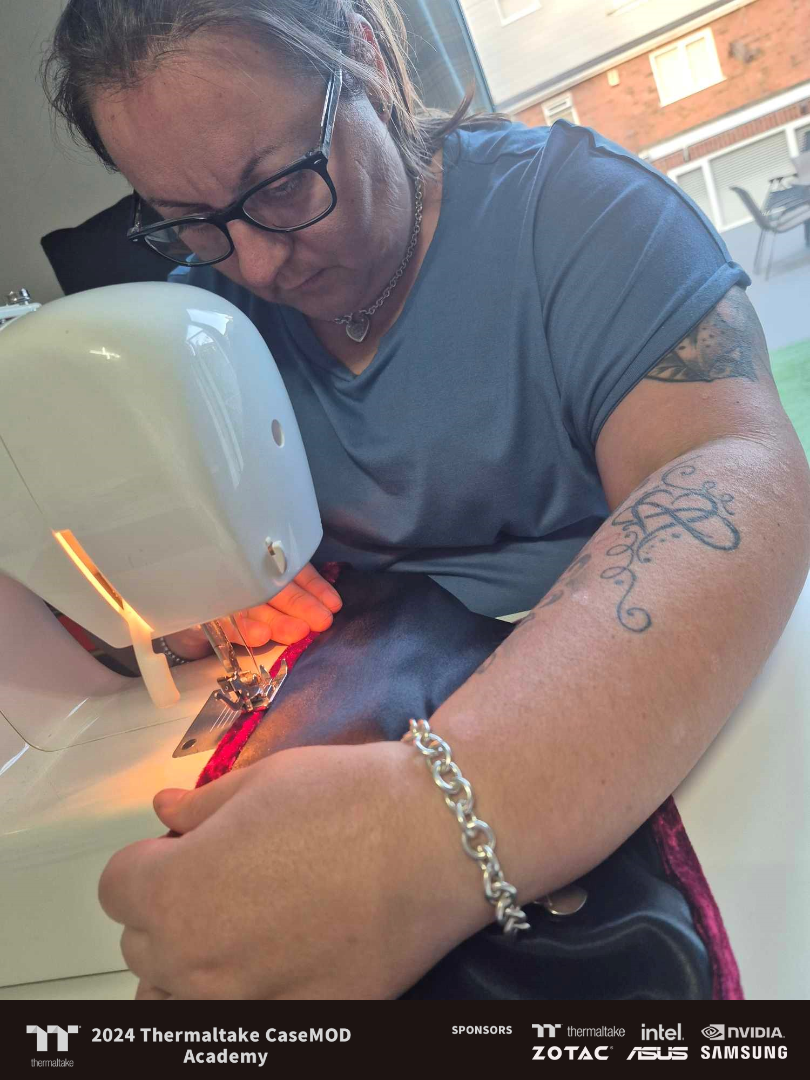
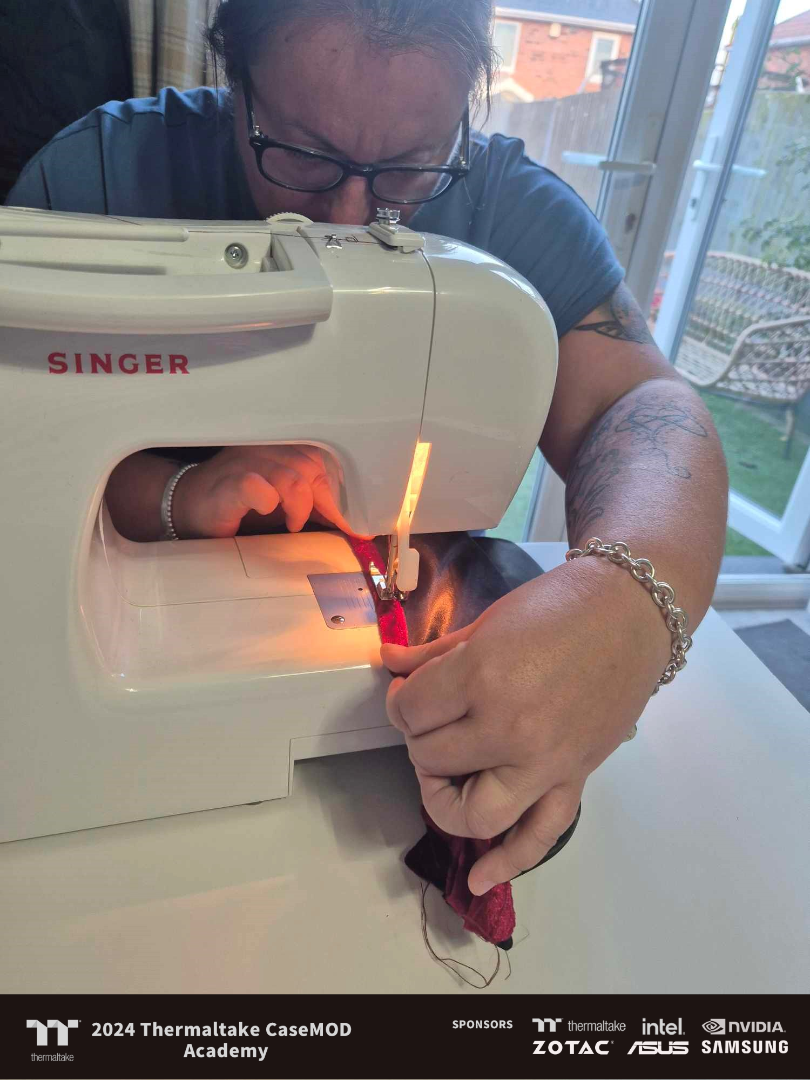
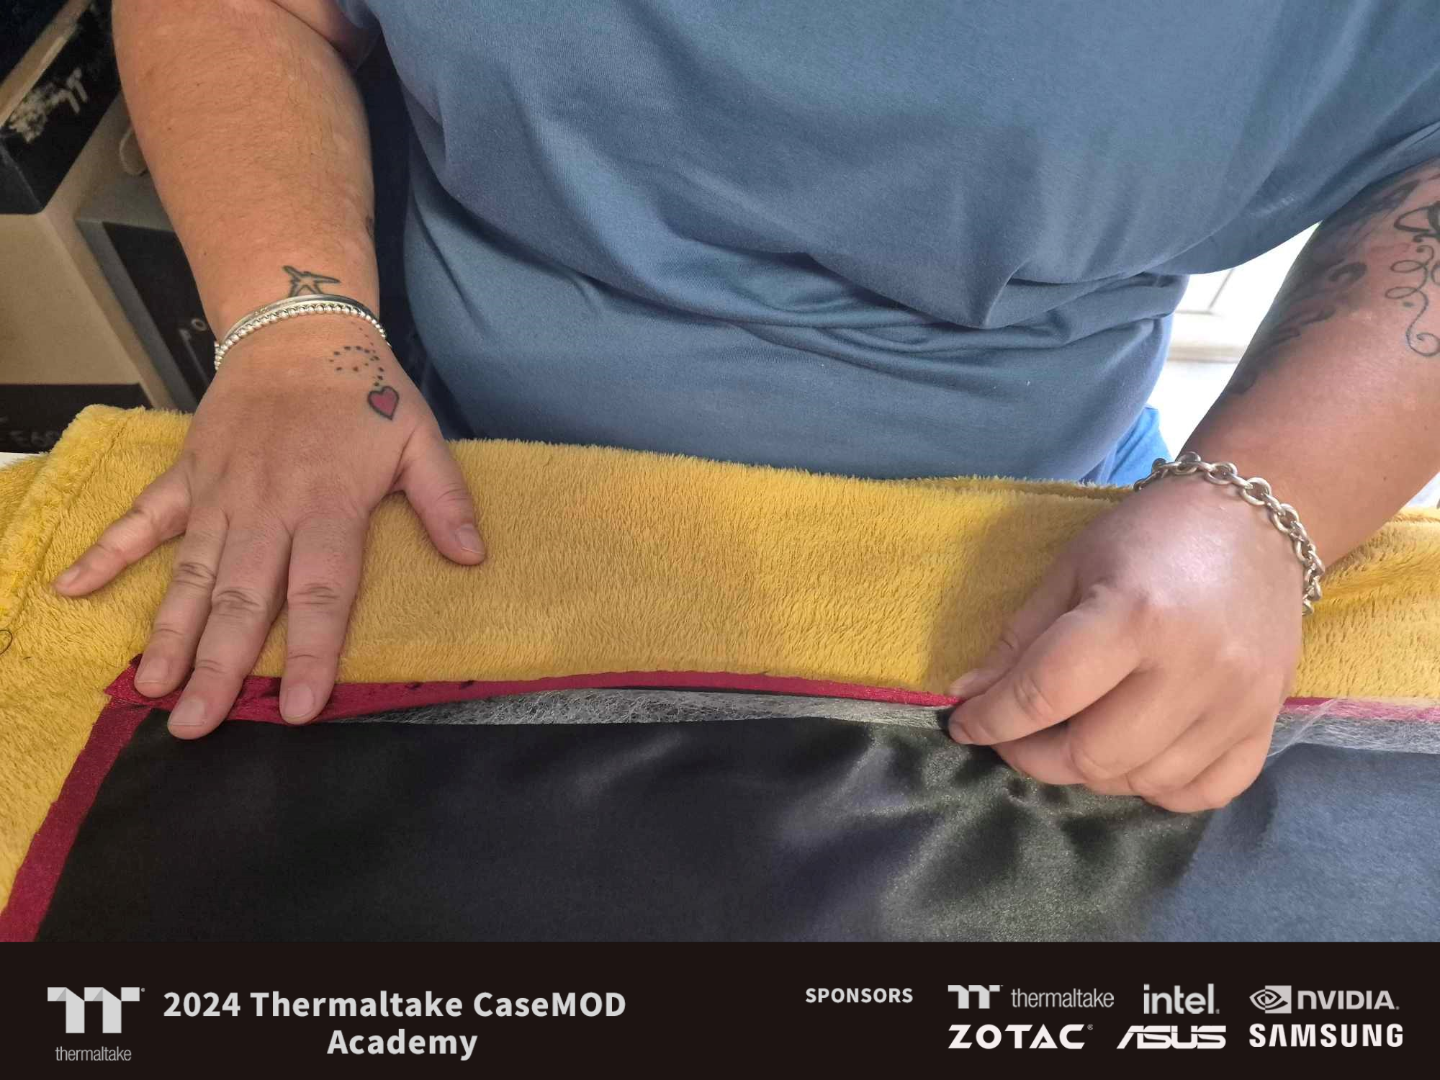
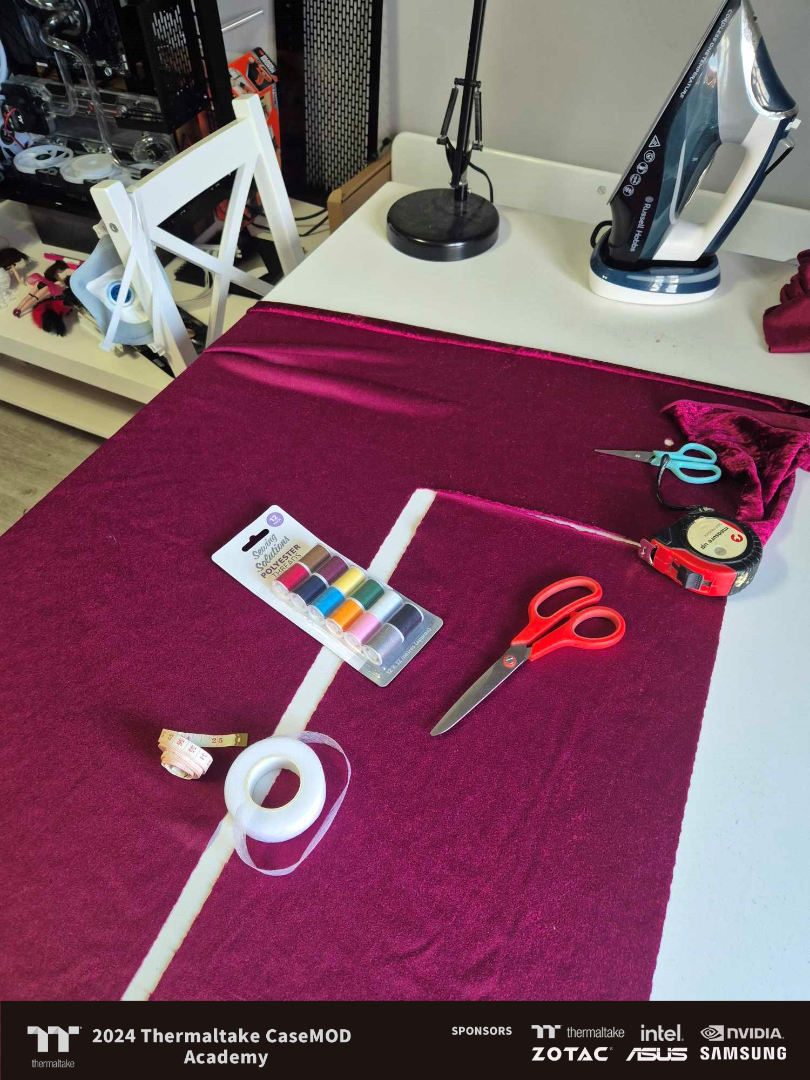
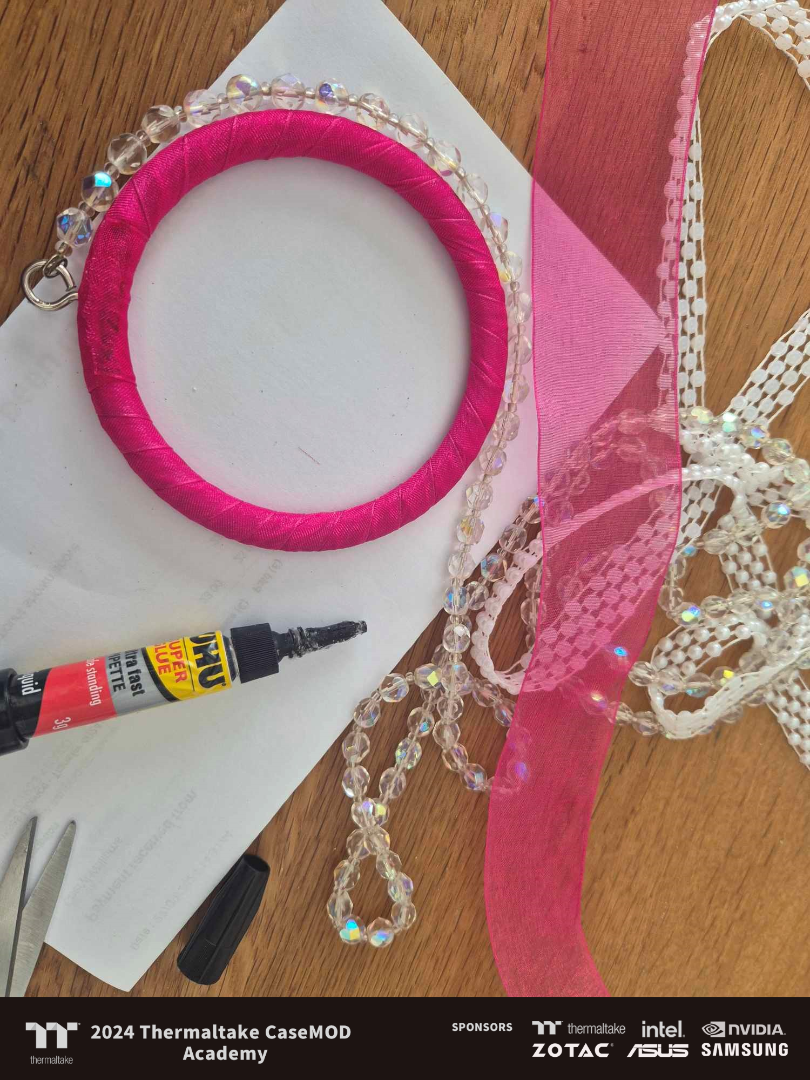
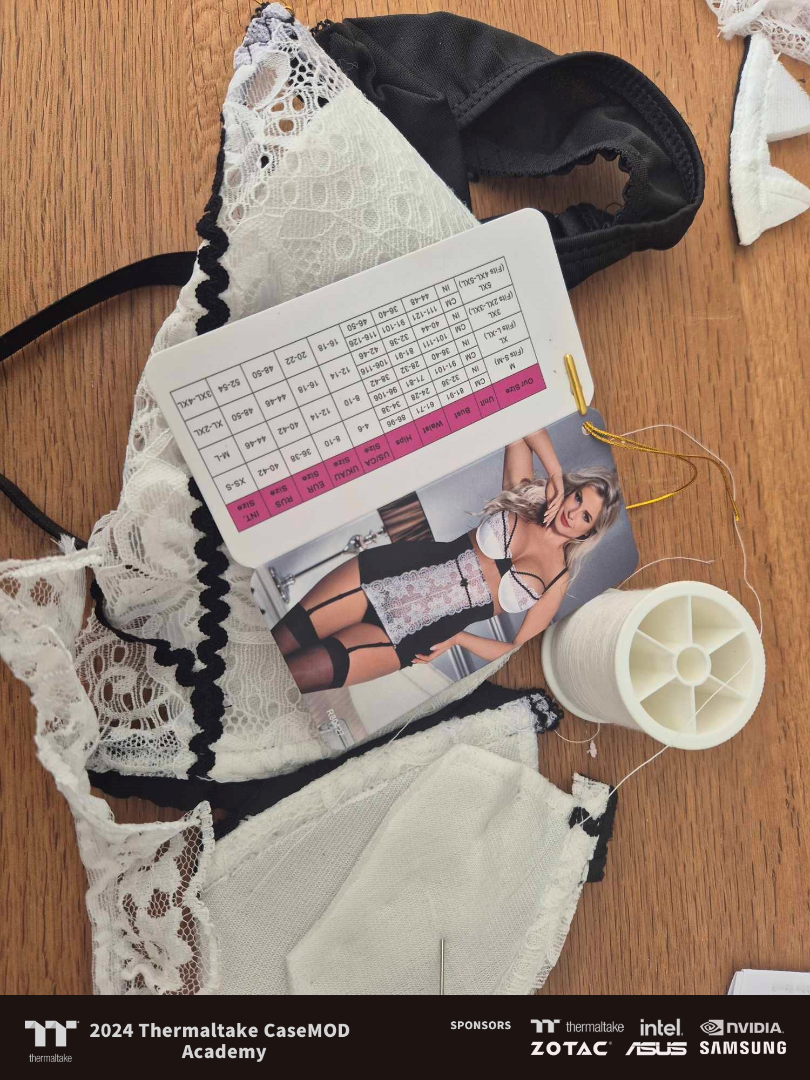
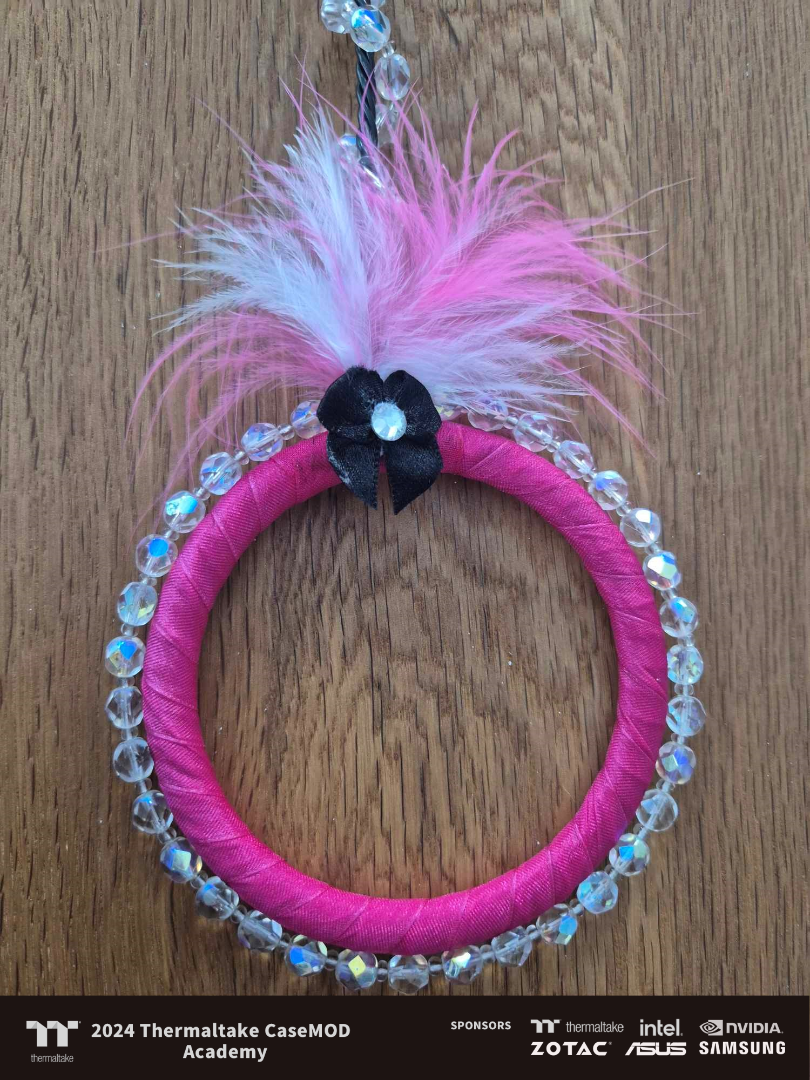
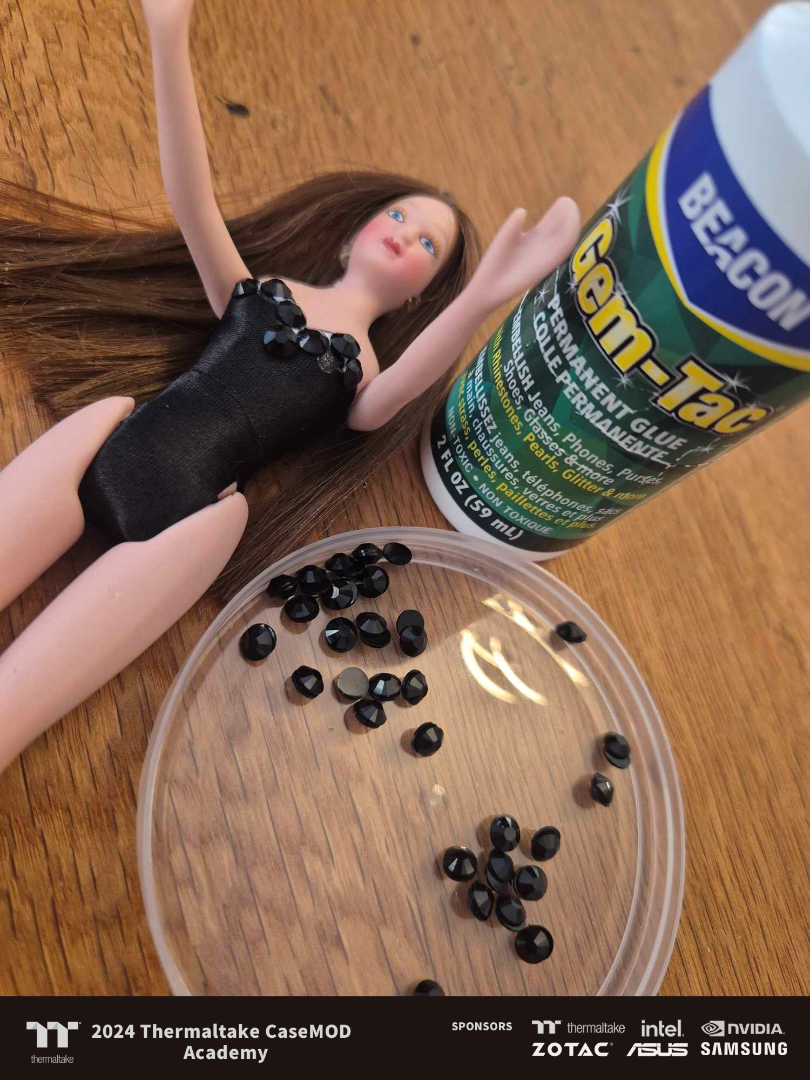
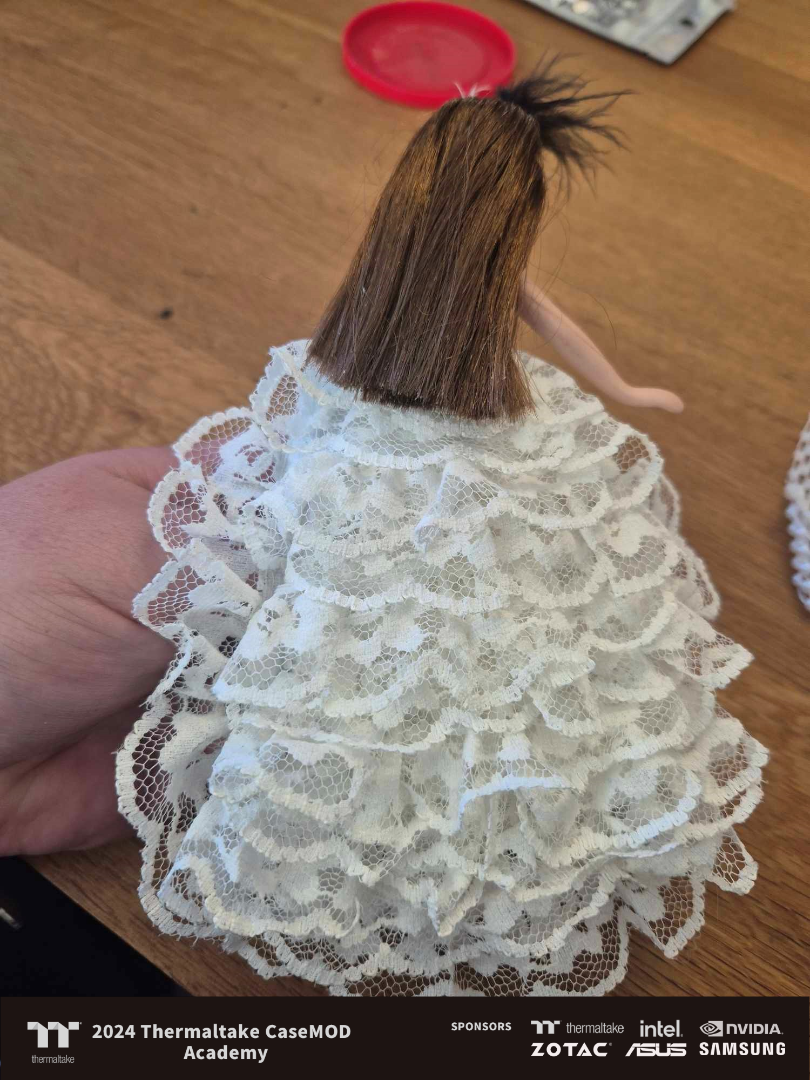
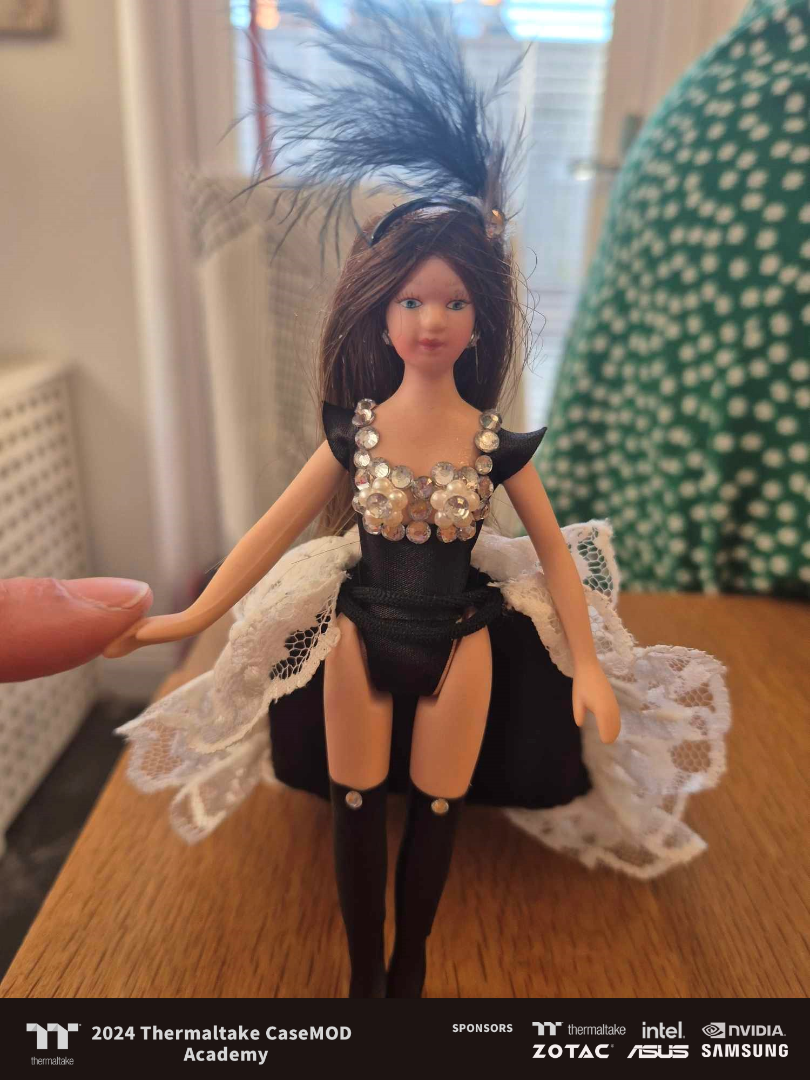
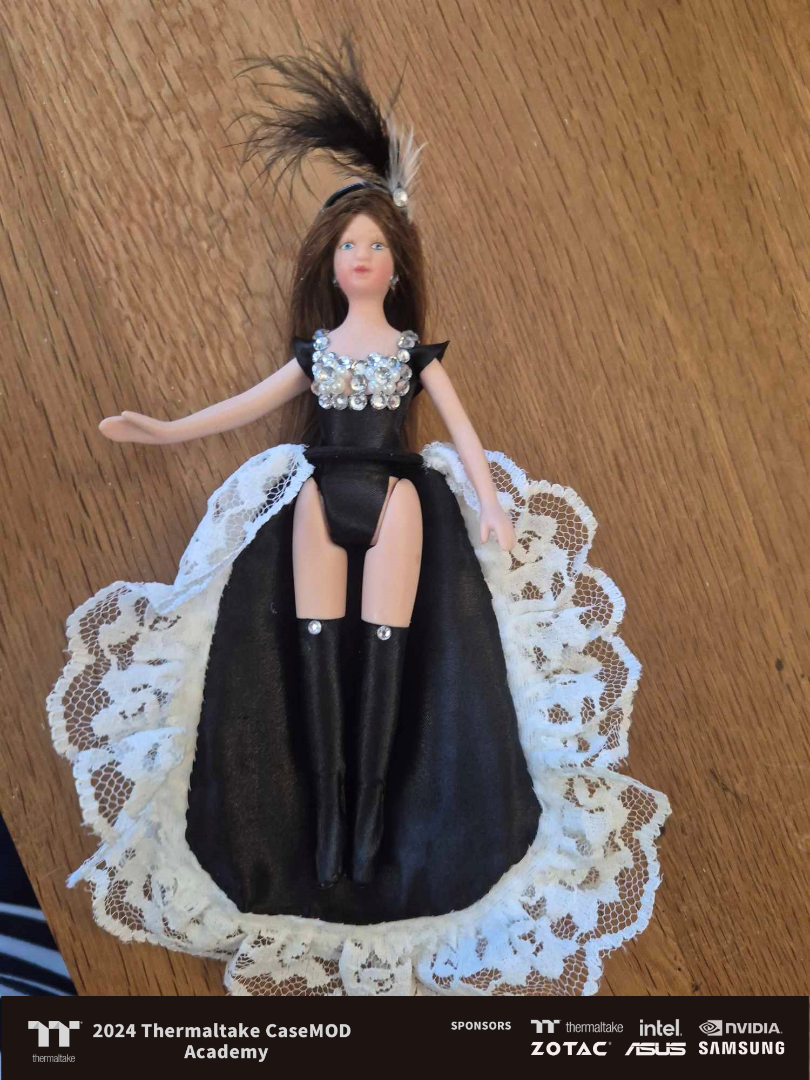
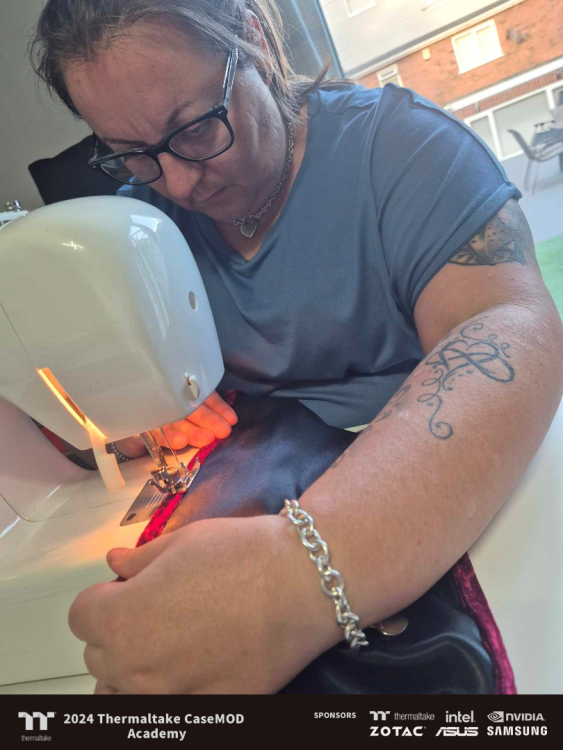
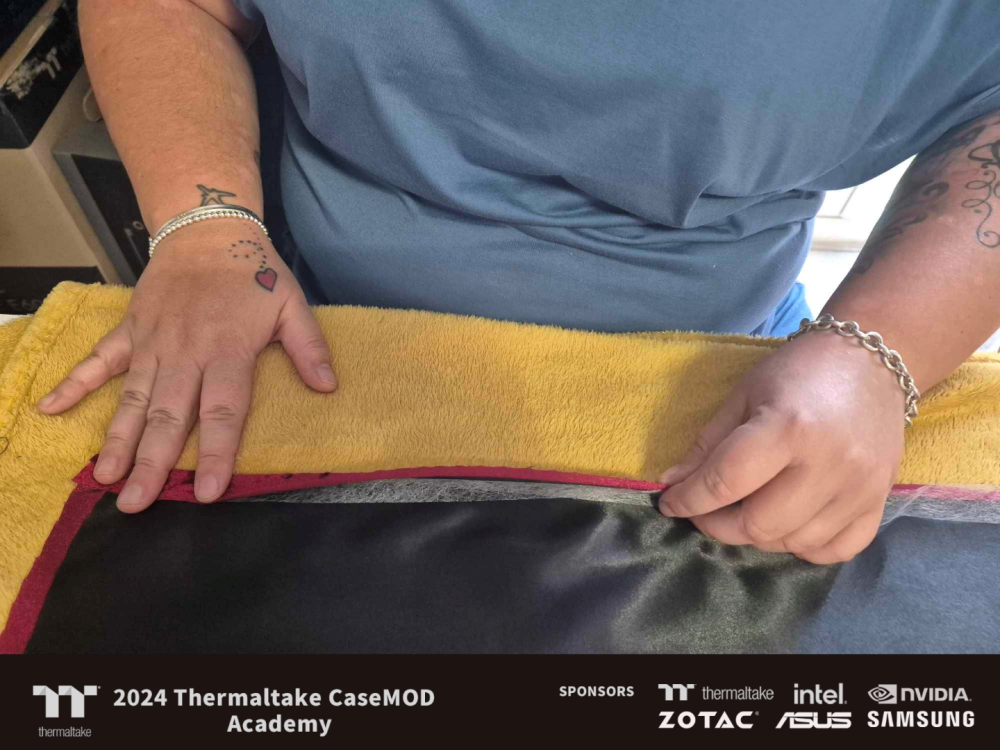
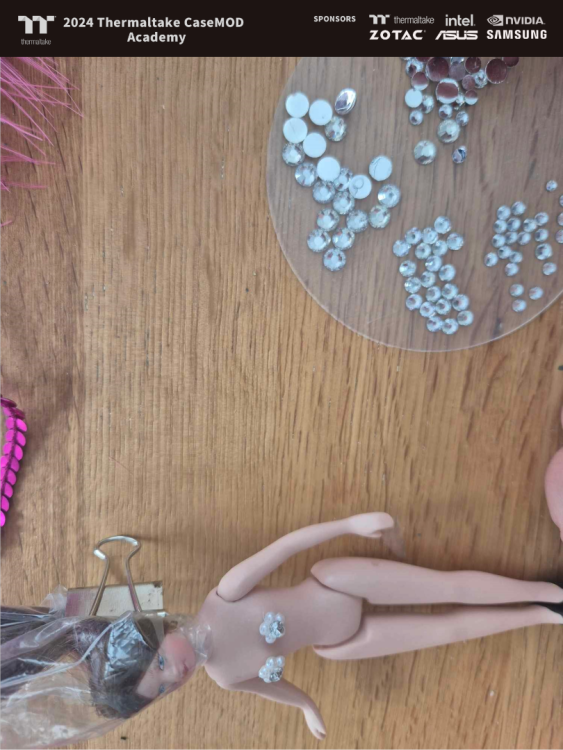
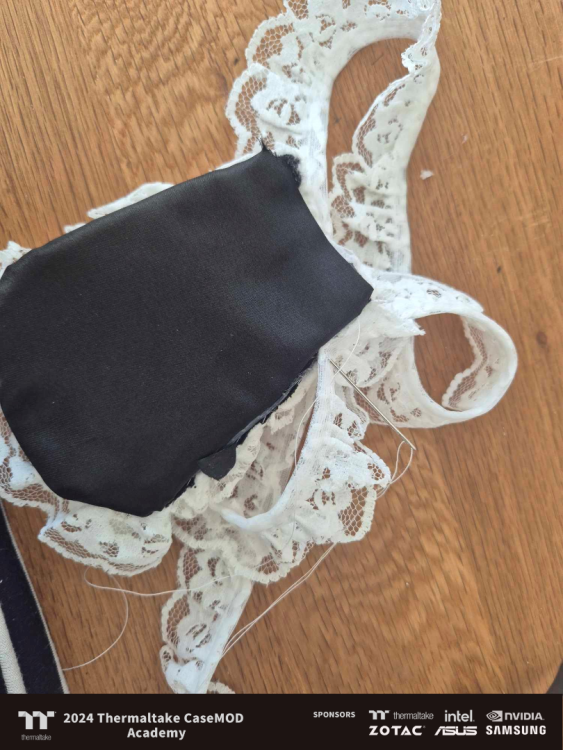
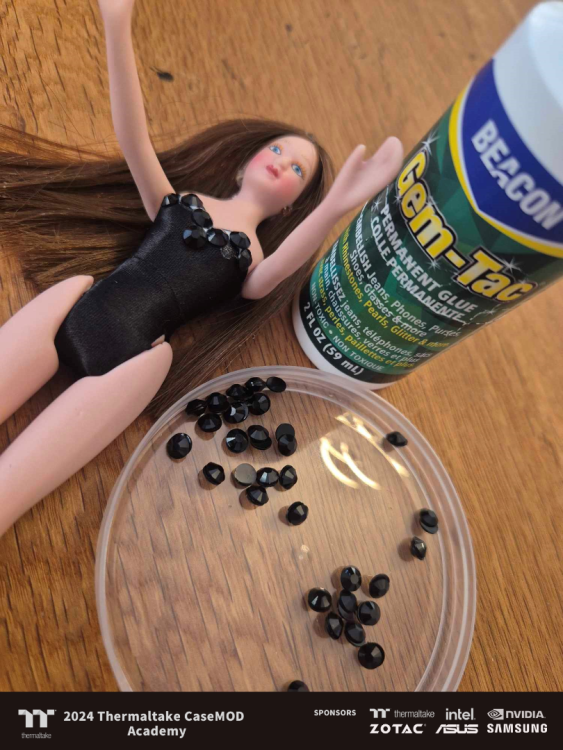
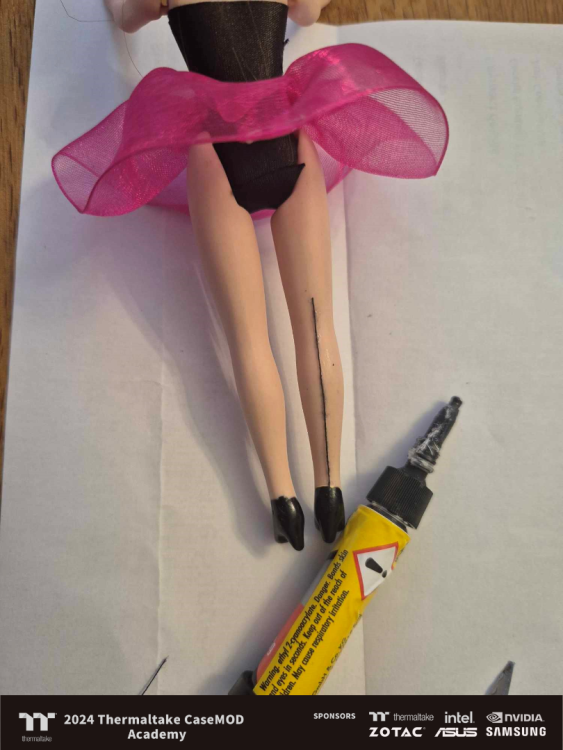
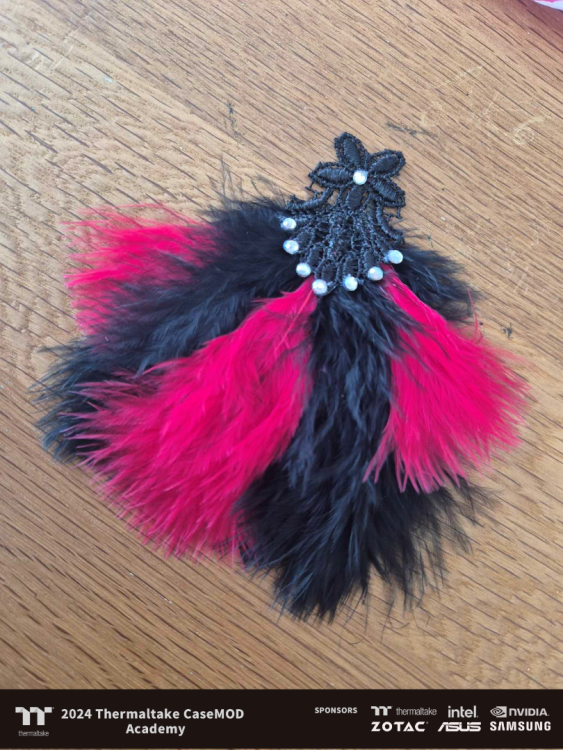
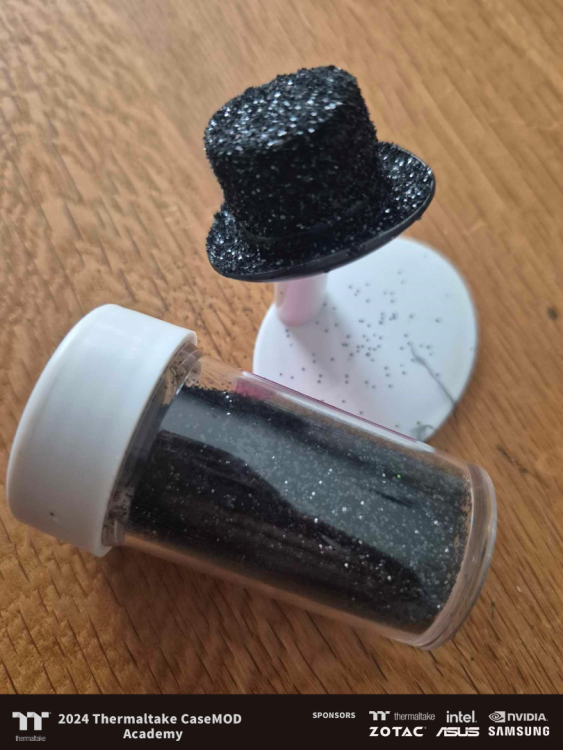
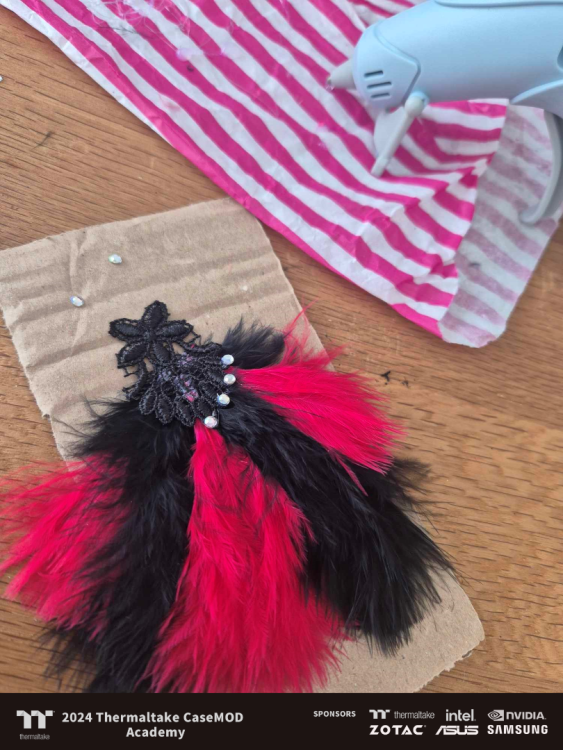
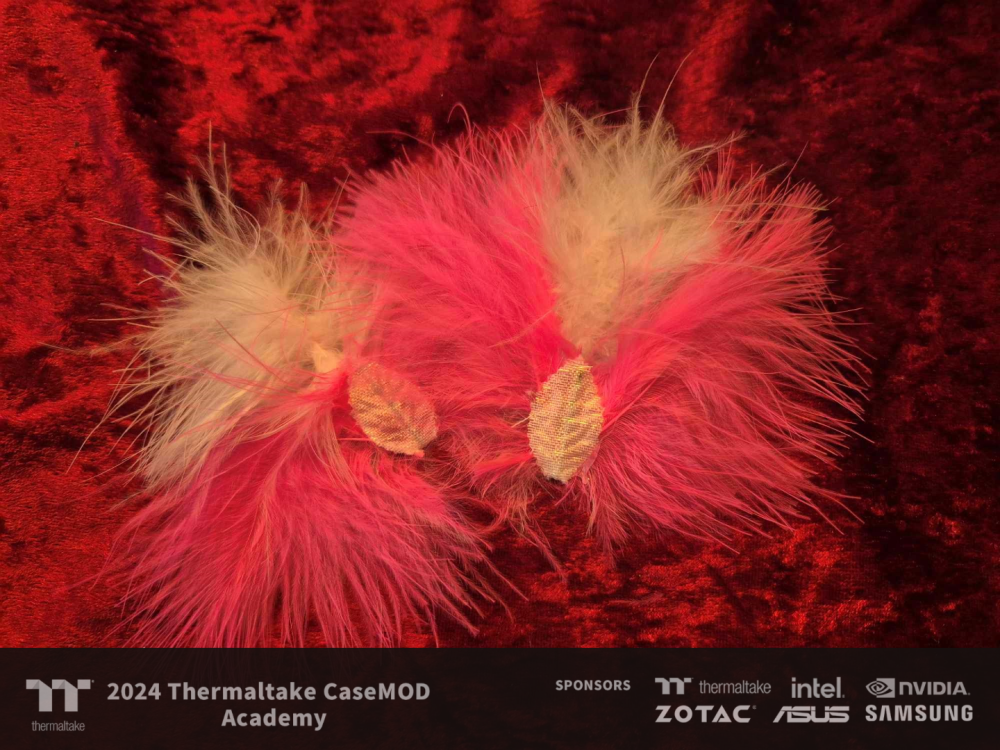
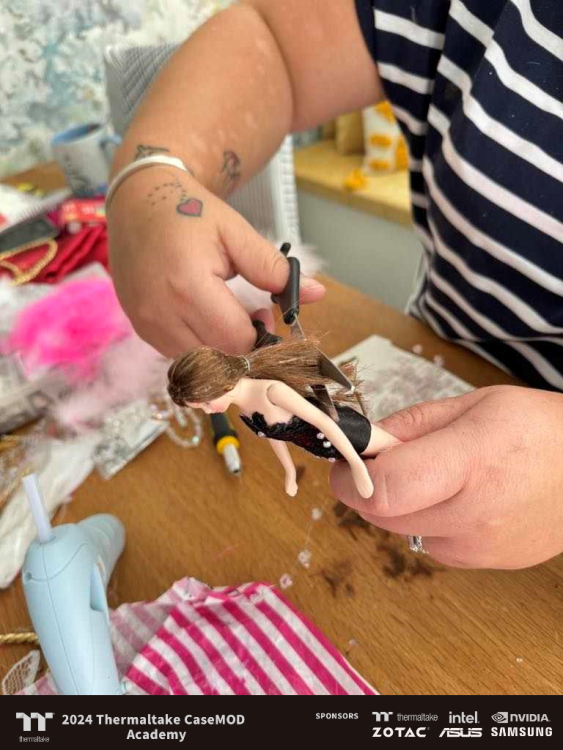
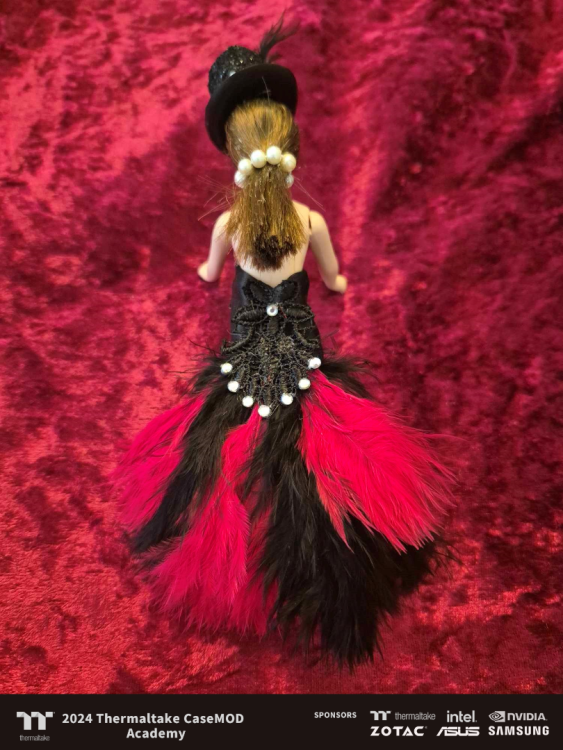
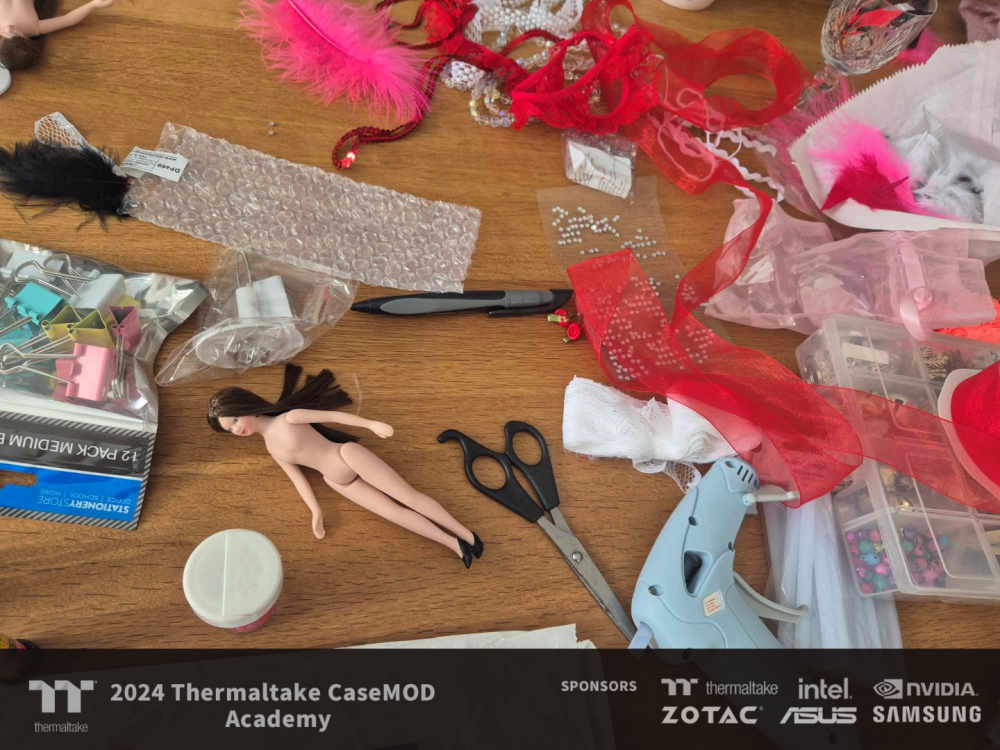
Cheryl has created her dresswear from scratch, from a collection of fabrics, feathers and glitter amongst other things. I feel Cheryl is really in her zone now and her attention to detail is really up there, she has a keen eye, trust me! She probably couldn't of chose a harder colour of paint to work with for her first time but she had the theme set and is determined to get it right, the painting process has been a chore to say the least, even a pain for me when I had a go, turns out one of the cans was spitting slightly but it came up on multiple panels, once this was replaced back over it went to Cheryl who finished the job nicely, pictures of that will be on early next week. Back on topic though below we can see Cheryl has done a beautiful job making the dresses for the burlesque dancers, even the hat didn't go without a shimmer of glitter, even the dimonties was individually placed on the back of one of the dresses, in total there will be 3 burlesque dancers. We're both excited for next week when the parts will be going in, this is where we all start to see her hard work come to fruition but she's already changed the layout of the GPU 3 times, there's really only the original orientations that she could resort to if we was to move it again and I'm certain that's not an option to her, I'm pretty confident it will stay where it's currently planned to be, just wish I'd of known sooner due to parts that have been ordered pre-emptively on the original design but again I feel Cheryl will see it as a challenge and give me yet another headache on how we might be able to fit everything in.... I'm pretty sure she's loving it more than me at this point but I'm happy knowing that, she keeps talking about what her next mod will be... She's definitely caught the modding bug.


-
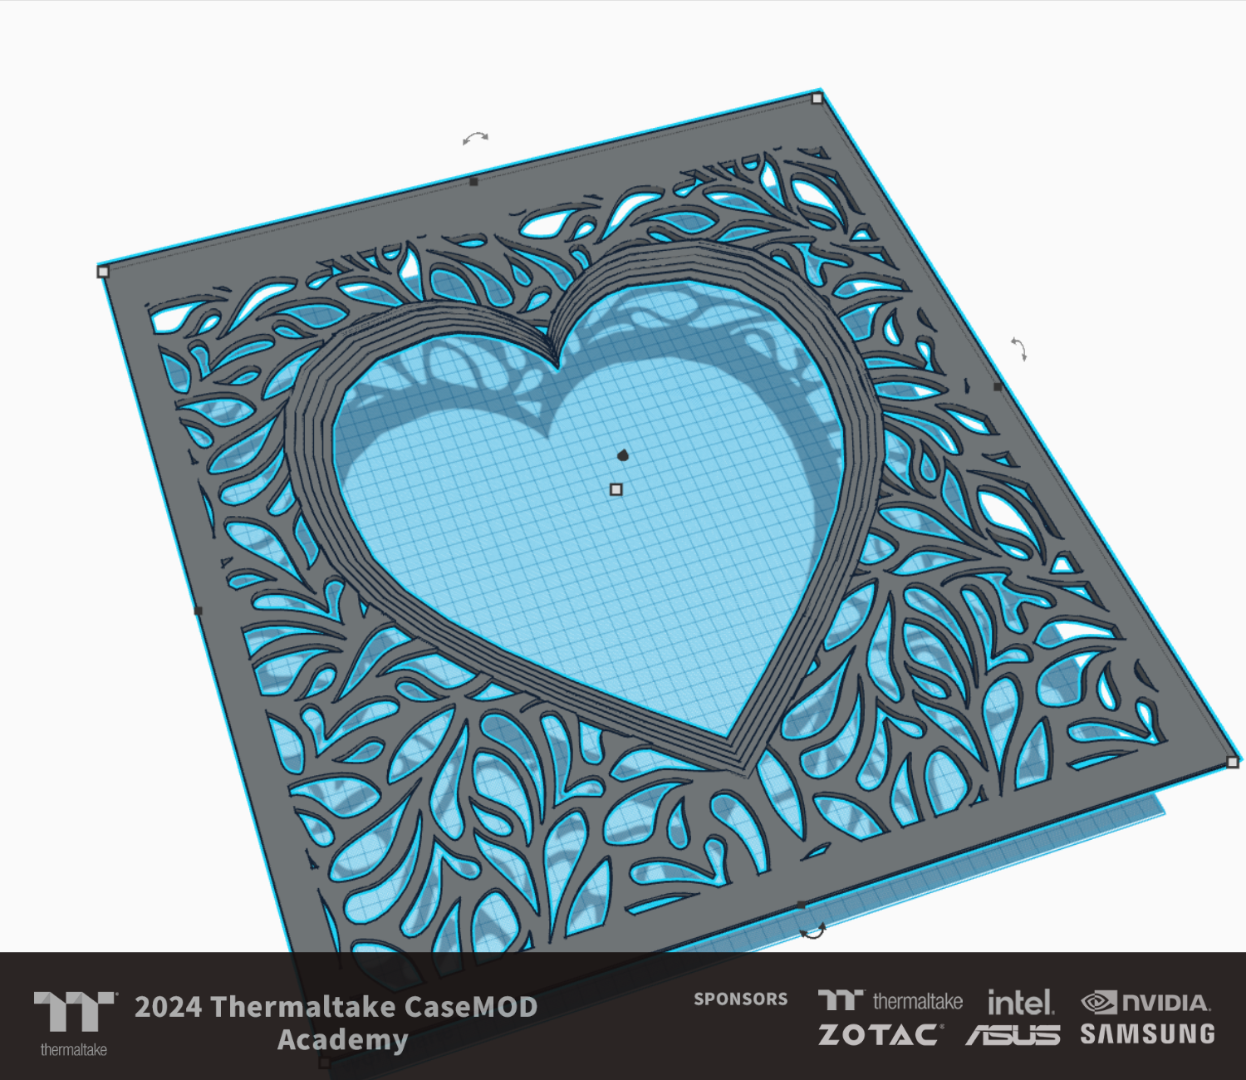
At this moment Cheryl is left to her own devices, currently dressing her 'dancer', ready for build to start taking shape next week. I've redone the panel aswel due to issues with the file, with this I had chance to add more area as a support brace for the bracket that will be behind, this threw off the center of the heart from being in the middle of the artwork area so I redid that to make it so and also I added layers to the heart, this gives a more pleasing look.

-
After a gruelling weekend Cheryl is happy with the design, She's not settled for anything less than what she has envisioned and as much as it has drained me, she's stuck to her guns, rightly so too! I love that she know's what she wants and now it's me who's not able to see her path, it's been somewhat the other way round with Cheryl having to learn some new skills, from paint prep & finish to a little bit of TinkerCAD, mind you, I've had a little bit of a learning curve of my own with TinkerCAD but we worked it out well in the end. Super proud of our effort. This will be used as a new window on the case, Cheryl isn't 100% decided on what acrylic she wants to use yet, I suggested smoked... she wants clear or gold, we'll go through some samples and talk through it but again, she knows what she wants, I have to show her the options though, I want her to be proud of this rig once she's built it.
-
[Austria] Ronald Bodinger
SIA Tech Mods replied to TT Amanda's topic in 2024 Thermaltake RAM MOD Invitational Season 1
I love this to be honest. You've done great, especially considering the time and other restrictions you've been dealt with. I actually love your concept and it's one of those things where you can actually use, like in 2 years time your lamp will be just what it was intended to be, a perfectly functional lamp. It's timeless in it's own right. -
SIA Tech Mods reacted to a post in a topic:
[Austria] Ronald Bodinger
-
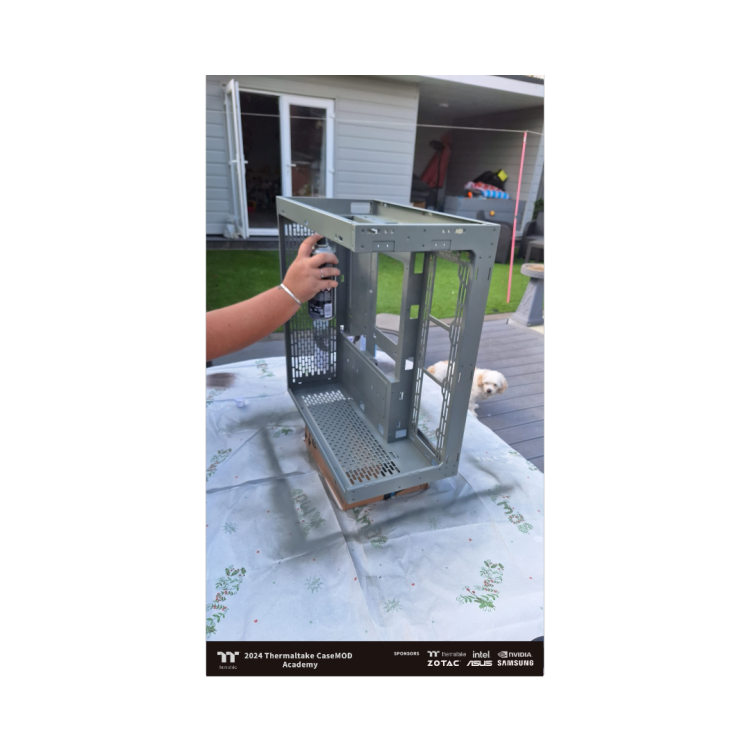
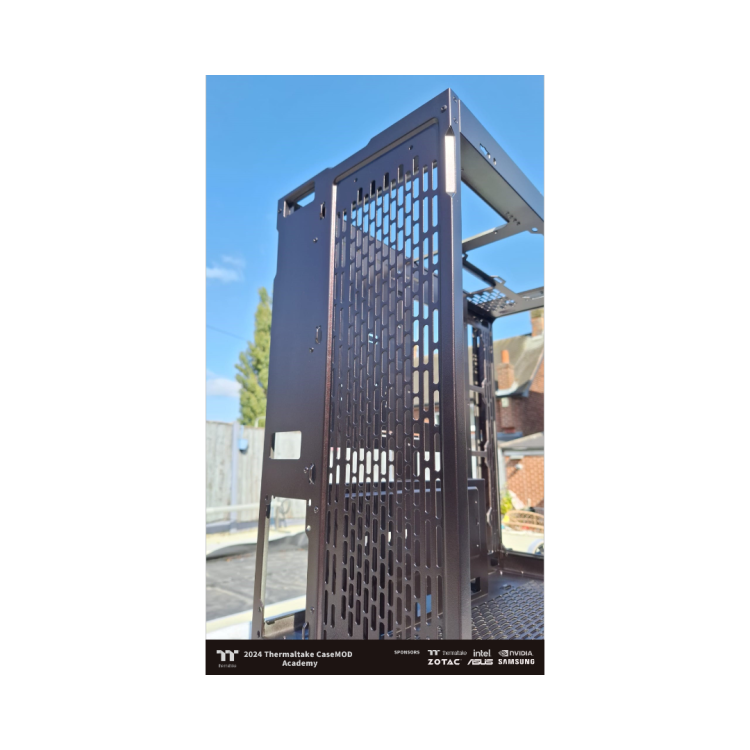
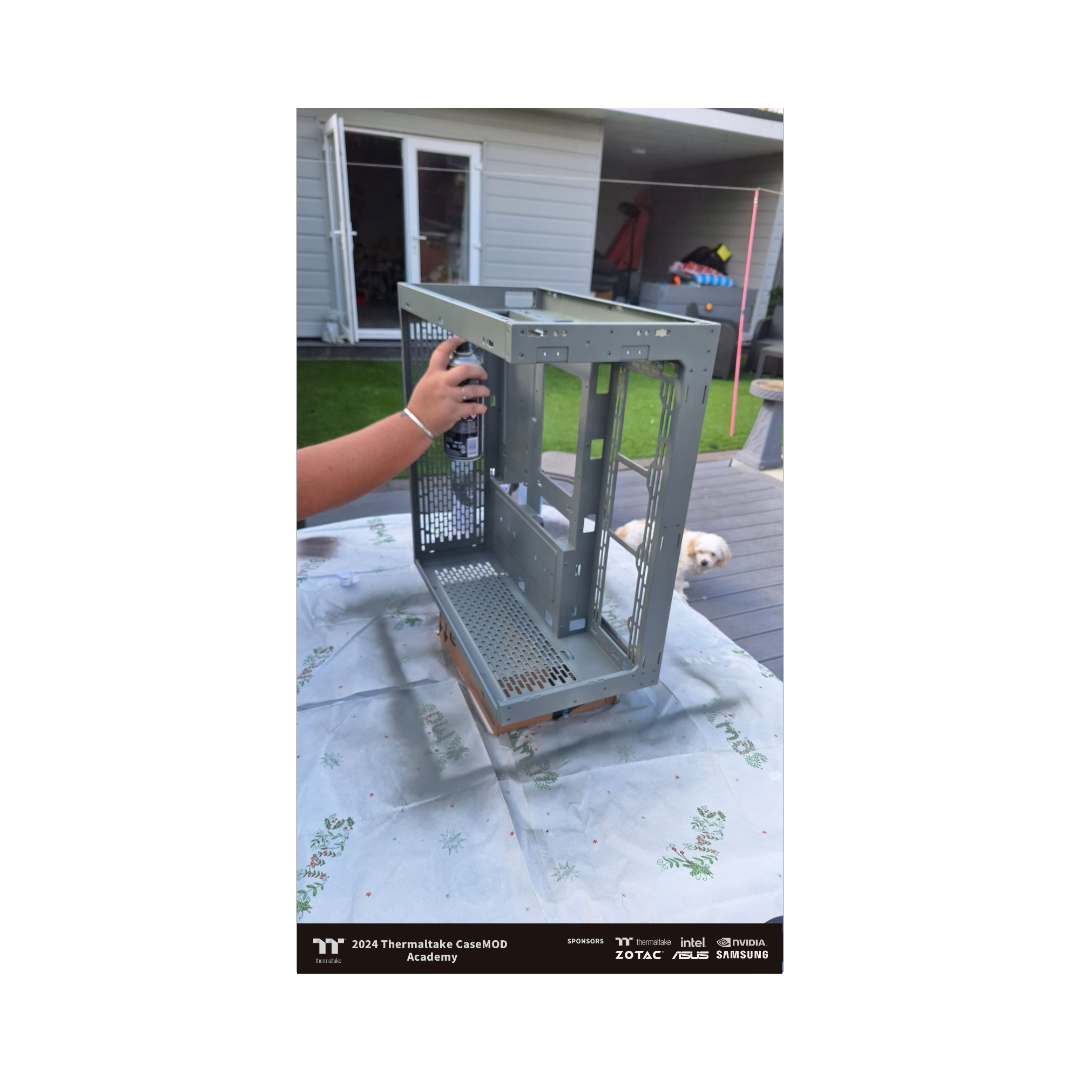
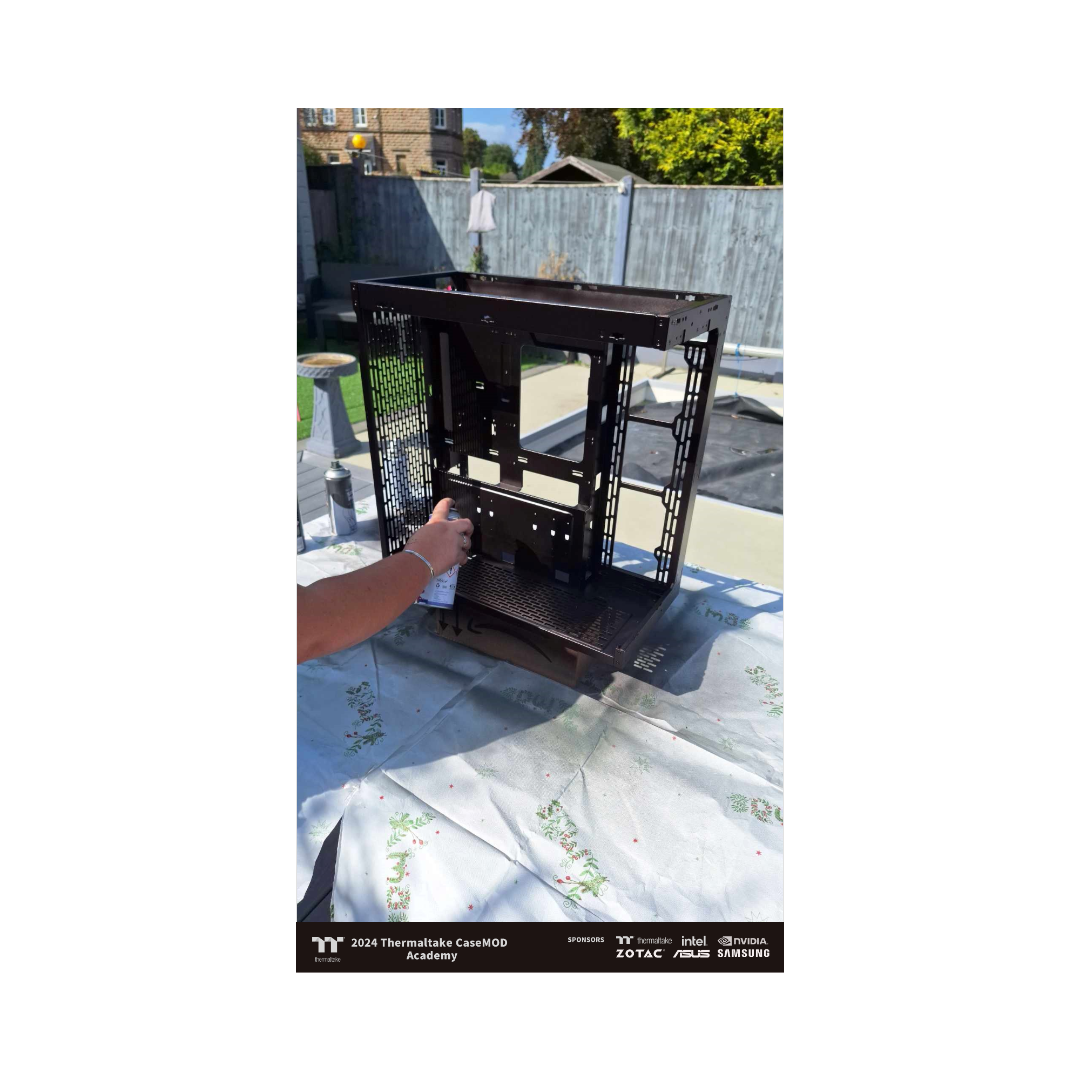
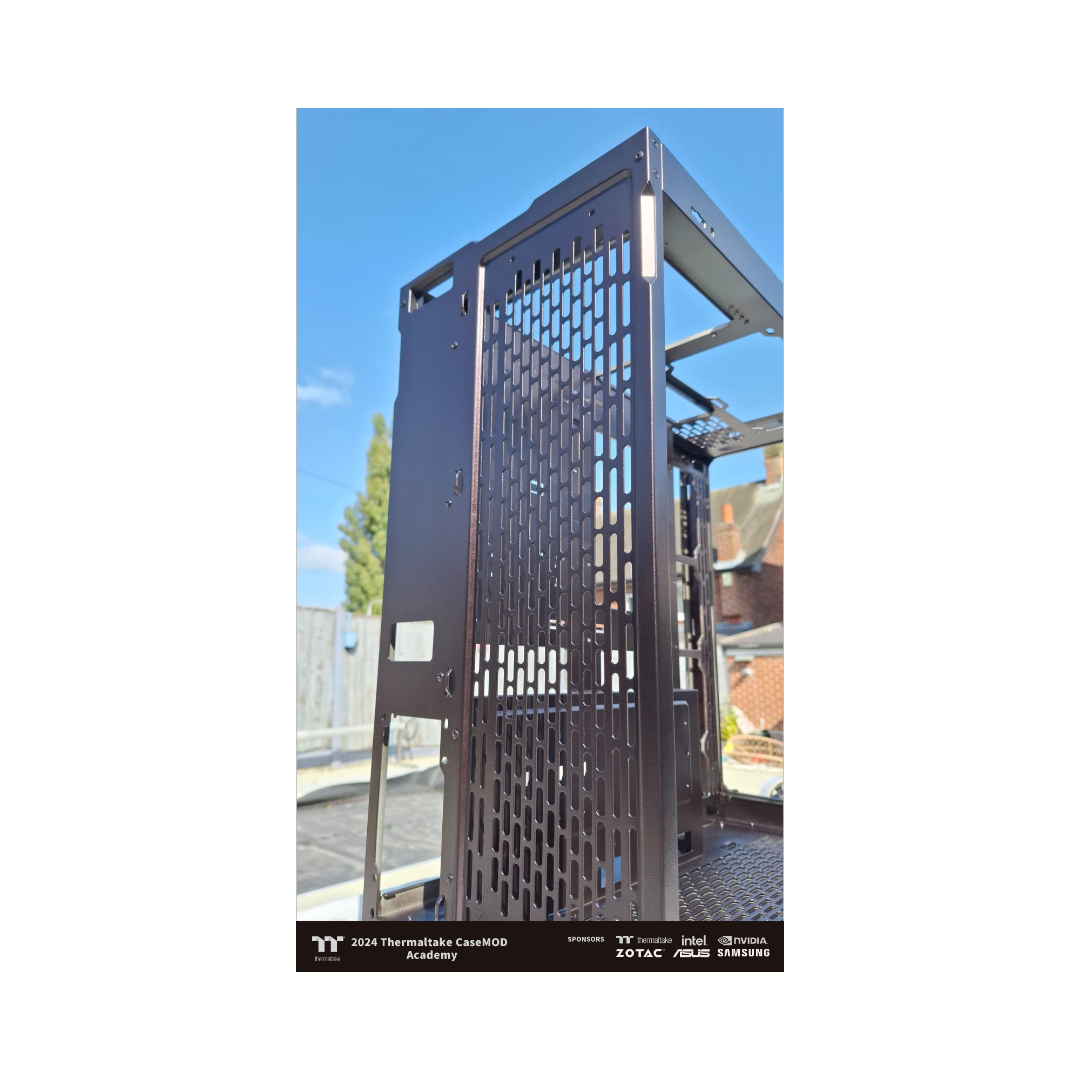
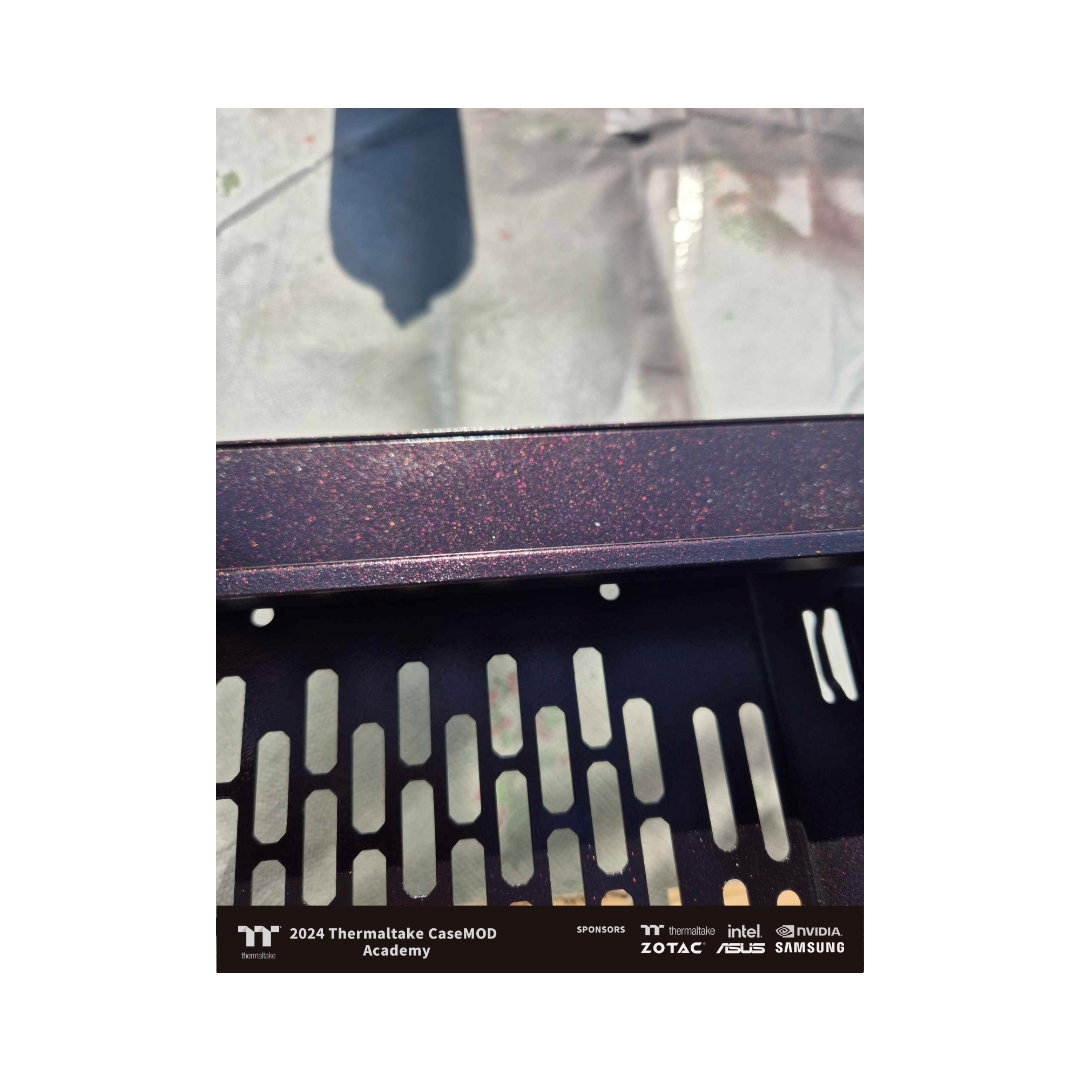
Once we got the basic sanding out of the way Cheryl then started off learning the correct technique with the spray cans and quite quickly too! The first base coat went on amazingly well once she picked up the technique. I was quite fond of the grey base as a colour choice but now is the time to put my opinions to the side and let the apprentice go to work! Me and the owner of the paint shop I use was pretty confident Cheryl wouldn't like the colour she picked once it was applied and for a moment it looked like we might of been right as Cheryl was applying the colour coat she questioned her choice but I assured her once the clear coat is on it can dramatically change the effect of the paint and alter the colours, which it did and I must say seeing the clear coat go on the colour and knowing Cheryl's theme, it has changed my opinion. This is such a unique colour but it is hard to see how dramatic it is in a photo... You'll have to make sure to come and see it at the event closing! As for the clear coat though, by this point Cheryl had mastered the art of a spray can and it was a pleasure to watch her work especially as she wasn't looking forward to painting the case, as you see though by that smile on her face she enjoyed it much more than she thought she would!