Search the Community
Showing results for tags 'mod'.
Found 14 results
-
This thread is dedicated for our fans that are keen to share with the community their builds! You can post other DIY Mods you might have come across or you can share something your about to build. Tt Community can offer great feedback and tips!
-
Project Serendipity came about by an ah ha moment. How it got its name was more inspired by the color scheme and design which is going to be black and white, but the predominate color will be swapped between the inside and outside. So for instance the outside of the case will be predominately black with white hand painted features and the inside of the case will be predominately white with black features. I would show off a design with a sketch or something, but I am having trouble getting my idea out on paper, so I will do my best to paint a picture with words and video and images. Something new to me and very fun is the lighting features I am working on. Of course I could go out and by RGB lighting that already comes with controls, but they are limited on their capability and I want to have a serious light show. So I opted to use Adafruit's NeoPixel light strips and an Adruino to control them. At that time I knew it could be done, but I hadn't the slightest idea how I was going to achieve what I wanted to do. Then I stumbled upon this guys unbelievably amazing build doing exactly what I wanted. https://youtu.be/ZTt1dBpbC_g Got an idea of what I want to do yet? Yeah this is so freaking cool and technical! What I did to copy what Will from Fuzzletek did took a bit to figure out, especially for this Arduino n00b. Apparently they are working on releasing a version of the software that doesn't require licensing. When that is to be released is still an unknown. Don't worry, you can achieve this level of awesome and it's a lot simpler than the process Will took, to an extent. You can make it difficult if you really want to custom a color scheme to match a song directly. That usually requires something like AfterEffects to produce a video with matched audio/visual queues that you have to manually build for the entire song. This is a bit more difficult, but gives you complete control over all your LED's. This method also allows for a really cool ambient color effect as seen in the videos below. https://youtu.be/T9lO4AidBSI https://youtu.be/USW-LatkZDY Ultimately I found a piece of software called Glediator by pure accident. This is called an led matrix control software and is open source. Follow the directions on their page and you too can ultimately run your lighting effects the way you want, including ambient lighting. There are alternative software sets that are more complicated and less attractive and not as useful or easy as this one and I grantee this is the better option currently available that I am aware of. If you find one other than this that is open source, works with Arduino and Adafruit Neopixel light strips I would love to know about it! Next I will go over the parts list, show a picture of the progress. This will be one of the more intricate PC builds I have ever done. The acrylic and wiring alone is expected to take a pretty long time. Mainly because of how I want the wiring displayed. Thermaltake Core V71 (Currently working on the case, thank you Thermaltake!) Thermaltake cooling (*) Samsung 850 EVO 500GB SSD's x2 (*) ASUS Z170-DELUXE (*) Intel Core i7-6700K (*) Crucial Ballistix Elite 16GB Kit (*) NVIDIA GTX 980ti (Just got this part last week, thank you NVIDIA!) Arduino AdaFruit NeoPixels * = parts not in my possession yet First picture of the template layout for the acrylic covers. More to come, main blog page is located at http://www.techpron.com/portfolio/project-serendipity-pc-mod/
- 5 replies
-
- 2
-

-
- arduino
- serendipity
- (and 4 more)
-
 if anyone could help me find the fan model of the thermaltake massive 20 rgb, id like to find a 200 L x 200 W x 18mm Height fan which has a power connector which is equivalent to the massive 20 rgb (power connector with same number of pins) if this is any help, here is the product page from thermaltake themselves, https://www.thermaltake.com/thermaltake-massive-20-rgb.html the reason i am asking for help on this is, i could not find the fan model when i tried alot of different of search terms. i know that it is replacable/ upgradable because it has screw holes right on the fan, and it has a power connector which is removable.
-
Hi, I’d like to know how to safely remove the front panel circuit board of the Thermaltake Core P3, I’ve removed all the screws from the board and tried to pull it out, but it won’t come out, looks like there’s still something holding it. Am I missing something?
-
Good Day Gentlemen, Anyone knows if the View 71 front or top fan mounts can accommodate the new thermaltake riing plus 20 RGB TT Premium Edition fans?
-
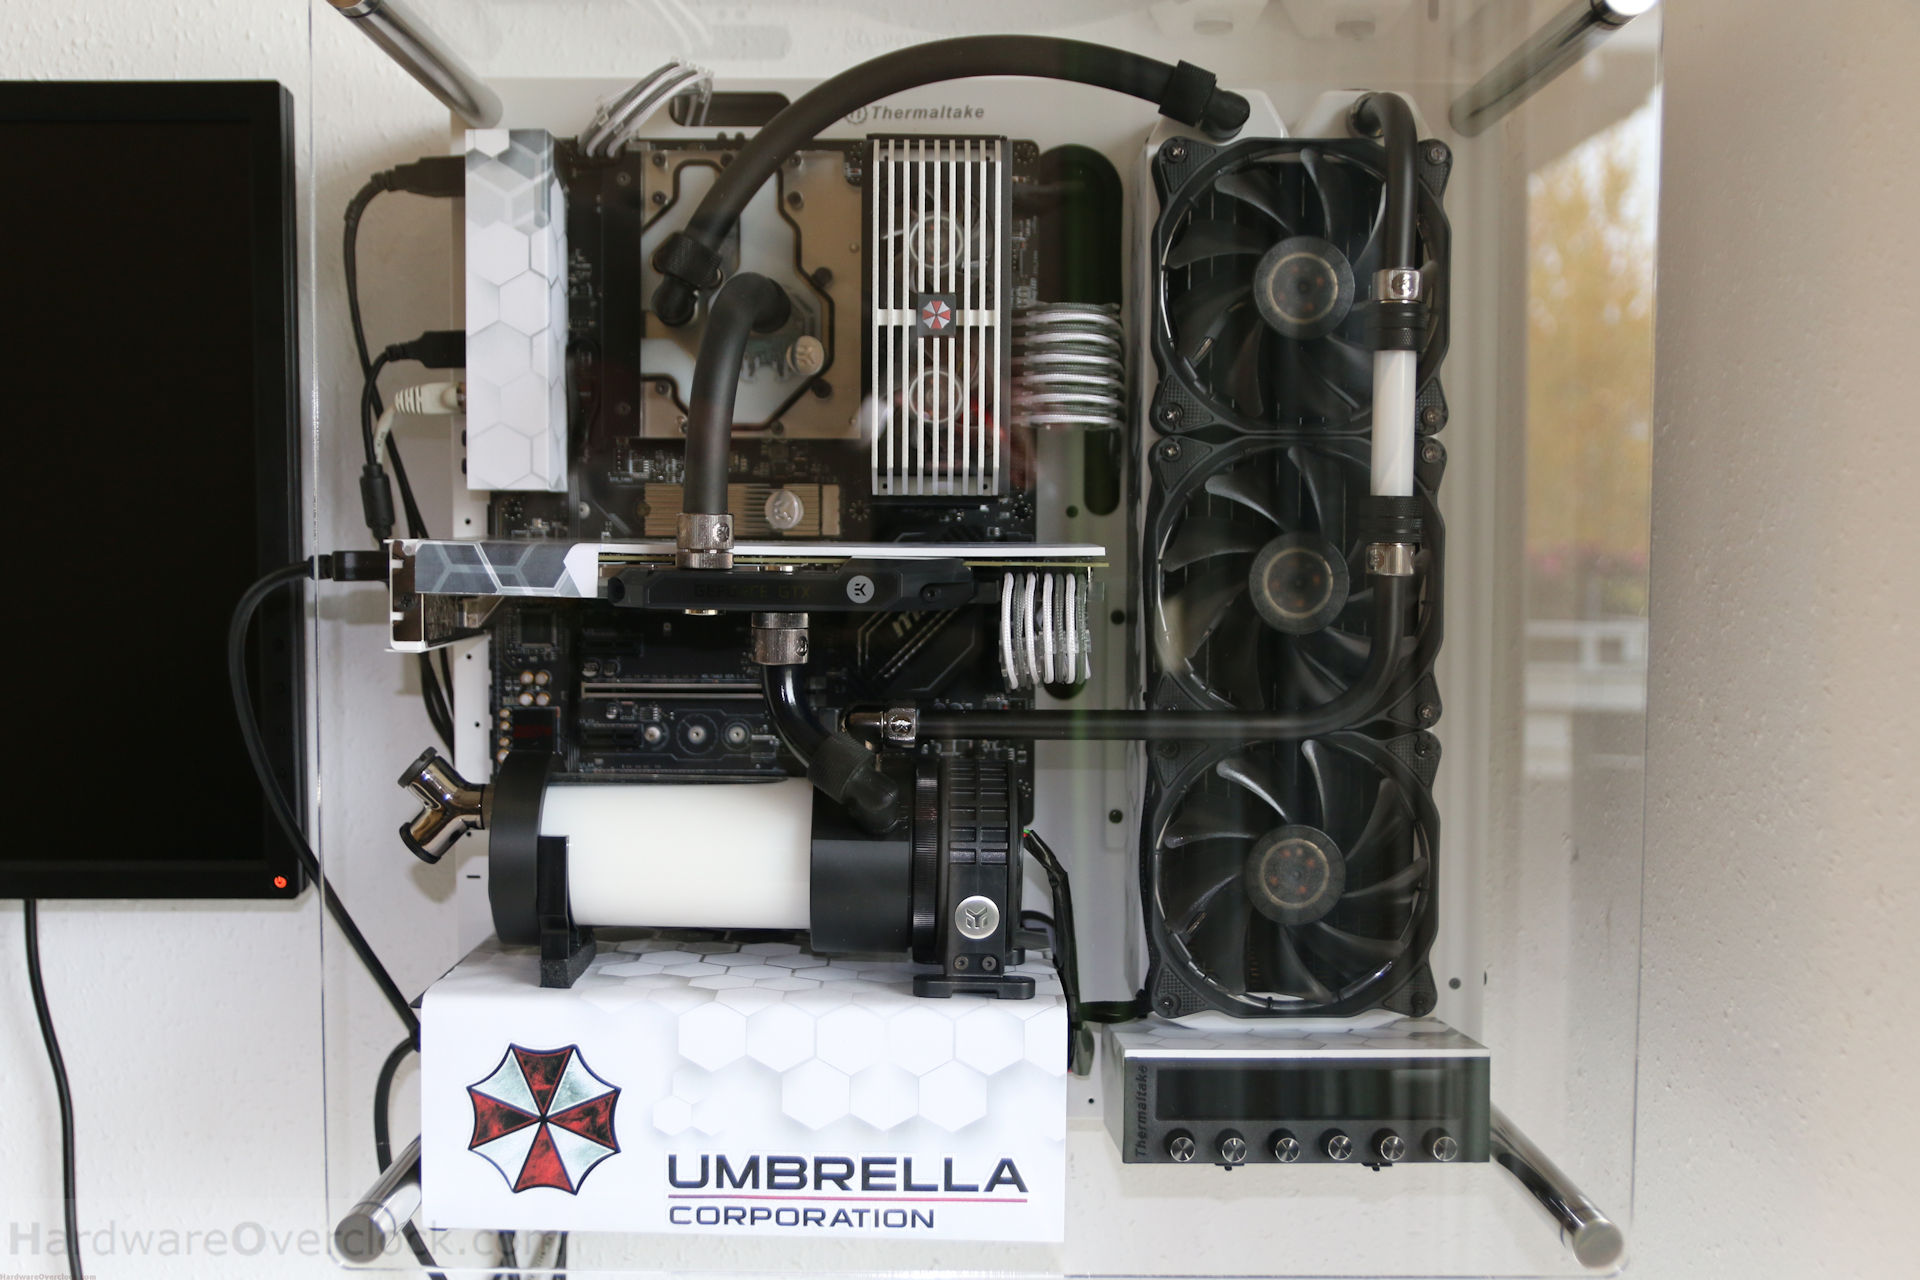
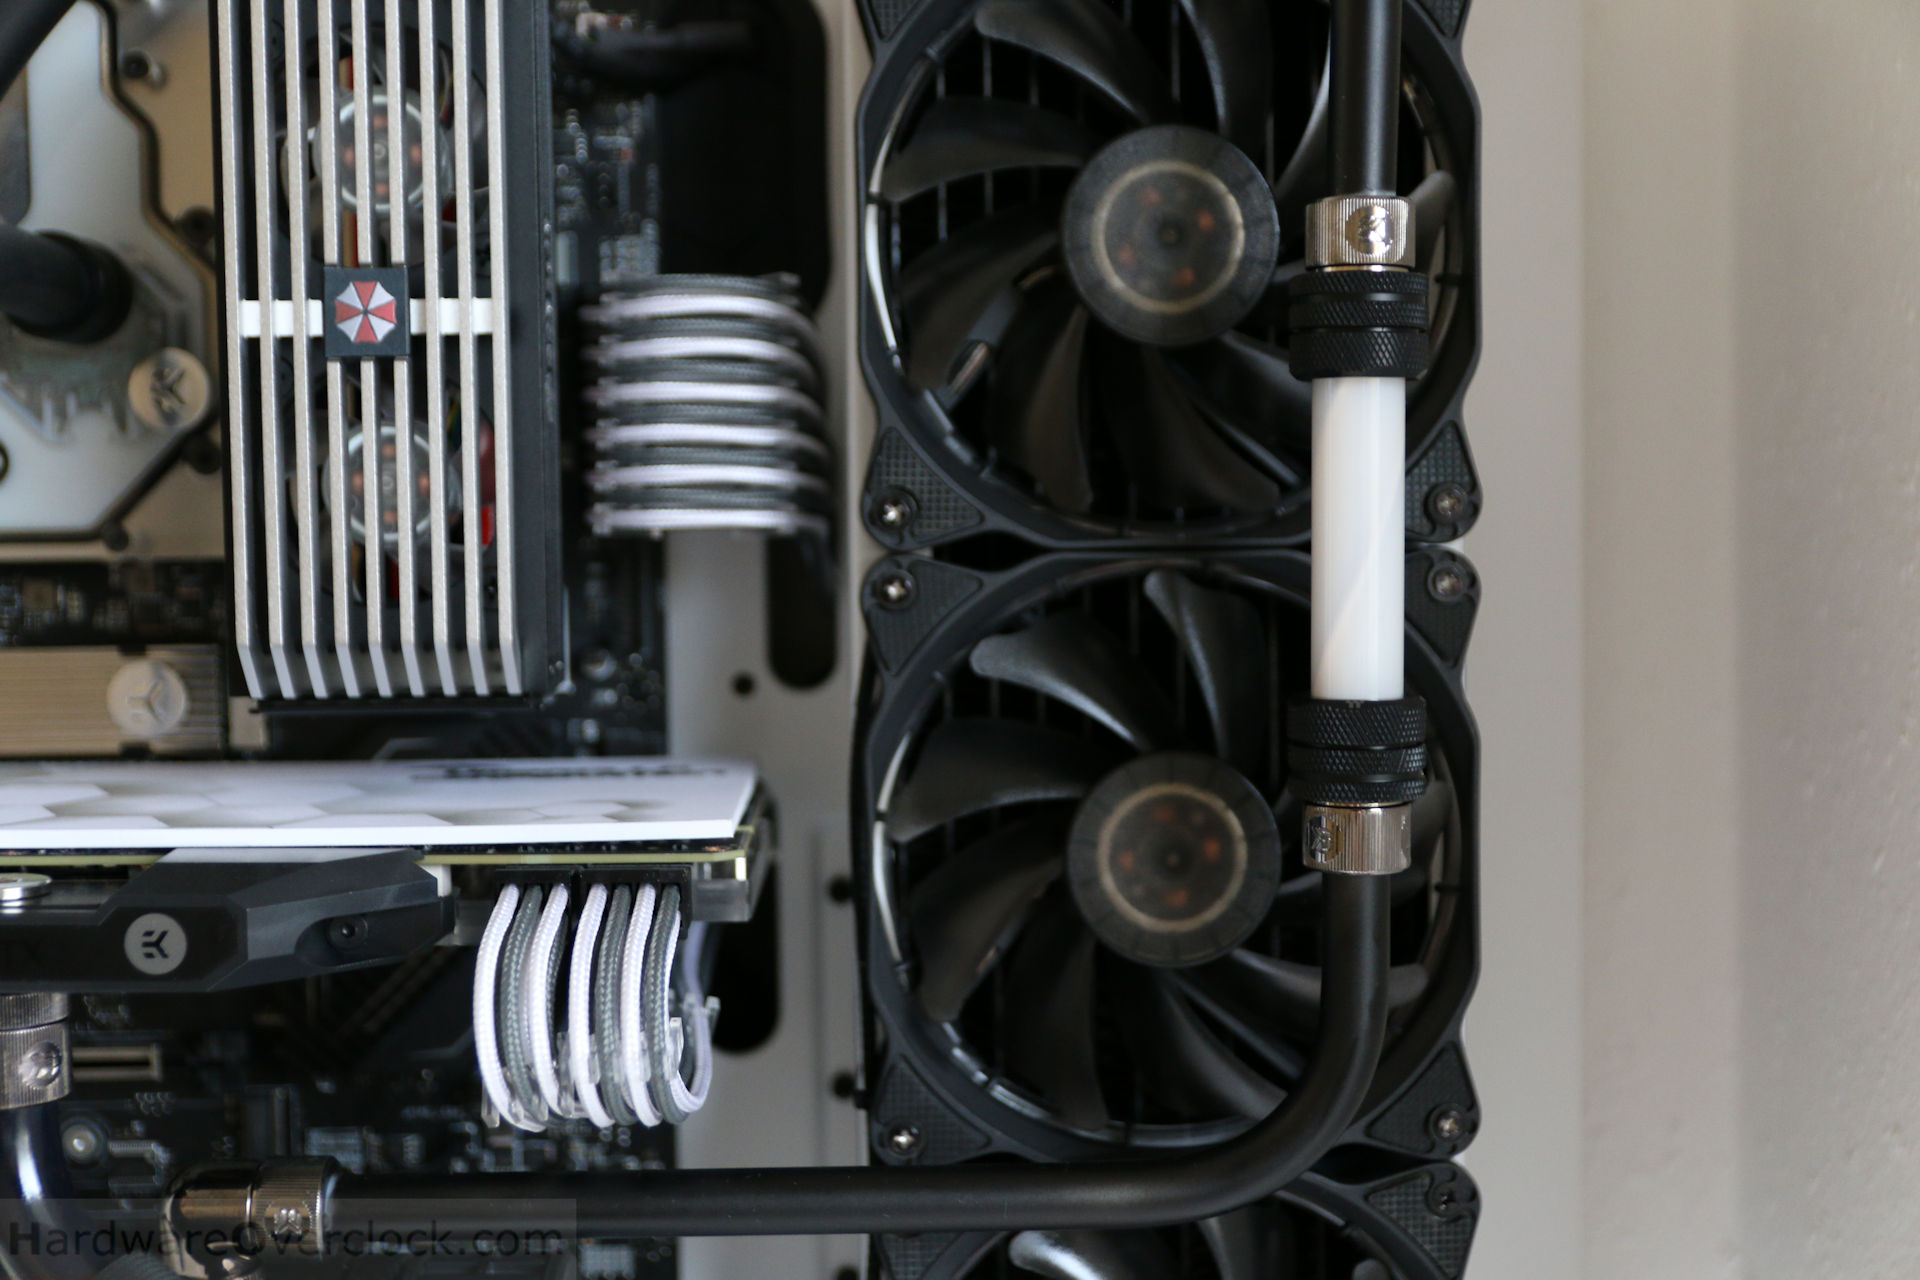
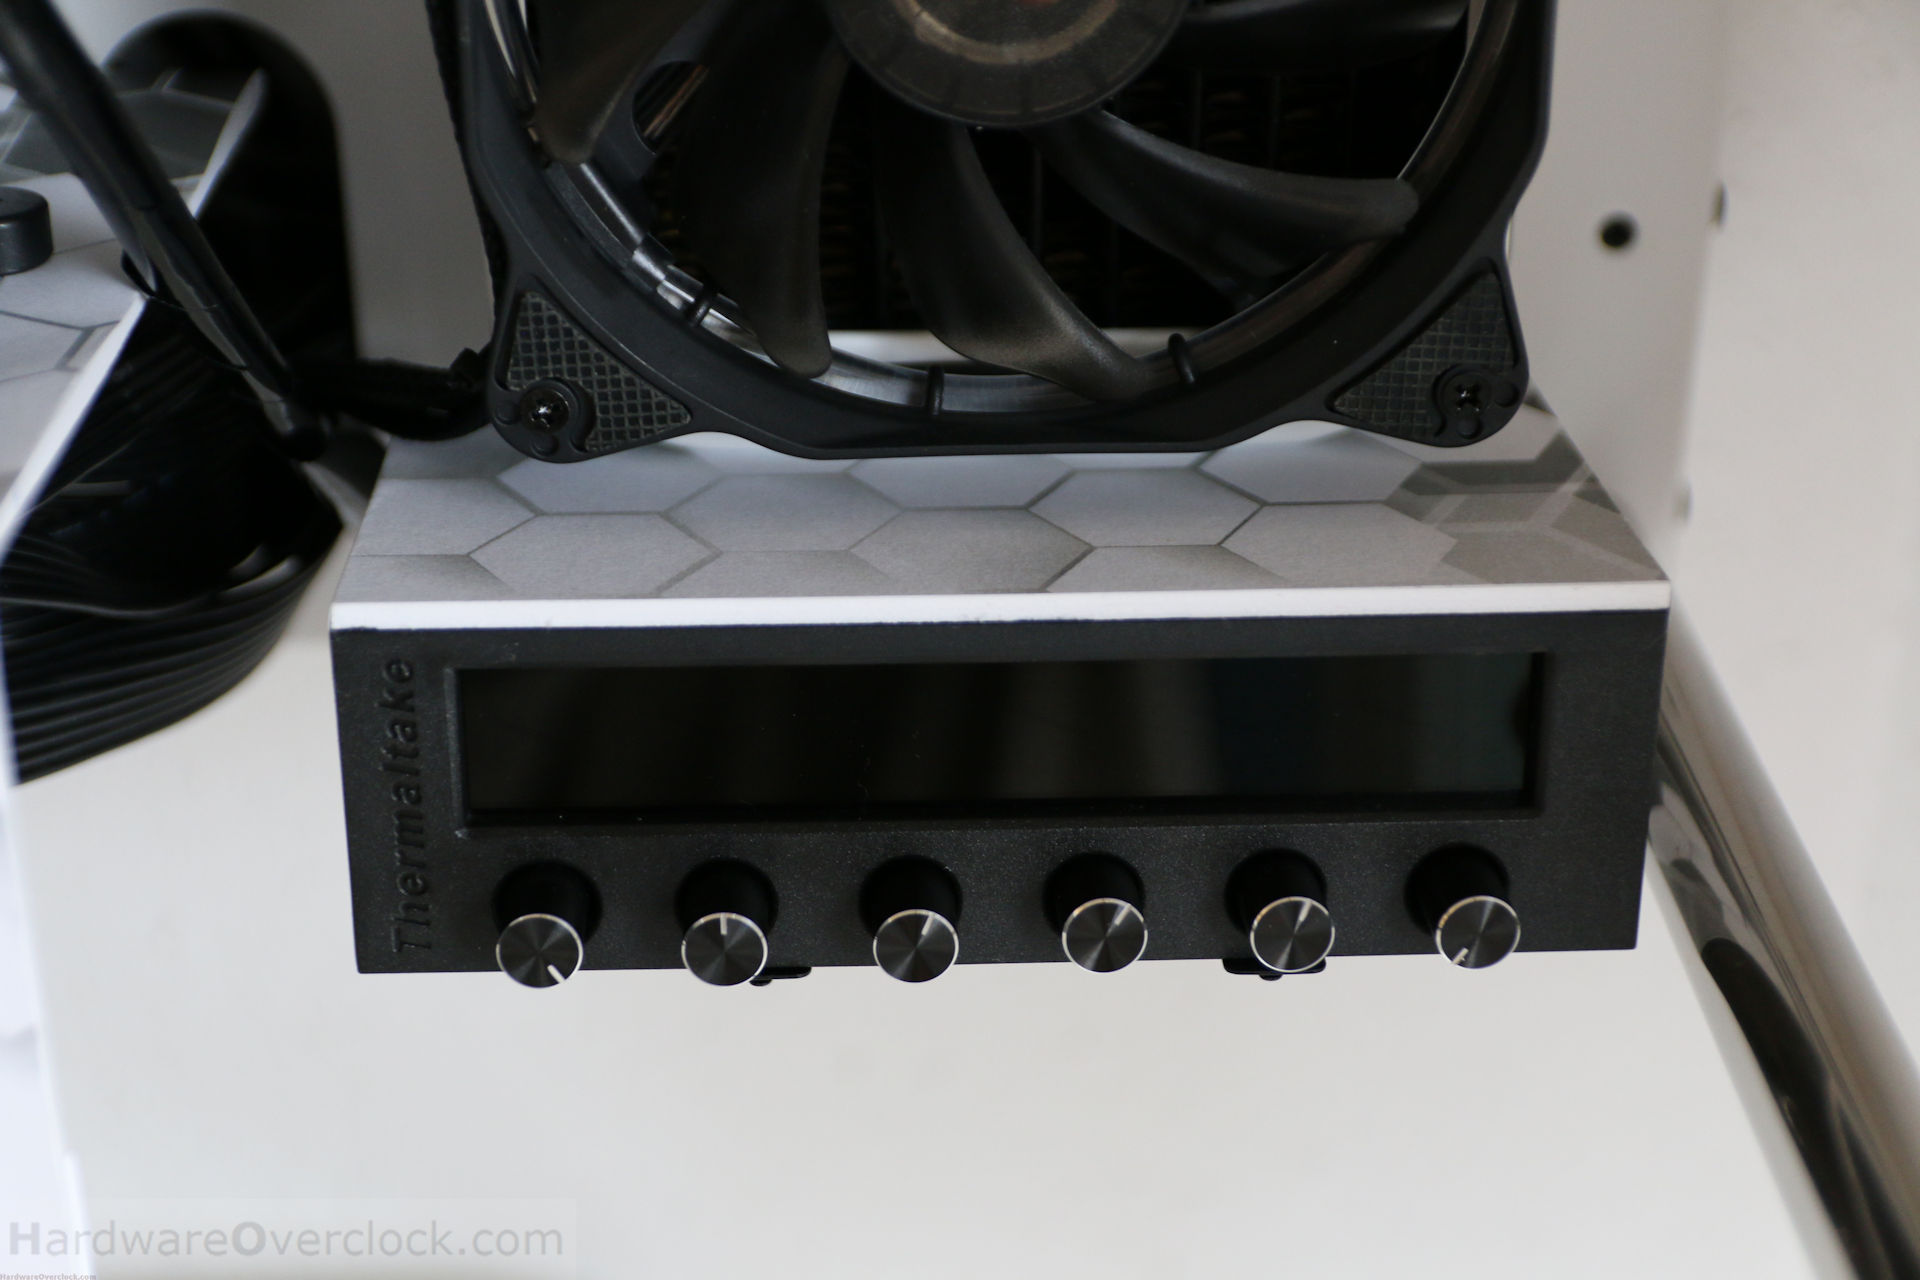
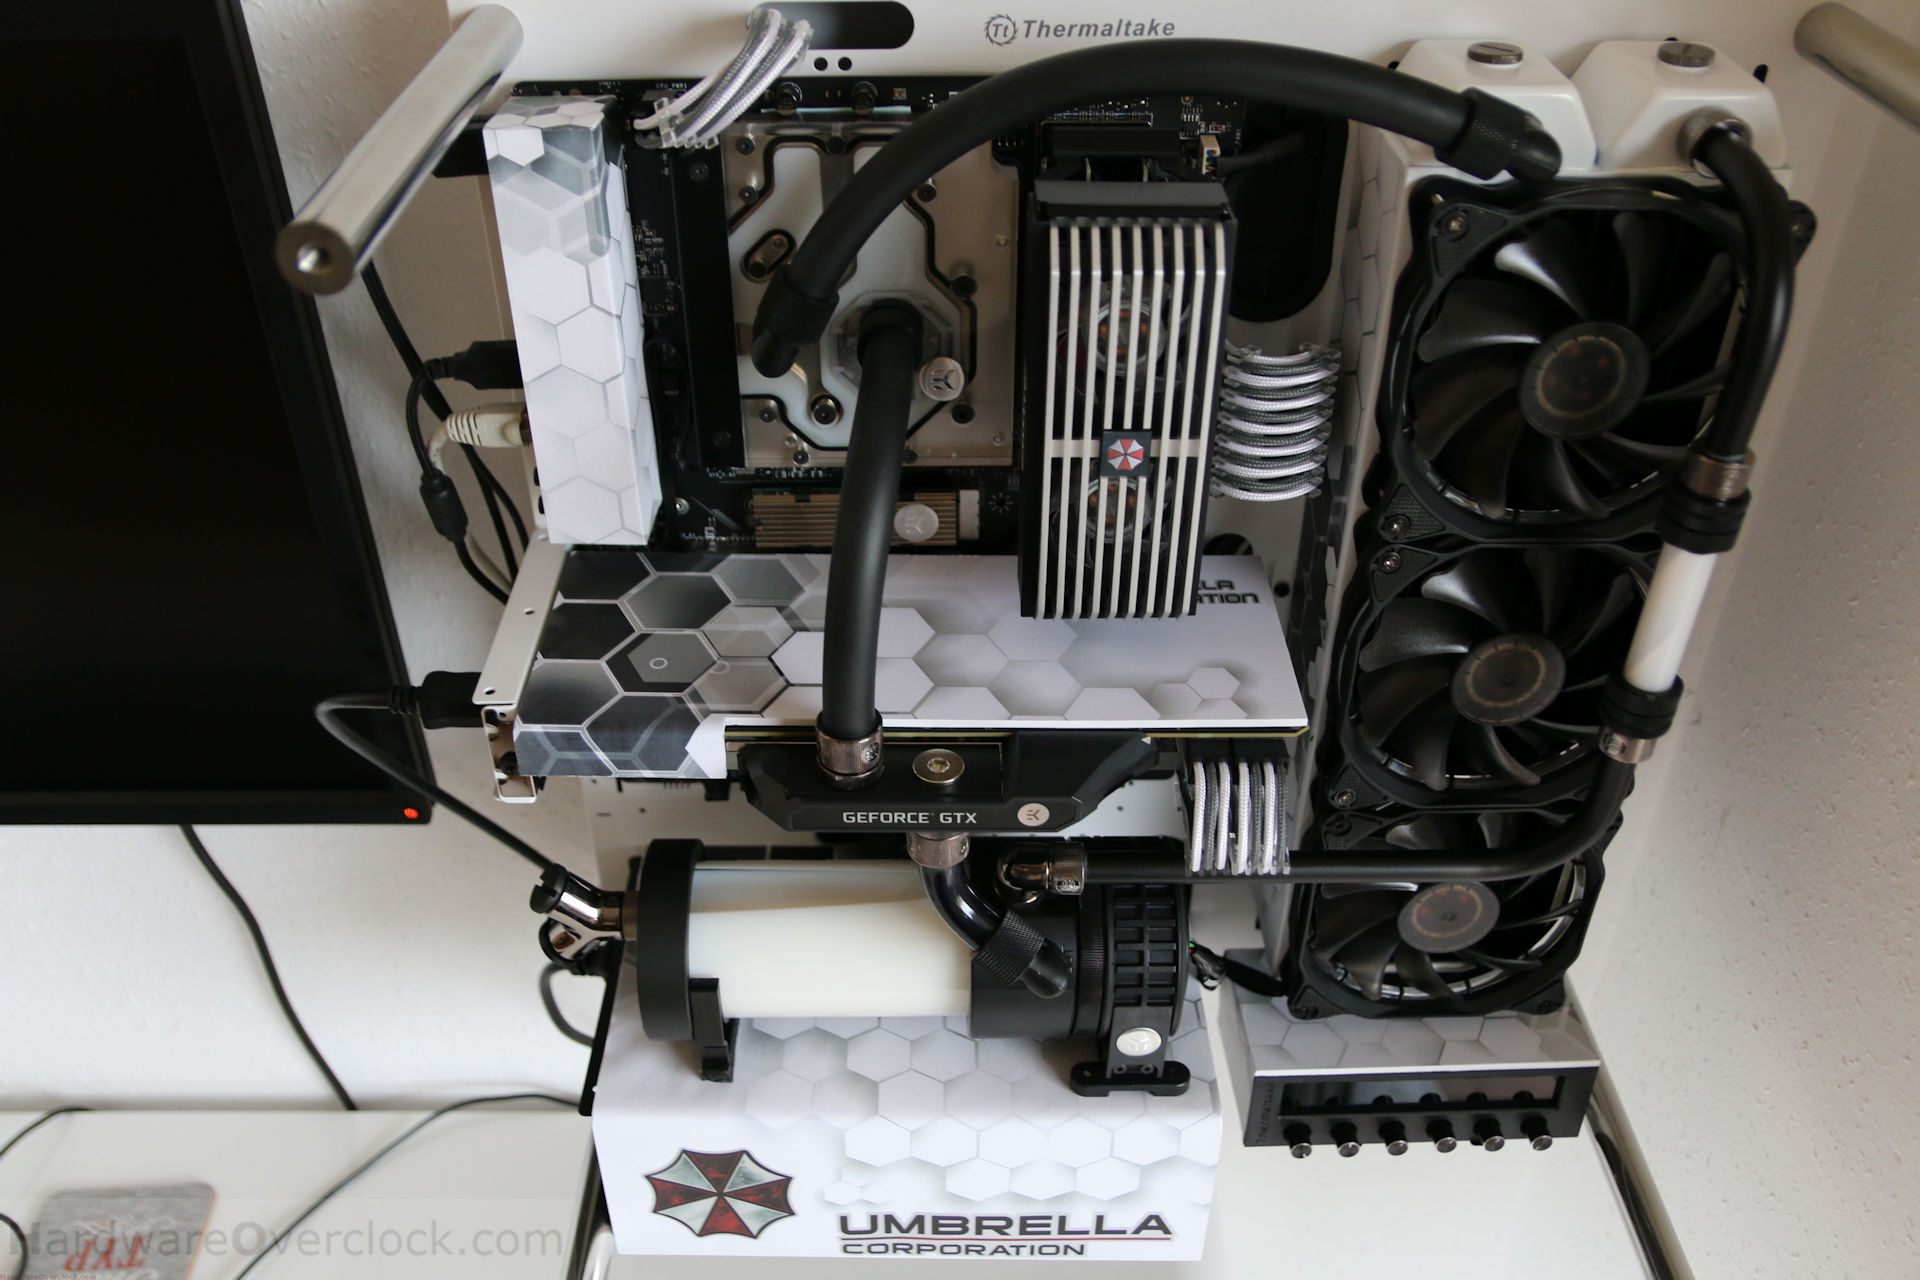
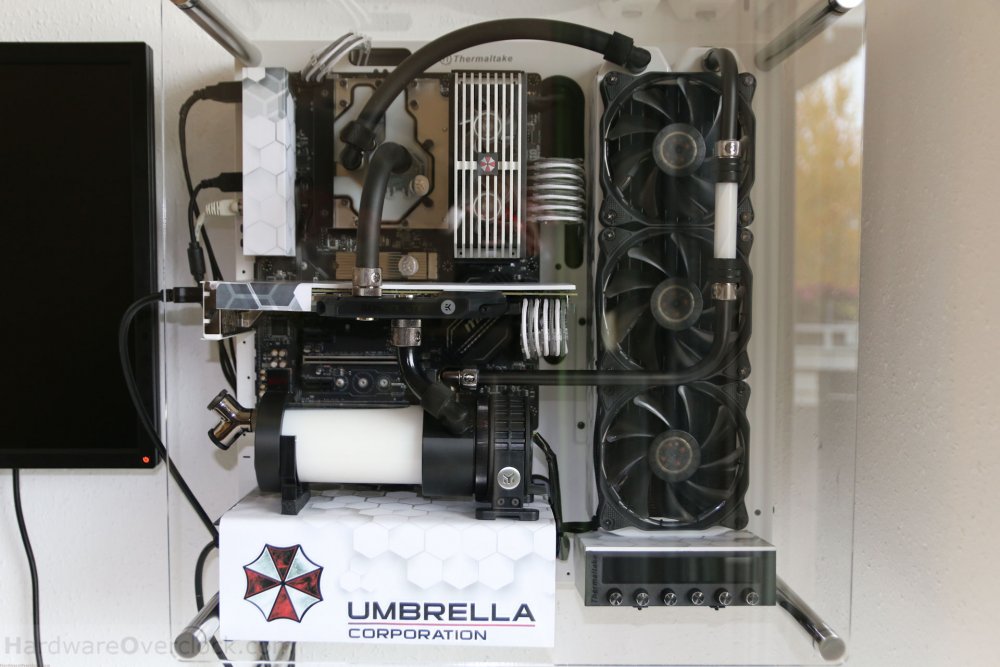
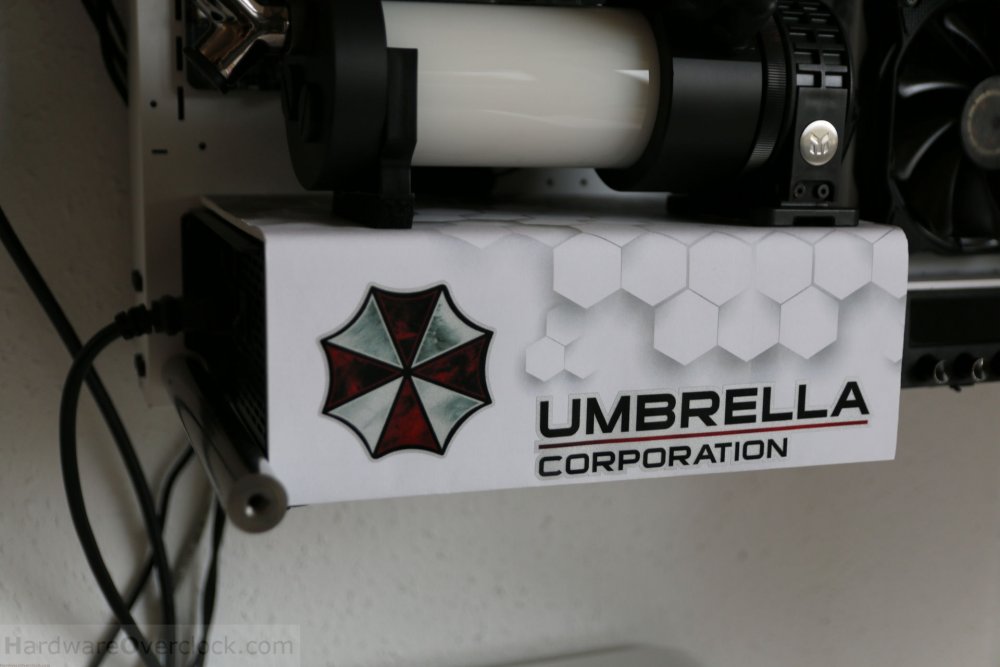
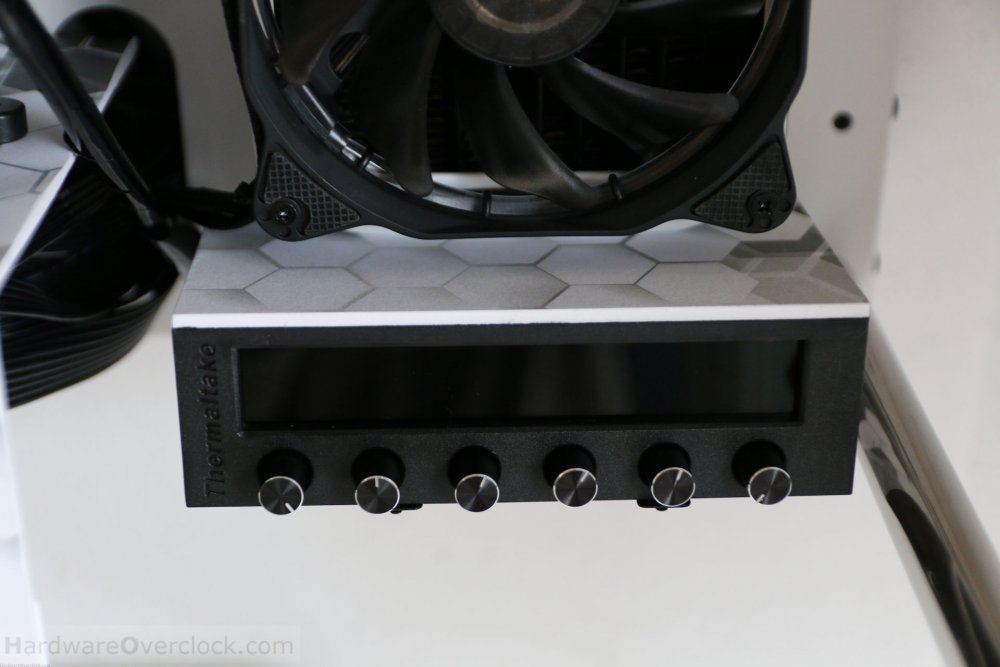
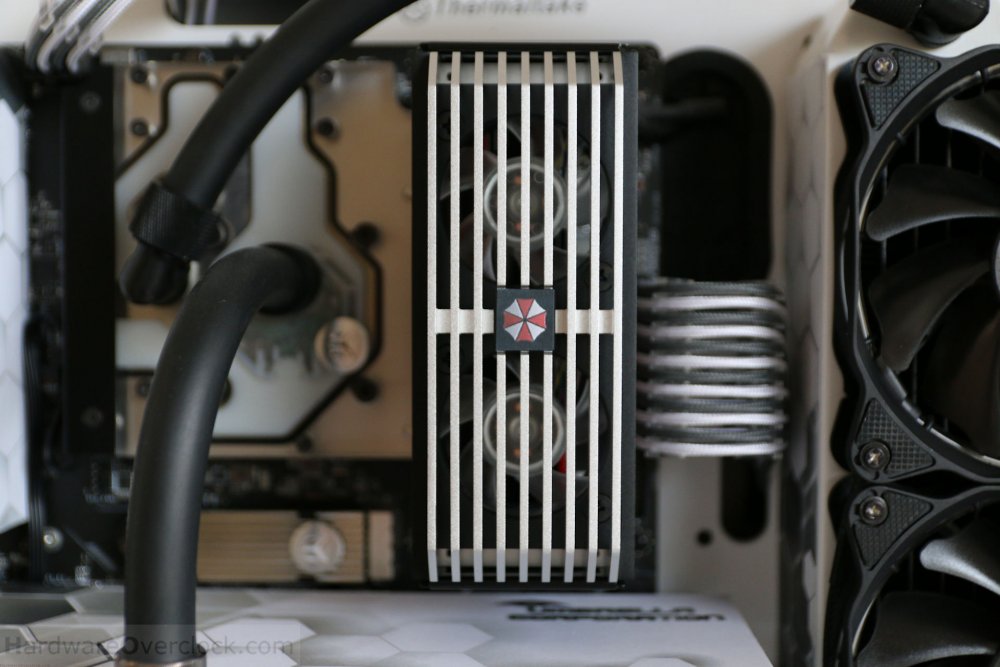
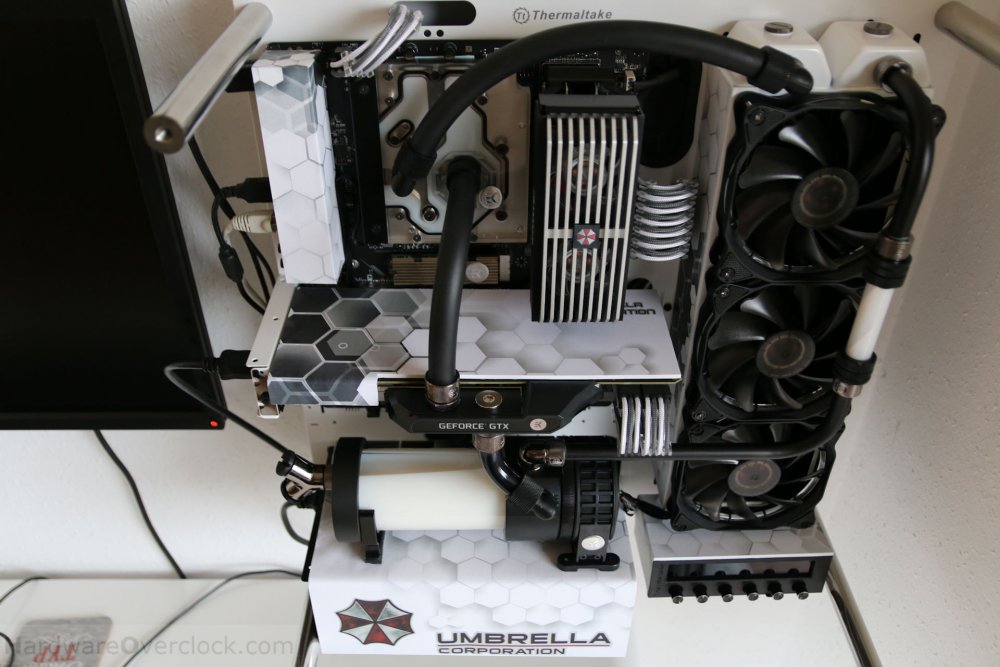
Here is my Core P3 Umbrella Corp. Mod Hardware: Thermaltake Core P3 White Edition Intel Core i7 6700K @ 4.8 GHz 32GB GSkill TridentZ 3200 MSI Z270 Gaming Pro Carbon NVidia GTX Titan X Pascal Thermaltake Toughpower Grand RGB 750W Cooling: EK Waterblocks Monoblock MSI Z270 Gaming RGB Corsair Dominator AirFlow Platinum RAM Kühler EK-FC Titan X Pascal Nickel Block Alphacool NexXxoS UT60 Full Copper 360mm Radiator White Special Edition Thermaltake Pacific Flow Indicator 2 anidees AI Halo Crimson Red LED 120mm EK-XRES 100 Revo D5 PWM (incl.pump) glass EK 12x10 Hardtubes and 16x10 PVC tubes matt Modding: Selfmade psu chasis Selfmade IO Panel Selfmade gpu backplate Umbrella Corporation Biohazard Resident Evil sticker Thermaltake Coolant C1000 White PHANTEKS cable set white/grey Hartschaumplatte 3x250x500 mm weiss Bauhaus Herma 4428 Universal-Etikett A4 for laser printer Hardtubes black matt sprayed Article with more pictures: http://hardwareoverclock.com/Thermaltake-Core-P3-Umbrella-Corporation-MOD.htm

-
Hello, I'm planning to buy X71 TG case and want to install as many radiators as possible! I want this combination: Front: 480/420mm @ push-pull (recommend thickness) Top: 360mm @ push only, 30mm Midsection: 280mm @ pull only. 45mm Bottom: 360mm @ push-pull, 80mm All leftover fan mounts: bare fans All used fans will be the Riing ones. If I mount 420 on the front I want to use my dual bay reservoir! Is this possible?
-
Hello Every body, My name is Claudiu and i'm 29 years old. I'm from Romania but living in Italy for 14 years. My passion is computer and everything is surrounding it. The passion to make modding began demanding to create my own computer customized my way. The project, which will present, arises from the requirement to create something unique and appealing at the same time. Hardware: (i will update soon) - - - - Watercooling system: (i will update soon) - - - - Sponsor: - Main Sponsor ThermalTake; - Avexir; - Sparco. Stay tuned !!!
-
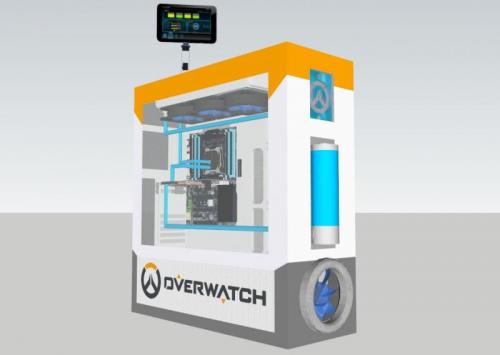
Hello im Anyone Mod Monkey, this is my first mod on this community. I want to present this project, Overwatch X71, below the render as you can see the theme of this mod is the last game of blizzard on core x71. changes I'm going to perform are: custom loop, new paint, new front, light box, aluminum logos, lcd with pc statistics, custom tank, and more.. all arrived, soon new updates! Thanks! See you soon.
-
Introduction Hi everyone, If you can remember, my previous mod was based on Assassin's Creed Game. So this time around I thought of going a bit to the future with a mod based on Crysis Game. This will have lot of work to do and will need lot of hours. So I expect this work-log to go on for few months. First I must give a huge thanks to Thermaltake for encouraging me to do this mod. This build would not become a reality if not for my Sponsors. So a big thank goes out to my sponsors. Avexir is supporting this build with Blue Raiden DDR4 Memory sticks Gigabyte is supporting this build with a X99 Gaming G1 WIFI Motherboard Nvidia is supporting this build with 2x GTX 980 Graphic Cards Thermaltake is supporting this build with all the items listed below. 1x Thermaltake Urban T81 2x Thermaltake Pacific PT40-D5 Silent Kit Reservoir/Pump Combo 2x Thermaltake Pacific RL360 Radiator 1x Thermaltake W2 CPU Water Block 2x Thermaltake V-Tubler PETG Tube 5/8†(16mm) OD 500mm 4 Pack 8x Thermaltake Riing 12 LED Blue 1x Toughpower Grand 1200W and dozens of Fittings needed for the loop. Concept I will be modifying the Thermaltake Urban T81 from ground up to facilitate a new component layout using materials like Acrylic, Aluminium and Steel. All the side, top and front panels will be made with acrylic sheets to carry the Crysis Game Theme. After assembling the whole case it will be airbrushed to give it the effects that are demonstrated in the pictures. This mod will have a motherboard cover which will be controlled by a Raspberry Pie Micro-Controller using a 7" touch screen. Raspberry Pie will also control fan speeds, LED colors and other actuators for moving parts. Main focus point of this mod was the holding facility where Crysis 3 game begins. So the airbrushing will try to demonstrate the looks of a old futuristic building. Renderings These are the 3D rendering of the mod. It should resemble these once completed.
- 2 replies
-
- 1
-
-
- Mod
- Crysis Mod
- (and 6 more)
-
THIS IS FOR CHALLENGER PRIME I was wondering if it was possible to change the variables of the red blue settings in a document or something, or if there was some driver I could download. Also is this: 17=Bklight,415,59,155,21, Able to be modified? I really want a bit more freedom with the colours.
-
I am new to this forum but far from new to PC building and Mods. I don't say this to give away my age, though I know it will...I remember when moding consisted of pulling apart the old beige cream colored cases, which powered those lovely green CRT monitors, maybe adding a fan or spray painting bits and pieces. Today, that old way of doing things is out the window. No longer is a bit of spray paint or a case fan (or dare I say...an upgrade to a 56k modem.) Gone are those simplicities and though I miss them some days, I absolutely love the attention to detail that goes into new builds. Coming out of the garage of todays builders, are the Ferrari of computers. Beasts that conquer the bench tests and frag any off the self pc no matter what brand is printed on the box. It is these type of builds that have kept me intrigued over all these years. I can not count the number of PC's under my belt anymore but I do recall the feelings I had the very first time I tore a system down and by some miracle, managed to get it back together. It is the same feeling I still get when I open up a new motherboard or graphics card and smell that unique fragrance that only new electronic components can claim. I took a short break, (2 years) which in this 'game' can be an eternity. I still followed many other builders online, in awe, of most of the things these people where doing to their rigs. I have since put a lot of thought into my next build. The problem I kept running into was, "What case am I going to use?" I have, in the past had this same problem as I am sure many builders have found themselves in. Typically I would pick a case make some heavy changes such as rotating the motherboard tray 180 degrees. For this new build however, I wanted to start with a case I loved, unlike those in the past I only liked. I found the perfect one (actually two in a stacked configuration) in the Core X9. This is the first build I have ever followed in a video documentary as well. I know a million videos are out there of unboxing, building, finished products, but I wanted to do things a bit differently and not only show all those things but cover the 'whys' for my components, explore alternatives for those wanting to spend less money, and generally offer some advice that has come with the wisdom only the experience of time can find. I am here to see what others are doing to their Core X9 boxes too. Most of the info out there consist of CES Thermaltake images or videos. (Which are excellent) I just feel like this is such a versatile chassis that I would love to see all the combinations others can come up with. Good luck with all your builds... Arial
-
Hello, my name is Dustin Porter. I have been building and modding pcs for about 7 years and I love every bit of it. Back in july of 2014, I built a desk from the ground up I call REDLINEelite. Im new to this forum and I hope you all enjoy my build. I apologize in advance, I lost some pictures so bare with me. http://www.techpowerup.com/forums/threads/redlineelite-desk-pc-mod.206797/
-
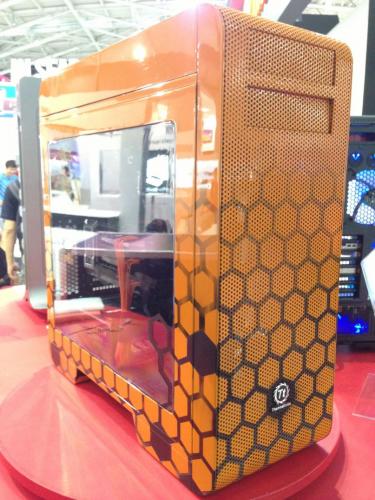
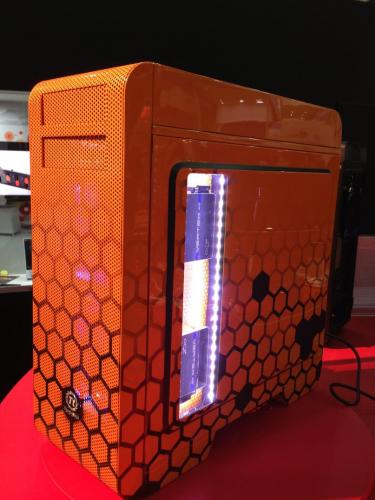
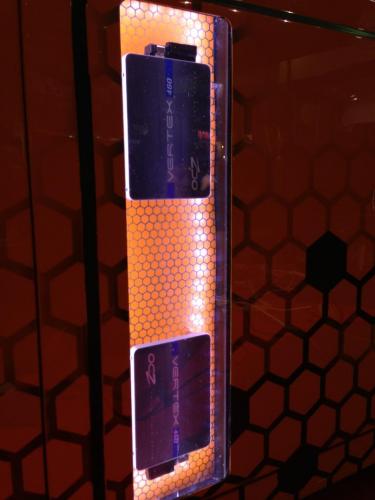
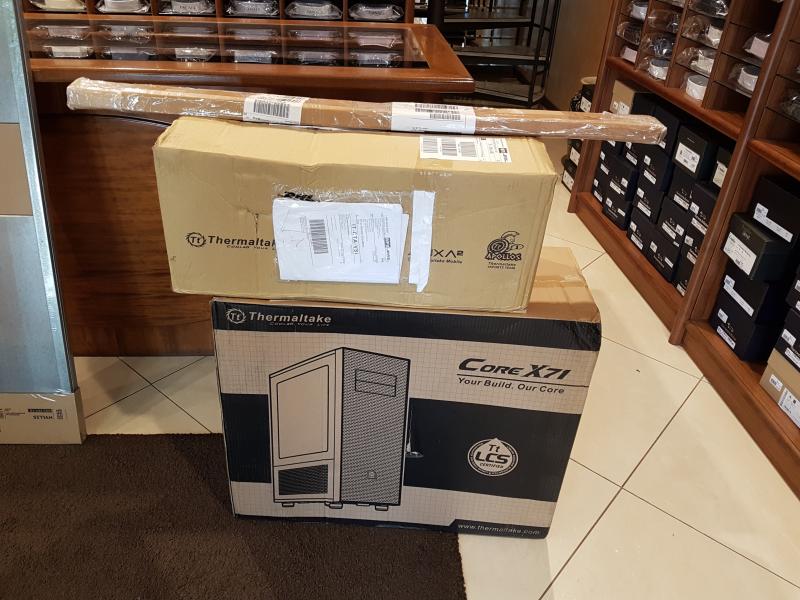
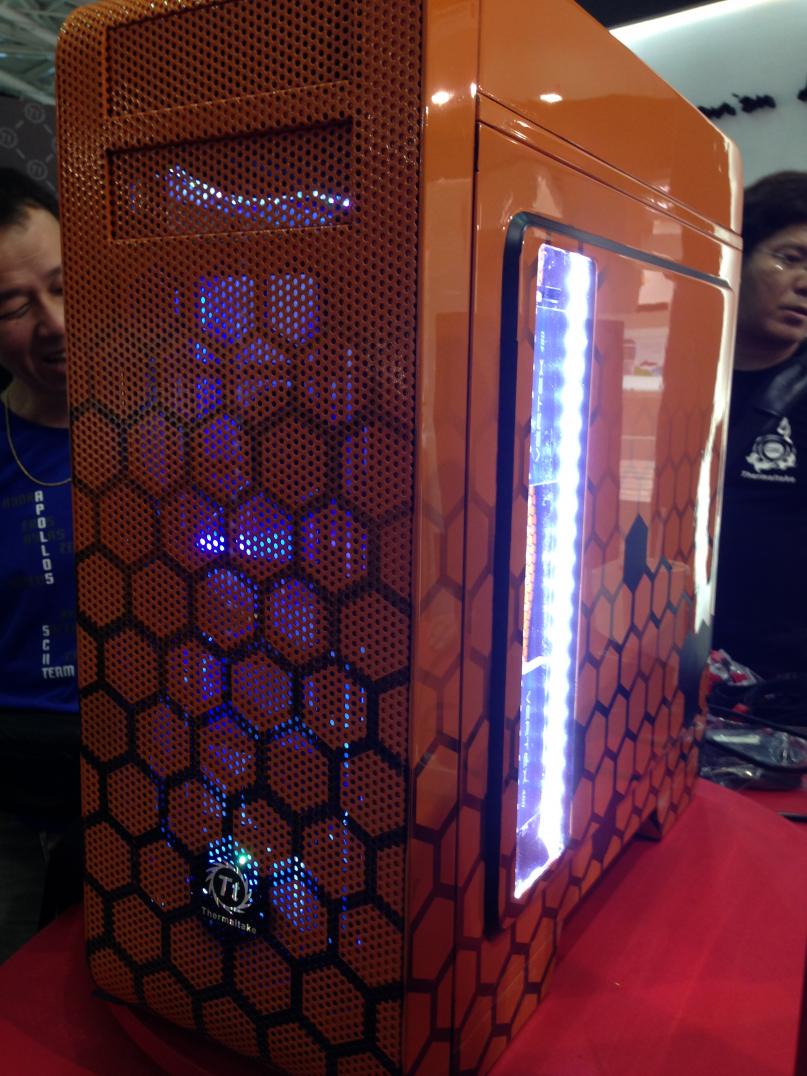
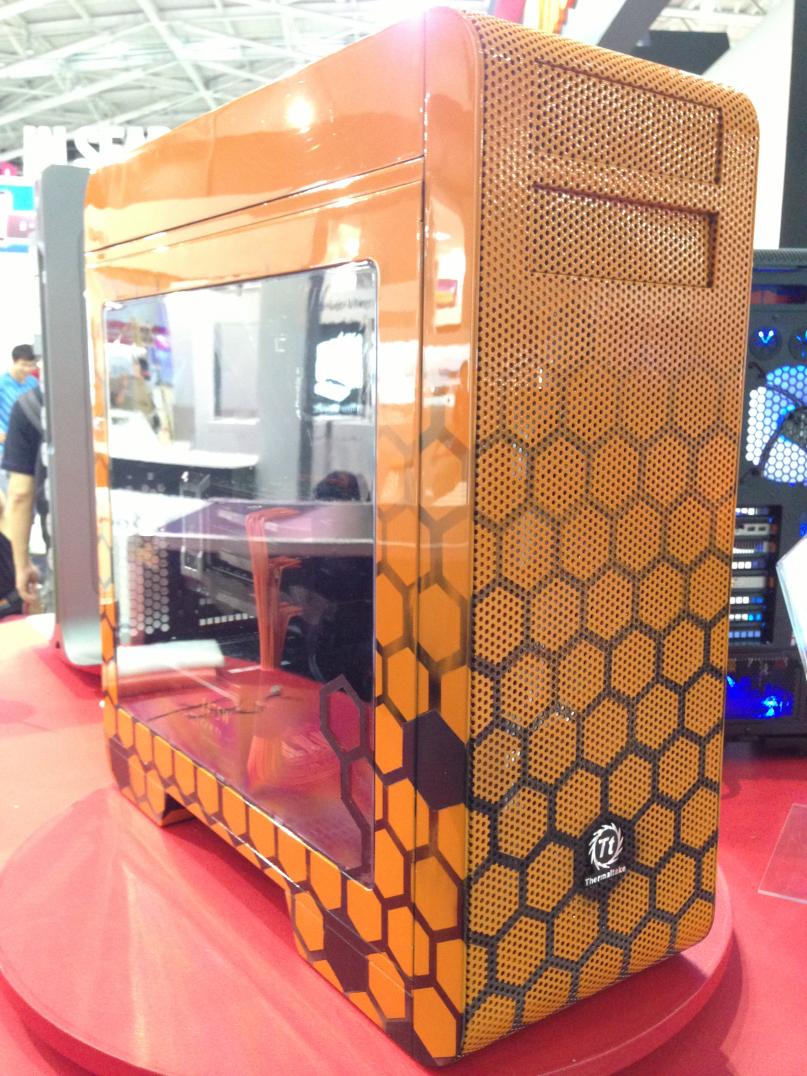
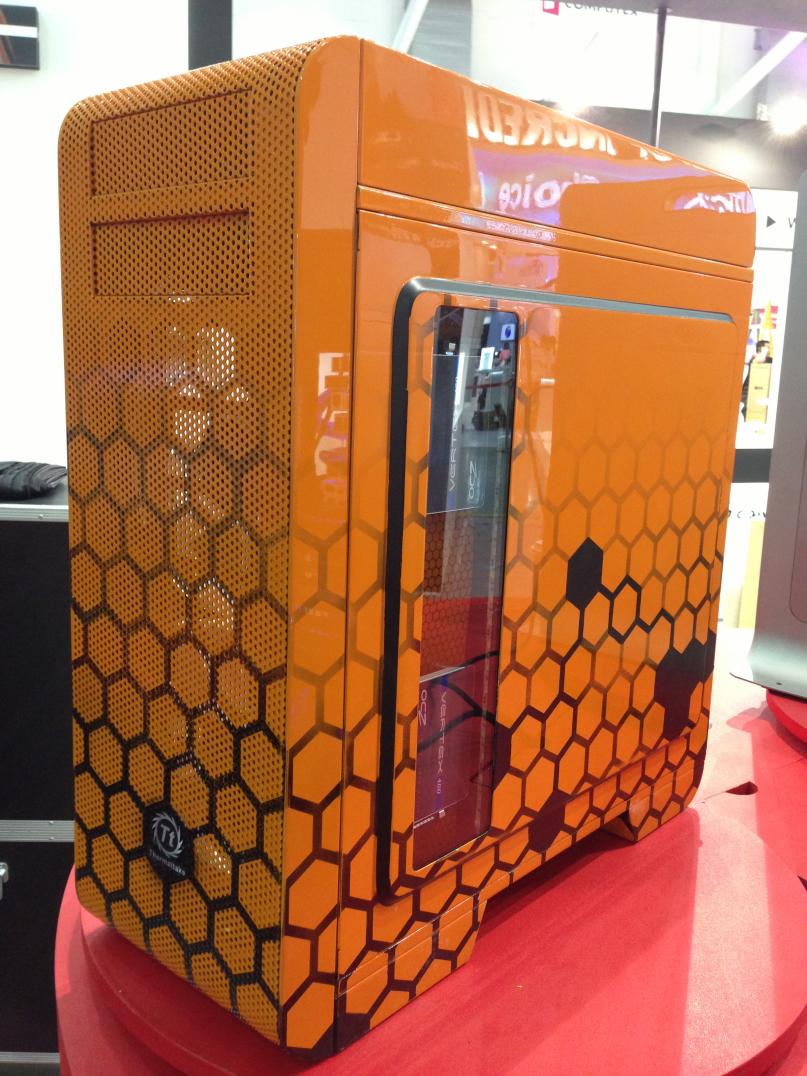
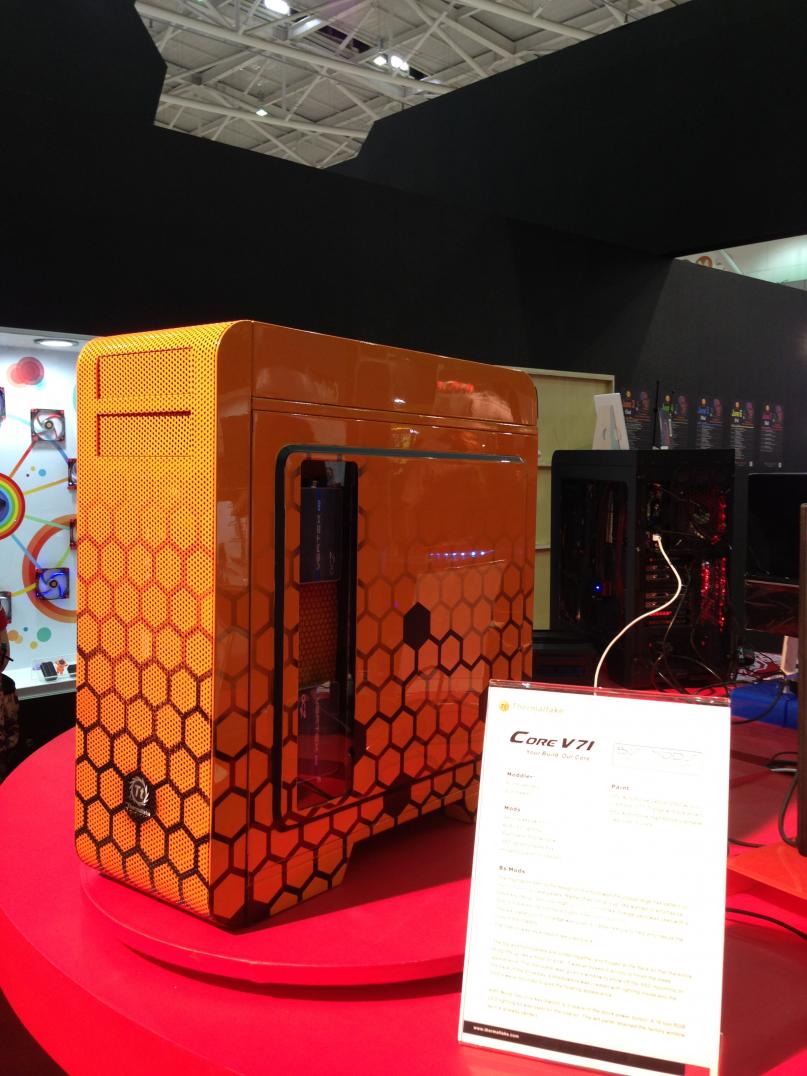
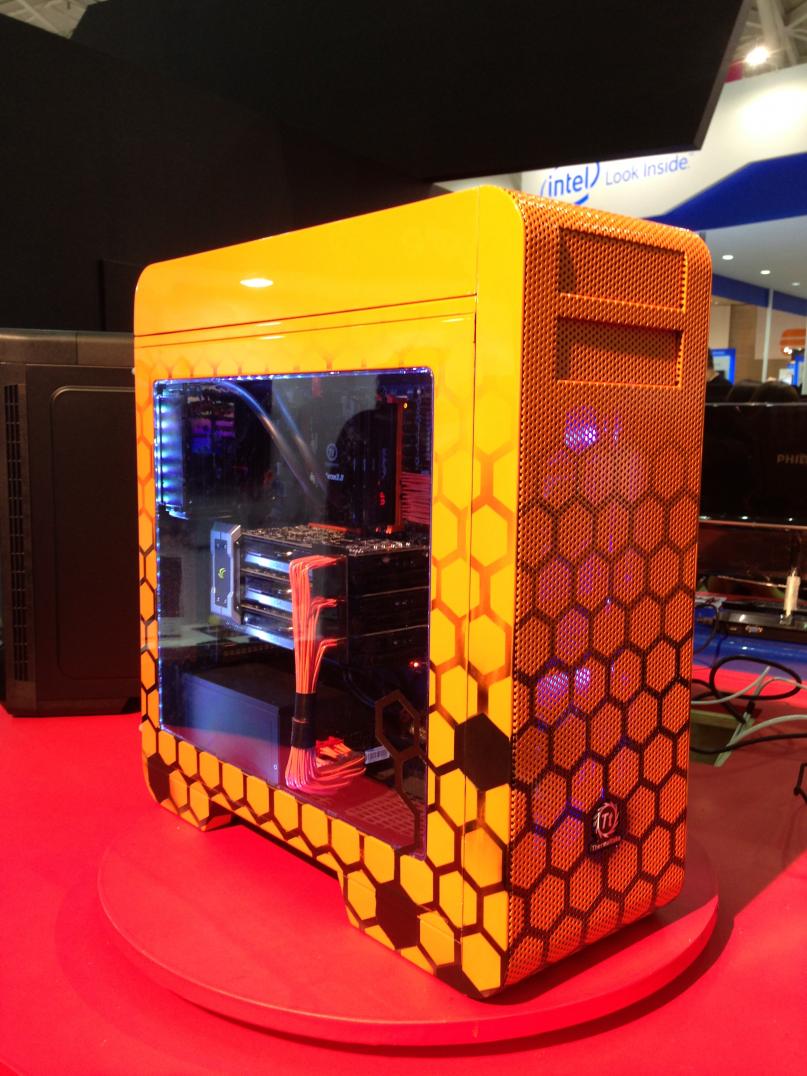
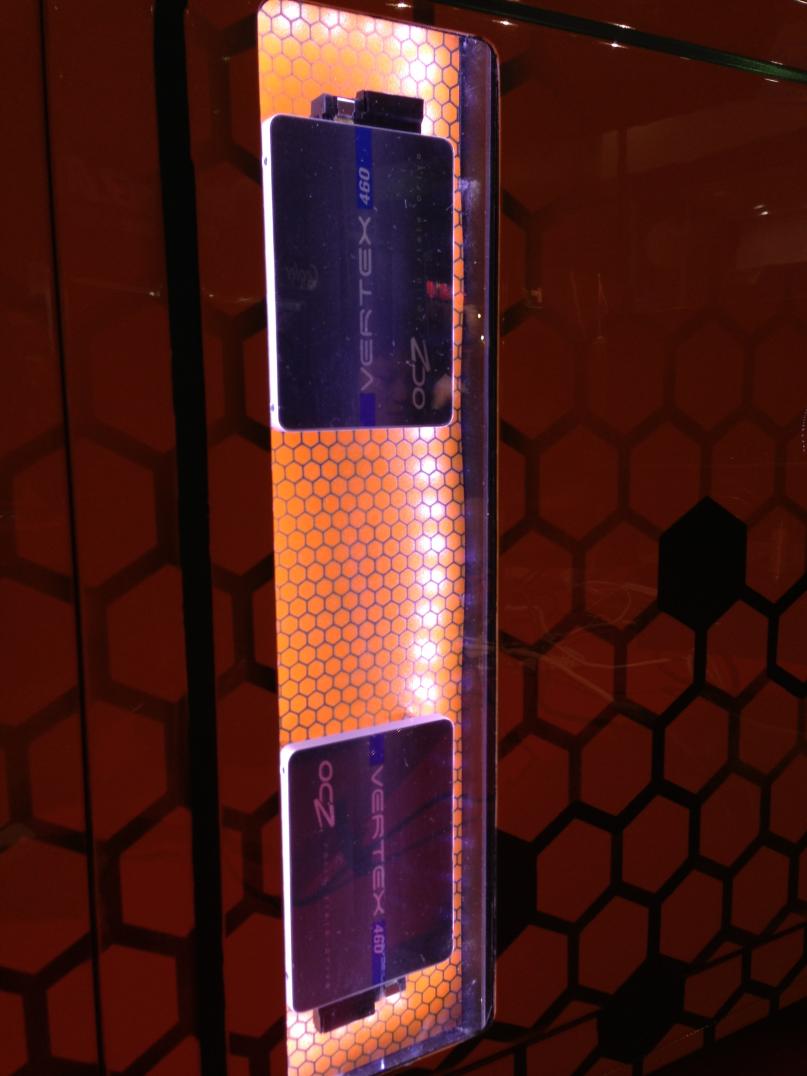
BS Mods The inspiration behind the design of this build was the unique large hex pattern on the front and top case panels. Rather than "chop it up“ We wanted to emphasize these key design features. High Quality Themaltake Orange paint was used with a fade to black styling to ensure it gets maximum visibility. The rear panel punch out edge was given a rubber texture to help emphasize the lines of the chassis. The interior was repainted in textured black. The top and front panels are joined together and hinged at the back so that the entire thing lifts up like a hood on a car. It was all boxed in acrylic to finish the sleek appearance. The rear panel was given a window to show off the SSD mounting on the back of the drive bay. a shadowbox was created with lighting inside and the SSD’s were mounted to give the floating appearance. A BS Mods Security Key Switch is in place of the stock power button. A 16 foot RGB LED lighting kit was used for the interior. The left panel retained the factory window as it is already perfect. Mods Security key switch RGB LED lighting Right panel SSD window SSD lighted display box Hinged top and front bezels Paint PPG Automotive Deltron 2000 acrylic Urethane in TT Orange w/ black accent PPG Automotive High Solids Urethane clear coat -5 coats Modder Rod Rosenberg Bob Stewart