-
Forum Statistics
94k
Total Topics115.2k
Total Posts -
Member Statistics
172,967
Total Members16,800
Most Online


Sanjaya
-
Posts
44 -
Joined
-
Last visited
-
Days Won
5


Sanjaya's Achievements
Just Getting Started (2/10)
20
Reputation
-
 vincentvr.21 reacted to a post in a topic:
[Sri Lanka] Sanjaya Bhanu
vincentvr.21 reacted to a post in a topic:
[Sri Lanka] Sanjaya Bhanu
-

[Sri Lanka] Sanjaya Bhanu
Sanjaya replied to TT Lily's topic in 2022 Thermaltake RAM MOD Invitational Season 1
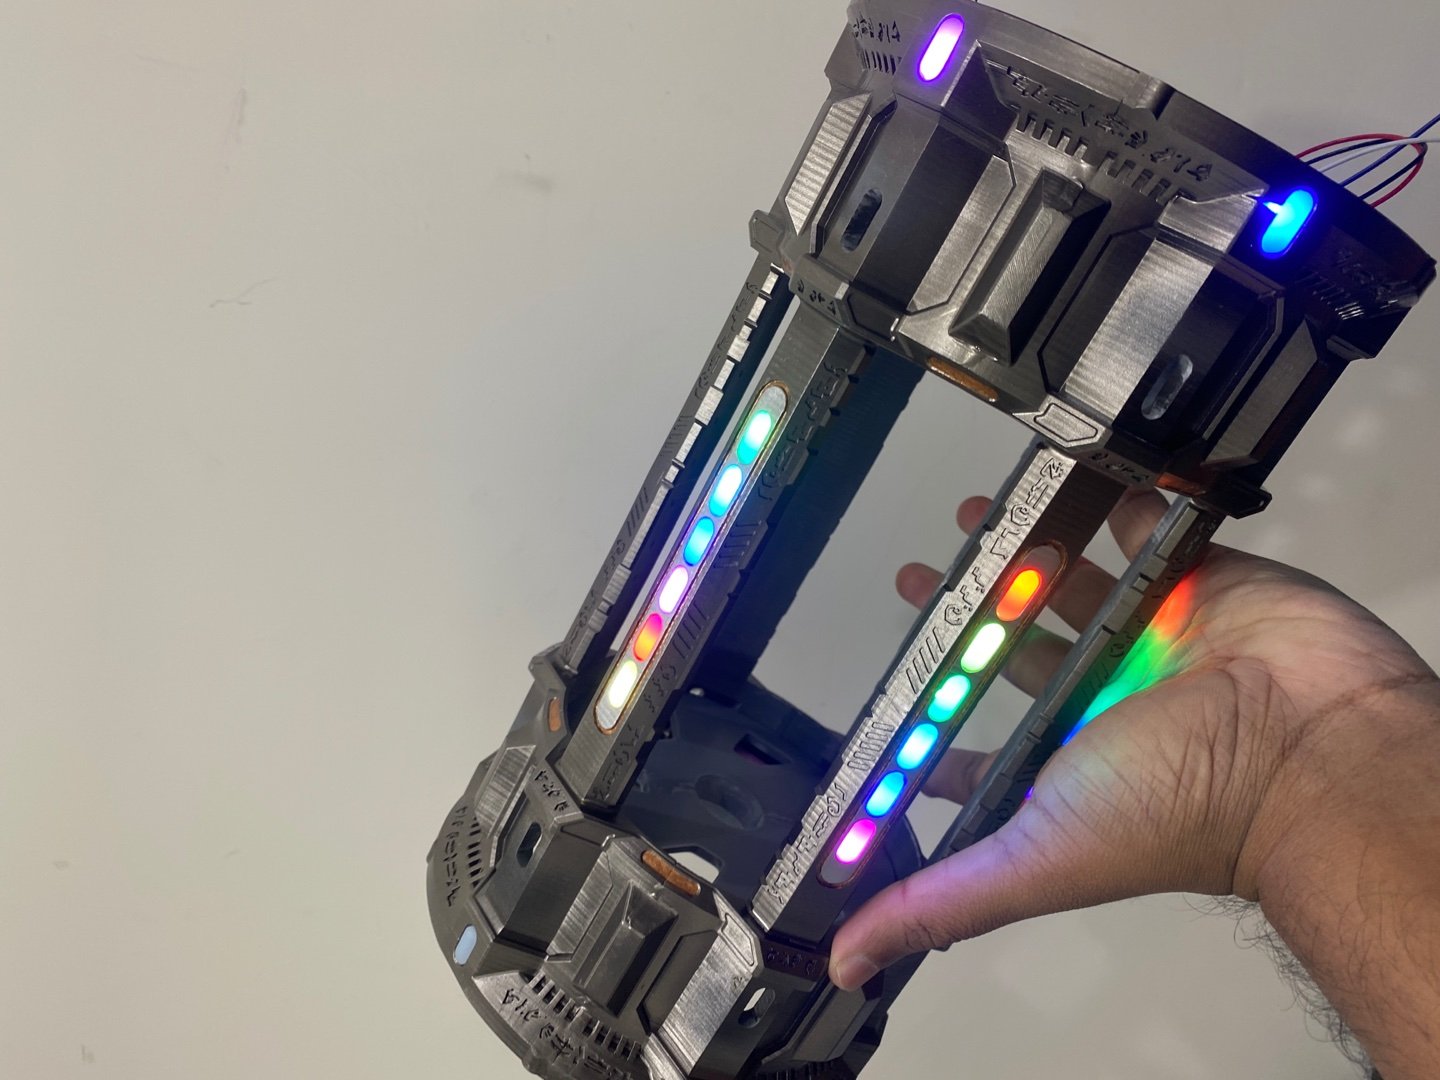
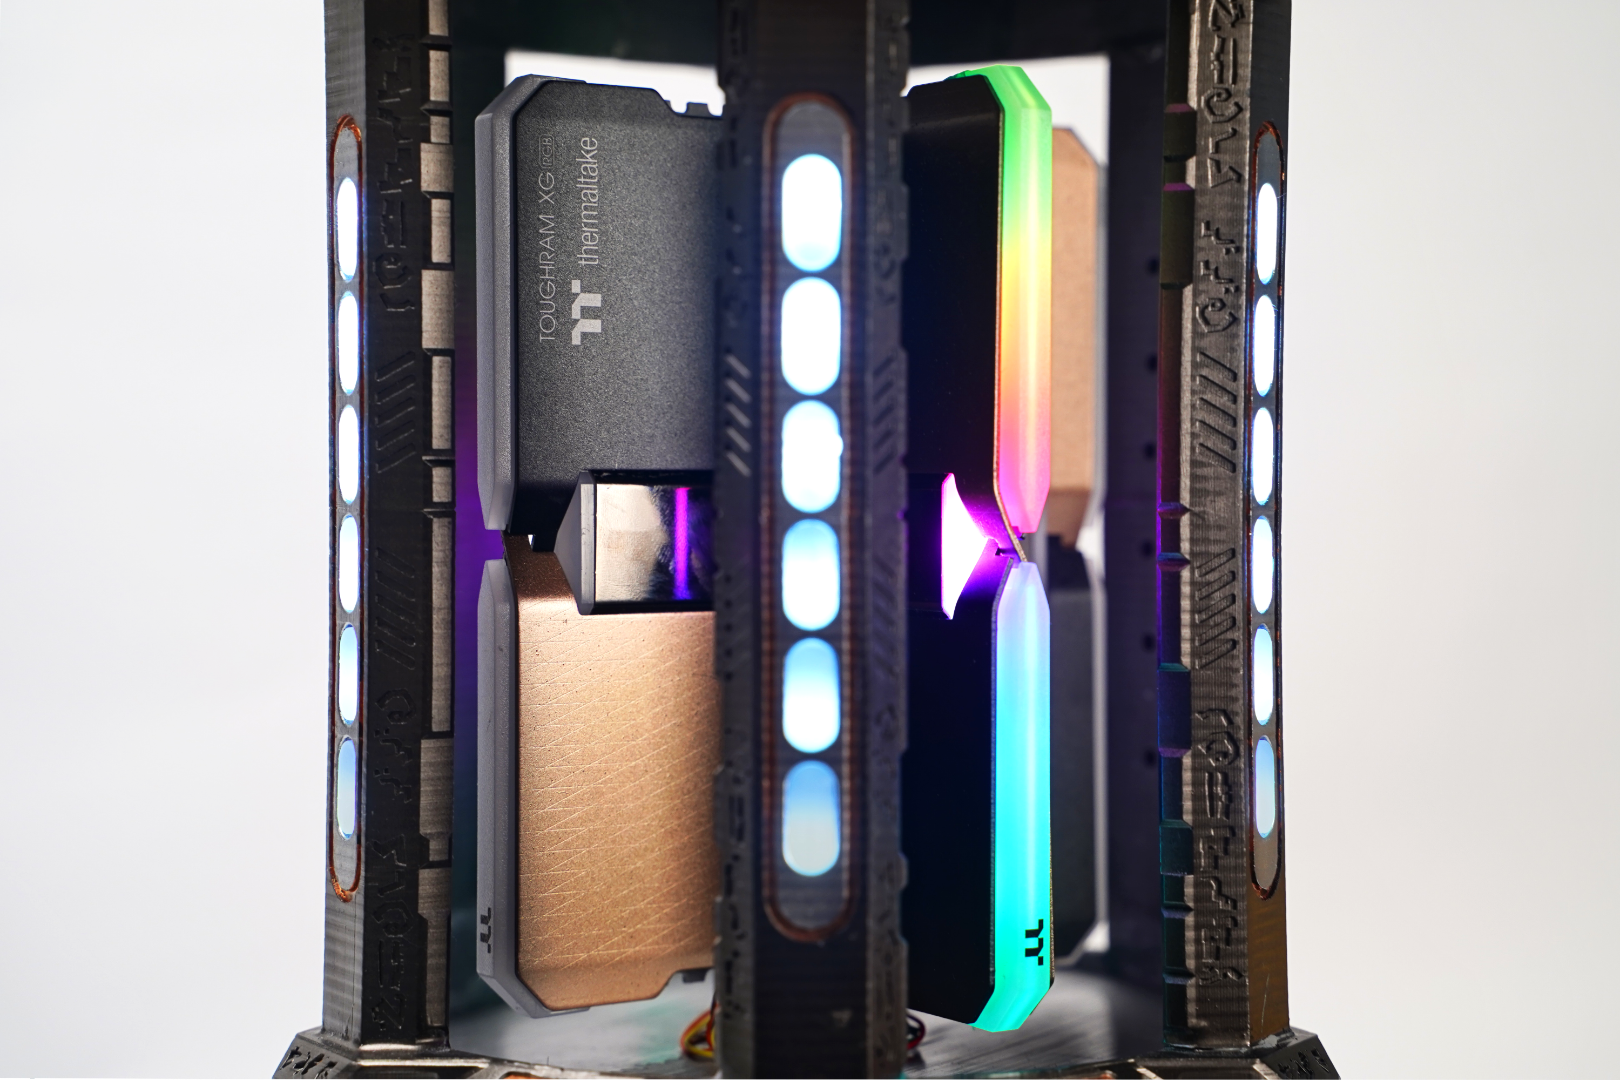
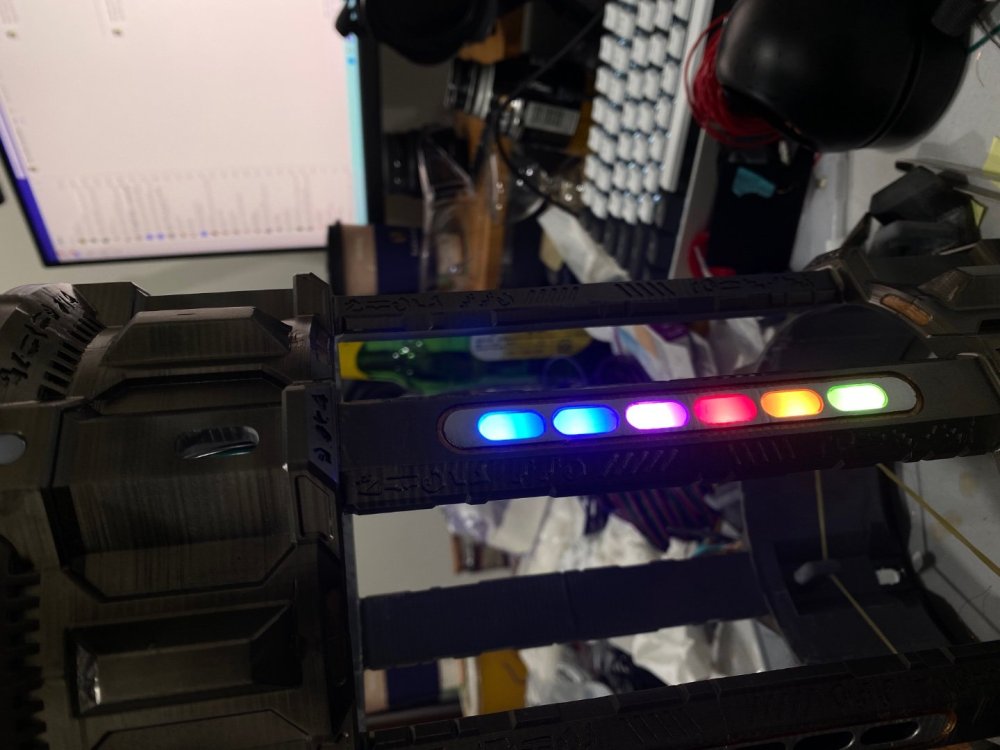
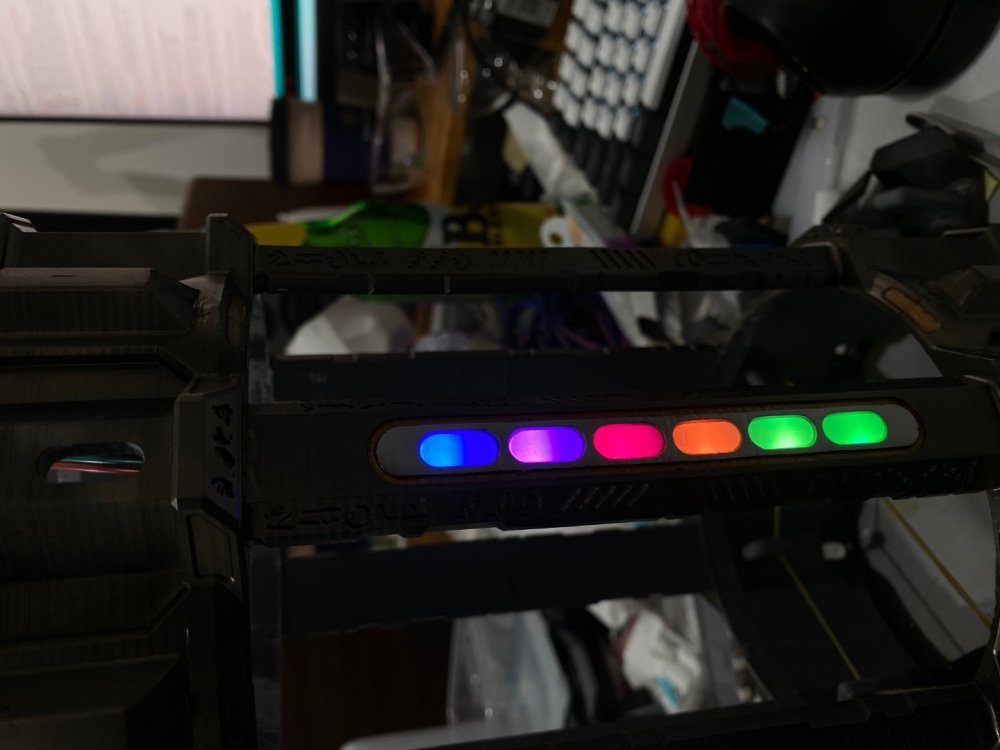
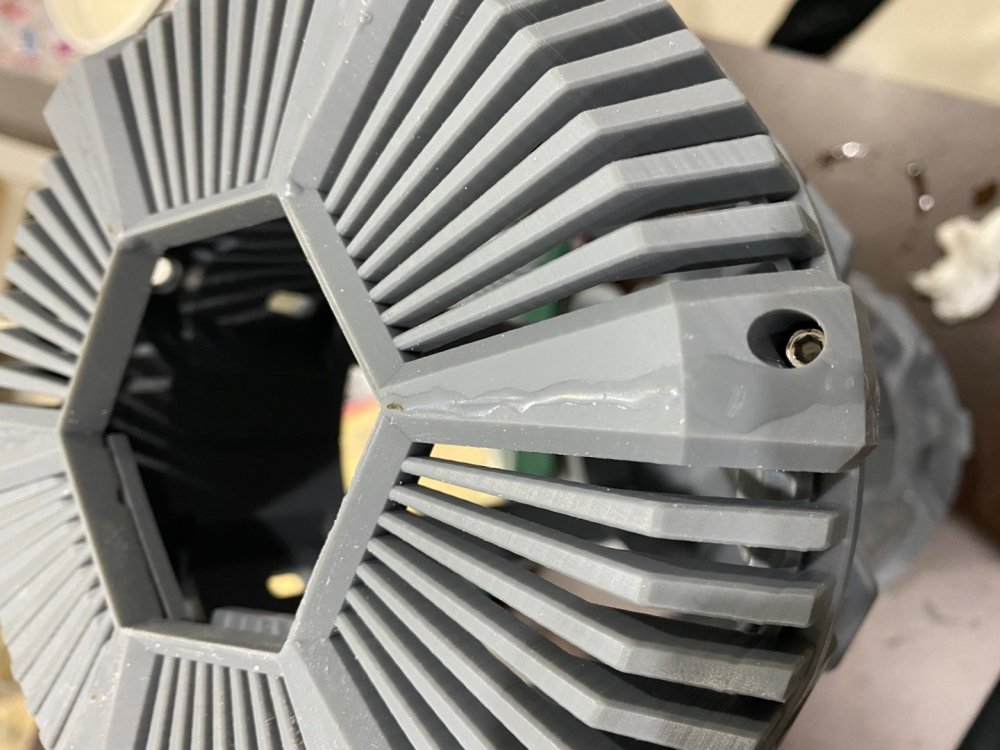
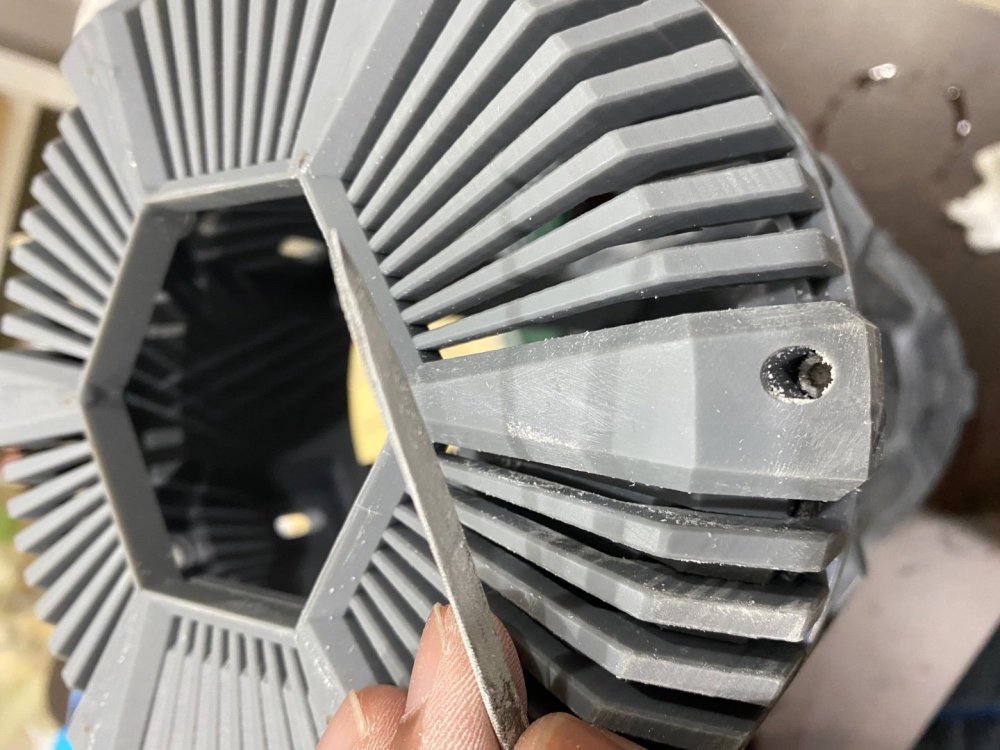
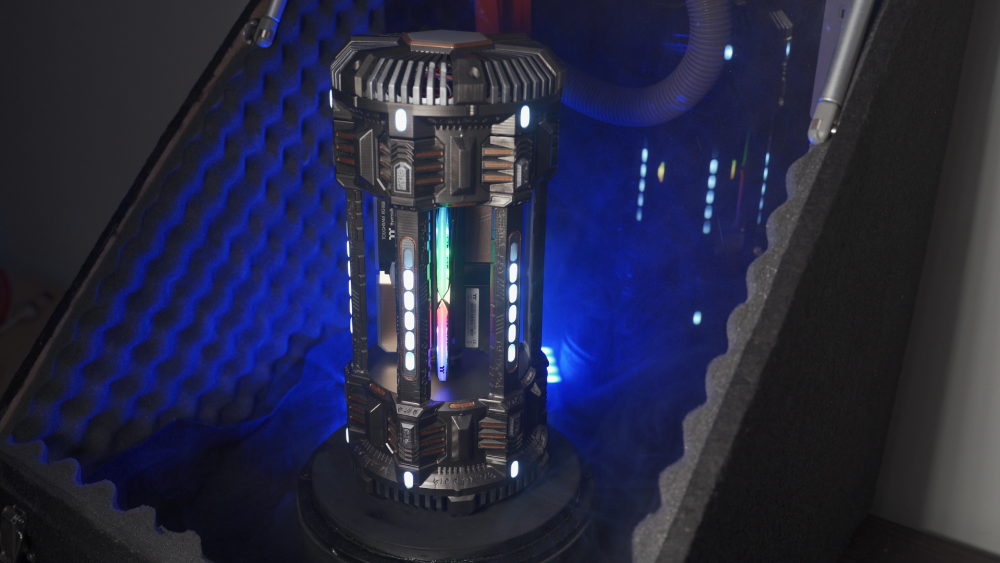
I added some extras photos for you guys to check out -
[Sri Lanka] Sanjaya Bhanu
Sanjaya replied to TT Lily's topic in 2022 Thermaltake RAM MOD Invitational Season 1
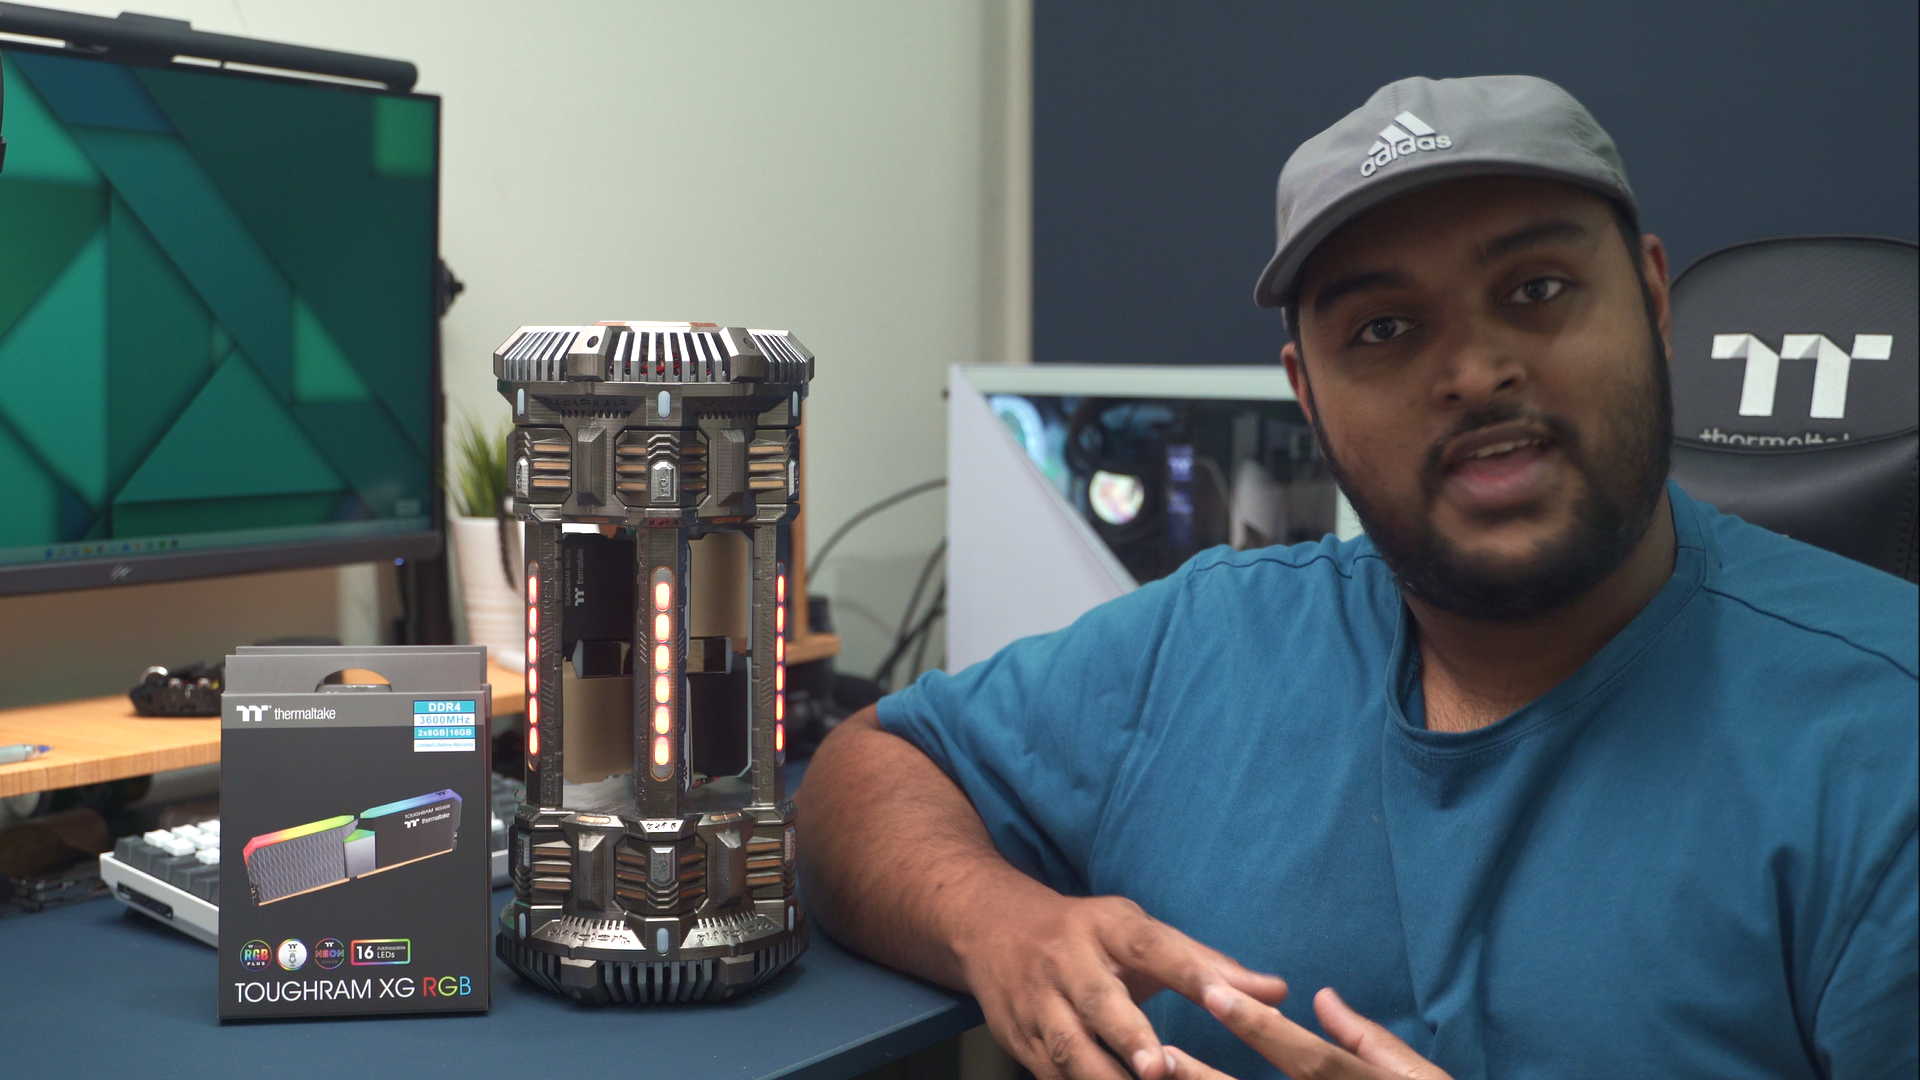
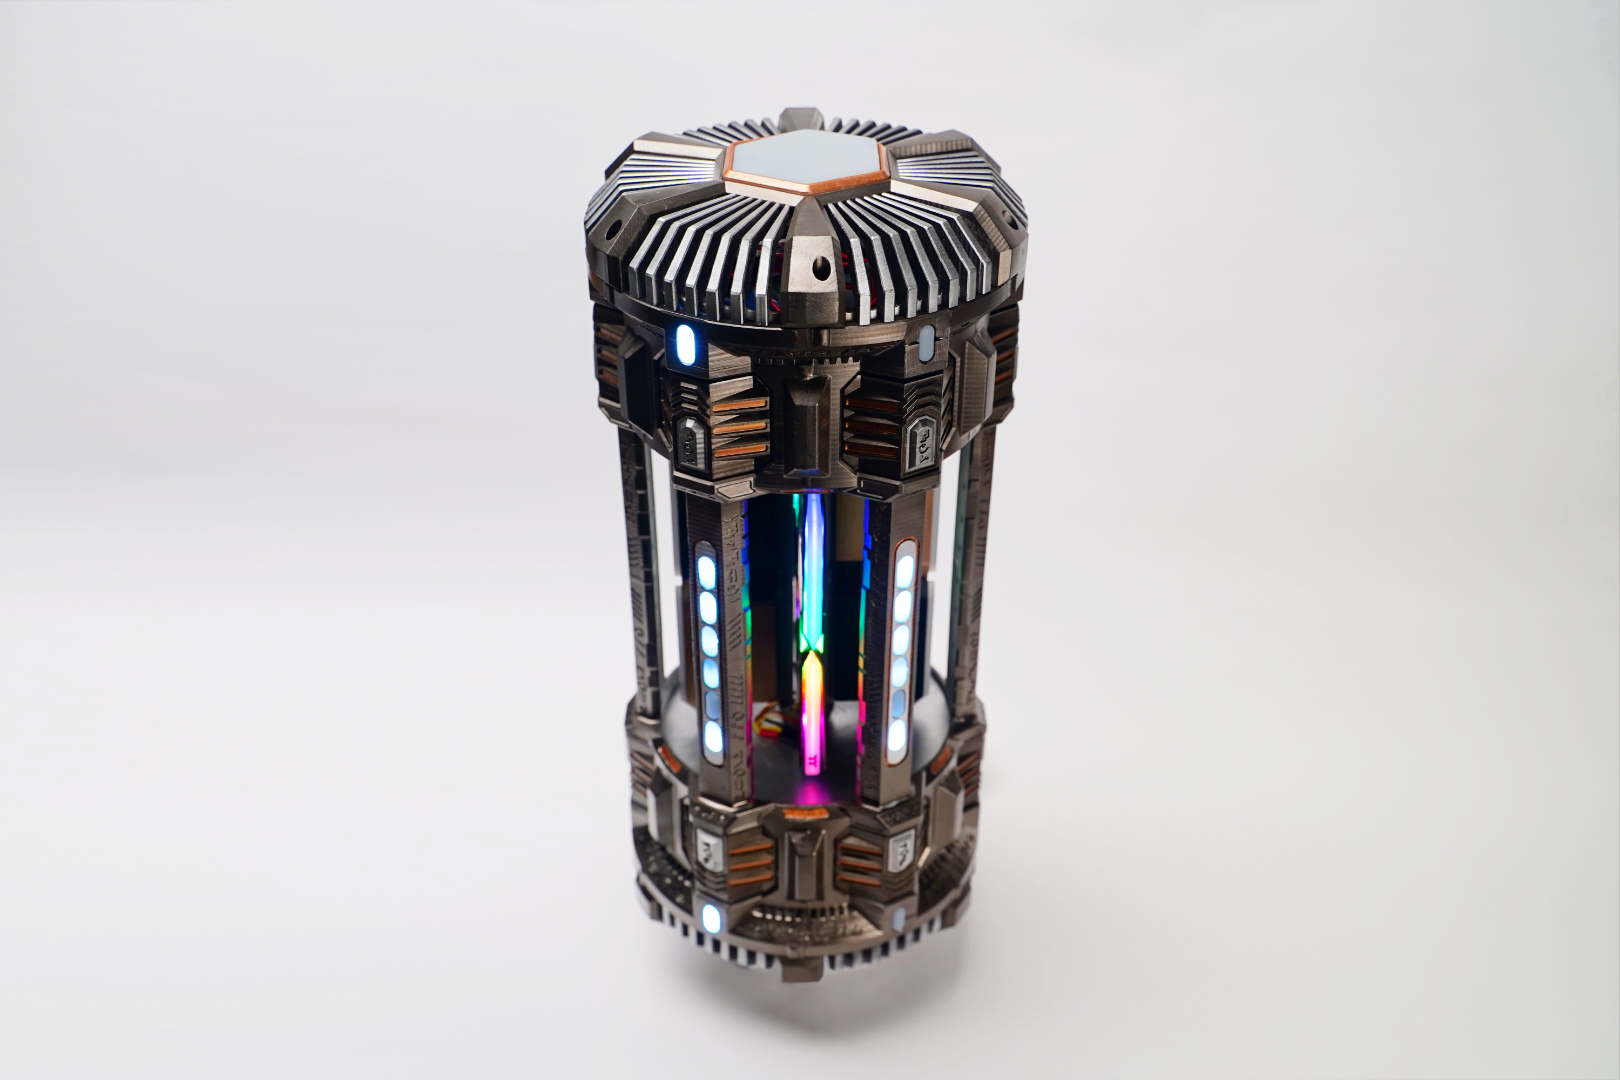
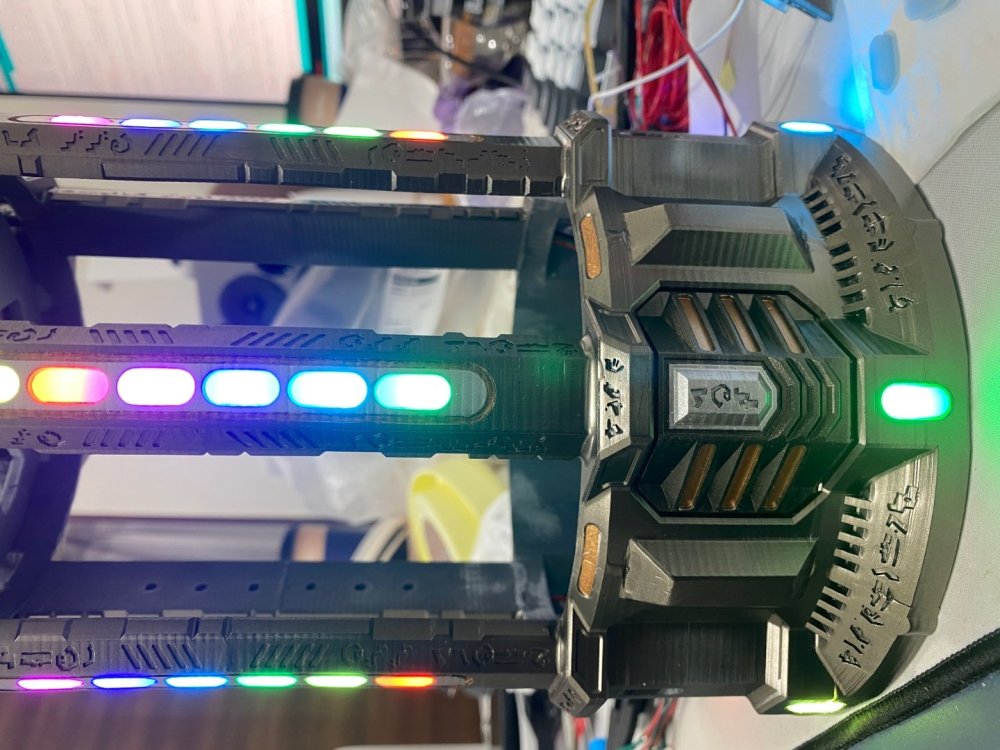
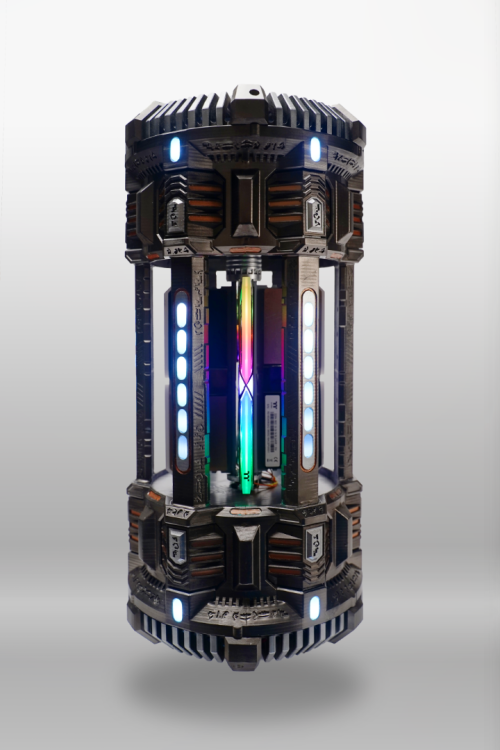
Ah… it’s finally over. What a journey it has been. M super happy with the way it turned out and the final video and photos are attached on the first post of the thread. Thanks for coming along with me on this wild project! -
[Sri Lanka] Sanjaya Bhanu
Sanjaya replied to TT Lily's topic in 2022 Thermaltake RAM MOD Invitational Season 1
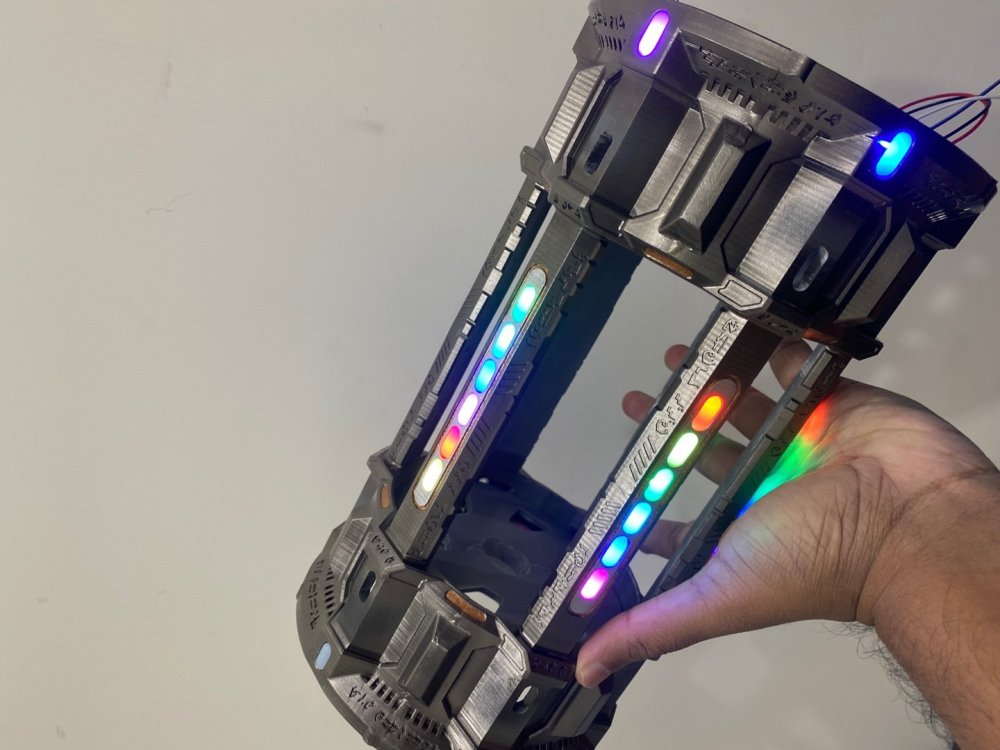
As I rush to finish the Mod, here it is coming along nicely. ☺️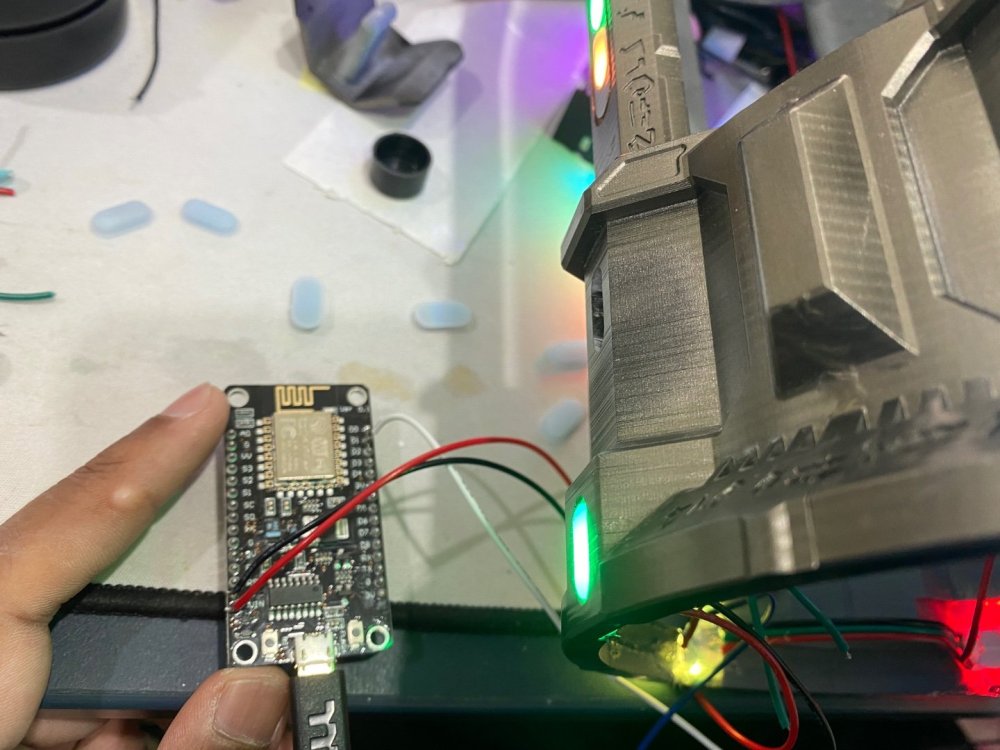

-
[Sri Lanka] Sanjaya Bhanu
Sanjaya replied to TT Lily's topic in 2022 Thermaltake RAM MOD Invitational Season 1
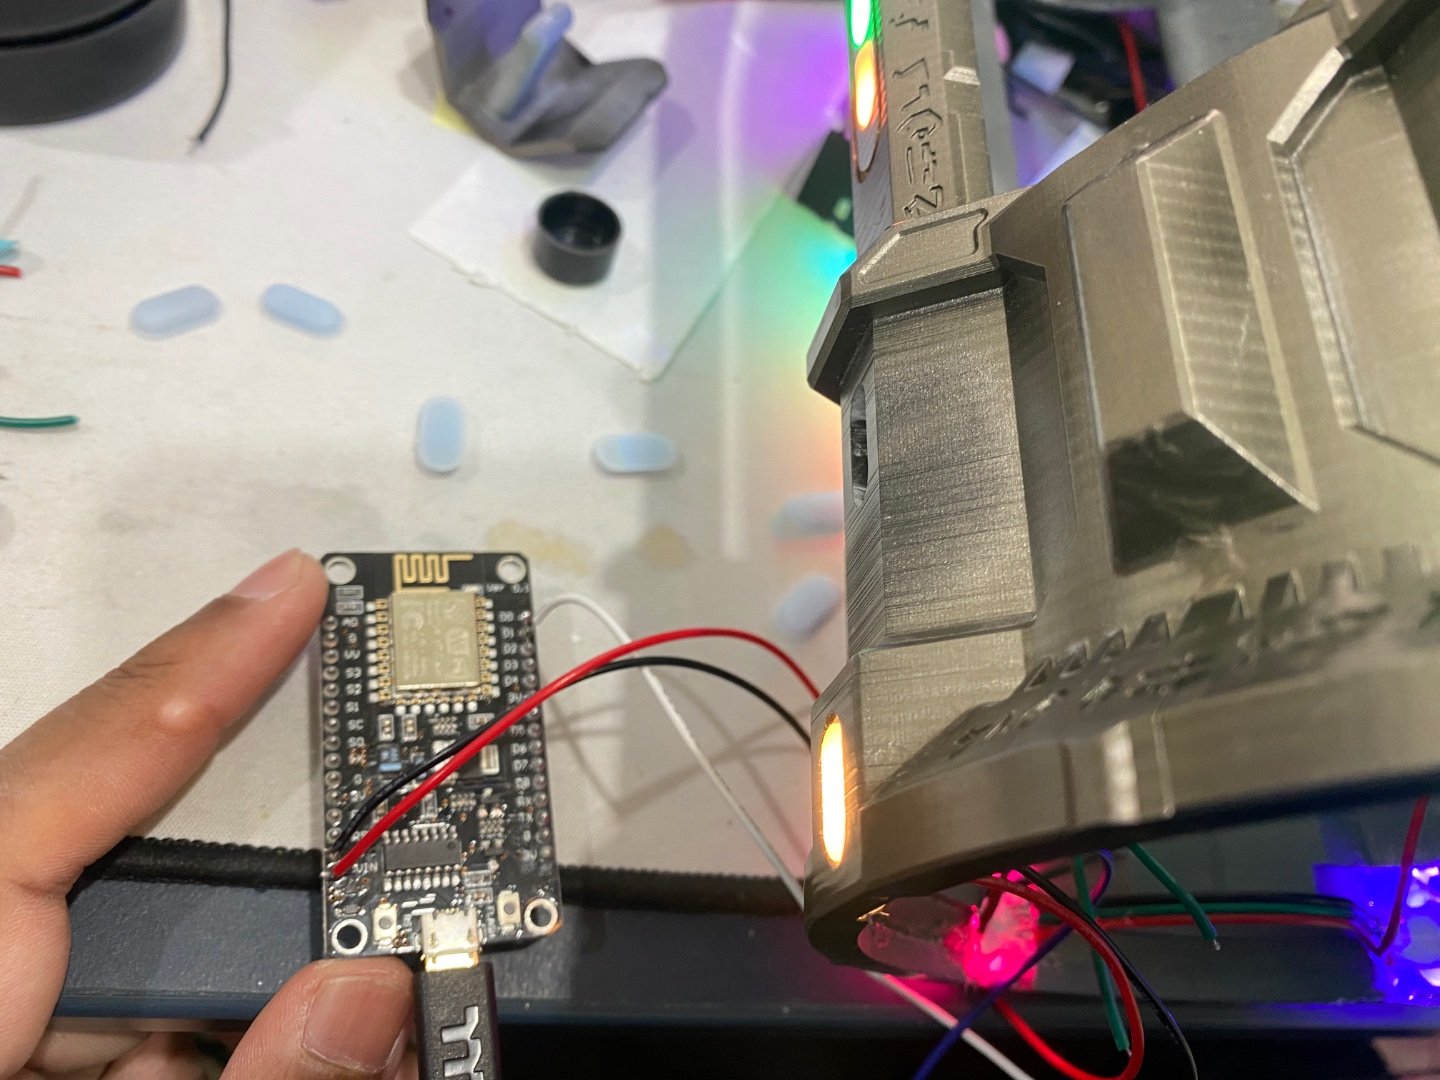
So I had to write custom code to make this all light up and function how I wanted. You can see below the code used. You are also free to use it if u need it for a build. ESP8266(the main controller) // A non-blocking everyday NeoPixel strip test program. // NEOPIXEL BEST PRACTICES for most reliable operation: // - Add 1000 uF CAPACITOR between NeoPixel strip's + and - connections. // - MINIMIZE WIRING LENGTH between microcontroller board and first pixel. // - NeoPixel strip's DATA-IN should pass through a 300-500 OHM RESISTOR. // - AVOID connecting NeoPixels on a LIVE CIRCUIT. If you must, ALWAYS // connect GROUND (-) first, then +, then data. // - When using a 3.3V microcontroller with a 5V-powered NeoPixel strip, // a LOGIC-LEVEL CONVERTER on the data line is STRONGLY RECOMMENDED. // (Skipping these may work OK on your workbench but can fail in the field) #include <Adafruit_NeoPixel.h> #ifdef __AVR__ #include <avr/power.h> // Required for 16 MHz Adafruit Trinket #endif // Which pin on the Arduino is connected to the NeoPixels? // On a Trinket or Gemma we suggest changing this to 1: #define LED_PIN 4 #define LED_PIN1 5 #define LED_PIN2 0 #define LED_PIN3 2 // How many NeoPixels are attached to the Arduino? #define LED_COUNT 6 // Declare our NeoPixel strip object: Adafruit_NeoPixel strip(LED_COUNT, LED_PIN, NEO_GRB + NEO_KHZ800); Adafruit_NeoPixel strip1(LED_COUNT, LED_PIN1, NEO_GRB + NEO_KHZ800); Adafruit_NeoPixel strip2(LED_COUNT, LED_PIN2, NEO_GRB + NEO_KHZ800); Adafruit_NeoPixel strip3(7, LED_PIN3, NEO_GRB + NEO_KHZ800); // Argument 1 = Number of pixels in NeoPixel strip // Argument 2 = Arduino pin number (most are valid) // Argument 3 = Pixel type flags, add together as needed: // NEO_KHZ800 800 KHz bitstream (most NeoPixel products w/WS2812 LEDs) // NEO_KHZ400 400 KHz (classic 'v1' (not v2) FLORA pixels, WS2811 drivers) // NEO_GRB Pixels are wired for GRB bitstream (most NeoPixel products) // NEO_RGB Pixels are wired for RGB bitstream (v1 FLORA pixels, not v2) // NEO_RGBW Pixels are wired for RGBW bitstream (NeoPixel RGBW products) unsigned long pixelPrevious = 0; // Previous Pixel Millis unsigned long patternPrevious = 0; // Previous Pattern Millis int patternCurrent = 0; // Current Pattern Number int patternInterval = 2000; // Pattern Interval (ms) int pixelInterval = 150; // Pixel Interval (ms) int pixelQueue = 0; // Pattern Pixel Queue int pixelCycle = 0; // Pattern Pixel Cycle uint16_t pixelCurrent = 0; // Pattern Current Pixel Number uint16_t pixelNumber = 7; // Total Number of Pixels int blnkint = 500; int blnkhld = 64; int blnkoff = 500; int brthint = 30; bool swon = 0; int prevon = 0; int br = 0; int brdr = 0; unsigned long brthPrev = 0; unsigned long blnk1Prev = 0; unsigned long blnk2Prev = 0; unsigned long rainbowPrev = 0; long firstPixelHue = 0; int a = 5; int b = 4; int c = 3; int d = 2; int e = 1; int f = 0; int g = 0; void ICACHE_RAM_ATTR isr(){ Serial.println("ISR"); if (swon == 0){ swon = 1; digitalWrite(13, LOW); } else { swon = 0; strip3.fill(strip.Color(0, 0, 0)); strip3.show(); digitalWrite(13, HIGH); } } // setup() function -- runs once at startup -------------------------------- void setup() { // These lines are specifically to support the Adafruit Trinket 5V 16 MHz. // Any other board, you can remove this part (but no harm leaving it): #if defined(__AVR_ATtiny85__) && (F_CPU == 16000000) clock_prescale_set(clock_div_1); #endif // END of Trinket-specific code. Serial.begin(115200); attachInterrupt(digitalPinToInterrupt(12), isr, FALLING); pinMode(12, INPUT_PULLUP); pinMode(13, OUTPUT); digitalWrite(13, HIGH); strip.begin(); // INITIALIZE NeoPixel strip object (REQUIRED) strip.clear(); // Turn OFF all pixels ASAP strip.setBrightness(255); // Set BRIGHTNESS to about 1/5 (max = 255) strip1.begin(); // INITIALIZE NeoPixel strip object (REQUIRED) strip1.clear(); // Turn OFF all pixels ASAP strip1.setBrightness(255); // Set BRIGHTNESS to about 1/5 (max = 255) strip2.begin(); // INITIALIZE NeoPixel strip object (REQUIRED) strip2.clear(); // Turn OFF all pixels ASAP strip2.setBrightness(255); // Set BRIGHTNESS to about 1/5 (max = 255) strip3.begin(); // INITIALIZE NeoPixel strip object (REQUIRED) strip3.clear(); // Turn OFF all pixels ASAP strip3.setBrightness(255); // Set BRIGHTNESS to about 1/5 (max = 255) strip.fill(strip.Color(127, 0, 0)); strip1.fill(strip.Color(127, 0, 0)); strip2.fill(strip.Color(127, 0, 0)); strip3.fill(strip.Color(0, 0, 0)); strip3.show(); } // loop() function -- runs repeatedly as long as board is on --------------- void loop() { unsigned long currentMillis = millis(); // Update current time if (swon == 0) { if(currentMillis - brthPrev >= brthint) { brthPrev = currentMillis; Serial.println("lp brth"); breath(); } if(currentMillis - blnk1Prev >= blnkint) {// Check for expired time strip1.fill(strip.Color(255, 0, 0)); Serial.println("lp blnk1"); strip1.show(); } if(currentMillis - blnk1Prev >= blnkint+blnkhld) { // Check for expired time strip1.fill(strip.Color(0, 0, 0)); Serial.println("lp blnk1 off"); blnk1Prev = currentMillis; strip1.show(); } if(currentMillis - blnk2Prev >= blnkint+blnkoff) { // Check for expired time strip2.fill(strip.Color(255, 0, 0)); Serial.println("lp blnk2"); strip2.show(); } if(currentMillis - blnk2Prev >= blnkint+blnkoff+blnkhld) { // Check for expired time strip2.fill(strip.Color(0, 0, 0)); Serial.println("lp blnk2 off"); blnk2Prev = currentMillis; strip2.show(); } } if (swon == 1) { Serial.println("swith pressed"); if(currentMillis - pixelPrevious >= pixelInterval) { pixelPrevious = currentMillis; theaterChase(strip.Color(255, 255, 255), strip.Color(200, 200, 200),strip.Color(150, 150, 150),strip.Color(100, 100, 100),strip.Color(50, 50, 50),strip.Color(25, 25, 25)); // White } if(currentMillis - rainbowPrev >= 20) { rainbowPrev = currentMillis; rainbow(); } } } // Theater-marquee-style chasing lights. Pass in a color (32-bit value, // a la strip.Color(r,g,b) as mentioned above), and a delay time (in ms) // between frames. void breath(){ Serial.println("breath"); Serial.println(br); if (brdr == 0){ if(br < 225){ br = br+5; strip.fill(strip.Color(br, 0, 0)); } else { brdr = 1; } } if (brdr == 1){ if(br >0){ br = br-5; strip.fill(strip.Color(br, 0, 0)); } else { brdr = 0; } } strip.show(); } void rainbow() { // Hue of first pixel runs 5 complete loops through the color wheel. // Color wheel has a range of 65536 but it's OK if we roll over, so // just count from 0 to 5*65536. Adding 256 to firstPixelHue each time // means we'll make 5*65536/256 = 1280 passes through this loop: if(firstPixelHue < 65536){ firstPixelHue += 256; // strip.rainbow() can take a single argument (first pixel hue) or // optionally a few extras: number of rainbow repetitions (default 1), // saturation and value (brightness) (both 0-255, similar to the // ColorHSV() function, default 255), and a true/false flag for whether // to apply gamma correction to provide 'truer' colors (default true). strip3.rainbow(firstPixelHue); // Above line is equivalent to: // strip.rainbow(firstPixelHue, 1, 255, 255, true); strip3.show(); // Update strip with new contents } else { firstPixelHue = 0;// Loop the cycle back to the begining } } void theaterChase(uint32_t color, uint32_t color1, uint32_t color2, uint32_t color3, uint32_t color4, uint32_t color5) { // Update delay time strip.clear(); strip1.clear(); strip2.clear(); if(a < (pixelNumber - 1)){ a = a+1; strip.setPixelColor(a, color); // Set pixel's color (in RAM) strip1.setPixelColor(a, color); // Set pixel's color (in RAM) // Update strip to match strip2.setPixelColor(a, color); // Set pixel's color (in RAM) // Update strip to match } else{ a = 0; strip.setPixelColor(a, color); // Set pixel's color (in RAM) strip1.setPixelColor(a, color); // Set pixel's color (in RAM) // Update strip to match strip2.setPixelColor(a, color); // Set pixel's color (in RAM) } if(b < (pixelNumber - 1)){ b = b+1; strip.setPixelColor(b, color1); // Set pixel's color (in RAM) strip1.setPixelColor(b, color1); // Set pixel's color (in RAM) // Update strip to match strip2.setPixelColor(b, color1); // Set pixel's color (in RAM) // Update strip to match } else{ b = 0; strip.setPixelColor(b, color1); // Set pixel's color (in RAM) strip1.setPixelColor(b, color1); // Set pixel's color (in RAM) // Update strip to match strip2.setPixelColor(b, color1); // Set pixel's color (in RAM) } if(c < (pixelNumber - 1)){ c = c+1; strip.setPixelColor(c, color2); // Set pixel's color (in RAM) strip1.setPixelColor(c, color2); // Set pixel's color (in RAM) // Update strip to match strip2.setPixelColor(c, color2); // Set pixel's color (in RAM) // Update strip to match } else{ c = 0; strip.setPixelColor(c, color2); // Set pixel's color (in RAM) strip1.setPixelColor(c, color2); // Set pixel's color (in RAM) // Update strip to match strip2.setPixelColor(c, color2); // Set pixel's color (in RAM) } if(d < (pixelNumber - 1)){ d = d+1; strip.setPixelColor(d, color3); // Set pixel's color (in RAM) strip1.setPixelColor(d, color3); // Set pixel's color (in RAM) // Update strip to match strip2.setPixelColor(d, color3); // Set pixel's color (in RAM) // Update strip to match } else{ d = 0; strip.setPixelColor(d, color3); // Set pixel's color (in RAM) strip1.setPixelColor(d, color3); // Set pixel's color (in RAM) // Update strip to match strip2.setPixelColor(d, color3); // Set pixel's color (in RAM) } if(e < (pixelNumber - 1)){ e = e+1; strip.setPixelColor(e, color4); // Set pixel's color (in RAM) strip1.setPixelColor(e, color4); // Set pixel's color (in RAM) // Update strip to match strip2.setPixelColor(e, color4); // Set pixel's color (in RAM) // Update strip to match } else{ e = 0; strip.setPixelColor(e, color4); // Set pixel's color (in RAM) strip1.setPixelColor(e, color4); // Set pixel's color (in RAM) // Update strip to match strip2.setPixelColor(e, color4); // Set pixel's color (in RAM) } if(f < (pixelNumber - 1)){ f = f+1; strip.setPixelColor(f, color5); // Set pixel's color (in RAM) strip1.setPixelColor(f, color5); // Set pixel's color (in RAM) // Update strip to match strip2.setPixelColor(f, color5); // Set pixel's color (in RAM) // Update strip to match } else{ f = 0; strip.setPixelColor(f, color5); // Set pixel's color (in RAM) strip1.setPixelColor(f, color5); // Set pixel's color (in RAM) // Update strip to match strip2.setPixelColor(f, color5); // Set pixel's color (in RAM) } strip.show(); // Update strip to match strip1.show(); // Update strip to match strip2.show(); // Update strip to match } ESP32(motor controller) // MultiStepper.pde // -*- mode: C++ -*- // // Shows how to multiple simultaneous steppers // Runs one stepper forwards and backwards, accelerating and decelerating // at the limits. Runs other steppers at the same time // // Copyright (C) 2009 Mike McCauley // $Id: MultiStepper.pde,v 1.1 2011/01/05 01:51:01 mikem Exp mikem $ #include <AccelStepper.h> // Define some steppers and the pins the will use // Defaults to AccelStepper::FULL4WIRE (4 pins) on 2, 3, 4, 5 AccelStepper stepper2(AccelStepper::FULL4WIRE, 26, 33, 25, 32); bool swon = 0; void setup() { pinMode(34, INPUT); stepper2.setMaxSpeed(300.0); stepper2.setAcceleration(500.0); stepper2.moveTo(1000000000.0); } void loop() { swon = digitalRead(34); if (swon == 0){ stepper2.run(); } } -
[Sri Lanka] Sanjaya Bhanu
Sanjaya replied to TT Lily's topic in 2022 Thermaltake RAM MOD Invitational Season 1
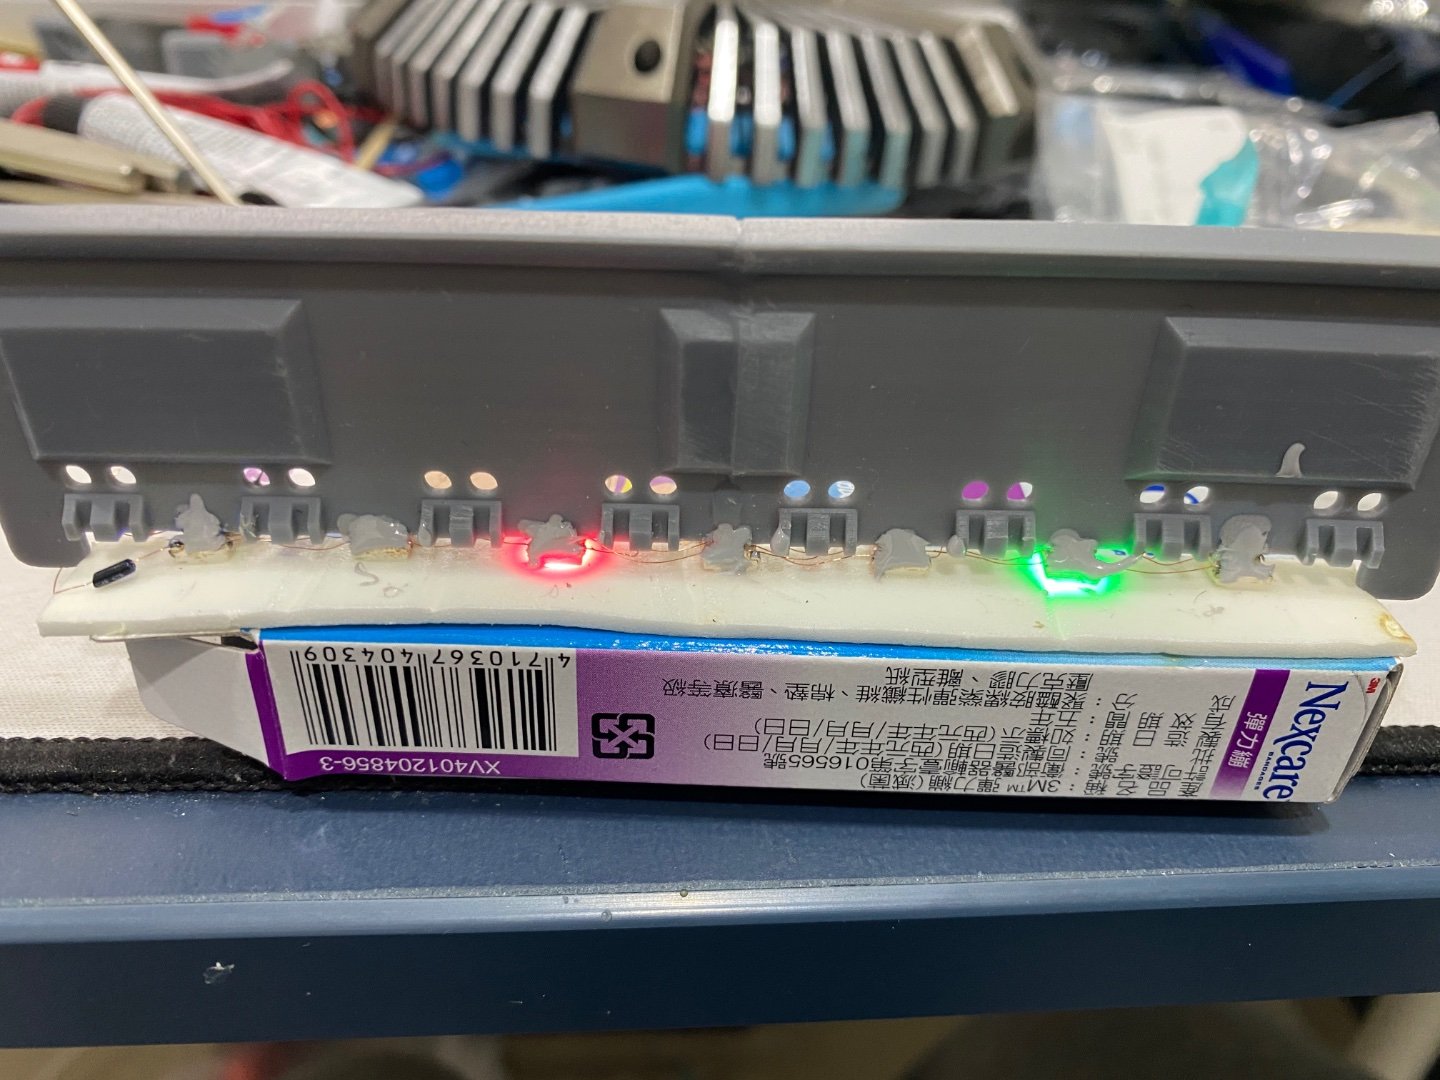
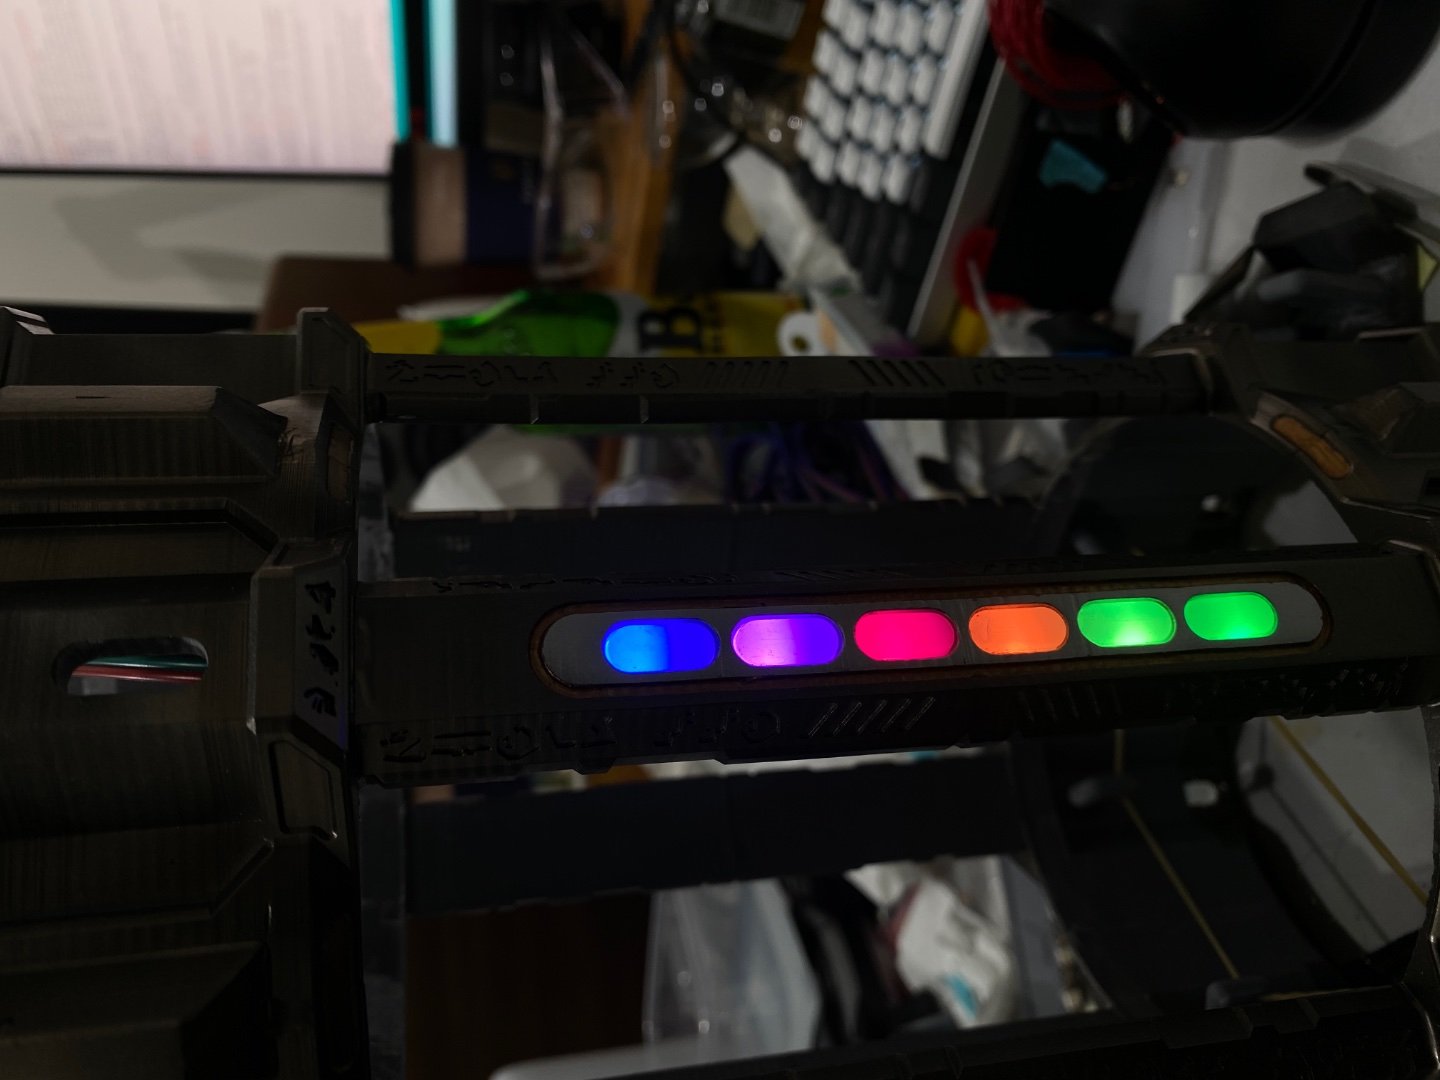
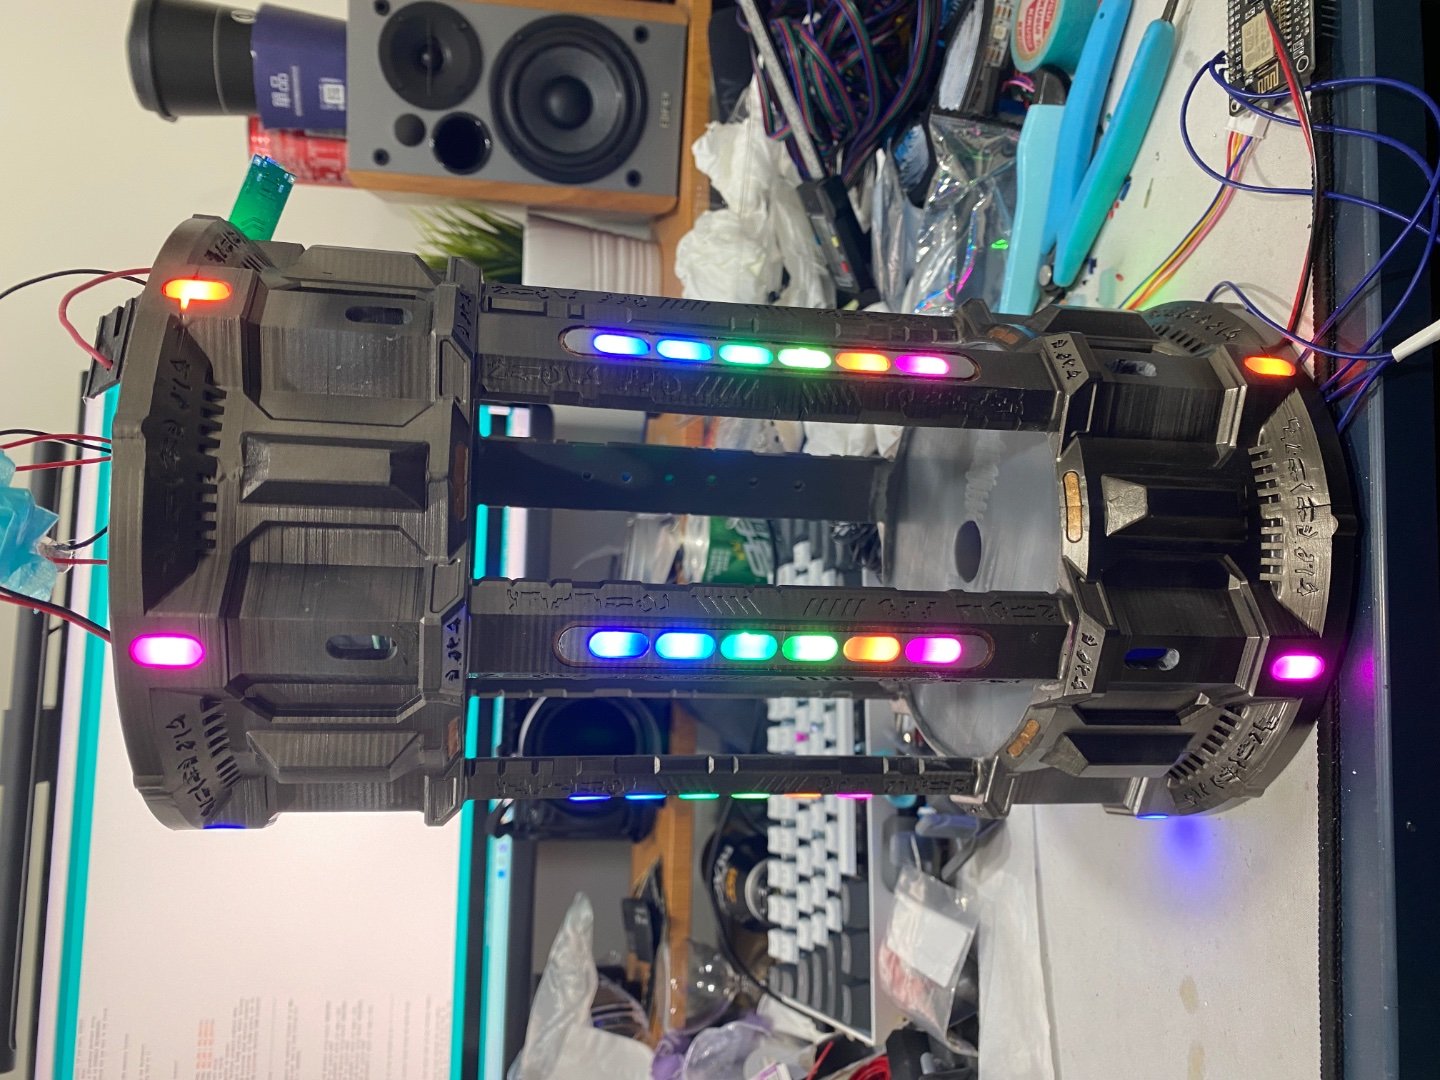
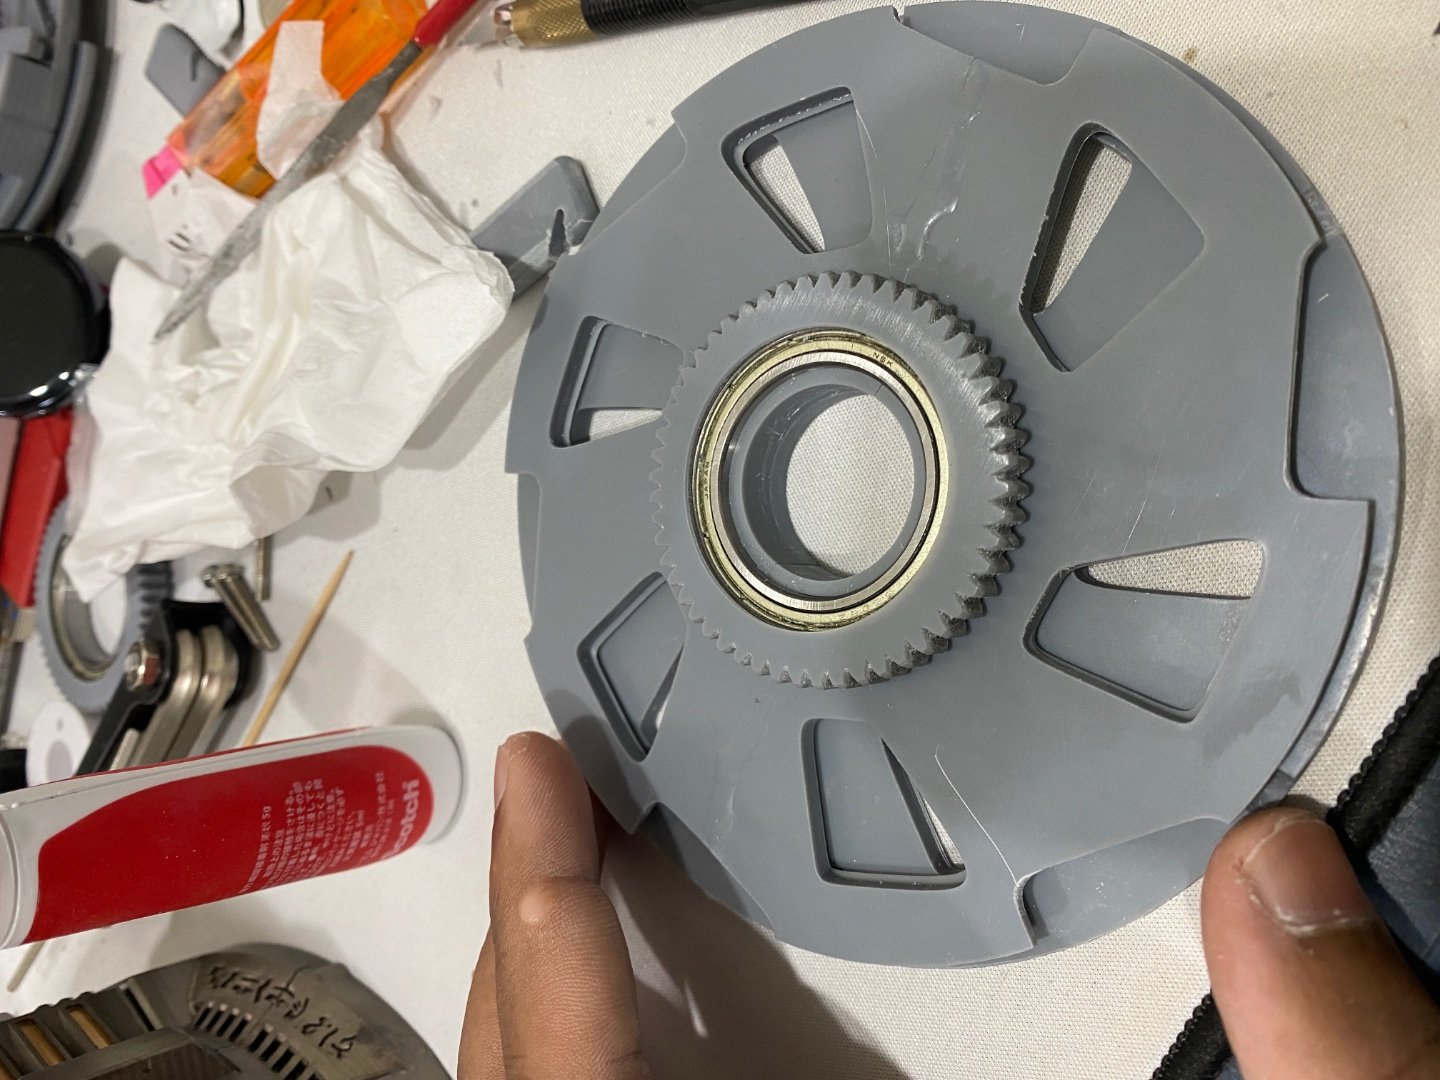
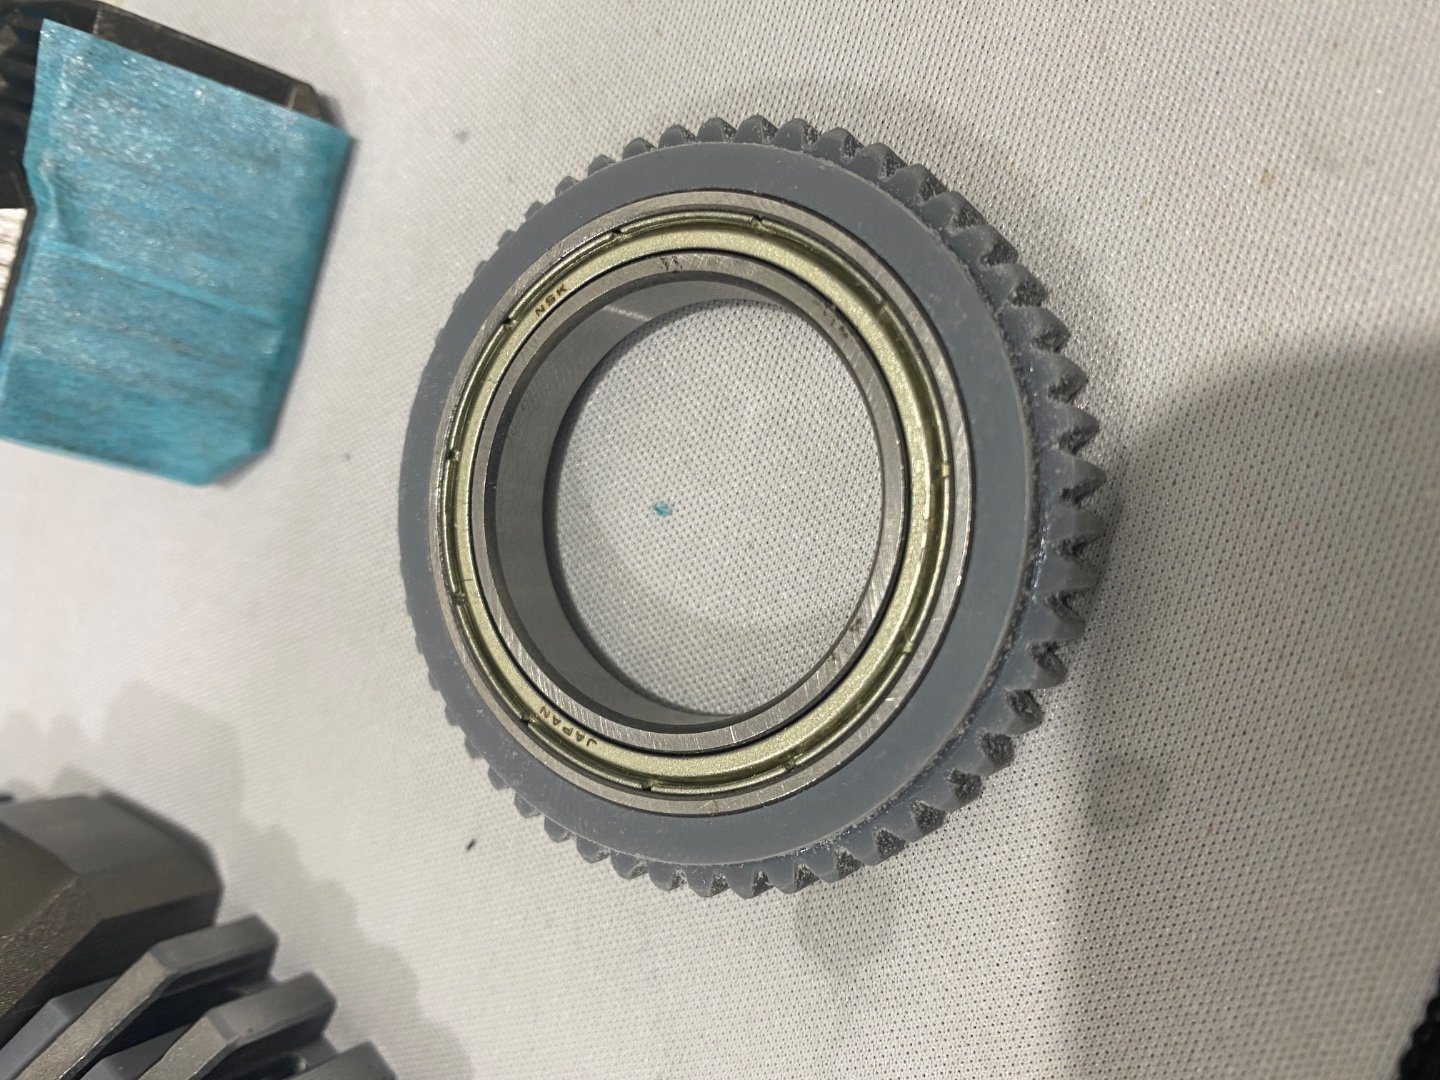
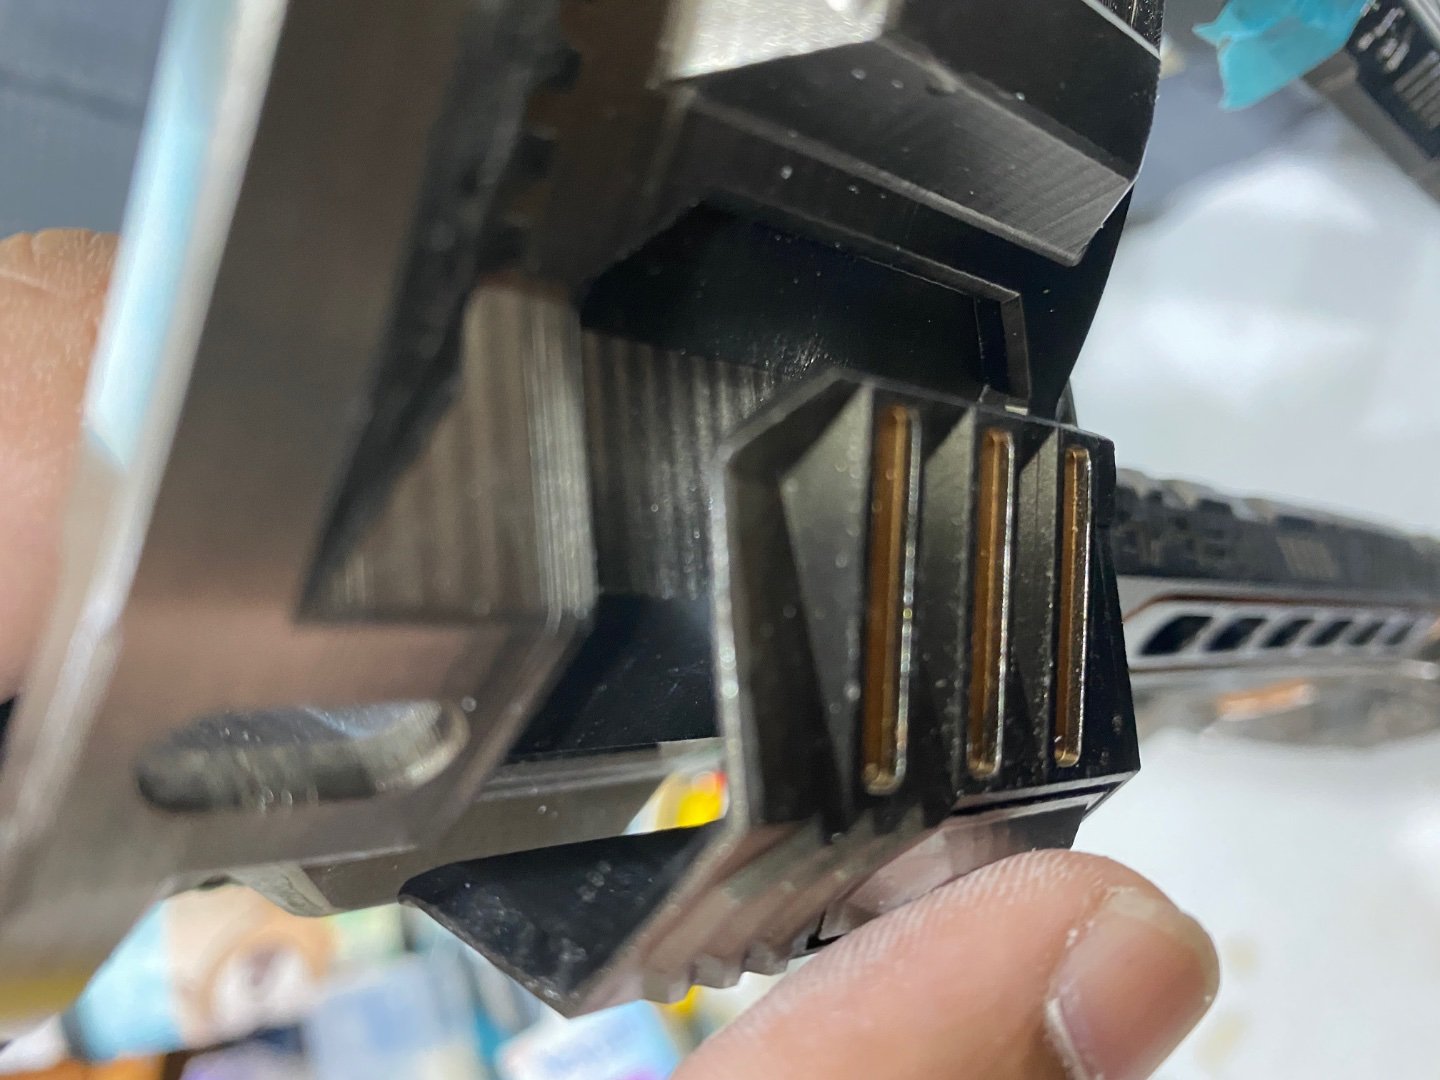
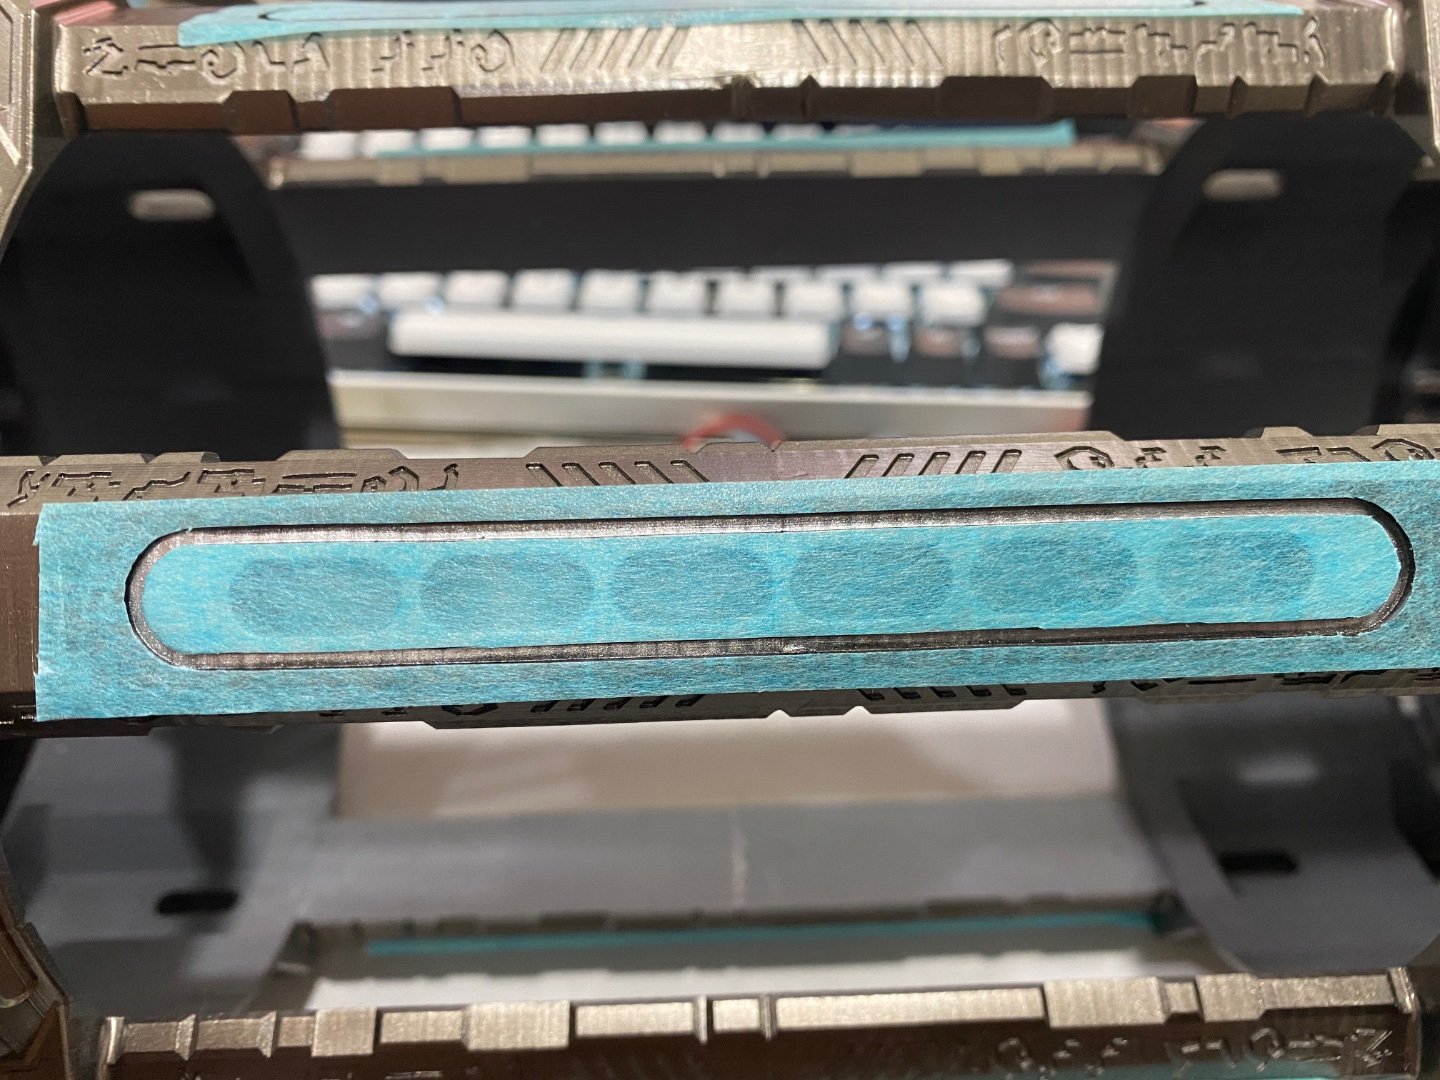
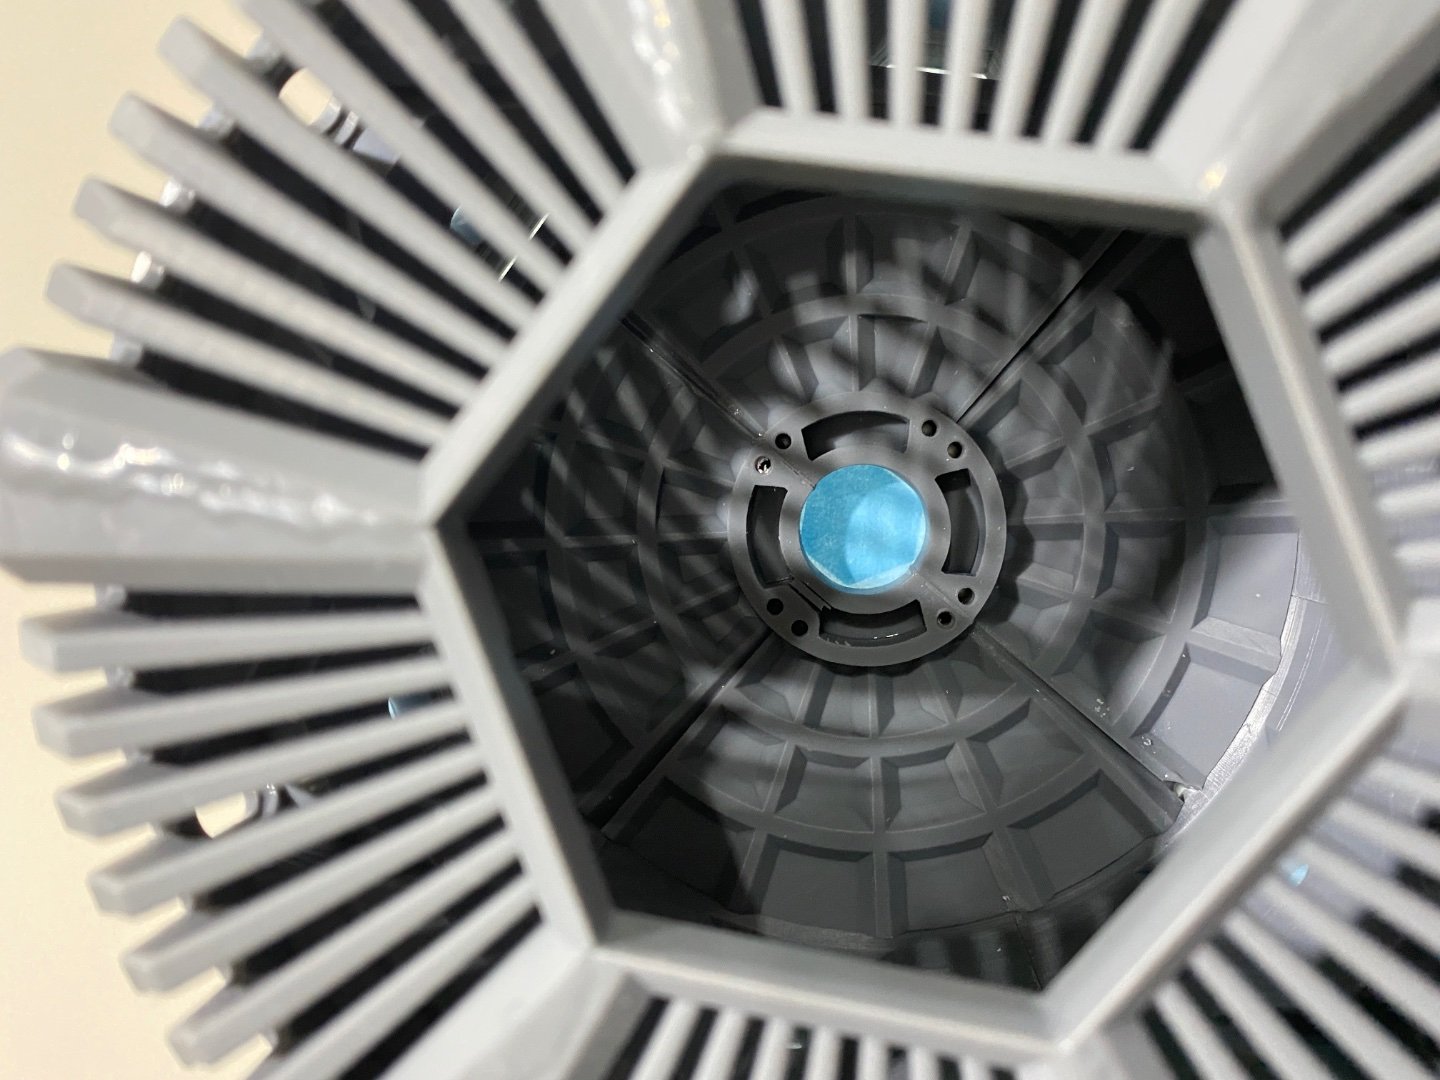
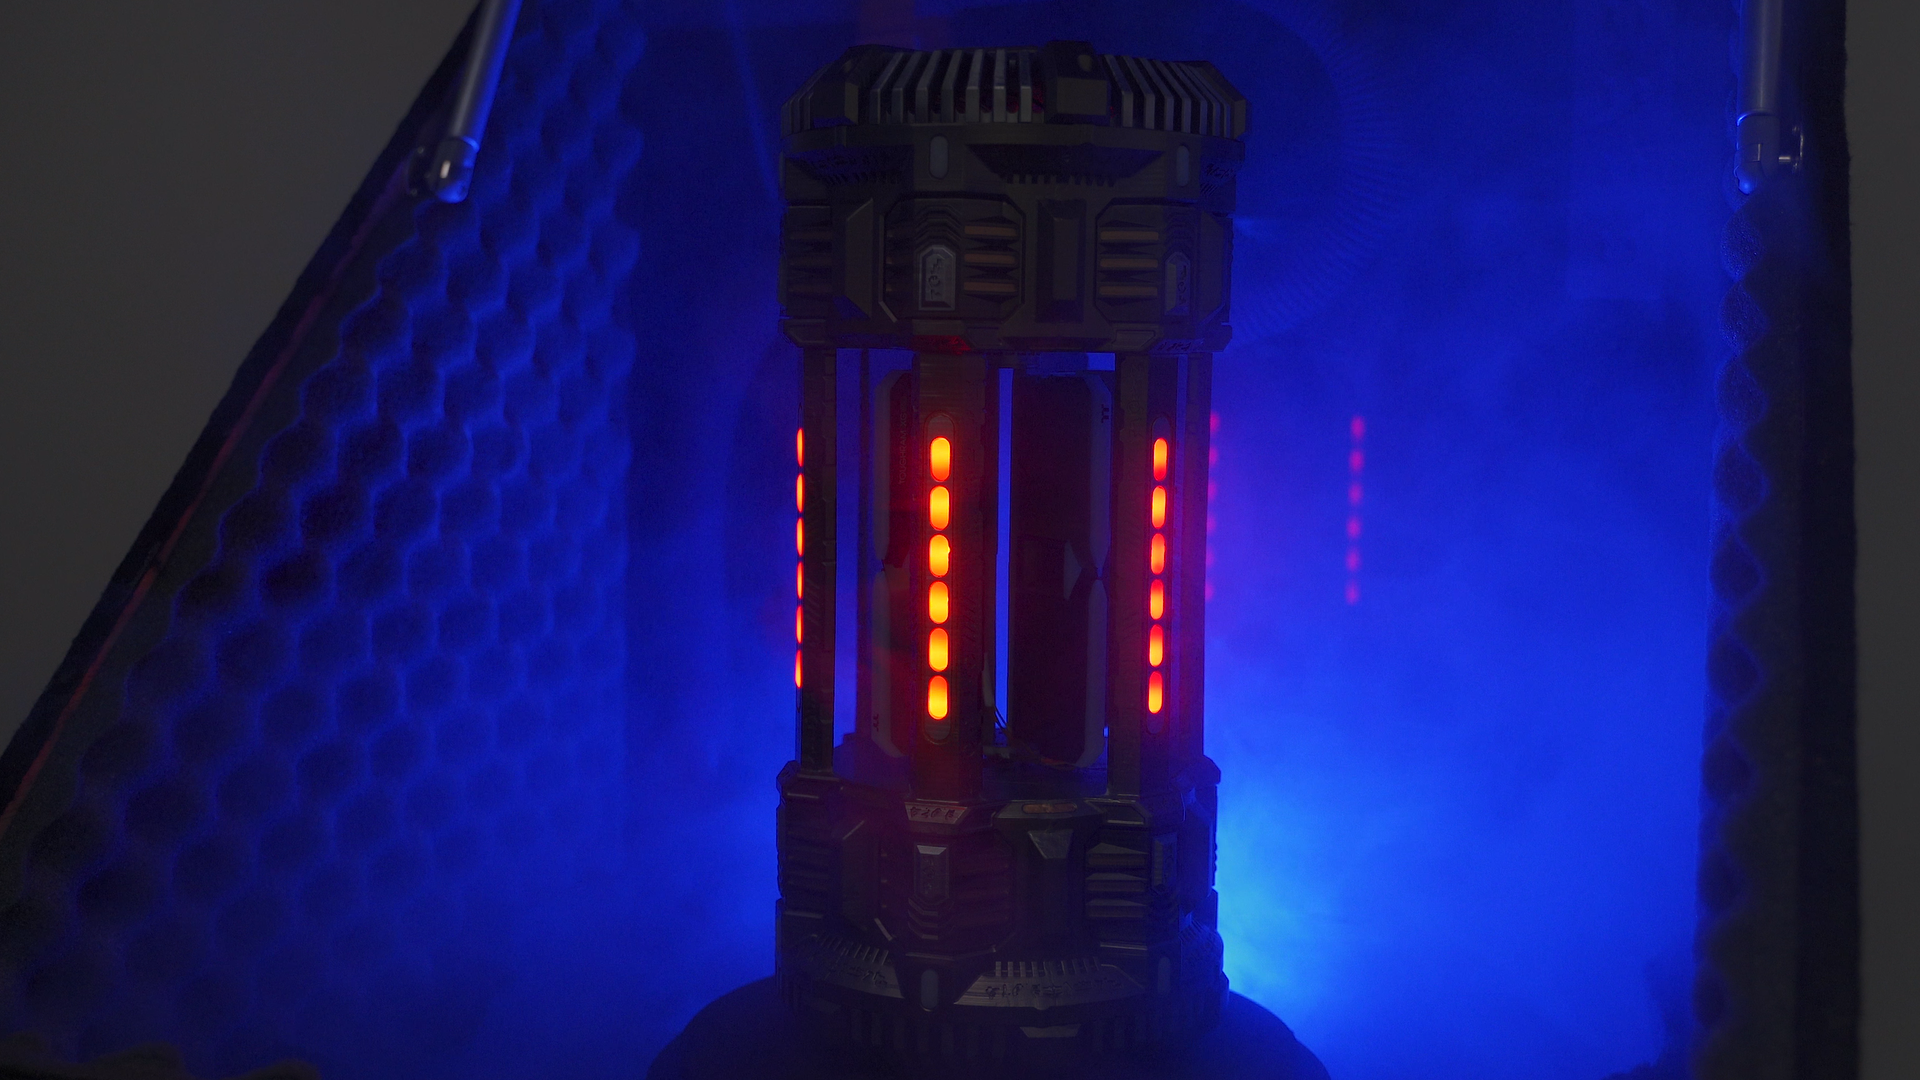
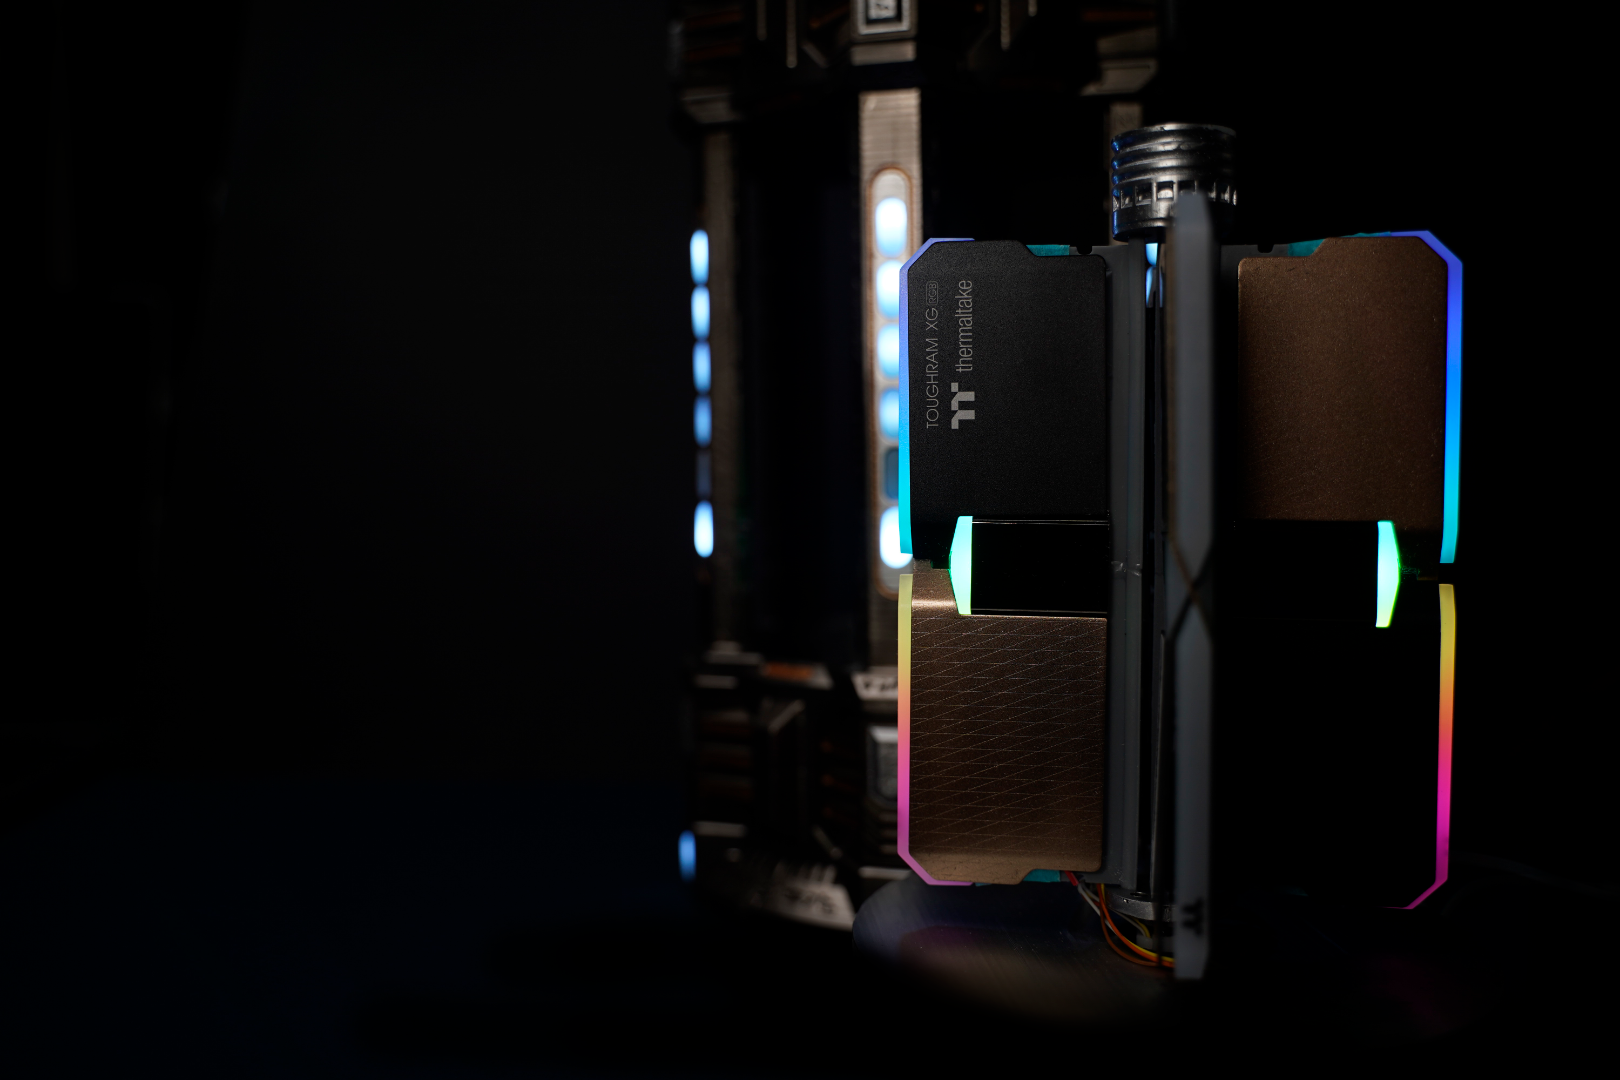
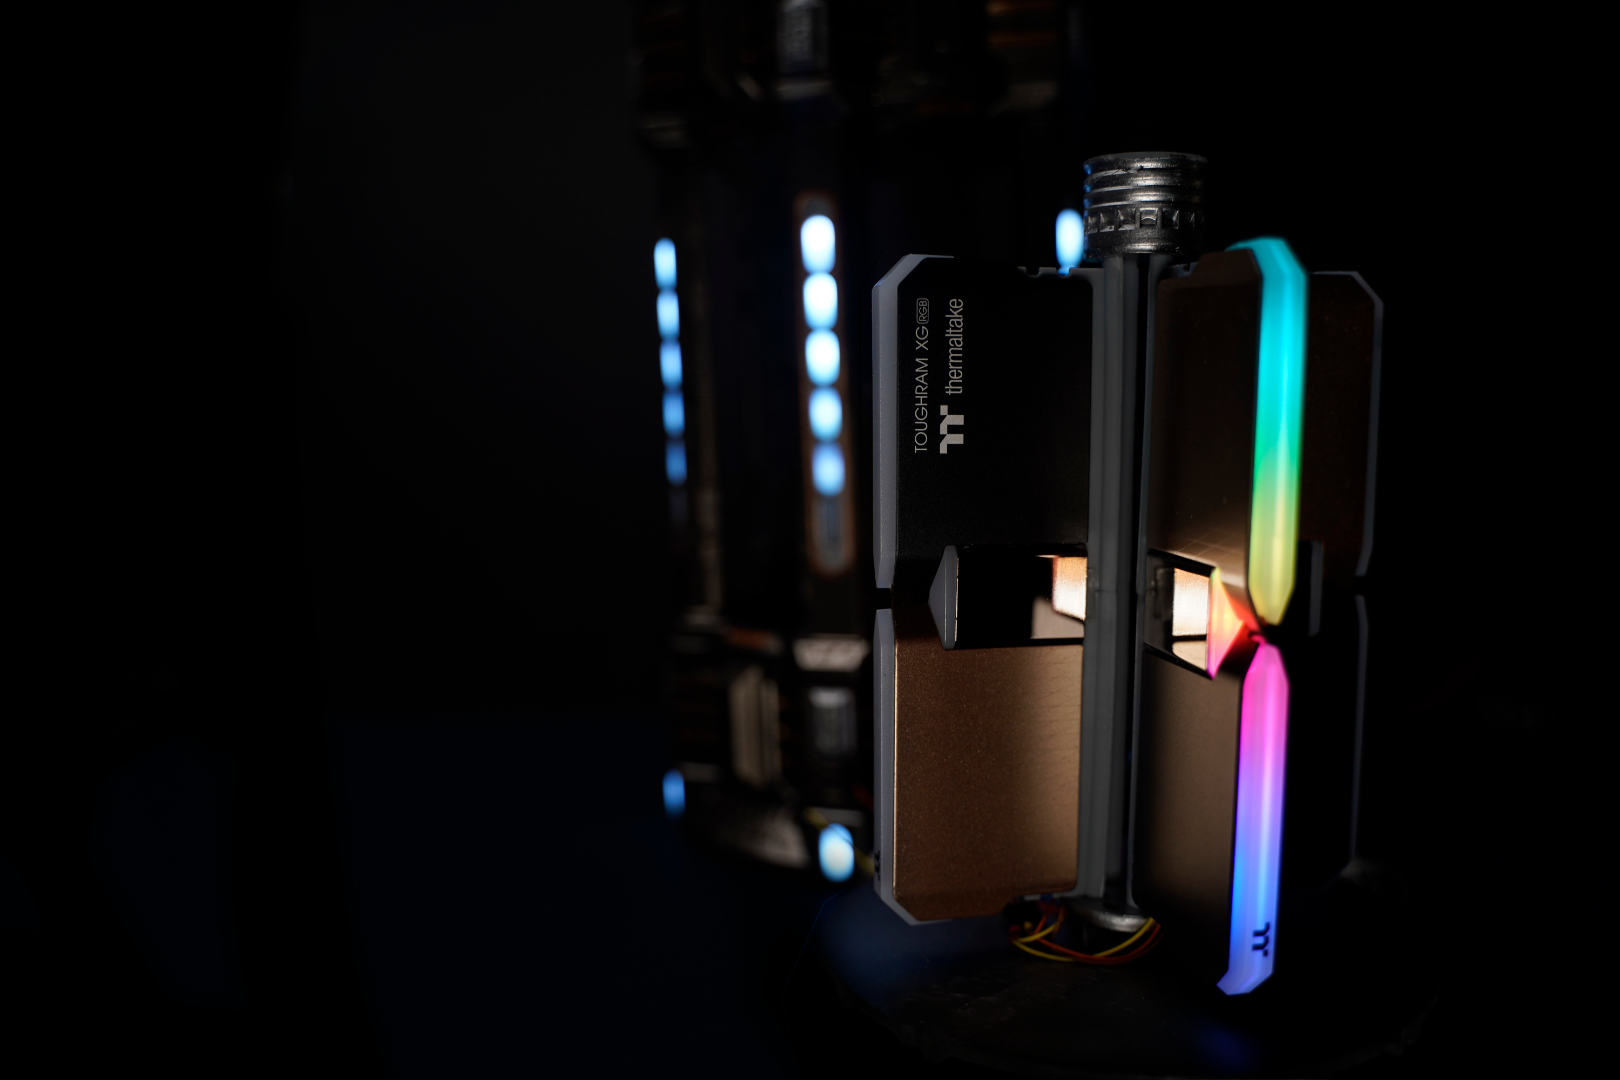
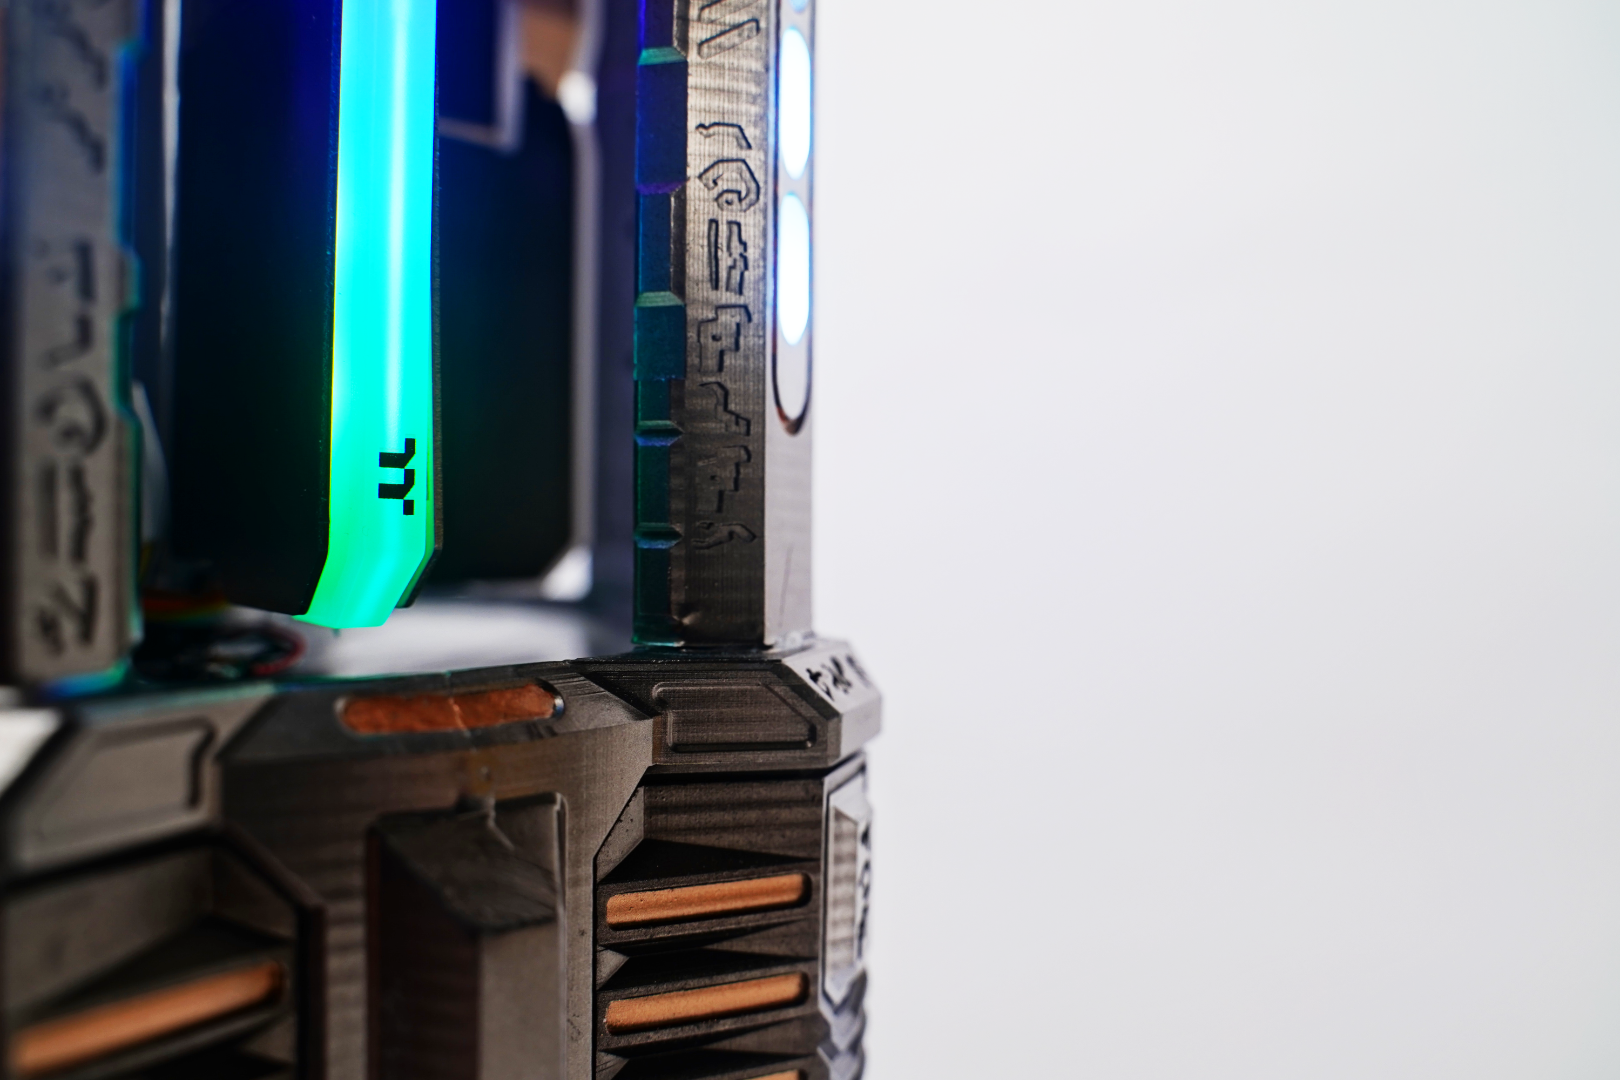
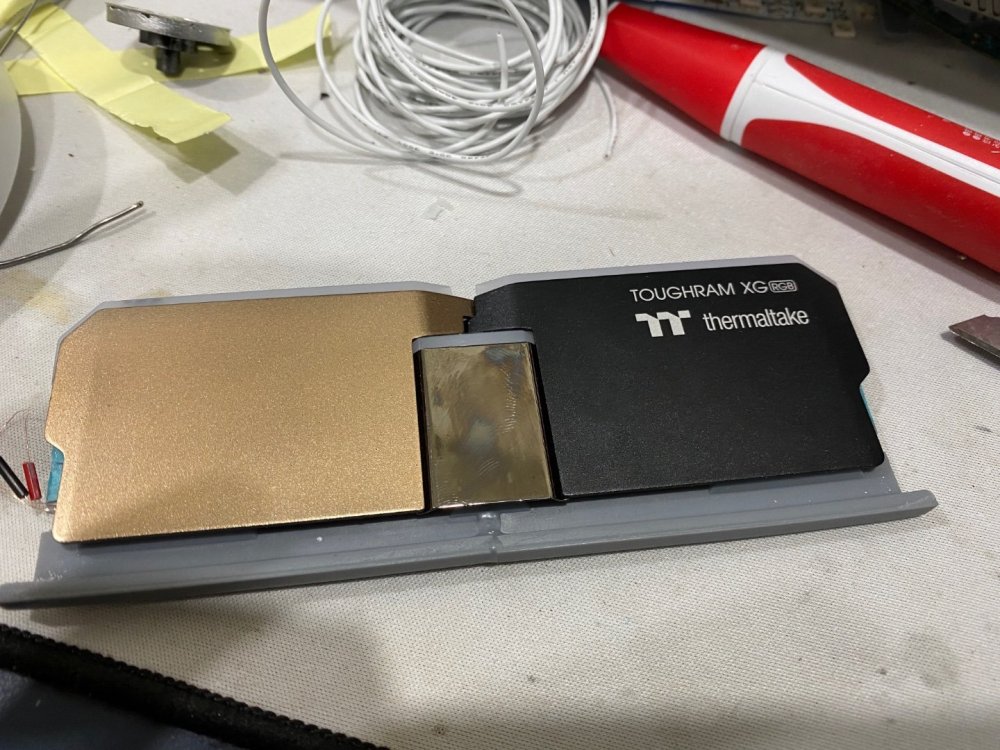
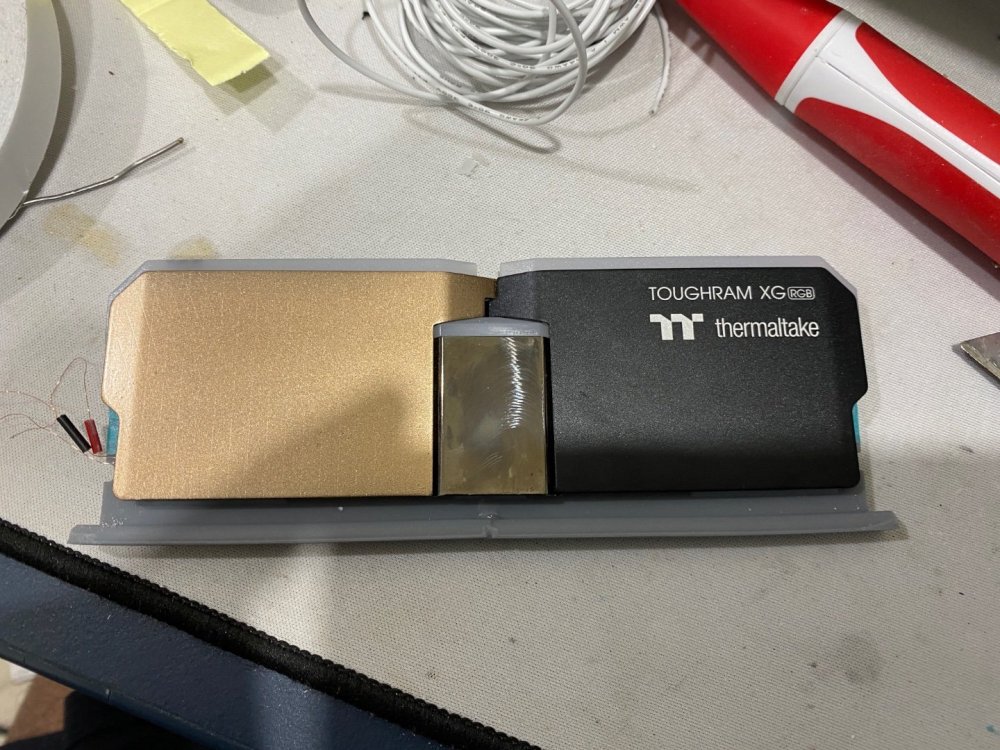
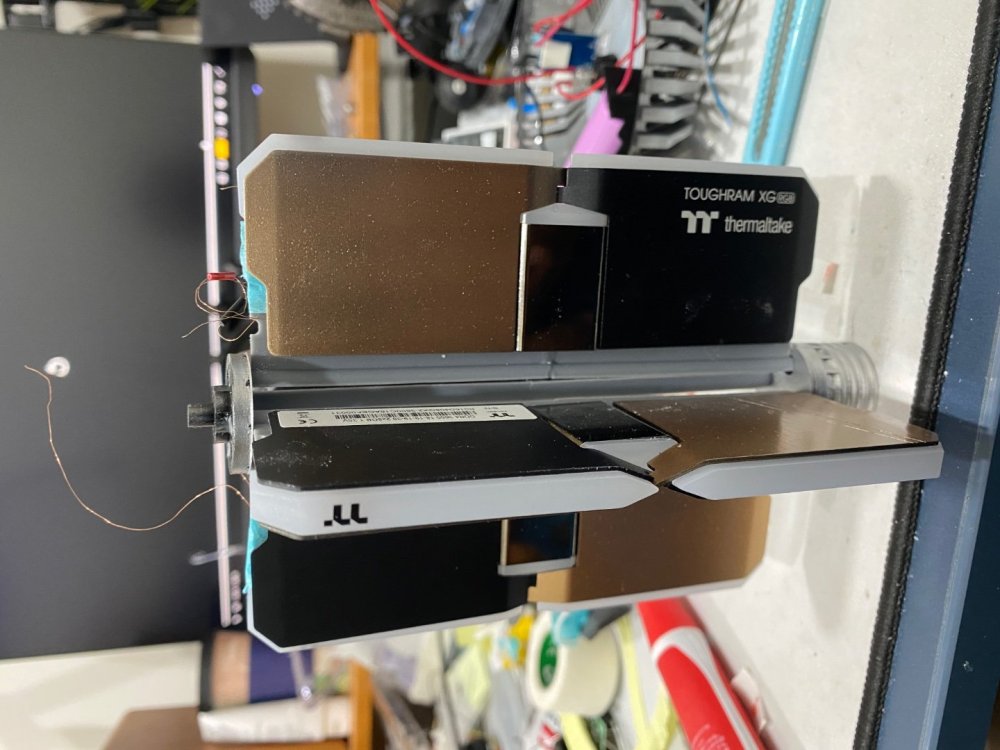
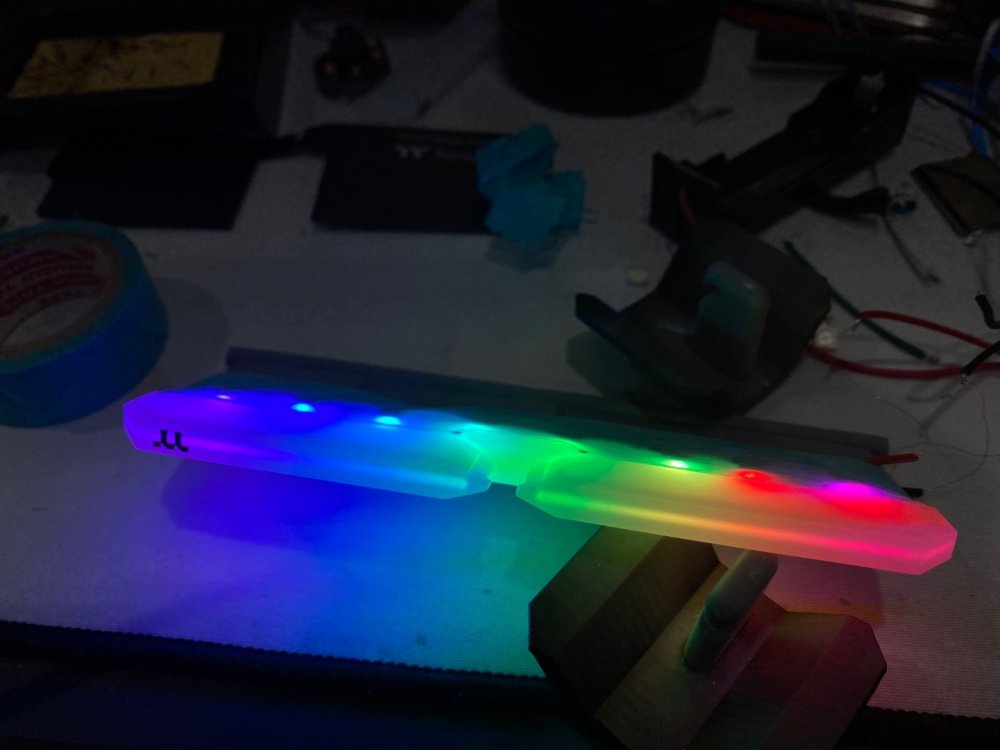
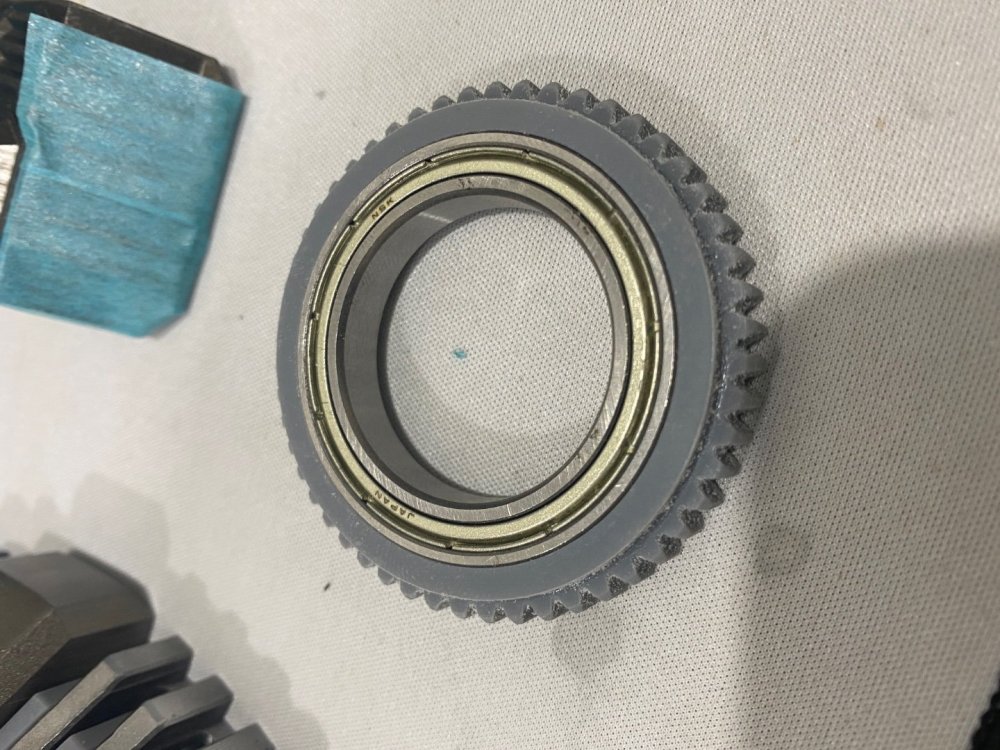
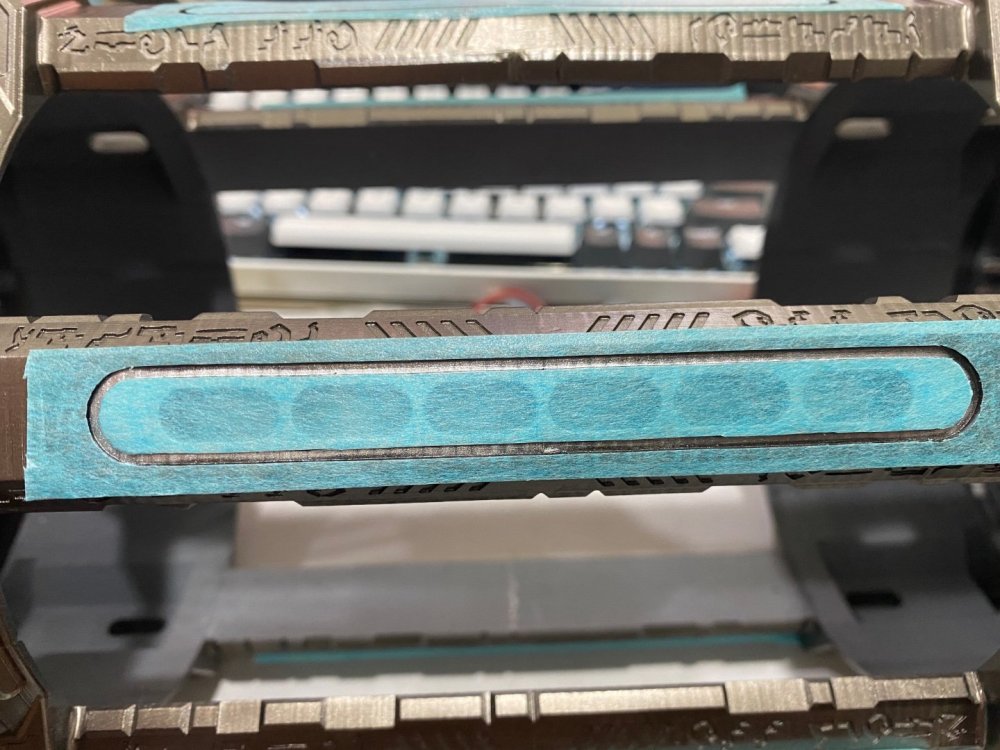
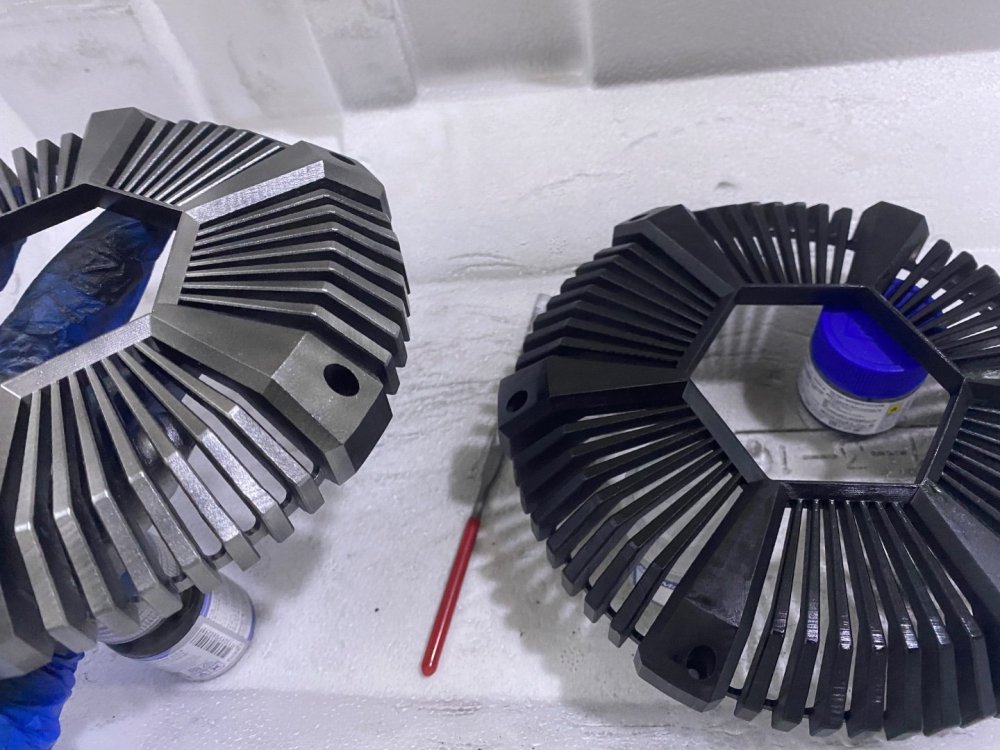
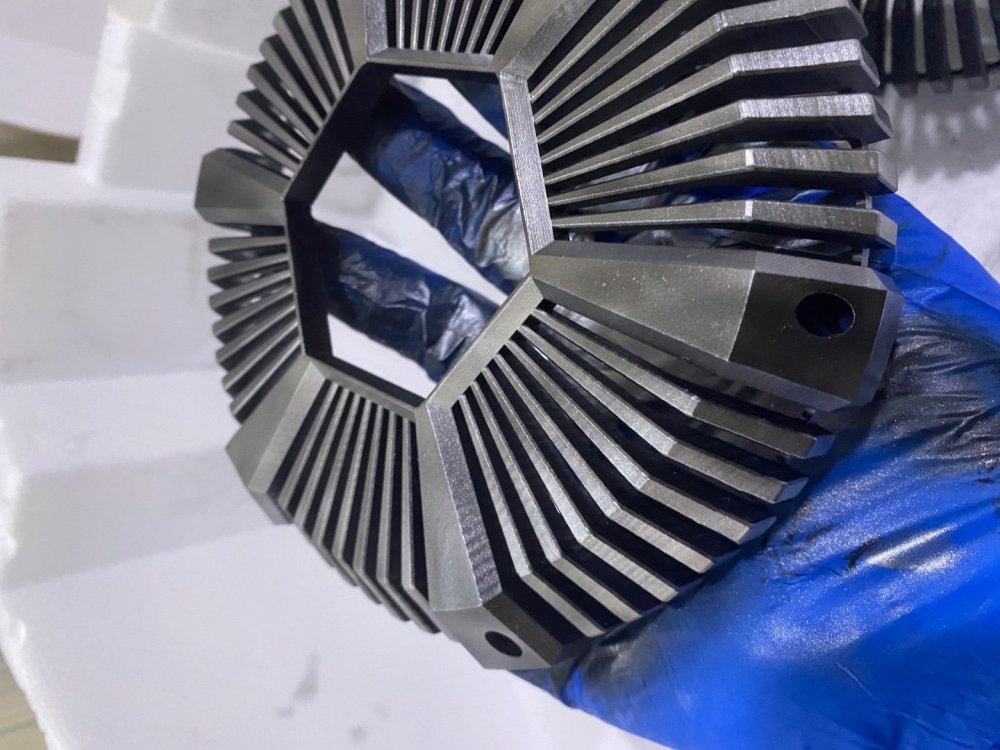
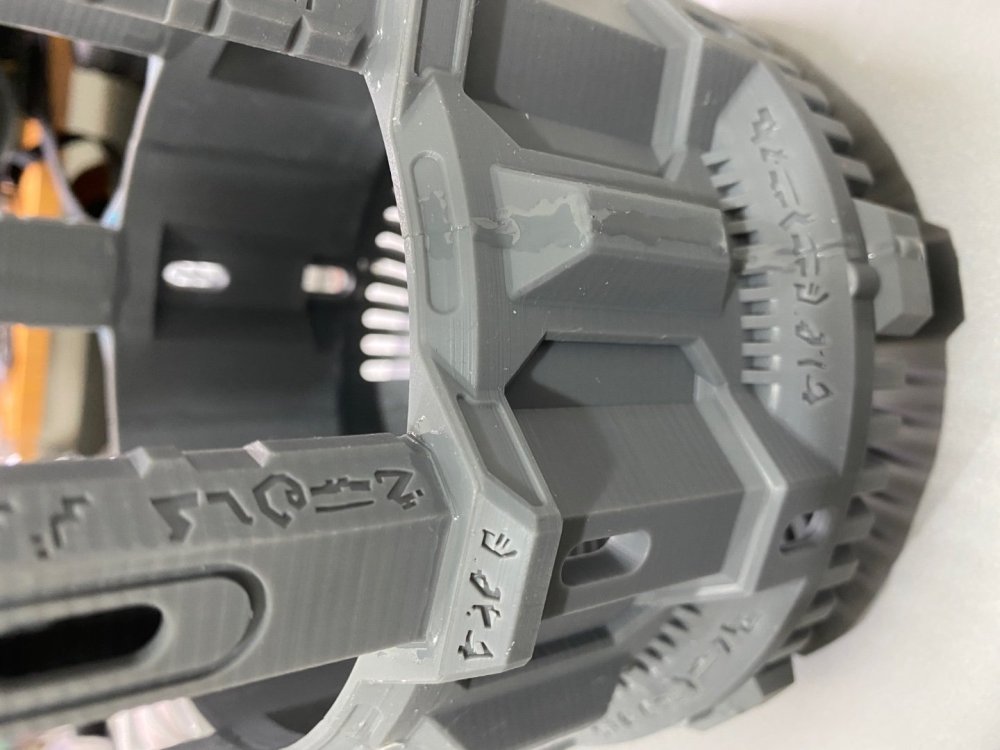
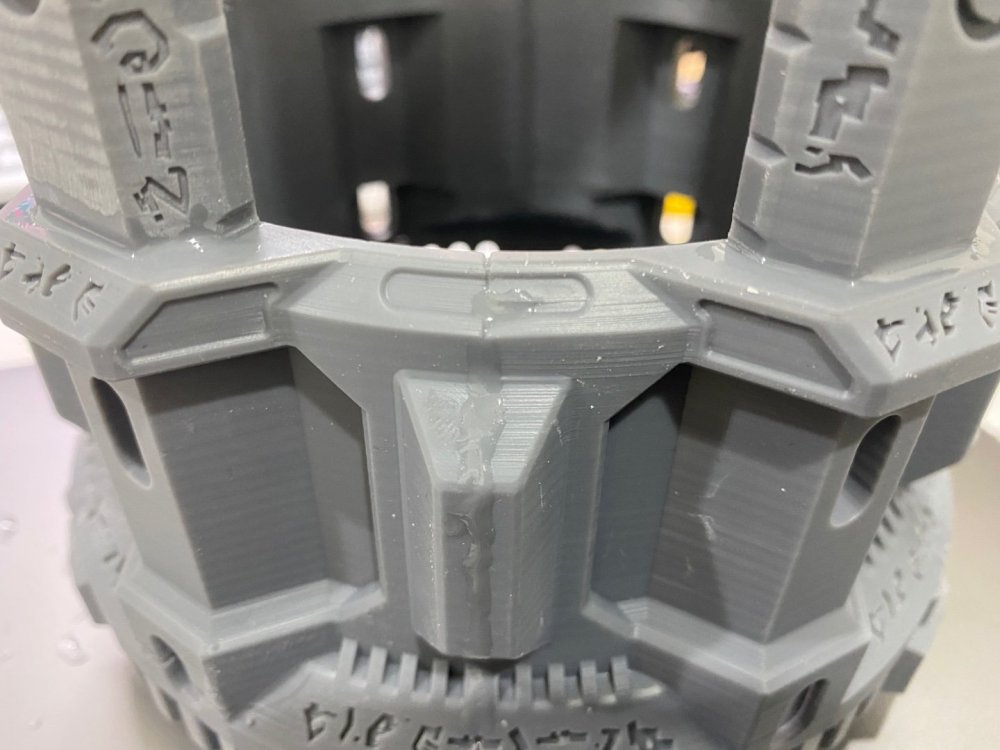
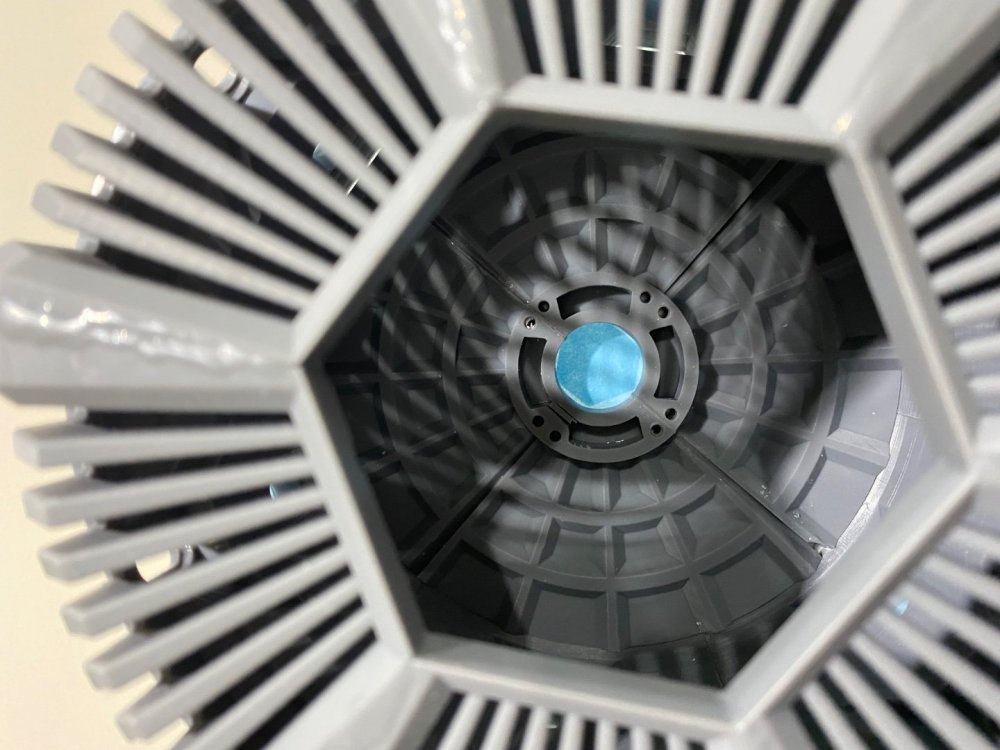
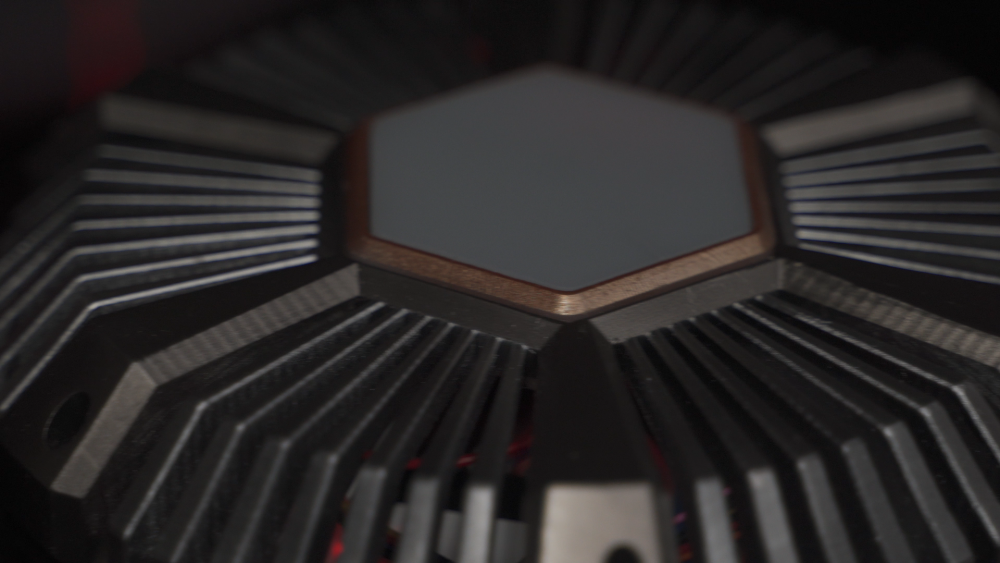
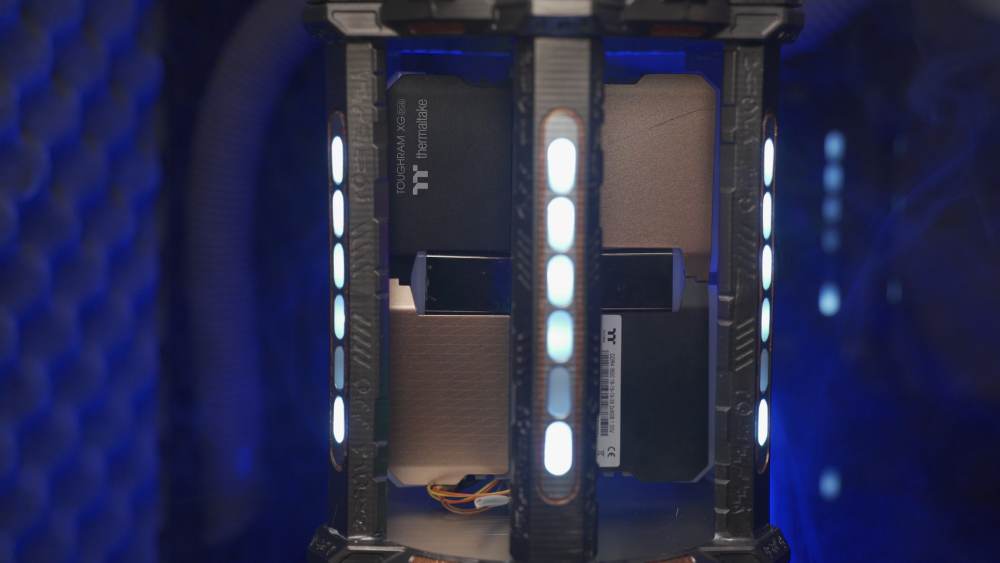
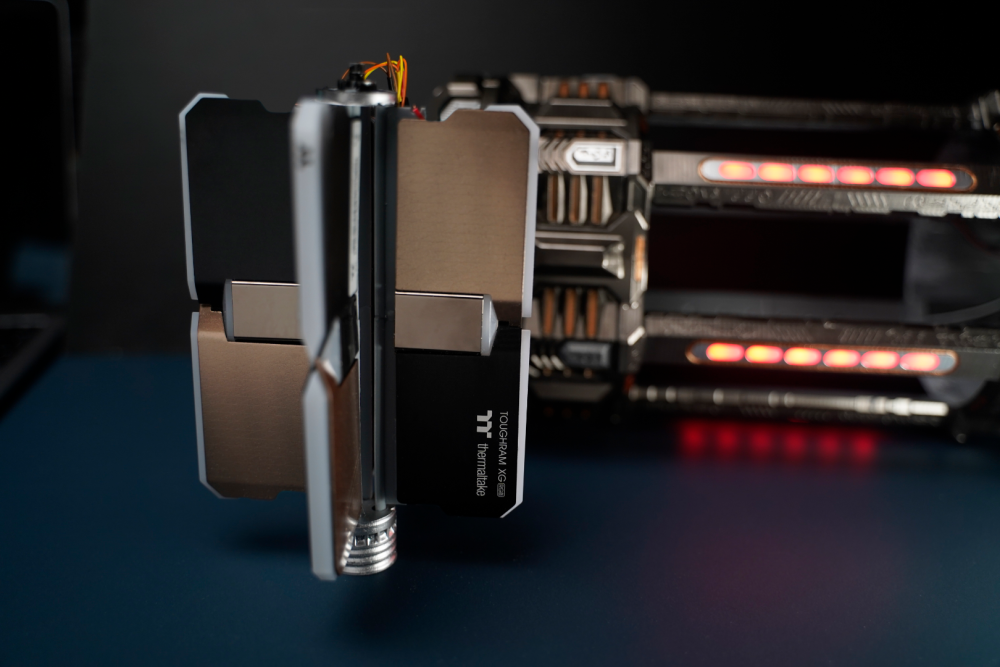
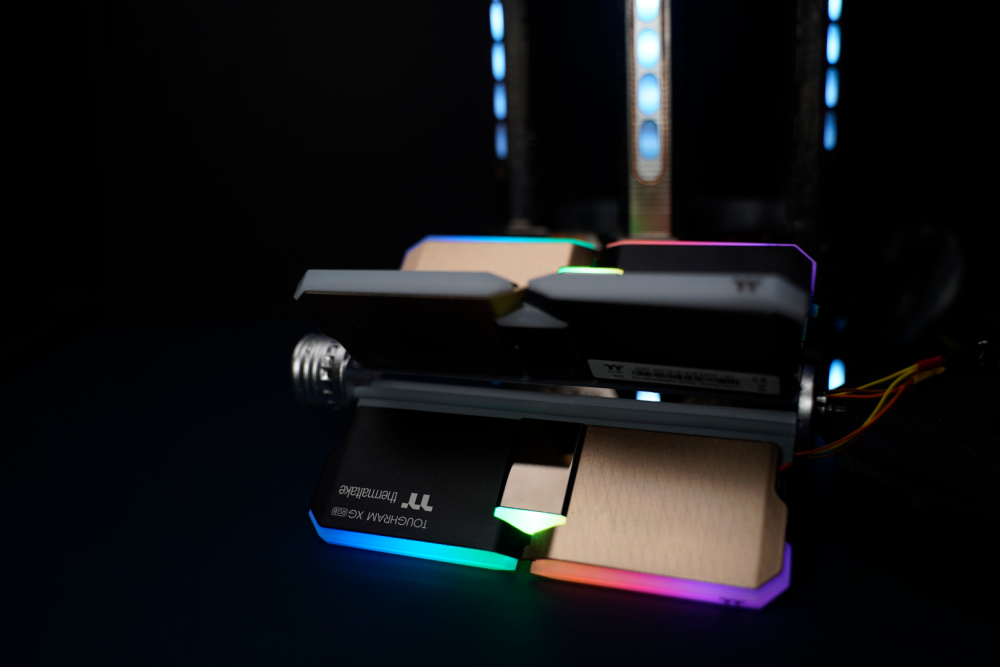
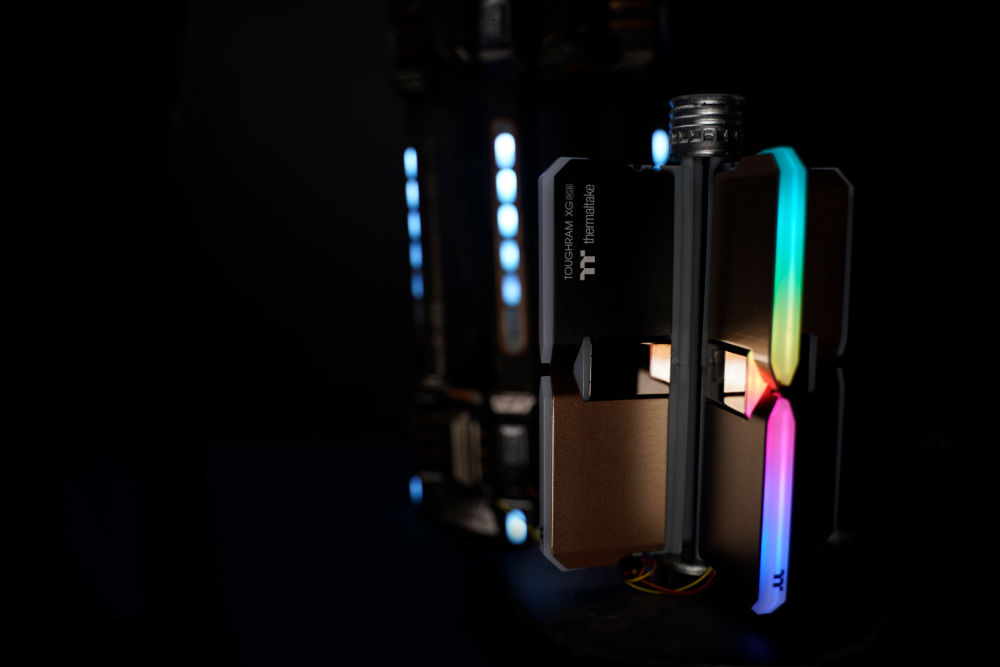
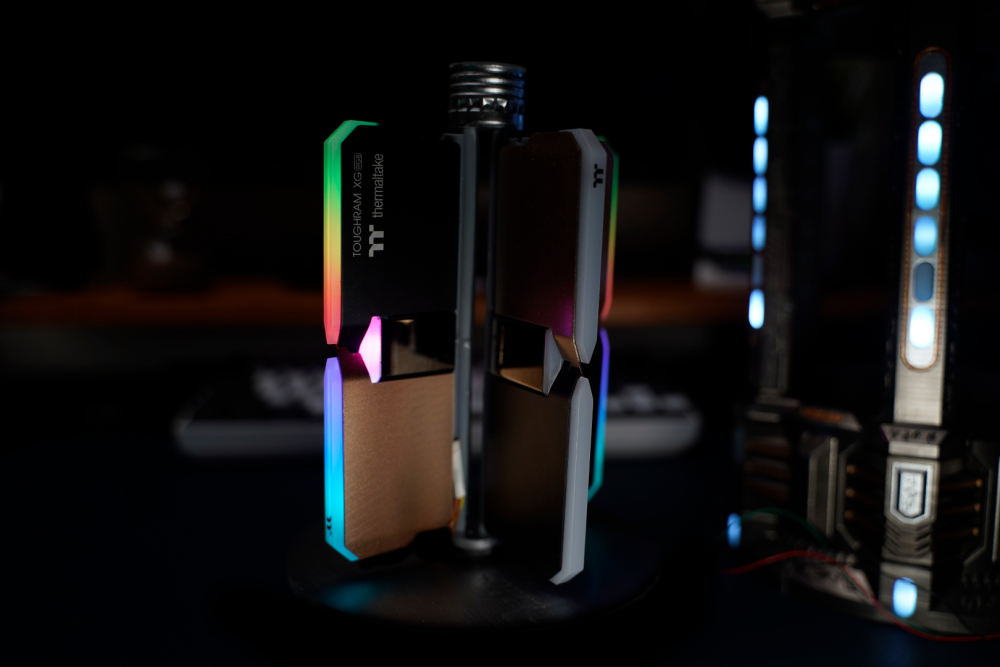
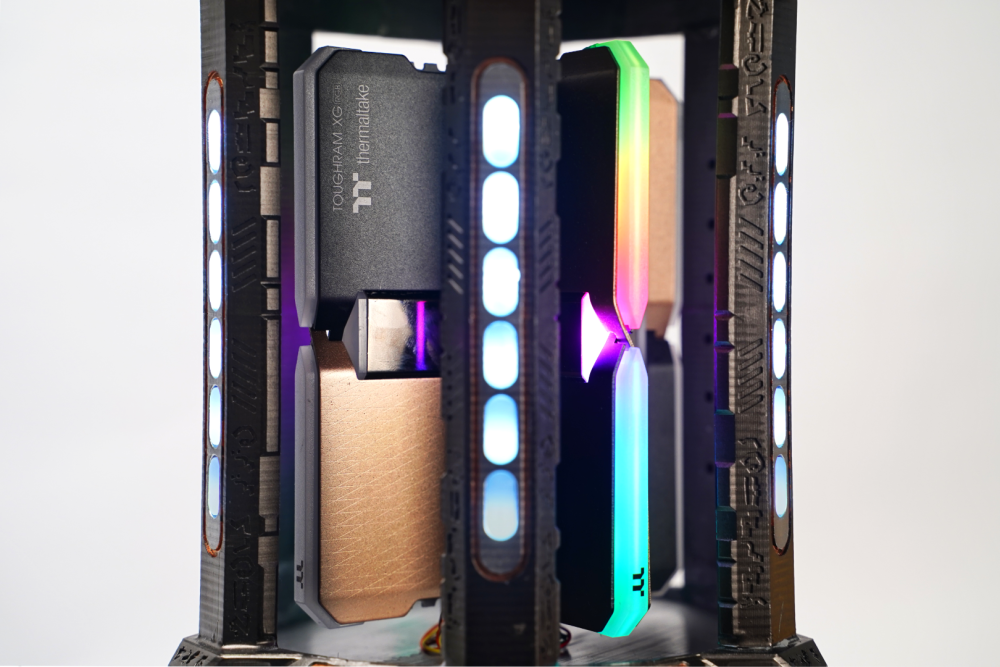
I’ve been doing a lot of wiring on this, rush off to the ending. Each half of the mod contains an ESP32 to control lighting Motors. i printed several mechanical parts, and also individually soldered 5050 SMD LEDs onto the RAM to make sure that it can be lit up. All the mechanical and Electronic work is included below.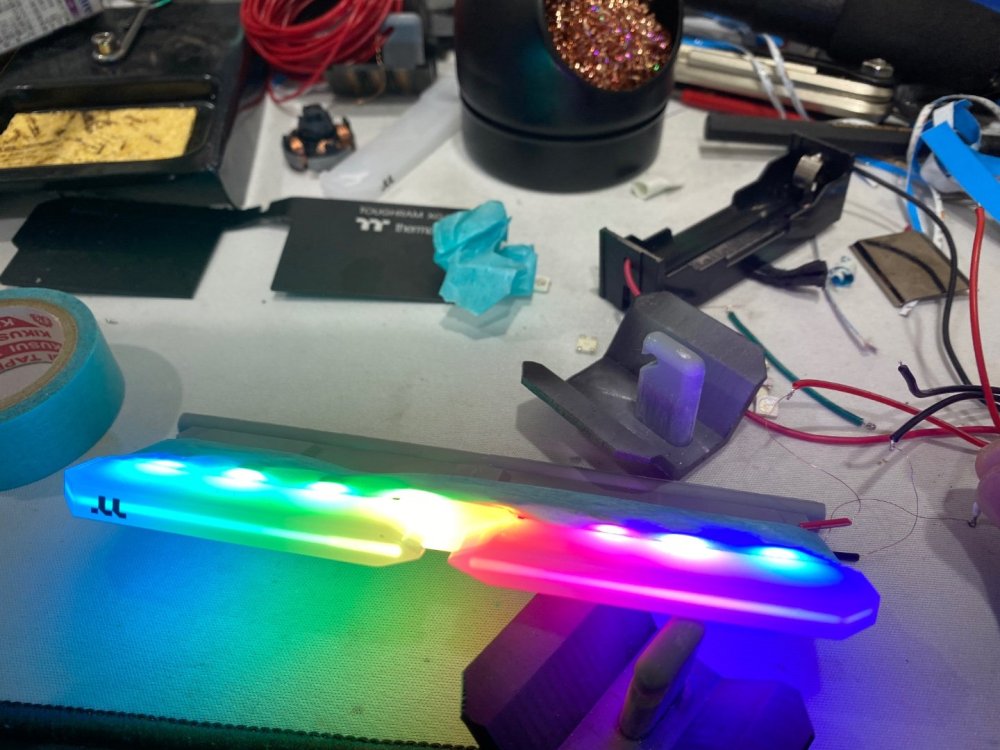


-
[Sri Lanka] Sanjaya Bhanu
Sanjaya replied to TT Lily's topic in 2022 Thermaltake RAM MOD Invitational Season 1
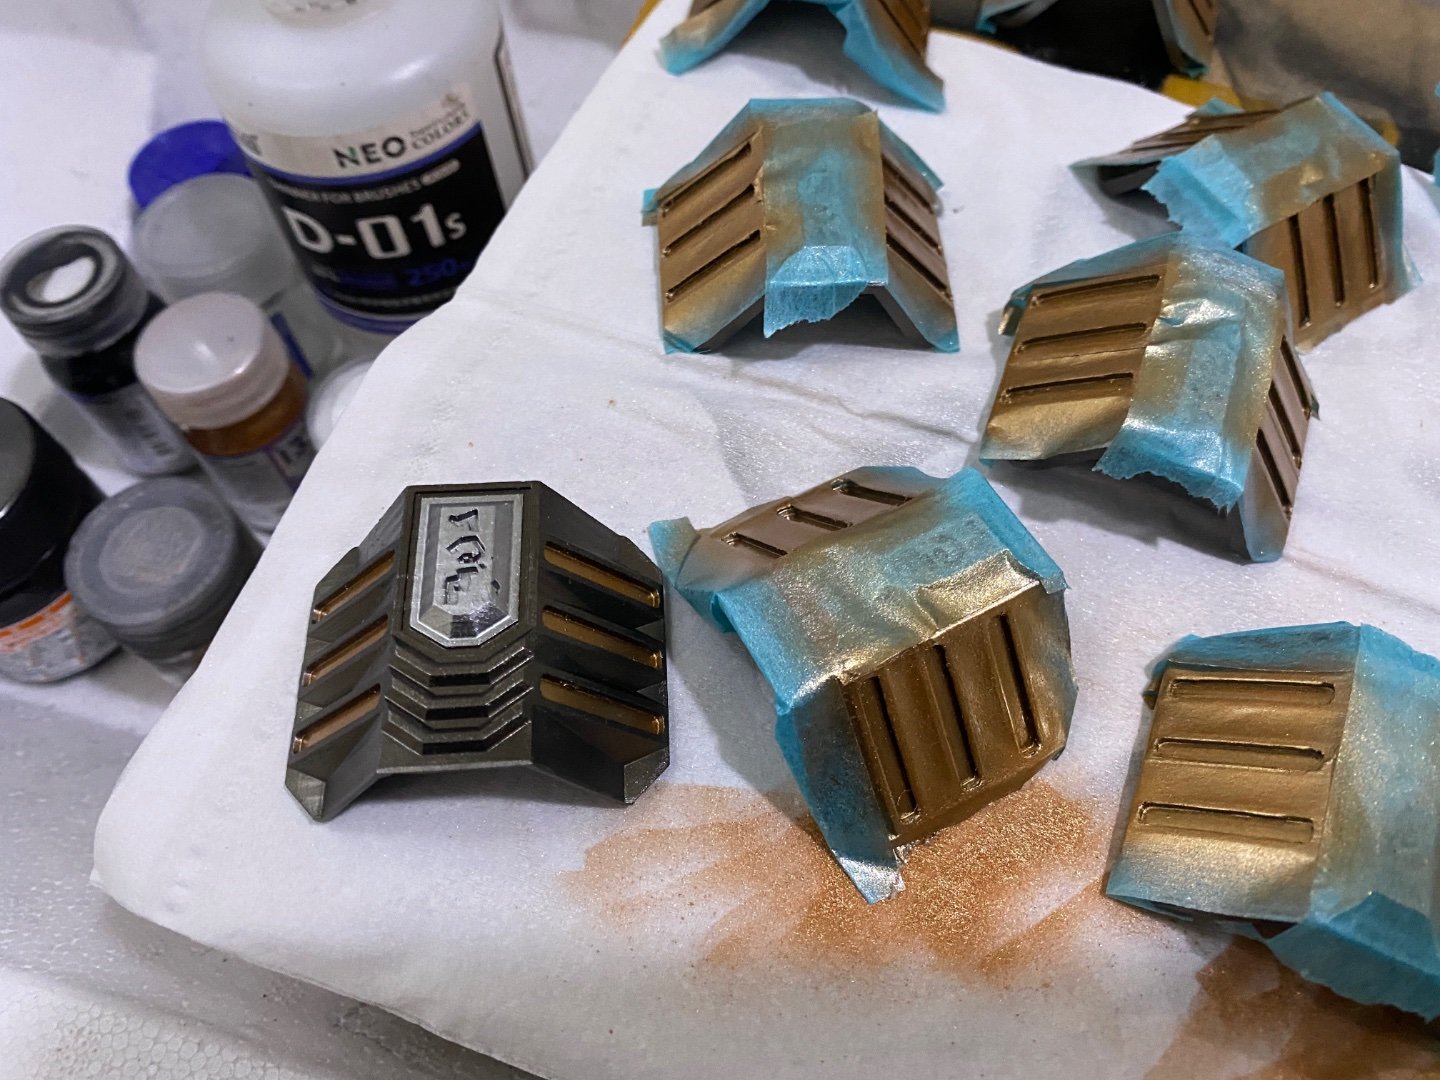
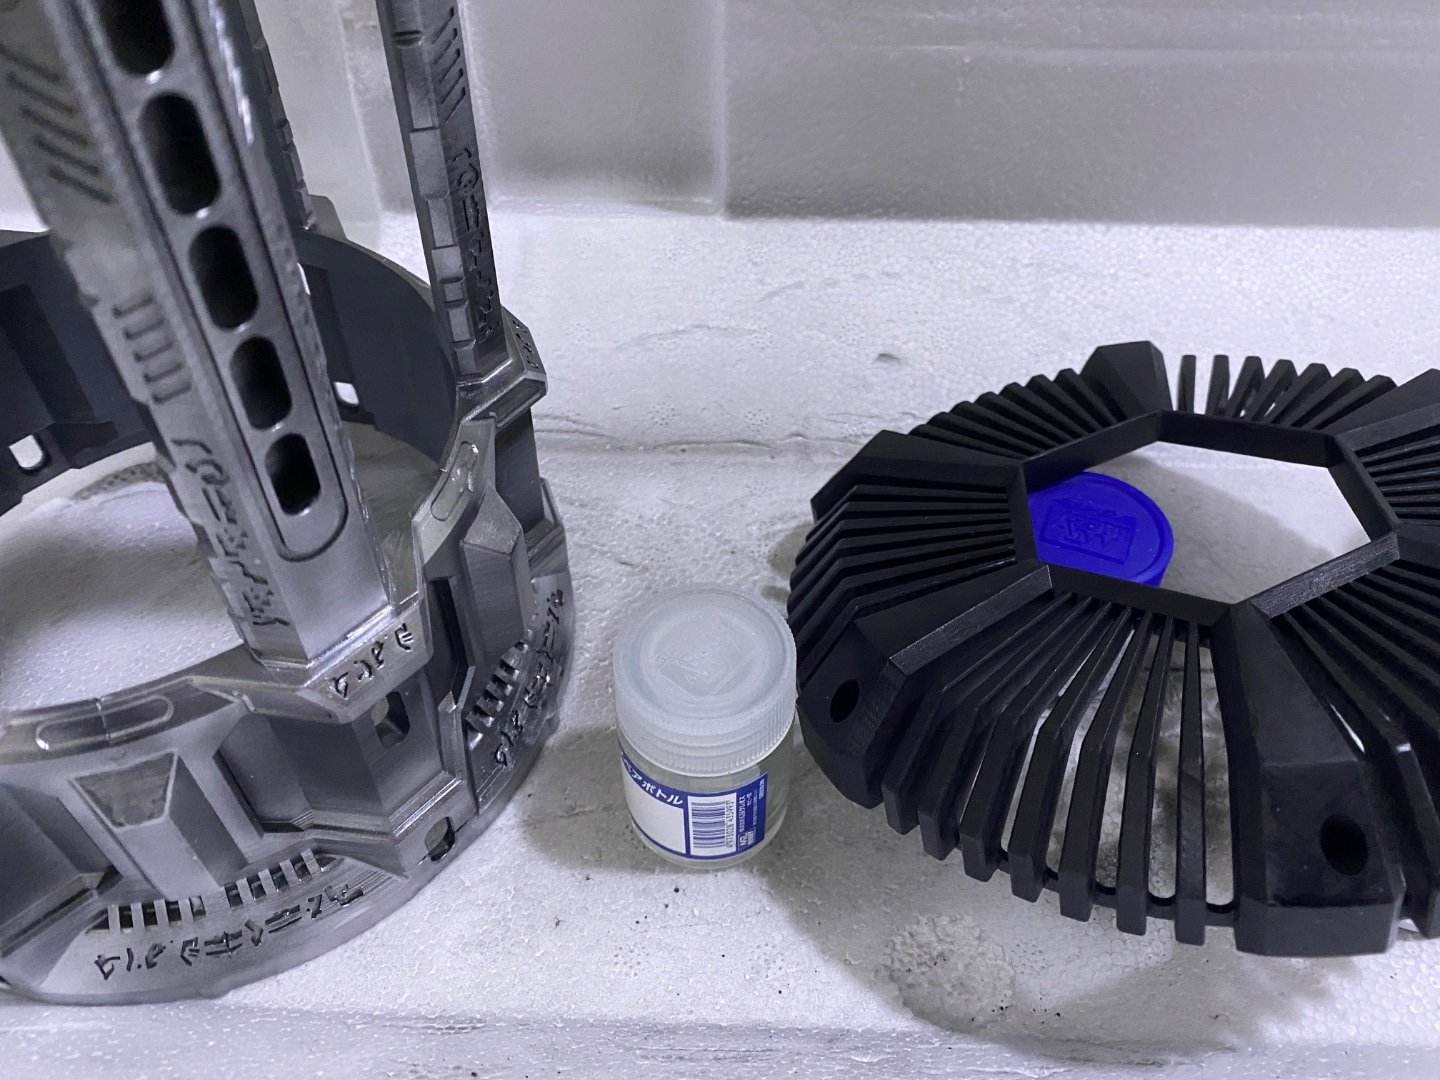
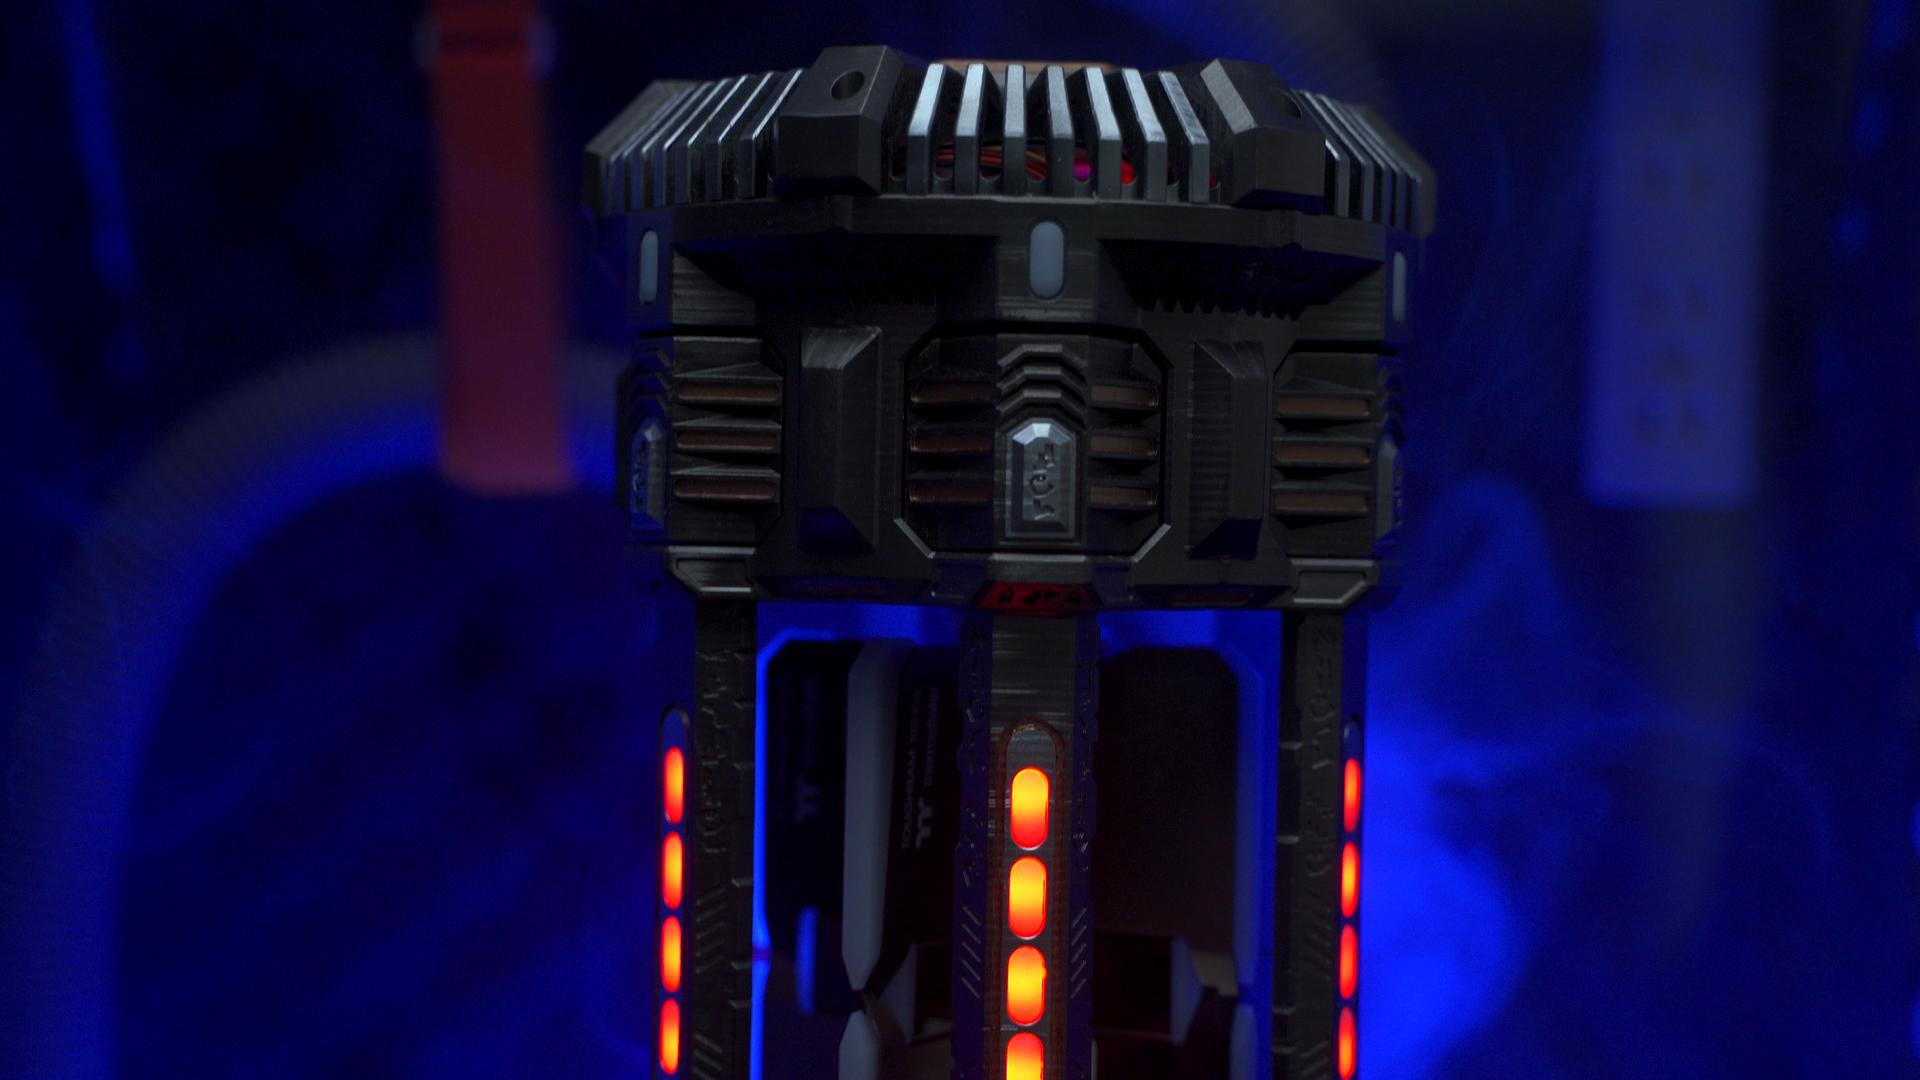
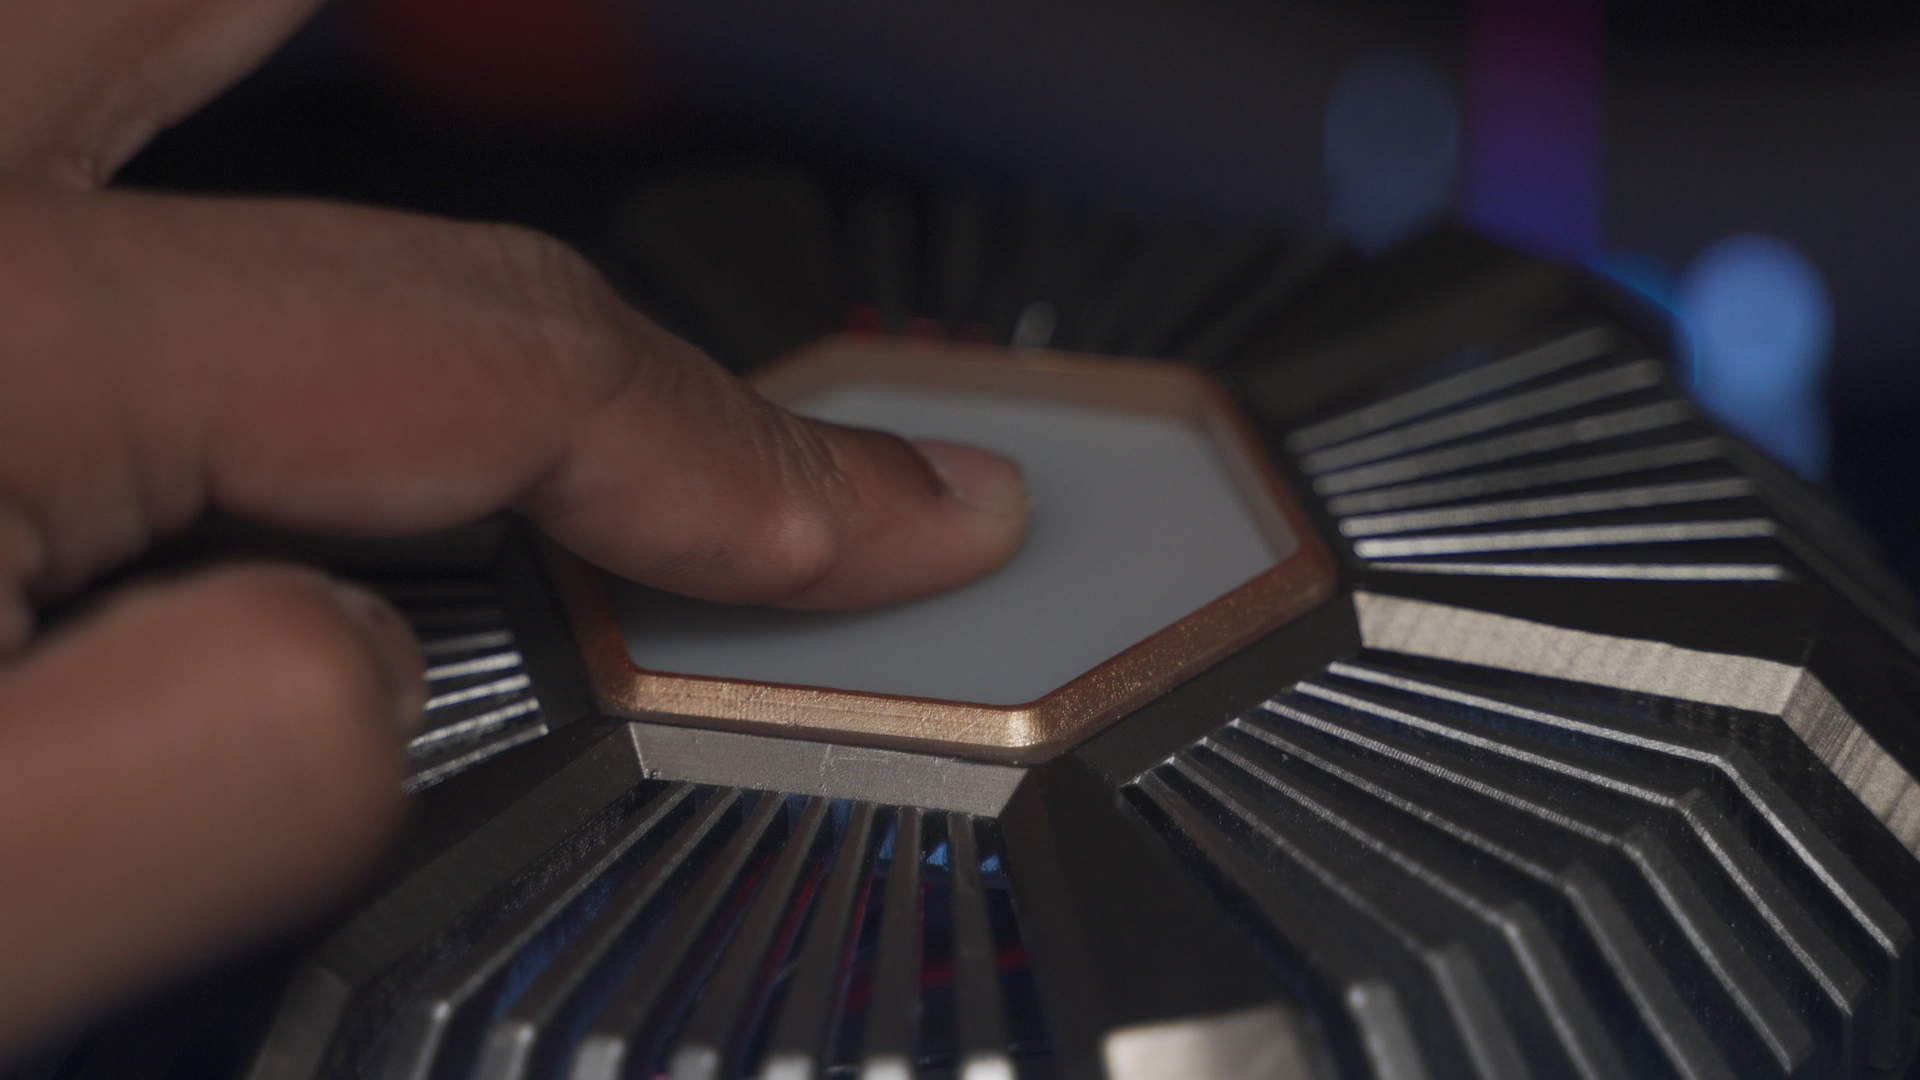
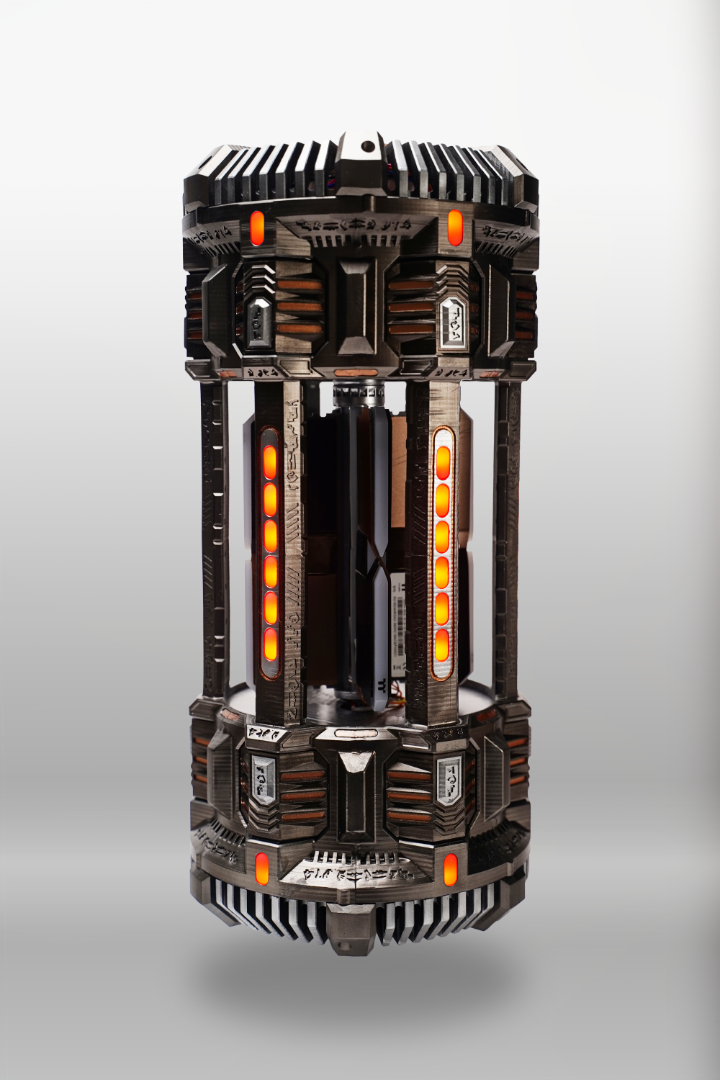
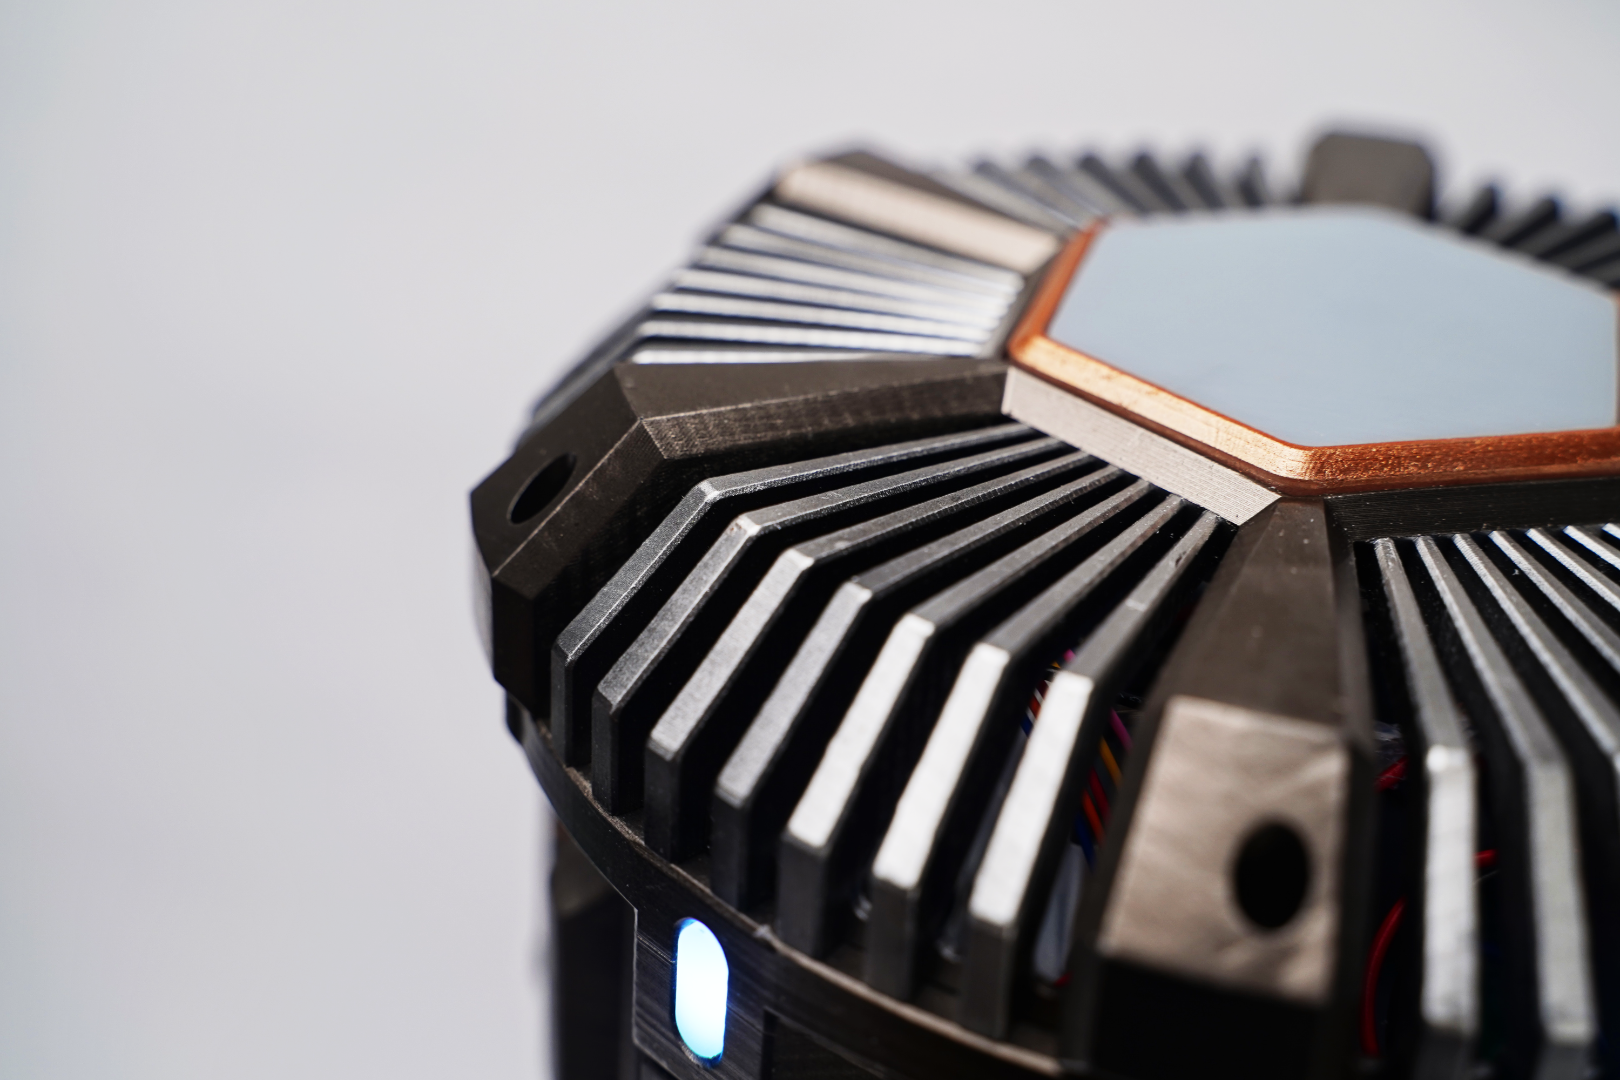
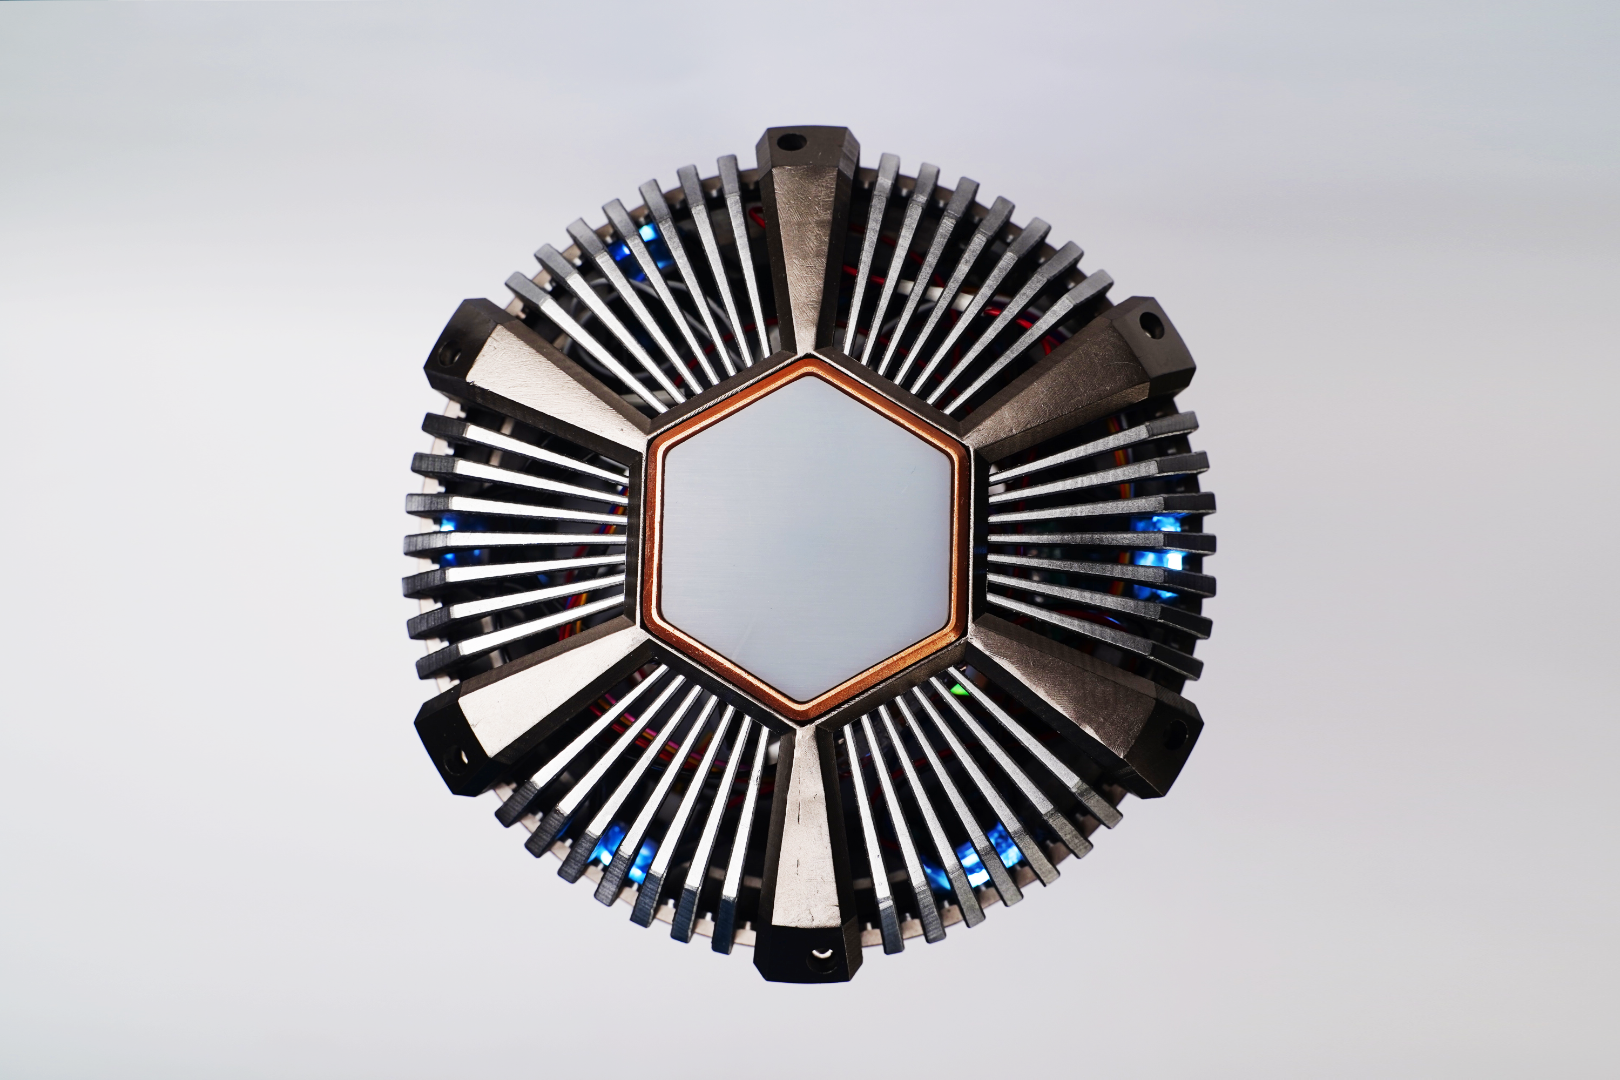
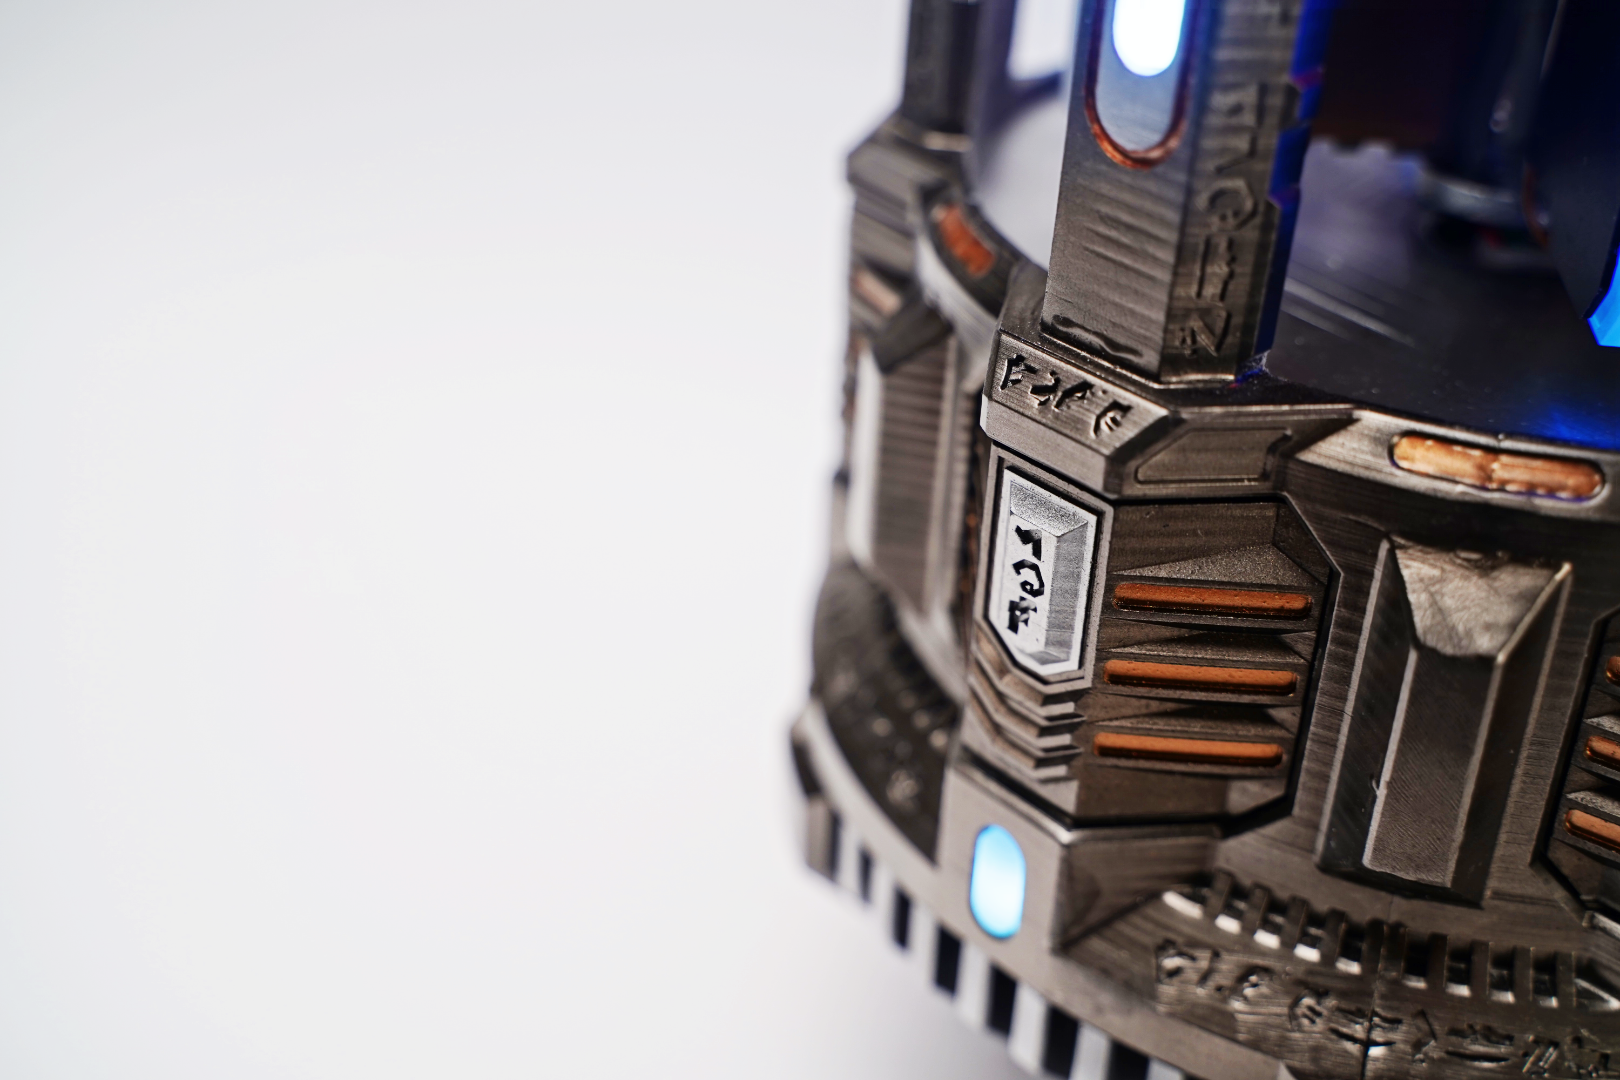
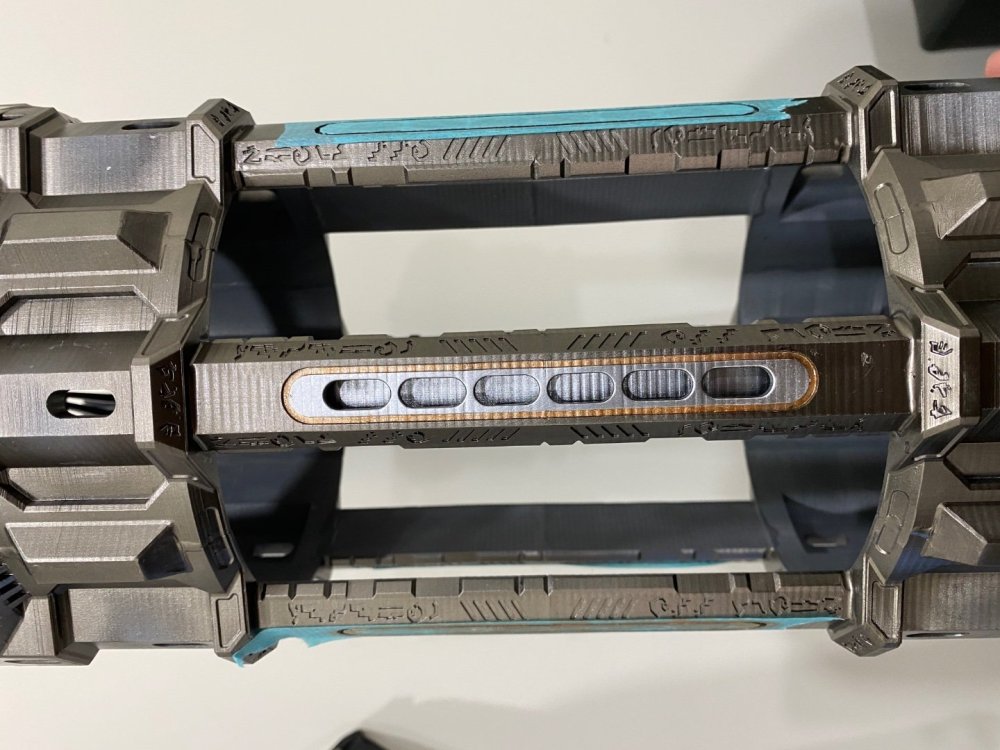
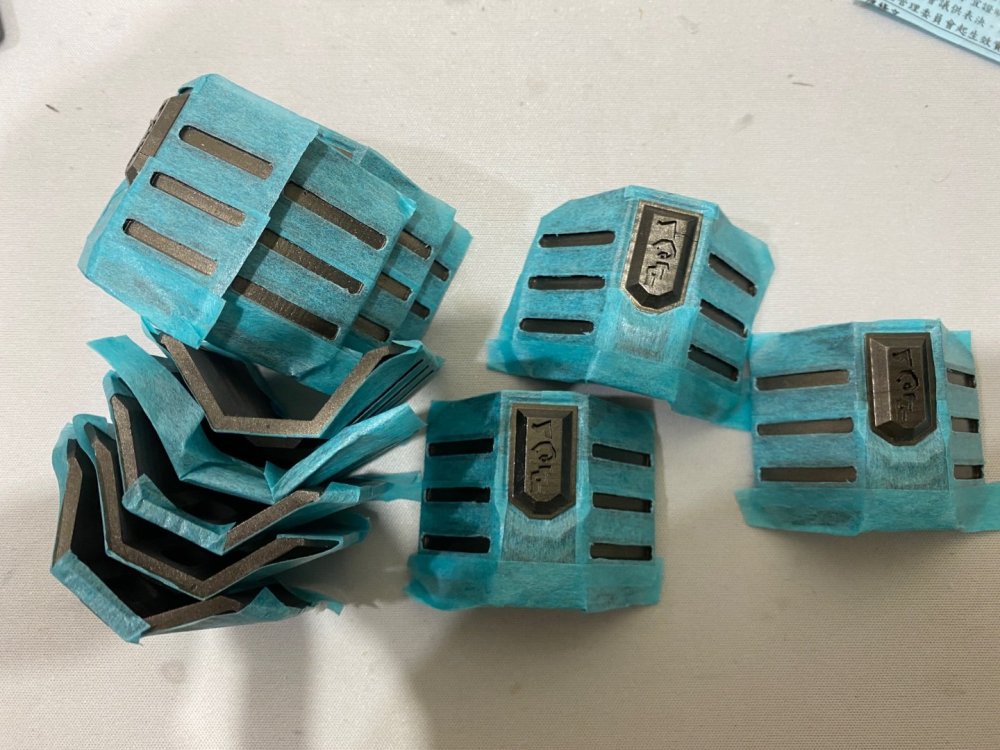
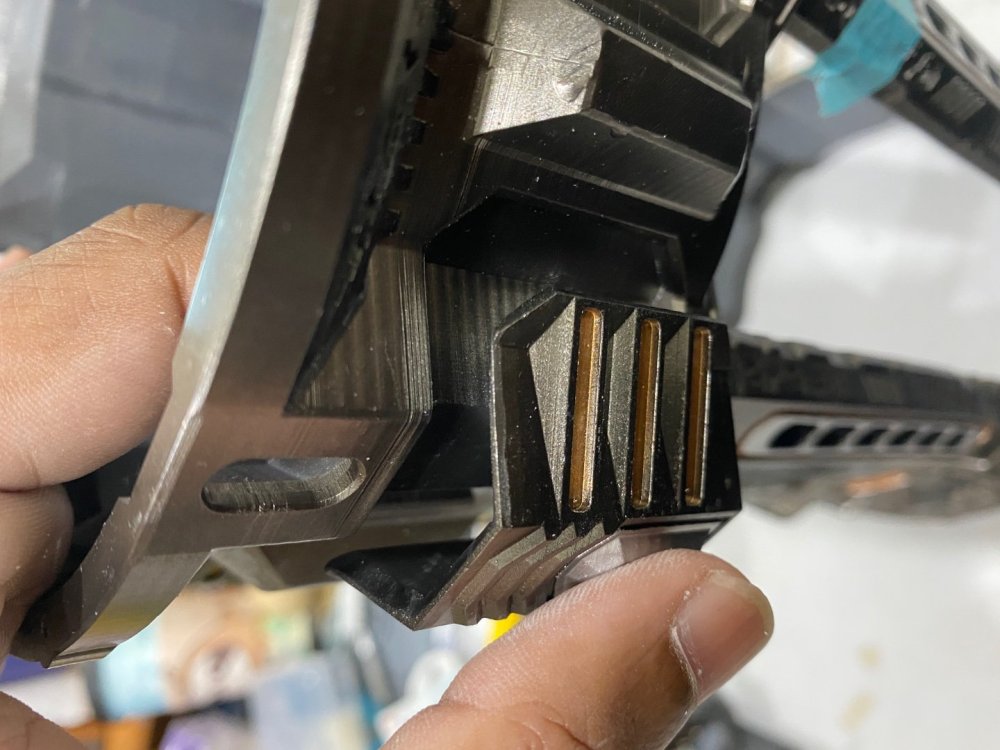
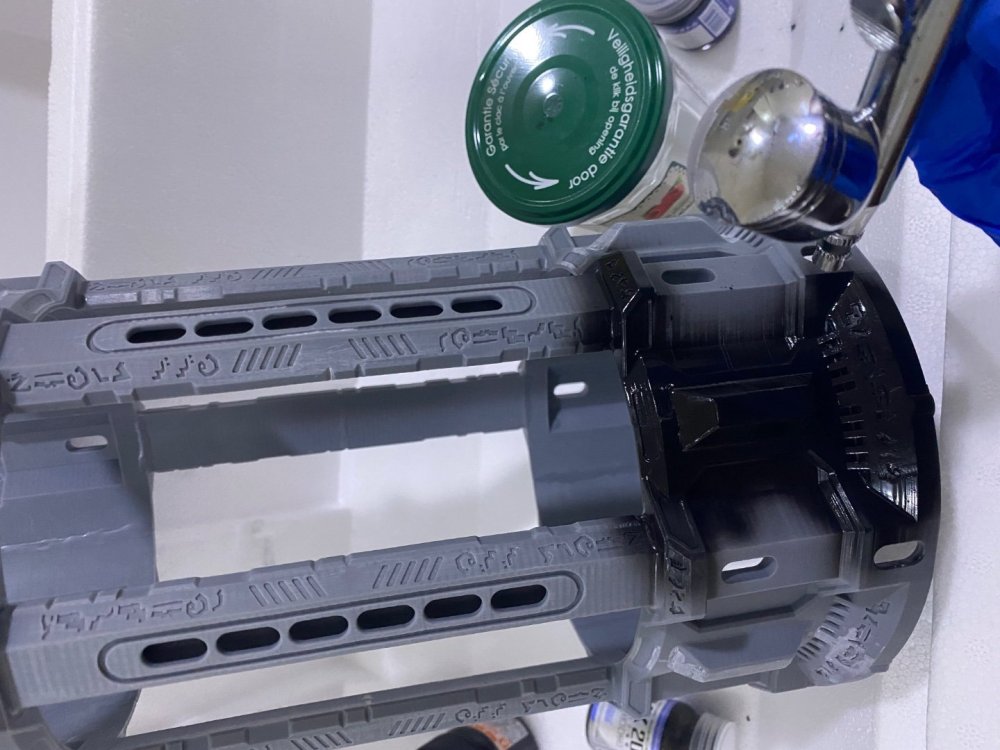
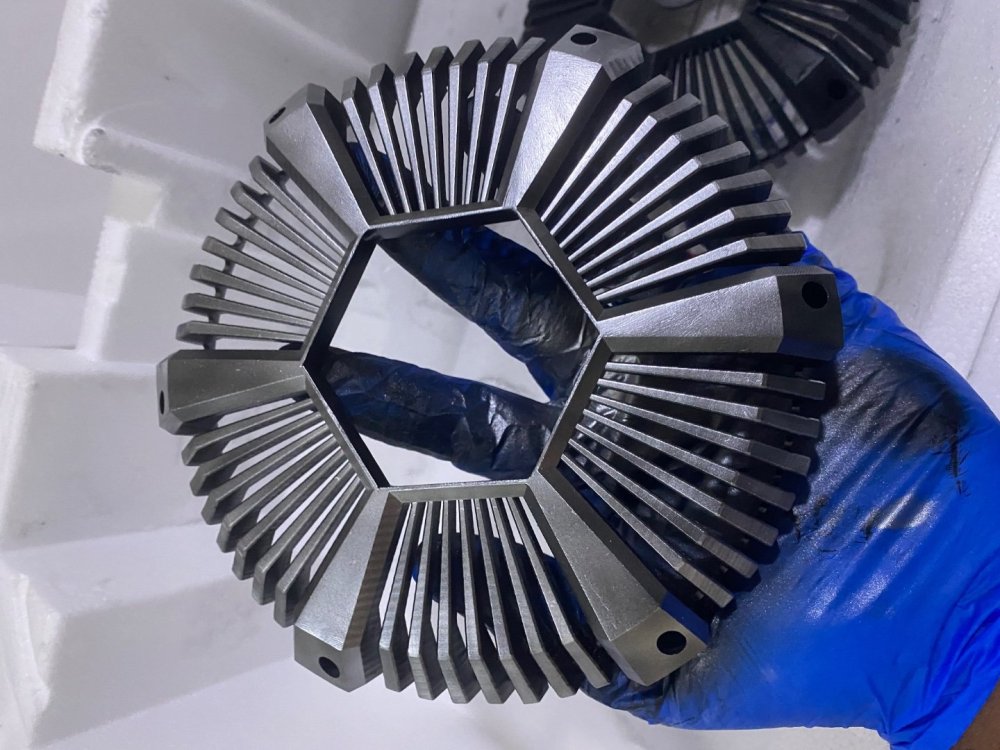
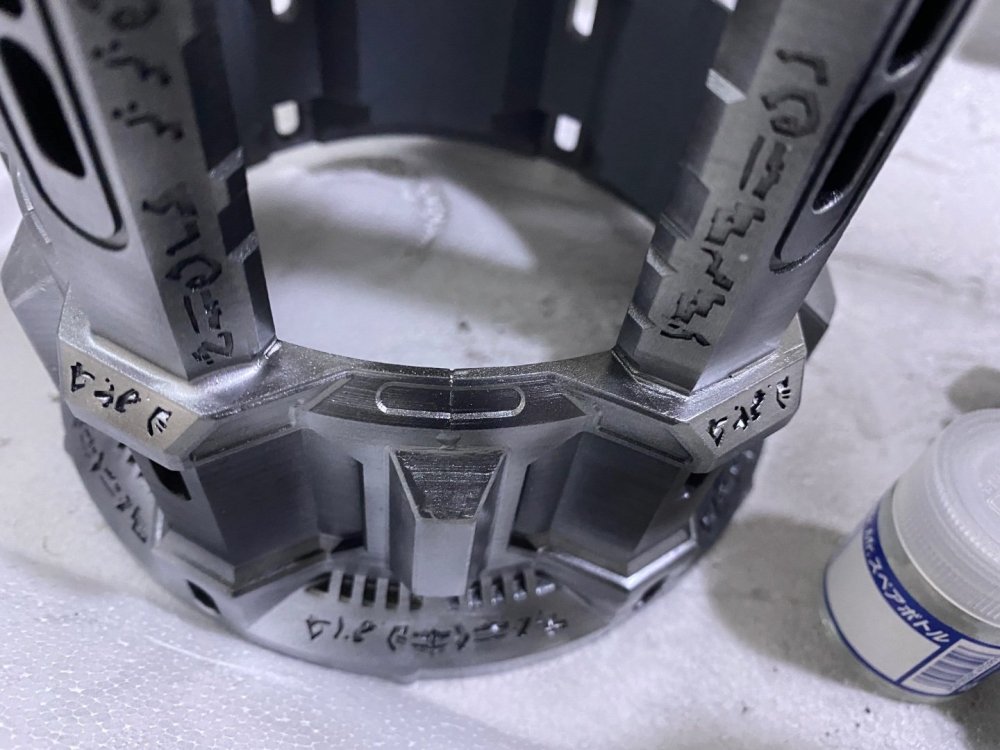
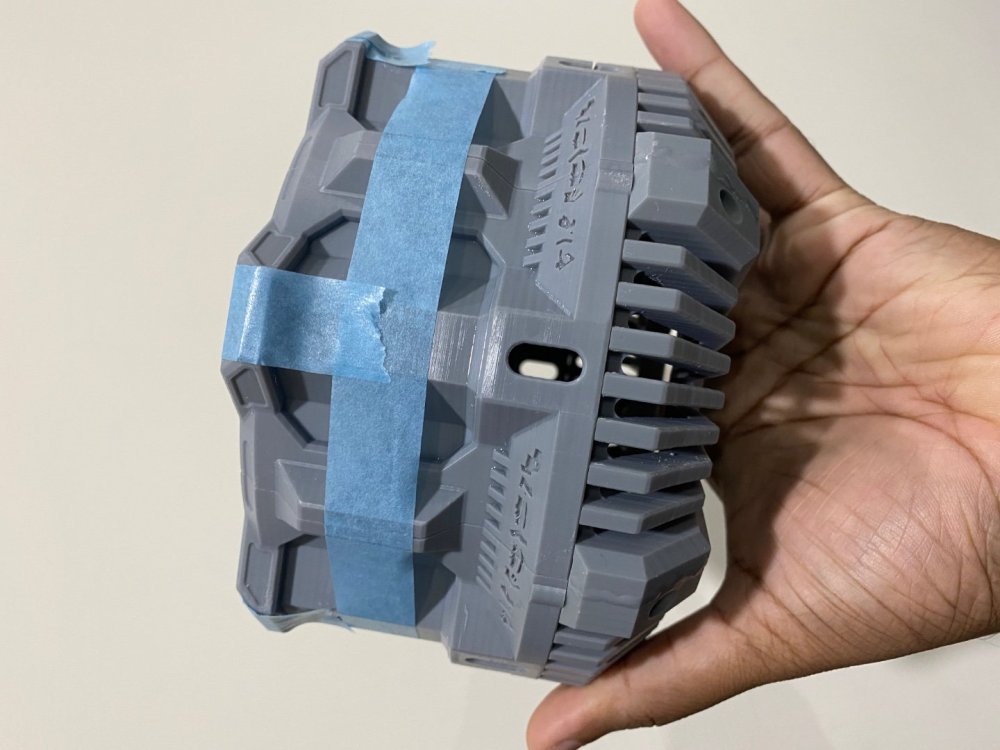
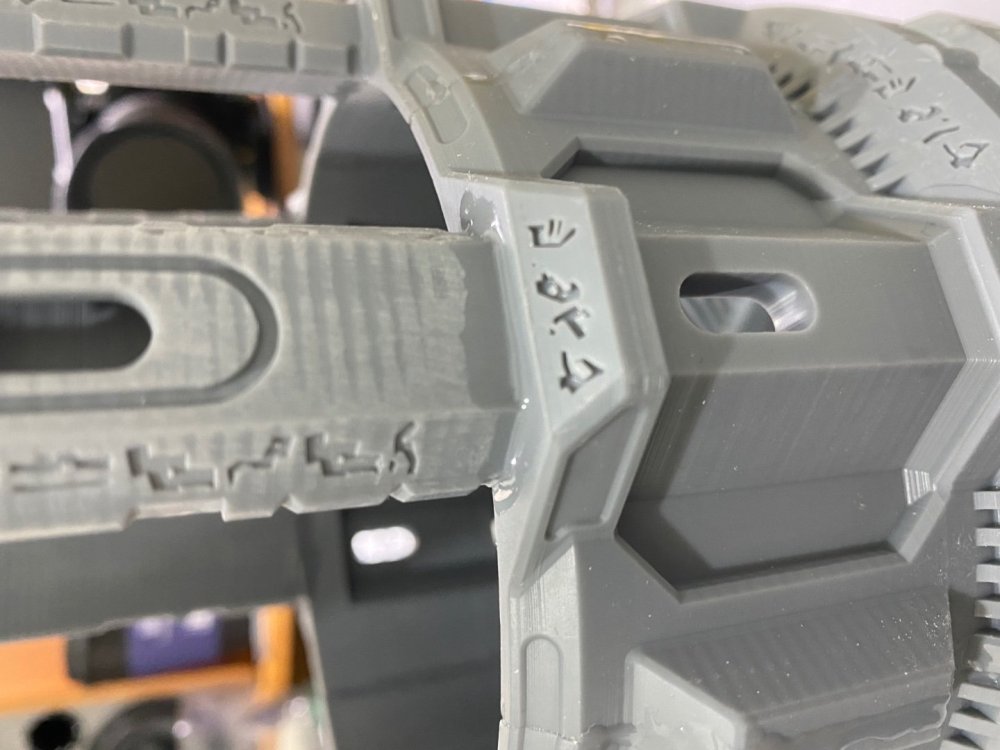
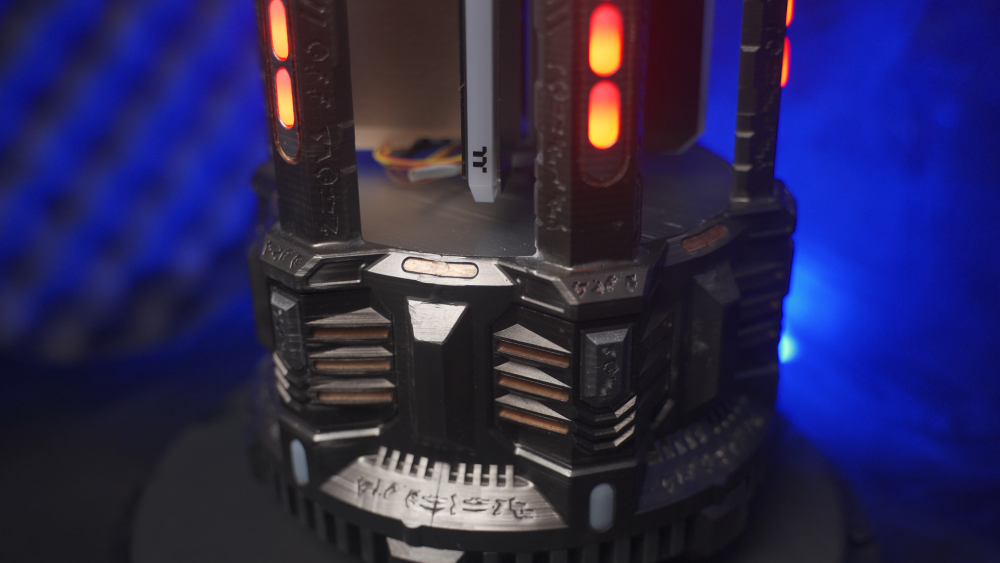
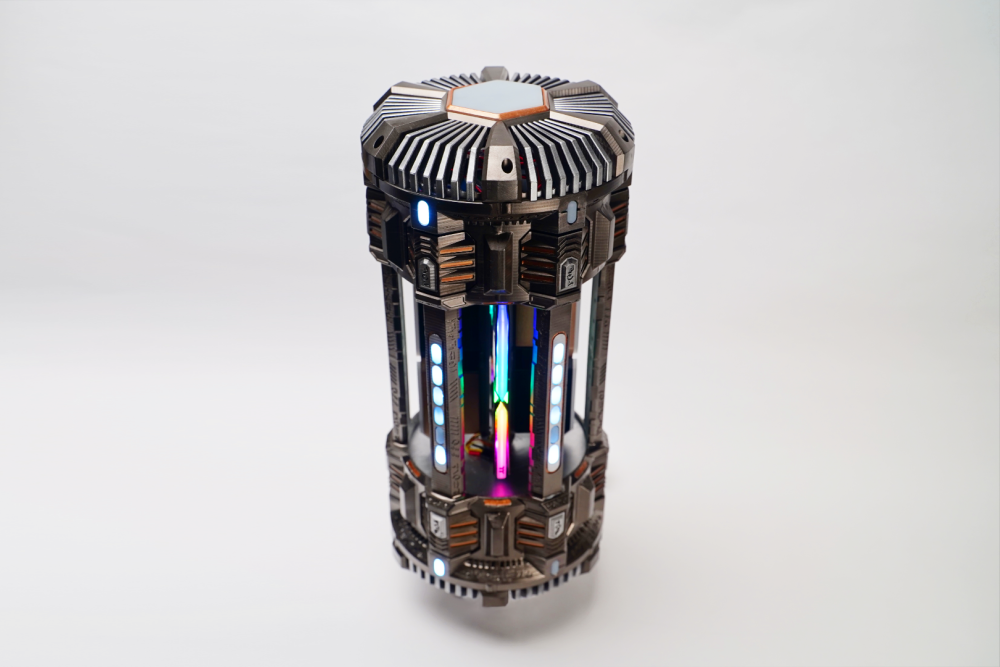
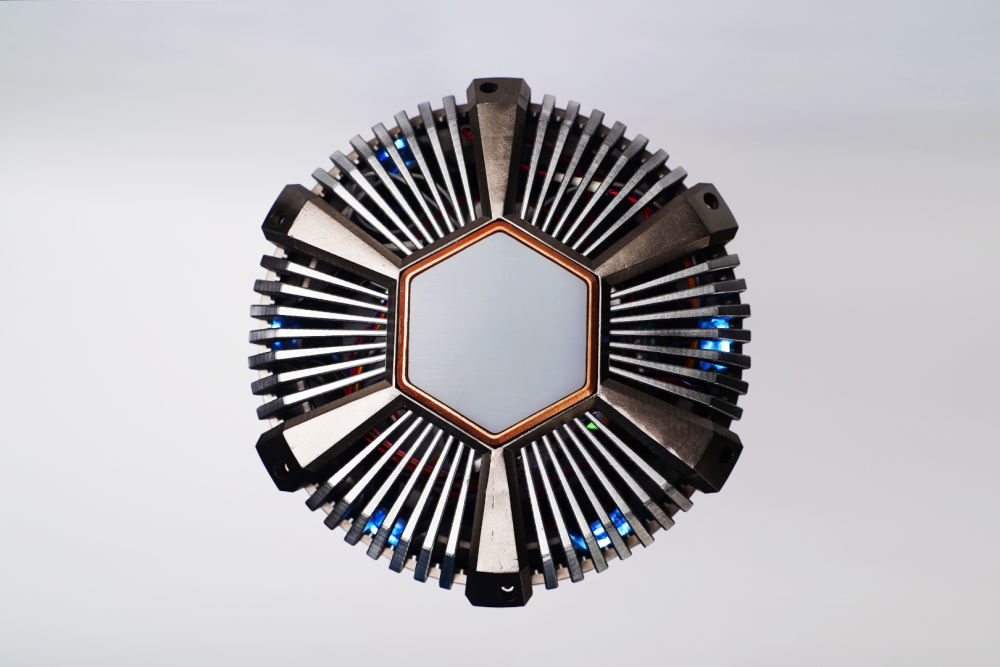
Adding more details to the paint. i wanted to keep everything in metallic color. So the colors are as follow. 1. Gun metal as the main color 2. Star Silver for large accents 3. Copper for smaller intricate details by far the most annoying and hard thing was cutting the masking tape for the fine details.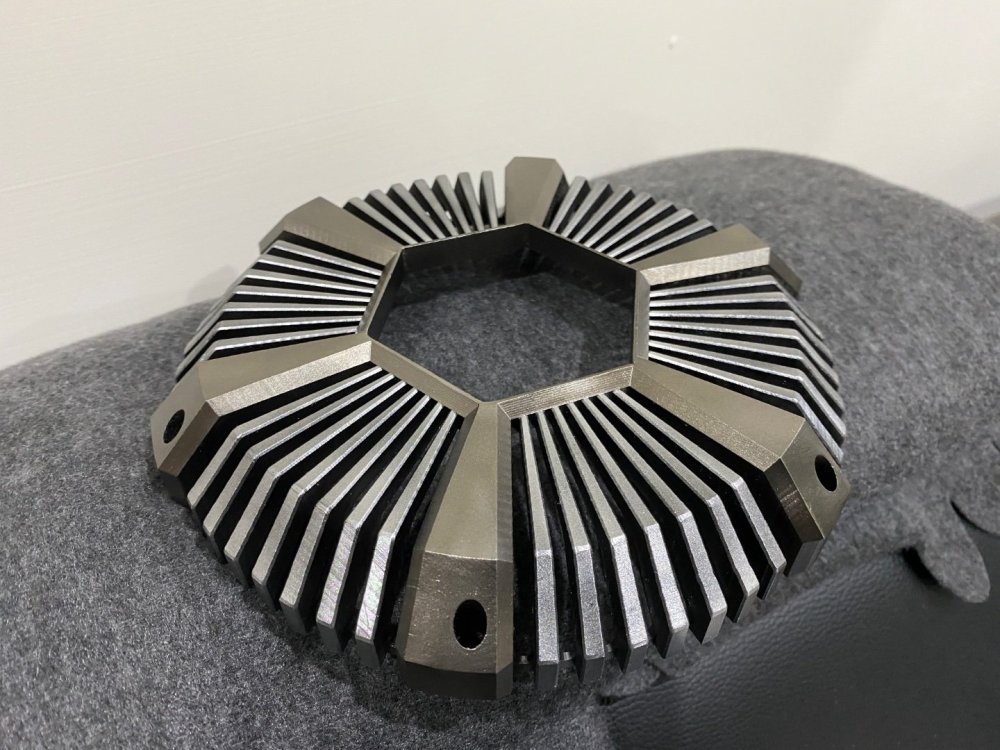

-
[Philippines] Michael F Samsin
Sanjaya replied to TT Lily's topic in 2022 Thermaltake RAM MOD Invitational Season 1
Darn broooo this looks sick! -
[Philippines] Michael F Samsin
Sanjaya replied to TT Lily's topic in 2022 Thermaltake RAM MOD Invitational Season 1
#### broooo this looks sick! -
[Sri Lanka] Sanjaya Bhanu
Sanjaya replied to TT Lily's topic in 2022 Thermaltake RAM MOD Invitational Season 1
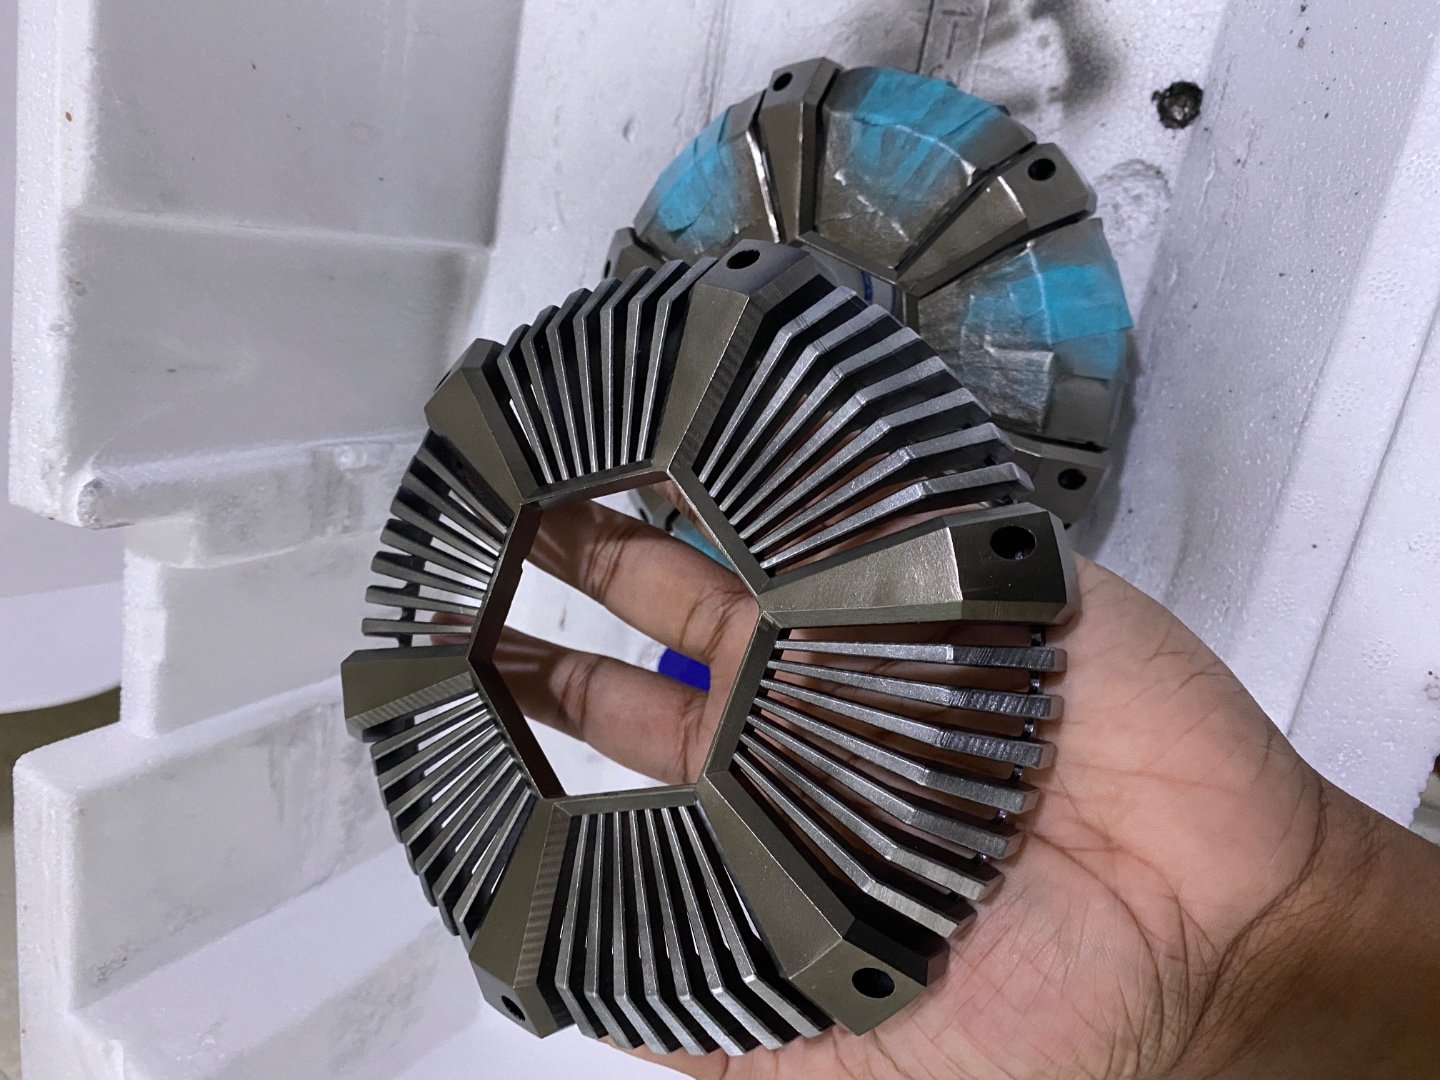
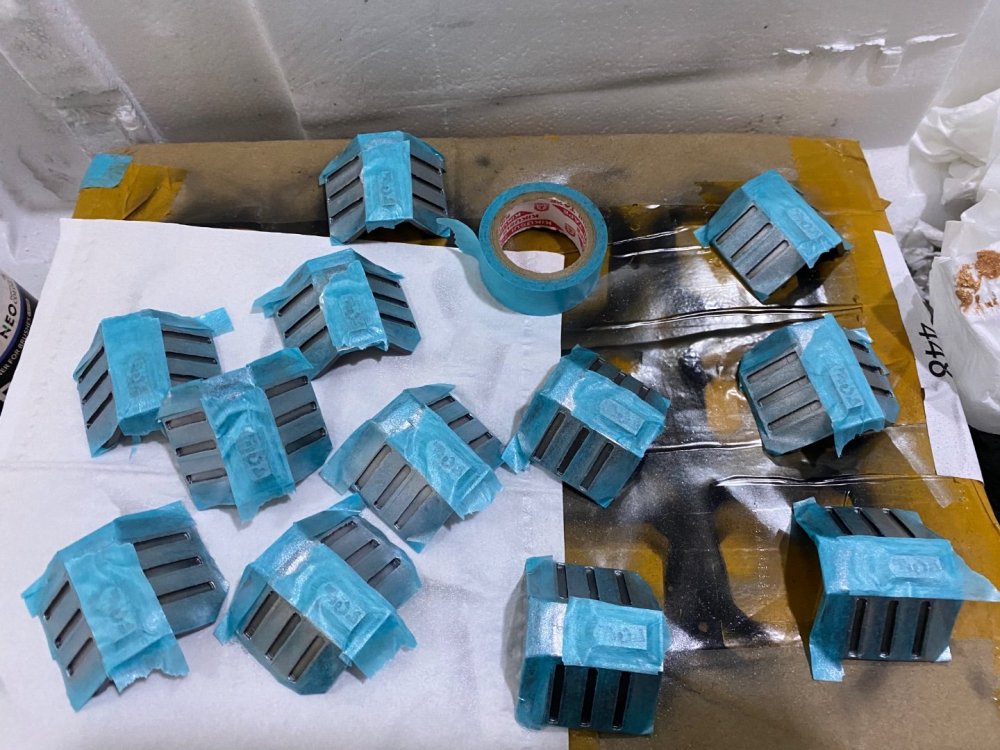
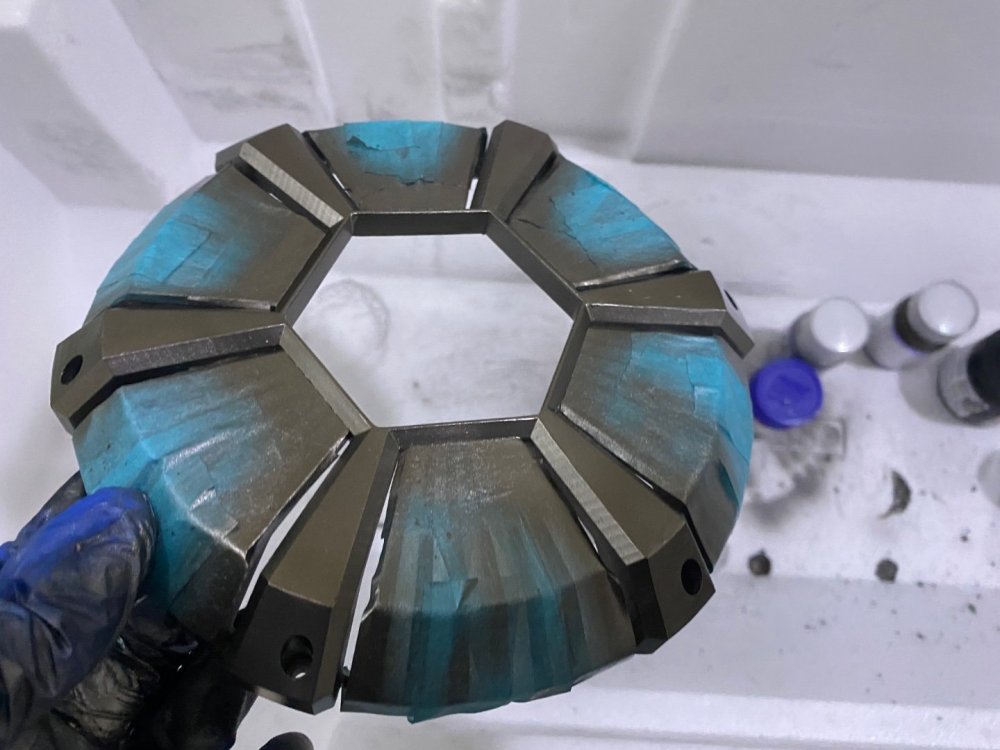
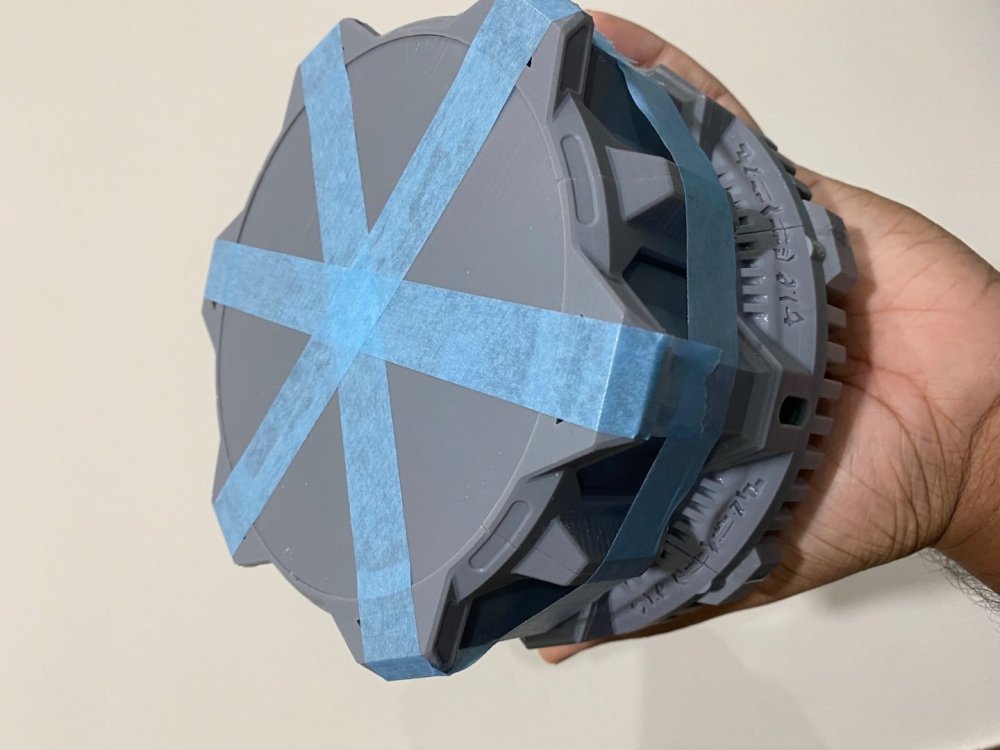
Alright, running a bit tight on time but here’s a quick update sanding and painting is the current step.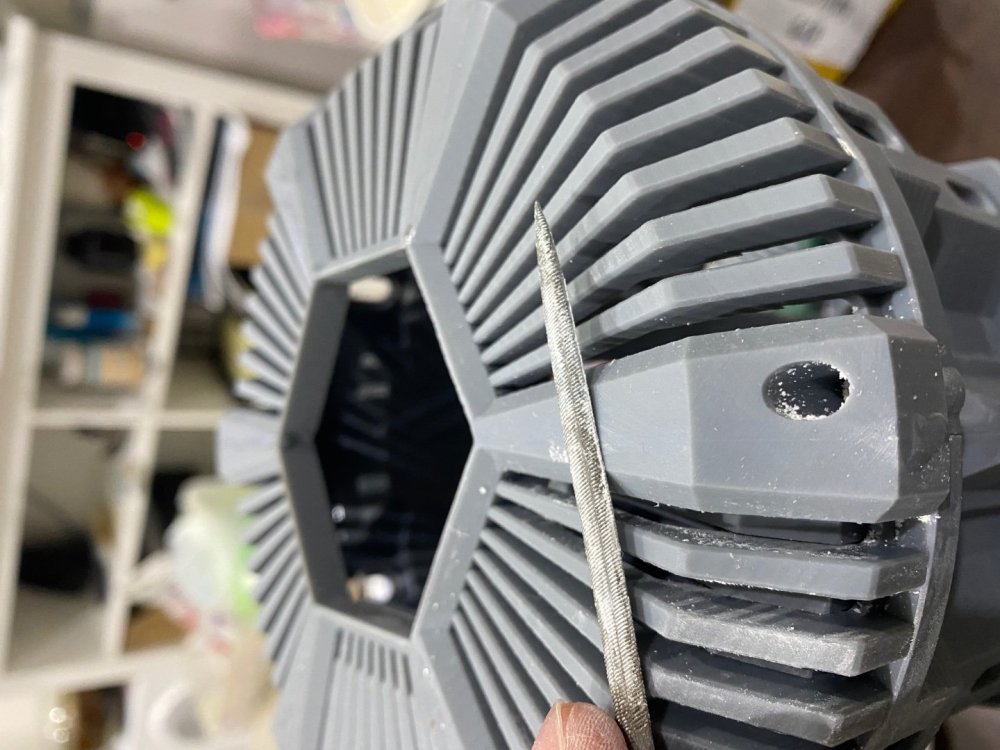


-
[Sri Lanka] Sanjaya Bhanu
Sanjaya replied to TT Lily's topic in 2022 Thermaltake RAM MOD Invitational Season 1
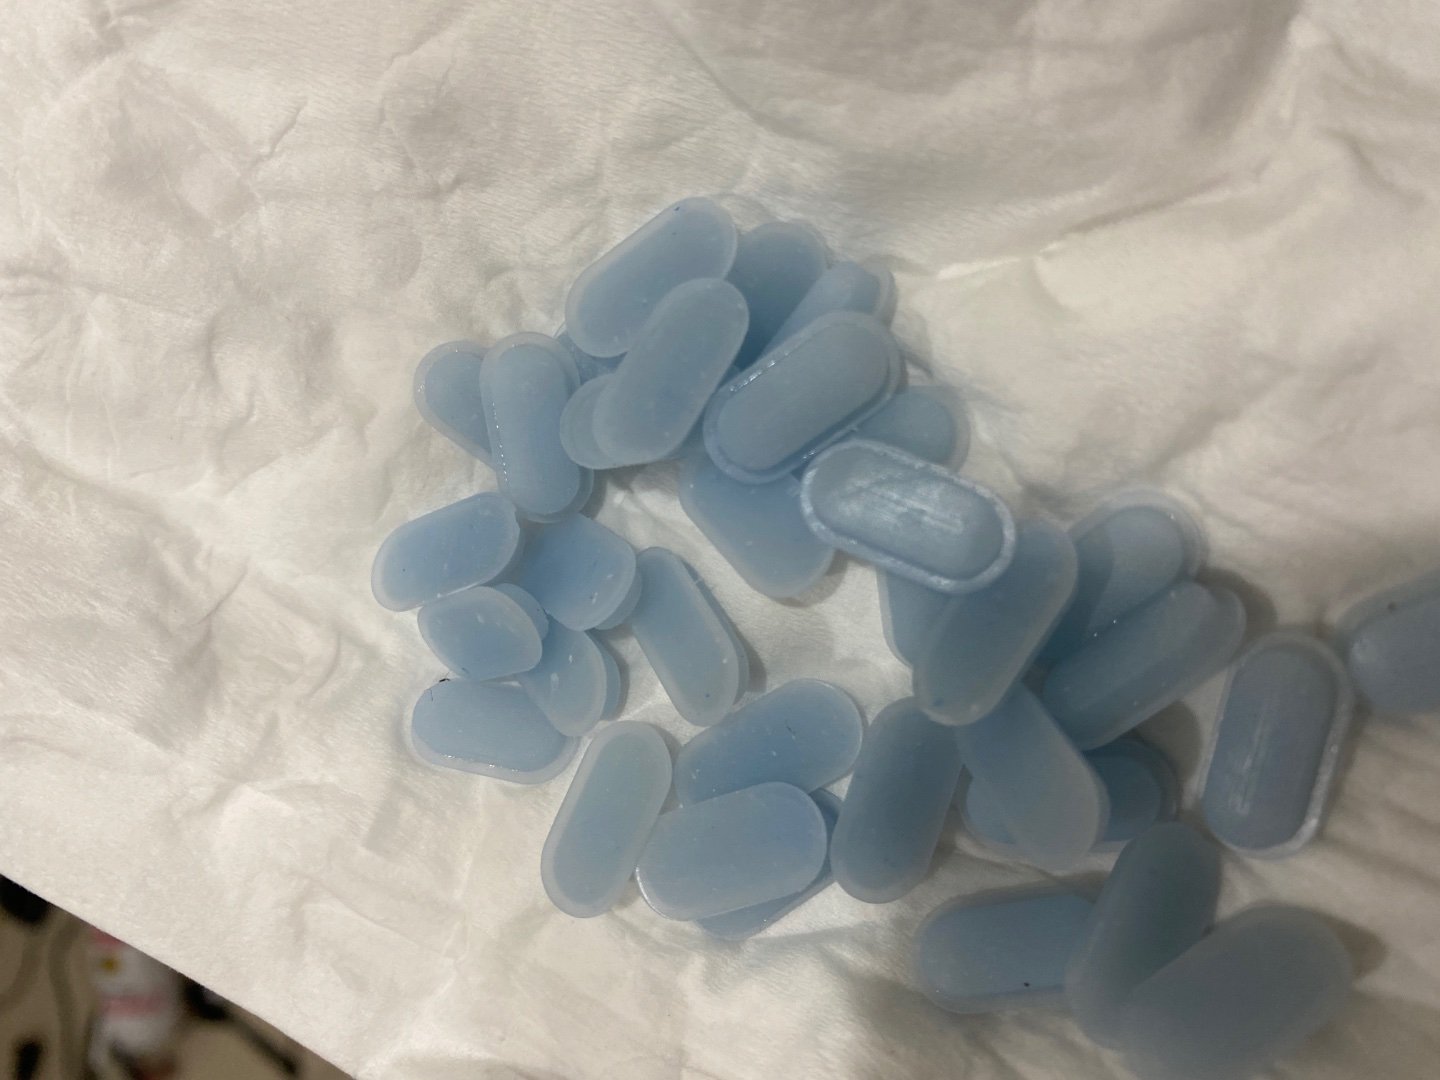
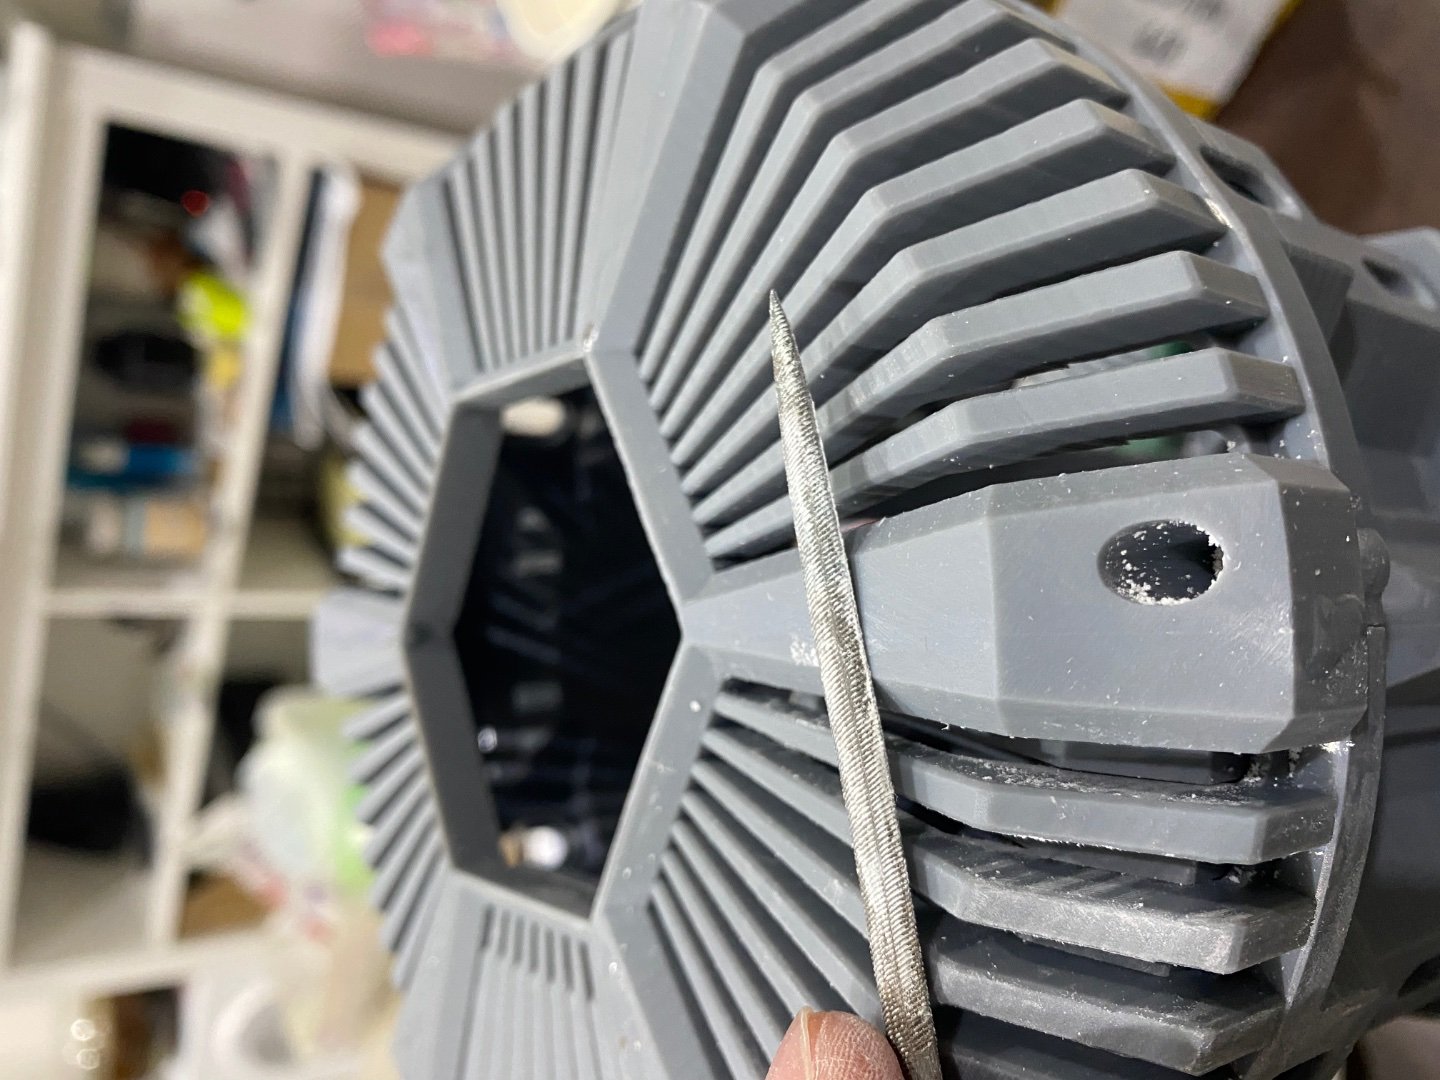
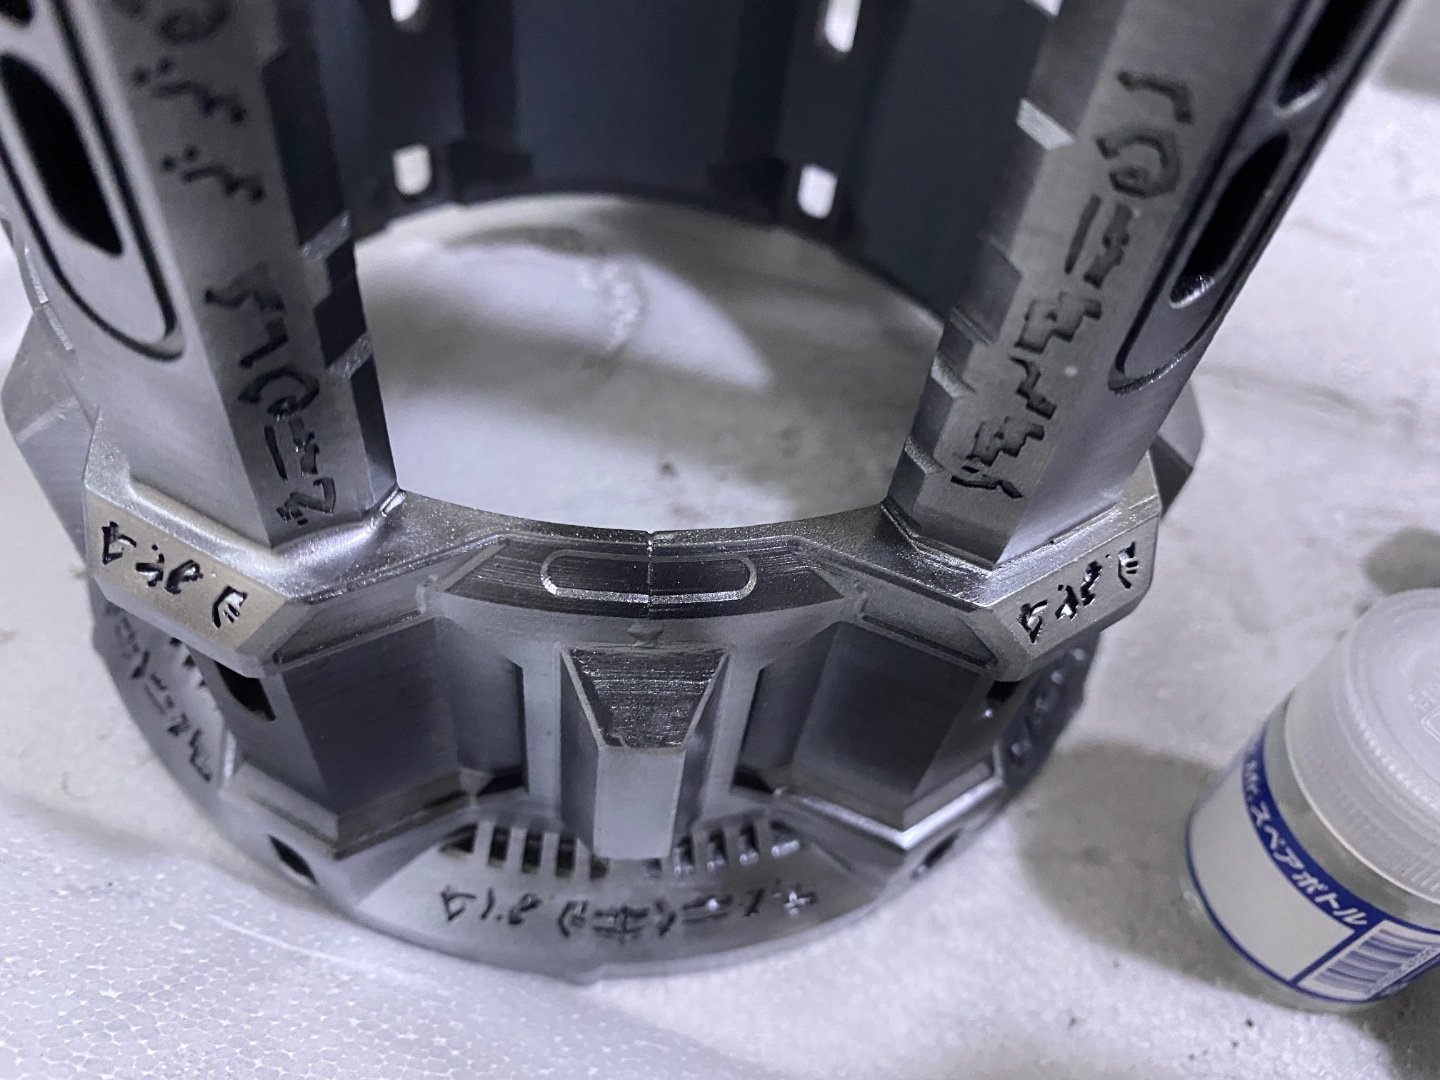
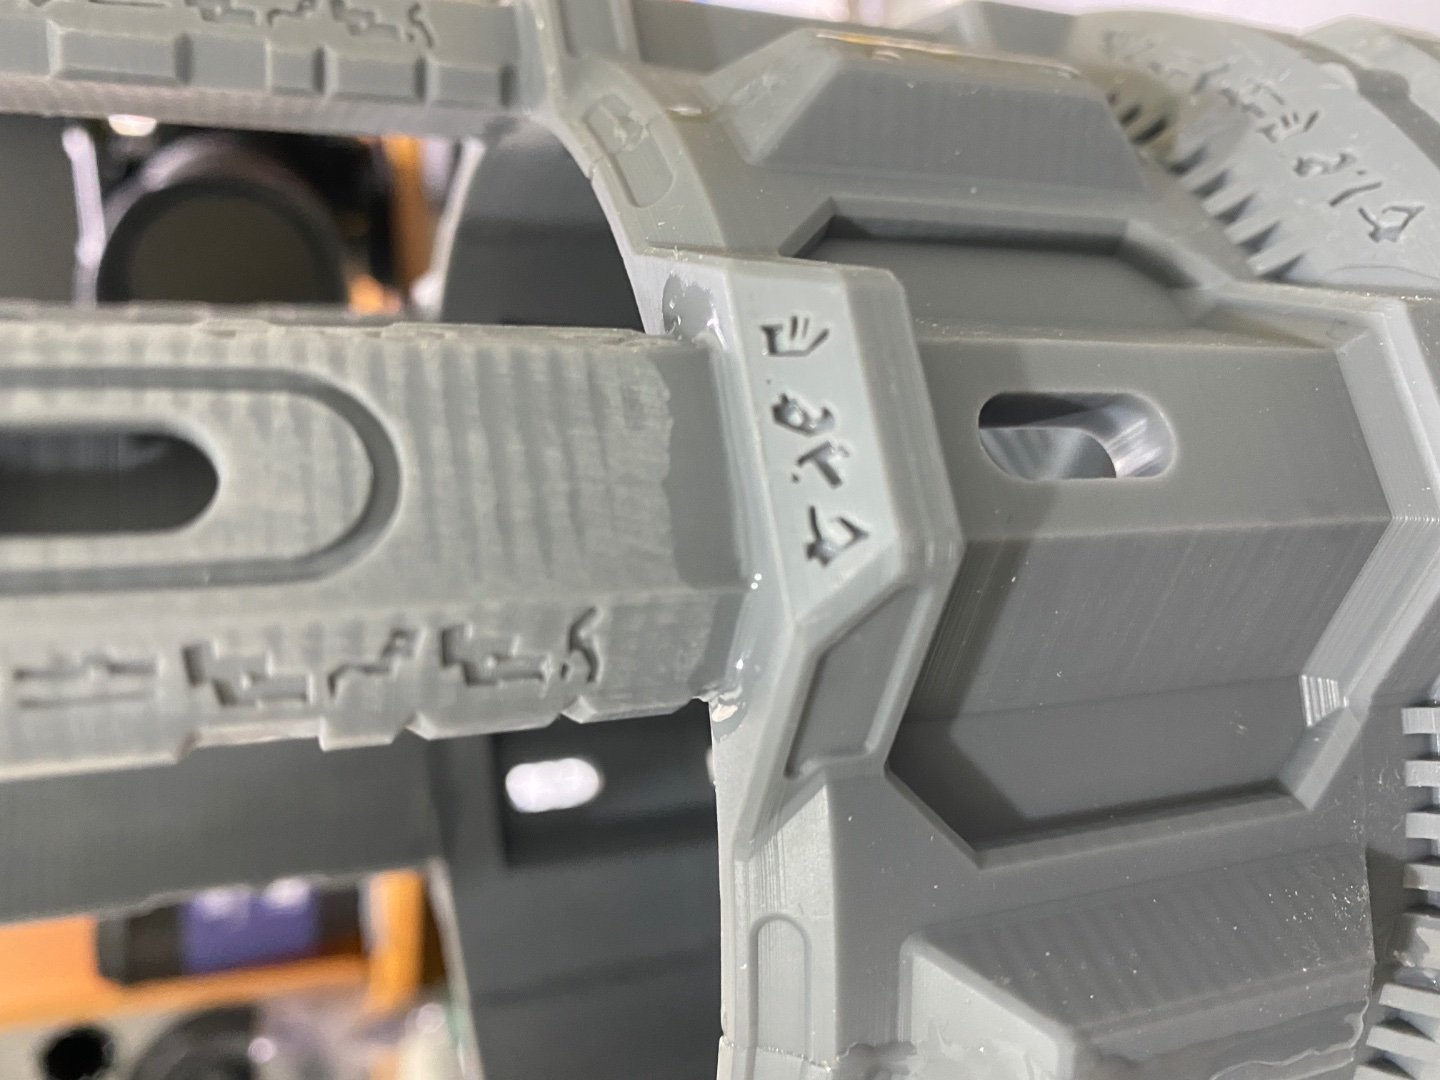
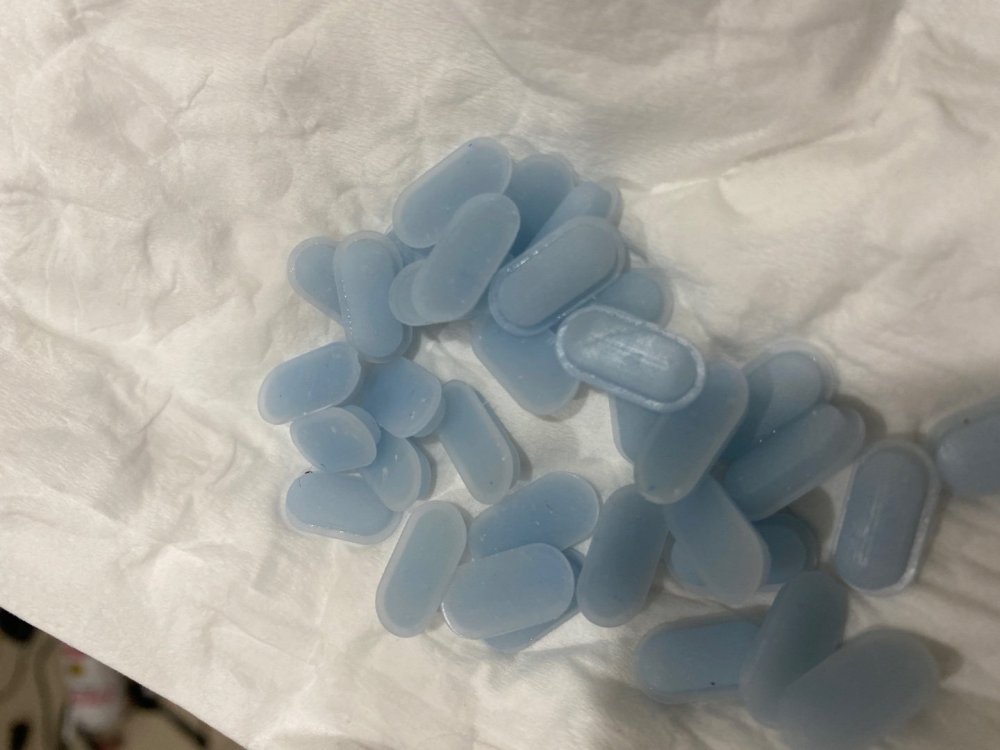
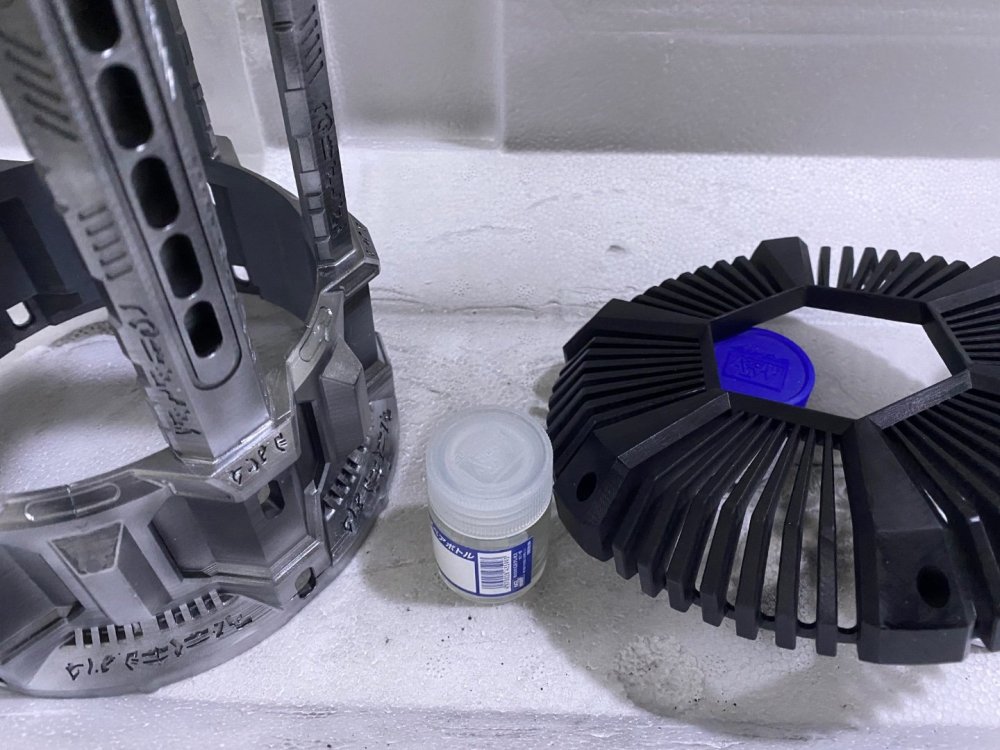
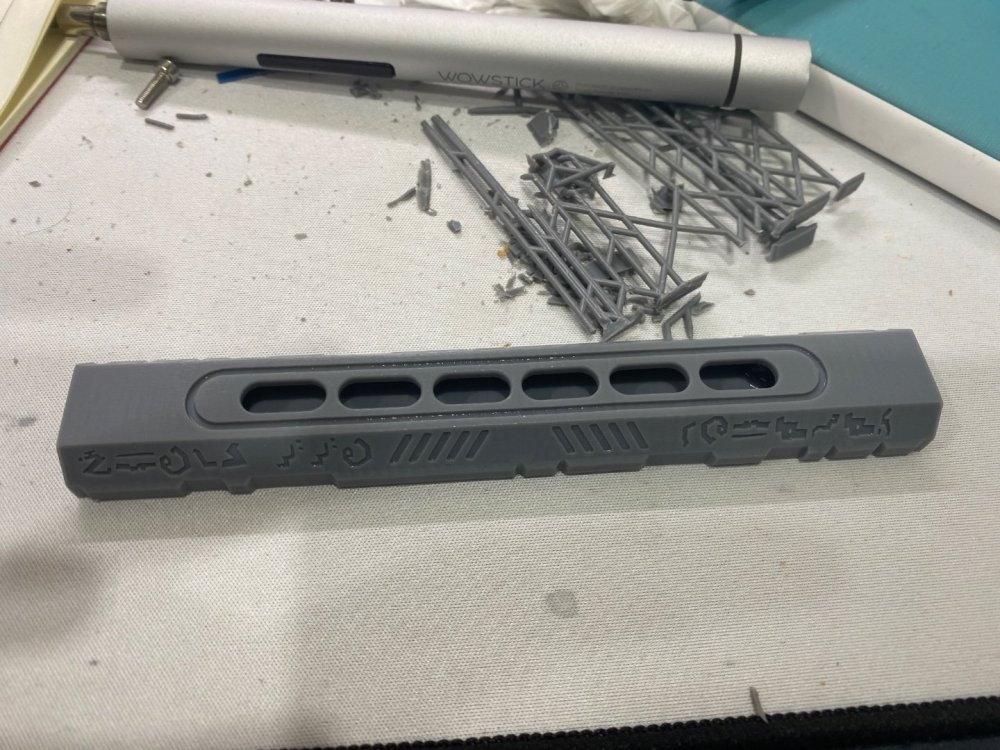
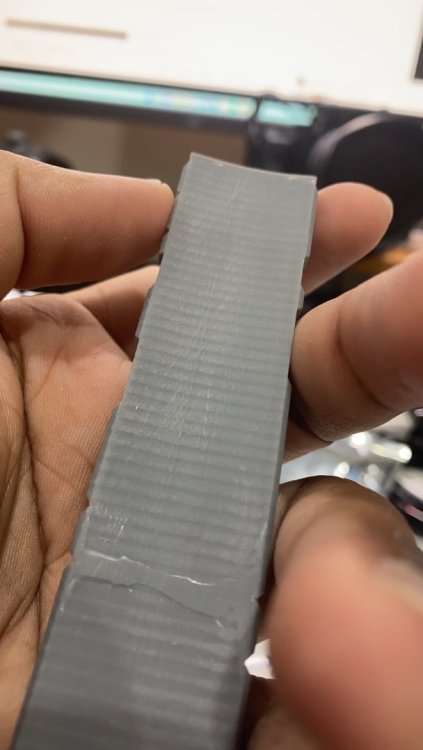
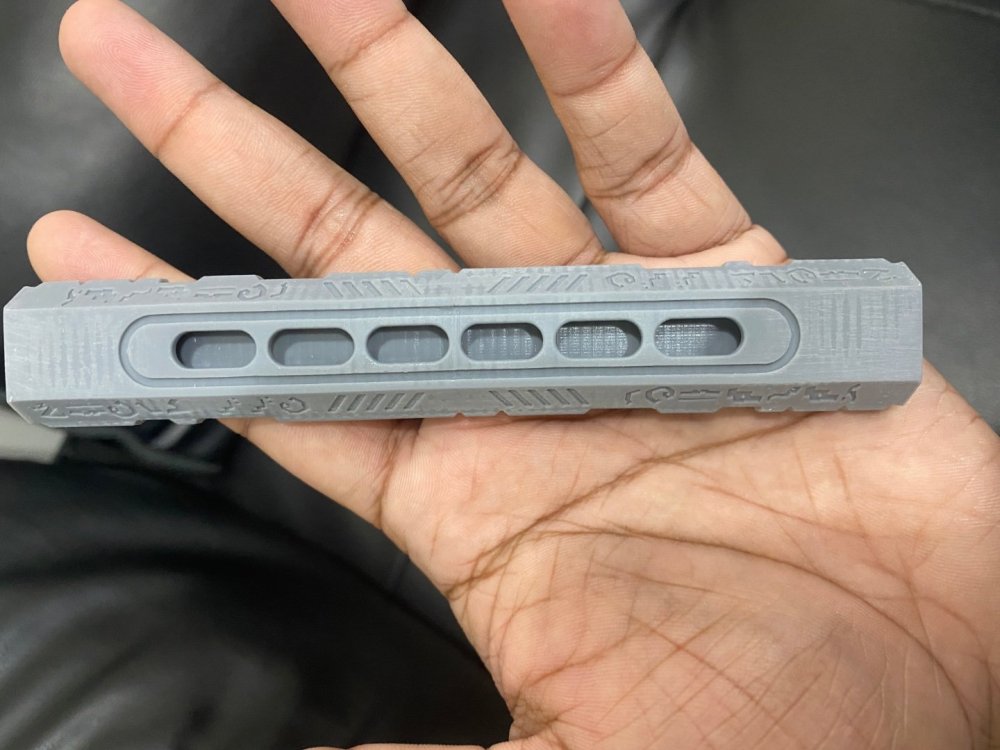
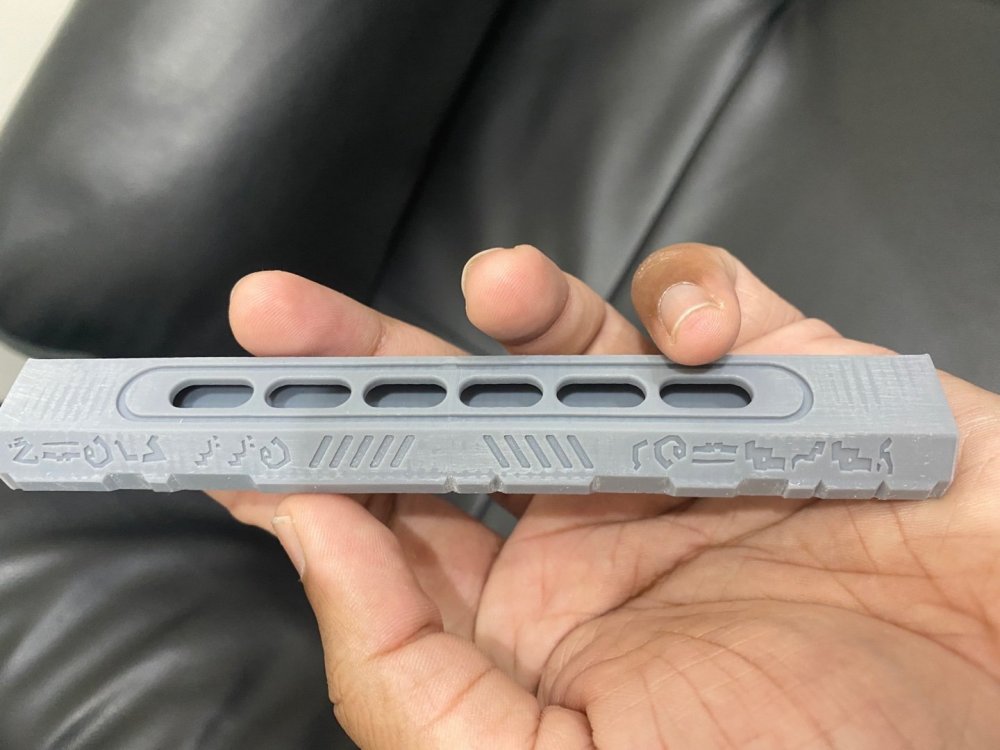
Hi Guys m back with another update! the pros of having a small resin printer is that you can print anything you can think of but the cons of a small resin printer is that it’s small and cannot print anything big… sooo it’s time to glue 😭 this process by far took the longest time and it was really hard. And then I had to sand them down as well 😭😭😭 But I think it turned out really good. i used resin and and a UV lamp to make it a bit faster to work with than traditional glue. It also helps fill in the gaps easier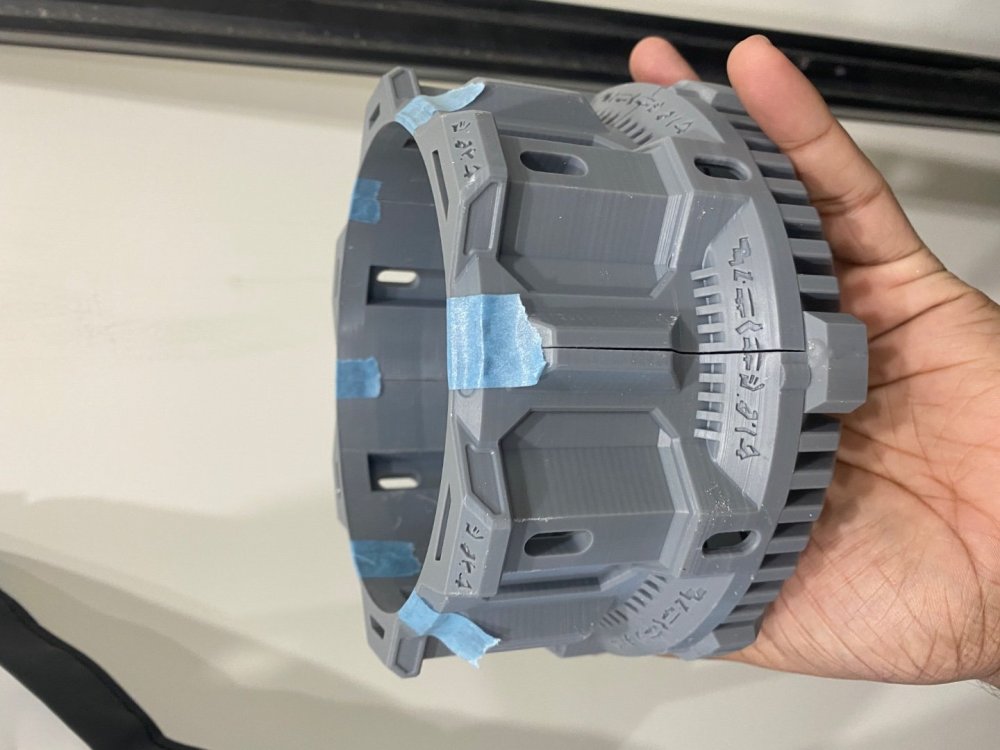

-
[Sri Lanka] Sanjaya Bhanu
Sanjaya replied to TT Lily's topic in 2022 Thermaltake RAM MOD Invitational Season 1
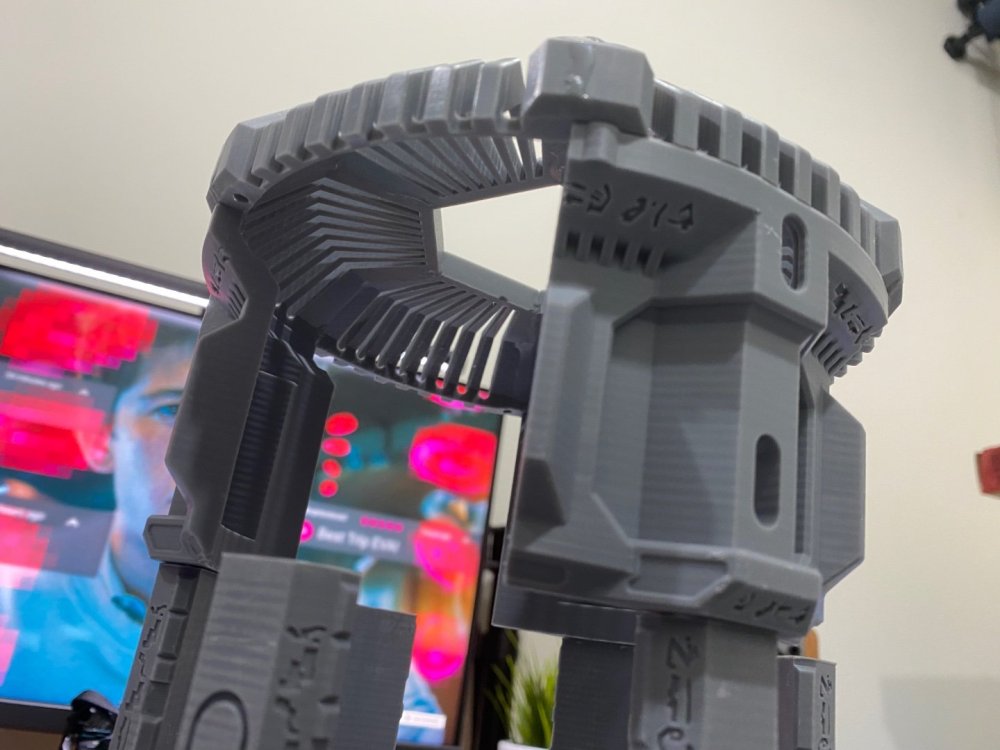
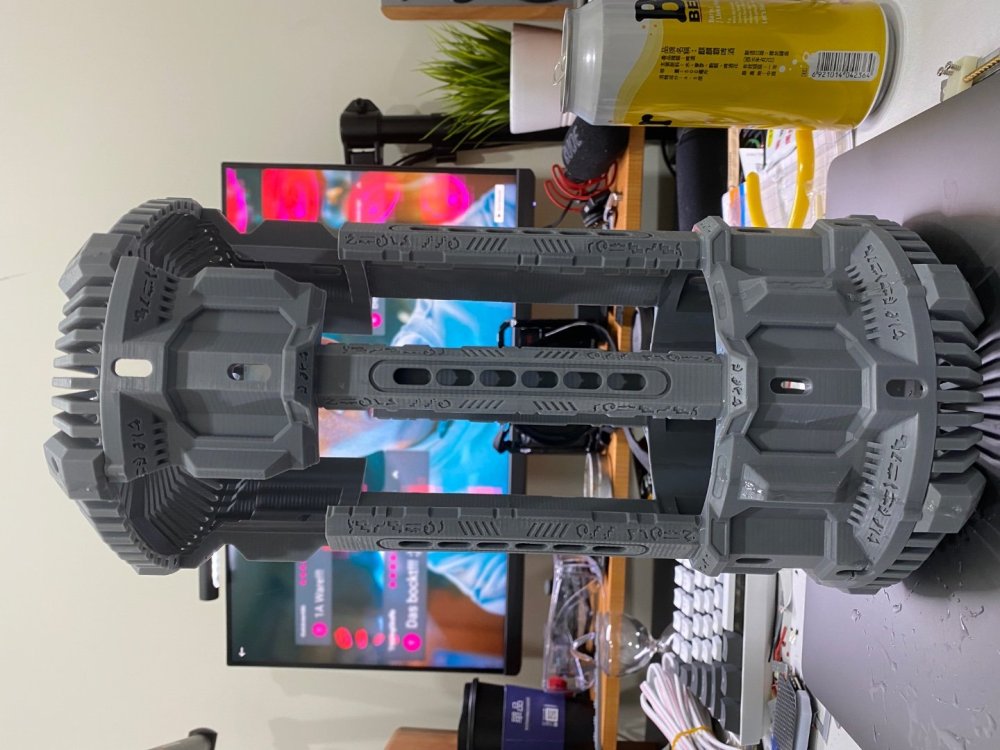
Hi All, First of all I'm super greatful to be competing against some of the best modders in the world and a big thanks goes to the team from TT, Andy, Lilly and everyone at TT. So for the first update, I started working on a 3D design. For now I won't go into details. but I will be 3D printing these designs and airbrushing them. for some cool looks. I am also thinking of adding some electronics to it to make it even cooler. I will leave it at that for this update, but I'll be back with another update very soon. Update on the progressu 😆 so I started the 3d printing process, given that my printer is only a Sonic Mini 4k, the print area is really small and i have to print so many hours. So far close to 100 hours of printing alone 😭 but here are some components. These are pillars of the structure and this is two pieces glued together. We need a total of 12 prints to make 6 pillars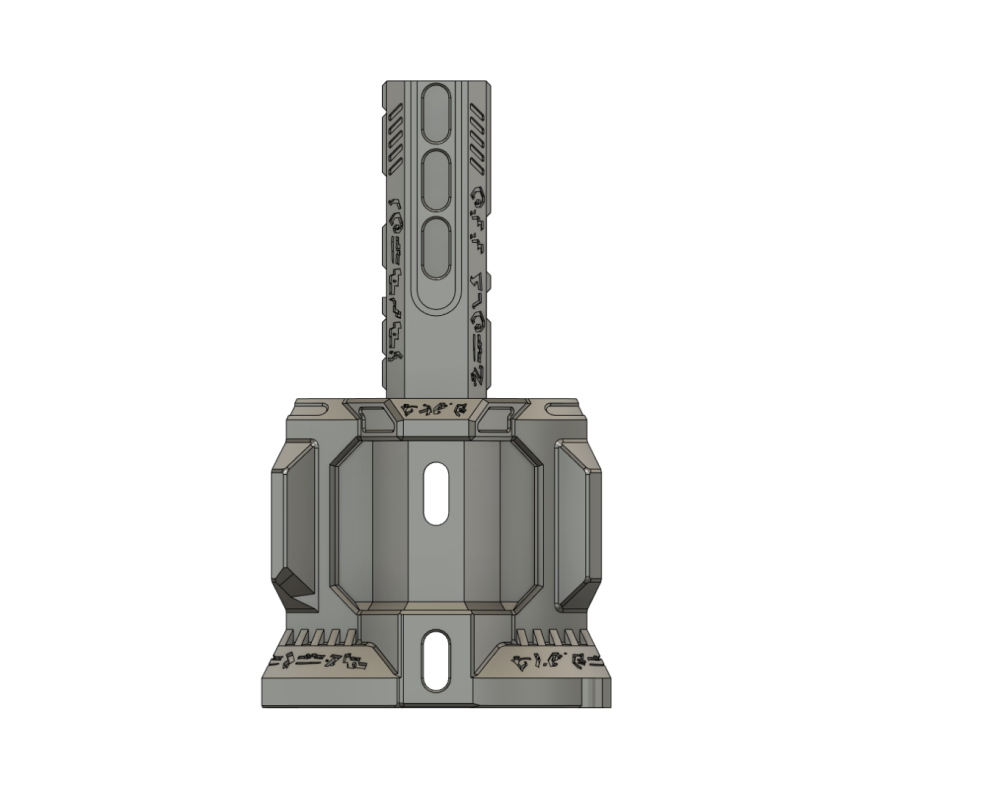
-
[Sri Lanka] Sanjaya Bhanu
Sanjaya replied to TT Lily's topic in 2022 Thermaltake RAM MOD Invitational Season 1
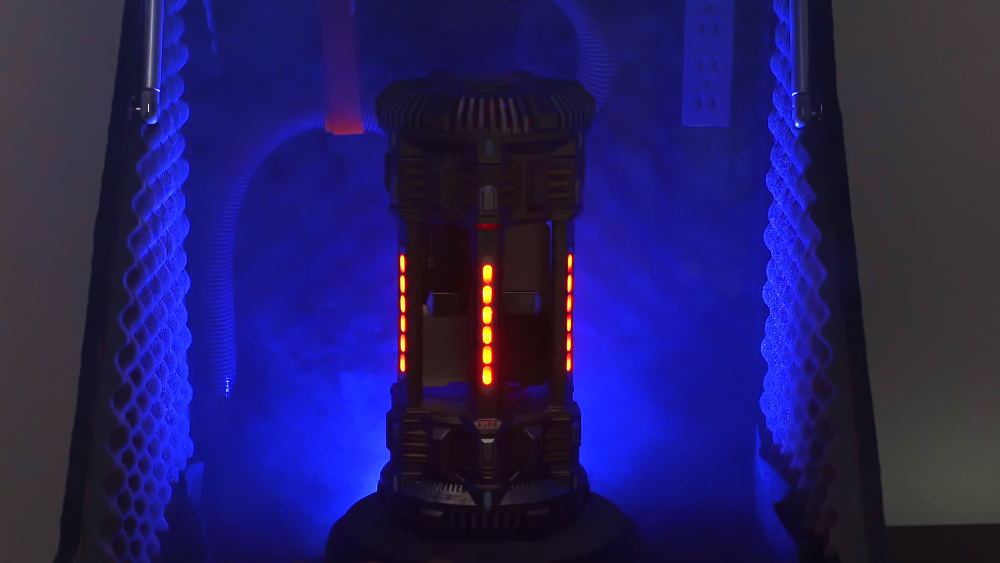
Here is my trailer video + how I made it Final photos are below.


-
mainframe reacted to a post in a topic:
[Sri Lanka] Sanjaya Bhanu
-
[Sri Lanka] Sanjaya Bhanu
Sanjaya replied to TT Lily's topic in 2021 Thermaltake Ultra GIF Design Invitational Season 1
Thanks bud 🙏 -
RandomDesign reacted to a post in a topic:
[Germany] Stefan Ulrich
-
[Germany] Stefan Ulrich
Sanjaya replied to TT Lily's topic in 2021 Thermaltake Ultra GIF Design Invitational Season 1
I love the hamster one too -
mainframe reacted to a post in a topic:
[Sri Lanka] Sanjaya Bhanu
-
[Sri Lanka] Sanjaya Bhanu
Sanjaya replied to TT Lily's topic in 2021 Thermaltake Ultra GIF Design Invitational Season 1
Hi All, Here is my final Entry into the 2021 Thermaltake Ultra GIF Design Invitational Season 1 Thank you all for the support and stay safe!