-
Forum Statistics
93.2k
Total Topics114.3k
Total Posts -
Member Statistics
173,094
Total Members16,800
Most Online


Rakesh Sharma
-
Posts
58 -
Joined
-
Last visited
-
Days Won
2
Content Type
Profiles
Forums
Downloads
Events
Gallery
Blogs
Posts posted by Rakesh Sharma
-
-
Waiting to see more about the project. Best of luck.
-
My vote is with [India] Pramod Hambir
-
Good.. waiting to see whats coming next...
-
-
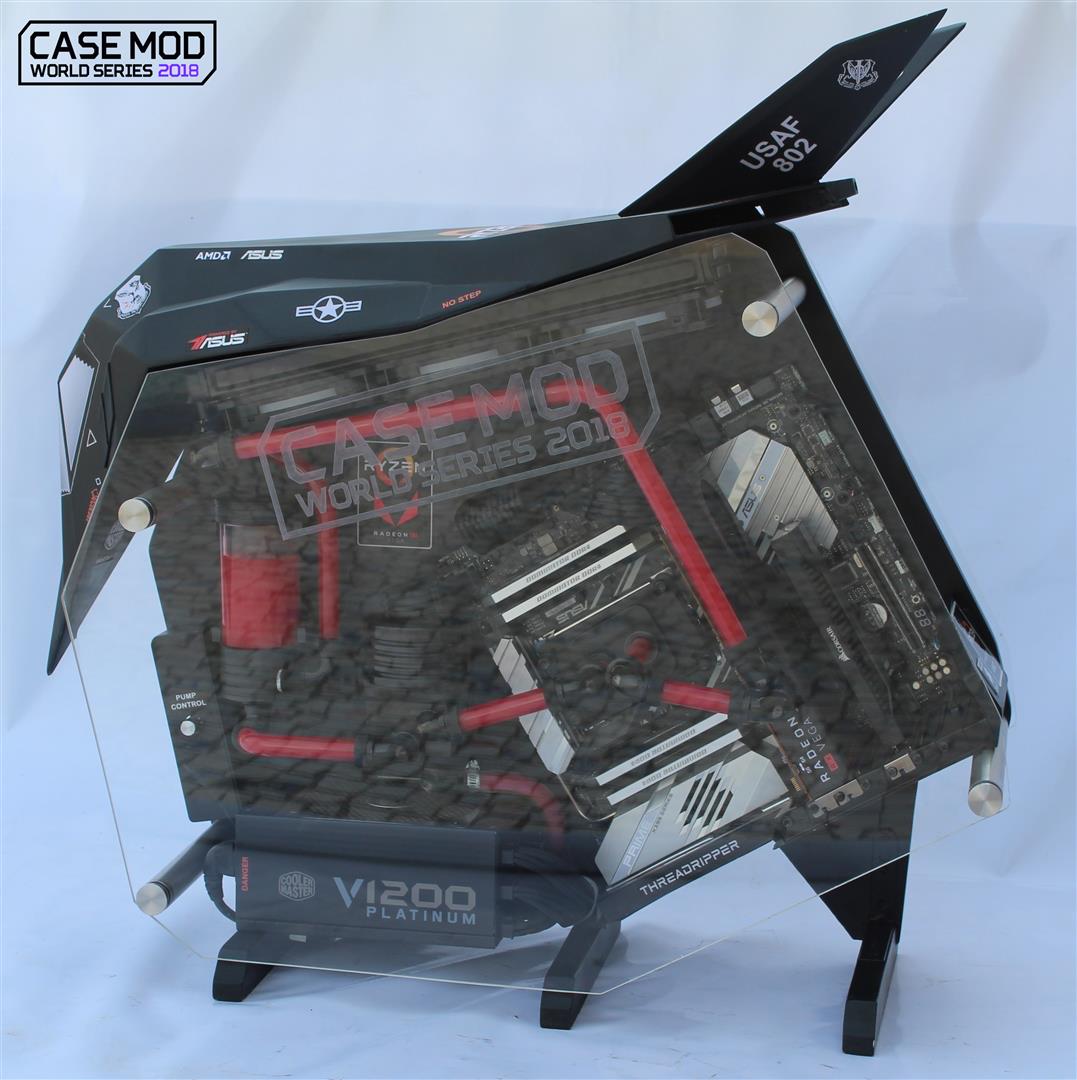
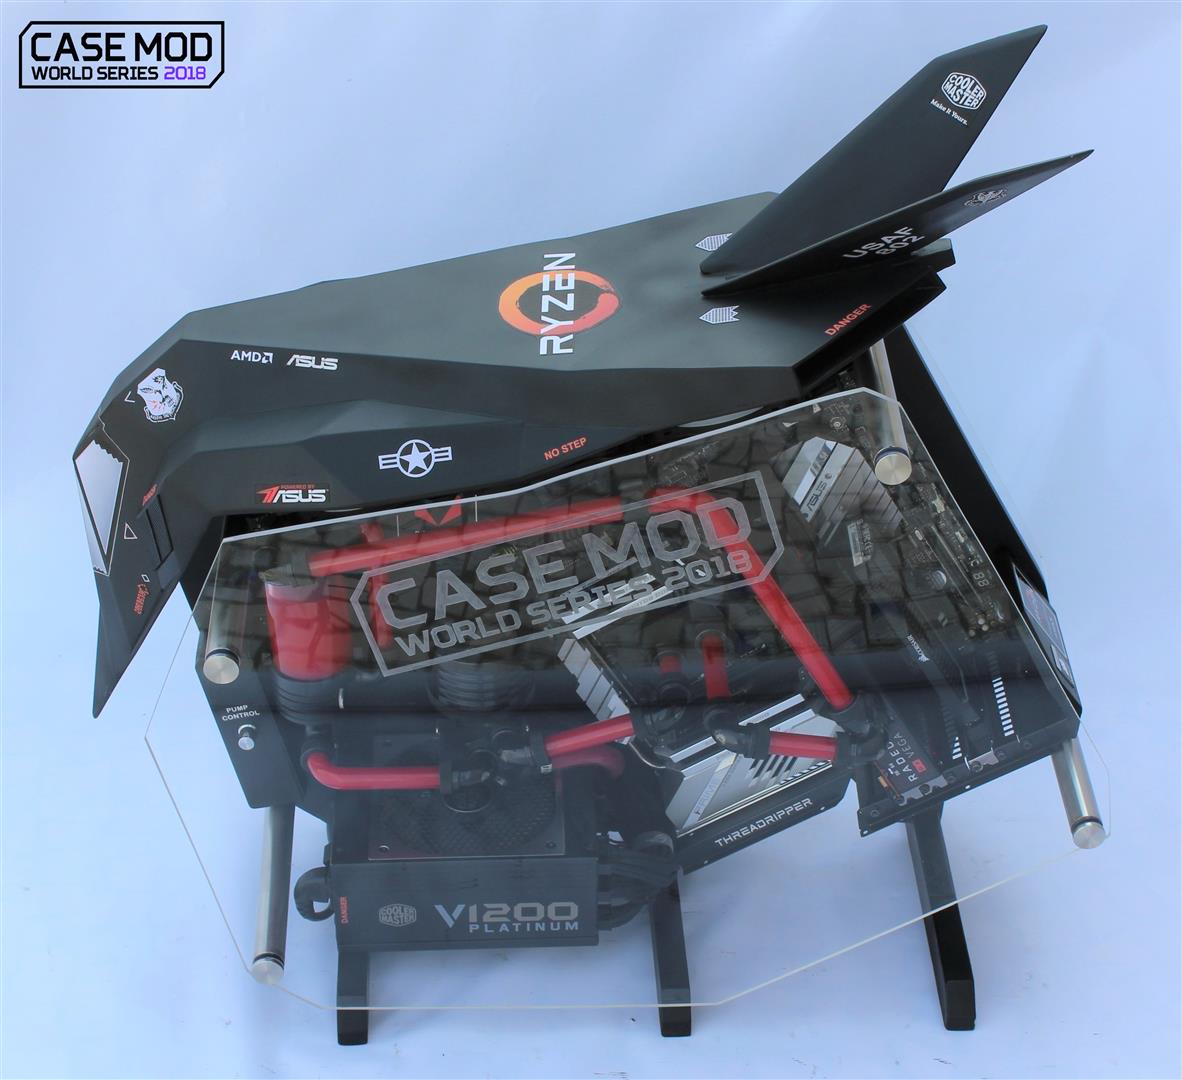
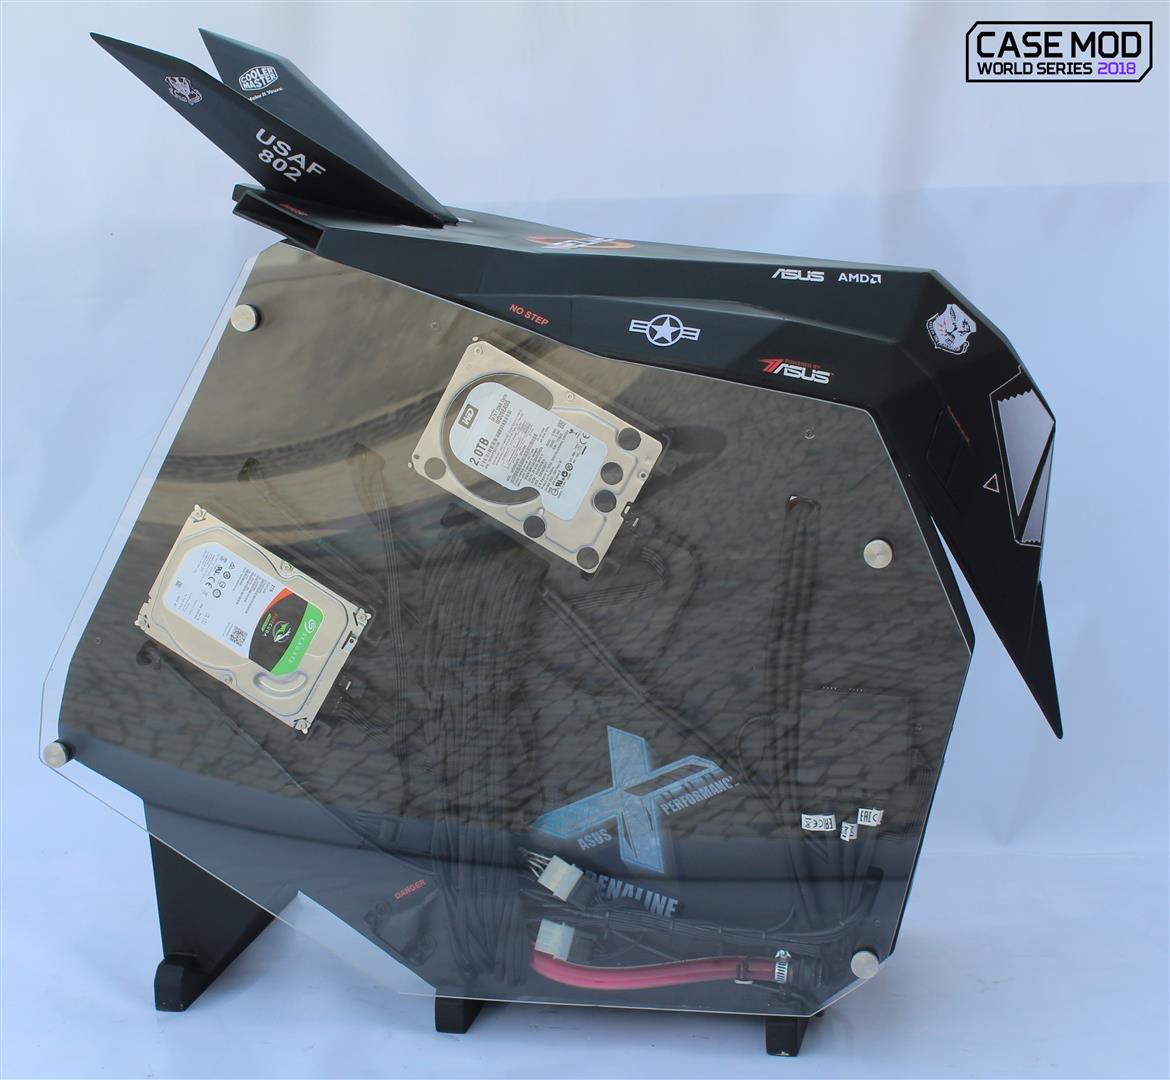
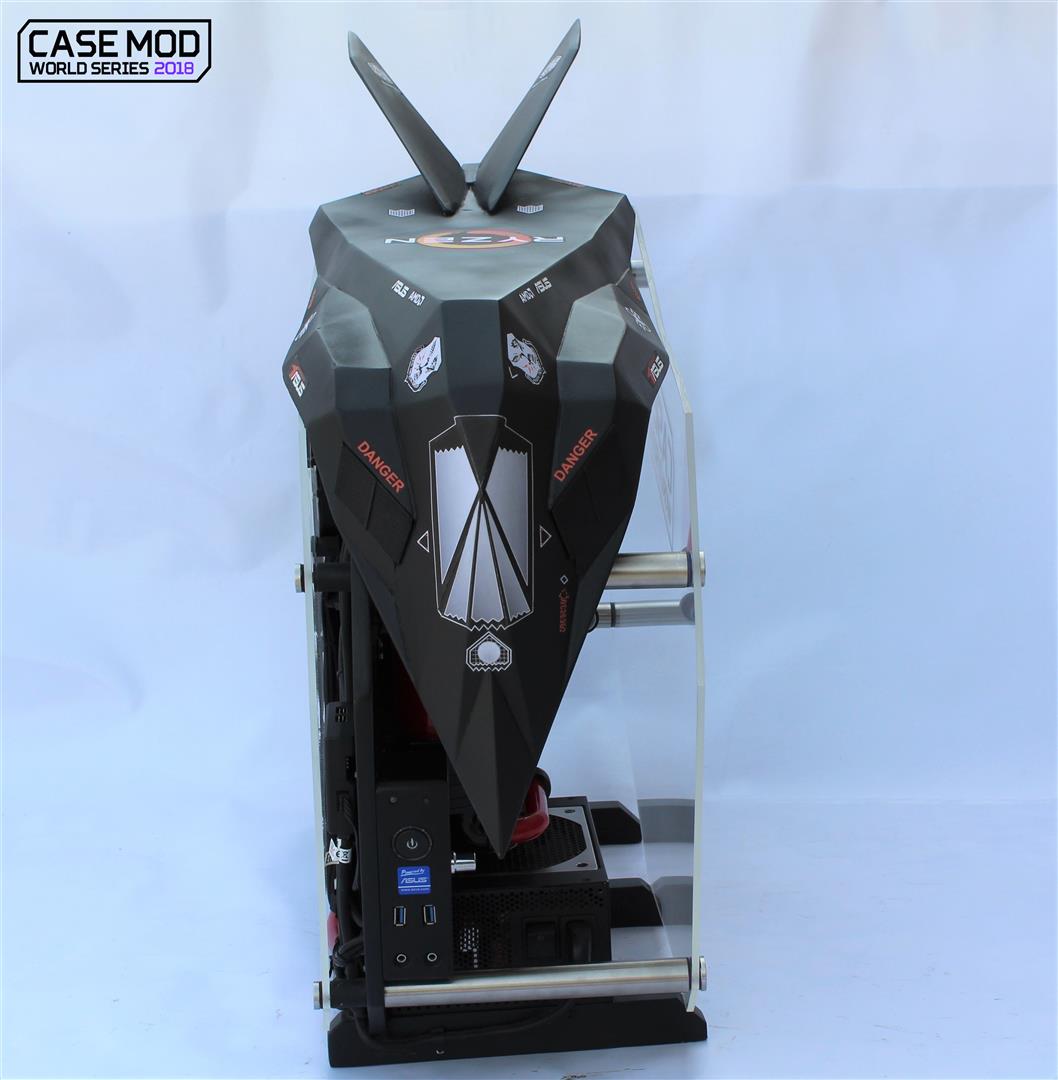
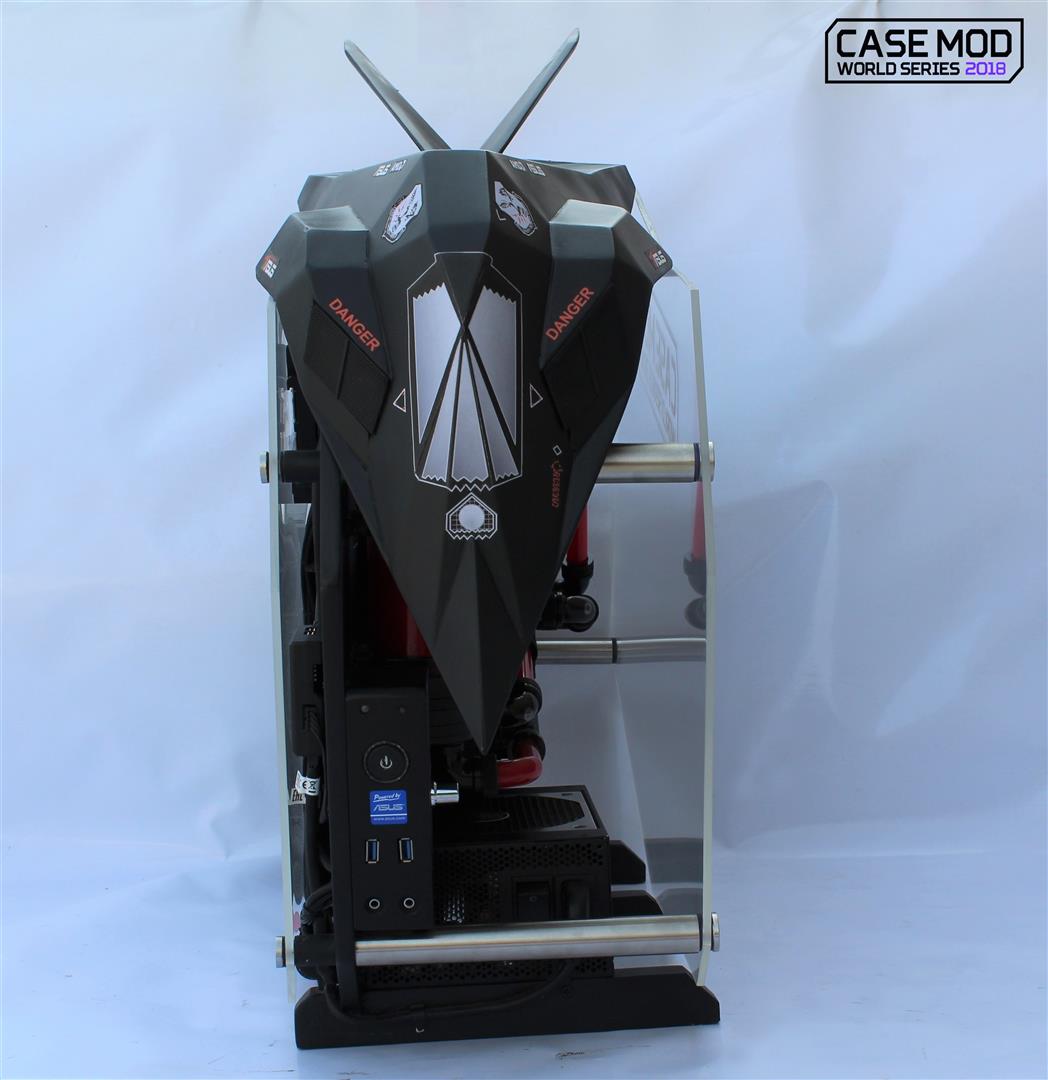
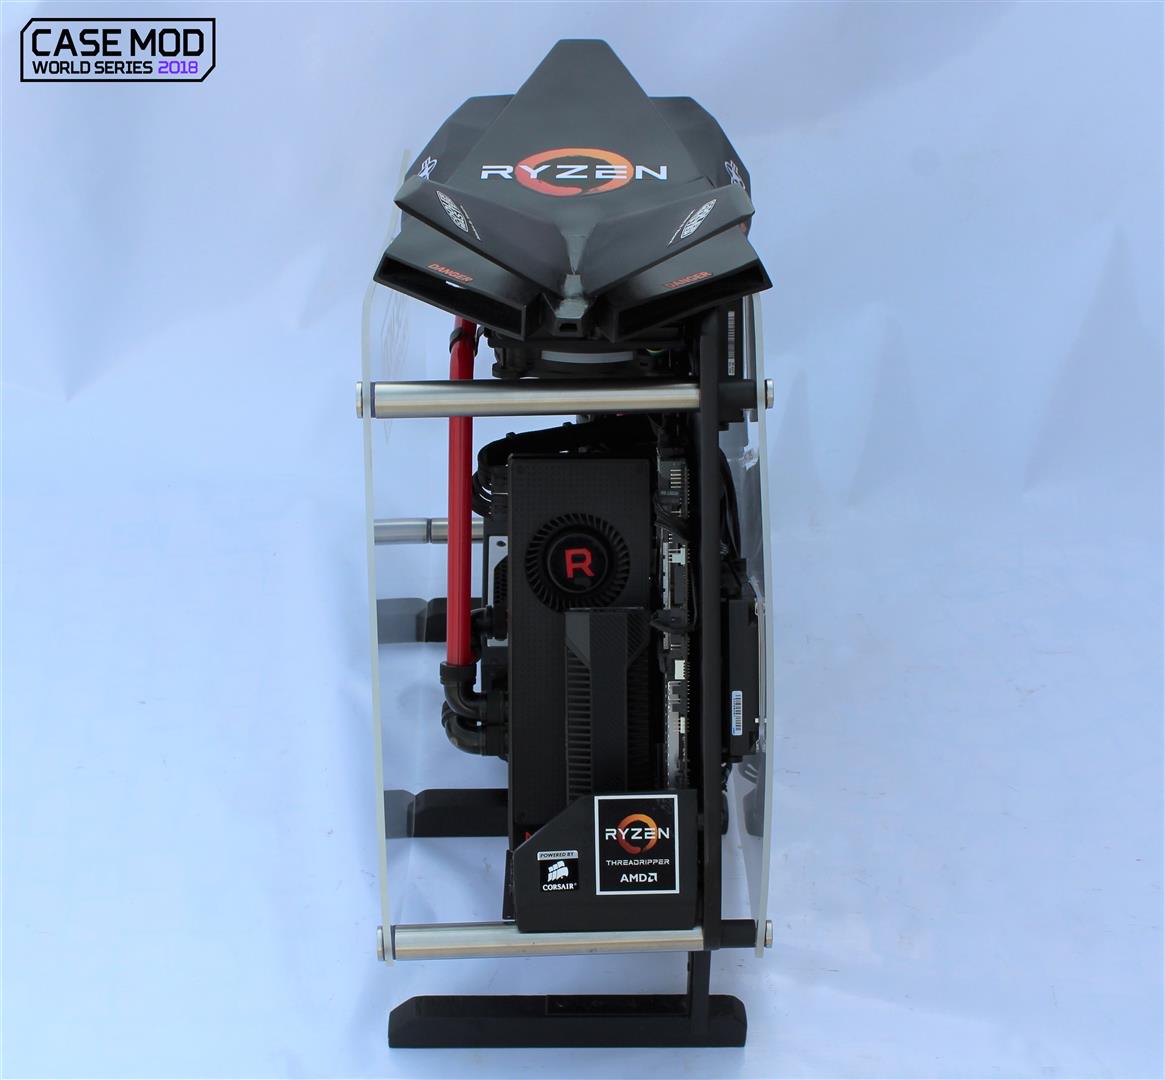
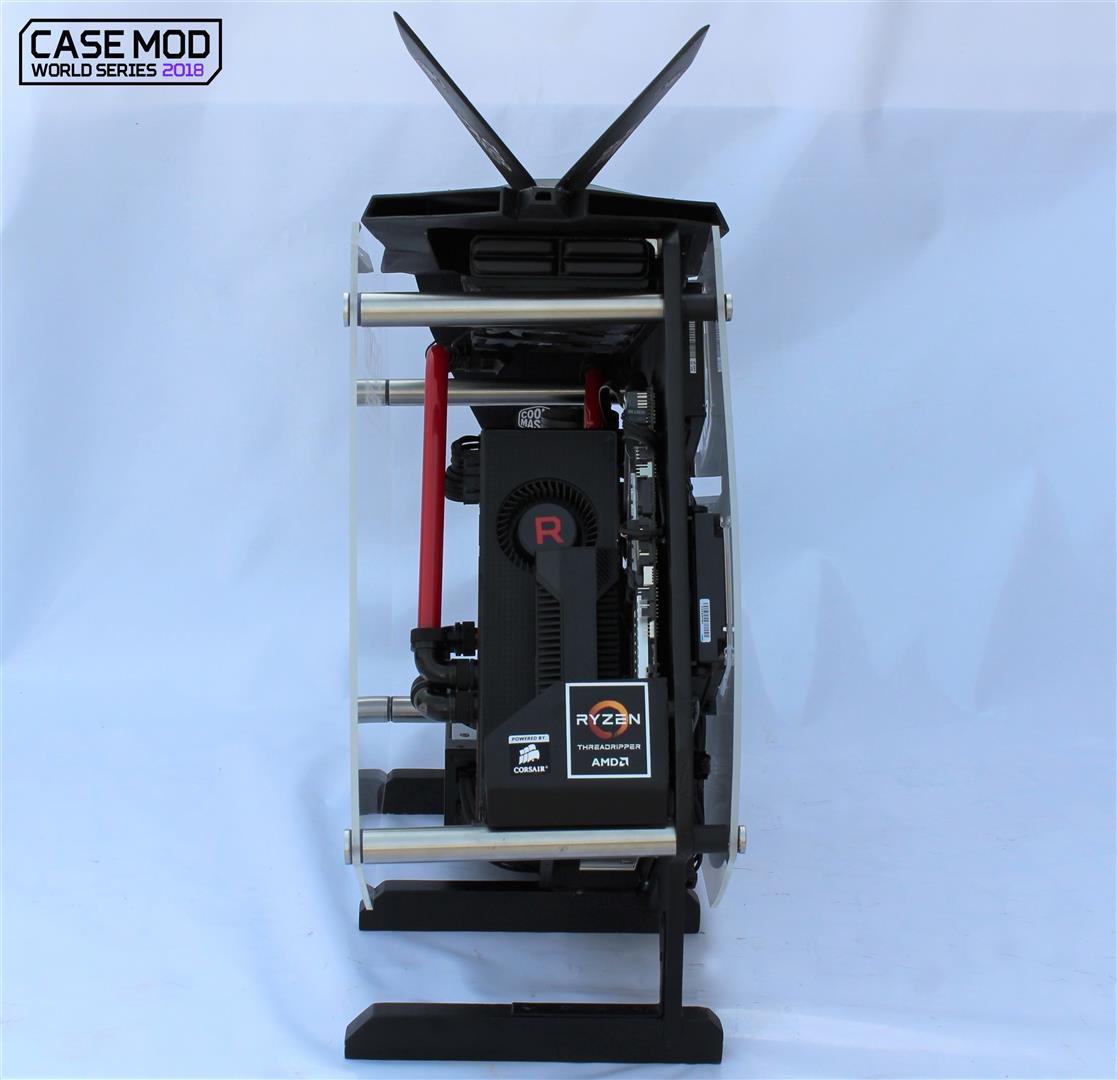
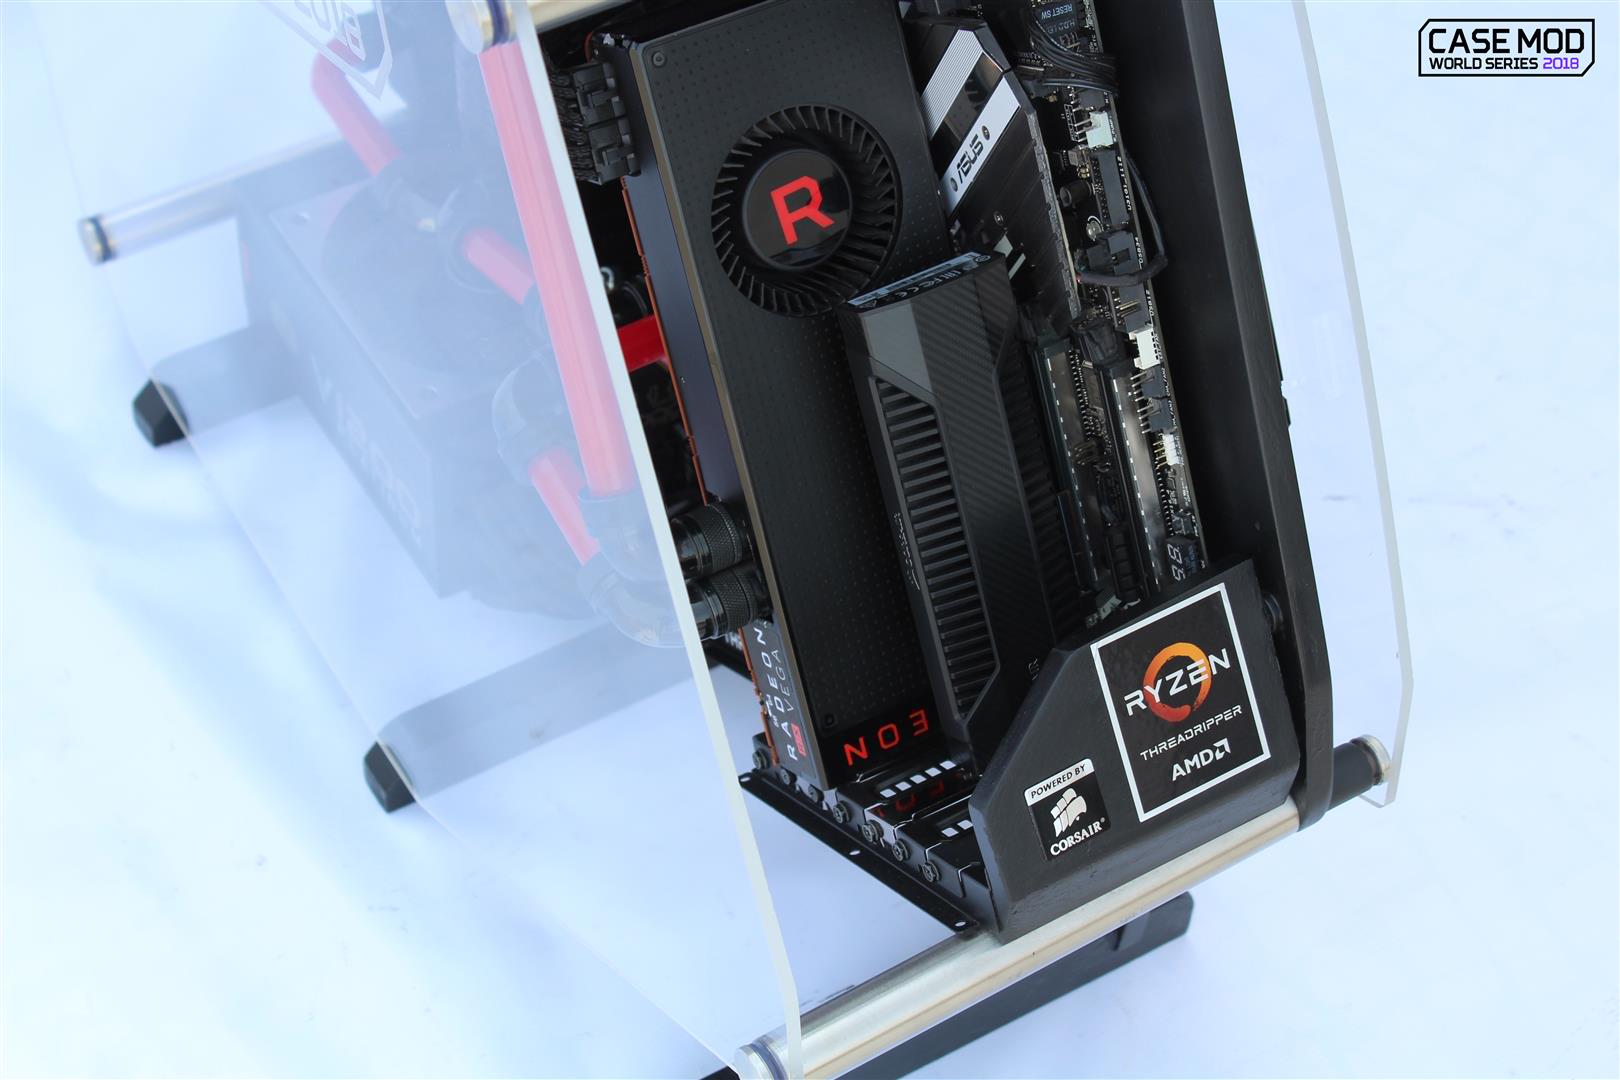
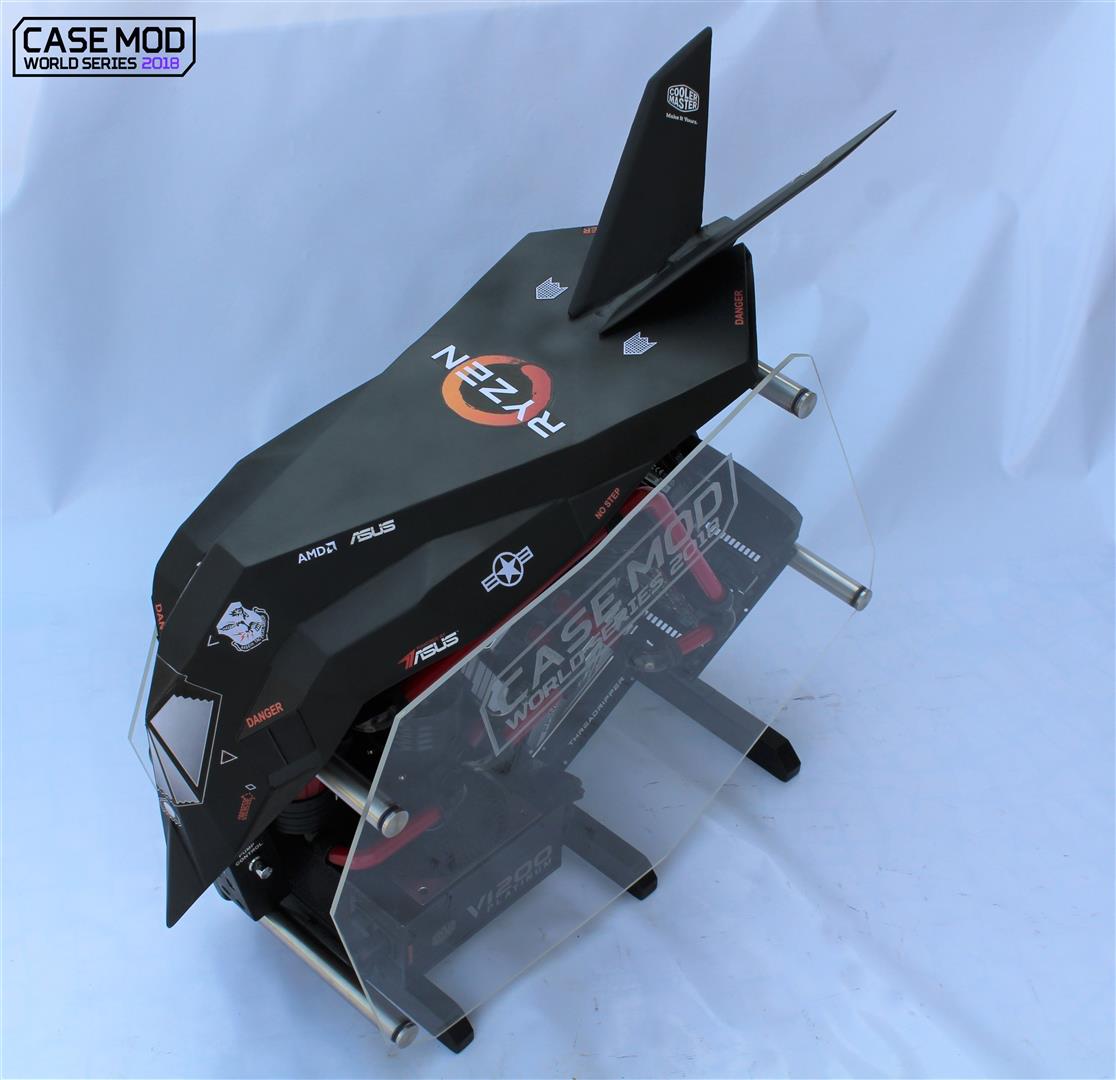
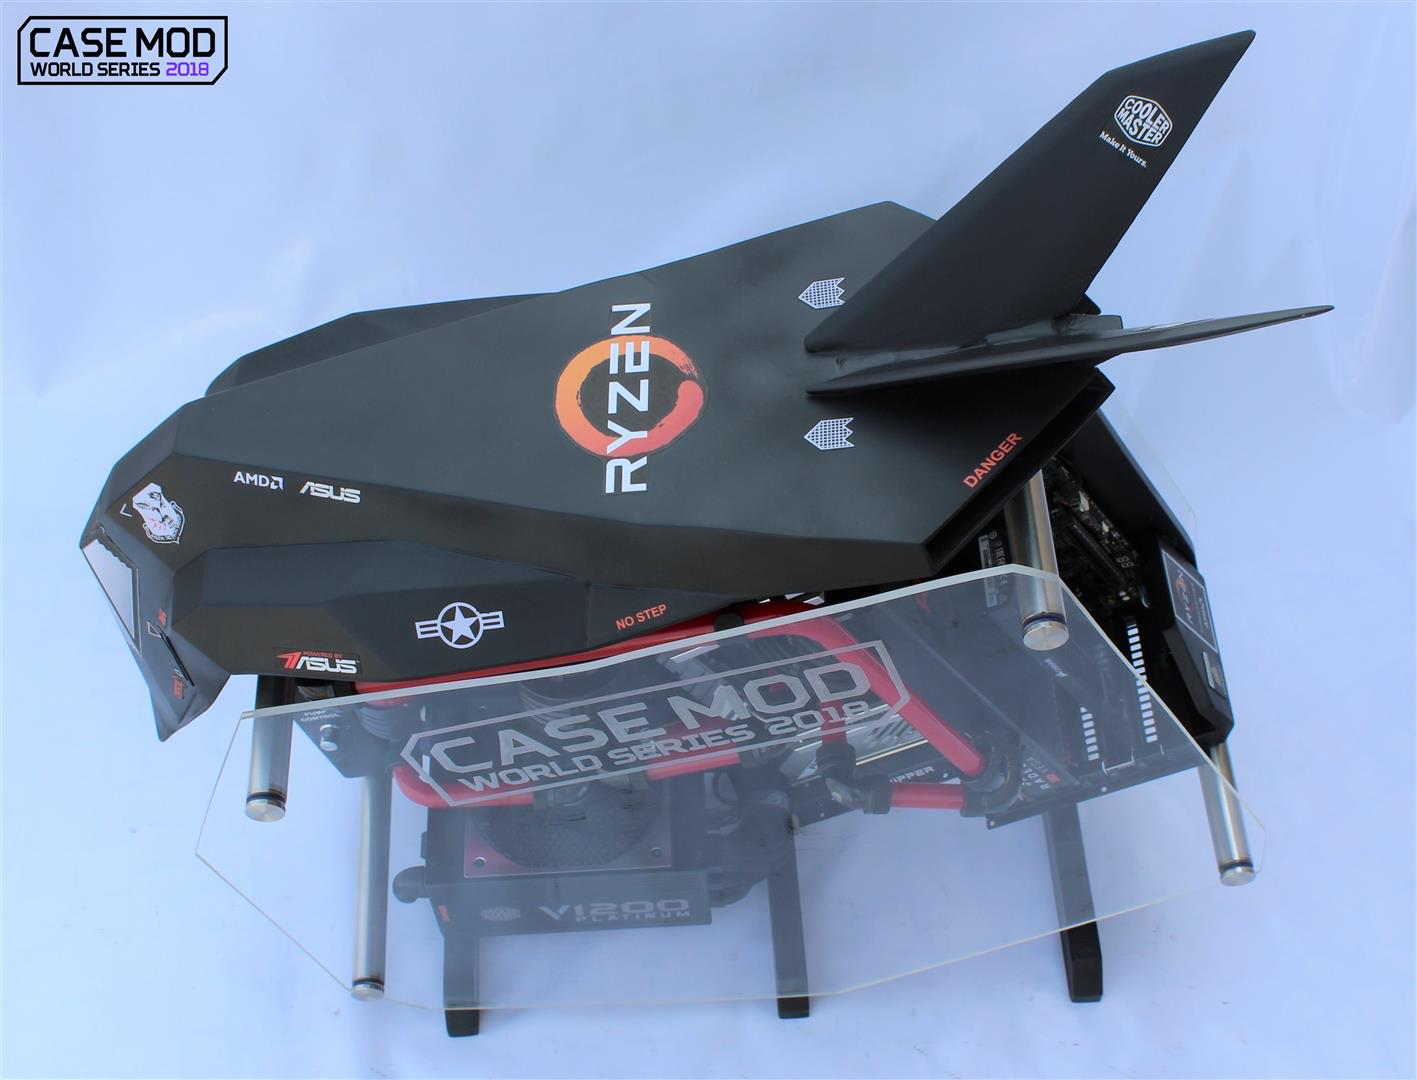
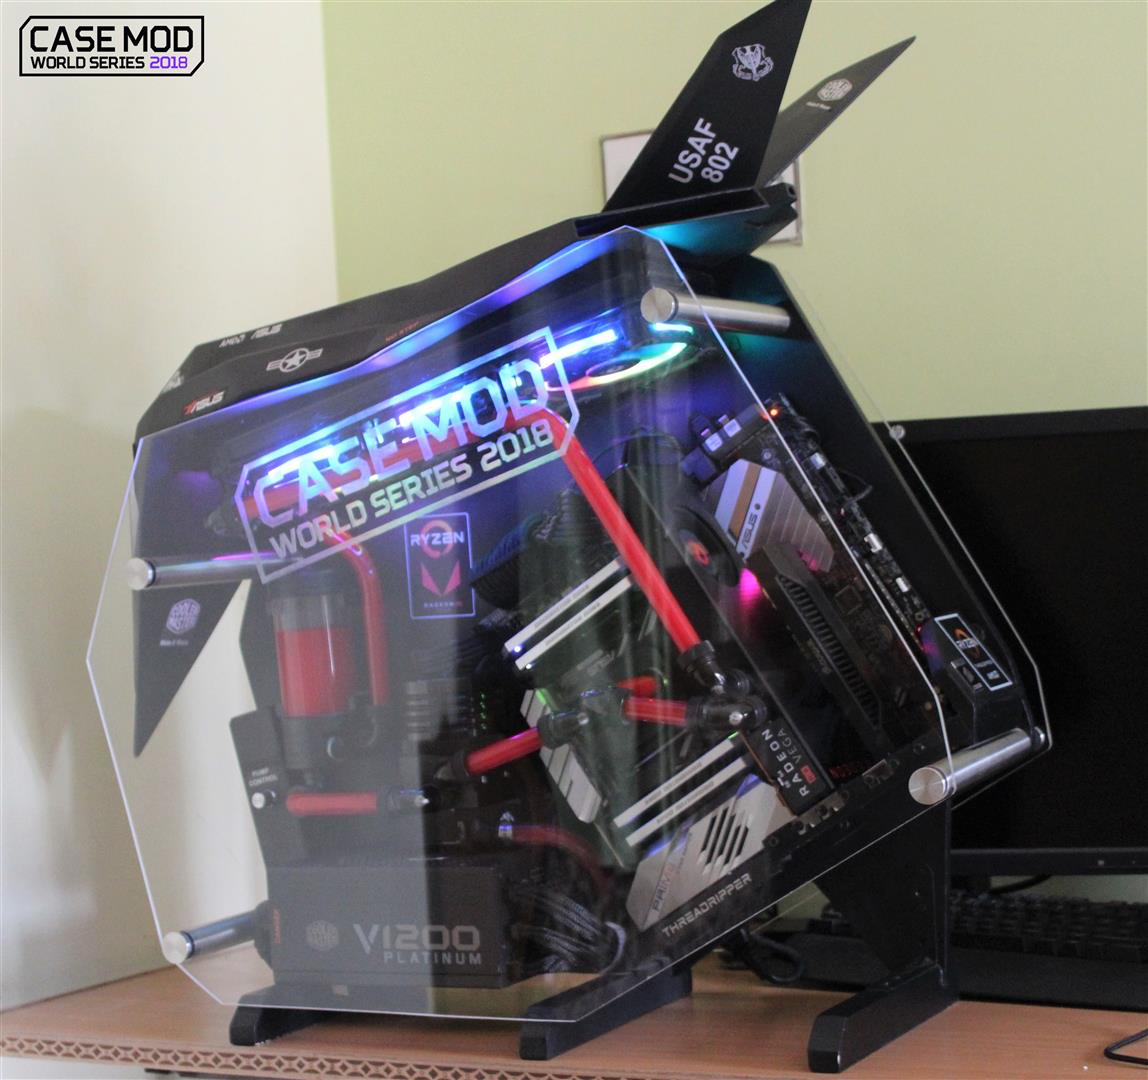
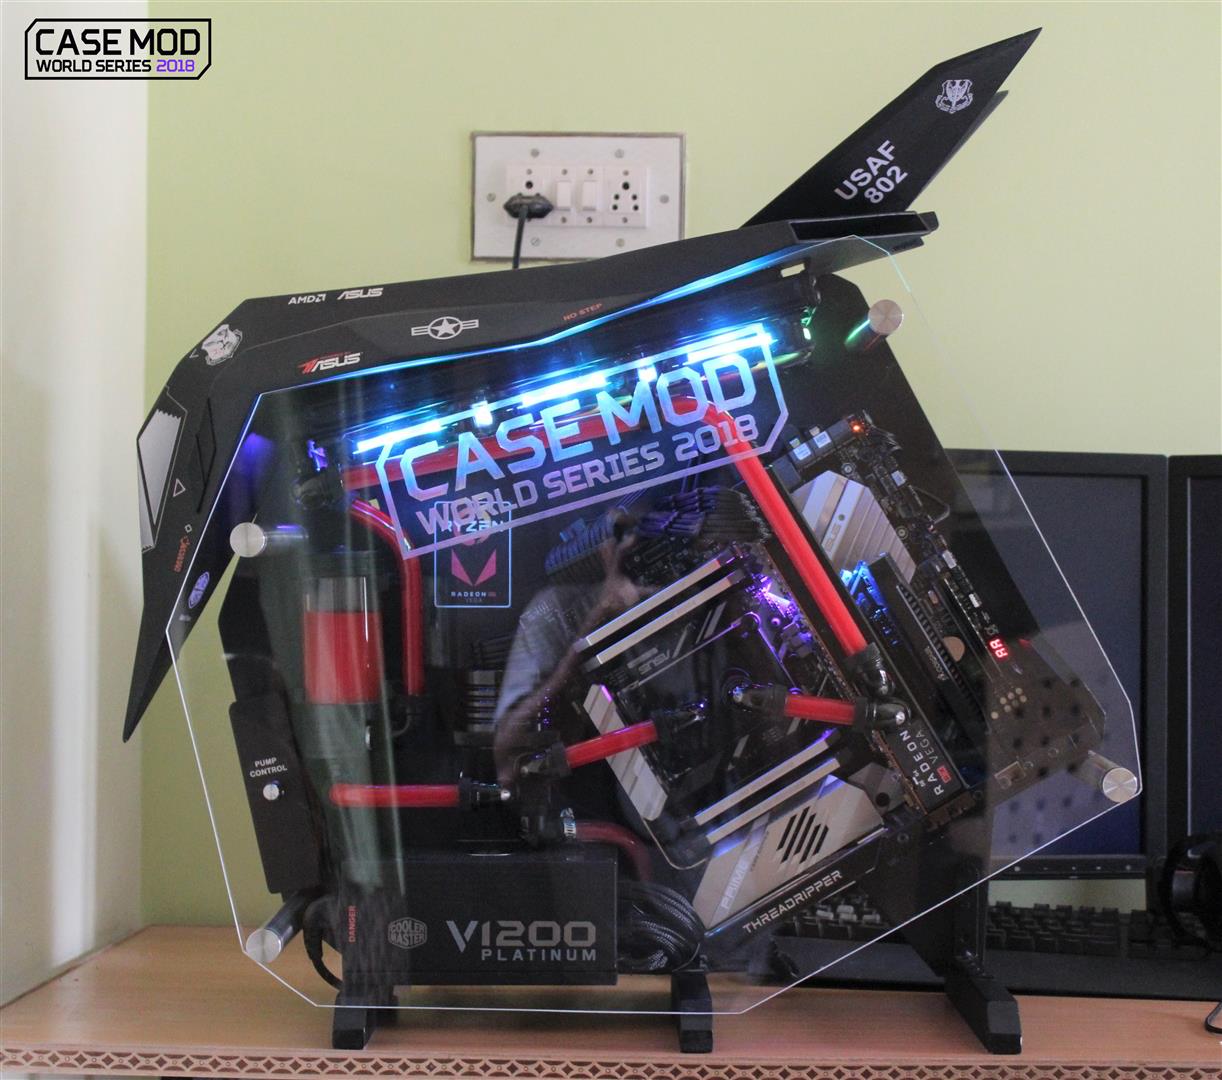
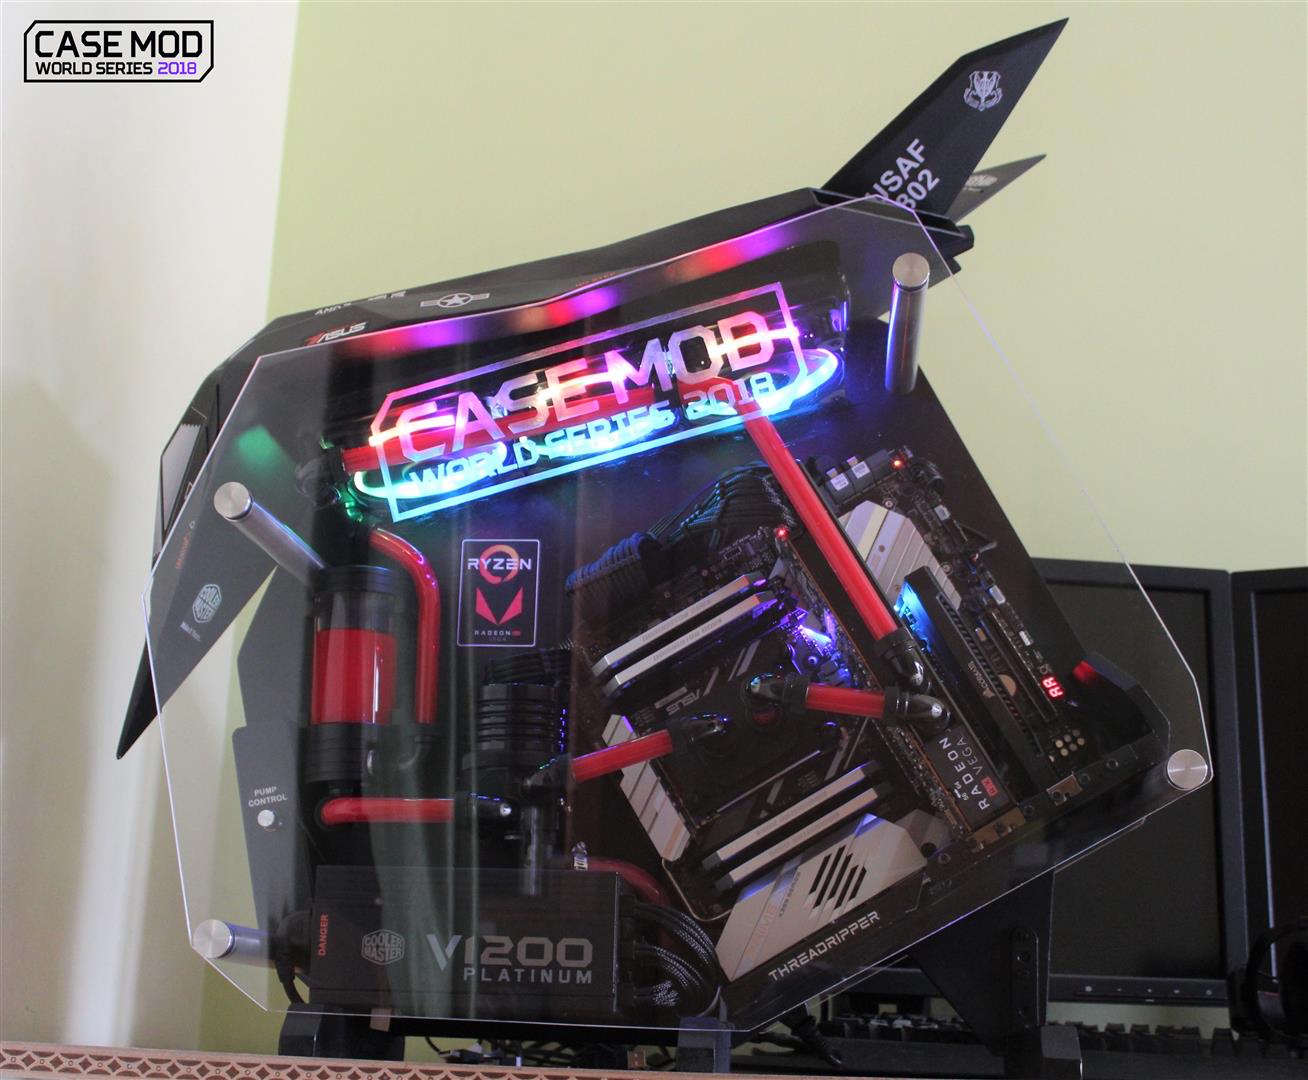
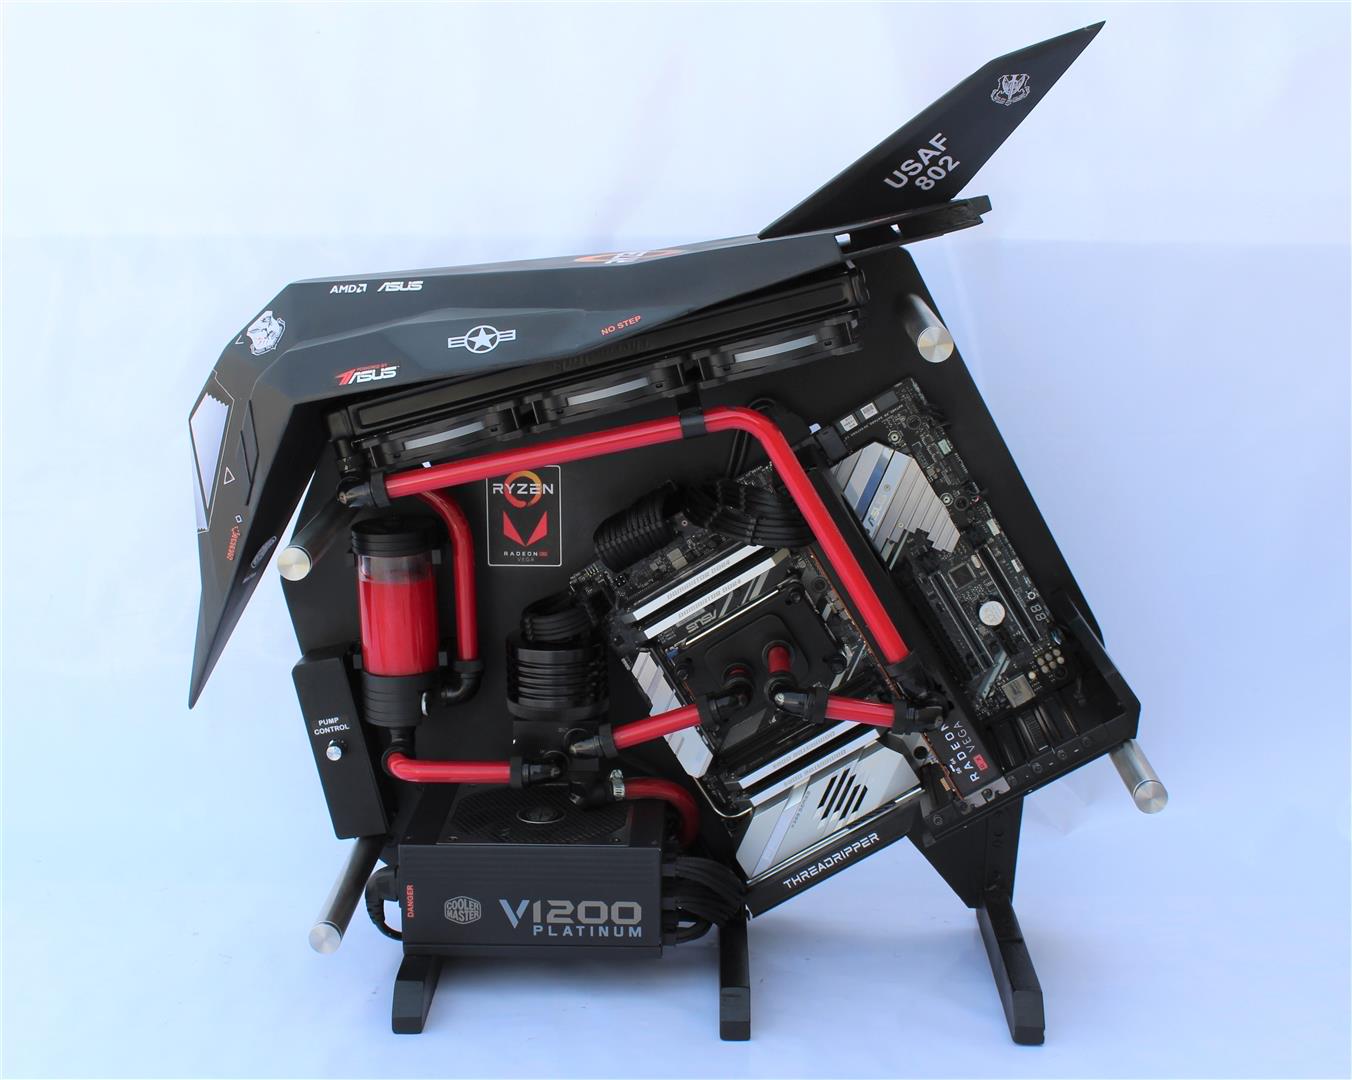
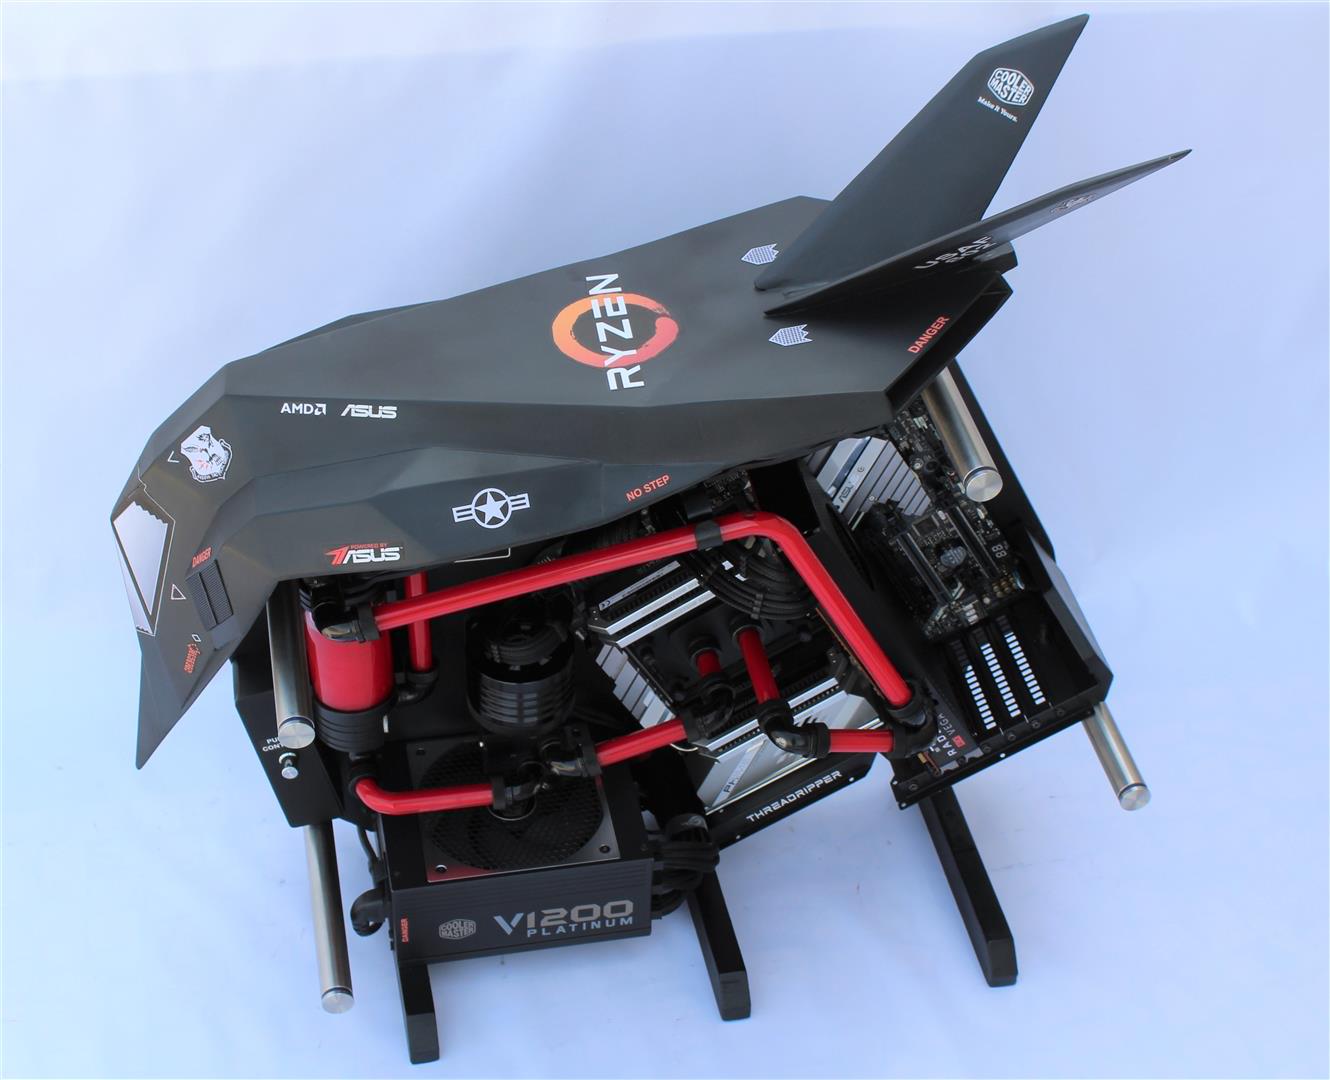
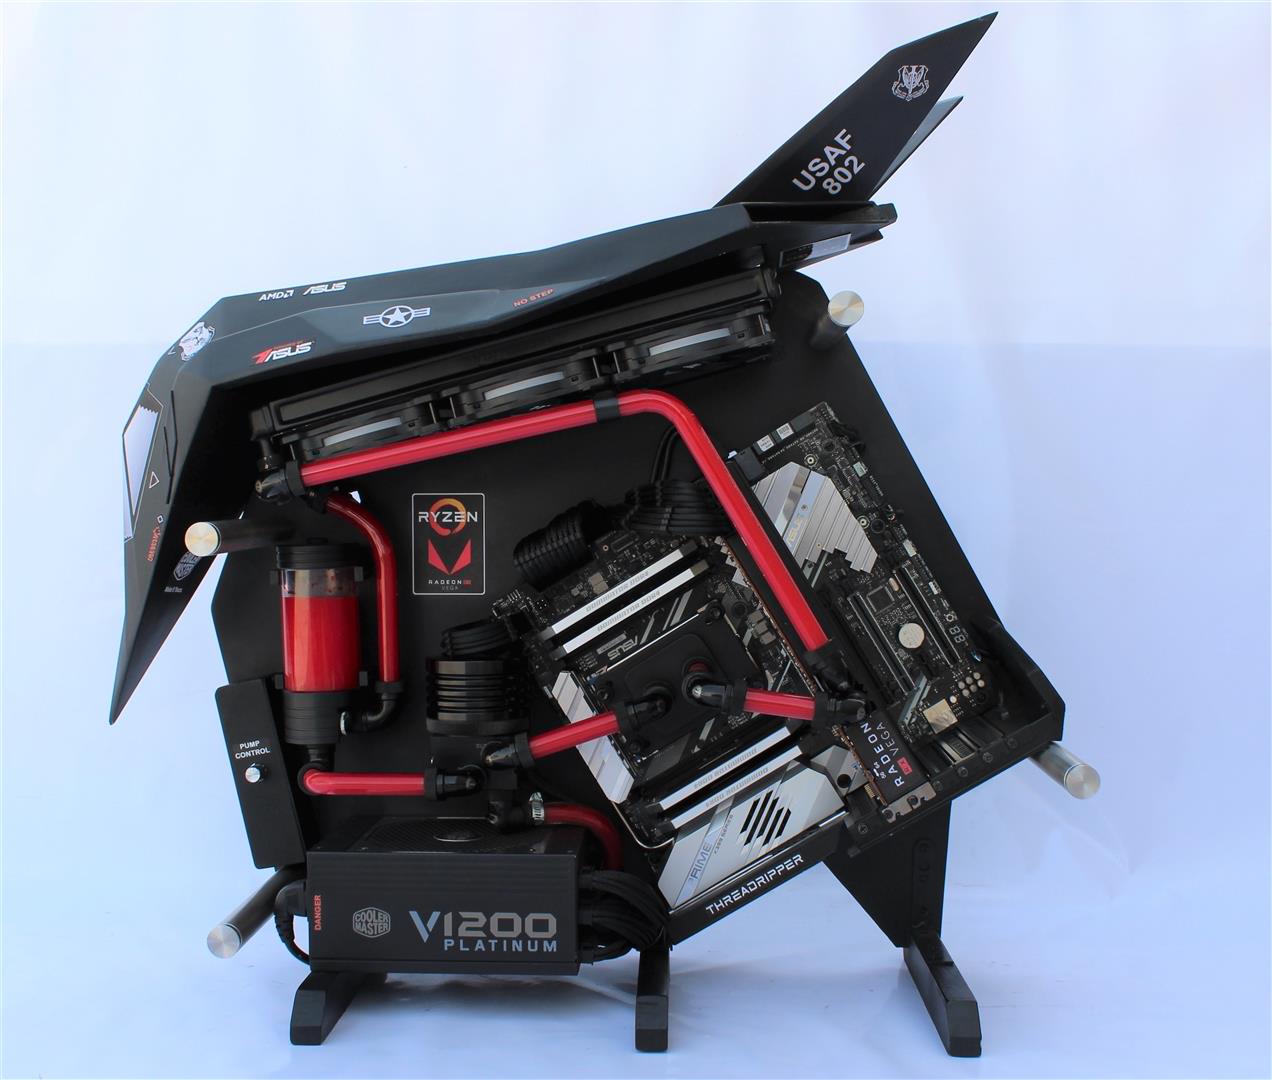
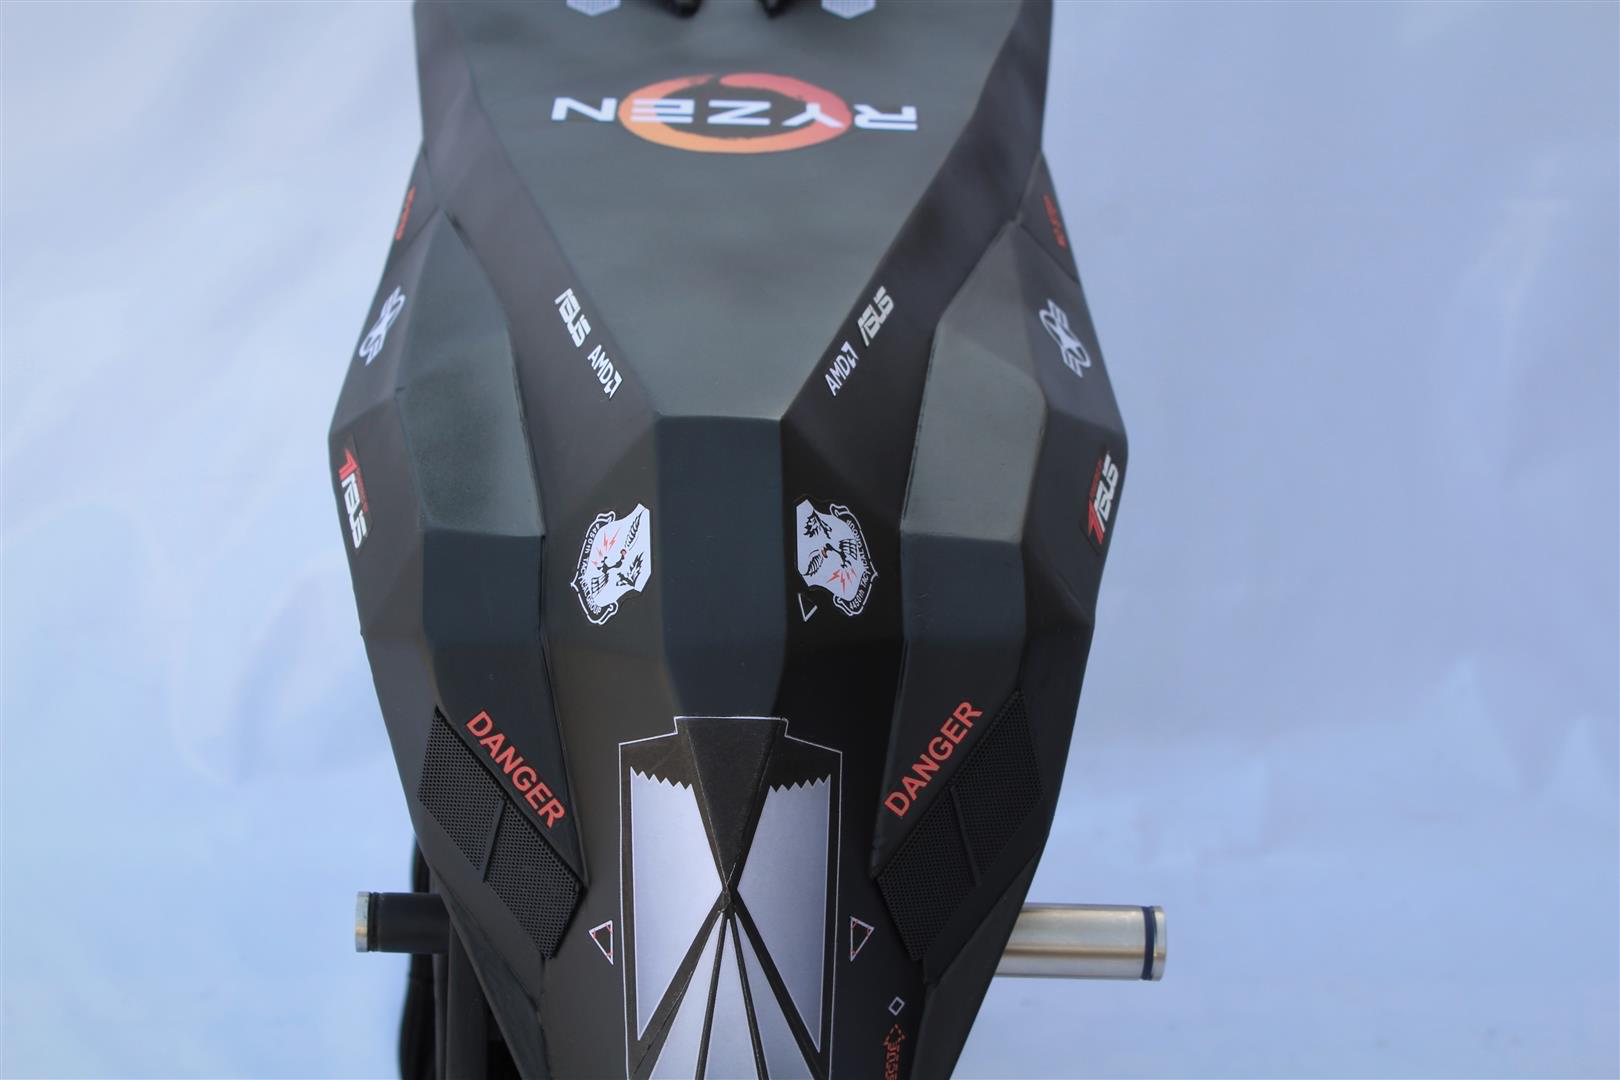
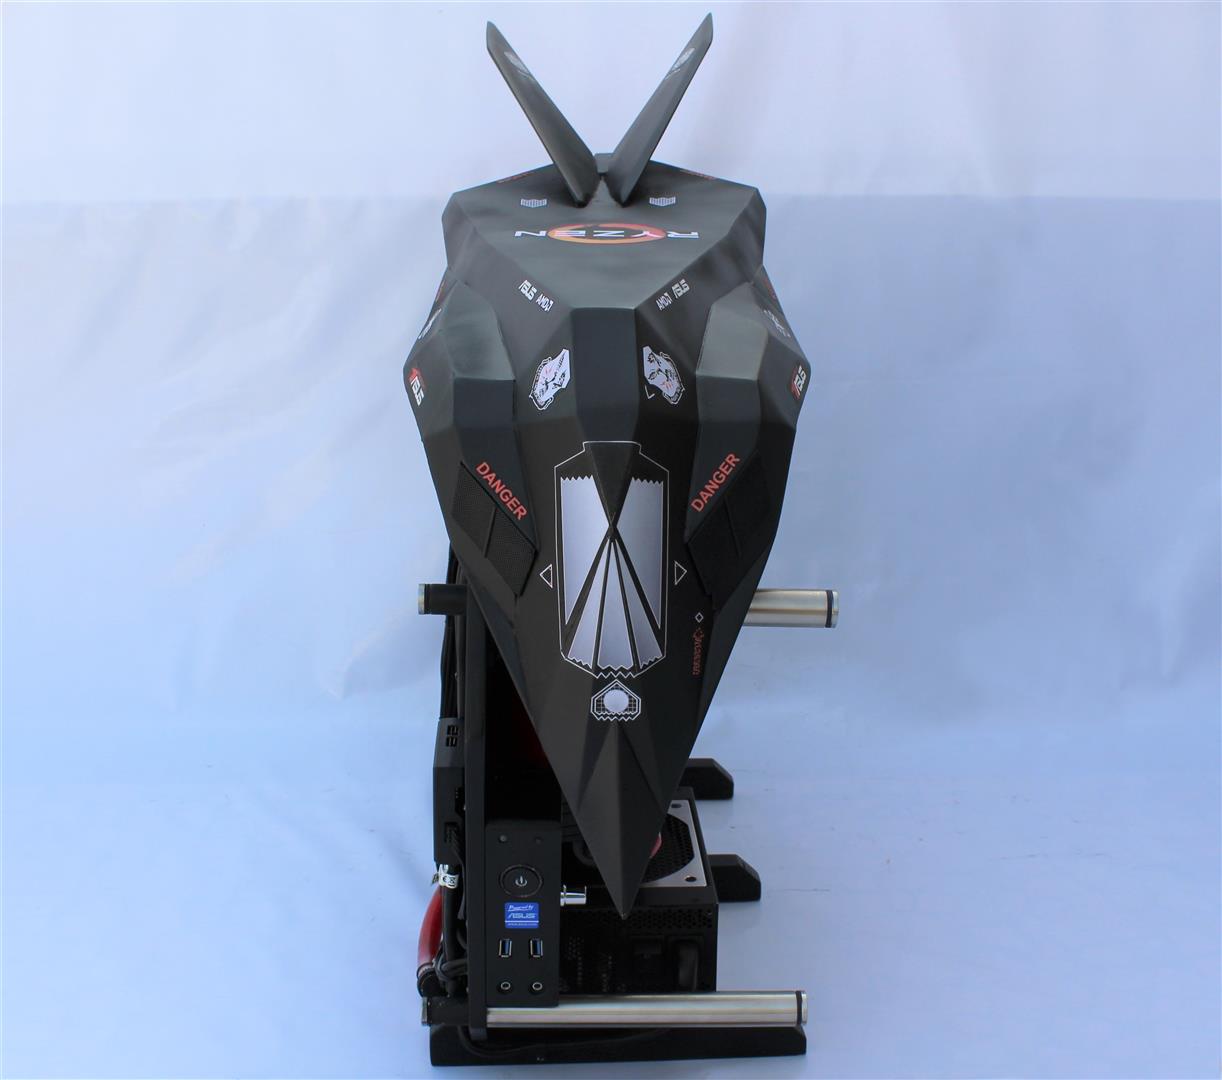
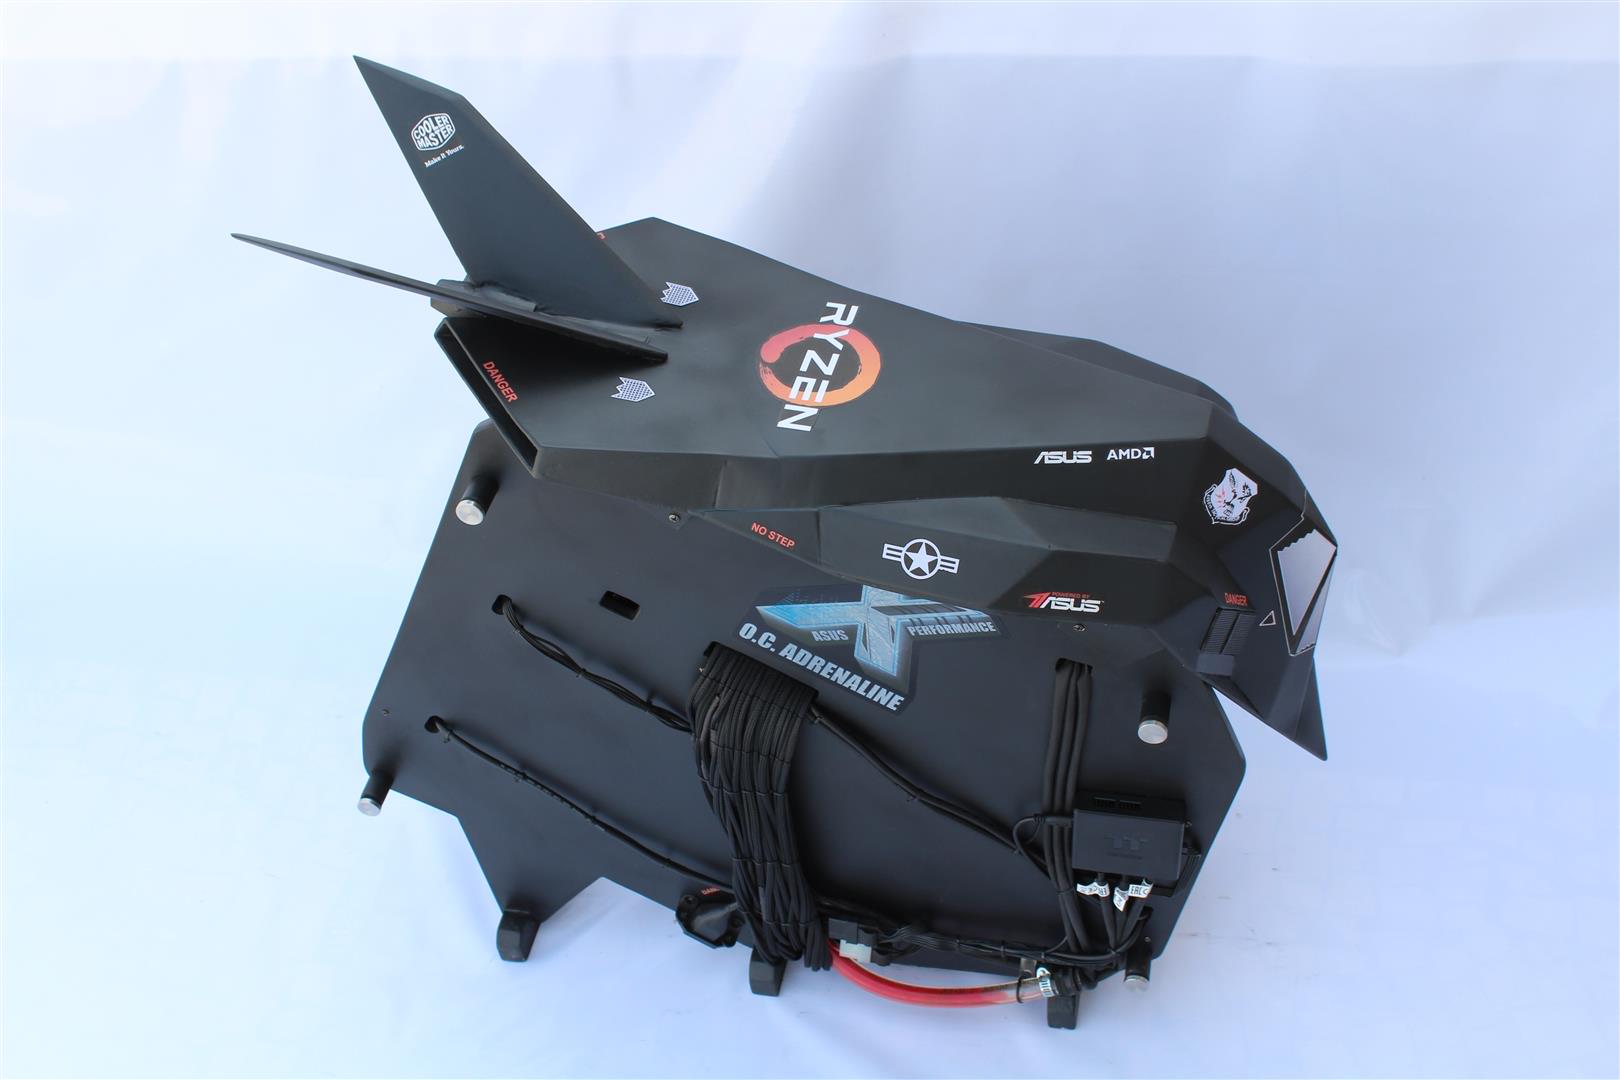
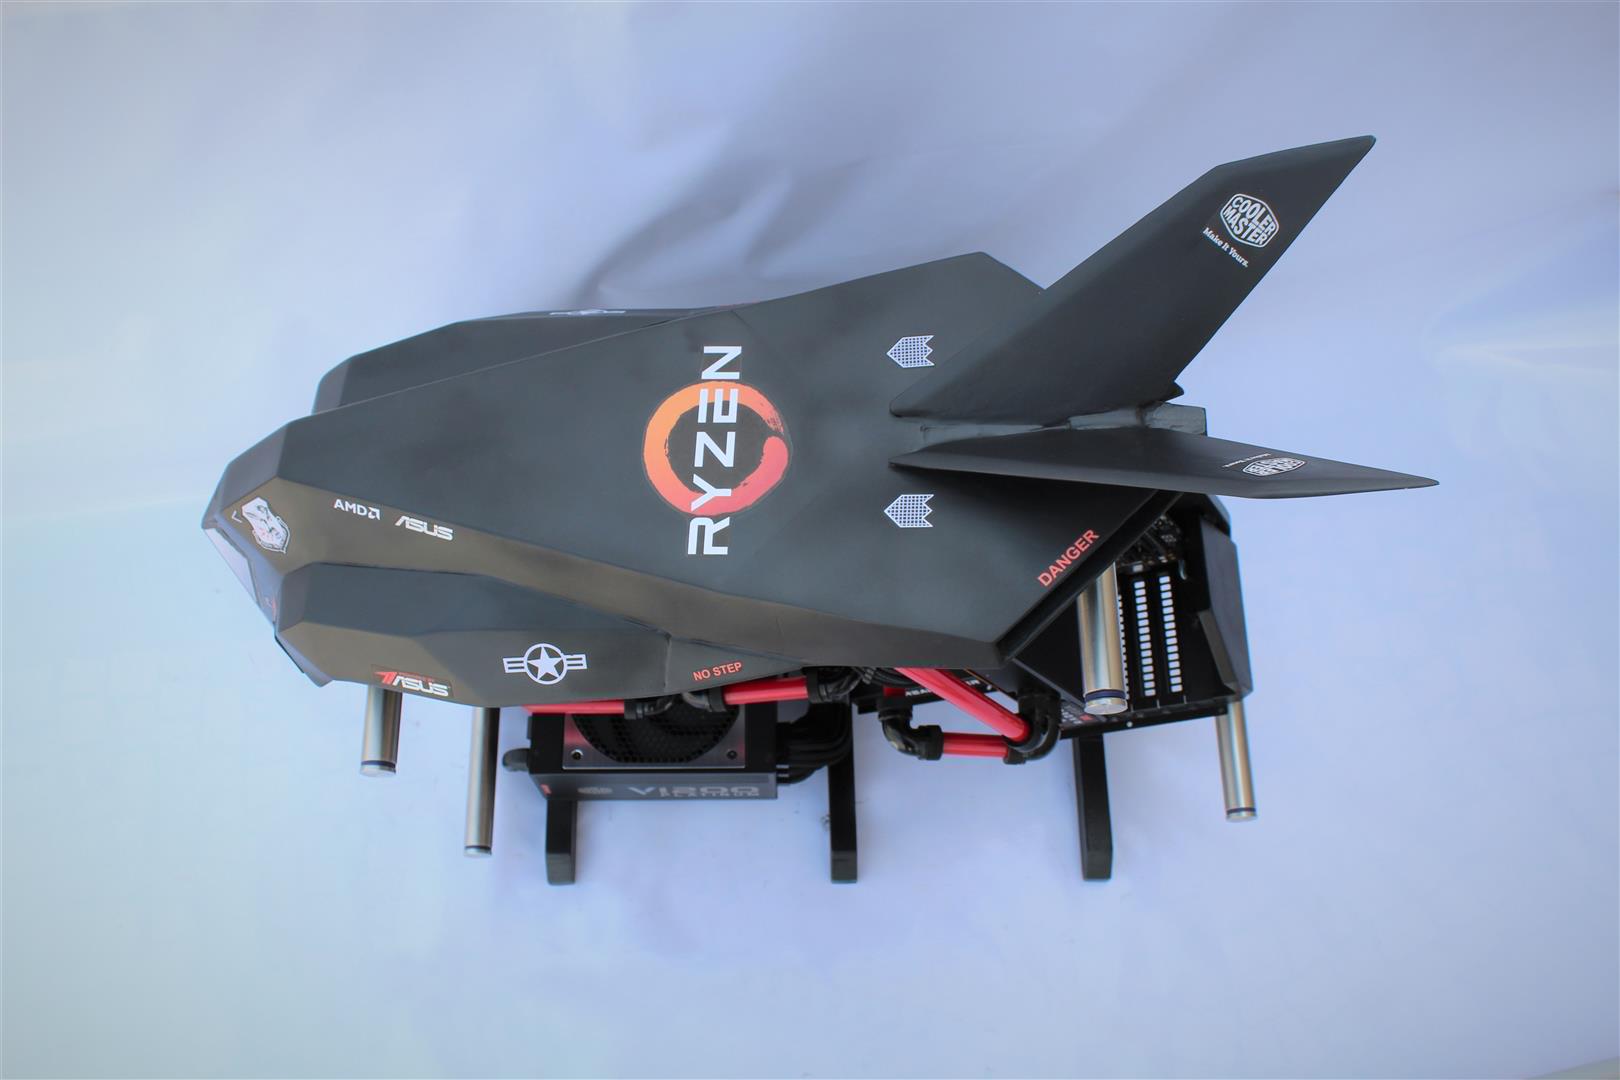
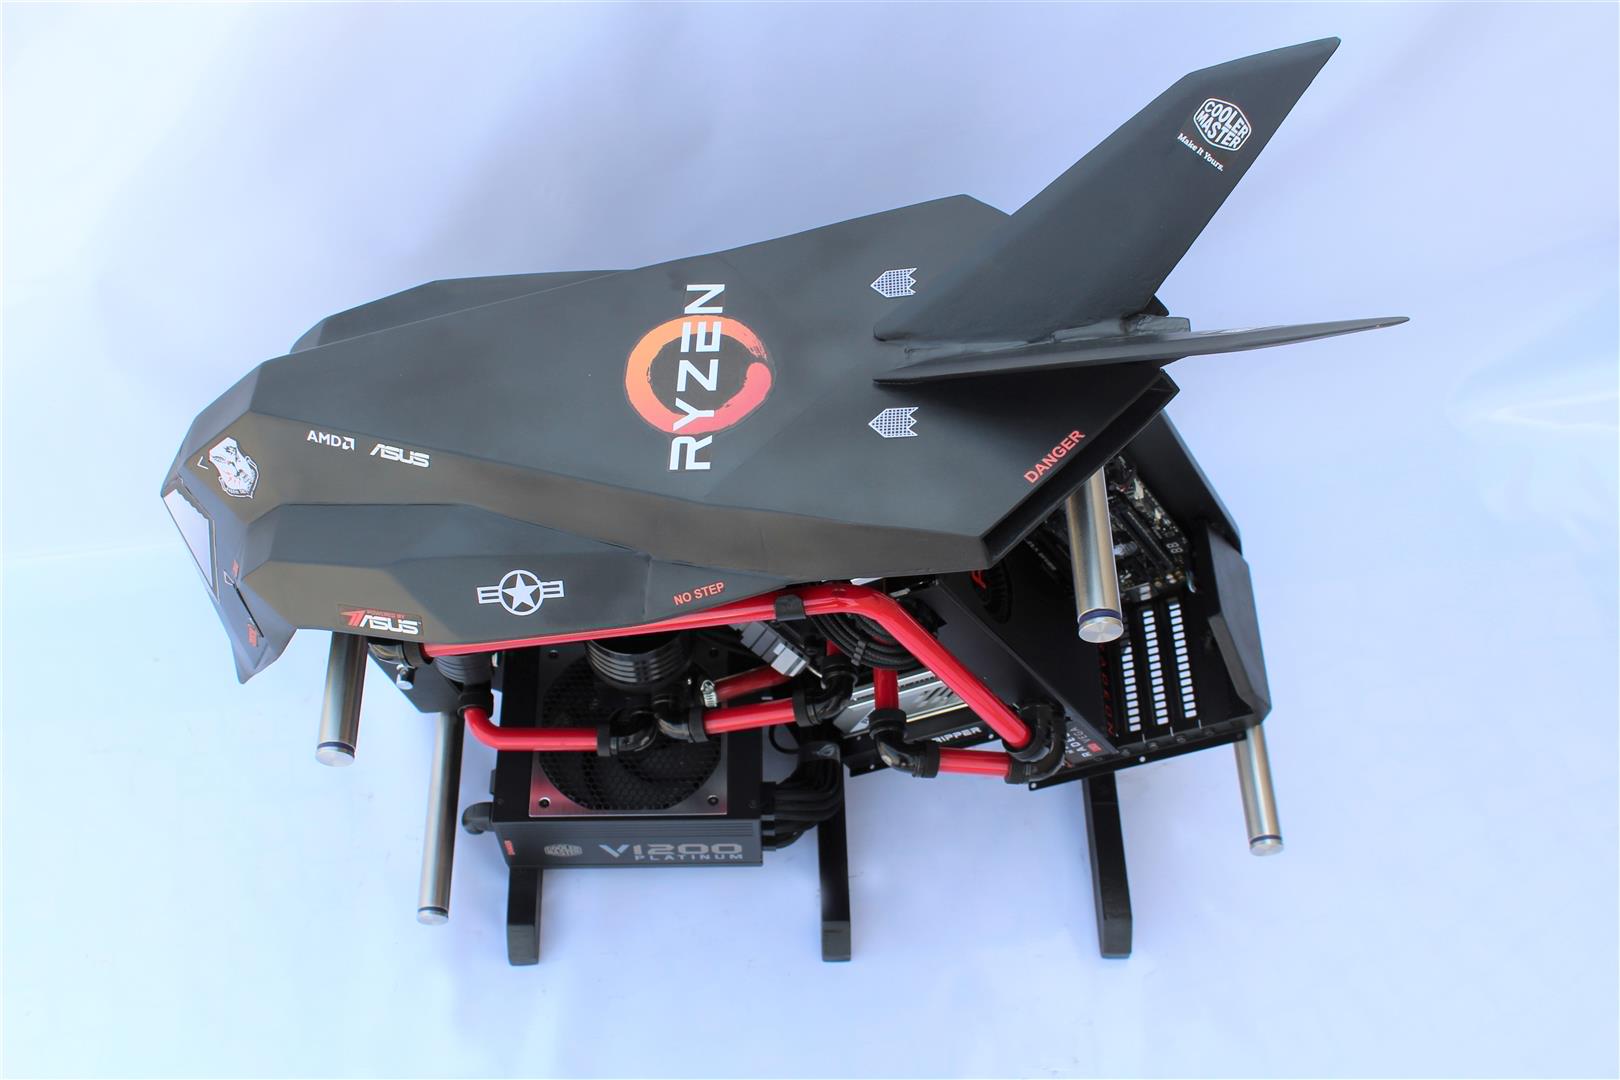
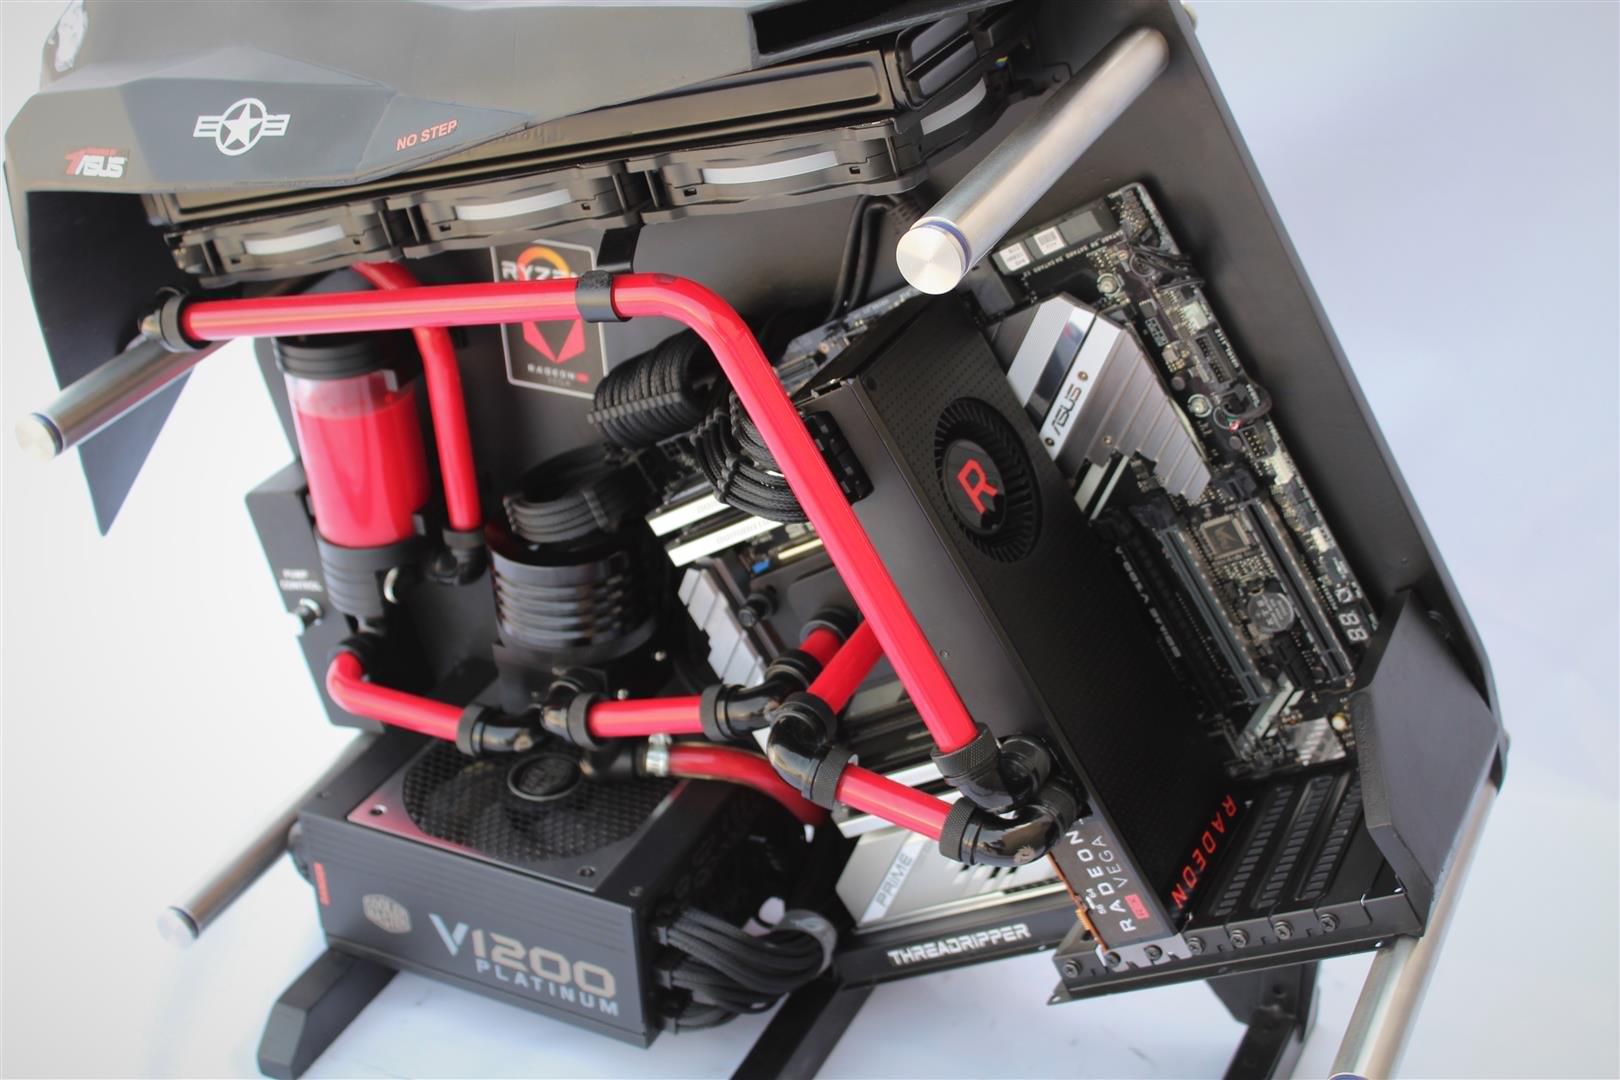
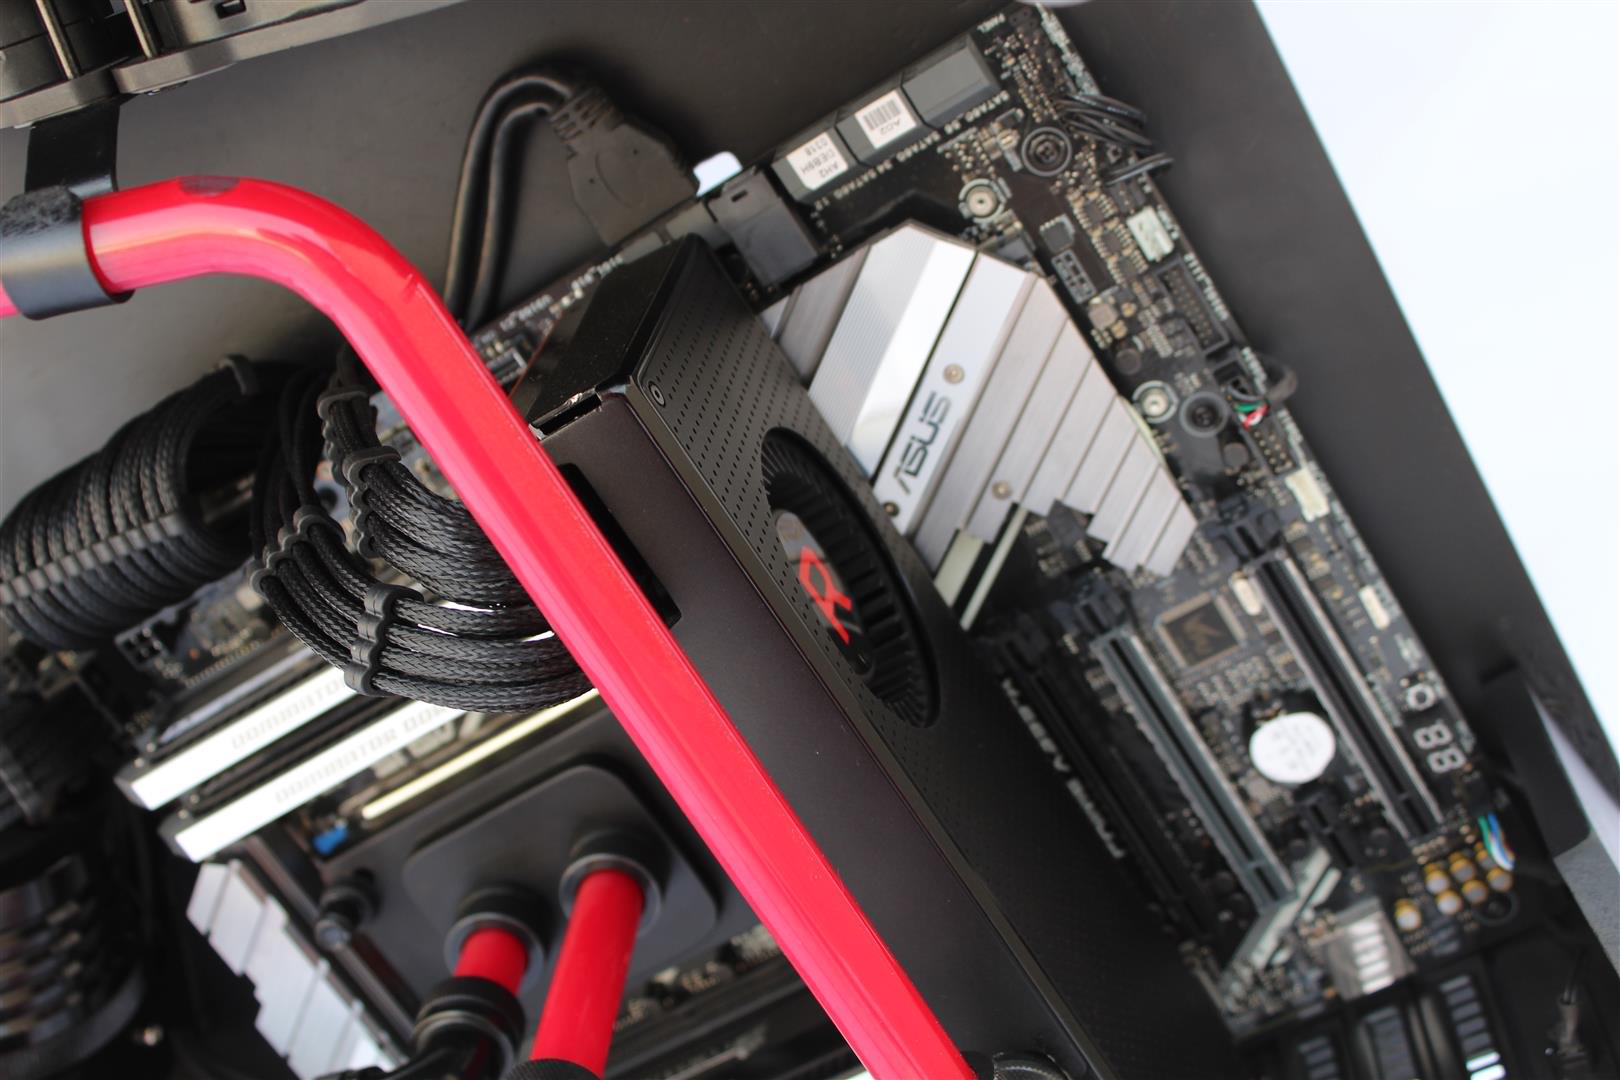
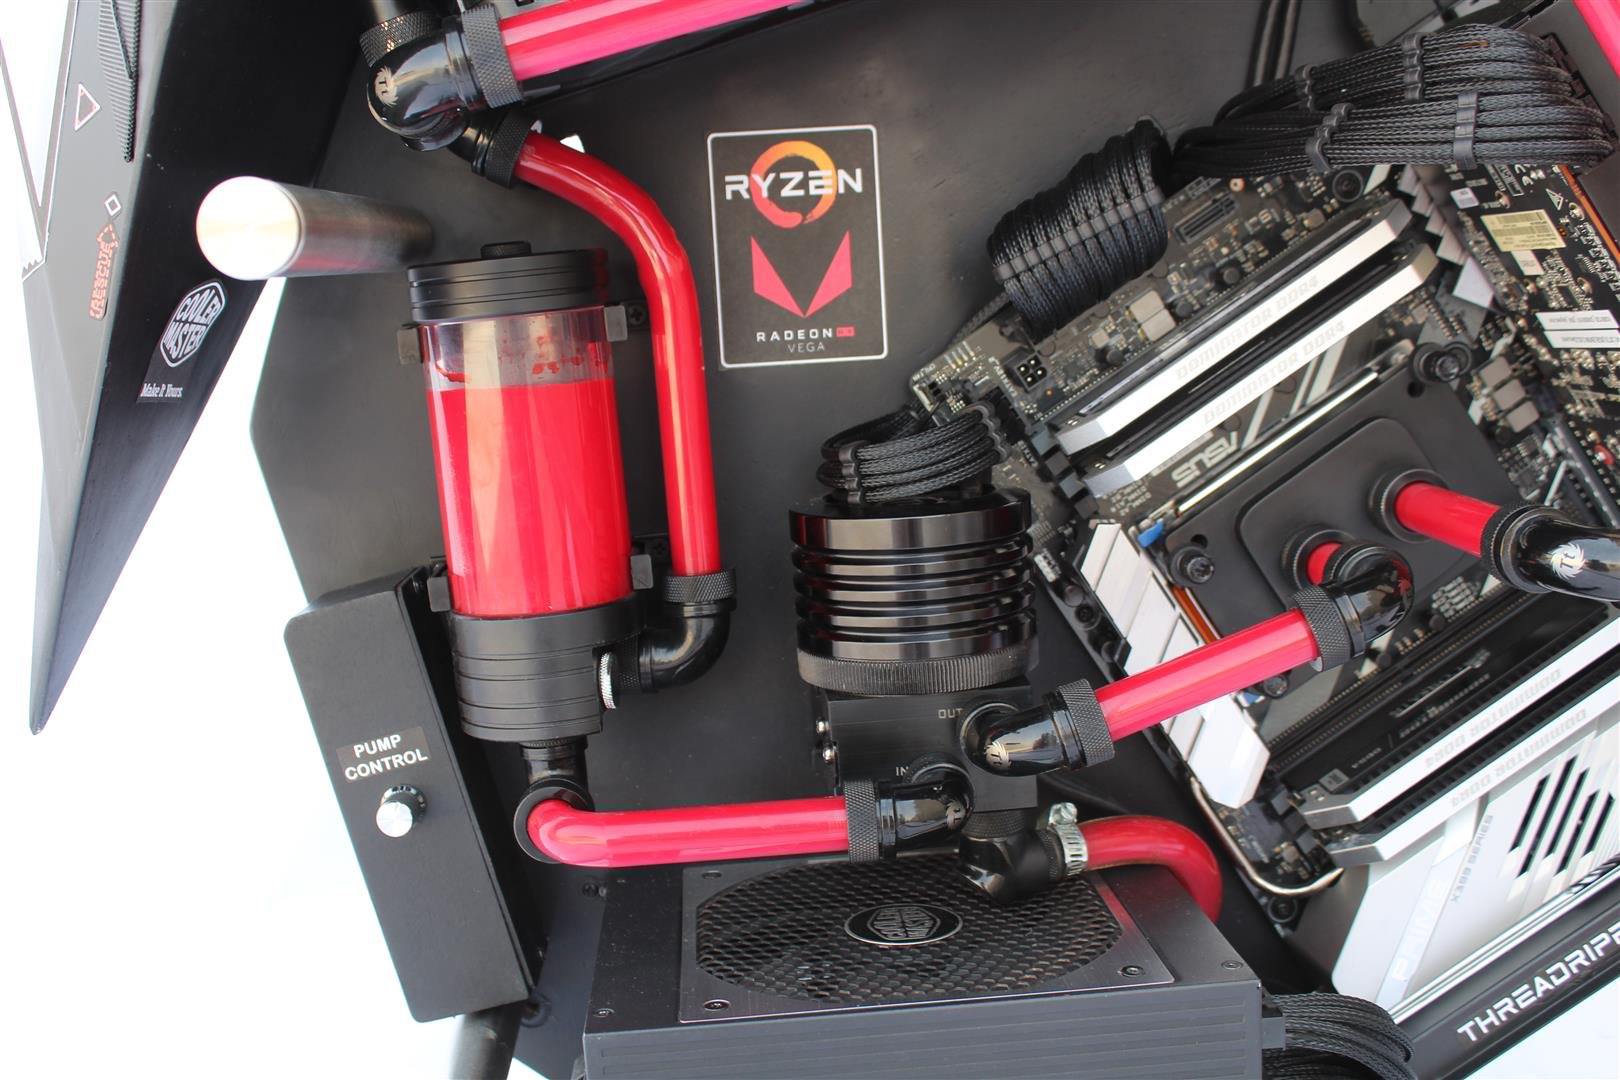
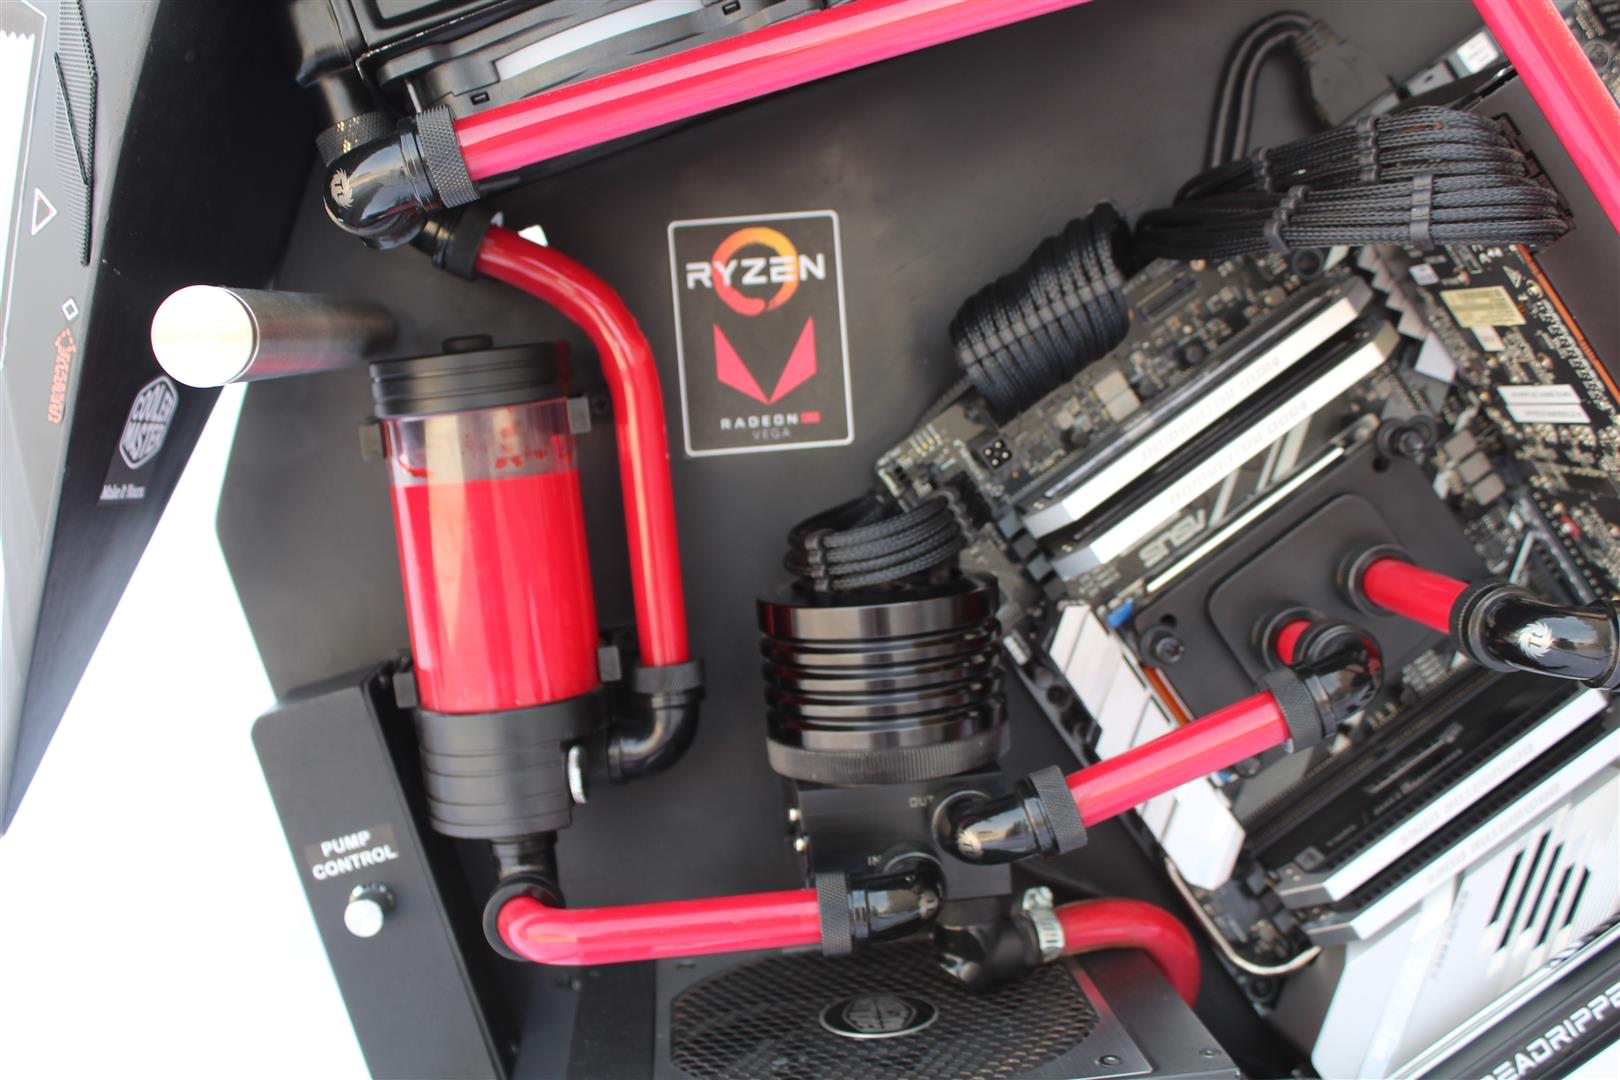
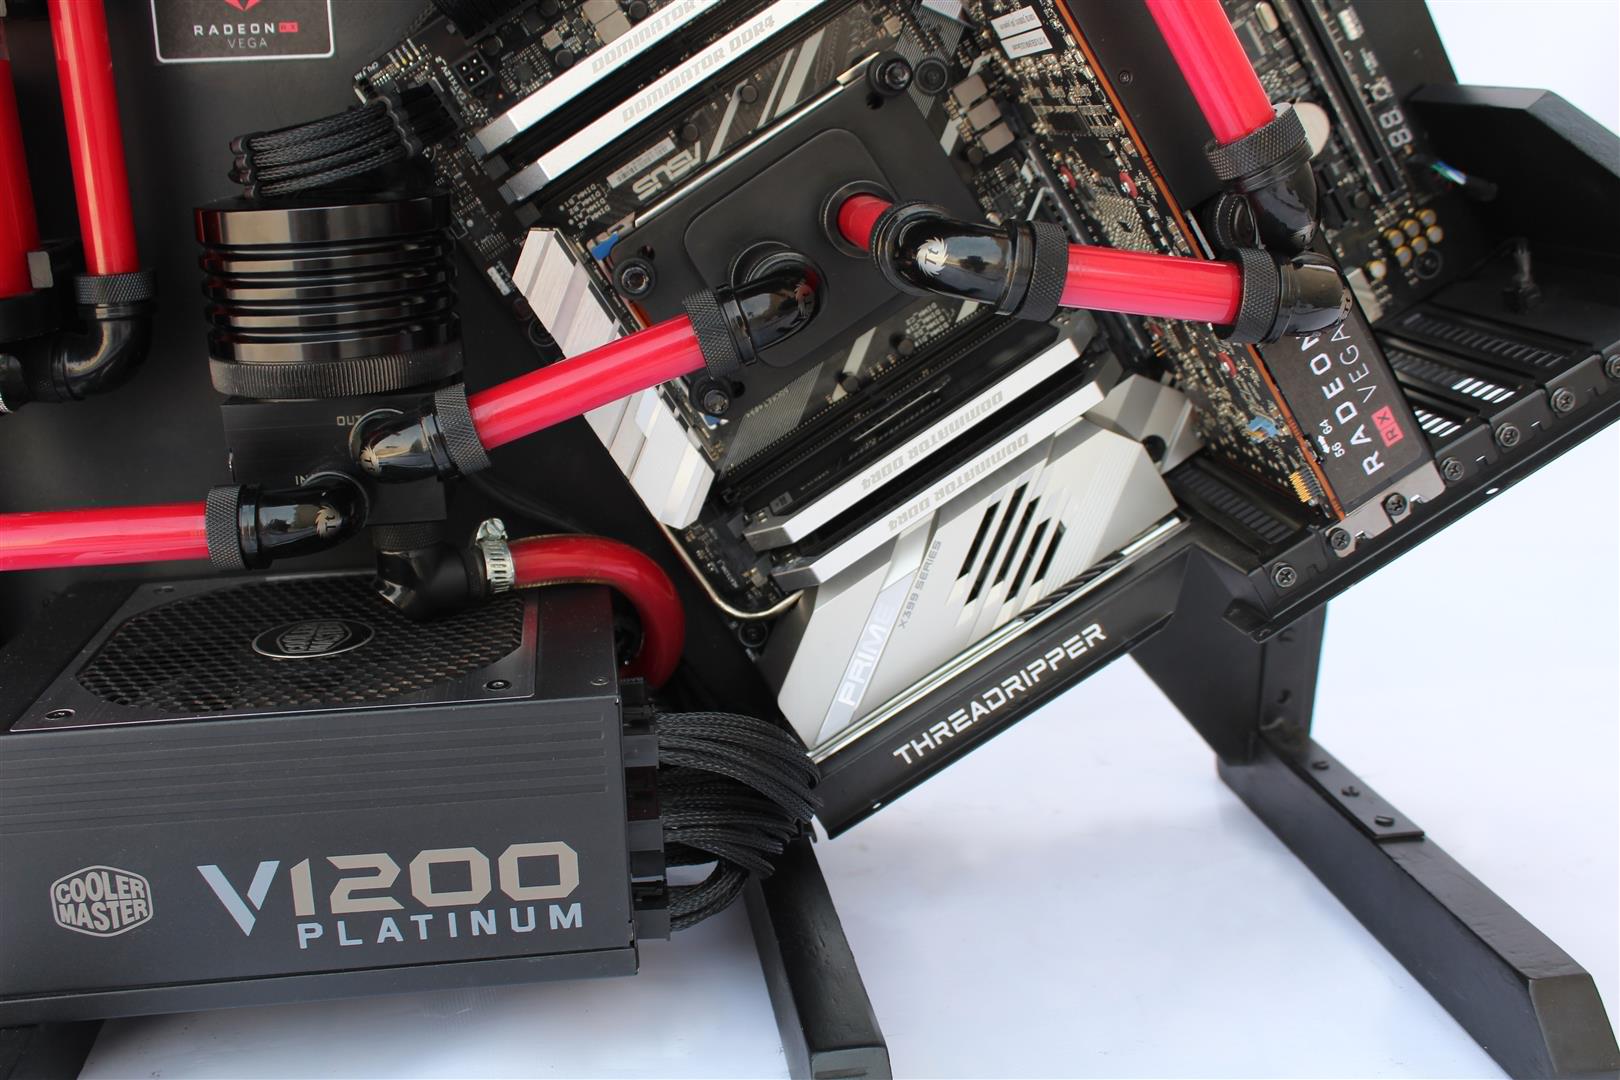
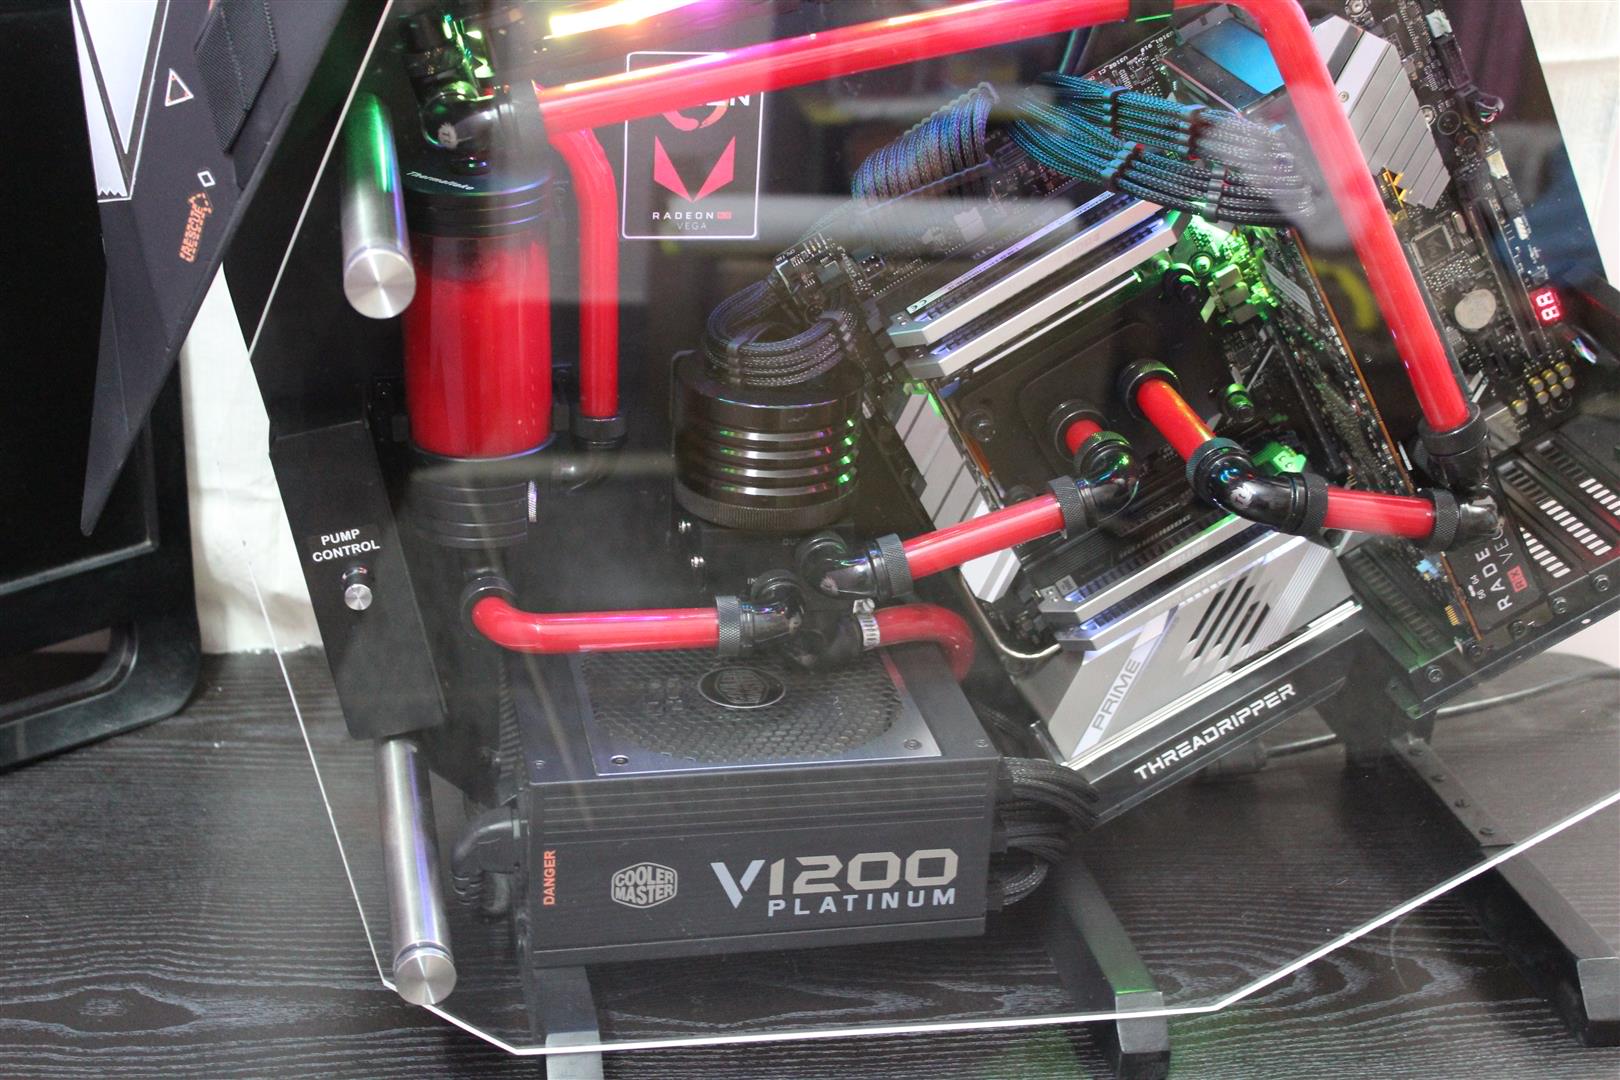
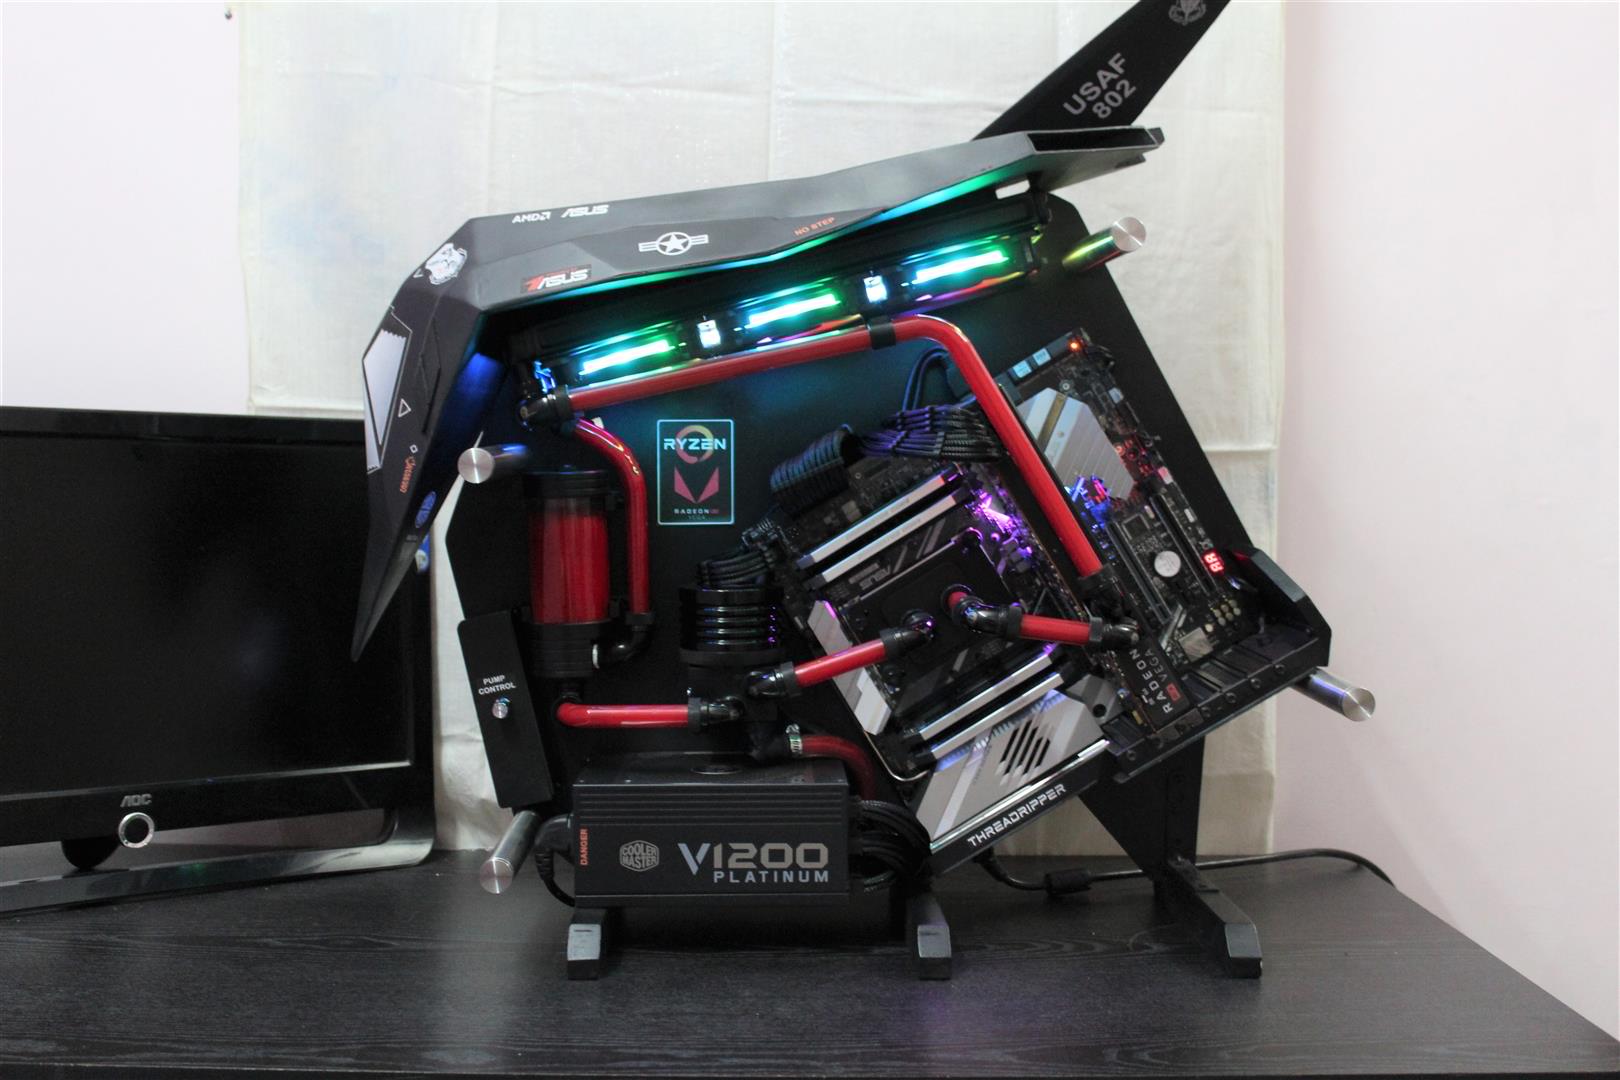
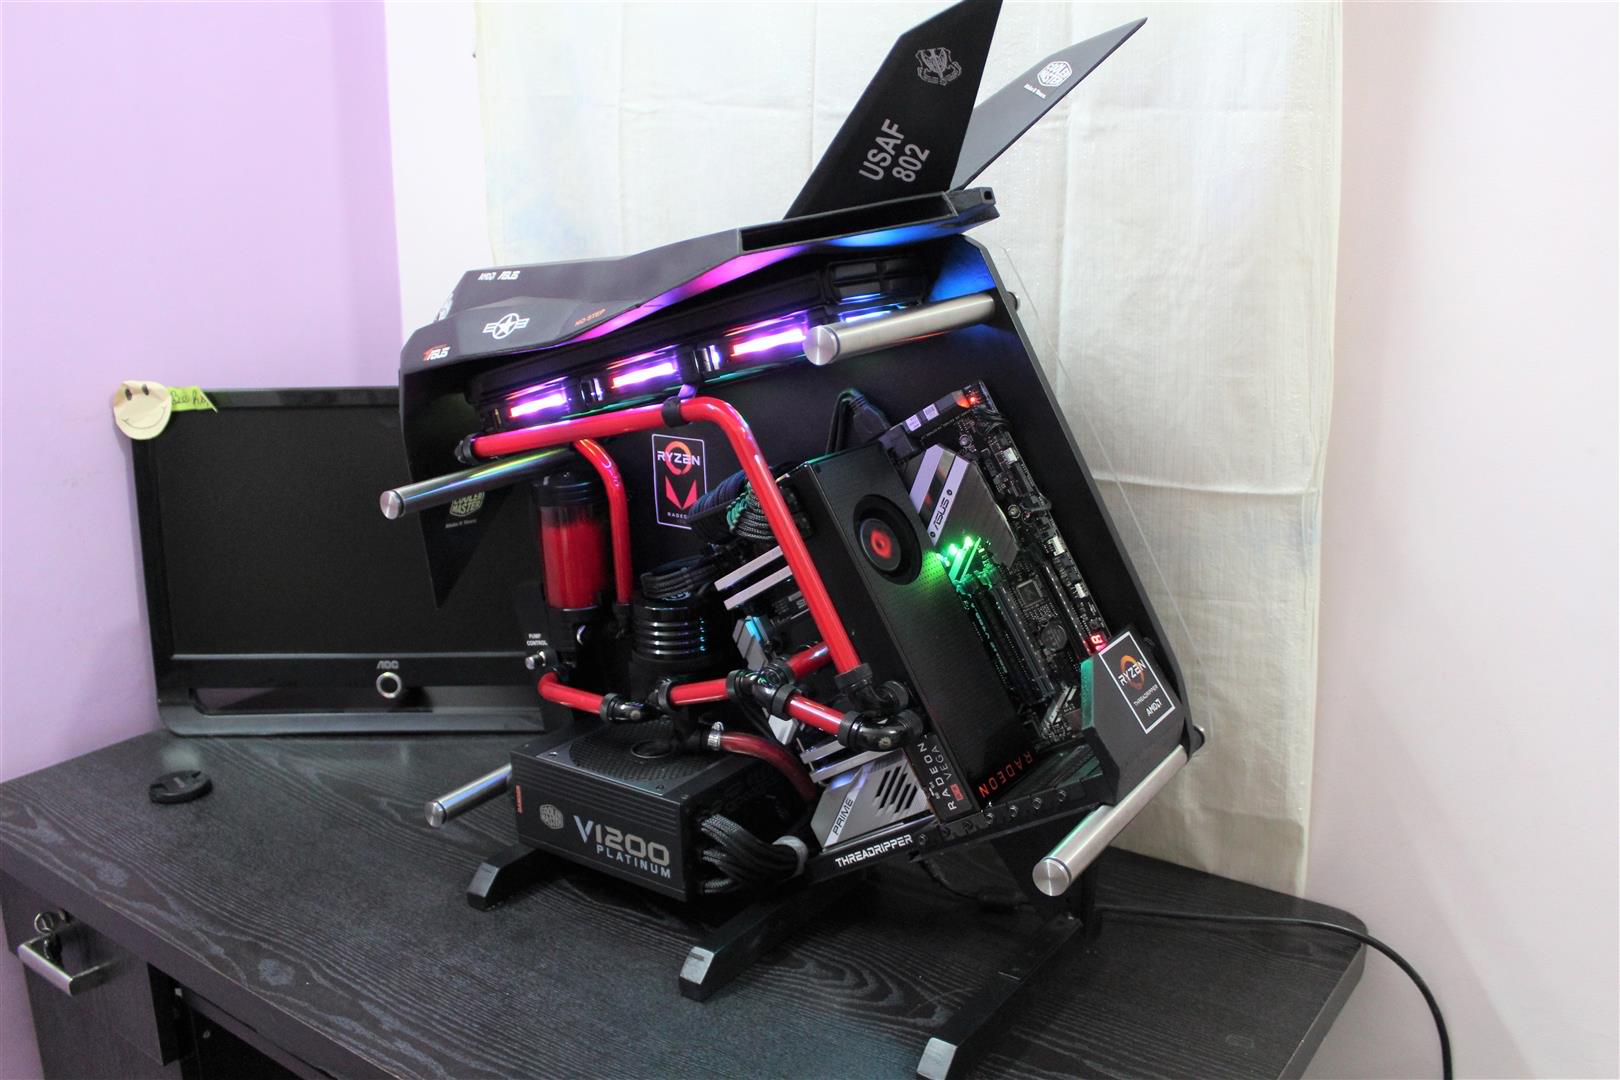
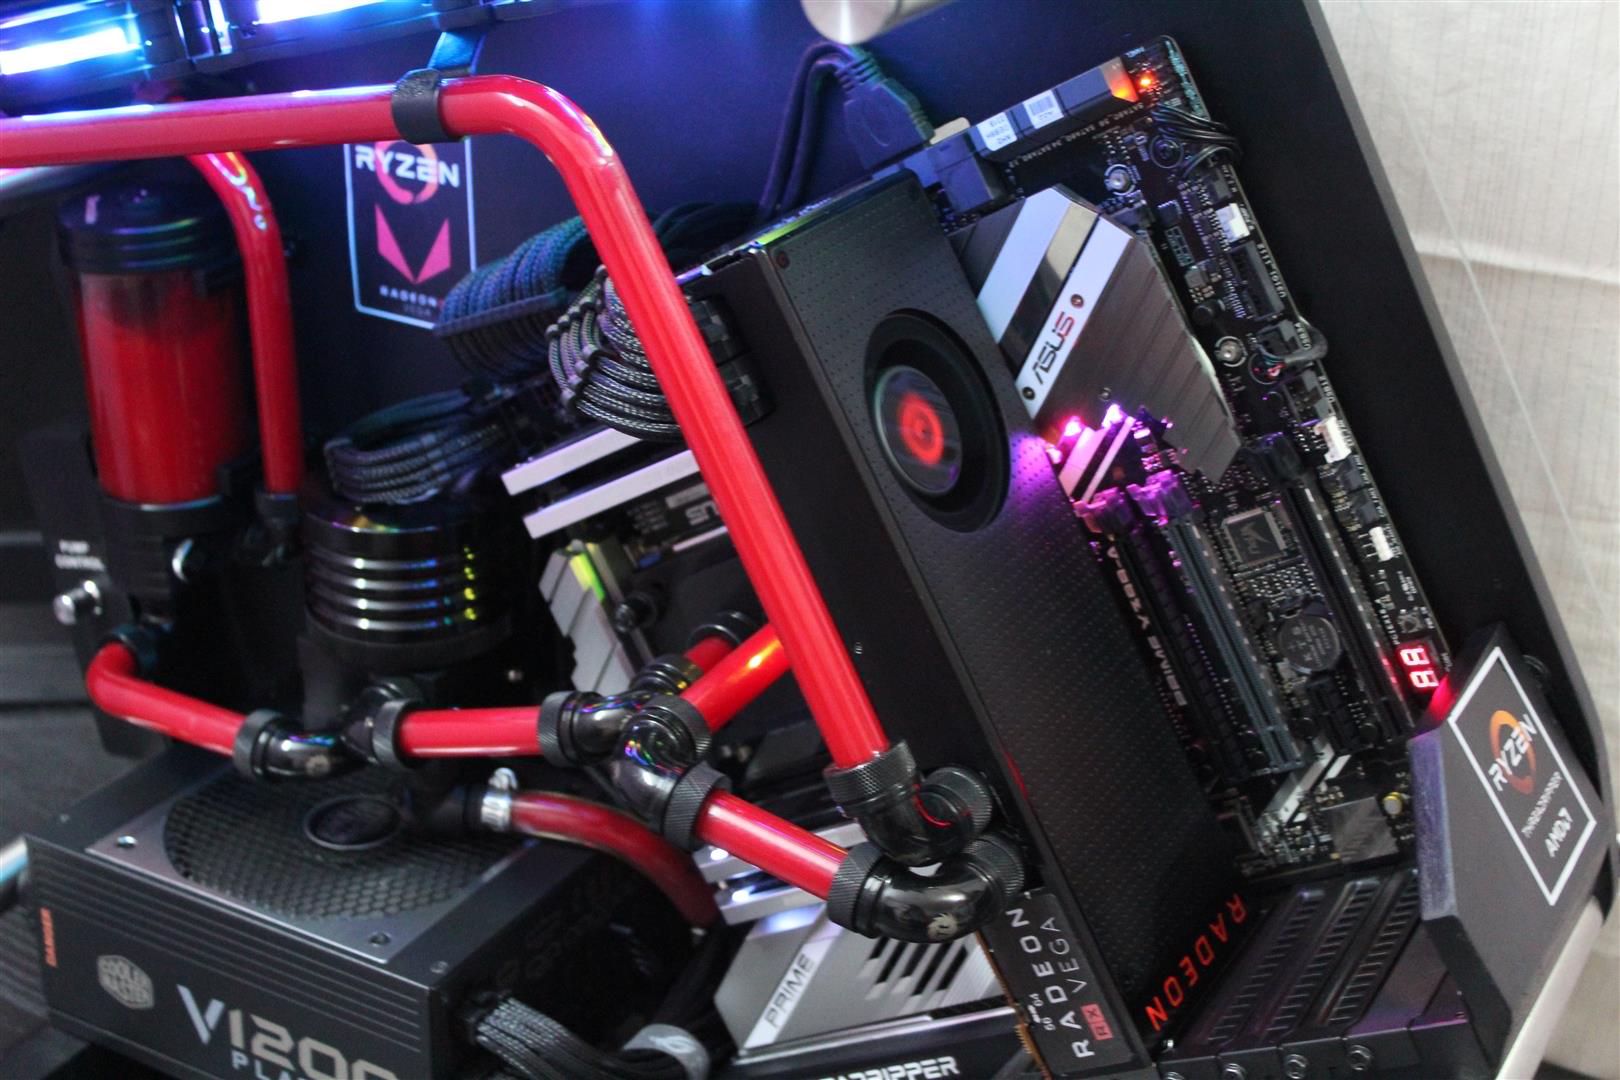
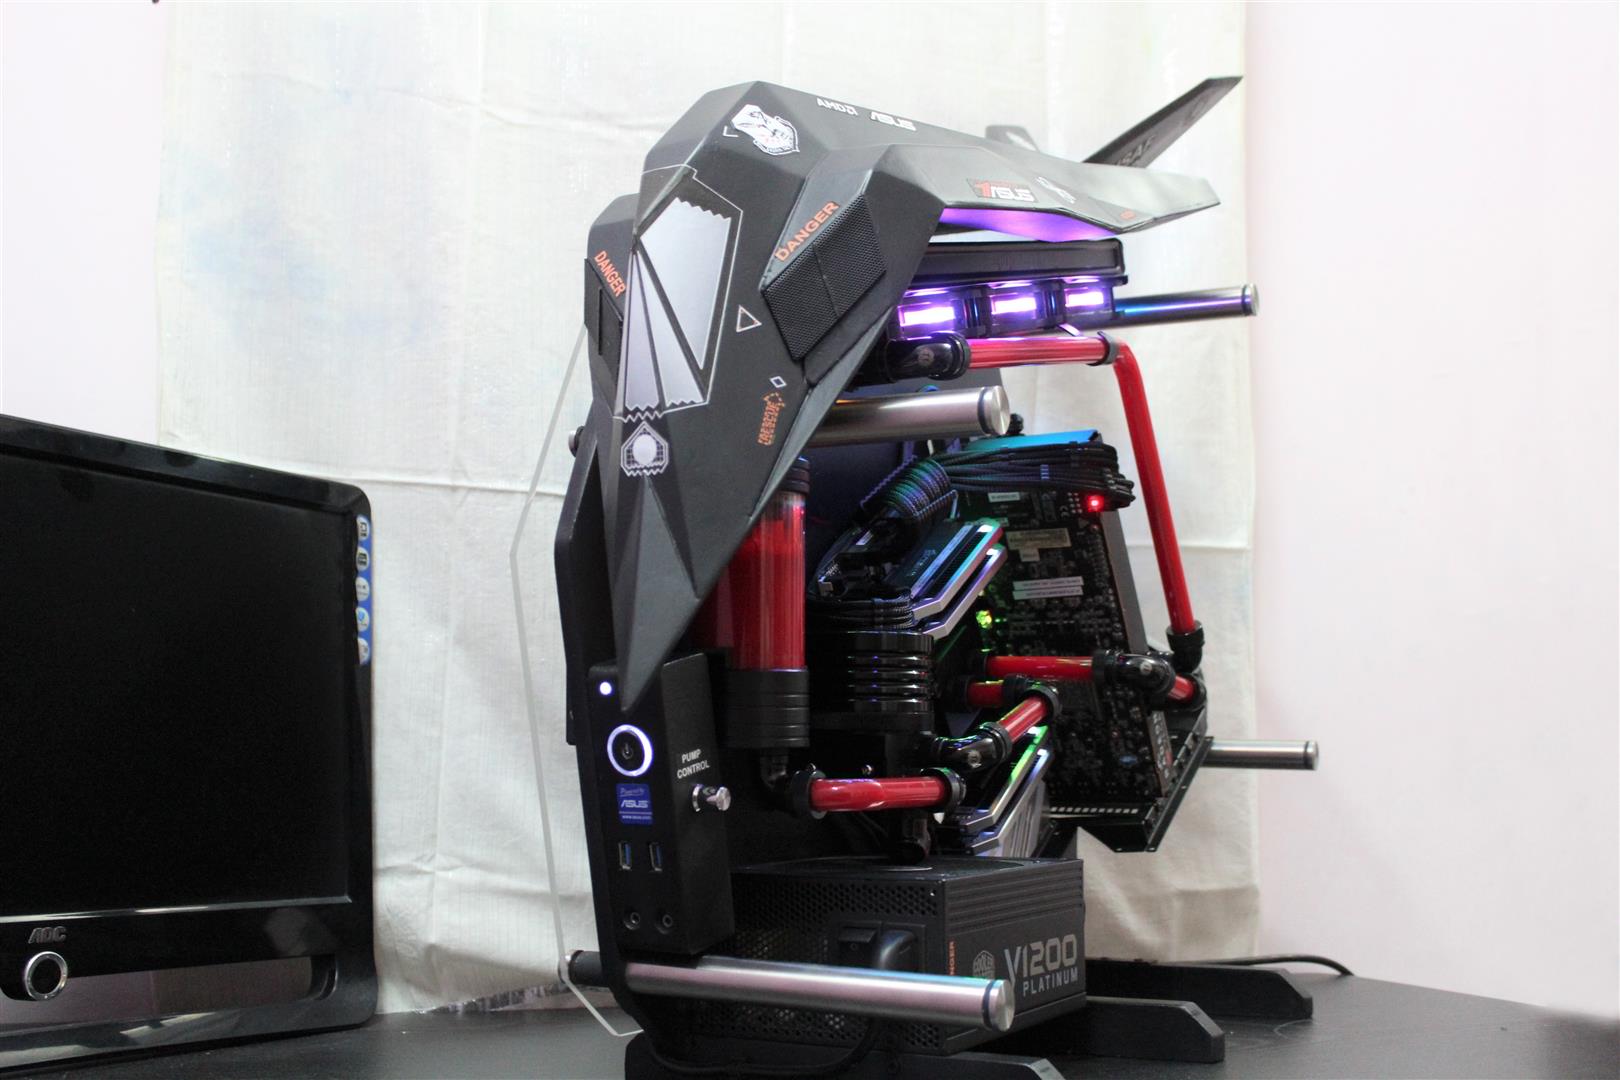
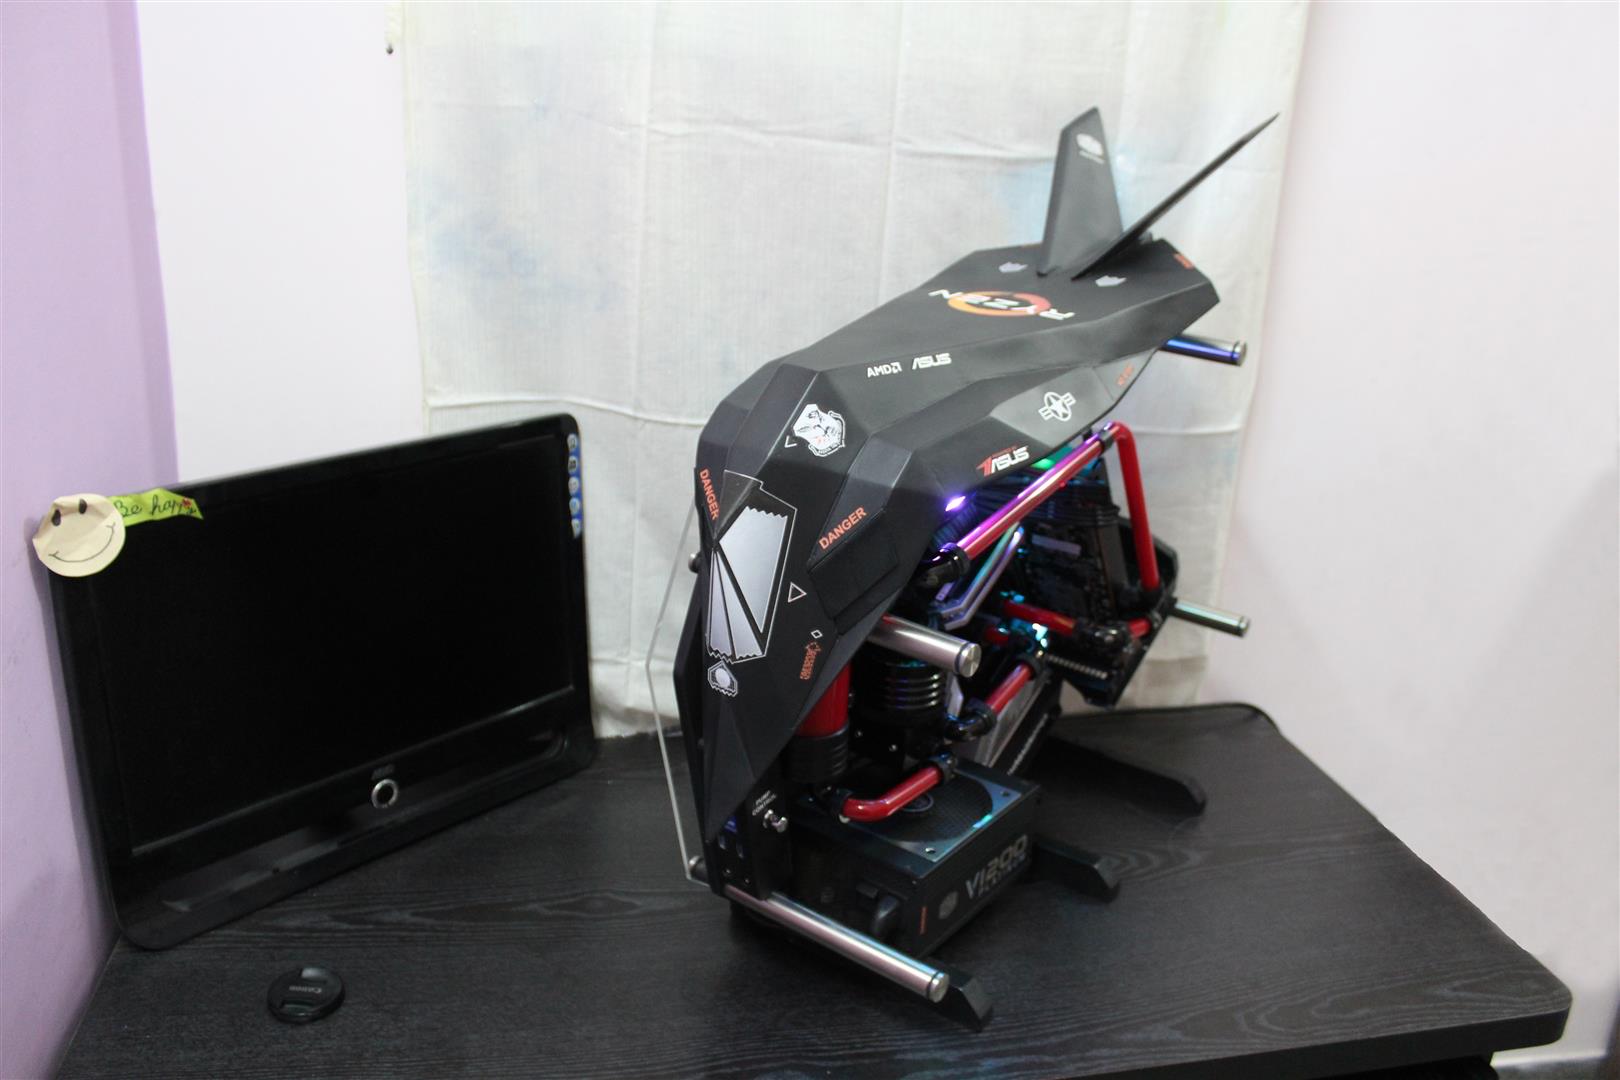
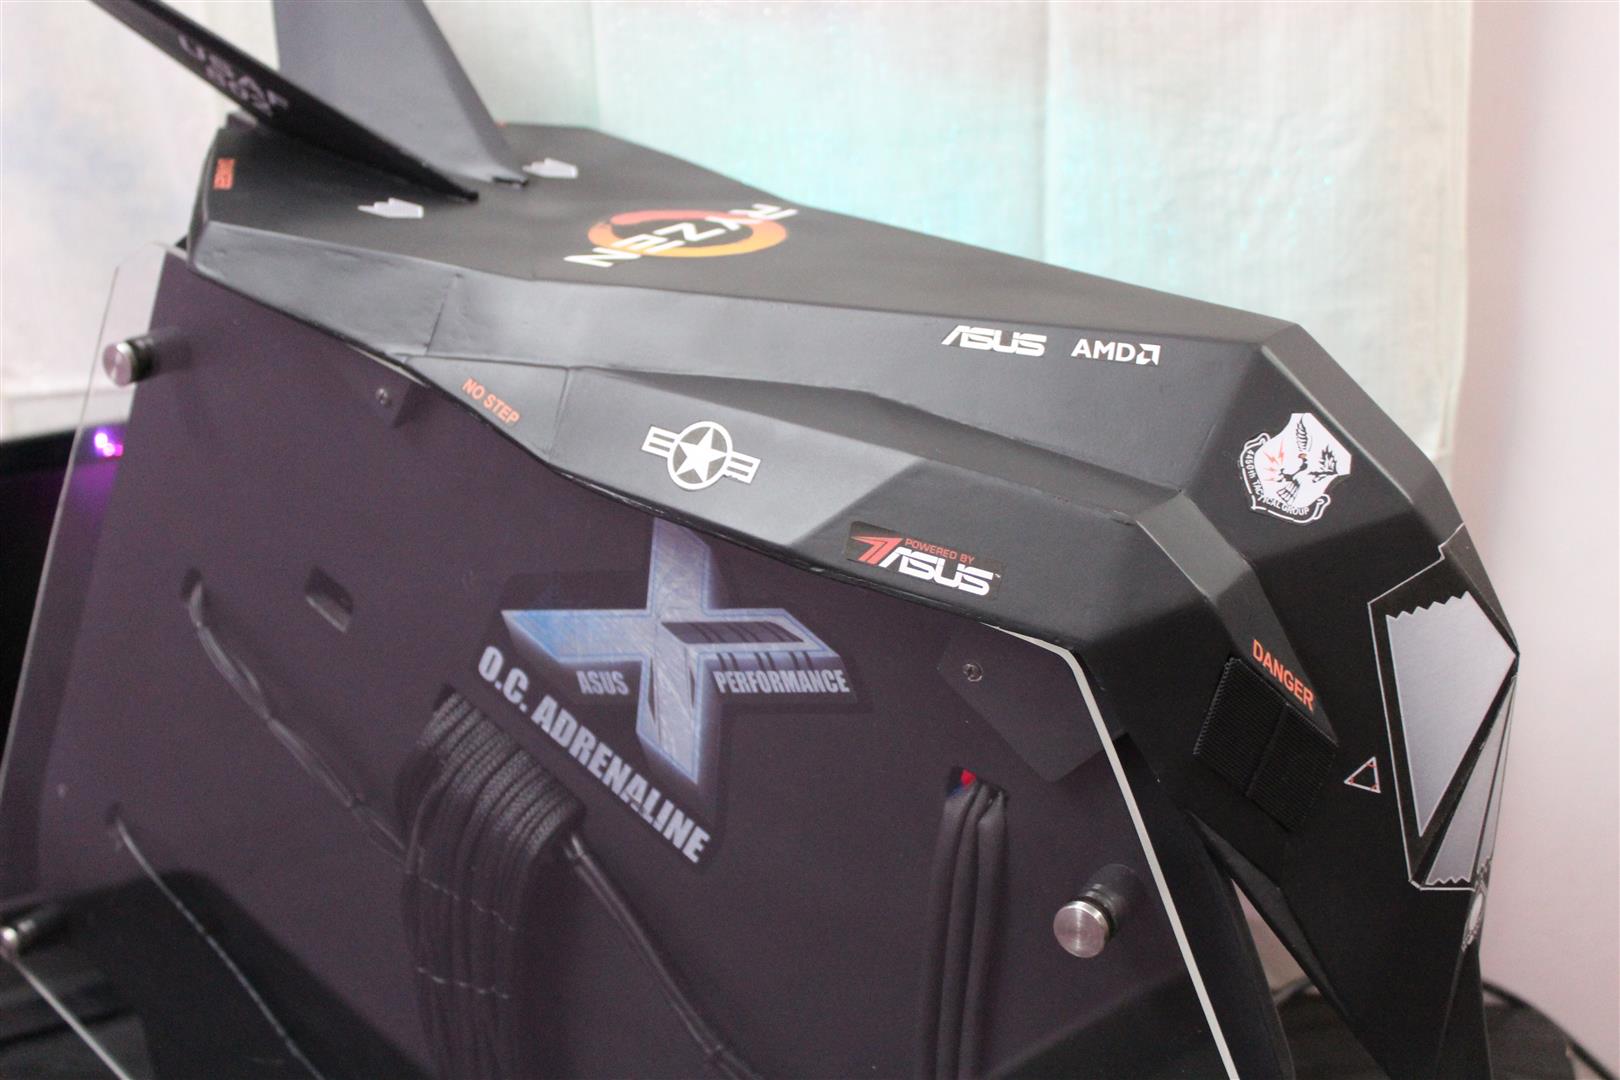
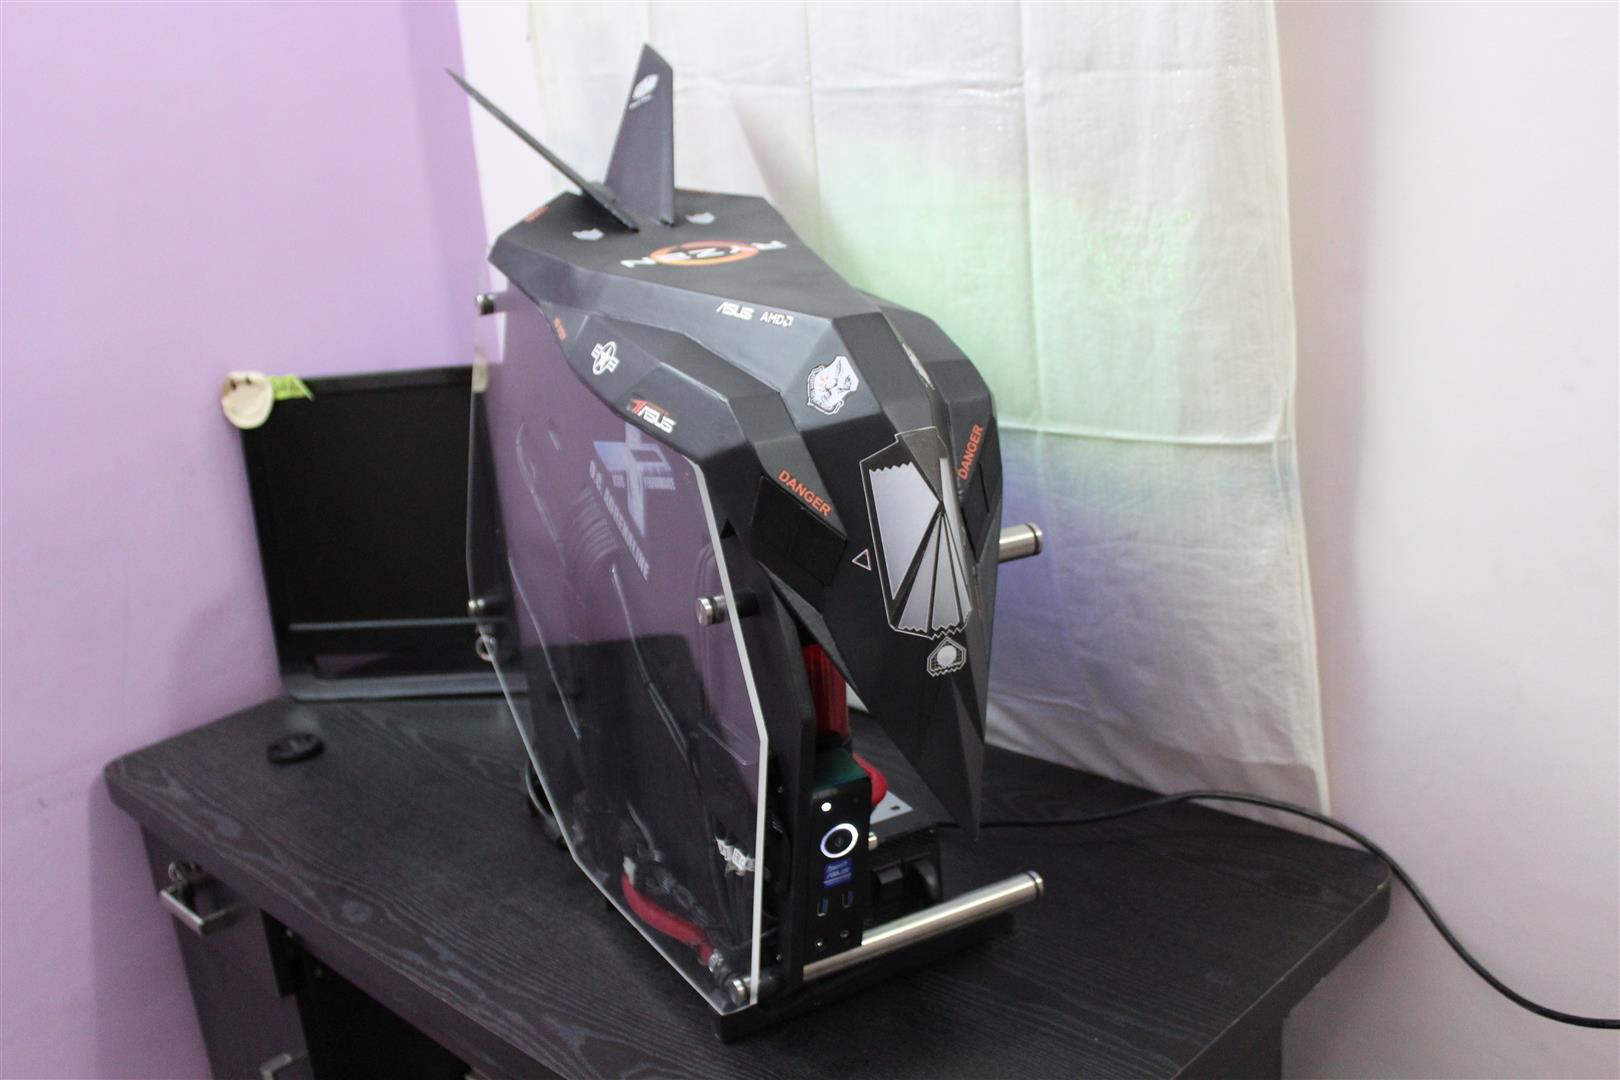
Finally the Nighthawk build is finished. Hope you all like the build. Thanks to ASUS India, AMD, AMD Gaming, Thermaltake, Corsair and Cooler Master for supporting the idea.
And Special Thanks to you all guys for watching this build log.
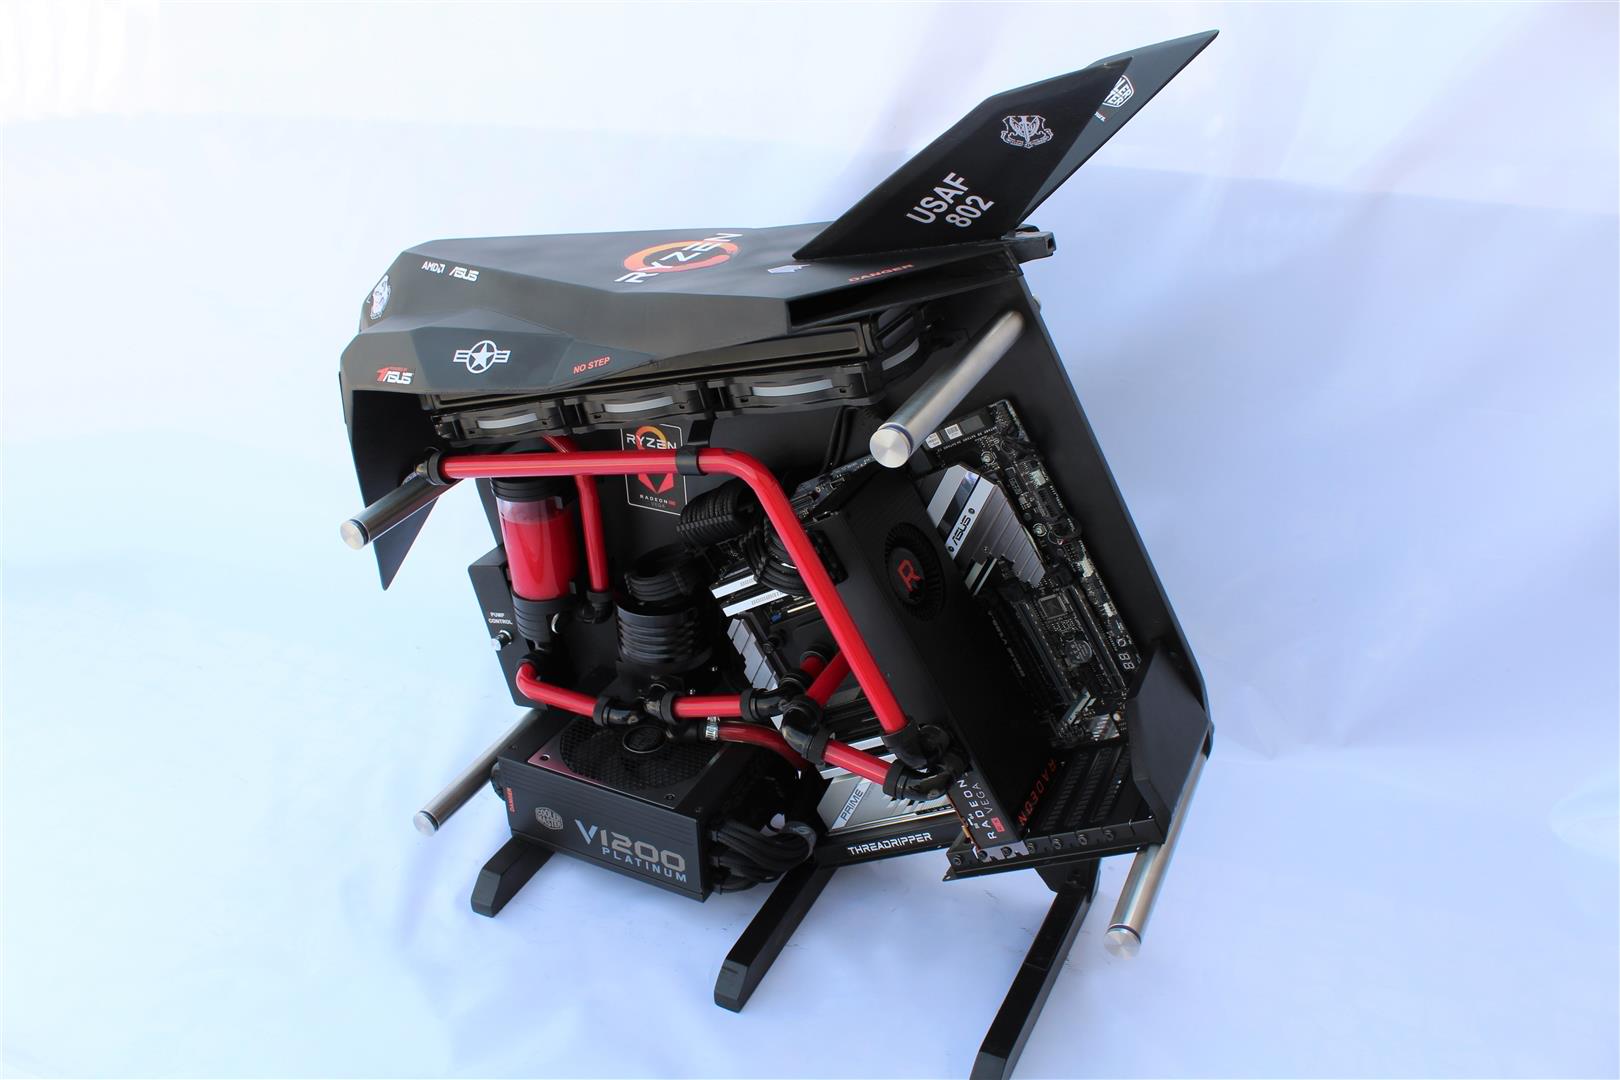
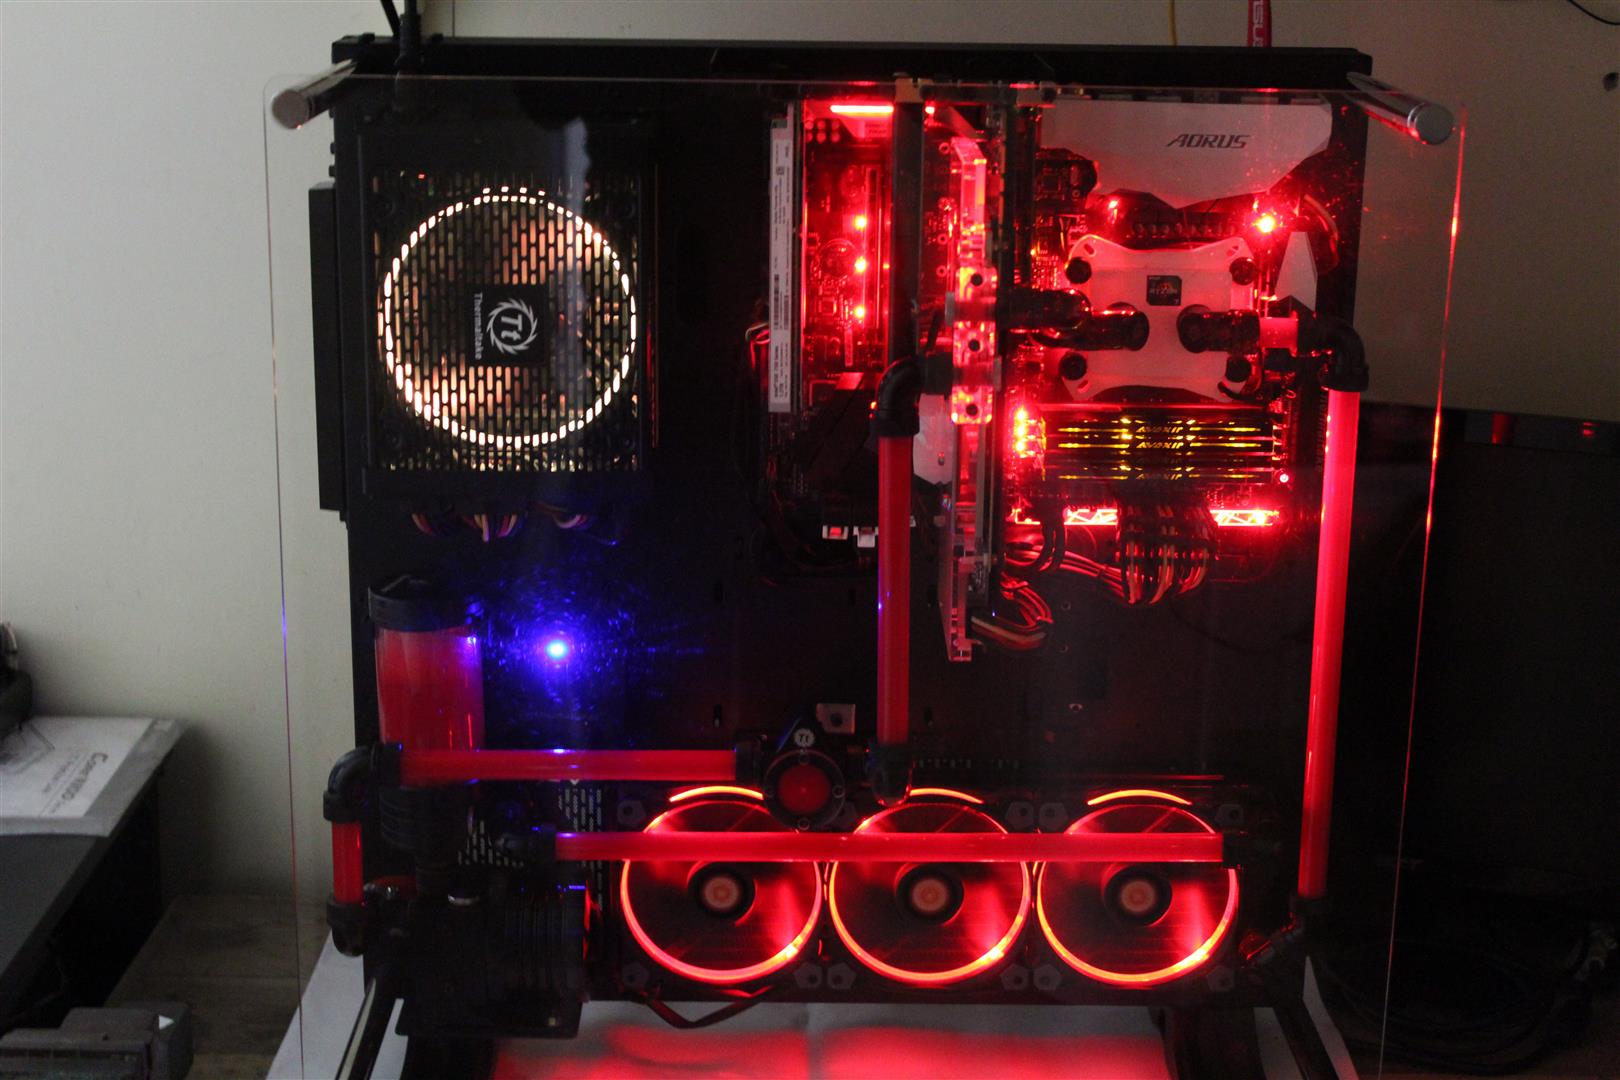
System Specifications
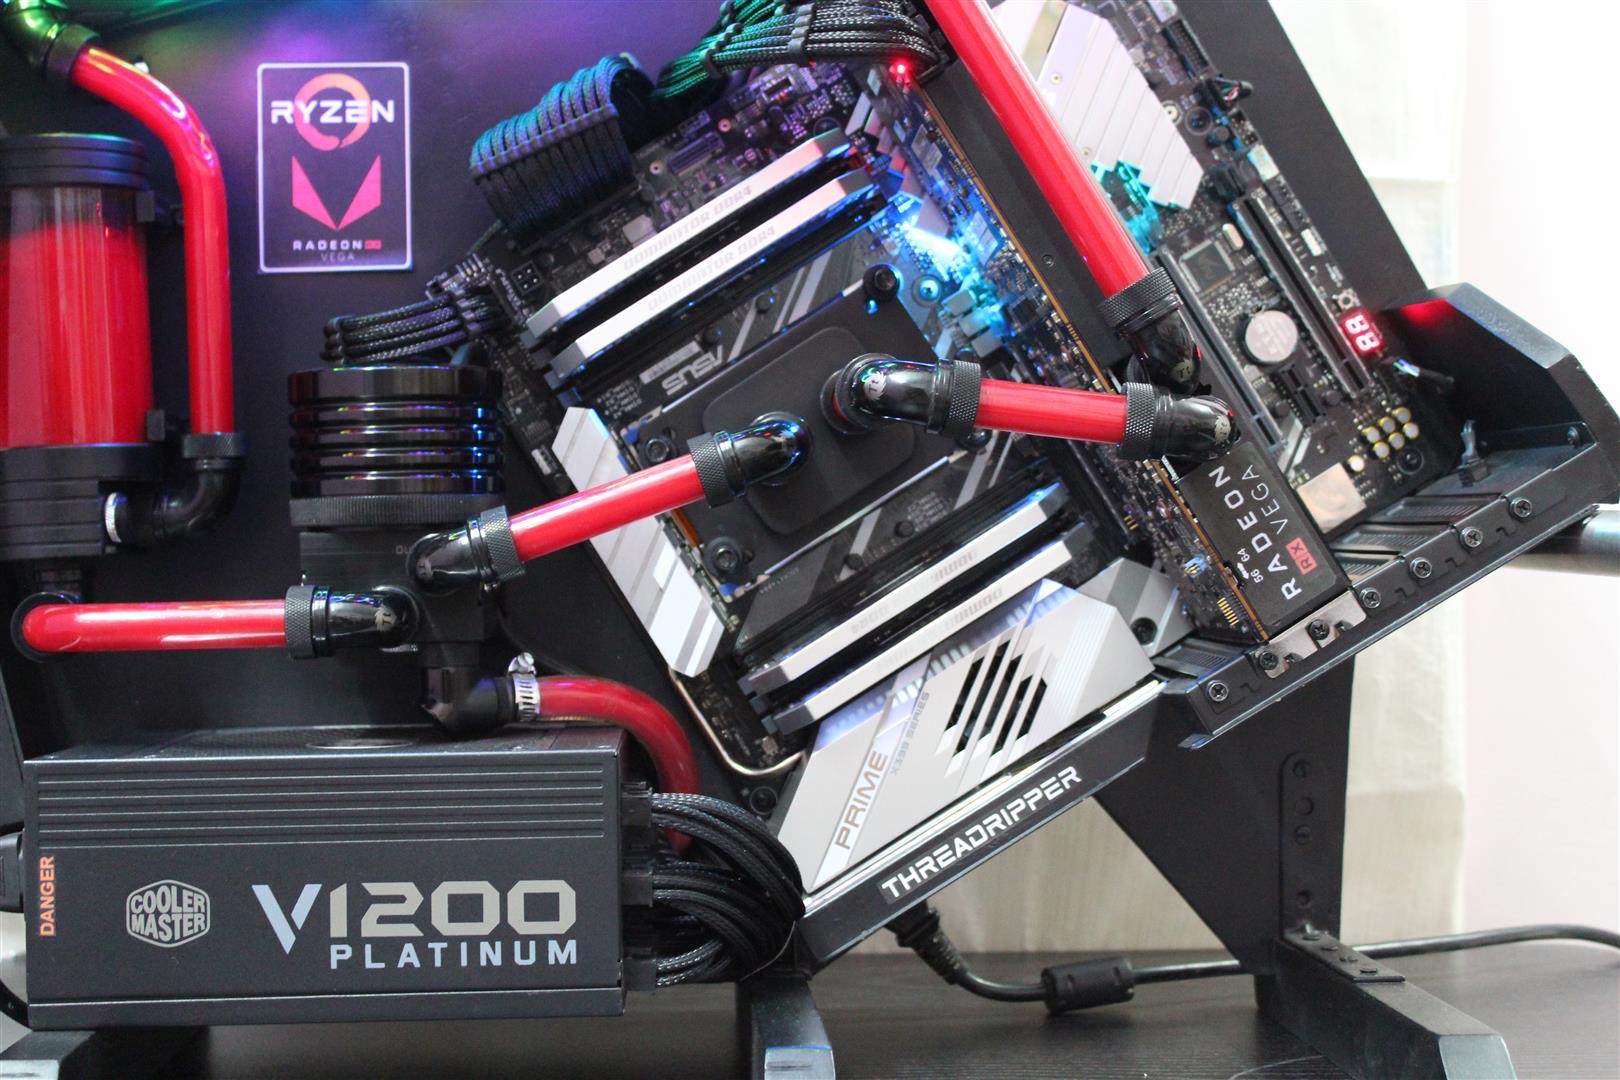
- AMD Ryzen Threadripper 1900X
- ASUS PRIME X399-A
- CORSAIR Dominator PLATINUM 16GB 3000MHz DDR4
- AMD Radeon RX Vega 64
- CORSAIR Neutron NX500 NVMe PCle 400GB
- Cooler Master V1200 Platinum
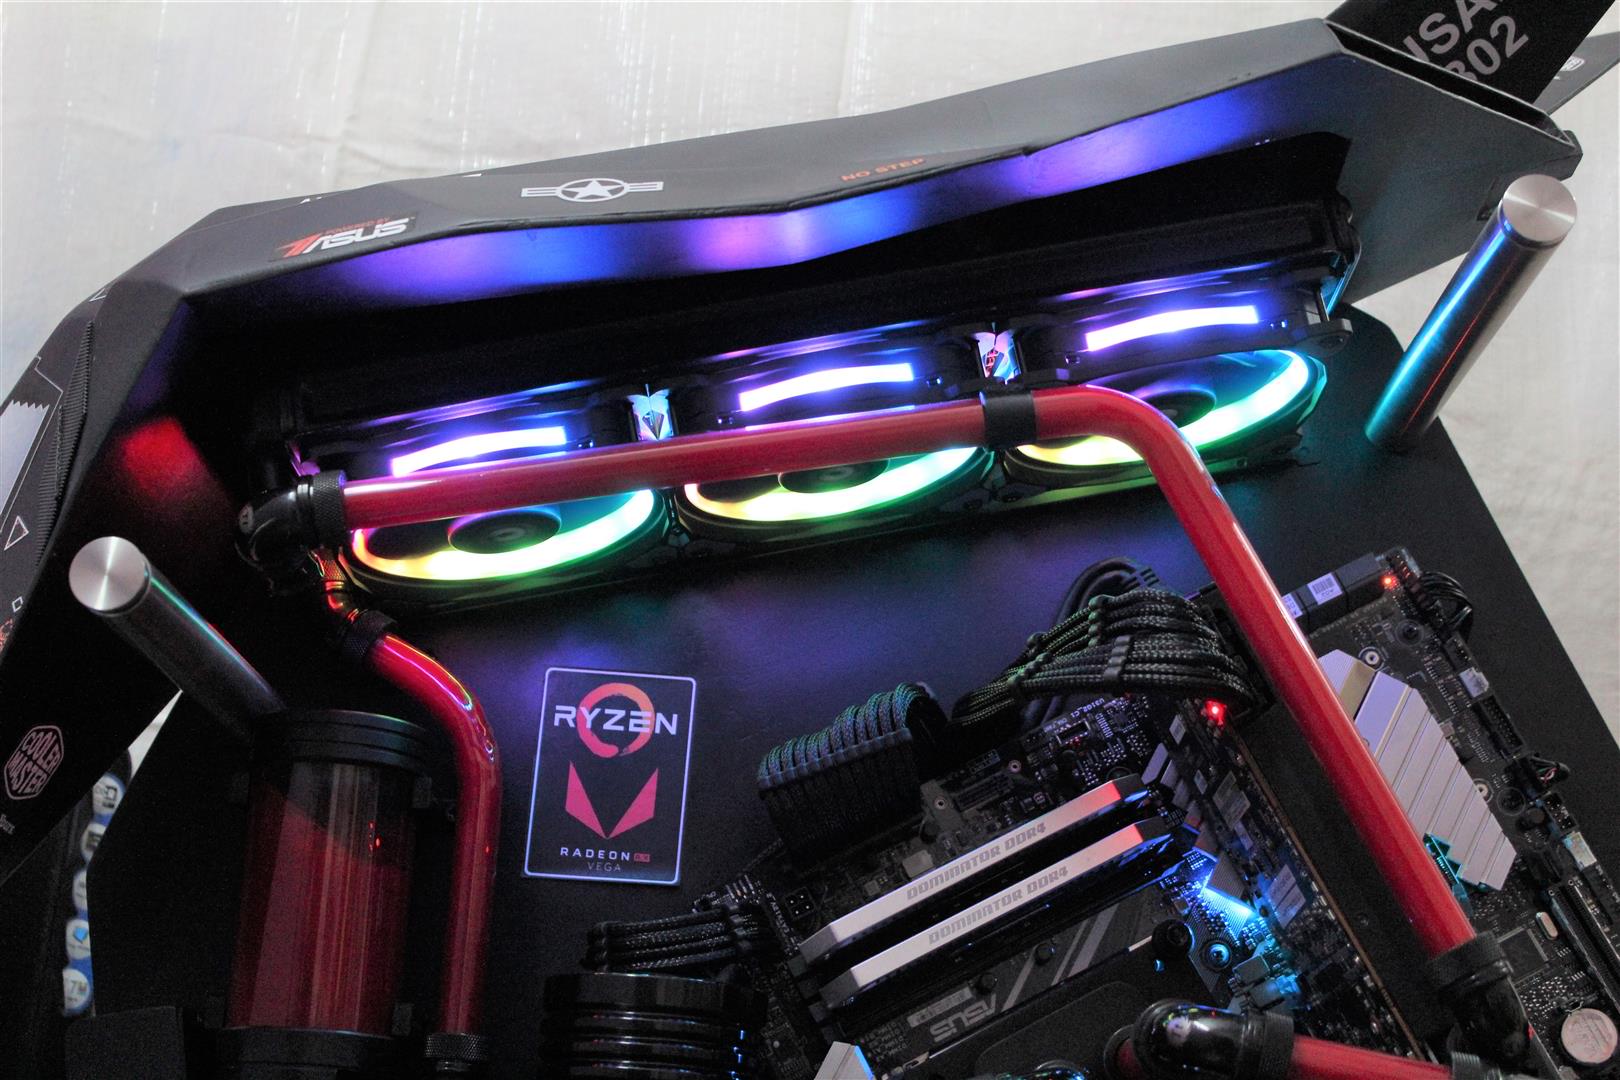
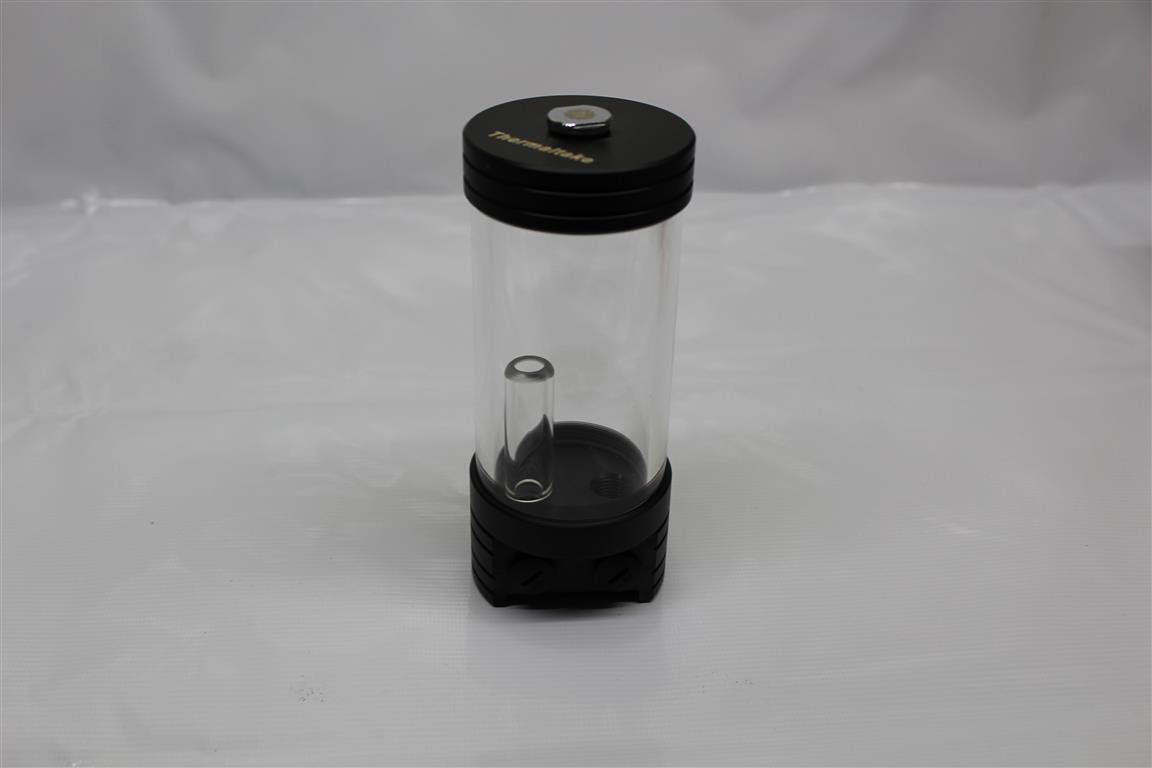
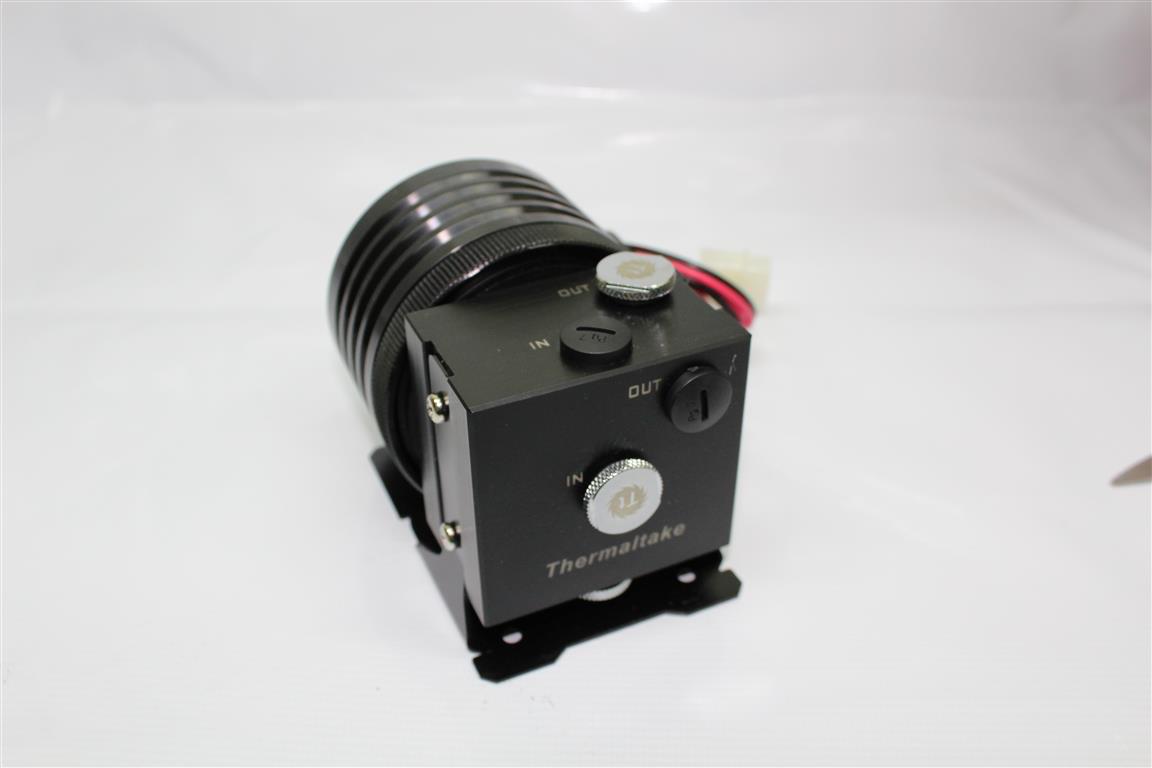
- Thermaltake Liquid Cooling Solution
#CMWS18 #ASUS #AMD #AMDGaming #Corsair #CoolerMaster #Nighthawk_Build

Thanks. -
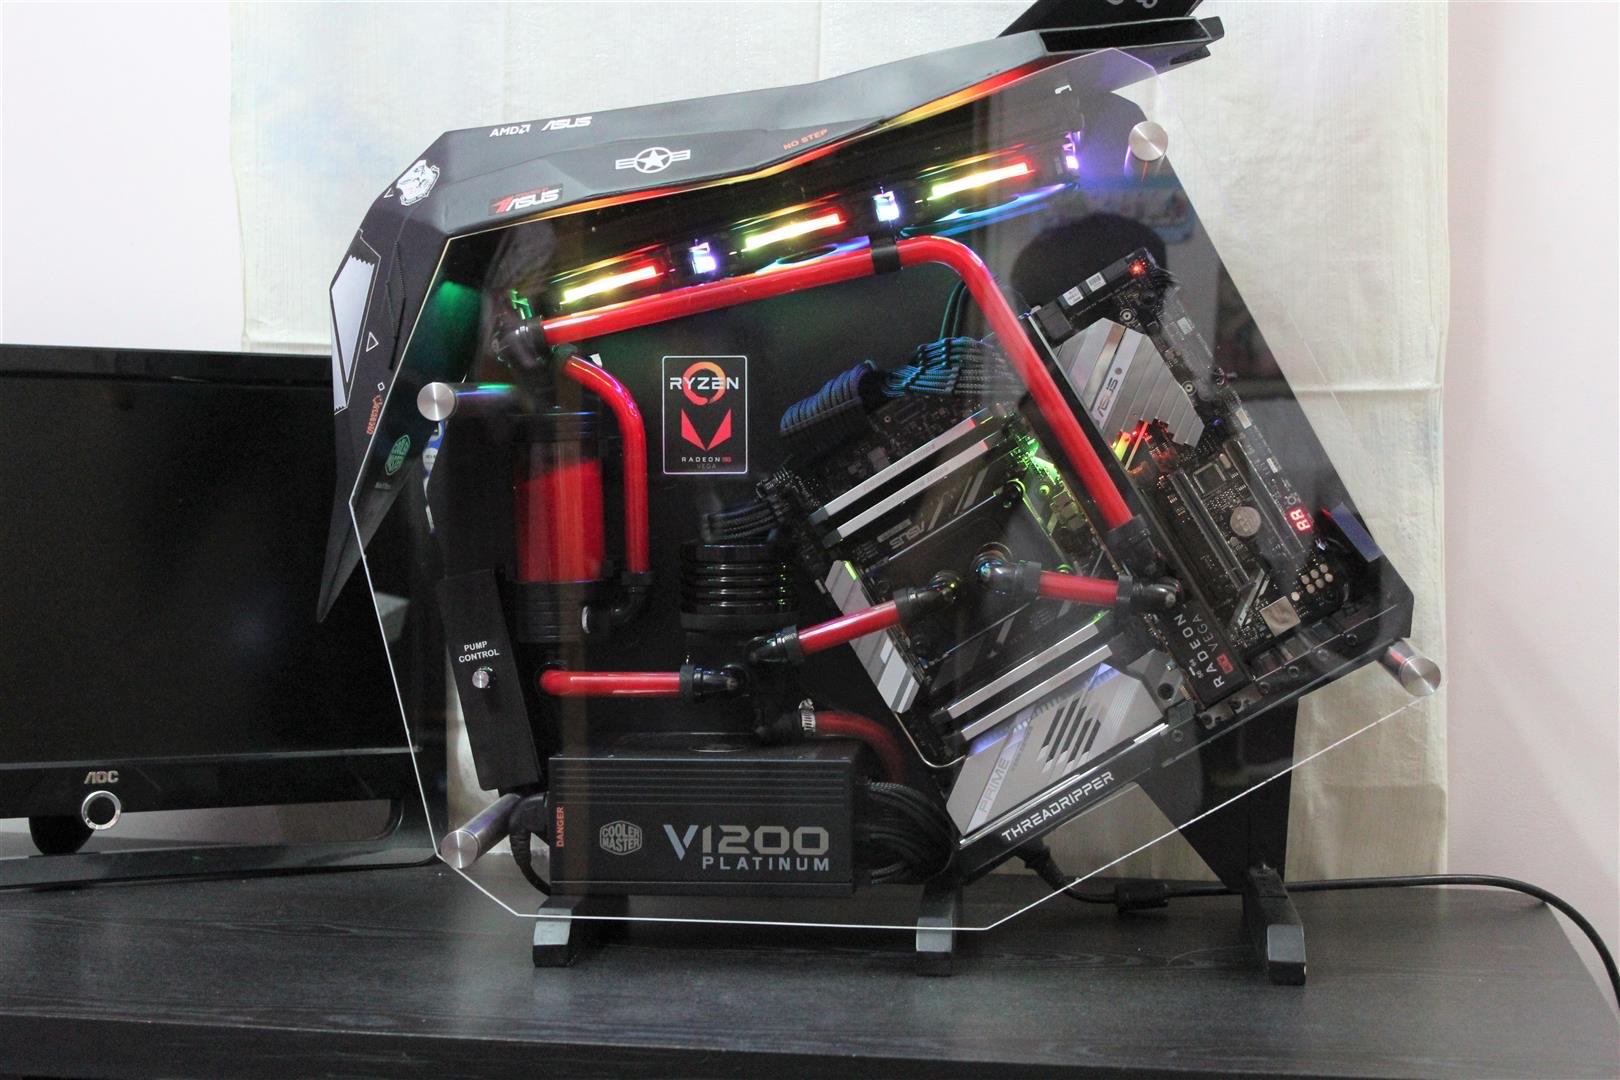
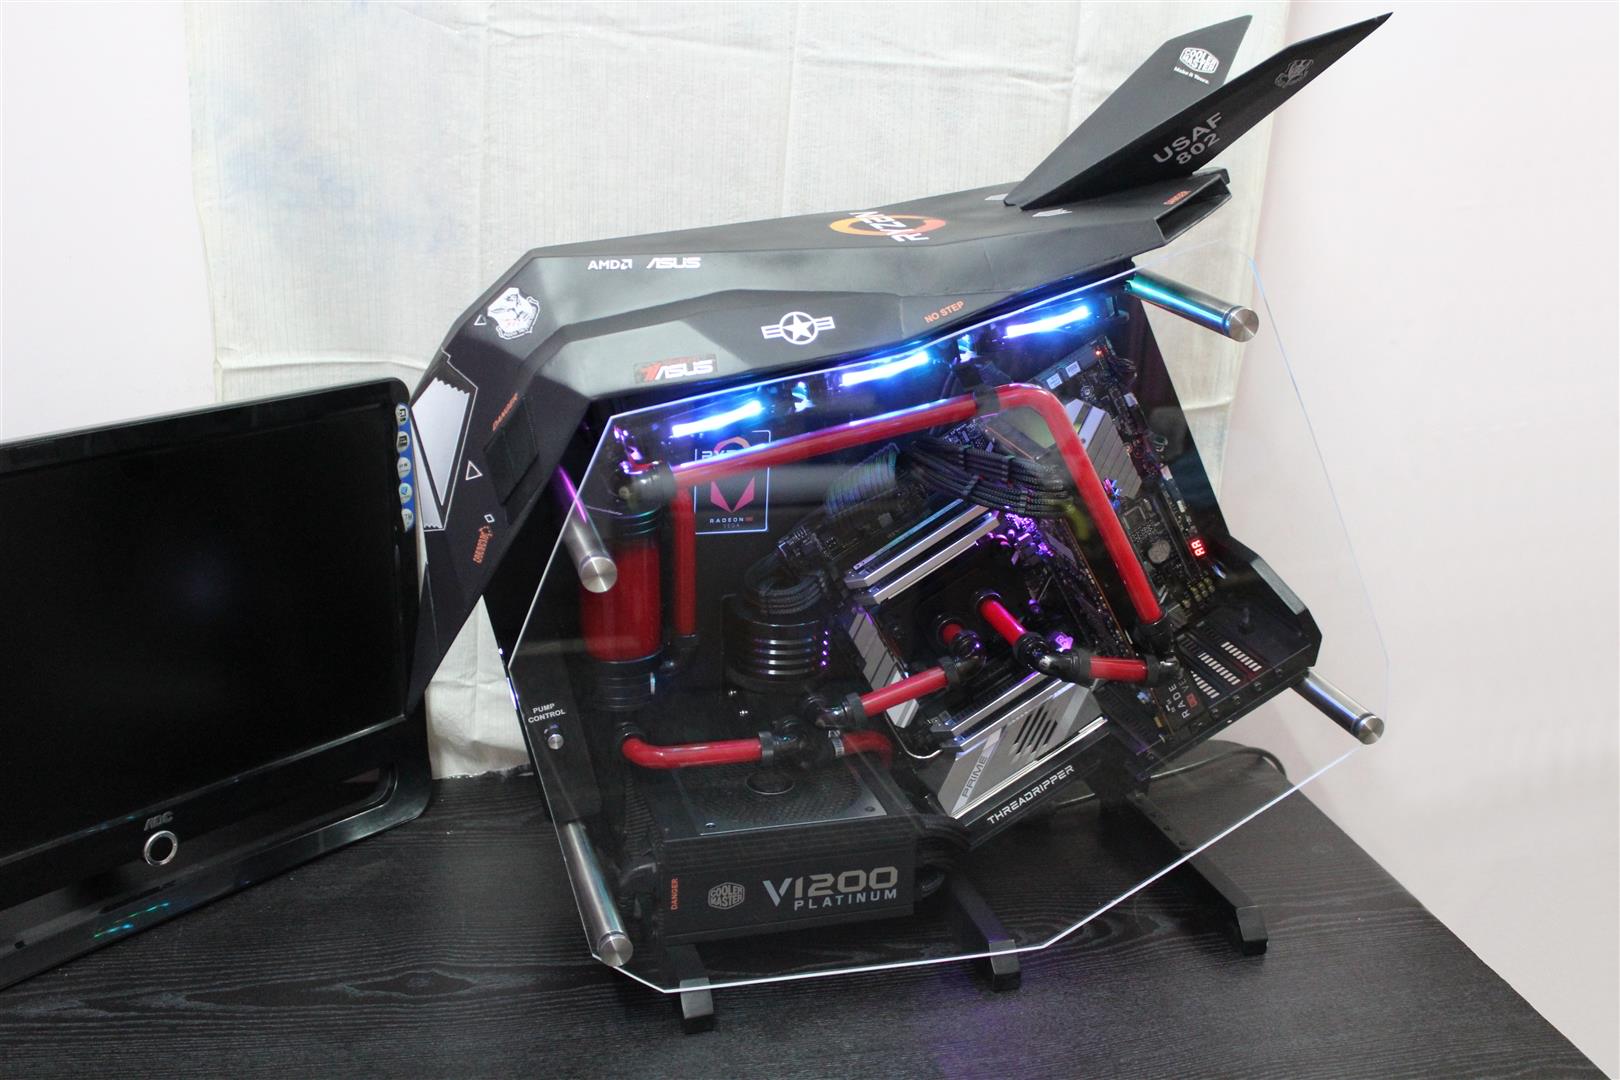
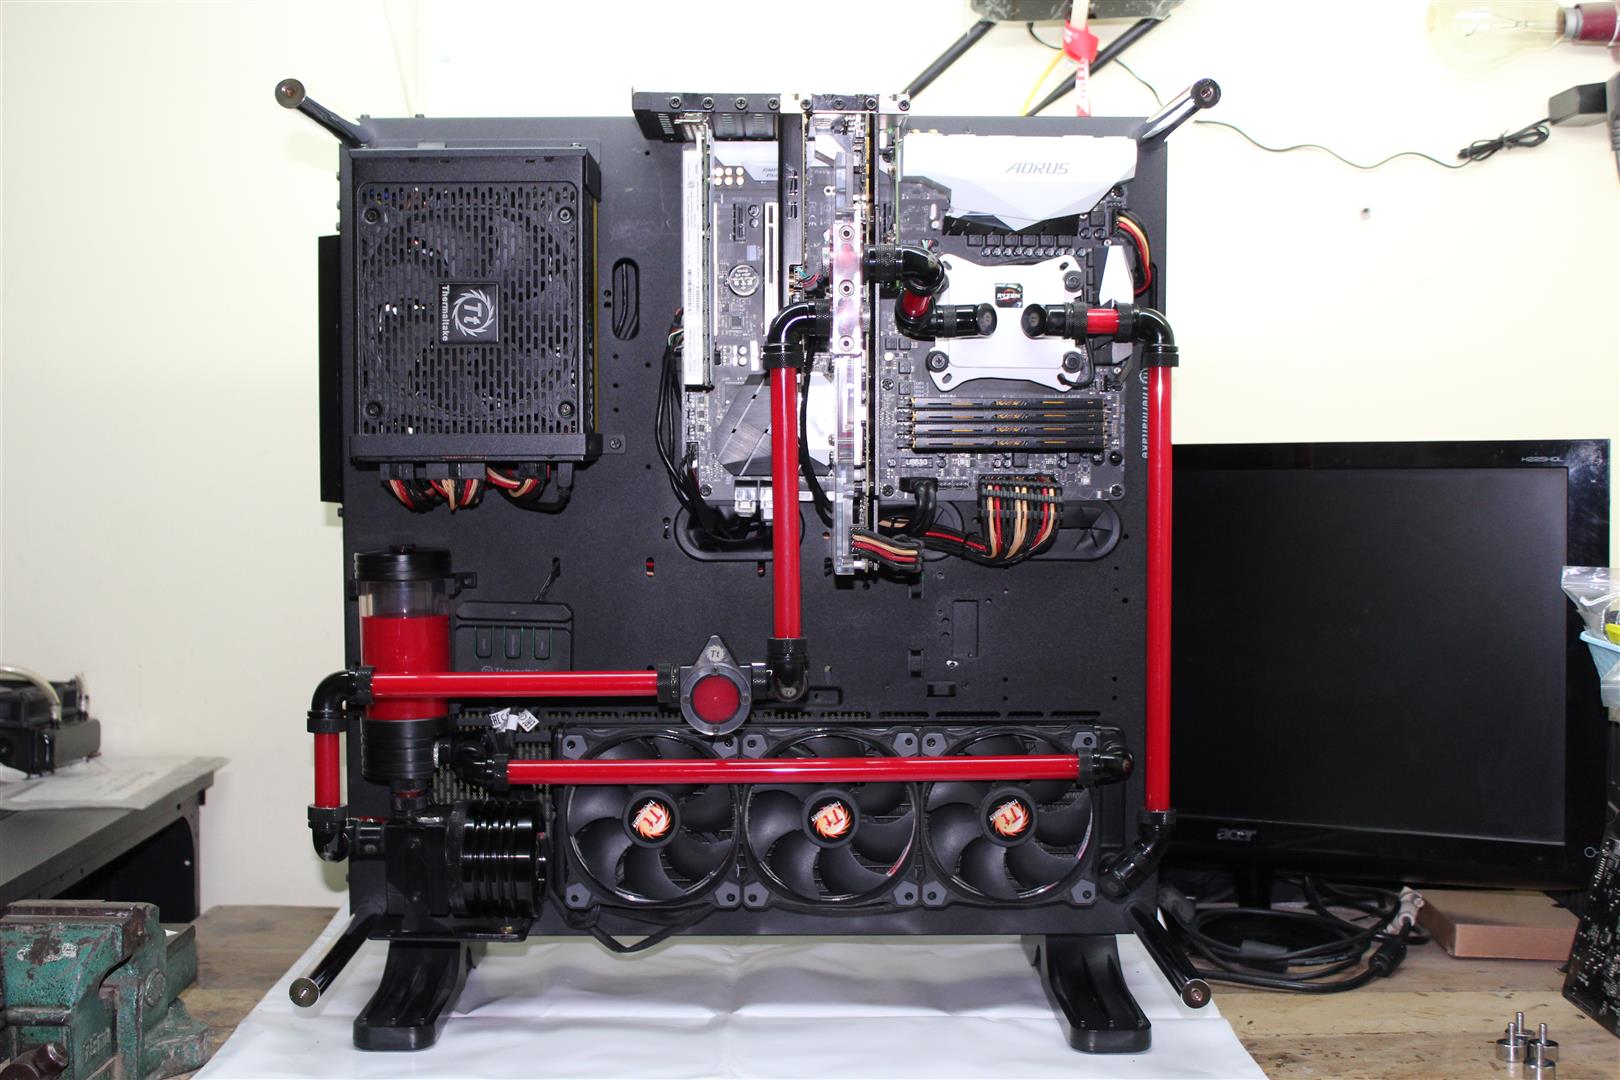
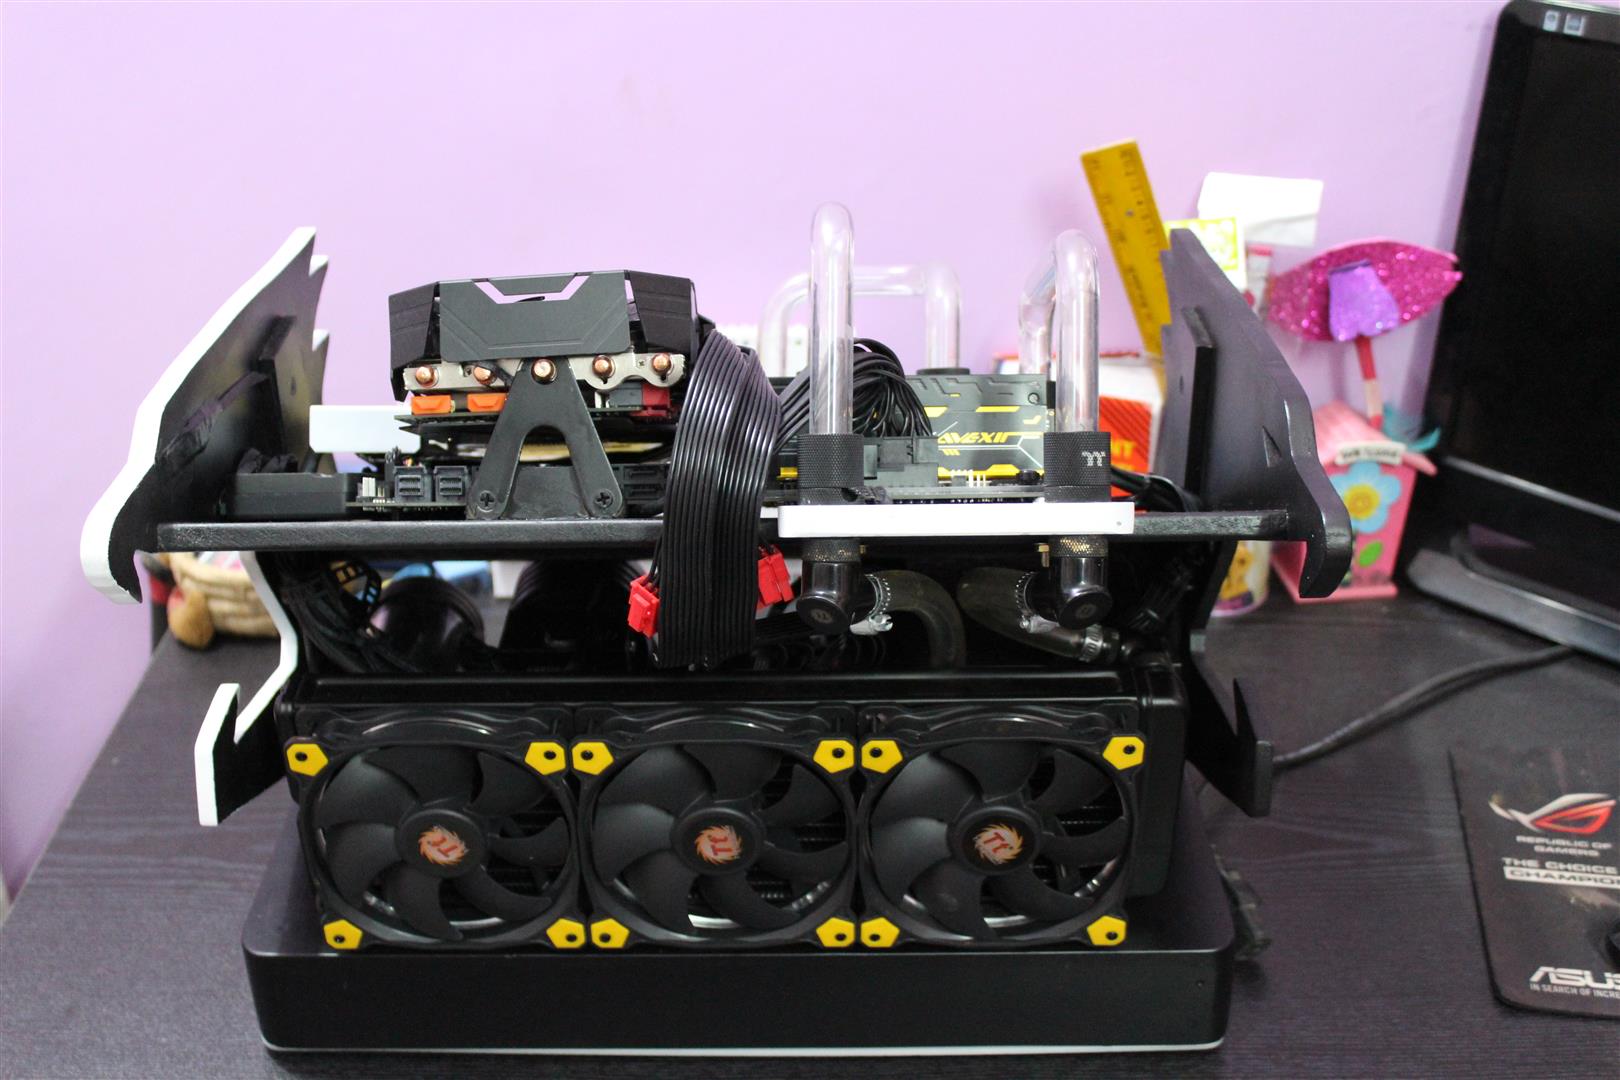
NIGHTHAWK, a case build with a theme of the famous Stealth Fighter plane Lockheed F-117 Nighthawk.
AMD Threadripper 1900x
Asus X399 Prime-A
AMD RX Vega 64
Corsair Dominator 4 x 4GB DDR4 @ 3000MHz
Cooler Master V1200
Samsung 960 EVO 250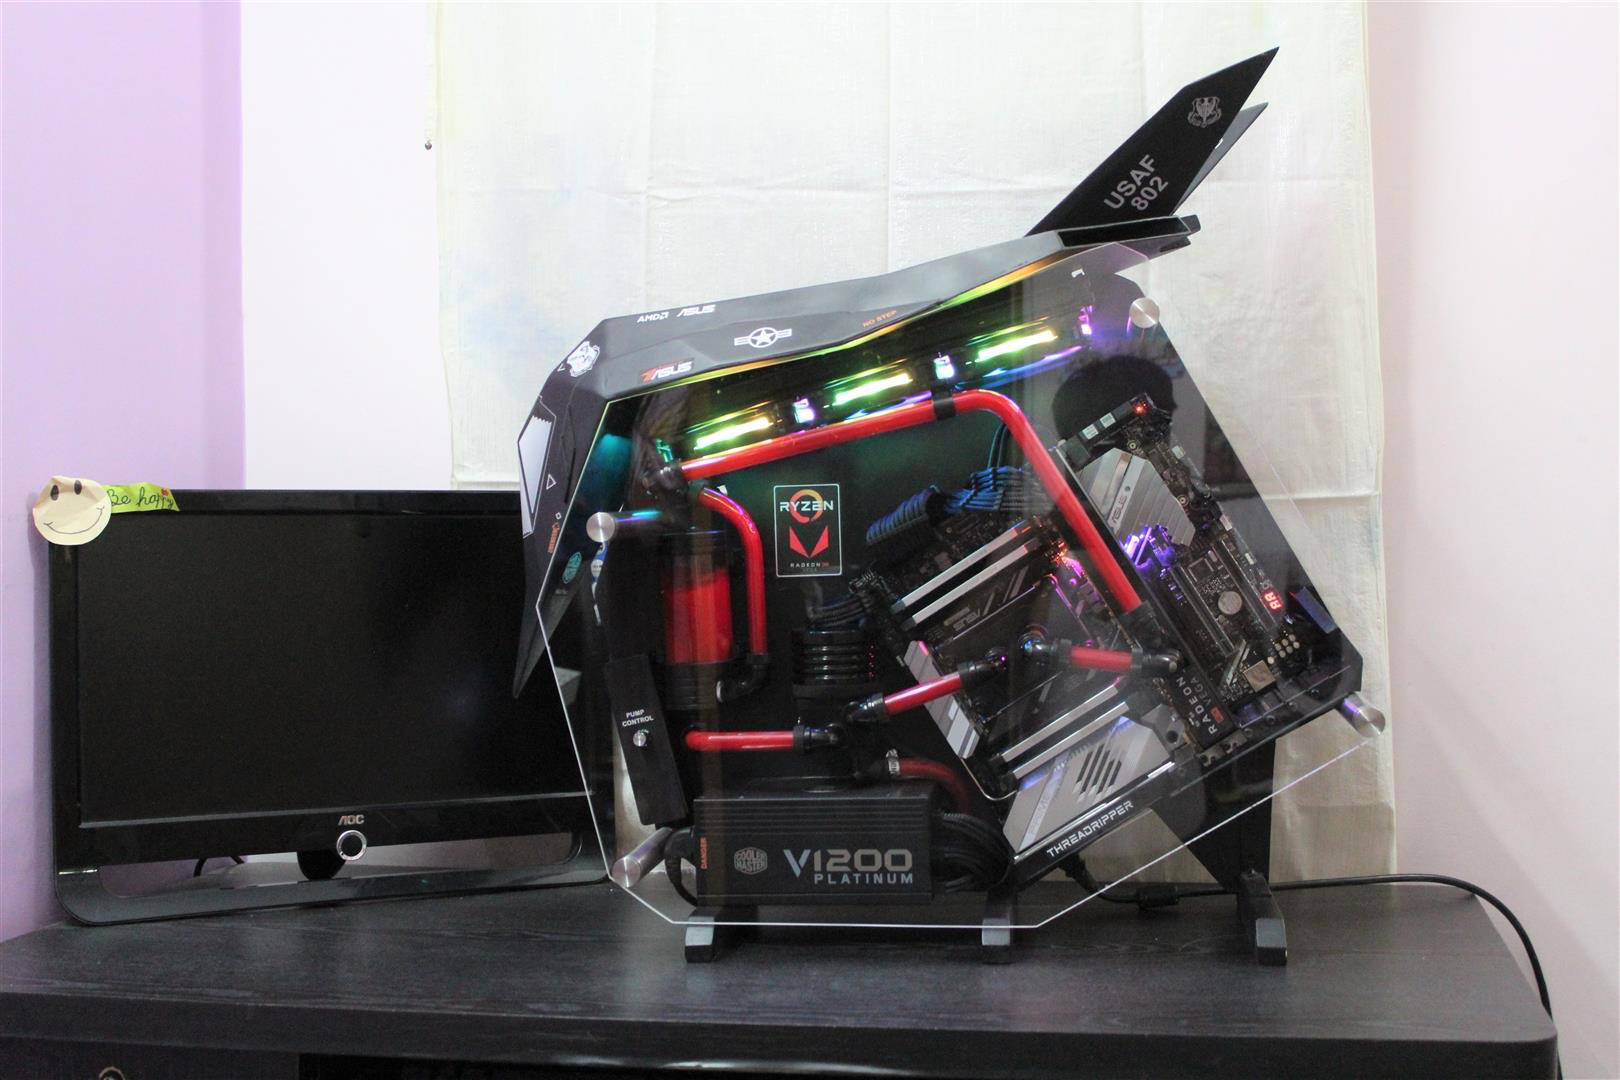


-
Nice build ....
-
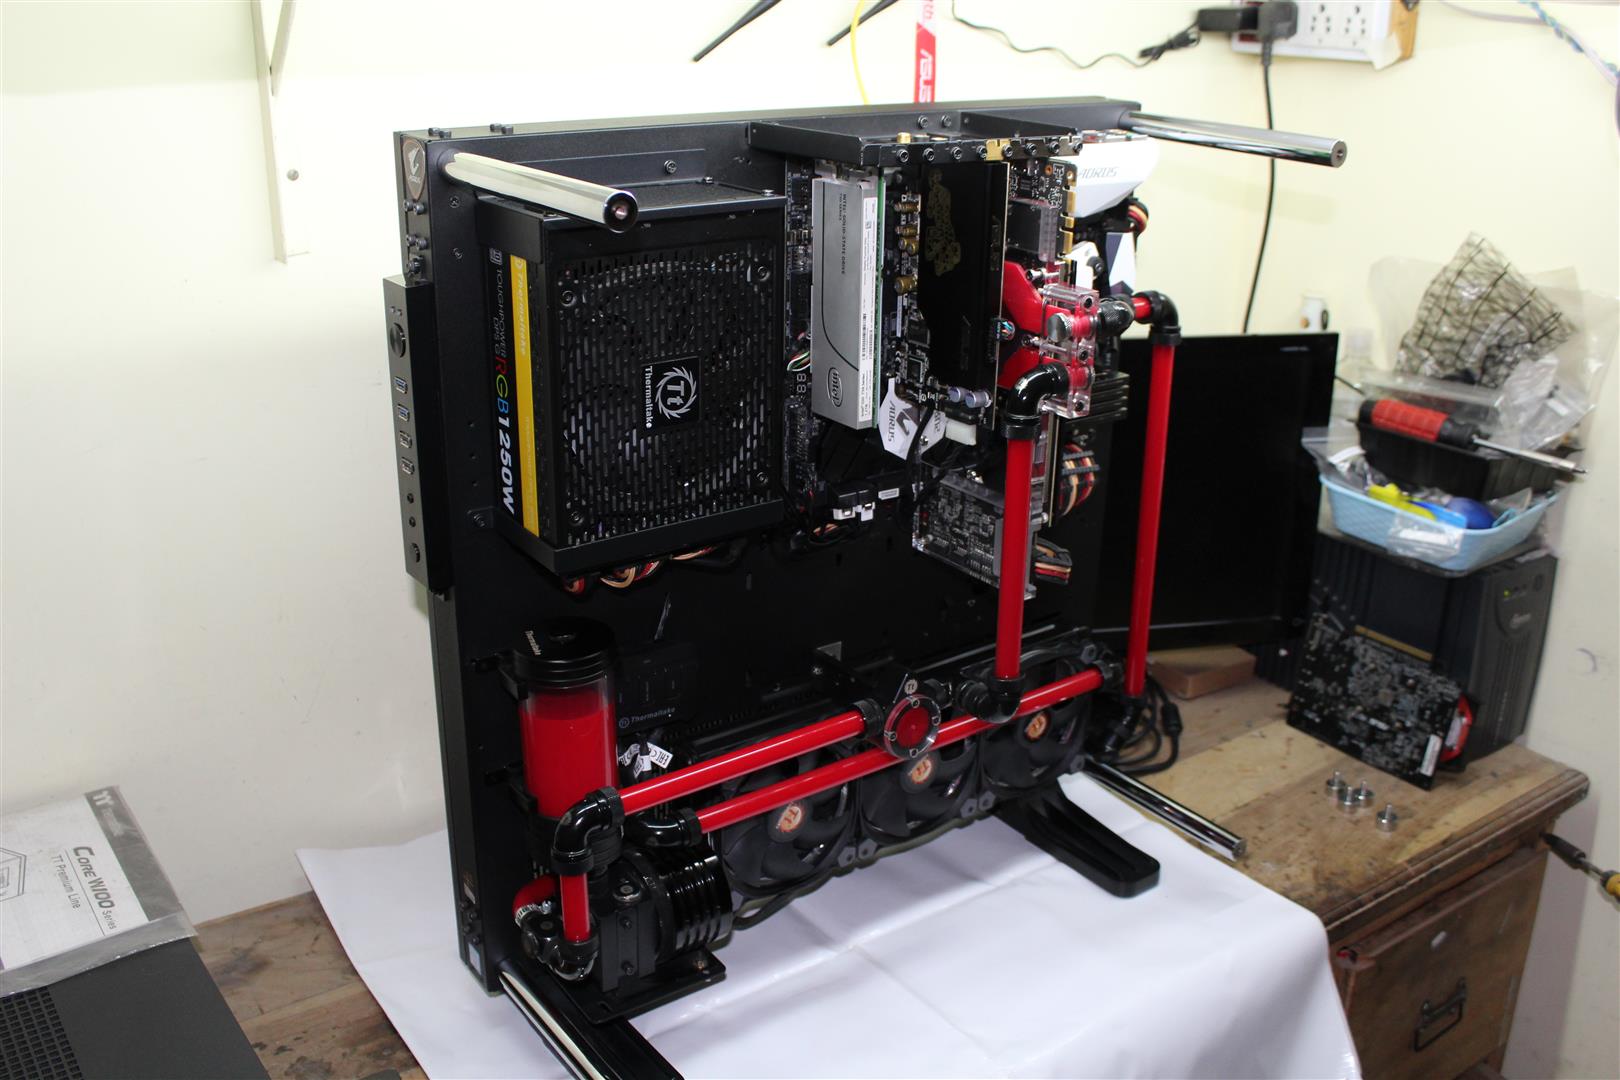
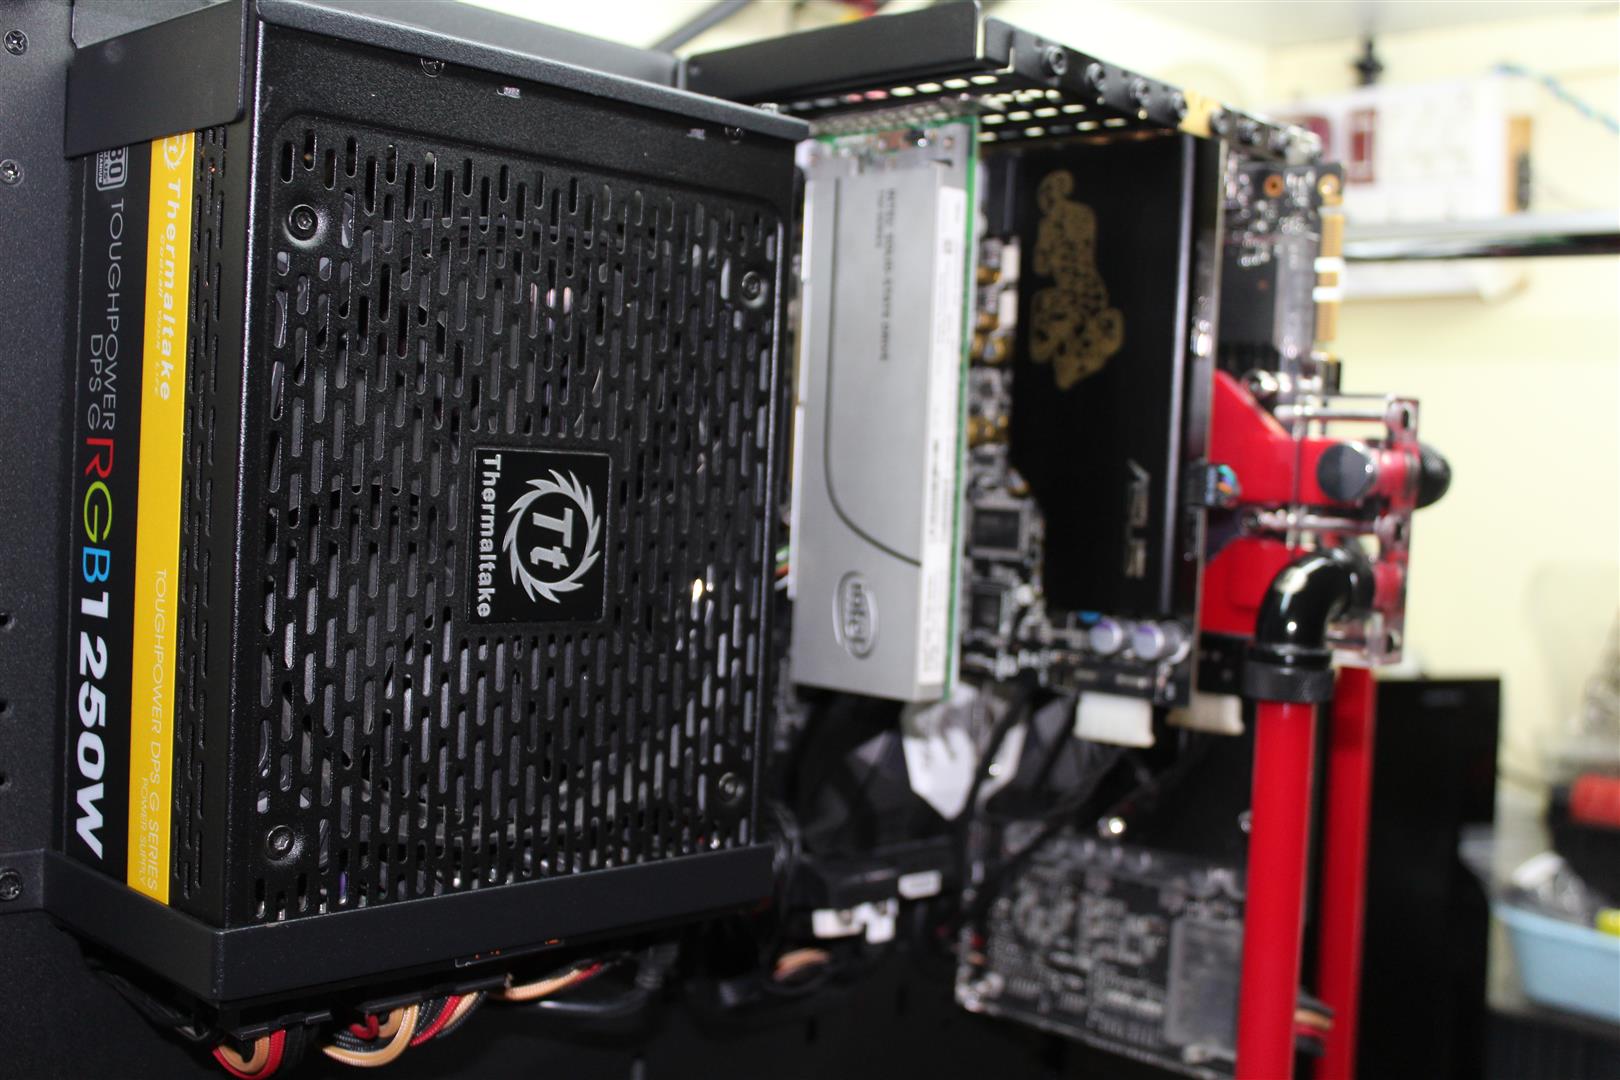
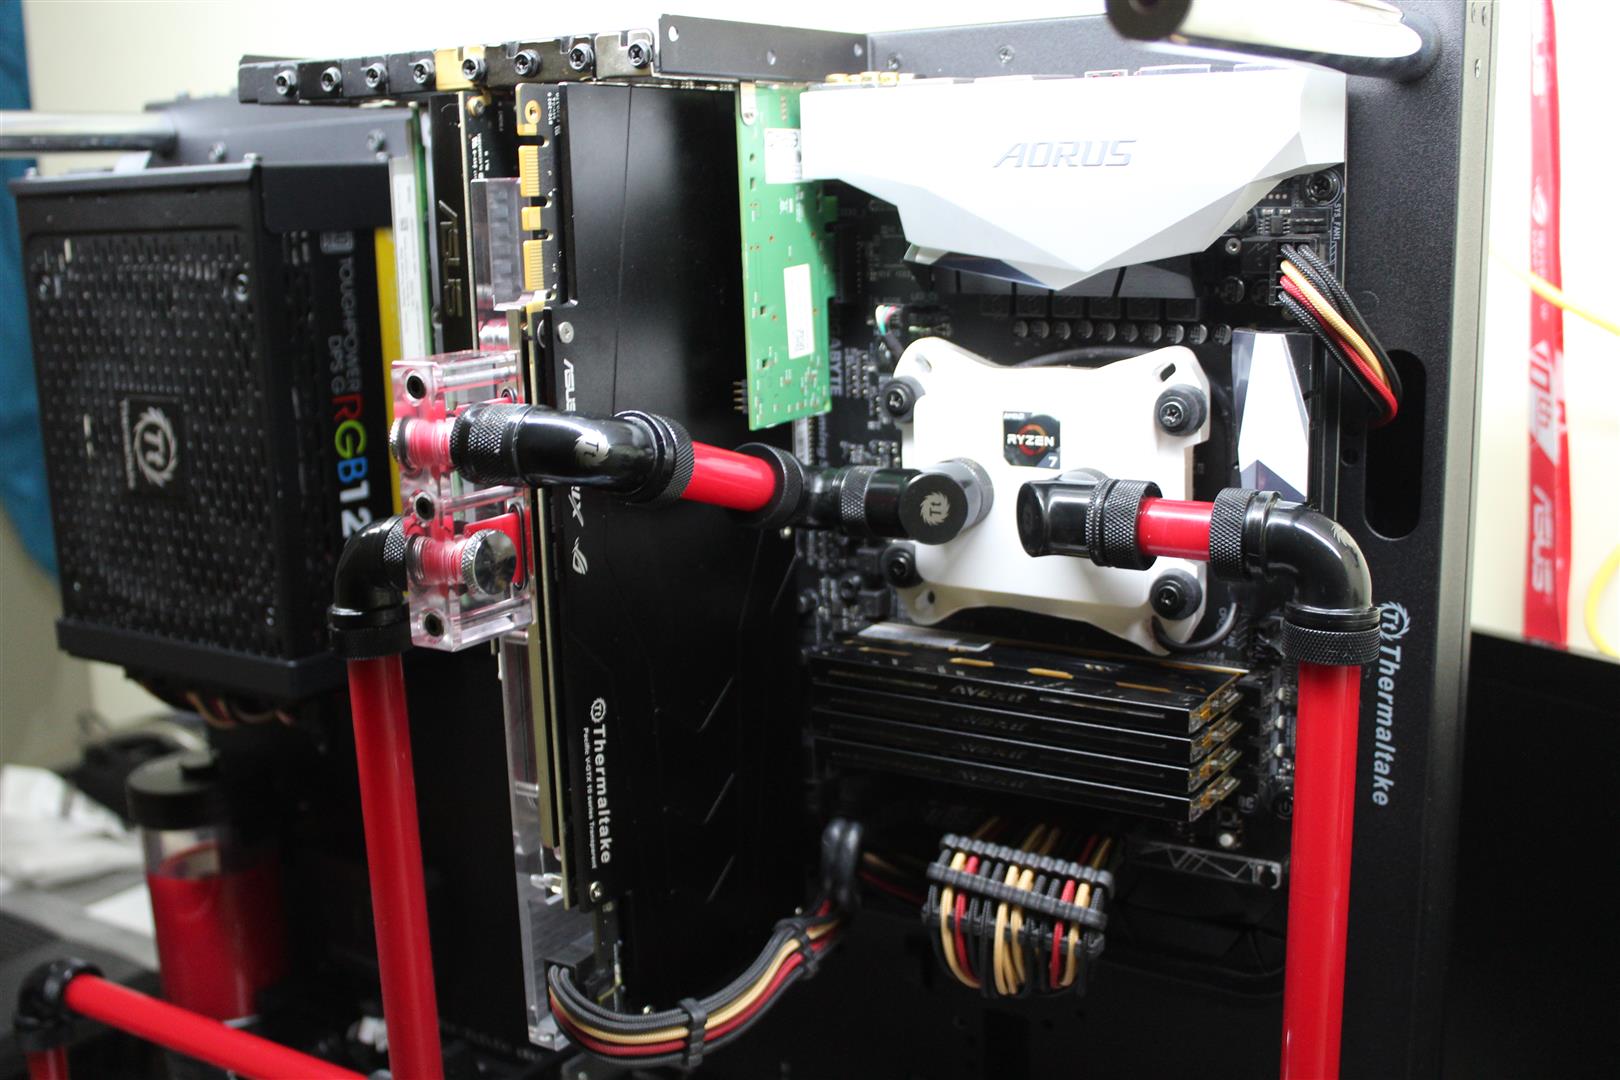
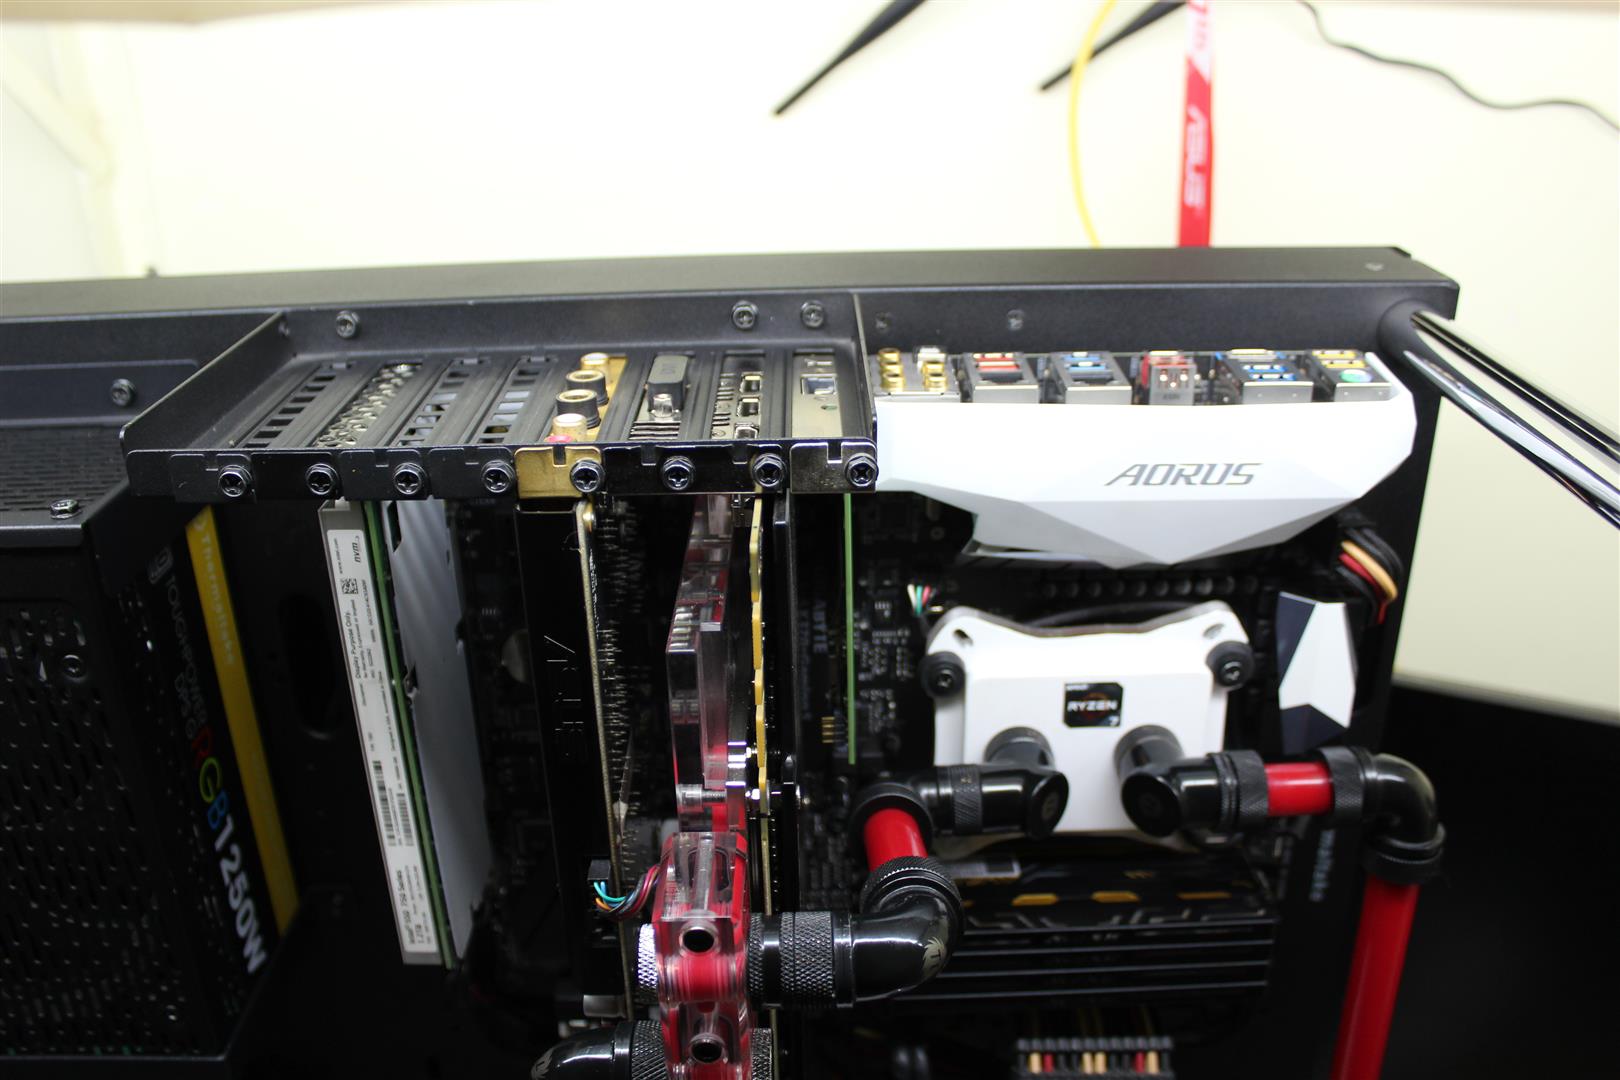
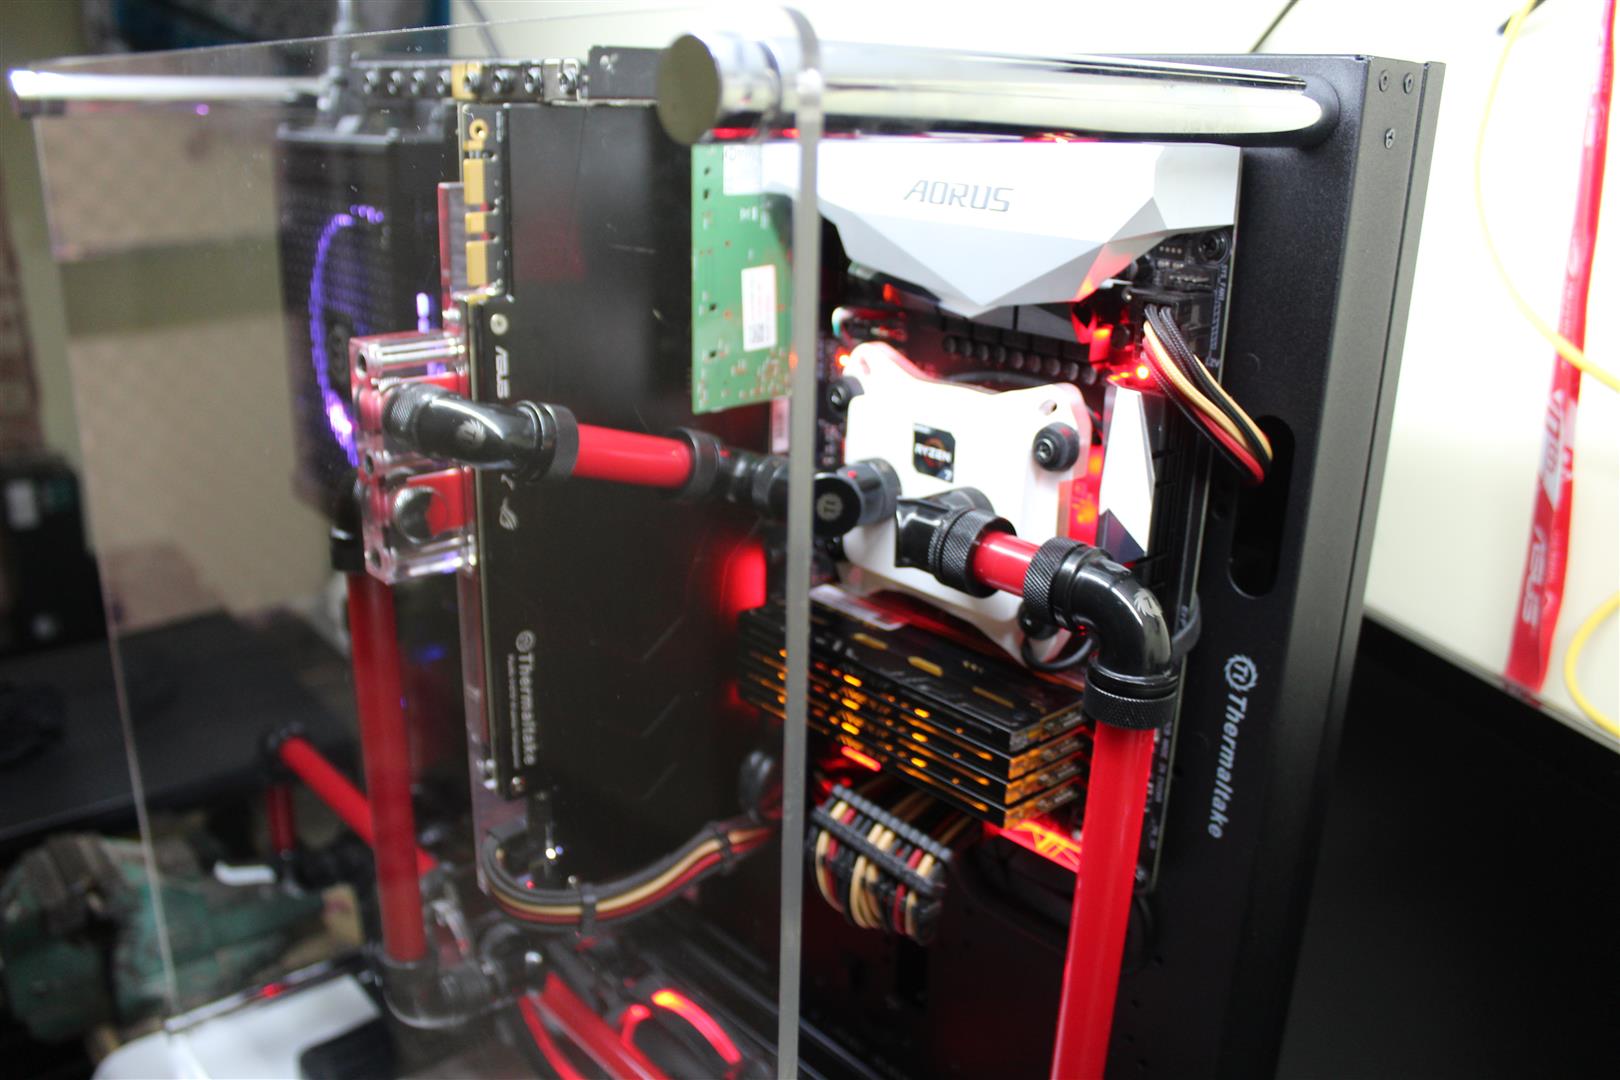
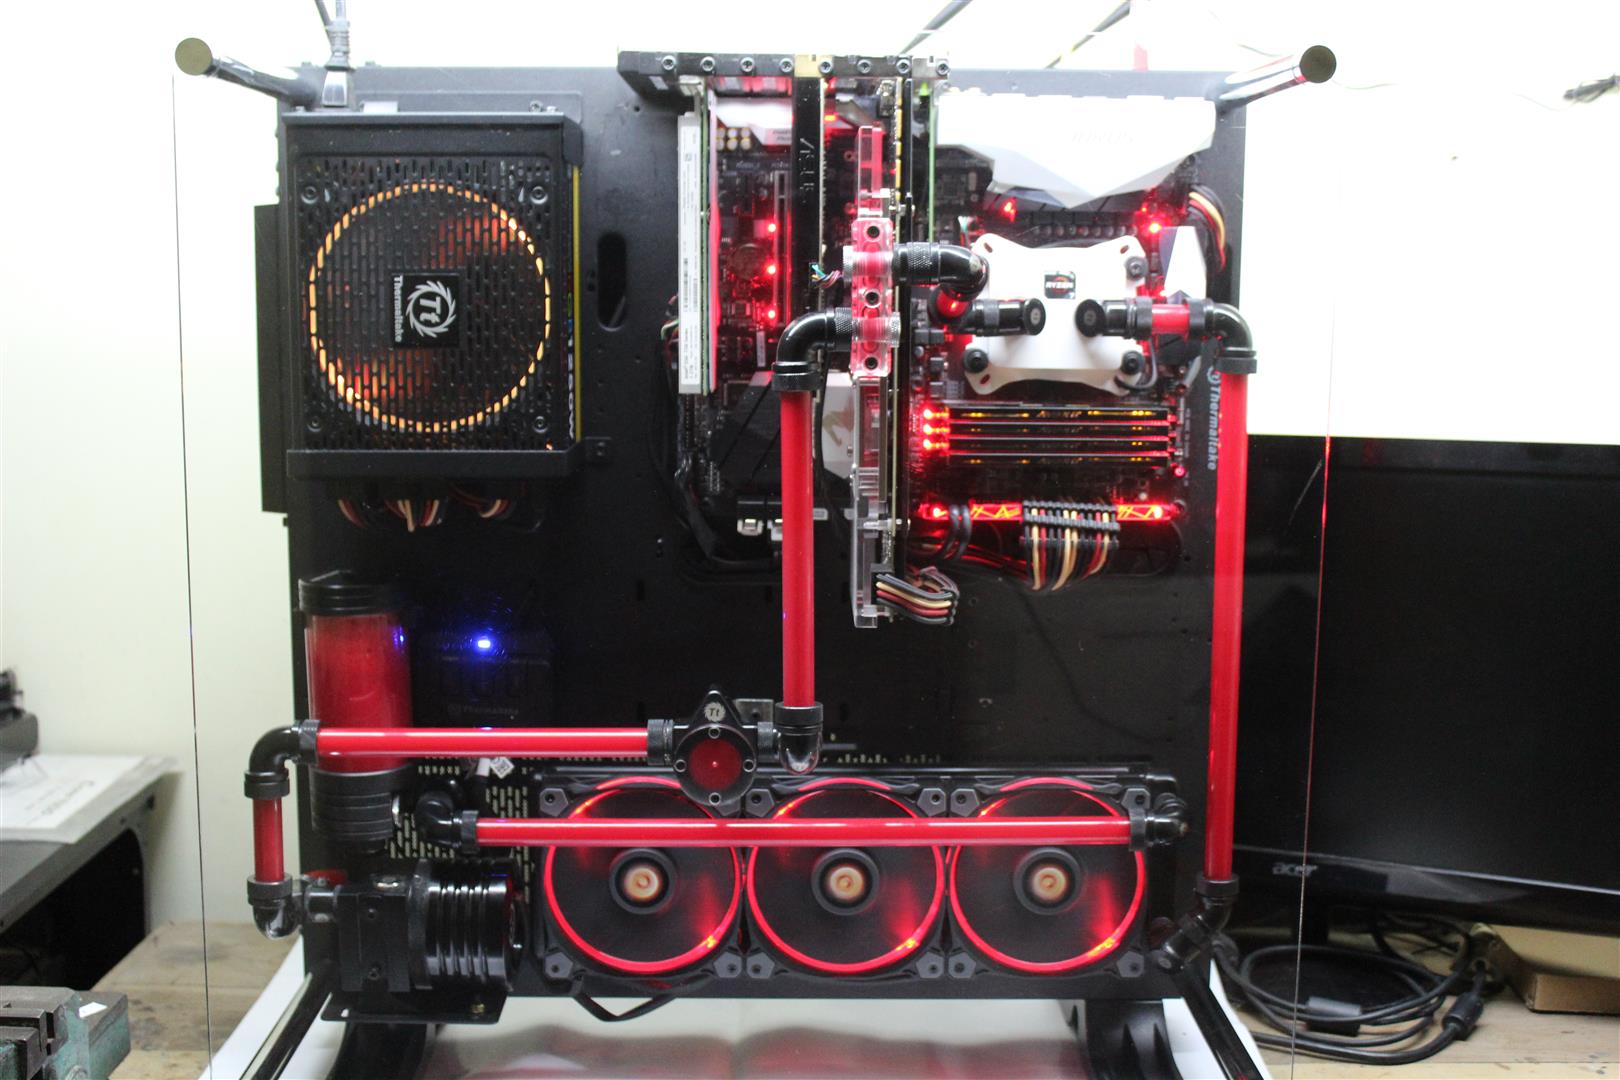
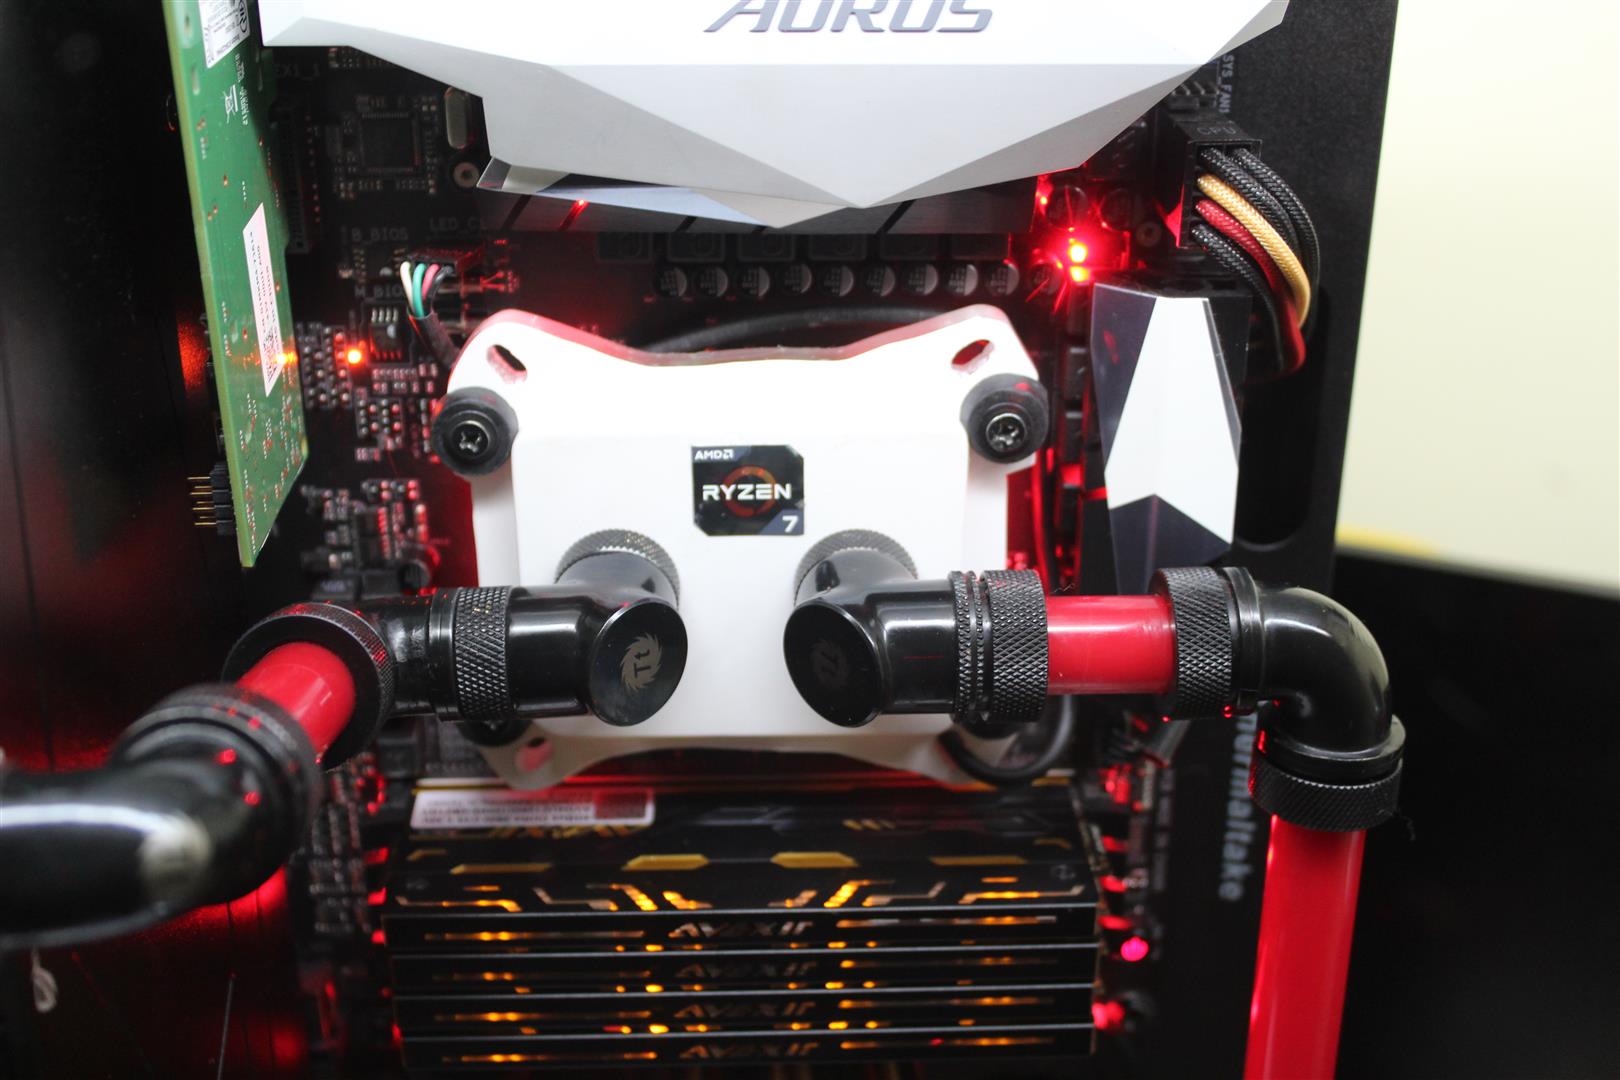
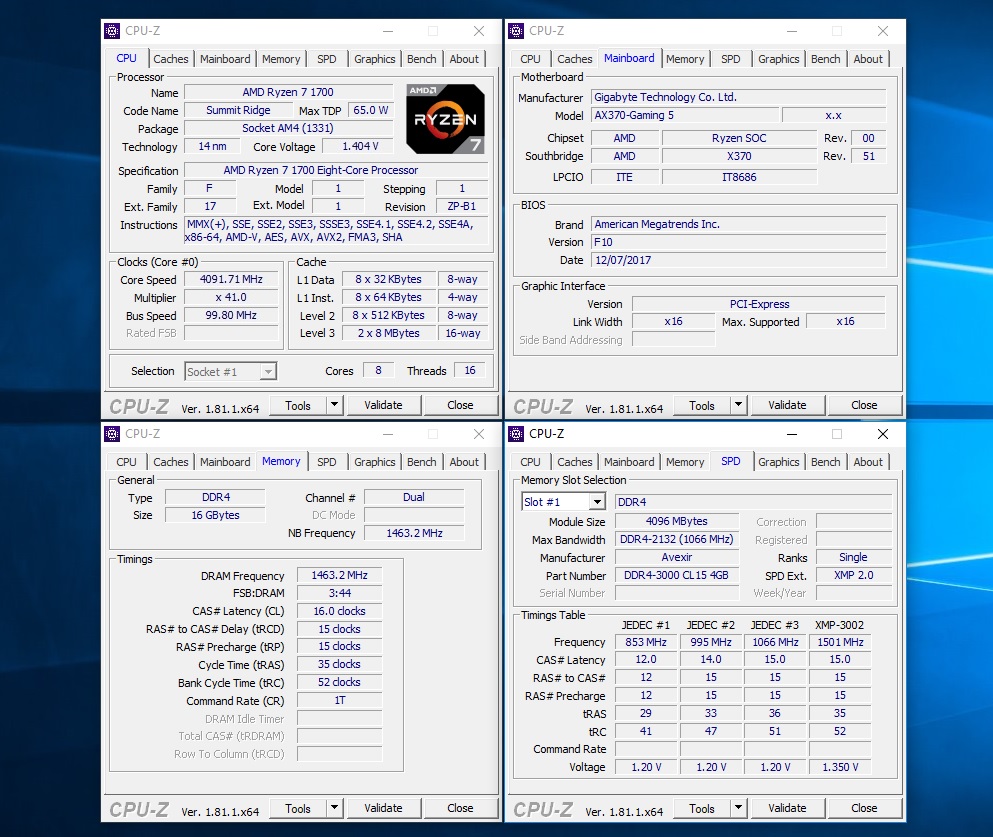
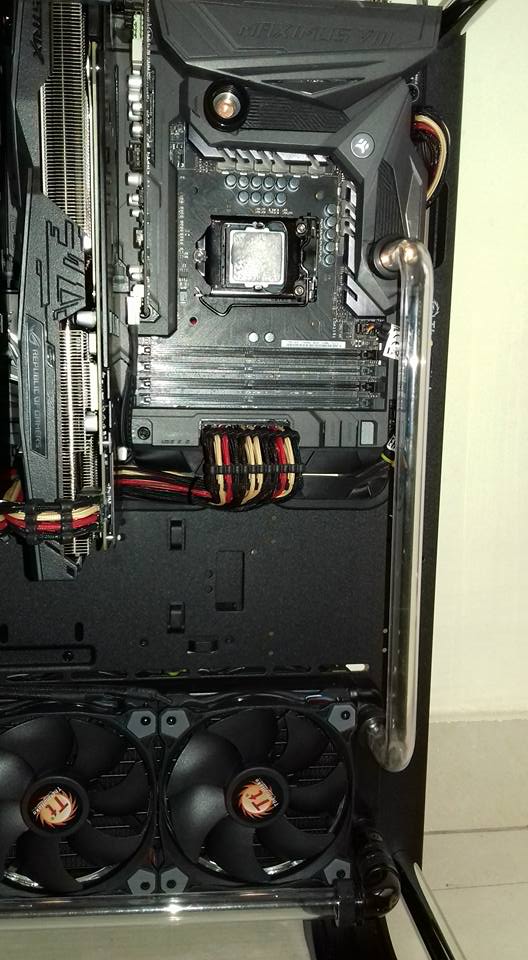
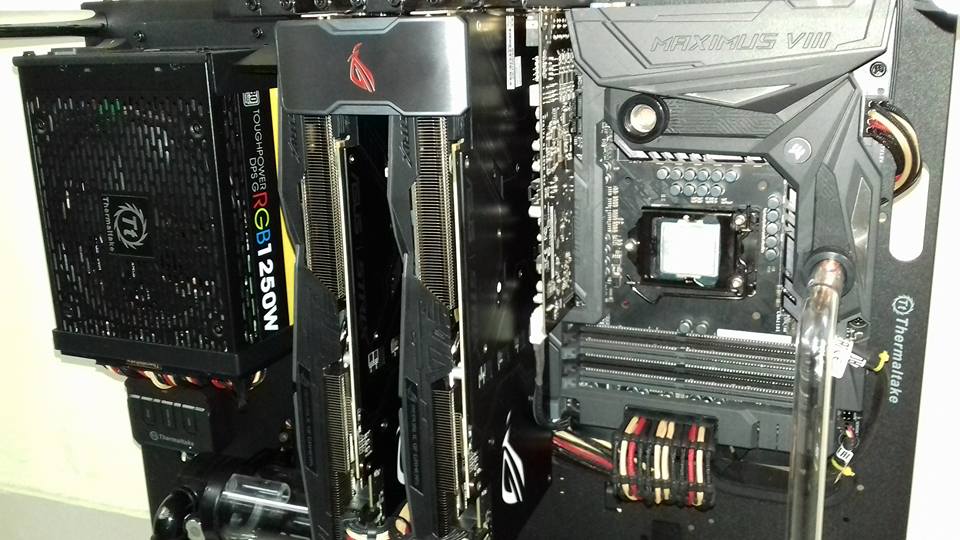
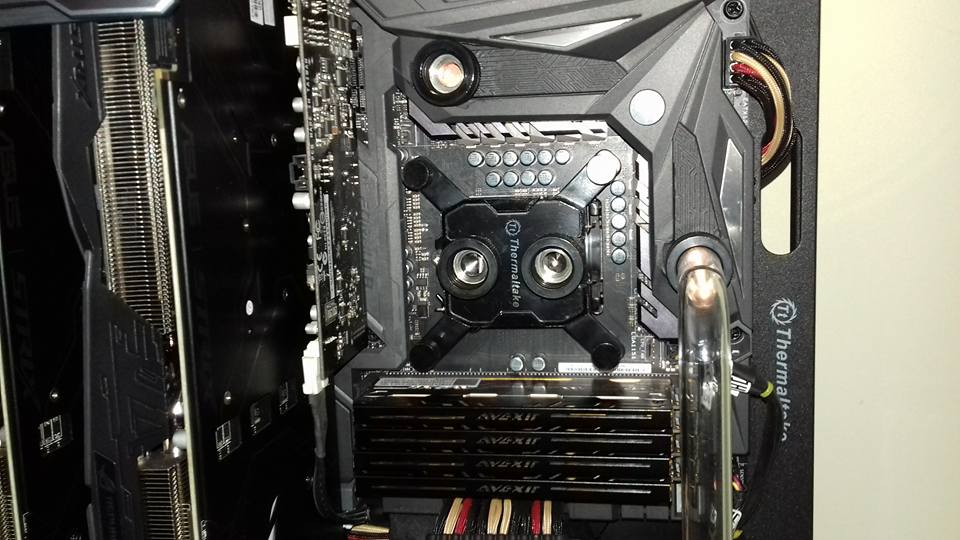
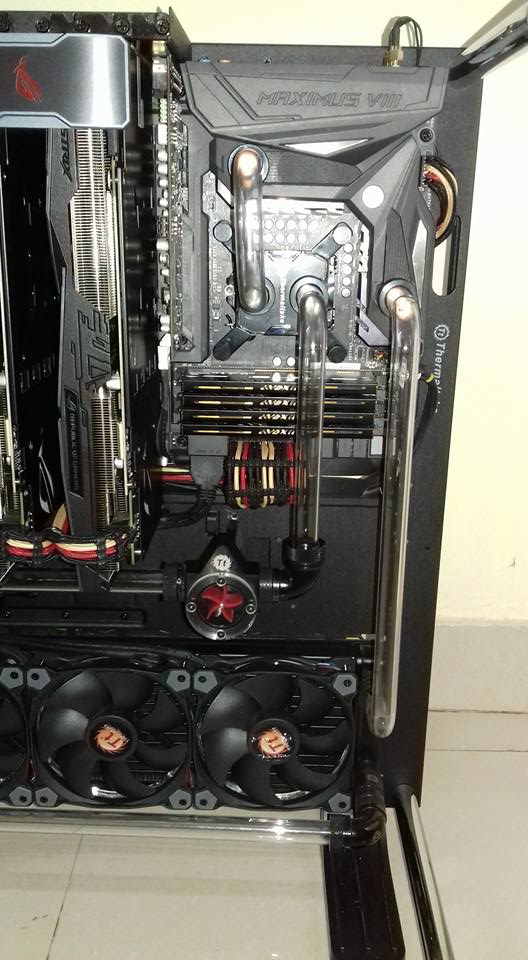
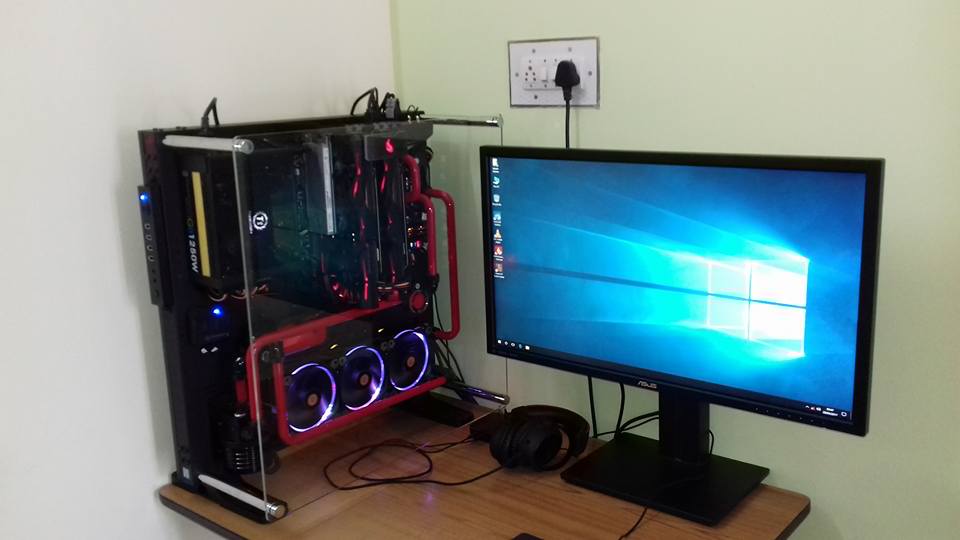
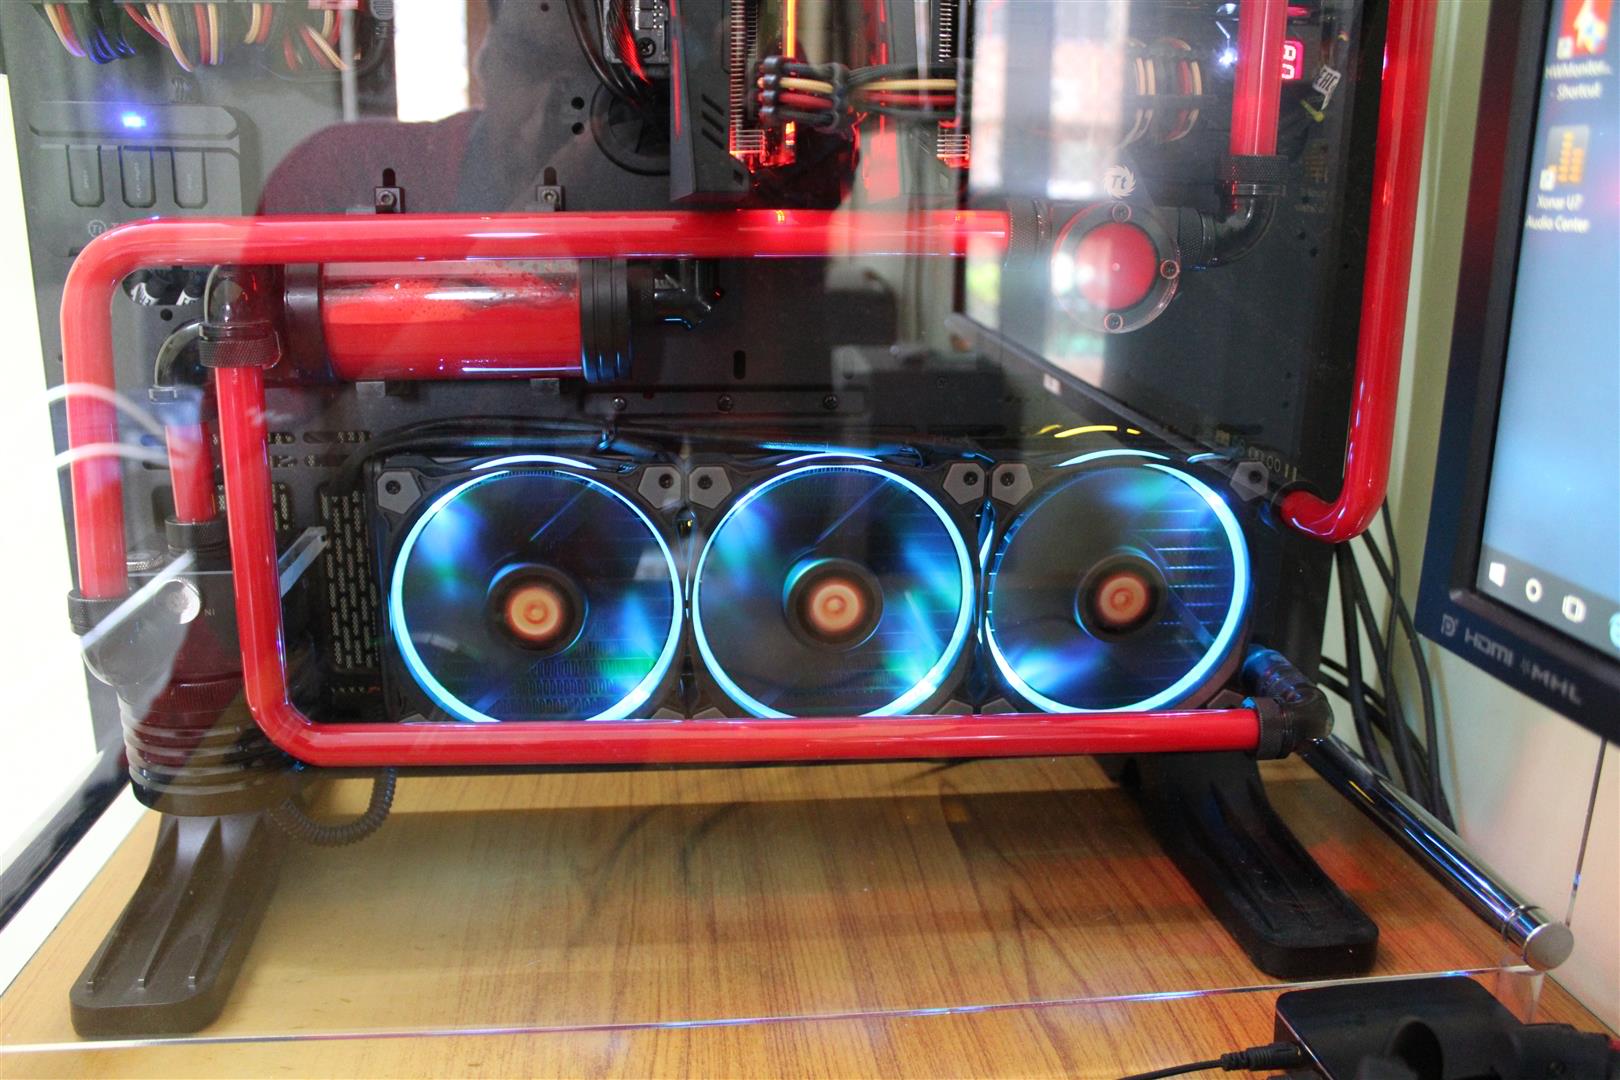
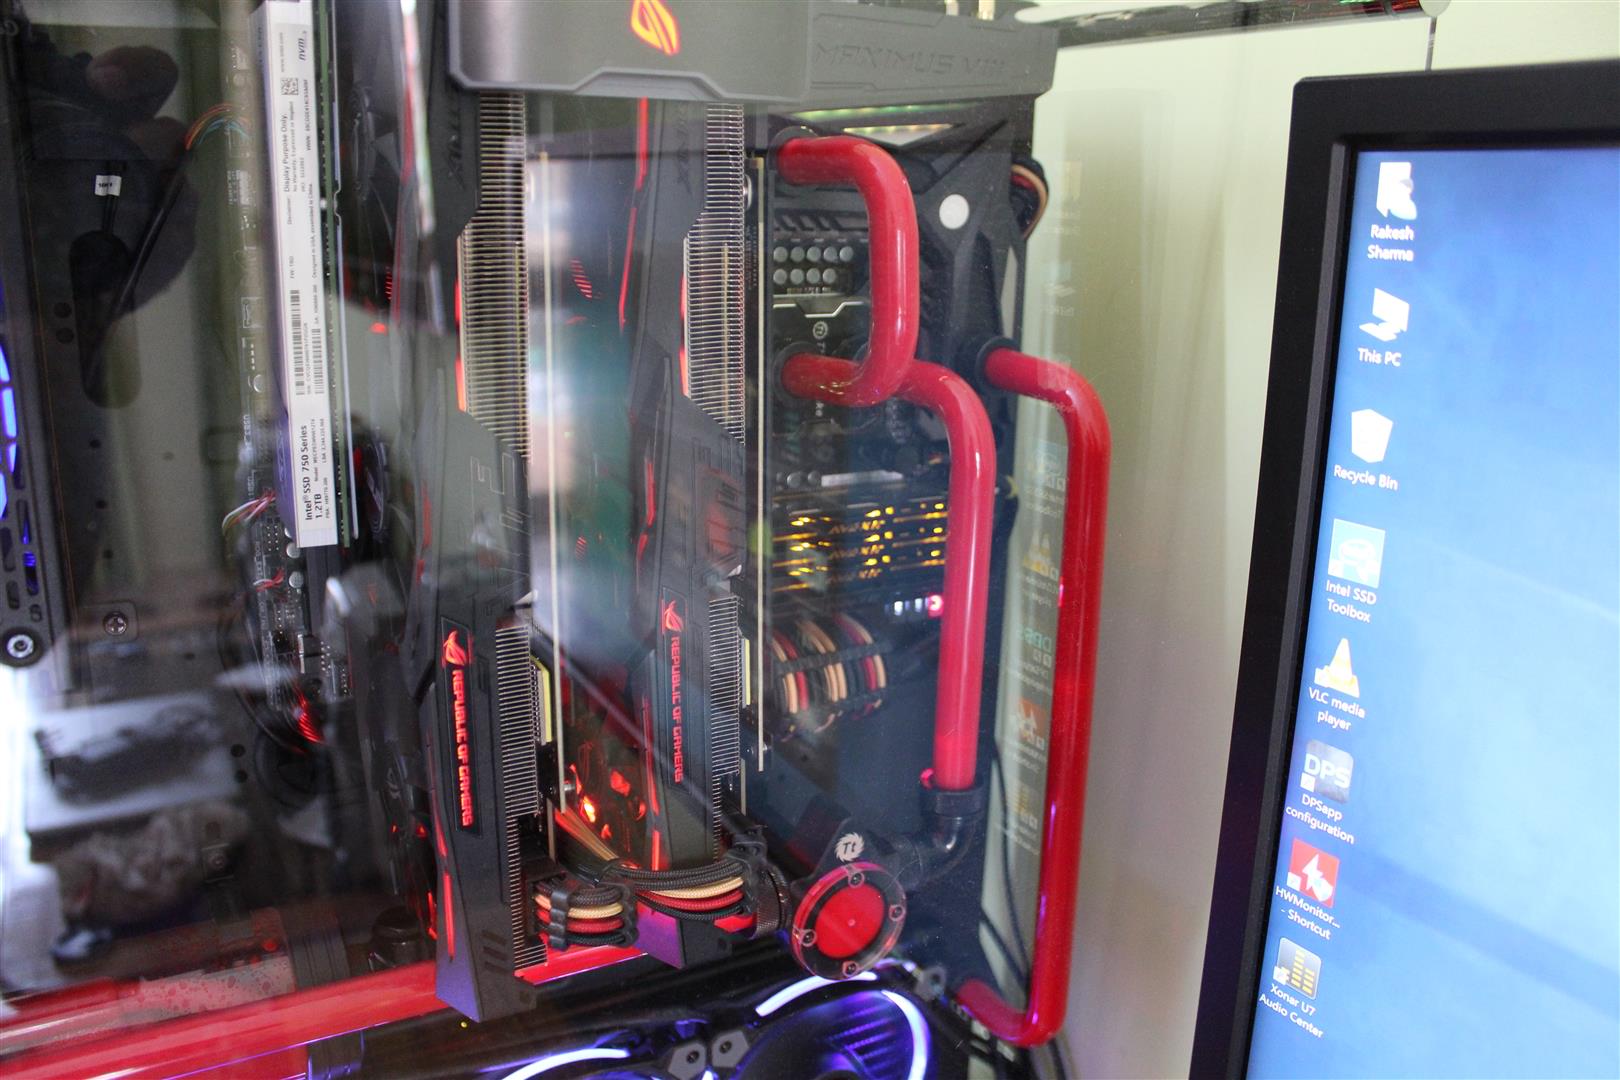
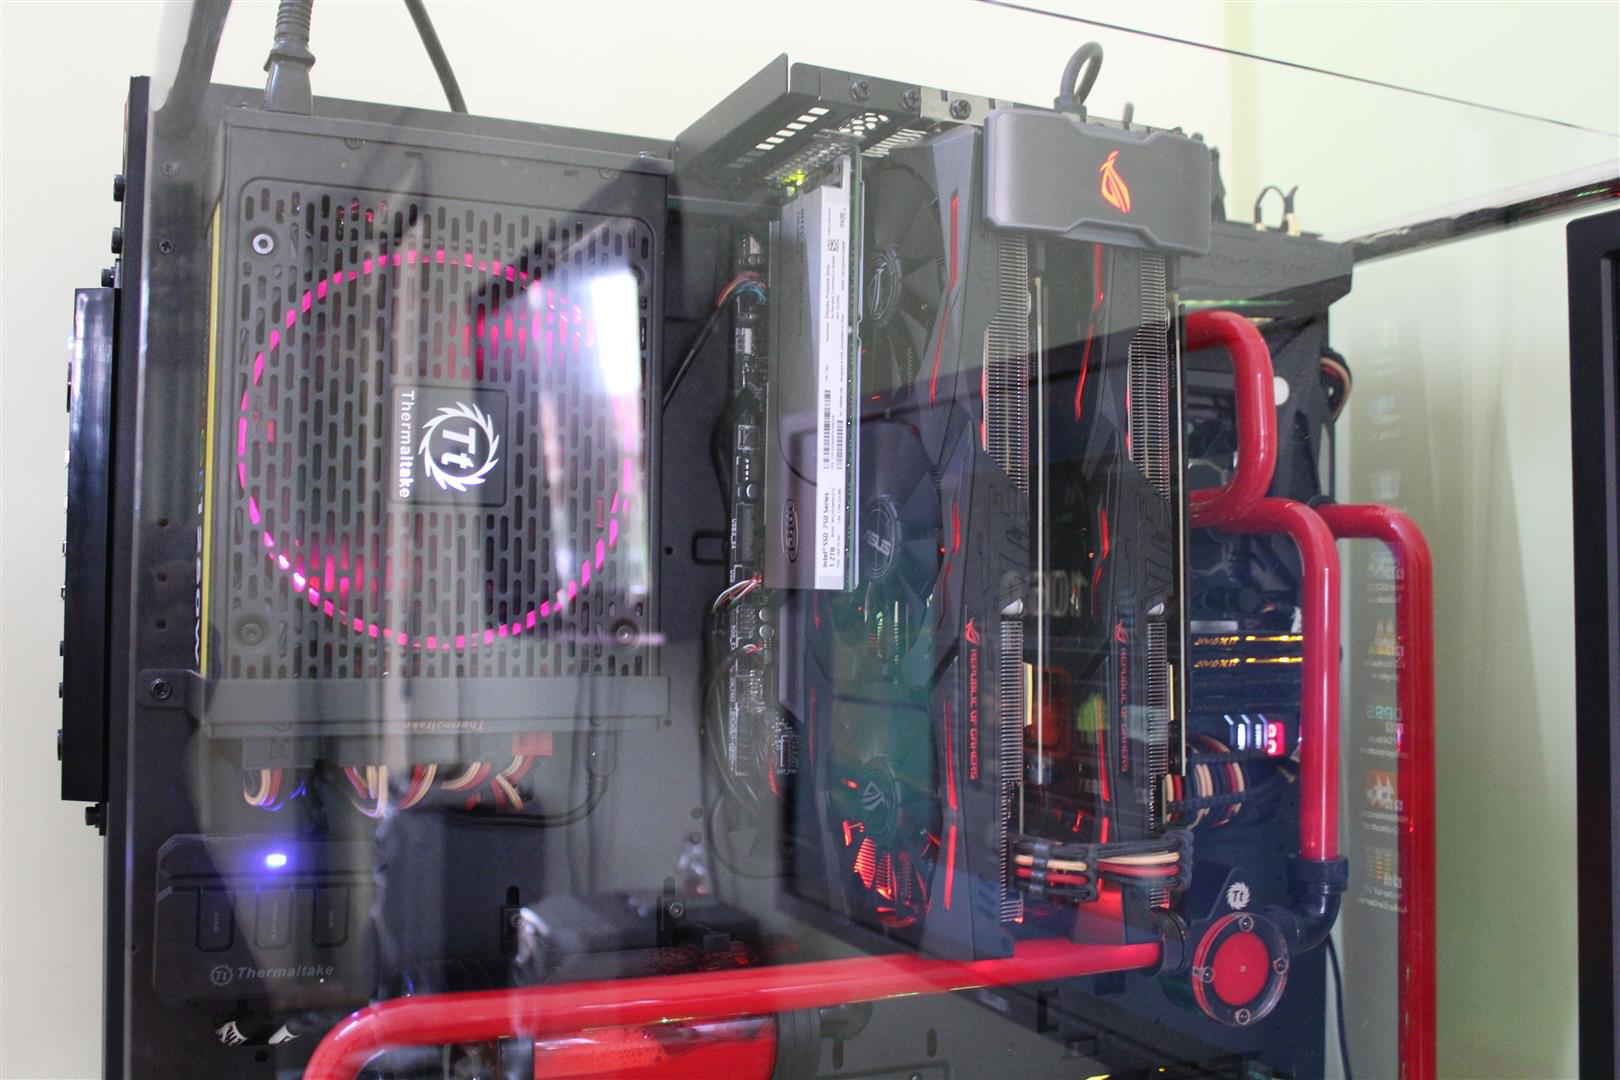
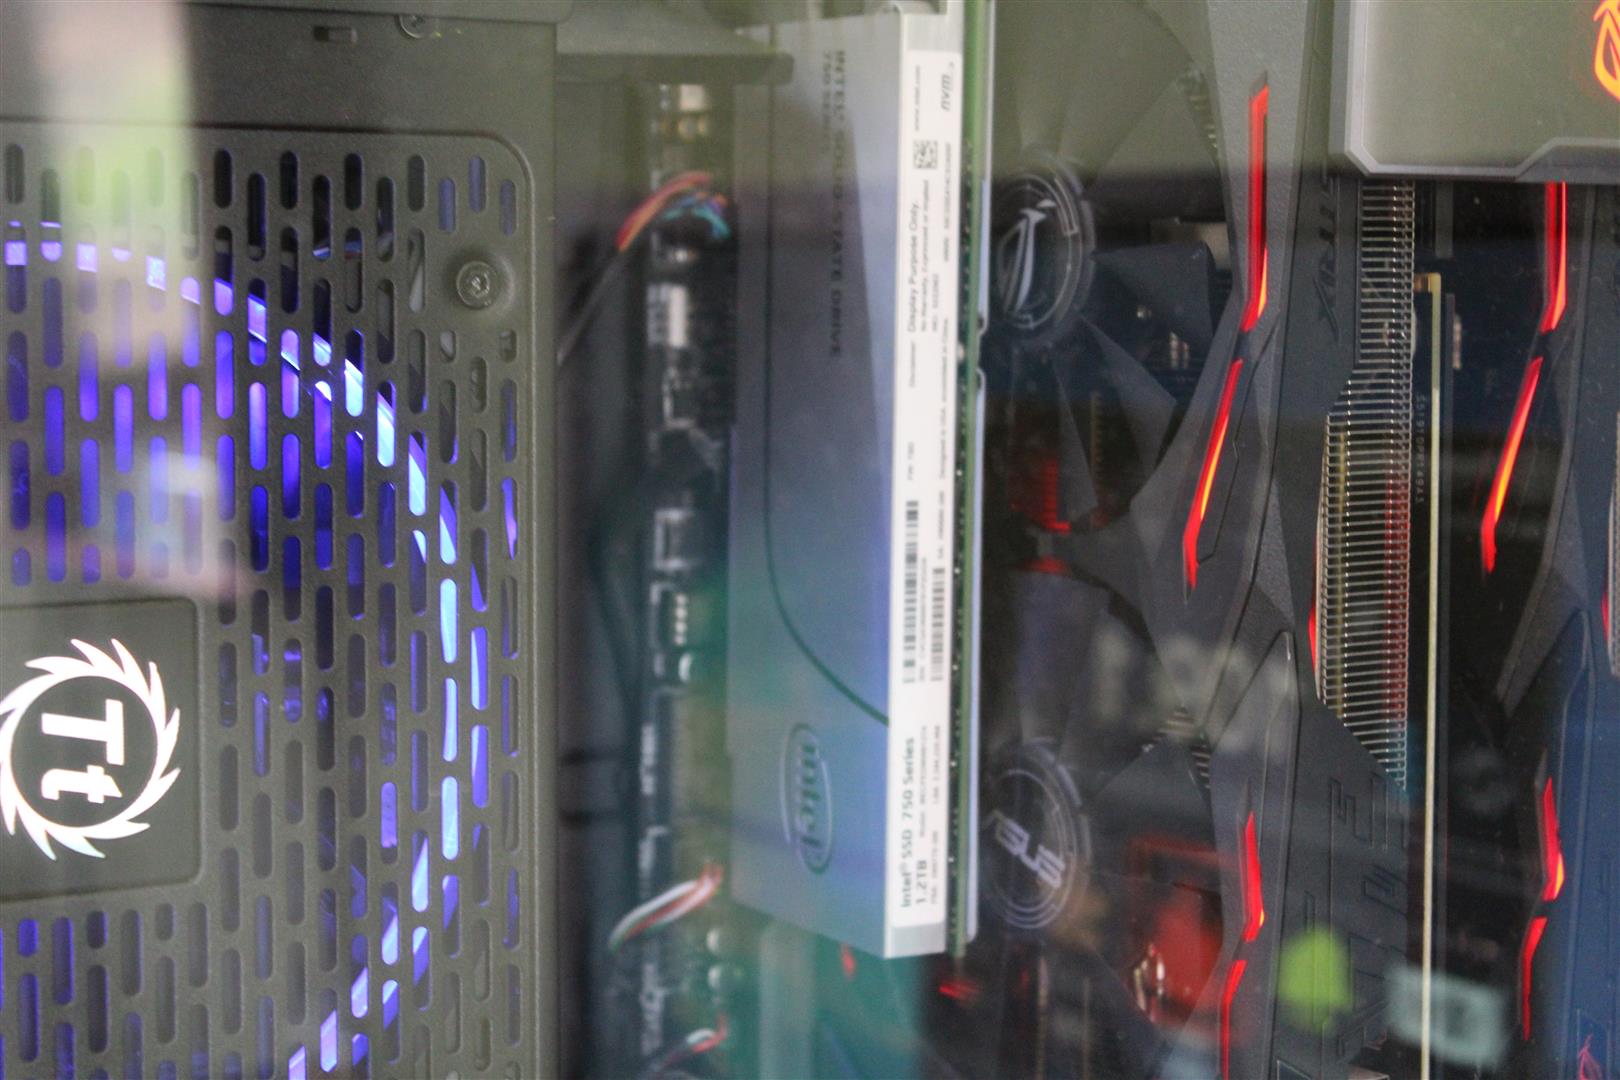
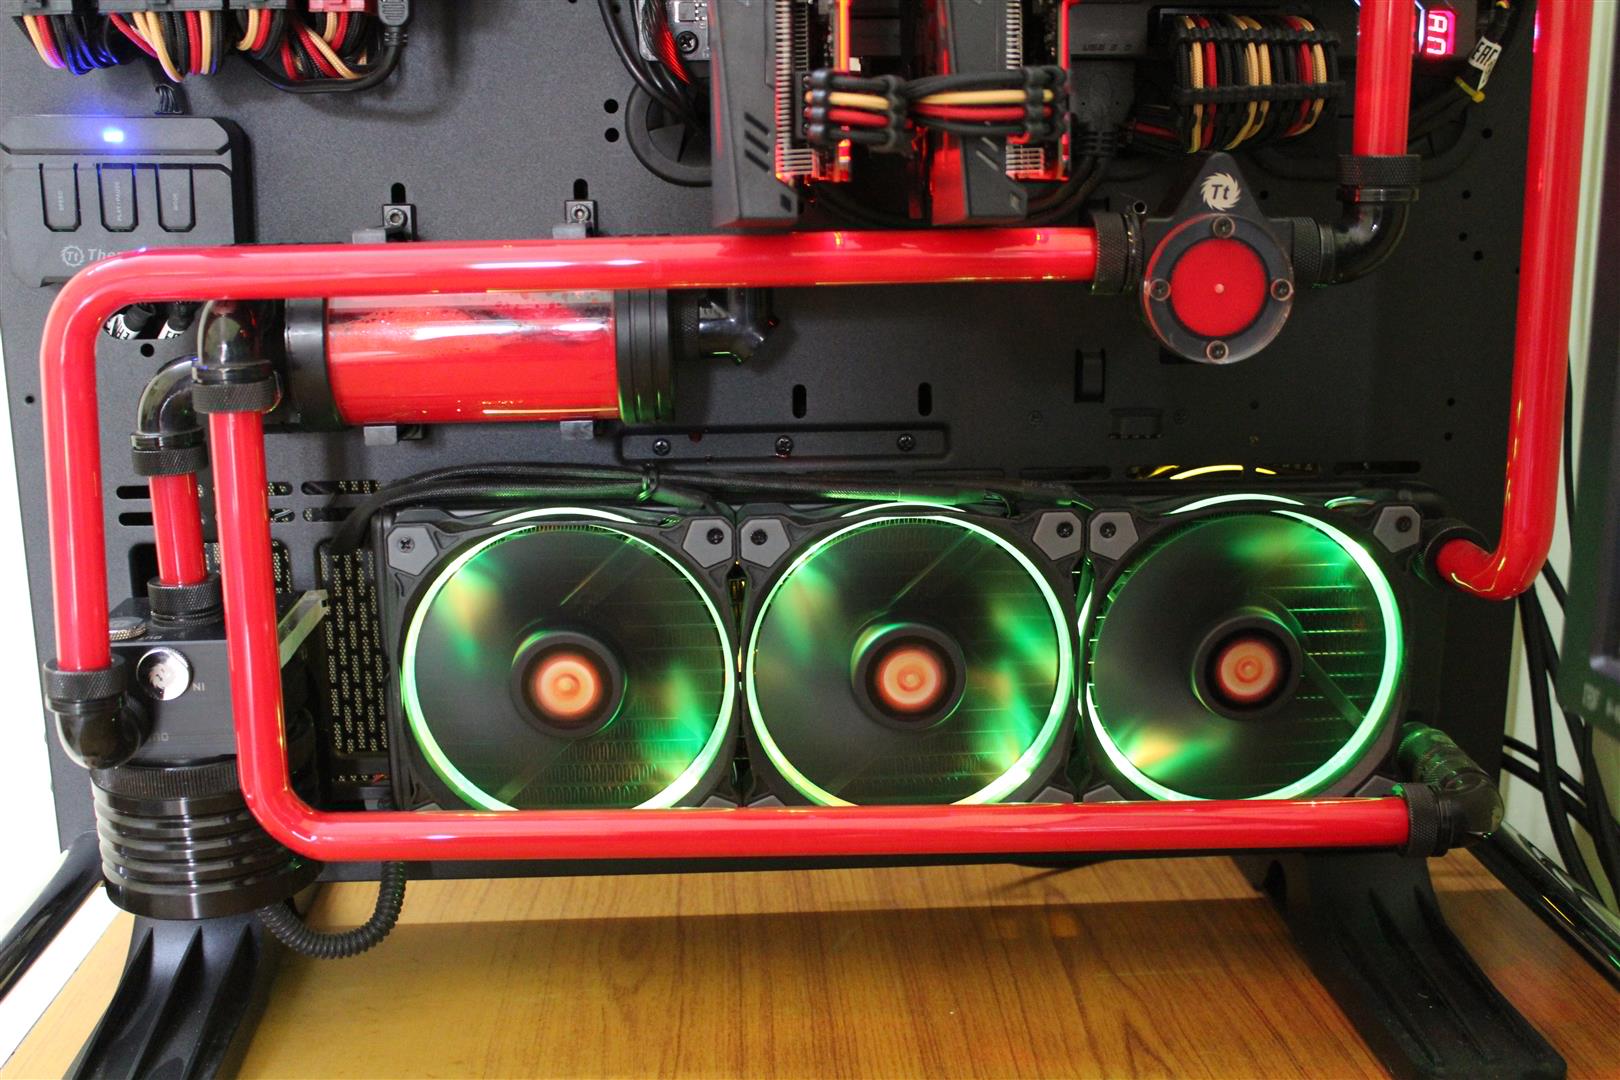
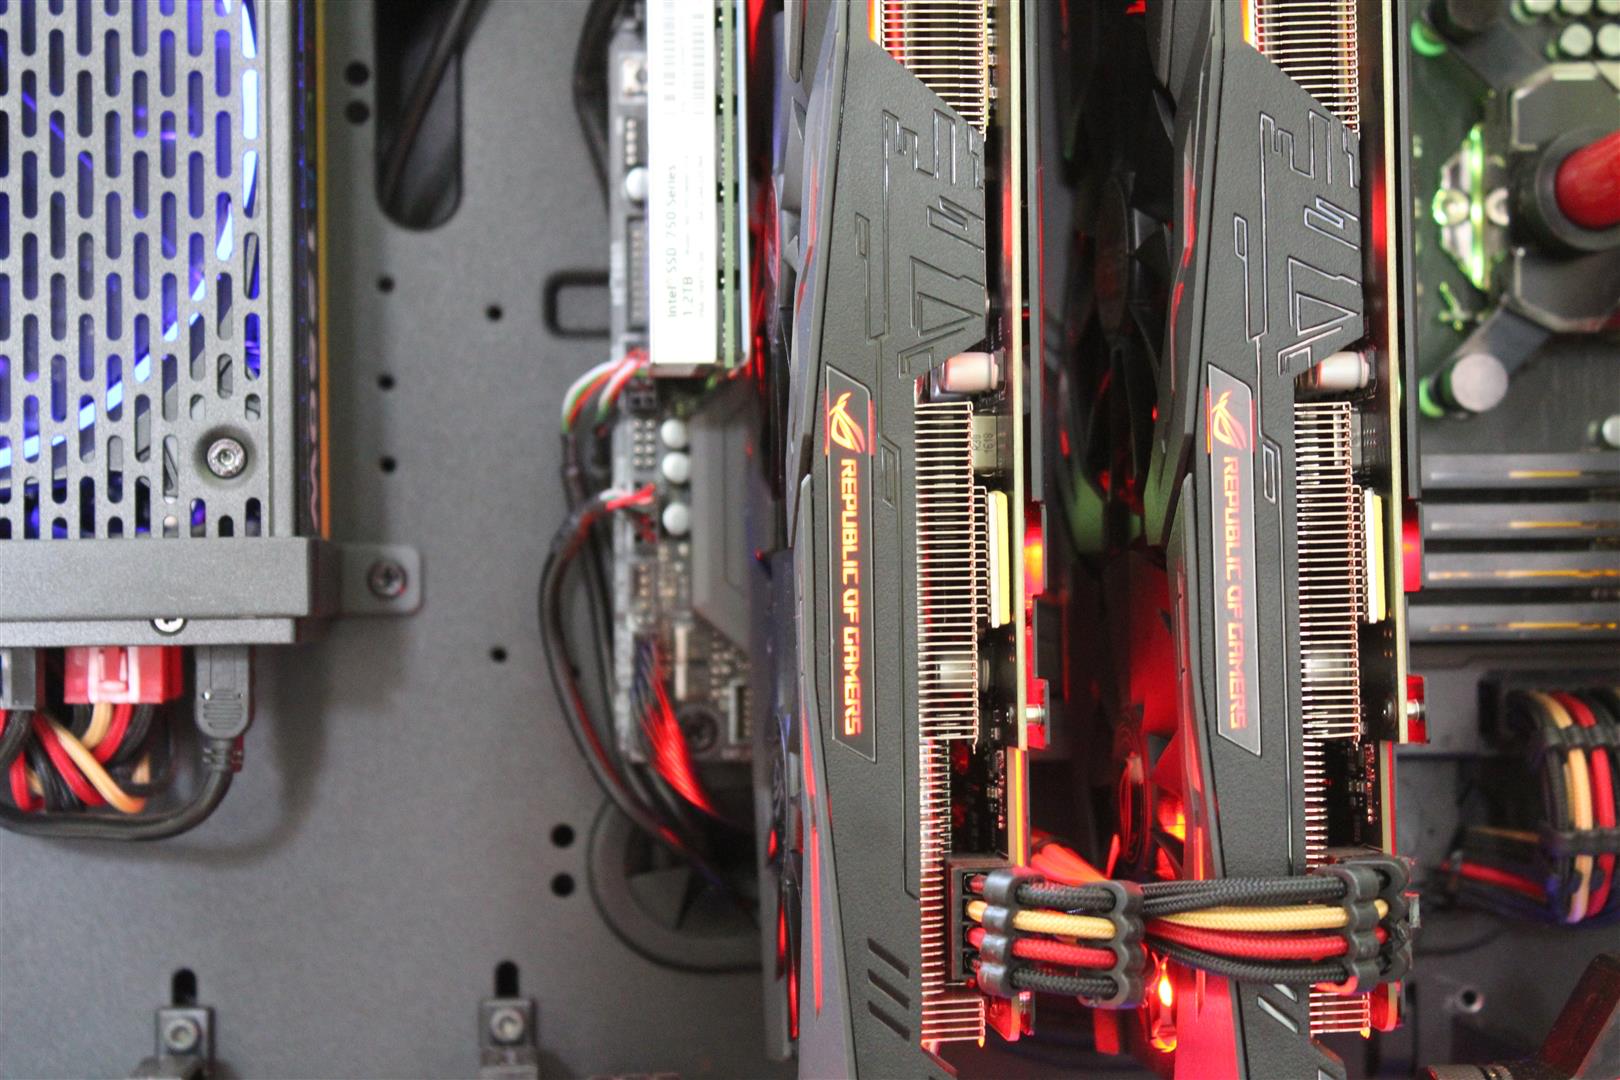
AMD Ryzen Core P5 Build
Finally upgraded to AMD Ryzen.
I was a long AMD fan till Phenom X6, but due to reason known to everyone have to switch to the blue team. But AMD is now back in action with Ryzen and mostly all RAM related issues have been ironed out. So I think this is the best time to upgrade. My last PC was an Intel i7-7700K based system and for this build I am going with AMD Ryzen 1700 CPU with custom liquid cooling.
Hope you all like the build.


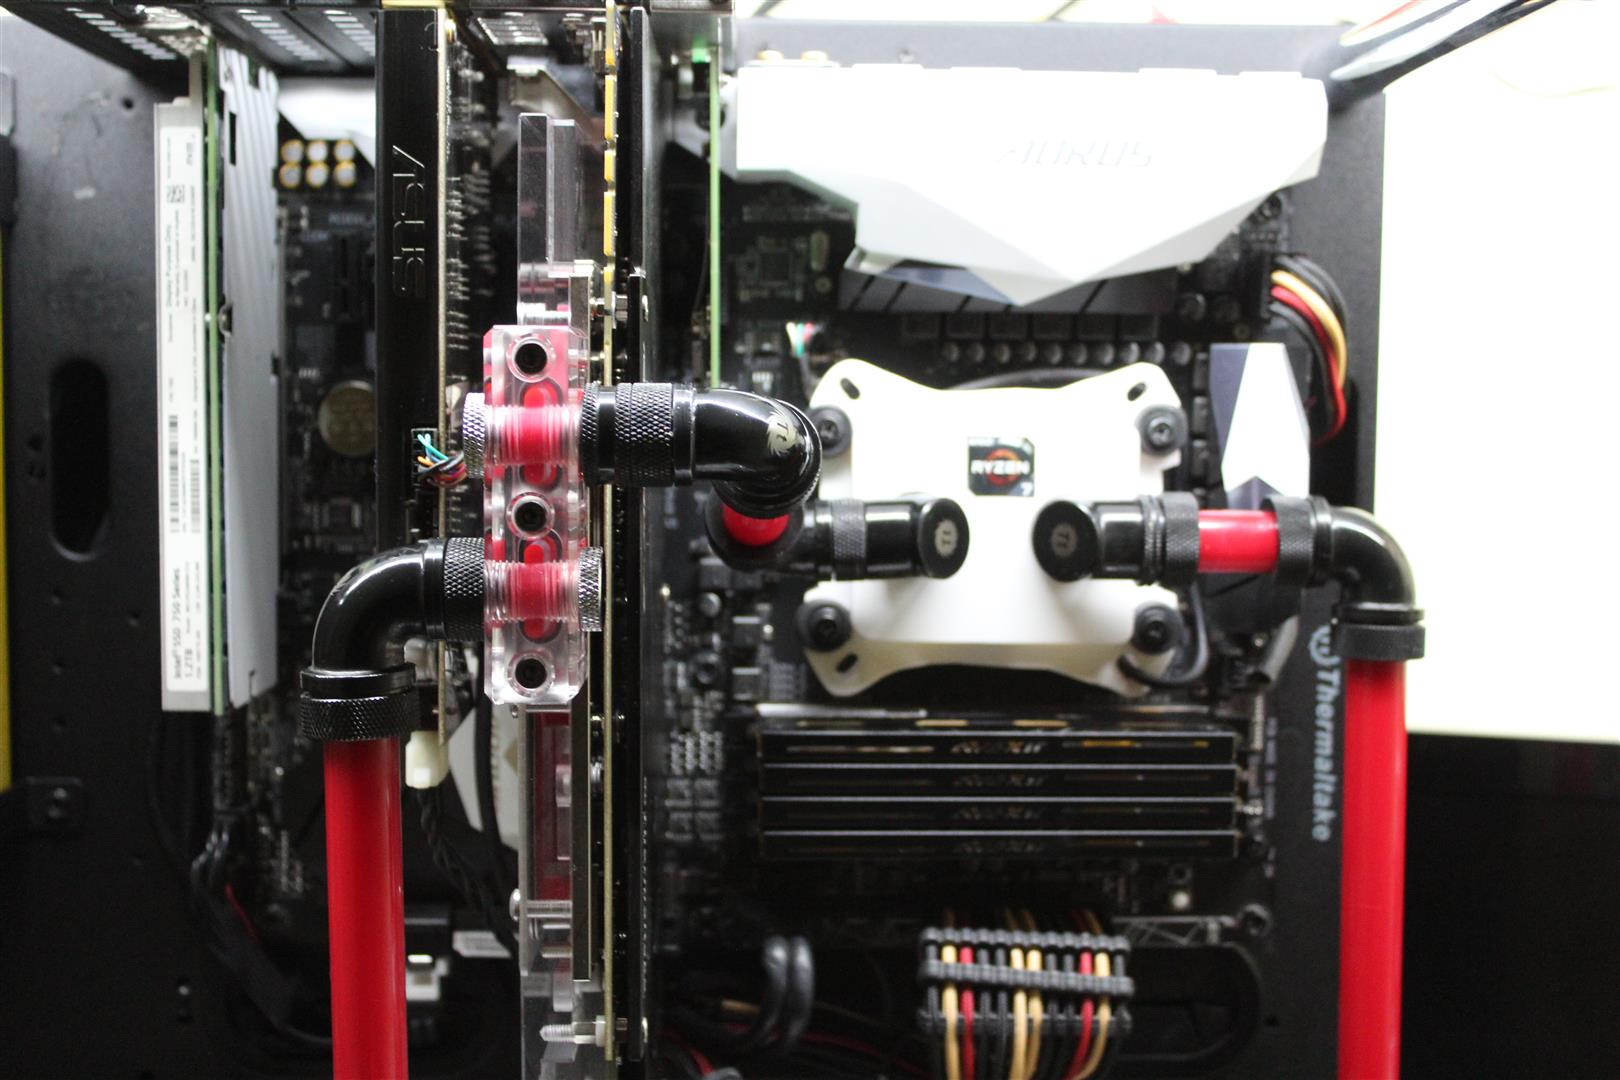


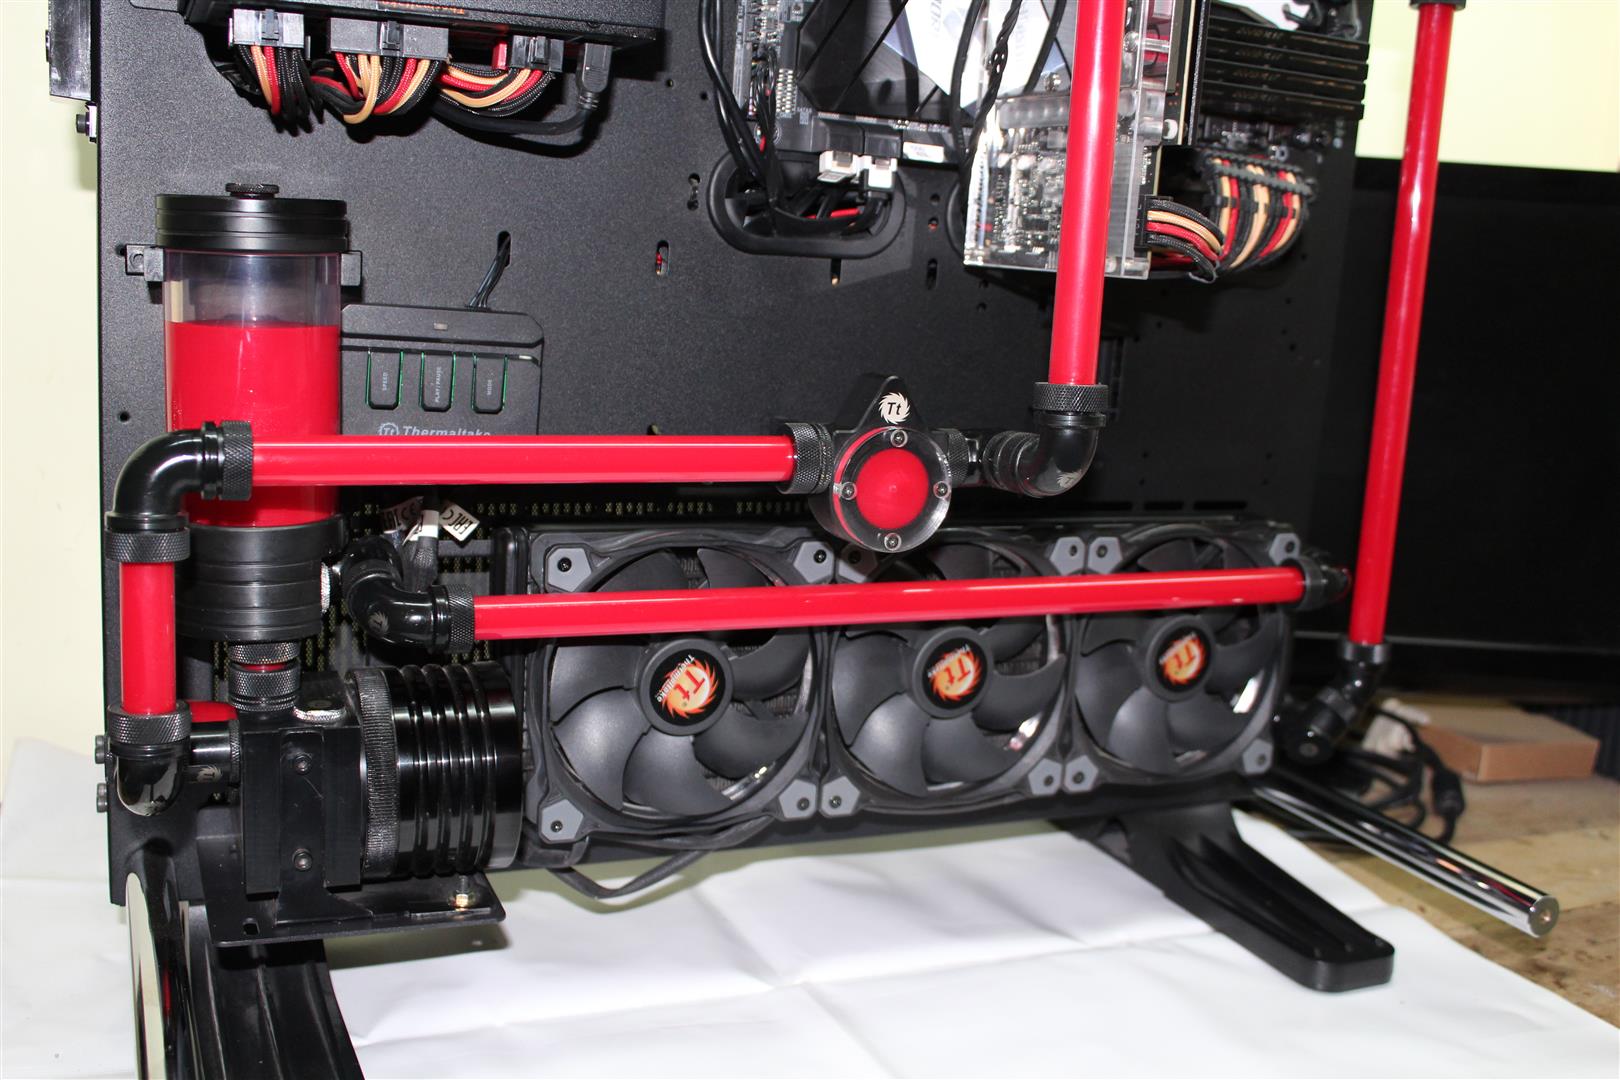


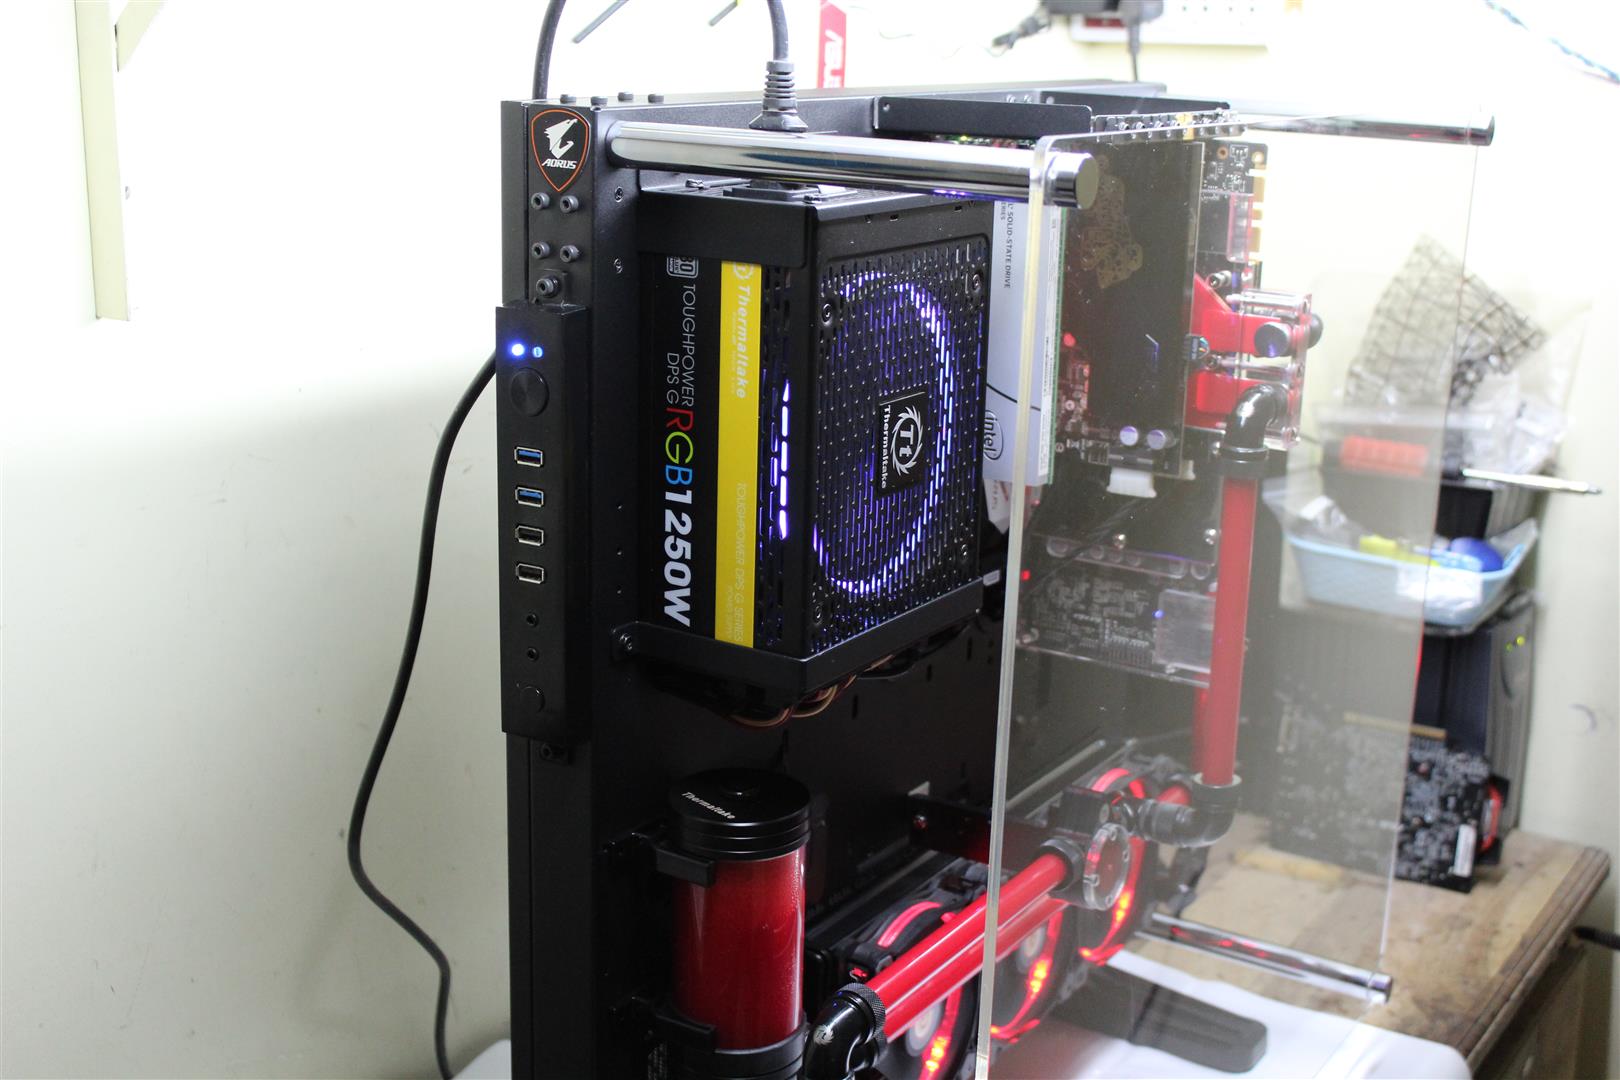
Thanks.
-
My vote goes to Ali Abbas. Very nice build idea and great build progress so far. Best of luck
-
20 Nov 2017
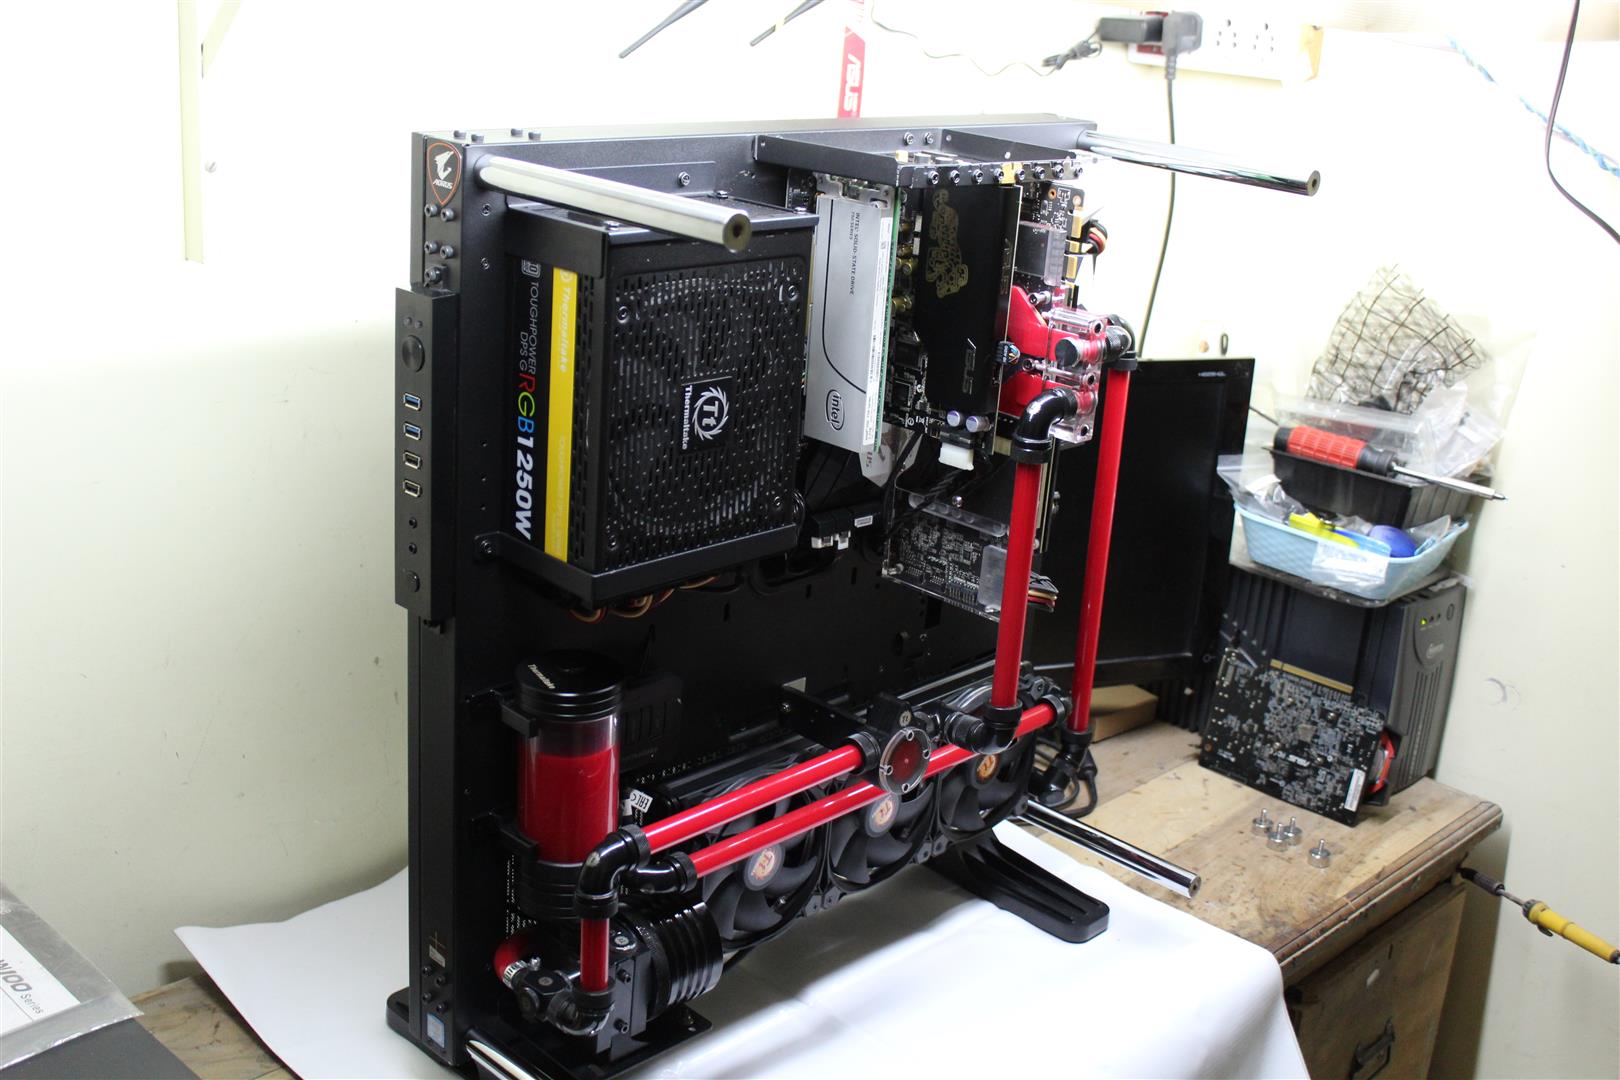
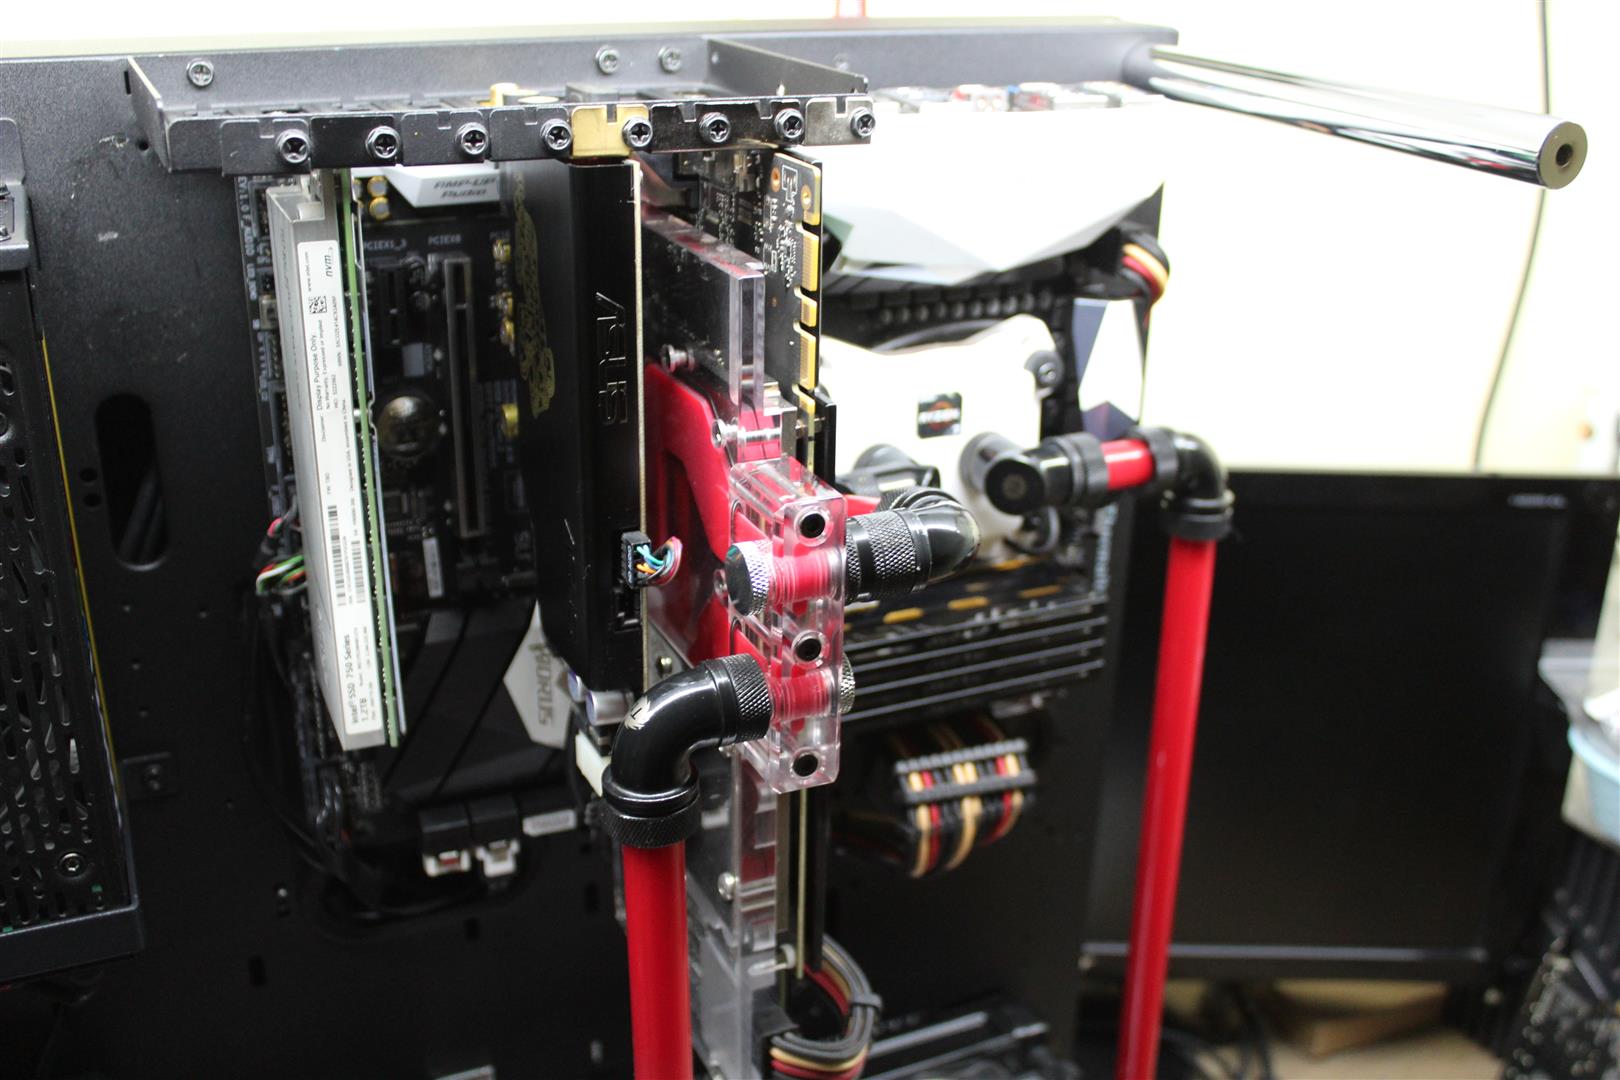
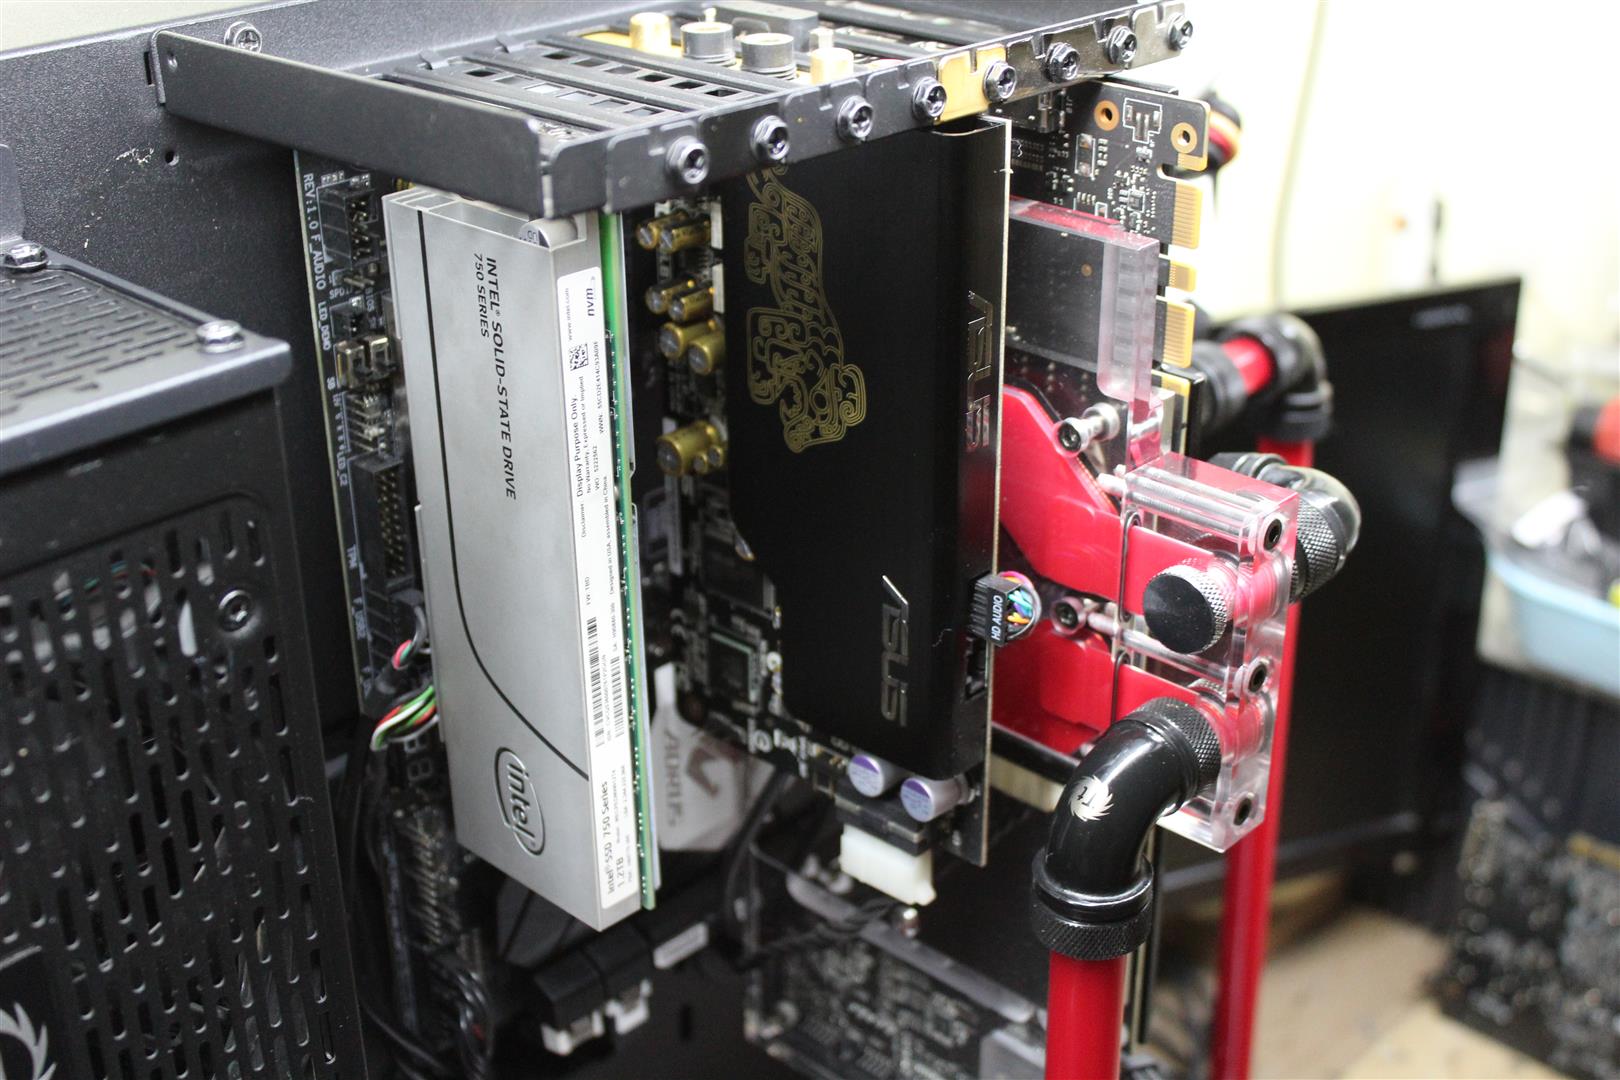
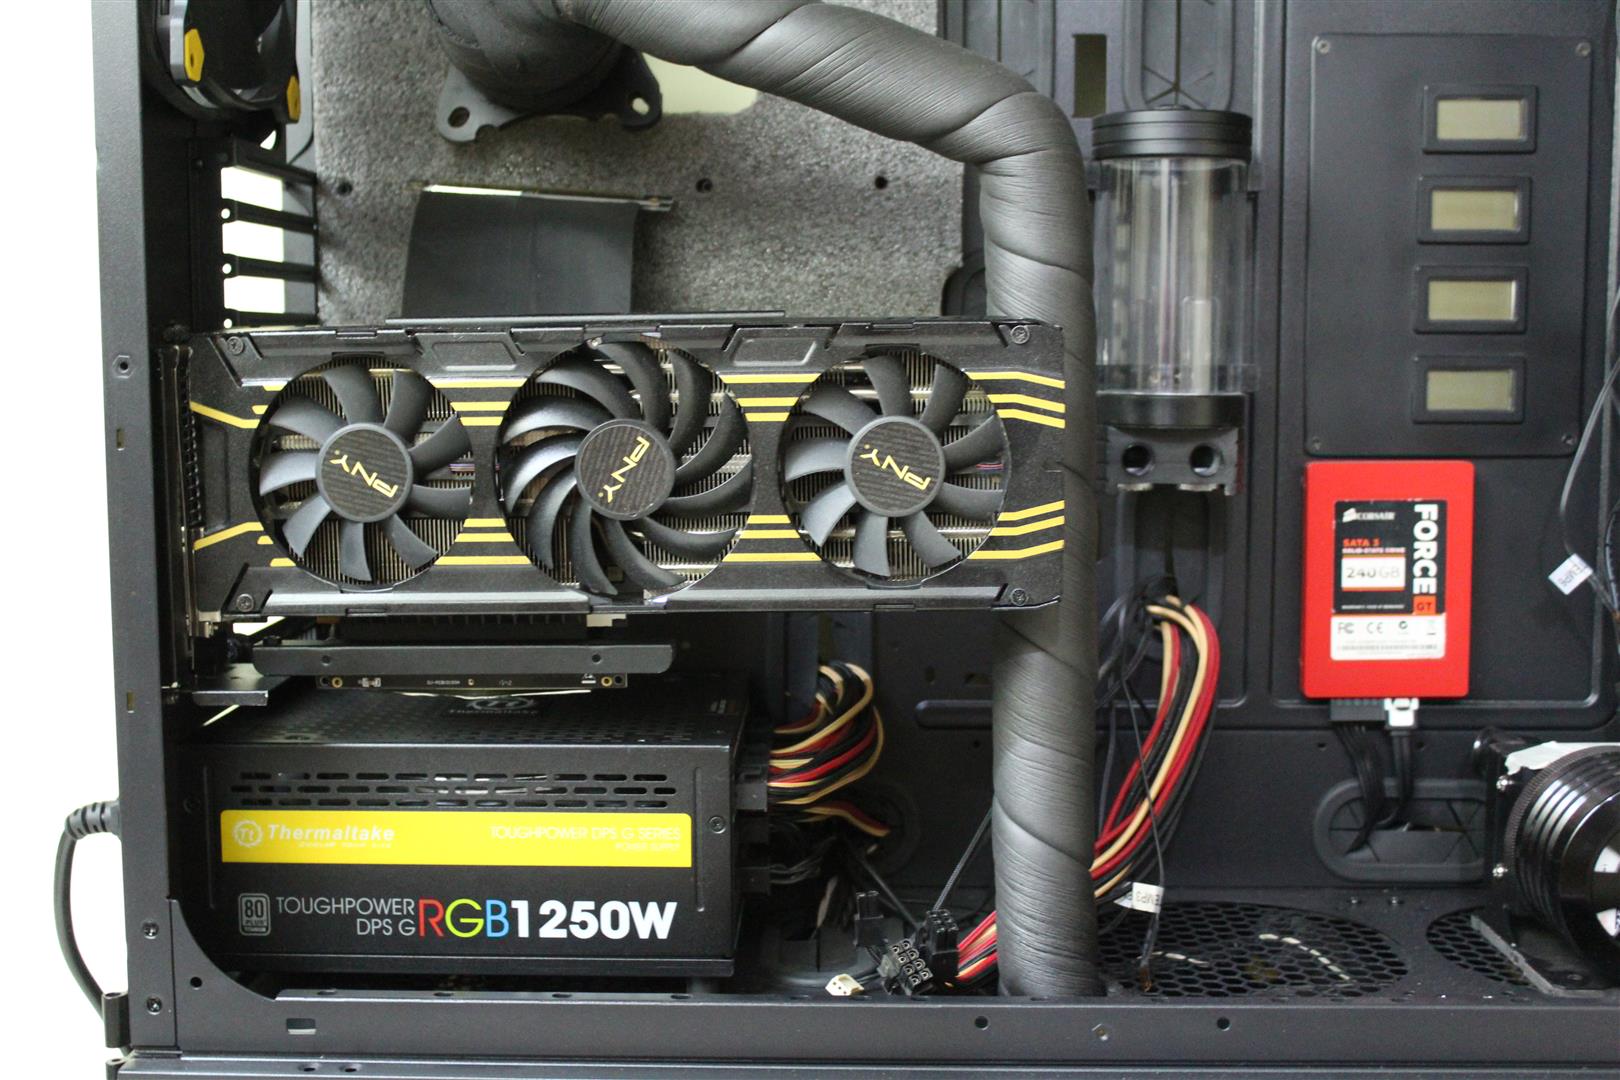
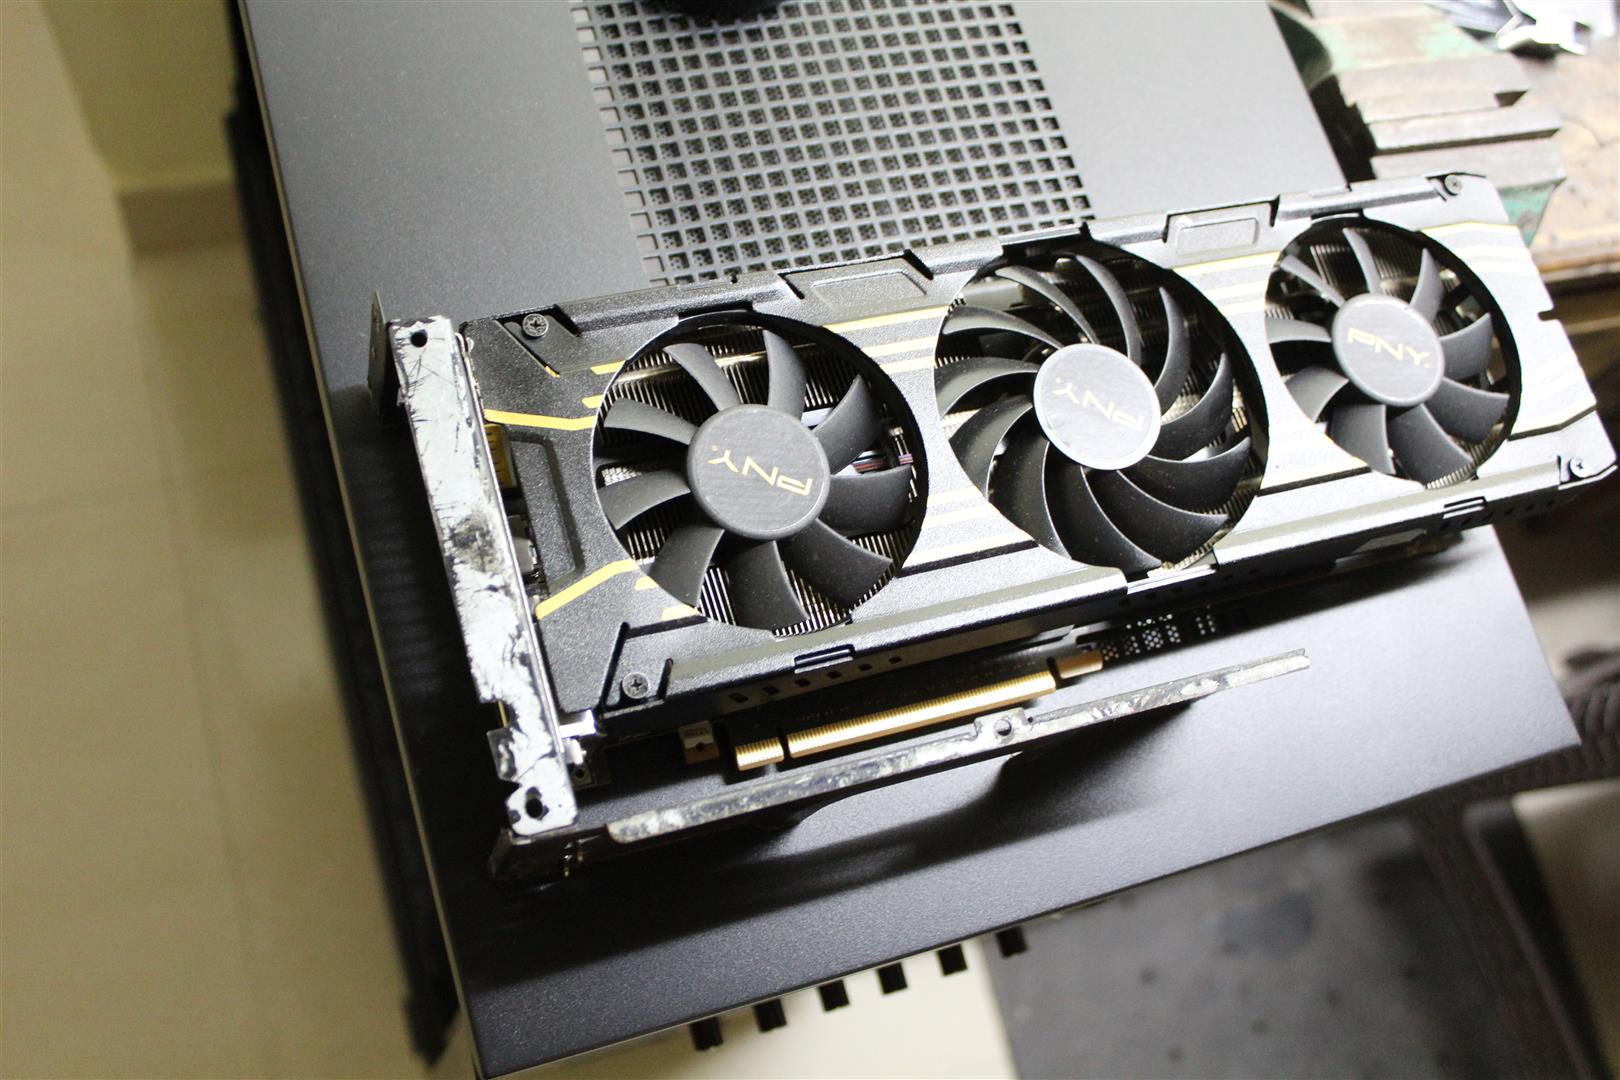
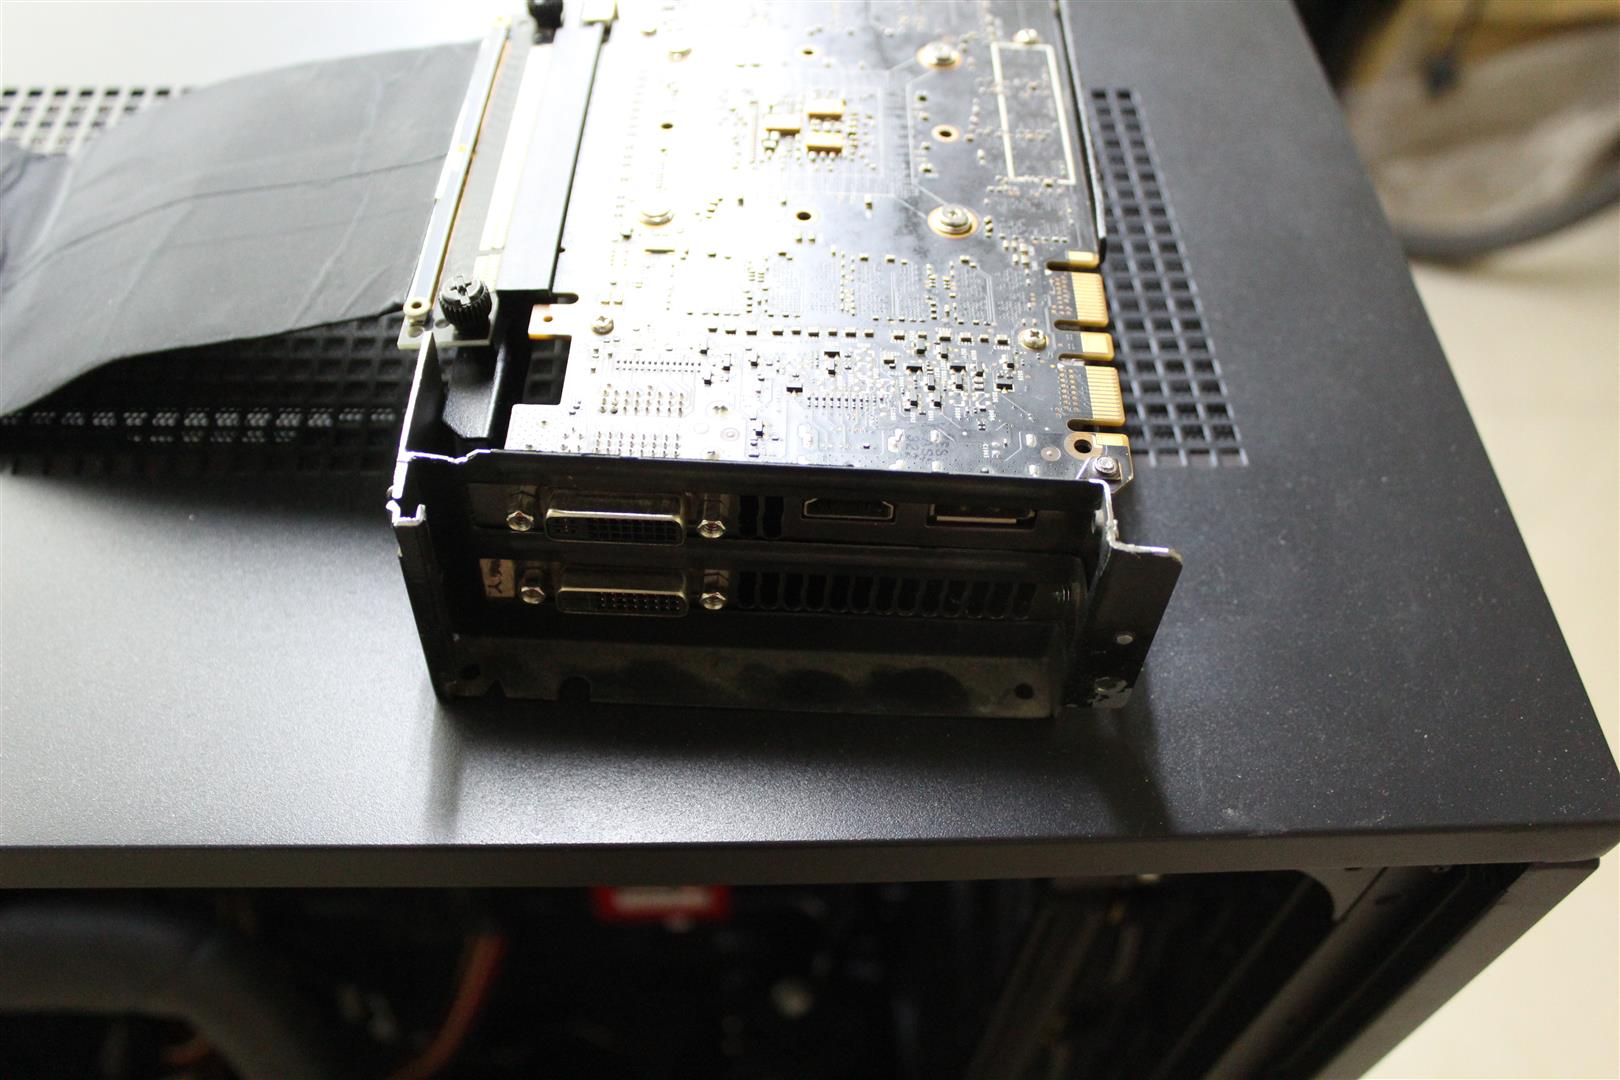
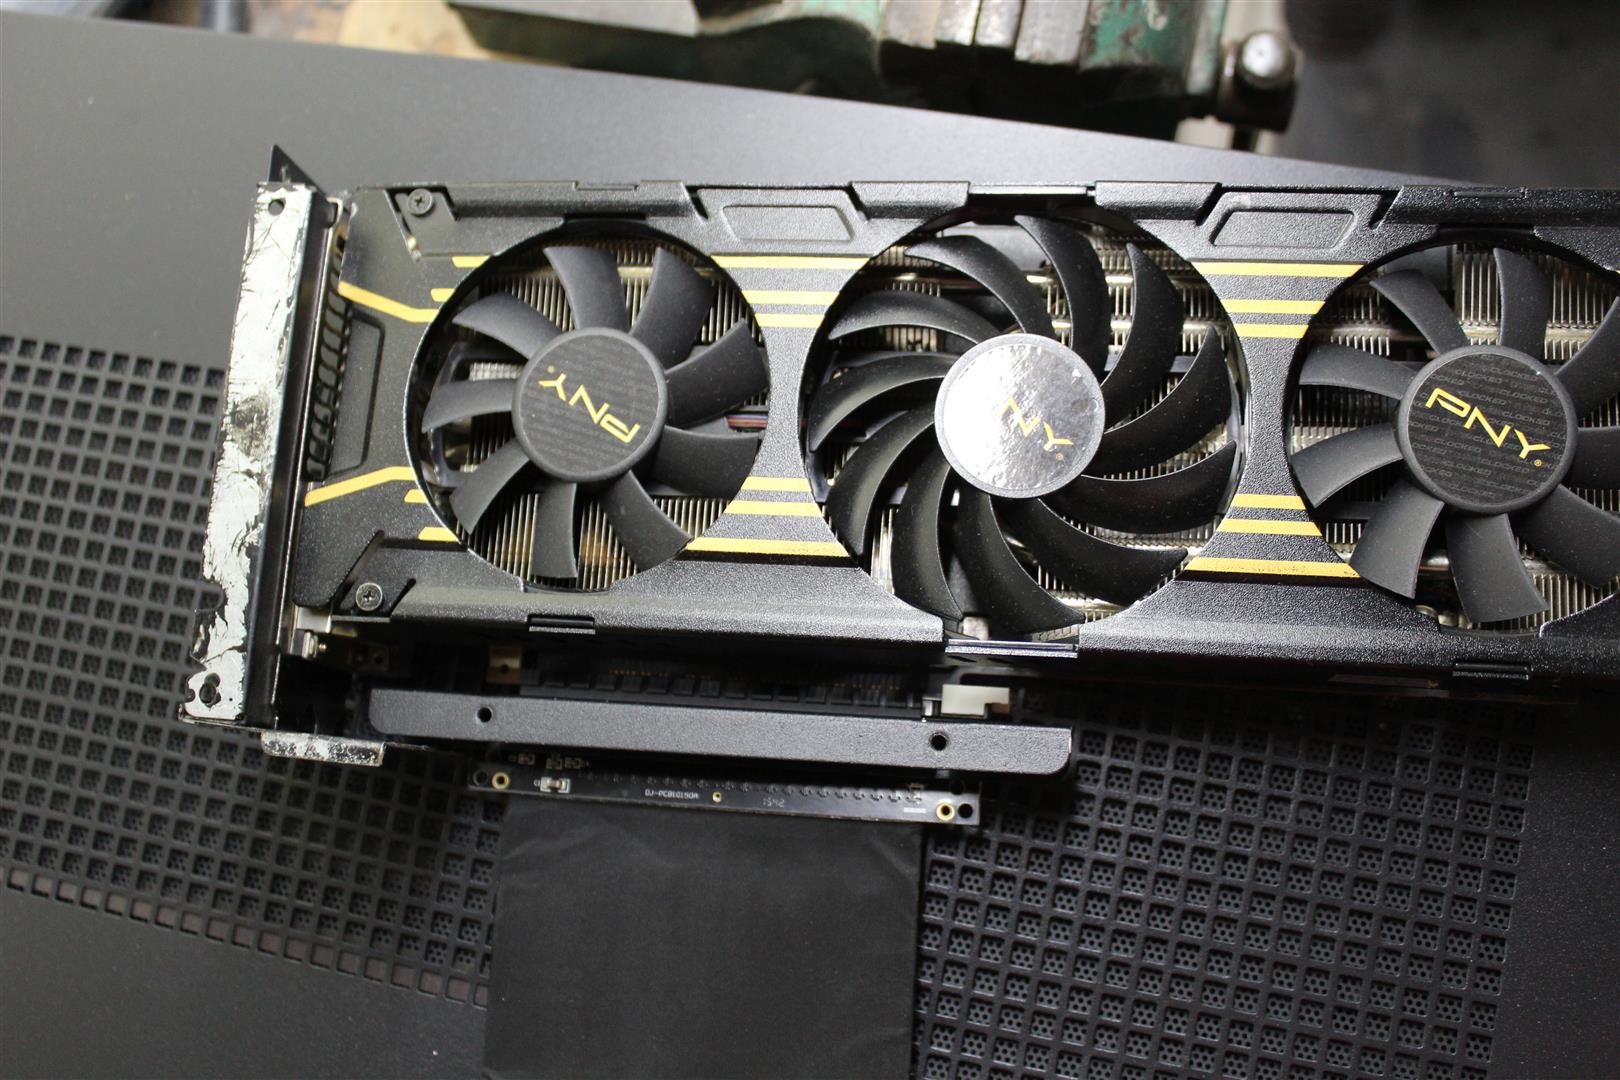
Vertical GPU mounting done. Need little finishing but will do that after I have received remaining hardware for the build.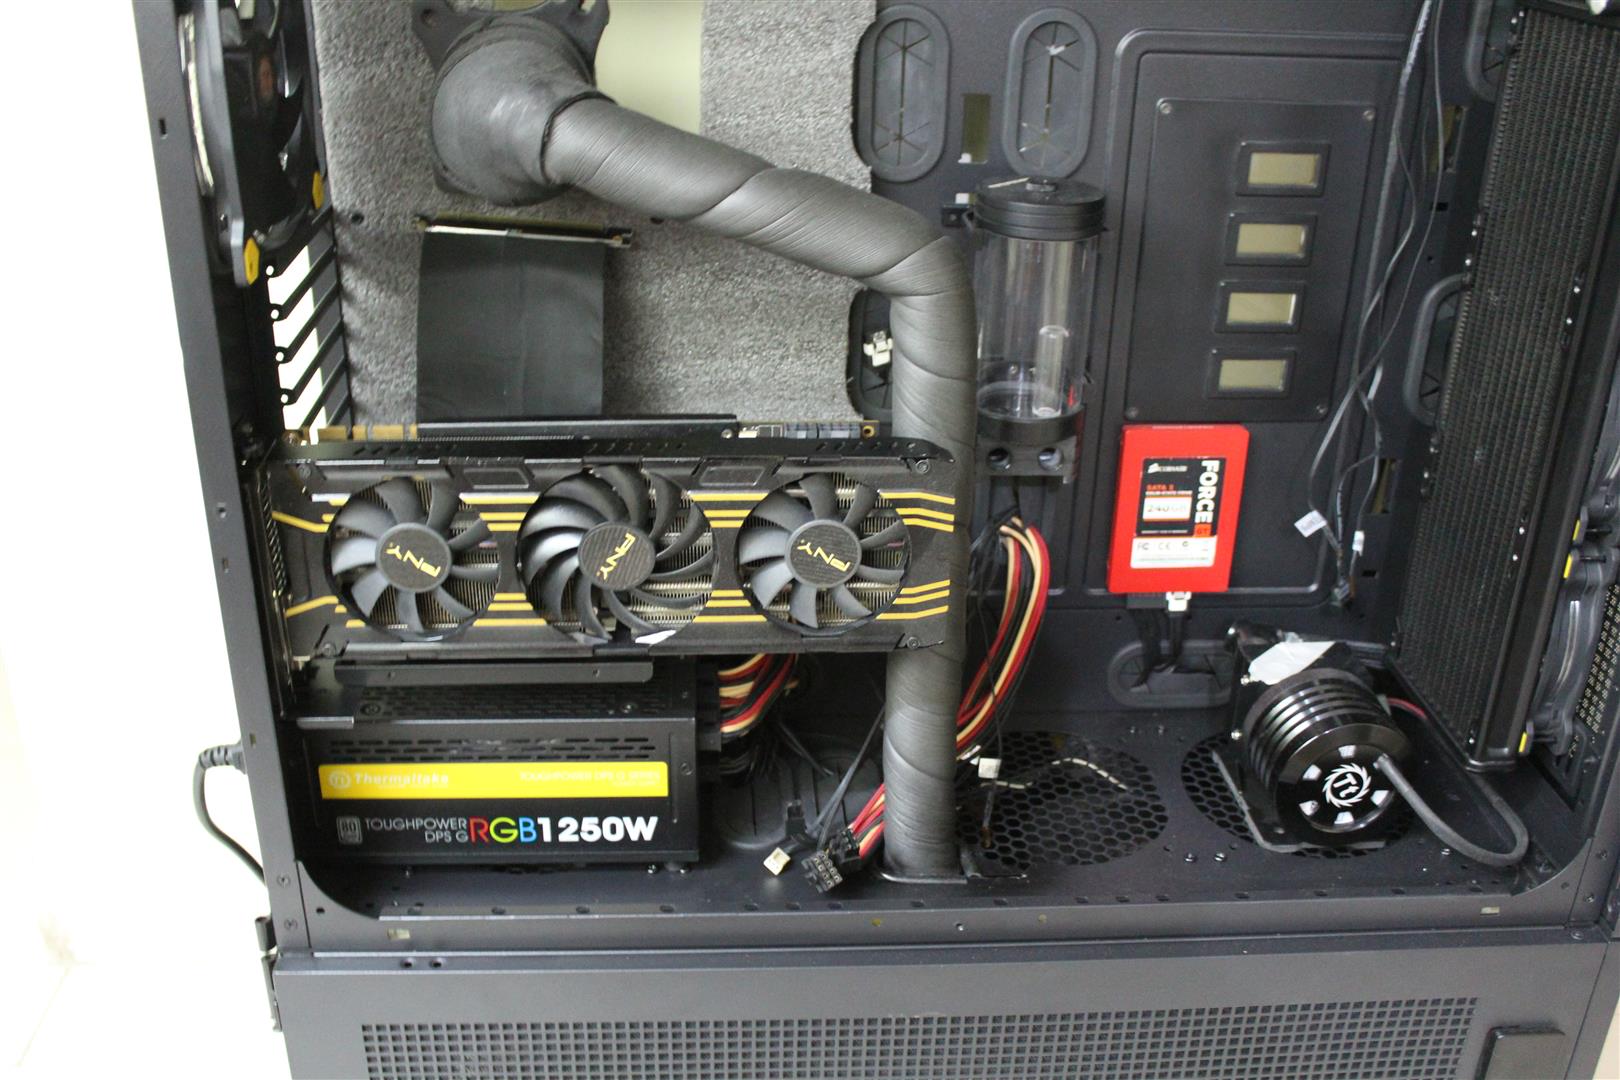

-
15 Nov 2017
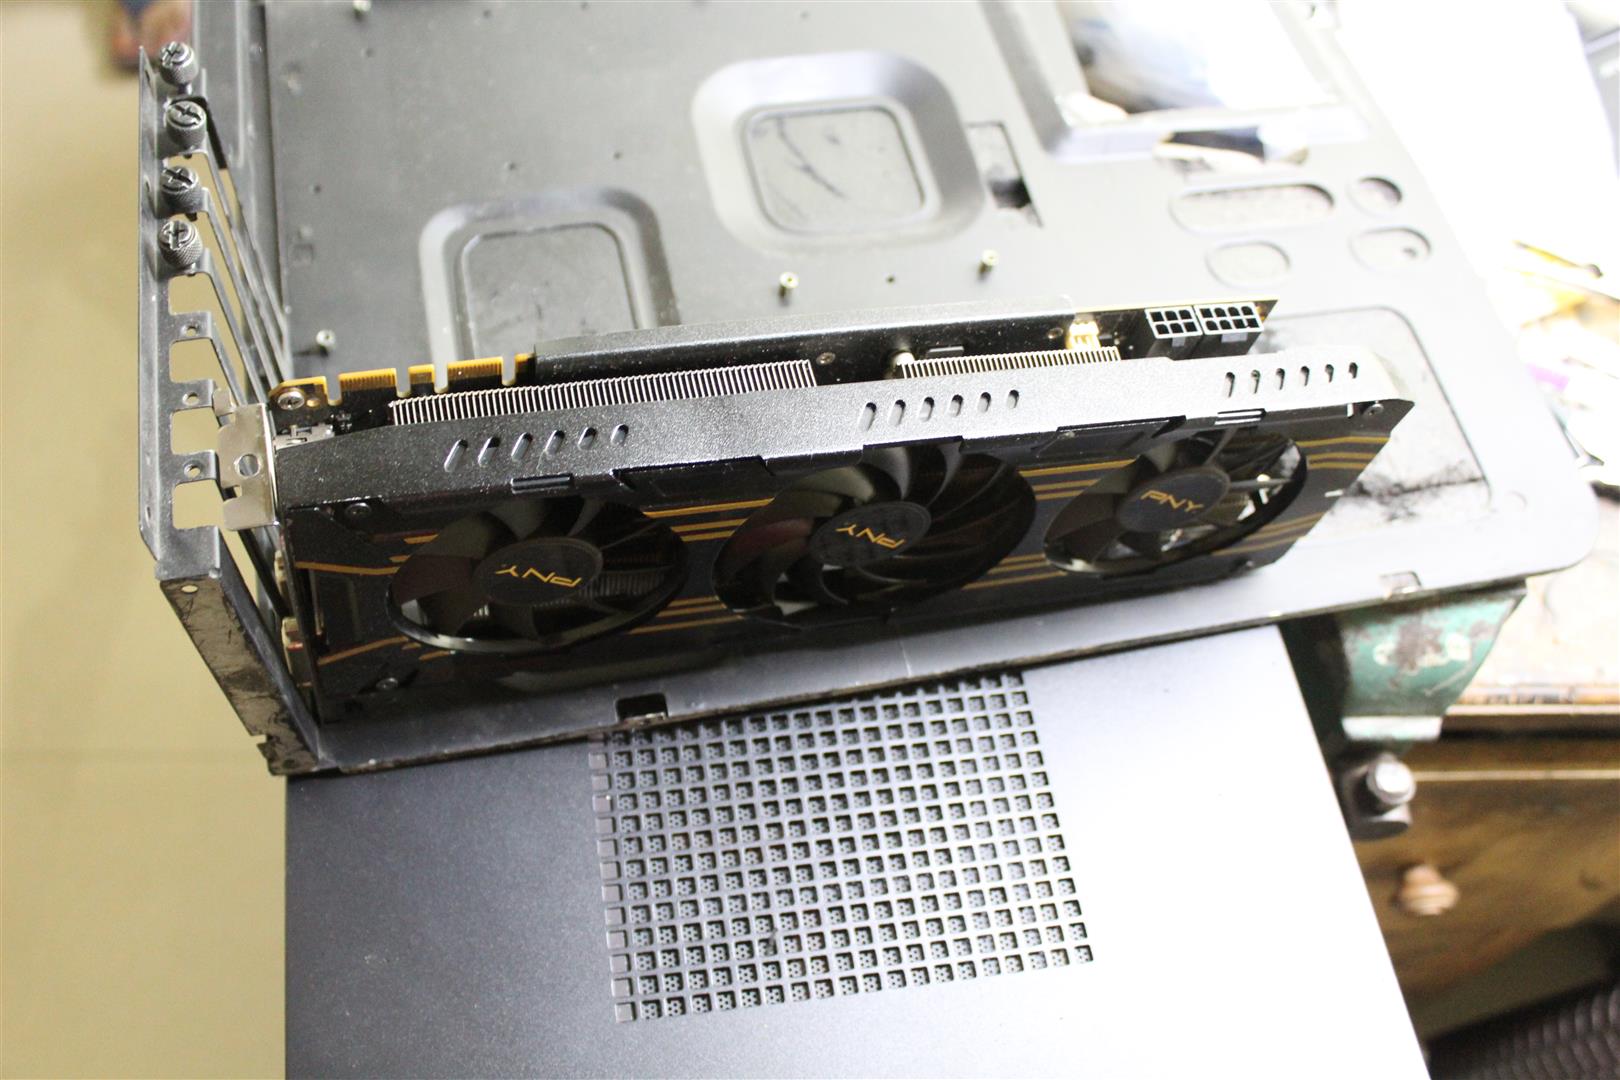
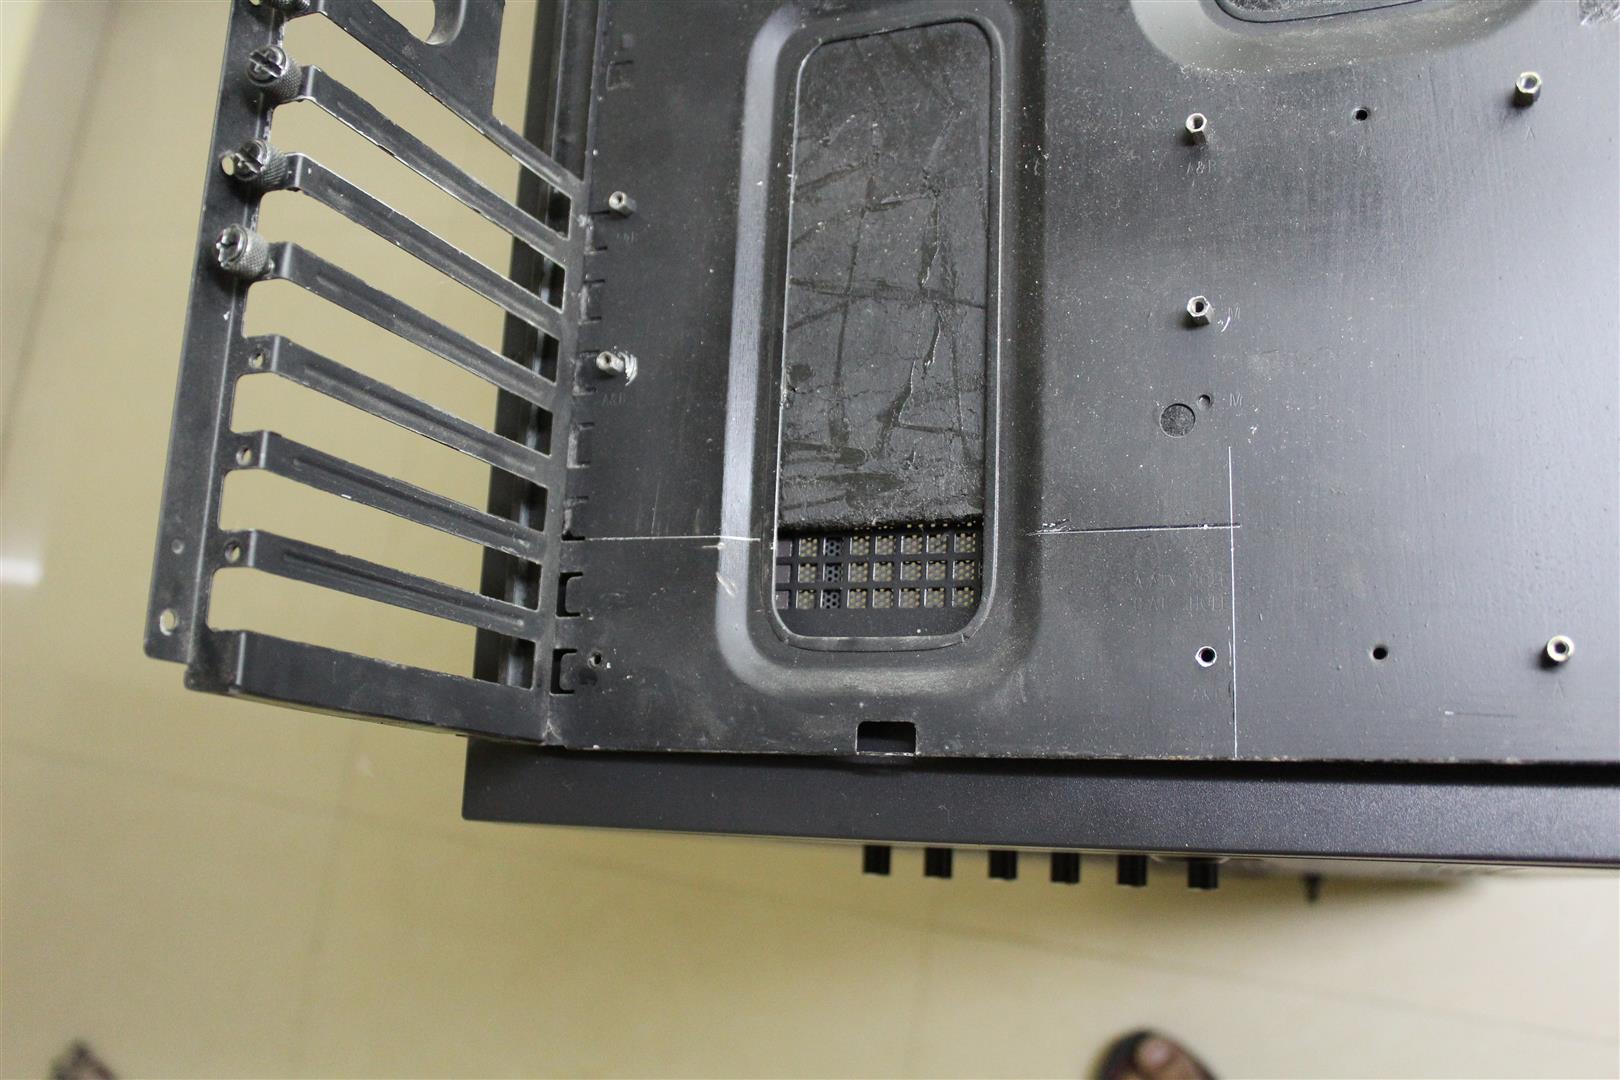
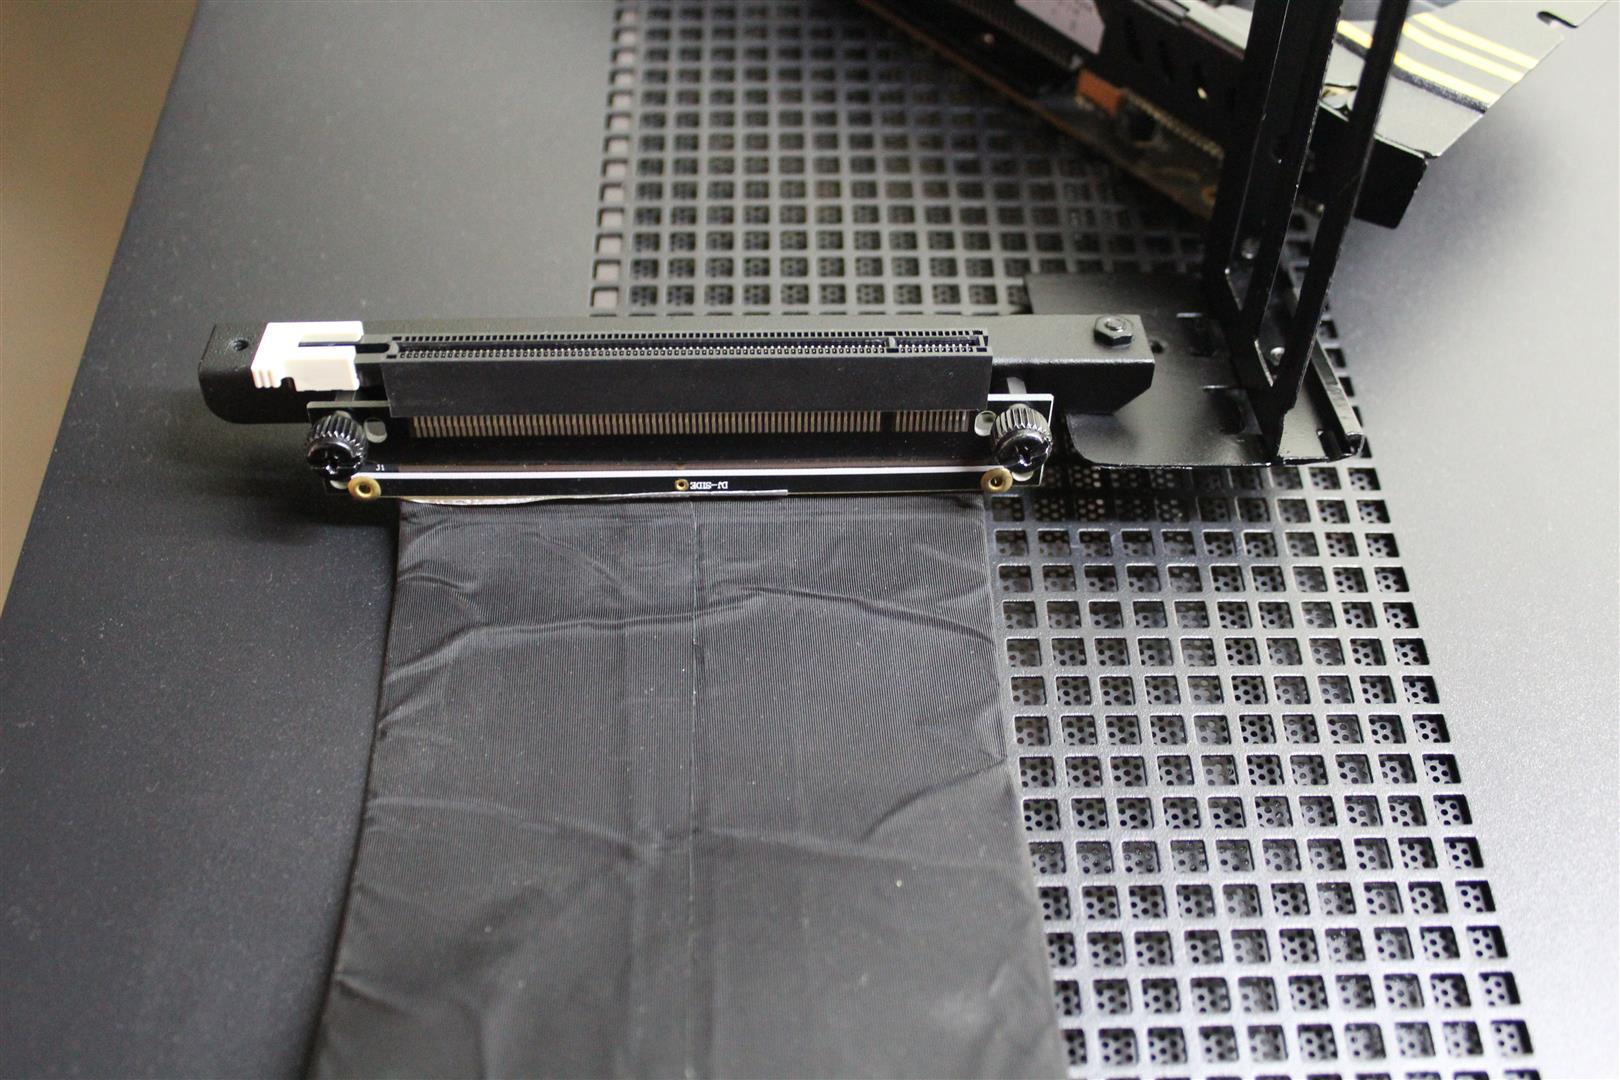
Making of Vertical GPU mount
As we all know the Thermaltake Core WP100 Super Tower Chassis don’t support vertical GPU mounting. But in my SUPERBUILD I want to install GPU vertically with hard tubing liquid cooling solution. So need to make a vertical GPU mount for this case.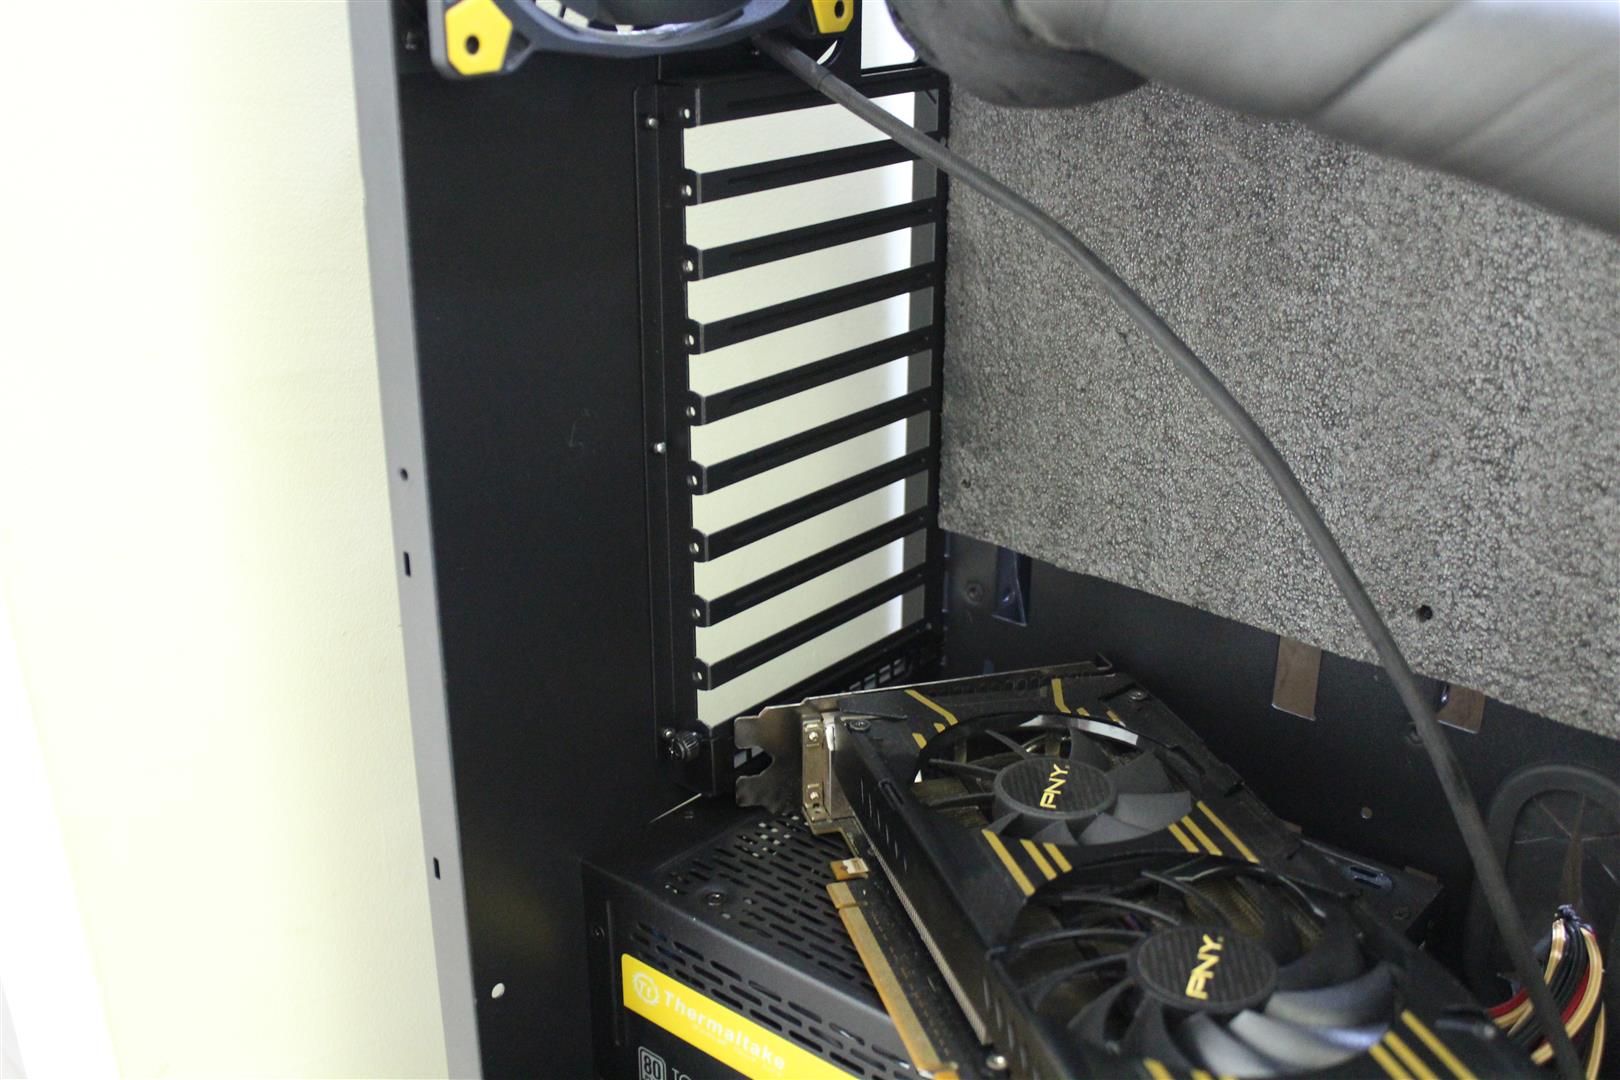
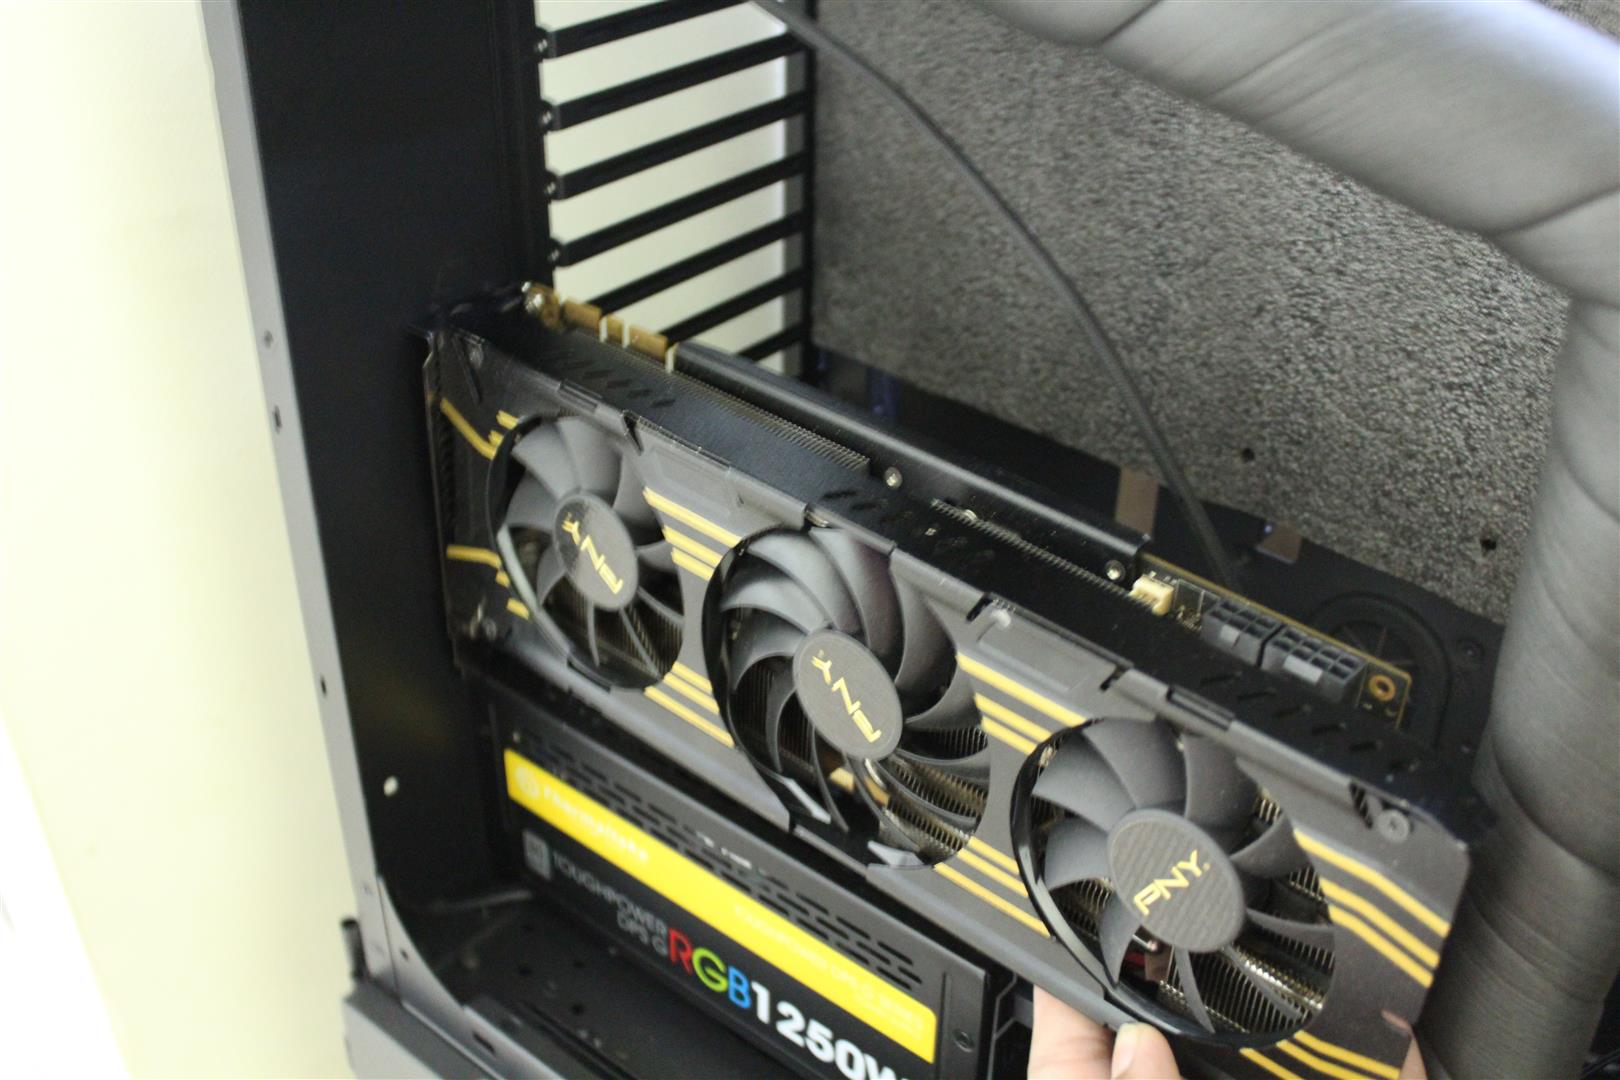
Will be modding old motherboard tray for PCI-e mounting plate and use PCI-e riser cable for graphics card installation.
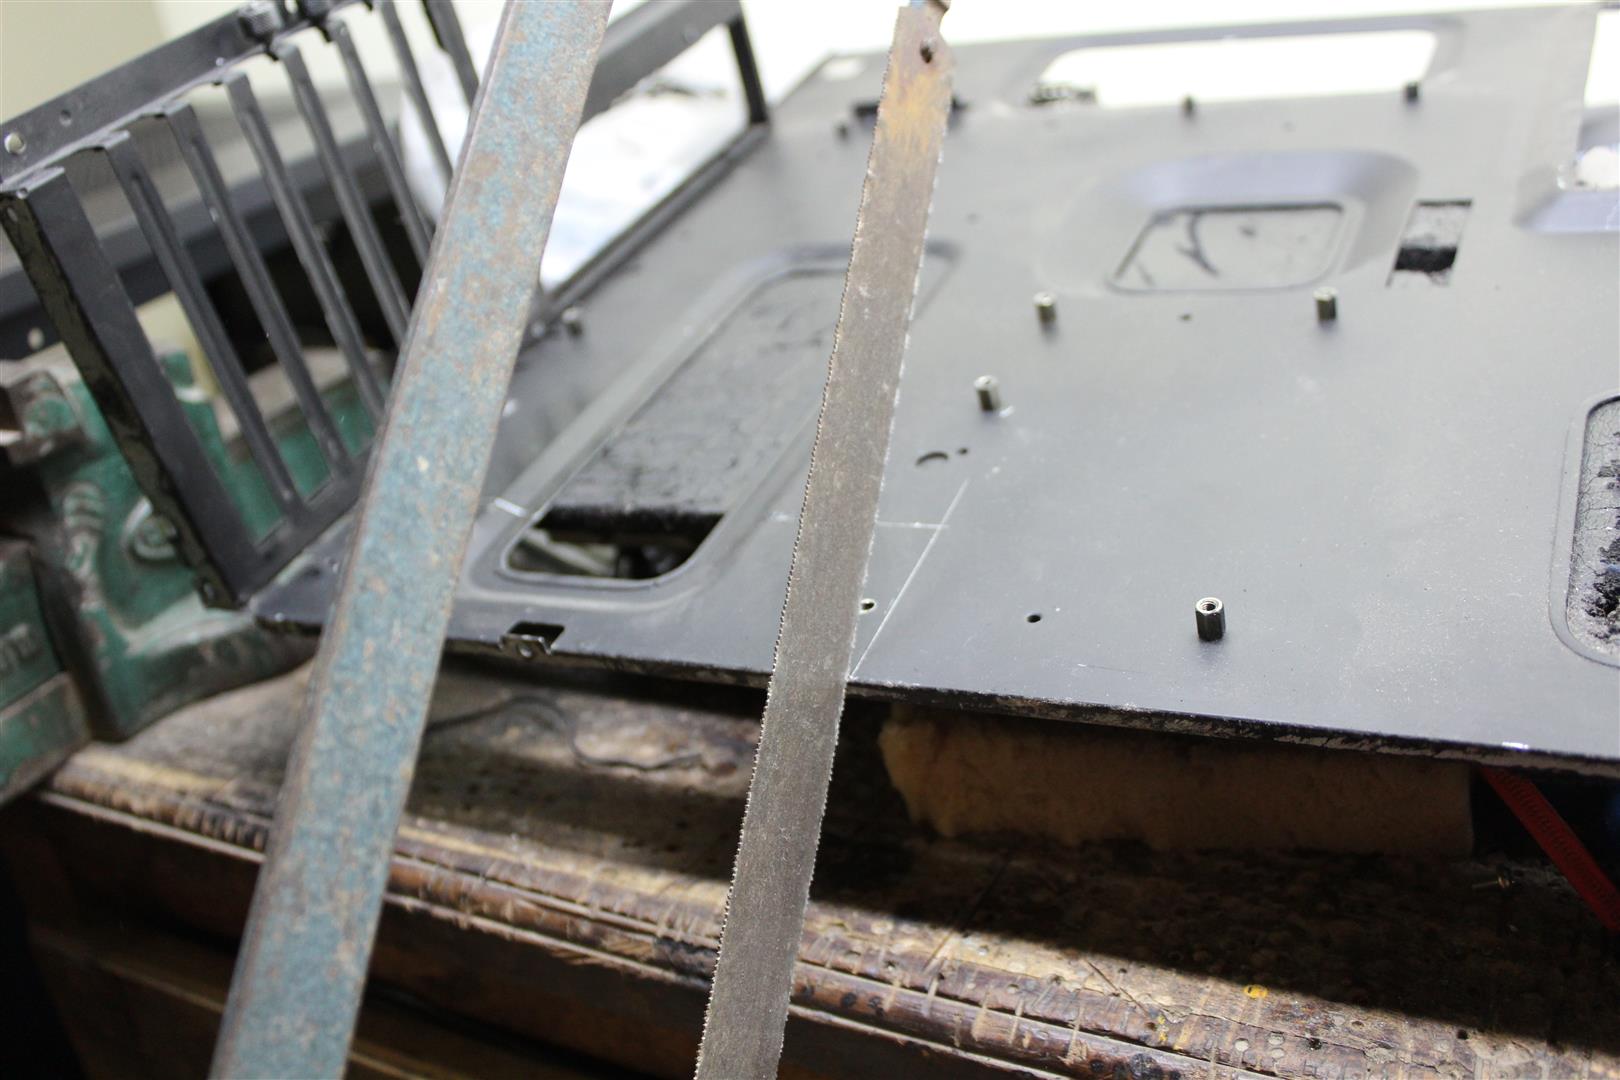
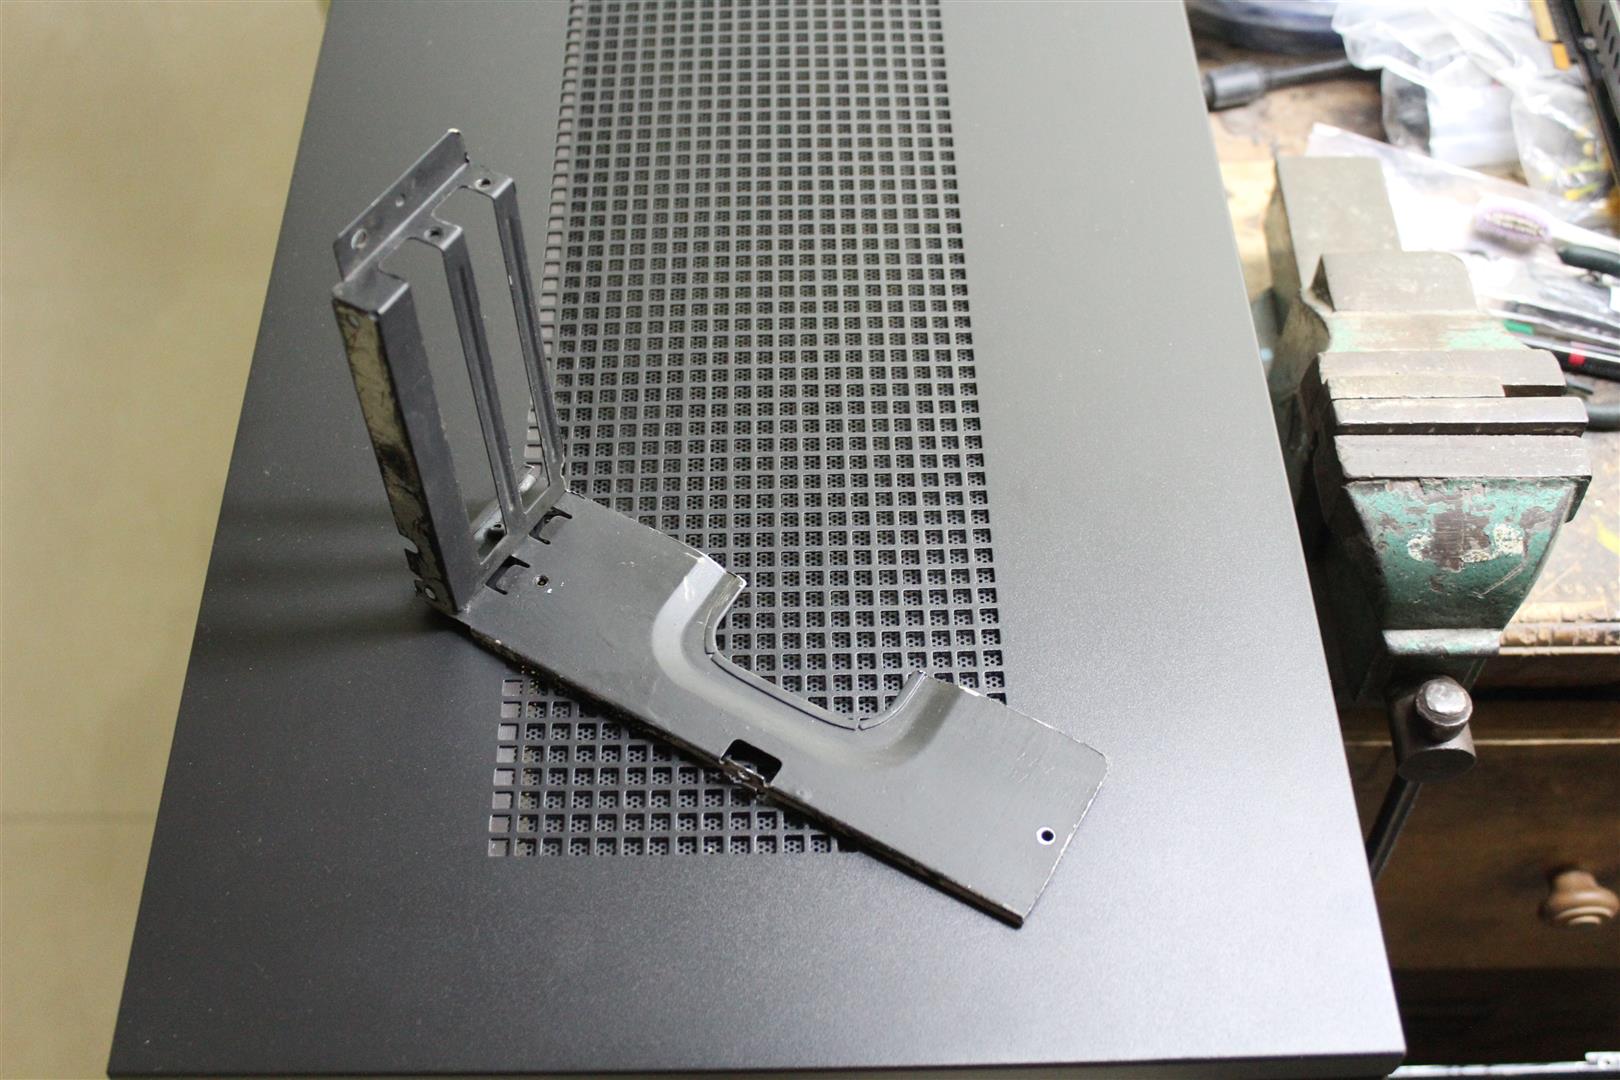
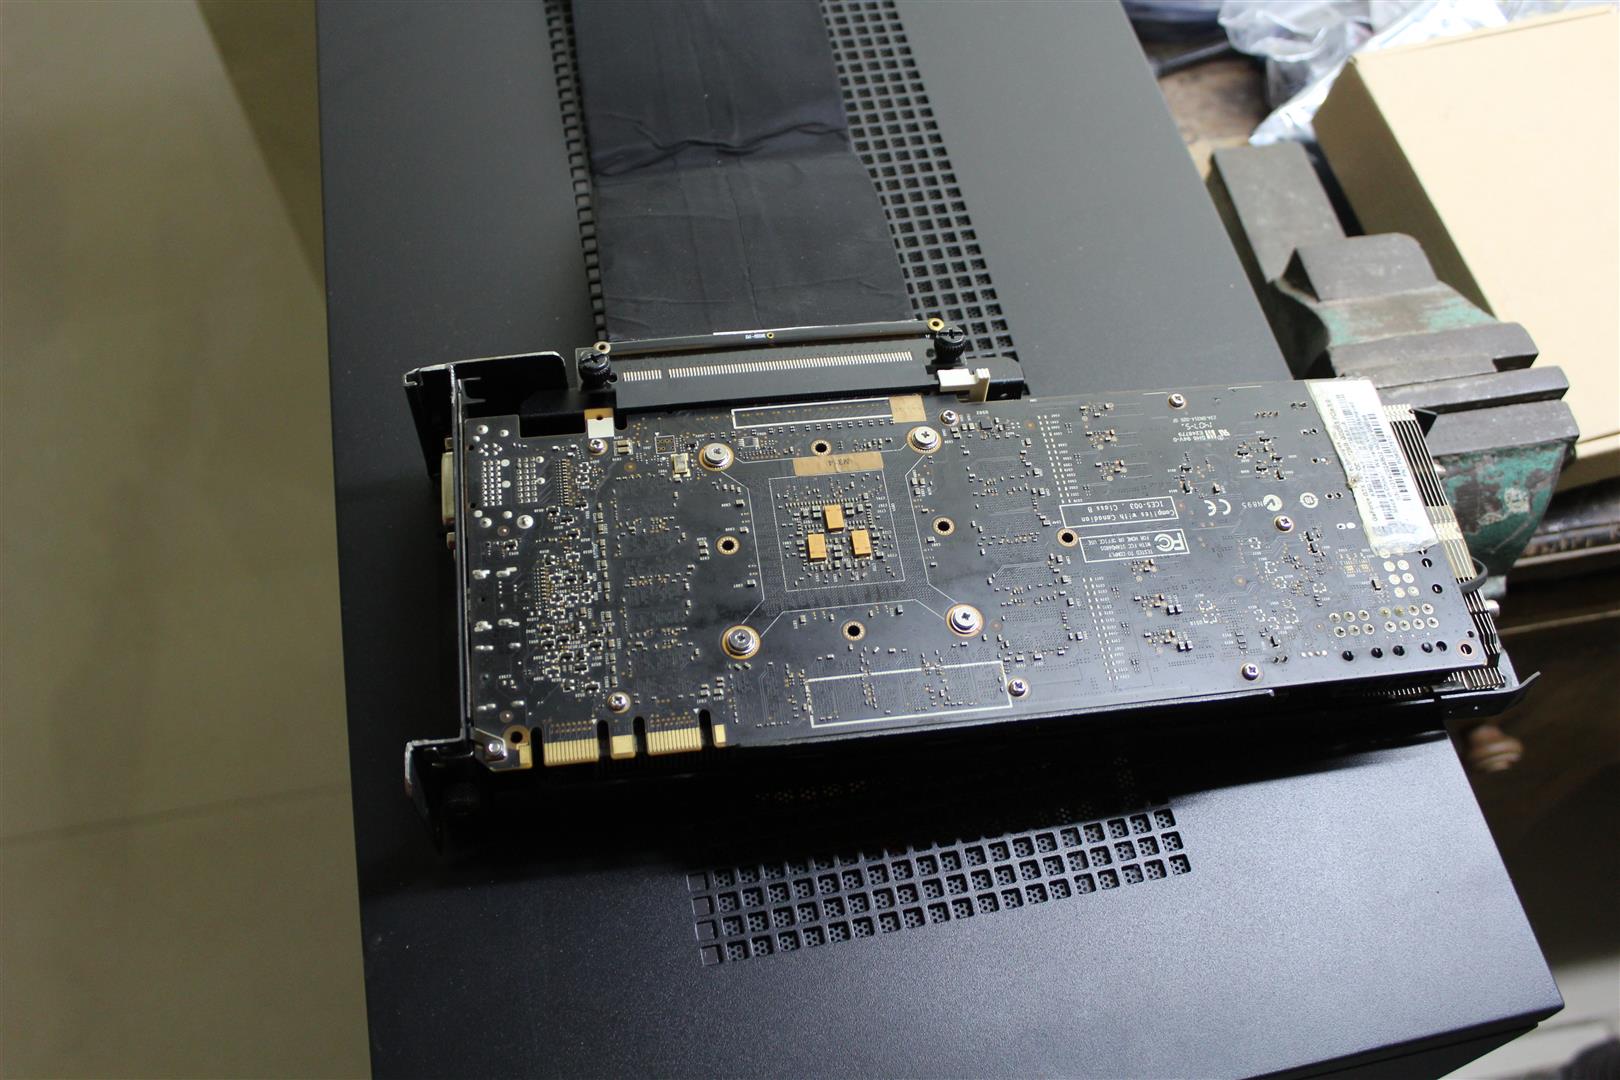
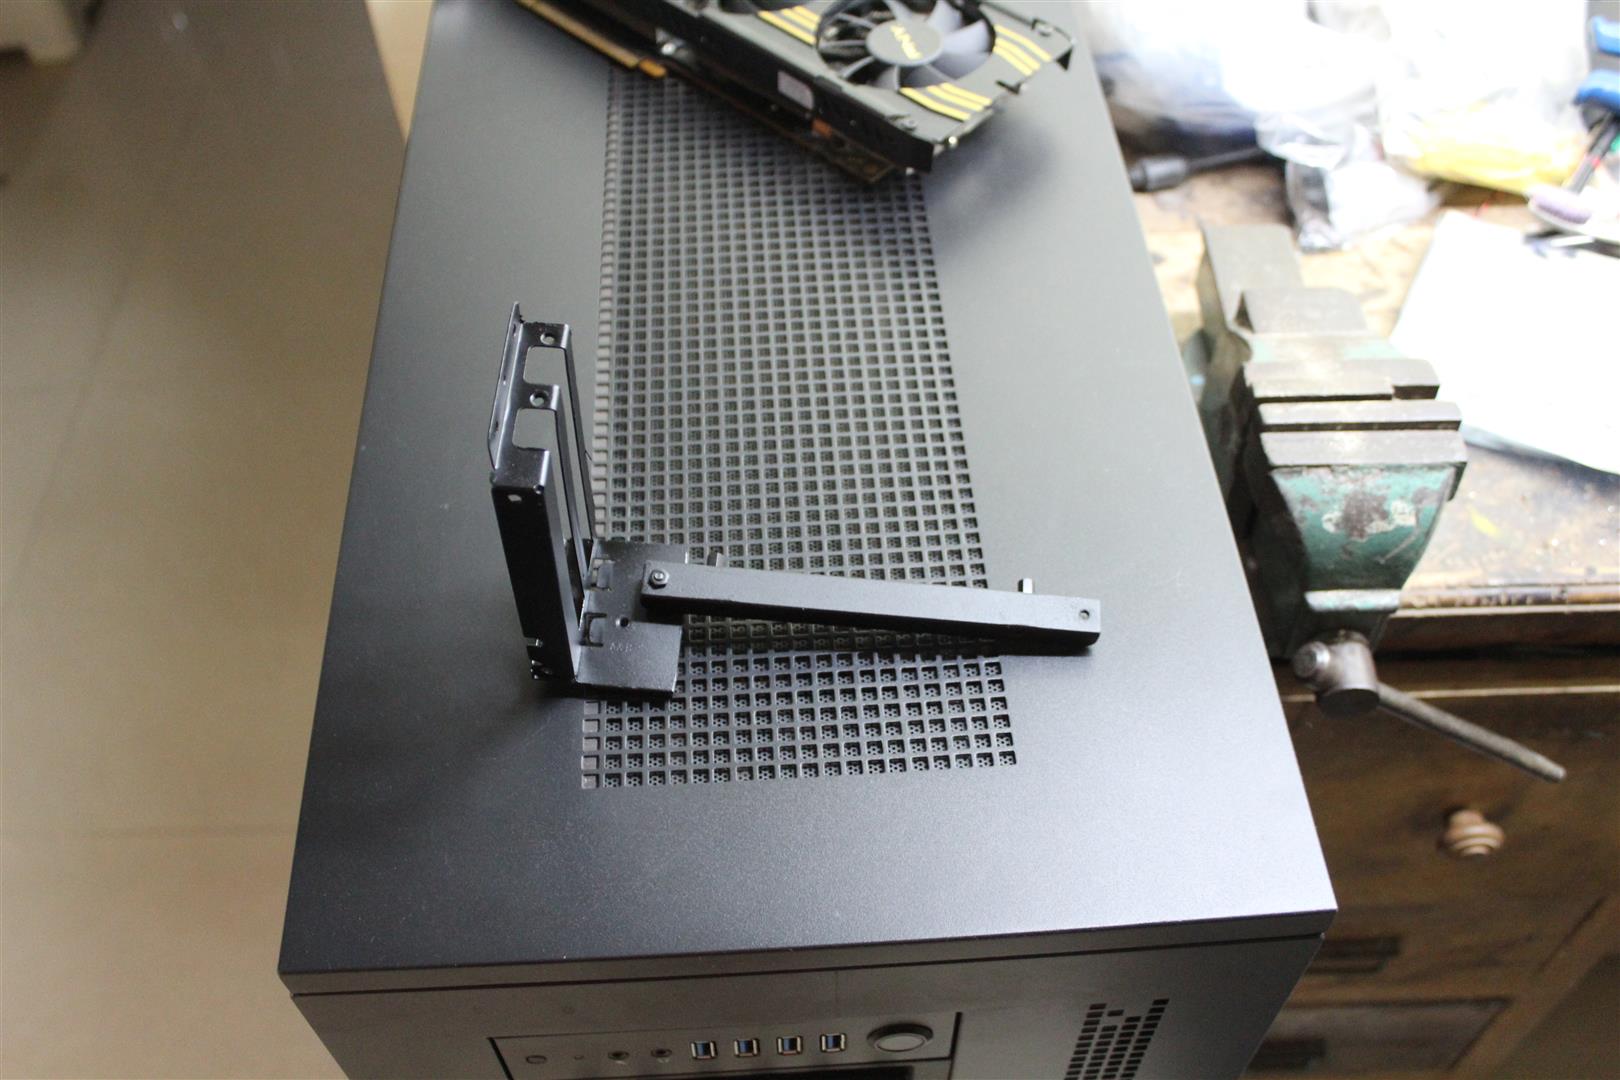
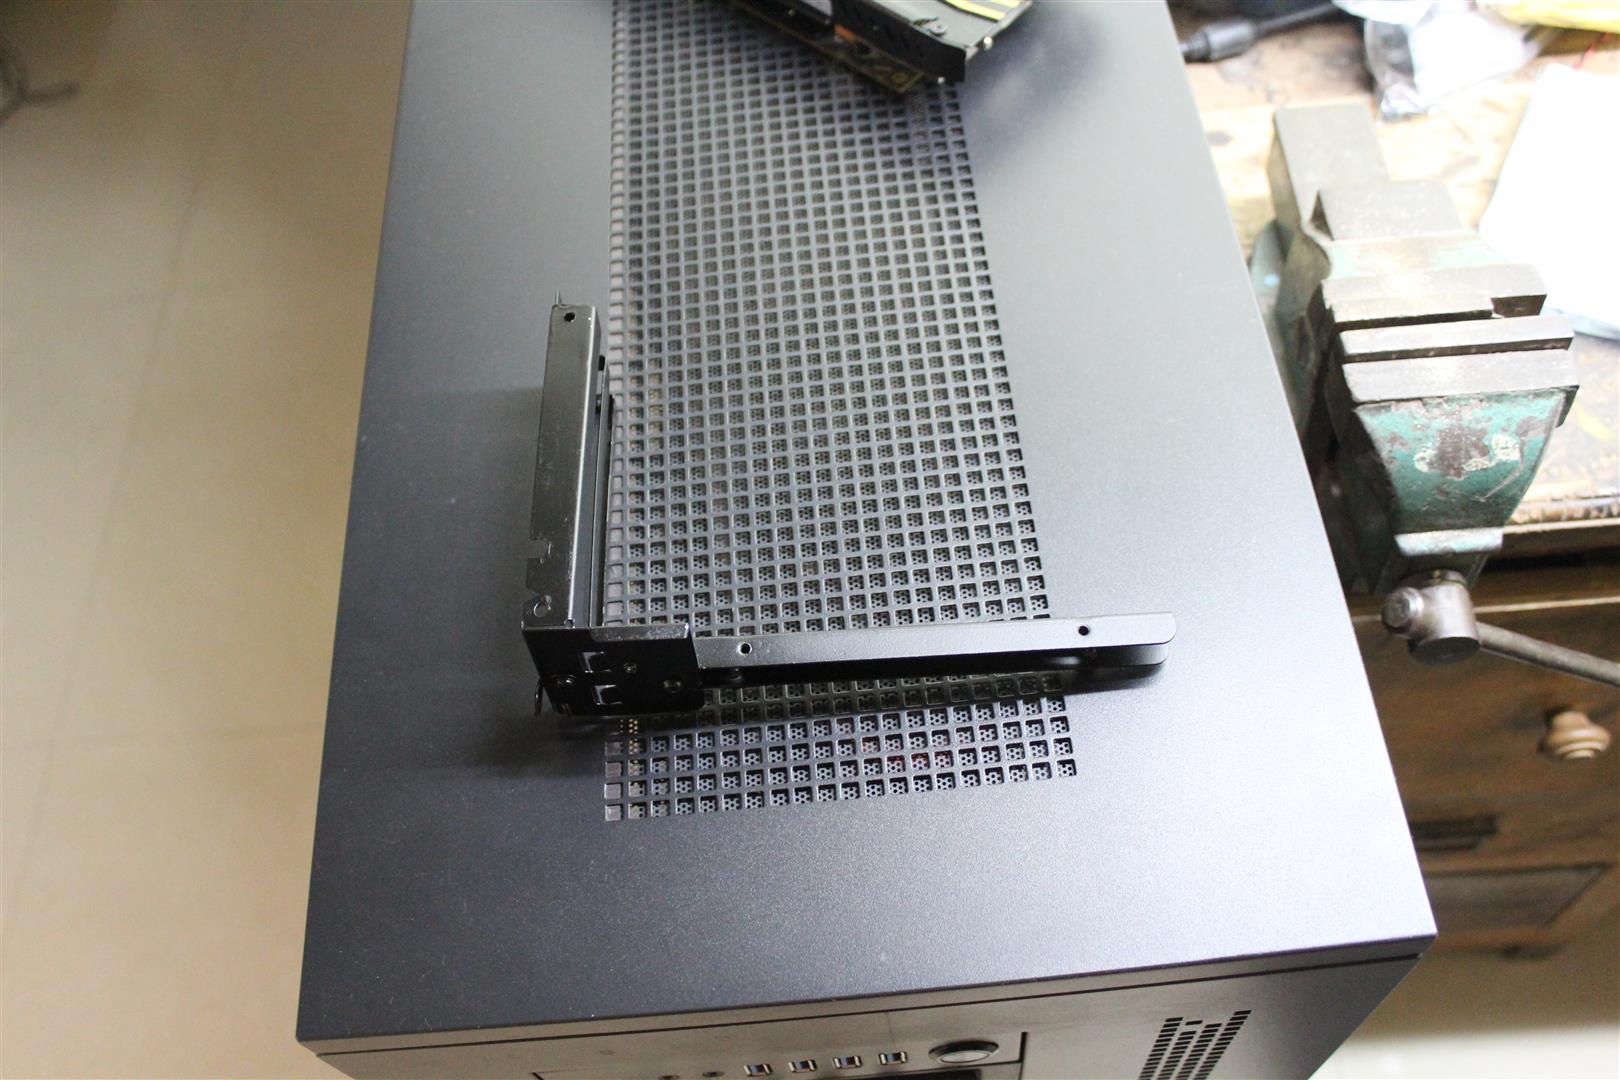
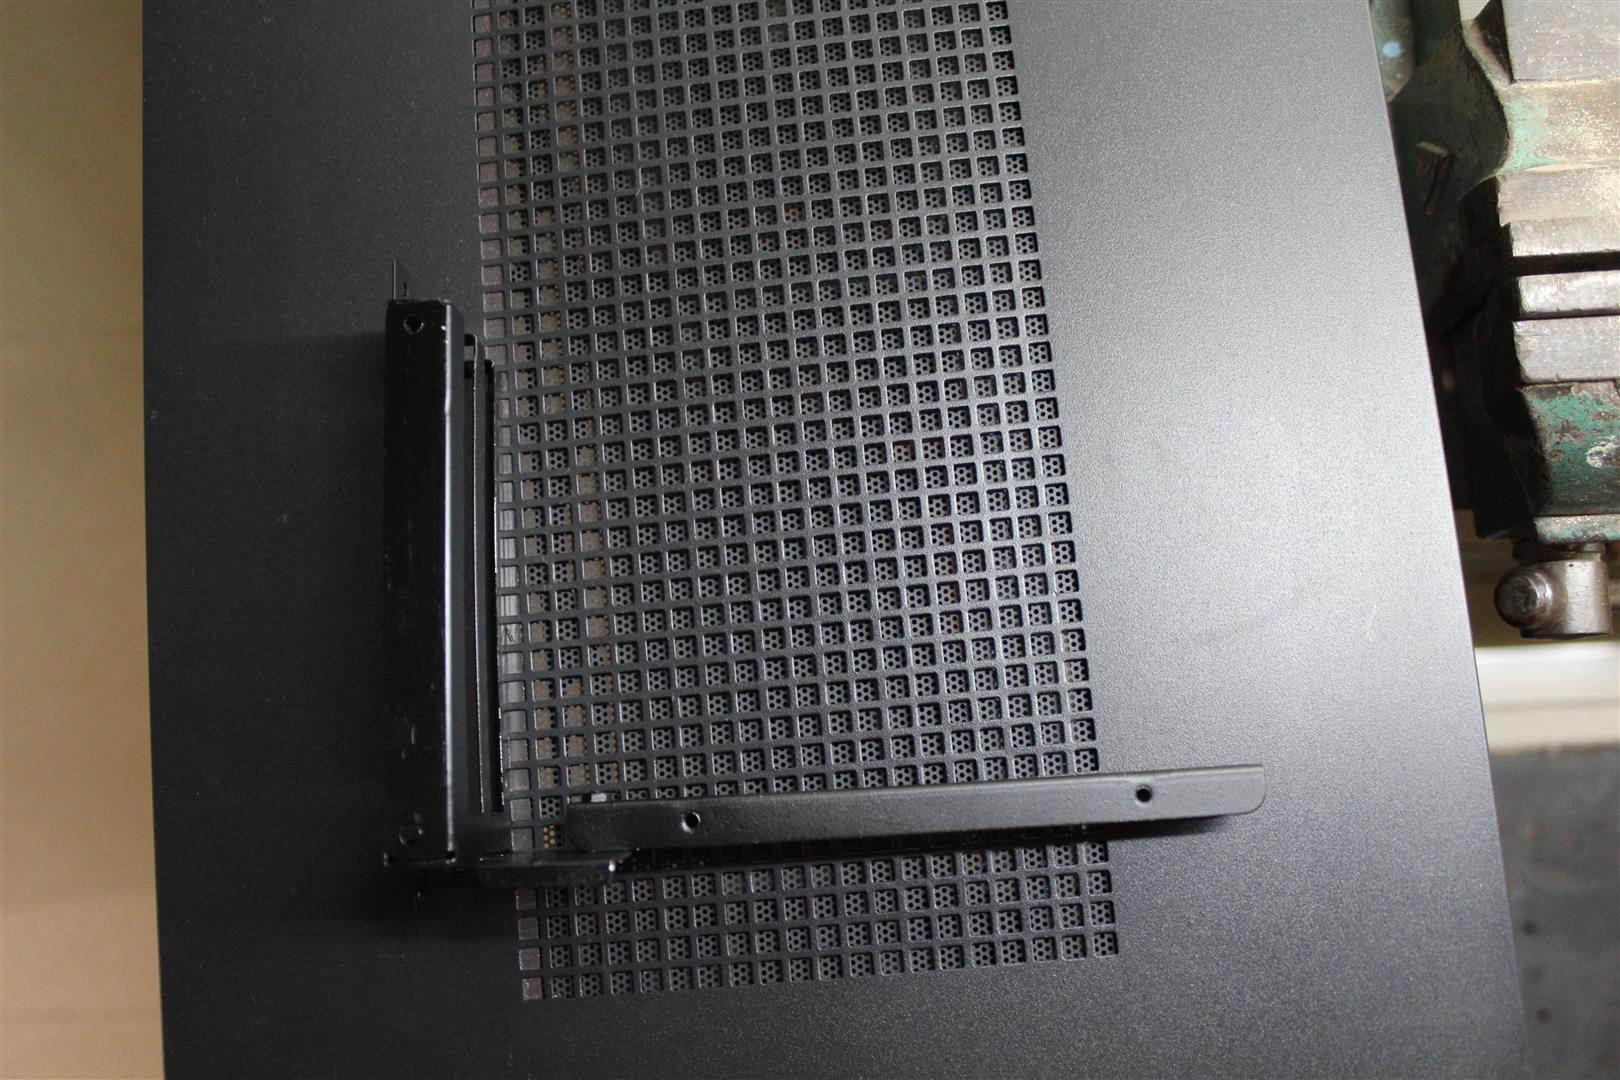

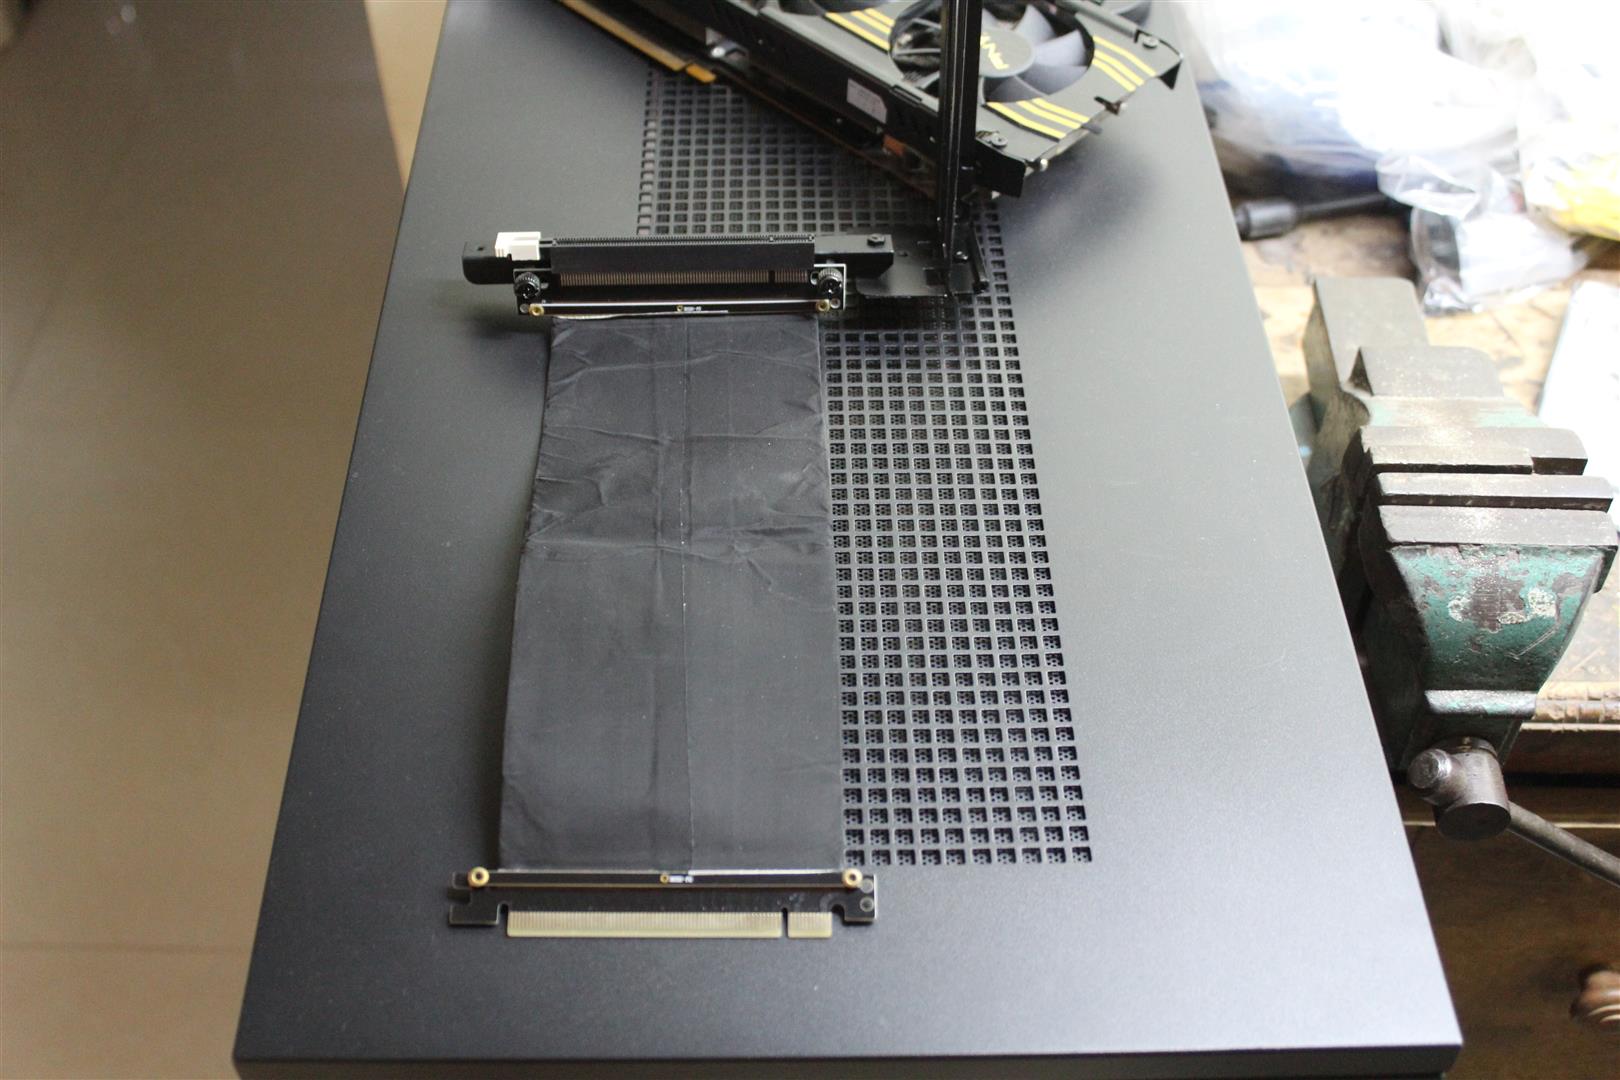
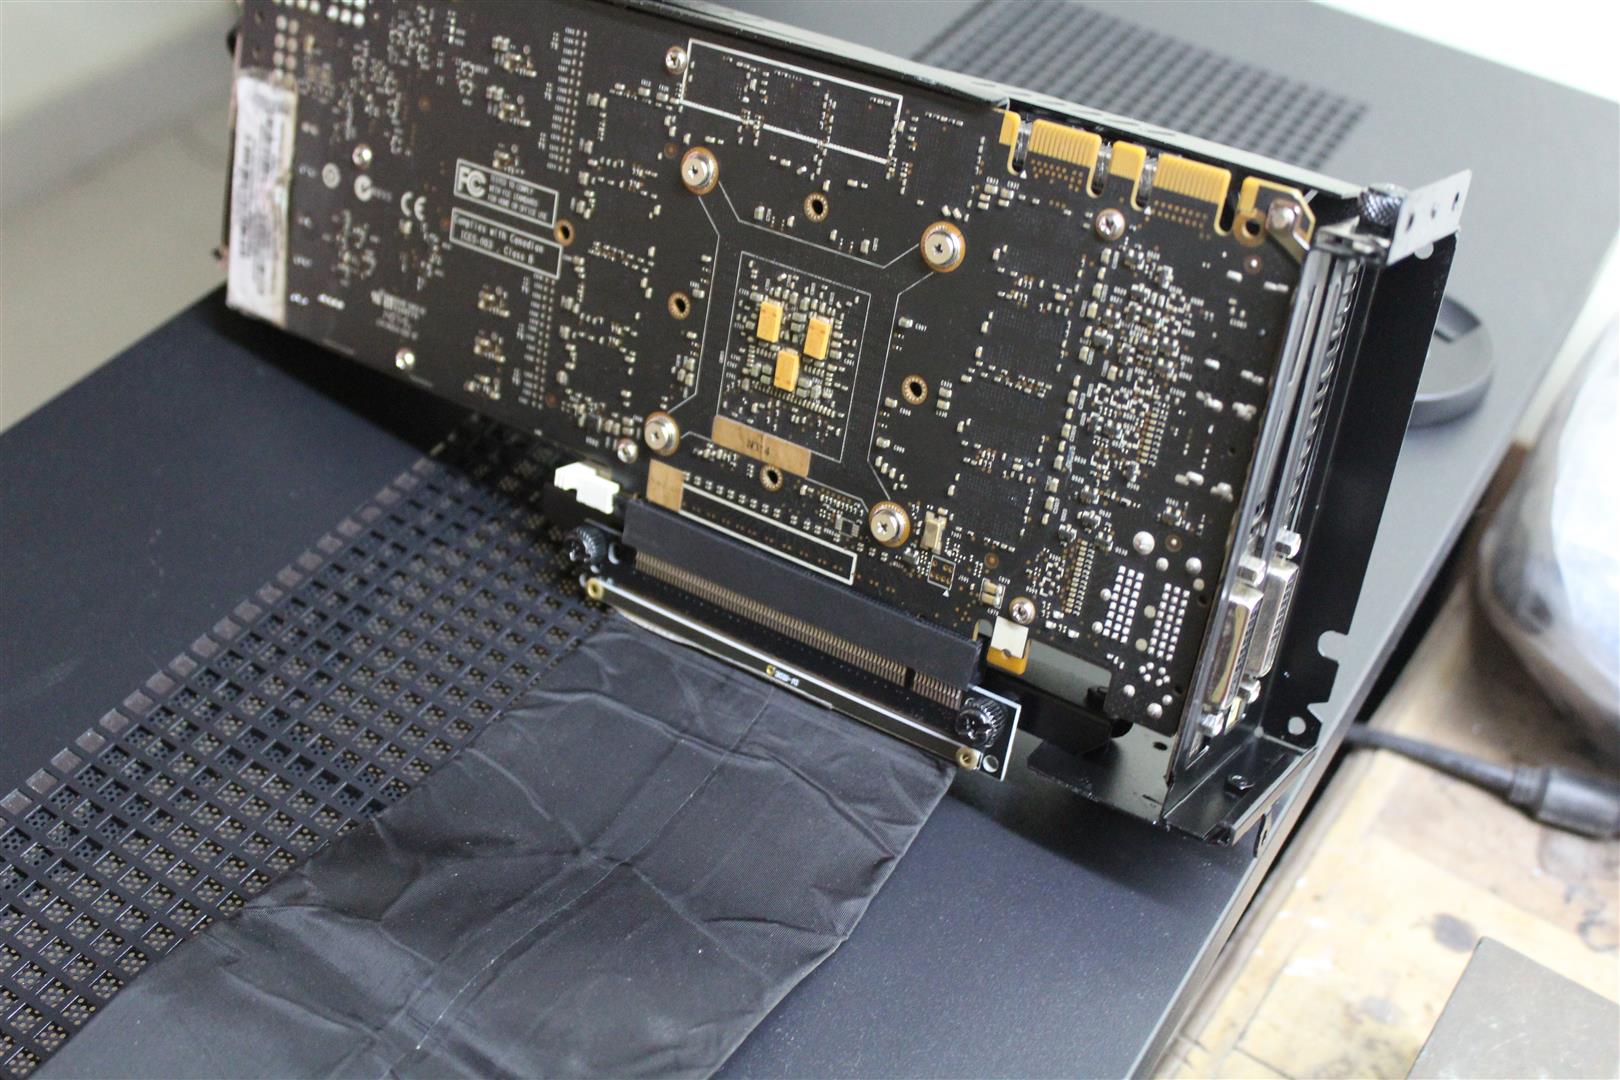

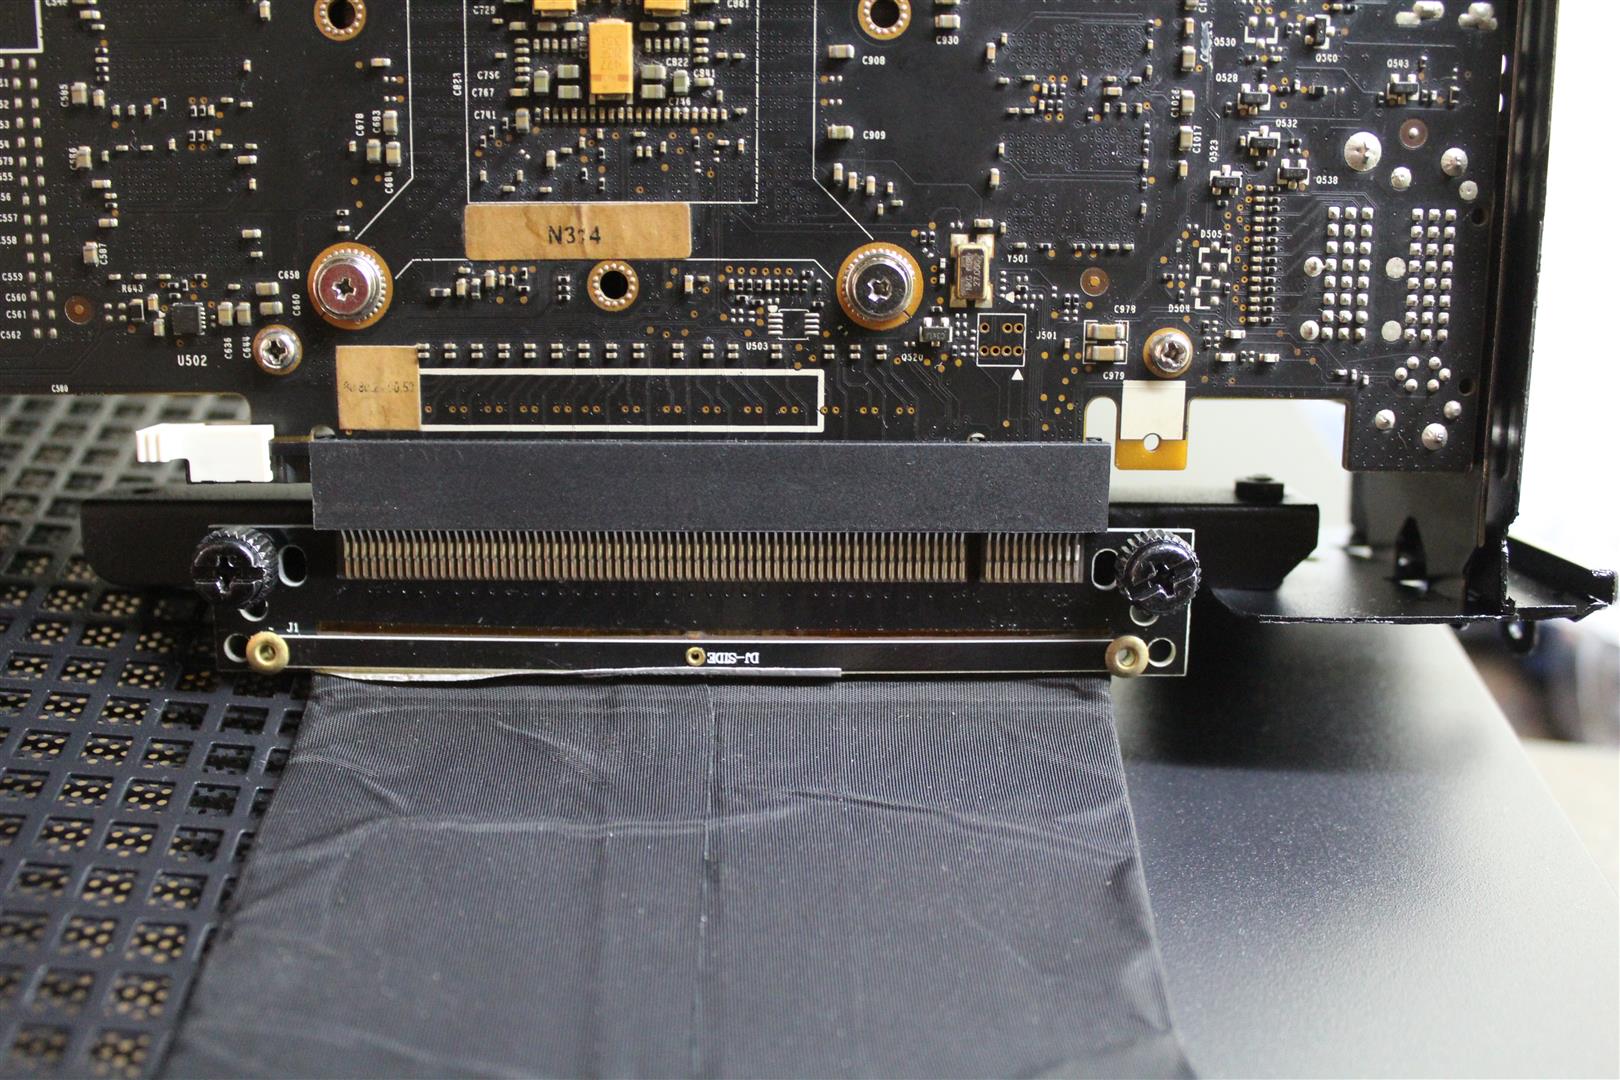
Vertical GPU Mounting bracket is done. Next have to cut few holes in the case back panel for installation of this bracket.
-
13 Nov 2017
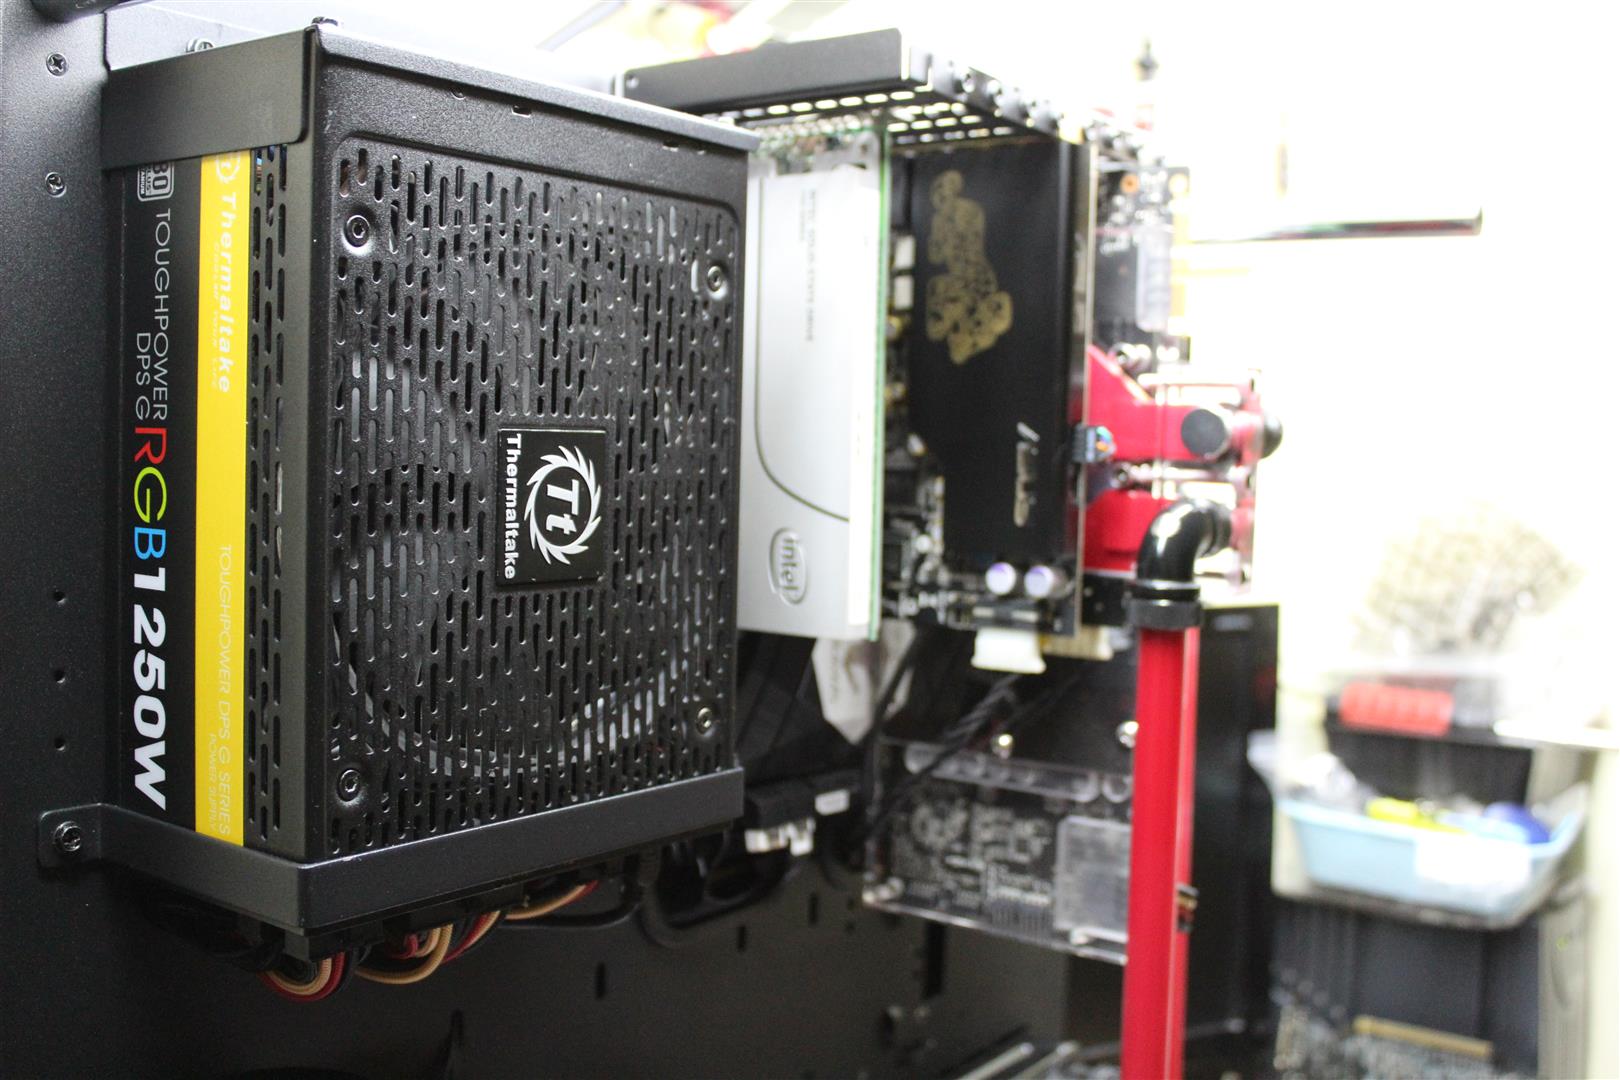
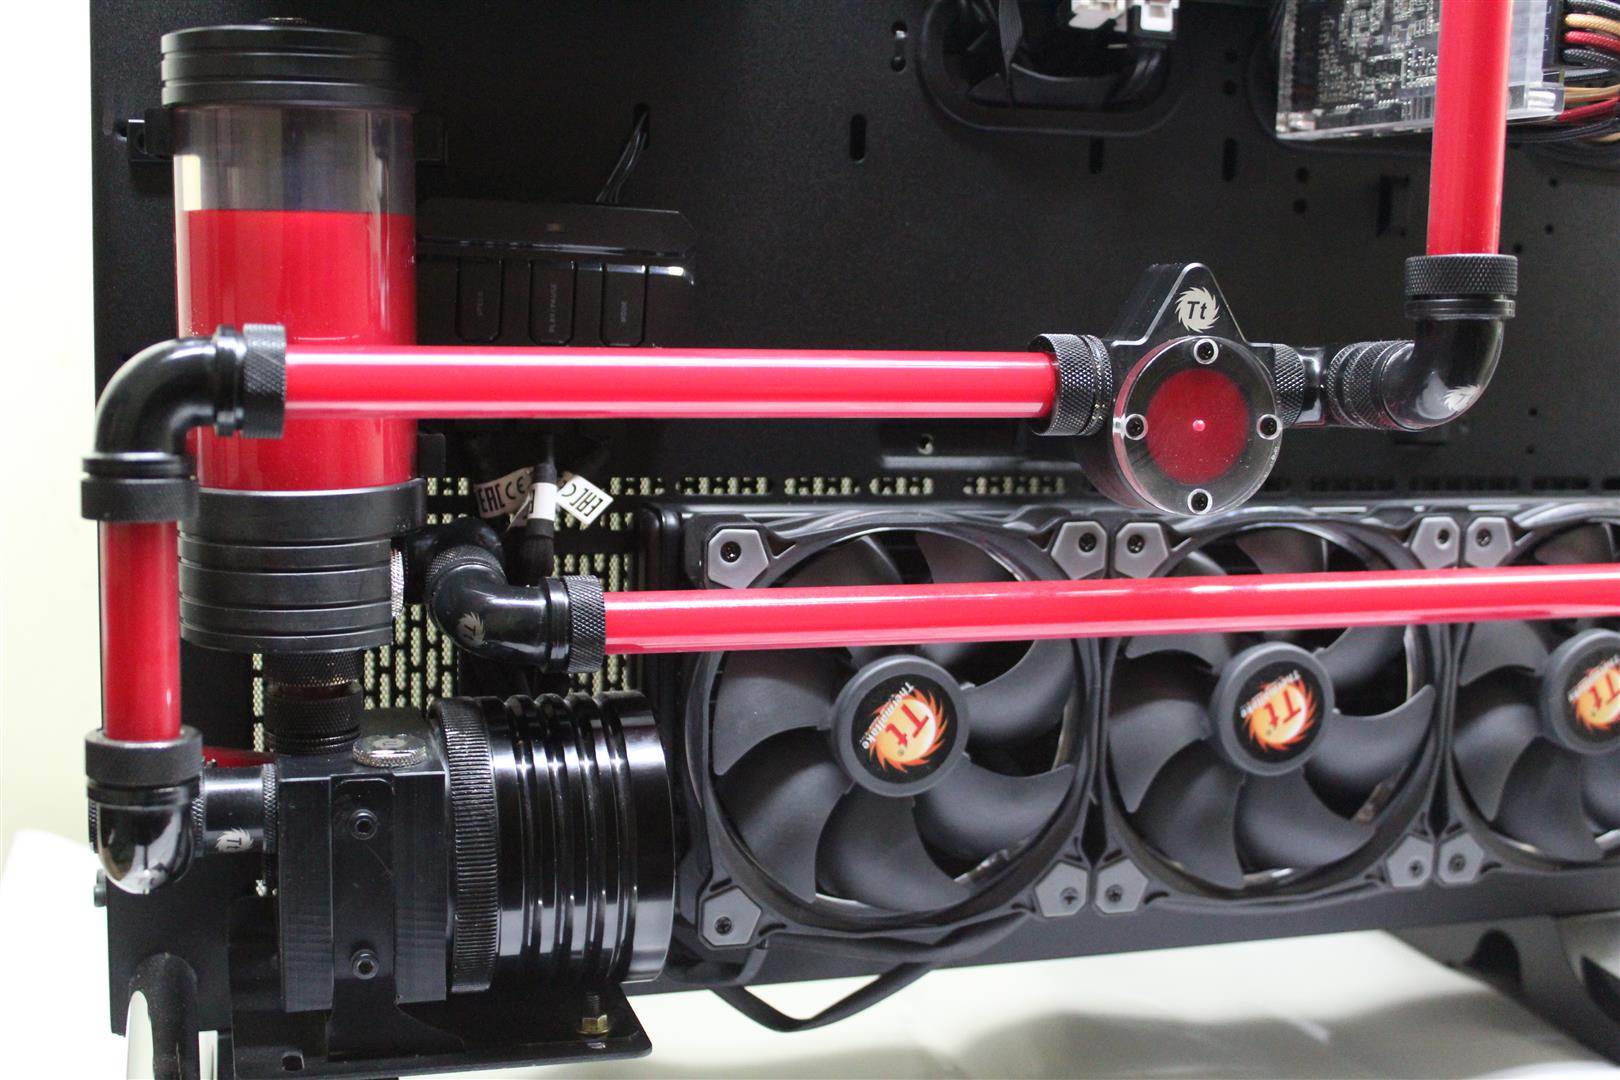
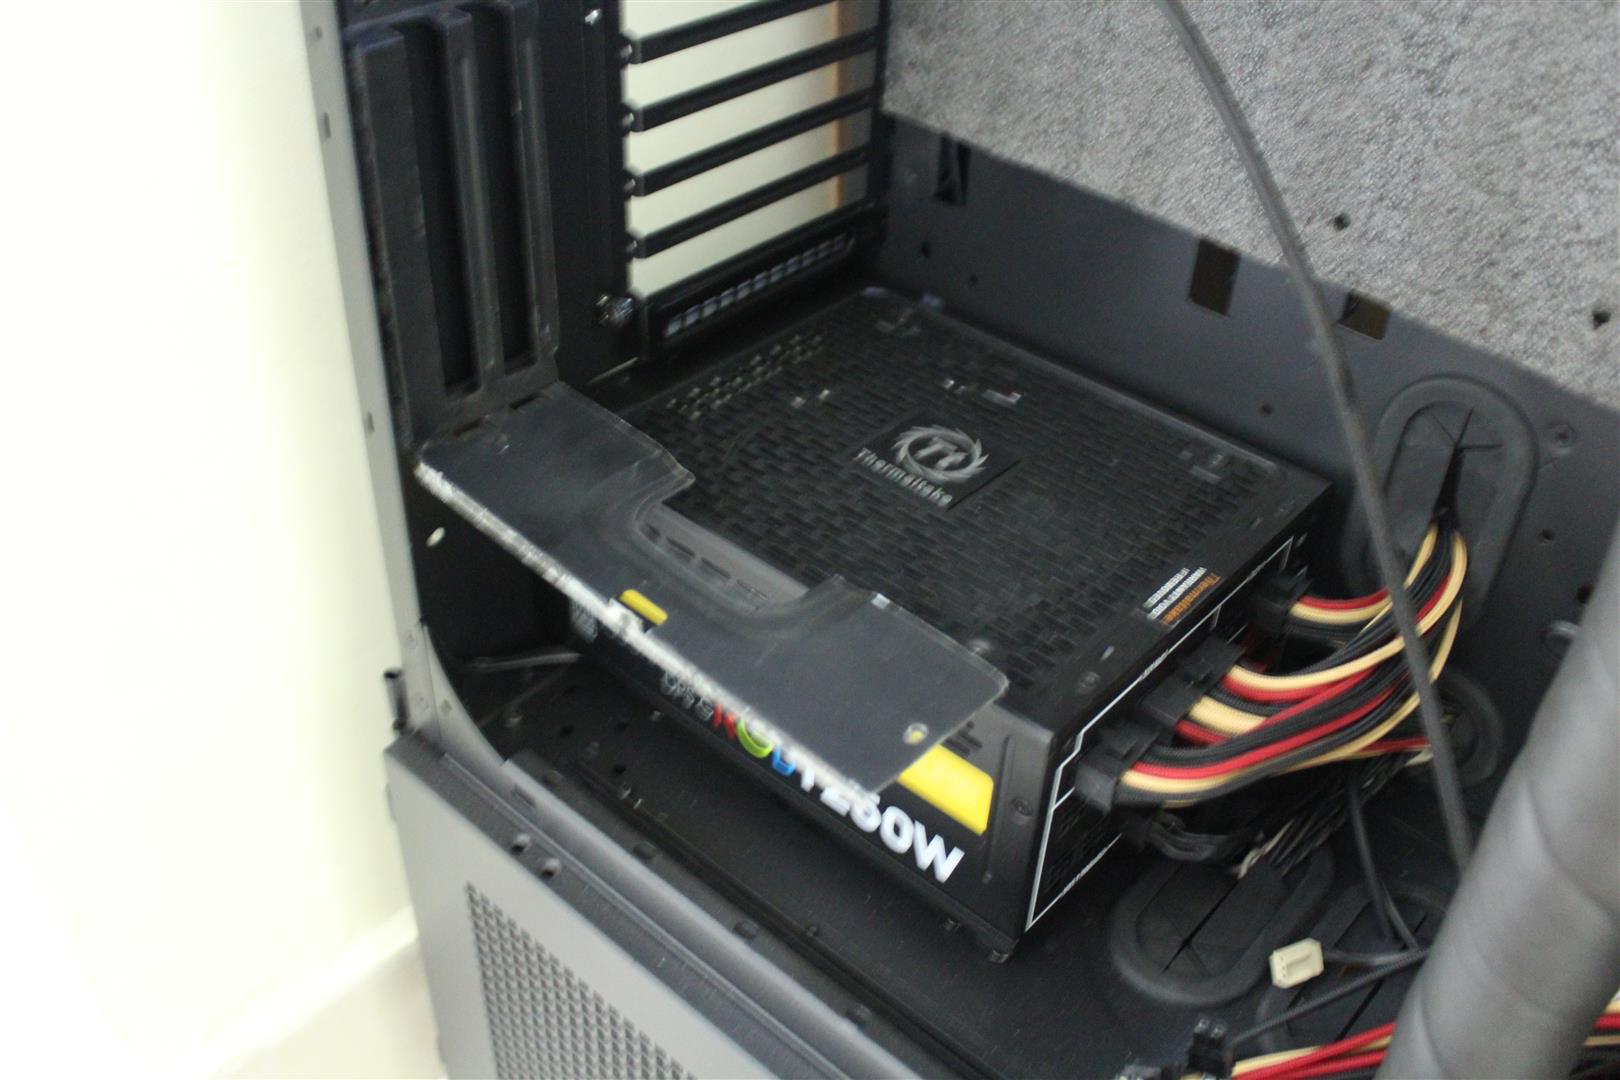
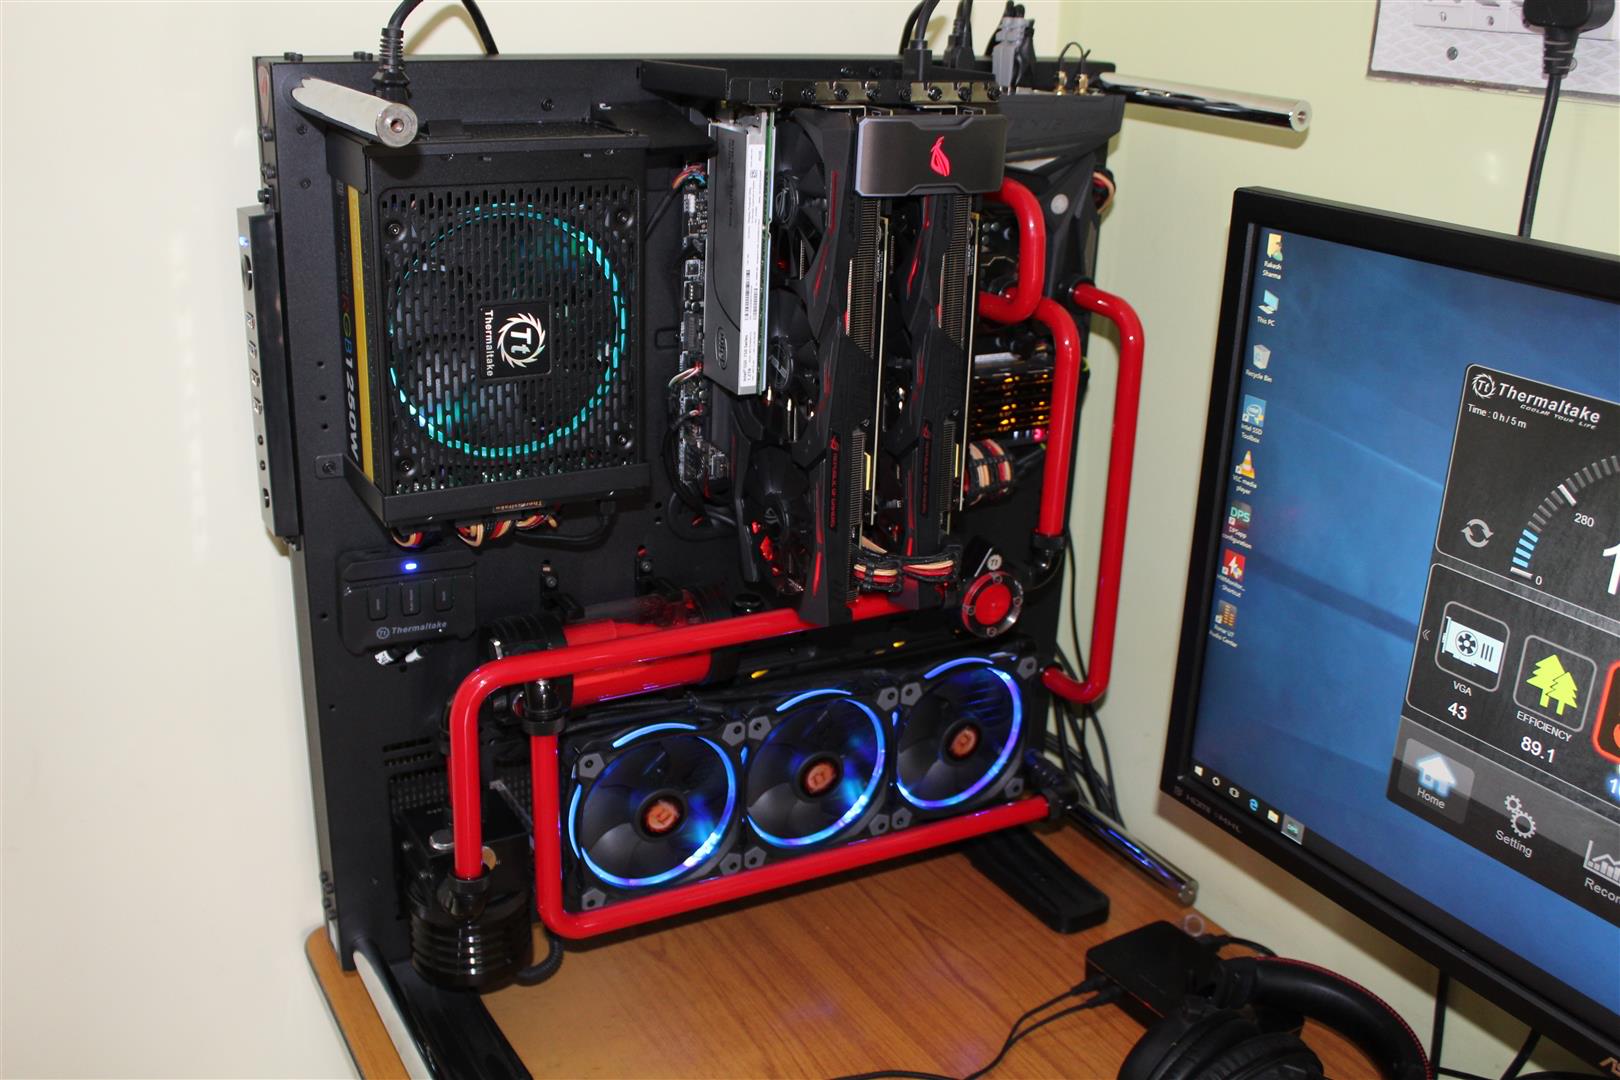
PSU for the project arrived. Thermaltake Toughpower 1250W RGB PSU, a huge 1250 watts 80 PLUS Titanium power house, best suitable for this build.
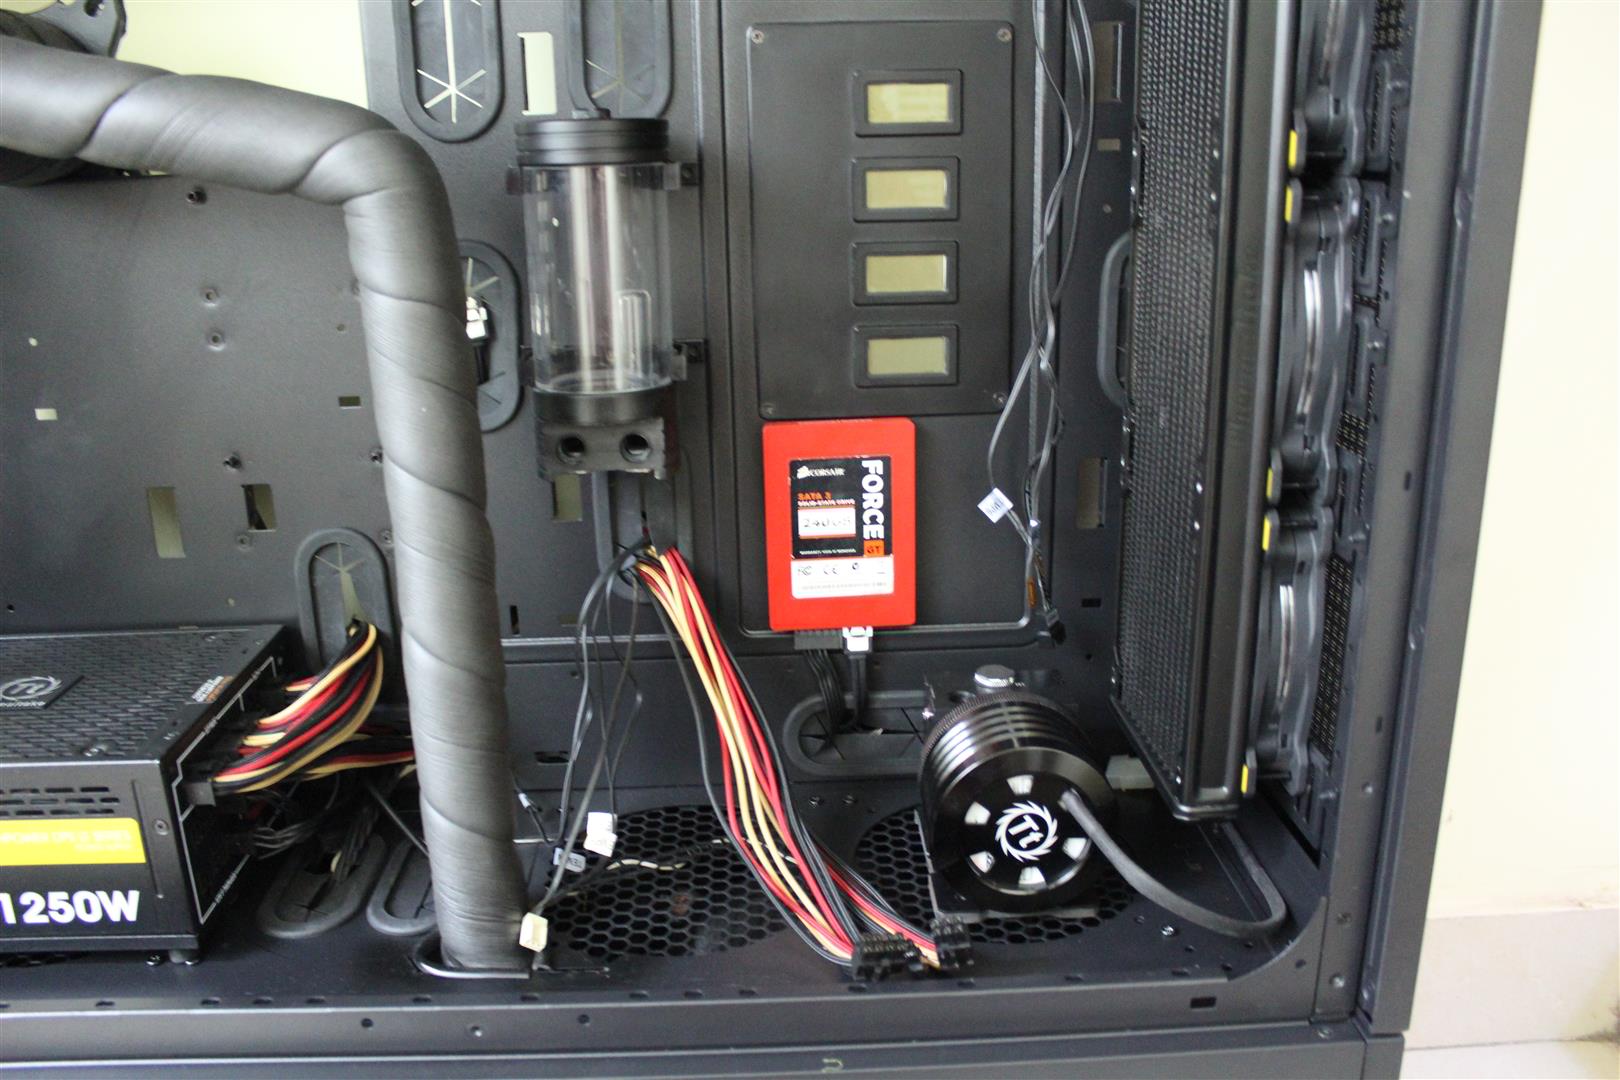
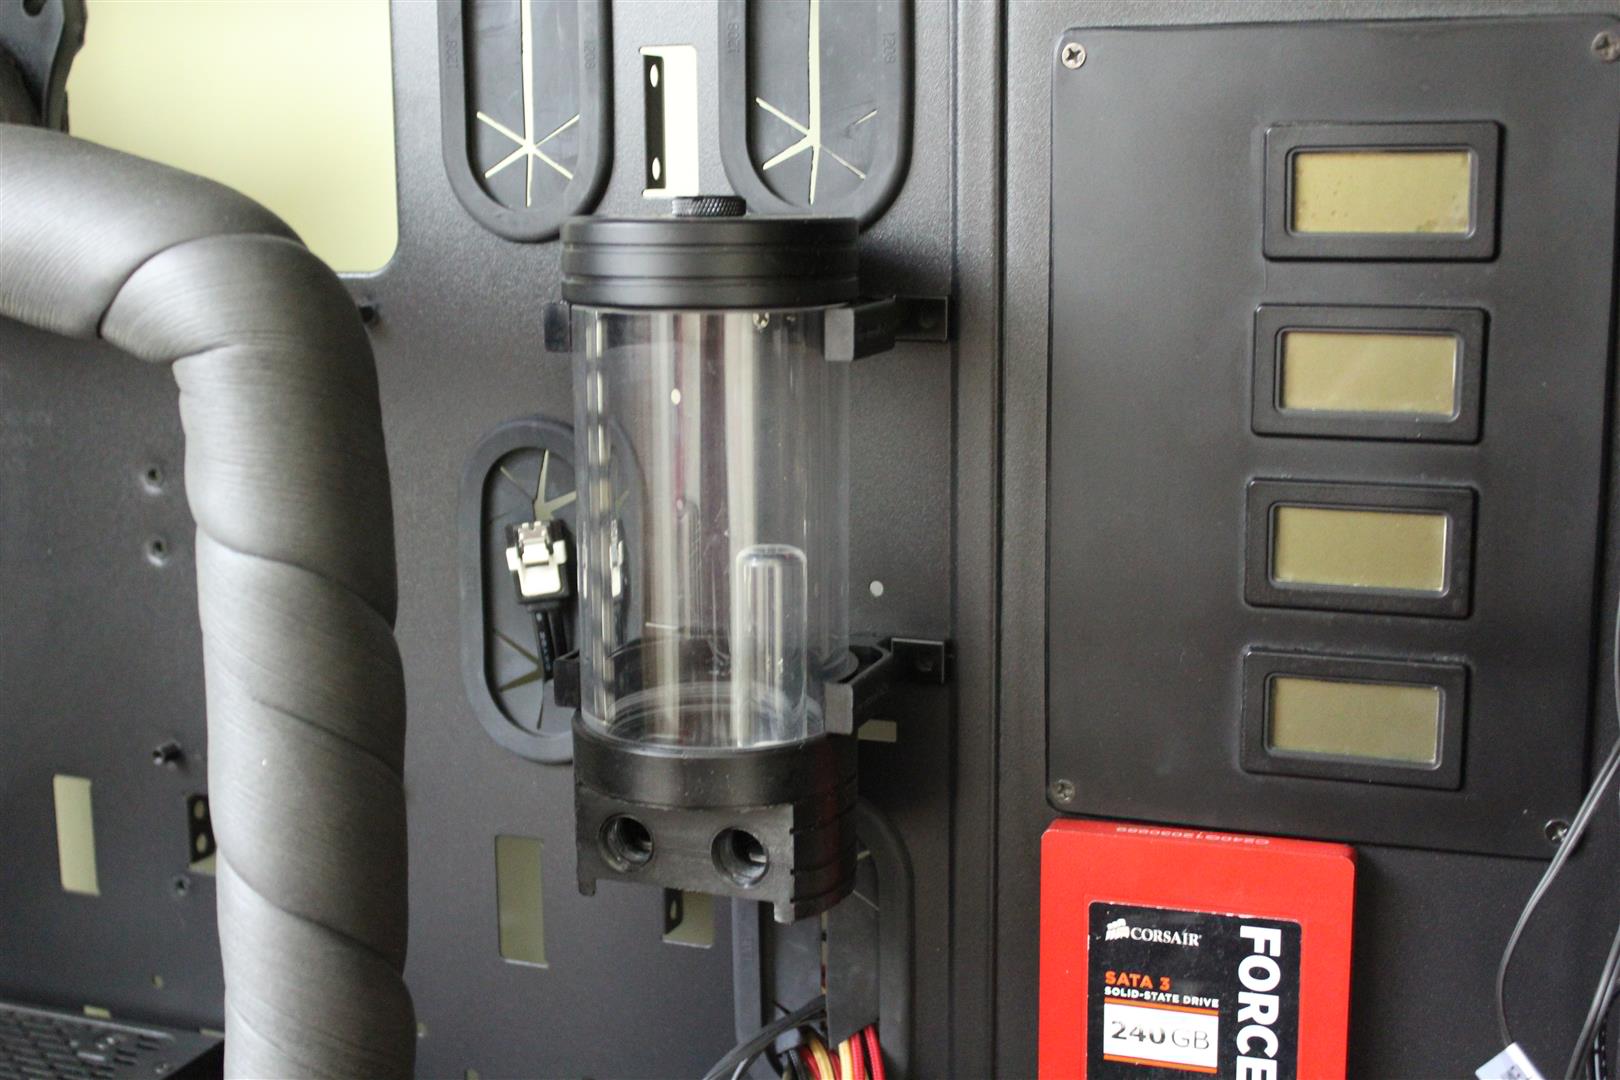
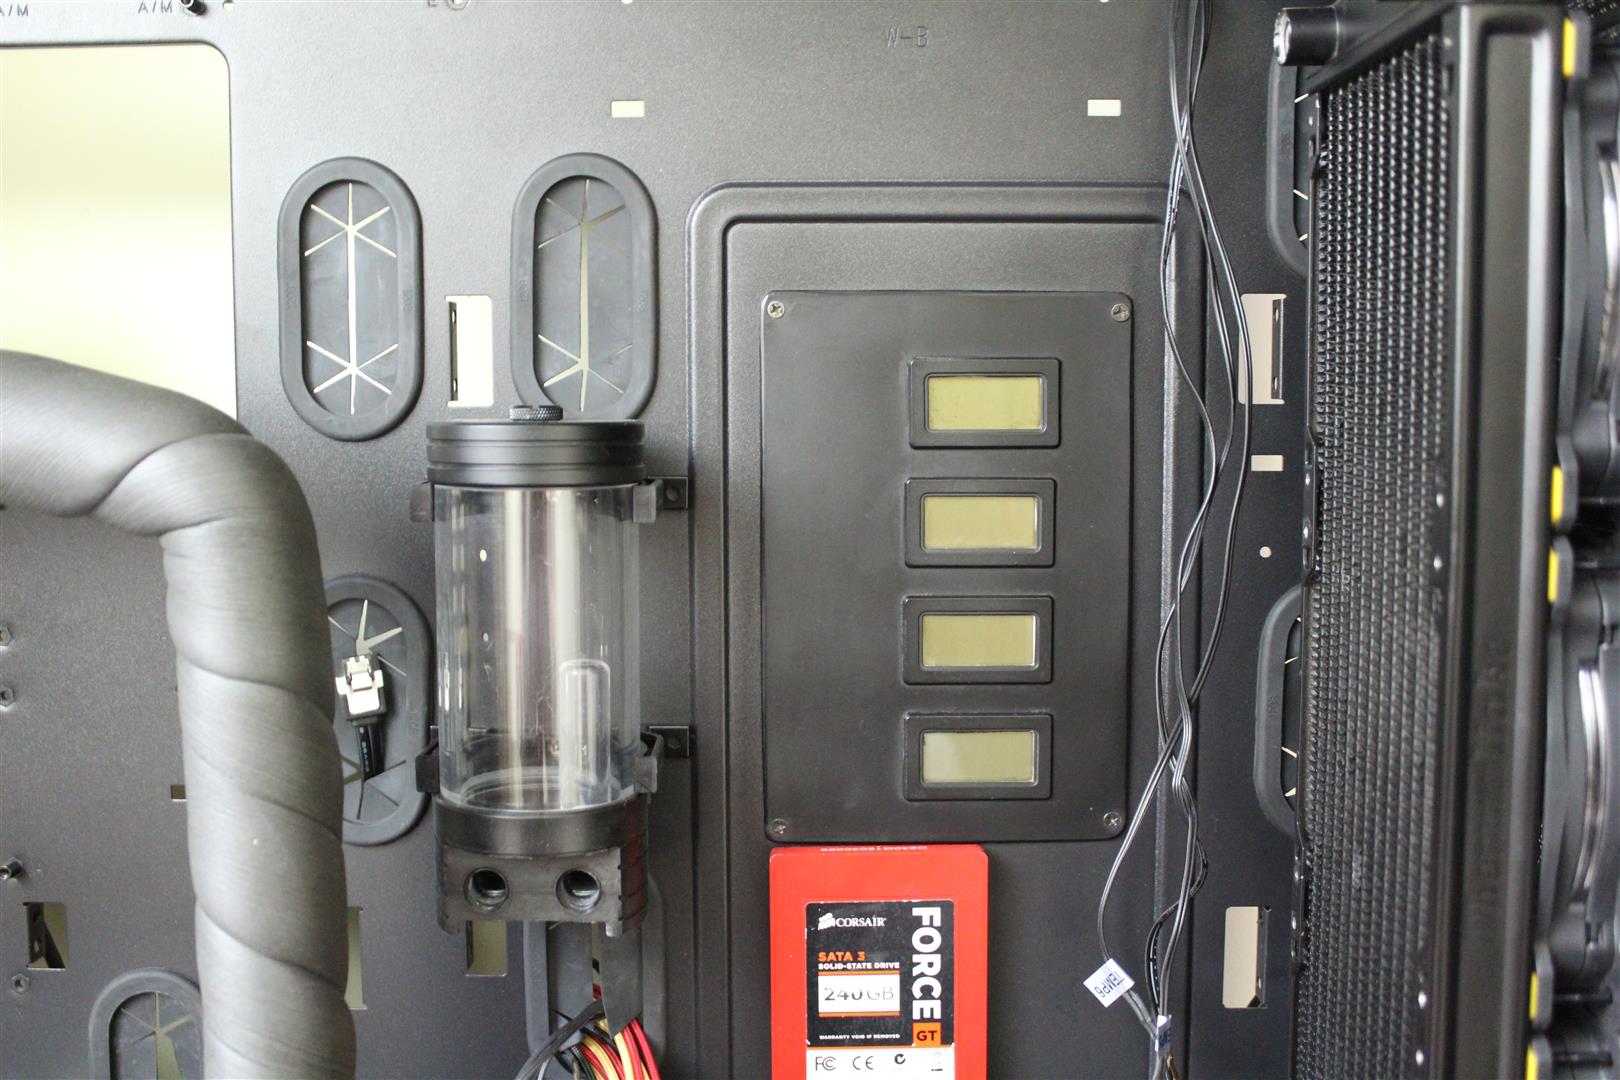
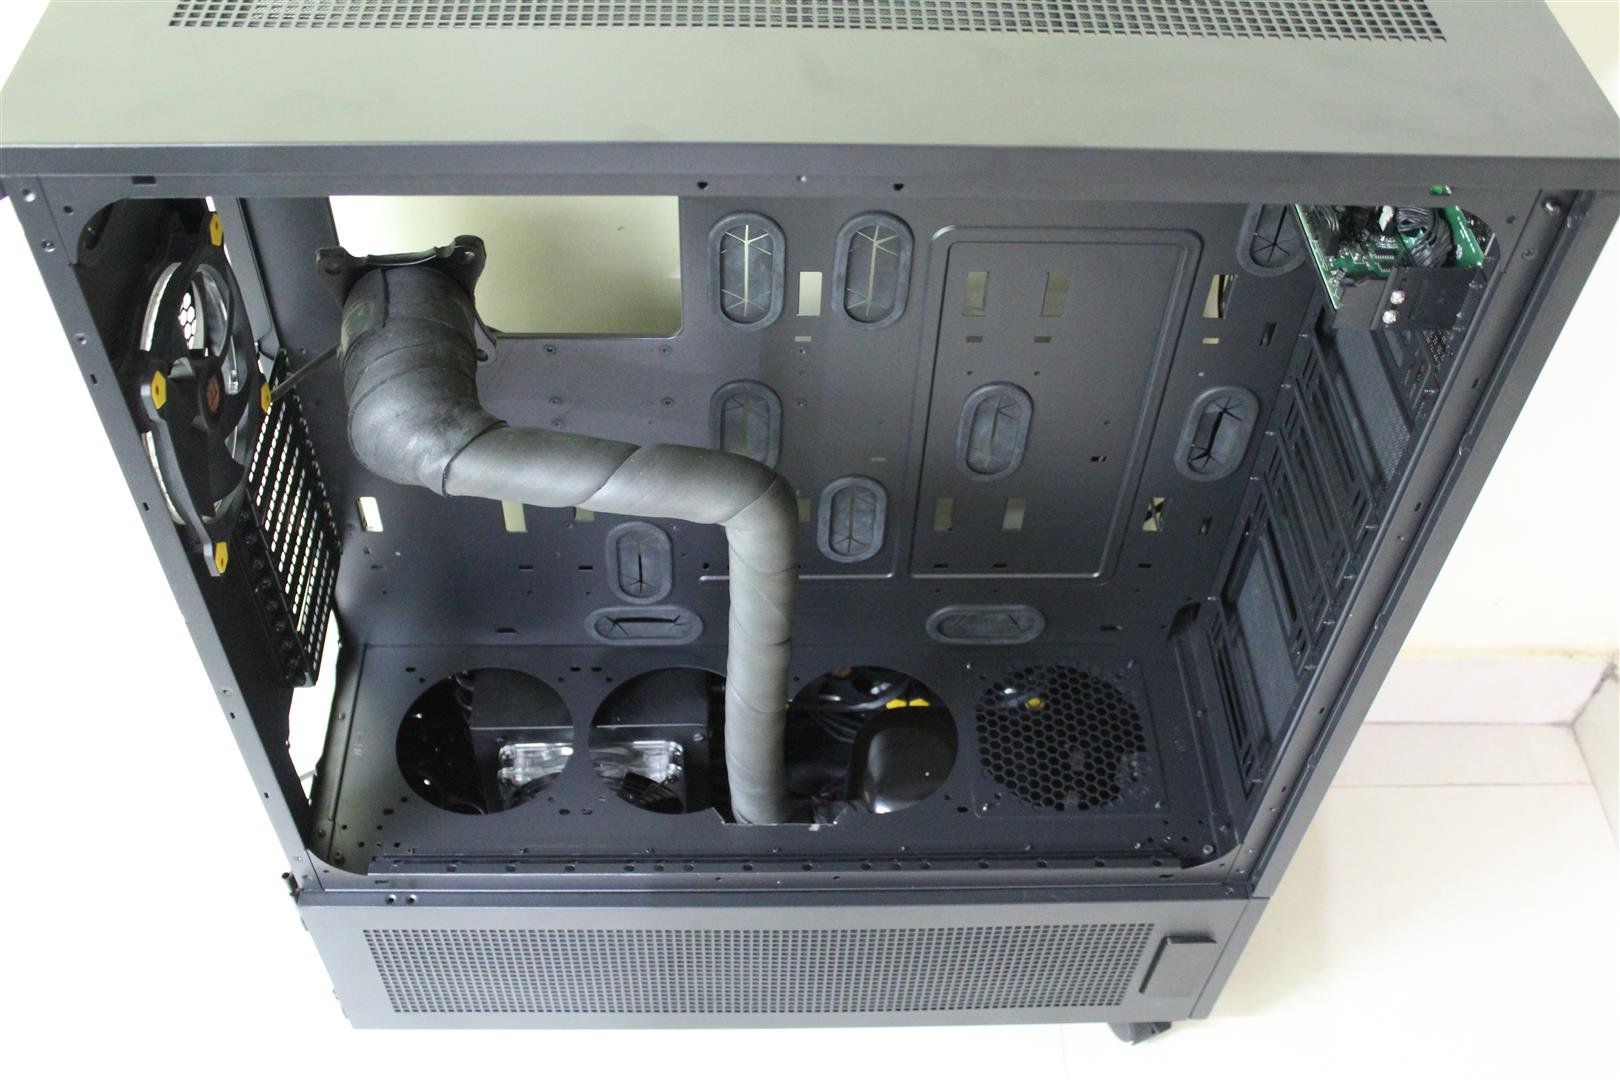
Fitted the case with four LCD thermometers for monitoring temperature of different segments of Phase Changer section. Also started working on custom liquid cooling for the GPU.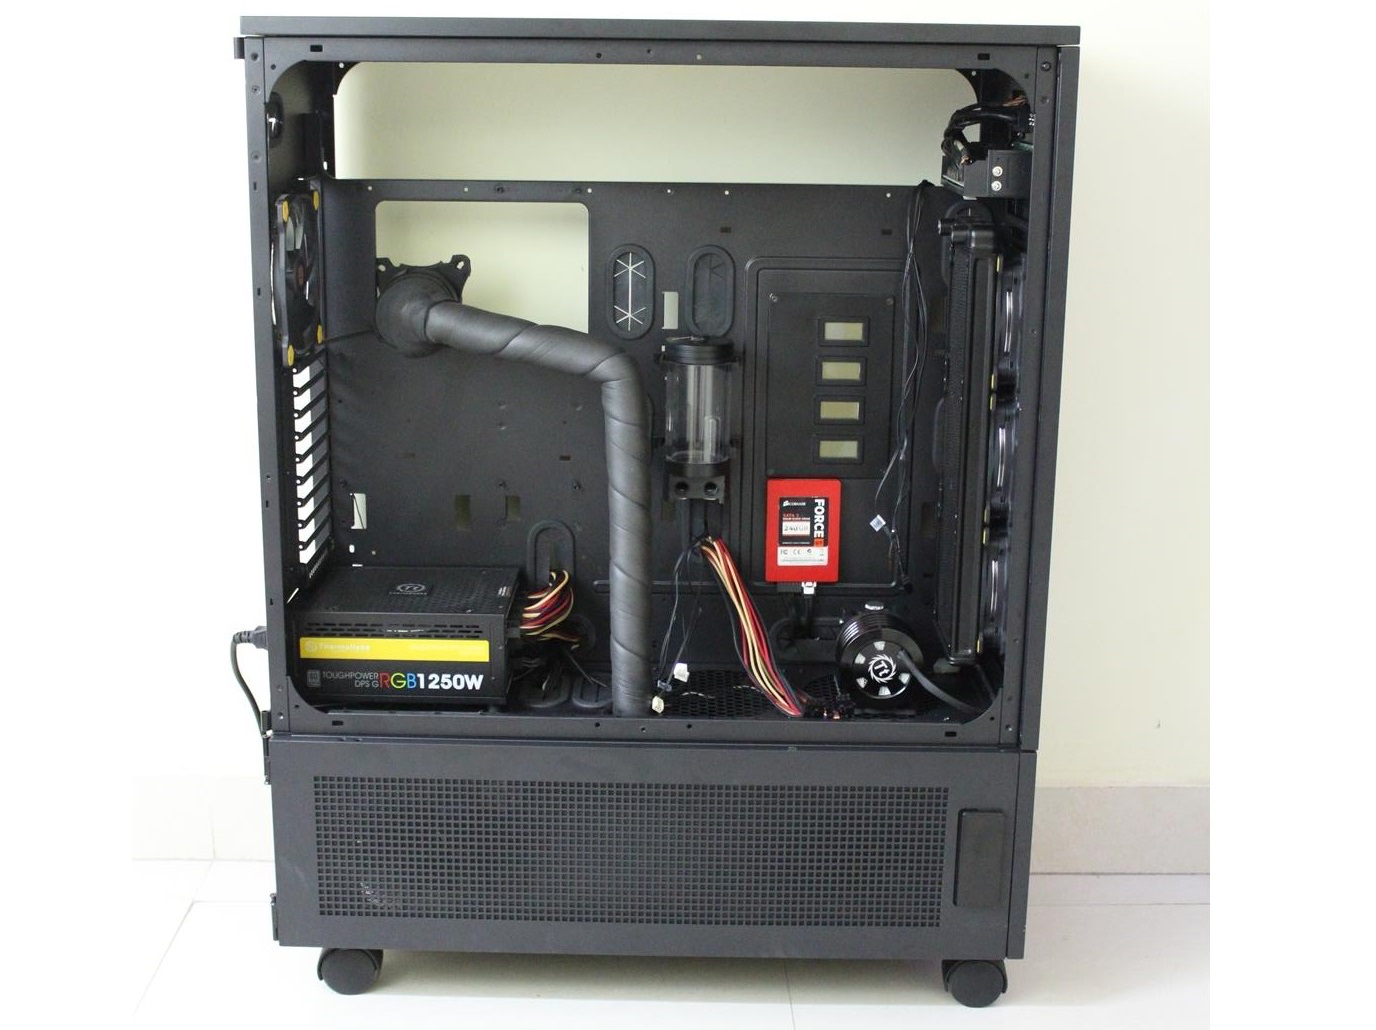


-
11 Nov 2017
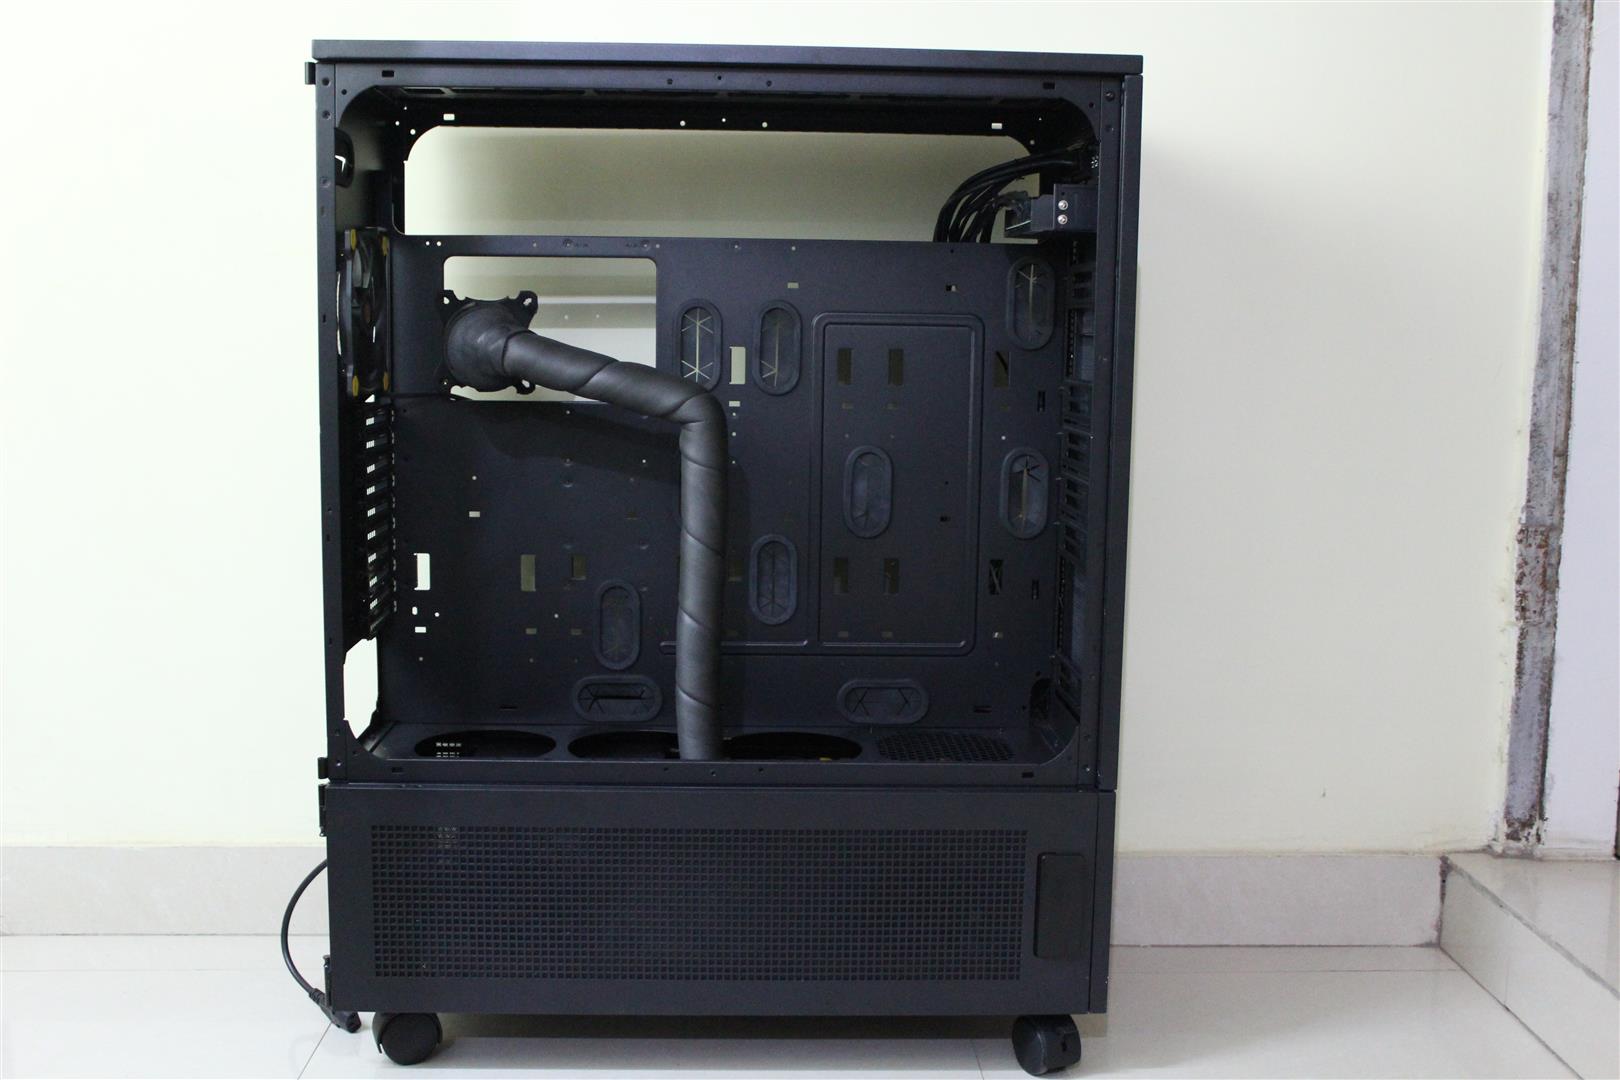
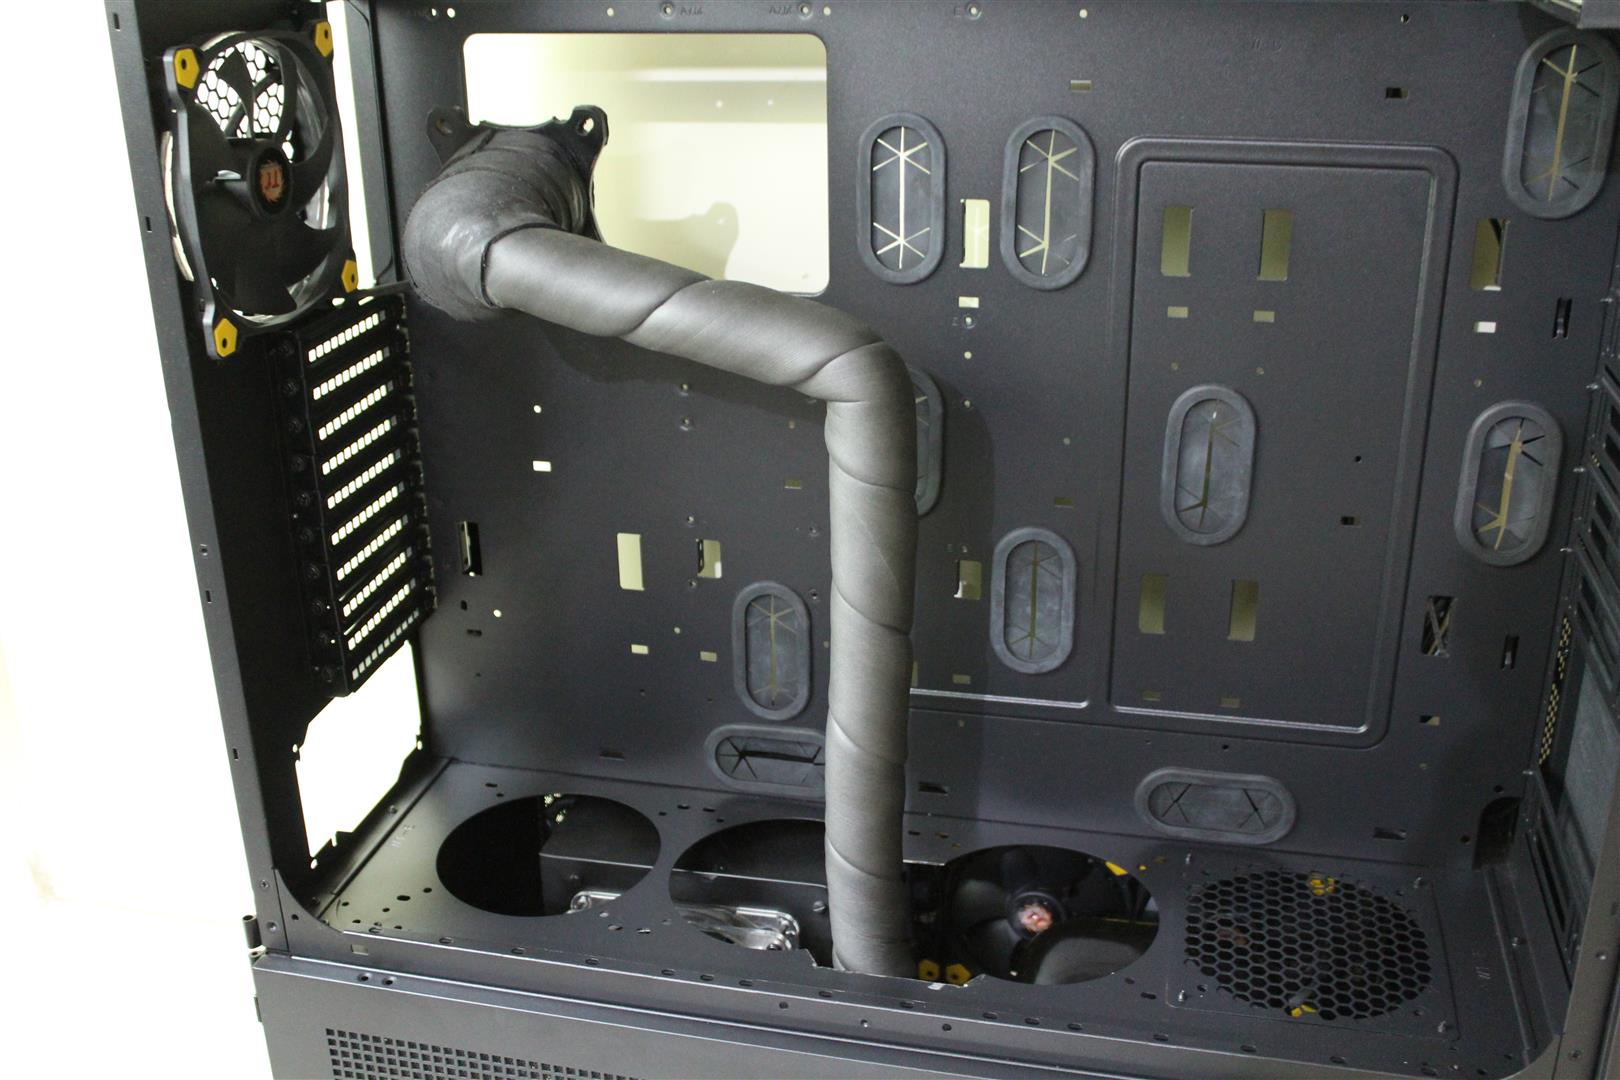
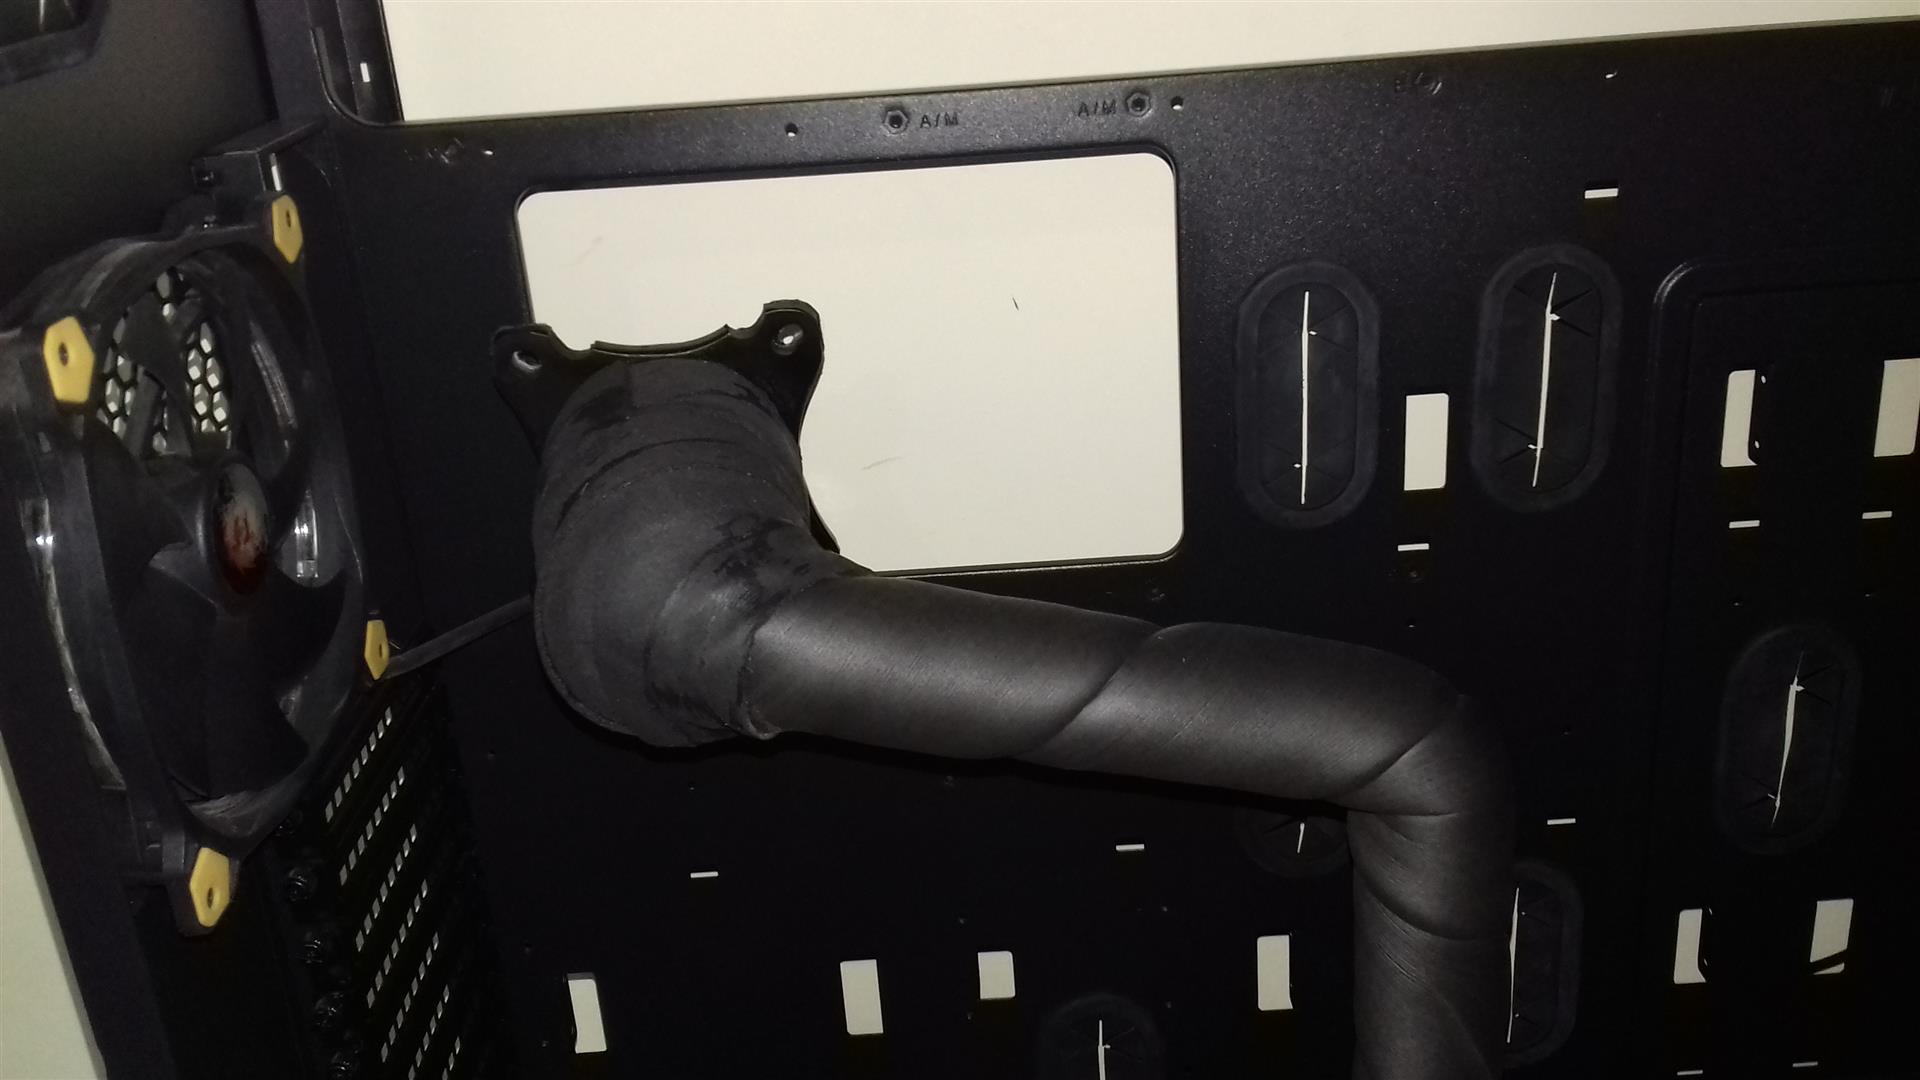
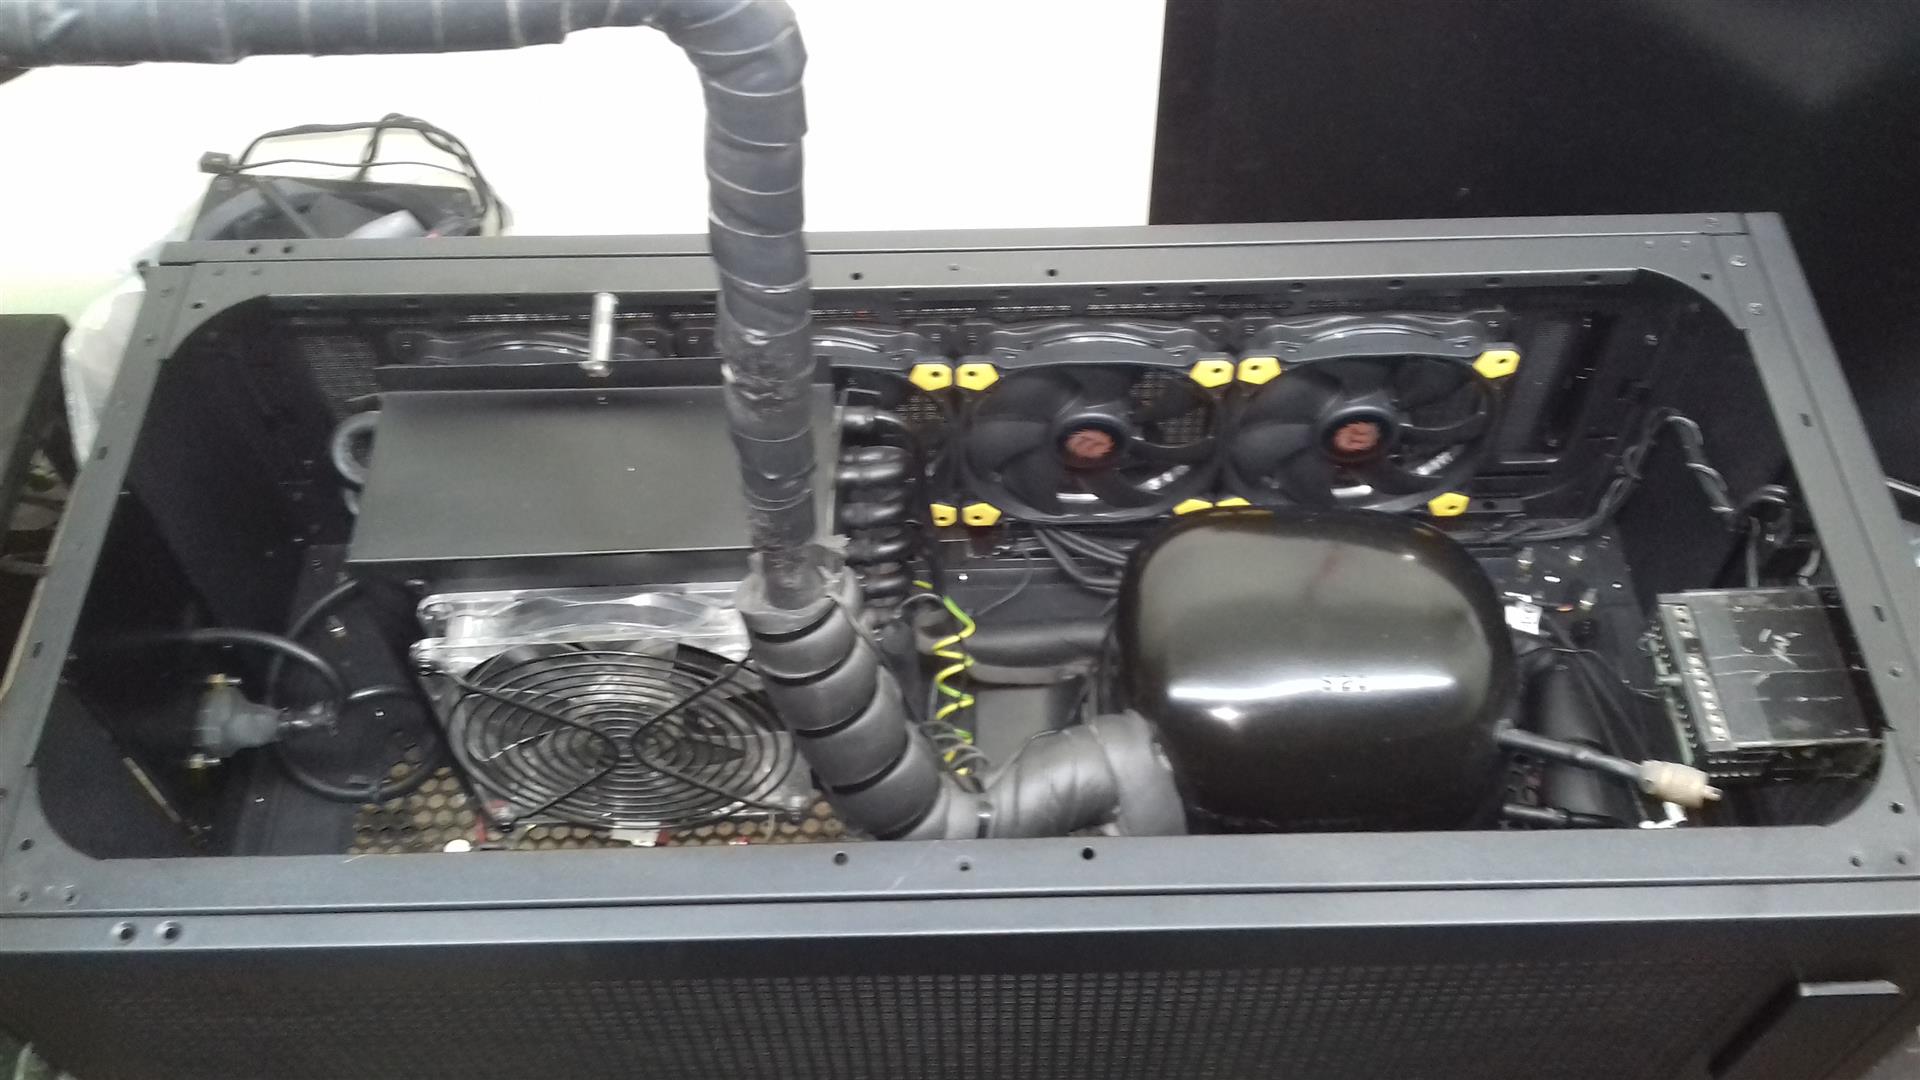
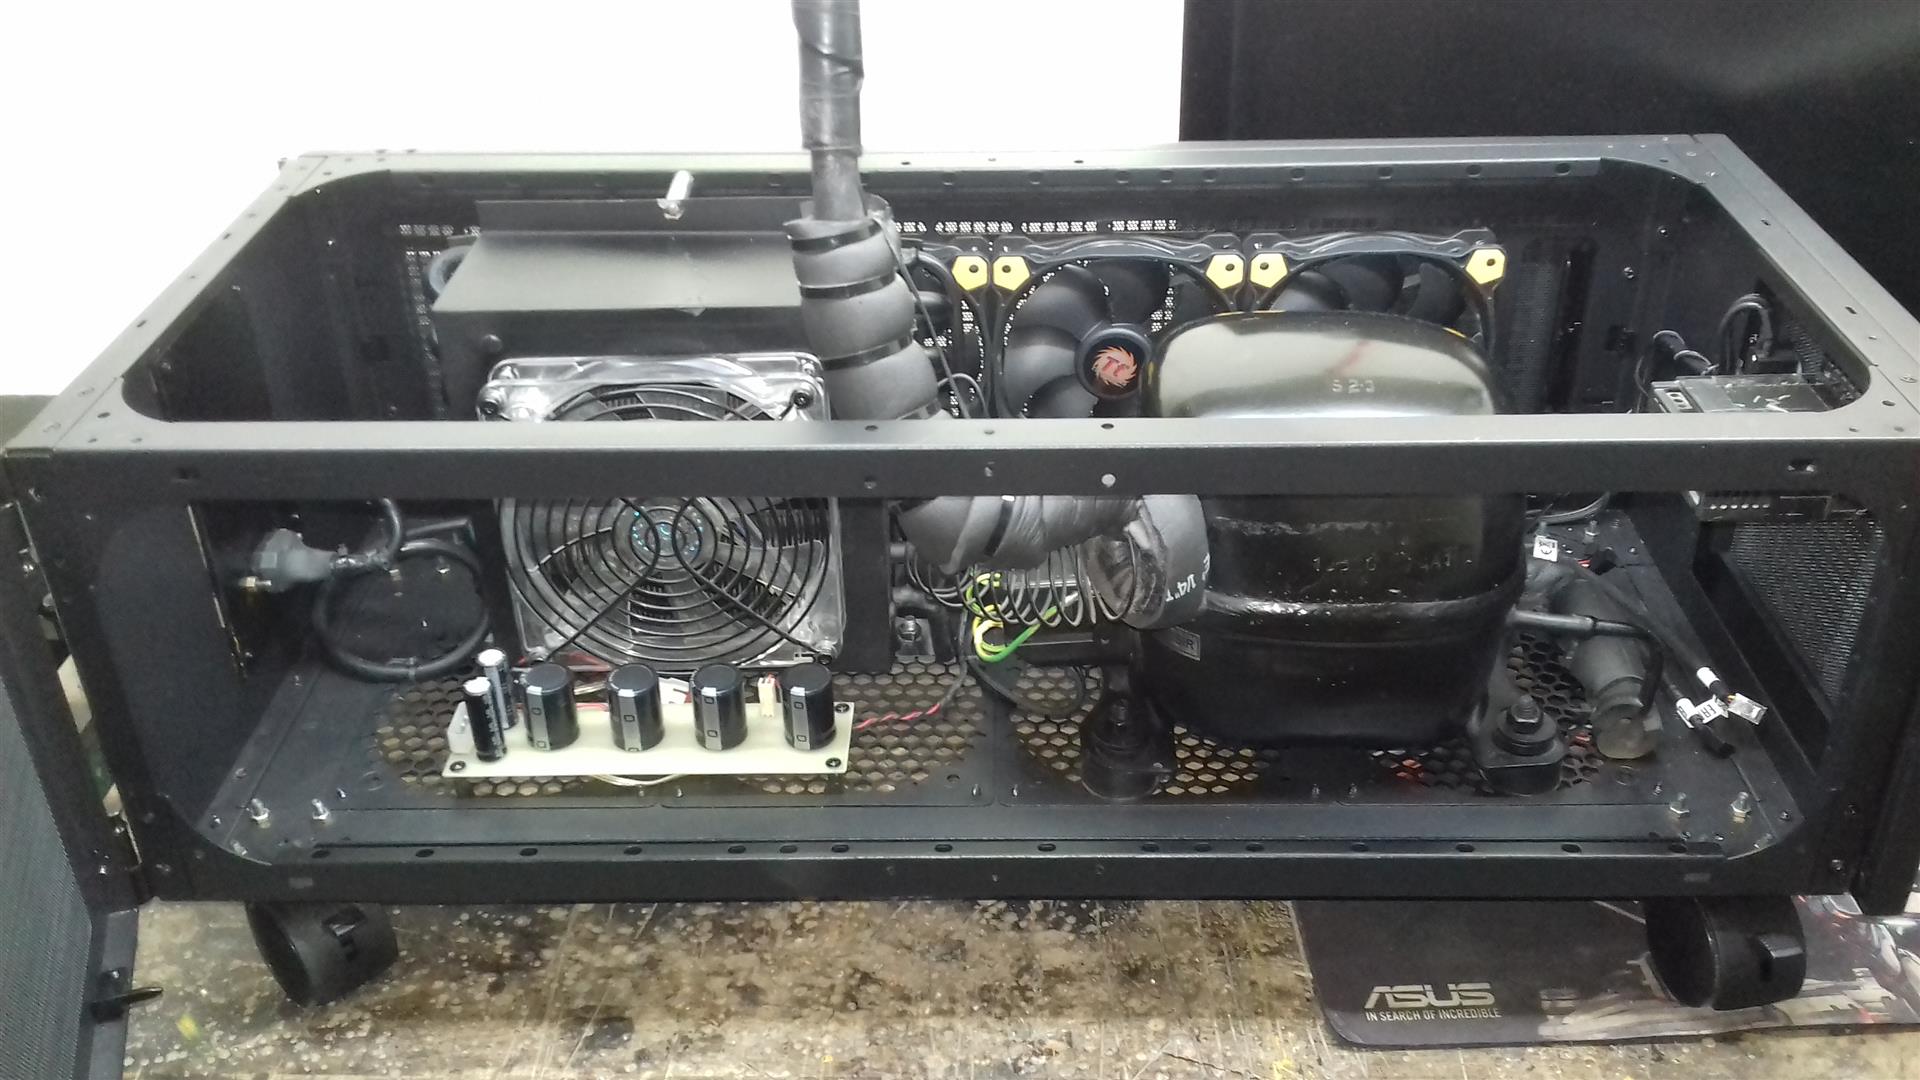
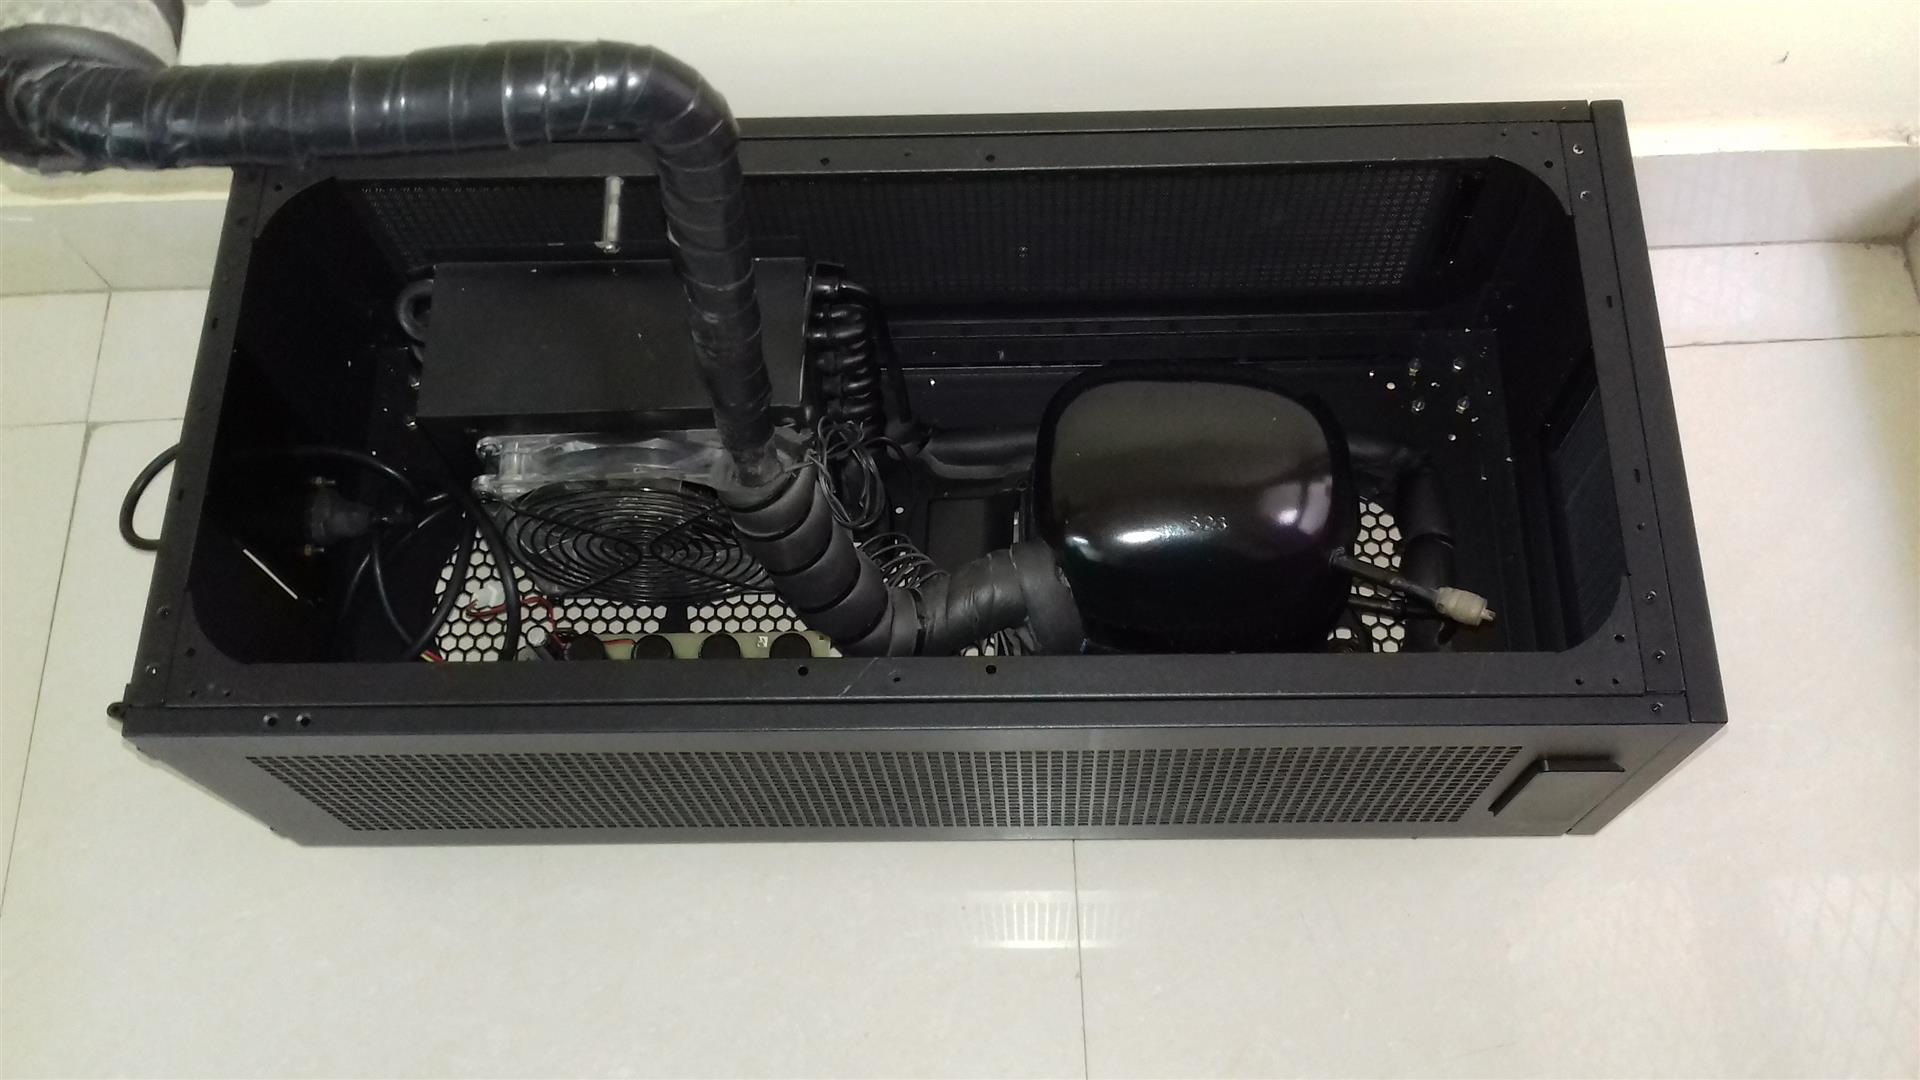
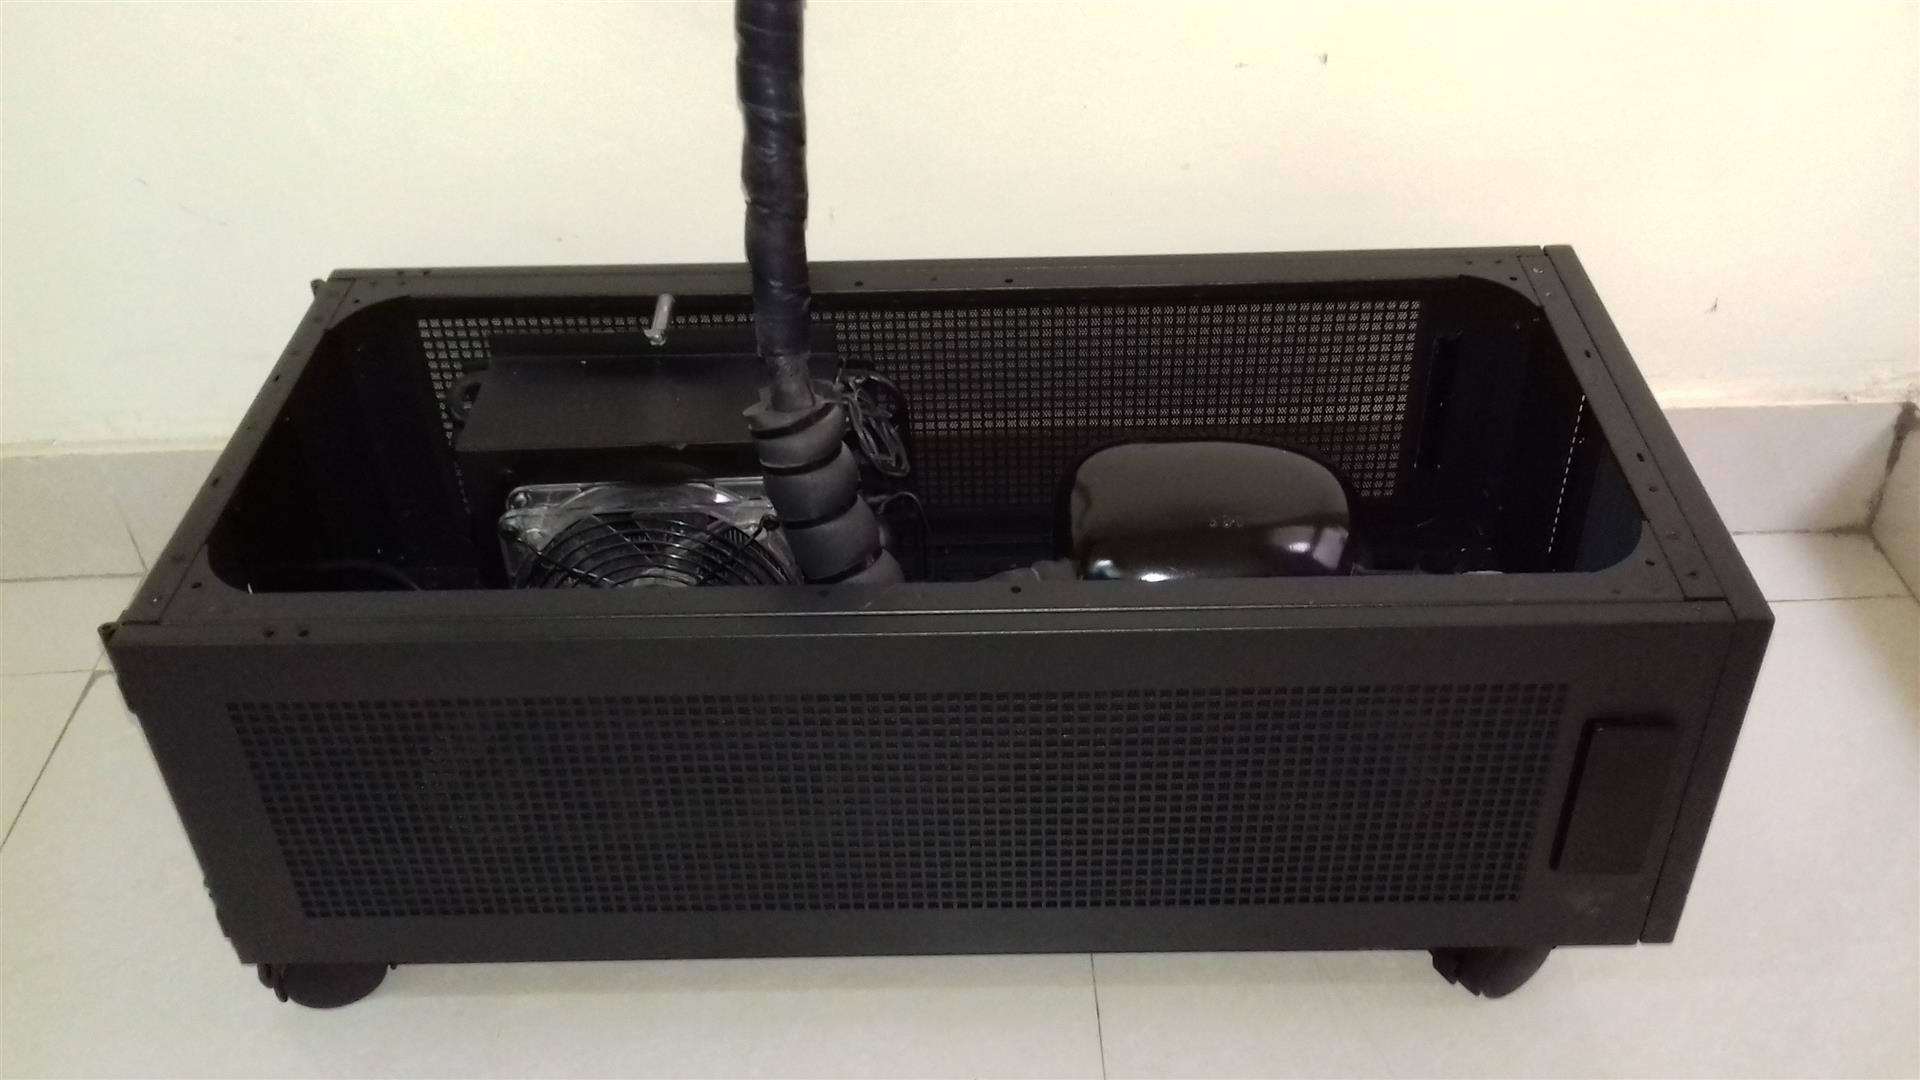
Phase changer tubing is now properly insulated with new foam insulation. Now top main PC section of the case is joined with the phase change section.

-
07 Nov 2017
Phase changer section wiring 90% done with few fans installation. Waiting for insulation foam parts to come.


-
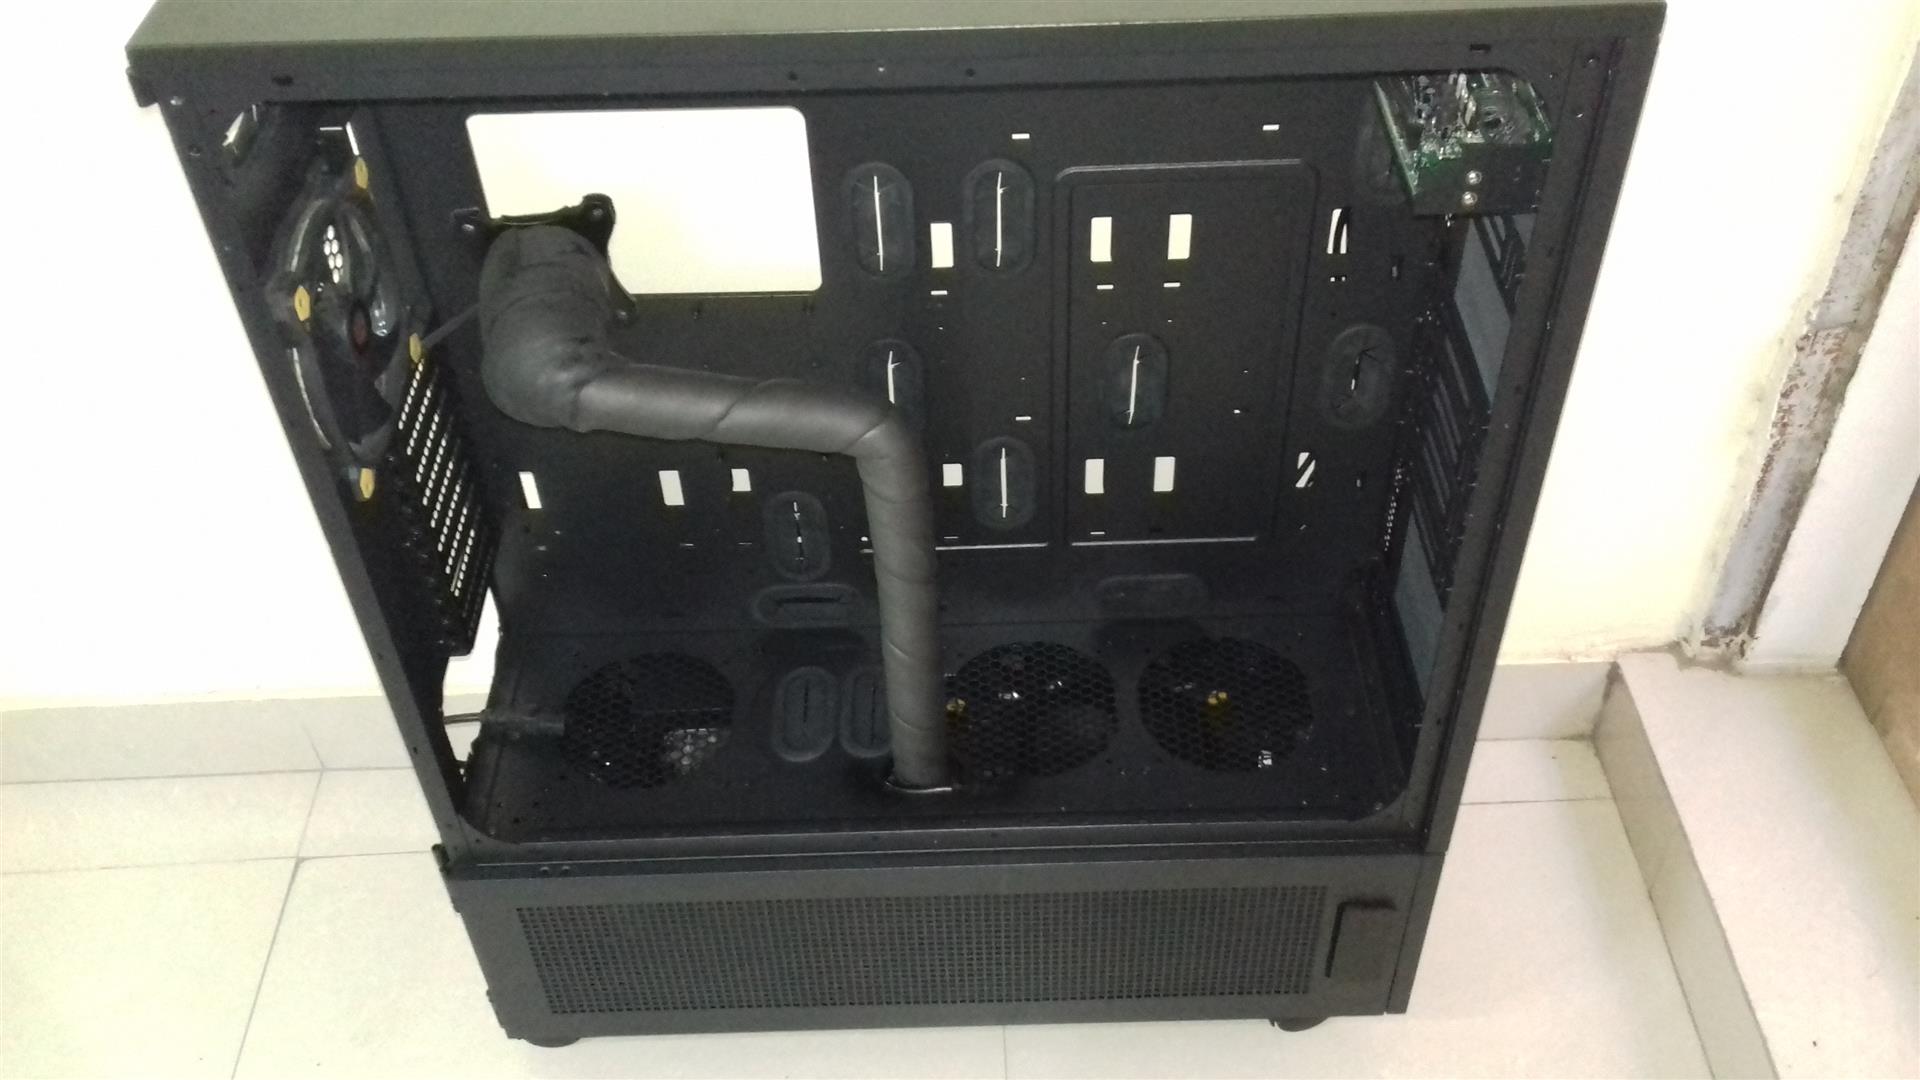
The "SUPERBUILD" Case ModHello to all,
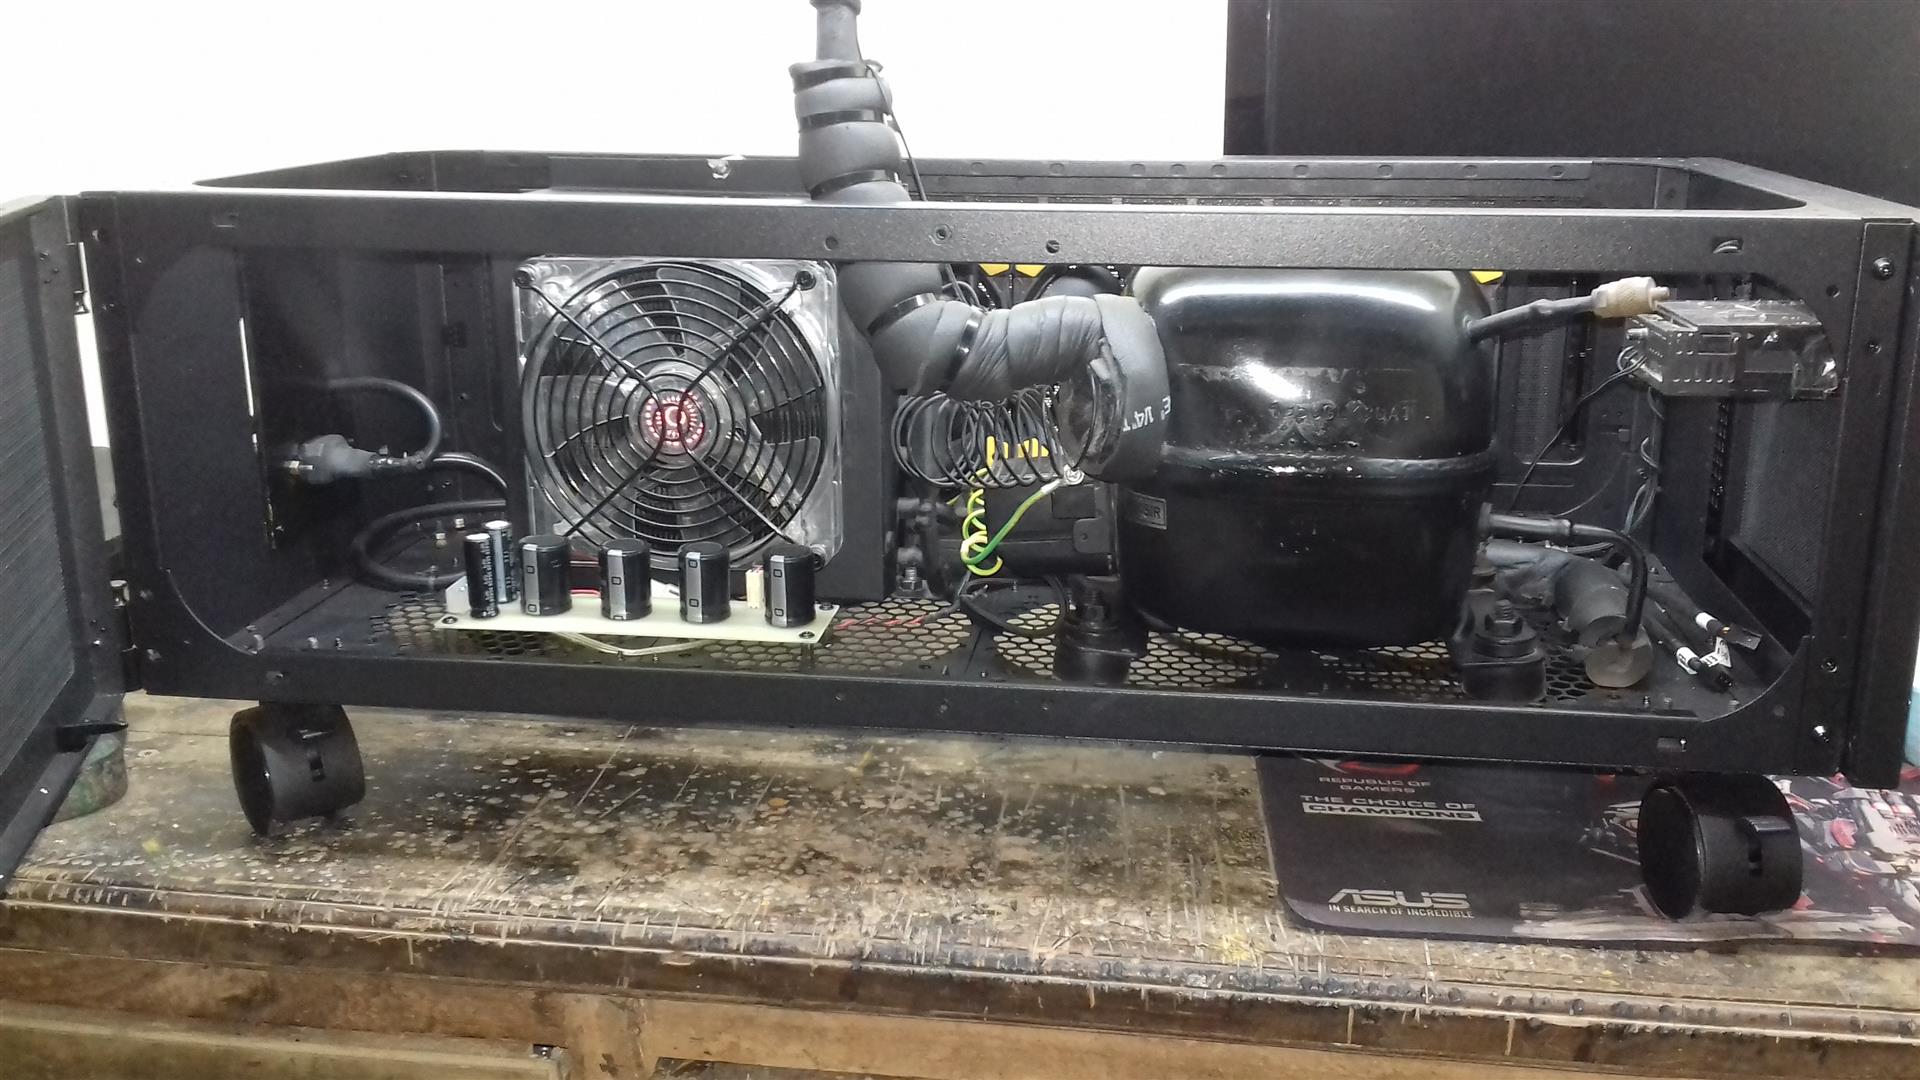
As most of you know, in year 2011 I build a “Phase Changer Rig” . An extreme overclocking rig. Capable to cool down the CPU below -38C. One of its kind in India.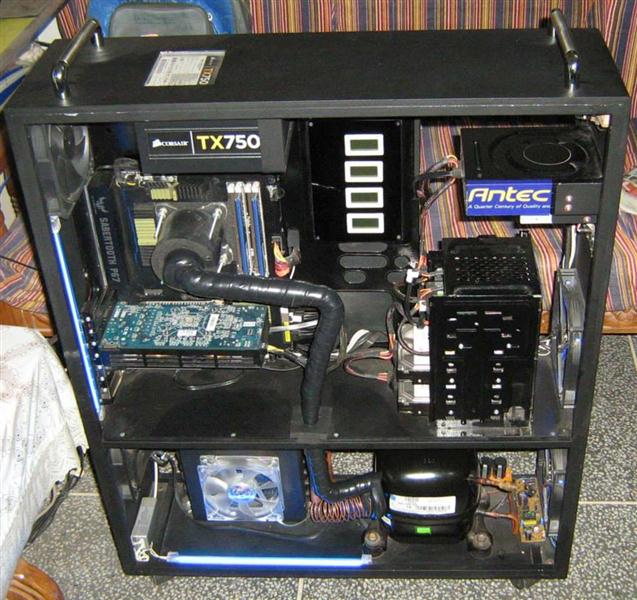
It was a complete scratch build using MDF board and aluminium square rods. Till date case is in good nick, only thing I did wrong was not to cover sides of lower phase changer section.
Nothing bad, but recently due to absence of the side covers I accidently mange to damage the condenser and brook a copper tube. Resulting in a complete failure of the phase change unit.
Now this has to be fixed. But this MDF case is about six years old, so I said to myself the fixed phase change unit defiantly needs a new and safe home now. So my hunt for a suitable case began.
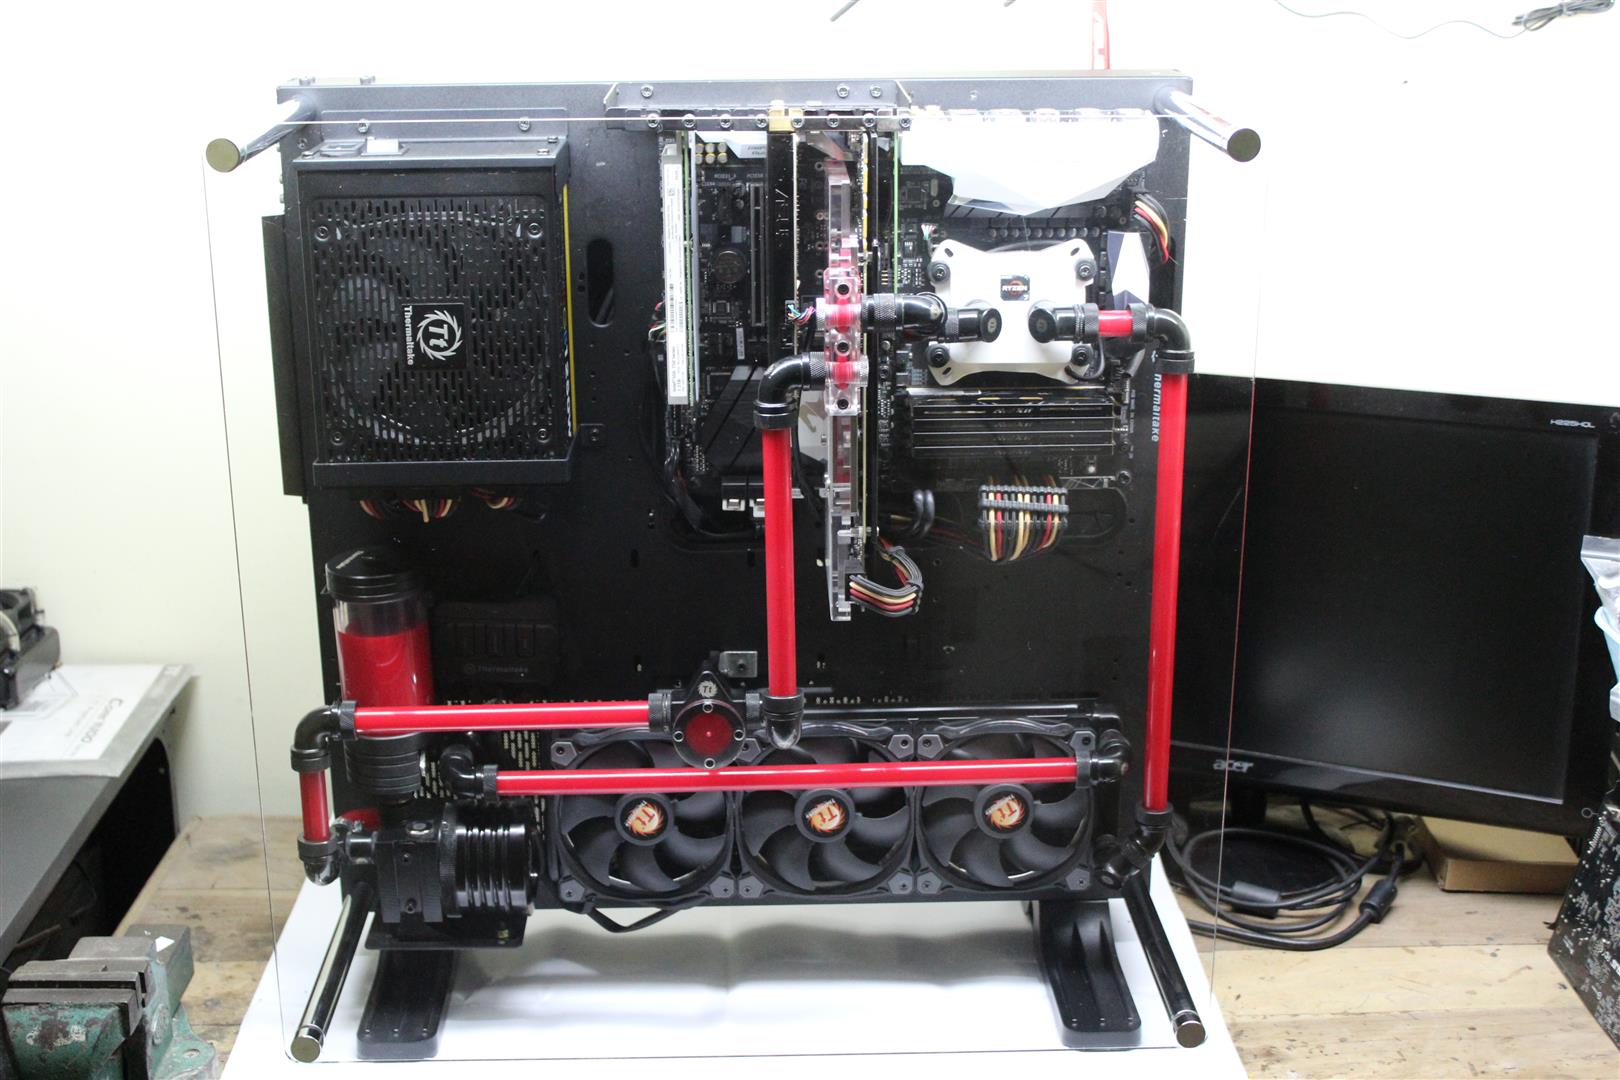
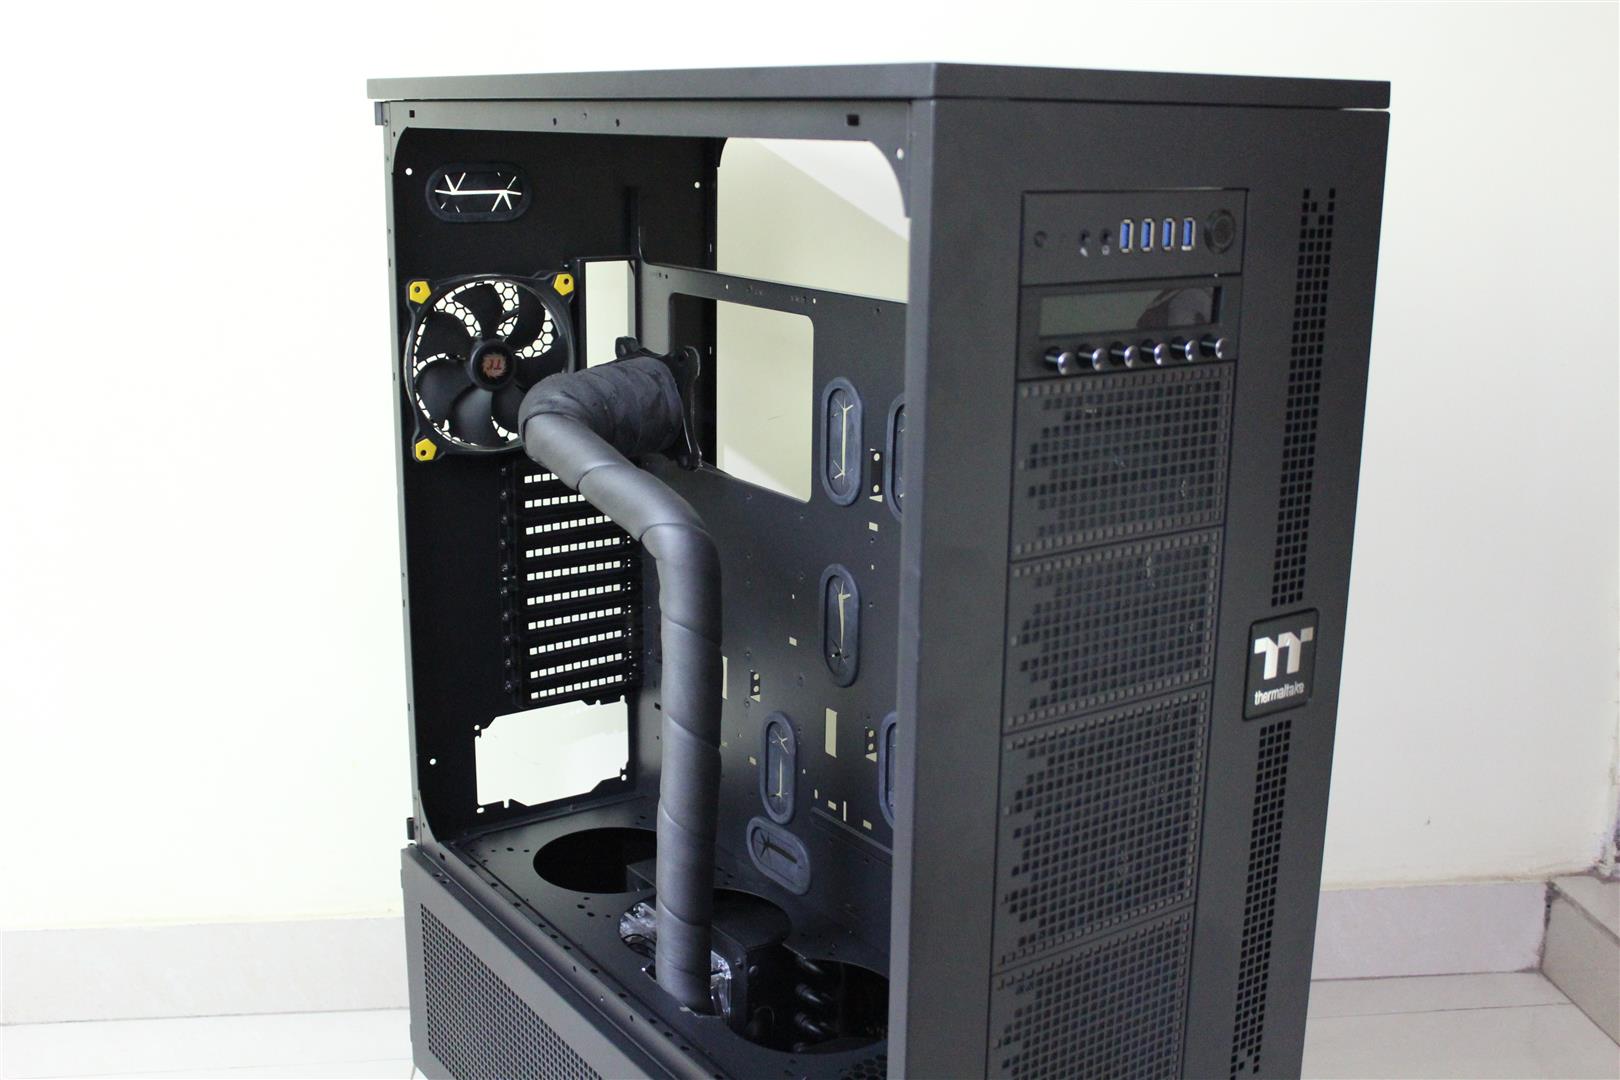
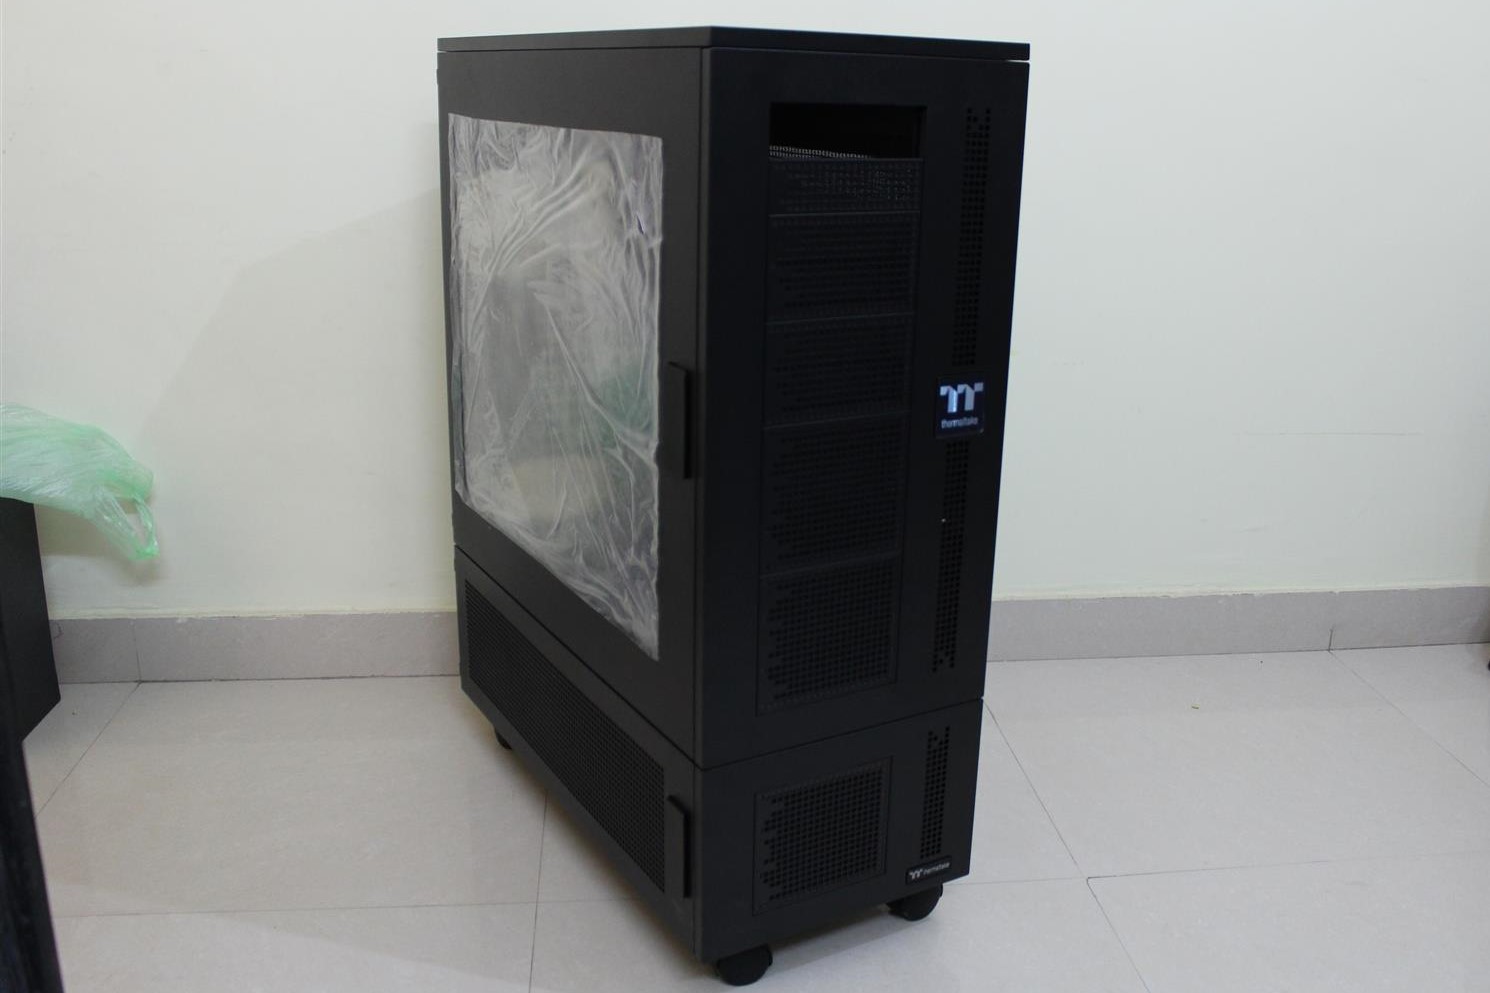
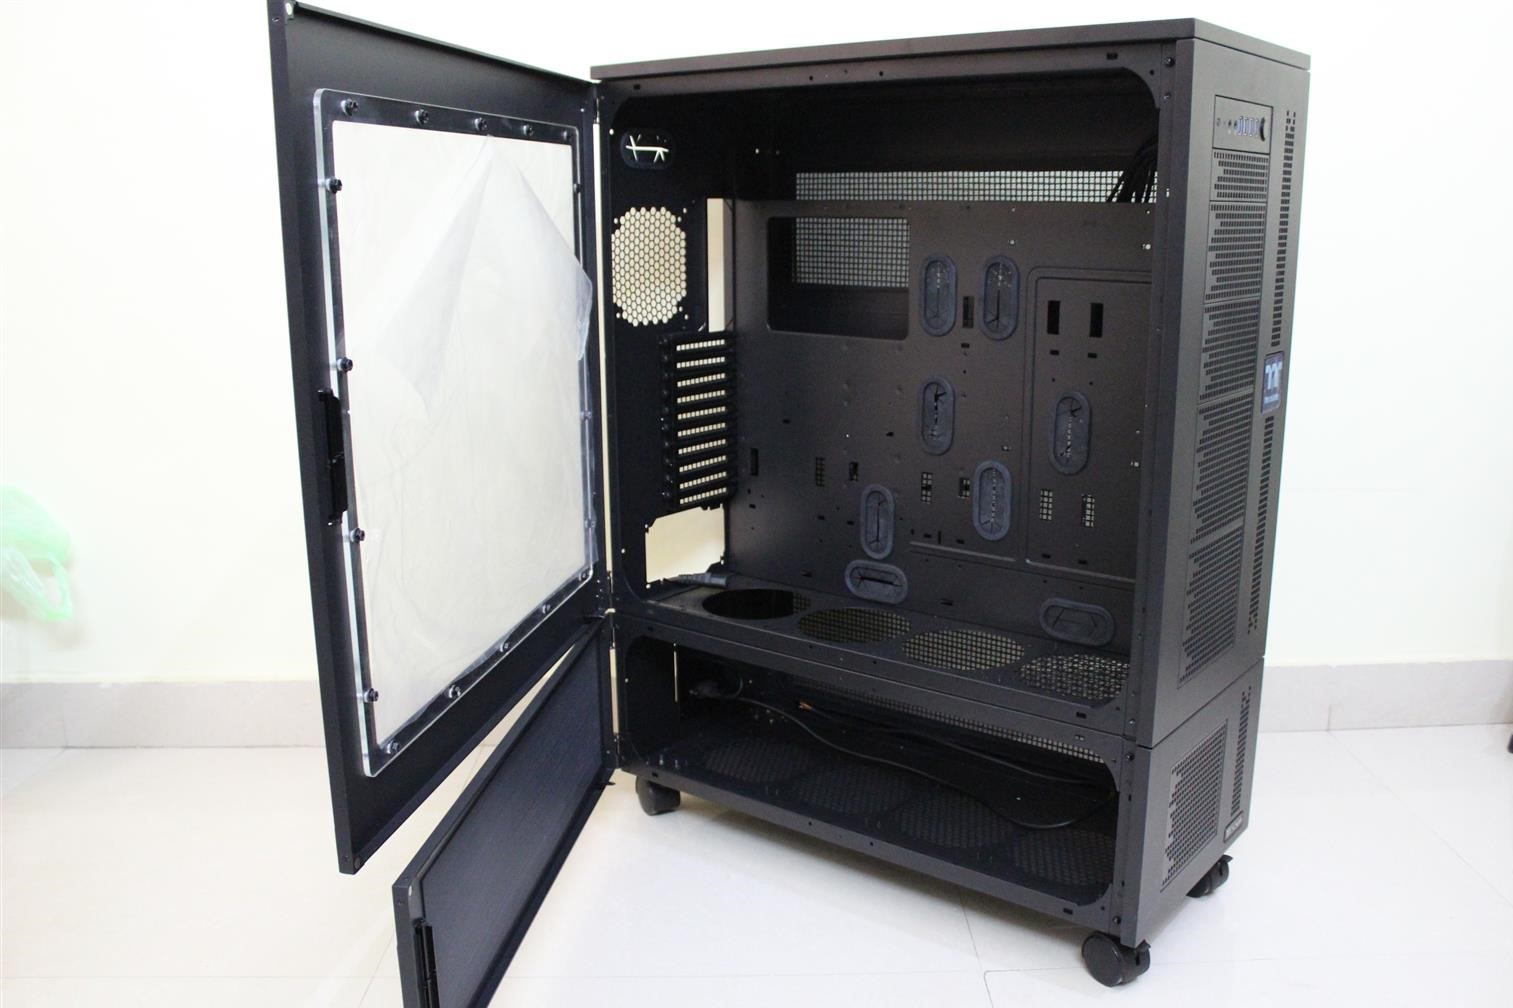
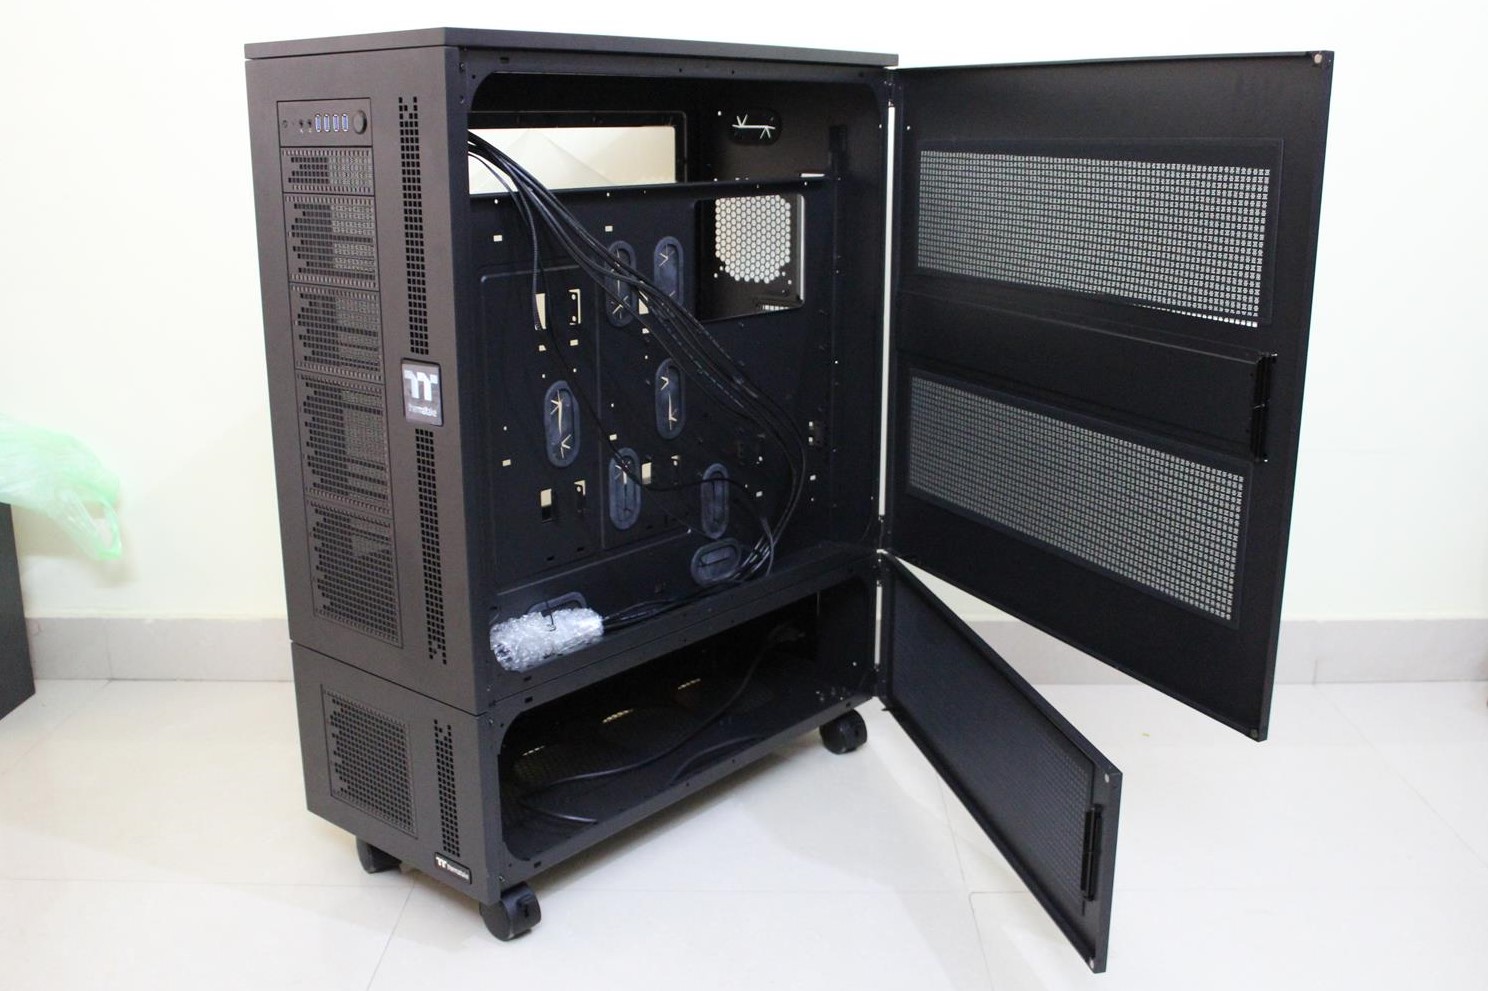
As I have recently worked with few of Thermaltake cases, the first option came in my mind was the Thermaltake Core WP100 Super Tower Chassis. A two chamber case perfect for my needs.
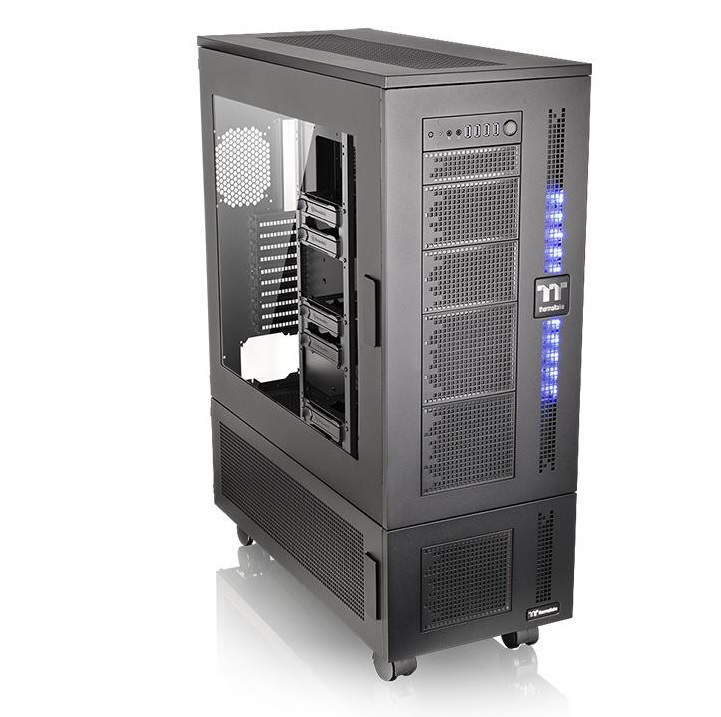
After going through the datasheet and checking dimensions, the Thermaltake Core WP100 Super Tower Chassis fits best for this super build giving new life to my 24/7 extreme overclocking Phase Changer build.
I called the new Case build as SUPERBUILD. Where CPU will be pushed to extreme limits at sub-zero temperature and I will also overclock the GPU using custom liquid cooling . So this build will be a super overclocking beast.
Like to thanks Thermaltake for supporting my idea and the build.
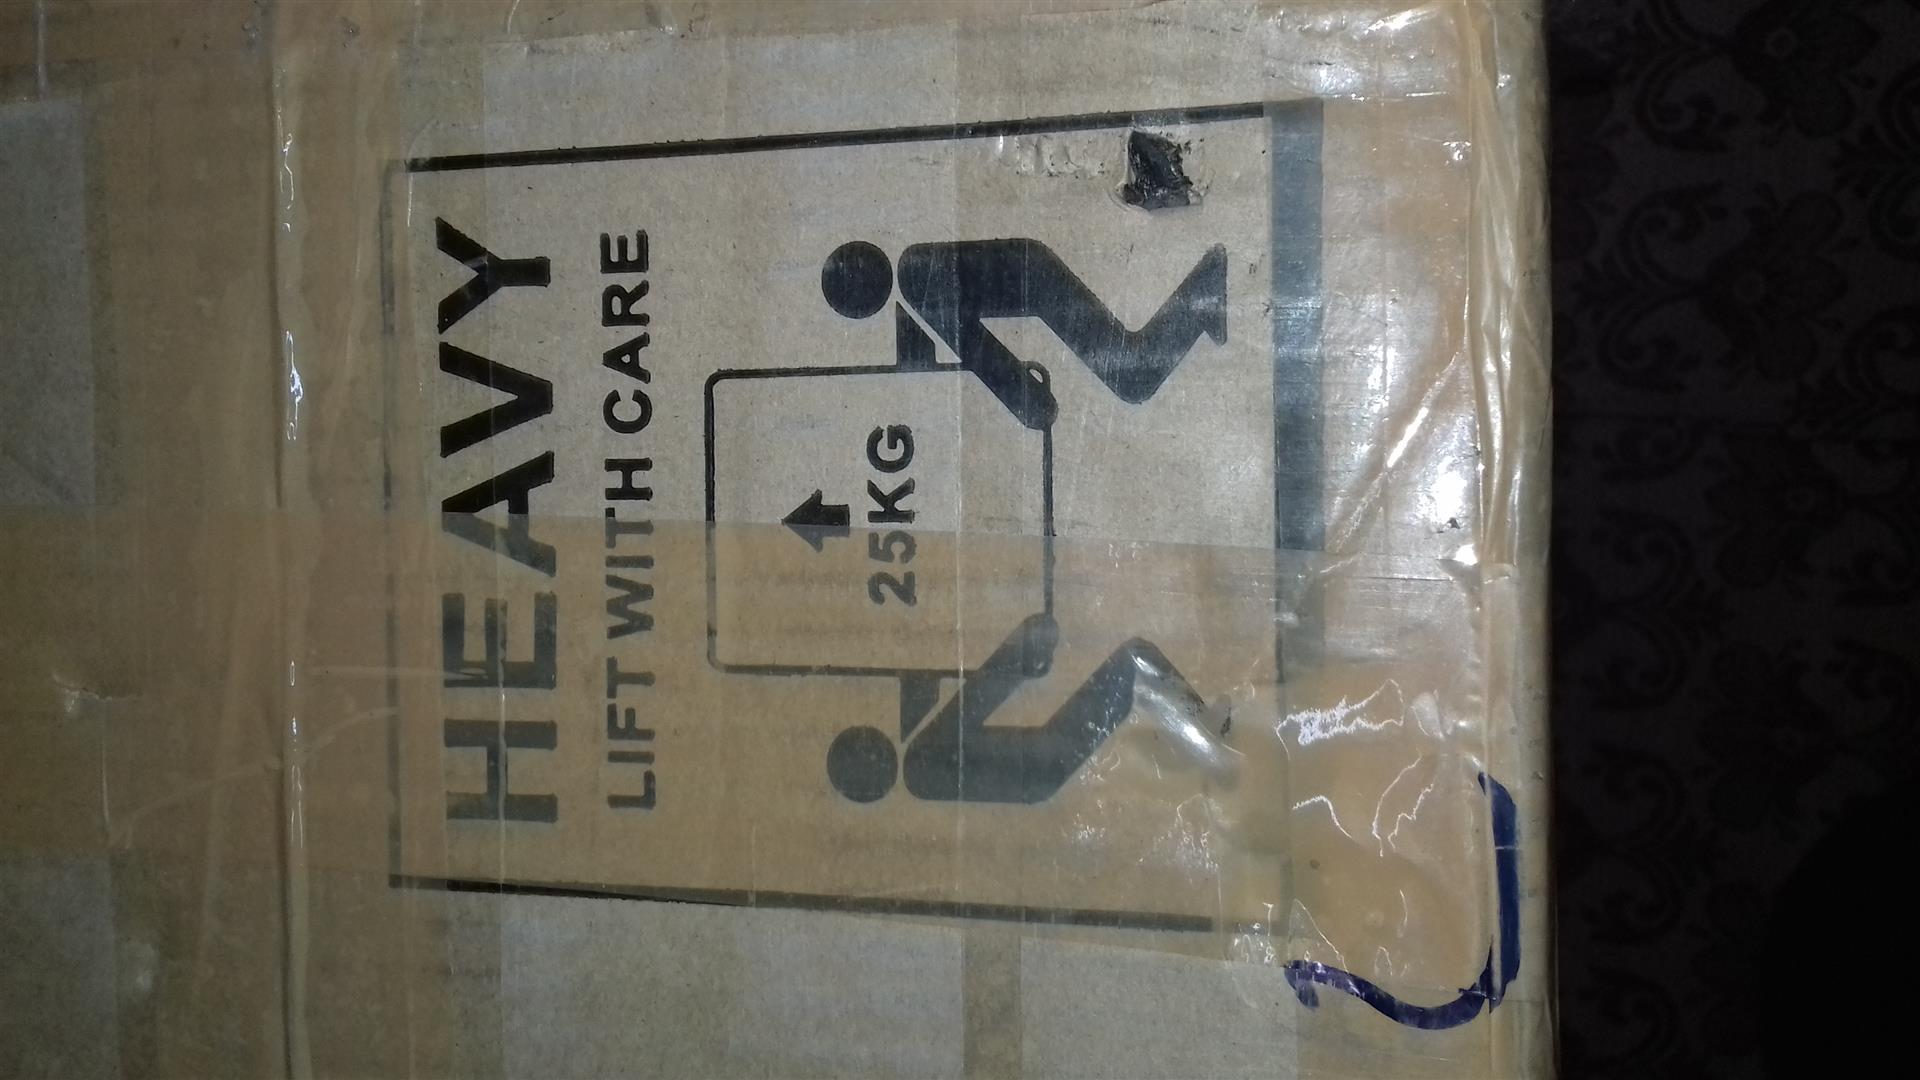
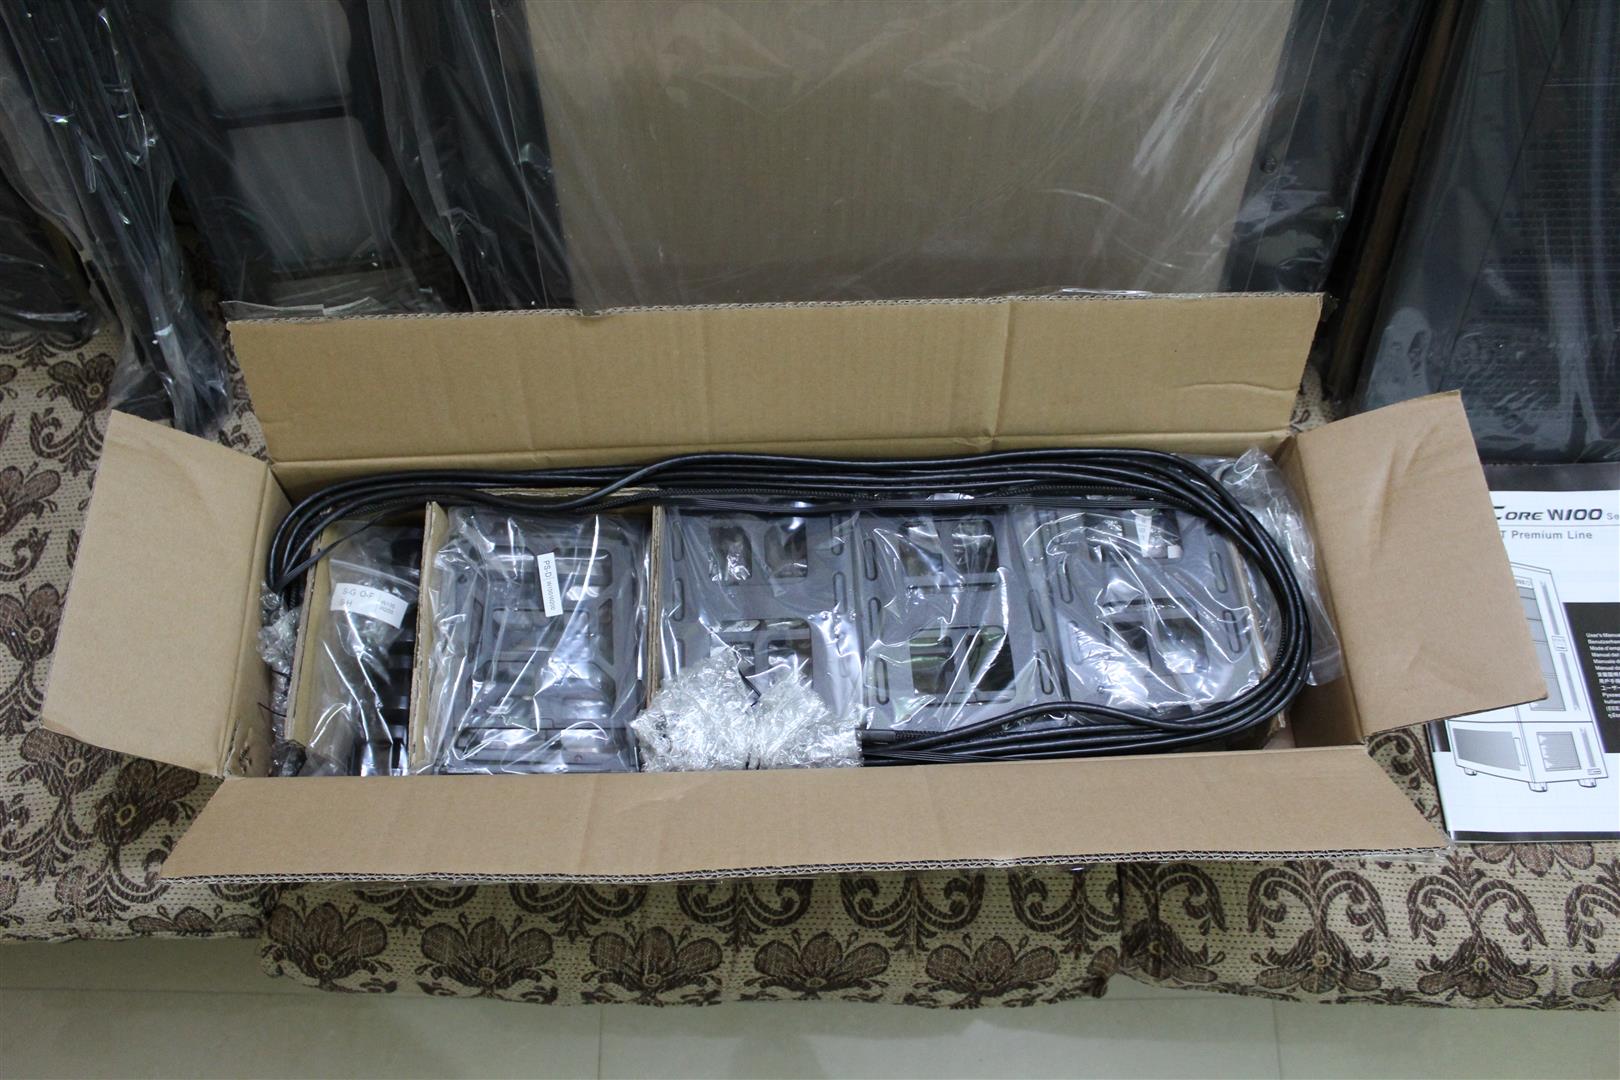
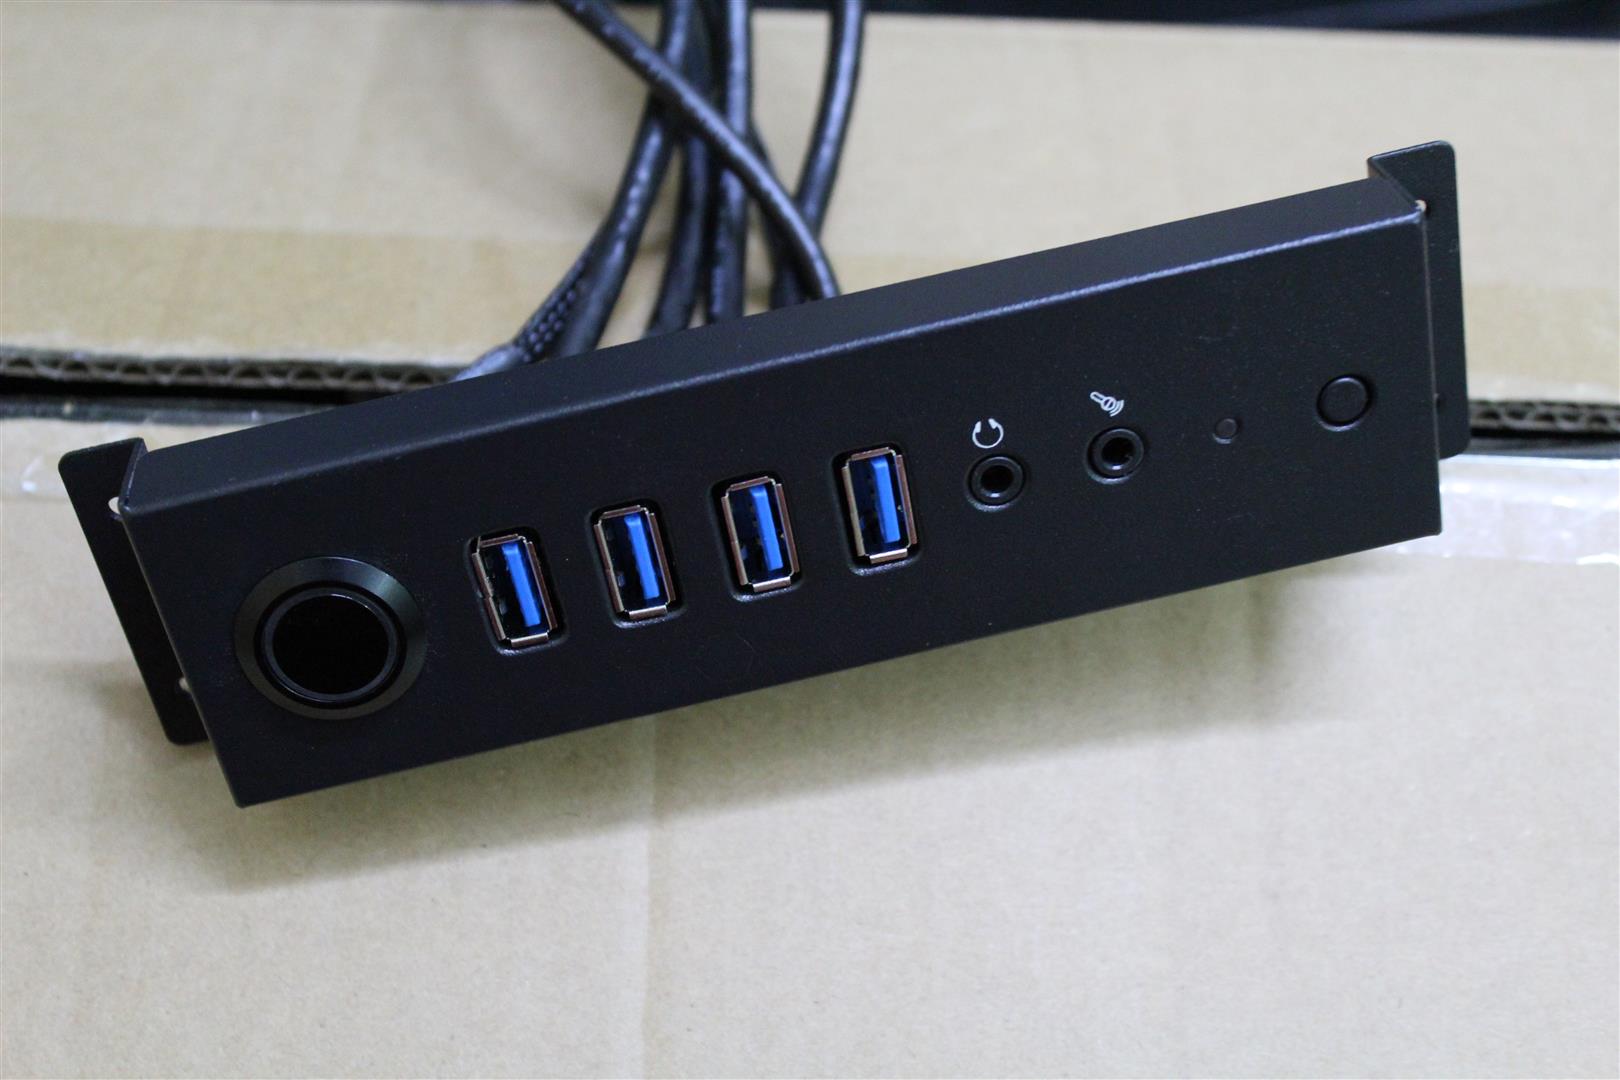
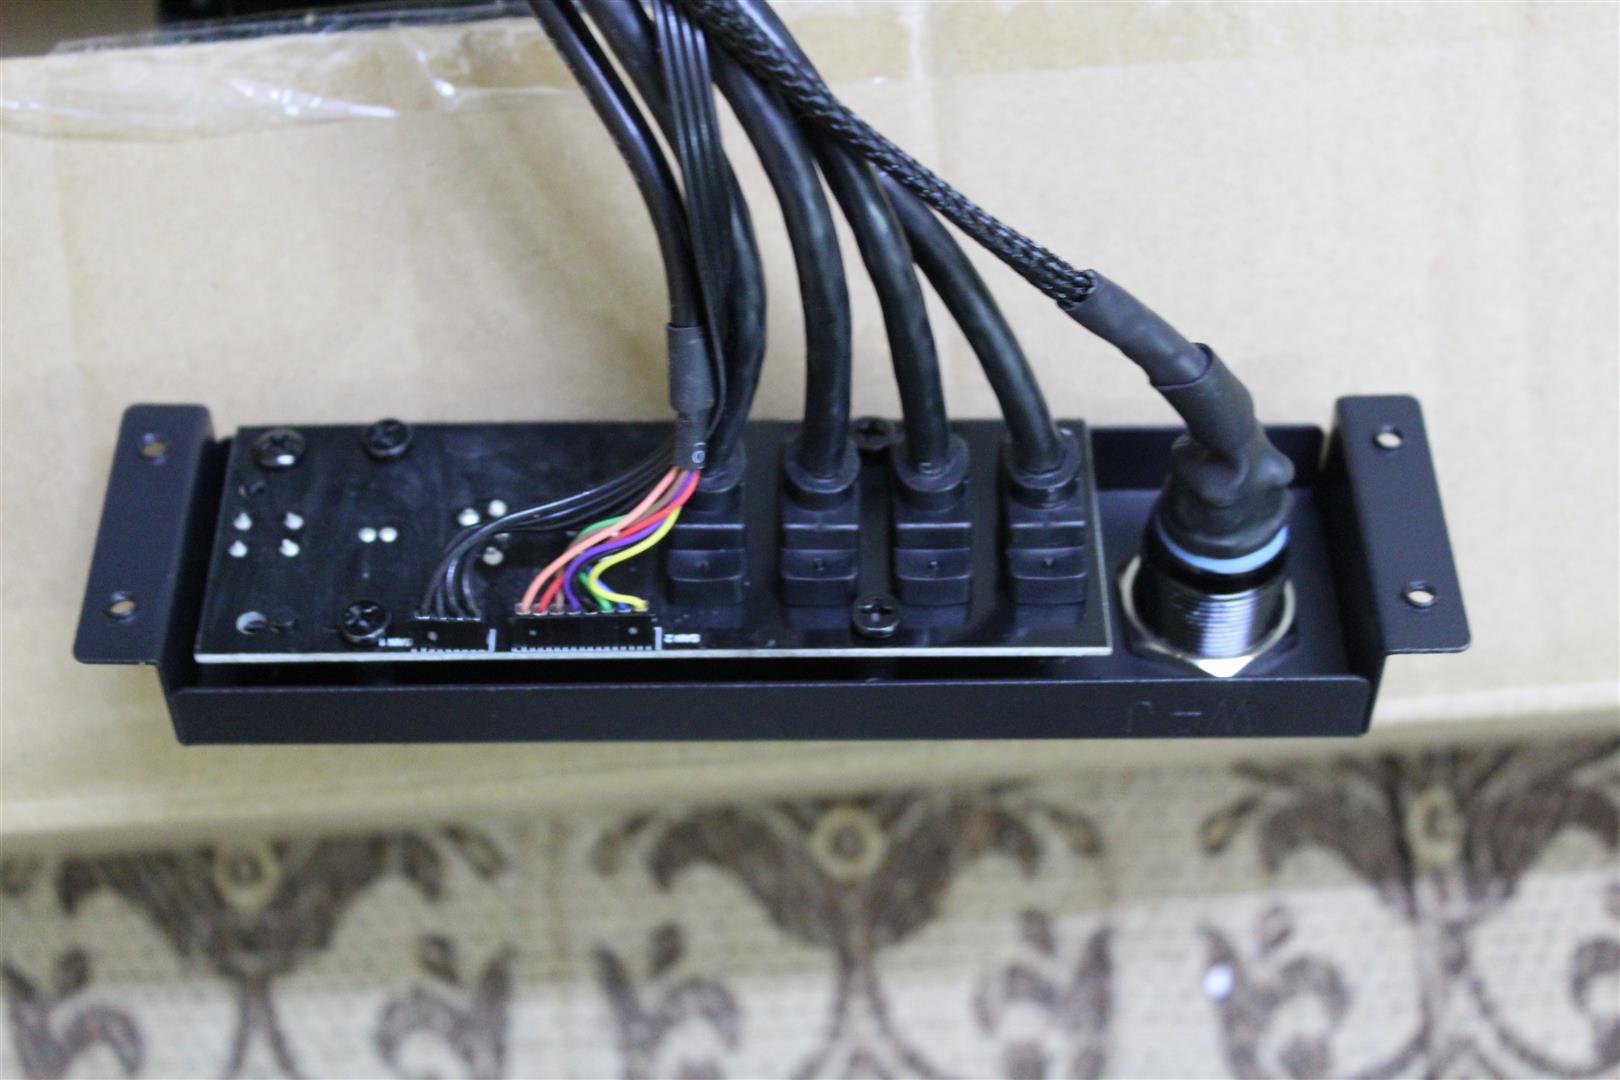
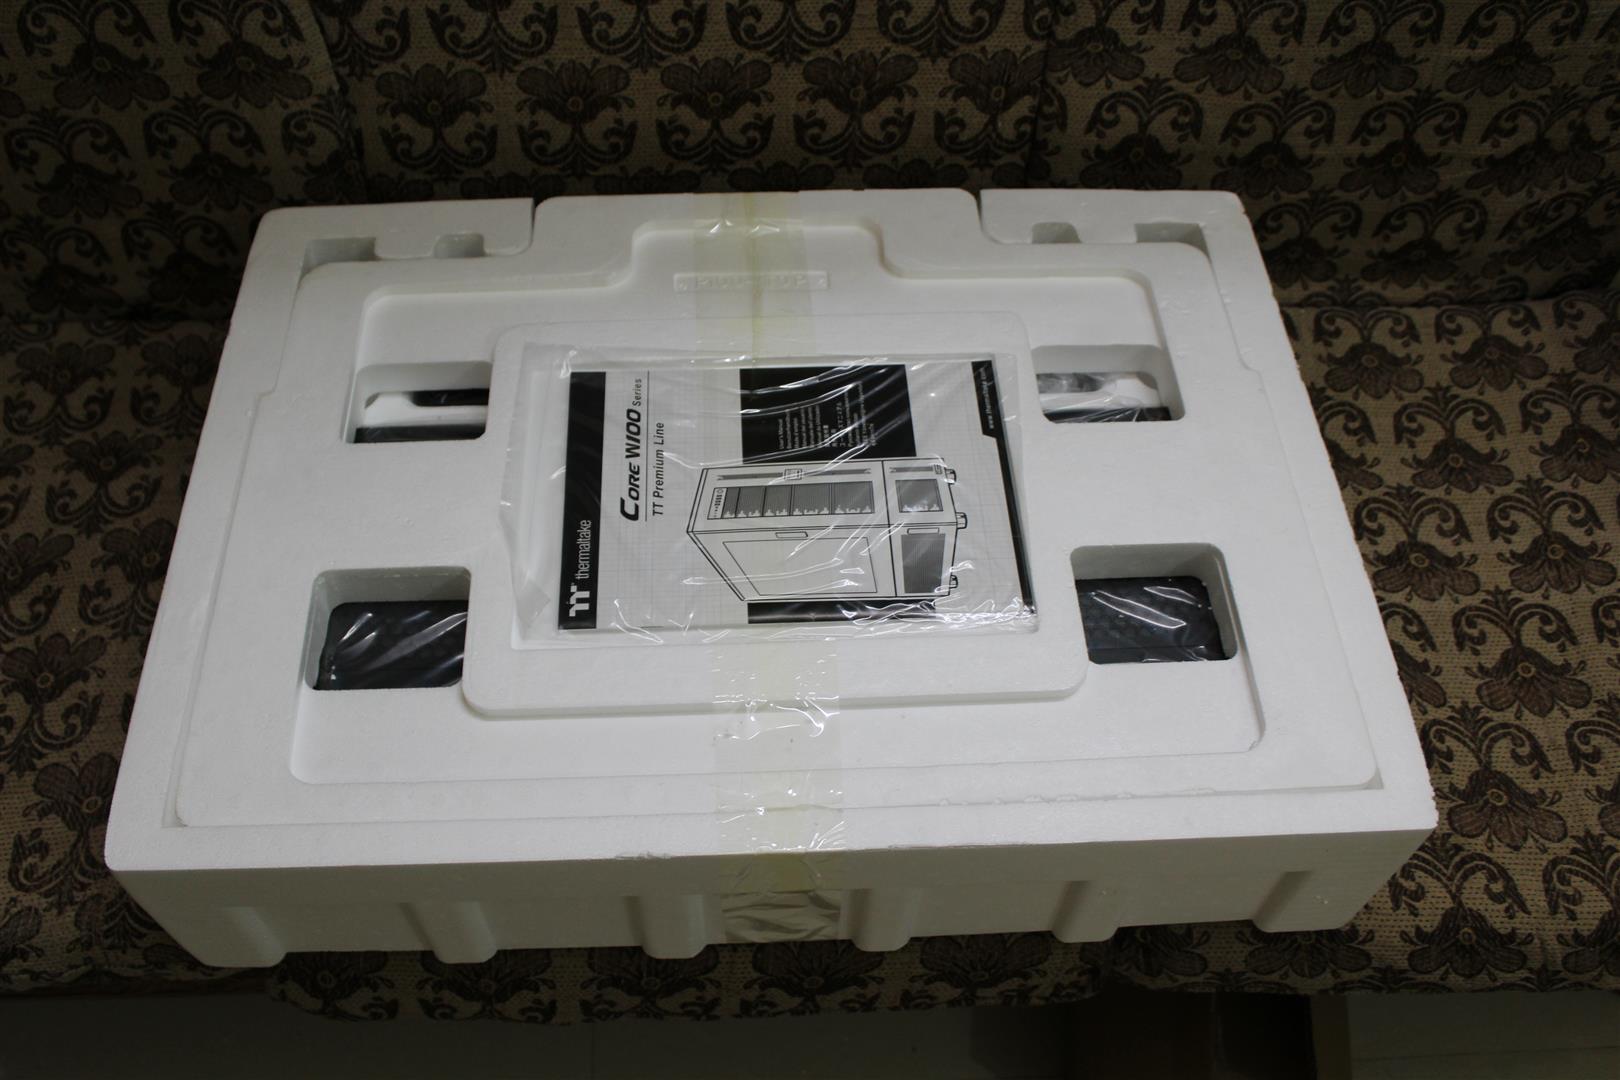
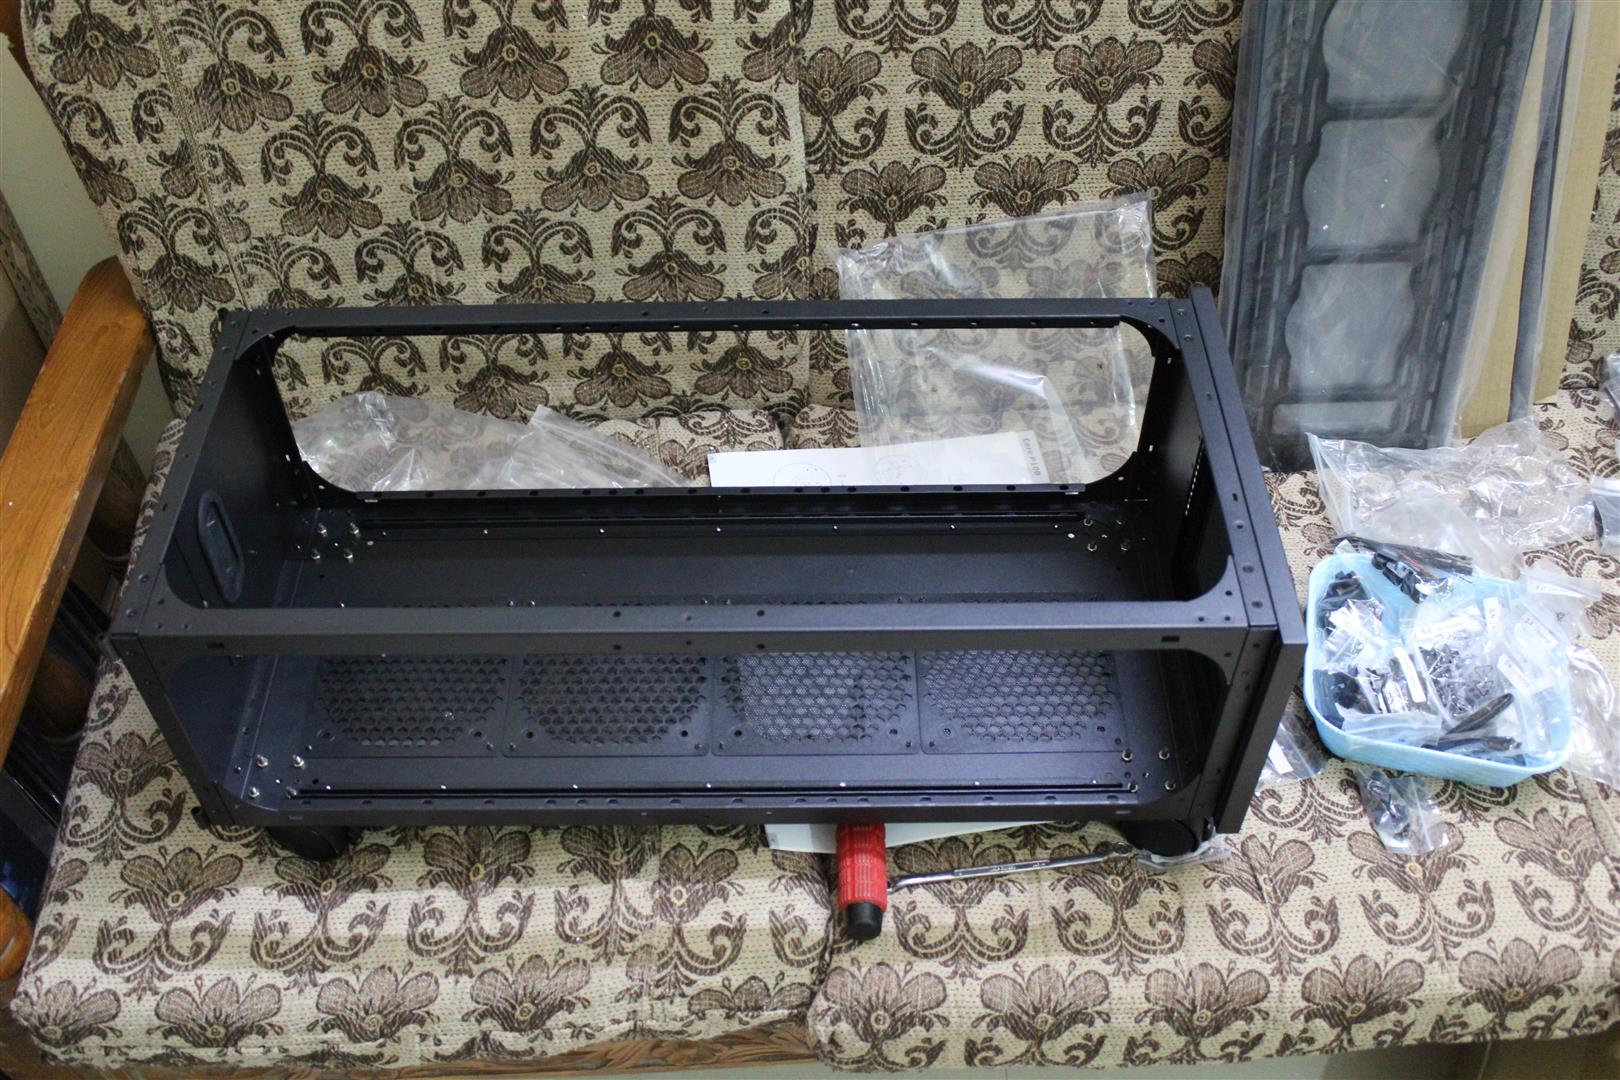
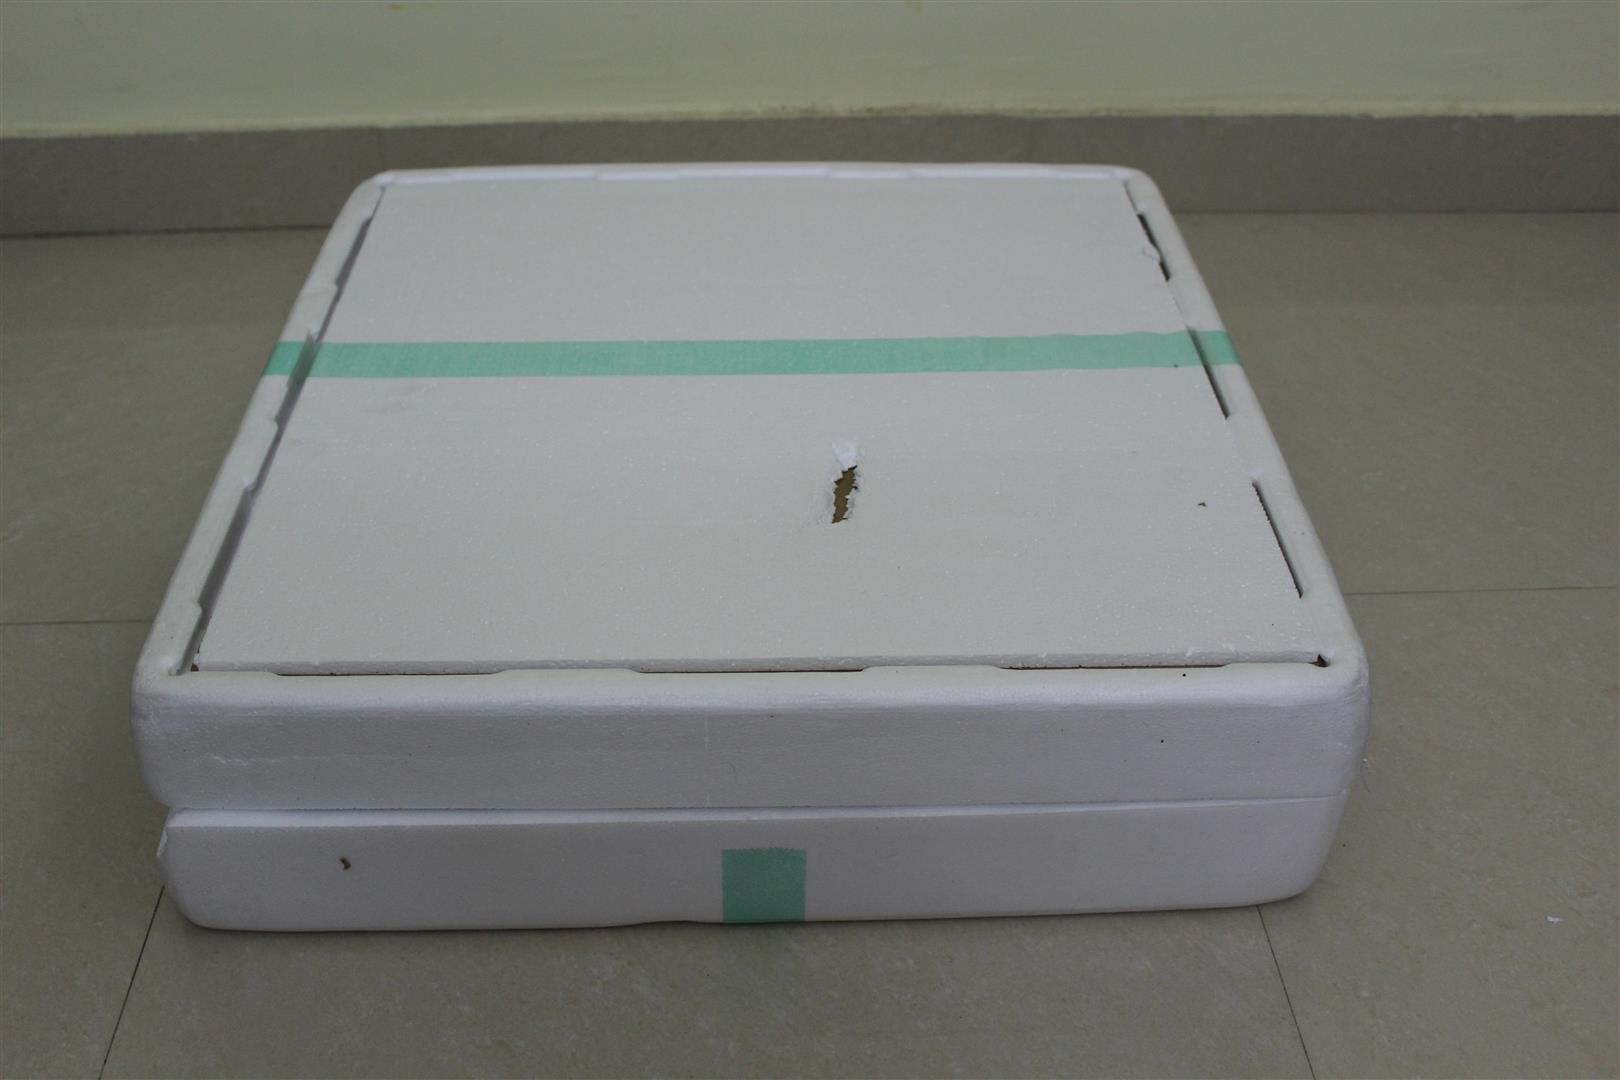
First the Thermaltake Core WP100 Super Tower Chassis arrived in two big and heavy boxes. One box had the Core W100 and other the Core P100. Both are individual cases by themselves, but stacking them together makes the monster Core WP100 Chasis.
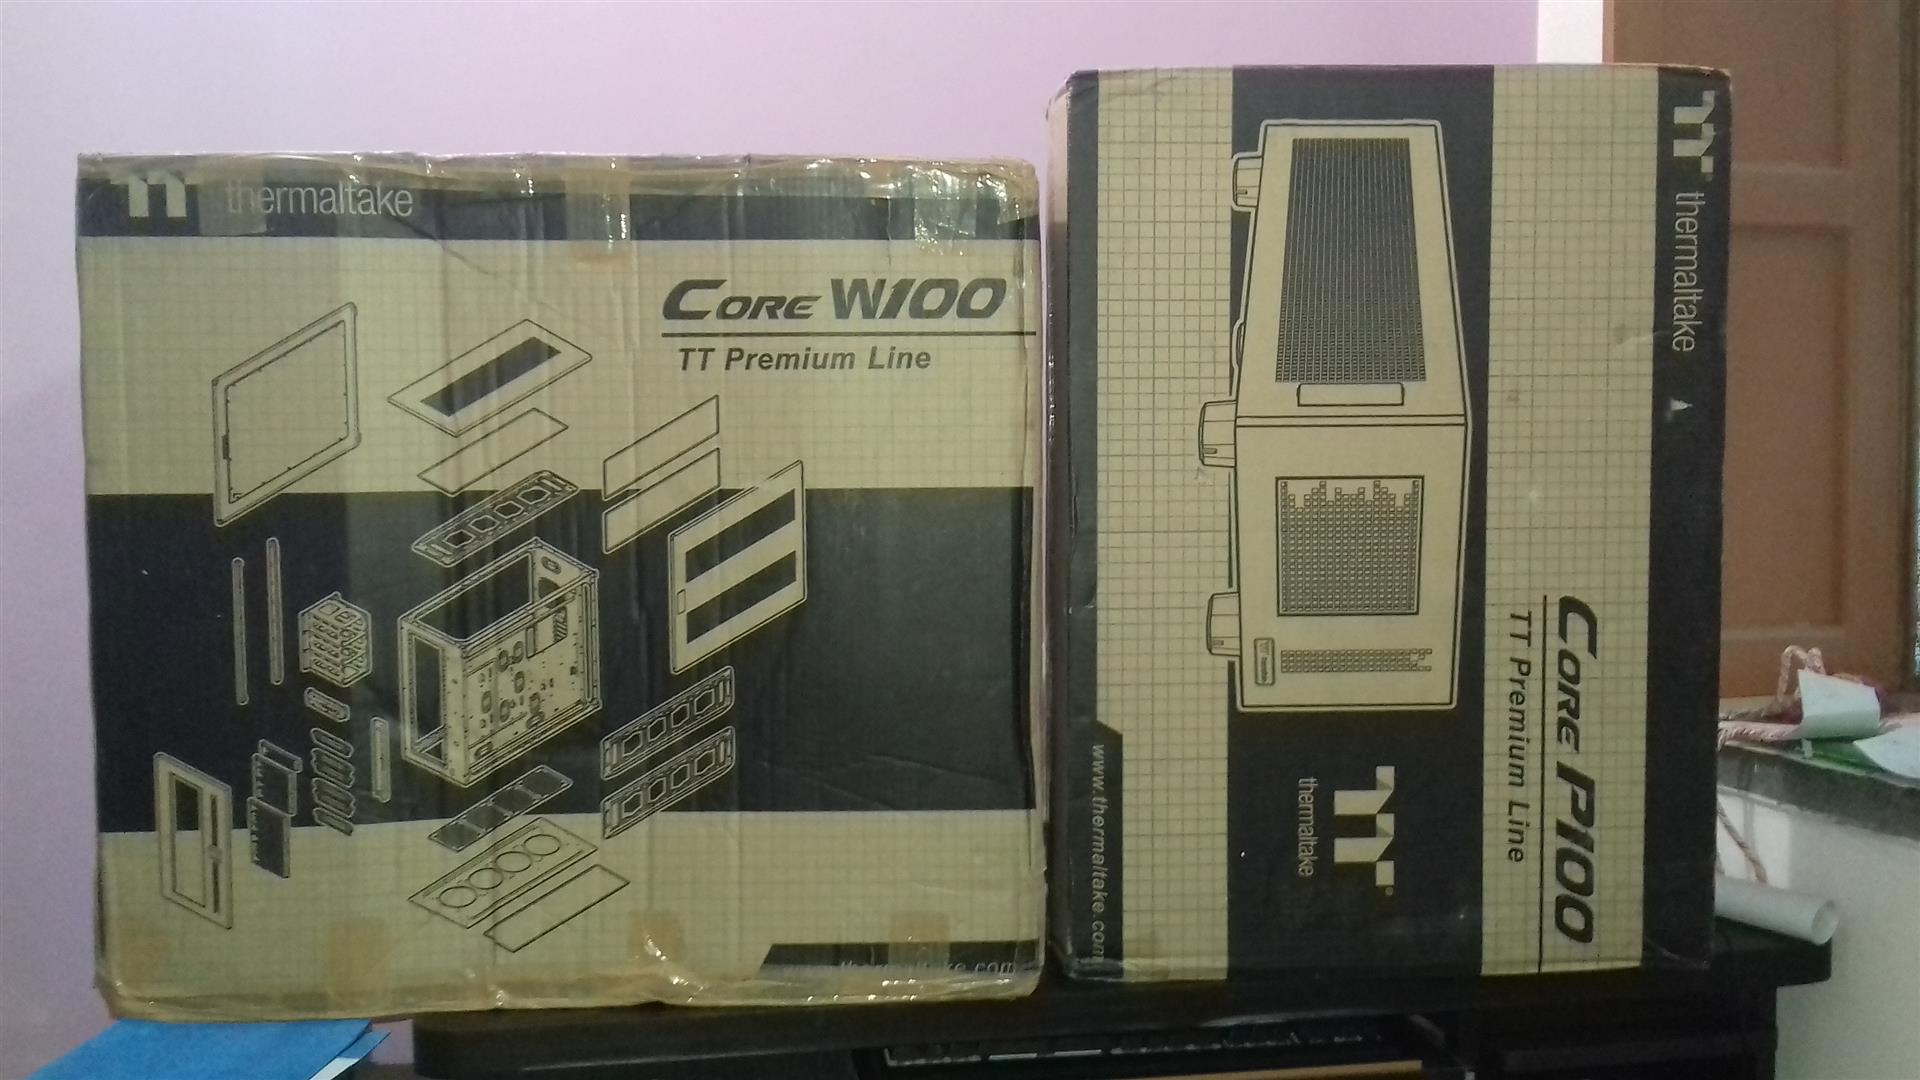
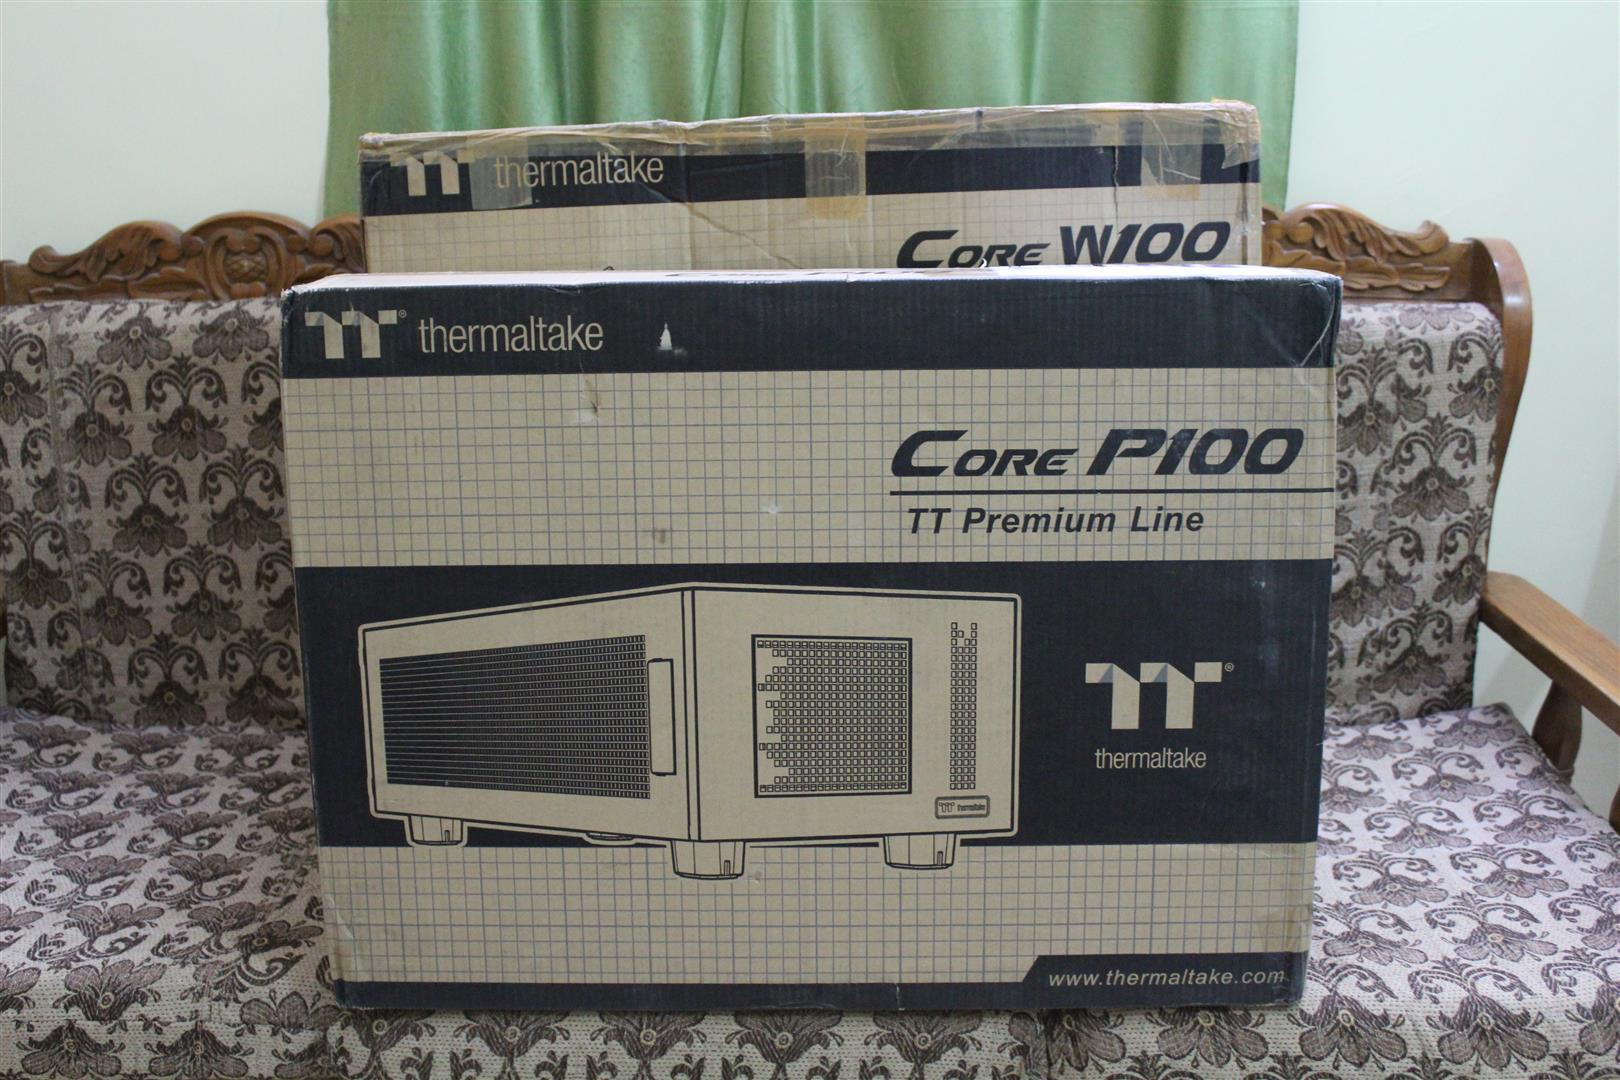
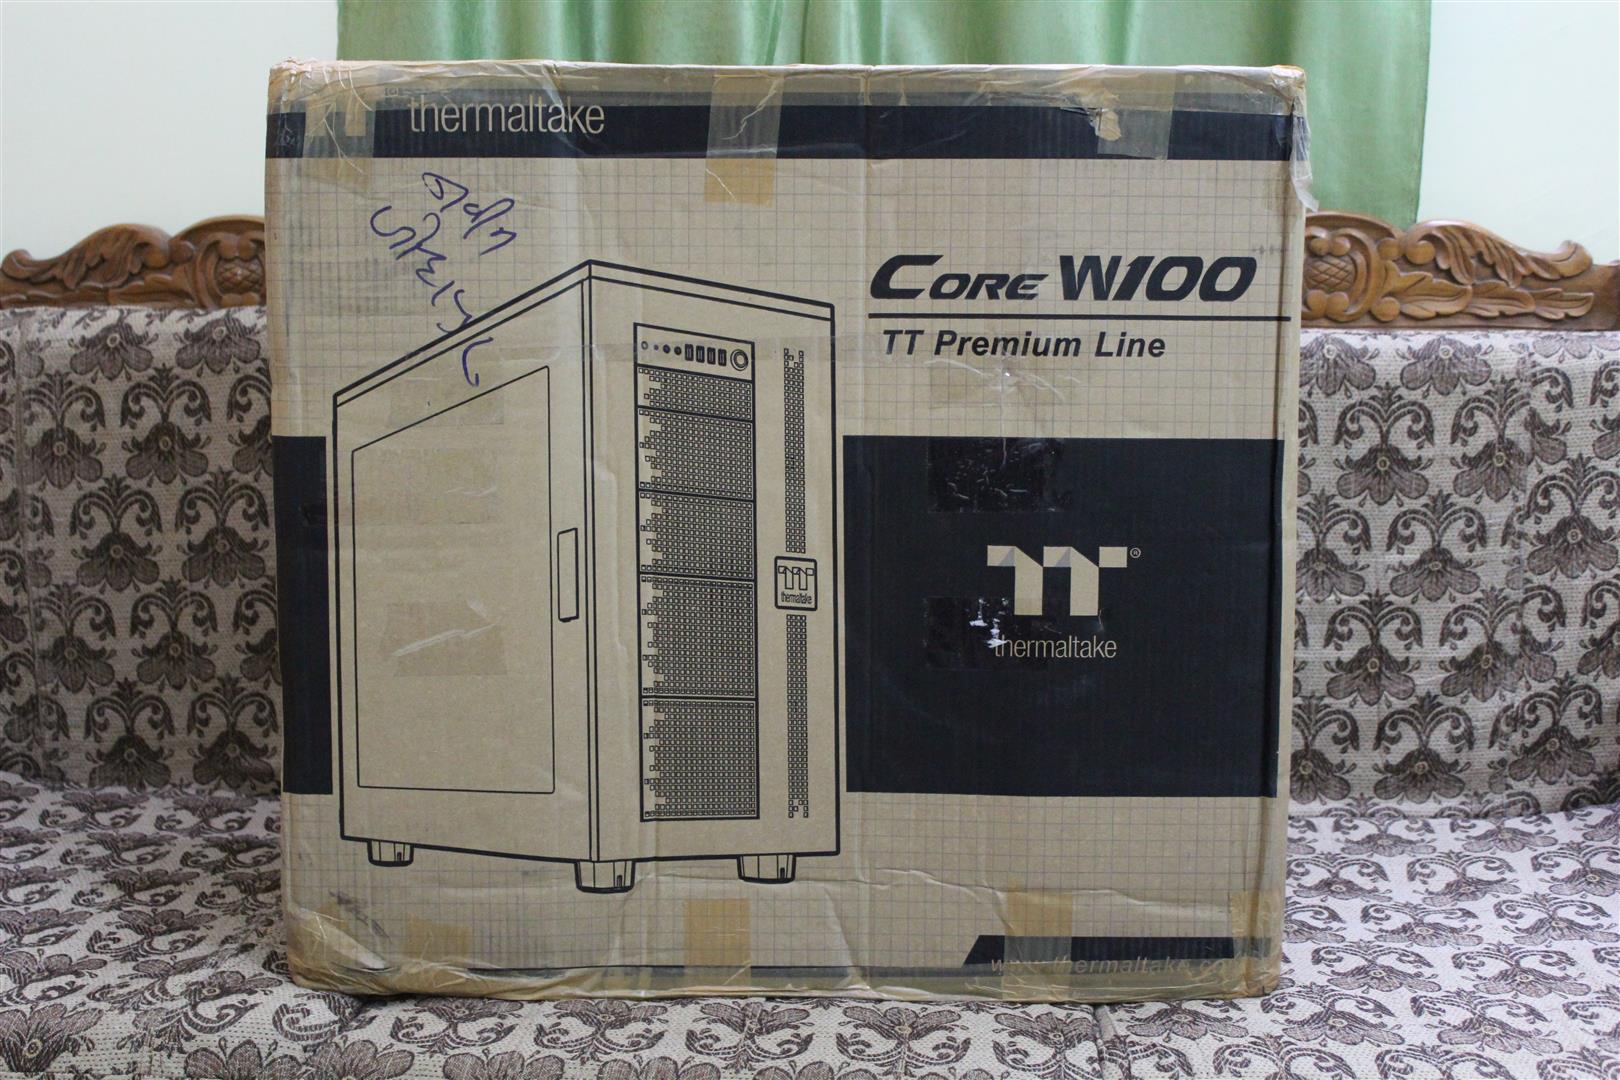
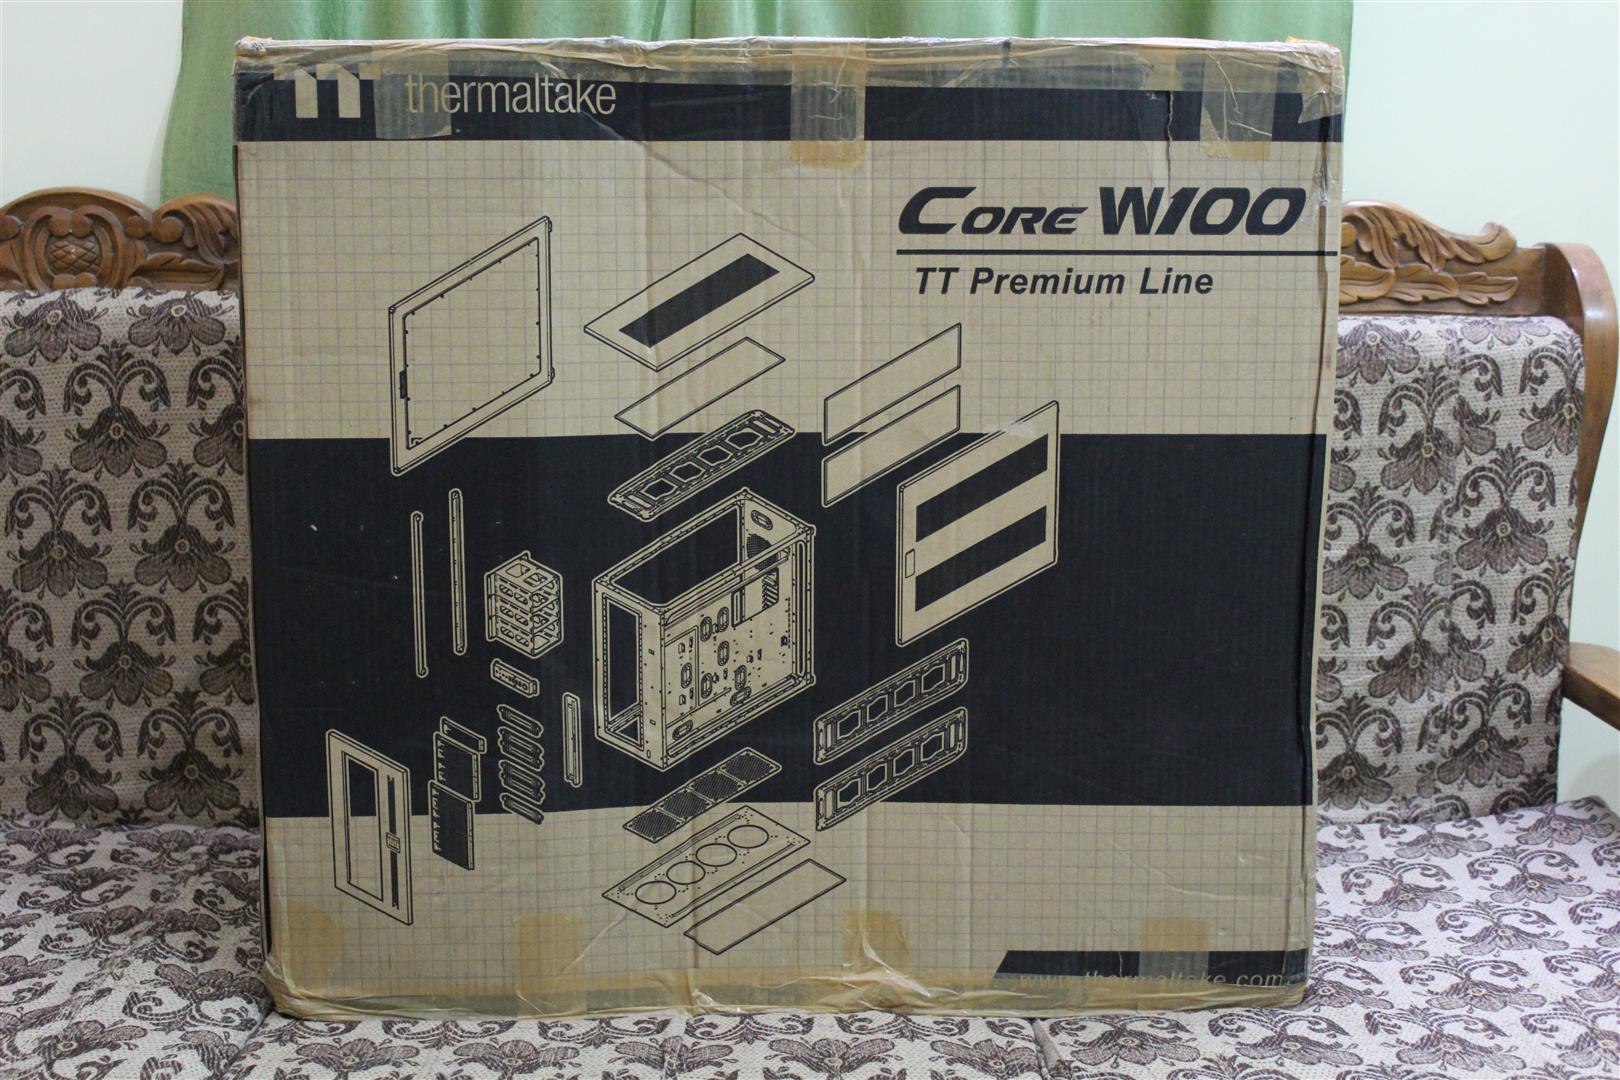
Now let’s un-box the cases. We start with Core W100.
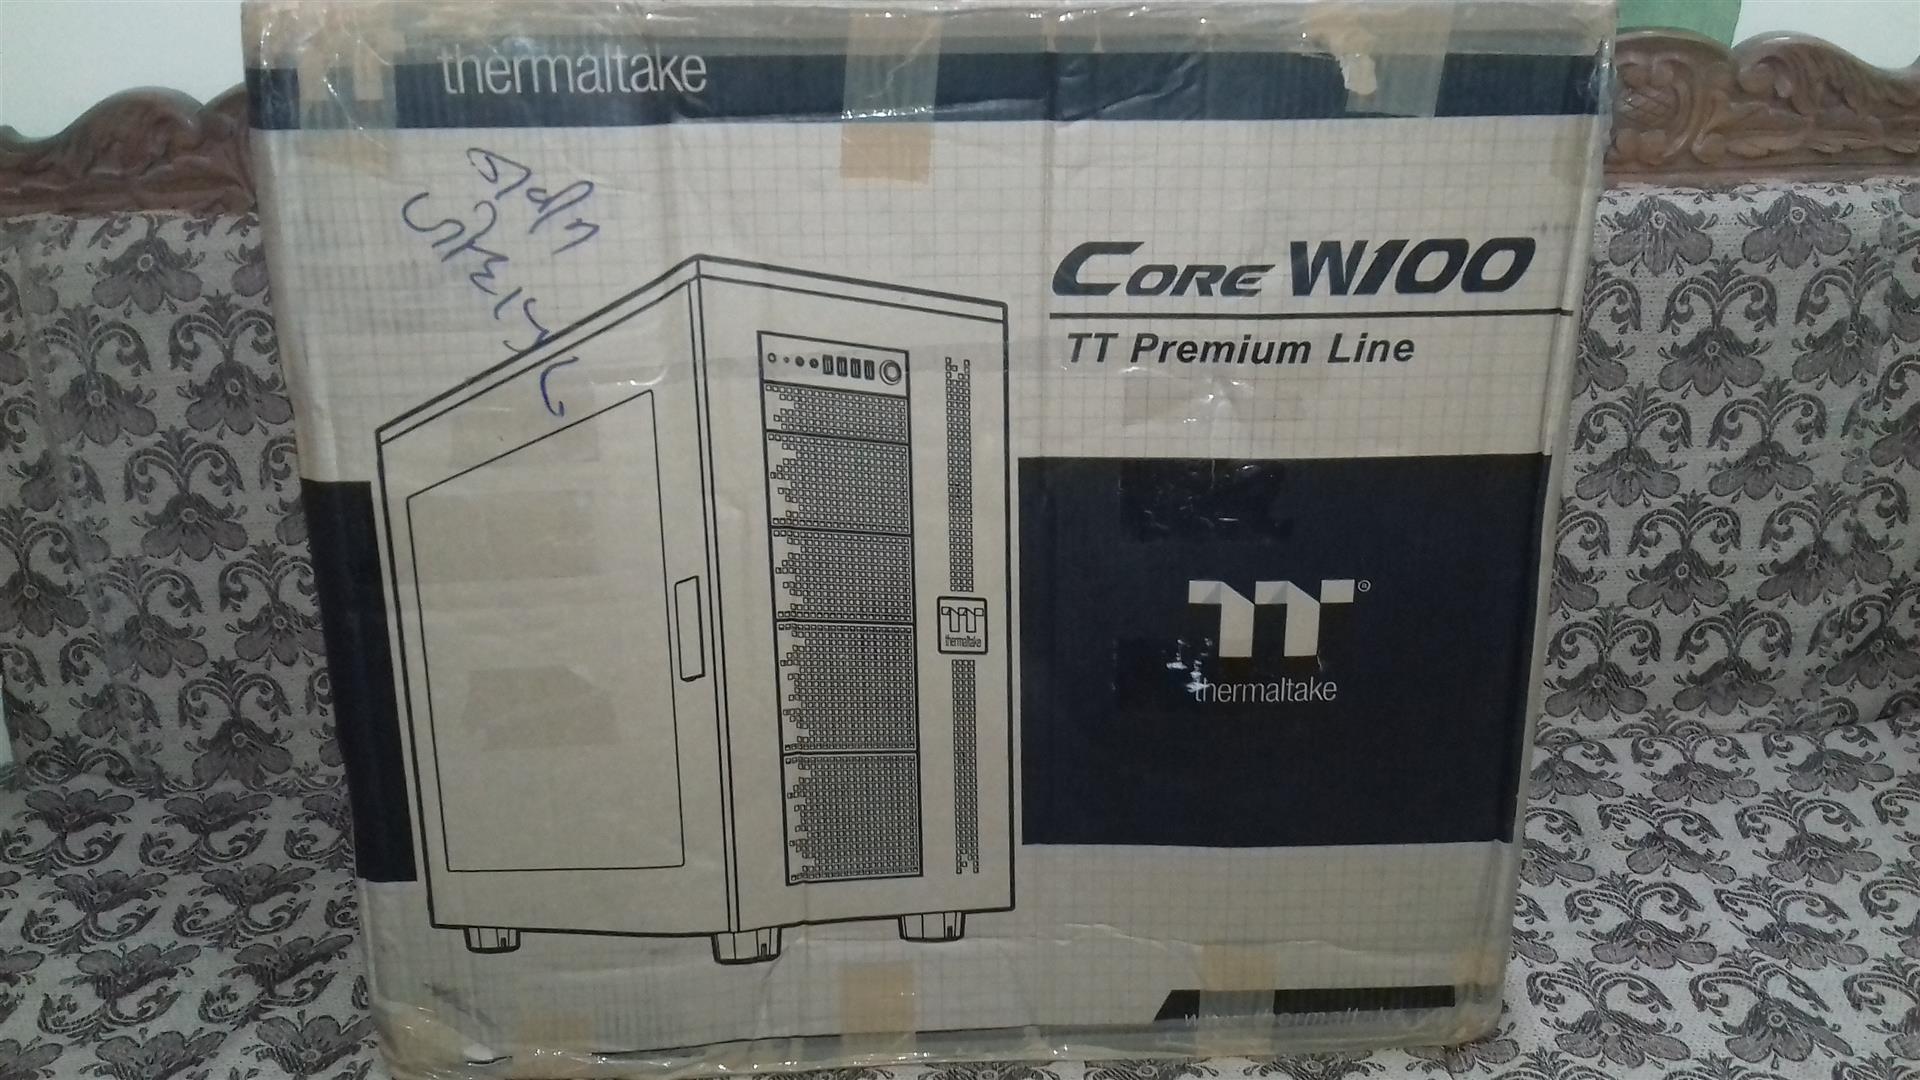
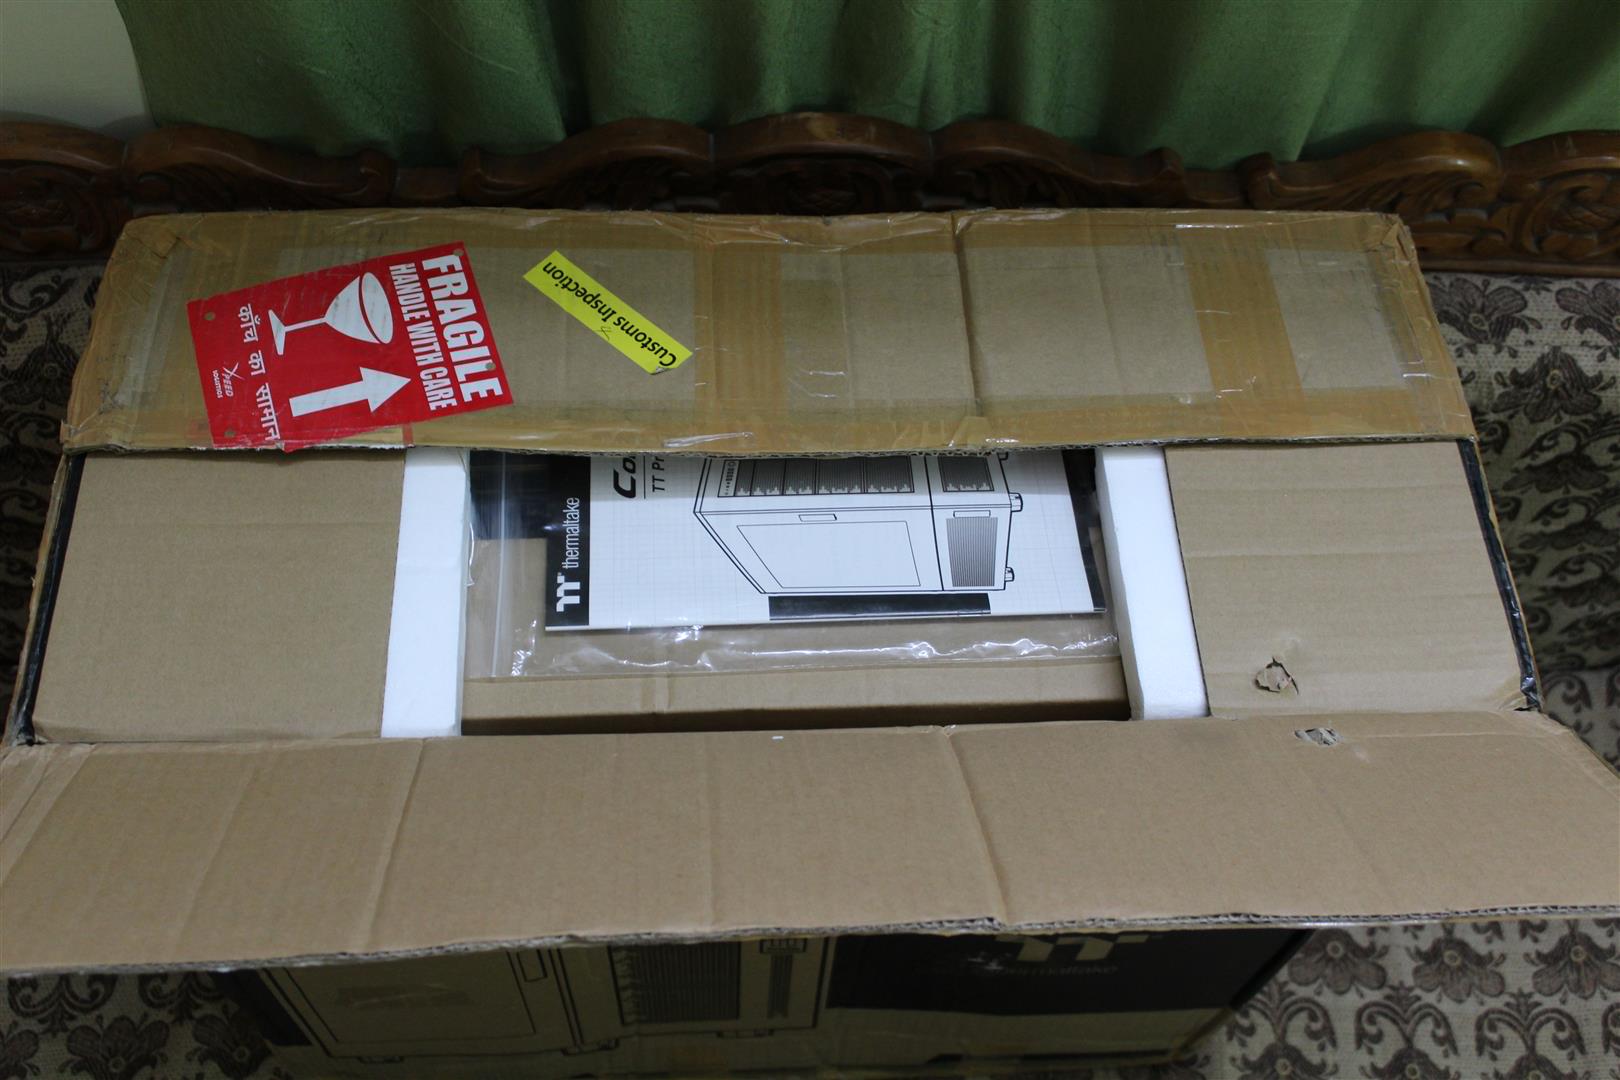

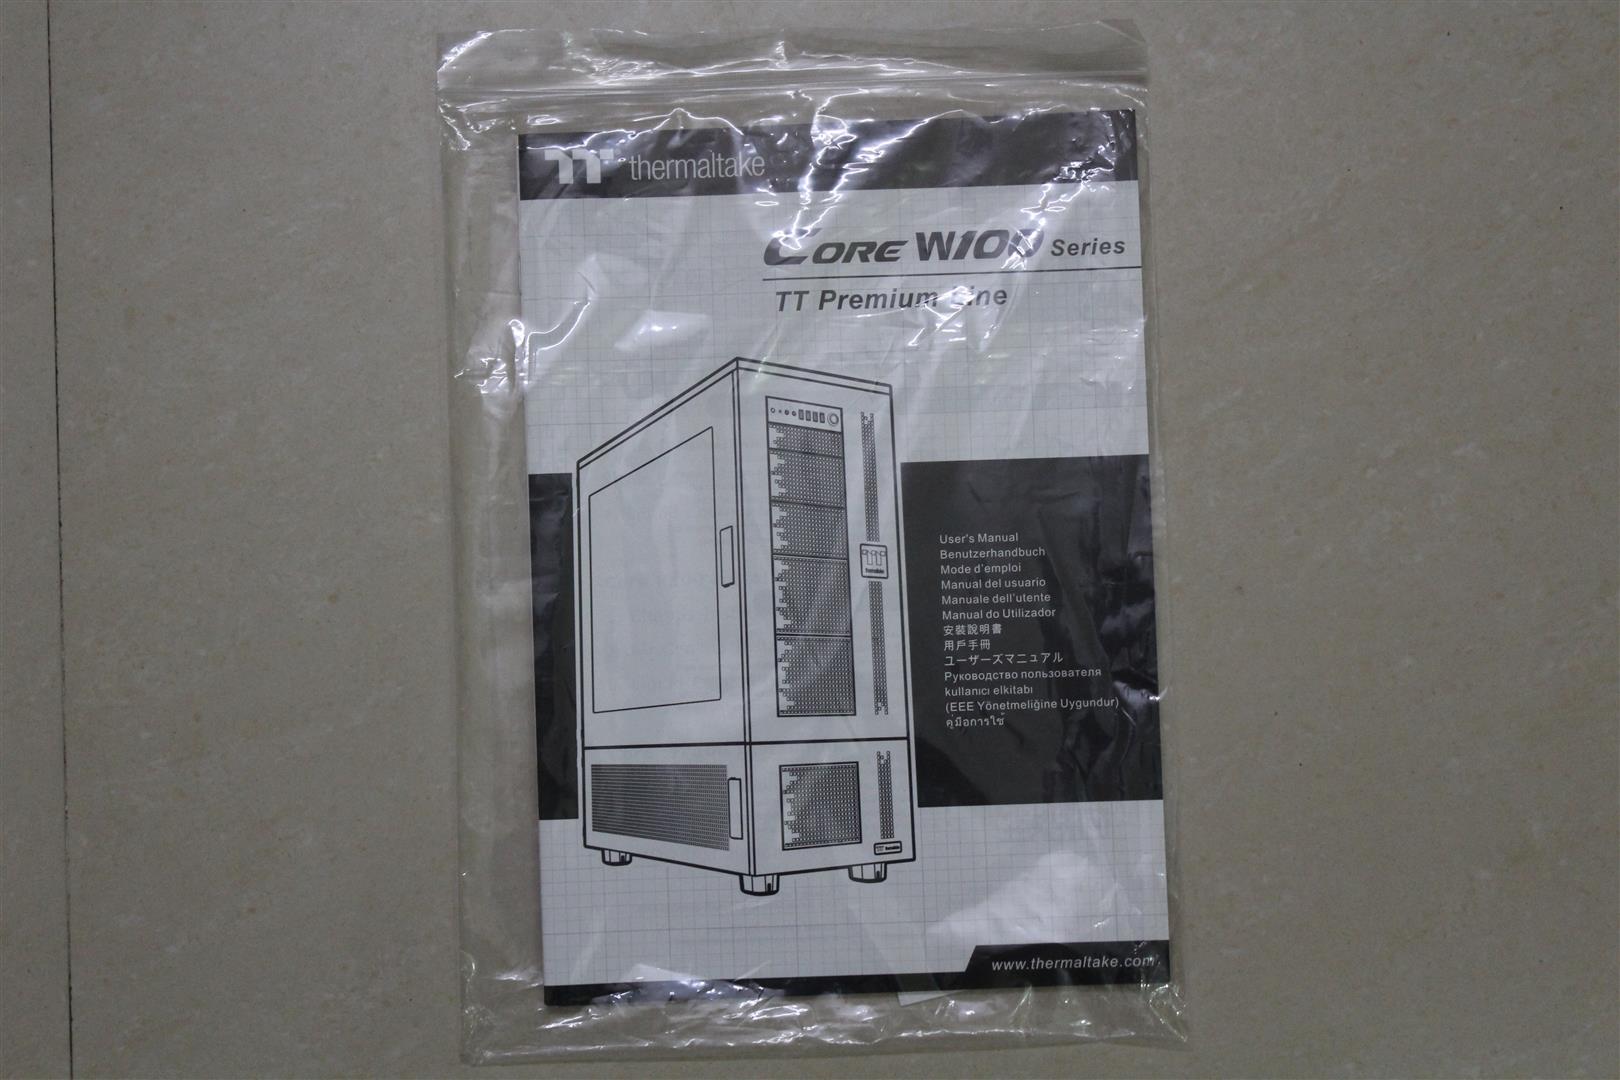
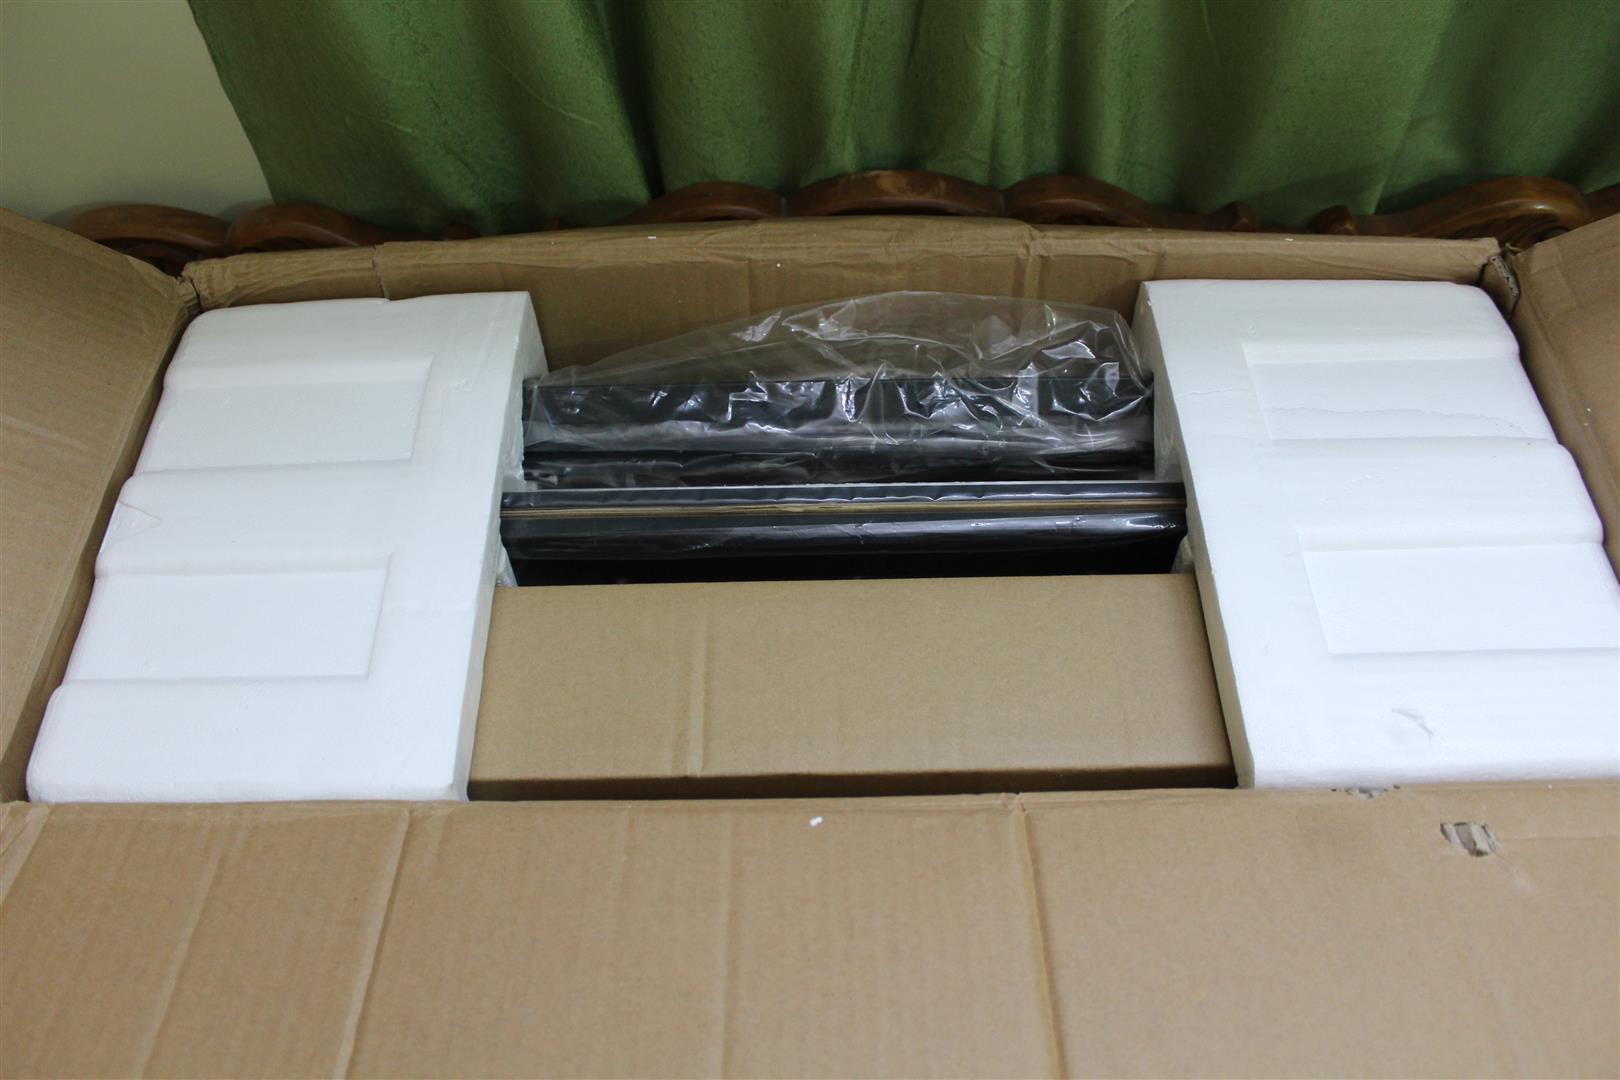
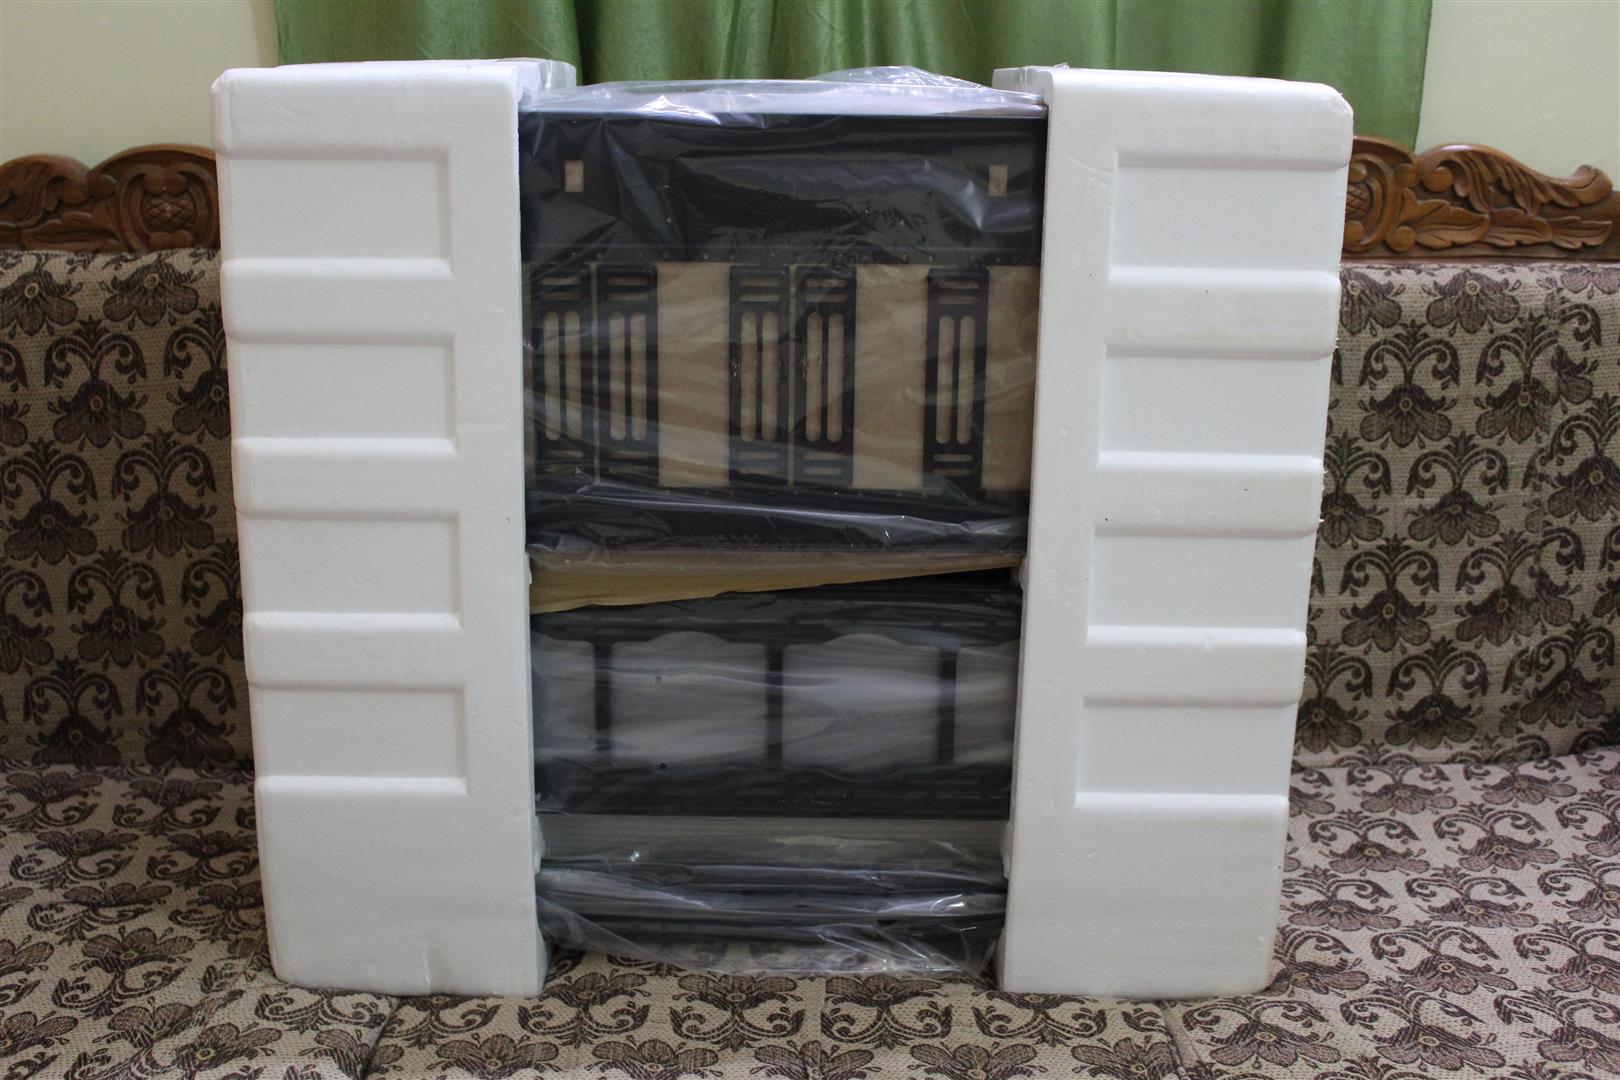

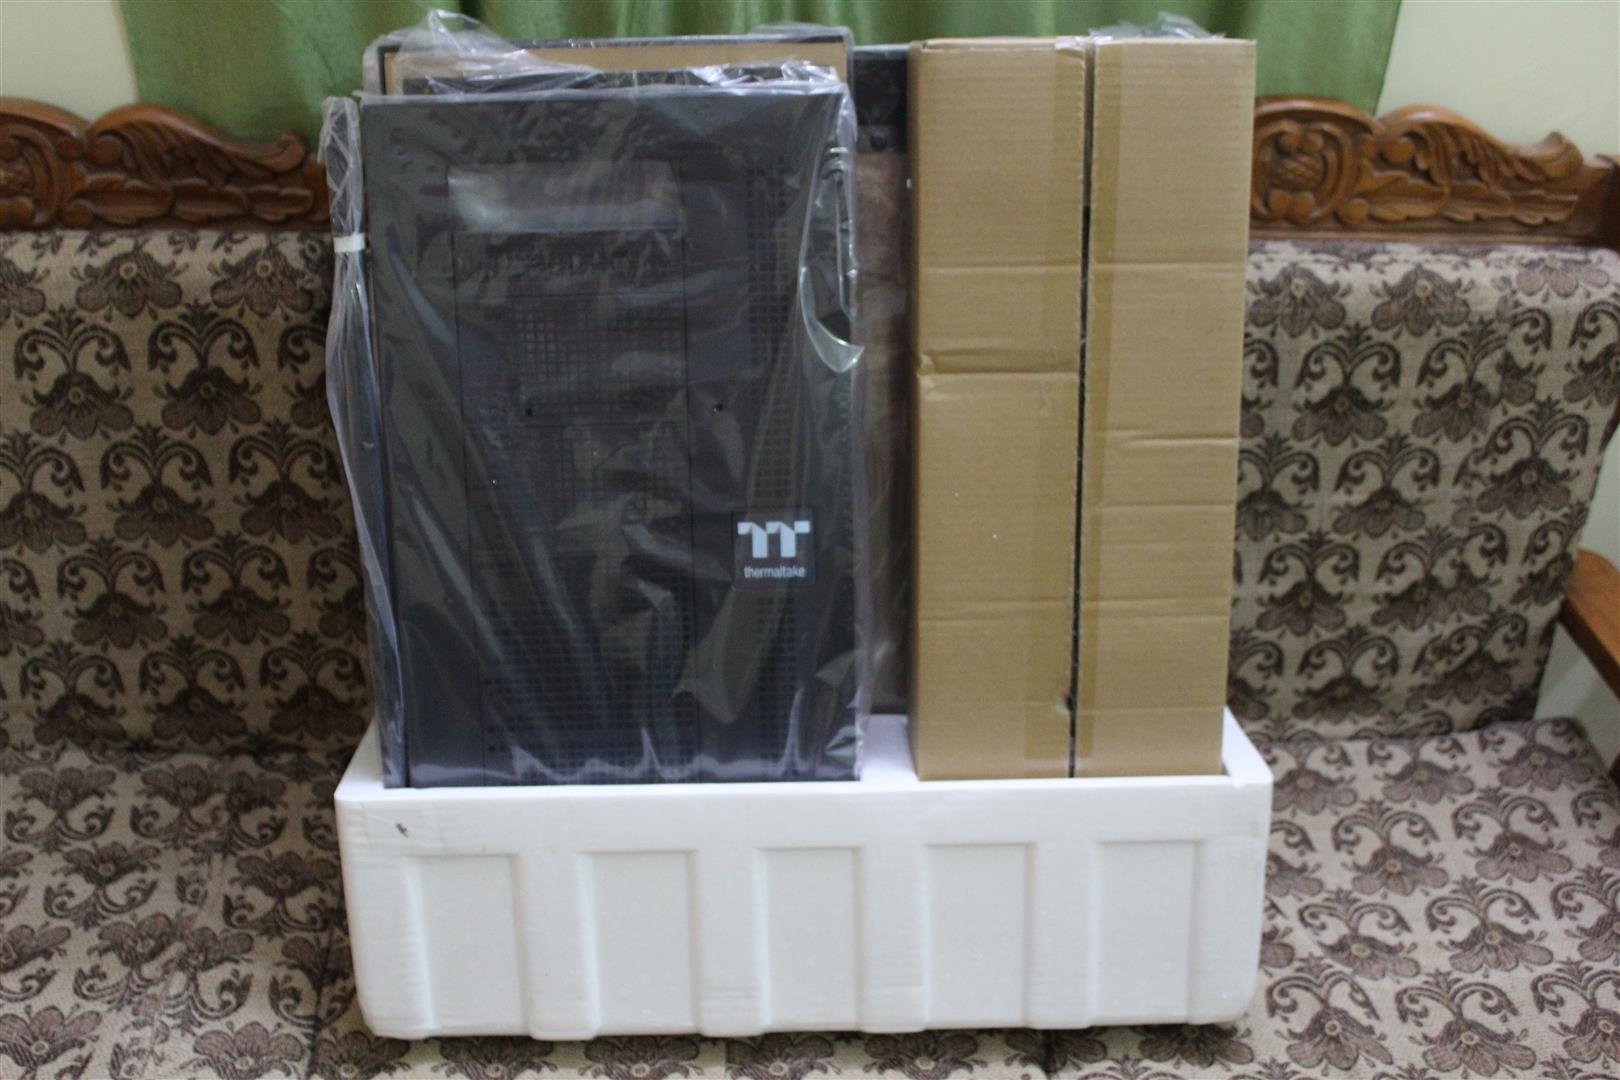

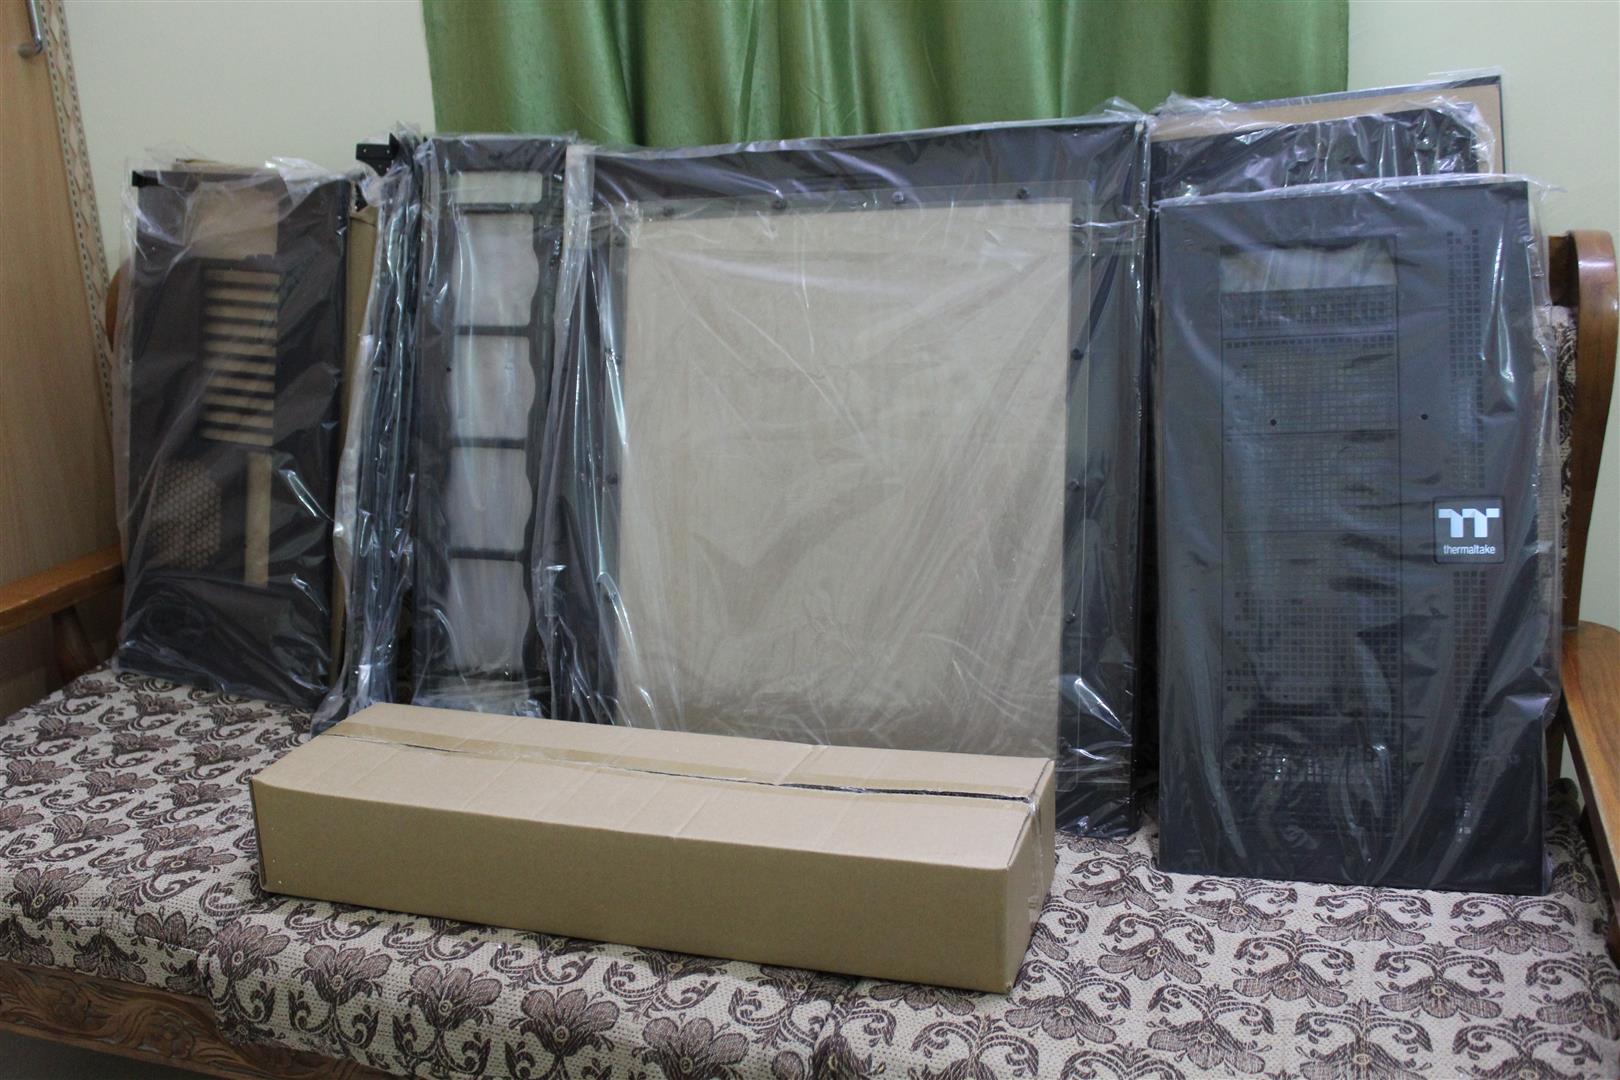
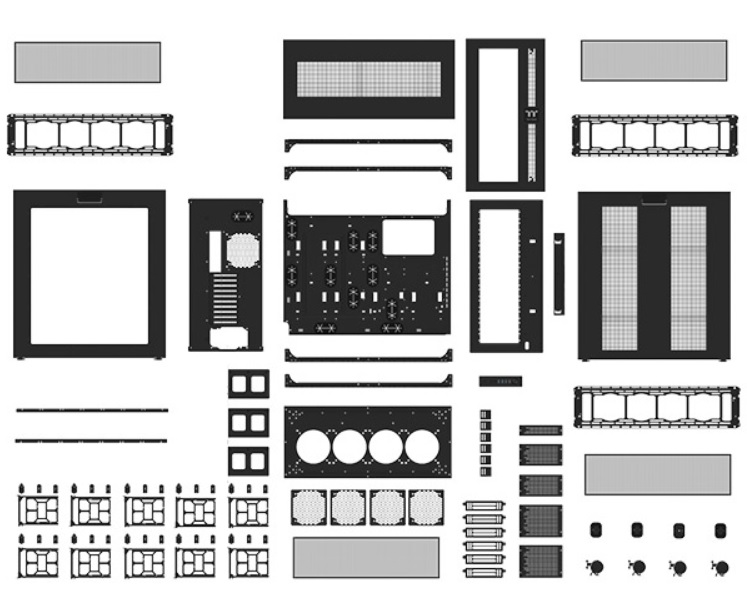
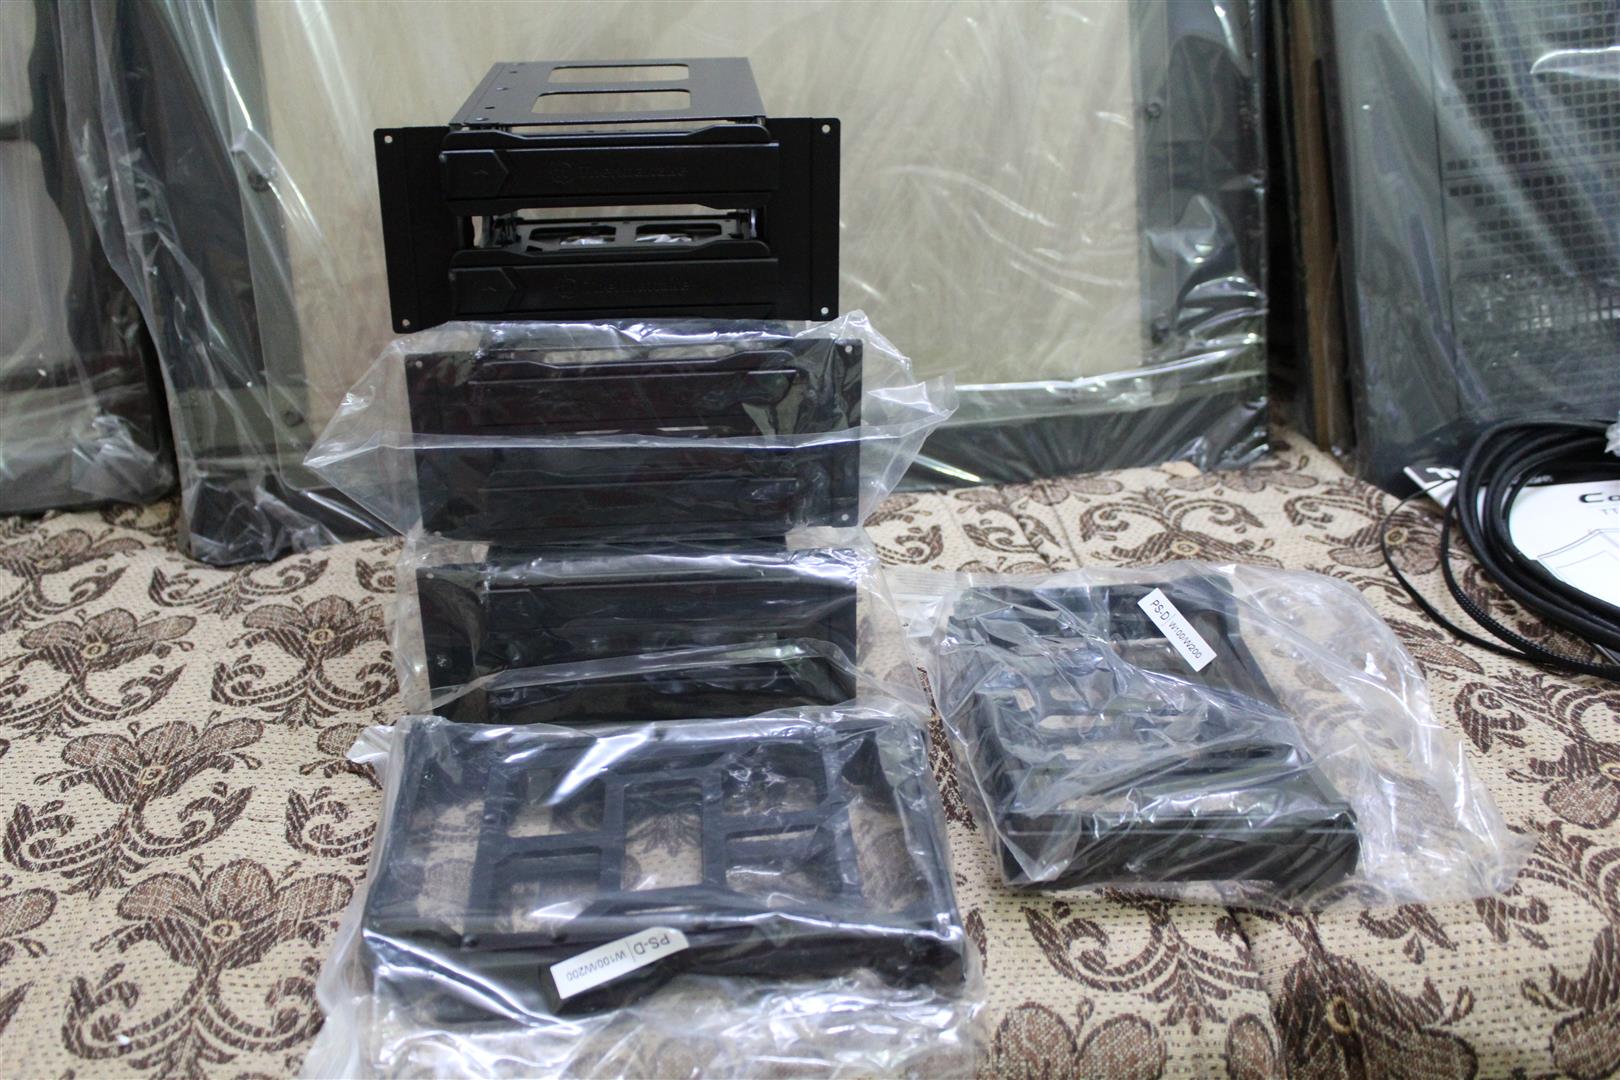
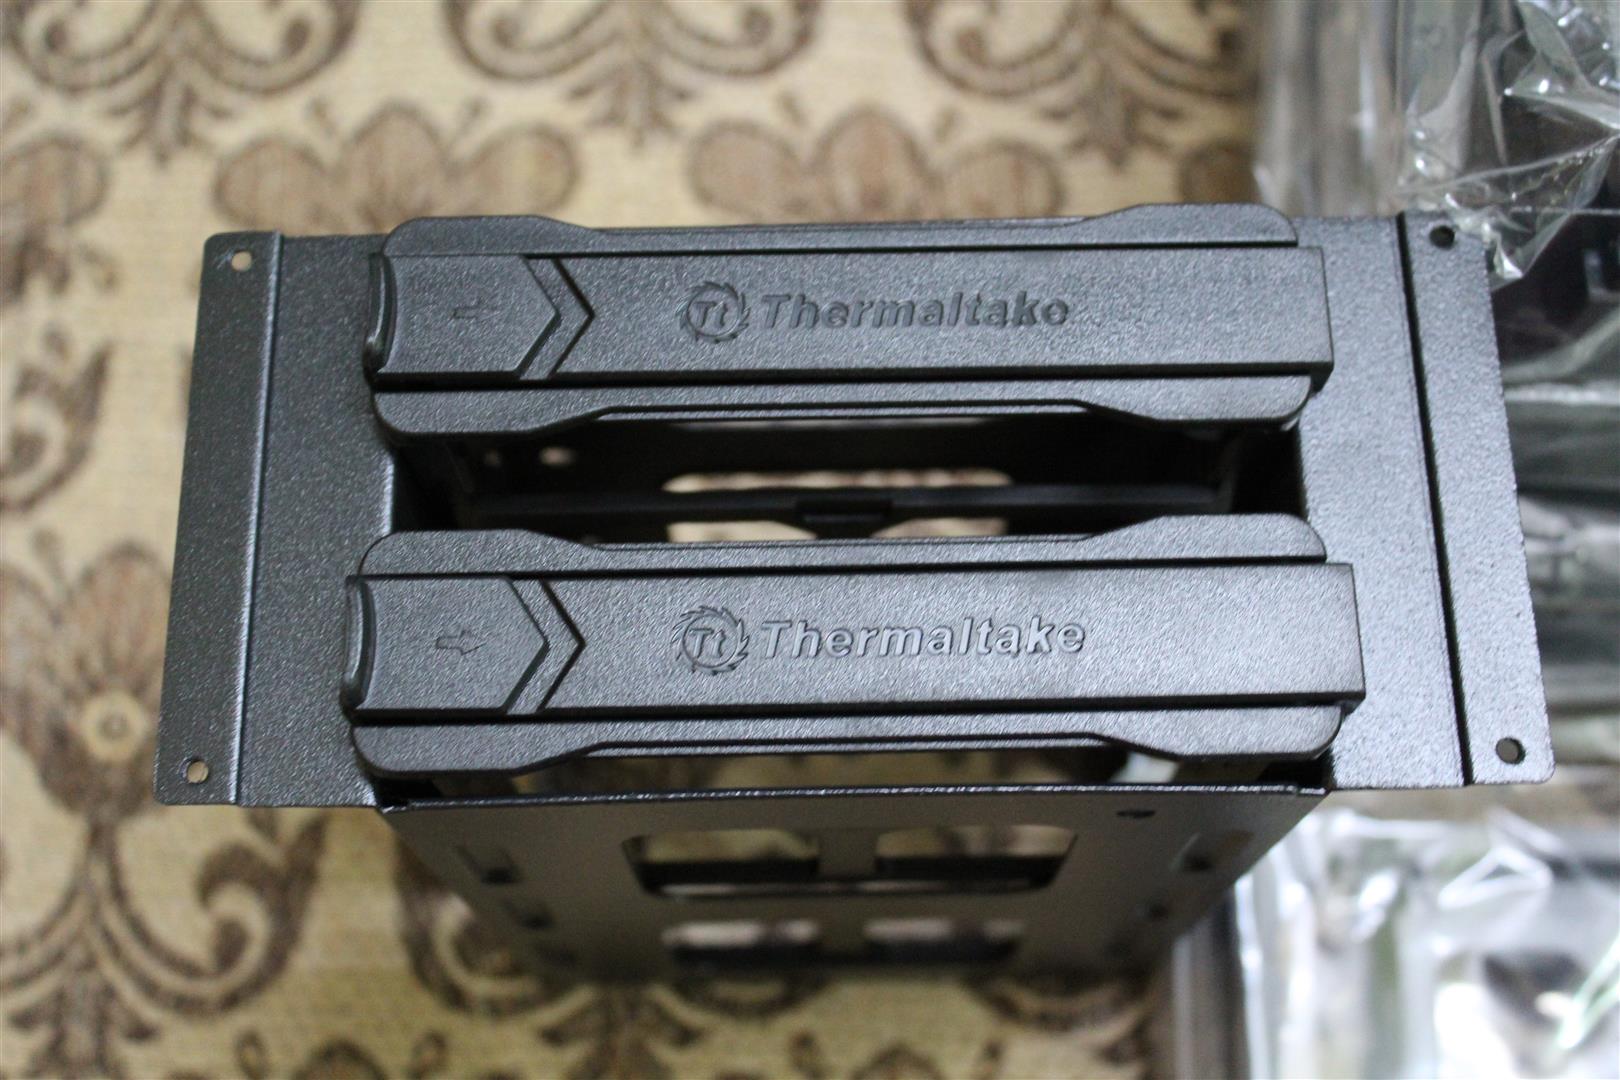
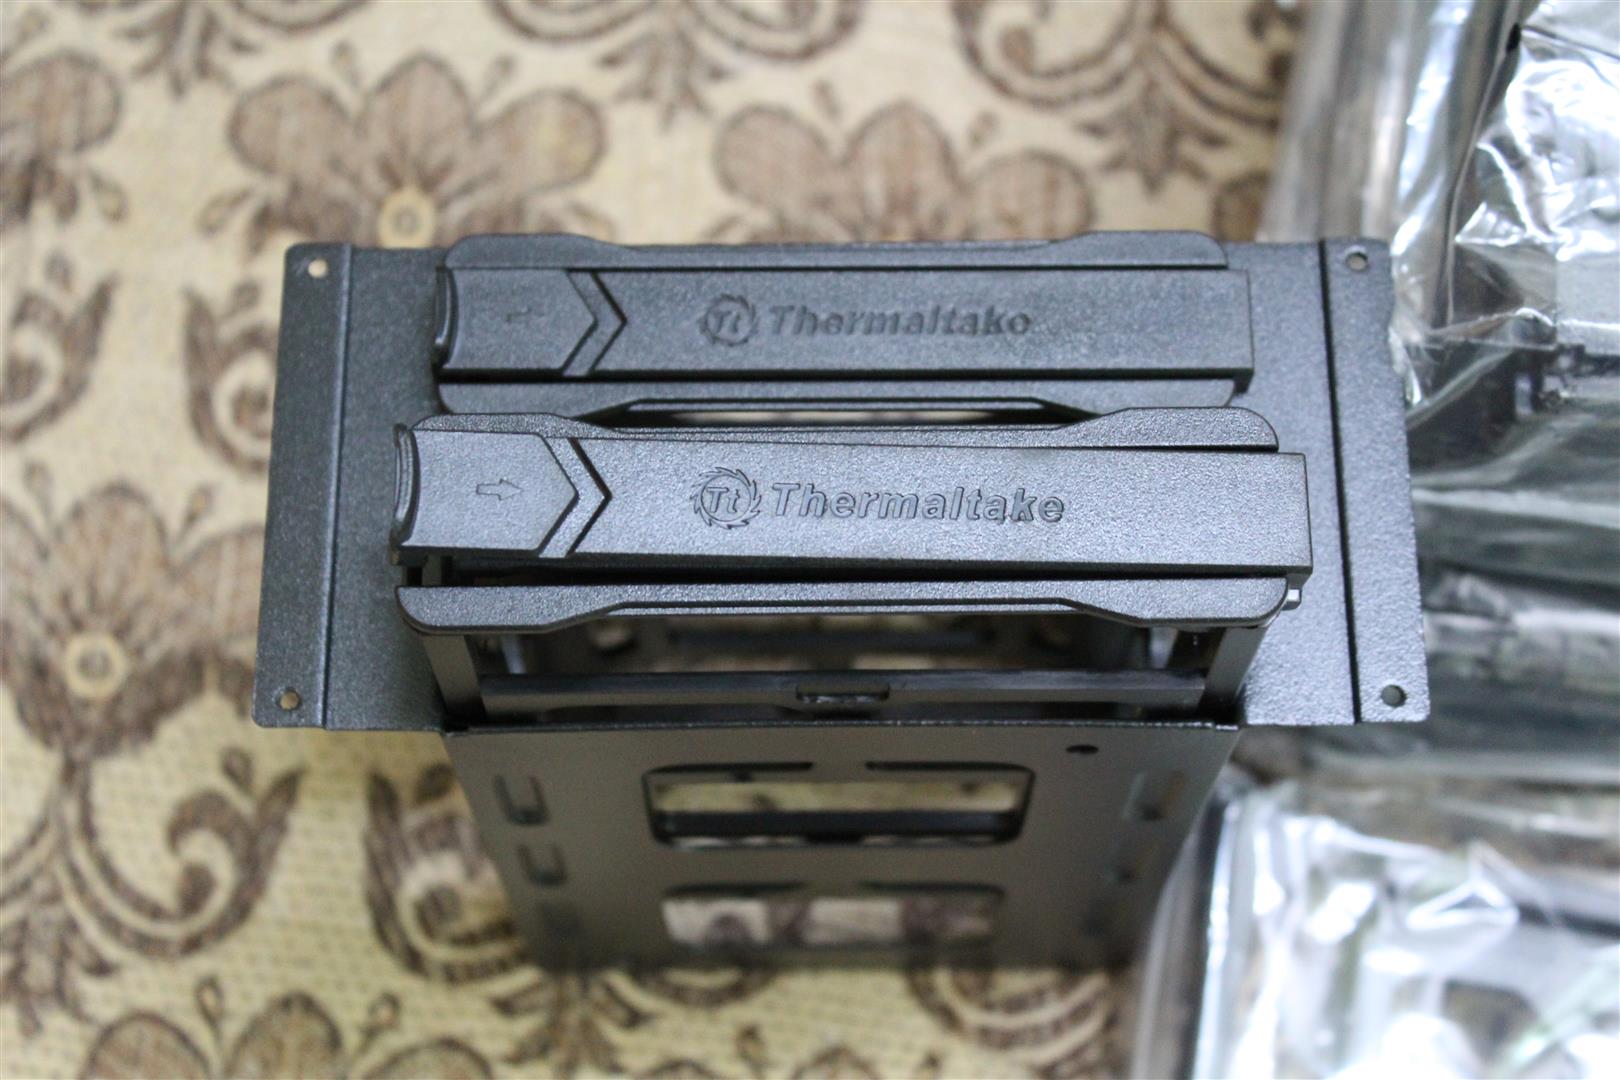
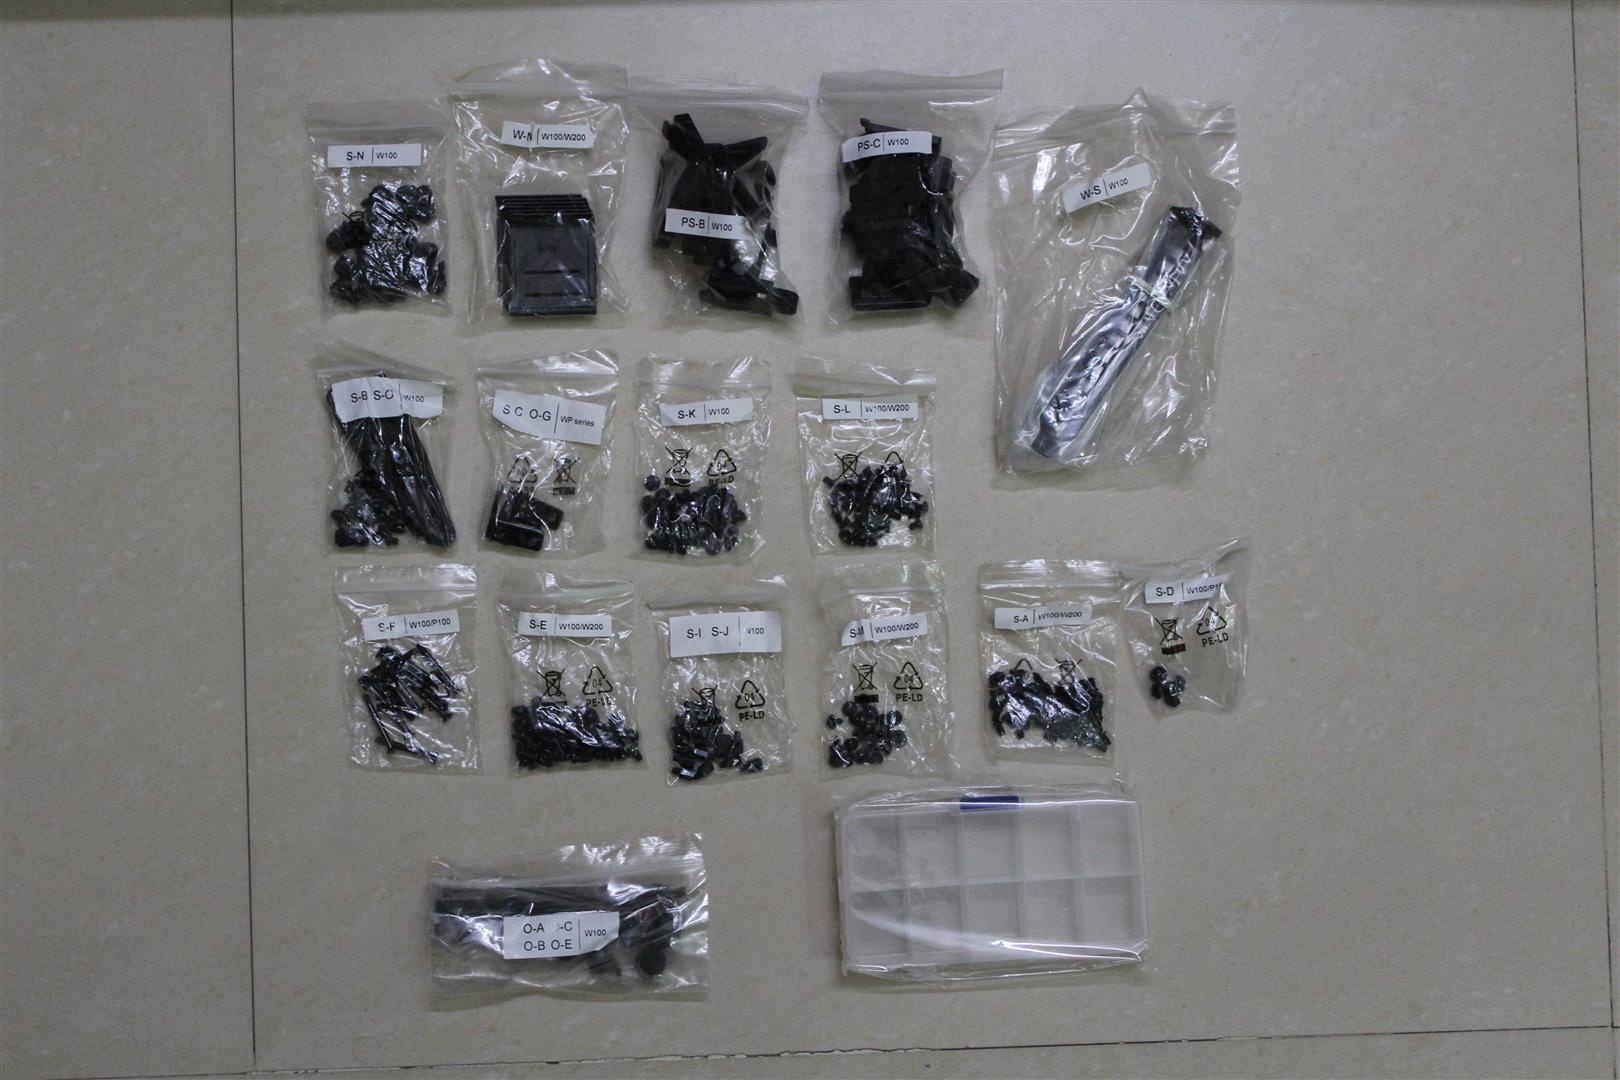
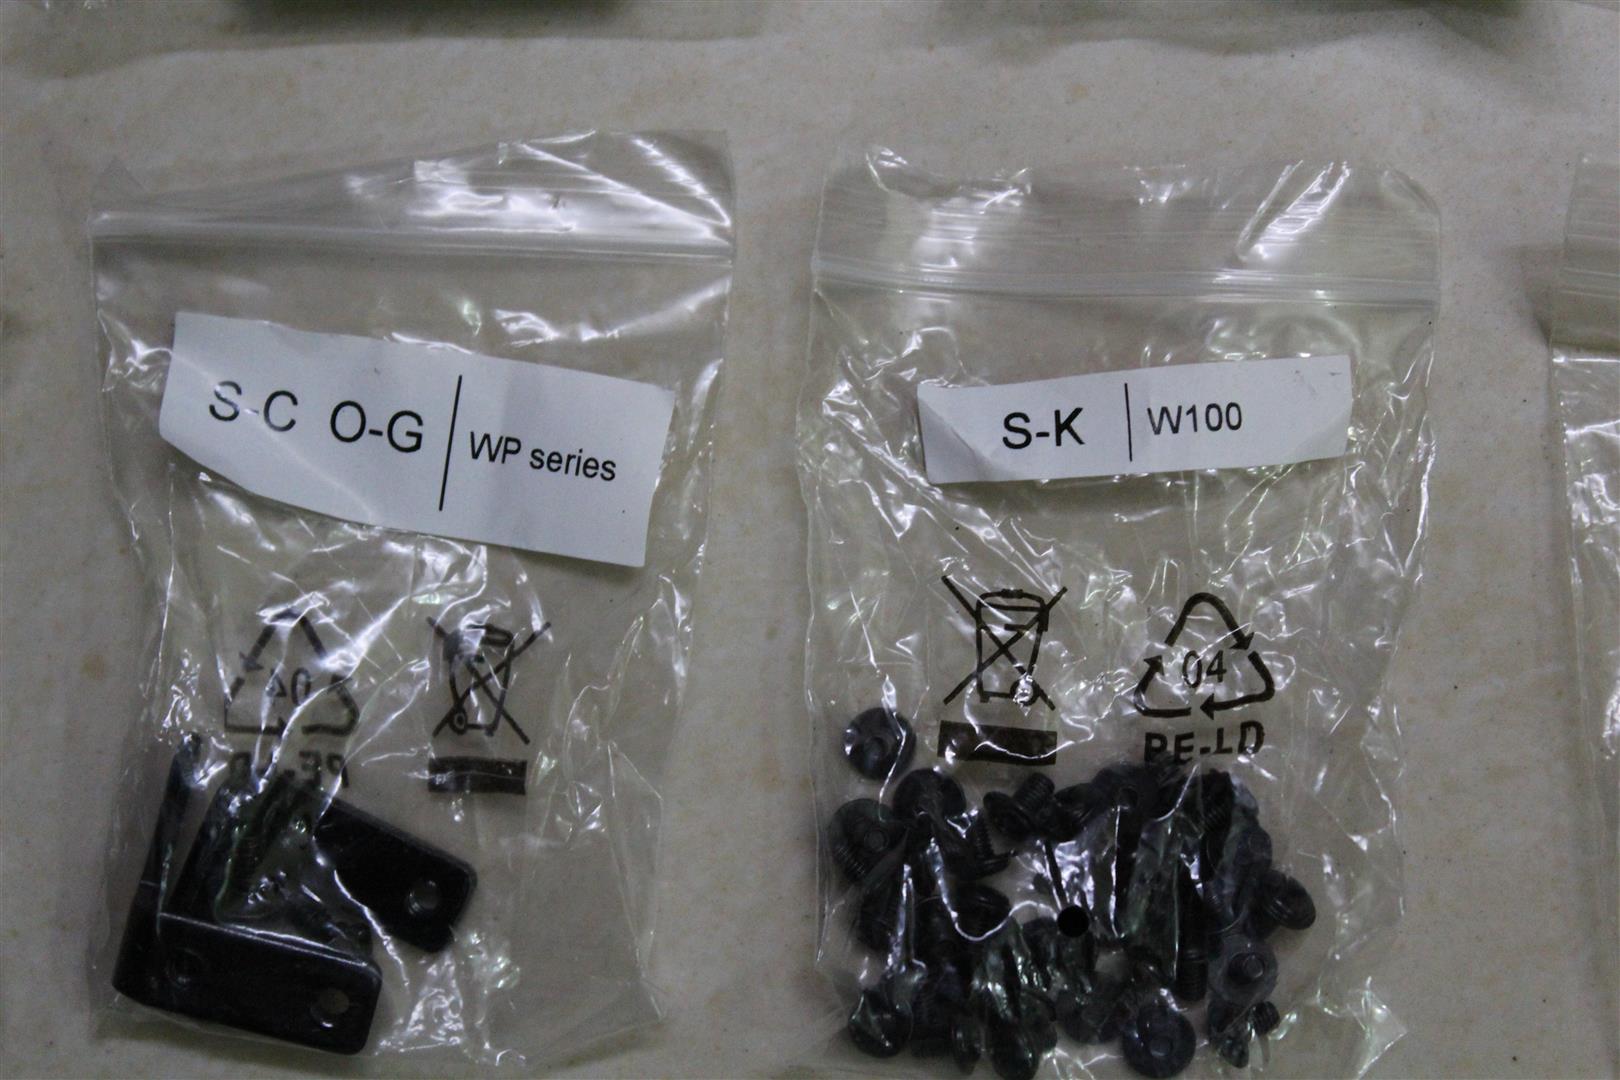
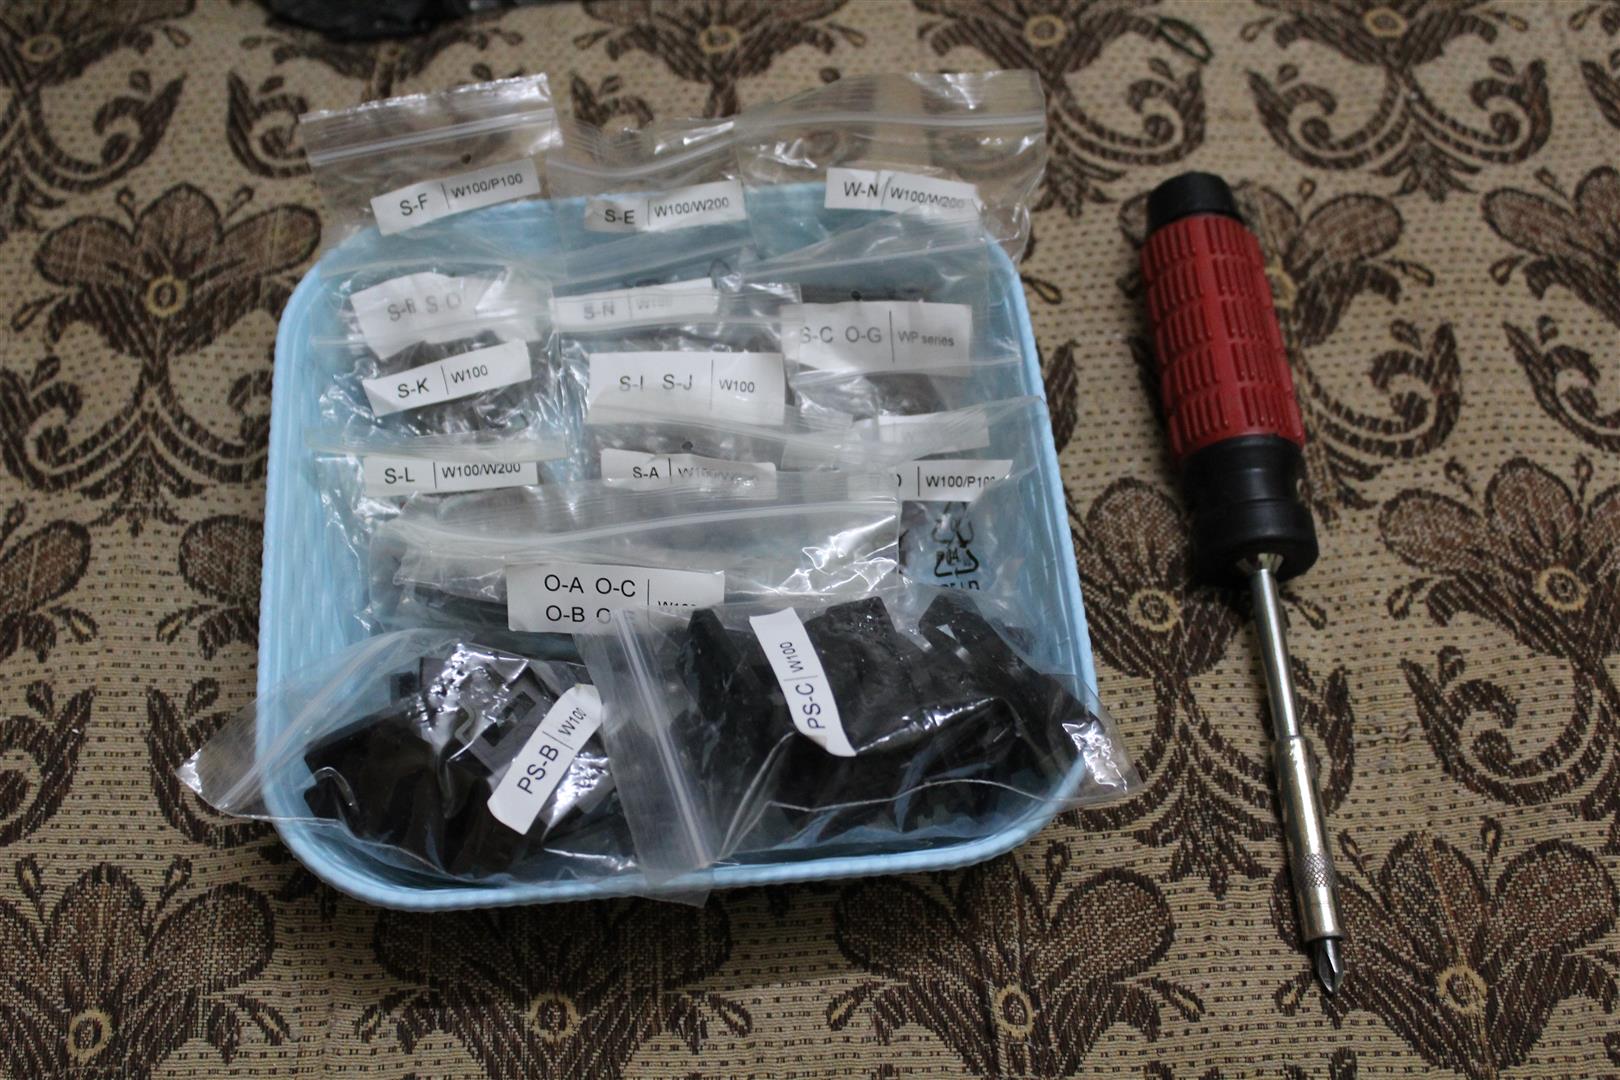
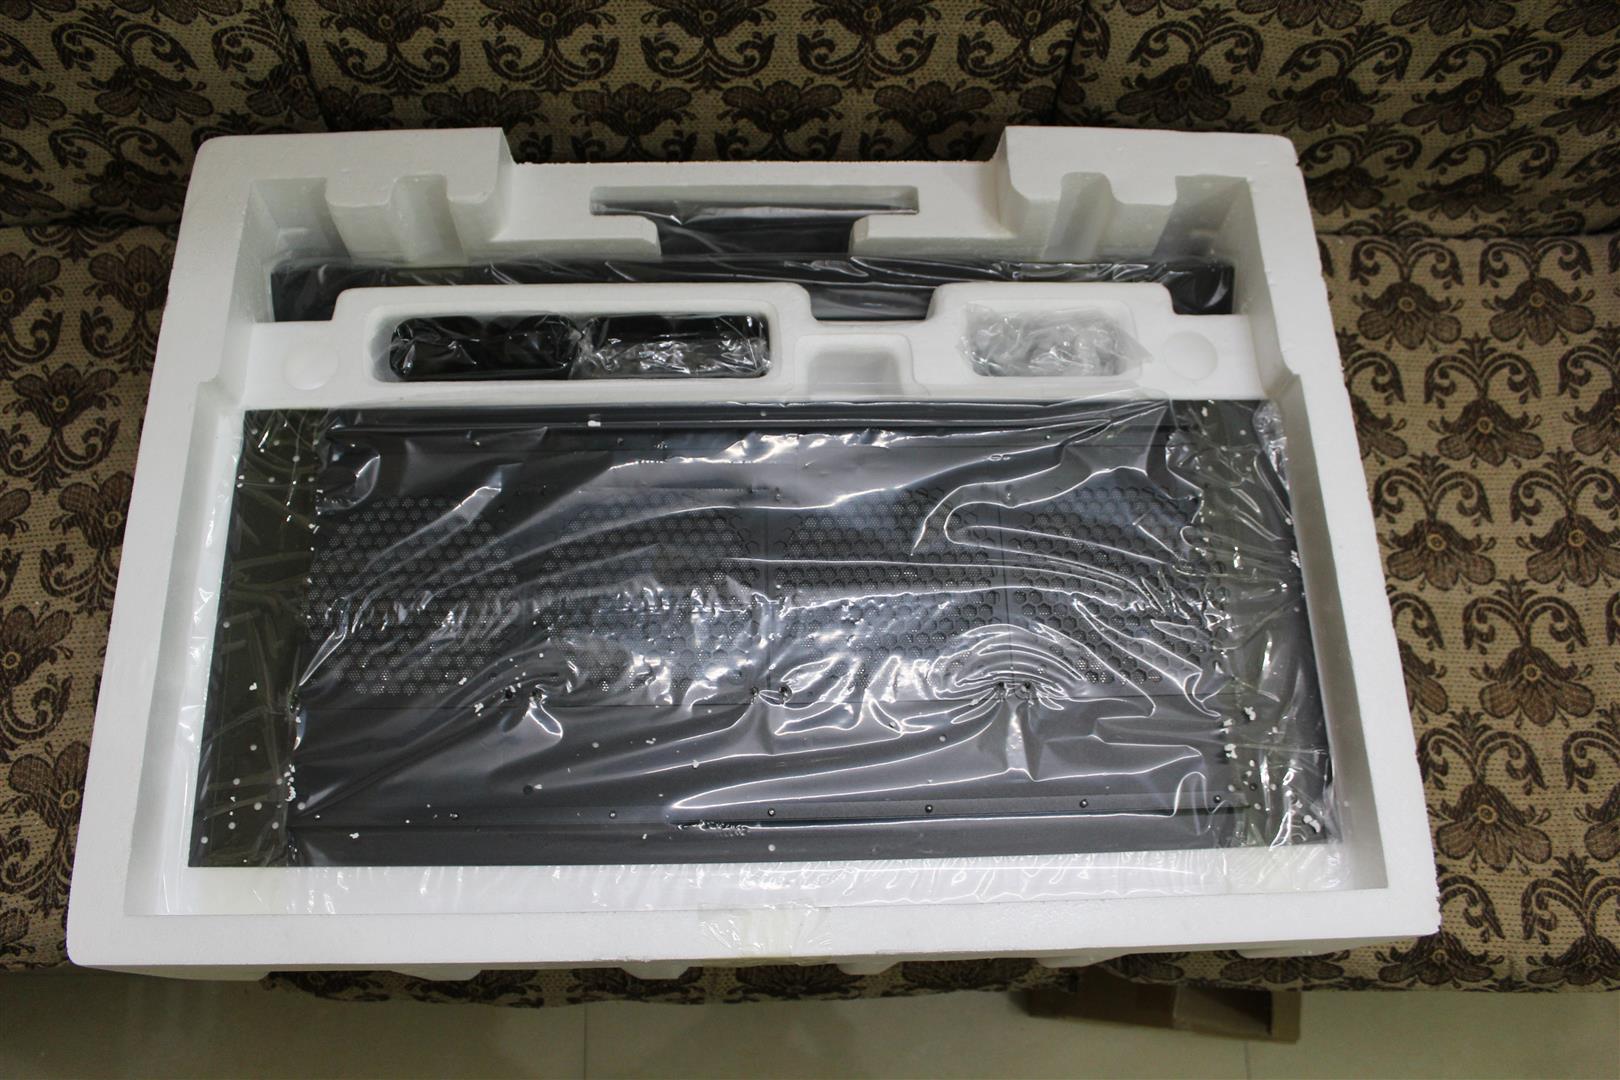
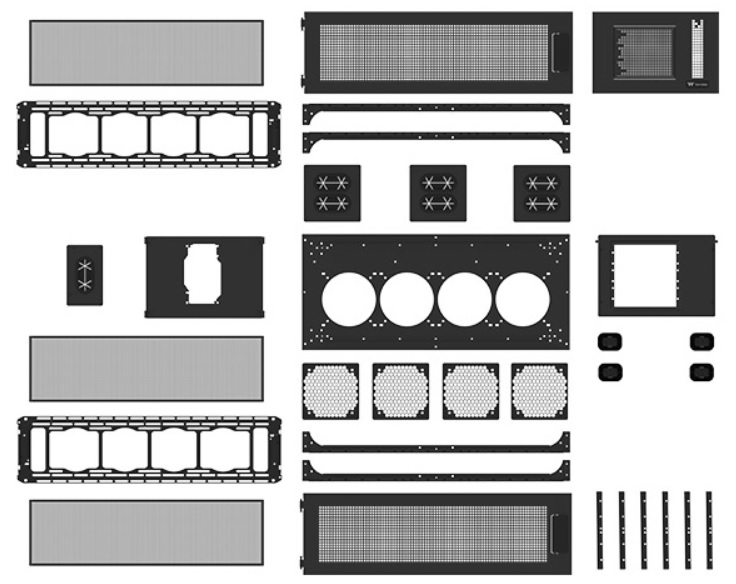
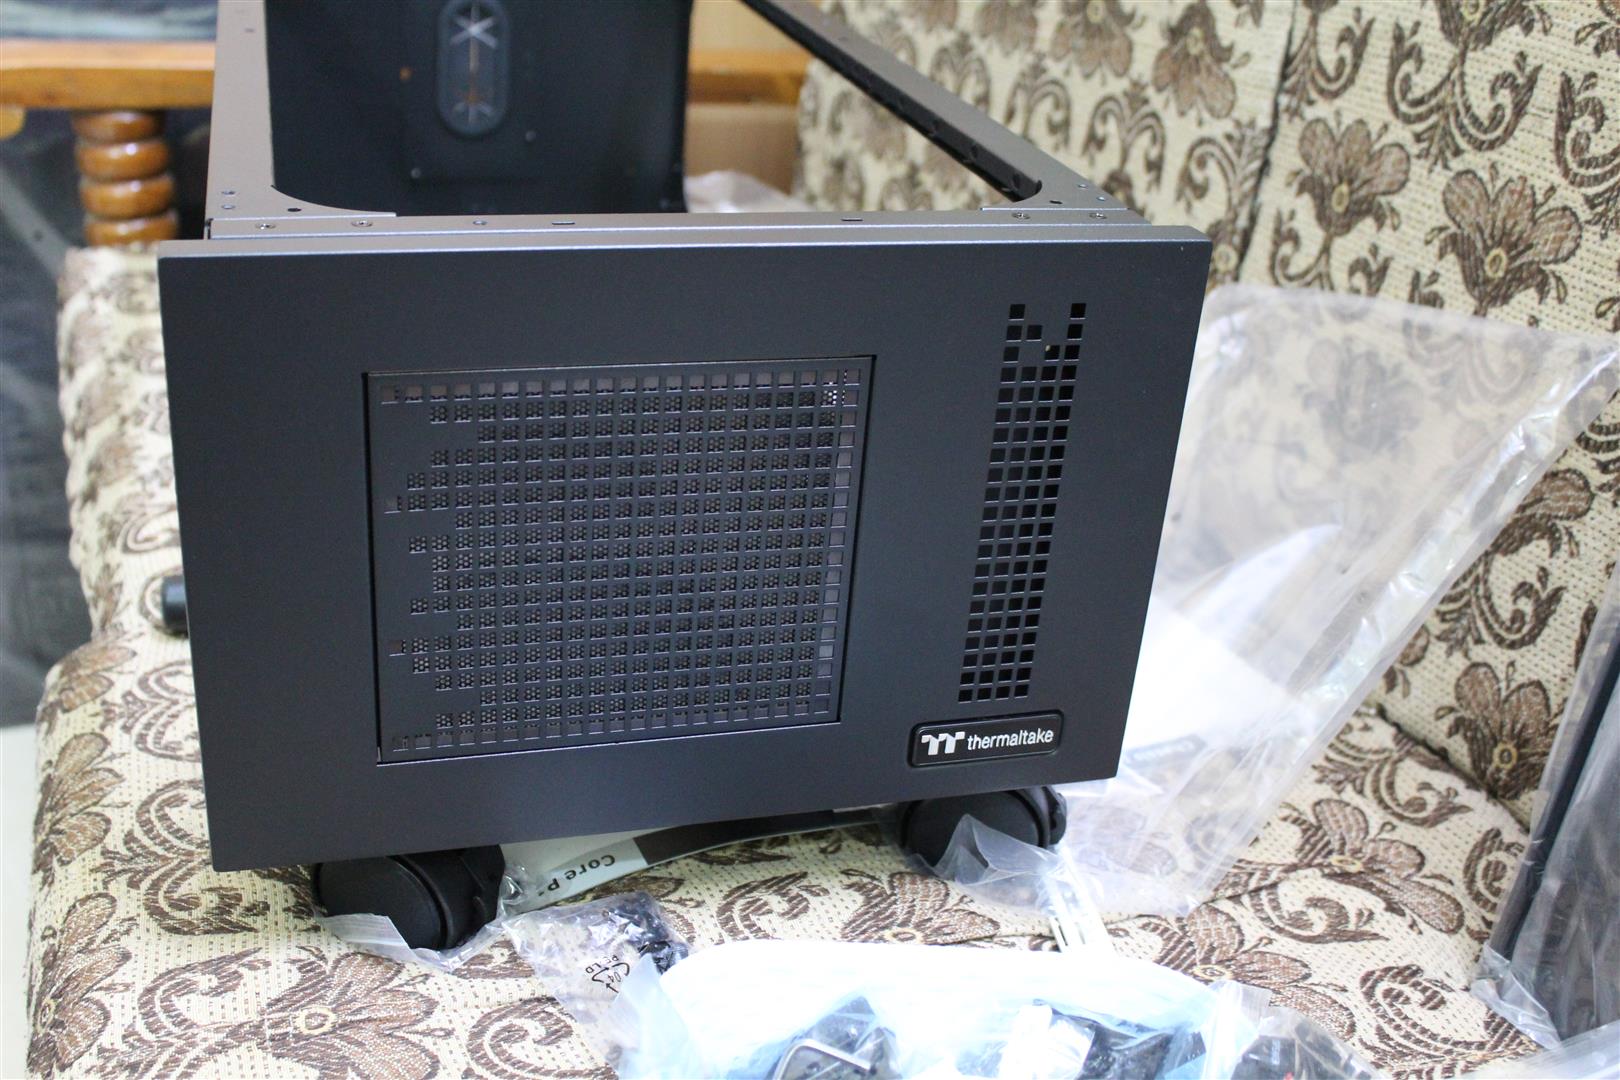
Case build experience with Thermaltake Core W100 Chassis is unique as this case is not like other cases in the market. As mostly all Pc cases are pre factory build and came ready to be used out of the box but not this one. Thermaltake Core WP100 Super Tower Chassis comes in de-assembled bits and pieces, with proper labelling and complete build guide. So one have to assemble this case piece by piece. A total do-it-yourself experience, a priceless experience for me.
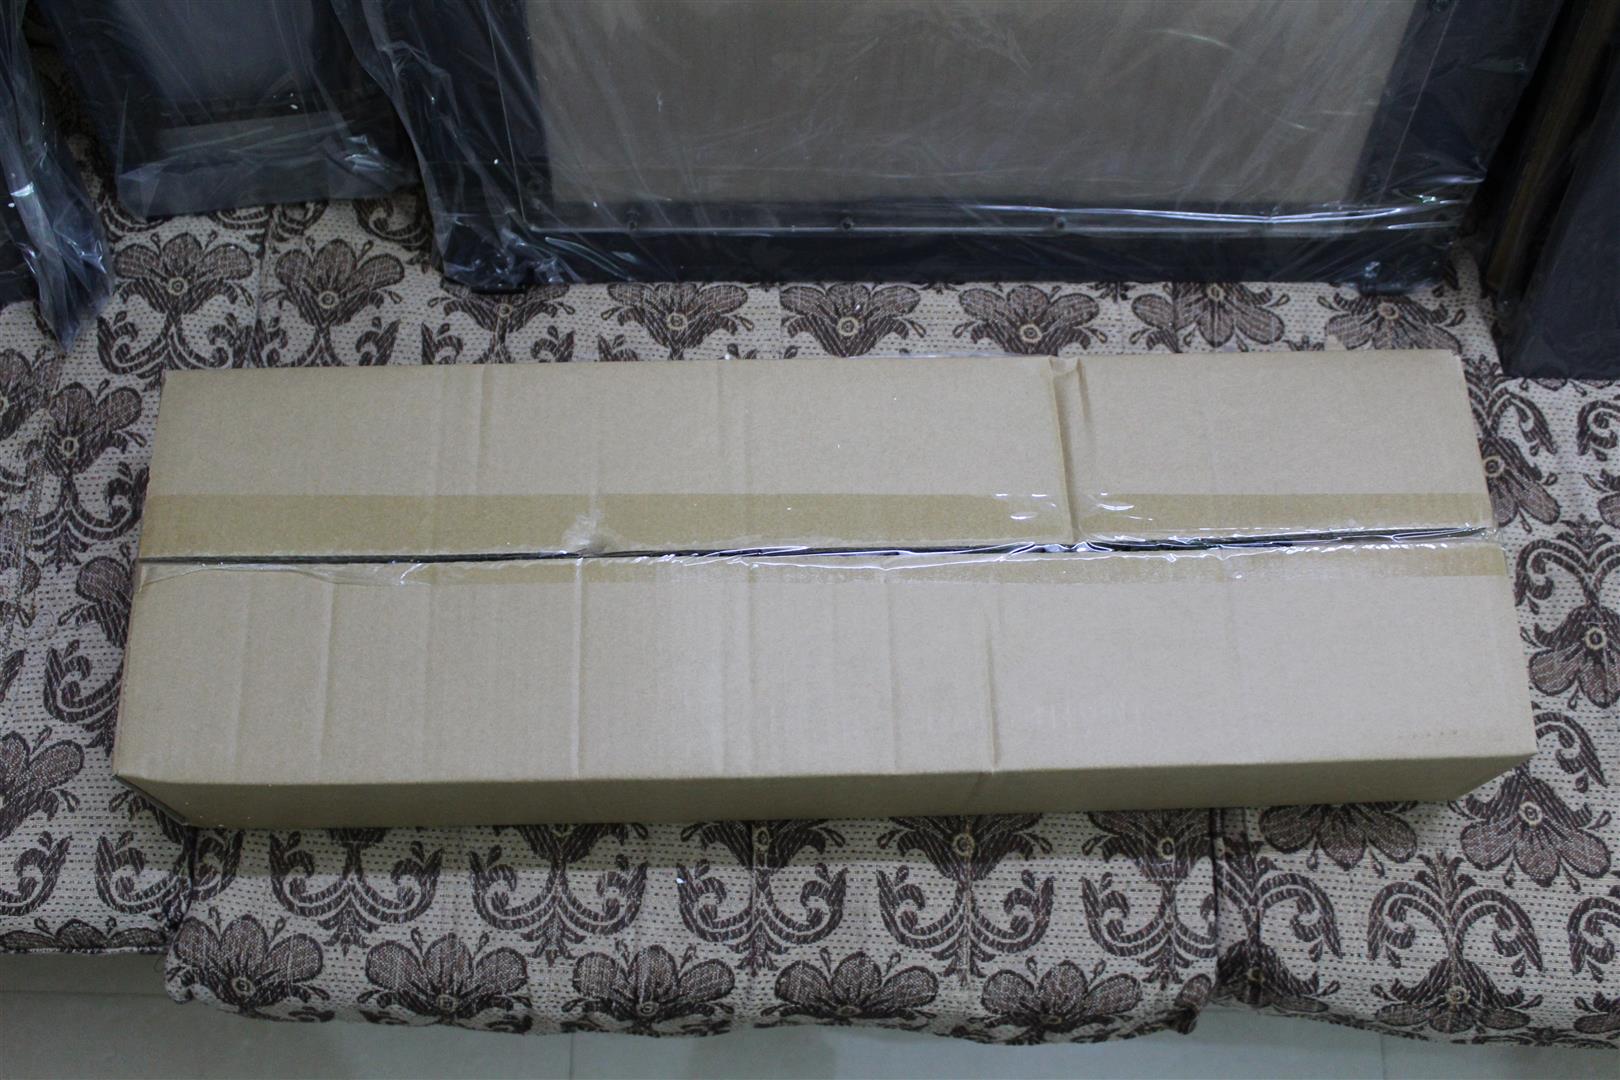
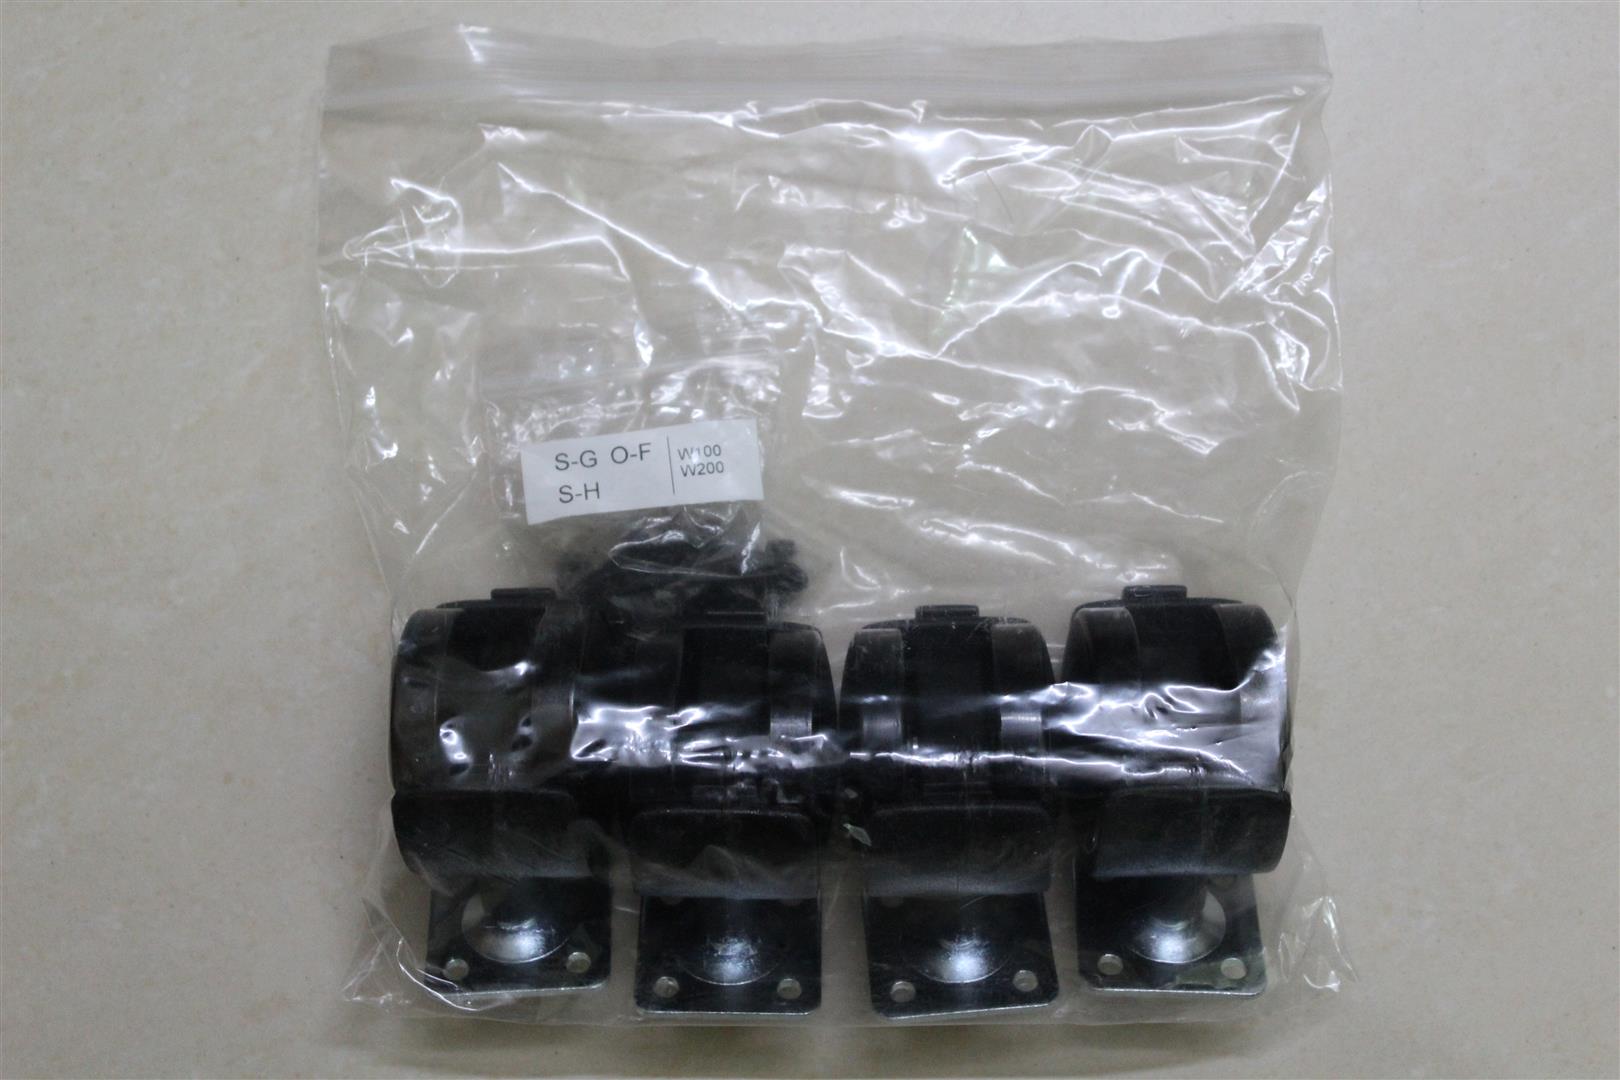
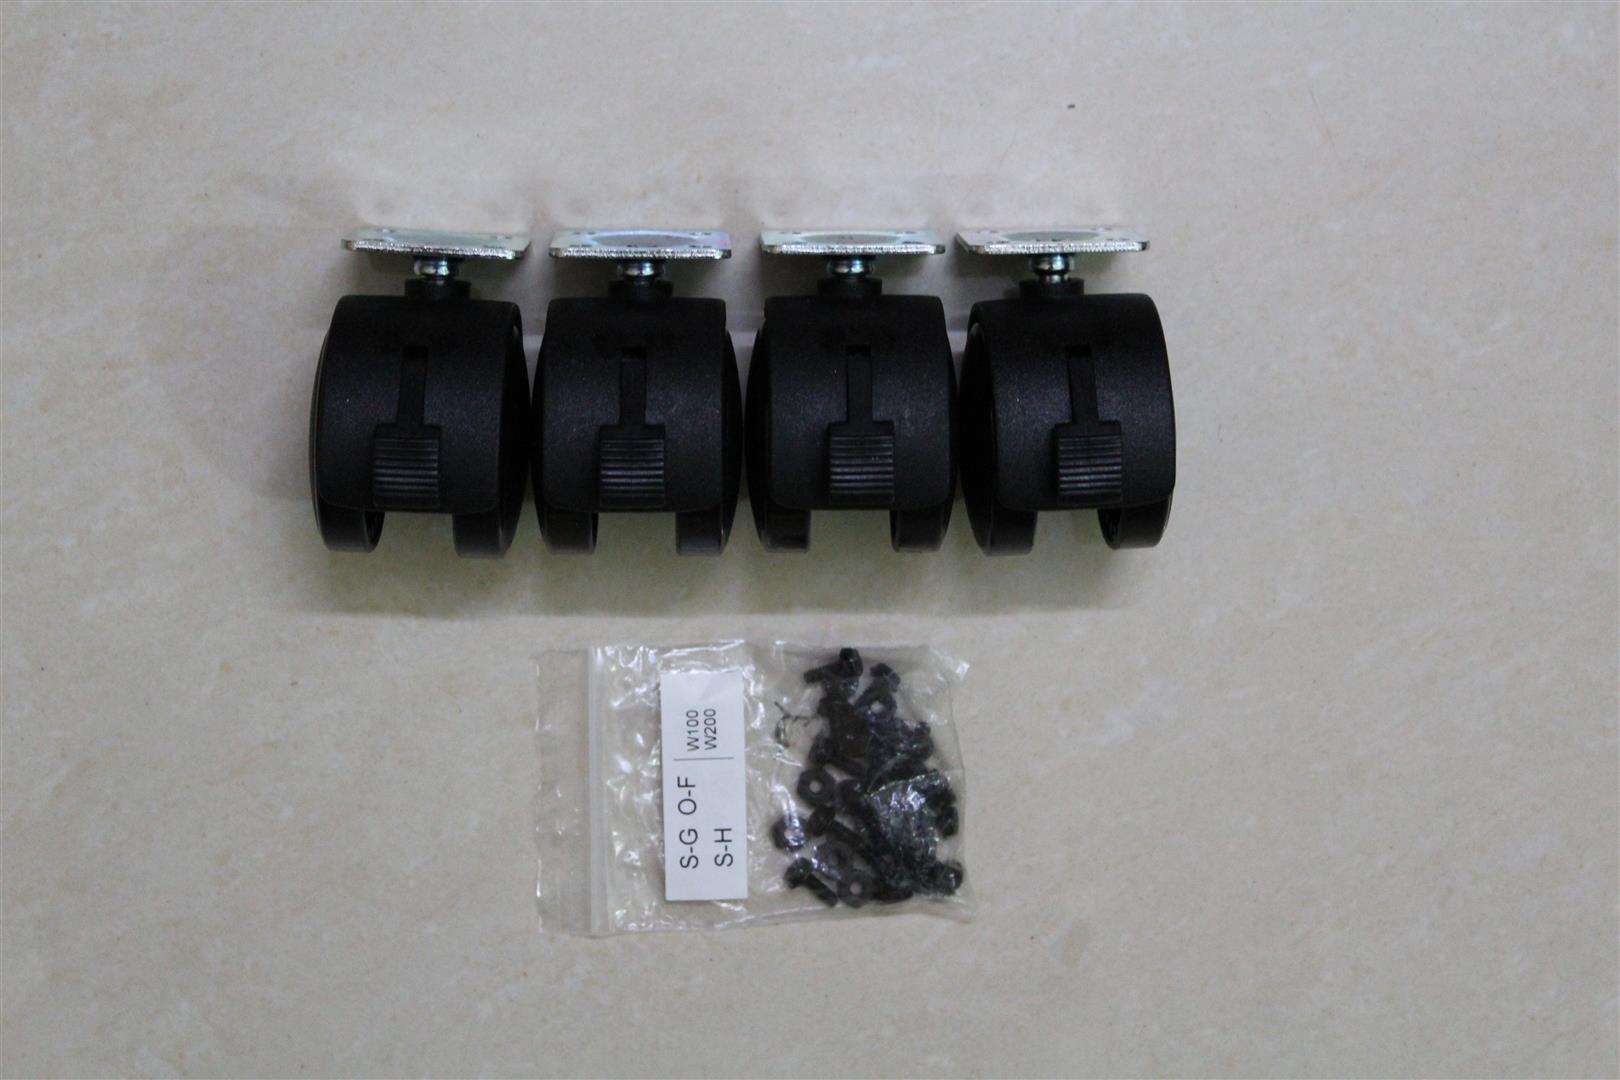
Beside all side panels and structural parts, the Core W100 case comes with a big accessories box, with lot of screws, for build the case together .
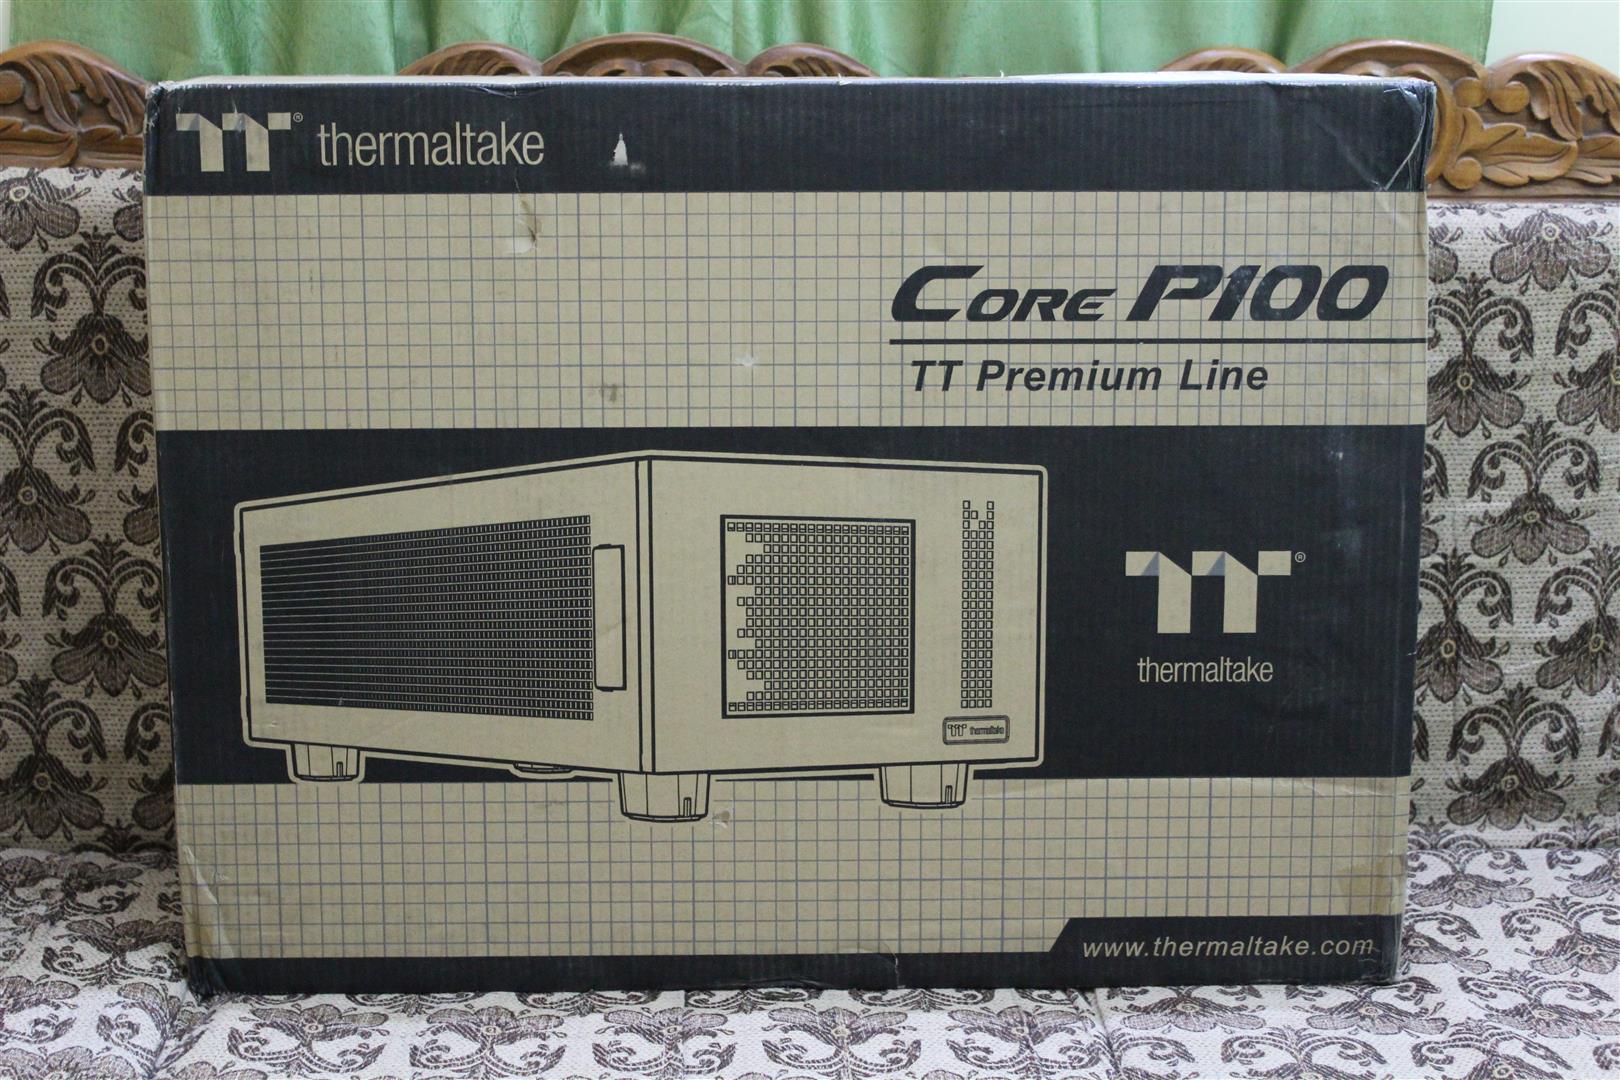
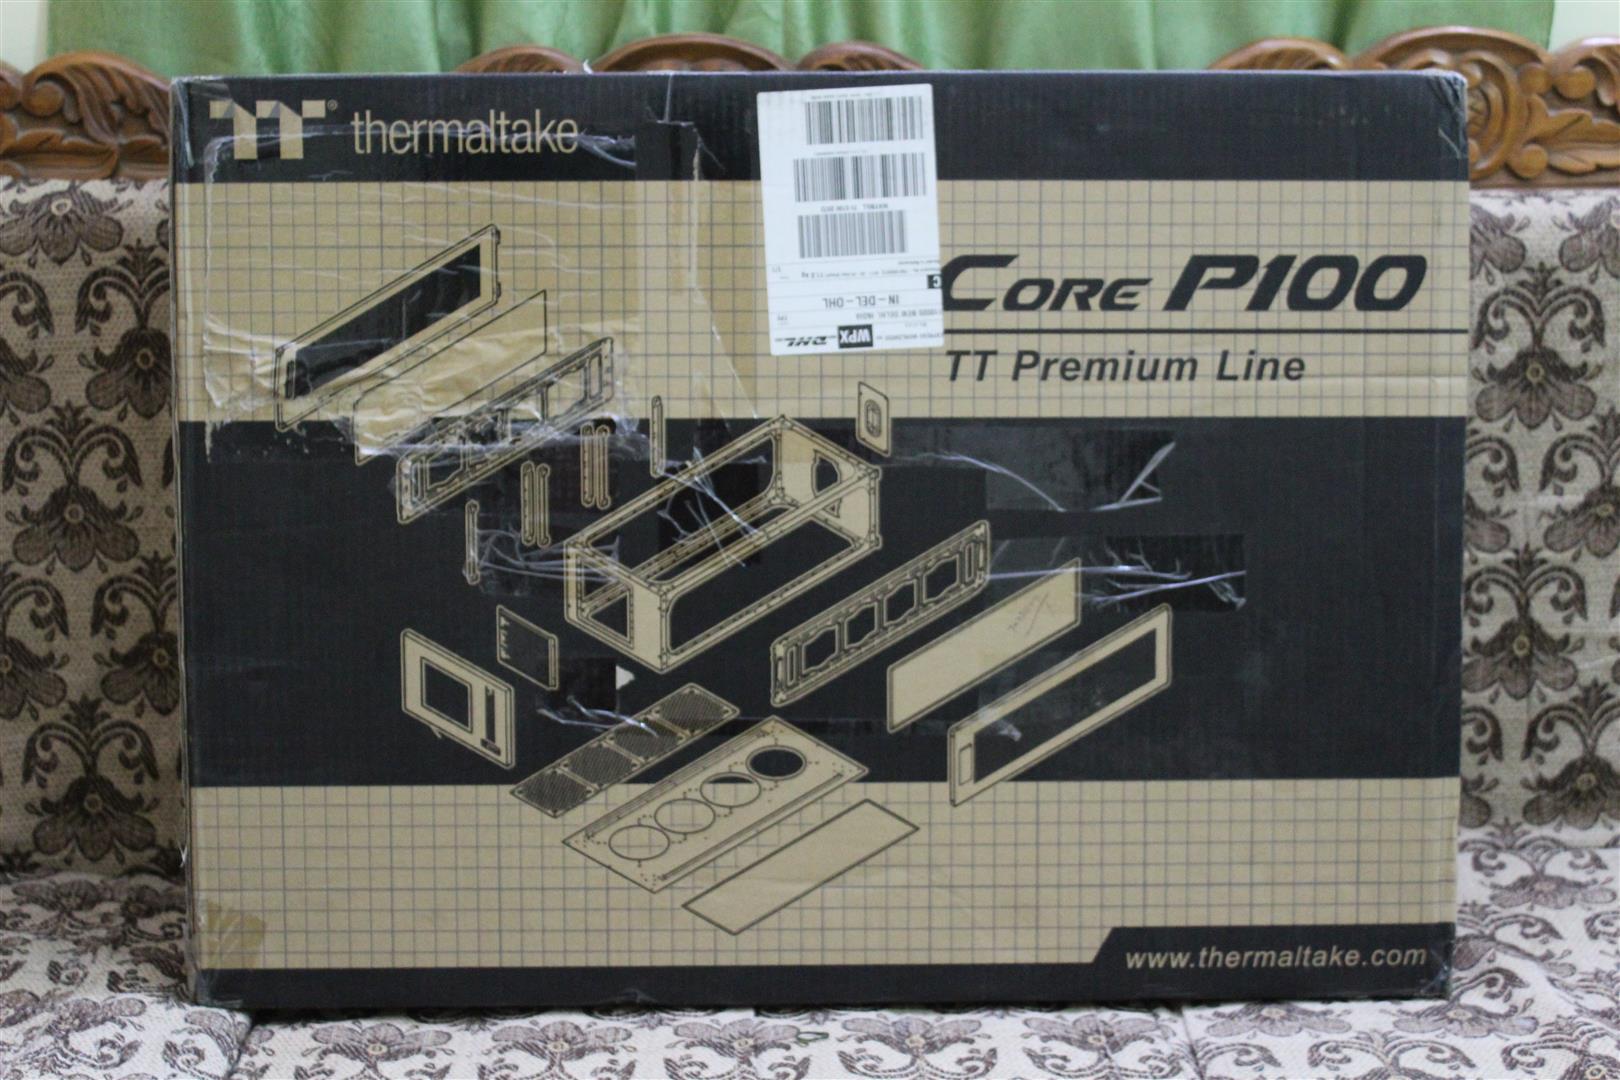
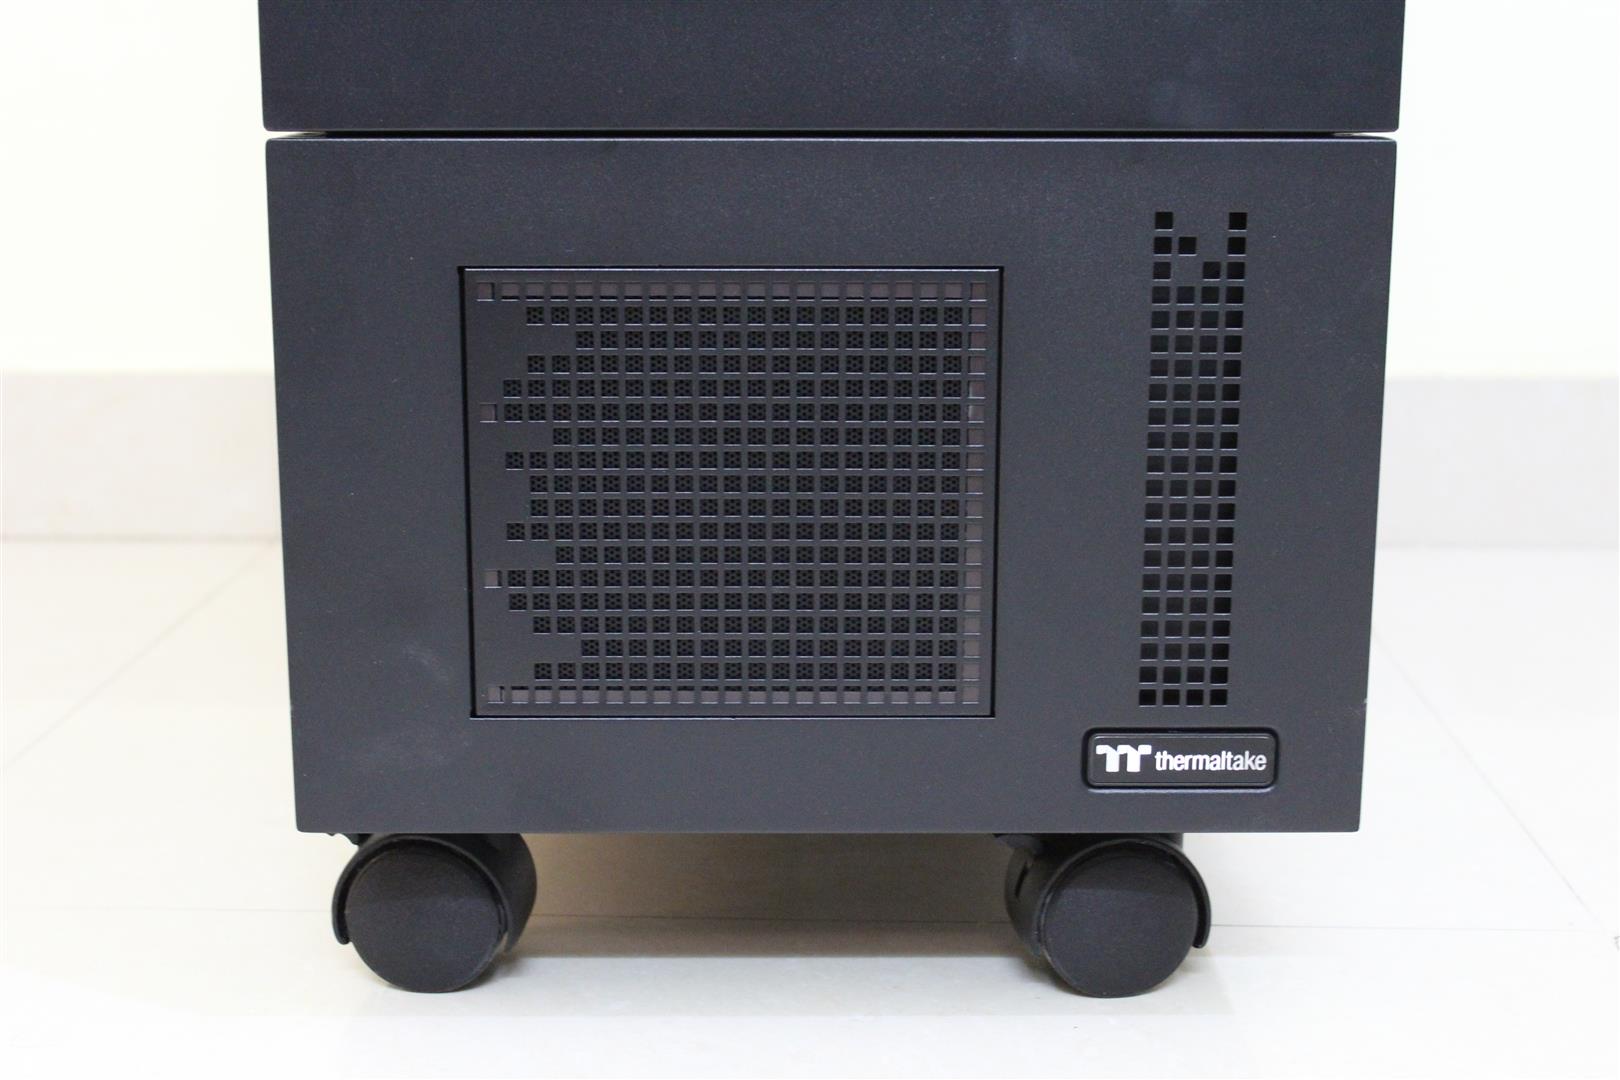
Now un-box the second half of the Thermaltake Core WP100 Super Tower Chassis, the Core P100 case.

Now let’s start the build.
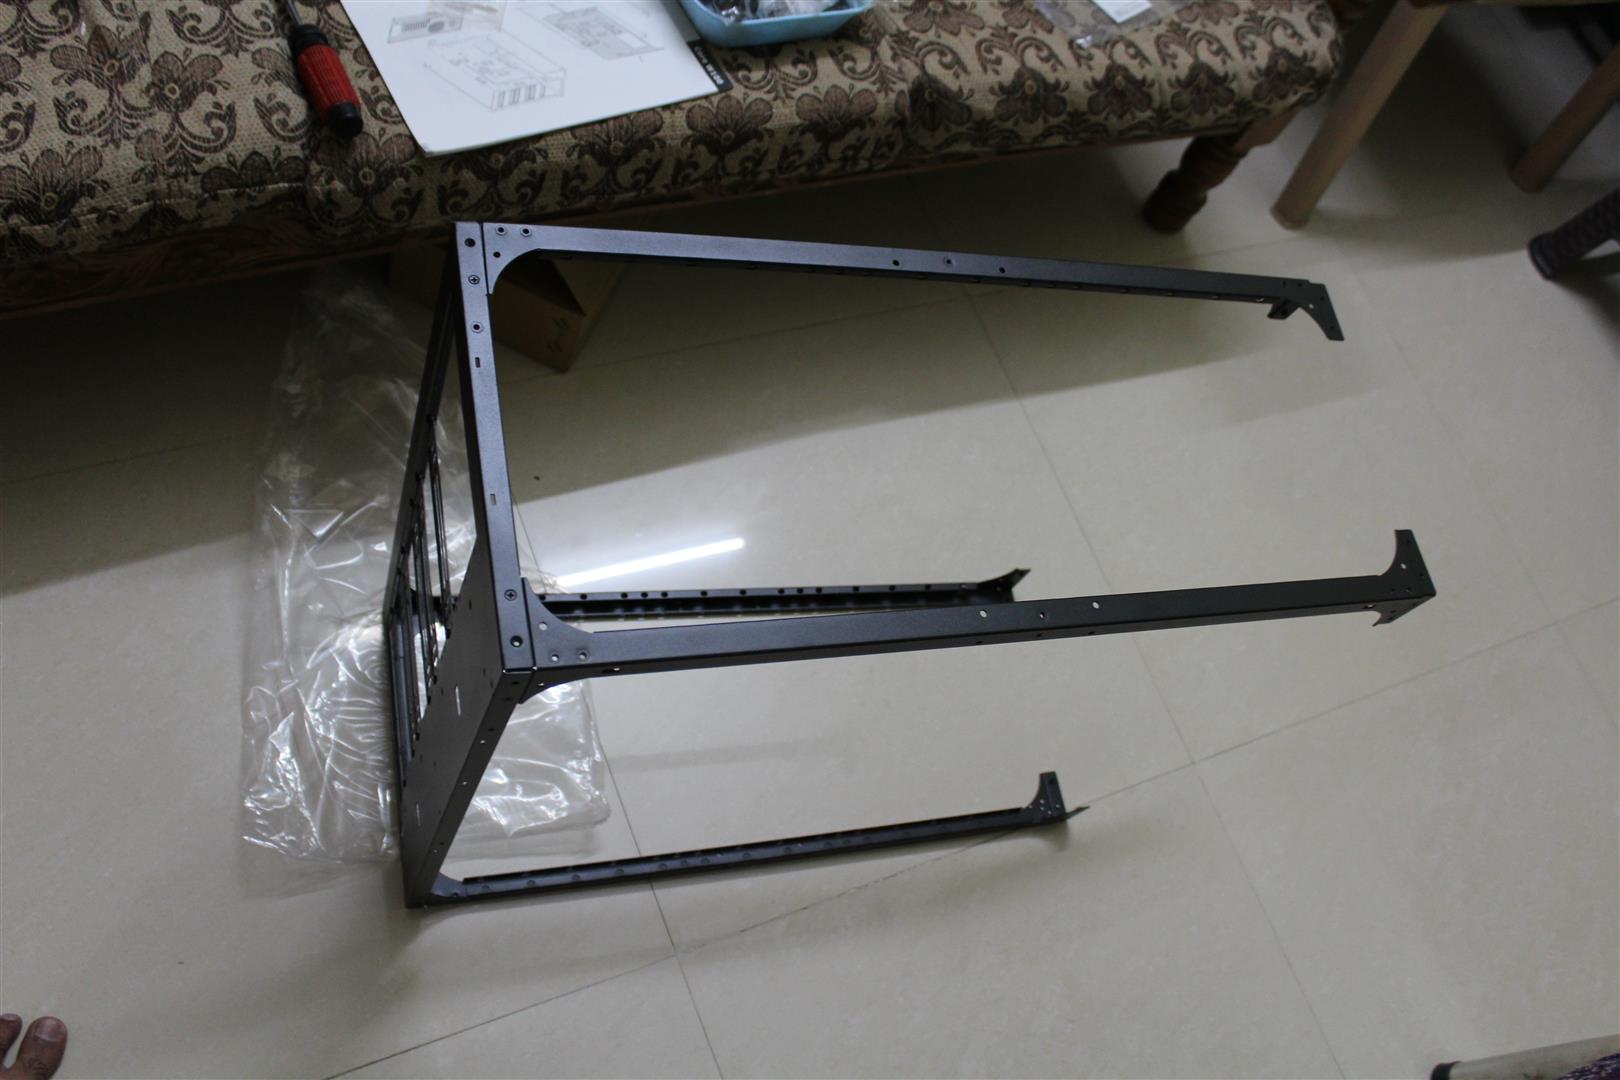
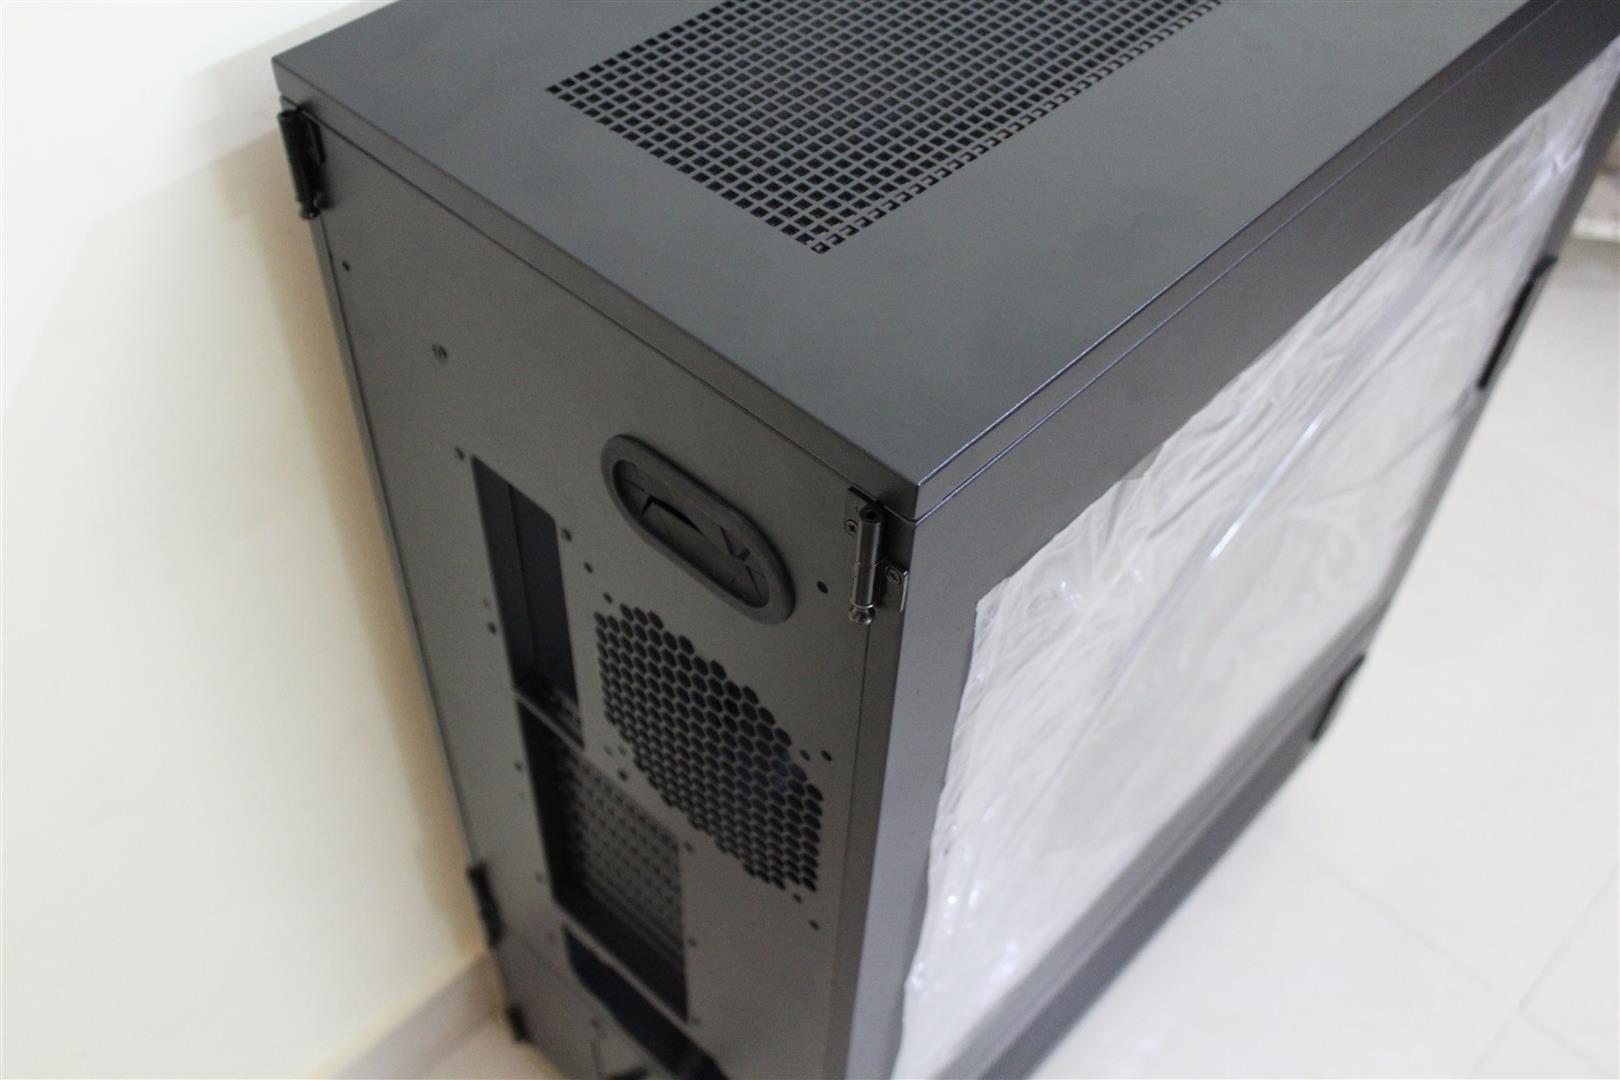
The Core W100 and P100 stacked together to form the Core WP100 Super Tower .
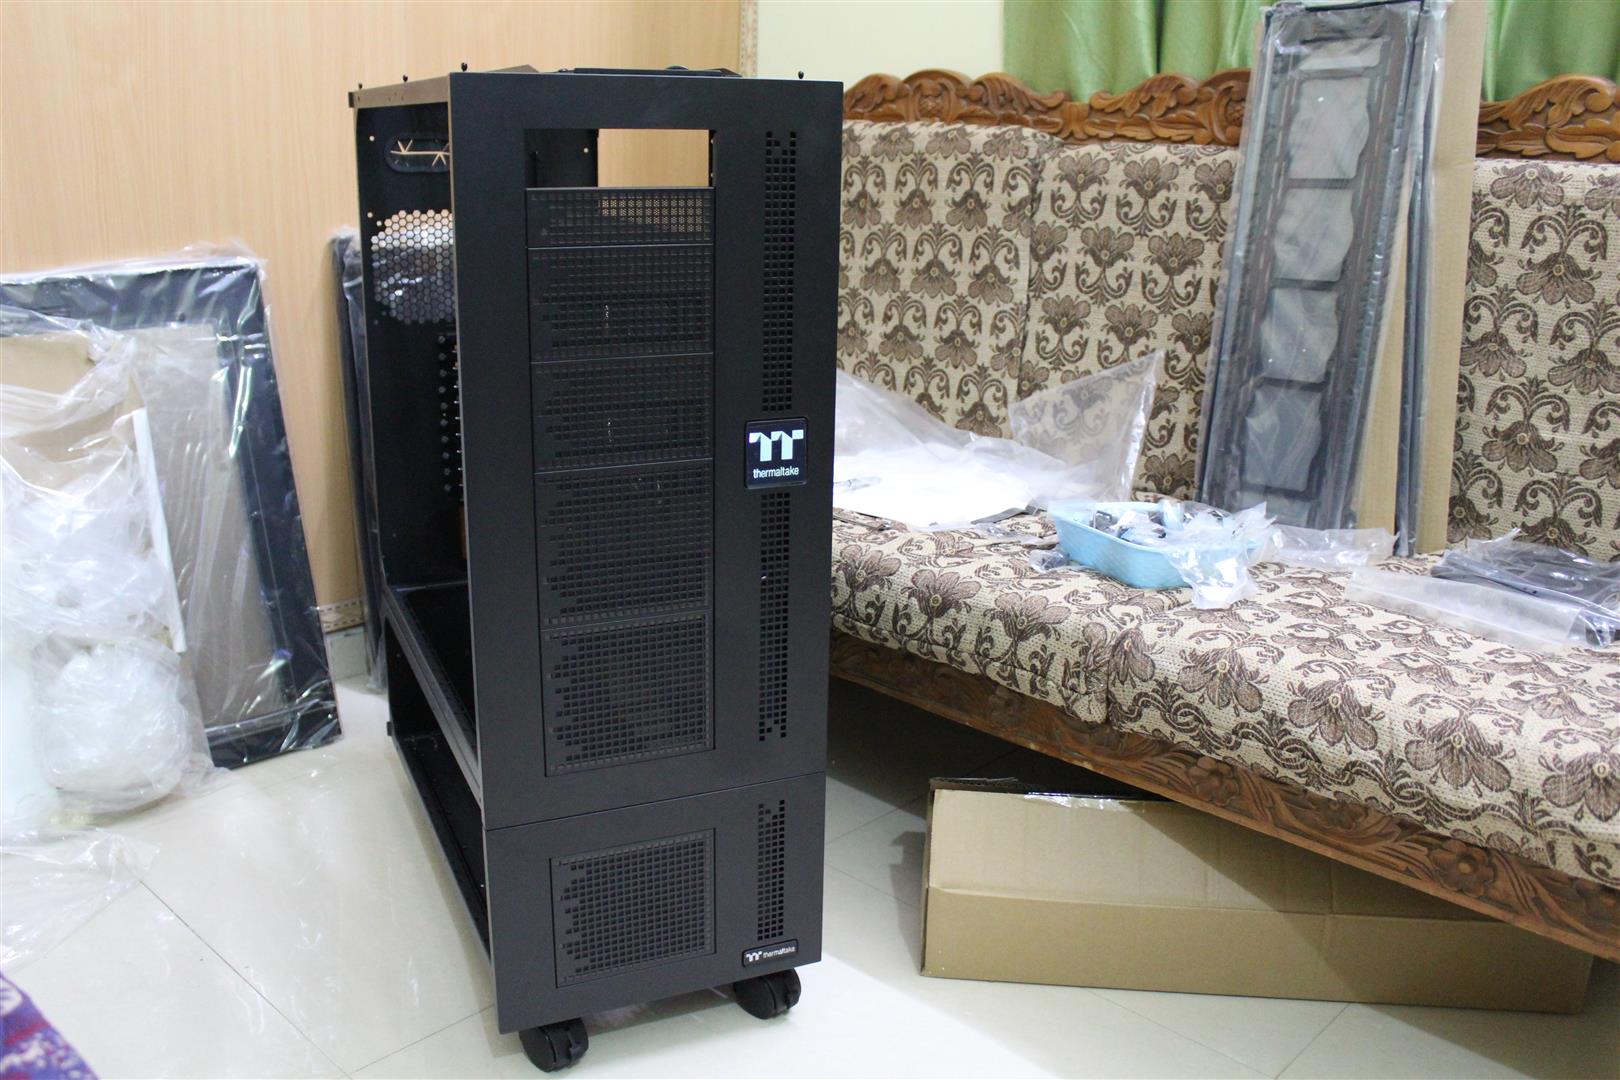
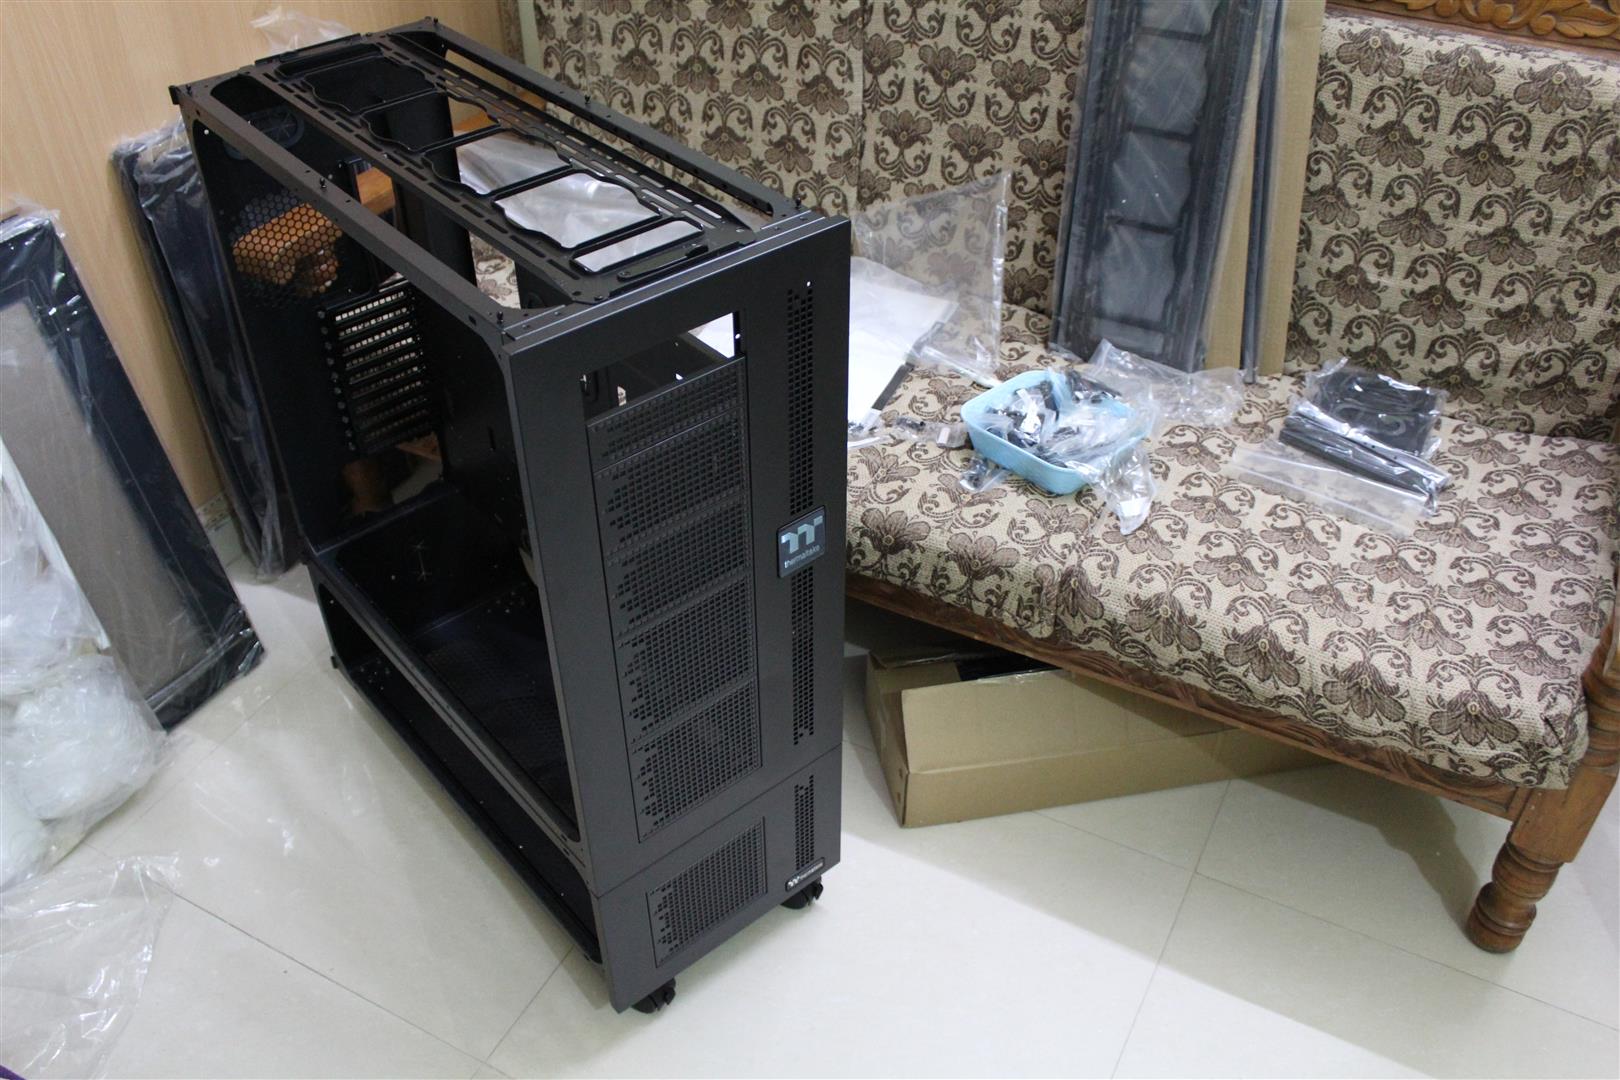
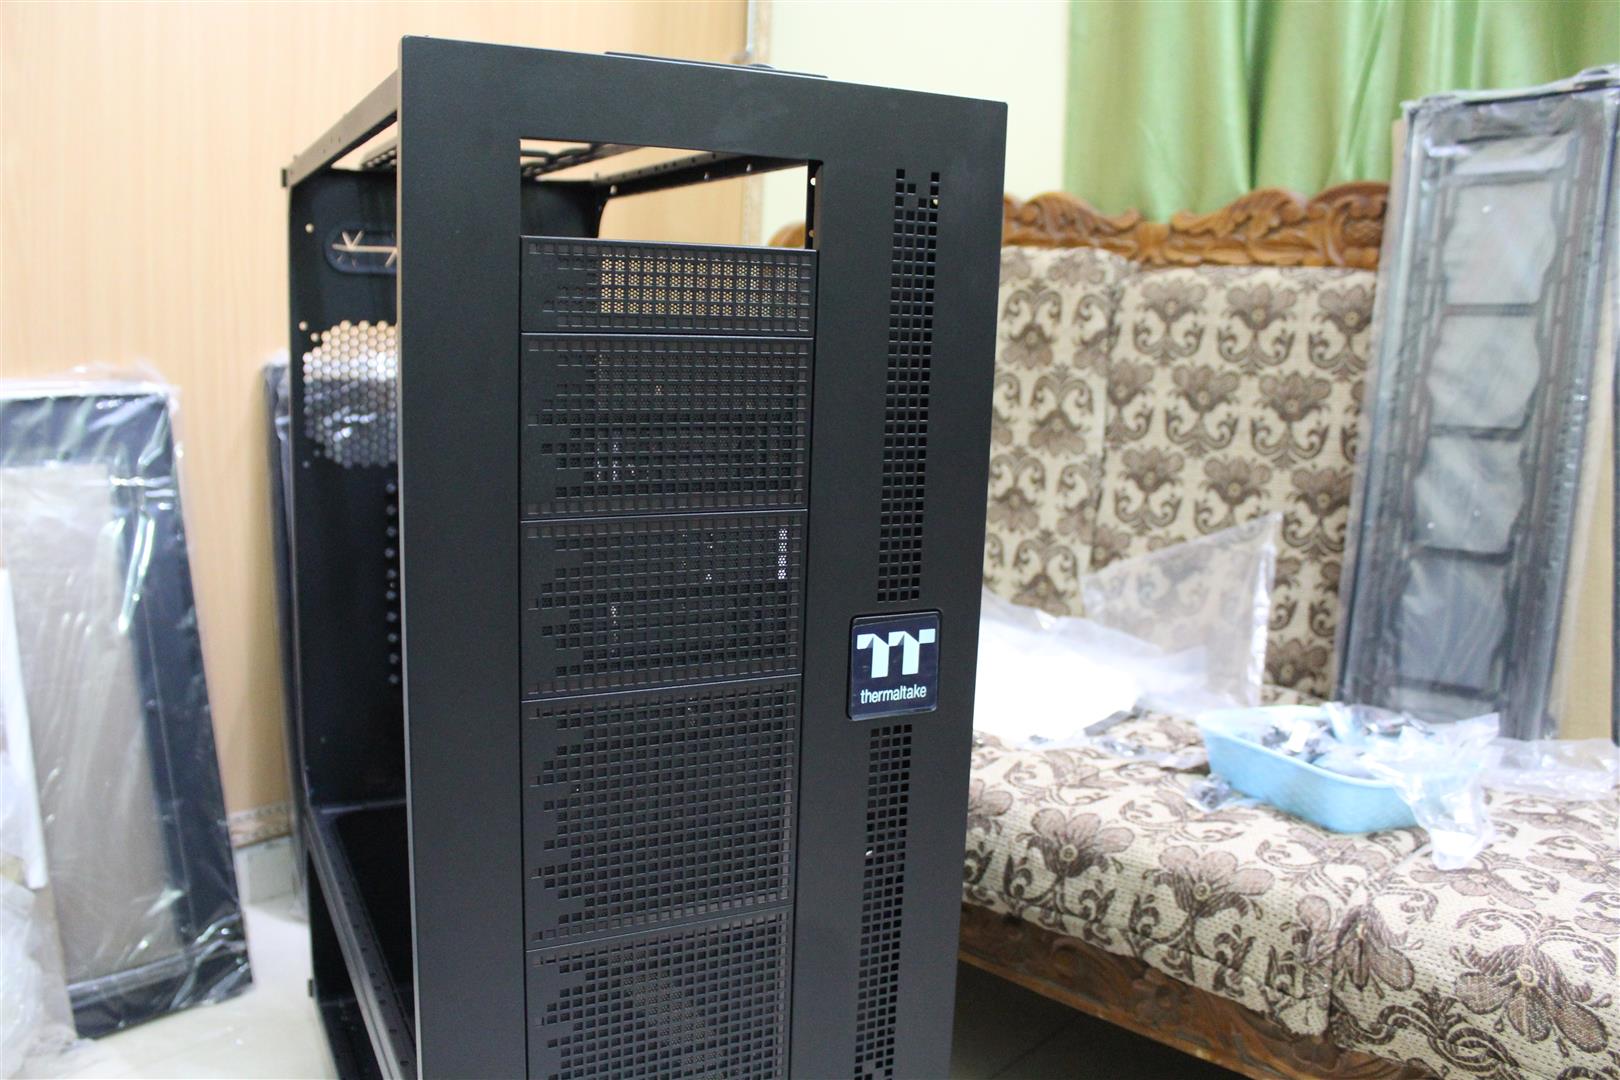
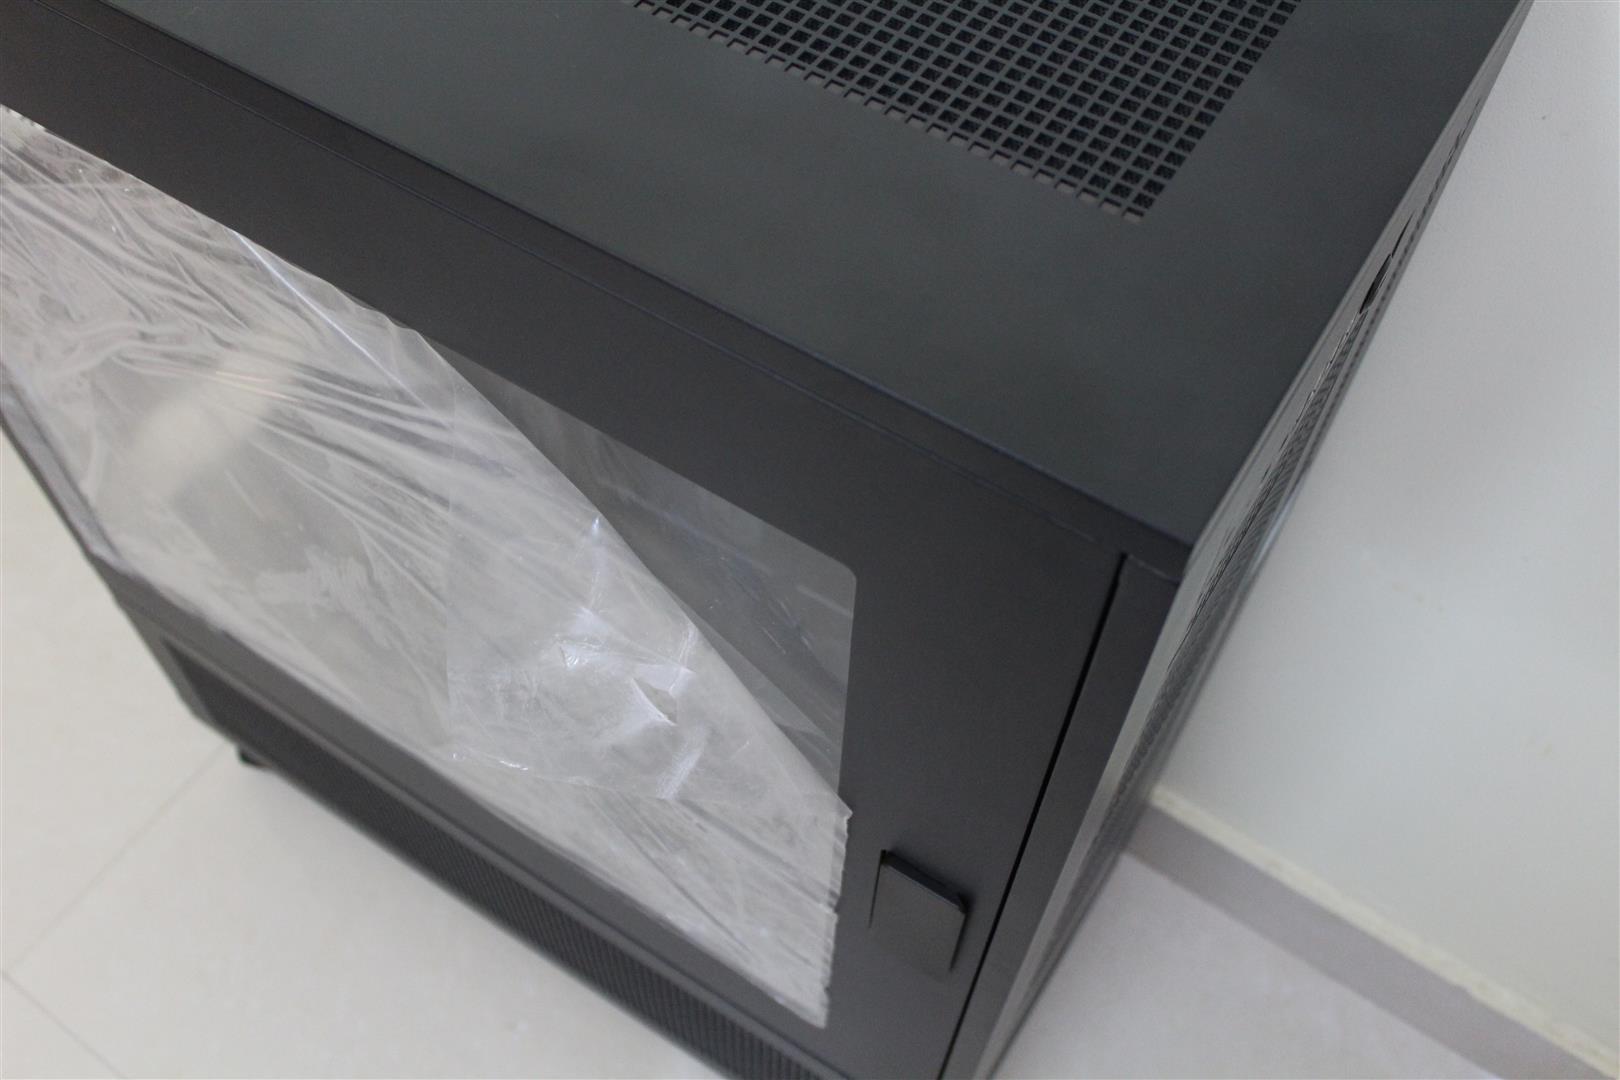
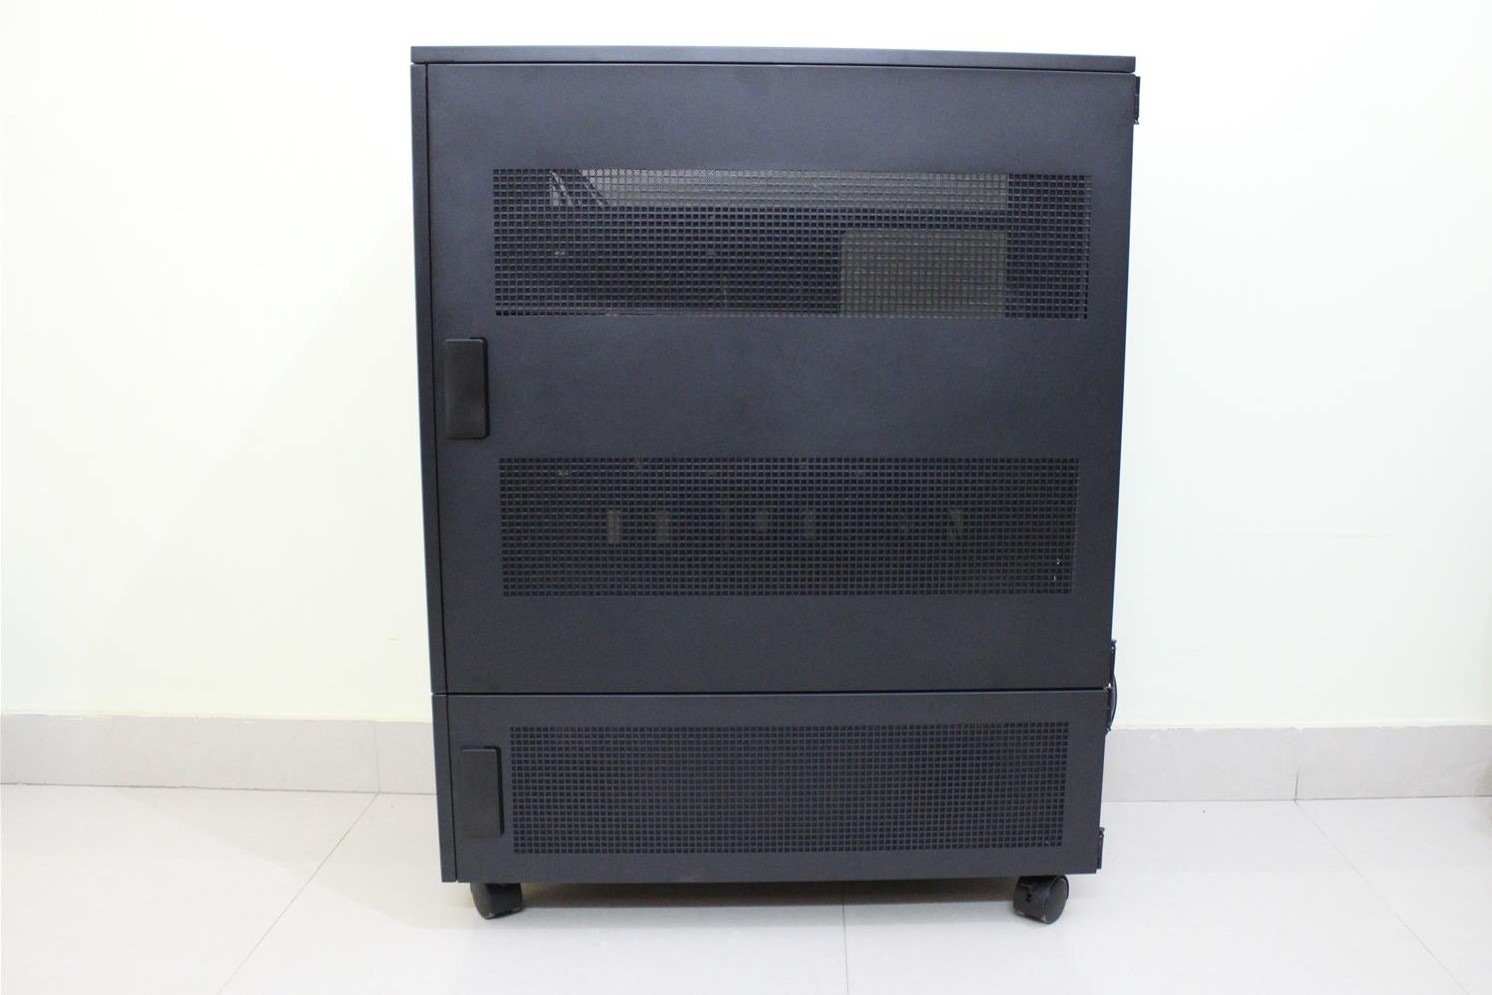
This is a huge case with superb build quality.
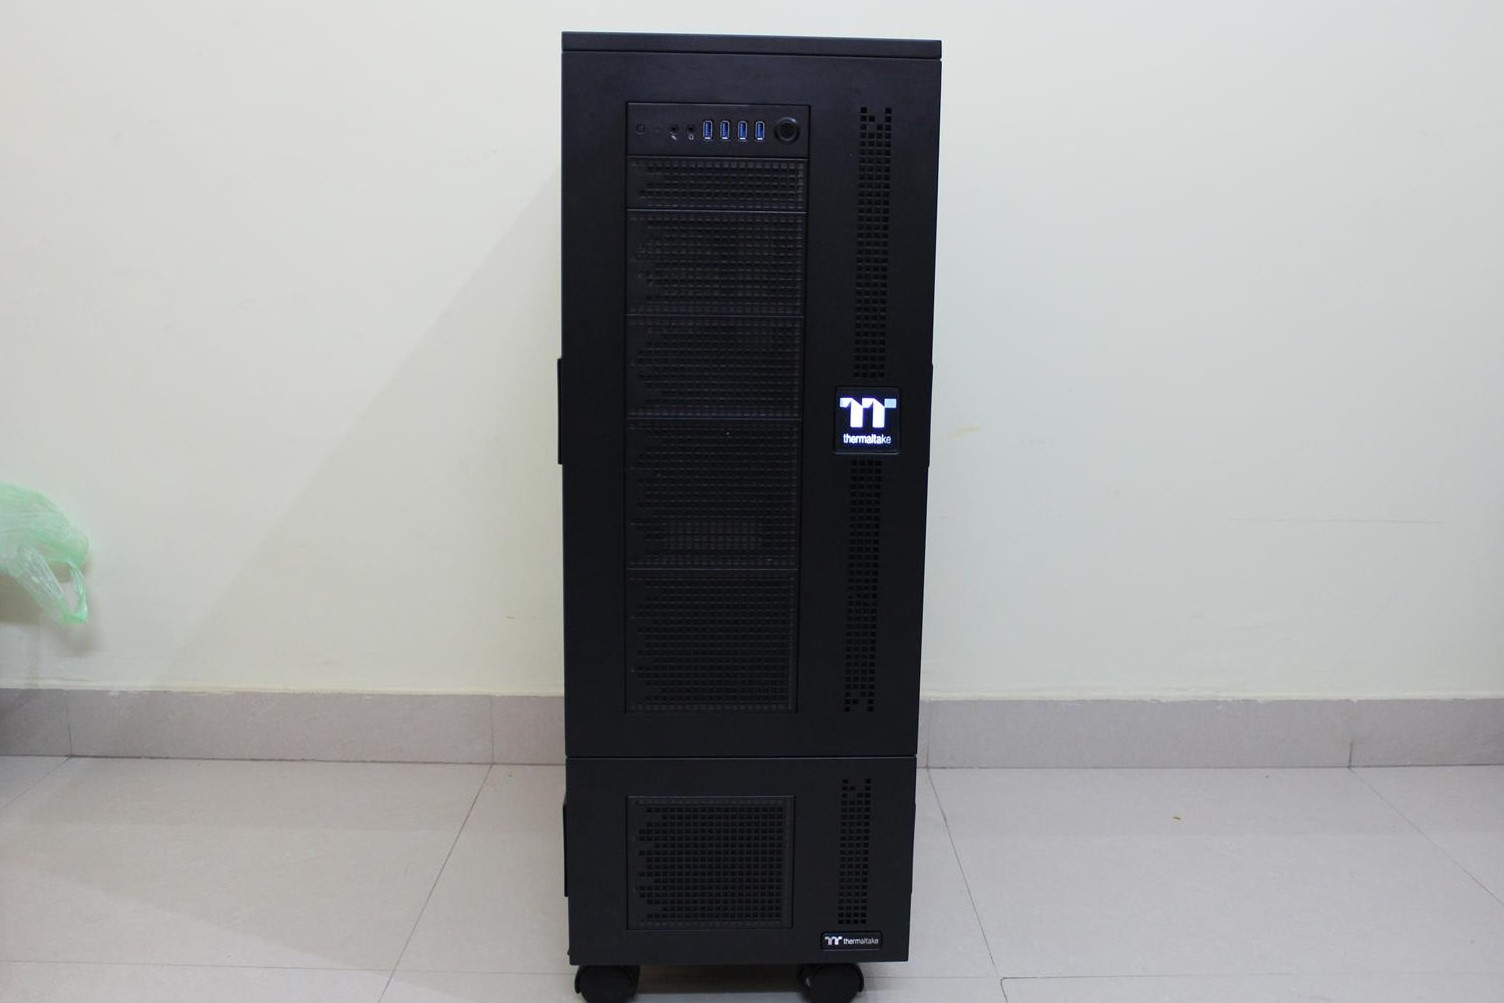
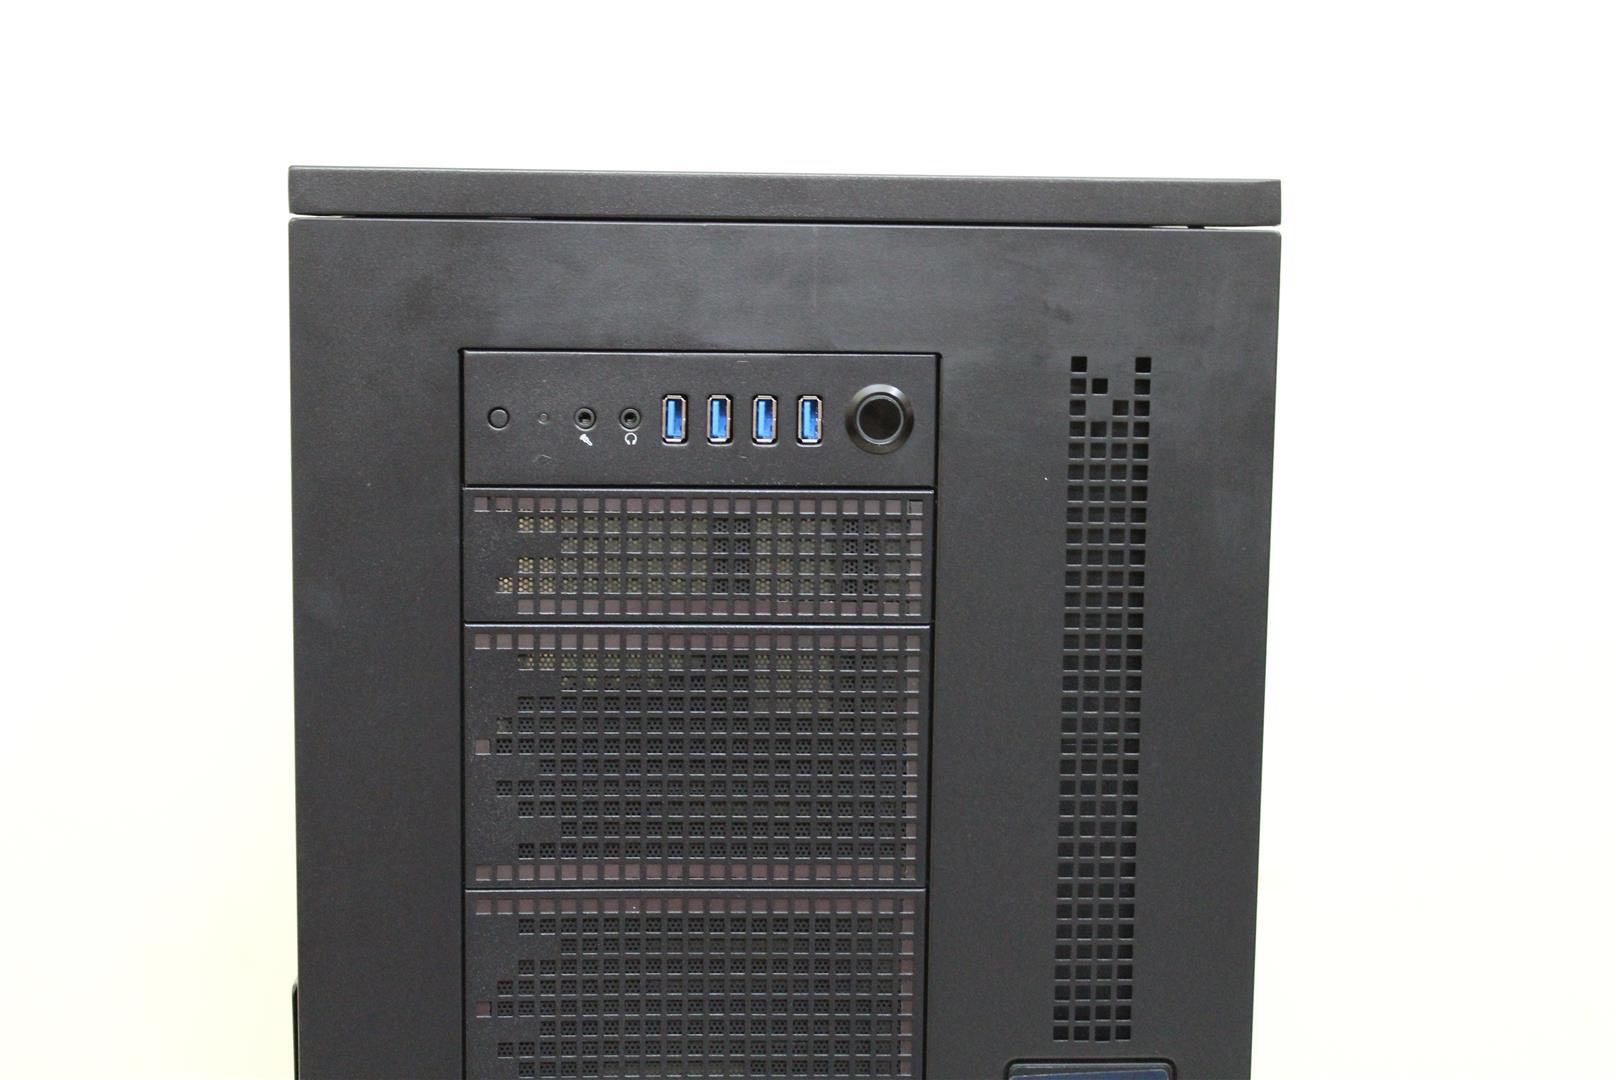
All side panels are hinged with no panel screws what so ever. Also case have a big side window with thick acrylic sheet.

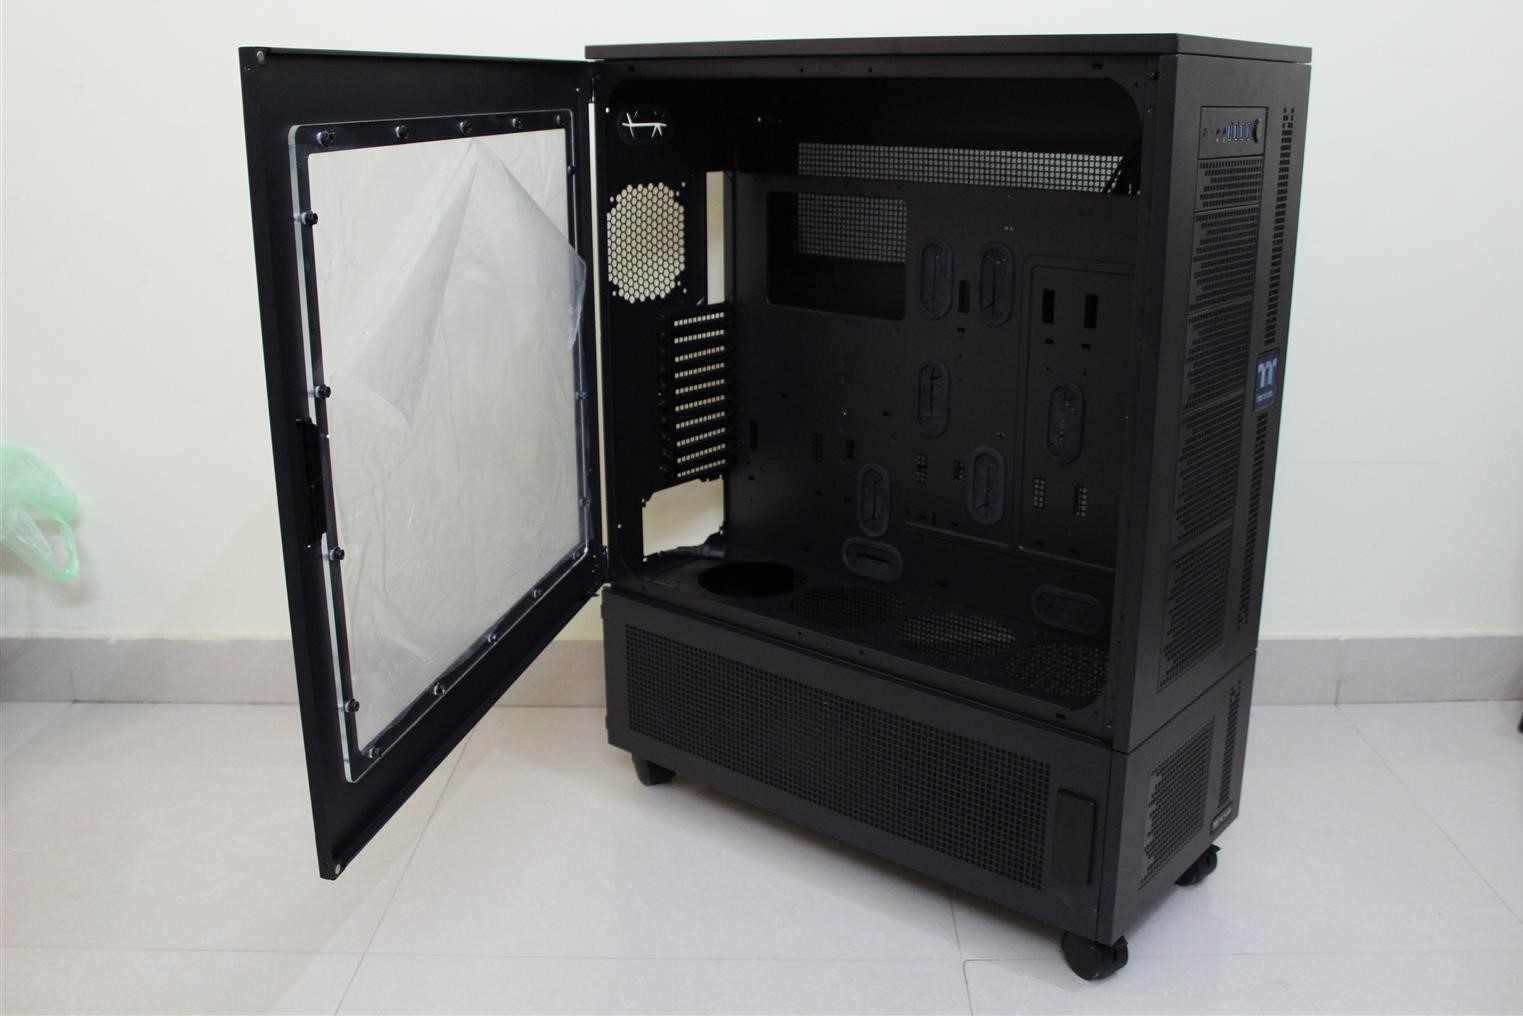

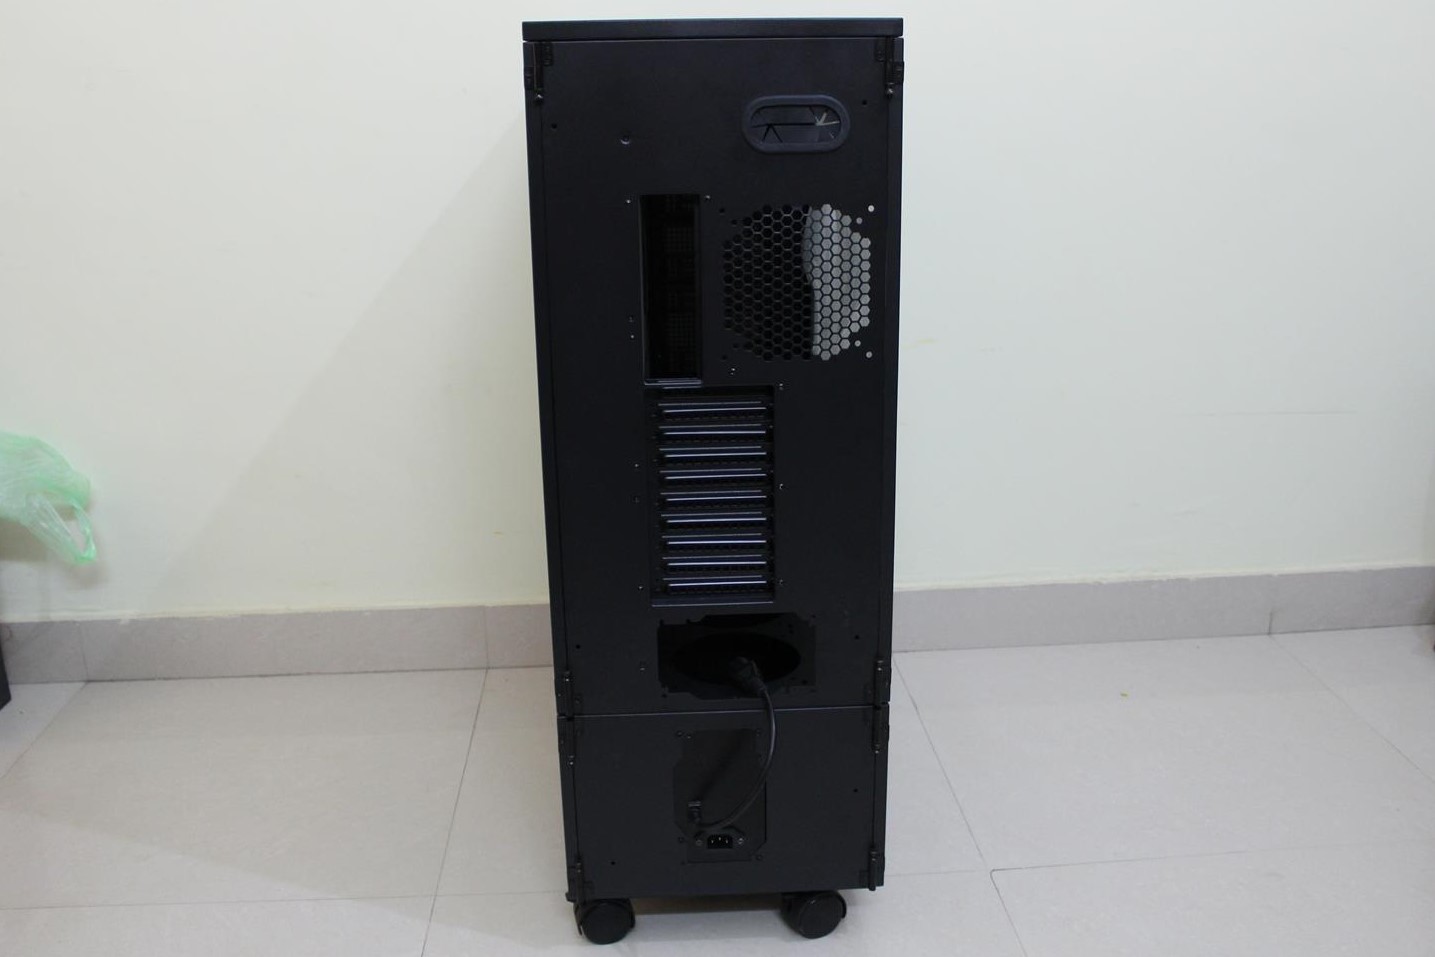
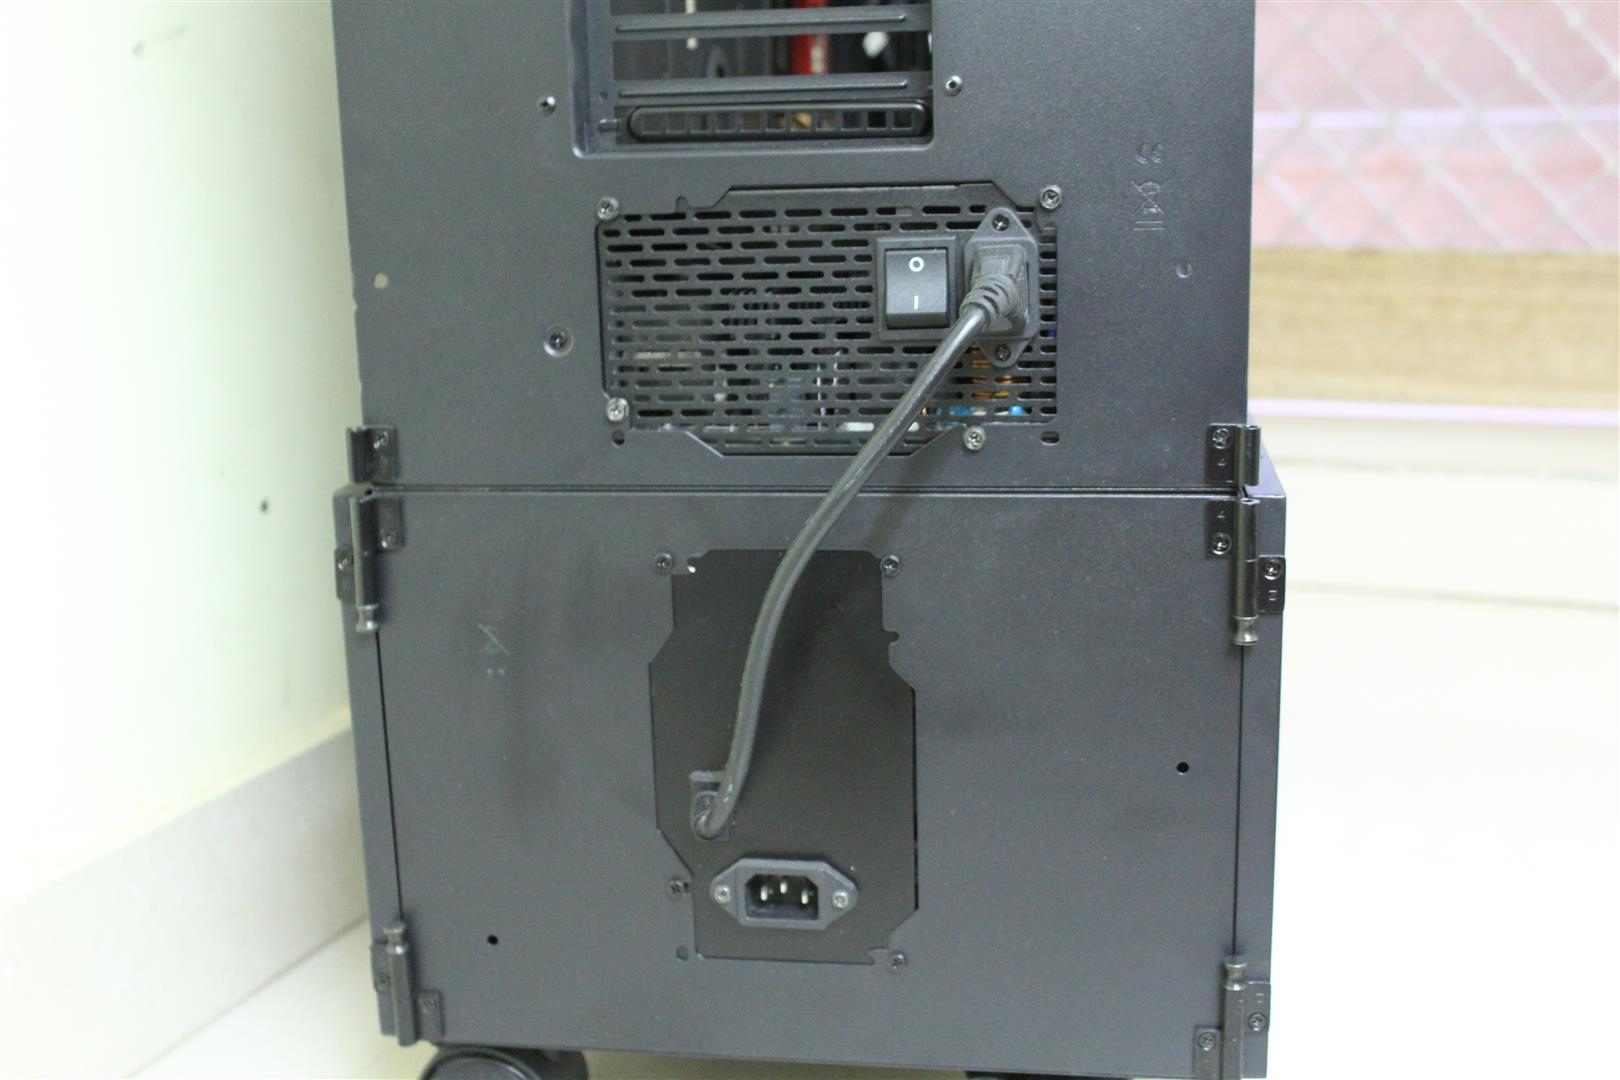
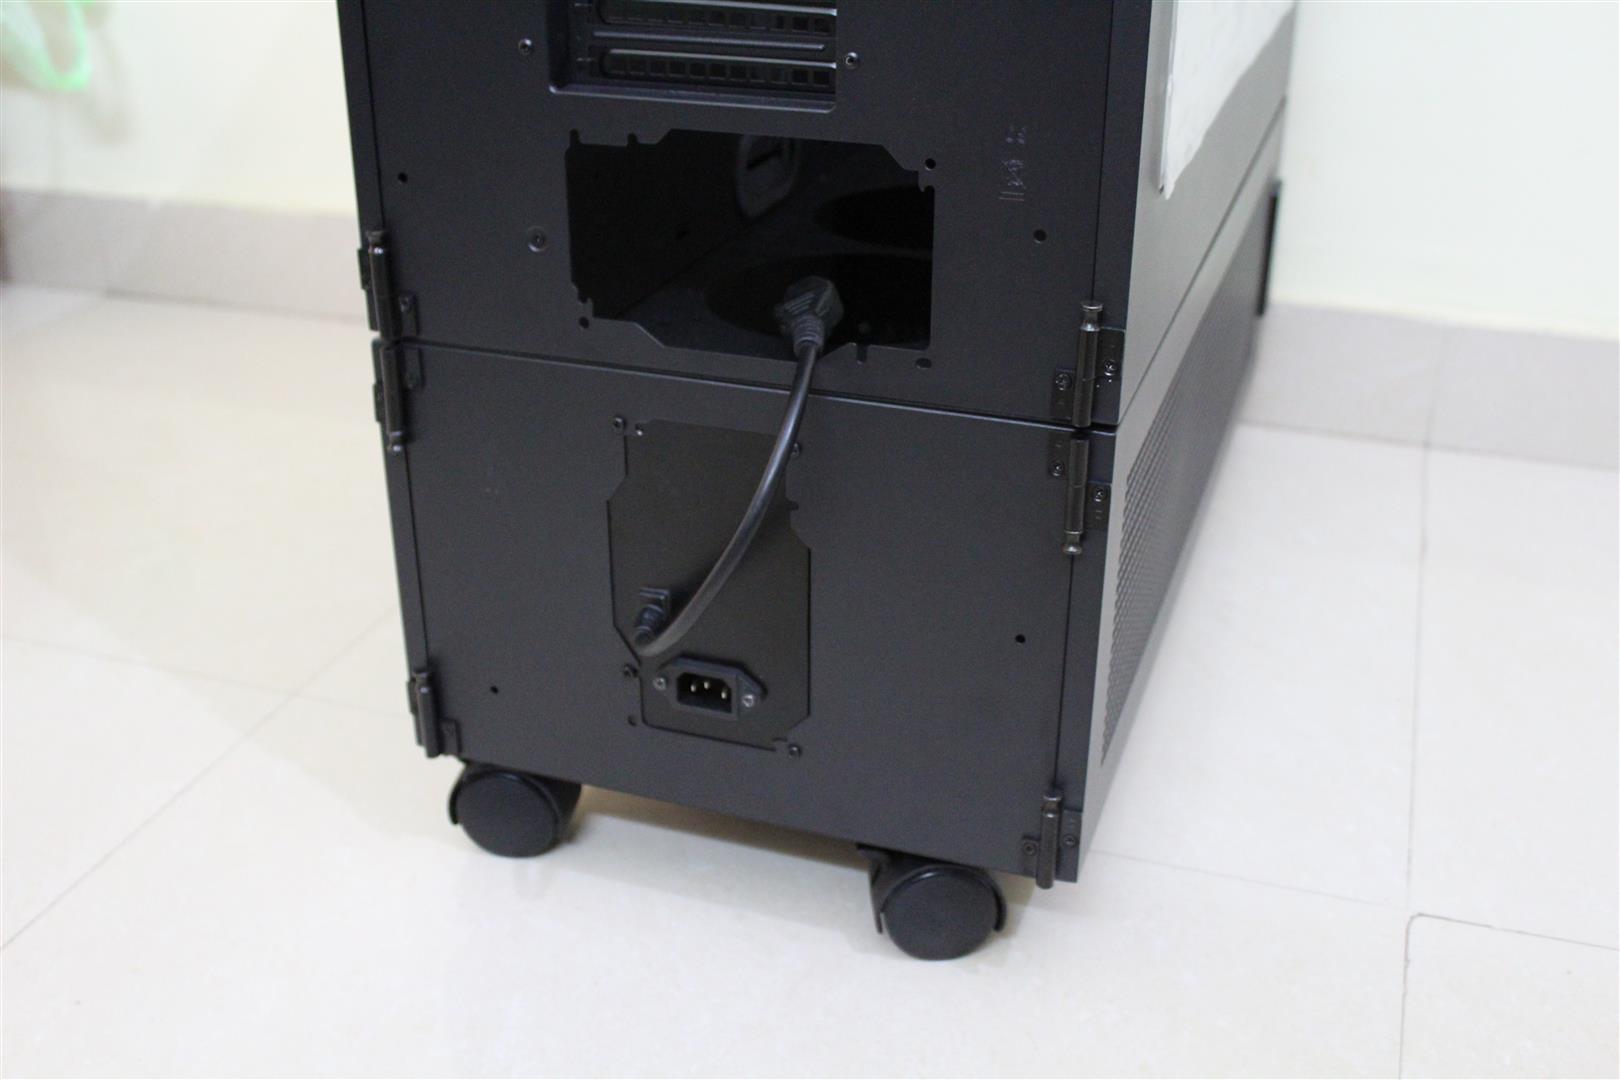
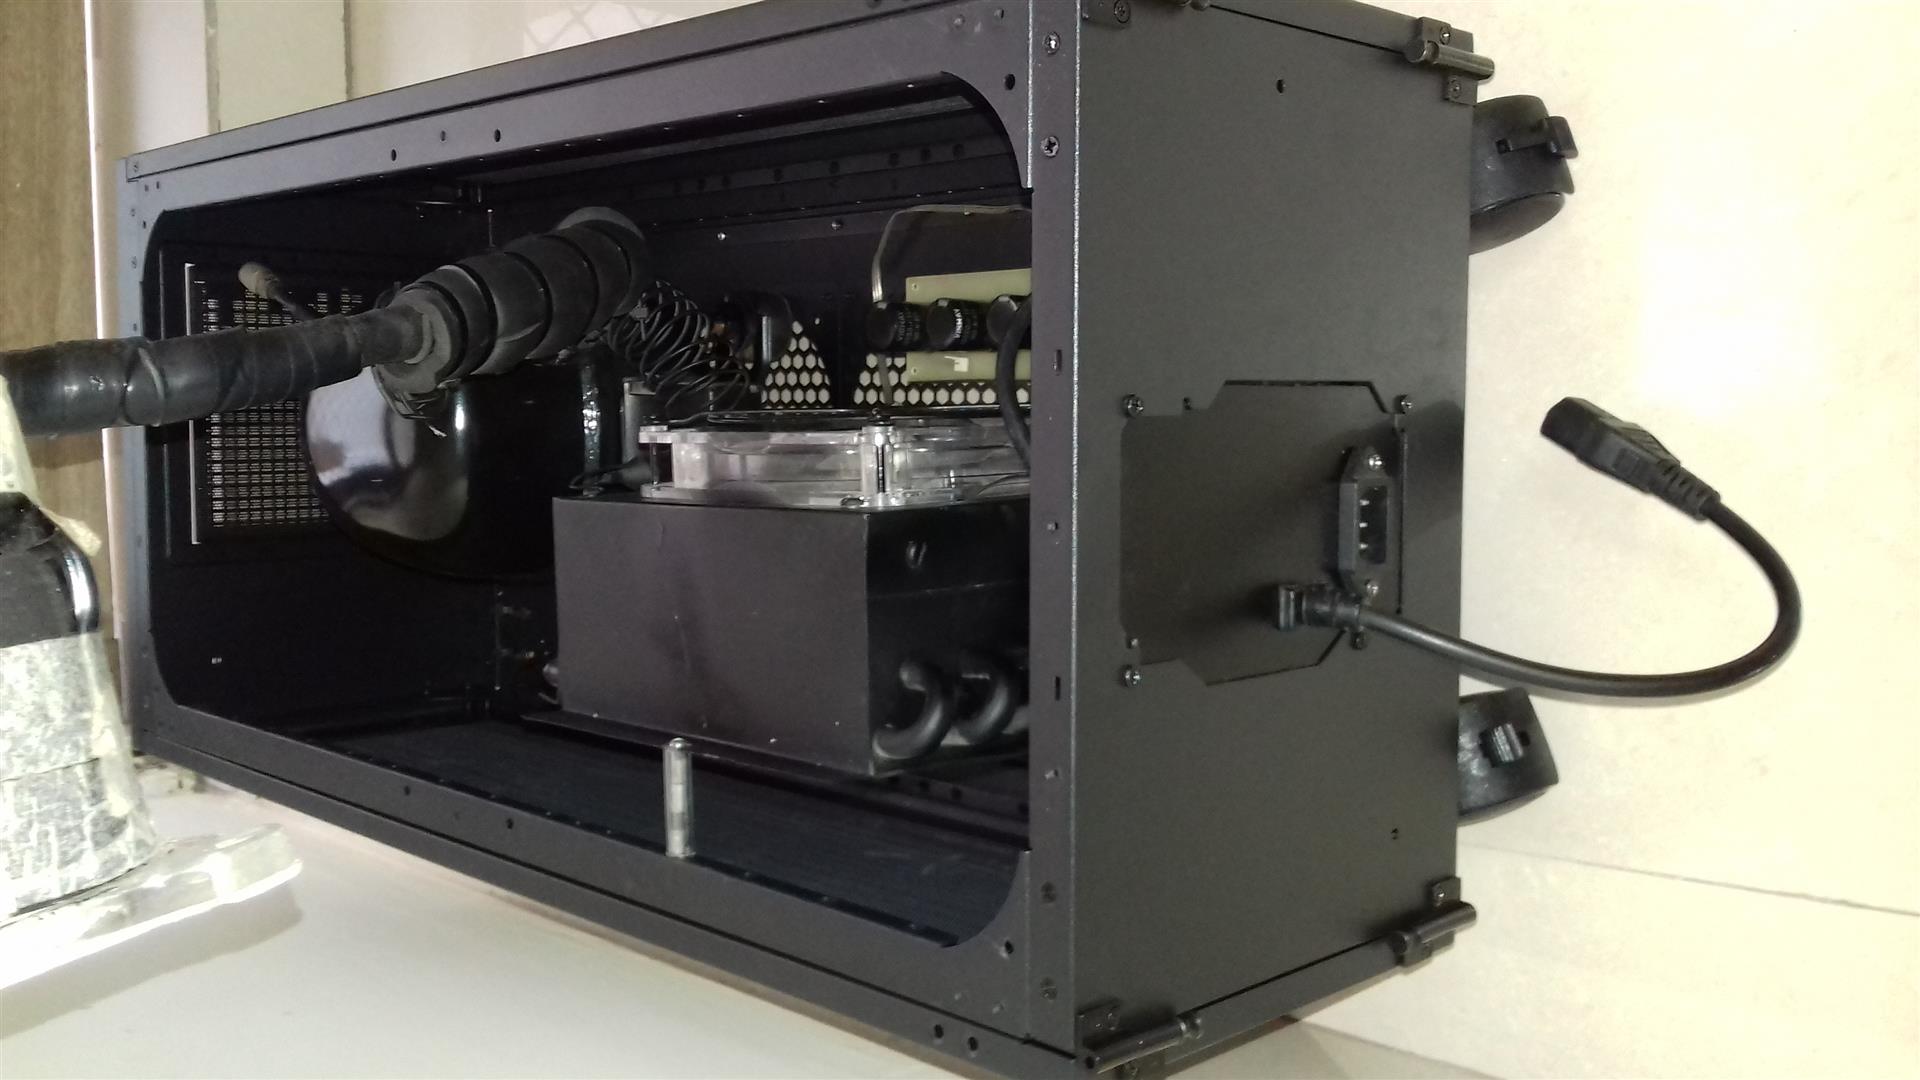
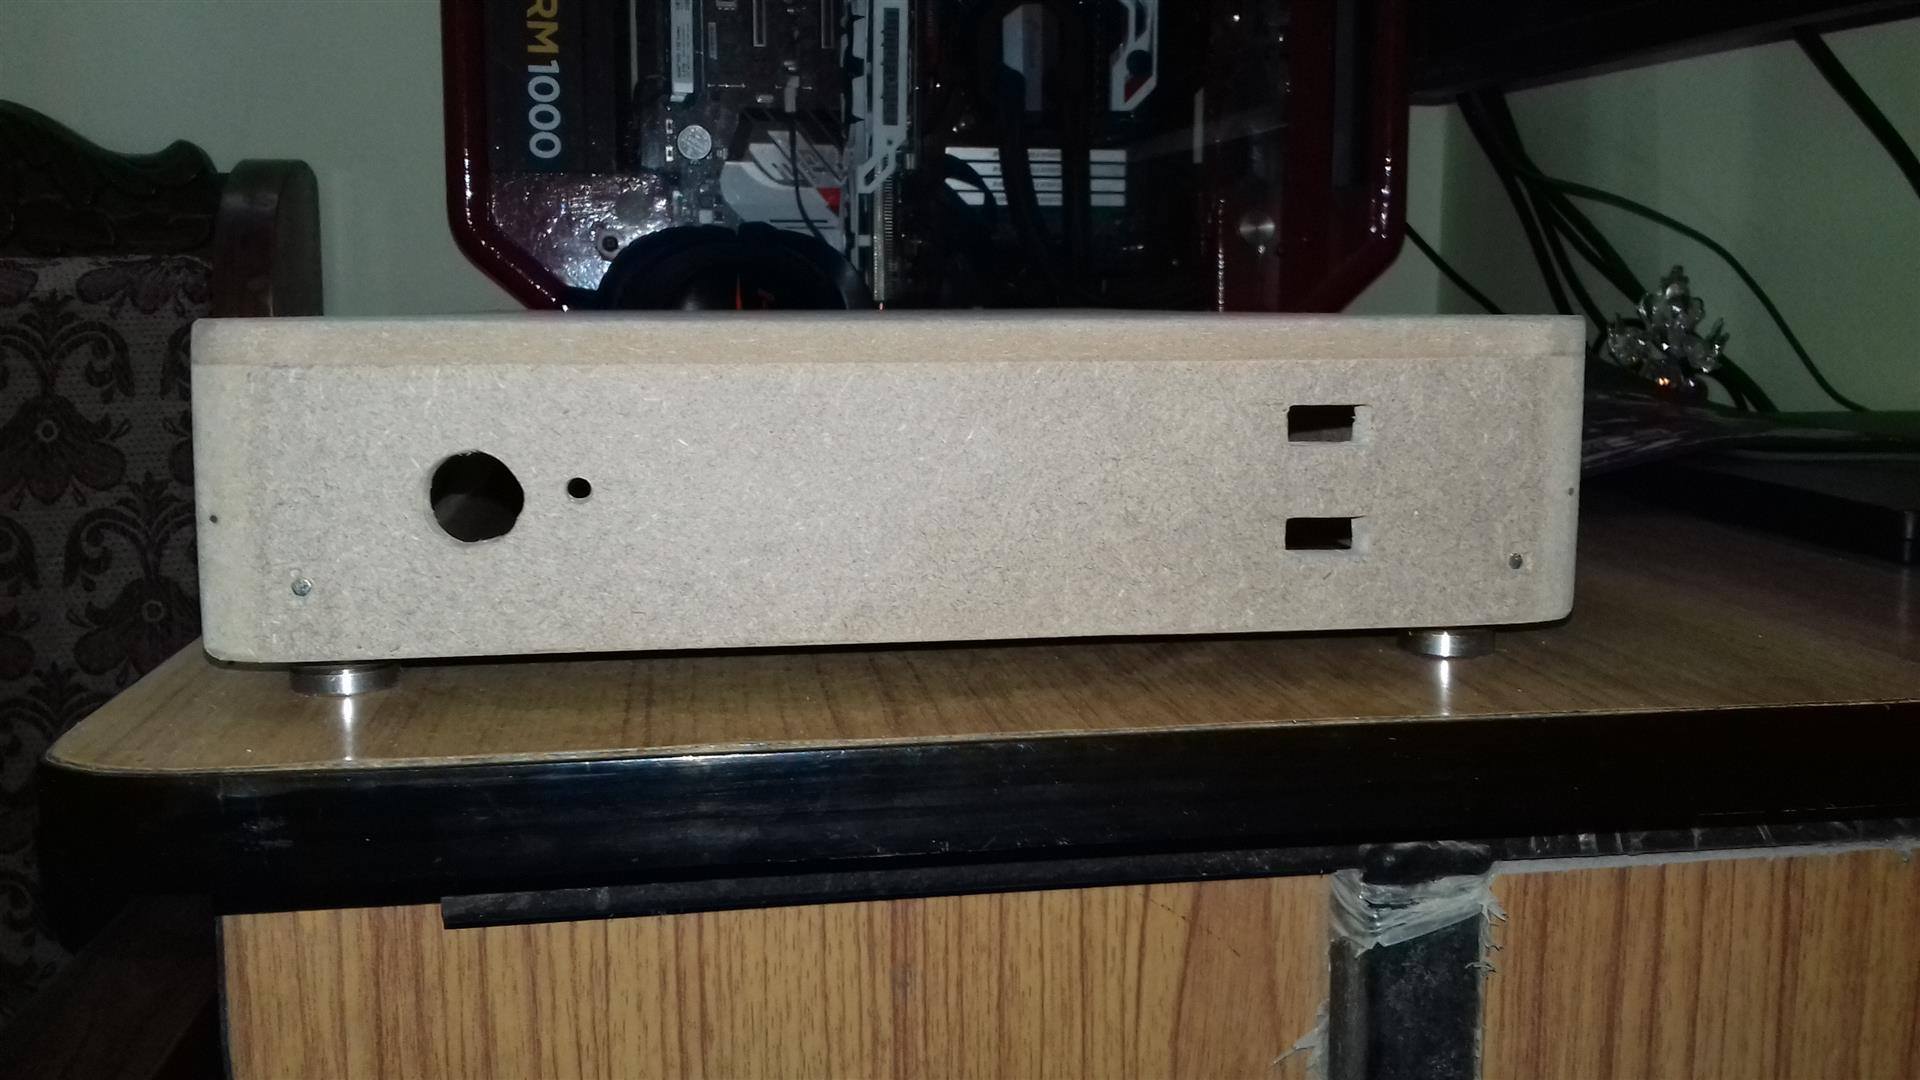
I have installed a custom mains power connector back plate.

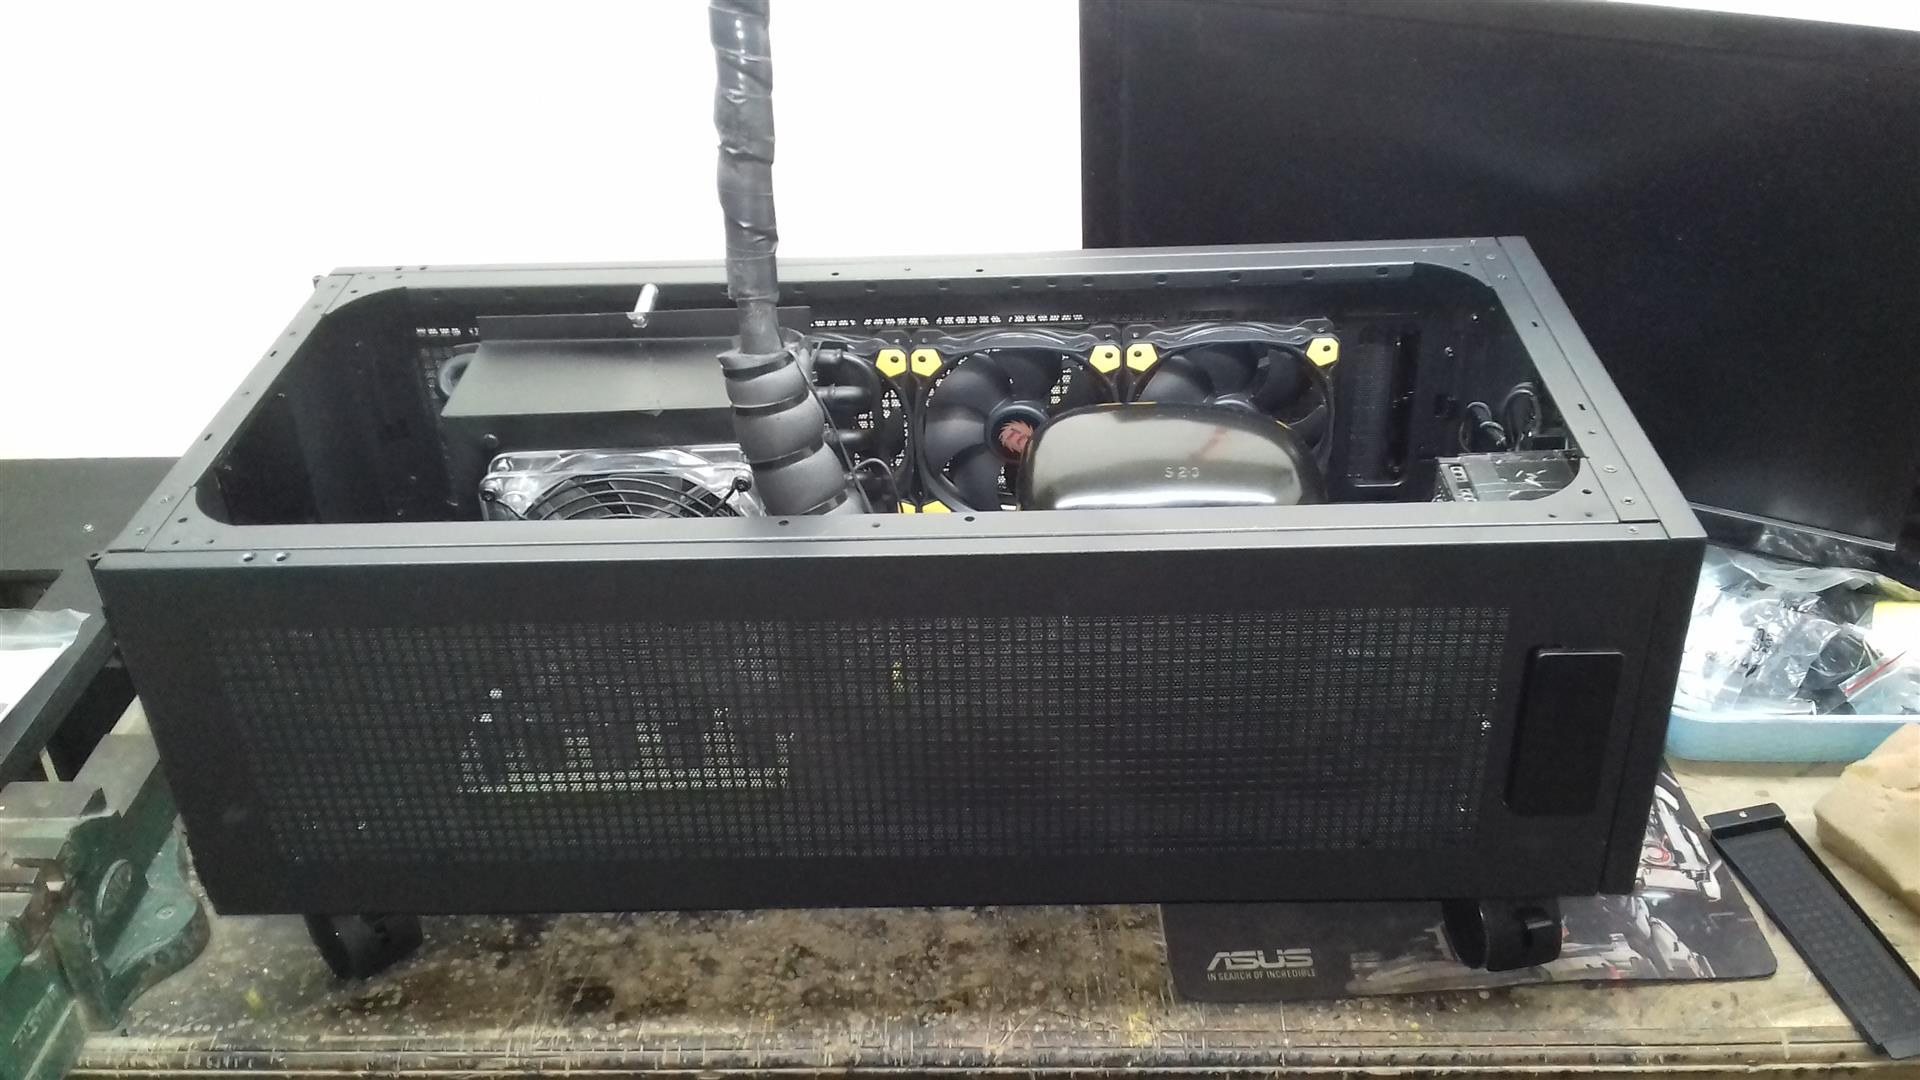
Now repaired the phase changer unit. Replaced the condenser coil and re-filled the gas. Tested all working fine again. Now started installing the phase changer unit in the bottom section of the case i.e. P100. Everything fits perfect. Now next step will be installing a new controller and re-doing of all the wiring and all new Neoform insulation part.
Waiting for some parts to arrive. Will update more
Thanks.
-
Lovely build... my vote goes to you bro.
-
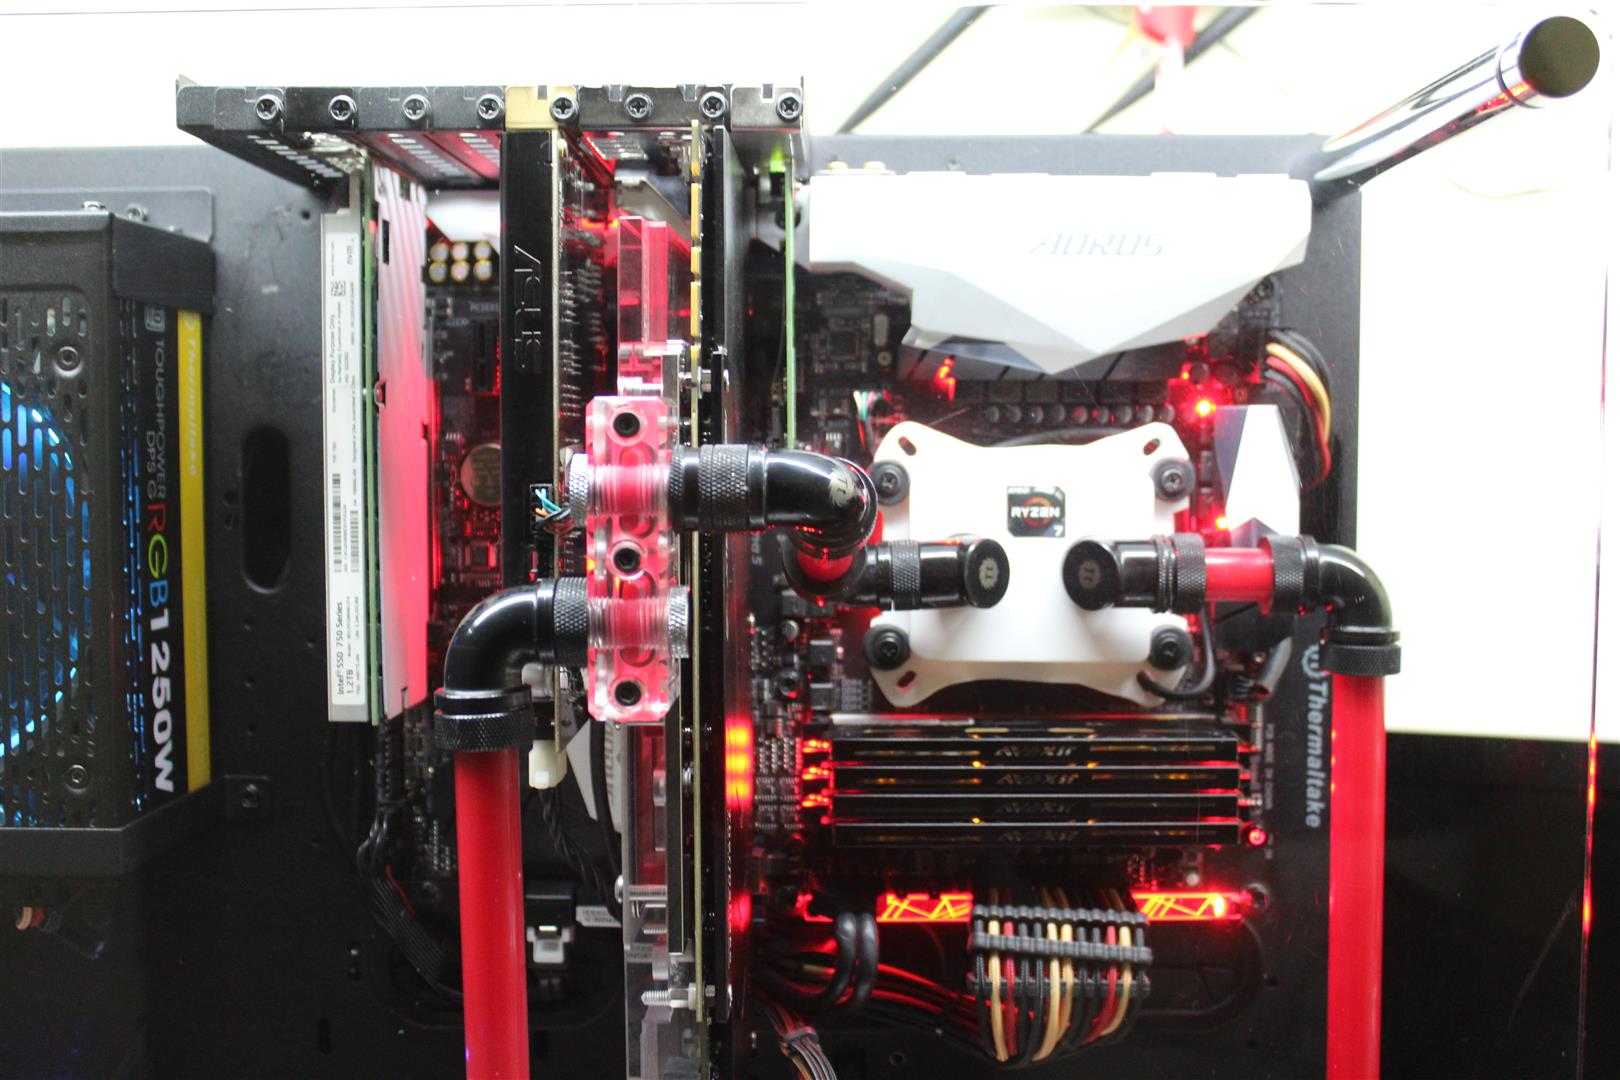
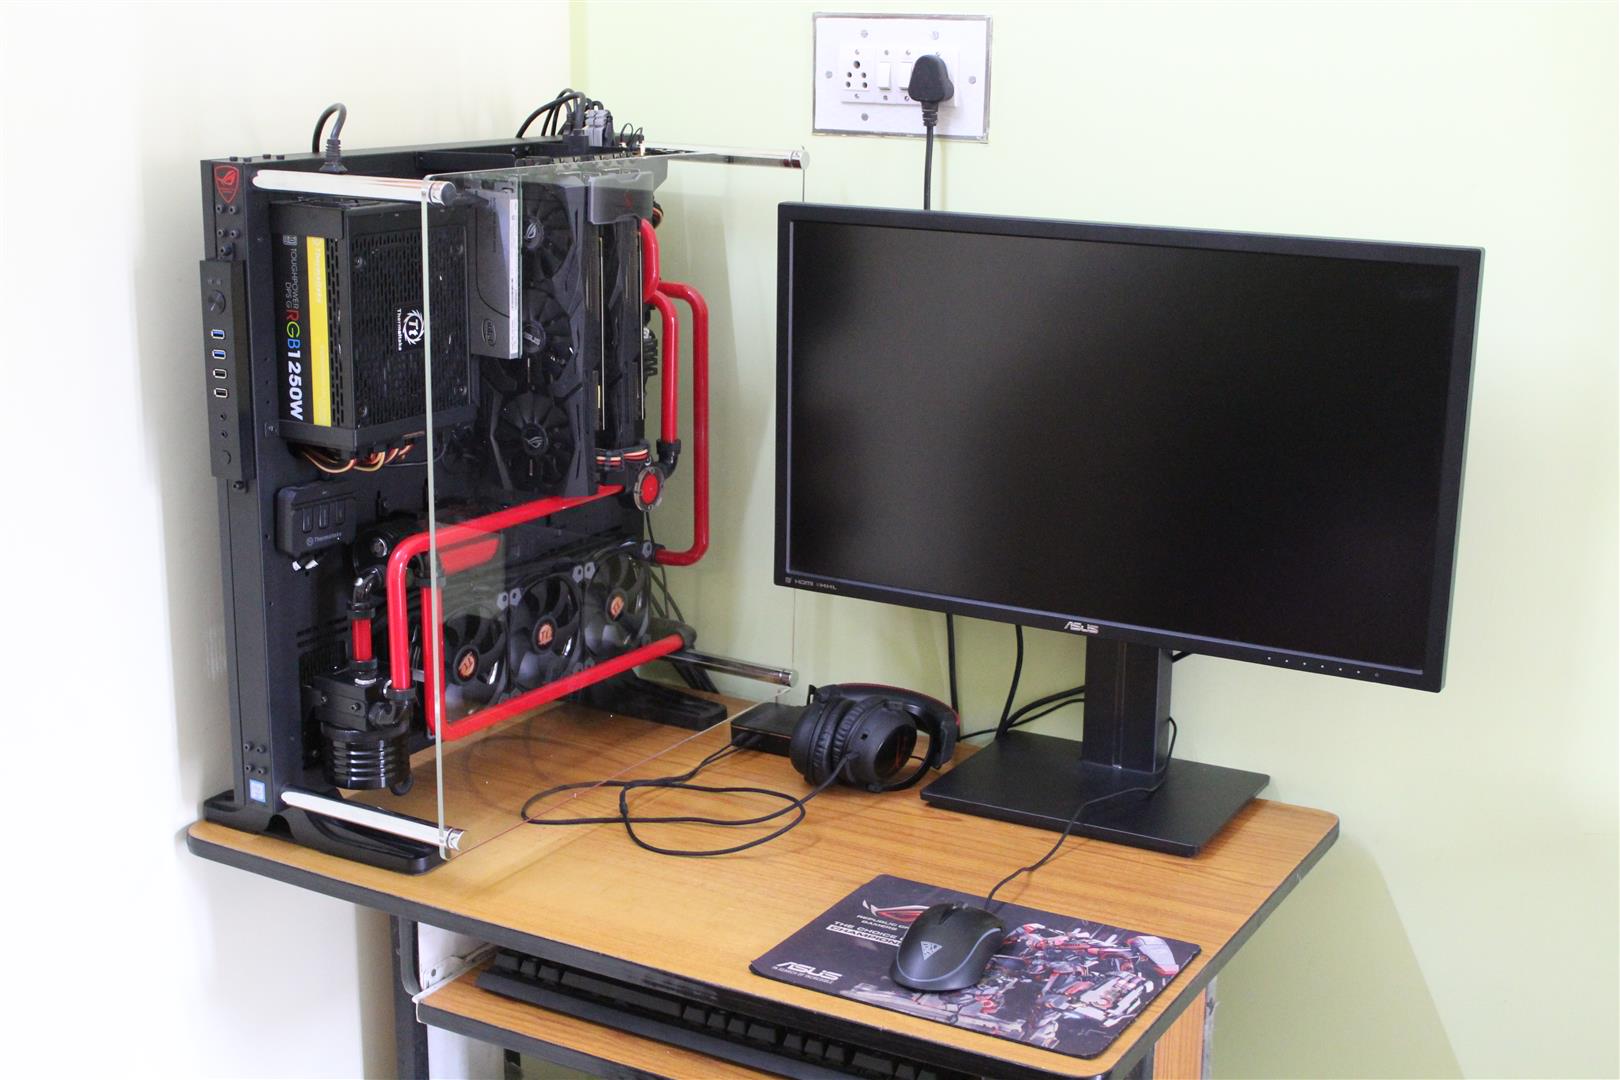
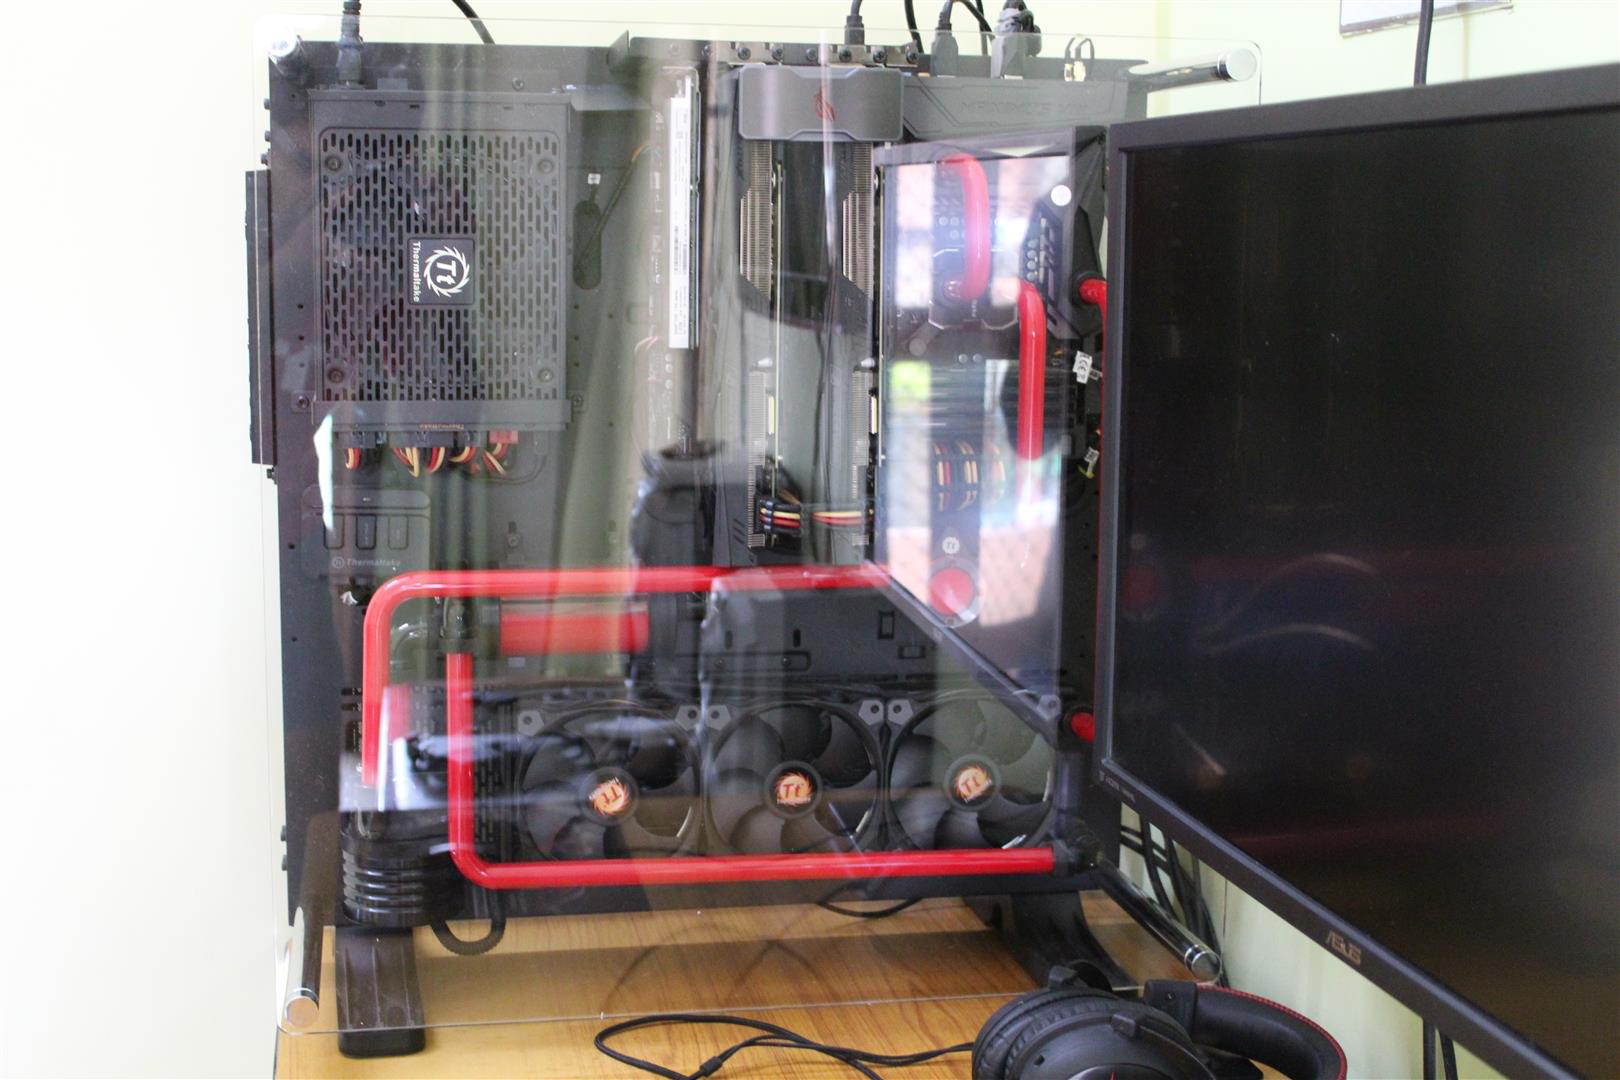
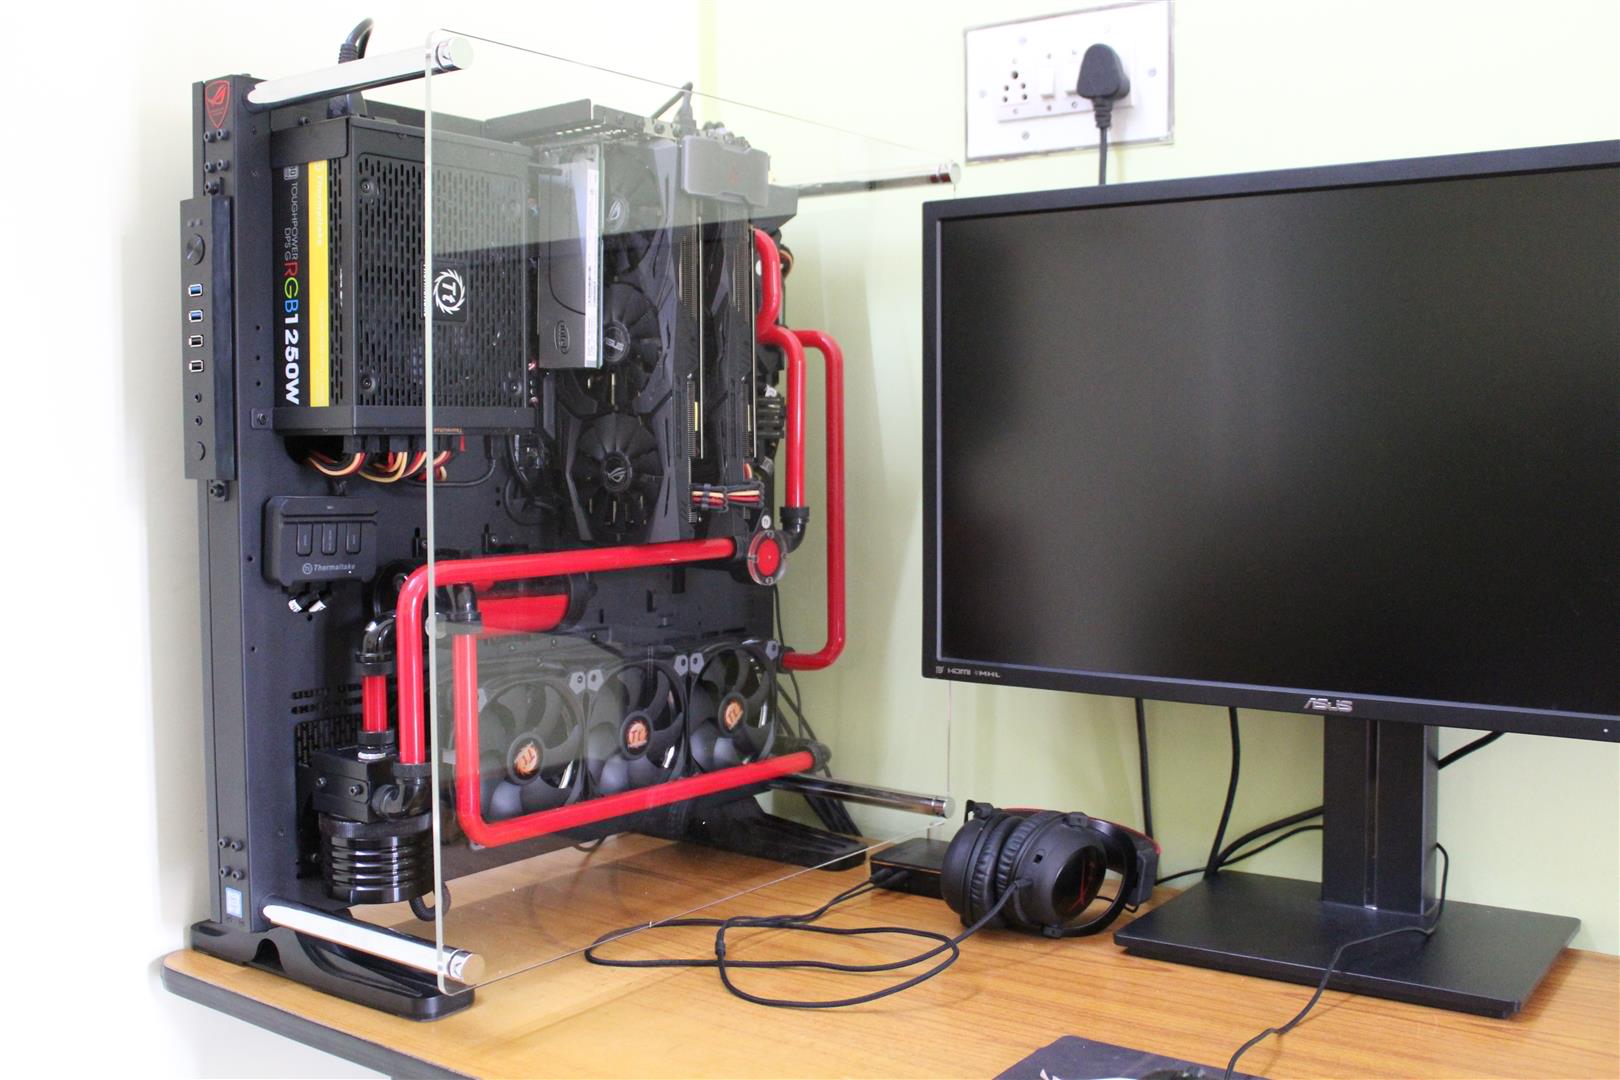
Here's some pic of my build with Toughpower DSP G 1250W PSU.
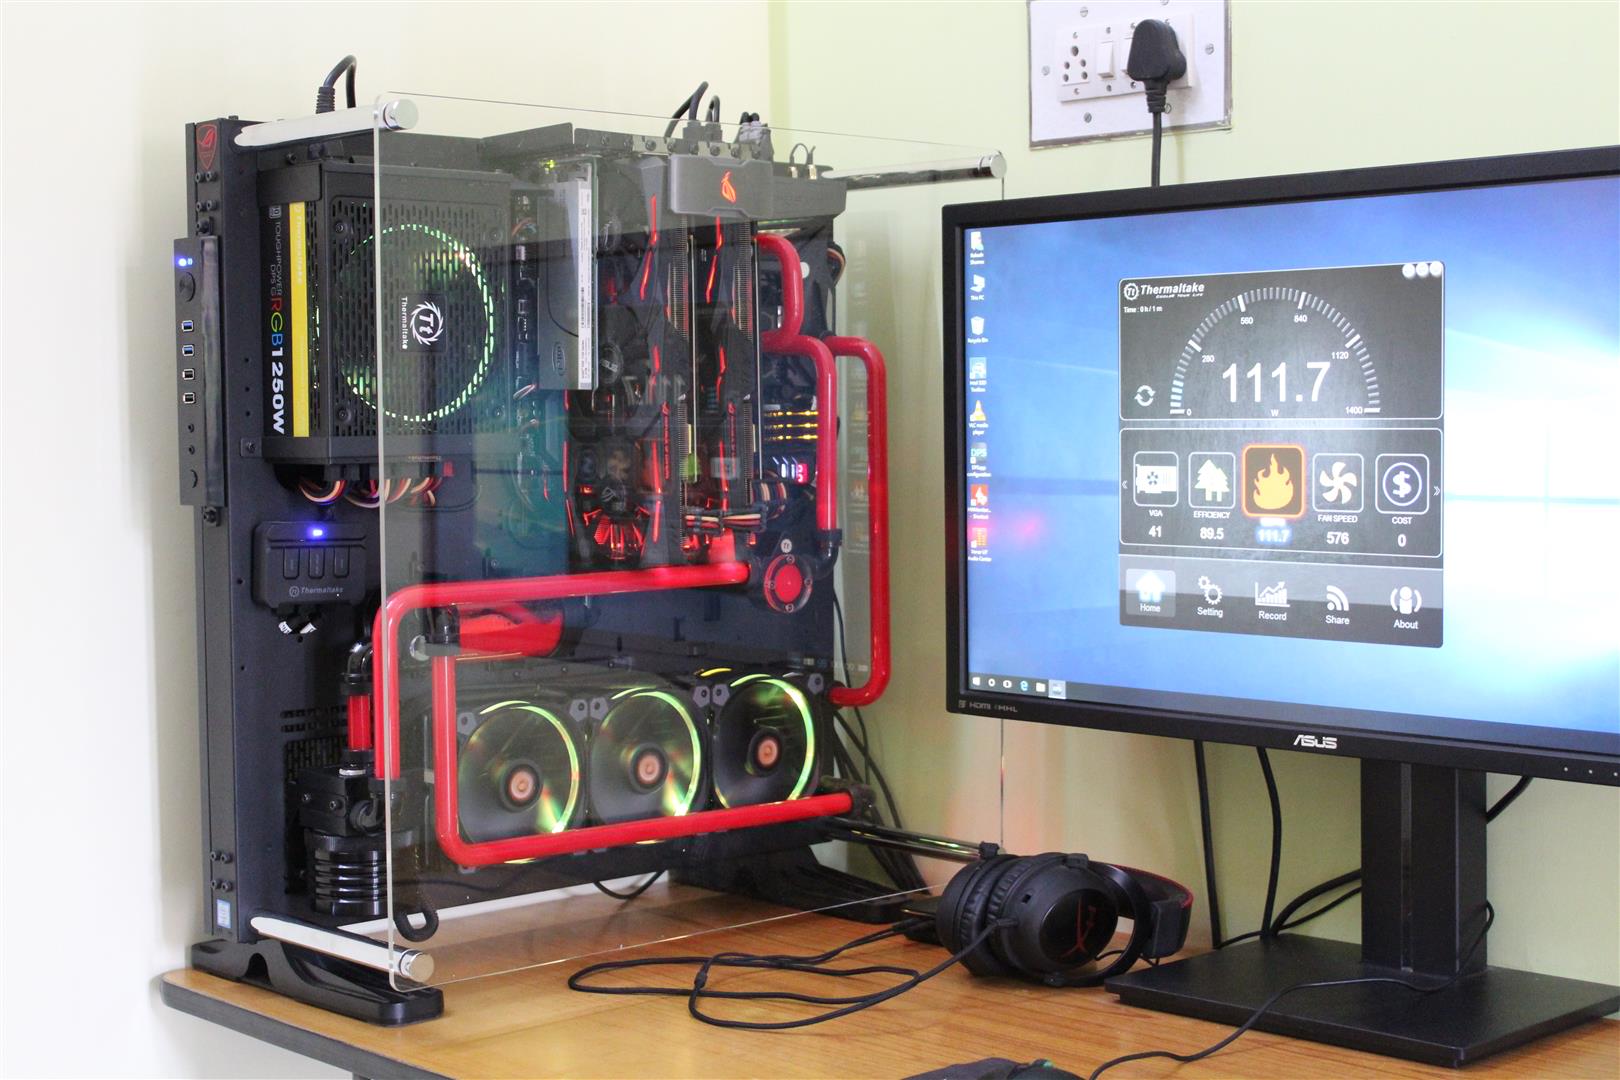

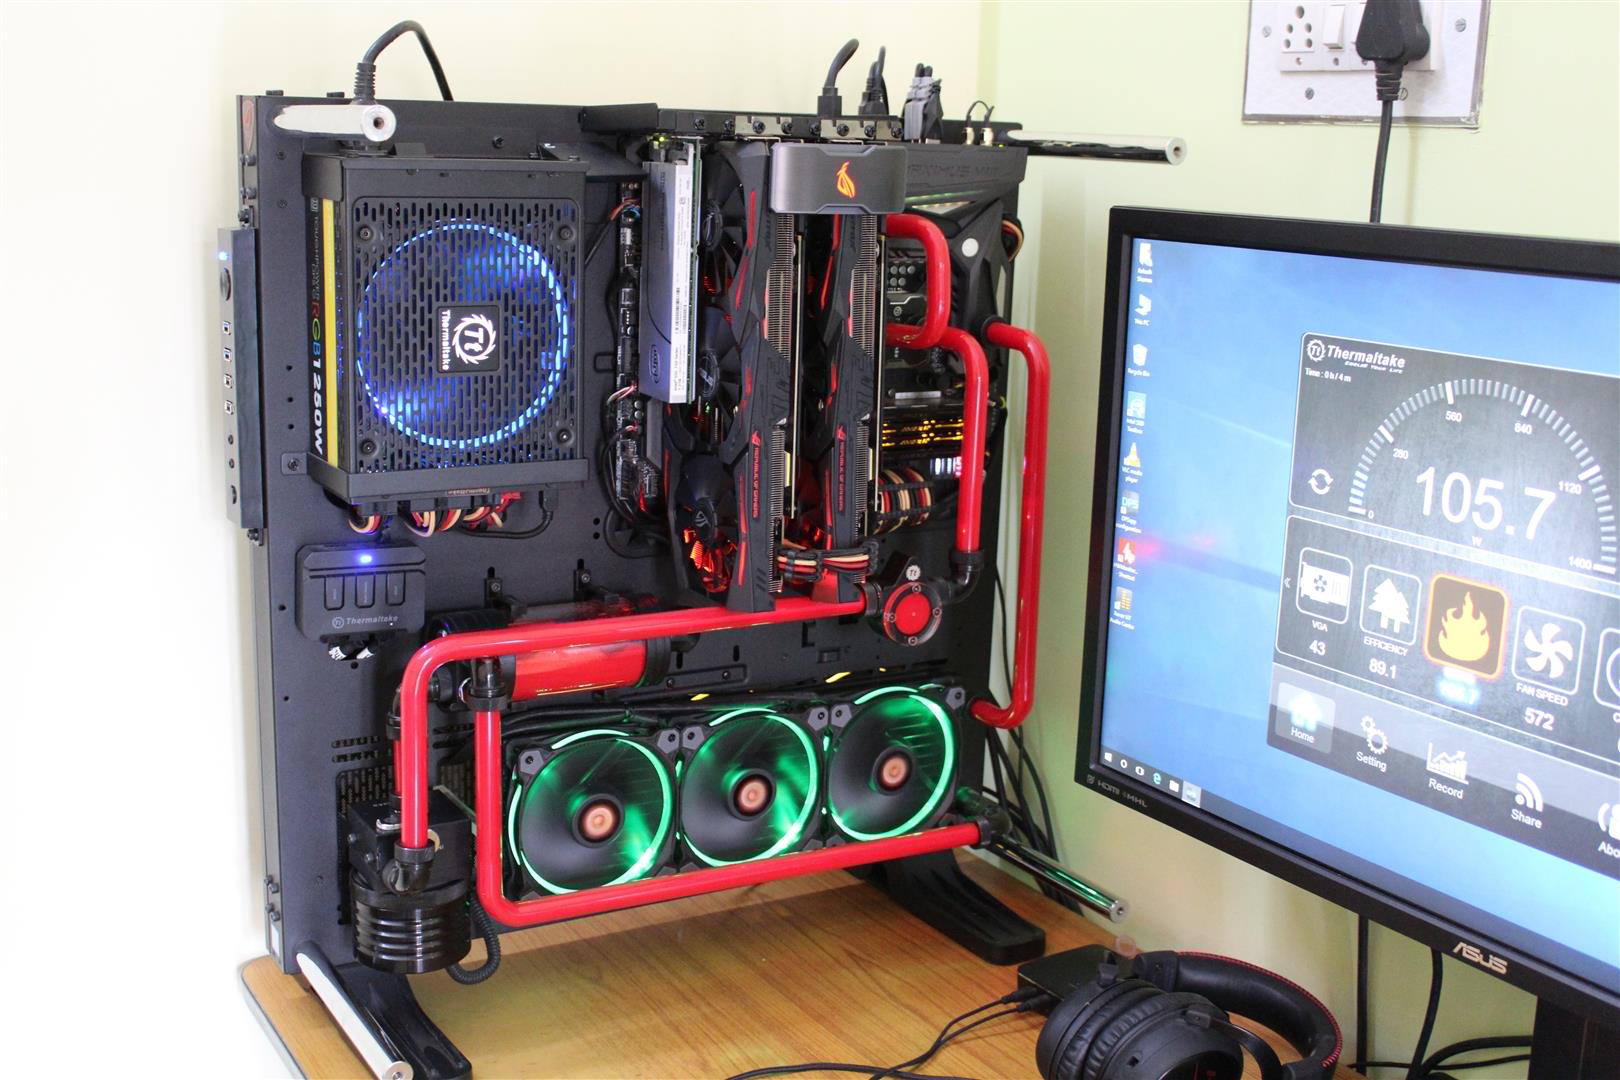
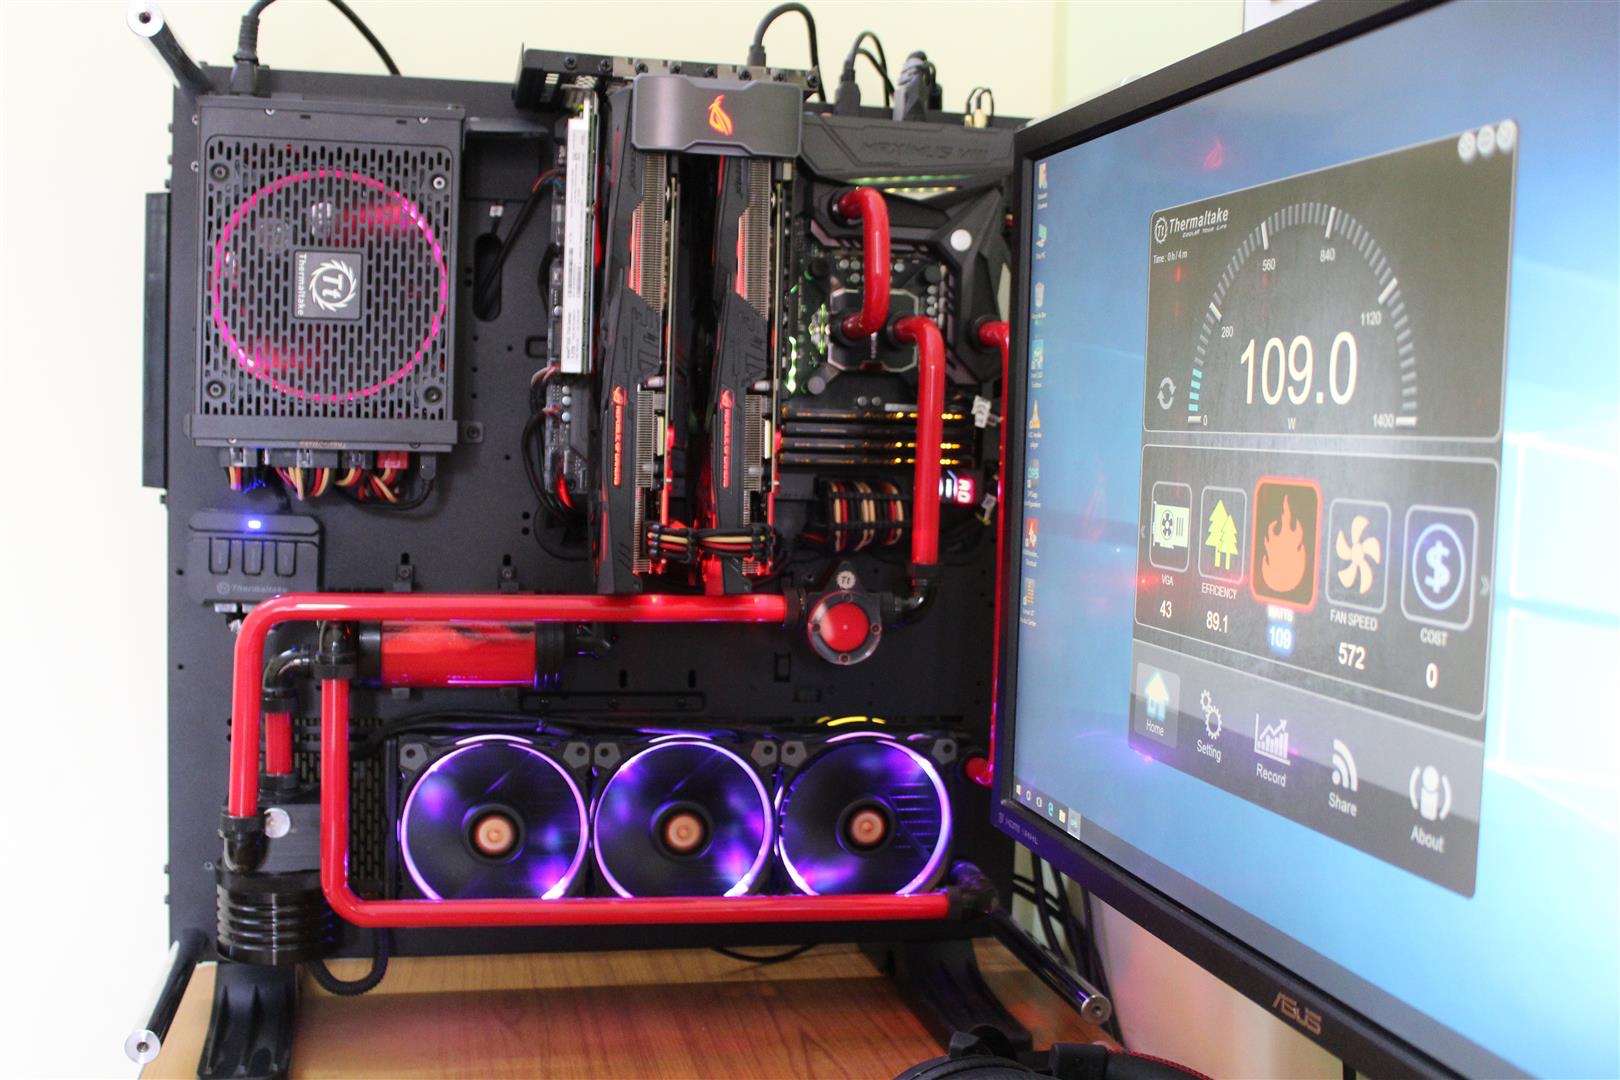
Wonderful products with great features and lot of power to run any PC build.
- r3v3nant, Denny and filip3dejkoff
-
 3
3
-
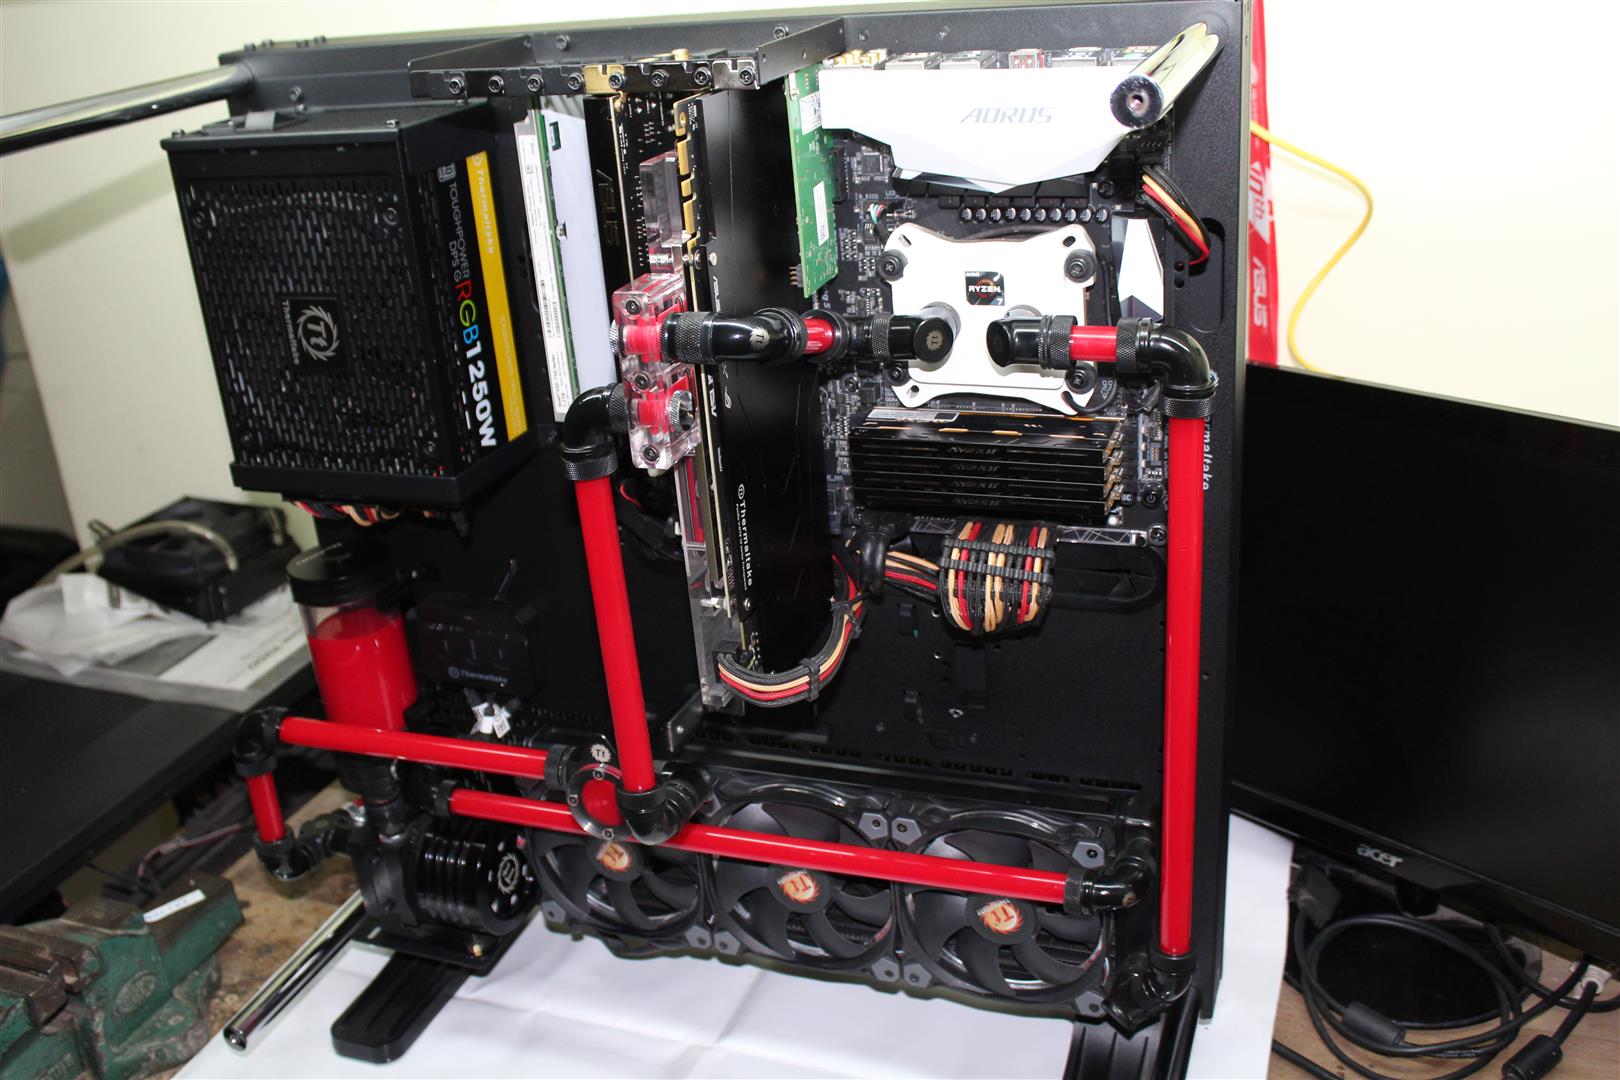
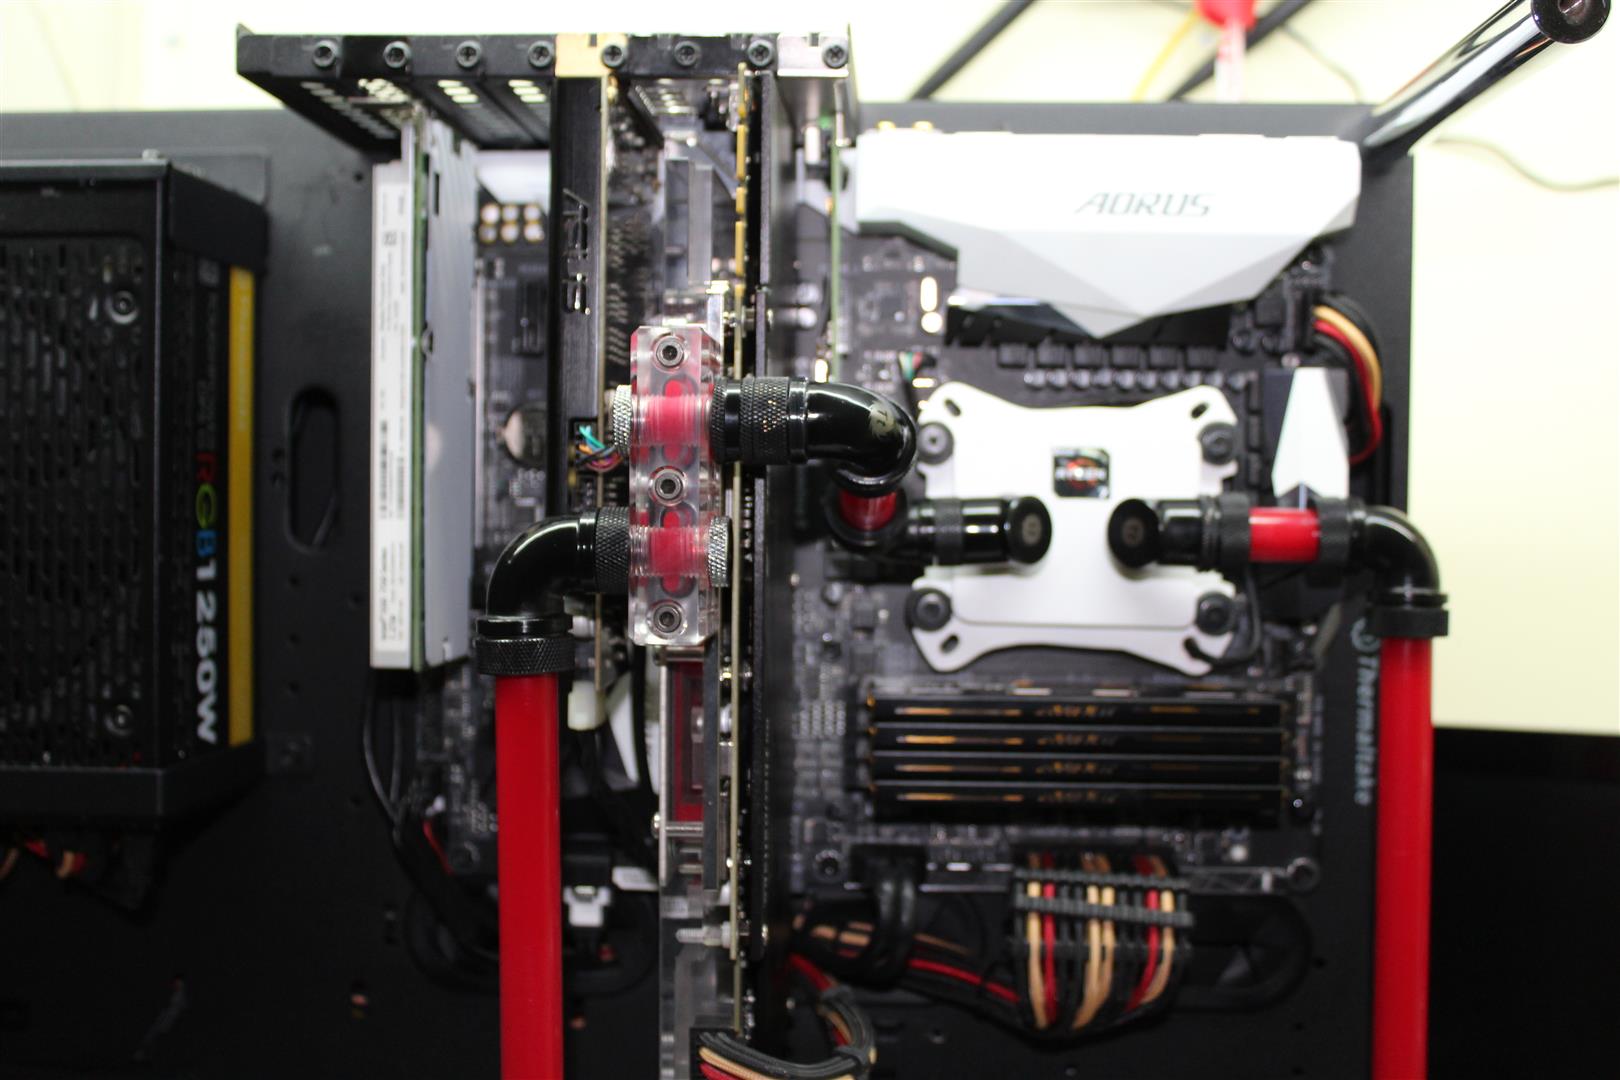
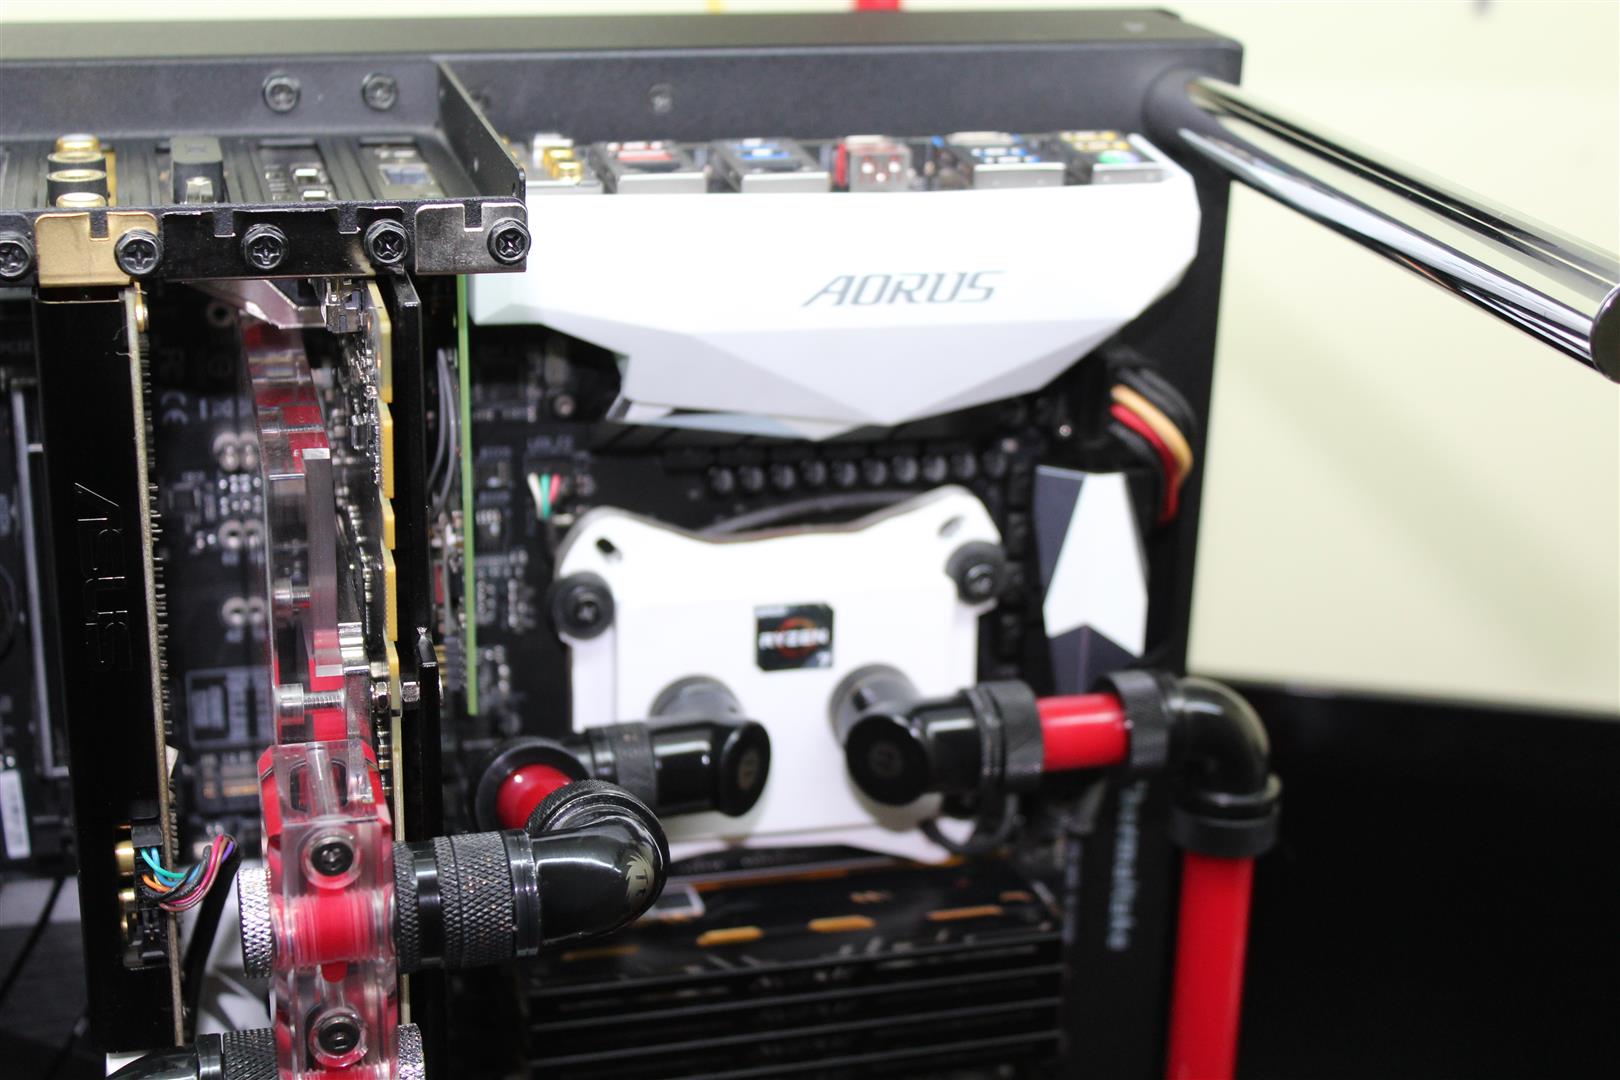
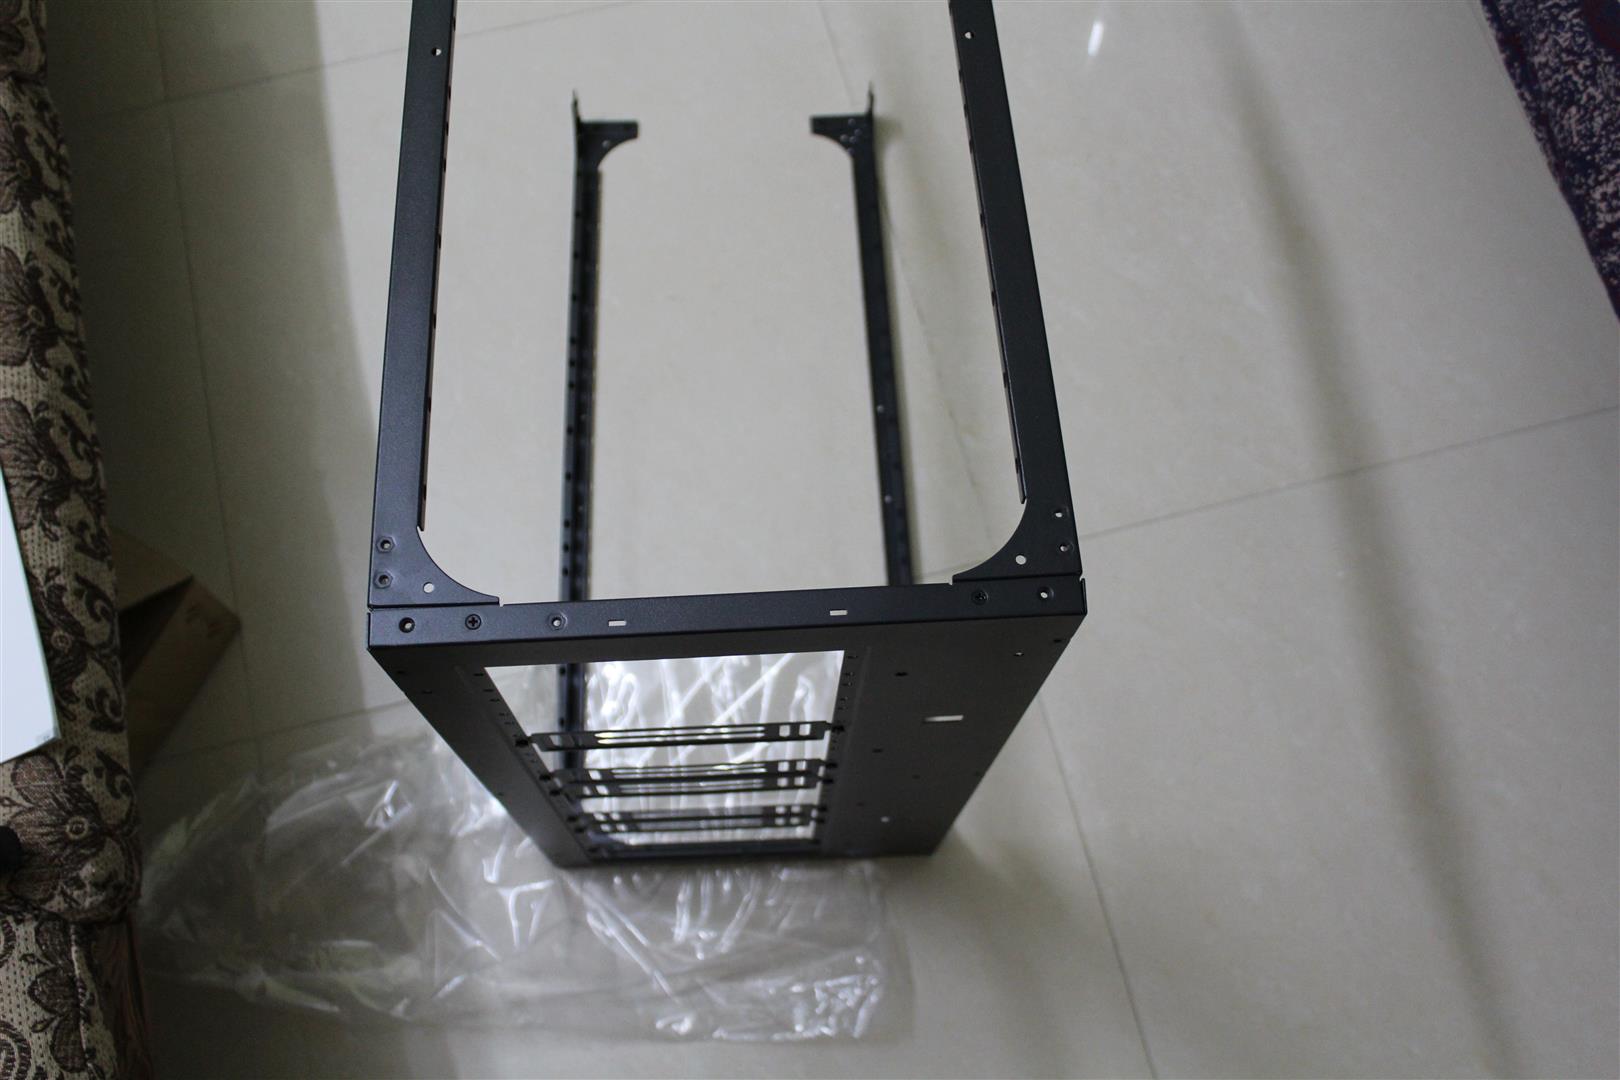
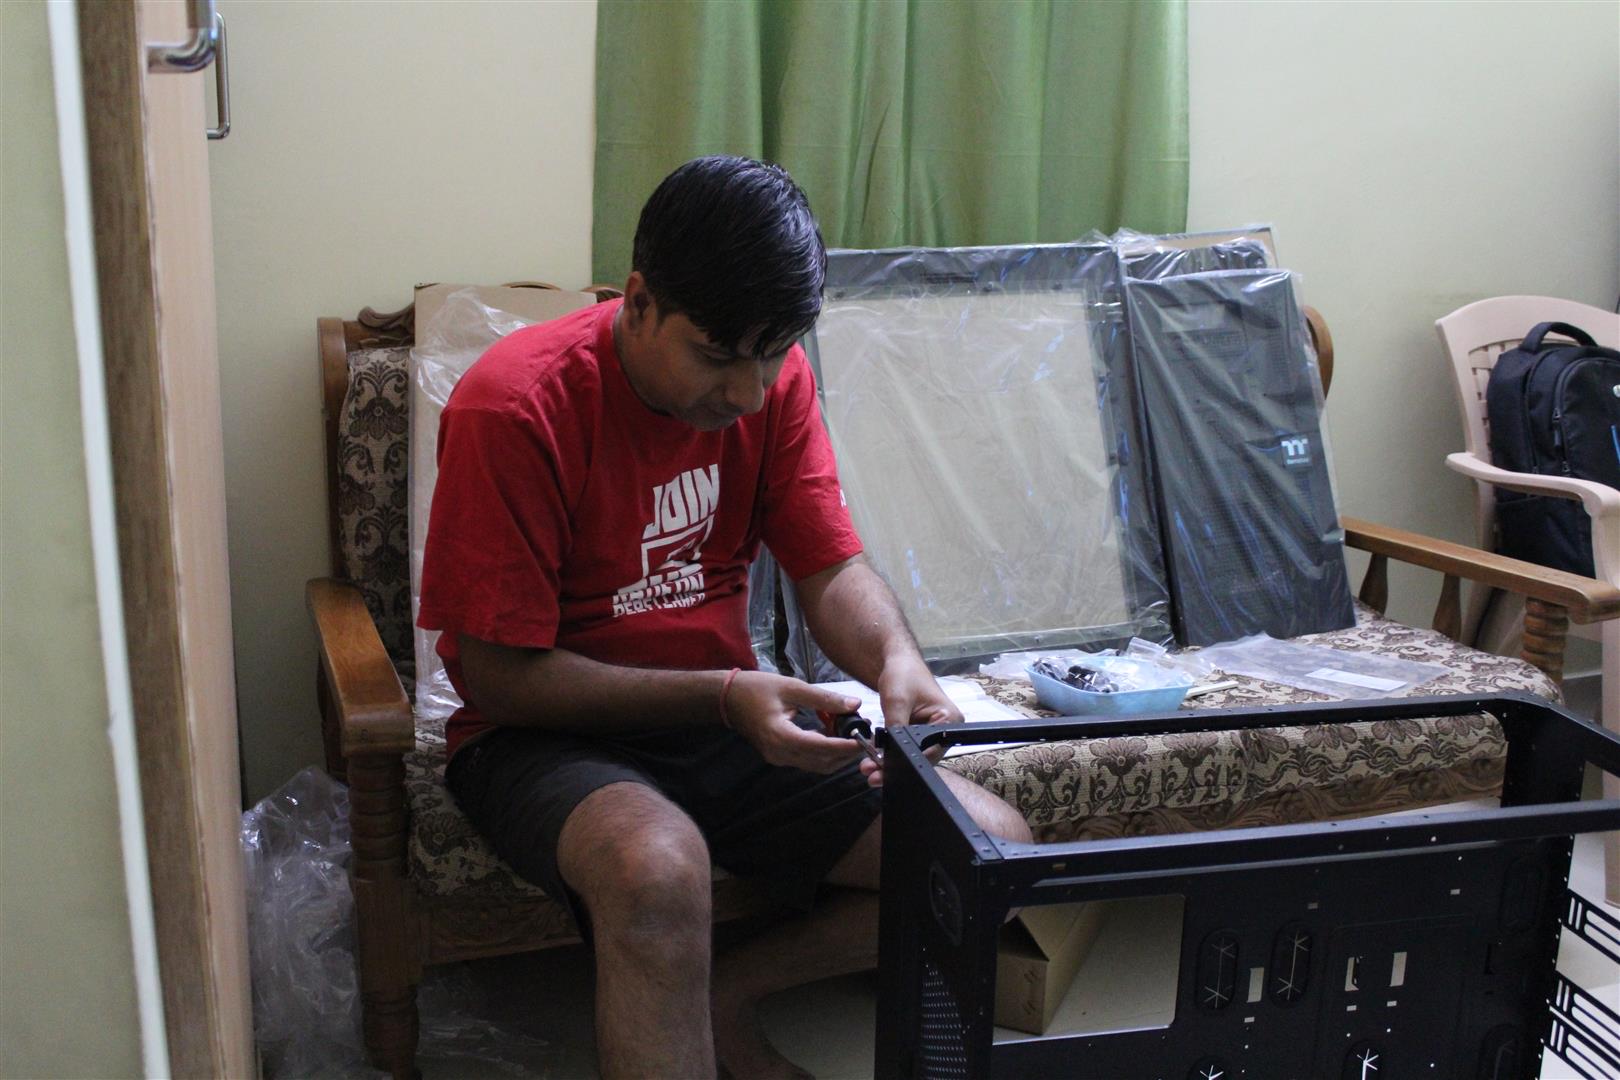
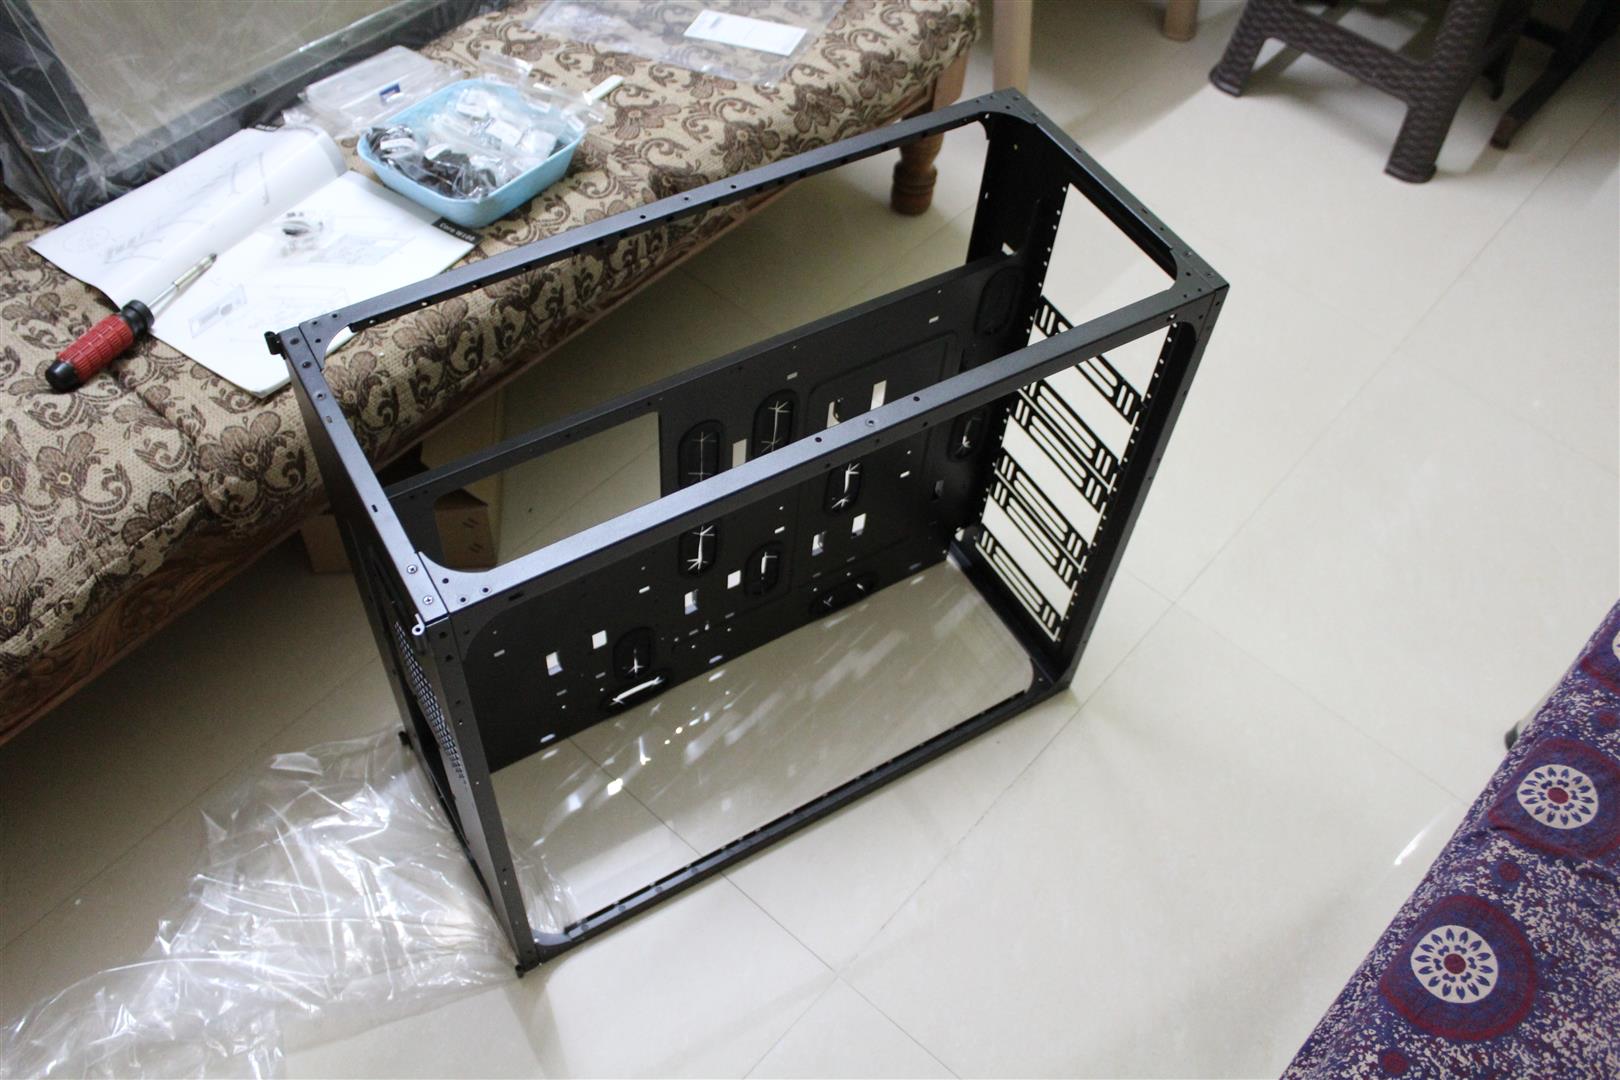
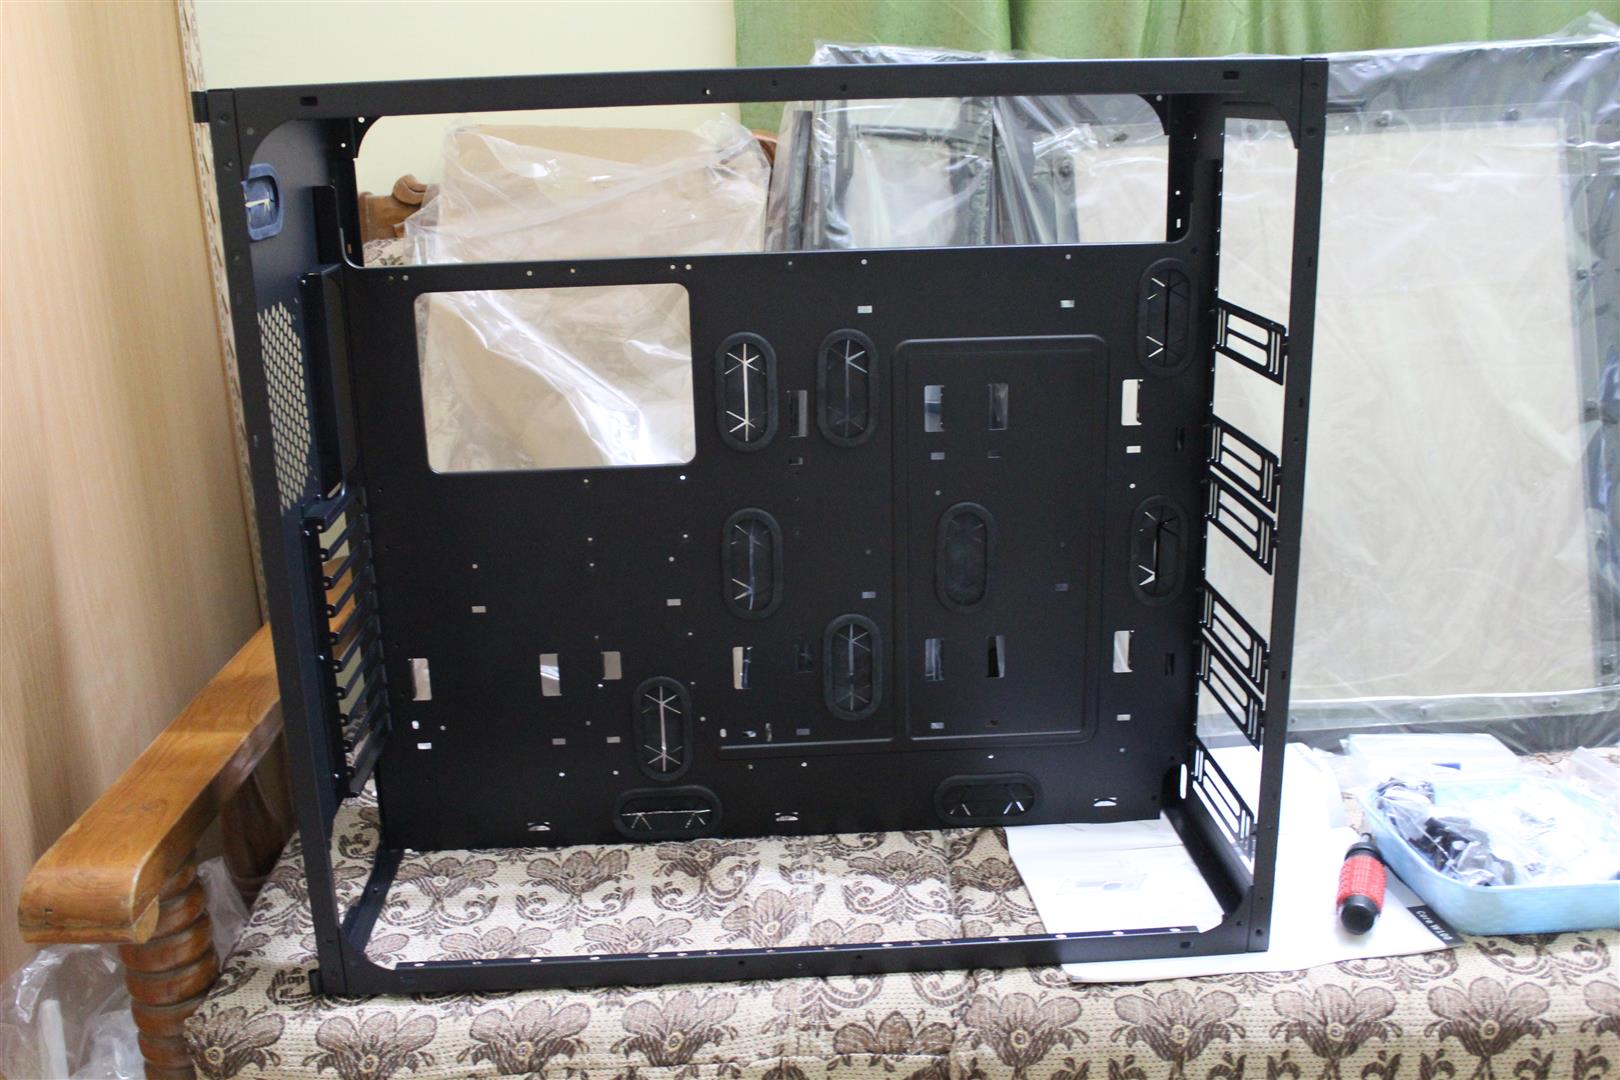
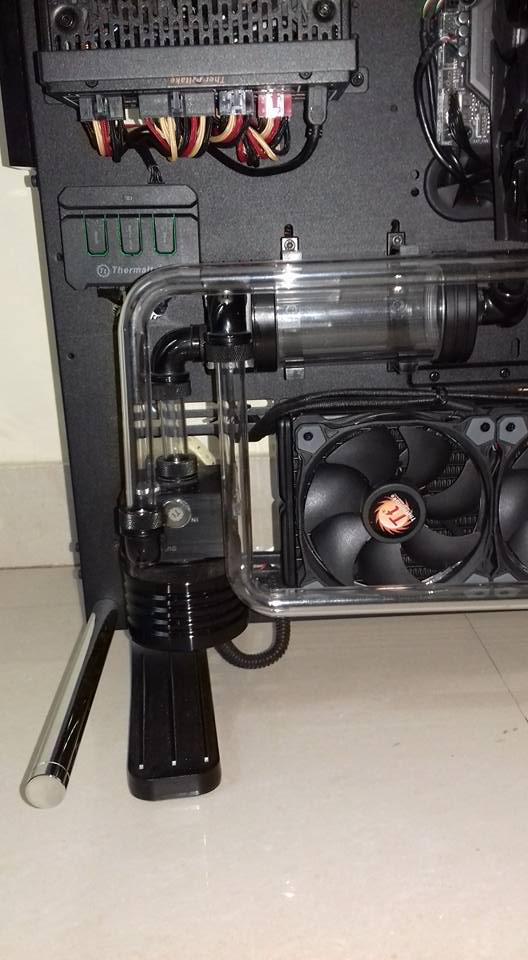
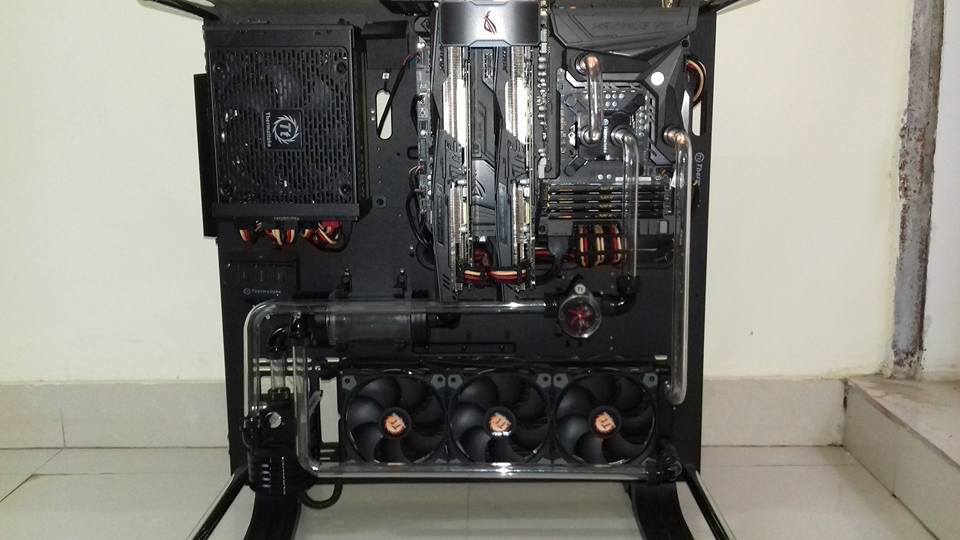
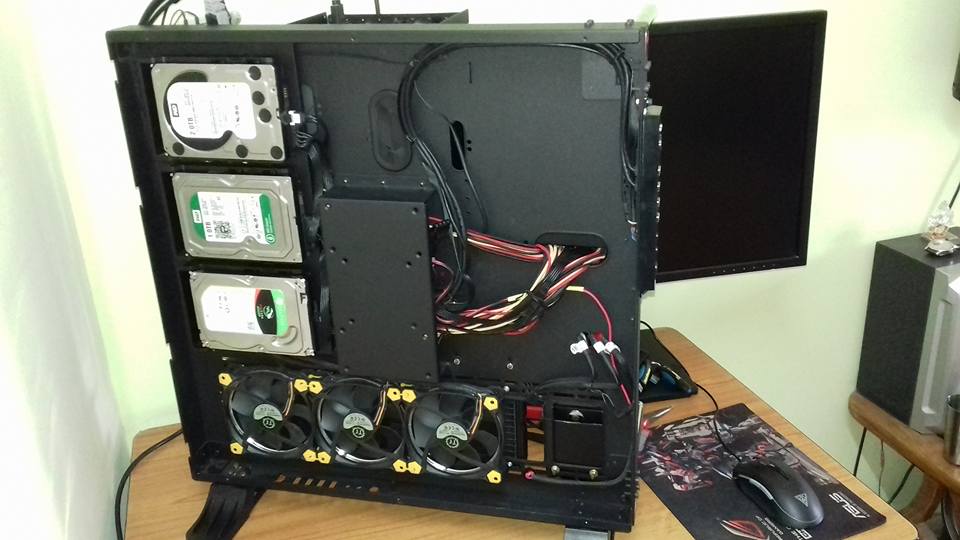
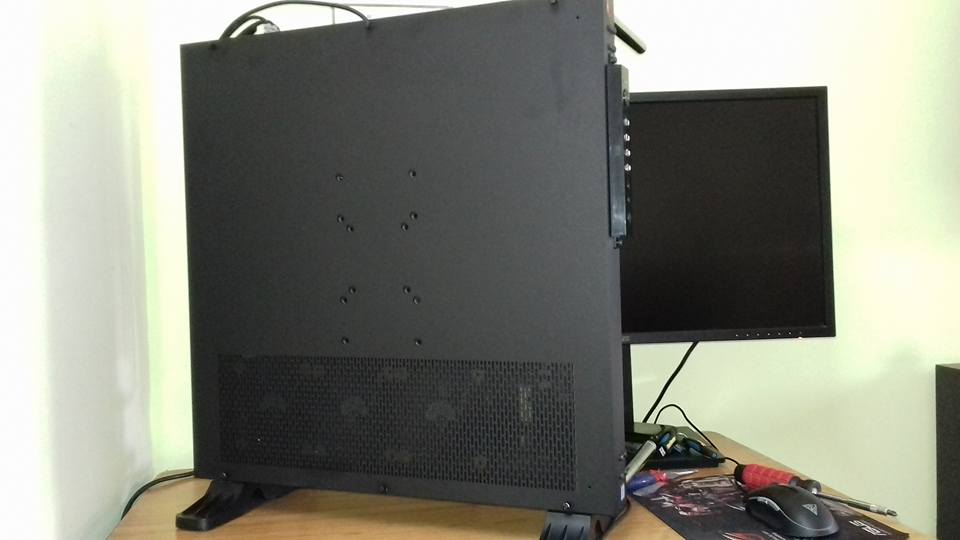
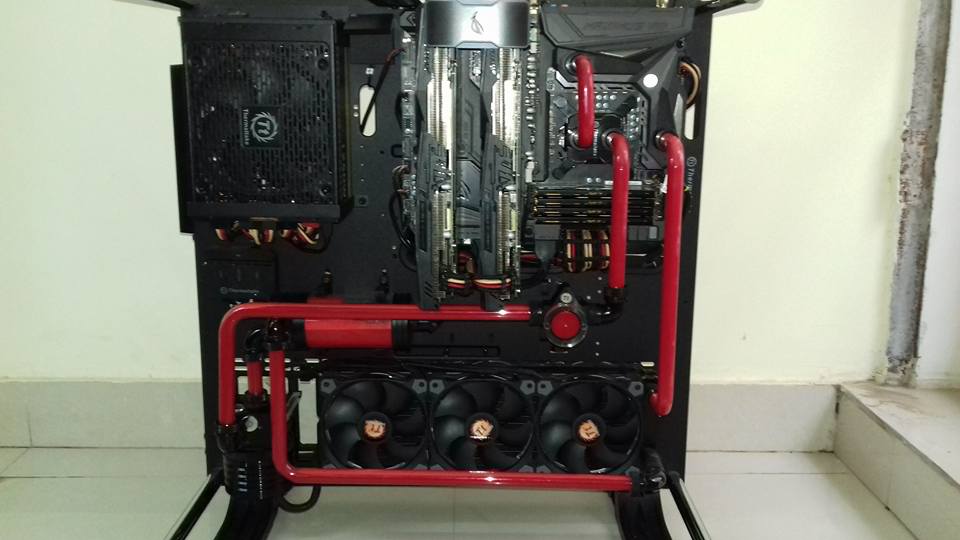
Core P5 case is one of the most popular case globally in Liquid Cooling and Open frame type case lovers.
Being one of them I also like this Core P5 case, due to its special 90 degree GPU mounting capability.
But dual graphics cards setup was difficult and especially I don’t like the graphics card bending and hanging by the PCI-e slot on the motherboard.So I planned to change the case orientation and here it is an Un-boxing with my mod of Core P5 Case.

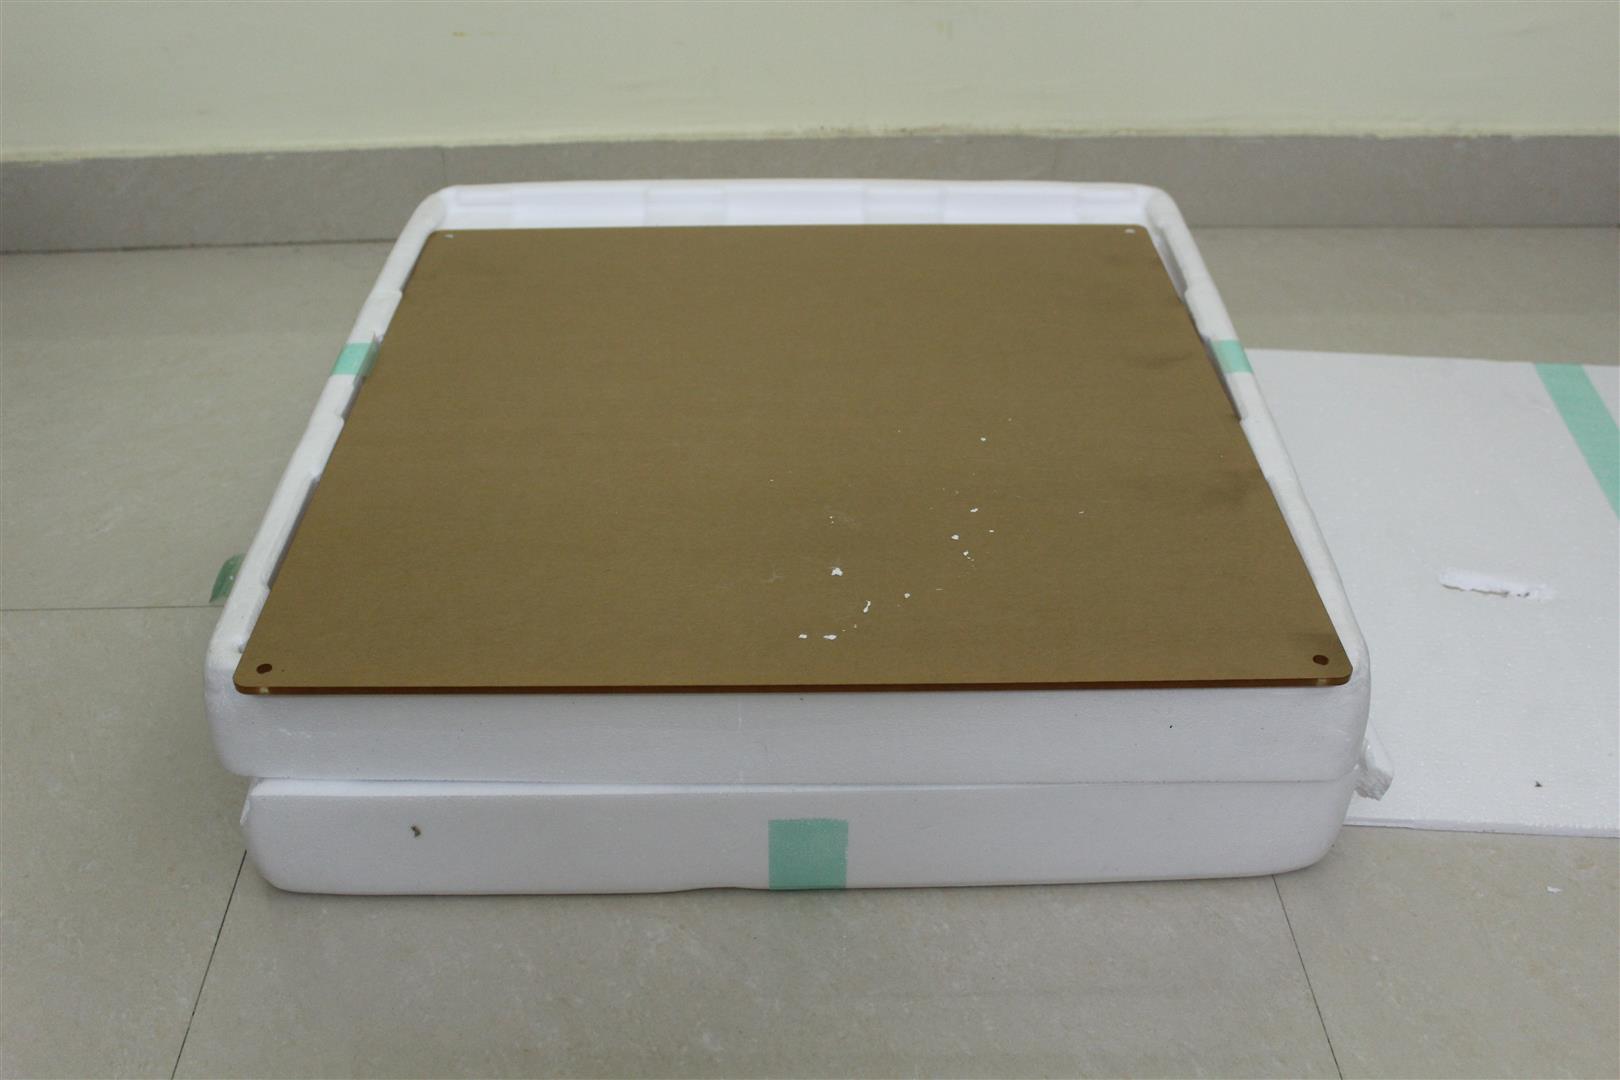

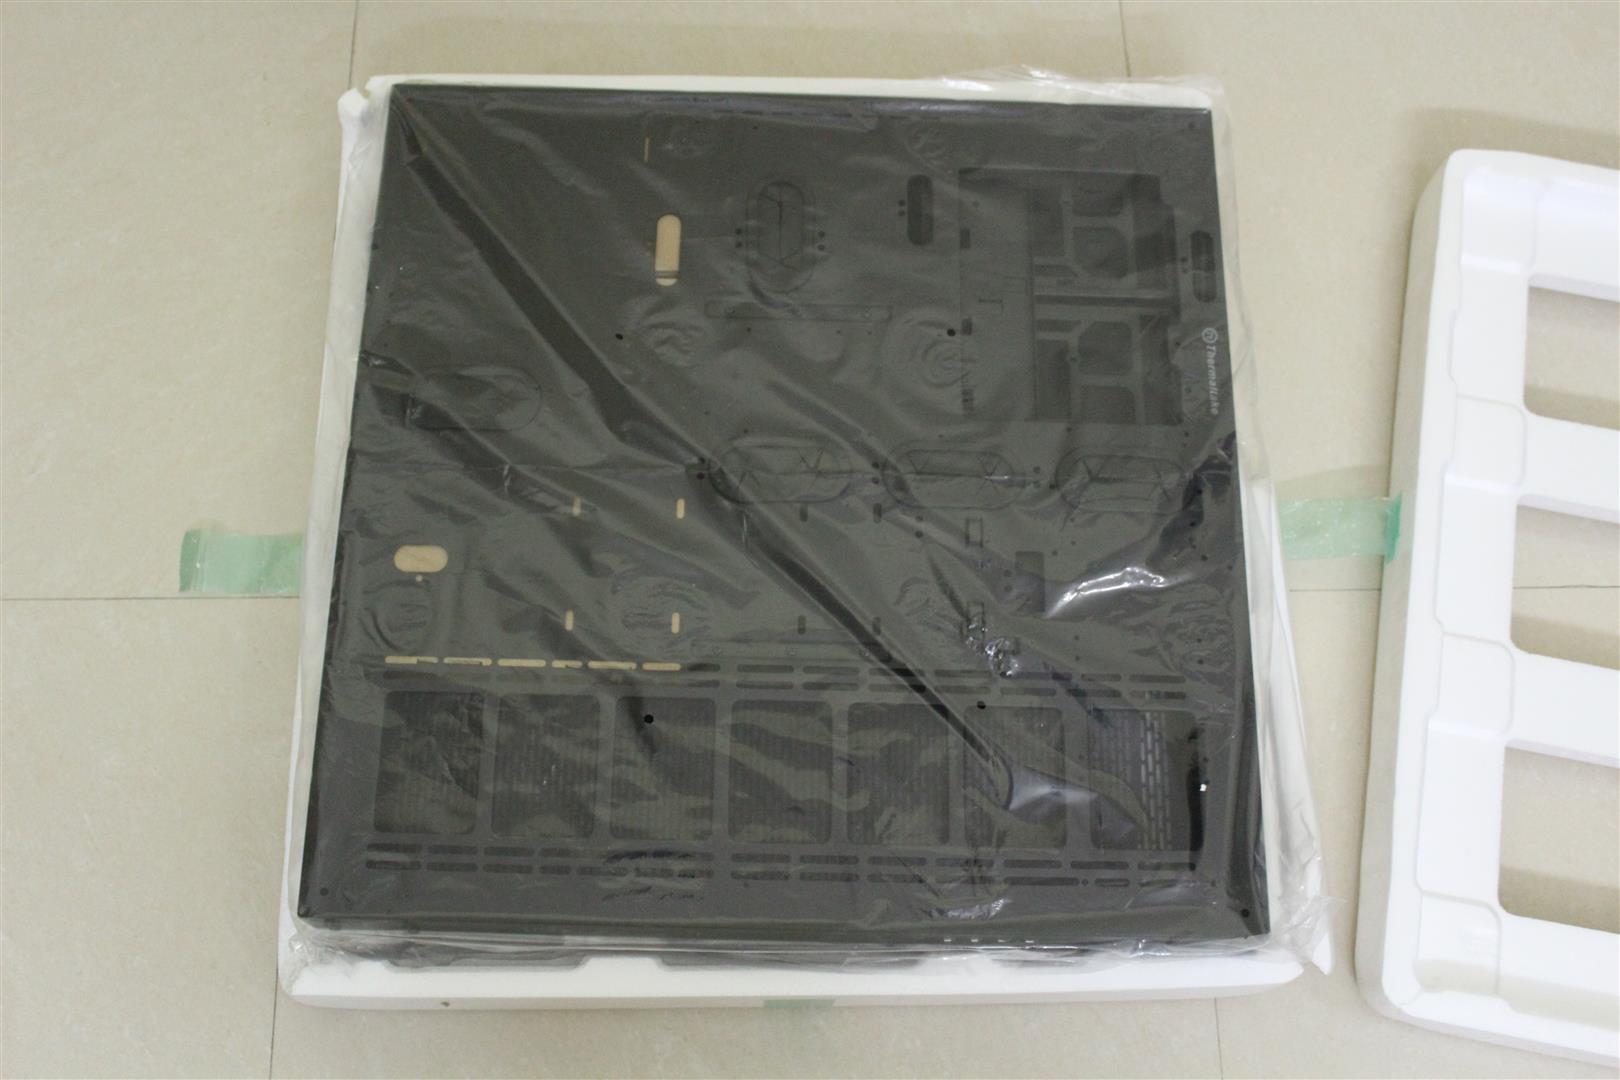
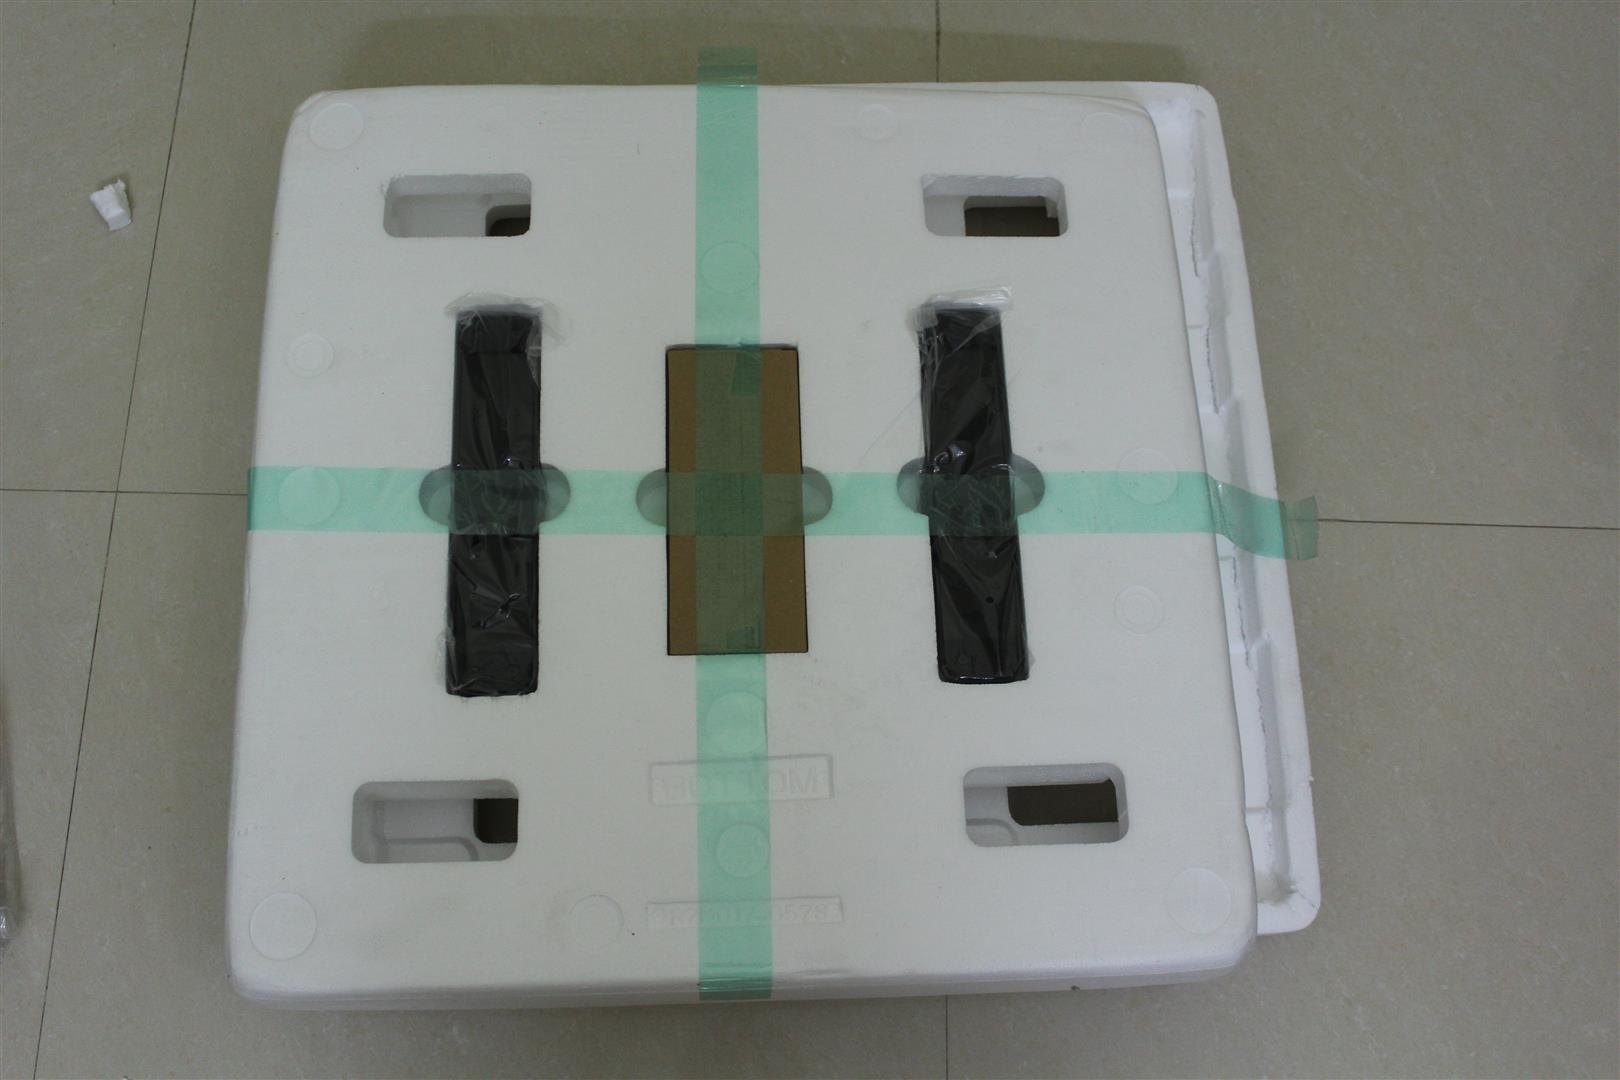
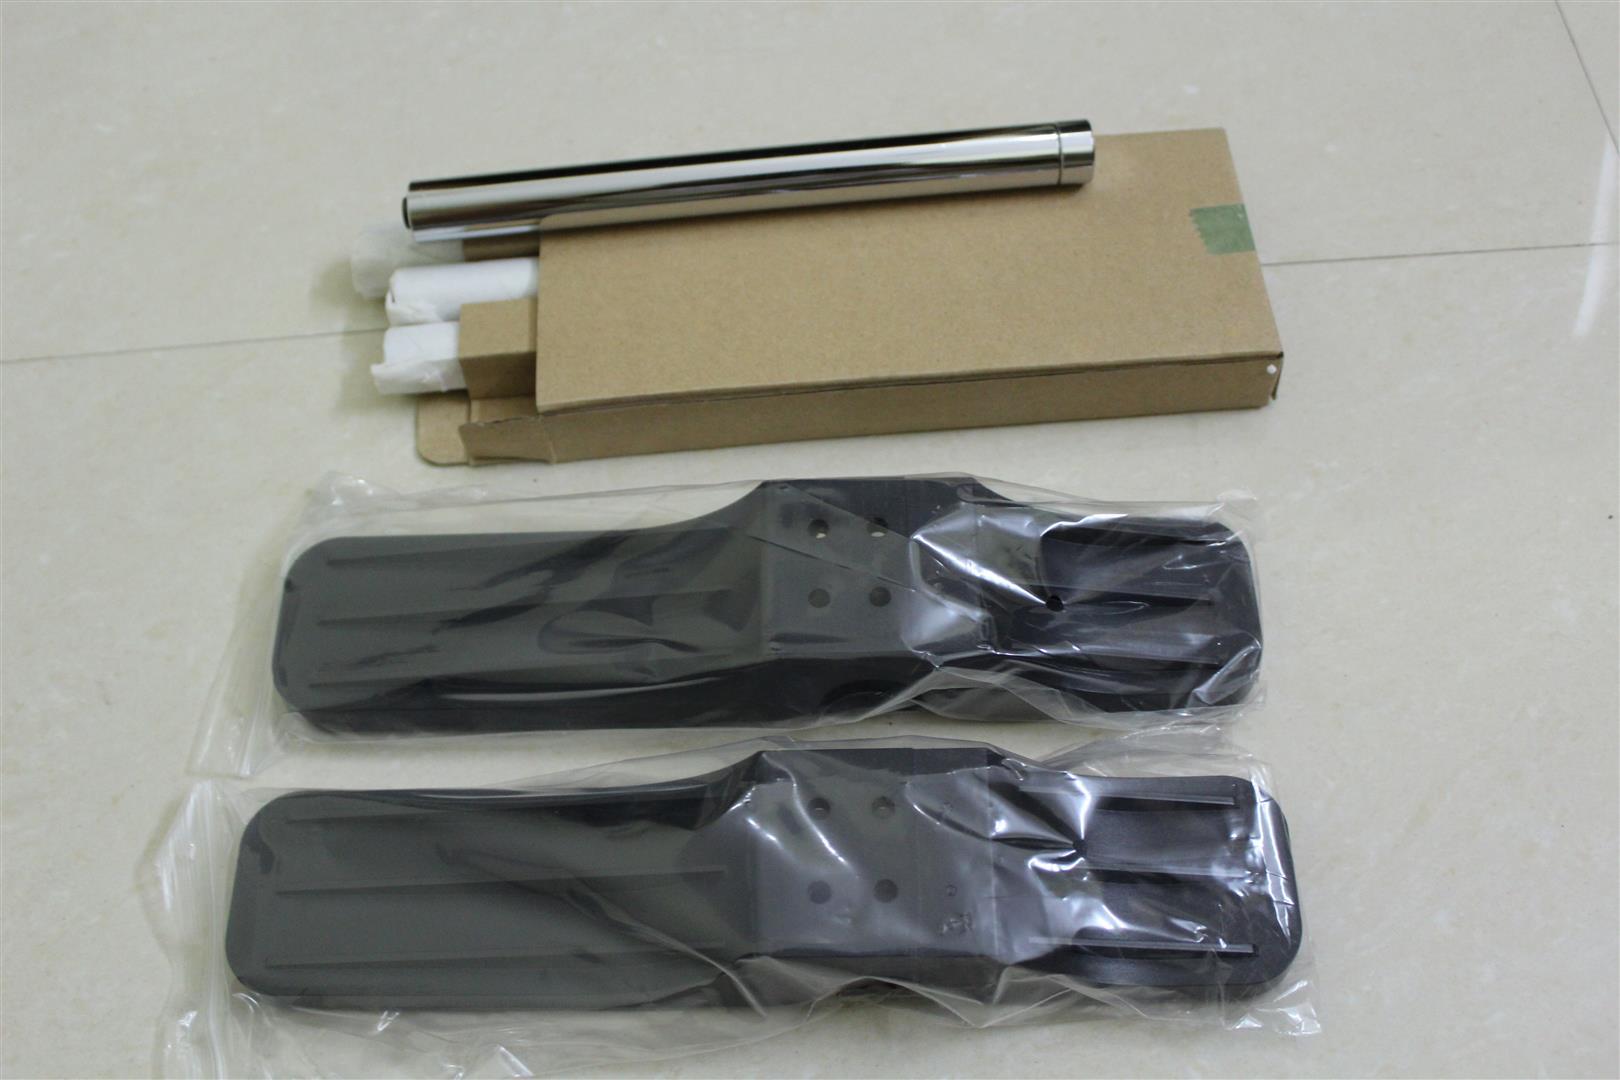
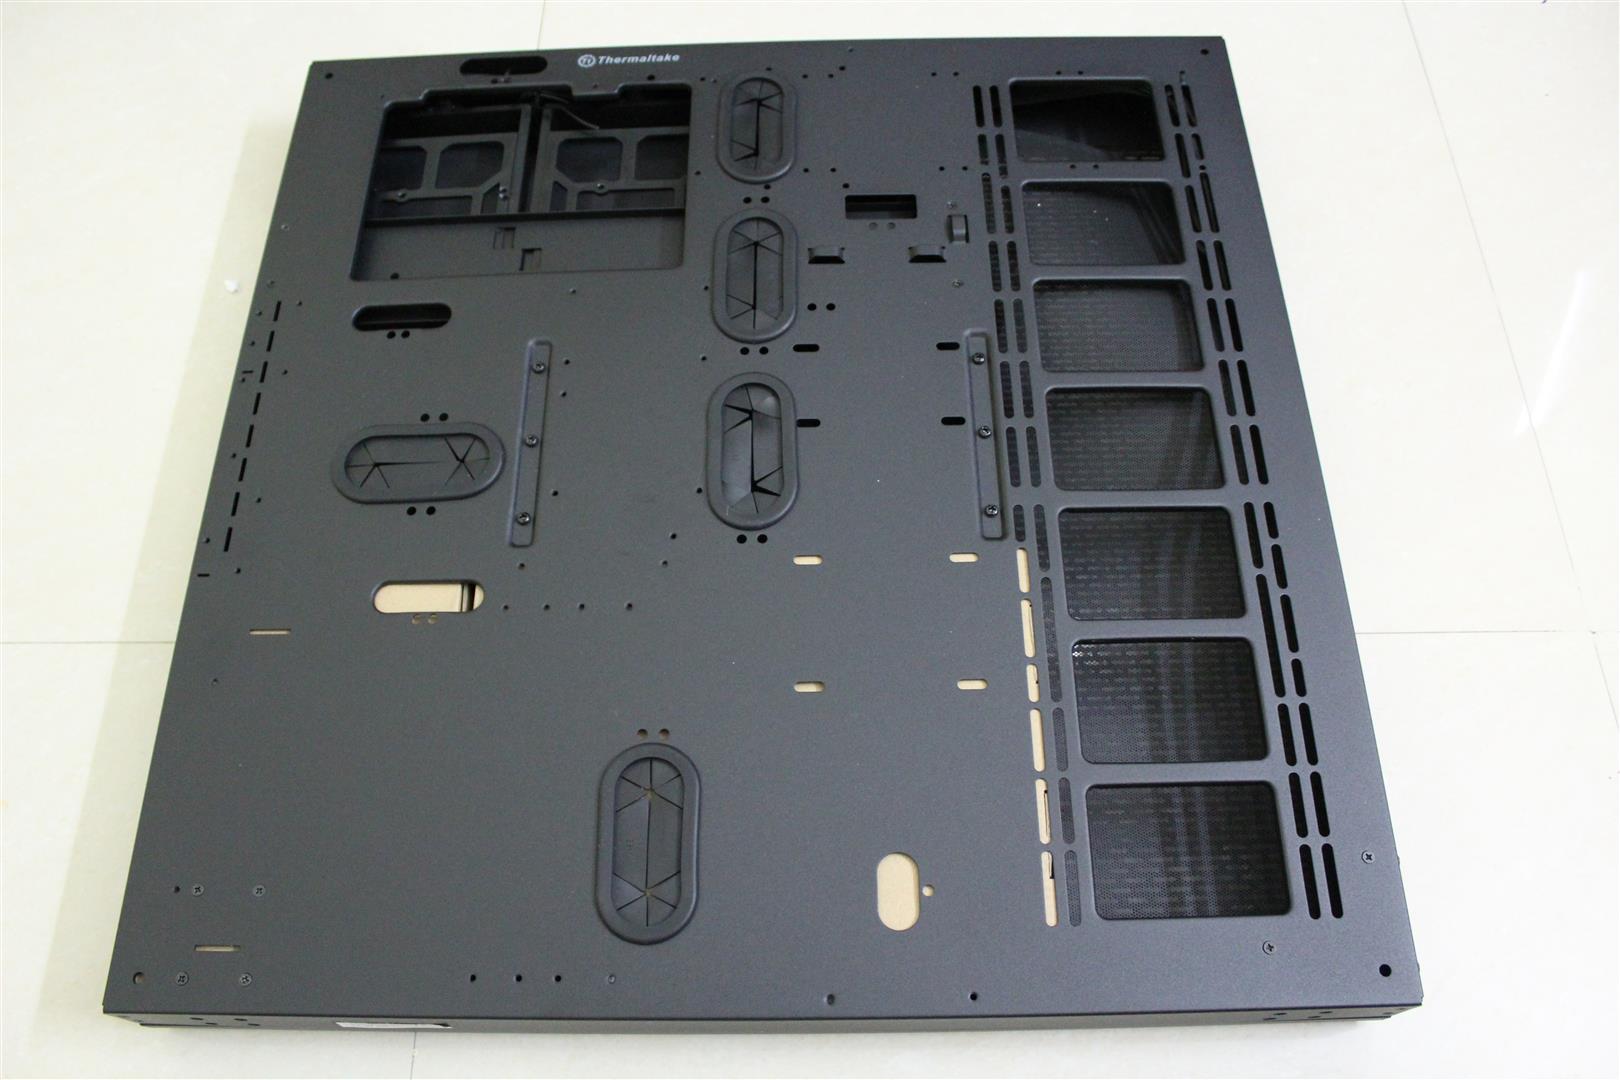
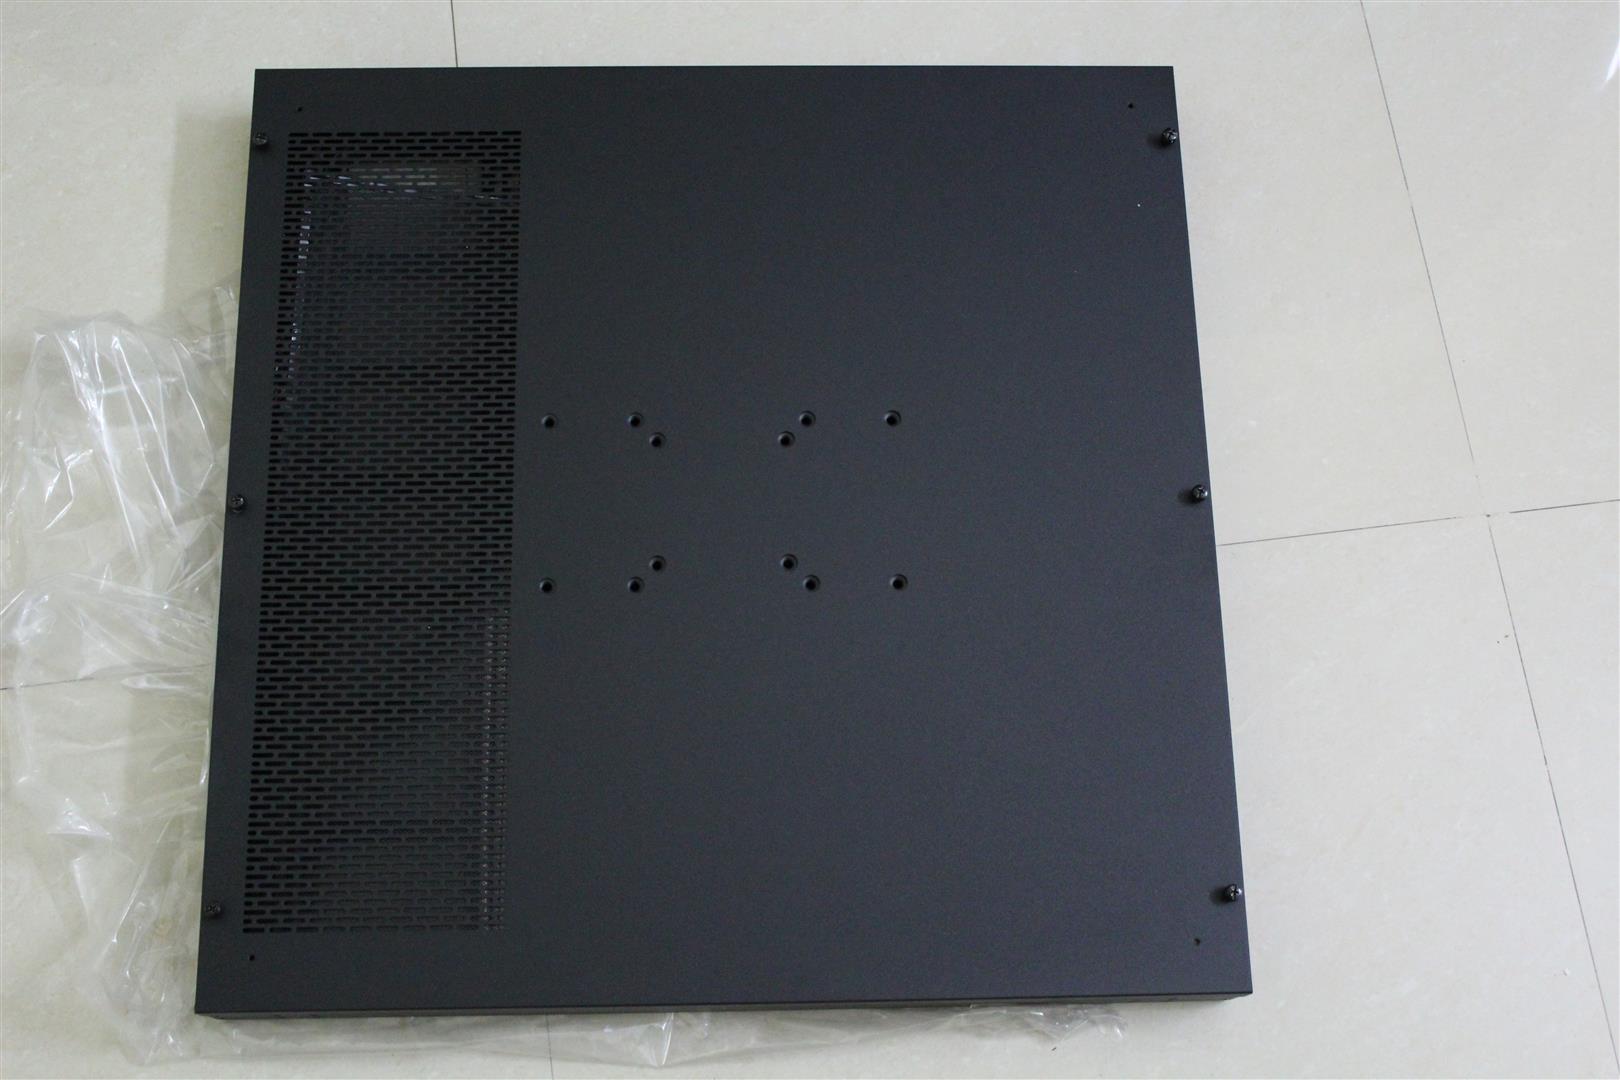
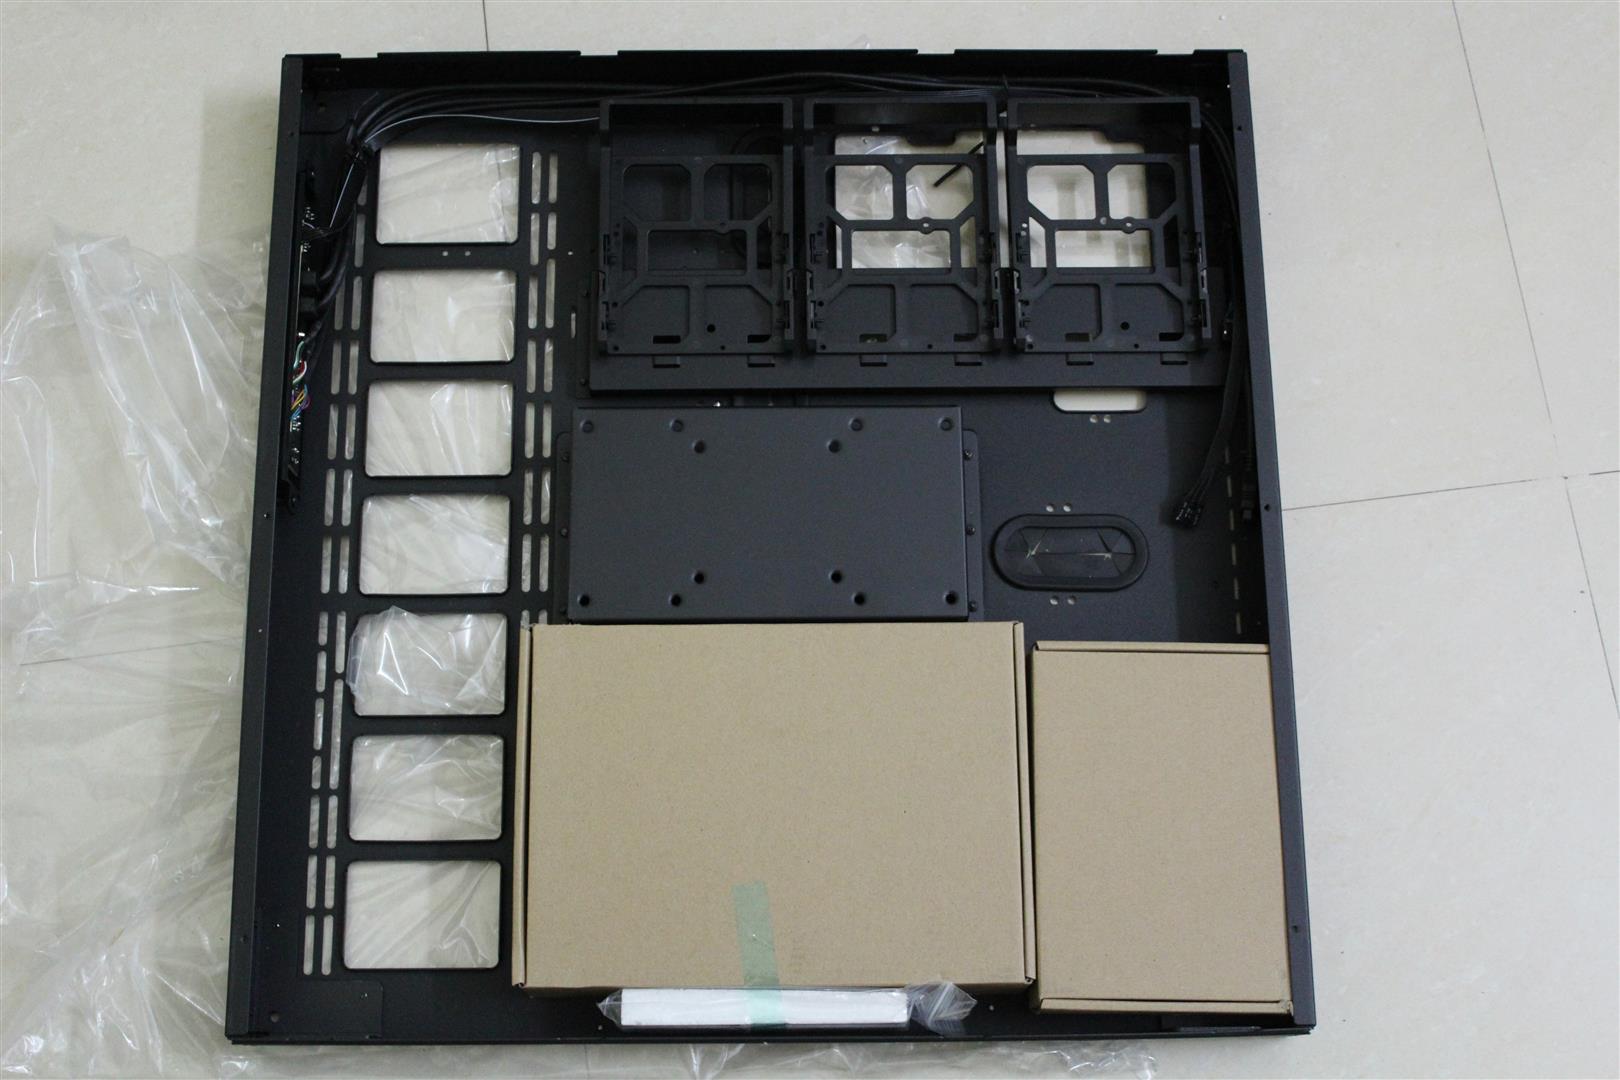
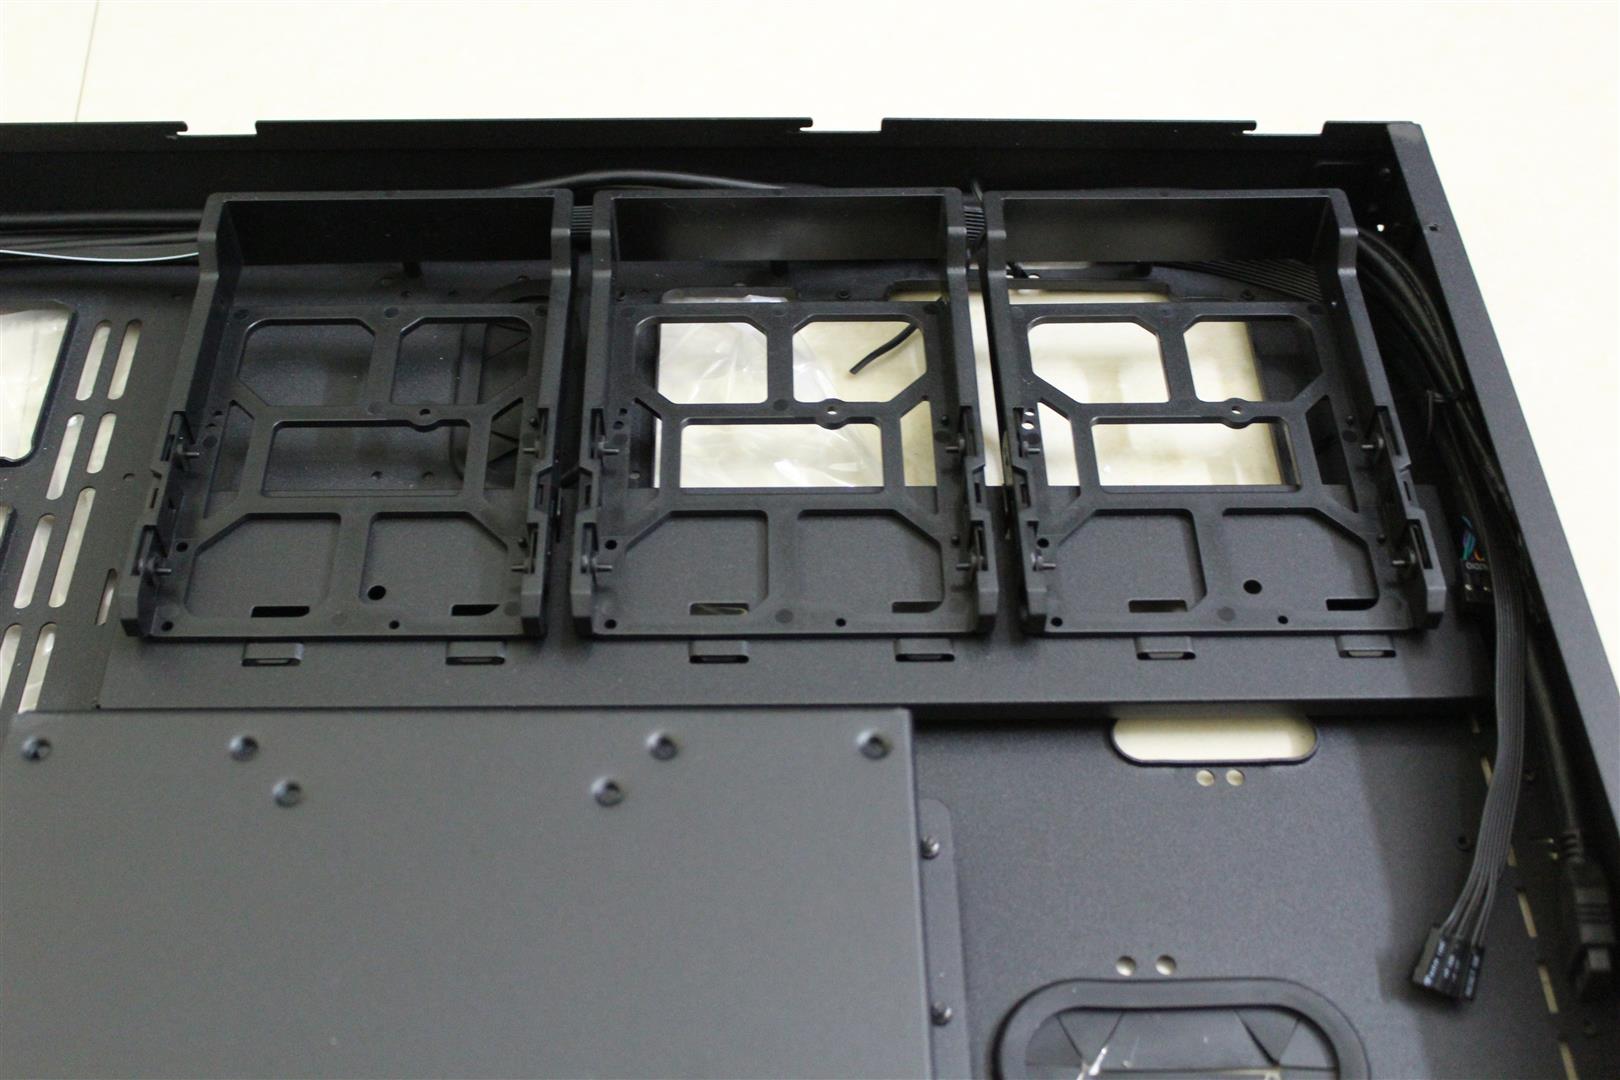
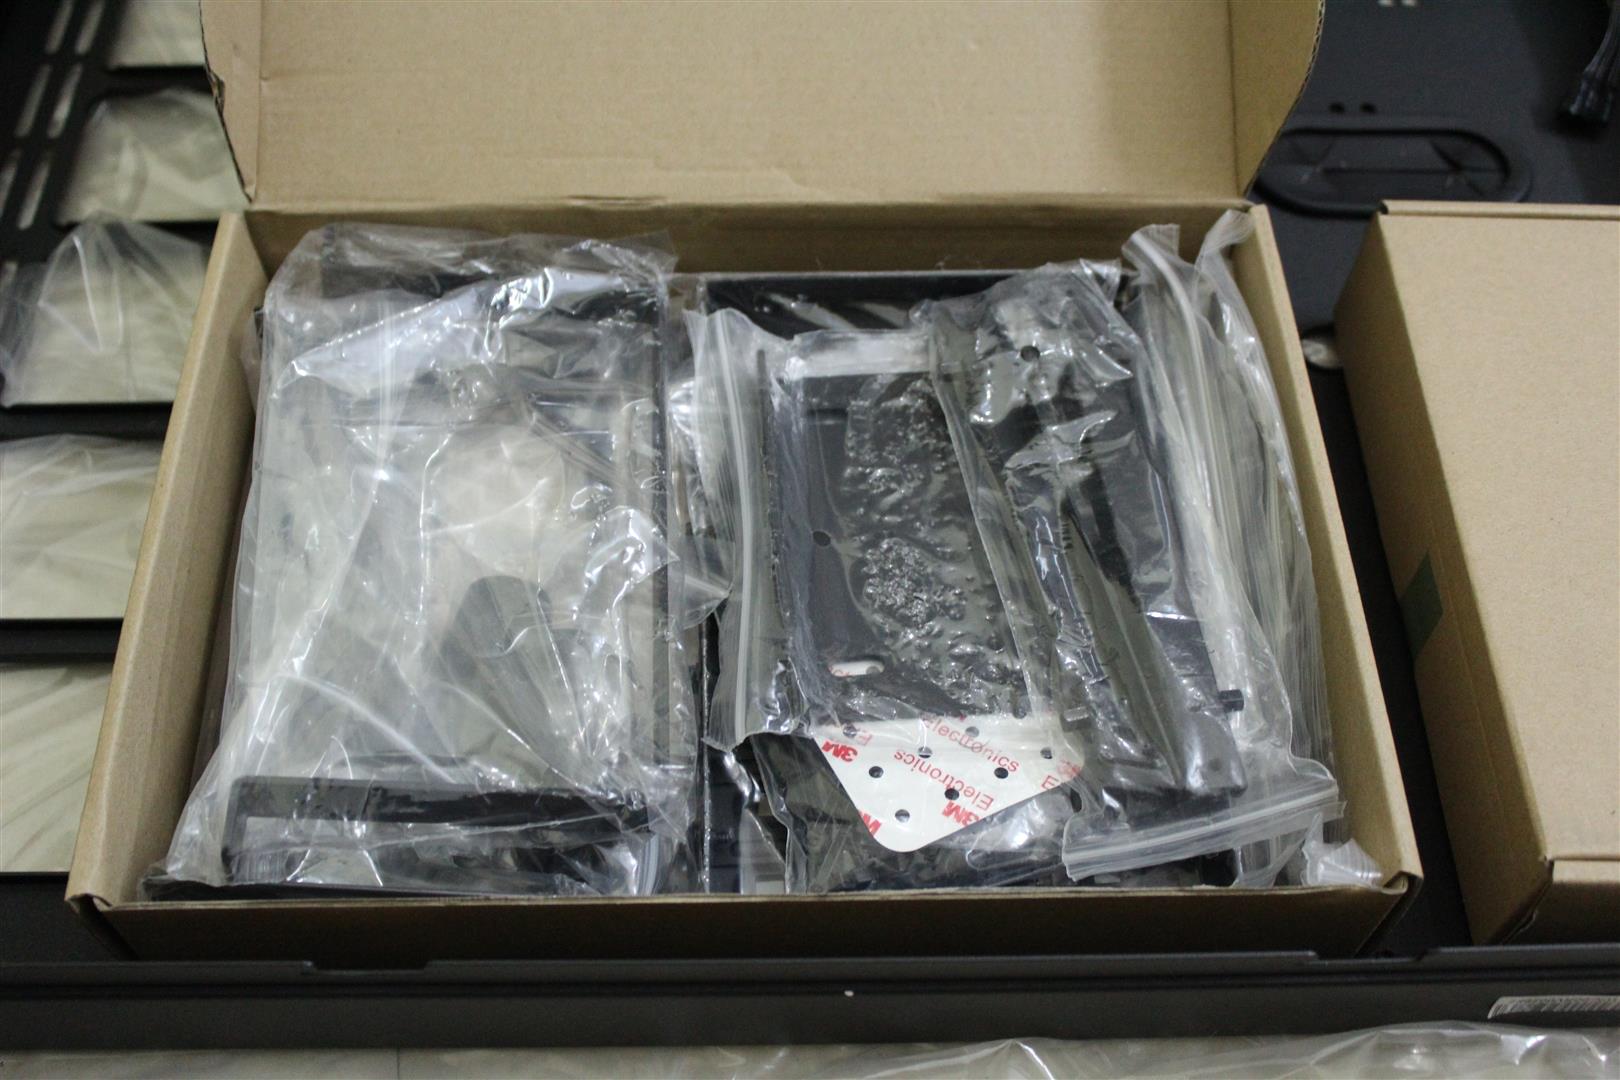
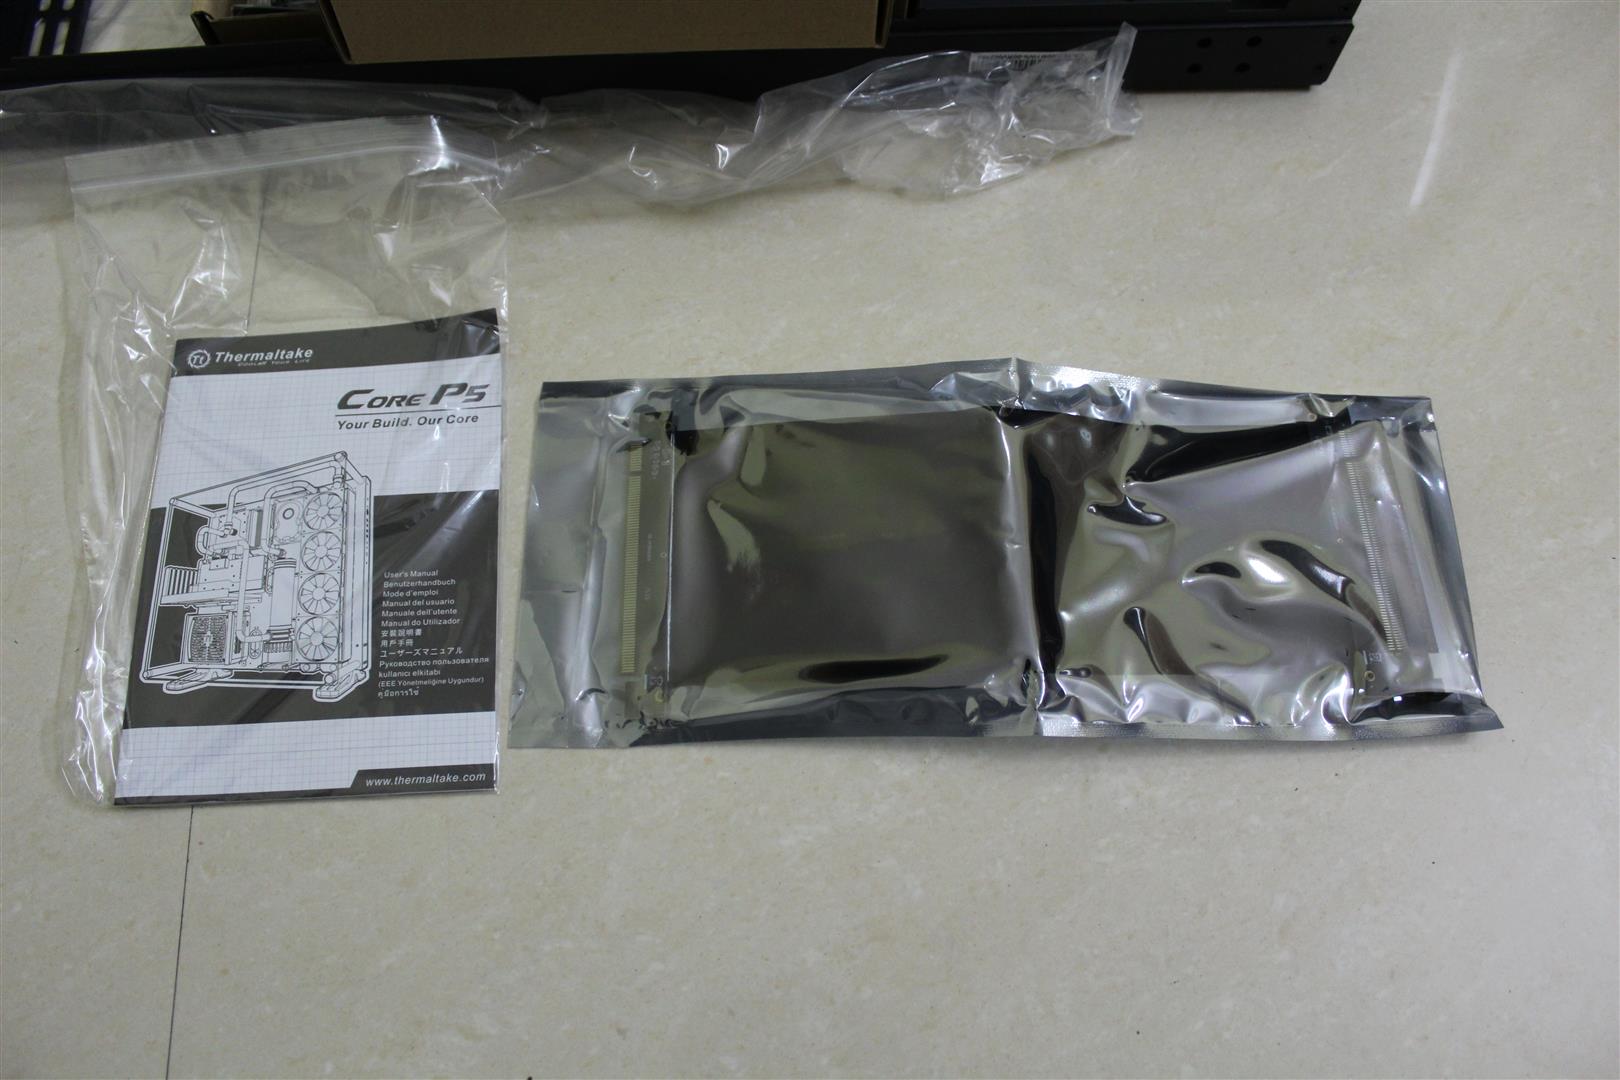

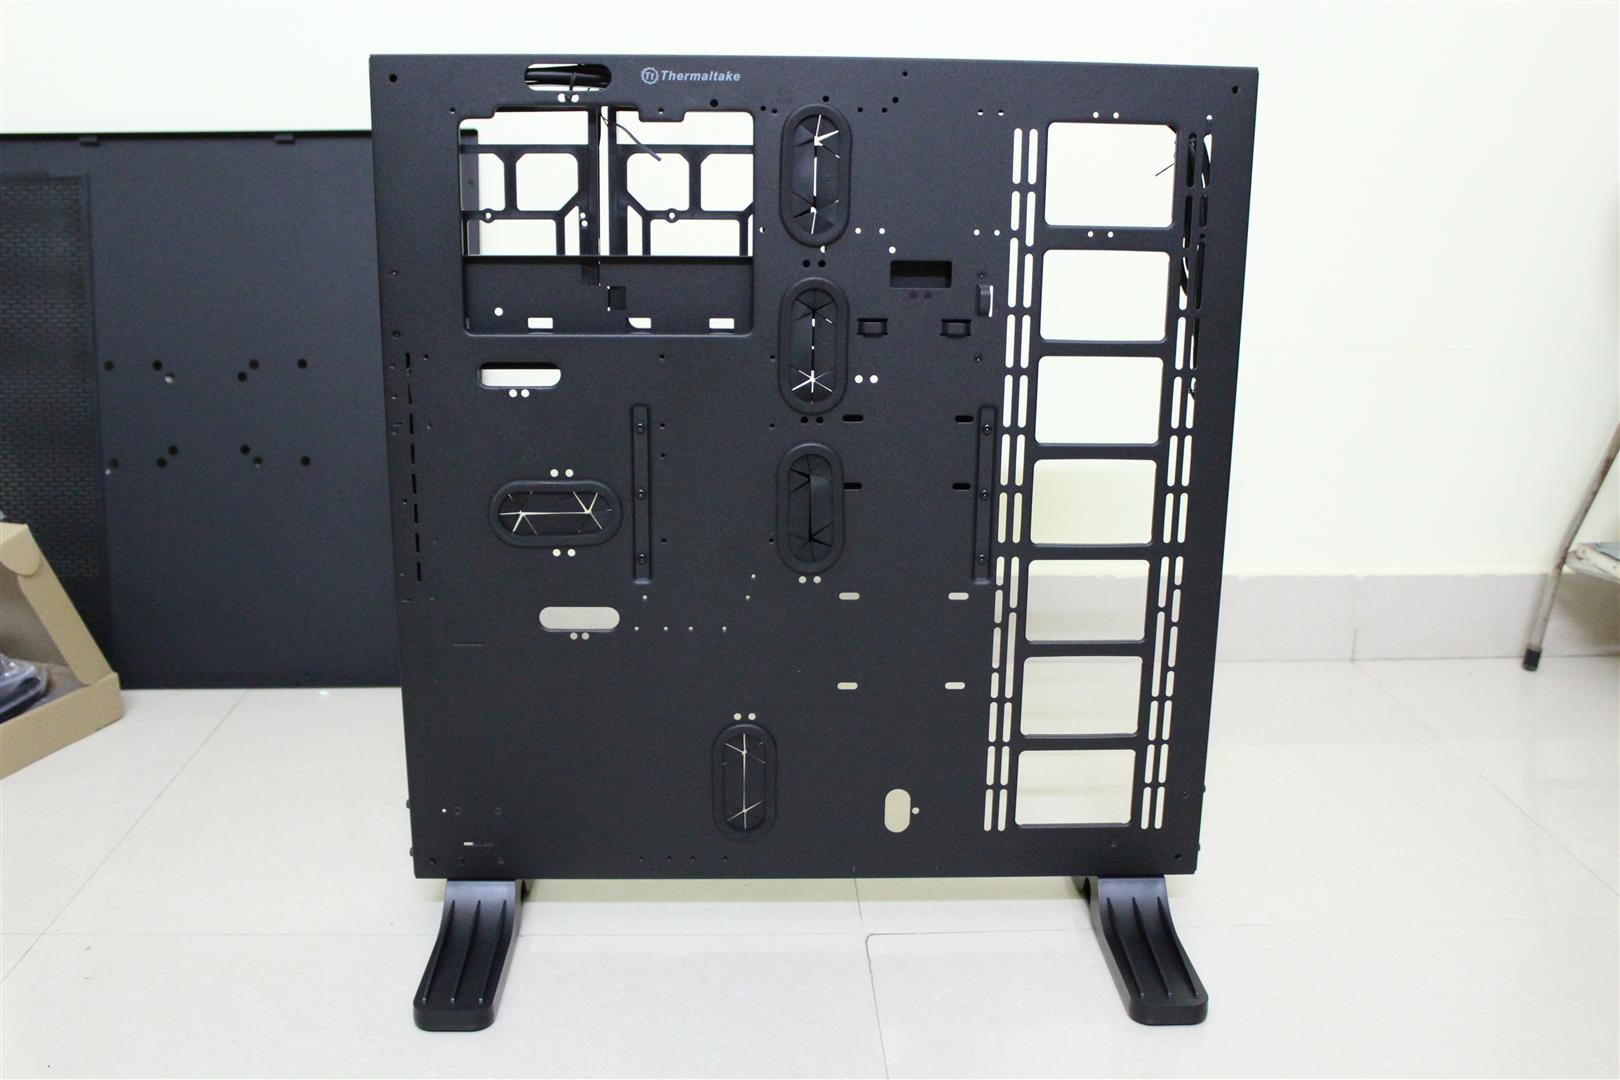
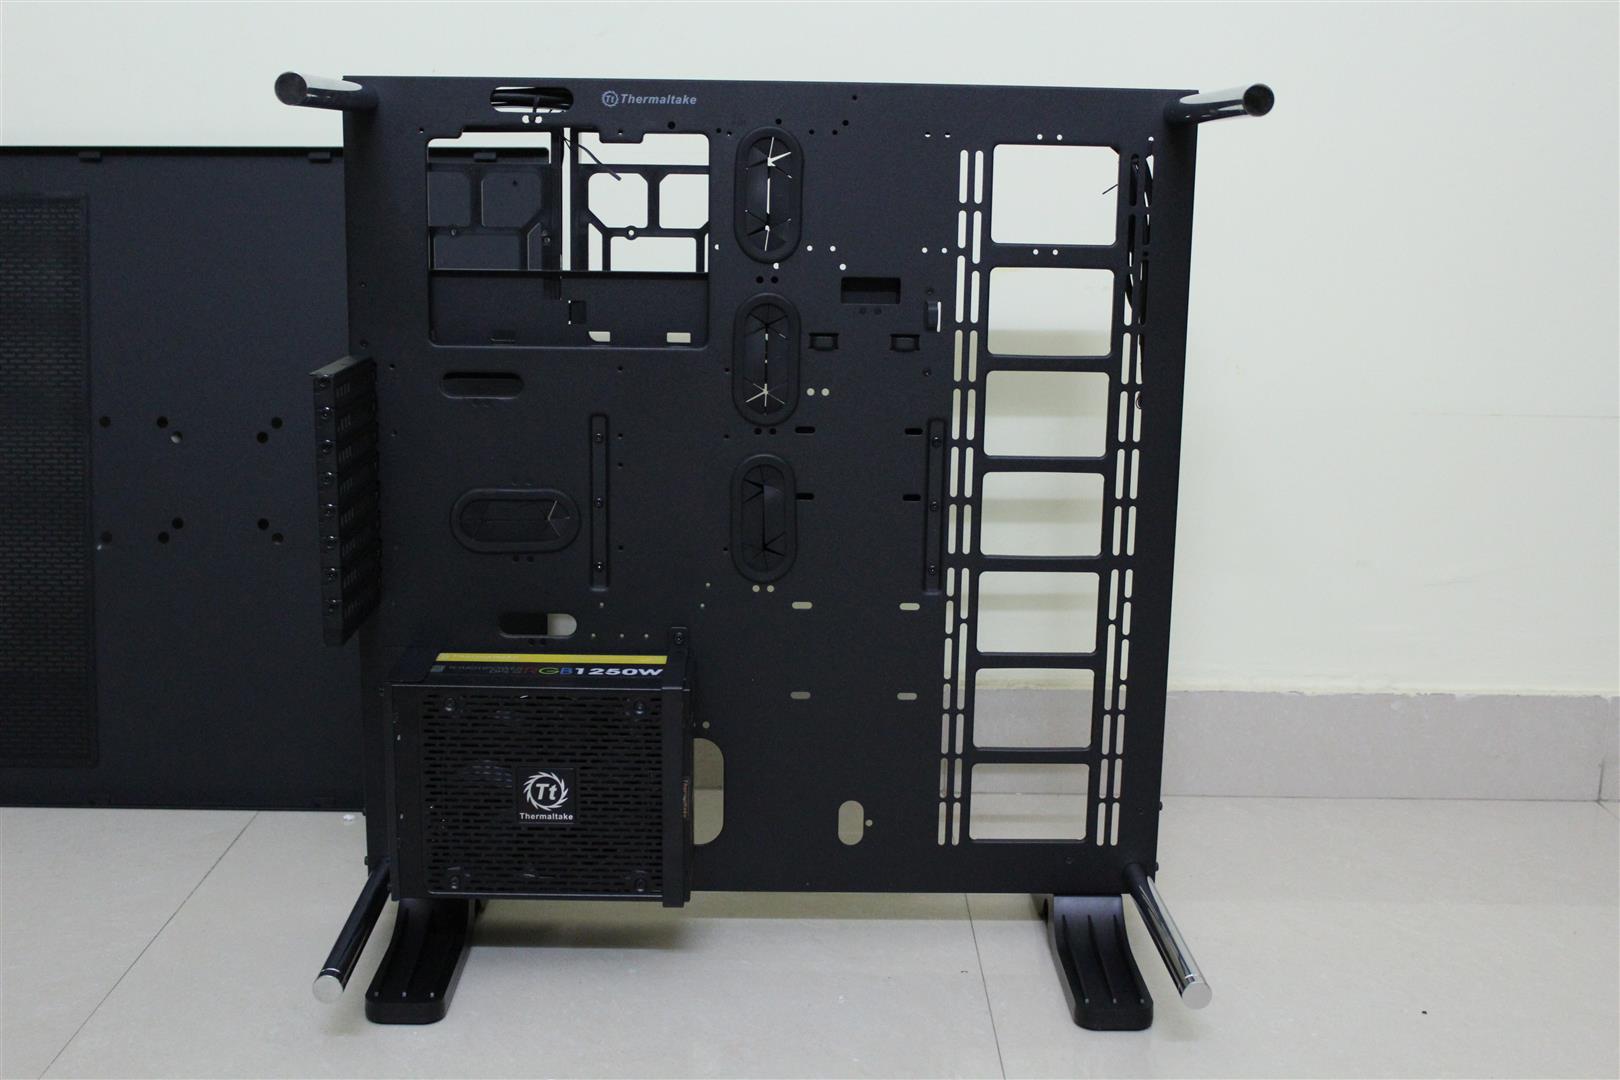
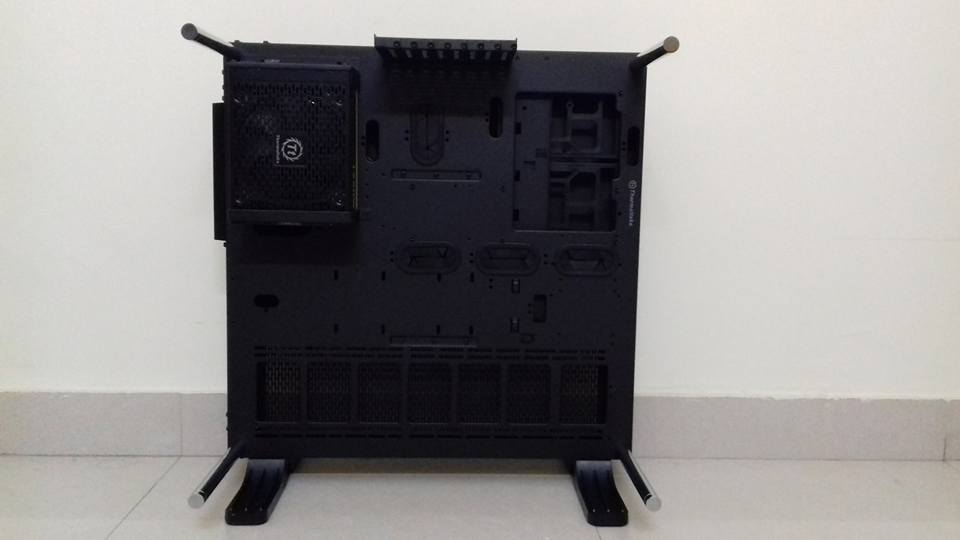
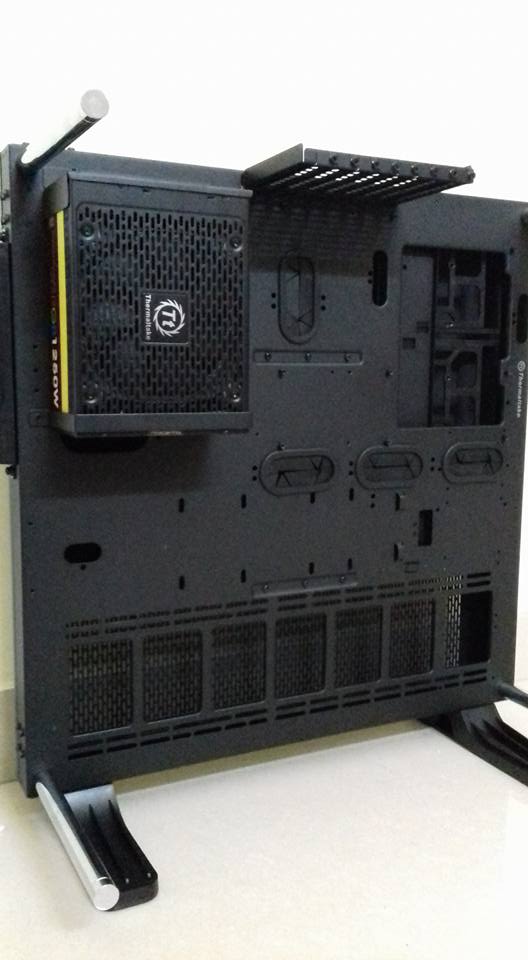
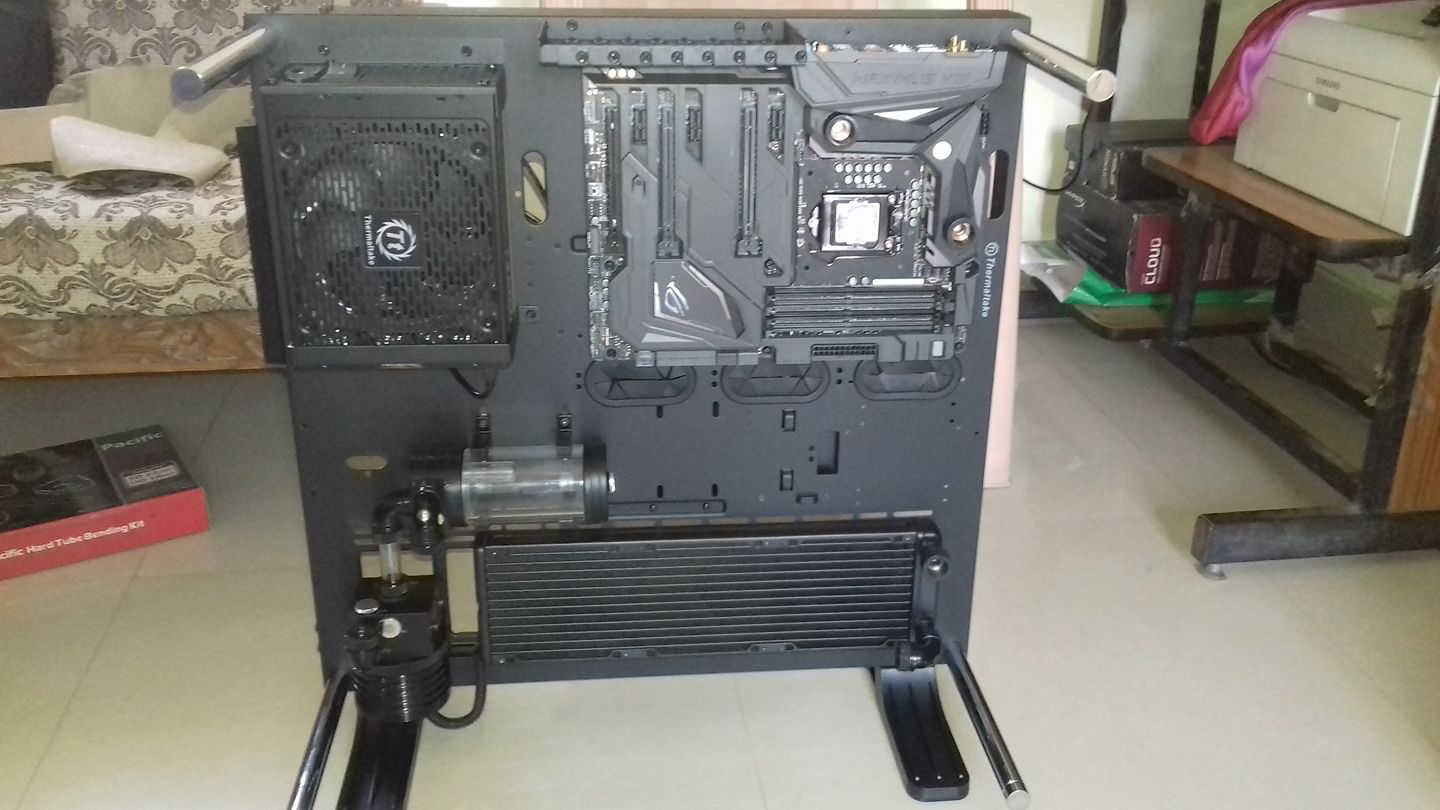

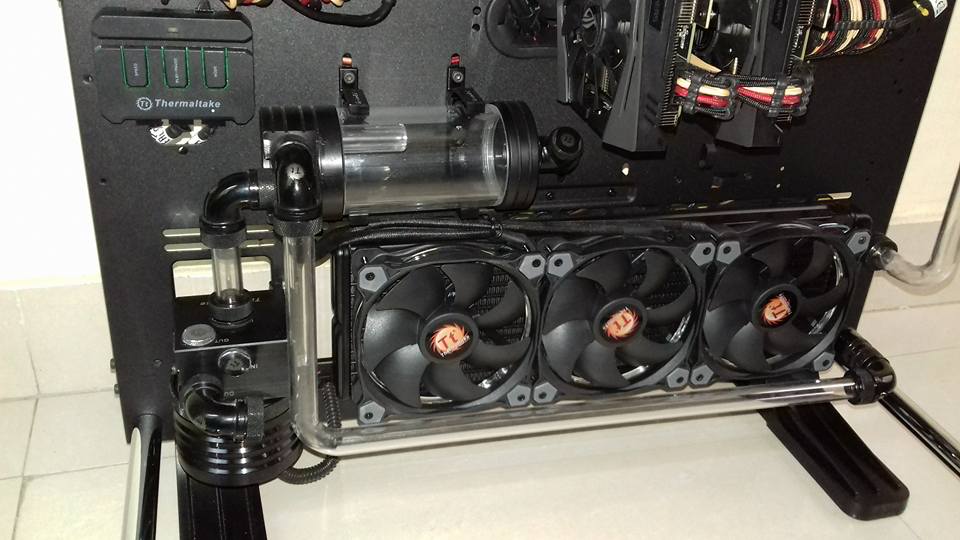
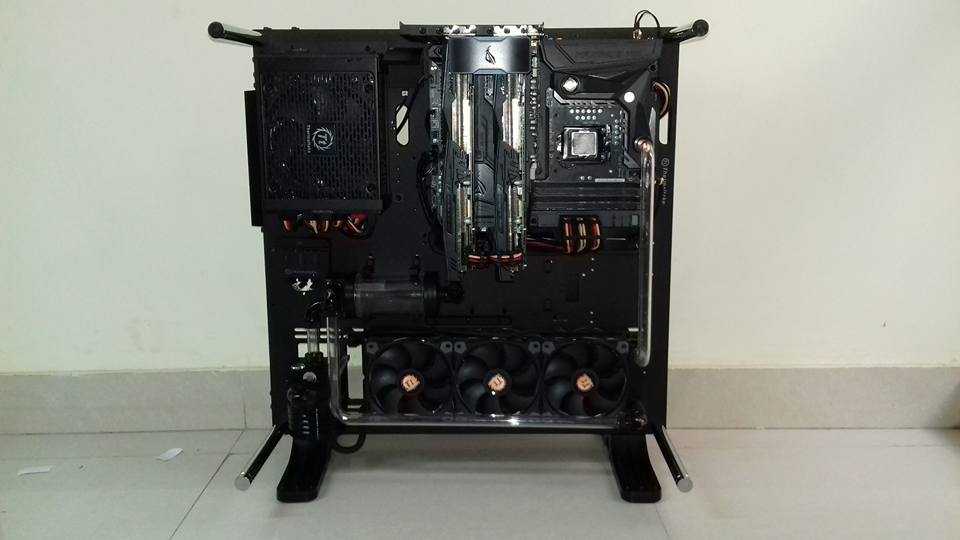

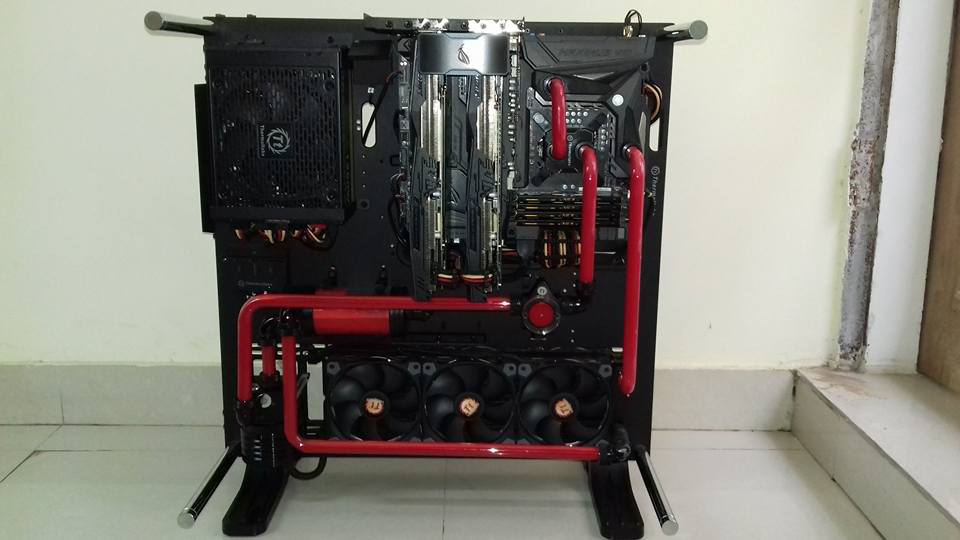

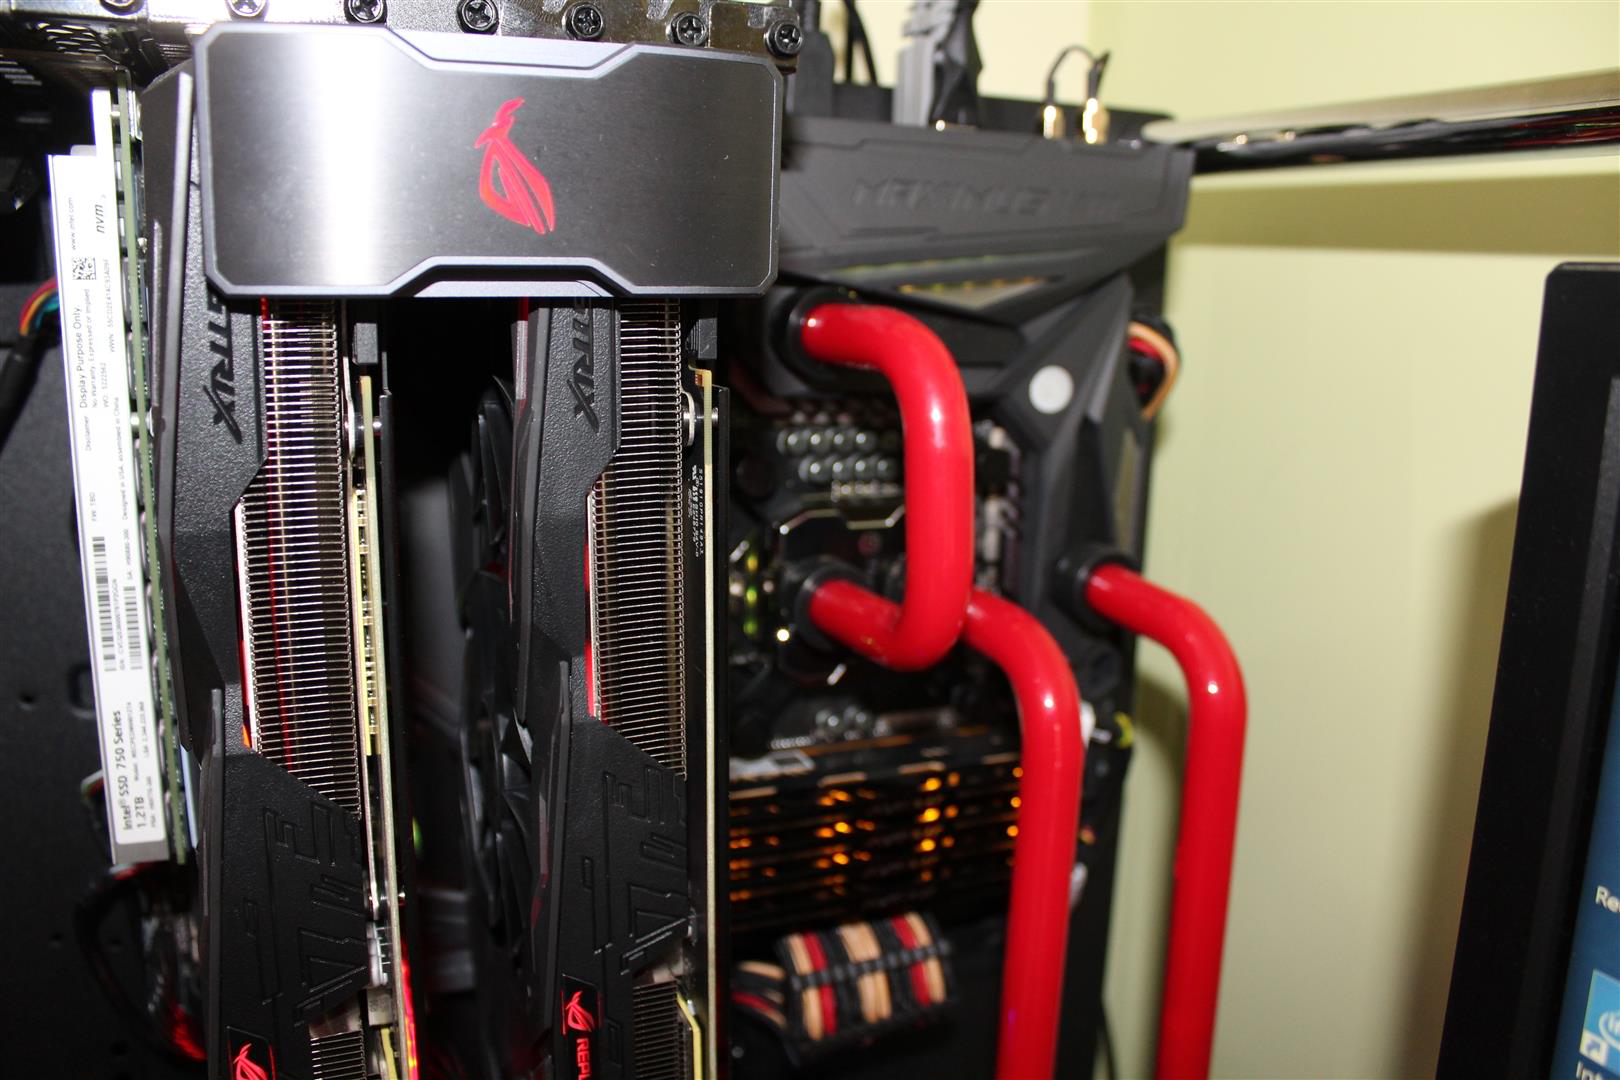
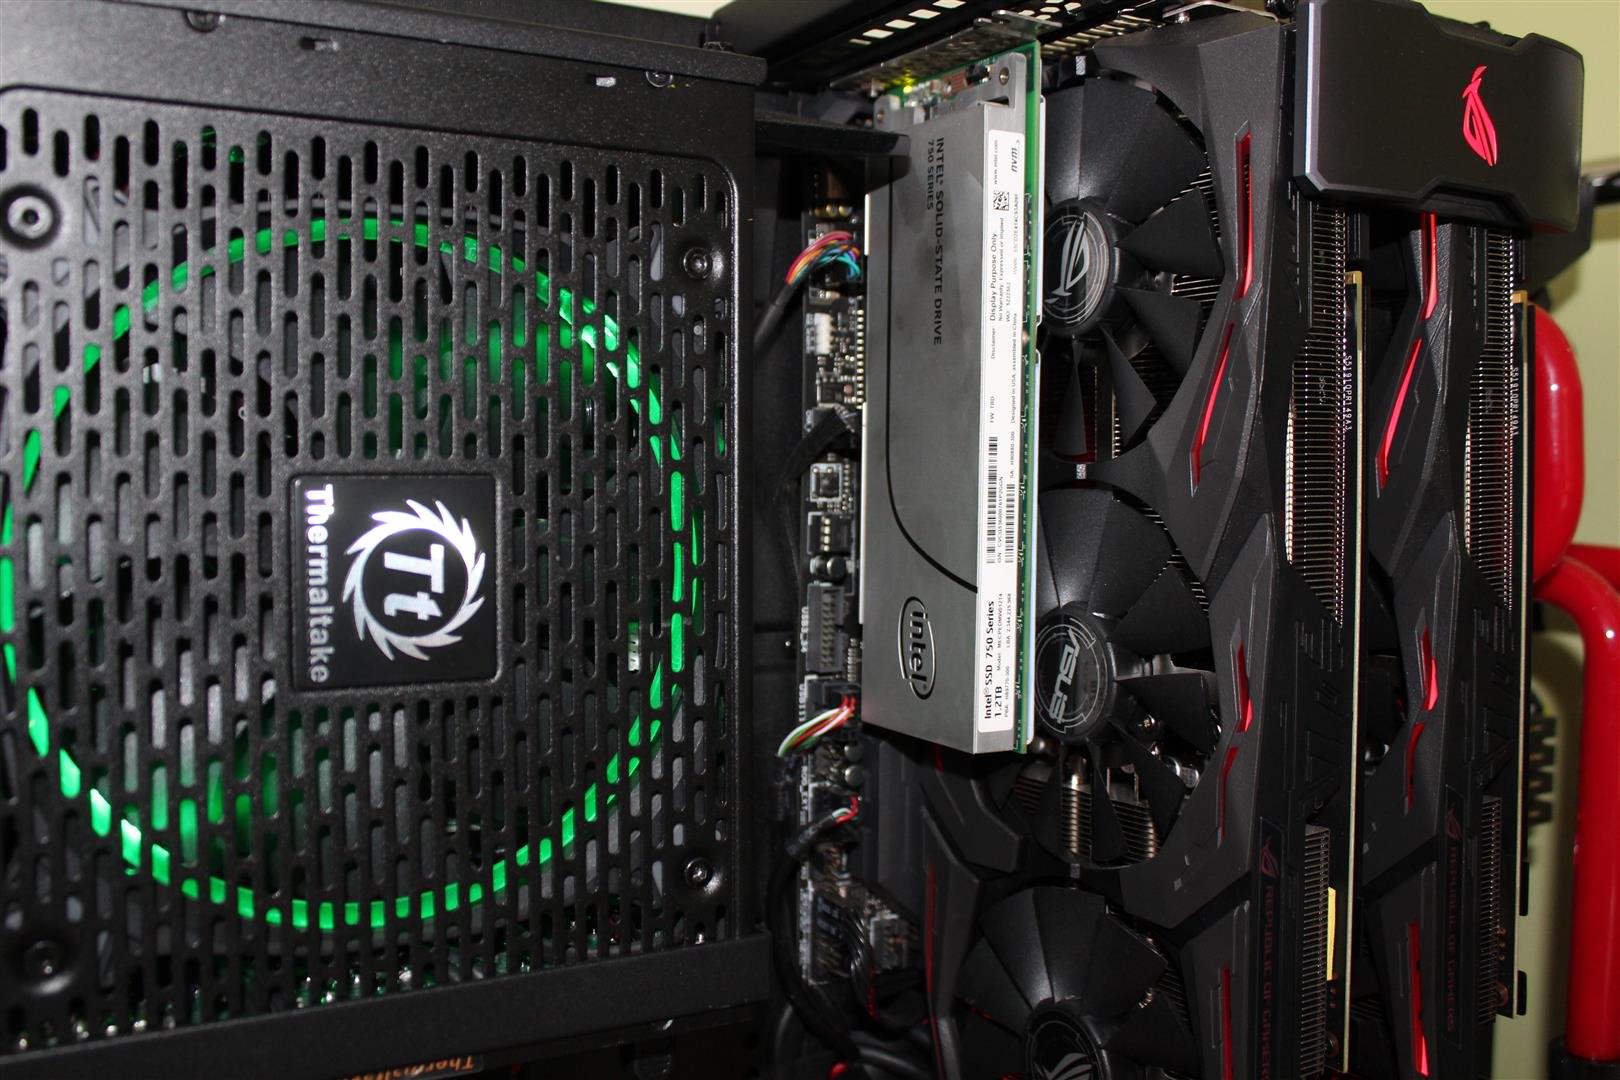
Thanks Thermaltake for supporting my build. -
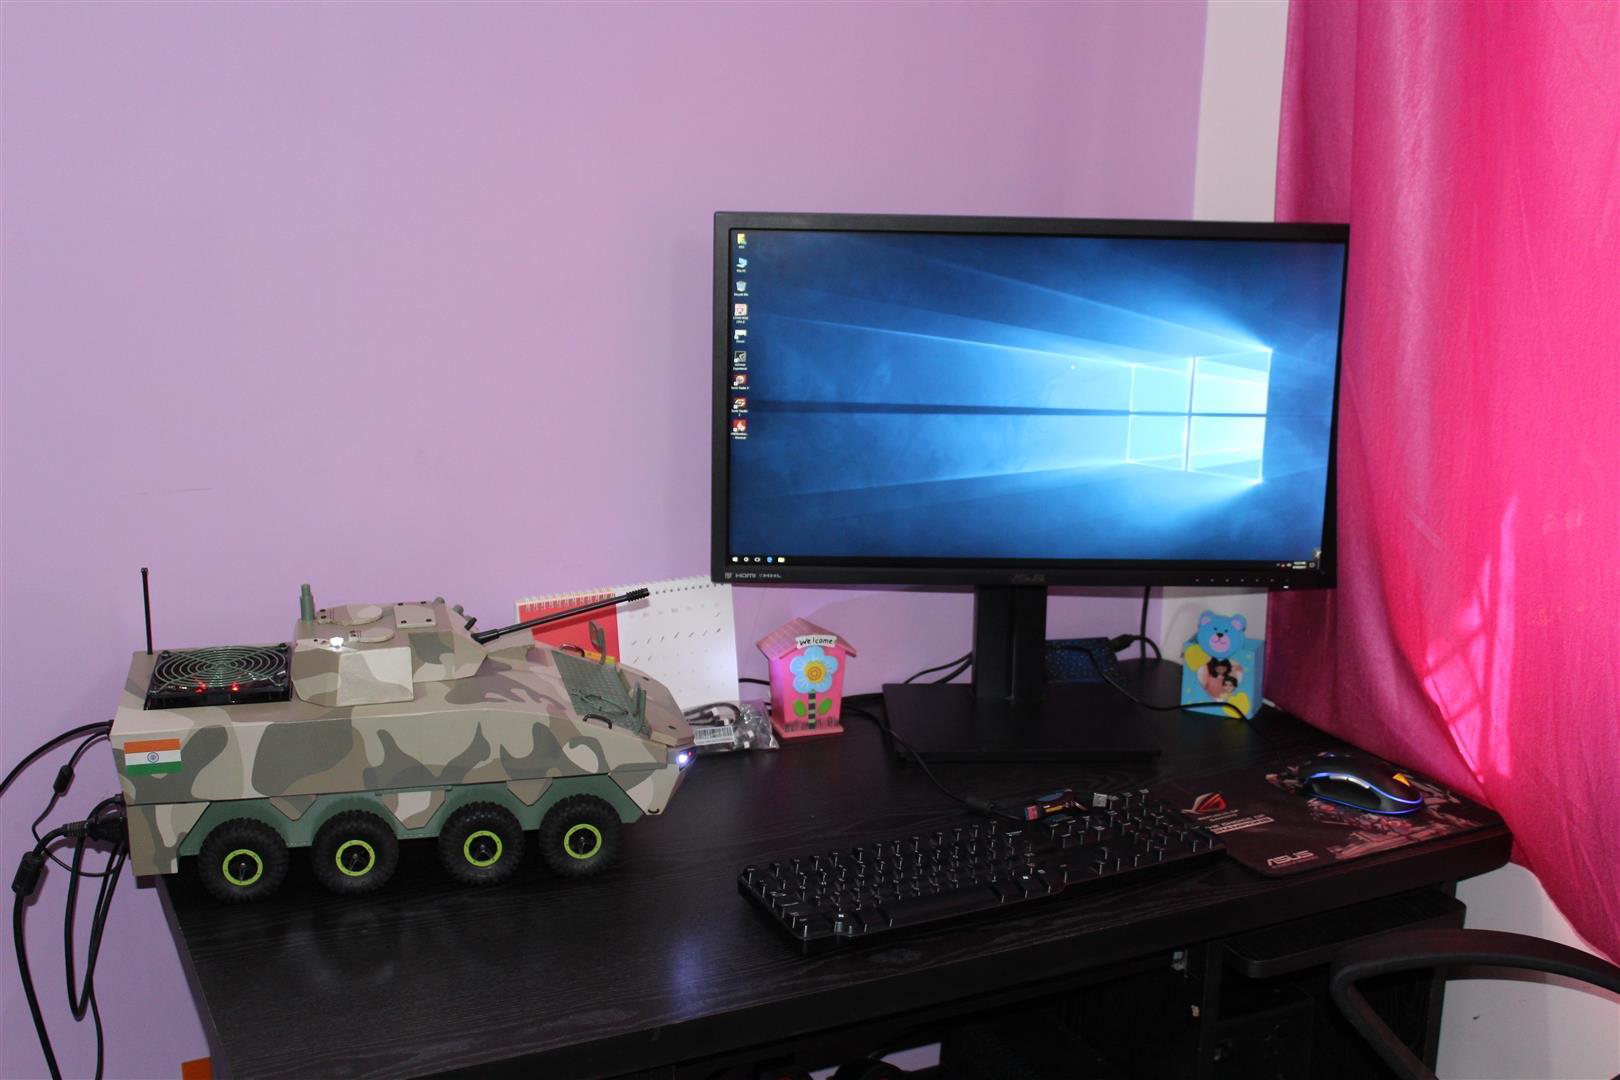
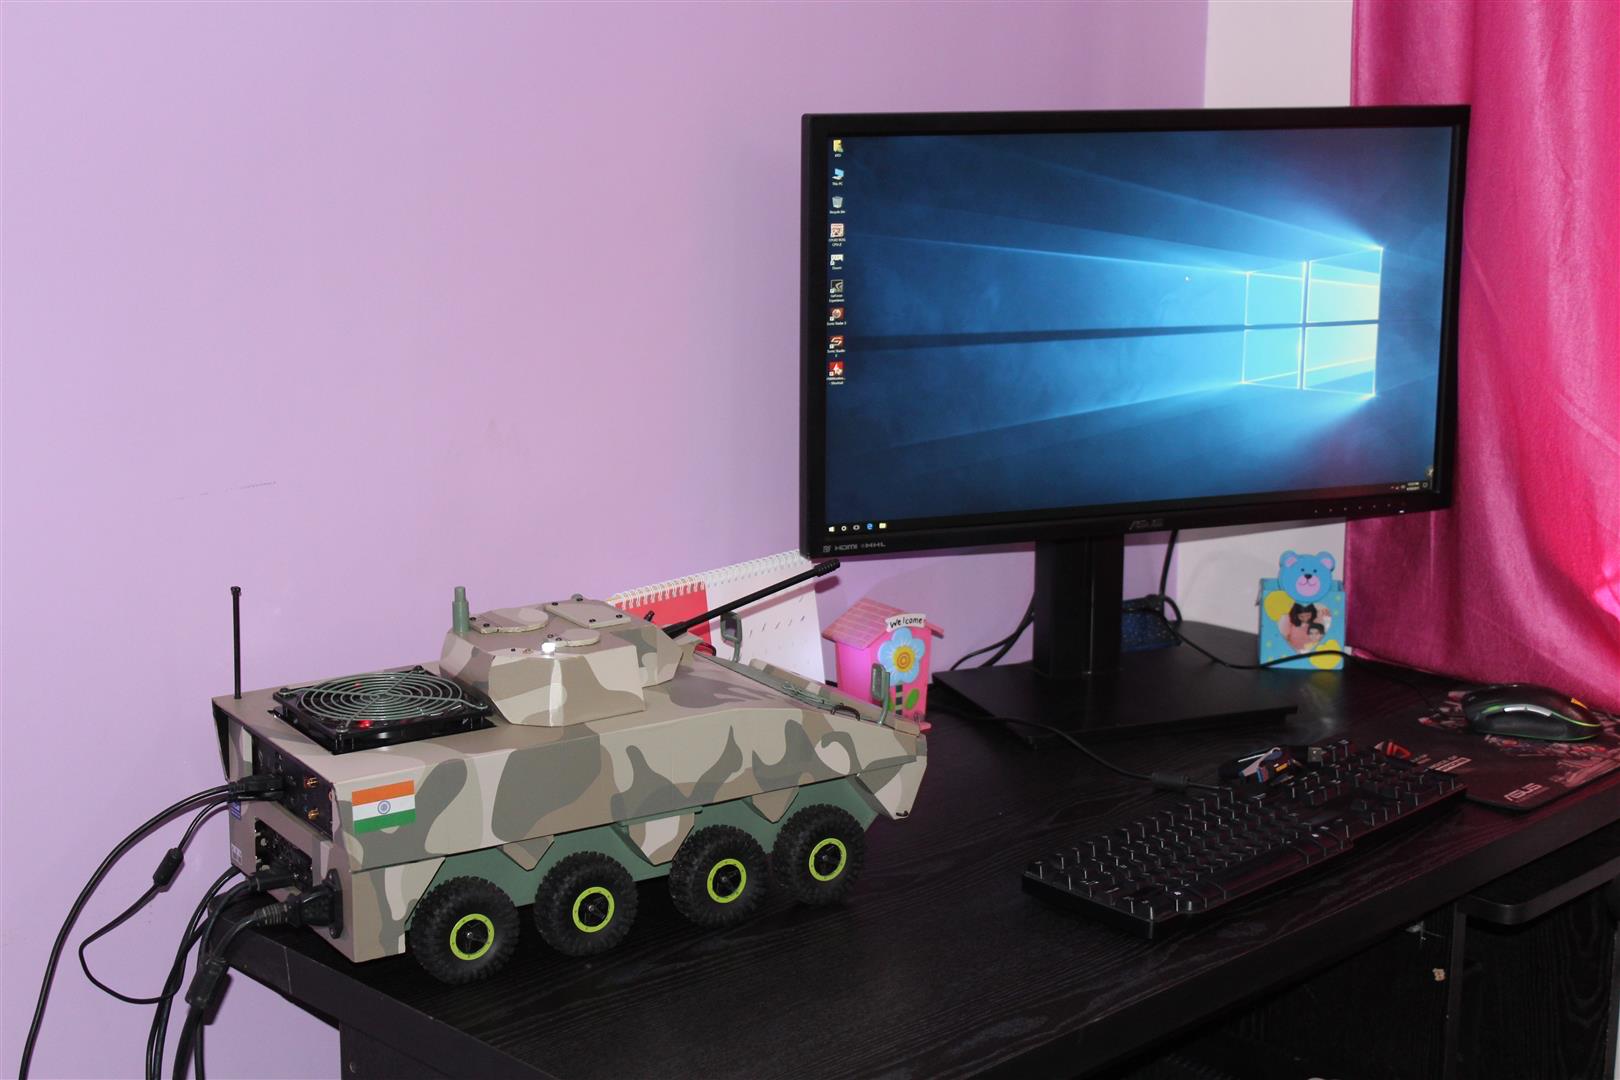
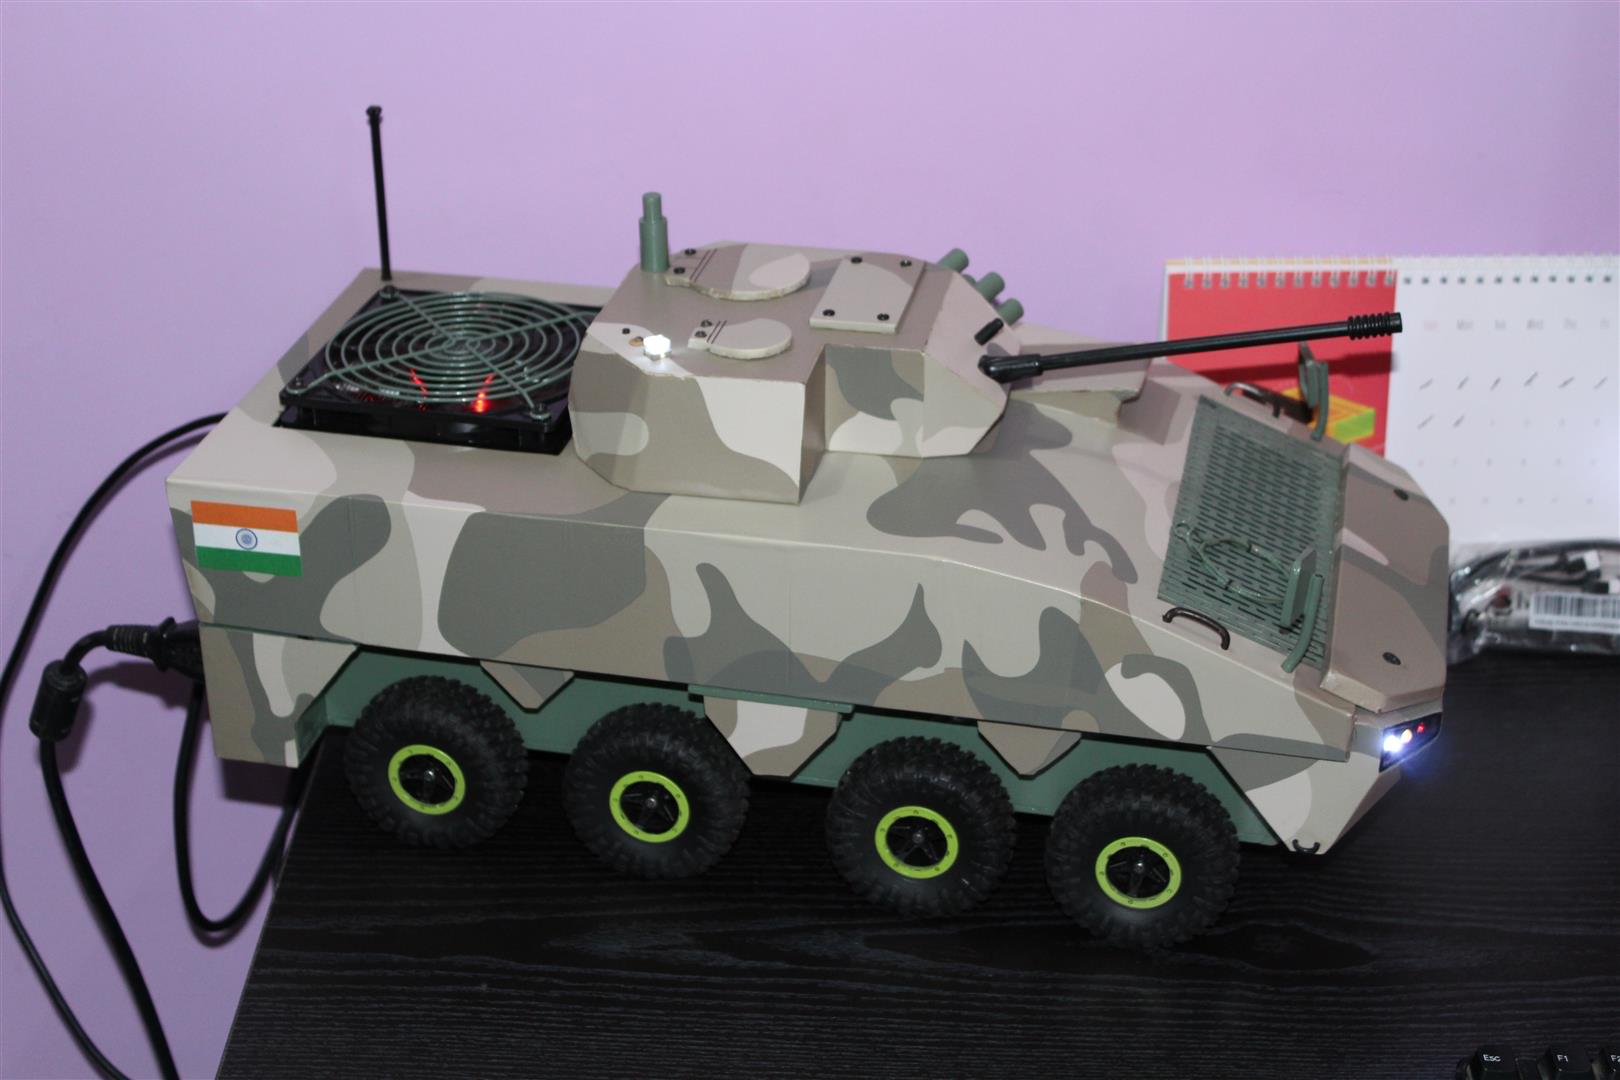
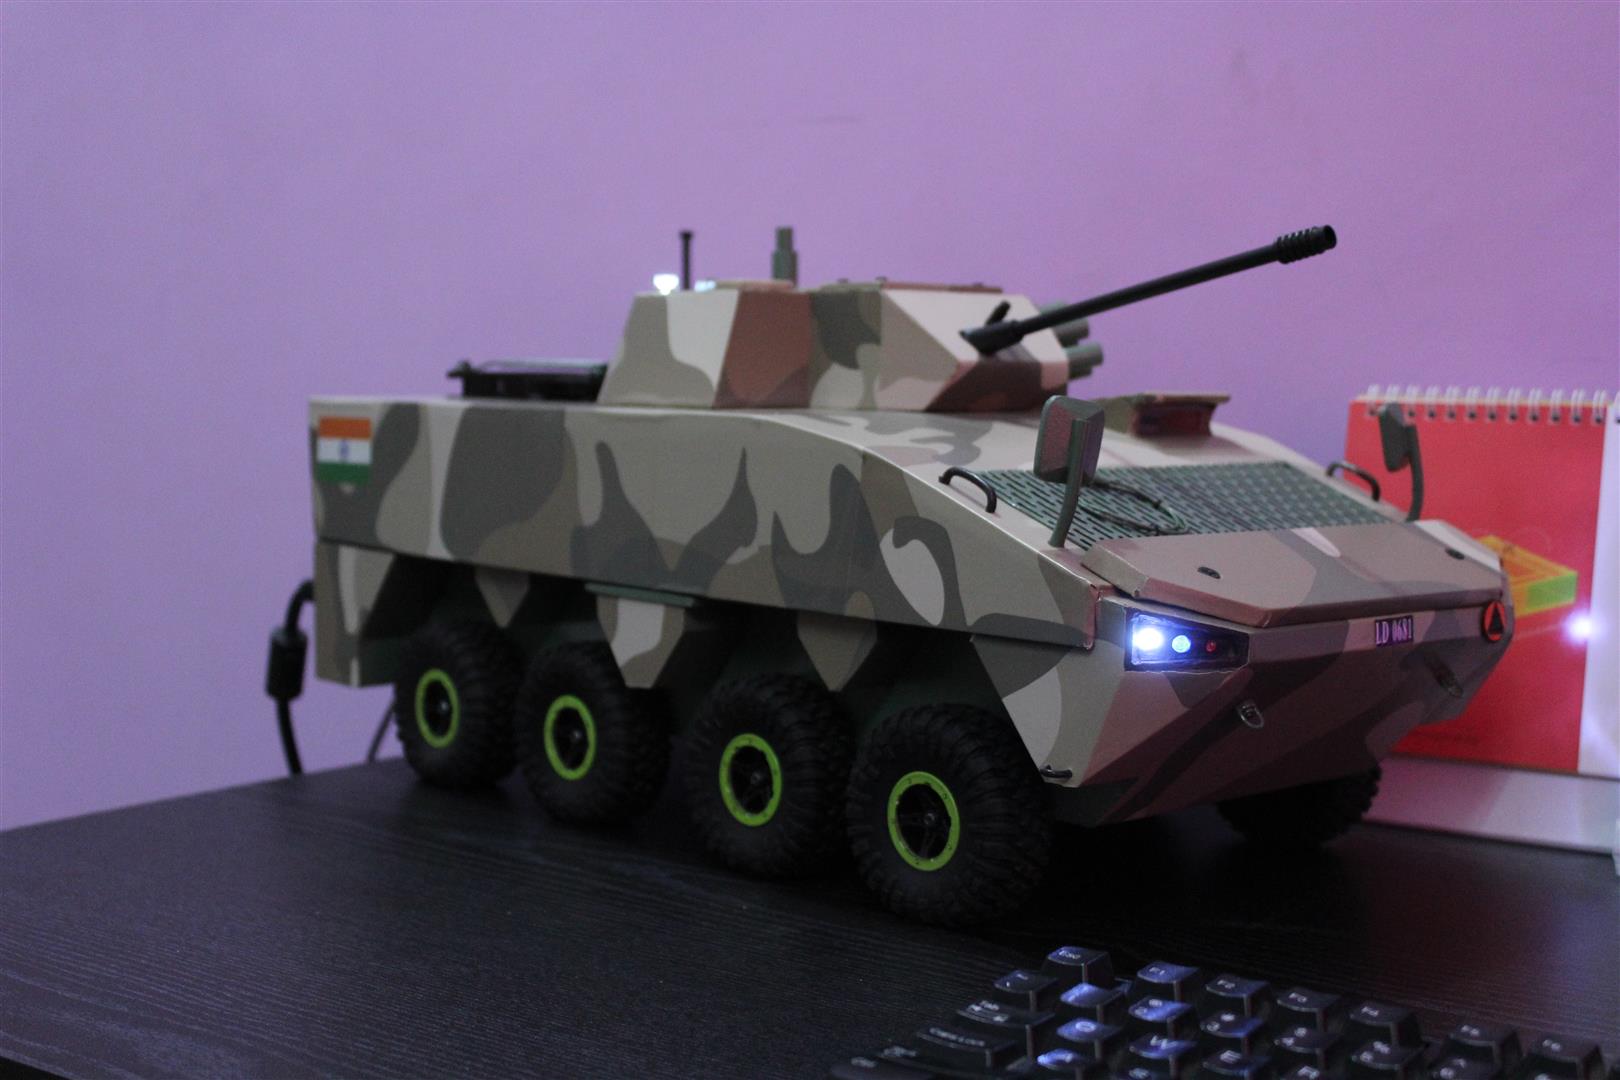
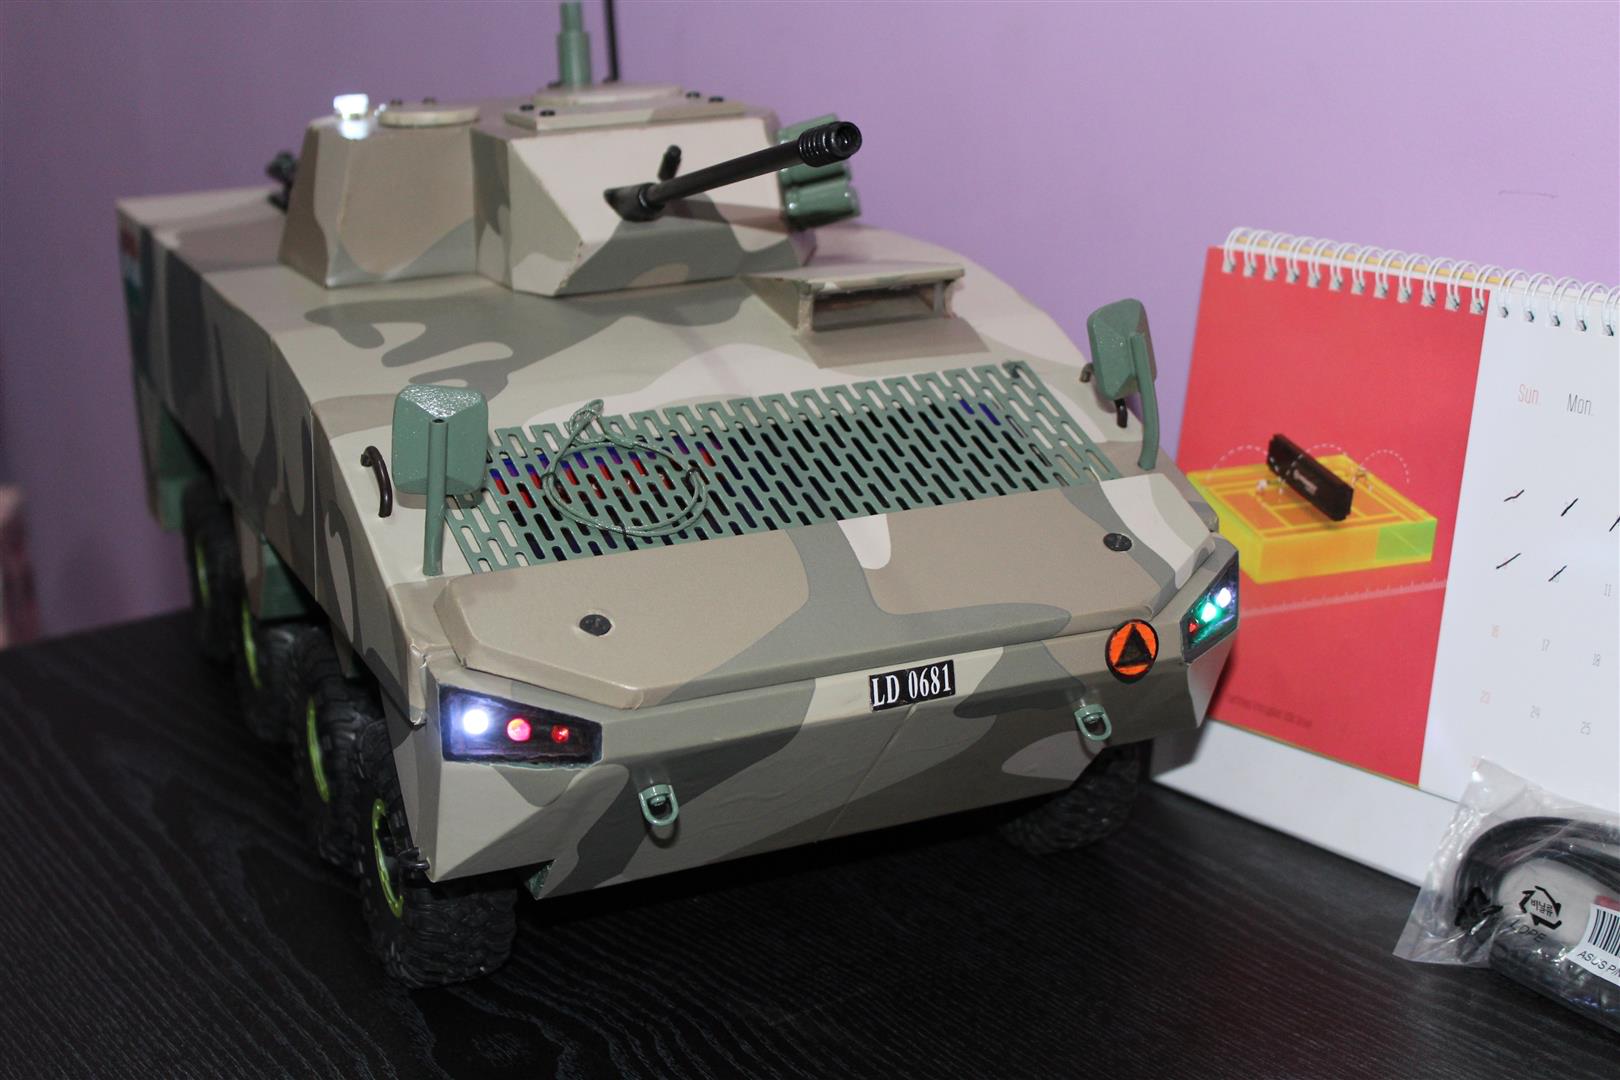
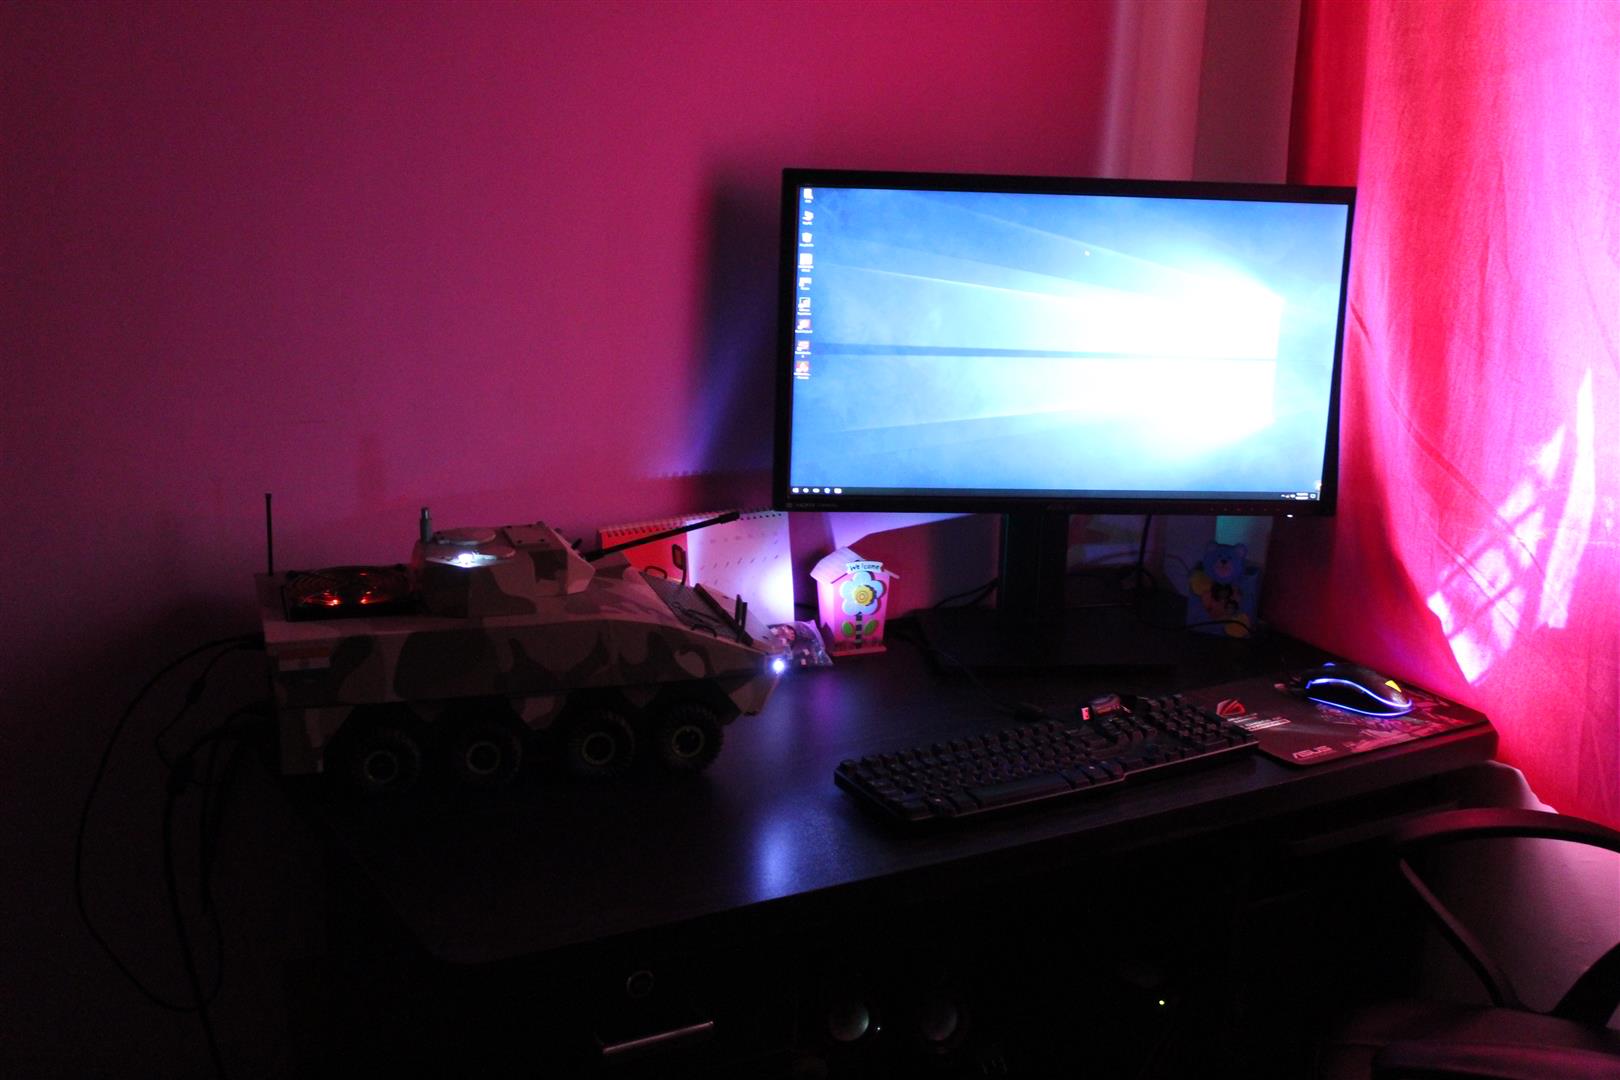
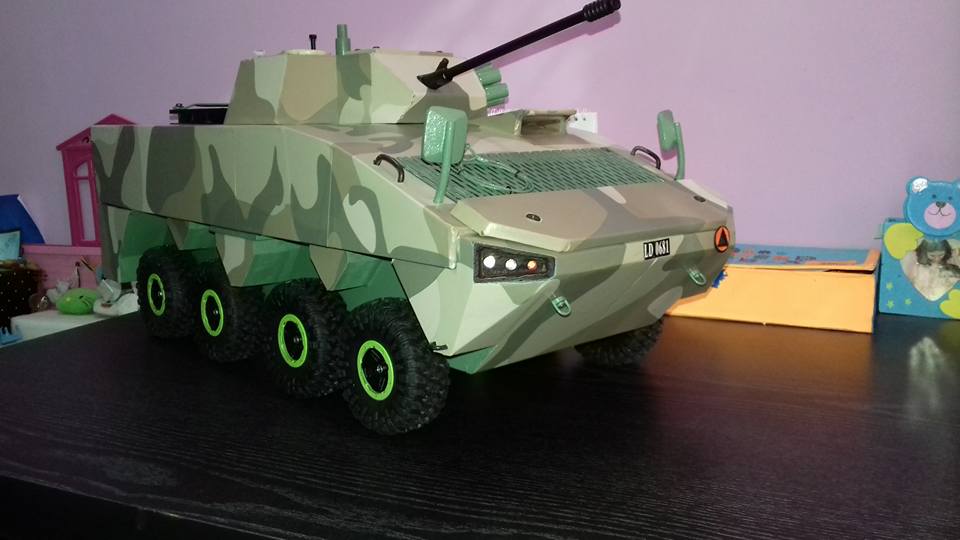
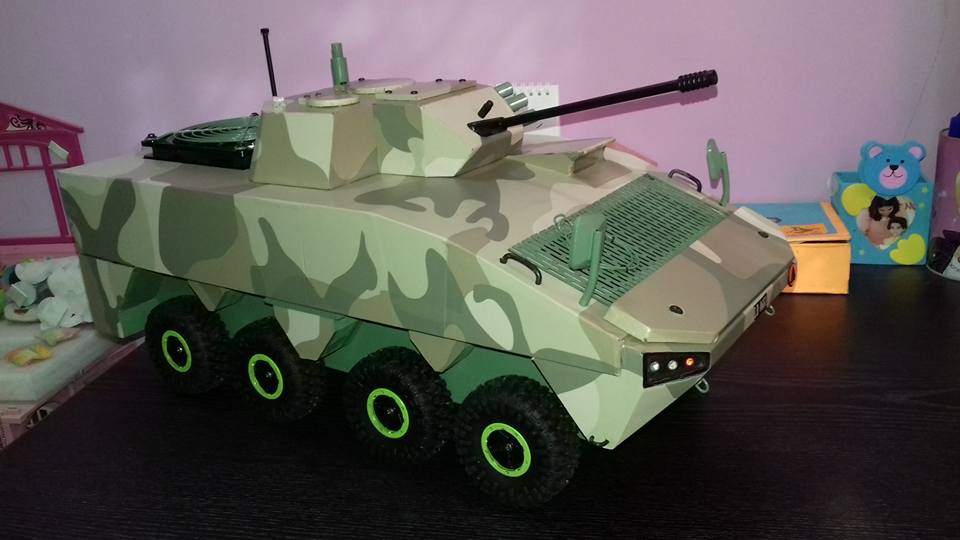
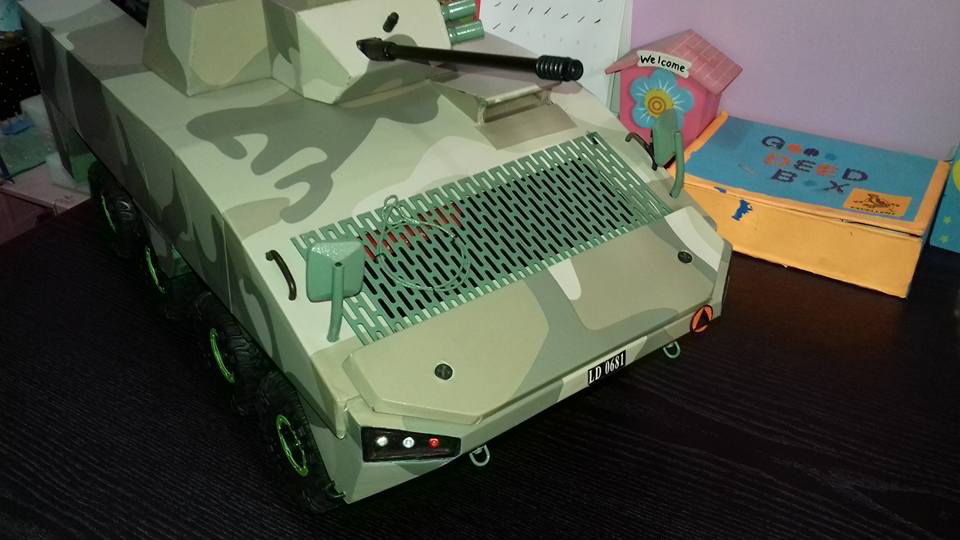
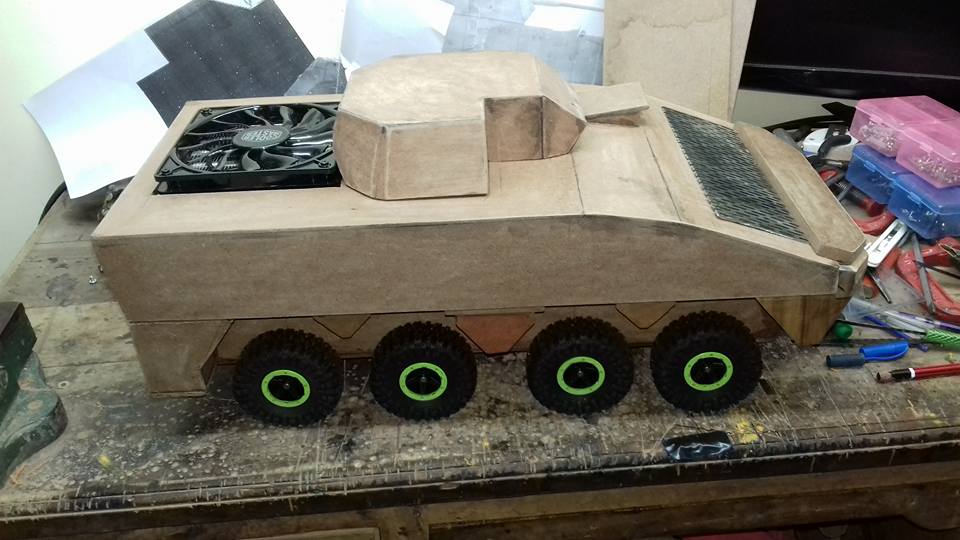
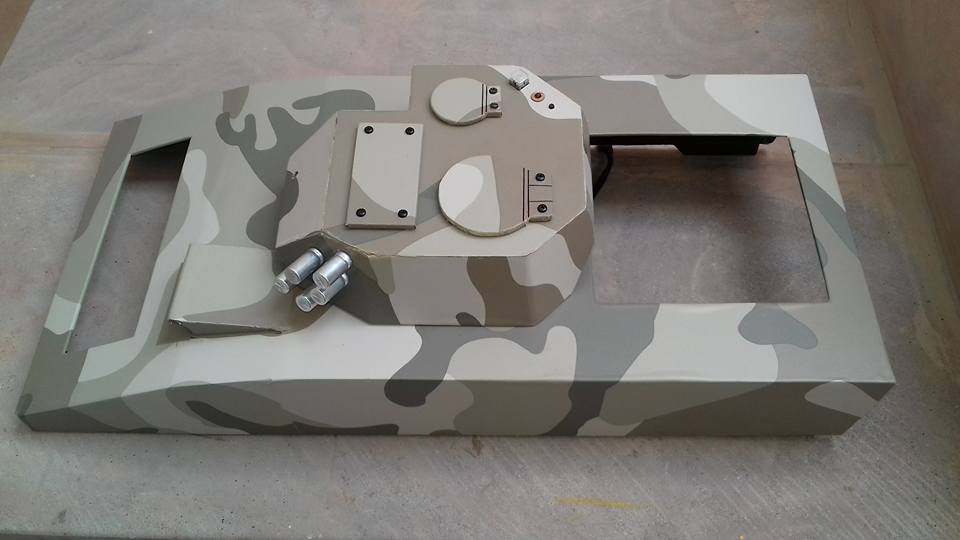
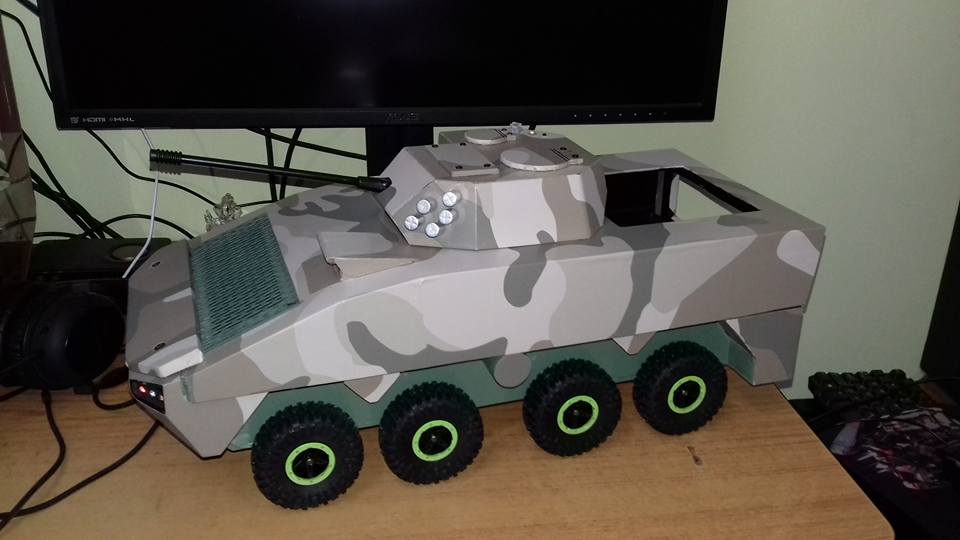
Finally KTO Rosomak built finished.
Thanks to you all for watching my build.


-
KTO Rosomak built almost done. Some detailing work is pending.


-
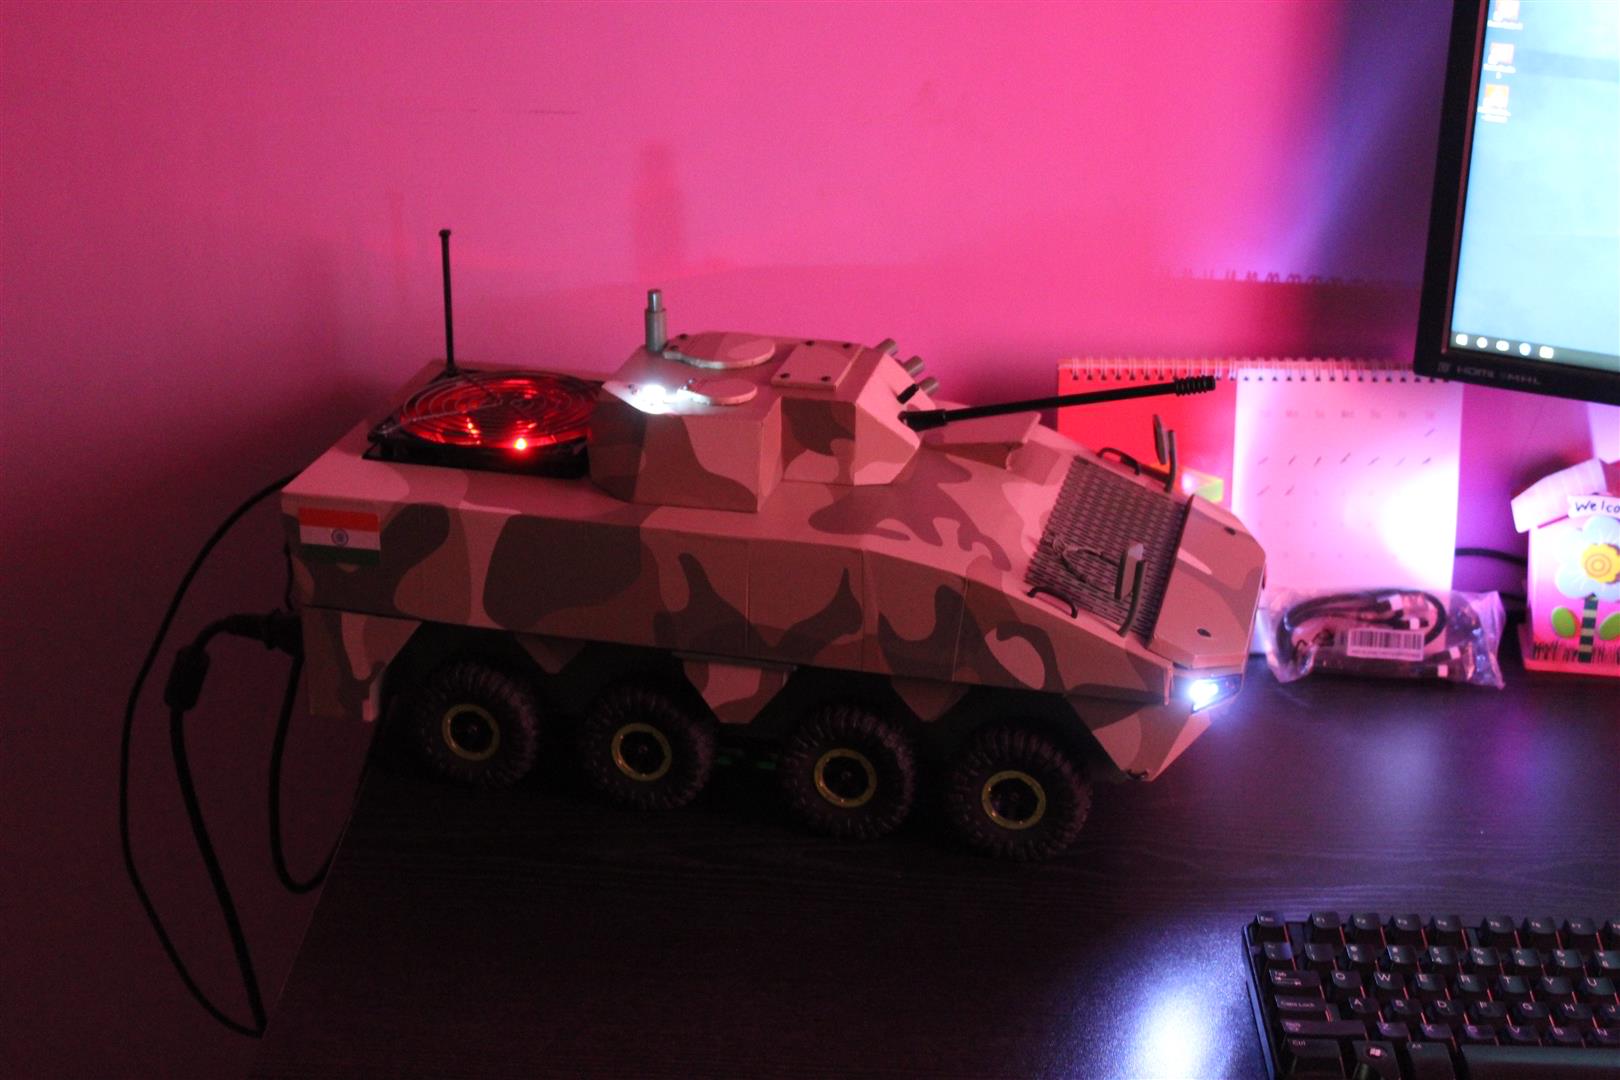
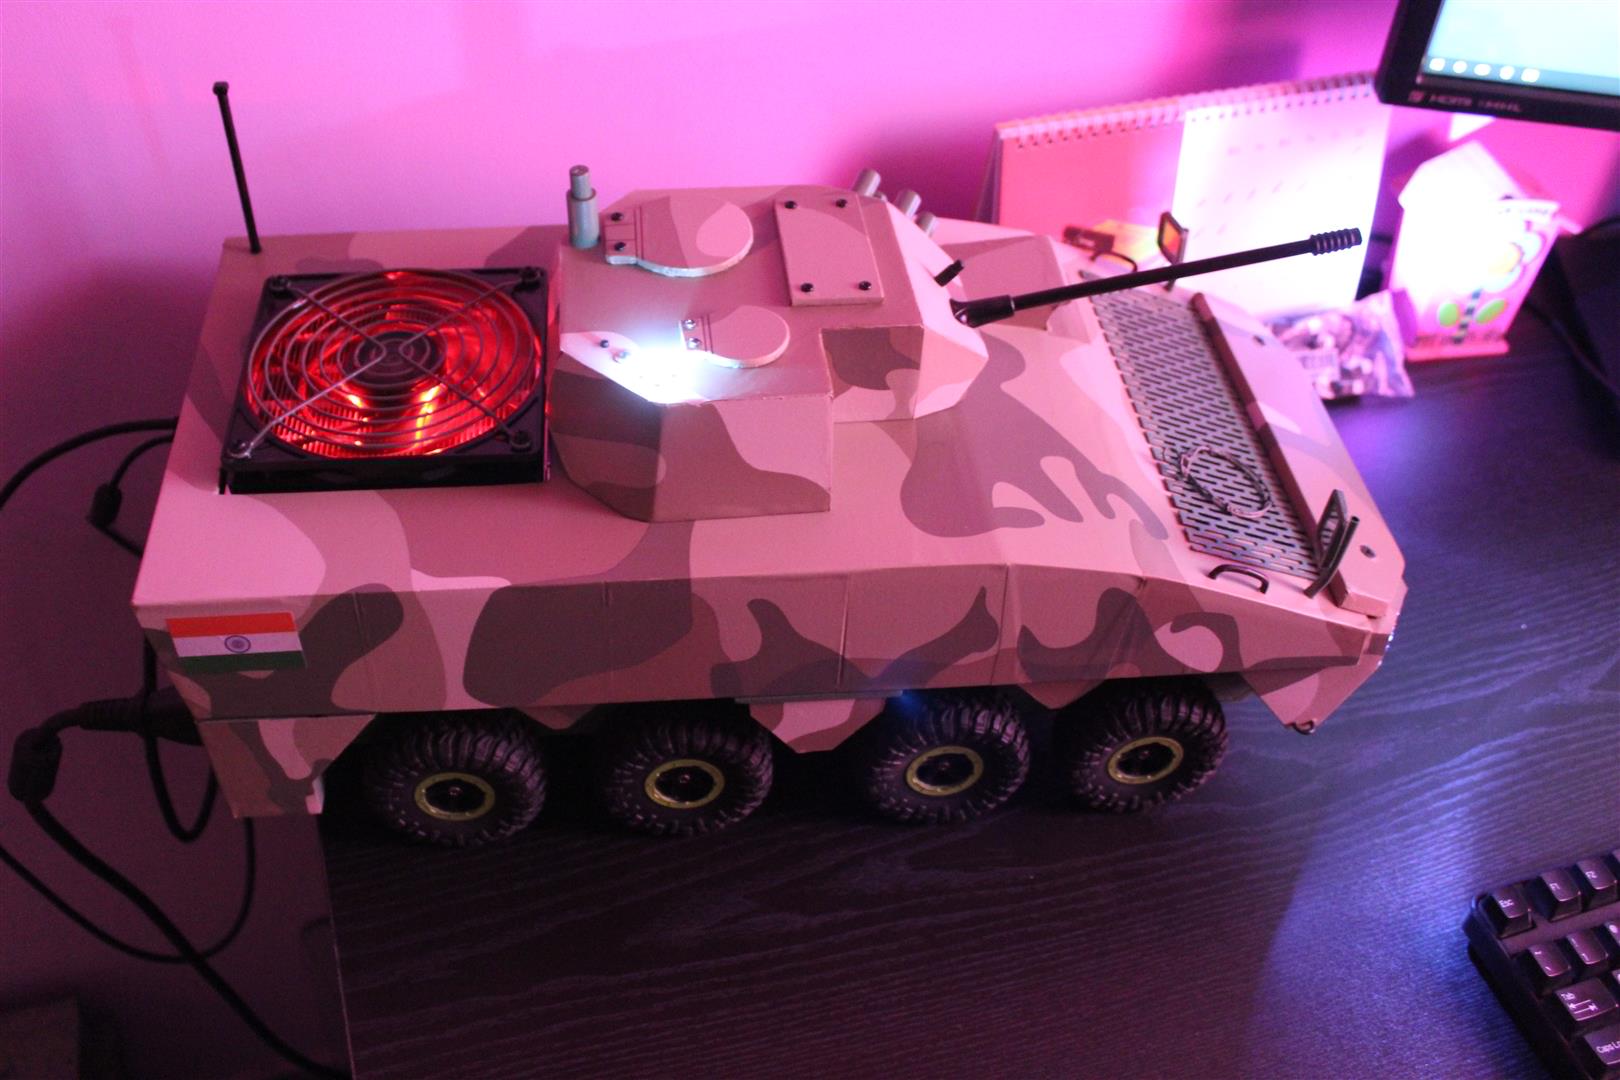
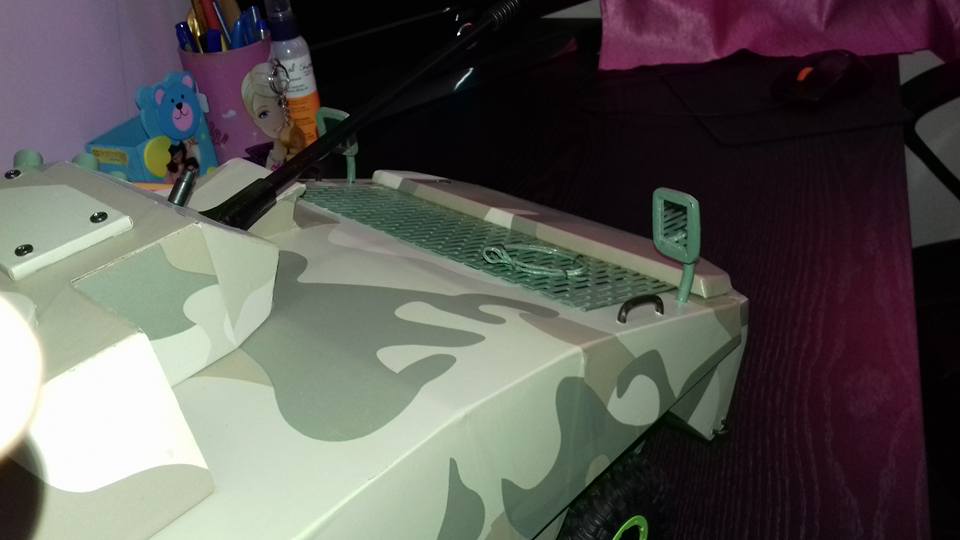
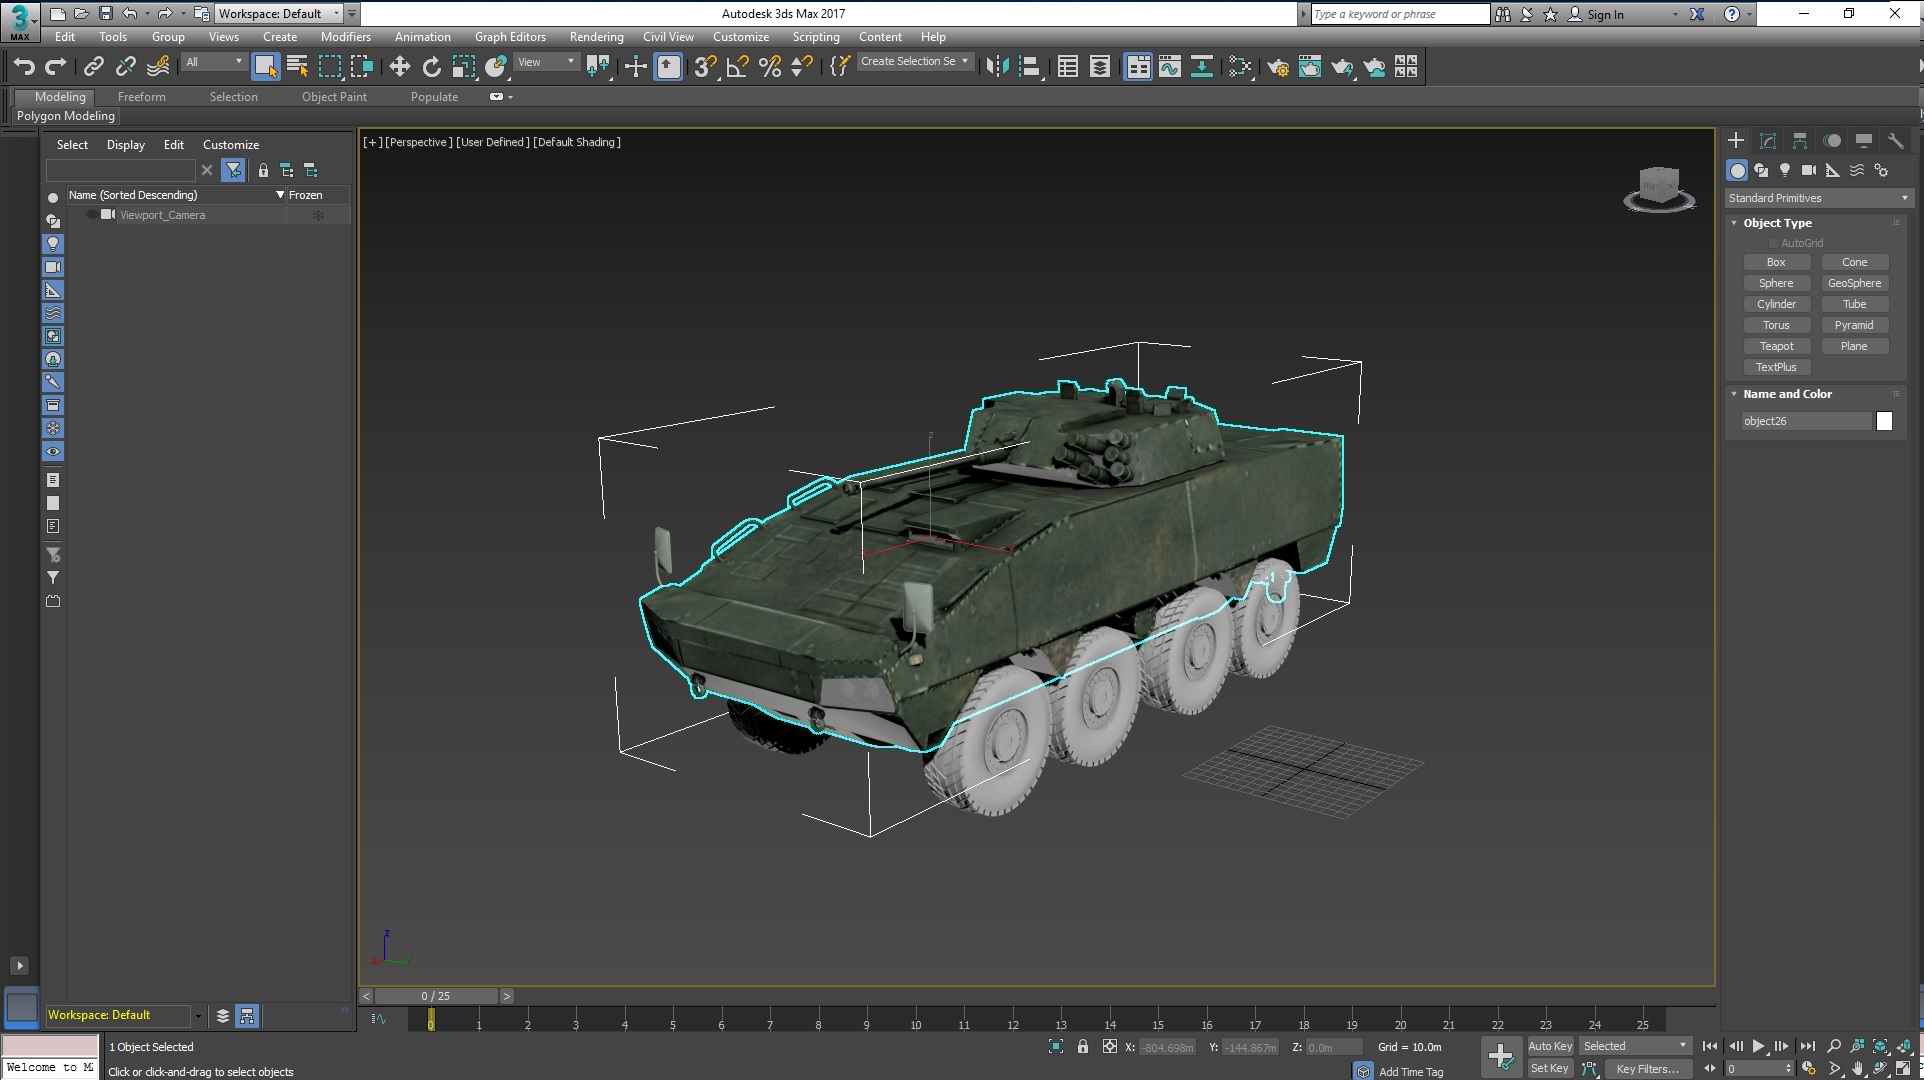
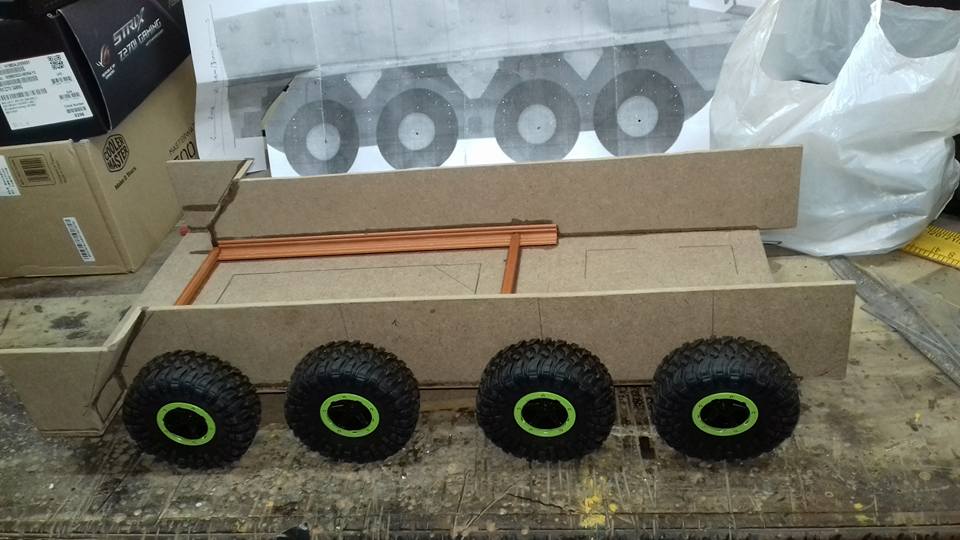
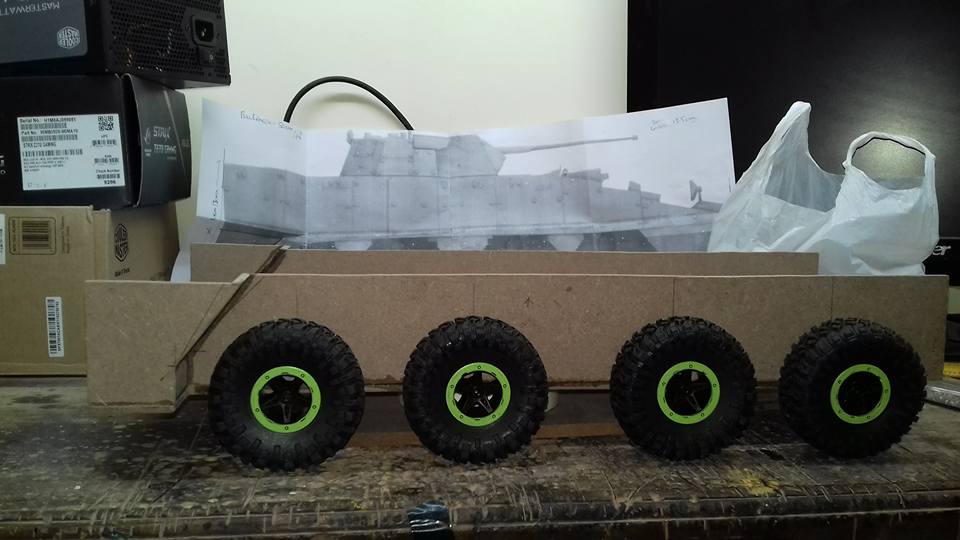
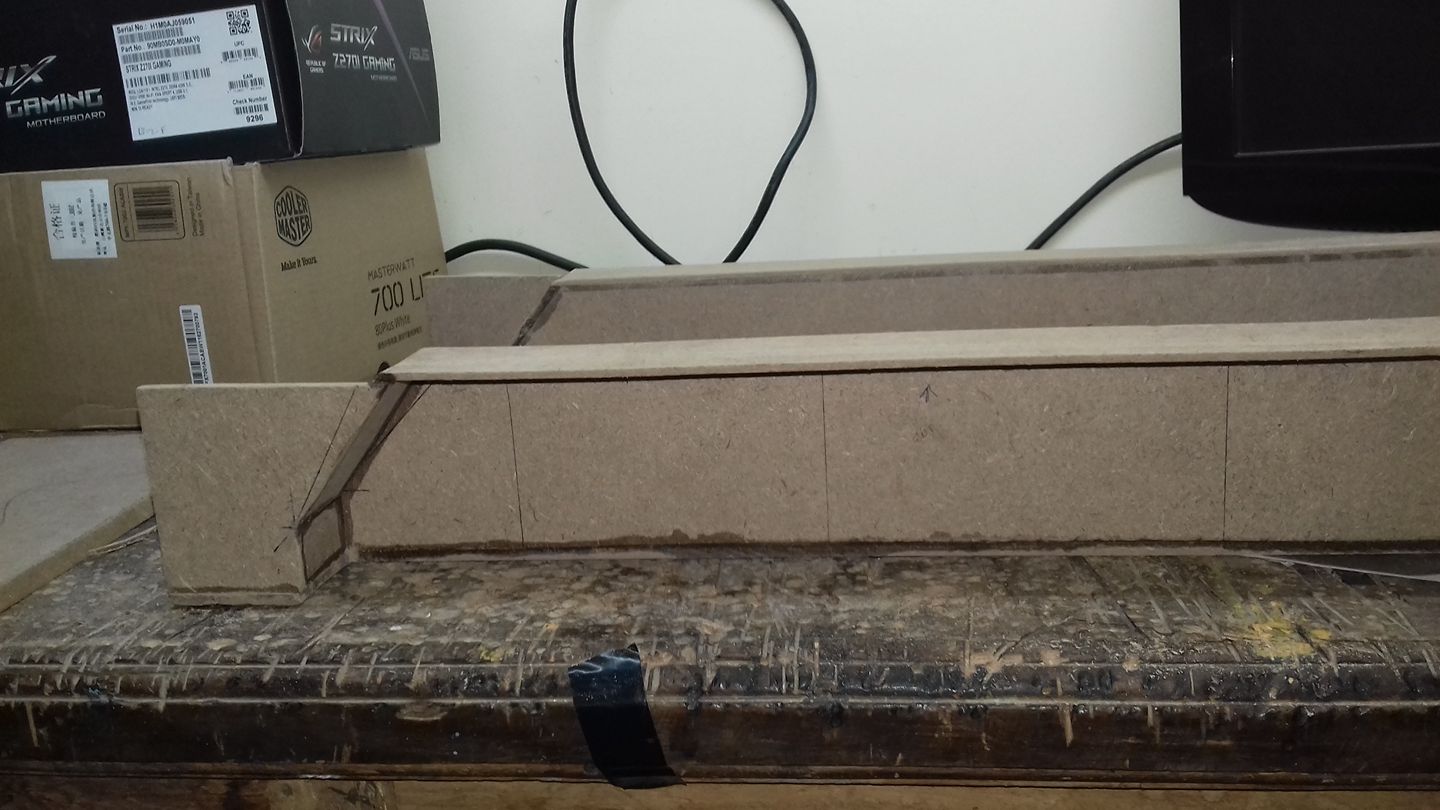
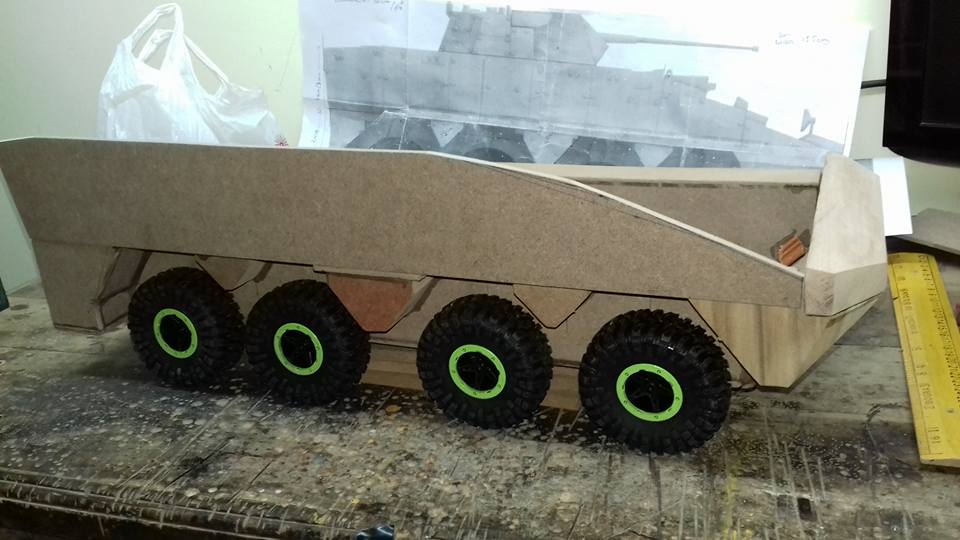
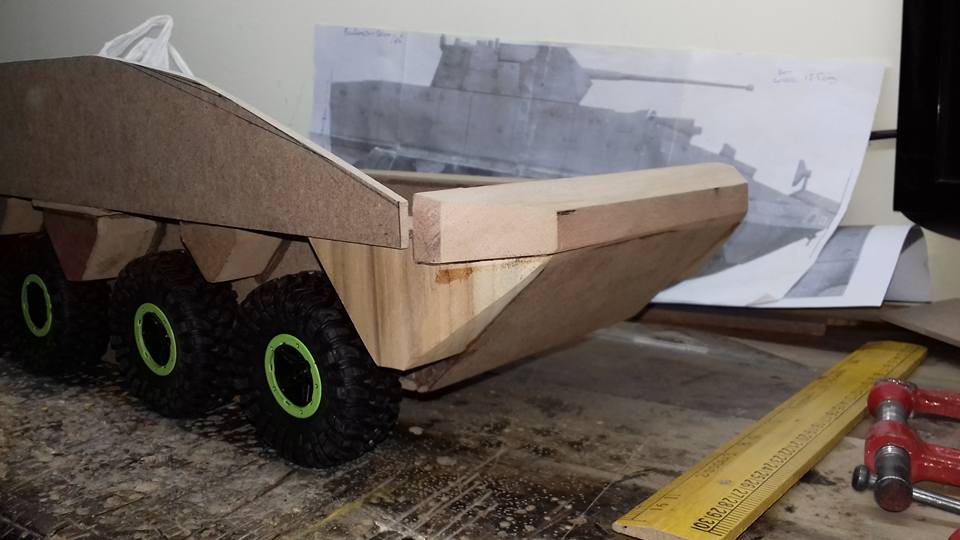
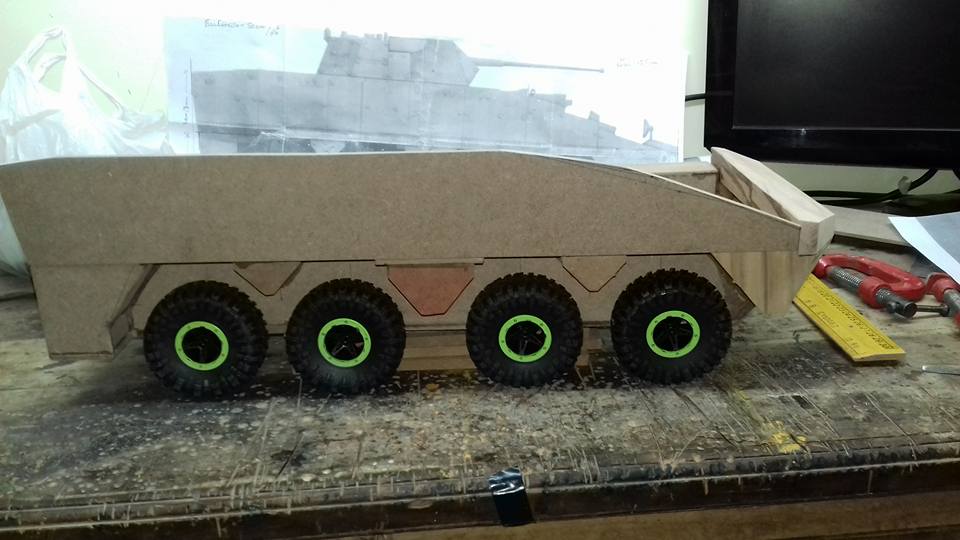
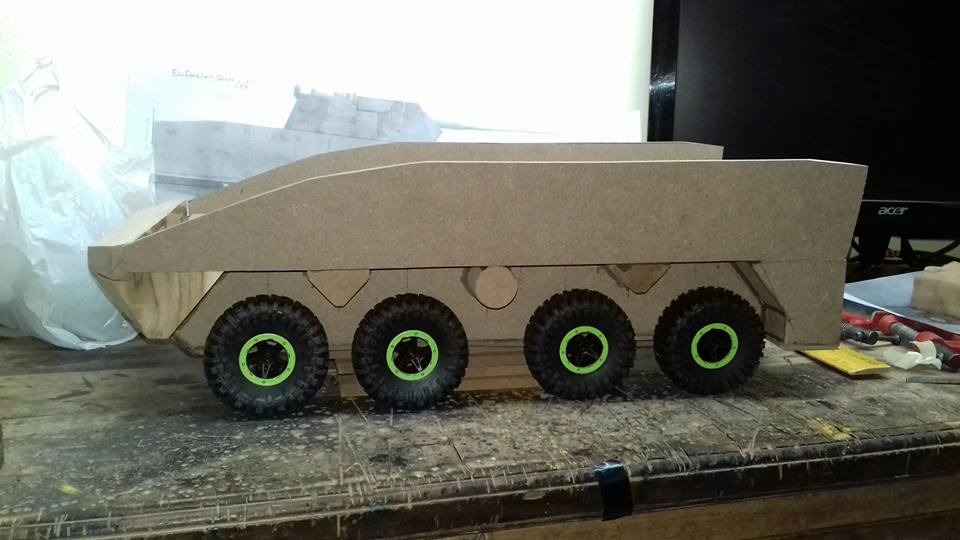
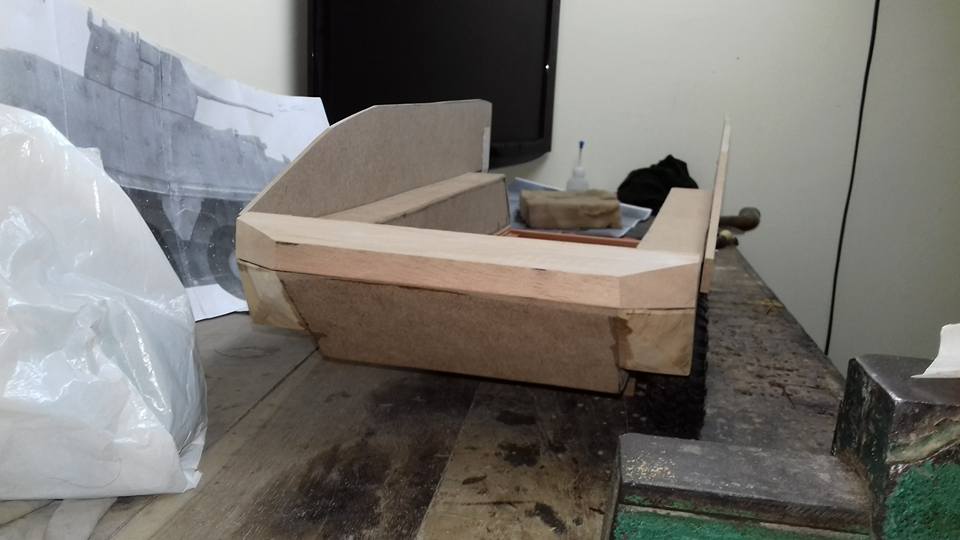
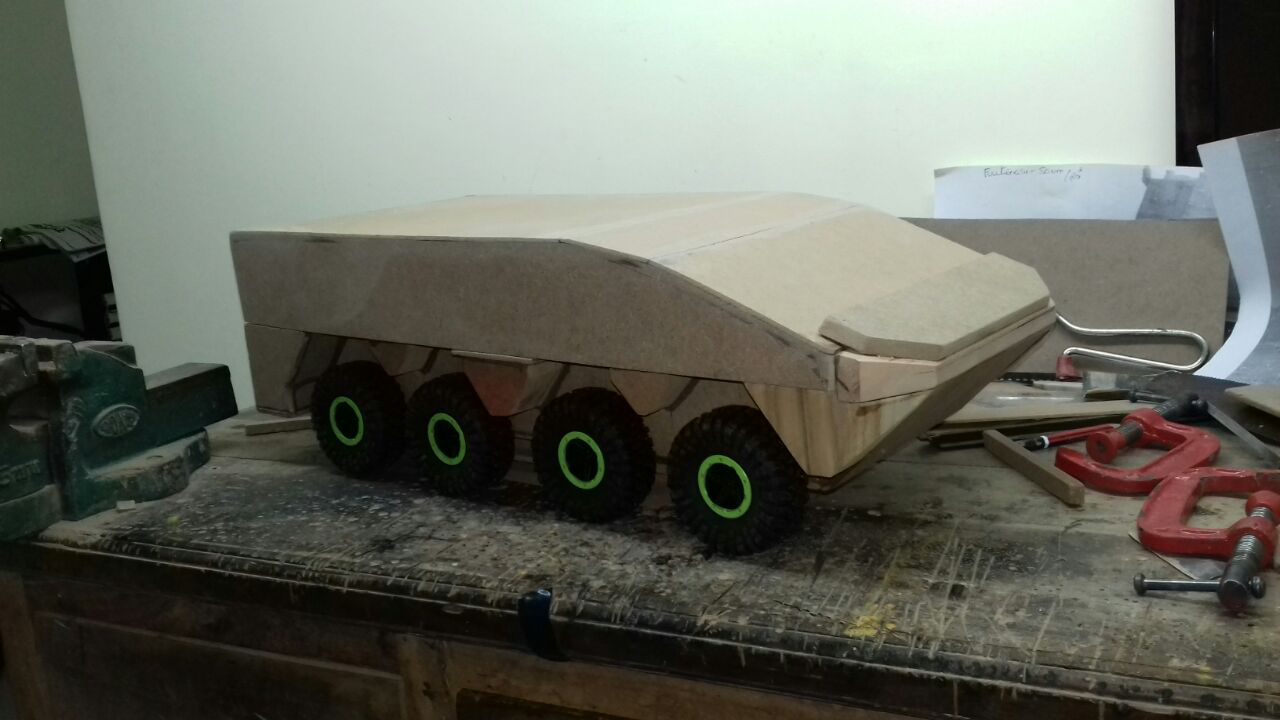
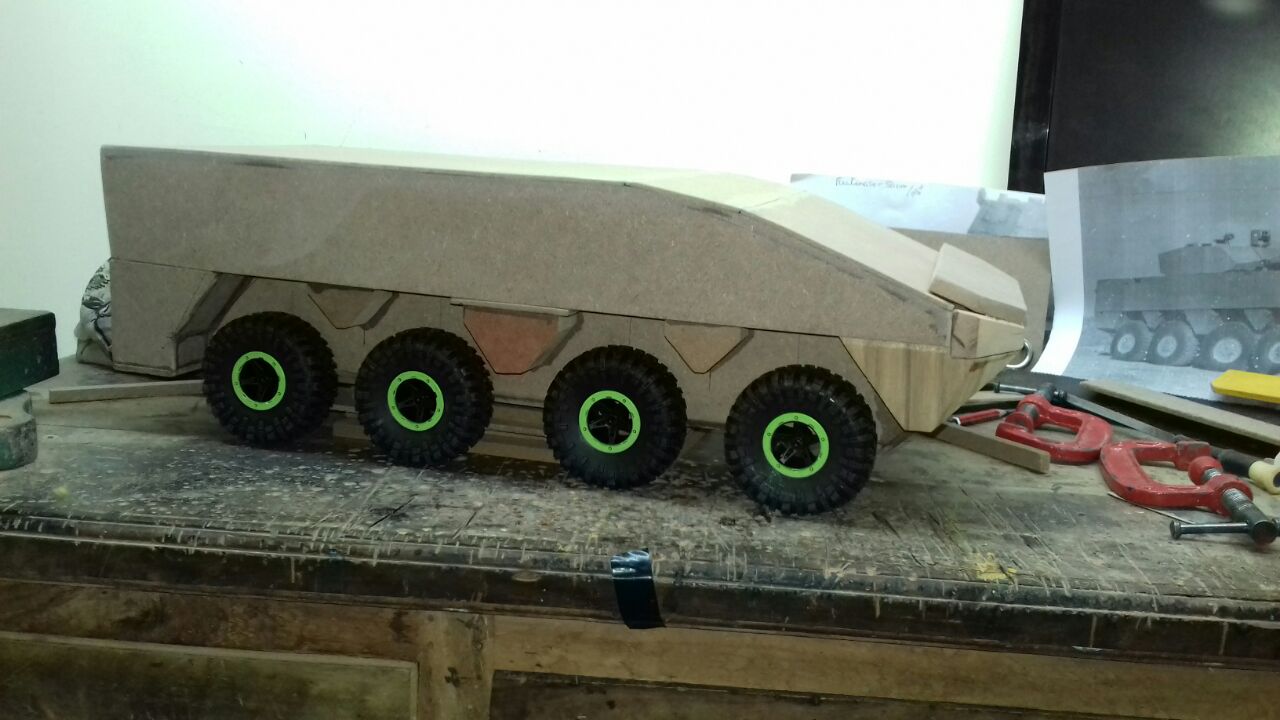
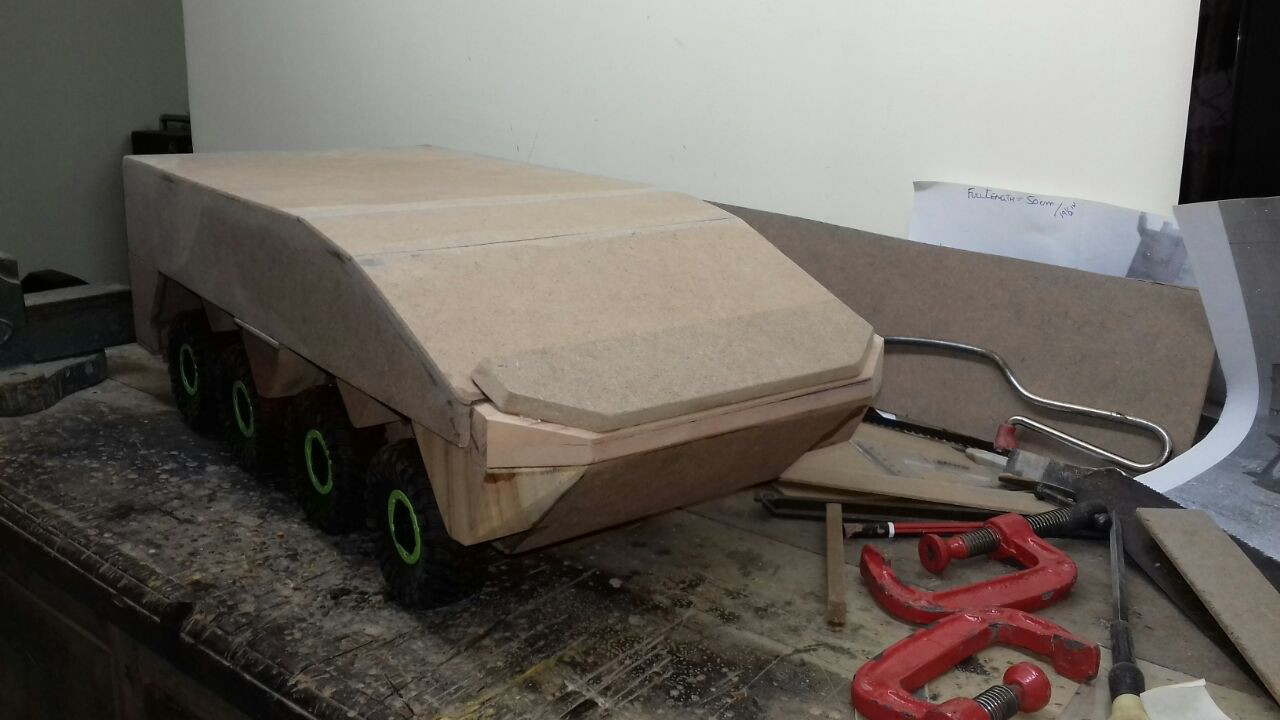
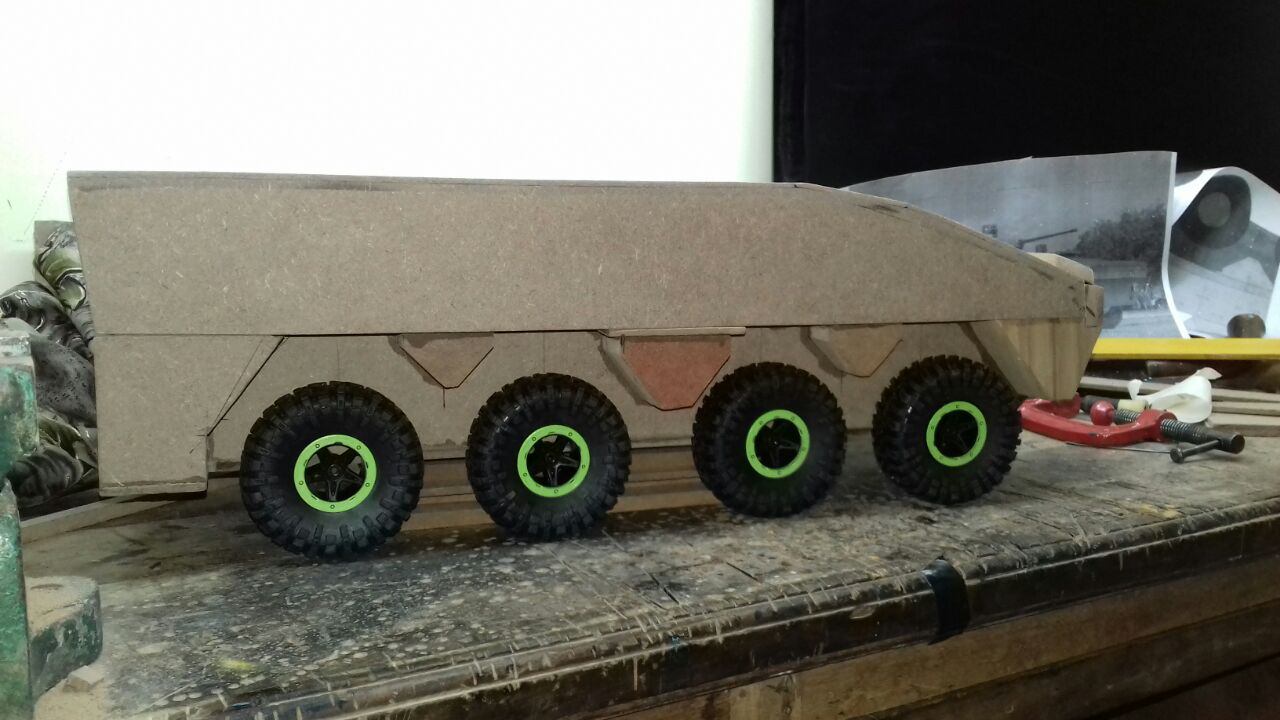
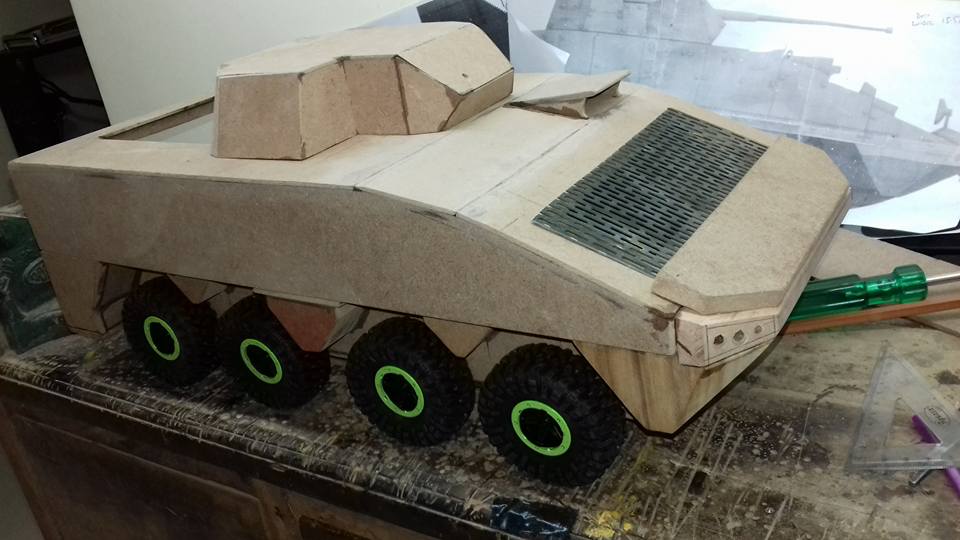
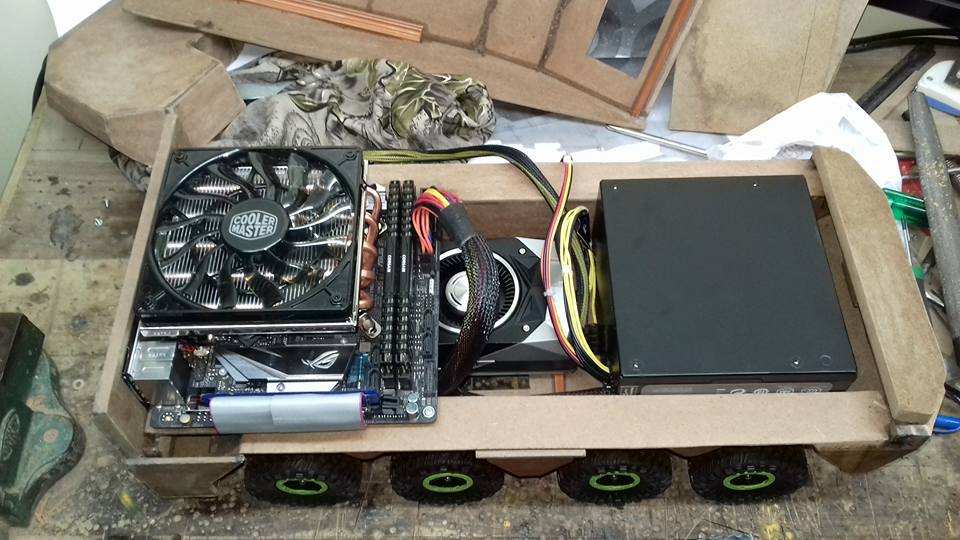
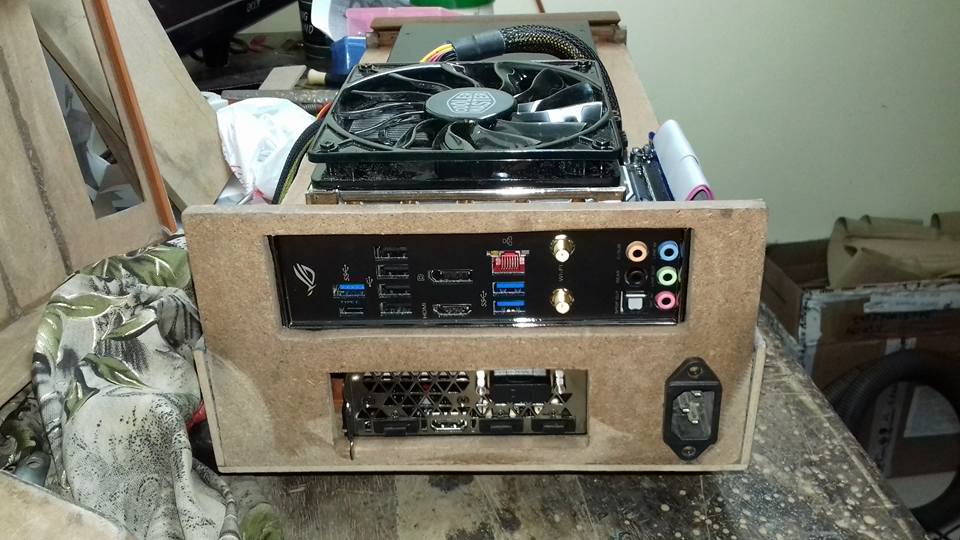
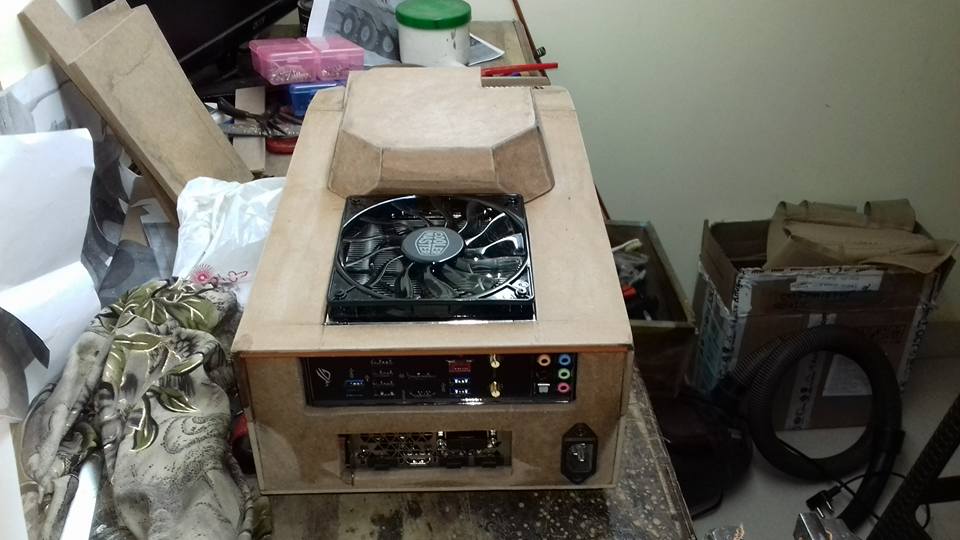
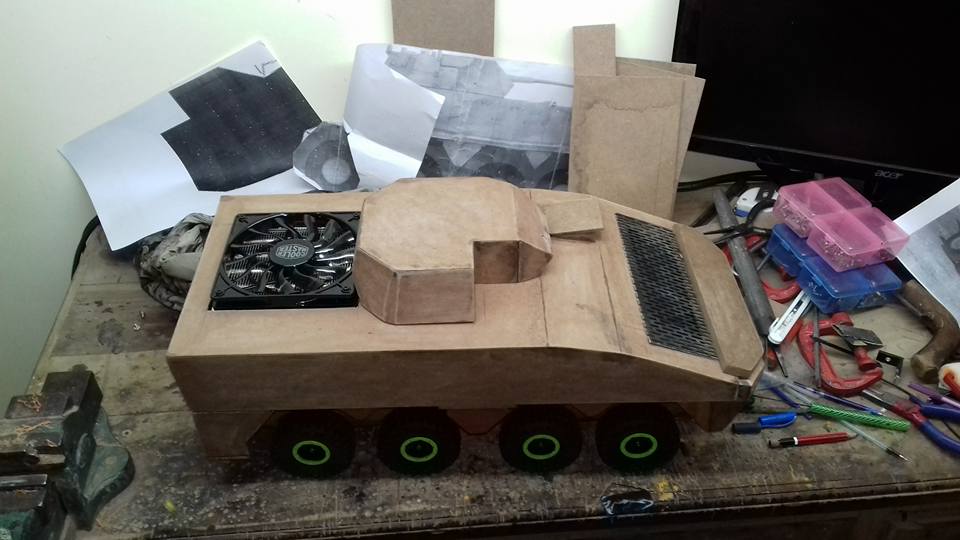
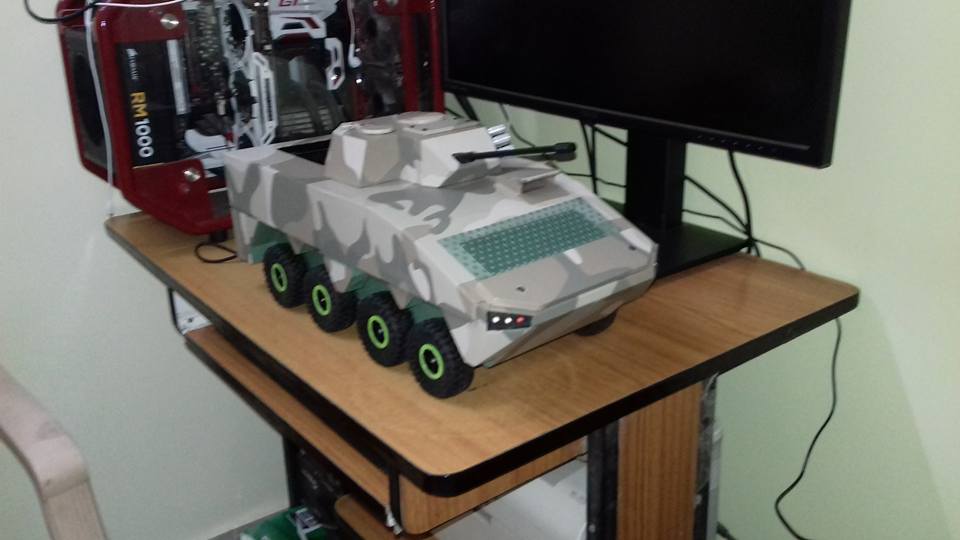
KTO Rosomak Build
Hello, I am back with another build. This time doing a Scratch build my build is named as “KTO Rosomak”
As the build name suggests. KTO Rosomak is a Polish armored fighting vehicle and I will be building a Gaming PC case like this vehicle with all components installed inside the compact sized interior.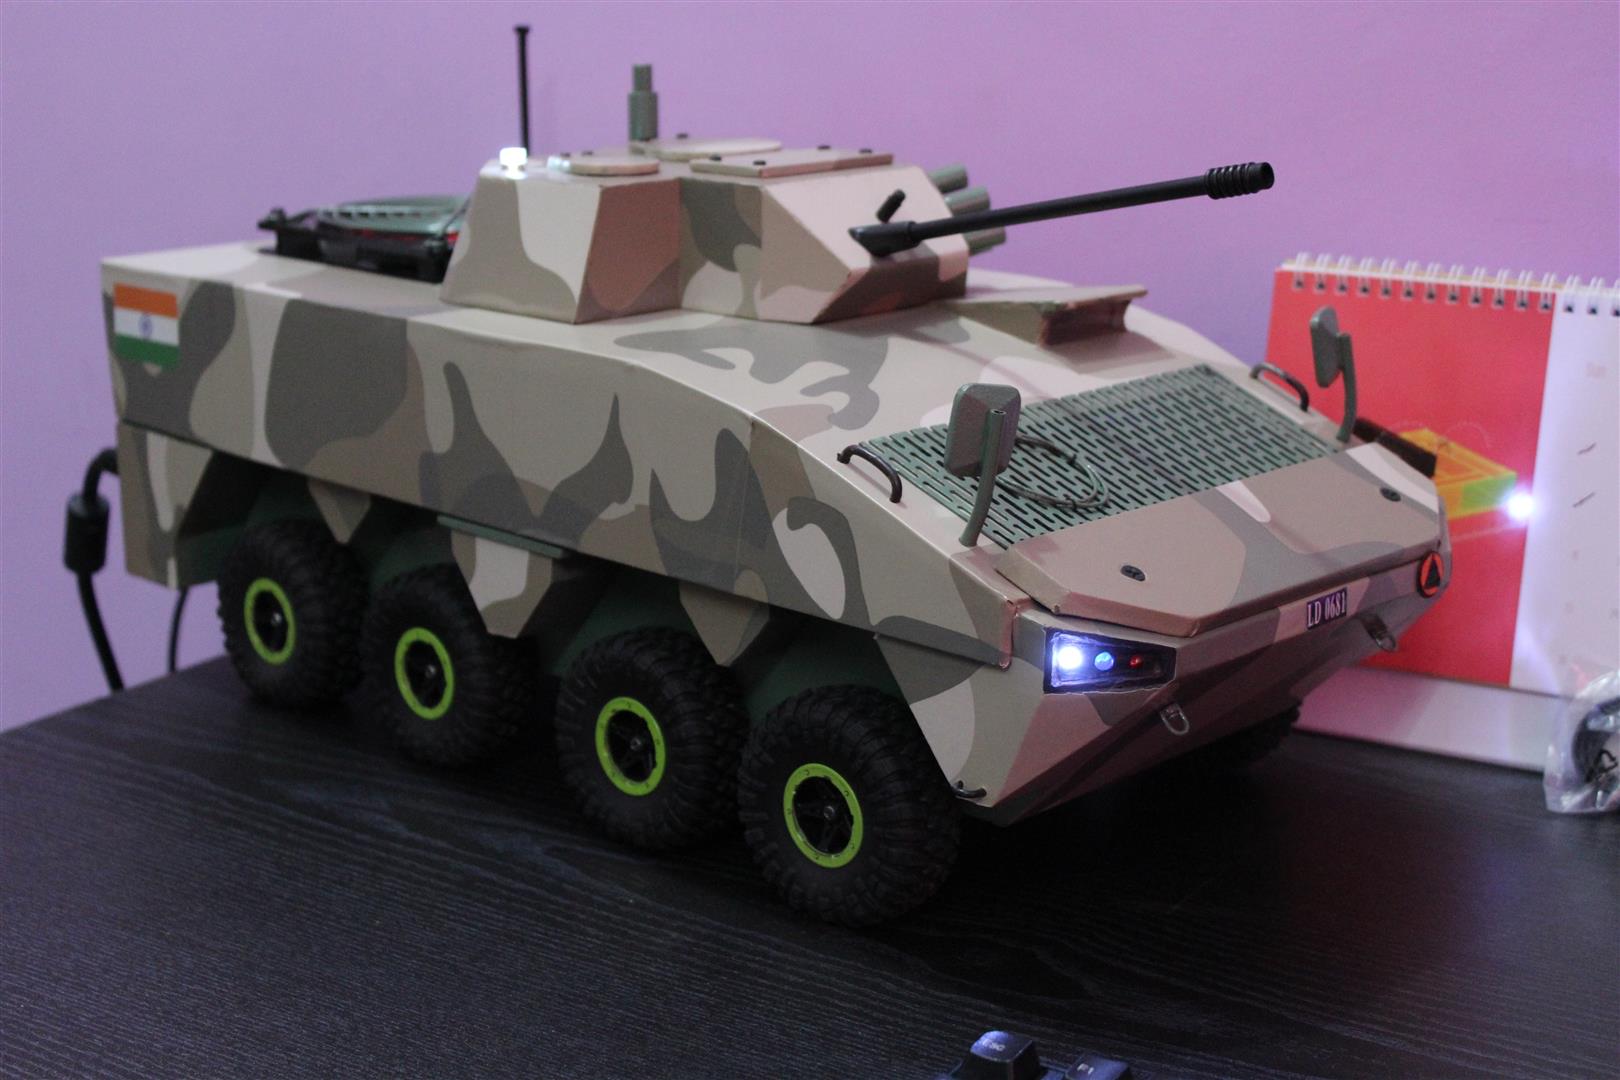
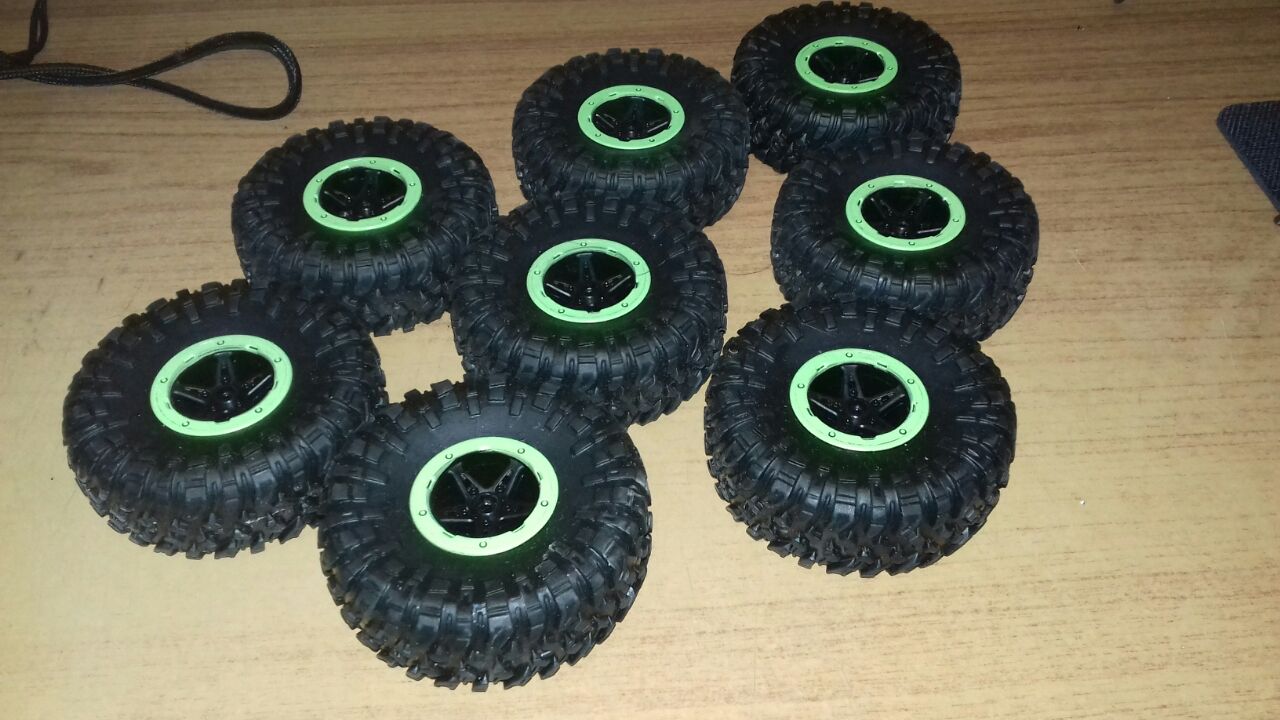
Parts Started to arrive.. It just one month remaining.. so build work at full speed.
First came some wheels..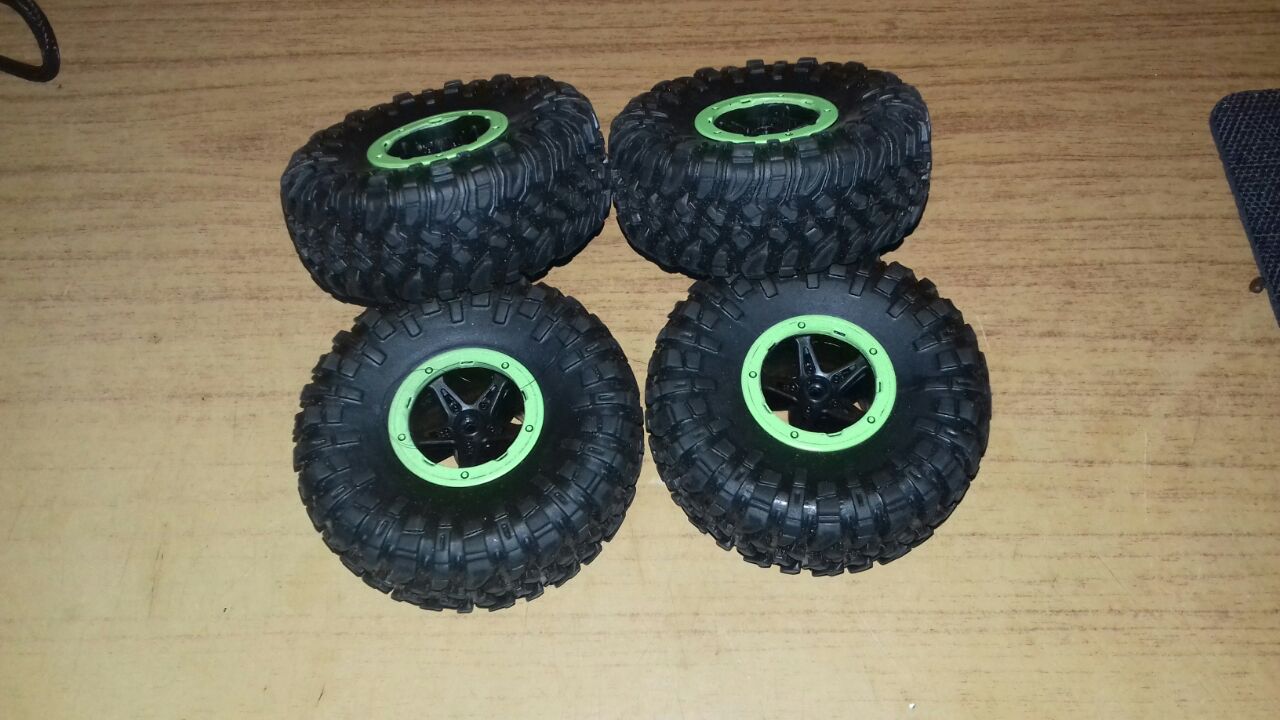
Actual prototype printouts for measurements..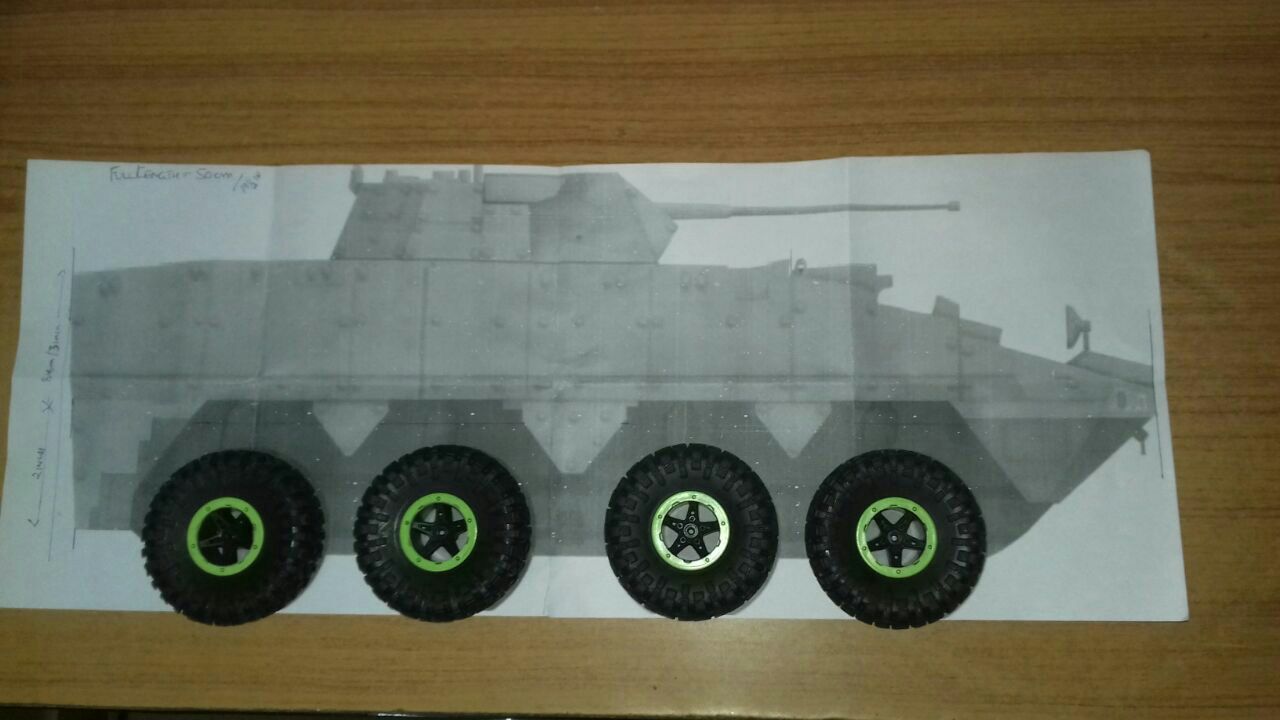

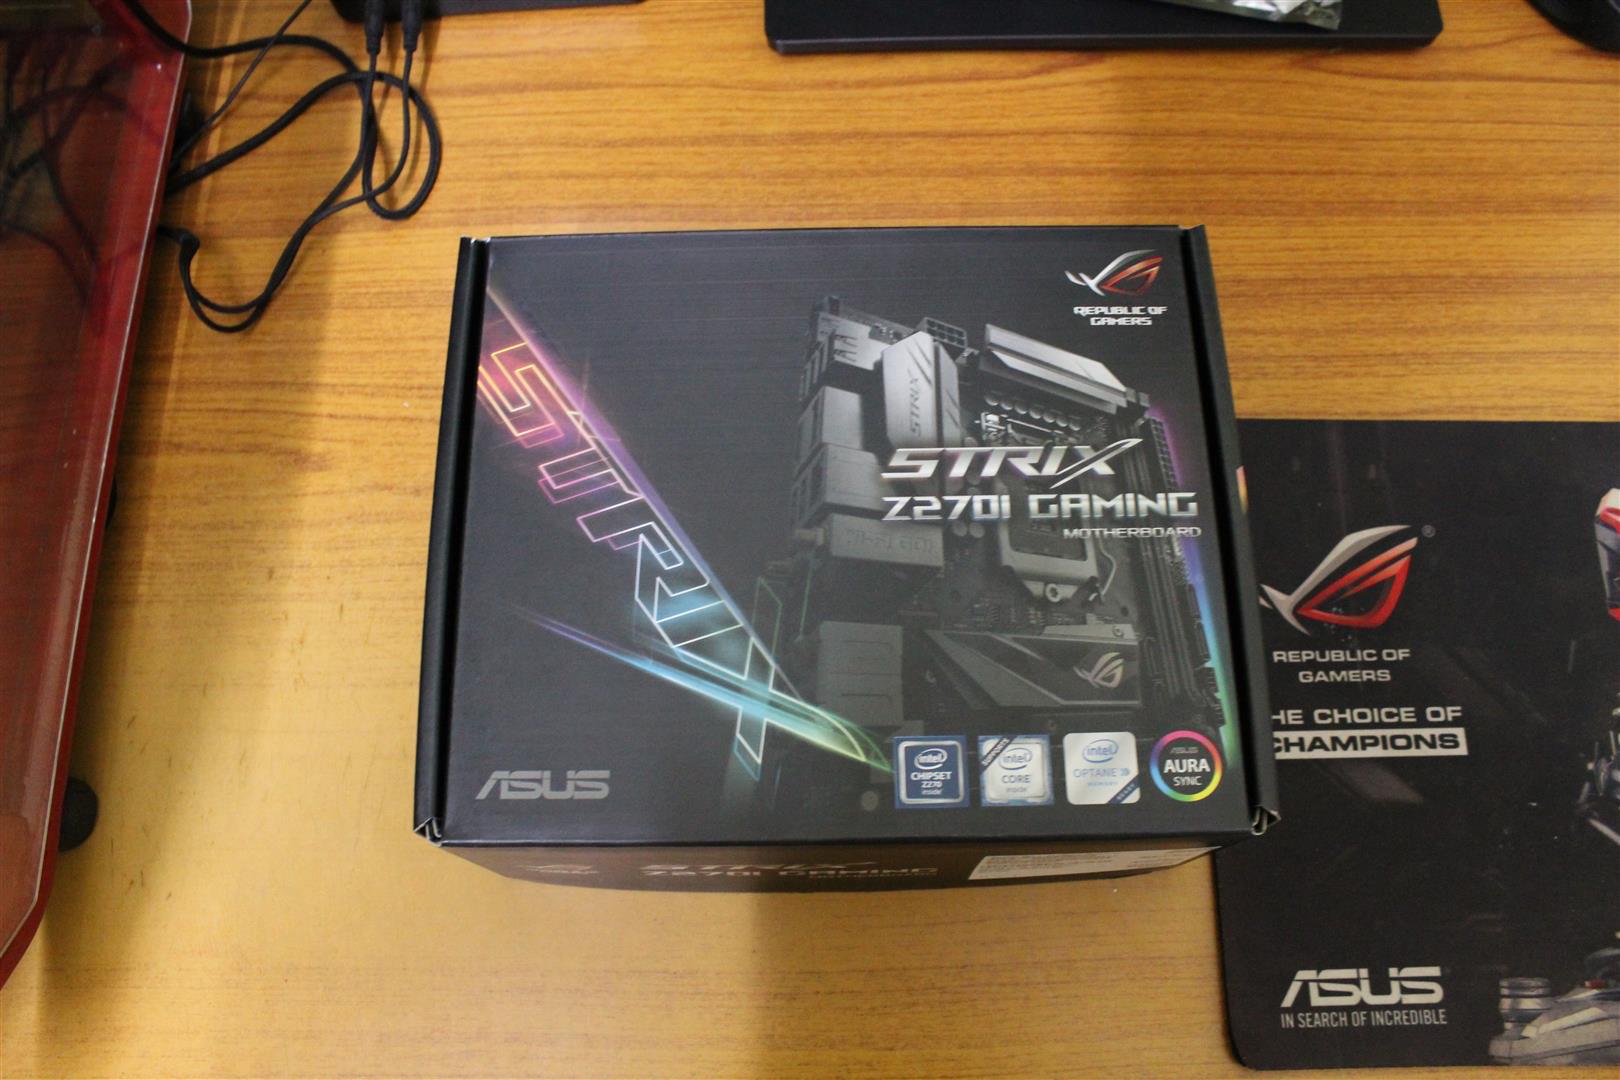
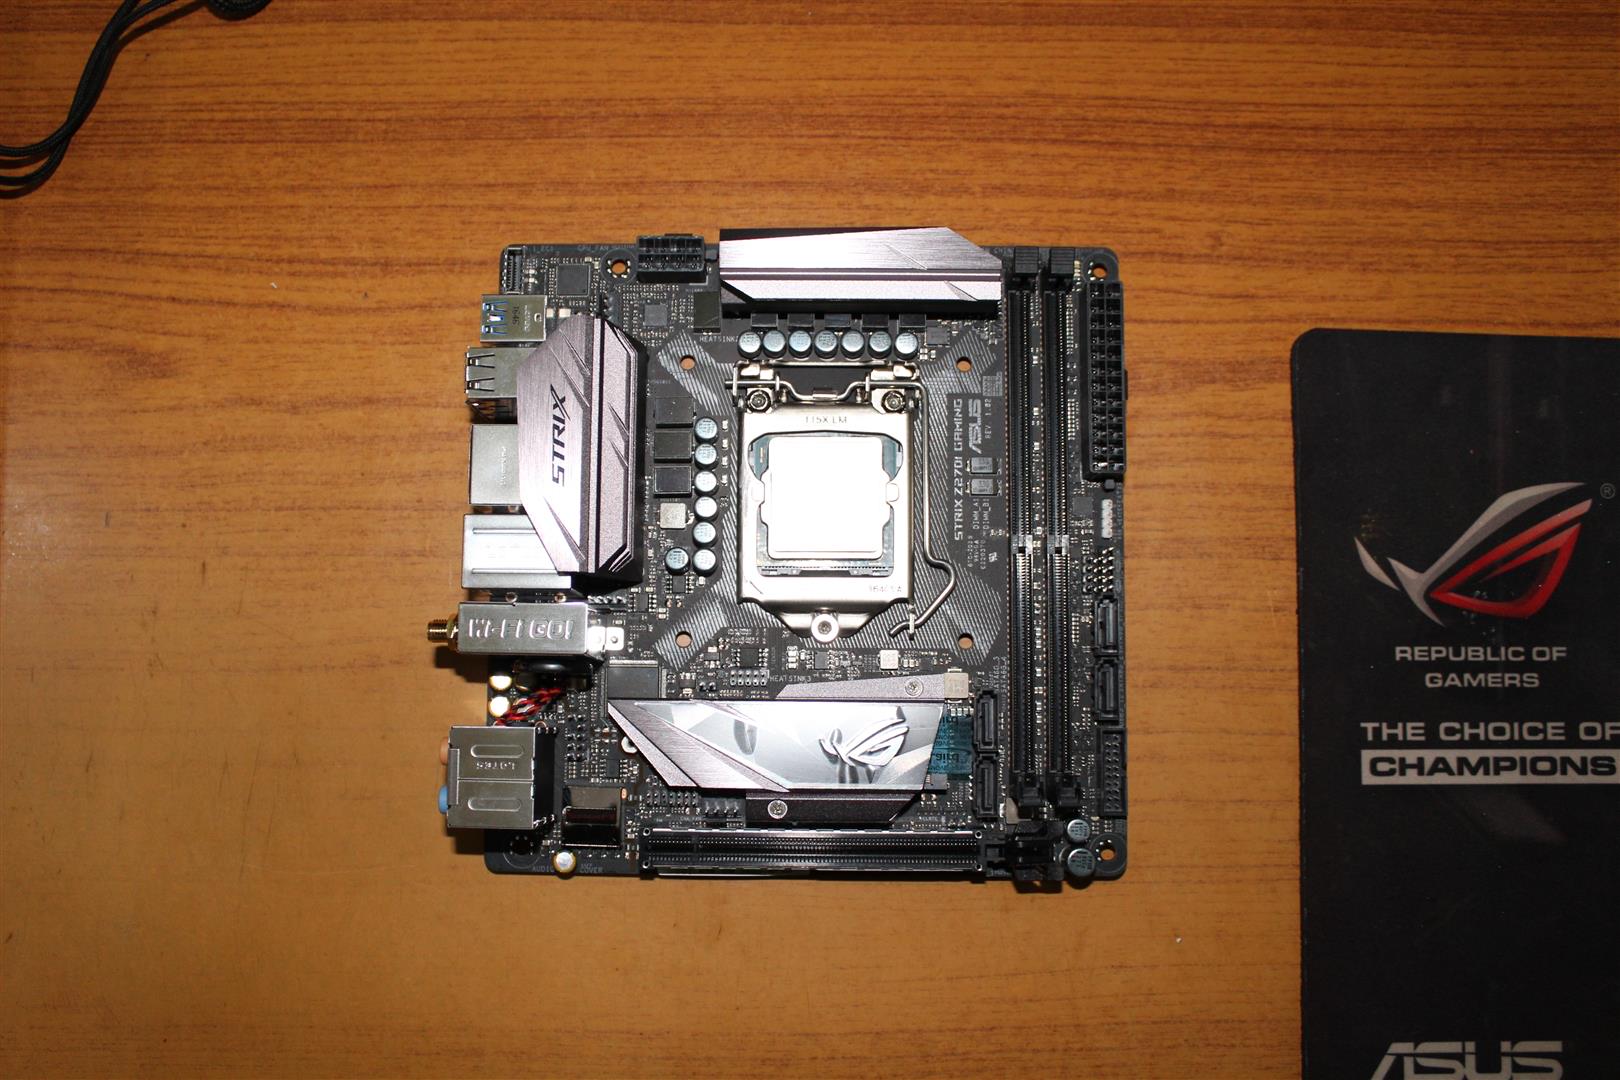
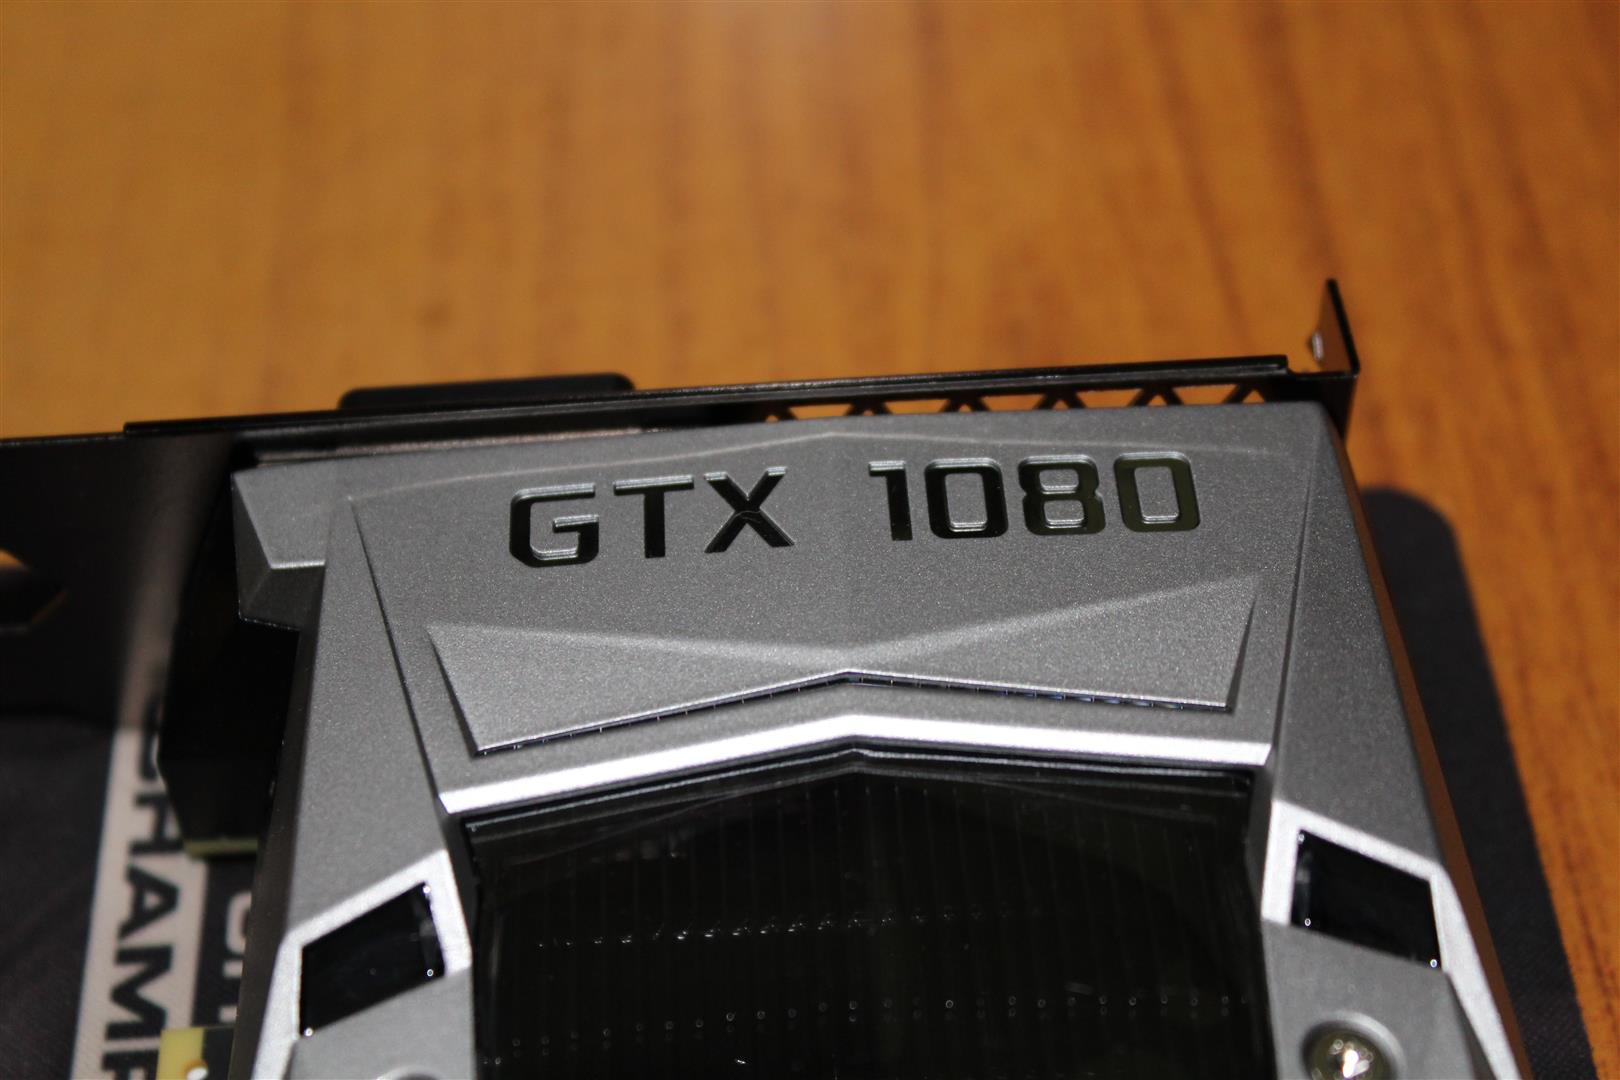
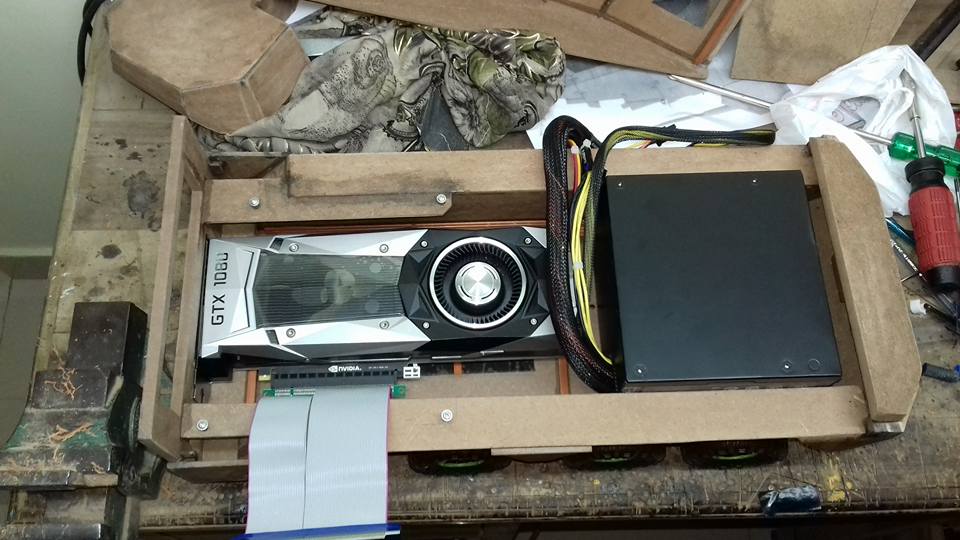
Hardware started showing up for my build. Thanks to ASUS India.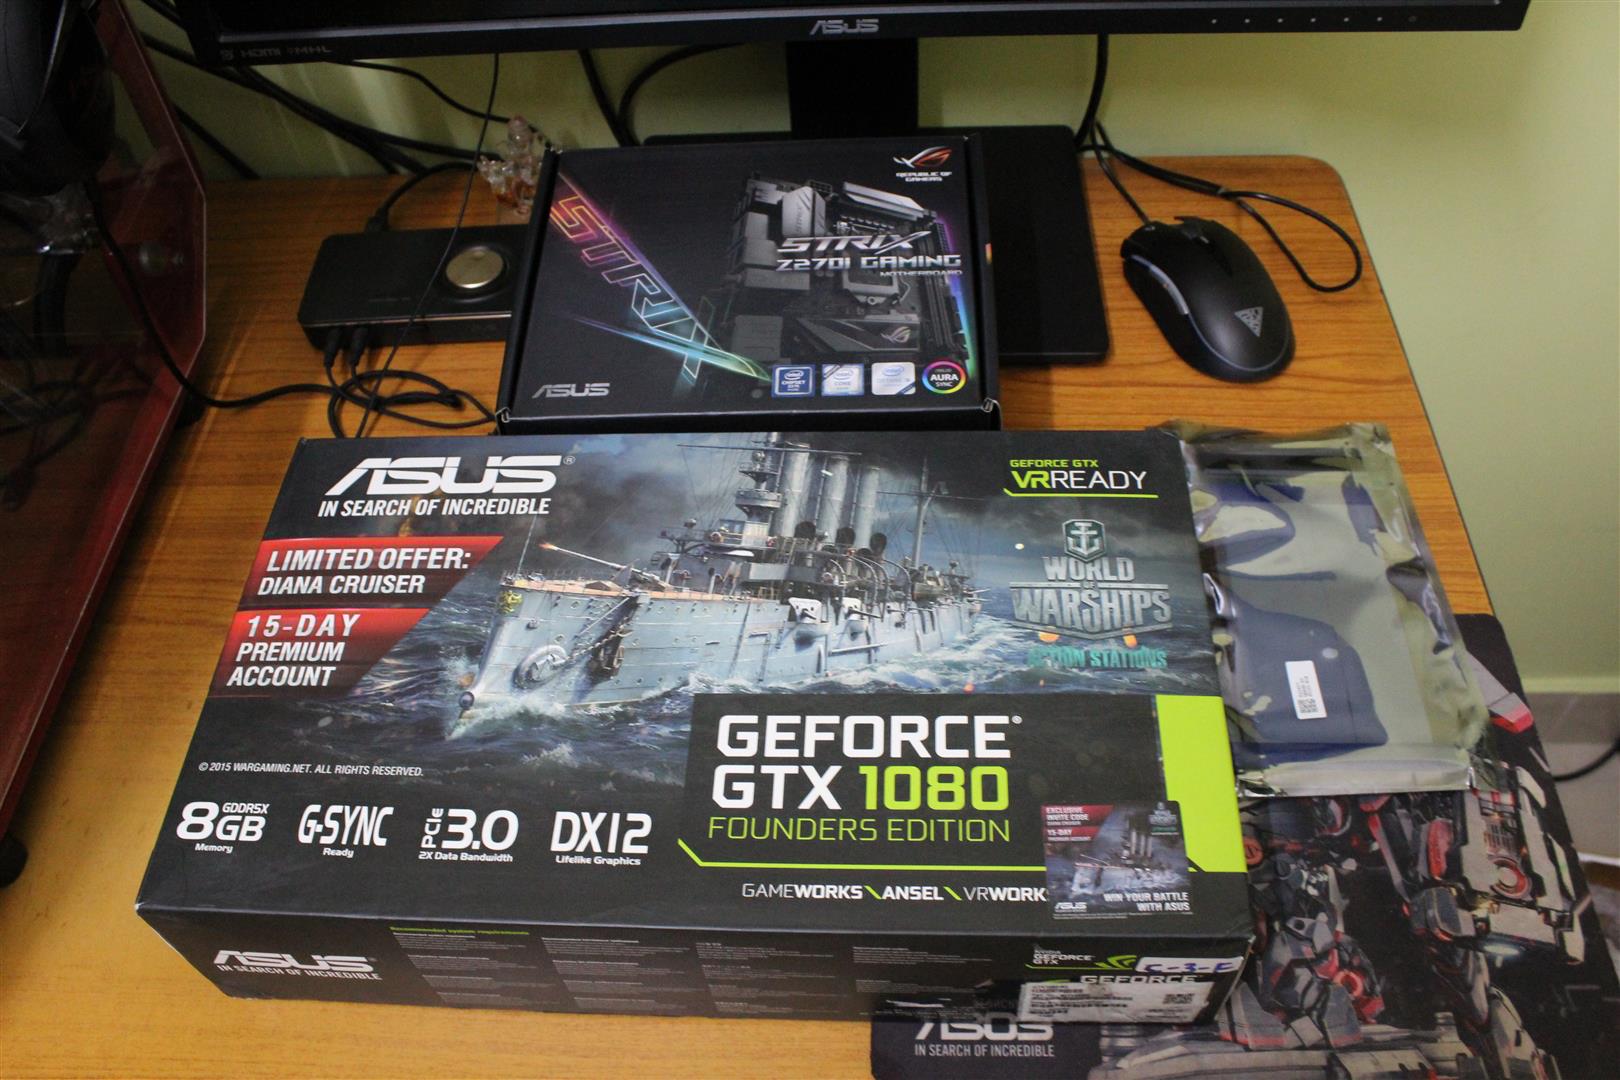


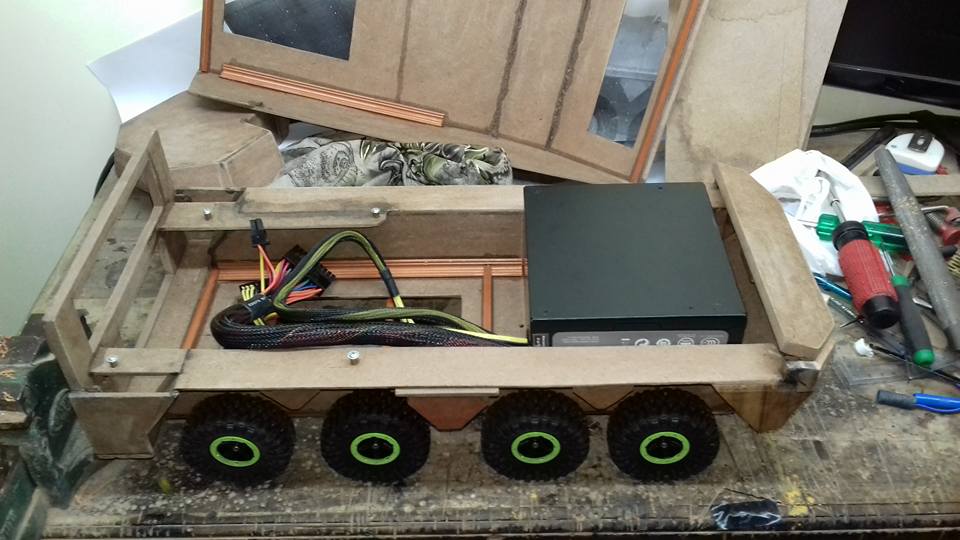
And PSU for the build is
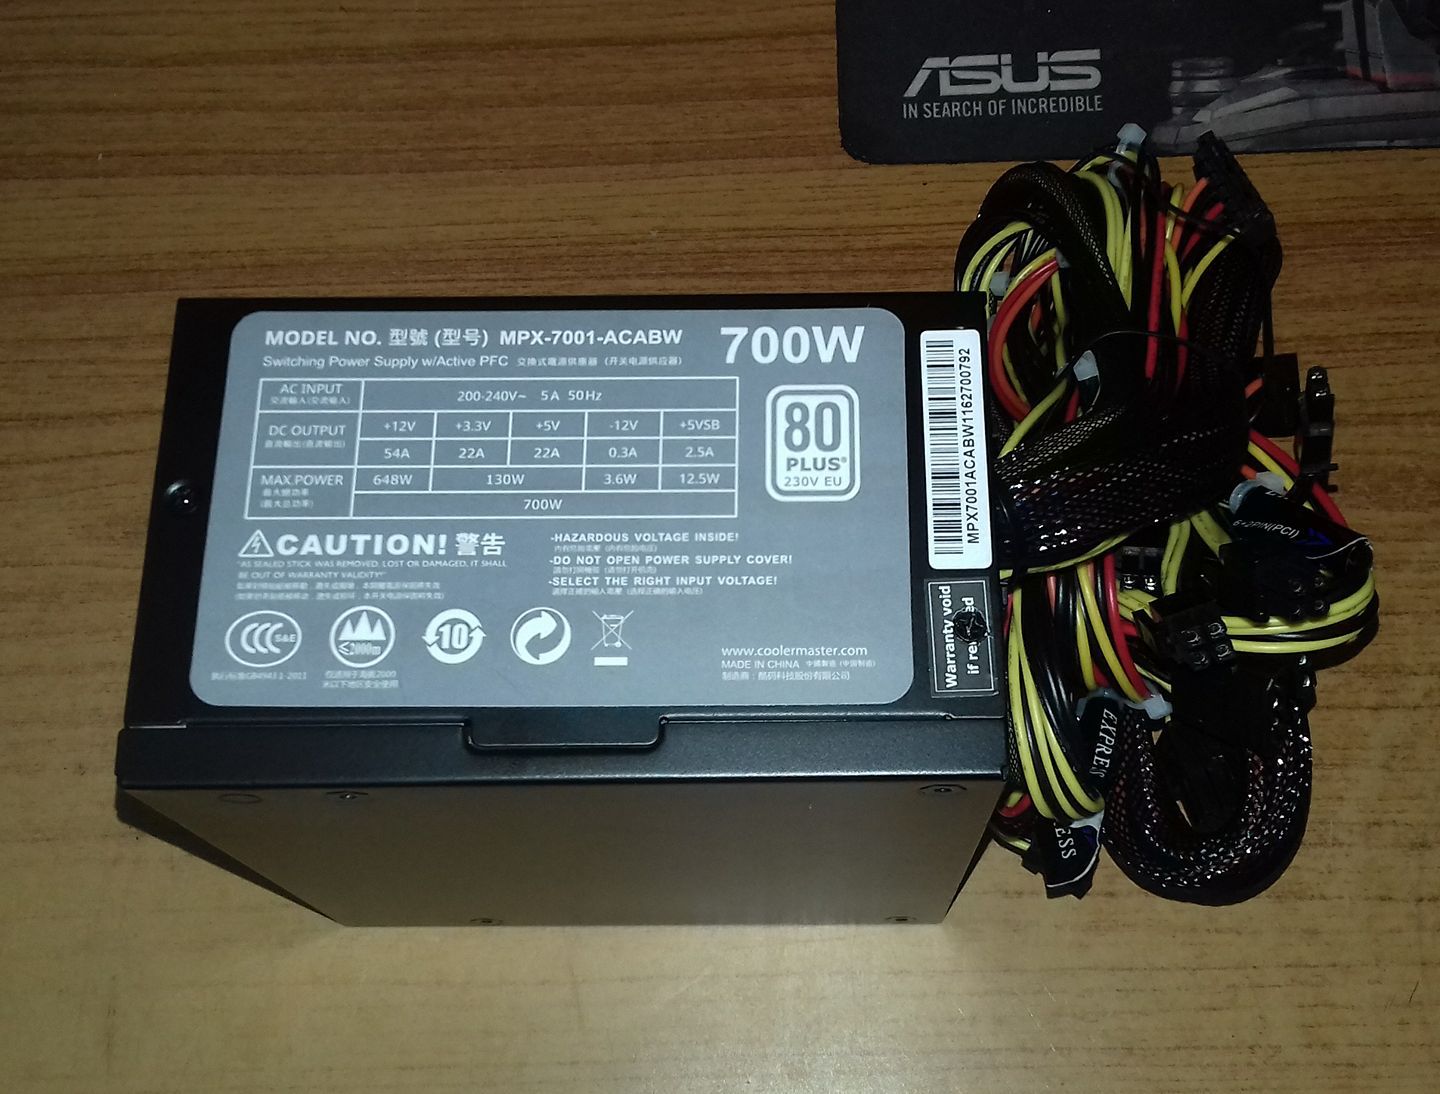
Modding PSU. Reducing cable's length and count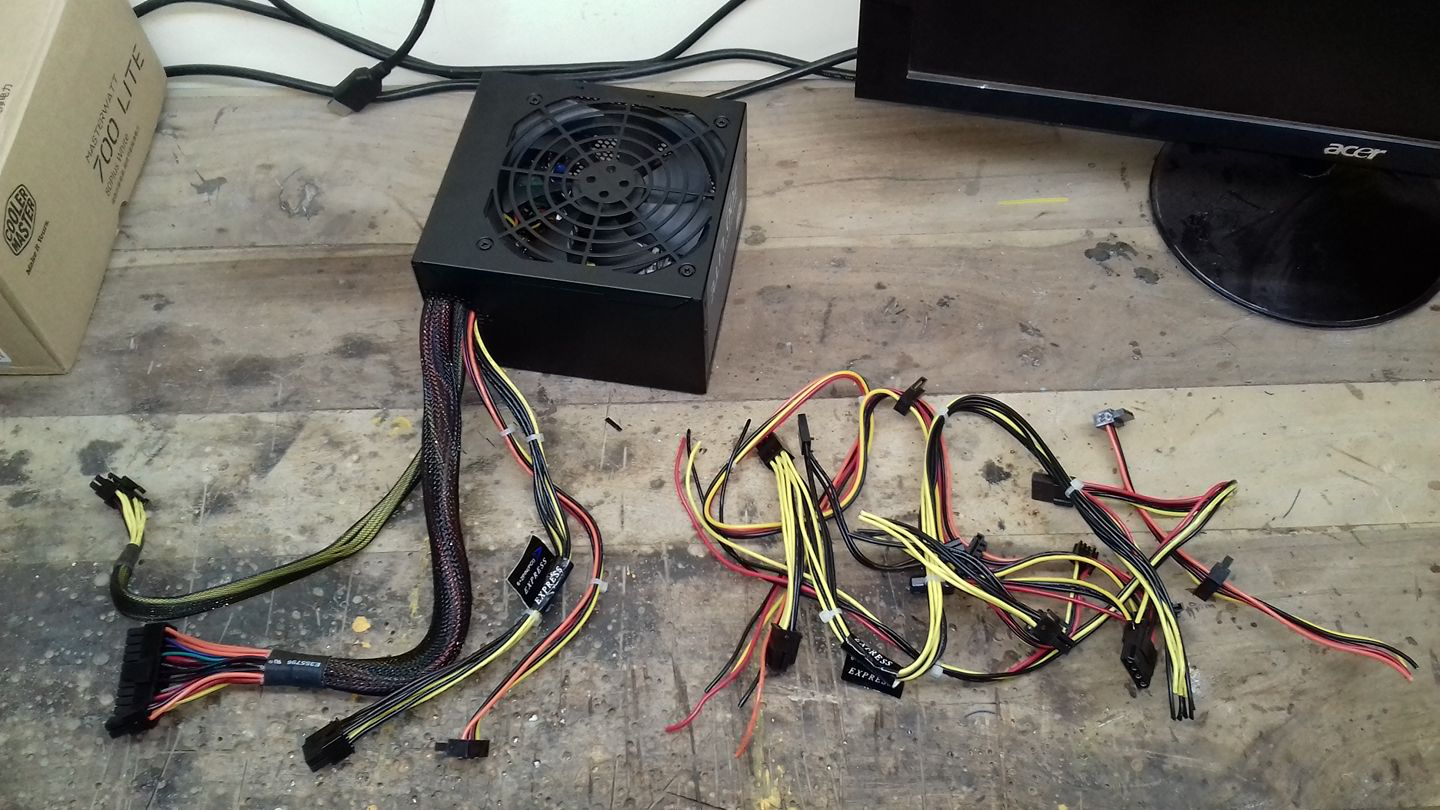
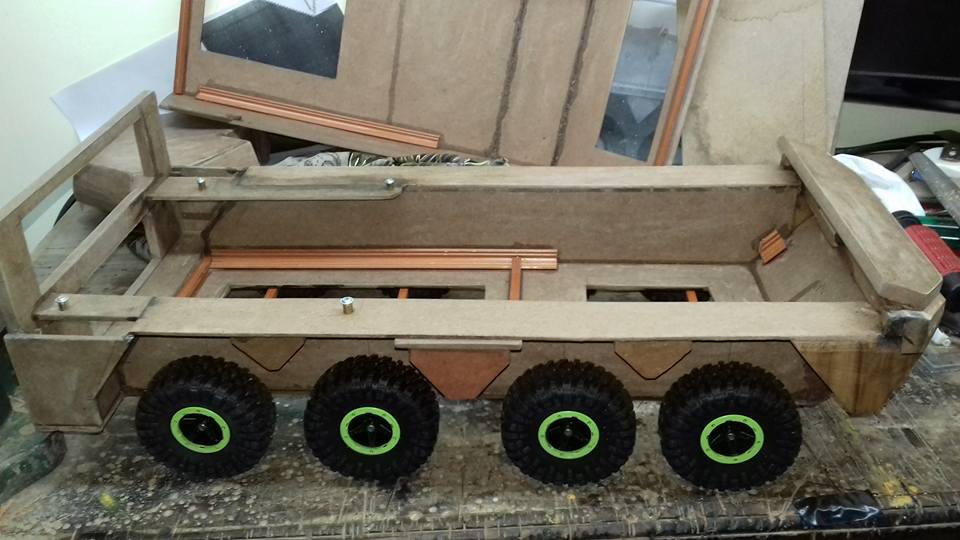
Started working on the build.
First making of base frame.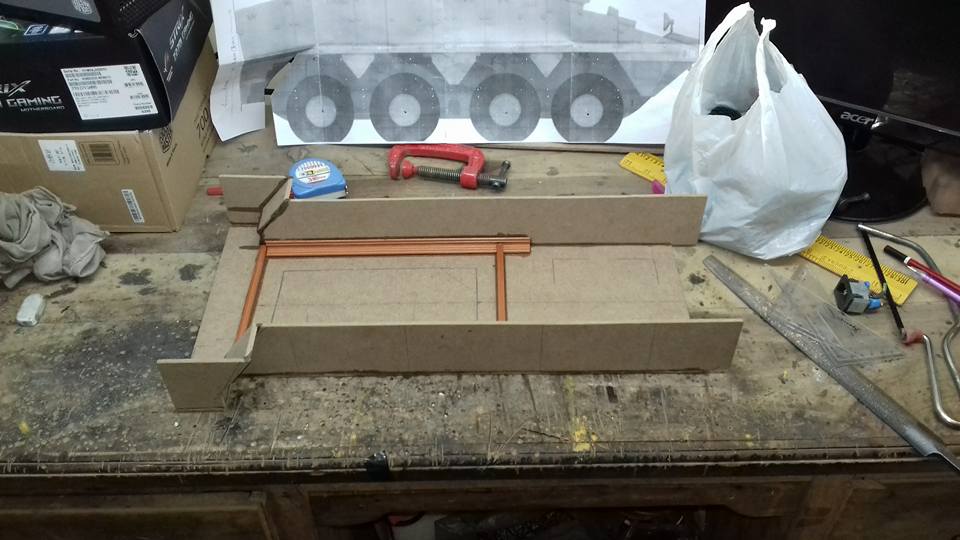

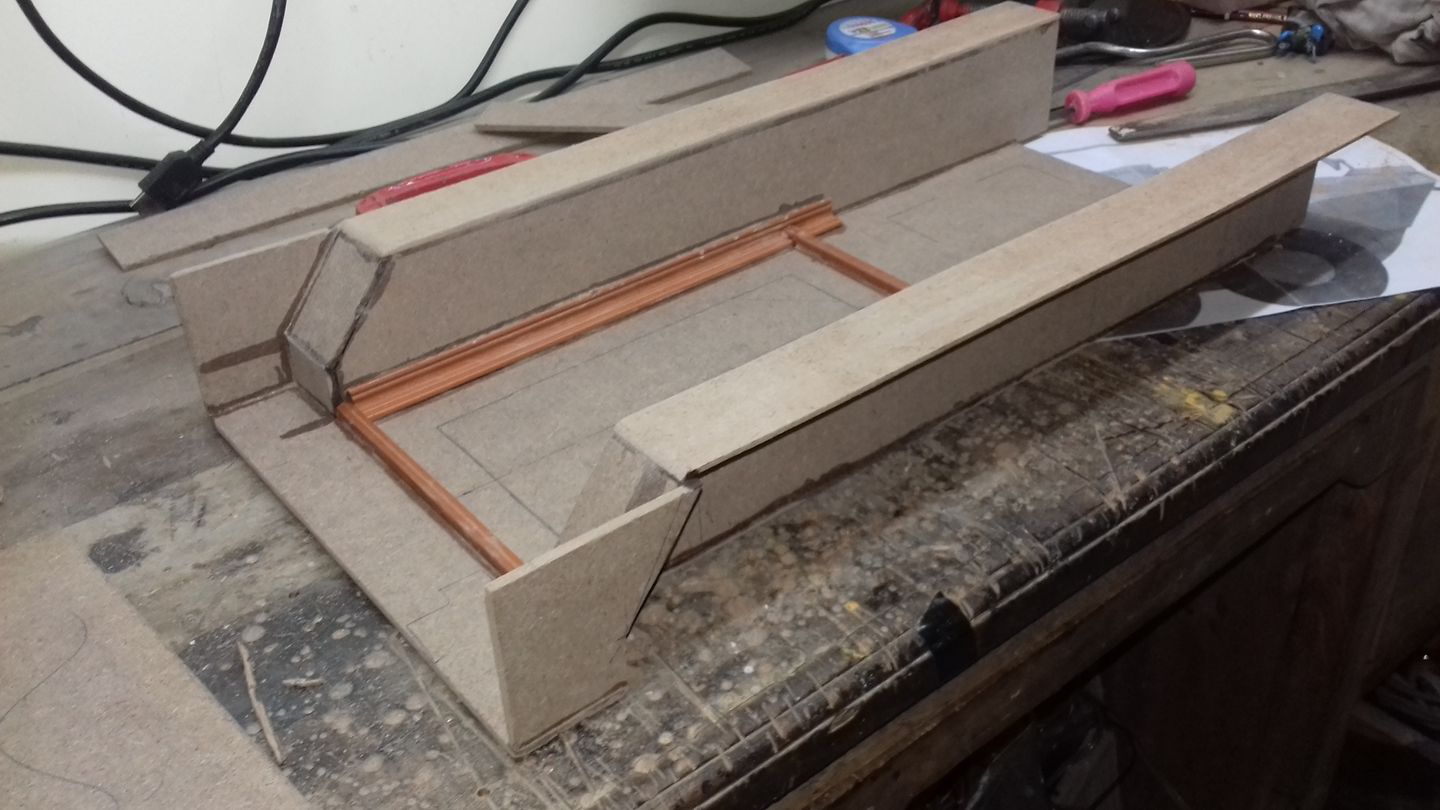
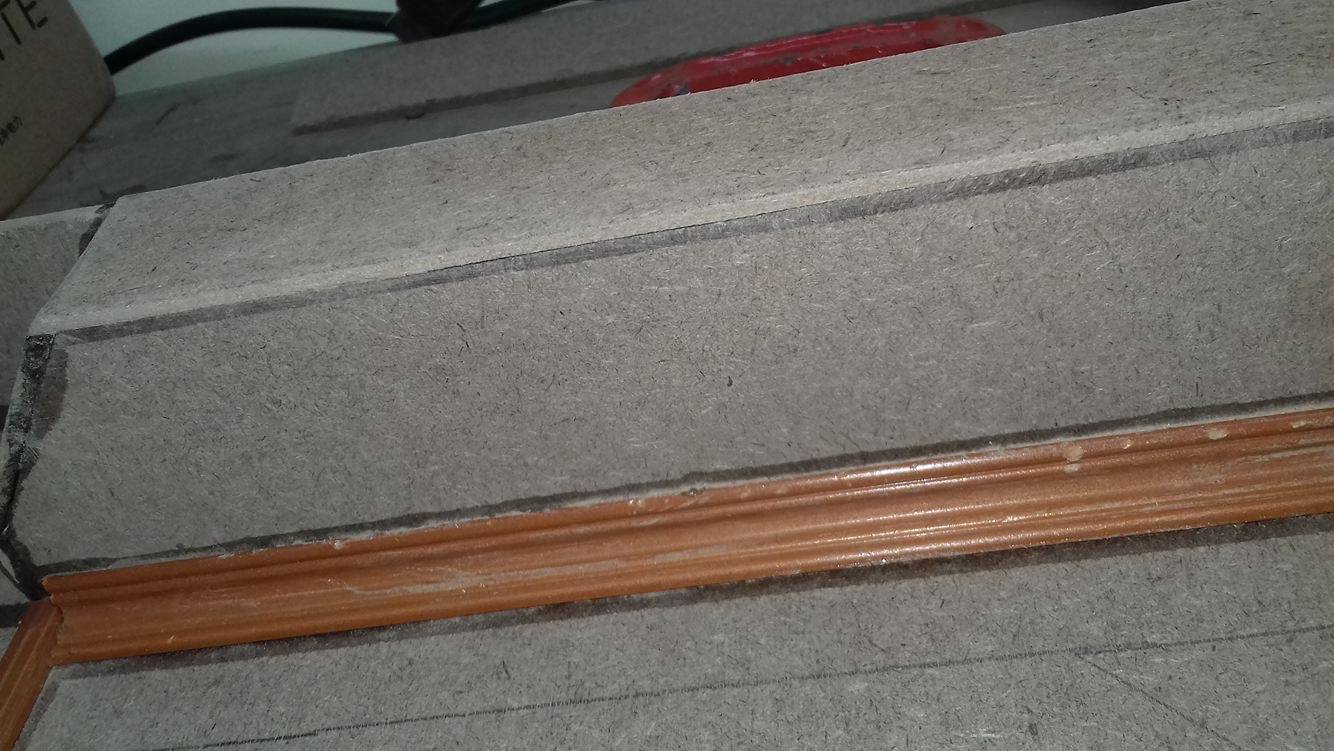
KTO build started taking shape. More update soon..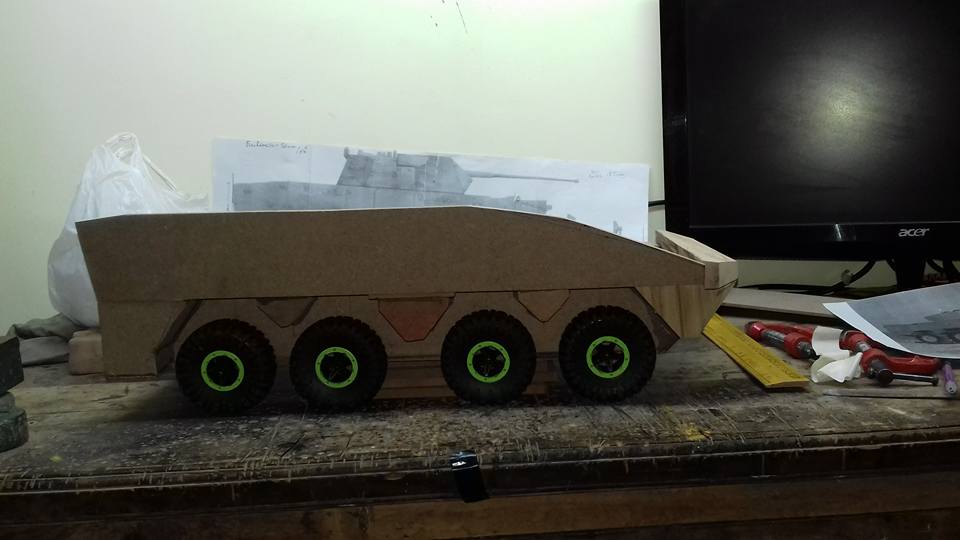
Some late night update for my build.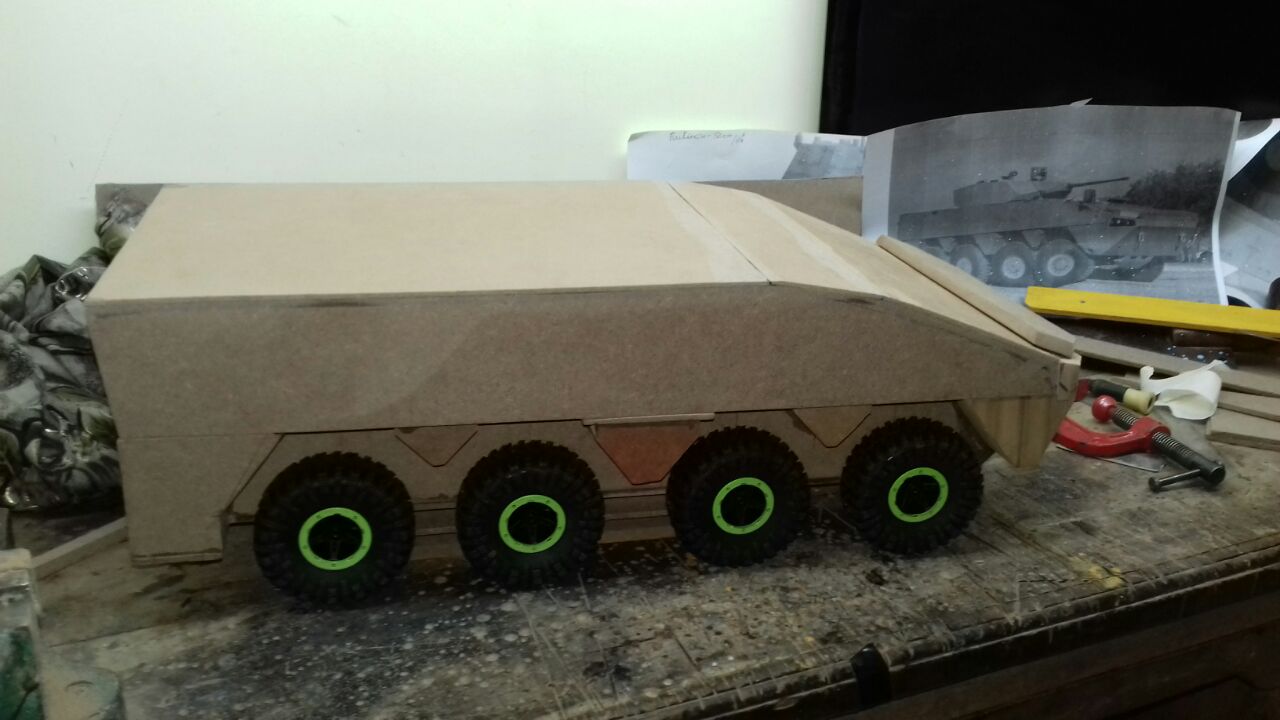
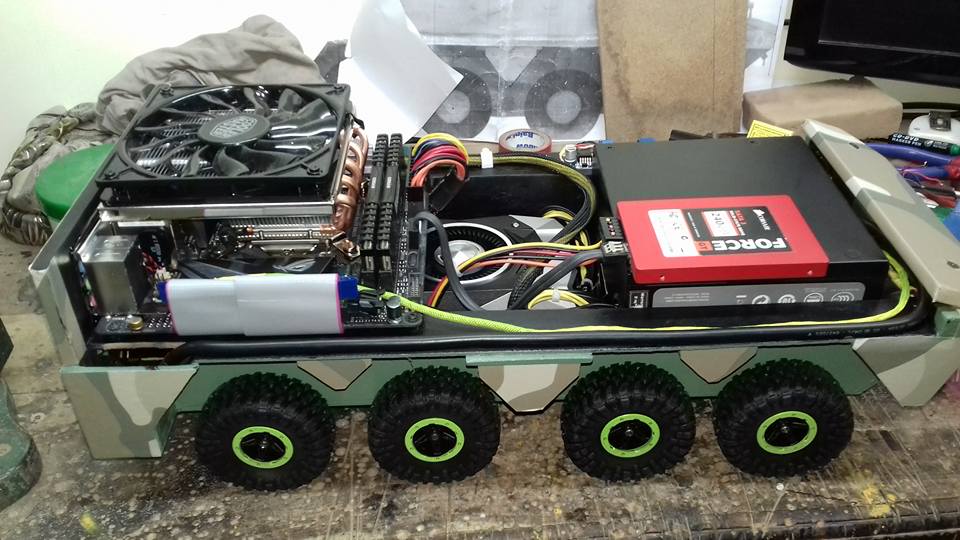
CPU Cooling solution arrived.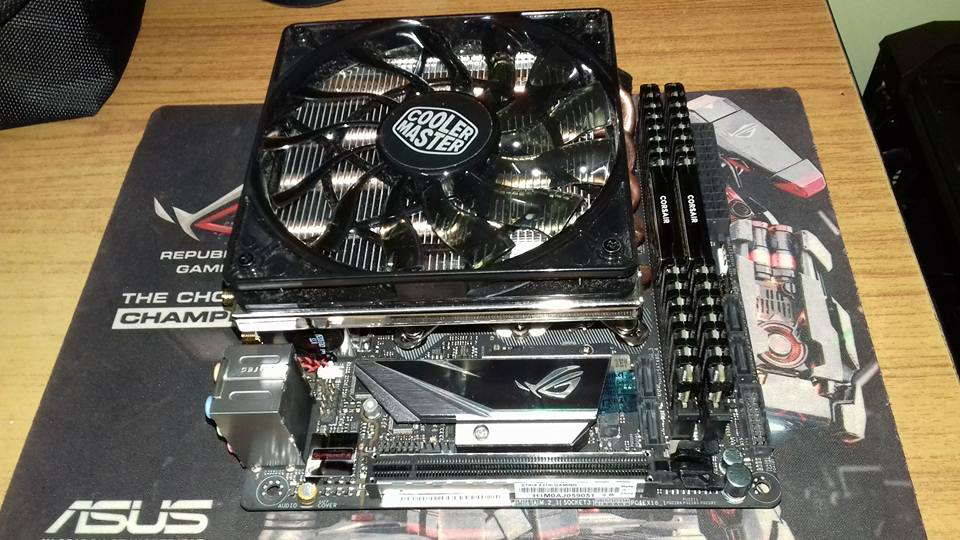
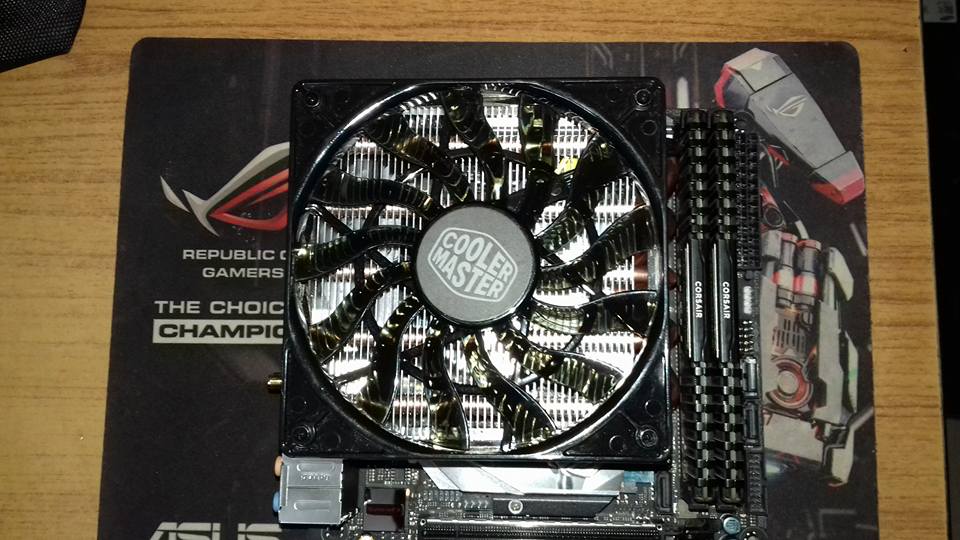
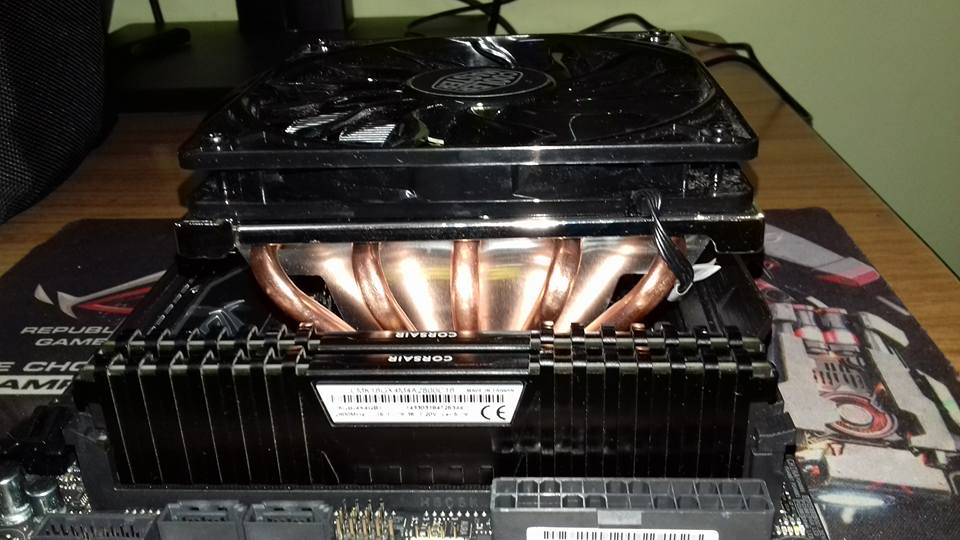
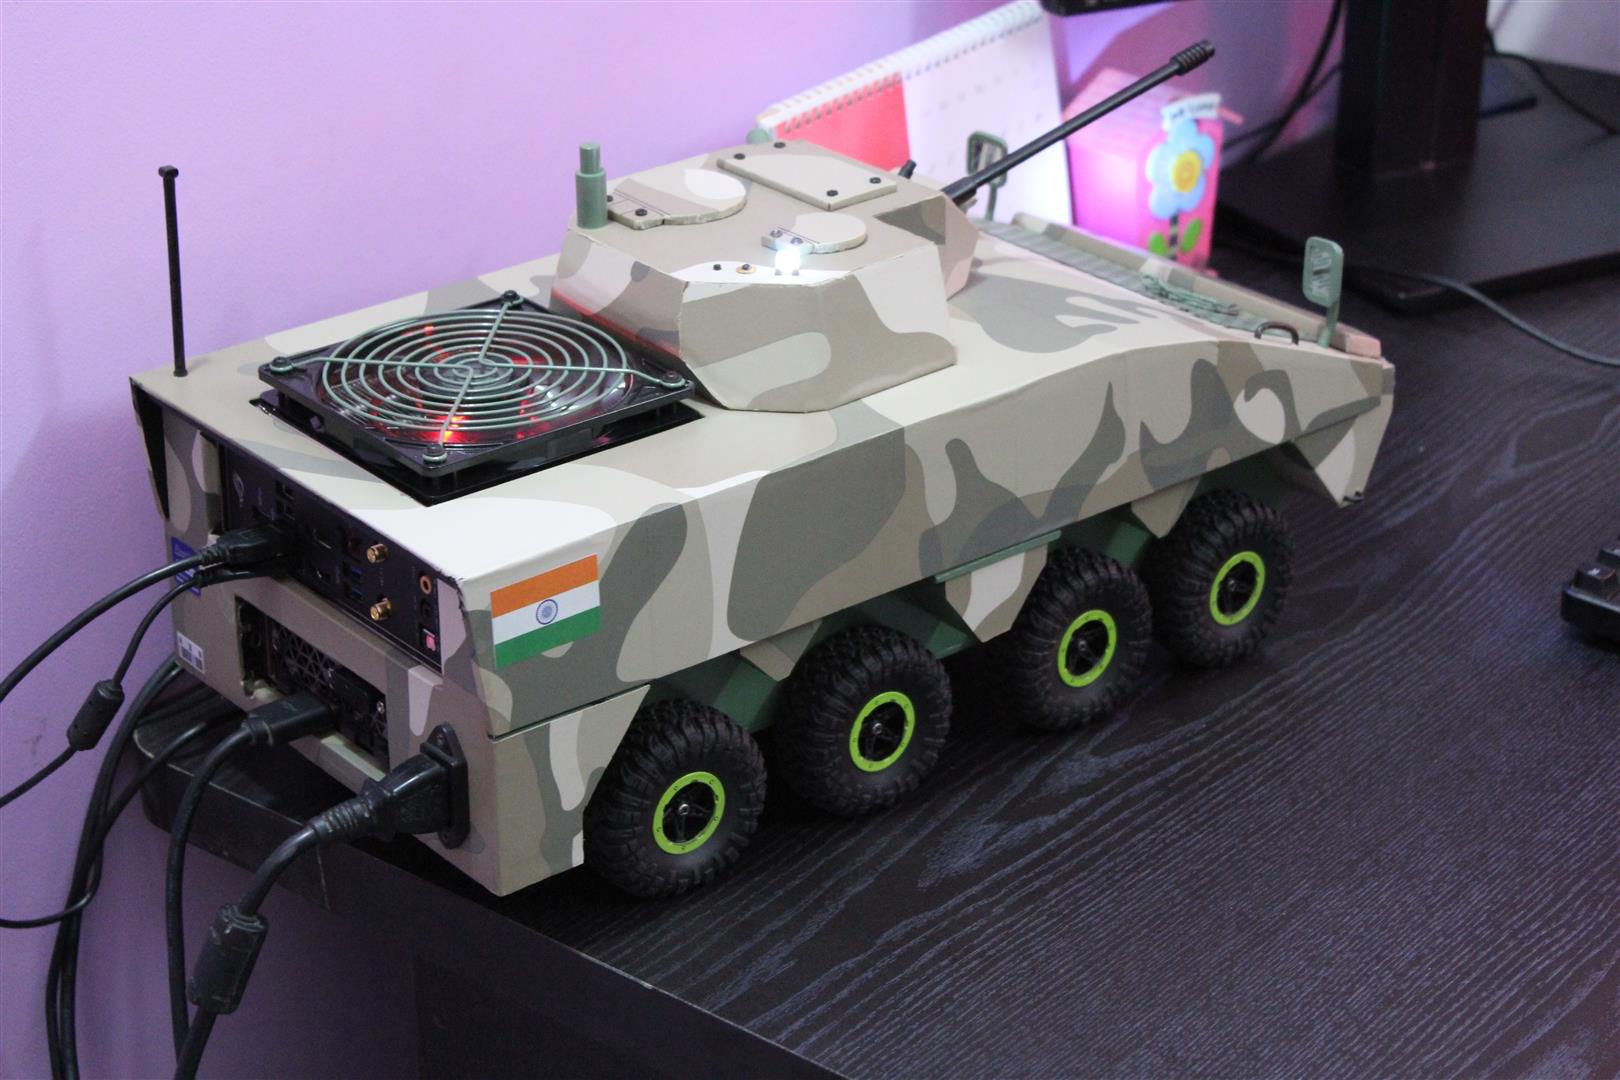
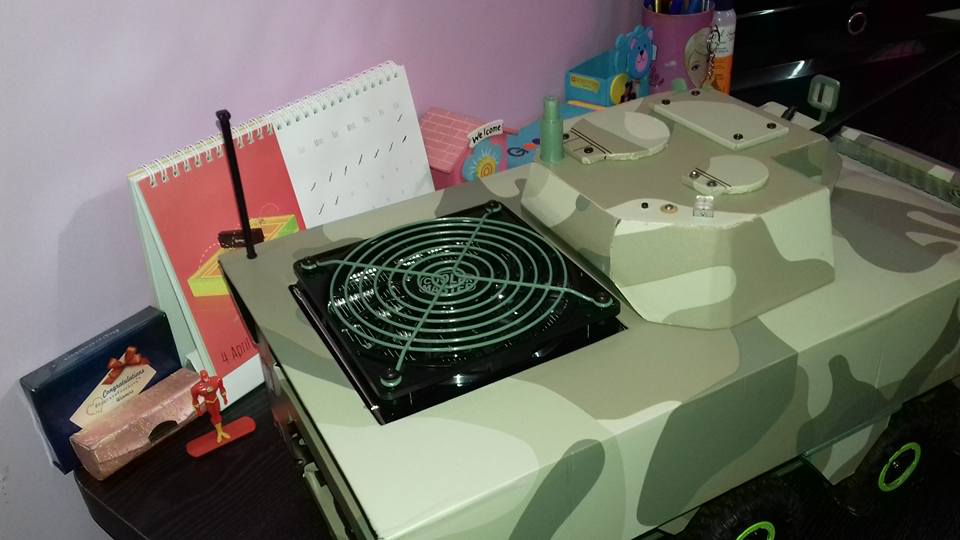
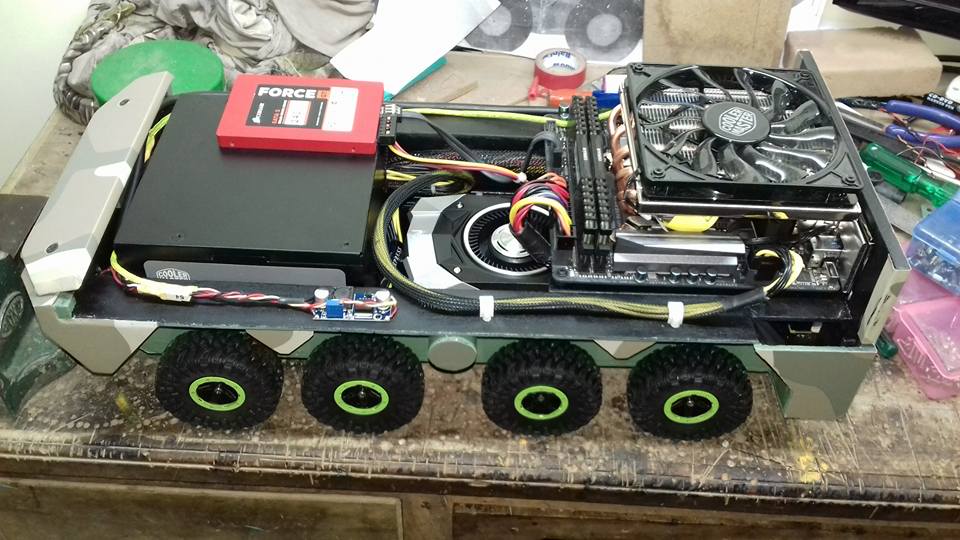
Working on top turret part and internal hardware installation.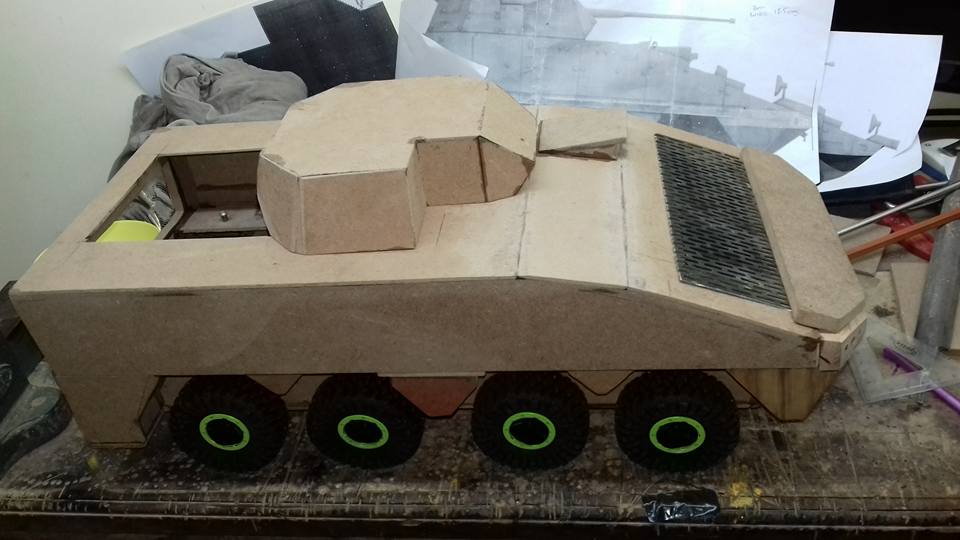


Test hardware installation. Everything fits perfectly.
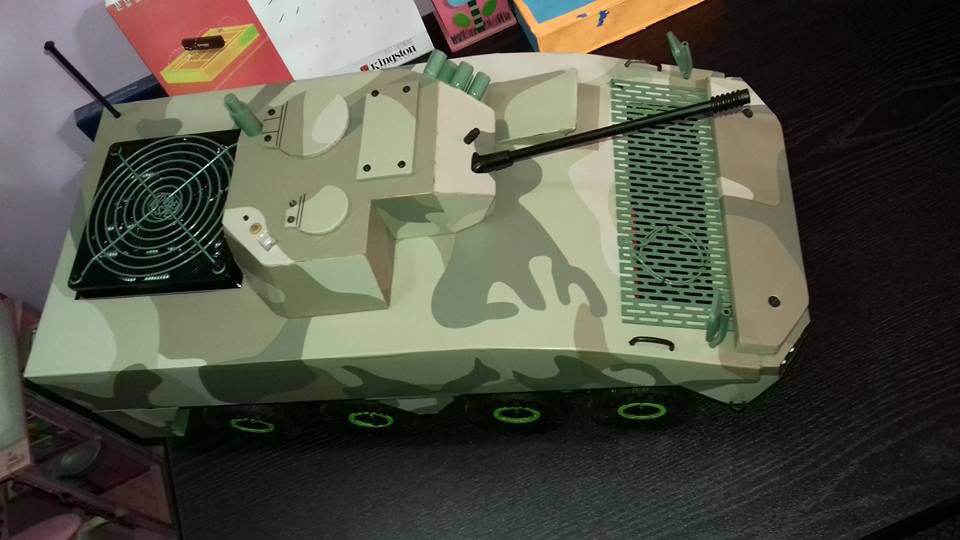
KTO build process going on with full speed. Hope to meet the deadline.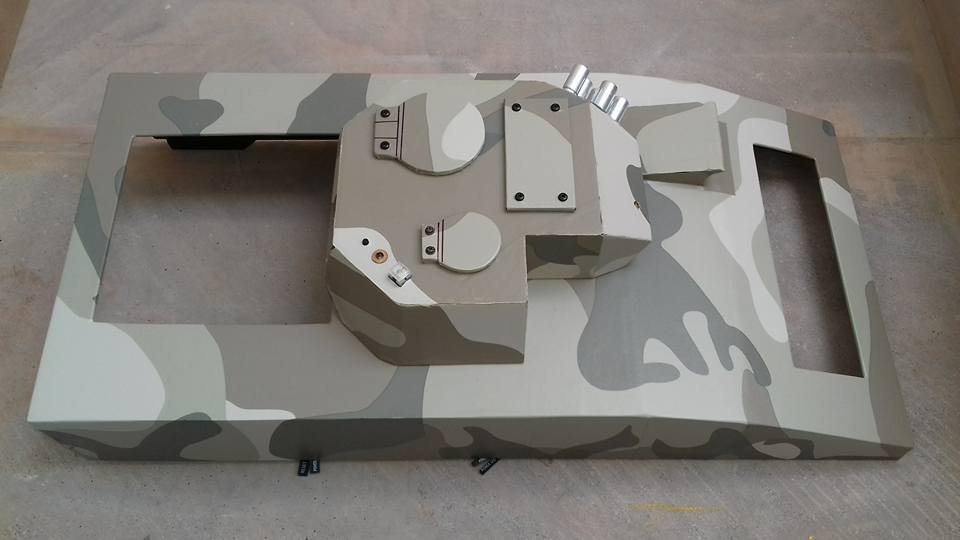
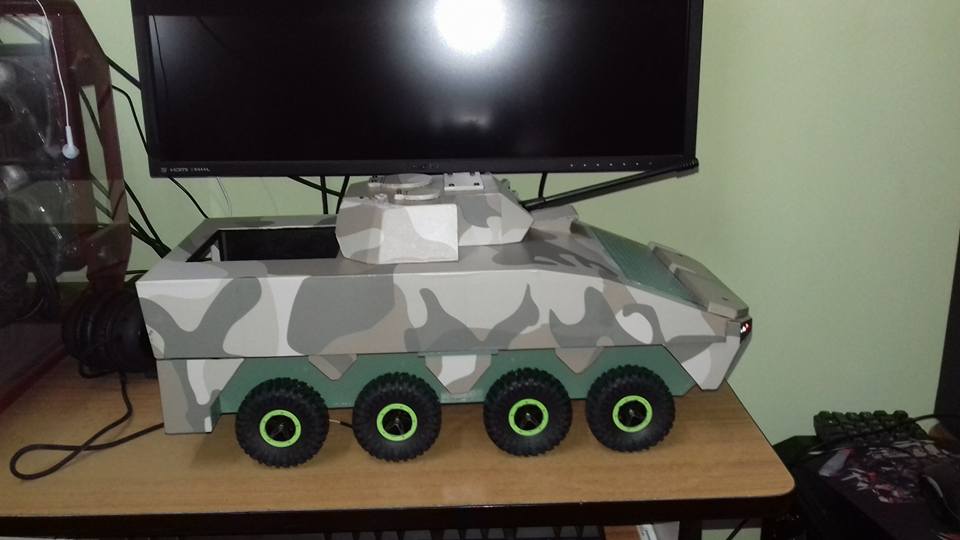

All hardware and software installation done. KTO is ready to fire.
-
Liquid Cooling part done.

 Bottom cover installed
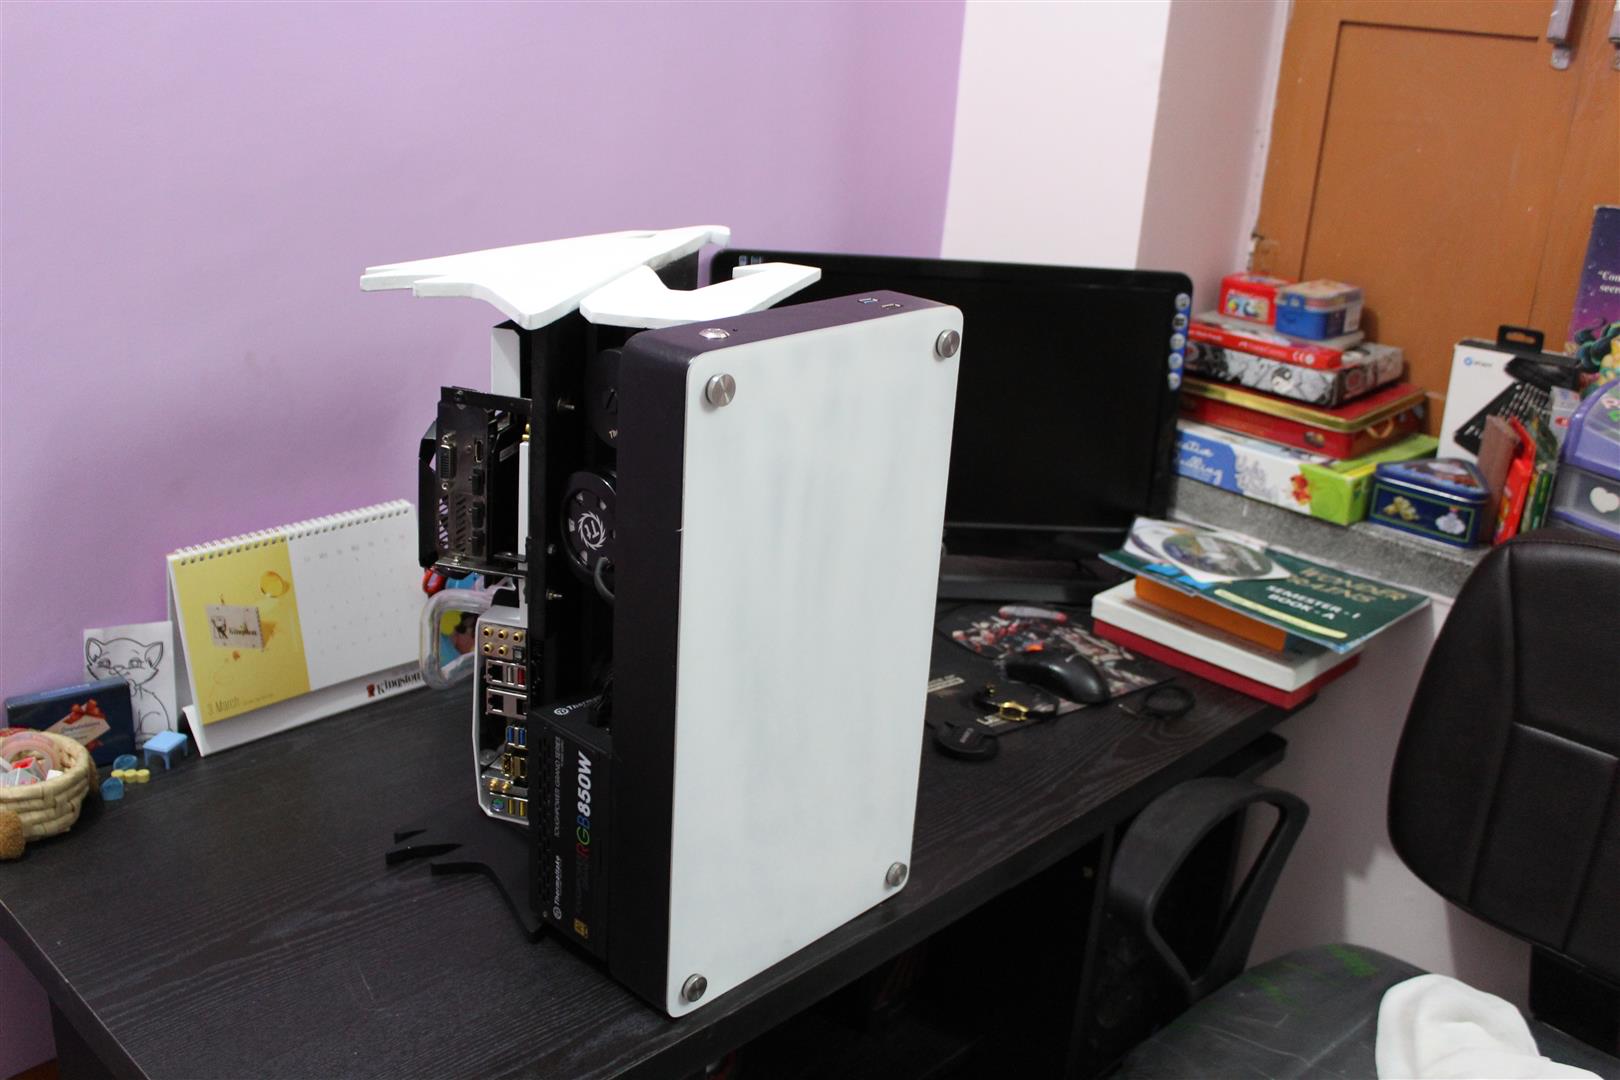

 Now let’s fire it up.
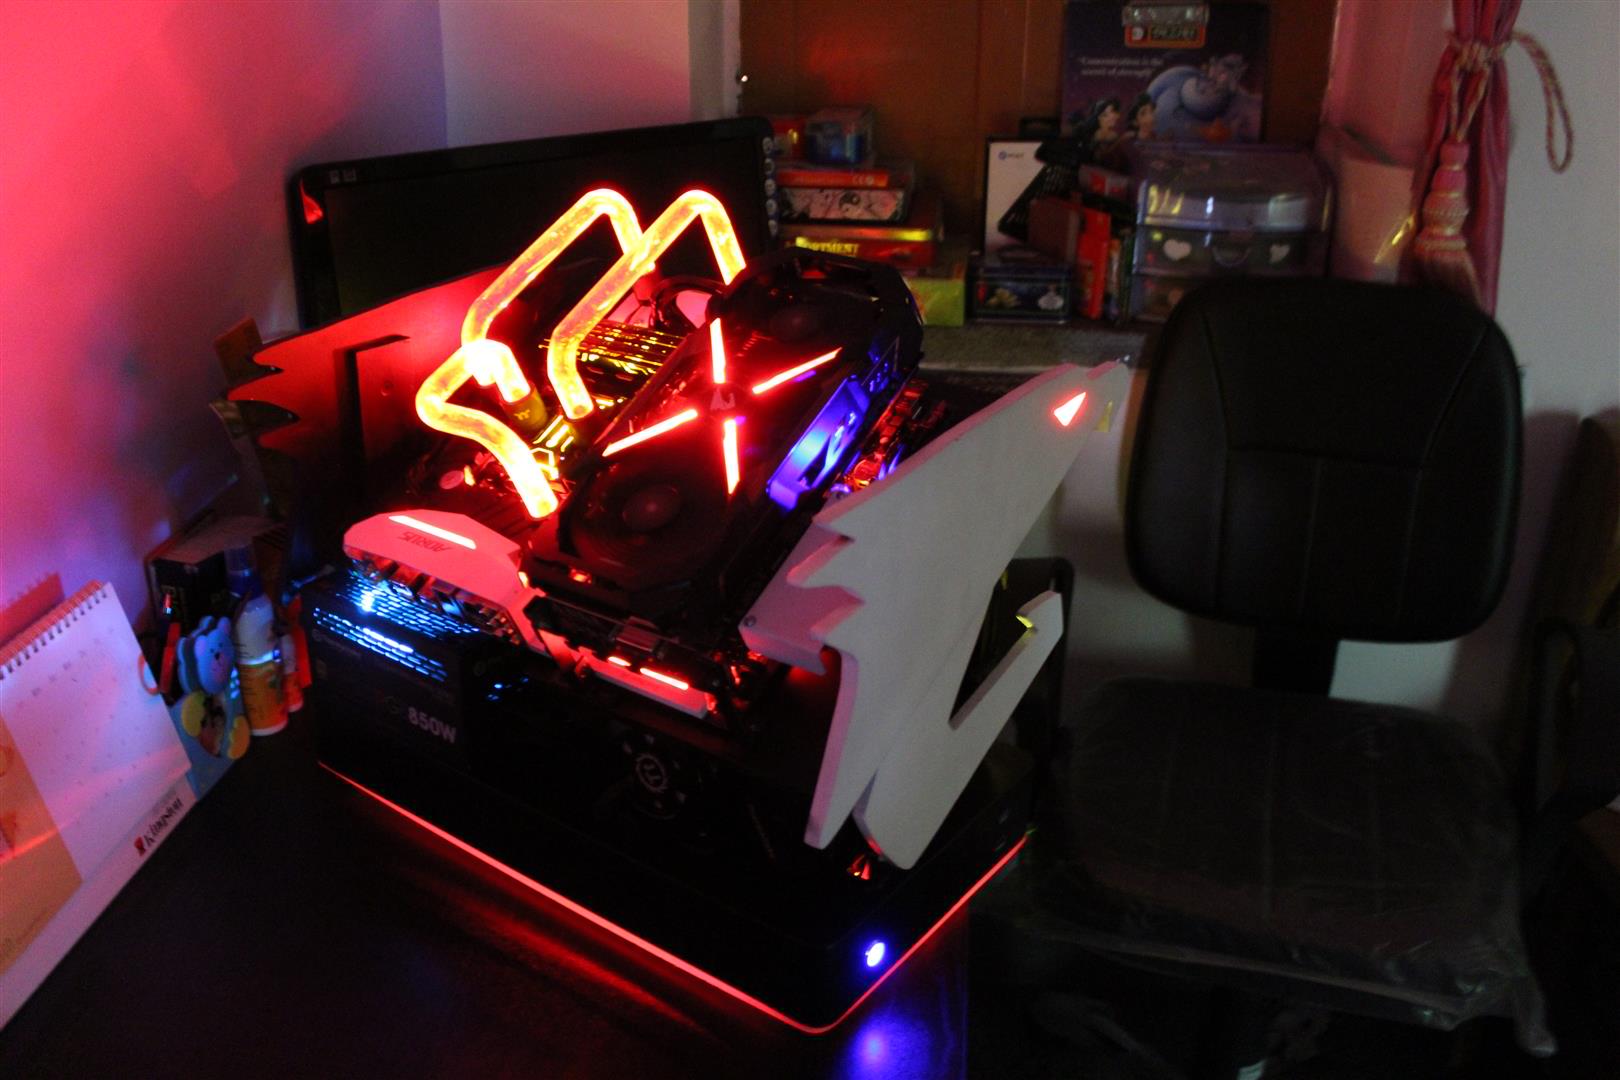
 More updates Soon.Thanks
-
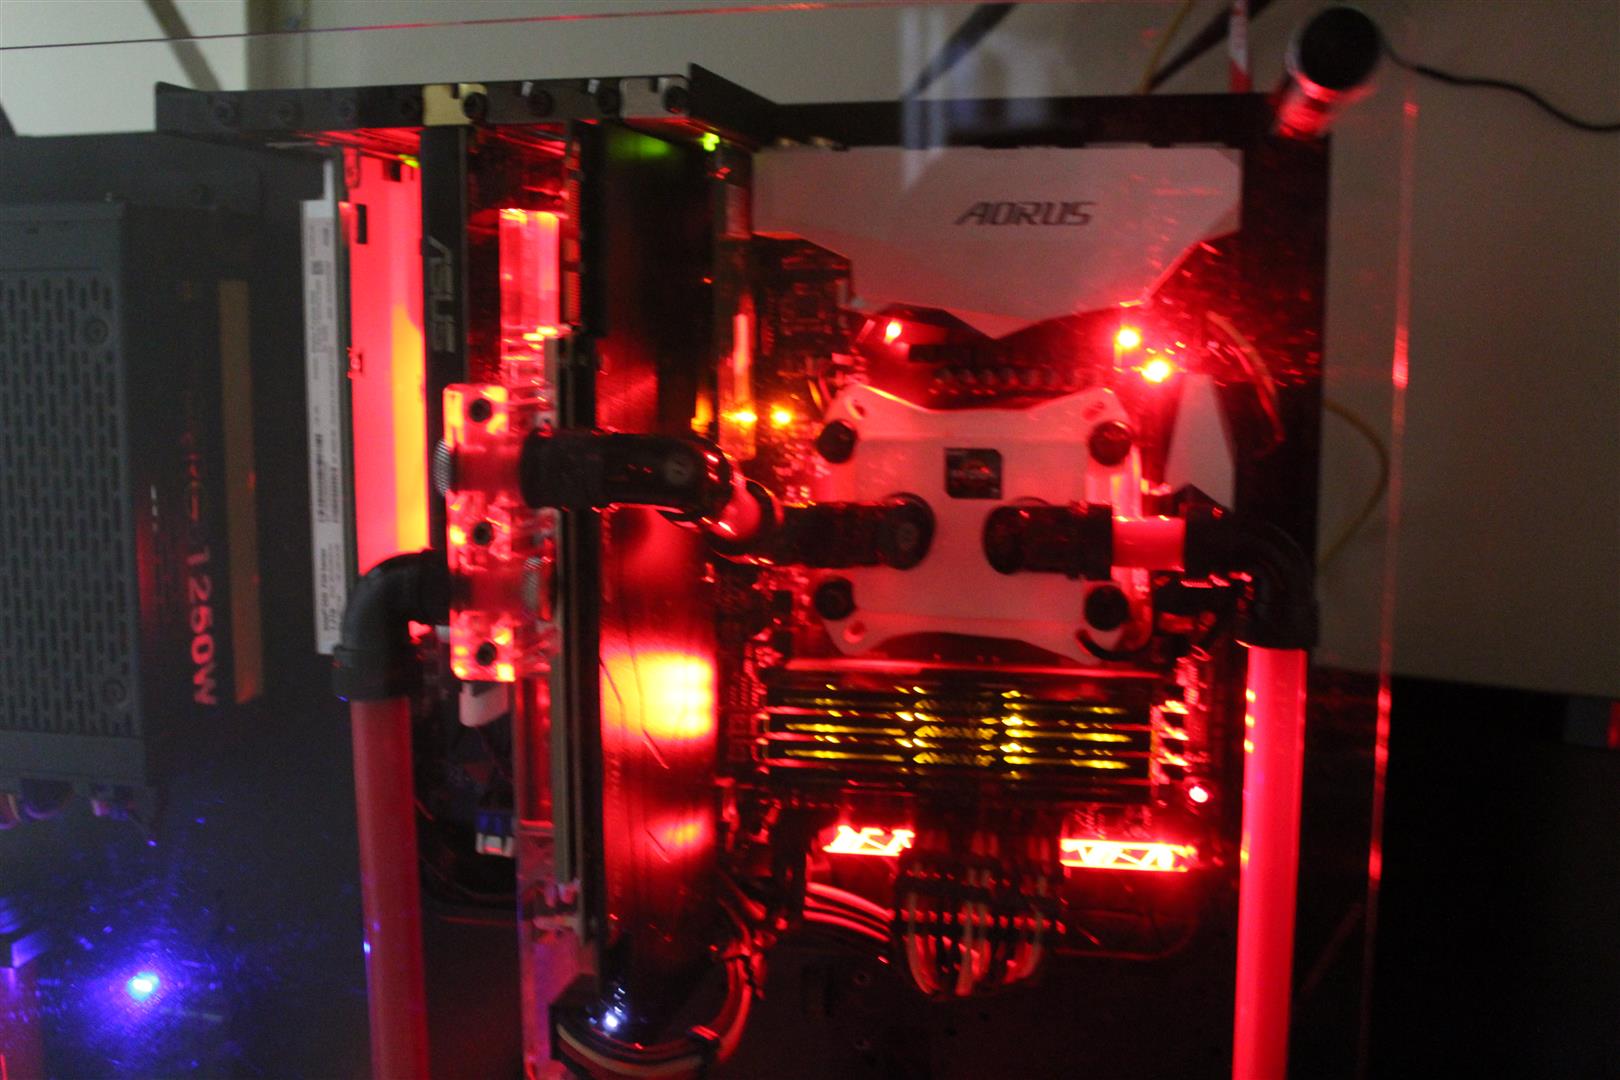
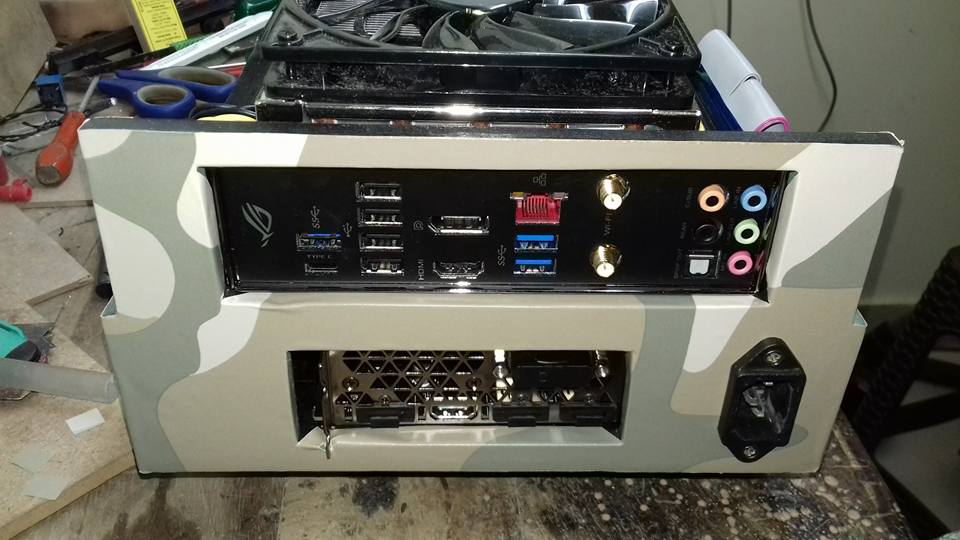
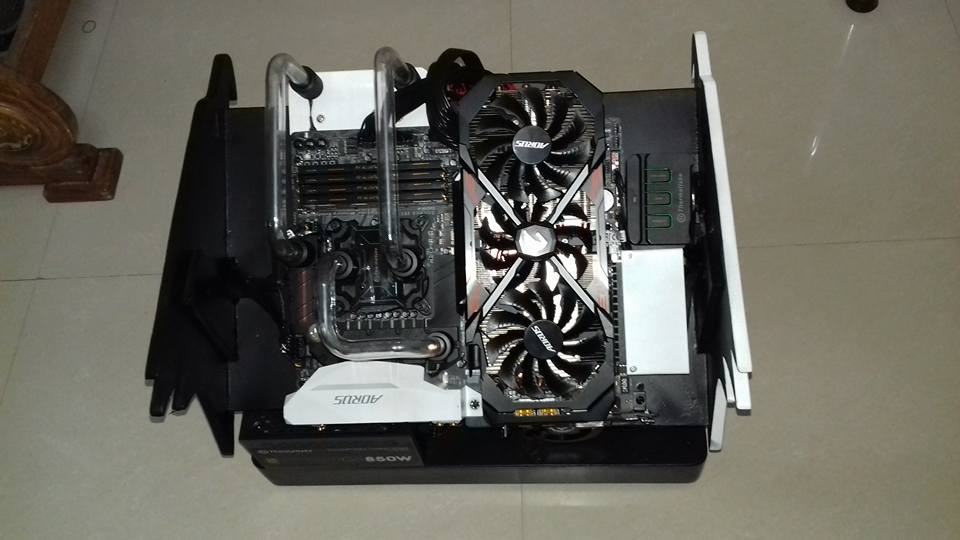
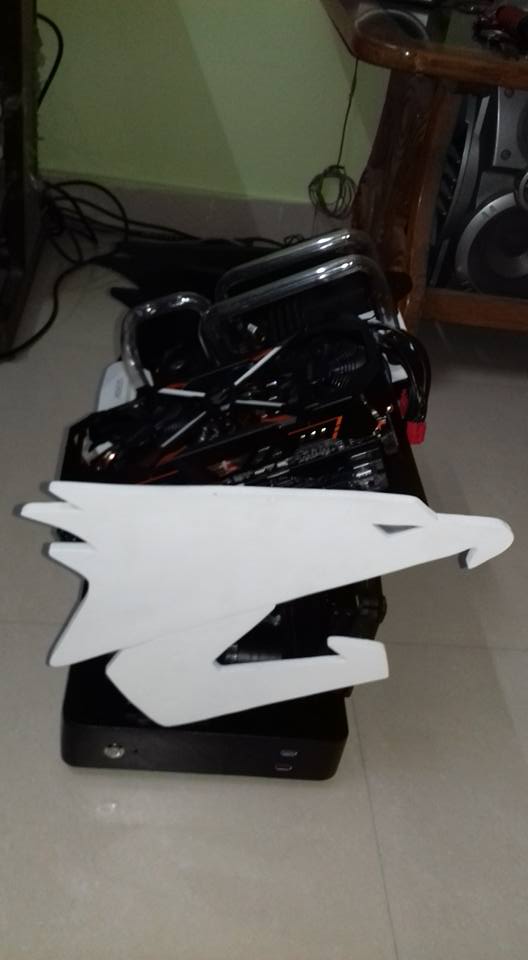
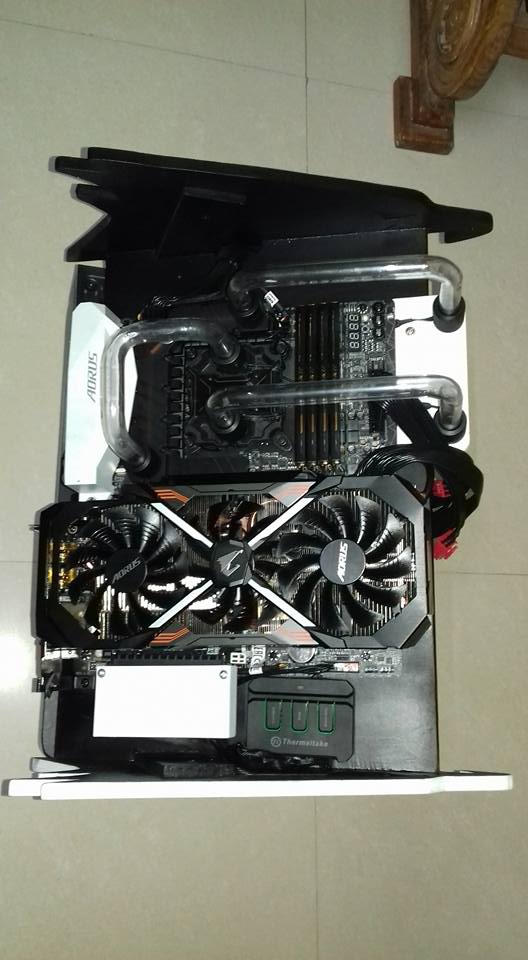
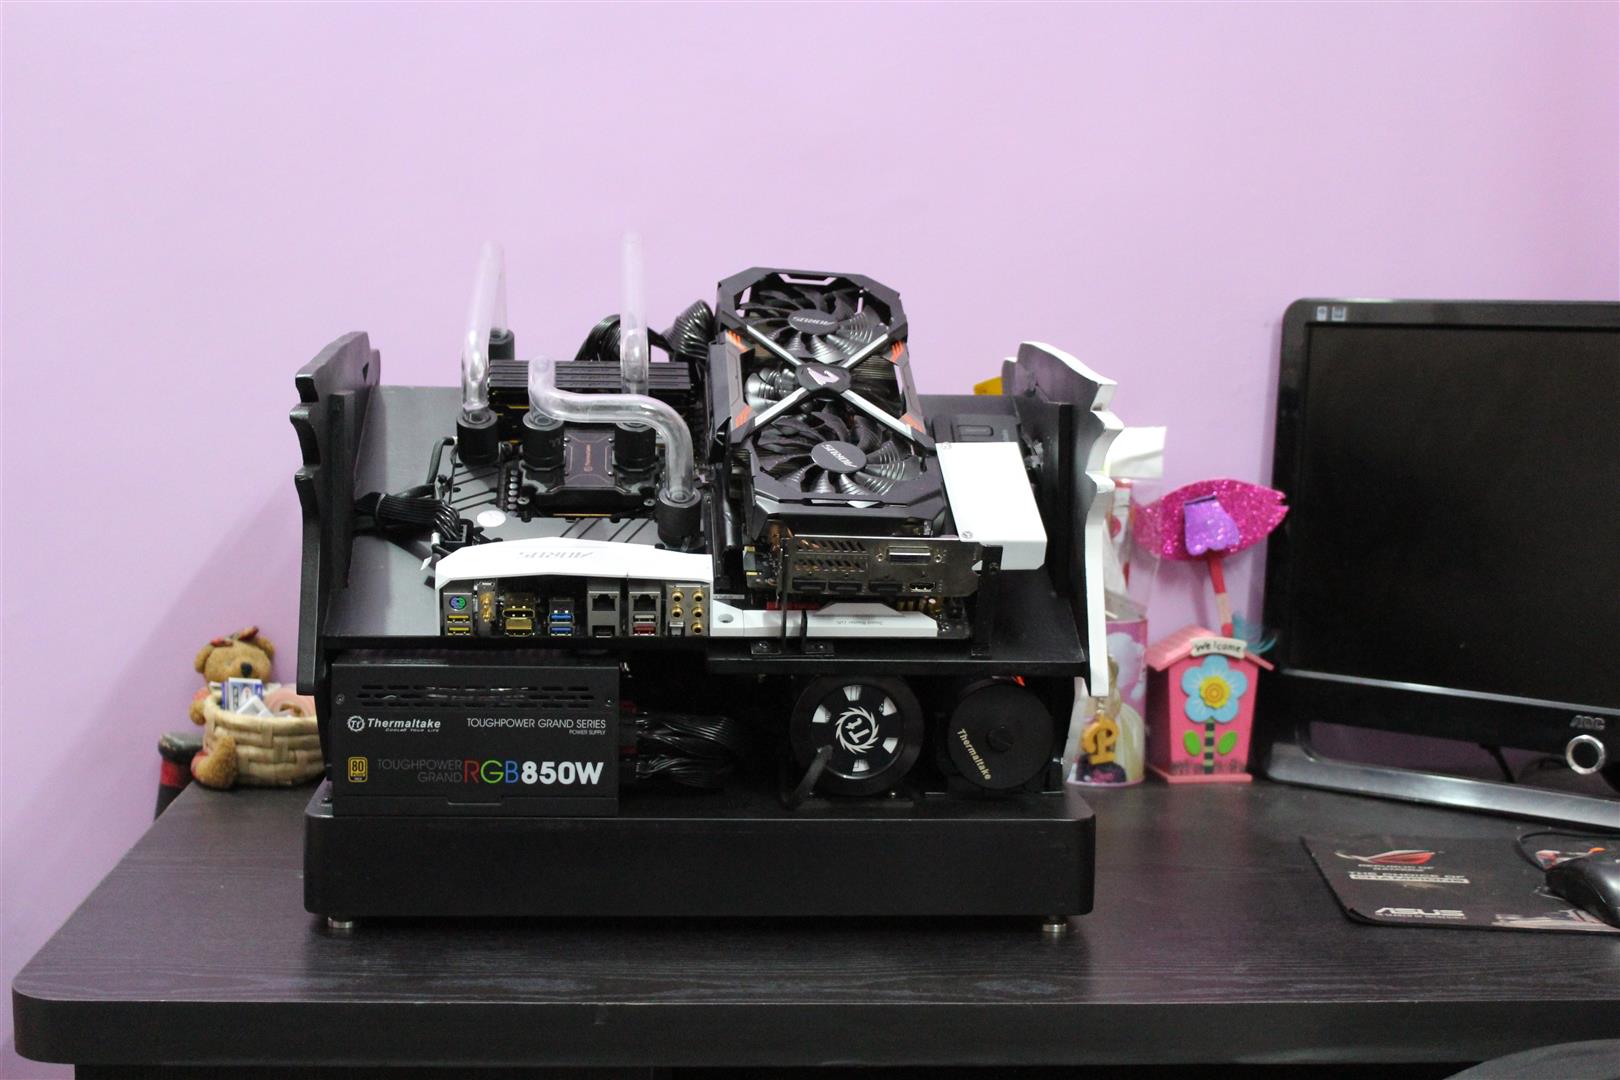
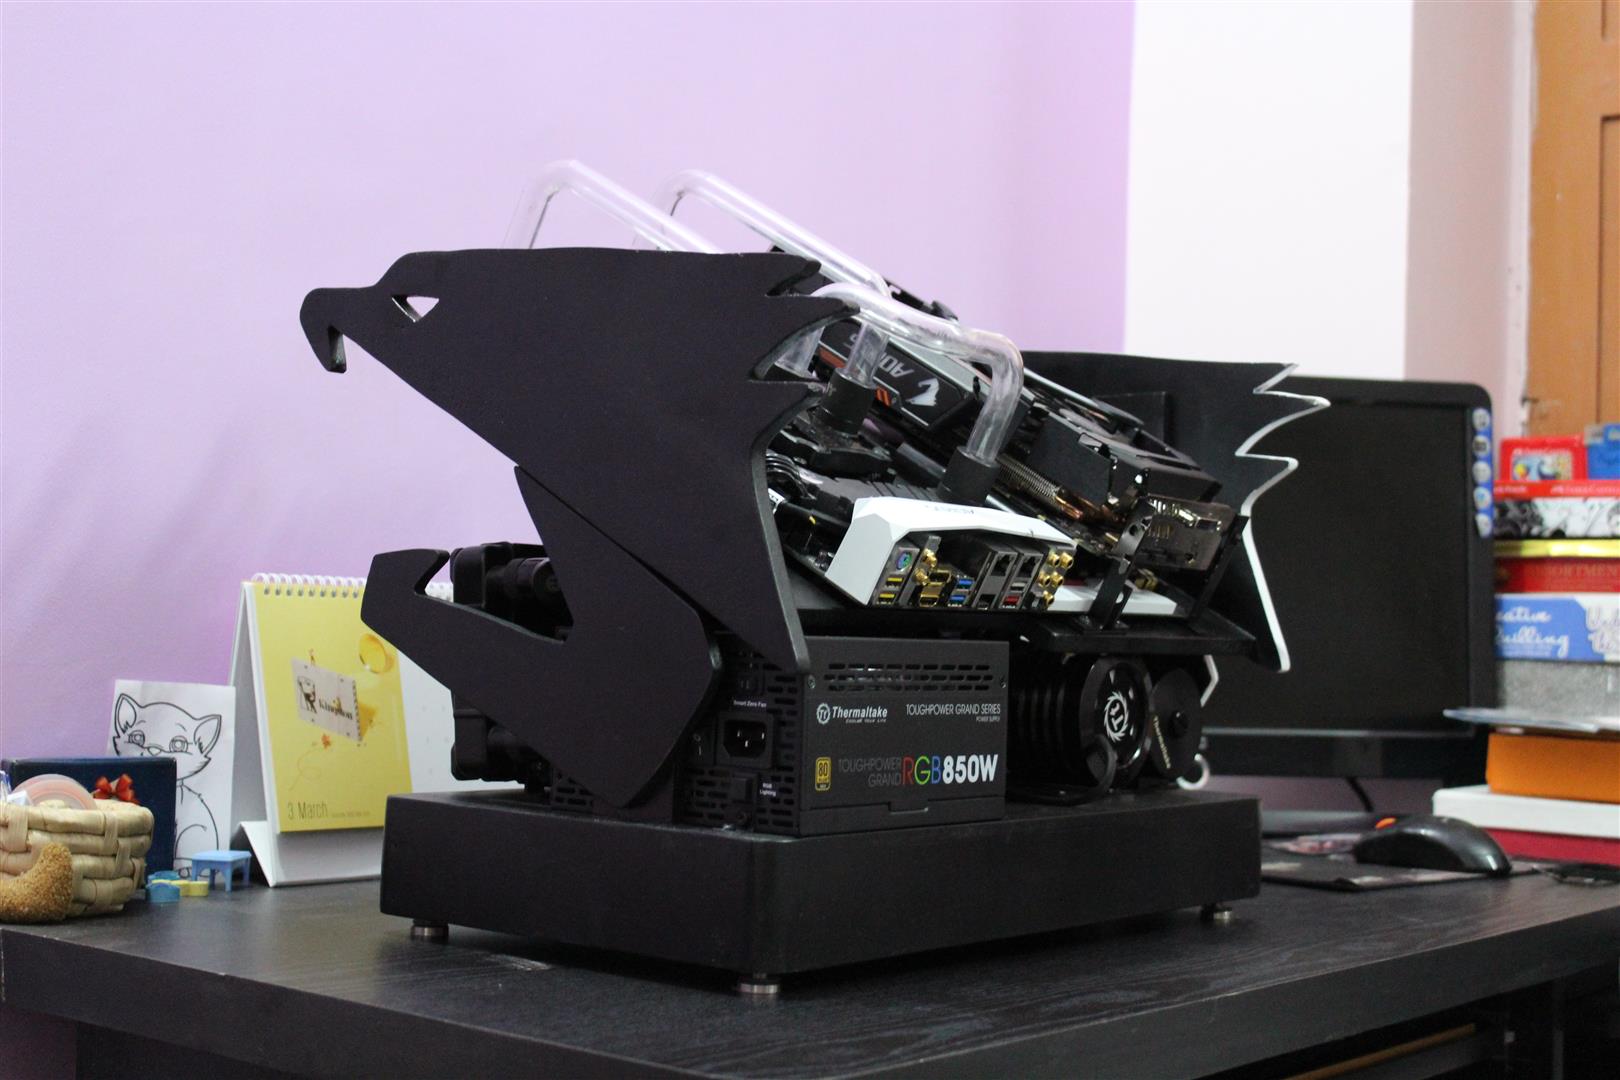
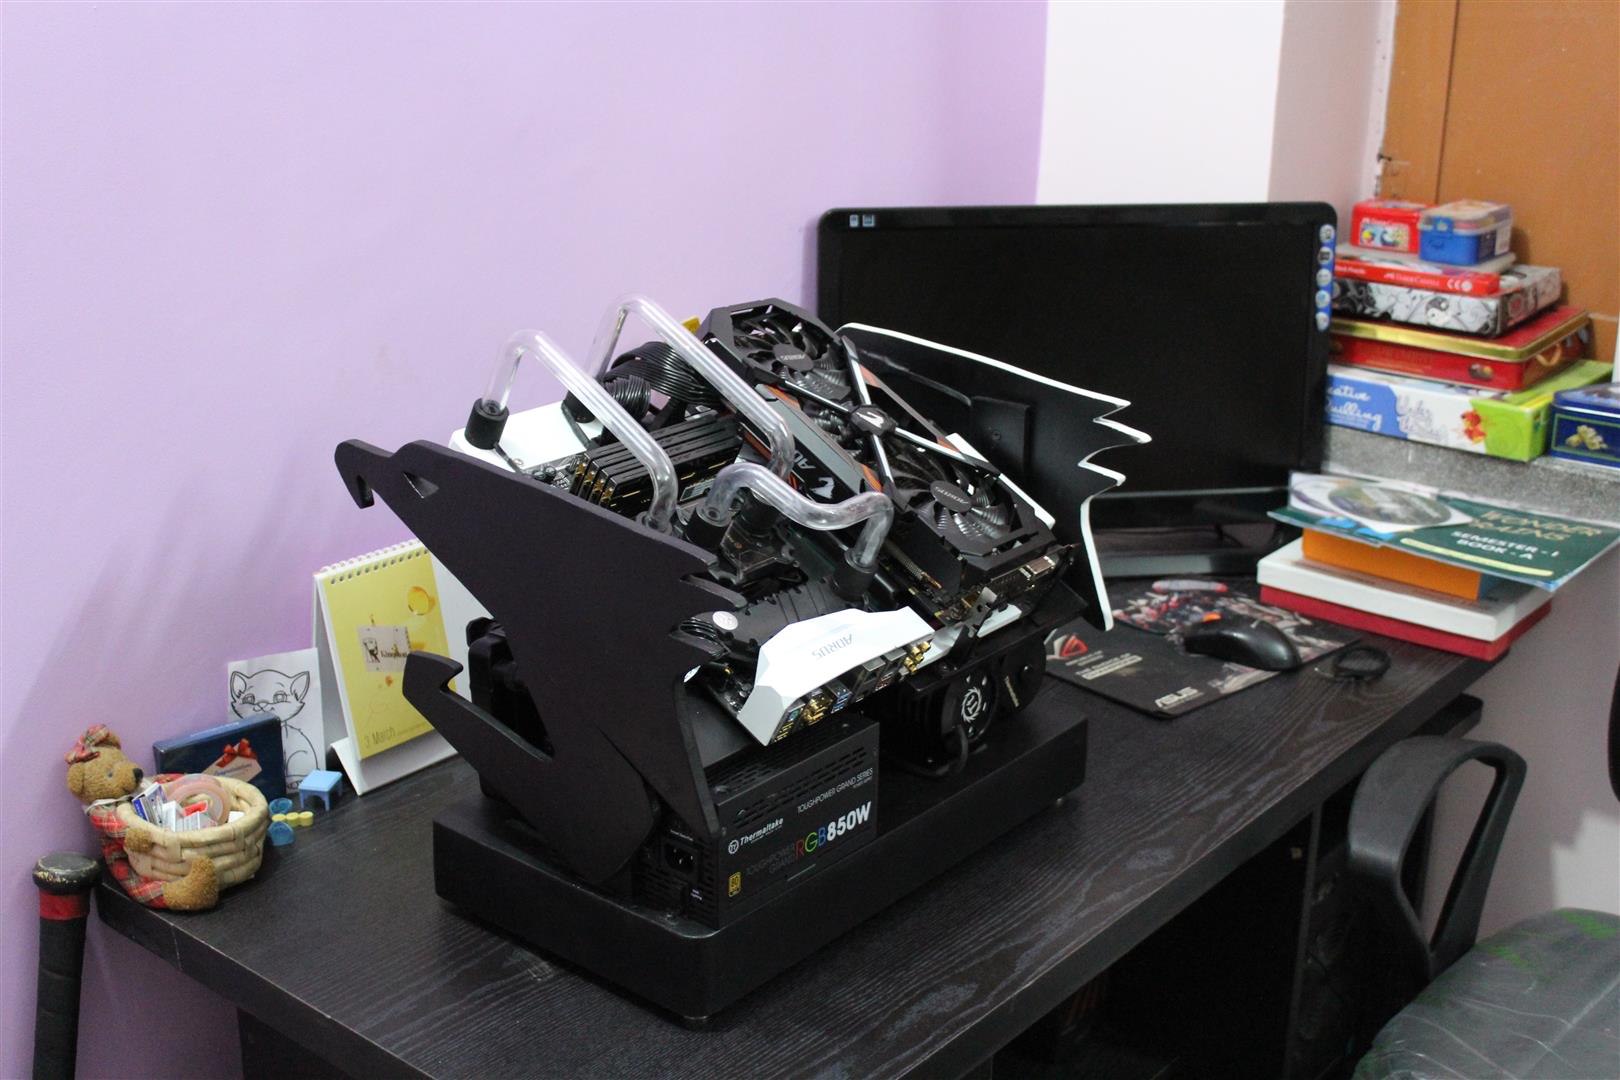
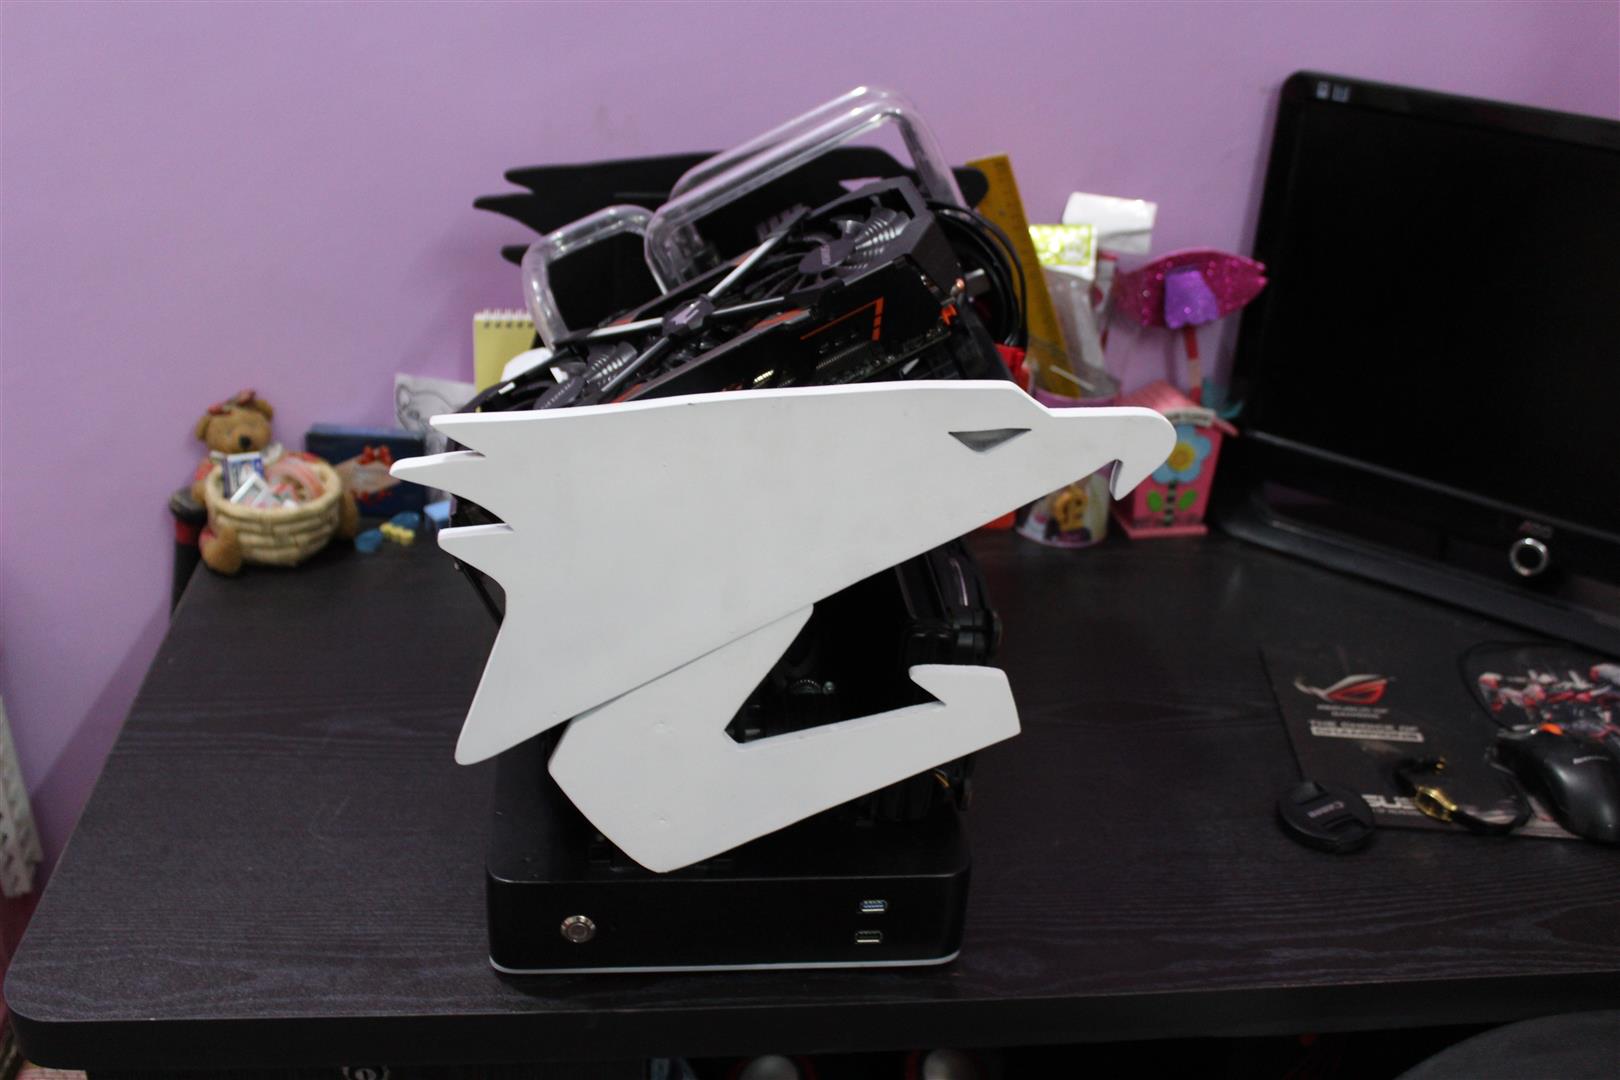
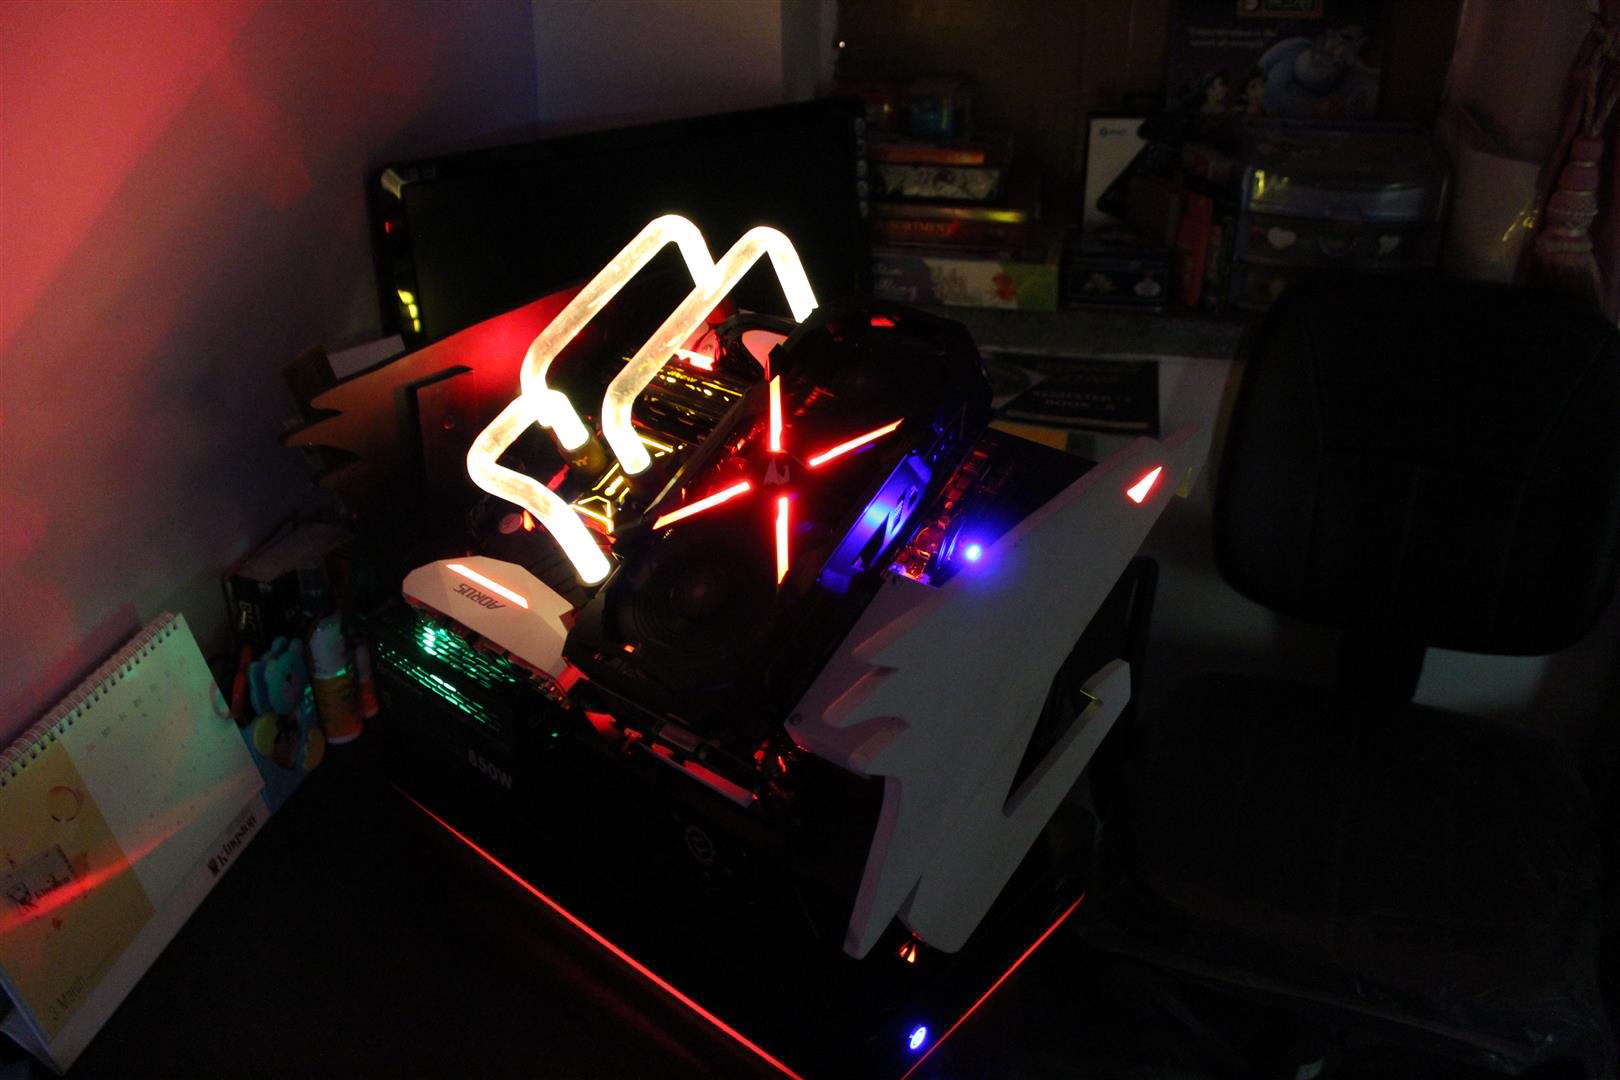
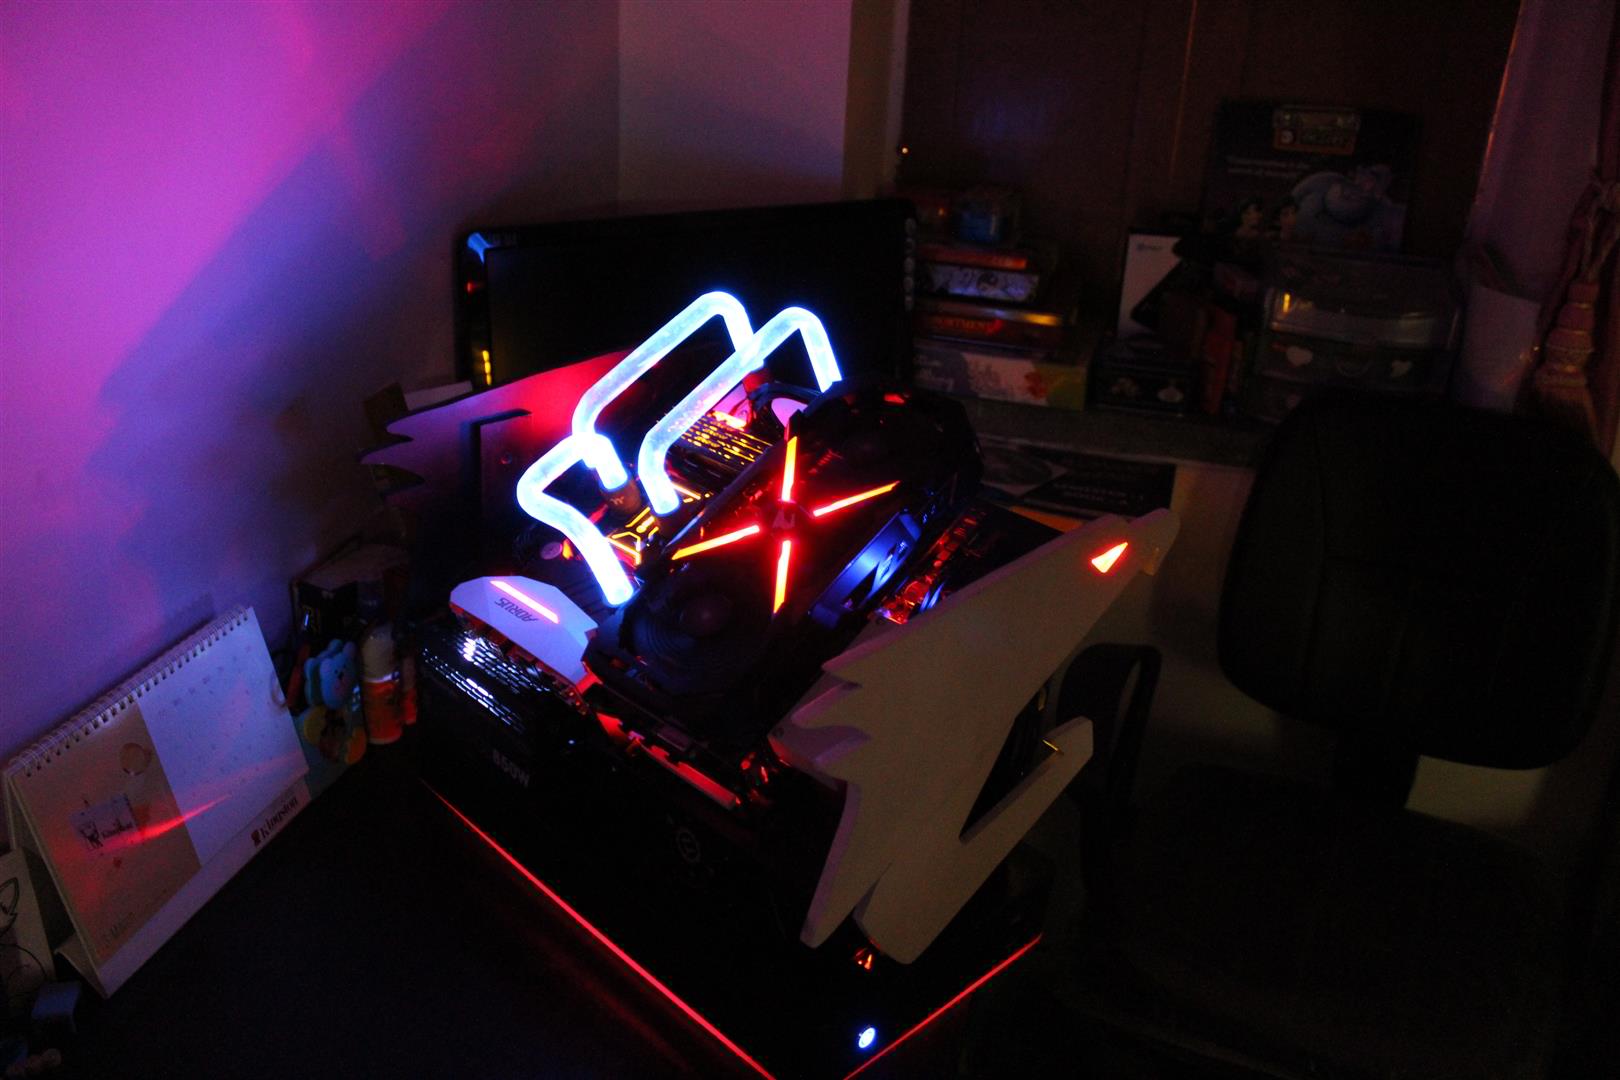
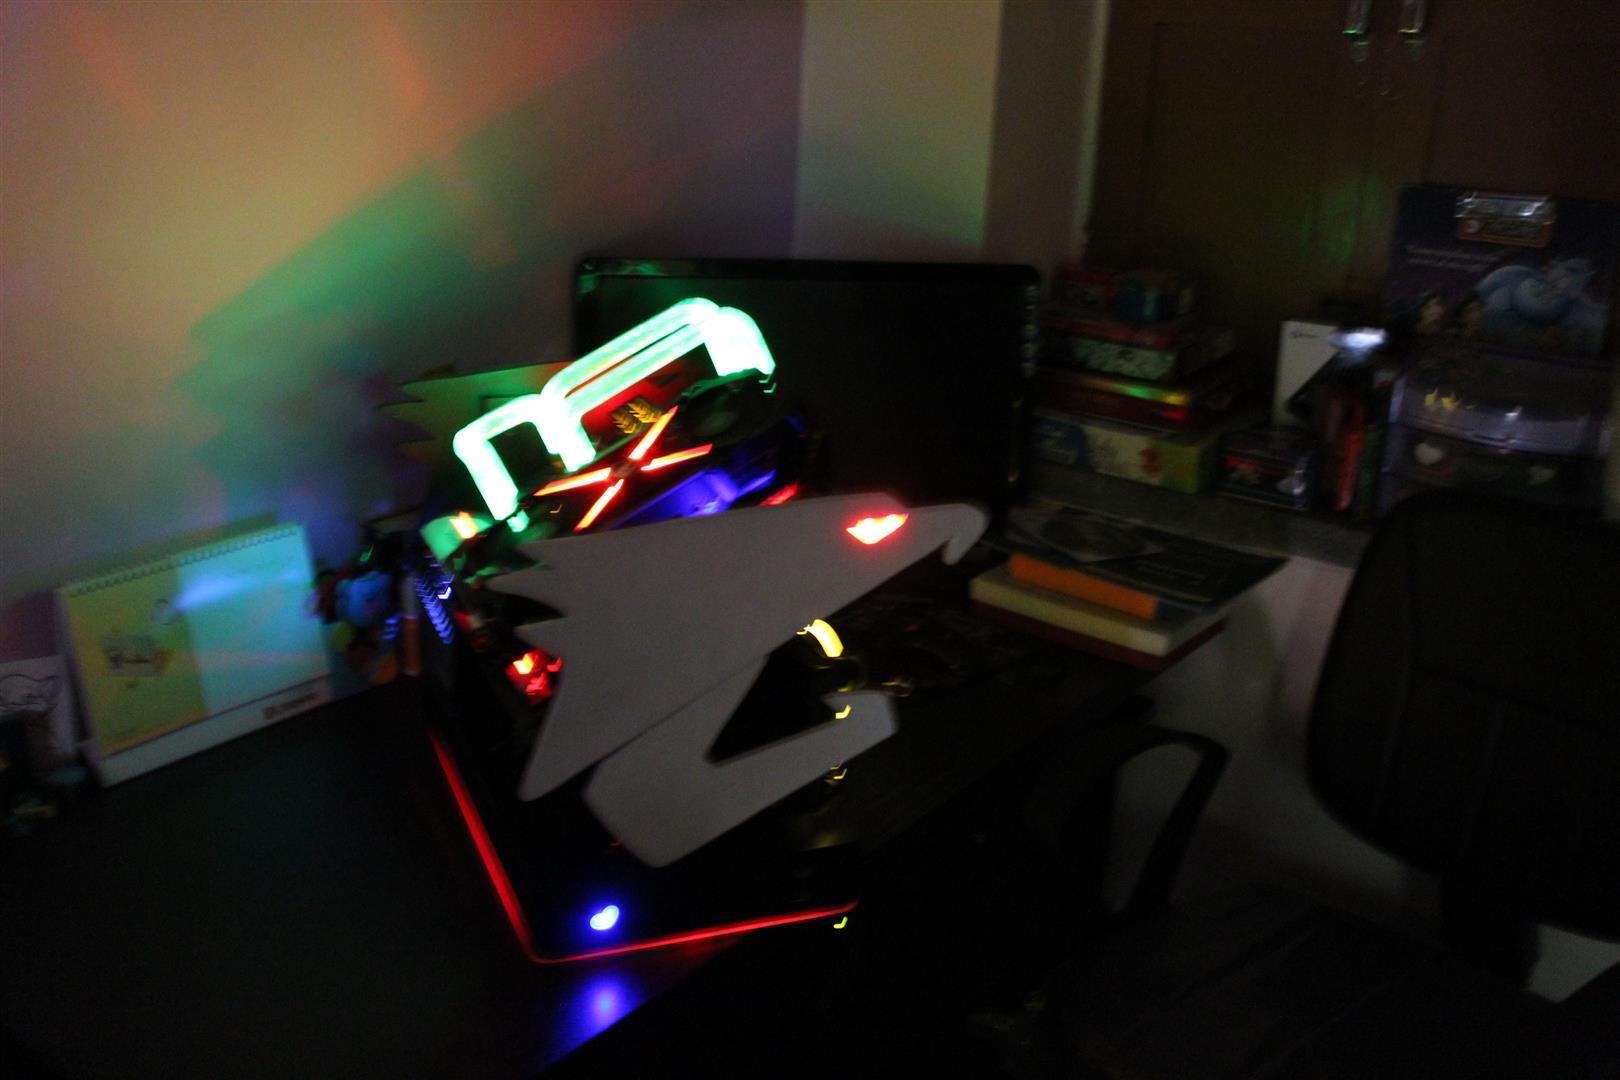
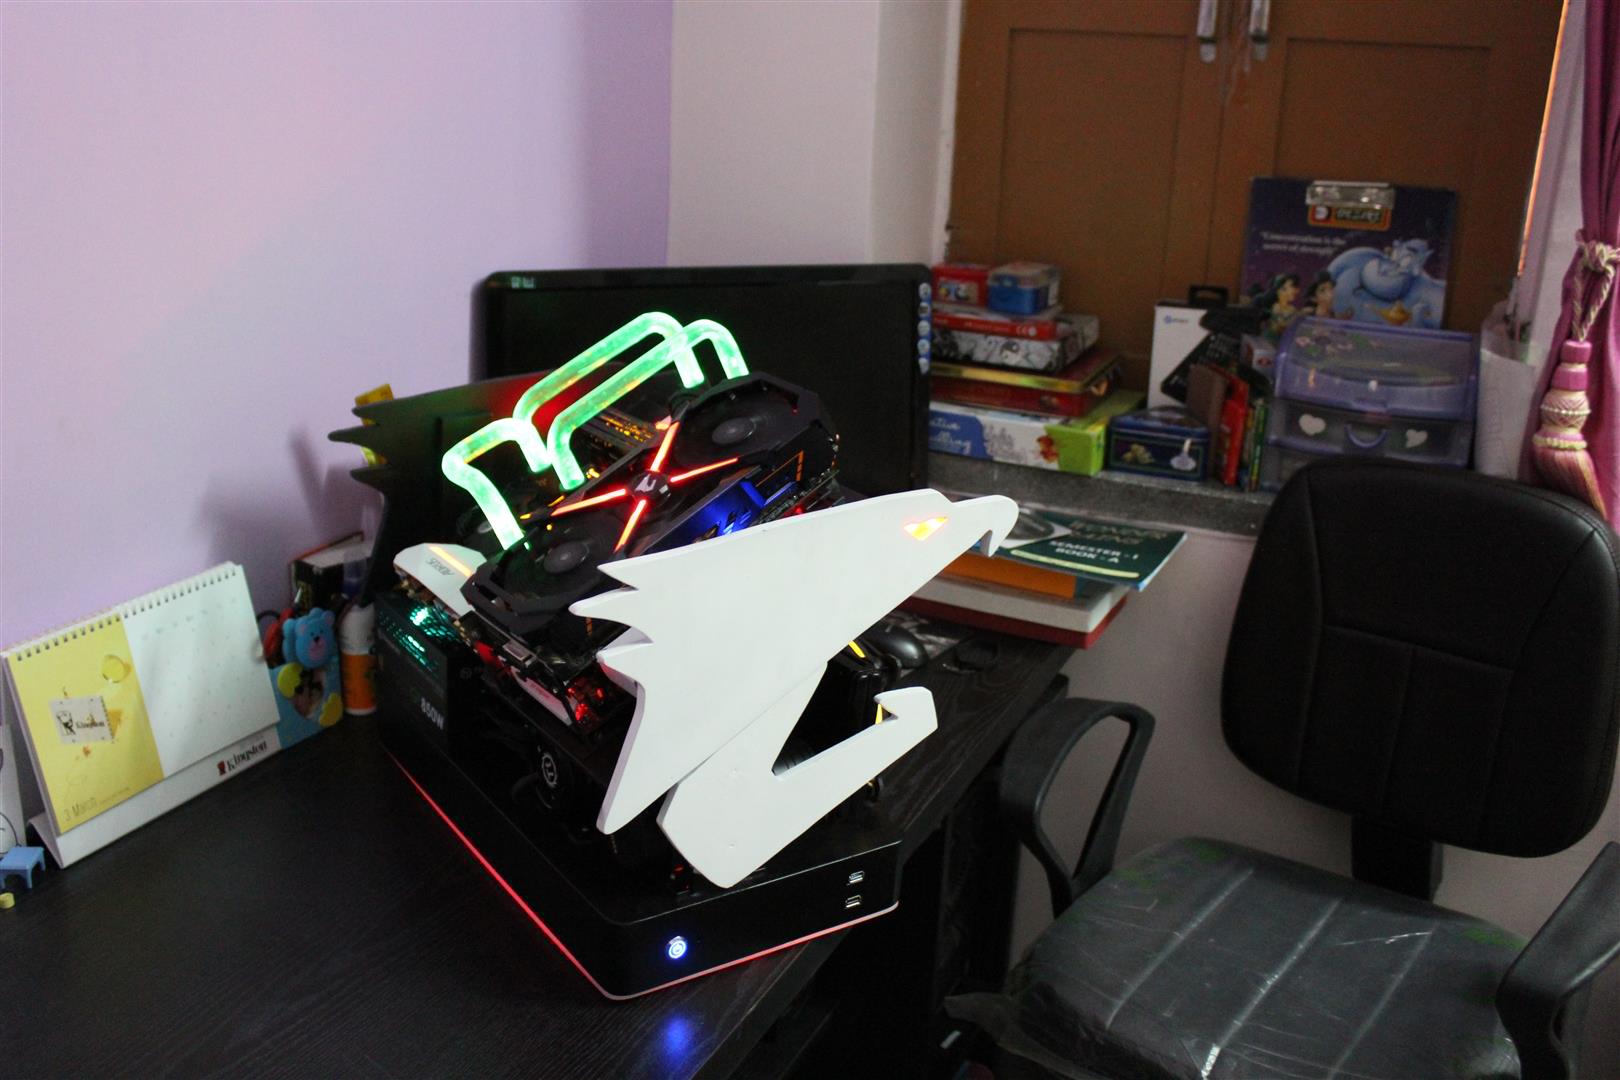
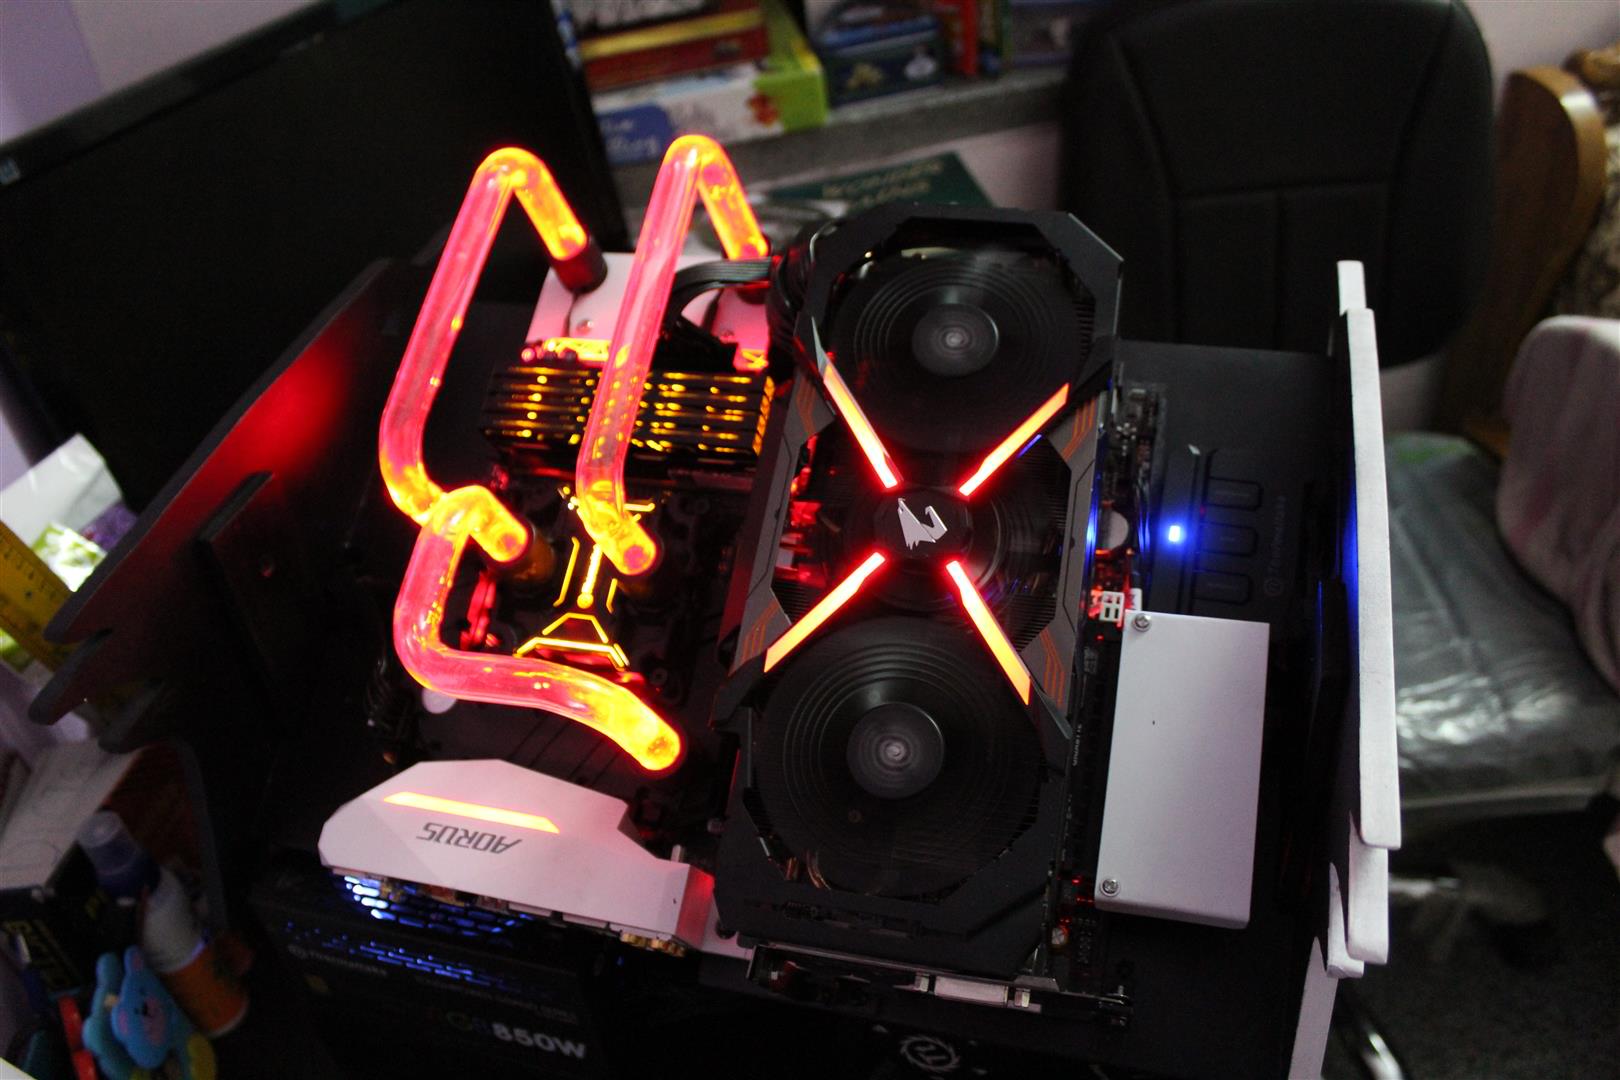
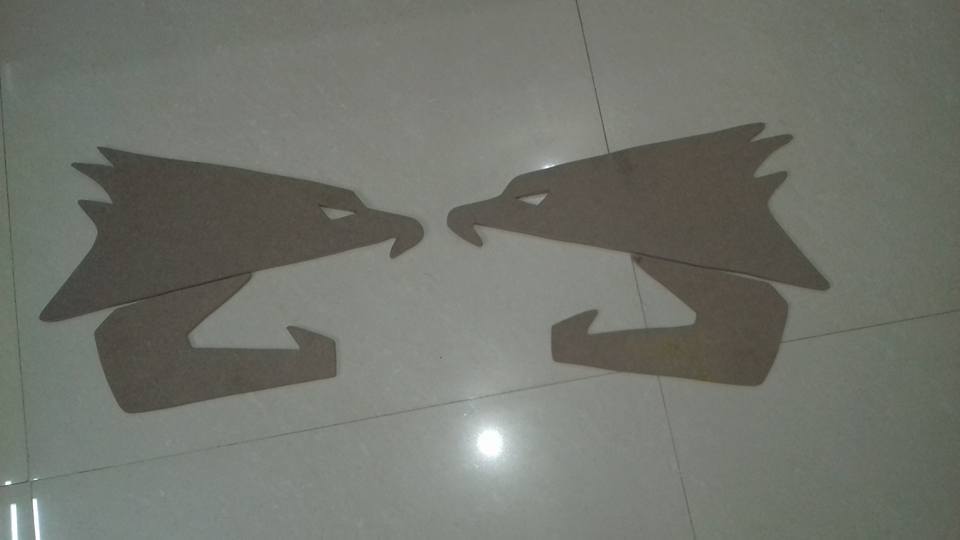
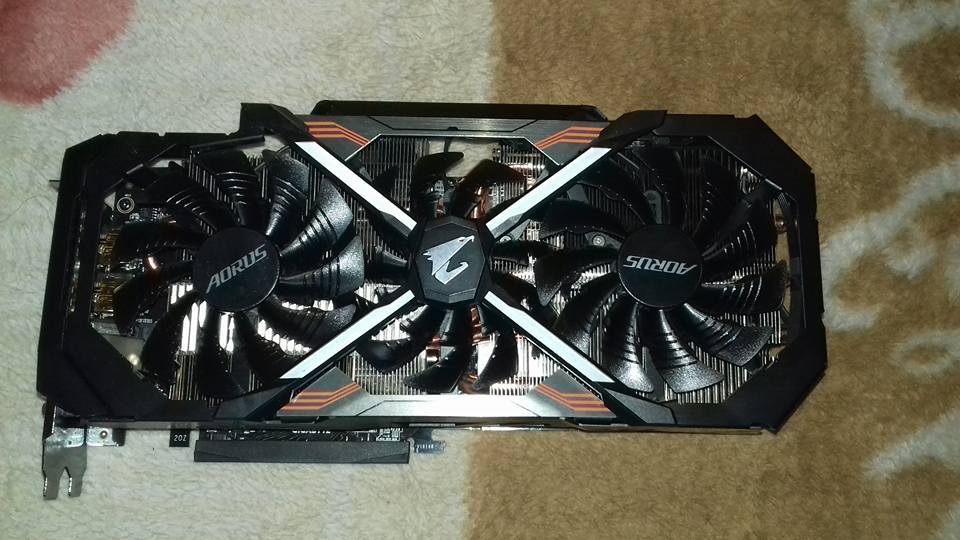
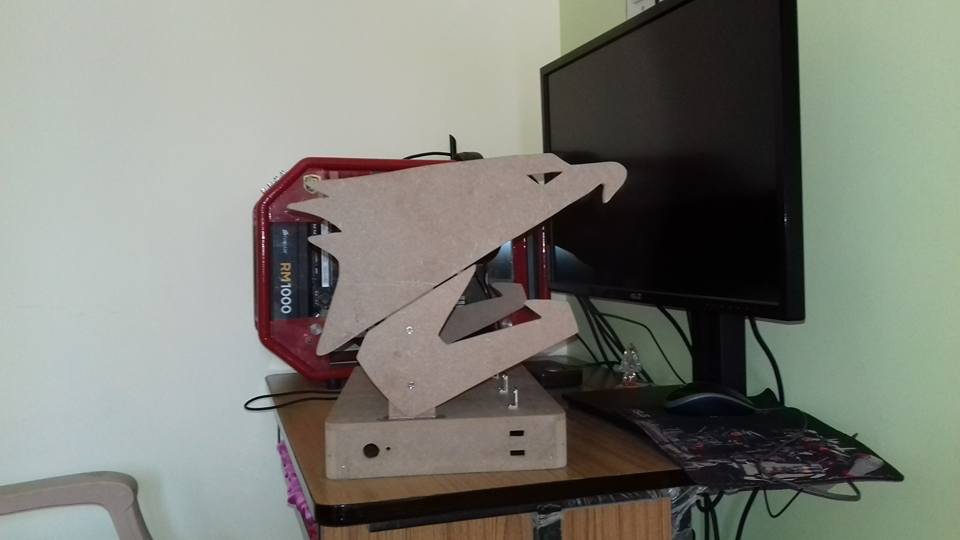
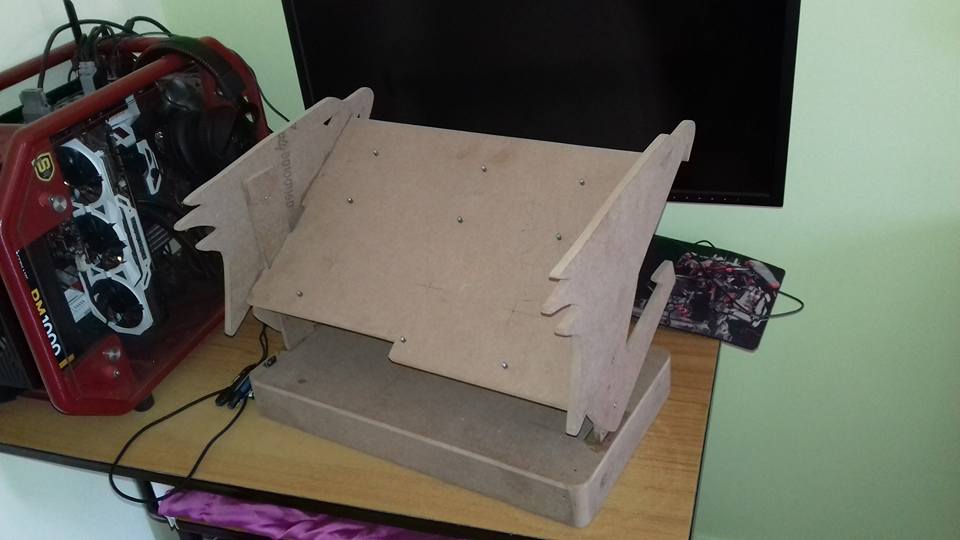
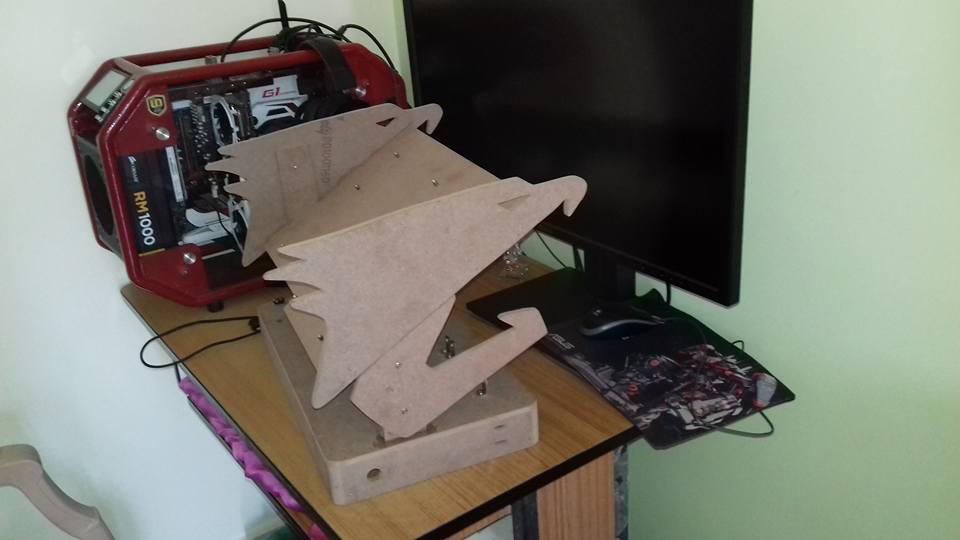
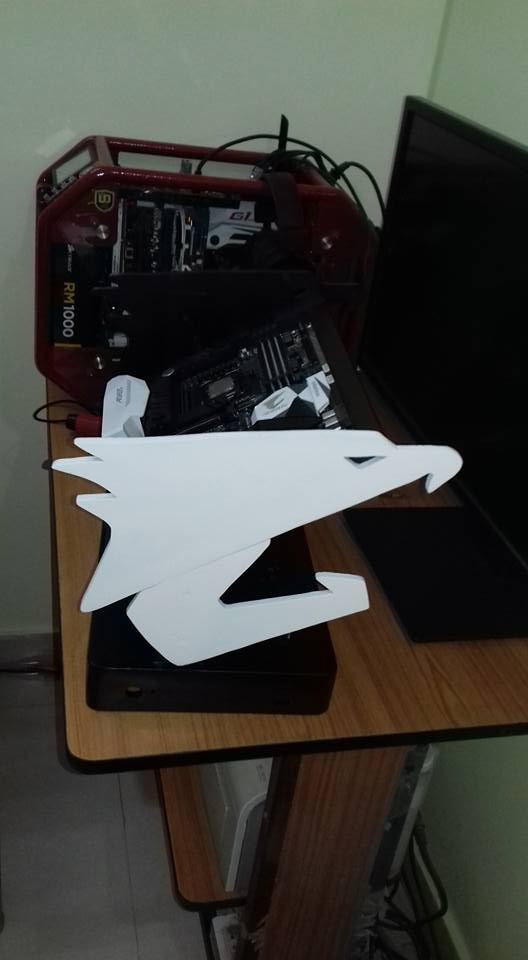
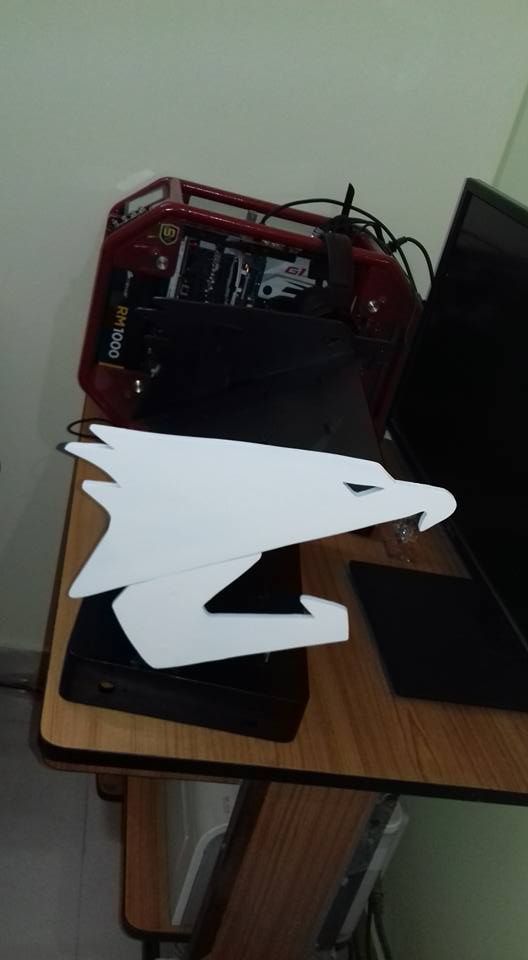
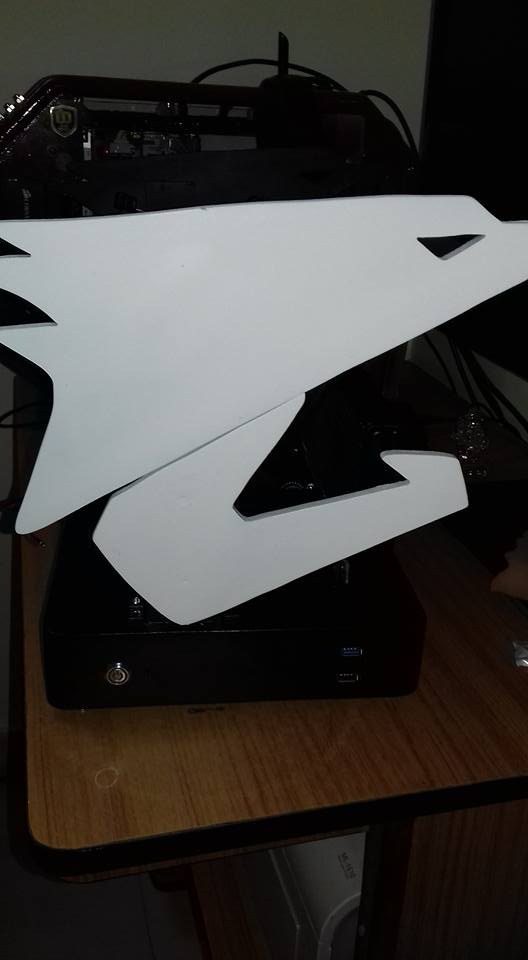
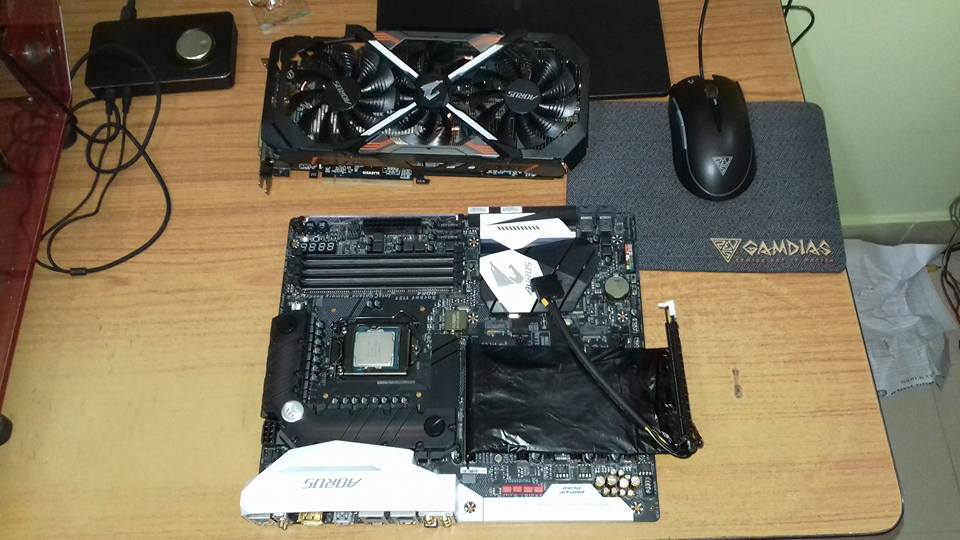
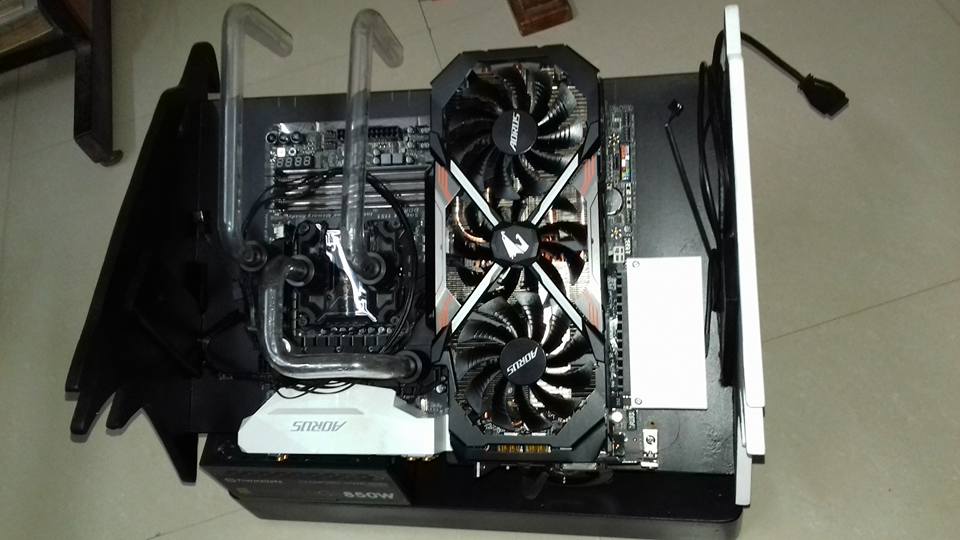
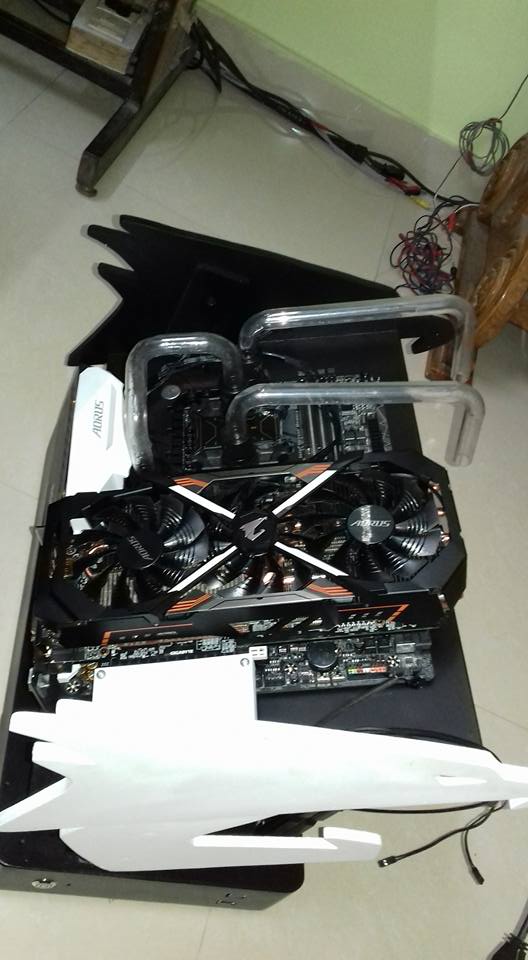
AORUS BuildHi am back with another build, this time it’s an open bench build with Gigabyte AORUS branding as theme.AORUS, is a premium gaming brand stemmed from GIGABYTE, delivers a full spectrum of gaming products ranging from GeForce® GTX series gaming laptops for VR, gaming motherboards, gaming graphics cards, mechanical gaming keyboards, to gaming mice offering the most extreme gaming experiences.

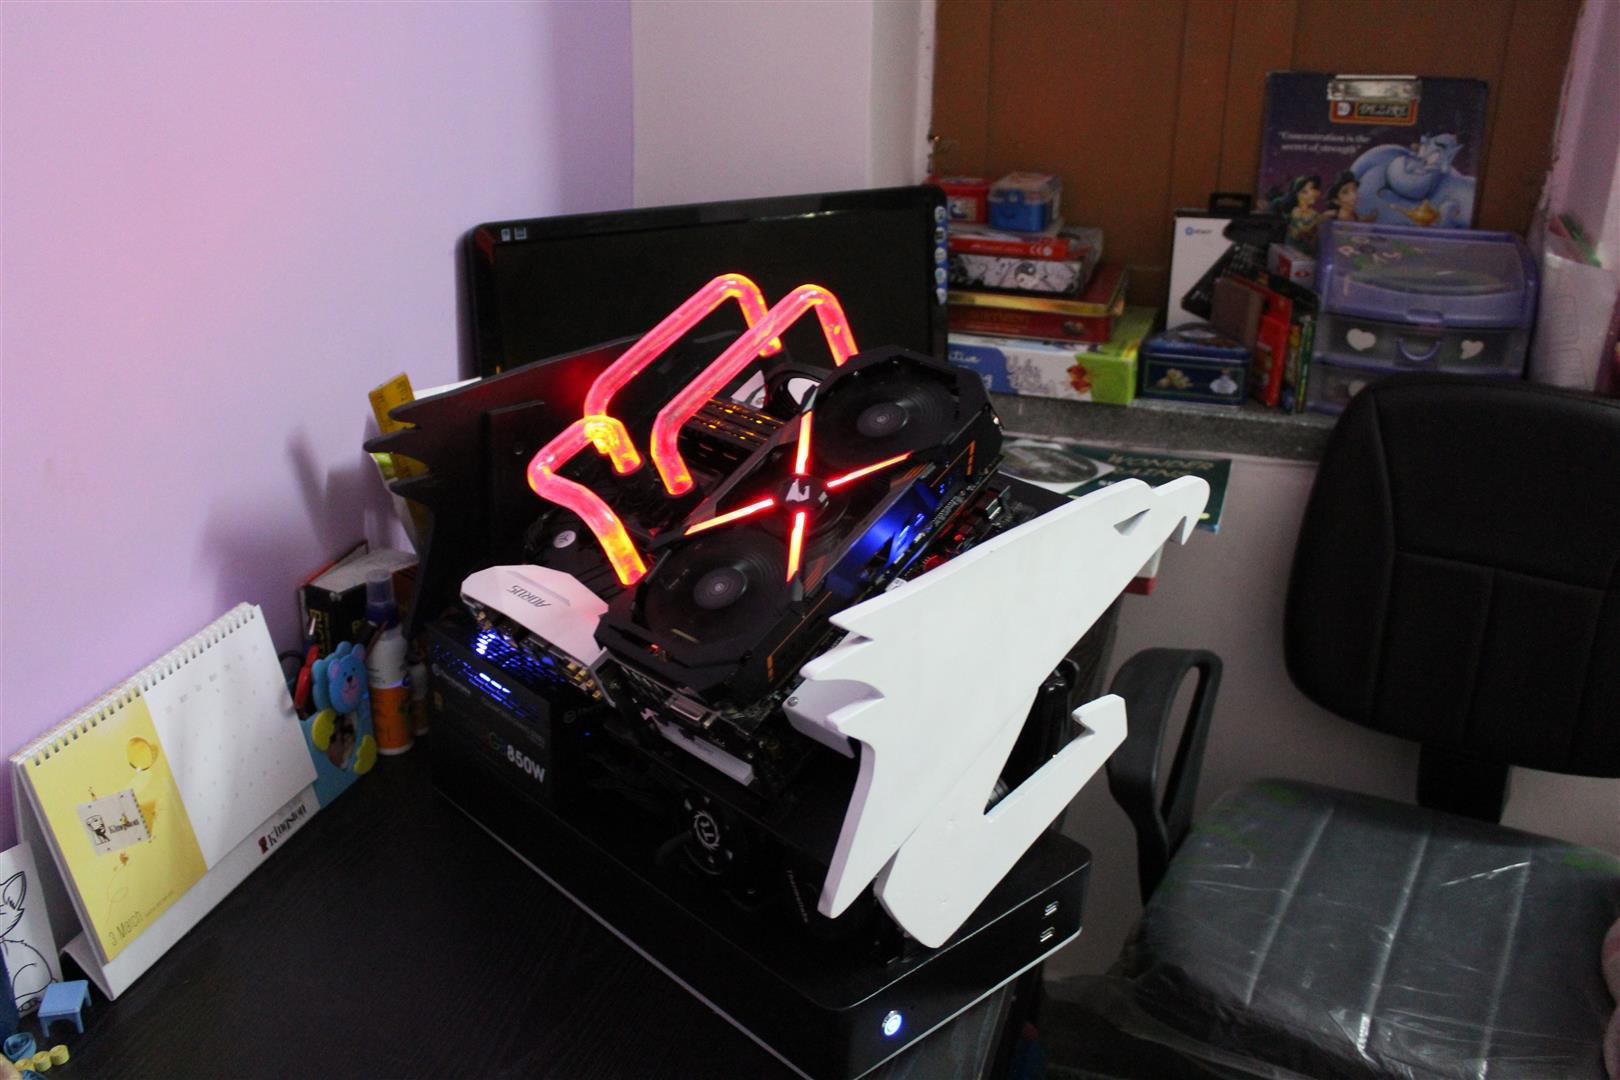
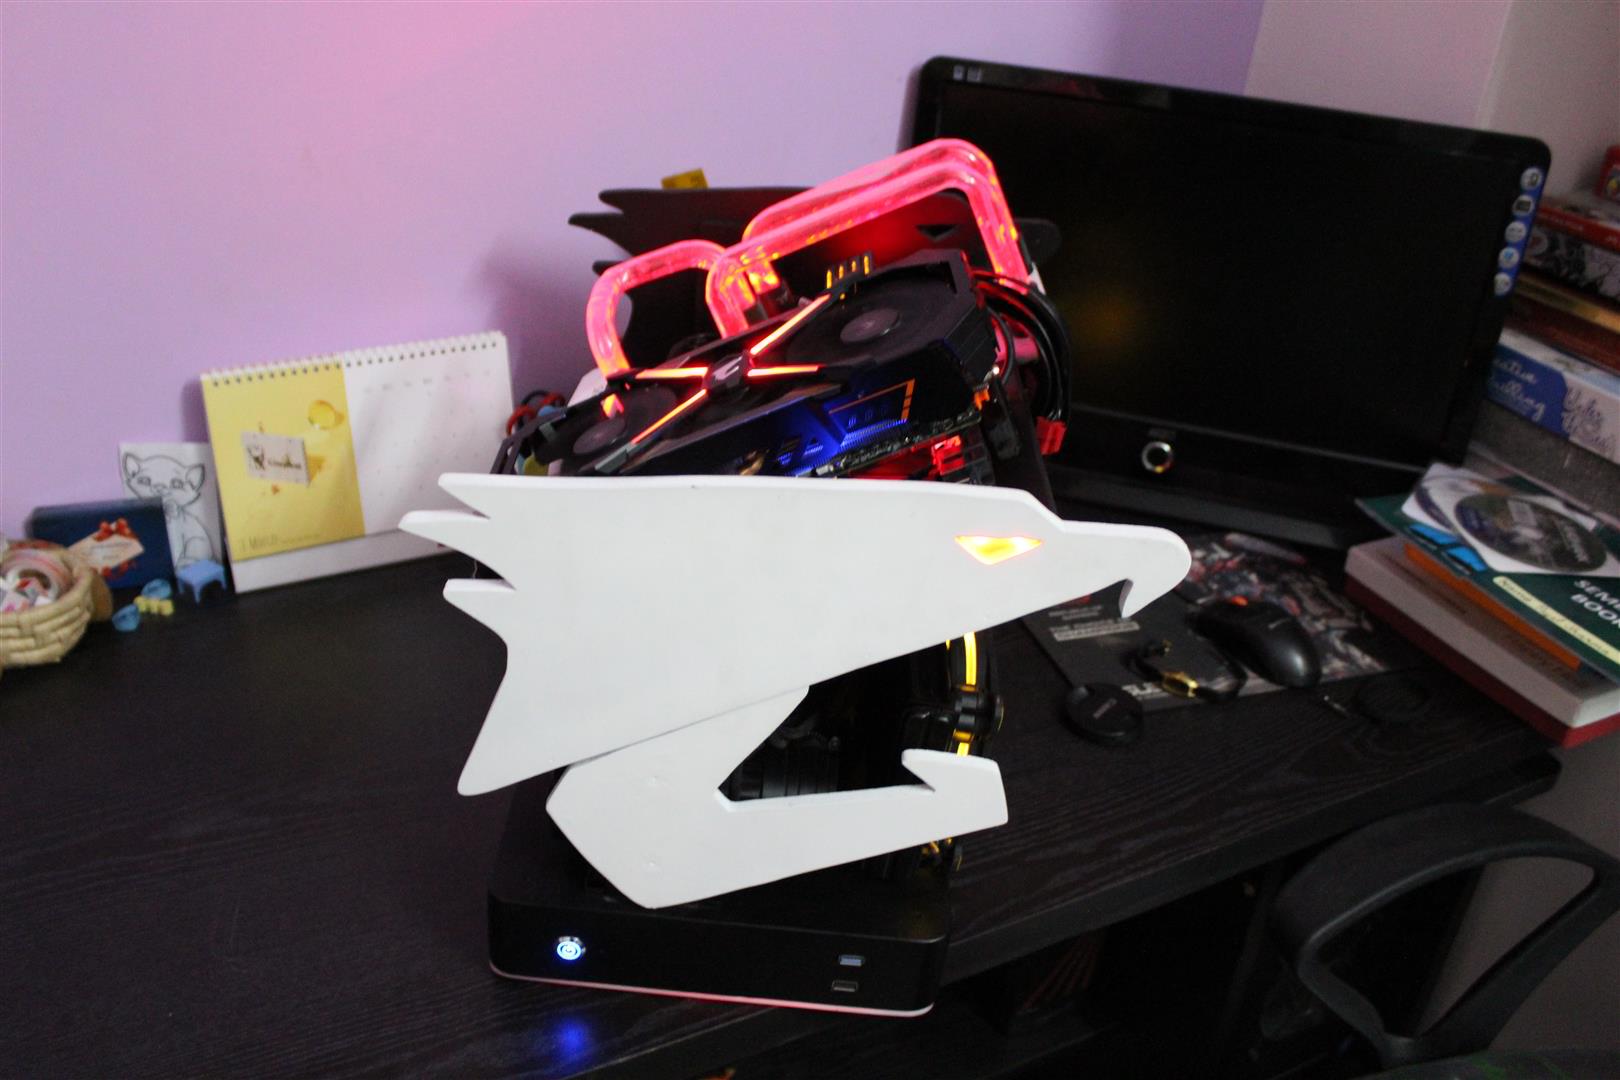
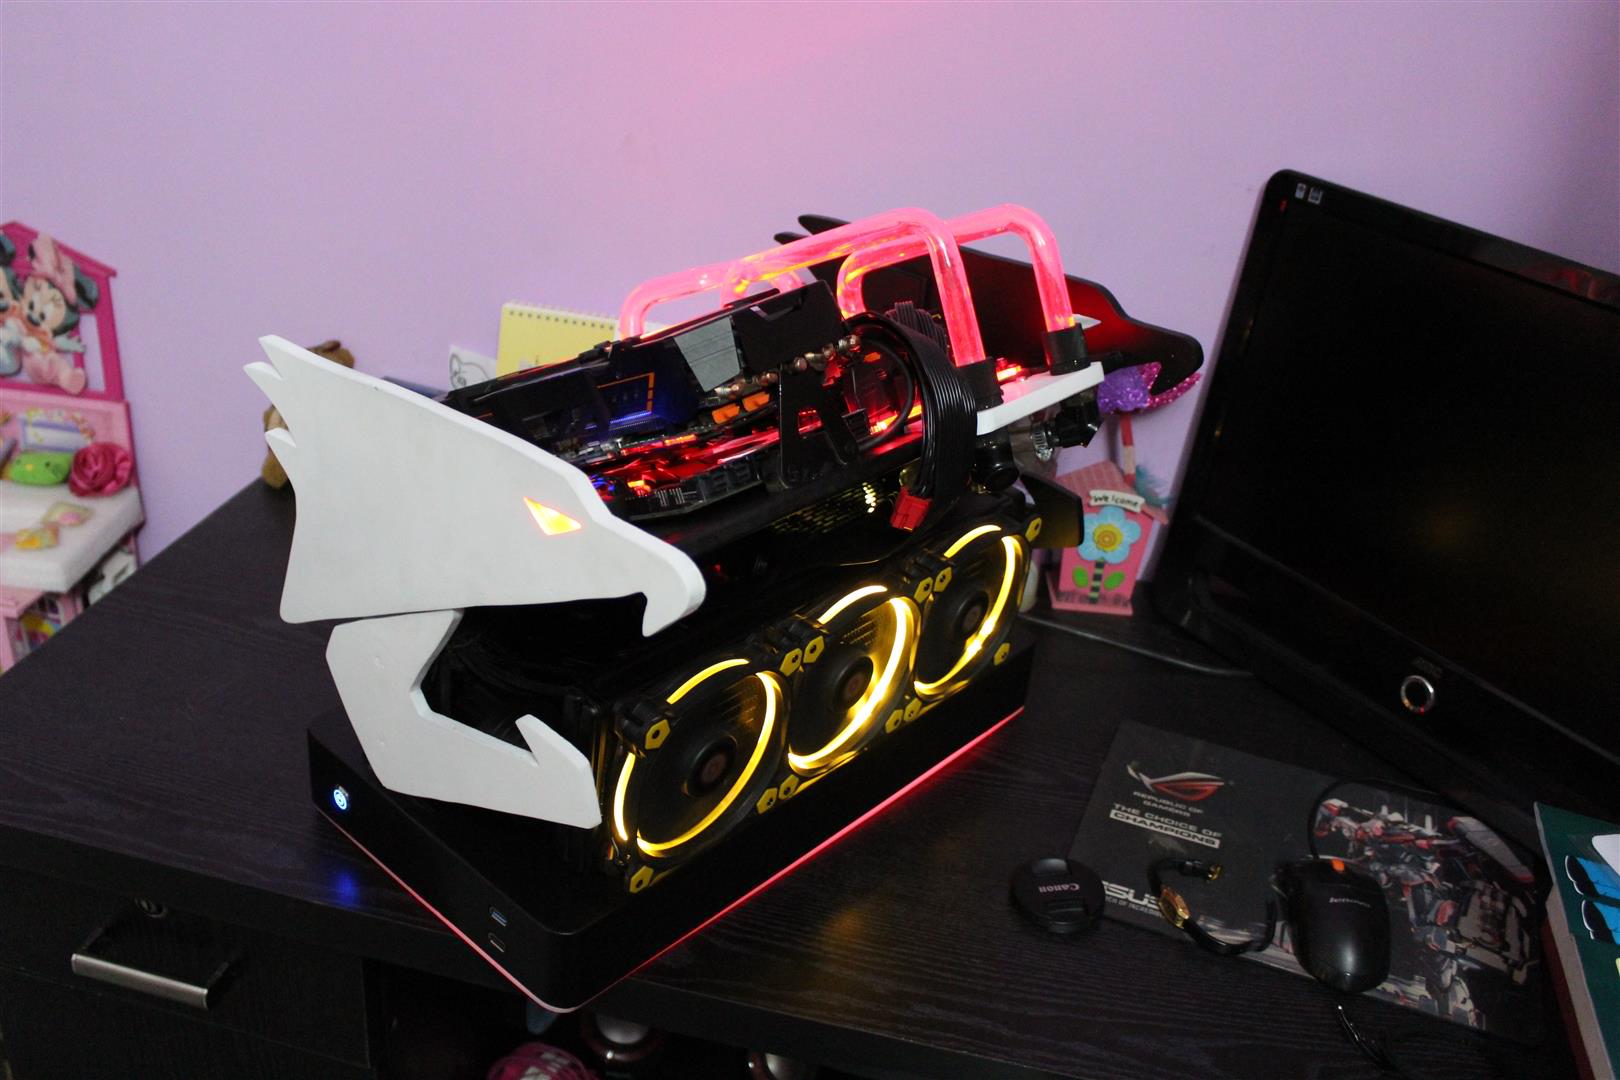
So for this build, my idea is to make a compact open bench gaming PC with AORUS eagle face in focus.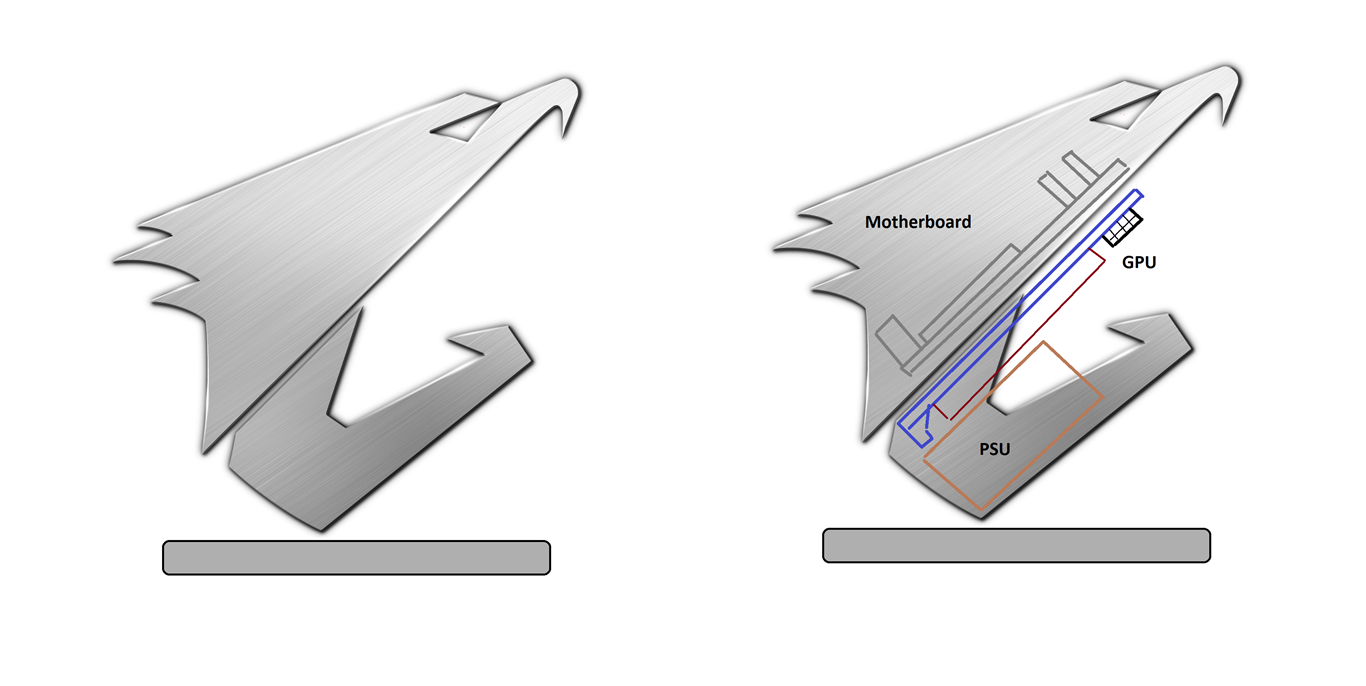 First making the base for the bench.
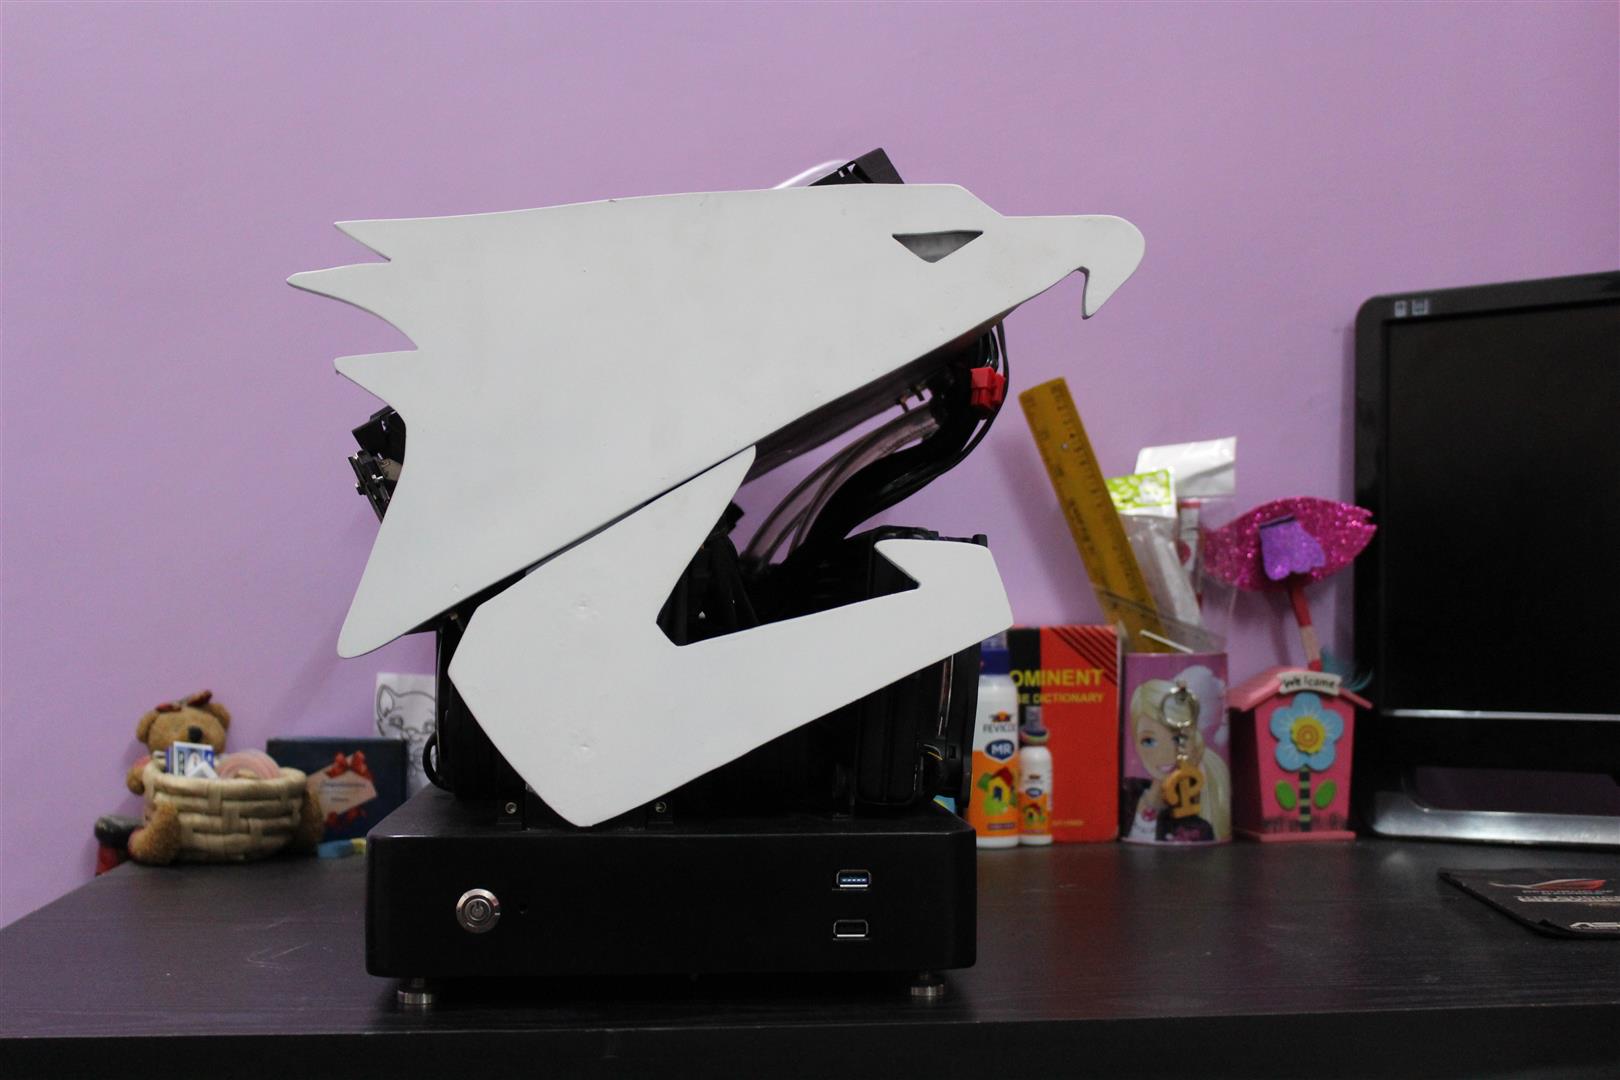
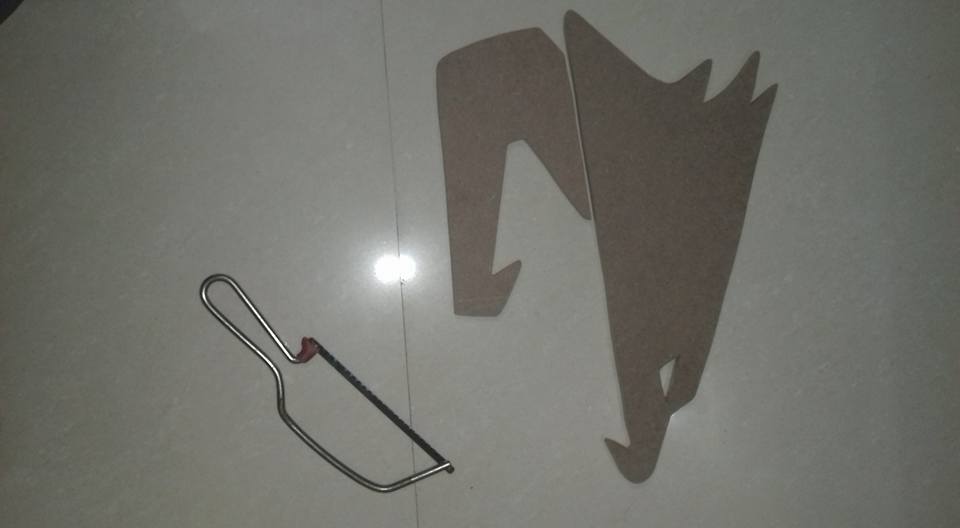
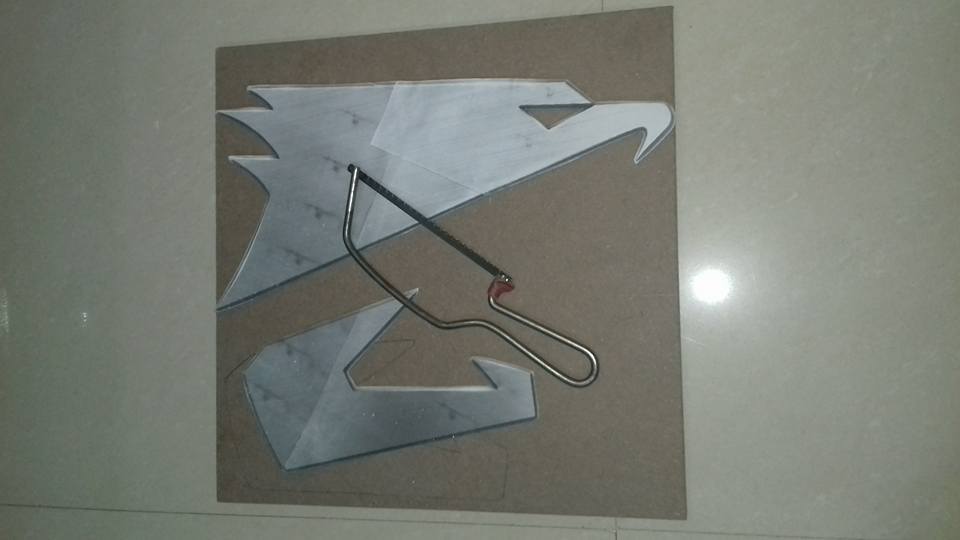
 Now making of AORUS eagle.
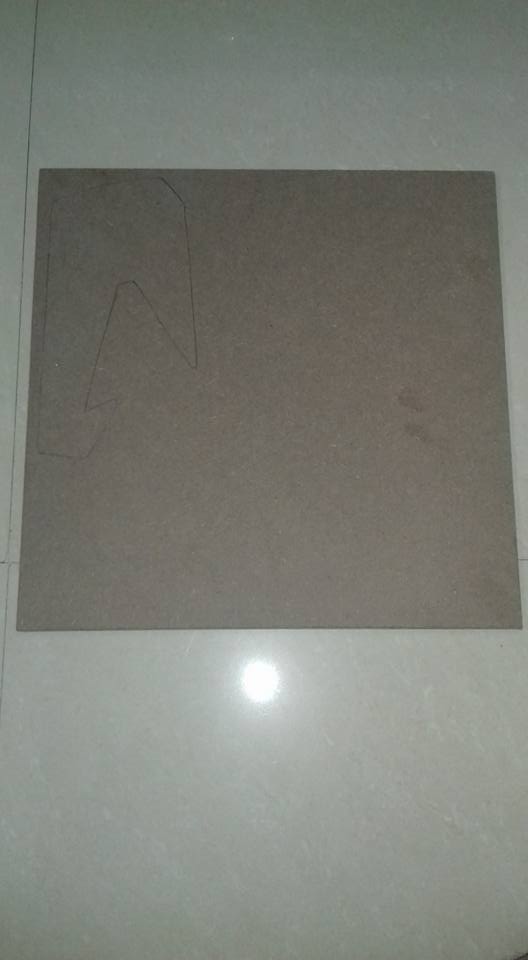
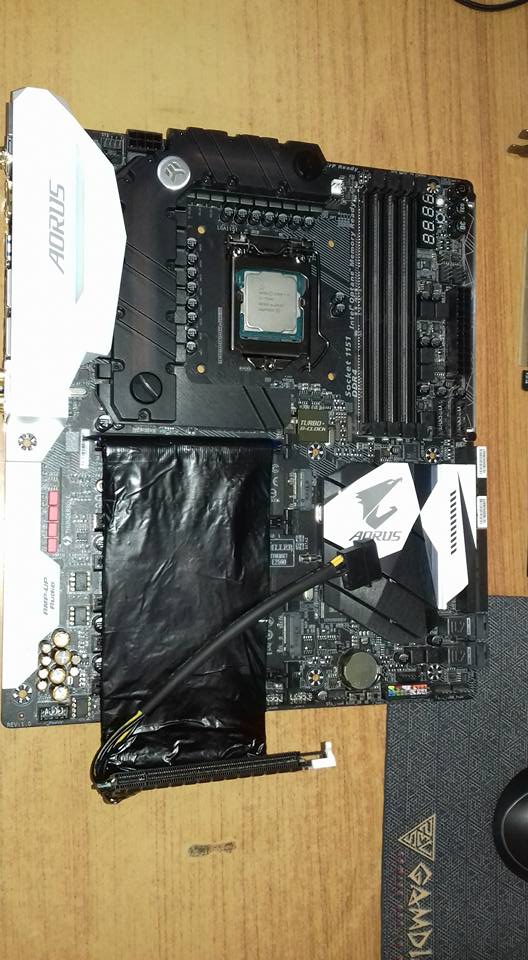
 Hardware for the build

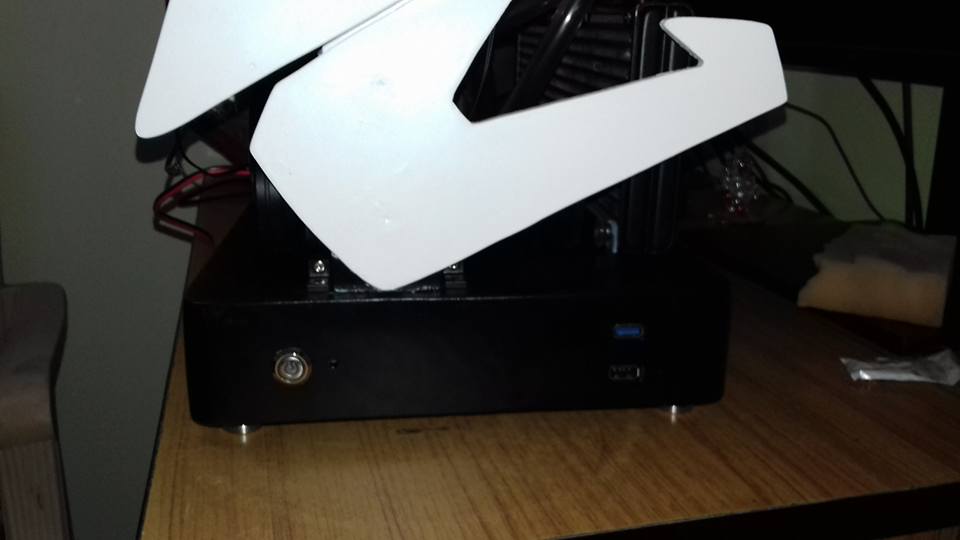
 Frame base ready
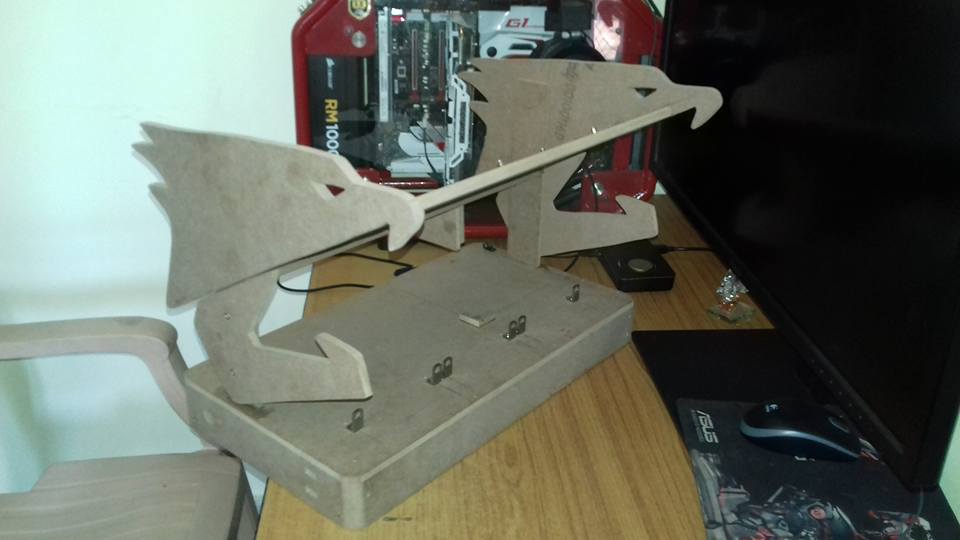
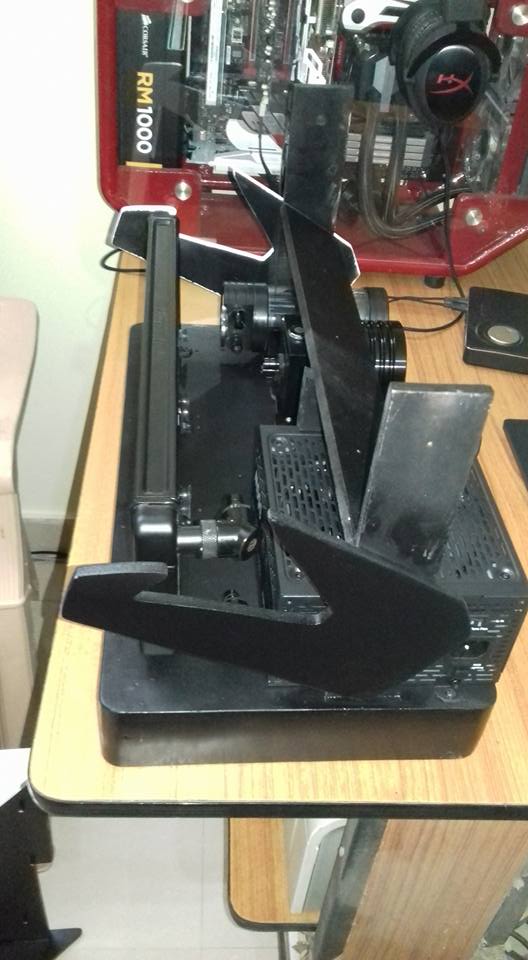
 Applying primer coat.
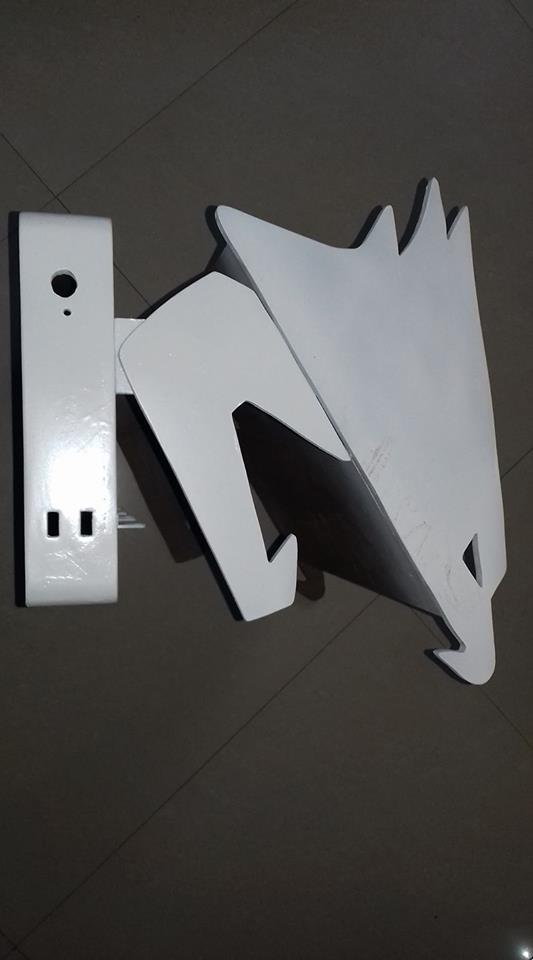 Starting building process.
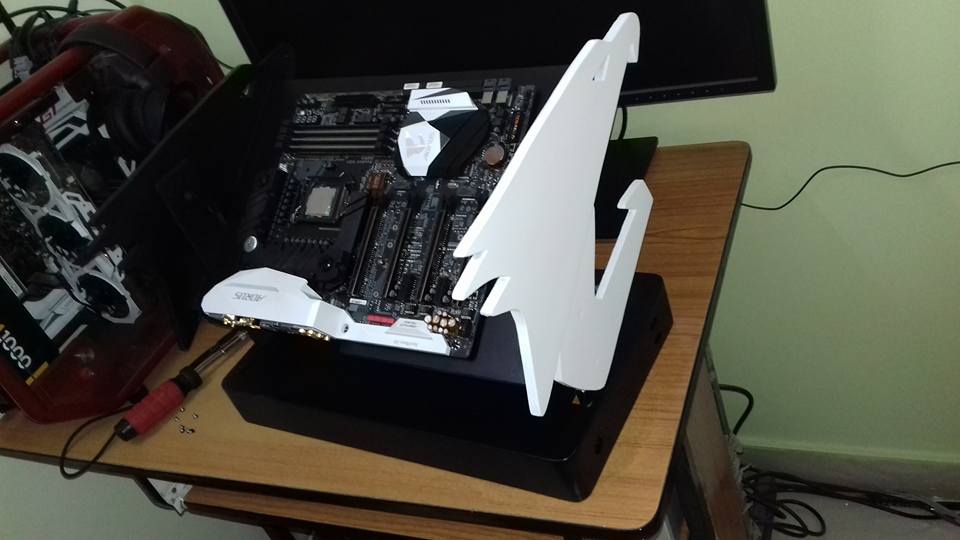
 DIY shielding PCIe Riser Cable.
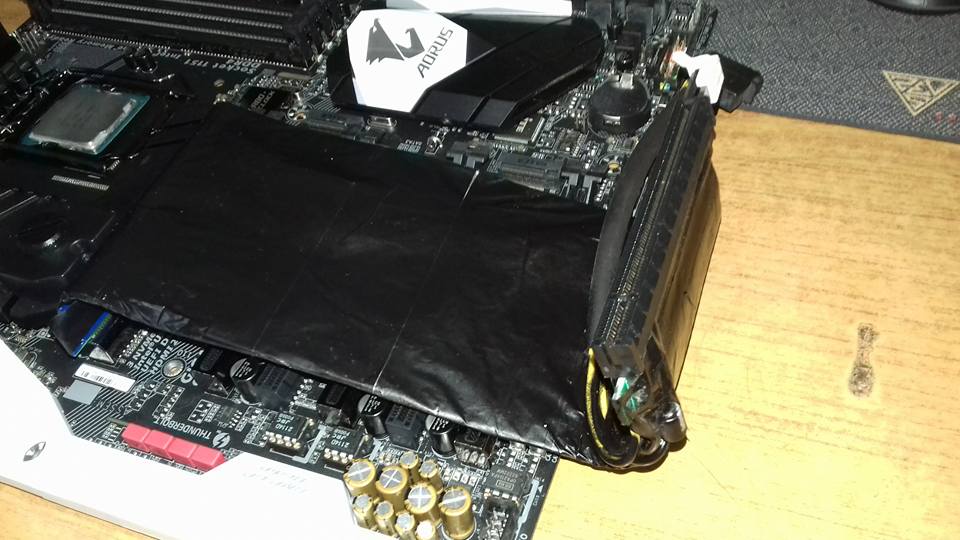
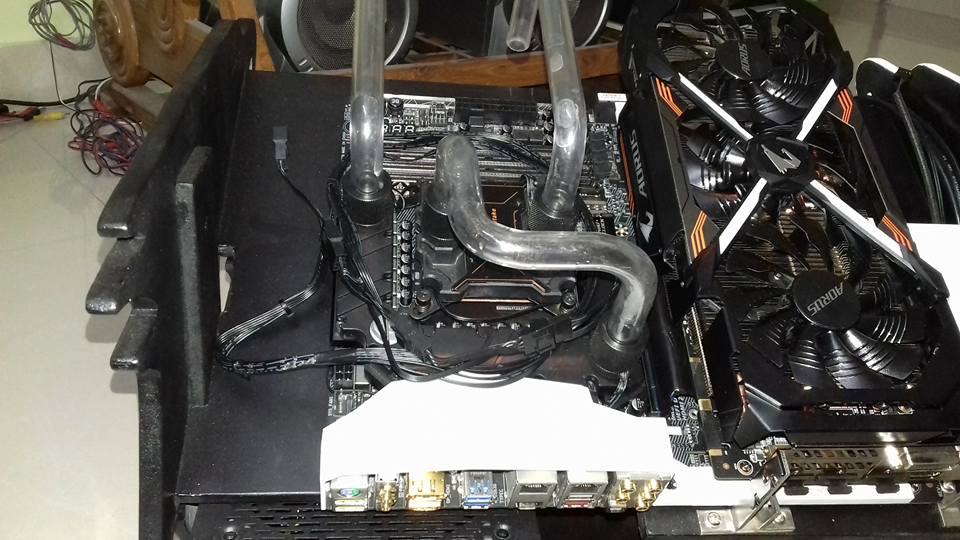
 Started working on Liquid Cooling and Graphics Card installation.
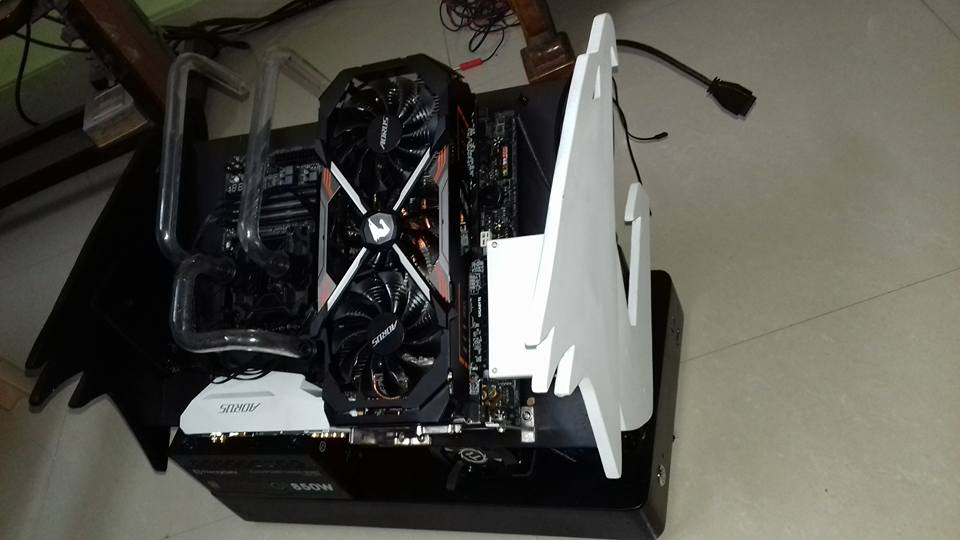
-
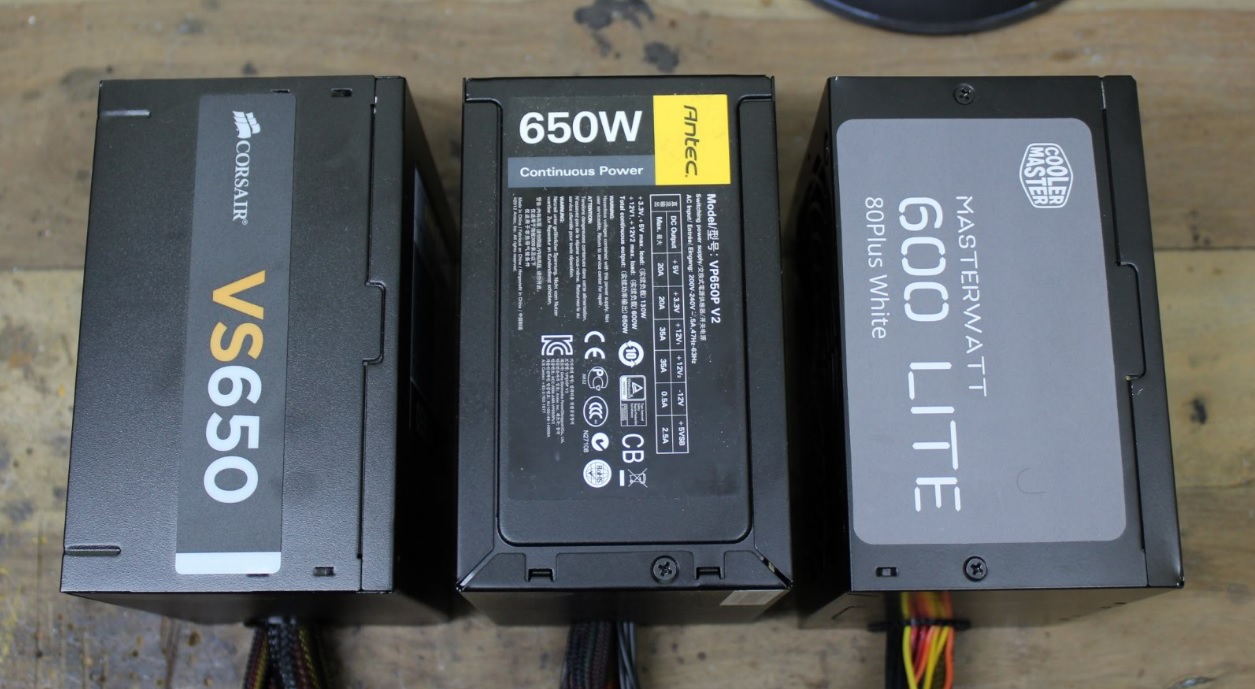
600 Watt budget PSUs BattleCorsair VS650 - vs - Cooler Master MasterWatt 600 - vs - Antec VP650
 I have reviewed few PSUs in past two years or so mostly all were higher end expensive computer PSUs and I am constantly asked by many to suggest a budget gaming PSU or review one. I have few budget PSUs with me and was for long willing to test them but didn’t have a good idea or inspiration for an article.But recently I got news about Cooler Master’s new PSU lineup the “MasterWatt†and “MasterWatt Lite†series of PSU, offering new design and features with improved performance and reliability. I was more interested in MasterWatt Lite series as they would be having lower price spectrum. I contacted guys at Cooler Master India to confirm and was surprised to know that MasterWatt Lite 600 is indeed a under Rs.5K price tag product.600 + watts and with a under Rs.5K of price tag, is the PSU every budget gamer or pc builder looking for. This gave me an idea to do a comparison between PSUs with 600 + watts of power and are under Rs.5K. I already have Corsair VS650 and Antek VP650 with me, and when shared the idea with Cooler Master India, I also got a sample of Cooler Master’s MasterWatt Lite 600 PSU.So now about this article. This comparison is not about the marketing features of these three PSUs (For that you can find respected product links at the end of this article), but rather about the features, product performance and reliability which is more important for a budget buyer.I will be doing a detailed inside-out run on these PSUs and will be giving each a point (at a scale of 1 to 5, i.e. BAD to GOOD, not EXCELLENT as these are budget PSUs) at every segment of this article. In the end we can club these points together to find which PSU is best among these… Simple.Now let’s begin the comparison.
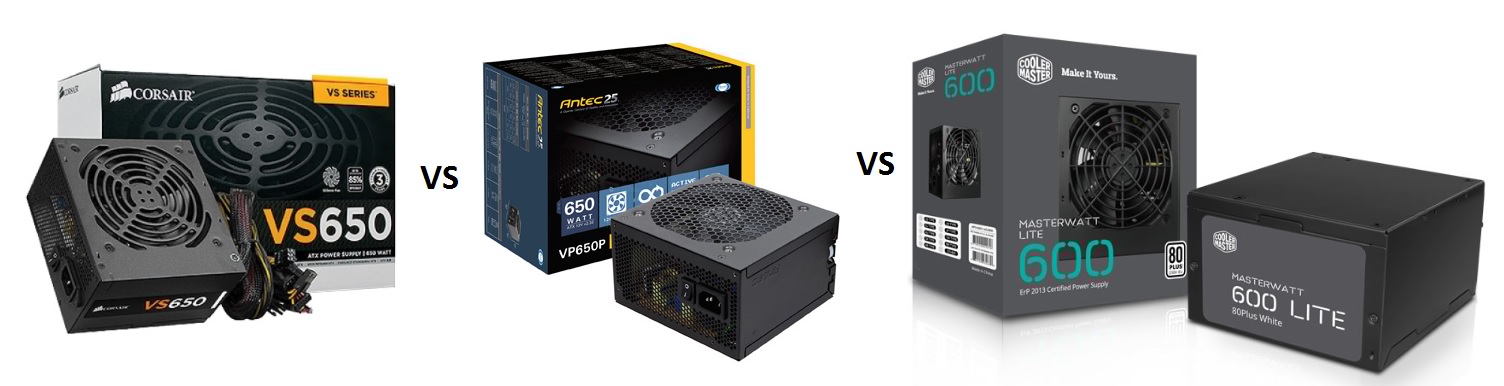 Product looks and detailsWhat you get out of the box.All PSUs comes in a cardboard box with PSU, manual and decent AC power cable. PSUs are build with requisite quality and thickness of iron sheet for rigidness and minimization of interference.
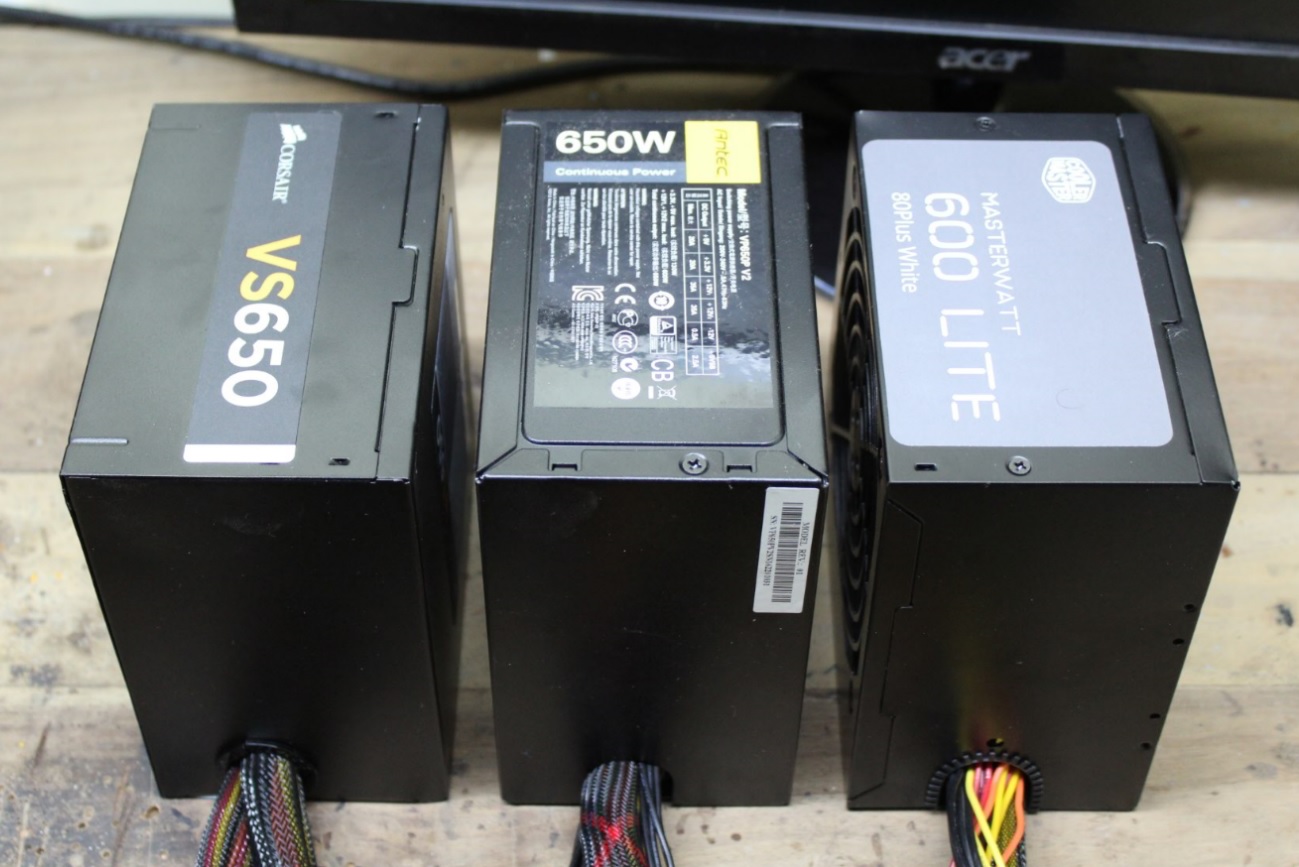 All three PSU are having a 120mm fan for cooling and a power ON/OFF switch along with Main IEC power connector.
 SCORECorsair VS650 = 5Antec VP650 = 5Master Watt 600 = 5-------------------------------------------------------------------------------------------------------------------------------Cables and Connectors
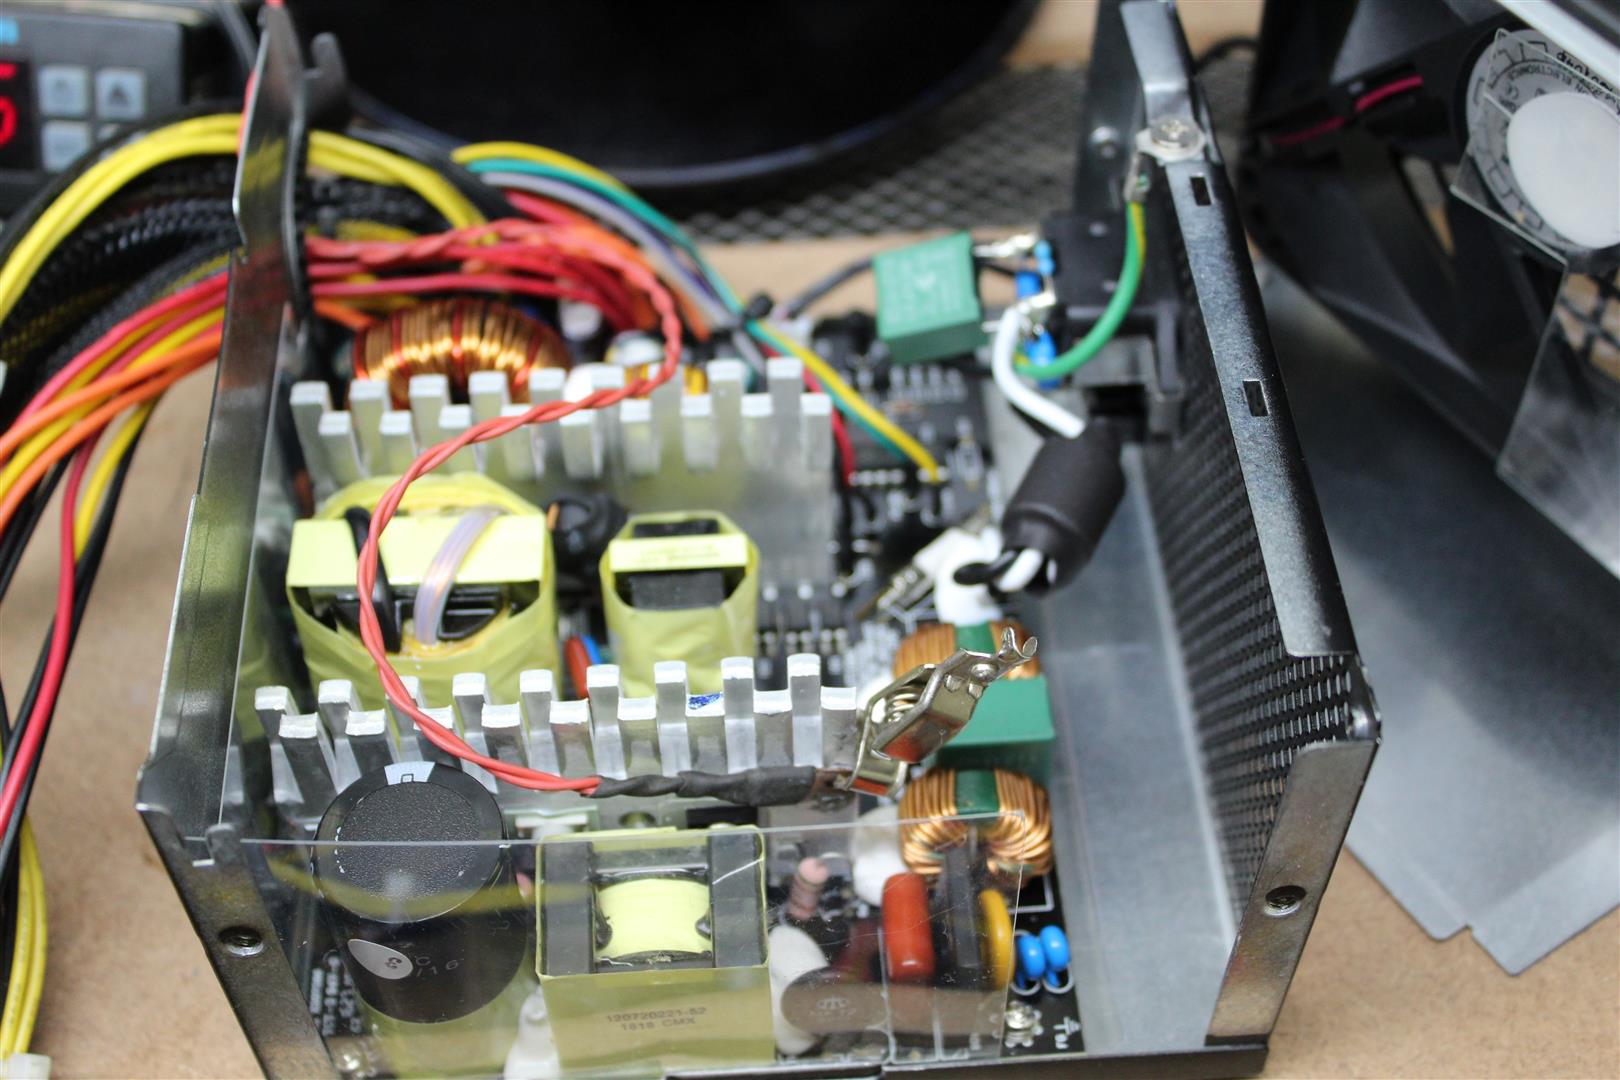
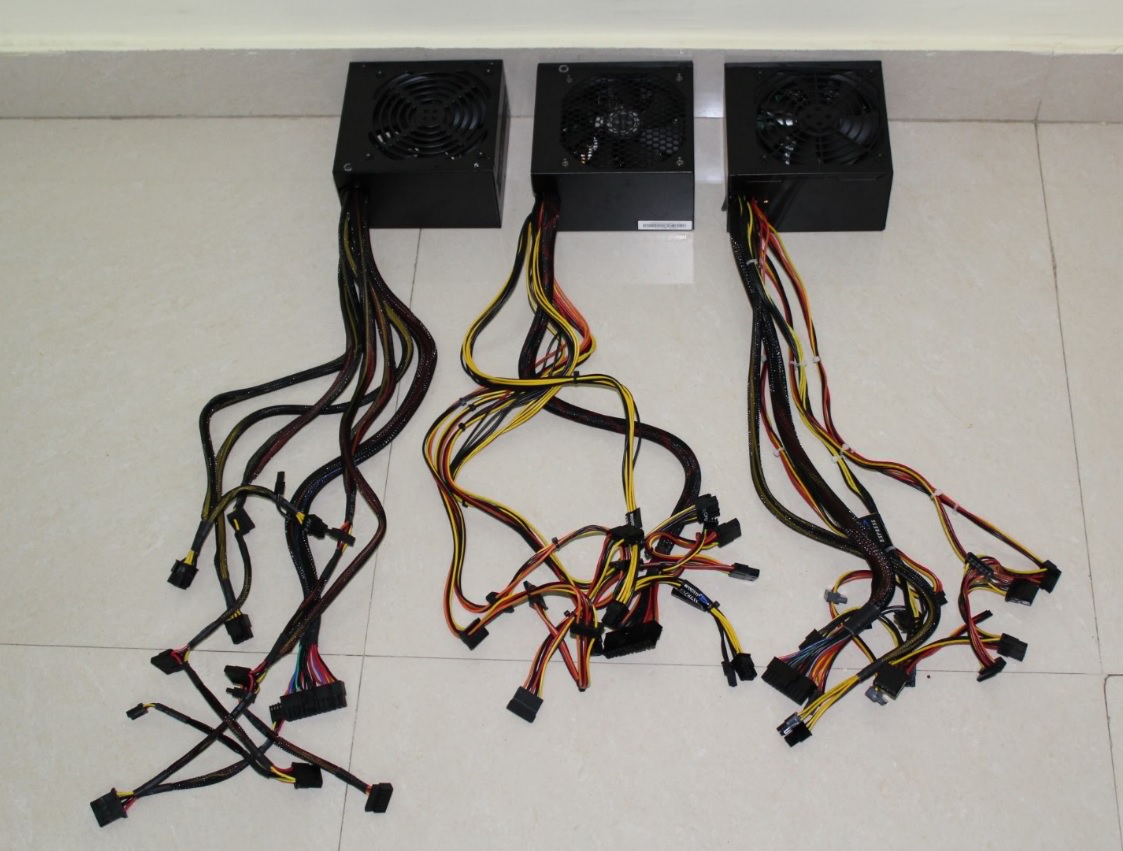 All PSUs have decent 18AWG cables. Among all three, Antec cables was little stiff and Corsair is having full single braided cables. As per connectors, beside 24pin ATX, 8pin CPU and (1 by 2) 8pin PCIe connectors Corsair is having 4 Molex and 3 SATA connectors, Antec is having 3 Molex and 6 SATA connectors. Finally Cooler Master is having 4 Molex and 6 SATA connectorsSCORECorsair VS650 = 5Antec VP650 = 4Master Watt 600 = 4-------------------------------------------------------------------------------------------------------------------------------Inside looks and Components detailNow let’s open these PSU to see what all they have for us. Note very few of PSU brands manufacture their own entry level PSU. Here only Cooler Master manufactures it’s MasterWatt PSU, remaining two are OEM. Corsair have CWT as OEM and Antec goes for Delta Electronics.
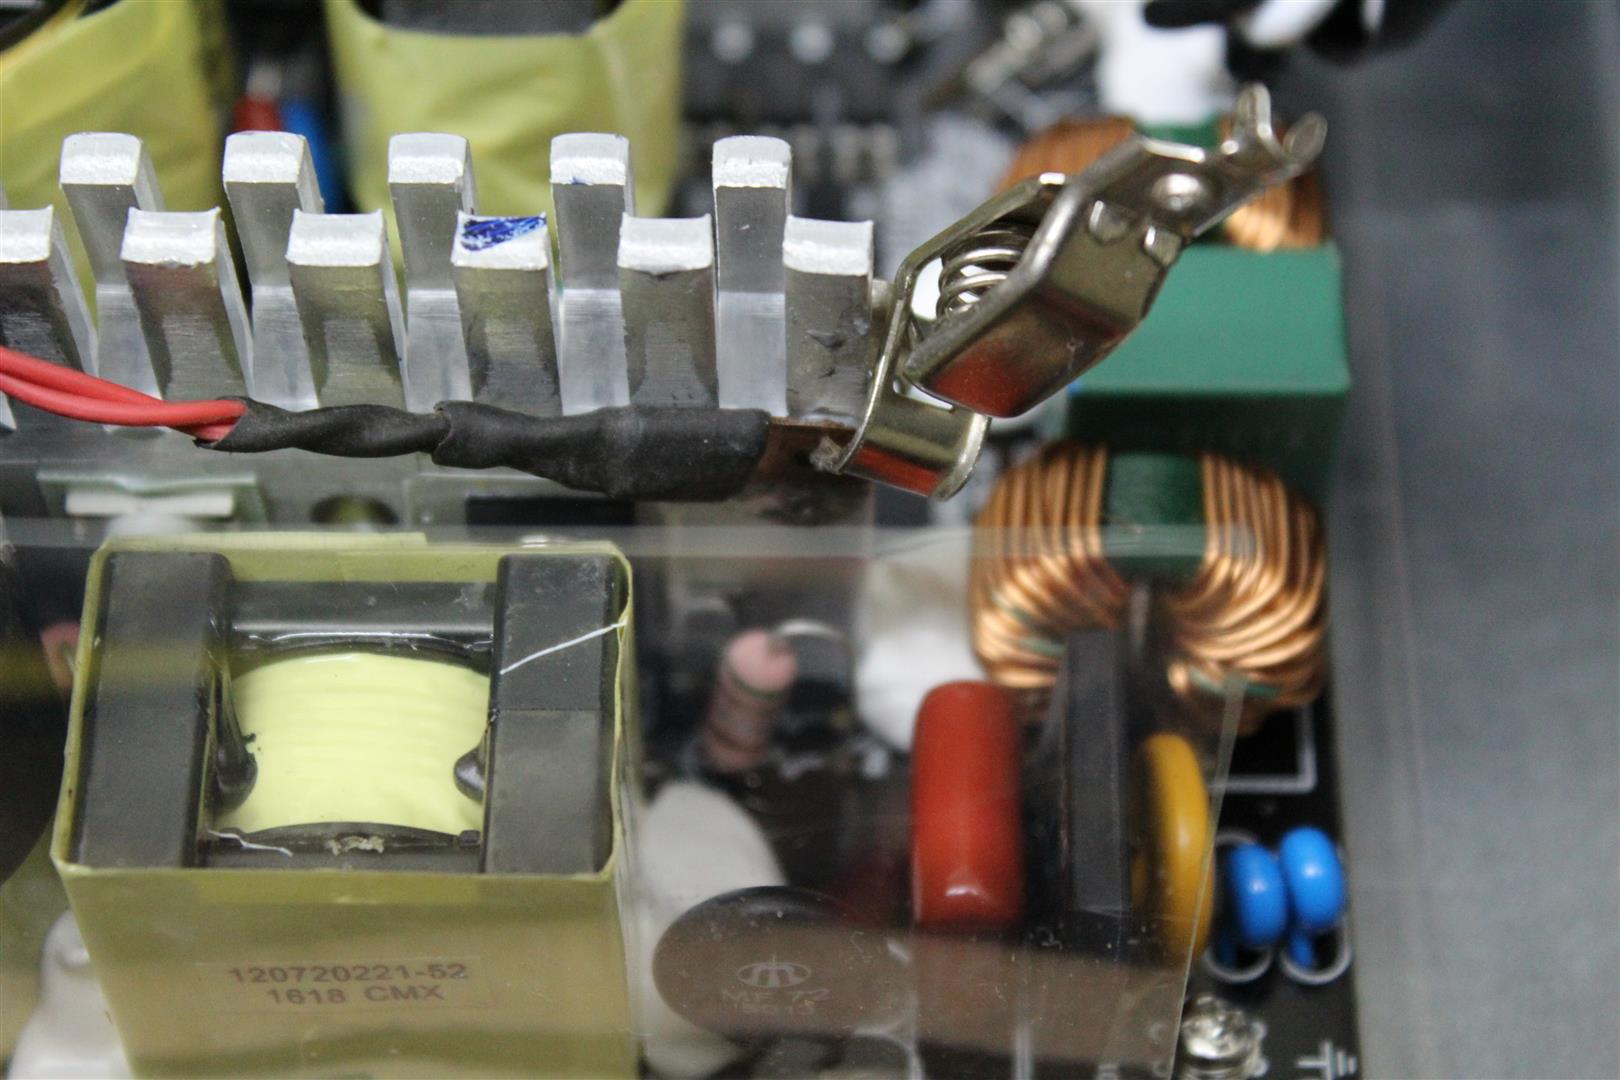
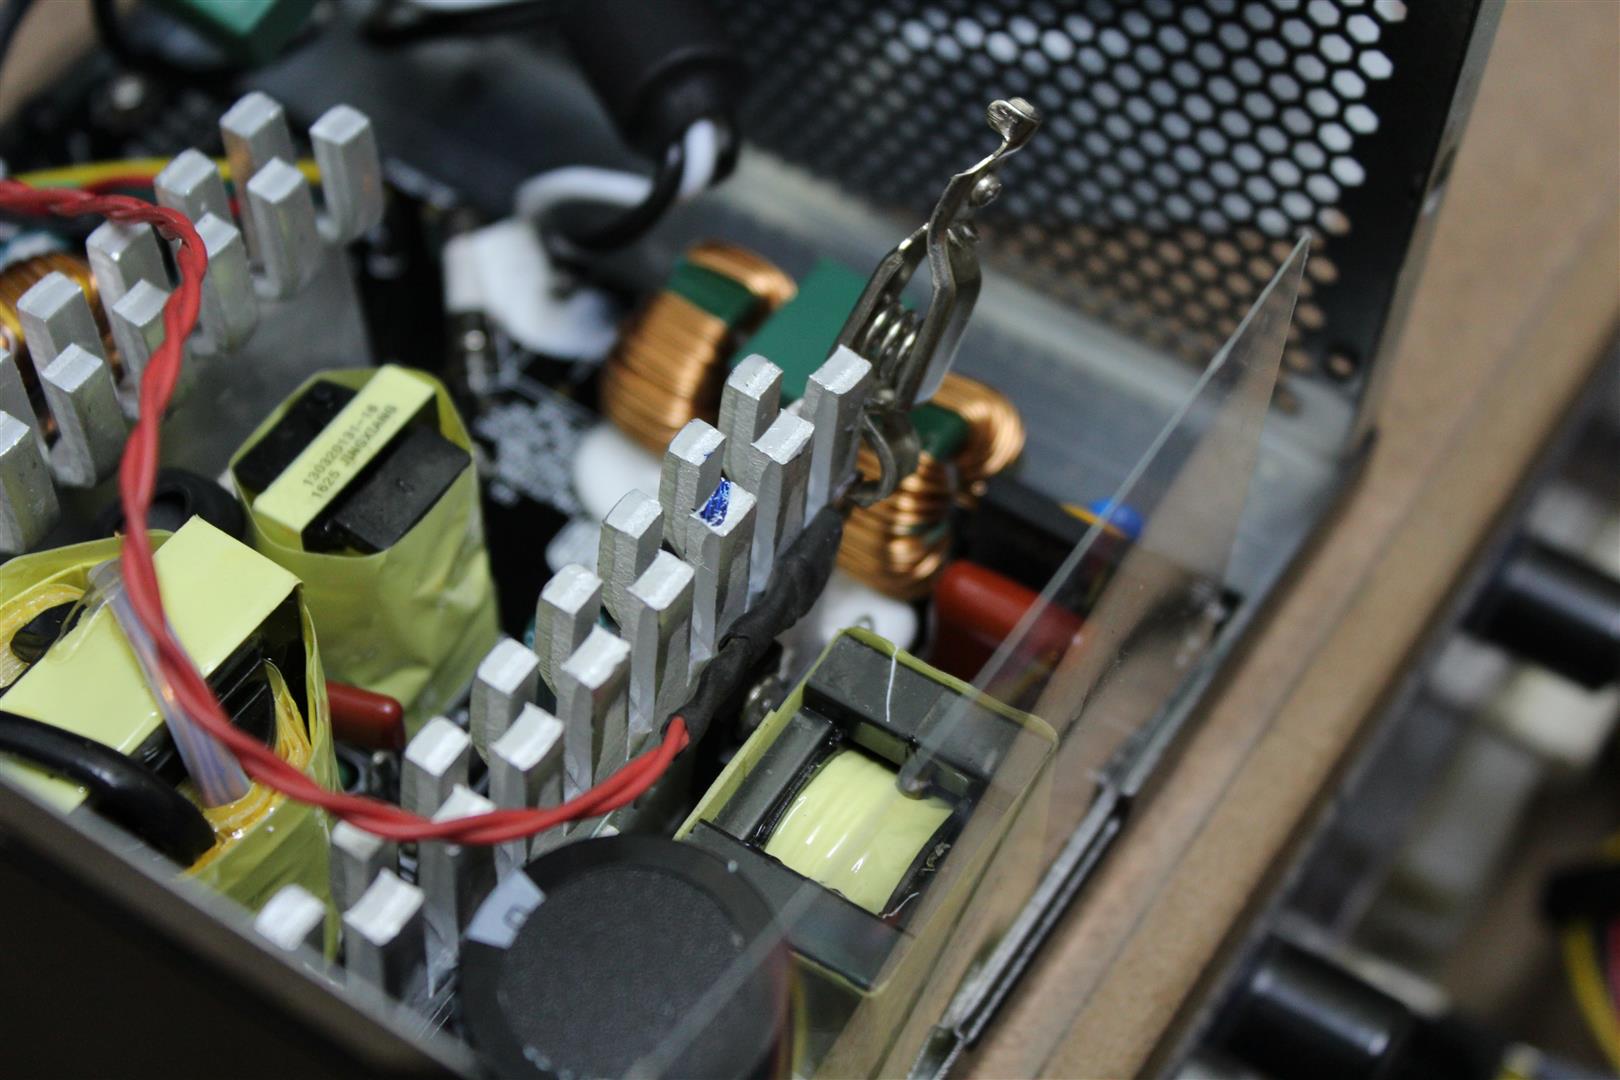
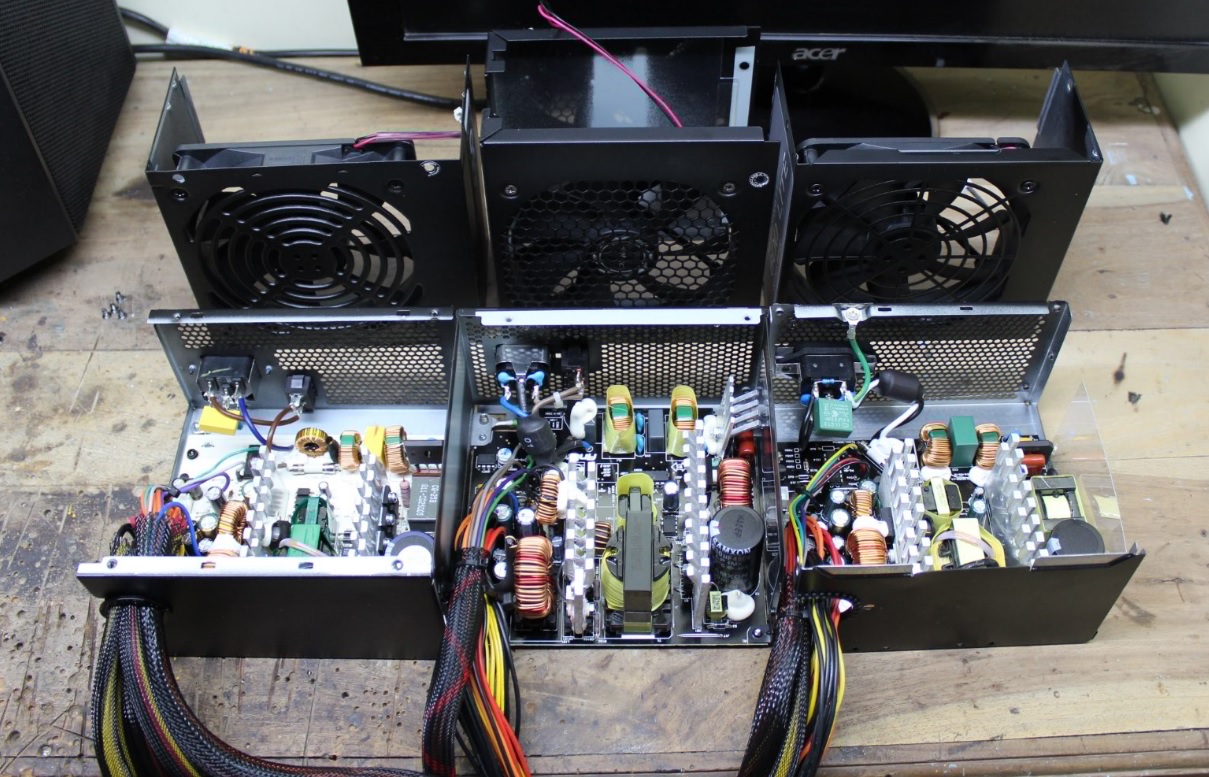 Component details are segregated as following.Transient Filter stageTransient filter starts right from the IEC connectors via wires wrapped around ferrite ring to the PCB (Corsair is have a separate ferrite coil on the PCB) fulfilling all the transient filtering needs, components namely two CM chokes and two pairs of X and Y caps. Unfortunately there is no MOV (Metal Oxide Varistor) present on the Antec PSU, so this PSU is susceptible to spikes coming from the power grid.
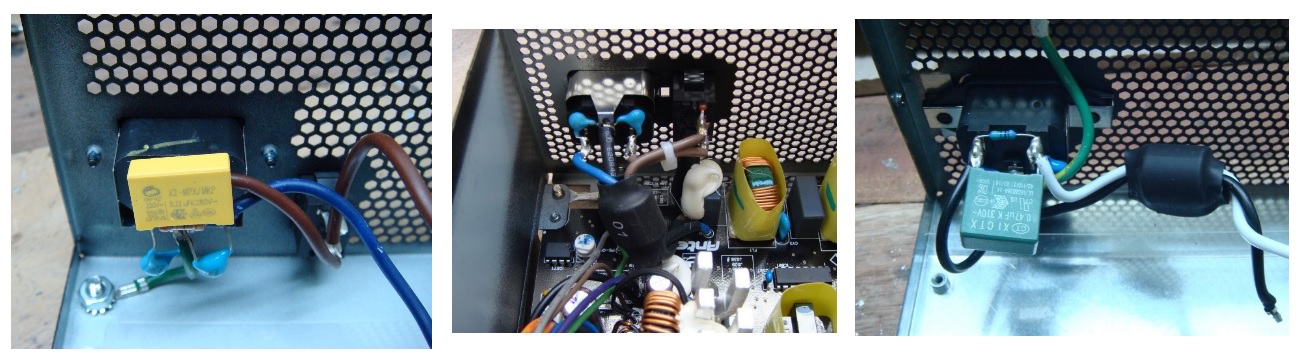
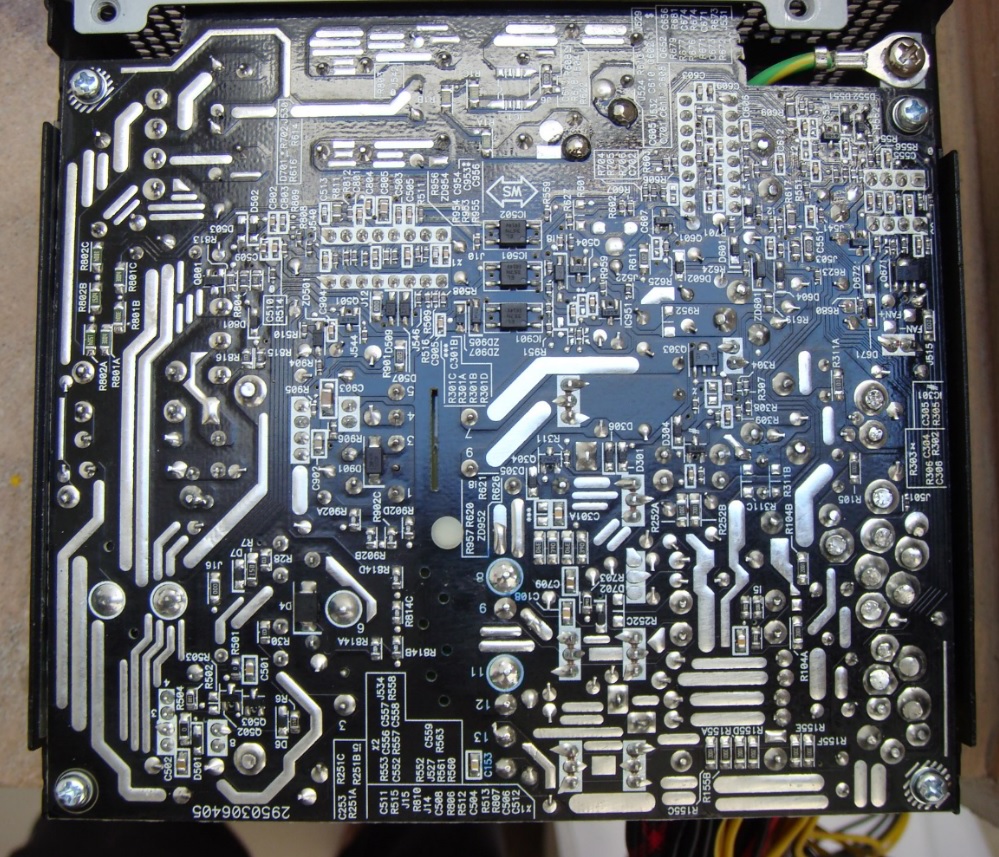
 SCORECorsair VS650 = 5Antec VP650 = 3Master Watt 600 = 5-------------------------------------------------------------------------------------------------------------------------------PCBFirst look on the PCBs gives an impression that the build quality of Antec seems to be very good, but later found Antec to have the thinnest and poorest PCB. When I started de-soldering the components off the Antec PCB whatever low temperature I tune on my soldering iron, the copper traces pops off with the components on Antec PCB. So I decided not to de-solder any components off Antec. Too bad. Remaining two PSU have good quality PCB.Corsair PCB Front and Back.
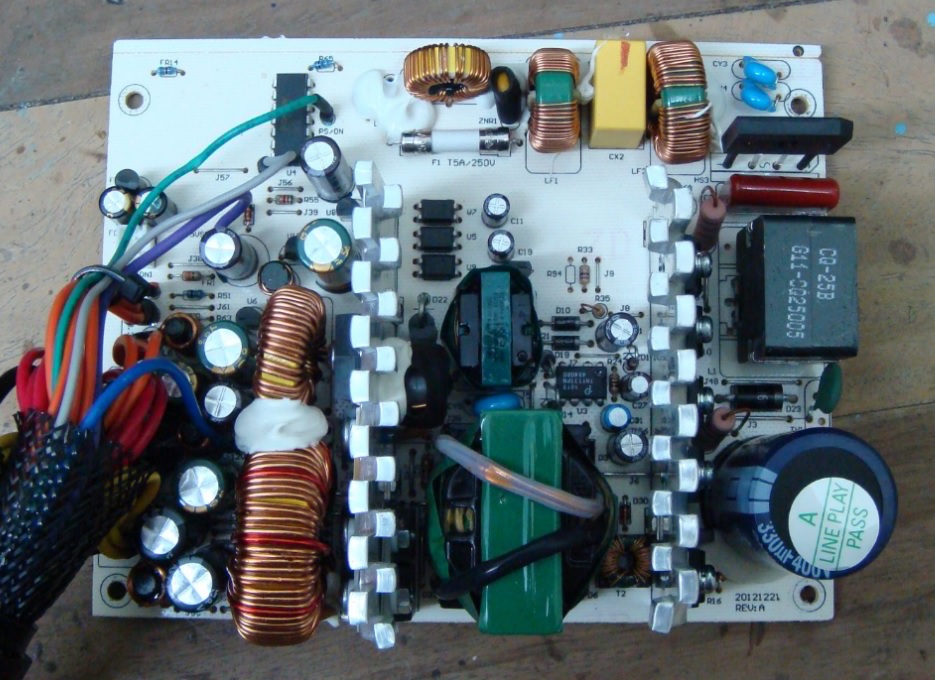
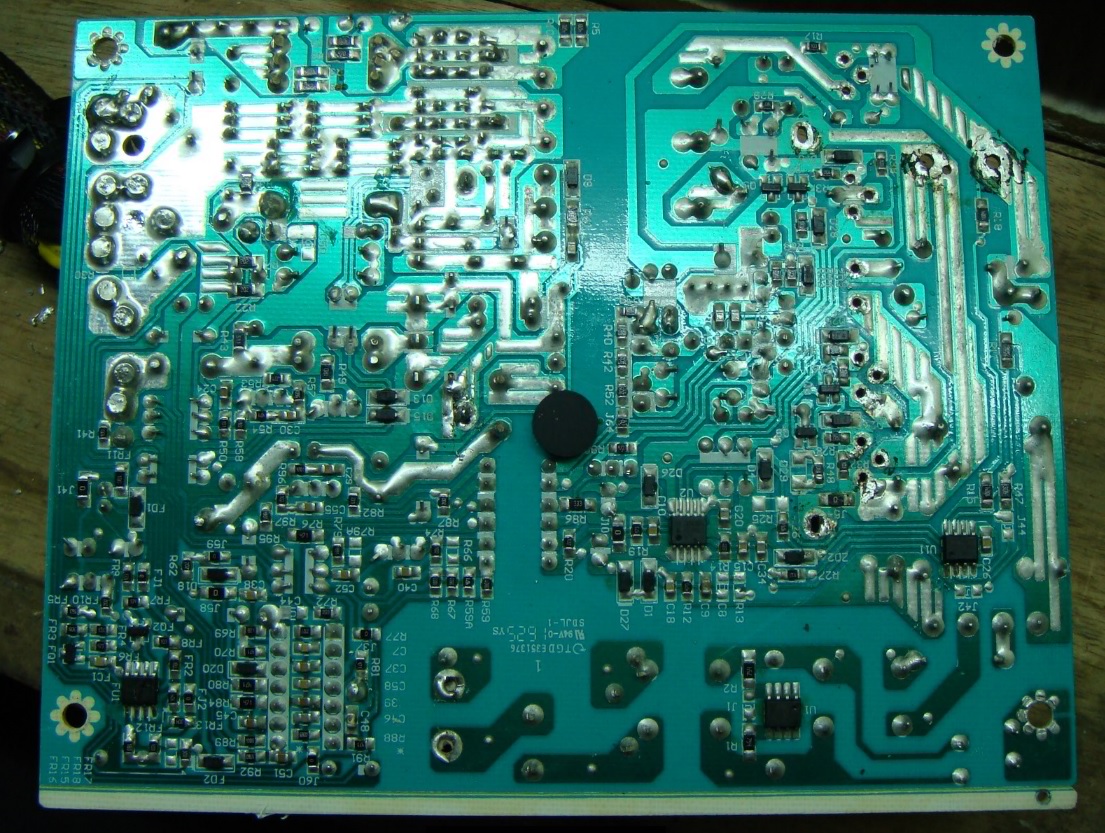 Antec PCB Front and Back.
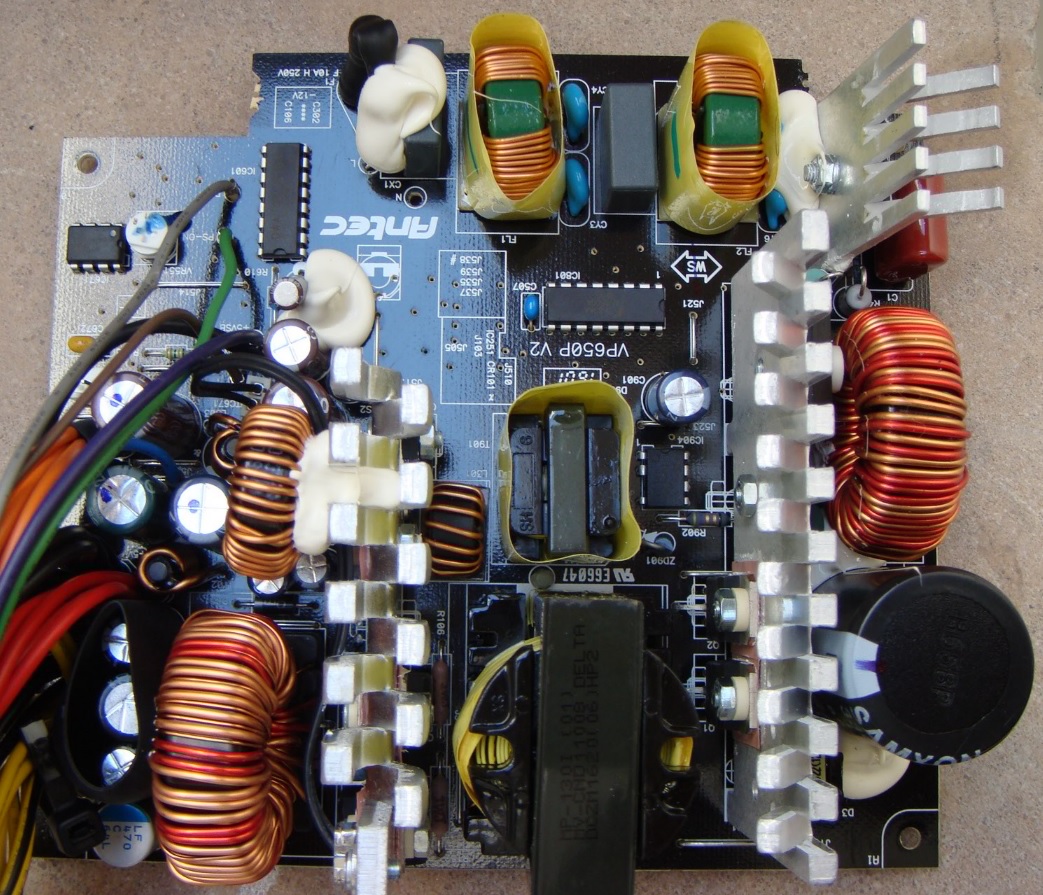
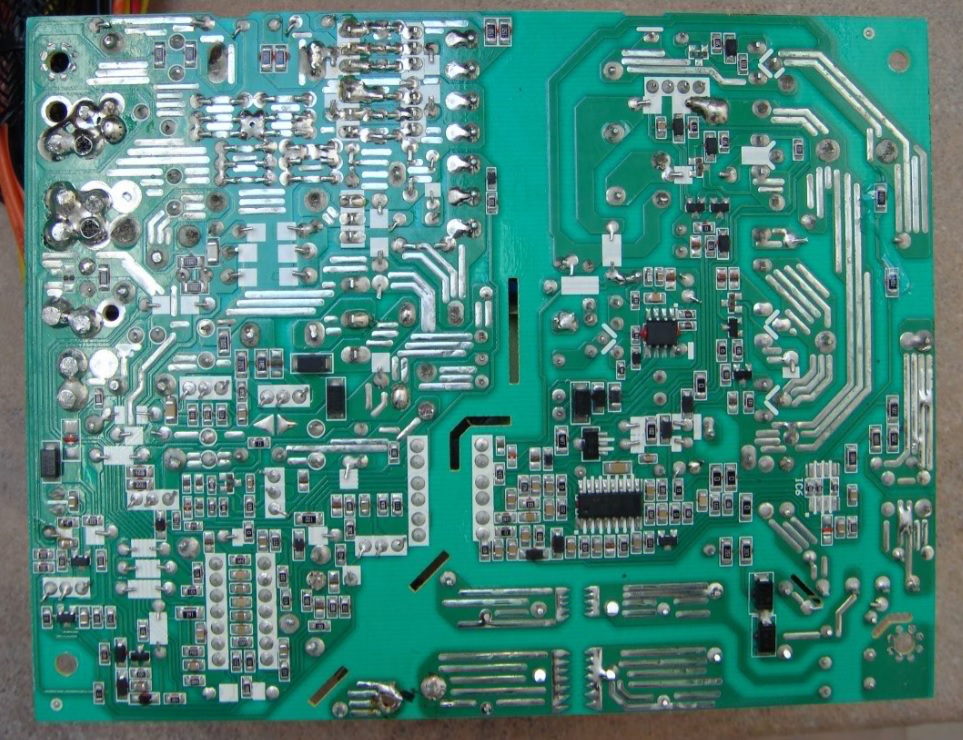
 Cooler Master PCB Front and Back.
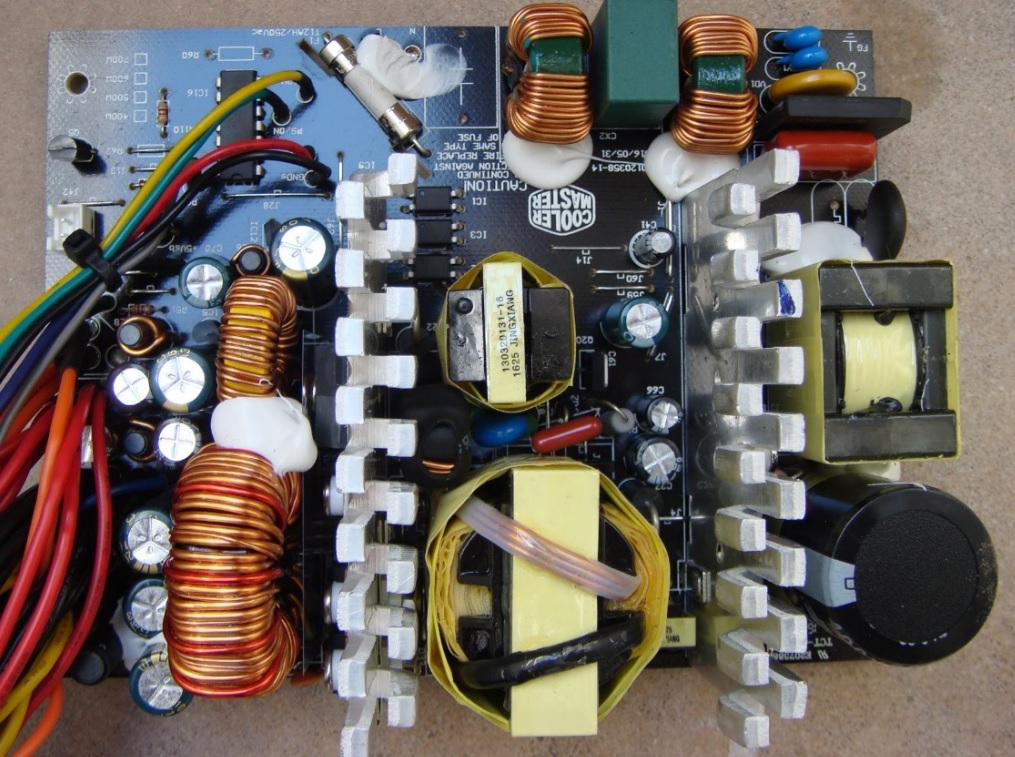
 SCORECorsair VS650 = 4Antec VP650 = 2Master Watt 600 = 5-------------------------------------------------------------------------------------------------------------------------------MAIN Bridge rectifierBoth Corsair and Cooler Master is having the same GBU606, a 6amp bridge rectifier, where as Antec is having 8amp GBU8K bridge rectifier that too on a separate heatsink. Though at 600W loads cooling of bridge rectifier is not needed, but extra cooling is always welcome.
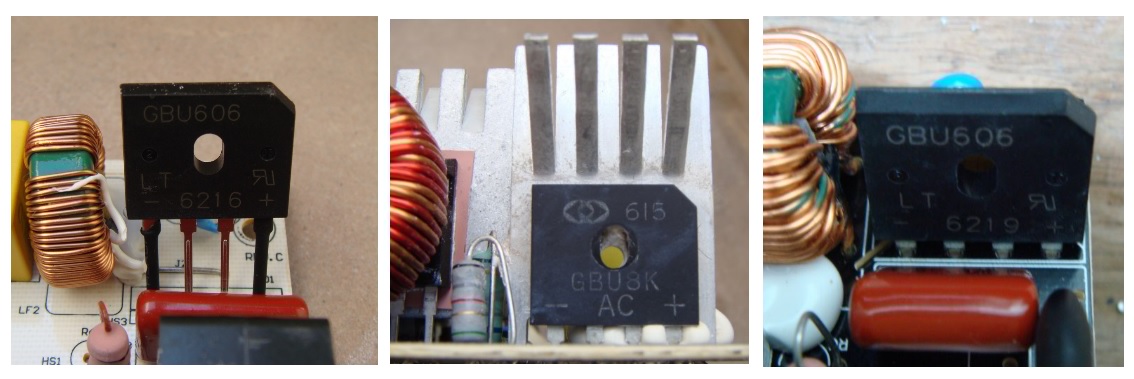 SCORECorsair VS650 = 4Antec VP650 = 5Master Watt 600 = 4-------------------------------------------------------------------------------------------------------------------------------MAIN Primary CapacitorHigh voltage DC from Mains AC is filtered by big hold capacitor in a PSU. This is one of the key component depending for smooth DC-DC conversion. And this is most likely the top most candidate responsible for any PSU failure.I am personally disappoint to have a 85C ratting main cap on all three PSU, although 85C is doing the job, but please a 105C rating main cap is the best.Below table give the technical details of each cap, giving us an idea about its quality and help in giving points. Beside all the datasheet figures, I know with my last 12 years of electronics experience the Elite cap are the most busted caps I have seen among these three.
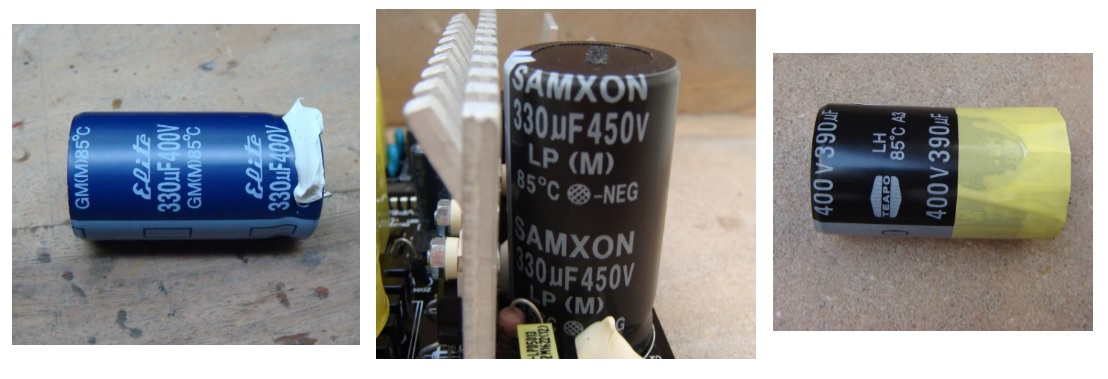 SCORECorsair VS650
Brand : Elite GMRating : 330uf/400v 85CEndurance : 2000 hoursDissipation Factor ** : 0.15Rated ripple : 1.85 *Hmm… even quality caps have 2.00 or above= 2Antec VP650
Brand : SAMXON LPRating : 330uf/450v 85CEndurance : Strangely nothing specified by manufacturer in DatasheetDissipation Factor ** : 0.20Rated ripple : 2.12= 3Master Watt 600
Brand : TEAPO LHRating : 390uf/400v 85CEndurance : 2000 hoursDissipation Factor ** : 0.15Rated ripple : 2.15= 5-------------------------------------------------------------------------------------------------------------------------------** Dissipation factor (tan d)or DF is defined as the ratio of the ESR and capacitive reactance. It is the reciprocal of quality factor Lower DF means higher quality.APFC and Main Switching MOSFETBoth Antec and Cooler Master have a single MOSFET, where as Corsair have two MOSFET(in parallel) in APFC stage along with APF Diode. Main switchers are two MOSFETs all adequate for mentioned ratings.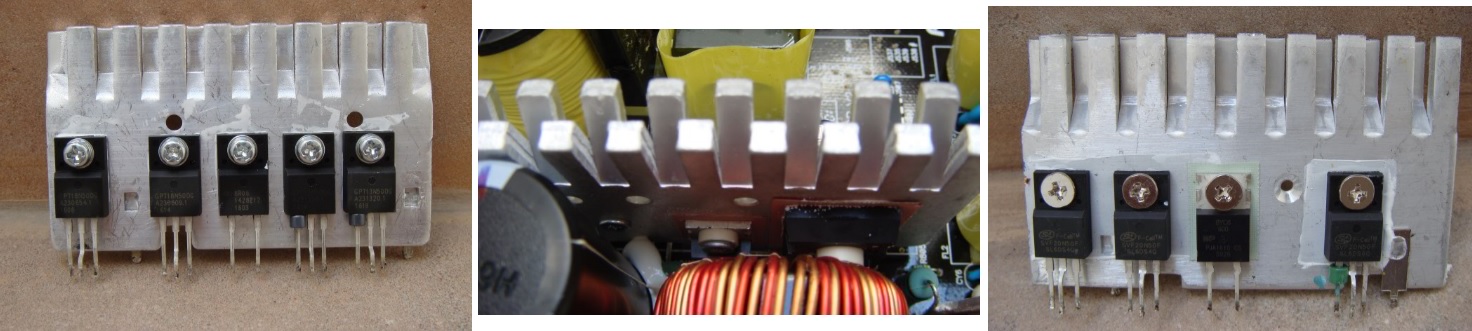 SCORECorsair VS650
APFC MOSTET : 2 x GPT13N50DAPFC DIODE : GR05-1438Main MOSTET: 2 x GPT18N50DG (18amp each)= 4Antec VP650
APFC MOSTET : HP 20N50FAPFC DIODE : un-readableMain MOSTET: 2 x SPP15N60C3 (15amp each)= 3Master Watt 600
APFC MOSTET : F-Cell SVF20N50FAPFC DIODE : NP-PJA1610Main MOSTET: 2 x F-Cell SVF20N50F (20amp each)= 5-------------------------------------------------------------------------------------------------------------------------------APFC and Switching ControllerDifferent manufacturers used different SMPS design with different controllers and protection chips. Every chip is a well designed package with lot of embedded features suitable for a power supply. All three PSU uses equivalent chips but with slight different implementation.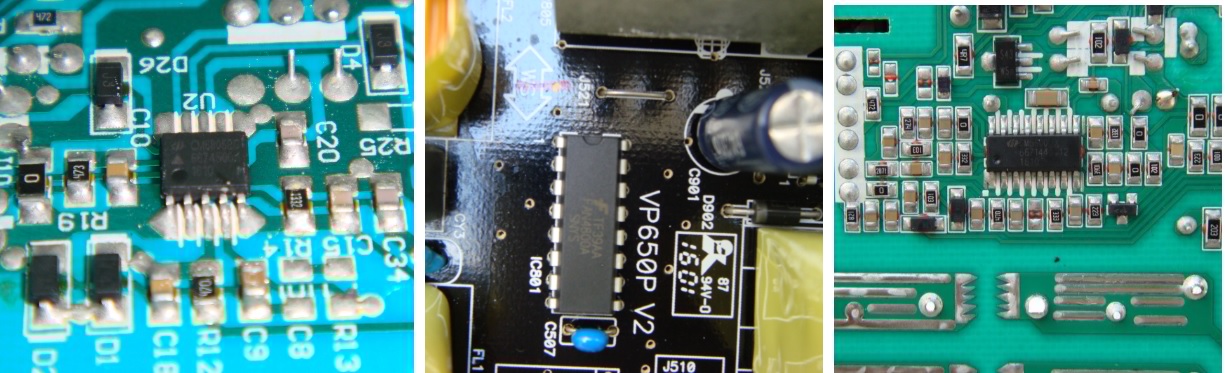 SCORECorsair VS650
PWM/APFC : CM6805BC= 5Antec VP650
PWM/APFC : FAN4800A= 5Master Watt 600
PWM/APFC : CM6800= 5-------------------------------------------------------------------------------------------------------------------------------Stand-By Switching ControllerAll ATX PSUs have a separate 5v Stand-By circuit, which used to mostly power the Soft-Start segment of the PSU and Motherboard.Antec and Corsair Stand-By SegmentAntec and Corsair used similar type of chip for their Stand-By segment. TinySwitch Single chip Switcher solution, which incorporates High voltage MOSFET and control circuitry on one dye.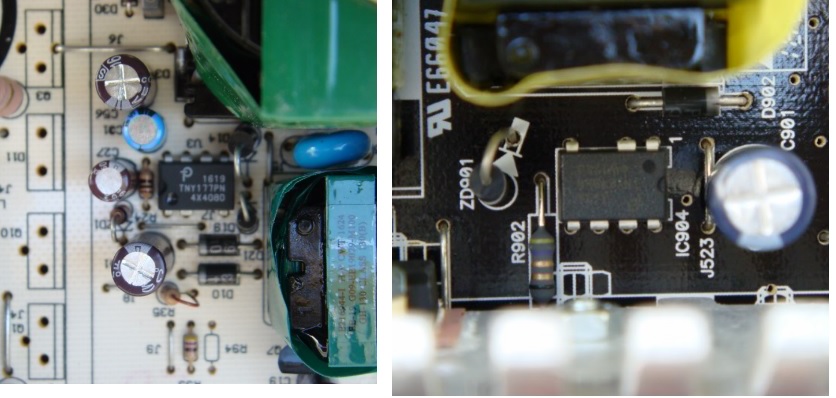 Cooler Master Stand-By SegmentCooler Master used separate switching controller chip and discrete Power MOSFET and other power components for its Stand-By segment. Design is good and more reliable than single chip solution.
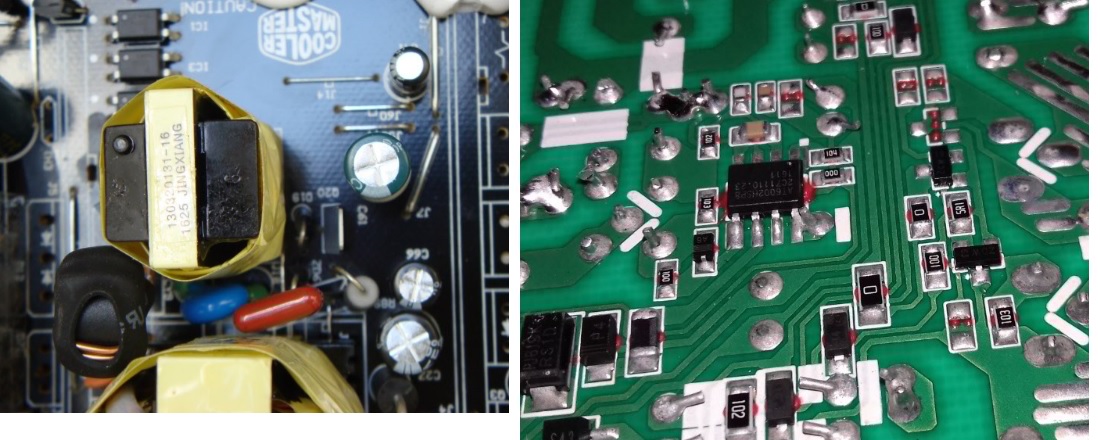 SCORECorsair VS650
Stand-By PWM : TNY177PN= 4Antec VP650
Stand-By PWM : TNY278PN= 4Master Watt 600
Stand-By PWM : AT6002HS= 5-------------------------------------------------------------------------------------------------------------------------------Secondary Schottky rectifierAll PC Switching mode power supplies uses dual center tap Schottky rectifiers in secondary stage and even installed in parallel to double the current handling of the DC- DC conversion.We will judge the PSU according to the total Ampere ratings of the Schottky rectifiers for each DC rail output.Corsair Secondary Schottky rectifiers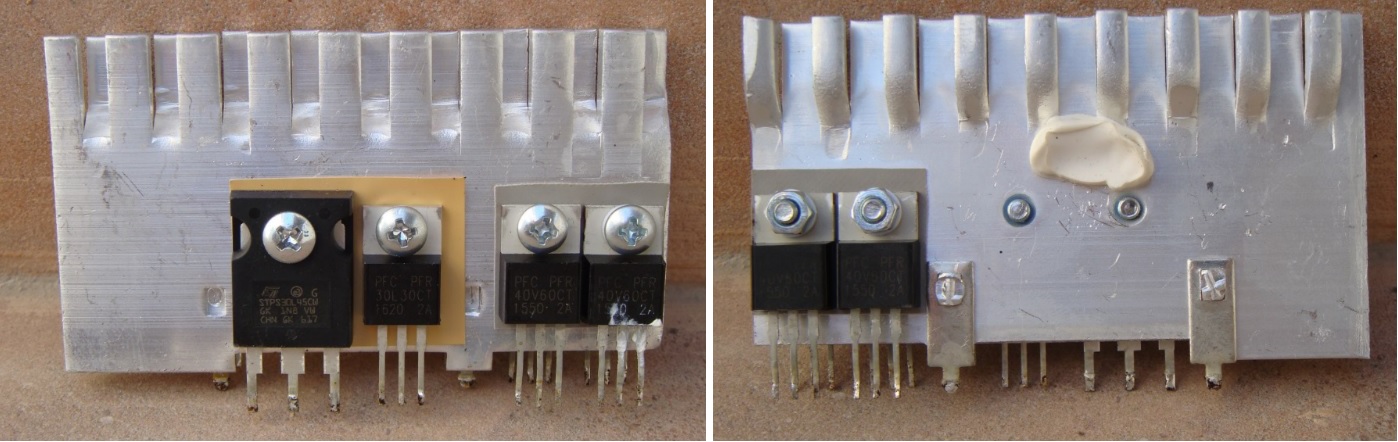 Antec ** Secondary Schottky rectifiers can’t be de-soldered due to poor quality of Copper trace bonding on the PCB.
 Cooler Master Secondary Schottky rectifiersAll 12v and 5v Schottky rectifiers are having small green ferrite rings over the DC output leads. This helps in filtering out the high frequency edge off the DC rails and improves ripple management. Great job Cooler Master for this.
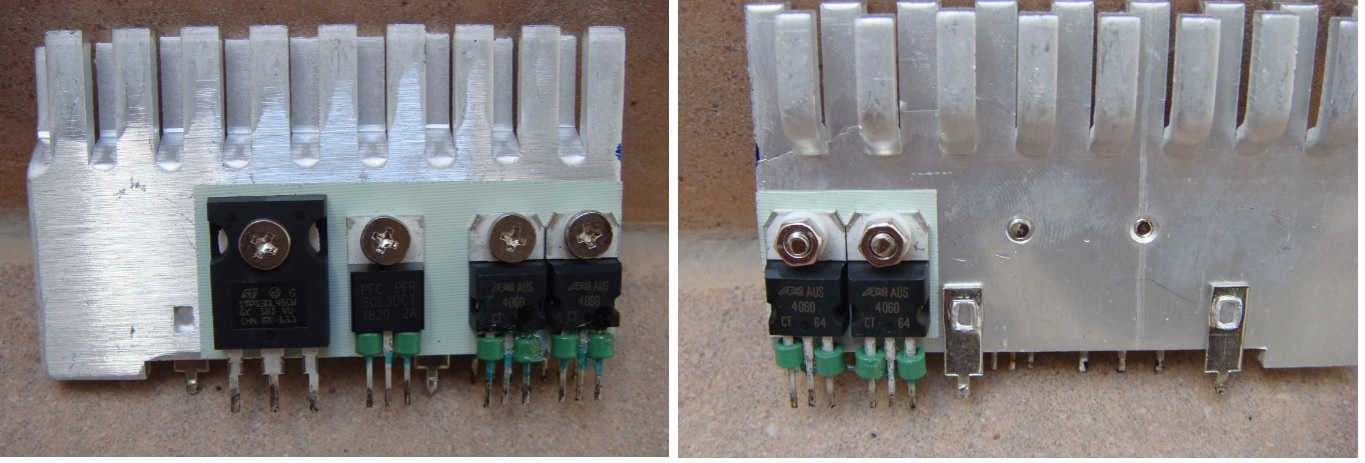 SCORECorsair VS650
12v : 4 x PFC40V60CT (40amp each)5v : PFC30L30CT (30amp)3.3v: ST30L45CW (30amp)= 4Antec VP650
12v : 2 x STPS30L60CT (30amp each)5v : 2 x STPS20L60CT (20amp each)3.3v: MBR3045(30amp)= 3Master Watt 600
12v : 4 x AUS4060CT (40amp each)5v : PFC30L30CT (30amp each)3.3v: ST30L45CW (30amp each)= 5-------------------------------------------------------------------------------------------------------------------------------Secondary Filter CapsThese PSUs are designed for budget market, so you will get decent brand caps at secondary filter stage.For decent filtration minimum of 2200uf filter caps should be used in DC-DC convertors. So we will judge this segment according to total capacitance on each voltage output.All secondary caps on these three PSUs are 105C rated.Corsair Secondary Filter Caps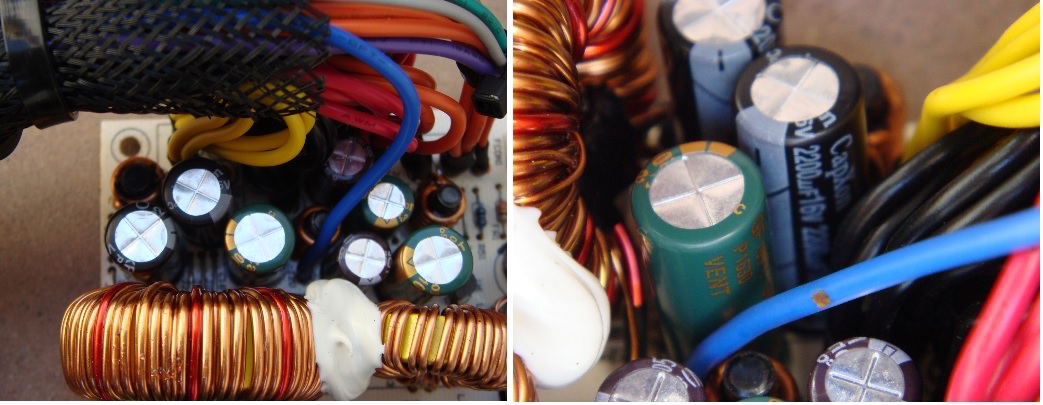 Antec Secondary Filter CapsBeing this a budget unit I was first surprised to see a Solid Cap and premium Japanese Rubycon Caps on Antec PCB. But looking closely found that the solid cap and Rubycon Cap were just installed on 12V rail and remaining 5V and 3.3V was having Taicon and LTec caps. This is weird, its seems like these premium caps are installed for a reason or better say a “PATCHâ€, as later I notice significantly high voltage ripple on 12V rail. It seem engineers were trying to fix high ripple issue due to some design or PCB layout fault, but still problem is not fully rectified. Hmm ..
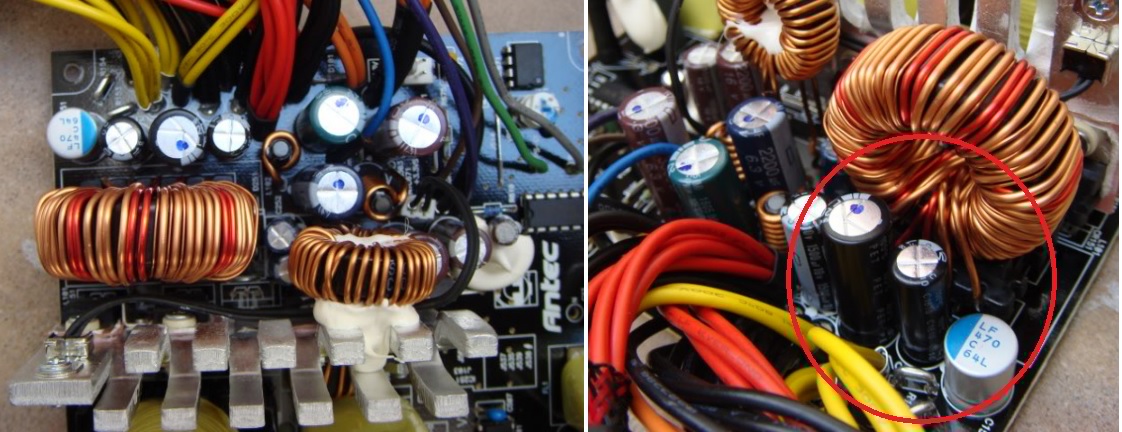 Cooler Master Secondary Filter Caps
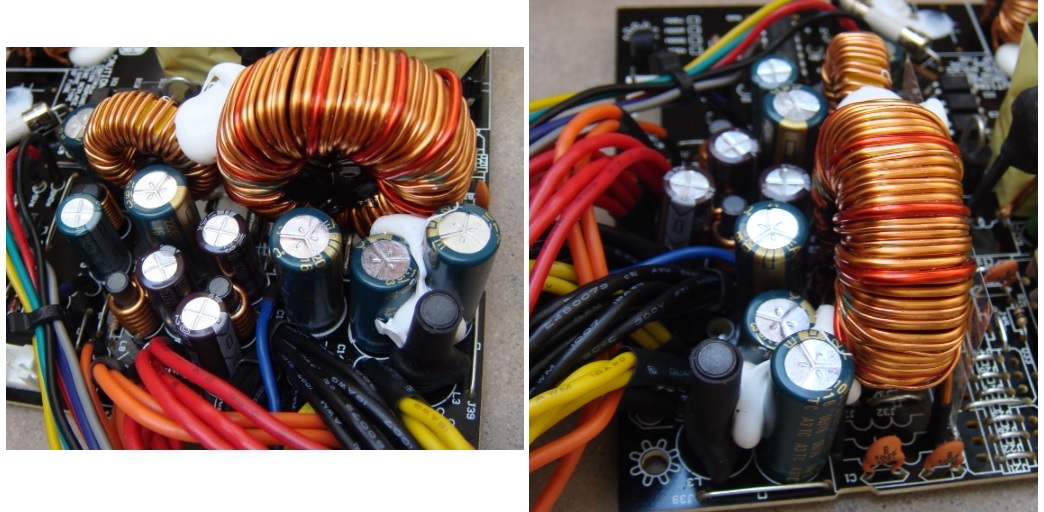 SCORECorsair VS650
12v : 2 x 2200uf/16v (CapXon)5v : 2200uf/10v(CapXon) + 1000uf/16v(Suscon)3.3v: 2200uf/10v(Suscon) + 2 x 1000uf/16v(Suscon)5v SB : 2200uf/10v(CapXon) + 1000uf/16v(Suscon)= 4Antec VP650
12v : 470uf/16v(Solid Cap) + 2200uf/16v (Rubycon) + 1000uf/16v (Rubycon)5v : 1500uf/10v(Taicon) + 2200uf/16v(Taicon)3.3v: 3300uf/6.3v(LTec) + 1000uf/6.3v(LTec)5v SB : 2200uf/16v(LTec) + 1000uf/16v(LTec)= 2Master Watt 600
12v : 2 x 2200uf/16v (Teapo)5v : 2200uf/10v(Teapo) + 1000uf/16v(Suscon)3.3v: 2200uf/10v(Teapo) + 2 x 1000uf/16v(Suscon)5v SB : 2200uf/10v(Teapo) + 1000uf/10v(Teapo)= 4-------------------------------------------------------------------------------------------------------------------------------Protection ChipAll PSU have decent protection chip onboard for Short circuit, over voltage and over current.Corsair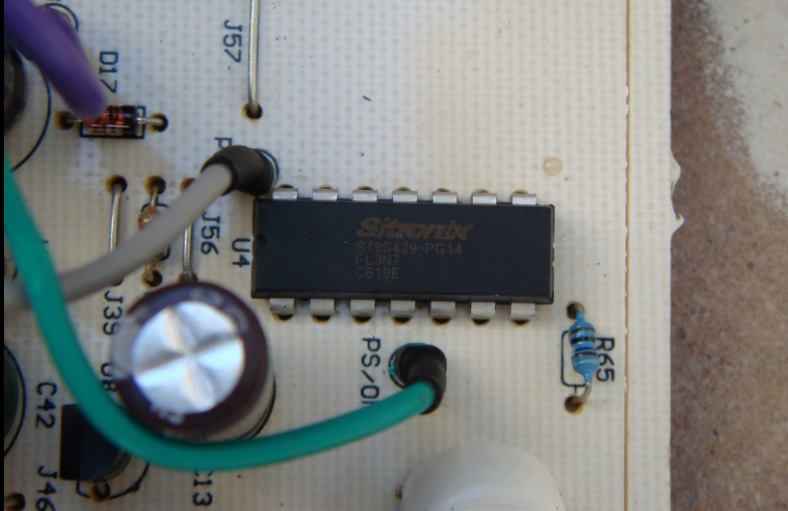 Antec
Antec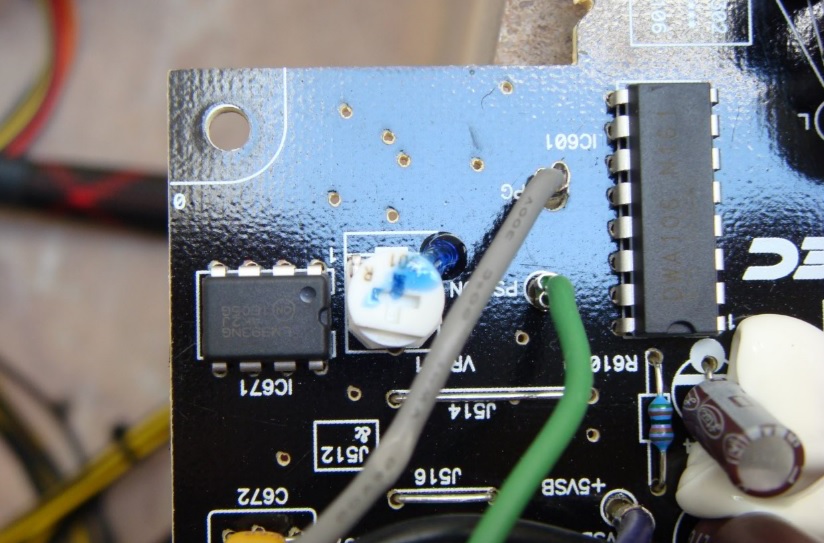 Cooler Master
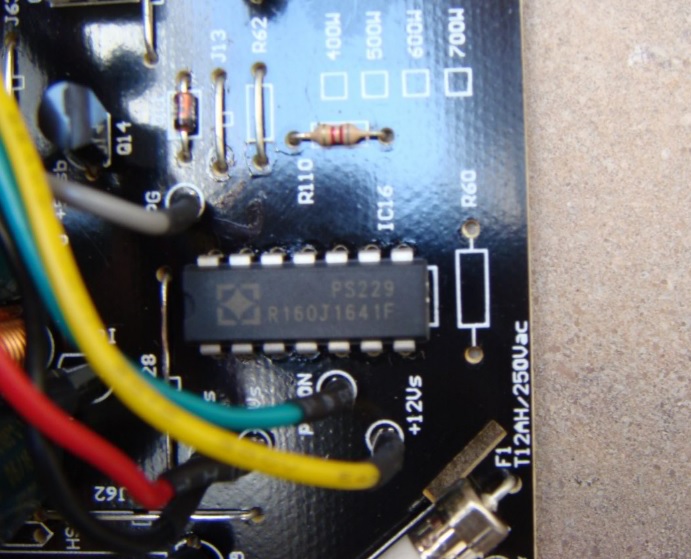 SCORECorsair VS650
Protection : Sitronix ST9S429-PG14= 5Antec VP650
Protection : DWA106 + LM393= 5Master Watt 600
Protection : SiTI PS229 + LM393(on backside)= 5-------------------------------------------------------------------------------------------------------------------------------CoolingFor cooling solution all three PSU have a 120mm fanCorsair – FAN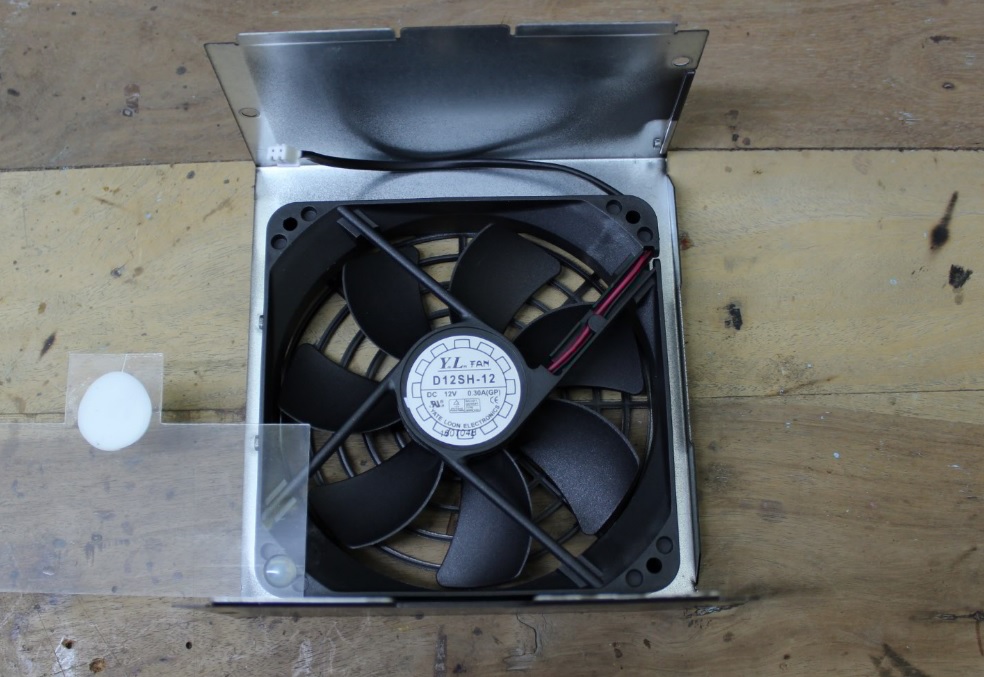 Antec – FAN
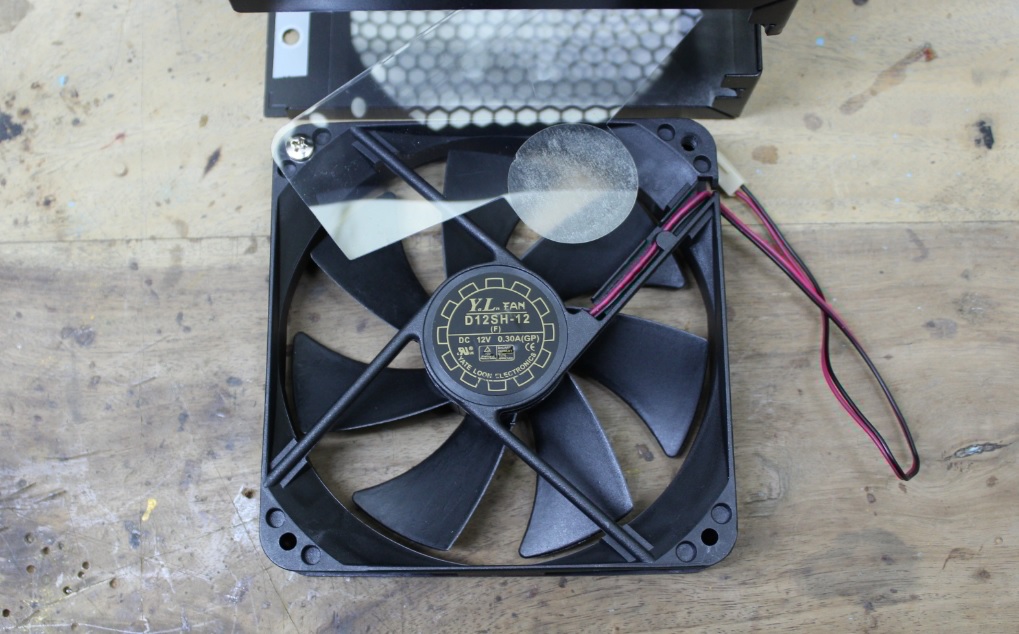 Cooler Master – FAN
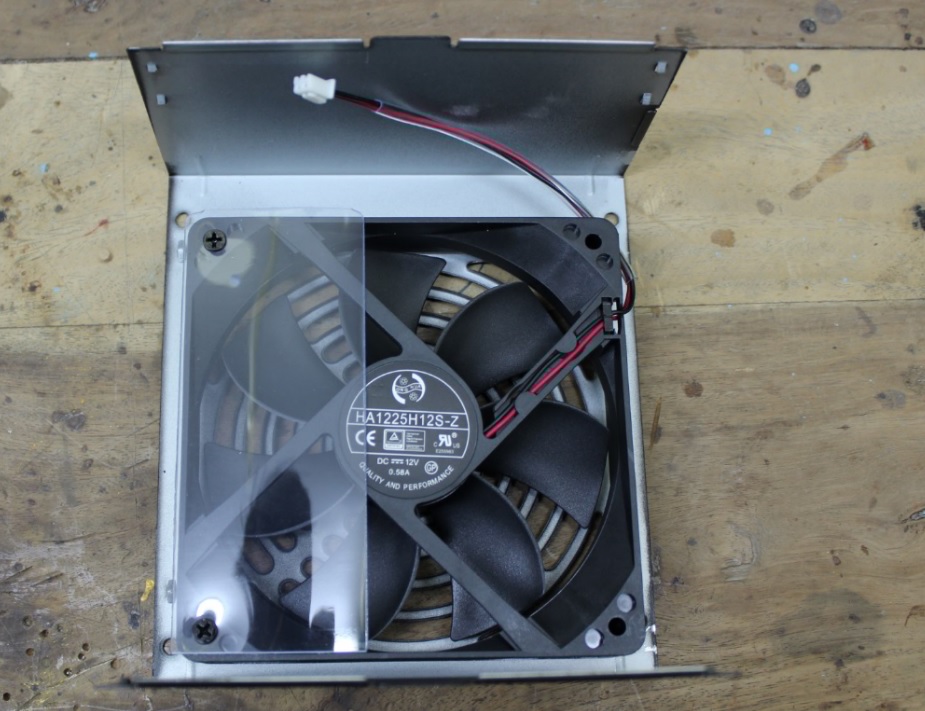 Speed of fan is controlled via a simple thermostat and power transistor circuit. For fan to react according to the internal temperature thermostat should be properly installed onto the heatsink. Both Cooler Master and Antec have done it right, but unfortunately that is not true for Corsair.CorsairBelow you can clearly see that thermostat is just soldered onto the PCB and is having a gape of about 1-1.5mm from secondary heatsink so real temperature is never registered by the thermostat and fan will not ramp-up when needed the most. This results in higher junction temperature on power devices and over all higher operating temperature of the PSU, lowering the overall PSU life and I think this is the main reason of high failure rate of this PSU.
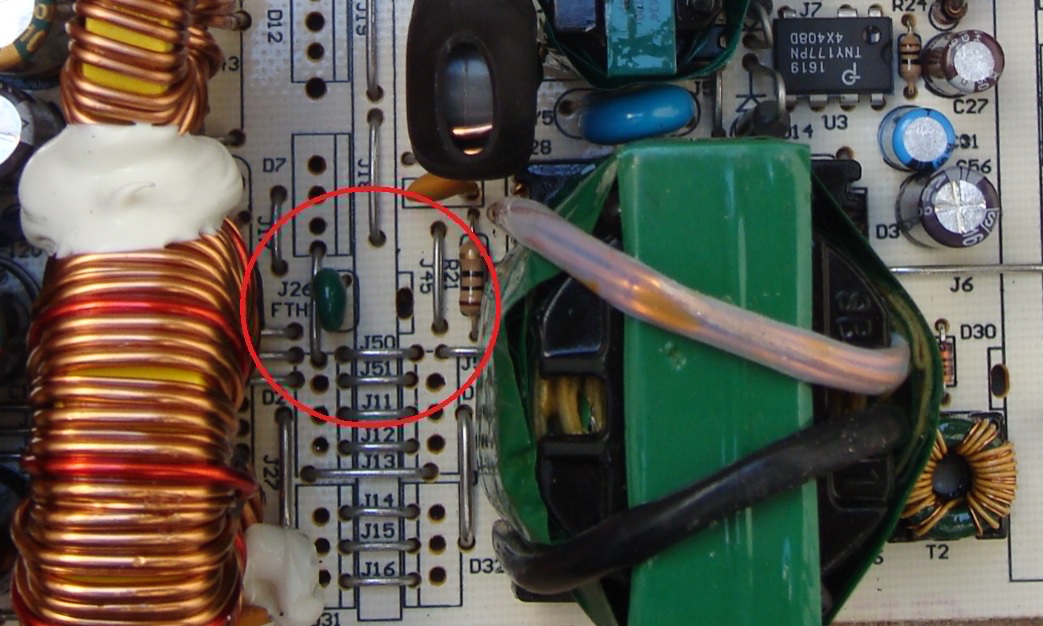 Antec
Antec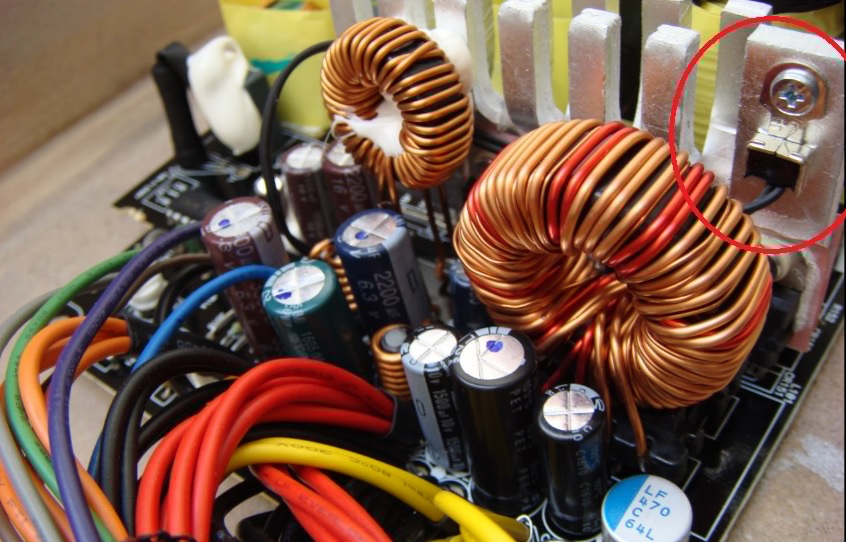 Cooler Master
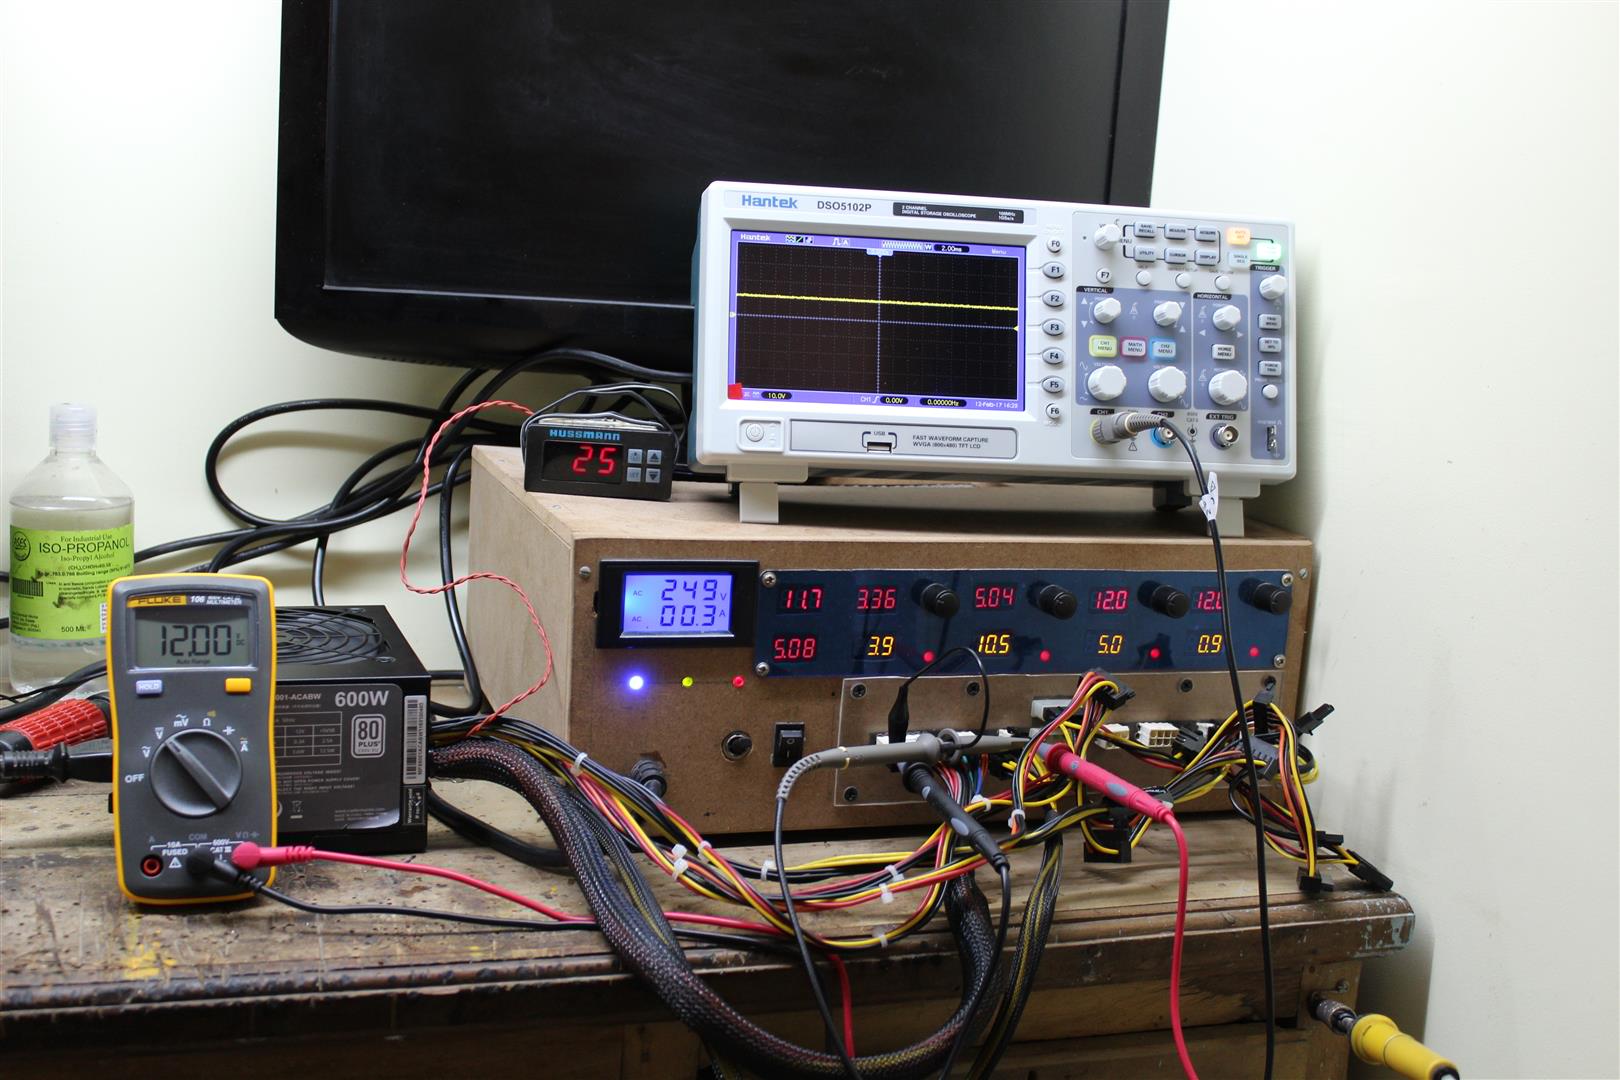
 SCORECorsair VS650 = 2Antec VP650 = 5Master Watt 600 = 5-------------------------------------------------------------------------------------------------------------------------------Load TestTo test the PSU on my Active load test, I have manually increased the load in Amps on 12v first rail, 12v second rail, 5v and 3.3v rail to simulate 100%, 80% 50% and 20% load. Since this PSU is having only single 12v rail, so divided the load in half on both 12v loads on my tester.5V stand-by and -12V supply was left at a constant 0.5amp load throughout the test run.Maximum theoretical load handling capacity of my tester is somewhat around 1500W, but due to MOSFETs safe operating area (SOA) characteristics and thermal load handling capacity of the heatsinks, this tester can handle Max 1300W.. For safety reasons I have also installed a thermal controller which turn OFF the attached PSU if temperature exceeds SOA specifications.
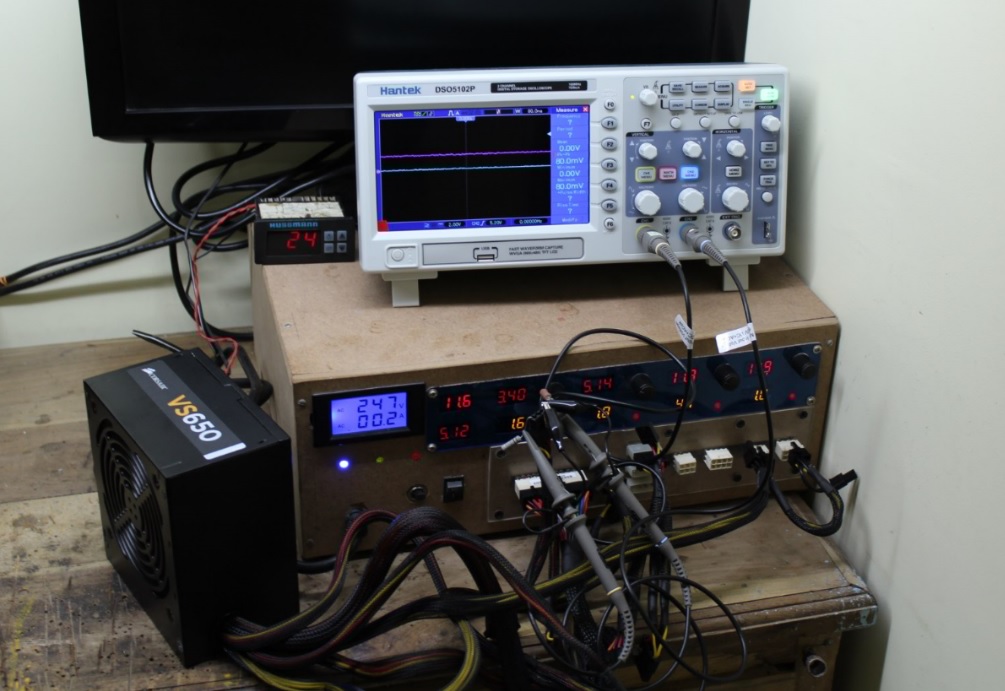
 Corsair
 Antec
Antec Cooler Master
 SCORECorsair VS650 = 3Antec VP650 = 5Master Watt 600 = 5-------------------------------------------------------------------------------------------------------------------------------Over Load RunDuring this test we try to pull more than specified power of the PSU. So at certain point PSU should turn OFF by itself showing proper working of Overload protection or should die showing absence of any protection.Below is the absolute Max power we were able to pull from these PSUs.SCORECorsair VS650
672W= 4Antec VP650
667W= 4Master Watt 600
695W= 5-------------------------------------------------------------------------------------------------------------------------------Voltage RippleWe measured range of ripple using oscilloscope at maximum rating of the PSU for 12v, 5v and 3.3v supply output in Pk-Pk(mv).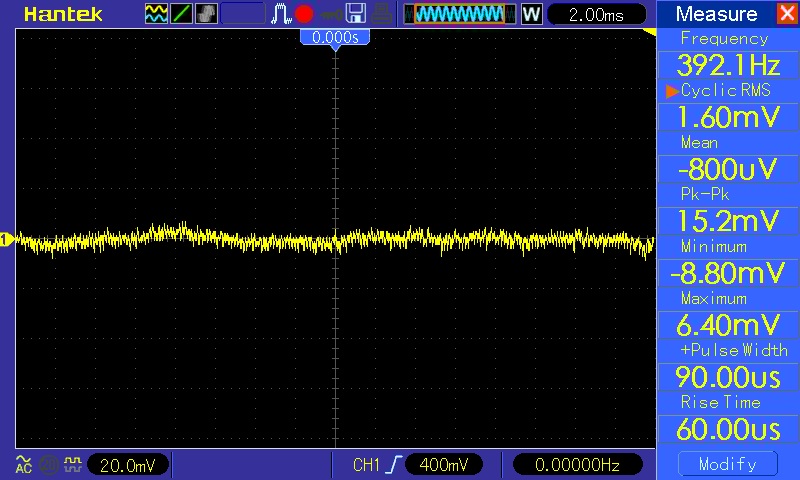 ATX specification for Ripple Pk-Pk(mv) for +12v is 120mv and for +5v and +3.3V it is 50mv. So let’s seen which PSU gives lowest ripple.SCORECorsair VS650
12v : 80 - 90mv5v : 22.5 - 24mv3.3v : 20 - 28mv= 4Antec VP650
12v : 110 - 98mv5v : 18 - 20mv3.3v : 16 - 19mv= 3Master Watt 600
12v : 75 - 53mv5v : 13 - 15mv3.3v : 15 - 16mv= 5-------------------------------------------------------------------------------------------------------------------------------Voltage RegulationWe measured change in voltage of different rail from 20% load up till the overload protection of the PSU is triggered.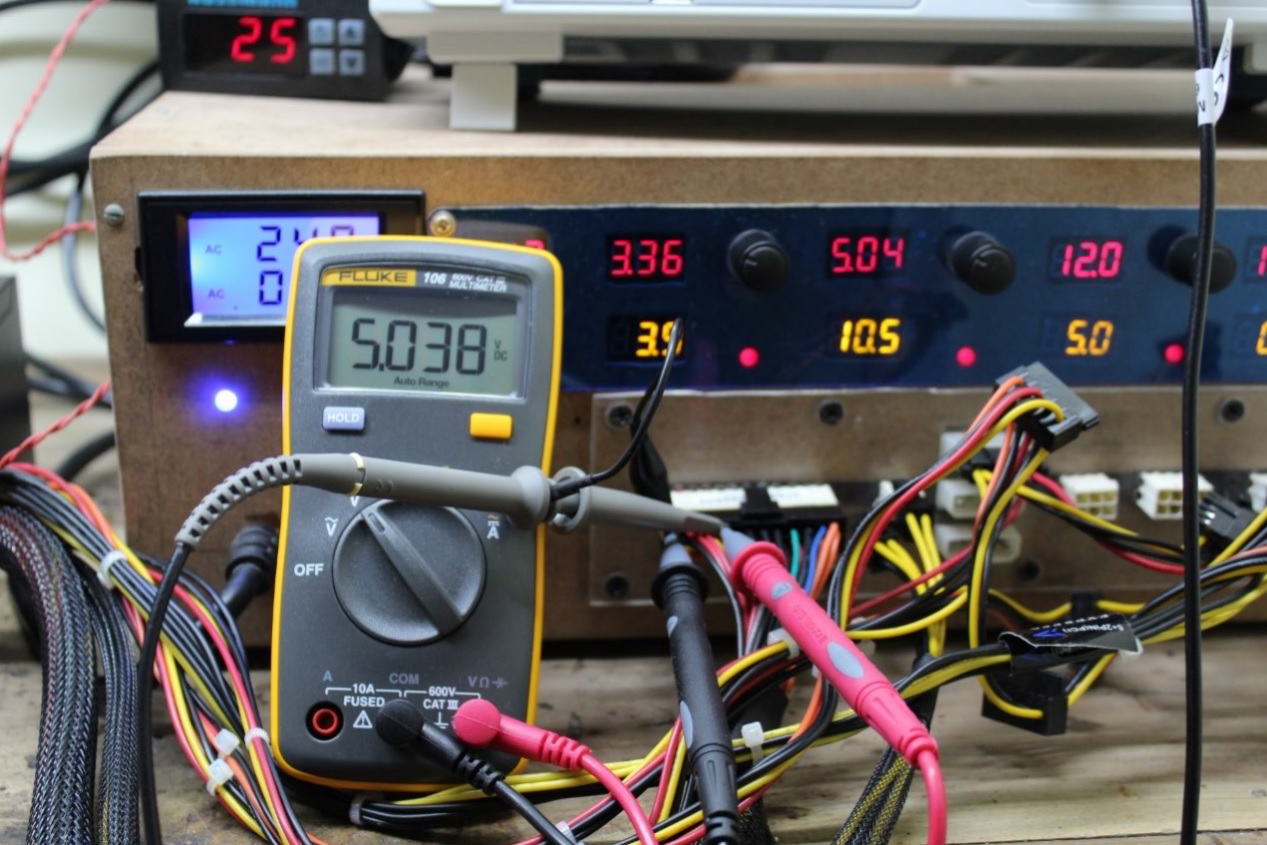 ATX specification for Voltage range min. to max. is as following.
12v : 11.40v to 12.60v5v : 4.75v to 5.25v3.3v : 3.135v to 3.465vStarting and end voltage readings with drift in voltage is listed below.SCORECorsair VS650
12v : 12v - 11.5v (drift 0.5v)5v : 5.04v – 5v (drift 0.04v)3.3v : 3.31v – 3.3v (drift 0.01v)= 3Antec VP650
12v : 12.1v - 11.8v (drift 0.3v)5v : 5.04v – 5.01v (drift 0.03v)3.3v : 3.34 v – 3.29v (drift 0.05v)= 4Master Watt 600
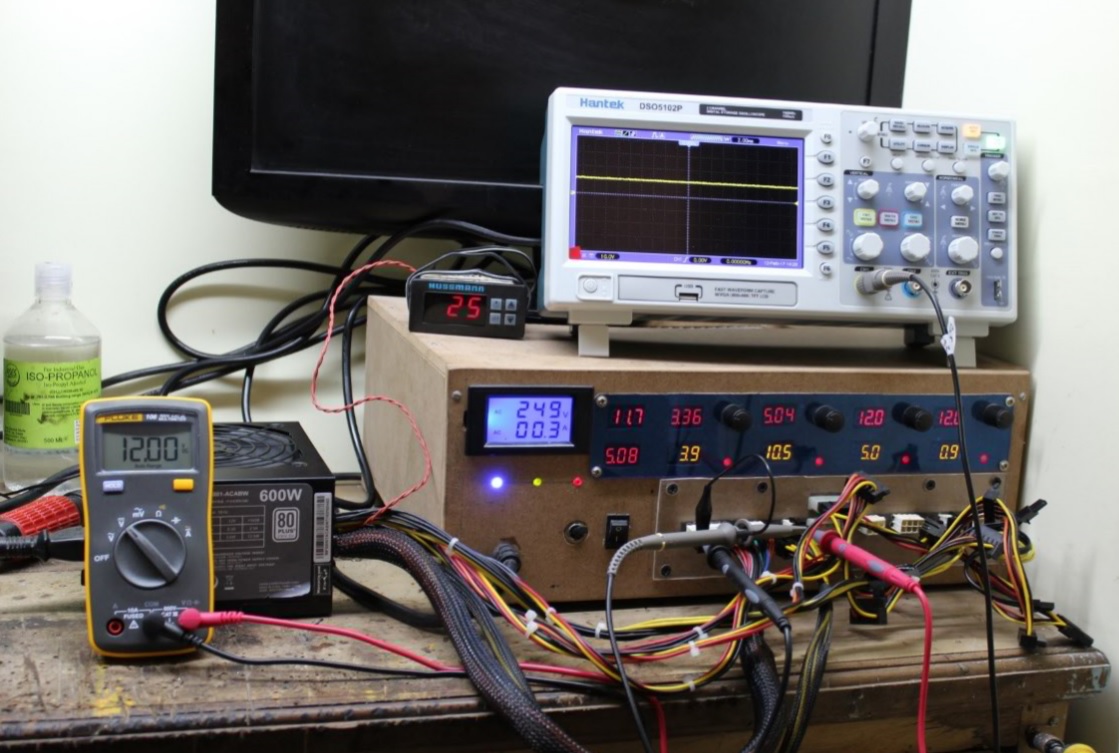
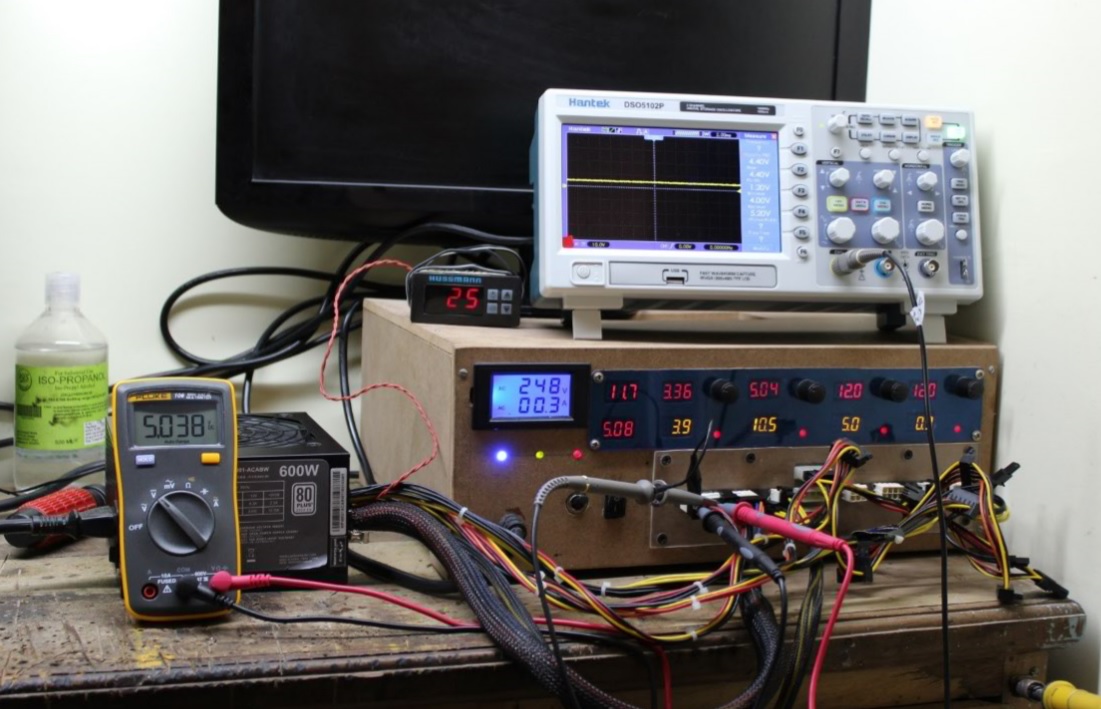
12v : 12.1v - 12v (drift 0.1v)5v : 5.04v – 4.98v (drift 0.06v)3.3v : 3.31v – 3.3v (drift 0.01v)= 4-------------------------------------------------------------------------------------------------------------------------------TemperatureTo measure exact thermal performance of the PSU, we mounted our thermostat with proper thermals onto the Primary heatsink of the PSU and top cover with fan is closed properly.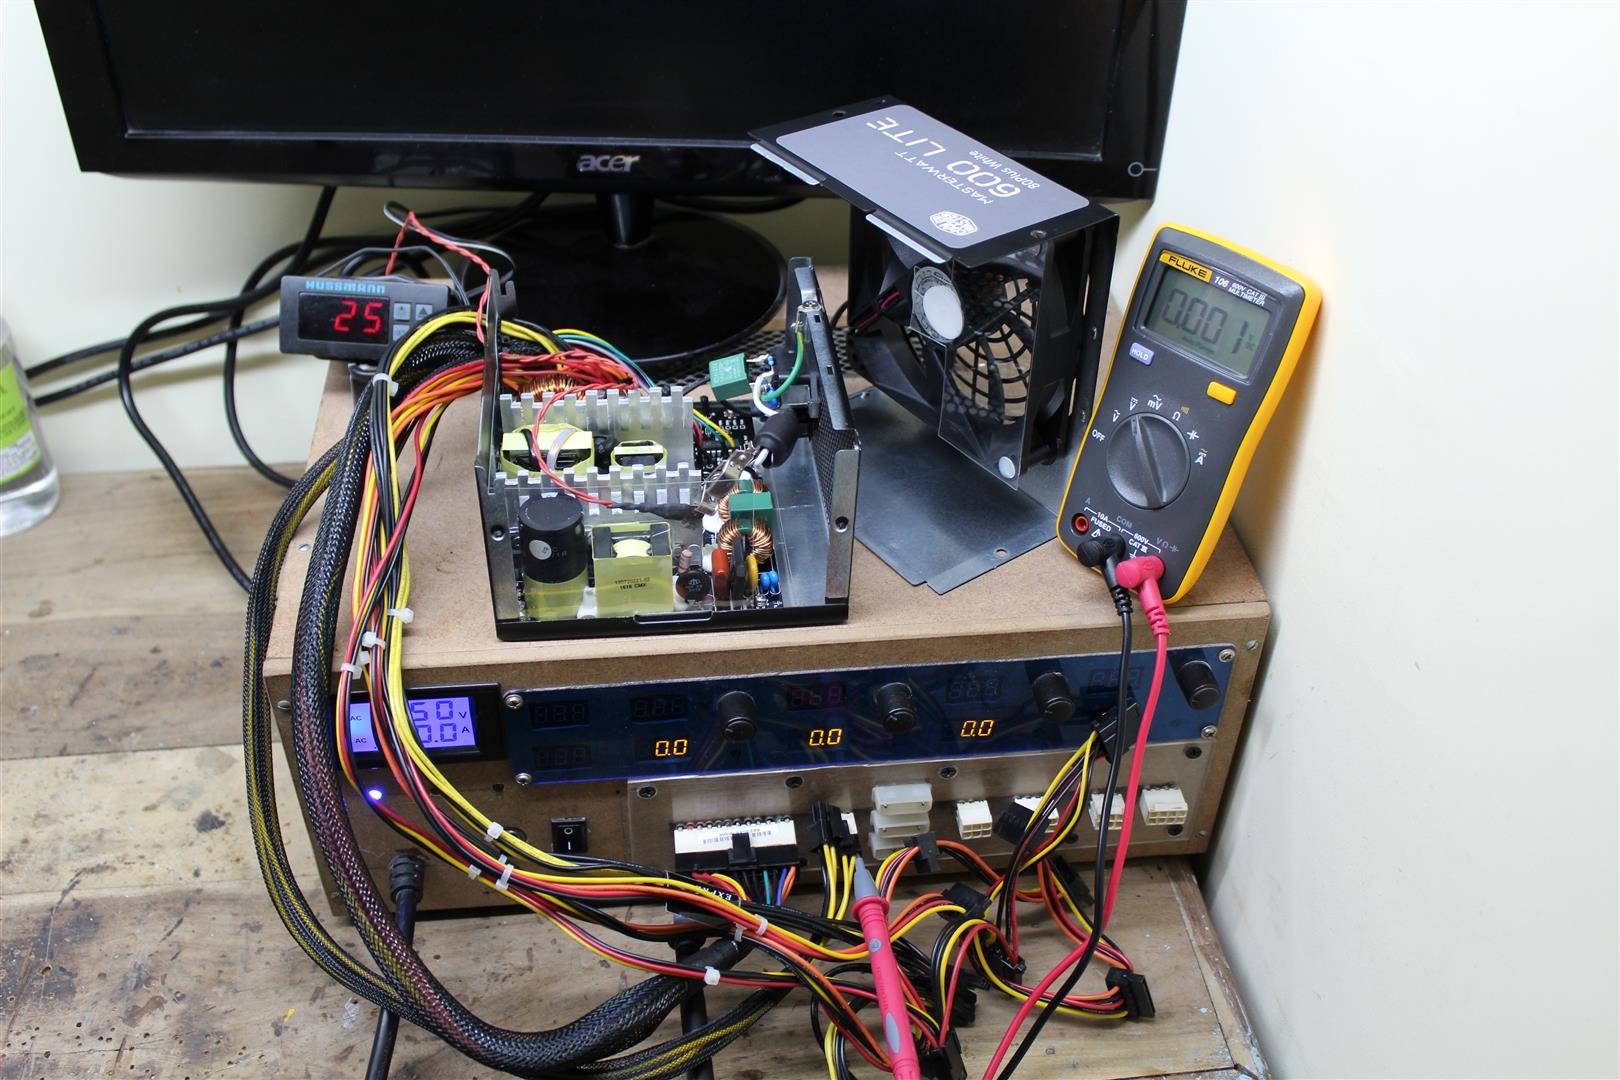
 Before and after every test PSU and test equipments were turned OFF for half an hour. 500w of load is applied to each PSU for duration of about 5 minutes and change in temperature is measured.Starting and end temperature readings are listed below. And as I mentioned earlier in Cooling section, due to thermostat placement, the primary heatsink of Corsair PSU is touching 88C not good.SCORECorsair VS650
25C to 88C= 1Antec VP650
25C to 72C= 5Master Watt 600
25C to 73C= 5-------------------------------------------------------------------------------------------------------------------------------PC PerformanceTo test these PSUs in a real world scenario I installed an old power hungry graphics card, the HD7990 and ran 3Dmark2006 and measured voltage at PCIe power connector.Test system configuration -CPU - Intel Core i7 6700KBoard - GIGABYTE Z170 Gaming G1RAM - 2 X 4GB Corsair DDR4 3000MhzSSD - Kingston 120GB SSDCooler / Case - CustomGFX - ASUS HD7990Display - ASUS PB287QOS - Windows 10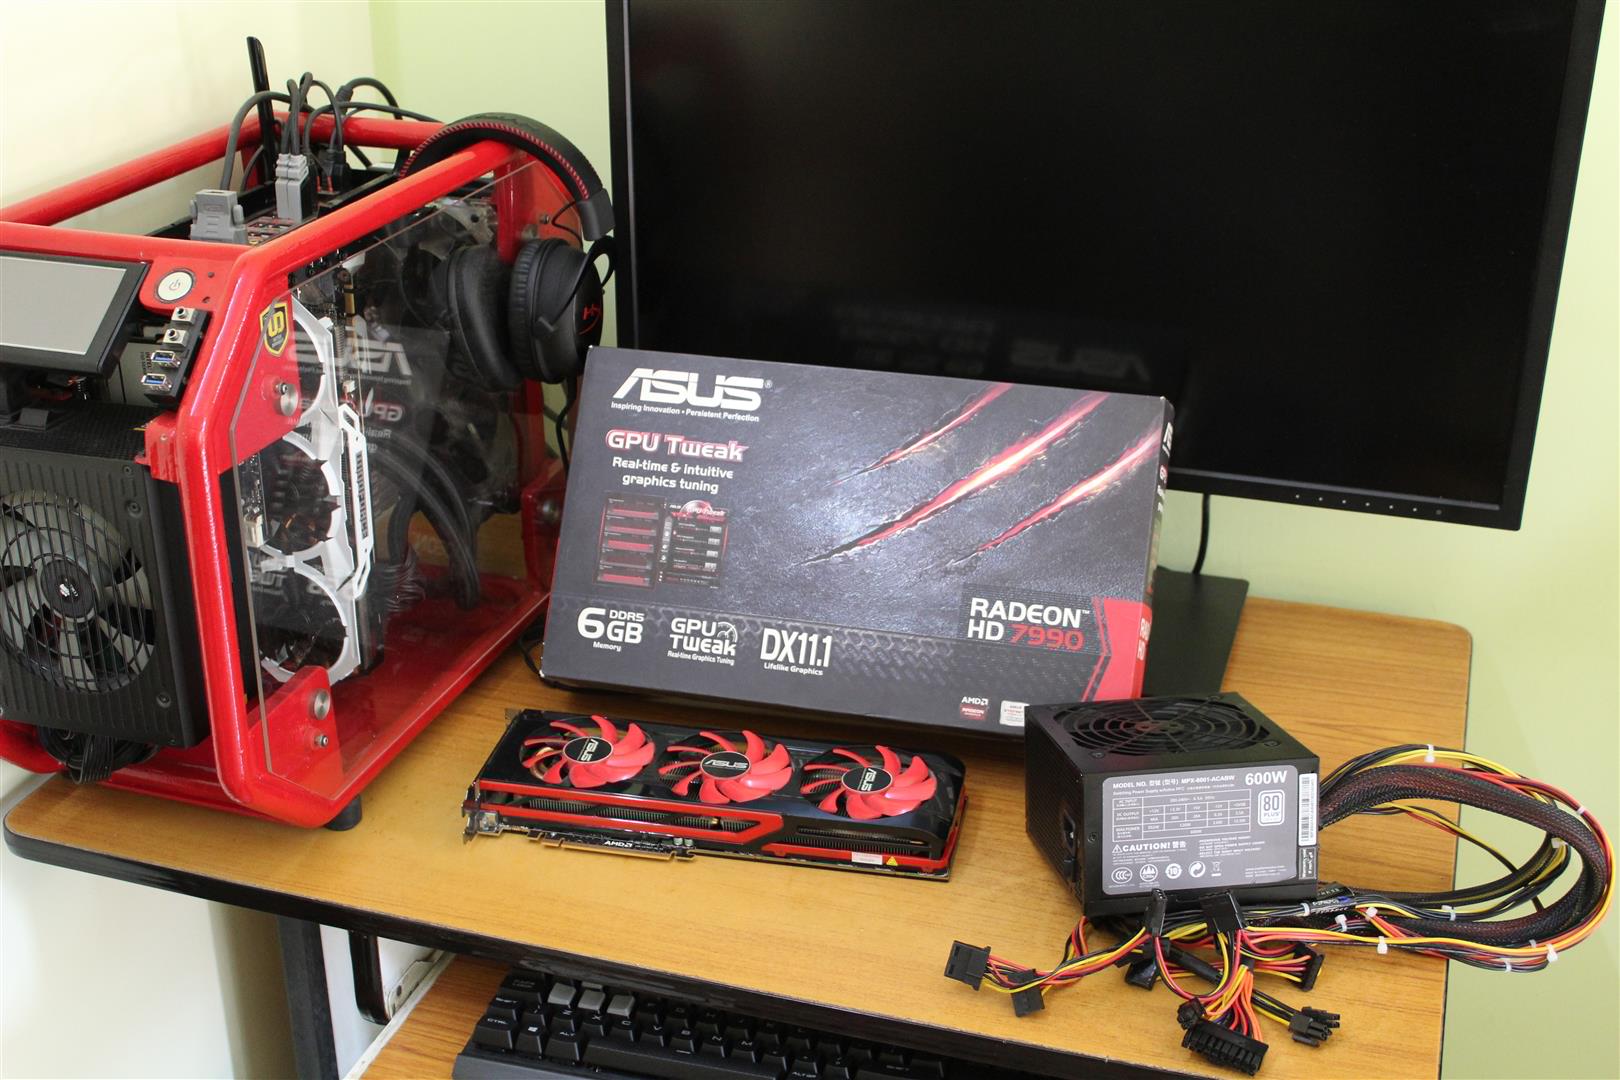
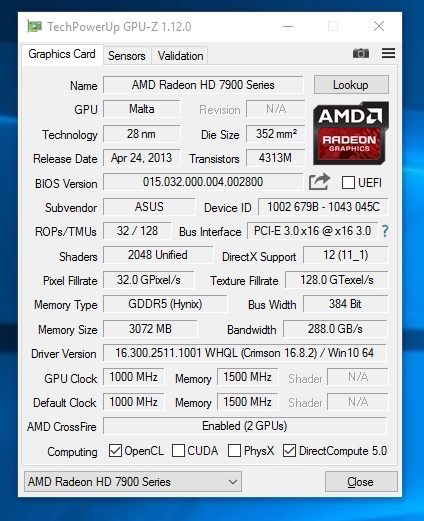 12v reading was good at this test. At stock GPU setting everything went fine for all PSU, but when GFX is overclocked closed to 1100MHz, the Corsair PSU gave a BSOD and computer restarted.SCORECorsair VS650 = 2Antec VP650 = 4Master Watt 600 = 5-------------------------------------------------------------------------------------------------------------------------------ConclusionFinal ScoreOut of total score of 95, following are the final scores of each PSUSCORECorsair VS650 = 70Antec VP650 = 74Master Watt 600 = 91-------------------------------------------------------------------------------------------------------------------------------There not much to say now, the final scores is self explanatory. Still considering the price, Cooler Master’s new Master Watt Lite series PSU is definite a game changer in the segment and will create a good competition and may inspire other brands to redo their budget PSU segment. Which is actually good for the market as latest graphics cards are becoming more and more power efficient, a 600W PSU is sufficient for mostly all single card gaming build and if we get good price to performance ratio from a product it’s always welcomed.ThanksLinks : CORSAIR VS650Links : MASTERWatt Lite 600Links : Antec VPS650

[India] Vinay Agrawal
in 2022 Thermaltake CaseMOD Invitational Season 1
Posted
Very nice build Vinay. 🤩