-
Forum Statistics
8.2k
Total Topics53.3k
Total Posts -
Member Statistics
136,398
Total Members16,800
Most Online

ThermalMike
-
Posts
1,020 -
Joined
-
Last visited
-
Days Won
46
Content Type
Profiles
Forums
Downloads
Events
Gallery
Blogs
Everything posted by ThermalMike
-
Bullybeef73, Welcome to the forums and thank you for reaching out to us! The top filter that slides into the slot at the top should be solid. When pressing it in, make sure you press it in all the way. It will get to a point before going all the way in where there is a stop and then a final press should lock it into position. (this is the top filter that slides out the back) Tilting it or moving it around it should be good, if you have any further troubles take some pics if you can and post them up. Feel free to contact me directly or our support team as well! (Info below)
-
Sorry to hear about it, we will get a proper replacement out to you once we receive. I will mention to the team to check it over before shipping out.
-
Happy, I checked with out team, did you sent the email to ttsupport@thermaltakeusa.com? We are checking and did not see any message. Feel free to call us or email us again to the email I have referenced so we can support you. -Mike
-
Happy, I will let them know so we can follow up with you. Don't forget you can also call as well for faster assistance.
-
Project SunkisTt - Chrome Frame, Candy Paint (Completed)
ThermalMike replied to ThermalMike's topic in Modding
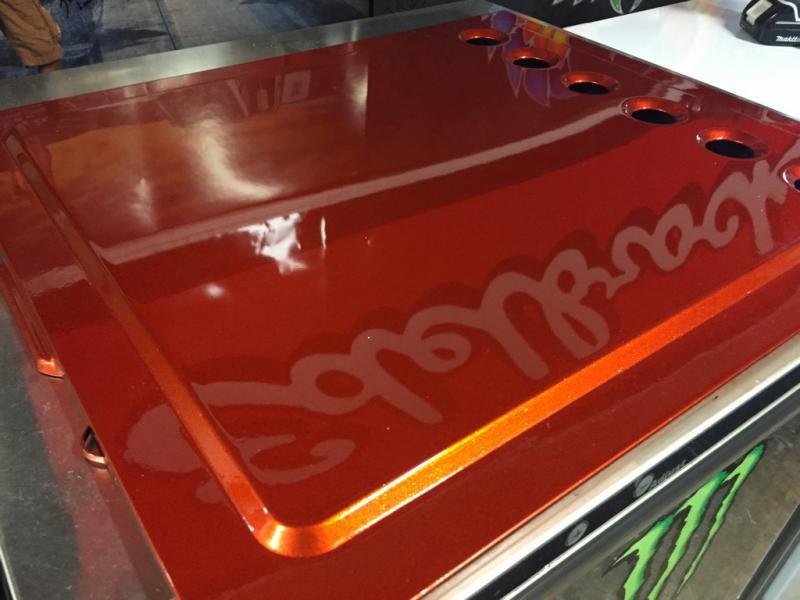
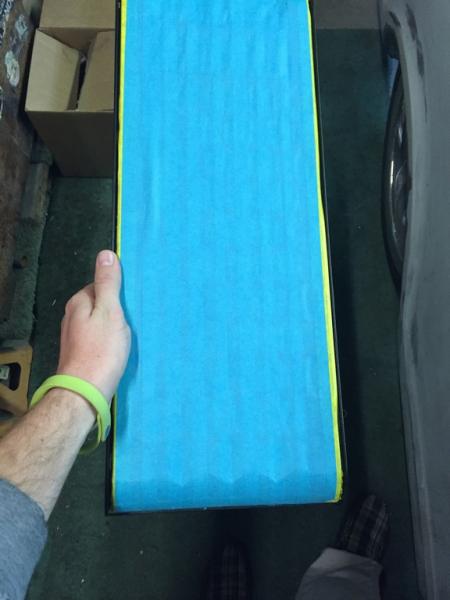
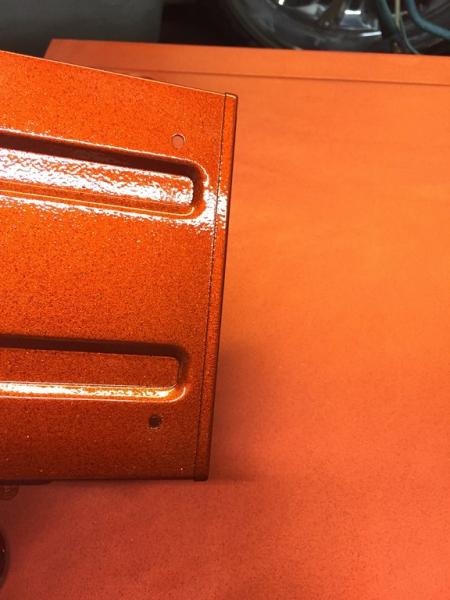
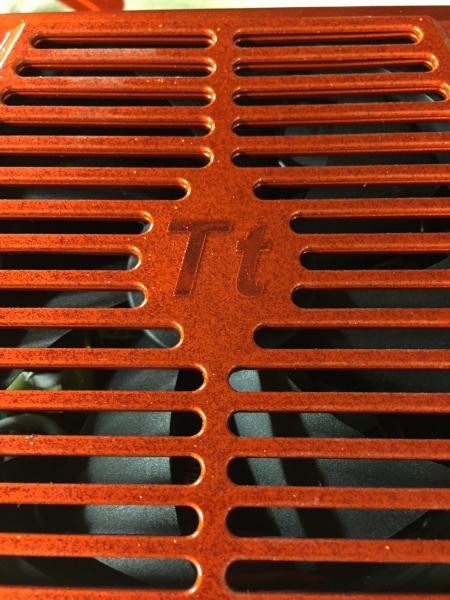
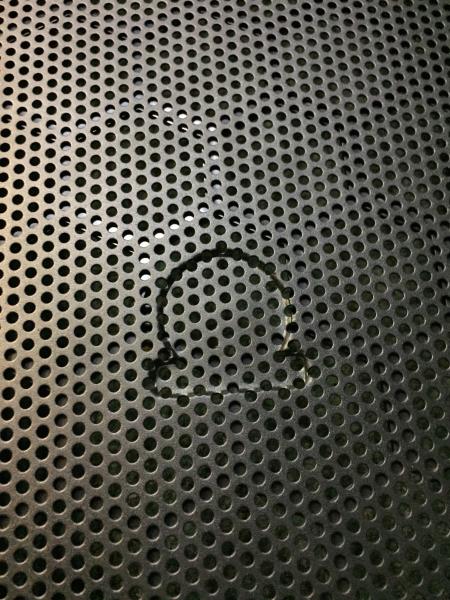
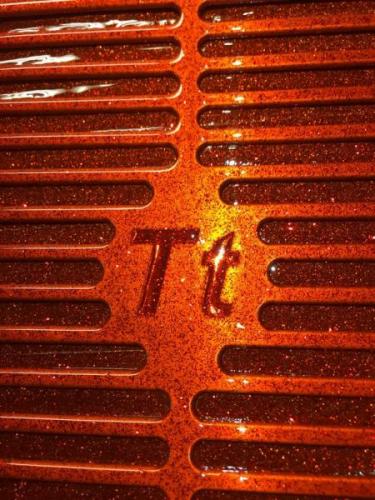
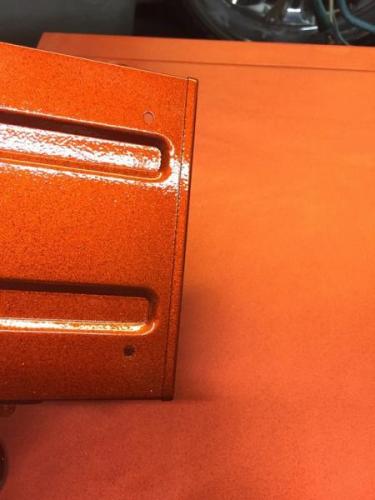
Got some time to do some finish sanding on the side panel, coming along really nicely... Now you may be able to notice some silver flake on the panel, well that is because the flake cut through to the panel a little and it needs to be re-shot. Hope to get some time in the booth this week to re-shoot some panels so they come out to near perfection, because I want this chassis to really shine. I hope to show you the chassis put together soon and once I finish buffing the PSU it is going back together and start the sleeving! #### I can't wait to continue!

- 35 replies
-
- 1
-

-
- Thermaltake
- Orange
- (and 3 more)
-
Project SunkisTt - Chrome Frame, Candy Paint (Completed)
ThermalMike replied to ThermalMike's topic in Modding
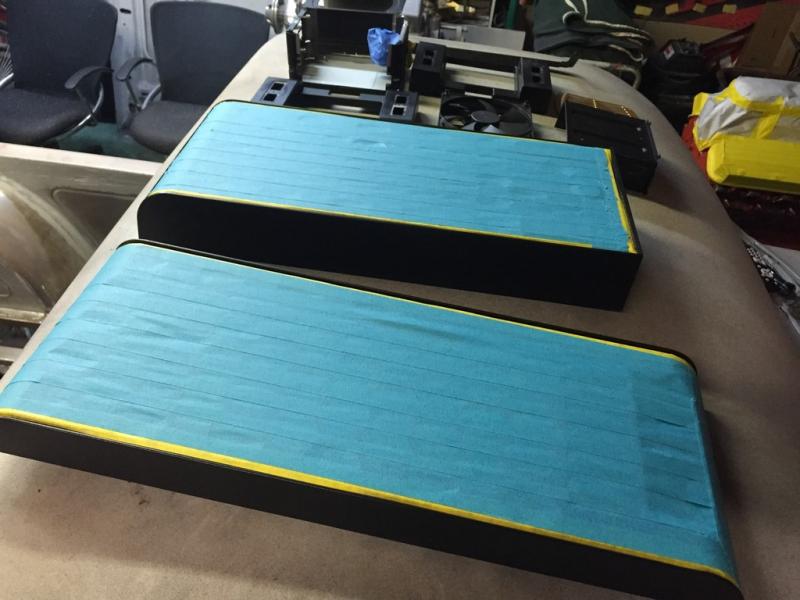
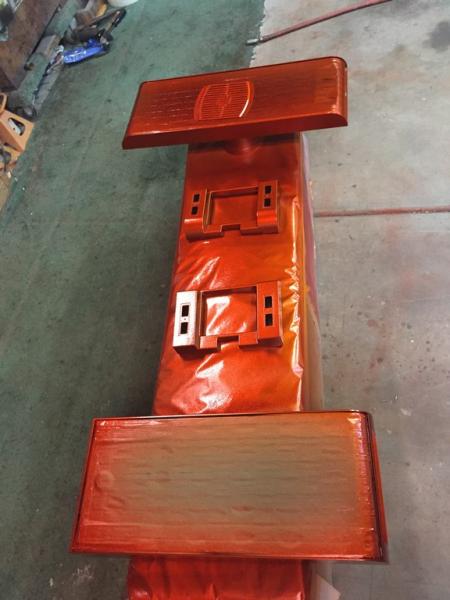
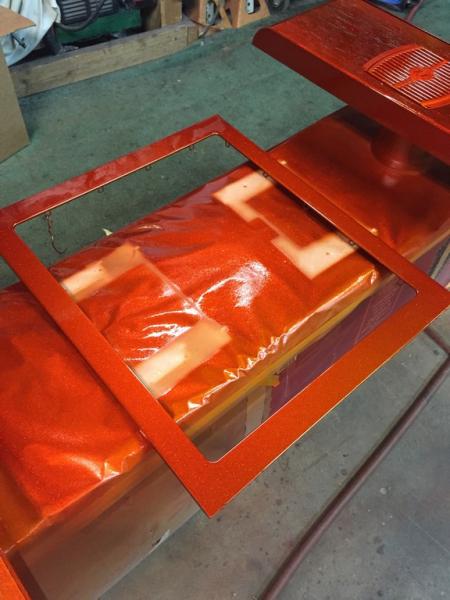
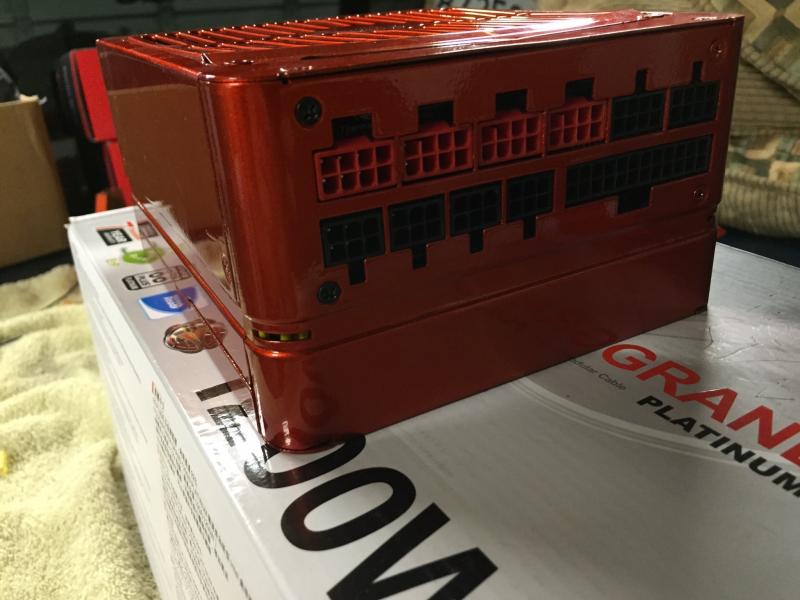
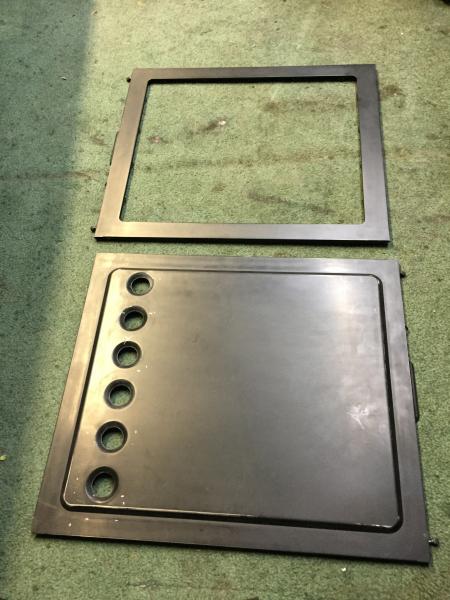
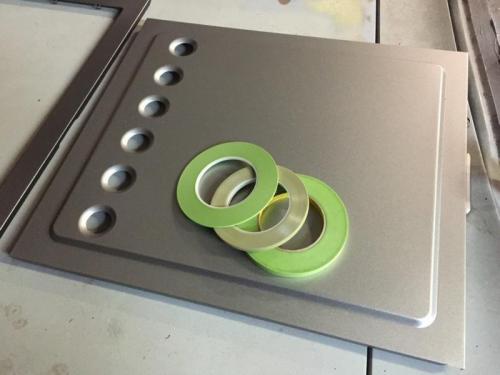
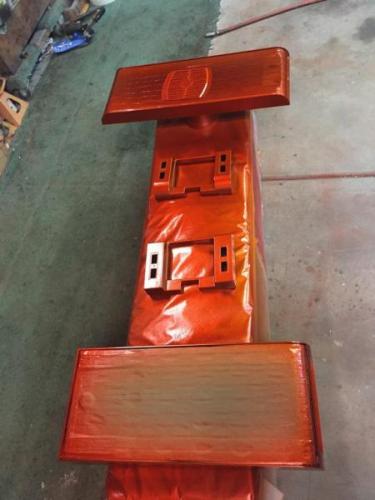
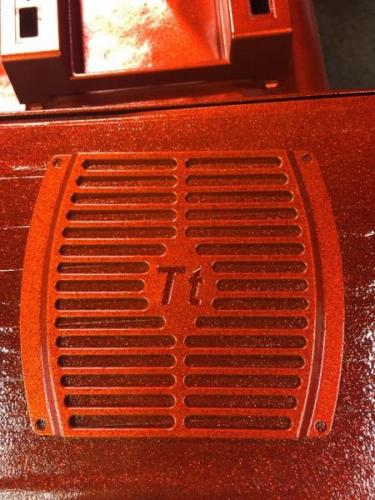
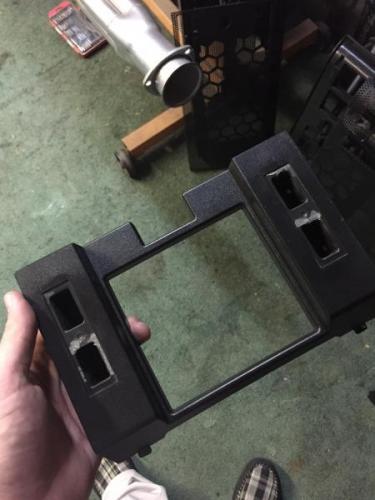
Some updates on the project, actually a lot of updates so lets get started! Here is the panels with the base coat of silver on them, originally I was looking to do a silver base, stripe it, then spray gold over it, but the silver did not stick so well... Here is the rest of the case panels all taped and ready to be shot: Now since the silver did not stick very well and it got me thinking of something that may look a lot better, there was a change of plans... With the silver gone, I decided to go with a gold base add some red flake and then spray some HoC Candy Tangerine over like originally planned, check it out! Here is the grill shells removed and the top/front panels painted: Now for the best part imo the side panels... I even painted the inside just the same so the back panel will show very nicely on the inside when looking through that nice chrome frame This case would not be the same unless it had a matching powerhouse to go with it, so my DPS 1050W got the same treatment: Now I have been sanding everything to knock it flat and then on to buffing and polishing. Here is what the optical drive cage looks like not sanded next to the side panel that has: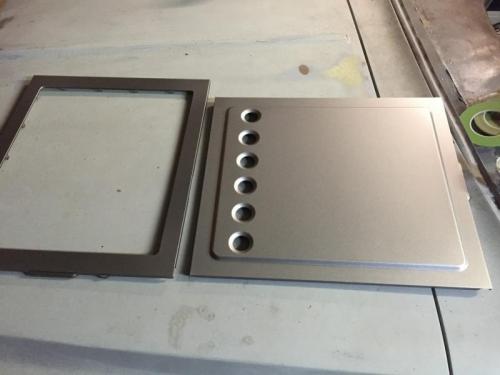


-
Do you think efficiency is important for a power supply?
ThermalMike replied to Tt Andy's topic in Power Supplies
I see a lot of Platinum in my future Currently running Gold atm -
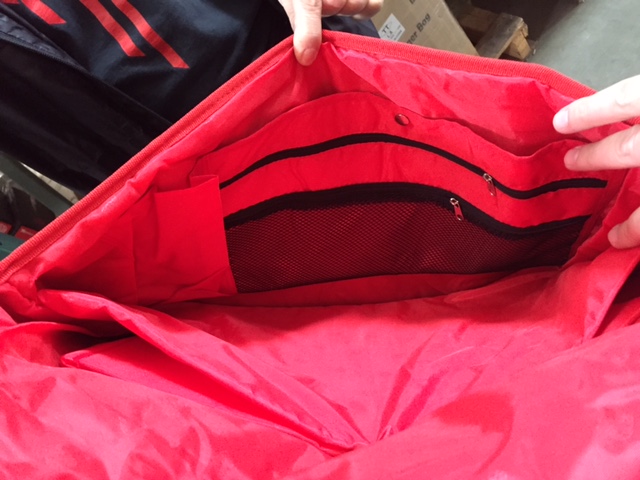
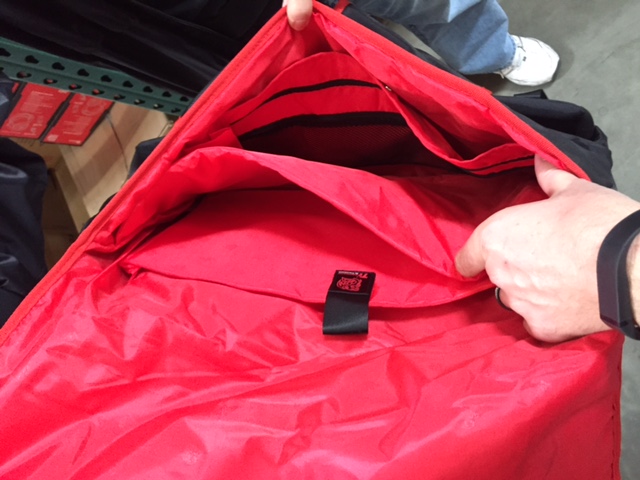
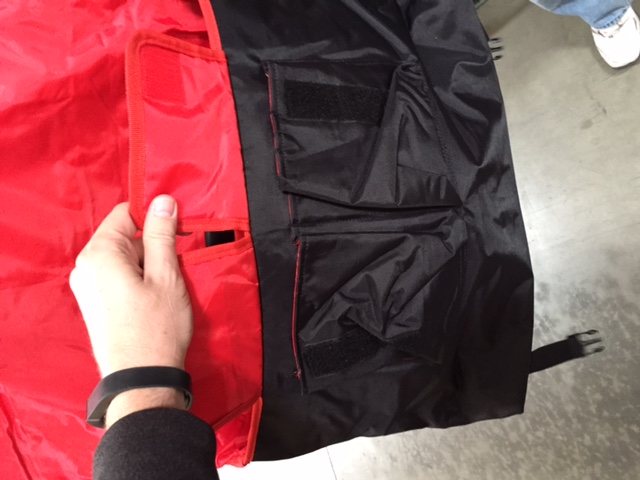
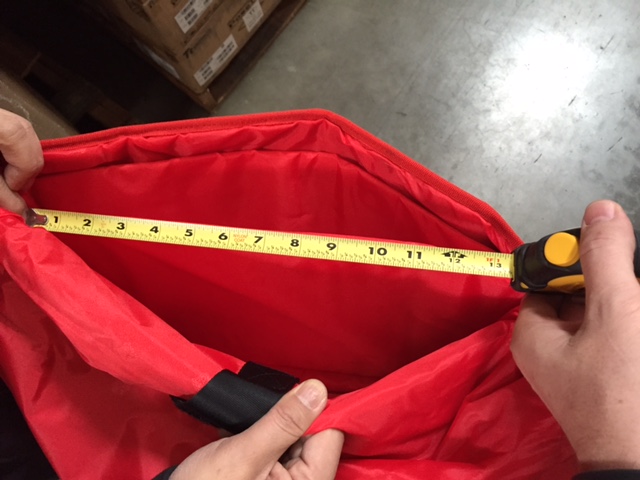
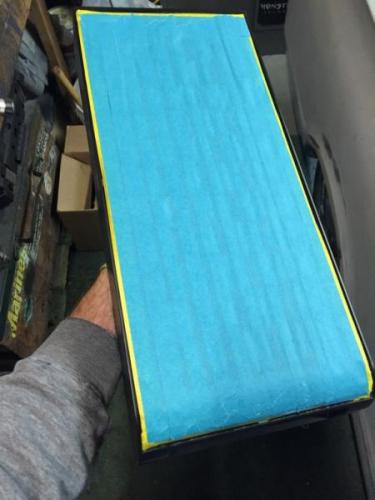
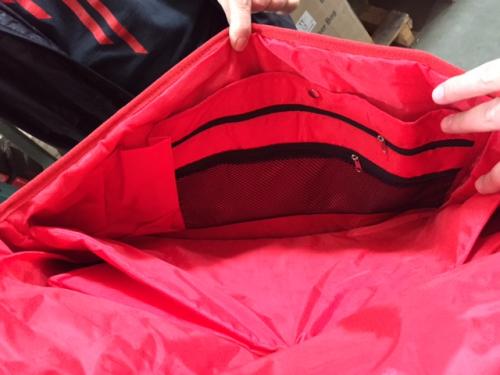
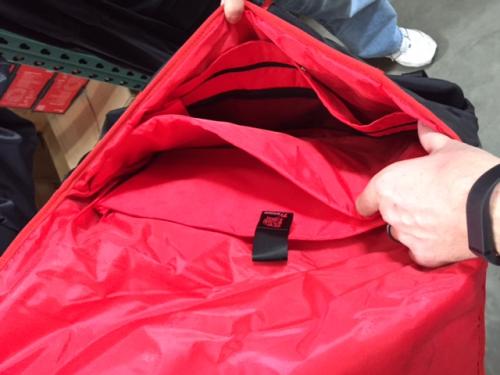
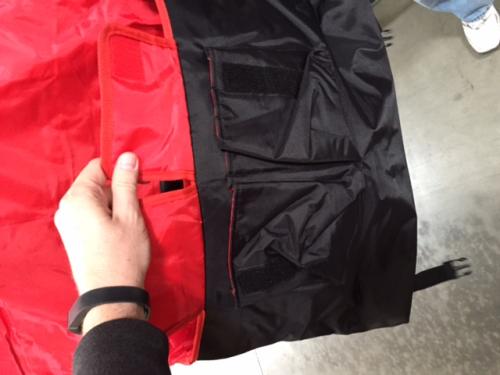
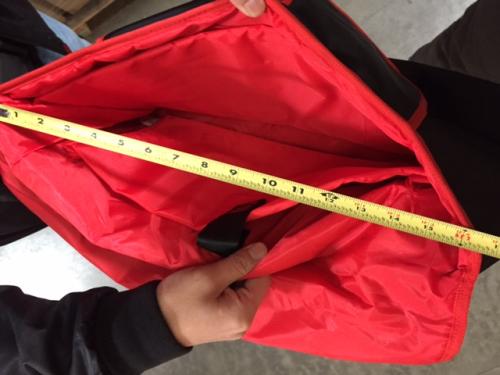
Happy, Here is some more details on the Messenger bag, thanks for pointing out about the inside pics, we will look to get some added shots on the page. Bag large section (Inside) max width was about 15" Secondary section is about 13" There is foam padding between both sections and take a look at the compartments as well on the inside.

-
Rest your Wrists with the Tt eSPORTS Gaming Wrist Rest!
ThermalMike replied to ThermalMike's topic in Gaming Accessories
Quick update... We are looking to receive the shipment of DK Wrist rests this week and they should go up pretty quick. Tt Buy store will likely be the first place to grab one! -
Hello, MSRP for the Core V21: $69.99 Keep an eye online for this case showing up, we should have first shipment next week!
-
ess-mk, Welcome to the Tt Community! Give our support a call tomorrow, if we have the part available we can see how we can support with a replacement. Even if you are outside of warranty, we might have some options available to assist. Number and info in my Sig!
-
Hello, Thanks of the update. If you are having issues like this with the USB/Audio I would suggest to stop using the connections until it is replaced. You can always use the audio and USB from the motherboard I/O. If you can, email me your contact info and I will work with you early next week on a replacement and we can see what we can do on the process to assist.
-
Hello, For the I/O pin outs, when you look at the separate connections, take note the (+) connection will have a "Triangle" shape on it, double check to make sure the connections are setup correctly. Does the 2.0 ports work where the 3.0 ports do not or the other way around? Does everything else work except USB/Audio? We can look into speeding up an I/O replacement if we need to, just want to be sure and also for our Quality control if there is an issue we want to review. My email is below, send me some pictures of the connections from the case to your motherboard headers or post them up here if you can. Let us know any updates.
-
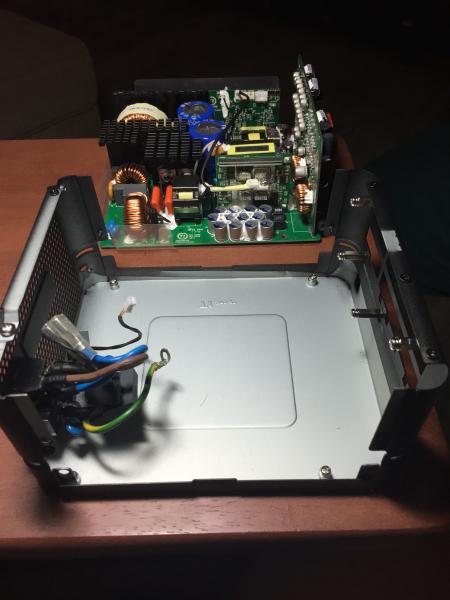
I have an extra front panel that I used to remove the front badge and grill. If you want the frame just PM me and we will figure something out. Tearing down the PSU is not really all that bad: - You ok with voiding your warranty... - Check it out first, take the top section off or check out a review on it where the reviewer took it apart already. - See what it will take to get the PCB removed from the case to paint it. - the DPS was failry easy, 4 screws on the connection panel and about 6 on the main PCB. - The connections just unplugged and made it very easy to remove. (Take pictures of it before you disconnect everything) - Big concern for me was the plug/switch, I did not remove it completely, but you can push it through the case just enough to get tape around the connections on both sides to paint it and avoid removing solder connections.
-
Looking great so far and cant wait to see the end result! I did not use primer on mine because I did not want everything to be too "thick", just painting over the plastic after wet sanding it with 1500 grit.
-
Toughpower DPS 850W Monitor Software Never Loads (TPG-0850D)
ThermalMike replied to monty's topic in Power Supplies
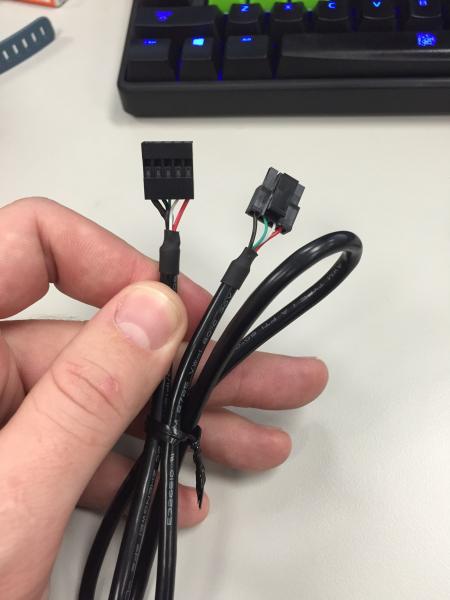
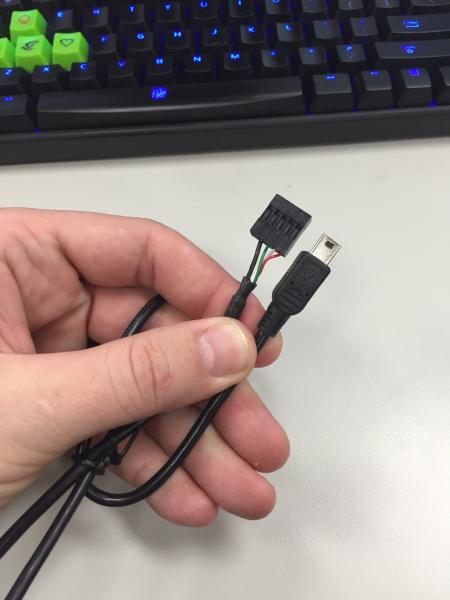
Here is some photos of each models cable. This should help to verify which model you have and the correct software you need. DPS G: Download: http://www.thermaltake.com/DPSAppdownload.aspx?type=dpsapp DPS: Download: http://www.thermaltake.com/dpsappdownload.aspx?type=PSTPG

-
Toughpower DPS 850W Monitor Software Never Loads (TPG-0850D)
ThermalMike replied to monty's topic in Power Supplies
Hello FunkSoulBro and monty, Make sure you downloaded the correct version, DPS vs DPS G as it does make a different to confirm that first. Since the monitor does work, just not every time, the controller should be ok on the PSU. Some questions/Troubleshooting steps: - Have you tested with the other USB Header right next to it on the motherboard? - Does the motherboard Bios have an option to set the header to USB 1.1 for compatibility? Please check and test. - If you disconnect the cable prior to boot, then connect the cable does the PSU detect properly? I did read your comment, just wondering if there is an initialization issue. You should not need any specific USB driver to work, but check with ASUS on it as it. You should not have a "Unspecified" group in DM, it could be related as this is not normal and the device inside is a USB device. We can look into a faulty cable as the issue over the entire unit, but would need to know where you are located to get you to that region specifically for support/options. (Goes for everyone) Swapping out the cable is much more convenient. My contact information is below, feel free to PM, Email or reply to this any updates. -
Project SunkisTt - Chrome Frame, Candy Paint (Completed)
ThermalMike replied to ThermalMike's topic in Modding
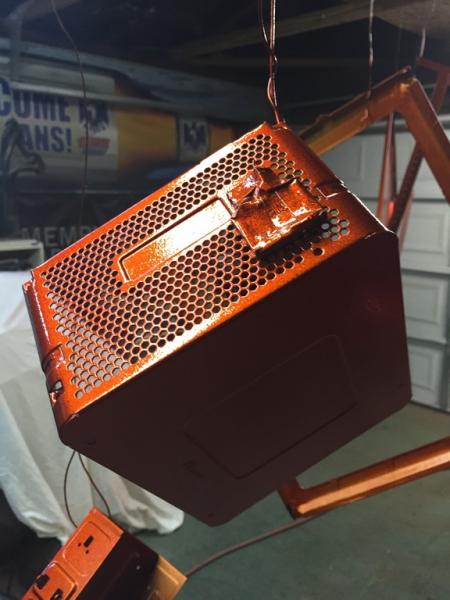
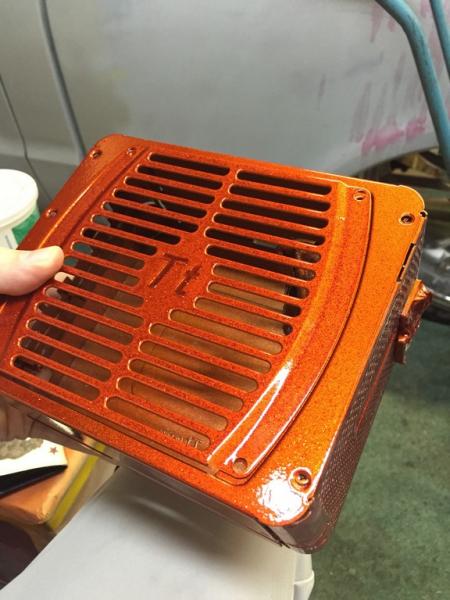
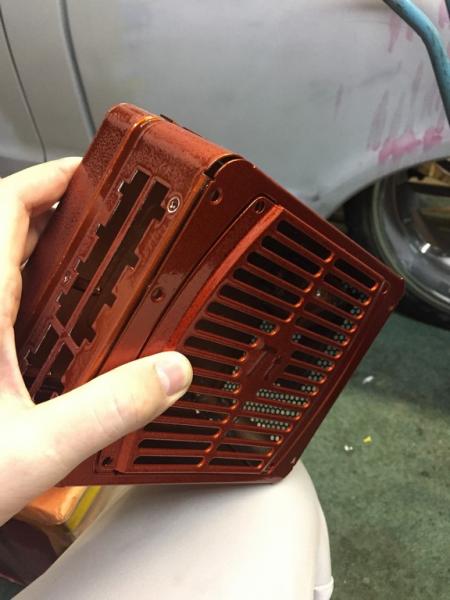
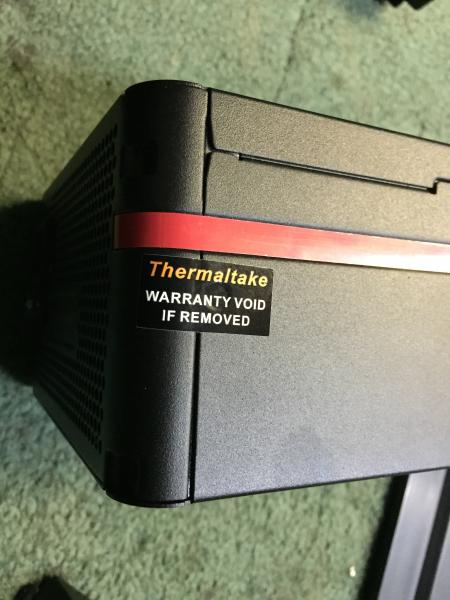
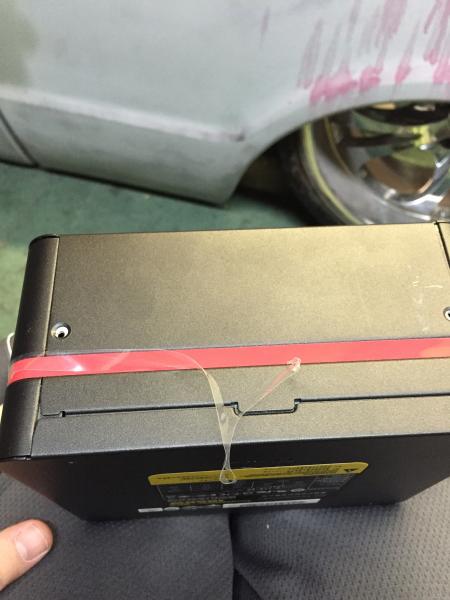
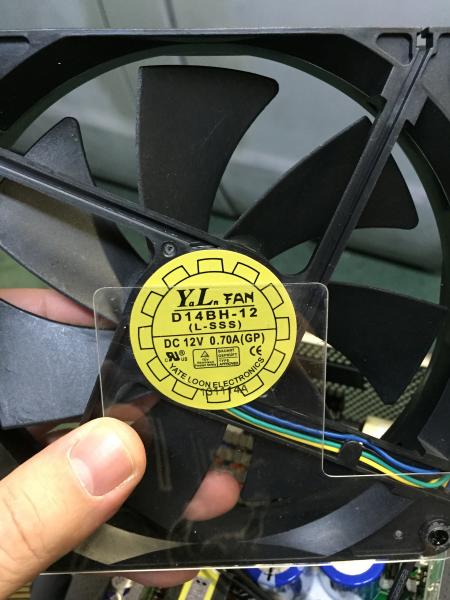
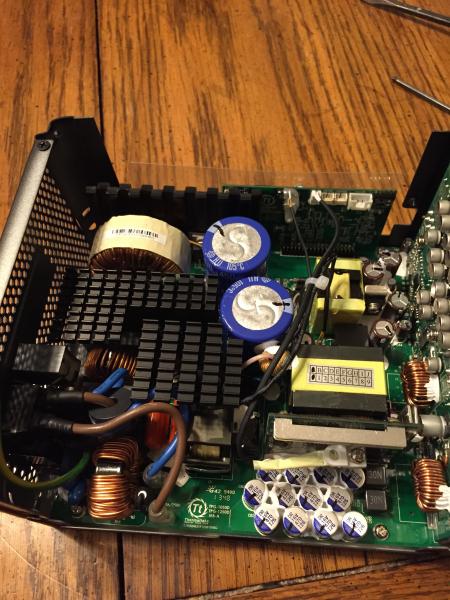
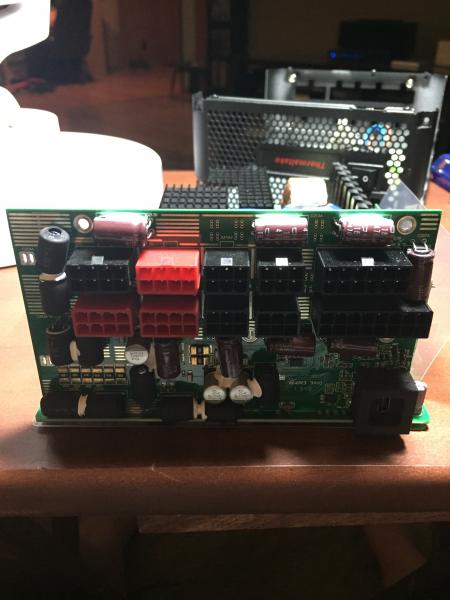
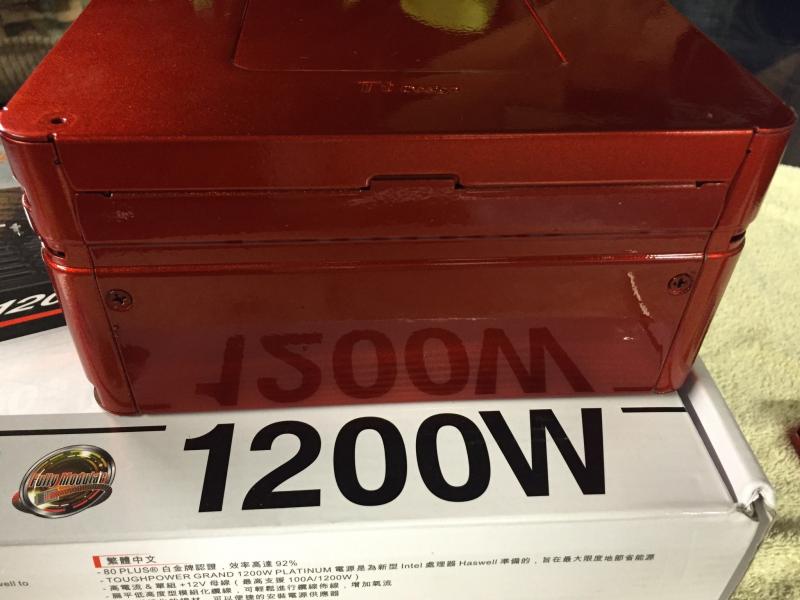
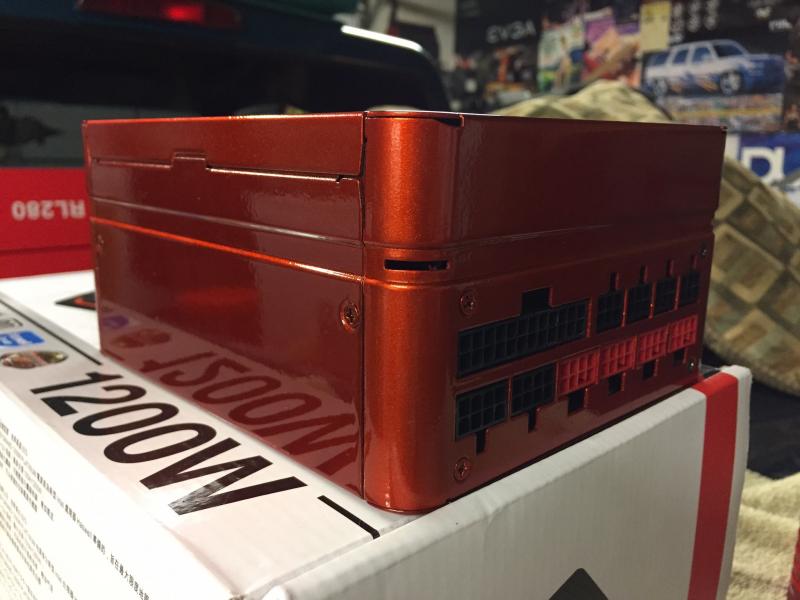
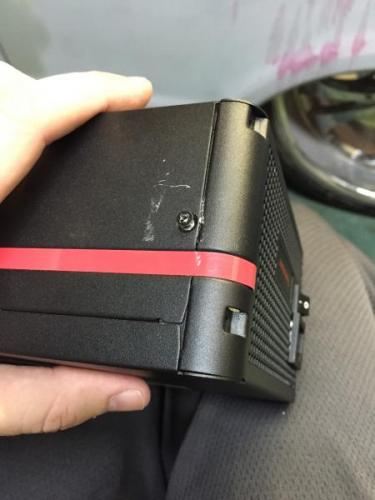
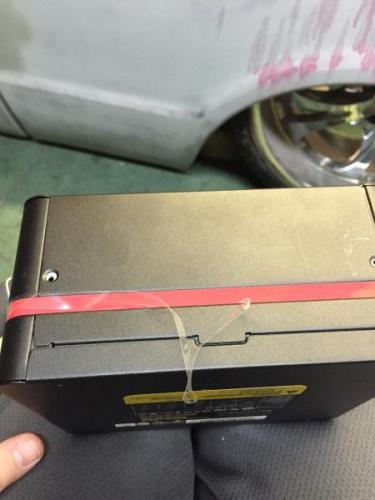
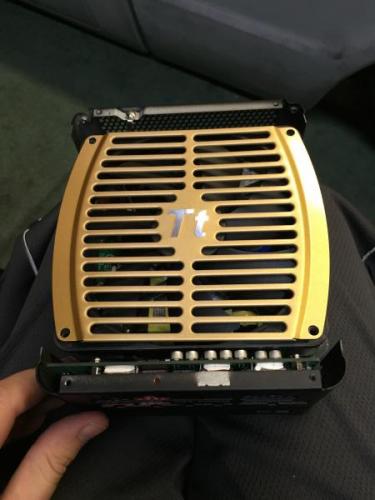
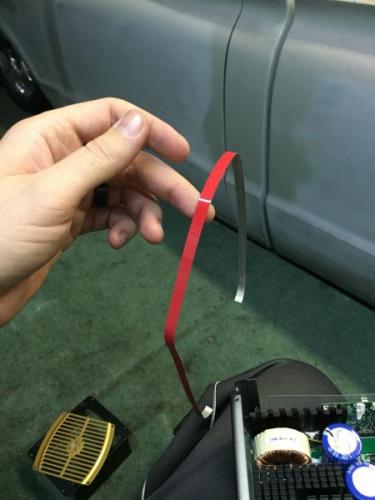
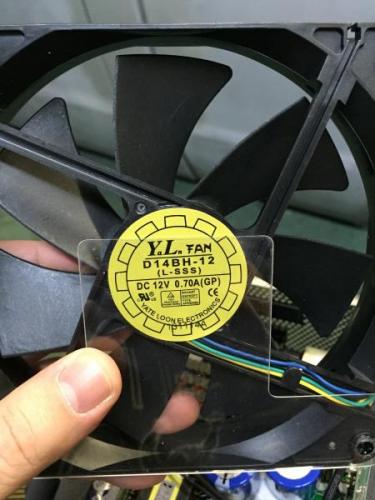
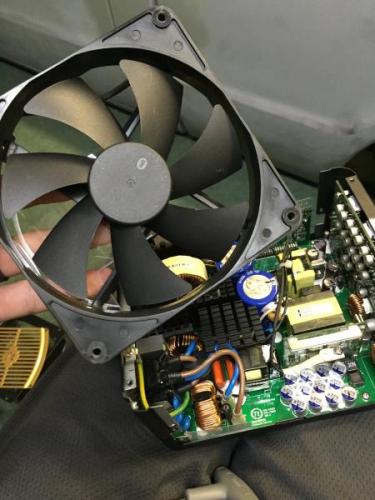
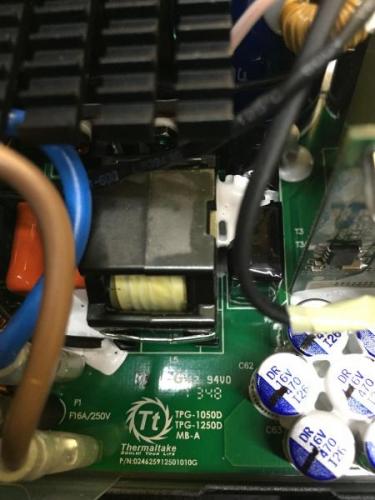
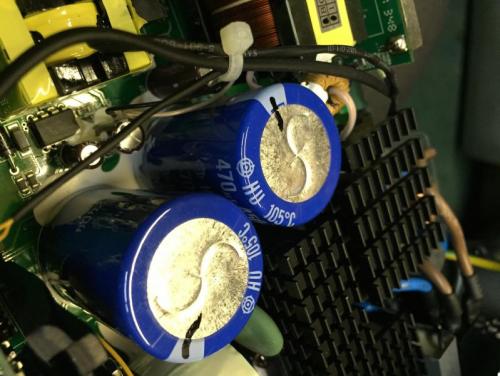
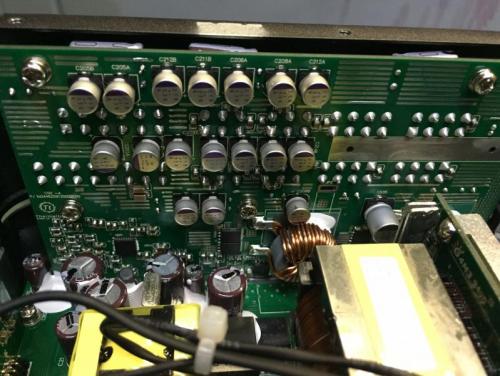
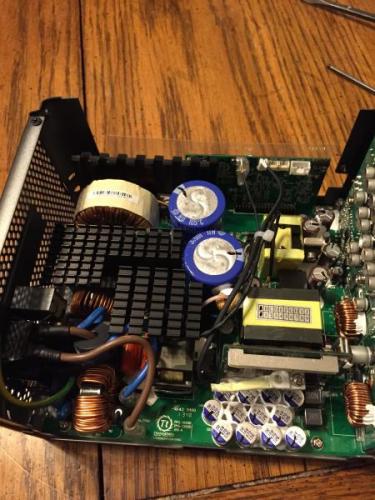
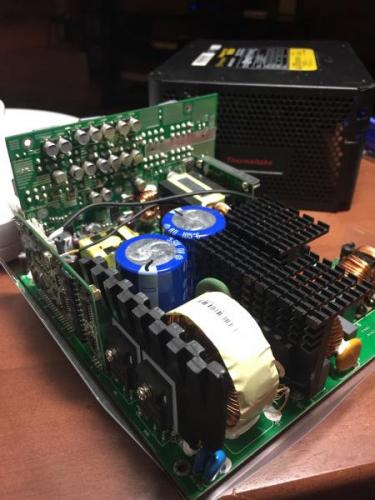
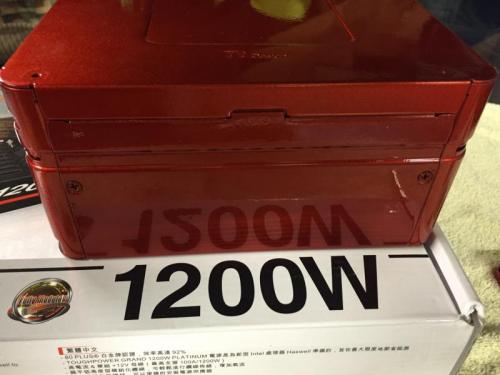
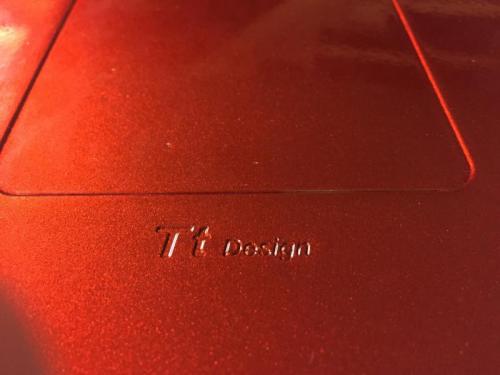
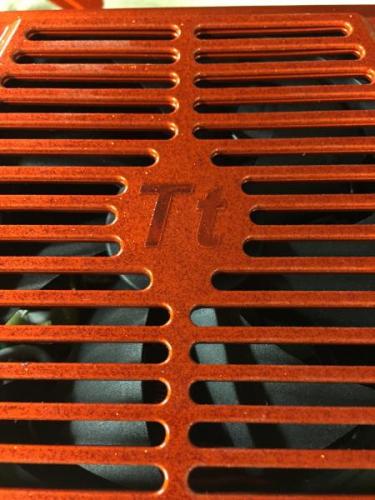
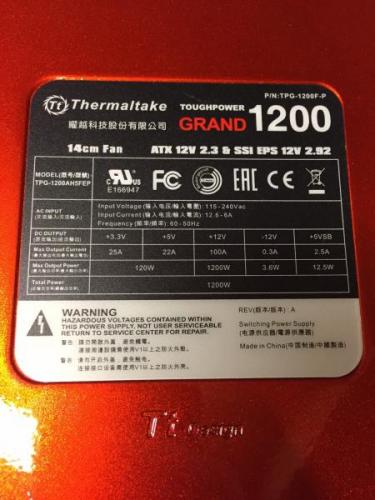
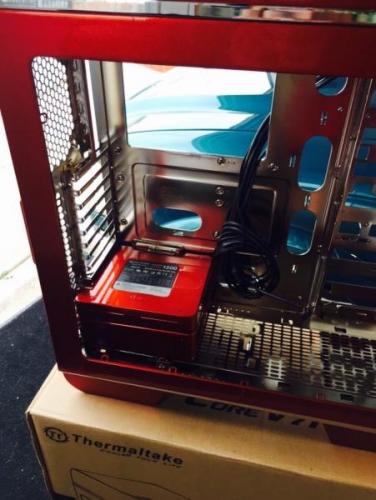
** Over the time of waiting for parts to be available I changed out the PSU to the Thermaltake Toughpower 1200W Platinum ** Since I already took this apart, painted it and put back together, i figured I would leave this here so some could see what the insides look like Muhahaha! Removing the protection plastic strip and then disassembling the PSU to get the case prepped. Yate Loon FTW! Some shots of the inside of the PSU Don't forget to take off the stickers on the bottom Moving on to the NEW 1200W Platinum, it got a similar treatment to the project! And then inside the case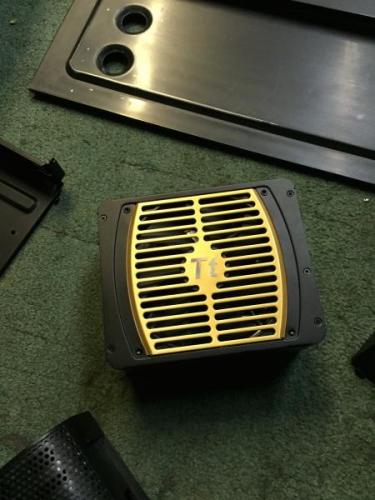


-
Project SunkisTt - Chrome Frame, Candy Paint (Completed)
ThermalMike replied to ThermalMike's topic in Modding
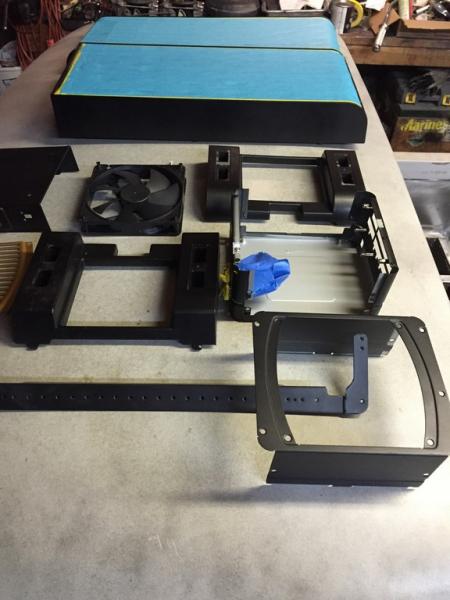
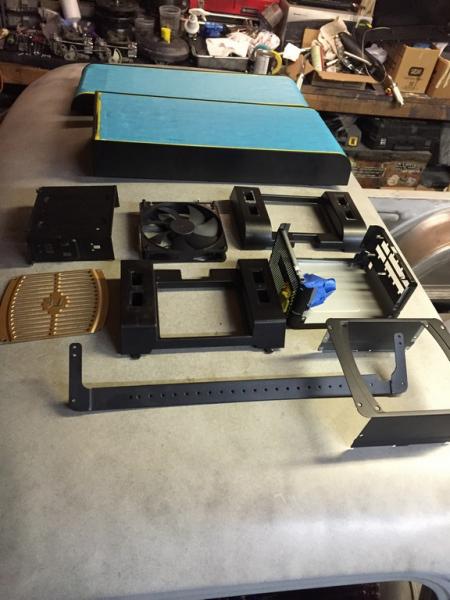
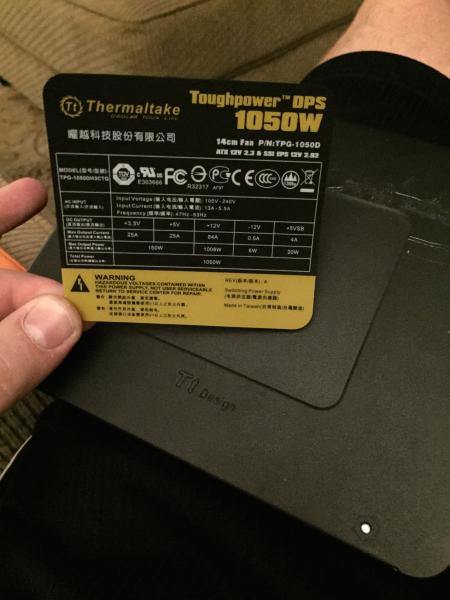
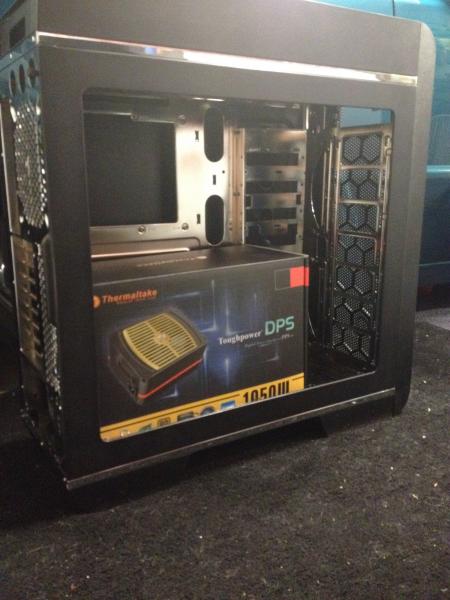
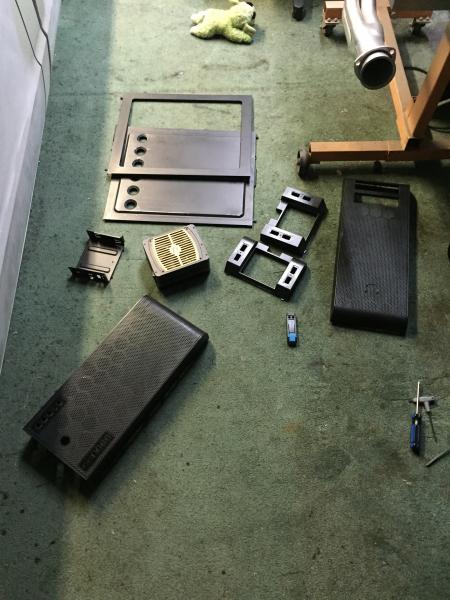
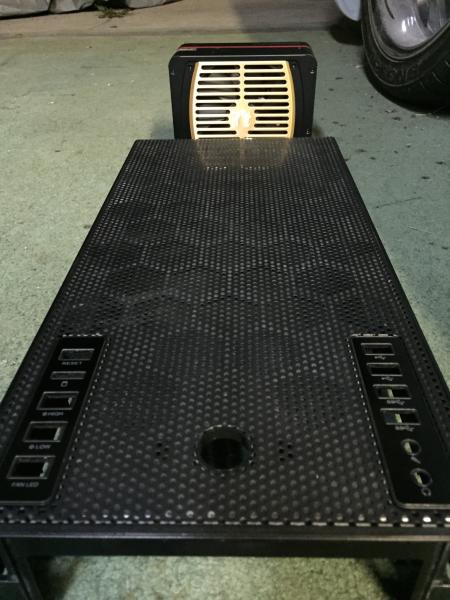
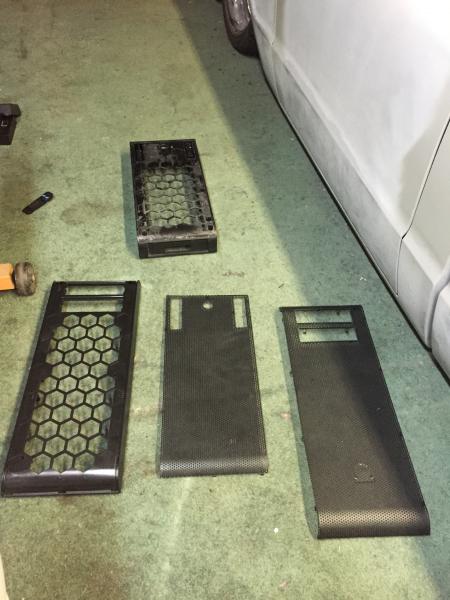
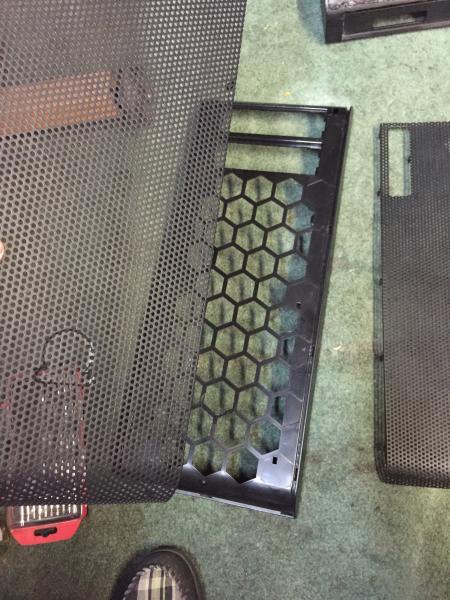
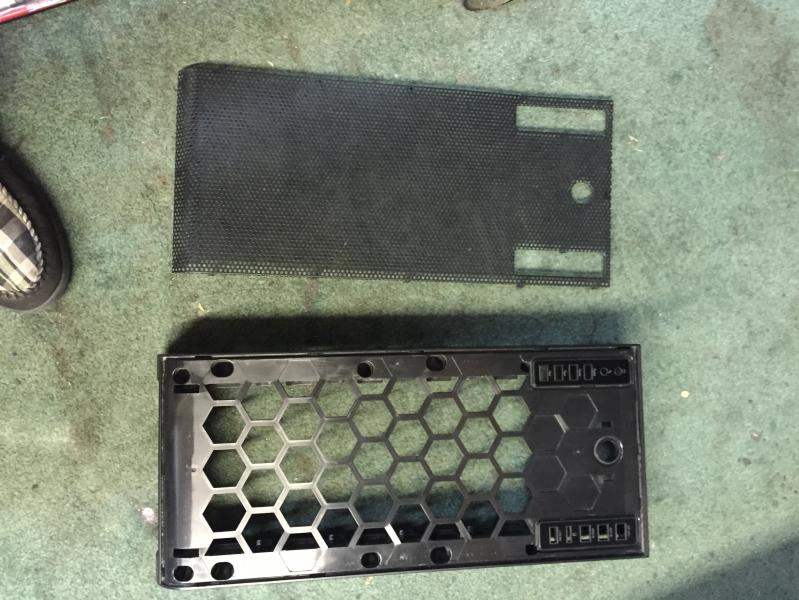
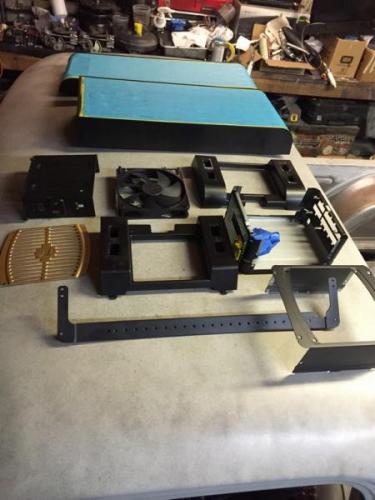
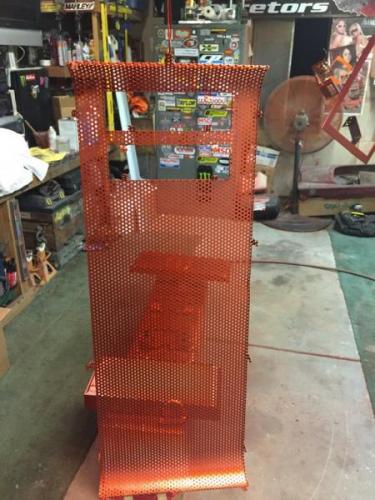
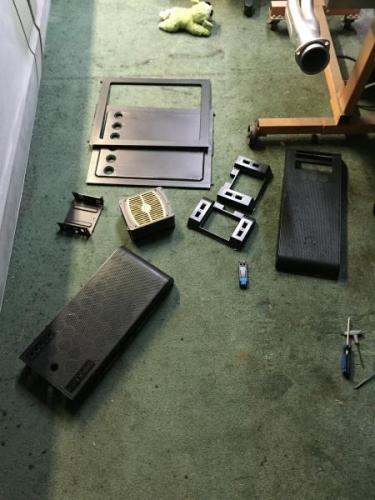
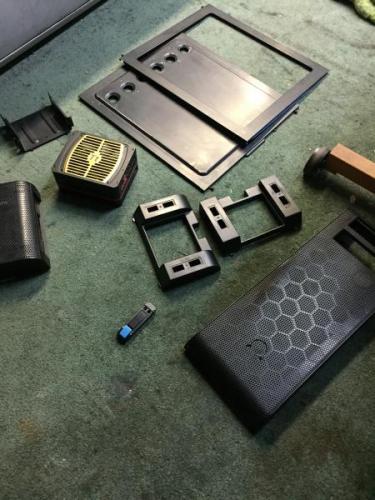
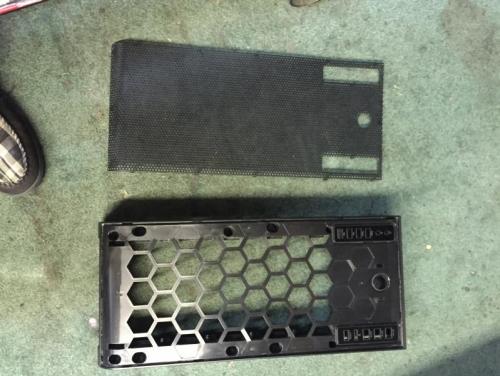
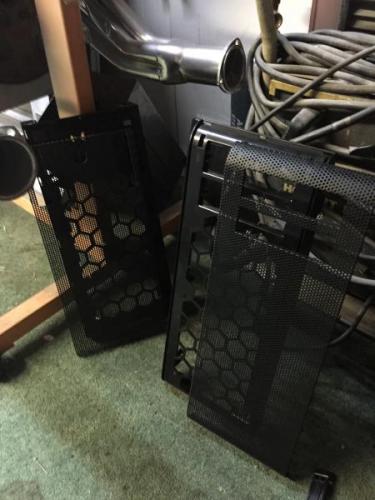
Now to power the system I of course decided to go with the Thermaltake Toughpower DPS 1050W Power Supply. A smile in every box... Now before I play with some power, it was back to sanding all of the body panels on the Core V71 that will be painted, here I gathered all of my parts together and went over each part with 1500 to wet sand and smooth off any rough edges before taking the next step. Removed the logo and kept it in a safe place for now I also removed the mess grills separating them from the framing... Now the feet I already removed to do the chrome plating, but here is what the bottom looks like. You have to remove the rubber pad to access the screws on the bottom.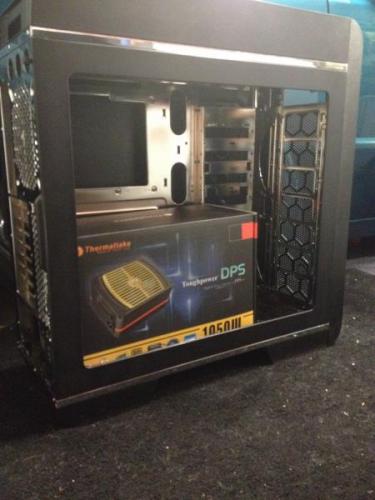


-
Project SunkisTt - Chrome Frame, Candy Paint (Completed)
ThermalMike replied to ThermalMike's topic in Modding
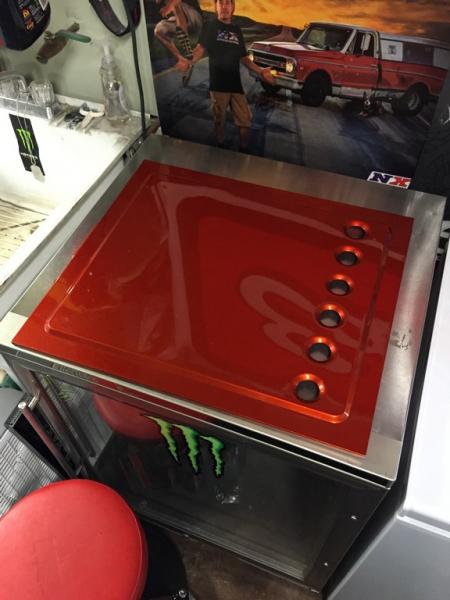
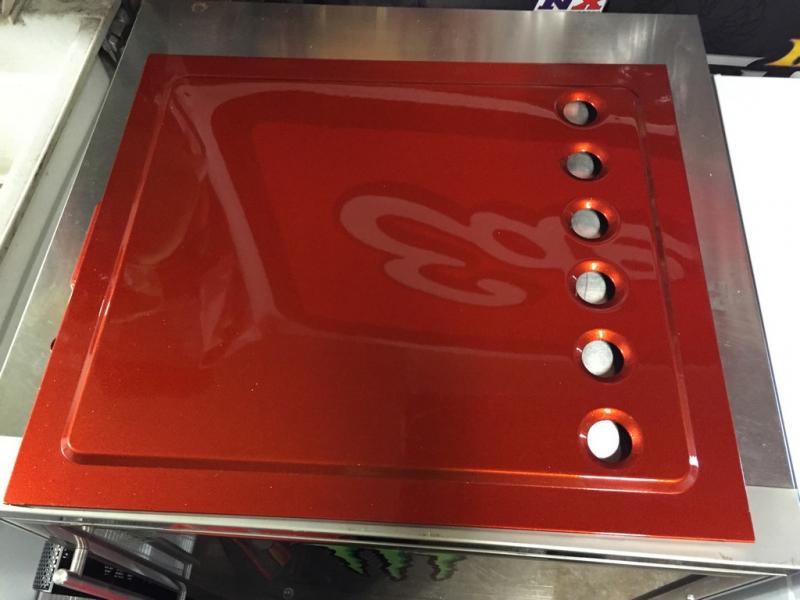
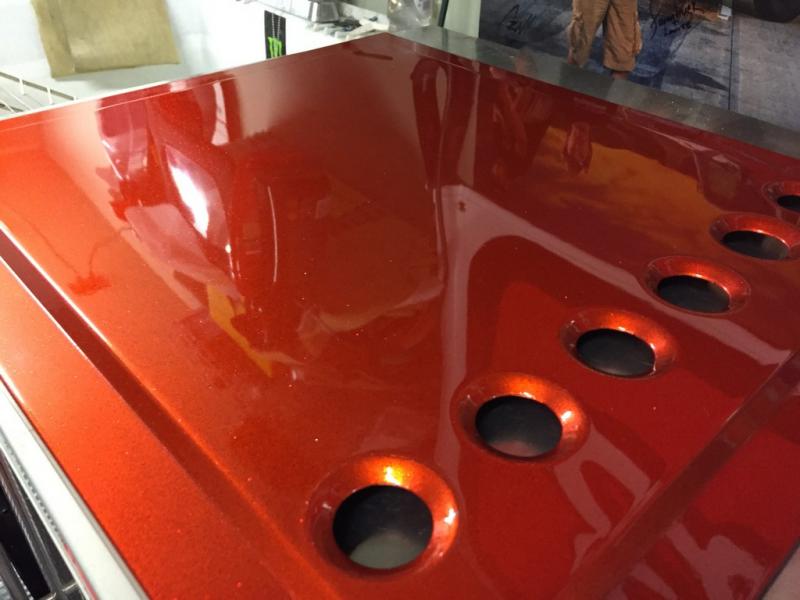
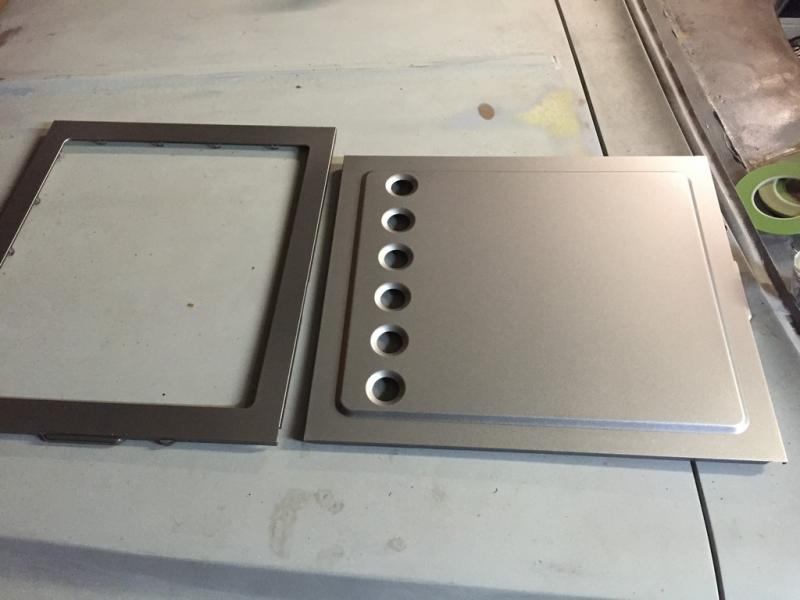
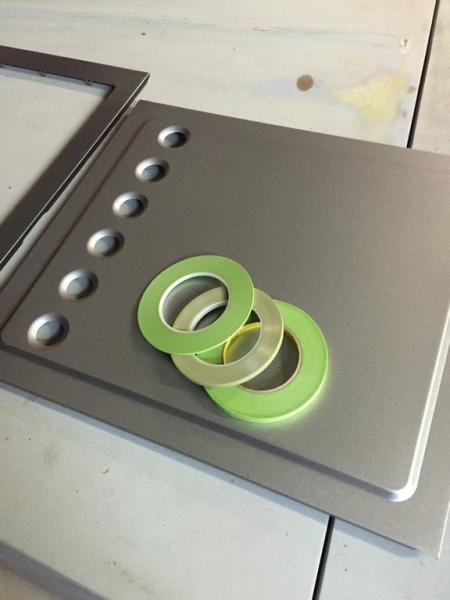
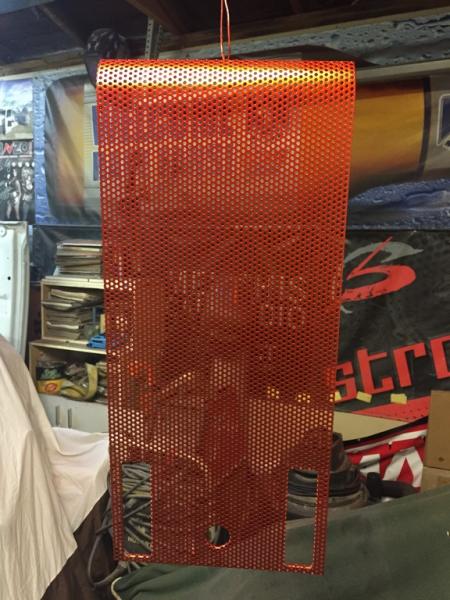
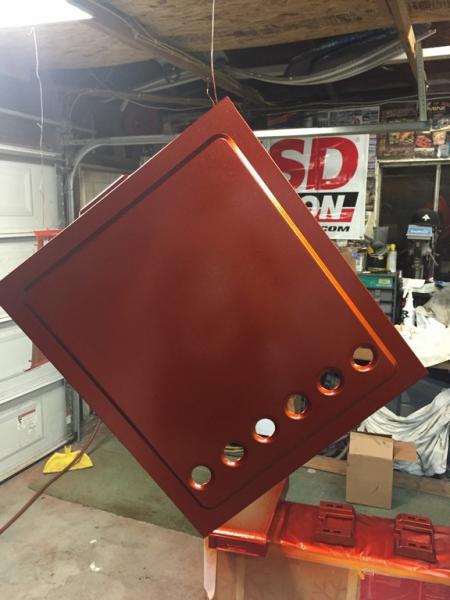
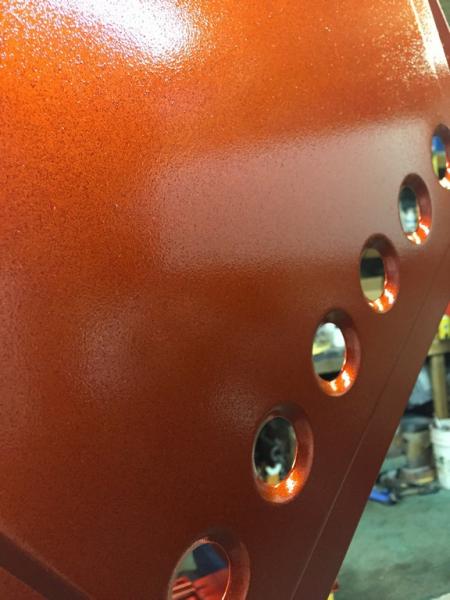
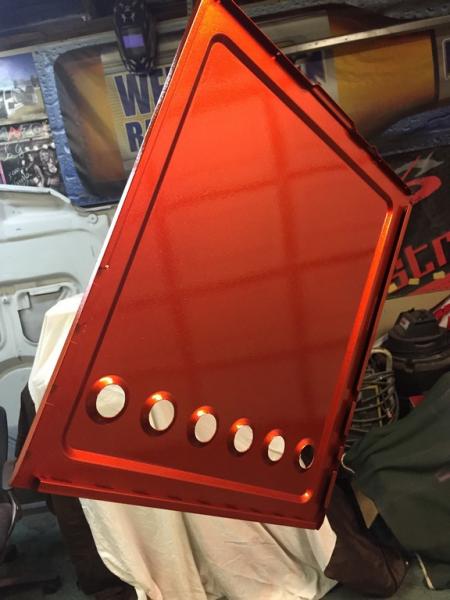
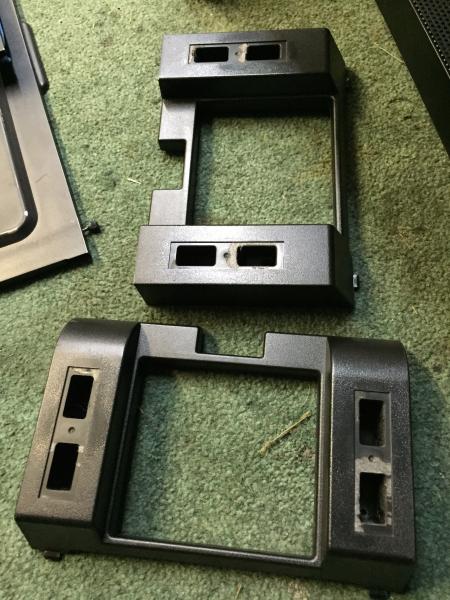
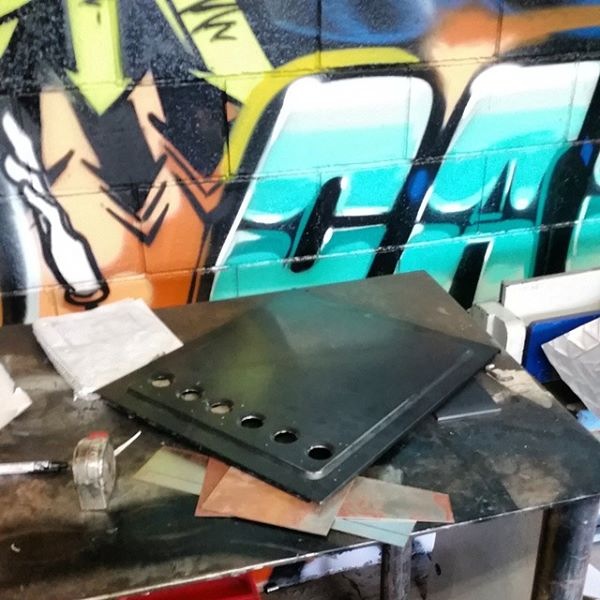
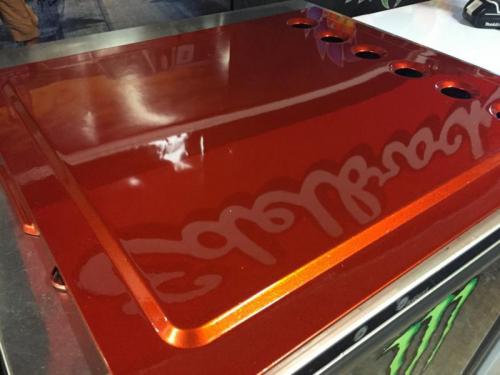
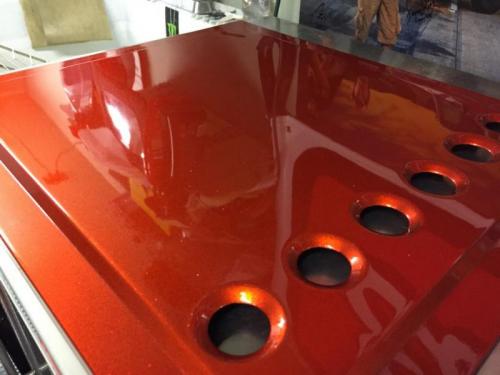
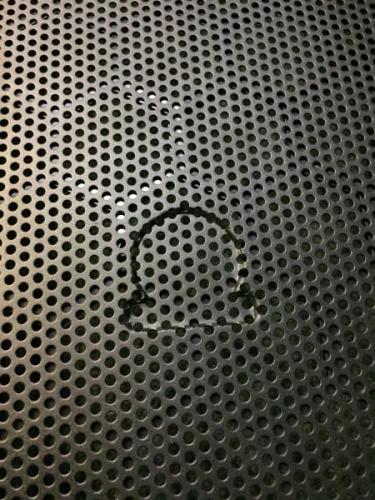
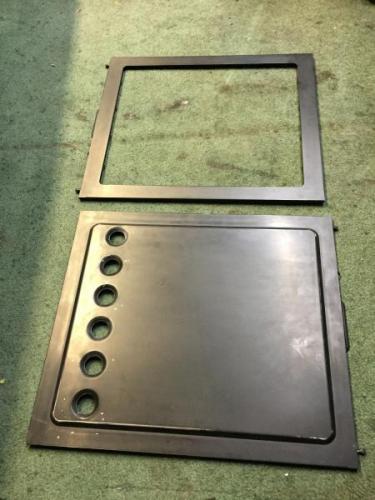
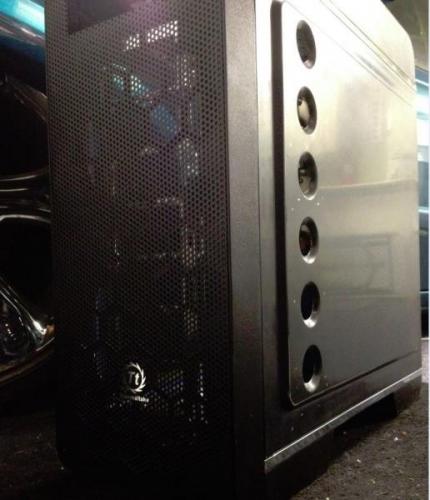
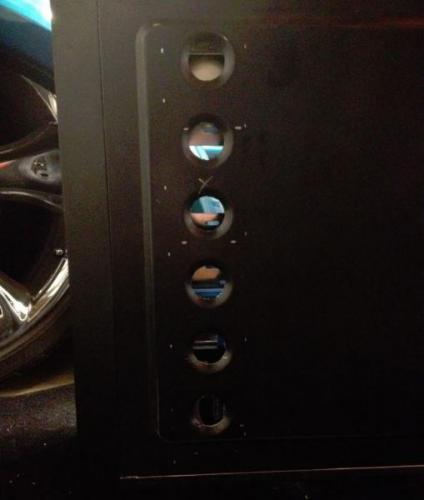
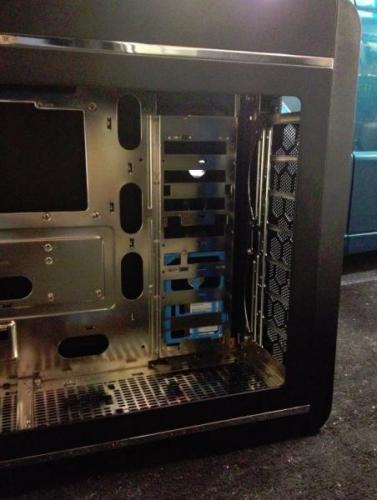
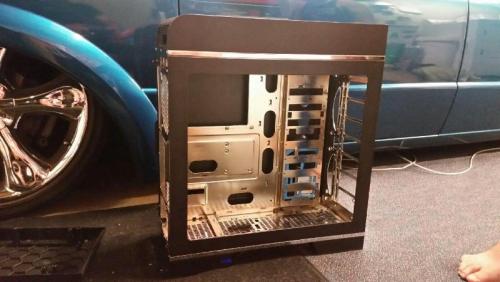
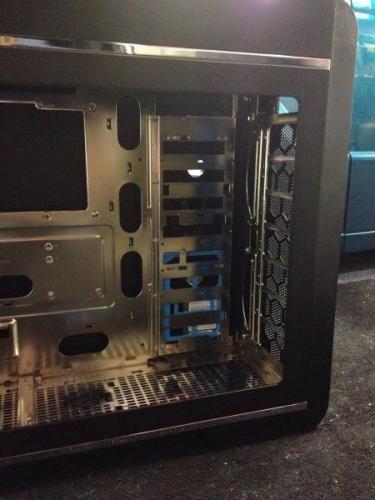
Now as a Car and PC enthusiast I really wanted to combine my 2 favortie hobbies together so I had an idea to dimple dye some holes in the side of the solid panel and expose the hidden drive bays that are cleverly mounted on the back side allowing me to have more room for water cooling! Here is the side panel after getting a great treatment of modding glory from a close friend that has a shop and machine that can do the work: Here is what it looks like back on the chrome frame: Other Side: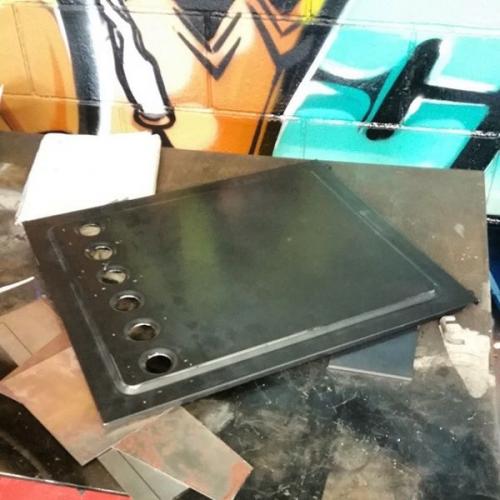

-
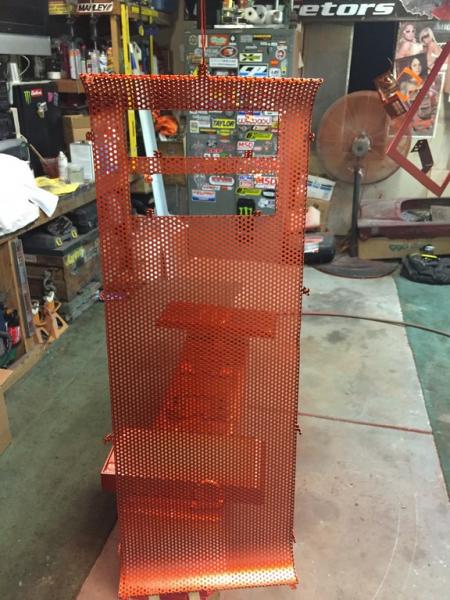
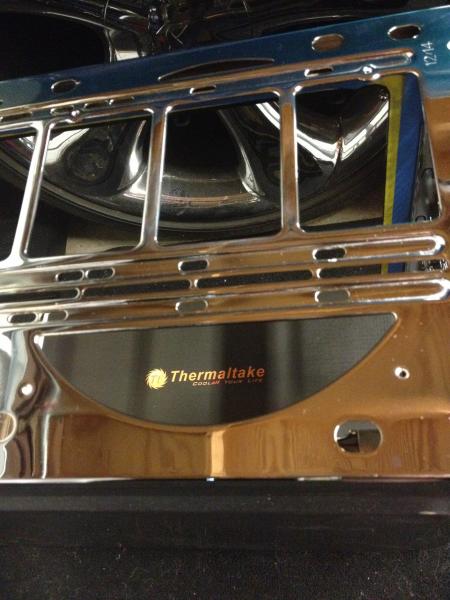
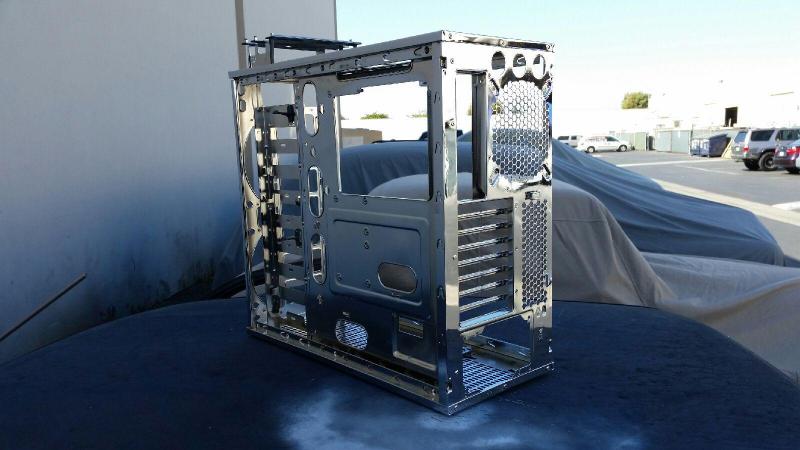
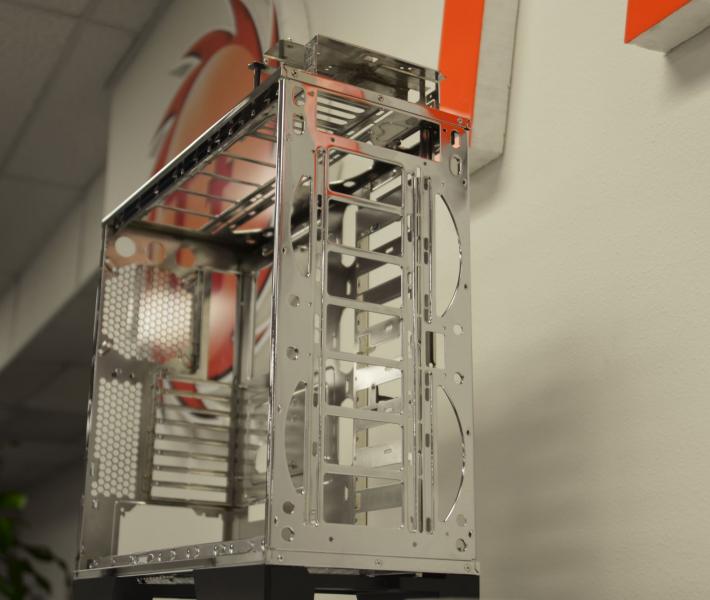
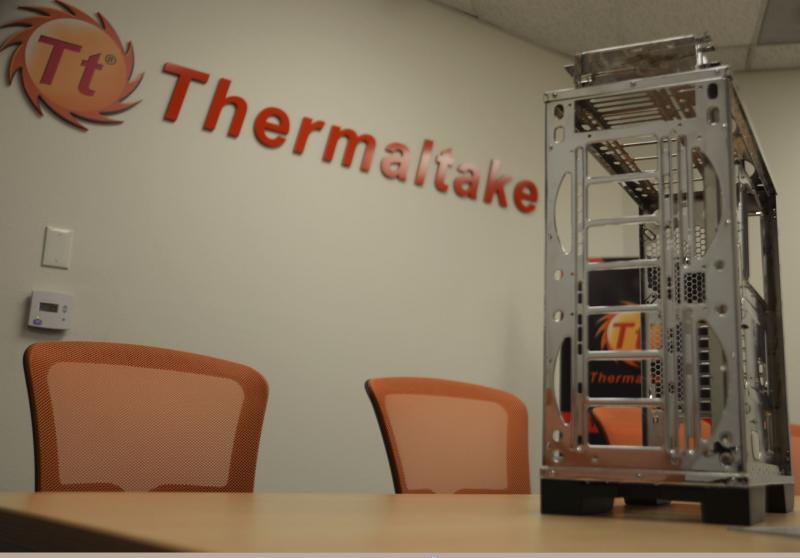
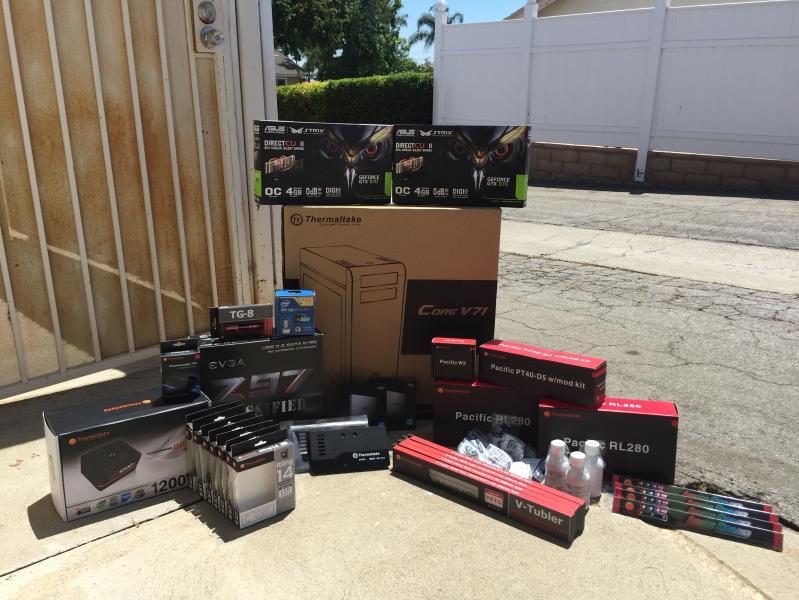
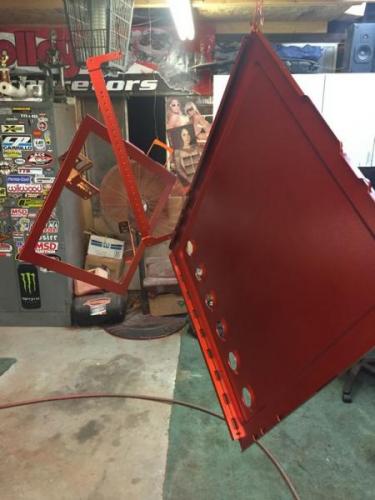
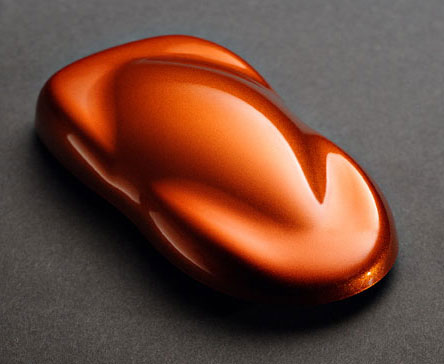
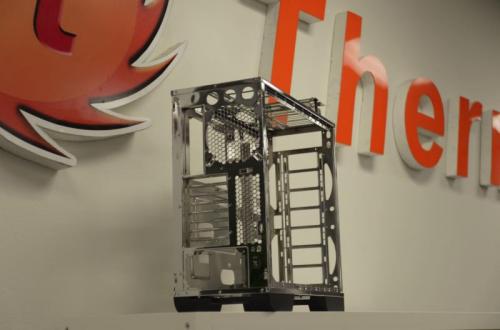
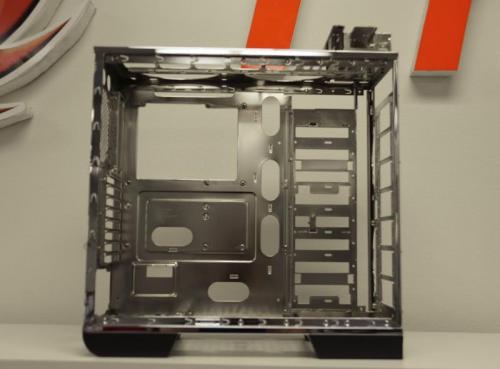
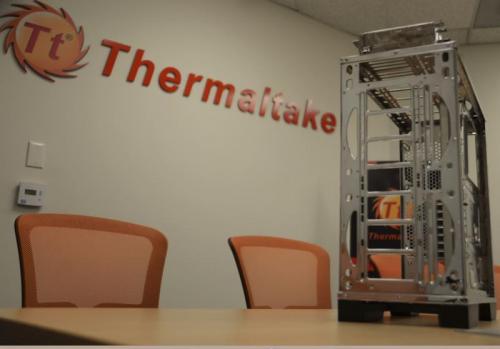
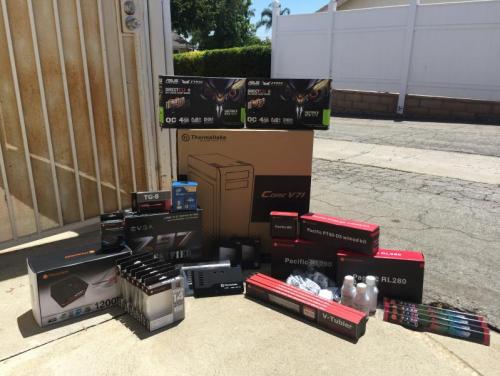
When I started my first modding project with Thermaltake, I was not really sure what I wanted to achieve with this build. How to make it a part of what I do, taking into account what I have done for several years with my car hobby and paint hobby and bring it into full throttle for a unique system, a Thermaltake system that I am proud to say is my own. Project SunkisTt Parts List: Case: Thermaltake Core V71 CPU: Intel Core i7 4770K Motherboard: EVGA Z97 Classified RAM: Avexir Core Series 4GB x4 DDR3-1600 C9 PSU: Thermaltake Toughpower Grand Platinum 1200W GPU: ASUS Strix GTX 970's (2x) SSD: Samsung Evo 256GB (2x) -RAID 0 CPU Waterblock: Thermaltake Pacific W2 GPU Waterblock: Thermaltake Pacific ASUS Strix GPU Block (2x) Radiator: Thermaltake Pacific RL 280 (2x) Pump/Res: Thermaltake Pacific PT40-D5 w/ Mod Kit Fans: Riing 140mm White (7x) - LED modded Orange Coolant: Mayhems Aurora 2 (Custom Orange/Red) Tubing: Thermaltake Pacific PETG 16mm Fittings: (Chrome) Thermaltake Pacific G 1/4 PETG 16mm (9x) Thermaltake Pacific G 1/4 Stop Plug (8x) Thermaltake Pacific G 1/4 90 Degree (1x) Sponsors Thermaltake Avexir BS Mods Mayhems The Build First Step was to take the chassis completely apart and send off the frame to get it chromed. This process took about a month and required sandblasting off the stock finish, while going through the process of being copper plated, polished, nickel plating, then chrome plating and finally polished. The end result looks like this: Now before we get started, here is the color I chose for the body panels. This is HoC (House of Color) Candy Tangerine Orange "UK08-BC02" - http://www.houseofkolor.com/speedshapes/speedshapes_urethanes.jsp Now back to the Chrome... Here is some of the pictures I took in the office to show my friends of the first big step I took into this build!


- 35 replies
-
- 7
-
-
- Thermaltake
- Orange
- (and 3 more)
-
I apologize first for not posting here sooner, this is one badass Core V71. Really like what you did with it and love the paint job!
-
We should have first shipment of the window panels very soon! Make sure to sign up for the auto-notify
-
You could run into some issues using a splitter especially if one of those splits going to be for the OC options with the mobo or the water 3.0 monitoring. A card would be the best way, you can stick a PCI-E 1x card in the bottom full PCI-E slot. Does not have to be installed in the 1x only. Might be your only real option for compatibility and performance.
-
Rest your Wrists with the Tt eSPORTS Gaming Wrist Rest!
ThermalMike replied to ThermalMike's topic in Gaming Accessories
Hello, I will check with the team, we should have them up at our TT Buy Store here soon! https://store.thermaltakeusa.com/account.php?backurl=aHR0cHM6Ly9zdG9yZS50aGVybWFsdGFrZXVzYS5jb20v