-
Forum Statistics
94k
Total Topics115.2k
Total Posts -
Member Statistics
172,976
Total Members16,800
Most Online


Dirty South PC Mods
-
Posts
35 -
Joined
-
Last visited
-
Days Won
10
Recent Profile Visitors
2,461 profile views
Dirty South PC Mods's Achievements
Just Getting Started (2/10)
73
Reputation
-
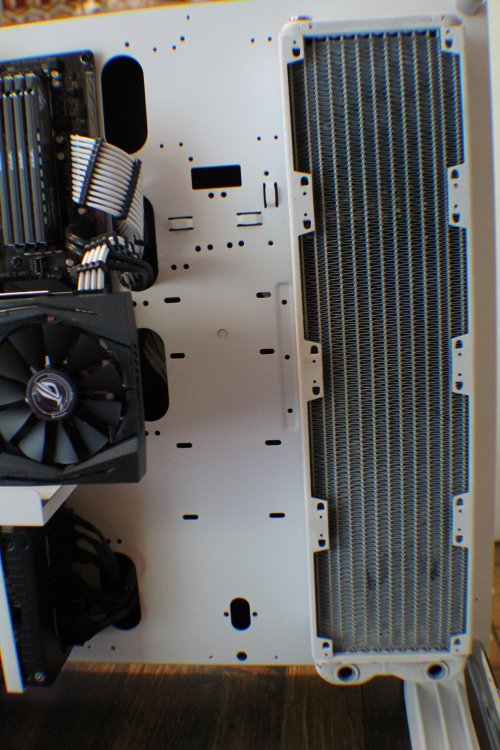
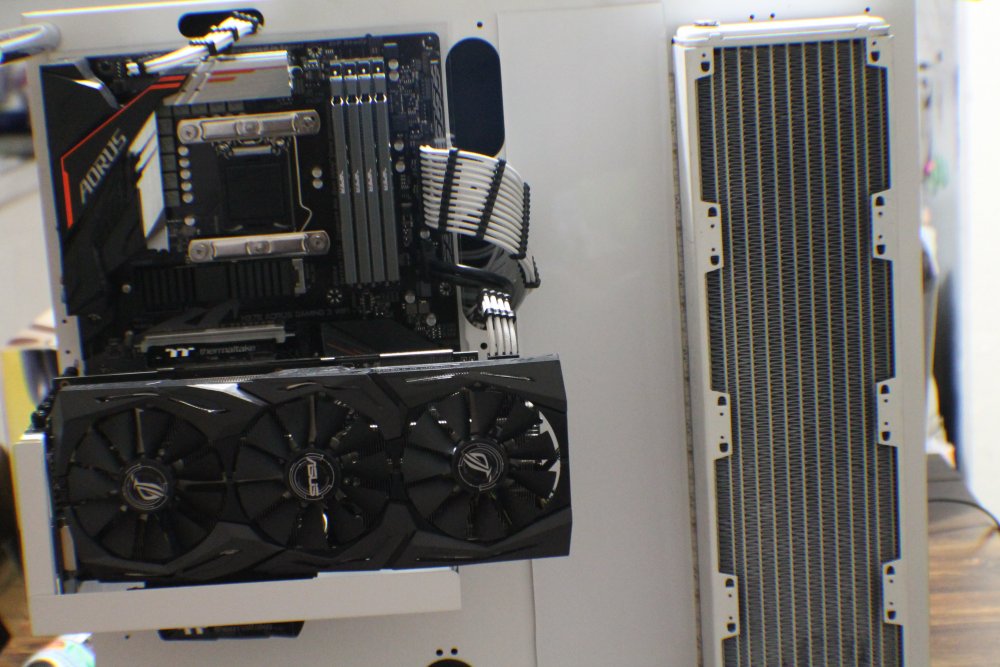
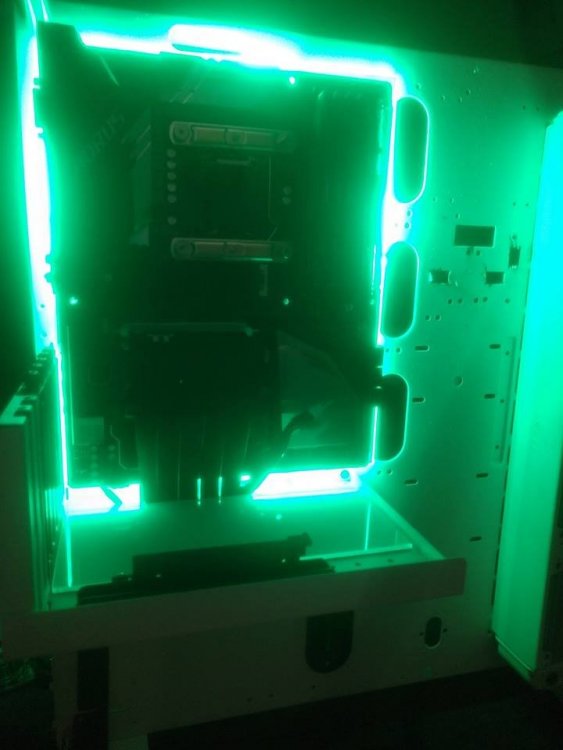
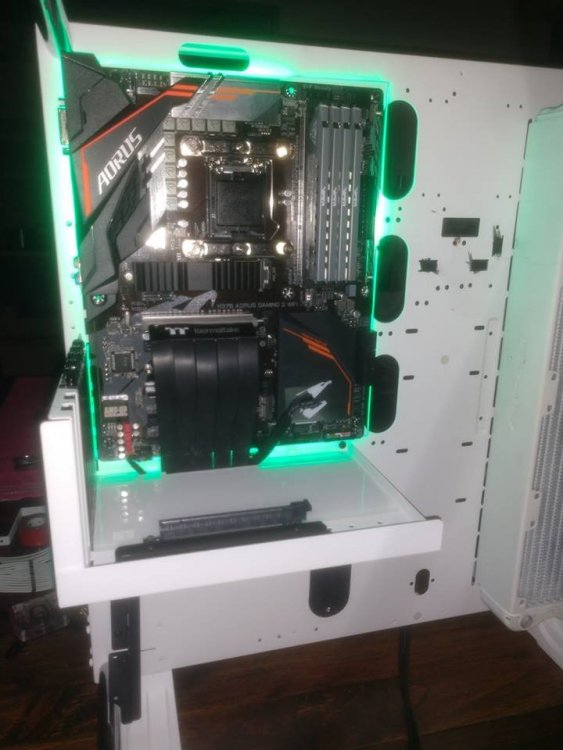
Finishing on a CoreP5 build that I had started a couple of years ago. Unfortunately, life got in the way and I had to put it on the back burner. Things have gotten back to as close to normal as they are going to get. So It's time to get back to the building.

-
 eqeqeqe reacted to a post in a topic:
Thermaltake Core V1 by Dirty South PC Mods
eqeqeqe reacted to a post in a topic:
Thermaltake Core V1 by Dirty South PC Mods
-
ArthasofLordareon reacted to a post in a topic:
POSEIDON Z RGB Owner's Club
-
dragon2knight reacted to a post in a topic:
POSEIDON Z RGB Owner's Club
-
eqeqeqe reacted to a post in a topic:
Project Spy vs Spy Double Stacked Core X9
-
Rave reacted to a post in a topic:
[Philippines] Jesse Palacio
-

[Philippines] Jesse Palacio
Dirty South PC Mods replied to Tt Andy's topic in 2015 Thermaltake CaseMOD Invitational Season 2
Bro this is outstanding!!!!! You deserve to win.. So much heart and soul go into your creations. Go man Go. -
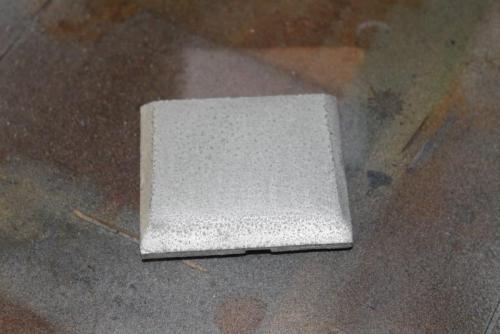
Hey guys nick here just though I would share my custom digital camo paint job on my Poseidon Z RGB. Keep in mind doing so as far as I know will void your warranty. 3 screws and some very careful prying, and the two halves come right apart. First up some White Primer, When doing a camo you want to start with the lightest color first. This is so that the darker colors don't bleed through. I found a template online so I vectored it and cut some out with my vinyl cutter. Placed some of the decals in random places around the frame of the keyboard. Once you have the desired amount of decals. Go ahead and lay down your second color. In this case Red. Once the second color has dried. It's time to add another layer of stencils. Once you have your desired amount of stencils, It's time to lay down the darkest color. I chose Black in this case. Once the Black paint has dried. Get a set of tweezers and carefully take off the stencils. Don't worry if you make a few scratches with the multi layer colors you can barely tell. If you want to protect all your hard work I would suggest shooting a clear coat over it. Once the clear coat has dried carefully put your devices back together.
- 182 replies
-
- 2
-
-
- Mechanical
- RGB
- (and 3 more)
-
Josephliz reacted to a post in a topic:
Thermaltake Core V1 by Dirty South PC Mods
-
ShadoWx3Sandy reacted to a post in a topic:
[Closed] Pre Event Prediction Voting Thread
-
cassiejg4 reacted to a post in a topic:
Man of Steel Thermaltake Urban T-81
-
I'm going with my homeboy Jessie P. Go get them bud.
-
Gratz to the winners
-
nice mod bro
-
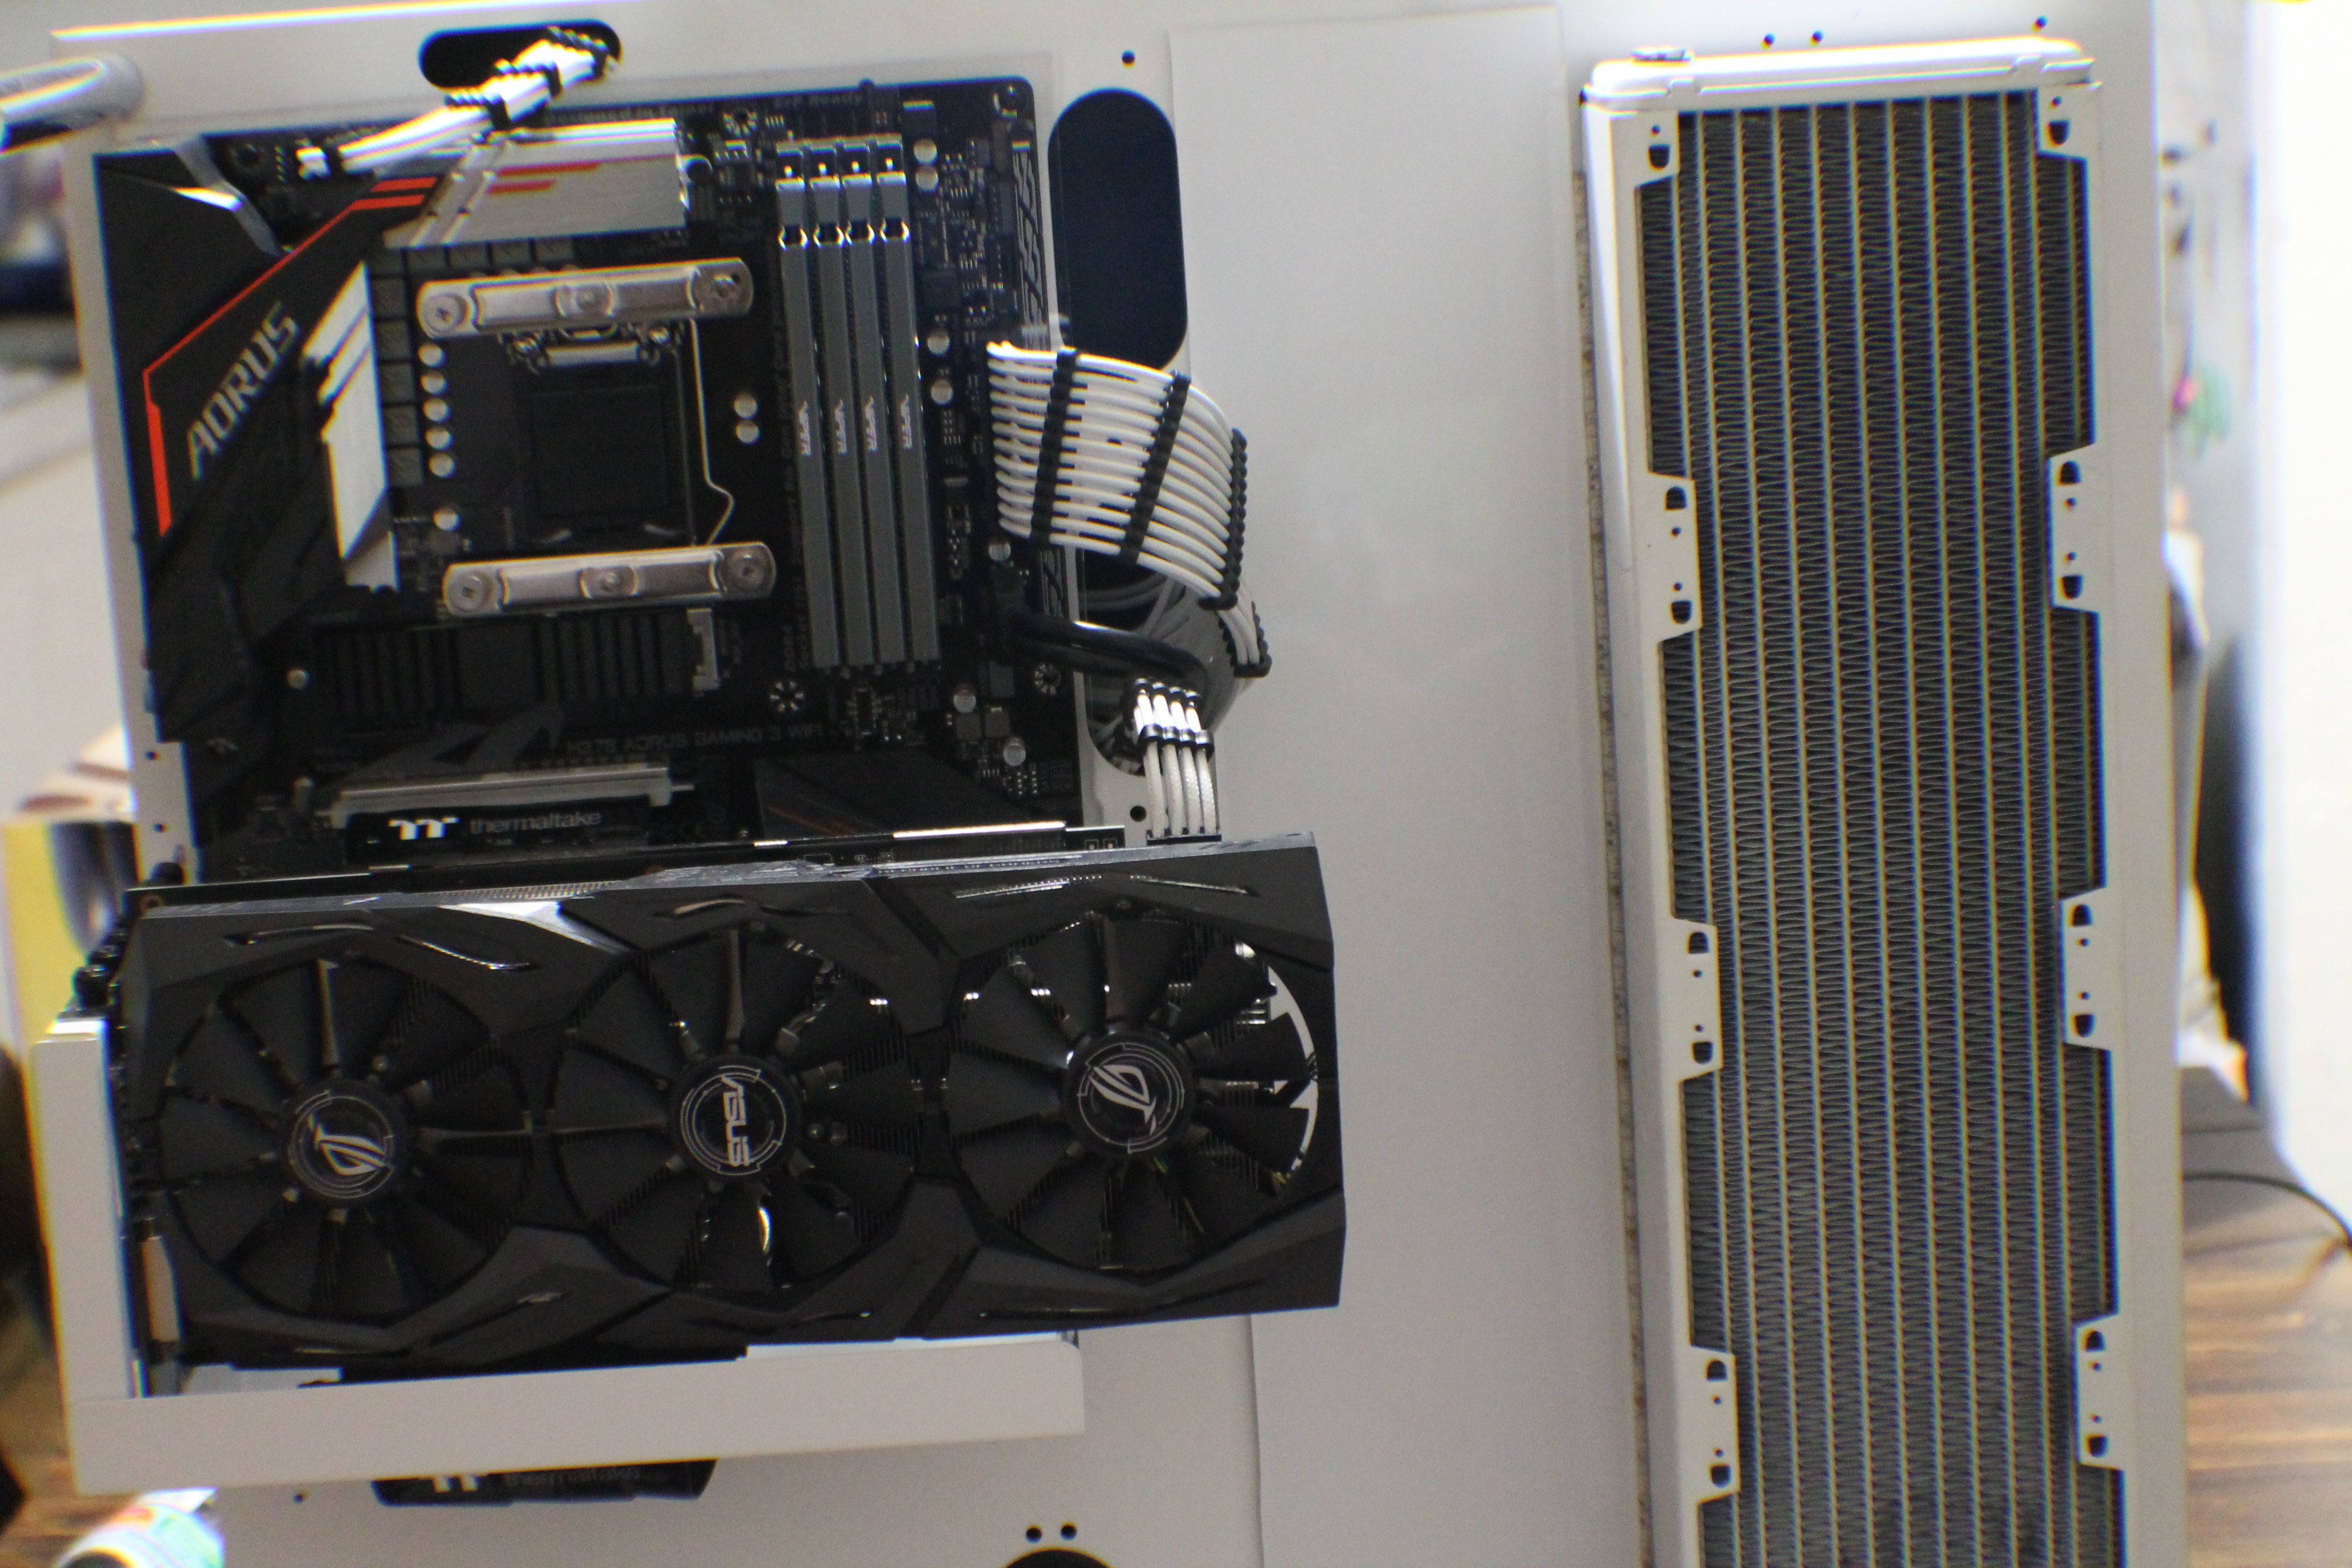
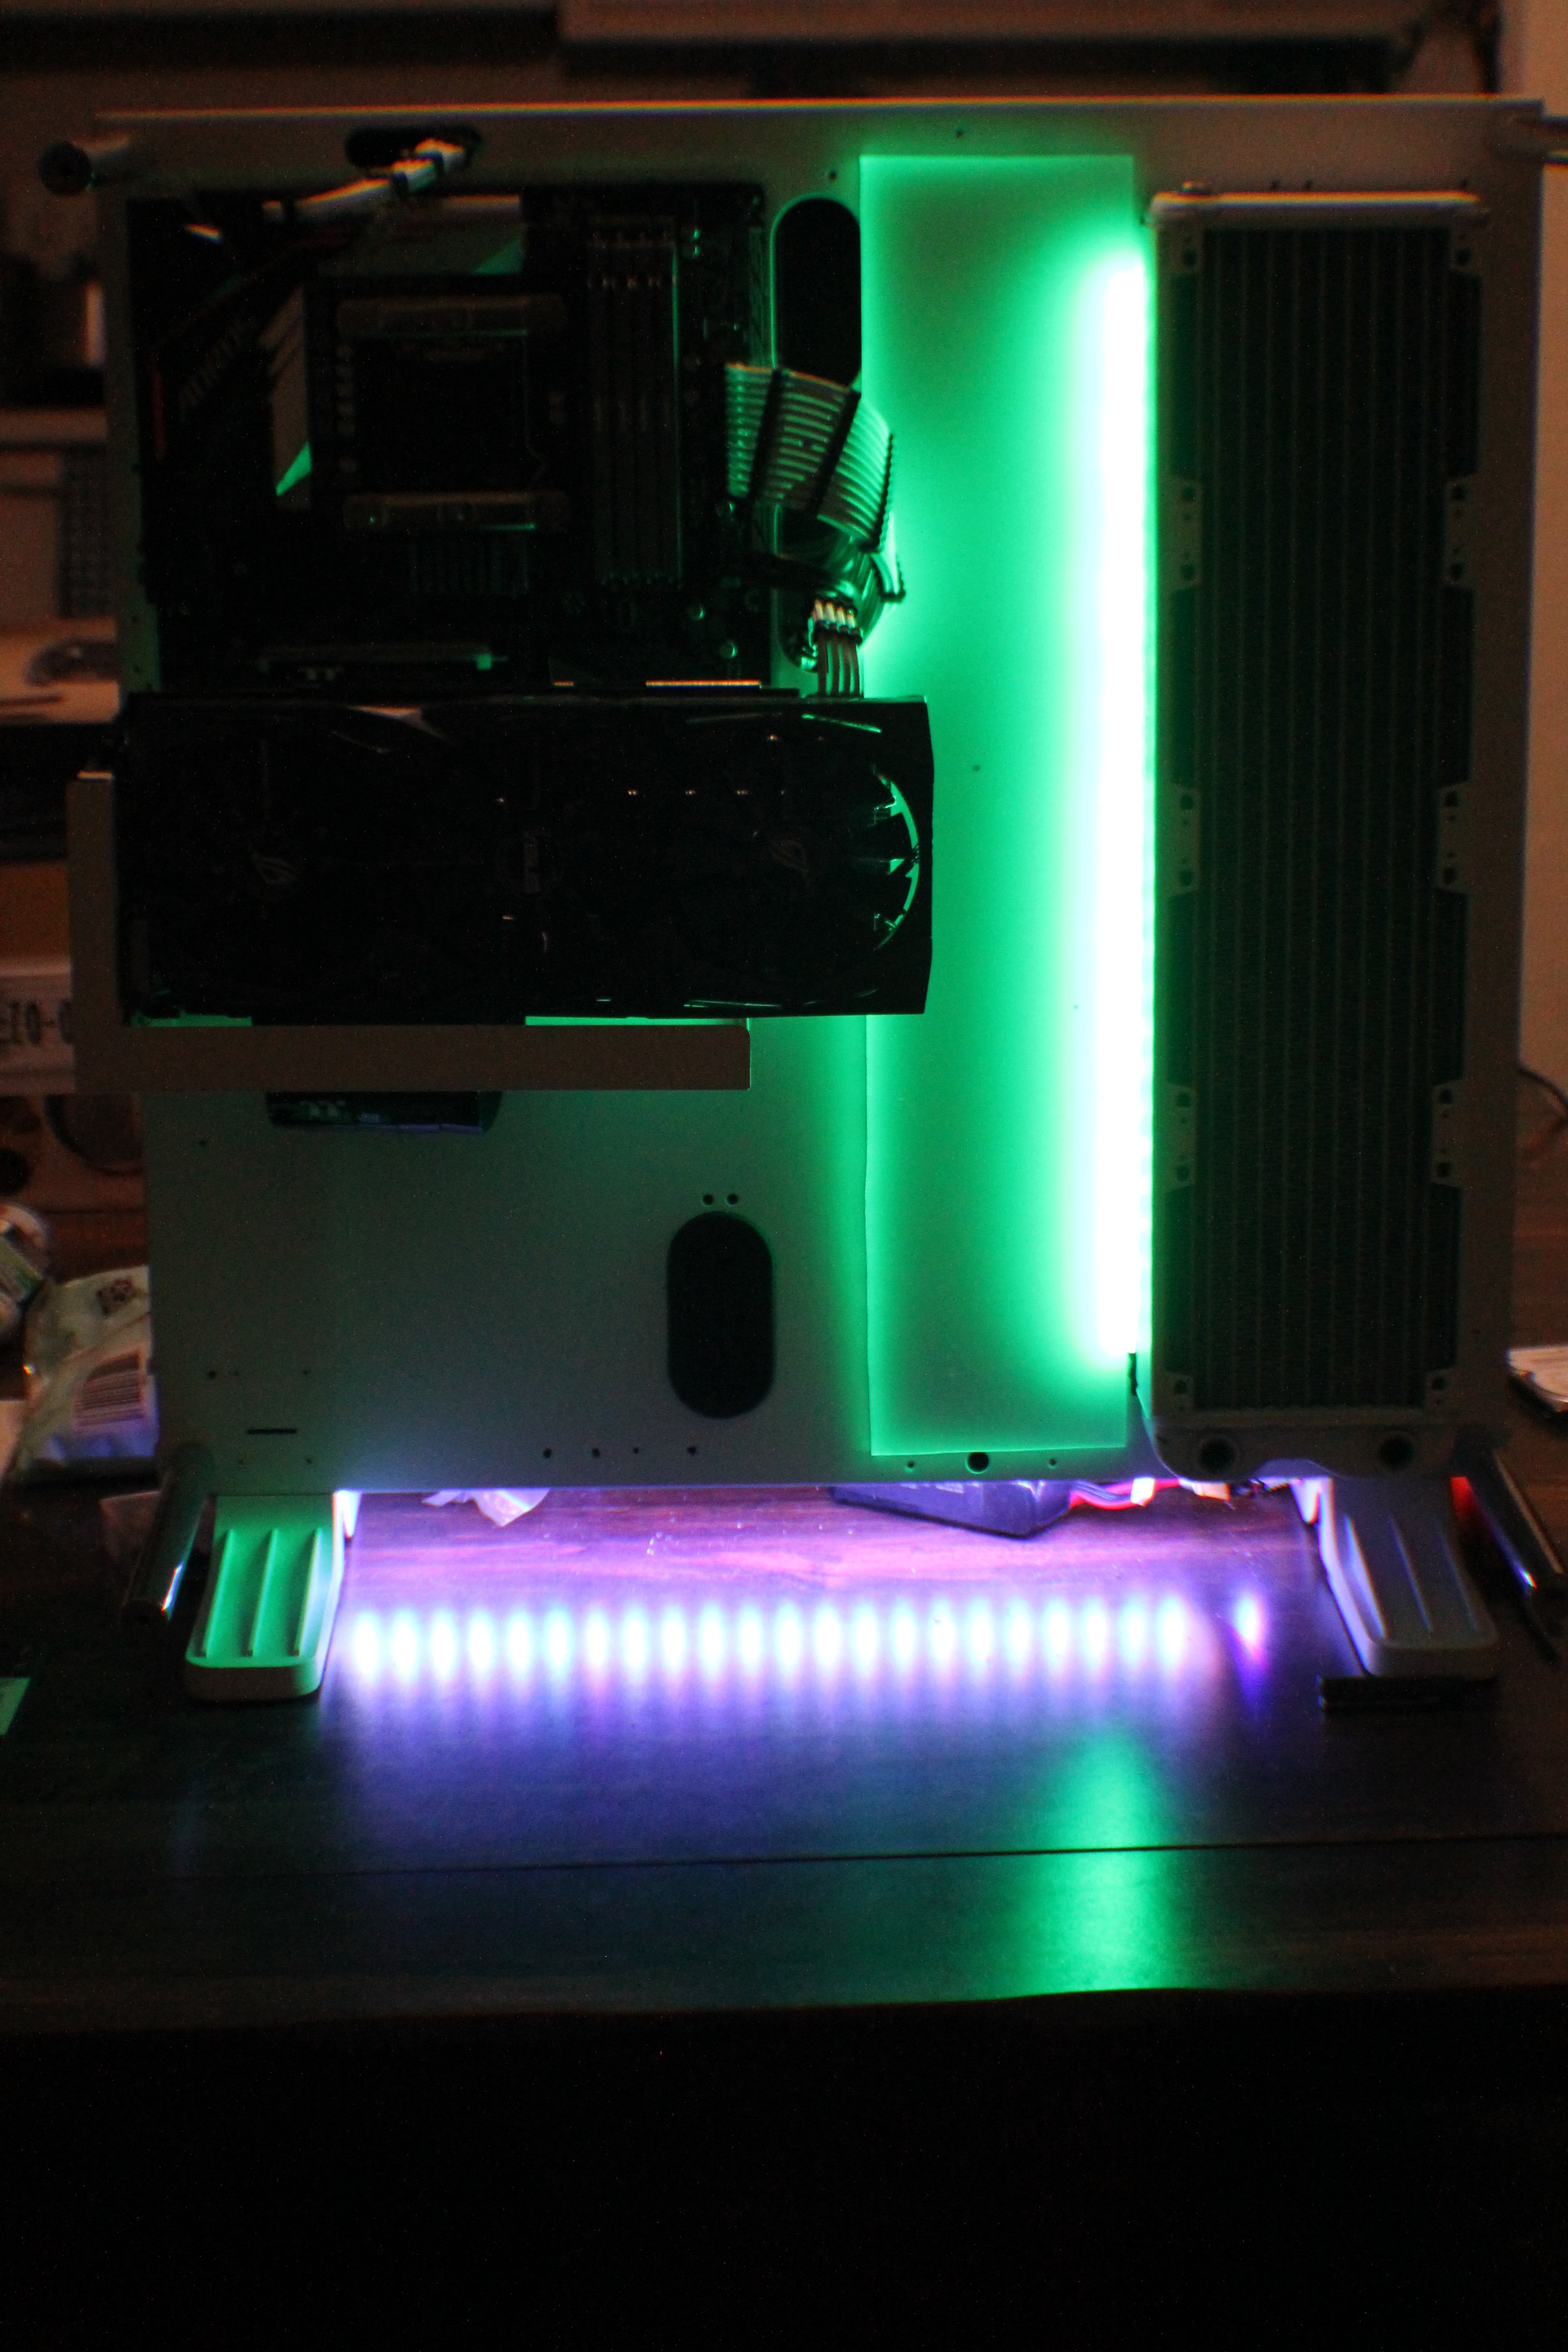
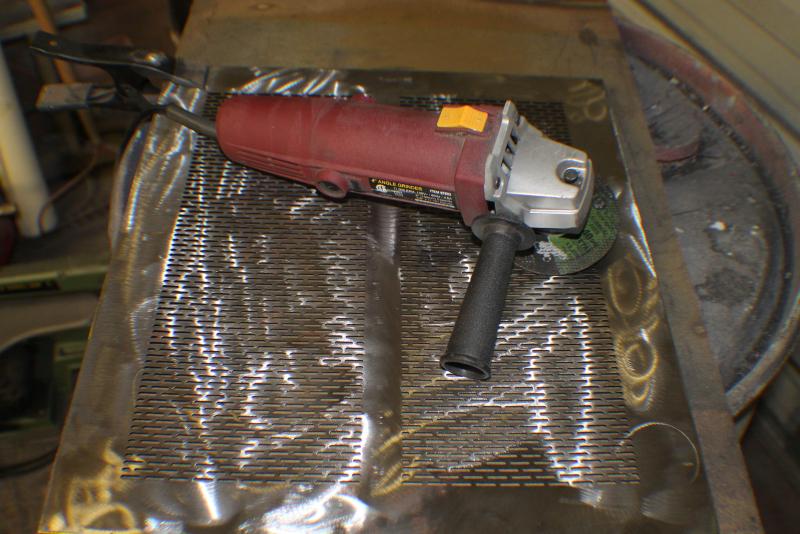
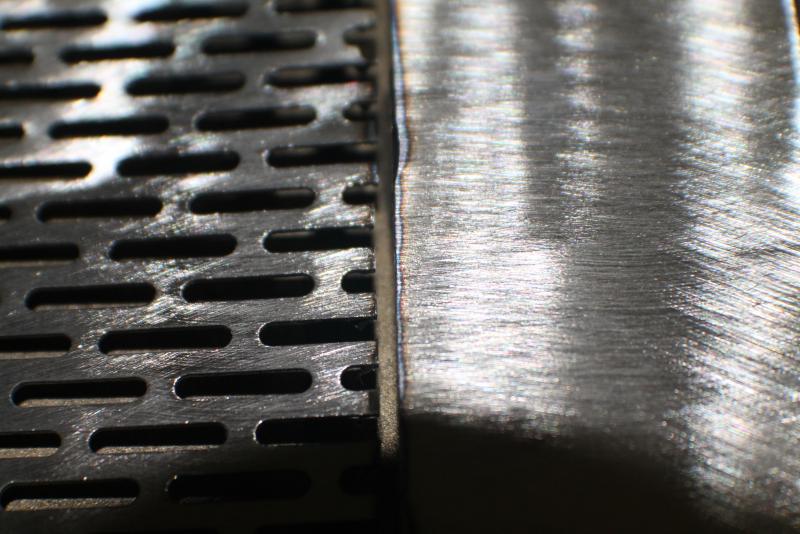
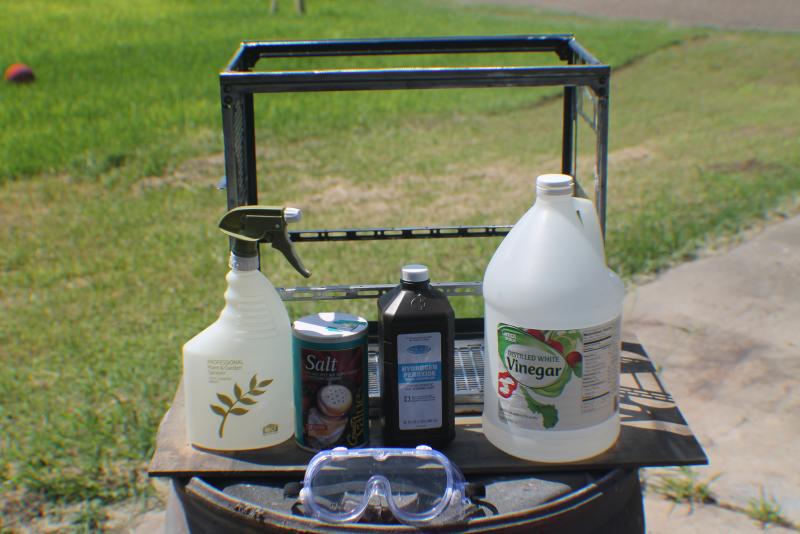
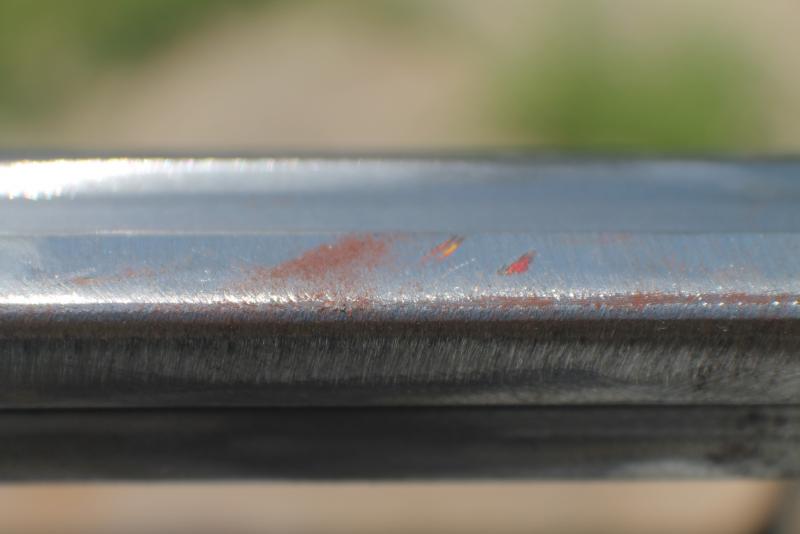
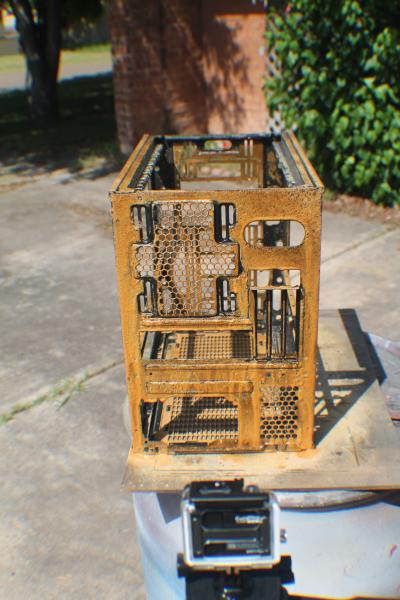
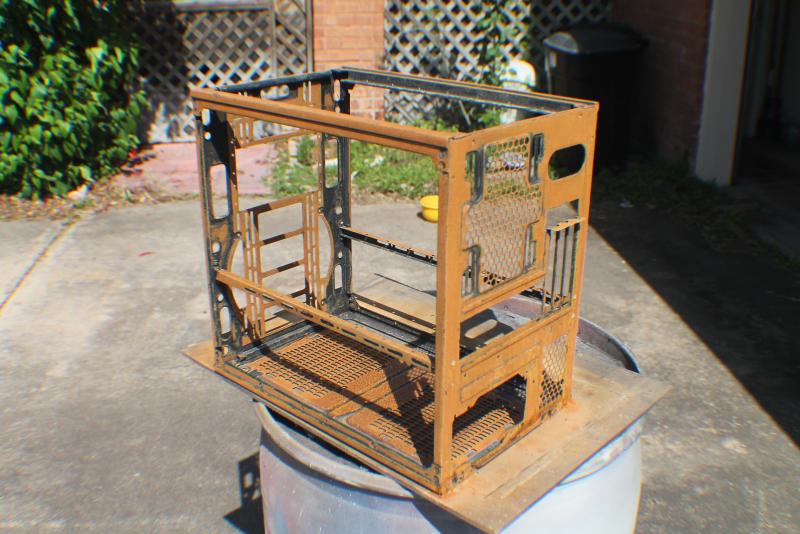
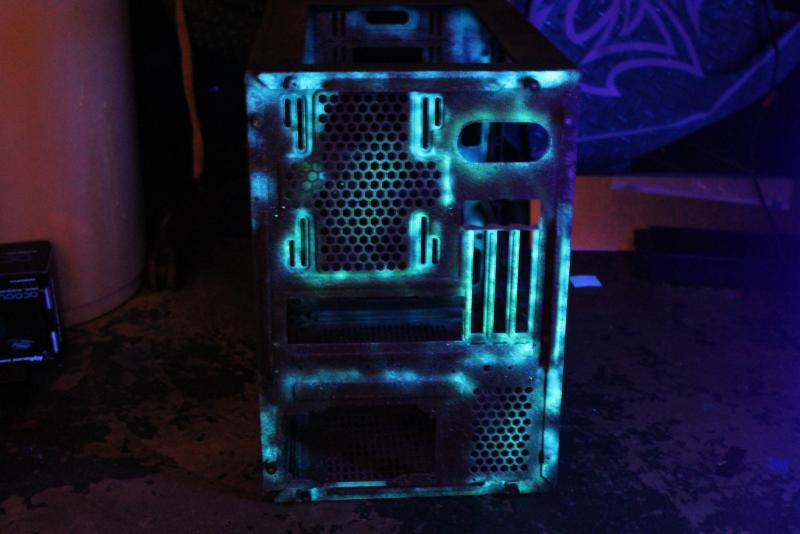
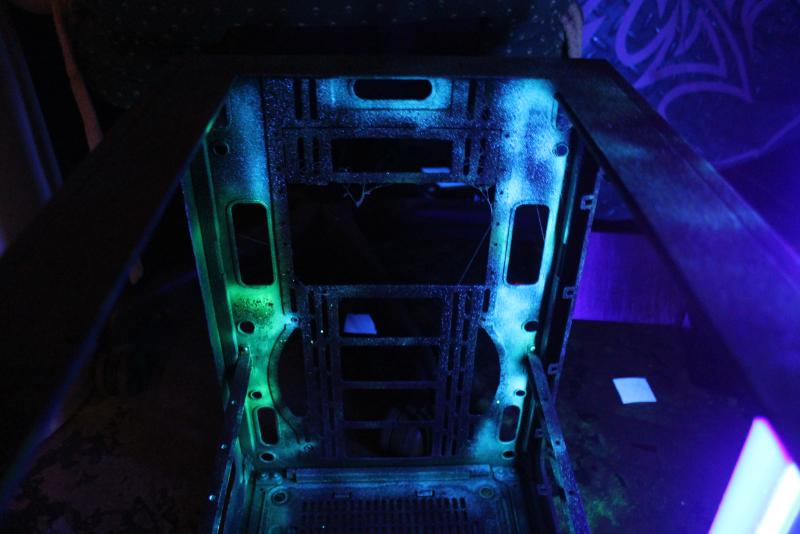
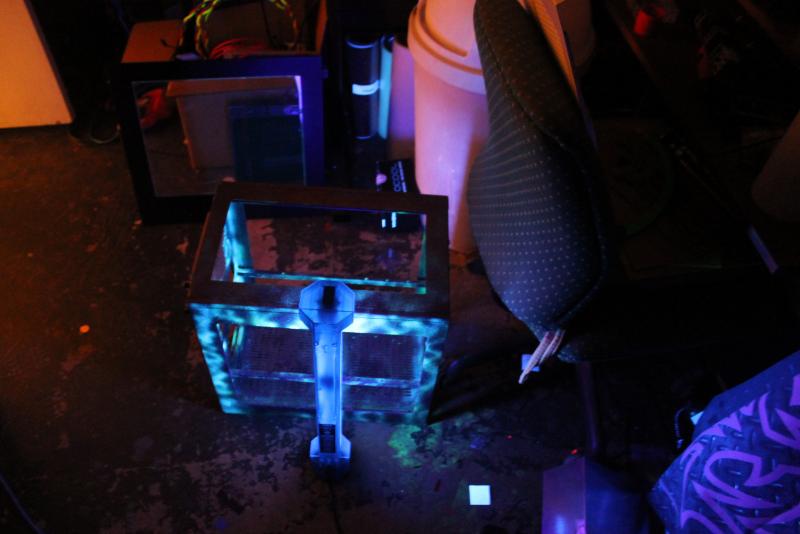
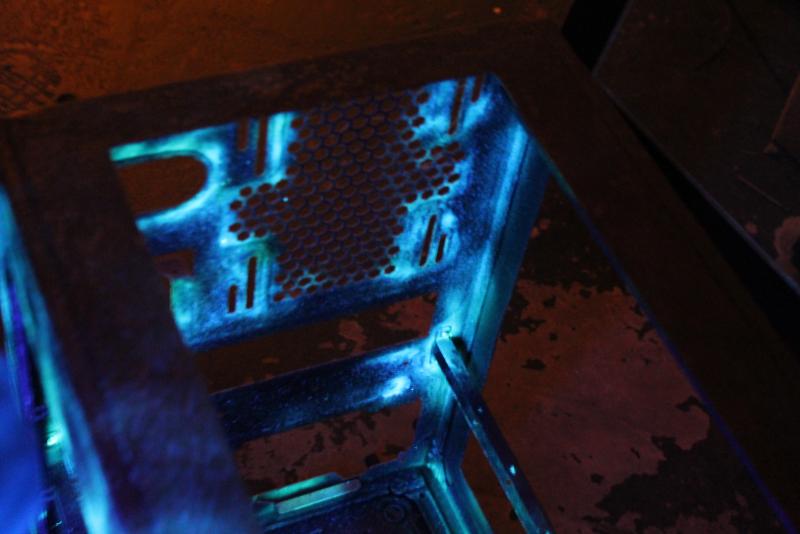
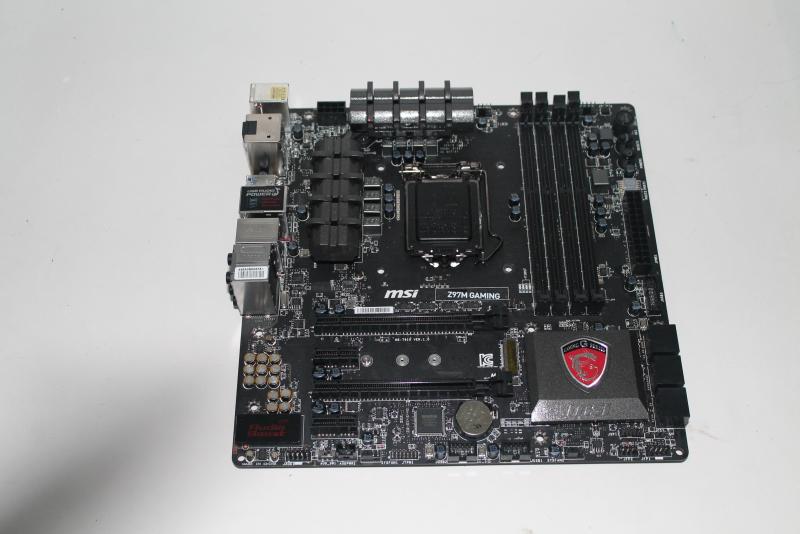
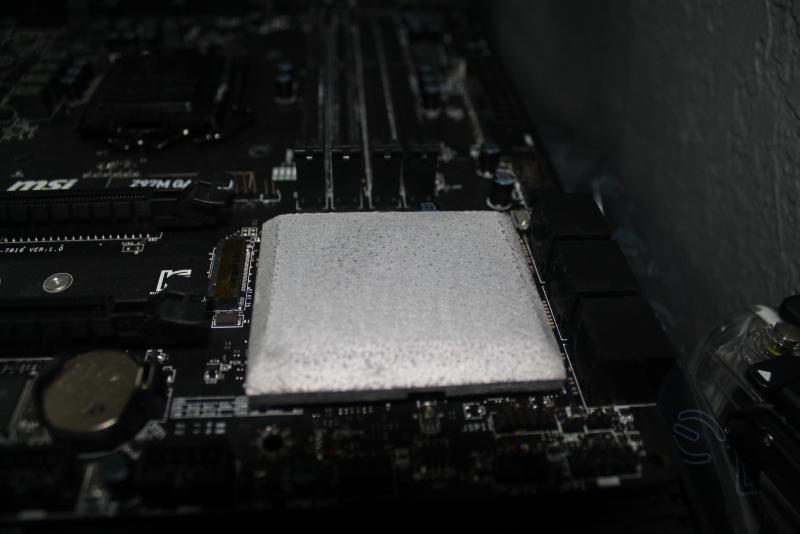
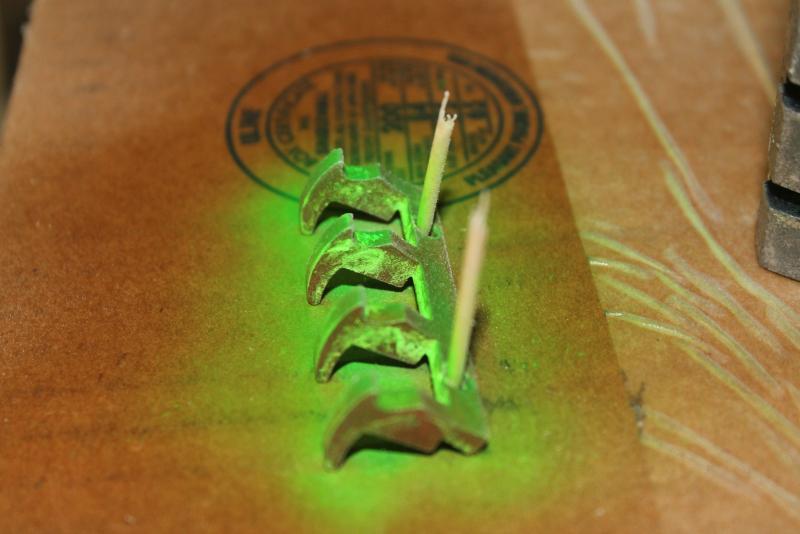
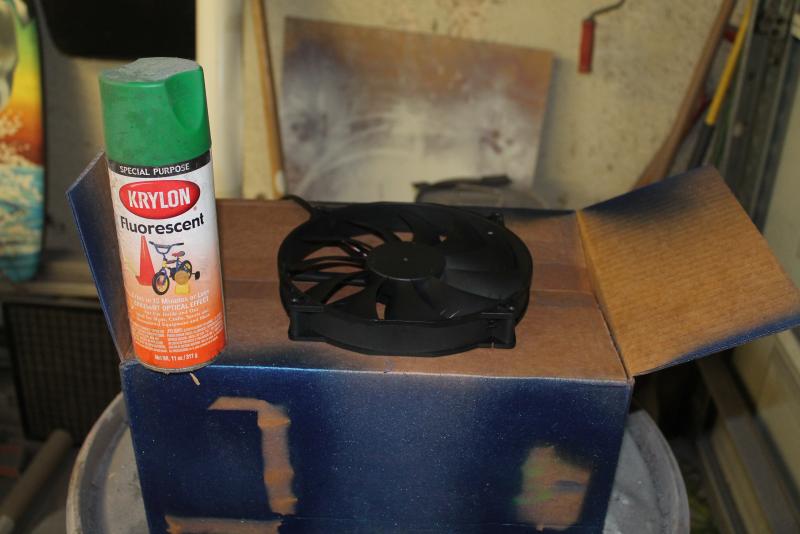
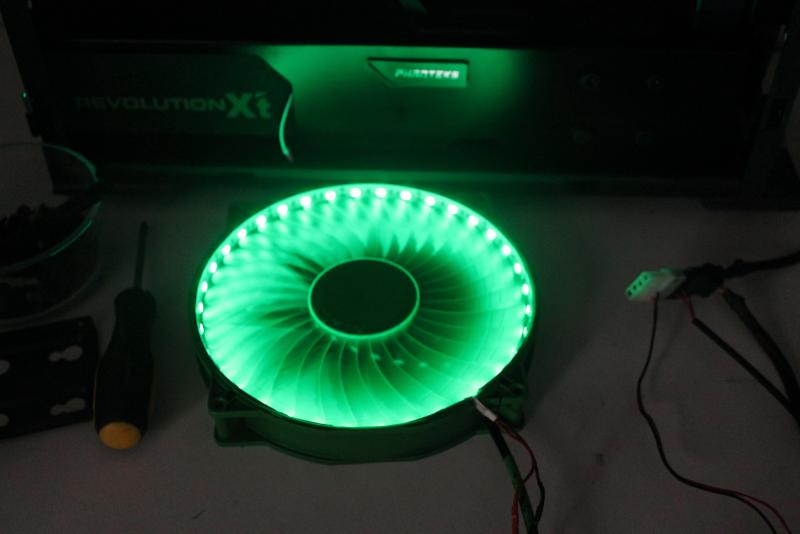
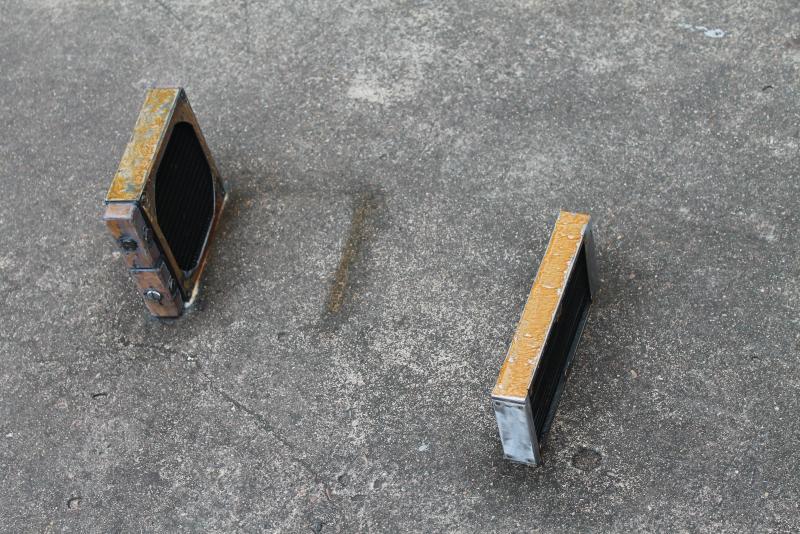
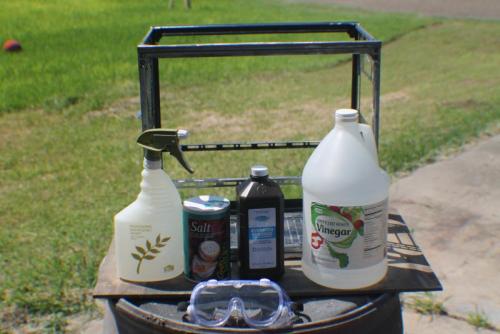
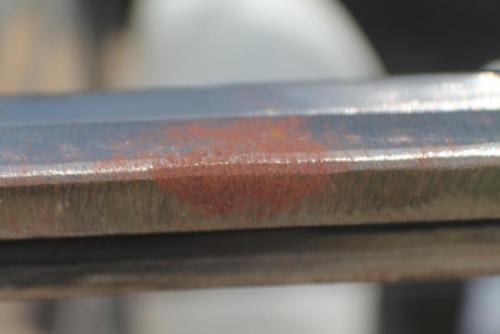
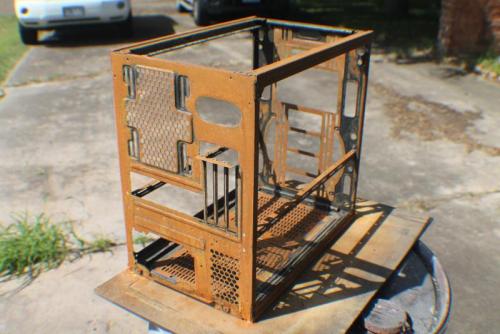
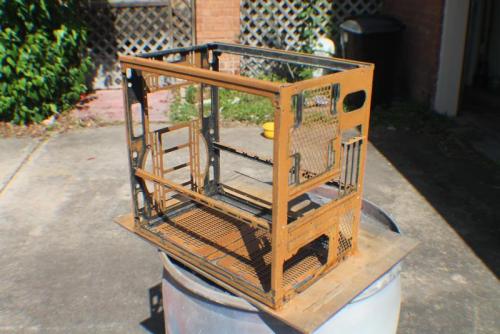
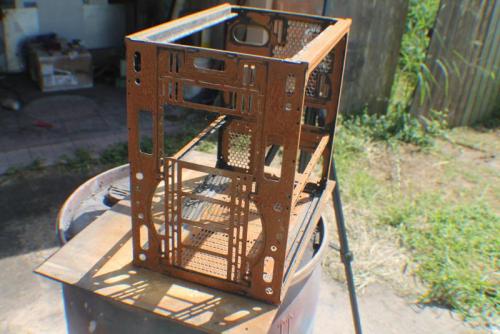
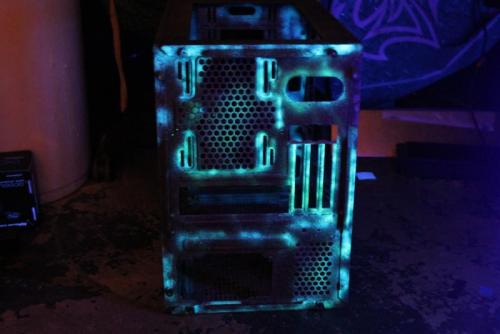
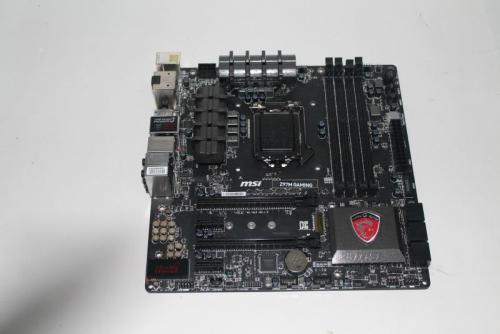
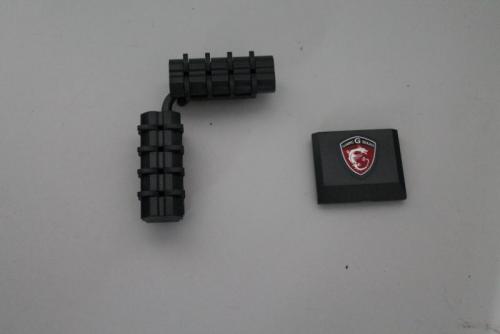
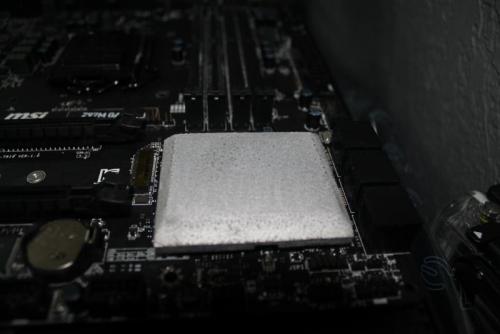
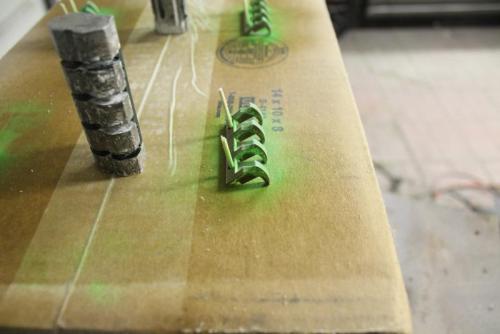
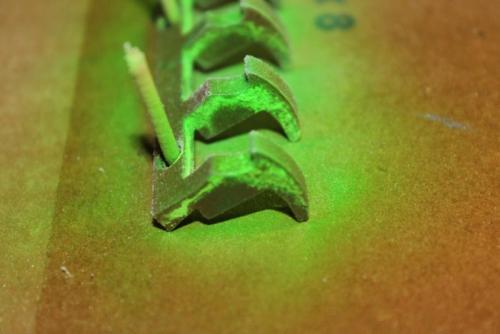
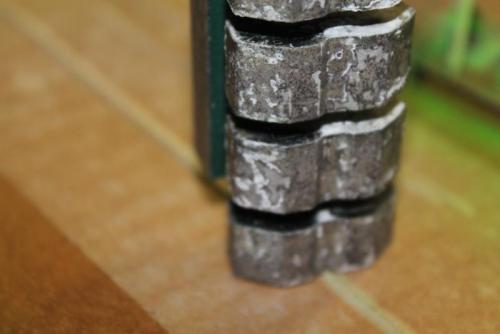
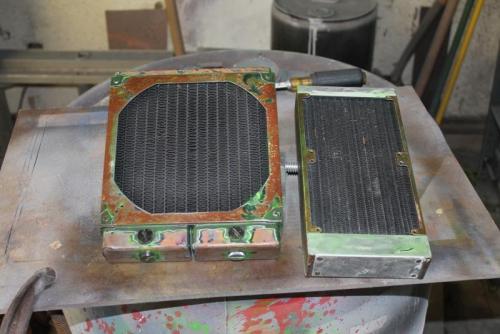
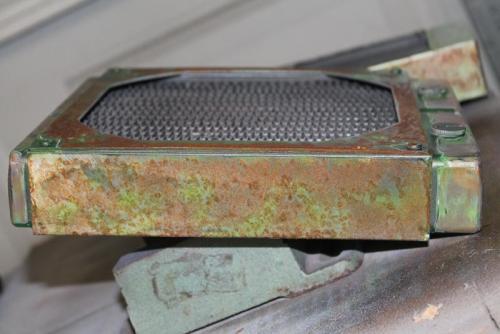
Alright first thing is to remove the factory paint form the case...To do what I want to do I need to get to the bare metal. Ok so the paint stripper doesn't work if there is a ceramic in the paint so Good ol Grinder with a flap disk gets that paint right off. Ok used a cut off wheel on the grinder to cut two more window holes on the top and right side panels. Now exposed metal will start to rust over time. That is something I don't have at the moment, so I need to accelerate the process. That's where this little mad scientist trick comes in handy. 1 x 32oz empty/clean spray bottle, 1 16oz bottle of 3% Hydrogen Peroxide, 2oz of Distilled Vinegar, and 2 oz of table salt. Don't forget to wear safety goggles as you don;t want this stuff getting into your eyes. What this solution does is rapidly accelerate the oxidization process to a matter of seconds/min depending on the raw metal you are working with. After about 20 min the rust starts off looking like a light orange color....but if you let it sit for a couple days it starts to develop the dark Redish-Brown more commonly seen. After we let the rust develop over a couple days. I went ahead and air-brushed some UV Green in some areas to make it look like there is still some corrosive on it, and then sealed it with Rustolium Matte Clear. Alright time to turn my attention to the Motherboard I am going to be using in the build I decided to go with a MSi Z97M. First up I removed the heatsinks and soaked them in paint thinner overnight to remove the paint on them. Then a quick hit with the grinder to get to the exposed metal. So the oxidation solution can do it's magic. The claw inserts I ended up spraying with some UV green. Now for the Front Fan I am going to use a Tt 200mm Fan first up paint it UV Green. after that I took a Green 5050 LED strip hooked up to a dimmer switch. The two radiators I am going to be using are a 200mm Phobya Extreme and a EK 240mm PE. The rads are getting the same treatment the rest of the metal. Stripped/Corroded/Sealed.


-
Gratz to the winners.
-
[USA] Nick Blackwell
Dirty South PC Mods replied to Tt Andy's topic in 2015 Thermaltake CaseMOD Invitational
Alright guys the project is done. Here are the final pics. -
[USA] Nick Blackwell
Dirty South PC Mods replied to Tt Andy's topic in 2015 Thermaltake CaseMOD Invitational
Hey hey I'm back.....Now after taming the Flying Spaghetti Monster...It's time to Install some Killer 5050 RGB LED's http://www.bsmods.com/Mod_Shop.php This is the only place I get LED strips. Each strip and controller is inspected to make sure it is in working order before it ships. I sent the reservoirs off to V1 Tech http://www.v1tech.com/ ​to be laser engraved. So I am just waiting for them to arrive. While I wait for the reservoirs to show up I went ahead and started on the rest of the tubing runs. Here is a sneak peak at the designs we went with. -
[USA] Nick Blackwell
Dirty South PC Mods replied to Tt Andy's topic in 2015 Thermaltake CaseMOD Invitational
Now its crunch time Running Flat out on system integration. At first I was thinking. How in the world am I going to hide all those wires? Then I thought. Why would I want to hide all my beautiful hard work? Man those Riing fans look SICK!!! -
[USA] Nick Blackwell
Dirty South PC Mods replied to Tt Andy's topic in 2015 Thermaltake CaseMOD Invitational
Ok after 5 days of prep-work, sanding and painting at Camco the now White Core X9 is back at the shop. This is as close to a show-car finish as we could get with the amount of time invested. Now that both the cases are together you can see the theme start to come together. All that's left is to finish is sleeving the PSU's, pumps and a few of the front panel wires...Then I can get started on the system integration and the detail work. Both of the Pacific P1 Black D5 Variable Pumps kits have been sleeved. I really like the silencer look to them. Sweeet the Button Head fasteners from Tek By Design (https://www.facebook.com/tekbydesign?fref=ts) have come in. Thank you for supporting the project.....I have used their fasteners in quite a few builds. It is getting to the point where I use them almost exclusively. They have almost every length and thread you would need for your PC. -
[USA] Nick Blackwell
Dirty South PC Mods replied to Tt Andy's topic in 2015 Thermaltake CaseMOD Invitational
I am happy to announce I picked up another awesome sponsor Avexir was kind enough to send us out some beautiful DIMM chips. -
[USA] Nick Blackwell
Dirty South PC Mods replied to Tt Andy's topic in 2015 Thermaltake CaseMOD Invitational
Thanks Guys .......So the day has finally arrived. Today I get to use a real professional paint booth. A big Thank you to Camco Wheel and Axle for letting Me use their equipment. I really appreciate it. Woot weeere heeeeere!!! Ohhhhh Man!!!! That's a BIGGG paint booth. This is going to be EPIC!!!!!!!!!! This is the paint mixing station located just behind the paint booth. My good friend Memo. He helps me out a lot around the shop. If you see a picture of me in this build log it was most likely him that took it....Thanks a lot for all you help bro. lol Memo said I looked like a mad scientist in this shot. Alright at this point we have already shot the primer on most of the case was wet sanded it down with 400, 600, 1000 and 1200 grit sand paper. Used compressed air, a Wax and Grease Remover, and a Tack Rag to clean it off. It is now ready for the first application of the final color. This is the paint Camco was kind enough to provide for the project. PPG DelFleet Essential in GM 50 Olympic White. It's a real Glossy Bright White. This is after the second coat. Going to sand it down one more time and shoot the last coat. -
Hey guys whats up I just got this totally awesome headset. I took a few quick pics for ya....Bu sure to stay tuned for my review in a couple weeks. First Impressions. The thick padding on both the ear cups and the headband should make for some comfortable raiding.