Search the Community
Showing results for tags 'Core'.
Found 19 results
-
Hey guys. This is something I've been planning to do for nearly two years now, and it's finally coming to a head. As some of you may have seen, I recently put together a custom reservoir to sit in the window of a Thermaltake Core P5. You can find the thread detailing how that all happened here . So after much debate between choosing X299 or X399, I eventually opted for Threadripper. I wanted a build I was sure would continue to be supported for years to come, and I didn't feel that I could get that out of Intel (Plus I didn't want to delid). So here are the parts! I ordered these during one of Ebay's 20% off sales, so most of them were a pretty good deal. The parts are as follows: Threadripper 1950x Asus ROG Zenith Extreme Strix GTX 1080ti Gaming TeamGroup Vulcan ram (64gb 3000mhz) Samsung 250gb Evo M.2 SSD Thermaltake 850w DPS Titanium (Only PSU with theRiing fan and two EPS outlets) Some Riing fans for the radiator And of course, the Core P5. I'll be using some HDD's from my current computer when it's time to migrate to this one. The first thing I did was put everything together and test the system. I decided to shove the 1080ti straight into my current build and pull the R9 290x out of that one so I could enjoy those high refresh rates straight away. We have ignition! Windows was successfully installed! It was time to focus on the more aesthetic side of things. I figured, if I was going to put this much effort into this build, I may as well have a symbol/logo done up to match the PC's name. I contacted a graphic designer located in Queensland called Sam Johnston (He has a business page if anyone's interested. Would recommend). Within a week I had a fully-fledged logo! I'm lucky that at work we have a laser cutter on hand. Here I am testing a few different power levels before etching the window. And here's the real deal. I decided to etch it backwards so that it would retain the gloss from the front side of the window. And not long after. Here it is after a quick cleanup. And finally after a polish. Not long after this, my water cooling equipment arrived from Bitspower. All bar the pump mount, which I unfortunately forgot. Hello extra $35 shipping. I tell you what, I feel that Bitspowerdon't get the recognition they deserve. Look at the quality of these blocks. Opps, forgot to take a photo of these ones with the wrapping off. While the waterblocks were great, I did have an issue with the radiator. I find it unfortunate that Bitspower stopped producing the single-sided version of the 480 radiator, and have opted for a double-sided model only. This produced a problem when mounting it to the P5 as I'm sure you can clearly see here. The Core P5 is flat on the side I need to mount the radiator to. But I had a solution in mind. Little bit of silicone and they were sitting pretty. Just shove em in. And wipe the excess away! Now I do love Bitspower, but one thing that irks me about them is the fact that all their plexi products have a frosted finish. I much prefer how EK does this with their crystal clear blocks. Thankfully, polishing acrylic isn't something that's particularly difficult. Before: And after: Before: And after: Before: And after: This was by far the worst part. I forgot to take photos of the ram blocks, but I did get a few before and after shots of the ram sticks themselves. At this stage, I ordered some cables fromCablemod. I quite like the scheme I came up with. They arrived not long after. Shortly thereafter, my pumps and liquid metal arrived. Naan Bread always looks at me like I've just asked her to hang out the washing.Unfortunately I didn't order enough sleeving. I sleeved up one of the pumps, but had to order more sleeving for the other. I couldn't find anyone selling Alphacord in Australia, so I opted for a knock-off vinyl sleeve from eBay. It was not good. I'll post photos of that later, but it looks like I'll have to order more Alphacord from overseas. Money money Next up was attaching the monoblock to the motherboard. Not a bad idea, Asus. Liquid metal is awfully pretty. And hard to figure out how to apply for someone who's never used it before. I got there eventually. And that's where I'm up to for now! Looks pretty good I reckon. I've got a few more parts on the way. Not much more I can do for now until they arrive.
-
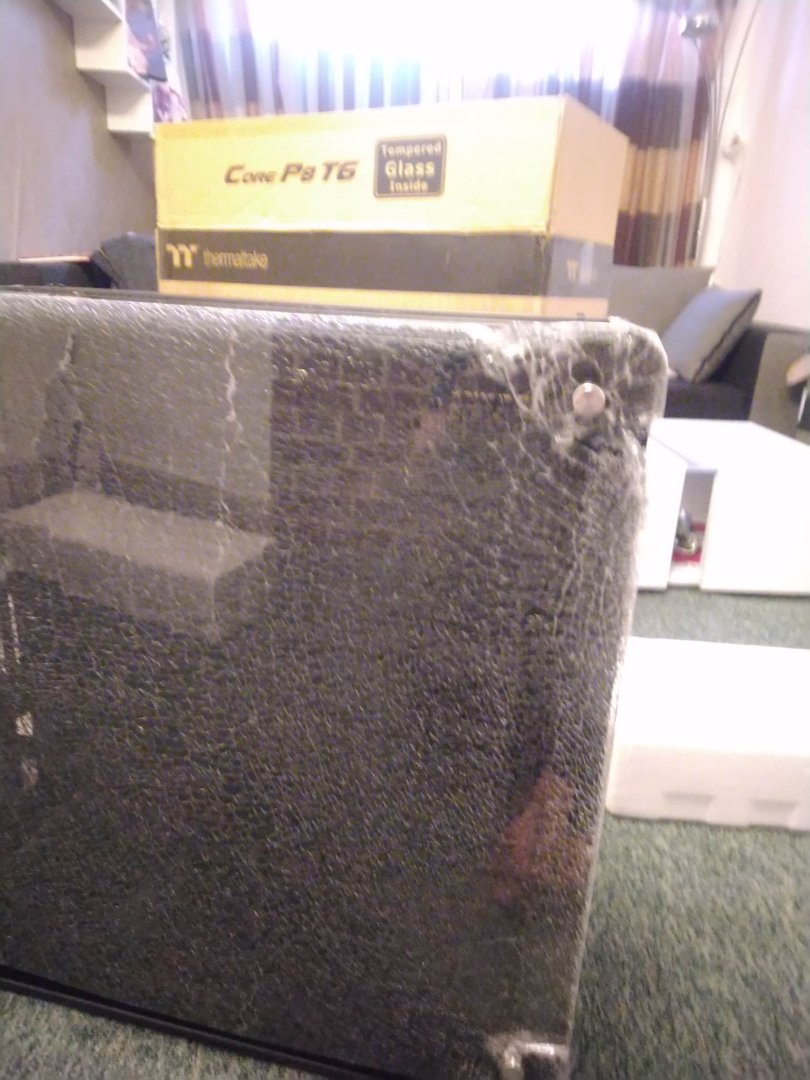
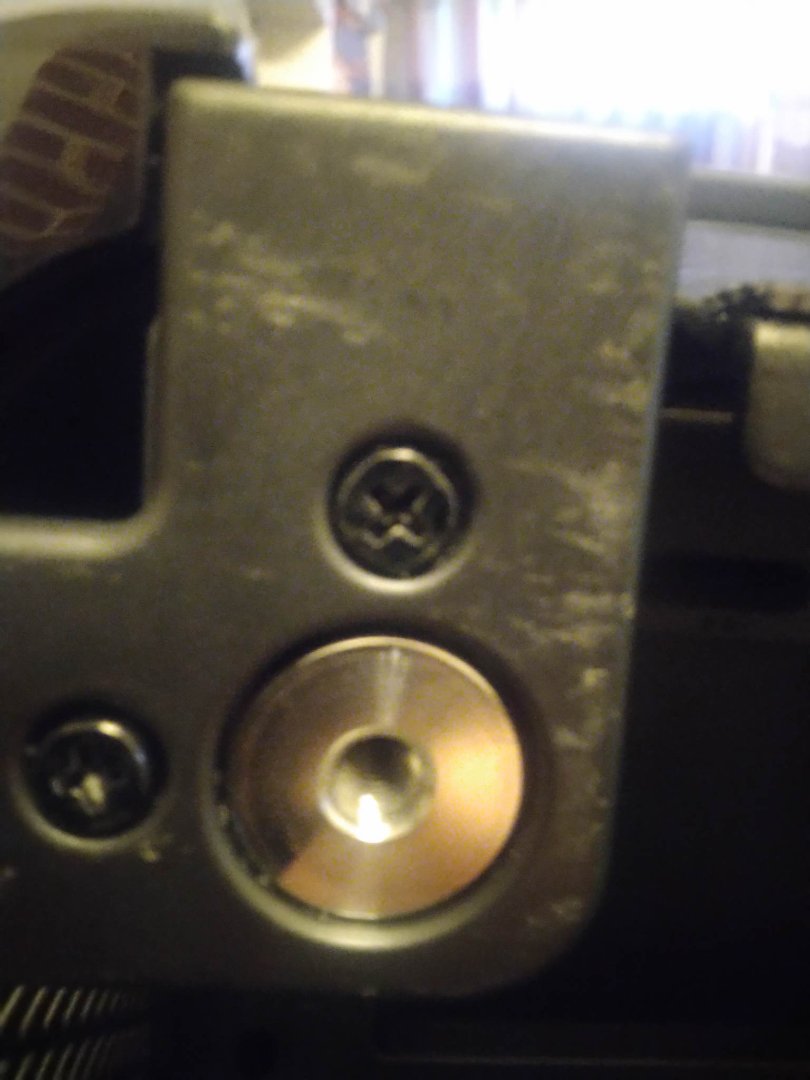
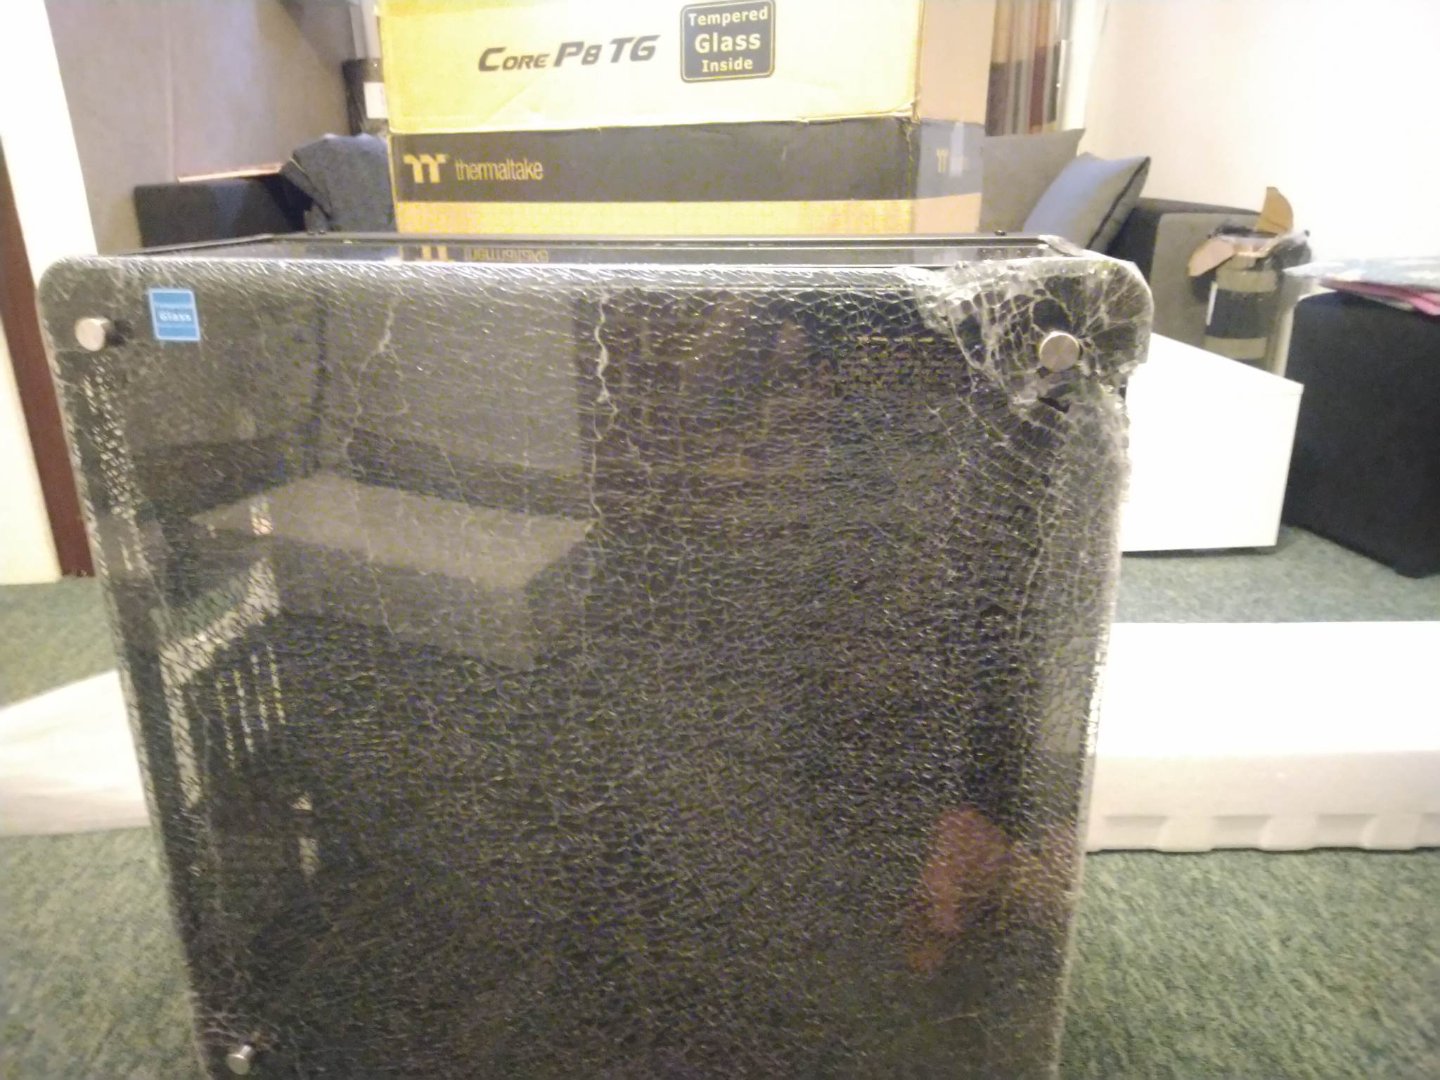
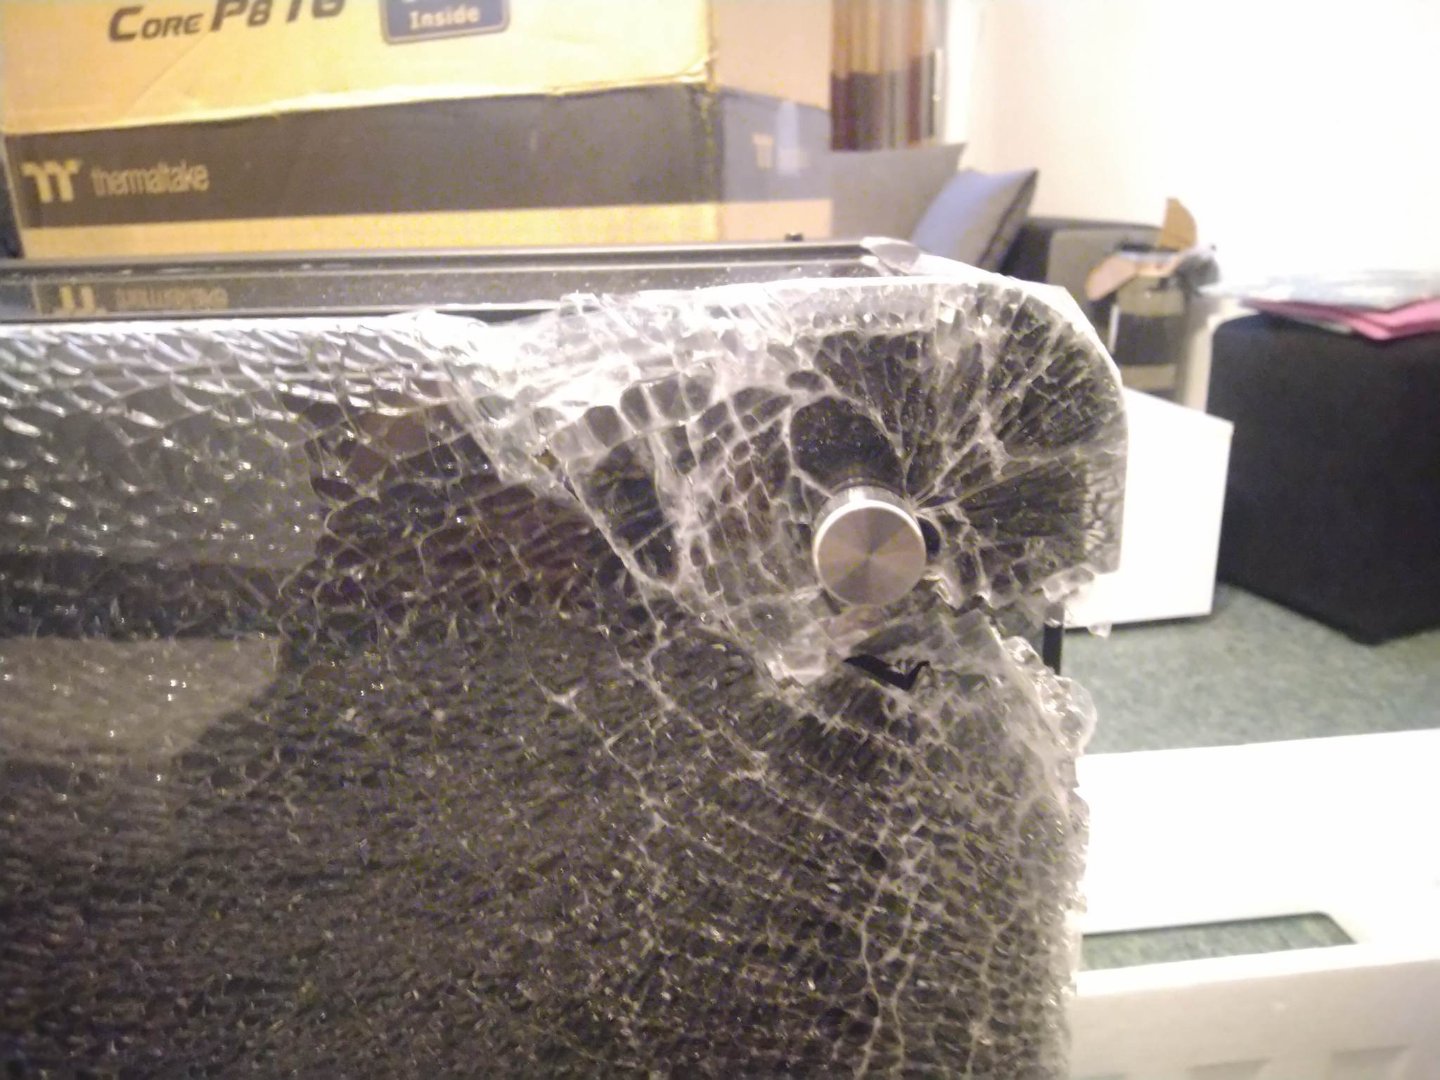
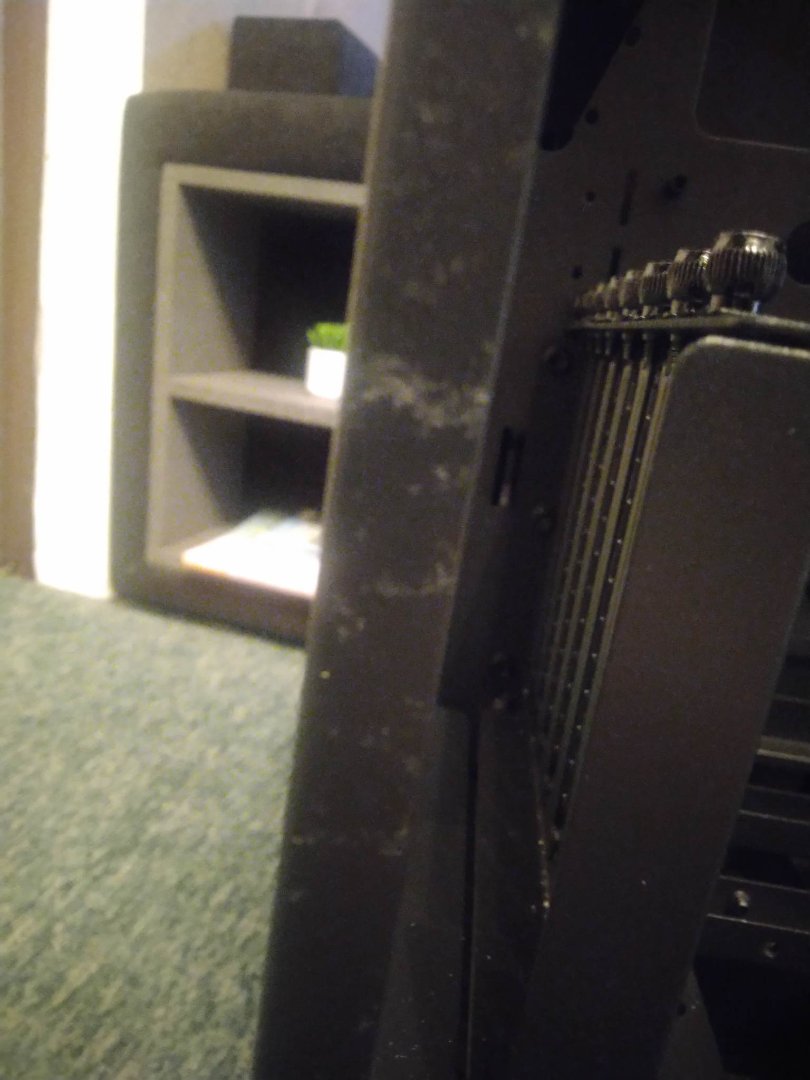
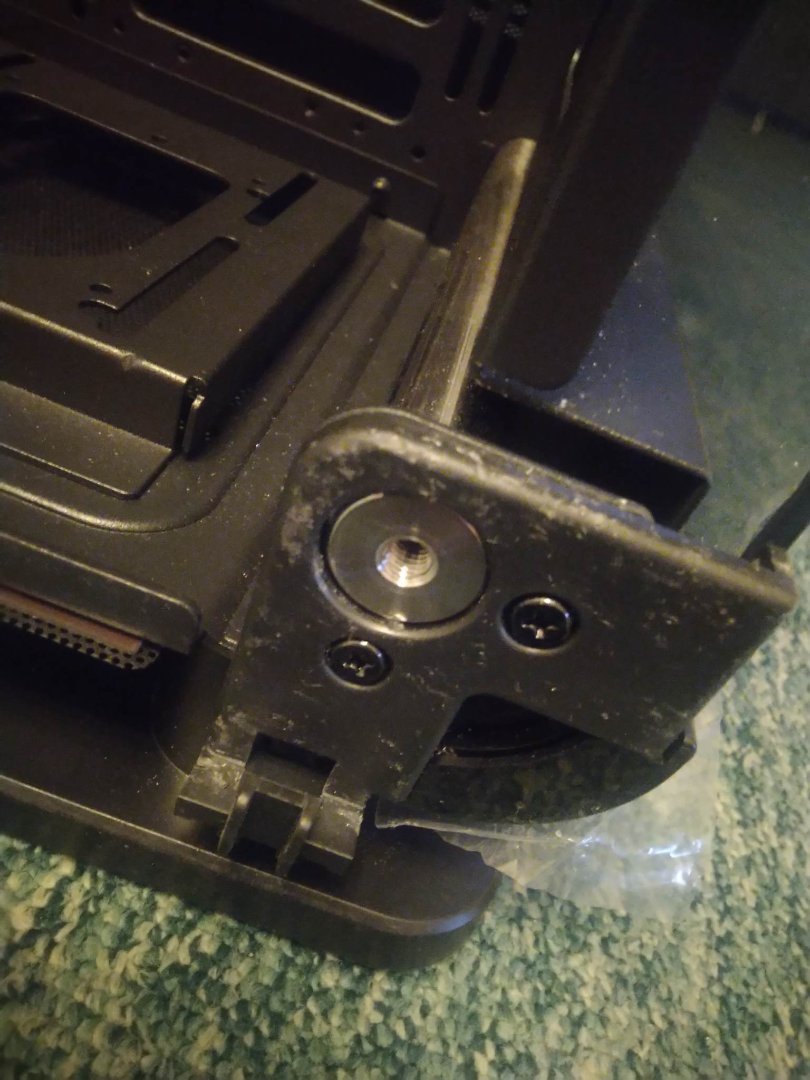
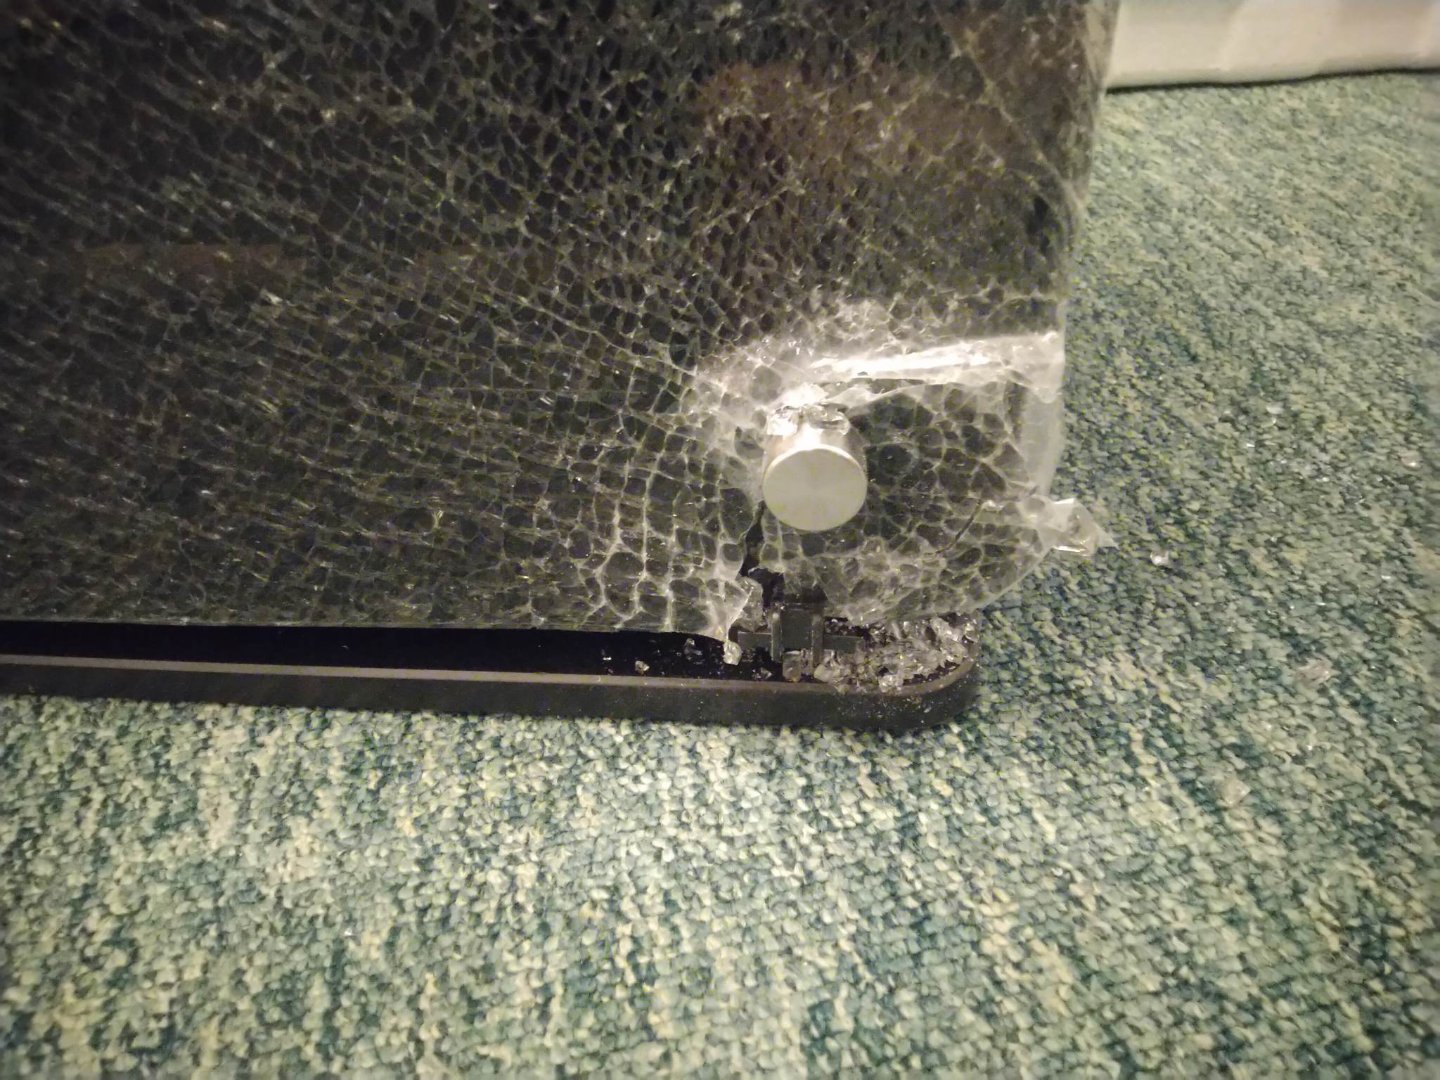
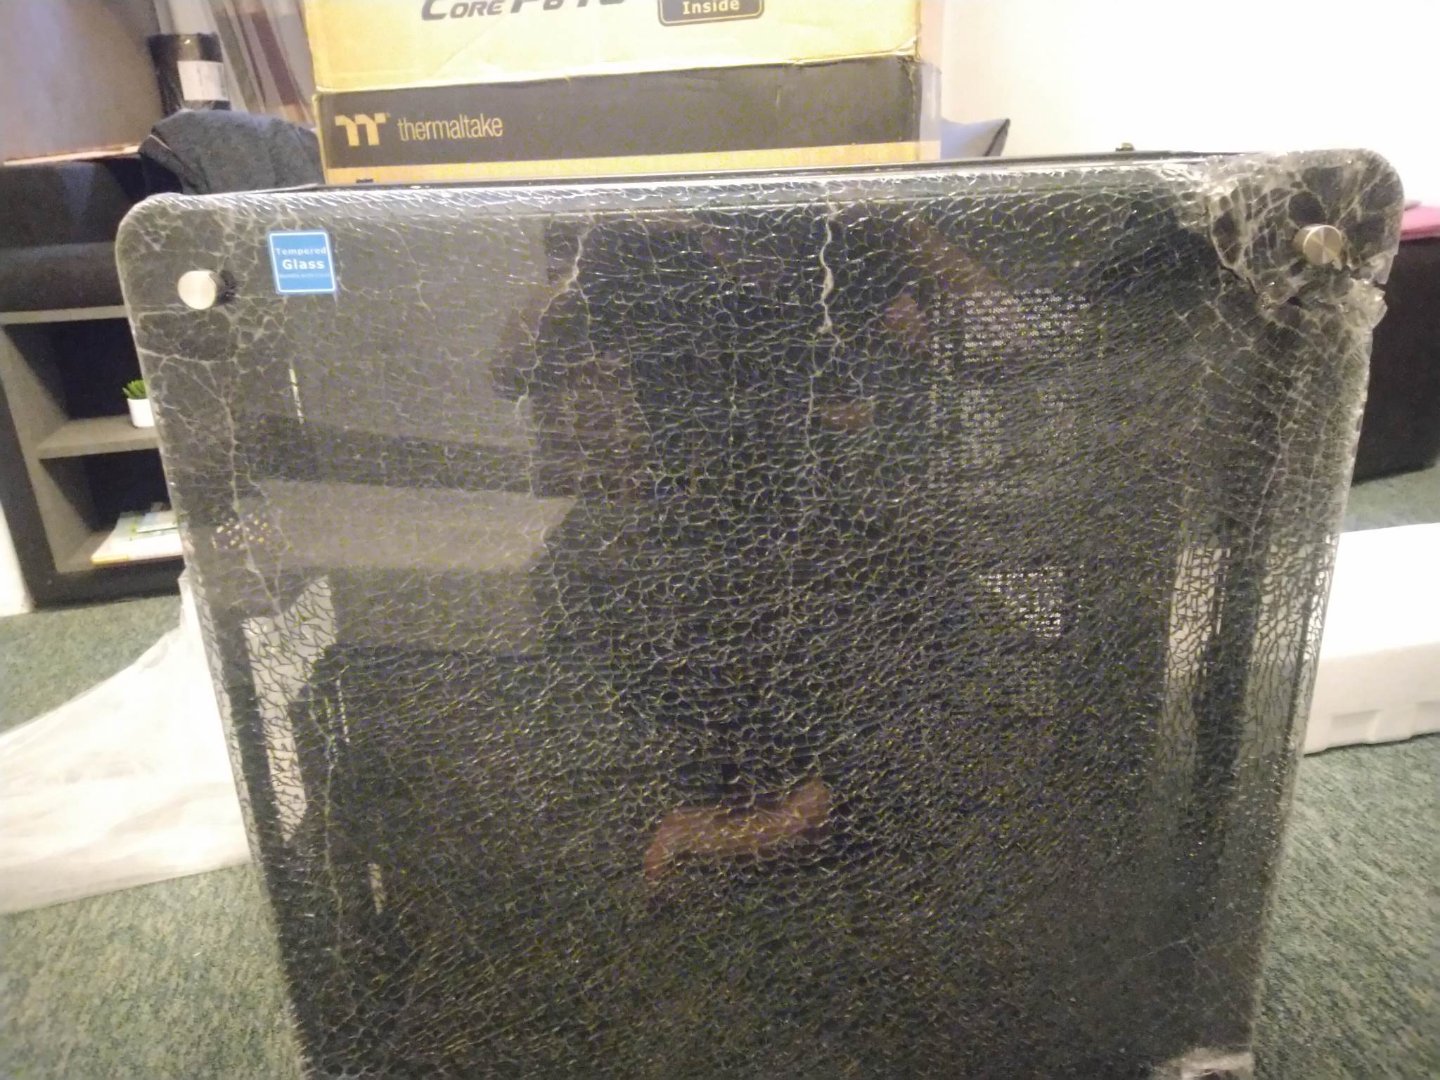
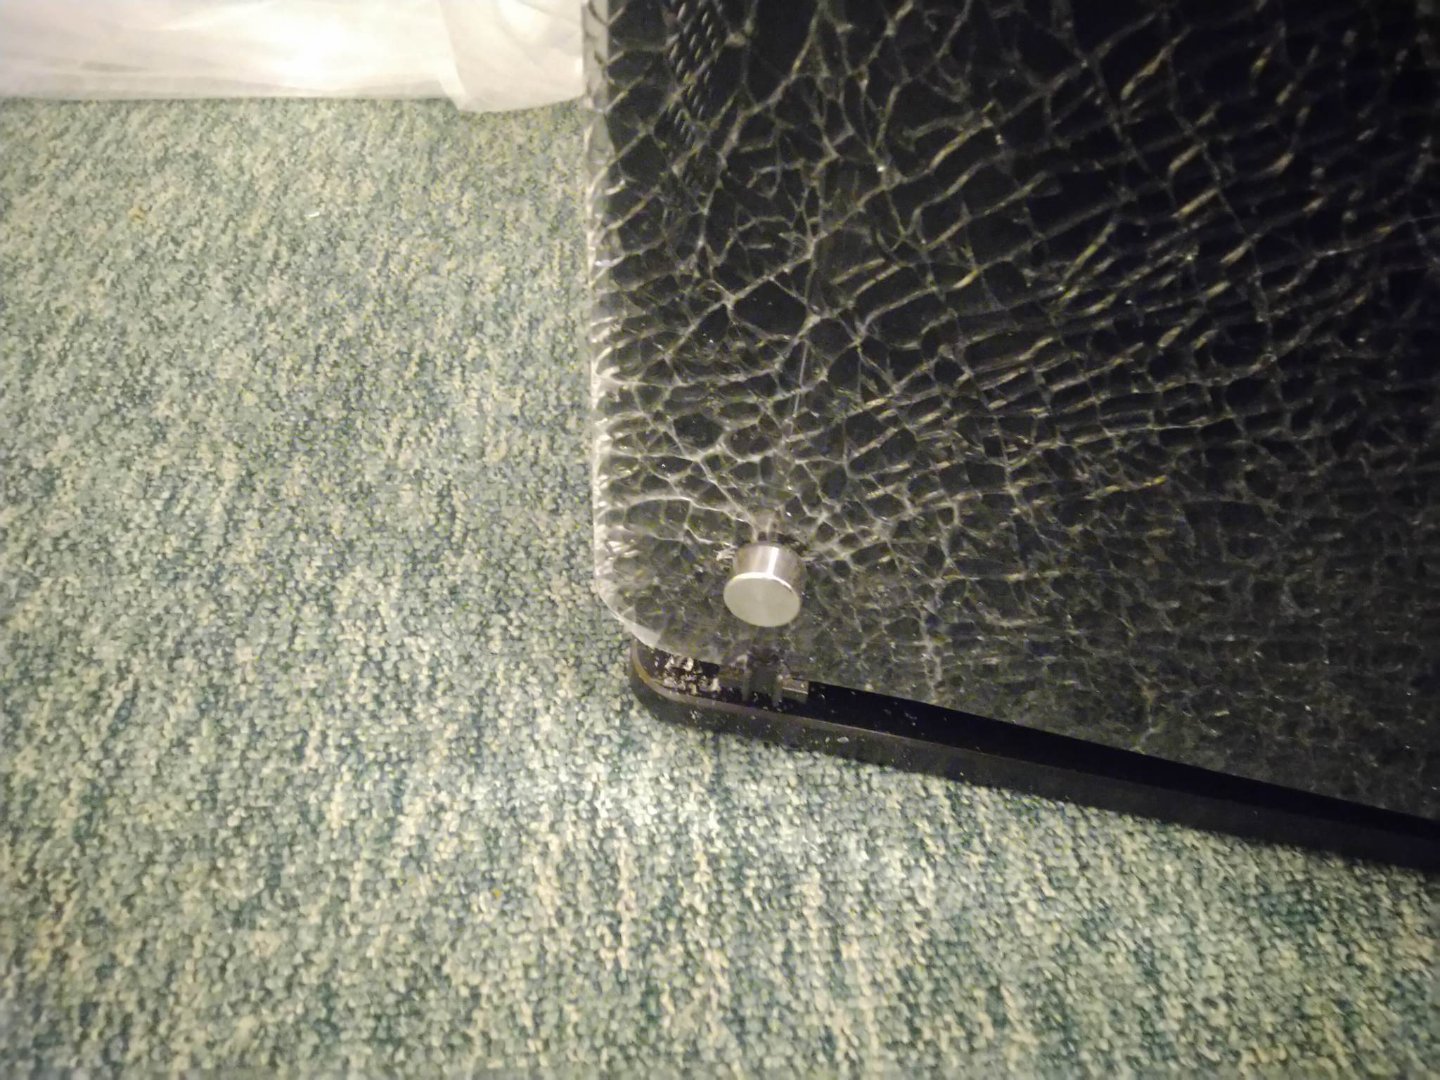
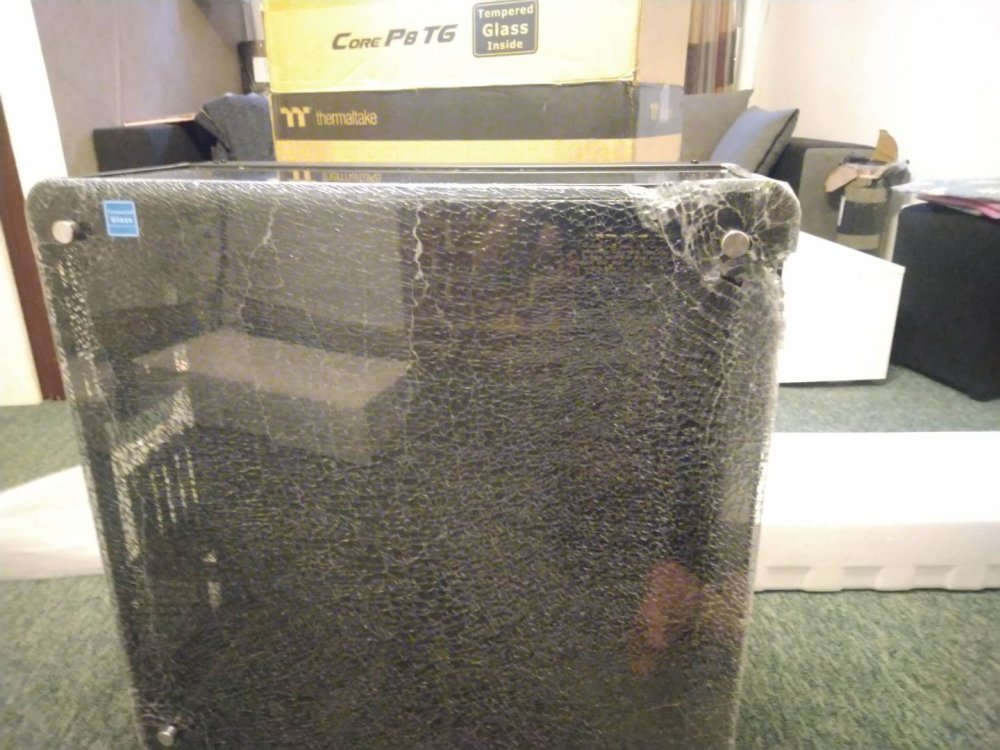
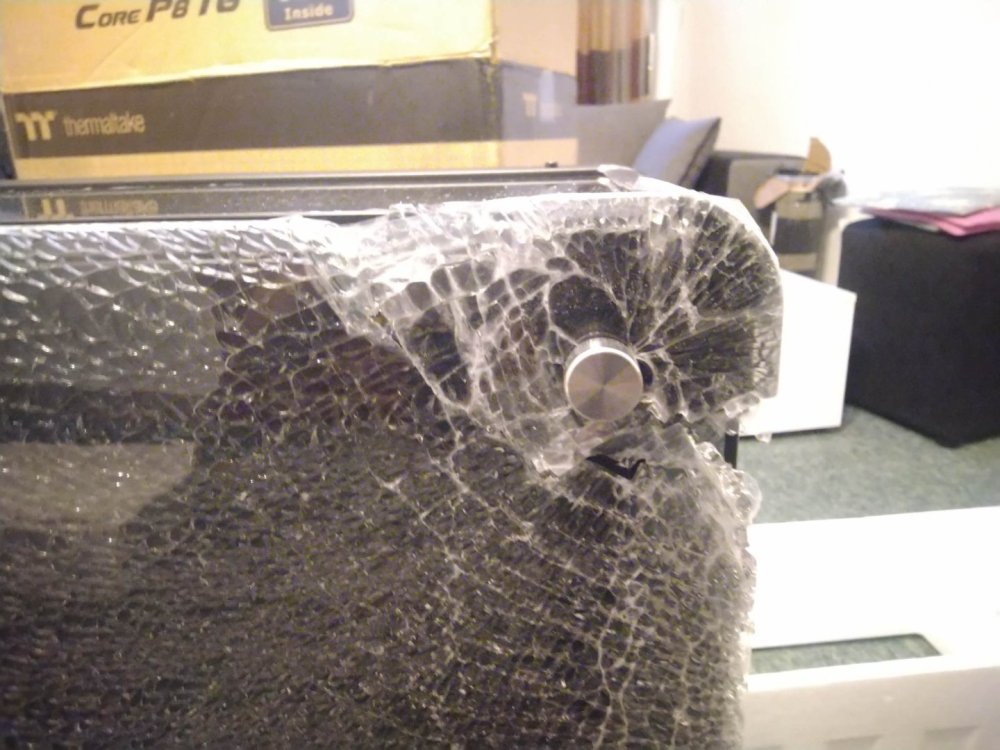
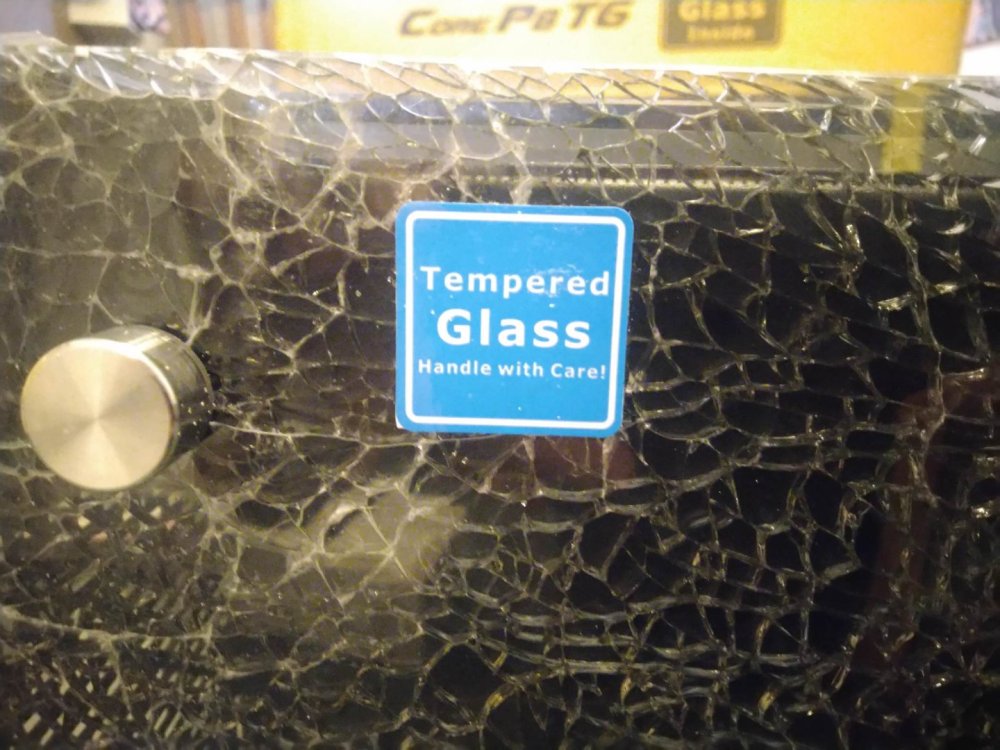
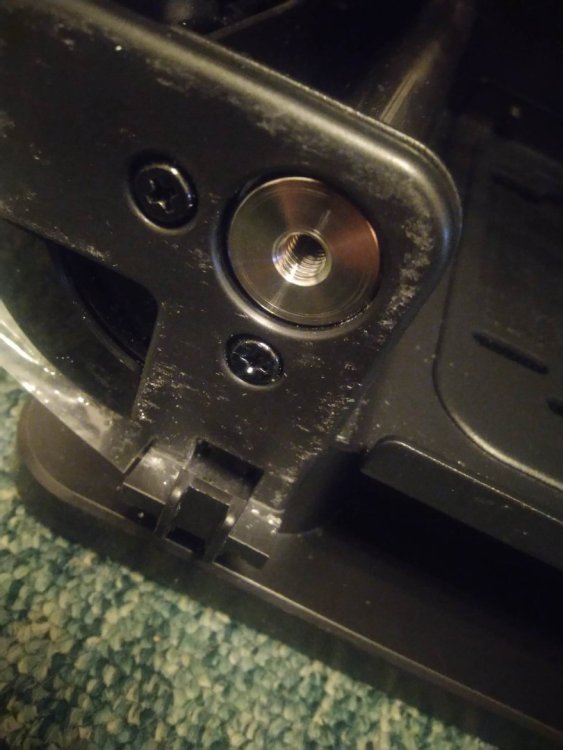
 Hi all, I am currently building a fully water-cooled PC from scratch. I have all the necessary PC parts except for the PC case. I ordered the Thermaltake Core P8 Tempered Glass Full Tower Chassis, a very large computer case, on March 13, 2023. Unfortunately, when the case arrived on March 20, 2023, it was completely broken. The side glass was shattered into a million pieces, and the PC case panels were also scratched. It appears that the case was brutally damaged during shipping. I ordered the case from "https://ttpremium.eu". I have tried to request a refund or a replacement, but they are not responding to my emails, and the phone number provided is invalid. I also tried to create a "Request Form," but I have not received a response. Does anyone have any experience dealing with tech support? Any advice would be greatly appreciated. Here are some pictures: https://drive.google.com/drive/folders/1SYPfxFwIZNagoHaznm9pzVdsXyp0CY9D?usp=sharing I'm very disappointed :( Best regards, Zoltán


-
Thermaltake Core V51 mid-tower chassis, a new member of the Core Series, which now comes after the launch of Core V71 and Core V1, retaining the curved metal mesh look and delivering an outstanding cooling performance with the compatibility for the extensive DIY/AIO LCS, and the air cooling units that the series has become so very well known for. Core V51 is an enthusiast’s grade mid-tower that creates unprecedented space for high-end hardware and liquid cooling expansion, supporting the latest E-ATX, ATX, Micro ATX motherboards, and all high-end GPU cards. For more details please visit: http://www.thermaltake.com/Chassis/Mid_Tower_/Core/C_00002402/Core_V51/design.htm Reviews: [Hard]OCP Editor's Choice "Enthusiast" Gold Award http://www.hardocp.com/article/2014/10/01/thermaltake_core_v51_midtower_case_review/1 Video:
-
Whats the price of the Core V21 Very sure i want one hahah
-
Thermaltake Mini Chassis - Core V1 The new Core V1 represented by Thermaltake is a small and cute ITX based chassis with a 200mm fan in the front panel. Smart interchangeable side panels allow users to flip it accordingly to showcase either for superior liquid cooling or superb airflow, which allows you to make your own personal setup. You not only grant to have a really powerful mini system, it also has the ability to house various overclocking components to keep it really cool! For more details please visit the official product web page: http://www.thermaltake.com/Chassis/Mini_Case_/Core/C_00002373/Core_V1/design.htm Reviews: [H]ard|OCP Editors Choice Gold Award http://www.hardocp.com/article/2014/08/15/thermaltake_core_v1_miniitx_case_review/1#.U_QwQMWSy-U The Mod Zoo 5-nanners Award http://themodzoo.com/forum/index.php?/topic/1737-review-thermaltake-mini-chassis-core-v1/ Tweak Town Must Have Editors Choice Award http://www.tweaktown.com/reviews/6635/thermaltake-core-v1-mini-itx-sff-chassis-review/index.html ProClockers Highly Recommended & Best Value Award http://proclockers.com/reviews/computer-cases/thermaltake-core-v1-chassis-review Play3r Gold Award & Value Award http://www.play3r.net/reviews/cases/thermaltake-core-v1-m-itx-case-review/ Video: Owners list: Demond http://community.thermaltake.com/index.php?/topic/156-core-v1-owners-club/?p=952 najiro http://community.thermaltake.com/index.php?/topic/156-core-v1-owners-club/?p=2603 Acinonyx http://community.thermaltake.com/index.php?/topic/156-core-v1-owners-club/?p=2603 Core V1 Case mod by Dirty South PC Mods http://community.thermaltake.com/index.php?/topic/261-thermaltake-core-v1-by-dirty-south-pc-mods/?p=1372
-
Hi guys. My first post here so I thought I'd make it a good one. It's been a dream of mine to build a reservoir and integrate it into the window of a case for some time. I initially went down the path of having someone else (A very well known custom PC builder with a huge Youtube presence) do all of the design work and production for me, but after waiting nine months with no communication from them except to sometimes reply to an email giving me excuses as to why we'd blown out the initial six-week timeframe, I decided to do it myself. Here is where it all started. This was done up in paint hastily as a way to try and visualise what I was going for. Now, I have some design experience and could have done the next step myself, but as a high school teacher I rarely find the time and since we were in the middle of marking season, I decided to outsource the designing to a fantastic case modder in Italy, FlowMods. He was absolutely fantastic, and offered me a more than reasonable price. From top to bottom it measures at 570mm. Go measure that. YOU SEE THAT?! That's absolutely huge! So, now I had to source the case and acrylic block for machining. The block itself was actually quite cheap, but the shipping. Good lord. It was more than the #### block! And yet, it was still the cheapest option I had. From Sydney to Canberra it cost me $57 to ship it. The block itself was only $45. Here it is, and where it'll be sitting on the case window. My next job was to find a CNC shop with the equipment to machine acrylic this size. I eventually came across a shop called "Devilish Racing", who despite the name mostly built custom equipment for the Australian Defence Force. Naturally, Defence work took priority, so after about two and a half months I dropped by and picked up the freshly machined reservoir, threaded for M4 bolts to hold it to the window and G1/4 for the water cooling connections. He even cut the holes in the window for me, which was nice of him. So that was the easy part. Next came the polishing. This stage took about six hours in total. I needed a few things. 600 and 1200 grit sandpaper. Kerosene. Most people wet sand acrylic with water, but kerosene is more viscous than water, so I drowned my sandpaper in that instead. A drill and polishing attachments (Reasonably cheap). Brasso. WD-40. Plastx headlight polish. FW1 cleaning wax. As you can see, the reservoir was quite cloudy from the CNC process. So my first step was to hit it with my kerosene drenched 600 grit sandpaper. This took about an hour. As you can see, it looks much clearer already. Next step, 1200 grit sandpaper and even more kerosene. Another hour :'( The improvement was a bit harder to see this time, but it felt MUCH smoother. After this came the brasso and drill polishing kit. Thankfully this was nowhere near as physically taxing as the sanding and significantly faster. So it looks much clearer now. Brasso is fantastic stuff and was recommended to me by Ross at Devilish Racing (the CNC shop that produced the reservoir). The only problem was that it gunked up the threads. This was something I would have to deal with a little later on. So, this is where I used the Plastx. The reservoir was much clearer already, but still cloudy in some areas, especially those the polishing attachments couldn't reach. I neglected to take a photo of the reservoir immediately after hitting it with the Plastx, but you can see the impact it had in this photo where I'm cleaning out the threads with WD-40. So I found that even though I was doing this part by hand, I couldn't quite clear up the internal corners. I grabbed my Dremel kit and attached the small polishing tools to finish that job. Something I once again forgot to take a photo of. But here is the reservoir after, about to get another hit from some Plastx. As you can see, it's already very clean at this point. Following this, I gave it a final polish with some FW1 cleaning wax. Naturally, I only applied this to the outside. You don't want wax residue flowing through your loop. Here she is, looking crystal clean. Polishing is now complete, thank ####. So with the polishing out of the way I now had to measure and cut the O-Ring cord to fit. Please ignore my pyjamas. You can usually use superglue for this bit, but I opted for an O-Ring connecting specific glue (Sureloc SL406 Cyanoacrylate). Here it is fused together. Looks good, hey? Nearly done now. The first step of sealing it up was to bolt down a select few of the screws so that everything was lined up. This is the part where I had to be most careful. If I overtightened a single bolt, the entire thing would be ruined. I set my electric screwdriver to its lowest torque setting so that at the slightest touch of resistance it would automatically stop. I lightly tightened each bolt three times after they had been fully inserted so ensure that there would be no leaks. I cannot stress enough how careful you have to be here. As soon as you feel resistance, move on and come back around to it. After tightening every single bolt in the first pass I found that the bolts I'd first done now needed additional tightening. Here it is all fastened and ready to begin filling for the leak test. SUCCESS! Here she is! Finished at last.
-
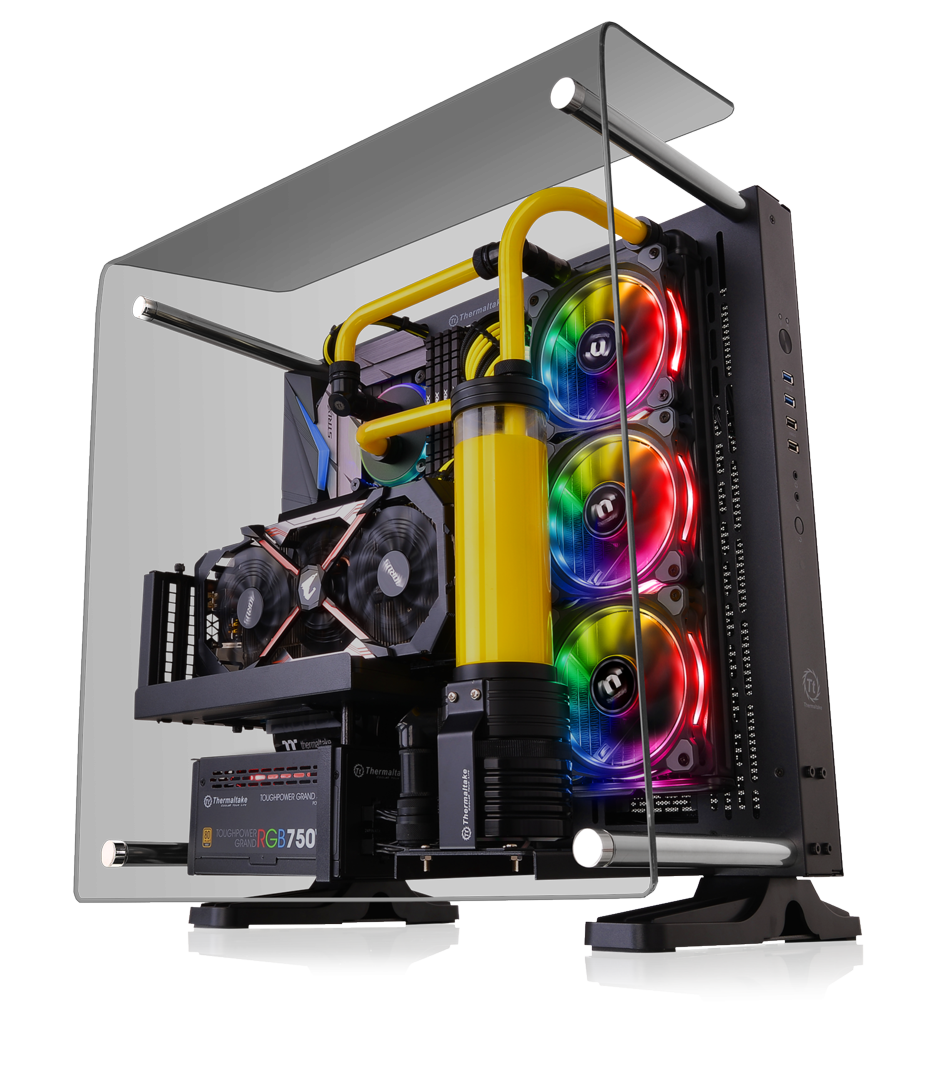
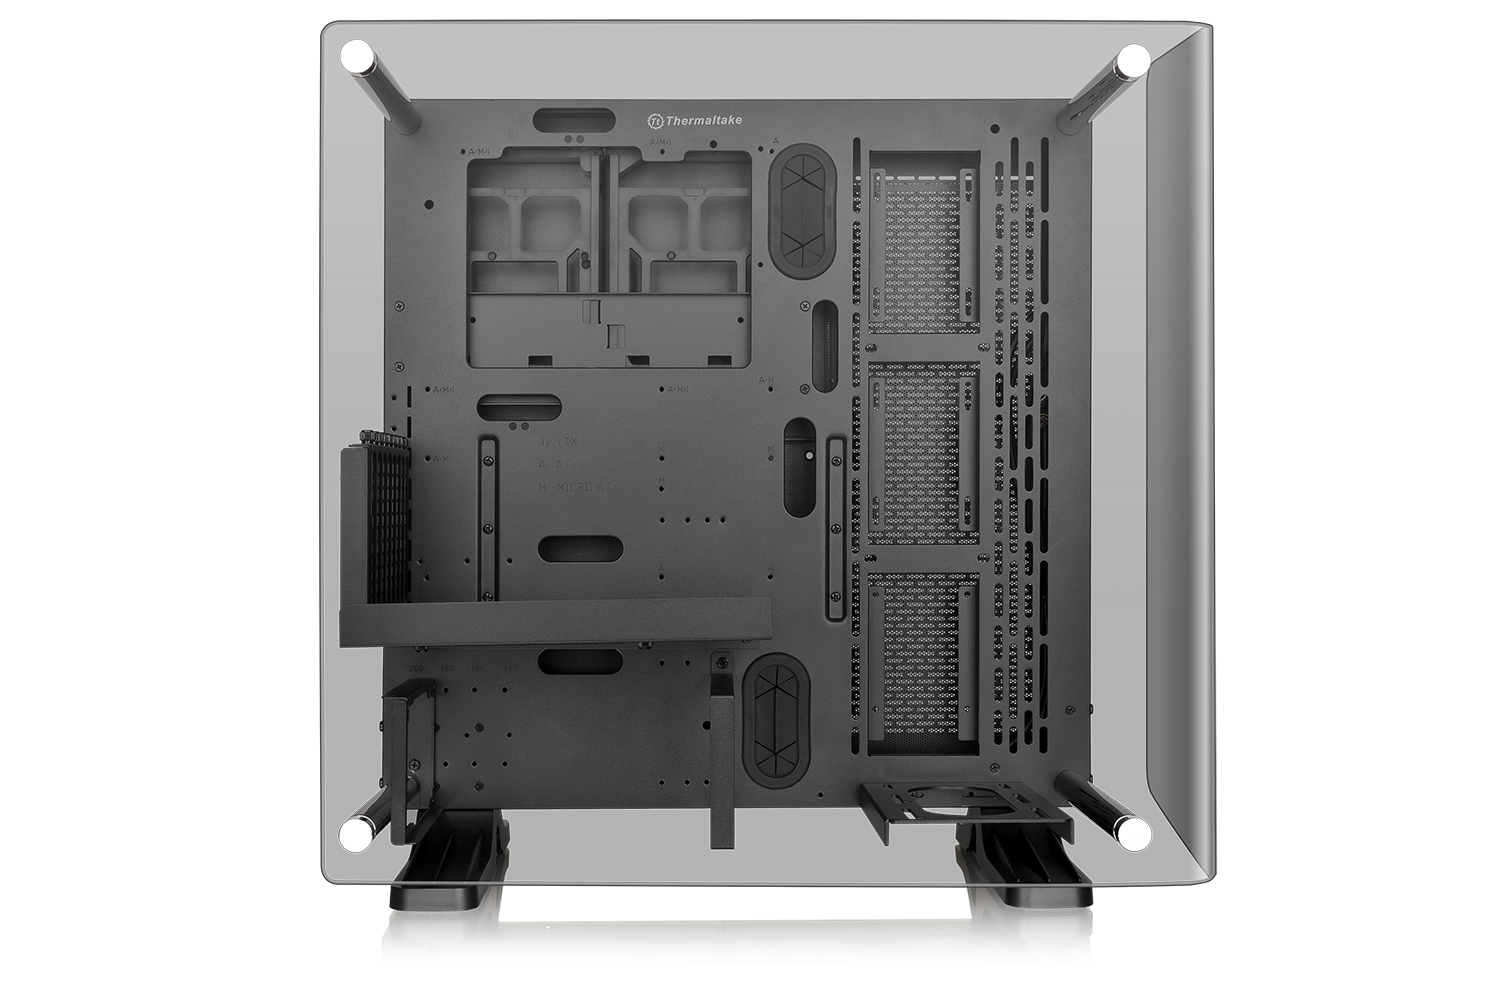
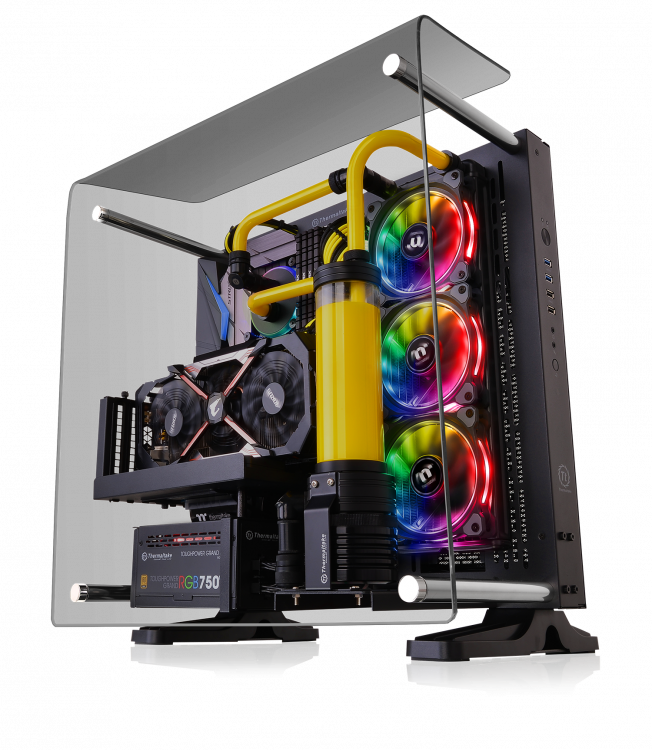
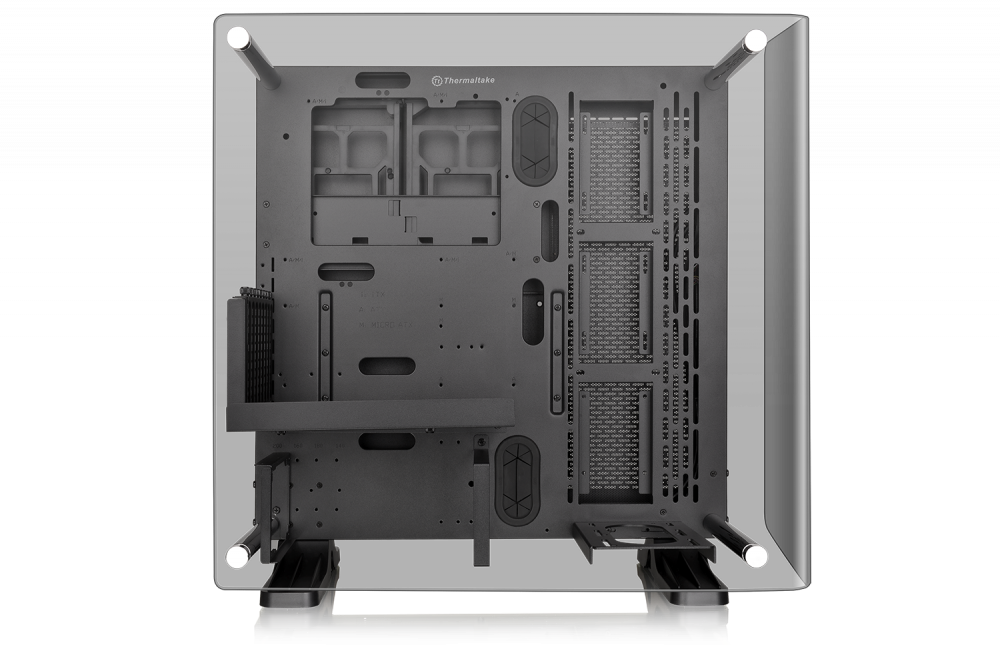
Thermaltake Core P3 Tempered Glass Curved Edition ATX Open Frame Chassis *The image is for reference only. Product Link Thermaltake has kicked open-frame chassis up to a notch and presented the Core P3 Tempered Glass Curved Edition ATX Open Frame Chassis. Open framed PC cases are all about style, about showing off your hardware and taking pride in your system. The Core P3 Curved chassis is the next step in open frame tempered glass case design, with a 90° curved panel; giving you awesome views of your hardware and more options to make your custom system a reality. The chassis is designed with dual GPU and PSU layout options and 3-way stand placements (wall mount, horizontal, and vertical placements), plenty of liquid cooling options and near unlimited flexibility when it comes to building the most advanced customized PC.
-
I am waiting for the rest of my parts to come in but I am building an Asus rampage 6 extreme core p5 build. I am using Asus thor 850w power supply and i need to find a way to mount it in the traditional way instead of the Thermaltake way fan facing out. Also, I am using an AIO cooler from Asus so there is the mounting bracket issue. I have the brackets and the case. (I ordered the separate 3 mounting brackets) I am waiting for the graphics card, the processor and the cooler and the rest of the ram to arrive. I ordered custom 3D printed brackets for a horizontal (traditional mount) psu mounting position. I am hoping my motherboard is large enough to allow the AIO cooler to mount in the space allocated for the radiator on the case. If not I may get Thermaltake’s P5 pump and do it myself. This is the first time I have ever built a computer so I wanted to keep it as simple as possible and in my skill level. That being said, I read and watched a guy mount the cooler sideways using the vga brackets. (the covers used to cover the spots where the graphics card(s) go. I am not sure of their name) I am hoping to get some help from the community because I am new to all this. Here’s to DIY and community to help.
-
 Hi, I want to buy a Core G21 TG but i'm not sure it can fit my cooler, which is a Cooler Master Hyper 212X. On the TT site it says it can fit a cooler up to 160mm, the Hyper is 158mm, so it is really close. I'm afraid the measurement aren't that accure... Has anyone a concrete example maybe? It would be really appreciated
 -
Please answer the following question on this thread to be in the draw to win a Core V1! Week 1: 8/19 ~ 8/26 Question 1: What is your name?

- 238 replies
-
- 22
-

-
Hello. Is it true, that the height of CPU cooler can be only 155 mm? Does someone apply cooler with larger height ?
-
Hi, I just bought a v21 and have figured out (somehow) where to put some of the case fans. Going to the manual, I noticed that it is possible to place 120mm fans at the bottom panel, but when I inspected the panel, I couldn't find any proper mounting holes for the fans. Can anybody also confirm that you can mount 140mm fans at the said panel? I read very briefly that somebody was able to do so but I didn't read in detail how he / she did it. Reason I'm asking is that my HDDs are hot. They used to have a temp of around 35C in my old CM case where they had a fan directly in front of them. Now that they are towards the back of the case, and near the PSU, their temps are going over 50C (it's 57C in one of the drives). I'm thinking those fans at the bottom might help draw in and blow some air towards them. Thanks!
-
Hello guys. So I want to buy a Core P7 for my next RIG, but I can't find any info about vertical gpu montage with that included GPU raiser. Something like this; http://www.hostingpics.net/viewer.php?id=960794maxresdefault.jpg Sorry for my paint skill...
-
Is there going to be or is there already an upgrade path for us loyal P5 owners who would like to go the tempered glass route or our we SOL?? If there is a kit could you link it, or give the price? If not is there a plan to do this? I really hope so I am putting together a really sweet build and I just got the regular core P5 a few months back. If there are no plans you should do a poll to see if there is interest. I can't imagine there isn't. Thanks!!
-
My name is Dustin Porter and I am the owner of REDLINEeliteModz Facebook.com/REDLINEeliteModz Thermaltake asked me to build a twin Core P3. Specs. CPU-Intel i7 4790k Mobo-ASRock Fatal1ty Killer Z97 RAM-Corsair Vengeance Pro 32GBs GPU-EVGA 970 PSU-Tt DPS RGB 850 G Storage-2X Corsair Neutron XT's 480GBs Raid0 All Thermaltake Water cooling parts. Sposors. A HUGE thanks to Thermaltake and CableMod Enjoy!!
-
Hi guys! I am Filippo and I am a 20 years old italian modder! Last year I finished a mod with Cooler Master Italy, called Project Alpha, which had a lot of success! Then I had the luck to be invited to participate in a big project for Nanoxia, which invited me to Germany to build a desk pc for their booth at Computex in June 2015! I am going to introduce this new mod sponsored by ThermalTake that I thank you immensely for the support! The Mod, in white & black theme, is based on a Core X9 Snow Edition to which I decided to remove the original front and midplate and to replace them with two pieces of acrylic completely designed by me and made with laser cutting and CNC milling machine! The project includes two liquid cooling loop which will respectively cool the CPU and 2 GTX 970 strix! Each loop has a D5 pump and a 480mm radiator connected by rigid pipes while under the midplate I assembled systems with flexible tubes to facilitate the assembly operations. The threads for fittings mounted on midplate were hand made, and the work was not so easy. The hard part was being able to have a tip that does not split open the plexiglass out of the hole, I solved that problem by bringing the drill bit to changr the cut angle to the company I'm referring to the works in acrylic! All cables are sleeved by me, it wasn't easy since it's the first time i made a full sleeved cable set, but sleeves from Icemodz are amazing, and the will be cool But let me say the components of this mod, which I list below: HW: Asus Maximus VII Ranger i5 4670k 2x Asus GTX 970 Strix Thermaltake Thoughpower Grand Platinum 1200w HDD: 1TB Barracuda Ram: 4x4 DDR3 1600 Avexir Core Red Led SSD: 1x Samsung 850 EVO 256GB Loops: 2x pumps D5 Thermaltake (Pacific P1 black) 2x trays cylindrical Thermaltake (Pacific T22) 2x 480mm radiators Thermaltake (Pacific RL480) WB 2x GPU Asus Strix 970 Thermaltake 1x WB CPU Thermaltake Pacific W1 8x Fans Thermaltake Riing White LED Several fittings Thermaltake Chrome Tubes 16/12 PETG ThermalTake DP Ultra liquid Aquacomputer Aquaero 5 LT Power Adjust 3 Ultra by Aquacomputer 2 Temperature sensor to monitor the loops temperatures. I take this opportunity to thank ThermalTake and especially Andy, who supplied me with such a large number of components to build this mod to re-enter in the world of modding after a stop of some months. I also thank Mundi from Icemodz.com who provided me all the material needed to create my sleeved cables! I leave you to the photos of the progress! Filippo Thanks: Photos:
-
just like to make live easier for sb else. it is expensive, it is huge (and i mean HUGE), rock-solid and has (nearly) endless space. but, it is well worth the money if you look for sth like that (btw, if it is to small for you, there is sth even bigger supposed to come your way soon (just google it). anyway, finally last thursday my huge box arrived. considering the damage to the box, the shipping company guys REALLY don't like the size and weight! anyway, it looked worse than it was, a slight dent to one of the door corners from one of the a**holes at ups thinking it is funny to toss ppl's stuff around. maybe trump is right after all!? - just kidding! anyway, the case... awesome! - the guys at tt did a pretty good job to give Lian Li a run for the money. diff. is poss the steel vs. aluminum decision. hey, there has to be a reason that thing weights 50+ lbs! since i have no idea how long i will go on about this case, let me put my relevant findings first: 1- the manual is pretty good - do NOT follow it all the way! 2- if you just remotely think about using the hdd locations on the back of the (off) center wall (the right, looking from the front) - install the whole little bits and pieces as soon as you got the basic case assembled! just in general, put the little plastic pieces for the 6 hdd's on the back in! you will regret if you do not and take out mb, drive cages etc. later to install them! 3- be prepared that many of the screws don't go in easy (my experience)! have a screwdriver with a handle that allows for some serious torque and potentially be prepared to re-thread some screw-holes before anything will work. 4- i use a lot of asrock mobo's - the right-hand side atx stand-off's most likely will be a shot in the dark for you - meaning they are just not there! so. be prepared that your asrock mobo is kinda swinging free on the far right after putting it in. maybe the same for other mobo's as well, i can't tell. it's not a disaster, you just want to consider that when pushing in cables, ram etc on that end - use your fingers to support/ hold up the mb while pushing down... otherwise you might have a mb to replace!!!! 5- this case has 4 usb3 ports at the front panel, most mb's offer 1 port (supporting 2 plugs) - so you might wanna get a usb3 to usb2 adapter cable to utilize the remaining 2 ports! ok, that was the first little 'look out for...' - i have to re-run the whole build in my clouded head also again. i am sure there will be some more things coming back to me. BUT! - don't let any of that put you off considering this box! it is one of the most awesome cases on the market at the moment - if you need supersized. and in terms of value for the money def in the top of the top5!!! cheers, L
-
Hello Im about to build a new computer into a Core P5. I know that you guys probably hate it, and that Core P5 isnt "made for AIO" but i was wondering if there is a compatible one out there. I can see other build using AIO to cool the CPU, and ive done some reseach and most say "just get one with long tubing" The longest ive been able to find is the Kraken X61 with 400mm of tubing - would that be enough to reach the radiatorslot made availeble in the build? Does anyone have any experience with AIO systems, that fits the Core P5? thanks in advance.
-
Thermaltake Core V21 Micro Cube Chassis As the latest addition to the Core V Series, the new Thermaltake Core V21 is a quadrate micro M-ATX-based chassis that offers an endless stackable and flexible thermal solution. It allows externally-modular upgrades for enthusiasts to create dual systems. Designed for use in either a vertical or horizontal orientation on the motherboard, users can customize the chassis for the best viewing presentation. A 200mm fan on the front panel ensures that the Core V21 delivers outstanding cooling performance with compatibility for extensive DIY/AIO LCS, further enhancing the reputation that the air cooling units of the series has become renowned for. Guaranteed to be an immensely powerful system, the Core V21 also has the ability to accommodate various overclocking components to boost performance even further where it counts! Product Web Page: http://www.thermaltake.com/Chassis/Micro_Case_/Core/C_00002559/Core_V21/design.htm