Search the Community
Showing results for tags 'core v71'.
Found 6 results
-
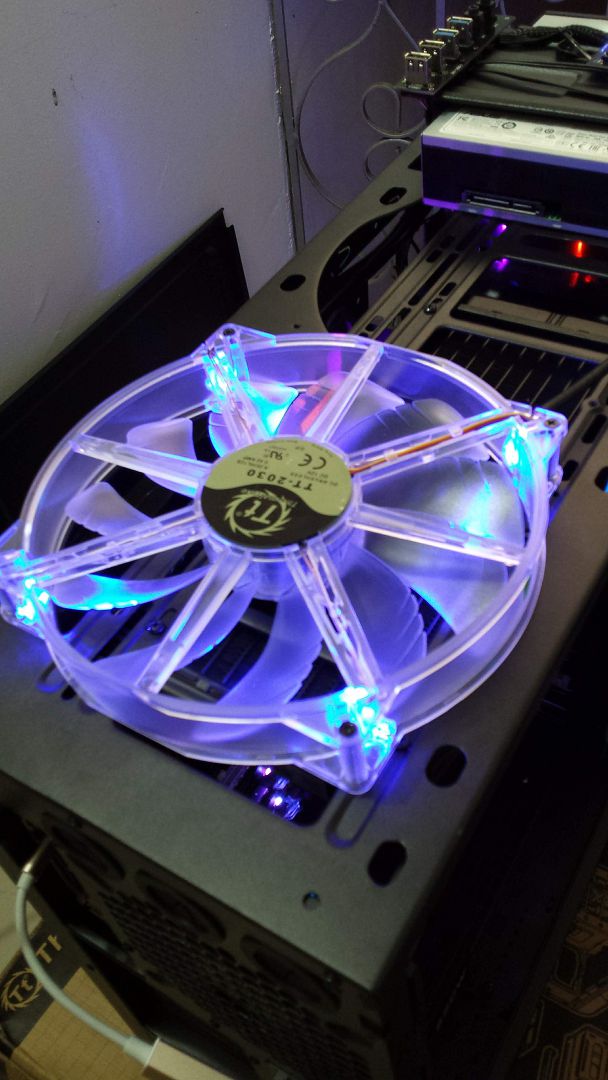
Thermaltake Core V71 Full-Tower Chassis http://www.thermalta...x?id=C_00002231 Experience the next generation of chassis design! Thermaltake has introduced a new concept for more versatility and adaptability to any configuration. The Core V71 full-tower E-ATX case gives PC enthusiasts flexible installation options and seamless operation. Users can keep their systems cool by modifying the chassis for superior liquid cooling or superb airflow. This new chassis is the ultimate powerhouse suitable for any type of PC enthusiast – no matter liquid cooling or extreme airflow. Supreme Air Cooling System Core V71 is built with a fundamental airflow-optimized design. Standard equipped with triple 200mm LED fans and a 140mm fan, it is the first chassis in the market that has the ability to house four 200mm fans along with three more 120mm fans, achieving unrivalled airflow. Extensive Liquid Cooling Support Core V71 pushes the envelope and utilizes a high-end water-cooling solution that feature front 360/420mm, top 360/420mm and bottom 120/240mm radiators to support extreme performance. Youtube Video Owners list: DKmann101 http://community.thermaltake.com/index.php?/topic/68-core-v71-owners-club/?p=324 Uber_Tiny http://community.thermaltake.com/index.php?/topic/68-core-v71-owners-club/?p=422 CyberDracula http://community.thermaltake.com/index.php?/topic/68-core-v71-owners-club/?p=945 http://community.thermaltake.com/index.php?/topic/68-core-v71-owners-club/?p=2356 zimzoid http://community.thermaltake.com/index.php?/topic/68-core-v71-owners-club/?p=2356 Drevni http://community.thermaltake.com/index.php?/topic/68-core-v71-owners-club/?p=3903 marcnaz http://community.thermaltake.com/index.php?/topic/68-core-v71-owners-club/?p=3959
- 227 replies
-
- 16
-

-
Project Serendipity came about by an ah ha moment. How it got its name was more inspired by the color scheme and design which is going to be black and white, but the predominate color will be swapped between the inside and outside. So for instance the outside of the case will be predominately black with white hand painted features and the inside of the case will be predominately white with black features. I would show off a design with a sketch or something, but I am having trouble getting my idea out on paper, so I will do my best to paint a picture with words and video and images. Something new to me and very fun is the lighting features I am working on. Of course I could go out and by RGB lighting that already comes with controls, but they are limited on their capability and I want to have a serious light show. So I opted to use Adafruit's NeoPixel light strips and an Adruino to control them. At that time I knew it could be done, but I hadn't the slightest idea how I was going to achieve what I wanted to do. Then I stumbled upon this guys unbelievably amazing build doing exactly what I wanted. https://youtu.be/ZTt1dBpbC_g Got an idea of what I want to do yet? Yeah this is so freaking cool and technical! What I did to copy what Will from Fuzzletek did took a bit to figure out, especially for this Arduino n00b. Apparently they are working on releasing a version of the software that doesn't require licensing. When that is to be released is still an unknown. Don't worry, you can achieve this level of awesome and it's a lot simpler than the process Will took, to an extent. You can make it difficult if you really want to custom a color scheme to match a song directly. That usually requires something like AfterEffects to produce a video with matched audio/visual queues that you have to manually build for the entire song. This is a bit more difficult, but gives you complete control over all your LED's. This method also allows for a really cool ambient color effect as seen in the videos below. https://youtu.be/T9lO4AidBSI https://youtu.be/USW-LatkZDY Ultimately I found a piece of software called Glediator by pure accident. This is called an led matrix control software and is open source. Follow the directions on their page and you too can ultimately run your lighting effects the way you want, including ambient lighting. There are alternative software sets that are more complicated and less attractive and not as useful or easy as this one and I grantee this is the better option currently available that I am aware of. If you find one other than this that is open source, works with Arduino and Adafruit Neopixel light strips I would love to know about it! Next I will go over the parts list, show a picture of the progress. This will be one of the more intricate PC builds I have ever done. The acrylic and wiring alone is expected to take a pretty long time. Mainly because of how I want the wiring displayed. Thermaltake Core V71 (Currently working on the case, thank you Thermaltake!) Thermaltake cooling (*) Samsung 850 EVO 500GB SSD's x2 (*) ASUS Z170-DELUXE (*) Intel Core i7-6700K (*) Crucial Ballistix Elite 16GB Kit (*) NVIDIA GTX 980ti (Just got this part last week, thank you NVIDIA!) Arduino AdaFruit NeoPixels * = parts not in my possession yet First picture of the template layout for the acrylic covers. More to come, main blog page is located at http://www.techpron.com/portfolio/project-serendipity-pc-mod/
- 5 replies
-
- 2
-
-
- arduino
- serendipity
- (and 4 more)
-
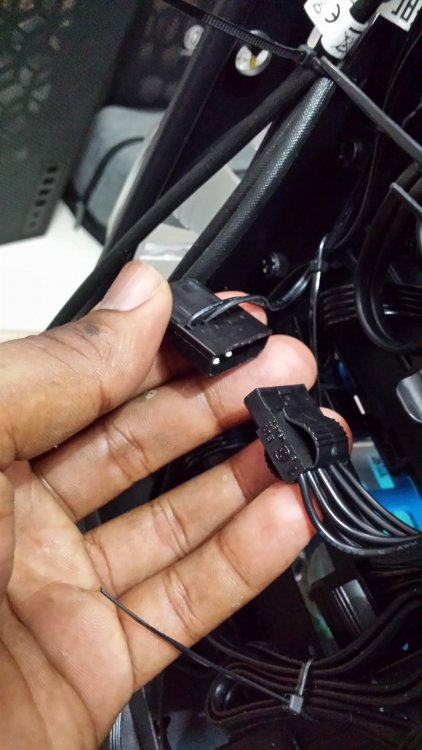
 Greetings to all, On July 8, 2018 I bought a Thermaltake Core V71 Tower in Spain and I arrived in Colombia at the end of August, so a couple of weeks ago I was able to start with the installation and assembly of my computer parts, All the parts of the computer are Thermaltake brand (source, heatsinks, liquid cooling, etc ...) once the assembly was made in the Tower Thermaltake Core V71, there was a problem when performing the ignition and is that the three (3) Fan (heatsinks) of 200mm that brings this Tower located in the Front and top part DOES NOT ROTATE, just turn on the LEDs. In detail I checked all the connections, I made sure everything was connected correctly, later I focused specifically on the MOLEX connector which is connected to a PSU Thermaltake Toughpower RGB 850 W Gold; connecting and disconnecting repeatedly, but the fans did not turn and the result was always the same. Obviously if the Fan (dissipaters) do not rotate the functionality of the FAN LOW and FAN HIGH switches is null, but the Leds of these switches if they turn on when pressing them, I would say that their function is fine, but if the Fan does not rotate, there is no case. I have the three original 200 mm fans connected to the FAN CONTROLLER and the only thing I can think of is that it is defective ... Is there anything I could do wrong? Is it possible to CHANGE THE FAN CONTROLLER due to factory defects? Can it be repaired? Where can you change it in Colombia? Could Thermaltake send it to Colombia where I am currently residing? I think all the connections related to the fan controller are correctly. Does anyone have any ideas or recommendations? Everything else works very well, but I would like the fans to work properly and help maintain a good temperature inside my tower. I appreciate the advice and / or recommendations of everyone. ---------------------------------------------------------------------------------------------------------------------------------------------------------------------------------------------------------------------------------------------------------------------------------------------------------------------------------------------------------------------------------------------------------------------------------------------------------------------------------------- Saludos a todos, El día 8 de julio de 2018 compre una Torre Thermaltake Core V71 en España y me llegó a finales de agosto a Colombia con lo cual hace un par de semanas pude empezar con la instalación y ensamble de las partes mi computadora, Todas las partes de la computadora son de marca Thermaltake (Fuente, Disipadores, Refrigeración Líquida, etc…) una vez realizado el montaje en la Torre Thermaltake Core V71, se presentó un problema al realizar el encendido y es que los tres (3) Fan (disipadores) de 200mm que trae esta Torre ubicados en la parte Frontal y superior NO GIRAN, solo encienden los Leds. Detalladamente revisé todas las conexiones, me aseguré de que todo estuviera conectado de forma correcta, posterior me centré específicamente en el conector MOLEX el cual está conectado a una PSU Thermaltake Toughpower RGB 850 W Gold; conectando y desconectando en repetidas ocasiones, pero los Fan no giraron y siempre el resultado fue el mismo. Obviamente si no giran los Fan (disipadores) la funcionalidad de los interruptores FAN LOW y FAN HIGH es nula, pero los Leds de estos interruptores si encienden al presionarlos, diría que su función está bien, pero si los Fan no Giran no tiene caso. Tengo los tres ventiladores originales de 200 mm conectados al CONTROLADOR DEL VENTILADOR y lo único que se me ocurre es que esté defectuoso… ¿Hay algo que pude hacer mal? ¿es posible CAMBIAR EL CONTROLADOR DE VENTILADOR por defectos de fabrica? ¿Se puede reparar? ¿Dónde pueden cambiármelo en Colombia? ¿Podría Thermaltake enviarlo a Colombia donde actualmente estoy residiendo? Creo que todas las conexiones relacionadas con el controlador del ventilador están correctamente. ¿Alguien tiene alguna idea o recomendación? Todo lo demás funciona muy bien, pero me gustaría que los Fan funcionen correctamente y ayuden a mantener una buena temperatura al interior de mi Torre. Agradezco los consejos y / o recomendaciones de todos.
-
I've re-modified this post to be more official. We are away! I've kept this under wraps for a little while, but now is a better time as any to get this going. It'll help me kick myself into gear to get it across the finish. Meet my mascot - Tina the stuffed Alpaca. Tina approves of the V71. Worklog First off - I stripped the case. Top panel. Front Panel. Side panels. I stripped it down 'till it was #### naked. This is an easy process with the V71. And now, the hard work begins. I grabbed the case front panel and very patiently (which may or may not have had excessive amounts of cursing) began prying the front mesh away from the front plastic. I am by no means a handyman. But I love to learn, and I love to do things as best as I can. I reached a point where I had no choice but to dremel two of the centre mesh metal clips. Several thousand more curse-words later - I did succeed in separating the two. If you're wanting to do this at home, I recommend a pair of long nosed pliers, a thin towel/fabric and patience. Don't resort to the dremel like I did. I felt like Jeremy Clarkson after with a chainsaw. I decided that because the colour of choice was necessary to be bright as possible, I had this notion in my head that a white primer was best. After a lot of cleaning, de-dusting, de-oiling with some light metho - the primer was applied. I've been told there are grey primers that may have been better than what I had chosen - nonetheless I went ahead and primed: (I note that the above images is over two days. We had some nice hot days in Sydney, Australia during this process which really helped. I also had some modder's mesh lying around for a different case mod and I decided to test the bonding between the paint and the primer. This turned out to me mostly good, however I noticed that the paint did take a lot longer to dry. I've been told that primers and paints can have different chemical mixtures and can sometimes have issues sticking to each other. Anyone else have this experience? Unfortunately, Sydney Australia was hit with a huge number of storms and this delayed more painting greatly. There were a couple of great sunny weekends to do more painting, but we were either reluctant for fear of more whacky weather, but also the fear that the paint wouldn't correctly stick and we monitored the modder's mesh test closely. I've managed to get the first coat of red onto the front. It will DEFINITELY need some sanding to get the coats right, but it's a labour of love as I'm sure many of you know. But the red was a good choice. The reason for such a bright red is because I want the end result to have two very different looks. By day - it will have layers of red and black all compiled together. The mesh will be staying unpainted and as-is. The red honeycomb will peek through the mesh exactly like this: And by night? -Well - that's something I'll have to show when I have the parts. (Still on the hunt for CPU cooling, GPU, SSD, Fans, 3mm LED's and many other little items to add - Saving in November with Xmas around the corner is just - INSANE!) Just in case I drop the ball on the painting, I'm ordering a second front and top panel (with thanks to this forum for directing me there. Thank you guys). I'm also calling up some friends who are handy with a soldering iron to help me out further. As soon as my funds come through, I'll be investing in some more paint and some tools to commence dismantling my PSU.
-
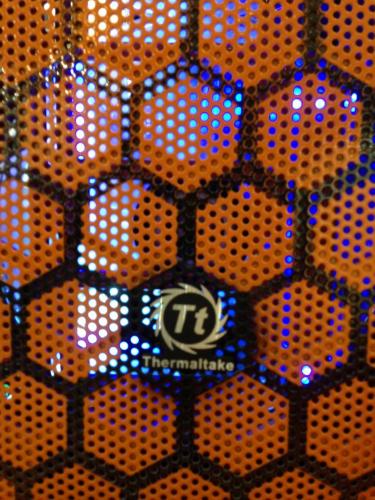
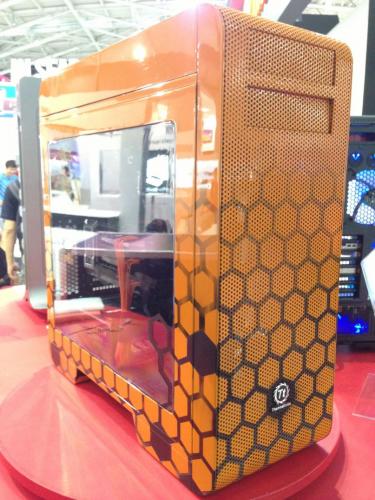
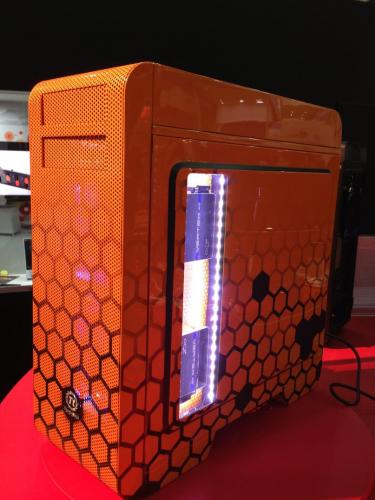
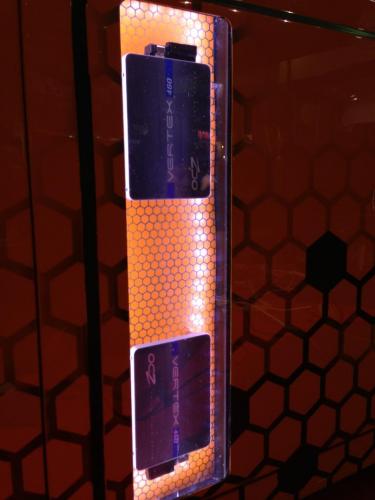
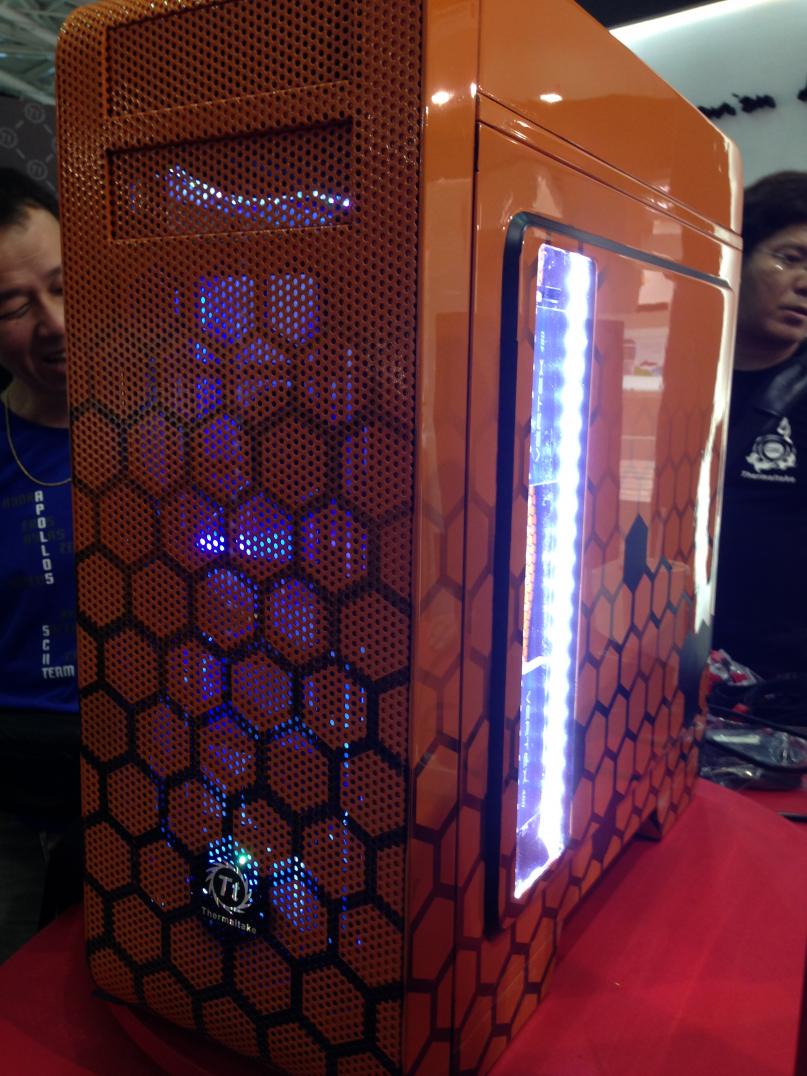
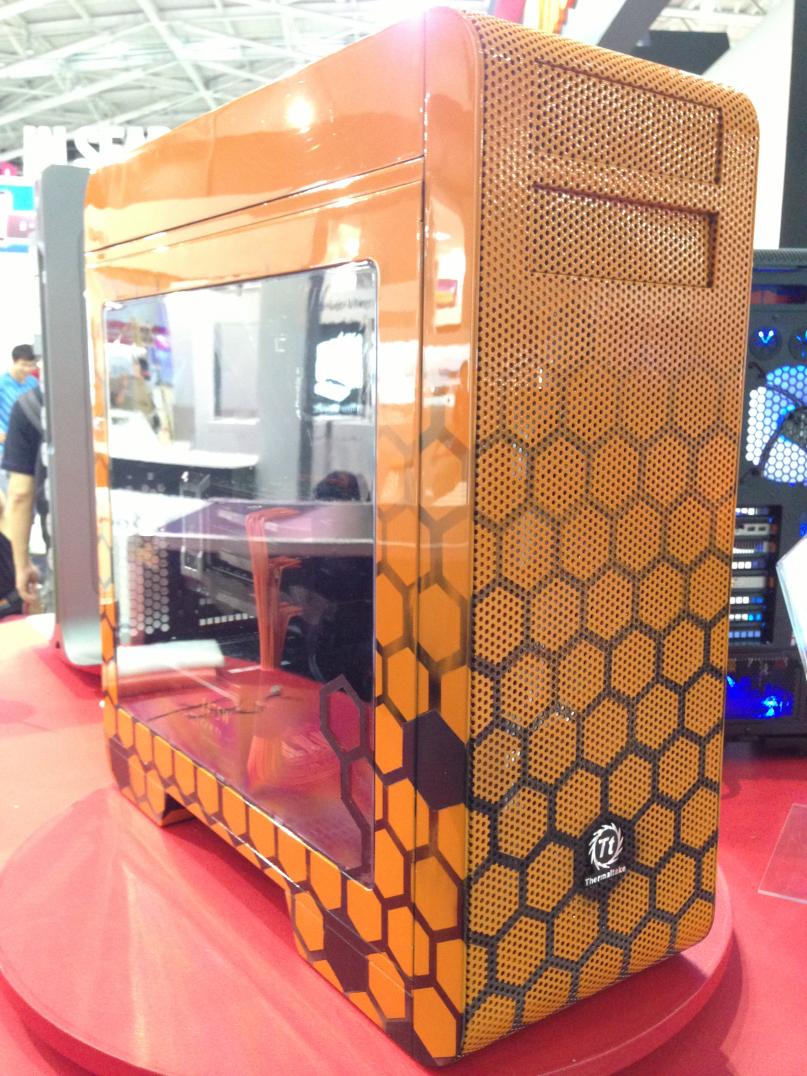
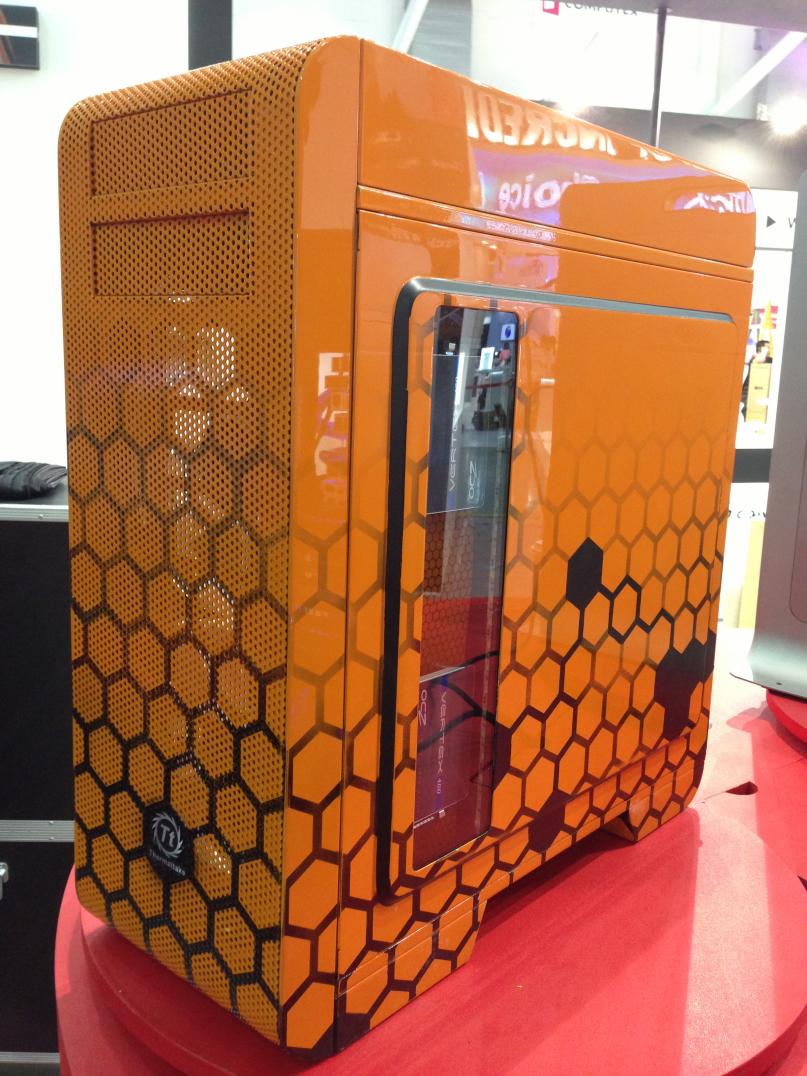
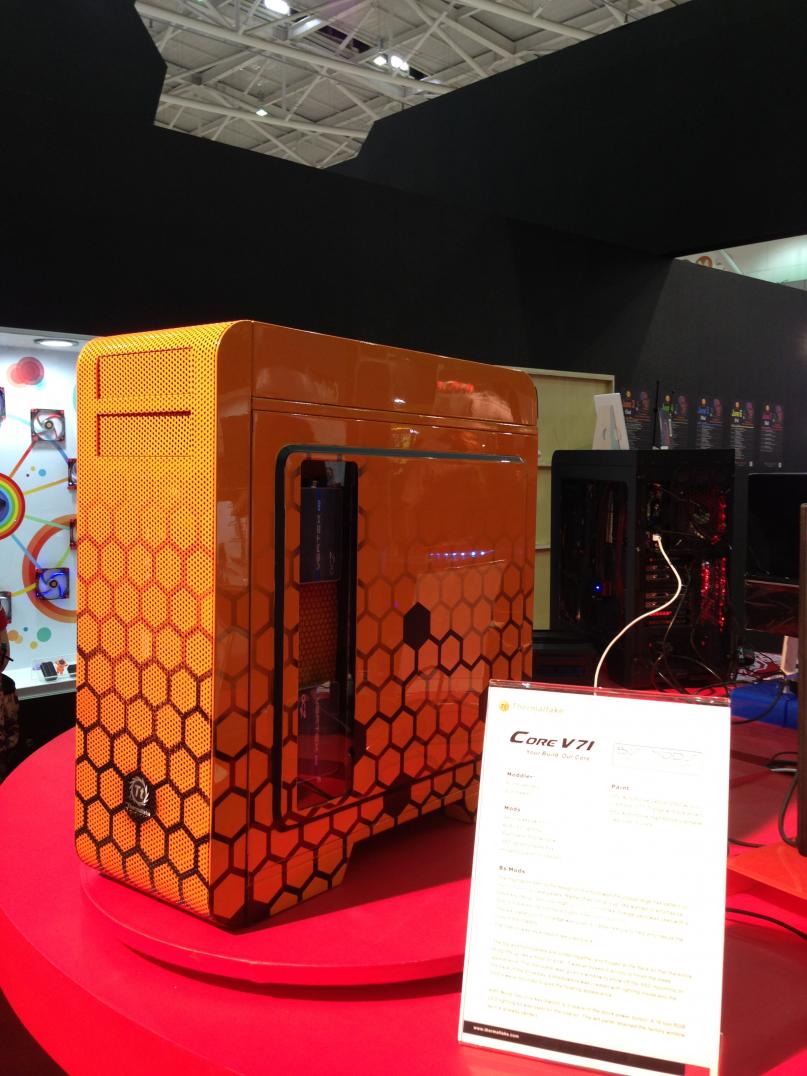
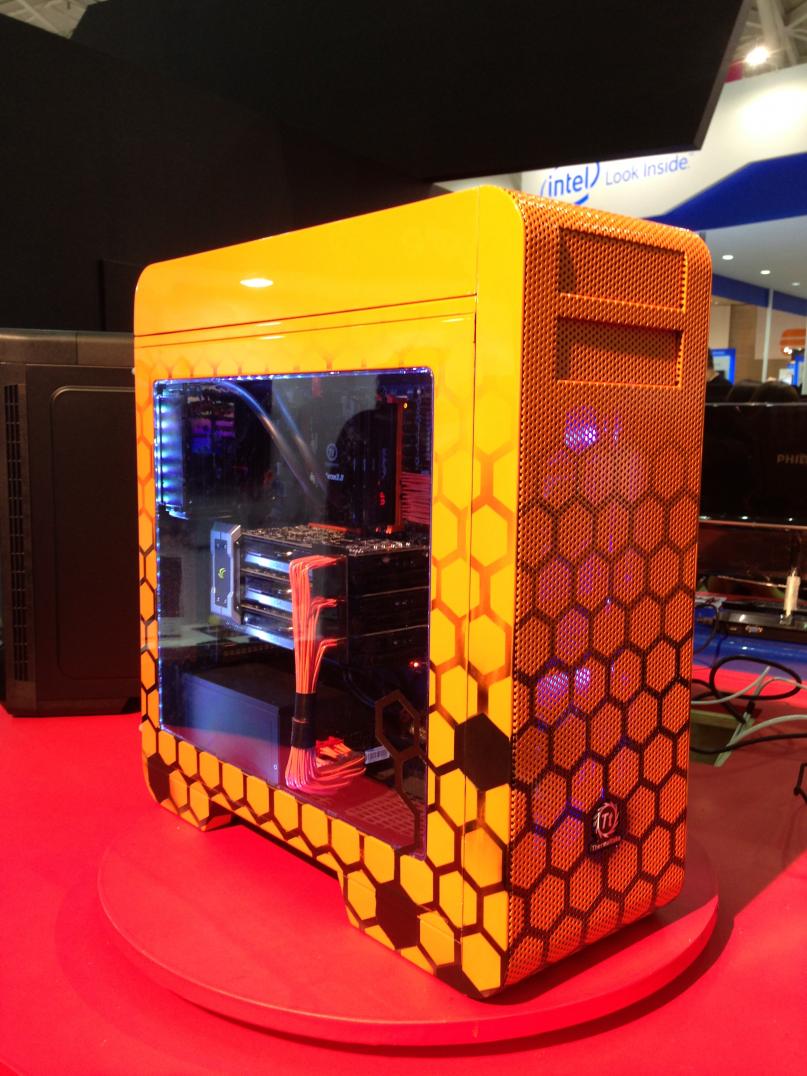
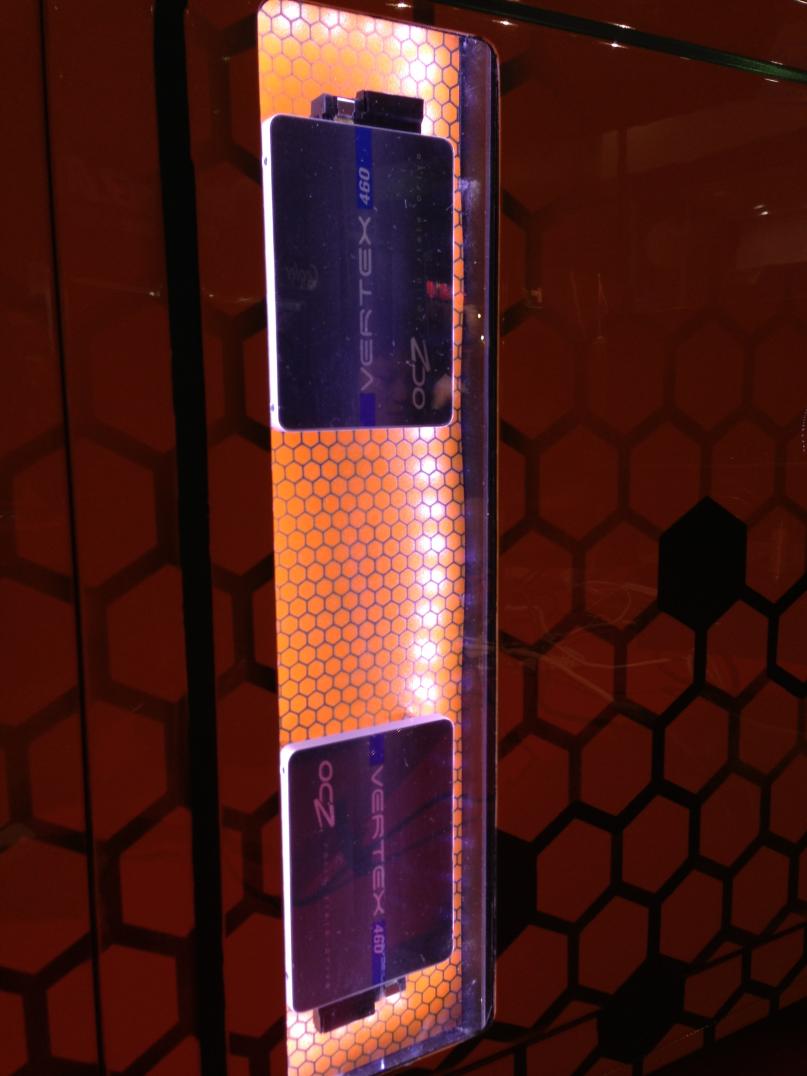
BS Mods The inspiration behind the design of this build was the unique large hex pattern on the front and top case panels. Rather than "chop it up“ We wanted to emphasize these key design features. High Quality Themaltake Orange paint was used with a fade to black styling to ensure it gets maximum visibility. The rear panel punch out edge was given a rubber texture to help emphasize the lines of the chassis. The interior was repainted in textured black. The top and front panels are joined together and hinged at the back so that the entire thing lifts up like a hood on a car. It was all boxed in acrylic to finish the sleek appearance. The rear panel was given a window to show off the SSD mounting on the back of the drive bay. a shadowbox was created with lighting inside and the SSD’s were mounted to give the floating appearance. A BS Mods Security Key Switch is in place of the stock power button. A 16 foot RGB LED lighting kit was used for the interior. The left panel retained the factory window as it is already perfect. Mods Security key switch RGB LED lighting Right panel SSD window SSD lighted display box Hinged top and front bezels Paint PPG Automotive Deltron 2000 acrylic Urethane in TT Orange w/ black accent PPG Automotive High Solids Urethane clear coat -5 coats Modder Rod Rosenberg Bob Stewart