Search the Community
Showing results for tags 'liquid cooling'.
Found 14 results
-
Thermaltake Core V71 Full-Tower Chassis http://www.thermalta...x?id=C_00002231 Experience the next generation of chassis design! Thermaltake has introduced a new concept for more versatility and adaptability to any configuration. The Core V71 full-tower E-ATX case gives PC enthusiasts flexible installation options and seamless operation. Users can keep their systems cool by modifying the chassis for superior liquid cooling or superb airflow. This new chassis is the ultimate powerhouse suitable for any type of PC enthusiast – no matter liquid cooling or extreme airflow. Supreme Air Cooling System Core V71 is built with a fundamental airflow-optimized design. Standard equipped with triple 200mm LED fans and a 140mm fan, it is the first chassis in the market that has the ability to house four 200mm fans along with three more 120mm fans, achieving unrivalled airflow. Extensive Liquid Cooling Support Core V71 pushes the envelope and utilizes a high-end water-cooling solution that feature front 360/420mm, top 360/420mm and bottom 120/240mm radiators to support extreme performance. Youtube Video Owners list: DKmann101 http://community.thermaltake.com/index.php?/topic/68-core-v71-owners-club/?p=324 Uber_Tiny http://community.thermaltake.com/index.php?/topic/68-core-v71-owners-club/?p=422 CyberDracula http://community.thermaltake.com/index.php?/topic/68-core-v71-owners-club/?p=945 http://community.thermaltake.com/index.php?/topic/68-core-v71-owners-club/?p=2356 zimzoid http://community.thermaltake.com/index.php?/topic/68-core-v71-owners-club/?p=2356 Drevni http://community.thermaltake.com/index.php?/topic/68-core-v71-owners-club/?p=3903 marcnaz http://community.thermaltake.com/index.php?/topic/68-core-v71-owners-club/?p=3959
- 238 replies
-
- 16
-

-
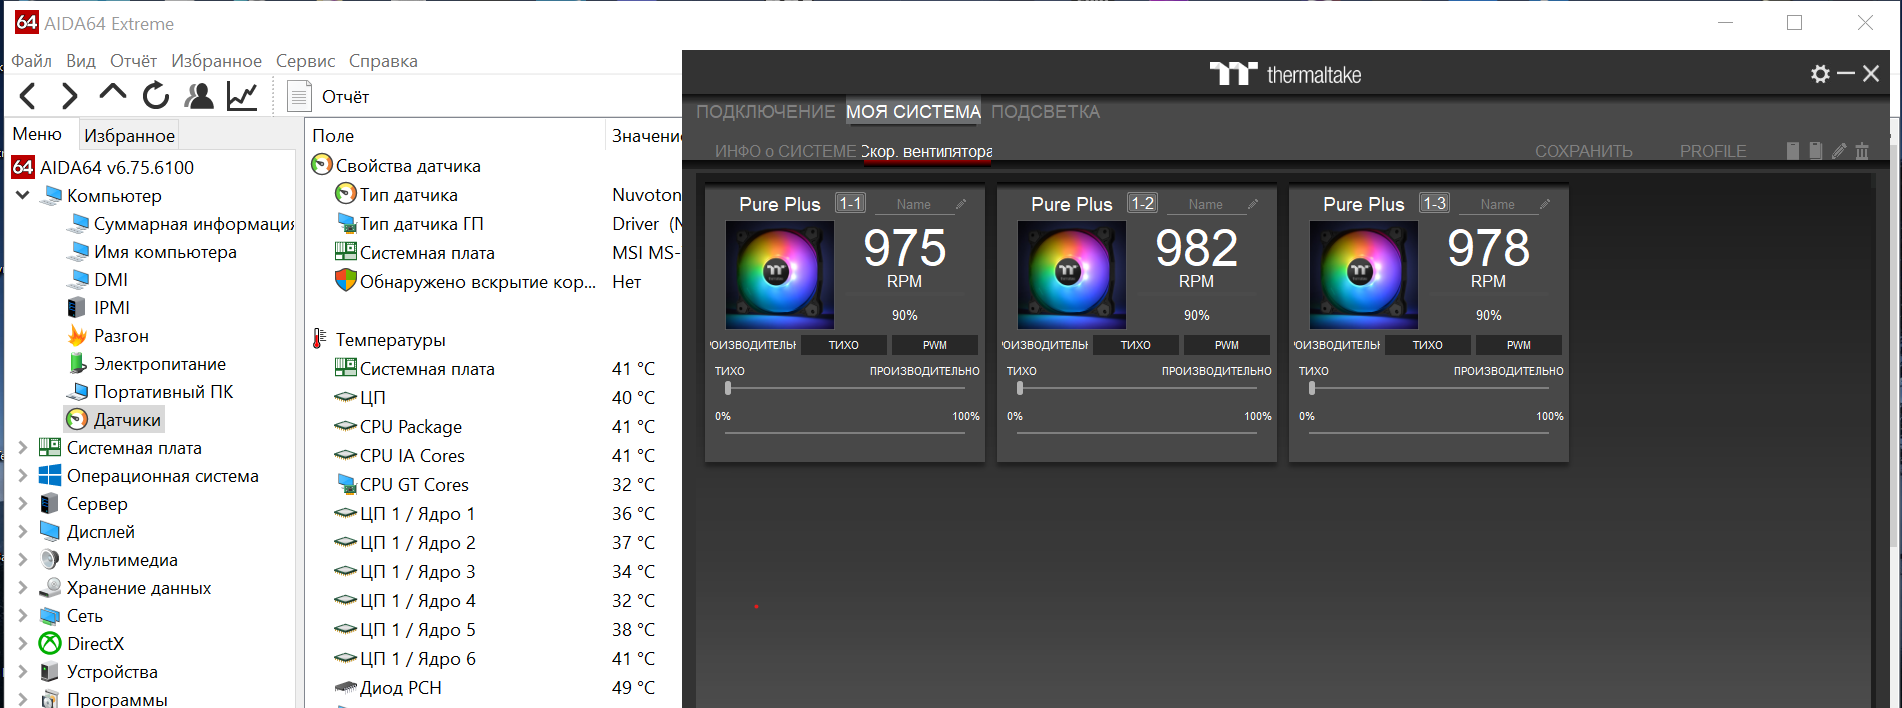
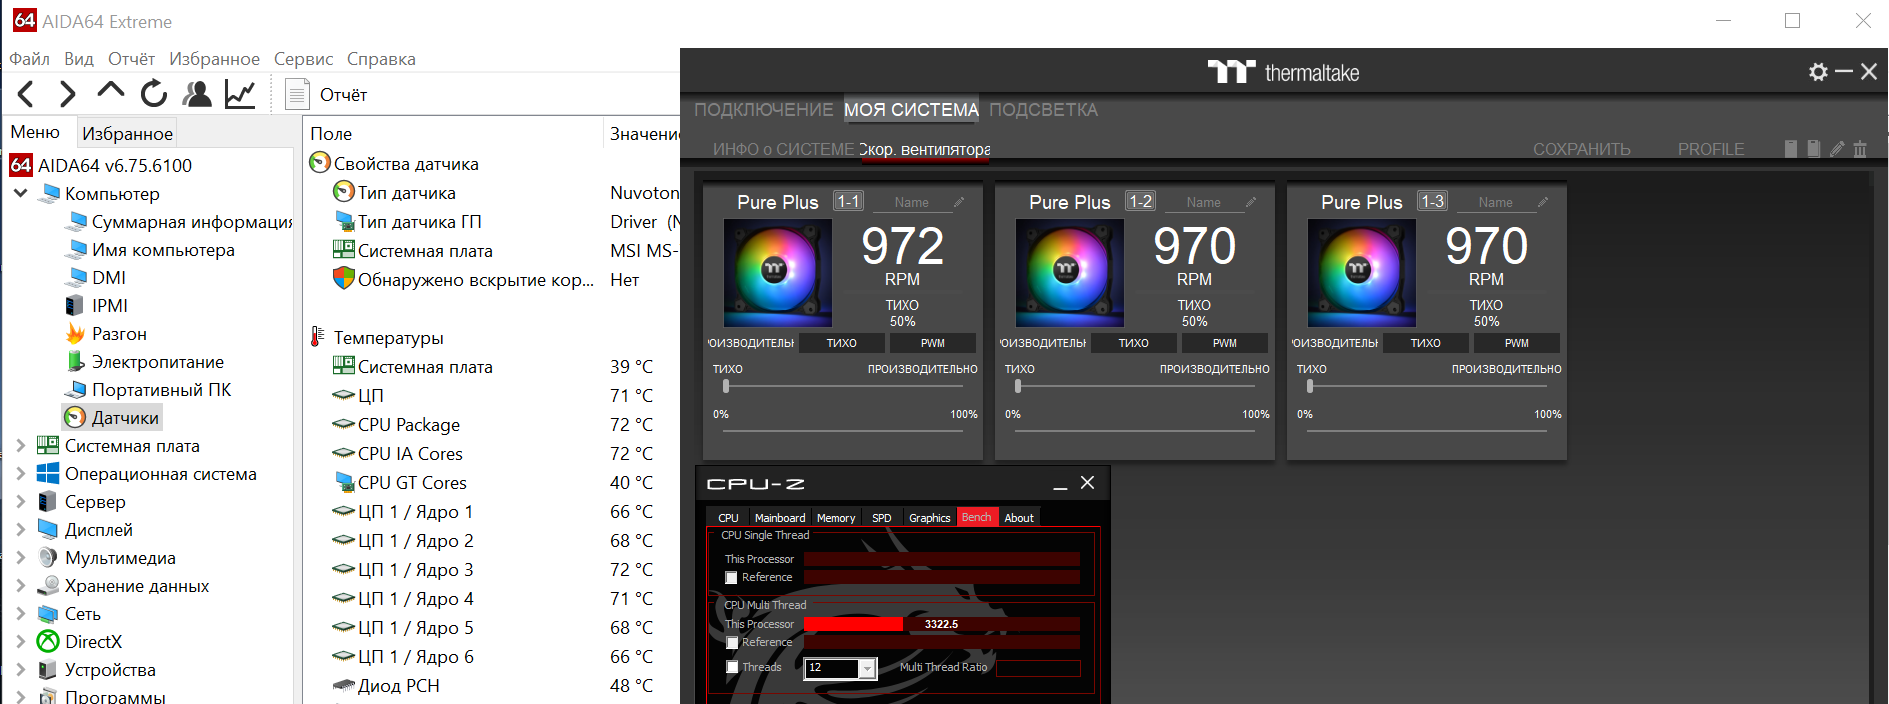
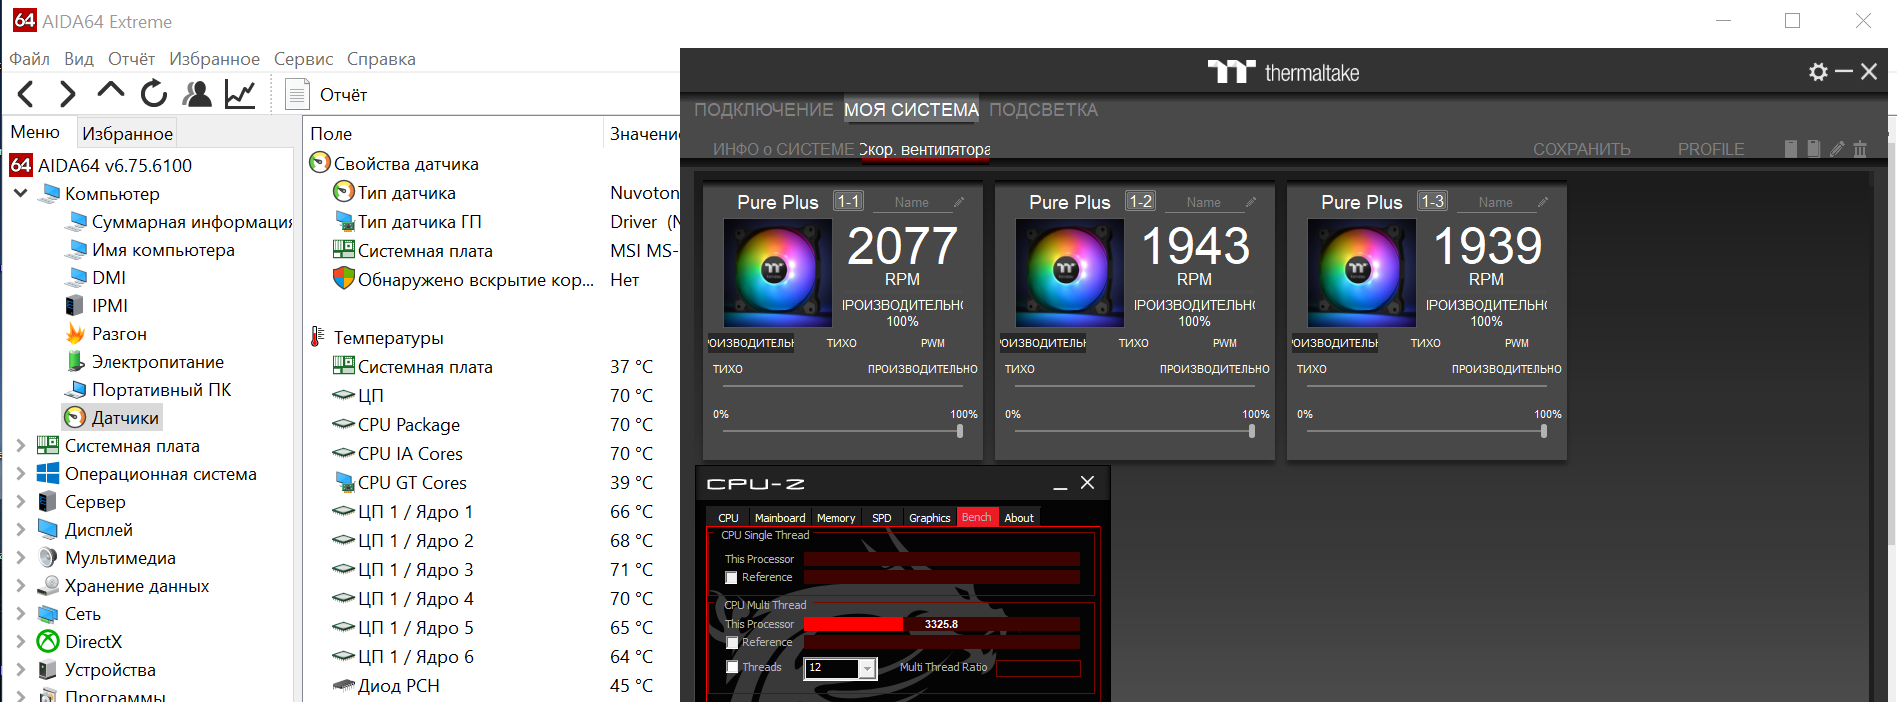
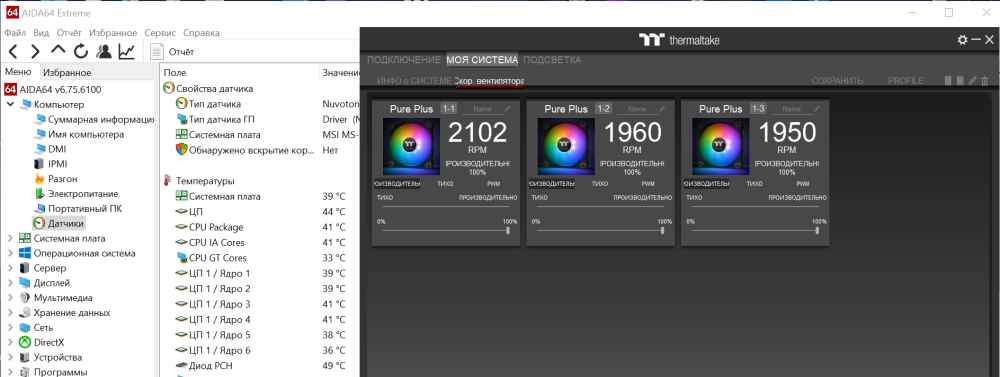
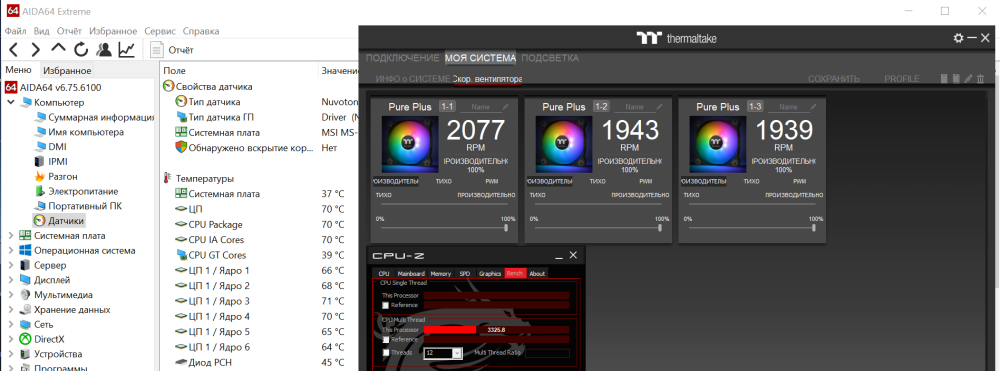
 Good day! My processor is i7-8700k and I recently purchased a new liquid cooling system. After installation, I came across the phenomenon that when the number of fan speeds increases, the cooling efficiency does not change and the temperature remains the same. The number of revolutions increases from ~1000 to ~2000 but the temperature does not change! I tried changing the supplied thermal paste to another one. The question is, what could be the problem and how to solve it? The screenshots below will show other fans, but this is due to the program version. Unfortunately, with the new version of the program nothing connects at all.

-
 Hi, I'm using the P8 DP-D5 Distro-Plate as reservoir and pump combo and it will be cooling AMD 7950x and Gigabyte 4090 gaming OC. My idea is to run one V-Tubler PETG from the plate to GPU and another for the CPU as it have dual outtake, returning back they will go to there separate radiators, the CPU have 360 radiator while GPU have 480. The part I'm stuck is when they have to go back to the plate again from the radiators there is only one intake "unless I use the fill port as secondary intake and then do fill port somewhere else", my original idea was to do an y split back when it goes in to intake. I'm going with mx2 water block for CPU and since there is no Thermaltake GPU water blocks for 4090, I will mostly use the ek-quantum vector 2 master. What is the best scenario here ? do a single loop passing thru GPU then CPU back to the first and then second radiator and then going back to the plate or use sperate outtake ports and then use the fill port as secondary intake or do a y splitter on intake ? Thanks in advance and with best regards
 -
 Project Open Core: Thermaltake P5 Build (Introduction) I have been using my current build for almost 5 years now, and it is time for an upgrade! Not only are the components getting a bit long in the tooth, but I recently received my Oculus Rift VR Headset, and my system just wasn't ready to help me step into the world of virtual reality. For this new build, will be using the Thermaltake Core P5, open air case. This time around decided to go with hard acrylic tubing, so I did a 3D render in Google SketchUp to get a better idea of how things would be installed, and what kind of bends I will need to do. This is going to be a bit different from by previous builds using the Corsair 800D, as there will not be much "modding" required to the case itself (we will see if that holds true). I really like the design of the Core P5, and am looking forward to seeing what I can create using it. I will be including some custom lighting as well, but still deciding which direction I want to go with the acrylic panels, and lighting source. Testing both RGB LED light strips and EL Wire at the moment. I will go into more detail regarding the components that will be used in a future post. Until then, check out this short video showing the 3D render from a few different angles.
- 63 replies
-
- 4
-
-
- liquid cooling
- core p5
- (and 1 more)
-
Introduction It's time for another custom Liquid Cooled build, and this time we are utilizing the MASSIVE Thermaltake Tower 900 case! This is a commissioned build, using some extreme hardware, and I am really excited to get started. Will feature dual liquid loops, one for the i9-7980 Extreme CPU, and the other cooling 2x Nvidia Titan X Pascals in SLI. We will incorporate a little bit of acrylic work to clean things up, along with some painting, and RGB lighting. Take a look at all the components below to see just how impressive (and powerful) this build will be when completed. I present Project Ecthelion! Component List Component Type (PC Hardware) Case Thermaltake Tower 900 White x1 Motherboard ASUS Prime x299 Deluxe x1 CPU Intel i9-7980XE Extreme 18 Core Processor x1 RAM G.SKILL 64GB (4 x 16GB) TridentZ Series DDR4 PC4-27200 3400MHZ x1 Video Cards Nvidia Titan X Pascal x2 SLI x2 GPU Backplate Titan X Design x2 Color Backplates x2 SSD NVMe Samsung 960 Pro M.2 2TB x2 (RAID) x2 SSD 2.5in Samsung 860 EVO 1TB x1 Power Supply EVGA SuperNOVA 1000 P2 80+ PLATINUM, 1000W x1 Custom Cables Blue and Black sleeved x1 OS (Dual Boot) Windows 10 x64 / OSX (HackinTosh) Fans / Lighting NZXT RF-AR140-C1 HUE+ & Aer RGB140 Fans Bundle Pack x1 Lighting NZXT HUE+ Extension Kit LED Strips x2 Component Type (Liquid Cooling) Reservoir / Pump Thermaltake Pacific PR22-D5 Adjustable D5 Pump/Reservoir Combo x2 Fans (Radiator) Corsair ML120, 120mm Magnetic Levitation SP Fan (2-Pack) x3 Radiator XSPC EX360 High Performance Radiator x2 Tubing (Hard) Monsoon Hardline PETG Tubing 1/2" ID, 5/8" OD (16mm) 36inx3 x1 Tubing (Soft) PrimoFlex Advanced LRT 3/8in.ID x 5/8in.OD Tubing Bundle (10ft pack) x1 Fittings Monsoon to 1/2" ID, 5/8" OD Hardline Eco V2 Compression Fittings x6 x3 Fittings Barrow G1/4" Fittings (Various) x46 Fittings XSPC G1/4" Ball Valve, Black Chrome x2 Waterblock CPU EK X299 Monoblock x1 GPU Waterblock Watercool HEATKILLER for Titan X Pascal - ACRYL Ni x2 Coolant Additive Mayhems Pastel Concentrate White - 250ml x1 Coolant Additive Mayhems Pastel Concentrate Blue - 250ml x1 Misc Barrow Replacement G1/4" O Ring - 10pcs - Blue x2 Component Type (Mini Case Display) Display Toguard 7 inch Ultra-Thin High-Res 1024x600 HDMI Monitor x1 Misc Flat Slim High Speed HDMI Extension Cable x1 Misc USB 2.0 Male to Micro USB 90 degree Angled Cable x1 Misc DC Barrel Power Plug Pigtail Cable 12v x1
-
Hi I've just bought the view 71 im a bit amazed how much money it has turned out to cost. Especially if you want the nice fans and a riser cable for graphics card. Anyway, question is has anyone installed a corsair H115i into the view 71? im almost up to $600 just on this case so I'm trying to use currently owed parts for this build.
-
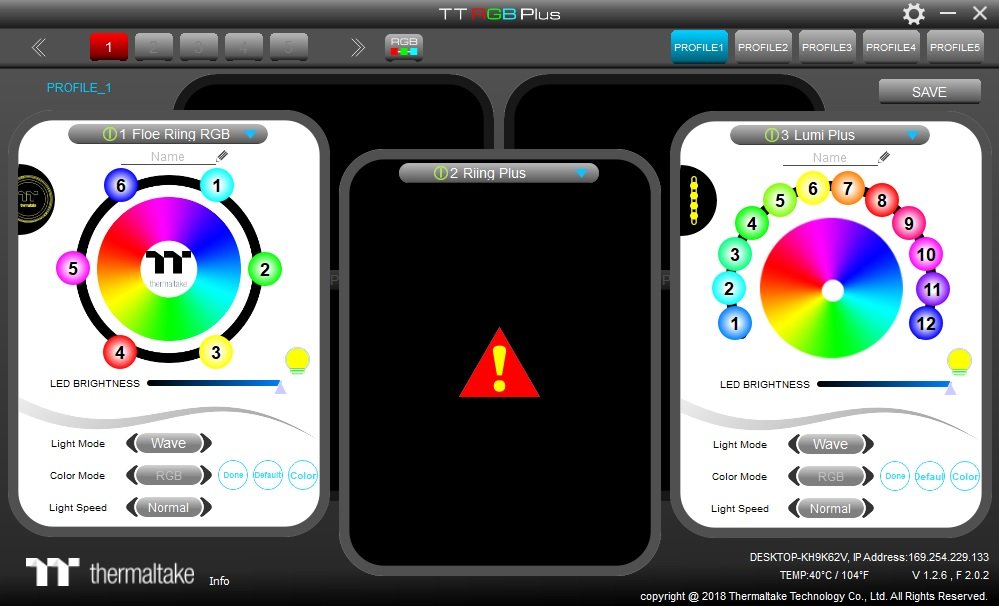
I've encountered a problem with my ThermalTake Floe Riing RGB 240 Liquid Cooler. The LEDs for the fans are lit but the fans are not spinning. Also I am unable to adjust the fan speed due to Controller error. I am able to adjust the fans LEDs but only under the Lumi Plus plus setting. Whenever I switch the dropdown menu to the Riing Plus selection I get a popup that says, "Warning Controller 1." I have double checked everything and it is all plugged in correctly with power and the correct dip switch settings. In my screenshot both 2 & 3 are the fans and 2 is experiencing the controller error under the Riing Plus selection. While 3 the other fan is set to Lumi Plus.
-
 Hello, I had considered buying a Floe Riing RGB 360 TT Premium Edition and I was just wondering if it's possible to set up a push/pull fan configuration for it? That's kind of all there is to my question. I had considered buying an extra Riing Plus 12 LED RGB Radiator fan TT Premium Edition 3-pack for it. But I'm a little unsure. Someone recommended I do a push/pull config for my case, but with three fans on one side and three fans on the other, well, that's a lot of fans. And possibly two fan controllers to keep tack of, if I'm not mistaken? I'm having second thoughts and wondering if this is a good idea? The case I'm trying to fit it all in is an NZXT H440. I was told the case gets a bit hot on the inside but I wanna stick with it because it looks good and has all the functions I want. EDIT: Unrelated question, but does this AIO cooler come with thermal paste or do I need to buy it separately?
 -
Is there enough room to do a push/pull config on top and front radiators? It looks like PLENTY on the front, but cant tell about the top.
-
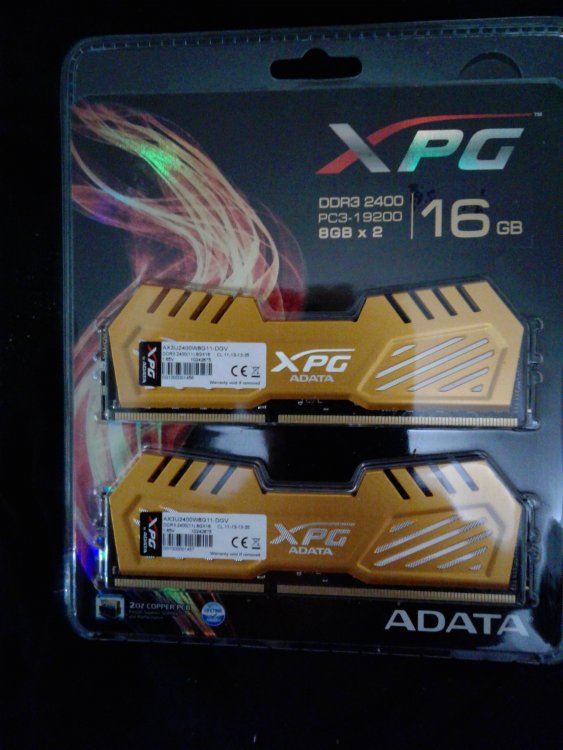
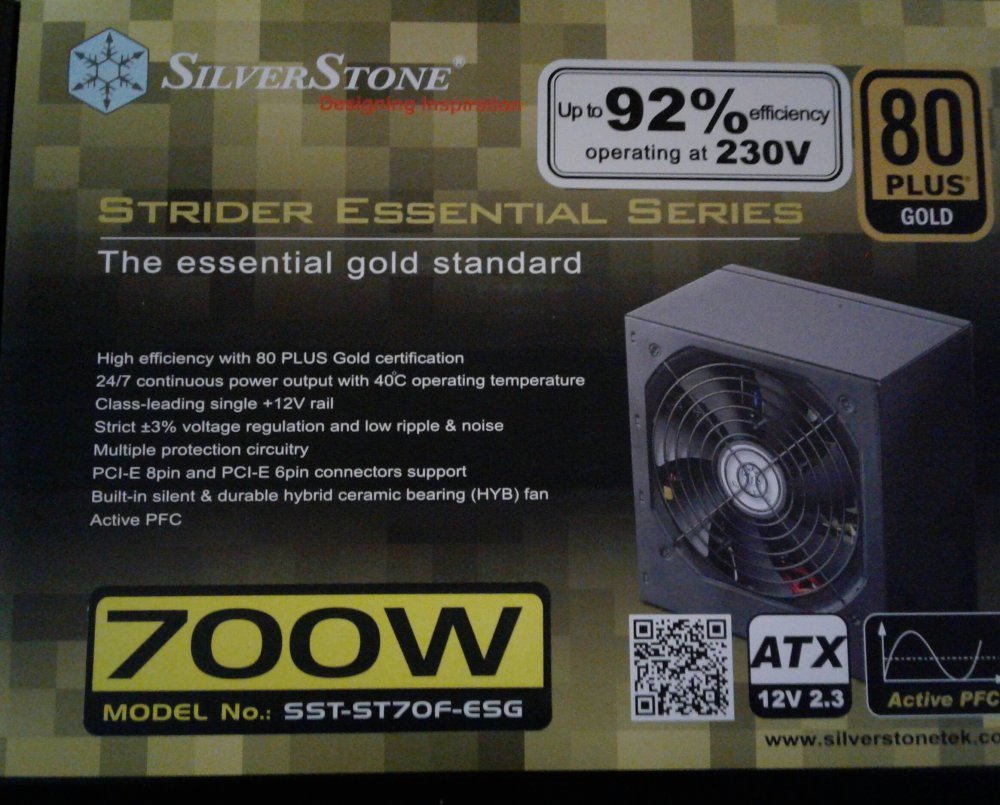
First of all, my name is Edwin. I have only purchased 1 computer in my life and the rest after that were home builds, my home builds. Only I knew exactly what I needed and how to get it, and that was to build my own. Never realized there was a market for this sort of thing until recently, so, here I am with my present build using a Core V71 case. The list of individual parts I plan to use is as follows; Thermaltake Core V71 case MSI Z97 Gamer 5 motherboard Intel i7 4790k Devils Canyon quad core 8 thread CPU ADATA 16Gbs (2 x 8Gbs) DDR3 2400 RAM Geforce GTX 970 video card (x2) Custom cooling loop utilizing cooling blocks, fittings, tubing and coolant from EK and other manufacturers(to be completely listed as used) Silverstone SST-ST70F-ESG 700W PSU RGB lighting (haven't made a decision yet, but will list later when used). I have nothing better to do with my time but to make my life easier and the pursuit of entertainment, in this case, gaming. I am a disabled-vet and I can't explain the enjoyment and happiness I experience when I complete a build for someone seeking my assistance and knowledge to get them exactly what they need. This build, however, is mine, all mine! The parts have started to arrive....


-
Hi all.. I have begun a new build, and its my first build since the 90' ... Its a replacement for my old Apple Mac Mini, that died on me some weeks ago. Then I look a the prices, and went for a HackInTosh build. (And there went my savings for the trip to New York) Its a workingstation build, not a gaming rig, for that I have my consoles. Here is some specs: Intel Core i7-6700K 4.0GHz Quad-Core Processor Enermax LiqMax II 240 AIO Liquid CPU cooler Gigabyte GA-Z170X-UD5 TH ATX LGA1151 Motherboard G.Skill TridentZ Series 16GB (2 x 8GB) DDR4-3200 Memory Corsair RM 550W 80+ Gold Certified Fully-Modular ATX Power Supply Thermaltake Core P5 ATX Mid Tower Case I finish the first stage: Assembly of the Core P5 chassis, that will be the main platform. ATM I'm installing the main hardware, so we can make the first boot and do some testing. When its up an running, I have to do the planning of: Where to mount my drives, and how. Where to install the Raspberry Pi. ( more on the Pi later) Where to install RGB leds. Water cooling design and mount. You can follow my build, and join in if you want. Everything is shared on BitBucket. Pictures, more info and progress comming soon.. Best regards Bjørn Christiansen ChrisB Bredstedgade 6 st th DK5000 Odense C Denmark LTE : +45 2266 6693 Email / Messenger : bc@chrisb.dk Web / Skype / Facebook : chrisb.dk Twitter : chrisb_dk LinkedIn / Instagram / Pinterest : chrisbdk
- 1 reply
-
- 1
-
-
- build
- raspberry pi
- (and 3 more)
-
PROJECT BUYANGYANG INTRO Its a case mod with the aim of showcasing all components of a computer. All parts will be exposed. Even the Liquid Cooling System. We want to say thanks to the following sponsors. Thermaltake Technology Inc Thermaltake Philippines MSI Philippines Plextor Philippines Avexir Table of Contents: Hardware List and Photos - http://community.thermaltake.com/index.php?/topic/1625-project-buyangyang/?p=10442 SketchUp/Plan - http://community.thermaltake.com/index.php?/topic/1625-project-buyangyang/?p=10443 Tools - http://community.thermaltake.com/index.php?/topic/1625-project-buyangyang/?p=10444 Materials - http://community.thermaltake.com/index.php?/topic/1625-project-buyangyang/?p=10445
-
Thermaltake Core V21 Micro Cube Chassis As the latest addition to the Core V Series, the new Thermaltake Core V21 is a quadrate micro M-ATX-based chassis that offers an endless stackable and flexible thermal solution. It allows externally-modular upgrades for enthusiasts to create dual systems. Designed for use in either a vertical or horizontal orientation on the motherboard, users can customize the chassis for the best viewing presentation. A 200mm fan on the front panel ensures that the Core V21 delivers outstanding cooling performance with compatibility for extensive DIY/AIO LCS, further enhancing the reputation that the air cooling units of the series has become renowned for. Guaranteed to be an immensely powerful system, the Core V21 also has the ability to accommodate various overclocking components to boost performance even further where it counts! Product Web Page: http://www.thermaltake.com/Chassis/Micro_Case_/Core/C_00002559/Core_V21/design.htm
-
Hey guys whats up I'm Nick from Dirty South PC Mods. We were given this awesome Core V1 Mini ITX Case to Mod by the generous folks here at Thermaltake. This one is going to be called "Dexter" First up I would like to thank my sponsors and supporters Thermaltake You can see more awesome Tt stuff here http://www.thermaltakeusa.com/ LutroO Customs Check out all the awesome sleeving gear here http://lutro0-customs.com/ Specs Case - Thermaltake Core V1 ITX Mobo - EVGA Stinger Z77 ITX CPU - Intel 3770K /w EK Block Ram - 8Gb (4Gb x 2) G.Skill 2133Mhz /w EK Block GPU - EVGA GTX 660Ti 2Gb /w EK Block PSU - Thermaltake Toughpower Grand 1050W PSU SSD - OCZ Vertex 4 120Gb Fans - Thermaltake Luna 20 LED 200mm x 2 and Thunderblade Rv2 80mm x 2 Phobya 200mm Extreme Radiator Magicool 160mm (80mm x 2) Radiator Swiftech DDC Pump /w Bitspower Pump top Primochill Flow indicator Monsoon Econo line Rigid fitings Monsoon Blood Red PMMA Rigid Tubing First up doing a quick dry fit to see if all the parts I want to use will fit. And it looks like they will. The 200mm Radiator however will need a bit of coaxing. Ok so now that I know that the parts that I wan't to use will fit. Drilled out the rivets that hold the Mobo plate in place so I can mod it to fit the 200mm Radiator and to prep it for paint. Using a Right angle grinder with a cut off wheel to remove the small part support on the left so the Radiator will fit. Luckily the HDD drive cage will make up for the lack o support there. After that was cut off we switch to a Flapper Wheel on the grinder to smooth out the edges. Once that part was removed the 200mm Radiator will fit with enough room to do a push/pull fan setup Oh man that is a super tight fit..Running that 24 pin is going to be fun Alright time to get this bad boy ready for paint. When sanding your case for paint. There is no need to go all the way down to the metal just take the shine off. And there we have a white Core V1. Now we need to get the Thermaltake Toughpower Gold 750W PSU headed in the right direction. There we go much better. Painted the SSD/HDD Caddy with Banner Red. Thermaltake was gracious enough to send me two of the 200mm Luna Red LED fans. Thanks guys All the Hardware (minus the 160mm rad it is drying its paint) Having a bit of fun with Tt Dude . Going for a blood splatter effect I think it came out rather well. check out the reflection off of the mirrored floor. With all the hardware crammed in there you can bet it was no easy task to get that hard-line in there. After a successful leak test here we go. Had to get the rigs all shined up for a Local Rock show. Had the Thermaltake Core V1 "Dexter" and Urban T-81 "Man of Steel" folks were really digging on the Core V1. Still need sleeve the cables and do some detail work on the inside to get it ready for HorrorCon