Search the Community
Showing results for tags 'thermaltake'.
-
Hey guys, I have the TT Core P3 SE and I want to install the GPU vertically. I've heard bad reviews about the TT riser cable, do any of you have the same case and an aftermarket riser that works flawlessly? Suggestions would be greatly appreciated! Is this cable a good option? https://www.amazon.com/dp/B06Y5YNGDJ/ref=sxbs_sxwds-stvp_1?pf_rd_m=ATVPDKIKX0DER&pf_rd_p=3171424582&pd_rd_wg=dqLRf&pf_rd_r=T2B7HM3FG750SNGXV0QD&pf_rd_s=desktop-sx-bottom-slot&pf_rd_t=301&pd_rd_i=B06Y5YNGDJ&pd_rd_w=LoSTQ&pf_rd_i=pci-e+16x+riser+cable&pd_rd_r=5D0ECADJM3N9PMRQ5AK0&ie=UTF8&qid=1503677990&sr=1 and what length would you all recommend?
-
The Original CyberMods Halo RAIJIN Build: After finishing our CyberMods Competition build called RAIJIN we wanted to do a new build using the hardware and other parts we had. Clockwerk Industries and I both felt RAIJIN had some really cool hardware and watercooling. It was also my first time using Thermaltake gear in a long time. I liked it so much I wanted to give another build a shot using all Thermaltake Parts and watercooling. Once the rest of the gear arrives I will assemble everything and decide which direction the build should go. I do know there will be some awesome mods, sick hardware and some amazing Thermaltake goodness. Currently we are planning on continuing the RAIJIN case mod in the Thermaltake Core P5 instead of the Core P3 we used during the competition. You'll be able to see some of the mods we didn't have time for as well as some new ones. To make things easy to reference we will call this build RAIJIN V2. CPU: Intel Kaby Lake i7 7700k Motherboard: Colorful IGAME z270 GPUs: Colorful IGAME GTX 1080 Memory: HyperX Storage: HyperX Savage PSU: Thermaltake 850watt RGB Ring Cables: Modular custom sleeved Thermaltake (black and white) Cables Combs: Thermaltake slip on combs (black) Fans: Thermaltake Premium Plus 4 X 120mm Ring Fans CPU Block: Thermaltake Pacific W4 RGB GPU Blocks: Colorful Full Cover aluminum and plexi (un-released) Pump: Thermaltake P1 D5 Radiator: Thermaltake deep 360mm radiator Reservoir: Thermaltake 250mm tube reservoir Tubing: Thermaltake 16mm PETg hardline Coolant: Thermaltake custom mixed color Fittings: Thermaltake 16mm chrome fittings (Possibly Thermaltake RGB fittings) * I will be doing a full custom watercooling loop using primarily all Thermaltake Parts. It will cool the GPU and CPU in a single loop. PWM Cables LEDs: Thermaltake Lumicolor Fan Controller: Custom Mods: Injection molded and acrylic psu shroud with custom paint. Custom Vinyl work Etched acrylic Pacific W4 waterblock mods Custom watercooling loop Thermaltake Core P5 mods 3D Printed Thermaltake accessories Hand made acrylic work 90 degree radiator flip Metal radiator mount Scratch built pump mount for the radiator S
-
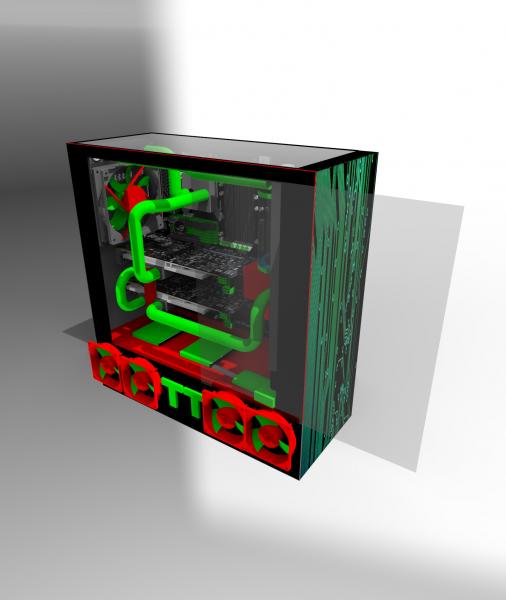
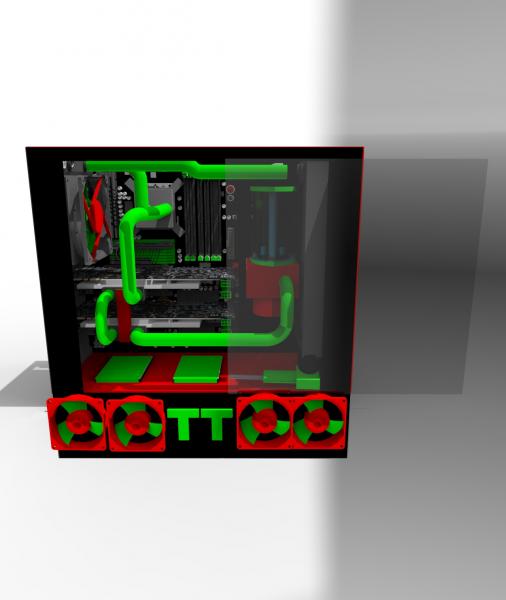
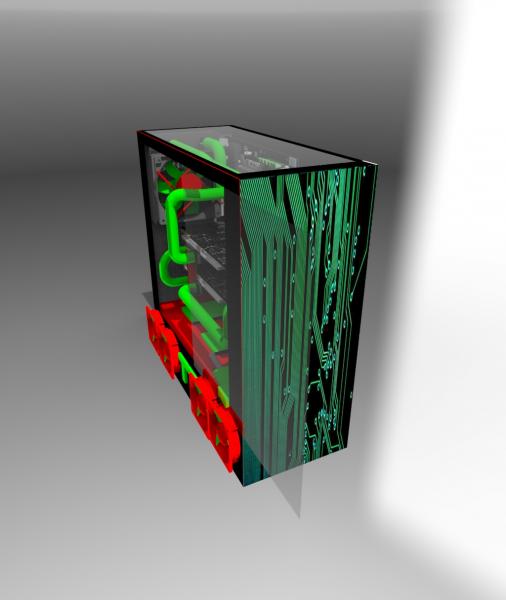
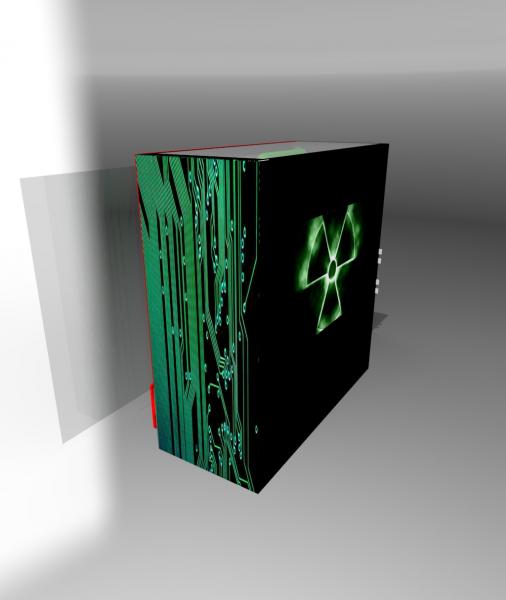
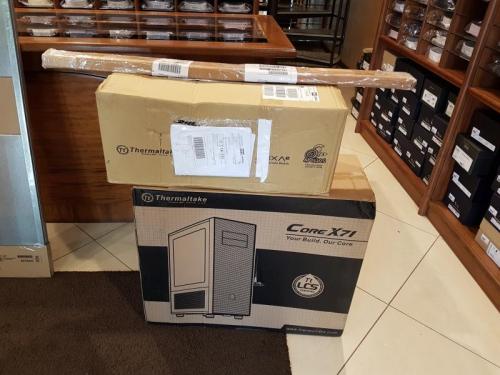
Hello everyone, this is my worklog of my project with Thermaltake, apacer, aquatinung. The case will be core x71 watercooling Aquatuning Blade fire DDR4 RAM Apacer 32 gb 3200 mhz motherboard MSI z170a pro gacrbon rgb Processor Intel i5 6600k Nvidia Gtx 780 you power supply to be decided The proget as you see from photos of plays in green black and red, the front part of the circuit will be laser-cut, the front panel will be apeto electronically with electronic actuators. There will be prints 3d, el wire and el panel. the rest you will see it during the project.


- 3 replies
-
- 1
-

-
- thermaltake
- aquatuning
- (and 2 more)
-
Hello Every body, My name is Claudiu and i'm 29 years old. I'm from Romania but living in Italy for 14 years. My passion is computer and everything is surrounding it. The passion to make modding began demanding to create my own computer customized my way. The project, which will present, arises from the requirement to create something unique and appealing at the same time. Hardware: (i will update soon) - - - - Watercooling system: (i will update soon) - - - - Sponsor: - Main Sponsor ThermalTake; - Avexir; - Sparco. Stay tuned !!!
-
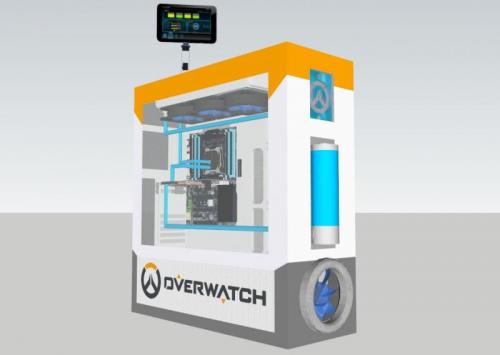
Hello im Anyone Mod Monkey, this is my first mod on this community. I want to present this project, Overwatch X71, below the render as you can see the theme of this mod is the last game of blizzard on core x71. changes I'm going to perform are: custom loop, new paint, new front, light box, aluminum logos, lcd with pc statistics, custom tank, and more.. all arrived, soon new updates! Thanks! See you soon.
-
Hello, I just purchased the Thermaltake Riing 120mm RGB fans and for some reason they don't start with my system. I have to manually turn them on using MSI command center :/. Is there a way to solve this?
-
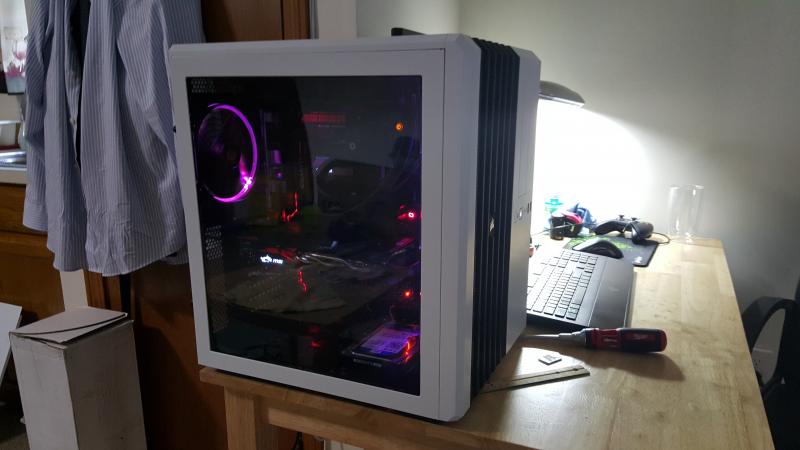
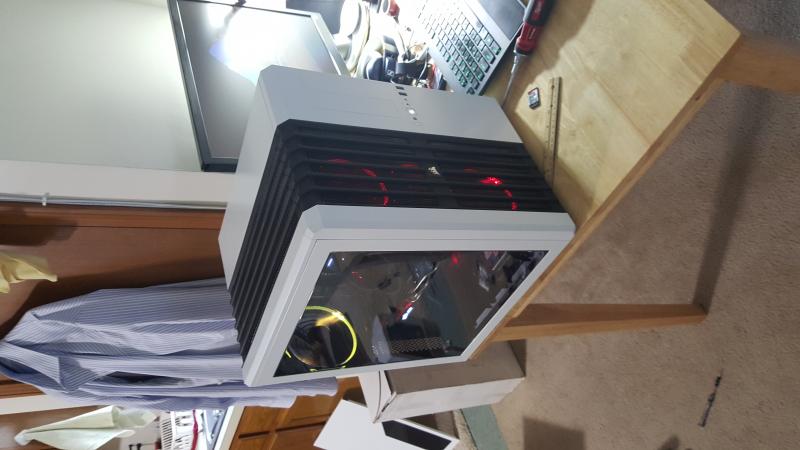
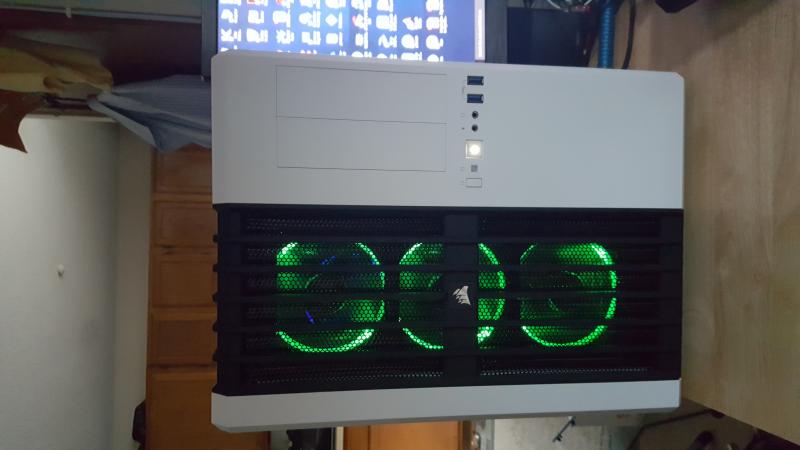
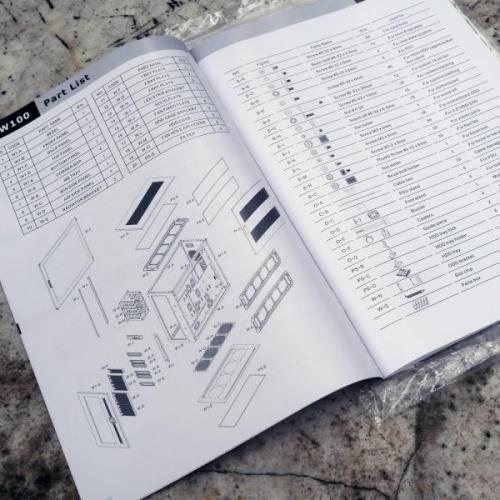
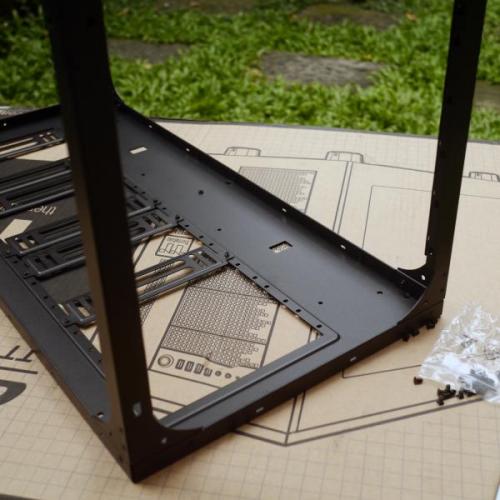
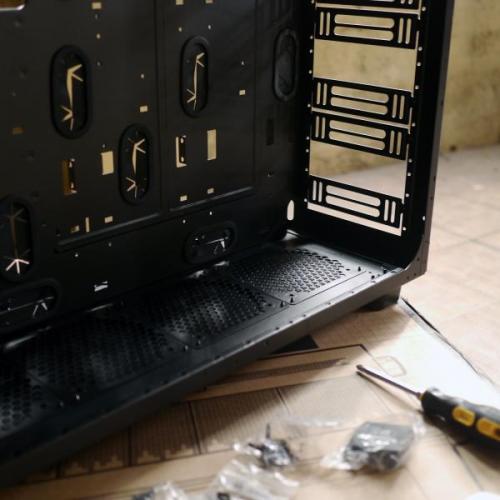
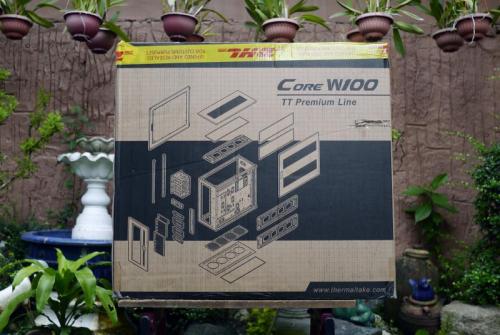
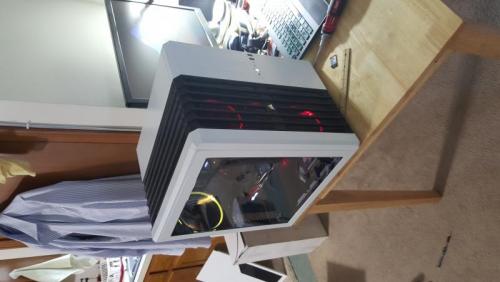
Hello Everyone! Just wanted to share my Thermaltake Core W100 custom build. Quick Unboxing:


- 7 replies
-
- 1
-
-
- customLCS
- thermaltake
- (and 1 more)
-
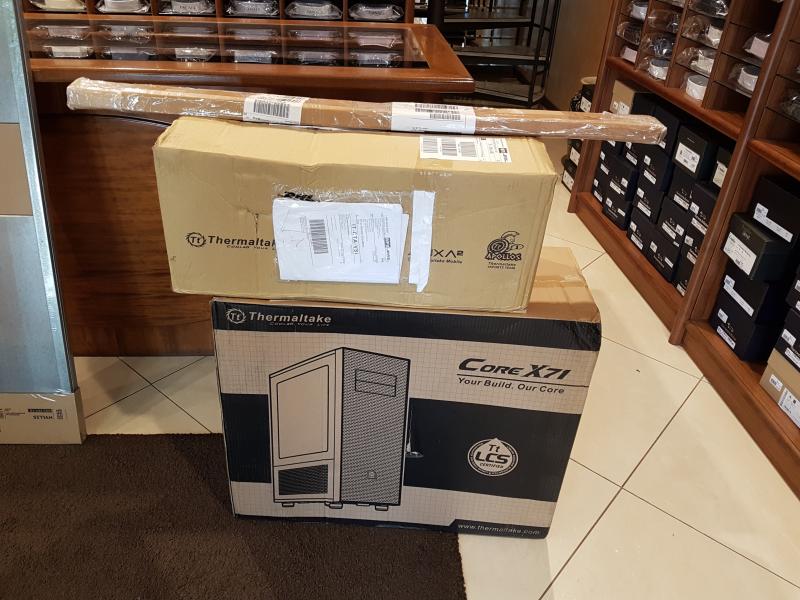
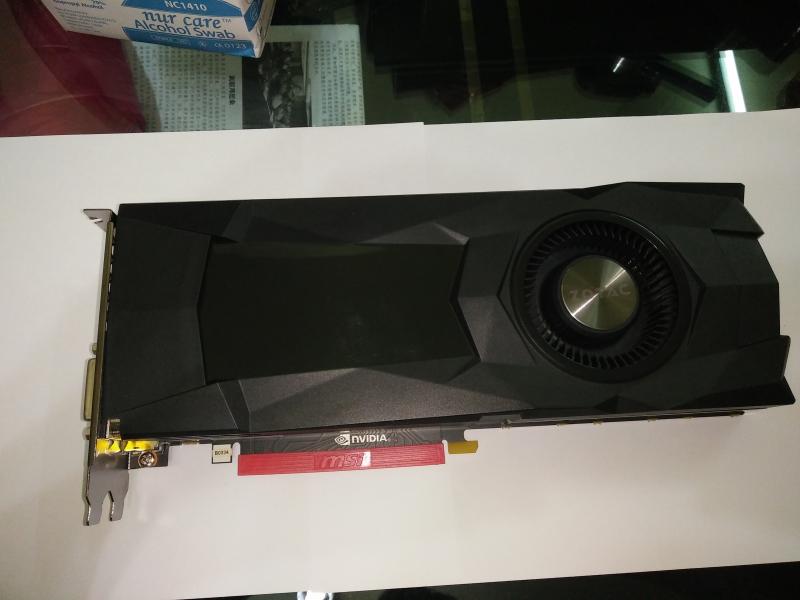
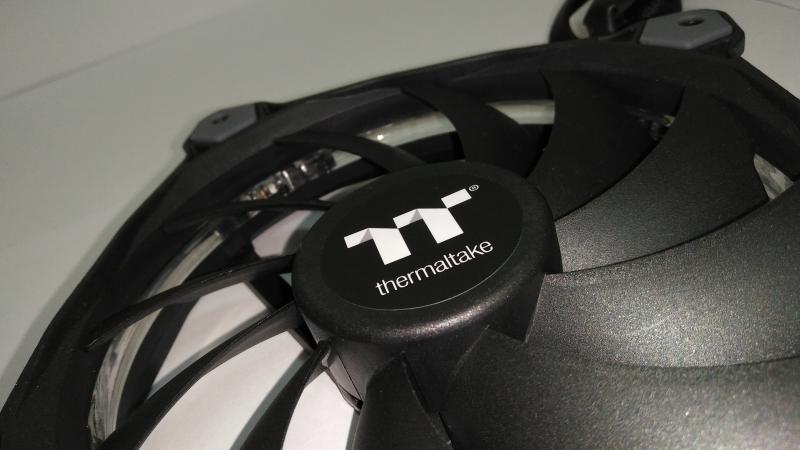
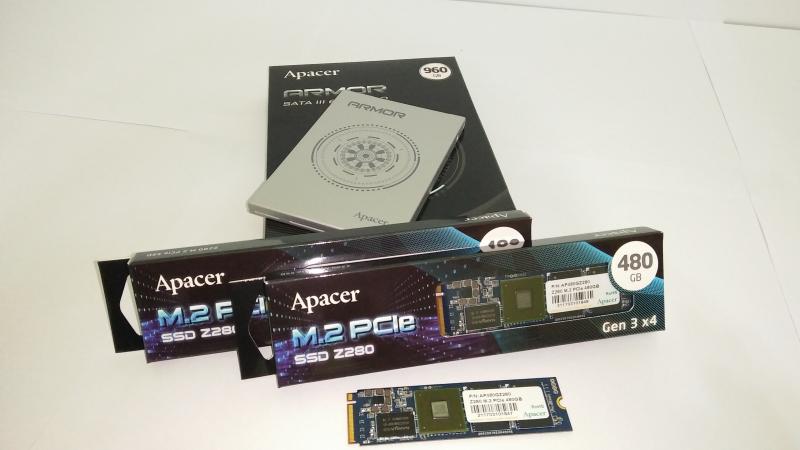
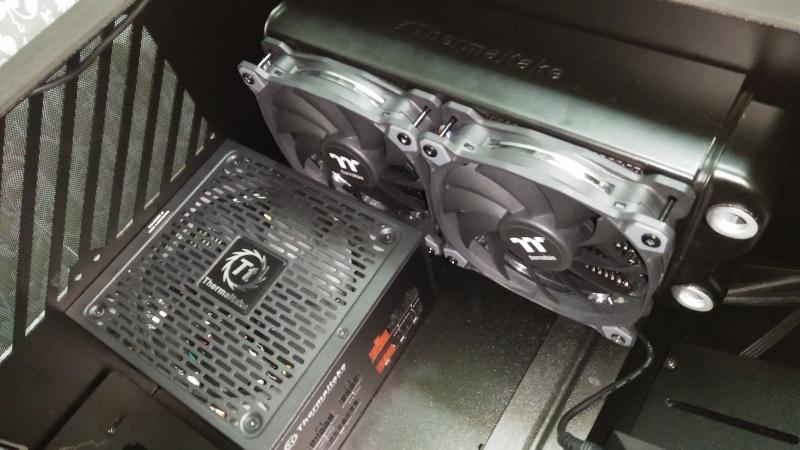
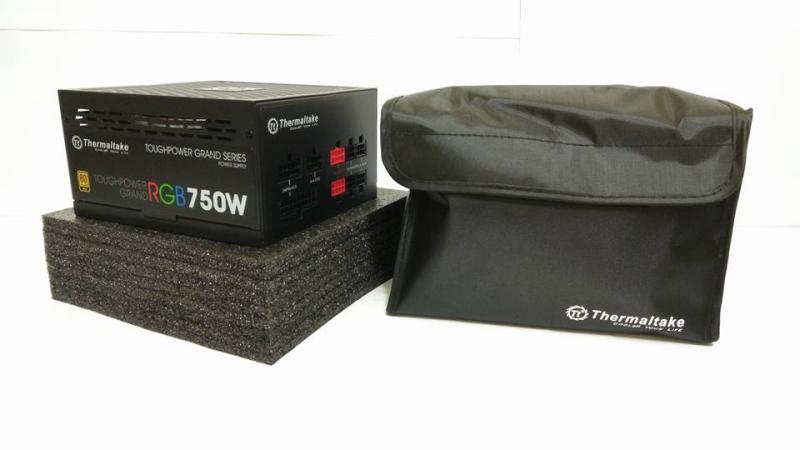
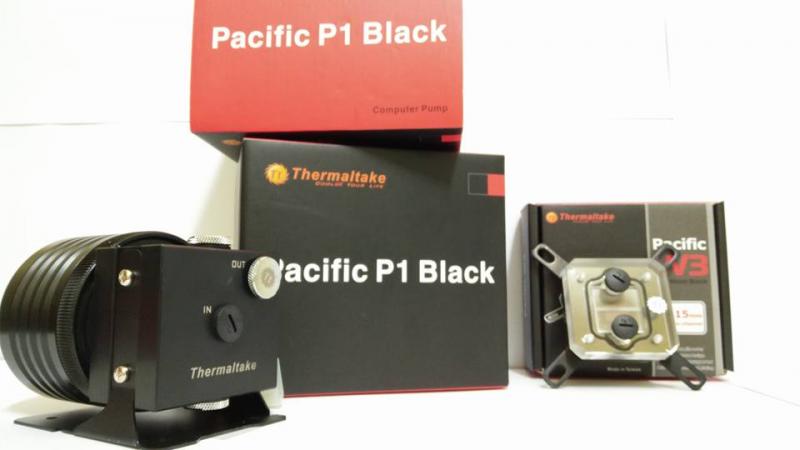
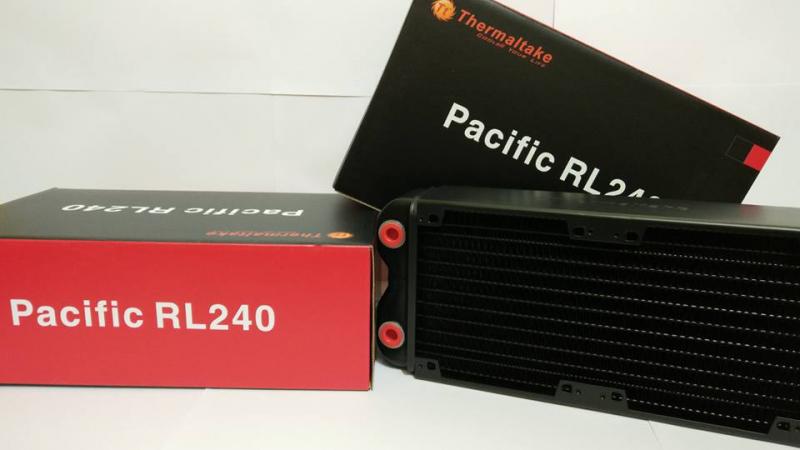
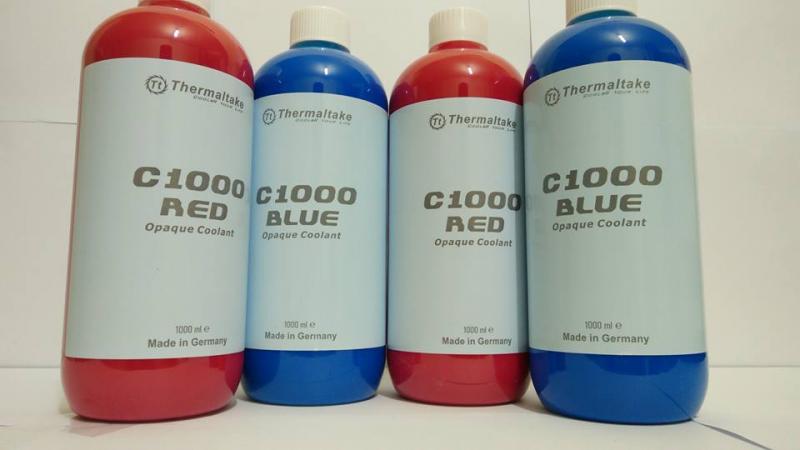
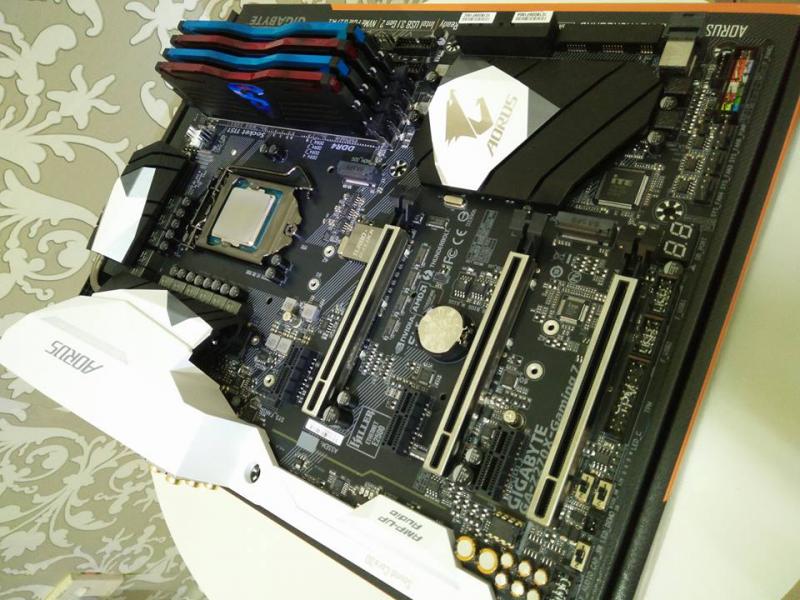
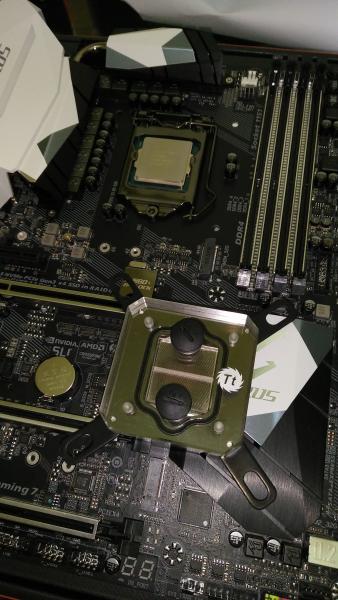
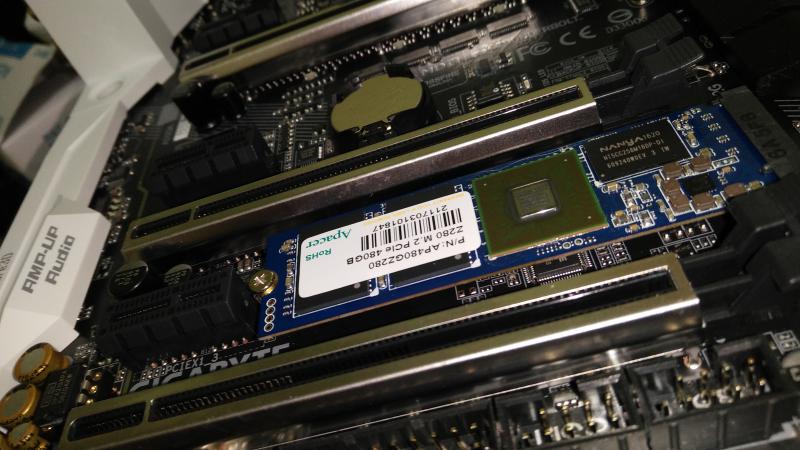
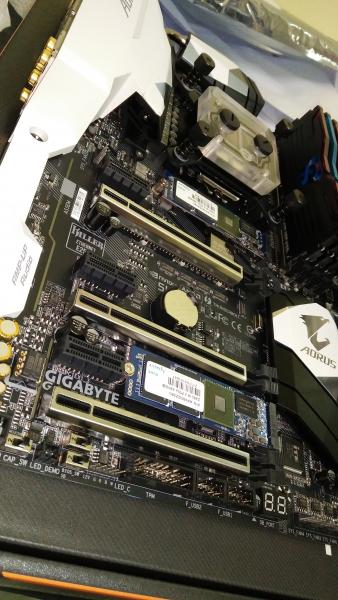
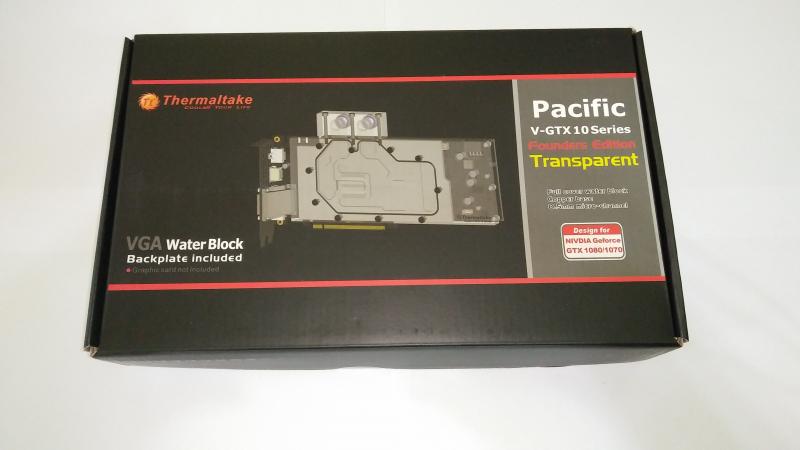
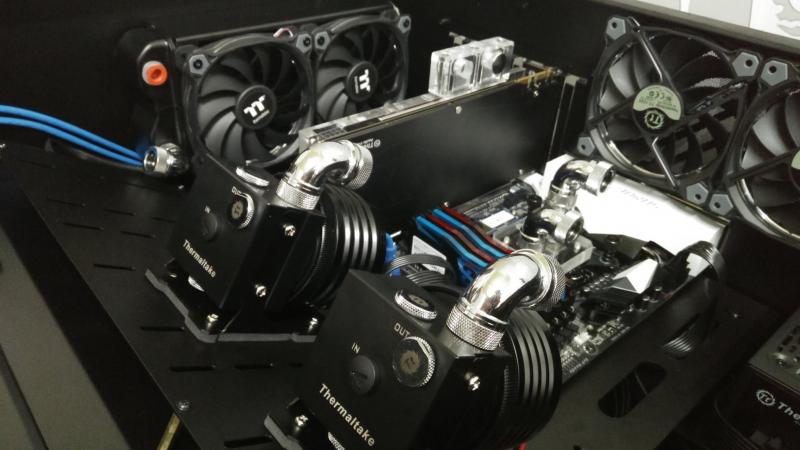
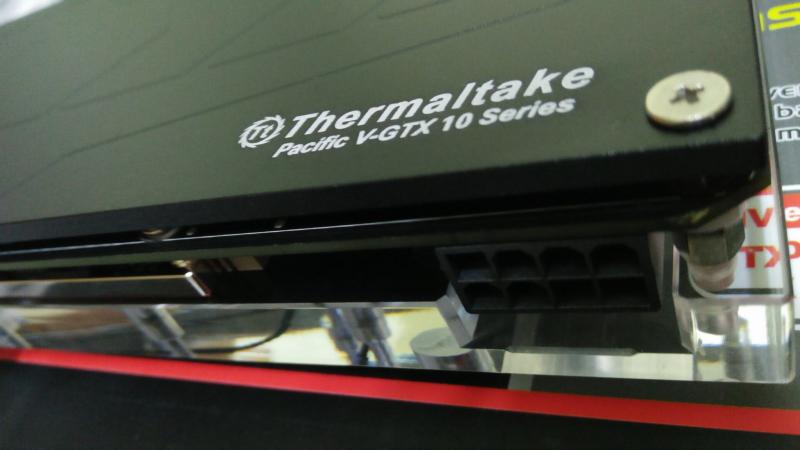
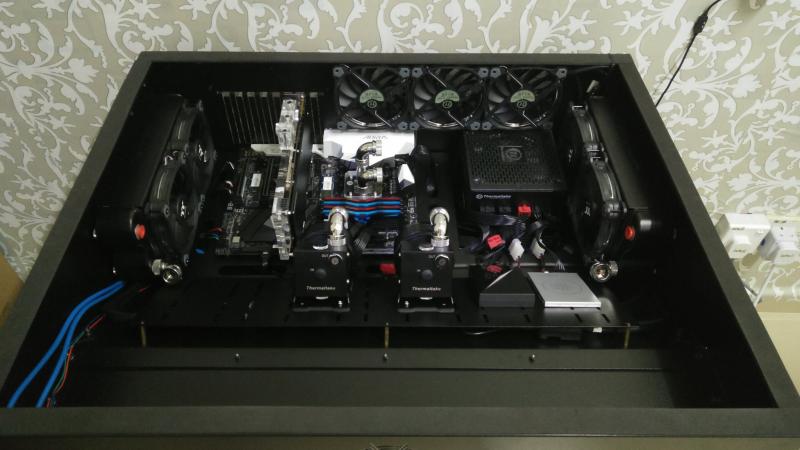
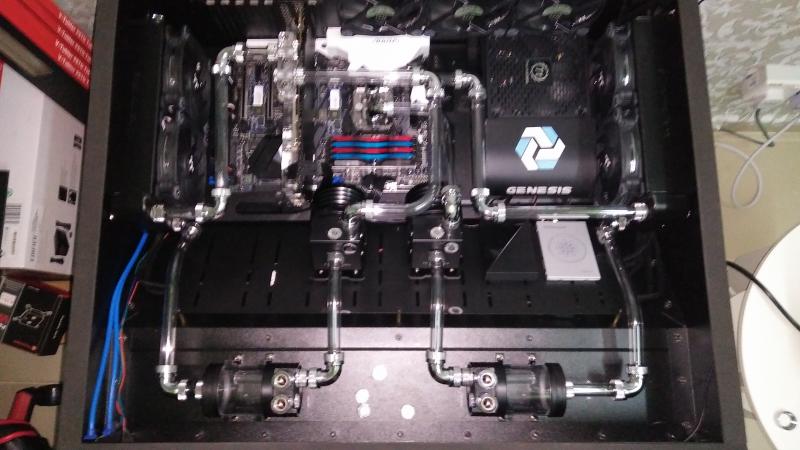
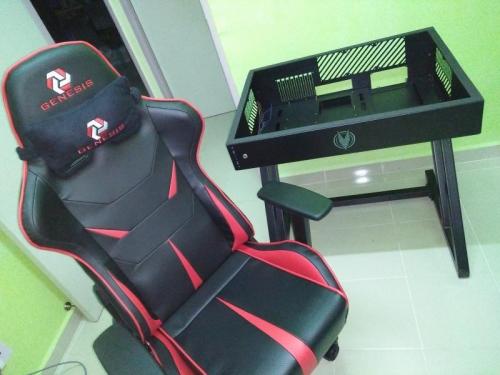
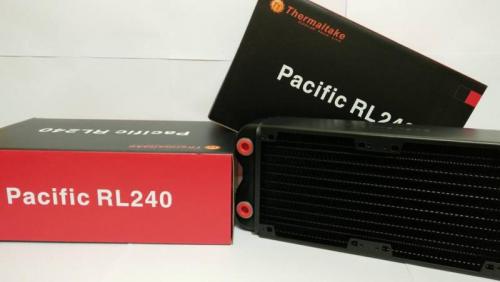
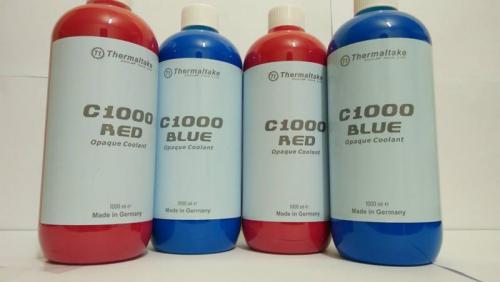
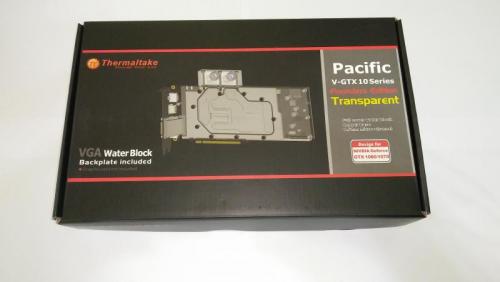
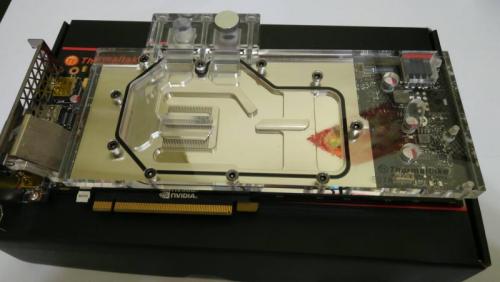
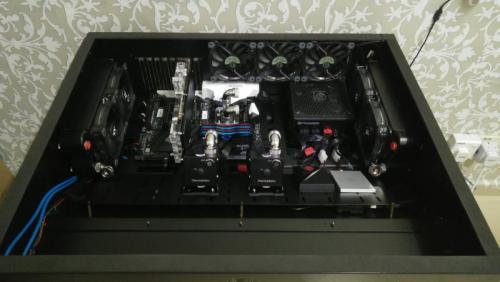
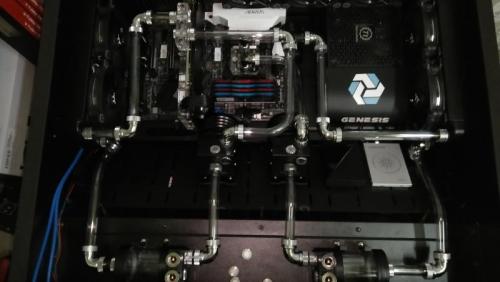
This project is brought to you by GenesisGear, Thermaltake, Apacer & GeIL. ( Build On the way) A custom dual loop desk PC based on Star Wars movie. Specs: -Processor: Intel Core i7-6700K -GPU: ZOTAC GTX 1070 Black Edition -Mobo: Gigabyte Aorus Z270X Gaming 7 -RAM: GeIL Super Luce 4x4 GB -PSU: Thermaltake ToughPower Grand RGB 750W Gold -Case: Vector Desk Mini - Storage: [ Apacer Z280 480GB NVMe m.2 SSD x2 in raid 0 (Boot) ] [ Apacer Armor 960GB SSD (Games&Software) ] -Monitor: Acer Predator XB281HK 4K Gsync -Chair: Malaysian brand GenesisGear Dominion gaming chair _______________________________ Water Cooling: - Thermaltake Pacific W3 CPU WB - Thermaltake V-GTX 10 Series Founders Edition - Thermaltake Pacific P1 Black D5 pump - Thermaltake R15 Reservoir - Thermaltake Riing Premium RGB 120mm - Thermaltake Pacific RL240 Radiator - Thermaltake V-Tubler - Thermaltake 90° Dual compression 16mm - Thermaltake 90° Angle Compression 16mm - Thermaltake 16mm Compression Fitting - Thermaltake 30mm Extender - Thermaltake C1000 Red coolant - Thermaltake C1000 Blue coolant Still had to wait for some fittings and reservoir just a test out how it looks
-
- 1
-
-
- Thermaltake
- GenesisGear
- (and 2 more)
-
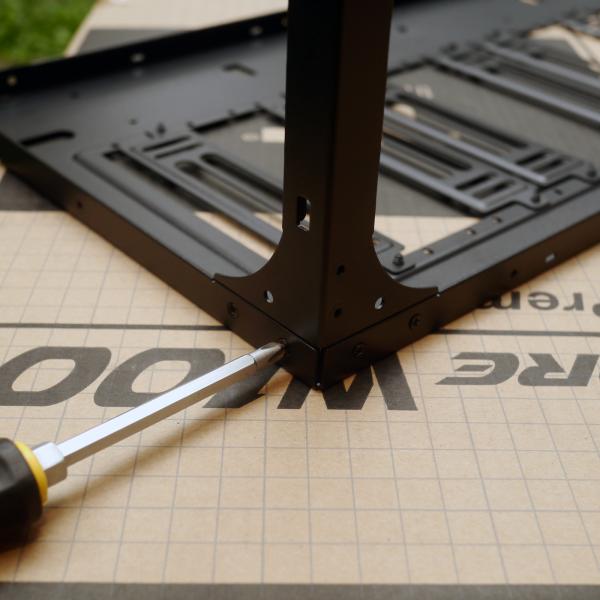
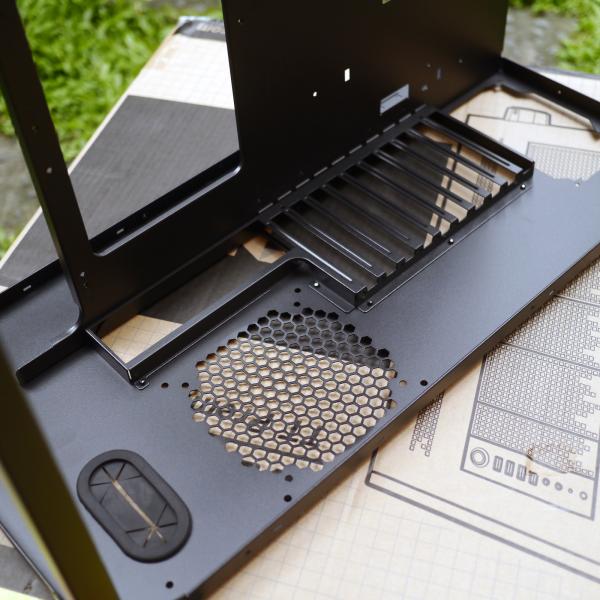
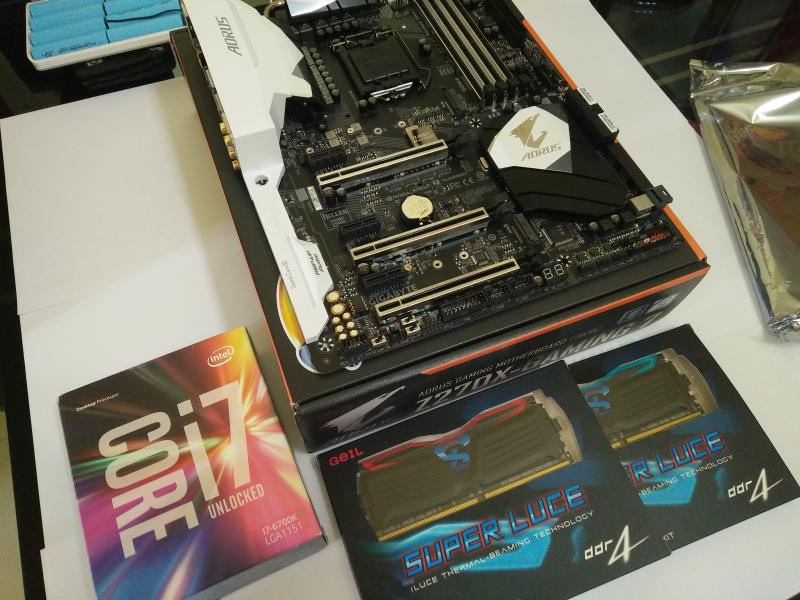
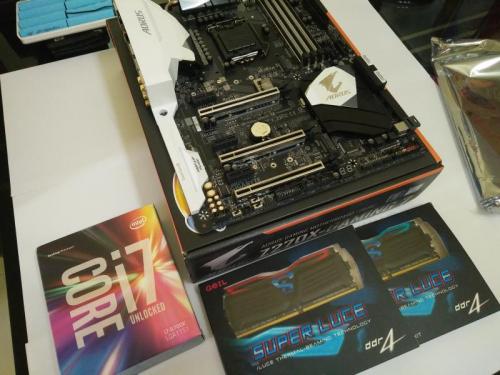
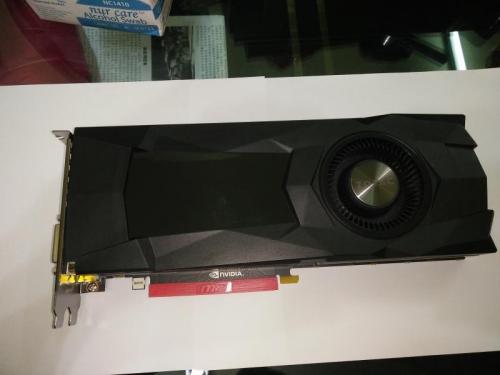
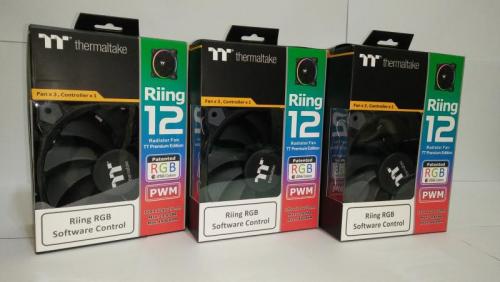
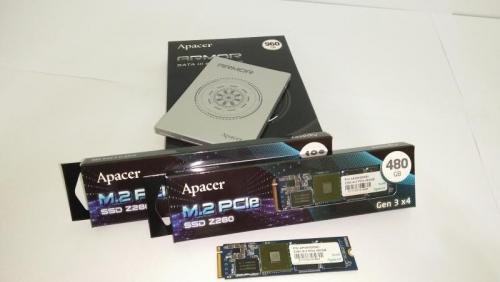
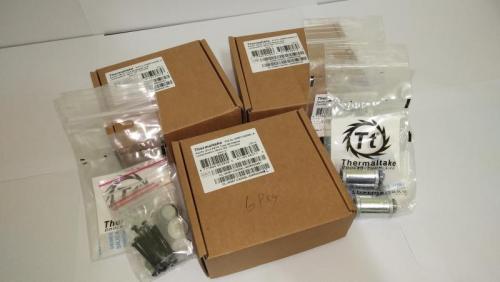
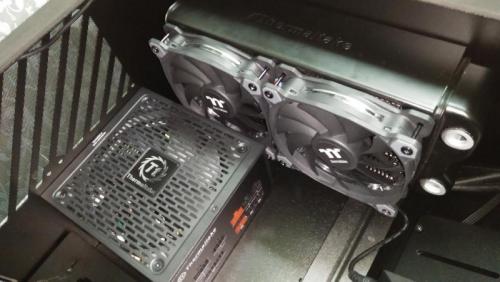
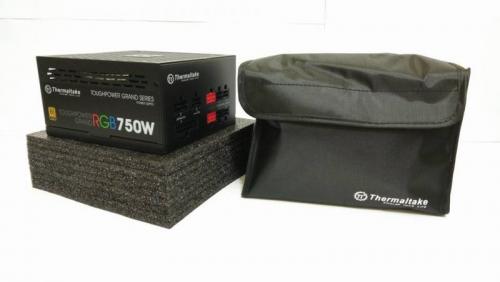
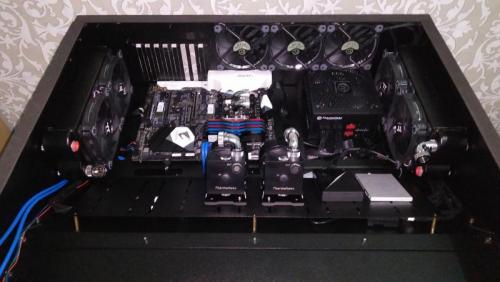
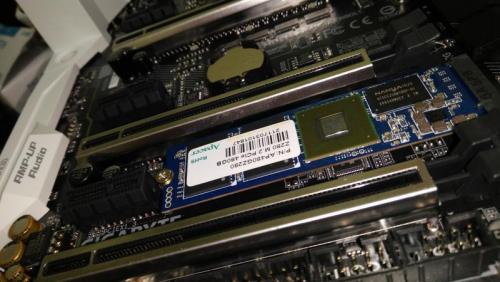
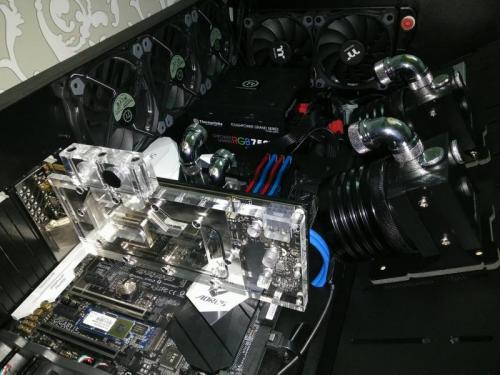
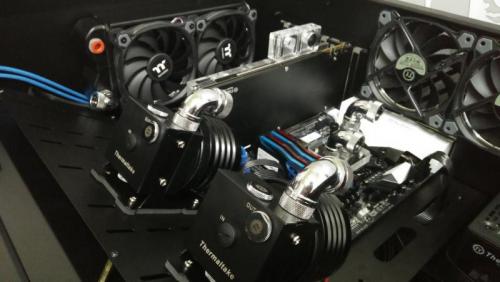
This project is brought to you by GenesisGear, Thermaltake, Apacer & GeIL. ( Build On the way) A custom dual loop desk PC based on Star Wars movie. Specs: -Processor: Intel Core i7-6700K -GPU: ZOTAC GTX 1070 Black Edition -Mobo: Gigabyte Aorus Z270X Gaming 7 -RAM: GeIL Super Luce 4x4 GB -PSU: Thermaltake ToughPower Grand RGB 750W Gold -Case: Vector Desk Mini - Storage: [ Apacer Z280 480GB NVMe m.2 SSD x2 in raid 0 (Boot) ] [ Apacer Armor 960GB SSD (Games&Software) ] -Monitor: Acer Predator XB281HK 4K Gsync -Chair: Malaysian brand GenesisGear Dominion gaming chair _______________________________ Water Cooling: - Thermaltake Pacific W3 CPU WB - Thermaltake V-GTX 10 Series Founders Edition - Thermaltake Pacific P1 Black D5 pump - Thermaltake R15 Reservoir - Thermaltake Riing Premium RGB 120mm - Thermaltake Pacific RL240 Radiator - Thermaltake V-Tubler - Thermaltake 90° Dual compression 16mm - Thermaltake 90° Angle Compression 16mm - Thermaltake 16mm Compression Fitting - Thermaltake 30mm Extender - Thermaltake C1000 Red coolant - Thermaltake C1000 Blue coolant Vector Desk Mini & GenesisGear Dominion Series Gaming Chair GeIL SuperLuce RAM 4GB x4 Intel Core i7-6700K Processor ZOTAC GTX 1070 Black edition, I know it was ugly but will be using Pacific V GTX 1070/1080 Thermaltake Riing Premium RGB​ Fan! Thermaltake Riing Premium RGB logo? Apacer Z280 480GB NVMe M.2 SSD & Apacer Armor Series 960GB SSD Fittings Premium packaging and affordable PSU, to be honest Thermaltake has the best packaging! Thermaltake ToughPower Grand RGB 750W 80+ Gold Power Supply Thermaltake Pacific P1 Black D5 Pump w/ silent kit Dual Thermaltake Pacific RL240 Radiator Thermaltake C1000 Coolant Blue & Red, Light & Dark, Jedi & Sith Gigabyte Aorus Z270X Gaming 7 Motherboard That was tight. Thermaltake Pacific W3 CPU Waterblock Apacer Z280 PCIe m.2 NVMe SSD in raid 0 Thermaltake Pacific W3 CPU Waterblock installed ain't this sexy? Almost Done! just need to make PSU shroud to cover the wire, and waiting my fittings reservoir and PETG tube. Thermaltake Pacific V GTX 10 Series Test out the system before installing GPU


-
This is the 2nd purchase I have made of the Thermaltake keyboard mouse combo and the software still won't open. I can see it has downloaded but it won't let me open it so I don't have any keyboard functions. If someone can provide advice, I would greatly appreciate it. Thanks.
-
Can someone please help me with a software issue? This is the 2nd thermaltake keyboard and mouse combo I have tried and I can't get the software to work. It acts like it downloaded but I can't open it. I can't get the macros and other keys to work without it. Any thoughts/ideas/fixes would be greatly appreciated.
-
Hey guys wanted to share my project code named: Red 27 made possible with support from Thermaltake a company that truly supports modding!! This is a freestyle mod done in the view 27 enclosure. When I saw this case I had to do a build in it, and I wasn't disappointed. It has such a unique yet familiar layout and with the vertical gpu mount, its so easy to show of your super expensive graphics card you worked so hard to pay for lol. Now I am still waiting on a couple things to finish up the loop, but should be here anytime. Specs: Case: Thermaltake View 27 CPU: intel i7-4790k MOBO: ASUS z97 ROG Ranger GPU: EVGA GTX 970 SC RAM: Corsair Vengeance DDR3 1866mhz SSD: 2 x Radeon 240gb PSU: Thermaltake Toughpower G DPS RGB 850 watt 80 plus gold (10 year warranty!!!!) CABLES: Thermaltake TTmod red and black cable extensions LED: 2 x Thermaltake Lumicolour 256 C with controller Cooling: Fans: 6 x Thermaltake Riing 12 RGB Premium Edition 120mm, 1 x Thermaltake Riing red 120 mm Pump: Thermaltake Pacific P1 D5 black silent edition Resevoir: Thermaltake Pacific R22 Fittings: Assorted Thermaltake extensions and adapters and RGB fittings 16mm Tubing: Thermaltake V-tubler 16mm O/D PETG Rads: Thermaltake pacific 360mm, Thermaltake pacific 120mm CPU Block: Thermaltake Pacific Block GPU Block: EKWB gpu block RAM Block: EKWB monarch ram block
-
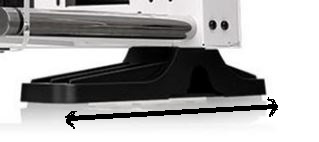
Update: found out else where . delete thread Hello I am interested in buying a Core P3 , Could someone Please let me know the Length of 1 of the Feet , I would like to place the core P3 on my adjustable rail shelf above the monitor if the feet not to long .
-
Hello friends and moderators here at Tt, A while ago I made a Tt Steam group, which now has quite a lot of members. The idea of the group is just to allow Tt fans all come together, and to promote the company. If any moderators would like a moderator/administrator position, please let me know. http://steamcommunity.com/groups/TteSPORTS-Thermaltake
-
Good time of the day everyone! This is my first thread here and I'm new here, so sorry if I posted something duplicate or not. I need your help! Recently I bought 1x 140mm Riing RGB fan and 3x 120mm Riing RGB fans. Both of them came with controllers. I connected one 140mm fan with one controller and three 120mm with second controller. Both of them hooked up with M/B 4pin. After installation I faced an issue that 256 color mode (switching colors) going "not synchronously". In other words, 140mm fan change color a little bit faster than rest three 120mm fans. Is there any way to solve it? I've seen on Tt website cable to connecting controllers together but wasn't able to find it anywhere in stores AND online (USA) Do you know how to solve it? Thanks! BTW, I don't know what happened with picture's orientation ... They were OK...


-
Starting a P5 reference area. Join the club! Load pics! Suggest Ideas! I'm ordering all my components at once and waiting to hear about the http://www.thermaltake.com/Liquid_Cooler/Liquid_Cooler_/Water_Blocks/C_00002766/Pacific_V_GTX_980_Ti_Reference_Design_Transparent/design.htm Availability. Im going with an and a Intel® Core™ i7-5960X Processor Extreme Edition (20M Cache, up to 3.50 GHz) AND A
-
Mind if you could help me with my Tt eSports Poseidon ZX? I've got this awesome keyboard way back 2013. And with all due respect, this keyboard help me almost all of my projects as a programmer and a gamer here in the Philippines. But theres one thing that went my keyboard to have a problem on its Kailh switches. When pressing the keys "f" and "j" it suddenly doubles what I've clicked. Can you help me with this? Is my keyboard still covered with its 5year warranty? Help me please
-
Level 10 M Advanced gaming mouse is the enhanced version of the first version of our Level 10 M Mouse and it’s the first foray into gaming peripherals formed through the design collaboration by Thermaltake Group and BMW Group DesignworksUSA. The Level 10 M Advanced gaming mouse was built with a laser engine up to 16000 DPI that can be used on most surfaces. OMRON engineered switches have a lifetime of 50 million clicks, improved ergonomic shape design for better hand grip feeling with an additional base-plate design to reduce friction while moving and has a brilliant RGB illumination with 16.8 million color. More info: http://bit.ly/1TDCrK1

-
Hi guys! I am Filippo and I am a 20 years old italian modder! Last year I finished a mod with Cooler Master Italy, called Project Alpha, which had a lot of success! Then I had the luck to be invited to participate in a big project for Nanoxia, which invited me to Germany to build a desk pc for their booth at Computex in June 2015! I am going to introduce this new mod sponsored by ThermalTake that I thank you immensely for the support! The Mod, in white & black theme, is based on a Core X9 Snow Edition to which I decided to remove the original front and midplate and to replace them with two pieces of acrylic completely designed by me and made with laser cutting and CNC milling machine! The project includes two liquid cooling loop which will respectively cool the CPU and 2 GTX 970 strix! Each loop has a D5 pump and a 480mm radiator connected by rigid pipes while under the midplate I assembled systems with flexible tubes to facilitate the assembly operations. The threads for fittings mounted on midplate were hand made, and the work was not so easy. The hard part was being able to have a tip that does not split open the plexiglass out of the hole, I solved that problem by bringing the drill bit to changr the cut angle to the company I'm referring to the works in acrylic! All cables are sleeved by me, it wasn't easy since it's the first time i made a full sleeved cable set, but sleeves from Icemodz are amazing, and the will be cool But let me say the components of this mod, which I list below: HW: Asus Maximus VII Ranger i5 4670k 2x Asus GTX 970 Strix Thermaltake Thoughpower Grand Platinum 1200w HDD: 1TB Barracuda Ram: 4x4 DDR3 1600 Avexir Core Red Led SSD: 1x Samsung 850 EVO 256GB Loops: 2x pumps D5 Thermaltake (Pacific P1 black) 2x trays cylindrical Thermaltake (Pacific T22) 2x 480mm radiators Thermaltake (Pacific RL480) WB 2x GPU Asus Strix 970 Thermaltake 1x WB CPU Thermaltake Pacific W1 8x Fans Thermaltake Riing White LED Several fittings Thermaltake Chrome Tubes 16/12 PETG ThermalTake DP Ultra liquid Aquacomputer Aquaero 5 LT Power Adjust 3 Ultra by Aquacomputer 2 Temperature sensor to monitor the loops temperatures. I take this opportunity to thank ThermalTake and especially Andy, who supplied me with such a large number of components to build this mod to re-enter in the world of modding after a stop of some months. I also thank Mundi from Icemodz.com who provided me all the material needed to create my sleeved cables! I leave you to the photos of the progress! Filippo Thanks: Photos:
-
Hello, my name is DJ Madrid age of 21 and also known as Kryptek PC Casemodz, I am from the Philippines. And also, thanks to Thermaltake my major sponsor for this build project, thank you so much for this oppurtunity, more power! And now, let's go to the build. This project will be named "45Deg" or "45 Degree", the position of the motherboard is something new in our eyes because normally many of the mods today are rotated into 90 degree or 180 degree inverted, so I decided to make a 45 degree rotated motherboard position. I'll be using Thermaltakes water cooling parts, case, power supply and Riing fans. Here is my isometric 3D design using Google Sketchup Pro. Hope you'll like it.
- 16 replies
-
- 1
-
-
- asus
- thermaltake
- (and 1 more)
-
Hi everyone. Its time for a new project. And this time, no more scratch build. This will be my first tower mod. Hope everything goes well. I saw the trailer of deadpool movie and its a comedy action which i like. So for this build, i thought of making deadpool as the theme. First of all, I would like to say thanks to Thermaltake for giving me such opportunity to mod a Suppressor F51 no window (which i choose). I forgot to take photos of the case when it is still in "one piece" coz, I'll be honest, I was so excited to mod the case. The case it self has lots of potential. Lots of space for custom LCS, sound absorbing material, well lets just say that it is a "feature rich" tower case. For more info on this case, check out this link: - http://www.thermaltake.com/Chassis/Mid_Tower_/Suppressor/C_00002676/F51_No_Window/design.htm Table of Contents: Hardware List - http://community.thermaltake.com/index.php?/topic/2095-project-deadpool/?p=13569 Sketch/Plan - http://community.thermaltake.com/index.php?/topic/2095-project-deadpool/?p=13570 Mod - http://community.thermaltake.com/index.php?/topic/2095-project-deadpool/?p=13571
- 13 replies
-
- 5
-
-
- firstTowerMod
- avexir
- (and 6 more)
-
.thumb.jpg.d527fe25ad83b5c62c758473b251c12c.jpg) Ok so I was recently accepted into Thermaltake's SPM testing program So I thought I would give a quick overview of the Thermaltake DPS G 650w PSU I received. The unit is 80 plus gold rated and as you can see is a semi modular. Unpacking the PSU it feels very sturdy and features flat cables cables kind of like the old school ribbon cables. All the modular cables are stored away securely in a nice little Thermaltake pouch. The PSU also comes with a extended 7 year warranty, which is great for people like me who are PSU jinxed. The DPS G 650w also features Tt’s new SPM software for monitoring hardware and power consumption. This information can be retrieved via a desktop monitoring application or a Smart phone app of your choice. (Android/Apple). This is a really cool aspect of these power supplies and lets me keep track of all the numbers my OCD demands. The information can then be uploaded to the SPM cloud where I can reference the numbers later. I must confess I have always liked the Thermaltake power supplies but this one is another beast entirely. After a weeks worth of use it has not skipped a beat even with my horrible horrible electricity companies dirty power the unit has held strong. At first I was having a few issues with getting the software to sync but after a reinstall (With Admin rights durp) everything worked. The software has a very easy to understand UI and is accurate and matches up with my own temp probes and software. All in all Im very impressed with the Tt DPS G 650w and will definitely be picking up a more powerful model asap. Link to the PSU - http://www.thermaltake.com.au/Power_Supply/Smart_Series_/Smart_DPS_G/C_00002720/Smart_DPS_G_650W_Gold/design.htm Link to main Build Log http://community.thermaltake.com/index.php?/topic/30812-bloodlines-rebuild-a-quick-spm-enabled-facelift/
Ok so I was recently accepted into Thermaltake's SPM testing program So I thought I would give a quick overview of the Thermaltake DPS G 650w PSU I received. The unit is 80 plus gold rated and as you can see is a semi modular. Unpacking the PSU it feels very sturdy and features flat cables cables kind of like the old school ribbon cables. All the modular cables are stored away securely in a nice little Thermaltake pouch. The PSU also comes with a extended 7 year warranty, which is great for people like me who are PSU jinxed. The DPS G 650w also features Tt’s new SPM software for monitoring hardware and power consumption. This information can be retrieved via a desktop monitoring application or a Smart phone app of your choice. (Android/Apple). This is a really cool aspect of these power supplies and lets me keep track of all the numbers my OCD demands. The information can then be uploaded to the SPM cloud where I can reference the numbers later. I must confess I have always liked the Thermaltake power supplies but this one is another beast entirely. After a weeks worth of use it has not skipped a beat even with my horrible horrible electricity companies dirty power the unit has held strong. At first I was having a few issues with getting the software to sync but after a reinstall (With Admin rights durp) everything worked. The software has a very easy to understand UI and is accurate and matches up with my own temp probes and software. All in all Im very impressed with the Tt DPS G 650w and will definitely be picking up a more powerful model asap. Link to the PSU - http://www.thermaltake.com.au/Power_Supply/Smart_Series_/Smart_DPS_G/C_00002720/Smart_DPS_G_650W_Gold/design.htm Link to main Build Log http://community.thermaltake.com/index.php?/topic/30812-bloodlines-rebuild-a-quick-spm-enabled-facelift/ -
Hello, my name is DJ Madrid age of 21 and also known as Kryptek PC Casemodz, I am from the Philippines. And also, thanks to Thermaltake my major sponsor for this build project, thank you so much for this oppurtunity, more power! And now, let's go to the build. This project will be named "45Deg" or "45 Degree", the position of the motherboard is something new in our eyes because normally many of the mods today are rotated into 90 degree or 180 degree inverted, so I decided to make a 45 degree rotated motherboard position. I'll be using Thermaltakes water cooling parts, case, power supply and Riing fans. Here is my isometric 3D design using Google sketchup Pro. Hope you'll like it
-
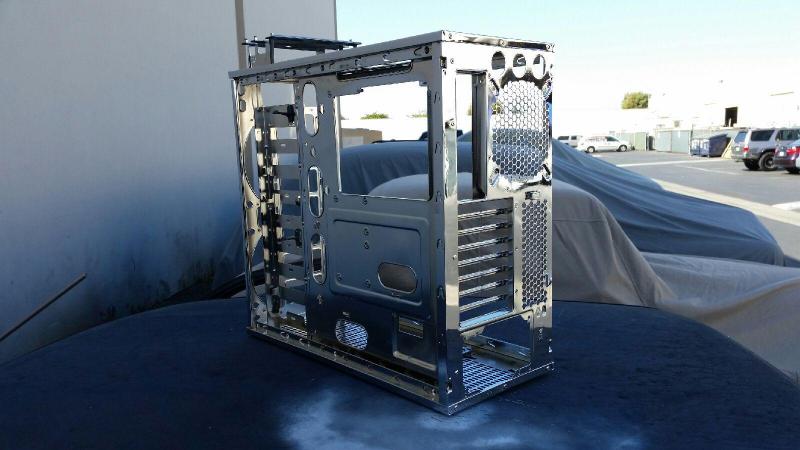
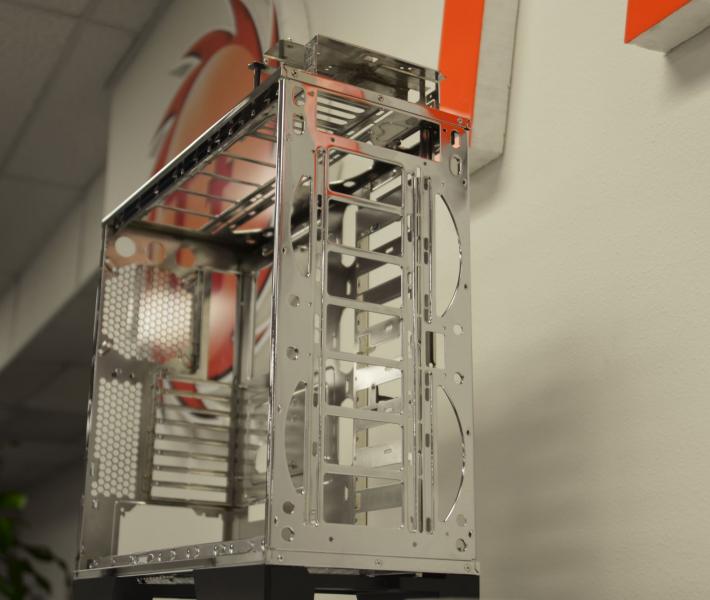
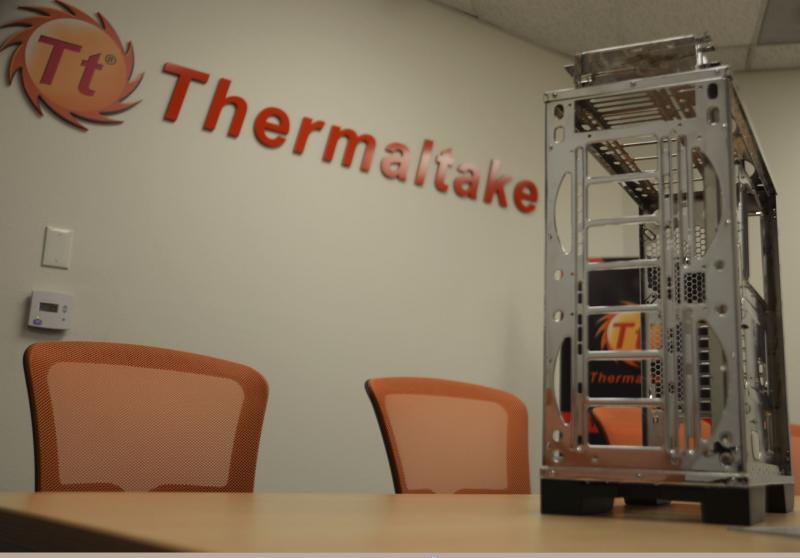
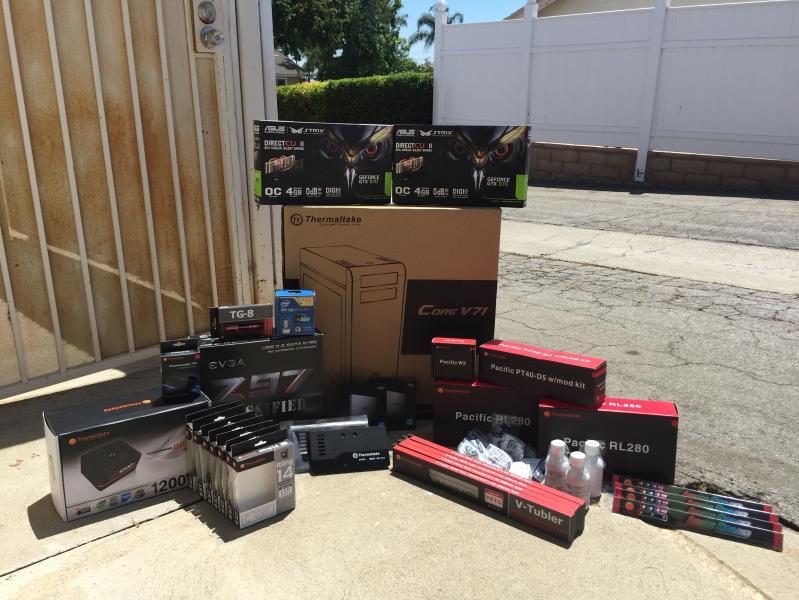
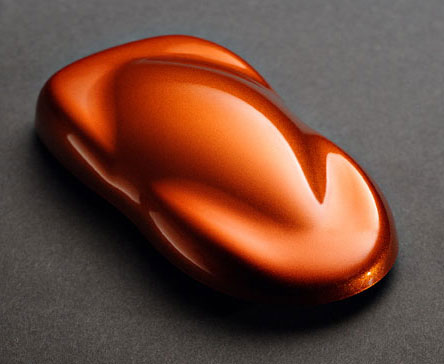
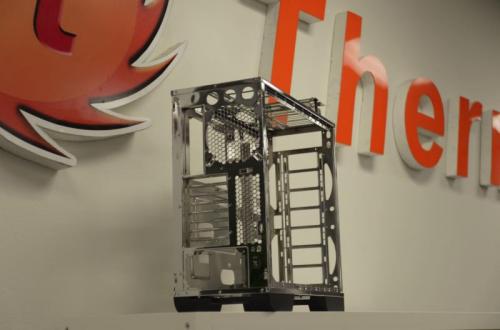
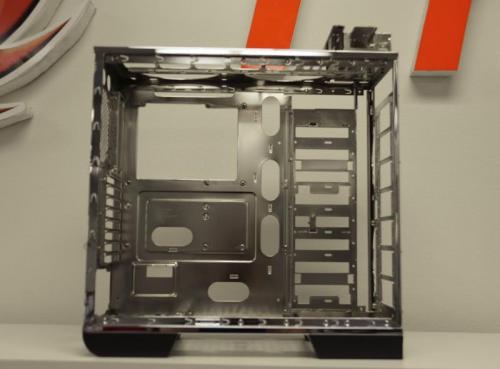
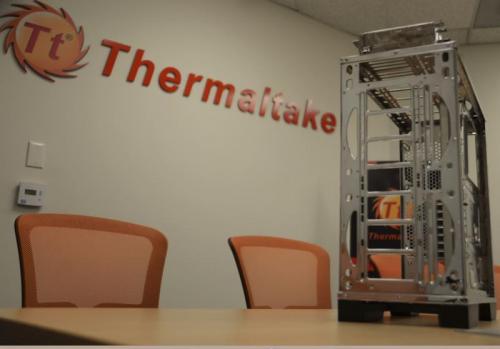
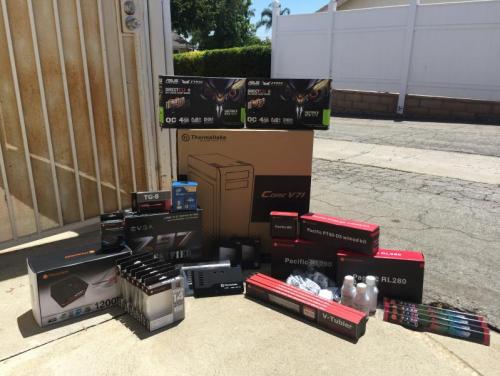
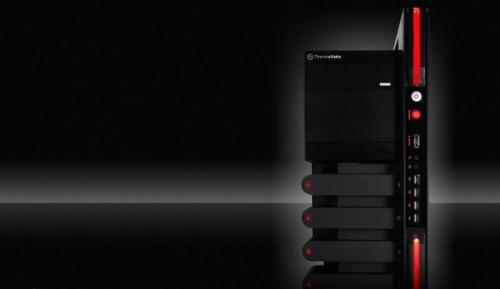
When I started my first modding project with Thermaltake, I was not really sure what I wanted to achieve with this build. How to make it a part of what I do, taking into account what I have done for several years with my car hobby and paint hobby and bring it into full throttle for a unique system, a Thermaltake system that I am proud to say is my own. Project SunkisTt Parts List: Case: Thermaltake Core V71 CPU: Intel Core i7 4770K Motherboard: EVGA Z97 Classified RAM: Avexir Core Series 4GB x4 DDR3-1600 C9 PSU: Thermaltake Toughpower Grand Platinum 1200W GPU: ASUS Strix GTX 970's (2x) SSD: Samsung Evo 256GB (2x) -RAID 0 CPU Waterblock: Thermaltake Pacific W2 GPU Waterblock: Thermaltake Pacific ASUS Strix GPU Block (2x) Radiator: Thermaltake Pacific RL 280 (2x) Pump/Res: Thermaltake Pacific PT40-D5 w/ Mod Kit Fans: Riing 140mm White (7x) - LED modded Orange Coolant: Mayhems Aurora 2 (Custom Orange/Red) Tubing: Thermaltake Pacific PETG 16mm Fittings: (Chrome) Thermaltake Pacific G 1/4 PETG 16mm (9x) Thermaltake Pacific G 1/4 Stop Plug (8x) Thermaltake Pacific G 1/4 90 Degree (1x) Sponsors Thermaltake Avexir BS Mods Mayhems The Build First Step was to take the chassis completely apart and send off the frame to get it chromed. This process took about a month and required sandblasting off the stock finish, while going through the process of being copper plated, polished, nickel plating, then chrome plating and finally polished. The end result looks like this: Now before we get started, here is the color I chose for the body panels. This is HoC (House of Color) Candy Tangerine Orange "UK08-BC02" - http://www.houseofkolor.com/speedshapes/speedshapes_urethanes.jsp Now back to the Chrome... Here is some of the pictures I took in the office to show my friends of the first big step I took into this build!


- 35 replies
-
- 7
-
-
- Thermaltake
- Orange
- (and 3 more)
-
The upcoming PC giveaway on Gaming Tribe is featuring a sexy Thermaltake Level 10 case! One of my most favourite cases of all times. You can see some pictures here (I also attached one of them): https://www.gamingtribe.com/status/13194139933336/
- 4 replies
-
- 1
-
-
- Level 10
- Thermaltake
- (and 3 more)