Search the Community
Showing results for tags 'rgb'.
-
Hello my Fellow TT Army: Welcome to the Toughpower Grand RGB Gold Owners Club. Once again you have made the right decision...and we thank you for that. Toughpower Grand series is one of our best series so far and this ATX PSU contain all the best features and most affordable price ever. Welcome to share your builts and ask questions here, we are looking forward to see all amazing works around the world.

-
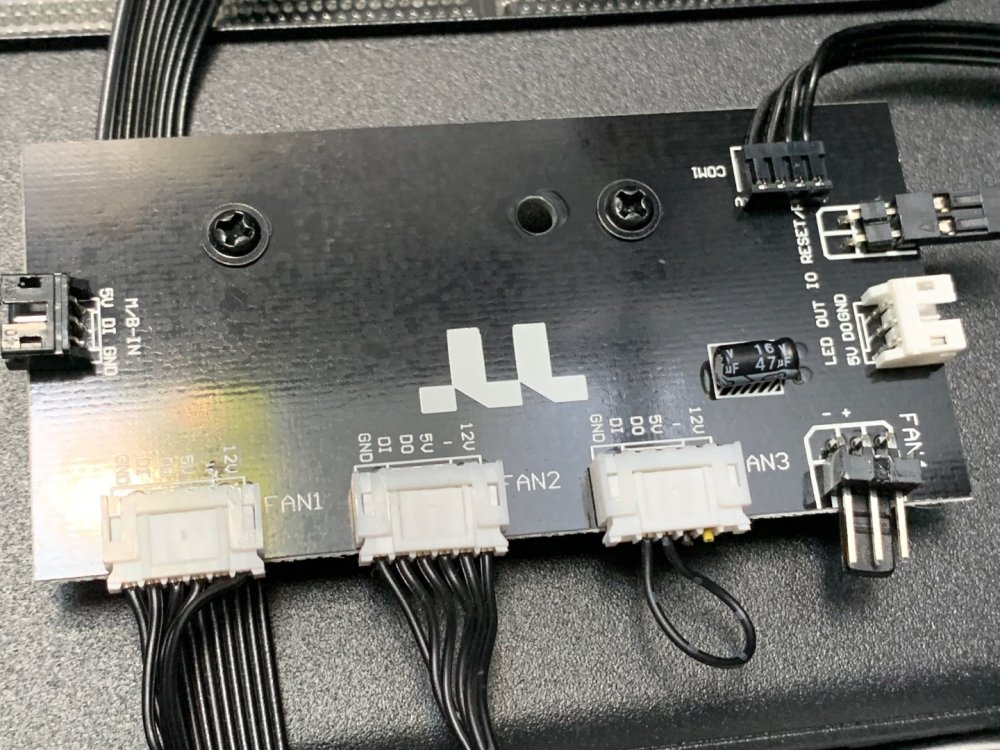
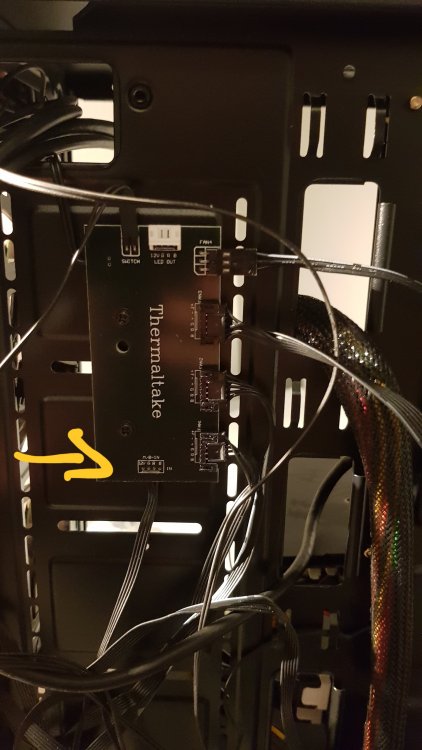
Hello, how to connect rgb coolers in the thermaltake commander c31 case to the motherboard? Do I understand correctly that this will require a splitter in the photo?
-
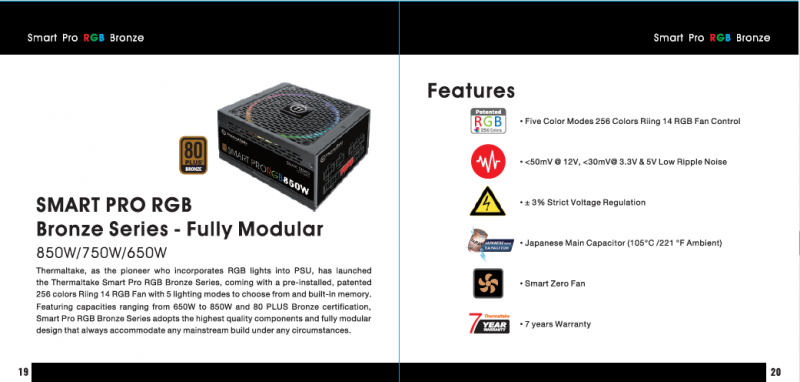
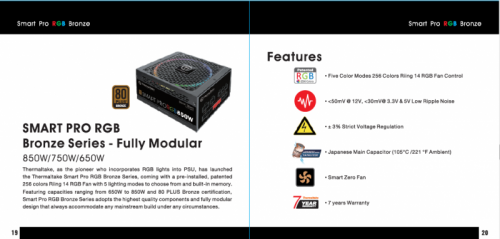
Greeting to all Smart Pro RGB owners: Welcome to the Smart Pro RGB Bronze Owners Club. Once again you have made the right decision...and we thank you for that. Smart Pro RGB Bronze series is our first fully modular bronze power supply alone with the best features and most affordable price ever. Welcome to share your builts and ask questions here, we are looking forward to see all amazing works around the world.
-
Hello, We have a wonderful keyboard with original Cherry Mx switches. Thermaltake is a premium company selling excellent quality pc peripherals from long time, hence expectations from them is at par with their competitors, however at the same I found Premium X1 keyboards software is way too weak and buggy compared to competitors like Corsair and Razer's solution. I did not found any way to layer multiple RGB effects with this software and make cool custom lightning profiles. Thermaltake please advise if any possibility / hope of adding this multi layer effects capability with new software update from your end, so that we can have custom lighting profile sharing community like other brands. Thermaltake fans please share your thoughts / expectations about this. Thanks......
-
Hi all Building a new PC and just want to sanity check whether I can do this or if it will overload the Mobo and blow something up.. Case: Corsair 5000D Airflow (comes with 6 x 4-pin PWM fan repeater/hub). https://www.corsair.com/ww/en/Categories/Products/Cases/Mid-Tower-ATX-Cases/5000D-AIRFLOW-Tempered-Glass-Mid-Tower-ATX-PC-Case/p/CC-9011211-WW#tab-overview Mobo: MSI B550M Mortar Max Wifi https://download.msi.com/archive/mnu_exe/mb/MAGB550MMORTARMAXWIFI.pdf Fans: -2 x (3-Fan Pack of Riing 12 LED RGB Sync Edition fans) – https://www.thermaltake.com.au/riing-12-led-rgb-radiator-fan-sync-edition-3-fan-pack.html Instructions for the Riing 12s – https://thermaltake-au.azureedge.net/media/productattach/db/support/usermanual/_a2485c9a43f4414b8f482246010b8d37.pdf -2 x Corsair 5000D Case Fans -1 x Artic Cooling F12 PWN Fan (https://www.scorptec.com.au/product/cooling/120mm-fans/88929-acfan00203a) Questions: 1. The Riing 12s manual says I need to connect to the 12V RGB header on the Mobo. But the Mobo only has 1x 12V RBG header (JRBG1). Can I daisy chain 6 of the Riing 12 fans into the single JRGB1 header with no issues? Looking at the mobo manual the JRGB header has a max 3A rating, and the rated current for the Riing 12s are 0.2A – which will be total 1.2A for the 6 fans. But on the physical fan itself, the rating says 0.3A (I assume this is the motor and not the RGB?) – in which case the total would be 1.8A for the 6 fans. Would this be okay? 2. I want to use the supplied 6 x 4 pin PWN Fan hub with the case and connect all the fans to it; Can I use the supplied Riing12 3-splitter PWN cable to connect all 3 fans together and then into a single hub header? Effectively I will use 5 hub headers for the 9 fans that I have. 2a. The Fan Hub is powered by SATA cable from the PSU (so I don't need to worry about max amps here) and then I can connect the fan hub header directly to any fan connectors on the mobo (ie. SYS_FAN). Is this correct? Any help would be greatly appreciated! Thanks!
-
Thermaltake View 71 Tempered Glass Full-Tower Chassis View 71 TG RGB Product webpage View 71 TG Product webpage Designed to expand the legacy of the View Series lineup, the View 71 Tempered Glass Edition Full Tower Chassis features unrivaled cooling support and expandability surrounded in tempered glass for a one of a kind view. Swing open full window tempered glass panels for easy access with all panels properly spaced for optimal airflow. Preinstalled with two 140mm Riing Blue fans, Vertical GPU mount and 3-Way radiator support for today’s PC hardware demands, the only limitation is your imagination.
-
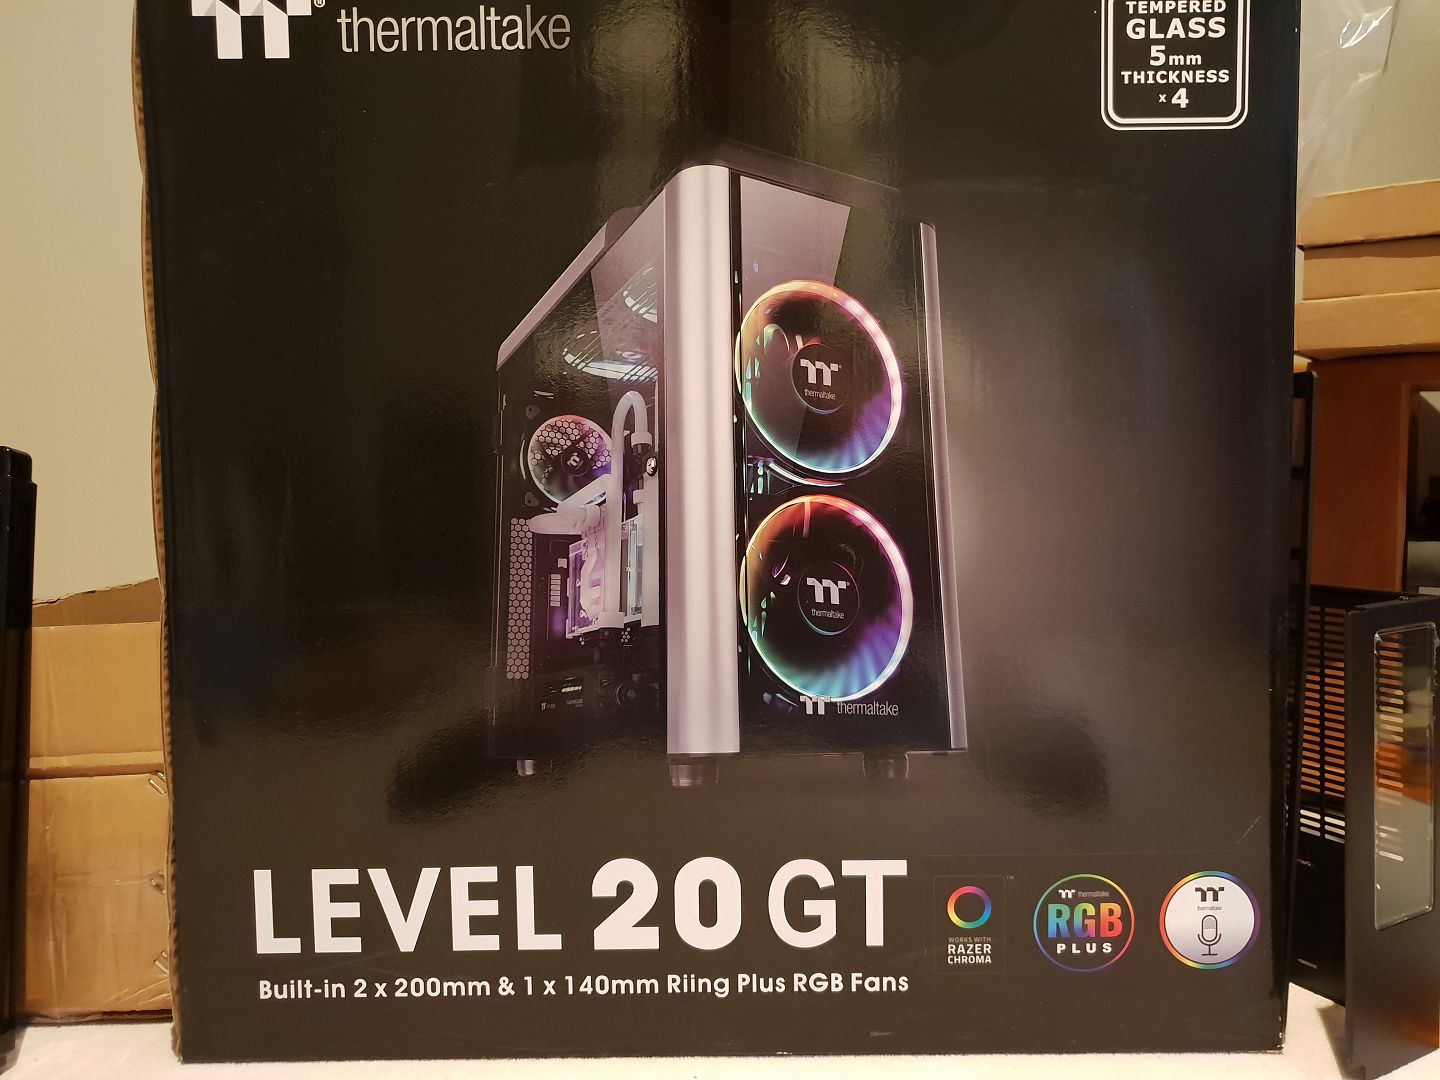
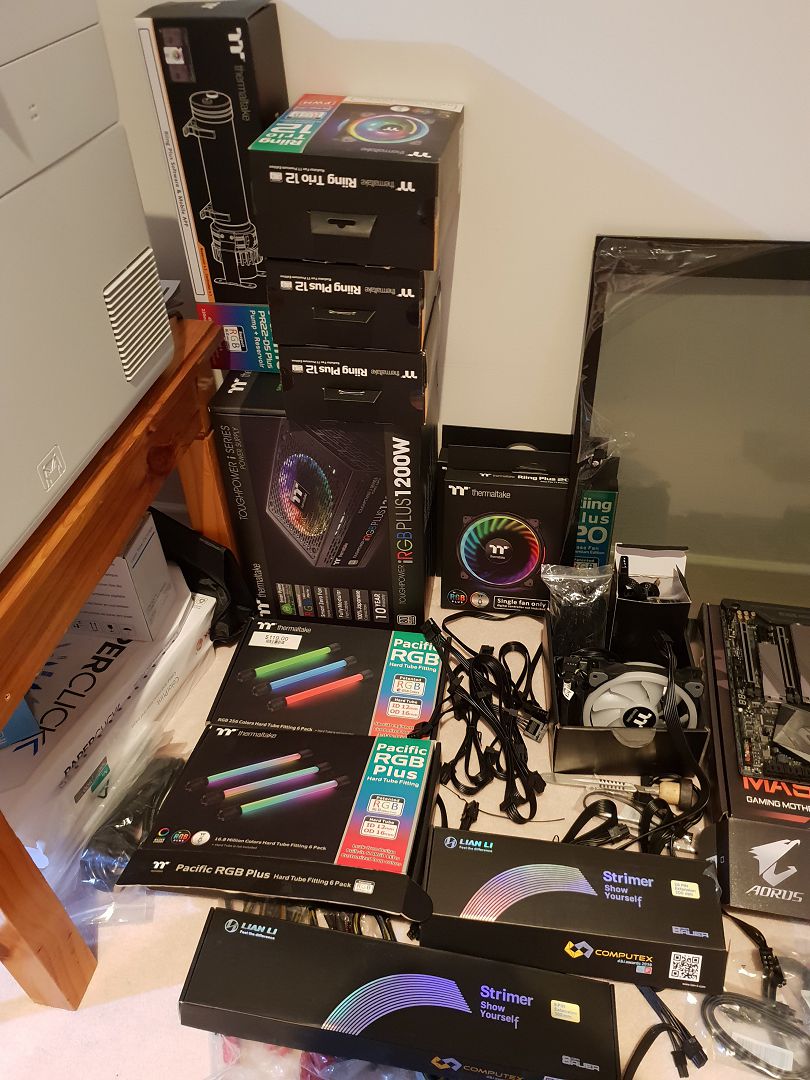
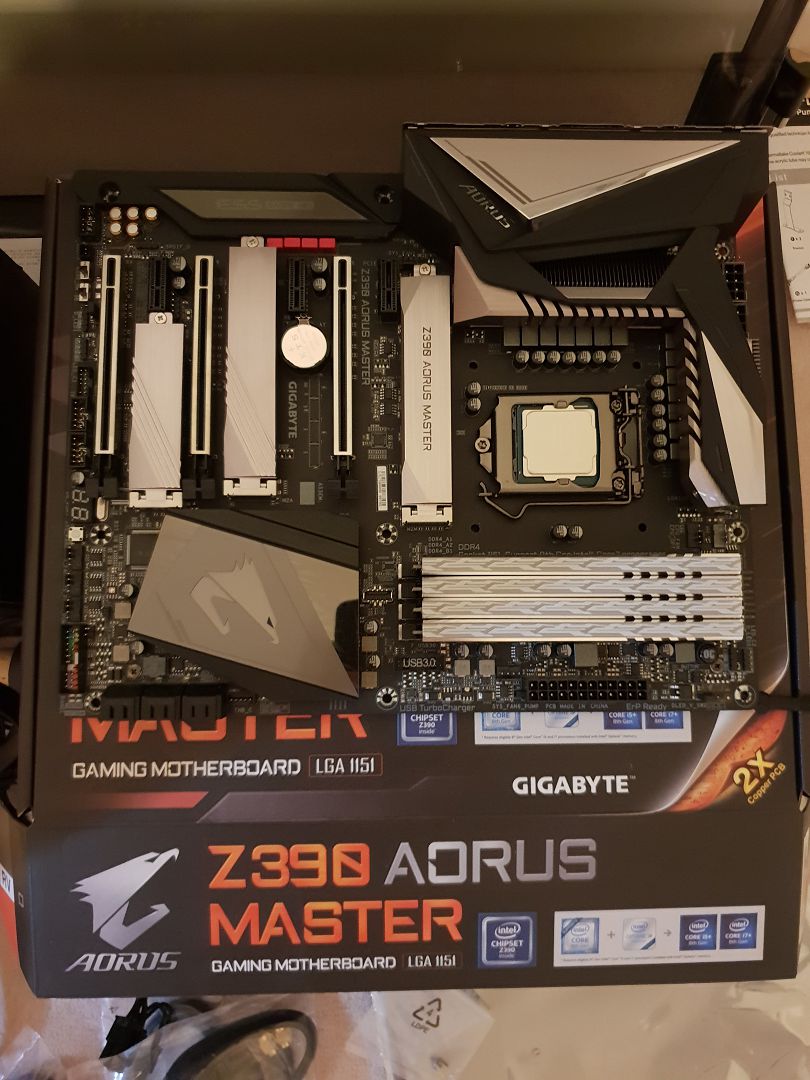
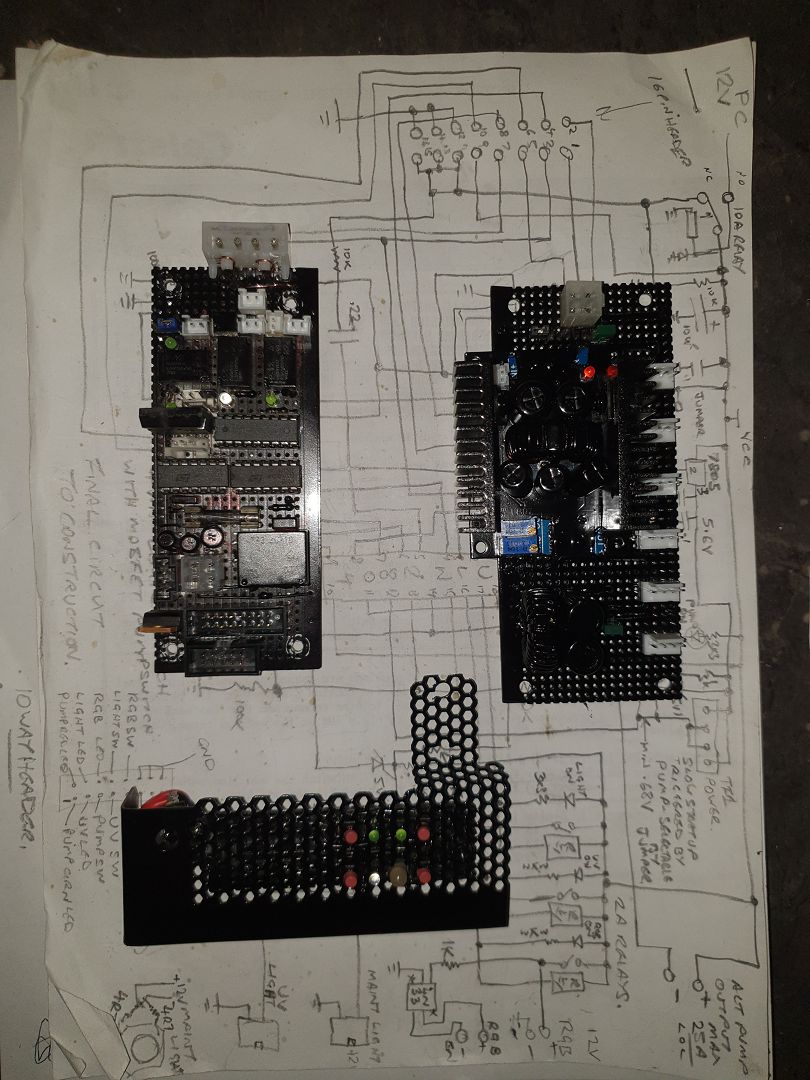
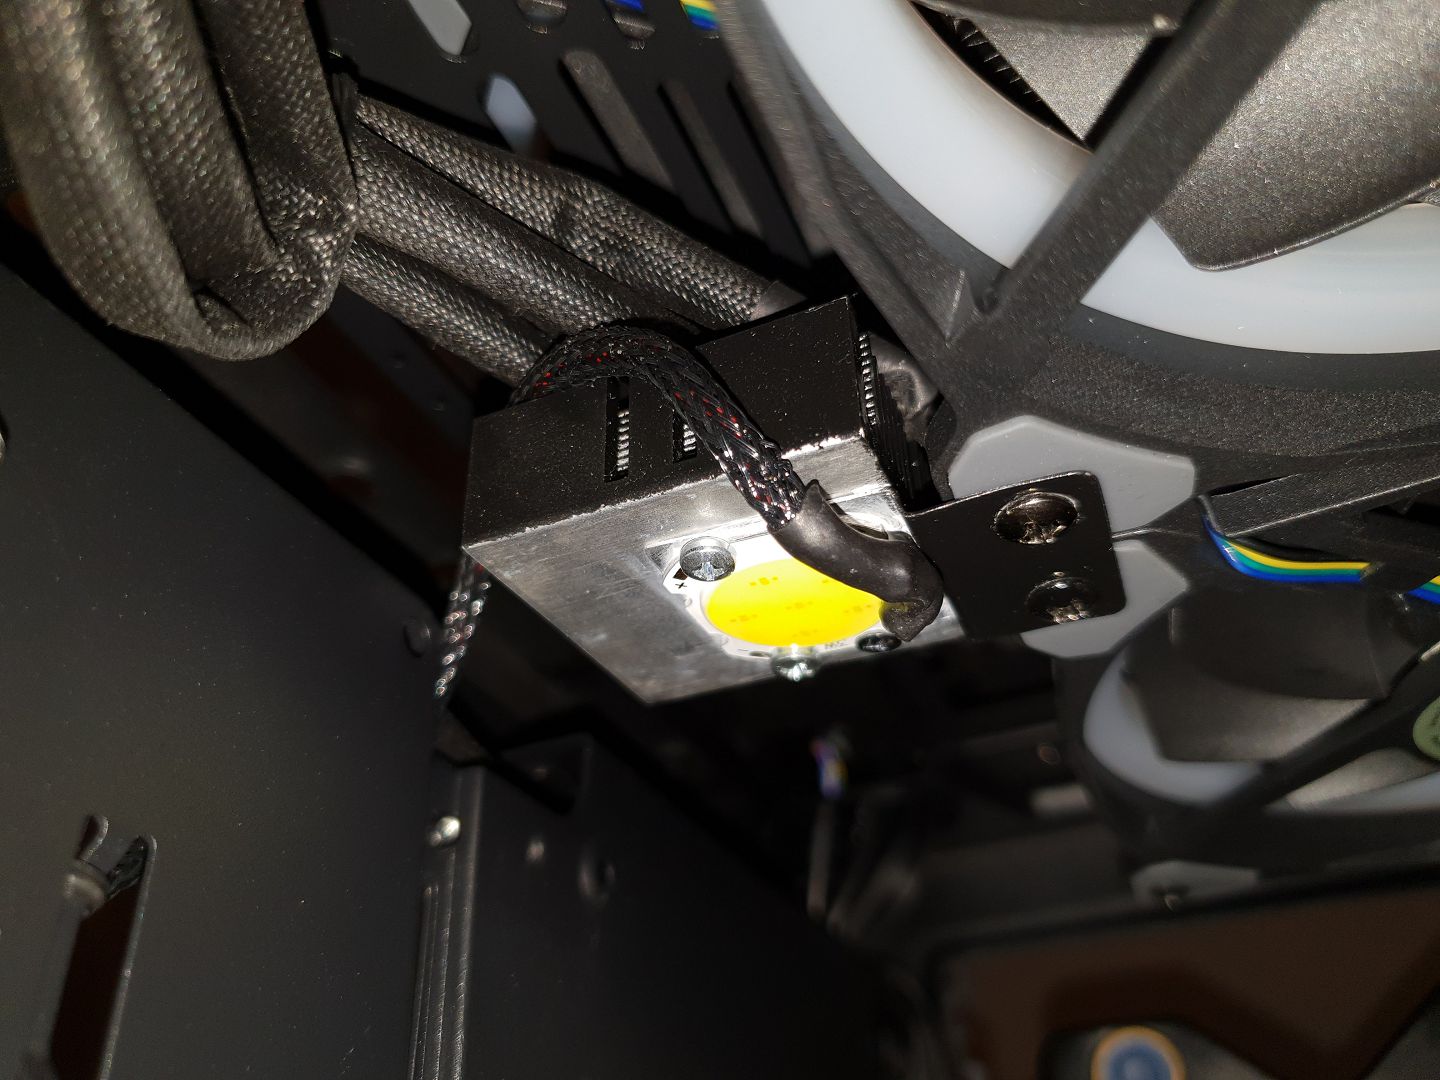
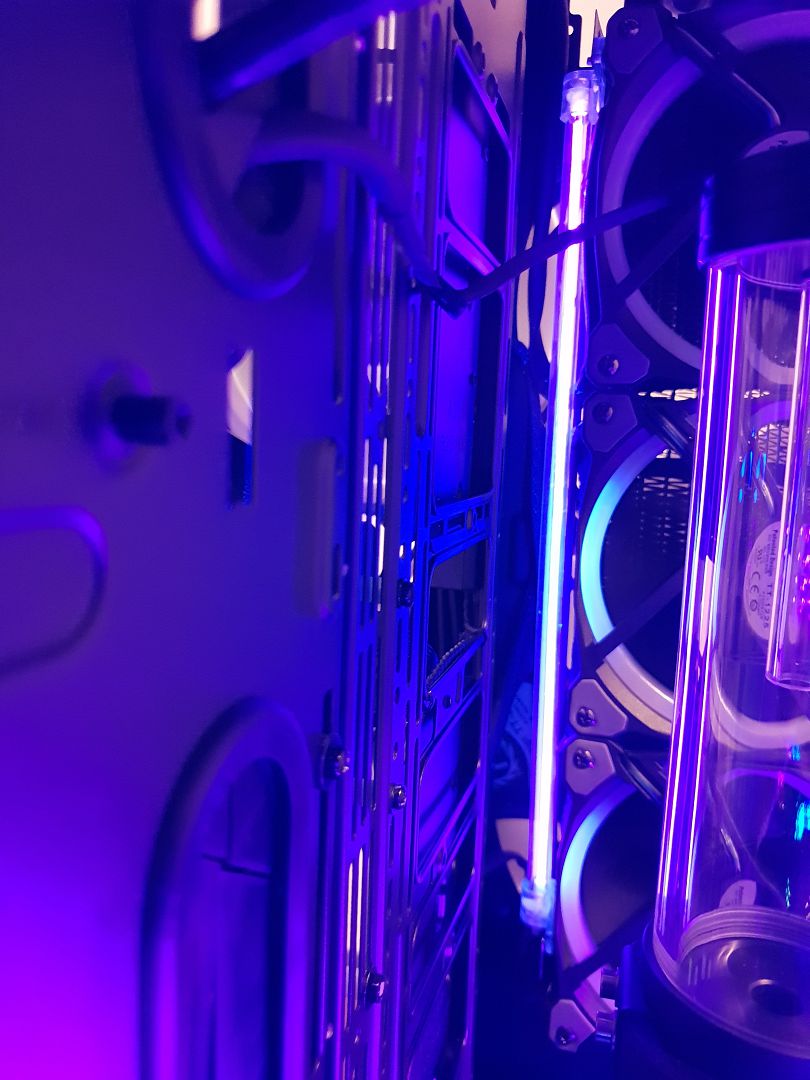
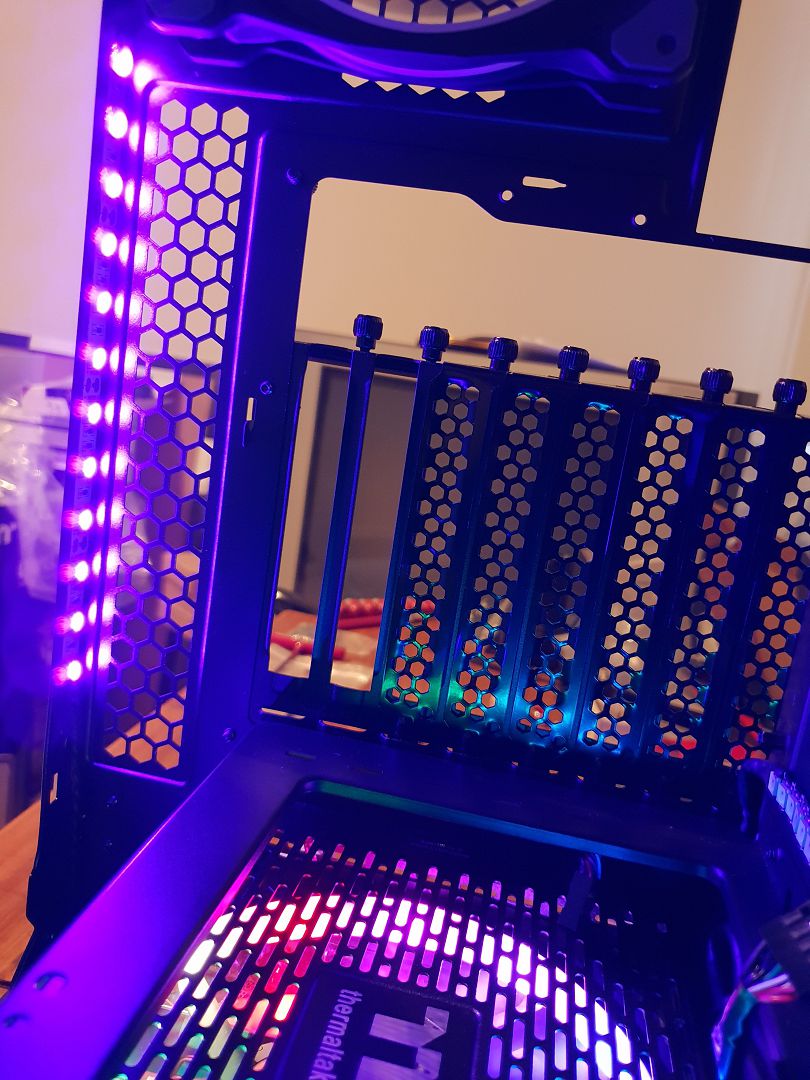
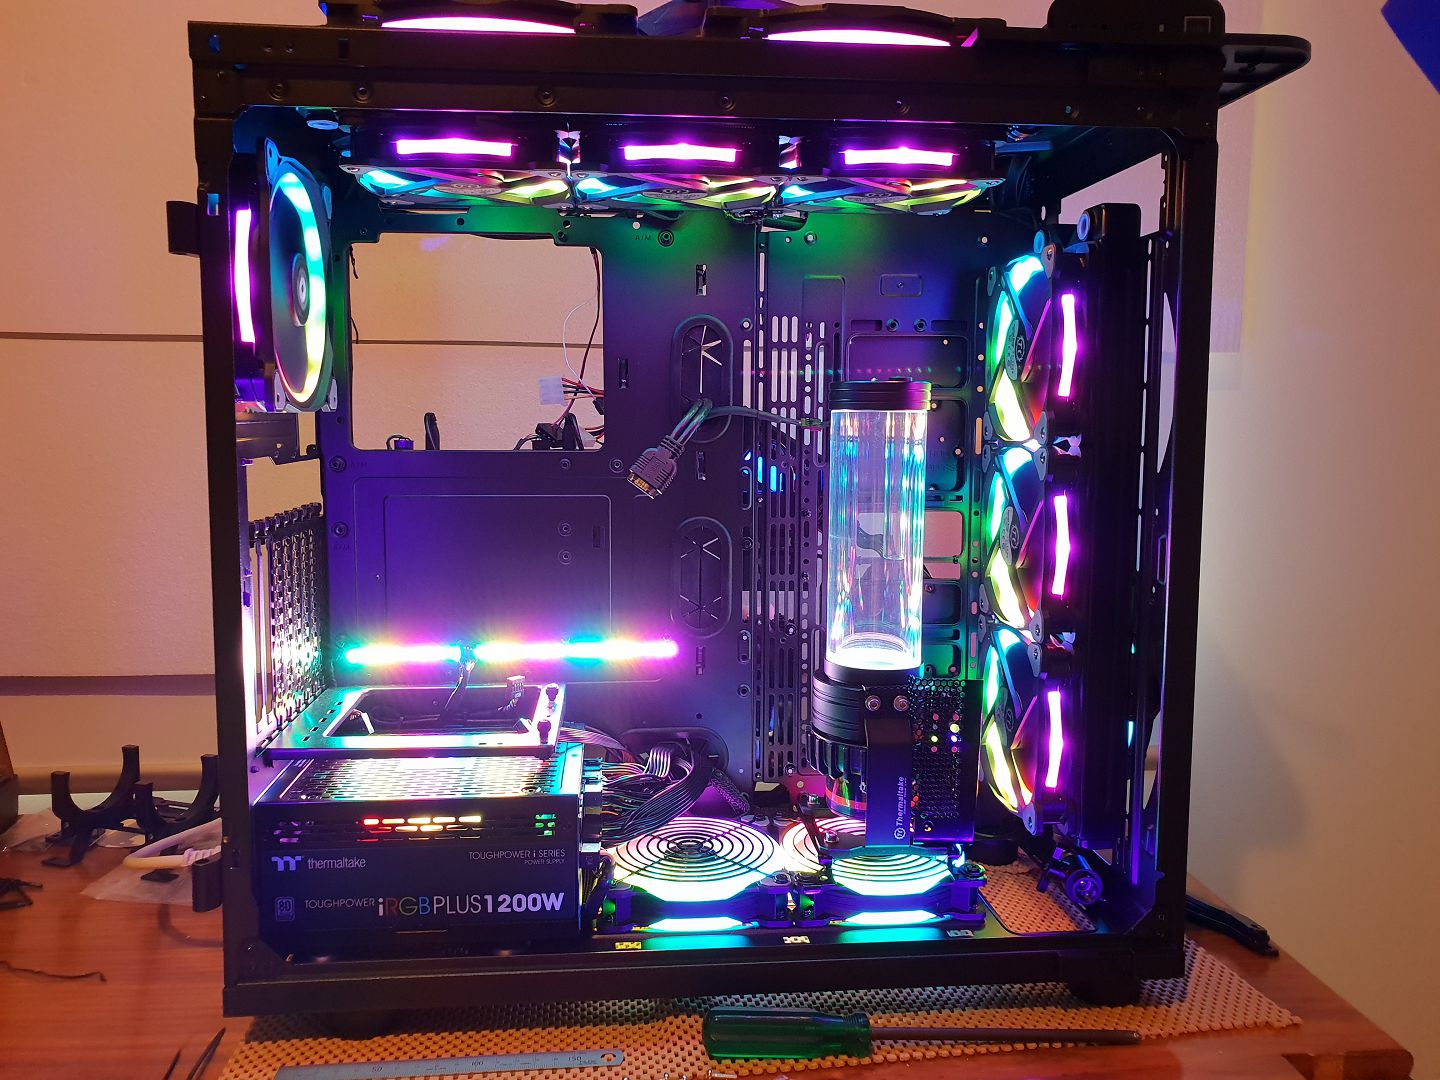
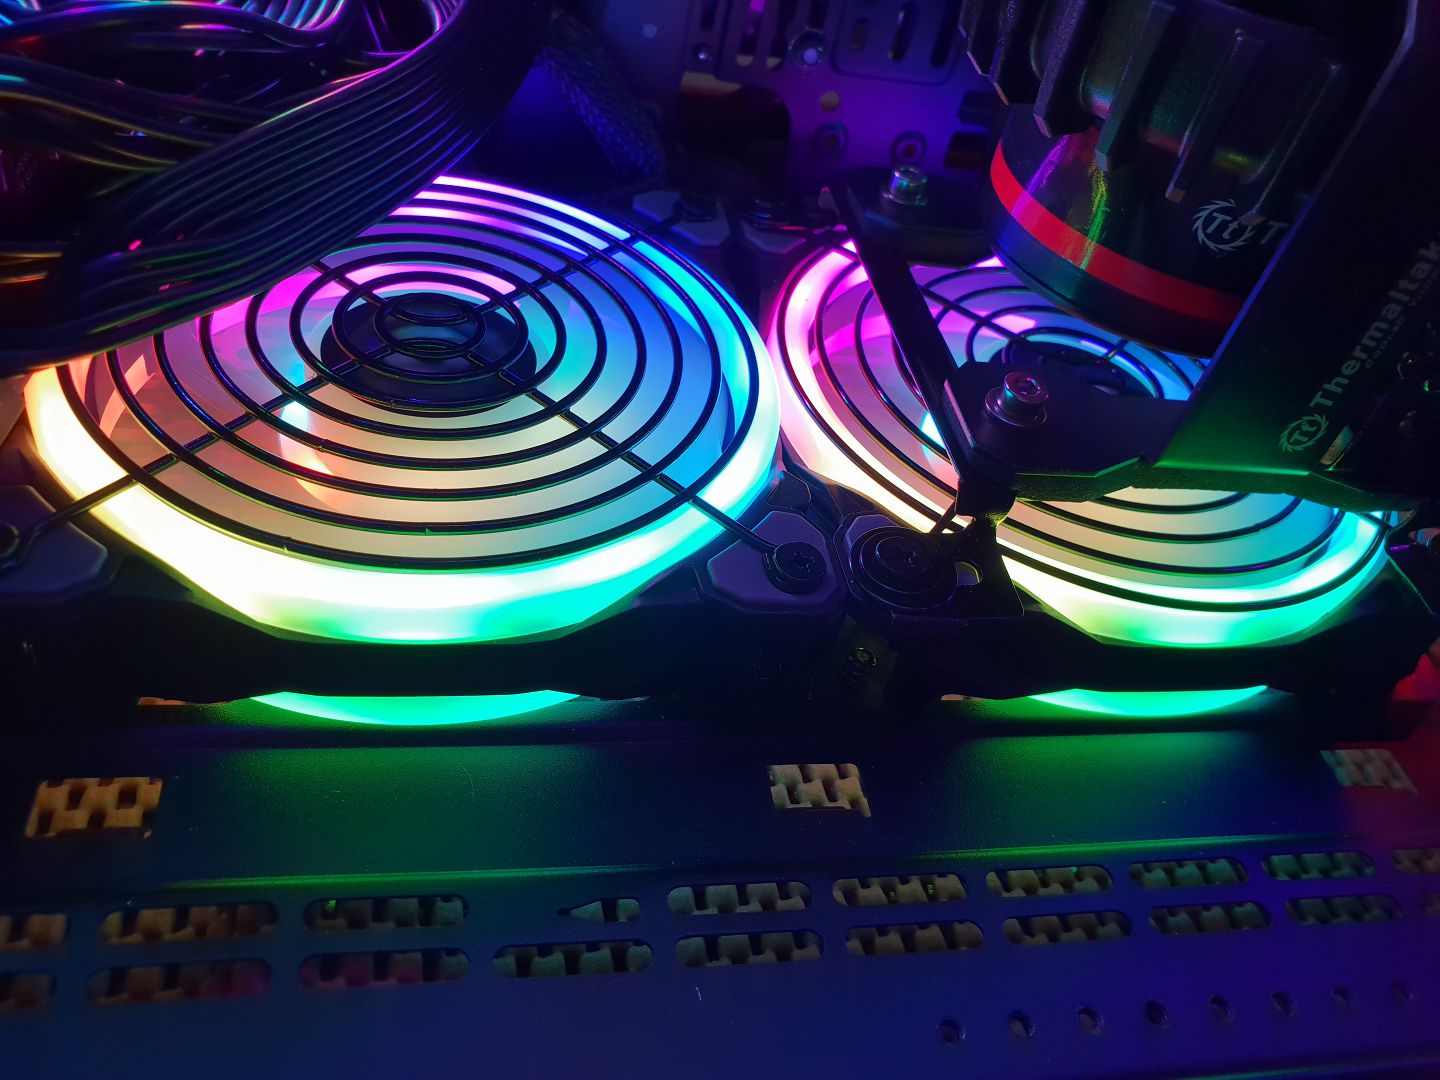
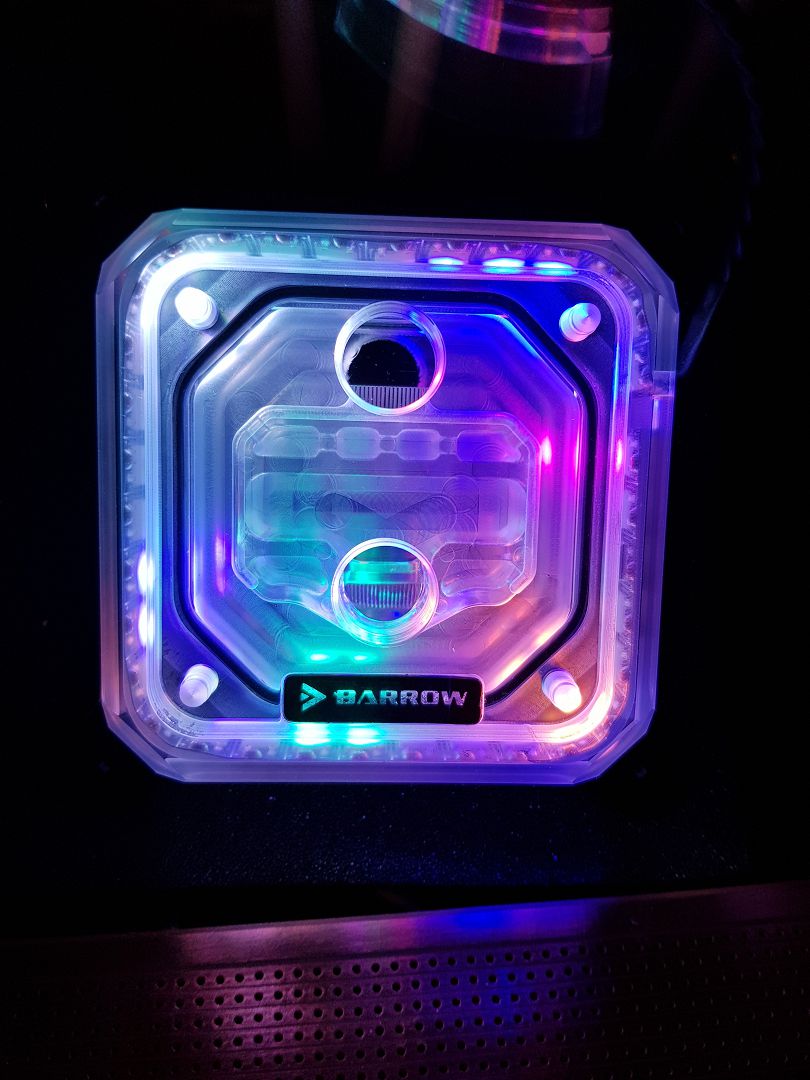
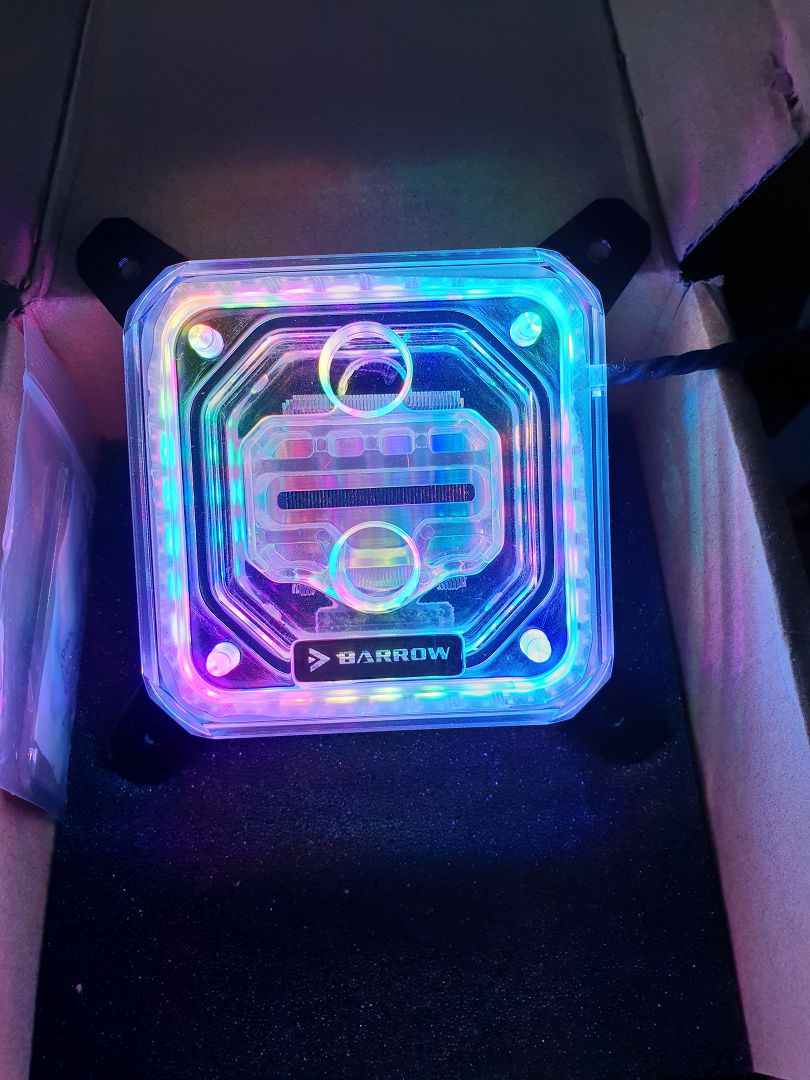
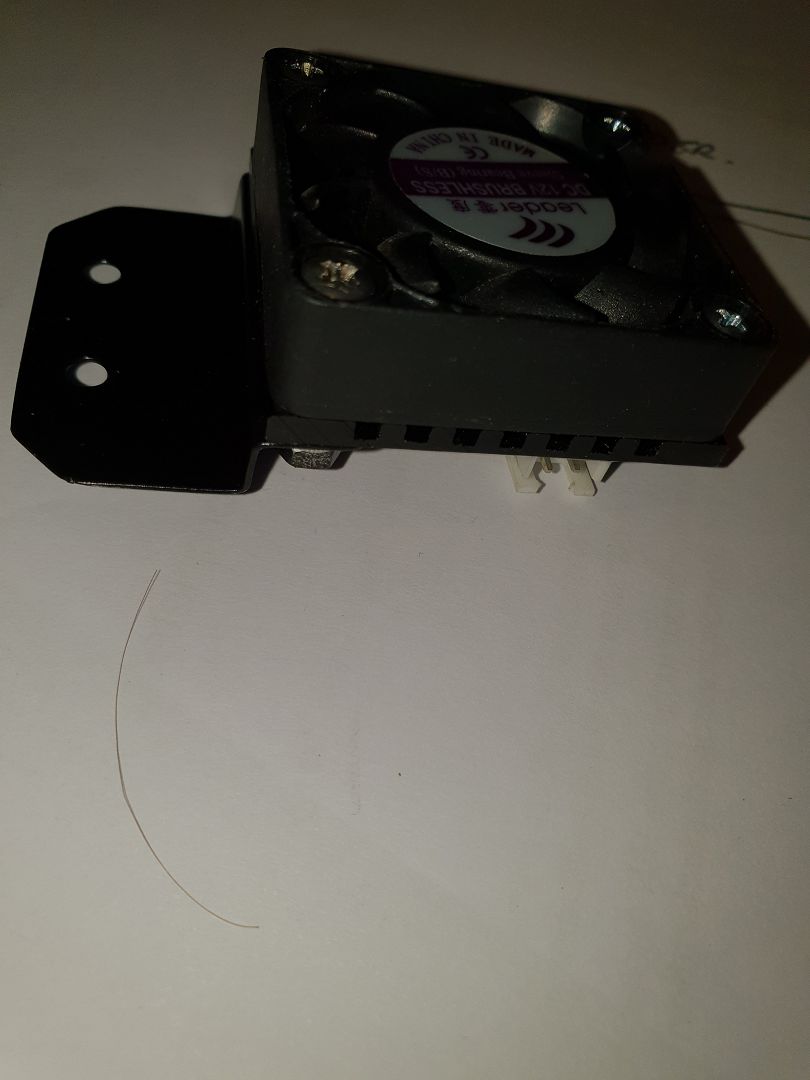
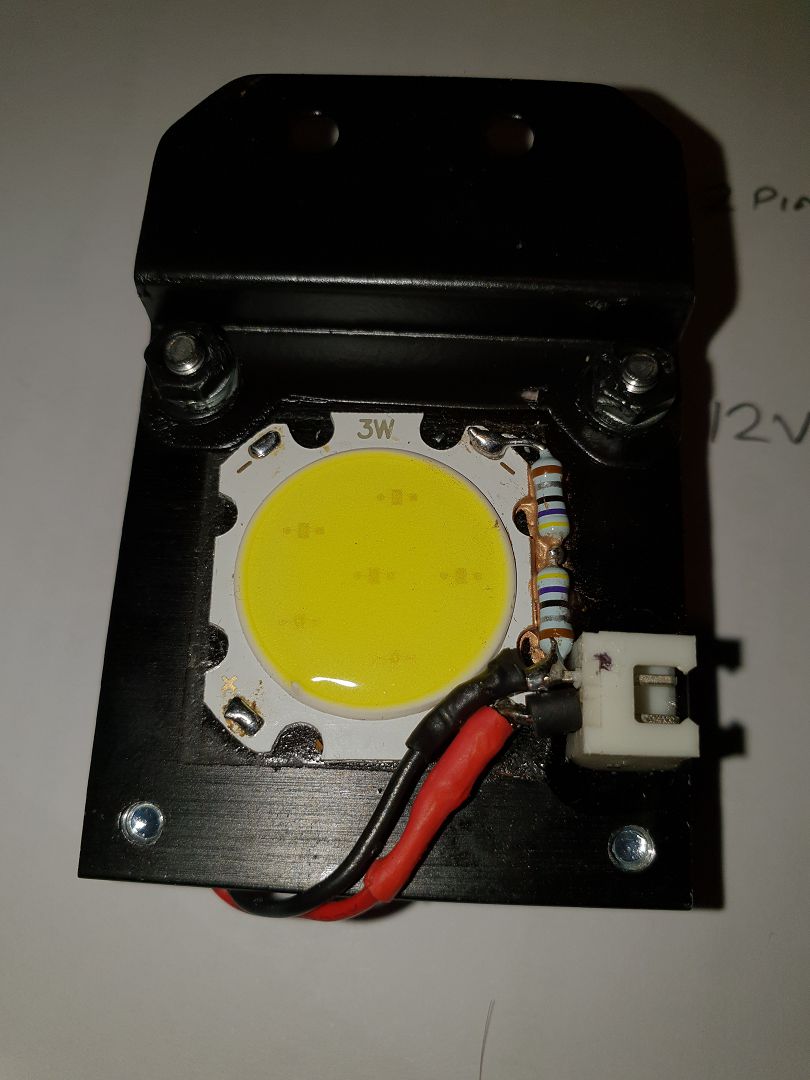
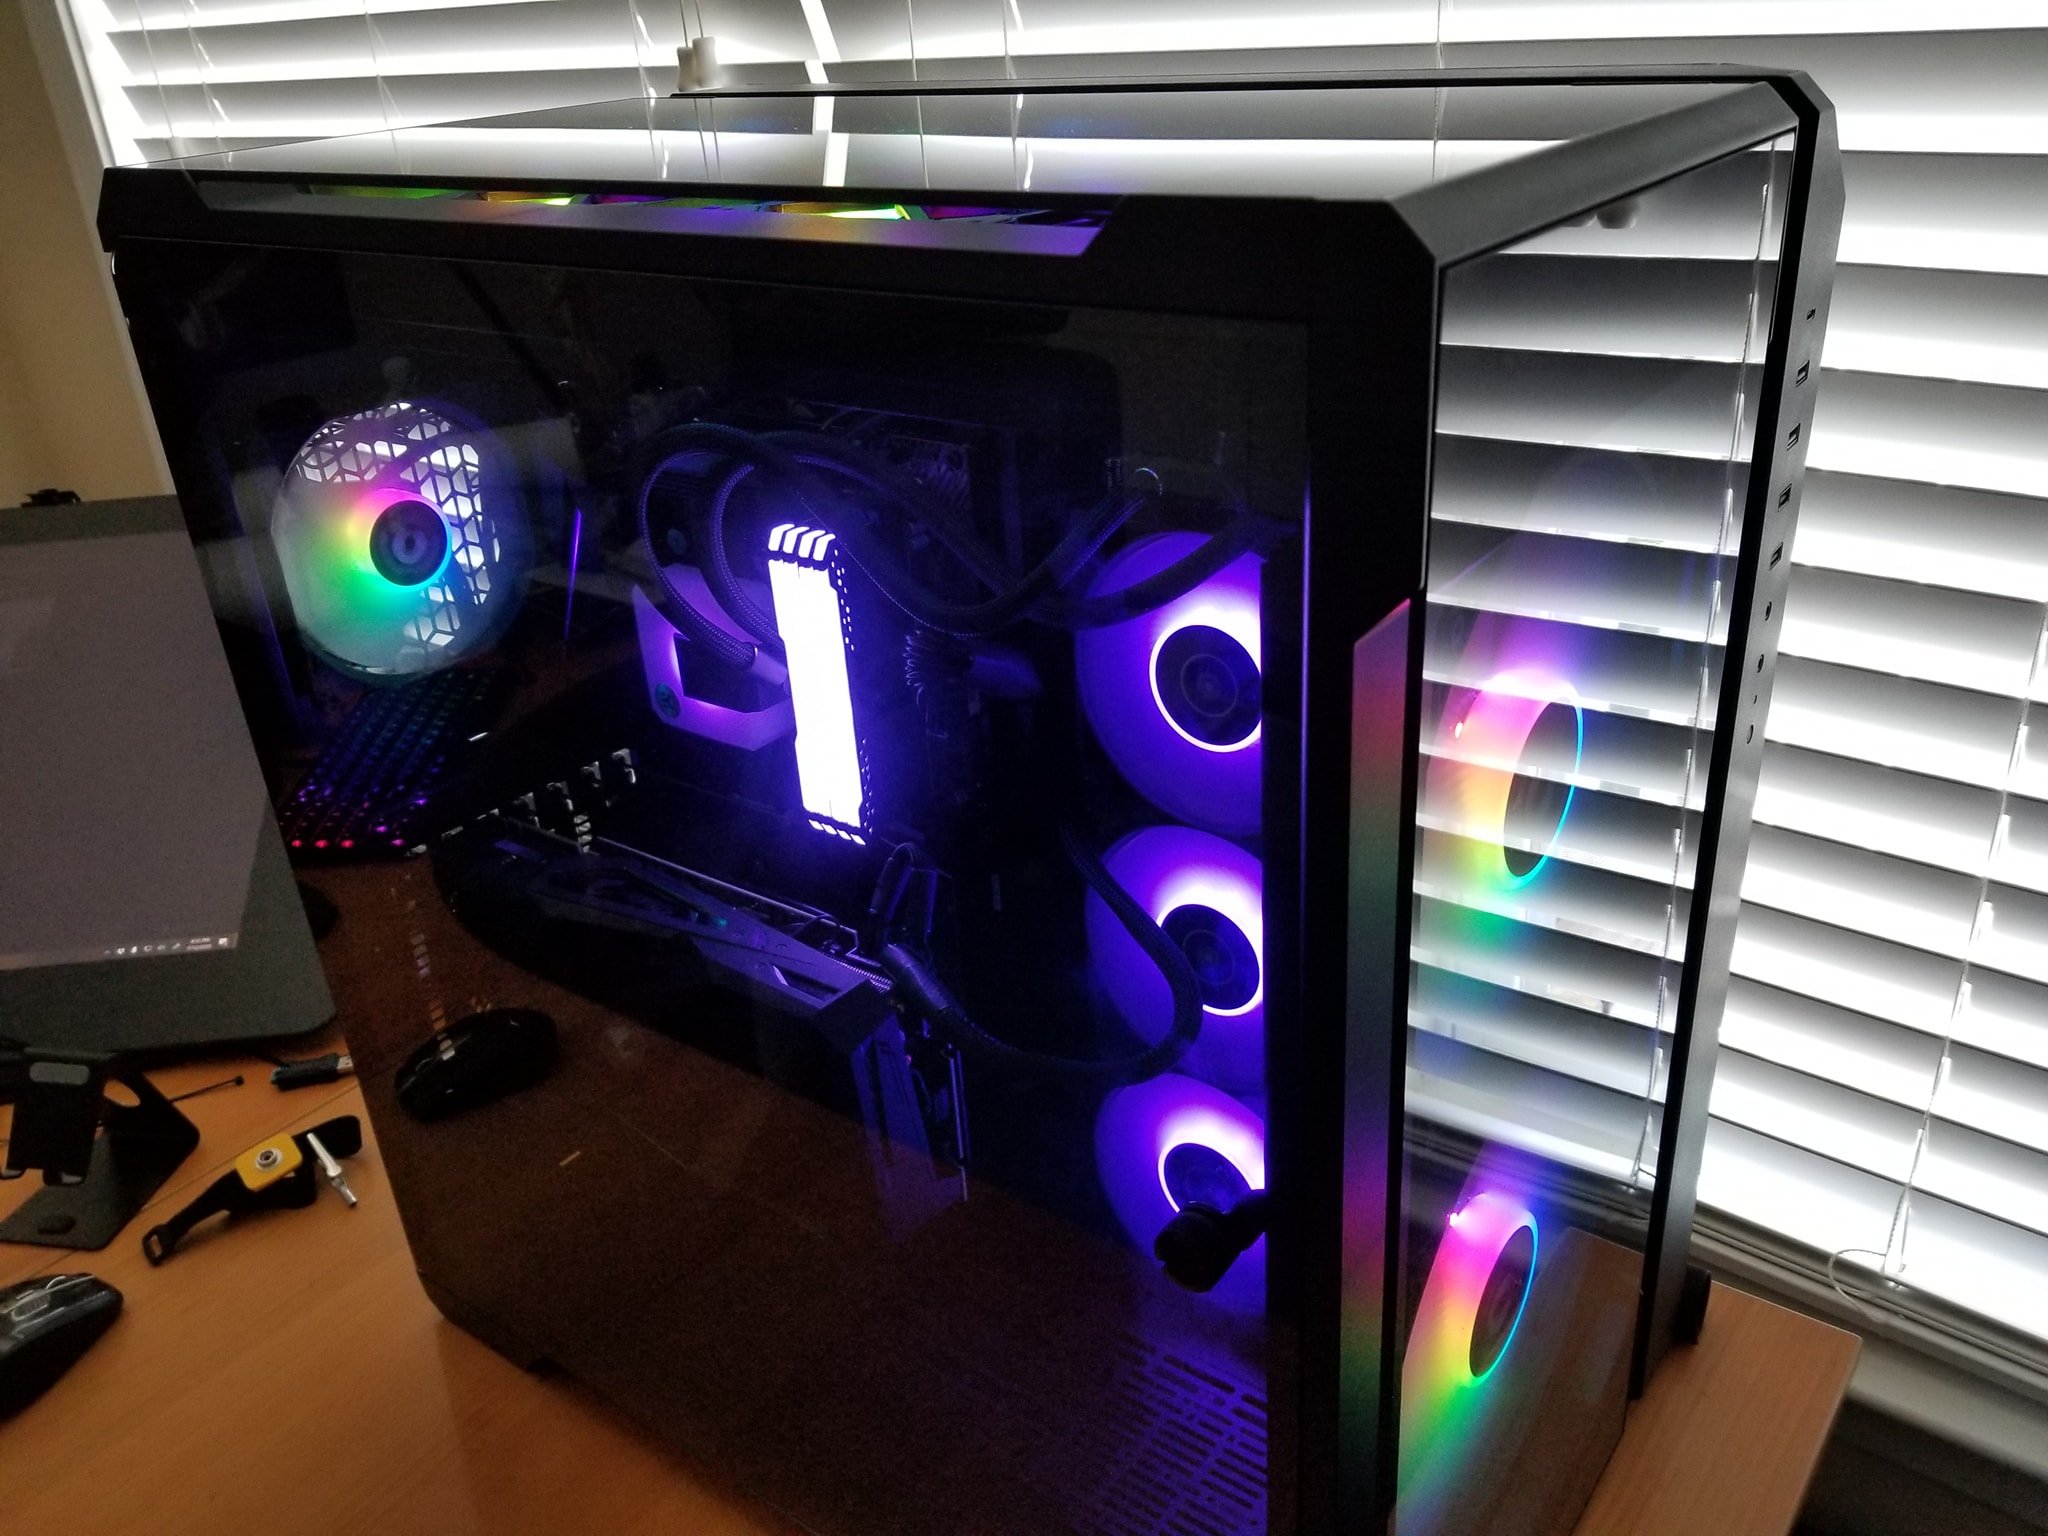
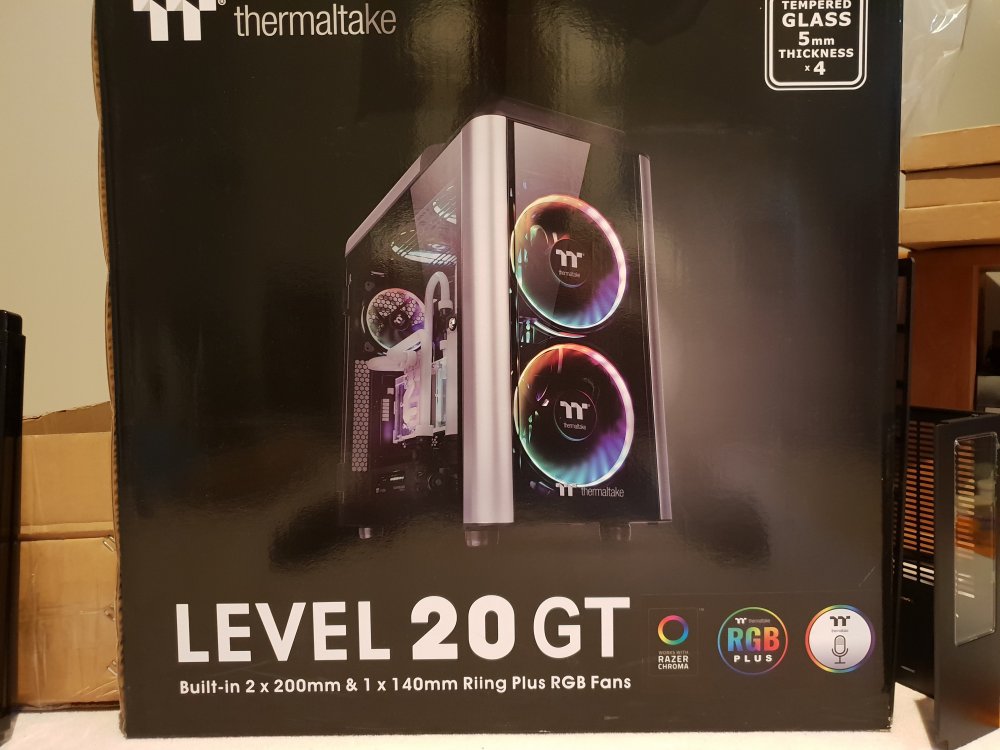
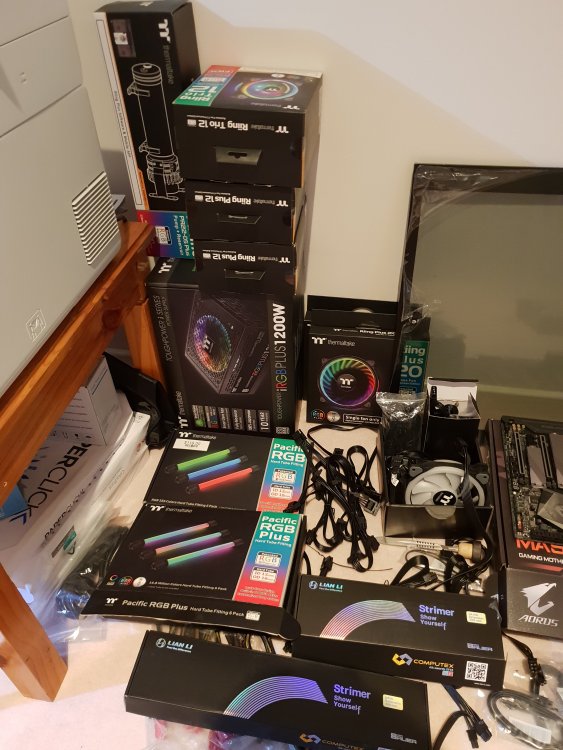
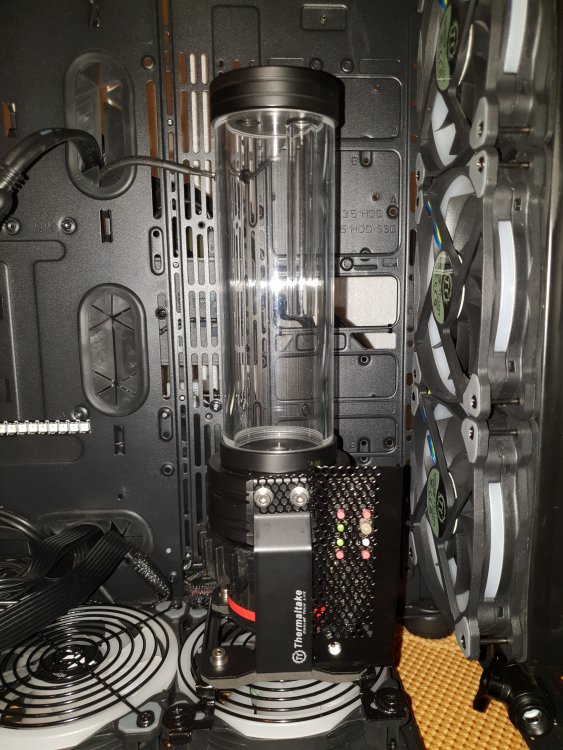
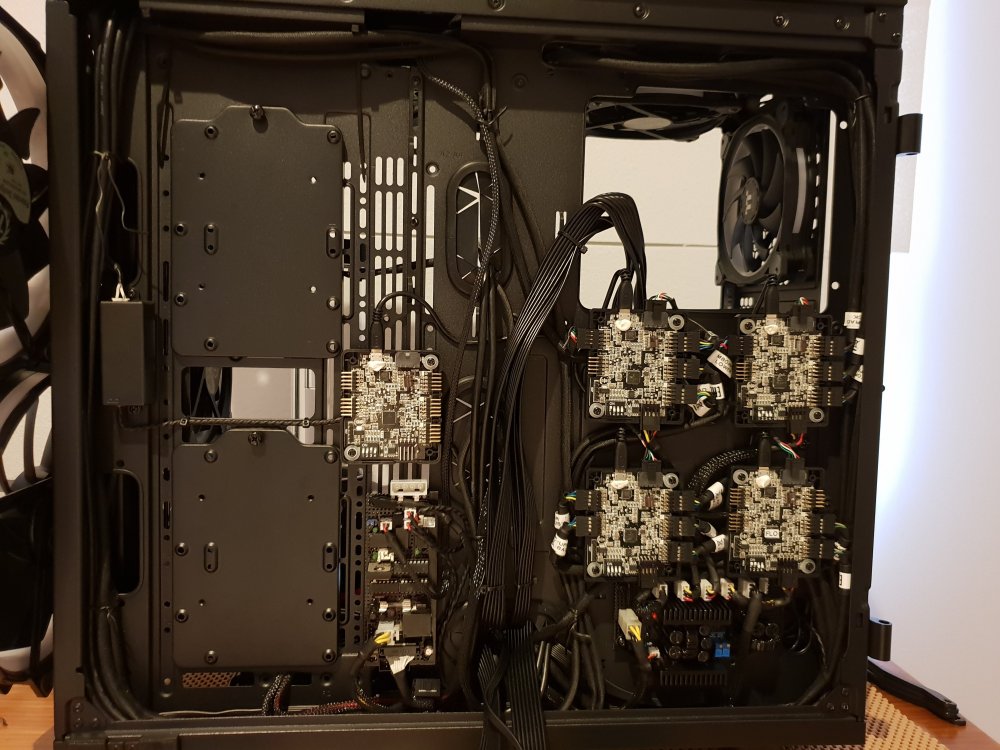
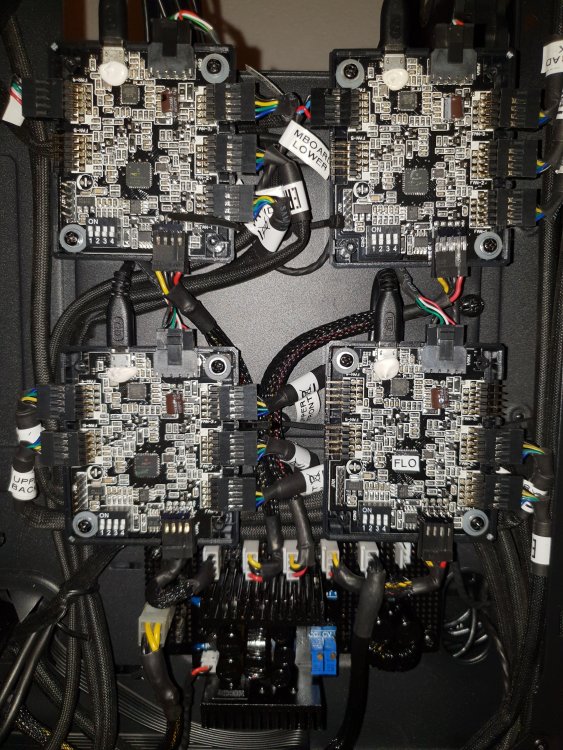
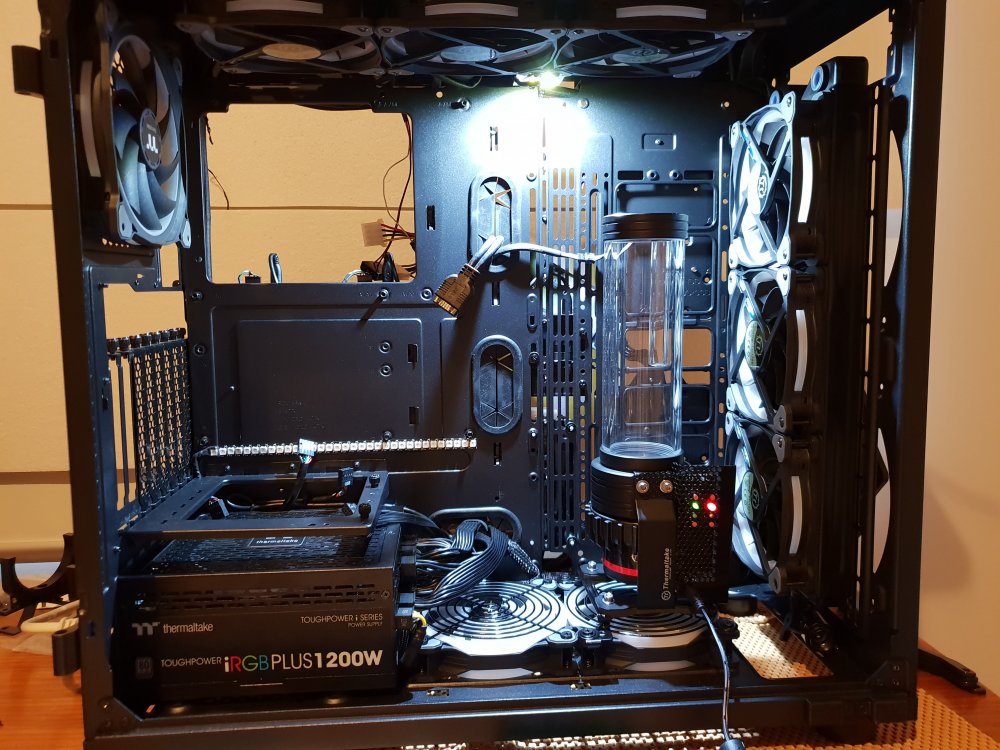
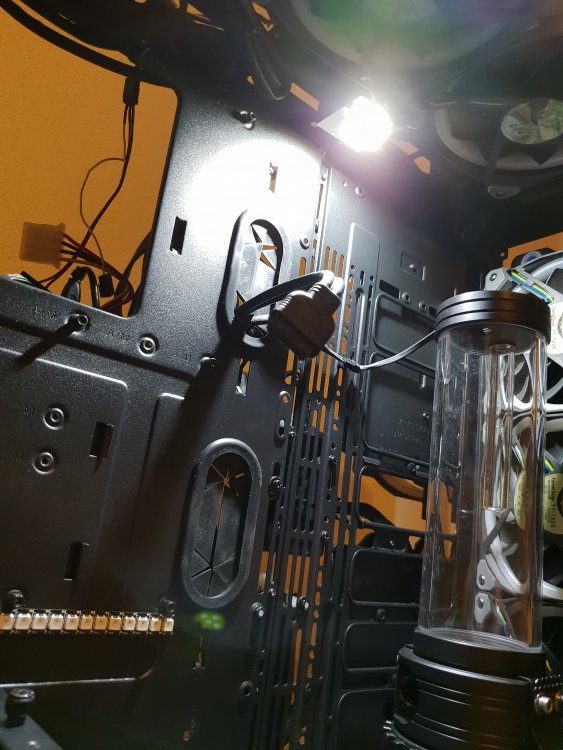
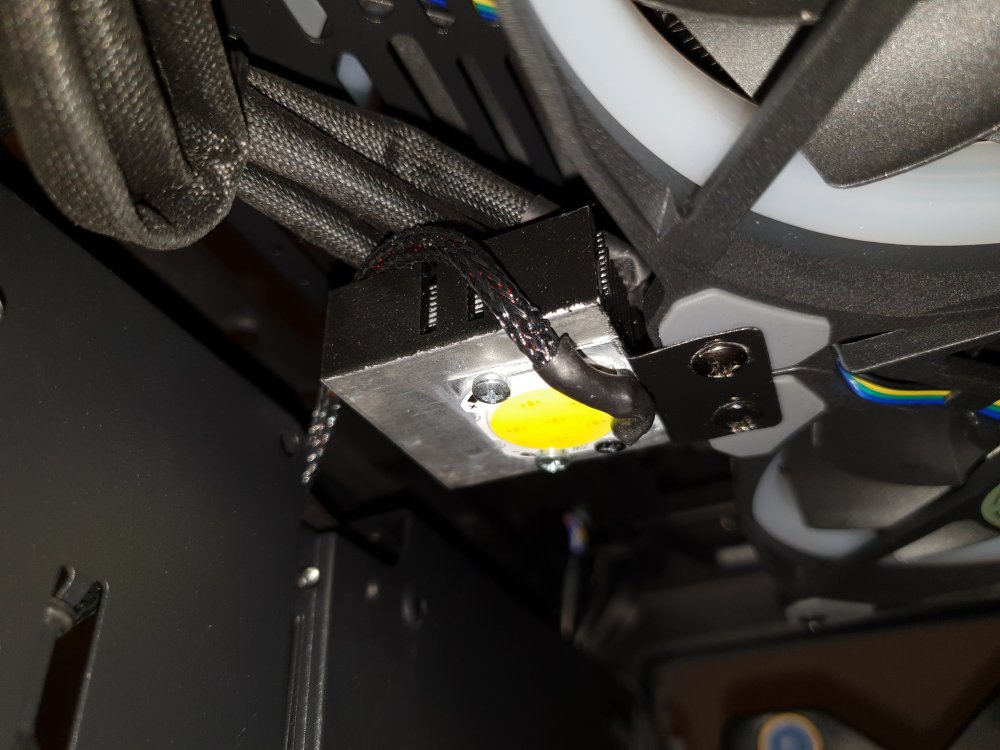
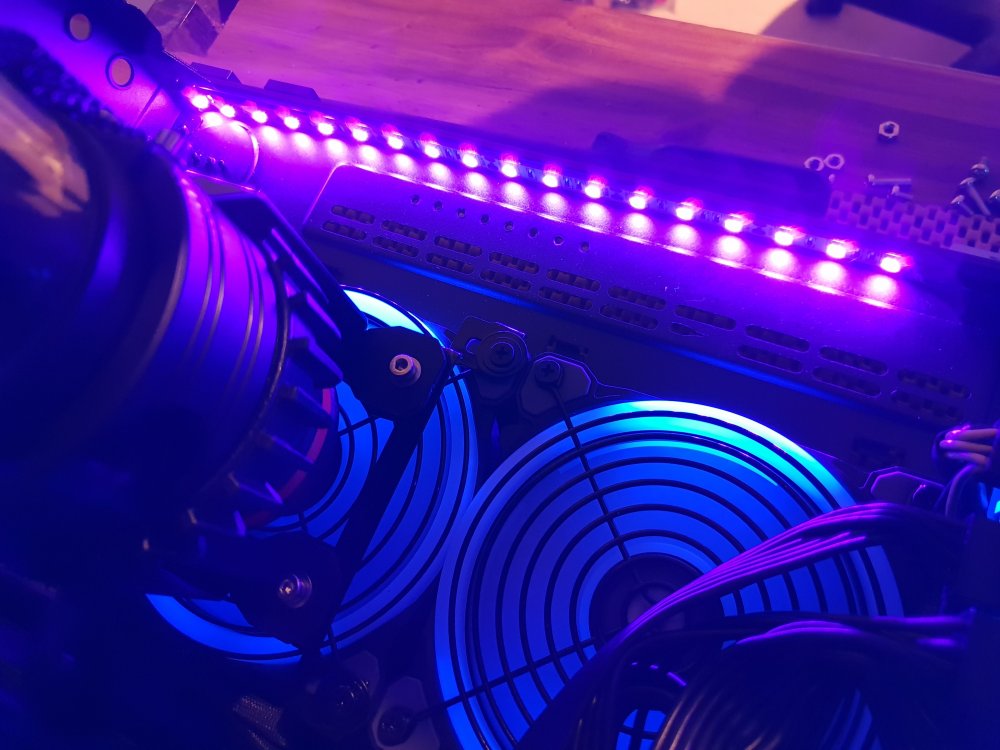
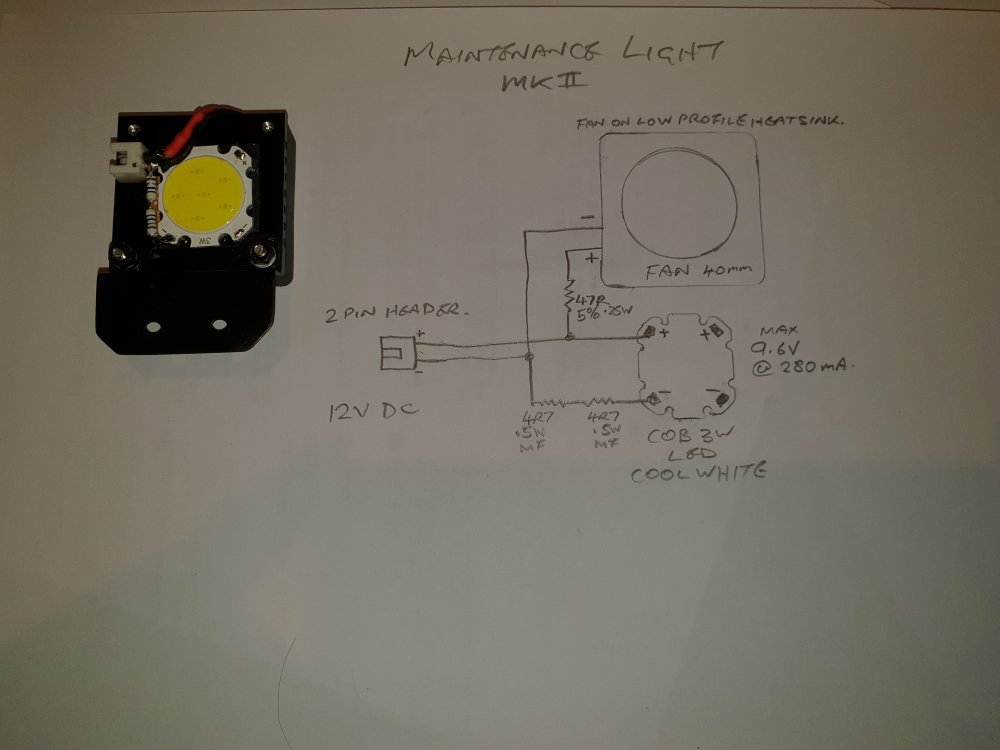
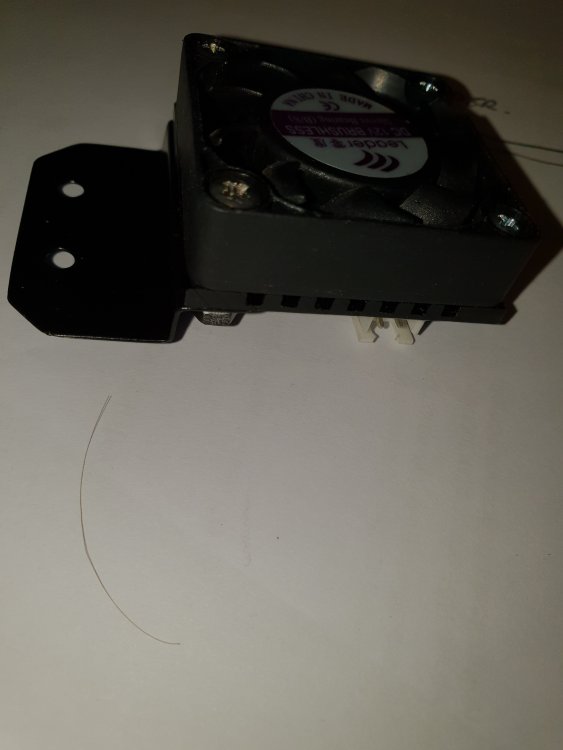
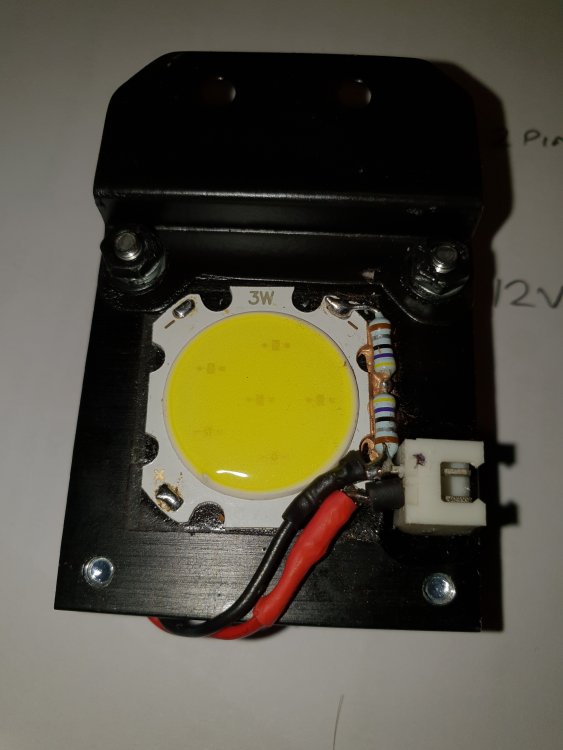
My old rig with Z97 and i5 4690K running AIO cooler was getting a bit dated at 4 years old. As I don't know how long the AIO cooler will last and VR is pushing the 4690K a bit it was time for an upgrade. Walked into Centercom and there is the Level 20 GT plus sitting on the floor in front of me in a very big box. The 200mm ARGB fans got me, as its such a nice case thought I might as well go all out with ARGB everywhere and its perfect for my first open loop which might as well be nuts as well. Scroll straight to the bottom of this blog for the finished product. What to stick in it took a bit of research and based on price and availability ended up with this: 2 x 360x25mm copper/brass radiators from ebay 6x Riing Plus 12 fans for the radiators Another 2x 200mm Riing Plus 20 fans for the top of the case 3x Riing Trio 12 fans for the bottom of the case and 1 out the side TT Gaming riser cable PCI-E 3.0 X16 200mm Pacific PR22-D5 Plus pump Pacific RGB Plus Hard tube fitting set Pacific RGB Hard tube fitting set Pacific TF1 Flow/temp sensor Pacific Flow Indicator 2 iRGB Plus 1200W Power Supply TT Ice blue and Acid green concentrates 2 litres of TT clear coolant Gigabyte Z390 Aorus Master motherboard Gigabyte Aorus 16Gb RGB memory kit TT Toughram RGB 32Gb (2x 16Gb kits) i5 8600i-k CPU (Initially anyway) i9 9900K CPU Upgrade Samsung 970 Evo NVMe M.2 500Gb drive (For system only) Seagate Barracuda Pro 6TB (for game storage) Hard drives and iGame GTX 1080Ti from old PC Lian Li CPU and PCIE Strimmer RGB Cables Bykski GPU water block to suit above Barrow CPU water block (which I've polished to a glass like transparency) Heaps of PETG 16mm tubing and bending tools Heaps of G1/4 fittings, extenders, adapters, couplers and plugs. Turned out to be quite a list in the end which has been sourced through Centercom Bundoora, TT Direct and ebay. Just a little bit of TT stuff....thought I would keep the theme. Aorus Master....couldnt wait for the extreme water cooled version and besides this cost more than the processor, which is a first for me, didn't want to know what the extreme will cost. Edit: Motherboard, processor, memory and Evo HDD were tested to bios with a heatsink and fan to verify these parts were ok before any assembly commenced. PART ONE RGB Design Concept As the case, leads, motherboard and mostly everything else is black I decided to make everything where possible...black thus Ebony Bliss also as everyone else gives their build blog a name so will I. That's a lot of black so Its going to need balls of RGB lighting to even see it. Bring on the 13 Riing fans and other RGB parts listed above. I've also included ARGB strips under the front and lower edges of the motherboard adapted to use the TT Controller plugs. The CPU and GPU blocks both have ARGB strips also adapted to TT plugs along with the Strimmer leads. All this RGB requires power and a lot of it, my calculations averaged around 10A @ 5V and I've added to that. While the TT power supply can deliver 30A @ 5V getting 10A out of it with Molex plugs gets messy plus I didn't want to deny the motherboard any current so a power distribution rethink was required. The UV concentrate looks excellent....suppose it will need UV lighting then. Bring on the cold cathode 300mm tube hidden down back edge of front radiator plus UV LED strip along inside lower and back edges of the case, these also need control. Testing of the pump made me realize that you need control of it to purge out the air etc so some sort of switch control is required. Furthermore this will need to be done preferably without the motherboard, drives etc powered up as many start/stop cycles are required. I could just use a toggle switch or similar but I want this a bit fancier so might as well build something. When working on the PC its always hard to see anything especially when everything is black on black. So a maintenance light to illuminate the entire case would be most excellent indeed. So requirements: Logic toggle switch control of pump, light, UV and RGB lighting (if possible) Ability to run at least pump and light from alternative power supply 12V to 5V converter and distribution board with custom leads Make a very bright 12V maintenance light using a 3 watt COB LED Upper Left - Logic controlled switchboard with MOSFET switched pump and 3x switched relay outputs Upper Right - Power Distribution Board with 12V to 5V 300W converter and 6x output headers Bottom - Pump mounted Master Switch Panel with 4x tactile switches and LEDs (pump LED is a dual colour green/flashing red that was in my breadboard, UV LED is a 3mm UV LED and the other 2 are green 3mm for RGB & maintenance Light functions) As I couldn't find anything like I wanted on eBay I built it instead, the above pics show the fruits of my labor with the 4 way logic switch board, pump mounted master switch panel and TT power distribution board. Discreet logic was used due to laziness however a microprocessor such as PIC or arduino would be better. The switch panel also has a DC power connector to allow a 12V 4A or so power supply. When plugged in the maintenance light comes on instantly and all other functions off, pump, light and UV can be operated in maintenance mode but not RGB as the maintenance 12V is isolated from the PC. In normal running mode the pump, UV and RGB are triggered but not the light. An additional switch board using blue illuminated tactile push button switches will be made to install at the top front of the case to mimic the function of the internal master switch board. A 10 way header is already installed to the switch board for this provision. Very careful drilling required for that exercise. Edit: I did find something on ebay in the end, if someone wants to do something similar with a lot less work search for 4 channel touch switch. The power distribution board consists of a 300 watt buck converter from ebay with an additional output filter and 6 output headers. This will supply up to 6 TT controllers with 12V & 5V and up to 15A or so on the 5V rail all from the PCs 12V supply only. An enable header was added to allow opto coupled control from the switch board however without 5V the TT controllers run the fans at full speed so that could be a problem. Under full load the buck converter only gets warm. Careful not all buck's on ebay meet their specs, the first 200W buck I got screamed horribly and blew up at only a 7A 5V load TT controllers mounted to 3rd hard drive bracket on standoffs as double sided tape wont cut it and surfaces are uneven. Leaving the covers off as the cute little boards are black and I like the exposed electronics on black look. This will provide up to 25 controllable ports for ARGB with the maximum capability of 30 if required. So far I have nicked a lot of parts off old PC peripherals including but not limited to: 2x motherboards for headers, heatsinks, capacitors and other assorted components 2x Floppy drives for power headers 1x stuffed power supply for case steel, massive MOSFET, large choke and heaps of bits 1x DVD burner for header And more The maintenance light consists of nothing more than a 3W COB LED with 2x 4R7 resistors in series on 12V. Works very well and lights up the whole case very well but gets very hot so I bolted it to a chip set heat sink and it seems fine without the fans running. A small bracket I made tucks it up level with the radiator and prevents it blinding you. Edit: I wasnt happy with the first maintenance light, got to toasty in ambient conditions...bring on Mk2 Found a small fan on a low profile heatsink, epoxyed a 2 pin header to the heatsink and slowed down the fan, works perfectly. LED is off center as the sticky pad already was there like that, small bead of compound under the resistors. Yet another custom bracket And here is the UV lighting as installed, will wait till coolant is flowing to see if more strips need to be added. UV Cold cathode behind radiator on more custom made and spray painted brackets....mixed feelings on this as I think UV LED strip is brighter but I bought it so in it goes. UV strips cut to length and wires with headers attached, strips stuck to cut lengths of magnetic fridge magnet (thanks to the real estate agents who put fridge magnet calendars in the letter box. Edit: Pointing up seemed better, lucky I used the magnets. Should do the job. Ok now its starting to look better, strip above power supply will be covered by the motherboard and the motherboard front strip is between the motherboard back plate and PCB. Pump is on a custom bracket I made from part of the case that fell out when I touched it above the front radiator. Lower Trio fans required grilles I nicked off old power supplies and sprayed black, got sick of fishing out dropped screws out of them. By the way you go through a lot of spray paint by the time you have sprayed boards, brackets, screws, washers, standoffs and even plug shells. Becomes a bit of an obsession....but it must be black! Didn't like the TT CPU blocks, sorry TT, and got 2 blocks for the same price as an EK block. This is the Barrow block after I increased the number of LEDs but before polishing. This is the Barrow block after polishing. I followed this guide here and he is spot on, you can get the acrylic polish at auto or hardware stores. This block has now been bolted to the motherboard/processor with Thermal Grizzly Conductonaut liquidmetal compound, seen used in Linus tech tips vids. Has to be the craziest compound Ive ever used, strange almost spooky liquid metal stuff. (But I will NEVER use it again) More to come.....water cooling next........ UPDATE!! Even though the liquid metal compound works so well I will NEVER use it again. When I upgraded the CPU to a i9 9900K I found the compound had totally removed or covered the makings on the i5 8600K CPU and I had to linish the water block back to raw copper to remove it. The compound cannot be removed from the CPU at all. Really nasty stuff. Considerations, comments and suggestions are all welcomed as I'm flying by the seat of my pants here.


-
Hey everyone, Just got my new Tt Esports Neros RGB Optical gaming mouse in the mail. Just plugged it in and after attempting to change the colour I could not figure out how to do so. Could someone please inform me how I can change the colour of the mouse as clicking the scroll button as it said has done nothing. Is there a program I need to download to do so? This would be much appreciated Thank you.

-
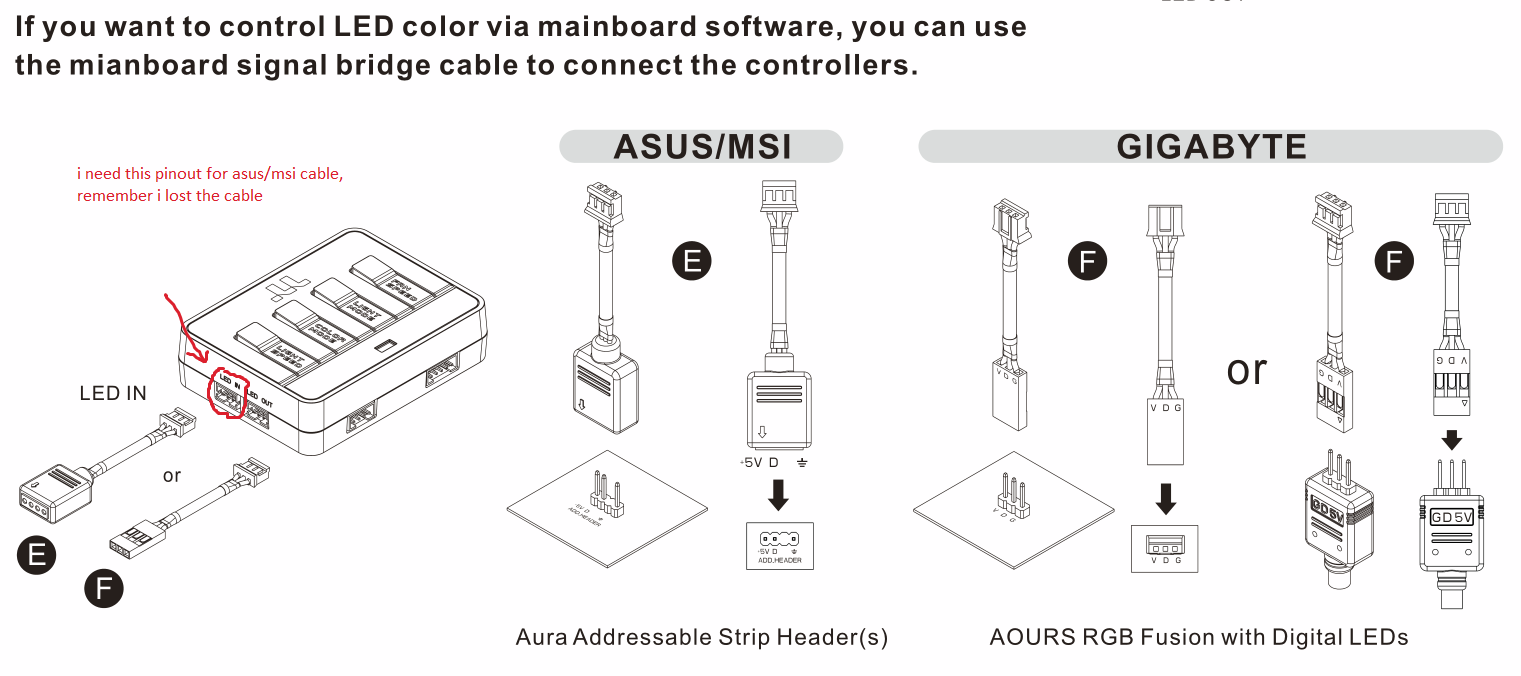
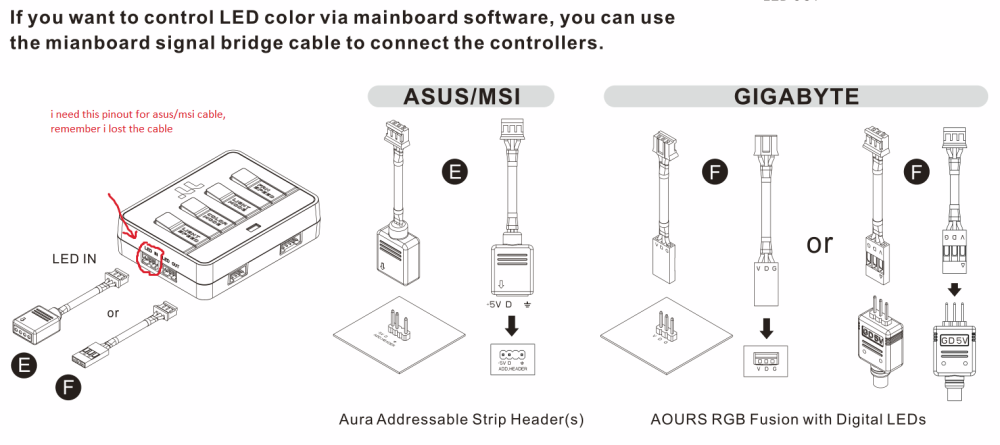
Sorry for my english. The cuestion is, i lost the cable led-in to argb motherboard msi. anybody can help me to know the pinout for this cable (led in to argb msi 5v) to make a one to replace the lost. i live in Cuba and its imposible buy a new one. Thanks to everyone.
-
My Thermaltake Neptune Elite RGB stopped working after update, can anyone help me or please post Thermaltake Australia phone number. The windows picks up the driver but with unknown driver {USB input device}, and the Tt eSPORTS Gaming Software 3.0 says Please connect to correct device. I have tired it on 3 PCs Thank you
-
I own a TTesports IRIS RGB miku edition. Few months ago it started to not work after startup and each time I have to unplug and plug in the mouse again. I am used to it but the usb port is starting to show signs of wear and I wish to fix this. Software is on V1.0017 firmware is on V1.128
-
I recently bought a pc then built it. It was working fine untill I plugged the gdv cable into my fan hub. Because i didnt know what it did. Then smoke appear. I yanked it out. My fans rgb were working untill I turned my pc off and on again. Now the rgb doesnt work. How can I fix?
-
Who's here's excited for our new Poseidon Z RGB mechanical keyboard! It's coming out soon and features 16.8 million RGB colours through each individual keycap LED. In addition - models will be available with both a Tt Blue Switch and Tt Brown Switch, and are fully backed by our World First 5 Year Warranty on a mechanical keyboard. I know I'll be getting one! Which switch type with you be getting and why? For more information: http://www.ttesports.com/Keyboard/201/POSEIDON_Z_RGB_Brown_Switch_Edition_/productPage.htm?a=a&g=ftr#.V58MqPl96M8

-
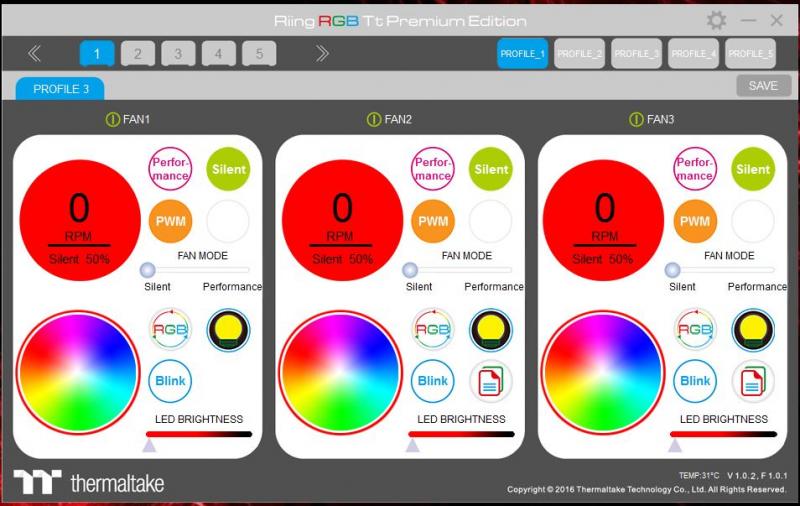
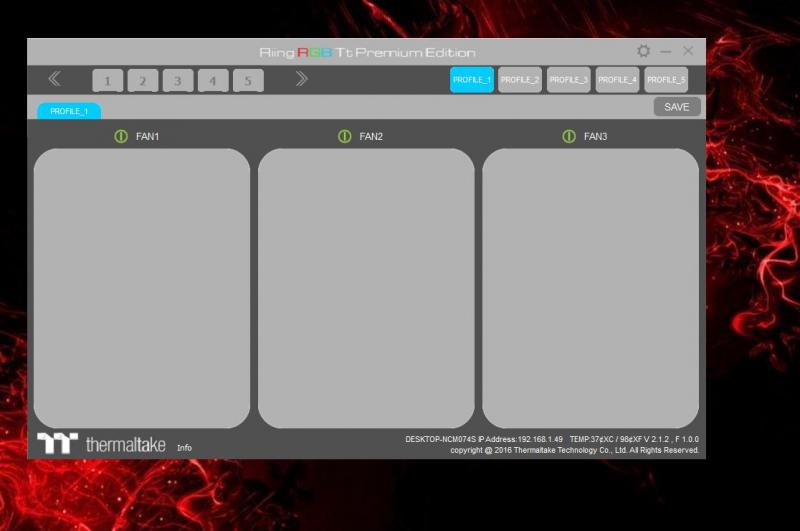
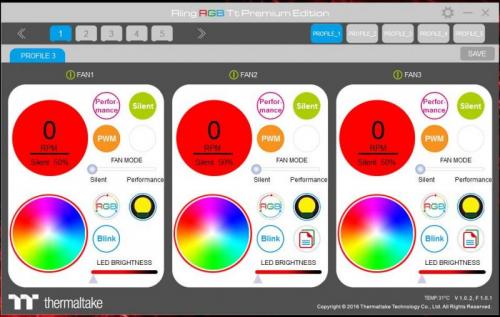
I bought 6 TT Riing Plus 12 LED RGB fans and installed them in my new system and have 3 each on each digital controller. They are spinning and lighting up, but in the software(V1.0.2 and 2.1.2) they are not detected. I can't select a Hub number in the upper left corner. The fans are shown as 0 rpm and I cant change the color either The internal USB 2.0 header works fine with everything else i connect to it. The motherboard I use is the Gigabyte Z170X gaming 5. Does anyone have an idea why this is? Any help would be greatly appreciated!
-
Hi, Recently I bought a Thermaltake View 51 and I mount it and synchronized everything well. The first days I've seen that when I turn on the computer, the RGB fans did a little White blink before they synchronize with the color of the motherboard. I know that this is pretty normal (someone explained me that this is a test that the controller do in order to check if the fans are right). But lately, the back 120mm fan started to not doing this little blink when I turn on the computer (or it'll do it in another color). Is this normal? is there a way to solve it? I have to say that it does the synchronization with the motherboard. Thank you.
-
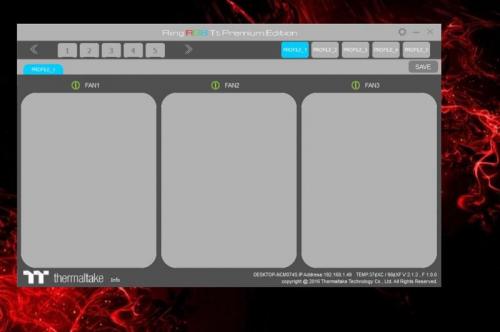
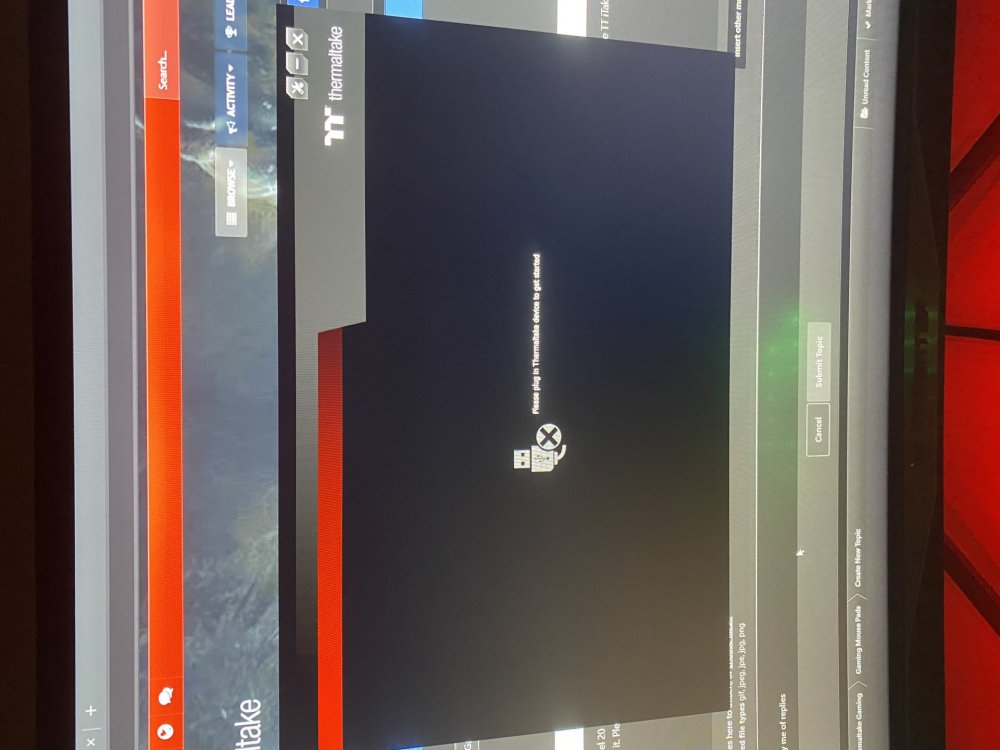
Although my Level 20 RGB Extended Gaming Mouse Pad does light up when connected to my motherboard's I/O USB port, I am unable to control the lighting via TT iTake Engine. The TT iTake Engine is unable to detect it. Please see the attached screenshots of the issue.
-
I picked up a Thermaltake Pacific R1 Plus Lighting Kit (no memory) and have no idea what to do with the DIP switches on the back of the included controller. The instructions simply state" Set the DIP switch on the backside of the controller to assign the number of the controller." Any assistance would be appreciated. Thank you.

-
I've been having some issues with my Riing Trio fans when they're connected to Razer Synapse. My setup is 6 Riing Trios and 2 controllers, 3 on each controller. The issue is when I'm playing a game that uses Razer connect (where Razer controls the lighting based on the game being played i.e Apex Legends) After a short time the fans will switch to default color losing all connection with Razer. I am then unable to change any profile on the fans until I restart my PC, then everything will function normally until it decides to bug out again. I originally experienced this issue with Controller 1 when I had 5 fans installed on it, I then switched 2 of them to my second controller thinking in might have been a power issue, but now the issue is only occurring on Controller 2. I know I could use the fans without connecting to Razer but that's literally the only reason I chose these fans over Corsair fans. Has anyone experienced this issue before and could offer me any advice.
-
Basically the setup I have is 4 x 120mm riing fans and 2 controllers. Each controller has 2 riing fans plugged into it. The controllers are then plugged into 2 separate 4-pin chassis fan connectors on the motherboard (Asus Gene VIII). I boot up and set the fans to a specific colour via the controllers, but next time I boot ,the LED's don't turn on. I have to manually go and set them again. I have made sure all my connections are OK, tried a CMOS reset, updated the BIOS, uninstalled all of the bundled Asus software, yet it still won't behave as expected. So I'm not sure if its an issue with the MB, or my fan controllers?
-
doesnt work gaming key, light key and windows block. VID_20200621_213045460.mp4 VID_20200621_213045460.mp4
-
I have recently bought the V200 TG RGB case which comes with 3 RGB and 1 non-RGB 120mm fans, and I would like to be able to control the fans speed. The included controller has no way of doing this, but my motherboard has spare fan connectors, and I wanted to know if there was any way I could control the fan speed with my motherboard. I have a MSI B450 Gaming Plus MB.
-
Hi, I have build my Computer into a new Chassis from Thermaltake (TT V200 TG). Everything ist working fine, expect of the RGB Fans. (They are connected to a RGB Fan Controller) The Fan Controller has a very different 12V Input cable...The cable hast a female and a male 4 Pin...I have no clue how to Connect it... I hope Somebody can help me... Sorry for my bad english, i am from Germany Greetings Frederik Reintjes

-
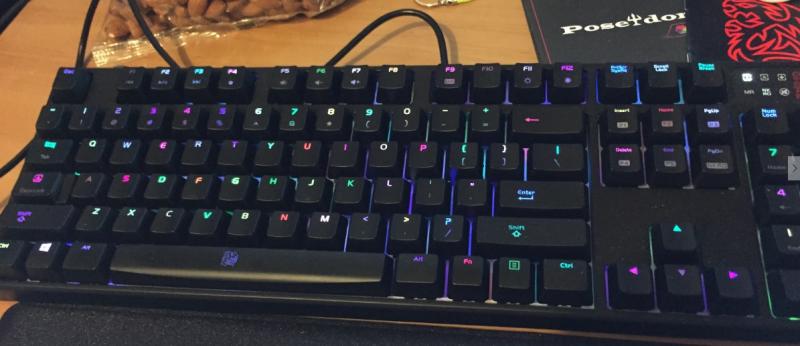
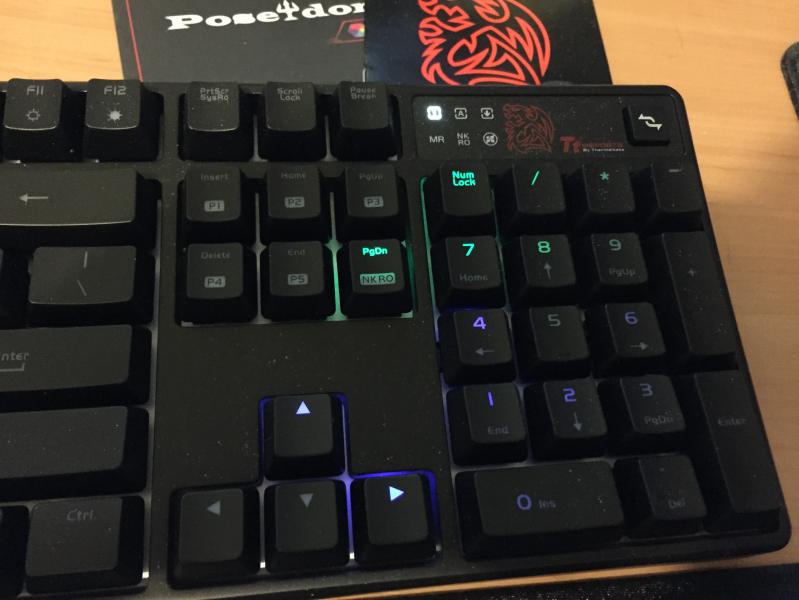
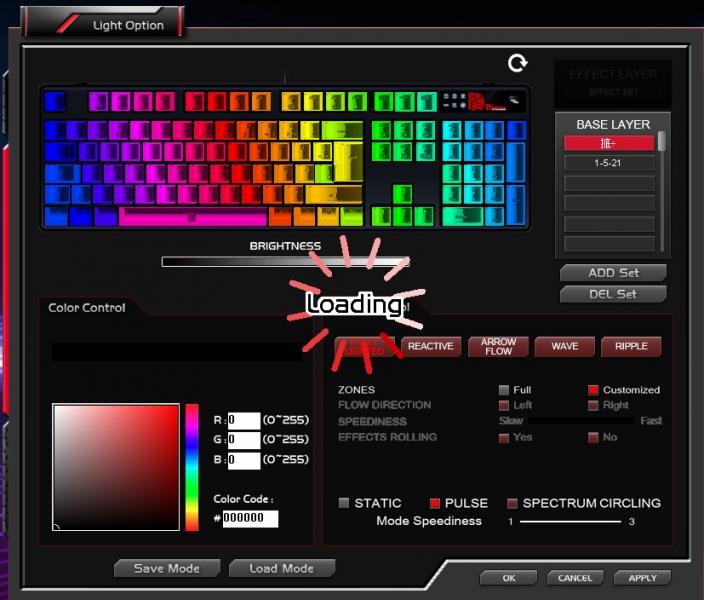
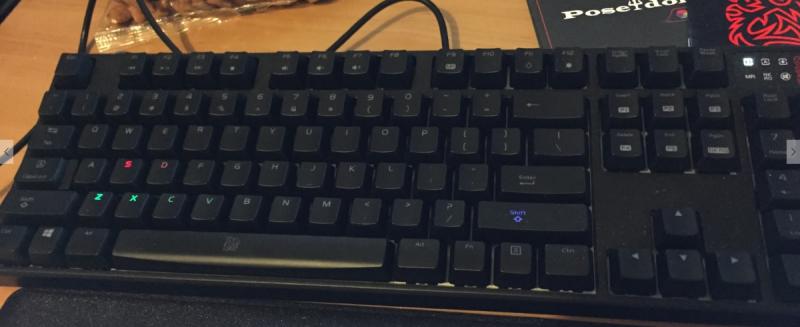
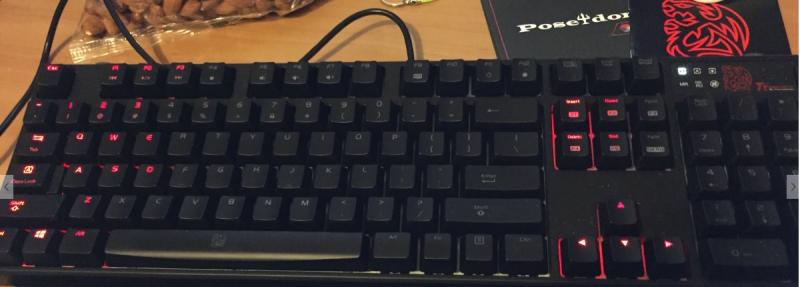
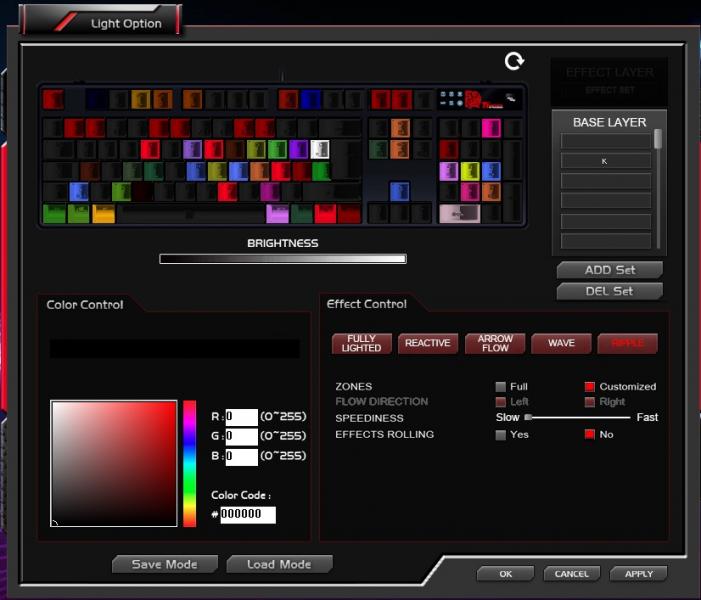
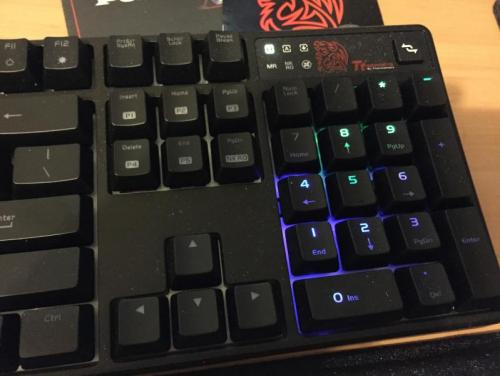
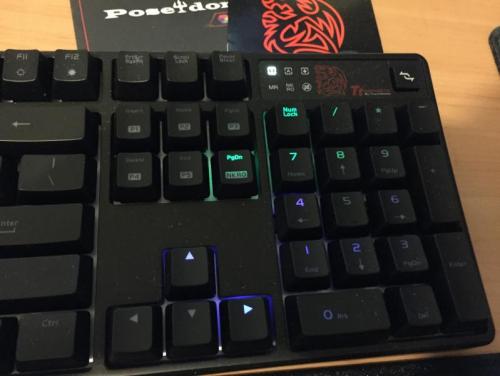
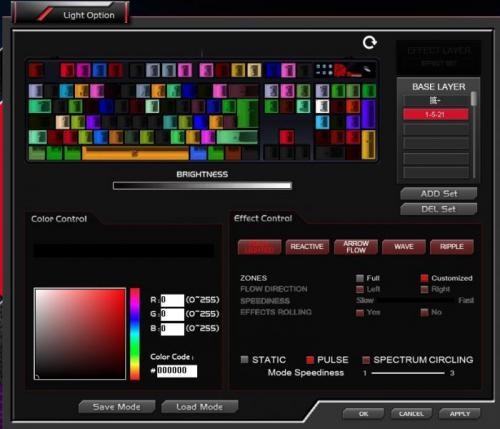
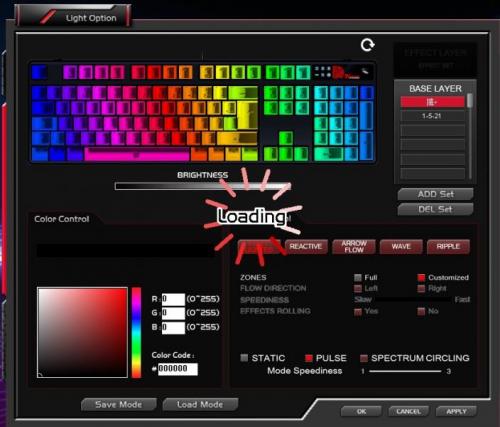
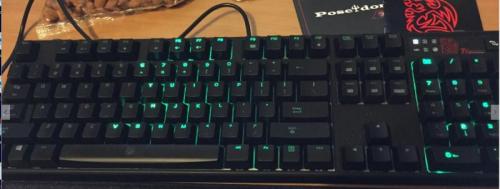
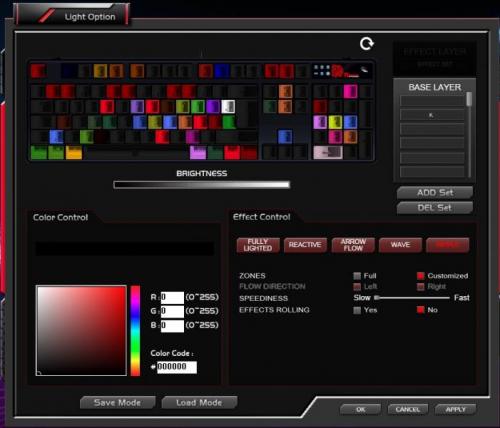
 Hi Community! I've recently bought the ThermalTake Poseidon Z RGB (Cherry Brown) and I had installed the software and set it up perfectly on my Windows 8 Pro machine. I had tested all lighting functions within the Effect Control section of the software (Fully Lighted, Reactive, Arrow Flow, Wave and Ripple) which worked beautifully. Although from what it seems now, after updating to Windows 10, the lighting on the keyboard is either non-existent or seems like it's got a mind of its own. >> Here's a quick summary of issues: - There are no longer any proper full colours displaying (Red, Blue, Green, Yellow etc) - it's all very light colours depending on the effect control set - The programming behind setting a Effect Control function seems to apply, but the lighting is complete screwed. Eg: Certain areas of the keyboard light up, some appear randomly and are also inconsistent. Like stated above, a mind of its own - The key that disables the Windows key (Button above the keypad - 2 arrows) makes the keyboard light up crazily. The light display outcome is always different. When pressed, a lot of times the light will display around the keypad area - I had to plug and unplug my keyboard multiple times for it to even detect on the pc - The second time I had updated the firmware to 36 from 30, the lights aren't even displaying at all when changing Effect Controls. I've manually reset it a few times, still to no avail. >> Further Testing: - After testing thoroughly for another 30 minutes, I've managed to somehow not display any colours at all on the keyboard no matter what Effect Control function I select. Resetting it brings the keyboard back to Red, but after choosing an effect, all colours disappear. Also refer to my 'Settings' attachments to see how it looks like. >> What's been done that didn't resolve the issue: - Re-installing the software several times, updating firmware etc - Fn+Esc hardly works, I have to manually click the Refresh button within the software to no avail - Removing the keyboard device and trying different USB ports I have a 40 second clip which shows the incorrect colours but is too big to attach. If you require it, please let me know the best way I can display it accordingly. Thanks. - Wilfred.
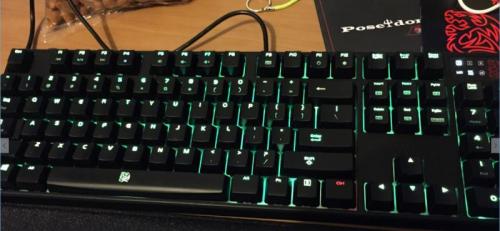


- 33 replies
-
- 1
-

-
- firmware
- Effect Control
- (and 5 more)
-
Hello, Just finished building my AMD system in my new TT View 51 case. The issue is after wiring the front panel switches into my Aorus x570 pro wifi board. When I press the reset button on the front panel to switch from the default rainbow color on my case fans, my machine reboots. I have tried short pressing, long pressing 3 seconds indicated in instructions, and trying different placements of the H.D.D Led pin ( currently located in the Hard Drive Activity LED location). All to no avail. Can anyone please help, the directions are a little vague. Thanks, MT

-
http://www.ttesports.com/Mice/302/TALON_ELITE_RGB_GAMING_GEAR_COMBO/productPage.htm?a=a&g=ftr#.W1mkktgzbUI