Search the Community
Showing results for '인터넷 오션파라다이스7 사이트 ㏏ USA143。COM ┝인터넷 바다이야기↗오션파라다이스7 사이트 게임∩온라인 게임№오션파라다이스7┍인터넷 오션파라다이스▧인터넷오션파라다이스☜온라인게임 추천 2018㎝릴게임다빈치☏'.
-
iOS 12 was released on 17th of September 2018 after announcing at Apple's Worldwide Developers Conference on 4th of June 2018. This is the twelfth major iOS release after successful iOS 11. This version comes with a very attractive appearance and improved performances. Apple has paid more attention to devise performances, battery life, and security when it was released. Currently, iOS 12.1.3 is available as the latest update and it comes with some important bug fixed. The latest update was released on the 22nd of January 2019. You can have faster app launching, keyboard and camera opening in iOS 12 iOS 12.1.3 This is the latest iOS 12 update. You can have this update on your iPhone,iPad or HomePod.It includes bug fixes for all those devices. It has a fix for distortion when using external audio components on 2018 iPad Pro. Also, it resolves the problem which causes to freeze Carplay randomly when using from iPhone XR, iPhone XS, and iPhone XS Max. Meanwhile, the new update has addressed the stripe artifacts on photos from the Share sheet. The most bothersome iMessage issue which affects photos in detail view also has been resolved in this update. When it comes to Homepods, Apple has included a fix for restarting issue and Siri not listening Cydia For iOS 12.1.3 As you know Cydia is the most popular and successful third-party app store for jailbroken iPhone, iPads or iPods. You can have a number of free and paid apps and tweaks which are not available in Apple's App Store. So users are very keen on Cydia installer and its alternatives. Currently, Sileo is the most competitive alternative. However, none of app is still able to take the place of Cydia. You can install Cydia up to iOS 11.3.1. If you want to install Cydia on your device you have to jailbreak your device in order to get the permission to install a third-party app which is not signed by Apple. But unfortunately, there is no jailbreak for iOS 12.1.3 which means you have to wait for another period of time to install Cydia on your device. It is better if you could avoid iOS 12 updates if you are really interested in iOS 12.1.3. The most recent and popular jailbreak tool is Electra jailbreak tool and you can use it if you are running on iOS 11. How To Install Cydia Using Cydiacloud Installer Visit www.cydiacloud.com using Safari browser Safari browser on your iPhone or iPad Tap on "Cydia Download" icon on the page Let the installer determine the compatibility of your iOS version to be jailbroken A "Install" button will be displayed if your iOS is compatible Tapping on it will lead you to "Settings App" Tap the "Install" button again Enter your Passcode if required Tap on"Install" again and tap on"Done" to finalize the process At last, you will see Cydia on your home screen
-
Can somebody please tell me where I can buy another drive cage for the View 71? It comes with 2 and there is space for one more. I have 6 drive 3.5" drives. I currently have two of them on the back but it aesthetically displeases me a lot. Also I don't know how good it is long-term for a 3.5" drive to be vertically placed. I know its probably not a real concern but still, it makes me uneasy. I do see a drive cage on the TTstore which is the Hard Drive Cage with Trays for F31/F51/X31/X71/View 31/View 37 [<-clickable link] but that's not the same one that comes with the View 71 and its also been out of stock since November 2018 (or more, only had this case for 3 months).
-
Hello guys i bought a P3 case 8 months ago, had the same issue as everyone with the riser cable. Contacted thermaltake by email, they sent me a replacement cable today ( 14/1/2018) but i wanted to know before plugin it , does they still have the problem ? If i get no answer i will try it and give you guys my feedback
-
@Cynaax , great help on this issue, Thanks !! Hope now people will either pause windows update (like me) to avoid this issue or will wait patiently for Tt to fix this issue with future software update. Hope to receive updated software real soon, also waiting anxiously for compatibility for Razer synapse 3 for Tt products, which was to happen Q4 2018 as per announcement, but now delayed for "Around Q1 2019". Also wondering if this collaboration can add multilayer effects capability to this X1 premium keyboard. If this happens won't that be awesome guys? GUYS PLEASE READ INFO BY "Cynaax" BEFORE FORMATTING YOUR WINDOWS 10 AND REINSTALLING TT X1 SOFTWARE FOR "KEYBOARD NOT DETECTED ISSUE".
-

watercooled Level 20 GT Plus Build - Ebony Bliss
Eatsrootsnleaves replied to Eatsrootsnleaves's topic in System Builds
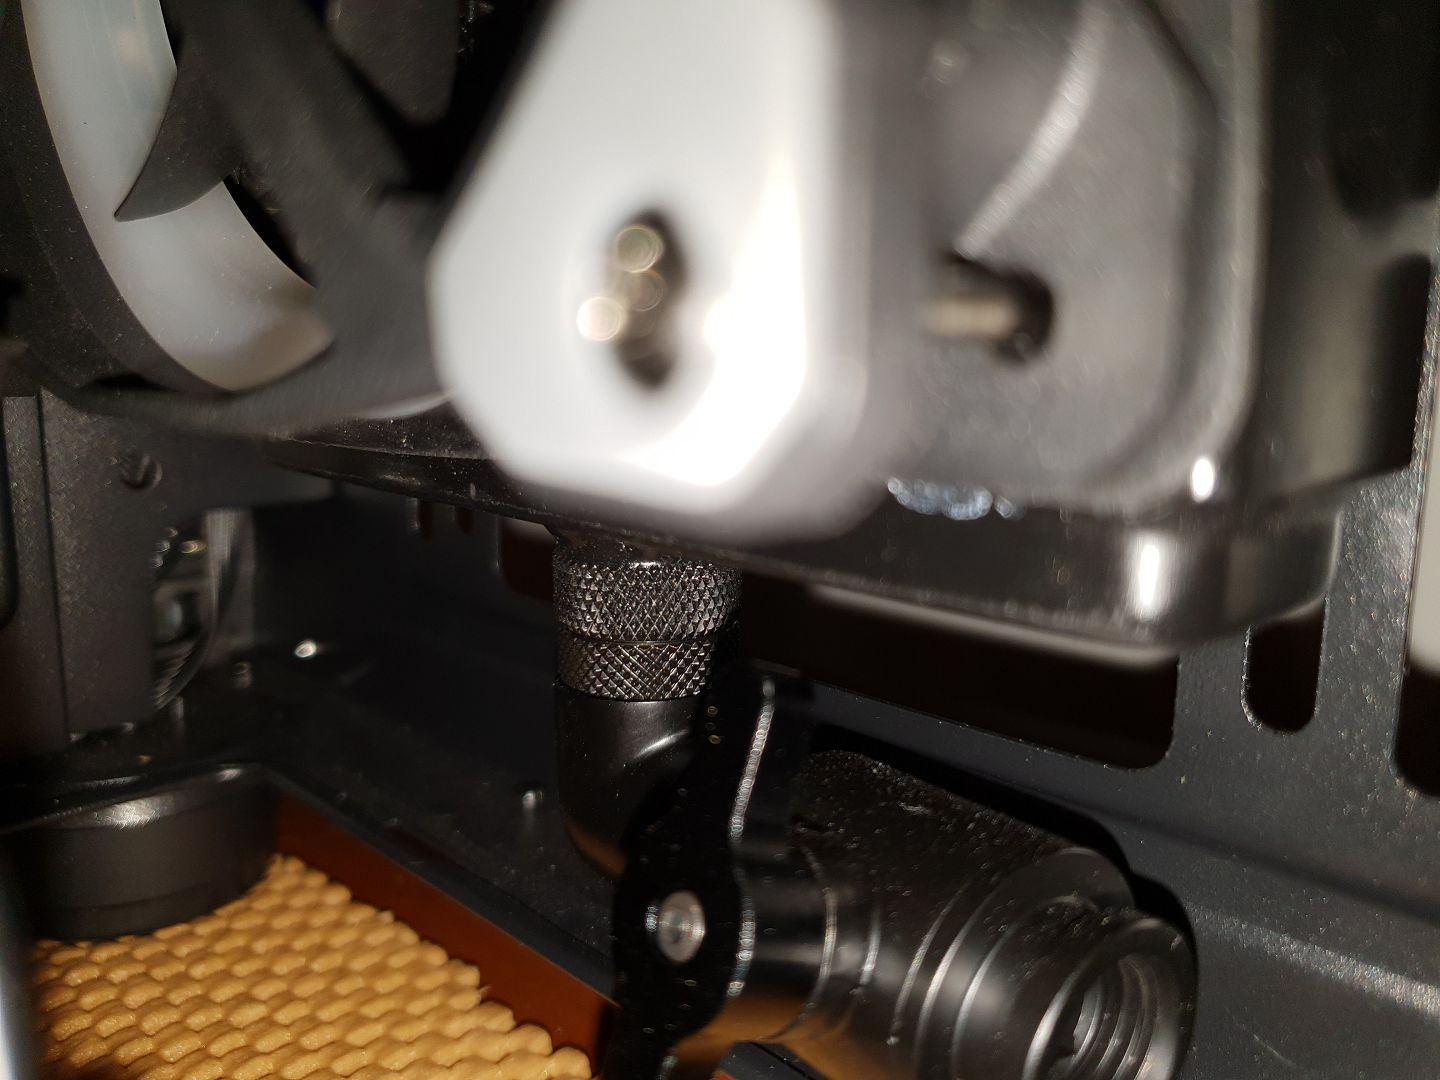
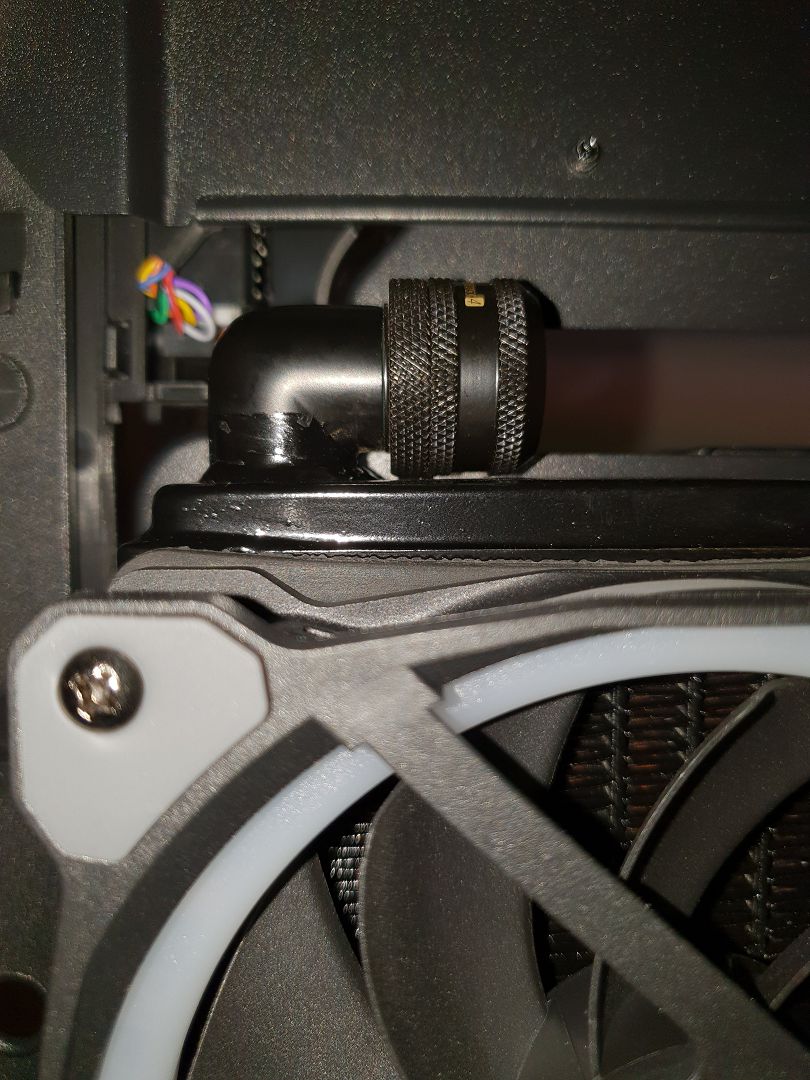
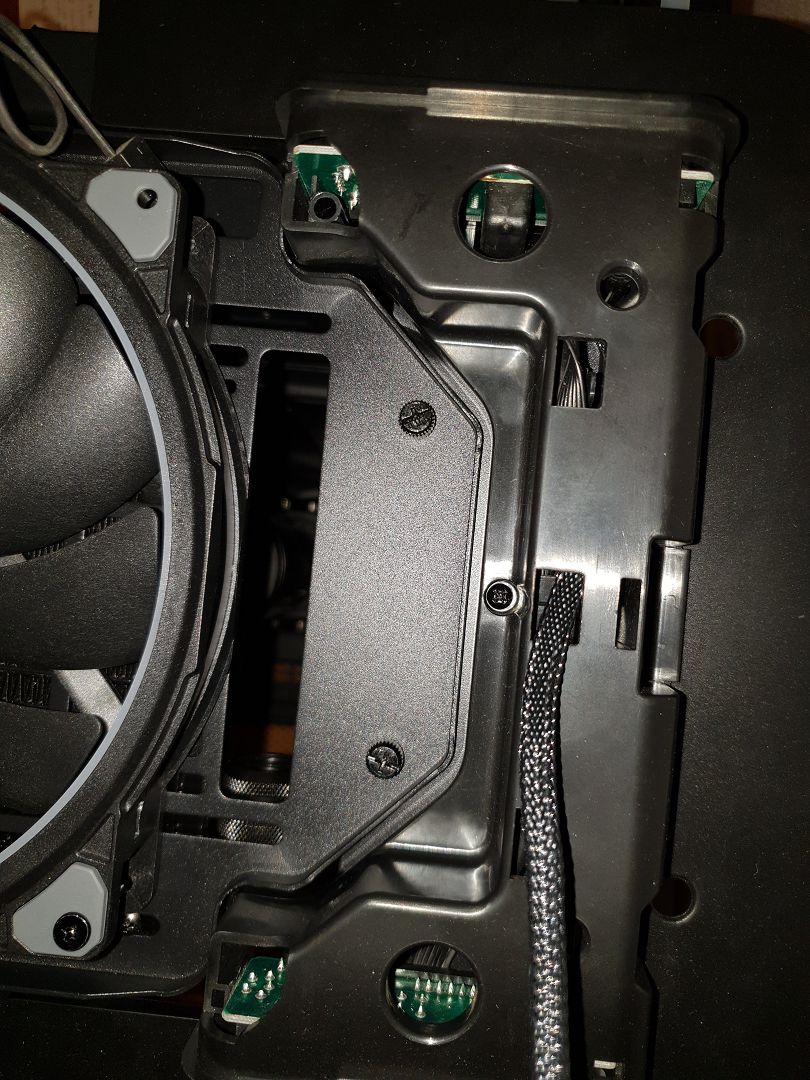
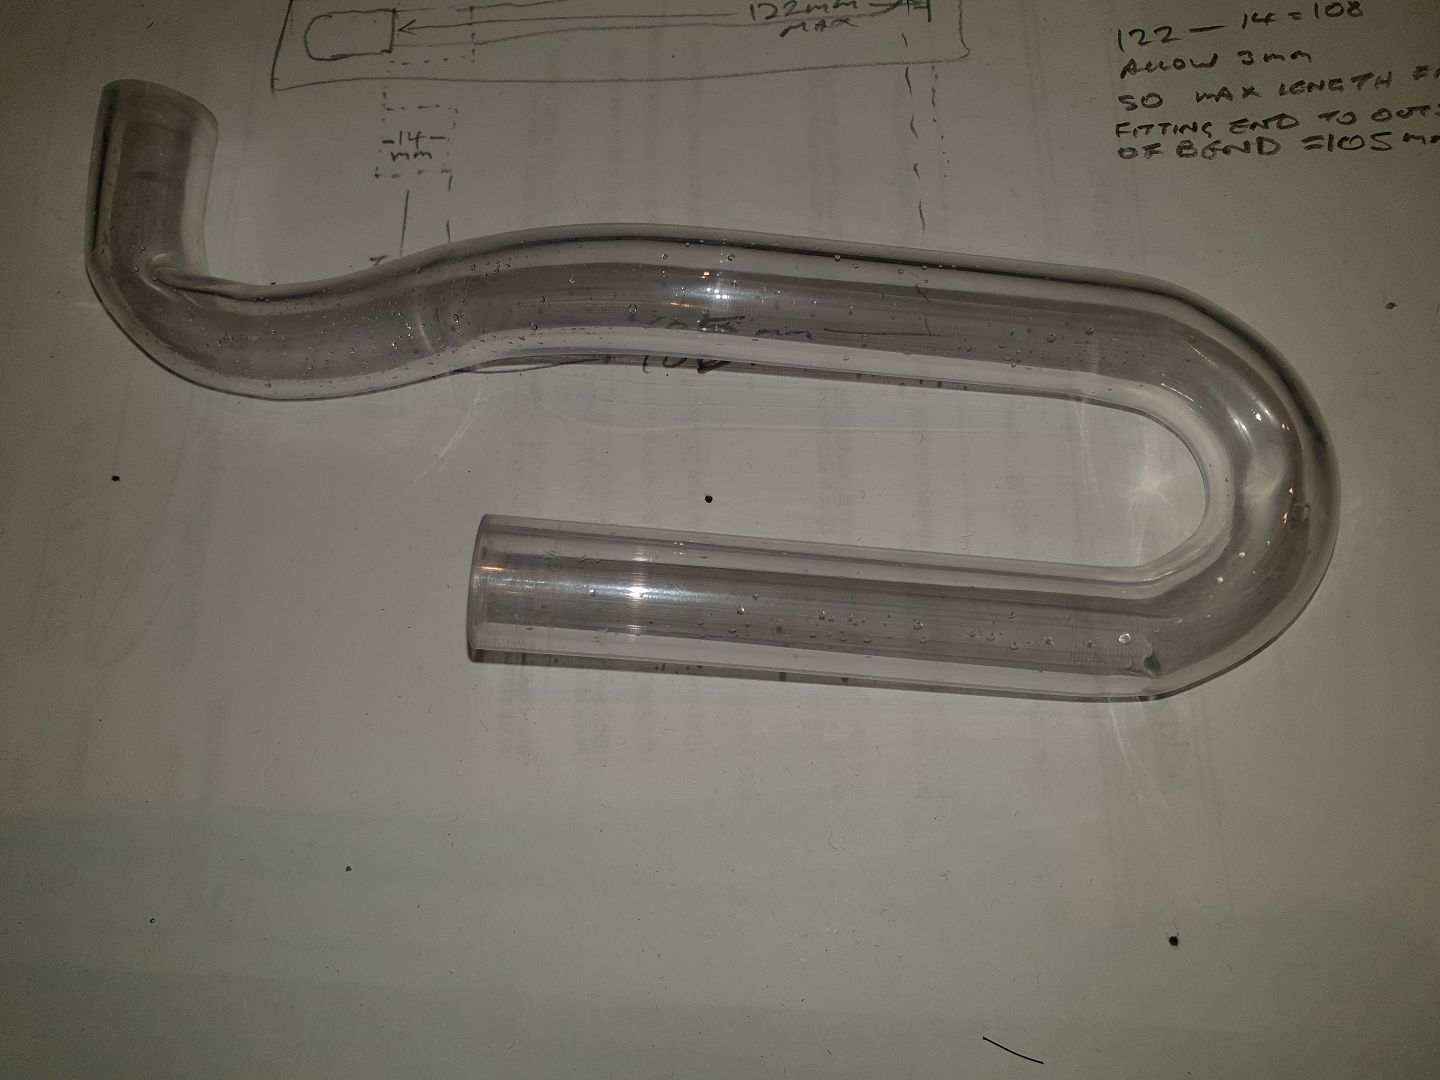
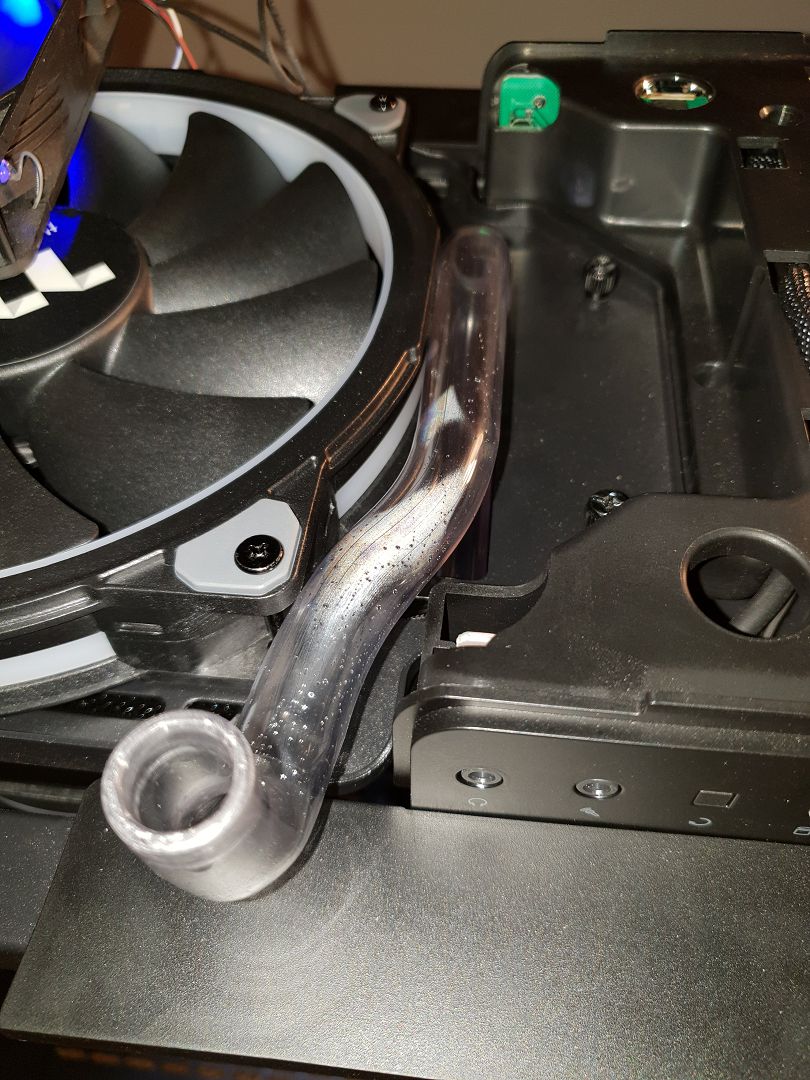
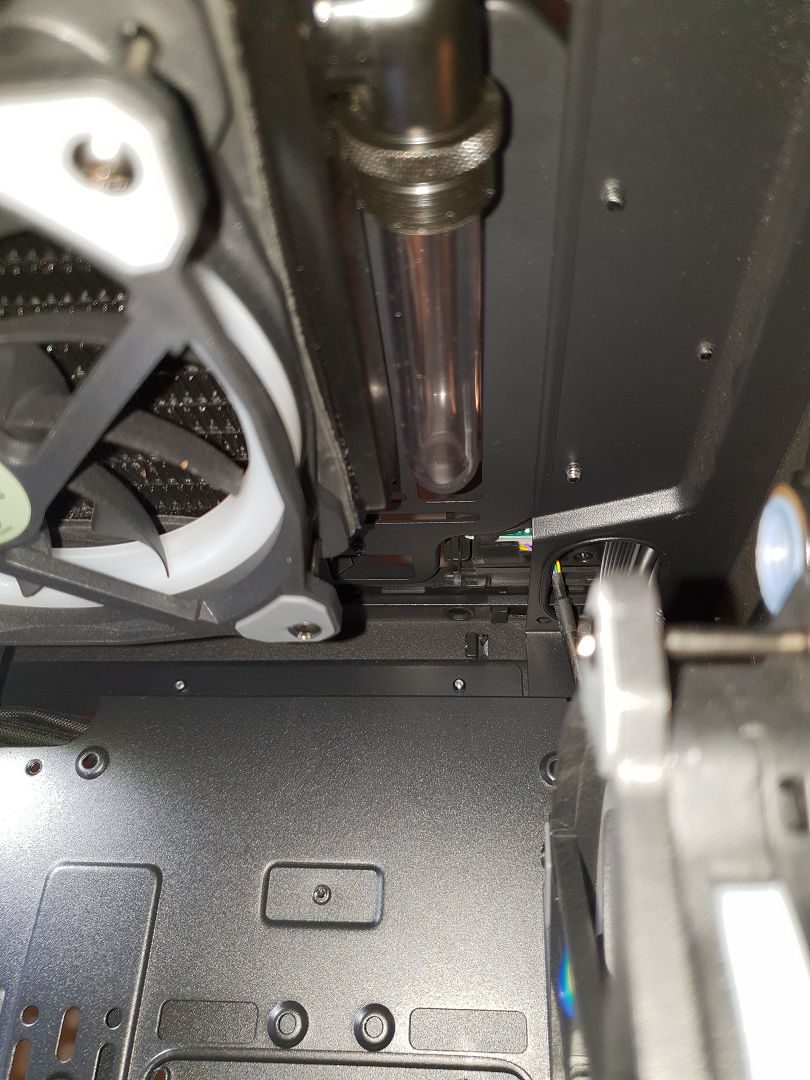
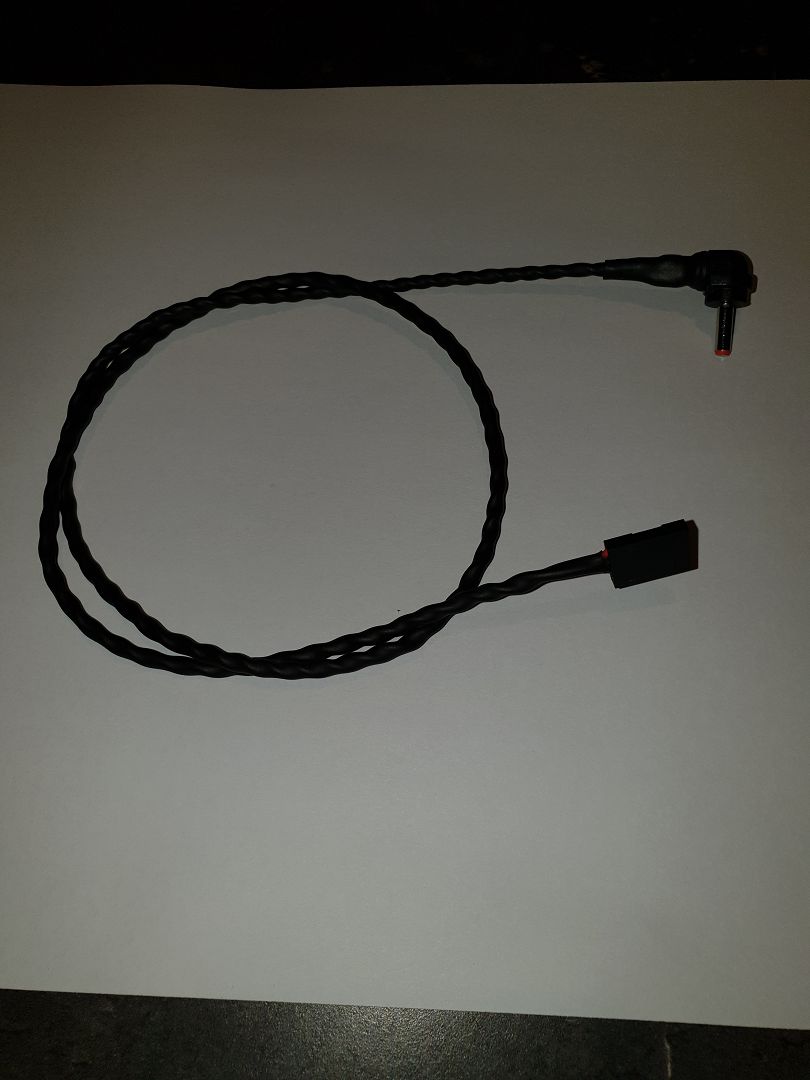
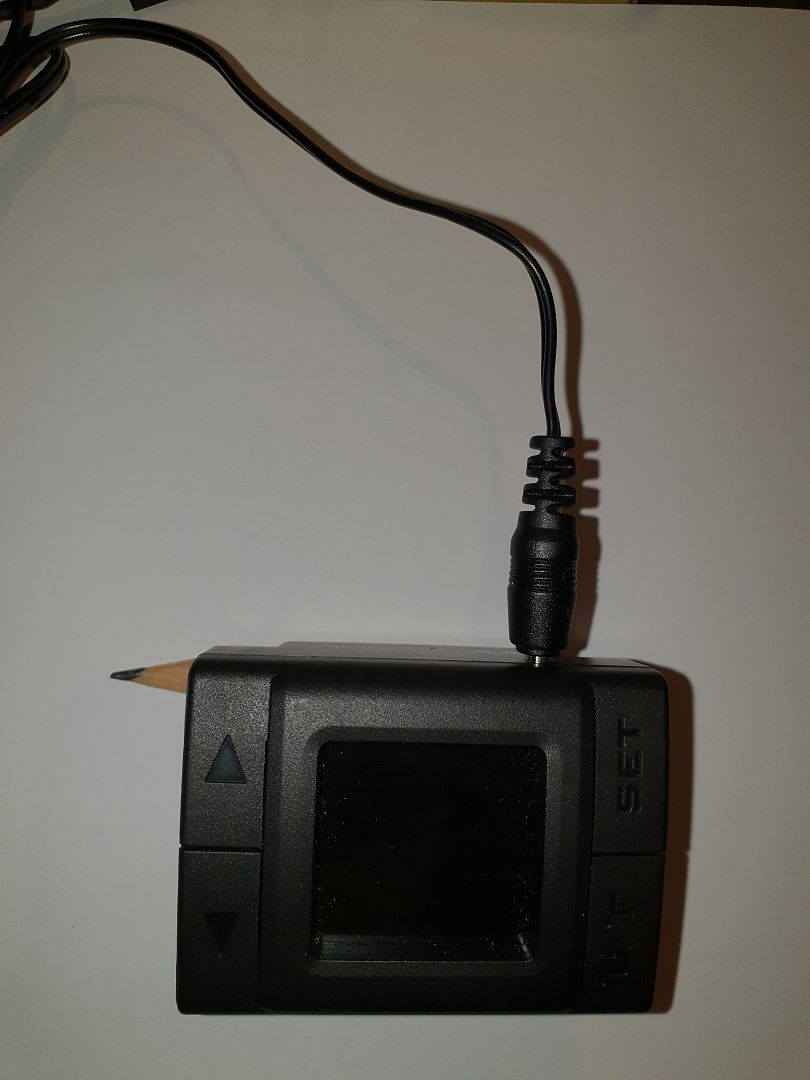
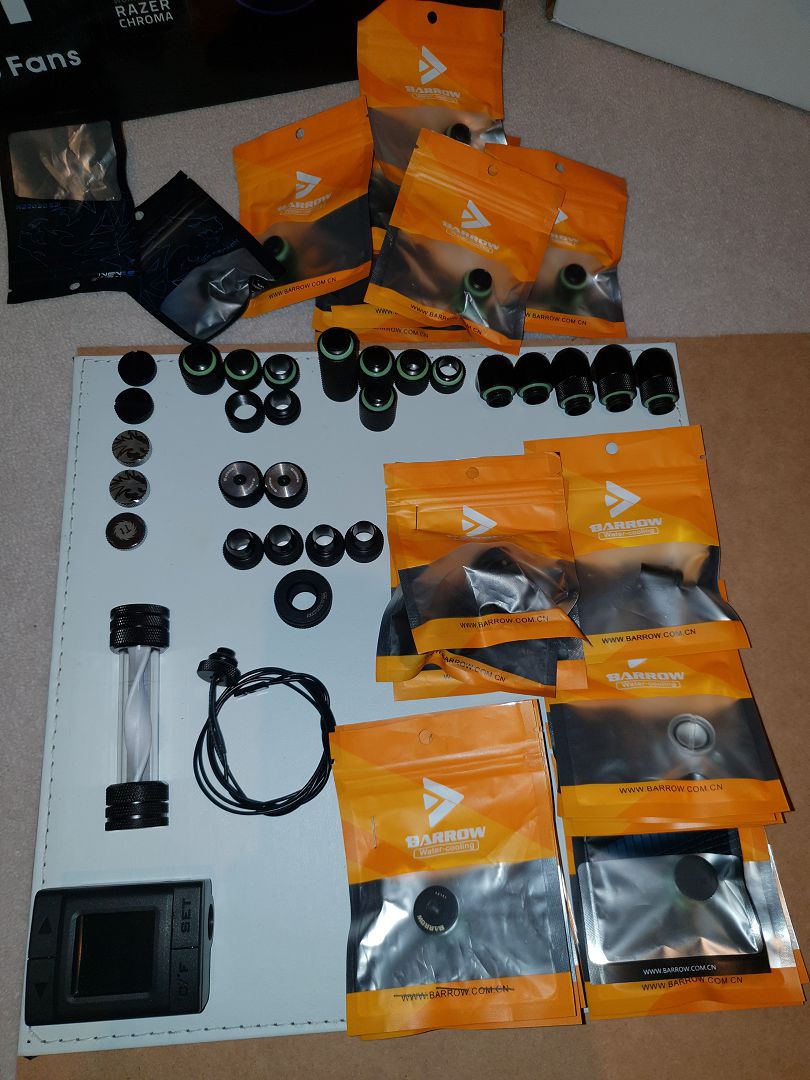
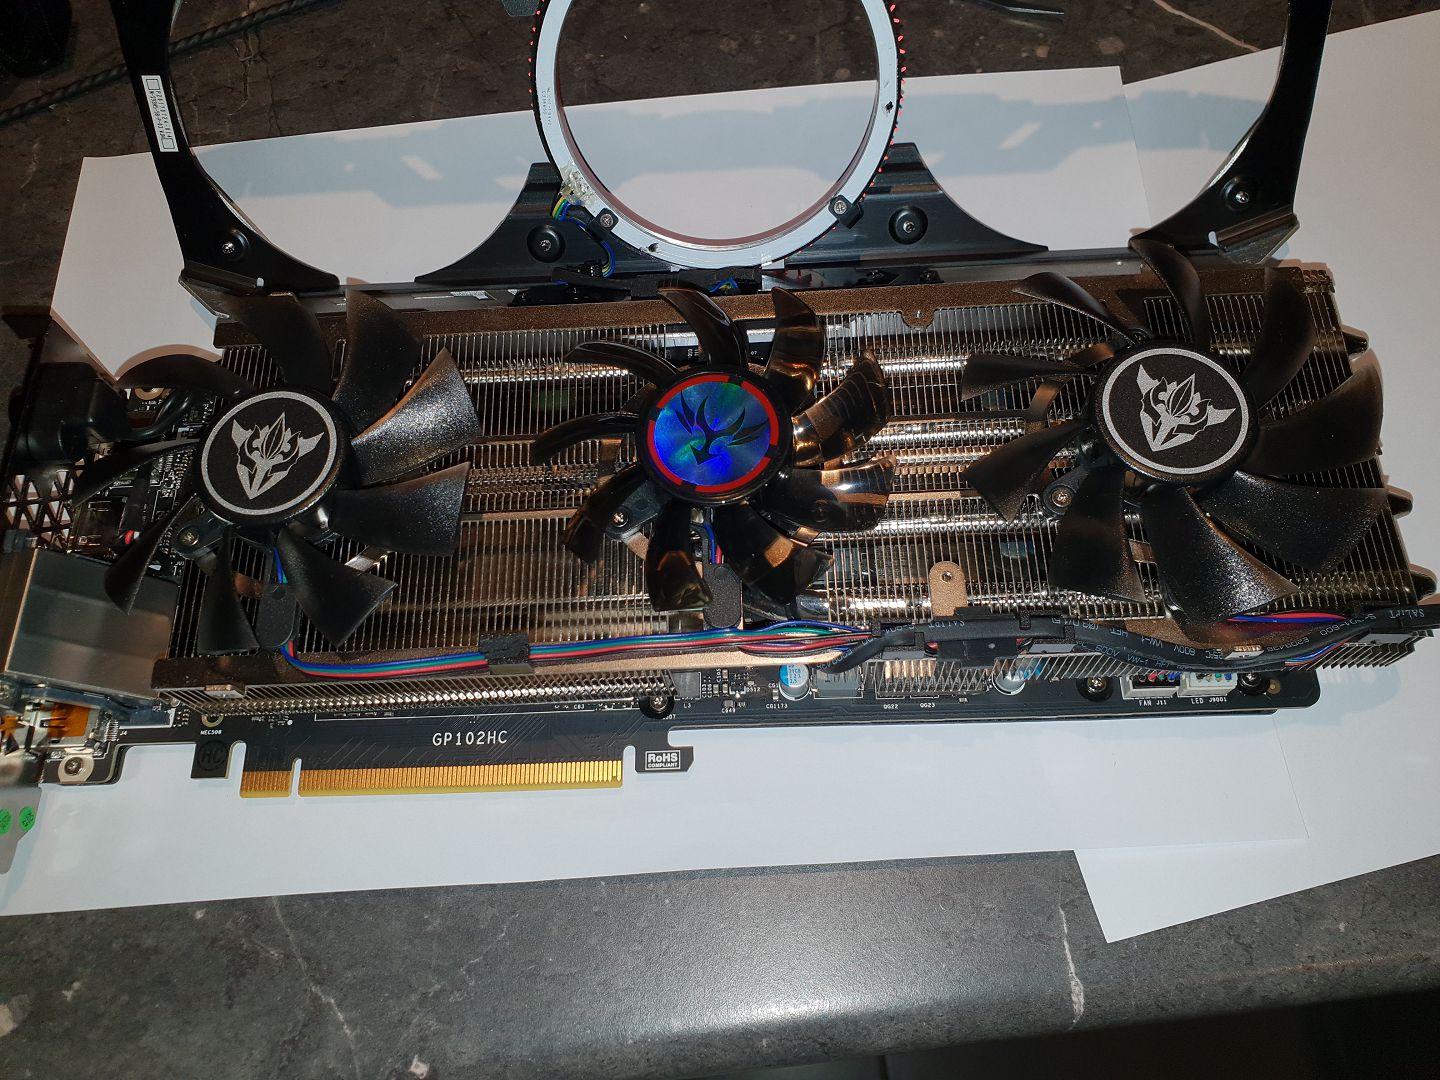
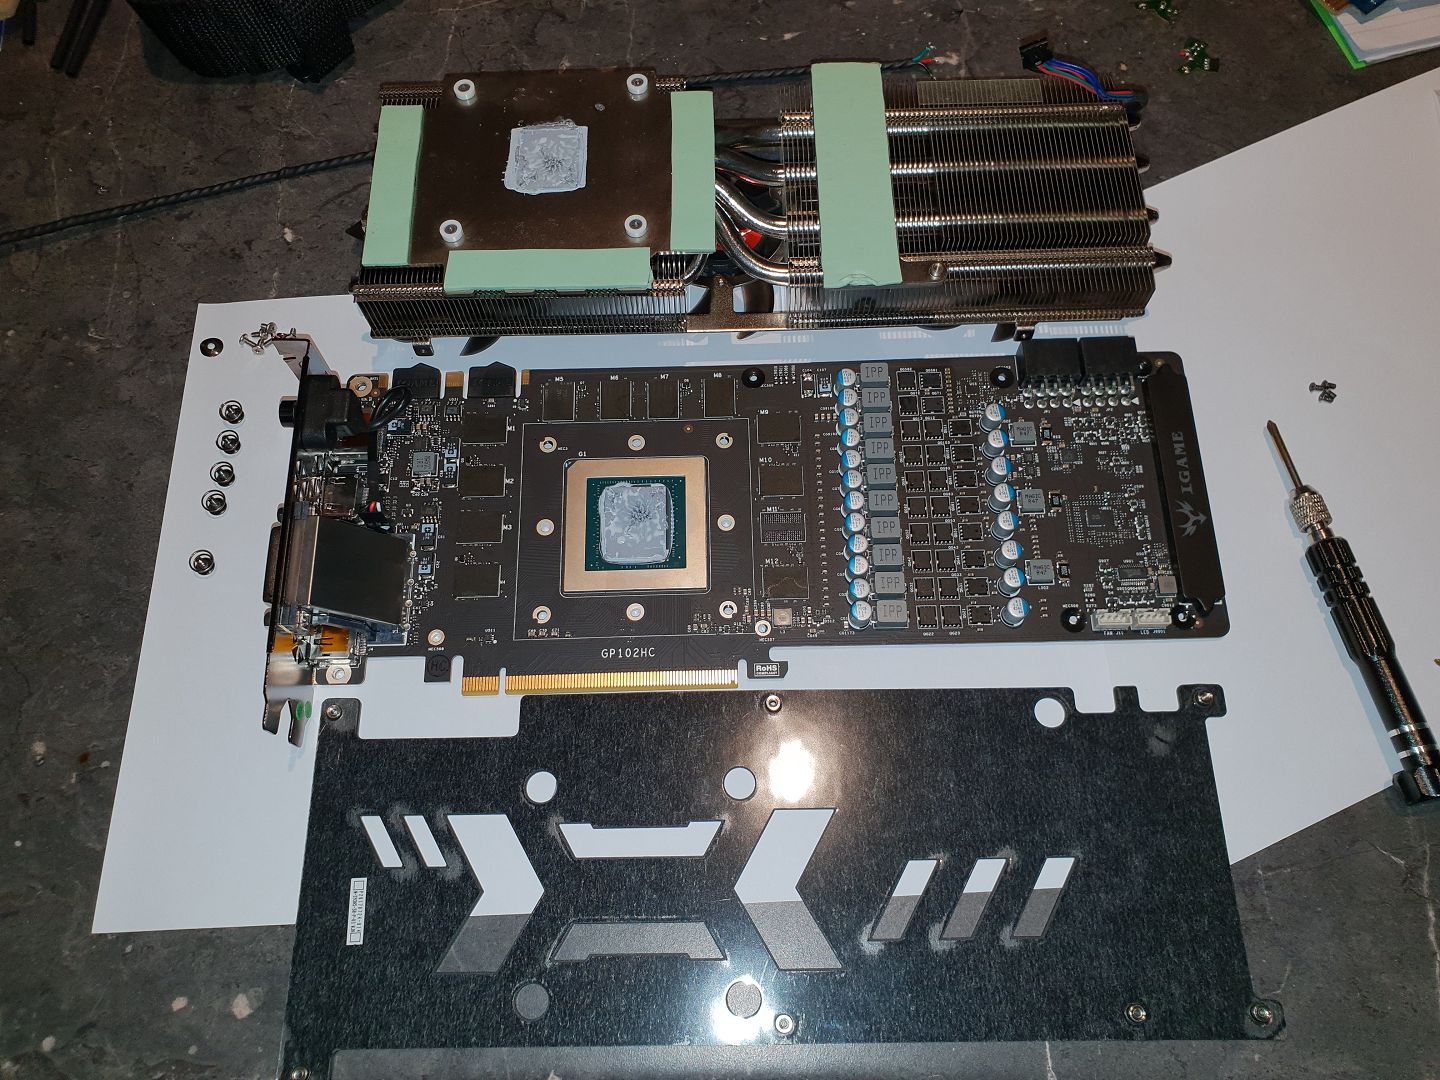
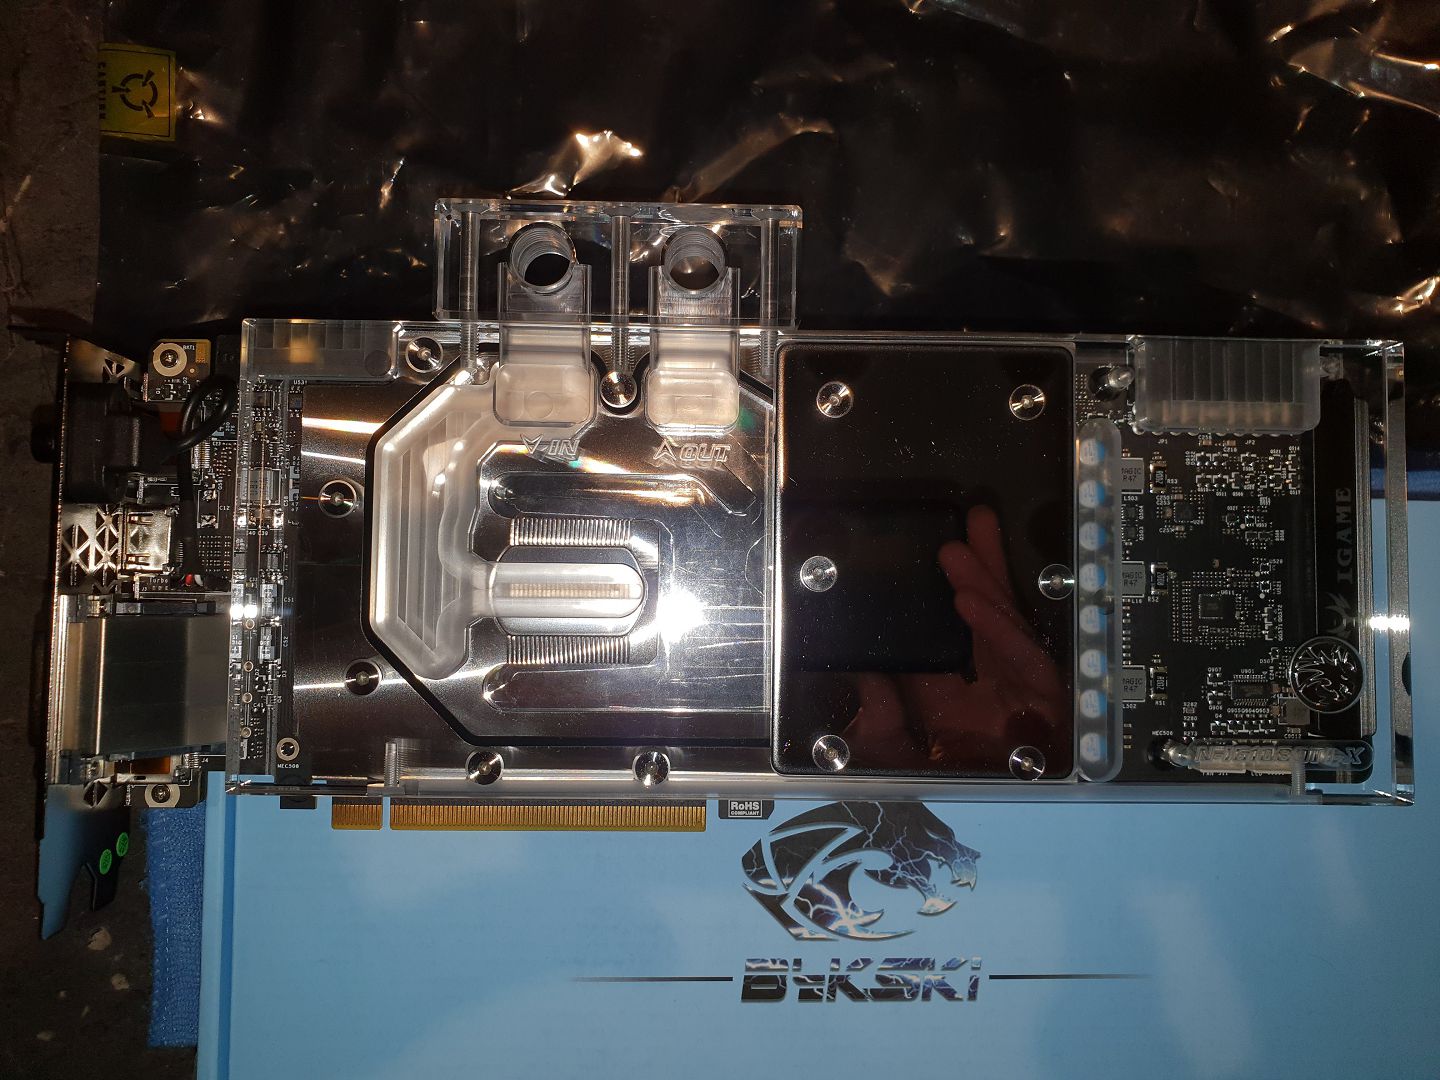
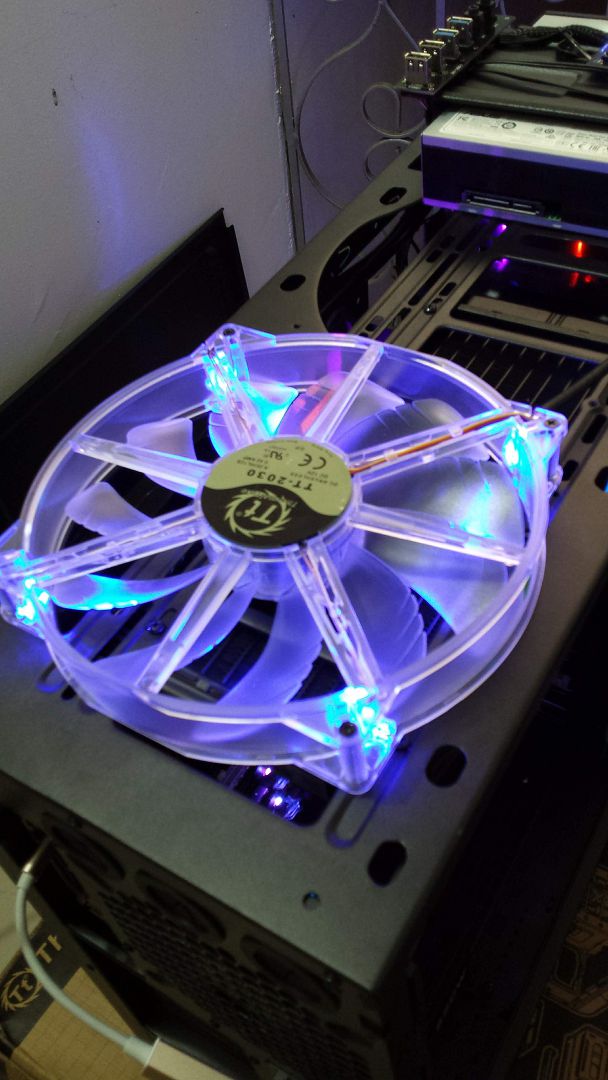
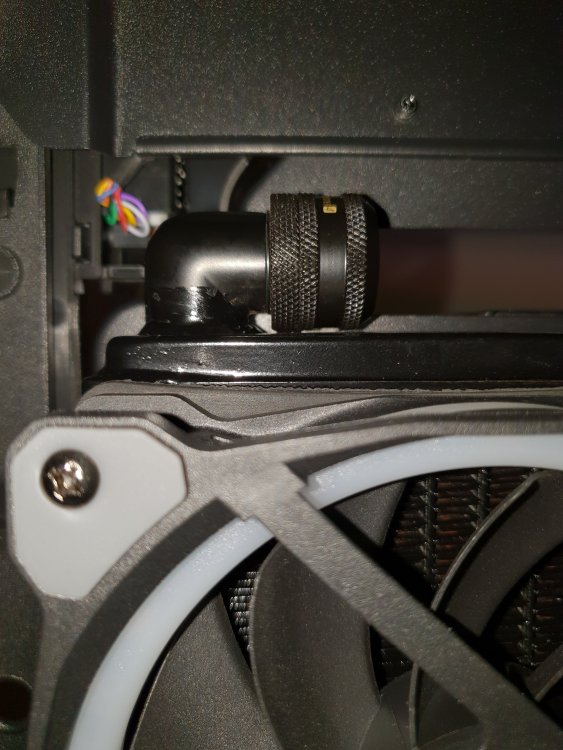
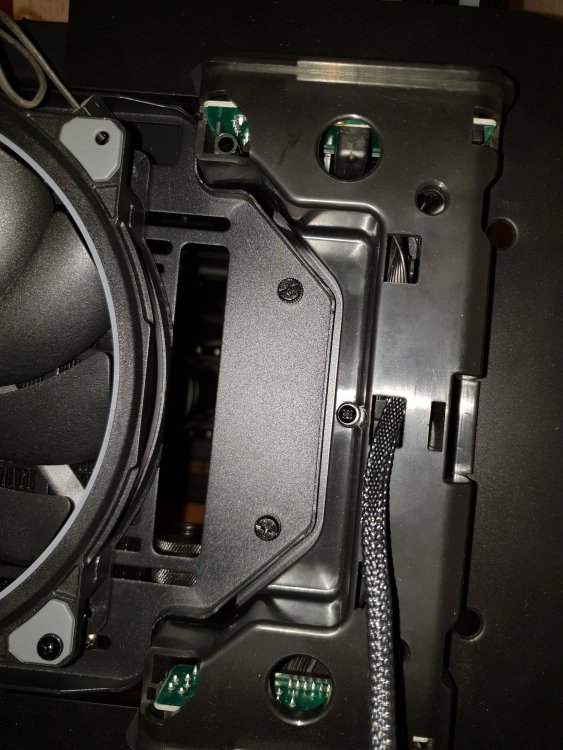
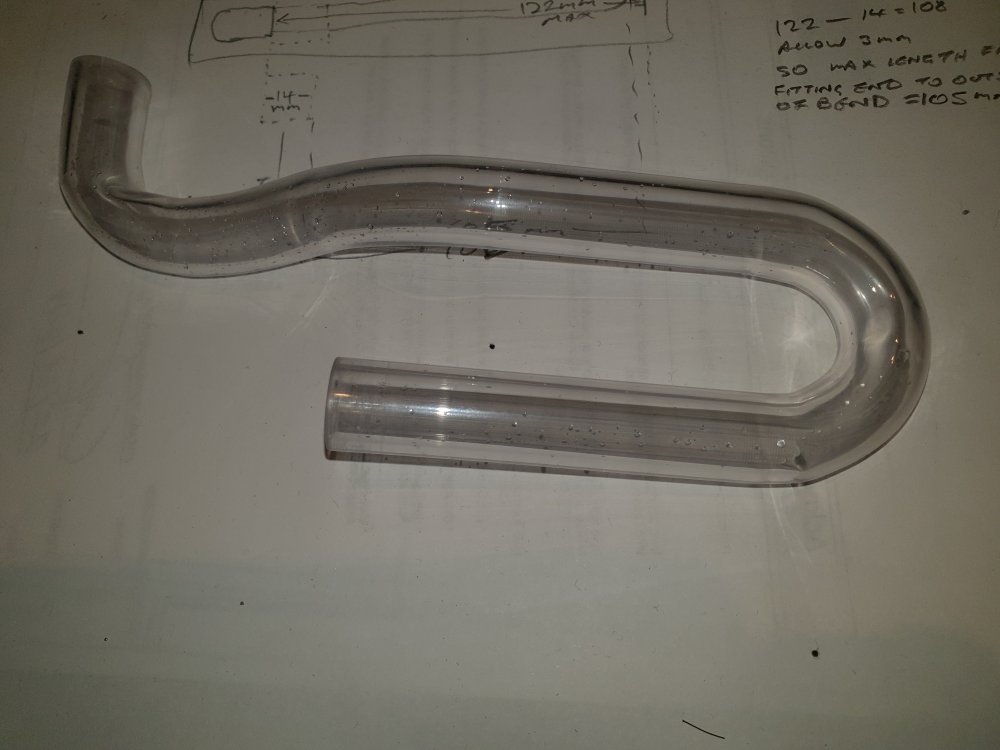
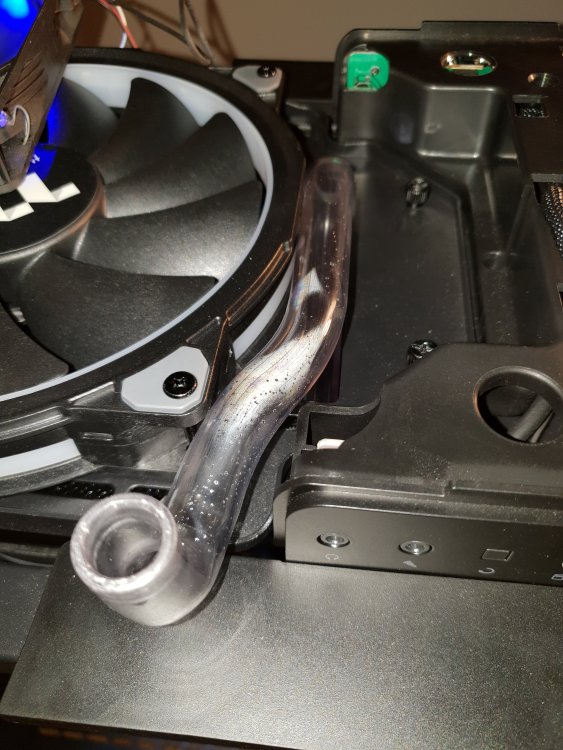
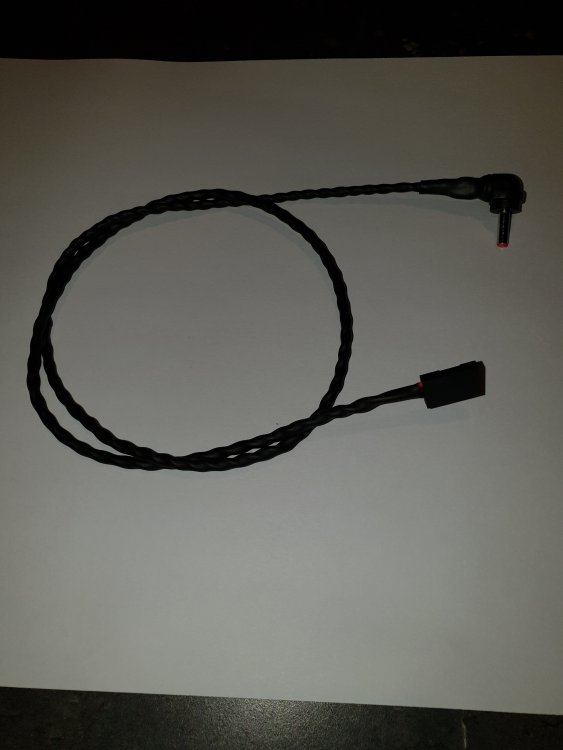
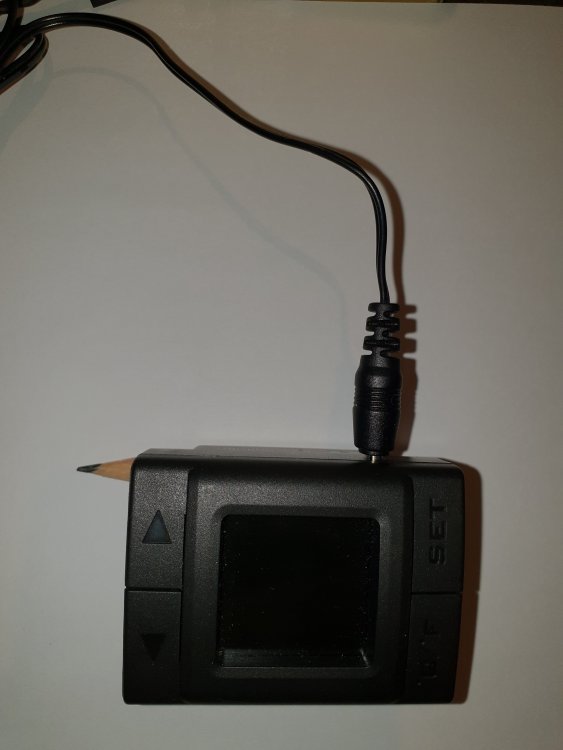
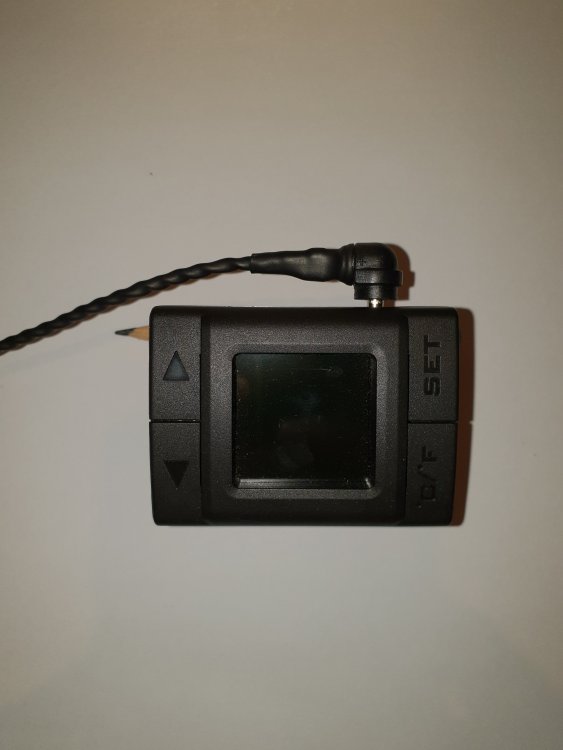
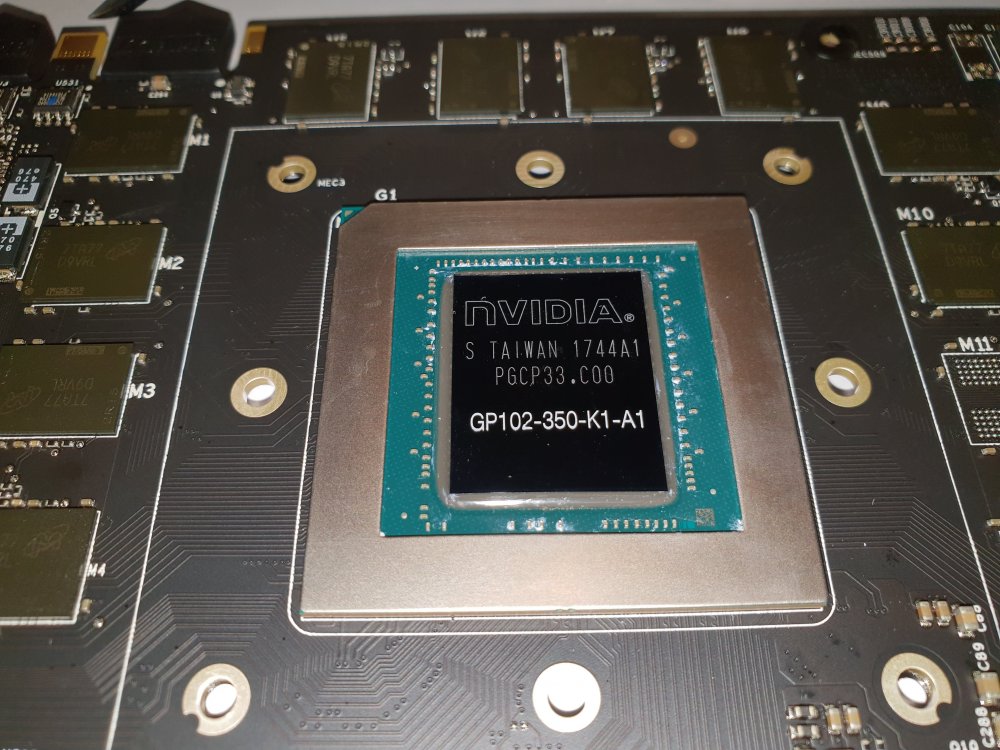
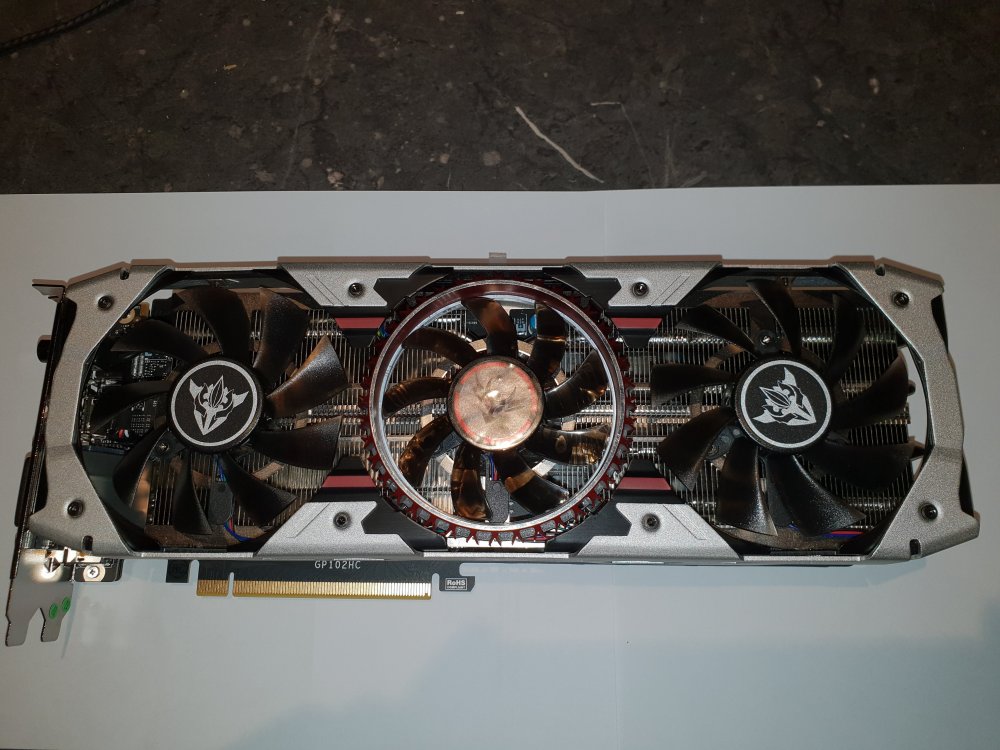
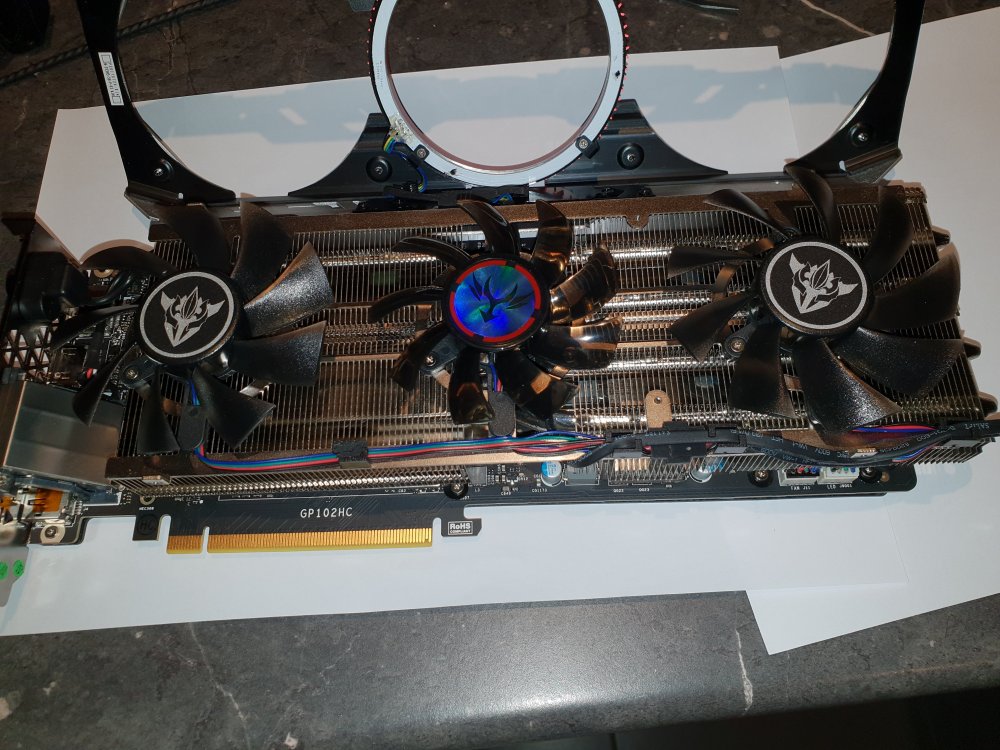
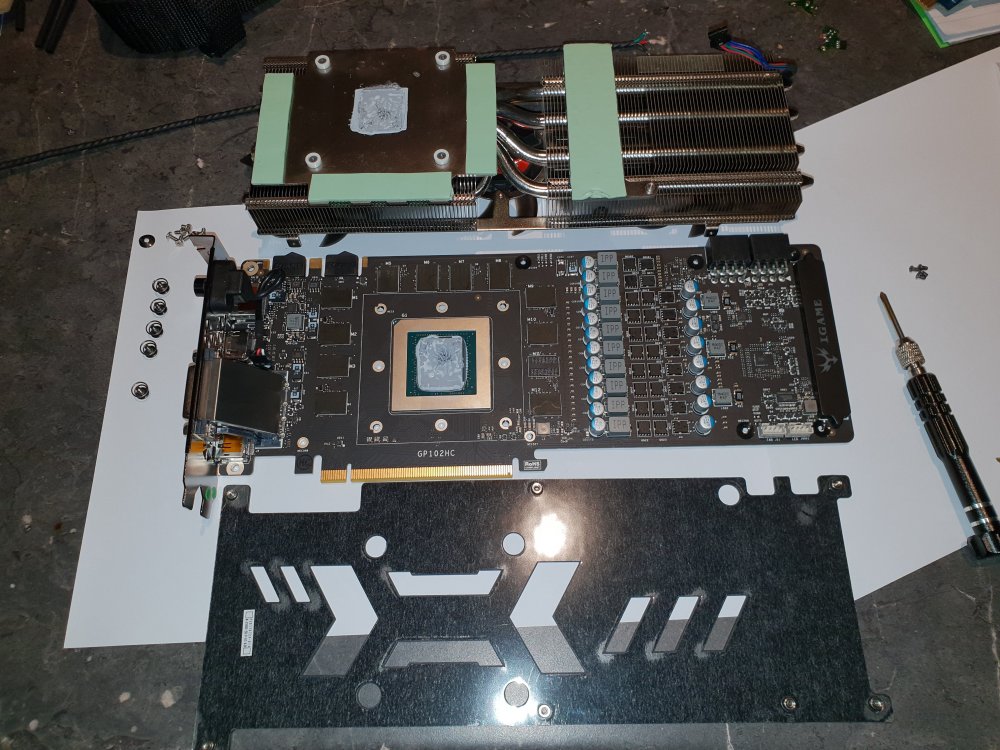
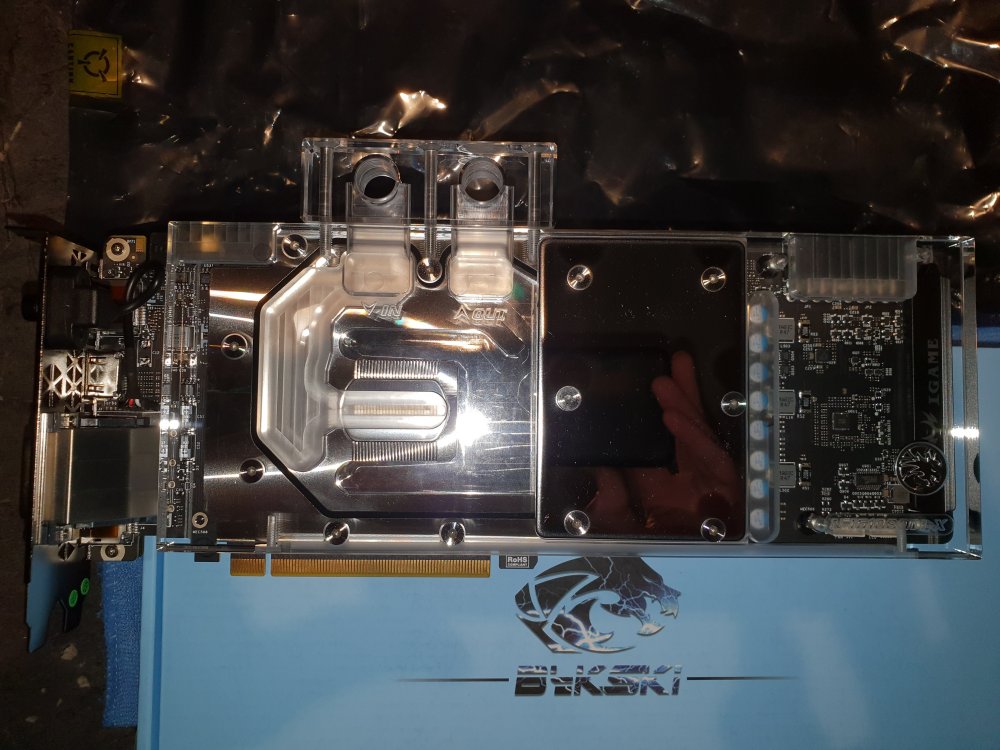
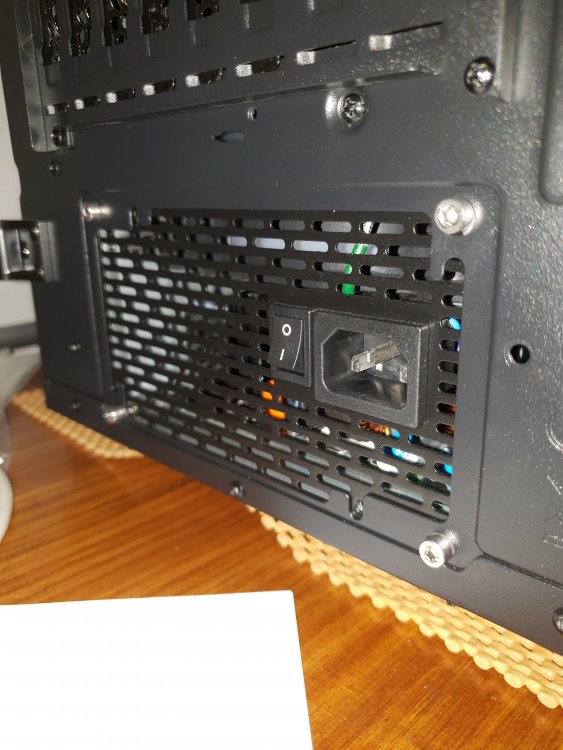
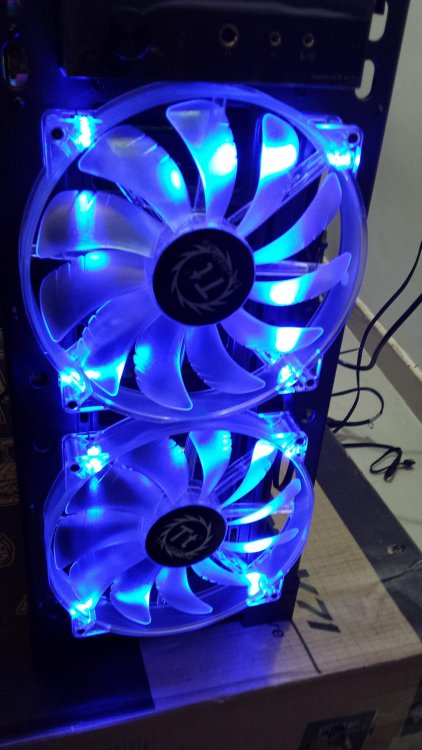
PART TWO Water Cooling Design Concept After a lot of research I decided that the D5 pump had all the grunt I should need and the Pacific PR22-D5 Plus pump suited my needs perfectly. D5 pumps aren't cheap so a single loop will do for my first WC project but it will be a long one. Decided on two 360x25mm copper core brass tank radiators from ebay, at AUD$56 each.....bargain! Edit: While getting them from ebay as I wanted to mod them suited my needs I wouldnt recommend it. The overall quality of the radiators isnt bad but be prepared for an excessive flushing experience. Had flushed and vinegar washed them then set them up to run on the bench with the pump. Next day pump was full of microscopic shiny specs, which I can only assume was oxides, looked like a snow globe. Ive had to pressure wash litres of water through them to clean them out so unless your getting creative get good quality EK or Alphacool radiators. One will be on the inside top the other on the inside front both in push pull fan configuration. The top radiator really needs a vent or bleed to remove the air for easy filling and the front radiator needs a bottom port for draining. Loop to be....Pump - GPU - Top rad - CPU - Front rad - Pump The TT TF1 flow meter is to be powered from a dedicated header/5V supply on the switch board. This output features delayed startup and shuts off with the pump in maintenance mode only (selectable). Radiator mods By grinding the paint from sections of the tanks and fittings and carefully drilling holes in the tanks of the radiators I was able to solder the fittings to the tanks easily with a small blowtorch. As they are both brass the solder created a very strong and water tight bond. The use of pure core solder with water dissolving flux made the removal of the flux after very easy. More black spray paint....nice....looks professional LOL Here is the front drain with tap fitted. Here is the top radiator bleed. Space is tight so I bonded a female to female right angle straight onto the tank.....worked perfectly. Plan is to bring 16mm PETG tube across and up through this slot to get it above the radiator then U turn it and maybe pop out the side of the case with a bleed valve. Thought this might be a good place to practice bending, if I can bend this the rest should be easy. Well first bend done and it was a curly one.... Bit dodgy on the end but I can easily redo it later and Ive learnt a few things like dont pull out the bending rod till you know its good cos you wont get it back through the bend. More importantly it fits! Fittings Probably a good time to mention fittings. Your going to need more than you think as things will change as the build progresses or so Ive found. Seems there is another obsession that can happen here as there are so many different types and they are so very well made. Because your not completely sure what you need I found Ive ended up with alot of fittings, joiners, extenders, elbows, rotatable elbows, end caps...and on it goes. The quality of the Barrow fittings is excellent and about a third of the price of EK fittings. All Bykski and Barrow fittings were sourced from mydiyau for local Aussie stock or ins_mqzje for direct from China. Having a bit of a go at TT here. Had to make a custom power lead for the TF1 not just because I am running it from a custom header but also because the lead supplied is terrible. Here is the lead supplied with massive straightplug. Keep in mind here that the objective is to hide as much cabling as possible. Here it is with my neat right angle plug and heatshrunk cable...much better. As all the fans etc from TT come with expanding or silicon sheath I would expect the TF1 to also. While I'm having a go at TT I found this also. Had to replace the mounting bolts for the power supply as 2 of the threads stripped out on first use, screws supplied where cheese metal also and totally useless. So far not impressed with this power supply for the money, the flat unbraided lead set supplied is cheap and nasty, but luckily black. Also the 8pin motherboard power leads supplied are not long enough to get to the motherboard headers at the top of the case, they fall short by 150mm or so. This is a TT power supply in a TT case....they should reach should they not. Still waiting for extension leads from ebay that I shouldn't have to buy which I then have to sheath as they are yellow and black. The USB connection is a mini USB all others are micro USB. Lead supplied used both USB ports on a motherboard header. This meant I had to combine 2 lead sets to make a mini & micro USB to motherboard header lead. This keeps the 2nd motherboard header free for actual USB ports. Edit: And that didn't work either, TT's idea of daisy chaining controllers seems good but in practice there is a limit to the number of USB hubs you can plug into each other. Any more than 4 controllers daisy chained together on the Z390 Aorus Master MB gave a "To many hubs" warning from Win10. In the end I ran 3 controllers off 1 USB port and the other 2 on the other usb port. Modified another lead to plug the mini USB of the power supply into the output of those 2 controllers. Total of 6 devices from 2 ports (1 x USB2.0 header) All 4 holes drilled and tapped to M4 with M4 stainless steel screws fitted, looks better too. GPU Colorful igame GTX1080Ti Vulcan AD card I picked up for less than $1000 in the great GTX1080Ti clearance of late 2018, I almost missed out. I had a feeling the 2080 would be a lot dearer and not much better than a 1080Ti which turned out to be correct. Hard to even find a 1080Ti now. Well there goes the warranty, doubt it would have been useful anyway. And we are in, excessive amounts of horrible rubbery compound everywhere. Compound removed exposing the hideously expensive GPU with heatspreadder Bykski GPU block fitted with liquid metal, probably overkill but thats the theme here. Bykski was the only block available for this card. Quality is good although I would like to sand and polish the machine marks out of it but dont want to pull it apart yet. They seem to have blocks for every card out there. I gave the block as much of a polish as I could, looks great. Considerations, comments and suggestions are all welcomed as I'm flying by the seat of my pants here.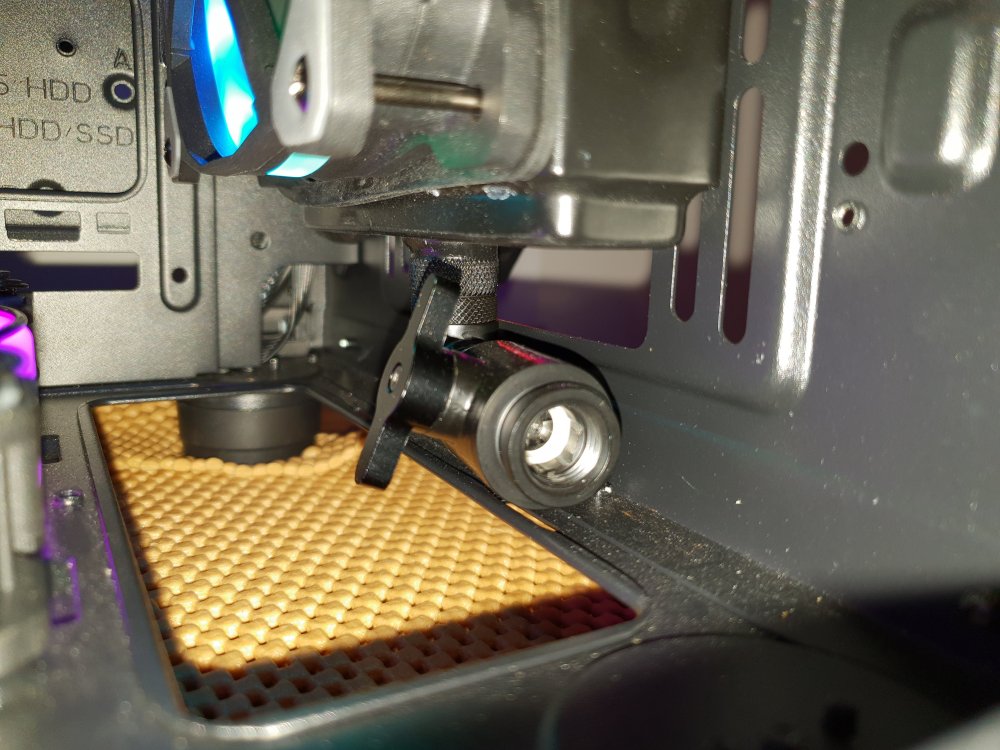


-
2018 Thermaltake CaseMOD Invitational Season 2 - TT Talent Stage Two - Voting has started! All you have to do is vote for your favorite modder for this season on the poll on or before 12/4/2018 11:59pm PST! We are also giving 3 lucky voters the chance to win a Level 20 VT chassis, just for voting! so don't miss out! Below are the videos by the modders: UK Alex Banks Alex_Banks_UK-A_life_of_colour__Season_2.mp4 Argentina Andrés Sebastián Barés Andres_Argentina.mp4 Brazil Douglas Alves Douglas Alves Brasil_Brazil.mp4 Germany Stefan Ulrich Stefan_Ulrich_Germany.mp4 South Africa Stuart Henning Stuart Henning - TT Casemod 2018 S02 - TT Talent Round 2.mp4 Vietnam Nguyen Dinh Ban Ban_Vietnam.mp4

-
Congratulations to the top 3 winners of Stage Two TT Talent! 2018 CaseMod S2_Top3.mp4 Please note that the giveaway prizes will be released on 12/14/2018 so look out for it! Germany Stefan Ulrich 1st Place Argentina Andrés Sebastián Barés 2nd Place Brazil Douglas Alves 3rd Place

-
I have Thermaltake LITEPOWER 650w power supply, it started to make noise 3 months after purchase. And it literally died. Then i send ticket to support of Thermaltake and i don't get any reply from Tt. (already 4days+). WhatsApp Video 2018-11-28 at 22.04.31.mp4
-
I purchased the "Thermaltake Floe Triple Riing RGB 360 TT Premium Edition PWM TR4 AM4 LGA2066 Ready AIO Liquid Cooling System 360mm High Efficiency Radiator CPU Cooler CL-W158-PL12SW-A" in January of 2018 and just about a week ago the pump itself has started to make a loud chattering noise. I am certain it is not coming from the fans and the noise is a constant chatter. I have tried calling thermaltake support a few times and left voicemails and emails for a callback or any support. Not sure what I could try or do about the issue, I am worried that the pump is failing. Any advice helps! Thanks in advance -Ry
-
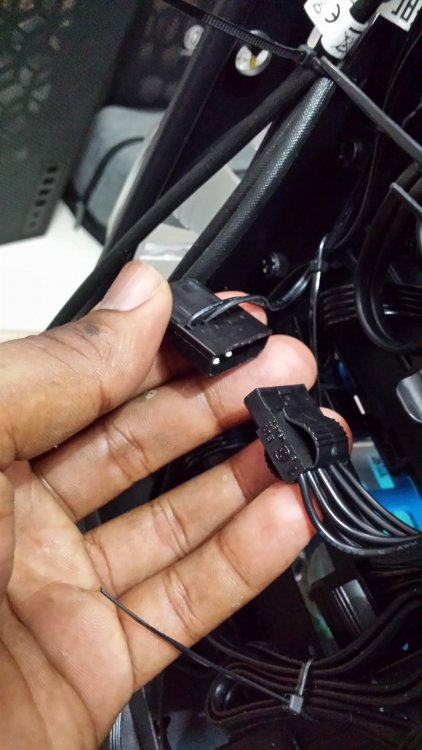
 Greetings to all, On July 8, 2018 I bought a Thermaltake Core V71 Tower in Spain and I arrived in Colombia at the end of August, so a couple of weeks ago I was able to start with the installation and assembly of my computer parts, All the parts of the computer are Thermaltake brand (source, heatsinks, liquid cooling, etc ...) once the assembly was made in the Tower Thermaltake Core V71, there was a problem when performing the ignition and is that the three (3) Fan (heatsinks) of 200mm that brings this Tower located in the Front and top part DOES NOT ROTATE, just turn on the LEDs. In detail I checked all the connections, I made sure everything was connected correctly, later I focused specifically on the MOLEX connector which is connected to a PSU Thermaltake Toughpower RGB 850 W Gold; connecting and disconnecting repeatedly, but the fans did not turn and the result was always the same. Obviously if the Fan (dissipaters) do not rotate the functionality of the FAN LOW and FAN HIGH switches is null, but the Leds of these switches if they turn on when pressing them, I would say that their function is fine, but if the Fan does not rotate, there is no case. I have the three original 200 mm fans connected to the FAN CONTROLLER and the only thing I can think of is that it is defective ... Is there anything I could do wrong? Is it possible to CHANGE THE FAN CONTROLLER due to factory defects? Can it be repaired? Where can you change it in Colombia? Could Thermaltake send it to Colombia where I am currently residing? I think all the connections related to the fan controller are correctly. Does anyone have any ideas or recommendations? Everything else works very well, but I would like the fans to work properly and help maintain a good temperature inside my tower. I appreciate the advice and / or recommendations of everyone. ---------------------------------------------------------------------------------------------------------------------------------------------------------------------------------------------------------------------------------------------------------------------------------------------------------------------------------------------------------------------------------------------------------------------------------------------------------------------------------------- Saludos a todos, El día 8 de julio de 2018 compre una Torre Thermaltake Core V71 en España y me llegó a finales de agosto a Colombia con lo cual hace un par de semanas pude empezar con la instalación y ensamble de las partes mi computadora, Todas las partes de la computadora son de marca Thermaltake (Fuente, Disipadores, Refrigeración Líquida, etc…) una vez realizado el montaje en la Torre Thermaltake Core V71, se presentó un problema al realizar el encendido y es que los tres (3) Fan (disipadores) de 200mm que trae esta Torre ubicados en la parte Frontal y superior NO GIRAN, solo encienden los Leds. Detalladamente revisé todas las conexiones, me aseguré de que todo estuviera conectado de forma correcta, posterior me centré específicamente en el conector MOLEX el cual está conectado a una PSU Thermaltake Toughpower RGB 850 W Gold; conectando y desconectando en repetidas ocasiones, pero los Fan no giraron y siempre el resultado fue el mismo. Obviamente si no giran los Fan (disipadores) la funcionalidad de los interruptores FAN LOW y FAN HIGH es nula, pero los Leds de estos interruptores si encienden al presionarlos, diría que su función está bien, pero si los Fan no Giran no tiene caso. Tengo los tres ventiladores originales de 200 mm conectados al CONTROLADOR DEL VENTILADOR y lo único que se me ocurre es que esté defectuoso… ¿Hay algo que pude hacer mal? ¿es posible CAMBIAR EL CONTROLADOR DE VENTILADOR por defectos de fabrica? ¿Se puede reparar? ¿Dónde pueden cambiármelo en Colombia? ¿Podría Thermaltake enviarlo a Colombia donde actualmente estoy residiendo? Creo que todas las conexiones relacionadas con el controlador del ventilador están correctamente. ¿Alguien tiene alguna idea o recomendación? Todo lo demás funciona muy bien, pero me gustaría que los Fan funcionen correctamente y ayuden a mantener una buena temperatura al interior de mi Torre. Agradezco los consejos y / o recomendaciones de todos.
-
Unable to run, always getting this error: - System - Provider [ Name] Windows Error Reporting - EventID 1001 [ Qualifiers] 0 Level 4 Task 0 Keywords 0x80000000000000 - TimeCreated [ SystemTime] 2018-11-06T09:29:15.745941600Z EventRecordID 5668 Channel Application Computer 9900K Security - EventData 1625717833733007914 5 CLR20r3 Non disponible 0 RiingPlus.Service.exe 1.0.0.0 5bbbd8ff RiingPlus.Service 1.0.0.0 5bbbd8ff 58 127 System.NullReferenceException \\?\C:\ProgramData\Microsoft\Windows\WER\Temp\WERAF39.tmp.dmp \\?\C:\ProgramData\Microsoft\Windows\WER\Temp\WERAF97.tmp.WERInternalMetadata.xml \\?\C:\ProgramData\Microsoft\Windows\WER\Temp\WERAF98.tmp.xml \\?\C:\ProgramData\Microsoft\Windows\WER\Temp\WERAF9C.tmp.csv \\?\C:\ProgramData\Microsoft\Windows\WER\Temp\WERAFAD.tmp.txt C:\ProgramData\Microsoft\Windows\WER\ReportArchive\AppCrash_RiingPlus.Servic_0a34ccf75f57a74aed08611a4987a797d87c8_ec4d77fb_3487b2a4 0 cf5375a4-cb23-44df-81ab-e0ac5a0adbe9 268435456 0a12153312c3e022968fb5c1a0ac6a2a 0
-
2018 Thermaltake CaseMOD Season 2-TT Talent Round 1 Voting has started! All you have to do is vote for your favorite modder by using the poll on this post before 11/3 11:59pm PST Contestants are below, for more information about the modder please click their profiles to expand! The Round 1 final Vote score will be accumulated from the below categories: Tt Community Members 50%, Professional Modders 25%, and Thermaltake Judge 25%

-
I have had a Black X Duet since April 2018, so it's only 6 months old as I write this. It works for a short while, and then will just eject one or both drives. I tried different USB cables and HDD, but the problem persists. I am using an IMac with system OSX 10.11.6. I haven't changed OS versions or anything. How do I make a proper diagnosis? thank you Model number is ST0014UCAI000912
-
Time to kick this project into max gear. Some major changes to the original rusting effects. So first i took the original flow indicators and knocked the ffect out of the ballpark! Absolutely in love now. Last night, i went into the shop, re-alligned 2 lasers and set to work on the midplate.side panels and some other acrylics :p We used 6MM clear acrylic for the midplate. After this was done, it was time to crack open the case, and etch that front panel And here's where i'm at as of this morning 11/10/2018 Let me know in the comments below what you think. - Craig
-
So I had my liquid cooling system (h60) for about 5 years, and it failed. When I got it back in 2014, Water cooling was all the rage. In my search for a new CPU cooler, I noticed that everyone is using air cooling now. Which is better in 2018 folk? should I stick to liquid cooling or are there better Air cooling options that I don't know about? Rufus MapQuest UpToDate
-
Hey everyone,Sorry for the lack of updates, Project:Snow is now completed, if you were at EGX 2018 @ NEC in September you would have seen Project:Snow on the Cyberpower booth. I have also been doing design work for the Thermaltake UK Modding Trophy 2018 sponsor by thermaltake, Asus, AMD, Adata, Bit-tech and Scan. This build log is live. I just want to say a massive thank you to Thermaltake for sponsoring the project, I think the build turn out great.Final Photos,
-
Project : SNOW I am back with a new build for 2018, I want to start by saying a big thank you to Thermaltake for supporting this project. I am doing a Ryzen 1600 build paired with a MSI 1070 gaming x8 graphics card. I will be building in the core P3 from thermaltake, this will be fully watercooled. I have set myself a big challenge to think more outside the box for when it comes to where to place the reservoir and radiator. I have also set myself a challenge to make everything white so I will be doing a lot of painting and resleeving and a lot of cables. Here what I will be using, The thermaltake core p3 snow edition, Ryzen 1600, MSI Tomahawk Arctic B350 The thermaltake Pacific W4 Plus CPU water block, Corsair Vengeance RGB 2x8gb 3000Mhz could upgrade this two 32gb, Samsung 960 EVO m.2 250GB this will be used for OS, WD HDD 1TB, Thermaltake Toughpower SFX 600w PSU, MSI GTX 1070 Gaming X8, Thermaltake Pacific RL 360 Thermaltake Pacific P1 Black, Thermaltake Pacific RGB Hard Tube Fittings, Thermaltake C1000 Green and White, Some of the cable and connectors, I am using mdpc sleeving. Thanks for checking out the post if you have any question or suggestion, leave a post and I will get back to you as soon as I can.
-

Problem with version 3.0.9 - help!
eddd2002 replied to eddd2002's topic in Digital Power Supplies(Smart Power Management)
Good afternoon! Thank you for deleting accounts. Today I re-created my account - eddd2002@gmail.com But the data is not uploaded to the site. I noticed one oddity - in the My uploads tab - in the Activity section - the schedule date is displayed on the next day (2018.10.04), although the date is still on my computer (2018.10.03). Maybe this is the reason not to upload data to the site? Attached a screen screen with this problem.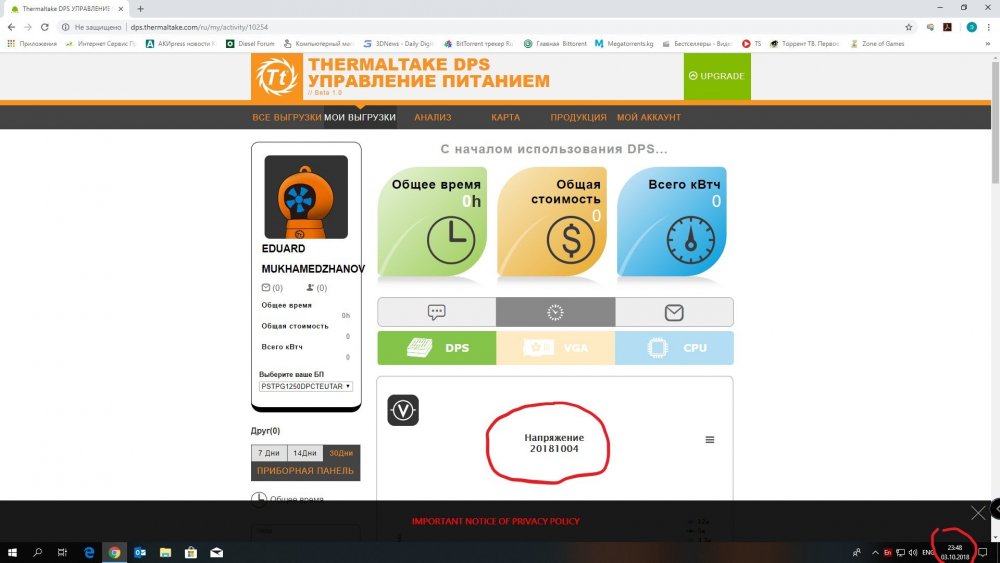
-
Video of the final version of this casemod I did for the 2018 Thermaltake Casemod Invitational season 1. The theme is the Decepticon race from the Tramsformers world. This is a Decepticon that battled for decades on Cybertron and travelled for years to get to earth to ask for help as the war on Cybertron is not going well for the Decepticons. In times of war the outside of the machine is scarred and no time has been spent on making it a shiny machine with glossy paint. The panels are tough and can be replaced easily after having taken damage. The hardware in the other hand is powerfull and well maintained to be ready for any battle ahead.
-

[Malaysia] Ahmad Syafiq Hamman
HammanCronicle replied to Tt Andy's topic in 2018 CaseMOD Invitational Season 1
we are struggling alot for the final... but hey ... here some small teaser for u guys . :D 2018 Thermaltake CaseMod Invitational (TT Season 1) Sponsors ; AMD Thermaltake Technology Inc ASUS Republic of Gamers G.SKILLPlextor AOC TteSPORTS LUXA2 #casemod #battlestation #asus #thermaltake #hcmod #hammanchronicle #thermaltakecasemod #invitational beforefinal.mp4 -
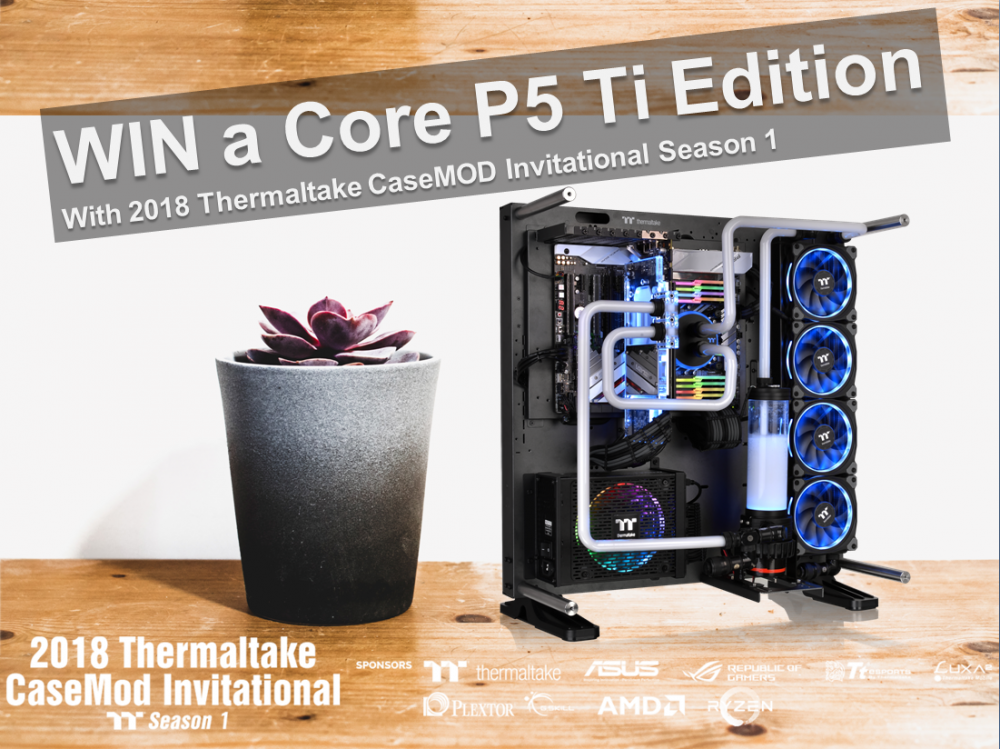
The Prediction Voting Event has Started! All you have to do is comment below on who you think will win this seasons CaseMOD Invitational for your chance to win our NEW Core P5 Ti Edition! Event date: July 6th 2018 ~ August 3rd 2018
-
<a href="https://www.rsmssbldcresult.in/">RSMSSB LDC Result 2018</a>
-
I'm working excel and I can confirm as of August 17, 2018, the Left Shift + Left Ctrl + Down Arrow do not work together. This is a standard and pivotal action for Excel!
-
Hi, I have 8 Riing Plus 12 LED RGB Radiator Fan TT Premium Edition - https://www.thermaltake.com.au/Cooler/Case_Fan_/Riing/C_00003056/Riing_Plus_12_RGB_Radiator_Fan_TT_Premium_Edition_5_Fan_Pack_/design.htm - Link for my fan so there can be no confusion. With the new update to the TT RGB PLUS Software V 1.2.0 released on 2018/07/16 I seem be having an issue that is quite irritating. Before anyone says this isn't the correct software which I've been told, this is the software listed on the support page for my product. Firstly now with the new software if it isn't running as a background task the lights on the fan don't work. I never used to have the program open displaying in the taskbar to have the lights working but now if it isn't a background task the lights don't work anymore. I'm guessing this is just a new implementation by Thermaltake which I can live with but is annoying since I didn't need it as a background task before. Secondly now when my PC goes to sleep the lights on my fans stop working. When i wake up my PC the lights continue to stop working and I have to manually close the software from the task tray and reopen it manually for the lights to kick in again. Does this happen to anyone else with the new software? I have tried reinstalling it with no luck and I have no access to previous versions to test them out. I emailed Thermaltake to ask them for access to previous versions and they said they couldn't provide me access to it. If anyone could provide any word on this issue on how to fix or if they are getting it also would be appreciated. Thanks
-
The build is all most completed, I have had a little delay due to me moving house and all my gear is in storage, should have been in the new house on 27/07/20108 but now it will be 10/08/2018. so the last time I posted we can everything white and in place to where I wanted everything, I was not to please with the color of the cables so I redid them. I wanted the green to match the rest of the build so painted the cables green with the airbrush. I think they turned out great. I cut some 3mm perplex to make a cable cover for behind the motherboard, this is not going to be on show but thought it will be a nice touch. The build is almost completed, need to run the hard tube and do a small PSU cover then the build we be completed. Here is a little sneak peak. Thanks for taking the time to check out the build log.